100% Steam Achievement Guide
=×= PRECIPITATION =×=
Welcome to my silly guide! Not necessarily straightforward, just tips and ramblings of a hyperfixated completionist who made this guide on a whim one day, not expecting it get much attention but.. oh well. Hi, hello! Hope you enjoy!
This guide is going to assume you have already played the game once or have seen people play it before. If you haven't, well, I recommend you just play through the game, you don't need to focus on achievements on your first playthrough, trust me! Can't stop you tho.
Game is gonna get spoiled, one way or another.
Let's just get right to it!
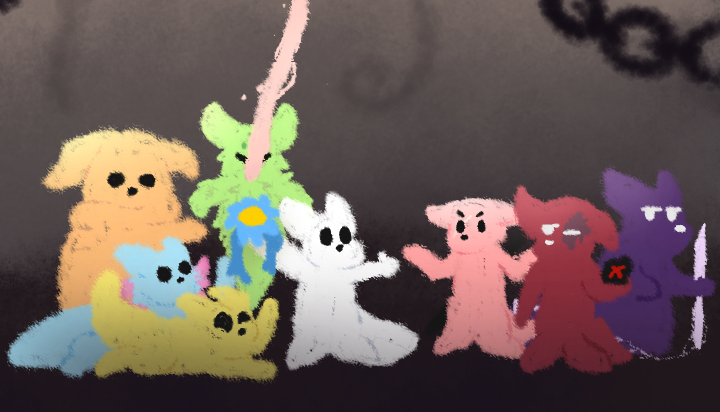
Oh, also just gonna be adding dumb doodles all throughout the guide, hope you don't mind! :3
Completionist's Paywall
Unfortunately, to truly 100% Steam Achievements of this game, you must own the following DLCs:
https://store.steampowered.com/app/1933390/Rain_World_Downpour/
https://store.steampowered.com/app/2857120/Rain_World_The_Watcher
If you are still keen on getting 100% on just the base game achievements, I have included the quirks of some of the achievements that work differently on the base game version for you :]
Is this cheating?
Achievements are still enabled even when using Workshop Mods or Remix options.
The game as it is, the cycles of pain, the deaths the loss, the downwards spiral. It's by design and part of the experience. Some of these achievements are hard and require patience. It's trial and error, and don't get discouraged! I believe in you!
But.. if you feel like it's too much for you, and you really, really want to enjoy the game but couldn't due to the inherent difficulty of the game. Well, there is no shame to use workshop mods or the built-in assists in Remix to help you out. Admittedly, I have used some, since Downpour did get a bit rough on me...

At the end of the day, it's up to you play the game however you want! Just remember: have fun!
Don't let other people undermine what you've accomplished! <3
I have no idea where I'm going
The wawa is lost, help :<
There's plenty helpful resources out there, the main one I can recommend is the Rain World Interactive Map[rain-world-map.github.io] I think it's cool! :3
Though, I still (personally) highly recommend, just bumbling around and internalizing the map, it's fun. And you'll know where everything is more you play. That's just my experience tho, and I can understand if this part of the game can get frustrating for you.
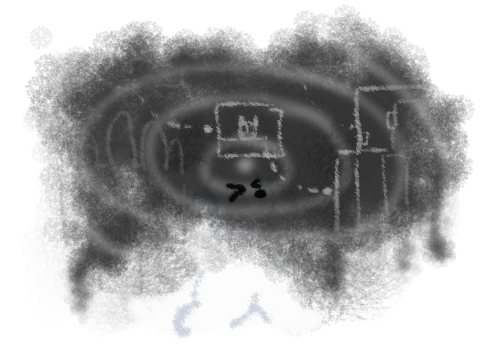
Monk and Survivor
Monk and Survivor have basically the same campaign set in different points in time.
To unlock the rest of the gang you need to beat the game with one of them.
They don't have any inherently exclusive achievements, in fact you can get the same achievements as Survivor, but Monk does have some perks that make some achievements easier.
Their empathetic nature makes taming lizards and befriending the Scavengers a whole lot easier. Although, Monk is physically weaker than Suvivor, making killing things a bit harder, so achievements that require killing is harder with Monk.
(Sidenote: Without the Downpour DLC, <15. The Scholar> is completely unobtainable with Monk due to being late to the party, all the pearls have lost their color. This has since been retconned with the Downpour DLC to only apply to Saint.)
Basically, Monk is cool is their own respect, they make a bunch of the harder aspects of the game easier, but they're basically the only optional campaign in terms of getting achievements.
...but he's such a silly goober tho! Still worth a shot playing him! :3
Though, word of advice: DO NOT GO THROUGH "Unfortunate Development" AS MONK. BIGGEST MISTAKE OF MY LIFE.

=×= STORY ACHIEVEMENTS =×=
These achievements are tied to progression in the "Story". Unlike other games though, these have specific triggers and you can complete the game without ever getting these achievements, well, except of the one you get for doing the ending.

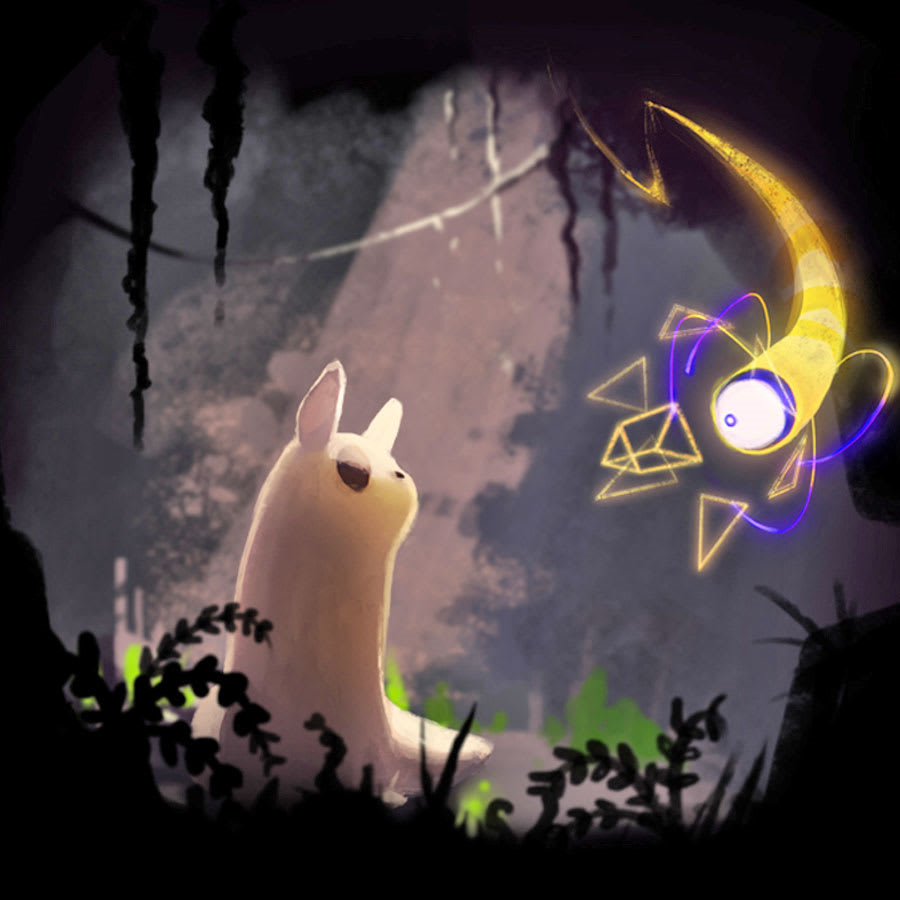
These are simple enough to follow through though, as the yellow dude will attempt to give you directions in the first half of the game.
He will only ditch you if you get <2. Stolen Enlightenment> and will be substituted by these weird orange blob things.
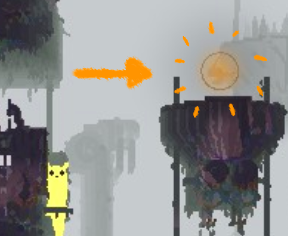
Touching these will show you where to go similar to the yellow guy but not as active due to it being limited and expendable.
1-2. A New Friend / Stolen Enlightenment


You can get either of these achievements depending on your actions after first meeting Looks to the Moon.
The achievement you get is dependent on what you do with the five white "neuron flies" floating around her.
Depriving her of one or more of these neuron flies by either eating it or "stealing" it from her will result in Stolen Enlightenment. While not doing that and simply just visiting her, grants A New Friend.

There are pros and cons to doing either, eating the flies will make you glow, making travelling in dark areas significantly easier. In turn, you will lose the yellow lad's guidance as mentioned earlier. Not eating the flies will keep the guide on your side and your dignity, at the cost of having trouble with the dark areas.
You get the achievements immediately after hibernating if the conditions above are met.
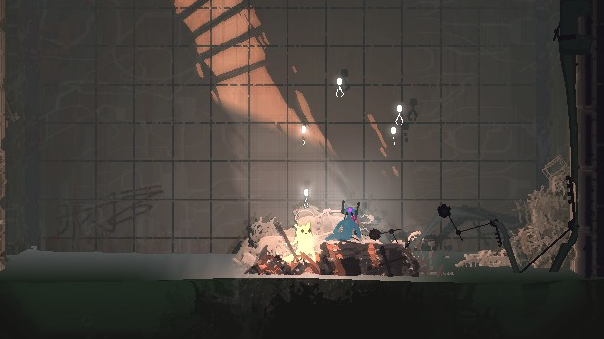
Note that both achievements aren't intended to be obtained through a single playthrough, but you can still try to savescum it by creating a backup of the "sav" file (numbered depending on save slot) before triggering the achievement and pasting it back in to do both with the same save file.
This can easy be accessed by typing %appdata% in the search bar. This will put you in AppData\Roaming, so go back a folder and then go to LocalLow, where you can proceed to find Videocult then Rain World.
This is only useful if you're not planning on doing another playthrough for whatever reason but still want to get the achievement. I'm not here to judge, just do whatever!
3. The Journey

You get this achievement after first meeting the increasingly exasperated Five Pebbles.
As Survivor/Monk, meeting Five Pebbles will non-consensually max out your Karma Level and give you the Mark of Communication, allowing you to go back and understand Looks to the Moon, only if you want to since there's no achievement to doing so. You can get some juicy lore out of her though (see <15. The Scholar>)
Five Pebbles might have a different reaction on each of the different slugcats...
You get this achievement immediately after hibernating, once that whole thing is done.
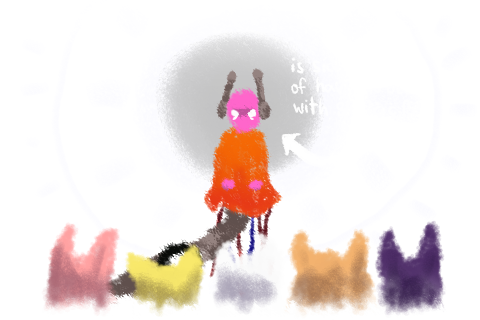
Man, if only you can beat the game without going to Five Pebbles.
(See <4. Pilgrimage> below for more info)
4. Pilgrimage

Reach the maximum karma level in the game before talking to Five Pebbles.
This is done by visiting these enigmatic "Echo" entities which gives you a lil increase of your maximum karma for every one you visit. (go to the <=×= ECHO ACHIEVEMENTS =×=> chapter for more info on individual echo locations!)
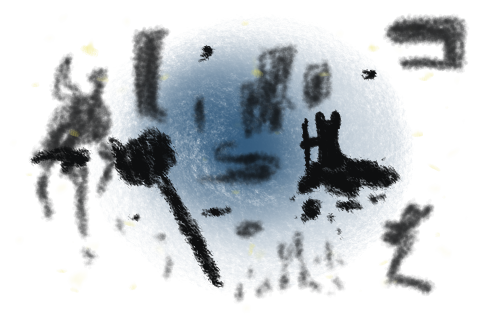
You only really need to find 4 of those guys to be able to get this achievement.
5. Ascension

You get this achievement by beating the game. Just follow Five Pebble's instruction/directions and you'll get there.
The ending gets me all the time.

=×= PASSAGE ACHIEVEMENTS =×=

Passage Achievements are more like challenges, and are confusing the first time since they don't really tell you what you need to do. They literally just randomly appear as branches next to your karma level with little to no context. But that's the point ig.
There are two type of passage challenges that I dub thee: Pip-based and Slider-based.
Pip-based ones are easier to understand, each dot represents something and is like a checklist of things you must do.

Slider-based ones however, seem to work on a "point-based system". You can gain or lose progress depending on your actions.

For both of these, progress is updated after hibernating.
Although, you would probably get most of these achievements on your initial playthrough with Survivor/Monk, I will still be thorough enough to include how the other scugs work with these passages, given there's a caveat or unique interaction.
Oh, protip! Hold the map button to speed up the animation of the hibernation screen. I only found it out 70 hours into the game, god I'm so dumb.
Once a passage challenge has been completed, it will no longer track progress as it is, yknow, already complete, and you will recieve the achievement accordingly. Only exception to this is <11. The Chieftain>, which can revoke your passage, but no way it's gonna revoke your Steam achievement lol.
You will also gain a Passage token, indicated by the symbols next to the "Passage" button on the bottom-left of the hibernation screen.

By selecting the "Passage" button, one can use Passage tokens to fast-travel to any shelter that has been previously visited. This is helpful when backtracking or escaping softlocks.
But, a neat thing is since map progress is shared across all playthroughs in the same save slot, you can basically skip parts of the game with this knowledge. Basically, a New Game+ thing.
As of Downpour, different characters don't share the same map anymore.
6. The Survivor

You get this achievement by spending five cycles at the maximum karma level. Which is 5 at the start of the game.
This is the first achievement you'll ever get, since you can't make progress towards some of the other passage achievements, without unlocking this first in ANY given playthrough. I will append a "Requires Survivor" to them accordingly. Though, every achievement will still require this achievement if the remix option allowing bypasses is turned off.
This passage is pip-based, representing each cycle you spent at max karma.
Since this is using pips to track progress, you don't need to do the five cycles consecutively. If you die, you don't lose progress, but you do lose karma, so, you still end up having to spend another cycle to continue making progress again.

7. The Monk

You get this achievement by spending six cycles* sticking to a diet of only plants and such.
 { Requires getting <6. The Survivor> passage before progress can be made }
TO AVOID CONFUSION: This passage is not exclusive to the Monk slugcat character!
I notice it takes a while to pop up after getting The Survivor. Just keep eating stuff until a progress bar appears.
*This passage is slider-based. You only need a total of 6 points to complete it. 1 point for each vegetarian cycle you do successively. However, dying in the process subtracts 0.5 points, and breaking your diet sets you way back to 0. So it's not as simple as 6 cycles in a row..... I mean, it is, as long as you DON'T DIE. Progress is only tracked in the hibernation screen after getting more than 1 point.
To be more specific now, you are only limited to eating blue fruit, popcorn plant, bubble nuts, and orange mold.
 Availability of these mostly depends on the area you are in, so you have to be on the look out.
- Blue fruit is a hanging fruit, that is blue (duh), pretty common. If you can't reach them, you can throw something and the fragile vine holding it will let go.
- Popcorn plants are found closed, you have to hit them with a spear to trigger a chemical reaction to make the fruit *pop*, hence the name. You can eat off this plant an unlimited number of times once open but only for that cycle.
- Water nuts, also called bubble fruit, are nuts that usually grow next to water, they look like rocks with blue in the middle when closed. They can be cracked by going into water while holding them, which will make it puff up into gelatin you can eat.
- Orange mold glows, usually found in the darker regions. Mostly found in clusters. That's basically it.
- Neuron flies are flying plastic things that comes in different colors. You can eat them and gain the ability glow (seems safe to me). They're found all around inside the Five Pebble Superstructure. Don't eat Moon's neurons, you monster.
 Downpour-exclusive stuff:
- Lilypucks look like blue flowers on lily pads that float in water and found in areas in and connected to water systems for the most part.
- Gooieducks are like blue fruit but light blue and sort of glows. You need to bite off the shell before you can eat it and takes more bites to eat but gives 2 pips.
- Glow weed is found submerged on the floors of waterlogged areas, they look like glowing yellow eggs that have a stem connected to the underwater floor. They only give half a pip of food but are usually plentiful.
- Dandelion peaches are these blue things with white puffs, found growing in the ground around the sky areas. They are light and fall slowly if thrown.
- A single popcorn.... Drops from popcorn plants under circumstances.

8. The Hunter

You get this achievement by spending six cycles* sticking to a diet of only meat; other creatures.
{ Requires getting <6. The Survivor> passage before progress can be made }
TO AVOID CONFUSION: This passage is not exclusive to the Hunter slugcat character!
*The progress tracking follows the same logic as The Monk but instead of being vegan, it's meat-lovers. Go read how the tracking works on that one if you just skipped to this section.
You could probably already know what to eat here by cross-referencing the Monk diet and process of elimination but couldn't hurt to elaborate.

- Batflies are black bats that flies, usually found in flocks. Common in more open areas.
- Vulture grubs are lil yellow grub things with a tip and you should handle with care. You can only eat them dead I think.
- Centipedes are armored shock bugs that comes in different sizes. Small ones, you can pick off and eat but if you take too long they will stun you and attempt to flee. Bigger ones, you have to kill to grab and eat, but mind the fact that they could actually coil around you and give you death at 10,000 volts.
- Jellyfishes are white blobs in the waters of Shoreline. They can shock you with facts, but you can use this to your advantage by sometimes traumatizing an enemy by throwing these at them. You can eat them to assert dominance.
- Noot flies are flying creatures that looks like noodles. The moment you grab one, you instantly squish them to death. If there is a parent nearby, they will turn their noodles into needles and attempt to stab you.
- Squid things, also known as Hazers, are portable smoke bombs, but you can eat them instead if you kill them.
- Eggbugs are fast lunchboxes that when killed, all of the "eggs" in its back will fall apart allowing you to pick up eat them.
- Exclusive to the slugcats who like hunting big game (or fat), you can indulge in the consumption of lizards, vultures and all kinds of stuff if you manage to kill them. Mmm-mm!
 Downpour-exclusive stuff:
- Firebugs are like Eggbugs but firey and can actually kill you. They drop fire eggs like eggbugs. This guy is exclusive to Saint.
Due to a possible oversight by the devs, looks like Firebug eggs are considered fruits instead of meat. So...
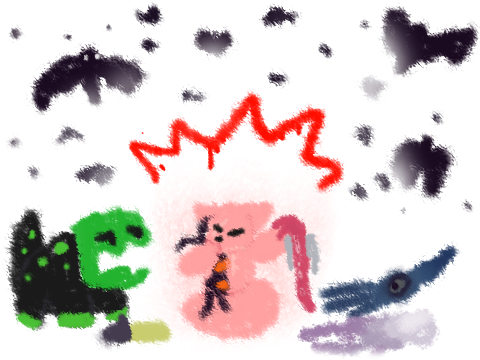
9. The Saint

You get this achievement by spending six cycles* not hurting any creature, including both passive and hostile creatures.
{ Requires getting <6. The Survivor> passage before progress can be made }
TO AVOID CONFUSION: This passage is not exclusive to the Saint slugcat character!
*The progress tracking follows the same logic as the previous two passages; 1 point per cycle on given condition. You can actually make progress here at the same time as either of the previous two! Just be careful not to hurt anything unless you wanna set your progress back to 0. Like before, progress is only tracked in the hibernation screen after getting more than 1 point.
"Hurting" something is when you hurt something. This includes the spear, obviously. But also consider that throwing a rock/rubbish at someone's face is gonna hurt too, even if it practically can't kill them. Also, mind your weight Monsieur Gourmand.
Though, you can still eat bats and similar creatures that doesn't need to be killed first.
Try the pacifist route! It's not that hard not to hurt anything... okay... maybe it is if everything is out to kill you.
10. The Outlaw

You get this achievement for killing things just because... why not? :>
The complete opposite of The Saint.
{ Requires getting <6. The Survivor> passage before progress can be made }
This passage is slider-based, you get 1 point by killing something, and lose 1 point if you die. If you don't kill 'nythin for a cycle, you start all over. Keep that killstreak hot at all costs!
Murduring defenseless creatures like lantern mice and squidcadas? That counts.
Actively hunting plenty of lizards? That counts.
"Trolling" the funny masked creatures by throwing a bomb on their face? That counts.
Needless slaughter is the name of the game. If it breathes, then don't let them. Kill them. KILL THEM ALL!

Okay.. might've went overboard there but try killing a lot of stuff, you might even get it in one cycle!
11. The Chieftain

You get this achievement after you get a high enough global reputation with the Scavengers found all throughout the regions.
{ Requires getting <6. The Survivor> passage before it can be obtained, but reputation can still be gained without it }
This passage is slider-based, and is the only passage that can be revoked even after getting it. This is because the point system for this passage is directly tied to your current reputation with the "scavenger" creatures.
(Though Steam Achievements can't be revoked, so go wild after you get it ig)
Explaining how reputation works is pretty complicated, but I'ma try to simplify it. The point system goes from -100 to 100, yes, you can gain negative points. Think of it as a morality system, but only for scavengers. Your default starting value is 0, obviously. You get the passage around after getting a high enough rep.
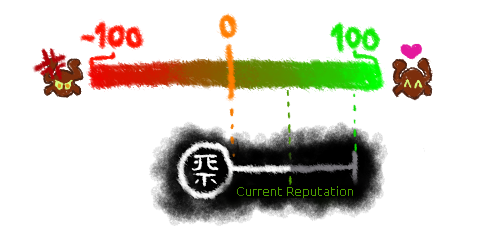
Doing bad things (i.e. stealing their gear, harrassing them, LITERAL MURDER etc.), will reduce your global reputation depending on the severity of your actions. Bad reputation eventually leads to having a bounty on your head, making any encounter with the Scavengers be a kill-on-sight situation. So, not optimal.
Unfortunately, due to Artificer's desire for REVENGE. She cannot in any shape or form make peace with the Scavengers. This is a burden you have to play around with in her campaign.
Doing good things (i.e. saving them from a creature attacking them, dropping a spear for them as a peace offering etc.) will increase your global reputation depending on how significant your actions are. Good reputation gets you to be besties with these creatures, and will follow you along. You can even freely take stuff from their base, since you're technically part of their tribe now.
I've been noticing there is an element of randomness that sometimes increase and decrease a bit of reputation, even though you haven't encountered any Scavengers throughout at all. I don't know what causes this but they're usually minor enough to ignore.
Oh, and they also like Pearls.
Giving scavengers these seemingly worthless shiny orbs are an easy way to earn their trust, and in turn get their reputation high enough to get the achievement, to the point of even maxing it out to 100 sometimes.
But actually, you might need them for Scavenger Tolls. You have to pay 1 pearl (or 4 spears) to them to be able to pass through them without making them mad. Thankfully you don't have to risk them being aggressive if you do that once you're all friends, but you still kinda owe them, so it's gonna reduce your reputation a tiny bit.
Scavenger Tolls are marked with this giant mask with pearls dangling from it.
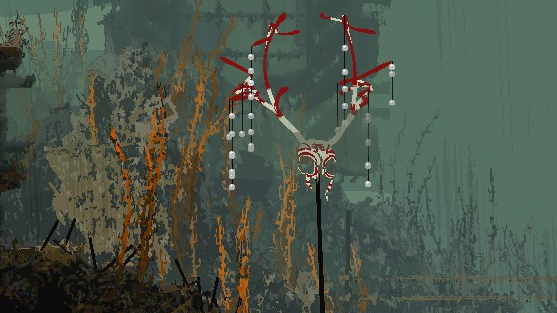
Just keep a pearl in your belly (by holding the grab button in case you didn't know) and throw them near the scavengers whenever you come across them. Or save it to cross a Scavenger Toll. Both gradually increases your global reputation with the Scavengers.
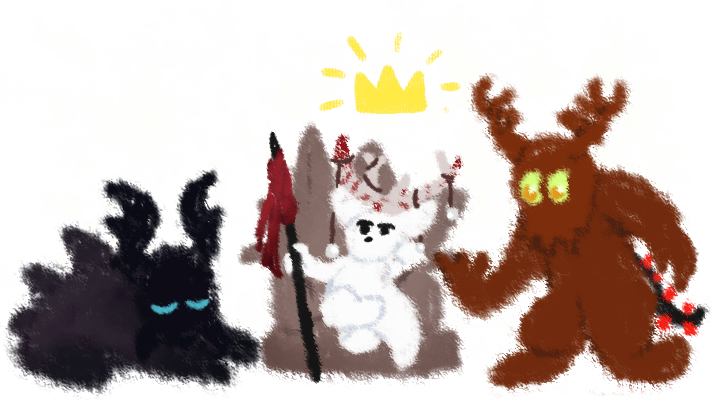
Building up their reputation can actually help you in the long run because you don't have to worry about them and sometimes, they'll even join your shelter. My experience with that is... let's just say that I got stuck for a good 2 minutes .w. (i luv them,,)
12. The Wanderer

You get this achievement by sleeping in a shelter in all of the major regions of the main game, at least once.
{ Requires getting <6. The Survivor> passage before progress can be made }
This passage is pip-based and pretty self-explanatory. The dots in the hibernation screen actually represent specific areas and you can use it to potentially find the area you haven't slept in yet. Just keep wandering, hence the name, until you stumble across the all regions.

1 - Outskirts
2 - Industrial Complex
3 - Drainage System
4 - Chimney Canopy
5 - Garbage Wastes
6 - Shaded Citadel
7 - Pipeyard (DLC)
8 - Shoreline
9 - Sky Islands
0 - Farm Arrays
A - The Exterior (The Leg, Underhang, The Wall)
b - Five Pebbles
C - Subterranean
* The order, moving away from the central Karma level symbol
Keep in mind that Pipeyard (7) does not exist without the Downpour DLC, so that don't worry about it if you're just playing the base game.
If you are playing a More Slugcats campaign, there is an extra 14th pip!
Gourmand – Outer Expanse
Artificer – Metropolis
Rivulet – Submerged Superstructure
Spearmaster – Looks to the Moon
Saint – Rubicon
Saint has around the same regions but are renamed and modified, but you should know that The Exterior (A) and Five Pebbles (b) are removed, because it crashed down to merge with Shaded Citadel (6).
NOTE: If you are planning to use Passages to get this achievement fast, travel to a shelter at or near the karma gate leading to that area instead of travelling to that area directly.
From my experience, not using a karma gate to enter that region makes this achievement confused and make it not count if you just teleport there.
Found this out after wasting some of my passages so hope the few people that are reading this doesn't make the same mistake ^^"
(Though this only applies for New Game+ situations, since you can only travel to a previously visited shelters.)
13. The Dragon Slayer

You get this achievement by killing at least one of each of the usual lizard types.
{ Requires getting <6. The Survivor> passage before progress can be made }
This passage is pip-based. Each dot will represent a color of the corresponding lizard killed.
As of Downpour, this has be reworked to killing 6 different lizard color types instead of the specific ones, meaning you can kill any of the following lizard types and it will count.-
Green Lizard
-
Pink Lizard
-
Blue Lizard
-
White Lizard
-
Yellow Lizard
-
Black Lizard
-
Cyan Lizard
-
Red Lizard
-
"Caramel" Lizard (Spit Lizard)
-
"Strawberry" Lizard (Zoop Lizard)
If you don't know how to kill a lizard this might be tough. Each type has their own quirks that you'll find out throughout the game. Just know not to aim for the head, because spears bounce off it.
I find that the easy way to kill one is keep a rock/rubble on your right hand, and a spear on the other. If you don't know how to switch hands, double tap the pick-up button. Hitting a lizard with rubble on the head will make it flip over and temporarily stun it. This combo essentially means, you get to stab the lizards softer back with the spear. After that, go next to the lizard, go prone, pick the spear up and stab, pick the spear up and stab, do this until the head is no longer glowing and it's (probably) dead. If you're not quick enough, the lizard might still get up.
Another easy way is with Explosive-tipped Spears, as hitting lizards weak spot with this baby will instantly kill them no matter what. Though, these are few and far between.
If you need more details about how the specific lizards act, you can go check out this other cool guide!https://steamcommunity.com/sharedfiles/filedetails/?id=2927034988

You have to specifically kill green, pink, blue, white, orange/yellow, and black (6 in total). You can do them in any order. Just have to kill at least one of each throughout your whole playthrough.
Go forth and slay the "dragons"!

14. The Friend

You get this achievement by hibernating with a lizard in a shelter three(?) times in succession.
{ Requires getting <6. The Survivor> passage before progress can be made }
This passage is slider-based. You need 3 points in total, you gain 1 per cycle and you lose all progress if you advance a cycle without a lizard in your shelter. Meaning you have to hibernate with a lizzie, three times in a row. Though, less points is gained if the lizard isn't tamed.
 Actually had an untamed lizard follow me in a shelter on my first playthrough without me realizing it. Doing it is hard though, considering the "in-a-row" clause, and I recommend just trying to tame one instead, it's more reliable and it actually guarantees the 3 cycles, since untamed might need you to spend an EXTRA CYCLE with a LIZARD THAT WANTS TO EAT YOU.
Don't worry! Taming lizards is simple enough, feed them creatures. Preferably dead, so your peace offering doesn't run away. Different lizards have need varying amounts of food given before they are considered "tamed". Keep this in mind.
Another alternative way to making them gain your trust is saving them, though this is more hard to do. Either making a Vulture drop a lizard on its mouth or saving lizards from other lizards. It's not really conveniently reliable, especially to beginners, so I still recommend the feeding method.
Personally, blue lizards are absolute sweethearts. They can keep up following you through most terrain since they can scale background walls, and they're pretty easy to tame! Only downside is, they are very weak and can die from other lizards easily. That won't stop me from loving them tho.
If you need more specifics, go check out this guide!
https://steamcommunity.com/sharedfiles/filedetails/?id=3394531196 (the old guide got deleted somehow(?) anyway here's a compromise)
Also note that even tamed lizards CAN STILL bite you, especially if they're badly hurt or just aggitated. Give them something to chew on and feed them (that is NOT your squishy body) from time to time. Trust me on that one, you don't want your pet killing you unknowingly and losing a lot of progress.

15. The Scholar

You get this achievement by picking up 3 colored pearls after meeting both "Looks to the Moon" and "Five Pebbles".
{ Requires getting <6. The Survivor> passage before progress can be made }
This passage is pip-based. Any colored pearl you pick up after meeting with the two characters, will add a pip of progress. Neat thing is, the pip color will represent the color of the pearl you picked up. You only need 3 to get it.
These are usually placed in specific locations of the world (typically one in each region) and you can come across them sometimes, and you can still find them without being able to make progress yet.
https://steamcommunity.com/sharedfiles/filedetails/?id=2631638763
You can store them in a specific shelter and it will stay there for that playthrough if you don't wanna have to remember where they are. Just be warned that pearls will disappear and permanently gone (afaik) in the next cycle if not stored in a shelter after being picked up.
These pearls are canonically data banks, and bringing these pearls to Looks to the Moon will give you the sweet, juicy, Rain World lore. Recently though in Downpour, doing this now let's you keep the lore pearl as a collectible in the main menu, giving completionist incentive to actually do this. It doesn't give an achievement tho-
But if you don't care about that, just pick them up and drop it back down and it should still count!

== Downpour Passages ==
16. The Martyr

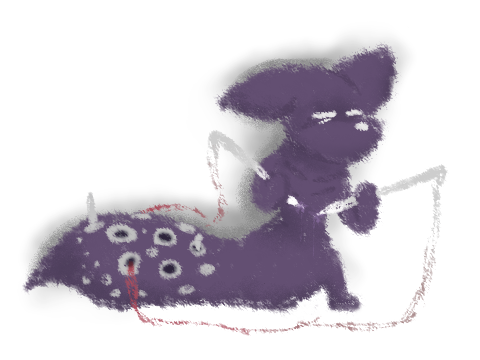
You get this achievement by spending four cycles* in state of starvation.
Starvation is a state you can enter by force-hibernating by holding [DOWN] in a shelter. This can only be done if you have less than the minimum required food indicated by the divider in the food bar. Doing this will cause you to look more pale and prone to exhaustion the next cycle, but also this will NOT SAVE the previous cycle.
To add to that, trying to force-hibernate will remove the karma protection provided by Karma Flowers, making this whole thing more risky.
*This passage is slider-based. You need a total of 4 points to complete it. Each time you force hibernate, you gain 1.08 points. While hibernating with sufficient food, starving or not, subtracts 0.08 points. Be warned that dying in the process completely HALVES your current points; i.e. dying while having 3 points brings you down to 1.5 points, while dying at only 1 point brings you down to 0.5 points.
(Funny thing about the progress lost when dying is that dividing is not subtracting, meaning it will infinitely divide if you die over and over and it will almost never bring your progress back down to zero, even to the point of rivaling the decimal places of pi. But seriously, pretty sure there's an integer limit, but still funny)
Since starvation forces you to completely fill out your food bar, you are never able to do starvation cycles in a row**. But I guess that's why the game gives you an extra 0.08 points, just so it can take it away after surviving a starvation cycle. Meaning it takes 7 cycles minimum to obtain this passage; 4 cycles to force-hibernate and 3 cycles while starving. You will get it after force-hibernating for the 4th time but you will still wake up in a starve cycle afterwards, so you still have to deal with it. Dying doesn't really revoke it so I guess you can just die to end that starve cycle early if you don't mind the possible consequences.
Obviously since hibernating with enough food only takes away a mere 0.08 points, you can pace out the starvation cycles instead of doing them all back-to-back, if you want. Personally would want to get it over with.
**If Vanilla Exploits remix option is enabled, one may do: Starvation Glitch
17. The Nomad

You get this achievement by visiting 4 different major regions in a row. Doesn't have to be in the same cycle. Just don't skip a cycle without moving regions!
{ Requires getting <6. The Survivor> passage before progress can be made }
This is passage is pip-based, yet this is the only pip-based passage that loses progress. You don't lose progress by dying, only by hibernating in a region already tracked by the pips.
Most Major Regions are separated by Karma Gates. Unless you have crossed one, you are still in the same region, and probably just entered a sub-region. You can cross-reference regions, even their associated pip color, back at <12. The Wanderer>.
18. The Mother

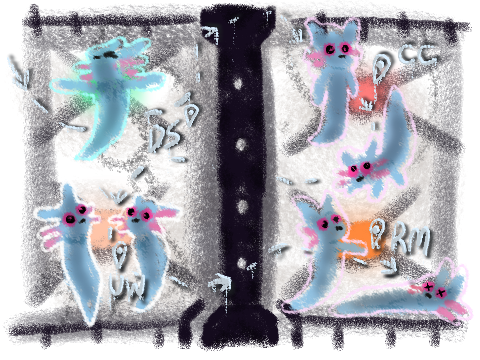
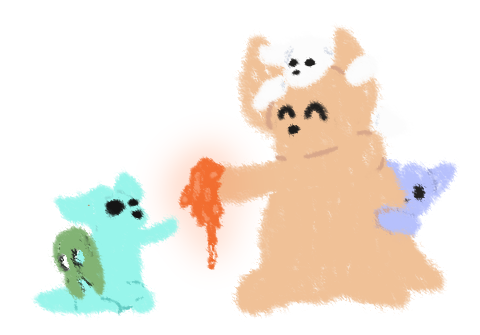
You get this achievement by hibernating with Slugpups. Progress made is dependent on the number of pups.
Slugpups are unlocked after finishing the Gourmand campaign (non-ascension ending), with all of the "grocery list" items above the food bar fulfilled. (Will put more info later.)
Afterwards, you will start to find slugpups around the map as Gourmand, Hunter and Survivor. Slugpups will start off fearful, but after holding their hand and hibernating together, that slugpup will now be BOUND to you, and will add another food bar separate to and above your own. In this state will you start to make progress on the passage.
As far as I know, you can have a maximum of 3 pups, but can only hold onto 2 at a time; one on your head and one on your hands. Leaving the third pup at the mercy of pathfinding.
Slugpups need to be fed in order to hibernate with them. Throw food at them or throw THEM at food, and they will grab it and eat it. Unlike Jolly Co-op, slugpups will permanently die and cannot be revived in any way, or well, at least... the only way to get them back is by committing not live yourself so the cycle resets back to when they are still alive. Sacrifices have to be made :<
This passage is slider-based. You need a total of 5 points to get the passage. Each pup you hibernate with contributes 1 point per cycle. Meaning you can get 3 points per cycle, granted you have 3 pups that are already bound to you. You cannot lose progress by dying, but hibernating without at least a single slugpup in your shelter, will completely reset the progress, so please take good care of them <3
19. The Pilgrim

You get this achievement by visiting every Echo entity.
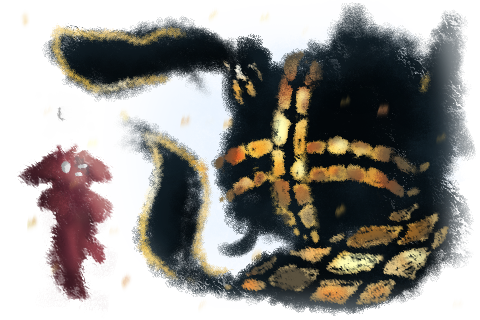
Just like <4. Pilgrimage>, except this time you pay a visit to every one of these past failures! There are usually 6 of them in total, but Artificer and Saint have extras.
See section below for more details :]
=×= ECHO ACHIEVEMENTS =×=
These achievements are associated with the "Echo" entities that appear throughout specific areas of the game. Along with Pilgrimage, this is a hidden achievement.
Sometimes, when entering an area and you get an animated blue flash in your screen and the surroundings look grayscaled, it means that this area is special and you should come back there later.

By "later", I mean, after either hibernating or by dying or quiting, but there are things to consider before returning to the spot:
Your KARMA level. An Echo will not spawn if your karma is not high enough. This depends on how much your current maximum karma level is. You start the game with 5, and meeting Five Pebbles as Survivor or Monk, automatically maxes out your karma to 10. I'll list down the specifics below in a table, to hopefully be easier to understand.
55 7
7 6-7
6-7

 8-10
8-10


This table may not be accurate to those that start off with less than 5 karma present in the DLC, like Artificer and Saint.
An easy, but questionable way to get karma is to use one of the Passages gained from the Passage achievements as this will automatically put you to whatever your max is. Since Passage tokens are limited, it's up to you if you think it is worth it.
Only exception to this requirement are two specific echos, and will always appear no matter what and all you need to do is reach their spots, and they'll be there, just chillin'. They are the first two that I list in this section.
20. Six Grains of Gravel, Mountains Abound
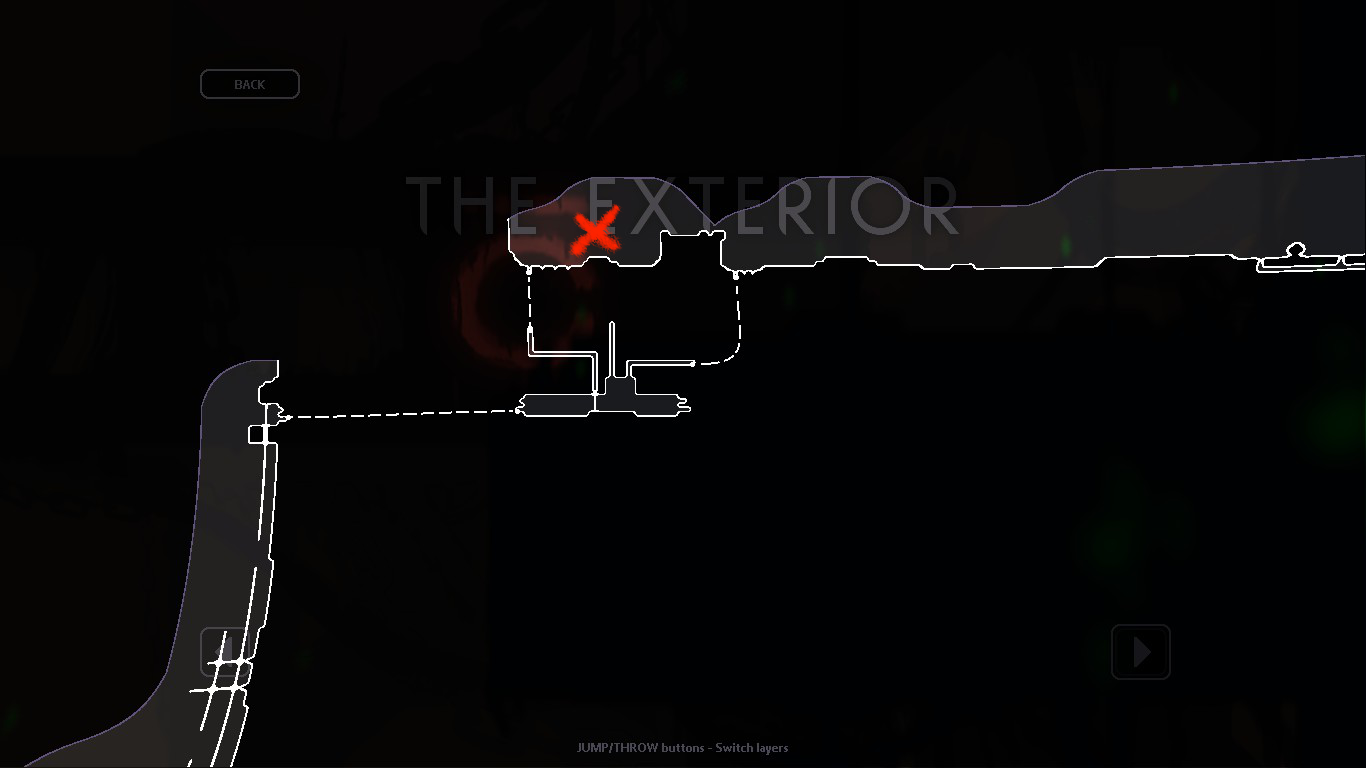
 This cool echo is always hanging about at the top of the The Wall, the left-most part of The Exterior. It's also left of the exit to Five Pebbles after taking the long empty walk.
Doesn't care about karma and doesn't spend a cycle letting you know they're there with a flash, you'll see them the moment you enter their area.
21. Two Sprouts, Twelve Brackets

This echo is at the right side of the big pit leading to the Subterranian, coming from the Farm Arrays karma gate.
Like Six Grains of Gravel, Mountains Abound, they couldn't care less about your karma level and you'll see them the moment you enter their room.

22. Four Needles under Plentiful Leaves

They reside in the right-ish area of the Shaded Citadel, to the left of the gate leading to Shoreline. Go in the top-right pipe in a crossroad area.
Has a Karma requirement.

23. Nineteen Spades, Endless Reflections

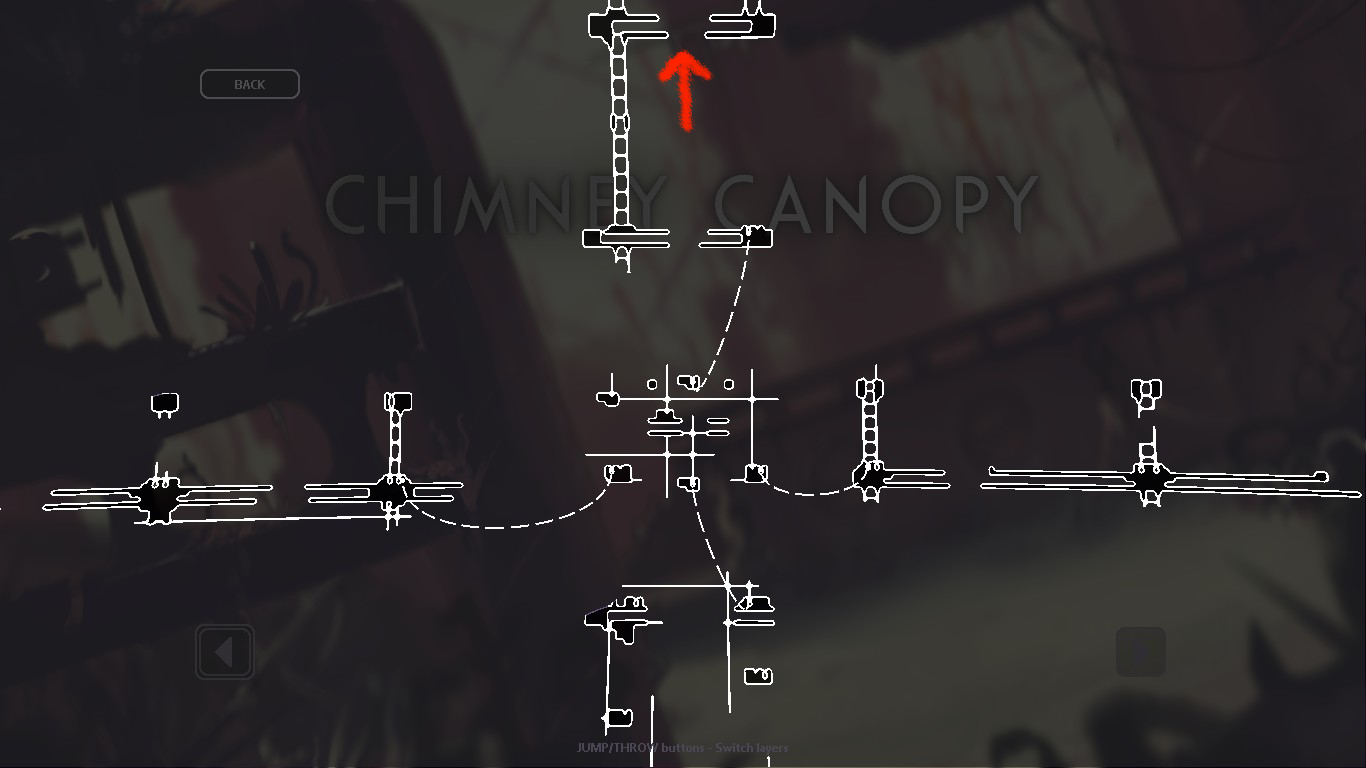
Located in the top of the world in Chimney Canopy between the paths leading to the karma gates of the Sky Islands and The Wall.
Has a Karma requirement.
24. Droplets upon Five Large Droplets

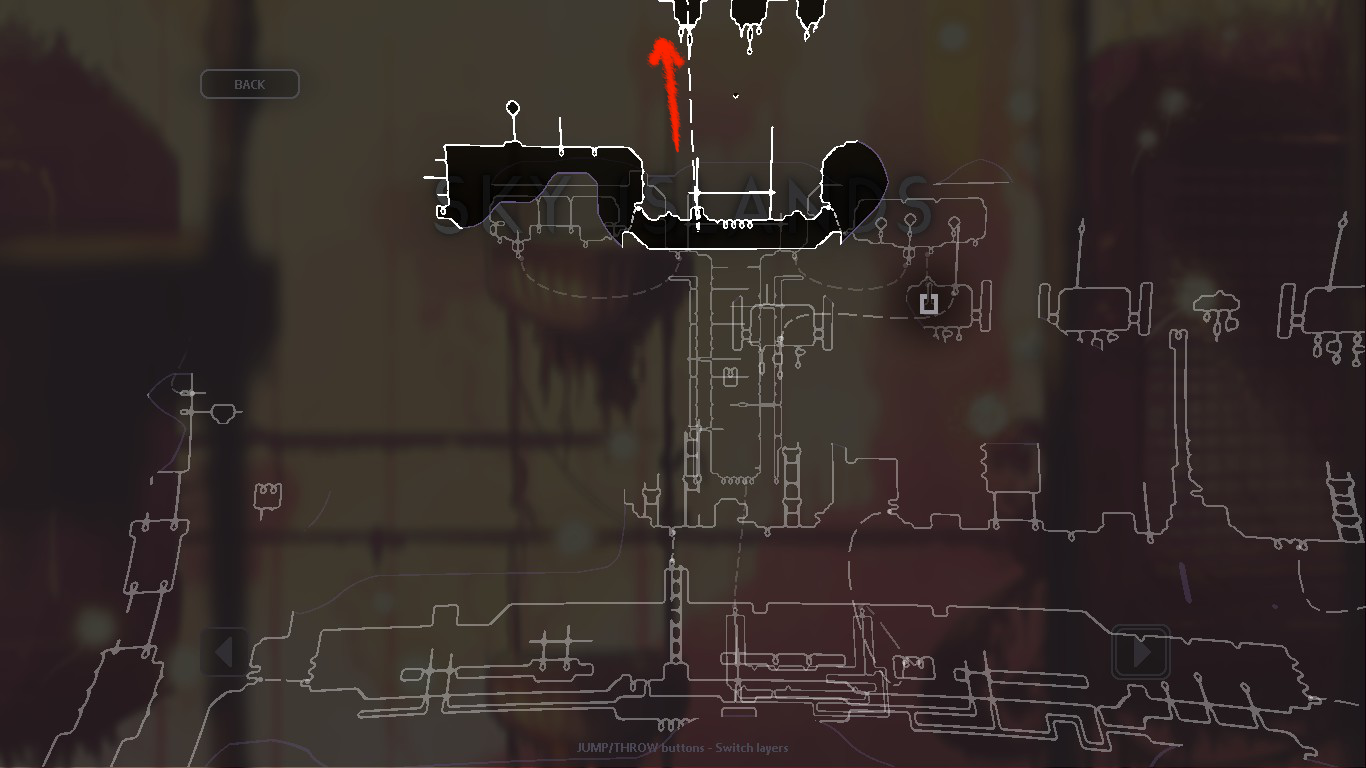
Located above the infamous yellow lizard tunnel, on the solo pipe in the left-ish middle area.
Has a Karma requirement.
25. A Bell, Eighteen Amber Beads

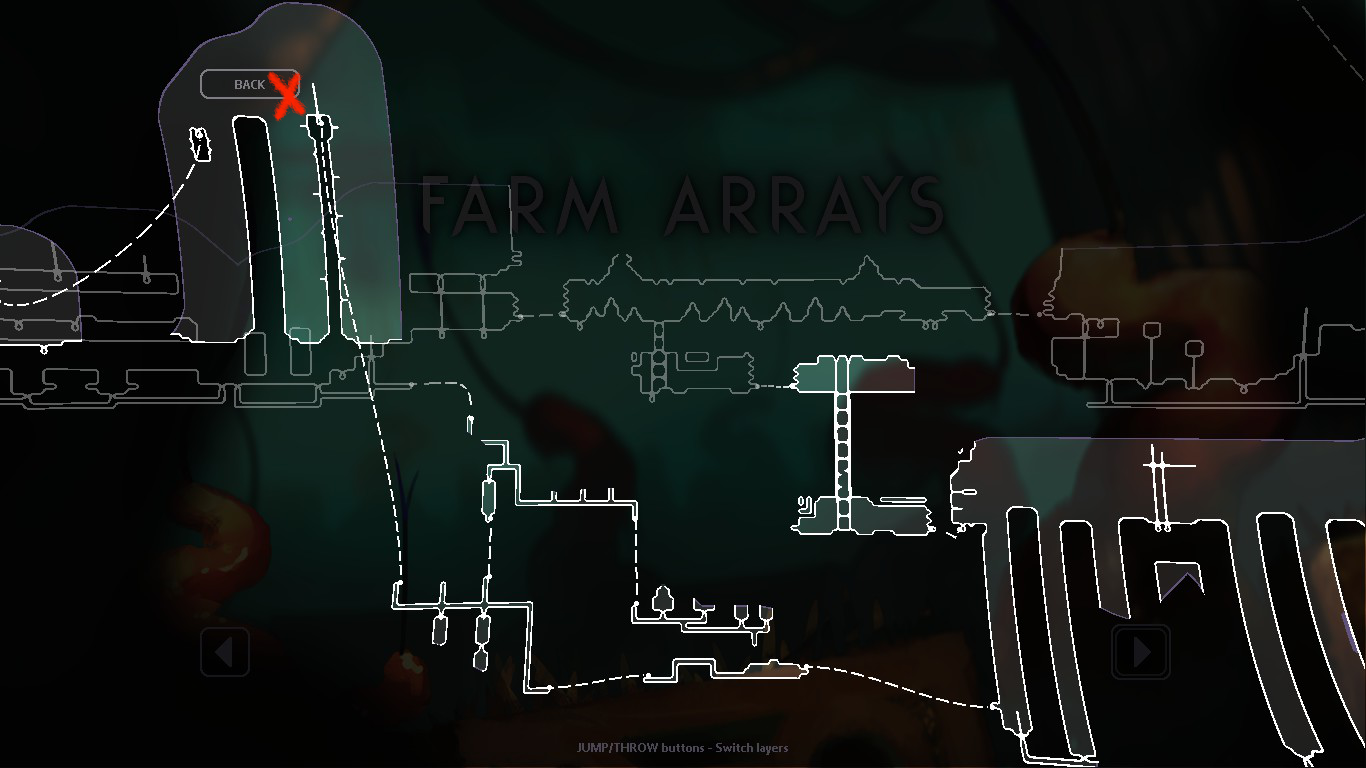
Located at the lower right area of the Farm Arrays, going down to the pipe in the left pit to the left of the Outskirts karma gate and then through the left pipe.
Has a Karma requirement.
~ More Ghosts Upon Rusted Dimes ~
There are some additional echoes that can be encountered on some specific campaigns. They have no official name. They contribute to the Pilgrim achievement so I am including them here.
On Artificer, there is an echo on Atop the Tallest Tower.
On Saint, most are required for progression and are expected to be found. The new ones are in Frigid Coast (Looks to the Moon), Undergrowth and Silent Construct.
(will add map screenshots later)
=×= HUNTER ACHIEVEMENTS =×=
Before the release of the Downpour DLC, Hunter was just an extra optional challenge in the game for players who want more pain. There were only 3 characters that stand in for Easy, Medium, and Hard modes, and the Hunter campaign is hard alright.
Well...
Now there's achievements related to Hunter now, so I guess I need to talk about them proper.

Hunter is the first slugcat to have a 'unique' campaign, spawning in Farm Arrays with a purpose. Hunter spawns with a colored pearl in their belly and a 'Green Neuron Fly' on their paw, which will be relevant for the first Hunter achievement...
- You start off in Farm Arrays instead of Outskirts.
- Living on "borrowed time"; instead of cycles counting up, it is counting DOWN. You have 19 cycles, clock is ticking.
- Hunter is the only one with a strict cycle limit, it is quite a big change in playstyle since there are a lot of things that take time, like gaining karma. This makes Hunter one of the harder ones to play as you simply cannot take your time in it, if you lose all cycles you start over. If this is too punishing for you, I suggest you take time to really get to know the game first. I mean it.
- More strong and agile than yellow/white counterparts, they are the Hunter after all.
- The world is cruel. Harder predators not present in the Monk/Survivor campaign will now spawn.
- Can put an extra spear behind behind their back, for later use. Hold [GRAB] to 'sheathe' the spear and 'unsheathe' it later with an empty hand, same manner of how you store things inside in your belly, but for spears!
- Able to grab and munch on corpses of bigger creatures for food. Delicious.
- Carnivorous scrunkler. They are on a strict meat diet (see <8. The Hunter >, excl. Batflies), and eating anything else won't give as much.
- Cannot use Passage tokens, don't make this easy for yourself.
- Echo entities do not need that first "blue light" pass, and will immediately appear if requirements are met. You don't have time for that after all.
26-27. A Helping Hand & Within Time


As Hunter, deliver the payload to Looks to the Moon; and ascend before your time is up.
Lumped the two achievements together since due to how Hunter plays, you might as well get them both in the same "run".
Your whole purpose is to revive Looks to the Moon using the Payload (Green Neuron Fly) on her place at Shoreline. You also want to ascend in the depths like with Monk/Survivor. Your time is limited so map knowledge and route planning is KEY, if you wanna make this easy for yourself.
First thing I recommend doing is ditching the colored pearl stored in your gut as you wouldnt need it for where you're going, it's better to keep the payload safe in your tum 'til you reach Moon.
Things to keep in mind:- Visiting Five Pebbles will not set you to full karma like Monk/Survivor, Pebbies will only give you +1 karma level, but notably, +5 cycles to your doomsday clock. He's tryna buy you more time, so it might be worth to visit him!
- Because of that, visiting Echoes are essential to max your karma level for ascension.
- Visiting Looks to the Moon for "A Helping Hand" might not be required as I've heard you also get the achievement from visiting Five Pebbles with the payload. Just for the principle of it, please revive Moon.
There are plenty ways to go about the routing, here are some for example:
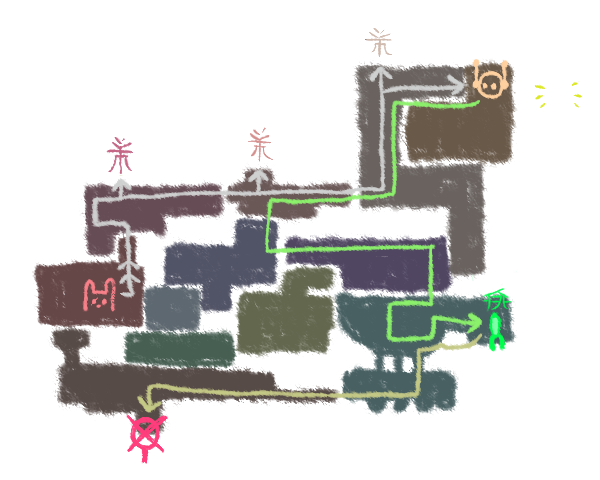
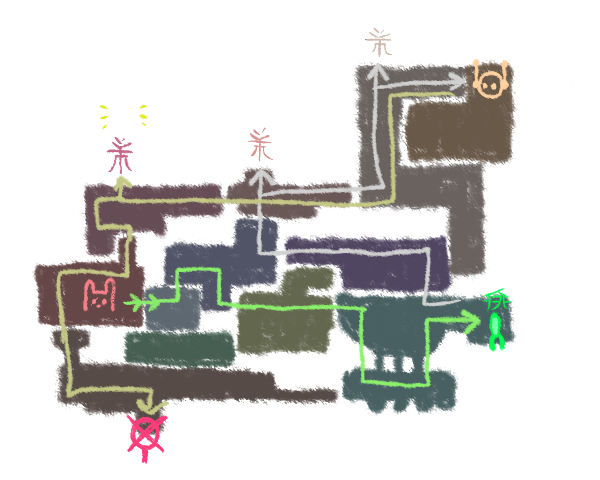
Don't be afraid to experiment on coming out with your own path. There are plenty more echo locations as you might know from the ECHO ACHIEVEMENTS section, so maybe you can plan around them, these are just something I would do personally.
=×= MORE SLUGCAT ACHIEVEMENTS =×=
28. Migration

As Gourmand, reach Journey's End in the Outer Expanse.
~ Gourmand's Grocery List ~
29. Closure

As Artificer, put an end to your blood feud by exacting revenge on the Chieftain in Metropolis, or just accept that it happened, move on, and attempt to ascend.
30. An Old Friend

As Rivulet, take care of Looks to the Moon by plugging in a power core into her submerged systems.
31. Messenger

As Spearmaster, broadcast the message of Look to the Moon's worsening state by bringing the pearl you were given to the Communications Array in Sky Islands.
32. The Cycle

As Saint, ascend.
=×= REMIX ACHIEVEMENTS =×=
33. Champion

Beat every challenge in the Challenges section of Arena.
34. Expedition Leader

Complete every quest in Expedition.
=×= THE WATCHER ACHIEVEMENTS =×=
=×= FINAL RAMBLINGS =×=
Well, hope this proves helpful, at least to some :D
Other helpful resources include the Rain World Wiki[rainworld.miraheze.org] and Discord server[discord.gg].
This is was my first time making a steam guide, and learned a lot. I just initially used this guide as a way to cope with the loss of my grandfather, and it makes me happy to think I ended up helping a buncha people. Thank you for all the support, it's really all unexpected-
I have since improved this guide to better serve future readers! I've included the Downpour achievements and will soon the Watcher when I have the time for it!
I'm sorry I let this guide to rot for years, it's been really hard to maintain this guide all by myself, but I'd like to thank my friends who have supported me along the way.
I have since contributed a bunch to the Miraheze Rain World wiki, mostly on the passage related achievements. Funny thing, it actually devastated me when I first realized they removed everything from the Achievement page, but then my dumb silly brain finally realized they just moved it to its very own Passages page. Which is cool :]
Oh! If you, for some reason, need help from me(?), feel free to shoot me a message on Discord! (meepercreep). Just don't send a friend request– you should still be able to DM me if you're in the Rain World discord.
Also, if you (for some reason) wanna see more of my stuff, I made a scuffed website hosting most of my work! Shameless plug.[meepercreepertown.neocities.org] ^^"
Anyway.
Still freakin love this game, man. It means a lot to me...
Thanks for reading and happy hunting!

Beat Rain World's 100% run?
Flex it — let your friends know you pulled it off.
- Storyline Region Routes★ 5 (592)31k views1.4k ♥2 minUpdated 20 Jun, 2017
- Dress My Slugcat: Custom Slugcat Tutorial - Basics, Setup, Workarounds (WIP!)★ 5 (335)21k views932 ♥29 minUpdated 8 Jun
- Detailed Region Maps★ 5 (803)19k views1.7k ♥1 minUpdated 10 Mar, 2023
- General and Advanced Movement Guide★ 5 (572)17k views1.3k ♥15 minUpdated 5 Mar, 2021
- All Slugcats Guide★ 5 (682)15k views916 ♥9 minUpdated 30 Oct, 2025
- **SPOLIER FREE** Rainworld Guide★ 5 (257)14k views409 ♥10 minUpdated 30 Mar, 2023



- Upgrading to PremiumTeam Fortress 2★ 5 (20k)1441k views11k ♥6 minUpdated May 11, 2022
- No More Room in Hell Official ManualNo More Room in Hell★ 5 (2.8k)569k views2.1k ♥29 minUpdated Apr 22, 2019
- NMRiH Community Hosting GuidesNo More Room in Hell★ 5 (526)351k views653 ♥1 minUpdated Aug 10, 2022
- ULTIMATE GUIDE FOR GAME DEV TYCOONGame Dev Tycoon★ 5 (5.8k)326k views10k ♥4 minUpdated 23 Jan, 2014
- How to 'Git Gud' Soon™MORDHAU★ 5 (2k)318k views3k ♥68 minUpdated Nov 16, 2024
- Лучшие кооперативные игры SteamPAYDAY 2★ 5 (1.5k)315k views2.1k ♥56 minRussianUpdated Apr 27, 2025






This guide was created by its original author on the Steam Community. Are you the author and want it removed? Request removal.