A painfully detailed guide to MapleStory [DEC UPDATE] MAPLESCOUTER AND MORE
Foreword
This is my first time making a guide, so I hope it's not too bad. I would've never thought of making a guide, especially a MapleStory guide at that. But here I am. If you have any feedback I'd be open to hearing it. As long as it constructive feedback that I can work with.
I will try to update this guide as much as possible and keep it up to date. You can see on the right hand side when this guide was last updated. If you have any questions feel free to ask me in the comments section.
I will also try to make a less detailed version of this guide, for those who need a quick guide.
Sadly people tend to forget this, so I'll start by saying this; DO NOT FORGET THAT THIS IS A GAME AND GAMES ARE MEANT TO BE FUN. THIS GAME IS A MARATHON NOT A SPRINT. YOU'RE NOT COMPETING WITH ANYONE HERE. KEEP THAT IN MIND AND PLAY AT YOUR OWN PACE.
Intro
Before we begin, I want all returning players to throw everything they knew about this game out of the window. The reason being that Maplestory is a completely different game from back then. Lots has changed since then, whether you like it or not. Maplestory can be overwhelming at times, there's so much you can do which often leads into demotivation. Don't let that stop you though, after more experience and maybe after this guide, hopefully you will have a better understanding over this game. This guide will be a lot to take in. Take it a step at a time, at your own pace. Even if you have to come back several times to this guide. You can always ask me if you don't understand something, I'll be more than happy to help you.
Now that everyone is a "new player" in this regard let's begin.
Note: I will leave some useful link that other people/creators have made at the end. So even if you don't care about this guide I would still recommend those links as they can help you a lot. Naturally all credit goes to those people who made those links.

MapleStory is a lot like fighting games(excluding Soul Calibur & Tekken). In a sense where there's only 4 ways to move. Instead of the 360° movement, you can only move up, down, right and left ( ↑ ↓ → ← ).
So how do you play?
Like any other MMORPG, MapleStory has a lot of skills you can use. But instead of having to point and click or aim to fire an ability/skill, MapleStory just has stationary or directional skills. Meaning you don't have to aim(for the most part) where your skills go. Which makes it more simple to play.
But don't let that fool you, MapleStory is easy to learn hard to master game, meaning that MapleStory isn't just a simple game that you can pick up and play. Hence why I created this guide.
You play MapleStory using the Arrow Keys ( ↑ ↓ → ← ) instead of the traditional WSDA. Every skill is now bound to: 0-9; a-z; F-F12; CRTL; ALT; INS; DEL; HOME; END; PAGE UP; PAGE DOWN.
And you're going to need ever single keybinding, because MapleStory has a lot of Skills, Pots etc.
Regions & worlds:
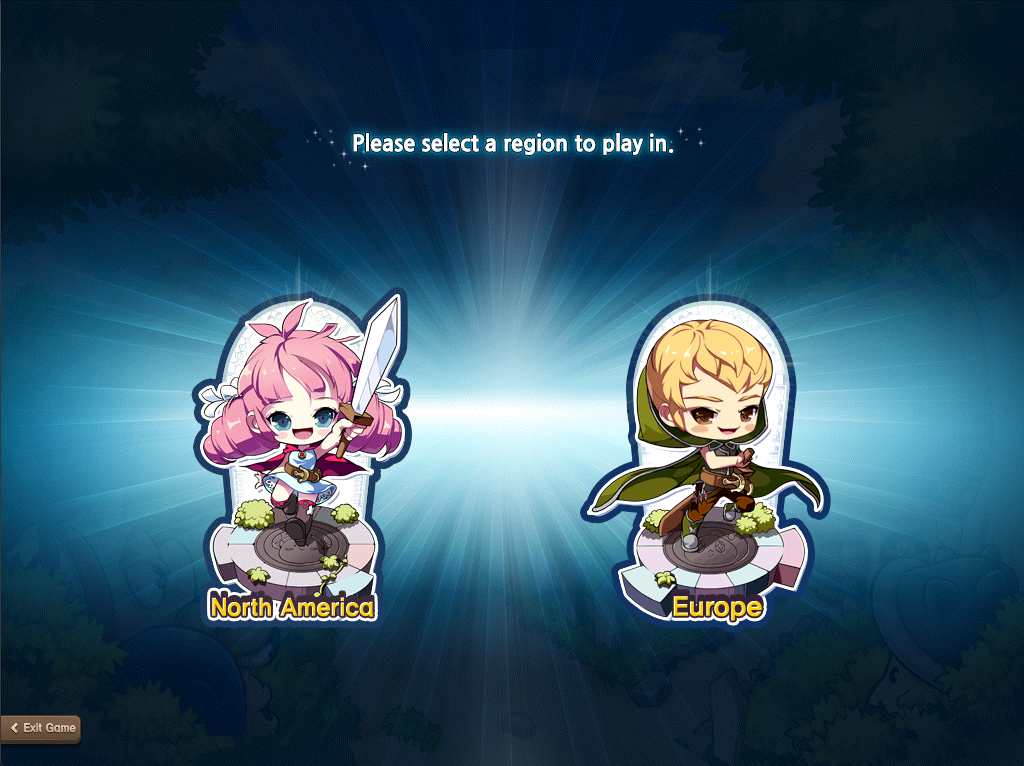 Now what do we have?
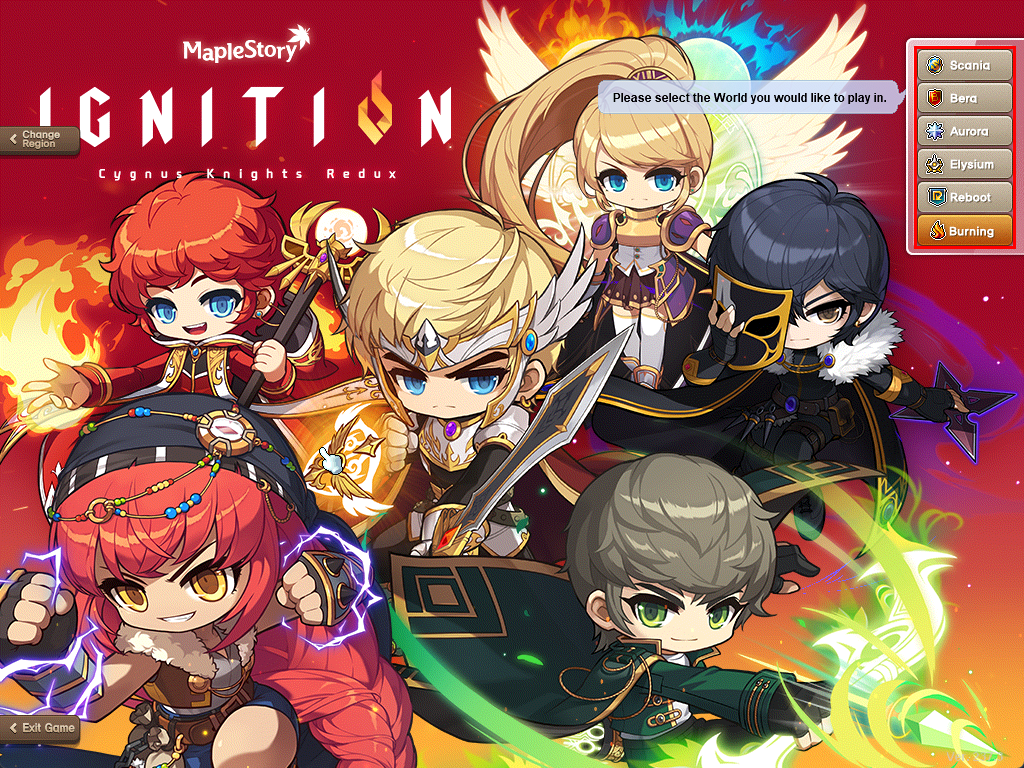
Below you will find the two regions you can choose from & the worlds within those regions.
- North America
- Scania
- Bera
- Aurora
- Elysium
- Reboot (now Kronos & Hyperion)
- Scania
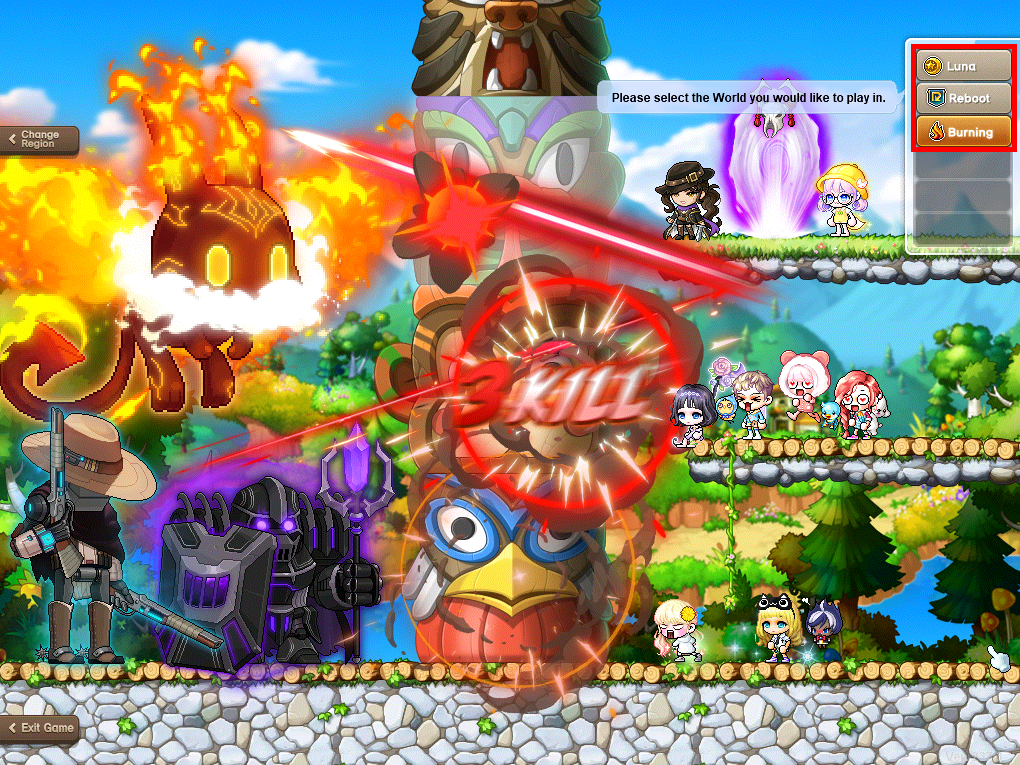
- Europe
- Luna
- Reboot
- Luna
Sidenote; I've been playing NA even though I'm EU. Because of the fact that I have people on NA to play with, I can't speak on EU since I don't really have played on it(as of lately). I am sure EU is lots of fun too. (The latency on NA isn't that bad for me. Especially using ExitLag. (not a sponser))
Reboot also has additional exp and meso drop rates. Meaning you will level up faster and gain more money ingame. This is a given because everything in this world cost ingame money. So you'll be needing lots of it. At first this sound good on paper/sounds easier. But in reality this is and will be harder when you are a new player. The reason is that because you can't trade you can't progress further if you're stuck. No new gear, no better potions etc. One of the other changes in this server is that you can have more than one profession. Unlike regular worlds, where you can only have one. I will go further into details about what a profession is later in this guide.
You now also have a second option when it comes to Reboot: Hyperion. The exact same as Kronos just a fresh start, meaning less players. This is both a pro and a con, refer to the statement on the EU server having less population.
Note; that cosmetic items are still purchased through real life money. Keep that in mind.
Sidenote; there are a lot of botters(hackers) in this world. Making it sometimes impossible to play(because of no training spots). But this only applies to higher level areas. You won't have to worry about it until very late. I do not know too much of this and neither do I know what Nexon has done to prevent this. Keep that in mind if you if you really want to play in this server. I'd suggest doing a more research for this world.
FAQ #1
So now that you have chosen a region and a world, what now? Now you can choose a class to play the game with.
IGNITION UPDATE: HYPER BURNING TILL LV. 260(6th job)
Note: That in this event you can get a lot of goodies. I.e. good gear and other various items. Make good use of these and these events.
- Warrior
- Mage
- Pirate
- Bowman
- Assassin
Each of those classes have their sub-classes and some of those sub-classes have their own sub-classes. That'll make sense in a minute. So let me explain that. Let's take the ancient explorer class for example. If you choose to make an explorer you can choose within that class what you want to become. You can choose one of the above mentioned classes. Let's say you want to become a Warrior. You job advance into a warrior. But within that warrior job class, there are 3 different ways you can choose. Dark Knight, Hero or a Paladin. Depending on what kind of warrior you want you can choose between those three. Dark Knight being a Spear/Pole Arm user. A Hero being a Sword&shield/Two-handed Sword/Axe&shield/Two-handed Axe user. And lastly Paladin being a Sword&shield/Two-handed Sword/Blunt weapon&shield/Two-handed Blunt weapon user. And the same goes for Mages, Pirates, Bowmans & Assasins. But not all classes have these type of sub-classes. For example a Mihile is a warrior. But he can't choose between other warriors because his job is also a Mihile. Unlike Explorers they have warrior class and Dark Knight, Hero & Paladin as jobs.
That being said there are some classes that are "essential" to make.
Link skills lets you give a fixed skill of that class to another class. Each class has their own fixed link skill, that you can't change. Let's take a Mercedes(archer type class) for example. Her link skill is "Elven Blessing". Her link skill allows you to gain more %EXP. So it's easier to level. And that's one of the many link skills you can get. You can give that to any of your other classes. This is why it's important to make lots of other classes, solely for that purpose. To buff up your main. But to be able to get these "link skills" you have to have that specific class to at least level 70. There are usually 3 levels of a link skill. First level unlocks at lv. 70, to be able to be used by other classes. After that the second level will be unlocked at lv. 120. And last but not least at lv. 210. Usually level 2 is enough as you start.
As of which I would recommend? A Mercedes, just as I said in my example, her link skill is essential. To be able to level faster is a godsend.
So first and foremost I would recommend Mercedes(you don't say). Lv. 120 should be enough for now. As well as every other link skill until you either reach a wall or when you're reaching end game. Secondly I would recommend Aran & Evan. As these three classes have EXP boosting link skills. But feel free to skip Aran & Evan. There are others that have a bigger impact on your gameplay than these, but for the time being leveling is your focus until you reach 200. Besides it's good to have EXP based link skills so if you make more characters you can level them up more quickly.
For all other classes link skills, go to Scardor's Google Docs: here[docs.google.com]. There you can see not only the link skills but also the Legion.
If you really aren't sure or if you think multiple are cool looking I would recommend a channel called; KyoWantsCute. He is a Maple content creator and goes over all the classes and their skills. So you can get a general idea of how each class plays and how they look like and if it's for you or not.
FAQ #2
Note; Some classes have their own storyline, which you have to do in order to do certain stuff. Like job advancement. I will talk about this in the paragraph below.
- st job advancement = Lv. 10
- nd job advancement = Lv. 30
- rd job advancement = Lv. 60
- th job advancement = Lv. 100
- th job advancement = Lv. 200
- th job advancement = Lv. 260
- (Boss-)Mule(s)= is a character who serves a singular purpose(i.e. only for bossing(boss mule))
- BiS = Best in Slot
- MVP xx:35 ard/cyg/MS = EXP buff at xx:minutes Ardentmill/Cygnus boss/Mushroom Shrine
- SF = Starforce
- FZ = Frenzy(increases the spawn rate of mobs in that map)
- FS = Firestarter(increases the burning stage % inside a map)
- AH = Auction House(previously called FM(Free Market))
- (B)POT = (Bonus)Potential
- CDHAT = A helm with CDR(CoolDown Reduction) as potential
- CC = Change Channel/Current Channel
- CS = Cash Shop
- IA = Inner Ability
- WAP = Wealth Acquisition Potion
- Lomien = Lotus+Damien
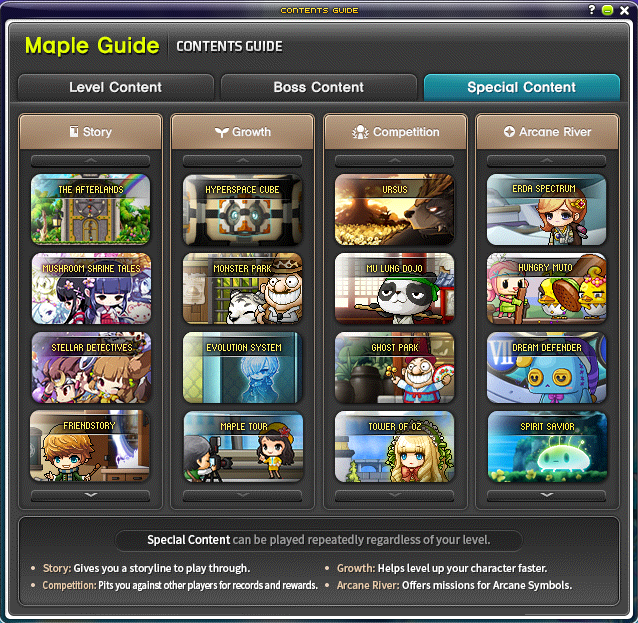
Theme dungeons is a Story quest-line that gives you various rewards. Some are good some are bad. That's why it's important to know which ones to do and which ones not to do. Theme Dungeons take a long time to complete due to the fact that the story of the quest-line is long. It can take around two hours each, maybe even more if you don't know what to do. That's why I will always recommend watching a walk-through for the most efficient way of clearing the dungeon. As it can cut down on how long you spend for each dungeon.


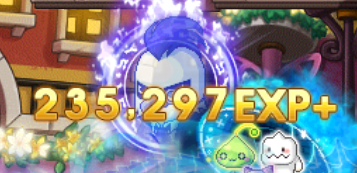
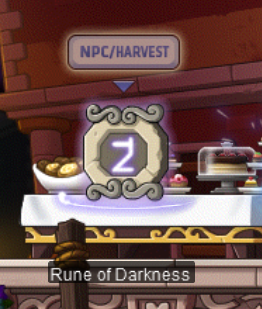 You get EXP orbs by getting chain kills. If you get a combo of 50, 100, 150, 200 etc. you get a EXP orb. These orbs, as stated, give EXP when walked through it. The amount of EXP varies as you get a higher combo count. There's no cooldown to this EXP orb thing. It just works with combos. You have to kill them successfully back to back without leaving too much time in between to get it to work.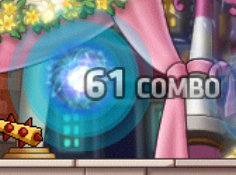
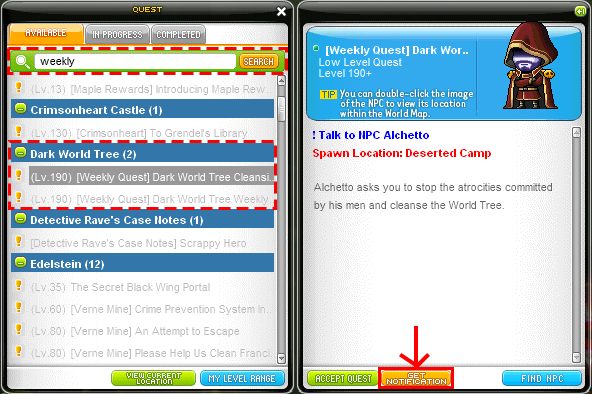
Weeklies are weekly things you do in the game. I.e. Dark Tree & Haven, Hard bosses.
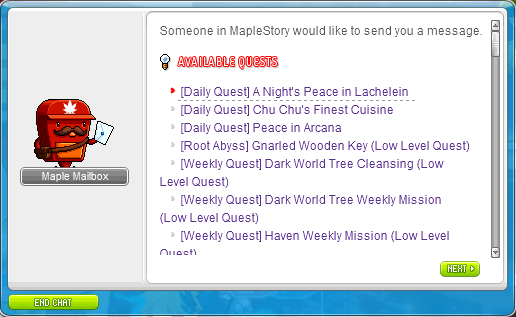
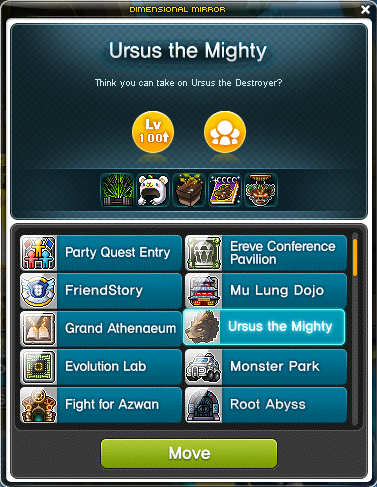
NOTE: Ursus is a 18 PLAYER PARTY QUEST; meaning IT WILL GET LAGGY. if you don't load in immediately just wait. Sometimes you get downed before even loading in completely.
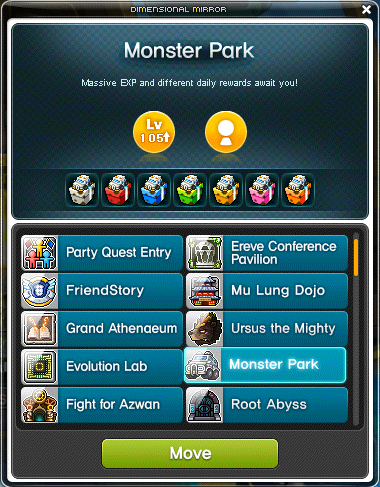
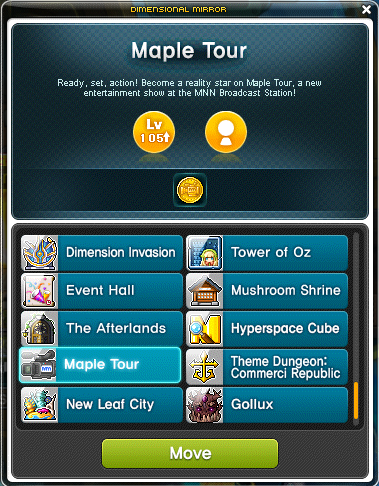

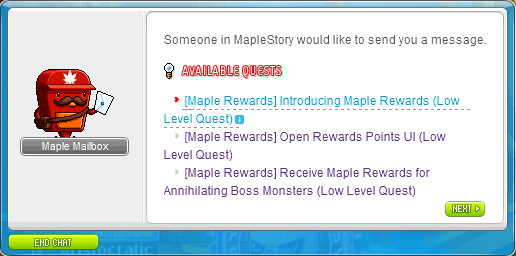



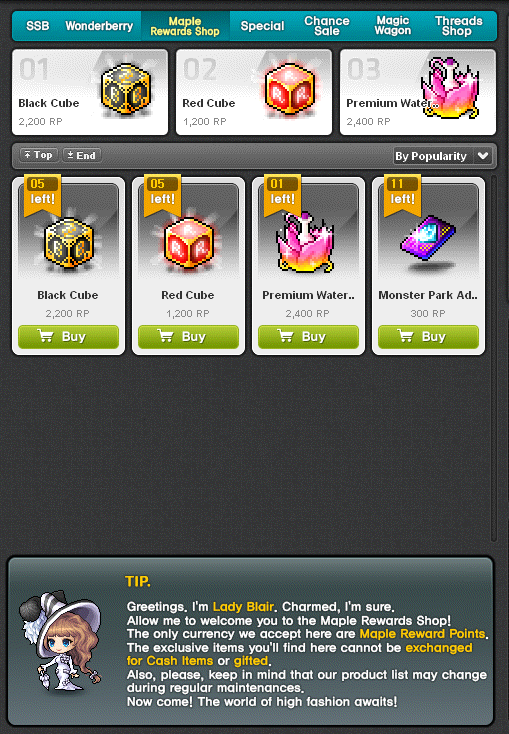
TIP: You can get 500 RP per day by playing Maplestory M. A mobile Maplestory game. You do some daily tasks to get the RP. A gude and hwo to link your MS PC & MS M account by watching this
FAQ #3
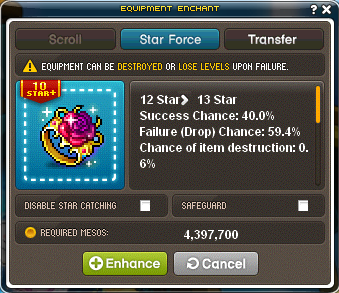
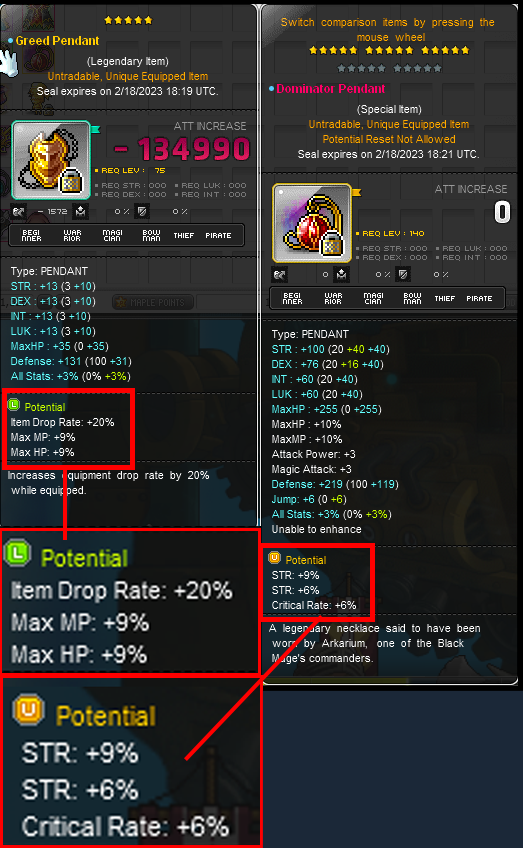
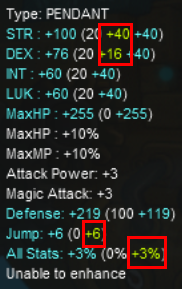
How to reroll Flame Stats
Rebirth Flame allows you to reroll the Flame Stats on an equipment. These are obtainable through bosses, events, ingame shops, harvesting veins, bounty pouches & monster collection
What can be Flamed?
- Hat
- Face Accessory
- Eye Accessory
- Earrings
- Pendant
- Top
- Bottom
- Overall
- Belt
- Cape
- Glove
- Weapon
- Shoes
- Pocket Item
- Emblems
- Badges
- Shoulderpad (Scarlet Shoulderpad can be flamed however)
- Rings
- Secondary Weapons (including shield and katara)
- Medals
- Android
- Android Hearts
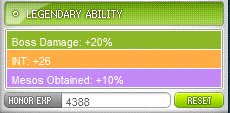
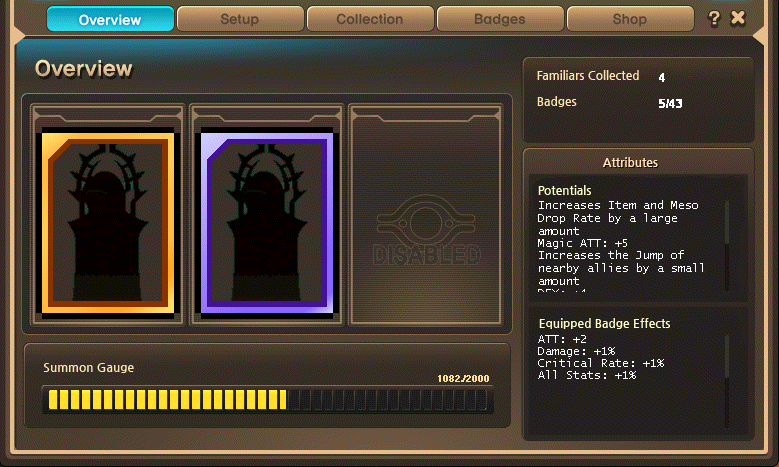
*PNO can drop a Legendary Familiar, but it's super rare.
Grinding

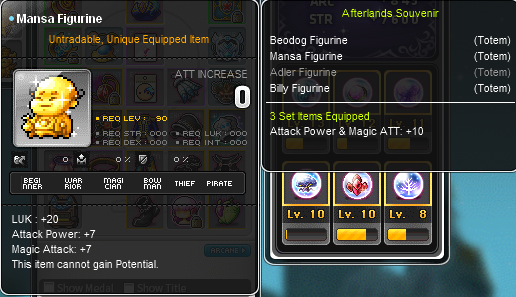
Afterlands walk-through. God bless this man, truly a blessing this guide.
After this it's a long grind till 200. I'd recommend skipping all quests and going straight to grinding. But don't let me stop you from doing quests, make sure to have fun and progress on your own pace.
One last trick you can do is when you reached lv. 199. You can go to Scrapyard Haven and accept a quest where it's all dialog and you will gain one full level. Lv. 199 to lv. to 200. But this will be a long way, so skip this for now. But make sure you keep this in mind because it save you a lot of trouble and time. Does not work anymore
Note; stay within your level range when hunting monsters, or else it won't be optimal. For regular servers up to 10 levels above/below and in Reboot up to 6 levels above/below.
Trainingspots
Before you look at this, do know that it doesn't really matter where you train, as long as you are within level range(in Reboot +-1 your level). That being said, there is an optimal path to take for leveling more efficient.(subject to change) USE THE INGAME GUIDE BUTTON & MAIN QUEST INSTEAD.
LVL 10 - 20 = Savage Terminal, Wasted Treatment Planet 1/Henesys, Golem's Temple Entrance
LVL 20 - 30 = Savage Terminal, Stray Dog Alley 1/Ellinia, Giant Tree
LVL 30 - 50 = Savage Terminal, Mr. Hazard's Lair 3/Shaded Dump Site
LVL 50 - 60 = Perion, Wild Boar Land
LVL 60 - 70 = Sleepywood, Silent Swamp/Humid Swamp
LVL 65 - 80 = Orbis, Stairway to the Sky 1
LVL 70 - 75 = Aqua Road, Red Coral Forest
LVL 75 - 80 = Verne Mine, Shaft 4
LVL 75 - 85 = El Nath, Ice Valley 1
LVL 80 - 90/100 = Ariant, Sahel 2/Desert of Serenity
LVL 97 - 100 = Leafre, West Leafre Forest
LVL 100 - 106 = Normal Zakum boss(solo) + rune and/or 2x EXP
LVL 100 - 110 = Minar Forest, Cranky Forest/Steep Hill
LVL 110 - 120 = Ludibrium, Toy Factory <Apparatus Room>
LVL 110 - 130 = El Nath, Sharp Cliff 2/3
LVL 130 - 135 = Korean Folk Town, Wanted Sign Quest till Goblins
LVL 130 - 140 = Korean Folk Town, Black Mountain Entrance
LVL 135 - 145 = Korean Folk Town, Goblin House
LVL 140 - 150 = Kerning Tower, 2F cafe/higher levels
LVL 150 - 160 = Leafre(theme dungeon), Colossus West Road 2
LVL 160 - 161 = Normal Horntail boss(solo) + rune and/or 2x EXP
LVL 160 - 165 = Omega Sector, Boswell Field 2
LVL 165 - 170 = Omega Sector(Inside the Mothership), Corridor 103
LVL 170 - 175 = Omega Sector(Inside the Mothership), Corridor 203
LVL 175 - 190 = Temple of Time(Gate to the Future), Knights Stronghold
LVL 180 - 190 = Temple of Time(Gate to the Future), Twilight Perion: desolate Rocky Road
LVL 190 - 200 = Temple of Time(Gate to the Future), Forsaken Excavation Site 2
LVL 199 - 200 (FREE LEVEL) = Scrapyard Haven, introduction quest(talking only)
(From 200 you generally want to follow the storyline as through that you will progress to new stages of the game) (no longer works)
LVL 200 - 205~210 = Weathered Land of rage/Sorrow, Upper Stem Crossroad
LVL 205 - 210~215 = Below the Cave, Eastern Cave Path 2, Reverse City(storyline)
LVL 210 - 215~220 = Slurpy Forest Depths, Mottled Forest 3, Torrent Zone 3/1(only if you can one shot them)
LVL 215 - 220~225 = Hidden Illiard Field, Mushbud Forest 5, Hidden Mushbud Forest
LVL 220 - 230 = Revelation Place 3, Chicken Festival 1/2, Occupied Dance Floor 2(only if you can one shot them)
LVL 225 - 245 = Cavern Lower Path (1/2), Between Frost and Thunder 2, Labyrinthine Cavern (- Upper Path/Side Path), Deep in the Cavern - Upper Path 2
LVL 235 - 250 = Mirror-touched Sea 2/3/4
LVL 240 - 255 = The Final Edge of Light 4, Plunging Depths 1/4, Star-Swalloing Sea 1/4
LVL 245 - 255 = Last Horizon 5, Mysterious Fog 2, Void Current 1/3
Lv. 202-250 Coppersan
Lv. 10-250 Nucleous Maplestory
Lv. 10-210 ClanKaiser
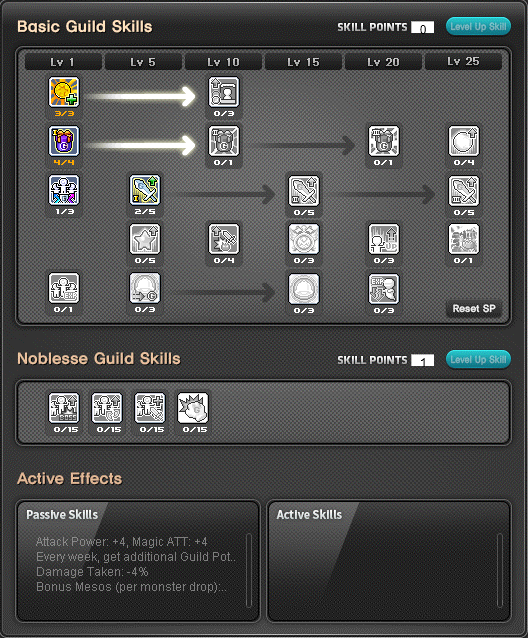
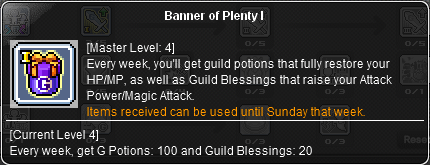
Guilds
5th job & Nodes
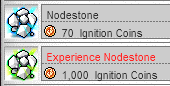
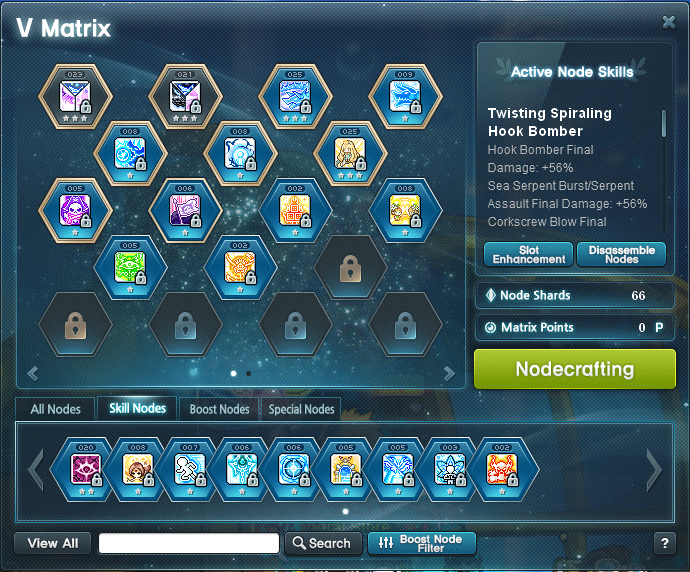
Official MapleStory VMATRIX Guide[maplestory.nexon.net]
- A Skill Node's highest Rank is normally 25, but can be increased to up to 30 via Slot Enhancement.
- A Boost Node's highest Rank is normally 50, but can be increased to up to 55 via Slot Enhancement.
- The Rank of a Skill Node and the level of the Node slot determine the level of the obtained skill (excluding Special Nodes).
Ex: If a Rank 2 Skill Node is equipped in a Lv. 3 Node slot, then the subsequent Skill will be Lv. 5.
While Special Nodes can be equipped into Enhanced Slots, they will gain no benefit from doing so.
- Boost Nodes
- Skill Nodes
- Buff Nodes
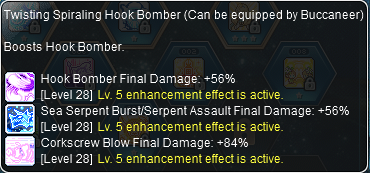
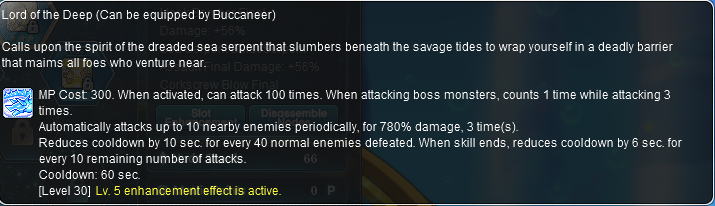
[No Image]
- Weeklies
- Monster drops
- EVENTS
All Class Trio Nodes[thedigitalcrowns.com]
Alongside this Decent Speed infusion and Decent Advanced Blessing have now become passive skills alongside Maple Warrior(not a 5th job skill but including it regardless). Which means more slots on the Pet Auto Buff.
6th job & Sol Erda
Requirement: Lv. 260 and above (Zero characters must have completed up to Chapter 2). Character must have completed the ‘[Convergence] True Form’ quest, ‘5th Job: Record of Power’ quest, and 5th Job Advancement.
6th Job Advancement can be started by accepting the ‘[6th Job] Merged Dimension’ quest within the lightbulb notifier on the left side of the screen.
Reminder: Your character must meet the following requirements to start the 6th Job Advancement:
- Lv. 260 and above
- Completed the ‘[Convergence] True Form’ and ‘5th Job: Record of Power’ quests
- Completed 5th Job Advancement
As you progress through the quests, you’ll receive the following quest items. You must activate the stones and defeat monsters near your level (20 levels below and 20 levels above) to fill each of them with EXP. Once you complete each quest, you will receive EXP as a reward.
- My Arcane Stone
- Vanishing Journey Stone
- Chu Chu Island Stone
- Lachelein Stone
- Arcana Stone
- Morass Stone
- Esfera Stone
[more information coming soon]
Hexa Matrix
Hexa Skills
Hexa Skill Nodes consist of the following:
- Skill Node: New Origin skill will be given once activated
- Mastery Node: 4th Job or lower skill will either be enhanced or replaced once activated
- Boost Node: 5th Job skill will be enhanced once activated
- Common Node: New skill that is shared between characters of the same class will be given once activated. Common Nodes will be available at a later date, so stay tuned!
Hexa Stats
Hexa Stats are stats that can be obtained and enhanced through Hexa Stat Nodes.
Hexa Stats consist of the following stats:
- Critical Damage
- Boss Damage
- Ignore Defense
- Damage
- Attack Power & Magic ATT
- STR/DEX/INT/LUK (MAIN STAT)
You can set one Main Stat with a higher value and two Additional Stats with a lower value per each Hexa Stat Node.
- You can set one type of stat once within all Hexa Stat Nodes
- Ex: Boss Damage stat can only be set as a Main Stat for one of the six Hexa Stat Nodes
- You can set up to two duplicate types of stats as Additional Stats within all Hexa Stat Nodes
- Ex: Critical Damage stat can be set as one of the two Additional Stats on Stat Node #1 and Stat Node #2
- You are unable to equip the same type of stats within the same Stat Node
- Ex: If the Main Stat is set as DEF Ignore, the two Additional Stats have to be set among the five other stats
Hexa Skills and Hexa Stats can be activated or enhanced by using enhancement materials: Sol Erda and Sol Erda Fragment.
Sol Erda
Sol Erda is used in the following ways:
- Activate and enhance Hexa Skills
- Activate Hexa Stats
Sol Erda can be obtained by earning Sol Erda Energy after completing the 6th Job Advancement.
You can earn Sol Erda Energy by the following methods:
- Completing daily quests
- Defeating monsters in Sacred Powered Grandis areas
- Defeating the following bosses:
- Lotus (Hard)
- Damien (Hard)
- Lucid (Hard)
- Will (Hard)
- Verus Hilla (Normal, Hard)
- Guardian Angel Slime (Chaos)
- Gloom (Chaos)
- Darknell (Hard)
- Black Mage (Hard, Extreme)
- Chosen Seren (Normal, Hard, Extreme)
- Kalos the Guardian (Chaos)
- Kaling (Normal)
You get 1 Sol Erda (untradeable) when you collect 1,000 Sol Erda Energy.
Each character can have up to max 20 Sol Erda. If the character has 20 Sol Erda in their possession already, Sol Erda Energy will no longer drop for that character.
Sol Erda Fragment
- Sol Erda Fragment is used in the following ways:
- Activate and enhance Hexa Skills
- Activate and enhance Hexa Stats
- Sol Erda Fragment can be obtained after completing the 6th Job Advancement.
- You can earn Sol Erda Fragment by the following methods:
- Completing daily quests
- Defeating monsters in Sacred Powered Grandis area
- Sol Erda Fragment is tradeable within account in Aurora, Bera, Elysium, Luna, and Scania worlds. It is untradeable in Reboot worlds.
For characters that completed 6th Job Advancement, you will the following sources to earn Sol Erda Energy and Sol Erda Fragments:
Daily Quest
- You will be asked to defeat 3,000 monsters near your level (20 levels below and 20 levels above) in the Grandis area to complete the daily quest. Daily quests can be completed per character.
- Upon completing the daily quest, you can receive the following Daily Quest Rewards:
- Sol Erda Energy (x600): Untradeable, 7-day duration. (This is a use item, if you use it you will store it in your gauge, in which you can hold 20 max(Sol Erda). This is NOT the "Sol Erda Fragment". Those stack within your "ETC" tab. Which you can farm infinitely.
- Sol Erda Fragment (x12): Tradeable within account, Permanent. (Item is untradeable in Reboot worlds.)
- Sol Erda Fragments are given only once a day per world. After claiming the Sol Erda Fragment for the day, additional characters that complete the daily quest will only receive Sol Erda Energy.
6th Job Skills
To learn more about all the new 6th Job Skills, you can refer to the v246 Patch Notes here[www.nexon.com]!
Credits: Duky; https://www.youtube.com/@Duky
Symbols
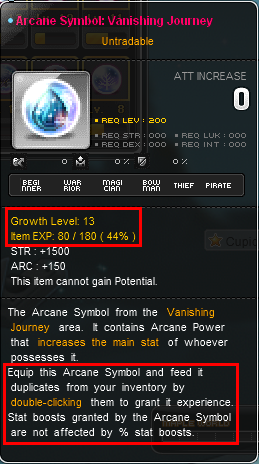
With the introduction of 5th job came a whole new area called Arcane River. With that also came new bosses, gear, storyline and the introduction of Arcane Symbol. You get your first Arcane Symbol after completing the VJ storyline. These symbols are necessary to progress further into the storyline/areas. Without these you will do no damage to the mobs located in these areas. The reason being that the areas have certain Symbol requirements, just like some SF requirement areas. More on that later.
After 5th job, transitioning into 6th job you will unlock "Continental Grandis". Which is the same as Arcane River.
The Grandis counterpart to Arcane Rivers; "Arcane Symbols" is called: "Sacred Symbols". Which do the exact- and work the same as Arcane Symbols. For that reason I will only go over Arcane Symbol as of now.
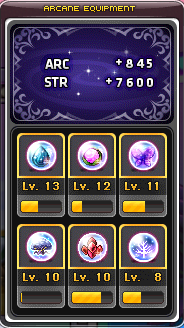
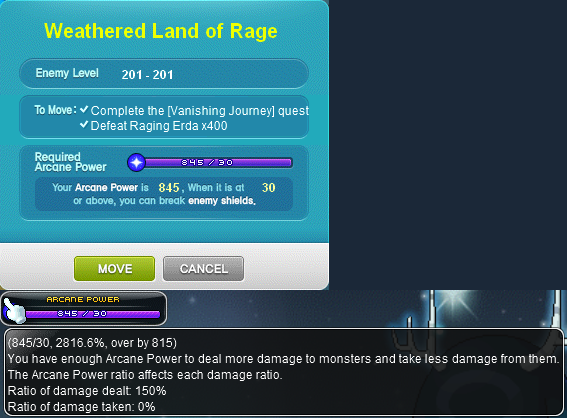
For example; if the area requires 100 Arcane Symbol and you have 250 Arcane Symbol you will deal 150% more damage to these mobs. Making them easier & faster to kill. And getting more EXP per min.
- Dalies
- Weeklies
- Killing MOBS in their respective area's(Extremely rare chance to drop)
- Getting them from EVENTS
Dailies & weeklies
Dailies are things you do daily in Maplestory, such as:
- Bossing
- Symbols Quests
- Monster Park
- Maple Tour
- Ursus
What are weeklies?
Weeklies are things you do weekly in Maplestory, such as:
- Hard Bossing
- Symbols PQ
- Dojo
- Guild Contents
- Dark Tree (AbsoLab Coins)
- Haven (AbsoLab Coins)
Why are "dailies/weeklies" so important?
Dailies/weeklies are important because they are easy(for the most part) and rewarding. In order for you to get stronger you have to do this at the very minimum. If you don't have time to play this game and still want to get stronger, this is the way. By doing this you gain EXP & Mesos. This adds up as you will be doing these daily/weekly. If you keep doing this you will eventually be really strong.
The Arcane River Symbols consists of:
- Vanishing Journey (lv. 200)
- Chu Chu Island (lv. 210)
- Lachelein (lv. 220)
- Arcana (lv. 225)
- Moreass (lv. 230)
- Esfera (lv. 235)
Each area has their own "Party Quest", which you can do in addition to the normal quests. These do not only give Symbols but EXP as well.
In the same order as the top list:
- Erda Spectrum (lv. 200)
- Hungry Muto (lv. 210)
- Dream Defender (lv. 220)
- Spirit Savior (lv. 225)
- Ranheim Defense (lv. 230)
- Esfera Gaurdian (lv. 235)
The Grandis Symbols consists of:
- Cernium (lv. 260)
- Hotel Arcus (lv. 265)
- Odium (lv. 270)
- Shangri-La (lv. 275)
- Arteria (lv. 280)
- Carcion (lv. 285)
Grandis DungeonsGrandis Weekly to get EXP, Sol Erda fragments & Sol Erda Energy.
The Grandis dungeons consists of: - High Mountain (lv. 260)
- Angler Company (lv. 265)
Monster ParkMonster Park is unlocked at lv. 105+. Each day has a different gift. For more info go to FAQ#2
MP is really usefull on the later stages of the game. Free EXP for 2min work at most.
There are in total 4 doors/Dungeons:- First door - Beginner Dungeon: lv. 105 - 139
- Second door - Intermediate Dungeon: lv. 140 - 179
- Third door - : lv. 179 - 259
- Fourth door - Extreme Dungeon: lv. 260+
Each day has a different gift:- Monday: Creation Box
- Tuesday: Enchament Box
- Wednesday: Trait Box
- Thursday: Honor Box
- Friday: Gold Box
- Saturday: Festive Box
- Sunday: Growth Box
Maple TourMT is unlocked at lv. 105+. Each day you can accumulate some money. After 1 week exactly(so after 7 days) you can claim your money. For more info go to FAQ#2
MP is really usefull on the early stages of the game. Free money for 2min work at most.
Thre are 5 levels in MT:- Commerci - San Commeric Outskirts Studio: Level 160-169
- Commerci - Sospetto Forest Studio: Level 170-179
- Zipangu - Midnight Pine Forest Studio: Level 180-189
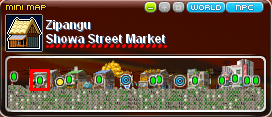
- Zipangu - Showa Town Studio: Level 190-199
- Masteria - Krakian Jungle Studio: Level 200+
UrsusUrsus is daily and at a certain time it's 2x mesos. Meaning you will get the double amount of what you regularly would get. So do this at those times. For more info go to FAQ#2.
(I can't tell you the exacy time because I do not live in NA, so you will have to figure this out on your own sorry.)Dark Tree + HavenDark Tree & Haven have 5 quests each. You need to do this in order to get AbsoLab gear. For more info look at Gear Progression.DojoDojo is a weekly ranking system that allows you to see how strong you are. Dojo ranks you with the same class so you can compare to other people of the same class. Players of level 105+ can participate.
You can access this content by talking to the Dimensional Mirror found in most towns. Once you enter the dojo there's an NPC called So Gong who you can talk to to enter the dojo rankings.
There is no EXP penalty for dying, but your attempt will be terminated. There are a total of 80 stages. You have a 15 minute time limit to clear as many stages as you can. Based on your best record for the week, you can get rewards.Guild ContentsThere are 2 guild contents you can do in order to boost your Guild level. You gain GP(guild point) by doing this.
The 2 Guild Contents are:- Culvert
- Flag Race
Culvert
Culvert is a weekly boss you can do for you guild. Just like Dojo you have certain stages to the boss you can beat. The more you beat the boss the higher you score is. Your score is a contribution towards the guild. You can level a guild doing this.Flag Race
Flag Race is a race minigame that you can play to achieve the same as Culvert. This and Culvert contribution score stack. So do them both to gain more Guild Points for the guild.This guide is a bit outdated, but it'll suffice. In the future(kms update) some of these dailies will become weeklies.
- First door - Beginner Dungeon: lv. 105 - 139
Bossing
When it comes to bossing there are certain things you need to know.
TBA
Gear progression
YOUTUBE VIDEO DOWN BELOW
Everything up until 150 doesn't really matter, with a few exceptions. But I'll go over that as we go. Just wear gear for each appropriate level up until you reach 150. After that it's all about min/maxing. From 150 onward you'll have reached "Late Game". You should have already done the Totem Dungeon grind. Which nets you 3 free totems that you will be having untill a new event comes which gives better totems. Untill then you are stuck with those.
Note; Pensalir gear(lv. 140) will just do fine if you can't get lv. 150+ gear. Pensalir gear will get you really far till even lv. 200+. This set is dropped by monsters that are lv. 130+.
And lastly Von Leon will give you ring, earring & pendant. Which WILL NOT count towards the "boss set" item. Von Leon has it's own set. BUT If you gather 10 Von Leon Accessories which include the aforementioned accesories(ring, earrings & pendant) you can combine them to make 1 super ring called; "Noble Ifra's Ring"(You will need to have completed the whole Von Leon questline in order to be able to do this). This WILL count towards the "boss set".
Other accessories that you'll want to get later one are from; Arkarium, Pink Bean, Hilla & Magnus. Arkarium will give you Mechanator/Dominator pendant. Pink Bean will give you Pink Bean mark & holy cup(pocket slot). Hilla will give you, (other than the Necromancer set), A free PET(that can loot items for you, very low chance in normal(Hard version which gaurantees the drop)), earrings & stone of eternal life(pocket slot). Magnus will give you a badge, royal black metal shoulder.
PNO(Princess No) Gives you a "secondary" equip. This is a weekly boss, meaning it's a though boss which you can do each week. This boss is also really annoying. In order to get the secondary you will need to collect 15 tokens that the boss drops.
Lastely you'll want to grind Gollux daily as you have to buy his accessories. What you want to aim for is Superiour Gollux accessories. After you defeat Gollux he will drop a few coins. He can additionally drop some gear ranging from cracked to superior(which is extremely rare).
These are the main boss accessories drops you want to look out for: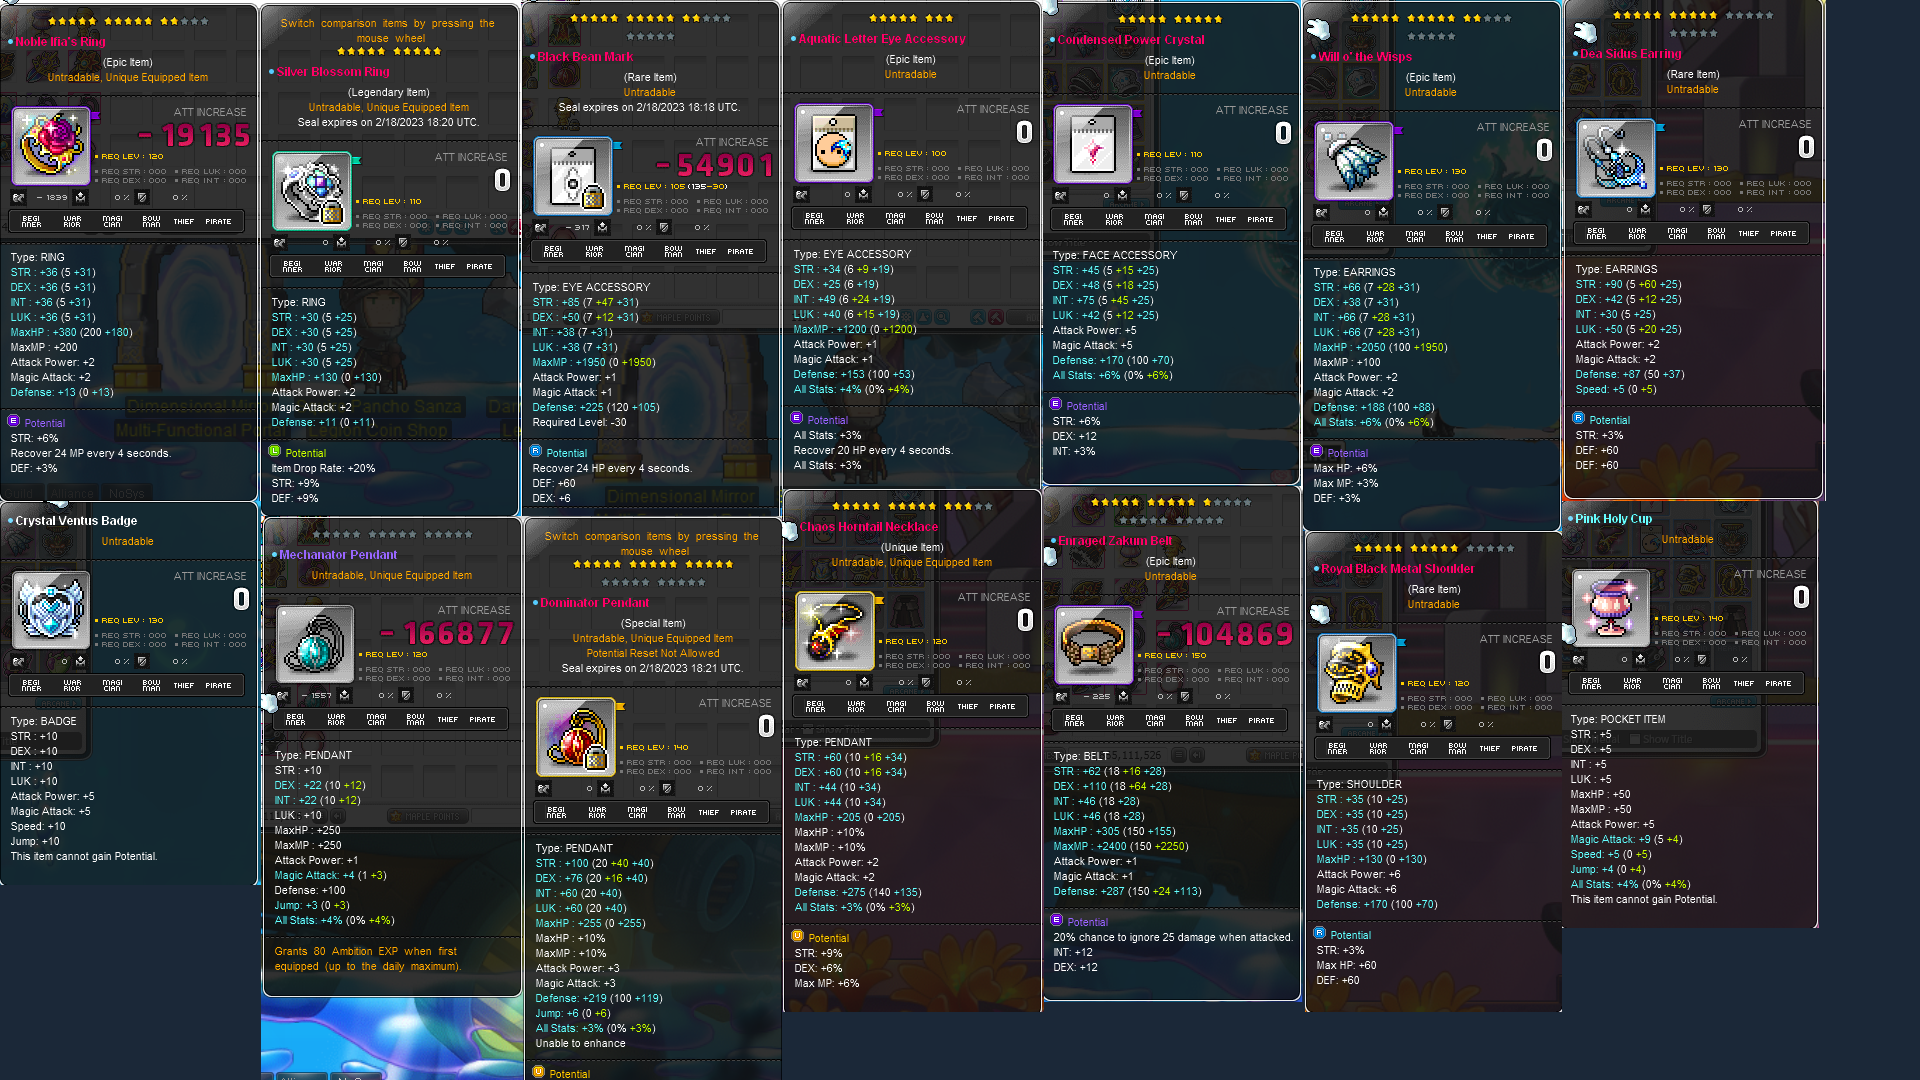
If you have all of these equipped you will receive a Set Effect which gives you bonus stats. This will be your main gear untill late game.
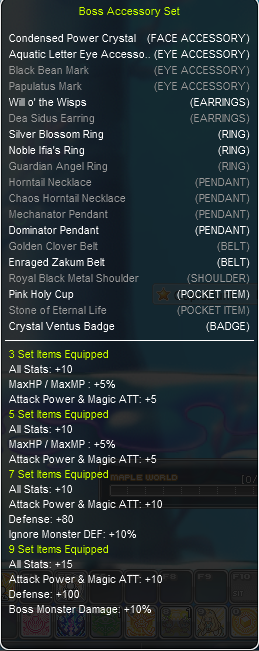
These bosses are hard, especially when you're just starting out. But if you're playing in a normal world you're in luck. As you can buy these items in the Auction House(AH for short). They usually don't cost too much. Depending on what class you are playing the prices increases/decreases. Since warrior is the most used class their gear is also the most expensive. If you're in Reboot you should look for struggle parties or if someone is kind enough a carry.
Both CZakum & HRanmaru drop lv. 150 gear that you can fill in. Czak drops a cape, while HRanmaru drops gloves, shoes & shoulder. Only get this when you are getting AbsoLab though.
Your gear now should roughly look like this: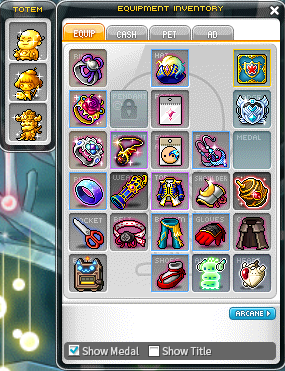
Generally you'd want to keep the TOP and BOTTOM from CRA. Because TOP&BOTTOM > OVERALL. You can get way more stats on a top and bottom as to an overall. But everything else around that will be changed to AbsoLab. Unlike CRA, AbsoLab DOES have gloves, boots, shoulders and a cape. So you'll be using that.
These cores/stones should look like this. The smaller one being the weeklies and the bigger ones being the Boss drops. After grinding AbsoLab your gear should roughly look like this: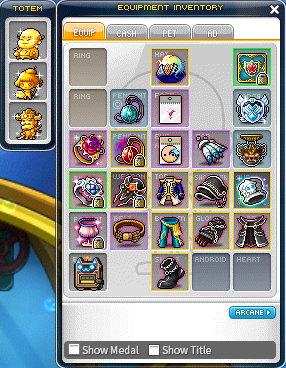
The DOM pendant and secondary can be replaced by a CHT pendant & a Frozen secondary. Or if you have not burned a character, you can also buy a secondary from the Secondary Item Seller located in most towns.
Additionally you will want to have a "Heart" and an "Android". Usually events have these. Some Hearts are better than others. And some Androids have different functions. Some have a built in shop, some have built in Buff Freezers. Usually a Heart is free stat gain.
Now it should looks somewhat like this: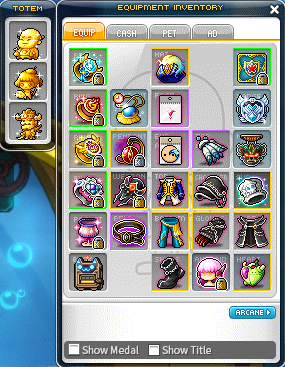
NOTE; THAT THE HEART WILL ONLY WORK WHEN YOU HAVE THE SAME OR HIGHER RANK ANDROID. MEANING A RANK 5 HEART WILL NOT WORK WITH A RANK 4 ANDROID. ONLY A RANK 5 OR HIGHER ANDROID CAN BE COMPATIBLE. IF YOU HAVE AN INCOMPATIBLE HEART AND ANDROID YOU WILL NOT RECEIVE THE STATS OF THE HEART.
Advanced gear progression
Alternatively you can hope for some Arcane Boxes drops from HLuWill. These are hard to come by so if it is your main I would recommend buying your first gear off the NPC shop. And use these as backups for when you want to push past 17*.
pitched
ethernals
How do you get the Ring and the Pendant?
The Superior Ring and Pendant are able to be bought at for 700 Gollux coins each.
Both the reinforced and the superior rings are BiS(in REBOOT, not so much in regular sever).
Try to hold off on buying the Belt and the Earrings as they have a chance to drop. These drops are low chance so it might be difficult to get.
Your priority should be on buying the Ring and the Pendants since they have NO chance of dropping. If you have enough coins let after that(1400 coins for both Ring and Pendant) then you can get the Earring/Belt. But even then I would rather buy Reinforced Ring and Pendant.
The Belt alone has a base MATT + ATT of +35. Which is absolutely insane.
The reason as to why I say Reinforced pendant as well is because: you get the additional +2 set effect but not only that you can never have enough rings/pendants/accessories/earrings. Why? You'll find out in the next headline.
Why is "mesos gear" so important?
After reaching late to end game you will want to min max your gear. But to do that it'll cost you a pretty penny. This is where mesos gear comes in.
How to get "meso gear"?
Through potentials. "Mesos obtained +20%" is a legendary potential line. Meaning you can only get it in the "legendary" tier. The same goes for "Item drop rate +20%".
+20% is the only % you can get for both of them. So no more, no less.
But you can get 2 lines of those 20% on one equipment. As they do stack with each other, regardless on what equipment it is.
- Rings
- Pendants
- Face accessories
- Eye accessories
- Earrings
Besides equipment there is:
- Legion's Wealth coupons
- Wealth Acquisition Potion(WAP for short)
- Inner Ability(IA for short)
- Phantom legion card
- Monster Life(for reg server)
- (REBOOT get free 500% base mesos obtained)
WAP gives you 20%
IA gives you up to +20%
Additionally Shadower's have a passive that nets them another +20%.
These are all stackable. Legion is additive, wealth is multiplicative.
Lastly I would HIGHLY recommend to cube EVENT RINGS for mesos obtained. As these rings fully built up have +40 all stats and +25 MATT/ATT. The reason why I say this is because to reach +40 all stat on a starforce-able ring you will need to have at least 15 stars on it. Which will cost a lot of mesos. And to add because it has "mesos obtained +20%" line on it, it takes up a spot of main stat % line. Meaning you will lose out on some damage.
After reaching late game you will fight the harder weekly bosses(From Lucid up to Seren, including Hard Lomien). These weekly bosses drop their boss set. Which is much better than the old boss set. This new boss set is called pitched. But these are extremely hard to get due to the chance of them dropping is incredibly low. This is where drop gear comes in.
How to get "drop gear"?
Through potentials. "Item drop rate +20%" is a legendary potential line. Meaning you can only get it in the "legendary" tier. The same goes for "Mesos obtained +20%".
+20% is the only % you can get for both of them. So no more, no less.
But you can get 2 lines of those 20% on one equipment. As they do stack with each other, regardless on what equipment it is.
- Rings
- Pendants
- Face accessories
- Eye accessories
- Earrings
Besides equipment there is:
- Legion's Luck coupons
- Wealth Acquisition Potion(WAP for short)
- Inner Ability(IA for short)
- Legion Artifact
- (REBOOT get free 500% base mesos obtained)
WAP gives you 20%
IA gives you up to +20%
Drop rate can usually be put on fodder equipment that you don't use. The reason why is because most(not all) bosses now have chests that you need to break before getting the loot. That means you can take your time and switch to drop gear. This saves you from having to fight with the drop gear equipped. Making you lose some stats.
Written Guide[docs.google.com]
Credits: Uncapped Games
Star Force & Spell Tracer
What is "Starforcing"?
Starforcing is upgrading your equipment's stars. Most equips have a number of stars to them. The higher the equipment level requirement, the more stars it has, the more you can upgrade it. You upgrade them with mesos. Upgrading works with chance%, more on that later.
So what does it do?
With each upgrade(each star) you get a permanent stat boost for that equipment.
The higher the upgrades(the more stars you get on an equipment) the stronger equipment gets and the more stats you gain from it. This also means it gets more expensive which each star.
The max stars you can get on a single piece of equipment is 25★. However you will most likely never reach the max stars. I will go in to detail as to why later.
Every 5★'s is a milestone.
0 - 5 > 5 - 10 > 10 - 15 > 15 - 20 > 20 - 22. You will never go higher than 22 as that is a net loss.
With each star the % of increasing the star decreases. So from 0 - 1 it will always be 100% succession rate etc.
From 0 - 15 stars: gets progressively more expensive and the % succession rate depletes.
From 15 stars onward: a small chance to "boom"(destroy) your item gets introduced. On top of that, stars now drop on each failure(cannot go lower than the milestone(15 stars)). But to help you with the next +2★ you get a safegaurd.
Safegaurd: allows you to remove the chance to "boom"(destroy) your item but doubles the cost of the upgrade. This will ONLY remove the chance to "boom"(destroy) and NOT help with regressing stars.
At 15★ and beyond, items have a chance of becoming destroyed upon failure and will leave behind a trace. Traces serve as the remnants of the destroyed equipment and will retain all of its stats and Star Force value up to 12★, but they cannot be equipped. To restore a trace, it must be transferred onto a new piece of the same equipment through the enhancement UI.
When an equipment's stars decrease twice in a row, chance time activates, which guarantees the next enhancement attempt to succeed. The guaranteed attempt will only apply to the item that is currently being enhanced. When chance time triggers when upgrading from 15★ → 16★ or 16★ → 17★, safeguard is disabled as it would provide no benefit
"5/10/15"
During certain Sunny Sundays, the success rate for upgrading from 5★ → 6★, 10★ → 11★, and 15★ → 16★ increases to 100%, colloquially referred to as "5/15/15". When upgrading from 15★ → 16★, safeguard is disabled as it would provide no benefit. (ONLY FOR 15★ → 16 SAFEGAURD ON 16★ → 17★).
30% off
30% off Star Forcing. As the name implies.
Potential progression
Potentials are usually for "late game" players but that doesn't mean you can't start now. Eventually there will be a point where you will need to min/max your gear and a part of that is your potential progression. Potentials are RNG based meaning they will be random.
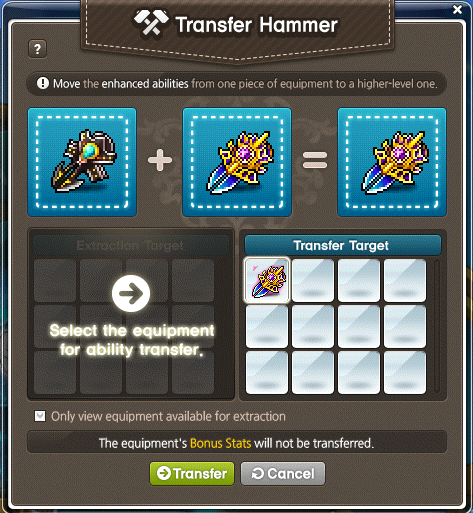
For example the cost of cubing lv. 120 equips costs 10% of the cost of lv. 130+ equips, so cubing lv. 120 gear and using the transfer hammer to transfer it to lv. 130 gear can save a large amount of mesos when going for EPIC(9%) potential early on. Especially if you can get full sets each each 120>130>140(Pensalir) gear while grinding from lv. 110 to lv140.
NOTE; AFTER EACH TRANSFER HAMMER YOU WILL LOSE 1*(STAR) OF STARFORCE AND ONLY EPIC POTENTIAL OR BELOW WILL BE TRANSFERED OVER TO THE NEW EQUIPMENT.
Once you have gotten yourself a Pensalir set, do not cube yet. Reroll as many time as you can to find the perfect Flame Stat equipment. As both POT and FLAMES will be transfered with TH(transfer hammer).
What is WSE?
WSE stands for Weapon, Secondary & Emblem
- Main stat
- ATT
- Boss DMG
- Crit DMG
- IED
- CDhat
Flame Progression
Familiar progress
Like I stated in FAQ #3, familiars provide extra bonus stats while having them out. With familiars you will be min/maxing your end game with a little bump in some stats/survivability. More on the survivability part later. Ideally you'd want to focus familiars when you're lv. 230+. The reason why is that area's above lv. 230 drop familiar cards unlike area's like VJ(Vanishing Journey), Chu Chu etc. where MOBS don't drop familiar cards. Since you will be training in those areas when you are lv. 230 + it's best to farm up all the cards you can.
There are 2 requirements you need to fulfil in order to rank them up.- Level them up to lv. 5
- Merge 100/150 of the same mobs together
Other benefits badges give:
Badges give stats depending on which badge you have. Having a low level badge(so early game badge with weak monsters in it) will give you a low stat badge.
Ardentmill progression
As soon as you reach lv. 35 you can start your Ardentmill progression.
You can accept the quest on the left side, grey lightbulb.
After you have accepted the quest, go down and talk to two people at the far right called: "Cole - Master of Mining" & "Saffron - Master of Herbalism". Cole will unlock "Mining profession" and Saffron will unlock "Herbalism profession".
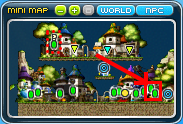
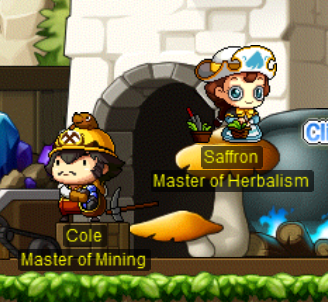
Once you have learned those you can start mining ores and digging herbs. Note: I'd recommend doing this ASAP. The sooner you begin the more ores/herbs you will have collected. You will also begin leveling your "Mining" & "Herbalism" professions. The level cap of all 5 professions is 10 + 2(the other 2 being "Master" & "Meister").
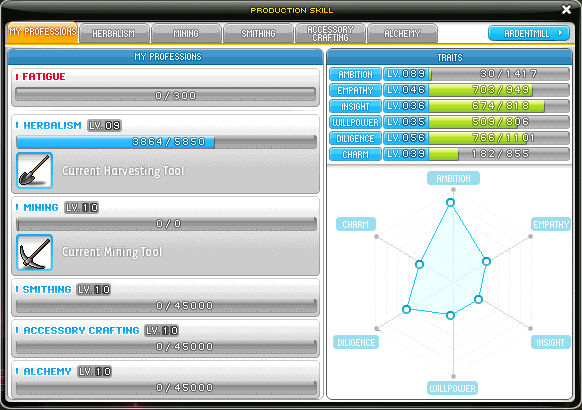 After you have the 2 main professions, you can now start either crafting or brewing.
You have 3 professions to choose from. In regular servers you can only choose 1/3 but in Reboot you can choose them all 3/3. The reason being is that you can't trade in Reboot.
Here are the 3 professions you can choose from:
- Smithing
- Accessory Crafting
- Alchemy
Smithing Tech
Arrows are the best way to level your Smithing level. This only works up to levle 10. After that you will need to start making gear to level up to Meister.
Alchemy Tech
You can easily level by making transformation potions. These do have a cooldown after each brew. This can be done up to Meister.
Stats progression
Each class has their own progression. As each class has different wants and needs for each different situation. You have 3 presets for each of the following, usually 1 for mobbing, the other for bossing and the third is fodder.
Generally you'll want something along the lines of this:
- +1 Attack Speed
- 30% Boss Damage
- 30 (Magic)Attack
- % Damage to monsters inflicted with Abnormal Status
- Item Drop Rate
- Meso Drop Rate
- <30 (Magic)Attack
- % Damage to normal monsters
- Buff skill duration %
- Critical Rate
In this order:
Mobbing:
- Damage
- Normal Damage (+Damage against normal monsters)
- Attack Power & Magic ATT
Optional/only do if have high critical rate
- Experience Obtained
- Arcane Force/Power
- Critical Rate (get around ~100% if can, not higher)
- Critical Damage (only after you've reached >95% rate)
Arcane Force is if you cannot 1 shot MOBS(monsters) in the area you are training at. (requirement lv. 200+)
Lastly, the reason being is that you'll spend too much points on these if you don't have enough critical rate. Which can be invest into other (bonus)stats. Bossing:
- Damage
- Ignore Defense (also called IED(Ignore Enemy Defense))
- Boss Damage
- Critical Rate (get around ~100% if can, not higher)
- Critical Damage (only after you've reached >95% rate)
- Attack Power & Magic ATT
- Your class's Main Stat
Mobbing:
- Mercedes Link Skill
- Aran Link Skill
- Evan Link Skill
- Hoyoung Link Skill
- Kanna Link Skill
- Demon Avenger Link Skill
- Lara Link Skill
- Khali Link Skill
Bossing:
- Kinesis Link Skill
- Ark Link Skill
- Explorer Mage Link Skill
- Explorer Thief Link Skill
- Demon Avenger Link Skill
- Demon Slayer Link Skill
- Xenon Link Skill
- Kanna Link Skill
- Luminous Link Skill
- Lynn Link Skill
- Cadena Link Skill
- Angelic Buster Link Skill
- Resistance Link Skill
- Phantom Link Skill
- Kain Link Skill
- Adele Link Skill (for party play)
- Explorer Warrior Link Skill
MapleScouter
MapleScouter is a tool to gauge how strong you and which bosses you can clear/attempt to clear. This is not a perfect metric to rely on but it will help you as it has a lot of features you can take advantage of.
See the videos below for more information.
Credits: Duky; https://www.youtube.com/@Duky
Credits: Drew; https://www.youtube.com/watch?v=ArDiGSVDO9I&t=4s
Resources:
GMS Conversion Help Sheet for MapleScouter[docs.google.com]
End game
FOMO
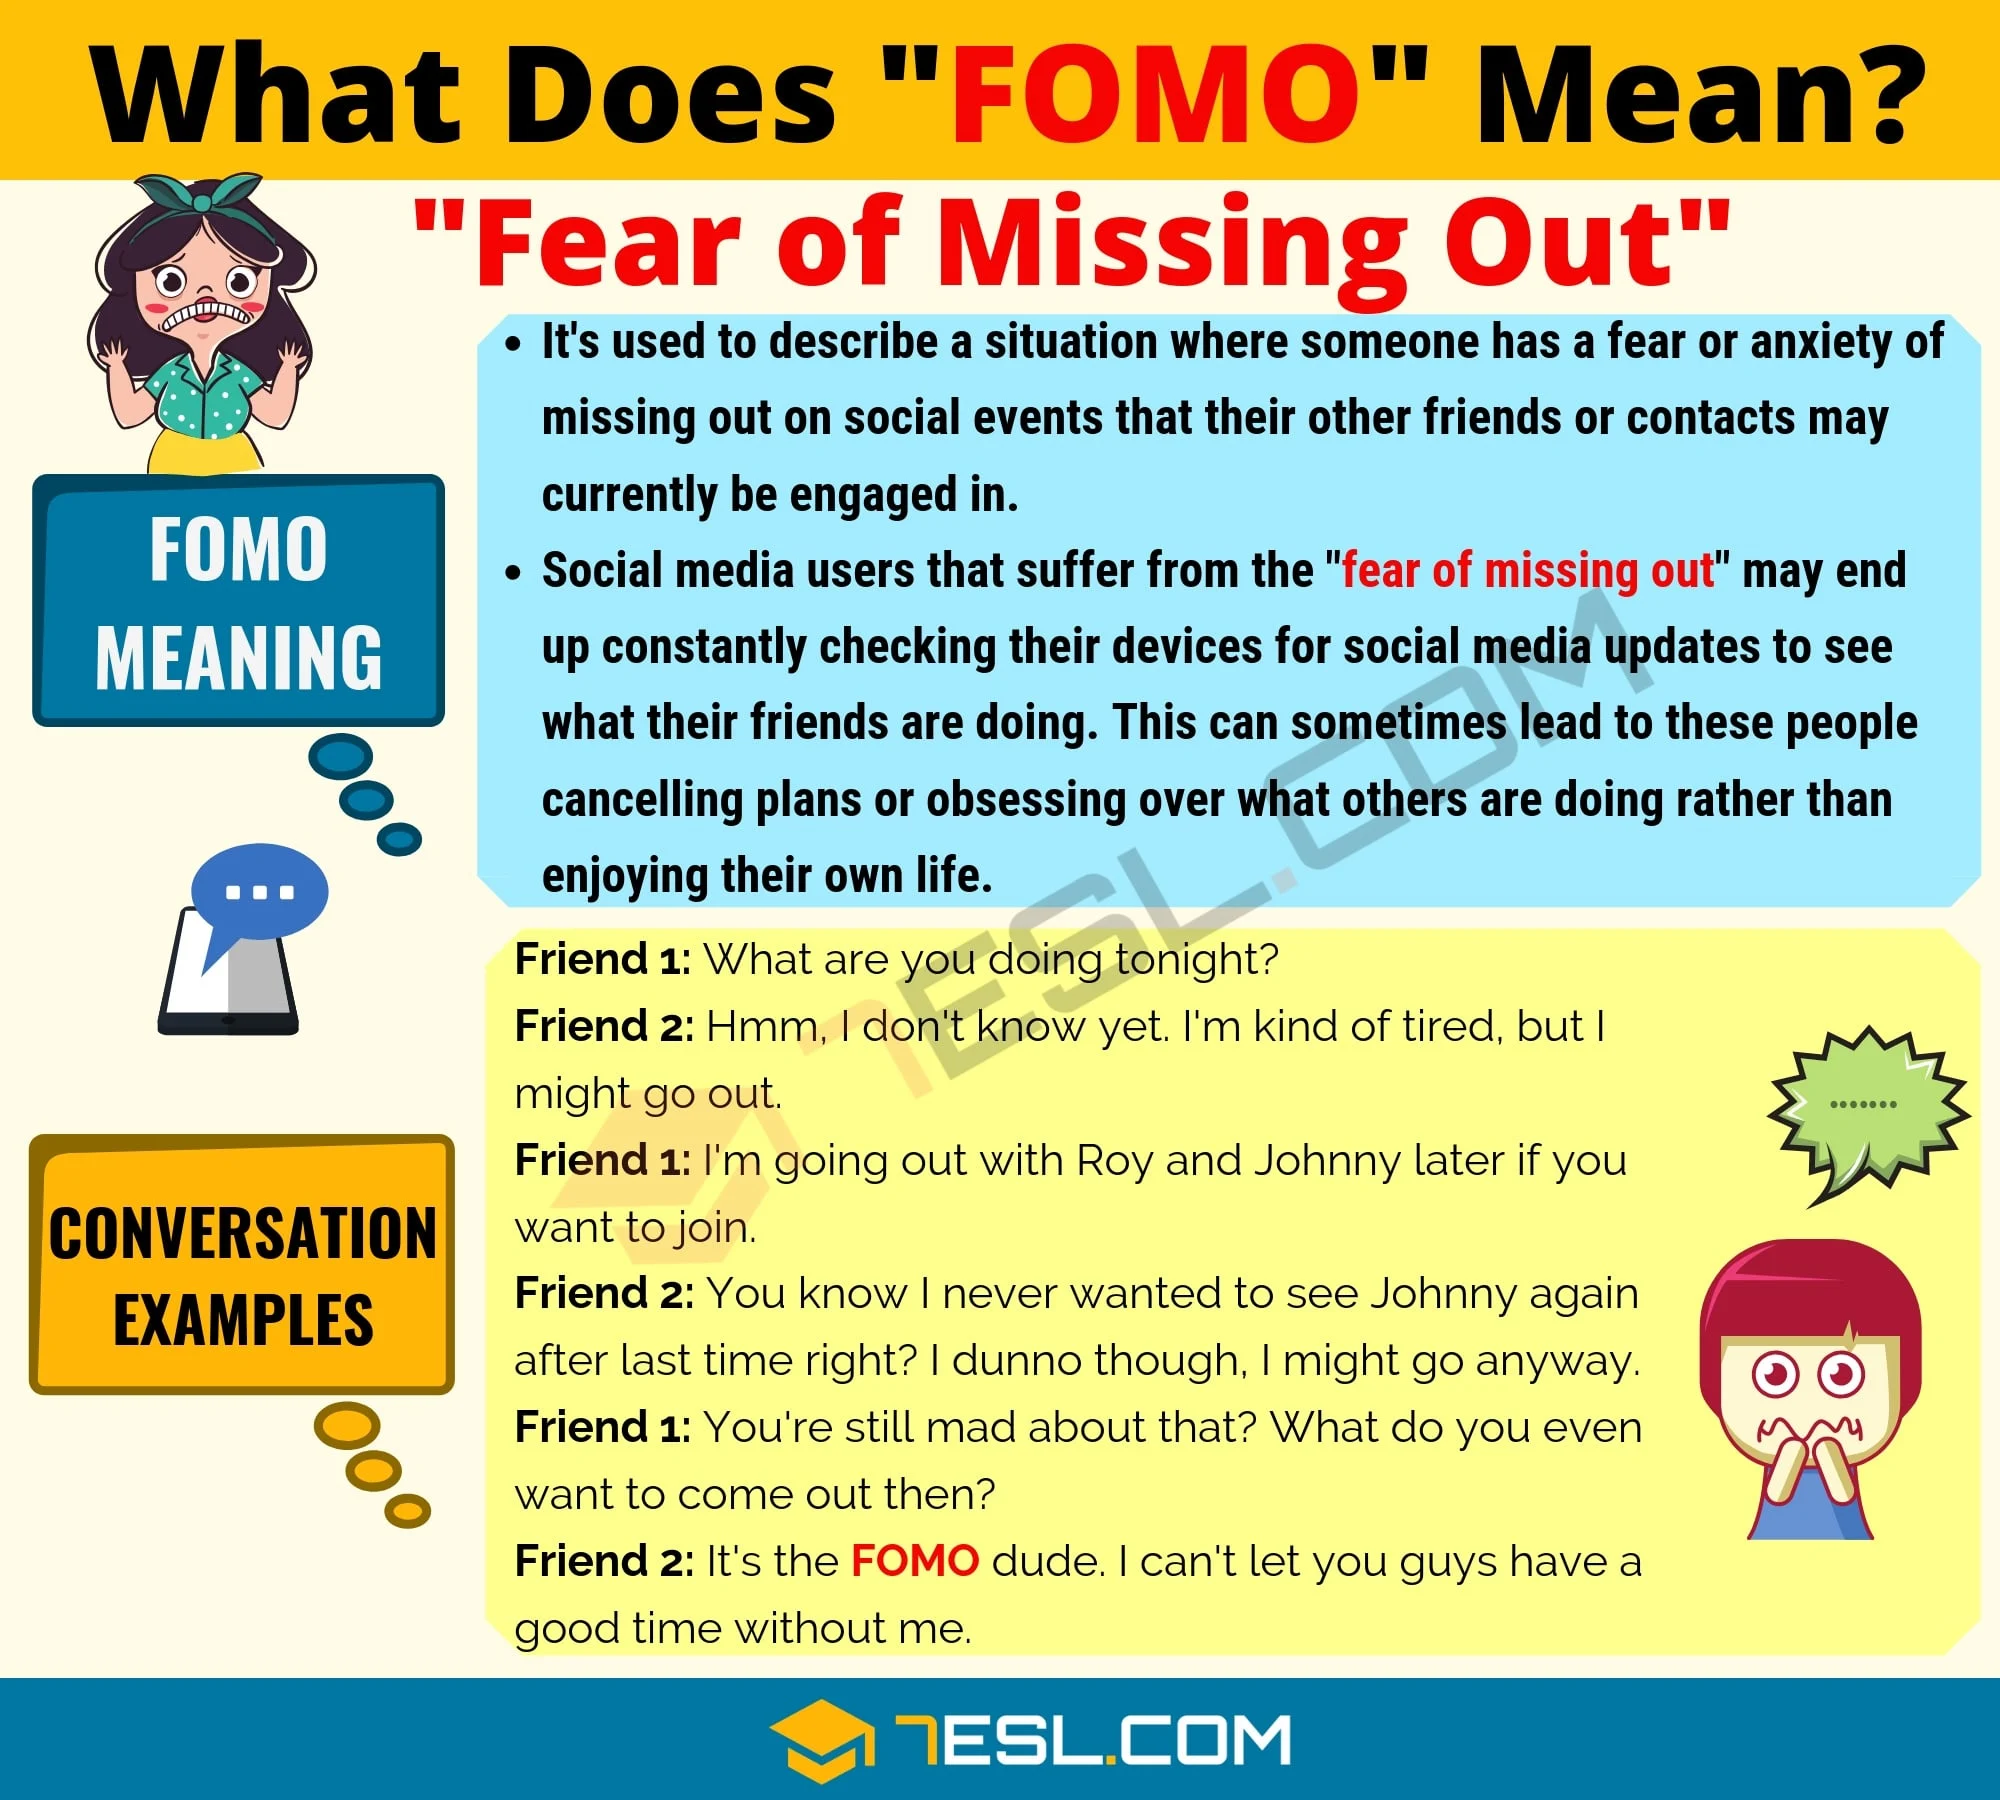
Games are meant to be fun, MapleStory is a marathon not a sprint.
It is NOT about who is better and who is faster, it's a journey. Improving little by little bit by bit until eventually you keep getting stronger and stronger, better and better. More gains, slowly but surely.
Just like in real life. Do not ever compare yourself to one another, downplaying yourself or even worse, downplaying others.
EVENTS
The main reason why people have FOMO in this game is because of EVENTS.
MapleStory has "exclusives" depending on what region you play. For example; MapleStory Global has Gollux, while Korean MapleStory doesn't.
But these are just regional differences. There are also "Legacy" items and "one in a lifetime" items. MapleStory often has events and those rarely, if ever come back. Which means you miss out on certain items.
This is where FOMO comes in, fear of missing out on those items.
But guess what? There will always be future events with "one time" items that come and go. You miss this event's item, no problem, onto the next event which another "one time" item.
In essence you never really miss anything. These small gains have no impact on whether you can or cannot defeat a certain boss, event, quest etc.
Do you lose a potential cool item? Yes? Is it worth your sanity/grinding over? No, never in fact.
FOMO is the #1 reason why people quit this game. FOMO leads to burnout and makes the game less enjoyable.
Here is your 1,000,000th reminder:
Games are meant to be fun, MapleStory is a marathon not a sprint.
So whether you lose, win, miss or don't miss out. It does not matter. At the end of the day it's a game. You log off and go on with your day, there's always tomorrow, the day after and so on. There's no reason for you to log off and leave angry/frustrated.
MapleStory is most fun when YOU yourself are having fun. And especially when you take your time to play.
Do not let FOMO control you. It's a plague that ruins games, social life and everything it touches. Don't let it happen to you.
HOME
Tips & tricks
Some QoL tips & tricks. A better experience overall.
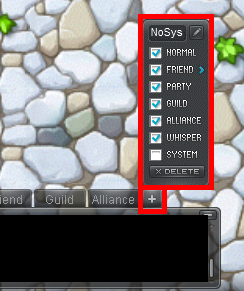
NOTE: THIS CHAT IS FILTERED AND WILL FILTER SYSTEM UPDATES(I.E. "YOU CAN'T PICK UP ANY MORE ITEMS" ETC.) TO BE ABLE TO SEE THESE AGAIN CHANGE THE CHAT TO "ALL".
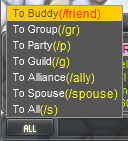
Chat commands are done by using the "/" key.
command(shortcut) = explanation
- /say(/s) = all chat
- /party(/p) = party chat
- /buddy(/b) = friends chat
- /guild(/g) = guild chat
- /alliance(/a) = alliance chat
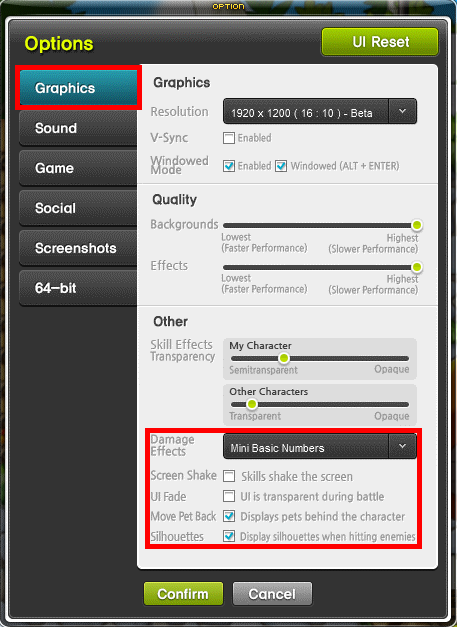
These settings are for better visibilities. You can choose to set your skill transparency to whatever you want but for bossing I would keep it low. Even for mobbing I keep it low because there's just oo much going on otherwise. And most of the time I do not need to see other player's skils. But I do keep it on, just to give me insight for certain things.
You can also hold right click an equipment in your inventory to see the set effect of that item. Instead of comparing the item to your equipped item.
You can sort your items in your inventory if you click the 3 lines next to your mesos. You have 3 options to choose from.- Consolidate = move everything up
- Sort by type = sorts by type
- Lock/unlock sorting = sorts by locks
Additionally you can also expand your inventory view by click on the arrow "[->]" next to the sorting button. This will fill up your screen if you have a lower resolution screen.
Equip tab
You can now hide your Medal & Title. So if you find that ugly you can remove the visibility of it. The stats and such will remain.
Cash tab
You can now have presets of cash outfits, although this works a little weird. What's more interesting is the "Default Weapon Motion". You can now change how you hold your weapon. Personally I love the "Gun" look, especially if you have a warroir. Your sword will now be held in the backside hand of your character. Which imo looks dope.
Note: you will need to have a NX weapon in order for this to work, does NOT work if you do not have a NX weapon
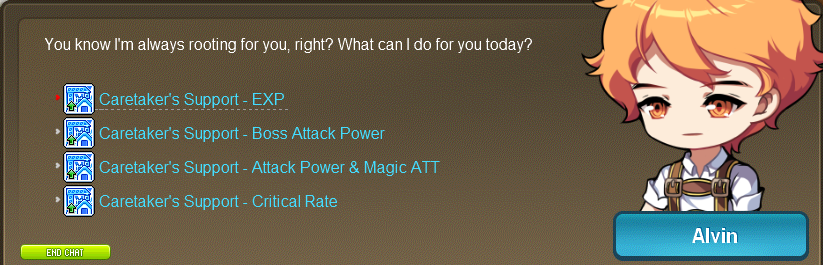
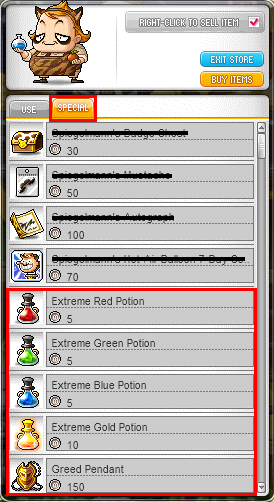
For starters there's a merchant which sells:
- Red Pot(ATT +30 for 30min)
- Blue Pot(MATT +30 for 30min)
- Green Pot(Increased AS for 30min(breaks AS CAP))
- Yellow Pot(EXP +10% for 30min(stackable))
- Greed Pendant(20% drop rate(passive))(POTable)

For starters there's a merchant which sells:
- Cider(WEP ATT +20 for 5min)
- Candied Apple(All stat +7 for 30min)
- Ginger Ale(75% of MP&HP)

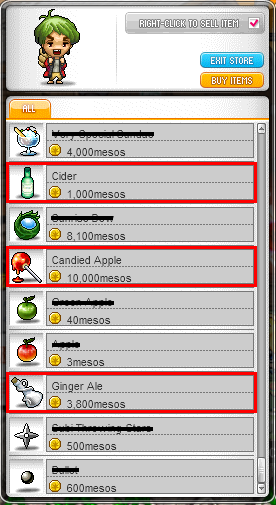
Note: Cider does not stack in inventory. It will take up 1 spot for every Cider you buy. Cider & Candied Apple have a duration after bought. Meaning you can only use it for "x" amount of days.
Alternatively Mushroom Shrine also has some good "USE" items.
Ninja Castle has some Anvil equipment.
Go to Haven, there you will find a robot(up left). Talk to the robot, you can skip all the dialogue if you want. After that you will gain a free level up. Does not work anymore.
First find a Rune to increase EXP. Then go to Zakum and make sure you choose NORMAL Zakum. Focus his arms first because that is where you will get all your EXP from. Once you killed those arms WITH the runes you will gain around ~12 levels. Going from lv. 100 > lv. 112.
With that in mind, once you have killed all the arms you can quit to "World Selection". Now every 30 min you can attempt it again and repeating the process.
Eventually you will be reaching higher levels and it'll take more attempts to level. You would want to do this till you reach lv. 140. Because this will unlock you S rank in Legion and give you a bigger block to place. Lv. 120 will unlock you level 2 of your Link skill.
To add to that once you have a few links skills/decent gear and you’re lv. 125-130 you can go to Korean Folk Town and do the Bunny quest all the way to the Goblin quest, these quest range from lv. 125 to lv. 150. By doing this, it will not only give you a lot of EXP, it’ll also give you mesos.
On top of that you will get up to pensalir gear. You can Star Force and Transfer Hammer from lv. 110>120>130>140 with the mesos you gain from doing the quest. Killing MOBS + after quest completion will give you mesos. In which you can eventually make a boss mule if you’d like.
Pensalir set is good for grinding as it has a good set effect includingn; ATT+MATT, Damage Against Normal Monsters & Ignore Monster DEF at 6 set items equipped.
Necromancer set is good for bossing if you can't/don't have CRA. This is dropped by Hila. The 5 set effect gives you 15% BOSS DAMAGE in total.
Also does not work anymore.Useful links;
All credit of links goes to the author of those links.
Note; Some links might be outdated, depending on when you read this guide. I will try to keep this guide as updated as I can.
All links[docs.google.com]
Shared CS Inventory: 1)Explorers (incl. Jett/Cann/DB) 2)Hero Classes (MAPLES) 3)Nova 4)Cygnus (incl. Mihile) 5)Demon/Resistance/Xenon 6)Beast Tamer 7)Kinesis 8)Sengoku 9)Flora (illium/Ark/Adele) 10)Anima (HoYoung) 11)Zero
Maple Guides Playlist
So you wanna be a "class" (outdated)
2020 - So you wanna be a "class"
5th Job Skills
Awake Skills 5th Job Update
Awaken Your Maple Class
Class vs Class
Class vs Class Unfunded Edition
Toss This Boss(TTT) - Boss Guide
Credits/sources;
- Scardor's Twitch[www.twitch.tv]
- Scardor's Youtube
- Kyo's Twitch[www.twitch.tv]
- Kyo's Youtube
- Coppersans's Twitch[www.twitch.tv]
- Coppersans's Youtube
- Akkad3's Twitch[www.twitch.tv]
- Akkad3's Youtube
- THE ULTIMATE REBOOT GUIDE (very outdated)★ 5 (184)17k views412 ♥28 minUpdated Aug 12, 2020
- How to Pick Up Items★ 4 (289)17k views69 ♥1 minUpdated Jul 9, 2016
- Reboot Link Skill Farming Guide★ 4 (68)7.9k views132 ♥7 minUpdated May 15, 2017
- [Reboot] So You're Level 150★ 4 (55)5.6k views129 ♥26 minUpdated Jun 1, 2019
- Level 1-???: Best Training Grounds4.1k views37 ♥16 minUpdated Sep 16, 2014
- Leechless Perm Beginner Guide2.3k views25 ♥27 minUpdated Jul 10, 2020



- Upgrading to PremiumTeam Fortress 2★ 5 (20k)1441k views11k ♥6 minUpdated May 11, 2022
- No More Room in Hell Official ManualNo More Room in Hell★ 5 (2.8k)569k views2.1k ♥29 minUpdated Apr 22, 2019
- NMRiH Community Hosting GuidesNo More Room in Hell★ 5 (526)351k views653 ♥1 minUpdated Aug 10, 2022
- ULTIMATE GUIDE FOR GAME DEV TYCOONGame Dev Tycoon★ 5 (5.8k)326k views10k ♥4 minUpdated 23 Jan, 2014
- How to 'Git Gud' Soon™MORDHAU★ 5 (2k)318k views3k ♥68 minUpdated Nov 16, 2024
- Лучшие кооперативные игры SteamPAYDAY 2★ 5 (1.5k)315k views2.1k ♥56 minRussianUpdated Apr 27, 2025






This guide was created by its original author on the Steam Community. Are you the author and want it removed? Request removal.