AI Squad Commands - Advanced Guide
To Start
The Easy Access Menu
Once you have it open, you should see a list like this.
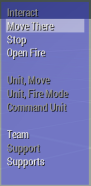 This list acts as an "Easy Access Menu" to important commands, so I won't go into too much detail about it.
You can select specific squad members with the Function Keys (F1 - F12, or fn + 1-12 on certain computers)
 Interact: This command requires you to be looking at applicable entities.
 By default, the "Target" option will appear there if you have one, more, or all of your squad members selected.
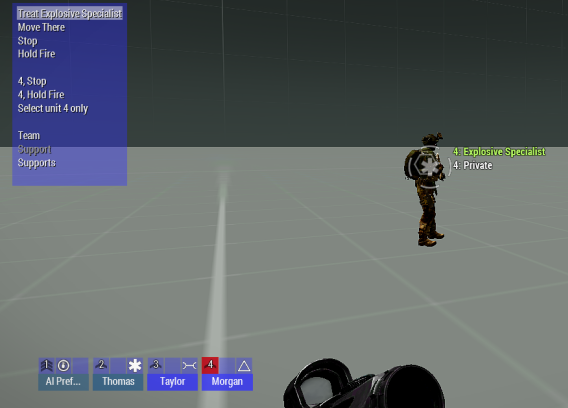
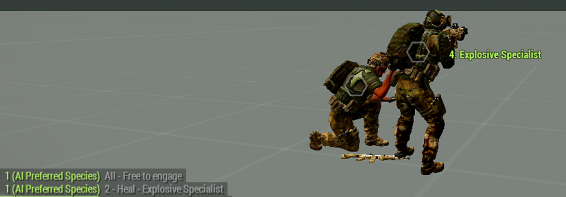
However, if you have a Combat Life Saver and one of your teammates (can be a squad member, friendly trooper, or even members of a different friendly faction such as AAF) is injured, the "Treat" option will appear. "Treat" is relatively finicky, however, as although AI will stop moving to allow the CLS to heal them, players will likely not even know its happening and will waste your CLS' time and possibly get him killed.
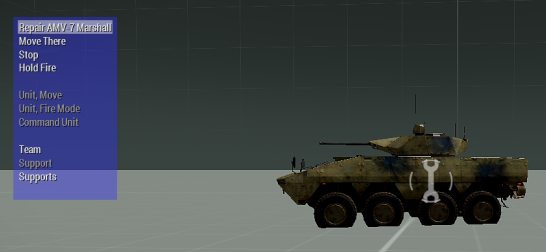
If you have a mechanic unit such as an Engineer or Repair Specialist and a vehicle is on red damage levels, the "Repair" option will appear. This functions just like the "Treat" command when it comes to effectiveness; if an AI is in the vehicle or the vehicle is empty, the mechanic should have no trouble. However, a player could end up knocking over or killing your mechanic, or wasting their time and getting them killed by another source.
One unique case lies in mines. Instead of using the "Interact" button, the game creates a new one underneath it.
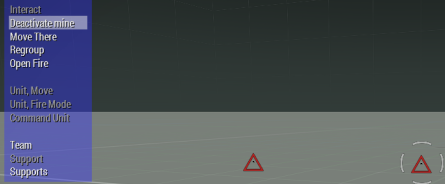
If you have any AI with a Toolkit selected and there are active mines, the "Deactivate mine" option will appear. AI are specifically programmed to avoid going over or accidentally exploding spotted mines, so unless a teammate decides to walk into your AI who is actively and clearly disabling a mine or for some god forsaken reason you're trying to clear mines in an active combat zone, they will be fine.
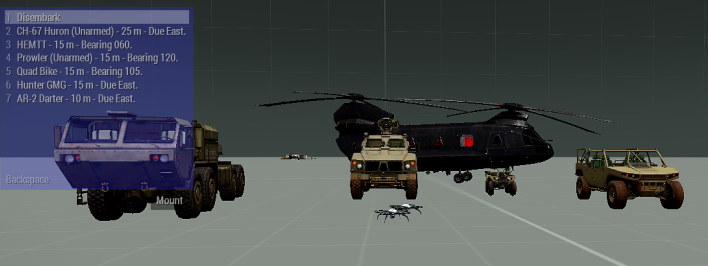
If you are looking at a vehicle or are inside a vehicle, it will change to "Get In". If a selected squad member is already inside, the option changes to "Disembark". Move There: A very simple order. Tells one or more squad members to move to a location, keeping formation with the highest numbered soldier. With certain things, including trees and rocks, buildings, and fences, there will be lines (or Positions, in the case of buildings) showing a specific spot an AI is willing to reside near or on. In the case of lines, they are sometimes vertically shorter, representing how an AI will use that cover, crouching and prone included.
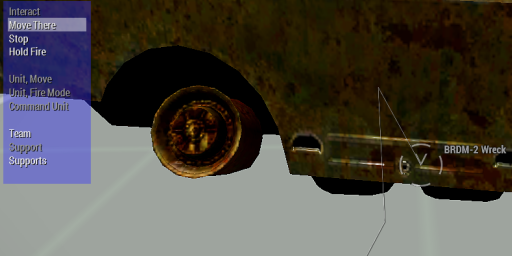
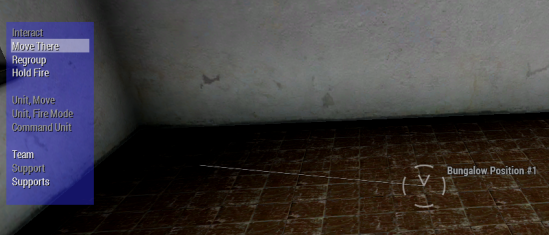
Stop: This option is exactly as it says. It stops one or more squad members from moving. This option changes to "Regroup" when the selected squad member(s) is already stopped or is otherwise not in formation (such as after completing an action).
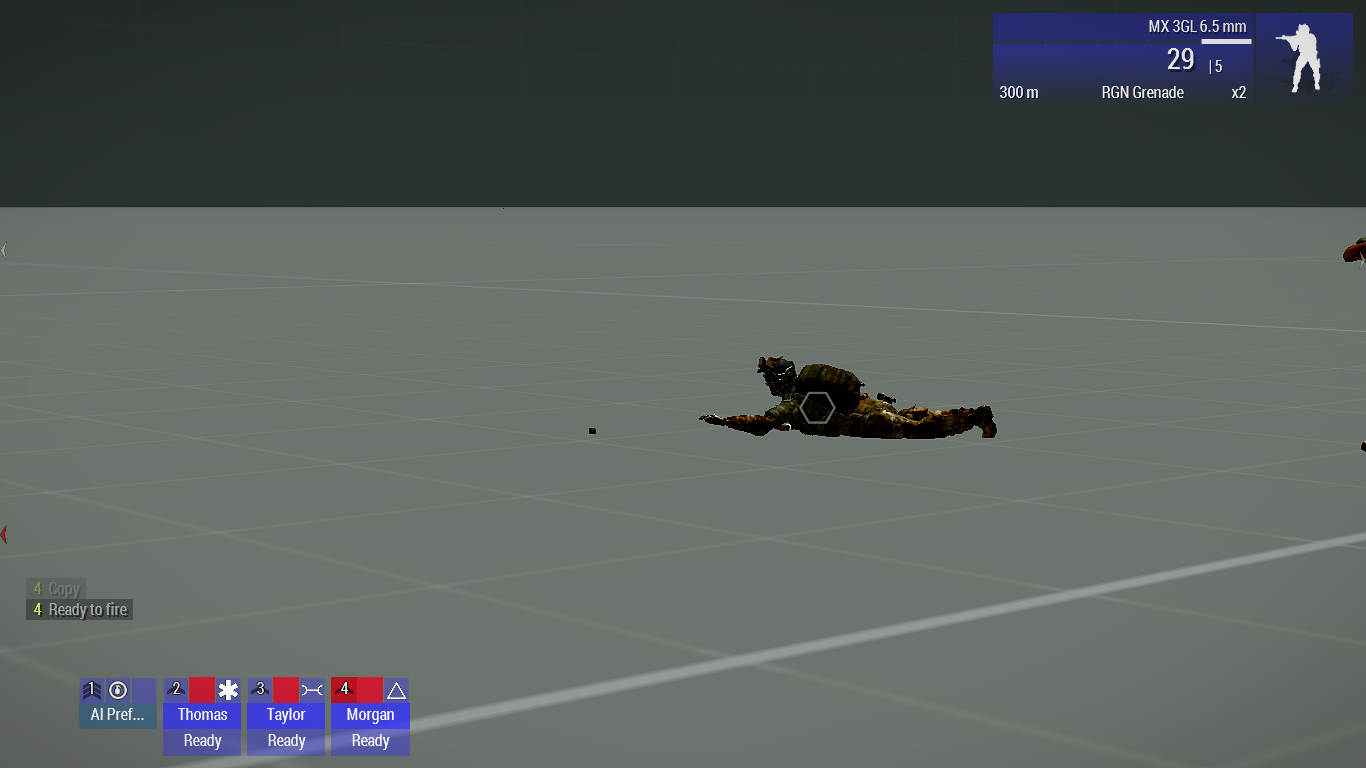
Hold Fire / Open Fire: Toggled option. If told to hold fire, AI will hold fire and the option will change to Open Fire. If told to open fire, the AI will willingly shoot hostiles and the option will change to Hold Fire. AI in the "Hold Fire" mode will have a red, hollow square to represent this. (In this image, "Free to engage" is enabled, so it's a fully red square.)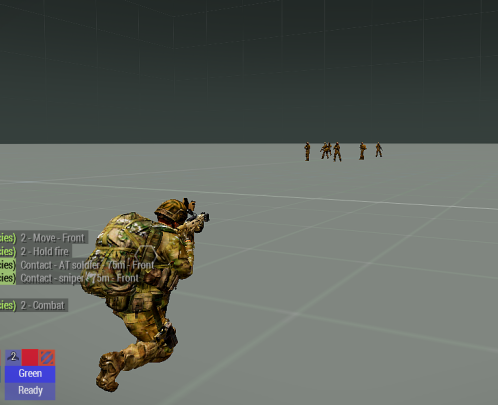
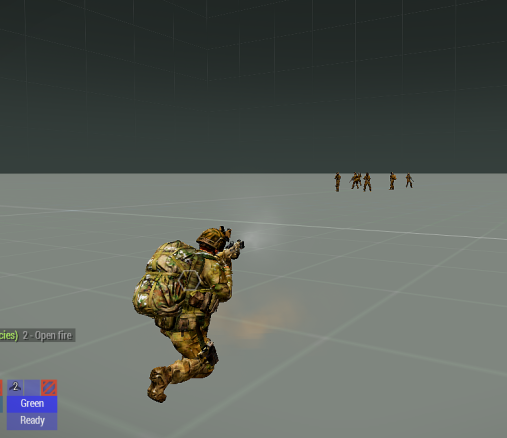

All the options shown are quite obvious, and will only show up when you are directly facing a squadmate with the menu open. When this occurs, you have the option to select the unit you are facing, as well as quickly telling them to Stop / Regroup or Hold Fire / Open Fire. Once the unit is independently selected, you can tell them specifically to do anything seen further on in the guide. Holding Control will allow you to select or deselect multiple units in your sight.

Team: This will lead to the 9th menu of the Command Menu. More on that later.
Support: Becomes "Injured" when you've taken some damage. Allows you to call out "Injured!"
Supports: This requires that you have actual supports available, which is only possible by use of the Eden Editor and requires the mission maker to use the Support Requester and Support Provider modules. Once used, these supports will help you out. However, they technically have nothing to do with your squadmates, so I am not obligated to tell you more other than that you'll know you have supports available if you see icons similar to these on the left of the menu.
"Watch There" simply tells a unit to watch a specific spot, which can be useful if you need a doorway under control.
1 - The Movement Menu
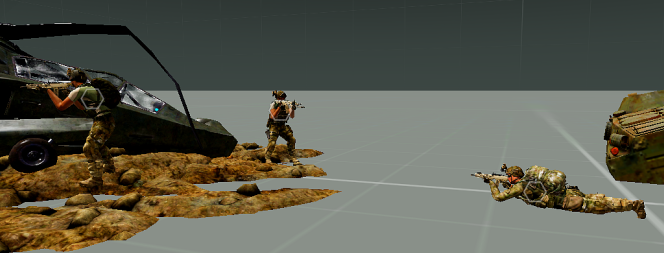
2 - The Targeting Menu

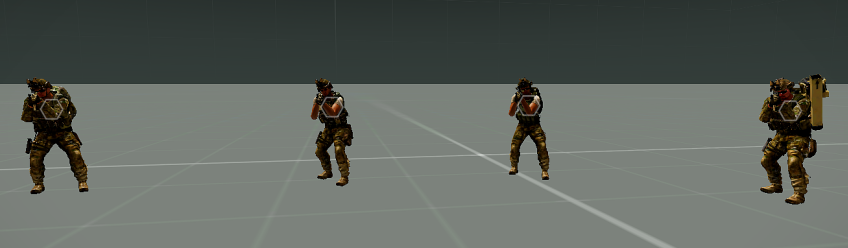
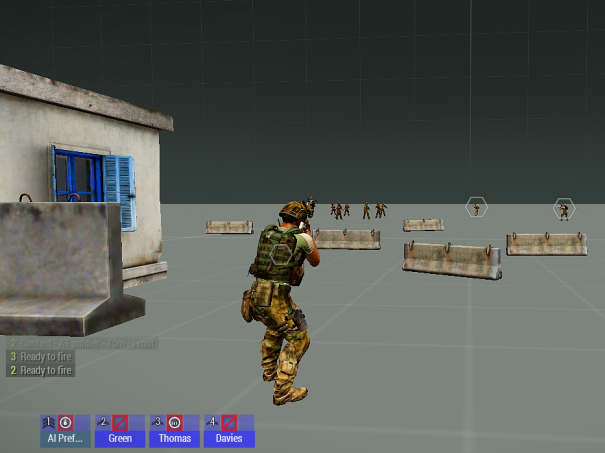
To get them to actually shoot friendlies willingly, however, you need our next menu on the list...
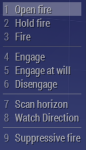
3 - The Engagement Menu
1 - North
2 - Northeast
3 - East
4 - Southeast
5 - South
6 - Southwest
7 - West
8 - Northwest
> Must be set to Open Fire
> Must be within AI squadmate's view
> Must be targeted directly by you
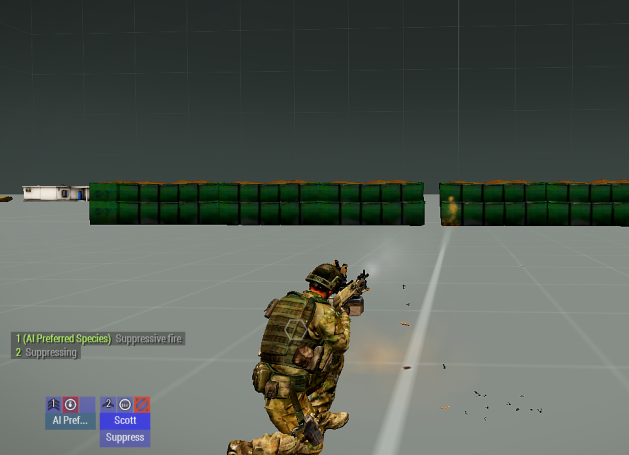
The command itself is simple. Look at a certain place and tell them to suppress, and they will fire on that location and make sure no enemies can make it through there without risk of dying. And hey, you get to hear your guy shout "Suppressing!!!!" at the top of his lungs, so that's always fun!
4 - The Mount Menu
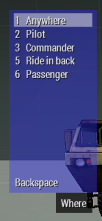
5 - The Status Menu
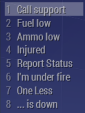
6 - The Action Menu
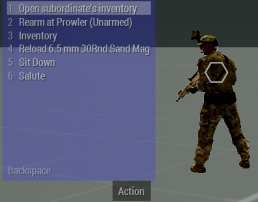
The Action Menu has so many options that change frequently based on your situation that specifying numbers is simply impossible. However, the general premise is "Actions the player can perform using the scroll wheel", such as reloading a specific magazine. Even then, the menu includes options such as "Sit Down" and "Salute", both of which require your units to be in Safe Mode and not in Formation.
I can, however, list commands that I find most useful and interesting!
-Note of Caution: Telling AI to heal "Soldier" is most likely telling them to heal a player. If they do heal a player and the player walks away, it will waste a First Aid Kit and possibly get the AI killed. Try to communicate with your player teammates, too!-
7 - The Combat Mode Menu
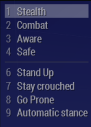
These options are a big player in how combat will play out.
8 - The Formation Menu
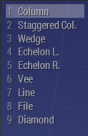
Explaining every individual Formation just seems like a hassle, as they should explain themselves. However, one major point to state is that changing Formation will change the direction of your Formation, which can help with Movement menu commands.
My favorite Formation is Diamond, if you were wondering.
9 - The Team Menu
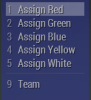
The Team Menu, great for larger squad commanding.
This is used to assign your AI to team colors, allowing easier access to moving certain groups, such as an AT team and a Sniper team, separately and conveniently.
Allows you to select one of the teams you've organized. Even comes with specific voicelines!

0 - The Reply Menu
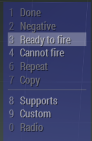
These responses have nothing to do with AI communication and are better for communicating with actual people. However, AI will use this frequently to inform you of their actions, so pay attention to them! Because most of the list is obvious, I'll go over the bottom 3.
Other Useful Tips
- They will only take off if given a Move order that is sufficiently far enough away from the helicopter (approximately 50 meters).
- They will only land if given a Disembark order. The best way to control the landing site is to find a helipad on the map, as helicopter AI will automatically search for the nearest helipad (including Helipad (Invisible)) within a radius. (Side note: Landing AI is buggy, but this will not usually be a problem for players, as the problems are usually all solved because of the disembark. This problem moreso matters for Zeus, who is probably trying to keep the AI in the helicopter and actually has options to do so.)
- When given a Target order, the AI will generally need to be told to Engage the target for the helicopter to actually move to engage. However, AI engagement is based heavily on the target they're being told to engage. In the case of Infantry, a Combat Life Saver won't Engage a tank. Likewise, a PO-30 Orca armed only with 7.62mm Miniguns won't (or at least shouldn't) Engage a tank. However, a PO-30 Orca armed with DARs will Engage a tank. It should be noted that all helicopter AI struggles pretty harshly with strafe runs and will generally use a movement pattern that encourages being shot down before they can ever fire their weapons.
- They will automatically take off if they are not set to Safe behavior.
- They will only land if given a Disembark order. They will always land at the nearest applicable runway, which could be several kilometers away. But if that's too much time and distance for you, you can always tell them to Eject.
- When given a Target order, the AI will generally need to be told to Engage the target for the plane to actually move to engage. AI planes have better movement patterns than AI helicopters, but their strafe run accuracy is not amazing, even against vehicles (however, lock-on weaponry usually hits the target).
- Pathfinding in water is extremely poorly developed.
- Any attempts at making the AI Disembark will likely go poorly, as you will either end up with a boat on the shore that can't be pushed back without a vehicle, or you will end up with AI in the water.
- The only practical use for a completely AI-driven boat in your squad is a tactical play where you use a Speedboat to watch the shoreline of a coastal objective.
- I haven't even bothered with the SDV, but I doubt it would be a useful tool given the problems the non stealth-based boats have. On the bright side, if the AI is using the SDV, they (hopefully) also have wetsuits, so Disembarking them underwater won't be a major concern.
Useful Info from Commentors
heads up the action menu also allows the AI to use the arsenal if they are close enough also for the movement menu a better way to frame the advance, stay back, flank left and right commands is think of the squad leaders position as the centre of a grid. The advance command tells the selected AI to move one grid squad ahead of you but stay in formation from that new grid. understanding this allow people to create more advanced formations like a proper diamond with two guys in front, behind, to the left and to the right of the squad leader by about 25m. This greatly increases the squad leaders capabilitiies and can not be stated enough. 80% of good squad leading comes from the movement menu and good positioning
So apparently its "Hold fire" and "Engage at will"
But its soo goofy and works not all the time
Conclusion
I don't completely regret it, I enjoyed researching the AI, honestly.
Now your skills are the only thing keeping you from being an efficient commander on the field. Can you memorize the numbers and their uses? Can you quickly put them in and get your AI to do as needed? It's up to you, squad leader.
- How to increase FOV in ARMA★ 5 (323)51k views586 ♥2 minUpdated Oct 10, 2022
- ACE3 Adv Medical + Cheat Sheet★ 5 (973)48k views2.2k ♥11 minUpdated Feb 21, 2024
- Управление ArmA 3.★ 5 (752)48k views997 ♥4 minRussianUpdated Oct 11, 2015
- ARMA 3 Complete Performance Guide [2020] [ENG]★ 5 (686)48k views1.5k ♥12 minUpdated Oct 10, 2022
- Arma 3 Movement & Weapon Controls (List)★ 5 (513)44k views593 ♥1 minBulgarianUpdated Mar 7, 2016
- How to fly in Arma 3★ 5 (459)40k views746 ♥10 minUpdated Apr 8, 2019


- Upgrading to PremiumTeam Fortress 2★ 5 (20k)1441k views11k ♥6 minUpdated May 11, 2022
- No More Room in Hell Official ManualNo More Room in Hell★ 5 (2.8k)569k views2.1k ♥29 minUpdated Apr 22, 2019
- NMRiH Community Hosting GuidesNo More Room in Hell★ 5 (526)351k views653 ♥1 minUpdated Aug 10, 2022
- ULTIMATE GUIDE FOR GAME DEV TYCOONGame Dev Tycoon★ 5 (5.8k)326k views10k ♥4 minUpdated 23 Jan, 2014
- How to 'Git Gud' Soon™MORDHAU★ 5 (2k)318k views3k ♥68 minUpdated Nov 16, 2024
- Лучшие кооперативные игры SteamPAYDAY 2★ 5 (1.5k)315k views2.1k ♥56 minRussianUpdated Apr 27, 2025






This guide was created by its original author on the Steam Community. Are you the author and want it removed? Request removal.