Changing your Crosshairs
Introduction
Requirements
Local edit - quick and dirty
The easiest way to modify your crosshairs is to edit the local file. Now that NS2 does no longer receive regular patches to the main game, this is more valid than ever, because you used be forced to do this every time a patch was released. Now it will last until you re-install, or validate your game files.
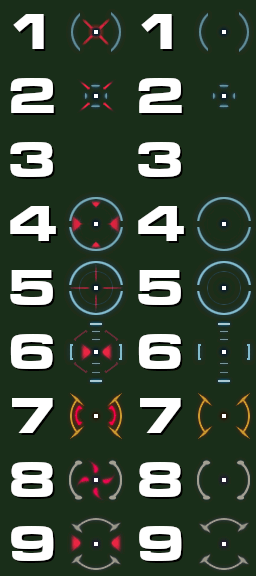
The files contain room for 16 slots of 64x64 Pixels each, but only 7 of these are used. You can set the grid[docs.gimp.org] to 64x64 Pixels and display[docs.gimp.org] it to make it easier to see where each individual crosshair is.
Now edit the files to your liking. If you want to have no hitmarkers, just leave crosshairs-hit.dds completely empty.
Creating a Mod - the "proper" way
Creating a mod is the more complicated way to do this, but this way no only survives Steam file validations, but also allows you to share your creation, if you so choose.
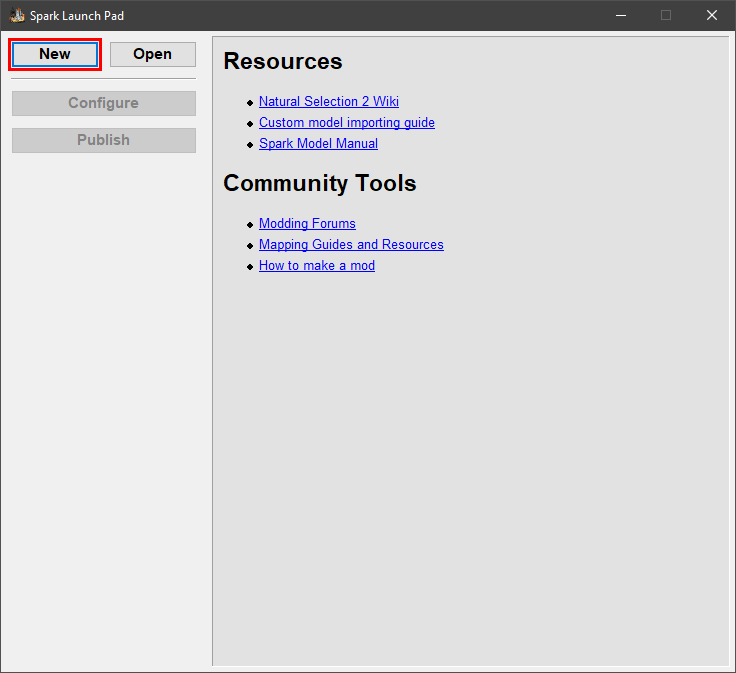
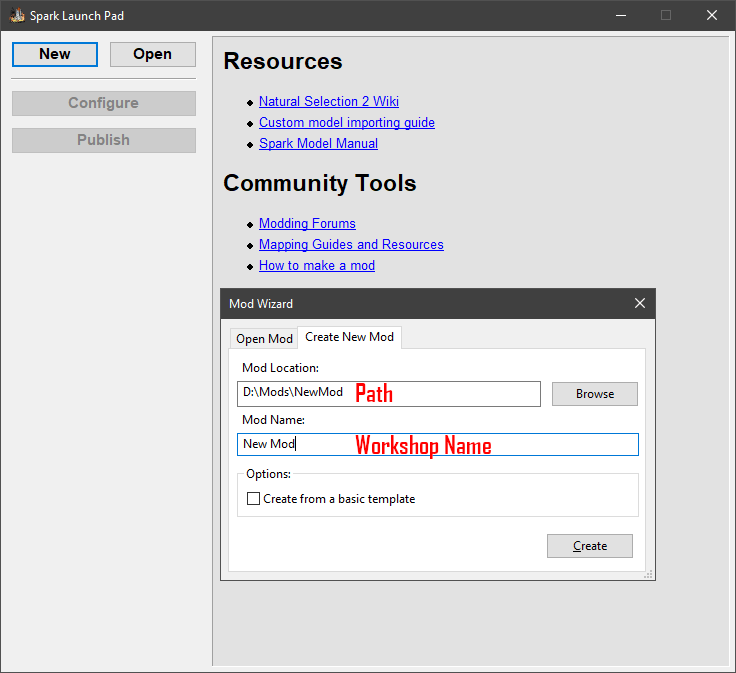
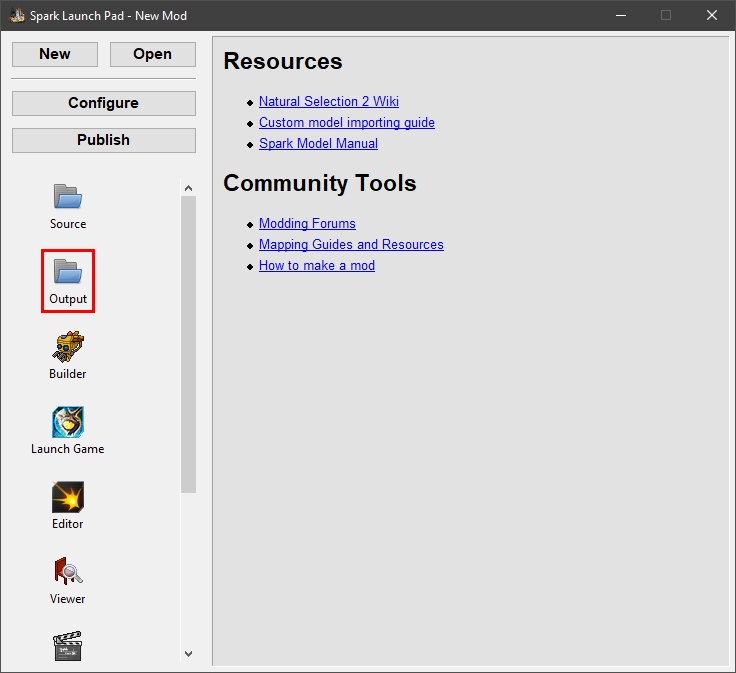
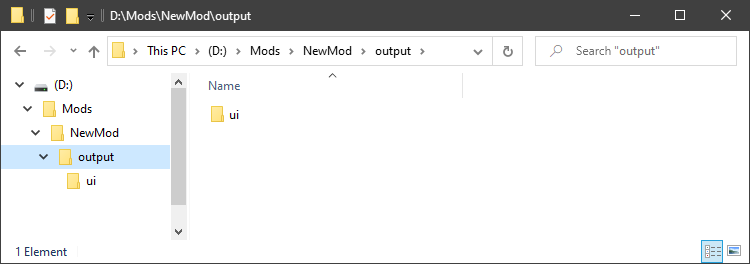
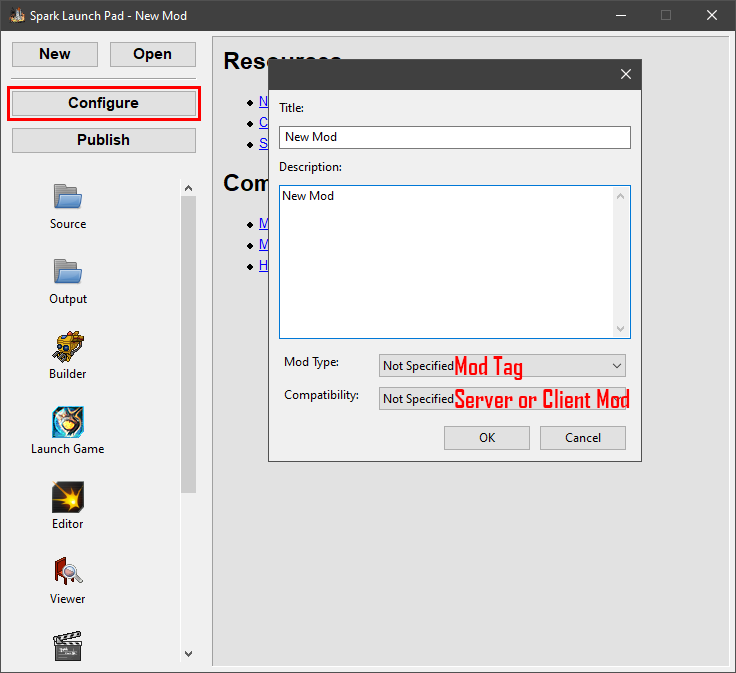
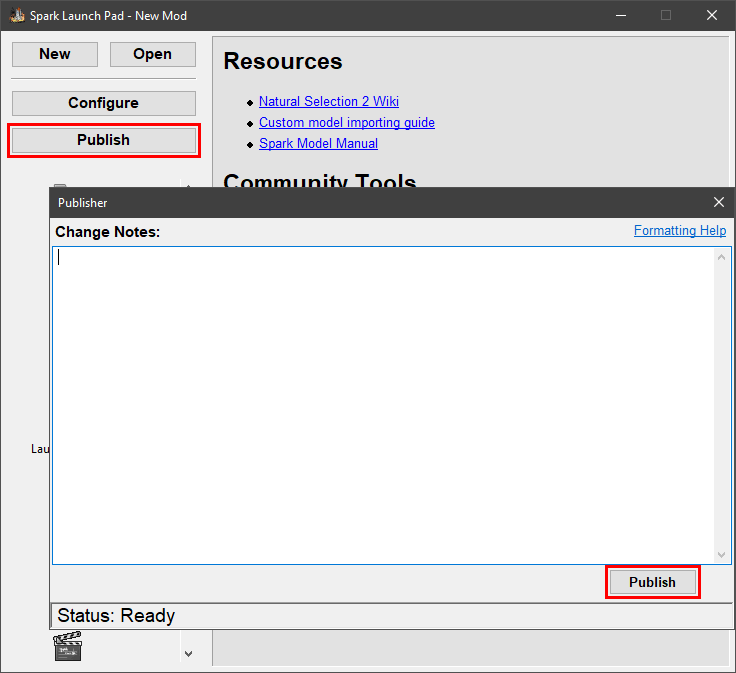
Now your mod will show up in your Steam Workshop. You can find it by visiting your profile and clicking "Workshop Items" in the list on the right side of your Steam profile. On the mod page you can also add screenshots, videos, or links, and also set the visibility of your mod, if you choose not to share it. You can also allow/disallow comments, or add contributors from your Steam friendlist.
You can also subscribe to your mod, and it will show up in your Modlist in game. Activate the mod from the Mod menu 'Options->Mods' in your NS2 client, and press the "RESTART" button. From now on you will be using your own custom crosshairs.
- The Ultimate NS2 Basics Tutorial: From Noob to Vet (Updated!)★ 5 (676)31k views784 ♥1 minUpdated Aug 28, 2013
- Natural Selection 2: Beginner Tips★ 4 (157)14k views117 ♥12 minUpdated Nov 30, 2014
- Большая энциклопедия по Natural Selection 2. Том 1: Боевая часть★ 5 (646)10k views385 ♥57 minRussianUpdated Jun 11, 2019
- Commander's Bible [UPDATED 6/5/2016]★ 4 (112)5.8k views110 ♥35 minUpdated Jun 5, 2016
- HOW TO DANCE★ 2 (79)2.6k views9 ♥1 minDanishUpdated Dec 23, 2015
- Spectator Controls★ 4 (48)1.8k views30 ♥1 minUpdated Feb 27, 2013



- Upgrading to PremiumTeam Fortress 2★ 5 (20k)1441k views11k ♥6 minUpdated May 11, 2022
- No More Room in Hell Official ManualNo More Room in Hell★ 5 (2.8k)569k views2.1k ♥29 minUpdated Apr 22, 2019
- NMRiH Community Hosting GuidesNo More Room in Hell★ 5 (526)351k views653 ♥1 minUpdated Aug 10, 2022
- ULTIMATE GUIDE FOR GAME DEV TYCOONGame Dev Tycoon★ 5 (5.8k)326k views10k ♥4 minUpdated 23 Jan, 2014
- How to 'Git Gud' Soon™MORDHAU★ 5 (2k)318k views3k ♥68 minUpdated Nov 16, 2024
- Лучшие кооперативные игры SteamPAYDAY 2★ 5 (1.5k)315k views2.1k ♥56 minRussianUpdated Apr 27, 2025






This guide was created by its original author on the Steam Community. Are you the author and want it removed? Request removal.