Dawn Of War: Boot camp
Intro


You can follow me, and see the rest of my guides here:
http://steamcommunity.com/id/StarSide/myworkshopfiles/?section=guides
Much to do about nothing
Well, first of all, welcome to Dawn of War. Better yet, welcome to your Space
Marine combat guide, where you will learn everything you need to know to
conquer the insane AI and the brutally good players you will face online.
I see a lot of guides online about Multiplayer tactics and whatnot, and generally most people neglect the lowly beginnings that is Boot camp. The ingame tutorial does a decent job of getting you battle ready and out into Singleplayer, where you will be mullerd by all kinds of Handicaps and uphill battles. If you want details on the more advanced tips and tricks, have a look at my other guide here in the Dawn Of War section.
I will assume that at least for the first section, you have not played the tutorial, and assume you do not have a general knowledge of the tech tree.
Ok. Without further a do, let's get started.
Disclamier: This guide was written by me and no one else. Please dont use my guide unless you credit me in the discription. The screen shots were also taken by me for the perposes of this guide.
The Basics: Interface elements
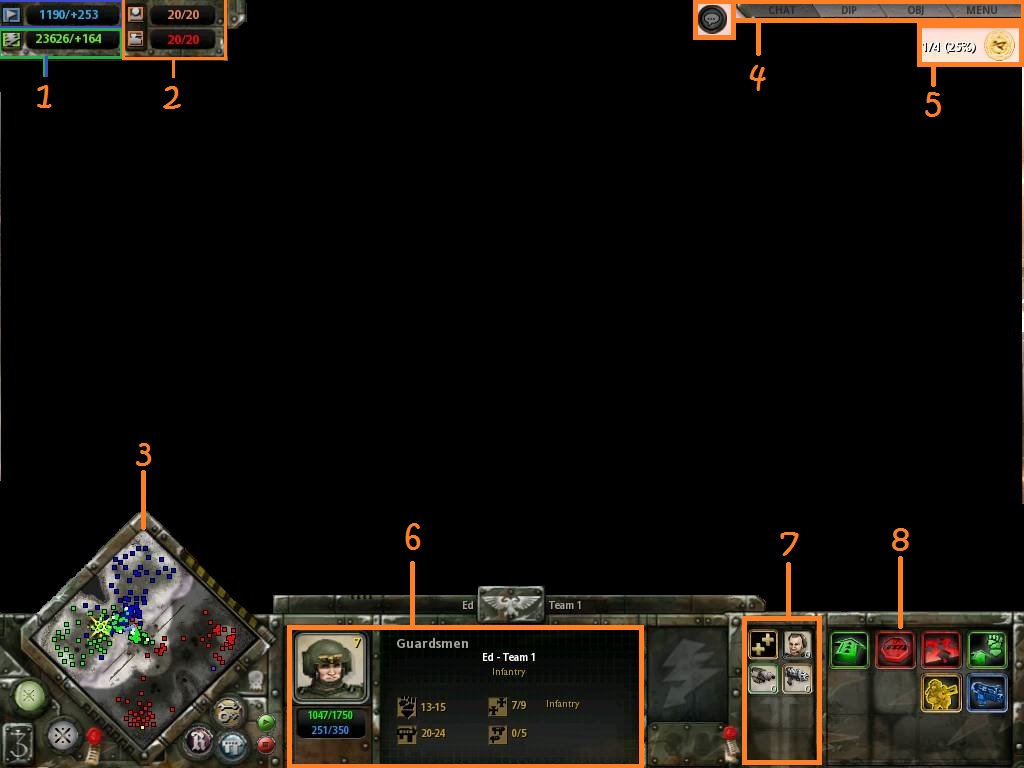
Ok. This is what you are seeing for 99% of your playtime here ingame. You have muliplable do hickeys and command buttons you can use to move your troops around the map, call reinforcements, and monitor your resources.
Here is the run down.
- Requisition (Blue), and Power (Green)
These resources allow you to bring units onto the battlefield from buildings, and in some cases
drop pods which you can 'deep strike'. - Total ground and Vehicle units, and their respective Unit caps.
This will occur when you cap out how many units you can train at one time. - The Minimap.
You know what this is if you have the slightest interest in RTS. The blips on the map represent
Units, terrain deformities, and strategic positions. You can Left&Right click with your mouse to
move units to a position on the minimaps, or jump there yourself. - Menu bar.
You can see your objectives, engage in diplomacy, tweak graphical and audio settings and quit
to the main menu. Also you can engage in hardcore verbal diarrhea with other players through
the chat box icon. Or not. - Special objective counter.
This will indicate certain parameters you must forfill to win the game. This can be anything from
capturing an objective, to holding points for a certain amount of time. - Unit information table.
This board will hold the stats of the thing selected, as well as the health and moral of the unit in
general. It also has a cute little avatar. - Squad control display.
This little box will be the key to the advancement of your units. You can upgrade your units, as
well as reinforce, or supply them with different weapons. This allows you to have much more
versatility in your squads. - The unit command prompts.
Basically a helpful reminder of the hotkeys. Otherwise it's useless.
Resources: Requisition, Power, Critical Locations, & Relics
You're not going to get far without an army. And both are required to construct buildings and train units.
Requisition:This is the lifeblood of your war effort. It regenarates automatically, it can be sped up with the acquisition of 'Requisition points'. These can be captured by Military units.
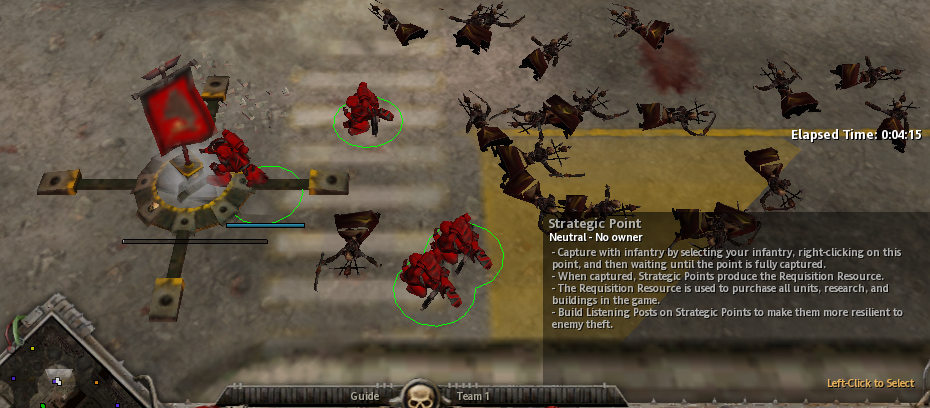
You can reinforce these points with Listening posts which stop the enemy team recaputring the point from you. They can be further upgraded with turrets and armour. This is a useful way of maintaining a hold on parts of the map that are unguarded by units, but can still buy enough time for your army to defend the point before it falls.
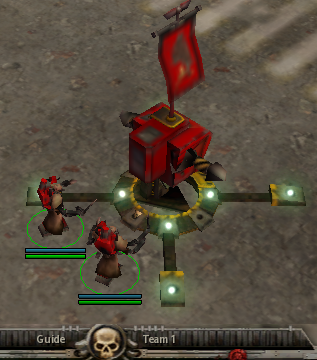 Later advancements to the Listening post can make it a beast in its on right and can be paramount in pushing foward against a well fortified opennant. As if your army falls, and they launch a counter attack, the listening posts can provide the last line of defence for your base, and possibly wipe them out.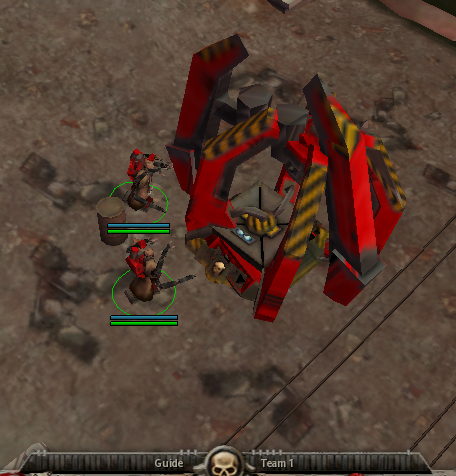
Power
'Power' is accumulated by maintaining generator structures. It is required for researching upgrades for your buidings and troops and deploying advanced units, especially vehicles. Setting up a Power infrastructure requires some Requisition to invest.
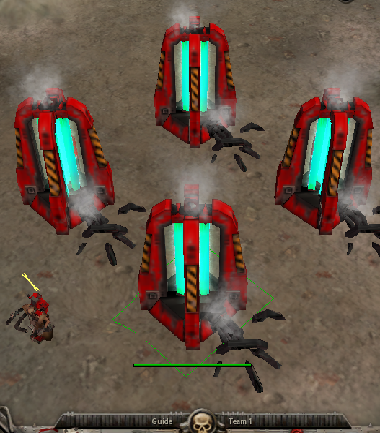
You can also build Heavy plasma generators on top of Slag deposits. These provide a much greater amount of Power, but are often found on neutral points on the map, and have have to defended.
Critical Locations
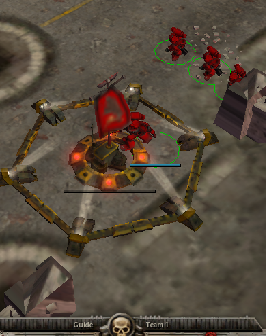 These points are generally located in the middle ground or area that are designed to be fought over. The number of critical locations on the map tends to vary from 1 to 5, and if you are playing with Take and Hold victory on then capturing and holding over 50% of the Critical Locations for 7 minutes will gain you victory. Critical Locations show up orange on the minimap and are different from strategic points and relics because they cannot be built upon. Critical Locations also give a larger sight radius than normal Strategic Points. Critical Locations also take longer to capture and decapture than normal Strategic Points. For Necrons, Critical Locations give a 10% reduction to unit build times, reinforcement times, and research times like an Obelisk. (a 15% reduction in Dark Crusade).
Relics
These points are generally located in the middle ground or area that are designed to be fought over. The number of critical locations on the map tends to vary from 1 to 5, and if you are playing with Take and Hold victory on then capturing and holding over 50% of the Critical Locations for 7 minutes will gain you victory. Critical Locations show up orange on the minimap and are different from strategic points and relics because they cannot be built upon. Critical Locations also give a larger sight radius than normal Strategic Points. Critical Locations also take longer to capture and decapture than normal Strategic Points. For Necrons, Critical Locations give a 10% reduction to unit build times, reinforcement times, and research times like an Obelisk. (a 15% reduction in Dark Crusade).
Relics 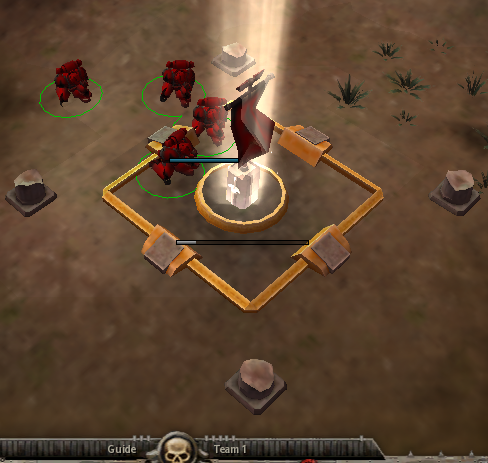 These beauty's are much less common than Strategic Points and will often be positioned much further away from the initial start point of your base. Relics appear yellow on the minimap. There is rarely more than one Relic per player spot on the map, and there can be less than one per player or even none on the map at all. All of the ultimate or 'uber' units of each race (such as the Baneblade or Avatar of Khaine) require possession of a Relic to be built so this means that they can often be hard fought over. Relics give a small trickle of Requisition points.
Games Modes
They say Deathmatch is the bread and butter of FPS games.
Well, for RTS it's king of the hill, and a whole lot more.
In this section I'll run down the game modes and victory conditions found in Dawn Of War.
Annihilation
BLOOD FOR THE BLOOD GOD!
Basically. Everyone keeps going until the ememys buildings cabable of training units are destroyed. Pretty simple. Game tend to take a while early on as players have tendecies to scuttle around the map making new hidden bases to avoid being knocked out.
Assassination
Players start with a Commander. The player who loses his Hero unit loses.
Can either result in short bloody games where someone loses his unit in the thick of battle, or if the enemy is feelign annoying, he'll camp his hero up where no can find him.
Control area
Pretty stand 'capture and hold' gametype. Players have to capture a certain amount of Strategic Points and hold them for a certain amount of time.
A classic. Games are always exciting, and end with huge battles. A keeper.
Destroy HQ
About as simple as it gets. Destroy the other teams HQ. Nuff said.
These can stretch on for a while as players build up large defences and hold up and defend there base. Massive battles will always certainly last for a while as sides struggle to resupply their armies with fresh troops for the slaughter.
Economic Victory
When economic victory is enabled, if a player can amass 12,000 requisition and 12,000 power they will win the game.
Sudden Death
Every game hangs on a knife edge. All player can be defeated simply by decapturing a strategic point that the player currently controls. Games are usually insanely quick, as teams rush for the other base to capture the other sides strategic points before the other sides achieves the same.
[Optional] Donate!
Of course this is not necessary however; It just gives me a little more insentive to write and edit more in the future!
https://steamcommunity.com/tradeoffer/new/?partner=38602821&token=A3SrzMse

- Dawn of War Widescreen Fix★ 5 (1.1k)102k views1.2k ♥3 minUpdated Dec 20, 2025
- A better 16:9 widescreen fix.★ 4 (162)30k views331 ♥1 minUpdated May 20, 2024
- Warhammer 40,000: Dawn Of War изменение разрешения экрана.★ 5 (462)30k views528 ♥1 minRussianUpdated Aug 29, 2020
- How to Play Good in Skirmish with Every Race★ 5 (459)28k views944 ♥38 minUpdated Jun 6, 2017
- Warhammer 40,000: Dawn of War - All Campaign Missions★ 4 (158)25k views201 ♥1 minBulgarianUpdated Feb 5, 2016
- Ultra widescreen Fix 21:9★ 4 (54)21k views102 ♥1 minUpdated Sep 10, 2017


- Upgrading to PremiumTeam Fortress 2★ 5 (20k)1441k views11k ♥6 minUpdated May 11, 2022
- No More Room in Hell Official ManualNo More Room in Hell★ 5 (2.8k)569k views2.1k ♥29 minUpdated Apr 22, 2019
- NMRiH Community Hosting GuidesNo More Room in Hell★ 5 (526)351k views653 ♥1 minUpdated Aug 10, 2022
- ULTIMATE GUIDE FOR GAME DEV TYCOONGame Dev Tycoon★ 5 (5.8k)326k views10k ♥4 minUpdated 23 Jan, 2014
- How to 'Git Gud' Soon™MORDHAU★ 5 (2k)318k views3k ♥68 minUpdated Nov 16, 2024
- Лучшие кооперативные игры SteamPAYDAY 2★ 5 (1.5k)315k views2.1k ♥56 minRussianUpdated Apr 27, 2025






This guide was created by its original author on the Steam Community. Are you the author and want it removed? Request removal.