Guide to the DMM Version of DOAXVV
Intro
This is my first guide so I apologize in advance for any sloppy/unclear sections. I'll do my best, hopefully it's at least half decent.
My goal here is to provide anyone with enough information to play the game even if they've never touched it before and to be thorough enough that even if this is the version you choose to start on the language barrier won't be an issue. If you feel like you already know enough about a certain section then feel free to skip around.
I guess I should probably start off by saying that I primarily play the DMM version of the game so for those who are unaware of the differences here are a few with regards to DMM:
- Region free, you don't need to go through a convoluted process of VPNs to get the game.As of the new DMM games player update the game is now region locked and requires a JP IP address to play the downloaded version (browser is still free). You're probably best off playing the Steam JP version to avoid this hassle as it would a require a vpn every time you launch the game otherwise... If you still do want to go through DMM and don't live in Japan then note that you only need a VPN to open the launcher and can turn it off immediately after for faster connection.
- Has a web browser version for easy access. (More on that later)
- Now has a Steam version (Region locked, see next section)
- Is ~12 months ahead of Steam in terms of characters/content.
- Is exclusively in Japanese (No localization for this game)
- Gets collaboration events with other popular IPs.*
- Has frequent dev interaction like retweet campaigns and rewards for #1 ranking on the DMM store page (to be fair Steam might get this one too and I just don't play often enough to notice)
- Has a higher level cap for girls. (Gotta get all one of that juicy level they gave usThere's more than one now :3)
- Has a few extra QoL features, it's fair to assume most if not all of these will make it to Steam at some point.
- Slightly better performance. I think this is because of the lack of Steam Overlay and the like but I get 60 FPS just fine here whereas I get around the mid-low 50s on Steam with the same settings.
- Slightly more expensive. (10,000円 > S$120.00) (Currencies fluctuate but at the time of writing 10,000円 is ~S$130.00)
*Steam recently received a collaboration with Destiny Child, whether or not this is the start of a trend of shared collabs is yet to be seen.
Edit: It Steam has gotten 3 collabs now so while I'm not sure all of the older ones will end up making it here it seems they are now getting them decently consistently. Worth noting since they're getting these collabs so much later some of them have extra outfits for girls that were either not released or paid only on DMM.
Since Steam seems to be getting new features independent of anything DMM does, I'm going to try to make a list for those unique features here as well. This might not be all of them since I don't play Steam nearly as much but hopefully I can cover most of it here:- Owner Pass[game.doaxvv.com]: Paid passes that last for a set amount of time and give additional benefits and login rewards.
- Auto-play[game.doaxvv.com]: Basically a bot that lets you automatically play up to 15 matches per day with no additional input. A paid auto-play pass exists that allows infinite use of the feature for a set amount of time.
- Episode Coins: A currency used to buy past episodes, DMM has the ability to do this as well however it is through the guest point shop instead.
- Gifting up to 100 items at once (DMM Cap is 10)Feature added during the 3rd anniversary
- Server wide rewards for birthday events (DMM is limited to those who draw from the gacha)
- Bonus XP/Gratitude from gifting items to girls on their birthdays.
- Different outfits, this refers to outfits like Helena's "Illusion" that are repurposed collab suits that are technically in DMM under their proper names. (Most collabs won't be coming to Steam like this since they would be recognizable even with their malfunctions)
- Altered outfits: Due to the nature of the way they release things here some outfits have their statistics modified from their DMM counterparts.
- Additional outfits: These are outfits exclusive to Steam that are not on DMM, currently they include: (Thank you to TskR Illusion for the English names)
- Frothy Maid
- Moonlight Shadow
- Auspicious Blossom
Additionally due to the nature of the contest, Design Contest outfits will be different between DMM and Steam EN versions.
- Frothy Maid
I think that broadly covers the main differences/incentives to play so with that out of the way I suppose I'll be getting into it.
Getting the Game
 A Steam version of the game was just released, this is separate from the English version here and is region locked to Japan only. With this new release you no longer need to play through DMM if you don't want to and can instead access the game through Steam.
If you wish to go through this route to play on Steam then go to the SteamDB page for the game here[steamdb.info] with a VPN on and click the install button. (Thanks to @Hanzo for testing this for me) Otherwise the remainder of this section will give instructions for DMM, the remainder of the guide should apply to both versions as they are run on the same servers and as such are effectively the same game. (You can even friend DMM players on Steam and vice versa.)
Note: As of right now there is no cross progression between Steam and DMM so if you choose one platform you cannot use your data on the other, make sure you pick the platform you want to stick with.
Note 2: I've heard that you don't actually need a VPN to download the game from Steam DB like the other version does so you should be fine without one. It seems only the store page is region locked. As with the EN version here they have since region locked this version to Japan only.
https://store.steampowered.com/app/1361350/DEAD_OR_ALIVE_Xtreme_Venus_Vacation/
If you see an error here you need to use SteamDB, otherwise just click the install button.
-------------------------------------------------------------------------------------------------------
Might as well start by getting the hard part out of the way. This game requires at a minimum a DMM Games account, this is as simple as creating an account on basically every other site on the internet.
This will be a step by step guide using only the game's official page as it ensures that the path you take will be SFW. That's strictly speaking, you still probably don't want to be looking at girls in swimsuits at work. (Or maybe you do?) Anything you do beyond the confines of this guide is at your own risk.
This will be the base link I use here: https://doax-venusvacation.jp/- Creating a DMM Games account
This should arguably be one of the easiest parts as a while back DMM added English translations to their site. The fastest way to go about doing this is to click the large orange circle at the bottom right of the page (it follows you as you scroll so it's impossible to miss), this will bring you to a login prompt that looks like this:
From this point you can (and probably should) click the "English" button at the top right of the page but just for the sake of completion I will cover the rest of the steps. Click on the gold button at the bottom and you will be brought to a page that looks something like this:
Enter your email in the first box, your desired account password in the second box, and uncheck the box beneath that (unless you like email spam) then click the gold box at the bottom and follow the steps in the confirmation email to activate your account.
Once your account is active then you can go back to the official site[doax-venusvacation.jp] and move on to...
- Playing the game
Here's where it gets slightly more complicated as the official site is only in Japanese. At the bottom of the main page you will see two circles that stay in the same position on your screen as you scroll:An orange one that says "ブラウザ版" is for the browser version of the game. if you have and are logged into your DMM Games account this will take you straight to the game and you can play directly from here. The specs for the browser version of the game are pre-set and cannot be changed, they are as follows:
Resolution1280 x 720Frame Rate30 FPSModel QualityHighDynamic ShadowHighAnti AliasingONDepth of FieldLow
Additionally there is a mechanic unique to the browser version which is scaling FP consumption which is why I strongly recommend avoiding this method of play unless it is for some reason your only available method or you cannot access the downloaded version. The consumption scaling is as follows:The Y-axis represents FP consumption from a base cost of 10, the X-axis represents Owner Level. The orange line represents the browser version while the blue represents the downloaded version.
As shown here starting from Owner Level 10 there is a linear increase in FP consumption until it doubles at Owner Level 100. This makes the browser option nice in a pinch but not nearly as good an option as the downloaded version for event farming. One final thing worth noting is that the browser version works on Macs so there is an option if that is your OS of choice.
To the right of the orange circle is a Teal one that says "ダウンロード版". This is the option to download the game software and comes with a couple of extra steps. Clicking this option will spawn a pop-up that should look something like this:
This is effectively the installation prompt for the game. DOAXVV Must be launched from the DMM Game Player client to run so your options are as follows:
The Blue box reading "今すぐプレイ!" downloads and installs the game on DMM Game Player, this only works if you have the game player installed already and as such we will be skipping this option for...
The orange box reading "DMM GAME PLAYER インストール(Windows版)" selecting this option will download the installer for DMM Game Player which will in-turn allow you to play the downloaded version of the game. The installer itself has an English option when you start it up so I won't be going over it here, set the file path to wherever and install it as you would any other program.
After installing the DMM Game Player go back to the game's official site (here if you're lazy[doax-venusvacation.jp]) and click the teal circle again, this time click the blue box. You may get a pop-up for the site requesting permission to open the DMM Game Player, allow it and you're good to go.
On the DMM Game Player client click the "Myゲーム" button on the left side under your avatar icon and you will be brought to your library where the game will be downloading.
When the download completes you will have 2 options shown by hovering your cursor over the game's icon:- The top button will say "ダウンロード版でプレイ" this is the option you will be using most of the time, it opens the game's launcher and allows you to start playing the game.
- The bottom button will say "ブラウザでプレイ" this option will open your default web browser and launch the browser version of the game. Again if you have the game downloaded then there's really not much reason to use this.
Using the Launcher
Upon first start up of the game the launcher will download any data it needs to launch the game, the first time might take a while. This also happens every time the game updates and something is added (IE pretty much at least once a week) but these are much shorter as you will already have most of the game's data.
While you are downloading game data/updates you might get a popup with some progress bars, this is part of the game's update process and is nothing to worry about, just leave it alone and it will finish.
Note: High and Low model quality are separate downloads so if you plan on doing something like farming on low setting but playing on high for photos then take the extra download time into account. (and perhaps get the bulk of it out of the way when you can)
The rest of this section will provide menu translations for each of the buttons and what they do, Since these are (mostly) the same as the Steam version's layout I'm just going to use it instead as it looks much neater than any edit I could make myself. If there's a difference I'll note it.
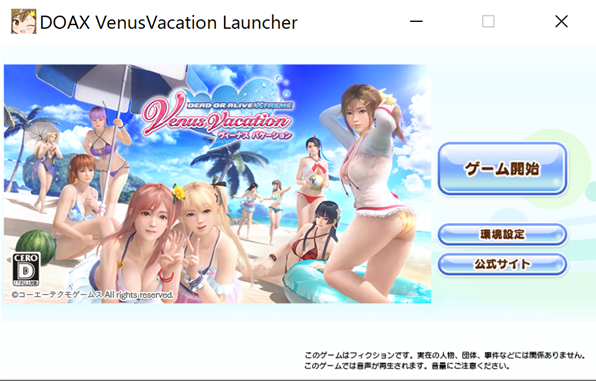
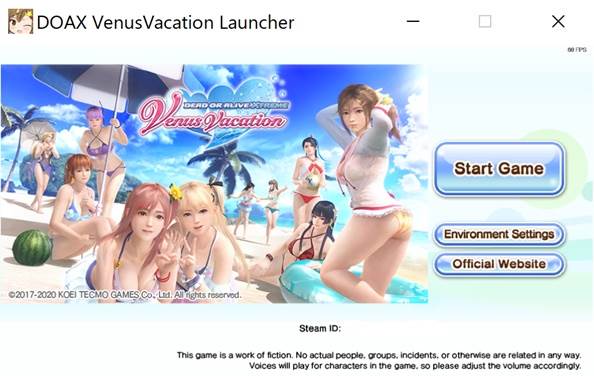 lllllllllll
Here are the Environment Settings:
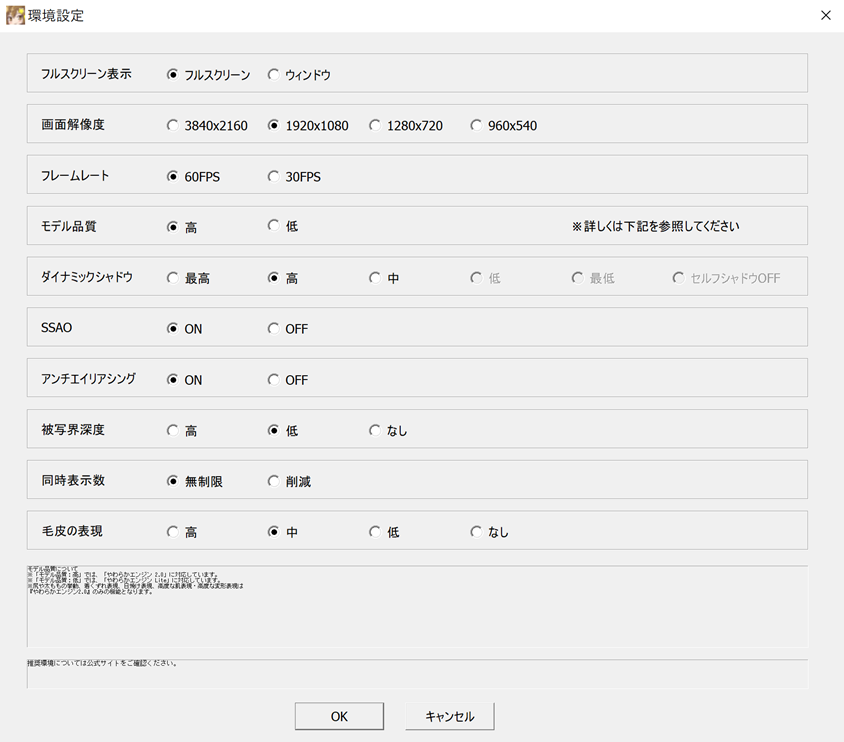
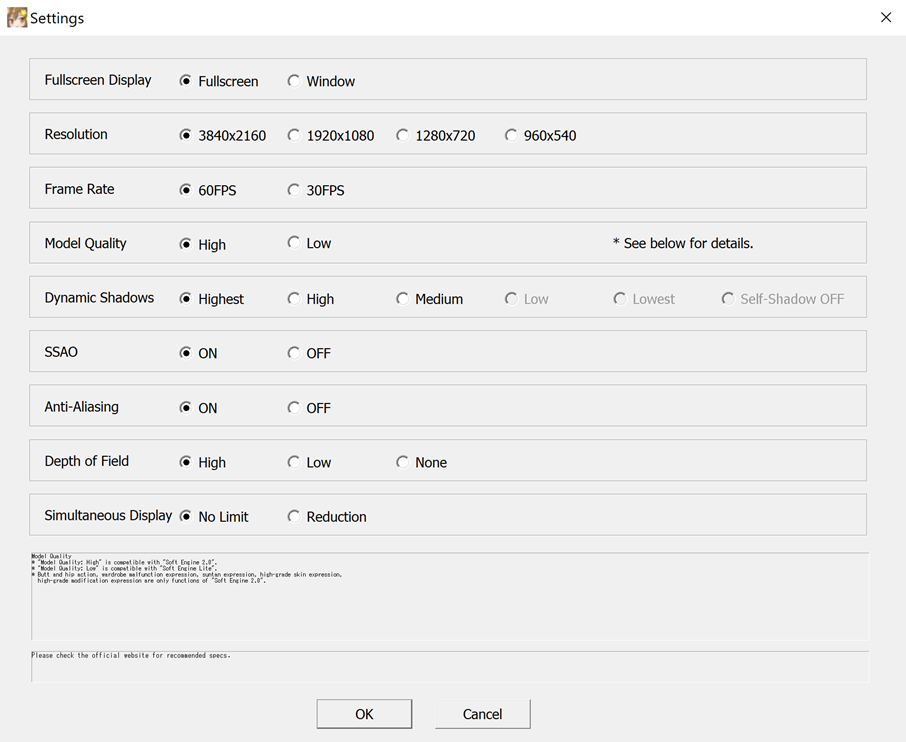 lllllllllllllll
Note:The last option on the bottom that says "毛皮の表現" is for fur textures. From the left side your options are: High, Medium, Low, Off. Only certain suits have fur on them so you might not notice this a lot.
Note 2: If you only see "?" in your settings menu then it's because you don't have a proper Japanese language pack installed, the menu itself will still function normally so you can still select your settings in that state.
The last button on the launcher will bring you to the official site in your default web browser. The official site has links to their twitter account as well as a section for news which is probably the easiest place to check new suits when an event releases. This is the same site we used to install the game.
The Home Screen「ホーム」
This is where you go when you first start up the game. You can pet/poke your partner here as well as take pictures, other than that it's mostly used to access other menus. Here is a quick rundown for the various buttons on the menu since there's a lot of them. (Sorry for my mouse writing)
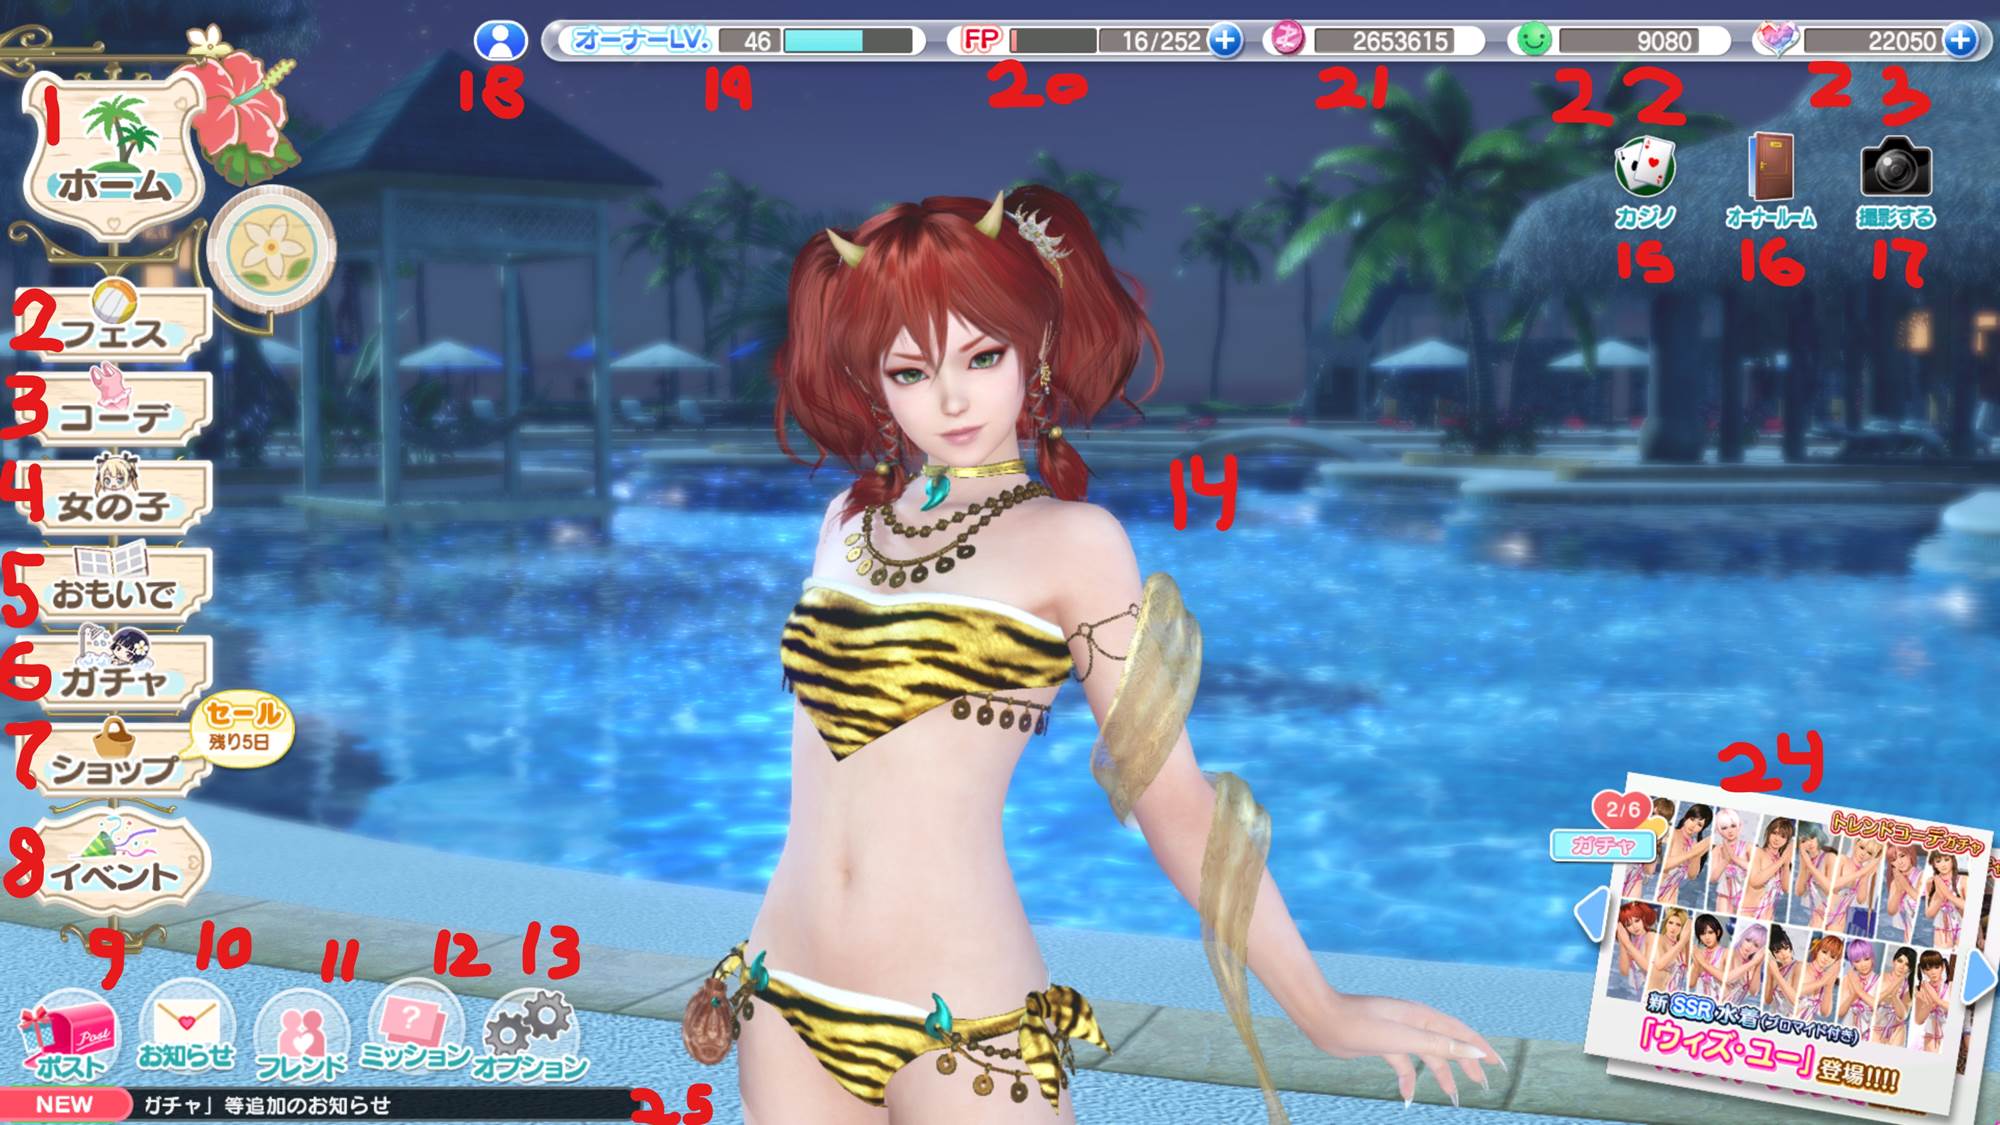
- Home: This is where you are. Press this on another screen to go back here.
- Festival: This is where you go to play the volleyball section of the game.
- Coordination: This is where you go to equip girls for festival matches.
- Girls: This is where you go to interact with specific girls.
- Memories: This is where all of the various types of episodes and bromides go.
- Gacha: This is where you play lootbox simulator to dress up your girls.
- Shop: This contains all the shops in the game in a single convenient menu. (There's a lot of them)
- Event: Brings you to the current event's page. Events can usually redirect to their festival matches and event shop as well as any score board they might have.
- Post: This is where your gifts go. This will mostly be filled by the score rewards you get from events.
- News: Brings back all those popups you see when you start up the game. They're too small for me to read so I just use the official site for that.
- Friend: Your friends list. Shows friends, requests, and pending request you sent to others. Friend limit is 100.
- Mission: Tasks you get rewards for completing. There are daily, weekly, owner (permanent), and event missions.
Note: There are occasionally event challenges labelled "女のそ" These are (usually) either for taking a picture of them with the current event's outfit equipped (most common) or for completing festival matches with them wearing the outfit. Don't forget about it if you get an event suit.
- Option: This is the options menu. I'll go into a little more detail for this further down since there are some useful functions.
- Best Girl: Fite me IRL.
- Casino: When you feel like your gambling game doesn't have enough gambling in it.
- Owner Room: A place to increase bonds between girls (This will be useful later). Also lets you decorate and take pictures with 2 girls instead of 1.
- Picture Mode: Lets you pose your current partner and take pictures, you can unlock different backgrounds to choose from here.
- Profile:
This contains your profile information which, among other things, has your User ID which serves as a friend code. Only you are able to see this on your profile. Features you can edit: (From top)
- Owner Name
- Island Name*
- Titles
- Owner Message*
- Owner Name
- Owner Level: You get XP for this by watching any new episode in the memory album. You can use this to control when you level up. XP Requirements are as follows:
- 1-10: 90XP
- 11-20: 120XP
- 21-30: 150XP
- 31-40: 180XP
- 41-50: 210XP
- 51-100: 240XP
- 101+: 500XP
- 1-10: 90XP
- Festival Points: This is effectively a stamina bar for festival matches. Your FP cap is increased by leveling up:
- 6FP per level until level 30
- 3FP per level from 31-100
- 2FP for every level after 100
- 6FP per level until level 30
- Zack Money: In-game currency, mostly used for upgrades.
- Guest Points: In-game currency, used for guest point gachas, converting to VIP points, and occasionally for buying things from the guest point shop.
- V-Stones: There are two kinds of these, paid and unpaid. For the most part both are good for gachas however... New girls for the first 3 months will have paid exclusive gachas and all Birthday gachas are paid exclusive. Additionally the Owner Shop occasionally has some packs for sale that can only be bought with paid V-Stones.
If you want to buy V-Stones I recommend keeping a close eye on how many you have and only spending them on paid exclusive gachas. You need to watch these because while the game may tell you how many you have it won't stop you from mistakenly spending some if you don't have enough unpaid V-Stones for a gacha. (Unpaid are always used first)
- General news tab to advertise the things they already advertised when you started the game up.
- Fancy scrolling news tab that kind of just does the same thing as 24.
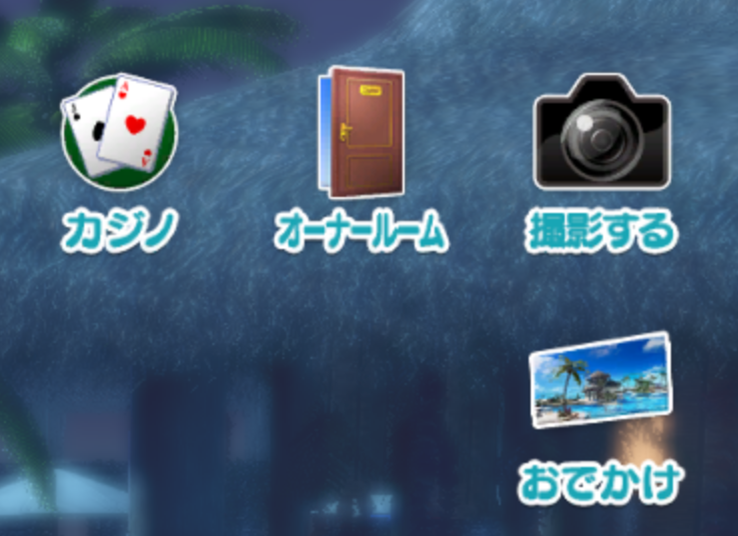 An additional tab was added a while back labeled「おでかけ」this controls the background of the home screen. Backgrounds are awarded by completing the finals of the various ranks in the main set of matches with specific girls (whoever you want as your partner), after claiming the mission reward they will be randomly selected from every time you return to the home screen. Clicking the button allows you to select a specific one which you can use during photo mode but there is no way to manually set one you like permanently as far as I am aware.
Options「オプション」
There are a few important functions hidden here among all the obscure shortcuts here so I'll go over the useful ones:

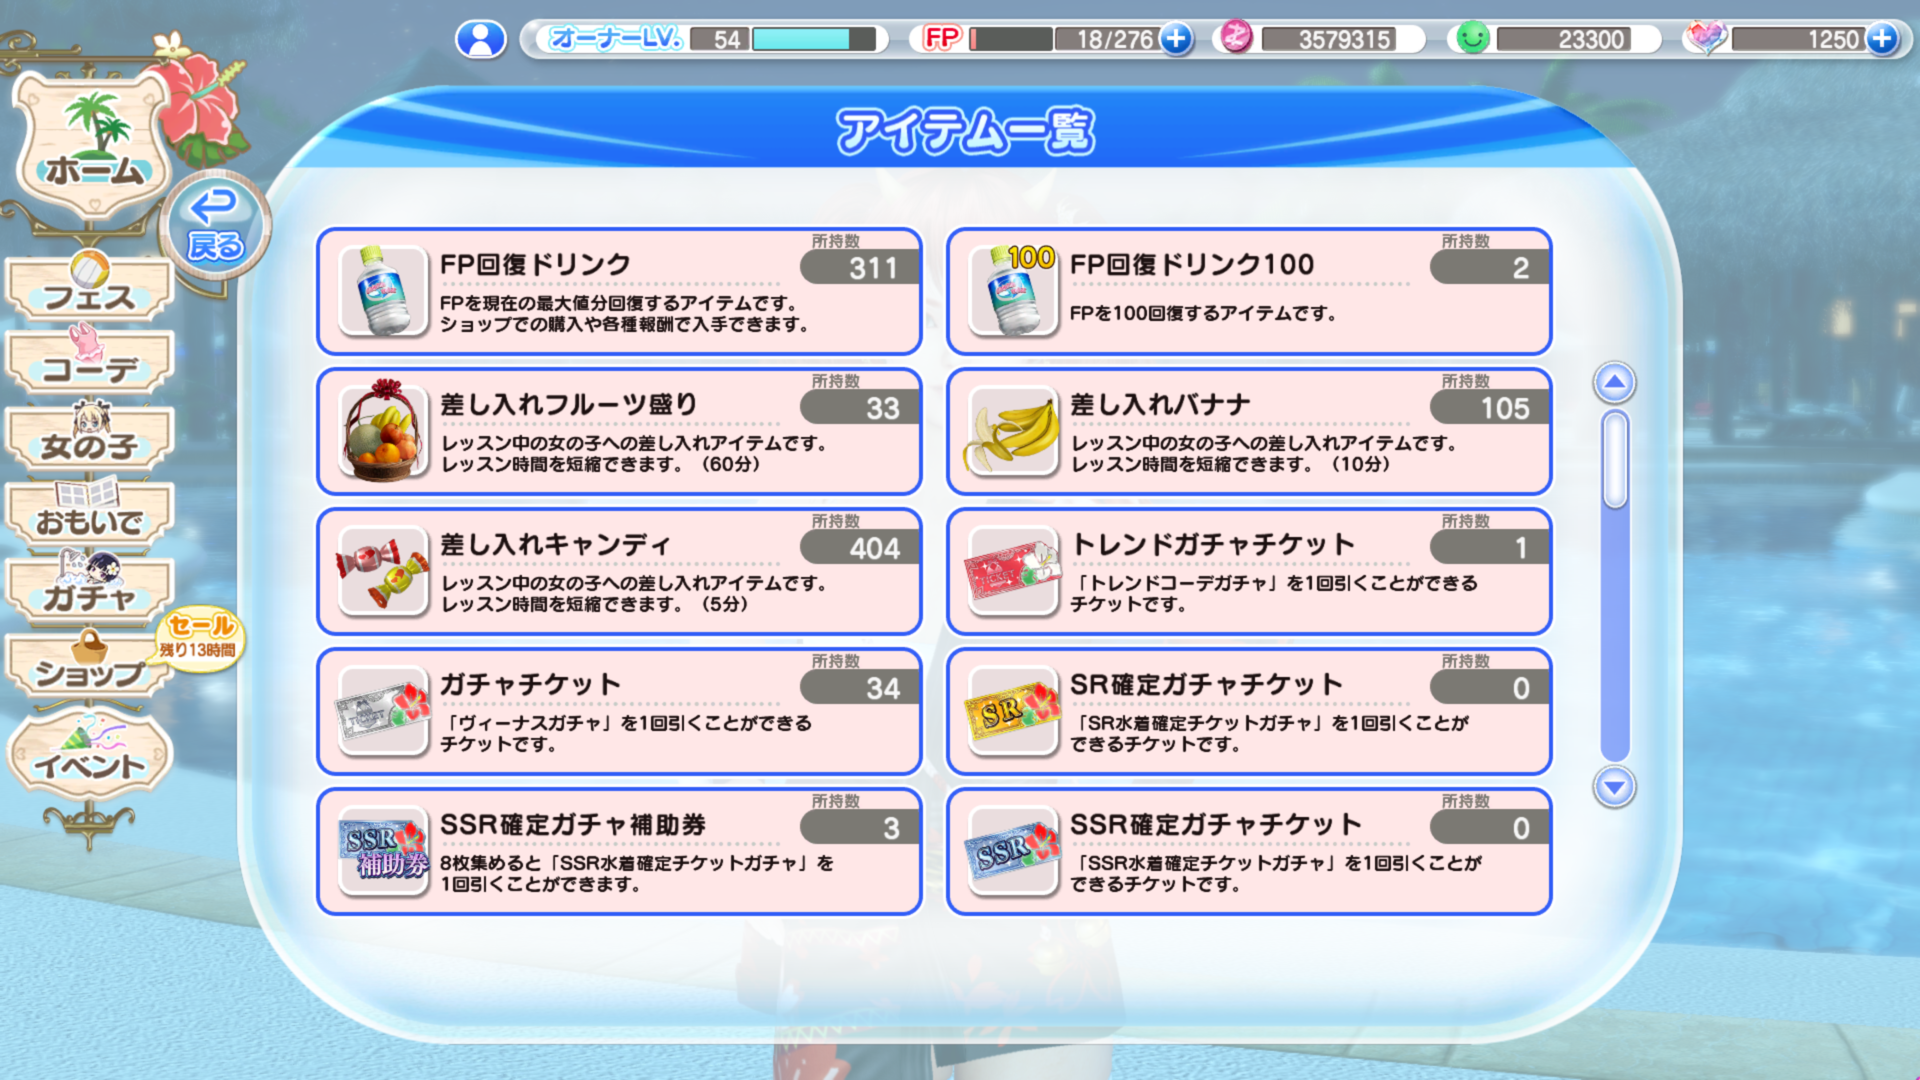
This opens a list of all your items which is good for keeping track of some of the more obscure ones. Additionally you can sell certain excess items for Zack Money as well as upgrade EX Oils here. Both actions are done by clicking the circle button in the bottom right of the item. (EX Oils cannot be sold so upgrading is the only option in case you were worried about that)

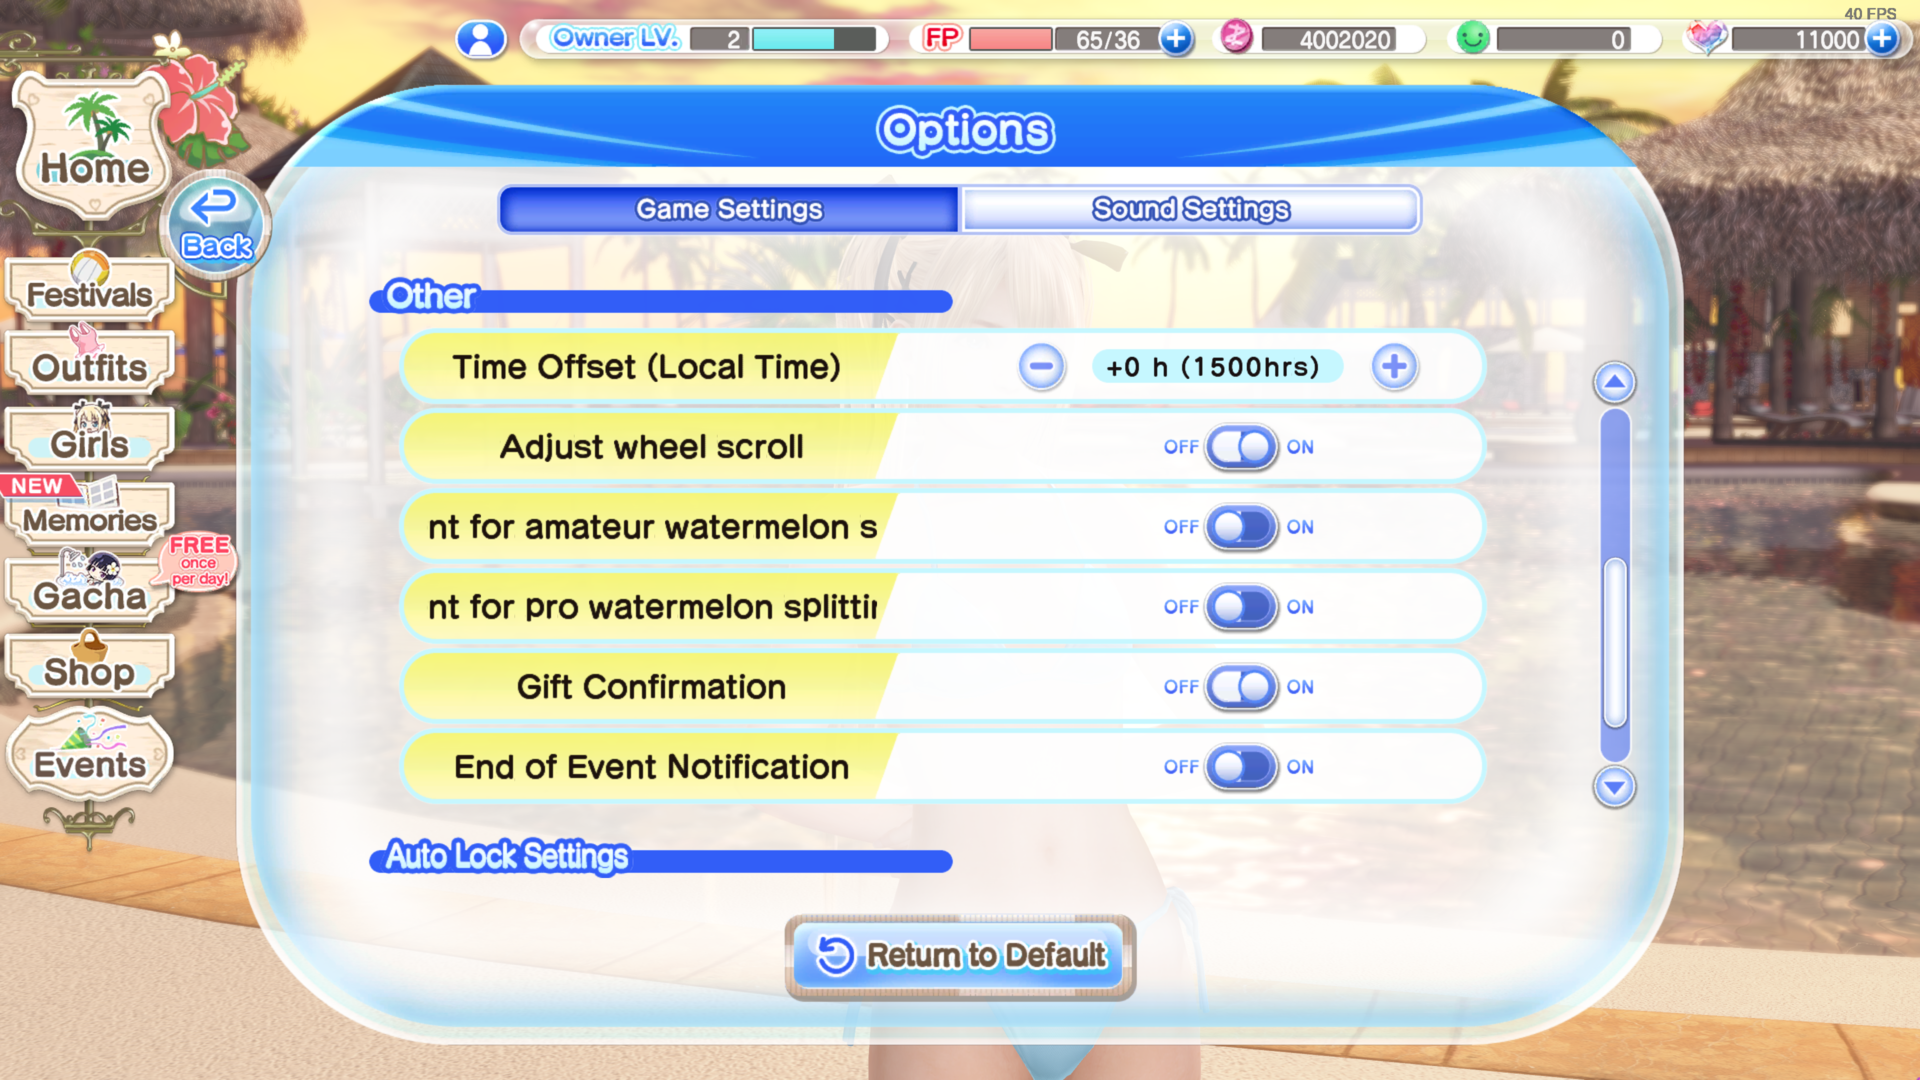
This opens the settings menu, there are a lot of options here and since it's pretty similar to the Steam version's menu I'm just going to place them side by side, I'll note differences as necessary:
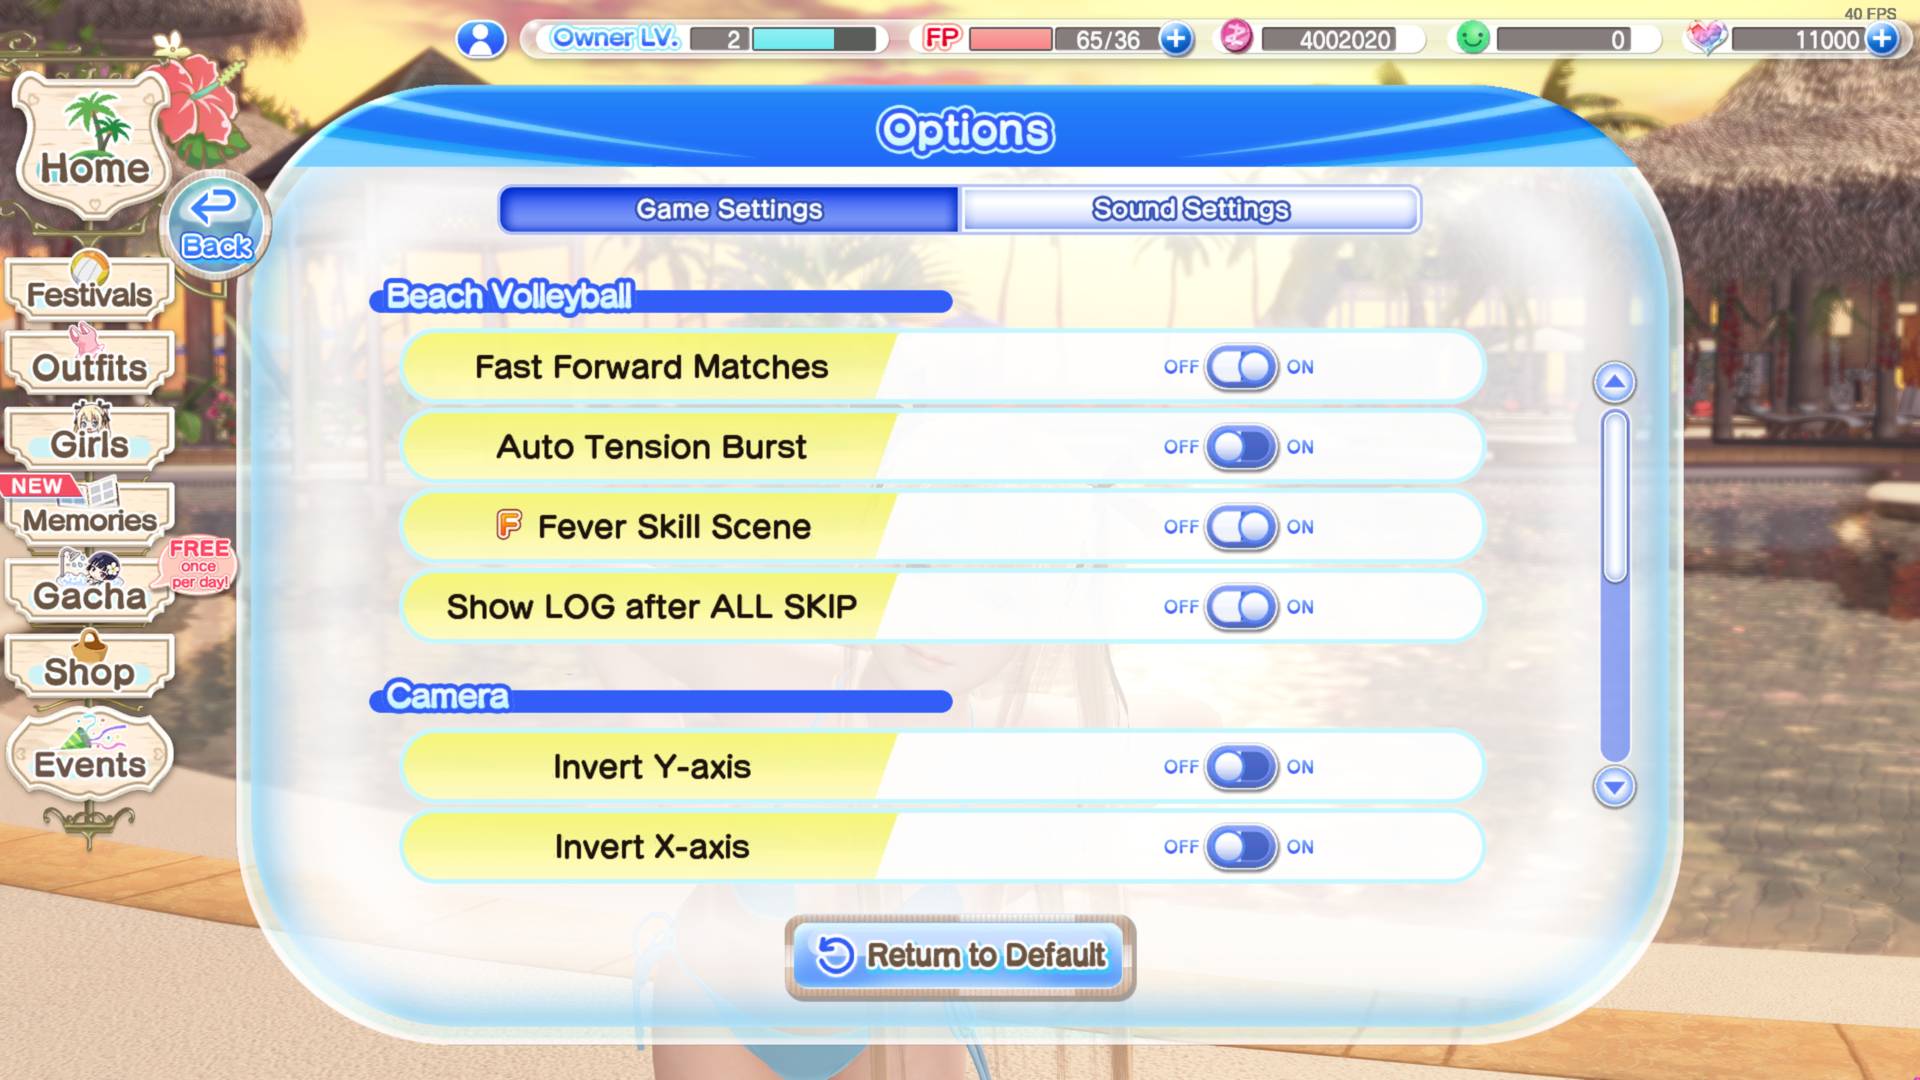
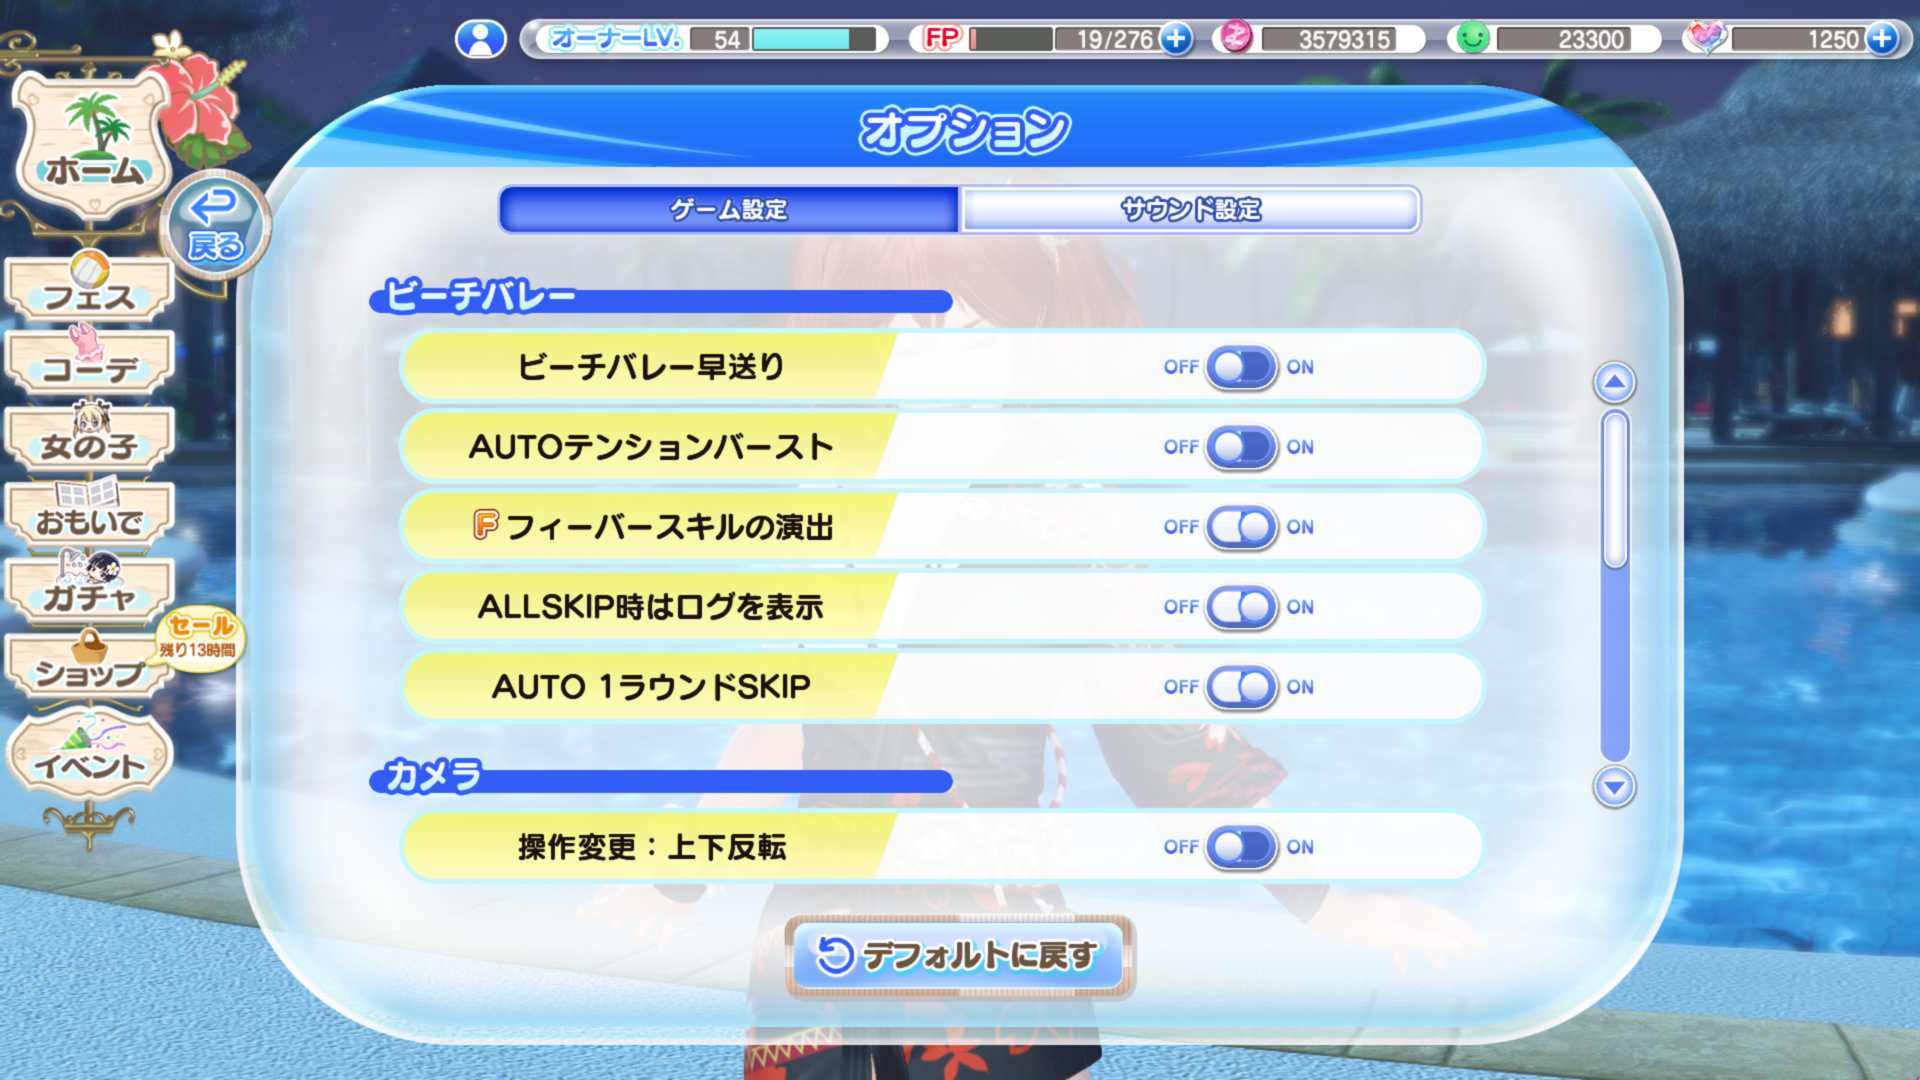 Already with the differences here, the last option on the DMM version is a toggle for the auto-skip function. This can also be done in any match as the toggle is right above the skip button.
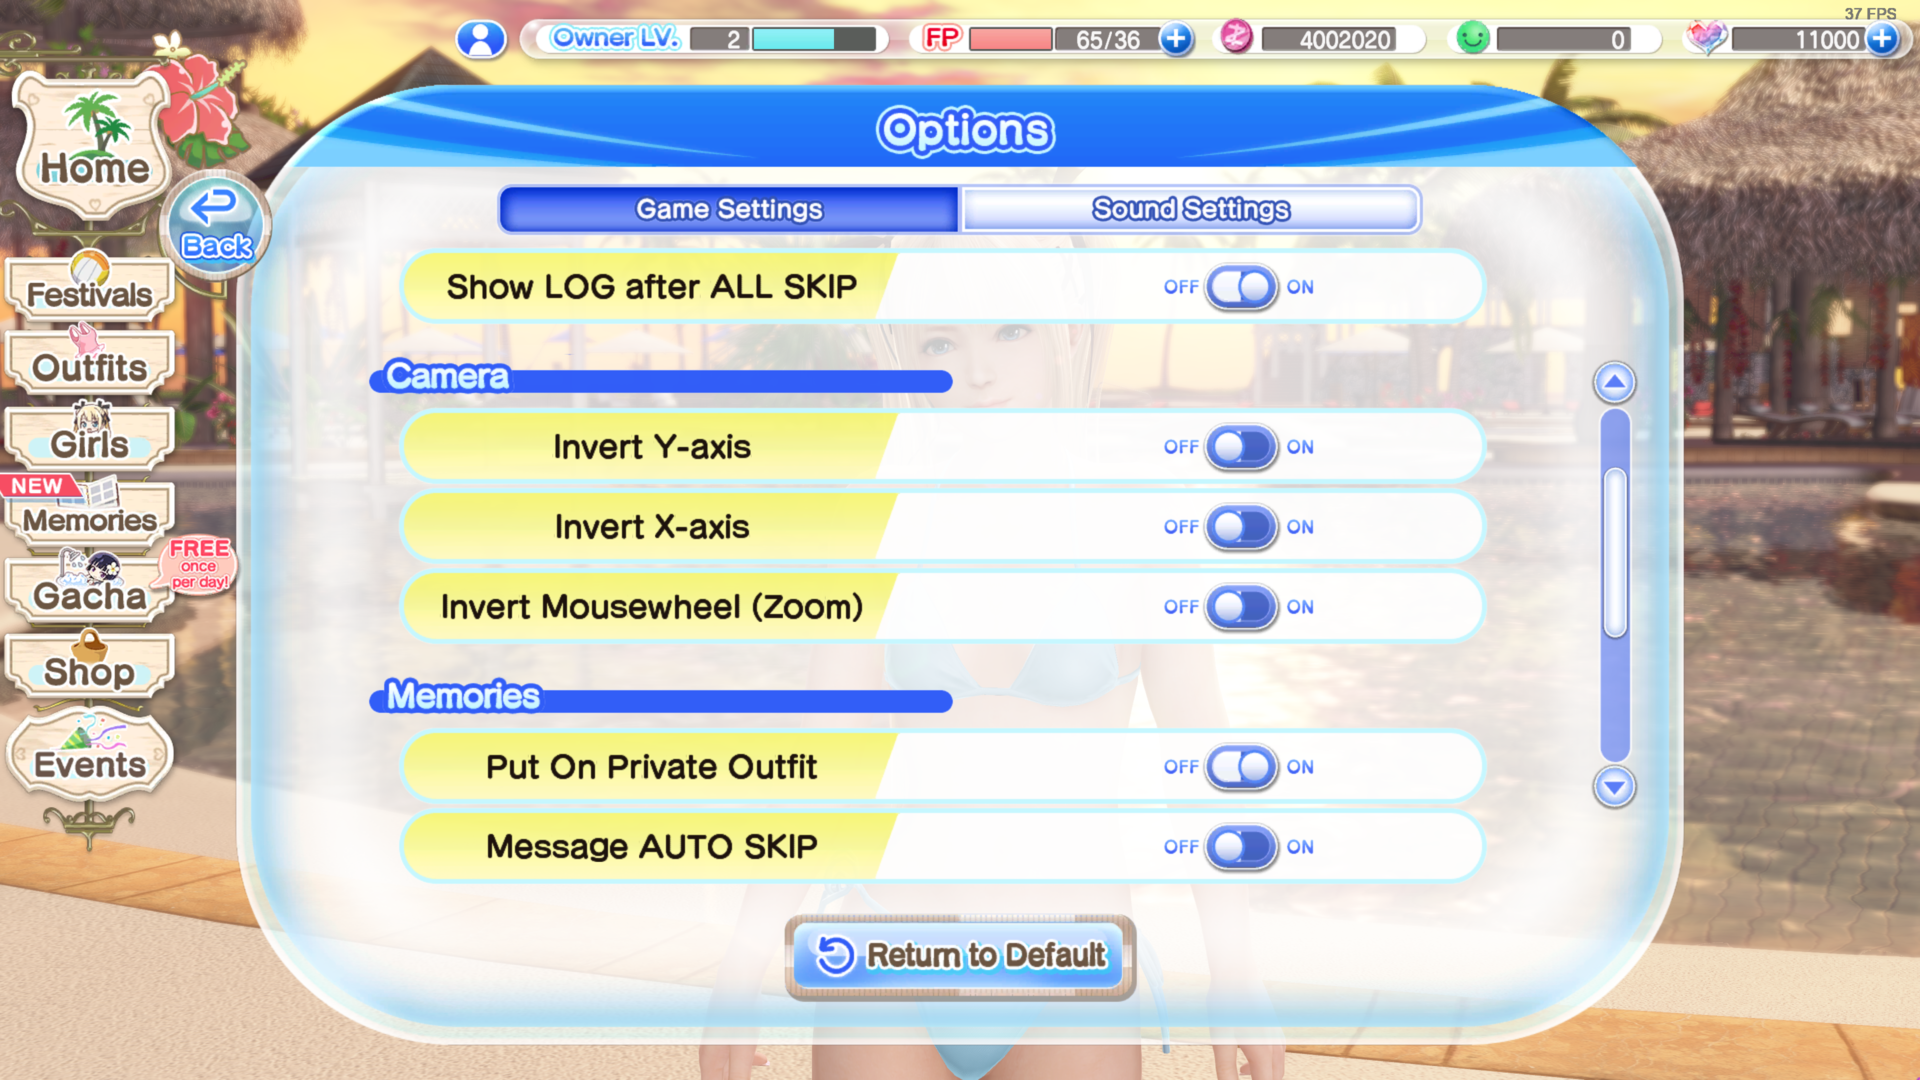
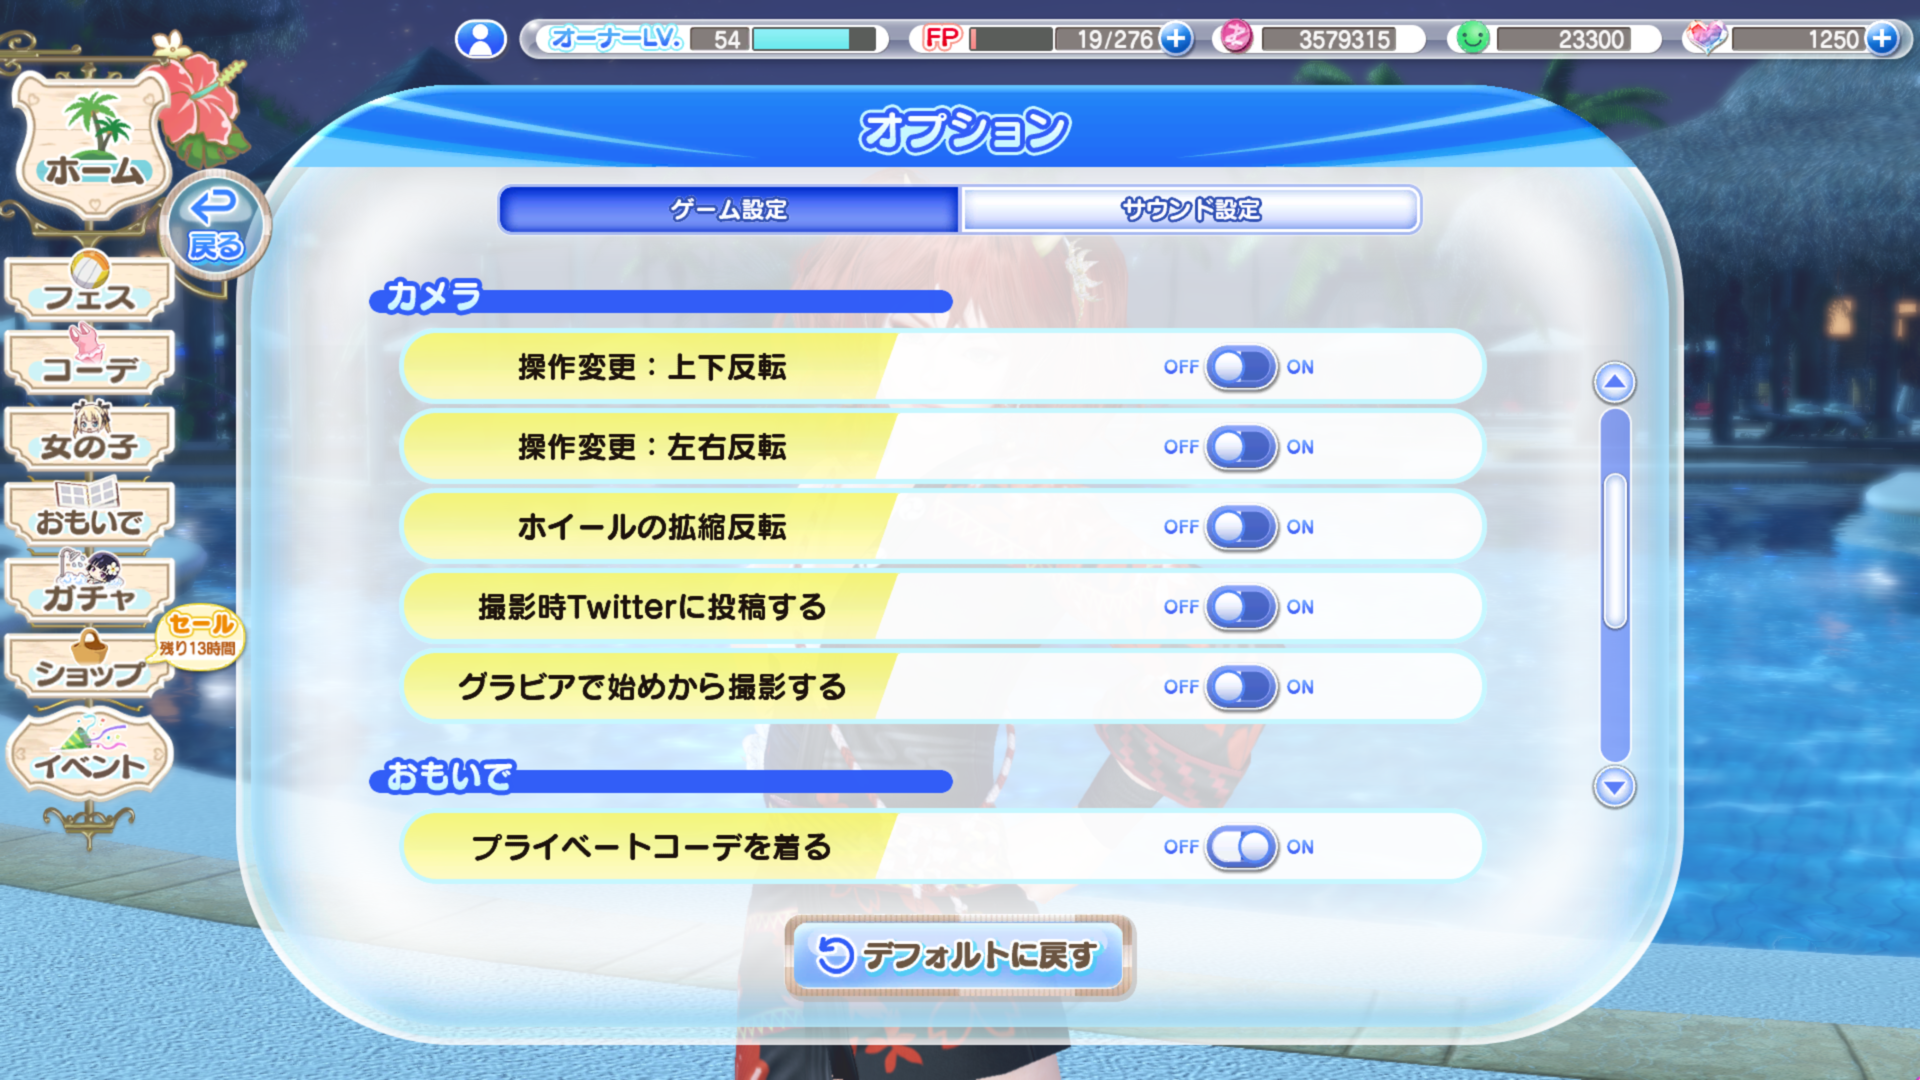 The last 2 Camera options on DMM are to upload pictures to Twitter and to start off in photo mode when viewing gravure panels.
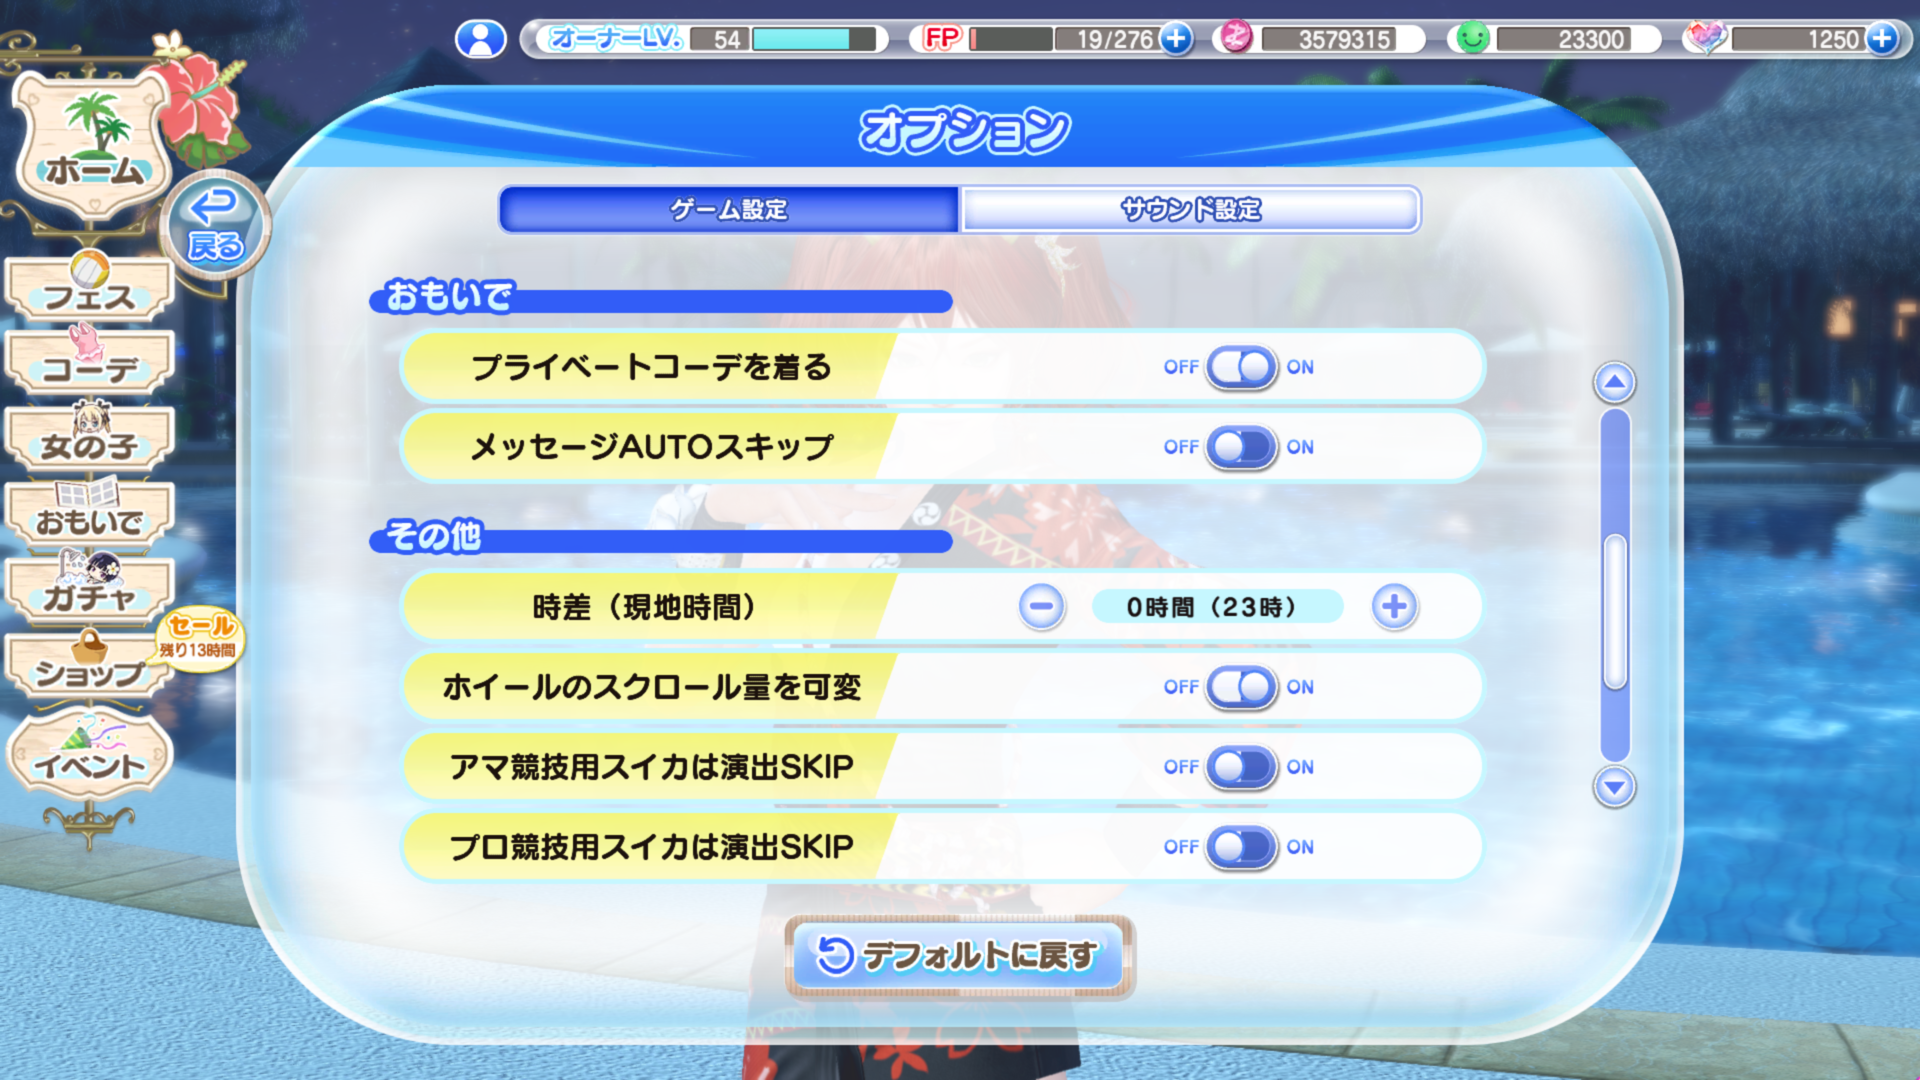 The section labeled "おもいで" is for memories, it's on the image in the section above, sorry for the inconvenience.
The "Other" section is the same as the Steam version minus the watermelon stuff.
The section labeled "おもいで" is for memories, it's on the image in the section above, sorry for the inconvenience.
The "Other" section is the same as the Steam version minus the watermelon stuff.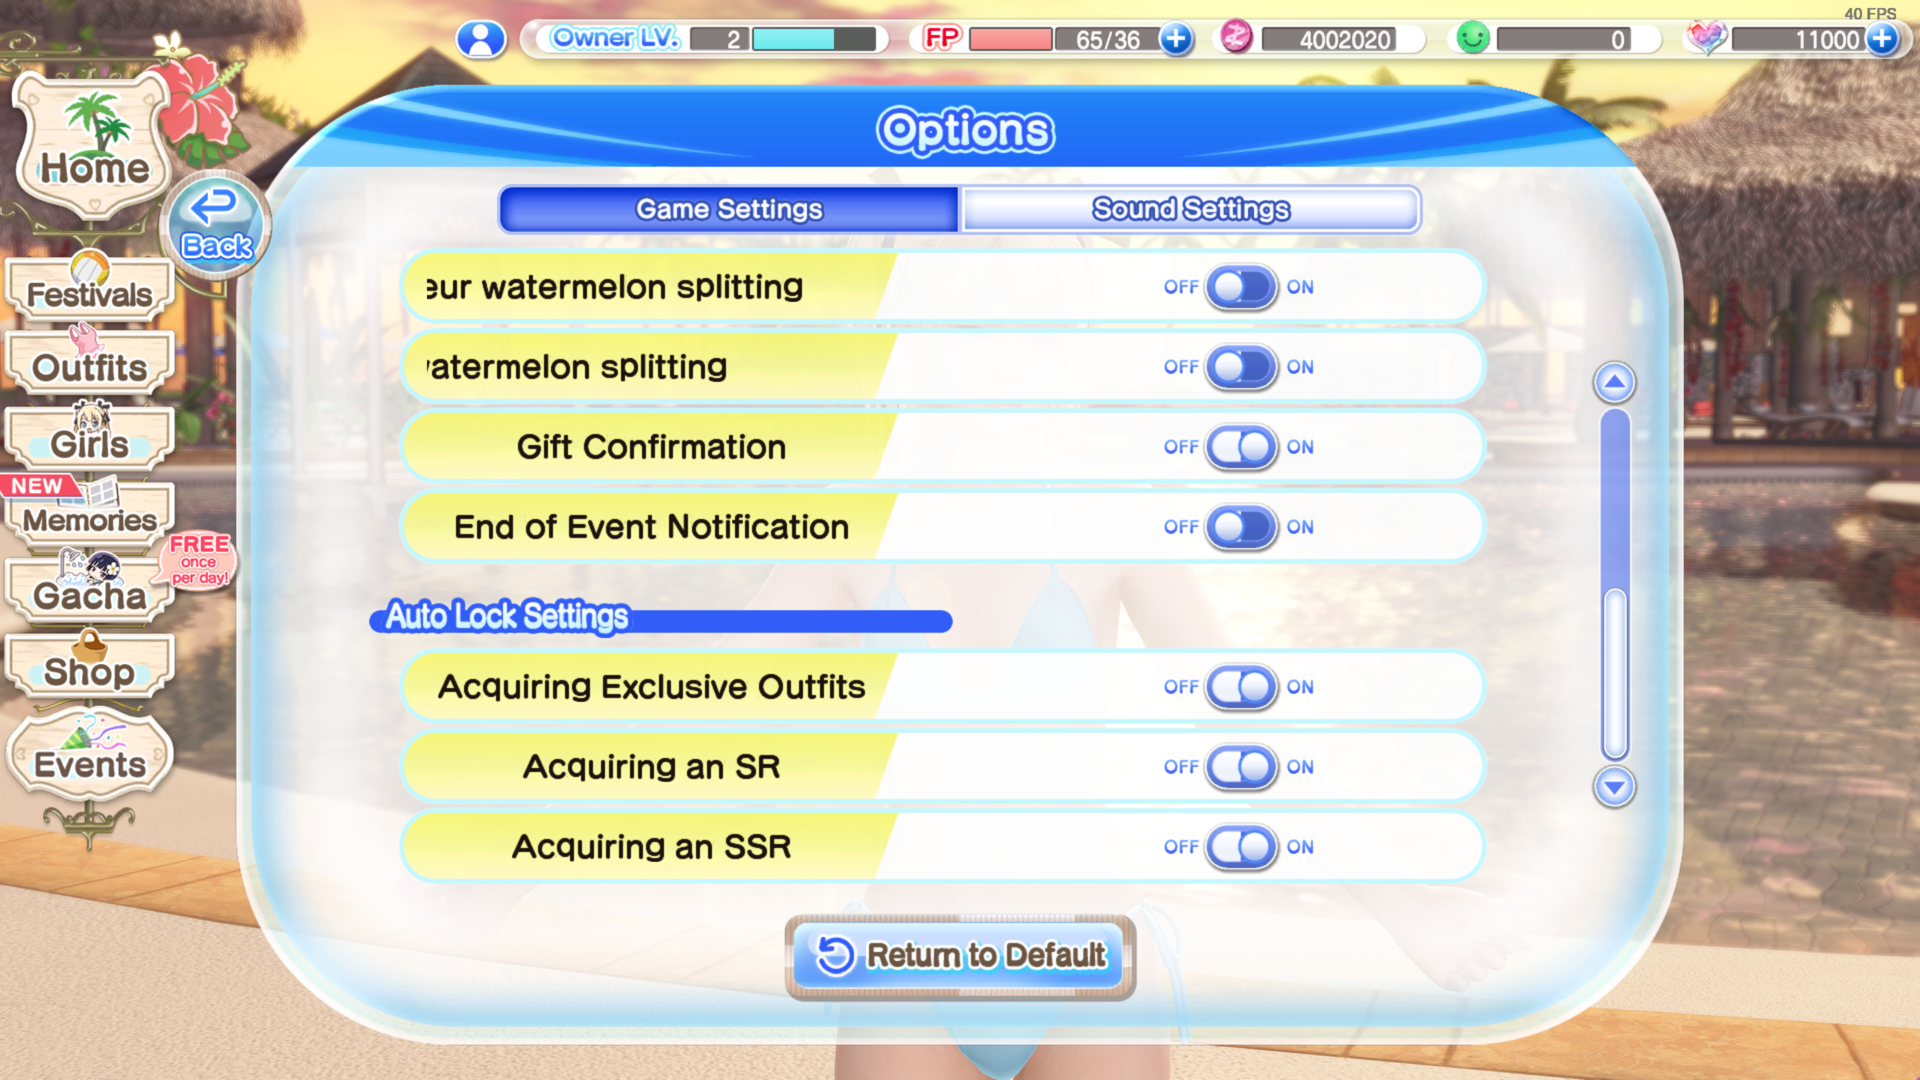
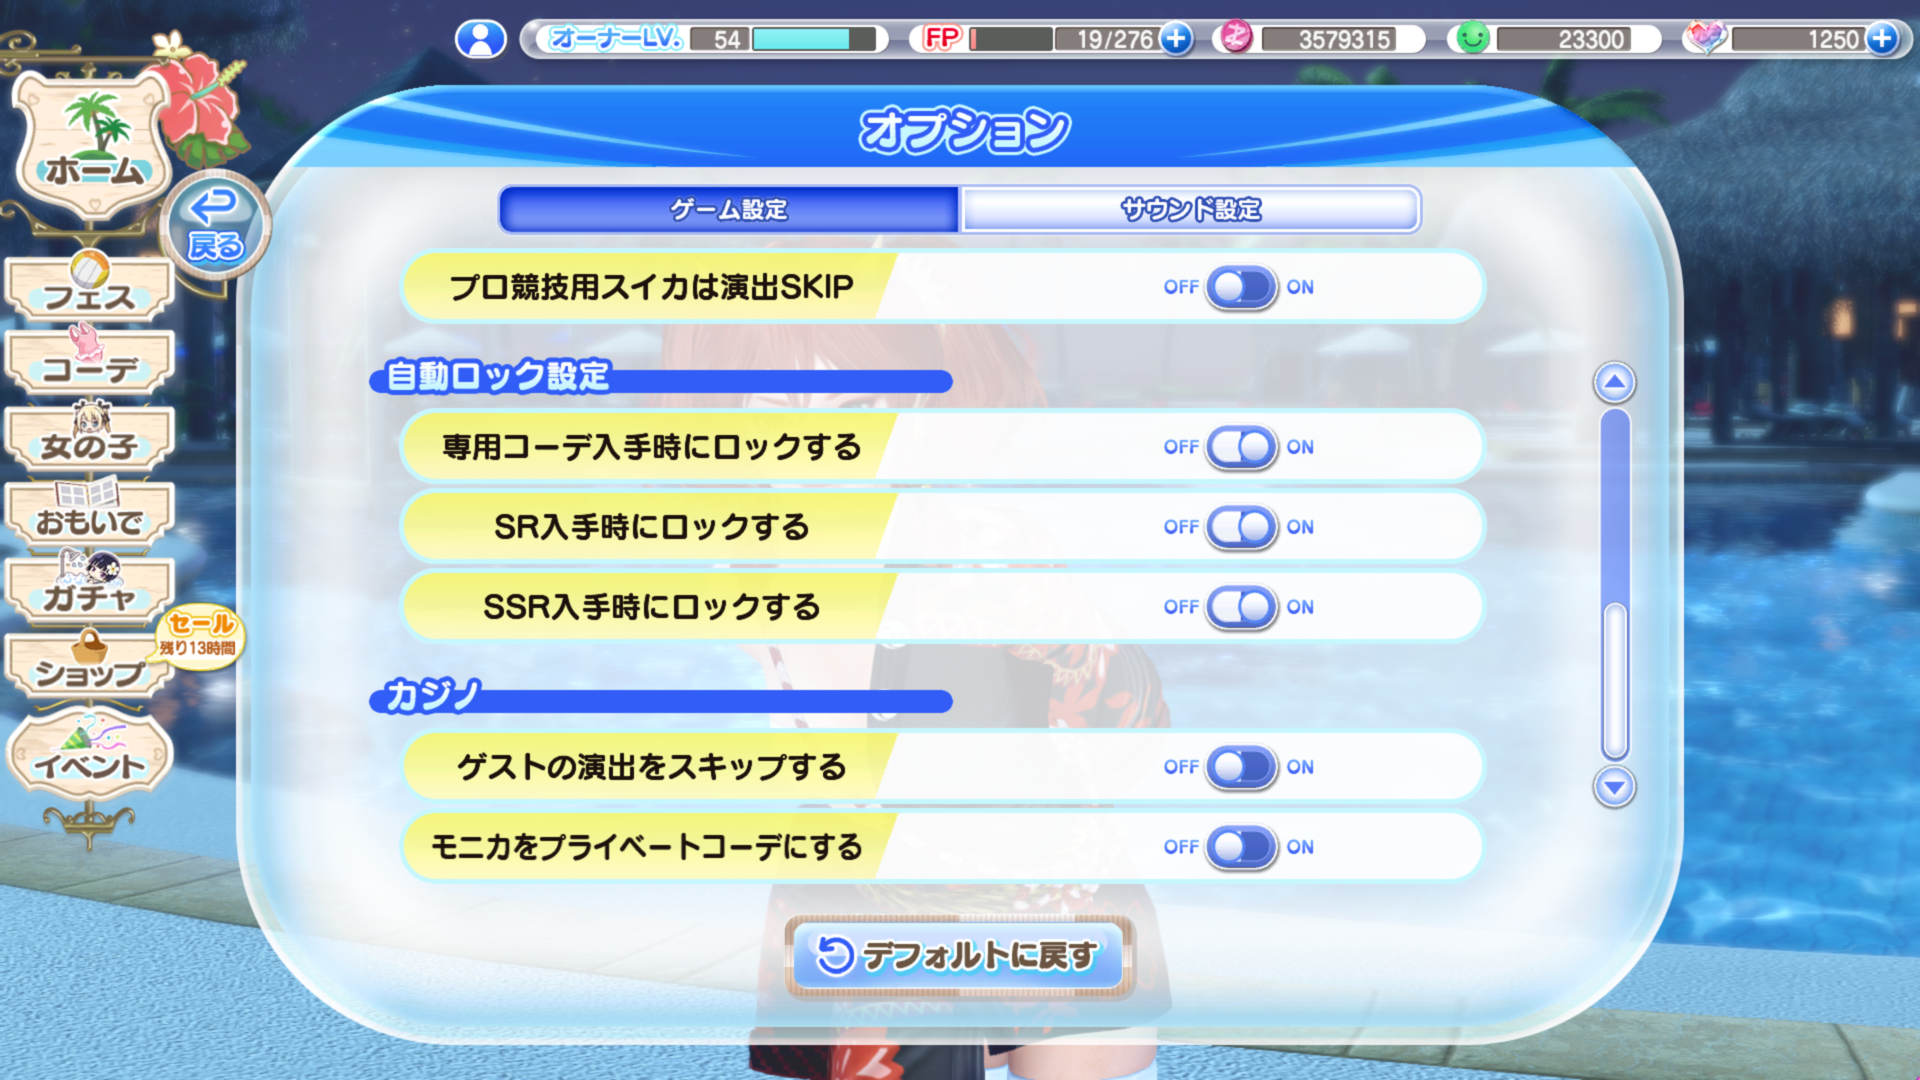 The top section is auto-lock settings, same as Steam. The last section on the bottom labeled "カジノ" is for Casino settings. The options are to auto-skip guest turns and to make Monica wear her private outfit (She otherwise wears her "Royal Flush" debut outfit.)
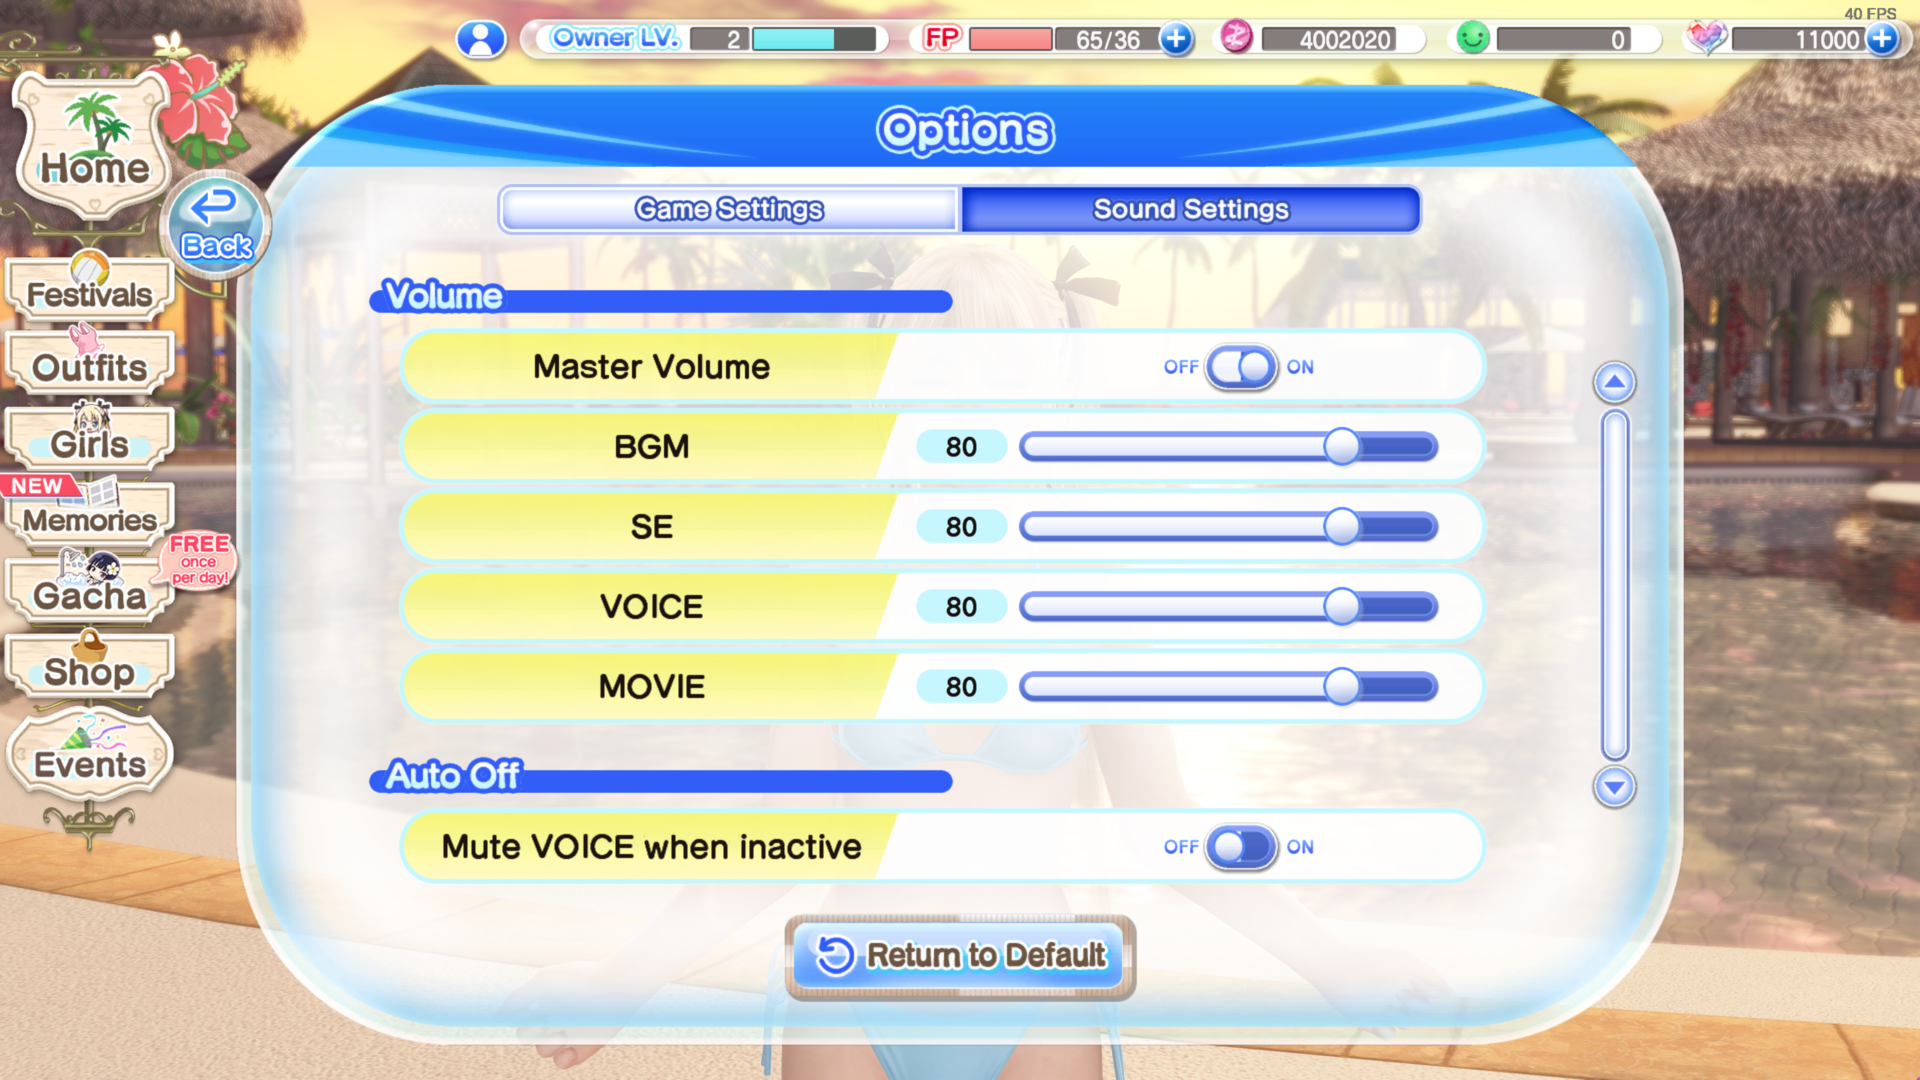
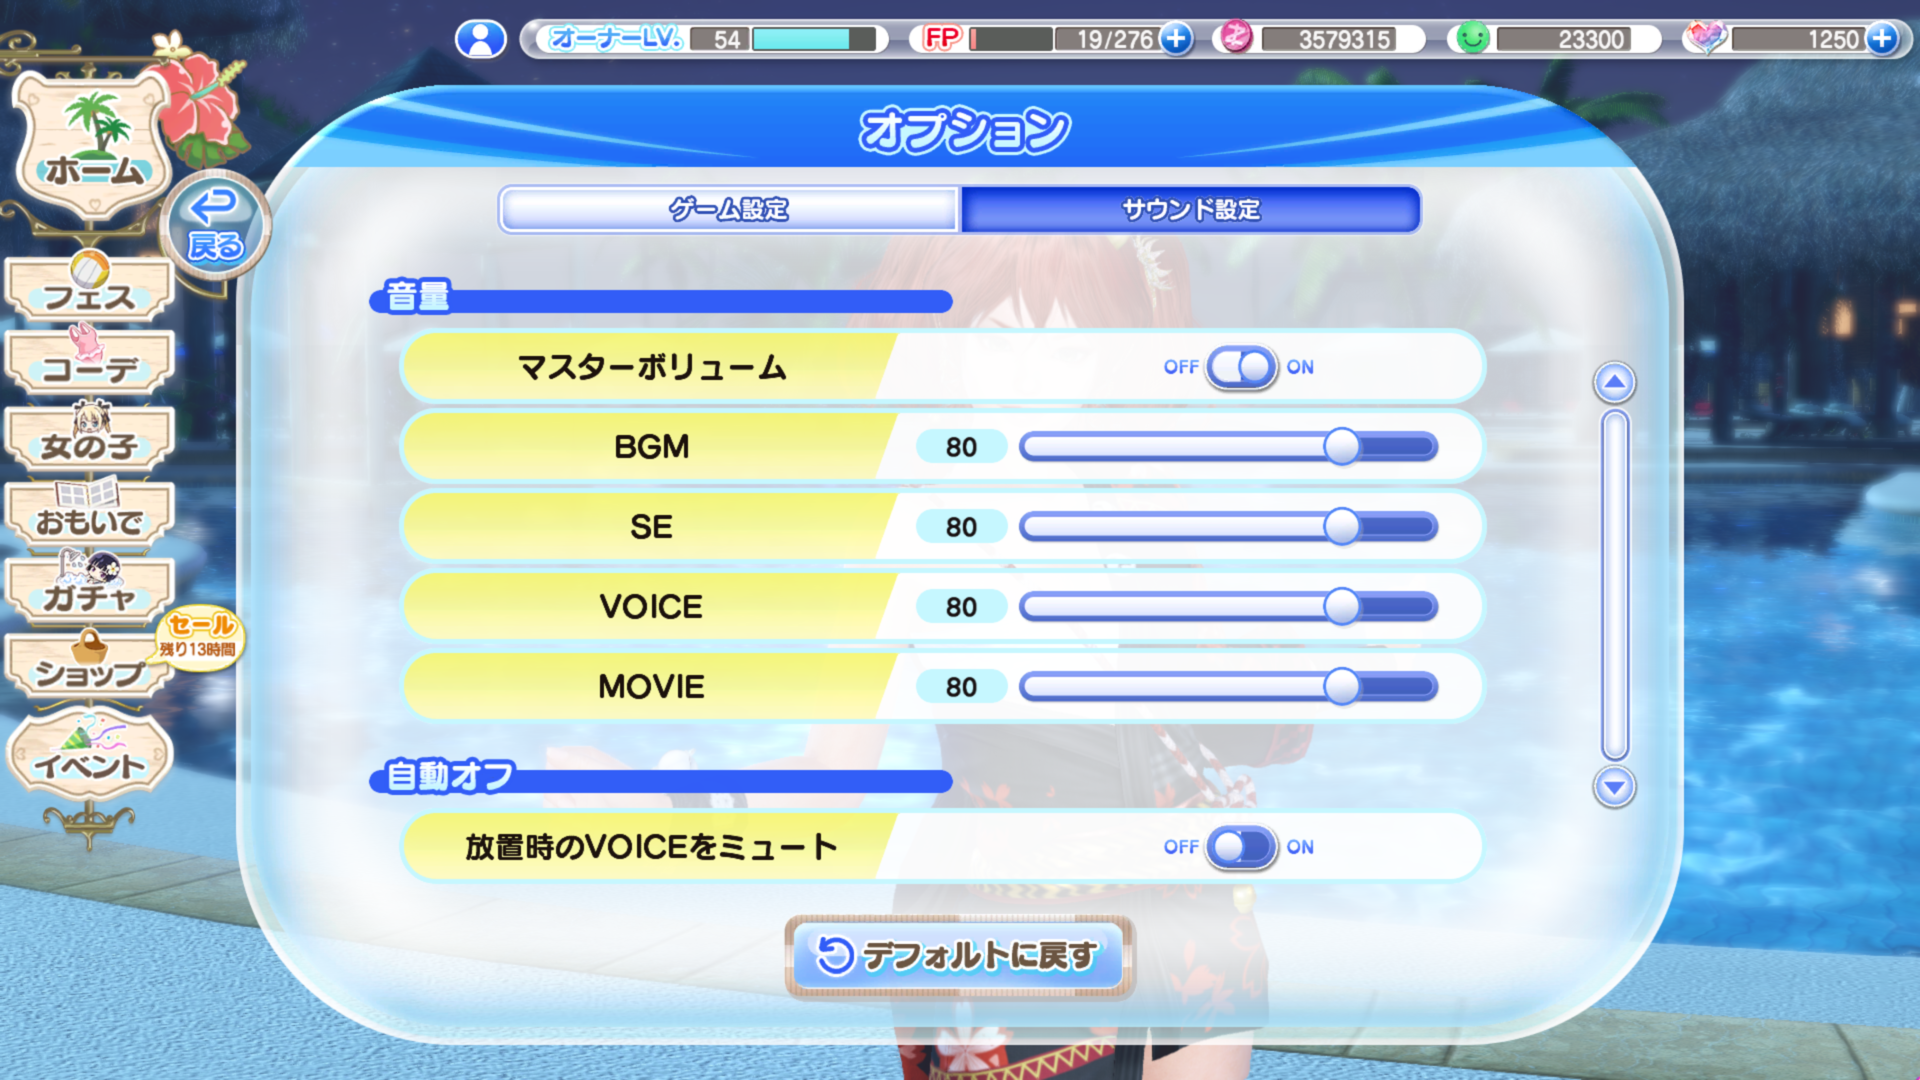 The second tab is for sound settings and while I'm guessing it might not have needed a translation here it is just in case. They're exactly the same.

This returns you to the title screen, I don't know why you'd want to use this since the only option from the title is to go back to the home menu but if you want it here it is.

This is the option to close the game, you can also do this from anywhere in-game by pressing ESC and pressing the "はい" button. (That might actually be in English since it pops up a system message rather than an in-game one)

This is where you go to enter any serial codes you may have for the game. DOAX3 Scarlet had a code for a Misaki SSR in it, future games may also feature codes. Aside from that I have heard they can be obtained from livestreams/comics. (Thanks to yamaneko_jp)
Festivals「フェス」
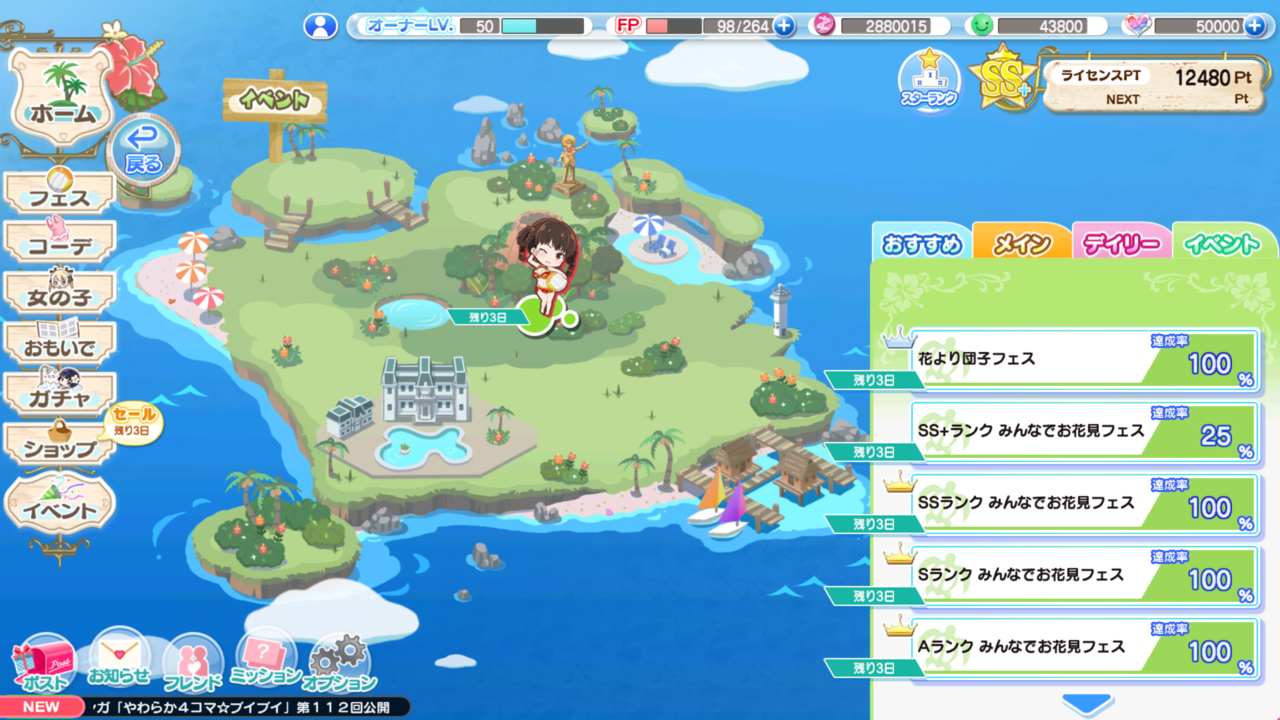 Festivals are where the bulk of the "gameplay" in this game lies. There are multiple types of festivals to play:
- おすすめ: Recommended - This will always have:
- The Daily Match(es).
- Your highest Main Match. If you have completed all the main missions then nothing will be here
- Your highest Event Match(es). If you have completed all your event matches the highest will still display here.
- Your last played match, good for farming.
- The Daily Match(es).
- メイン: Main - These are the main story missions, completing these will give you episodes as well as grant large amounts of points for Gravure Panels. These missions are always available however occasionally some events will reduce the FP cost of playing them by something like 50%.
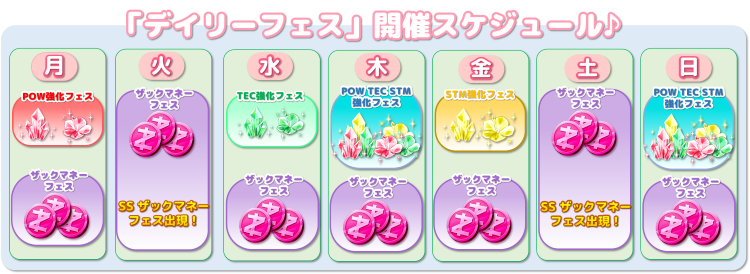
- デイリー: Daily - These missions change daily, they drop upgrade materials (except appeal) and Zack Money. These missions are occasionally discounted for events (50% FP) and further there are occasionally 50% cost 200% reward drops for Zack Money missions. For reference:
- 月曜: Monday - POW
- 火曜: Tuesday - Zack Money
- 水曜: Wednesday - TEC
- 木曜: Thursday - POW/TEC/STM
- 金曜: Friday - STM
- 土曜: Saturday - Zack Money
- 日曜: Sunday - POW/TEC/STM
- 月曜: Monday - POW
- イベント: Event - These are event missions, they (usually) change weekly. These missions should be prioritized as they are your primary source of free V-Stones and their shops tend to have very good items. (which means you need to farm for currency) Event currency expires at the same time the shop does. (~ a couple of weeks after the event ends)
Event missions will have a message saying "残り X 日" in the bottom left corner where "X" a number, this shows how many days are left in the event. When there is less than one day left it will shift to hours and then minutes when they are no hours left.
A silver crown next to an event mission means you have completed all missions in that rank, a gold crown means you have completed all missions with an "S" rank.
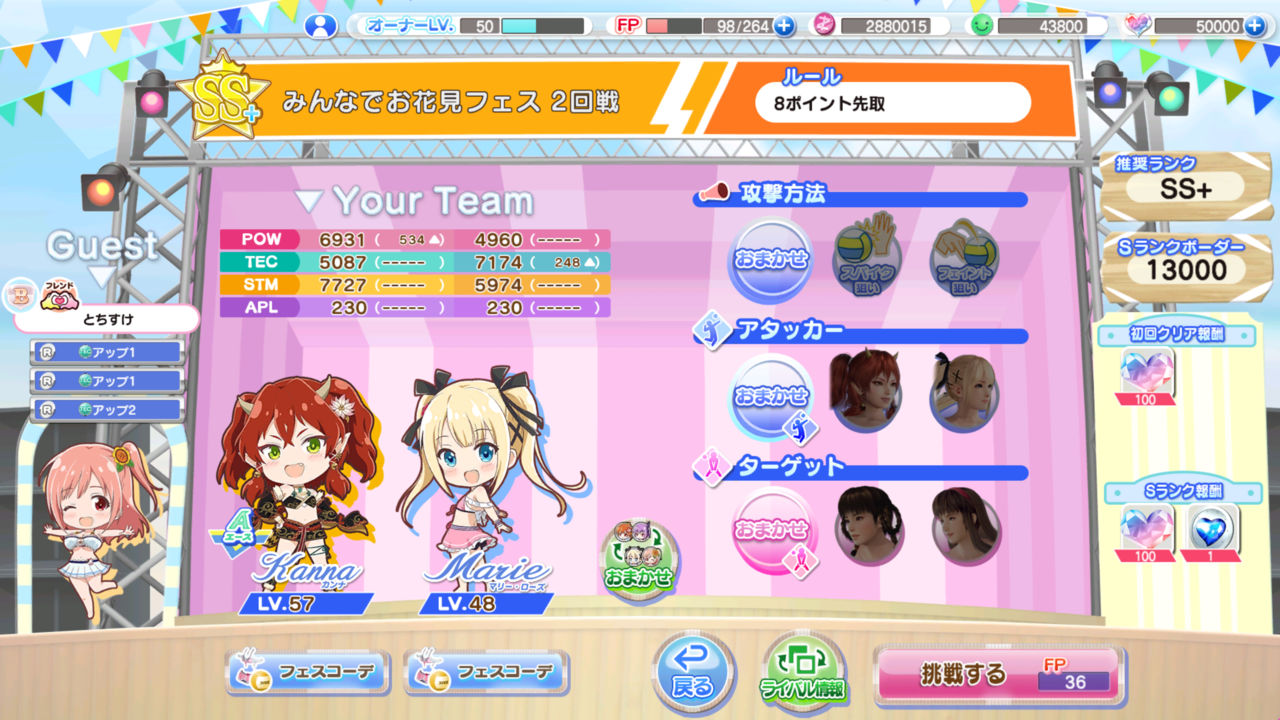
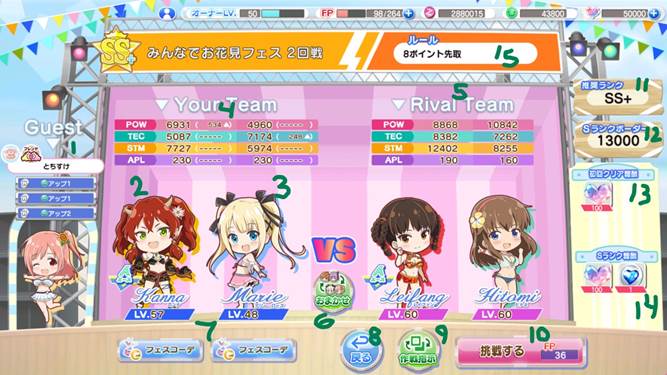 This is the match menu, there are a few things here so I numbered them to make it easier to go through them all:
- Guest - This is a character borrowed from either a friend or a stranger online. The game defaults to friends but if you run out then it's the latter, you can send strangers friend requests after matches. This is who you will (usually) be able to switch in during a match.
Note:If your guest is the same as one of the characters on your team then you must swap out that character if you choose to use them. (can't have 2 characters playing on the same side at the same time)
- Ace - This is the girl others will get as a guest when they choose you, it's generally nice to put any girls you have with trend suits here for your friends. They also get slightly more XP from matches (the amount that's listed in the result screen)
- Your Second girl - They won't be offered to anybody so you can have a weaker one you want to level/farm gravure panels for here.
- Your stats - These are the combined stats for each of your girls, stats being boosted (through skills or trend bonus) will be shown in parentheses.
- Opponent's stats - Use these to determine your strategy. (or not)
- I'll leave it to you - Lets the AI choose your team, don't do it...
- Shortcut to change festival clothing for the girls.
- Back - If you didn't figure it out yet...
- Strategy Menu:
- The first option selects their attack type (Automatic/Spike/Feint)
- The second option selects your attacker (Auto/Ace/Girl 2)
- The third option selects the target for your attacks (Auto/Girl 1/ Girl 2)
- The first option selects their attack type (Automatic/Spike/Feint)
- Start Match
- Rank of the match from F-SSS (Most of the time this starts off at E)
- Amount of appeal points you need to score to get an S rank for the match (You also need to win)
- First clear rewards, you get this the first time you win
- S rank clear reward, you get this the first time you get S rank on a match
- Rules, Tells you how many points you need to score to win. (Not to be confused with an actual set of rules)
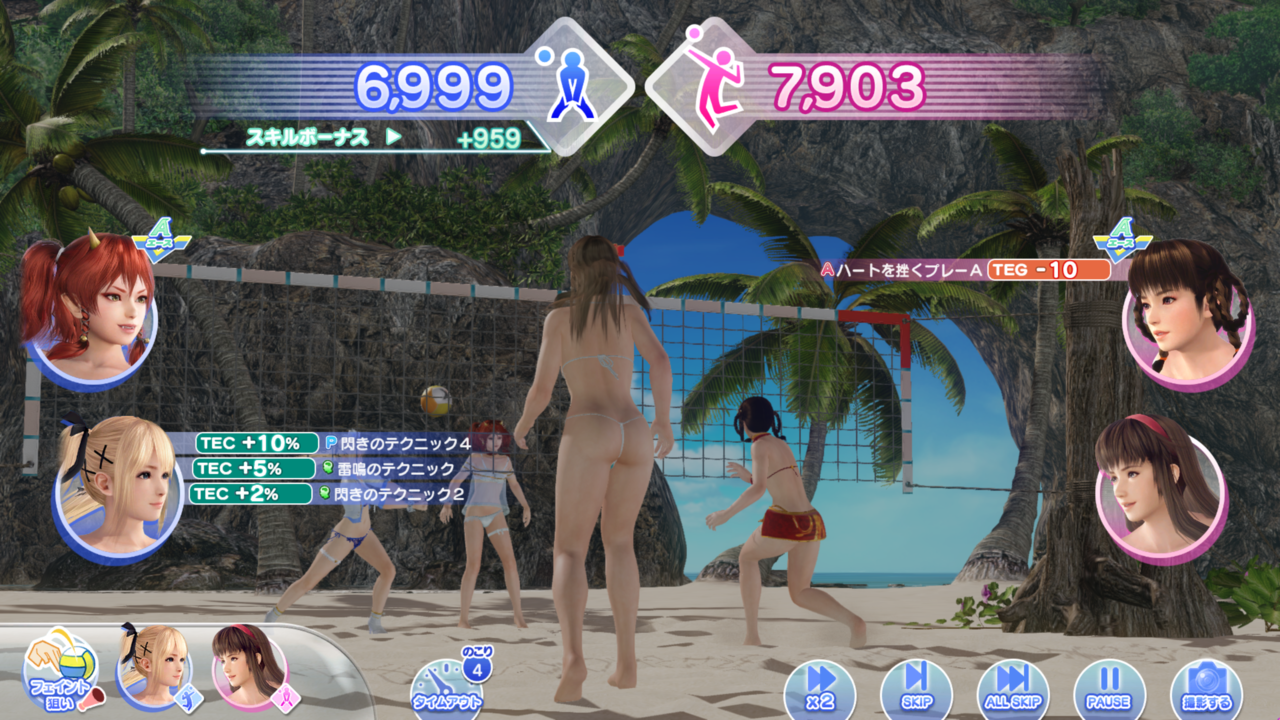 Once actually inside a match the goal is to score more points than your opponent, the more attack you have over them the more appeal points you get when you score.
When you attack an opponent, if your attack is less than or equal to your opponents then they will block the ball and it will be their turn to attack, you get a little tension every time this happens. Speaking of tension...
Once actually inside a match the goal is to score more points than your opponent, the more attack you have over them the more appeal points you get when you score.
When you attack an opponent, if your attack is less than or equal to your opponents then they will block the ball and it will be their turn to attack, you get a little tension every time this happens. Speaking of tension...
When your tension gauge fills up you can activate a Tension Burst, Burst increases POW and TEC by 50% for 2 turns, it's good for overpowering opponents to give you a chance to swap out a girl. Speaking of swapping out...
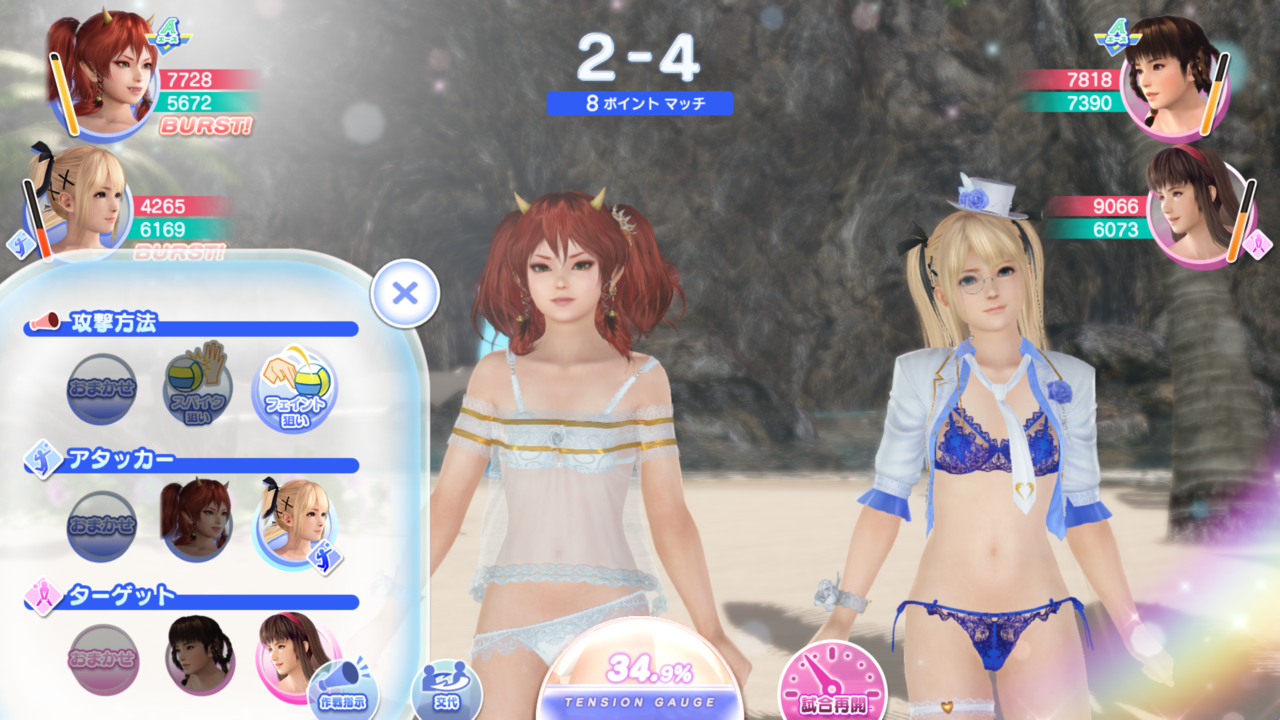
Timeouts are accessed by clicking the button in the bottom left labeled "タイムアウト", the number above it is how many you can use in a given match. Timeouts allow you to change strategies and swap a girl out for your guest (bottom left button that says "交代") this feature is extremely useful for high ranked matches since the swapped out girl will regenerate stamina, guests will last 2 turns save for tower events.
Since you only get them for 2 turns guest girls make good targets for burst since you won't have to deal with the downsides of it. I recommend only using a guest after you have scored a point to minimize the chance of the AI being able to target your other girl effectively making them useless. Also worth noting is that a guest will generate ~5% tension when swapped in so if you're just shy of a burst you don't need to worry about being a little short.
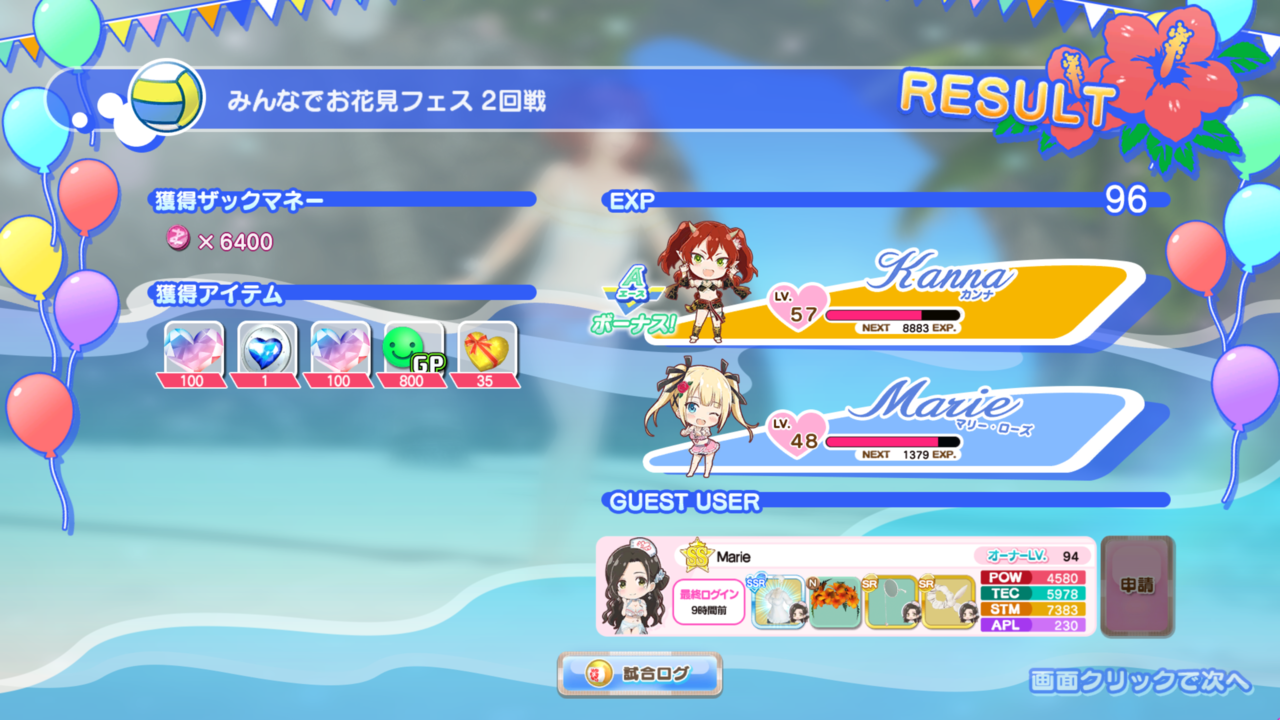
Once you finish a match you get a result screen looking something like this and there isn't a whole lot to explain here. You get shown your rewards, your girls get XP (barely), and there's a pink button at the bottom next to your guest girl that will let you send their owner a friend request.
Worth noting your second girl will make 50% less XP than the listed amount. Trend suits give a 50% XP bonus. If the reduction/increase would cause you to make a fraction of an experience point the game will round to the nearest whole number.
License Ranks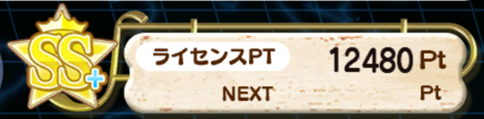 License Ranking is increased by playing through all the main missions up until SS Rank. After completing all main missions most players will be somewhere between SS- and SS+ with the highest rank being SSS+. Licenses are upgraded past S+ by playing matches, players are ranked on a leaderboard that updates daily and resets weekly and as such these ranks are very volatile. There's no real reason to reach SSS+ aside from a title, I'd recommend waiting until you have 2 trend SSR outfits if you want to farm for it.
Auto-Skip Toggle
License Ranking is increased by playing through all the main missions up until SS Rank. After completing all main missions most players will be somewhere between SS- and SS+ with the highest rank being SSS+. Licenses are upgraded past S+ by playing matches, players are ranked on a leaderboard that updates daily and resets weekly and as such these ranks are very volatile. There's no real reason to reach SSS+ aside from a title, I'd recommend waiting until you have 2 trend SSR outfits if you want to farm for it.
Auto-Skip Toggle  A recent update added a new button that toggles an auto skip feature, this is separate from all skip as it simply hits the skip button over and over. If might be slightly better for farming with auto burst on.
Events「イベント」
This section will cover the mechanics of the various events in the game (As they occur and I can take pictures) since some of them have some more obscure mechanics that might be hard to understand.
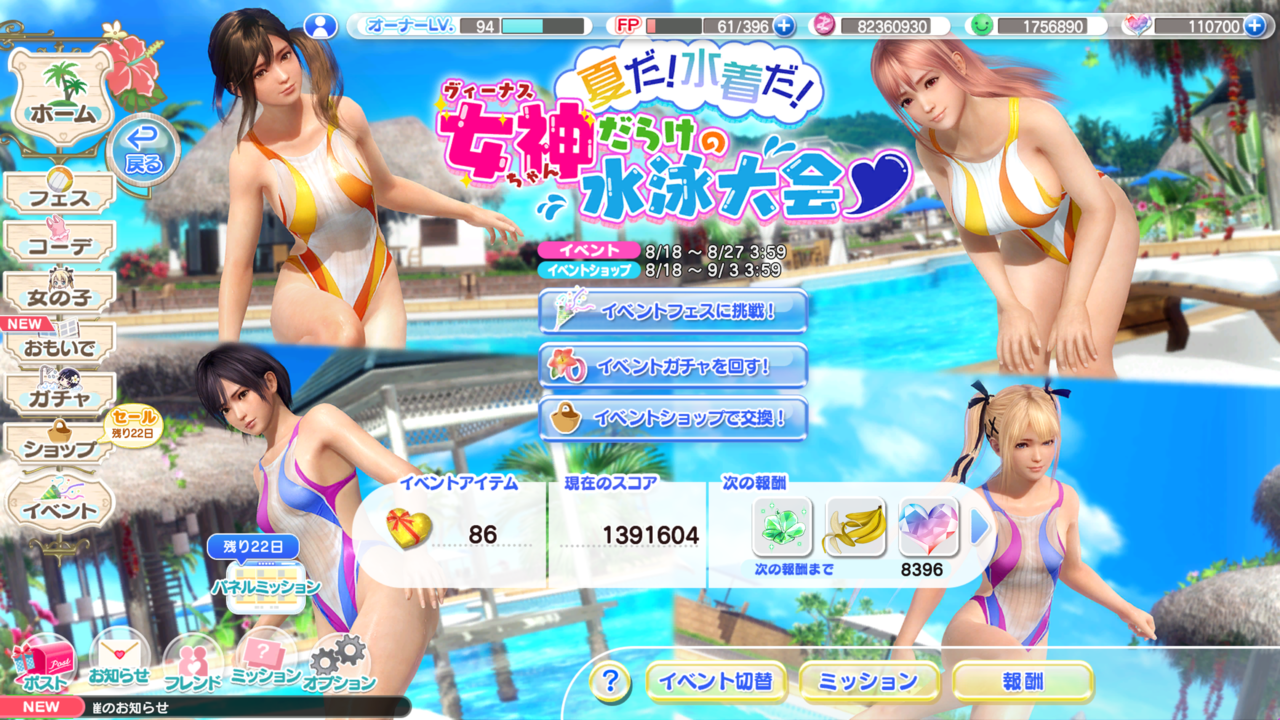 Nothing super special here, this is the category that most PvE events will fall under. Basically the only goal here is to play event matches for event currency so you can buy items from the event shop.
The top notification in pink that says「イベント」lists the event's start and end time, this is in JST. The bottom notification in blue that says「イベントショップ」does the same but for the event shop, which usually lasts a little longer.
Clicking the three buttons in the middle will take you to:- The Event Festival Page
- The current trendy gacha
- The Event Shop
It's worth checking the news section as these events might have special rewards for doing missions or maybe new items are added to certain shops but broadly speaking they all have the same gameplay loop so I'm gonna lump them all together here.
Rock Climbing「ロッククライミング」
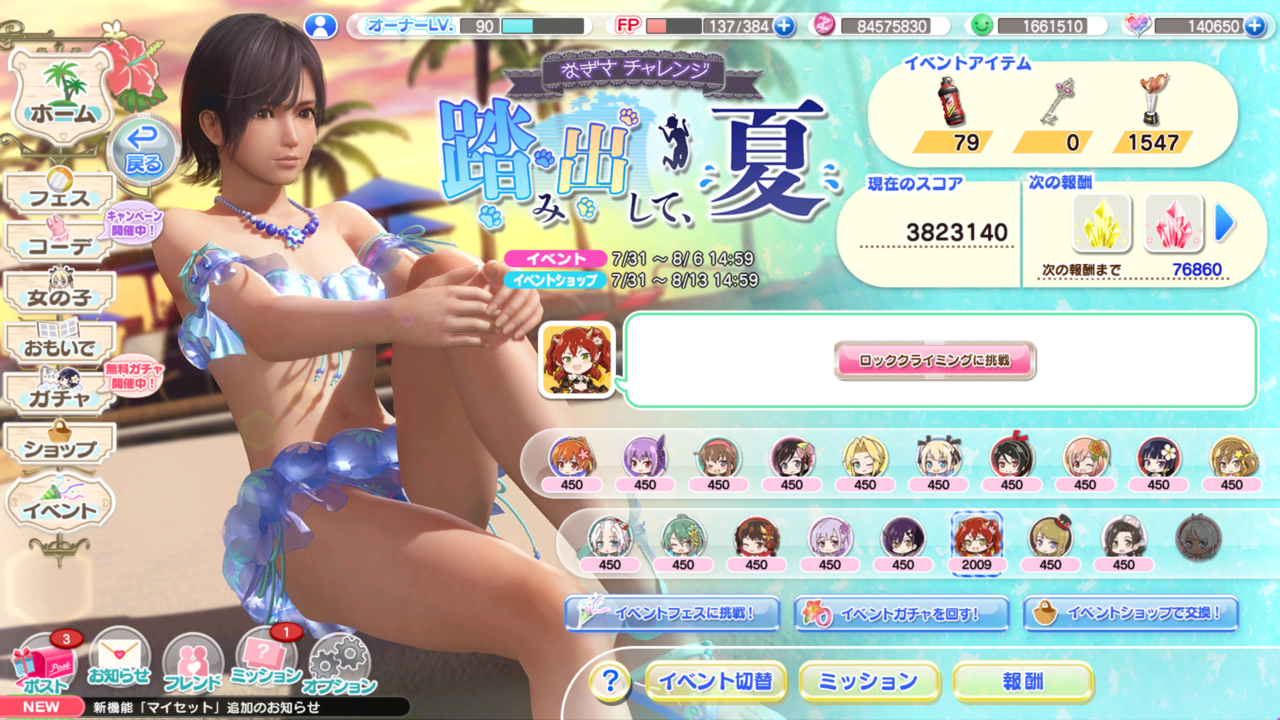 Rock Climbing events are where you can upgrade your potentials and feature several unique mechanics. To start, click the event 「イベント」button in the drop-down menu and you will see a screen like this instead of the usual event menu. This makes them immediately recognizable compared to other events.
Selecting any girl on the list and clicking the pink button reading 「ロッククライミングに挑戦」 will award her a special event potential and bring you to a screen where you can decide what potential you want to upgrade.
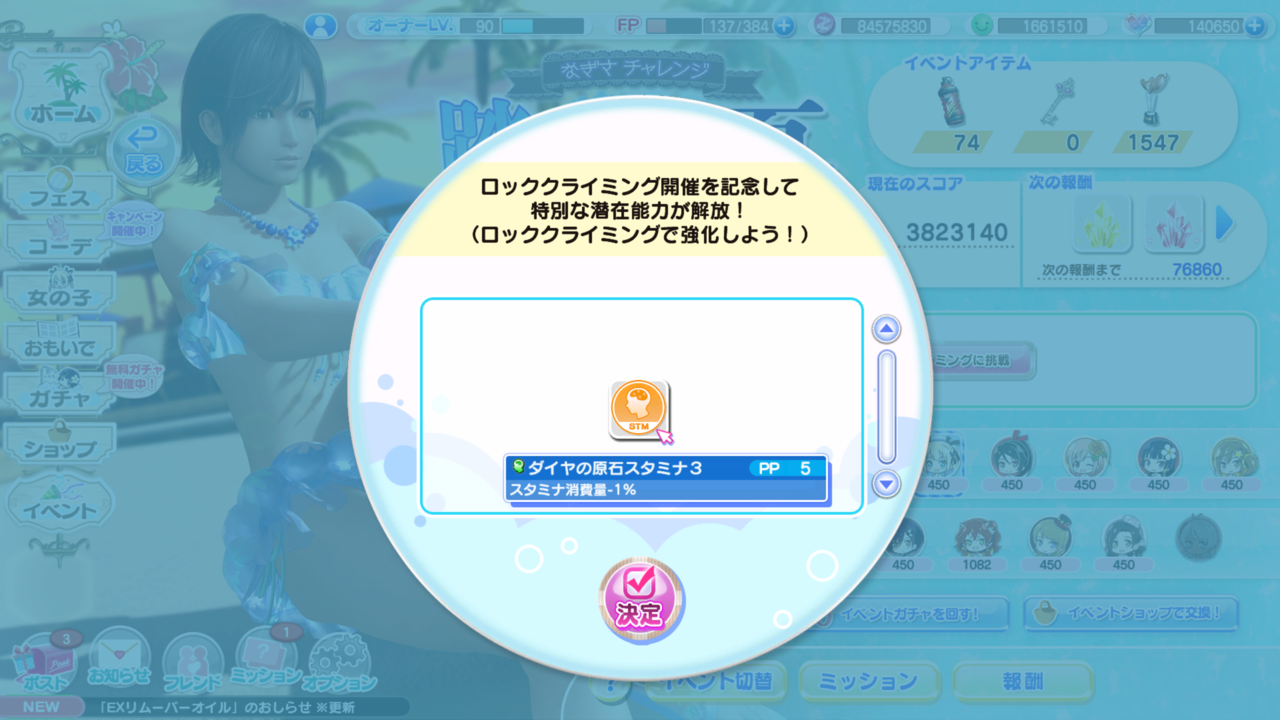
Note: The first time you press this button for each girl in the event they will get the potential (It's always the same for the event) so you might want to just get it out of the way at the start so you can get a free potential for everyone. The potential is usually pretty mediocre however they have a special property which will be discussed a little later.
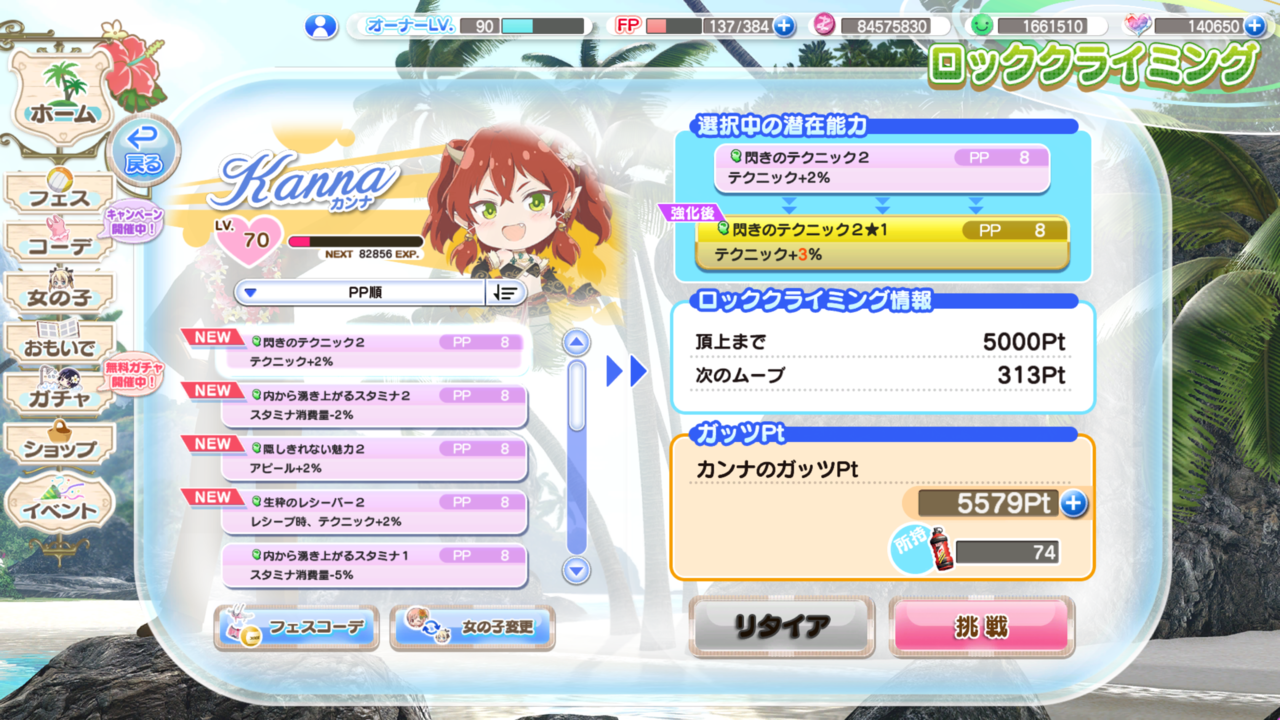 On this screen you will see a list of all the potentials you have unlocked on the girl you selected.
Note: Potentials that modify behavior such as Angel Spike/Fairy Feint cannot be upgraded and will appear greyed out at the bottom of the list.
By clicking on a potential in this list you will see it's current level and what it will become once you complete the round of Rock Climbing.
Note: Potentials change color based on their upgrade progress:- Unupgraded - Pink
- Non-Fully Upgraded - Gold
- Fully Upgraded - Diamond (Blue)
Additionally the section in white lists the total Guts Points required to complete the entire course (top) and the Guts Points required for you to make your next move (bottom)
The section in orange is the amount of Guts Points you currently have, this number is the same as the numbers listed under the girl's icons in the event page. By pressing the "+" Button you will be able to use Guts Drinks before a round of rock climbing, the total you're able to use is limited to however many you need to complete the round. If you choose not to do this you will be prompted to during the round when your girl runs out.
Guts Points: Guts Points are a special type of stamina used by Rock Climbing events, the only "cap" to it is based on how many you need to complete a Rock Climbing Course. Guts Points are refilled by using Guts Drinks which are obtained from the event shop. There are usually 2 types of drinks in the shop: A cheaper limited one and a more expensive one with no purchase limit, you should buy the cheap one first.
The amount of Guts Points awarded from consuming a Guts Drink is equal to 10% of your Girl's STM. This means before using them you should equip your girl with a STM suit and give her STM Accessories for the most benefit. Trend bonuses and Softening Skills also apply here so get her STM as high as you can.
Tip: A fun cheat if you have nothing better to do with your VIP Points and happen to have STM EX Oils is to give them to a girl, use her for climbing, and when you finish use a EX Remover Oil from the VIP Shop to get them back and give them to another girl to repeat. This is fairly expensive to do but if you have a lot of resources it's fun to try.
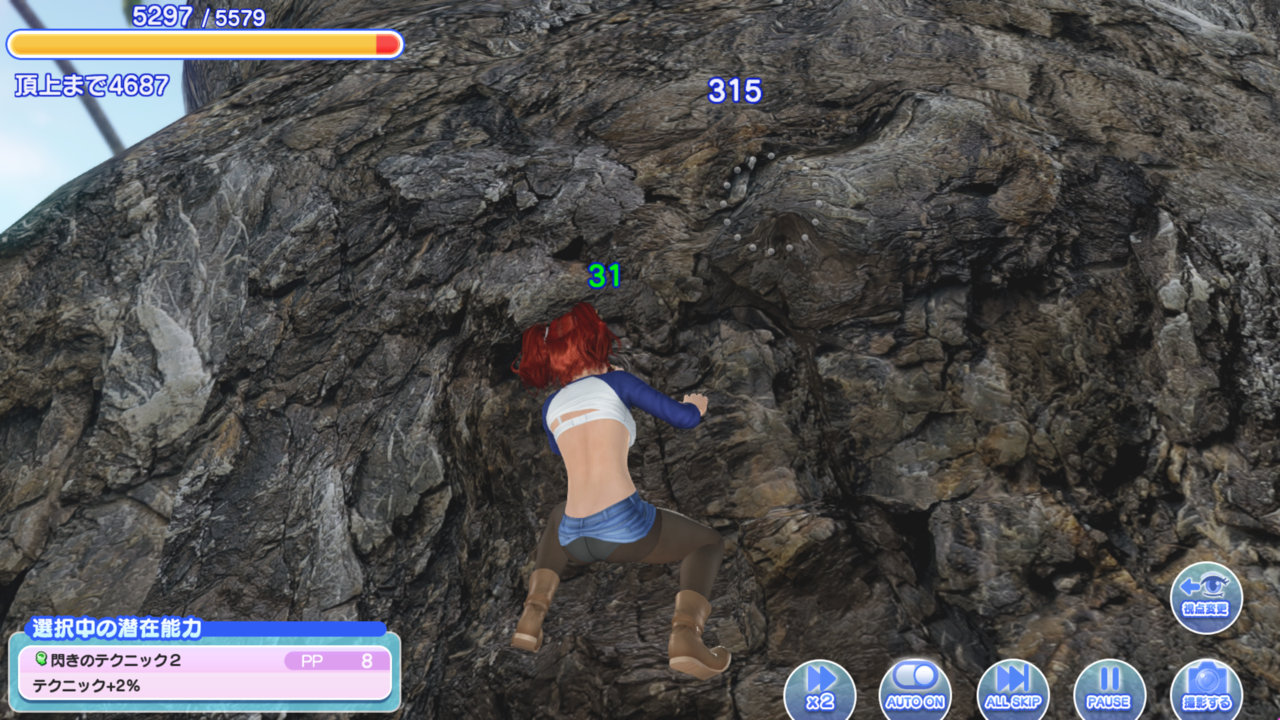
Clicking the pink button at the bottom that says 「挑戦」 will start the course and you will be brought to a screen like this.
From here you can see the potential you are upgrading (bottom left), your total Guts Points (top left), the cost of your next move (white number), the amount of Guts Points restored (green number) and some controls for the speed of the animation itself + photo mode access (with some limited options).
Restoring Guts Points:
Rock Climing events allow you to restore Guts Points by having your girls cheer for the one climbing. There is a limit of 3 girls you can have cheering at once, the girls used are: The last two girls you used in a festival match and your partner (Home Screen Girl). For all 3 to appear none of them can be the same girl and none of them can be the girl doing the climbing.
For each trend item your cheering girls have equipped your climbing girl is given a flat 5% refund of what she used to get to that point (IE if a step requires 300 points to reach and you have 2 girls in a trend suit then you will get 10% back or 30 points). The bonus is the same regardless of the rarity of the item which means at most each girl can give a 10% total bonus for equipping the trend SSR suit and trend SR accessory,
Difficult Route Keys: Eventually you will need to pay to start a route in these items. While the number of keys required per round might vary based on the PP of the potential you are upgrading the total number of keys required to fully upgrade a potential is always 8 with the sole exception being the free potentials given to you by the event, these require 0 keys and are a good way to blow through excess event currency when you run out.
These keys come from various sources including: The Event Shop, Login Rewards, Event Score Rewards, and Event Missions. The total per event is usually around 24. (Enough for 3 potentials to be upgraded)
Important: Once you choose to challenge a course you will be locked into that course and unable to select other girls/potentials to upgrade. You may choose to leave a course at any time by clicking the 「リタイア」 button however any progress you made and items spent including keys will be lost.
Note: You should usually focus on upgrading your most expensive potentials first as they have the highest stat boosts when fully upgraded:- 14PP - 30% Boost
- 13PP - 27% Boost
- 12PP - 24% Boost
- 8PP - 14 or 15% Boost (depends on base % 2 = 14 and 5 = 15)
- 5PP - 6 or 9% Boost (depends on base % 1 = 6 and 6 = 9)
- 4PP - 7% Boost
Note: A 12PP potential can be 10% or 11% but it has no impact on the final upgraded %. (It will always be 24%) Total Guts Points Required per potential:
- 13PP - 5,000(+2%) + 10,000(1 Key)(+2%) + 10,000(1 Key)(+2%) + 10,000(1 Key)(+2%) + 10,000(1 Key)(+2%) + 20,000(2 Keys)(+3%) + 20,000(2 Keys)(+3%) = 85,000 Points
- 12PP - 5,000(+1%) + 10,000(1 Key)(+1%) + 10,000(1 Key)(+2%) + 10,000(1 Key)(+2%) + 10,000(1 Key)(+2%) + 20,000(2 Keys)(+2%)* + 20,000(2 Keys)(+3%) = 85,000 Points
- 8PP - 5,000(1 Key)(+1%) + 10,000(1 Key)(+1%) + 20,000(2 Keys)(+2%) + 20,000(2 Keys)(+3%) + 20,000(2 Keys)(+3%) = 75,000 Points
- 5PP - 20,000(4 Keys)(+1%) + 30,000(4 Keys)(+2%) = 50,000 Points
- 5PP (Event Potential, Has "Diamond" in name 「ダイヤ」) - 23,000 Points
- 4PP - 20,000(4 Keys)(+1%) + 30,000(4 Keys)(+1%) = 50,000 Points
Note: "X" is a placeholder until I can record those values. (Leave it to me to not think about this until I spend all my keys >.>) Hopefully in the future this will allow you to prepare accordingly.
Note 2: The value with an asterisk in the 12pp requirements was taken with an 11% potential, I think that value is also a +3% on 10% potentials but would need confirmation.
Note 3: 8PP Values taken from base 5% potential.
One final thing worth noting about these events is that the trend suits are almost always STM. This can be good if you need one but otherwise I'd check the stats/skills of the suits before rolling for them unless you really like how they look.
Skincare Events「イベント」
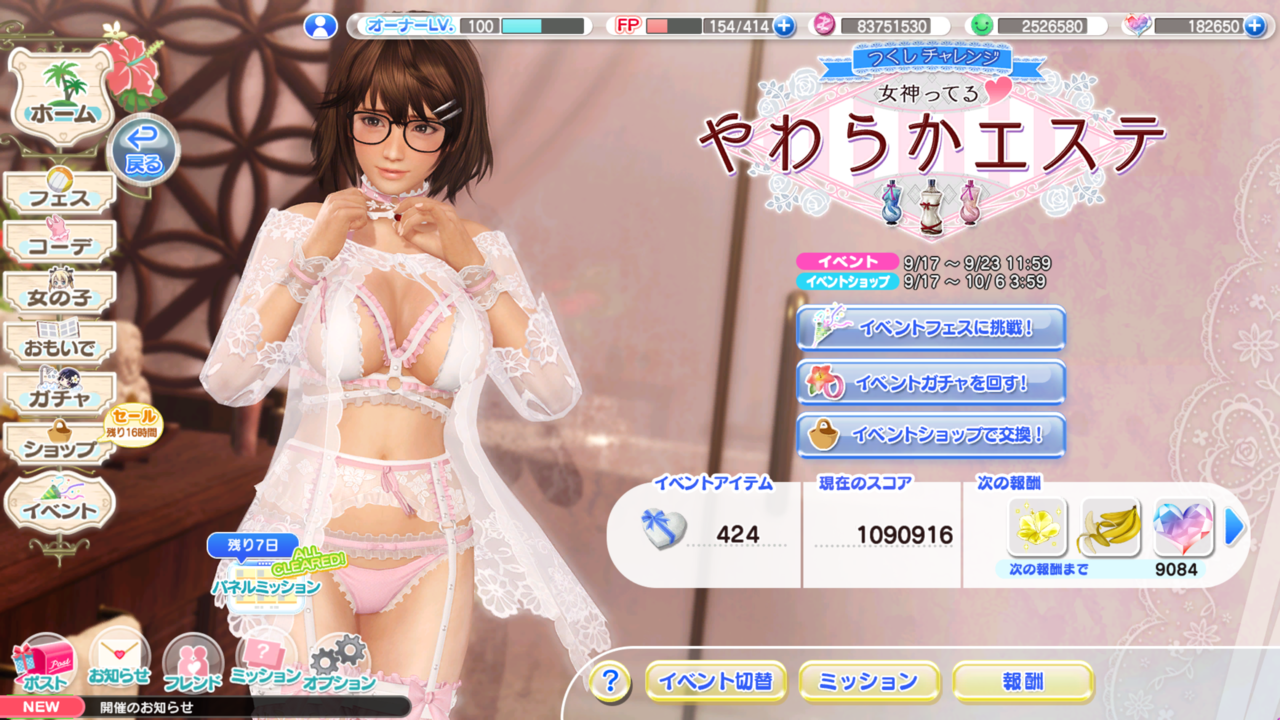 Skincare events allow you to control the impact of physics on individual characters as well as give them fairly large stat boosts that can be carried indefinitely. As far as the events themselves go these play like standard event matches however upon visiting the event shop you will see special skincare items: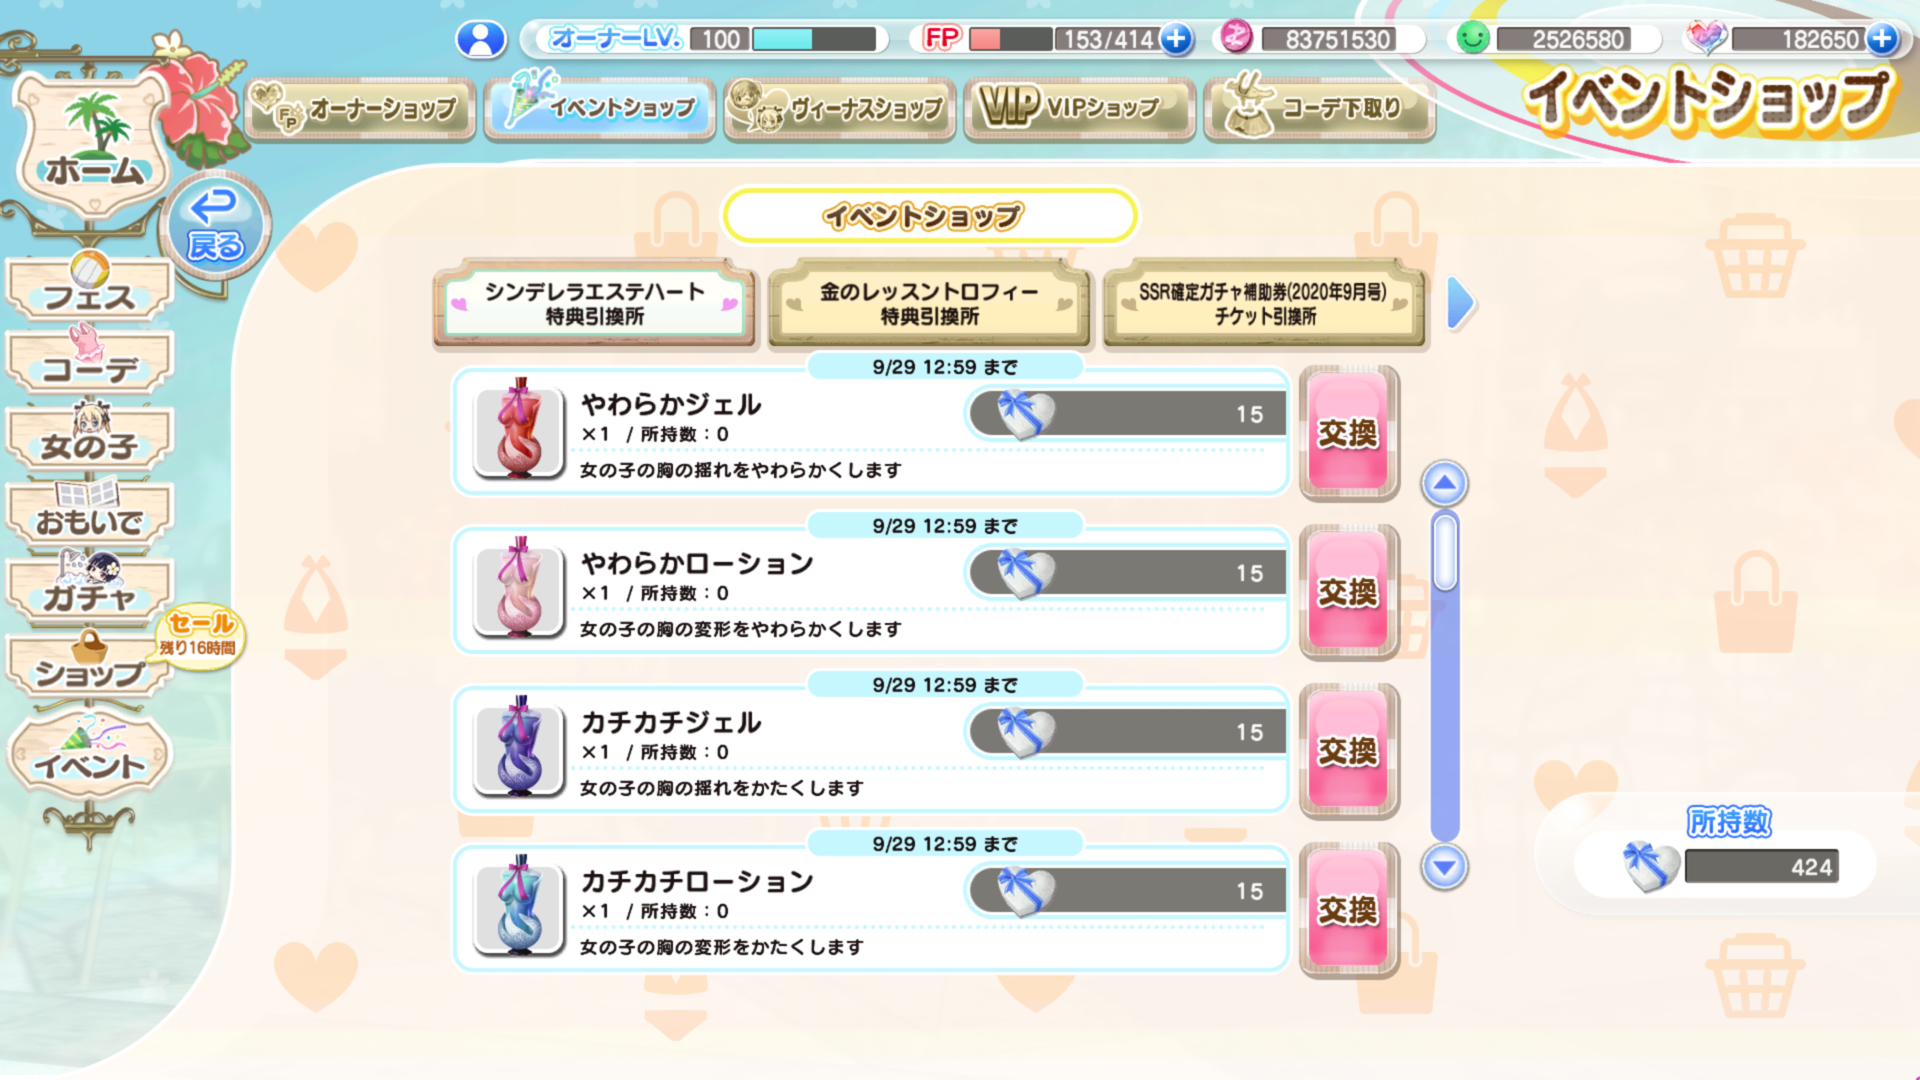
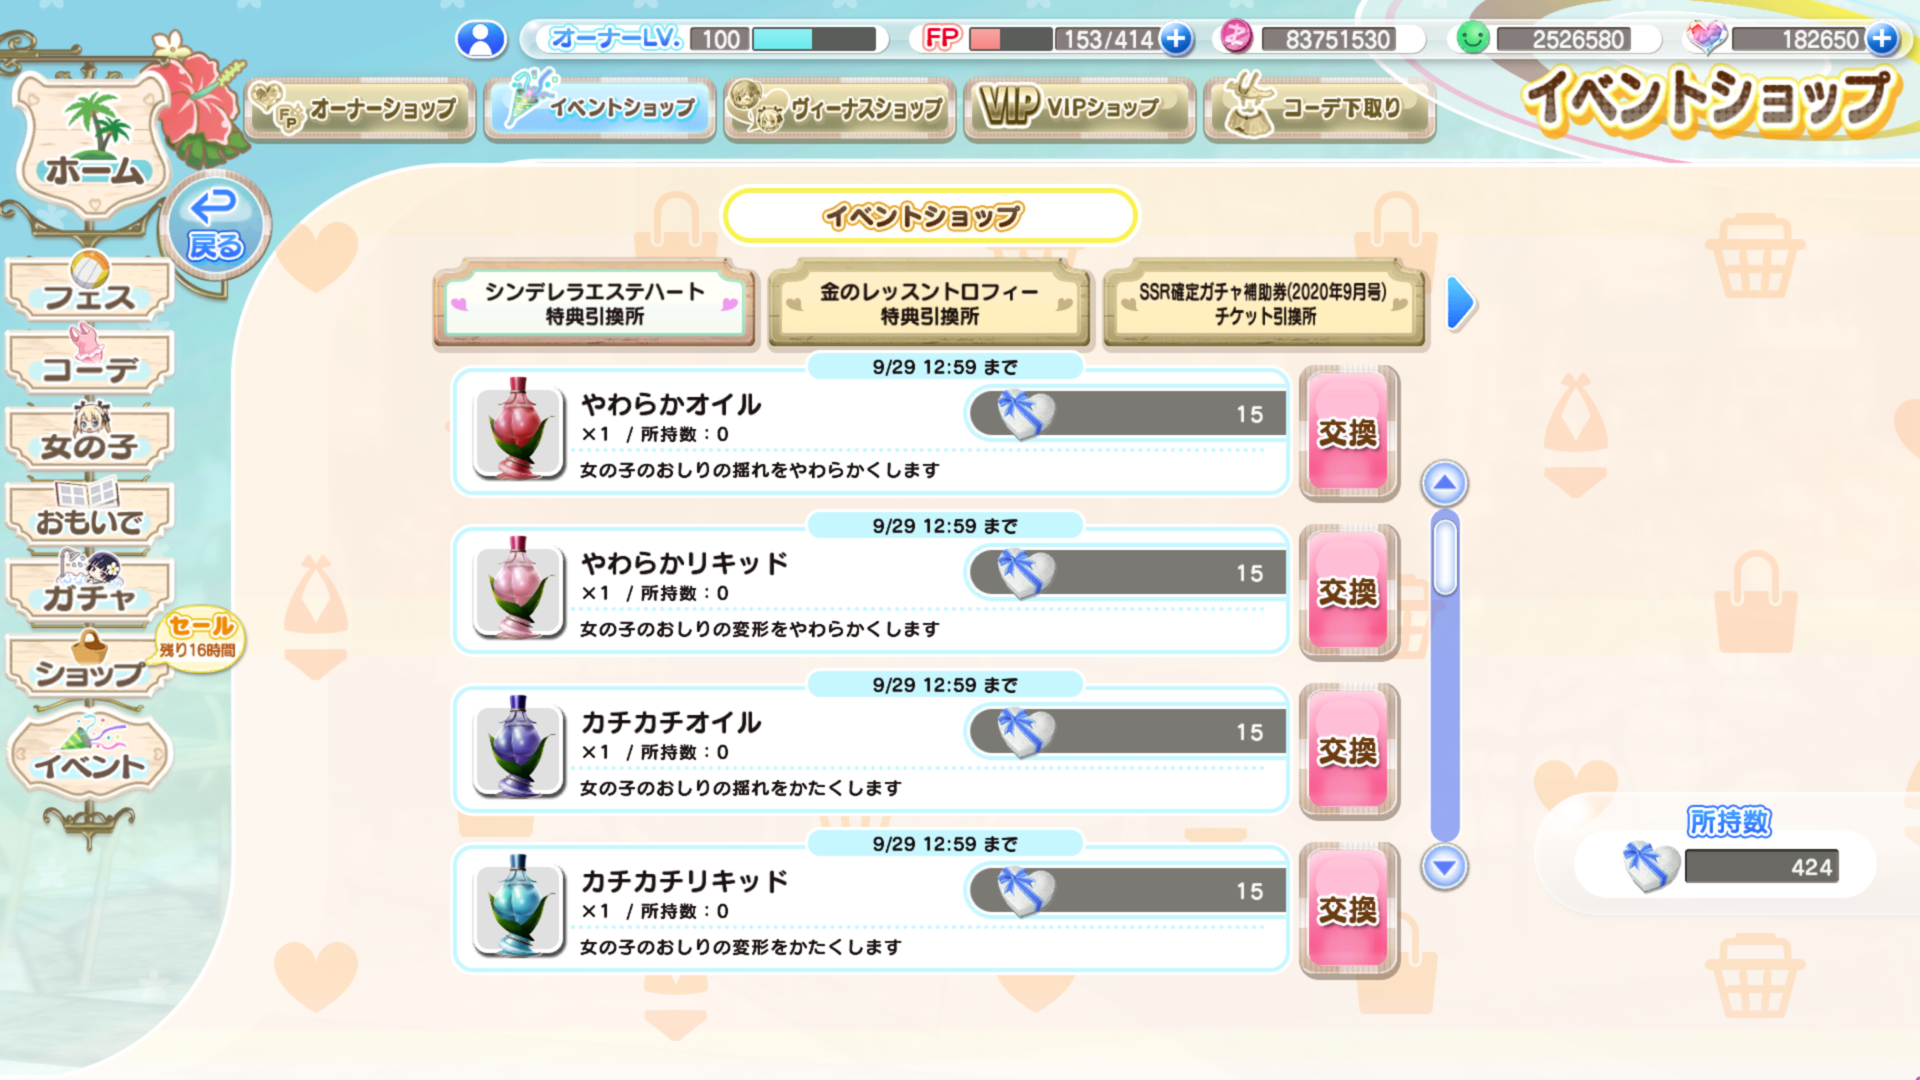 There are 4 items for each category plus a "Natural Milk" item. Since all of these items have different names I think the easiest way to go about explaining it is by shape/color.
The items shaped like a girl's breasts control physics over that area while the ones shaped like a butt control physics there. Red items increase the effect of physics while blue items decrease it.
The darker colored items control the jiggle physics of the selected part, this means it shakes more when the girls bounce around. The lighter colored items control the deformation of the selected body part, deformation is like the "hardness" of the part and will cause it to either obey gravity or maintain its shape regardless. The final item, natural milk, is used to reset these values to their defaults as well as clear any skincare skills you might have. If you wish to avoid having your softness settings reset you can click the lock next to the bar to keep it in that state.
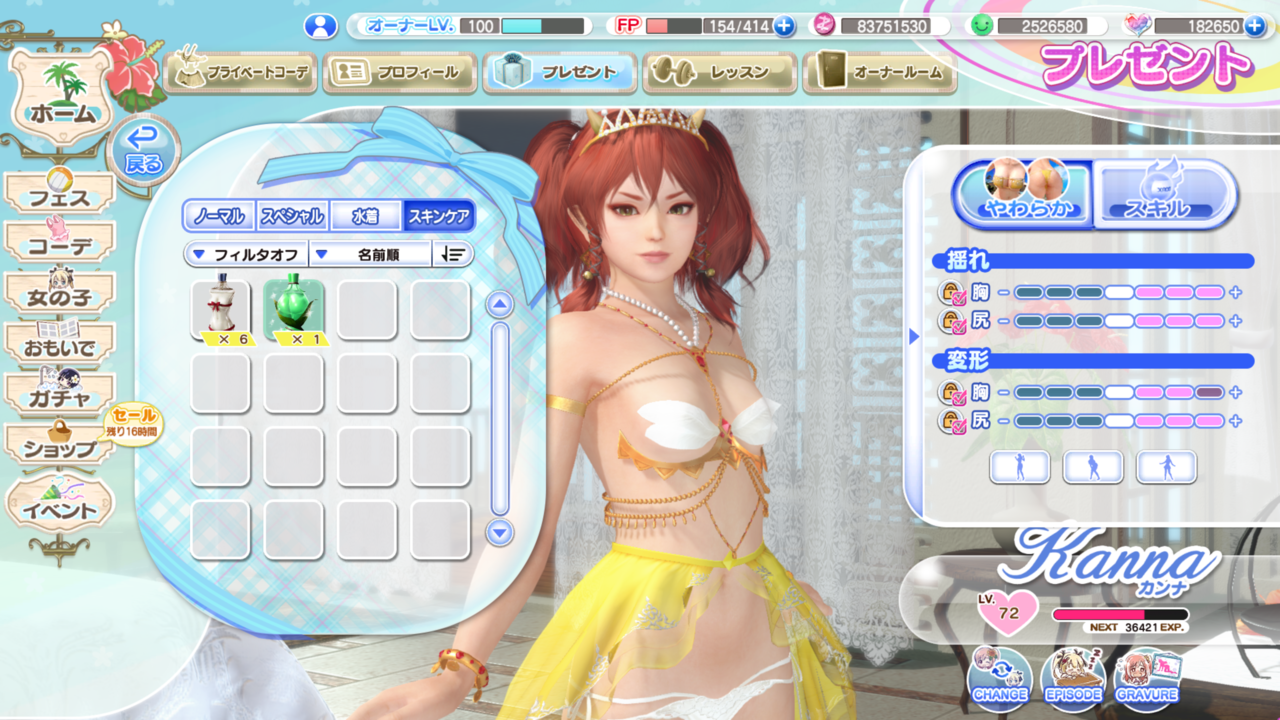 Additionally there are 3 pose icons at the bottom, these make the girls move in a way that displays their breast/butt shaking so you can adjust until you find a combination you are comfortable with.
Skincare Skills
Additionally there are 3 pose icons at the bottom, these make the girls move in a way that displays their breast/butt shaking so you can adjust until you find a combination you are comfortable with.
Skincare Skills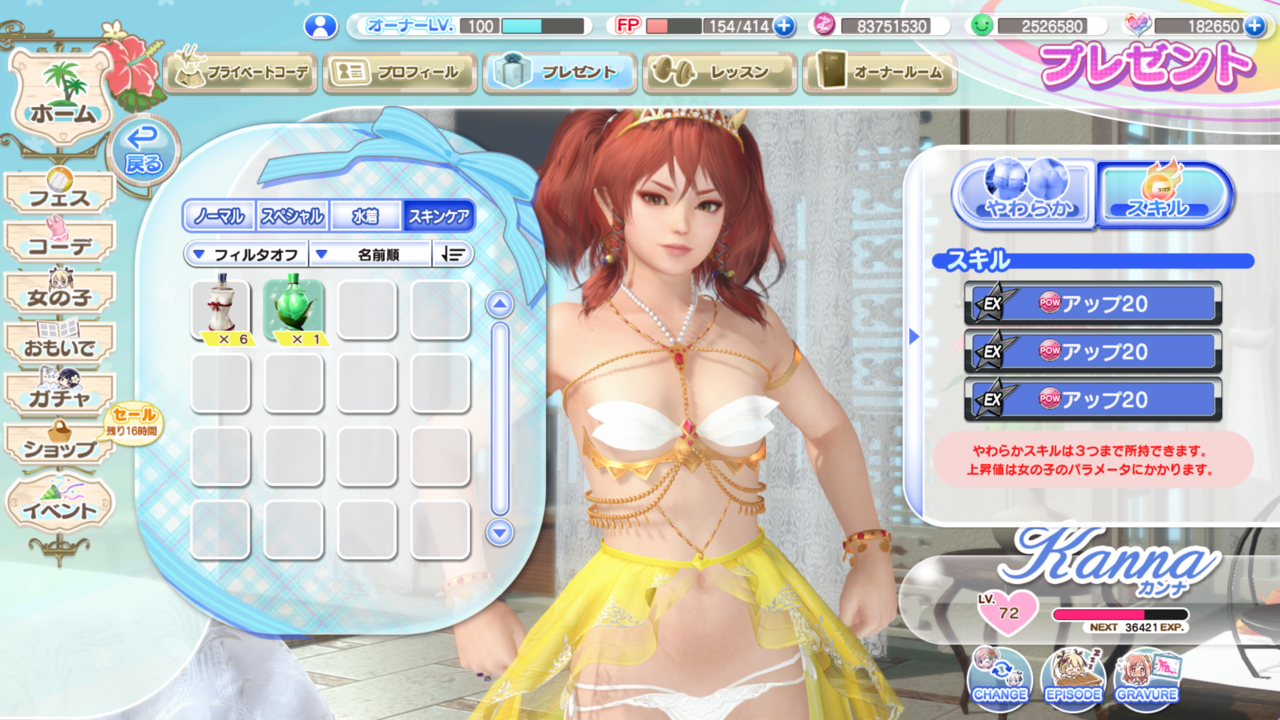 Giving a girl a skincare item also gives her a permanent skill, these skills are buffs on her base stats, the number next to each skill is the % of the buff while the POW/TEC/STM icon will tell you which stat is being buffed. In the case of the example picture each skill is giving a 20% buff to Kanna's base POW stat.
The stat affected by the skincare items changes with each event so it is important to read the event notes, as these events are typically reserved for the debuts of new girls it can usually be assumed that the strong stat (10%) will be the same as the new girl's. As for the skills themselves they come in different rarities:
Giving a girl a skincare item also gives her a permanent skill, these skills are buffs on her base stats, the number next to each skill is the % of the buff while the POW/TEC/STM icon will tell you which stat is being buffed. In the case of the example picture each skill is giving a 20% buff to Kanna's base POW stat.
The stat affected by the skincare items changes with each event so it is important to read the event notes, as these events are typically reserved for the debuts of new girls it can usually be assumed that the strong stat (10%) will be the same as the new girl's. As for the skills themselves they come in different rarities:- SR - These are usually 5%, these always have a chance to appear (except with awakened trend suits) and will be your only option if you manage to obtain skincare items outside of a skincare event (IE pool hopping)
- "SSR" - These are around 7% and are given by wearing the trendy SR suit while you gift skincare items to your girl, the higher the awakening the higher the chance for the skill up to 100% at max awakening. There are quotes here because these are not the strongest version of these skills.
- SSR - These are 10% skills and are the highest granted by these events, getting one requires the trendy SSR to be equipped when you gift the girl the items and follows the same rules as the last rarity (100% chance at max awakening).
- EX - These are 15% skills, they are obtained either through the owner shop (real money) or through pool hopping events, I list these here since they occupy the same slot. Unlike other skincare items EX Oils do not expire and can be held onto indefinitely.
- EX (Awakened) 1* - These are 20% skills, they are obtained by combining 3 EX Oils of the same type in the items list.
- EX (Awakened) 2* - These are 25% skills, they are obtained by combining 2 Awakened 1* EX Oils of the same type in the item list.
Note: Only the darker colored items give softening skills. Oils (butt) is usually linked to trendy SSR (10%) while Gels (breast) is usually linked to trendy SR (7%).
Note 2: EX skills cannot be removed by Natural Milk and require their own EX Remover Oil item from the VIP Point Shop.
Note 3: Skills cannot be locked, if you want to try to get 3 SSR skills you will need to keep resetting until you get lucky or fully awaken your suit.
Butt Battle「どんけつゲーム」
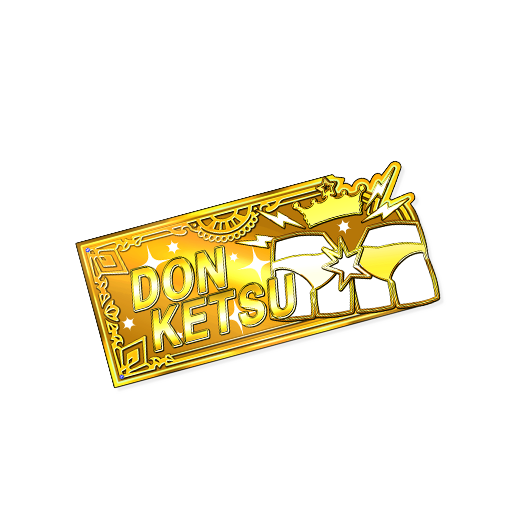
The donketsu ticket, this ticket allows you to play the butt battle mini-game by gifting it to a girl. Currently there are 5 ranks this can be played at:
- Practice - Green
- C - Blue
- B - Bronze
- A - Silver
- S - Gold
The ranking of the ticket determines the stats required to win and how many points you get at the end of each match, as well as the reward you get for completing the match. All ranks are played best of 3.
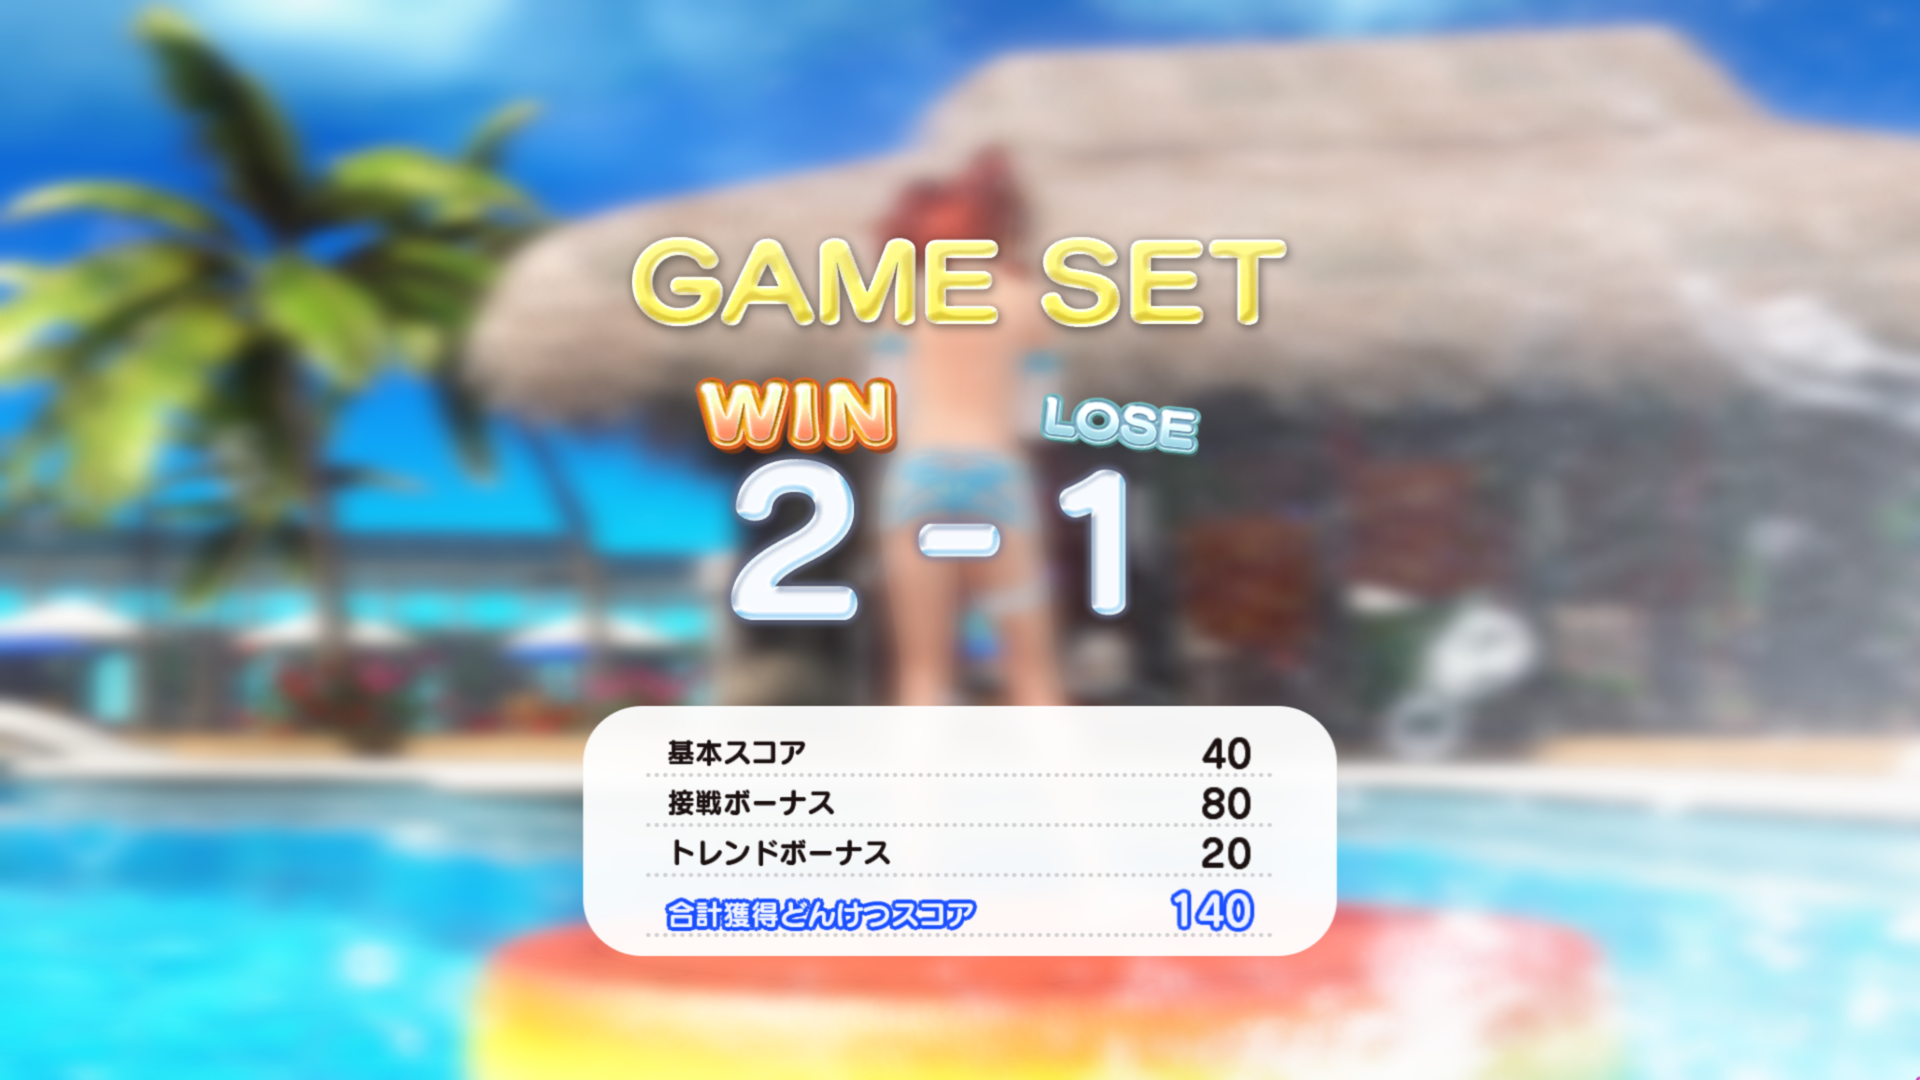
Points are fed into the the total server score and are determined by 4 things:
- The rank of the match
- Number of rounds won
- If it was a close battle (If tension burst was used)
- Whether or not your girl has a trend suit equipped
The server score for the event will grant additional rewards to all players as certain milestones are met. There is currently no way to check this aside from visiting the event notes on the site and seeing what the most recent item you got was to make a guess.
Opponents are randomly selected AI from the girls you have, it will either use your private outfit for that girl or, if you don't have one selected, will equip her with the current trend SSR.
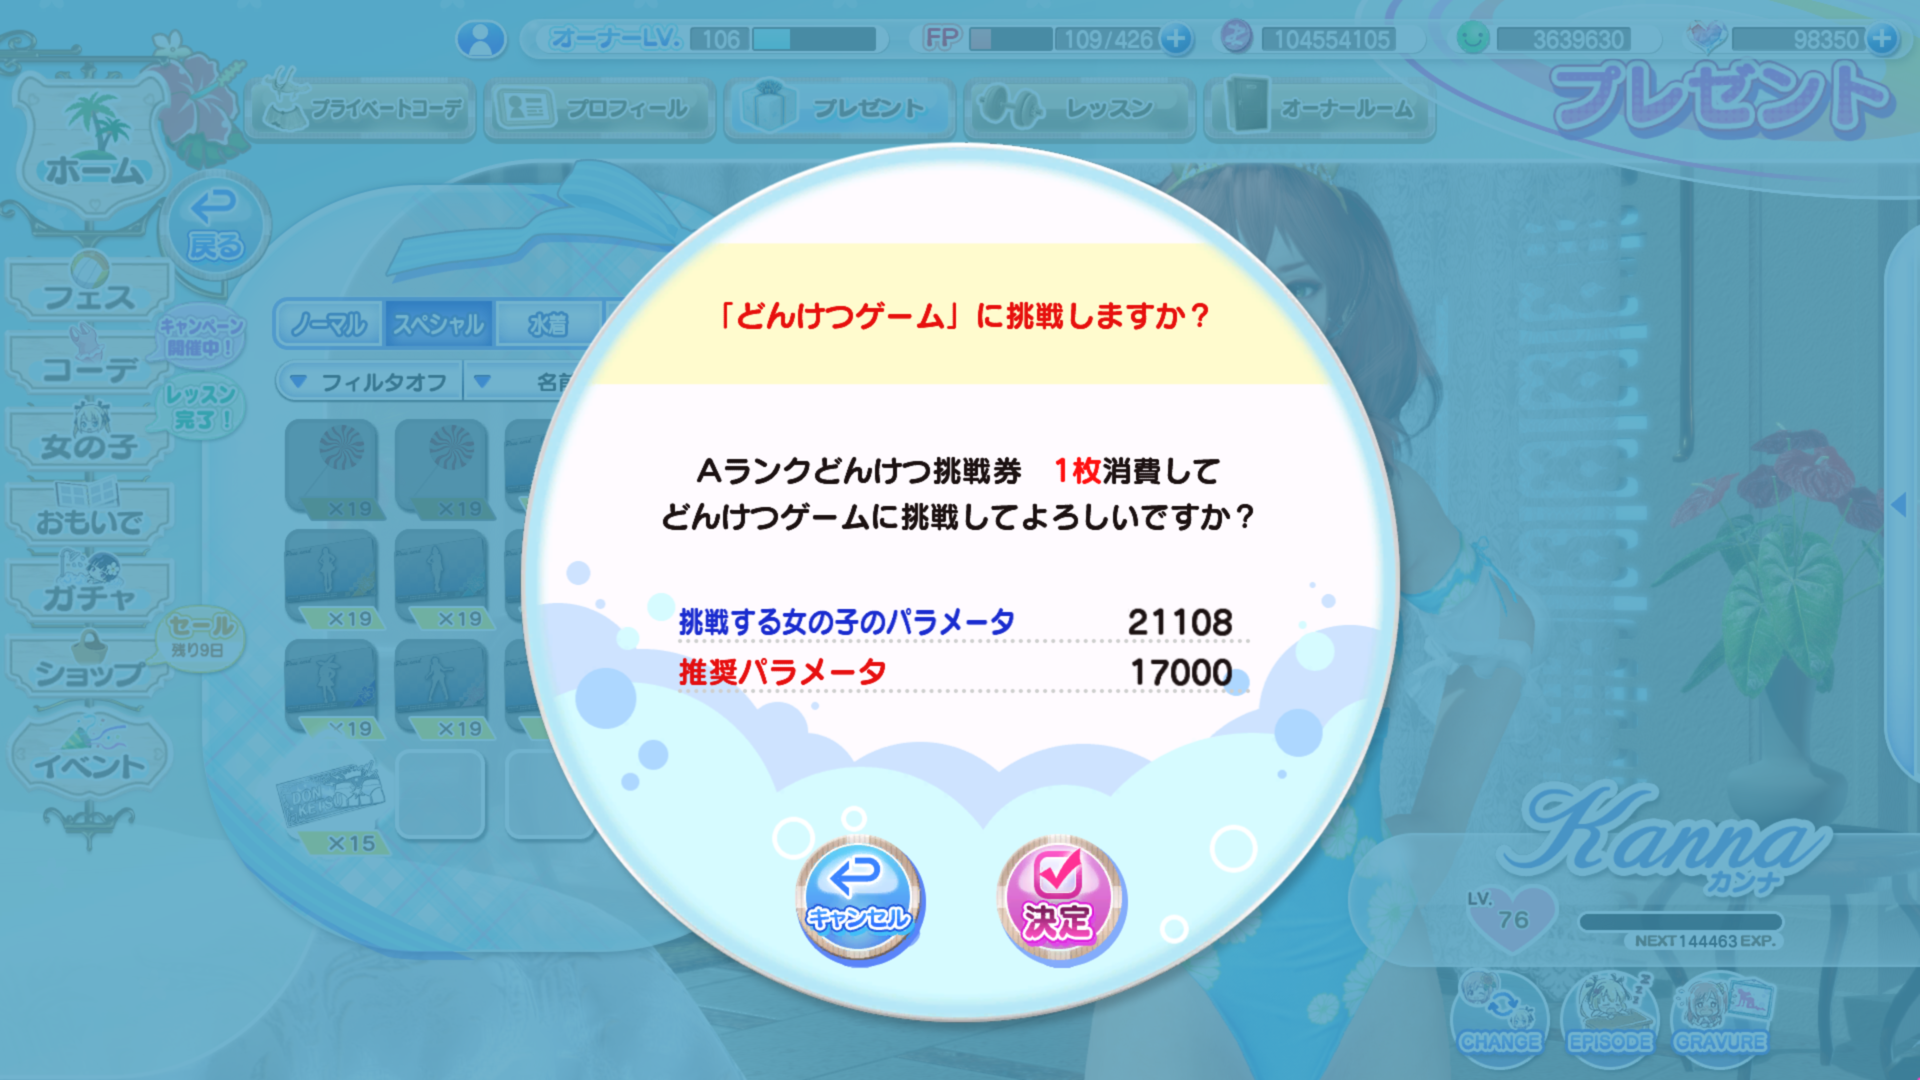
Giving a ticket to a girl will give you a popup that looks like this. The number on the top is your girl's current stat total and the number on the bottom is the recommended stat total for the rank
Your girl's stats for the butt battle match are determined by her base stats before trend bonuses and without skincare skills, you can check this on the festival coordination screen where it shows her total stats below her suit/accessories. The stat total for the battle is equal to POW + TEC + STM so any girl can be competitive here.
Practice tickets are sold in the shop for next to no currency (I think they actually cost 1 currency) and have a cap of 999 so if you want to set up for photos then you don't need to worry about running out of tickets.
PvP Events「イベント」
- Enemy teams do not have trend bonuses applied to them
- Enemy teams cannot use Deco-Bromides*
- Enemy teams cannot use Tension Burst
Note: The statement on Deco-Bromides is in my experience watching 20+ matches and never seeing one proc for an enemy, it's possible all those players simply weren't using any/were unlucky but I think that's unlikely. I'll test it some more later regardless, do tell if you happen to see one.
Additionally all PvP events feature leaderboards that are updated hourly. These leaderboards give you rewards based on your final position at the end of the event. The most important reward here is generally the featured SSR Accessory as this is the only way to obtain them outside of the shop. Winning an accessory typically requires you to finish within the top 5000 players.
Beyond these basics PvP events have their own differences in how they are played so each of the types will be covered below.
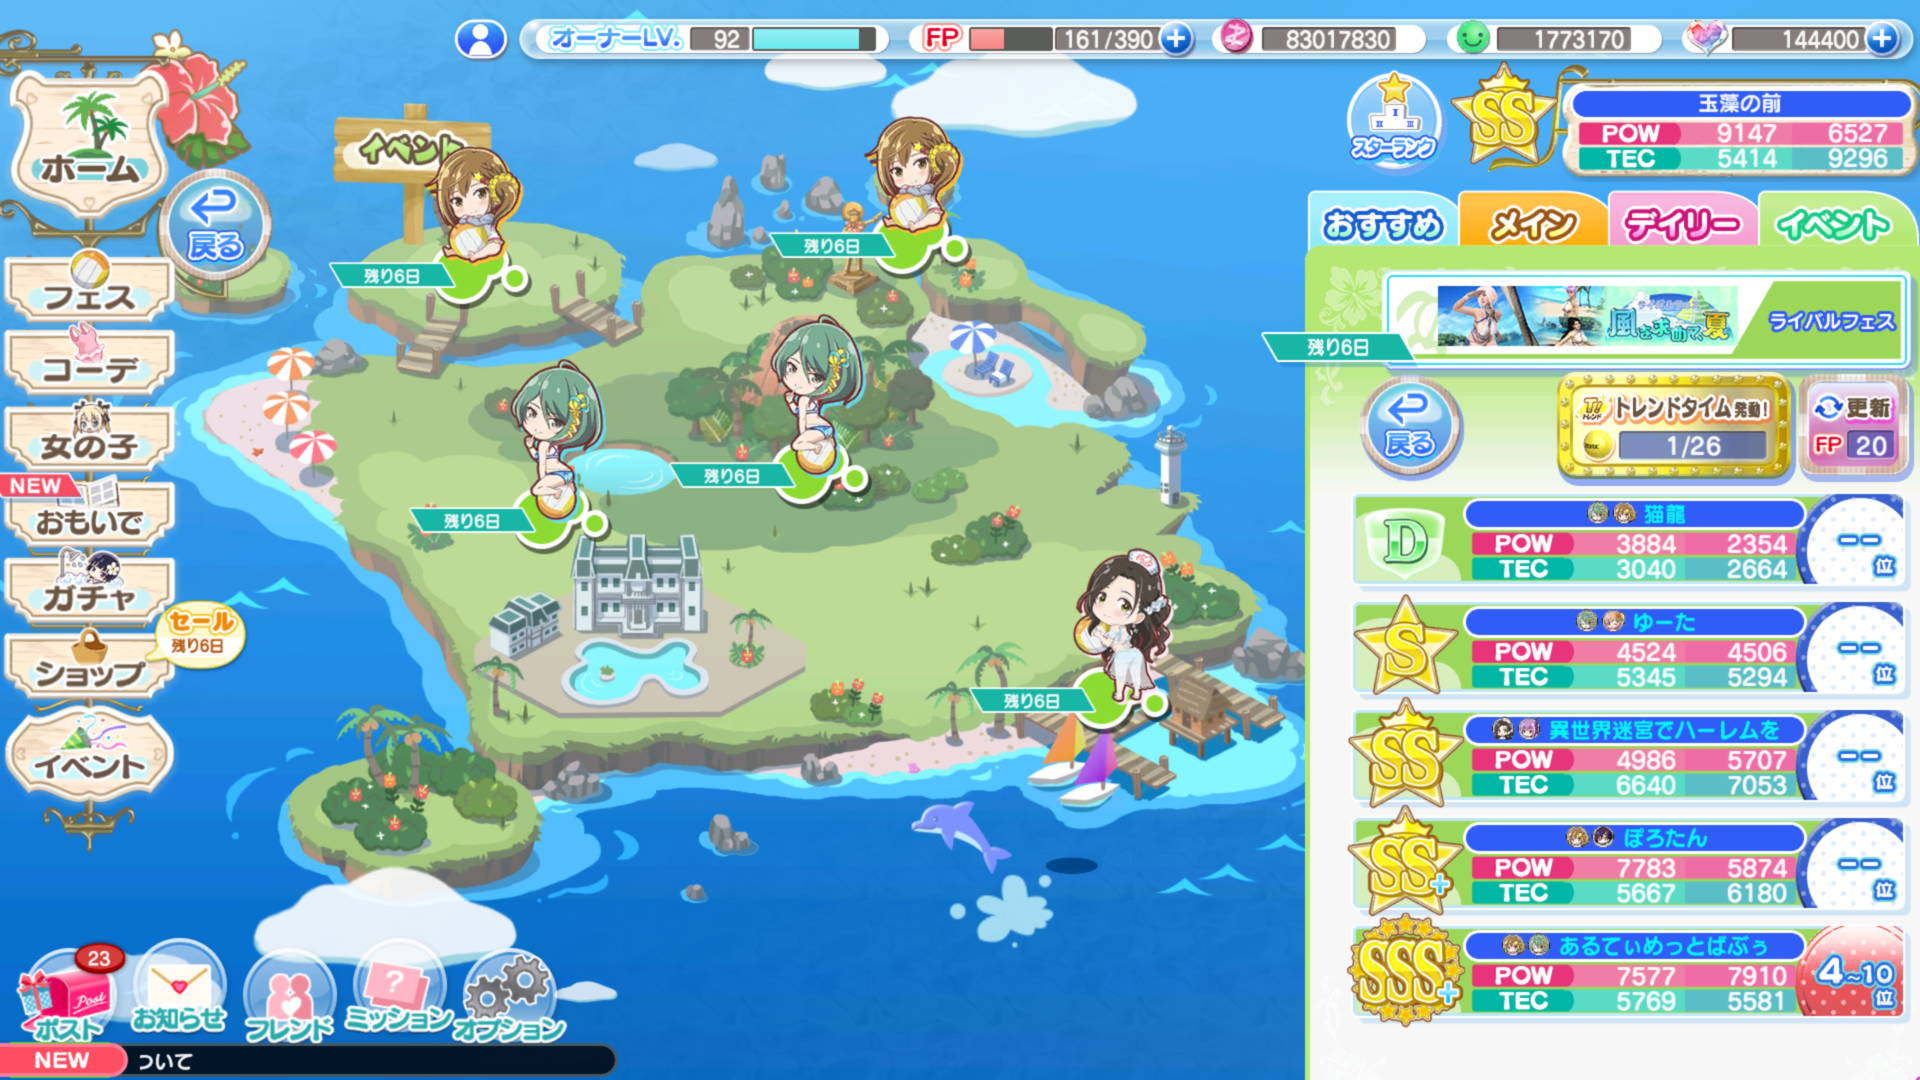 Upon entering the festival menu for one of these events your match selection screen will look like this rather than the usual appearance. The letters to the left of the name are their license rank, the numbers to the right are their approximate rank(If it's blank like above it's because they haven't played any matches to place yet), the colors of their names reflect their stat totals relative to yours (blue = lower, white = same, red = higher).
At the top right you can see your own team's stats at a glance (with trend bonuses included). Additionally you can see your stock of Trend Balls and to the right of it the refresh button. Refreshing costs 20 FP and is generally useless since all rival matches also cost 20 FP and reset the list as well, even if you roll garbage ranks you're better off just using that 20 FP to take whatever points you can get.
The number of rounds in a match is determined by the license rank of your opponent:- SSS - 8 Rounds
- SS - 7 Rounds
- S - 6 Rounds
- A - 5 Rounds
- B - 4 Rounds
- C - 4 Rounds
- D - 3 Rounds
- E- 2 Rounds
- F - 2 Rounds
You should always go for SSS whenever possible and never take less than SS if you can.
Note: The higher your license rank is the higher chance you have to be matched with higher ranked opponents. This is important as they give more points.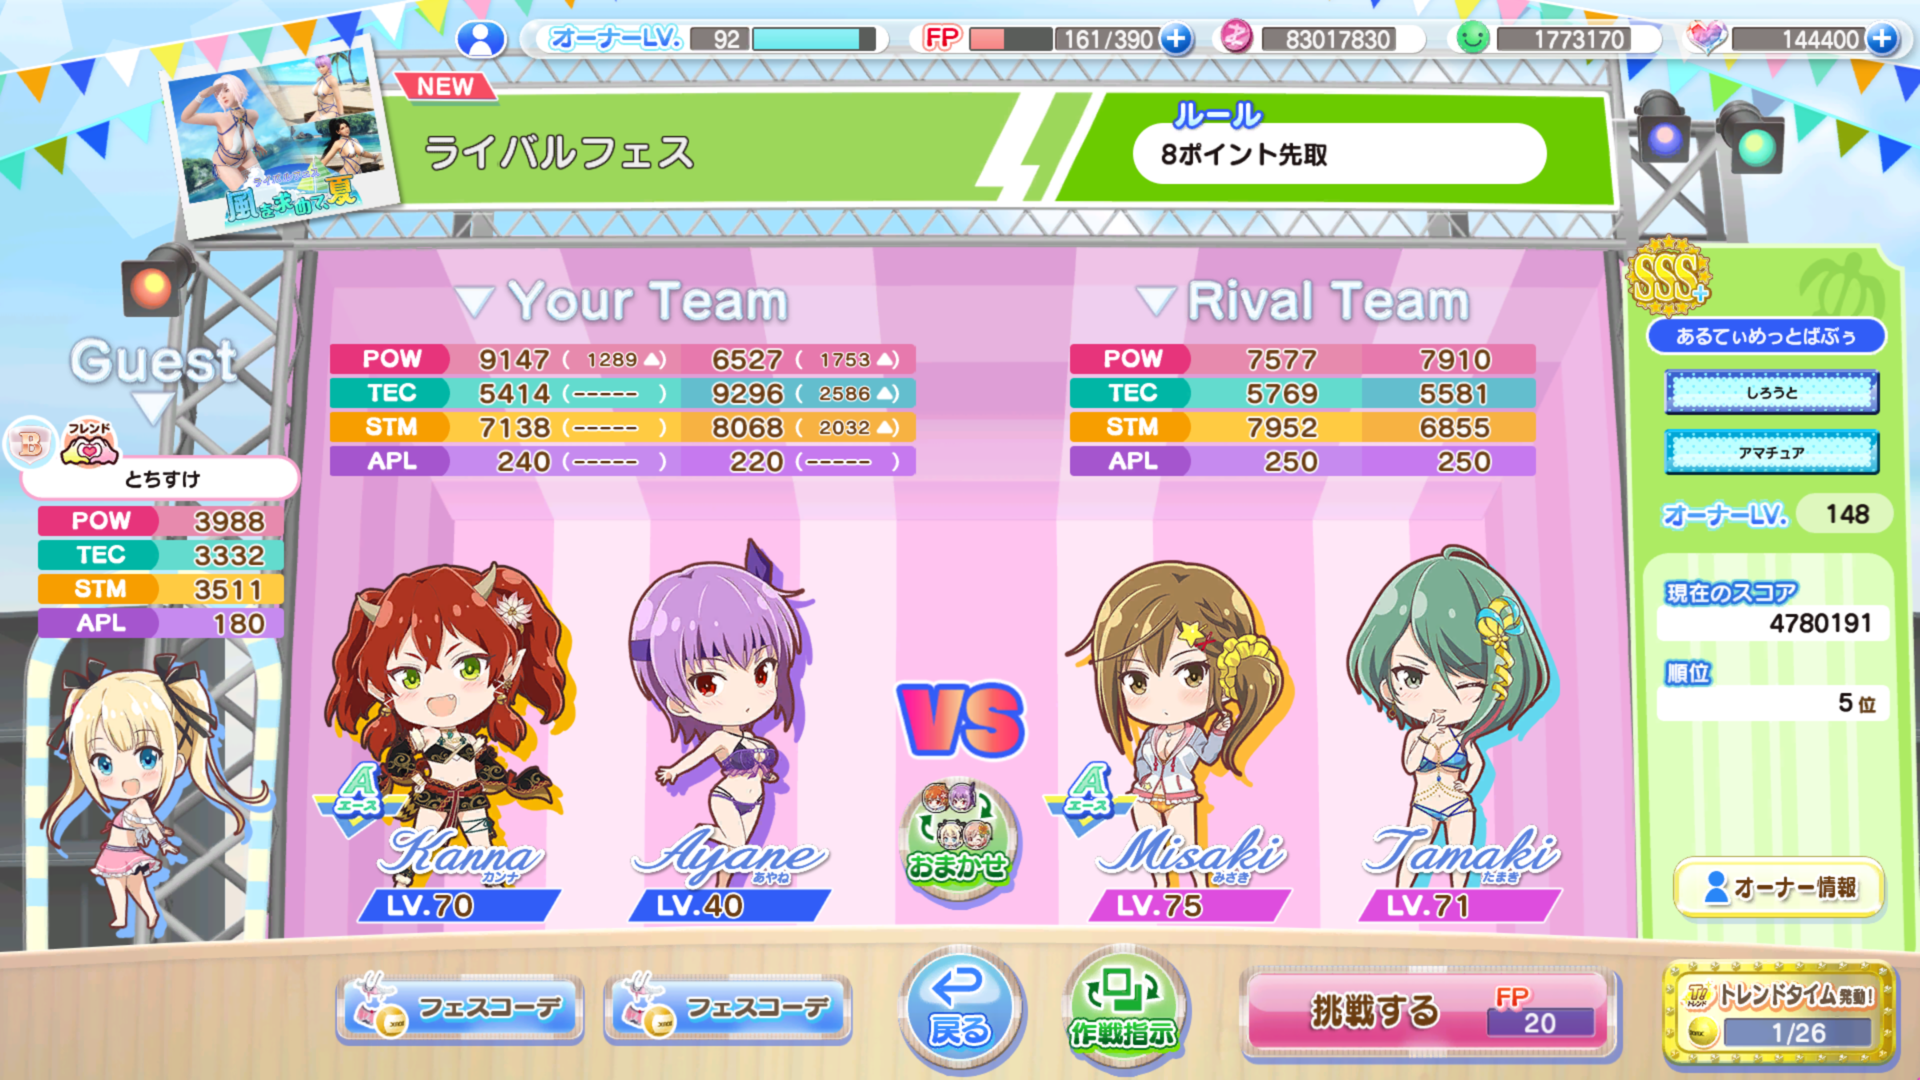 Upon selecting an opponent you will be brought to a screen that looks like this. Here, in addition to the usual info, you can see your opponent's:
- License Rank
- Name
- Titles
- Owner Level
- Total Event Score
- Current Rank
- Profile
Note: You can hover your mouse over an opponent's girls to see their suits/skills, you can use this to make sure they don't catch you off guard with things like POW- skills. (Potentials will still be hidden.)
Trend Balls: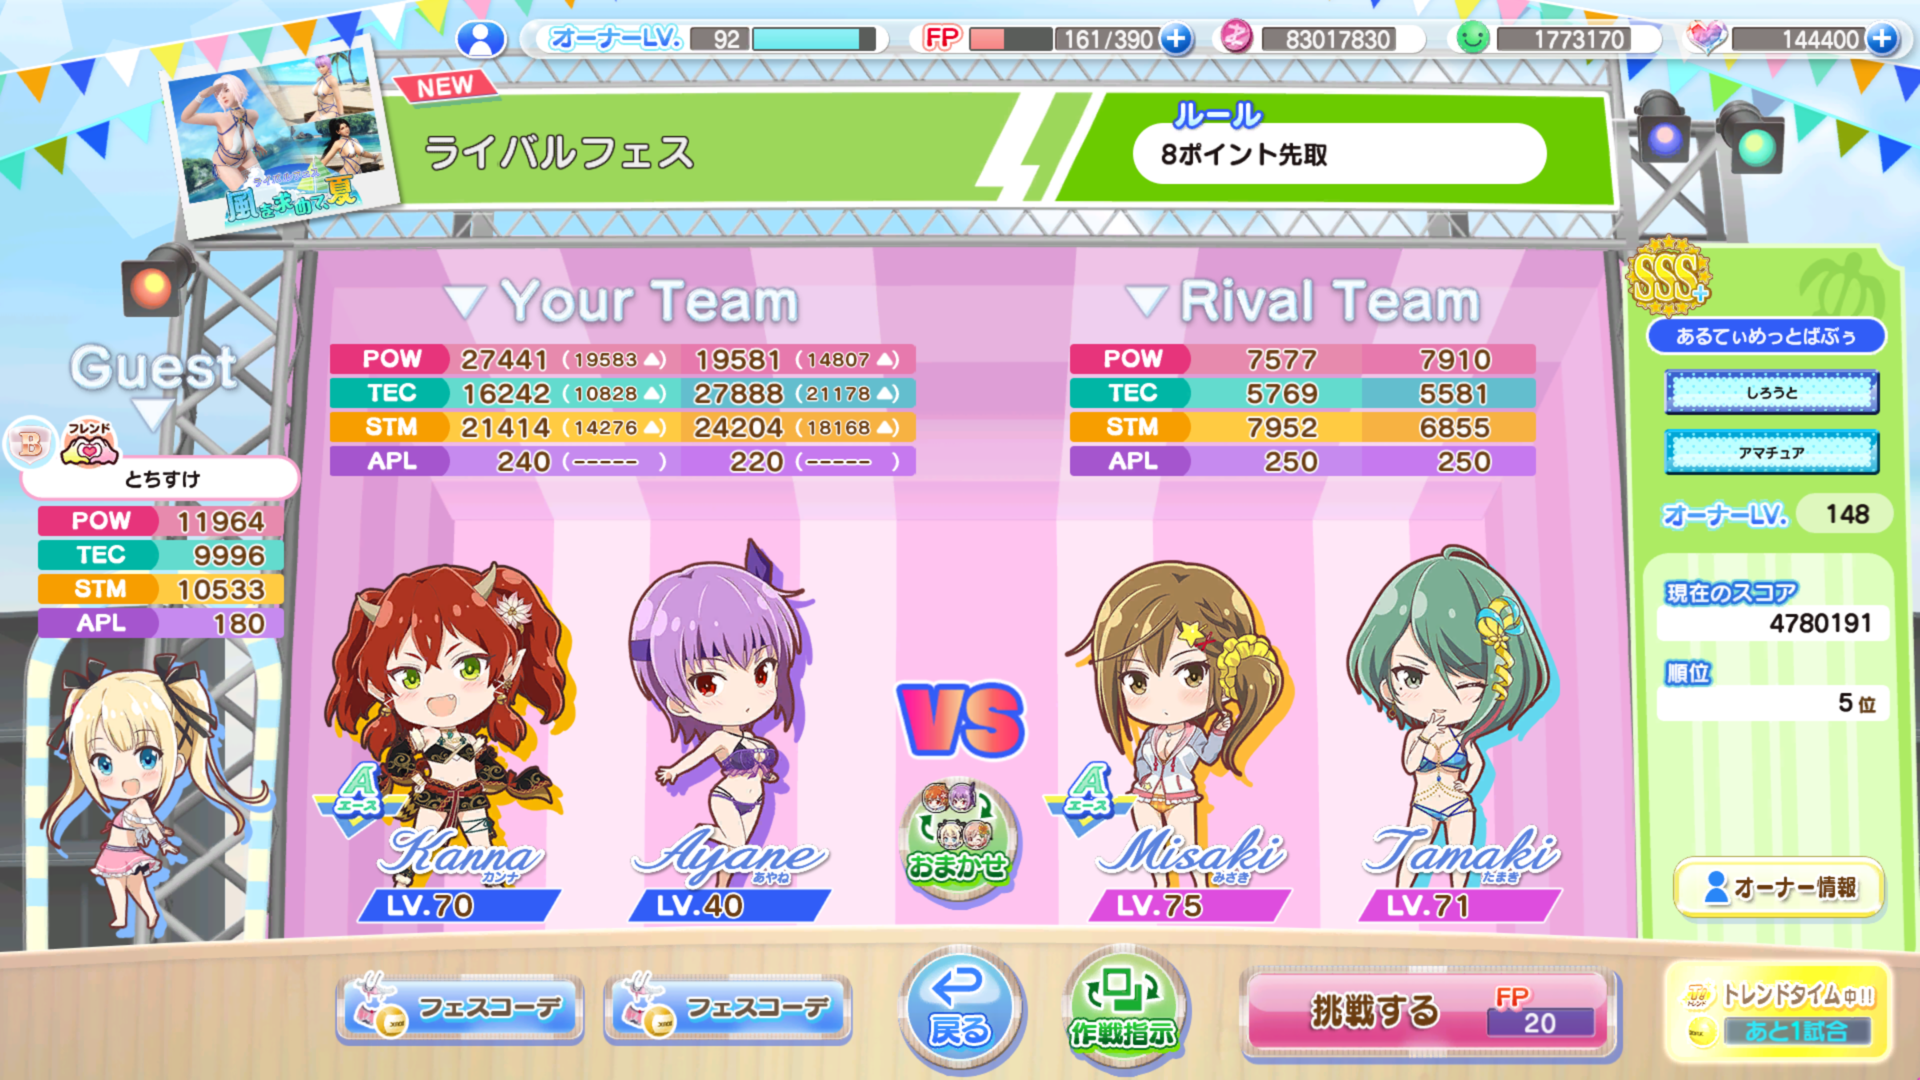 One of the biggest features to set rival events apart from other PvP events is Trend Balls.
By clicking the gold button on the bottom right (and confirming) you can use a trend ball (If you have any). Trend balls are consumed upon use and give massive trend bonuses (+200% if you like numbers) to you and your guest for your next game, additionally you will start your next game with a full burst gauge. You should only ever use these on SSS matches to maximize their use.
Note: Trend balls stack with other trend bonuses. IE if your stat is 5,000 and a trend bonus gives you 3,000 then the trend ball will make the total score 24,000.
Note: Once a trend ball is used you cannot cancel it so if you somehow managed to use this by mistake then you're probably best off using the refresh button until you find a match you want to use it on.
Trend balls are obtained from the Event Shop and score rewards as well as occasionally from other sources such as event missions, login rewards, or the Owner Shop.
Important: The Event Shop contains an amount of daily trend balls, these balls refresh at the start of every day (login bonus time) and will disappear if they are not used by the time the shop is refreshed. Daily trend balls will be used before your other trend balls, additionally they are far cheaper than the standard kind the shop sells. Make sure you look for「本日」in the pink box that shows purchase limit.
Scores:
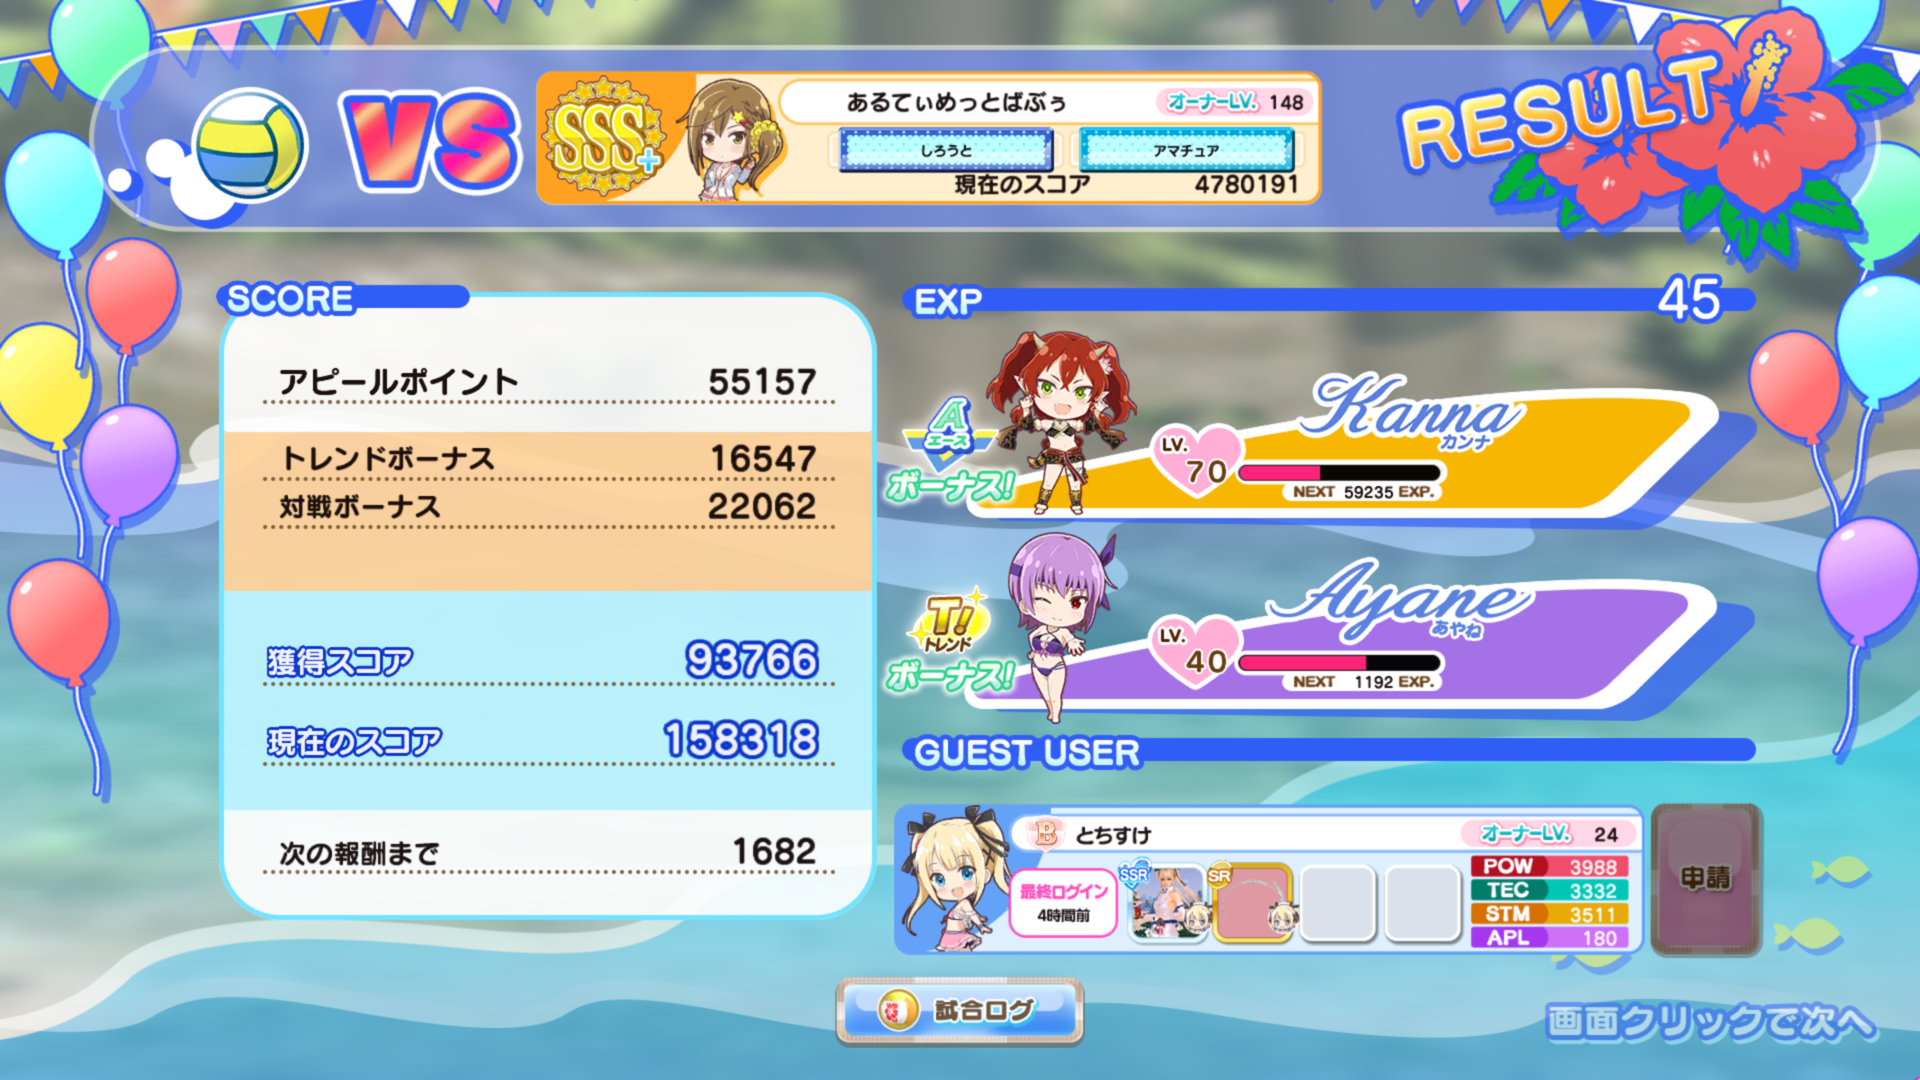 Rather than the usual result screen you will be greeted with a screen like this in Rival Events. These events have no match rewards aside from 45 XP and 50-100 GP depending on who you used as a guest.
The top of this screen once again shows your opponent and some of their information while the score sheet on the left shows:
Rather than the usual result screen you will be greeted with a screen like this in Rival Events. These events have no match rewards aside from 45 XP and 50-100 GP depending on who you used as a guest.
The top of this screen once again shows your opponent and some of their information while the score sheet on the left shows:- Total Appeal Points scored during the match
- Your Trend Bonus (~30% for a single un-awakened suit)
- Your match bonus (This is impacted by your opponent's license rank, since there is variation within the bonus even for people of the same rank I'm not actually sure how this gets calculated)
- Your total score for the match (sum of the first 3)
- Your total score for the event
- The amount of points needed for your next reward drop
Tower Events「イベント」
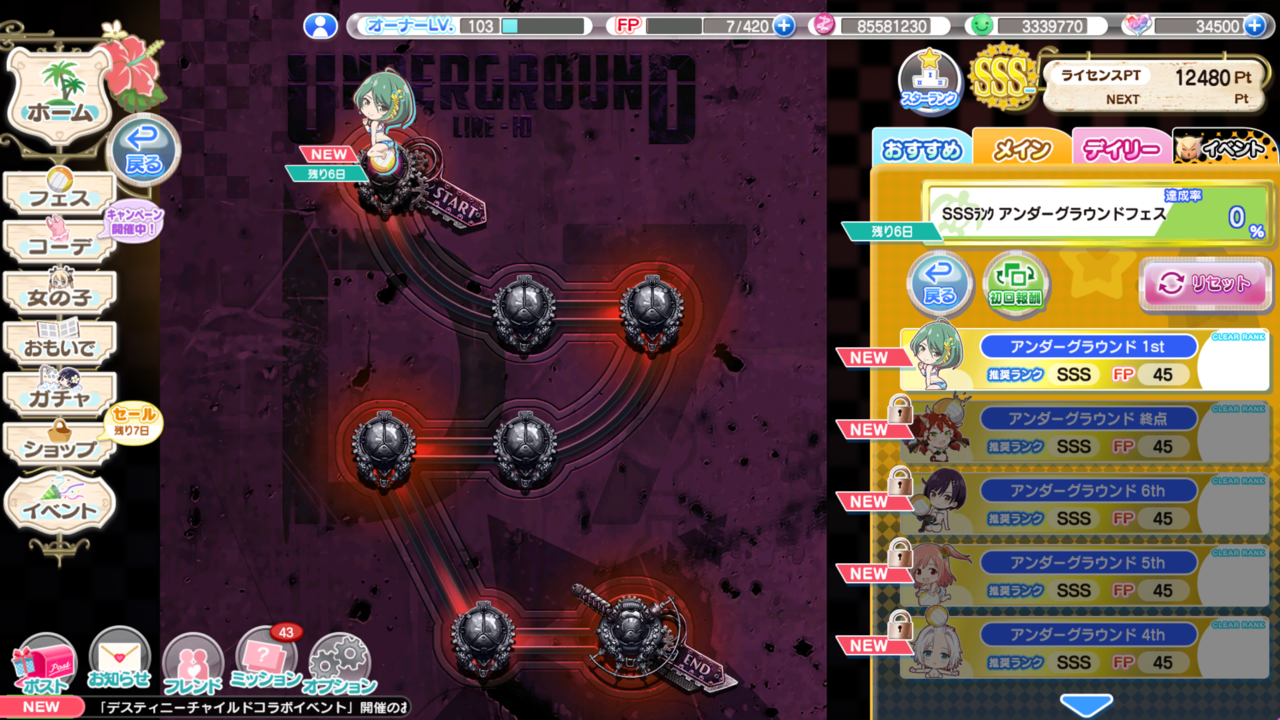
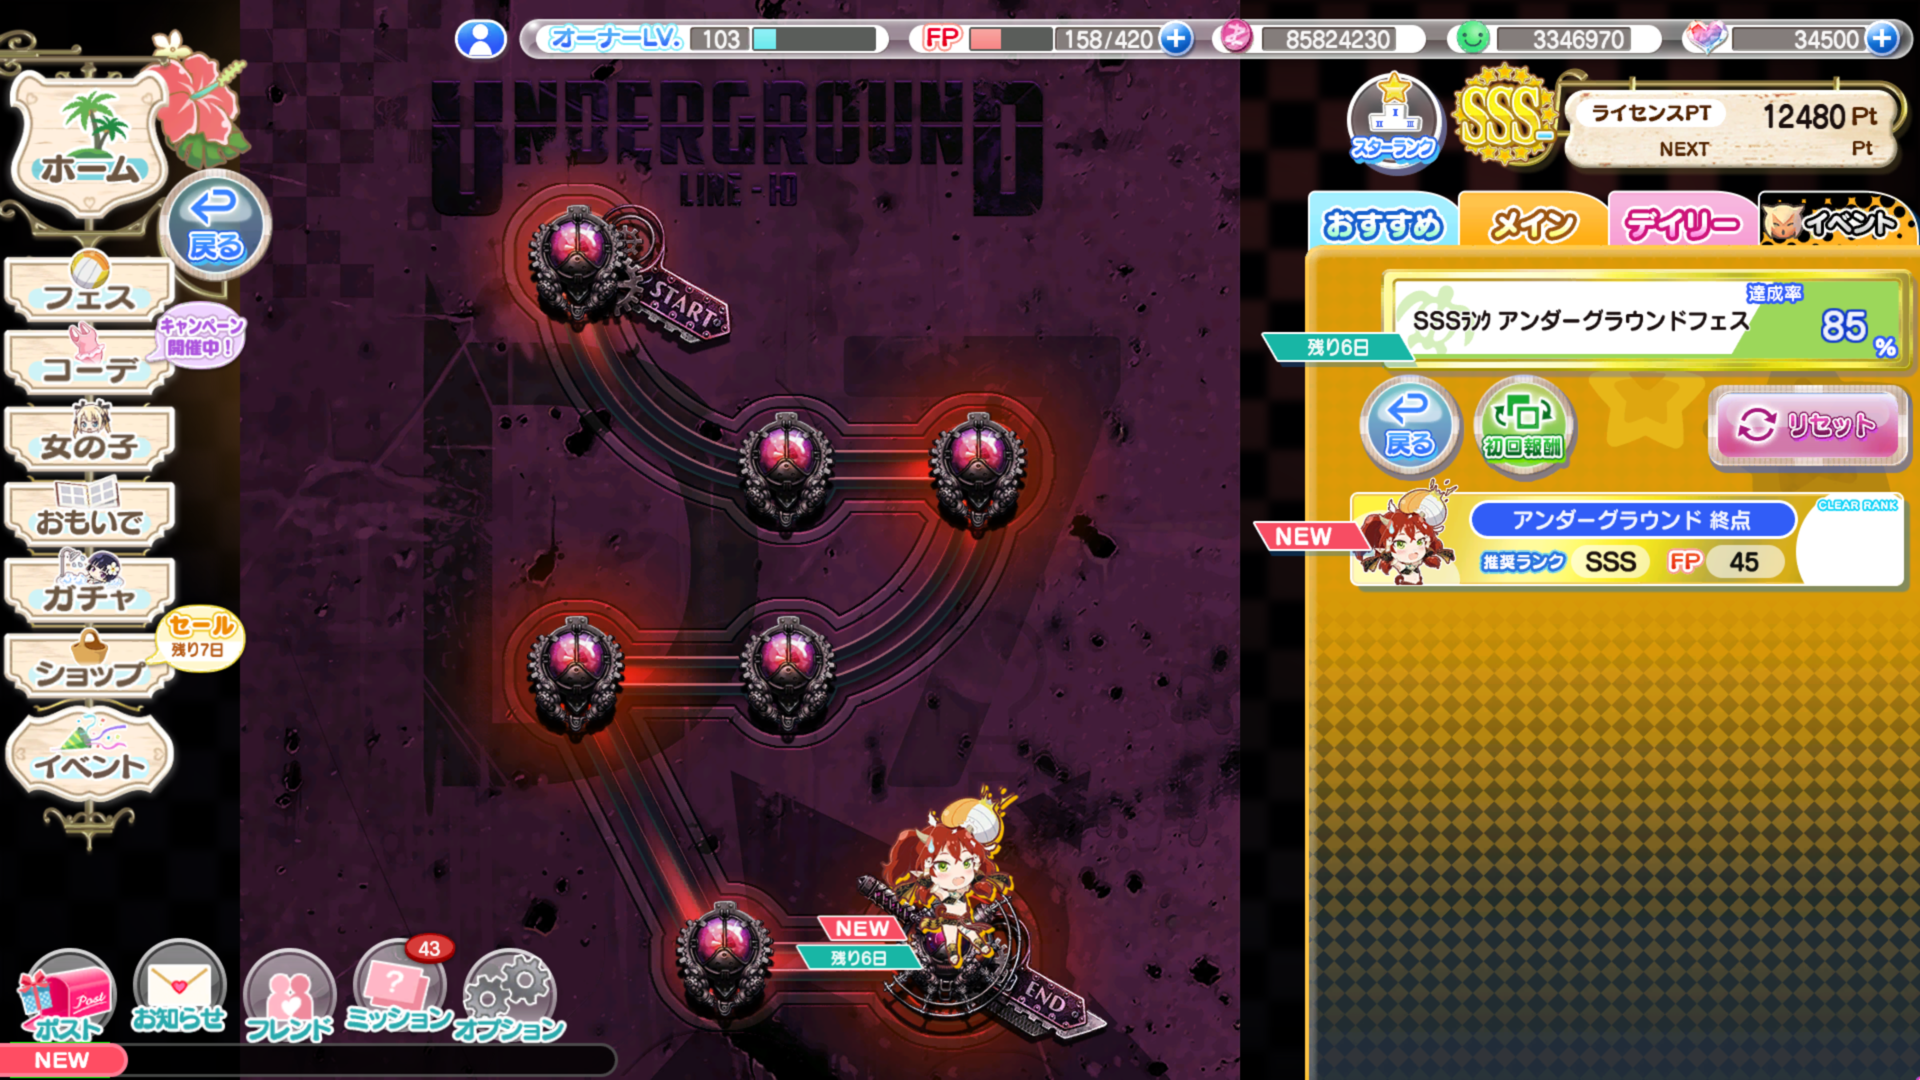
Tower events are a mix of PvE and PvP events, they are played mostly as PvE however scores are against other players and as such are considered to be PvP. These events are extremely rare so I ask that you excuse that my pictures for this event type are from a collab.
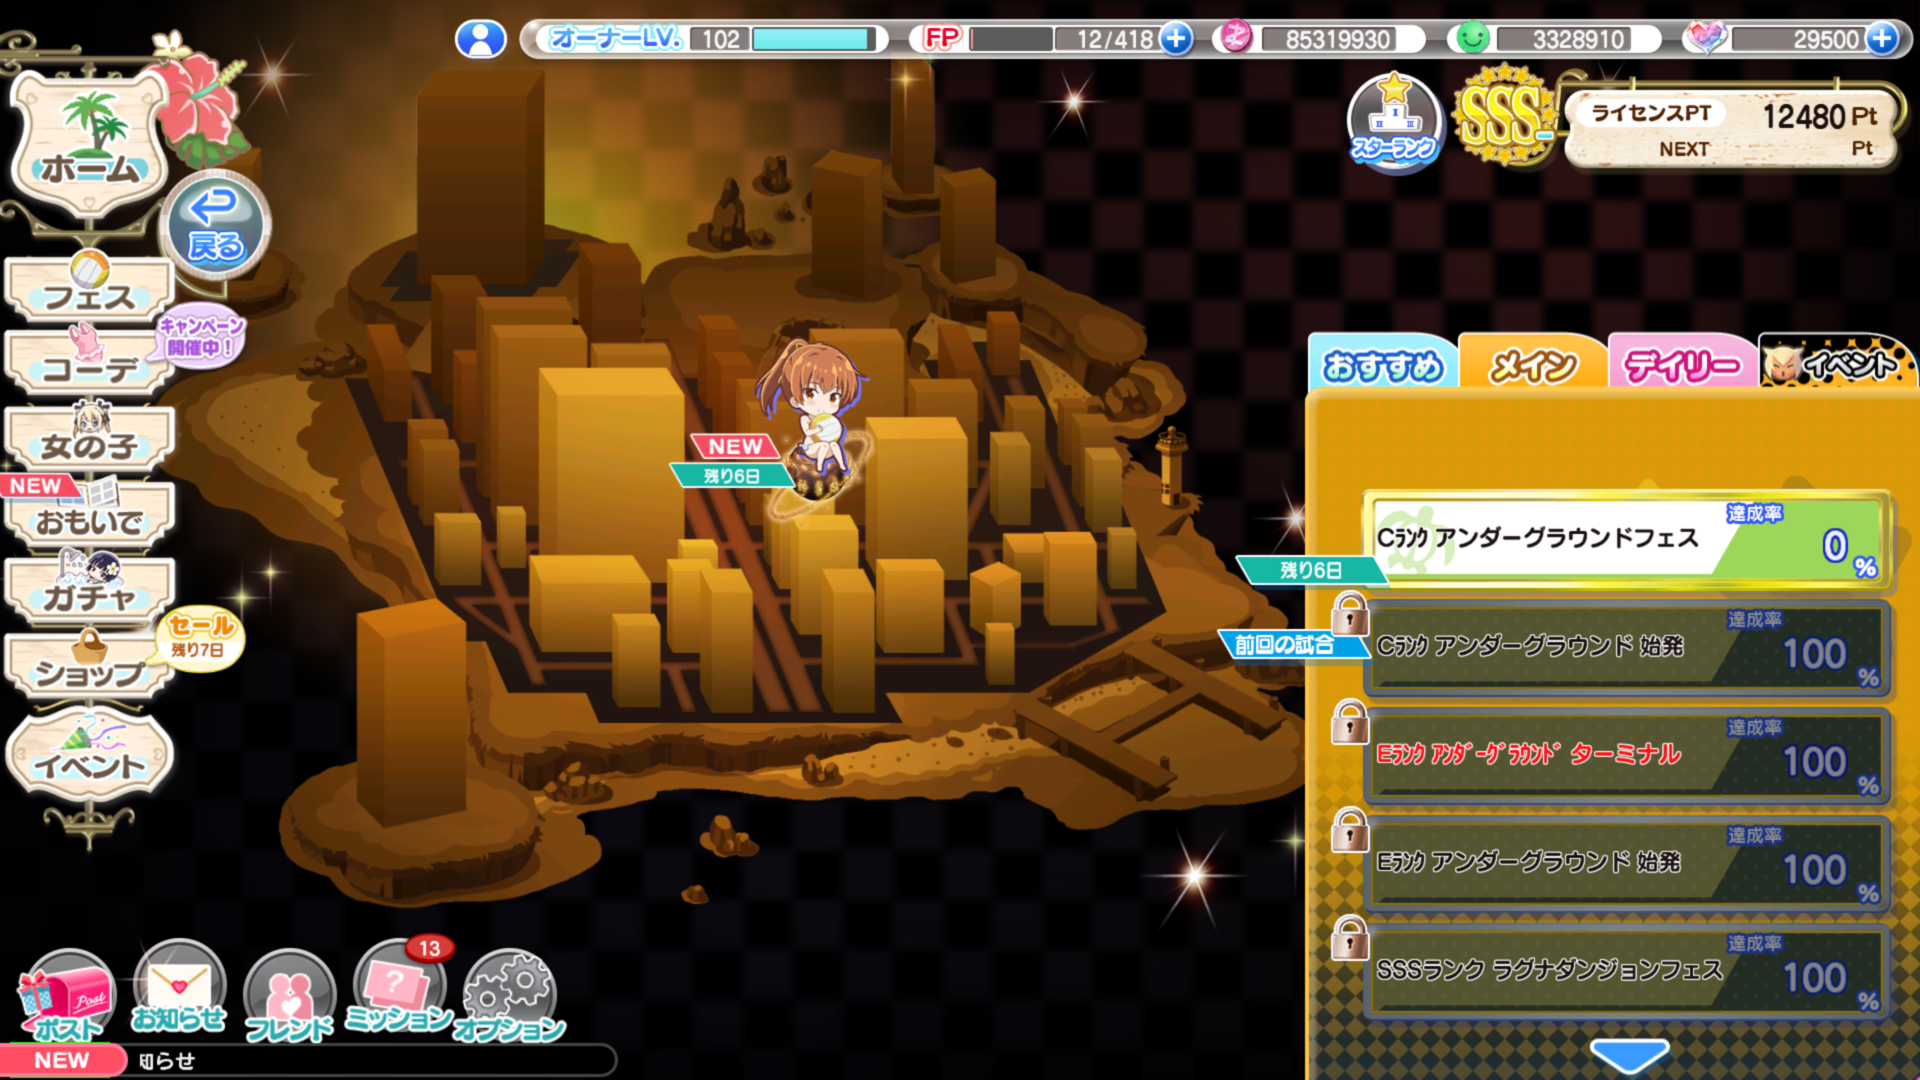
Once a tower is selected all other festival matches are locked and the tower must either be completed or forfeited in order to proceed. Each rank gets increasing difficulty and an increasing number of matches.
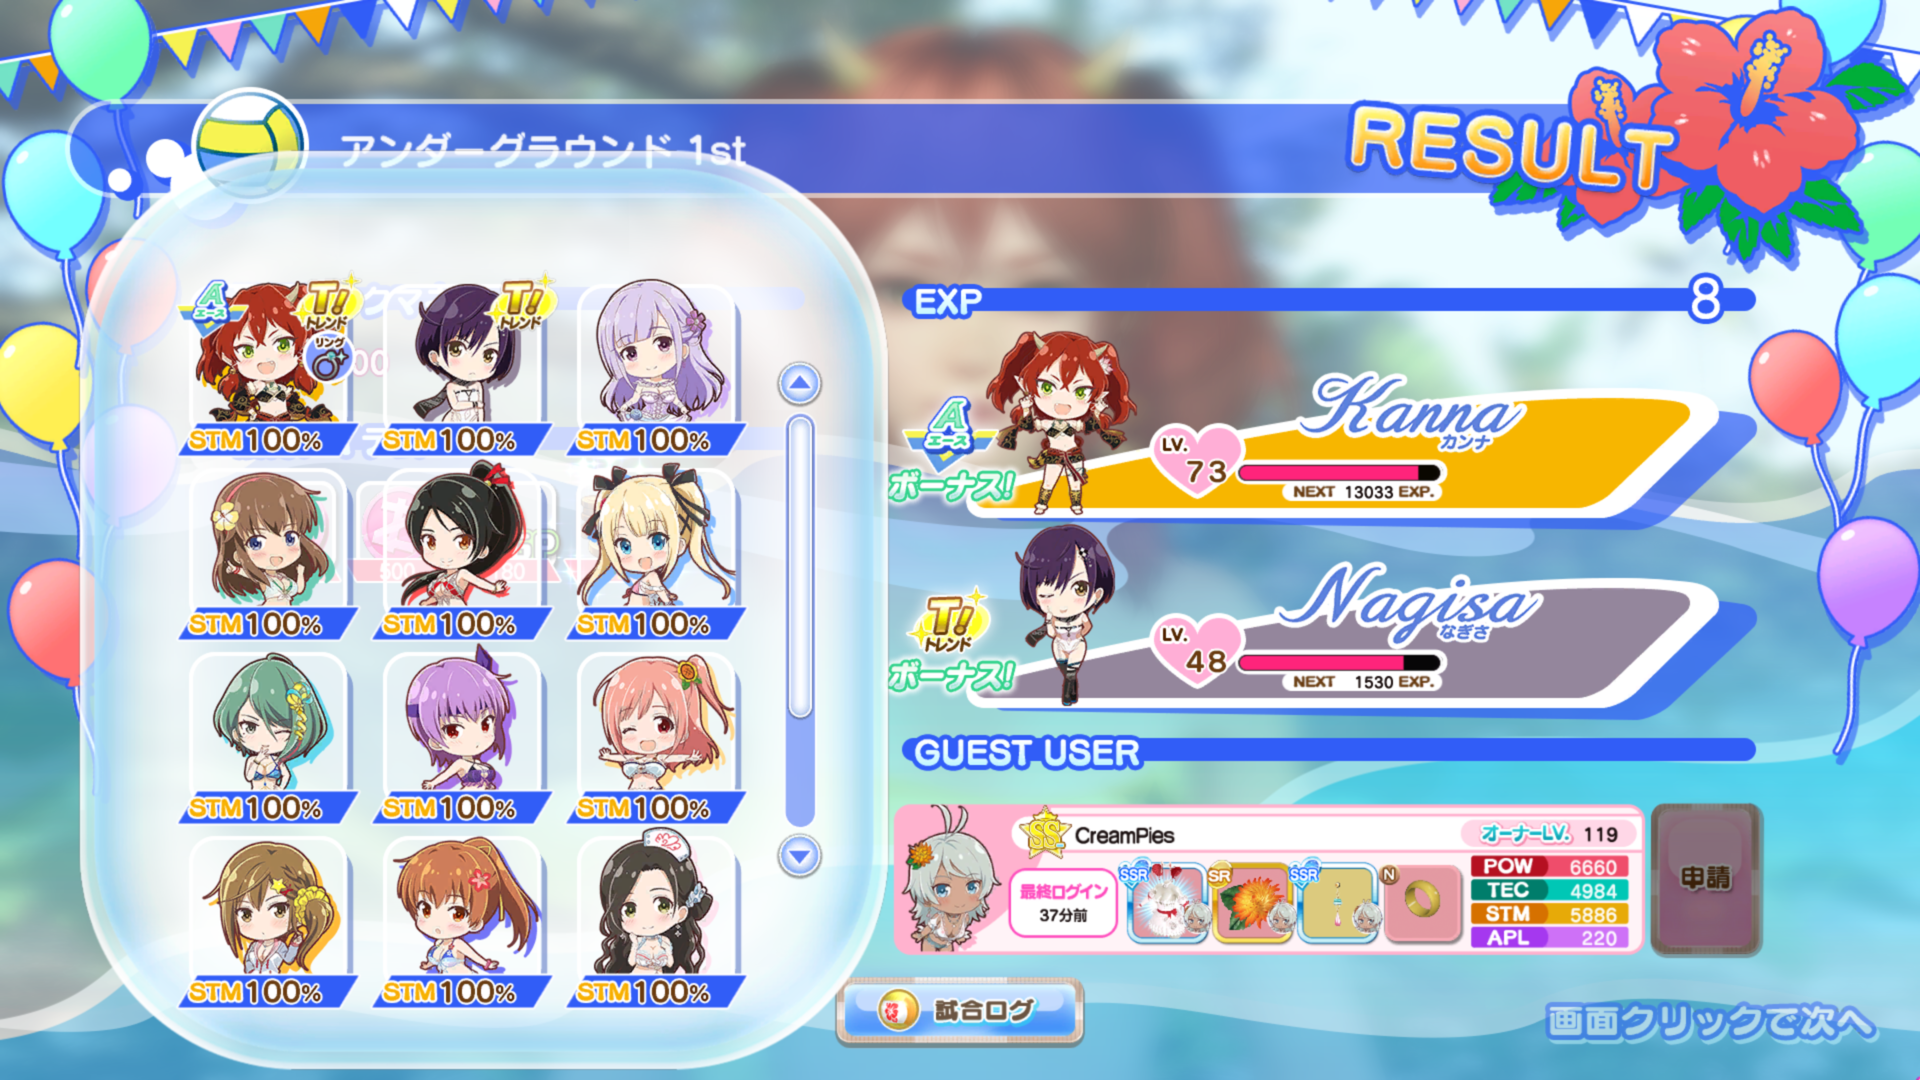
Towers also feature a unique mechanic which is STM is not restored between matches. This means if you finish a match at half STM your next match will be started at half STM. Girls will recover their STM when not used for a match or when completing a match while equipped with a trend suit. This means it is helpful to prioritize having a good number of girls leveled, having STM potentials, or having a trend suit for these events.
Additionally Guest characters will stay for 3 rounds in these matches instead of the usual 2 so make sure to make use of them to help manage your STM consumption.
Upon completing a tower of a certain rank a new unlimited match of that rank is unlocked which allows you to easily farm for event score and currency. Since these types of matches are not played in the tower they do not lock out other choices and are free of the STM restrictions.
In-case you are unable to complete a tower they can be prematurely ended by clicking the large pink button that says「リセット」located at the top right of the match selection page.
Butt Battle (PvP)「どんけつゲーム」
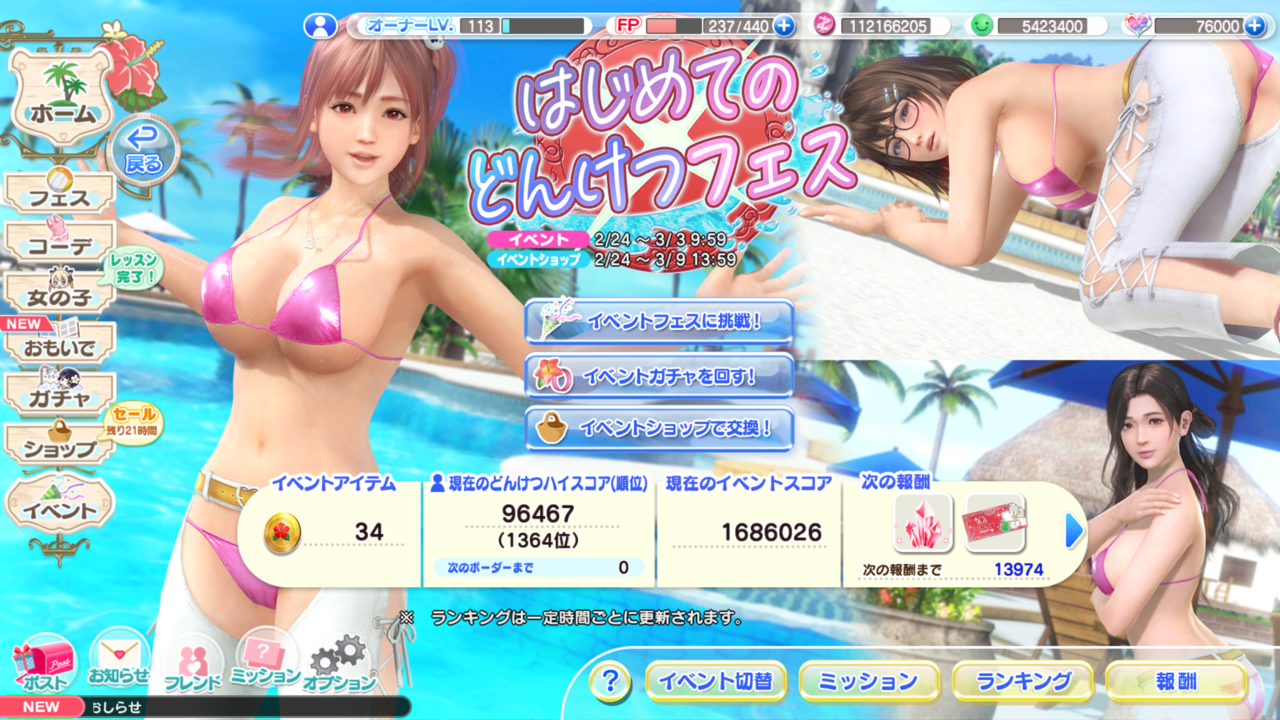 A variation of the original event from the third anniversary, this version features a scoreboard and rank rewards as opposed to a community reward. These events are unique in that rather than focus on a cumulative score only your highest score is counted for the leaderboards, this makes them much more forgiving than traditional PvP events.
Like PvE there are three ranks of tickets however stats differ for each in this version:
A variation of the original event from the third anniversary, this version features a scoreboard and rank rewards as opposed to a community reward. These events are unique in that rather than focus on a cumulative score only your highest score is counted for the leaderboards, this makes them much more forgiving than traditional PvP events.
Like PvE there are three ranks of tickets however stats differ for each in this version:- S Rank - 9 Rounds. Recommended Power: 40,000
- A Rank - 6 Rounds. Recommended Power: 30,000
- B Rank - 3 Rounds. Recommended Power: 20,000
As before your total power is equal to POW + TEC + STM, ignoring buffs such as skincare skills.
Note: Unlike in the PvE variant, Trend bonuses do count towards your total power in this mode (will be displayed to the right in parenthesis for how much it adds). (Thanks to The Dude for testing this for me).
Note 2: While there is a recommended power level you can be significantly lower than that and still have no trouble winning. If you are really concerned about it you should try one of the free practice matches to be sure.
In addition to the usual matches this type features a very heavy emphasis on Tension Burst and introduces a new item that permanently increases a girl's base APL, top coats (See Skincare and Manicures section for more info).
Because of this emphasis on APL, APL suits are extremely useful and are necessary to be competitive in these events.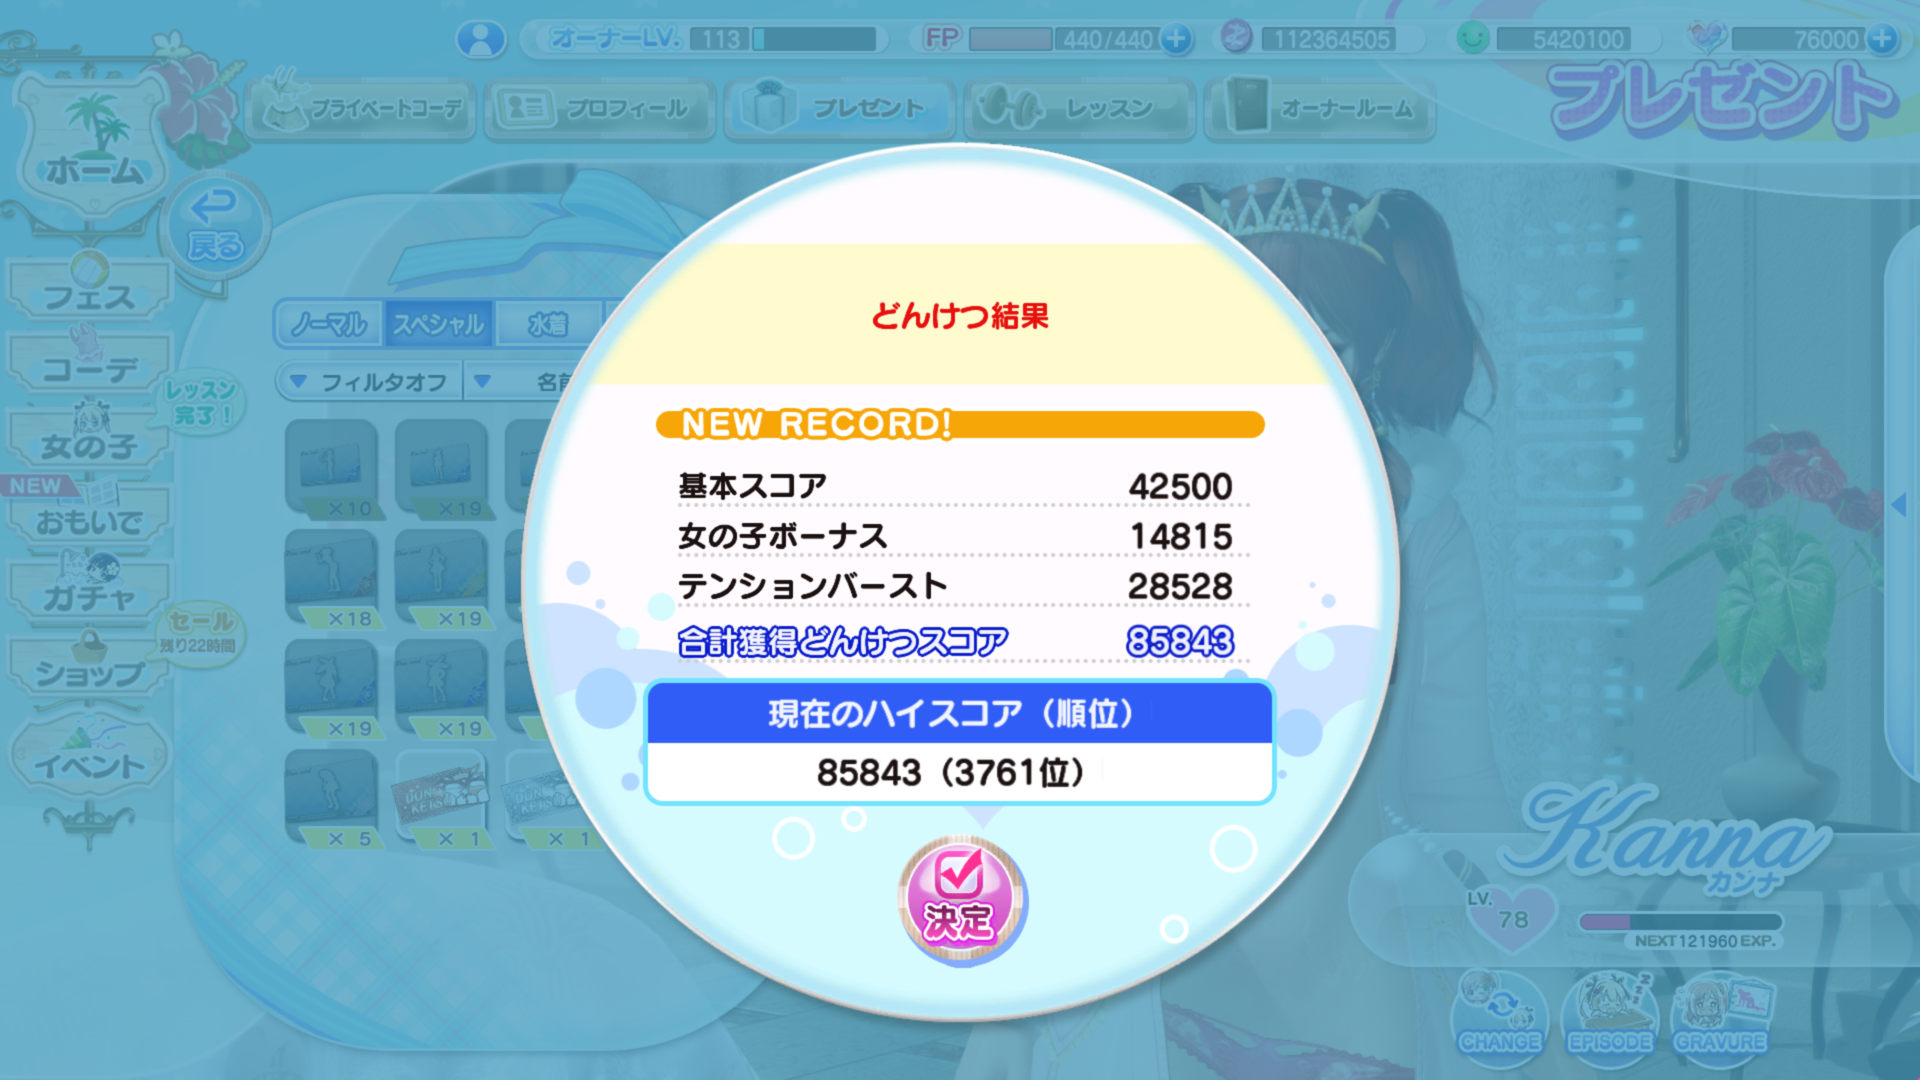
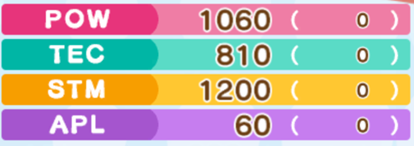
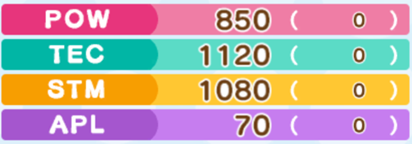
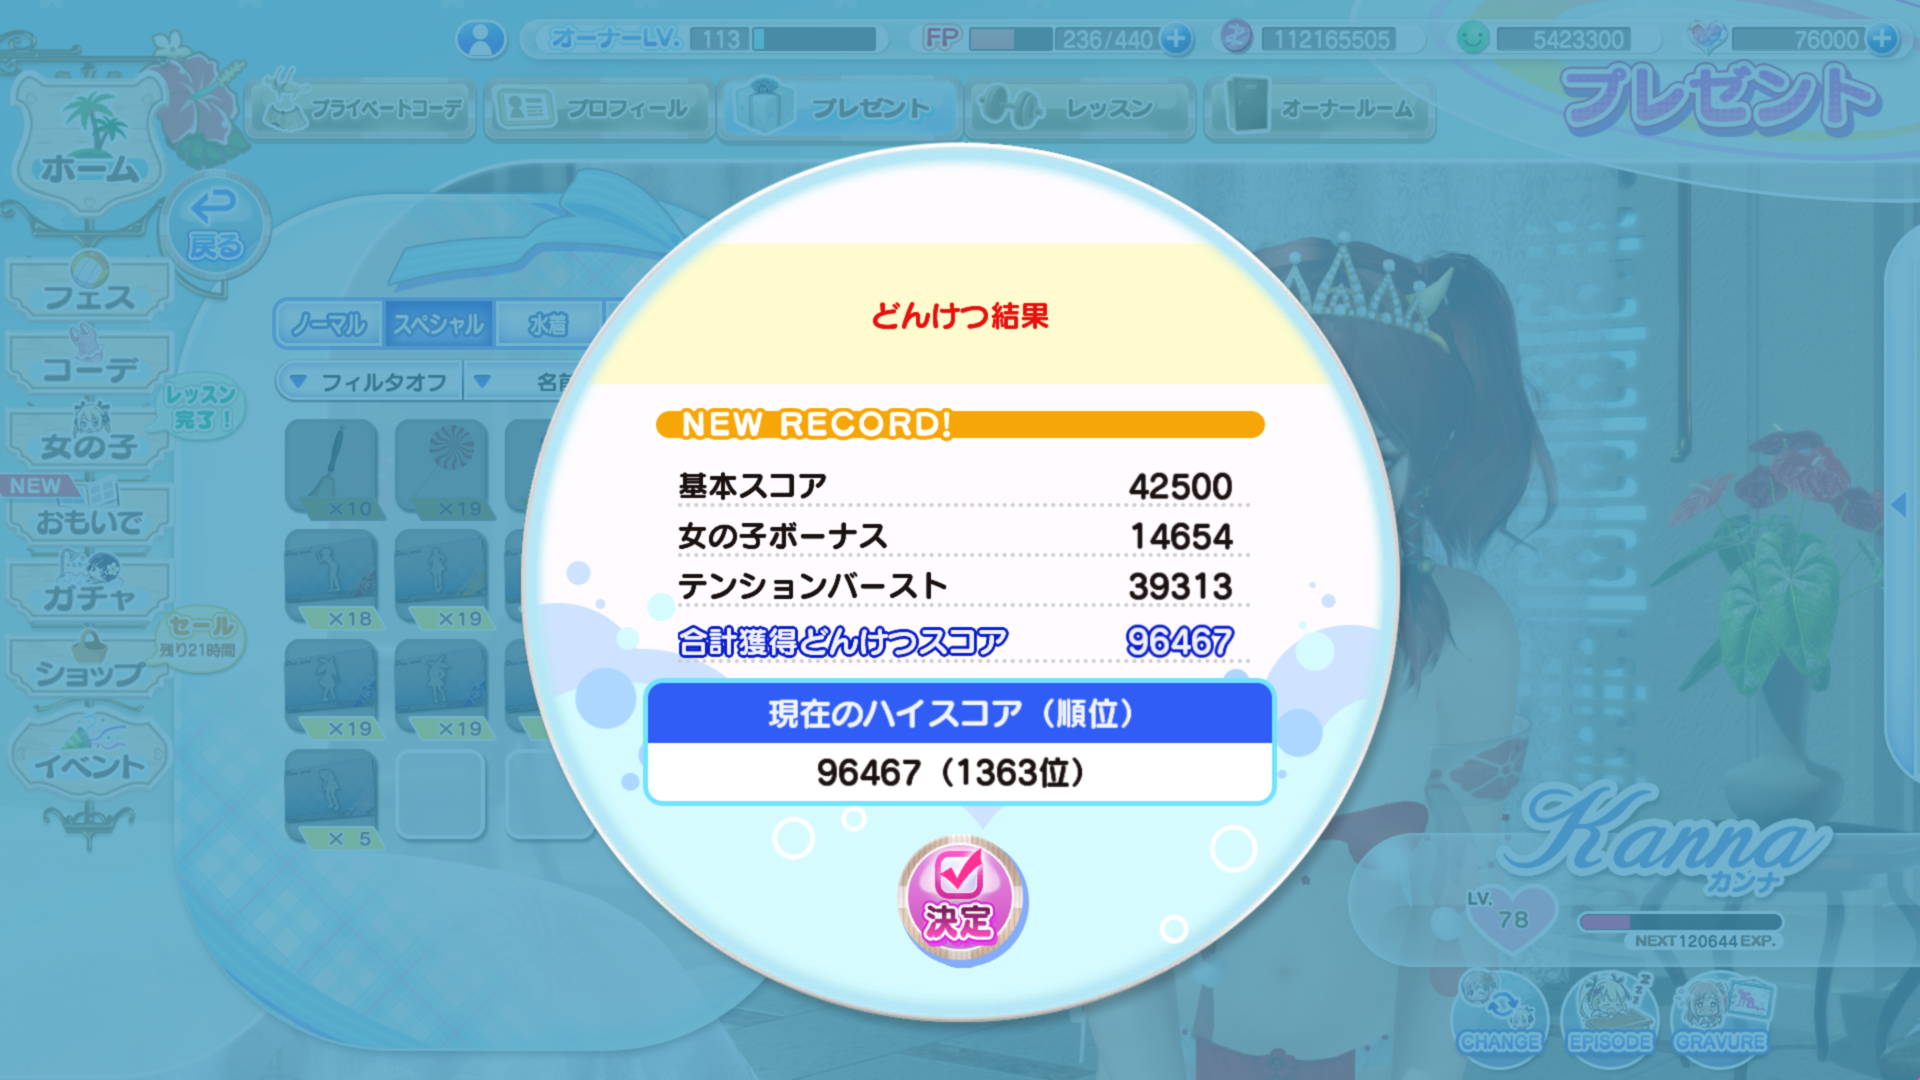 From here you can see the difference in score APL makes. On the left is Kanna in her stellar birthday suit, on the right she is in her fortune suit. Despite having lower stats it is significantly stronger due to the additional tension burst opportunities it gives.
As scores get closer in higher ranks it becomes more evident why being able to squeeze in one more burst is important in this mode.
Scores are divided into 3 categories:- Base score: This is a flat value based on the rank of the match.
- S Rank: 45,000 Points
- A Rank: 30,000 Points
- B Rank: 20,000 Points
- S Rank: 45,000 Points
- Girl Bonus: I do not know exactly what determines this score however it is impacted by your total power.
- Tension Burst: I am also unaware what exactly determines this value aside from the number of times tension burst was used in a match. Aside from doing the highest rank match you can this should be the second most important stat and is why you should focus on building APL for this mode.
Note: While there is no direct trend bonus for score they can still influence your total since they give higher stats.
Note 2:It is worth noting that even if you have a trend suit for this event type it is not worth using over an APL suit unless the trend suit happens to be APL as well. The difference in score from your girl bonus is negligible compared to the potential for more tension bursts.
Note 3: Potentials and Passive Deco-Bromides can influence your total score in this mode so obtaining APL ones can help you to get a higher score in this mode.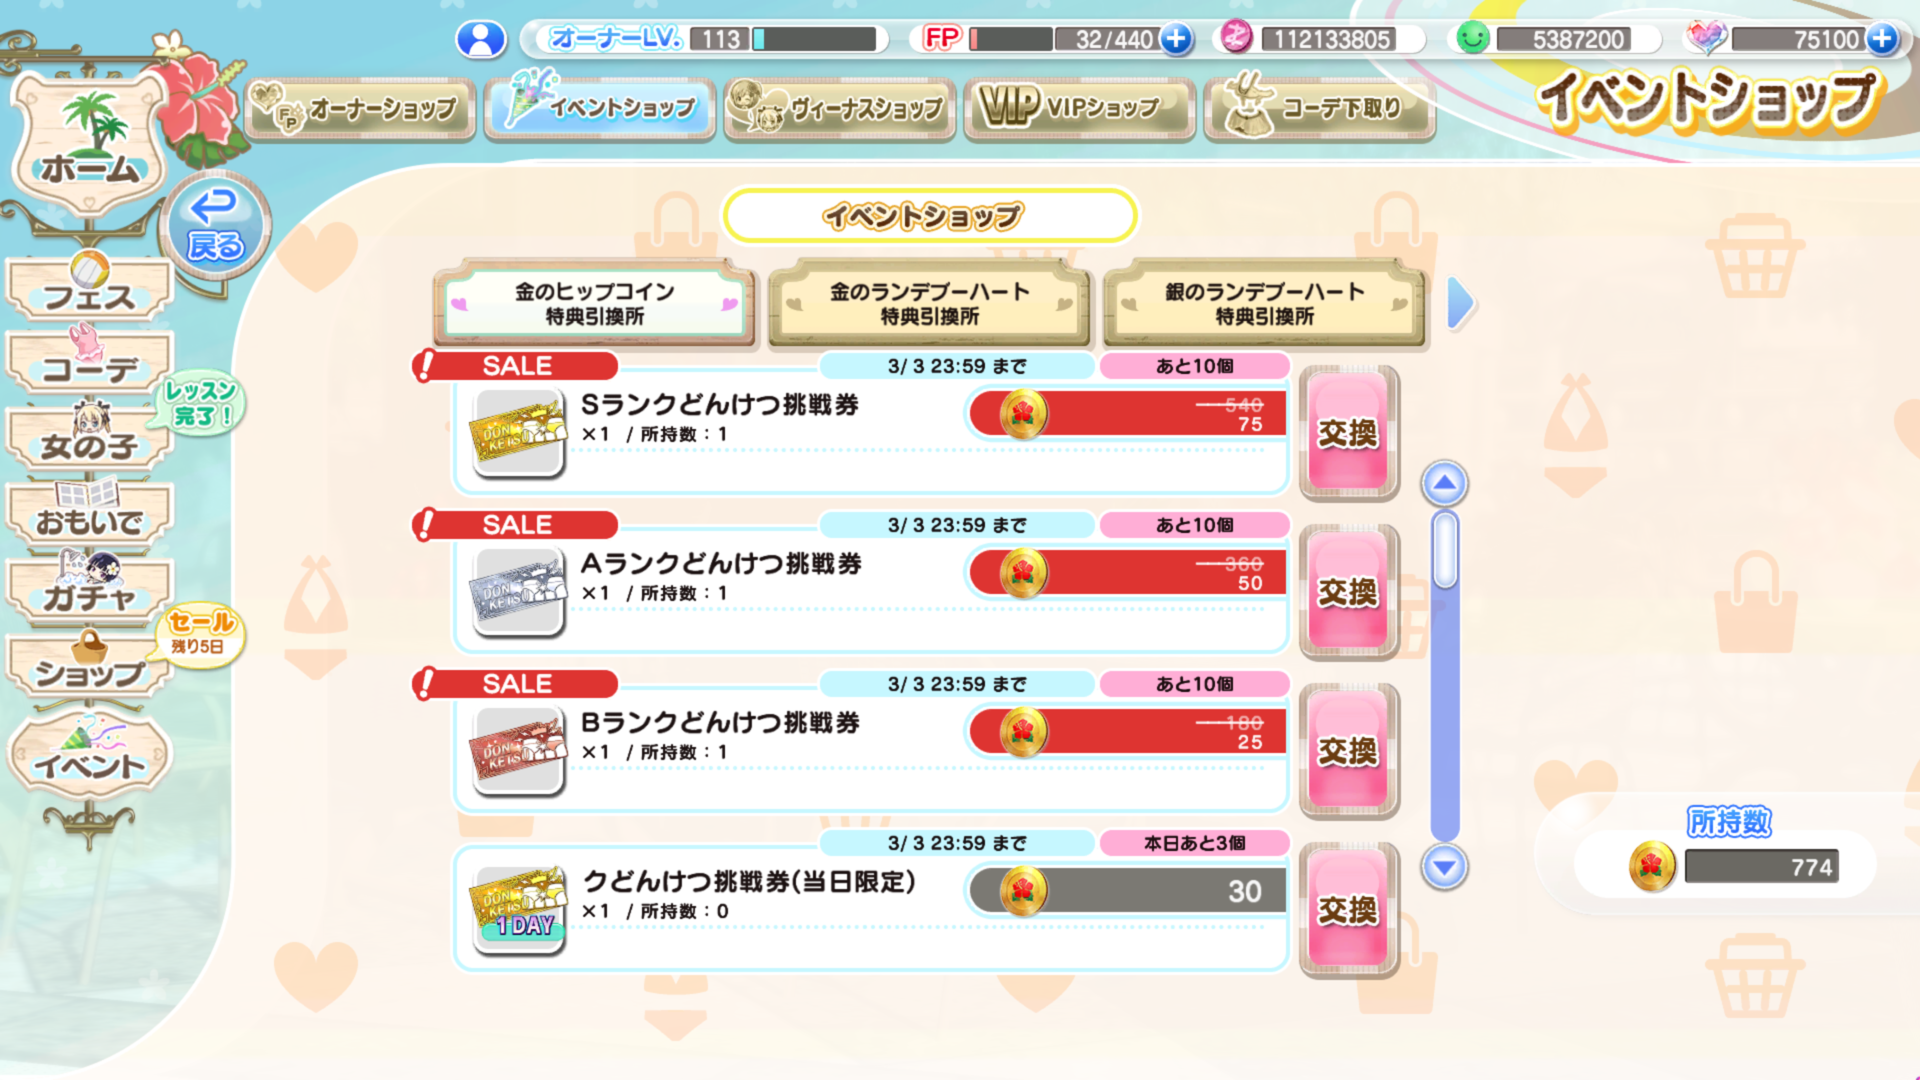 Similar to rival events, butt battle events feature both daily tickets you can purchase (3 of each rank per day) and diminishing discounts for the permanent ones.
Additionally there are practice tickets for each rank in the shop, they cost no currency and have a purchase limit of 999. They are the green tickets. Look for S/A/B in the name to determine the rank.
Note: Practice tickets do not contribute to event score and give no rewards so they should only really be used to determine your ability to complete a rank or to test what score you would get with your current build.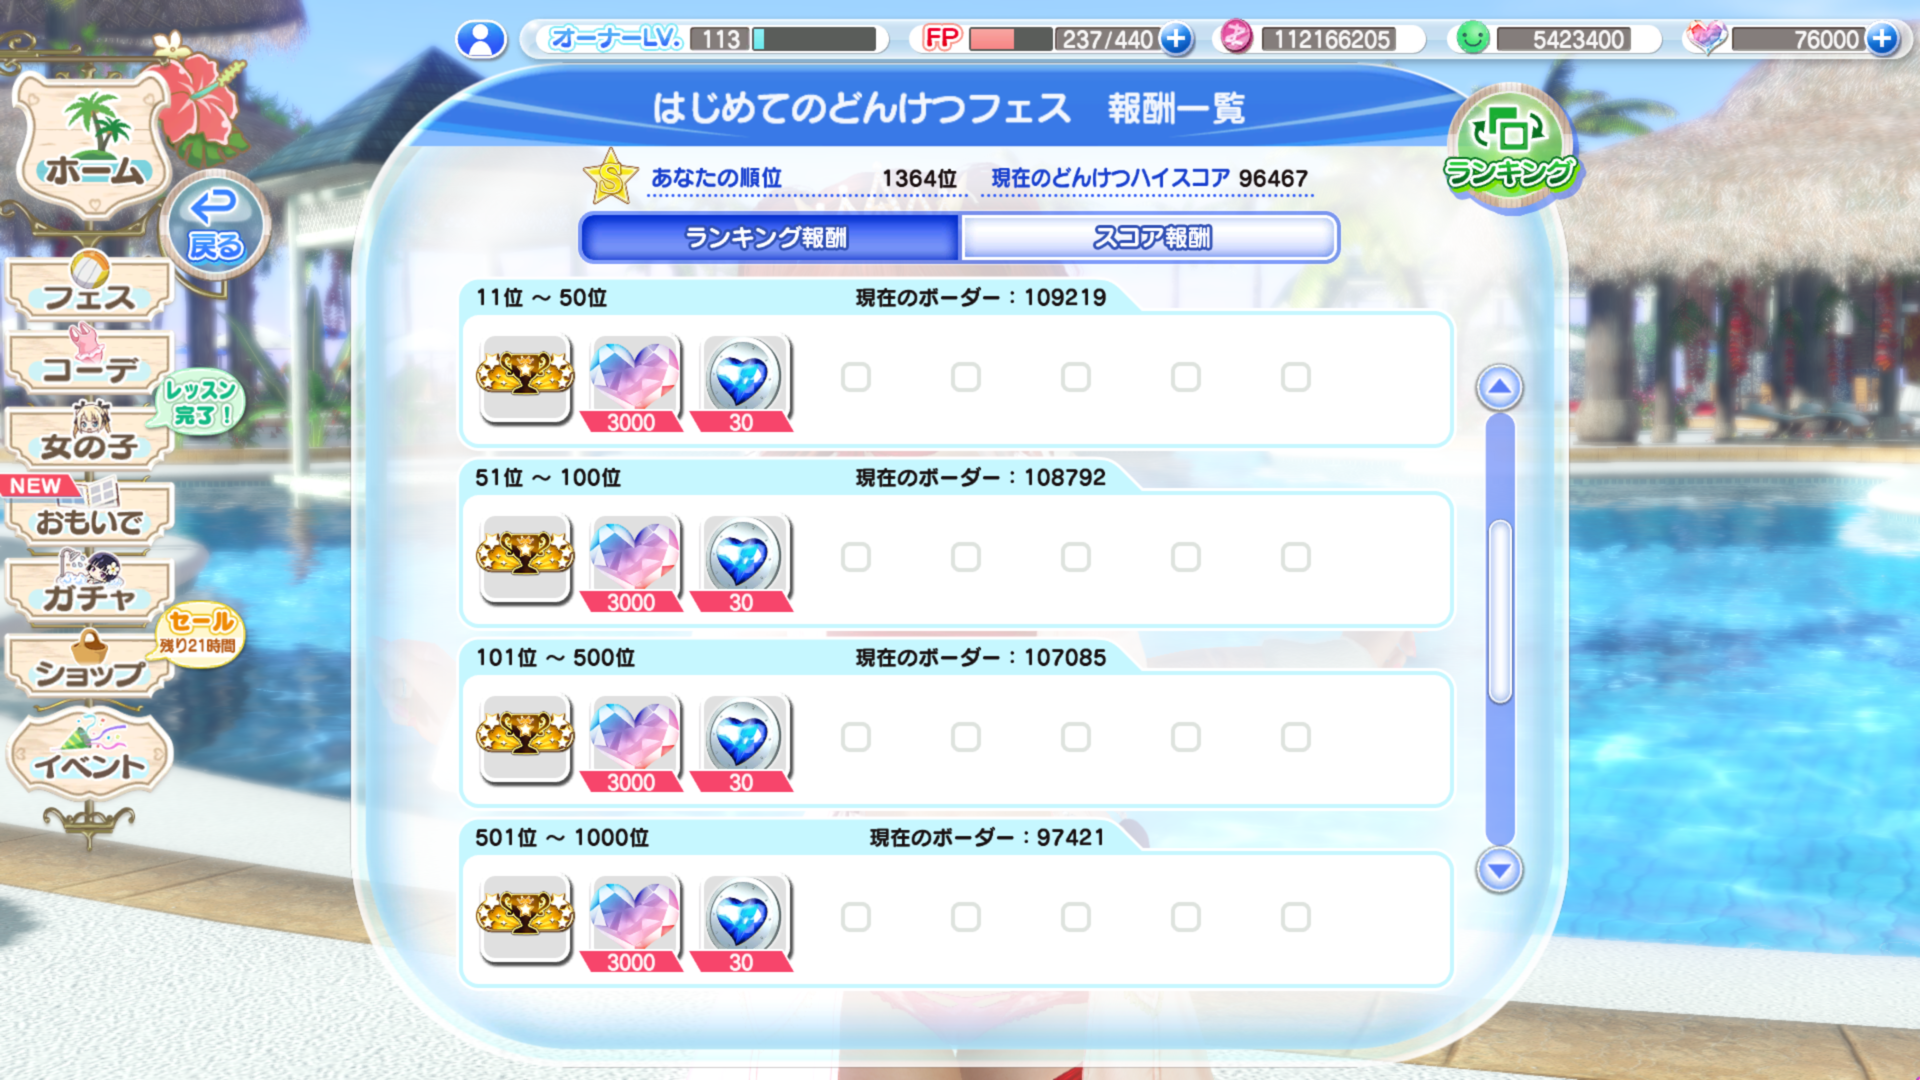
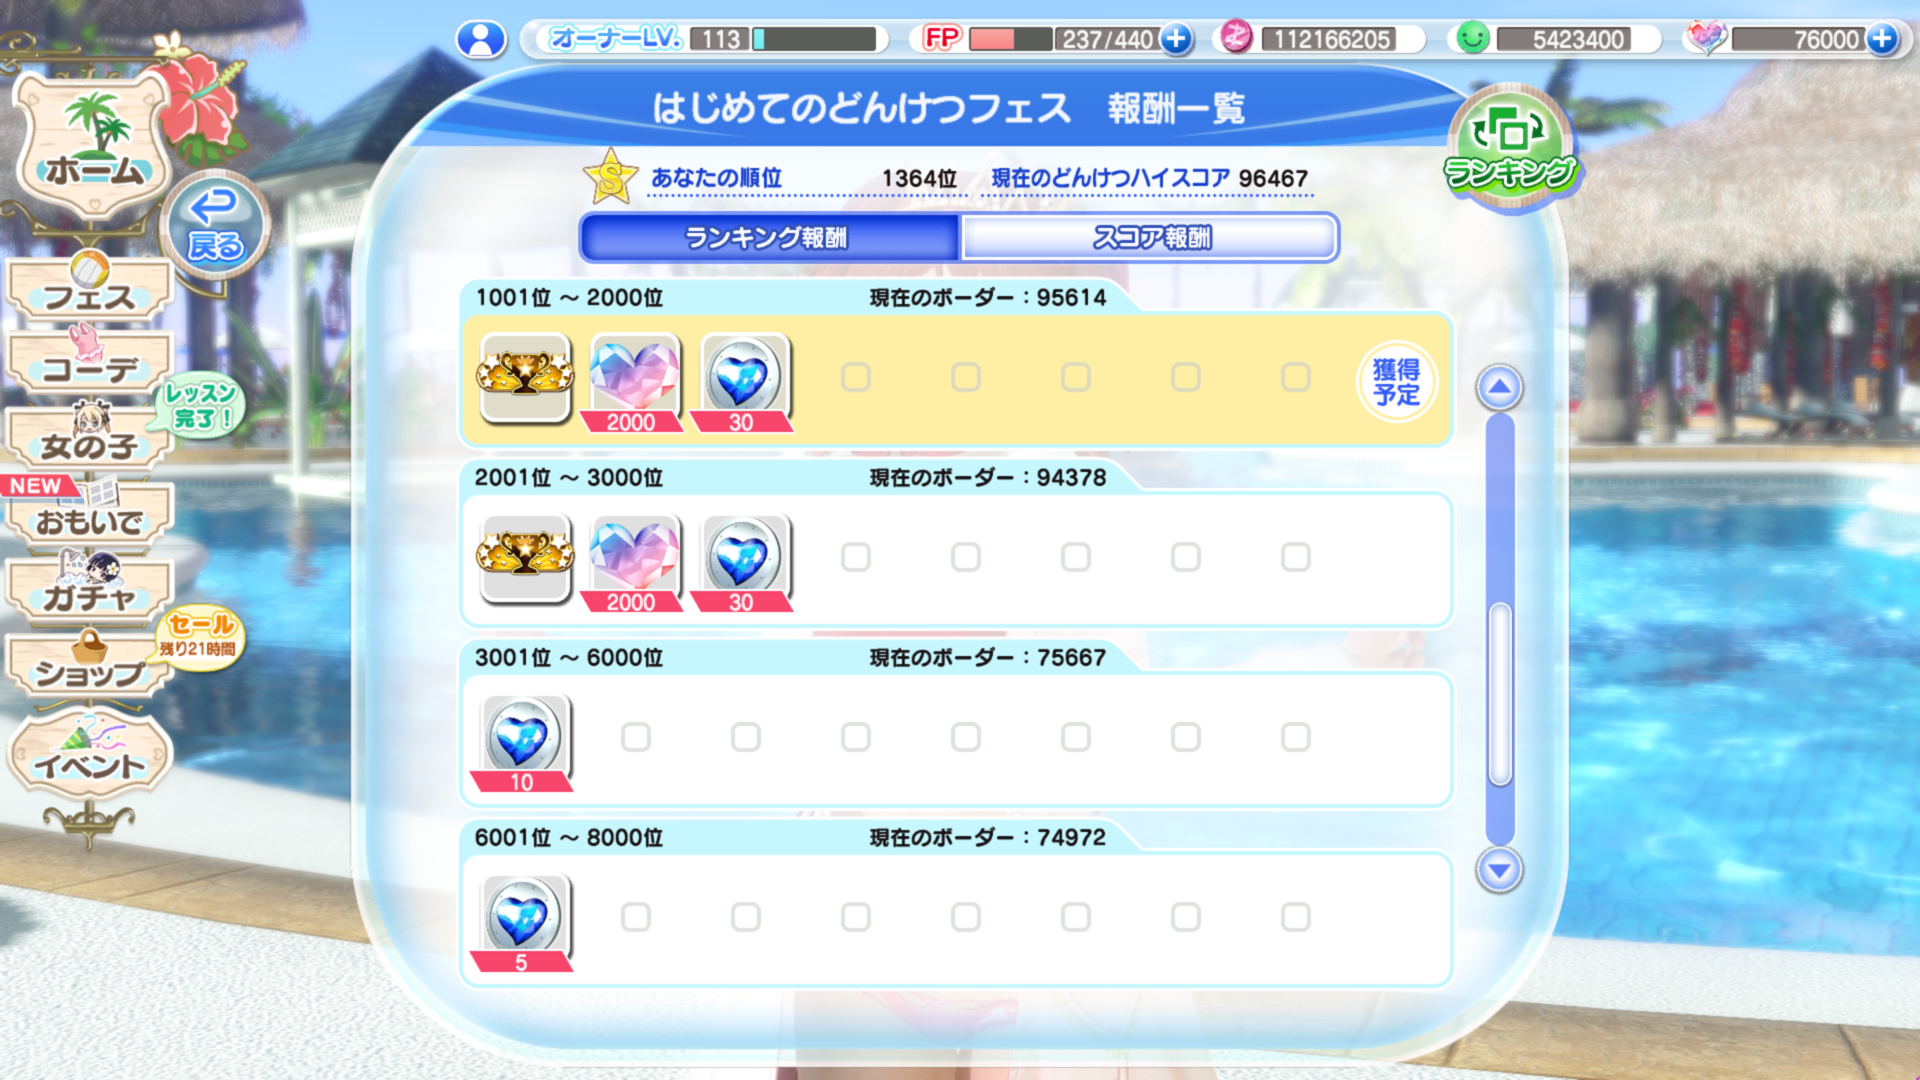 Rather than the usual SSR Accessory leaderboards in these events offer titles and V-stones/VIP Coins. Additionally the cutoff for these titles is top 3k as opposed to the usual top 6k.
Stat Distributions
The first thing you need to know before you even decide on an outfit for your girls is: Not all girls are created equally
Each girl has base stats and some girls just have straight up less stats than the others. Girls can have their stats geared toward POW, TEC, or STM, generally you want a suit that complements their best stat but in the case of a STM girl (seriously TN why?) you'll want to use their second strongest stat. Girl types will be listed below:
 &
&Note: I won't list numbers here, this is simply meant to be an easy glance and see what their strengths are sort of thing. If a new girl comes out who isn't on this list you can simply glance at her default N suit to tell without even having to know the stats as they are always the same type as the girl's main stat (If it's STM just glance at the other stats and go with the bigger one.)
In case you're wondering, as of right now:
- Kanna has the Power of an Oni highest POW in the game.
- Monica has the highest TEC in the game. (Leifang does, by like a lot, if you have both of her SSR accessories)
- Sayuri has the highest STM in the game.
Notes:
- A girl is considered to be STM when neither of her other stats are at least 1,000. For the most part STM is usually the highest stat on every girl.
- APL is the universal lowest stat but some girls have slightly more base APL than others, the differences are all kind of negligible though and level up has very little impact on it.
- If I put STM as their second stat then the distribution is so much better for their strength that you should just use the first unless you have a trend suit or literally nothing else. (My threshold for this was a ~200 point stat difference, think of that what you will. I mostly included the second column because STM girls needed another stat listed.)
- In case you didn't figure it out Honoka and Sayuri have an even stat distribution so go nuts, it doesn't really matter with them.
- Luna and Tamaki's TEC is actually really close to their POW so you can get away with TEC suits on them if you want.
Girls natural stats increase through leveling up, the number of points is distributed between POW/TEC with STM usually getting a little more than either. XP requirements for leveling are as follows:
Note: I'll fill this in as I record the requirements, it will probably be incomplete for a while. Sorry.
Note 2: I tried to make this as accurate as possible however I forgot to take into account that the girl who isn't your ace only gets 50% of the experience so the first couple of entries I did might be off by ~24 XP. 59-60 should have their values double checked to make sure.
Aside from these initial numbers all values were measured using XP items with fixed values and are therefore 100% accurate.
Note 3: In case you're wondering the "?" next to the max level it's because it's a relatively recent addition and as they have shown is likely to increase eventually.
Note 4: Just to clarify, these are the XP values displayed when your girl is at that level. IE When you have a fresh level 1 girl the XP required to get to level 2 will be displayed as 5.
Coordination「コーデ」
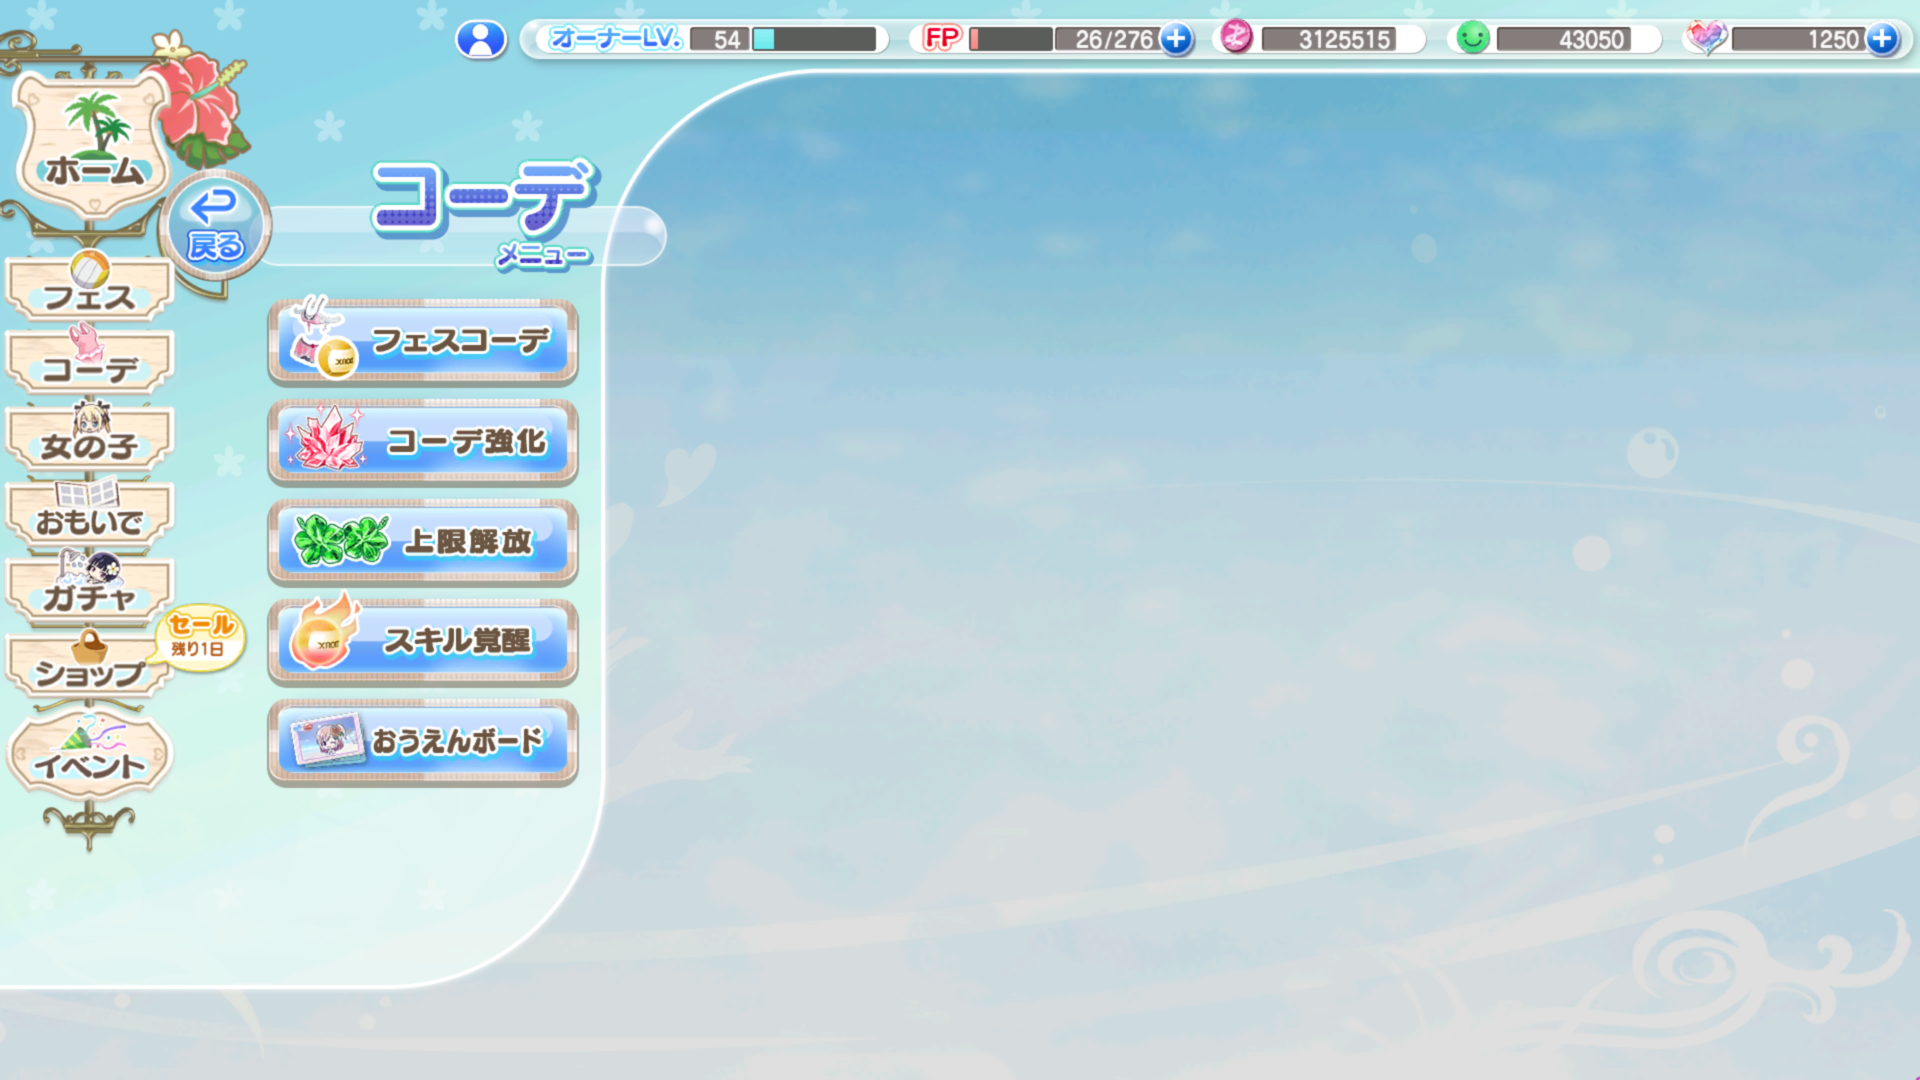
The coordination menu allows you to access your festival clothing sets as well as the means to upgrade them.
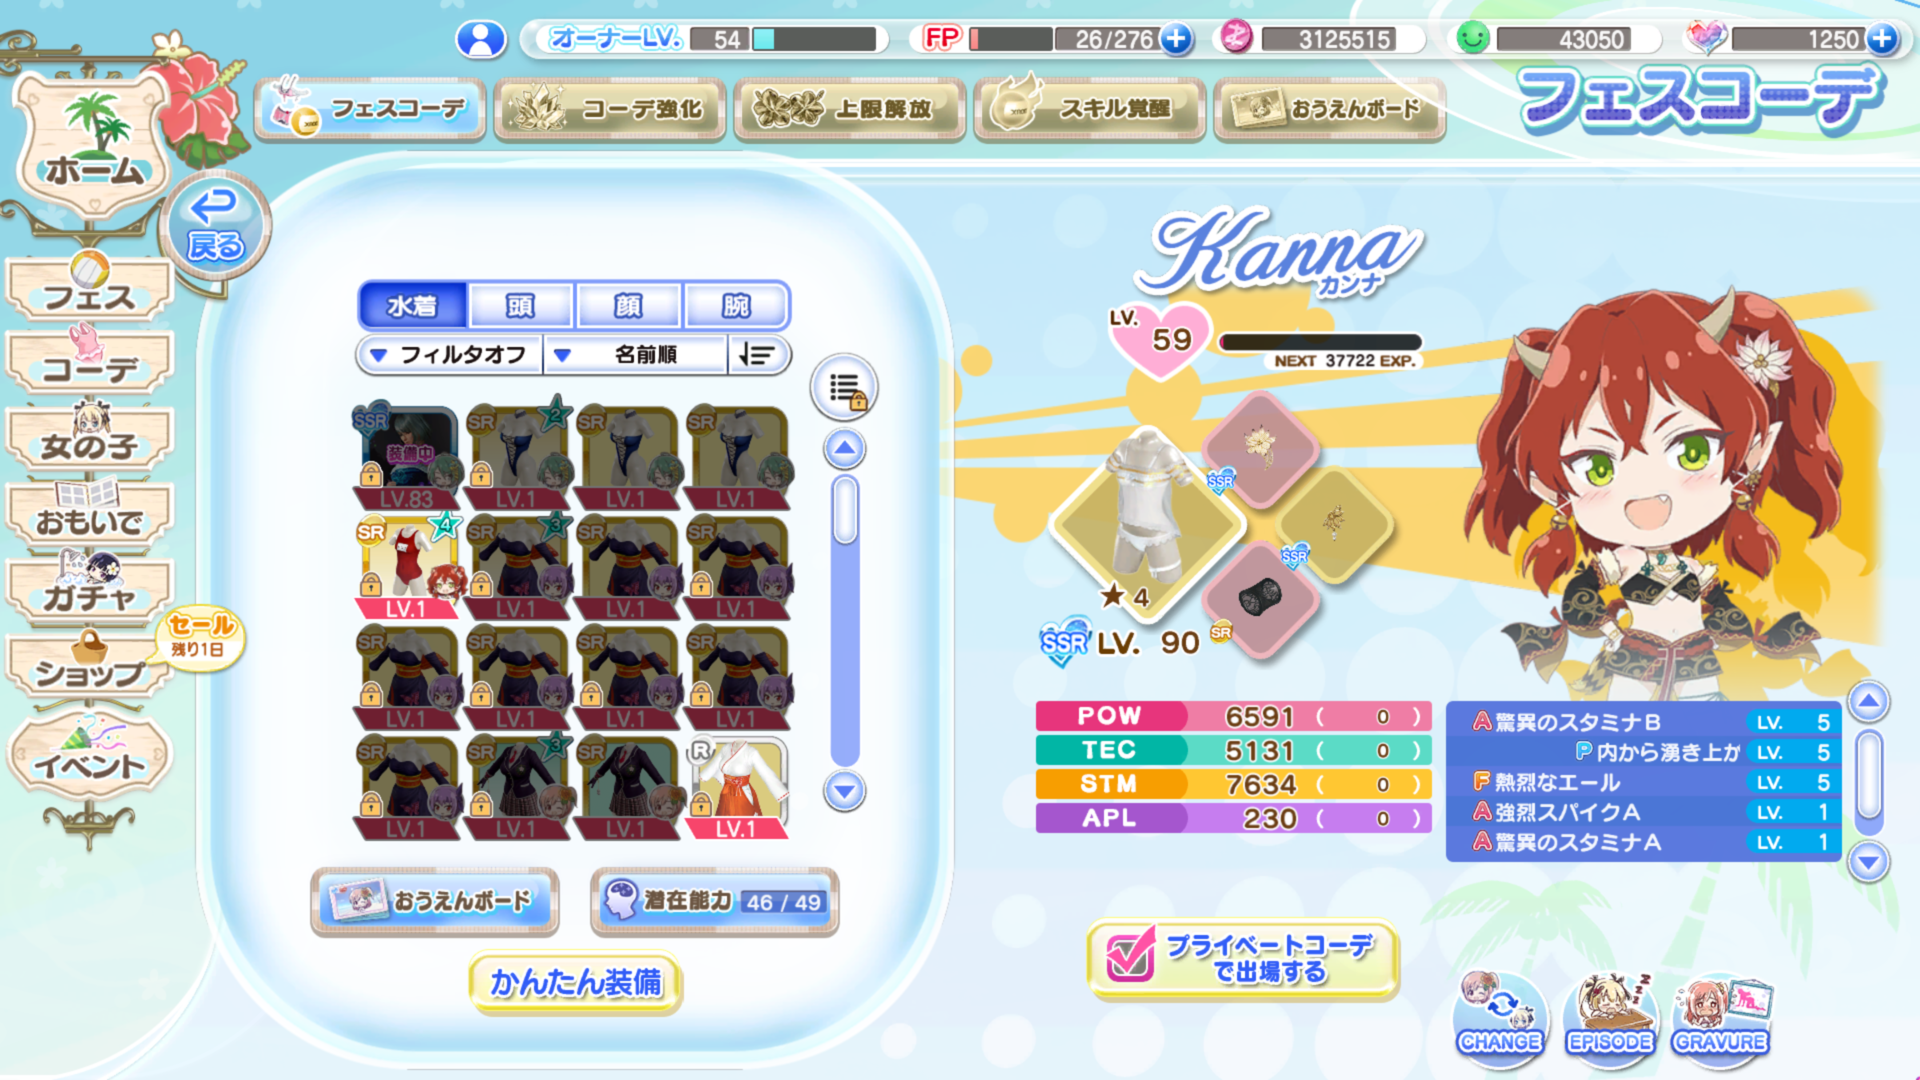
Festival clothing is the outfits that girls wear during their festival matches that affect them statistically. The yellow box at the bottom with a check inside of it is the toggle for wearing your private outfit cosmetics over your festival one so you don't need to choose between looks and stats.
The tabs at the top cycle through Swimsuits, Head wear, Face wear, and Arm wear.
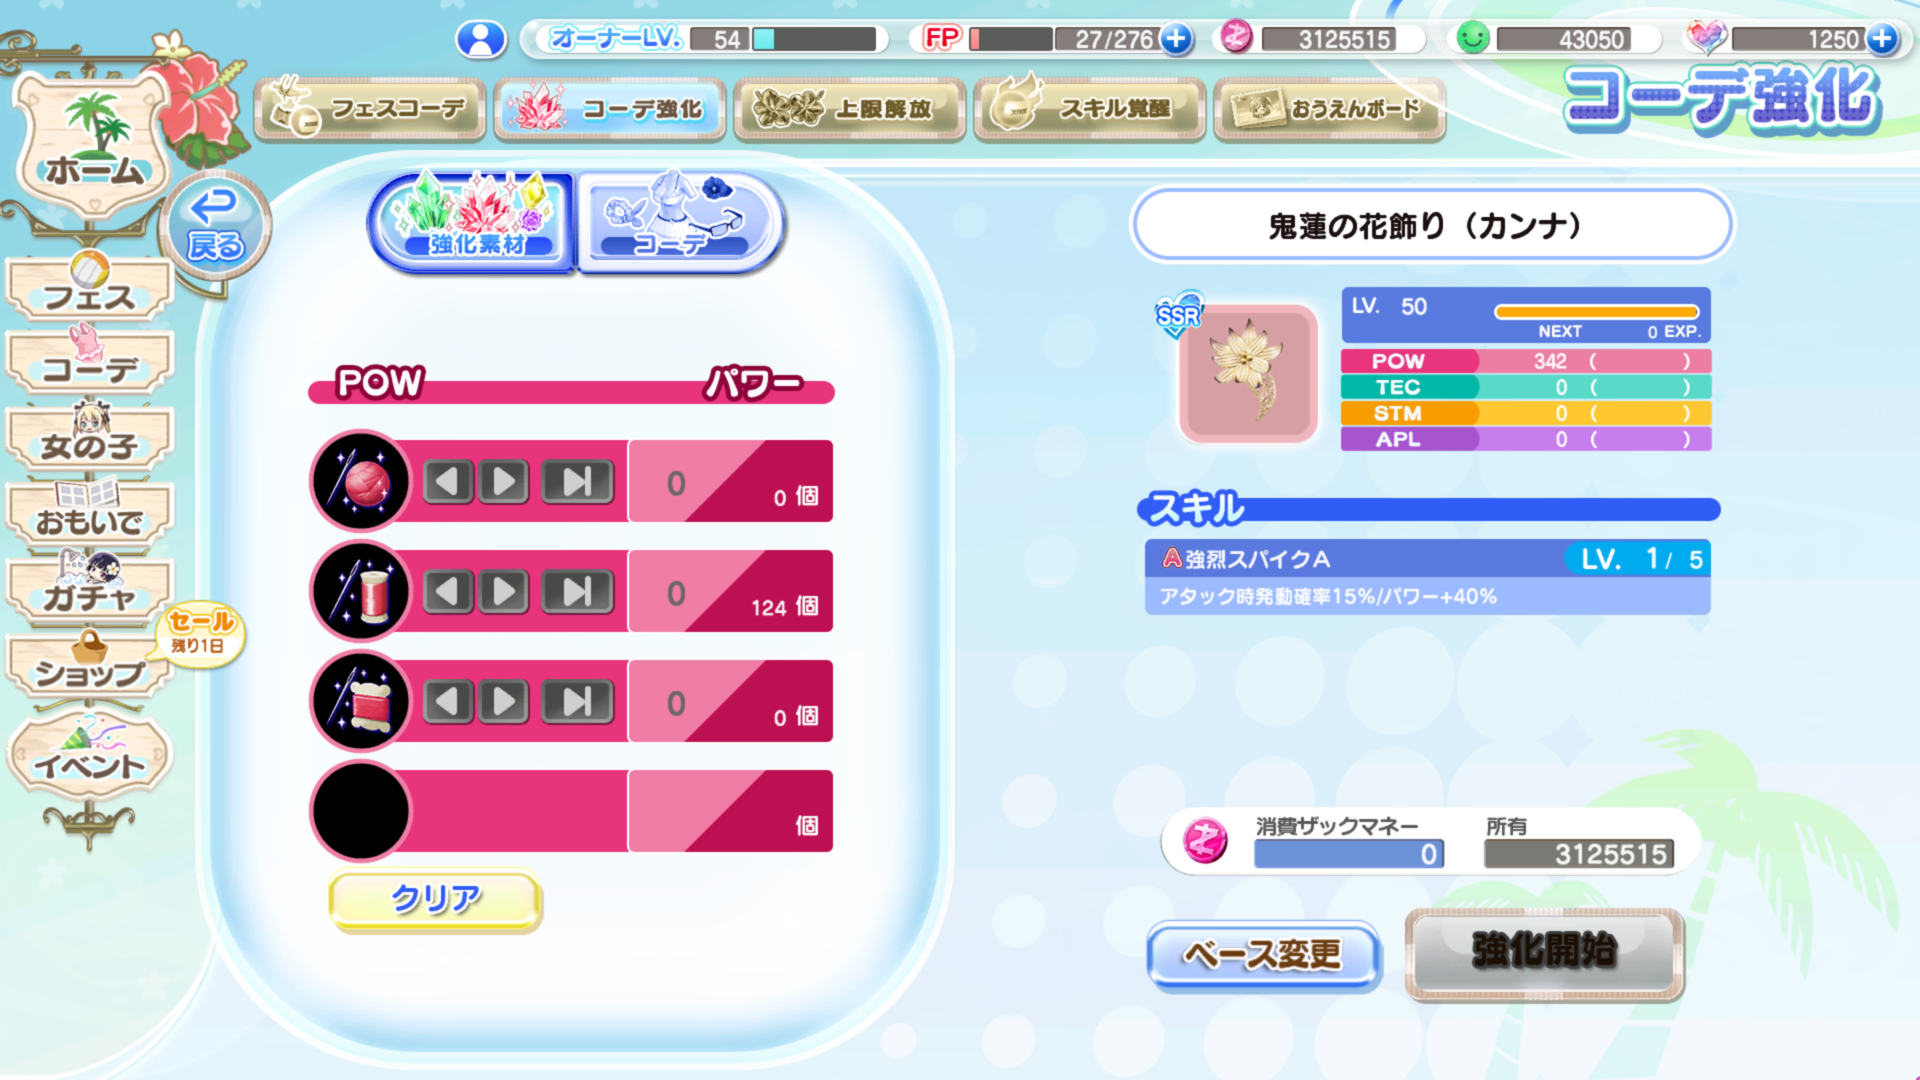
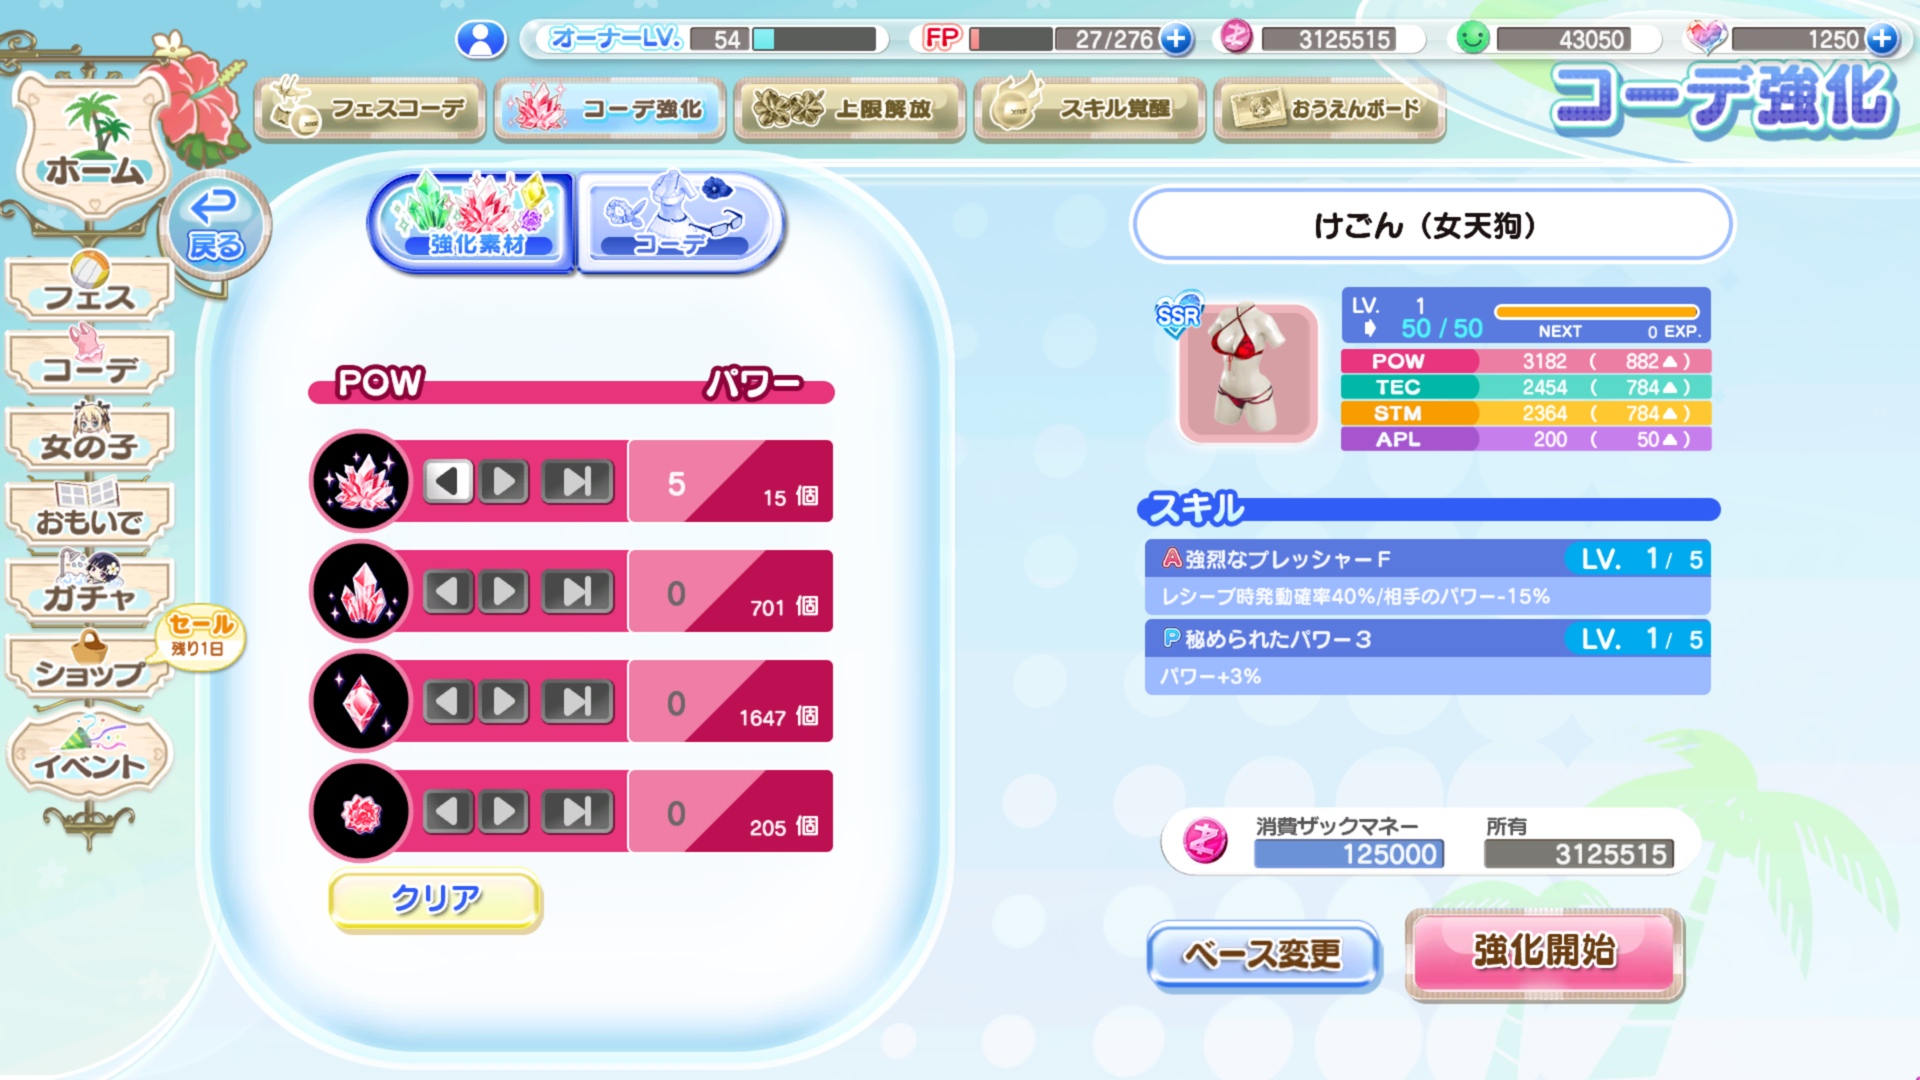
The next section is for clothing upgrades, accessories and swimsuits use separate materials however both can use other clothing items in place of that material. Using clothing gives less XP and Costs more so it isn't highly recommended unless you're really short on materials, even then it's probably better to just wait since daily missions give swimsuit upgrade materials.
Accessory upgrade materials are fairly rare (Dropped from lessons and some events) and give fairly little XP if they aren't XL so I would generally recommend just using spare clothing to upgrade them if you have any.
Note: These's a random chance when performing an upgrade that you will have a great success (words will be rainbow), great success gives (I think) 1.5x as much experience as the projected amount. You will never get less than the game predicts.
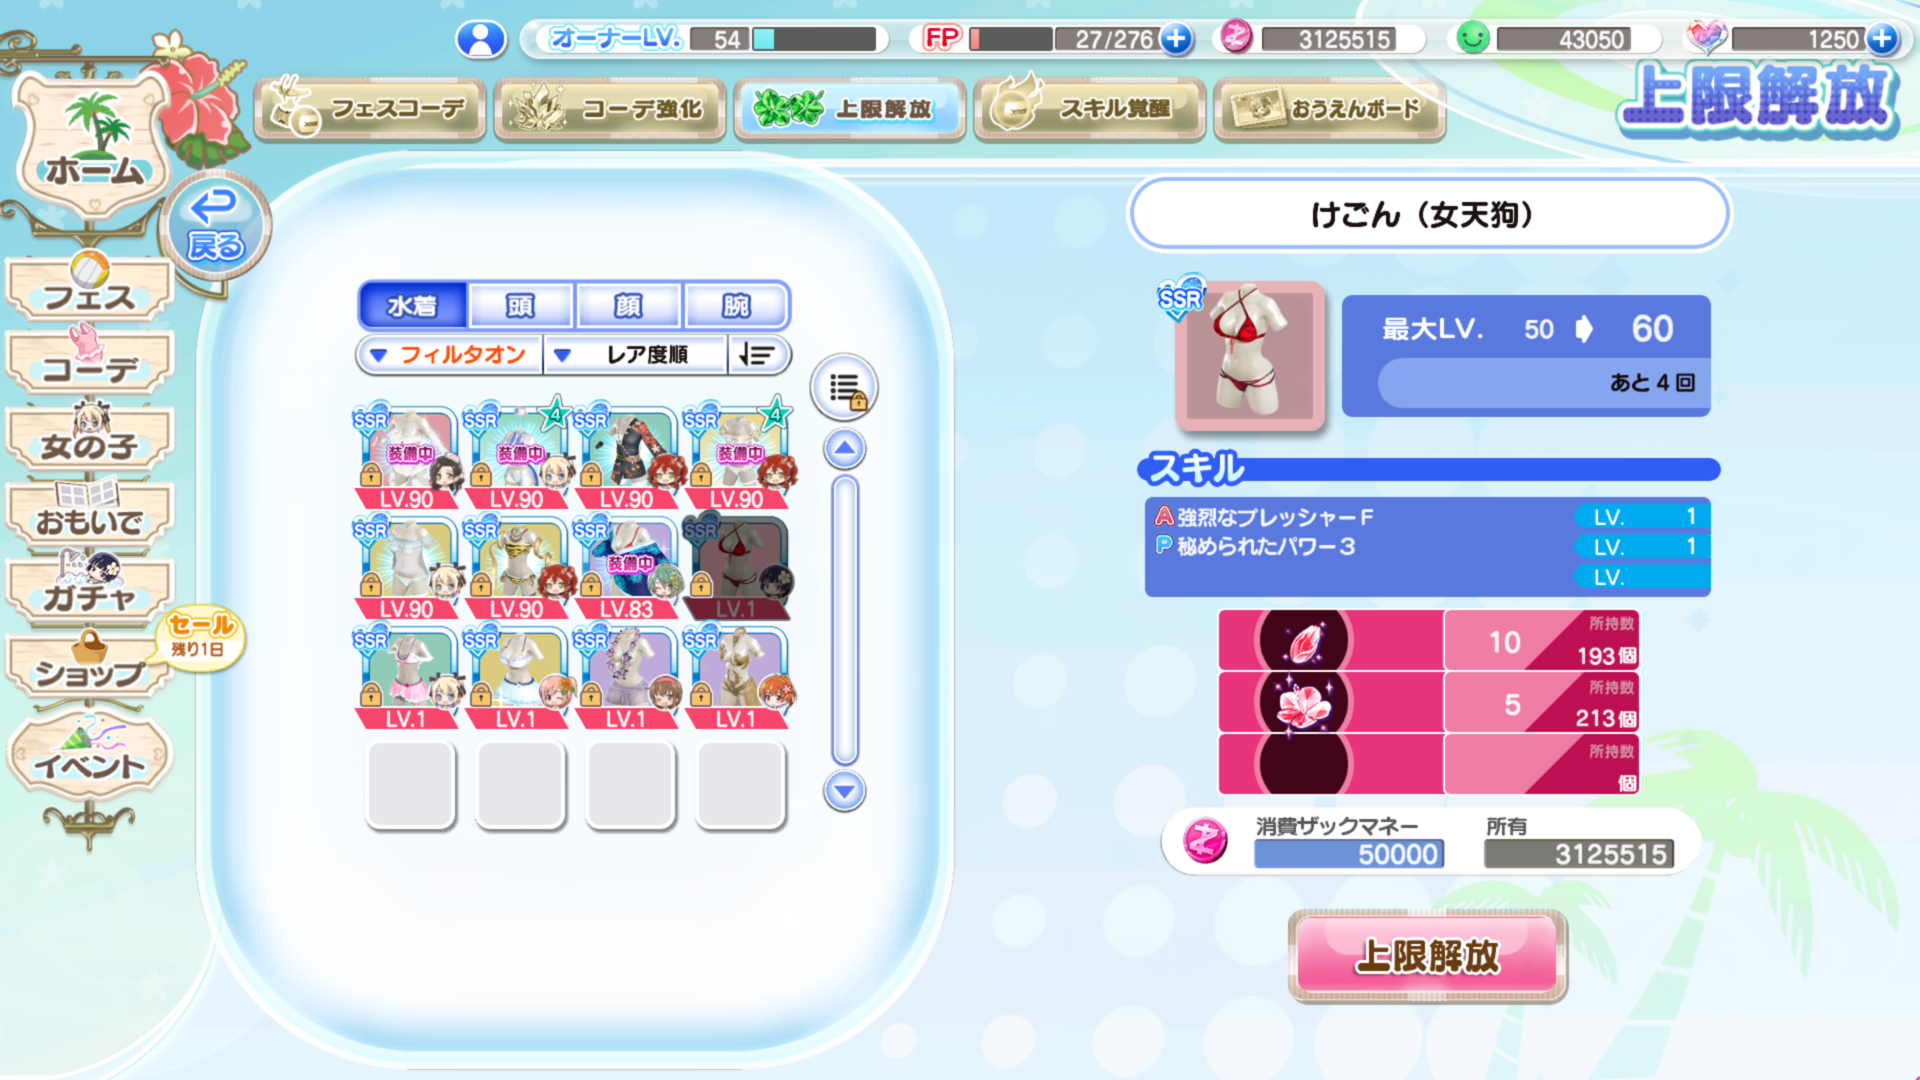
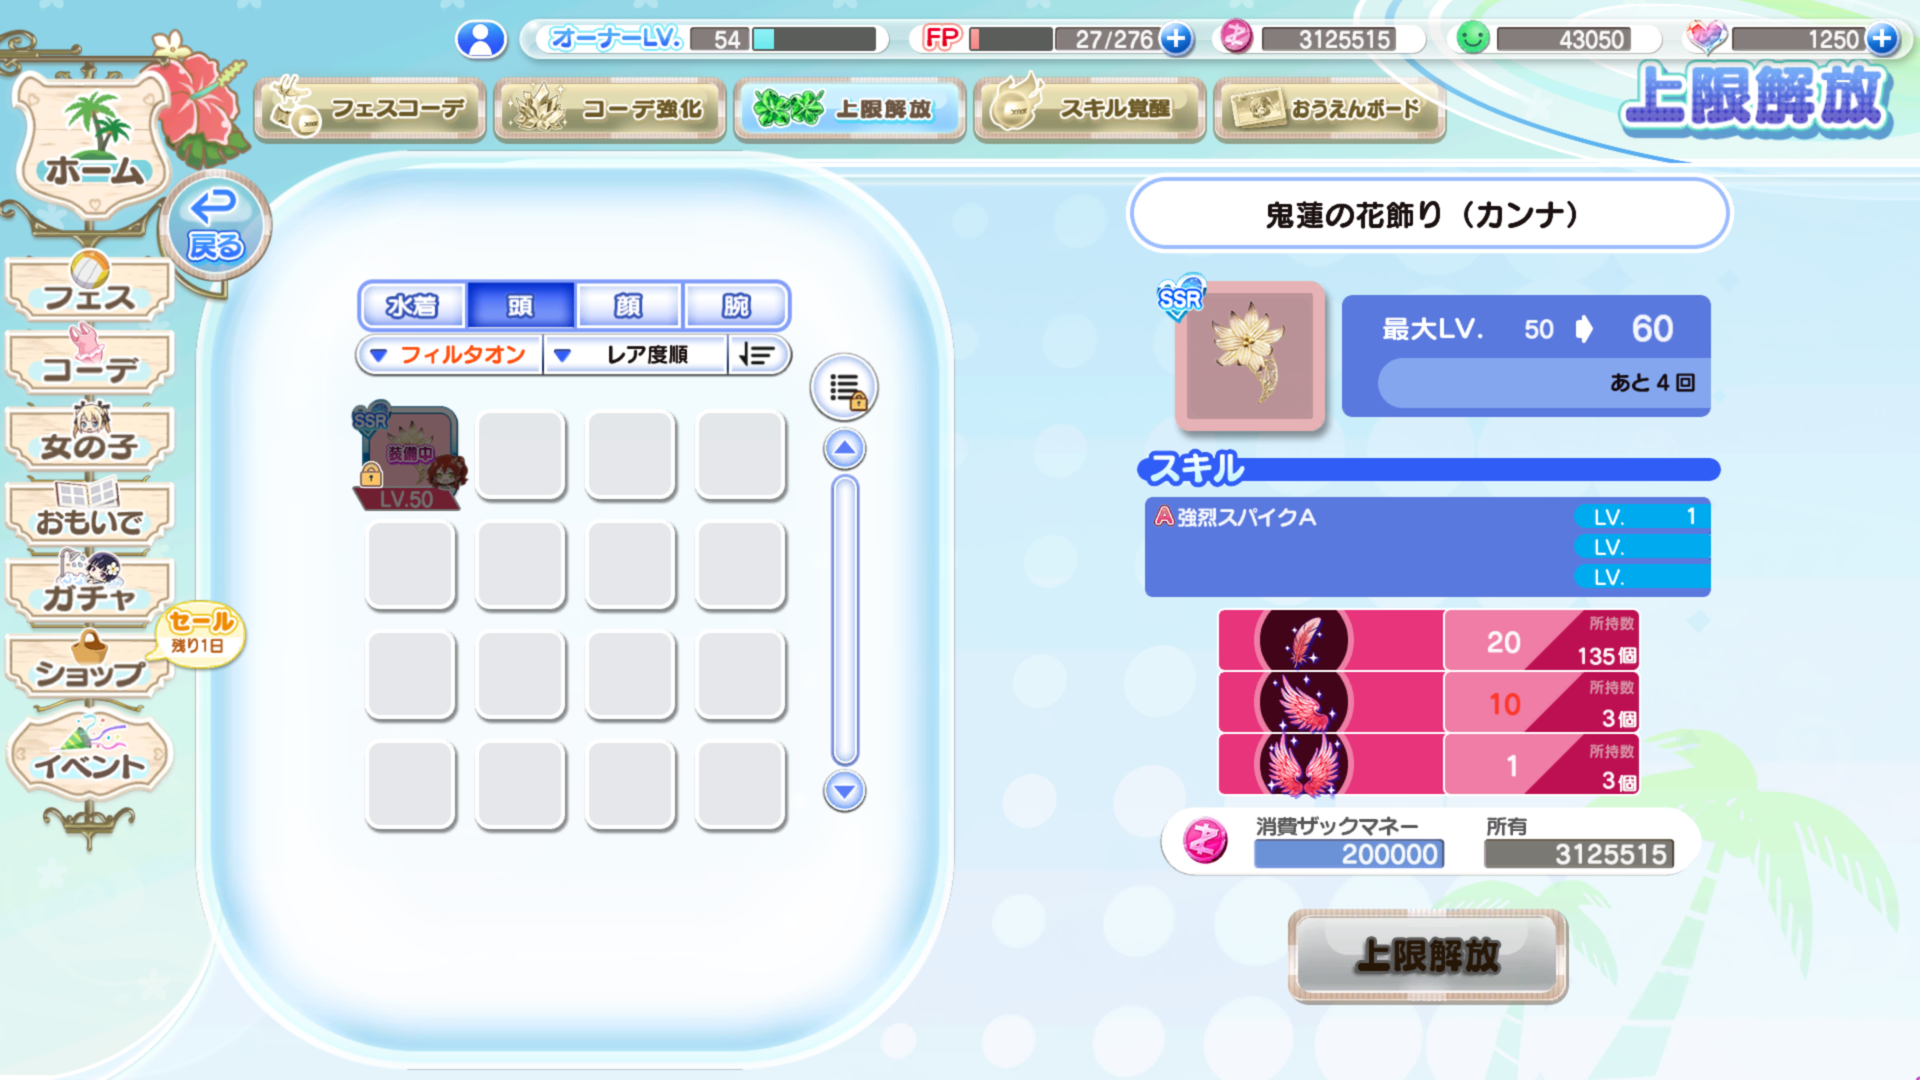
Limit Breaking allows you to raise the level cap for both swimsuits and accessories, a SSR has a max level cap of 90. A SSR Swimsuit needs a total of:
- 30 (M) Materials
- 55 (L) Materials
- 4 (XL) Materials
- 150 (M) Material. Can be obtained from Lessons or the Casino Shop (shop is on a cycle, Max 3(?) per month).
- 70 (L) Material. Can be obtained from Lessons or the Casino Shop. (Max 1 per month from Casino)
- 15 (XL) Material. These are given out as a reward for achieving S Rank (23,000 Appeal) on the SSS Final Match, types are cycled through in events. Achieving S rank without a trend SSR of some sort is exceedingly difficult and I wouldn't recommend trying unless you have a very well equipped team and at least a couple of friends with trend SSRs to use as guests.
They are also obtainable as a reward from certain events, such events are usually always RNG based so SSS is still your most consistent source for these.
(M) materials are fairly rare lesson drops and (L) materials are exceedingly rare so I wouldn't bet on any real reliable source for any of these honestly. I don't recommend ever trying to limit break an accessory that isn't SSR.
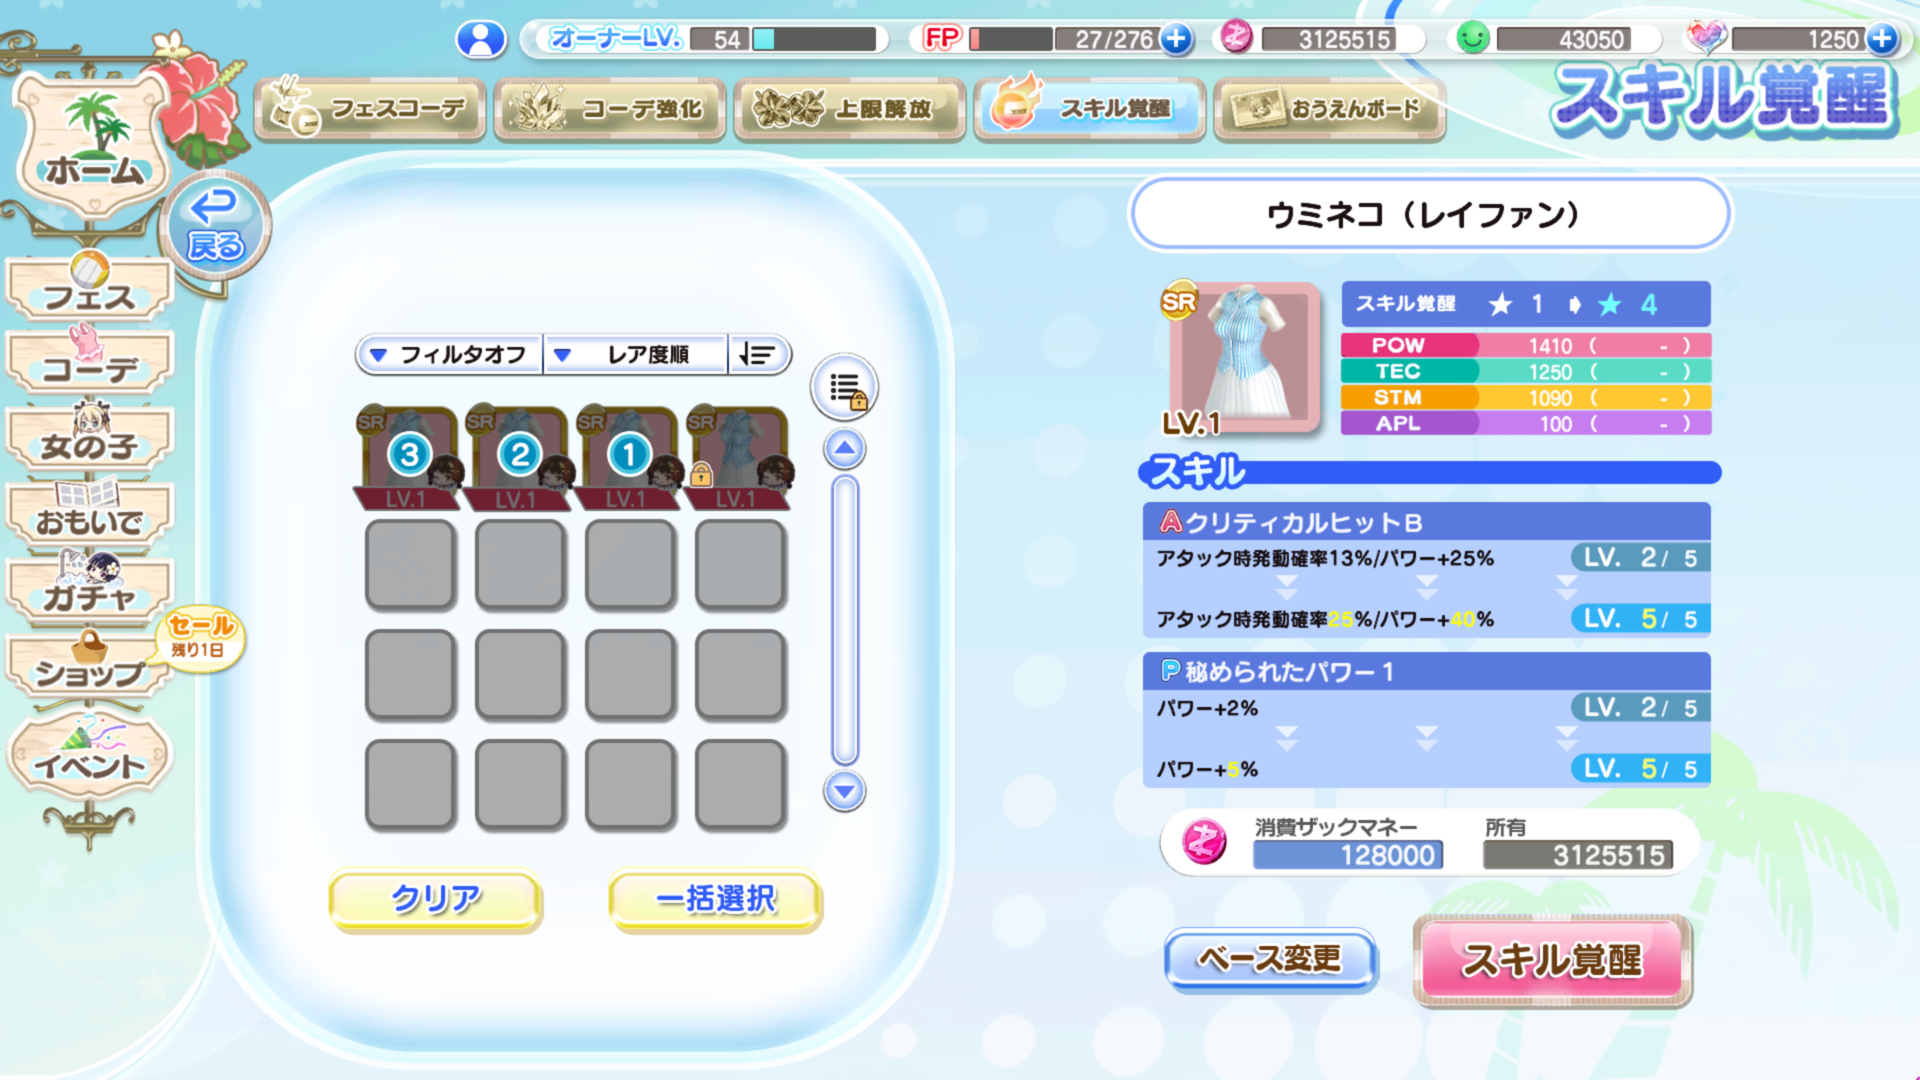
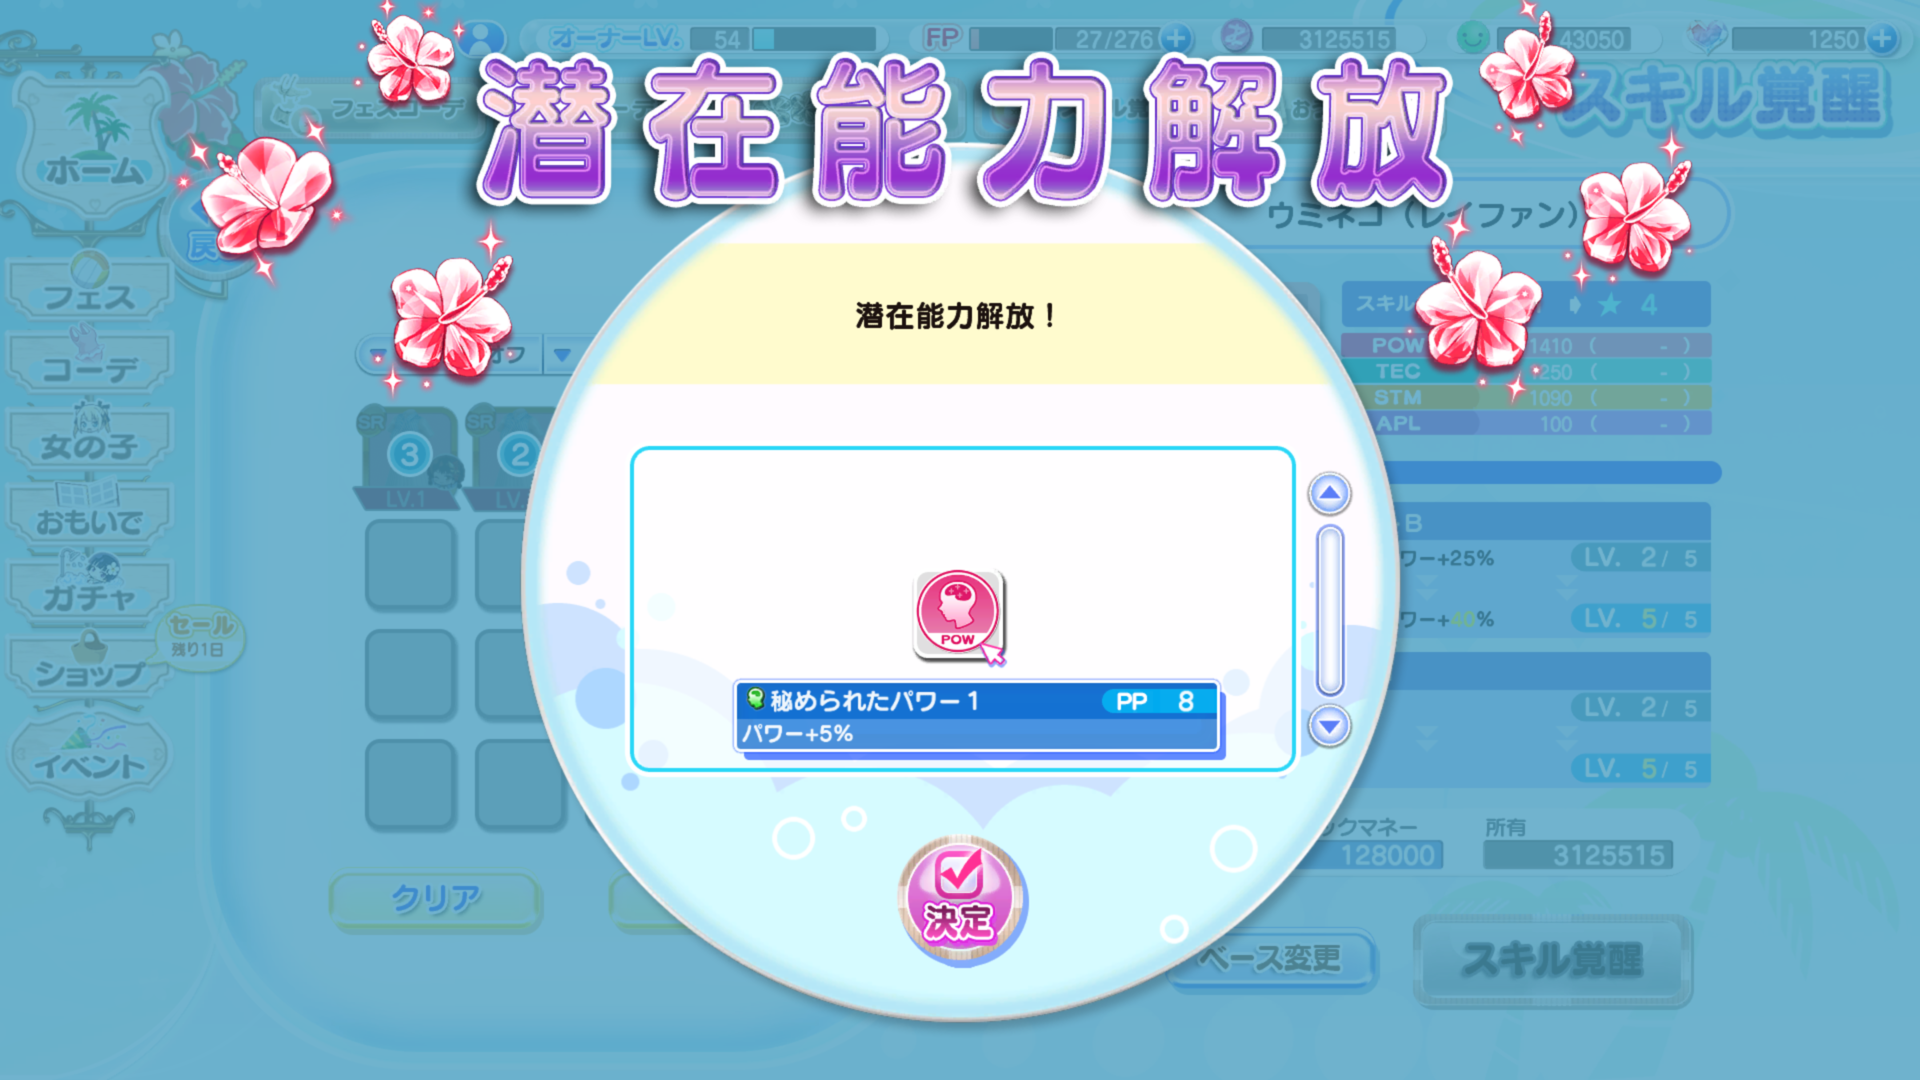
Awakening is done either by combining copies of various swimsuits or by using special Skill Awakening Gems. The former will likely be how you upgrade your SR suits while the latter will likely be used for SSR suits.
Awakening upgrades the skills of a particular piece of clothing. (both odds of occurring and strength) Fully awakening a swimsuit (requires 4 copies) will unlock a special skill called a "Potential" These are taken from the passive skill on a suit and can be equipped to accessories for further boosts (more on this later).
Accessories can be awakened just like swimsuits however they typically require special events for duplicates to be obtained and they do not grant a potential upon fully awakening them so your only benefit is a better skill.
The last tab in the coordination menu is for the support board slot, that one is slightly more complicated so I will give it its own section a little further down.
Skills/Potentials「スキル・潜在能力」
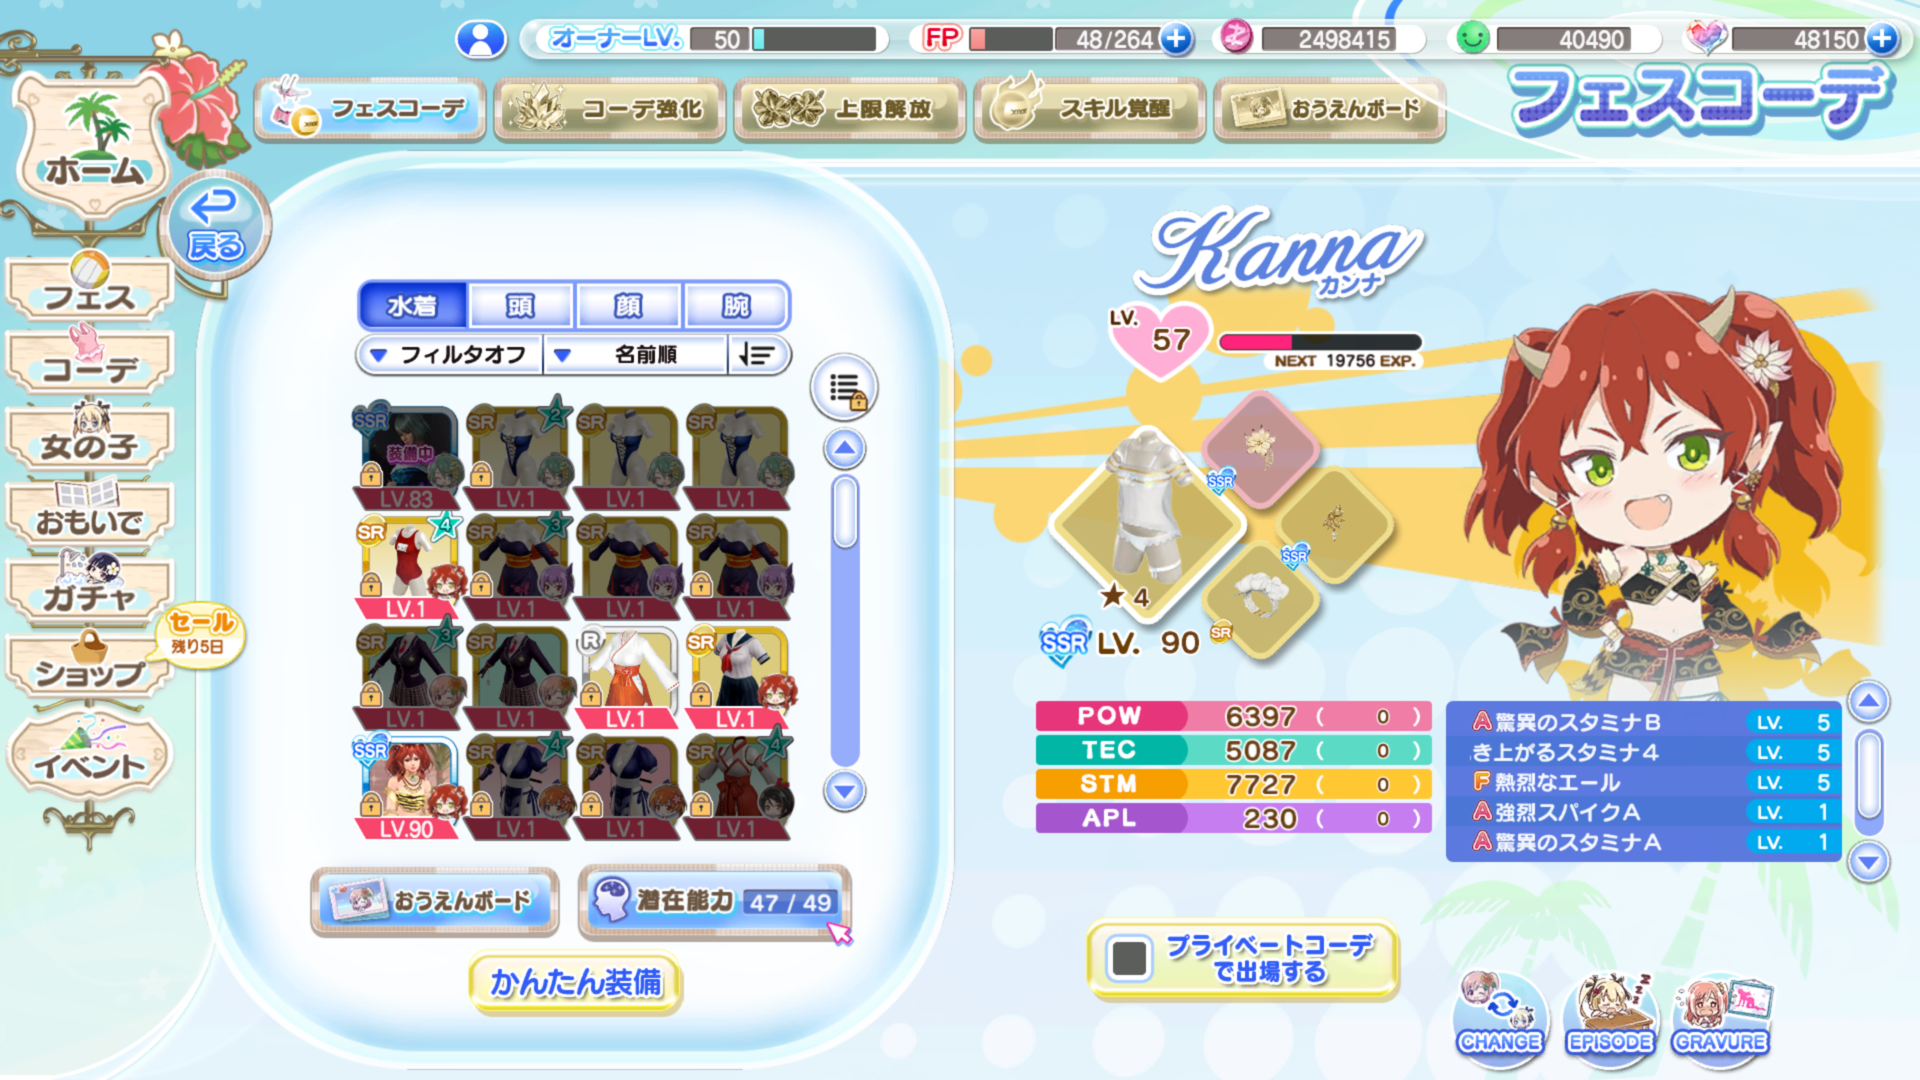
This section of the guide will be a general breakdown of all skills/potentials and what they do.
This game prevents you from ever getting 2 skills with the same name and as such there are many "copies" of the same skill under different names, I'm not going to bother translating all these names and will instead show how to identify skills and list their various requirements.
Before I get into this, a brief overview. Skills are what are attached to Suits and Accessories, they are pre-determined and you can't change them. There are 3 types of skills in this game:- A: These are Active skills, they usually have an activation condition such as attack or defend and a RNG component. Leveling these increases the chance they activate and the size of the bonus they give to a stat.
- F: These are Fever skills, they have activation requirements that once met are guaranteed to proc. They generate large amounts of appeal and leveling these increases the amount of appeal generated. These are essential for scoring high amounts in events without trend outfits. (Like getting an S rank on SS+)
- P: These are Passive skills, they (usually) have no activation condition and are on all the time. Upgrading these increases the percentage of the stat they boost.
- [Activation Requirement] {Activation percentage} / [Stat Increased] {Increase Percentage}
- レシーブ時 - This requires you to be on the receiving end of an attack, the attack has to correspond to the skill.(Spike for POW/Feint for TEC)
- アタック時 - This requires you to be the attacker, as above the type of attack you do has to correspond to the skill.
- チームメイト得点時 - Requires your teammate to score a point to activate. This requirement is (as far as I'm aware) reserved for fever skills.
- パワー: Power - These skills correspond with the Spike action.
- テクニック: Technique - These skills correspond with the Feint action.
- スタミナ: Stamina - That pretty yellow gauge that keeps your stats half decent.
- テンション: Tension - The gauge at the bottom of your screen during matches, filling it allows you to use burst.
- アピール: Appeal - The score you gain during matches, this also impacts tension gauge generation. Ironically these aren't usually the best option for generating appeal points because... Nobody knows. I'm not even convinced TN knows how this game generates appeal but having much higher stats than your opponent tends to be the better option for getting it.
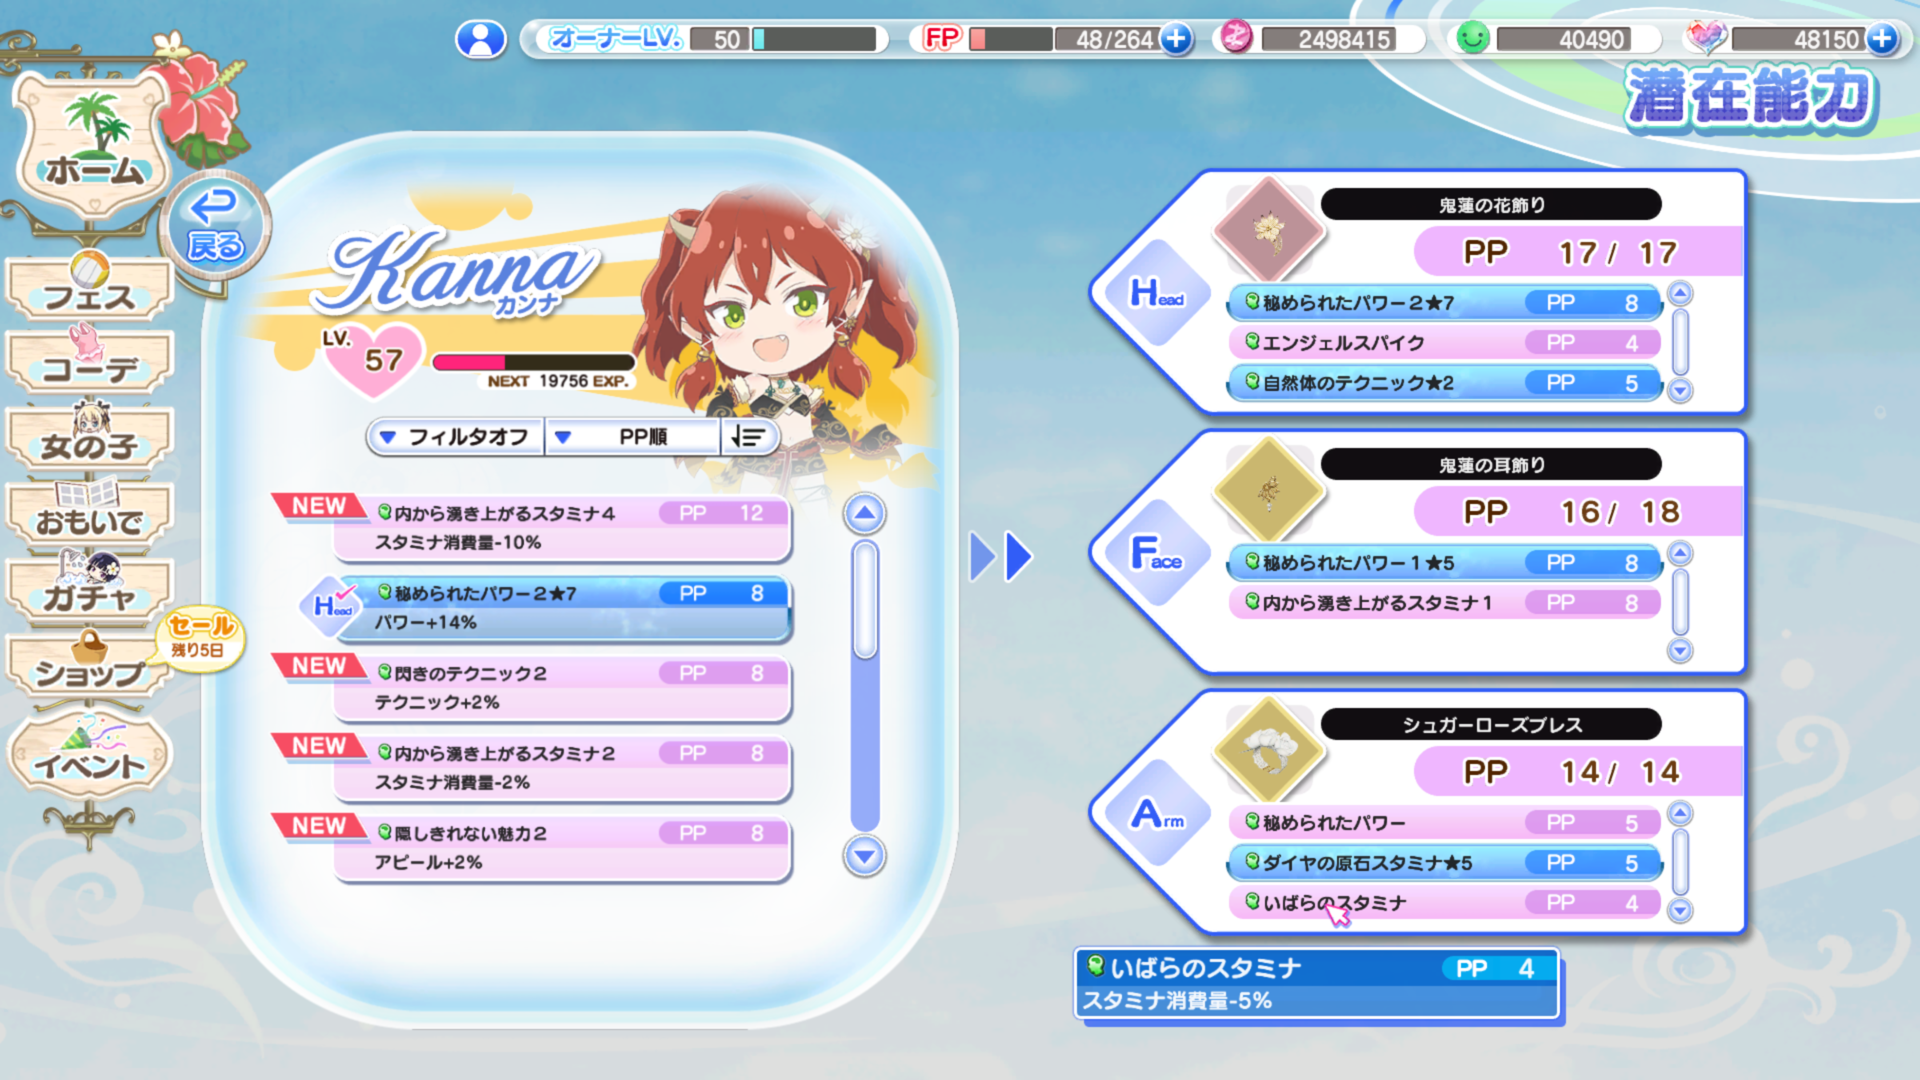
Potentials can be accessed by clicking the blue button at the bottom right of the festival clothing tab.
 Potentials are the passive skills from a SR/SSR suit you fully awaken, you can equip these to your accessories at the cost of PP. Despite being derived from passive skills potentials can have specific activation conditions, they will be listed by the effect if they have one.
Note: For a skill with a "receive" activation to proc you need the character with the potential equipped to be targeted by the AI and for them to be using the proper type of attack. (Spike/Feint)
Potentials are the passive skills from a SR/SSR suit you fully awaken, you can equip these to your accessories at the cost of PP. Despite being derived from passive skills potentials can have specific activation conditions, they will be listed by the effect if they have one.
Note: For a skill with a "receive" activation to proc you need the character with the potential equipped to be targeted by the AI and for them to be using the proper type of attack. (Spike/Feint)- A quick note on some of the less obvious skills, what they do and how they activate.
- STM-: These are activated by scoring a point, they reduce the amount of stamina you use to do it. If you get over 100% of this in a round you will actually regenerate stamina, it's pretty funny.
- STM+: These are also activated by scoring a point, they will increase the amount of stamina your opponent spends.
- APL+: These are triggered by scoring points as well. They grant additional appeal points as well as increase the amount your tension gauge is filled.
- TEG+: These have no activation condition, simply a % chance to activate. They increase tension gauge generation.**
- TEG-: (AI Only) Decreases your tension gauge gains for a round, this can cause you to gain a negative score and end up decreasing it. (My best guess as to why this happens is that the percentage is out of 100%, not what you actually score in the round) This skill is exclusive to SS+ and SSS with every match after the first SS+ match having a chance to proc it, the chance increases the further you go.
Note 2: I have never seen a Tension skill in-game so TEG+ is just my guess as to its abbreviation mid-match. I've only ever seen them on APL Deco-Bromides so if anyone's ever played around with them some info would be nice. Otherwise that's what all the skills I have access to say, I don't know for sure if it can work on the tension gained from you failing to score. I'll test it more thoroughly when I have the resources to spare, sorry for the inconvenience.
Finally there are a few unique potentials:- エンジェルスパイク: Angel Spike - Increases the chance of your girl using a Spike by 10%.
- フェアリーフェイント: Fairy Feint - Decreases the chance of your girl using a Spike by 10%. (Yes, that's actually how they worded it.)
- プラチナアタッカー: Platinum Attacker - Increases the chance of your girl being the attacker by X%.
- プラチナレシーバー: Platinum Receiver - Increases the chance of your girl being the receiver by X%.
Upgrading Potentials
Potentials can only be upgraded during rock climbing events. These are events that require both keys and burn a special kind of stamina unique to the event. Keys are very limited so make sure you prioritize potentials gained from SSR suits.
Upgrading a potential will boost the stat it increases even further. (For more info see "Rock Climbing")
Cheer Board and Deco-Bromides「おうえんボード」
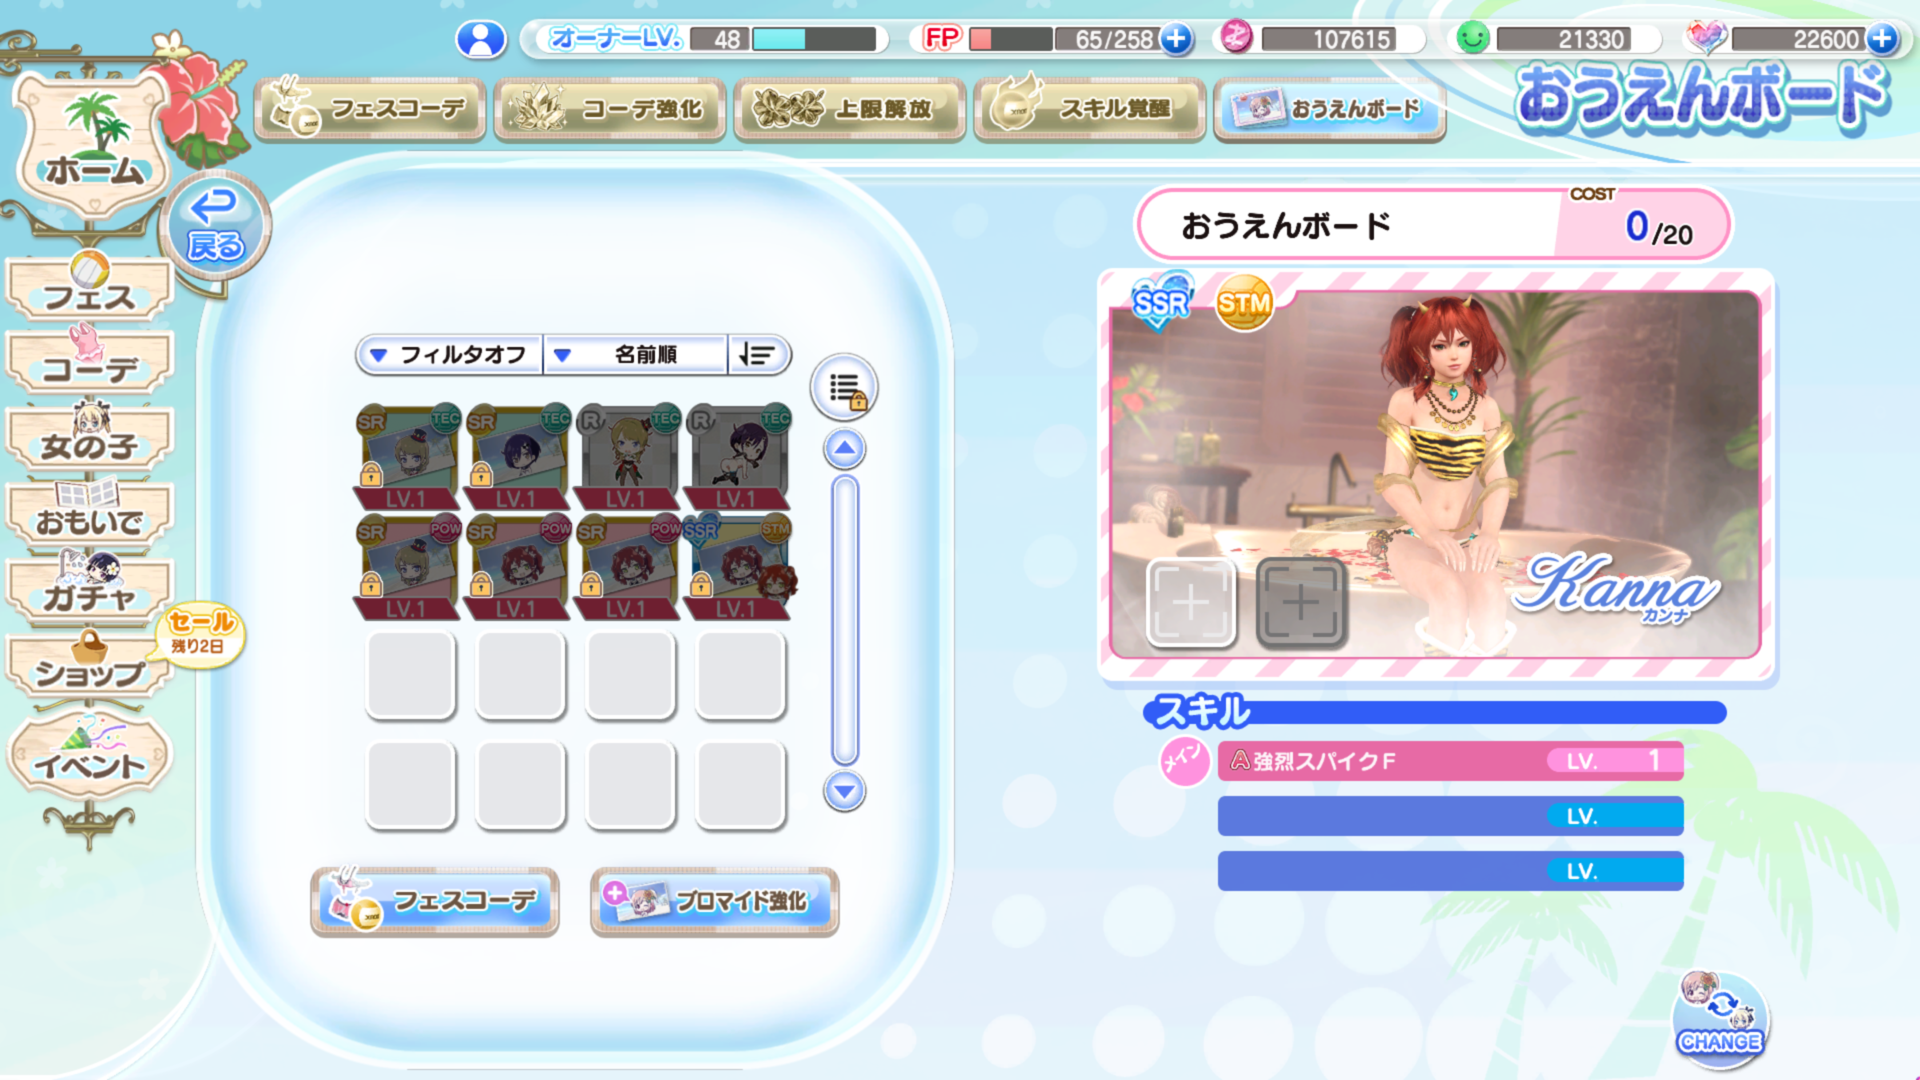 What is the cheer board slot? Put simply it's an extra slot that allows you to get more skills on your girls but mechanically it's pretty convoluted so let's get into it.
First thing's first, words to remember, I'm going to translate some of these items so they're easier for you to read in a guide:
What is the cheer board slot? Put simply it's an extra slot that allows you to get more skills on your girls but mechanically it's pretty convoluted so let's get into it.
First thing's first, words to remember, I'm going to translate some of these items so they're easier for you to read in a guide:- おうえんボード: Translates to something along the lines of "cheer board". This is the thing this section of the guide is about.
- 千雷のデコ筆: An item with a pretty long name that I'm just going to shorten to "Deco-Brush" in this guide. This is used to turn Bromides into Deco-Bromides. You get these from the Gold Chip Shop.
- キラキラのデコペン: For consistency I'm just going to shorten this item's name to "Deco-Pen" in the guide. This item is used to increase the rarity of a Deco-Bromide. You get these from the VIP Point Shop.
- デコ盛りクレヨン: These come in different varieties for each type of Deco-Bromide. They are used as level-up material for them. I'll just refer to these as Deco-Crayons for the purposes of the guide. You get these from events.
Where do you get equipment for this slot? The cheerboard slot is occupied by an item called a Deco-Bromide. There are four ways to obtain these:
- Event rewards: These are where you get R/SR Deco-Bromides (and very rarely SSRs)
- Venus Shop: Every girl has a SR Deco-Bromide available for 100 coins in her Venus Shop.
- Deco-Bromide Gachas: You can get SSR collaboration Deco-Bromides here so if you really want them this is where some of them come from. These are effectively event gachas so they aren't always available.
- Bromides: These are the pictures you get in the album when you unlock a SSR suit. They are the only way to get SSR Deco-Bromides outside of events.
Bromides can be turned into equippable Deco-Bromides by going into the memory album and clicking on them. This will bring up a menu that should look something like this:
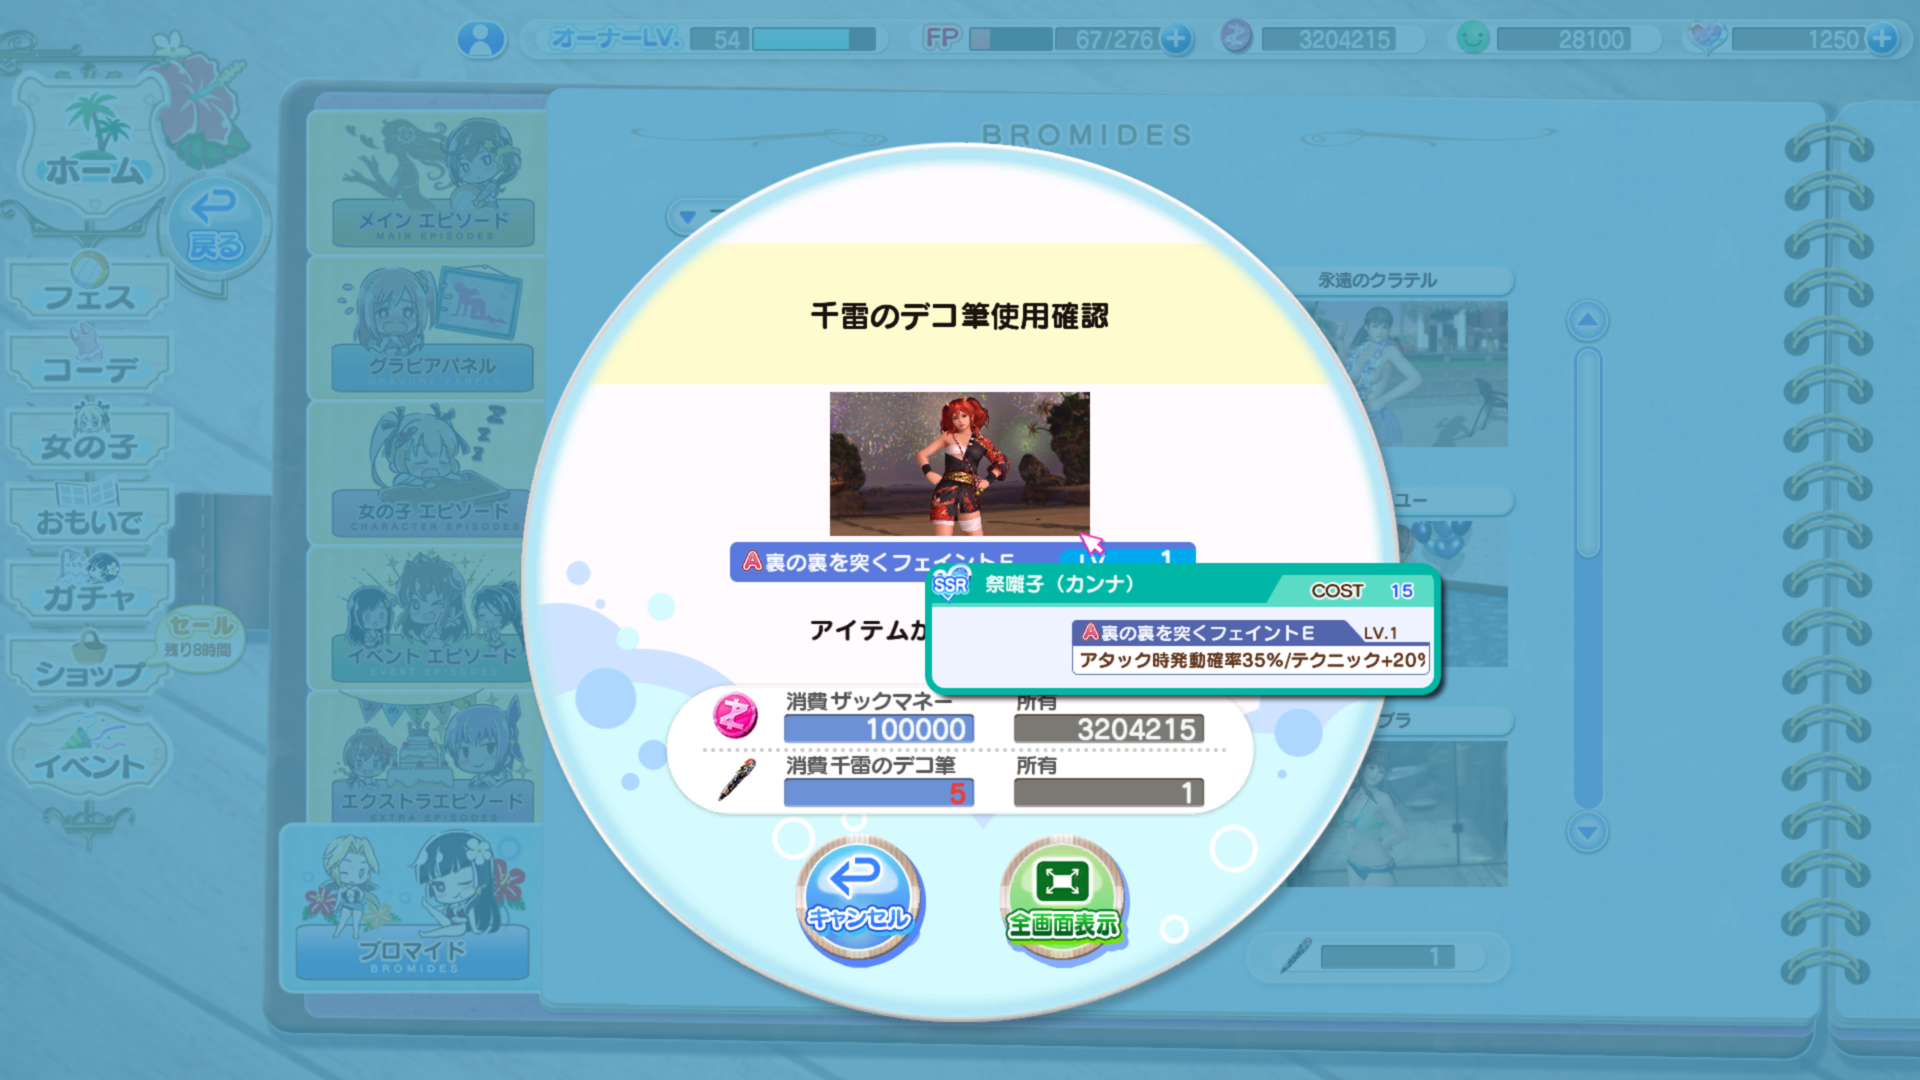
After clicking one we are shown a cost in Zack Money and Deco-Brushes. You can only ever get 1 Deco-Bromide from any Bromide even if you have more than one copy of the suit so keep that in mind.
Important: Take note of the skill you are getting before spending your brushes (Hover mouse over the picture), also take note of the type of suit the bromide comes from as it will be relevant later.
Note: SSR Deco-Bromides obtained from Bromides cannot be used as upgrade material.
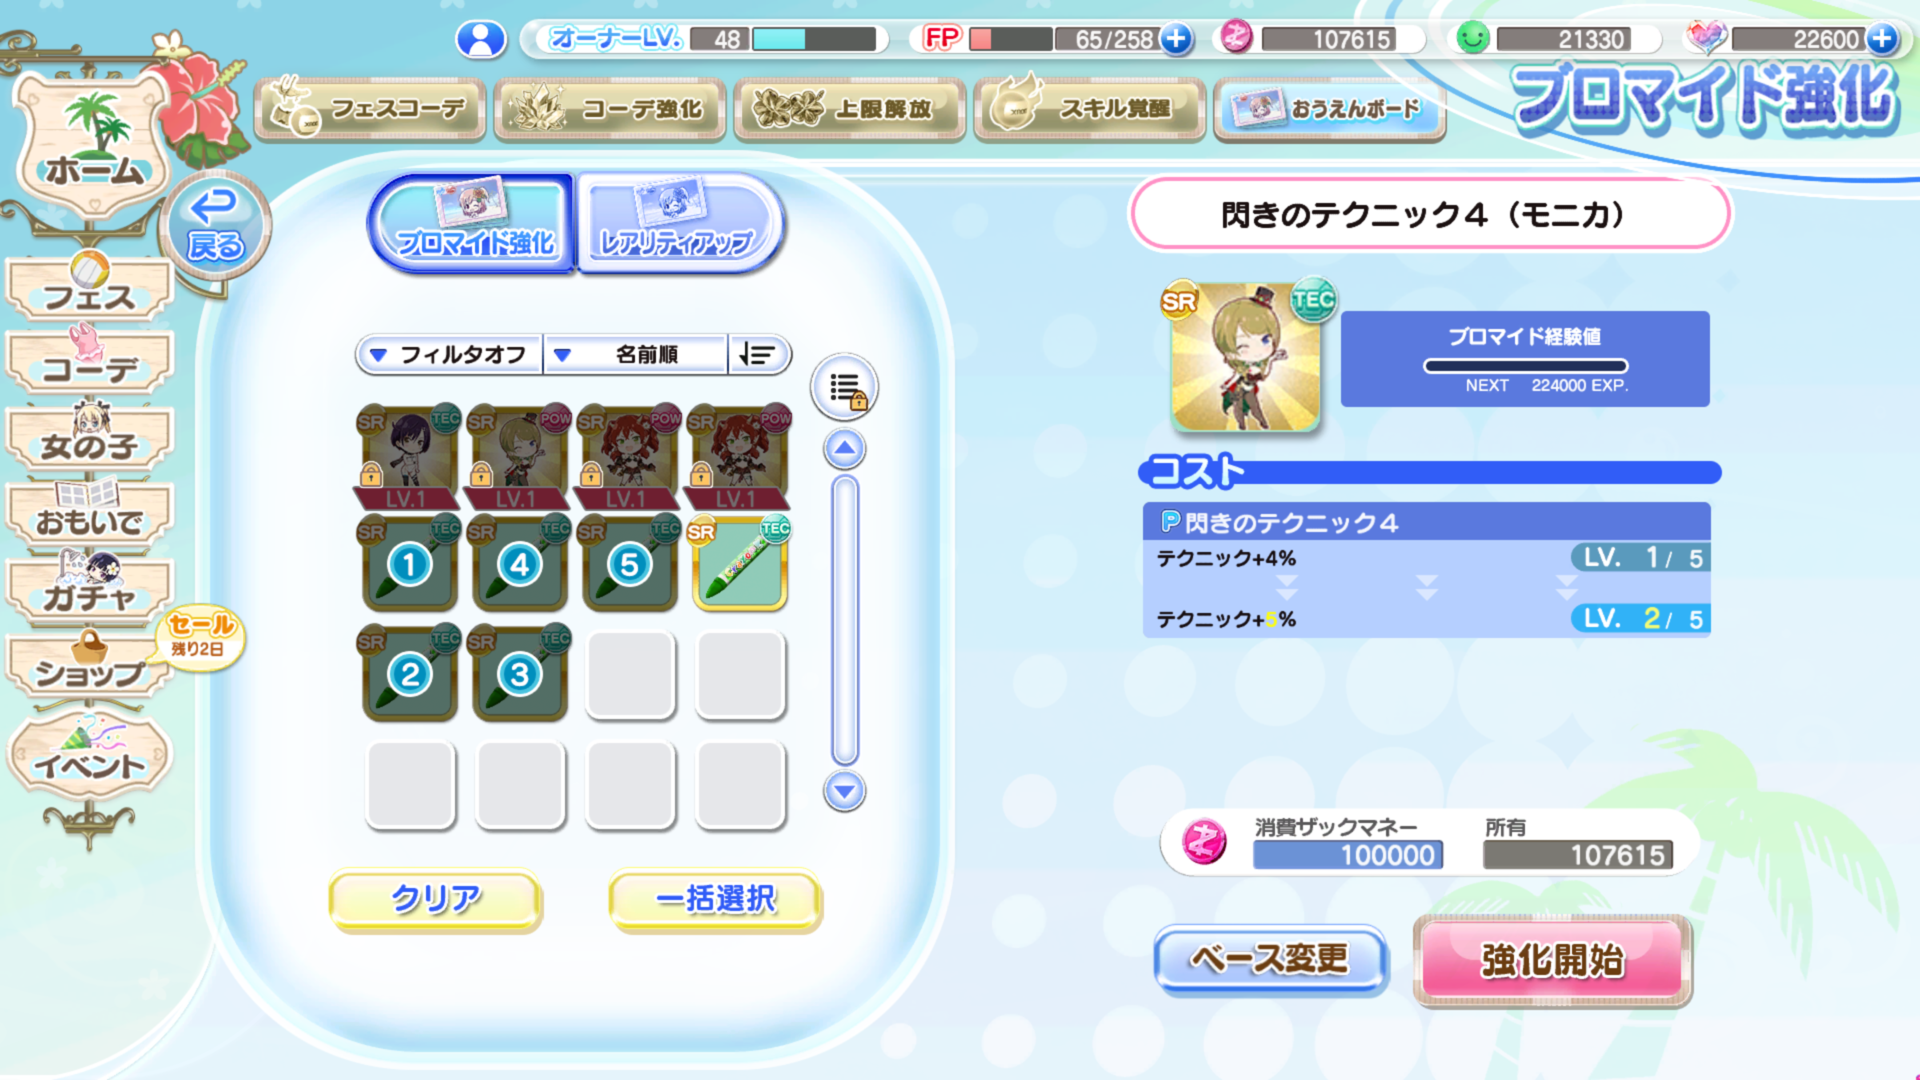 Deco-Bromides can only gain XP by using other Deco-Bromides of the same rarity or by Deco-Crayons of the same type and rarity. Every time the XP meter of a Deco-Bromide fills it's skill goes up a level. There are a couple of modifiers for experience:
- If the Deco-Bromide you use as material is exactly the same as the one you use as a base then you will get a 5x XP multiplier.
- If the material is the same type as the base (POW, STM, etc.) then you will get a 1.5x XP multiplier.
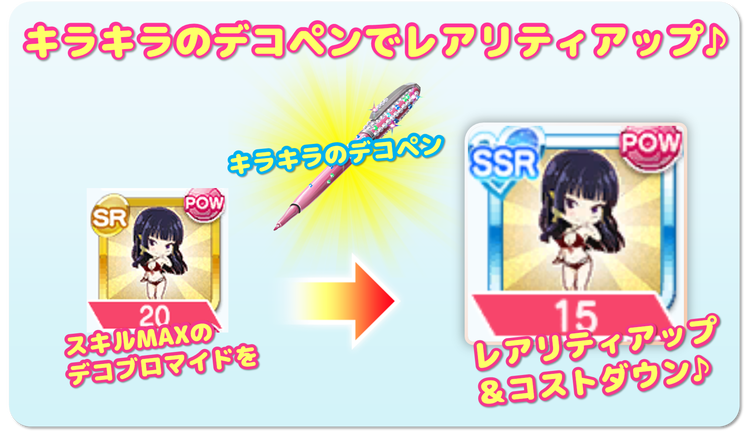 When a Deco-Bromide reaches it's highest level you can increase its rarity using Deco-Pens, rarities go as follows:
- R>SR - Requires 2 Deco-Pens and 5,000 Zack Money.
- SR>SSR - Requires 5 Deco-Pens and 15,000 Zack Money.
- SSR>SSR+ - Requires (20) Deco-Pens and (X) Zack Money. (Thanks to @El_Bukis)
Note: "X" is a placeholder until I actually manage to get a SSR Deco-Bromide to level 5 to see the cost.
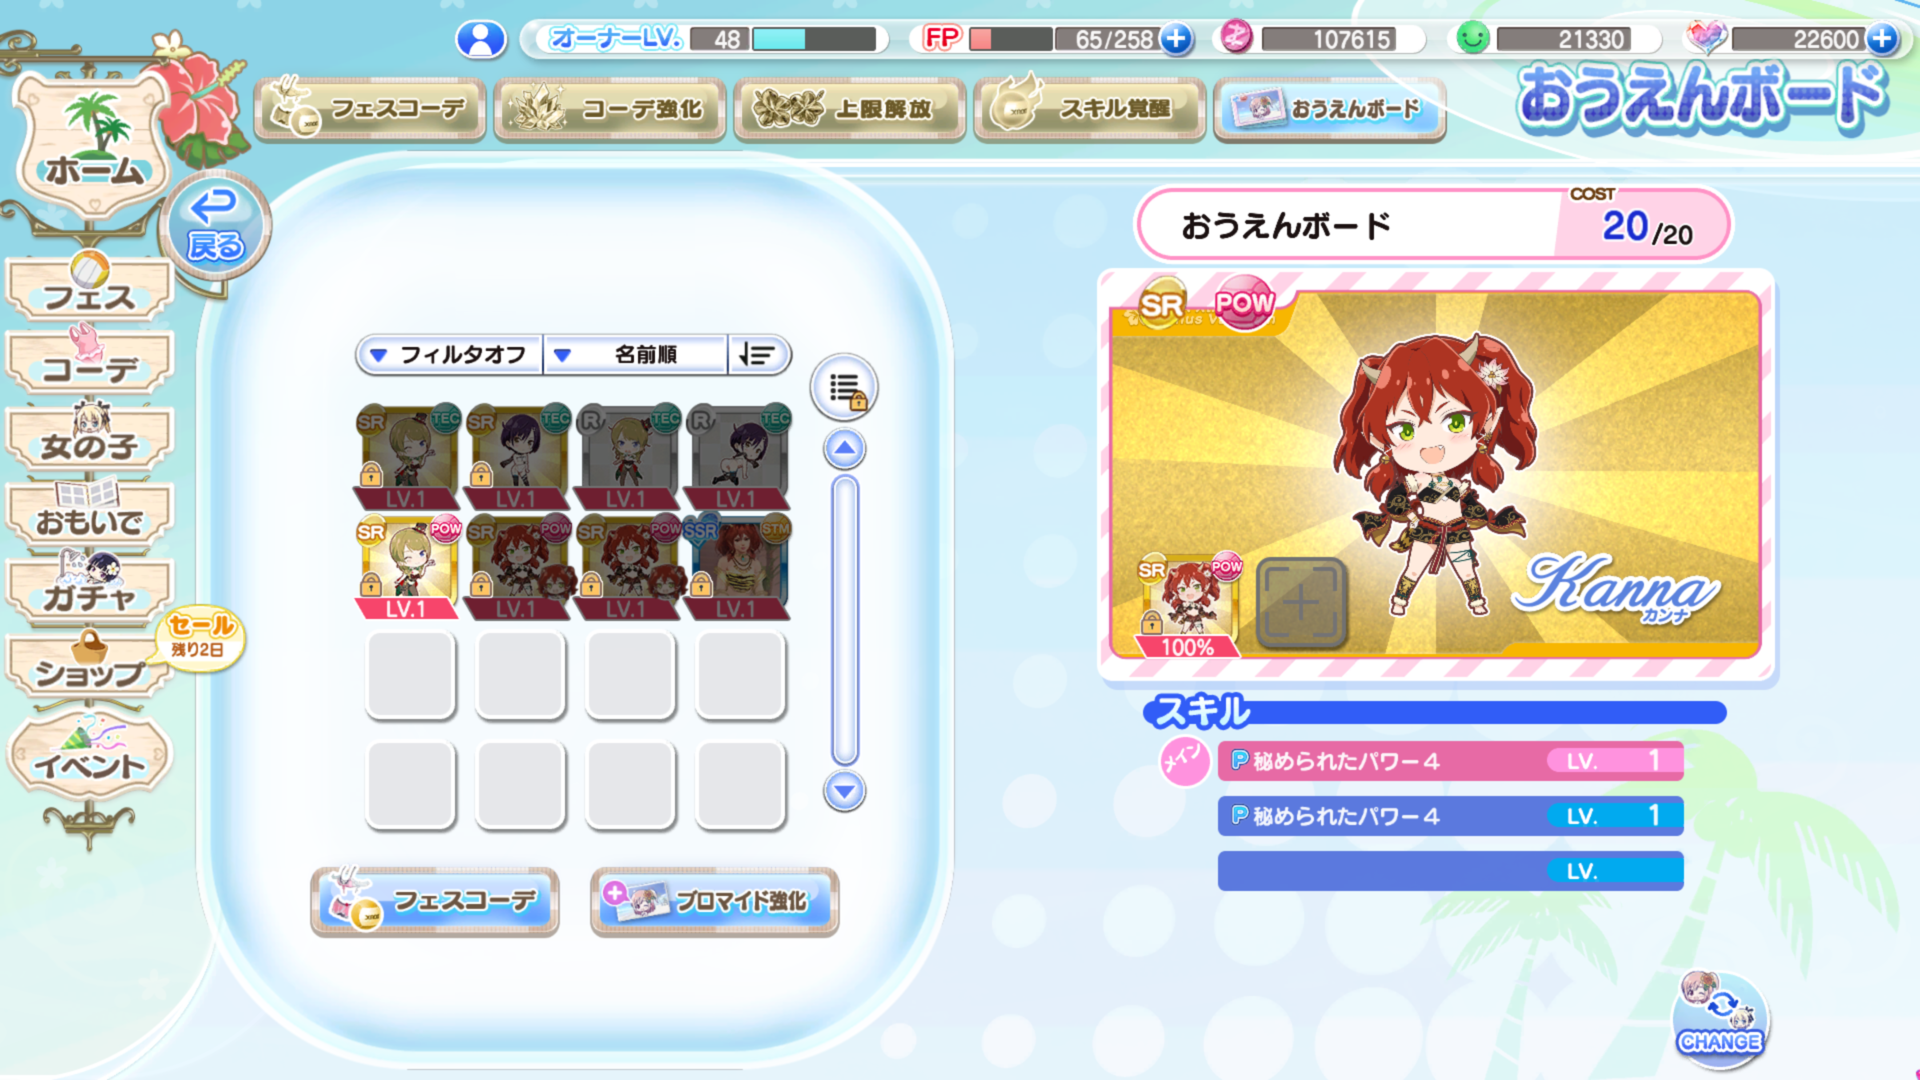
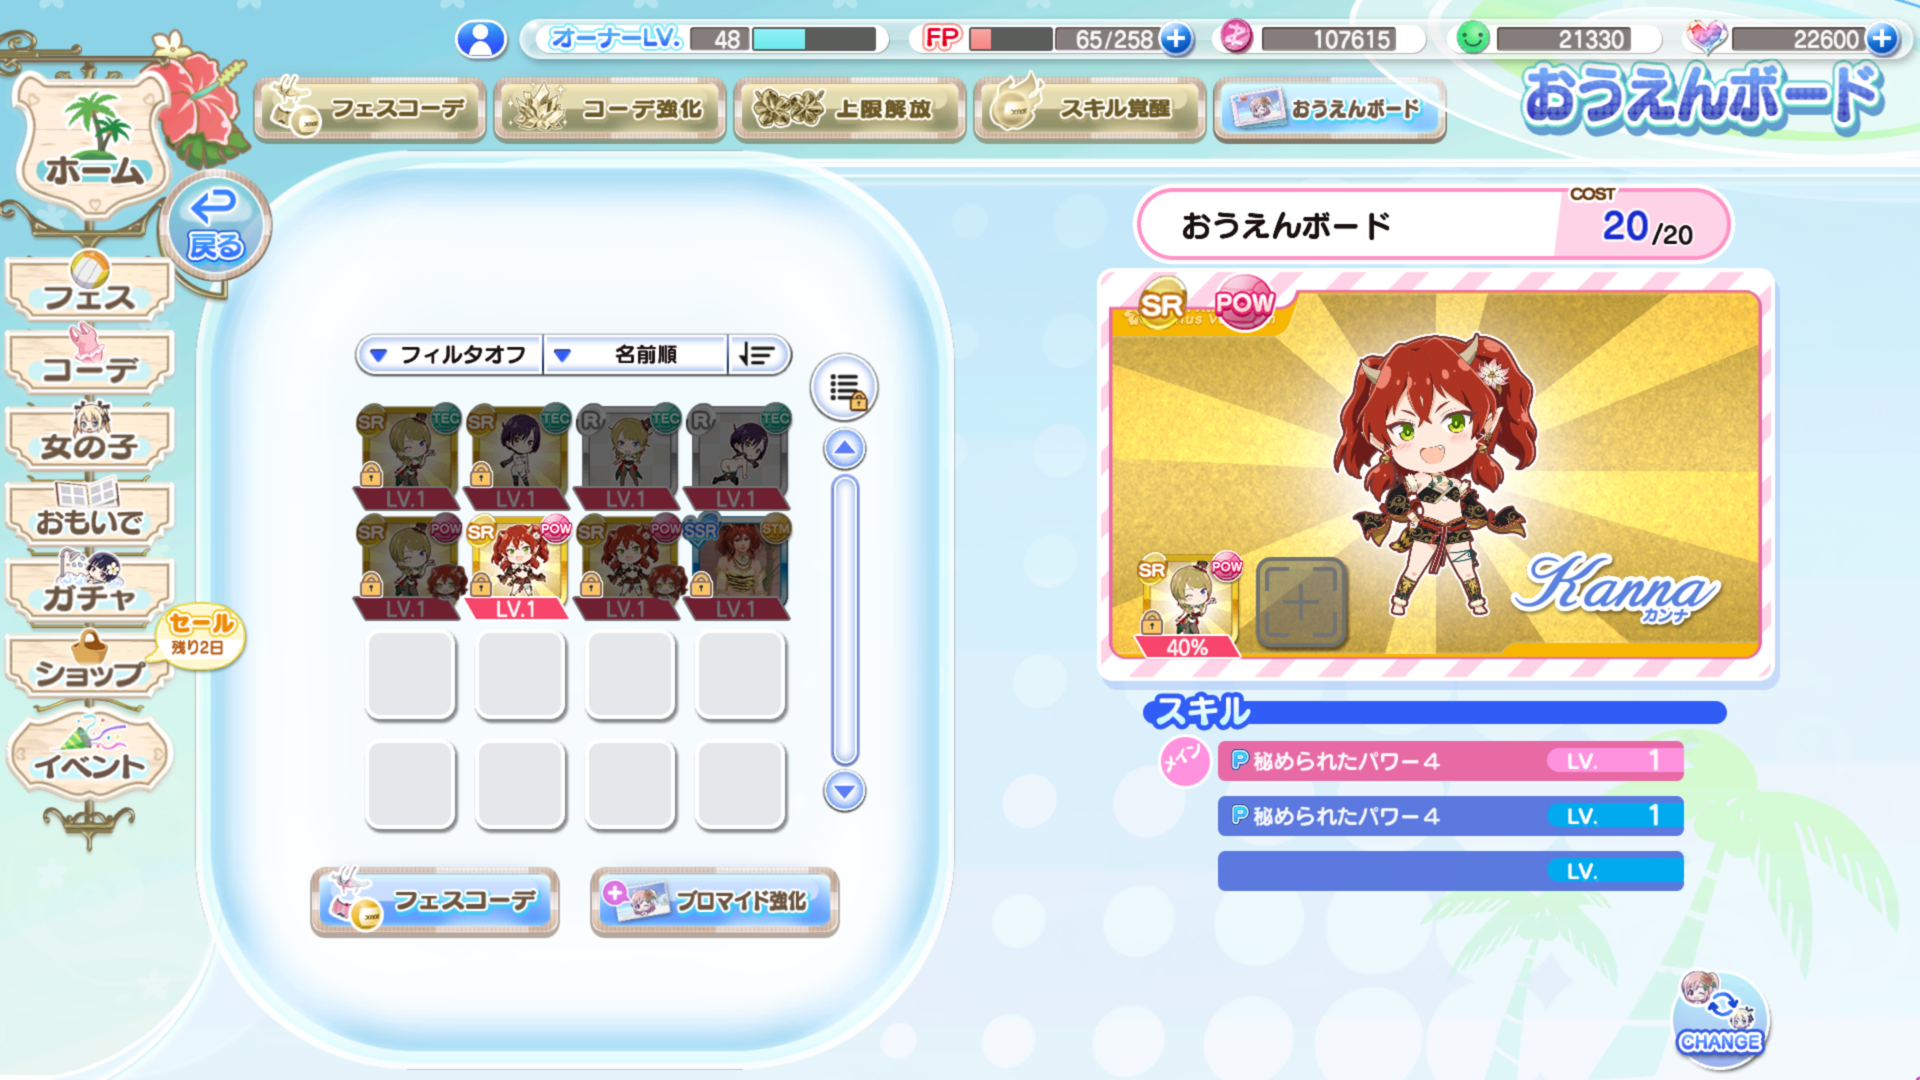 One of the first things to note about equipping multiple Deco-Bromides is that only Deco-Bromides of the same attribute as the main slot can be equipped in sub-slots. Next is efficiency denoted by the percentage at the bottom, there are a few rules for it:
- Base efficiency is 40%
- Efficiency increases by 5% for every 5 relationship levels you have with the girl who the Deco-Bromide belongs to. (For example if Kanna had a level 60 relationship with Monica then the picture would show 100% rather than 40%)
- Deco-Bromides belonging to the girl equipping them will always be 100% efficient on sub-slots.
- Deco-Bromides with no affiliation to any character (IE Event ones basically) will always be 100% efficient. This is true even if the bromide features a specific girl in its art.
The next thing to worry about is the cost. Each Deco-Bromide has its own cost which can only be reduced by increasing its rarity. Your most expensive one should be in the main slot since the main slot doesn't contribute to cost while the sub-slots are occupied by your cheaper ones so they can both fit.
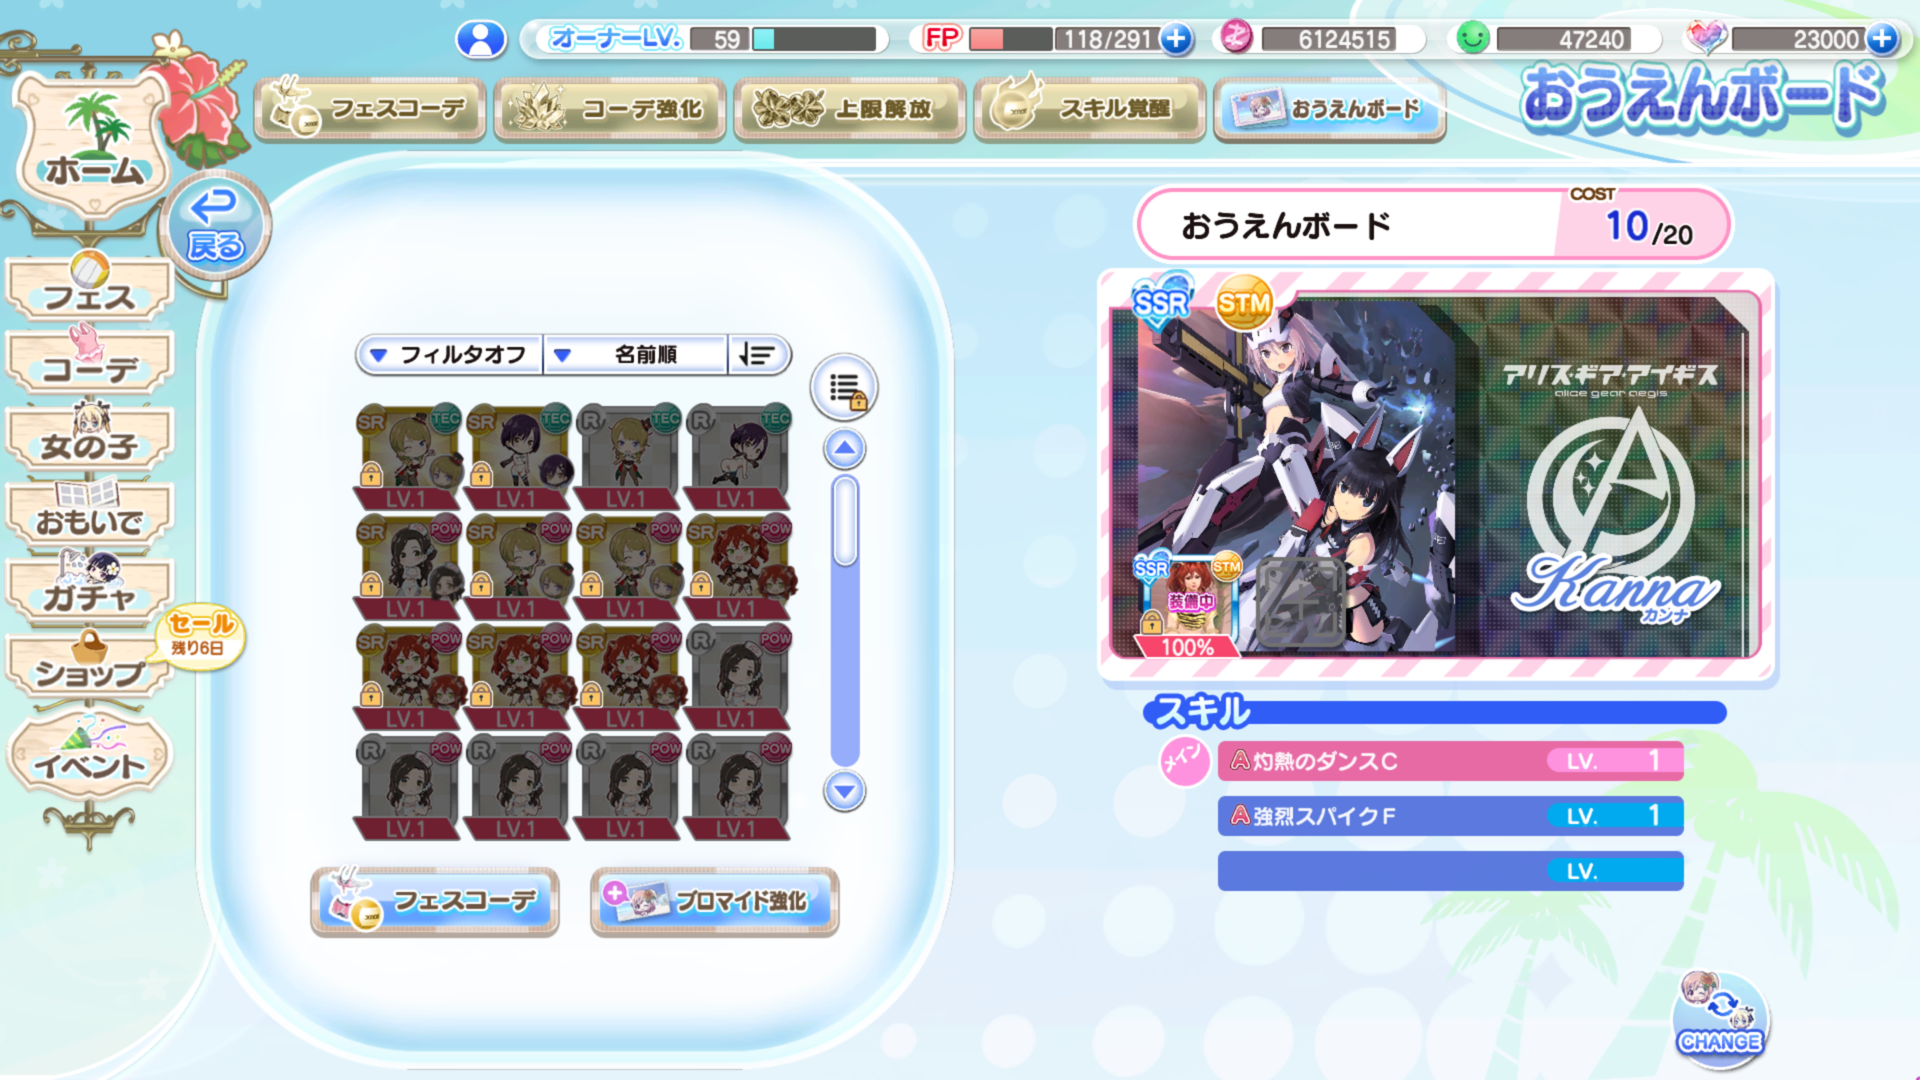
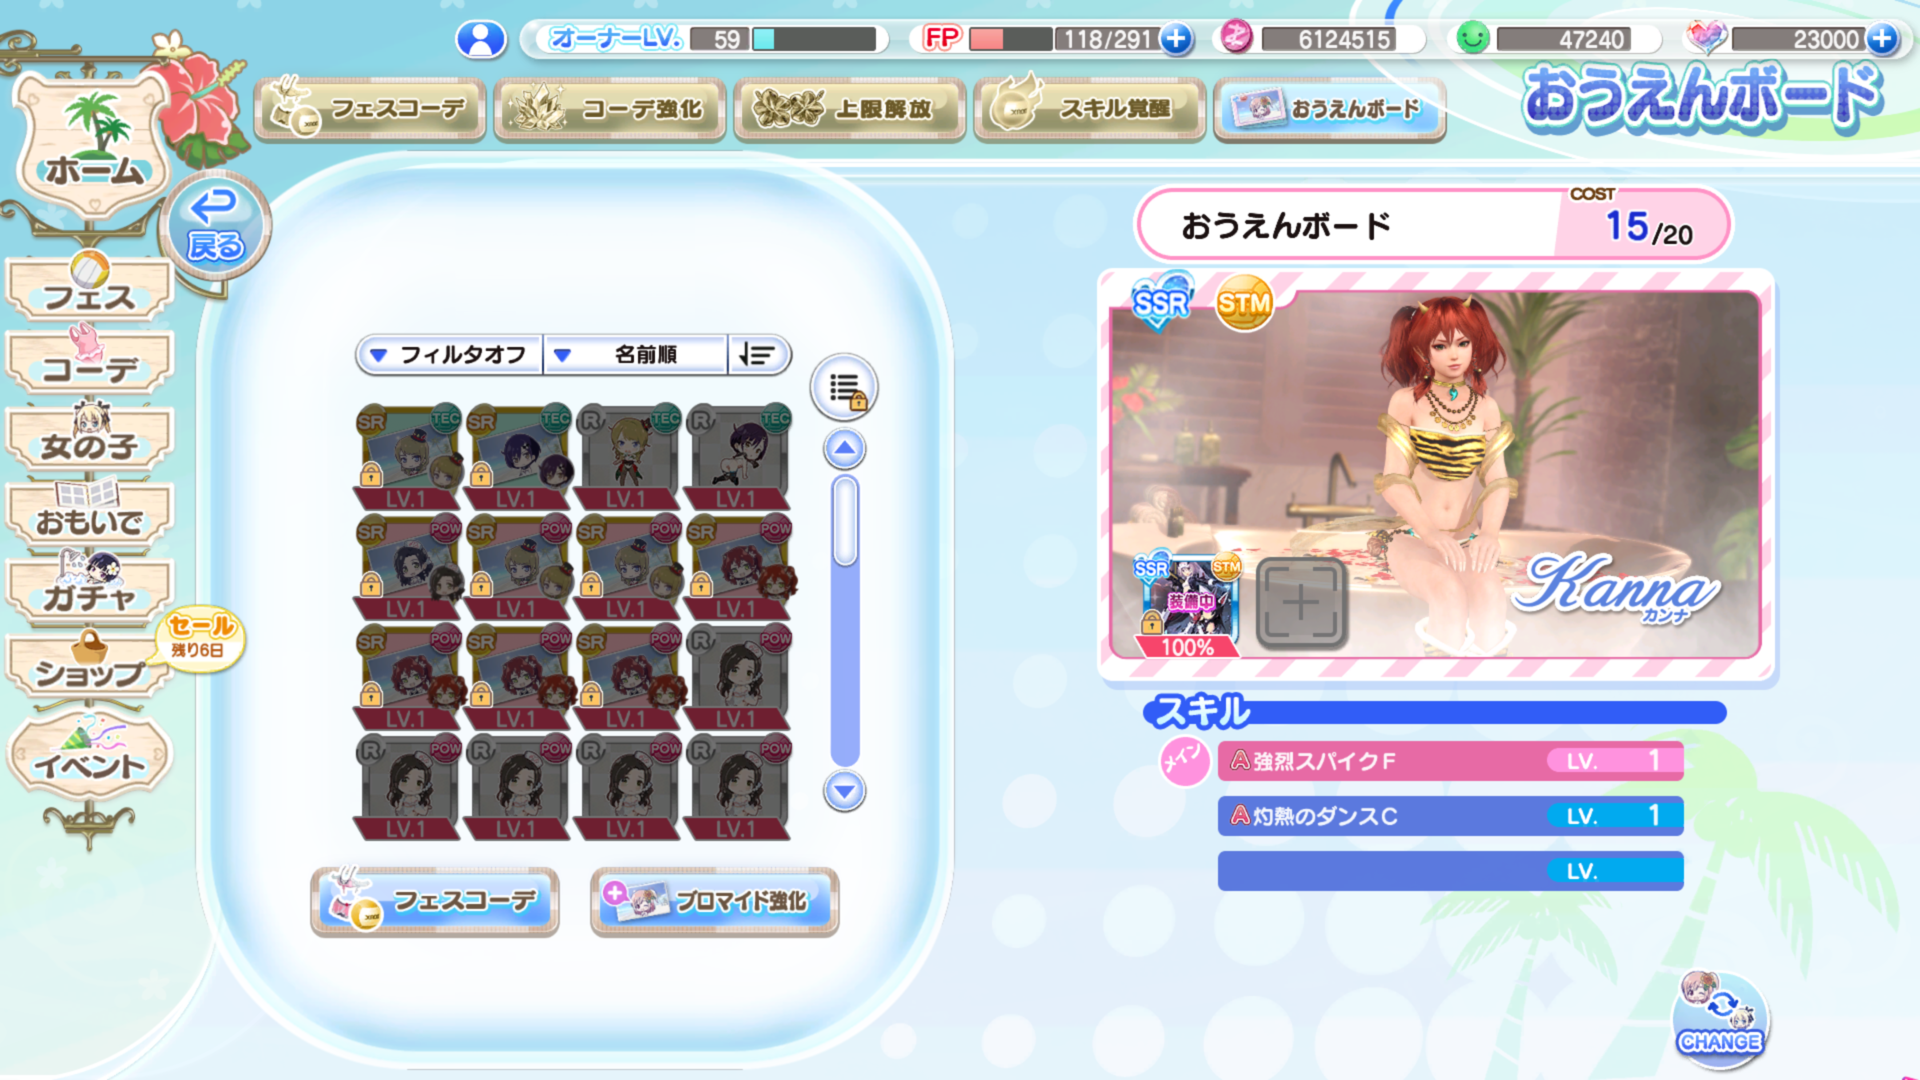
Equipping both may be a bit of an issue though because...
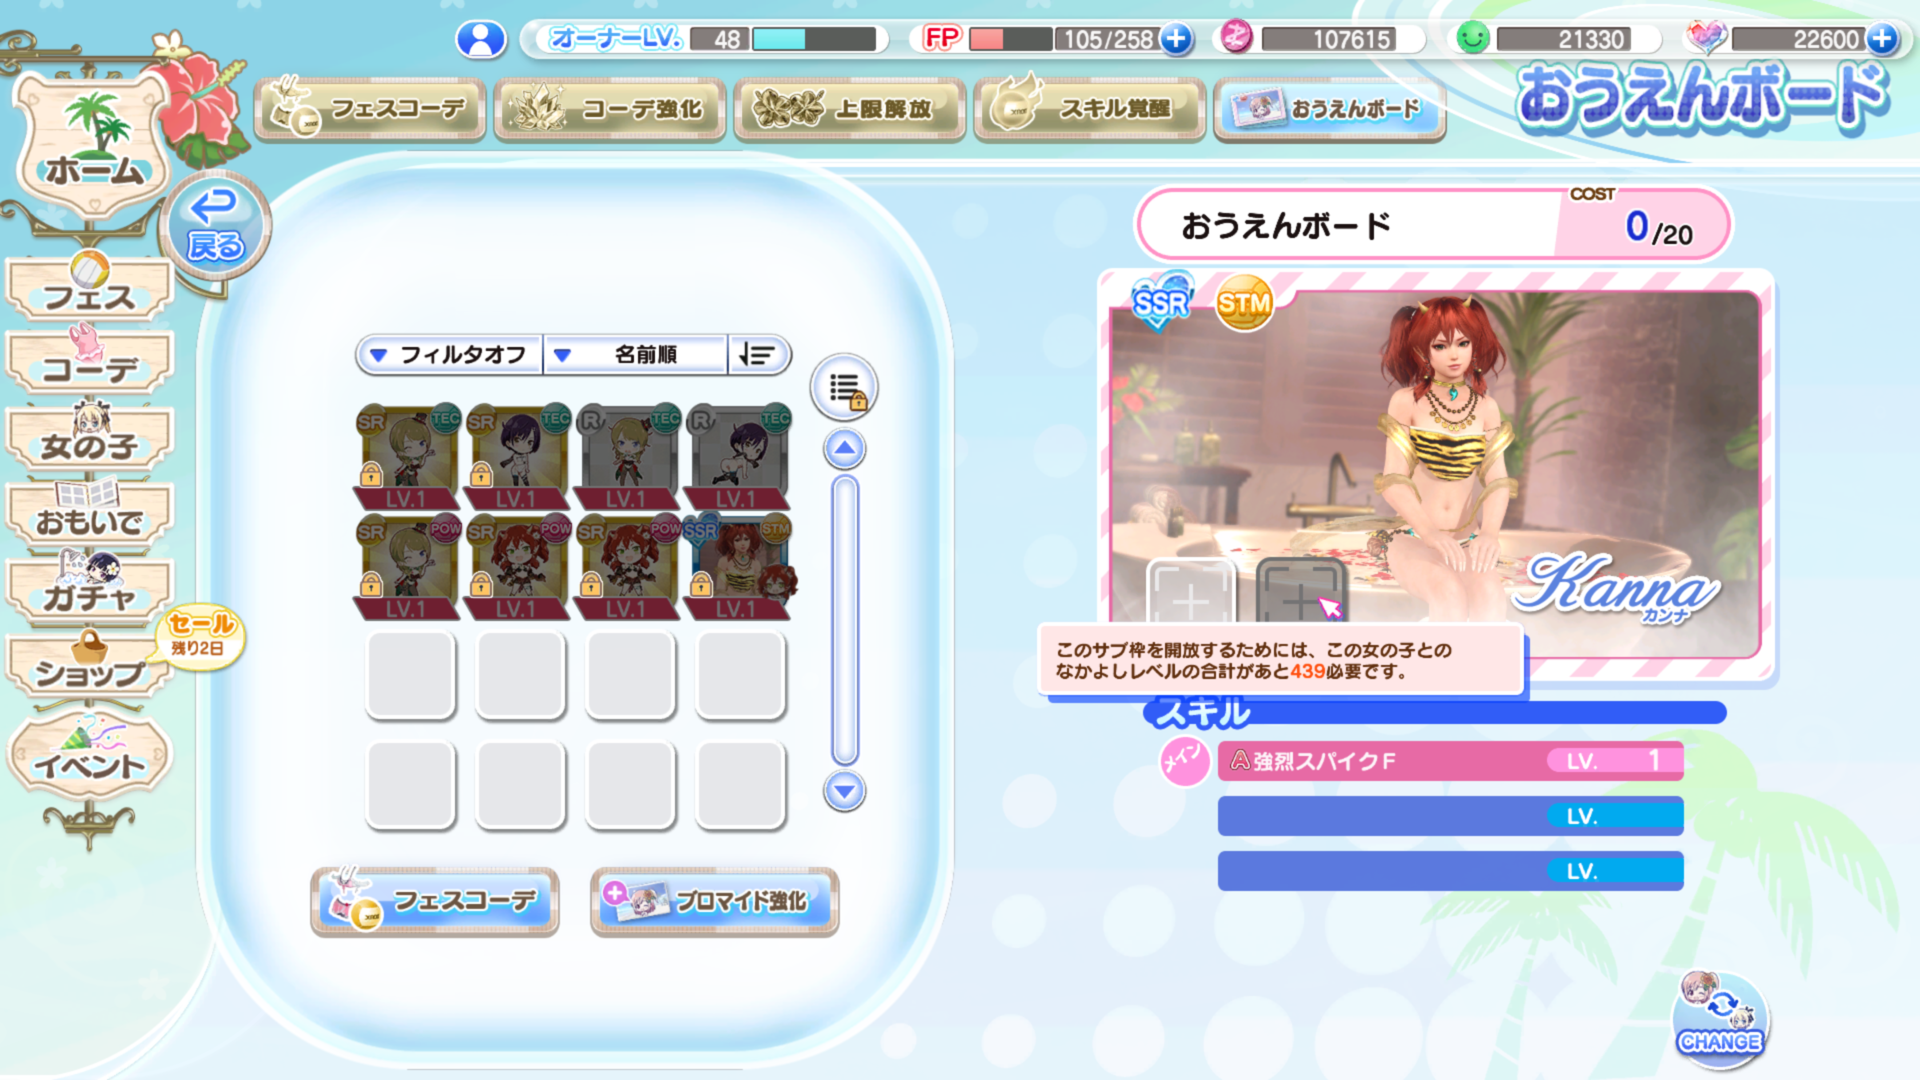
The cheer board slot has 2 sub slots, these are unique to each girl and are not shared in any way. This is important because while slot 2 may be available to everyone from the start, Slot 3 requires the girl you are equipping the Deco-Bromides on to have a total of 500 (No, that isn't a typo) levels of friendship with all the other girls combined.(These are gained from the Owner Room)
Reaching 500 with a girl will not only unlock her second slot but increase her total cost capacity by 5 (for a total of 25 instead of 20)- R and SR Bromides cost 20 to equip
- SSR Bromides cost 15 to equip
- SSR+ Bromides cost 10 to equip
- Paid SSR Bromides cost 10 to equip (Birthday/Debut Gachas)
- Paid SSR+ Bromides cost X to equip*
Note: X is a placeholder until I can test that Make sure you get keys from any events that give them to increase your level cap. If you're curious how many levels you have left you can check by holding your mouse over the second slot, it will be the number in red:
You can also click the "Change" button in the bottom right to see the relationship level of all other girls to your currently selected girl if you're looking for someone to level.
Girls「女の子」
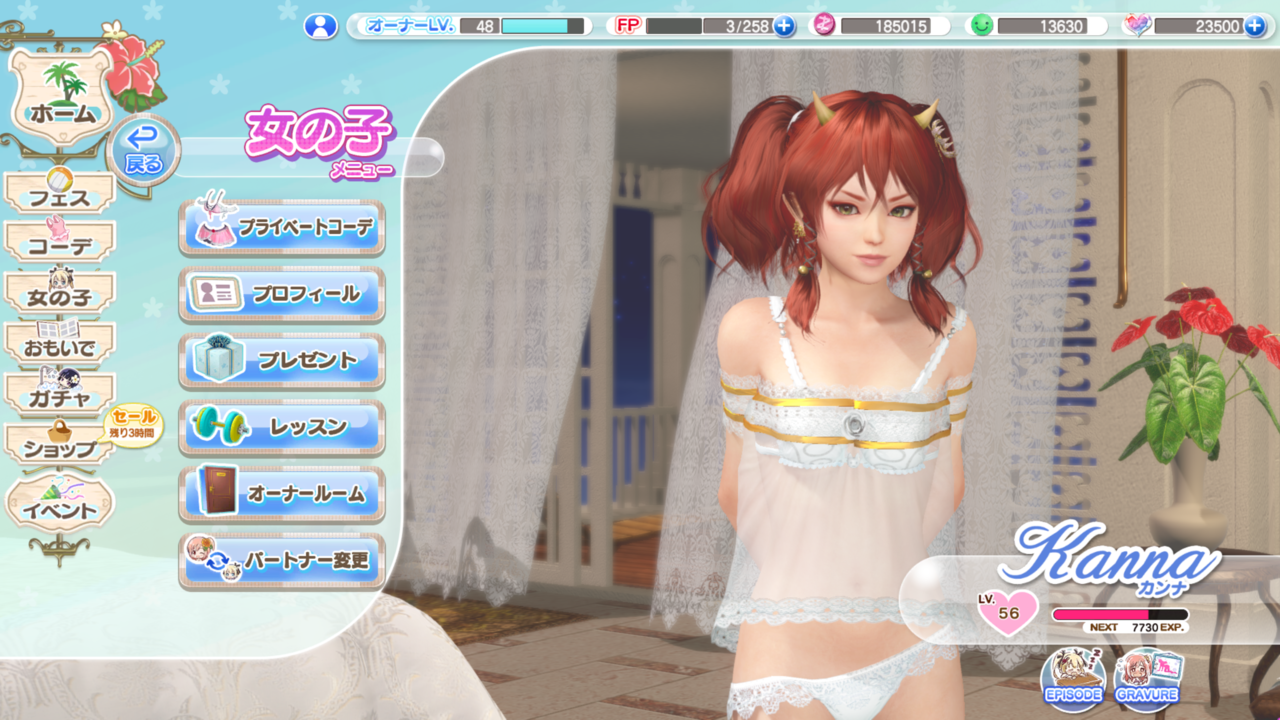 The Girls menu covers a variety of things and is somewhat broad so I'll just get right into it. In the order of the tabs on the menu:
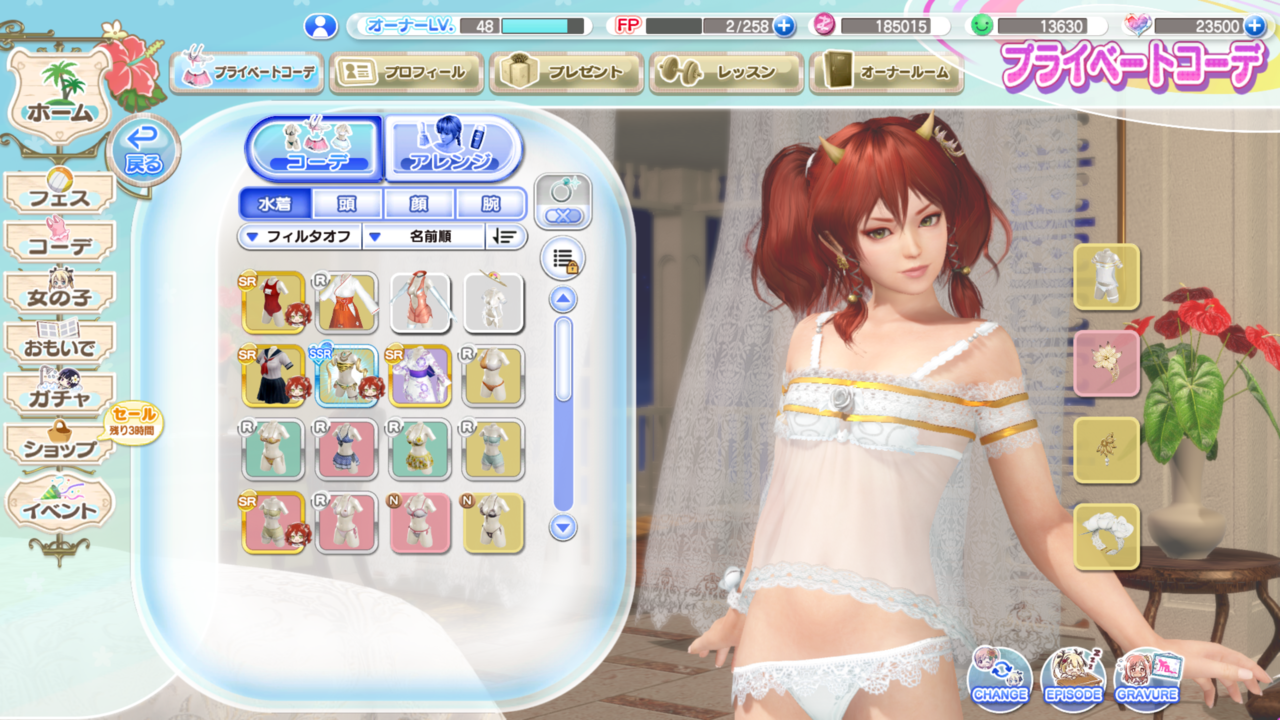 The private coordination tab is used to manage the girl's appearance. Any outfit selected here only appears outside of festival matches. (there is an option for it to override the appearance of your festival outfit.)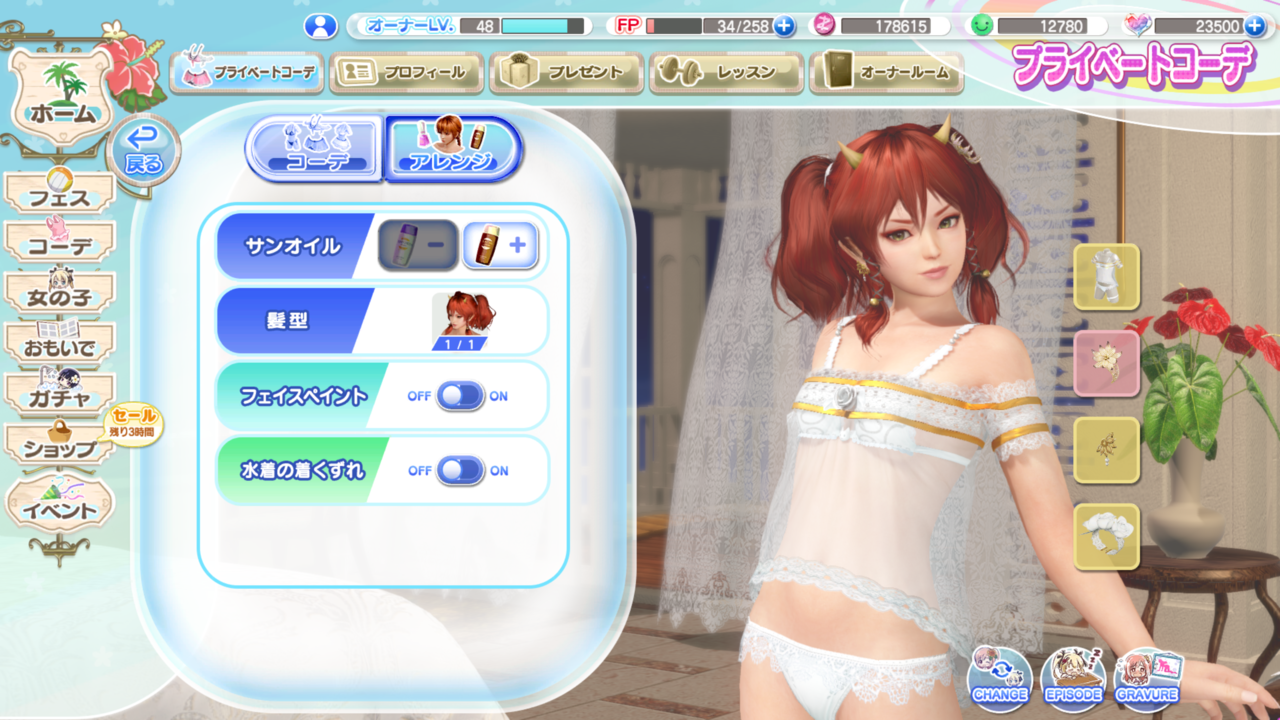
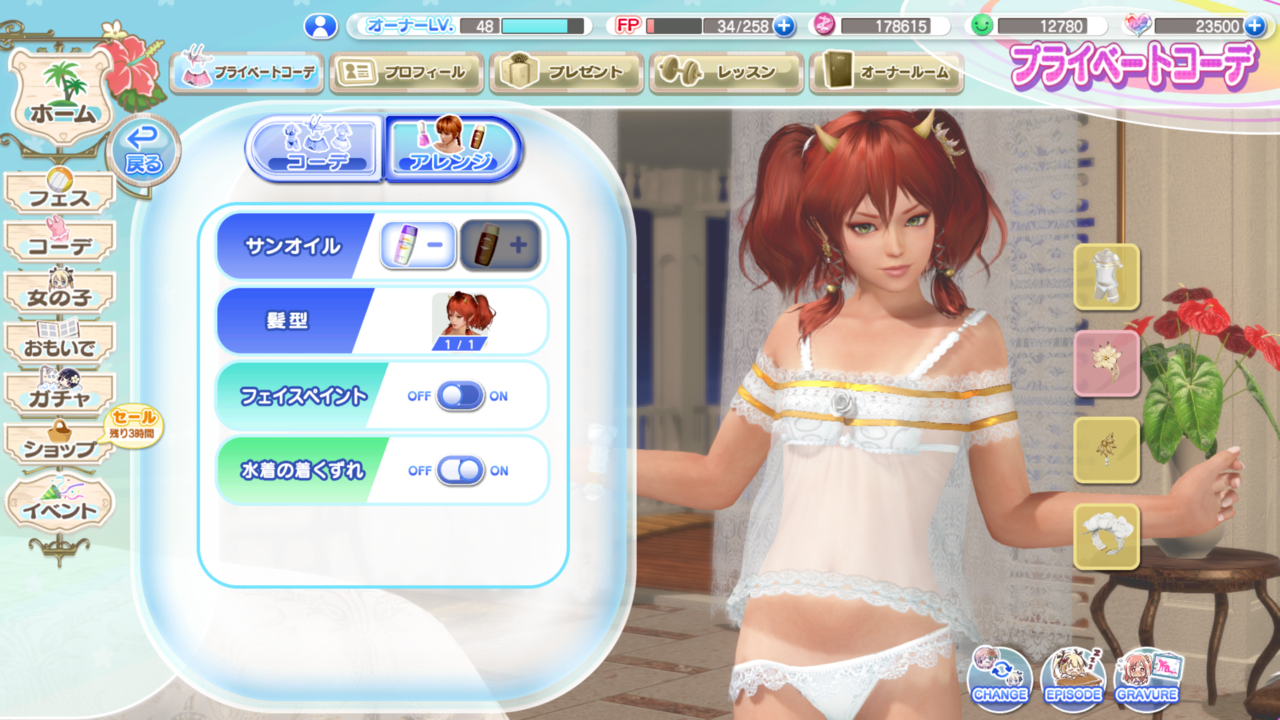
&
In addition to chosing an outfit for your girl you can also adjust their tan level, (The min/max for this varies by girl) Hair style, (If they have any, you get these from the Venus Shop)
Note: Tanlines are made based on the suit you have equipped when you give your girl a tan. They will persist across other outfits afterwards until you undo the tan and then redo it (if you want new tanlines) doing this on the suit you currently have equipped in most cases will also cause the lines to effectively be invisible because of this. (Thanks to The Dude)
It seems whether or not the suit uses tanlines for the normal suit or the malfunction is pre-determined so you don't always have total freedom so it's best to test around, some of the results can be quite interesting...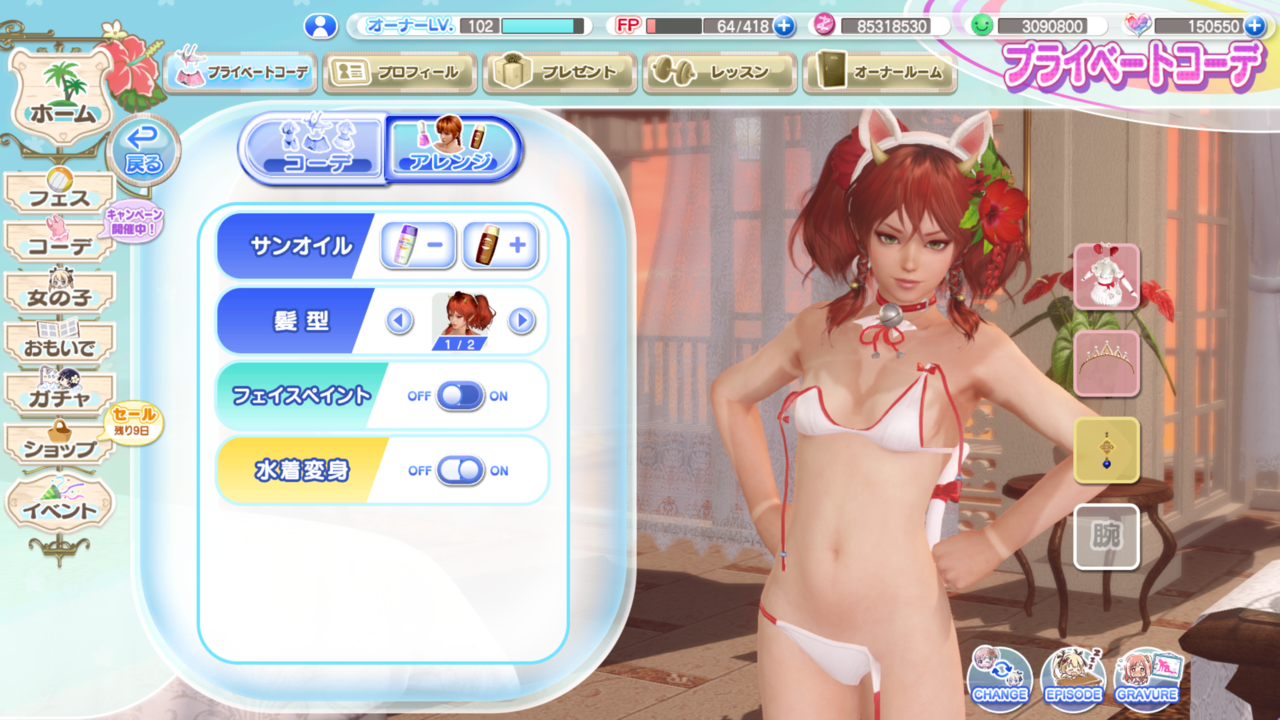
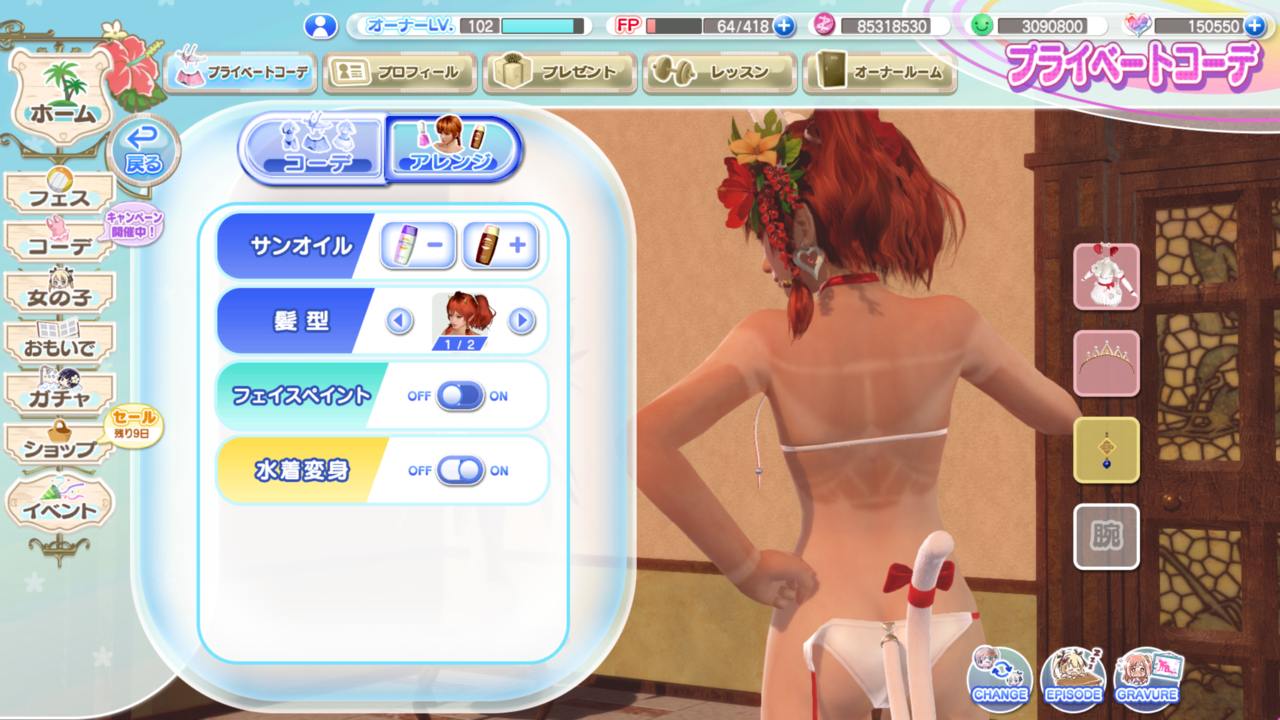
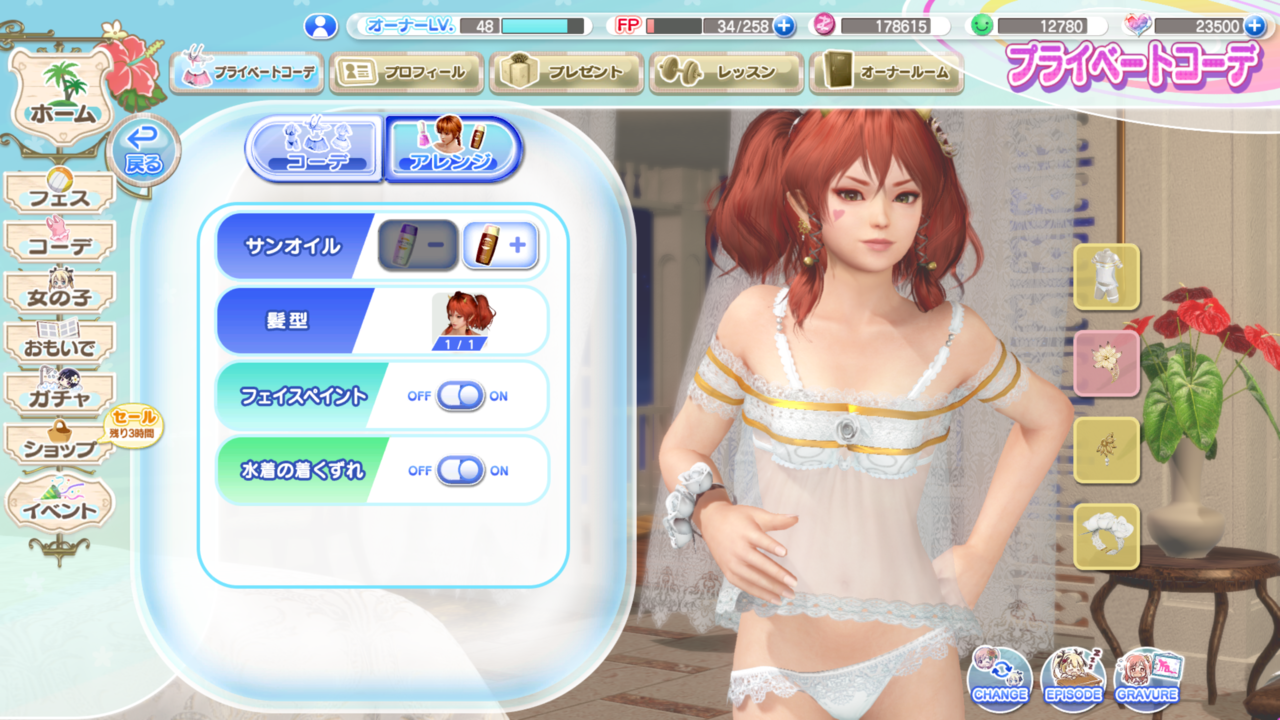 Facepaint, (Just adds a heart to their cheek)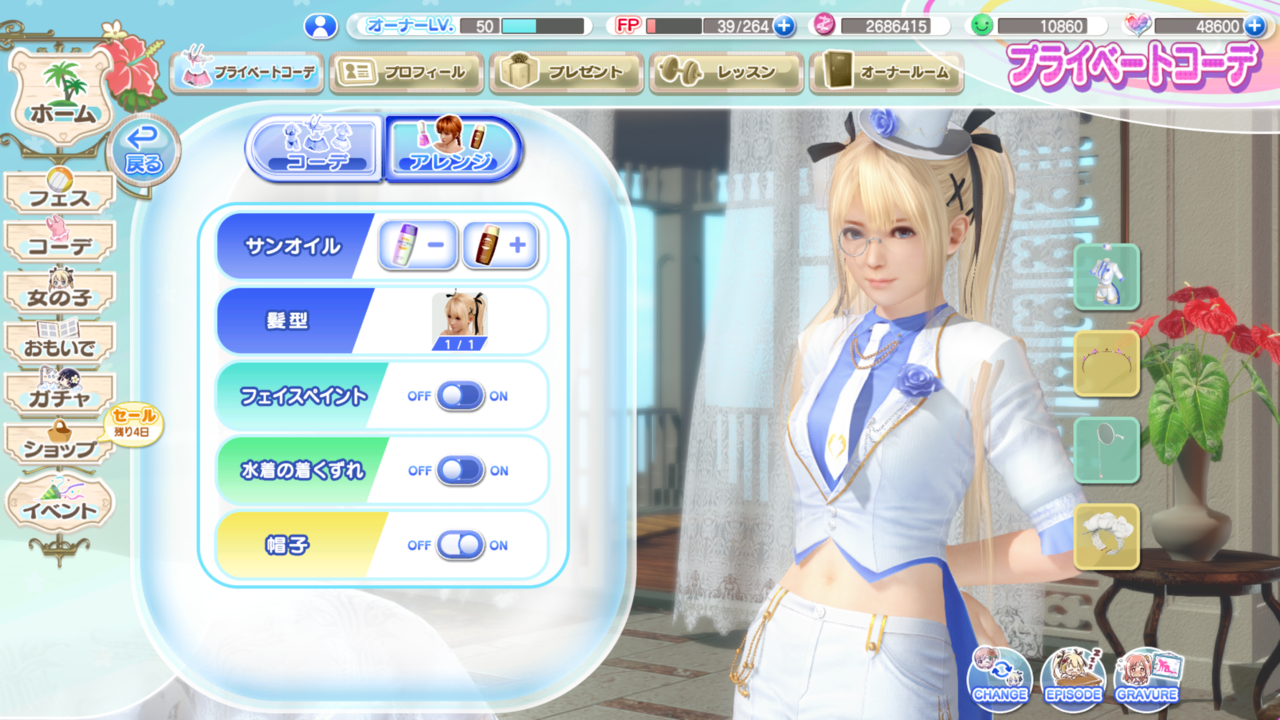
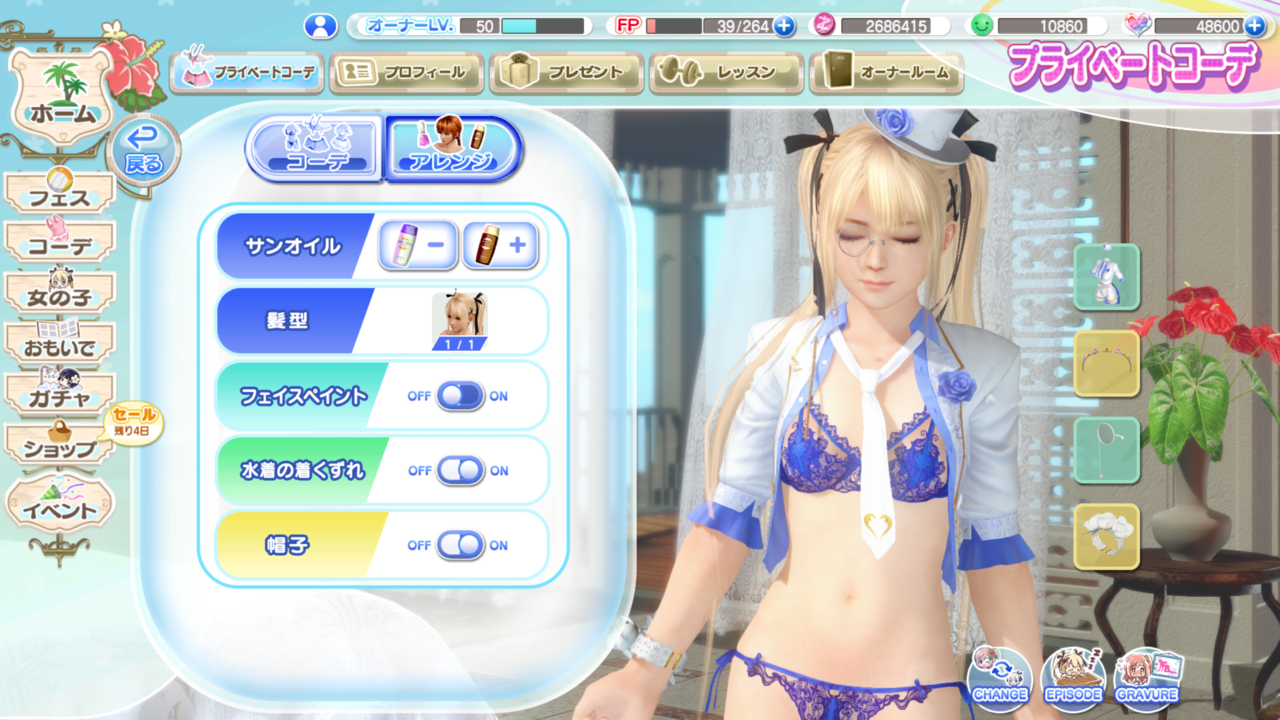 and Malfunction. Malfunctions vary by suit with some being much more subtle than others. Usually the more clothing a girl has the more they have to work with for malfunctions so they tend to be much more noticeable
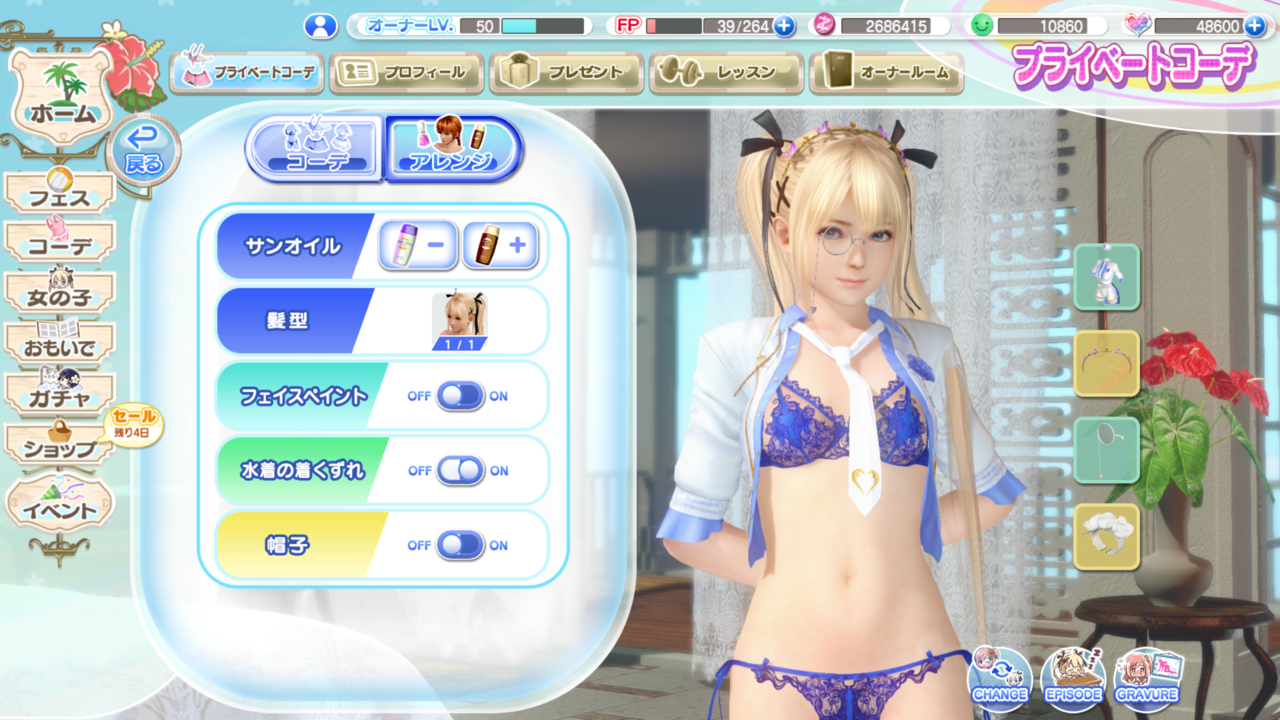 The last tab on the bottom for Marie is a toggle for suit specific headwear, not all suits have this so it isn't always there. Additionally some suits may add other things such as bracelets or extra effects so it won't always have the same text, it might be easiest to just toggle them yourself to see what they do than worry about a translation.
Note: If a suit has a toggle for an accessory (like Marie's hat) then it will override the appearance of whatever accessory you have in that slot so if you want to see your accessory underneath leave it off.
Rings Rings are special items obtained from the Birthday Festivals for each girl. Birthday festivals require you to have drawn from their Birthday Gacha to play and as such these items are paid only. Rings are purely cosmetic, they aren't visible on every suit however equipping it will also add an icon to the girl when they appear on the guest menu.
- Age
- Birthday
- Height
- 3 Sizes (Bust, Waist, and Hips)
- Blood Type (This is a personality thing in case you're curious, sort of like Zodiac signs)
- Hobbies
- Job
- Favorite Food (You get bonuses if you give this item to them in the present menu)
- Favorite Color
- Voice Actor
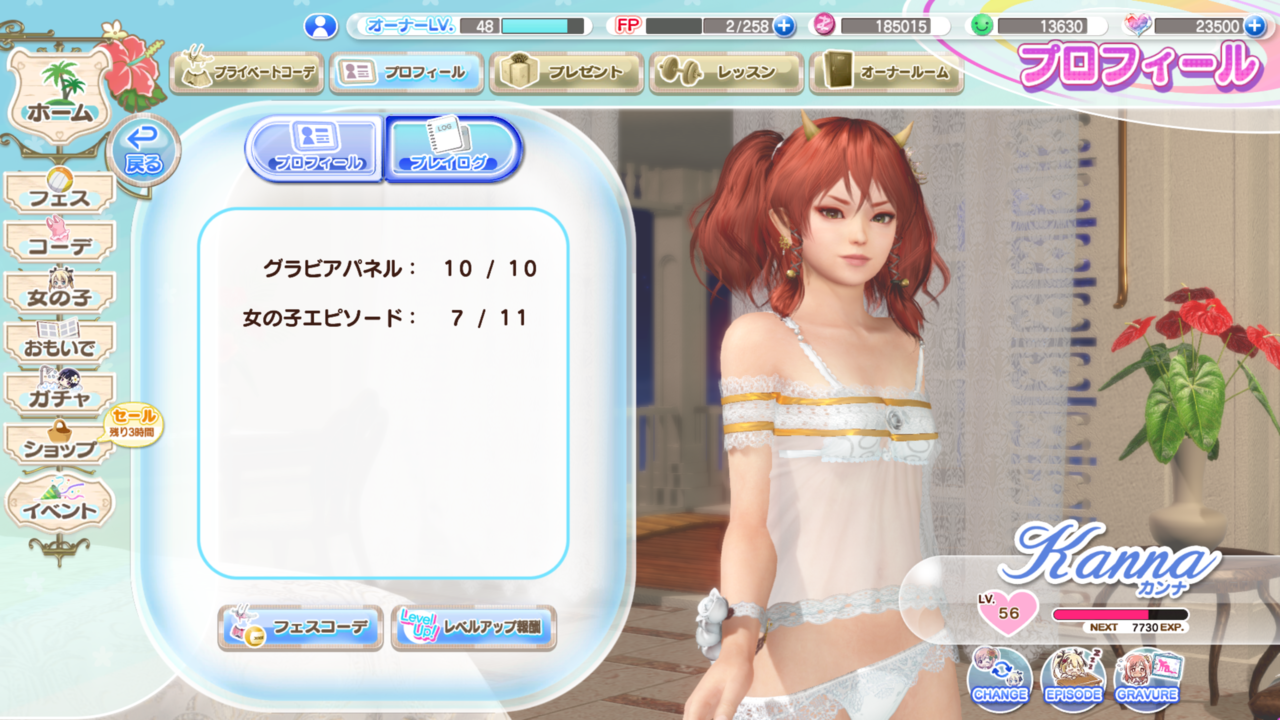
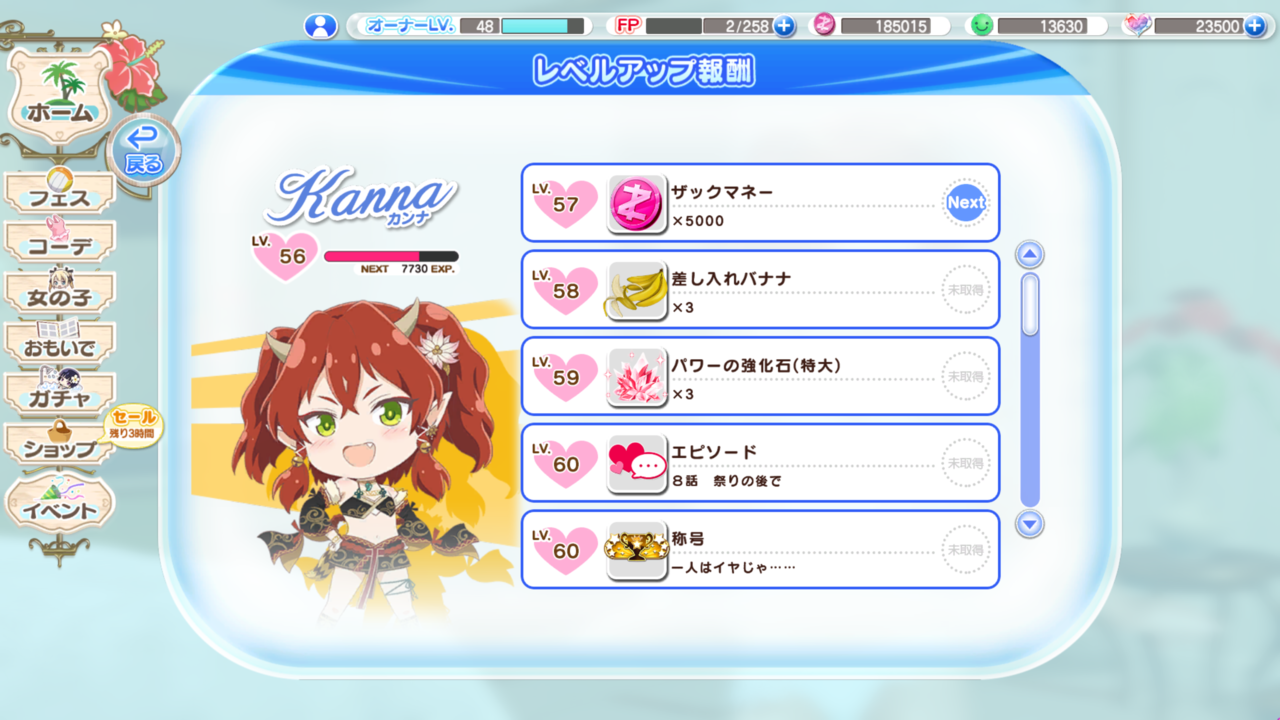 Adittionally you can find the play log and level up rewards on the profile page.
The play log simply tells you how many of the girl's base episodes you have. (Top is Gravure panels, bottom is from level up rewards)
The level up rewards menu as it implies simply lists all the rewards you get for leveling up all the way until the cap of 81.
Girls 2「女の子」
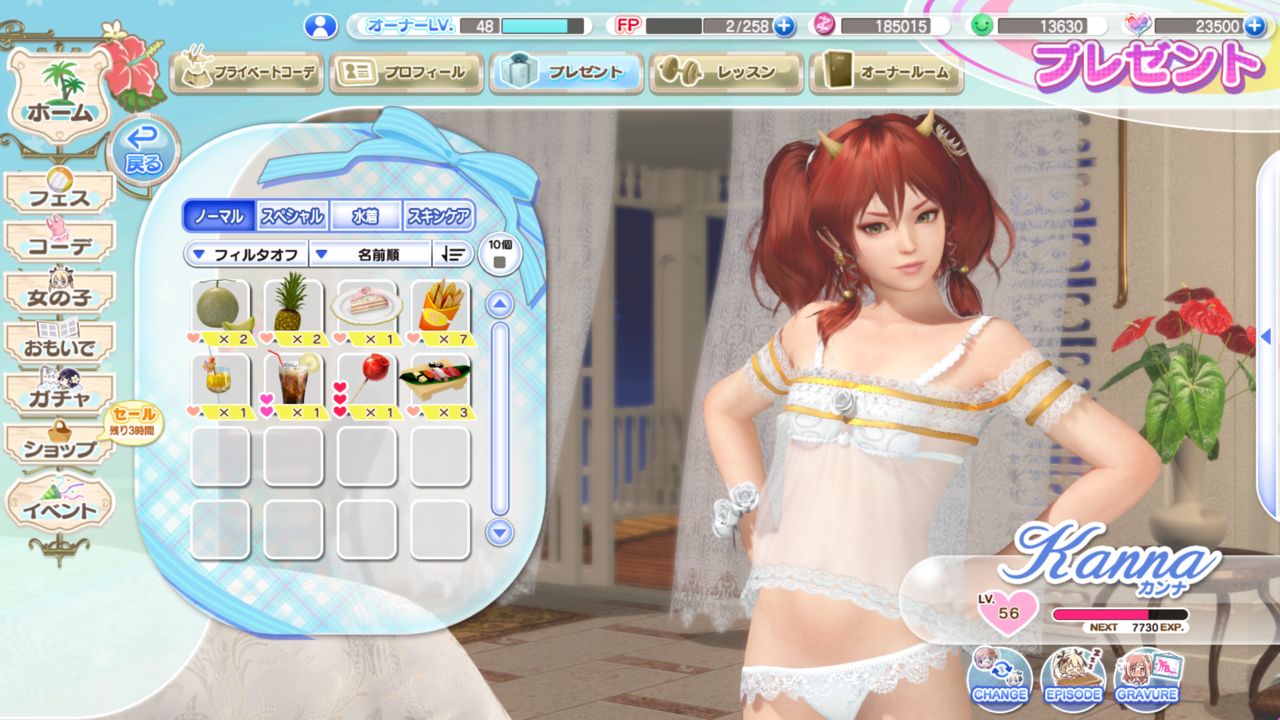 The present menu is where you give gifts to your girls, there are four tabs: From left to right Normal, Special, Swimsuit, and Skincare.
The Normal tab is where you gift (usually) food items to your girls, each girl has her own favorites which will give up to double XP. (This is indicated by the hearts next to the item.) Normal items, in addition to XP, have a chance to cause a girl to gift you an item which is usually just a small amount of currency or a small upgrade item. Items with higher XP values have a higher chance to give better rewards such as XL upgrade materials and FP drinks.
Girls are mentioned by name in the description for their favorite foods as well as having them listed in their profile but just in case here's a chart that shows them:
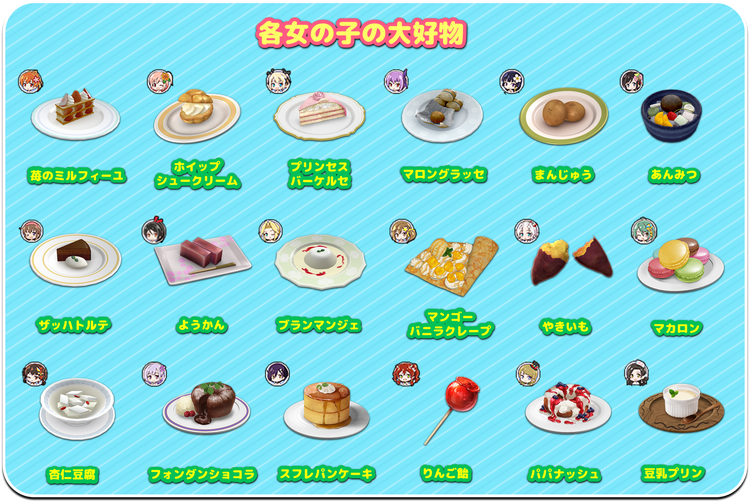
Note: Patty's favorite food is Hamburgers, Tsukushi's favorite food is Cup Noodles, Lobelia's favorite food is Bon Bon Chocolates, Nanami's favorite food is Tonkotsu Ramen, Elise's favorite food is Stollen.
The Special tab is where you gift items such as poses, props, and special event items.
The Swimsuit tab is where you gift girls various "generic" swimsuits, what I mean by "generic" is any suit that isn't girl specific so basically any R suit and some of the cosmetic only ones like design contest suits. These are the purely cosmetic copies and are completely separate from their festival counterparts, they cannot be gotten rid of aside from giving them to girls so enjoy.
Since the next area is mechanically complex it will be discussed in the next section "Skincare and Manicures"
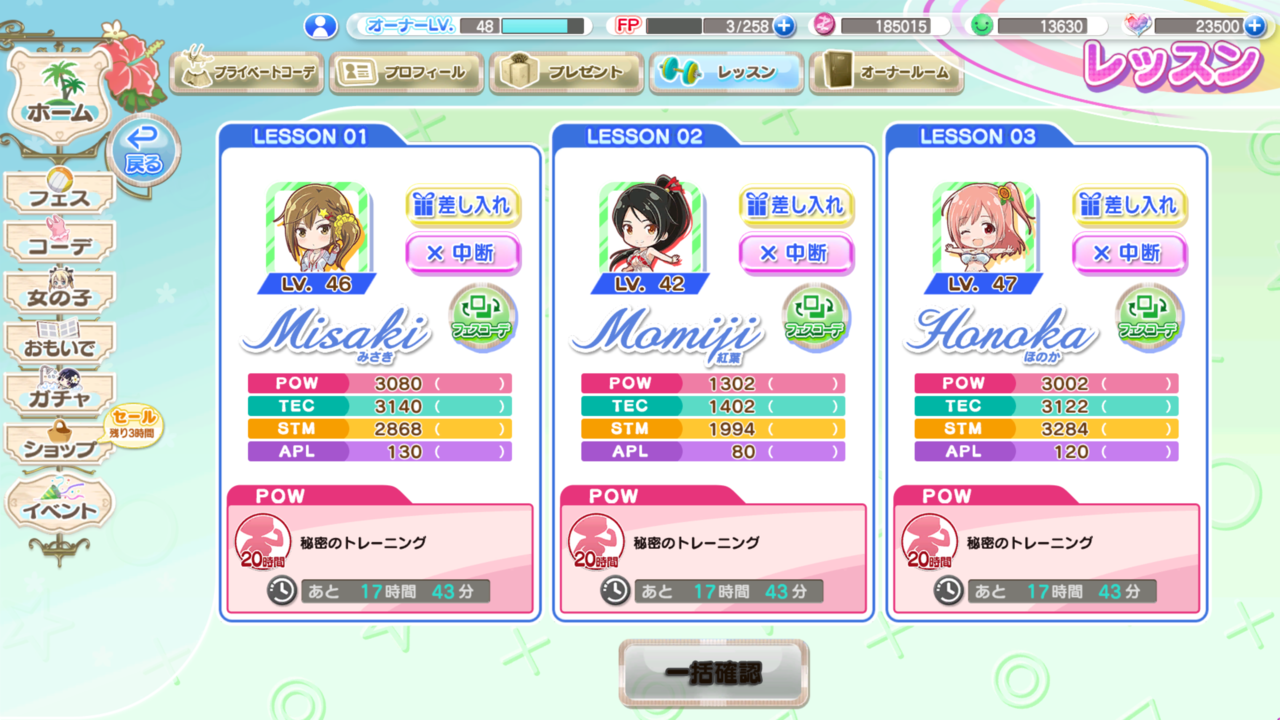
Lessons are a source of XP for girls as well as items, they can drop medium and large accessory limit break materials (feathers and single wings) as well as small and medium uncap and leveling materials for swimsuits. The type of material is determined by the type of lesson you take. The longer the lesson you take the more rewards you will get for a single run and the better the chance you have at rarer items.
The most "efficient" way to get rewards would just be to do the 15 minute lessons all day but since that's kind of impractical (unless you really have nothing better to do) it's usually just best to go with the 20hr lesson.
XP for lessons is earned at a rate of 1 XP/2 Minutes this is a flat rate and it isn't impacted by the type of success you get from the lesson.
Girls used in lessons cannot participate in festival matches.
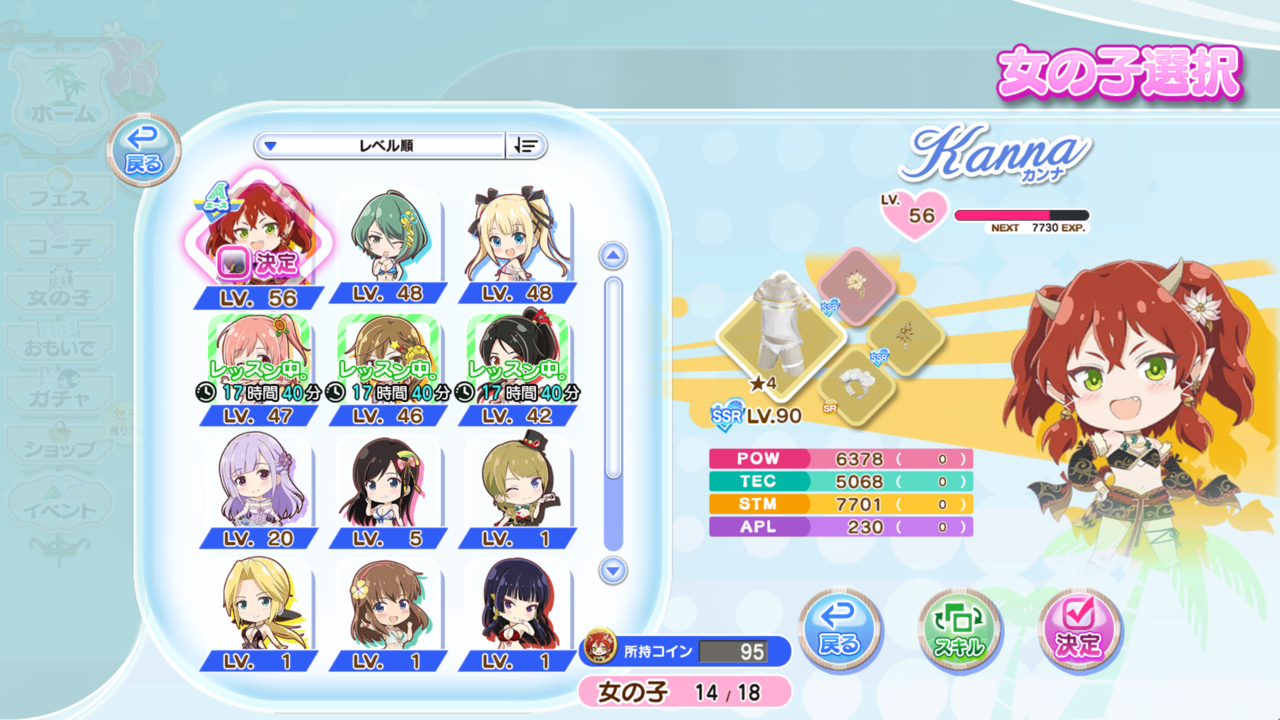
Your partner is the girl who appears on the home screen, she'll also be the one who plays in the Casino and may participate in other events but this has no actual gameplay impact so just pick your favorite.
In case you're wondering there is a right answer for who to chose as your partner and that answer is Kanna. (fight me)
Skincare and Manicures「スキンケアとマニキュア」
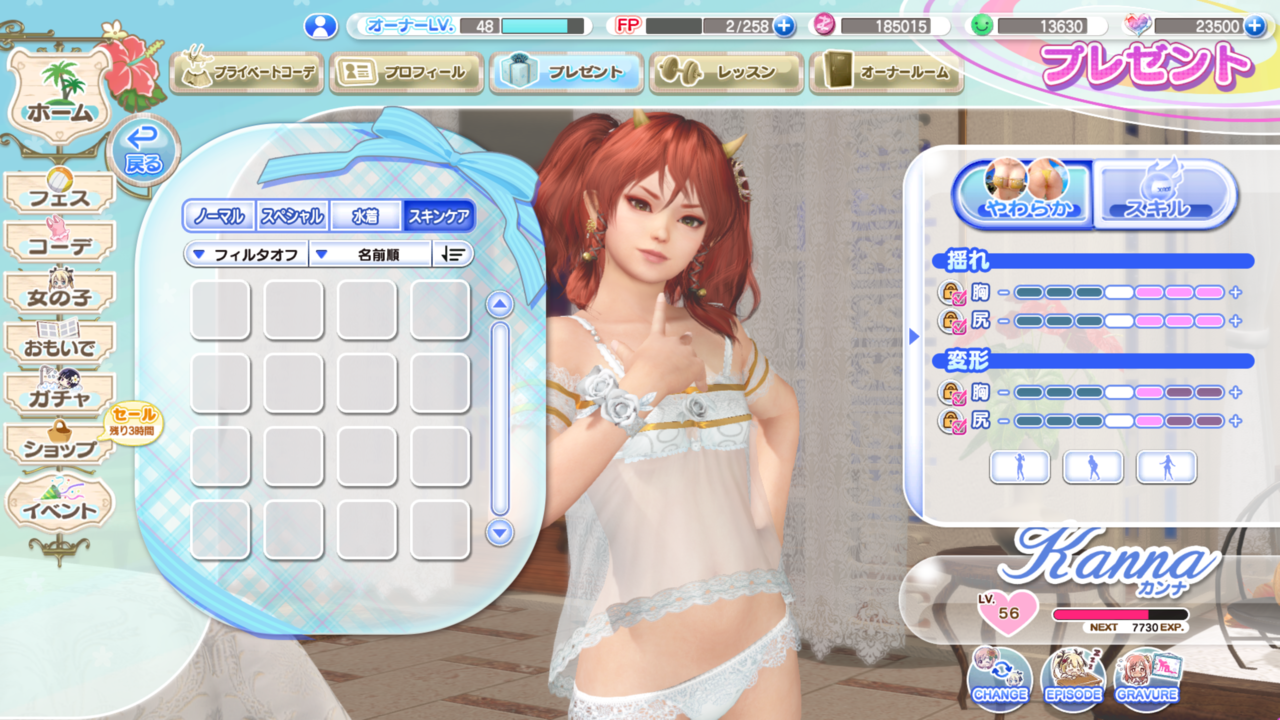
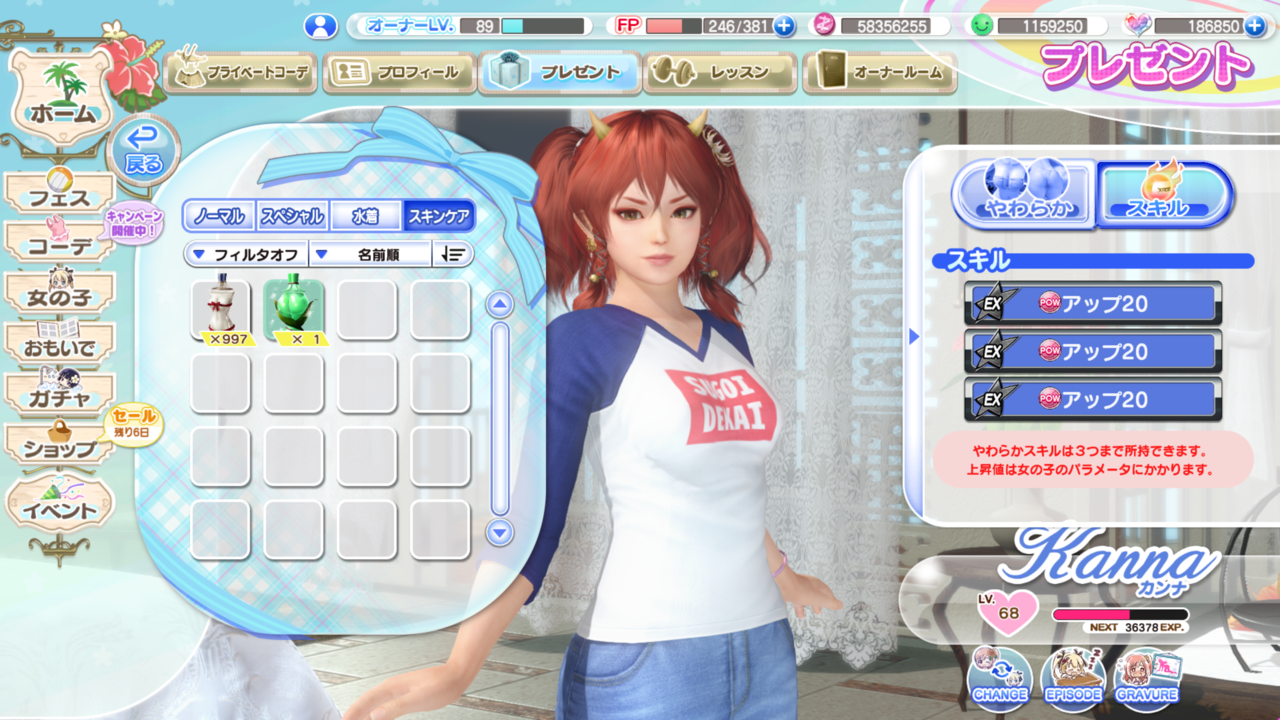
&
Items for the Skincare tab are only available during softening events and opening the menu will introduce a new side menu.
The first tab is for softness, this controls... jiggle,,, for the girl's... tops and bottoms...
The lock to the left of each stat locks it, this is needed since the event items will otherwise keep changing them which can be troublesome if you're going for a certain skill.
The stats you can manipulate are Bounce on top and Deformation on the bottom. Under each tab the top option is conveniently for their... tops... and the bottom option is for their bottoms...
Bounce should more or less be self explanatory however Deformation may be slightly more obscure. Deformation is the willingness of the affected parts to react to compression, specifically this applies to gravity and things such as physical compression. (like an arm in a pose)
Further left will make your selected part "hard" (They'll start to ignore gravity) while further right will make it "soft" (they act more naturally).
The second tab is for softening skills, these skills are permanent so you don't need to worry about losing them after the event. There are usually "SSR" skills (like 5%) that you can get from an event SR and then "actual" SSR skills (~10%) that require a trend suit to get (They are only guaranteed by awakening a suit).
Beyond this are EX skills which are even higher (15%) and are available from the owner shop during certain events (real money) and very rarely as heavily RNG based event rewards.
Beyond even this are "awakened" EX skills which are the result of combining multiple EX oils of the same type into one, each time this is done the strength of the output oil is increased by 5%. Since there are currently multiple levels I will make a list noting strength and amount of previous oils required to make:- 1* - 20% - Requires 3 EX oils.
- 2* - 25% - Requires 2 1* EX oils (6 base EX oils each)
The combining of EX oils is done from the item list in the settings menu. (The first button) When you have oils you want to combine find the EX oil in the list and click on the circle made of arrows. Doing so will spawn a pop-up that looks like this:
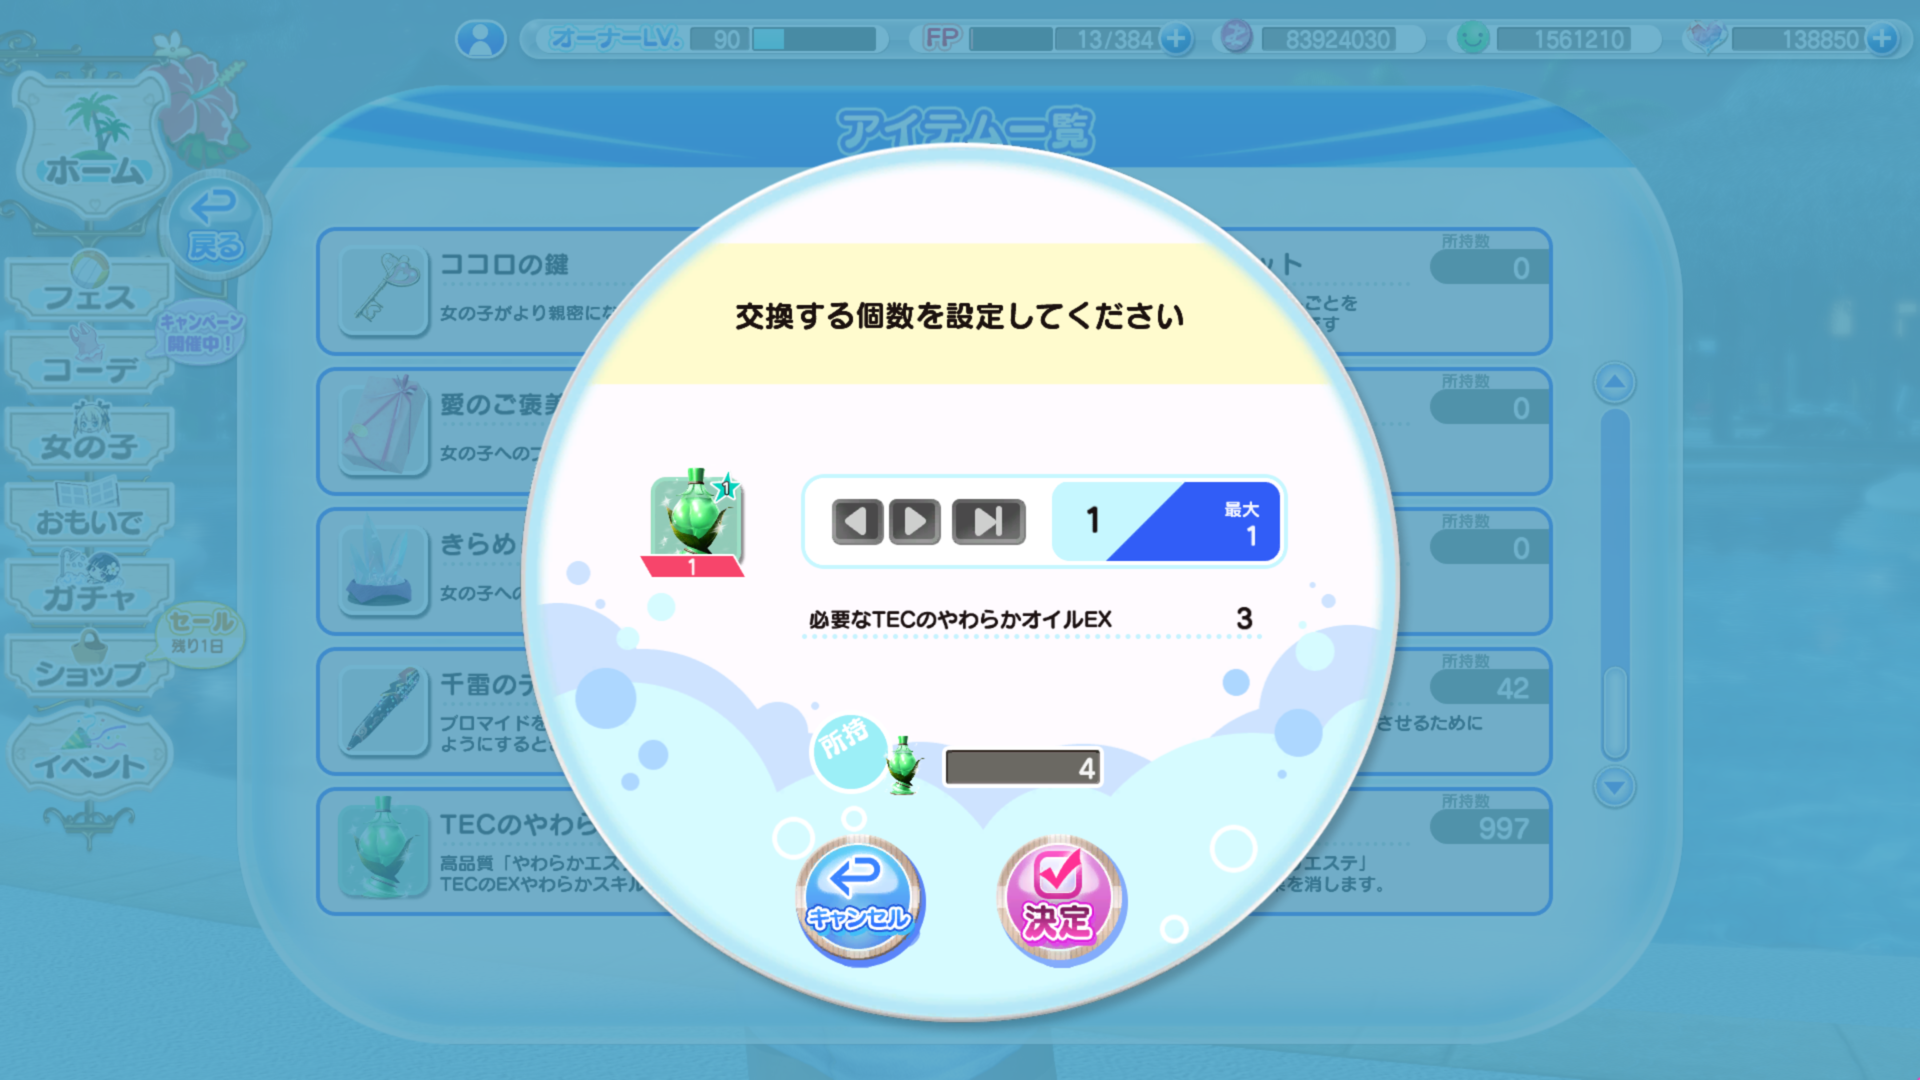
Upon confirmation you will lose your EX oils and gain the new awakened version.
Note: To my knowledge you can't change an awakened EX skill back into 3 regular ones so only do this when it would be more beneficial to you than 3 regular EX skills.
Note 2: EX Remover oil works on the awakened versions of EX skills and grants you the awakened oil back.
Softening skills are passive % buffs to the stat they boost, since they're permanent it's worth going for if a girl you like has a trend SSR for the event.
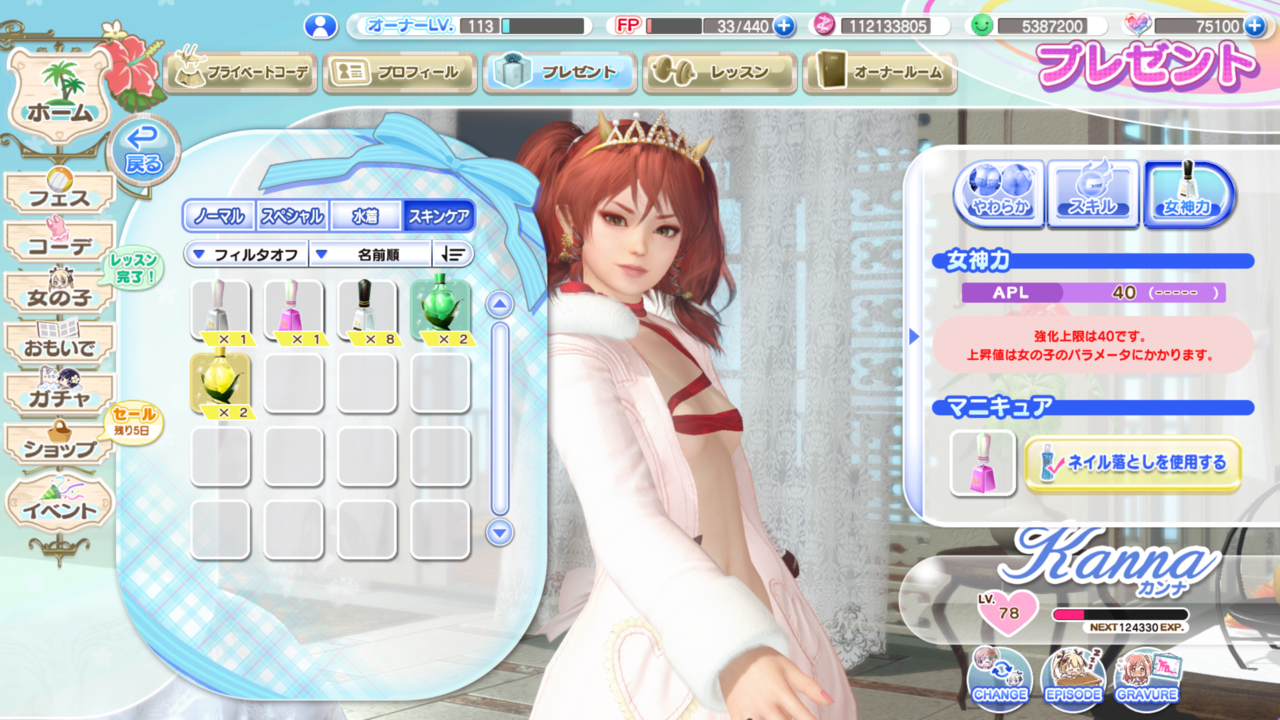 Here you will see a menu that looks like this. From this menu you can gift different color nail polish to change the color of your girl's nails and top coats to boost their appeal.
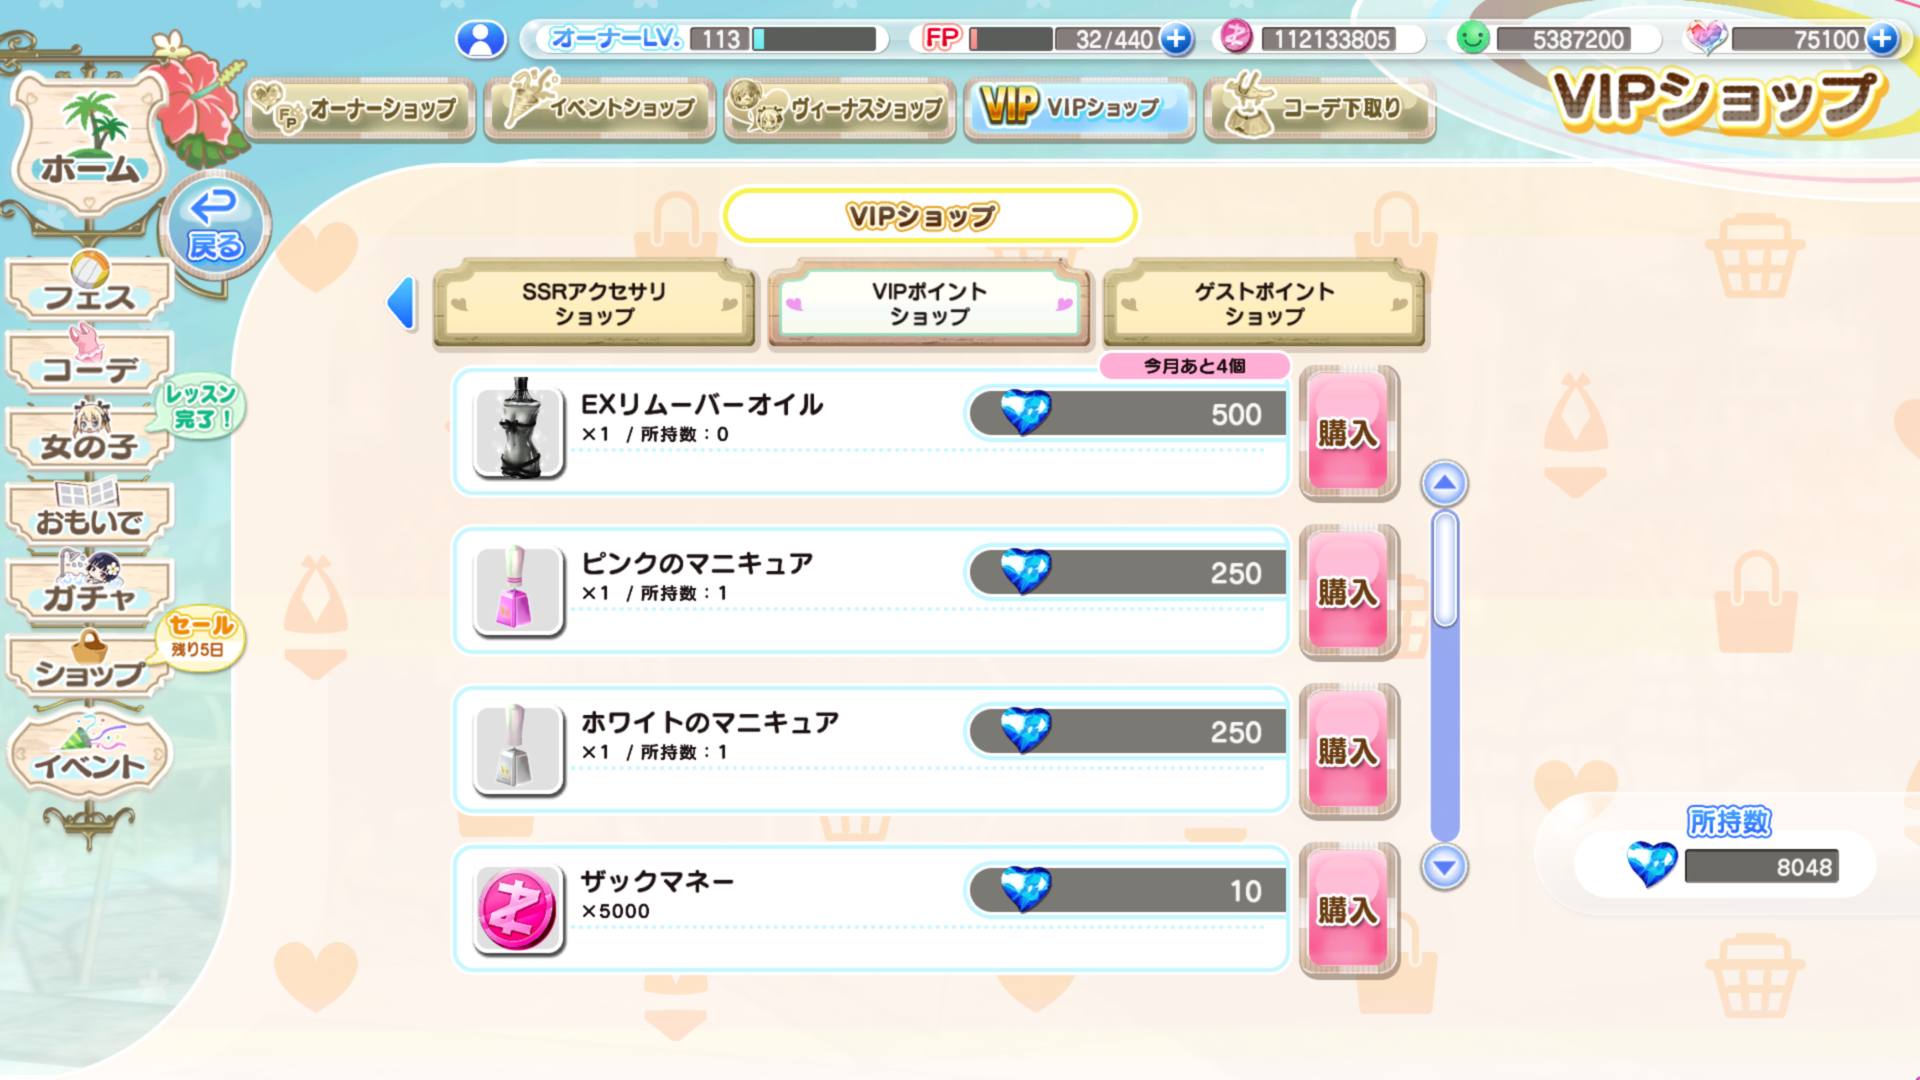 Currently there are only 2 colors of nail polish in the game:
- Pink
- White
It is possible more will be added later and the list will be updated accordingly. These nail polish colors can be purchased at any time through the VIP Point Shop for the cost of 250 points each. These colors will last indefinitely until removed either by replacing with a new color or pressing the nail polish remover button reading 「ネイル落としを使用する」located to the right of the nail polish icon in the list. Nail colors are purely cosmetic.
Note: There is an inventory limit for each color equal to the number of girls currently in the game.
Note 2: Outfits that change character's nails in some way (such as Kanna's "Lightning Speed" outfit) will not be affected by the color change. I'm not sure if this is a bug/oversight or intended.
 Top Coat items are a unique event item currently limited to Butt Battle events. Upon gifting one to a girl it will permanently raise her base APL value by 5 points.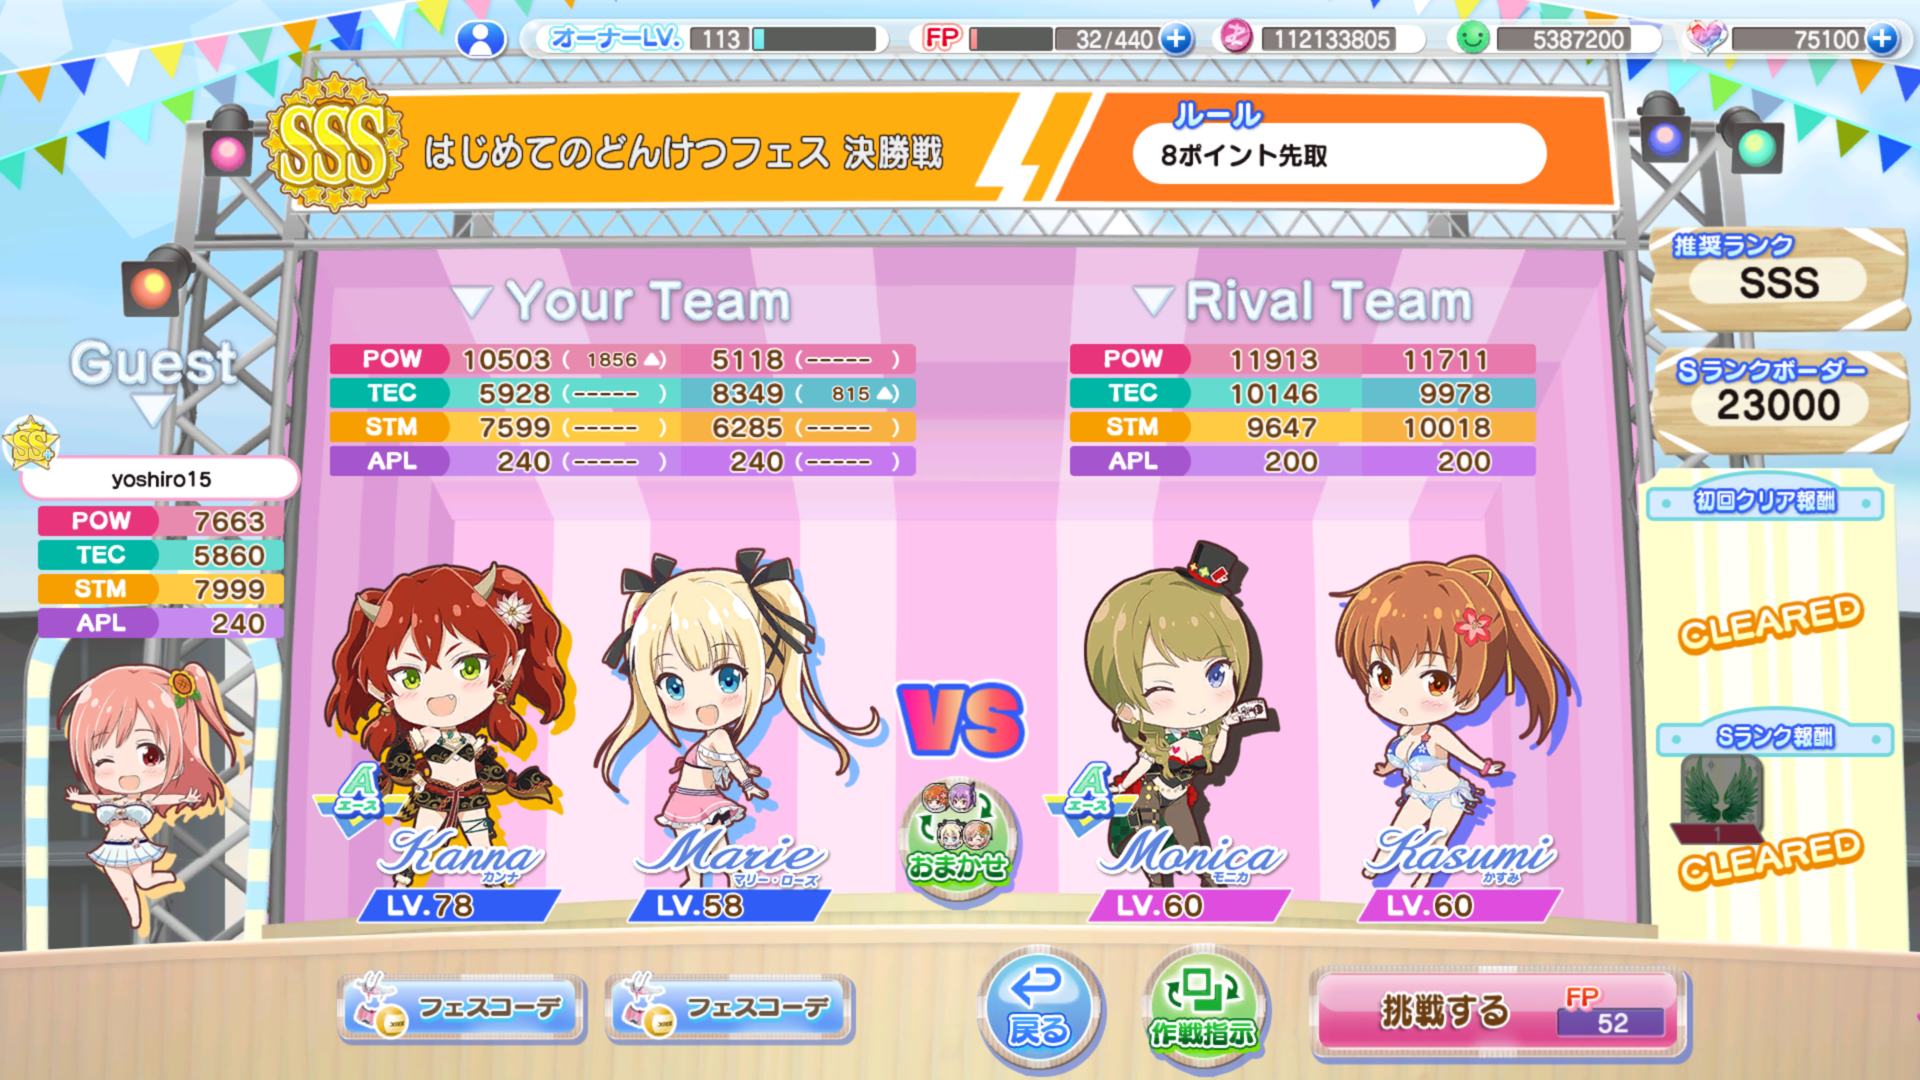
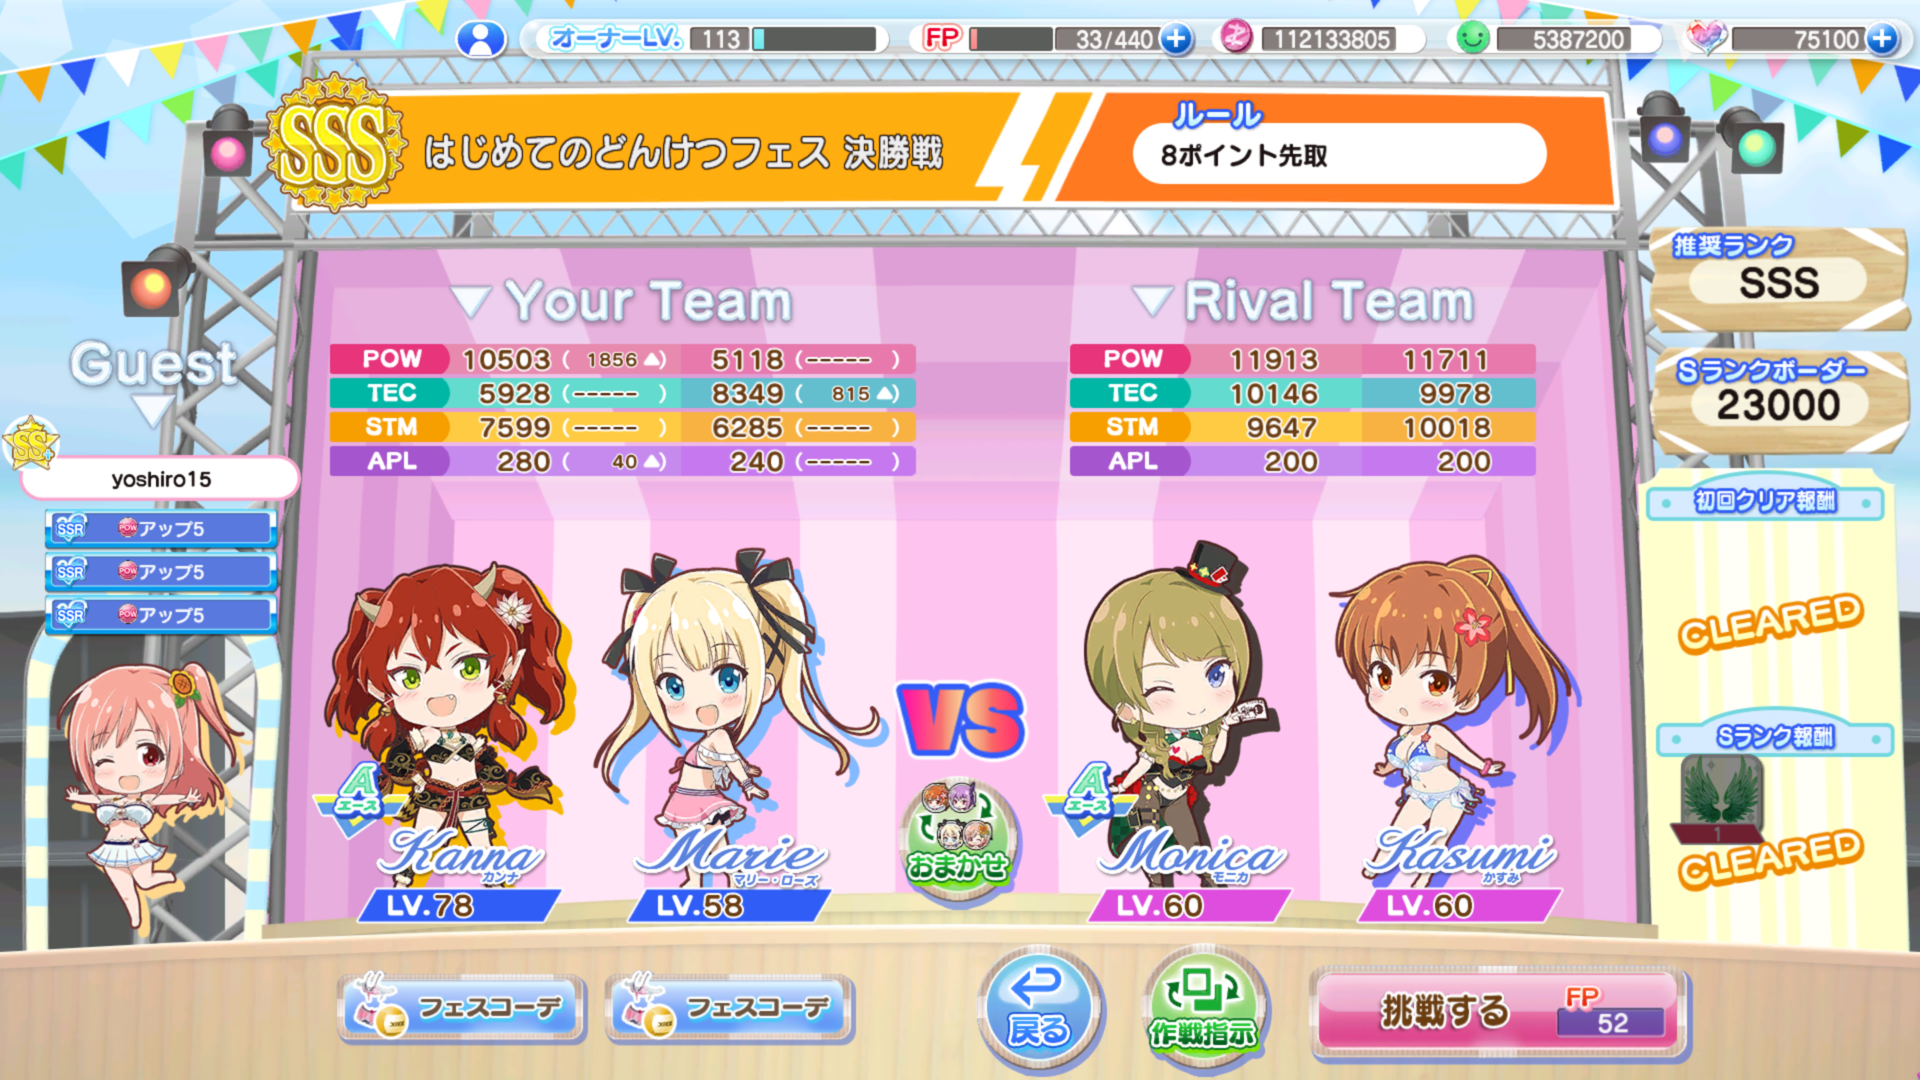 There is a max Appeal bonus cap that is the same for all girls regardless of base Appeal, this cap is 40 points (8 top coats). The APL boosts obtained using these items is permanent, like skincare skills, so you do not need to worry about losing the buff so long as you gift the items before the event ends.
Note: Like Skincare Lotions/Oils, Top Coat items will expire at the end of the event's duration so be sure to use them.
Note 2: Extra APL is useful in Butt Battle as it increases the frequency of Tension Burst which gives bonus points in that mode. It can also help to counter the TEG- skills of SS+ and SSS opponents in regular matches as a nice bonus.
Note 3: A potential unwanted side effect of raising APL would be the potential for auto-skip + auto burst farming to take longer since you will have to wait for the animation every time you get a burst.
Note 4: Top Coat has a black cap to help you distinguish it from Nail Polish.
Owner Room「オーナールーム」
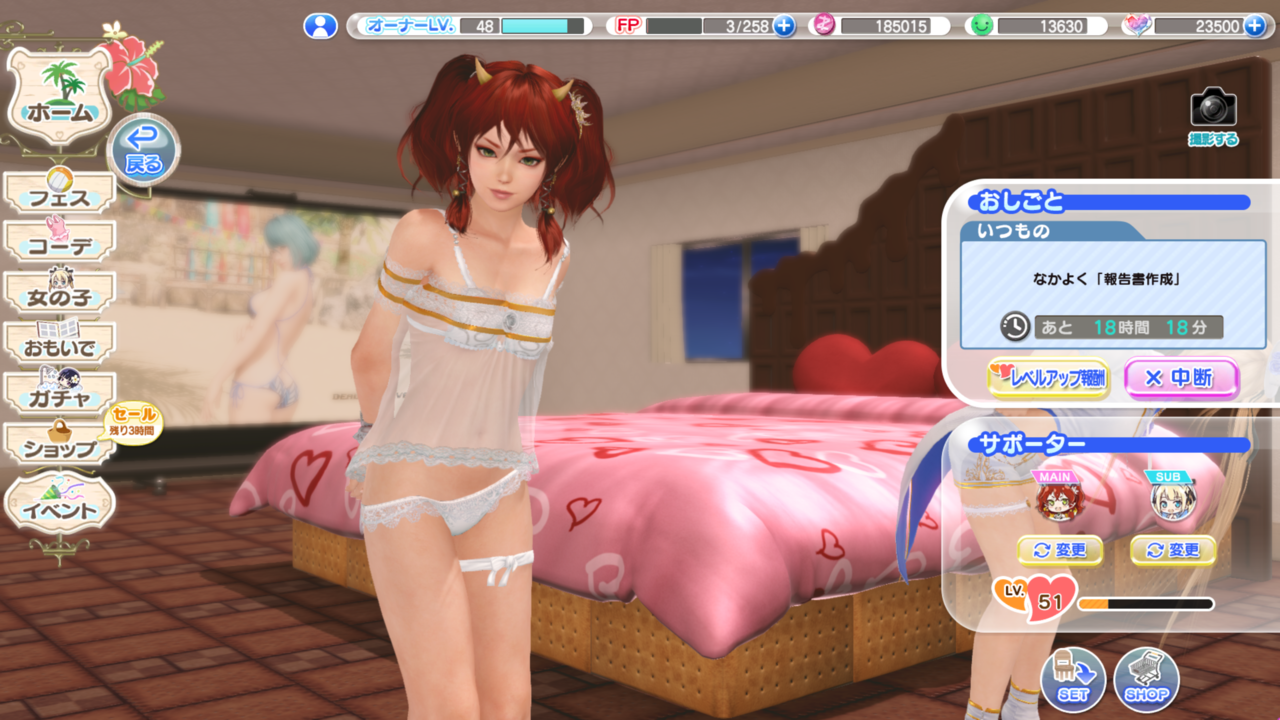
The Owner Room is a fairly important section of the game, it allows you to strengthen the bonds of your girls by taking on various jobs together. Leveling up relationships primarily rewards Furniture Coins and backgrounds for photo mode between the two girls, it will also allow you do do things like pose them together with furniture. Jobs are unlocked at levels:
- 4 - 1hr Job
- 6 - 3hr Job(?), 6hr Job
- X - 12hr Job
- X - 20hr Job
Note: The 3hr Job might be unlocked from level 5, I'll have to check that when I get a chance.
Note 2: The "X" is just a placeholder until I get the actual level.
Leveling up relationships is important though for the proper use of Deco-Bromides, In the case of these your goal should be to more or less pick one girl and get her to as high a level as possible with all girls, this will take quite a while and the benefits are marginal so there's no need to rush it.
The level cap for relationships is 60 which will also allow those girls to use each other's deco-bromides on their sub-slots at 100% effectiveness. If you reach level 60 with any pair of girls you like to pose together and are wondering who you should use next I'd strongly recommend girls who have the same type. (IE TEC girls together, POW girls together, STM girls together.)
Relationships have soft-caps at certain levels that require keys to allow them to progress further, these levels are:- 40 > 41: Unlocks:
- ニつの椅子: Sitting across from each other on two chairs. (Requires chairs to pose them in)
- ふたりでお風呂: Taking a bath together. (Requires "Flower bath [White]" Written "フラワーバス[白]" it costs 40 VIP Coins in the furniture shop.)
- ふたりで縁側: Sitting on an Engawa together. Don't know an English word for it but it's kind of like a veranda with a raised floor for sitting. (Requires the "Engawa" Written "縁側" It costs 60 VIP Coins in the furniture shop)
- ニつの椅子: Sitting across from each other on two chairs. (Requires chairs to pose them in)
- 49 > 50: Unlocks:
- ふたりでベッド: Sleeping together. (Requires a bed)
- 54 > 55: Requires 2 Keys. Unlocks:
- A sense of accomplishment...? (Also 95% deco-bromide efficiency)
- 59 > 60: Requires 3 keys. Unlocks:
- 100% deco-bromide efficiency... probably isn't really worth it but... congratulations, I guess...

Keys are obtained through the event shop for certain events and are usually fairly limited so you should pick them up when you can. You must have a full XP bar to use the key, when you can use it it will be the first option in the job menu with a 0 minute timer. By clicking the "Set" button on the bottom right you can gain access to the decoration menu.
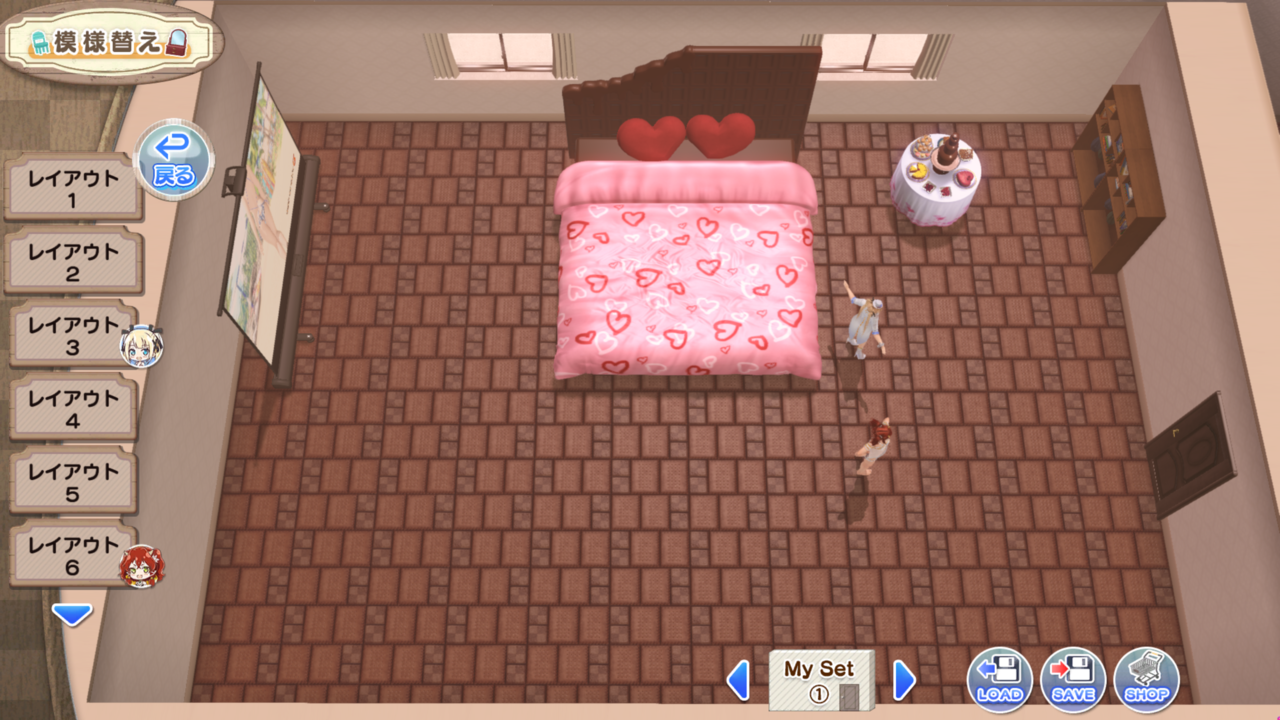 The Owner Room is divided to several layouts, each layout represents a section of the room. Layouts have their own storage which is divided into small(小), medium(中), and large(大) decoration slots, these slots correspond to the general size of the decoration (a bed is large, a chair is small).
Certain decorations can be interacted with by the girls this includes beds and some SSR decorations.
Hot Springs「温泉」
The hot spring is a new feature added for the 4th Anniversary and serves as a replacement for the old Lesson system, it can be accessed from either the home screen or the girl menu in both instances by clicking the pink button labeled 温泉.
 Like the old lesson system the hot spring allows your girls to gain XP and obtain rewards for the time they spend there. However unlike the original lesson system the hot spring is much less restrictive.
Girls in the hot spring can still participate in festival matches and any other content and rather than selecting times and having downtime if you can't login in time there is a Potency Gauge (効能ゲージ) you can refill at any time to keep the XP and rewards coming.
The gage is increased by adding Hot Spring Mix (温泉の素) which can be obtained from daily missions as well as events and point rewards. (basically the same places you got fruit and candy for the old lesson system)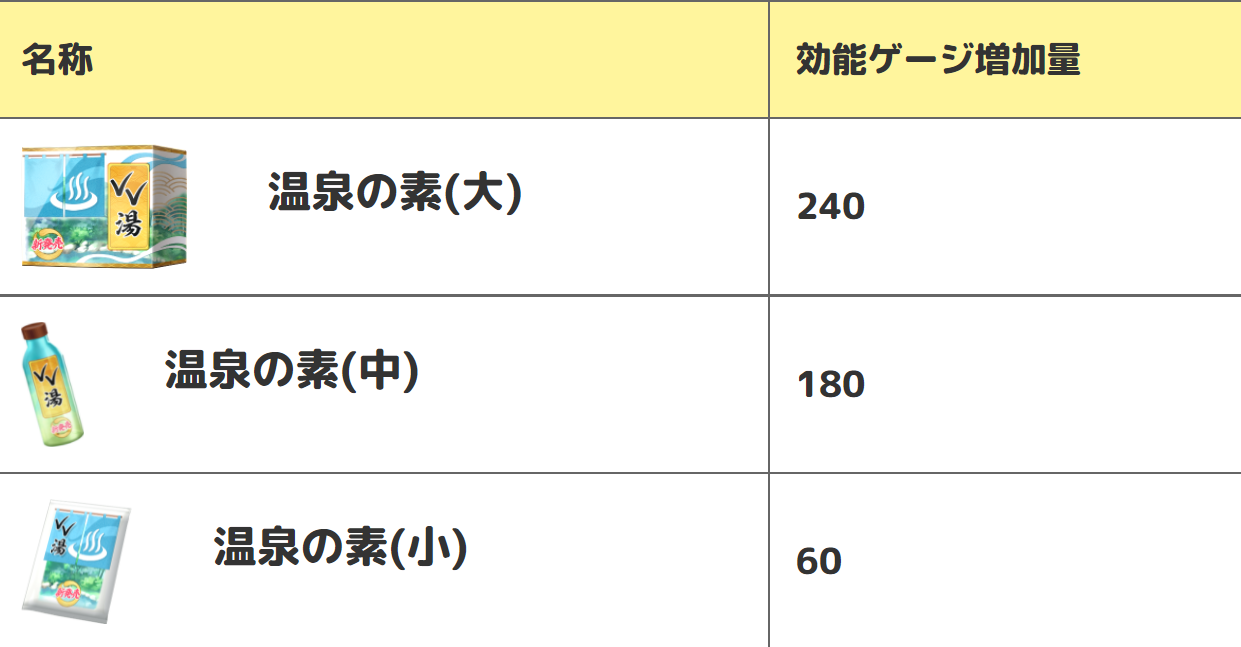 There are 3 sizes for the mix with the small being worth 60, the medium being worth 180, and the large being worth 240 points on the potency gauge.
Note: You do not need to fill the potency gauge to gain XP. The potency gauge simply increases the rate at which you gain XP as well as allows you to obtain items for girls in the hotspring.
Note 2: Changing the Hot Spring Quality will empty the gauge so make sure you let it drain properly before doing so.
You can change the hot spring quality by clicking the circular button on the left labeled (泉質変更). Changing the quality of the hotspring simply changes what rewards you can get akin to how the old lesson system worked. There are 4 types total, one for each type of POW/TEC/STM and one that gives rewards for all 3. They are labeled with the symbol at the top right of the hot spring image so it should be easy to know what type gives which reward.
The girl confirmation button (女の子確認) to the right of spring quality will allow you to select which girls you would like to add to the hot spring. there is a limit of 4 girls allowed in the hot spring at any one time.
The final pink button on the bottom labeled Go To Bath House (浴場へ) will allow you to take pictures of all your selected girls together in the hot spring.
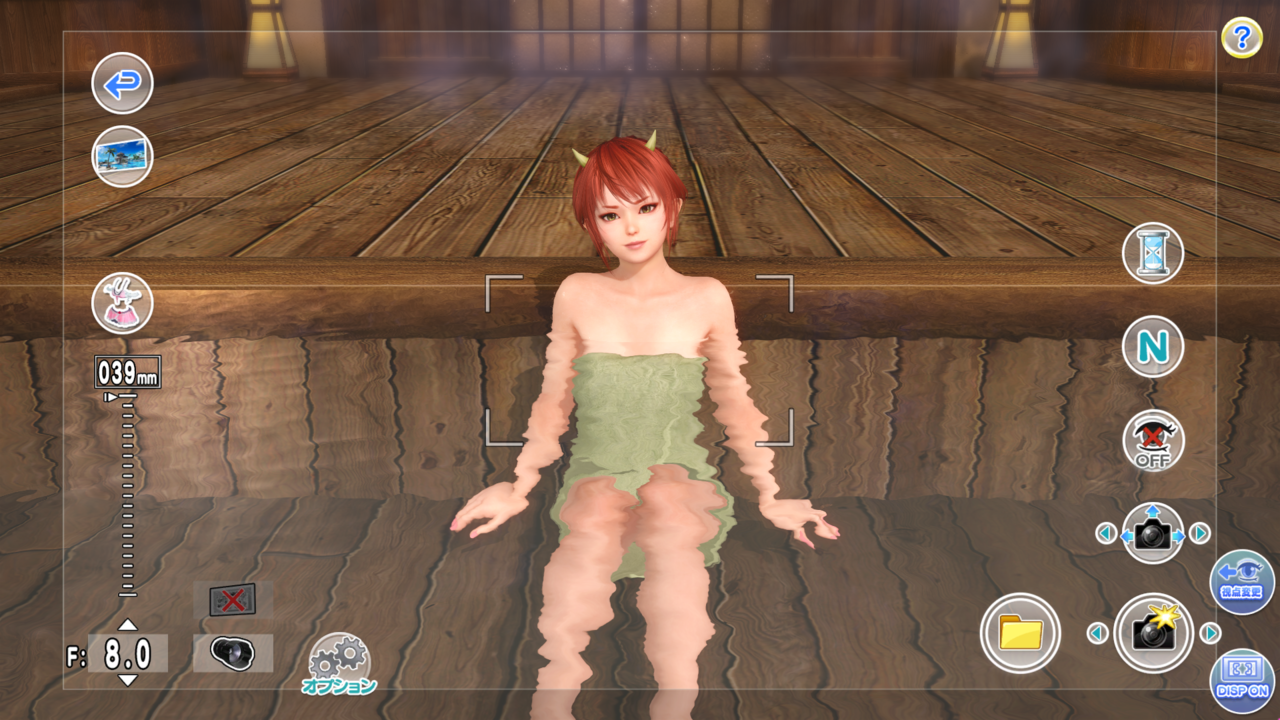
By default all girls in the hot spring will be wearing the green bath towel however there is an override located in a newly added section at the bottom of the settings menu.
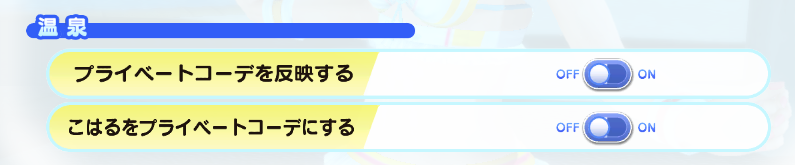 The top option is for your girls in the bath, the bottom one is for Koharu on the hot spring screen. (both of them are private outfit overrides).
Unlike the old lesson system the Hot Spring is always "on" and only requires you to periodically check in to collect the rewards and refill the potency gauge. There is a hard limit of 5,000 XP allowed to be stored up per girl so if you don't check in for a while the excess will be wasted.
Memories「おもいで」
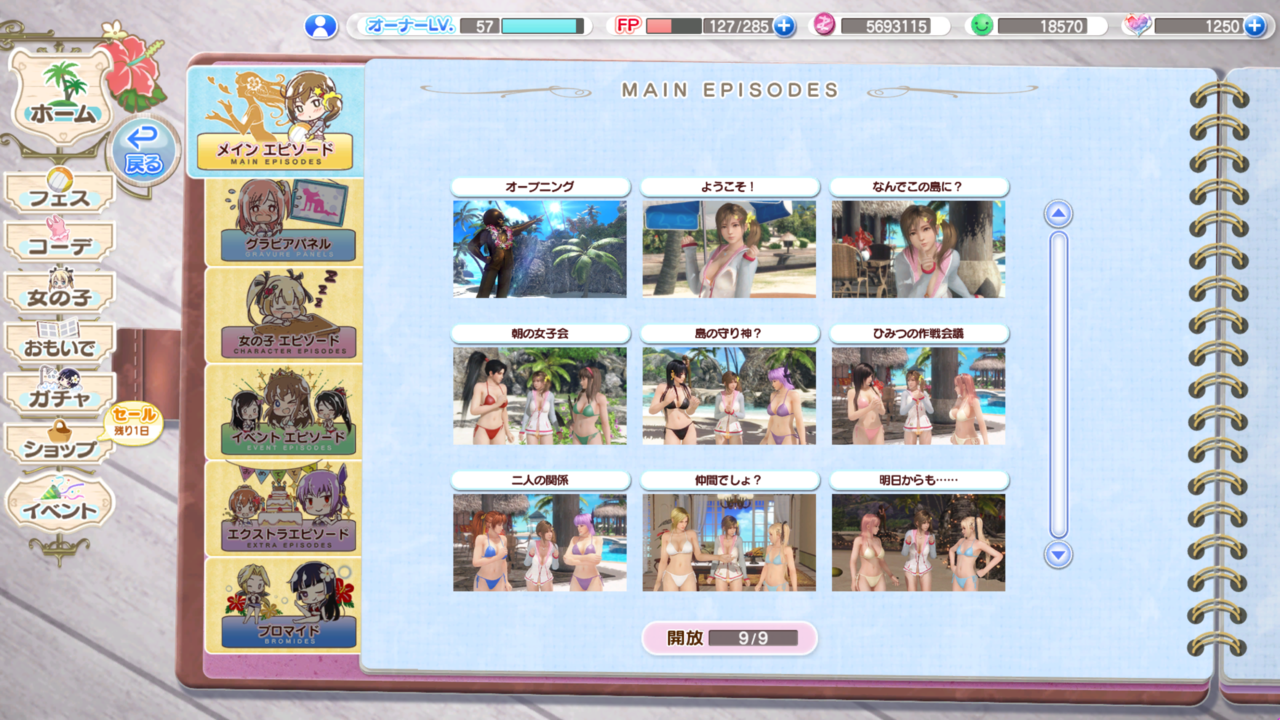
This is where episodes and bromides go, there isn't a whole lot to go into here since the tabs have English in them.
- Main Episodes - You get these from playing main festival matches.
- Gravure Panels - You get these from playing matches with girls, they give 30 XP each and each girl has 10. The best place to farm experience for these is from the highest ranked main match.
- Character Episodes - You get these from leveling girls up, each one is worth 30 XP.
- Event Episodes - These are added every week, they're worth either 60 XP or 10 XP (in the event there's like over 10 episodes for an event). Event episodes are (usually) obtained by opening the event tab at least once and scoring a certain amount in the event.
- Extra Episodes - Anything that doesn't fit into any other categories, birthday episodes and some special suit exclusive ones go here. They have varying XP values.
- Bromides - You get these from SSR swimsuits, one for obtaining it and one for fully awakening it. They don't give any XP but they can be used to create deco-bromides.
The viewing of any episode in the memory album can (and should) be delayed to give you control over when you level up so you don't waste FP. Do it when you're out so it starts regenerating immediately rather than having to wait to be rid of excess.
Gacha「ガチャ」
Gacha is short for Gachapon which if you don't know are basically like gumball machines that dispense small toys of varying rarities, hence the name. This is the basis for the game's monetization, it's pretty straight forward but I guess I'll cover it anyway just in case.
Rarities for this are:- N - Normal
- R - Rare
- SR - Super Rare
- SSR - Super Super Rare (Creative I know)
Before we start just a quick thing to note if a Gacha requires paid V-Stones the button will be green, if it's pink then you can use either. (Unpaid stones are always used first)

l
You can also check the gacha contents as well as the drop rate for each item by clicking this button at the top (Yay gambling laws!)
This is the Gacha that launched with the vanilla game, it's available year round and you get a lot of tickets for it. Aside from tickets this gacha should mostly be ignored as powercreep has made most of the outfits here obsolete.
This also has the worst SSR rate of any gacha in the game at 1%.
Also worth noting, as this was the Gacha that launched with the vanilla game the only girls with outfits available here are: Ayane, Helena, Hitomi, Honoka, Kasumi, Kokoro, Marie, Misaki, Momiji, and Nyotengu. This includes SRs as well so if you want Venus Coin fodder for newer girls you'll need to use the other Gachas.
The only other year round gacha, this exchanges guest points for R clothing and upgrade materials. It's kind of useless but I guess if you want a round about (not to mention tedious) way of making Zack Money then here you go.
Where most of your V-Stones should be going. Trend suits have substantial stat bonuses to for the duration of their event in their festival matches as well as flat appeal point boosts at the end and bonus currency. There are also external benefits such as guaranteed great success on jobs in the owner room (which gives 3 FP drinks every time you get it).
You can also get a lot of tickets for these gachas as event rewards, the tickets don't expire so save them if you don't like the current event's outfits. Trendy gachas have a whopping 1.1% SSR rate.
Trendy gachas will cycle after their event ends which is typically every week but occasionally it will last a little longer in the case of a 2 part event. (A new one will still be added as well most of the time)
 Trendy Gacha Coins:
Trendy gachas now have a paid V-Stone only option (Green button, has a pop-up at the top of it, look for 「トレンドガチャコイン(X)」where "X" is a color you probably can't read...) that allows you to access the same pity systems typically available in paid gachas. (1 free SSR of your choice for 100k paid stones worth of draws) This is very expensive (especially for suits that will return eventually) but if you don't want to take chances this is now an option.
These are returning gachas from past events, they no longer give any trend bonuses but if you missed an outfit you really liked then here's another chance to get it.
These also typically have 1.1% SSR rates.
Every once in a while a step gacha will appear, these gachas have steps shown at the bottom. After you roll the gacha that many times one of a few effects can happen, this will require you to read the artwork a little bit. If it says something like the one on the left (Keyword: ガチャチケット) you will get a ticket for a guaranteed SSR (this requires paid V-Stones for the guaranteed roll but the rest can be unpaid). If it says something like the one on the right (Keyword: 1回無料) then the last step will be a free 10x draw.
Additionally it seems 6-Step gachas always give tickets while 4-Steps always give the free draw but on the off chance any of that ever changes knowing the words to look for might help.
They have standard 1.1% rates otherwise.
These are special gachas with a 3.3% SSR rate, they typically come around the game's anniversary or special occasions. 3.3% is the highest SSR rate of any gacha currently in the game so it's a pretty big deal when they come around if you want the suits they have to offer.
The 3.3% is advertised on the banner as well as the artwork so it's pretty hard to miss when one rolls around.
These gachas give outfits/items from other IPs and as such will never return after their event ends, if you want these this will be your only chance to get them.
As far as I'm aware these all have a 3.3% SSR rate but if I see something that says otherwise I'll adjust it.
These come once per year on each girls birthday and last a couple of weeks. These gachas are paid V-Stone only, your first roll will give you a special event episode as well as a birthday cake item for the girl in the owner room.
These gachas give special items for drawing them which can be used for a "pity" SSR (that would cost you about 80,000 JPY worth of fails by the way) as well as several other useful items like FP drinks. The exchange is in the event shop list.
Birthday gachas also have a 1.1% SSR rate and some other SSRs mixed in to dilute the pool, this can include other paid only SSRs and debut outfits (If applicable) so make sure to check if you're interested.
These are debut gachas for new girls, they are paid only and are the only way you will get any outfits for them for at least the first 3 months they exist. The gacha itself will change with events however the special currency you get from drawing will stick around until the gacha runs its course. (they typically get 3 or so events)
These gachas have the same 1.1% SSR rate and pity system as above as well as Venus SSRs to dilute the drop tables, enjoy.
 These are the debut star clothing gachas for girls returned for special occasions. Like the original these are 1.1% and currently feature an increased rate for the banner outfit with a reduced rate for other debut outfits.
So far only one has released for Luna's 3rd anniversary.
Gacha 2「ガチャ」
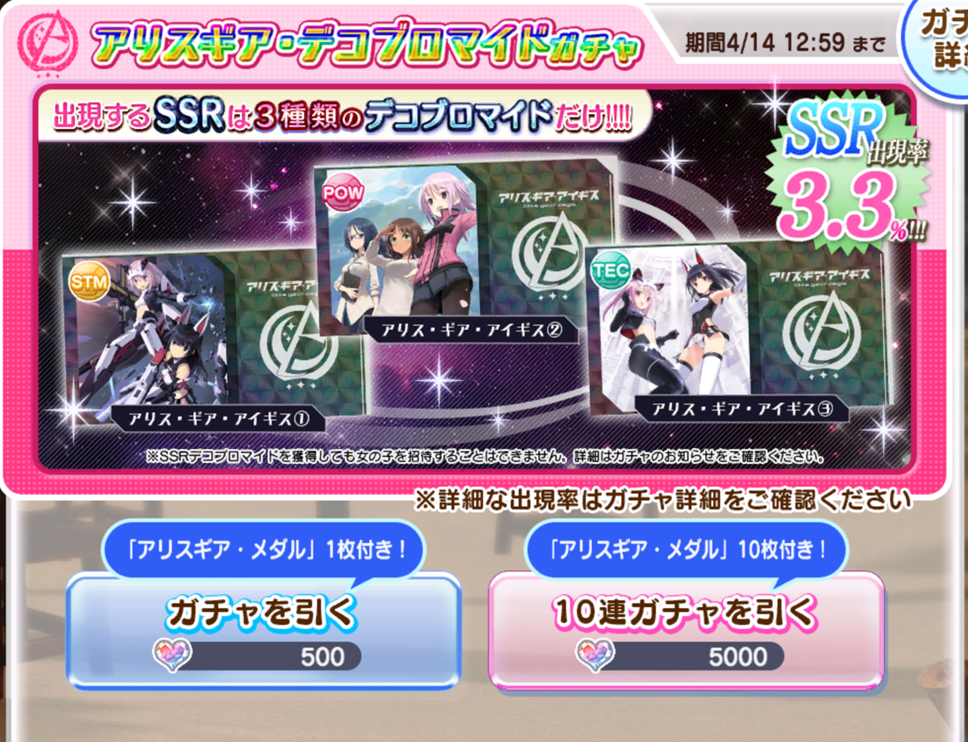
These gachas are, put lightly, the single biggest waste of V-Stones ever conceived. I don't know where they get off valuing a single, average skill, deco-bromide that you will rarely ever see in-game at the same price as a 3 skill SSR swimsuit but if you want to draw from it then here you go.
These Gachas have a 3.3% SSR rate and honestly I can't ever recommend using them when you have the same chance at getting a much better SSR suit for the same price.
If you really want to buy from one I would strongly recommend going to the official site and checking the news page where they list the gacha's contents as it will list what skills they have, unless you only want them for the collab art or something.
Free Draws: Occasionally you can get free gacha draws for a period of time, these will be shown by a red bubble next to the gacha tab on the homescreen. Clicking the red bubble rather than the Gacha button will take you straight there as a nice shortcut rather than forcing you to look for it. Free gachas will have a draw button that looks something like this:
They could be for a 10x draw or a first time only draw but a good rule of thumb would be if you don't see a price it's a pretty good idea to just push the button.
Shops「ショップ」
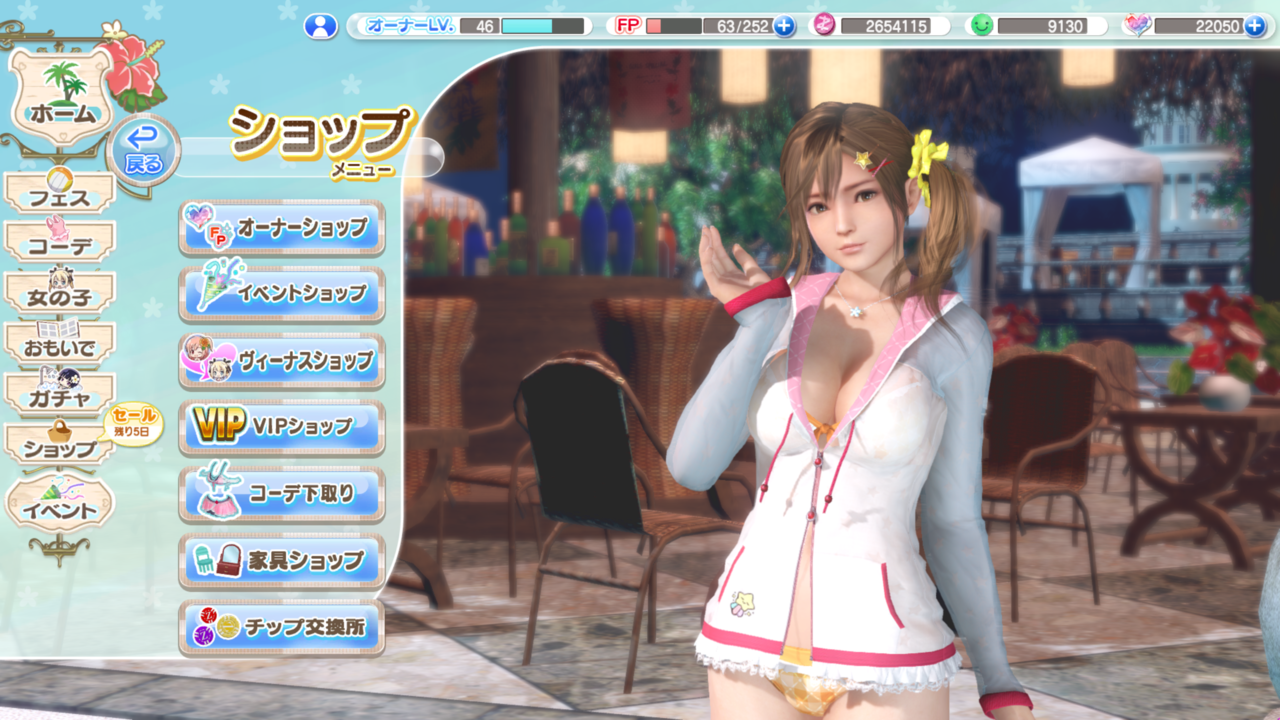 This section of the guide will cover all of the shops in the game, what they sell, what currency they use, why you should care, etc.
Before I get into it there are two things that apply to all shops which is Expirations and Item Limits.
This section of the guide will cover all of the shops in the game, what they sell, what currency they use, why you should care, etc.
Before I get into it there are two things that apply to all shops which is Expirations and Item Limits. The Number on the left is the date the item expires, after this time you will not be able to buy the item from this shop. This time is in JST.
The Number on the right is the purchase limit, when it hits zero the item will be out of stock and be greyed out at the bottom of the list.
The Number on the left is the date the item expires, after this time you will not be able to buy the item from this shop. This time is in JST.
The Number on the right is the purchase limit, when it hits zero the item will be out of stock and be greyed out at the bottom of the list.I won't be covering how to buy DMM points here as the site has English translations and it's pretty straight forward.
Note: I've had some friends have problems with their cards being accepted with this and have heard they've had success with Paypal so if you get denied that could be a work around.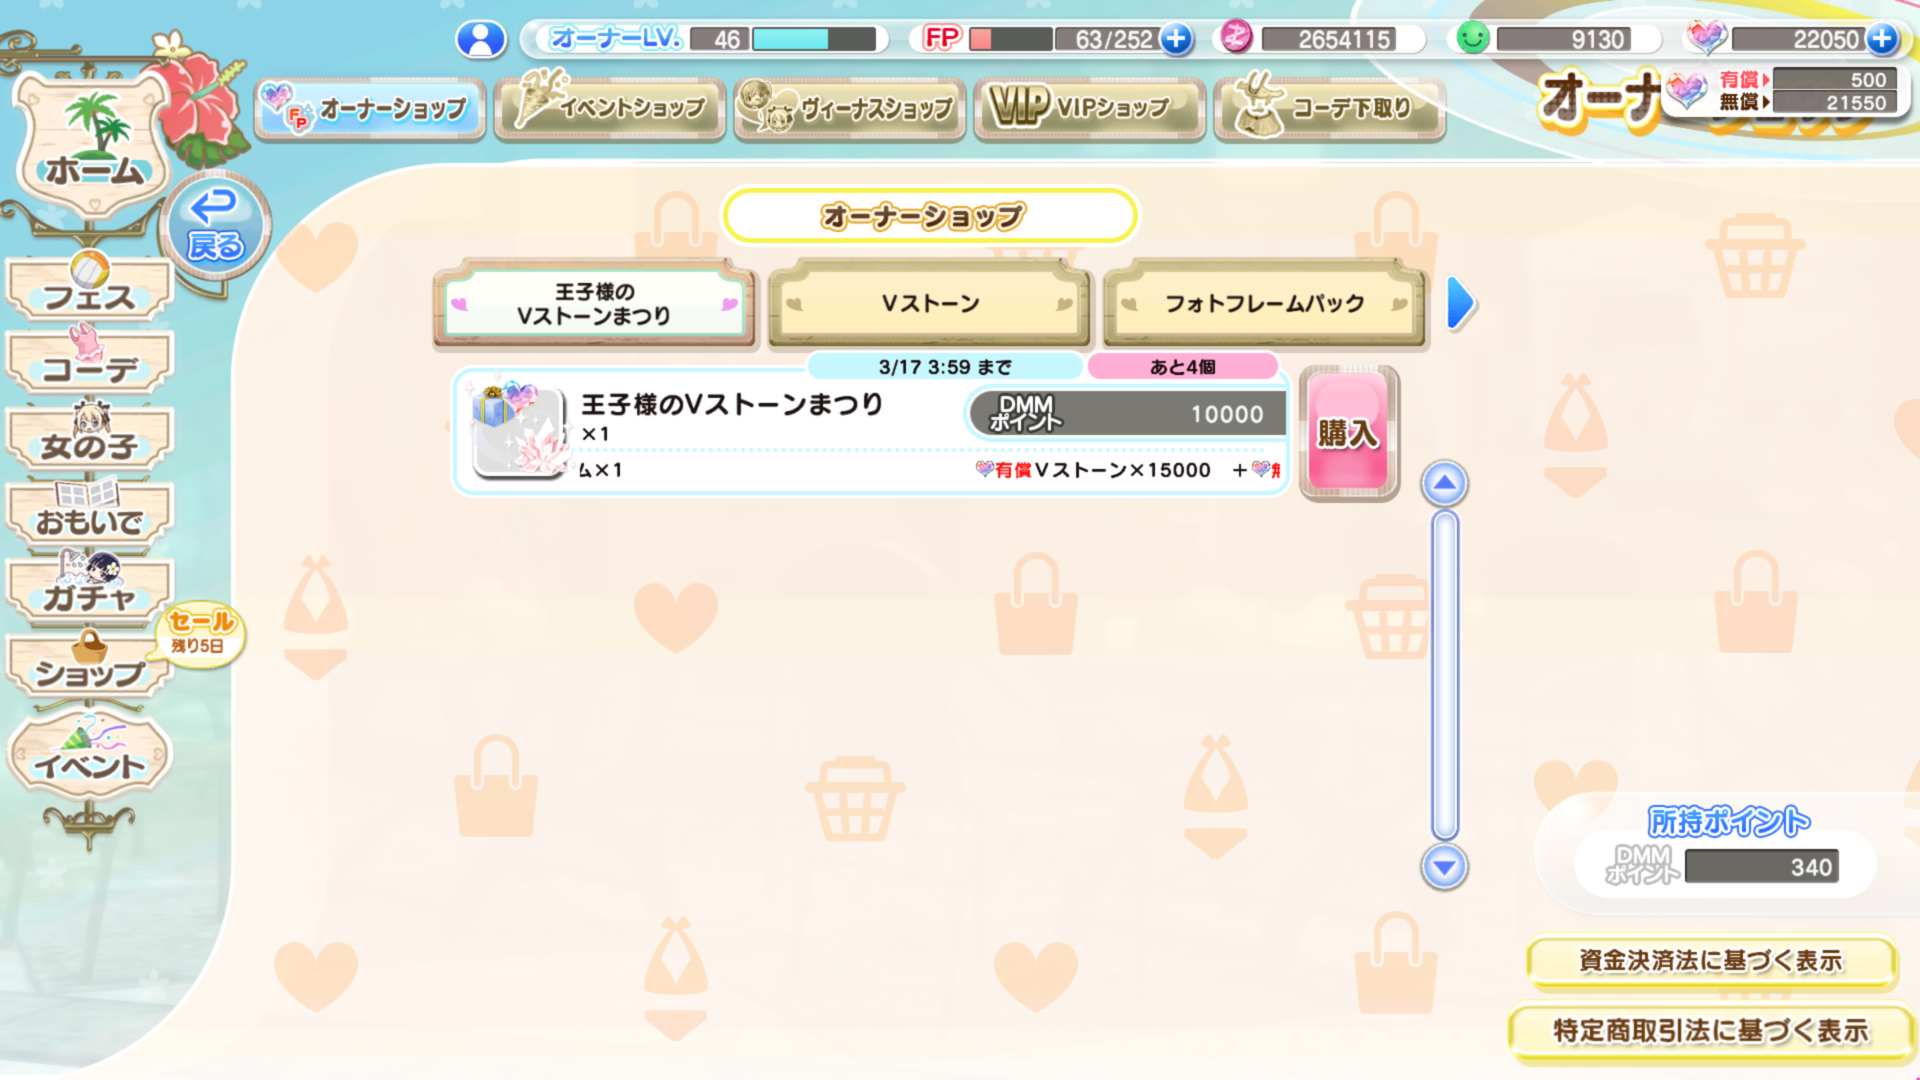
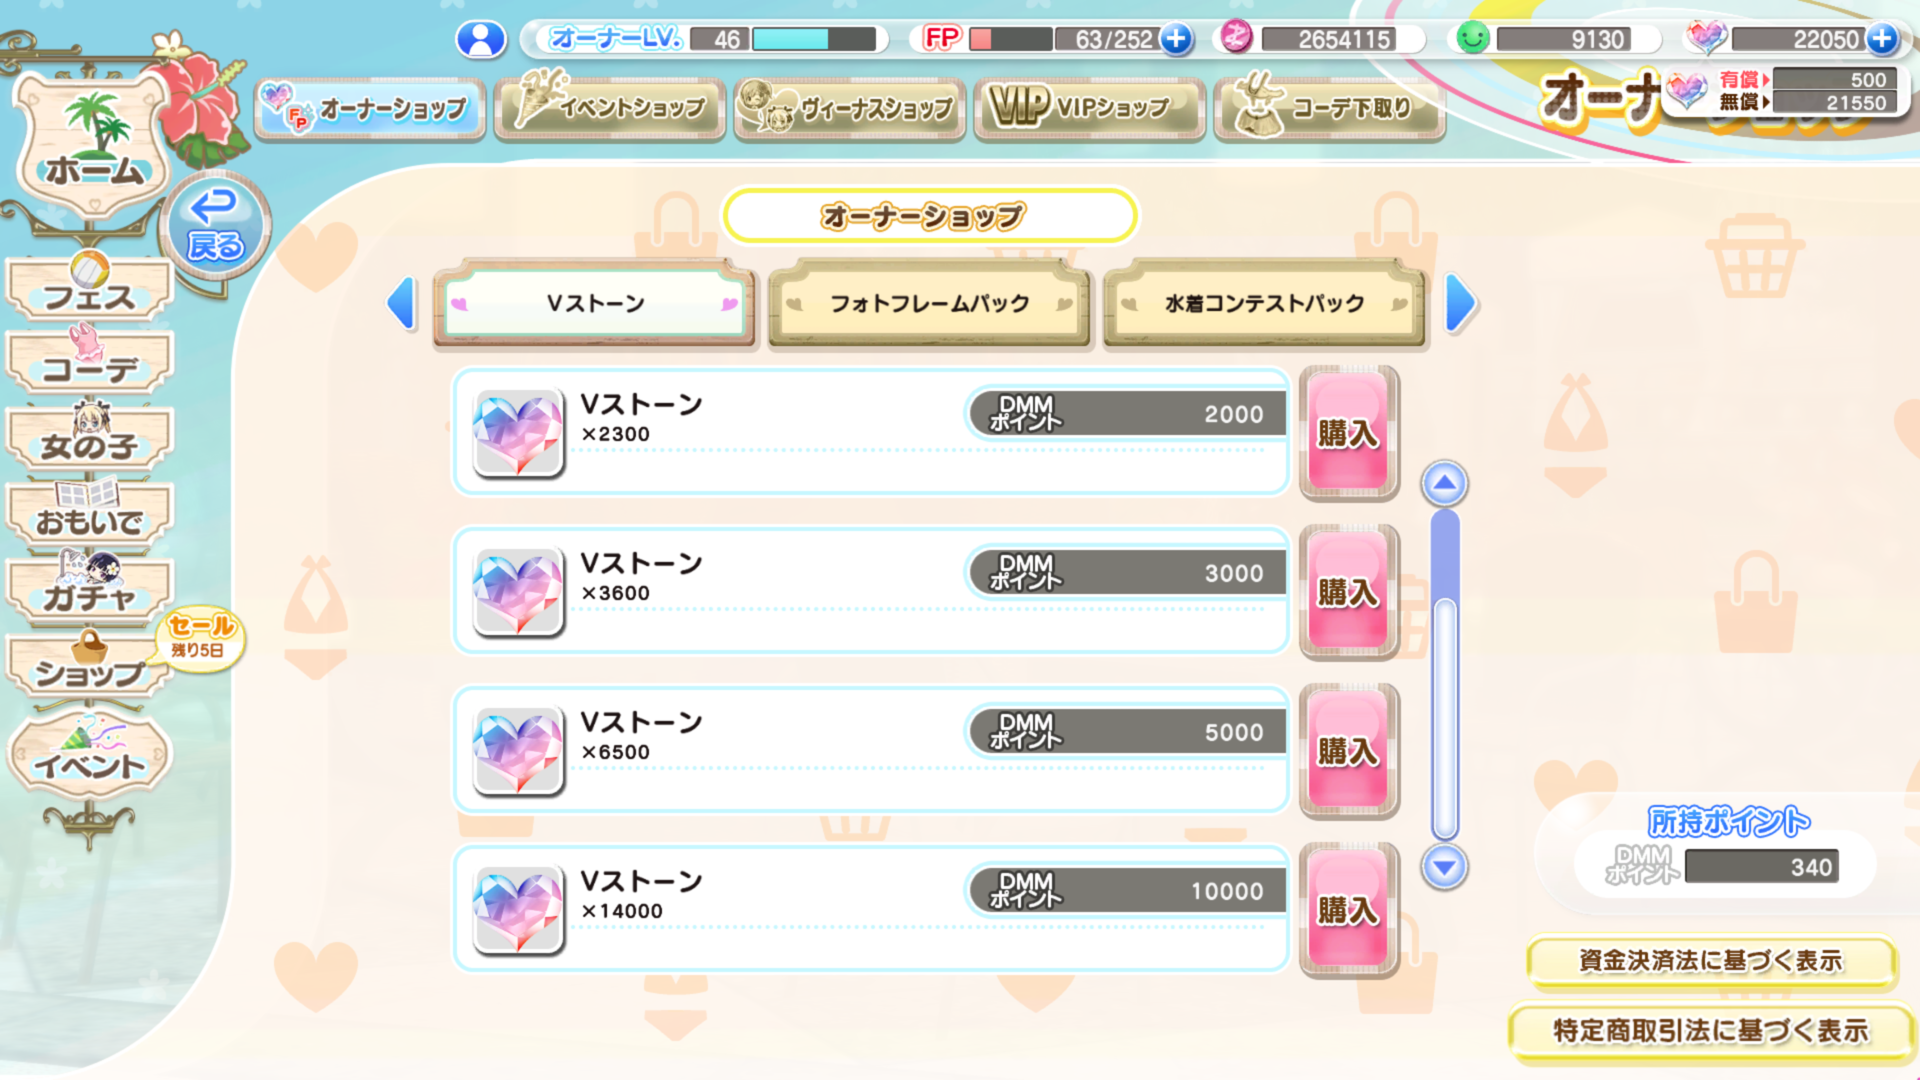 The first tab of the owner shop is usually for V-Stones, this tab is instead occupied by any specials they might have if there is one going on. If you are planning on buying V-stones I'd recommend only ever buying these special packs as they generally tend to be a much better deal offering more V-Stones, extra items, or both. As you can see regular purchases for 14000 V-Stones costs 10000 JPY however the pack gives 20000 V-Stones and a SSR awakening gem for the same price.
From my experience the best packs tend to be: (In no particular order)
The first tab of the owner shop is usually for V-Stones, this tab is instead occupied by any specials they might have if there is one going on. If you are planning on buying V-stones I'd recommend only ever buying these special packs as they generally tend to be a much better deal offering more V-Stones, extra items, or both. As you can see regular purchases for 14000 V-Stones costs 10000 JPY however the pack gives 20000 V-Stones and a SSR awakening gem for the same price.
From my experience the best packs tend to be: (In no particular order)- 24k V-Stones
- 20k V-Stones + item(s) (Usually SSR Awakening Gems or 20k XP items)
- 14k V-Stones + 3 EX Oils
 The next two tabs are for Photo Frame packs and for the costume design contest outfits. Both of these are paid for with paid V-Stones.
There are a couple of generic photo frames that stay in the shop year round, there's also usually a set that cycles with the events.
As for the design contest suits they are purely cosmetic, I don't know if they'll ever be removed but there isn't a date listed so I'd assume they're here to stay at least for a while. Something that might be worth noting is that the suits come with 10 Trend tickets so if you ever really wanted to spend paid stones on a trendy gacha this would give you more draws. (Assuming you aren't going for a pity SSR) The final tab is for FP Restoration Drinks. There are two kinds of FP drinks in this game: Regular "FP回復ドリンク" and "FP回復ドリンク 100". The former is what this shop sells. A single FP Restoration Drink restores 100% of your FP so they're best saved for when you're a decent level. (I don't recommend using them before level 30 at least) FP Restoration Drink 100s restore 100 FP and they are usually just given out for free by the game or for some events.
FP Drinks are actually pretty easy to come by and you don't really need to use that many of them outside of PvP events so I wouldn't advise buying these ever.
The final tab is for FP Restoration Drinks. There are two kinds of FP drinks in this game: Regular "FP回復ドリンク" and "FP回復ドリンク 100". The former is what this shop sells. A single FP Restoration Drink restores 100% of your FP so they're best saved for when you're a decent level. (I don't recommend using them before level 30 at least) FP Restoration Drink 100s restore 100 FP and they are usually just given out for free by the game or for some events.
FP Drinks are actually pretty easy to come by and you don't really need to use that many of them outside of PvP events so I wouldn't advise buying these ever. This is where event items are sold, the shops usually last a while after the event ends so you can go back and spend any left over currency you have before it goes to waste. This is also where you combine your monthly SSR ticket fragments into a guaranteed SSR ticket.
Event currency is obtained from event matches, the amount varies by event however the cost of the generic items (poses, upgrade materials, etc.) never changes.
This is where event items are sold, the shops usually last a while after the event ends so you can go back and spend any left over currency you have before it goes to waste. This is also where you combine your monthly SSR ticket fragments into a guaranteed SSR ticket.
Event currency is obtained from event matches, the amount varies by event however the cost of the generic items (poses, upgrade materials, etc.) never changes. Each girl has her own shop and currency here so you need to select one to go any further.
 The Venus shop sells mostly items for photo mode, Photo backgrounds, facial expressions, and (if they have them) hair styles. There's also a free pose and facial expression in each shop so you might as well get them.
Special Items:A quick list of the special items and what they do:
The Venus shop sells mostly items for photo mode, Photo backgrounds, facial expressions, and (if they have them) hair styles. There's also a free pose and facial expression in each shop so you might as well get them.
Special Items:A quick list of the special items and what they do:- Hourglass: Lets you pause a girls movements in photo mode (Hotkey W)
- Blue Fan: Same as regular fan but it won't dry girls if you spray them.
- Black Fan: Malfunction toggle, not really necessary since you can just do it before you enter photo mode.
 Venus coins are acquired by selling SR suits. If you don't need the potentials from them then this is a pretty good option.
Shops 2「ショップ」
 The VIP coin shop always sells SSR Awakening Gems, these are used to level skills on SSR suits without having to have a duplicate. This shop also briefly sells a limited number (5) of monthly SSR coupons at the start of the month. Occasionally there may be other items offered here.
 The Trend Gacha Coin Shop is essentially this game's pity system. If you choose to use paid V-Stones in a trend gacha (by pressing the green button for it specifically, not just happening to spend paid stones) you will get 10 coins per 10 draw. This means after 100k paid stones you can get an outfit from the shop just like you would be able to from other paid gachas.
Trend Gacha Coins come in various colors to differentiate them from other gachas that may be going on but they all have the same function. I really don't recommend ever using paid stones on a regular trend gacha like this but I guess if there's an outfit you really like and you want to guarantee you get it at any cost (literally) then there is now an option for you.
 The SSR Accessory shop allows you to trade SSR accessory tickets for SSR accessories. Each Accessory costs 20 tickets, additionally you can spend 20 tickets on 5 VIP coins. (Which I don't recommend you do) (Same value as a SSR Accessory in the exchange Devs plan on changing the sell value of SSR Accessories to 10 tickets but I'll leave this here for anyone curious in the future) The shop only seems to carry one of each character's accessory so whether or not events will change this is yet to be seen.
SSR Accessory tickets are obtained as event rewards either for reaching certain score thresholds, completing event missions, or for special events (like the game's anniversary). SSR Accessory tickets do not expire.
Note: You cannot buy a SSR accessory you already own a copy of, if you have one it will be removed from the shop. If you sell it for some reason it will be re-added. (Again I don't recommend you sell them because if you sell the wrong one it may not be the one in the shop.)
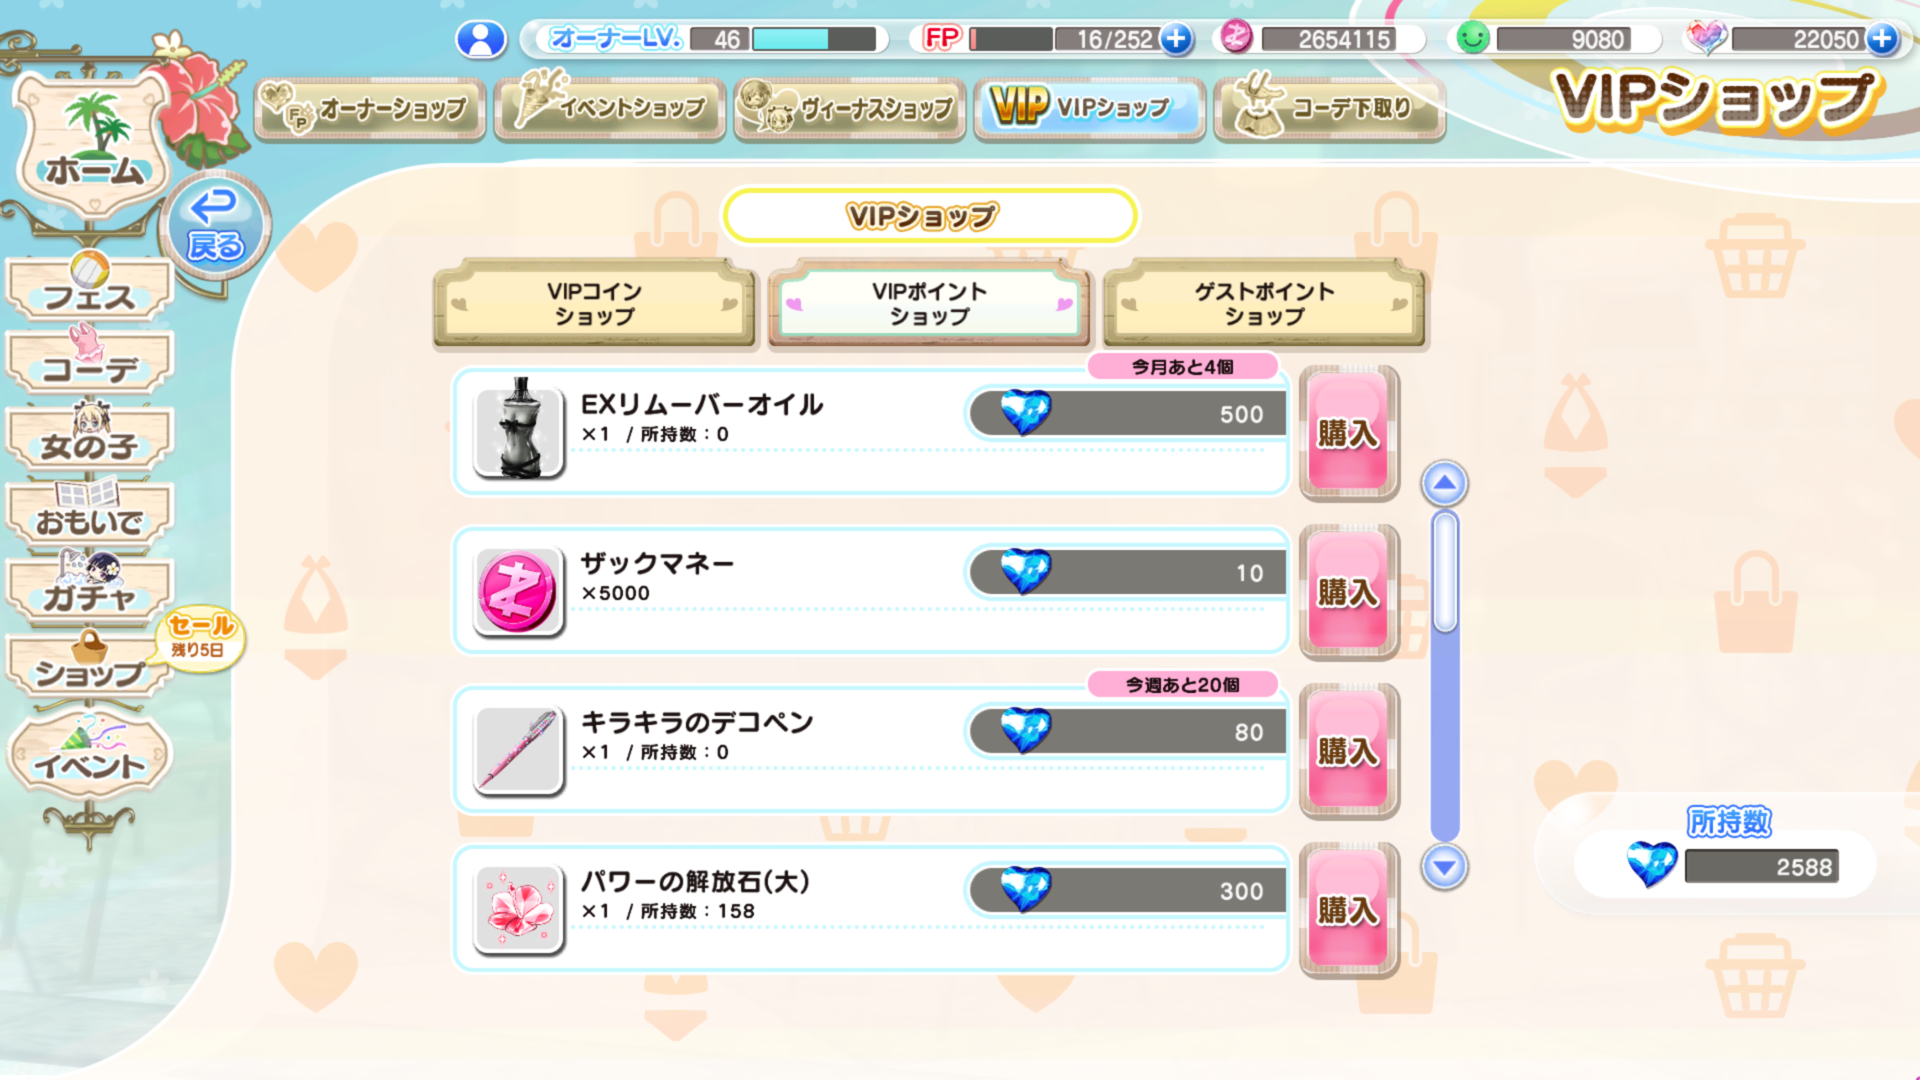 The VIP Point shop offers a handful of useful items chief of which are FP Potions (You can buy 7 of them) and Glittering Deco Pens (More on these later). The stock for this shop resets every week.
Note: EX Remover Oil (Pictured at the top) is the only way to remove EX skills from your girls, this item does give you your oils back when you use it so you don't ever need to worry about wasting oils on girls or giving a girl the wrong one.
 The Guest Point Shop allows you to convert GP to VIP Points, as of right now you can also use them to buy event episodes from past events. Guest points are obtained by playing festival matches, using a guest (which isn't optional...) gives you an extra 50 points and using a friend as a guest gives an extra 100 points/match.
Additionally, events hand them out generously as rewards for meeting certain appeal point thresholds so if you happen to get a trend suit you could farm out all of those.
The Guest Point Shop allows you to convert GP to VIP Points, as of right now you can also use them to buy event episodes from past events. Guest points are obtained by playing festival matches, using a guest (which isn't optional...) gives you an extra 50 points and using a friend as a guest gives an extra 100 points/match.
Additionally, events hand them out generously as rewards for meeting certain appeal point thresholds so if you happen to get a trend suit you could farm out all of those. This is where you trade in your unwanted clothing for other items. R clothing and SR Skill Gems can be traded for VIP Points. SR suits can be traded for venus coins, and SSR Suits can be traded for VIP Coins.
A SSR Suit sells for 10 VIP Coins, each time you awaken it its value goes up by 10 up to a max of 50 when it's fully awakened. Doing this will probably come down to preference (I'm kind of a hoarder so I don't) but even if you sell a suit here you still get to keep it for your private collection so you only won't be able to use them in festival matches (Statistically speaking because there's an option to have your private suit's appearance override your festival one)
This is where you trade in your unwanted clothing for other items. R clothing and SR Skill Gems can be traded for VIP Points. SR suits can be traded for venus coins, and SSR Suits can be traded for VIP Coins.
A SSR Suit sells for 10 VIP Coins, each time you awaken it its value goes up by 10 up to a max of 50 when it's fully awakened. Doing this will probably come down to preference (I'm kind of a hoarder so I don't) but even if you sell a suit here you still get to keep it for your private collection so you only won't be able to use them in festival matches (Statistically speaking because there's an option to have your private suit's appearance override your festival one)
 This is where you buy various pieces of furniture for the Owner Room, there's usually some event exclusive pieces and you can also trade 1000 furniture coins for VIP coins here.
Furniture Coins are obtained by leveling up the relationship between two girls in the Owner Room or sometimes in event shops in exchange for event currency.
This is where you buy various pieces of furniture for the Owner Room, there's usually some event exclusive pieces and you can also trade 1000 furniture coins for VIP coins here.
Furniture Coins are obtained by leveling up the relationship between two girls in the Owner Room or sometimes in event shops in exchange for event currency.
 This is where you go to spend your winnings at the Casino. It has upgrade materials and Deco-Brushes among other things. The items you see in the shop like the megaphone are props for photo mode and are given just like a pose from the gift menu.
Below is a list of what all items in the shop are:
This is where you go to spend your winnings at the Casino. It has upgrade materials and Deco-Brushes among other things. The items you see in the shop like the megaphone are props for photo mode and are given just like a pose from the gift menu.
Below is a list of what all items in the shop are:- Pose Catalog*
- Props - Candy Apple「りんご飴」, Bag「バッグ」, Baked Sweet Potato「やきいも」, Sparkler「線香花火」, White Lace Parasol「白レースの日傘」, Umbrella「雨傘」, Game「ゲーム」, Smart Phone「スマホ」, Maracas「マラカス」, Flower Petals「花びら」, Volleyball「バレーボール」, Megaphone「メガホン」, Beans「豆まき」, Purification Rod「大幣」, Soft Serve「ソフトクリーム」, Banana「バナナ」, Folding Fan「扇子」, Cheer Board「おうえんボード」(Displays current main slot deco-bromide).
- Venus SSR Ticket
- Deco-brush
- VIP Coin
- Natural Stone (Gives 5,000 XP when gifted to a girl)
- Accessory uncap material (L) (Type Rotates Monthly)
- Accessory uncap material (M) (Type Rotates Monthly)
- Zack Money
Note: All props are preceded by the the word 「小道具」, this literally means "prop" so if you see it then the item is a prop for photo mode. (Useful in case I don't immediately add it here)
Note 2: New props are sold at a 50% discount during the month of their release
Pose Catalogues:I'll make a special note here since their use is kind of obscure. The first item in the gold shop is a Pose Catalogue, they are used to "upgrade" poses. Only very specific poses can do this but it will grant you both the original and awakened versions of the pose upon use. Upgrades cost 5 catalogues and will look something like this after you use them:
 Poses are upgraded from the pose menu in photo mode.
As of right now props that can be upgraded include:
Poses are upgraded from the pose menu in photo mode.
As of right now props that can be upgraded include:- Volleyball
- Smartphone
- Sparkler
- Roasted Sweet Potato
- Bag
- Candy Apple
- Hand Bell
Casino「カジノ」
 Yes, that's right. The RNG gacha game now has a literal casino inside of it. Don't worry though, while I'm pretty much certain it's rigged it's all 100% free (It's actually impossible to spend money here so it's basically a mini-game). The Casino is a very valuable resource as it's one of the few places you can consistently get accessory uncap materials and resources for producing deco-bromides.
There are two types of chips used at the casino:
Yes, that's right. The RNG gacha game now has a literal casino inside of it. Don't worry though, while I'm pretty much certain it's rigged it's all 100% free (It's actually impossible to spend money here so it's basically a mini-game). The Casino is a very valuable resource as it's one of the few places you can consistently get accessory uncap materials and resources for producing deco-bromides.
There are two types of chips used at the casino:- Silver Chips: These are what you use to make bets in the casino's games. They are given to you for free in quantities of 1000 up to 3 times per day, in order for this to happen you need to be unable to place the minimum bet on the last game you played (100 for Blackjack and 10 for Roulette). Silver Chips have no expiration.
&
- Gold Chips: These are gained by winning at the casino, you get 10% of any profit you make in Silver Chips. (For example if you make a 1000 chip bet in Blackjack and win you get 2000 Silver Chips but only 100 Gold Chips since only 1000 of that is profit)
Gold Chips cannot be gambled with and reset to 0 at the start of every month. There is a limited "Bank" of Gold Chips you can earn that resets when the chips do, when this hits 0 you won't gain anymore Gold Chips from casino games.

Both these chips can be used in the casino's shop, there are two of them, one for each chip type.
There are currently two games to be played at the casino that are seemingly cycled through, Blackjack and Roulette. Keep in mind I'm no gambler (I mean not outside of whatever this game counts as) so my understanding of the rules is basic at best but I'll try to describe them as best I can and give some general strategies.
Before we get into this I will reiterate: The casino is absolutely rigged (You'll never convince me otherwise for all the times I've seen the roulette ball move backwards to hit a color I didn't bet on), if the game wants you to lose you're gonna lose. There's nothing to get mad over here, a month is more than enough time to get all your gold chips and there's no opportunity to blow real money so just have fun with it.
Bet Rate This sets the minimum and maximum bet for a given session, you can change this any time by entering the casino and selecting a game but once you choose you are locked into that until you exit your current session.
There are a couple of betting options and they're different depending on the game being offered. There's no right or wrong choice here, I prefer to use the lowest option since it saves me having to start up a whole new game just to get rid of my excess chips so I can get a free drop from Monica.
Note: Do Not take a bet you cannot afford. This mostly applies to blackjack as far as I'm aware but just in case I'll put this note here.
If you take a wager that would increase your bet beyond what you can actually afford to make, the game will crash. The game should stop you from even being able to on its own however sometimes the server isn't quite caught up with you and might display your funds incorrectly for a bit. If you have made a bet using all your money and you know you shouldn't have anymore then don't do something that would give you a negative amount.
I'm going to split the casino up into sections since Steam has character limits.
Blackjack「ブラックジャック」
This is the first of the casino's games, the goal of the game is to have the total value of your cards be higher than the dealer's. The limit here is 21, if you go over that you "Bust" and lose, the higher you go the more likely it is to happen as more cards in the deck can push you over.
Aside from the numbered cards:- All face cards (King, Queen, Jack) are worth 10
- An ace is worth either 1 or 11. it gets displayed as 11 when you draw it and 1 if a score of 11 would otherwise cause you to exceed 21.
For example if you draw an 8 and an ace your score will be 19 if you take another card and it is a 7 then your score will become 16 since that would make you go over 21
The game starts with you being dealt 2 cards, make sure you pay attention to what other characters are dealt. If your first two cards are an ace and a card that has a value of 10 then you get a "Blackjack" which is an automatic win, additionally you'll win 25% more chips from your bet. The player's turn is always second in this game, when your turn arrives you will be given a handfull of options: (Sorry for the sloppiness, writing with a mouse is hard...)
- This is the help button. It probably won't be much help since you can't read Japanese.
- Bet Rate: This is the minimum bet you set before you start the game, the higher the minimum you set the higher the maximum you can bet in a single round.
- Bet: This is your current bet, you will either lose this much or gain 2x as much from winning.
- Hit: This is the basic option to draw a card, there's no limit to how many times it can be used (outside of busting) so have at it. There are 4 of each type of card in the deck (1 for each: Club, Spade, Heart, and Diamond) so keep that in mind when taking a "Hit" to avoid going over.
- Stand: This will end your turn and progress to the next character's turn. Use this when you get a score you're comfortable has a reasonable chance of beating the dealer.
- Double Down: This will double your bet, draw one card, and end your turn. Use this if you believe in yourself I guess...
- Split: This can only be used when you have exactly 2 cards and they are the same. Splitting will effectively double your bet and give you 2 hands to play with instead of one. Each card is "split" into another hand and one new card is dealt to each.
The general advice for this is to always split Aces and 8s. Aces are a very good card and have the potential to effectively be a free win with any high value card and 8s because 16 is an absolute garbage draw that will likely cause you to bust if you take a hit. Cards higher than 8 are generally good to stand on and cards below can usually be salvaged so use it with your own discretion.
- Surrender: You get back 50% of your bet in exchange you don't lose/gain anything based on your cards. Not too much reason to use it unless you're certain you have no chance of winning, otherwise just standing at least offers a chance the dealer busts if you got a garbage draw.
- I'll leave it to you: This button lets the AI play for you, it's kind of like giving a child your credit card and letting them loose in a toy store. Don't do it if you value your chips...
- Skip: Skips the current character's turn. (but not yours) Just spam it if you want it to go by faster.
- Display Toggle: Toggles all the UI elements on the screen.
- View Toggle: Shows you the girls instead of the table.
- Your cards: Try to beat the dealer
- Opponents cards: Look at what cards they have
- Dealers Cards: Hope they don't get 21
Insurance occurs when the dealer draws an Ace as their visible card. The right option chooses not to buy insurance. Selecting the left option will buy insurance which increases your bet by 50%. After either selection the face down card is viewed (not by the player) if it is a card with a value of 10 then the dealer gets a "Blackjack" and you either lose immediately or get your bet back (If you bought insurance). If the card has a value < 10 then the game continues as normal, if you bought insurance then you're down the cost of the insurance bet.
Generally I always buy the insurance since this game loves to make you lose. At least with this you break even and get another round.
Note: Insurance will not occur if the dealer's visible card has a value of 10 but it is still possible for them to get a blackjack from that if their face down card is an Ace. In this situation you just have to take the loss.
Even money occurs when your first two cards give you a blackjack and the dealer has an ace as her visible card. Even money bets are similar to insurance bets. If you take the bet then regardless of whether or not the dealer has a Blackjack you get paid 2:1 for your original bet. The game is really weird about this and basically how it works is you actually get paid 3:2 but since the game took an extra 50% from your initial bet it ends up being 2:1.
If you do not take an even money bet and the dealer does get a blackjack then you draw and get your initial bet back but make no profits. If you don't take the bet and the dealer doesn't get a blackjack then you get the usual 3:2 payout. (50% more profits for not taking the bet and winning)
Note: As with insurance an even money bet will not occur if the dealer's face up card isn't an ace.
Note 2: The game handles this bet pretty weird so Gold Chips still treat the even money bet as profits, you will still make the same amount of Gold Chips as you would have for a normal win from a blackjack. I think this is because the game is set to pay 3:2 on a blackjack regardless so their work around is just to take 50% of your bet from you. If you just want the Gold Chips and don't care about the Silver Chips then this is a guarantee that you get paid.
Note 3: As far as I'm aware even money bets don't actually cost any extra money (which is why the game just gives it back if you make the bet) in real blackjack so I don't know if you can make this bet if you don't have enough chips to cover it. This is a pretty rare occurrence so it might take quite a bit for me to be able to test that.
Important: If you have a score of 21 because you have an ace worth 11 the game will not stop you from trying to draw another card, make sure you pay attention and don't just mash the hit button.
Roulette「ルーレット」
This is RNG the game, there isn't much else to it but if nothing else you'll get a kick out of watching the AI bet. This one is very straight forward and doesn't really require any translations but here we go. Roulette is a game where a ball is spun on a wheel, you place bets based on where you think the ball will land. If you guess right then you get paid based on the odds:
- Red/Black: This pays out double your bet if you win (I normally just pick a color and roll till I'm broke)
- Even/Odd: This pays out double your bet if you win. Worth noting is that 0 and 00 don't count as even or odd so it has the same odds as Red/Black.
- 1to18/19to36: This pays out double your bet if you win.
- 1st/2nd/3rd12: This bets along the columns with each section covering 4 of them, the payout for this is triple your bet.
- 2to1: These cover each of the three rows, the payout is double your bet. Worth noting is that these do not include 0 or 00.
- Numbers: The payout for landing exactly on a number is 36 times your bet
- Intersections: Placing a chip in the intersection allows you to bet on all 4 of the numbers touching it. The payout for this is 9 times your bet.
- Splits: Placing a chip between 2 numbers will allow you to bet on both of them. If either wins the payout is 18 times your bet.
While I'm not quite sure this qualifies as a strategy I've found that if both AI opponents start covering a certain section in bets there's a pretty good chance the ball will land somewhere around there. Betting on intersections when that happens tends to be easy money. This has failed for me in the past but more often than not it seems to work out so I felt it worth mentioning.
Like in blackjack there is an auto bet button here. Apparently the AI for each girl has a more or less unique betting pattern that remains consistent as seen in this album kindly provided by @FireWynd https://imgur.com/a/COXdY3S. I'm not sure of the album's origin but it seems to have been provided by a "Reddit" user named "adamrr" in this thread:" https://www.reddit.com/r/DOAXVenusVacation/comments/qy1ws6/roulette/ ". This would make certain characters much safer than others should you decide to use this feature here so I think it is worth a look.
According to @FireWynd: "Nagisa, Koharu, Tsukushi, Kokoro are thought to have the best roulette betting patterns and that you should use one of them if doing auto betting." I will trust their judgement here as they seem quite knowledgeable about the topic.
Note: Your total bet on a single location cannot exceed the cap. If you wish to bet beyond that you will need to chose a different spot or wait for the next round.
Photo Mode「撮影する」
 A brief breakdown of photo mode and all the functions you can use.
While most functions can be manually toggled by the buttons on-screen there are hotkeys for each of these which are as follows:
A brief breakdown of photo mode and all the functions you can use.
While most functions can be manually toggled by the buttons on-screen there are hotkeys for each of these which are as follows:- W: Pause movement (Requires Hourglass)
- G: Toggles girl looking at the camera.
- C: Switches to the camera
- V: Switches to the spray bottle, this item gets the girls wet.
- B: Switches to the fan. (Only the regular one, if you want blue you need to do it manually) The fan will blow the cloth in girl's outfits as well as their... jiggly bits... in whatever direction you move your mouse.
- N: Reset
- Space: Take Photo
- T+LMB+Up/Down Movement: Zooms in/out. Can also be done with a wheel if your mouse has one.
- F+LMB+Up/Down Movement: Adjusts Depth of Field.
- Z+LMB+Up/Down Movement: Tilts the camera. (Like in the screenshot)
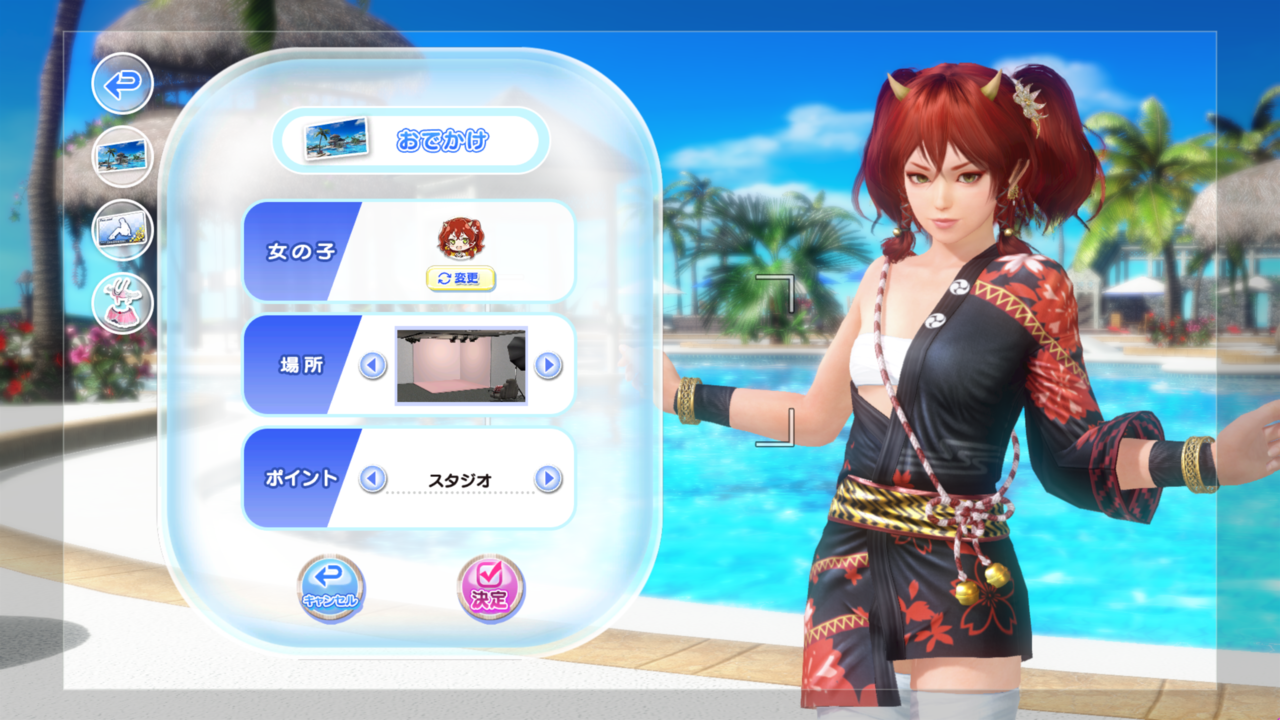
Clicking on the button with a landscape picture on it will bring up a menu that looks like this. The first tab lets you swap out the girl you're taking pictures of, the second changes the back drop (you mostly get these from the Venus Shop), and the third chooses a specific area within the backdrop.
In the Owner Room the third tab is also where you will find the options to pose girls together after you reach a high enough level. If you don't have the required furniture the option will still be there but you won't be allowed to select it.
Lens TypesCurrently there is only a single alternate lens to choose from, it is sold in the Owner Shop for 300 paid V-Stones:
 Just in-case more are added later I will make a list for them:
- 望遠レンズ - Telephoto Lens - Greatly increases the zoom limit (from 143mm to 287mm), additionally it has a wider angle and allows the camera to focus on both foreground and background objects.
Filters
Currently there is only one alternate filter to choose from and like the lens is sold in the owner shop for 300 paid stones:
 As with the lens I will make a list here on the off chance more are added later:
- モノクロフォトフィルター - Monochrome Photo Filter - Applies a filter to your photos that displays only black and white.
Note: To apply filters you need to take a picture as if you were going to apply a frame to it, you can then select the frame from there and it will be applied to your screen until you disable it (you don't actually need to save a photo to activate the filter just get to the point of frame selection). Frames
 Frames are bought from the Owner Shop and are selected by cycling the flashing camera button (the one that takes the picture) until it looks like this.
Upon taking a photo with this option selected a menu that looks similar to the pose menu will appear displaying all your frames, you can then select one by dragging it like you would a pose and it will be applied.
Collaborations「コラボ」
- Destiny Child^
- The Melancholy of Haruhi Suzumiya
- Is It Wrong to Try to Pick Up Girls in a Dungeon?
- Shinobi Master Senran Kagura: New Link *^
- Atelier Ryza †^
- Alice Gear Aegis
- Uzaki-Chan Wants to Play
- Destiny Child (Second Collab)
- Azur Lane (Collab only in Azur Lane, No content here)
- Romance of the Three Kingdoms XIV †^
- Atelier Ryza 2 †^
- The Idaten Deities Know Only Peace
- Shinobi Master Senran Kagura: New Link (Second Collab)
- Atelier Sophie †
- Alice Gear Aegis (Second Collab)
* Marks the introduction of Deco-Bromides, prior collabs have none. (With the exception of Destiny Child which got a second collab)
† Marks an IP owned by Koei Tecmo or Team Ninja.
^ Marks a collab Steam EN has gotten. Note that due to the time these were released on Steam they likely have more features/more girls included than the originals on DMM. (EX Destiny Child Collab on Steam has Deco-Bromides [First Steam Event to have them as opposed to Senran collab for DMM] however they do not have the Sytry outfits from Destiny Child collab 2.)
Common Errors
This is just a brief section to cover a handful of errors that may occur naturally when attempting to play the game.
If you get an error with this message when attempting to start up the game this means the servers are under maintenance (This usually happens between events). Most maintenances are scheduled and you will be informed ahead of time through the official site and in-game popups. Players are usually compensated post-maintenance for server downtime so if you get free stuff when you log in that's why.
These generally take a couple hours or so.

This will not fix the error itself however any message you see like this is the result of you not having a Japanese language pack installed on your PC. This can be fixed by changing your system locale under language for non-Unicode programs to Japanese or in some cases (such as in-game errors) you will need to change your region settings to Japanese as well. (This also applies to a lot of Japanese text in the game so if you want to be able to actually see that text then this needs to be done)
Doing the latter will result in all standard Windows system messages and menus being changed to Japanese (Locale won't) so I don't suggest doing it unless you're confident you can navigate Windows without any English.
- 1st offense: 5 day ban
- 2nd offense: 5 Week ban
- 3rd offense: Indefinite
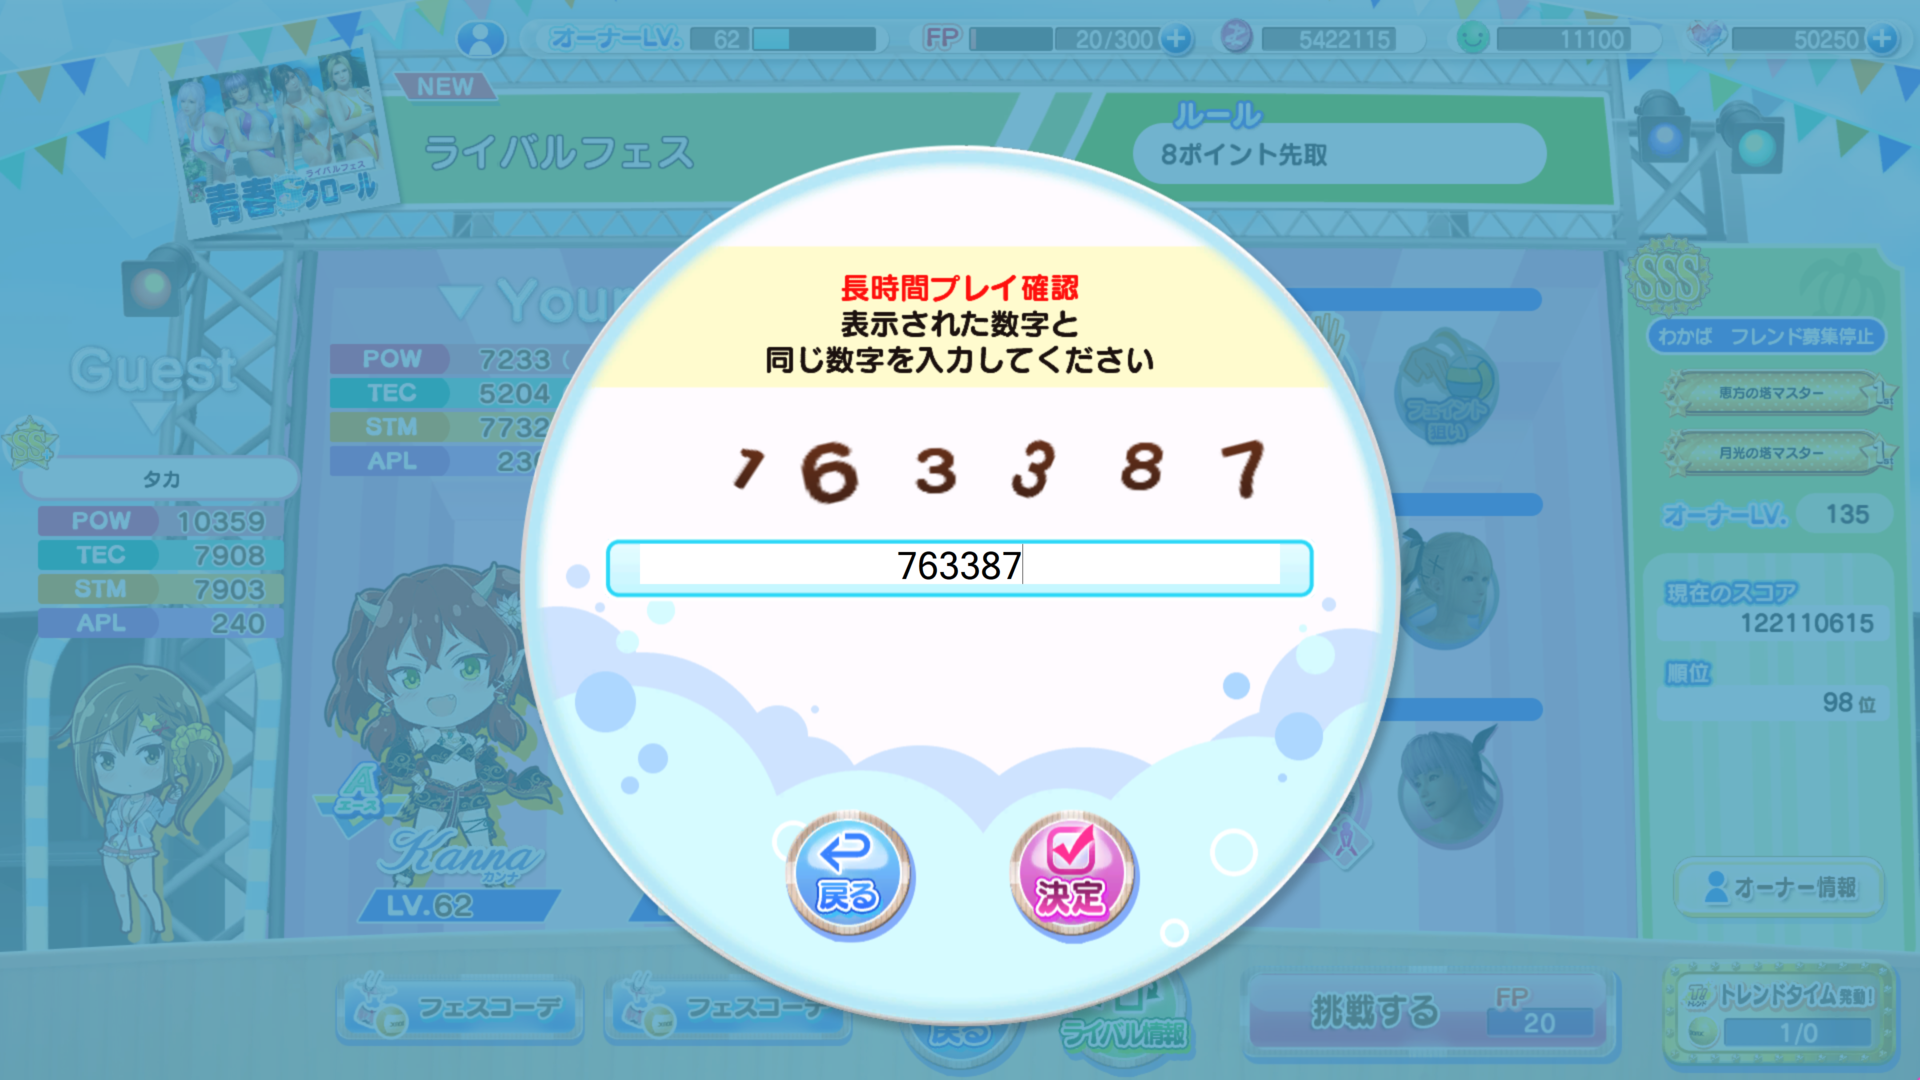
This is the game checking to make sure you're a person, it usually happens when you spend an excessive amount of time playing festival matches or the game suspects you of using macros.
Just enter the numbers in the order they're listed and you'll be fine, you might need to answer more than one. (If you're stupid like me and can't tell the first number was a 1 >.>)
- Restart the game
- Check your internet connection
- Restart your PC
- Verify the game files. This is done by:
- Hover your mouse over the game icon in the DMM Game Player.
- Click the "ⓘ" icon in the top left corner of the image
- Click the button on the bottom right that says " ゲームファイル整合性チェック"
- Hover your mouse over the game icon in the DMM Game Player.
- Uninstall and reinstall the game, this may be necessary after a long break if the launcher hasn't been allowed to download updates for a while.
Note: As far as I'm aware the DMM and Steam versions share the same error codes so here[game.doaxvv.com] might be a good place to start.
This one isn't something anyone should see or need to worry about for a pretty long time but just for the sake of having it since it will happen eventually this is the end of service message. When you see this the game's servers will shut down on whatever date they list (there's usually advance notice) and that will be the end of it.
I've seen games offer refunds to people who bought things within X months of the end of service announcement so when this does happen if you've spent anything on the game relatively recently I would recommend looking into that.
Conclusion
Sorry it ended up a little longer than intended, hopefully someone found something useful here.
- 《死或生 沙滩排球:维纳斯假期》中文入门指南★ 5 (663)117k views1.2k ♥1 minSimplified ChineseUpdated 4 Apr, 2019
- 秒明白,遲入坑,不可不知的十件事★ 5 (480)75k views275 ♥1 minTraditional ChineseUpdated 27 Oct, 2024
- DoA Xtreme Venus Vacation Modding (EN/RU)★ 5 (639)40k views1.3k ♥15 minUpdated 8 Apr, 2023
- DOAX防坑/运营/物品指南(20190414更新游戏系统/任务属性/技能/角色培养方向)★ 5 (355)26k views695 ♥2 minSimplified ChineseUpdated 24 Jul, 2020
- DOAXVV - The Long Gameplay Guide★ 5 (430)17k views592 ♥65 minUpdated 16 Aug, 2022
- 抽扭蛋的小技巧,大家一起总结吧!ver1.0★ 4 (124)11k views214 ♥1 minSimplified ChineseUpdated 25 Jan, 2021



- Upgrading to PremiumTeam Fortress 2★ 5 (20k)1441k views11k ♥6 minUpdated May 11, 2022
- No More Room in Hell Official ManualNo More Room in Hell★ 5 (2.8k)569k views2.1k ♥29 minUpdated Apr 22, 2019
- NMRiH Community Hosting GuidesNo More Room in Hell★ 5 (526)351k views653 ♥1 minUpdated Aug 10, 2022
- ULTIMATE GUIDE FOR GAME DEV TYCOONGame Dev Tycoon★ 5 (5.8k)326k views10k ♥4 minUpdated 23 Jan, 2014
- How to 'Git Gud' Soon™MORDHAU★ 5 (2k)318k views3k ♥68 minUpdated Nov 16, 2024
- Лучшие кооперативные игры SteamPAYDAY 2★ 5 (1.5k)315k views2.1k ♥56 minRussianUpdated Apr 27, 2025






This guide was created by its original author on the Steam Community. Are you the author and want it removed? Request removal.