How to Create and Upload Custom Textures
Where Textures are Located
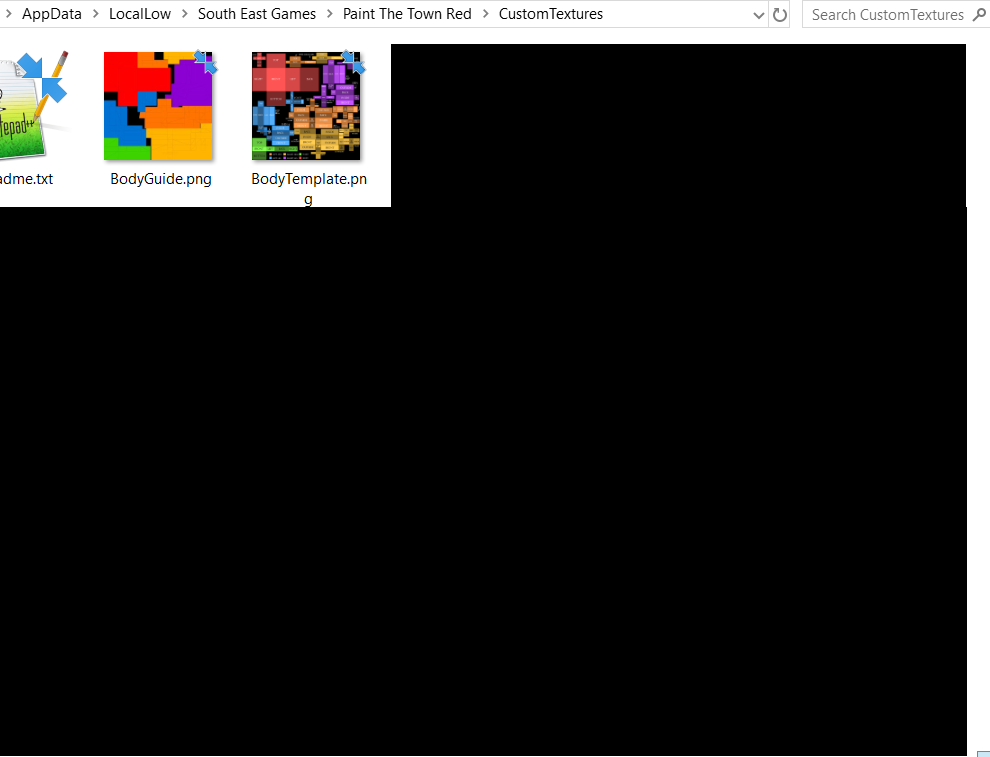 Another option to find this folder is by going to the texture pack creator in PtTR and opening the folder by pressing "open texture folder".
Creating the Textures
Next thing we do is create the textures themselves. For a character body texture, you only need 1 texture called "(your character name)_Body". For a head texture, you need 6. Here is a list of them:
- "(your character name)_Normal" (face texture)
- "(your character name)_Blink" (face texture)
- "(your character name)_Wince" (face texture)
- "(your character name)_Angry" (face texture)
- "(your character name)_Dead" (face texture)
- "(your character name)_Head"
The first 5 are character expressions, and the last name is the whole head. Lets start by going into an art tool of your choice. There are many tools to accomplish this, like GIMP and Photoshop, but I will be using MS Paint 3D. I will now create the first texture, "(your character name)_Normal". These don't have to be created in any order, but it is vital to have all of the textures for the head, or it can't load in the game.
One thing important to note is that the textures also have to have the right size. The game accepts head textures of 1024x1024 or 2048x2048. For face textures, they can be only 1024x1024.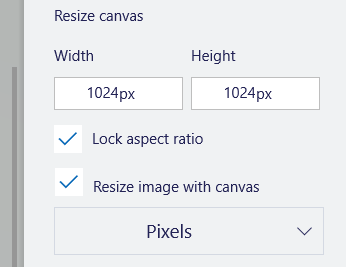 Both .png and .jpg picture formats are supported. When you are done with the picture and save it, make sure it saves in the texure folder explained earlier or drag the pictures into it after, or the game won't be able to find the textures.
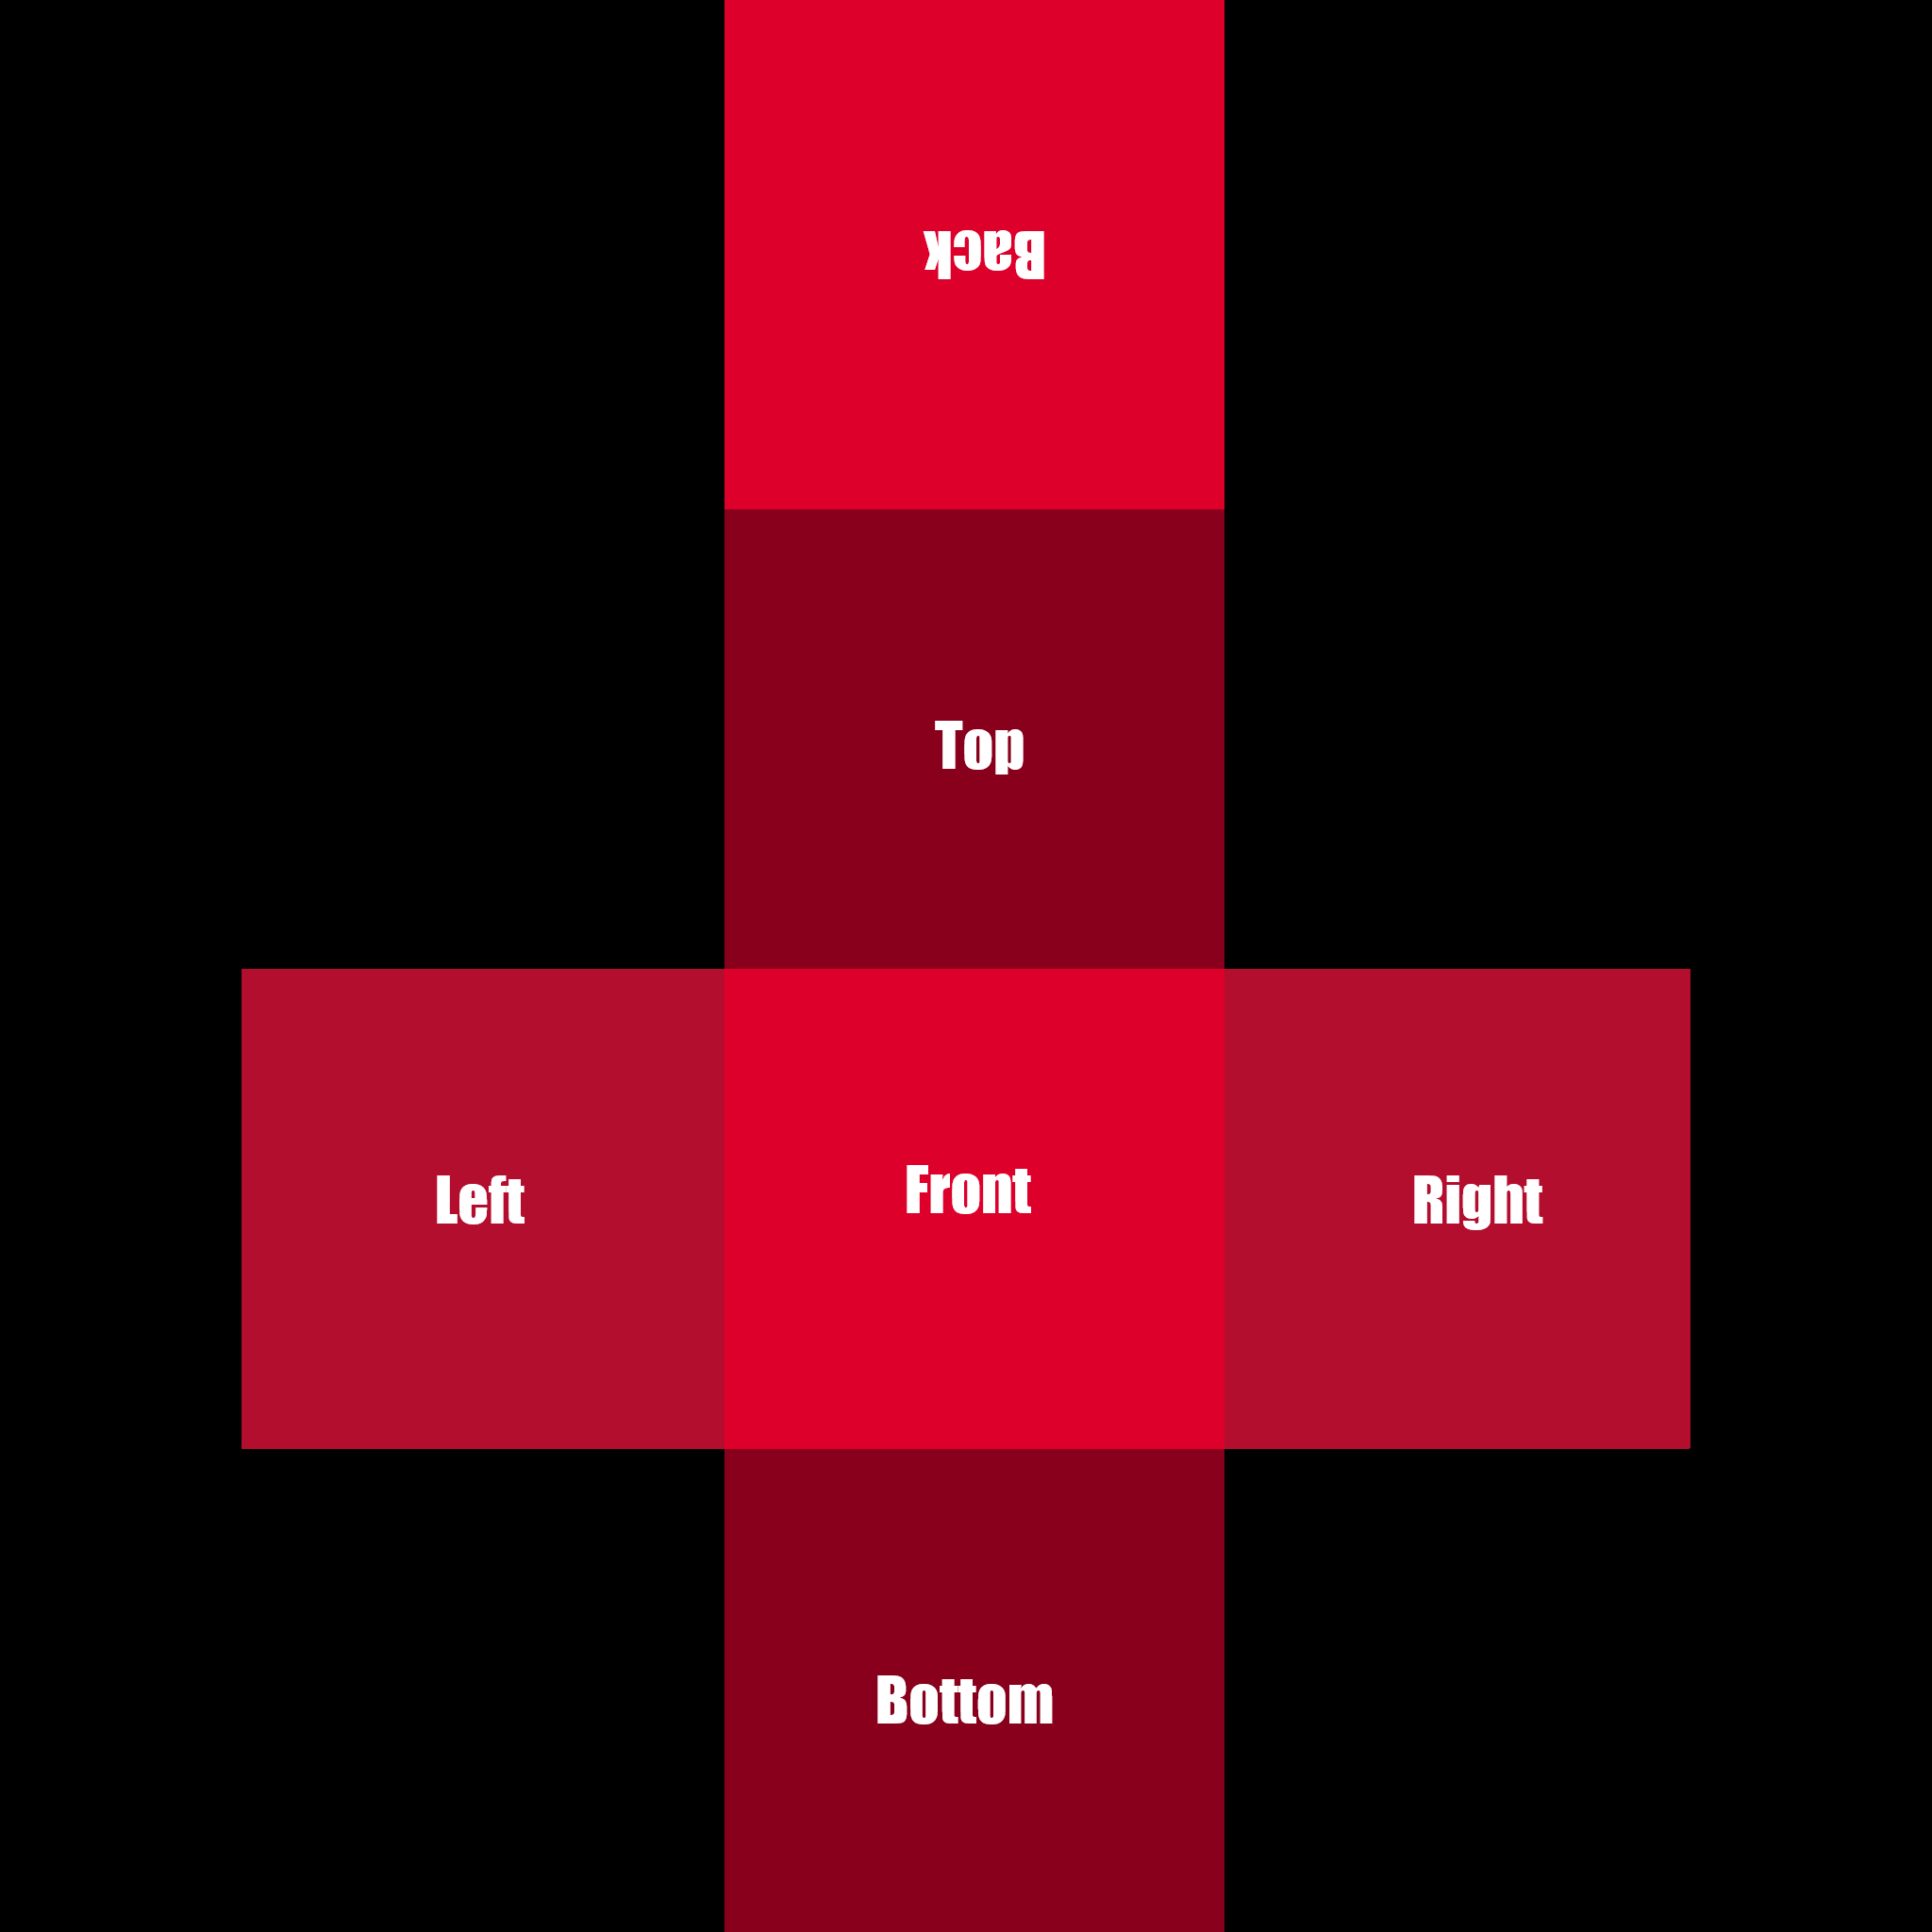
Continue on making your face textures with the right sizes and formats and put them in the texture folder. As an additional option, there are example head and face textures already in the folder that you can edit and save as different pictures of your own, if you don't want to resize a picture yourself. When you are done with the face textures, it is time to work on the head texture. The head texture is slightly different as it encompasses the whole head. There are specific areas that it uses as the sides of the head. A (rough) outline is shown to the left.
Both .png and .jpg picture formats are supported. When you are done with the picture and save it, make sure it saves in the texure folder explained earlier or drag the pictures into it after, or the game won't be able to find the textures.
Continue on making your face textures with the right sizes and formats and put them in the texture folder. As an additional option, there are example head and face textures already in the folder that you can edit and save as different pictures of your own, if you don't want to resize a picture yourself. When you are done with the face textures, it is time to work on the head texture. The head texture is slightly different as it encompasses the whole head. There are specific areas that it uses as the sides of the head. A (rough) outline is shown to the left. 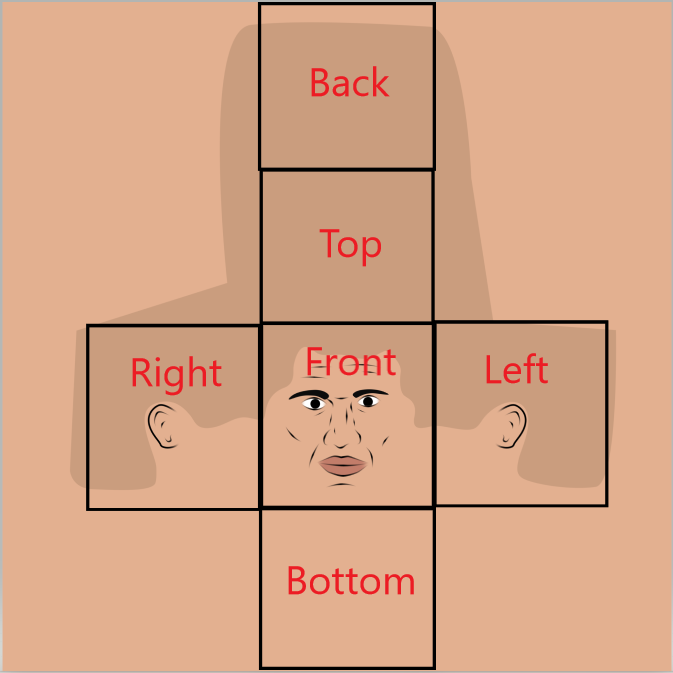 After we have created and saved all of the textures, we should be able to load them into the game. In the texture pack creator, click one of the plusses under the "heads to include" section. A window will appear where you can select the head texture. When you do, it will appear on the head of the blank character to the right. You can also select up to 4 other heads to use in the texture pack. Under the blank character, there will be a slider that lets you rotate the character to see all the sides. the words above will also say which face texture the blank character is currently displaying until the next one appears.
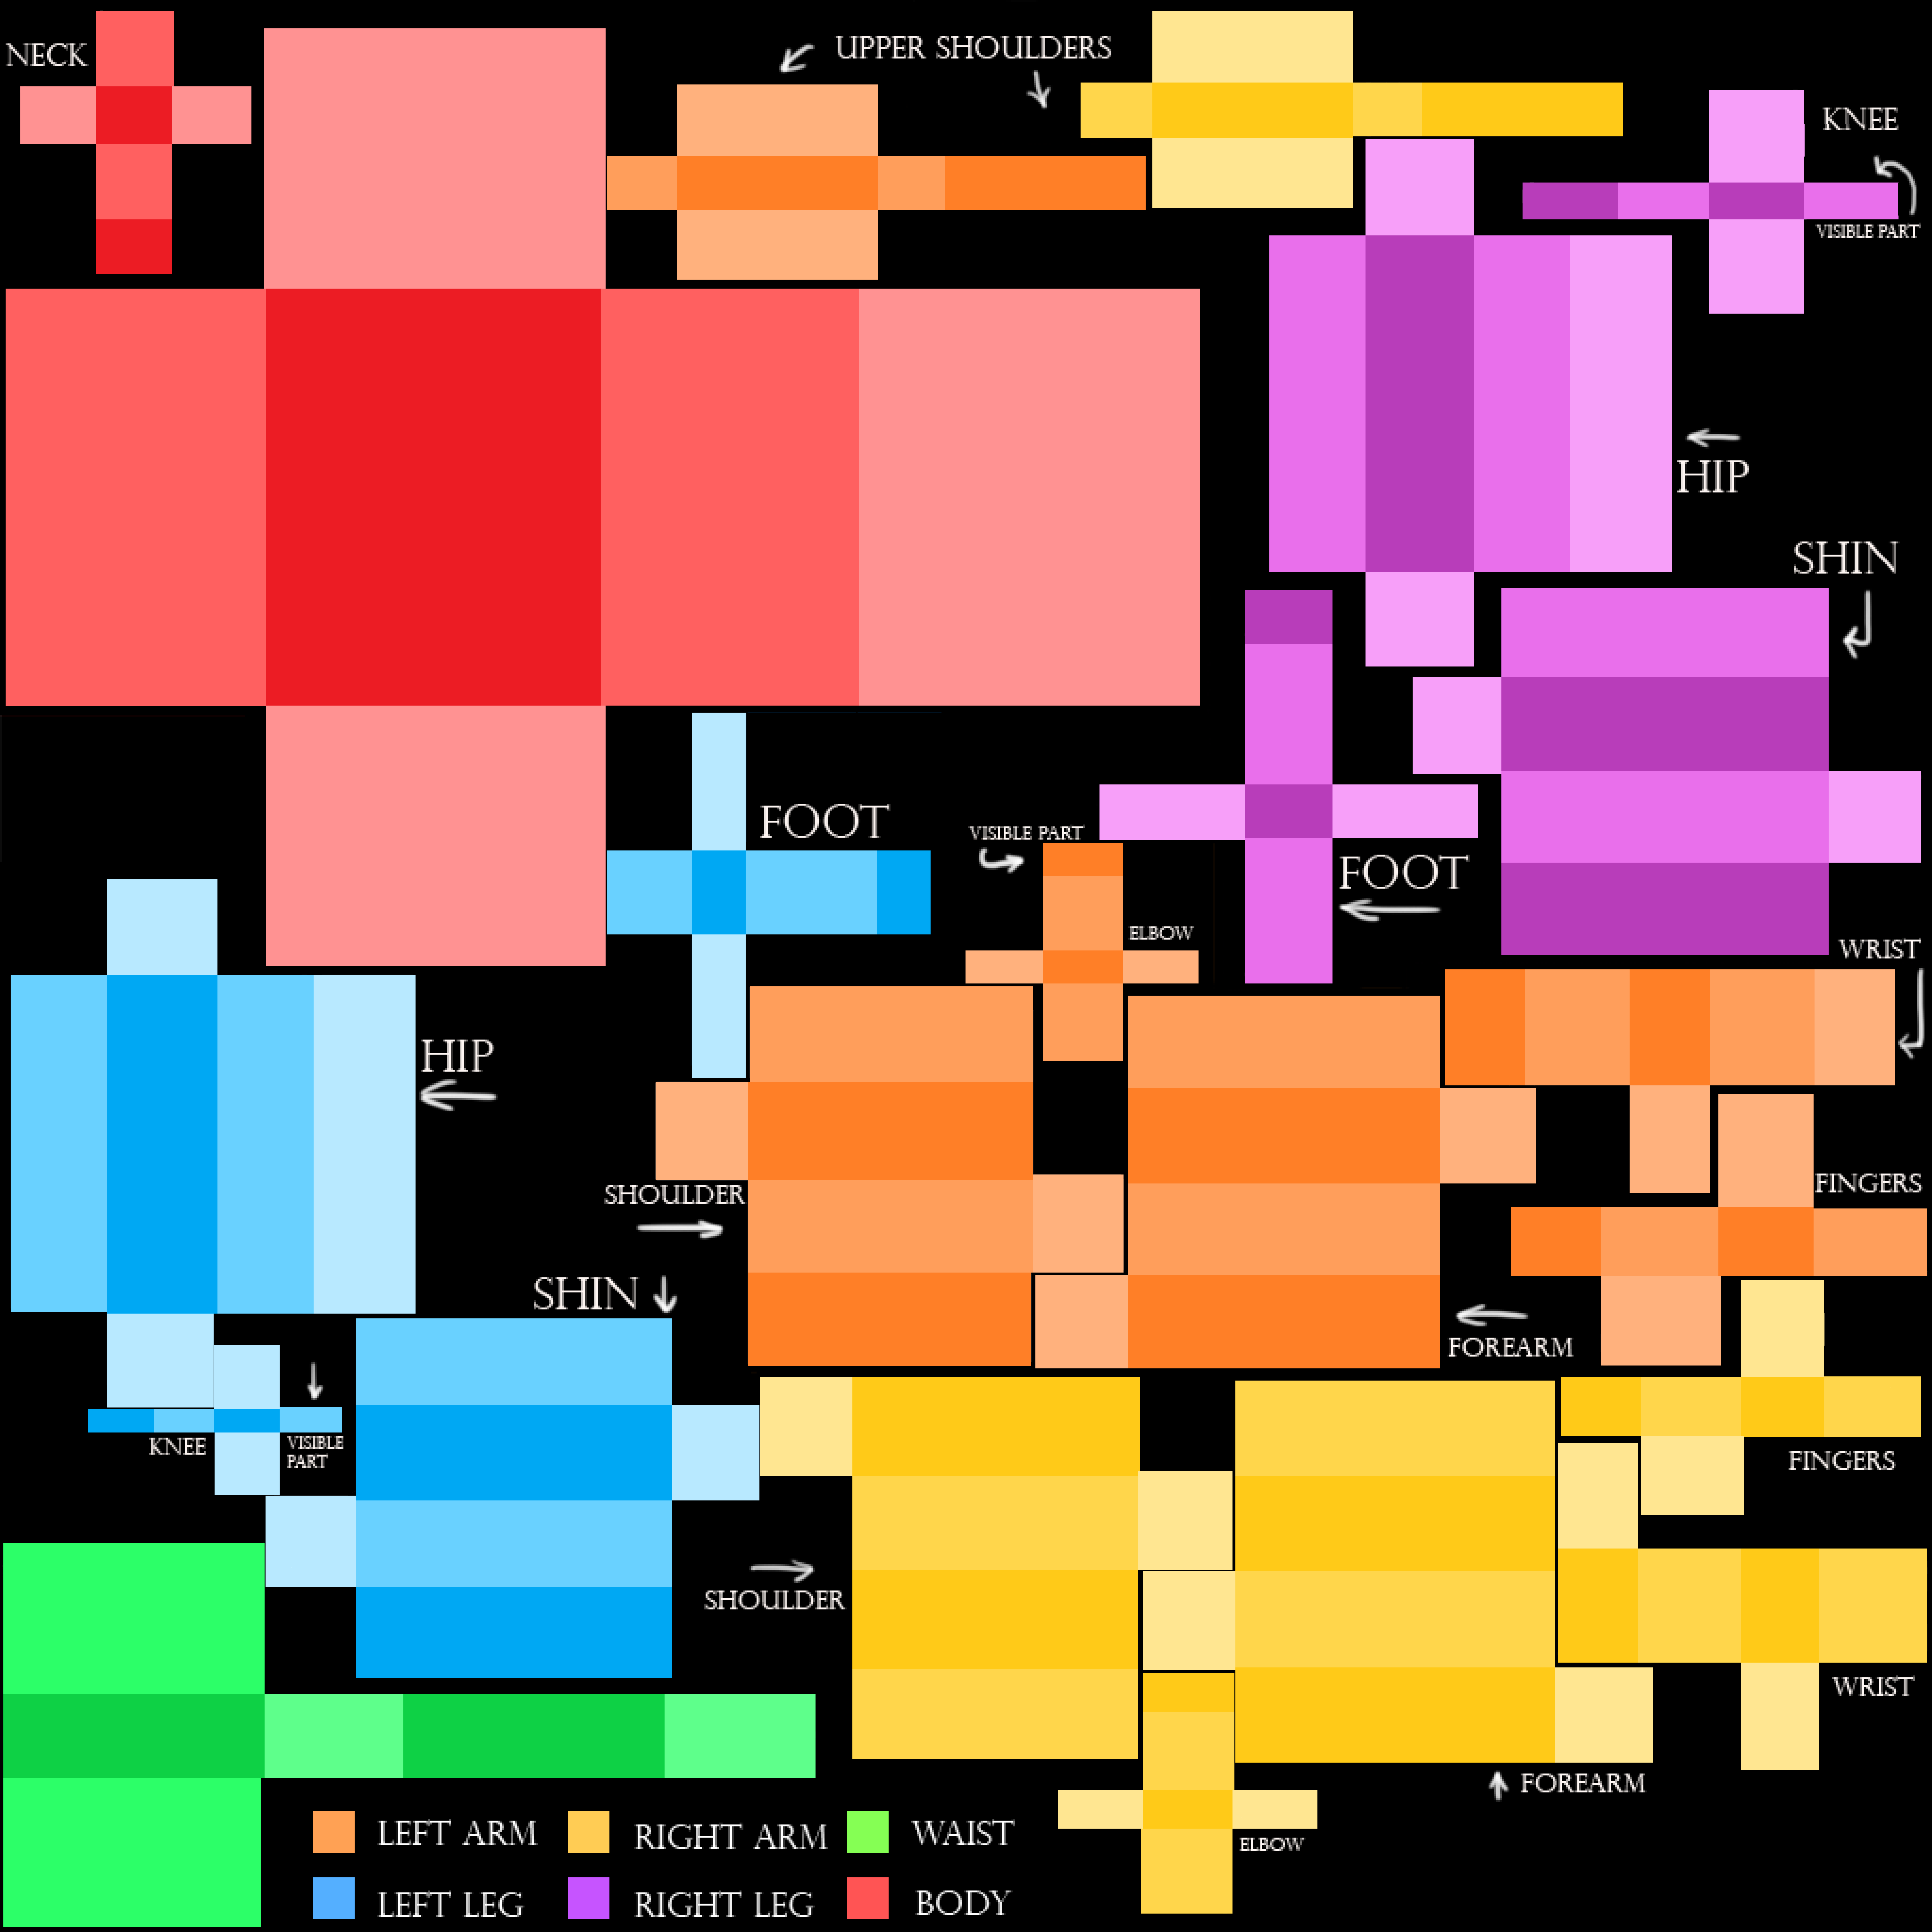
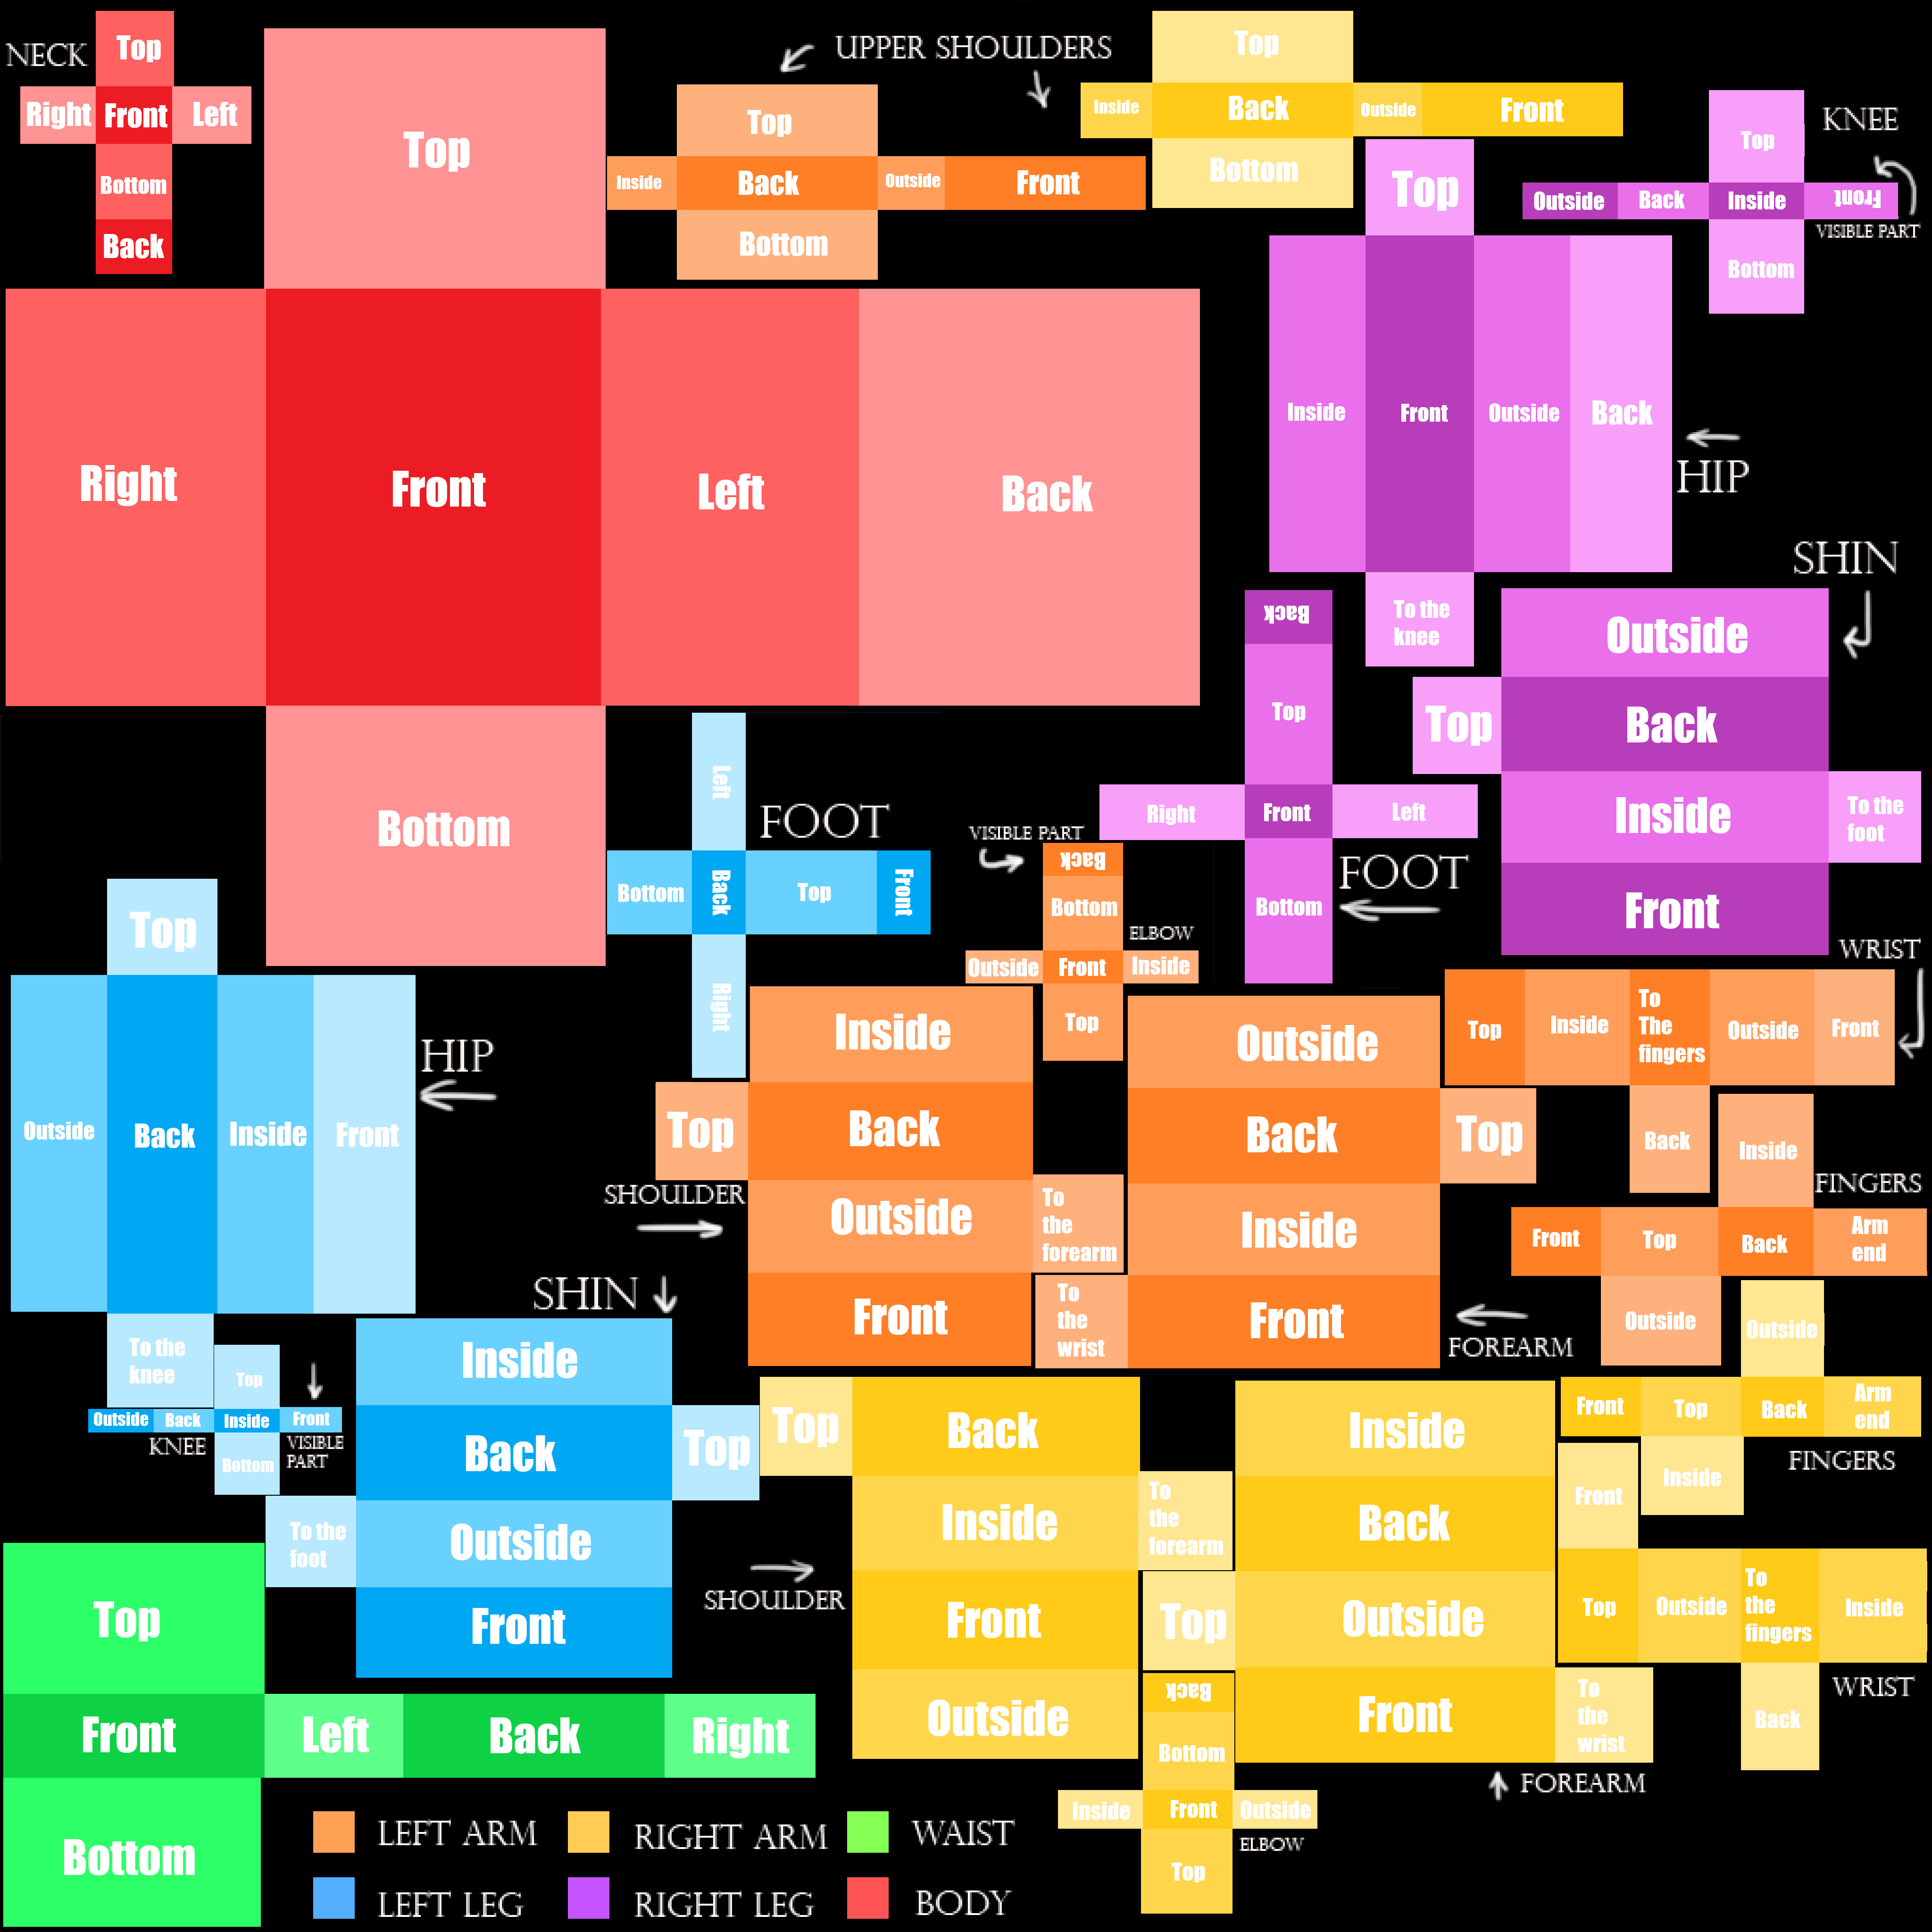
 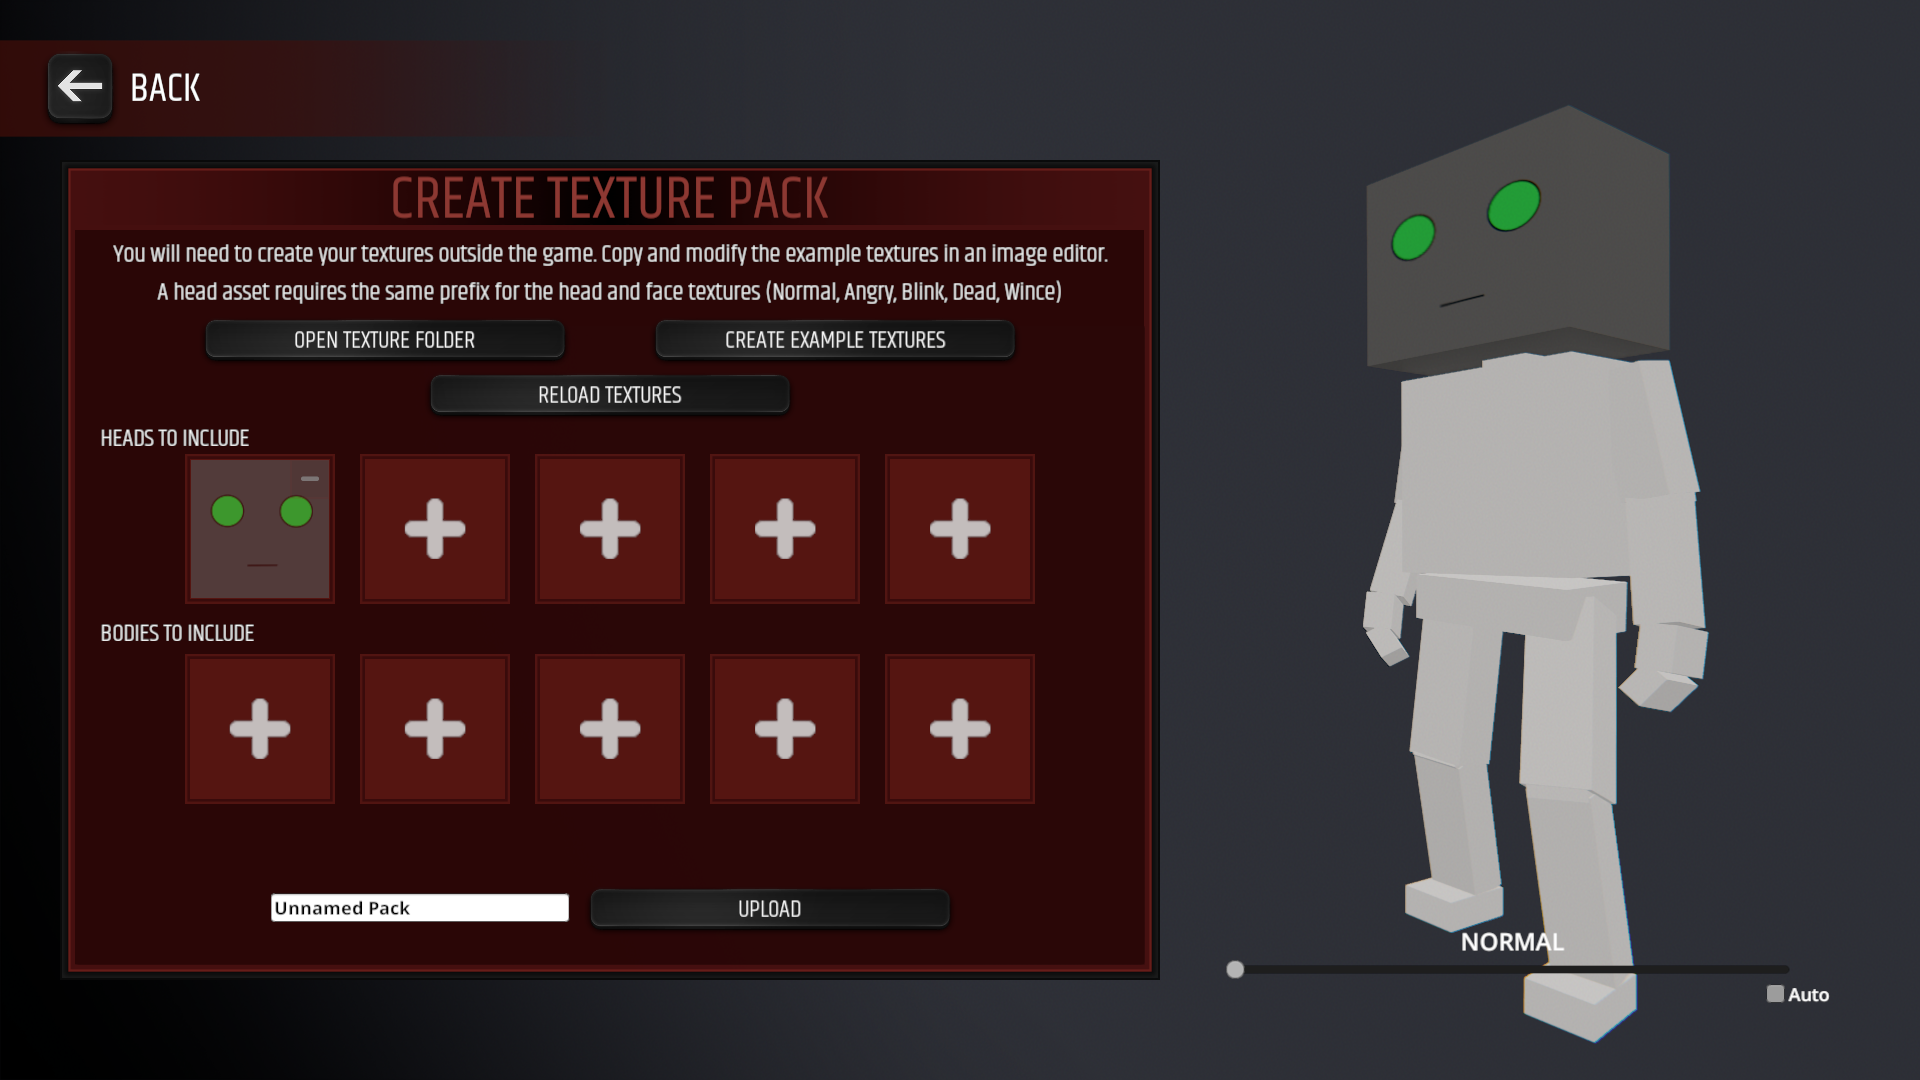 Next is the character body. This is similiar to the head as it uses only certain parts of the image to display on the texture. It can be sized to 1024x1024, 2048x2048, or 4096x4096. There is an example body texture you can see in the custom texture folder, to the right. This is pretty self explanatory, as it is color coded and shows the parts of the character body.
 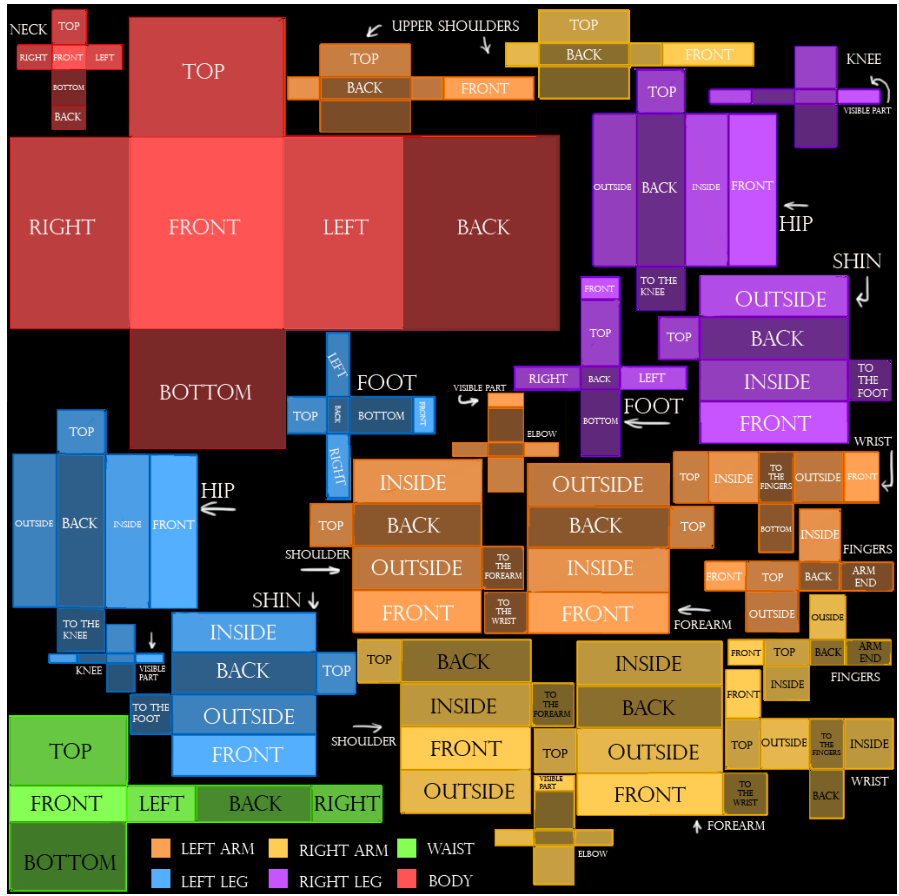 Edit the body how you want and save it to the texture folder. Now load it into the game by clicking one of the plusses under "bodies to include". Same with the heads, you can add up to 4 other bodies. The body will then display on the blank character along with your head. Now it's time to upload.
Uploading the Textures
Texture Templates
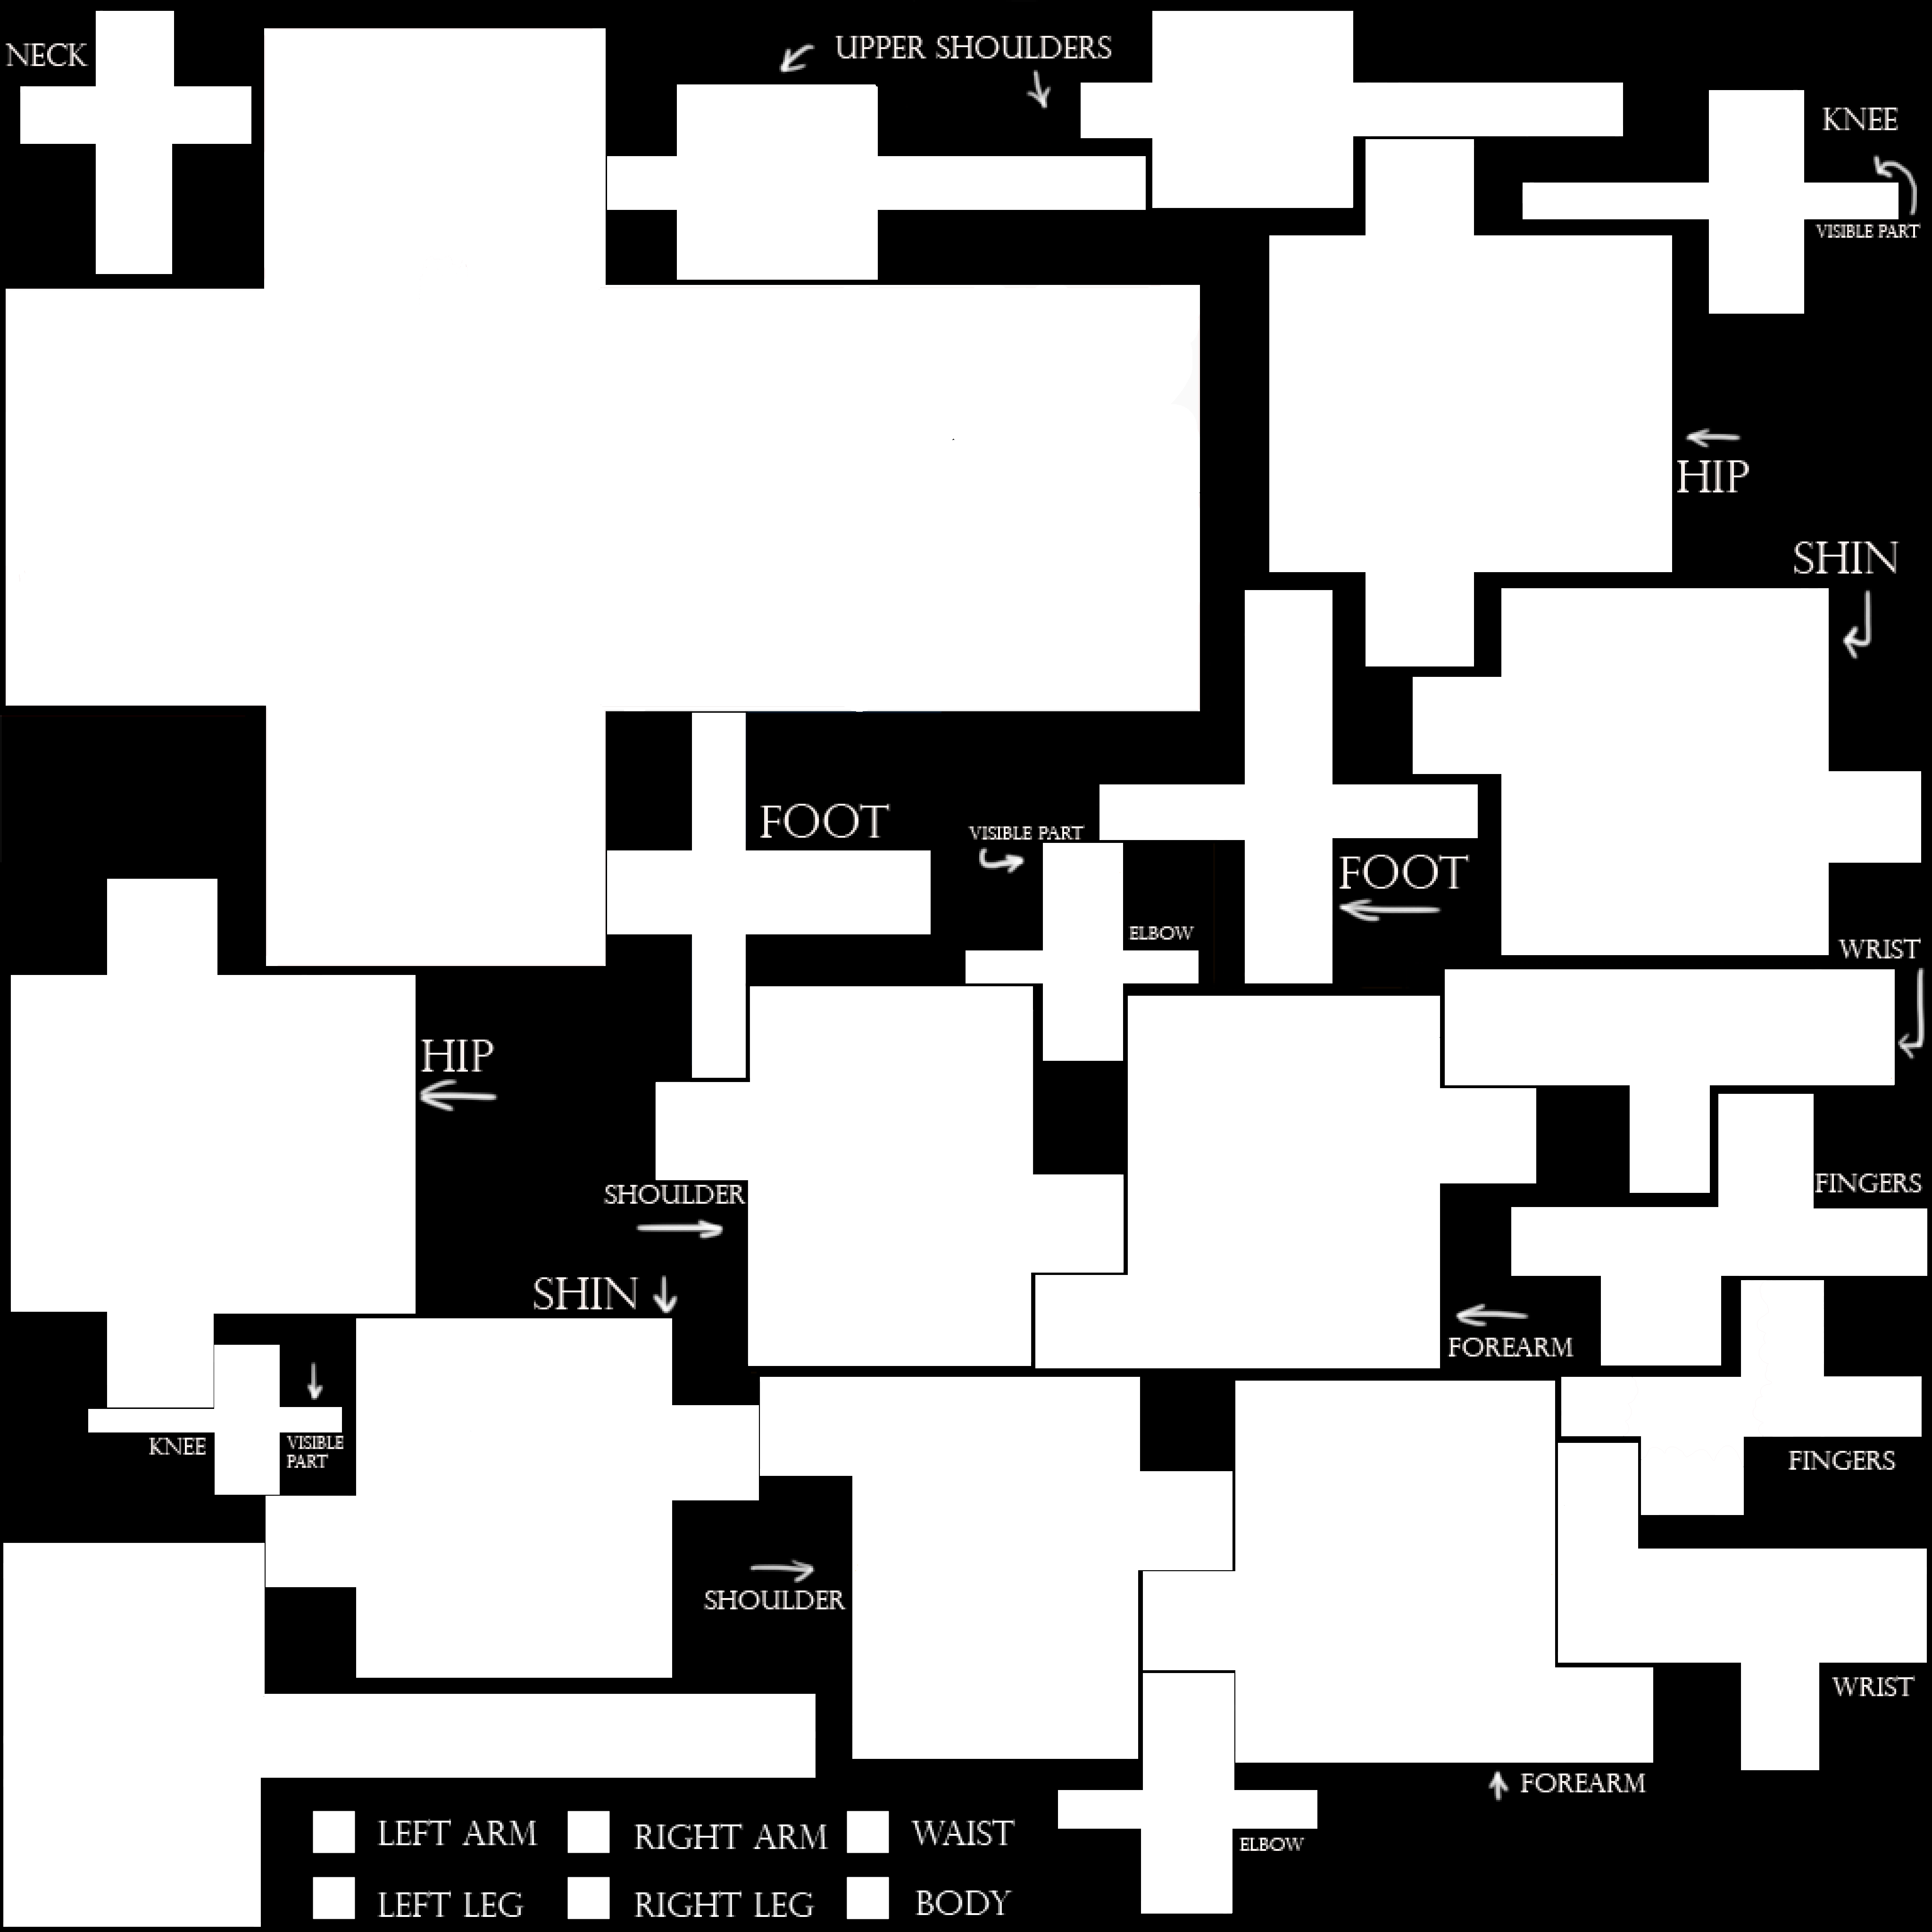
Blank white body template (good for filling in with paint bucket):
Colored blank body template:
Colored body template with text:
Head texture template:
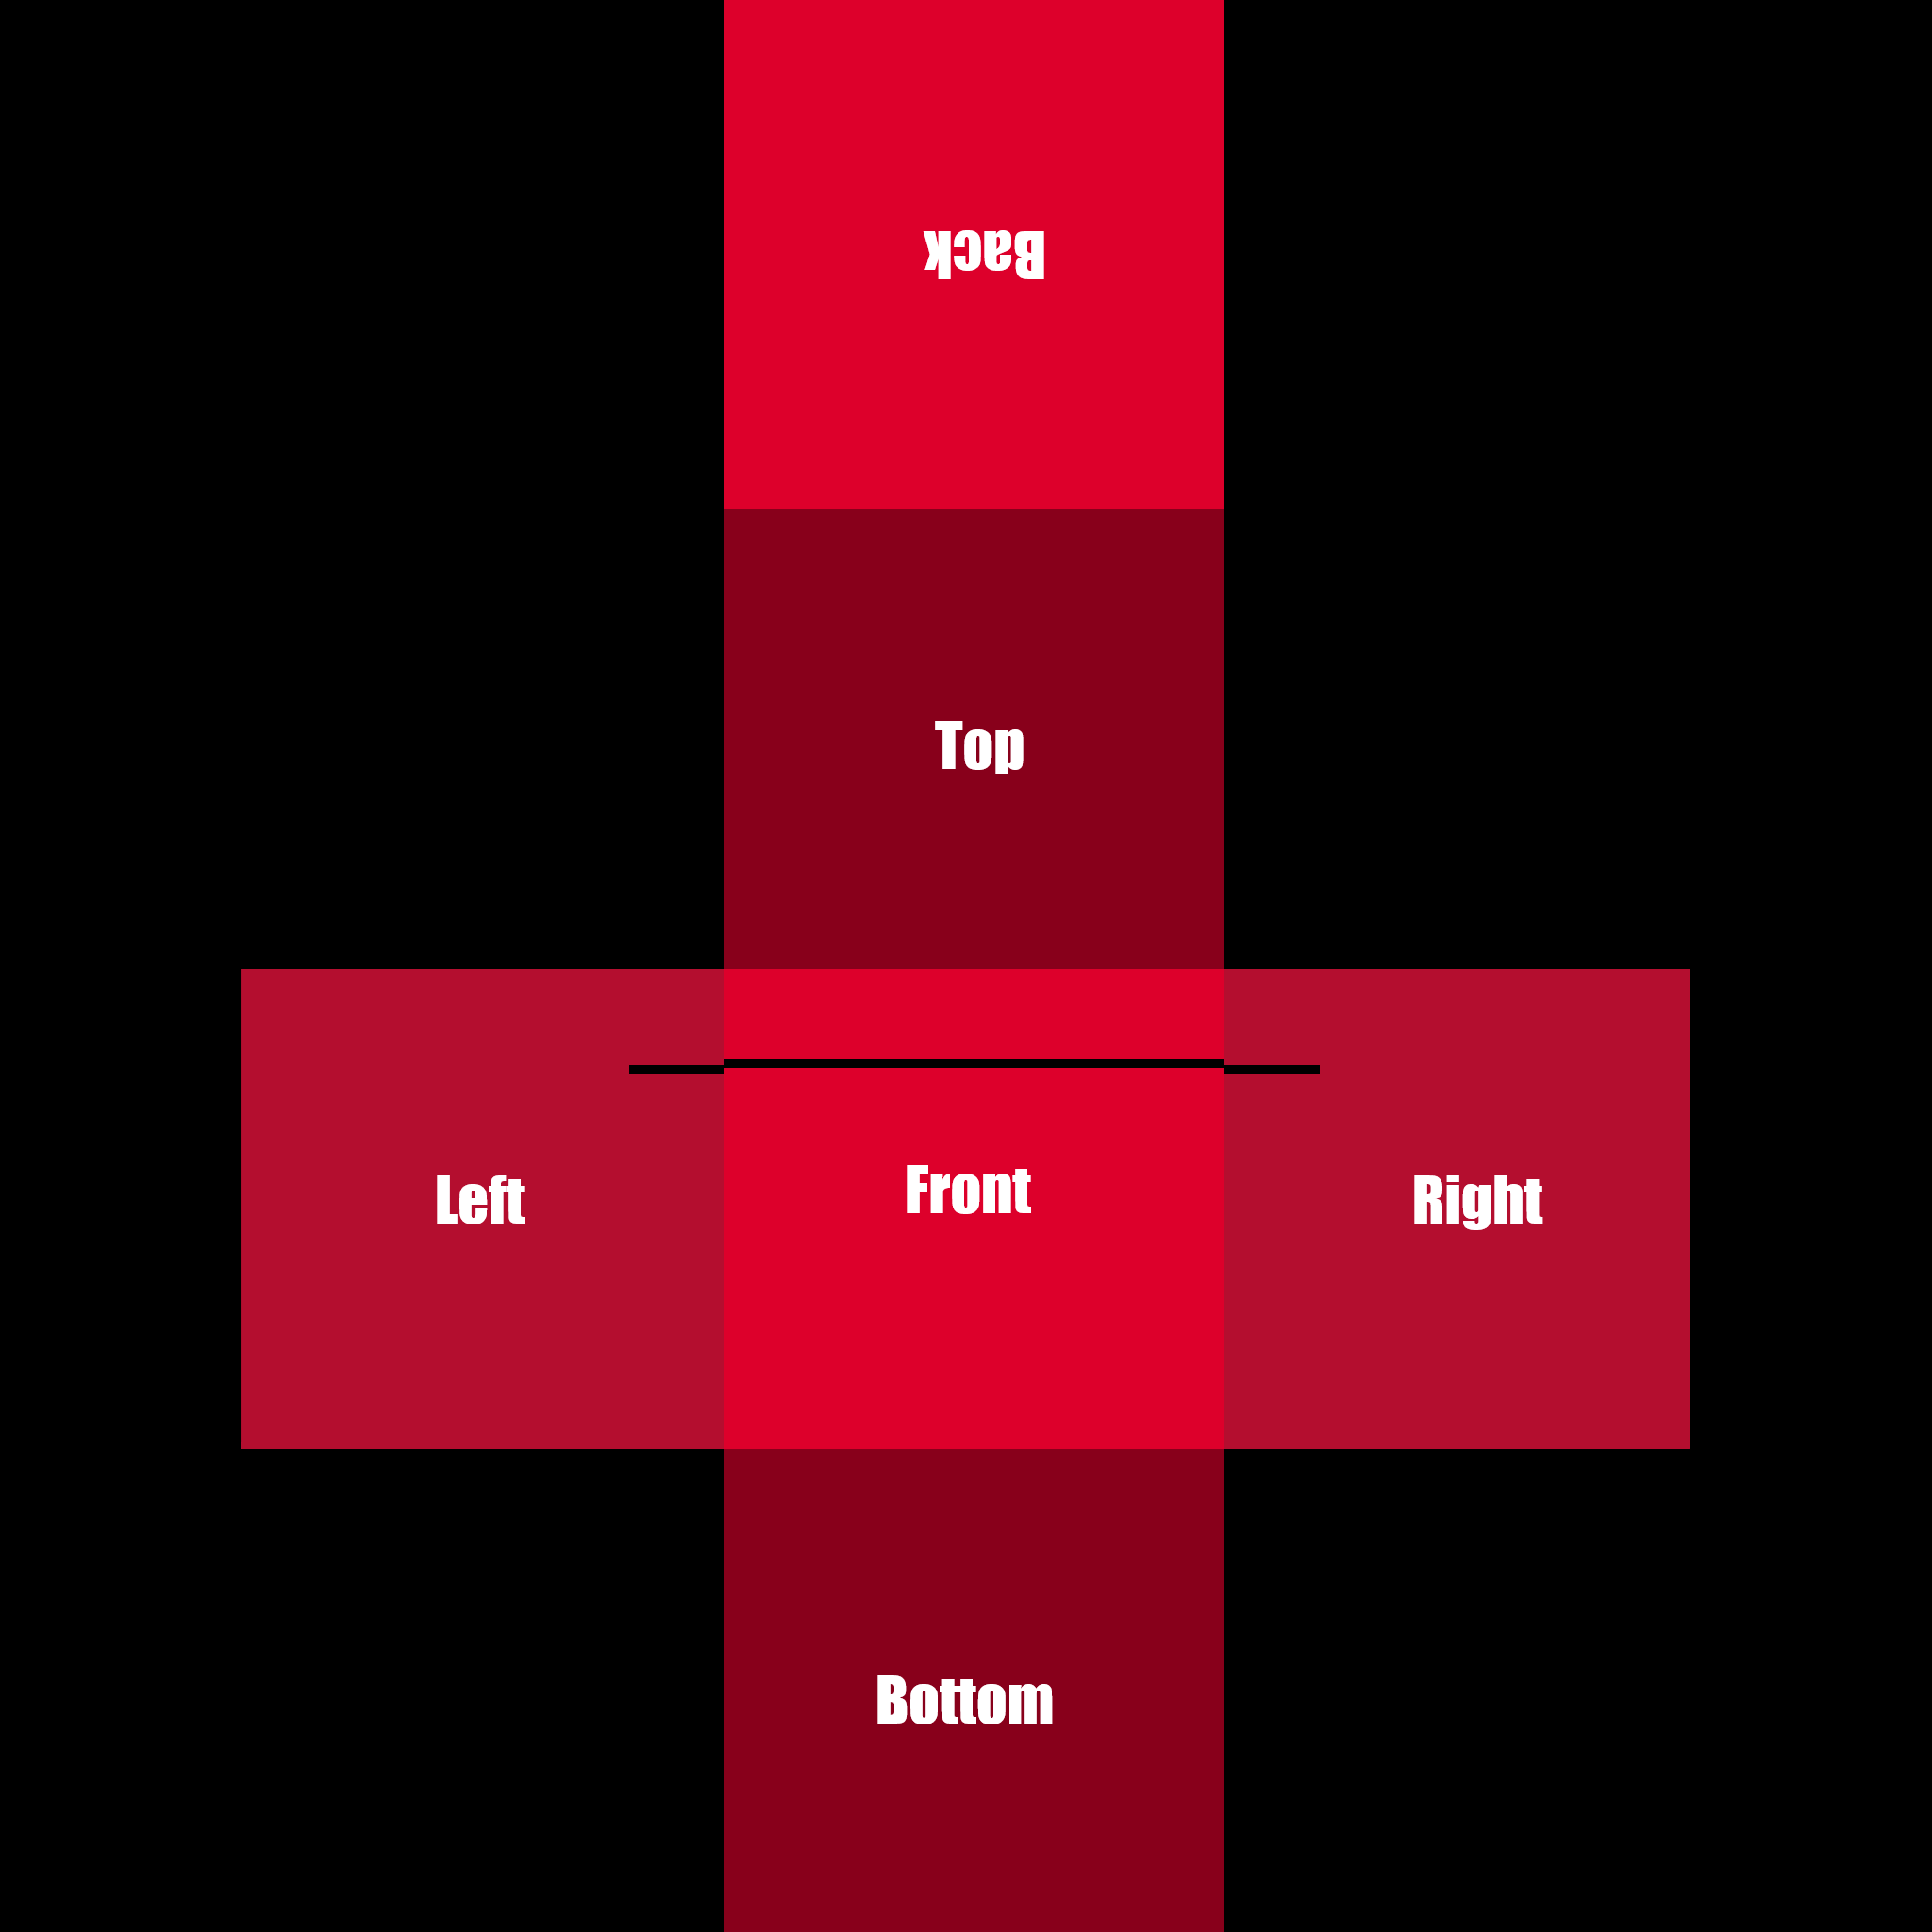
Head texture template with offset issue marked:
Conclusion
- Level Editor Guide★ 5 (544)59k views569 ♥37 minUpdated 9 Jan
- how to befriend the man in solitary★ 5 (284)20k views167 ♥1 minUpdated 26 Dec, 2016
- How to Unlock Every Achievement★ 5 (265)11k views487 ♥15 minUpdated 3 Jan, 2023
- Beneath: A Beginner's Guide★ 4 (128)8.6k views177 ♥8 minUpdated 6 Dec, 2019
- Значение всех модификаторов★ 5 (157)6.5k views199 ♥8 minRussianUpdated 12 Jul, 2025
- Как разблокировать все достижения★ 4 (146)6.2k views415 ♥13 minRussianUpdated 21 Apr, 2024




- Upgrading to PremiumTeam Fortress 2★ 5 (20k)1441k views11k ♥6 minUpdated May 11, 2022
- No More Room in Hell Official ManualNo More Room in Hell★ 5 (2.8k)569k views2.1k ♥29 minUpdated Apr 22, 2019
- NMRiH Community Hosting GuidesNo More Room in Hell★ 5 (526)351k views653 ♥1 minUpdated Aug 10, 2022
- ULTIMATE GUIDE FOR GAME DEV TYCOONGame Dev Tycoon★ 5 (5.8k)326k views10k ♥4 minUpdated 23 Jan, 2014
- How to 'Git Gud' Soon™MORDHAU★ 5 (2k)318k views3k ♥68 minUpdated Nov 16, 2024
- Лучшие кооперативные игры SteamPAYDAY 2★ 5 (1.5k)315k views2.1k ♥56 minRussianUpdated Apr 27, 2025






This guide was created by its original author on the Steam Community. Are you the author and want it removed? Request removal.