Novice to Expert Survival Guide
Welcome to the Constant!

There are game changing things that can be easily overlooked or not obvious... this guide seeks to help that (and more) in small and digestible sections to learn. Knowledge is indeed power in the world of DST and too much at once can be bad for your real life sanity! (and that matters a whole lot more)
DST is a game all about the journey and your own accomplishments, but you can't really accomplish much if you have no chance at surviving the journey.
 ...is it's divided in chapters going from the easy to more advanced and effective ways to surviving'n'thriving. Every chapter will have a small list of goals for the most important things you should be able to do in that chapter.
This guide still has a good amount of info and every sentence can contain a useful point. It's encouraged to glance back at previous chapters to freshen up or even find something you may have missed. You can follow this guide in chunks while playing through your many adventures in DST. Do not expect to do everything in a single run.
The goal list is merely there as suggestions, so do not make the mistake of thinking you HAVE to do them. There are many ways to play this game after all, but these goals can be used as great stepping stones to try for and learn with.
Also of course... expect some deaths. It's the nature of the game. ;)
Of course some of these strategies are not meant to always be the "best", but the most accessible. An example is I can't remember the last time I caught a rabbit specifically for its meat. Players can learn and grow to the best or their own favorite strats after they become more experienced to do such things. Obligatory statement over!
Chapters Breakdown
- The basic controls and gameplay info with some suggestions to improve your experience.
- The essentials every new player should know. Mastering these chapters will drastically improve your chances of survival. Early game tips. Butterflies! Good mindset. Intro to crockpots. Intro to combat with kiting.
- After learning these chapters it may be possible to skip to chapter 7 if you want to jump into surviving winter better.
- Builds off of the early chapters with effective ways to aid in your survival and fight off your troubles. How crockpots work. Fighting nightmares. More ways to help your stats.
- The more advanced and improved ways to survive that can last to the late-game. Better foods. Better light sources. Better weapons and armour. Inventory tips.
- Miscellaneous quality of life things
- Getting ready for winter and understanding the ways to control your character's temperature.
- Understanding every season and the many ways to survive against the elements. Cold in winter. Rain in spring. Heat in summer. Details the other dangers in these seasons.
Chapter 0 - First Things First...
Just to make sure we're on the same page... some important basic controls, gameplay and suggestions:
- WASD keys for movement
- F key to attack a nearby enemy
- SPACEBAR to quickly pick up or interact with something nearby
- M key to open the map
- C key to quickly open the crafting tab
- The mouse can be used for more accurate actions
- Clicking and holding the left mouse button can help repeat actions more easily (like cooking food, chopping a tree and so on) To repeat the crafting of an item you have to double-click and hold instead
- CTRL can split a stack of an item or only drop 1 of something while holding it on the cursor
- CTRL can also be used to force attack, useful for attacking allies or neutral beasts not hostile to you
- SHIFT can help you take/place things quickly in containers or crockpots
- SHIFT + right click on items in your inventory to quickly drop them at your feet
- TAB can show the other survivors in the world and other info
- Y key can let you talk to your fellow survivors
- U key can let you whisper to any nearby survivors
Tip: Changing your Spacebar and F keys around in the control options can make fighting easier. Just need to slap that big spacebar in the middle of battle instead! This can free your fingers to still be on the movement keys while attacking and generally be more comfortable. This guide will only go by the default key bindings so adjust accordingly.
Tip: In control options you can bind the "Attack" and "Force Attack" on the same key to always force attack with one button. Streamlined! Careful! The safety is off with this trick and you can attack anything. Be quick to cancel an attack you don't want to do by moving in any direction with WASD keys. A client mod like "Improved Force Attack" can help prevent attacking certain things.
- Survival mode is the default survival experience and needs resources to revive or the world will start anew once all survivors are ghosts.
- Endless mode allows you to revive at the portal with a small max health penalty at any time. Forever.
- Wilderness mode spawns you on a random part of this map and after your death allows you to pick a new fresh character spawned randomly around the same world. Careful for you lose your map and crafting knowledge.
 The crafting menu is on the left side of the screen and is organized in self-explanatory filters with many useful things. The majority of craftable items needs the proper crafting station near you to craft and learn those items.
Holding an item on your cursor will allow you to use it on other specific objects. You can place burnable items like logs in a firepit or campfire to fuel a fire and then hover an uncooked food item over the fire to cook it. Eating cooked food usually gives better stats.
The darkness allows someone to attack you... don't get caught in pitch black darkness or else you'll get slashed by her. Have a light ready and watch the clock for when night comes.

With lag compensation on your character's movements are smoothed on your screen, but their true position on the server is still lagging behind what you see.
I would also suggest, if you're really new, to stay away from certain characters that have downsides that can be hard to manage until you have just a bit more experience. (Mostly regarding to their limited or extra needs to hunger)
These characters are: Wolfgang, Wigfrid, Warly, Wortox, Wurt, maybe Woodie and no new survivor can even handle the power Wes bestows so don't even try. Feel free to try these characters later when you feel confident with collecting enough food and managing your stats.
You can try Wilson first to a get the most basic experience of the game then grow to other characters where their benefits help you on what you're weak at and have downsides you can manage. (or just more fun to play as) Try mixing it up later by playing other characters to get better at what you're weak at and become a more well rounded survivor.
You can see a quick breakdown of the characters along with some tips in the section called "Extra - Character Tips'n'bits" near the end of this guide.
- Being able to use a keyboard and mouse! Yay! Well done!
- Not playing Wes
- Trying lag compensation to 'none'
Chapter 1 - Teching and Trekking
This chapter gives some general advice when starting and showcases a few early sources of food, healing and sanity.
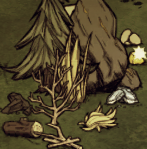 Getting a good stock of basic resources should be your top priority when starting out to craft useful tools for your survival while using your time to explore the starting area and collect enough food for you along the way for later.
Prepare for the looming darkness by crafting a torch to move through those short early nights. Use your first 2 flint to make a pickaxe to mine for more flint, rocks and even useful gold from certain boulders. Crafting an axe and chopping down fully grown birchtrees can be a good source of logs and food from cooking the birchnuts.
Get familiar with the world while looking for gold to tech up with. Try to always have a plan on what you should focus on doing next to survive and perhaps even thrive!
 The best way to killing a butterfly is to run after it and 'force' attack it (by holding the CTRL key) right when you catch up to it. I find the easiest way to do this is moving yourself with the mouse directly towards the fleeing butterfly and as soon as your character is next to the butterfly hit CTRL+F to attack it! Alternatively you can quickly run up to it while it's busy sitting in a flower or flying in place.
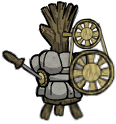 Once you acquire gold you can build a science machine from the Prototypers & Stations crafting filter! It's inexpensive to build with only 1 gold, 4 wood and 4 stone.
Standing next to one will allow you to learn and prototype more useful tools.
Once you acquire gold you can build a science machine from the Prototypers & Stations crafting filter! It's inexpensive to build with only 1 gold, 4 wood and 4 stone.
Standing next to one will allow you to learn and prototype more useful tools.The most notable to craft at first being:
- Backpack in storage solutions - for carrying more goodies
- Crockpot in cooking - for making better food (if you know what you're doing)
- Spear and log suit in weapons/armour - for defending thyself properly
- Alchemy Machine in prototypers & stations - for unlocking all of the advanced crafting recipes
Crafting something new will give you a sizable +15 sanity for every new item you prototype. You can see which items you haven't crafted yet to benefit from this sanity gain with a light bulb next to them. Crafting just a backpack, rope, spear and log suit for the first time will get you +60 sanity. Use this sizable sanity gain the best by ignoring your sanity for the first few days and focus on other things then go on a crafting spree later when you need those items more.
- using traps to catch smaller creatures such as rabbits, frogs or spiders.
- baiting moleworms with rocks on the ground to then shank them
- luring a gobbler toward you by dropping a berry on the ground to then shank them
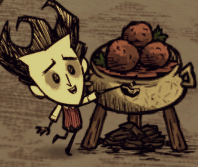 Once you have meat put a single piece of any type in the crockpot, combine it with almost any 3 foods (like berries, roasted birchnuts, mushrooms, butterfly wings or even ice) in the crockpot to create the easiest and most flexible dish for hunger you can make, Meatballs! Meatballs can restore a great +62.5 hunger!
Tip: 75 hunger points = 1 full day for most characters! At 150 hunger that leaves you 2 whole days without food before starving, so plan your meals accordingly.
Need some healing? Try trail mix! The cheapest recipe to cook trail mix is with 1 roasted birchnut, 2 berries and 1 stick. Trail mix doesn't give much hunger, but it heals for a nice +30 HP.
The power of the crockpot is great! Learning crockpot recipes like these can be very helpful for turning less useful food into something better! I suggest looking at a few other guides or even the wiki to help your cooking. This guide will go over some of the best recipes very loosely.
If you want a quick reference for the best recipes, try this guide:https://steamcommunity.com/sharedfiles/filedetails/?id=1937832167
- Cooked green mushrooms
- Cooked cactus is great for sanity!
- Taffy by cooking 3 honey + 1 stick in the crockpot
- Sleeping in a straw roll trades -3 hunger for +2 sanity every 3 seconds. Worth it? Not really~
- If you can recruit a pigman by feeding one with a piece of meat and stand very close to him you can gain +25 sanity every minute PER PIG. The problem is that pigs don't like pervs in their space and will back away, however if you get them to chop trees with you they don't mind you breathing down their necks. Friendship! You also get some wood out of the deal.
 If you're desperately low on sanity you can pick flowers for +5 sanity a pop as a last resort. Please make sure to leave a few flowers scattered around for those dee-licous butterfly wings. Picking 12 flowers will net you an instant +60 sanity and you can make a garland in the clothing tab for a measly +1.3 sanity every minute. It can give you a total of +80 points of sanity if you wear it for its 8 whole days.
The best time to pick flowers is away from any area where players are or pick them in winter since butterflies don't spawn with spring growing more around the corner. Don't pick flowers when you don't need them.
Tip: Blue mushrooms are great and versatile. Eating one raw will give you a good amount of health and hunger for a small sanity penalty. When cooked it can be a lesser version of cooked green mushrooms. They only appear during the night.
- Prototype a backpack
- Learn to kill a butterfly
- Make some meatballs (1 of any meat + 3 fillers like berries in the crockpot)
Chapter 1.5 - A Busy Body
This small filler chapter gives advice on a few more specific things this guide didn't get to in the previous chapter and how to be more productive. No goals here, just some specific info and advice. Sorta optional.
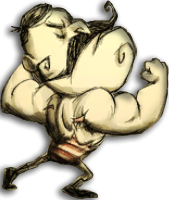 If you find yourself with full stats, a good stockpile of food and generally in a great position don't let it go to waste. It can be easy to slump down and ride it out in such positions, but use this good time by just doing anything you want. Things like:
 - Expand.
- Build things.
- Collect and stockpile a few resources you're low on for the future.
- Prepare for something big you plan on doing.
- Explore more parts of the world.
- Work on a giant project.
- Discover something new.
- Practice things.
- Make a mark on the world.
- Or just screw around and have fun!
- At central location that's easy to get back to from anywhere
- Has a variety of natural resources and biomes nearby to easily get when needed
- The distance from resources you can't move (like cactus or reeds)
- How important some natural resources are to you
Tip: You can precraft structures! Before placing a structure down simply right click to cancel it! The resources used to craft the structure is consumed out of your inventory and the structure is stored in your crafting menu to be placed down later. Useful for rushing an alchemy machine and placing it down later where you want to start settling down.
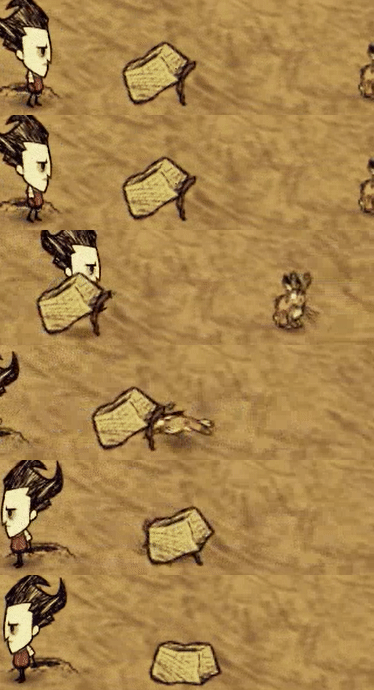
Tip: Low on food? Don't be afraid to cook and eat monster meat in desperate times. The only penalty with eating cooked monster meat is -10 sanity and -3 HP to gain almost +20 hunger. (unless you're Woodie or Webber)
 Space burnable objects and structures apart! Don't build everything in one large cluster unless you have specific tools that allow you to do that without worry. Instead try spacing things in many smaller clusters at first. This way it can prevent a fire from spreading and destroying everything from just a single small flame.
You can use a pitchfork to get an idea of how far fire spreads with being able to see and dig up turf tiles with one. Fires wont spread if an object is around ~2 turf tiles away.
A watering can is an easy way to control fires with. You can use poop to snuff out 1 object on fire too.
- Starting Biome: Where you spawn at from the portal. It has lots of mini areas with forests, rabbits and a large variety of resources around it in the green grassy areas. Great for gearing up with the plentiful resources and getting ready to explore other biomes.
- Mosaic Biome: Almost always connected with the starting biome somewhere. It can be noticed from the many scattered rocky and grassy ground there with holes in the land. Contains a mini rocky area with a good amount of gold boulders and has pine trees sprinkled in it. Usually contains a graveyard and meteor field. Great place to tech up with early on!
- Forests: There's many types of forests, but they always contain at least a few spiders, pig houses, twigs, red+green shrooms and berry bushes. Oh and TONS of trees of course.
- Decidous biomes: The red floored forest of birch trees! There can be up to 2 in the world and 1 will have pig king with many pig houses around. Can contain many types of mushrooms. Has some berry bushes and twigs scattered around.
- Savanna biome: The orange tinted grassy area. Holds nothing but heaps of grass then some beefalo, rabbit holes and the rare spider nest or forest-like area. There might be another similar biome that instead has more rocky and grassy turfs with 3 walrus camps and tallbirds.
- Swamp biome: Purple grounded marsh with tentacles, spiders and merms! Oh my! There's many reeds and ponds in this area. Careful!
- Desert biome: There's 2 types of deserts: D-fly or oasis desert. All deserts have plenty of cactus with some rocks and bones in it. D-fly desert has tumbleweeds, hound mounds and of course the dragonfly arena. Oasis desert has volt goats, buzzards and the oasis pond with green ground somewhere in it.
Tip: You can follow the edges of the land when exploring to guarantee you find every biome and maybe even quicker too. You might even see another biome across the waters to take note of. It can still be a long journey of 5-10 days to map out the entire land like this though so be prepared if you do.
Chapter 2 - Ruff and Tuff
This chapter explains how to equip yourself for battle and the basic idea of kiting for combat to plunder food and loot.
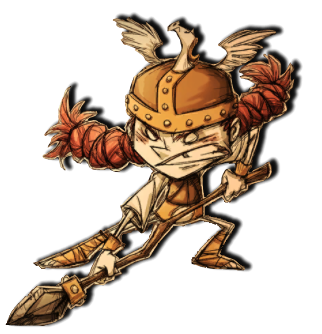 Most foes can hit VERY hard so crafting armour like a log suit can help you a lot!
A basic log suit gives you a great 80% damage reduction! Just be wary of an armour's durability, but if it does break and you have another backup in your inventory it will be auto-equipped onto you! Pair this with a spear and you can easily take on smaller threats like a few hounds while taking minimal HP damage.
It can be helpful to create a stockpile of emergency fighting gear to rely on from any surprises.
Tip: An easy strategy to keep your backpack is to equip a log suit from your inventory before a fight then pick your backpack up afterwards.
Tip: A player with 1 HP is better off than a dead player. Don't fight if death is certain. You can run from most fights and attack them later.
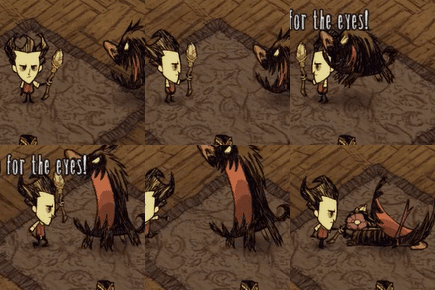 The basic idea of kiting is to B.A.R.:
- Bait out an attack by getting in an enemy's attack range
- Avoid that attack by moving out of its range before the attack actually hits
- Retaliate right after an enemy attacks, exploiting that your foe has a cooldown before they can attack again
- Retreat and repeat to be ready to dodge their next attack by running out of its range again. Repeat these until you are victorious!
Tip: Every foe is different. Some have short attack cooldowns while others have long cooldowns. Try to get as many safe hits in at once depending on the enemy.
Ever played an RPG where you have abilities, but they have a cooldown before you can use them again? Think of that, but with every enemy in DST having that with their basic attacks. Attack when they can't!
Take note that most foes and your character has to stop in place to attack.
Stay calm. Standing still then stepping directly away from your foe can be an easy way to bait and avoid their attack.
Kiting is a skill that you can only improve the more you do it. So grab some armour for protection and give it a go on easier enemies. Extra movement speed can make kiting easier, but lag can make it harder. Using the WASD keys is necessary because if you click anywhere to move while you're attacking you will just attack your target again and not move to where you clicked. Annoying.
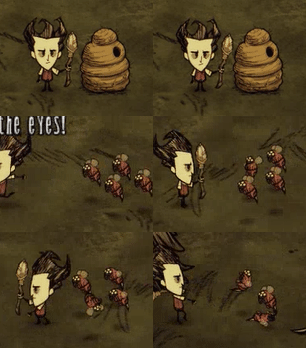 You can practice your movement and attacking skill with bees if you wish. They are slow, stun-lockable foes with terrible range and damage so kitting multiple bees can BEE easy. Try practicing by attacking a bee hive to anger a bunch of bees, retreat then attack using your F key to strike the nearest bee once then back off before the other bees find their stingers in you. Repeat over and over to get a feel of how to move plus when your own attack hits.
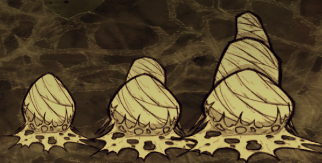 If you wish to clear out a spider nest, take note of its tier. Tier 1 is easy with holding only 3 normal spiders. Tier 2 or 3 nests however have warriors and these beefy spiders have 4 times the health of a normal spider with a leaping attack. To make it worse multiple of these warriors can come out at once if you attack a spider while near the spider nest! Yikes!
To take on these big boi spider nests you can lure spiders out by stepping onto their webbing, then get their attention and walk them away from the nest. Once far enough to not get the nest's attention, (a few tiles from the webbing) strike them down then collect your loot. Repeat this until the nest is emptied and clear of any more spiders if you step on its webbing. The spiders will spawn later for more loots!
Note that a tier 2 or 3 will always hold 1 warrior if you attack the nest. Destroying a tier 3 nest rewards you with lots of silk and a brand new spider egg for you to plant a new nest anywhere.
Tip:Spiders are some of the few enemies that can get stun-locked if you keep hitting them, so no kitting necessary for a lone spider. 3 good hits from a spear will take care of one, just watch out for their friends behind them!
 Watch out during the dusk or night time since spiders roam out of their nests. If you attack a spider, then any other spiders nearby will target you. This can be very dangerous when there's a large cluster of spider nests in one area.
If you find yourself against hounds in the early days take the initiative! There's so few in the first days that if you kill them fast enough as they come in 1 at a time you won't have to fight multiple at a time.
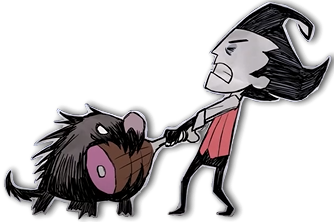 You can safely kite hounds and get 2 hits in for a lone hound after baiting and dodging their bite. After getting those 2 hits on the hound retreat and bait out another bite before you attack the hound again.
Taking on a few hounds at once can be much more tricky to kite... you should run and wait for a safe opening to hit a hound once or maybe even twice if the other dogs are busy after baiting the hound's attack out. Baiting out multiple bites and dodging them all at the same time to sync up their attack cooldowns can help.
Practice makes perfect ALOT here!
Try to lead them around the edges of the land for their long animations of jumping in and out of the sea.
Later hound attacks get more frequent and dangerous! Get creative! Lead them into tooth traps, tentacles and whatnot if you aren't ready for a fight. They are aggressive and will eventually start barking and then target the closest mob nearby. Use this to make them attack other creatures to fight.
Tip: WATCH OUT! You can sometimes go against red or blue hounds. They have less health than regular hounds, however with a special effect upon their death. Red hounds can burst into flames and burn things near while blue hounds start to freeze things near after its death. (including other hounds!) These hounds can drop gems. Worth it!
- Start learning how to kite by trying it on single enemies (Bait, Avoid, Retaliate, (B.A.R.) retreat and repeat!)
- Kill a hound wave
- Empty a tier 2 or 3 spider nest of spiders
Chapter 2.5 - Mean Cuisine
"Small" filler chapter on a few things. It explains how to hunt a koalaphant (with the dangers of a surprise) and a slight look on how the crockpot works with easy recipes.
 Along your travel you may have seen these small suspicious dirt piles. Interacting with them will reveal a footprint that points in a certain direction. Following the trail and revealing enough of footprints will spawn a beast at the end of the trail and make your character exclaim there's a beast nearby.
Tip: Following a trail in the dark can make the dirt pile harder to find and also make it harder to see what beast you really discovered at the end of the trail. Try to only start following one when you have enough day or dusk time.

One of the beasts you can find from following these tracks is a koalaphant! Killing this sucker will give you 8 big meats and a trunk. A great haul! The trunk can be cooked for some great stats.
Koalaphants will flee from you and prevent you from easily attacking it. Try to attack it with a ranged weapon (like a boomerang), flank it with a fellow survivor or let it sleep during night to stab it easily. You can also manage to trap it on the side of the land.
As soon as it gets attacked it gets aggressive to it's attacker and won't flee, so get ready for a fight! After it's attack you can easily get 5 hits in and with enough speed, maybe 6 before it can lunge at you again to kite it.
Koalaphants can also be ran back close to your camp to be slaughtered later for fresh meat, all the while producing a small constant supply of poop for fertilizer and fires.
- Ewecus - Has very low HP, but can snare you from range. Other survivors or even pigmen can help you get unstuck. Careful. Notably drops steel wool on death.
- Varg - A very large hound and can be very dangerous. Decent HP and can spawn hounds. Has it's own long range bite. Can chase after you very far. Doesn't drop anything special, but if you want to rid a varg from the world bring some pals to distract the hounds.
Tip: Vargs are big! They can't pass by 1 block holes in a wall, but will continue to run after you like it can with its dogs not far behind. Using this to your advantage and some creativity, you can trap a varg for a source of infinite hounds.
 When cooking in a crockpot many things matter in what food will be made:
- The "class" of food (like meat, vegetables, fruit, fish, eggs, etc)
- How many "points" of value that food gives to that "class" (like big meats give more meat points than smaller meats).
- Some specific foods matter to make their own recipes like trail mix requiring roasted birchnuts + berries to cook
- Most recipes also have filler restrictions that don't allow certain food types in their recipes. This will always prevent you from making trail mix with 1 meat in the recipe. Another example is that meatballs have a filler restriction of twigs, so you will never cook meatballs if you put even a single twig in the recipe. You will make the lesser kabobs instead.
Big meat and monster meat gives 1 point of meat, while small meats like morsels, frog legs, drumsticks only give 0.5 points of meat.
 Knowing this you can cook a meaty stew with:
- 2 big meats and 2 morsels in a crockpot to get exactly 3 points of meat needed for the stew
- OR 1 monster meat with 2 big meats and a filler (like a berry or ice)
 Another example is with honey ham for a nice 75 hunger and 30 HP. Honey ham needs 2 points of meat and atleast 1 honey.
- Putting 1 monster meat and 2 small meats with honey will cook one
- 1 monster meat and 1 big meat with 2 honey to cook another aswell!
Having less than 2 points of meat will create honey nuggets instead giving you almost half the amount of stats. If you have a LOT of honey however, you can put a single piece of meat and 3 honey for easy honey nuggets.
Experiment when you have the food to do so to discover and open up your options to become a culinary master! Those above were the most important to know the requirements for.
- Butter muffin: butterfly wing + any veggie + 2 twigs for good hunger and some HP
- Froggle bunwich: frog leg + any veggie + 2 twigs for good hunger and some HP
- Spiralled Tubers: potato + 2 twigs + filler (berry, ice, etc.) for good hunger and some sanity
Some of these recipes can take a long time to cook so try cooking these last and pick them up later. Multiple crockpots can help with the downtime.
- Hunt and defeat a koalaphant
Chapter 3 - Mind and Body
This chapter is all about better ways to improve your mental and bodily health using the resources you've gathered in past chapters.
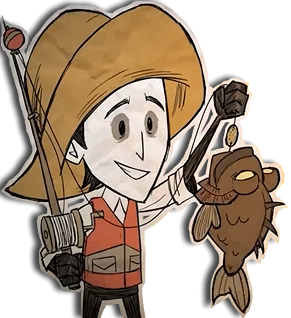 Are you a bit dinged up? Go out for some fishing! Building a fishing rod with 2 silk and sticks will allow you to fish in the ponds around the world.
You can even fish in the sea with a proper sea fishing rod made with a board and 6 silk. Make sure to put some bait and a bobber on it, such as a simple twig and seeds. Build a tackle receptacle for crafting better baits and bobbers.
Are you a bit dinged up? Go out for some fishing! Building a fishing rod with 2 silk and sticks will allow you to fish in the ponds around the world.
You can even fish in the sea with a proper sea fishing rod made with a board and 6 silk. Make sure to put some bait and a bobber on it, such as a simple twig and seeds. Build a tackle receptacle for crafting better baits and bobbers.Tip: For sea fishing let the fish wear themselves out when they try to swim away.
After getting some fish, head over to your friendly neighborhood crockpot. By putting 1 fish morsel, 1 stick and 2 fillers (berries, veggies, ice, etc.) in the crockpot you'll make fishsticks! Fishsticks heal a great 40 HP along with an almost equal amount of hunger.
 Fishsticks can be easy to make for some quick healing, however they go stale in a short 5 days massively reducing the HP they heal. Eat'em up!
If you have lots of fish you can stick 3 fish and a monster meat in the crockpot for Surf'n'turf. It gives 60 HP, 37 hunger and 33 sanity!
Note that you can sometimes use fish as a regular small piece of meat for recipes like meatballs. So 3 berries + fish = meatballs! Handy!Tip: Got a few extra fishsticks and you're full health? Craft a telltale heart for reviving ghost players in the future then eat a good healing food like fishsticks to get right back to full health. B-B-BONUS TIP: The player who revives a ghost player gains an instant +50 sanity. Let those that need sanity revive.
 You can plant your own flowers! Crafting a bug net with 2 silk, rope and sticks will allow you to catch live butterflies and other live bugs. Live butterflies can be planted (like pine cones) to make brand new flowers that allow more butterflies to spawn in the long run. If you have the silk why not make a little flower garden nearby and let those butterflies thrive!
...before you rip off their wings.
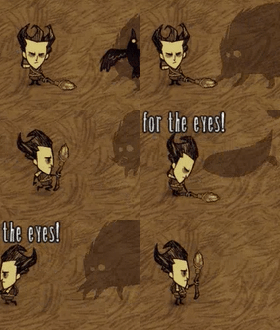 When below 15% sanity shadow creatures can start targeting you. You'll know when they can when dark red lines grow out around your screen. You can fell these dark creatures by kiting them with a trusty weapon at your side. Same as always, bait out their bite then strike them once, except watch out for their teleportation once you do hit them and any other creatures behind them ready to bite ya.
 Killing your nightmares can reward you nightmare fuel for strong tools later on and also rewards you a small amount of sanity depending on the type of creature. You can use this small sanity gain to get above 15% sanity to temporarily not get attacked. There's two types of shadow creatures, a crawler and a terrorbeak. The slow, thicc crawlers that give 15 sanity and the fast, slim terrorbeaks that give 33 sanity.
If you go up against multiple nightmares then make note of these 2 strats:
Killing your nightmares can reward you nightmare fuel for strong tools later on and also rewards you a small amount of sanity depending on the type of creature. You can use this small sanity gain to get above 15% sanity to temporarily not get attacked. There's two types of shadow creatures, a crawler and a terrorbeak. The slow, thicc crawlers that give 15 sanity and the fast, slim terrorbeaks that give 33 sanity.
If you go up against multiple nightmares then make note of these 2 strats:- If there are terrorbeaks and crawlers use their movement speed against them by running away from the slow crawlers and fight the terrorbeaks alone.
- If there are many crawlers then worry not for they take up alot of space and can make the others behind it from reaching you as easily.
Tip: If you're fast enough you can hit a shadow crawler while it's trying to get to you then abuse their small range bite by backing off quickly to avoid their attack and then hit them again. This way you get 2 hits in before they teleport making it a faster kill! It can be very hard to do this with those fast terrorbeaks however, but it's possible.
 Certain clothing you can craft give small amounts of sanity overtime, thus making your sanity management easier. A top hat in the clothing filter can be made to get a fair amount of sanity simply by wearing it. You can make a top hat out of 6 silk that gives around +3.3 sanity every minute. Wearing it for its entire durability of 8 days will give you a total of around +211 sanity. Not bad!
Tip:You can craft a sewing kit to repair most clothing items for a certain amount.
 Got tons of food for hunger, but not a ton of sanity or HP? Try topping yourself off with a tent! You can build a tent with 6 silk, some rope and twigs. You will need an alchemy machine to build it.
Sleeping in a tent at dusk or night trades -1 point of hunger for +2 HP and +1 sanity each second. Not a bad trade to top off your health. You can start cooking some food in a crockpot before sleeping to have food ready to eat after a nice snooze.
Alternatively if you have more wood than silk you can make a siesta lean-to. With 2 silk and 4 whole boards with some rope you can build a siesta lean-to. It functions the same as a tent except it takes 66% less hunger points away while sleeping and can only be used during the day.
Tents can be better in winter and spring, while siesta lean-to is best in summer then autumn from how the day, dusk and night cycle changes.Tip:A new tent or siesta lean-to starts with 6 uses. Each use allows you to stay in the tent forever, however you are limited by the time phases of the day and your hunger. Make each use count when you use it.
Tip: The safety of sleeping can be a great time to take a breather to open the map and plan what you want to do next. Make sure you have everything you need.
- Cook some fishsticks (1 fish, 1 twig, 2 fillers)
- Kill a single shadow creature without taking damage by kiting (bait attack, get out of the attacks range before it bites, attack back!)
Chapter 4 - Home Sweet Home
This chapter shows a bunch of useful things to take advantage of for making your base a home and some inventory tips.
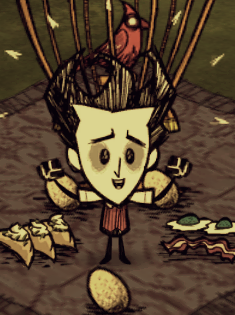 EGGS! Having eggs allows you to make 2 really good crockpot dishes, but how to get eggs? BIRDS!
A birdcage can be built with 6 gold, 2 seeds and 2 papyrus (from refining reeds in the swamp) in the structures filter. You can catch a live bird using some silk and sticks to craft a bird trap to eventually catch a bird in.
Placing a live bird in a bird cage will allow you get eggs by feeding the bird meats! Even raw monster meat!
Eggs take a long time to spoil and start fresh after produced from a birdcage. Eggs can last 20 days by themselves before spoiling. Eggs can also be traded to the pig king for a small amount of gold.
With eggs you can make long lasting pierogies and bacon and eggs in the crockpot.- Bacon and eggs can be seen as an upgraded meatballs and can be made with atleast 1.5 points of meat and 2 eggs for a great +75 hunger and +20 health. 'Cheapest' recipe is with monster meat and a small normal meat with 2 eggs.
- Pierogies are basically better fishsticks and can be made with 1 piece of any meat, 1 egg, 1 veggie and 1 filler (berry, egg, veggie, etc.) for that nice +40 HP and almost the same amount of hunger. Cactus can be used as a veggie.
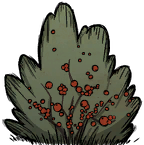 If you see lots of saplings, grass and berry bushes far from your home you can pick them up to plant back closer to you with a shovel. Make sure to fertilize grass and berries with rot or manure, then you'll have an easy source of basic materials and food. Placing a berry in a nearby fenced in area when collecting berries can get you some easy gobbler kills during day.
Tip: You can craft a poop'n'a'bucket with 3 poop, bone shards and wood to get 10 fertilized plants instead of just 3 from using the poop. Hammer bones around the world or your dead comrades to obtain the bone shards. You can also hammer spoiled fish for a decent chance of bone shards.
- Bee Boxes - Can provide you with a fair amount of honey from just catching some live bees with boards and destroying a bee nest for honeycombs to make. BEE sure to plant many flowers nearby for honey production! 6 flowers per bee box. Place these just far enough to not get assaulted by bees.
- Drying Rack - Can turn regular meat into fresh jerky which spoils slowly and gives a small amount to all of your stats. Jerky can also be used in the crockpot as meat. Great when you have a lot of big meats. Drying a single big meat can give +20 HP, +15 sanity and the same hunger.
- Farms - Made from a riga-ma-jig with the help of a hoe. Be sure to shovel up any debris and weeds up with a shovel so they don't cause trouble.
Farms can slowly turn seeds into unique crops you (almost) can't get anywhere else with sunlight. Some crops have unique recipes like dragonfruit. 1 dragonfruit + 3 sticks in the crockpot will give you an awesome meal. Some crops like tomatoes or potatoes can heal a decent amount of HP after you cook them. Pumpkins can give a good amount of hunger by themselves.
If you want more details about farming look at the section at the end of this guide called "Extra - Farming the Land"

While these food sources should not be entirely relied on they can be nice to have and be used to create unique food in the crockpot or recycle almost spoiled big/small meat.
You can find lots of useful stuff when traveling around and with the limited inventory you should hold only what you need with any of the tools you plan on using.
The "bear necessities" you need at any time is 1 or 2 light sources, armor+weapon, any useful clothing and then some food if you're traveling far. The light source can simply just be some wood and grass to have for some quick and easy fires anywhere, anytime OR just have a supply of grass and twigs for torches to keep moving around with.
Drop off your stuff at base. Use it as a drop off point for crafting tools to then go out and do what you plan on doing. You don't always need a full stack of grass, twigs, logs or flint at all times. Why carry flint if you already have all the tools you need or only carry about 6 of them so they're easy to put down for something better when your inventory is full, while the rest are safely put in a chest at base. Generally try storing materials that craft very few things at base.
All of these above and more to discover that works for you are great to consider when managing your inventory.
Why not keep it tidy also to make it easier to find things? Make a system to organize your inventory. My organization goes with basic resources to the far right, any equippable items to the far left and food or other resources in the center. If I have a backpack then rarer items and most of my non-healthy food items go in it. (to not get eaten by something like a spider upon my unfortunate demise)
Follow these and you can get a basic inventory like this:
Just look at all of that space ready for tools, loot and food! Ready for travel!
 Spoilage can make it hard to have freshly stored food at times. Building an ice box can make food last twice as long, however you need gears.
If you're lucky in your adventures you can find some clockwork chess pieces to kill and acquire some. There's three types: knights, rooks and bishops. The first can be killed like a high HP pigman, while the big rook and bishop are just more easily dealt with by tanking a few hits with armor to destroy them ASAP. Huzzah! Gears!
 Every clockwork has 900 HP and decent damage. Best to not engage them without sufficient armor, health and a good weapon.
If you're lucky you can also get gears from tumbleweeds or by digging up graves.
Tip: Keep raw food as long as you can and only cook it when you need to. Cooking food boosts its freshness and can help prolong the lifespan of food the most if cooked when it's nearly spoiled. Eat food with the least amount of freshness first. The notable exception to this is meat. Cooked meat lasts much longer than raw.
- Cook pierogies or bacon and eggs
- Replant and fertilize berry bushes closer to you
- Dry some meat on a drying rack
- Defeat a clockwork
Chapter 5 - Fighting the Darkness
This chapter shows getting better light sources from down under and a better weapon or armor. (and bunnies!)
 If your world has caves you can find an incredible resource for light there, light bulbs! Going down into the dim caves you may find a few light flowers at the entrance. Picking these flowers will net you 1-3 light bulbs and they regrow somewhat fast so pick as many as you can! They do spoil so stash some of them in a fridge for later.
 With light bulbs you can prototype lanterns for 2 light bulbs, 3 rope and twigs at the alchemy machine. Lanterns are refillable and portable light sources that can last for more than a whole day! You can drop'em on the ground to create a small and flameless campfire in pitch black darkness! Very useful! More light bulbs can restore the durability of these lanterns.
 If you're not too thrilled of your light source being handheld go for the next big thing: headheld with a mining hat! Above ground you can net fireflies with a bugnet at night; combining 1 of these with a straw hat and gold will get you a mining hat. It can easily be refilled with light bulbs!
Light bulbs can be placed on the ground for an emergency, last resort light source.
 Making a pigman eat 4 monster meats will transform it in to a fearsome werepig! Killing this beast will net you 2 big meats and a guaranteed pigskin. 4 monster meat with some fighting for 2 big meats and a pig skin, not a bad trade! Werepigs have more HP and can hit harder than regular pigmen, however they don't kite you after they attack making them easier to kite yourself!
Tip: Having food items on the ground will make a werepig immediately go to eat it and if it's a good non-meat food it can cause the pig to produce manure for every piece of food it eats. If you find enough light bulbs underground, you can drop a stack of 40 near a werepig for heaps of poop!
Tip: Pigs can change in to werepigs on a full moon if not in the safety of their homes. Full moons always appear on days that end in the numbers 11, 31, 51, 71, 91. For example a full moon will be on day 11 and 111 and 511 OR on day 31 and 131 and 531.
You can build a large amount of pig houses in an area and have a fenced in food item (like rot) to attract pigmen for access to pigs throughout the day. Similar to gobblers trying to get to a fenced in berry. They may even be a helpful deterrent against hounds provided there's fire protection ready.
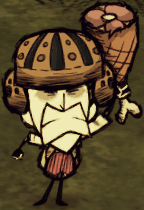 Now with pig skin you can create head armor so you don't have to give up your backpack. A pigskin with rope can be used to make a football helm! Identical to the logsuit in terms of protection except on your noggin.
Having a good supply of pig skin is very helpful, so try to collect some as often as you can. You can get a good amount of pig skins simply from hammering pig heads.
If you're feeling murderous you can use 2 big meats, pigskin and twigs to make a mighty hambat! Unlike most weapons a hambat has unlimited uses, but with a twist... it can degrade and spoil in 10 days! A freshly crafted hambat will do 59.5 damage a hit compared to a spear that only does 34 damage. Watch out though for its freshness determines its damage potential, going below the damage of a spear in its final day before it spoils and turns to rot. An excellent weapon if you plan on killing a lot. Food indeed makes more food.Tip: 4 monster meat + pig + fighting = werepig loot for another hambat. Make use of your hambat to get more monster meat for even more hambats down the line. Building a pig house or 2 a small walk from base for trading extra monster meat you have can be handy.
 Down back in the caves you can find rabbit hutches that house bunnymen in the grassy area. Similar to pigmen, BUT if you have meat in your inventory then you're a murderer. If a single bunnyman smells the meat on your person you'll find ALL the others near charging right at you and it just happens that if there's one bunny hutch then there's probably another close by. Be careful!
They also go back in their hutches come day, unlike pigs, and can drop a carrot, meat or bunny puff when killed unless you have low sanity then they'll drop monster meat and 2 beard hair. Pretty decent considering they respawn in a very fast 1 day!
Hammering their hutches, preferably at daytime when they're sleeping, will net you half the resources it takes to build one yourself. You can place them above ground for easy access. Be sure to place it away where your fridges and crockpots are so your cooking isn't interrupted by an angry, adorable vegan.Tip: Placing a few hutches near an open sinkhole will make bats no issue at all. The bunnymen will attack the bats as they spawn out of the sinkhole and won't eat the meat dropped by the bats either. Nice!
Bunnymen are the only mob in the game that flees from you when getting at critical health. If you have enough damage you might be able to kill them before they turn around and run. Take care if you do fight them, they can easily overwhelm you with their speed and numbers very fast.
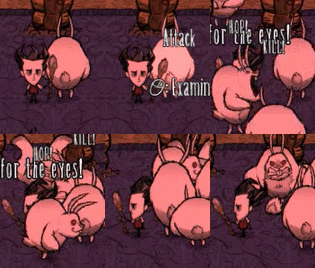 You can recruit bunnymen with carrots. Recruiting some can be useful for doing a trick to get them to fight one another by feigning an attack. You can do this by targeting a mob then moving away before your attack actually hits. Feigning an attack while you have a few bunnymen recruited will make all nearby bunnies attack your target... even if it's one of their own. Careful for even recruited bunnymen will attack if you have meat in your inventory.
Tip:Trap bunnymen in a pen or using the sides of the world so when they do flee after getting low HP they have nowhere to run.
- Craft a lantern or mining helm
- Kill a werepig without taking a hit by kiting (B.A.R. with 2-3 hits then retreat)
- Craft a football helm or hambat using pigskin
- Hammer 2 bunny hutches in the caves and then build one on the surface (optional)
Chapter 6 - The Finer Things (optional)
This optional chapter goes into some quality of life changes then we'll finally get to talking about the seasons! Also more of a placeholder.
 Having a safety net in case of your death is a great thing to fall back on. If you built a prestihatitator you can craft a meat effigy and life amulet to revive yourself to suffer no loss of max health.
The less expensive meat effigy only needs 4 boards, 4 beard hairs and -40 HP (just like telltale hearts) to build one. Beard hairs can be obtained from rabbits and bunnymen when your character is at low sanity or from Wilson's beard.
The more expensive life amulet needs some gold, nightmare fuel and a red gem to craft for a revival tool you can keep in your inventory. (keep it out of your backpack so you can haunt it as a ghost right after you die)
- ActionQueue Reborn OR the more updated ActionQueue RB2 - Lets you queue up many tasks to automatically do and lets you type to your fellow survivors while doing those tasks!
- Geometric Placement - Allows you to place structures on a grid for more consistent building.
- Reset Camera DST - Resets your camera to default with a press of a button so you can communicate directions better. Useful for those that turn their camera a lot.
- Wormhole Icons [Fixed] - Puts icons on connected wormholes after traveling through them so you don't have to remember every single wormhole you go through.
Once a minisign is placed it can be drawn on with a feather pencil. A feather pencil just needs a jet feather, charcoal and a single stick to craft in the tools tab. Boomerangs can help kill crows for feathers.
To draw on the minisigns you must drop the item you wish to draw on the ground near the sign then you can use the pencil on the sign to draw that item. The pencil will be consumed after drawing. You can always dig up minisigns to be moved elsewhere and the drawing will remain on it.
Chapter 7 - Seasons: Against the Elements
This chapter explains how to prepare before winter hits after 20 days of Autumn and how temperature, thermal stones and insulation works together. Just a bit technical, but very useful to know how it works.
- Lots of logs for the fire
- A decent stockpile of twigs, grass, flint and especially rocks.
- Some silk
- Berry bush farm ready to be picked before winter hits to harvest if low on food later in winter
- A stockpile of food in the fridge with crockpots ready
- A tent for warming up and recovering
- A bird in a cage or a few drying racks

Getting some beefalo wool can allow you to craft some great winter clothing. You can get wool from shaving beefalo during the night, just be wary if they're in heat. With silk and wool you can make a winter hat for a decent amount of insulation. If you manage to get a beefalo horn you can craft a very warm hat.
Having a stone firepit or 2 to fuel in frequented areas around the map can help you keep warm when traveling.
Having a campfire pre-crafted or burning lone trees with a torch can help you from freezing and warm you up. To pre-craft a structure like a campfire simply build the campfire, but instead of placing it down with left click just right click and you'll have a campfire ready to be placed at anytime. (even after you die and get revived!)
A good thing to do before winter is to collect a bunch of birchnuts from birchtrees since they can last up to 40 days if put in a fridge. Not only do you get 2 birchnuts per grown tree in autumn, but you also get wood for the fire for the coming winter. Just collect them before the birchtrees start losing their leaves. Beware and be careful though.
Having access to a spider den nearby to clear out every so often can give a good supply of meat to be cooked and fed to your bird for eggs or combined with 3 ice for meatballs. Glands and silk isn't bad to have either.
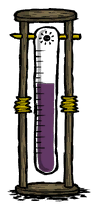 Temperature is a stat tied to your character that determines whether you take freezing or overheating damage if you get cold or hot enough. Note that getting wet can cause your temperature to drop enough to start freezing.
You can raise your temperature slowly by standing next to a heat source (like a fire/burning tree) or lower your temperature slowly by a cold source. (like an endo-fire) In extreme conditions like winter and summer, however you need a way to maintain that heat or cold or else you'll be stuck near a fire.
There's 2 ways to maintain your temperature while you are away from hot/cold sources: a thermal stone and/or insulation!
 Thermal stones can be crafted with a pickaxe, 3 flint and 10 stone from the survival tab. They can slowly store heat/cold sources around them, whether they're in your inventory or not. After becoming hot/cold it can then warm/cool you up to a moderate temperature.
T-stones will continue to warm/cool your character to maintain your temperature until they finally lose all of their heat/cold overtime then your character will begin to lose/gain temperature normally again. You can place a t-stone near a roaring firepit in winter to do a small task away from the fire then return to a warmed t-stone to get all snugly warmed back up again with your pet rock and go along your merry way.
There are 5 stages of a thermal stone:- Orange/red - HOT, HOT, HOT and warms you up
- Yellow - warning that it will turn neutral grey soon
- Grey - neutral and provides no temperature
- Light blue - warning that it will turn neutral grey soon
- Deep blue - frozen cold and cools you down
When t-stones turn yellow or light blue get ready to find another source of heat/cold before a minute passes or the thermal stone will return to its neutral temperature and lose durability. You can however repair almost broken thermal stones to full with... sewing kits... somehow? Whatever it works. Thermal stones produce a small amount of light, when heated to orange-red, that can save you from Charlie in the dark. Useful! You can also see how much light is being made to show the amount of stored heat left in the stone before no more light is made and the stone turns yellow-warm.
Note that certain sources of hot/cold warm the t-stone up more. Like a firepit only warms a t-stone up to halfway compared to the heat of a burning tree.


Winter insulation can be gotten from wearing warm clothing or even gained from certain characters with a beard.


Summer insulation can be gotten from wearing cool clothing or from umbrellas and such to keep the sun off you.
The best way to use insulation is to get as hot or cold as you can then go out with your clothing equipped.
So if you do stack lots of insulation clothes on your body you most likely don't need a t-stone then. You can still benefit by equipping insulation on after the t-stone turns yellow to save heat if you know you aren't getting to a heat source soon though. Having some smaller amounts of insulation on however isn't bad with a t-stone.
Lots of insulation from high tier clothing can make you last much longer in the weather, but needs to be on your equipment slots at all times or you'll quickly lose/gain temperature without a source of heat/cold near. This can prevent you from wearing armor or a backpack when you need them.
- Craft a thermal stone (right before winter starts)
- Gather some wool from shaving beefalo while they sleep
- Survive the 20 days of Autumn (if you haven't already)
Chapter 8 - Winter is Here!
Tip: Tumbleweeds in the desert can be a reliable source of twigs and grass in any season.
Winter also allows ice hounds to spawn during a hound attack and even after winter in spring. Tracking a koalaphant in winter will spawn a special winter koalaphant which gives a unique winter trunk that can be used to make an incredible puffy vest that gives a great amount of insulation if you are keeping your inventory cleaned well enough to trade your backpack for. The other vest made from a normal trunk isn't worth it at all.
 The winter does bring pengulls and with pengulls comes tons of ice to mine. ice can be mined from glaciers for many useful things. It can be stored forever in a fridge for use in later seasons. Gather as much as you can. Ice also can be used on burning objects to extinguish them.
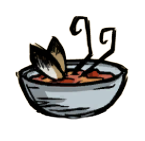 Ice can even be used as an easy filler for the crockpot. Be aware when trying to cook meatballs with ice. If you don't put enough meat when using 2 or 3 ice you'll get bunny stew, however the stew heals a good 20 hp for the cost of giving less hunger than meatballs. Cheap heals!
If you want to cook meatballs with ice be sure to put at least 1 big meat, such as monster meat, or 2 small meats with 2 ice.
Last and certainly not least: winter comes with cold weather, make sure to keep yourself warm with a t-stone and/or winter gear. Keep logs and grass on you to make a cozy campfire or bring a torch to burn lone trees/objects on the ground to keep your temperature high.
Tip: A good strategy is to place your t-stone near a lone tree then set it ablaze with a torch. You can collect anything around the area while the tree burns and warms up your t-stone. Once the tree burns out, grab your t-stone and go. A warmed t-stone from the heat of 1 to 2 fully burnt trees can last you almost 3/4 of a day. If your character starts freezing while the tree is burning just return to the tree. Your character's temperature doesn't matter when you hold a hot t-stone.
Other dangers other than the cold come out for the winter however...
 Walrus camps become active in specific areas around the map when the first day of winter starts on day 21. These camps house 2 ice hounds and mactusk (with his lil bro!) that will search for you around the camp during the day.
Mactusk has a chance to drop 2 very useful items when killed. A tam'o'shanter that gives insulation similar to a winter hat, but with a good portable +6 sanity gain every minute or a walrus tooth to craft, most notably, walking canes to travel the map faster. Both are very, very useful to have!
Mactusk doesn't fight like normal enemies though... he has a ranged attack! Be sure to have some armor on hand, just in case he gets in some quickscopes with his blow darts or his dogs get to you.
The easiest way to defeat Mactusk is to ignore his dogs and chase him far away from his camp until he gets too far from home and turns around to slowly walk back. This gives you a chance to kill him via melee! Once dead he will respawn 3 days later.
 There's something out there... breathing... menacingly!
Late in your first winter a player can get targeted by deerclops! Once deerclops spawns he she targets any structures nearby. A base wrecker! Getting away from your camp before she spawns or getting her attention by attacking can prevent her from doing any real damage.
Killing this big fella will net you lots of meat and an eyeball. This eyeball can be used to craft an eyebrella that is incredibly useful for the next 2 seasons! Felling this monstrosity can be quite difficult to the unprepared.
Deerclops has 4000 HP, a cone shaped AoE freezing attack with long range and a powerful insanity aura when near her. A mighty foe!
Being prepared can make this fight much easier. Bring the strongest weapon you can find with a few pieces of armor and healing. Prepare some sanity restoring food like jerky, cooked green caps and cactus to eat if you get attacked by shadow creatures from her insanity aura while fighting.
Deerclops can be kited even with her long ranged attack! You can get 2 maybe 3 easy hits right after baiting then avoiding her attack over and over. Alternatively having lots of armor, healing and damage you can just lazily but easily facetank deerclops with a nearby campfire to warm you up from her freezing attack. Multiple armed and ready survivors attacking at once can shred Deerclop's HP.
Tip: If you aren't prepared for this fight you can lure the deerclops away from your structures and get her to attack and aggro strong enemies with enough HP and damage to wittle her down. Tentacles can work! She can even topple trees and anger treeguards. Spider queens can even work just pick up the eyeball before a spider gobs it. If you're careful, other bosses can target her after she attacks them. Careful for she will rip and tear multiple weak mobs apart with ease.
Tip: Planting a bunch of pine trees 4-5 days in a long line before Deerclops spawns can allow you to lure her through all of them and topple them quickly for tons of wood.
- Gather a bunch of ice and put it in your fridge (like a full 40 stack)
- Kill mactusk and pray to the RNG gods
- Defeat deerclops
- Survive the 15 days of winter
Chapter 9 - Spring-a-ding-ding Baby
This chapter explains what spring does to change the world with its 20 days and how to deal with wetness.
During spring you will find that many plants grow back much faster. Use this to gather a bunch of grass, twigs and food. Also flowers slowly bloom around the world from all the rain.
Rabbit holes close come spring and bees become aggressive to attack anything that gets too close. Not the beeees! Beefalo will also always be in heat. Hunting tracks disappear faster and jerky takes longer to dry from the rain.
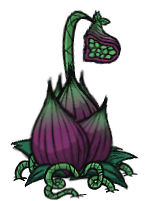 Lureplants can spawn nearby on any natural turf and grow many eyeplants to eat anything nearby. Get rid of these weeds as fast as possible before they eat and destroy anything useful. If you don't want them to spawn nearby somewhere then plant artificial turf like wood flooring. They typically spawn near items that players dropped on the ground.
Tip: Lureplants store the items their eyeplants eat for a short amount of time. Killing the lureplant will drop all recently eaten items, but wait too long and those items will be digested. Using this you can plant a lureplant in a large scattered field of grass/saplings and wait 2 days for the eyeplants to grow.. The eyeplants will collect anything nearby so if you're fast enough you can kill the lureplant to collect all of those resources.
Last, but not least spring will douse the world with rain making any items on the ground wet and may suffer penalties from being wet. Rain can also come with lightning and start a fire. Be sure to make a lightning rod to protect parts of your camp.
Rain can make fires burn out quicker. Even torches!
Wet items can suffer penalties like food spoils faster, wet fuel makes fires less efficient, slippery weapons can fall right out of your hand and wearing wet clothing lowers your sanity. Putting these items in a container will prevent them from getting wet or from staying under 35 wetness for your inventory.Tip: Items in a backpack are safe from becoming wet.
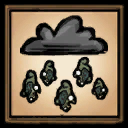 In spring, during a hard rain, you can also find frog rain. Yes, frog rain. Many frogs will descend upon the earth and wreak havoc. Prepare to run or have a few traps from your extra grass and twigs to capture a bunch of them for meat. Fighting a frog will make all the others aggro on you, so watch it!
 Your character can become drenched from all the rain and your inventory with it. Being wet enough can even cause to you to lose temperature and freeze! To remedy this you can wear something to resist the rain completely and then dry off very fast while near a fire. An eybrella or raincoat will give you 100% rain resistance when worn, but can be expensive to make.
If you aren't lucky enough to get an eyebrella you have 2 other good options: an umbrella or rain hat.
 A rain hat gives 70% rain resist and can be made with a few live moleworms, (from hammering them) bones shards and a straw hat. Great for shrugging off smaller showers. For stronger showers you can stand under a tree with this hat on and you'll have a 100% rain resist. Make a fire nearby with this 100% resistance to quickly dry off before the rain builds up on you too much and makes your inventory wet (35+ wetness). A rain hat will also prevent electrical damage!
 An umbrella gives a large 90% rain resist by itself for some twigs, pig skin and silk. Combine this with a helm or even a straw hat for 100% rain resist. Gotta trade your walking cane for it though. ;(
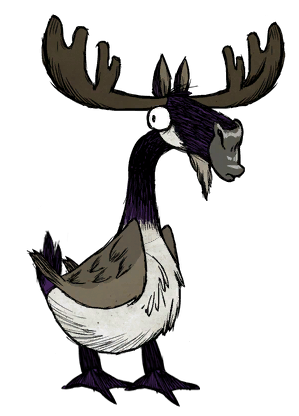 Moosegooses (meesegeese?) have a chance to spawn at all the nests around the world usually seen near ponds with carrots and berry bushes around. A moosegoose will lay an egg to eventually hatch babies.
A moosegoose is similar to fighting deerclops except with no AOE attack and has a massive 6000 HP with a honk ability that makes you drop your equipped hand item. Killing these big honkers will net you some meat, useful downfeathers and some very angry babies! You can use frog rain to easily swarm and kill a moosegoose.
After killing a moosegoose any babies left alive will become enraged and attack you. Their attack transforms them into a tornado that charges near your location. Their attacks can also spawn lightning! Sidestep their attack and follow them for they get dizzy at the end of their attack... the perfect time to strike back! If you get creative you can kill the babies before killing their mom to not deal with these Tasmanian devil rip offs! >:)
- Craft then wear good rain resistant clothing in the rain
- Survive the frog apocalypse
- Defeat a moosegoose
- Survive the 20 days of Spring
Chapter 10 - Crummy Summer
This chapter shows what summer does to change the world with its 15 days and dealing with its dangerous threats.
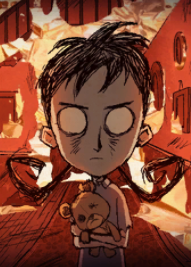 Summer is the last and most threatening season with many troubles that you need to be aware of.
Plants begin to slowly wither and food can spoil faster from the extreme heat. You can prevent your plants from withering by placing an on ice flingomatic in range of them to keep harvesting them throughout summer, but keep it fueled. The ice flingo can also stop an out of control fire near it. Drying racks are also faster from this heat.
You will find that days become much longer while dusk becomes shorter. Watch out during the day though because random objects can start to smolder and burst into flames! Try to put them out as fast as possible. Space things apart to contain wildfires and limit damage.Tip: For the magically inclined you can also make an ice staff with a prestihatitator to instantly extinguish something on fire.
 The oasis' pond awakens and can be fished out of to get a few useful trinkets. The oasis also gets covered in a sandstorm during summer, making it hard to travel through, but prevents wildfires in it. An antlion also spawns somewhere in the oasis.
Cactus now provides cactus flowers. They're useful for healing or crafting some summer clothing.
Red hounds will now consistently start spawning from hound waves even after summer in the autumn. Make sure they die far away from any flammable structures.
Finally overheating from the much hotter weather. The caves can be a great place to retreat to so you can get away from this summer heat, since it's cooler down there.
If you don't have much then duck under a tree to cool down a tiny bit and it might save you from overheating.
 To get cooled off make sure to build an endo-thermic firepit before summer hits with nitre, electrical doodads and stone for a very reliable source of cooling. It works just like a regular firepit, but it cools you down and cannot cook food.
You can also have a few t-stones in the fridge ready for the summer heat to cool down with. Pre-craft an endofire for some quick cooling anywhere.
To keep yourself staying cool you need some equipment that gives you summer insulation. If you're lucky to be the one with an eyebrella then it's incredible for the summer heat to keep the sun off you and keep you cool. If you don't have an eyebrella then your best bet is a frozen t-stone and/or other cool gear.
Here's a list of items to consider for summer insulation and stay cool for longer:
- Whirly fan - Inexpensive. Gives a tiny amount of insulation while you keep moving, however you can cool yourself off even more by running under a tree with this equipped and prevent overheating in the hottest parts of summer! Great for running from tree to tree with the help of other cool clothing.
- Umbrella or pretty parasol - Both gives a moderate amount of insulation. Preferably get the umbrella because it can be repaired to last much longer.
- Straw hat - Gives a tiny amount of insulation and doesn't last long for the price. Only craft if you really need it.
- Summer frest - Decent. Gives a moderate amount of insulation.
- Floral shirt - Gives a large amount of summer insulation and can last the majority of summer. Just need a variety of resources.
- Fashion Melon - Moderate amount of insulation and makes your wetness go up to 33%, but doesn't last long.
- Ice Cube - Prevents overheating and can cool you down a tiny bit, buuuuuuut makes your wetness go up to 50, slows you down, only lasts half of summer, ice only repairs it for 5% and just isn't really worth the price. A whirly fan + tree can give similar cooling for no downside except less portable.
Tip: A luxury fan can be made from 5 downfeathers from spring, 2 reeds and some rope. With 15 uses it can instantly lower your temperature and anyone else's nearby by a lot. It can also put out a large nearby fire. Combining this with some good summer insulation to slow your temperature gain and you can just carry this around with you to cool yourself off where ever you go. Similarly you can use a chilled amulet to cool off anywhere from crafting one next to a prestihatitator with gold and blue gem. When you start to overheat equip and use 10% of its durability for max efficiency since it can only get you so cold. EZ cooling!
Tip: If you're on the high seas you can get yourself to max wetness to prevent overheating in the middle of summer in exchange for your sanity and a wet inventory by rapidly paddling on your boat.
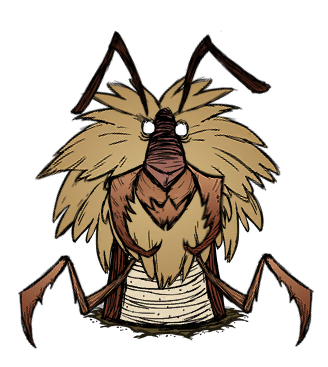 Somewhere in the oasis in summer, inside the sandstorm, lies the antlion. The antlion is not aggressive, but after around 5+ days of summer can get angry enough and summon sinkholes near a targeted player to destroy your world.
If you see the ground stirring under you and your character exclaiming something you should get as far away from anything important ASAP.
Somewhere in the oasis in summer, inside the sandstorm, lies the antlion. The antlion is not aggressive, but after around 5+ days of summer can get angry enough and summon sinkholes near a targeted player to destroy your world.
If you see the ground stirring under you and your character exclaiming something you should get as far away from anything important ASAP.Tip: When targeted by the antlion underground, instead of sinkholes, stones will fall from up above and harm anything crushed by them. These stones can be mined for some easy rocks.
You can actively feed it enough tributes with trinkets or rocks throughout summer to prevent these sinkholes or just kill it. To do either of these however you need a good way to travel in the sandstorm to even find it.
To effectively travel in the sandstorm you need to fish at the oasis pond (green area in the desert) enough to get blueprints for the fashion and desert goggles. Making then wearing the desert goggles will allow you to see and run through the sandstorm.
Once you find the antlion you can examine it to get an idea if it's angry and going to cause more sinkholes soon. You can feed it treasures you get from the oasis pond to please it and prevent sinkholes for a small amount of time. Or if you don't want to deal with this greedy ant for the entire summer you can feed it a frozen or very hot t-stone and fight it!
If you fight the antlion it has 6000 HP, can summon a cage of sandcastles to enclose you near it and also make sand spikes shoot from the ground to harm you. Be prepared for a fight if you're alone. When fighting try to attack as much as you can and dodging the sand spikes you can see before they shoot out of the ground on you. The sand spikes stay there and can even trap you if you're careless to get surrounded by them. The lower antlion's HP is, the faster he attacks with those sand spikes so sometimes try to back off, circle him and let the spikes settle down around him before attacking again. It's a fun fight.
- Survive the 15 days of summer
- Fish at the oasis
- Make a fire safety bear very happy by extinguishing a wildfire (only you can prevent wildfires!)
- Defeat or satisfy the antlion with trinkets (or not? if you like sinkholes for some reason?)
The End.
 Welp that's it folks. Hopefully this guide was worth it to help a few players out and was unique enough compared to other guides. More the merrier anyway. This guide started out as a way to categorize my thoughts on things, but I saw values it had that could help others. Took about 4 months to make from just very slowly adding things to it overtime then it just sat there and now finally published. How is it?
The guide may be over, but there's still plenty of things to do in the world of DST:
Welp that's it folks. Hopefully this guide was worth it to help a few players out and was unique enough compared to other guides. More the merrier anyway. This guide started out as a way to categorize my thoughts on things, but I saw values it had that could help others. Took about 4 months to make from just very slowly adding things to it overtime then it just sat there and now finally published. How is it?
The guide may be over, but there's still plenty of things to do in the world of DST: - Learn the magical arts.
- Improve certain aspects of your survival.
- Adventure in the seas
- Explore the ruins and gain strong ancient gear.
- Learn and conquer the many bosses around the world.
- Get creative with your base building.
- Explore parts of the game you aren't familiar with and triumph over them.
- Build a megabase.
- Give restrictions to yourself for a survival challenge.
- Toy around with world generation for a different experience.
- Make things interesting with game changing mods.
- Or just relax and Don't Starve... Together!
Have a good day. <3 ...and wash your hands! The power of hygiene! Be smart, stay safe.
And now... Extras!
These extras are typically lower effort than the main part of the guide and done mostly for fun.
Extra - Spelunkin'
This extra chapter showcases the things you can find when exploring the caves.
You can find a "sky star" somewhere in the caves. Picking it up will allow Hutch to spawn and acts as a mobile chest like Chester, however Hutch has other unique abilities that Chester does not.
Placing light bulbs in Hutch will make him transform and produce a large amount of light around him until the light bulbs spoil. You can then place a spear in Hutch to hurt any foe that hurts him. This form is useful for attacking tentapillars with the small tentacles they spawn. You can even place a one-man-band to gain a decent sanity aura around Hutch. A bit expensive and not really worth it though.
A useful friend indeed!
Tip: Speaking of Chester, you can fill Chester's inventory with nightmare fuel or blue gems and wait til a full moon to transform Chester. Doing it with nightmares gives 3 extra inventory slots or doing it with blue gems essentially makes Chester a walking ice box.
These trees will regrow quite quickly seasonally with the large amount of mush trees around. Blue mushtrees can be an excellent source of healing and food in the caves, because you're likely already insane down there anyway.
Depth worms can be found deeper in the caves disguised as a glow berry plant or attack you in waves when in the caves similar to hounds on the surface. Killing multiple depth worms can be done by crowding them all together then getting them to attack at once so their attack cooldowns are synced up. This allows you to get in some easy hits in before retreating and baiting all of their attacks out at once again. Careful! Depth worms hit really hard.
Moggles can be refueled by more glow berries or even lesser glow berries. Don't have a moggle, but plenty of glow berries? Eat the glow berries to gain a temporary light around yourself with some hunger/health as well just for a small sanity penalty.
- Grassy biome on top with exits to the surface and bunnymen (like the curvy top bun)
- The rocky portion of the caves with mushroom forests sprinkled around it (like extras/condiments)
- The big muddy area with light bulbs and glow berries with lichen (like the patty)
- Finally the ruins and all past the lichen on the bottom (like the more flat bottom bun)
Extra - Loony Lunar Loot
The extra chapter shows the wonderful things you can get by voyaging into the sea via boat!
When you find a field of salt at sea I suggest you raise any sails and only move around with a paddle so you have more precision to mine that good salt! Salt doesn't go unguarded however... many cookie cutters roam the salt covered seas. They go towards any boats nearby and jump out of the water to start puncturing the boat. Cookie cutters have the same 100HP like spiders, so take them out quickly before they end up leaving a hole in the boat. Bring some boat patches just in case!
With 10 salt crystals, a blue gem and cut stone you can make a salt box for your even fresher food needs.
A side note: You can find kelp to be collected around the shores of land. Kelp is best dried on a drying rack and can give a decent amount of sanity+hunger after a quick dry.
Tip: If you time your clicks right you can quickly raise your sail back up. Click again after the Heave! tooltip changes to Ho! to pull it up quickly instead of slowly cranking it up.
On the lunar island your sanity begins to raise and shadow creatures don't spawn, but you can get attacked by gestalts with high sanity. When above a certain amount of sanity gestalts seek you out and attack you to put you to sleep if hit by enough of them. Can be annoying, but not entirely dangerous.
The lunar island holds some unique items with it, the most notable being stone fruit bushes! They can give 3 stone fruit that can be mined on the ground to give stone or ripe stone fruit. Stone fruit is strangely considered as a vegetable in the crockpot. You can shovel these bushes up and replant them back at your camp to get lots of stone fruit. They grow in winter aswell! If you wait too long to harvest the stone bushes they can become too ripe and crumble when harvested. They also need fertilizing more often.
The lunar island also holds lune trees. Chopping a lune tree can spawn 1-2 lunar moths and some lune tree blossoms that can be used to craft baths bombs later. These lunar moths are similar to regular butterflies except they give sanity if you eat their wings! If you catch these lunar moths with a bug net you can replant more lunar trees anywhere else. Shoveling the lune tree stumps give 2 logs rather than just 1.
On an outer edge of the lunar island rests a rocky, sandy area that includes many beached bull kelps. Picking these bull kelps will yield a normal kelp and a bull kelp stalk. This stalk can be planted anywhere in the ocean and constantly produce kelp just like other bull kelps that can be seen floating around in the sea. You can collect around 20 or more of these stalks from the island and plant them right next to land to easily collect them later. Kelp regrows in just a few days and does not need any maintenance or fertilizing unlike stone fruit. A very quick and easy source of constant veggies! Just be sure to not let the stalks spoil before you're able to plant them.
Using some of the various moon glass shards scattered around the island or mined out of larger shards with a few boards you can craft a glass cutter. Glass cutters do a great 68 damage like dark swords. It only has 75 hits of durability though, but if used against shadow creatures it uses 50% less durability per hit. You can also craft a faster axe using this moon glass.
Near this new lunar shrine you can also craft bath bombs using lune tree blossoms to drop in the many ponds around the island. Dropping a bath bomb in a pond will make it hot and if you wait till a full moon it will turn into more moon glass to mine!
Extra - A Mighty Steed
How to tame and maintain beefalo.
Fully taming beefalo can be a long and involved process so make sure you're committed to taming it for 20 or more days to finally domesticate it and then continue to maintain it. Fully domesticated beefalo get many useful buffs, but you can still benefit from the beefalo while taming it with its movement speed and damage of an unbreakable spear. Have a good supply of items to feed your beefy friend with like grass, sticks, non-meat foods or even light bulbs.
There are a few important stats to know if you wish to tame a beefalo:- Obedience
- Tameness
- Tendency
- Equip the beefalo with a saddle without angering it
- Mount your beefalo
- Keep riding on your beefalo
- or if it gets too low the beefalo shakes off its saddle causing the saddle to potentially lose durability
Obedience goes from 0% up to 100% and feeding any item to the beefalo increases obedience by 10%. So feeding a beefalo 10 items will get it to 100% obedience. You need more than 50% obedience to mount the beefalo.
Obedience slowly drains overtime and also lowers by 1% if the beefalo gets hit by an enemy. If obedience gets below 40% while riding you will be bucked off! If the beefalo is not empty on hunger points or too overfed then obedience drains twice as slow.
Once a beefalo is domesticated its obedience can only go down to a certain percentage and doesn't drain anymore. A minimum amount of obedience.
- How long you can stay mounted on your beefalo before being bucked off. This can be called the "buck timer" and the amount of time can be reset by unmounting then remounting the beefalo.
- 100% fully tamed beefalo become domesticated and gain various buffs. You can tell if a beefalo is domesticated from its fancy fur.
Newly mounted beefalo with 0% tameness has a buck timer of 15 seconds that slowly goes up to ~240 seconds before becoming domesticated. Once 100% fully domesticated your beefy boi gains a huge spike of time on its buck timer. There's only 2 ways to increase tameness and doing both doesn't make taming faster:
- Being mounted on your beefalo increases tameness
- Keeping your beefalo's hunger above 0 if you aren't riding on it
Tip: You can estimate the amount an undomesticated beefalo is tamed from timing its buck timer. An almost 100% tamed beefalo can get up 240 seconds before bucking you off, exactly half of an in-game day. So if you get bucked off in a quarter of a day that means the beefalo is ~50% tamed. Make sure the beefalo's obedience is maxed before timing.
Careful! A beefalo's tameness drains overtime even if it's domesticated. The drain is extremely slow at first, however if the beefalo doesn't gain any tameness in a long time it starts to quickly lose it faster and faster. Make sure to feed or ride your beefalo even a little every day or even a fully tamed beefalo can revert back to it's old self. Alternatively you can park your ride near a salt lick to massively reduce the drain by building one with nitre and boards.
- Ornery - Increases when the beefalo does and takes damage. Once tamed increases its damage dealt, but reduces minimum obedience to 45%.
- Rider - Increases when riding the beefalo. Once tamed increases movement speed, but reduces the damage it deals.
- Pudgy - Increases when feeding the beefalo too much. A cute little boofy, but very weak when compared to the others.
Which ever tendency is the primary one being increased will show on the beefalo's face. The ornery is rough looking. Rider is fancy looking. Pudgy is "big boned" looking.
Once fully tamed the tendency can not be changed, so make sure you have the tendency you want before your ride gets 100% domesticated.
A beefalo without a rider is very weak since its attack speed is reduced to a regular beefalo compared to how fast it can attack when it does have a rider. You can't mount a beefalo that's fighting something else so make sure your beefy boi doesn't get in a fight that it can't survive while you're not mounted on it. Bring a good backup weapon to help end those fights for a chance to keep that big guy alive.
Don't shave your beefalo for it can make their buck timer much shorter and even stacks with a beefalo in heat.
A beefalo bell can help you name and control the beefalo.
- Glossamer: Gives 15% MORE movement speed than a regular saddle, but needs silk, living logs and a massive 68 butterfly wings to craft. Worth it? Sure!
- War Saddle: Gives less movement speed than a normal saddle, but makes your mount do 16 points of extra damage! Combine this with a fully tamed ornery for an amazing 66 damage! 2 damage shy from a dark sword, one of the most powerful weapons. Most notably needs steel wool to craft it.
Extra - Character Tips'n'bits #1
- Make use of your beard hair after winter to craft some meat effigies for all. Easy revives!
- Don't need your beard? Shave it every time it begins to grow for a small +10 sanity every few days.
- Drop Bernie to help take the aggro off when you or others get overwhelmed by many nightmares. When you are insane Bernie can help with fighting all foes! Be sure to use sewing kits or trusty tape to keep Bernie well repaired. It may even be a good idea to craft multiple Bernies.
- Don't forget you can cook food with your lighter!
- Wearing a top hat and holding your lighter/Bernie regens your sanity just enough to prevent your sanity draining from the darkness.
- Having a dumbbell equipped helps to maintain your might.
- Don't forget to build a gym in a central place to get full might quicker. Building statues from a potter's wheel can be an easy way to increase the weight load for even quicker might!
- Try to fight with Abigail during dusk or night. She does more damage the darker it is.
- Up against a strong foe that you know will kill Abigail? Tank some hits first and do as much damage as you can from Abigail giving you an attack bonus. Once Abigail dies then fight normally. The extra damage you did might make up for your weaker attacks after.
- Don't forget you can craft a sisturn. Filling it full of flowers can make Abigail recover much faster after her death. It also gives a decent, but stationary sanity aura for yourself and others.
- Make use of your ability to eat stale/spoiled food the most by massing a food that spoils slowly like pierogies or bacon and eggs. These 2 food can last up to ~20 days. Making 15+ bacon and eggs with some pierogies (for more heals) all at once can last you 20 days. During those 20 or so days you don't even need to touch another food item or crockpot to keep yourself fed. Just don't forget about those other surviving organics...
- Birds of the world + sleepytime stories = tons of birds to kill for meat and feathers with the possibility of Krampi attacking for more loots
- Planted twigs and grass + lureplant + lots of applied silviculture = HEAPS of grass and twigs after killing the lureplant
- Properly spacing a large square of minisigns (or 10x10 broken walls for an easier way) then reading On Tentacles in the center can allow many tentacles to spawn on the edges of your square. If the square is big enough to stay out of the range of the tentacles you can keep reading the book for tons of dense tentacles that can kill many things for you. A large amount of tentacles together could even rival some bosses. Just careful if you want to pick up any loot nearby...
- Keep your hunger low so if you transform then not as much hunger is ultimately lost.
- Wereforms can last up to half a day normally.
- You can extend wereforms using the full moon! Once the full moon appears if you're already transformed your weremeter gets instantly refilled to 100%. Great for exploring around the world more as a goose or gnawing more resources as werebeaver.
- Remember that any day ending in the numbers 11, 31, 51, 71 and 91 always have a full moon. Don't want to get transformed? Go in the caves before the full moon appears.
- Werebeaver can be used to quickly cut down fully grown birch trees without the risk of poison birchnuts. You can safely farm those birchnuts in Autumn! Werebeaver can't spawn treeguards!
- Wereforms don't get slowed by the oasis sandstorm, thus making it possible to rush antlion on day 1 of summer with the moose if you fight well.
- Weremoose can charge in a large line of foes, like frogs or hounds to hit many at once while taking minimal damage. (note that it doesn't work as well with enemies that have quick, long range attacks like bunnymen/pigmen)
- You can extend your weremoose form when there are no more mobs left to fight by swinging at landed birds.
- You can tame hounds from your charming mime abilities. Just unequip any tool in your hand and get the attention of a hound. You can then examine them over and over to show off your skills as a mime. The hound will appreciate this and become your friend after enough time.
- Fresh fruit crepes are Wes' favorite dish making it an even more filling meal, but sadly only Warly can make it. Be sure to give any butter and fruits/honey you get to a friendly Warly to help him cook some fresh fruit crepes just for you.
- When you spawn be sure to craft your secret balloon mech to get the most out of it. Do this by standing still and inflate as many balloons with your pile'o'balloons as you can until you get to 0 sanity or even more balloons if you can. More balloons, the better mech! Once you are surrounded by enough balloons force attack (ctrl+f by default) one of the balloons to assemble them all in to your mech to gain tons of bonuses!
- You can haunt your pile'o'ballons to spawn balloons as a ghost.
Extra - Character Tips'n'bits #2
- Focus on massing one resource when using your clones instead of switching between miners/choppers.
- Attack your shadow clones to dismiss them and refund 1 nightmare fuel once done with them.
- Help mine rocks and trade eggs/meat to the pig king for gold to keep crafting those durable helmets for your fellow survivors.
- Axes do as much damage as a normal spear with Wigfrid's damage boost. This works great in a pinch and it can be cheaper on resources.
- Their lowest max sanity of 100 is a double edged sword. It's easier to go insane faster, but also takes less resources to get back to being sane.
- Cancel your attack on a spider while having your own recruited spiders to create a spider war. This works best with many spider nests nearby. Be quick to pick up any meat.
- Don't forget Webber doesn't have any downside to eating raw meat.
- Keep a look out for spider queens as they can spawn a unique nurse spider. These spiders have an aoe healing ability that heals all spiders around. This even includes you, alas it's only 8 hp. Recruiting a nurse spider allows you to transform more with the correct switcherdoodle craft.
- You can pick up recruited spiders for safe keeping in your inventory.
- Keep your hunger high in case you need to craft something quick in a fight or suffer from a long crafting time.
- You can place many catapults around a single generator's range. This allows you to power many catapults while only fueling 1 generator, however the power will drain faster.
- An easy way to counter his need for variety is to fill your stomach to full and wait 2 days til you fall below ~69 hunger before you eat again.
- Take advantage of his special recipes like glowberry mousse by exploring the muddy area in the cave for glow berries. 2 lesser glow berries = 2 days of free light with the mousse.
- You can cook 2 monster meats + 2 eggs in your portable crockpot for a 50/50 chance for bacon and eggs or monster tartare (instead of lasagna). Both dishes give similar hunger and if you have a friendly Webber he can benefit from the tartare with no downsides.
Extra - Character Tips'n'bits #3
- Try keeping a minimum of at least 5 souls for emergency food or healing. When you have more than that use them more freely from how easy they are to replenish from killing easy mobs like bees, butterflies and even spiders.
- Zoom out as much as you can and soul hop to the top right or left of your screen for the maximum teleport distance by turning your camera in the direction you want to go.
- You can use your healing to easily make a few backup telltale hearts for any unfortunate deaths of your fellow survivors.
- Any fertilizer that serves as growth formula can cause you to start blooming a few days later. Blooming causes you to move faster, gain a small summer insulation and tend nearby crops, but causes a faster hunger drain. Rotten fish works well!
- Collect lots of light bulbs and let them turn to rot. All this rot can be great for a cheap and easy way to slowly heal out of combat.
- Save a few plants to plant when low on sanity for easy sanity management like seeds or pinecones. Digging up and replanting saplings can be easy sanity too.
- Wear your spiky chest armor with a football helm to prolong your thorny, damaging armor.
- You can corral a bunch of spiders on you to lead them all in a cluster of your aoe traps for a bunch of glands and silk (for tents) to mend your wounds. 3 hits from a trap = 1 dead spider
- Wurt can have a refreshable 40 minutes of immunity to freezing or overheating from a single inventory slot. The power of fish! Sunfish can be caught in summer from the sea and can prevent freezing when in your inventory. Likewise ice bream can be caught in winter and can prevent overheating. You can place 2-4 of these fish in a tin fishing bin to keep them forever and swap for a fresh fish whenever you like. No need to wait around for your temperature of your character or a t-stone... just swap fish and go! You can even get 4 fresh sunfish in a bundle wrap and easily shrug off the cold for 2 and a half hours!
- Meat isn't useless as Wurt! Feed them to a bird for eggs. Eggs can be sneaked in some crockpot recipes. A berry with 3 eggs for a fistful of jam to give Wurt 50 hunger. A veggie with 3 eggs can make a ratatoulie. Be sure there are many meats/eggs before doing this since they can be much more useful to other survivors.
- Recruit a merm and attack cancel a bird with a ranged weapon. (like a boomerang/blow dart) The merm will target the bird and can kill it without it being startled away. Use this to gain tons of meat and feathers throughout the day. You can use the bird meat for free eggs at a bird cage to help feed yourself.
- Giving merms live fish can recruit them, BUT if they die the drop that fish back as long as it doesn't spoil in their inventory. An example to use this is by giving a merm 5 fish, travel somewhere then kill the merm to obtain the 5 fish and its normal drops. Useful for carrying more fish for even more merm houses!
- A single tile of a swamp turf can fit 4 merm houses when they are placed on the edge of each corner. You can bring the swamp to you!
- Birchnuts and berries are great foods to stockpile before winter hits for trail mix and fistful of jams made with 3 ice.
- Wurt's 33% more hunger from food can add up. 4 cooked berries gives more hunger than meatballs for her.
- Crafting gold slingshot ammo can help kill birds for many feathers and meat. 1 gold nugget = 10 dead birds. You can give the bird meat to pig king for more gold nuggets! Be prepared to fight from being too naughty for even more loots.
- Don't forget you can craft a portable tent. While not as effective at healing as a normal tent it's cheap and portable with 4 more uses. You can use this to keep yourself healthy and not suffer a sanity drain from Walter having low HP. You can also avoid the darkness by sleeping through the night anywhere with one.
Extra - Lore of the World
https://www.youtube.com/watch?v=QGiGA_YQQp8
https://www.youtube.com/watch?v=kmC8Mbyty10
Extra - Farming the Land
If you don't care for your plants you will get similar amounts of food like the old farms besides a longer time for plants to grow (without care) and the possibility of weeds coming from normal non-specific seeds.
 The biggest thing to start your farming career is to craft a riga-ma-jig located in the food tab with some boards, rope and flint. Next up you'll need to craft a hoe. Crafting a shovel can be a great help.
Start by deploying the riga-ma-jig on a tile you wish to farm from. Once it's done digging the tile you can then shovel up any weeds to clear for your new farm plot. Now with your hoe you can till that soil then simply plant a seed. Congrats! That seed will now grow into a full crop in the next 3 to 8 days depending on how well it's treated, if it's a non-specific seed and some rng.
Once a crop is fully grown it can spoil if left for 4+ days. Make sure to harvest them.
Weeds can stress your crops and even be a danger to your character.
If you see any of these specific looking plants below starting to grow then whack-em with a shovel before they mature and cause trouble!


Weeds can still have their niche uses. Tillweeds can help make a healing salve. Forget-me-lots can produce flowers that you can cook with honey and ice in the crockpot to get a soothing tea.
 Crafting a gardeneer hat from the food tab can help you learn more about your crops.
While wearing a gardeneer hat you have access to 3 new abilities:
- Ability to research every stage of a plant
- Ability to tell what might be bothering a plant by interacting with it
- Ability to open the plant registry by right clicking on the hat while it's in your equipment slot to see all the info you've researched
Researching a plant enough can help you identify the plant and its seeds.
If a crop lacks something it can be stressed when growing to the next growth stage. There's a total of 4 growth stages for a crop and 6 main ways that can stress them every stage. Caring for the crop in 6 unique ways can prevent the crop being stressed to make it happy and more fruitful.
Note that crops can become more stressed if 10 or more crops are planted on a single tile. Make sure to avoid this by making a simple 3x3 pattern to plant up to 9 crops on each farm tile.
There are 6 things to keep your plants happy (ranked from lowest to highest effort):
- Letting them grow in their preferred season
- Clearing any weeds or rotten crops close to them
- Having 2 of the same plants close by the crop (planting tight groups of 3 of the same crop work well)
- Making sure there is enough water in the soil for every growth stage with a watering can by crafting and filling one up from a pond
- Tending to them on every stage of their growth (musical instruments help alot)
- Making sure the soil has the nutrients each plant needs with compost, poop and growth formula items, however there are ways to self-fertilize farms to make it easier by planting combos of certain plants
Tip: Planting groups of 3 of the same crops that prefer the current season with no weeds can be easily done with little effort. You can ignore watering, tending and nutrients entirely with this method and still get a good return! When using crops not in season with this you will need to focus on one other way to keep the plants happy or you may not get a bonus seed.
To guarantee 2 bonus seeds from a harvest you can complete 5 of these tasks every time before a crop grows into its next growth stage. Great for expanding. Triples seeds if you feed the crop to a bird. Takes about 4-5 days to grow.
These methods can be a mix of all 6 tasks, but it's easier to focus just on specific tasks.
To guarantee a giant crop you need to focus on all 6 of these tasks perfectly so the plant can be happy enough to grow big! Takes about 3-4 days to grow. Can give you 2 or 3 crops with 2 or 3 seeds once hammered.
A single farm tile can get to a max of 100% fertilization in 3 types of nutritions: Growth formula, compost and manure.
Many different fertilizers can be added to the farm tile to give 8%, 16% or 32% to these specific nutrients depending on how potent the fertilizer is:- growth formula - from a crafted starter growth formula - let it spoil for stronger effects
- compost - from a composting bin - add items in it, turn it and collect it later
- manure - from plain ol' poop!
Everytime a single crop grows to its next stage in a farm plot it consumes a certain percent of nutrition from the soil, however it also produces an equal amount divided across the other types of nutrients. (ex. potatoes consume -4% manure, but produces 2% to formula and compost)
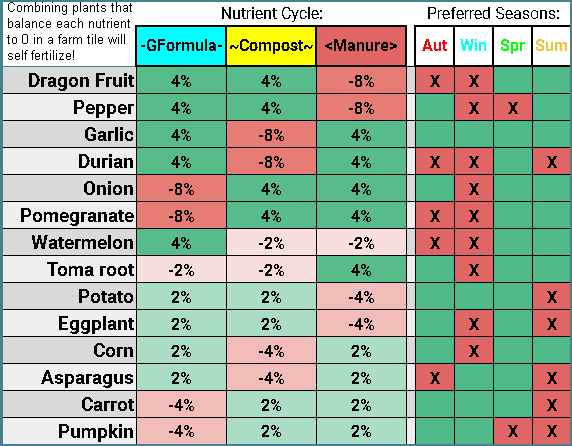
A simple example of a self fertilizing farm is planting 4 toma roots and 4 potatoes on a tile. Another is 6 toma roots and 3 dragonfruit. Yet another is 4 watermelons and 4 pumpkins, however this combo won't be as effective from their opposite preferred seasons.
Toma roots and watermelons seem to be great combination crops that can help fertilize every crop except any crop that consumes compost. (asparagus, corn, garlic, durian)
- Free Spools, Klei Points, Twitch Drops (22nd-July-2026)★ 5 (8.7k)283k views12k ♥5 minUpdated 22 Jul
- Modding Don't Starve and Don't Starve Together★ 5 (1.8k)263k views2.3k ♥4 minUpdated 11 Oct, 2024
- ⭐ All links for Free Spools, Klei Points & Twitch Drops★ 5 (4.8k)139k views5.2k ♥1 minBulgarianUpdated 21 Jul
- Don't Starve Together Ultimate Guide★ 5 (2.5k)86k views4.6k ♥222 minUpdated 17 Nov, 2023
- Полезные моды для Don't Starve Together★ 5 (503)58k views955 ♥4 minRussianUpdated 11 Nov, 2024
- ВСЕ Кулинарные РЕЦЕПТЫ и способы их приготовления★ 5 (1.8k)44k views2.5k ♥6 minRussianUpdated 15 Dec, 2022


- Upgrading to PremiumTeam Fortress 2★ 5 (20k)1441k views11k ♥6 minUpdated May 11, 2022
- No More Room in Hell Official ManualNo More Room in Hell★ 5 (2.8k)569k views2.1k ♥29 minUpdated Apr 22, 2019
- NMRiH Community Hosting GuidesNo More Room in Hell★ 5 (526)351k views653 ♥1 minUpdated Aug 10, 2022
- ULTIMATE GUIDE FOR GAME DEV TYCOONGame Dev Tycoon★ 5 (5.8k)326k views10k ♥4 minUpdated 23 Jan, 2014
- How to 'Git Gud' Soon™MORDHAU★ 5 (2k)318k views3k ♥68 minUpdated Nov 16, 2024
- Лучшие кооперативные игры SteamPAYDAY 2★ 5 (1.5k)315k views2.1k ♥56 minRussianUpdated Apr 27, 2025






This guide was created by its original author on the Steam Community. Are you the author and want it removed? Request removal.