The Ultimate Modding Guide
Introduction
From curiosity and research, I found a very simple way to mod this awesome game. What does this mean? Well, you can modify a character, a sound or a background! How? Continue reading!
Before we start, you might want to make a backup folder for the game and a folder for the modding stuff.
Join Randll on his Discord Server!! https://discord.gg/htx9pK4
Tools Needed
Files to XNB - https://randll.com/rebox
-----------------------------------------------------------------------------
Extractors
XNB to PNG - http://www.cl.ly/3D0X0l3M3m0e2X2q3N3q
XNB to WAV - http://www.gluevault.com/download/file/fid/323
-----------------------------------------------------------------------------
Editing Software
you only need one
Photoshop - http://www.adobe.com/products/photoshop/free-trial-download.html (Trial)
Affnity Photo - https://affinity.serif.com/en-us/photo/ (49.99 USD)
Pixlr - https://pixlr.com/editor/ (Needs Flash Player)
Gimp - https://www.gimp.org/downloads/ (Free)
-----------------------------------------------------------------------------
Audio Converter - http://media.io/
-----------------------------------------------------------------------------
Support
- Windows 10
- Windows 8
- Windows 7
- 64 Bit & 32 Bit
- Microsoft .Net Framework 4.6.1 or Better
Download Link for those who do not have it
https://www.microsoft.com/en-us/download/details.aspx?id=49981
Note
- All Credits go to the developers of each program used in this Guide.
- All of these Programs has been tested by Me and collaborators to verify the legitimacy and the simplicity of of each one of them.
Content Files
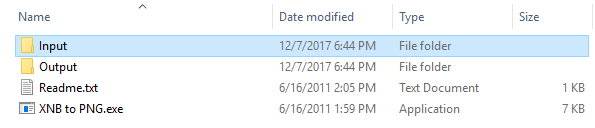
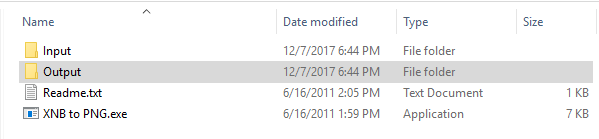
Step 2 - Run XNB to PNG Converter.exe to Decompile those files and now they are located in the "Output" Folder
-----------------------------------------------------------------------------
-----------------------------------------------------------------------------
- SIMPLE RECOLOR FOR PHOTOSHOP USERS -
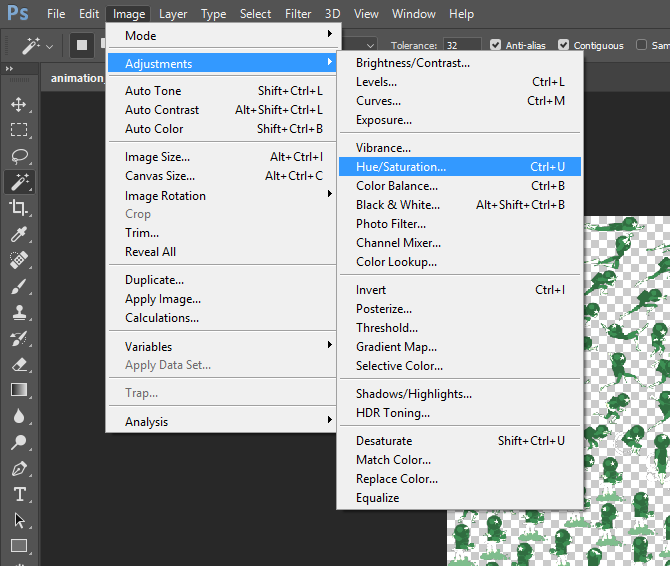
Step 2 - in Photoshop click "Image > Adjustments > Hue/Saturation
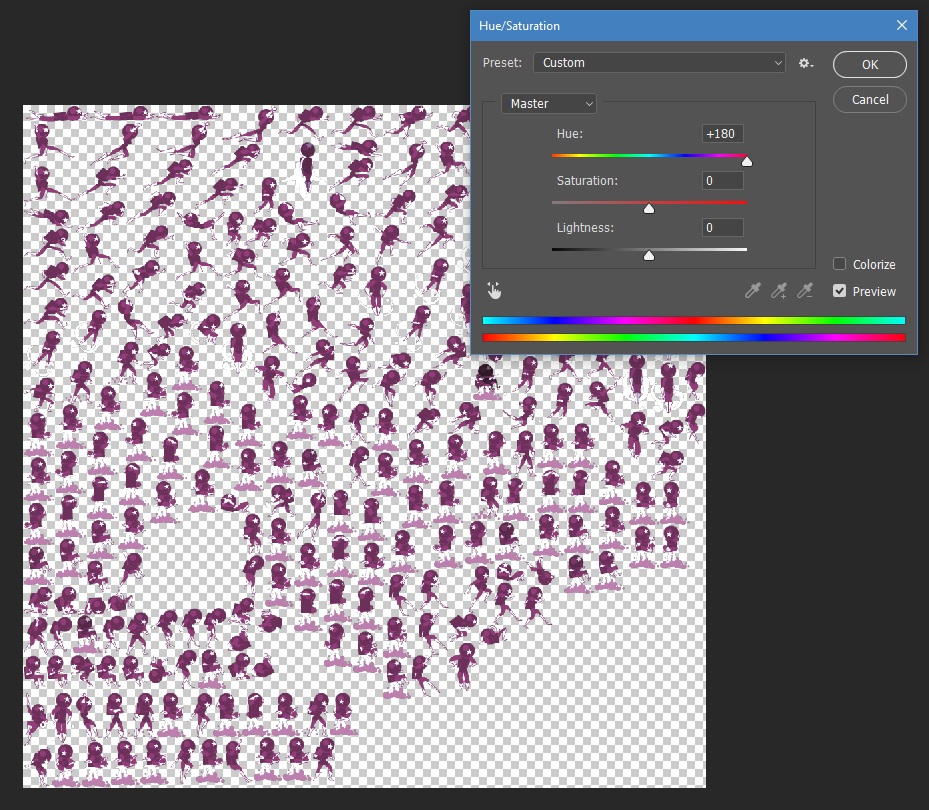
Step 3 - Adjust the Colors how you like now
-----------------------------------------------------------------------------
Step 4 - Save the Image As a PNG and make sure to keep the file name that its replacing with
-----------------------------------------------------------------------------
-----------------------------------------------------------------------------
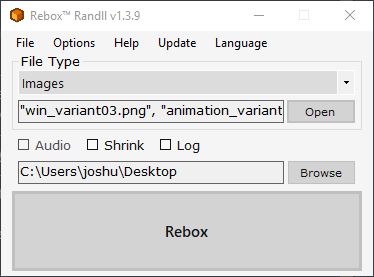
Step 2 - "Image" Is by default the selected item in the ComboBox if you wish to change the Format to use click the Combobox to select a different one.
-----------------------------------------------------------------------------
Step 3 - Click "Open" or Drag and Drop your selected files to add to Rebox.
-----------------------------------------------------------------------------
Step 4 - Now You can Click "Rebox" Button to Recompile the files into Dot XNB format.
-----------------------------------------------------------------------------
Note You will get a message telling you whether it succeeded or failed. If everything went correctly you can now go to the location that you chose to save the files (Default Is Desktop)
-----------------------------------------------------------------------------
Step 5 - Copy or Cut the Dot XNB files into the directory where the original files you want to replace are currently located (Ex. /Content/Characters/JesseCox)
Audio Files
Custom Map Backgrounds
-----------------------------------------------------------------------------
Step 2 - Click "Open" and choose a picture that you want to use it in-game
-----------------------------------------------------------------------------
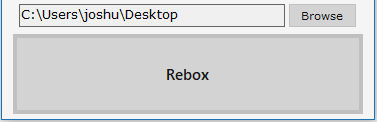
Step 3 - Click "Rebox" when you see the chosen picture’s name next to "Open"
-----------------------------------------------------------------------------
-----------------------------------------------------------------------------
Note: Your converted files will be located on your Desktop or elsewhere
-----------------------------------------------------------------------------
-----------------------------------------------------------------------------
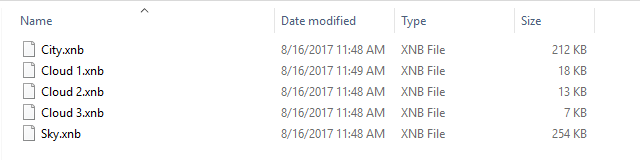
Step 4 - Open this folder: C:\Program Files (x86)\Steam\steamapps\common\SpeedRunners\Content\Backgrounds\ENV_Prototype
-----------------------------------------------------------------------------
-----------------------------------------------------------------------------
Step 5 - Make sure that the compiled files retain the same names as the ones that are in the speedrunners folder so that it replaces the files Ex. (C:\Program Files (x86)\Steam\steamapps\common\SpeedRunners\Content\Backgrounds\ENV_Prototype)
-----------------------------------------------------------------------------
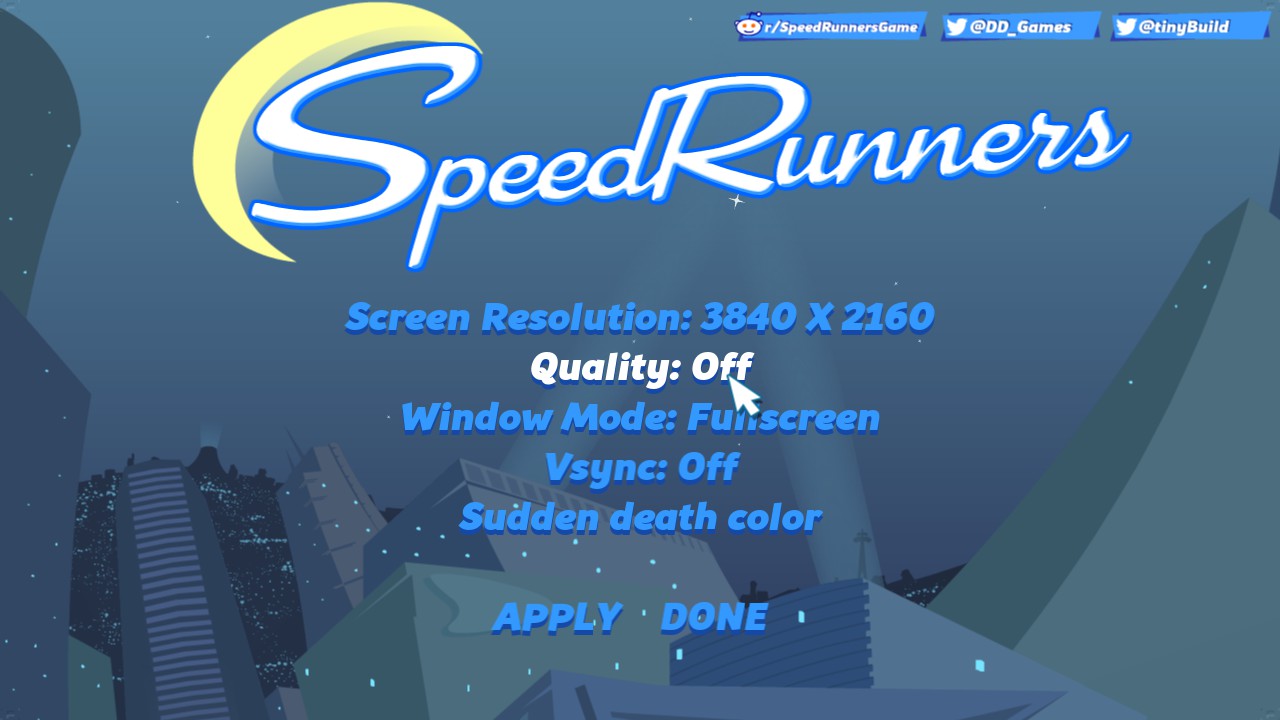
Step 6 - Now open SpeedRunners and Turn Graphics Quality to "Off". Now if you did this you will see your custom background in-game, but if you don't want to see your custom background just turn quality back on and then the normal speedrunners backgrounds are back.
-----------------------------------------------------------------------------
-----------------------------------------------------------------------------
How to make Trails
-----------------------------------------------------------------------------
Note : - When you making a new trail (by clicking Create a new), click to "Open Image Folder" and the game will like "Alt Tab" and opens a folder. Now there put any picture you want to make a trail of it and then close it and get back in-game.
-----------------------------------------------------------------------------
Some tips:
- You can change the Size if you click to "Size" and write a number in and test it out
- If you click to "Taper" it's will give it a nice effect like it's getting smaller
- You can set the fading and the fading speed
- With "Noise" you can make it look a cooler but not many people using it (i do)
- If Noise is on you can set up the "Wave Frequency"
-----------------------------------------------------------------------------
Conclusion
Good Luck & Have Fun modding!
- The official SpeedRunners controller guide★ 4 (111)99k views87 ♥5 minUpdated Sep 26, 2019
- SpeedRunners - All Secret Characters★ 5 (555)47k views656 ♥1 minUpdated Jun 19, 2015
- Hidden Characters★ 5 (865)44k views1.1k ♥1 minUpdated Jun 3, 2015
- The Ultimate Guide To Unlockable Characters★ 5 (235)27k views339 ♥2 minUpdated Nov 2, 2015
- Secret Characters★ 5 (378)25k views481 ♥1 minUpdated Dec 26, 2017
- Megamen in SR [UPDATED!]★ 4 (121)15k views66 ♥1 minBulgarianUpdated Aug 5, 2017



- Upgrading to PremiumTeam Fortress 2★ 5 (20k)1441k views11k ♥6 minUpdated May 11, 2022
- No More Room in Hell Official ManualNo More Room in Hell★ 5 (2.8k)569k views2.1k ♥29 minUpdated Apr 22, 2019
- NMRiH Community Hosting GuidesNo More Room in Hell★ 5 (526)351k views653 ♥1 minUpdated Aug 10, 2022
- ULTIMATE GUIDE FOR GAME DEV TYCOONGame Dev Tycoon★ 5 (5.8k)326k views10k ♥4 minUpdated 23 Jan, 2014
- How to 'Git Gud' Soon™MORDHAU★ 5 (2k)318k views3k ♥68 minUpdated Nov 16, 2024
- Лучшие кооперативные игры SteamPAYDAY 2★ 5 (1.5k)315k views2.1k ♥56 minRussianUpdated Apr 27, 2025






This guide was created by its original author on the Steam Community. Are you the author and want it removed? Request removal.