Tips, strategies and other information for PD:TH
Methods and terms
The damage and health numbers used throughout this guide are multiplied by 10 to make it more comprehensible for the average reader who then has to deal with fewer decimal numbers. This was already a common thing when these sections were added to the guide and there was no (good) reason to deviate from this notation.
General Tips
This section contains some of the basic tips that every PAYDAY: The Heist player should know.

- DON'T PLAY ON EASY OR NORMAL DIFFICULTIES AND DON'T USE GLITCHES.
Even though the 'normal' difficulty has that name, enemies still have a reduction on the damage they can take. This kind of makes 'normal' an easy difficulty and makes 'easy' very easy. Playing on this difficulty is fine if you want to get to know the game and it's really recommended to start out on this difficulty, but it doesn't really prepare you for the real deal. So try to beat all heists on this difficulty to get a feel for the maps and the game and then move on to the higher difficulties.
Moreover, many glitches have gone unpatched due to the lack of support from the developers. Some of these will allow you to complete missions very easily, but this kind of cheating should be avoided. There are also lots of funny things that aren't helpful at all, so it's fine if you want to learn them to have fun, but don't use them to get achievements or finish heists. If you do, you won't get the sense of accomplishment when you finally finish that one challenge nor does it make a better player out of you. And of course, using cheating tools is not allowed. But if you are reading this, it's just too late, because you've already been reported!
- Know the game, know what you can do and what you cannot.
PAYDAY: The Heist is a really challenging game that requires carefully planned actions if you wish to survive. Moreover, it's full of unwritten rules you may want to know. Here are some basic ones: The duration of the assault depends on both the difficulty you play at (e.g. it is generally longer on 145+ than on OVK) and the current objective. Assaults will end only after a certain time and each assault has a certain number of cops, so killing them faster does not make the assault end any sooner; it will only spawn more cops.
The police can't free hostages nor will the hostages free themselves during the assaults. You cannot take a law enforcer hostage during the assaults and they will not surrender if you already have four cops in the third intimidation state (where they count as hostages). It's usually better to trade someone than take a lot of risk in an attempt to get them back up. Moreover, the host generally has a much harder time than other players, so don't be angry when he or she decides to move away from the action.
- Know the team you're playing with.
This is a co-op game and communication is key. Most players have a hard time on the hardest difficulties, so make sure you play as a team. This means that one of the players has to take the lead: come up with strategies and decide what's best to do for the team. A good strategy takes your teams skills into account, so don't assign someone that just started playing the game to go for objectives by themselves.
If you don't know your team, first of all do a quick check about them by checking their Steam profiles to avoid any surprises. Achievements unlocked at the same time and impossible completion times can help you spot a cheater. It's sad to say, but in PD:TH you cannot trust anyone, because the lack of a real anticheat system makes people think they can get away with anything. You can usually make a good guess of someones experience based on the number of in-game hours and the publicly visible heist stats.
Even if you're not leading, try to communicate a lot with the team and give advice if you can, because a single bad action can easily result in failure. Obviously, if the team does not listen or does not even answer, you should have no mercy, let them die and find other people to play with.
- Be open minded and be ready for everything.
Be ready to act on unexpected events and focus on the objective when possible. It may be better to leave a teammate behind or to do an objective later than to risk getting downed in the process. Survivability is everything in this game: if using a doctor bag can help your team survive near certain death, you should use it, even if it's a bad spot or when you have not been downed yet. However, also think long term.
A good example where doing objectives at a later time is when escorting certain characters to certain points, like pushing Matt in Heat Street or getting the Taxman to his seat. These escorts will not move when there are cops around, so instead of forcing your way through it may be much safer to push them later when the cops have moved away. Maybe the best example of this can be found on Green Bridge, where the entrance of the tower is a very crucial point of the heist if your timing isn't perfect and you do not want to be there in the open.
The best cover is usually behind a wall. If you come from PD2 this can sound strange, but you can interact almost with everything through walls and ceilings. It means helping a teammate, trading an hostage, interacting with an objective item and stuff like that. This can be seen as a glitch, but it only makes a difficult game slightly easier and is generally accepted within the community.
- Use the right equipment at the right moment.
The game lets you choose your loadout before you start a heist. This can be both in your advantage and in your disadvantage. It's good to mix things up and have fun playing the game, but you should always go for something that suits the situation. Going with the Reinbeck and trip mines can be a good idea on Counterfeit, but doing so on Heat Street probably isn't the best idea. If your crew already has 3 medic bags, you should be wise and bring an ammo bag.
Bringing the AK and the Mark-11 is a good choice if you want to kill dozers, but keep in mind that those weapons eat up ammo very fast and if there's only one ammo bag in the game that may take a while, it may be better to switch to the Brenner instead. With a Reinbeck and a decent aim you can kill every non-special unit with a single shot from a mid distance and stun tasers/cloakers, but a dozer can be a problem. So you can equip trip mines or trust your teammates (and your Bronco). - Don't take civilians as hostages if they are in a BAD position.
"A civilian! Better to take him as hostage even if he's totally uncovered, so if we have to trade someone, we'll die trying!" Take a hostage only when needed and in a safe place. It means that you should not take all the 7 or 8 civilians as hostages in Counterfeit (unless you're going for Crowd Control achievement or don't want to kill them), don't take Chavez as hostage on the roof in Panic Room and don't take hostages at the end of the Bridge. Hostages that are ready to be traded (highlighted) cannot be killed, so you should make sure they're in safe (and reachable!) spots before it comes to that. Sometimes it's better to shoot a hostage to ensure you don't have to go all the way back to trade. Remember that you can do almost everything through walls, even trading a teammate. - MARK OUT SPECIALS!
You might think that marking out specials is the normal thing to do and does not belong in this list. However, it happens too often that special units that just shot a teammate surprise a player and get them downed as well. Marking them out can be the difference between winning and failing a heist and the only thing you have to do is press one button (and maybe move your mouse a bit). Even if you're not downed, marking the specials means you can track them even through walls and smoke. So, why not press that button?! - PUSH HARDER, SHOOT BETTER, GET RICHER!
As Hoxton says, pushing harder is always nice because you'll get richer and this game is all about MONEY. Being passive will most surely make your game more difficult and you are very likely to get overrun, which almost certainly cause you to fail the heist!
General Tricks
In this game there are several tricks you can use to your advantage.
One of the first things I can think about is the trading of a teammate. Trading a teammate with low health near the end of the assaul can change the ending of the game or just save a medic bag charge. Be careful with this strategy, because you have to make sure that you have enough time for the trade (watch those civvies!) and most of all, be sure to have a hostage. Remember that you can take cops as hostages only during the fade phases and that if you're not hosting, your will respawn with only half of your ammo. An example of this is the beginning of Panic Room: if the thugs almost killed you, well, first of all you should be more caful next time, but you can suicide and respawn right away with full health and full ammo if you are the host. This trading strategy concerns the host in particular by the fact that he will be targeted more (earlier actually, but as a consequence this usually means more), so for example, he can be the human shield for the crew in Heat Street when using the running strategy and be still traded right away with full health and ammo.
Other examples are about the movement and the reload tricks. In The Heist, most of the maps have some spots you can use to reach an objective faster or just to pass through cops much more safely. In Panic Room you can jump down from the windows to reach the ground floor from outside, in The Diamond you can jump down from the second floor without dying if you're going to do a speedrun, or just jump down from the elevators to avoid the heat. You can even just stay up to something that's high enough to avoid being charged from a cloaker. Talking about the movement, you can buy some time by jumping and shooting in the air, so you won't be slowed down by the scope. This is pretty useful if a cloaker is charging you, so you can just escape and buy some distance, then jump backwards and kill him while being in the air. I usually duck jump all the way, so this is pretty easy for me. I use this even when I need to reload and move fast at the same time. If the reloading speed is too long is obviously useless, but take a Reinbeck where you have to reload every bullet and you can reload one bullet with one jump without any slowdown. A very important thing about reloading is to cancel the reload animation with a melee or with a (short) sprint, so you can avoid being killed because of the idling time.
Baiting cops in certain spots is very useful, so the objective is clear and ready to be taken without cops nearby. In order to bait them, most of the team needs to stick together in the same area, so the objective guy won't be targeted much by the police. Anyway, crossing certain rooms will allow the police to walk through them through or spawn right there, like Cafeteria in No Mercy or the Containers Area in Slaughterhouse.
If you haven't done so, I also recommend you read the Things you must know (and do) if you consider yourself a Good Player guide by Kuffar
Common misconceptions
A lot of players that come from the second game think they know all about the mechanics in the first, while in reality many things are different. Even the game provides confusing information about some events, so I will try to clear up some of the most common misconceptions about what certain things do (or not do).
- Killing the bank manager on Overkill (and above) at the beginning of the heist will spawn two dozers and will increase your trade delay, but it will not cost any money;
- Killing chavez does not count as killing a civilian as he is counted as an enemy;
- Killing civilians in No Mercy (except for the technician) will set off the alarm.
Having a cop hostage does not do anything special either. These hostages still count towards the pool of enemies on the map and having four of them hostage will make other cops refuse to surrender. Cops that have not fully surrendered will not count as a hostage, but they will usually start shooting you again after a while.
Choosing your loadout
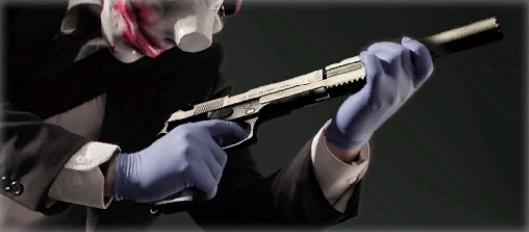
You may ask yourself what gear you should choose when you're on the loadout screen. It's a very common question and most people will tell you to bring the Bronco/M308/GL40/Extra Startout Ammo with Aggressor or BGH. This setup works well enough with every heist and every situation, but don't underestimate other setups. The "right" setup really depends on the heist and the planned strategy, so carefully look at what the other players are taking. Switching up your loadout will change the game experience, make the game more replayable and most of all, more enjoyable.
Weapons
You shouldn't blindly use the weapons other use and unlike what some people will say, all primary weapons are viable on OVK145+. For example, let's suppose that you want to go full aggro on Slaughterhouse. With a Brenner you can kill the cops at their spawning without a problem as it's unlikely you run out of ammo soon. It's also mostly close to mid range combat and has a lot of specials, so the AK is a really fine choice as well. Playing a map with mostly close quarter combat such as Panic Room or Undercover? The Reinbeck delivers exactly what you need. A fast Diamond? An AMCAR or an AK can do their job pretty easily. Of course nobody is telling that the M308 is not a valid choice, but be original and try to make your own setup so that you'll have more fun! You may even be better with a weapon other than the M308 and when you're playing with a team you really don't have to worry about tasers that much.
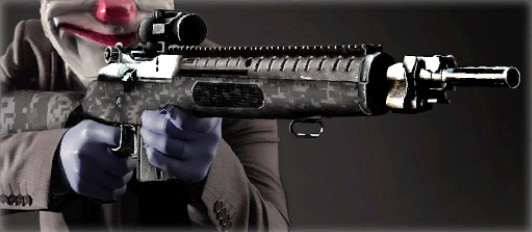 If you know how to use it, the M308 is a very good all-rounder and that's why most people use it (besides using because they think it's the meta). But what about the others? The Brenner can support a holding position pretty nicely and if someone has equipped the sharpshooter bonus, it can be used for mid-high distance even in the Bridge or Heat Street. Still not the best choice, but you can take it if you have balls of steel. The Reinbeck is one of my personal favorites; it is the most powerful weapon in the game. It can be used up to mid-distance and it can kill every non-special unit with 1 headshot, even on OVK145+, making it a very nice killing tool if you like to jump all the way like me. With the aggressor bonus you even extend its range. Also, it can stop charging cloakers with a single shot to the body, which is REALLY, REALLY helpful. Another really powerful weapon is the AK. Thanks to its rate of fire, it kills a dozer in less than 2 seconds and you even have bullets to spare, which cannot be said for the M308 where you have to hit all bullets to the head (with aggressor you can do it with two bullets less). Moreover, it has a decent reloading time if you do not empty the clip completely and has medium recoil, but watch out at overusing it, because it will eat A LOT of ammo. Finally, the AMCAR is more or less like the AK, it has a better accuracy and has a much faster reload, but it's less powerful. So, think about what you want to do and choose your gear based on that.
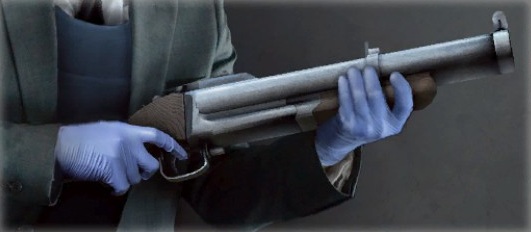 for one simple reason: it can kill shield units with a single shot without having to go around them. However, it can also easily destroy the glass on a dozer's helmet, it can clear massive waves of cops, stun enemies to exit more safely from a camping spot or cross a heat zone without taking too much damage AND it can even make you suicide in a safe spot if you're going to play OVK or doing some tricky stuff like speed running.
Not everyone has the Wolf Pack DLC, which means that you cannot use the GL40. So what should you take then? Well, the money to buy it of course! But let's suppose you want something else because you've had it with the GL40, what do you take then? You can choose between the Mark-11 and the Compact-5. I personally prefer the Mark-11 because of its rate of fire that can kill a dozer pretty fast, so it's a nice weapon to have if you're holding a Reinbeck that is not very effective against dozers. Moreover, it is a suppressed weapon, so you can fire being host in Counterfeit/No Mercy. The Compact-5 is nice to kill snipers at mid-high distance and first waves of blue cops/murkies, but do not rely on it to complete objectives on Panic Room, for example. And the locomotive? It's a decent shotgun with a really bad ammo pickup. So it's fine to use on those close quarter maps, but it should only be used as a secondary weapon as it'll run out of ammo really fast.
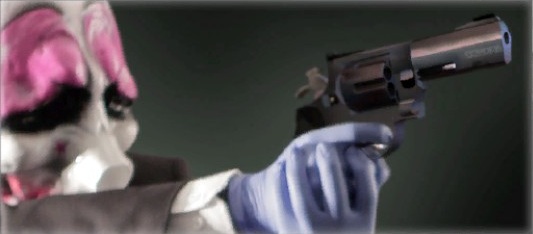
These points become much less valid when you play on the lower difficulties, but do you remember the first point of this guide? No? Well, go and look for it, it's REALLY important! Being serious, all of the pistols have a more or less nice accuracy, but the B9-S can be used only for Easy to Normal difficulties to be effective because of its really low damage. Forget about stealth, you have a melee attack and you're usually not playing alone. The STRYK is "nice" to kill dozers because of its rate of fire, but the ammo is out in a couple of seconds and the recoil is just too much if you focus on specials too much. Inexperienced players may want to go for the bronco on 145+ as you can stop nearly anything with a single shot, but you should seriously consider using an alternative on the lower difficulties.
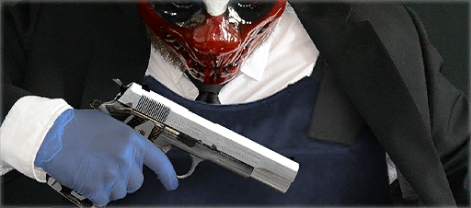
Player equipment

There's four different types of equipment you can choose from in this game (three if you don't have the DLC as that contains the toolkit). That's not a lot and they're not equally useful, but it's still worth to look at what they can be used for.
Thick Skin is actually nice for OVK145+, very good for OVK and yes, it can be taken instead of Extra Starting Ammo if you can manage your ammunition or when you're holding a Reinbeck/Brenner. In fact, since the health you receive after a down is based on a percentage of your total health (75%, 50% and 25% on the first, second and remaining downs, respectively), you always get to benefit from this health bonus. The picture of your favorite heister (or the one you're suck with) will be refilled exactly like when you're not carrying any protection. Try to take one kind of damage with and without it, the health will decrease definitely slower if you're carrying more health with you. On OVK145+ this is still the case, but the effect is lower since you'll only get 20% of your health back when you're revived. You still get that 33% extra HP, but it has a lower impact. It can even be useful on the maps where you may not consider it, like on Heat Street and Green Brige, since you generally have to push hard to advance in the heist and without a medic bag, you have to be really careful.
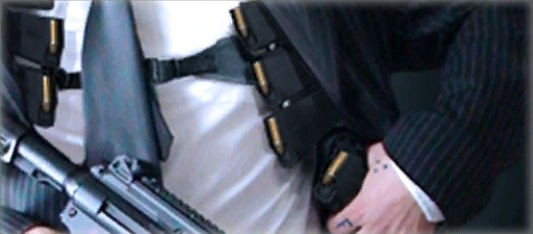
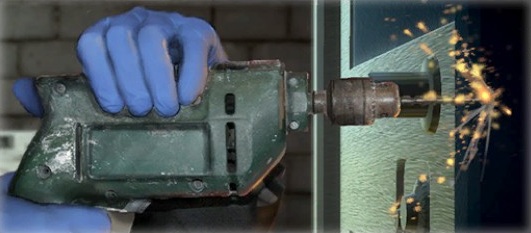 With this item you can interact with everything 20% faster. It is a must-have tool if you're going for speedruns where every second matters, but other than that you generally want to have the extra ammo or health instead. When speedrunning it's especially useful on maps that have lots of things to interact with like Diamond OVK and First World Bank. It can also be useful in Counterfeit to defuse C4 and open gates in the sewers. Not a must, but you can get some seconds if someone takes the last plate before you're ready. Just don't expect too much from it, you'll be disappointed.
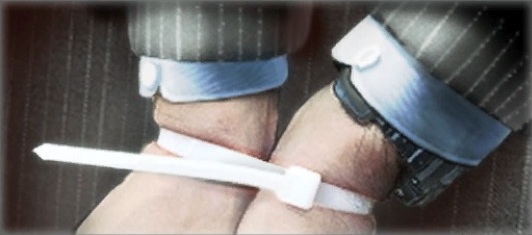 Gives you more cable ties with a total of 6 when fully upgraded. Can be used for the Crowd Control achievement or for maps with lots of civilians. However, you should learn how to take cops as hostage so you can do without. You should not use them for the stealth part in No Mercy, just spam that F button so you can choose a bonus you actually need.
Deployables
Two doctor bags coupled with the ammo bags is the most common setup for the deployables on the higher difficulties, however, it being the most common does not mean that it's the only one. Bringing a pair of both usually isn't about running short on supplies, but more because you can only drop them in one place. It's fine if your team is mostly camping in a single spot, but that may mean the runner won't be able to access the supplies.
Remember that your equipment has to last from the beginning to the end of a heist. If you mostly kill from a distance where you can't pick up the ammo or when you just can't manage your ammo very well, then you probably need two ammo bags. If you have to do objectives in open areas, you may think about bringing an extra doctor bag. In general bringing two of both bags means you usually don't have to worry about the supplies running out.
When placing a bag, always think about how you can access them. If a doctor bag is in the open, you risk getting a down when you need to use it. If it's on the ground, you may end up taking from the bag instead of reviving your teammate and sometimes those seconds do matter. Another use for bags is to provide additional cover: They stop bullets, so if you place them wisely you can make your camping spot even more secure.
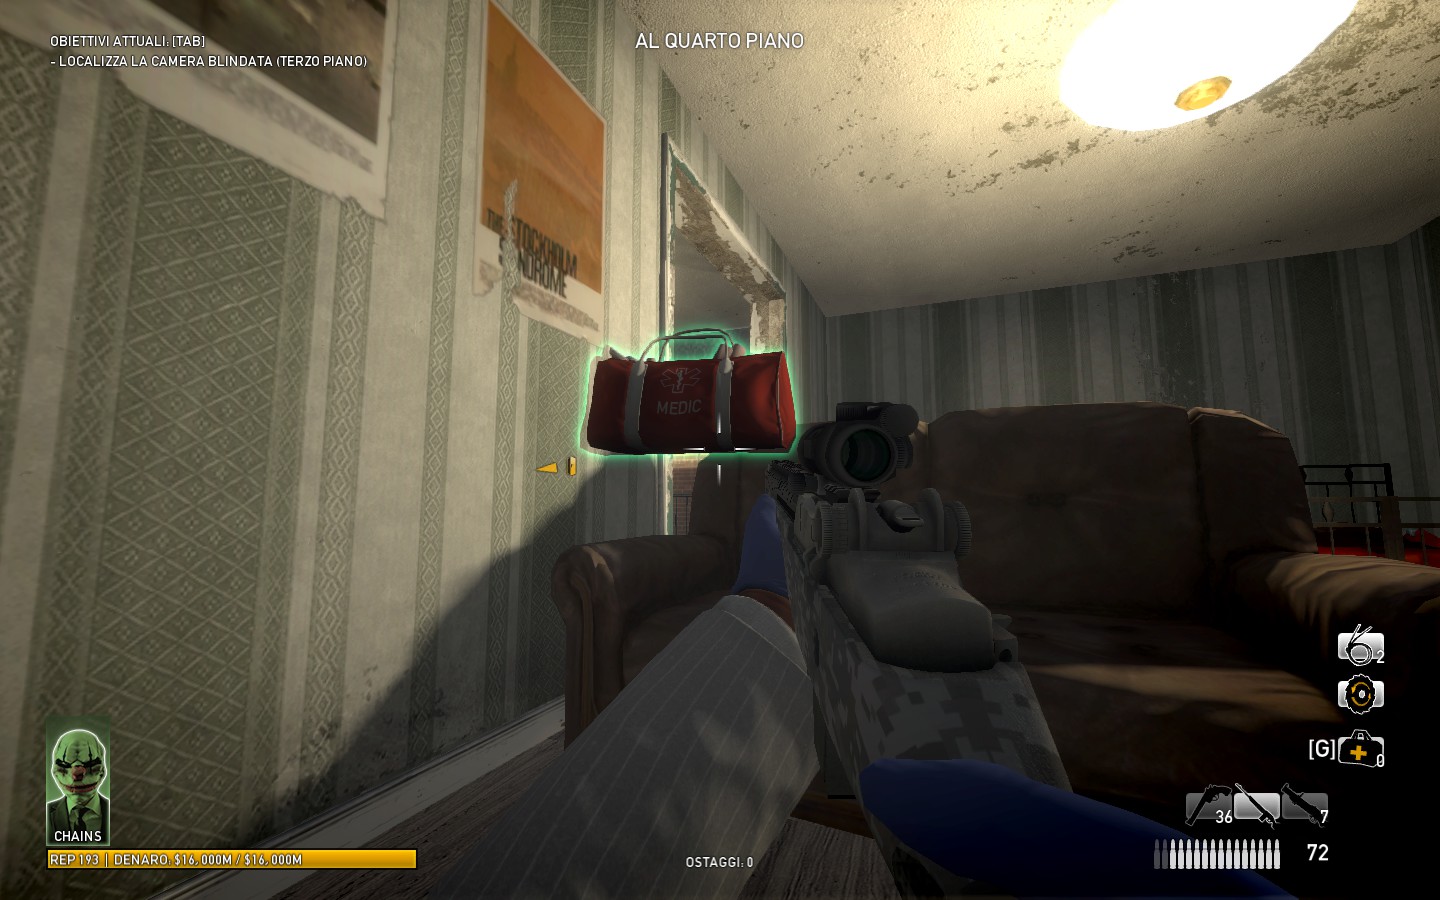 An example of a nice dropping in Panic Room. Dropping it this way you have more cover from the front, it is not on the ground, you can safely take the bag and you still can shoot staying behind the couch.
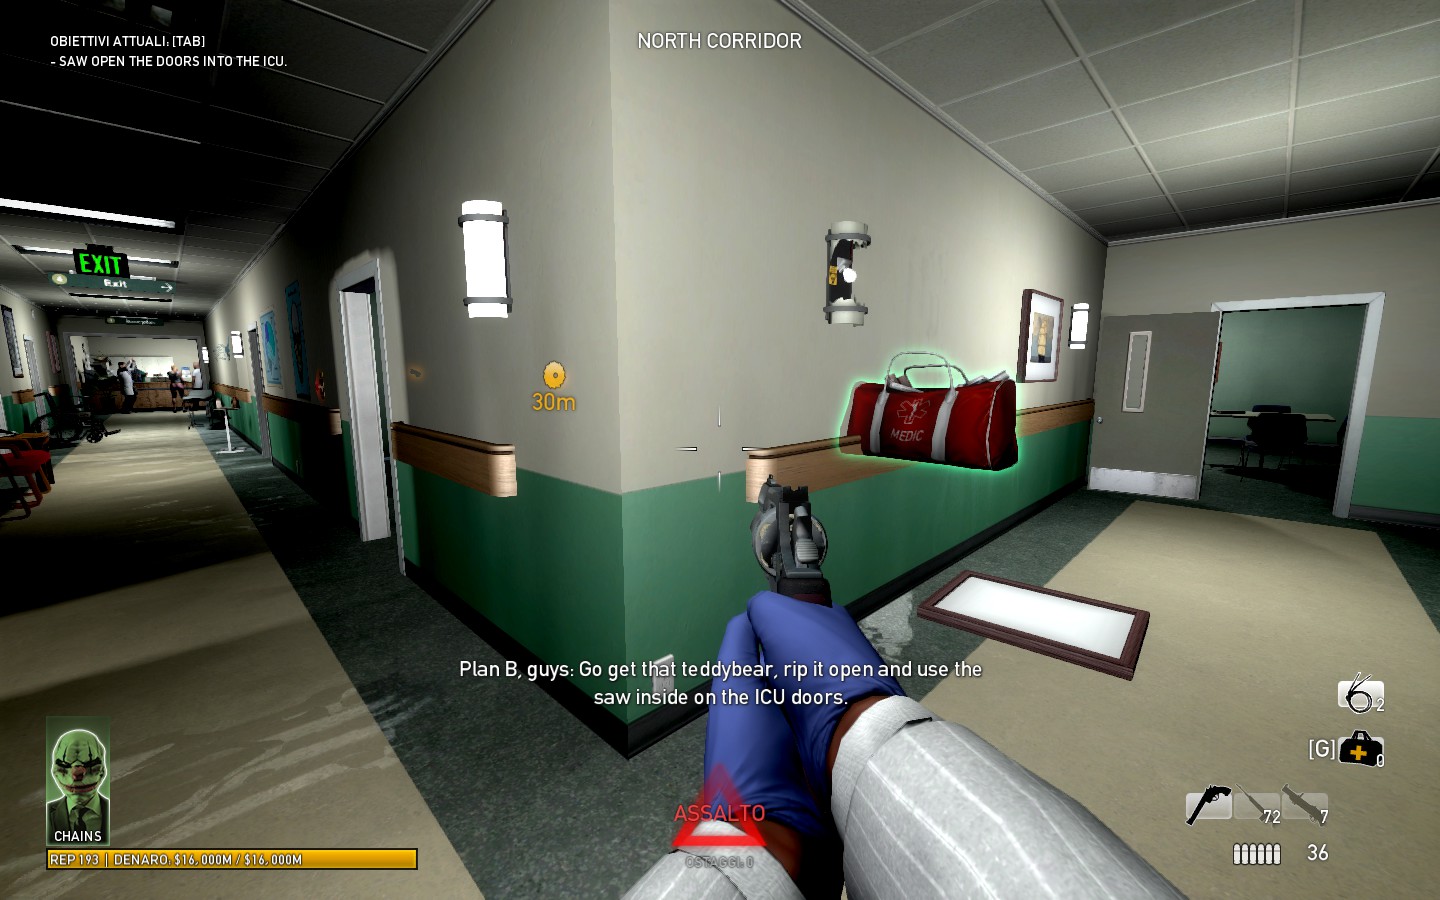 Another example of a placement that provides good cover, this time in No Mercy. It's not placed on the ground and it provides cover. However, this one can be considered a glitch as only a tiny fraction rests on a solid surface.
Bags are very exploitable and can even be dropped in the air. They're intentionally bulletproof, but being able to walk through them most likely to avoid getting stuck in them. However, this provides "Jesus spots" when placed correctly (you can still get cloaked and arrested) and that's considered one of those very broken bugs you shouldn't exploit. Bags don't need to 100% rest on something (not even in real life, who would've thought), but try to avoid exploiting the bugs that come from it as best you can.
Deployables: doctor bags
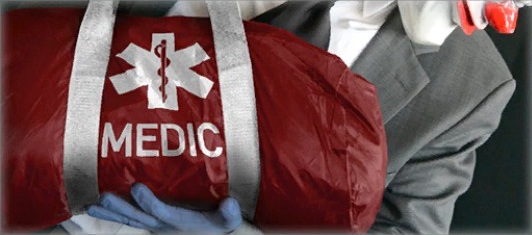
We've talked about what equipment to bring and where to place the bags, but how does the medic bag actually work? It's quite simple really. A fully upgraded 3/3 medic contains 5 charges in total (one less for each upgrade you're missing). Using them at the right moment is the key for success, but it depends on the difficulty, the situation and your role inside the team. On the Overkill difficulty your bleedout time doesn't decrease as fast as it does on OVK145+ for example and unlike on the highest difficulty where your health will always stay at 20% after each down, you will get some of it back. So if you're playing on OVK and you have very little health left, you can just take an intentional down to regenerate some of your health if you haven't taken too many downs already. But only do this when you really need the health and do it in a place where a teammate can safely revive you.
But WHY you have to take a med? The answer is simple: it is because a medikit will refill your downs and reset your bleedout time. In fact, in OVK you have 30 seconds to bleed after the first down without any bonuses, 20 seconds after the second down and 10 seconds after the third one, so healing up after the third down is generally a good idea. On OVK145+ you have 30 seconds at the first down, 15 seconds at the second and only 1 second at the third down, so healing up after the second is the best move. The More Blood to Bleed crew bonus will add 5 seconds on top of the initial bleedout time, so that gives you some extra seconds on your third down on OVK145+. It is quite risky to try, but if you trust your team and you are camping in a very small spot with decent cover like the bathroom in Undercover -- usually a long heist where taking as few charges from the medic bag as possible is crucial -- you can heal up after 3 downs even on 145+.
Of course, taking meds or not doesn't only depend by how many times you have been downed, but on a number of factors. For example, let's suppose you are camping with just one other teammate and you have both red health. If one of you must interact with a bag or if gets downed, the other one might die trying to get the teammate back. Another example is helping a buddy far from your location, which is risky by itself because you don't know what's waiting there, but if you want to do it, just heal up as soon he gets downed and get him. And of course, you have to stay in good health if you are the objective guy, so take it whenever you feel it. Just think of the bigger picture; sometimes it may be better for someone else to take over.
So far about their usage. Let's talk about how and when you get them. Doctor bags are a reward for leveling up the support tree and are unlocked at level 5 at which point they contain a mere two loads. The upgrades at level 11, 19 and 33 in the tree each increase their capacity with one load, making for a total of 5 full recharges.
Deployables: ammo bags
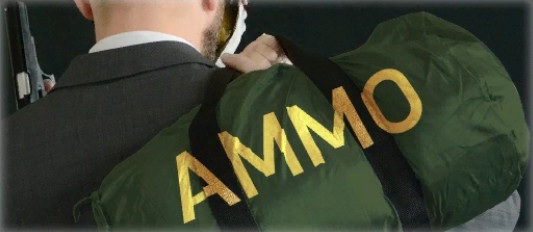
Unlike doctor bags, ammo bags do not have a predefined number of charges you can take from them. You can take ammo from a bag whenever you want and will only decrease by the amount you take from them. However, they do not have infinite supplies and eventually even the ammo bags will run out.
The ammo bag mechanics might seem a bit tricky at the beginning, but it is actually quite simple. A fully upgraded 3/3 Ammo bag has 10 full refills of ammunition inside (with a base of just 4 refills when unlocked at level 2 in the assault tree, 5 with the first upgrade at level 10, 7 with the second upgrade at level 19 and with the final upgrade being at level 30 in the assault tree). Let's say this is 1000%. Why not 100% you may think? Well it's easier if you consider each fully loaded weapon to have 100% of ammo. Since you carry 3 weapons, this means that you can carry 300% in total if you have full ammo on all weapons. Note that weapons are refilled in order, so taking from a bag may fill up your pistol completely while barely giving any bullets to your primary weapon.
Let's suppose you have an empty M308 without having extra starting ammo or benefit from the BGH bonus and have not used any of the other two weapons. So you've shot 72 bullets and now you're taking ammo from a fresh bag with still 1000% of ammo in it. Your M308 will now be fully loaded again (100% ammo) and the Ammo bag will now have 900% worth of ammo in it. Now let's do it again with Extra Starting Ammo + BGH. This time you can carry 124 bullets, which is your maximum amount for the weapon, your 100%. Again, fire all those 124 bullets and take ammo from a fresh the bag. The bag still holds 900% worth of ammo even though you've shot more 52 more bullets. Remember that the bag isn't affected by how often you take ammo, but it will be affected by the maximum amount of the ammo that you can carry and, of course, by how many bullets you miss when you're taking from the bag.
We've talked about the M308, but I've done some tests with different weapons and the result is always the same: The only thing that changes is the capacity of your gun. I tried with a Bronco without AND with Extra starting ammo, the result is like the M308. Tried with Brenner, taken from the bag for 10 times and each time I got 240 bullets.
Let's do a comparison with bullets from Brenner and Bronco: A Bronco and a Brenner without extra ammo have 36 and 240 bullets as their respective 100% capacity. Firing 6 bullets with the Bronco and firing 6 with the Brenner it definitely different. Six bullets from the Bronco is 16% of its total capacity, while 6 bullets from the Brenner are is 2,5% of the total for the Brenner. To reach 16%, the Brenner has to shoot 38 times. Same story for every other weapon, no doubts about it.
Usually you don't exclusively use a single weapon inside a game, right? Let's reach 50% from Bronco, 45% from Brenner and 5% from GL40. In order to reach this 100%, you have to shoot 18 bullets with the Bronco, 108 bullets with Brenner and well, 0.35 rounds with GL40, so let's say 1 round¹. This is all about the math behind it, just be sure to have enough ammo when you need it. Remember that if you join a game that has already started or you get traded without you being host, you will get only half of your total ammo, 50% for each weapon.
The conclusion you can draw from this is that you should prefer your primary weapon and use your other weapons to refill it and themselves if you want the ammo bags to last. If you're not able to collect much ammo, you'll have to resort to the bags faster meaning they go empty more quickly. So think about how much shooting that one shield is really worth if you have to spend multiple GL rounds on it.
[1] Tromboncino did the empirical tests. It's not actually 5% you're taking here, but 1/7th or about 15%. Just didn't want to redo the example. :P
Deployables: Trip Mines and Sentry guns
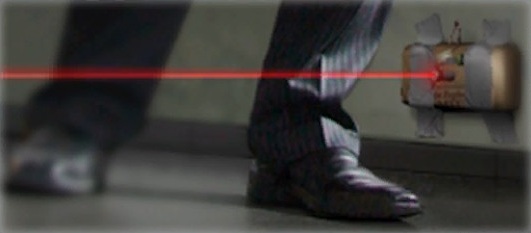 Trip Mines and Sentry guns aren't the common choice in the loadout menu, but they can be really useful if used correctly and can be a valid choice when you don't need the extra ammo or meds. As host you don't have a delay time on deploying trip mines and dozers can be taken out quite fast. The most common way to use mines is to place them somewhere (e.g. the floor) and shoot them when a special is near to speed up the process or to avoid wasting the mines or common units. You can also place a mine to the upper spot of a small room's entrance, making it only take out dozers only because they are the only unit tall enough to make it explode by touch. Of course, you should not use the GL40 if there is a mine nearby as it may unintentionally make the mine explode, so make a deal with the most used secondary.
The most obvious example for a good use of trip mines is on FWB, where you can use them for the Windowlicker¹ and the four dozers in the vault on OVK145+. An experienced player with trip mines can usually kill all of the dozers by themselves, or with the cover of another teammate, while the rest of the team covers the vault area and make the escape a lot easier for everyone.
Another good example for the use of mines is defending the electricity boxes and water valves on Counterfeit: By placing one mine in front of the power box or water pipe, the bulldozers will die before they have a chance to turn off the utility. You can also kill all the shields covering the escape with a single mine and you can even proceed solo in the sewers without losing time if there is an ambush. Just use your imagination, the mines are incredibly fun to use for a lot of things and they can save your back if you get overrun.
NOTE: A client will deploy a trip mine with some delay based on latency. They also detect enemies on the client side, so they work best when used as host.
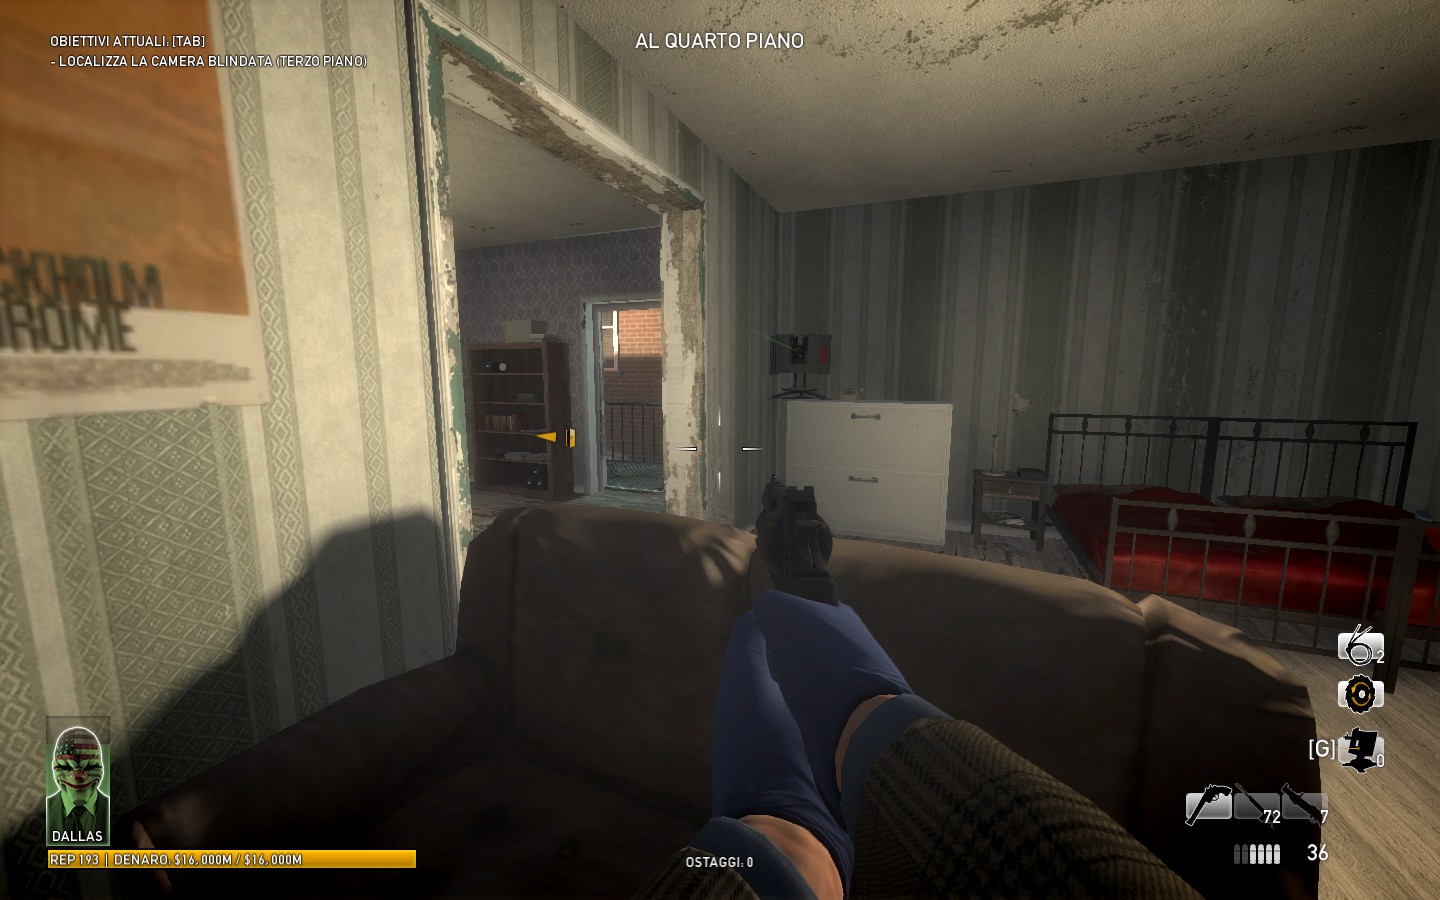
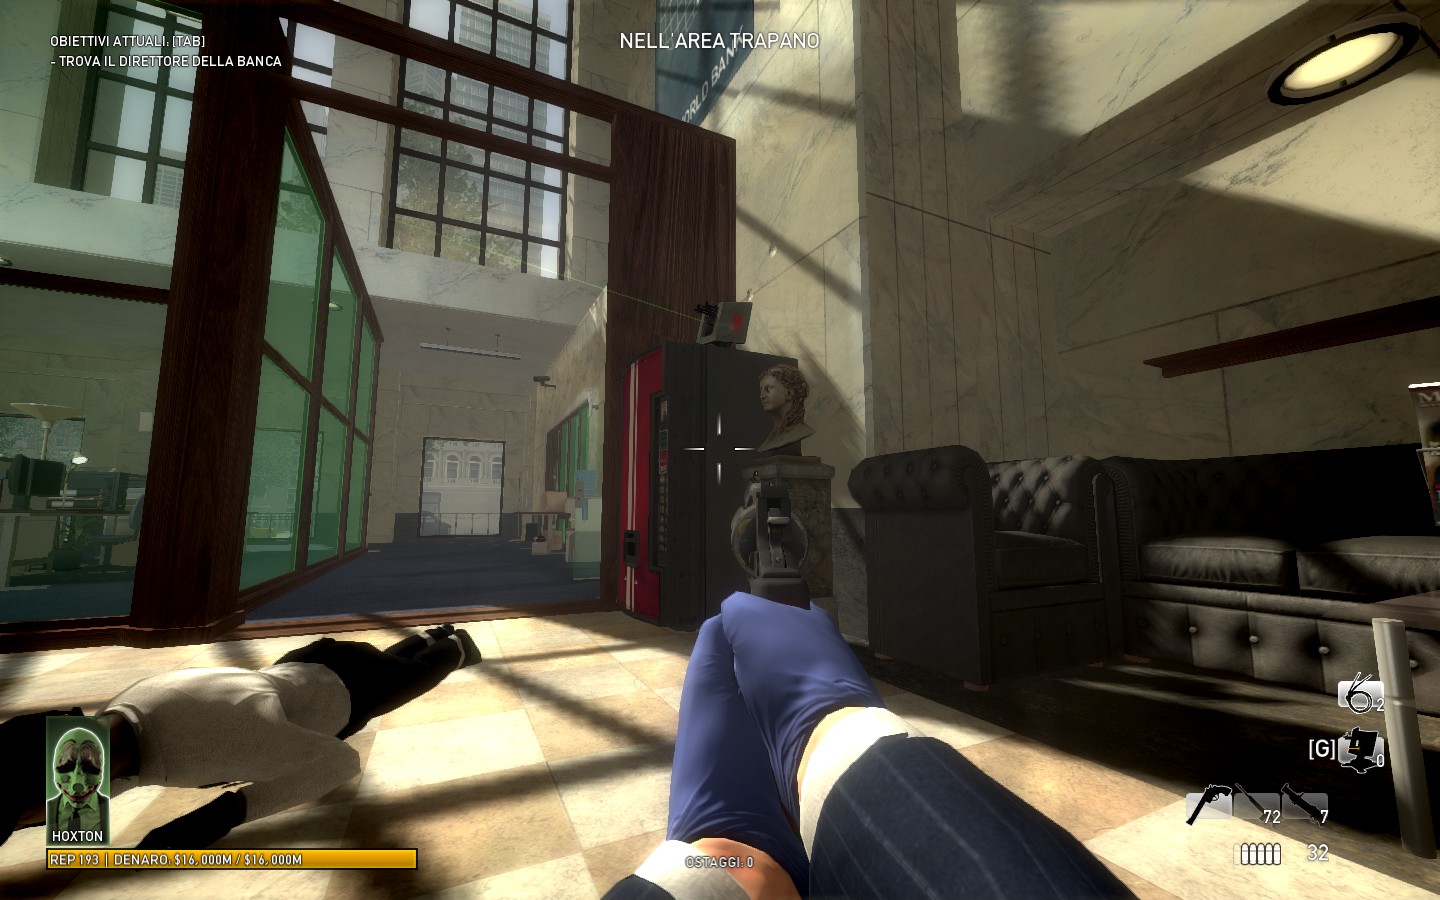
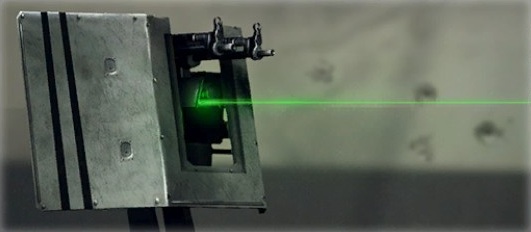 Sentry guns are less fun than the mines, but they can be placed in strategic spots to bait the police for a bit while taking down an objective, provide a little cover when the crew is being overrun, speedrunning or just escaping. After being placed, a sentry will become like a new member of the team, baiting the police and becoming a target. Therefore, you can even place it in a safe spot near the place you're holding, so 2 guys (+ sentry) can camp and 2 guys can go for objectives. A sentry will be taken down pretty easily (within a minute if it's placed in an open spot), so try to set it in a good spot where its back is covered and preferably where it cannot be kicked over by the cops. They cannot be repaired or picked up like they can be in PD2. But watch out to not let a shield in front of it for too long or it will be depleted in no time and there is no refilling them either. Here are two nice spots for a sentry gun, where it can cover if you're being overrun and where it can bait without being a waste, allowing your team to be less of a target as well.
[1] A swat will place C4 on the windows (on either side) to make an entry. If you kill him, you'll get an achievement called "Windowlicker".
Crew Bonuses
Like your deployables, the crew bonuses are something that directly impact your teammates. However, the bonus you choose does not affect you directly. Therefore, if you want to benefit from the same bonus, someone else will have to equip it for you. This is why you often see two of the same bonuses in a team. But this is not the only reason: Crew bonuses are only active if the player that has it equipped is in the standard state (alive and being able to shoot with any weapon), so once that player gets downed you no longer benefit from the bonus!
That was the basic information. Unfortunately it's not that simple for all crew bonuses. Big game hunters is always active, but you only get to benefit from the ammo bonus once you (re)spawn when someone has it equipped and More blood to bleed is only applied when you regenerate your health by either (re)spawning, using a doctor bag or leveling up on the lower difficulties. So if you drop into a game that has already started, keep these things in mind and choose your bonus accordingly. Oddly enough you do not initially benefit from the additional bleed-out time either if you start on a heist where you have to mask up. If you're not sure what to do, it's usually best to ask the team that's already playing.
One other thing to note is that when you drop into an active game, you'll have to wait for other players to enter the standard state after you've spawned for their bonuses to affect you (excluding the exceptions mentioned above). That means they have to get tased, downed, arrested, etc. and then return to the standard state for the bonuses to become active for you.
So far for the general information, let's look into the specifics. All numbers given next are taken from gir489[bitbucket.org]s decompilation of the source code and can also be found in Zdann's PAYDAY The Heist: Weapon and Enemy Statistics guide.


NOTE: Having the Wolf Pack DLC increases your overall armor and I made my calculations while having it; if you don't have it, the bonus will provide the same armor as someone with the DLC and no Protector bonus.

 These 2 crew bonuses have the same effect, boosting the earned money with 20%. The only difference between the two is that Noob Lube is for people with a reputation between 0-5, while Mr. Nice Guy is for people who have the maximum reputation. This is 145 or 193, depending on whether you own the Wolf Pack DLC or not. The bonuses do stack with one another, but not between themselves.
Some numbers
The formula for the amount of time you'll have left after going down is the following:
bleedout time = max((10|5|5|1), 30 + (5 if more time to bleed) - (number of downs * (5|7|10|15)))
The numbers between parentheses that are separated by the vertical bars are the values for each difficulty; easy+normal, hard, overkill and 145+ respectively. So after 3 downs on hard you'll have 30 - 3*7 = 9 seconds left without the bonus. After 4 downs on hard this is 5 seconds, since the minimum amount on hard is 5 seconds.
Note that your down time is calculated when regenerating (e.g. at the start, by leveling up on hard or below or by using a medic bag). So if someone drops in with more blood to bleed, it won't be effective. Each down only subtracts a certain amount that depends on the difficulty.
You cannot know the exact times in advance, but for besiege maps (everything except for Heat Street and Green Bridge), the assault on 145+ usually takes 7 to 8 minutes (30s to build, then sustain is 200 to 400 seconds). For street maps this is 2-3 minutes (35s build + 60-160 seconds for sustain). For overkill it's 150-360s / 50-120s, for hard it's 30-200s / 30-80s and for both normal and easy it's 30-160s / 30-80s. Breaks have a different duration and those too depend on the "difficulty" value and the difficulty you choose to play at: a higher difficulty means shorter breaks (for both).
- Diamond Heist OVK - speedrun (2:20 on avg) + grabbing 4 sapphires - rng involved, on average ~3500k per 1:55 / 1826k per minute
- Overdrill OVK (gold only) - 75M per 42 minutes / 1785k per minute
- Overdrill normal (gold only) - 73.2M per 42 minutes / 1740k per minute
- Overdrill easy (gold only) - 71.85M per 42 minutes / 1710k per minute
- Undercover OVK - triggering the saw and restart - rng involved, on average ~1500k per 1:05 / 1385k per minute
- FWB OVK - setting up the drill and restarting - 833k per 50s / 1000k per minute
Health, armor and damage taken
As you can see, you have the same health on overkill and overkill 145+. Besides the enemies being stronger, the difference is how fast you can take shots that do the same or more damage.
Body armor
In total there are 5 (4 without the Wolfpack DLC) armor upgrades. Each upgrade will upgrade your armor so that it will have 10 more hitpoints. To calculate your total armor, you take the number of upgrades you've unlocked (multiplied by 10) and add it to the initial armor for each difficulty. So with all armor upgrades, on easy you'd have 60 + 50 = 110 hitpoints for your armor and on overkill you'd only have 10 + 50 = 60 hitpoints on your armor. If you play with a team and someone other than you is using protector, you can add another 10% to the value you just calculated. On overkill this would be at most 6HP, while on easy it can add up to 11 HP to your armor. As long as you still have armor left, you can theoretically take a shot that does infinite damage, so when meeting a dozer, having 1HP on your armor is the same as having all of armor. This little detail is the power of your armor.
So what about protector? Let's do the math and assume you're getting shot on overkill 145+ by heavy swats carrying AMCARs. These beauties do 17 damage, so 3 shots won't completely take out your maxed armor, but 4 shots definitely will. Protector won't change this, since 4*17 is still more than the 66HP your armor has with it. It only makes a difference if you happen to get shot and your armor has taken more than 60HP, but less than 66HP, e.g. a single shotgun shot from close distance. In this case you can take one more shot and if you're in the open, you'll survive 0.15s longer, unless that one shot just happens to do a lot of damage (which you can take without problems with your max. 6HP amor).
Thick skin
Like many upgrades, thick skin is one that you have to upgrade to benefit from its full potential. Thick skin has 5 upgrades in total, each adding 20 hitpoints. Since your initial health is always the same, 300HP, a fully upgraded thick skin bonus can add as much as 100HP or 33%.
* The rifle used by a sniper looks exactly like an amcar-4, but it has different weapon values.
** The "pistol" used by a shield looks exactly like a compact 5, but it has different weapon values.
Damage output for each weapon
Weapons do the same base damage no matter which unit is using it. However, there exists a damage falloff for weapons that have specific values for certain units, which are defined by the skill level of the handler (normal, good or expert). The funny thing is that all weapons have a higher damage defined for shortest range (radius = 0), my guess is that the idea was to use an interpolation between the two nearest values. There's no such interpolation and the second value is always used, which often is a damage multiplier of 1. Since effectively only the reinbeck has a damage falloff that does make a difference, I will only list it separately.
Three skill levels exist for all weapons, but the following will only list stats for the reinbeck. There are more stats, but they're not very relevant here as there is no damage falloff on the other weapons. To get the total damage, simply multiply the base value with the damage multiplier at the chosen distance. For example, at short range a dozer does 60 * 4 = 240 damage:
*** A bulldozer uses the expert class, but it has some overrides.
Pickups
Ammo fills up each weapon independently so having one weapon full won't affect how much you get for the other weapons. The unit will disappear when ammo has been added to at least one weapon, regardless of whether it yielded a bullet or not. See Zdann's guide for how many bullets you get per pickup.
The second type is the special mission equipment that's synced by the host. There's only two examples of this and that's the drill on First World Bank and the saw on No Mercy. You have to interact with these units and by themselves they don't do anything. It's the interaction that triggers the host to send you the equipment or the reward from doing the interaction. These triggers are typically coded to be executed only once and as a result this type of equipment cannot be duplicated.
While they're not mission equipment, money bundles, small diamonds and jewelry fall under the first type. They award money directly on the client side and can be duplicated. Gold, blue gems and the red garnet are of the second type and you're awarded the money by the host and as a result can't be duplicated.
The teddy Moo saw in No Mercy deserves a special mention. While there's only one saw on the map that behaves like described, the host is always rewarded a saw as soon as any of the ICU rooms have been sawed open. It is therefore advisable to always let a client pick up the teddy bear.
Difficulties
The game has 5 difficulties, namely easy, normal, hard, overkill and overkill 145+. Overkill 145+ is only playable if you've reached reputation level 145 or higher and there are only two maps available for the easy difficulty even though most maps have events defined for this difficulty.
You may read about the Overkill 193+ difficulty, but that's not an official one and is added by the DAHM/DorHUD modification. Since I'm the author of that mod, I'll include a bit of the information for that difficulty as well.
The differences between the difficulties consist mostly of small tweaks to both the player and the enemies. There are also minor differences in the maps as some events only happen on 145+ (such as the 4 bulldozers in the vault in First World Bank) and more powerful units can spawn on higher difficulties or they spawn in larger numbers.
* The invincibility value is the time in which you take no damage from shots that do equal or less damage as the most recent shot that you took damage from (either to your HP or AP). If you take damage to your armor, the damage you take is capped to the amount of AP you have.
Another thing to note is that the health restoration after a down works different for Overkill 145+ than it does for other difficulties. Where you normally get max(25%, 100% - (25% * #downs)), on 145+ you only always return with 20% of your health after a down.
Overkill 145+ is the only difficulty where the enemies move faster. Their speed in increased by 5% for walking and by 15% for running.
OVK193+ is a special case and includes more varied enemies: You'll see FBI units even late in the game and assaults times can take slightly longer than on OVK145+ and have a more random duration. The idea for having these "weaker" units is to help the player with the increased number of cops on the map while having no changes to the equipment or ammo pickups. Another benefit is to have a greater variety of weapons shooting you (though this is not limited to only these units), making it more common that you get shot by multiple weapons in the invulnerability time period and thus increasing the chance of taking damage from at least one of them.
For the group ai singleplayer values are generally used (5-10 fewer cops than on multiplayer mod). On the Overkill 145+ difficulty on the PS3 the spawn caps on besiege maps (not HS or GB) are all set to 15 cops opposed to the 25 on PC. Note that it's defined as a range, but there's a hard limit of 25 cops and therefore there won't be any regular spawns beyond this limit.
Then there's the weapon accuracy. Weapons yielded by players are much more likely to hit their target (enemy). Not only are the hit chances higher, but also the cone in which auto hits are possible.
Damage on enemies: primaries
Some stats for the weapons on Overkill 145+ with all upgrades. Unfortunately, the sections have a character limit that does not allow for long texts (or tables in this case), so I had to split in three sections. The following tables show the number of shots needed for each enemy to die for every primary, secondary and pistol, respectively. The first row for each weapon is when the aggressor crew bonus is not in effect, the second row shows when it is in effect and the third row shows the difference.
To inflict headshot damage on a dozer, you first have to take off the faceplate. This faceplate has 200 hitpoints on all difficulties and damaging inflicts damage to the body of the dozer as well.
Also note that the shotguns have a damage falloff that makes them do less damage at greater distances. With aggressor you can slightly negate this effect. Moreover, every pellet fired by a shotgun does the maximum amount of damage. If multiple pellets hit a single unit, the damage is only applied once. Headshots take priority.
Damage on enemies: secondaries
Damage on enemies: pistols
Again, these values only show the shots needed for Overkill 145+. If you want to check another difficulty or more stats, you can download my spreadsheet[mega.nz] and change the multiplier values accordingly.
Challenges
- <map name>: Bulletproof: Your reputation has to be 20 or higher. Note that cloaker and taser downs do not cause you to fail this challenge.
- <map name>: Clean hit : Your reputation has to be 20 or higher.
- <map name>: Don't Lose Face: Your reputation has to be 48 or higher.
- <map name>: Like a Pro: Your reputation has to be 20 or higher.
- <map name>: Overkill: Your reputation has to be 48 or higher.
- Sentry Gun vs the World: You have to host the game.
Challenges that require you to play on a certain map and do stuff all require you to complete the heist while being in the escape circle. So you cannot be late and you cannot be in custody. These challenges, and a few that meet the same criteria, are:
- A bridge too far!: Awarded upon entering the escape circle.
- Dodge this!: You cannot be shot by ANY dozer; even losing armor fails this challenge.
- Last man standing: Even works with team ai
- Windowlicker: You can get the challenge on both sides. Even if one of the sides has already been blown.
- Gold digger: The challenge is unlocked when the first player enters the escape zone.
- Shinobi: Awarded upon entering the escape zone with all living players.
- Are those the blue ones?: Awarded upon taking the 10th sapphire.
- Stand together (well that kinda makes sense, doesn't it?) It will fail as soon as you see that someone is downed. Disconnecting will not save the challenge.
- Hot lava: Awarded when the escape objective triggers.
- Are you ready yet?: Awarded when the escape is available for the 7th time.
- Easy street: The accumulative result of all accuracies divided by the number of players needs to be at least 60. The challenge will fail if someone drops in after the game started.
- I pushed the button and lived!: Note that for this challenge nobody can be in custody.
- Noob herder
- Pacifist: Not a single unit can die, not even from enemy fire
- Blow-out: Enemies must die from an explosion caused by a GL40.
- Detective Gadget
- Don't panic: Note that going loud from the start awards you this challenge.
- That's the wrong door, again!
- Afraid of the dark: Only the first power box is relevant
Some of the challenges you have to do on the DLC maps. If you do not own this content, then you cannot unlock the challenges (and thus achievements). The only solution is to buy them (and move to the PC if you're playing on the PS3).
- Intimidating: You only have to complete the last step to get the challenge.
- But how?: It takes 10 minutes for the truck to fall. You have to shoot the window at the start to make it go in head first.
- Civil disobedience: Gangsters and civilians do not count.
- Are there more than two?: 12 bundles will spawn out of 53 possible locations.
- No photos: The camera in the middle of the lobby does count for the challenge, just not for reducing the odds of snipers spawning at the balcony.
- Eagle eyes: Guards in Diamond Heist count towards this challenge too.
- Darkness: Anyone can destroy the light bulbs.
- Last Christmas: The presents are available on all maps and only in multiplayer mode. Some locations are only accessible when the correct locations are available.
- You are GOLDEN! OVERKILL salutes you!: You only have to complete the 6 original heists on 145+ to complete this challenge.
- Don't Lose Face: You only have to complete the 6 original heists on overkill or above without trading to complete this challenge. You can have players in custody.
You can get most of the challenges even at max level. The only exception to this is the challenges that require you to level up:
- I ain't afraid no more: Your reputation must be lower than 193 (or 145 without the Wolf Pack DLC). Also make sure that you're leveling up the assault tree.
- Crack-bang: Your reputation must be lower than 193 (or 145 without the Wolf Pack DLC). Also make sure that you're leveling up the sharpshooter tree.
- Lay on hands: Your reputation must be lower than 193 (or 145 without the Wolf Pack DLC). Also make sure that you're leveling up the support tree.
Note that these challenges require you to level up during the game, not from awards gained at the victory screen.
Leveling up
PAYDAY: The Heist has a very basic leveling system in which you can only determine the order in which you want to unlock your skills, so a common question is what the best order is. There isn't an easy answer to this question as it's mostly a personal preference. For example you can choose to maximize your survivability to play the higher difficulties as fast as possible, go for a certain weapon or item or simply don't touch it at all.

The red rectangle is the relevant area and in this case [1] corresponds to the assault tree, [2] is for the sharpshooter tree, etc. This mapping depends on the platform and cannot be changed (without modifying the game).
- To level up beyond level 4 in any tree, you need to have a reputation level of at least 8;
- To level up beyond level 12 in any tree, you need to be at least level 20;
- To level up beyond level 43 in any tree, you need to be at least level 88;
- To get Mr Nice Guy (level 49 in any tree), you need to max out all skill trees to that point. This means you'll have to be level 144 or 192 depending on whether you have the Wolfpack DLC. Since the ultimate cap is on level 145 or 193, you can only unlock this bonus once¹.
At level 59 (and even earlier if you only go for the support tree initially) you can have all you need to be a full support member rocking a Reinbeck with fully upgraded doctor bags. Just don't try to face a bulldozer by yourself. The following is just an example, but it aims to maximize your survivability on Overkill as fast as possible as part of a team (though you normally shouldn't start out on this difficulty):
For the full list of upgrades see the PAYDAY Wikia article on the Upgrades[payday.wikia.com].
Map specifics and Strategies
Some players love to try new or challenging things, so a lot of spots, tricks and stuff to play with have been tested by many players. This section first goes over the general information for each map, shows what the differences between the difficulties are and finally provides some details on the most commonly used strategies for each map.

On the OVK145+ difficulty there are modifications to the maps that can surprise the unaware player and may even lead to failing the heists. This includes dozers in First World Bank's vault and some other heists, failing codes in Diamond Heist (yes, really, don't restart the heist when this happens), additional spawn locations for enemies, longer assaults and very early response times after each fade, so you have to act on these changes.
Moreover, enemies are faster, have more health and you face tougher enemies when you go up in difficulty. As a result taking a hostage is different between them. The general strategy is to go for body shots to weaken them, but if there aren't many around you may not want to risk killing a wounded enemy so sometimes melee is preferred.
First World Bank
 First World Bank is probably the most played map in the game and it is one of the easier ones to complete. It's the first map on the list and houses the secret Mayan vault with 70 bars of gold, making it the heist where you can get most money per minute if you play it right.
First World Bank is a close to mid distance combat map, making it perfect to use the AK, Brenner or Reinbeck on if you want take something other than the M308. The Brenner and Reinbeck are nice weapons to use for holding up the place and preventing you from being overrun, while AK can be used to take on the specials.
- Killing the bank manager at the beginning of the heist on Overkill and above spawns a pair of dozers. They won't spawn if you kill the manager more than 20 seconds after erasing the security footage.
- A swat, the "windowlicker", will usually try to destroy the cafeteria's windows during the beginning of the assault if there's someone in the area. A well-placed trip mine can easily kill him. Of course you can also just go outside and shoot him. The same event can happen on the other side and is triggered at the beginning of an assault.
- A sniper will always spawn facing the drill around 90 seconds after the first assault has started, watch when out fixing that drill! Luckily the heisters are aware of this even if you're not. Killing this sniper will make another one spawn some time later.
- A pair of snipers can sneak up on you at the big windows watching the drill area. You won't get a warning when this happens.
- If someone is in one of the offices in management during the first seconds when the security footage has to be erased and the laptop is in one of those offices, there is a 65% chance that spawn 3 special units will spawn on Overkill and above. They will enter through the windows, breaking them in the process and smoke will spawn.
- When Bain says "Specials units have been deployed!", two tasers will spawn on the balcony of the management's area from the roof.
- When Bain says "Cloakers have been deployed!", two cloakers will spawn in the conference room next to the management office and another three of them will spawn in the middle of the upstairs corridor, coming from a vent.
- Due to a bug in the game, the loop of specials (the two mentioned above + a dozer coming from outside) will stop if cloakers spawn three times. This is the reason there are seemingly very little dozers on this map.
- When entering the vault area (in the elevator room), there might be a cloaker hidden between the left or right pillars in addition to the bank guards. These two events are independent and the cloakers are exclusive to 145+.
- The thermite takes 5 minutes to burn through for when a single can has been placed or 3 minutes when two cans have been placed, counting from the moment of the placement. Whatever comes first.
- Enemies can spawn from the vents in the vault area on OVK145+. When these are enabled cloakers are often the first to spawn.
- There's a chance for a guard and some civilians to spawn in the closed vault.
- There are always 4 dozers waiting inside the vault on OVK145+. Rushing inside the money room is generally NOT a good idea.
- When exiting the vault area, there can be snipers in the balcony of the main room and cafeteria. Destroying the cameras can disable this event. It does not happen on easy and normal.
- During the escape, there can be a taser, shield and heavy swat covering the first door and a cloaker hidden in the left side of it. After that, a dozer, a pair of tasers or four blue swats swats can spawn. On OVK145+ there are always 3 tasers and 1 heavy swat on the stairs to the garage. In the last tunnel, a taser/bulldozer can spawn destroying a door and 2 cloakers can spawn at the exit, to the left of the extraction point. There are also some spawn points there on OVK145+, but those usually don't get triggered.
- The escape zone is not in the circle, but to the right of it. The circle was moved in an early update, but not the actual escape zone.
- The demo version on the PS3 stops when you are supposed to leave the vault.
- It's one of two heists with an easy difficulty you can actually play.
- It's one of the few heists where you can find loot on the map in somewhat hidden places.
- Killing the bank manager does not cost any money. Even if you don't kill him, there will be news papers mentioning that he got killed during the heist.
- It's possible to take the drill without taking the thermite by opening the printer from a distance.
- It's possible to get thermite for all team members and still have some left in the printer.
- If you are a client, you can yell at the extraction driver.
The second set are the cameras also used for overdrill (and the one in the hallway before it). Destroying these stops two elevator doors from opening and hence stops spawns from there.
For the final set of cameras I quote Frankelstner:Breaking the remaining vault area cameras disables the spawns associated with the first elevator on the right and the second elevator on the left. Breaking the cameras before the doors have opened has no effect. Because of that, depending on your luck with the initial 5 cameras, you might disable all elevator spawns while at other times breaking the final cameras has no effect whatsoever.
First World Bank: Management strategy
The management strategy is most commonly used on the higher difficulties and it's probably the safest way to successfully finish the heist. The strategy revolves around having a single runner and keeping the cops away from the drill area.
For the first part, the crew (which can be anything from 2-4 players) holds up on the right side of the bank to bait the police, while 1 person (not necessarily the same) goes for the drill once it's broken. You can camp at cafeteria's upstairs, facing the entrance of it if you want to play aggressively or do the same thing downstairs if you brought trip mines or found another way to prevent the cops from destroying the windows. You can camp inside the manager's room if you want to play more passively. However, the downside of this latter approach is that the entrance to this room will often be smoked, making it a good cover for cloakers and hard to get out for doing the objectives.
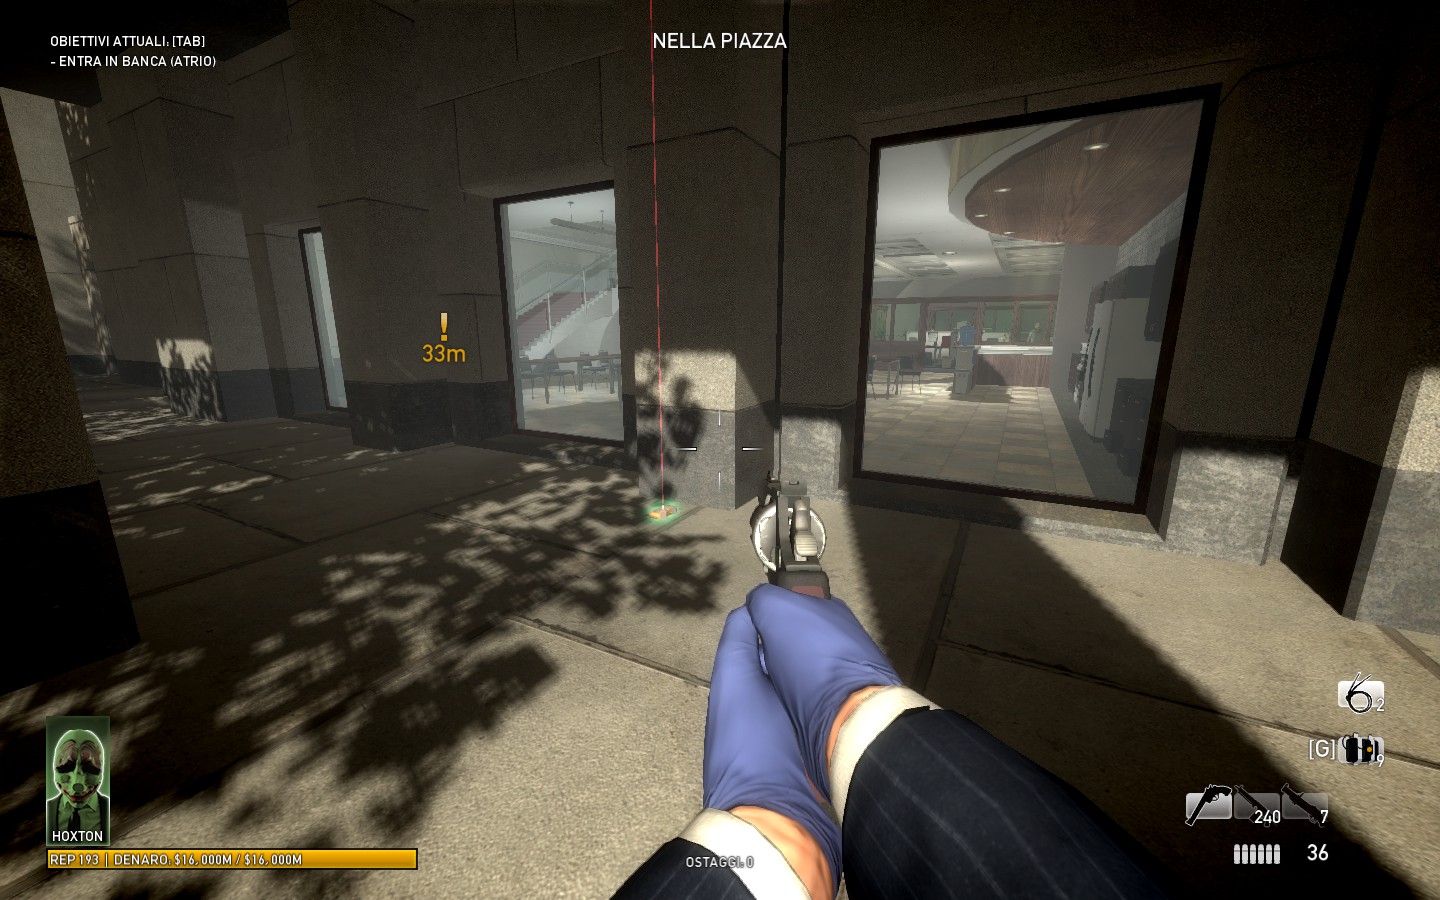 When camping here, you should know that a "windowlicker" will try to destroy the glass with c4, making an additional entry point for the law enforcers that leads directly to the stairs. If you want to avoid this in a safe way, you can take mines and place one outside the window by pushing yourself to the third pillar early in the game.
You should place a doctor and an ammo bag in (or near) the management's office, which will be useful considering you're staying here most the time. When the drill is done, you can choose two ways: the first is going all together and making a circle through the main lobby to end again in management's (after all the police are baited to the drill area). The other one is a little more tricky and has (the) two crew members with thermite place it and come back. This means that you'll lose at least half the team and you have to hold the room with a reduced fire power for a short period of time. Whatever you choose, you should wait at management area for the thermite to end. When it's about to finish, ammo up, med up and go for the vault area.
At this point you have 2 choices: if you have a trip mine guy, he can go inside the vault alone or with the help of one backup, while the other 2 or 3 guys are holding up outside to make the escape much more clear. The alternative is to go inside the vault with your whole crew, taking the money fast and escaping while they are still spawning; be sure to have a medic bag to use inside the vault for this one, because it's easy to lose health and you will need that for the escape. If you are slow, escaping will be pretty tough and someone will probably get downed, so just clear a little bit before running and stay in good health, it's very important.
Now you've reached the entrance of the vault area, so go to the right side and keep going upstairs; if you are really really lucky, the way is opened and you can go straight to the escape area and place the C4. If not, you have to go to the main lobby through the upstairs' window, paying attention to the balcony snipers that might be there. Reach the management's office, ammo and med up, plant the C4 and escape normally.
For those that prefer to watch a video instead, Chakki et. al have made two awesome videos that show just that. There is no real objective that needs to be done besides fixing the drill and placing the thermite, so these videos both show the strategy that's used from two perspectives:
The second video is from another team member:
First World Bank: Drill area strategy
This strategy (or at least a variant of it) is most commonly used on the lower difficulties. On OVK145+ it's a hardcore strategy, but that can also mean it's more fun than the other methods.
The strategy is simple: The team stays in the main room and fights the wave at the entrance, taking cover from the tables and the pillars, while 1 or 2 people give cover from the balcony. The alternative, which is much more safer, is fighting directly at the drill area with the help of a sentry and 1 dude at the balcony with M308/GL40 fire barrage.The sentry, facing the entrance, will give an excelent cover until the drill is done, 2 guys with Brenner camping at the left and the right side of the drill area's entrance can take out pretty easily everyone, while another one fixes the drill and the support from upstairs kills and marks most of the specials for the camping guys, who will be smoked for the most of the time. Watch out, because like the manager's camping, here too the police will try to destroy the windows with the windowlicker. When the drill is done, just set the thermite, place 1 ammo and 1 med at the first pillars and hold up there. If the timing is right and you didn't lost time with the drill, you should enter the vault when the assault is fading, so you have a completely clear escape. Quickly clear the vault with all the team, reach the pillars the more fast as possible and continue to the same escaping method from the first strategy, but wait for the assault to start in the drill area or when you'll be at the management's area, some police will wait for you there.
NOTE: For this one you usually take a sentry to have more cover during the drilling, so mines will be replaced to another medic bag to use inside the vault if someone gets damaged by dozers. If you want to take Trip Mines with you, trust your shooting skills more, renounce to the sentry and face the heat.
https://youtu.be/Jenf-8G0aKI
First World Bank: Playing chicken strategy
This strategy revolves around kiting through the area and is useful for when you can't hold the assault, for example when you're alone or with just two players. It's quite fun and 100% time based.
Being a 2 men army you have limited options to carry with you, so here depends your playstyle to decide your loadout. You can choose between Medic/Trip Mines if you feel you can manage enough your ammunition or Medic/Ammo if you trust your shooting skills more than explosives.
This strategy is focused all on baiting the police and not on fighting, most of all if you take trip mines instead of an ammo bag, so you just need to circle from the main lobby to the management, then drill area and main lobby again. Try to hold up the management a bit as long as the drill does not break, so you can buy some time and save a loop. Keep roaming until the drill is done, but don't be nervous to enter inside, you need to have the police away when entering because you need the time to set the thermite and come back. At this point you'll probably need a medic bag, so just place it at the left or right side of the vault doors to be able to get it from inside too. After that, keep circling, rushing the main lobby as fast as you can and go to the management's again. The tricky part is now, because you need to go inside the vault before the ending of the assault, clear the vault with 2 (how to do this depends on your choice between mines and ammo) and exit during a fade, so only a few cops will wait for you. Wait for the starting of the assault at the stairs of the drill area and escape normally after that.
https://youtu.be/mmIBcPEe38M
https://youtu.be/-l1P9P3RJTM
Heat Street
DON'T USE THE SCAFFOLD GLITCH YOU SISSIES.
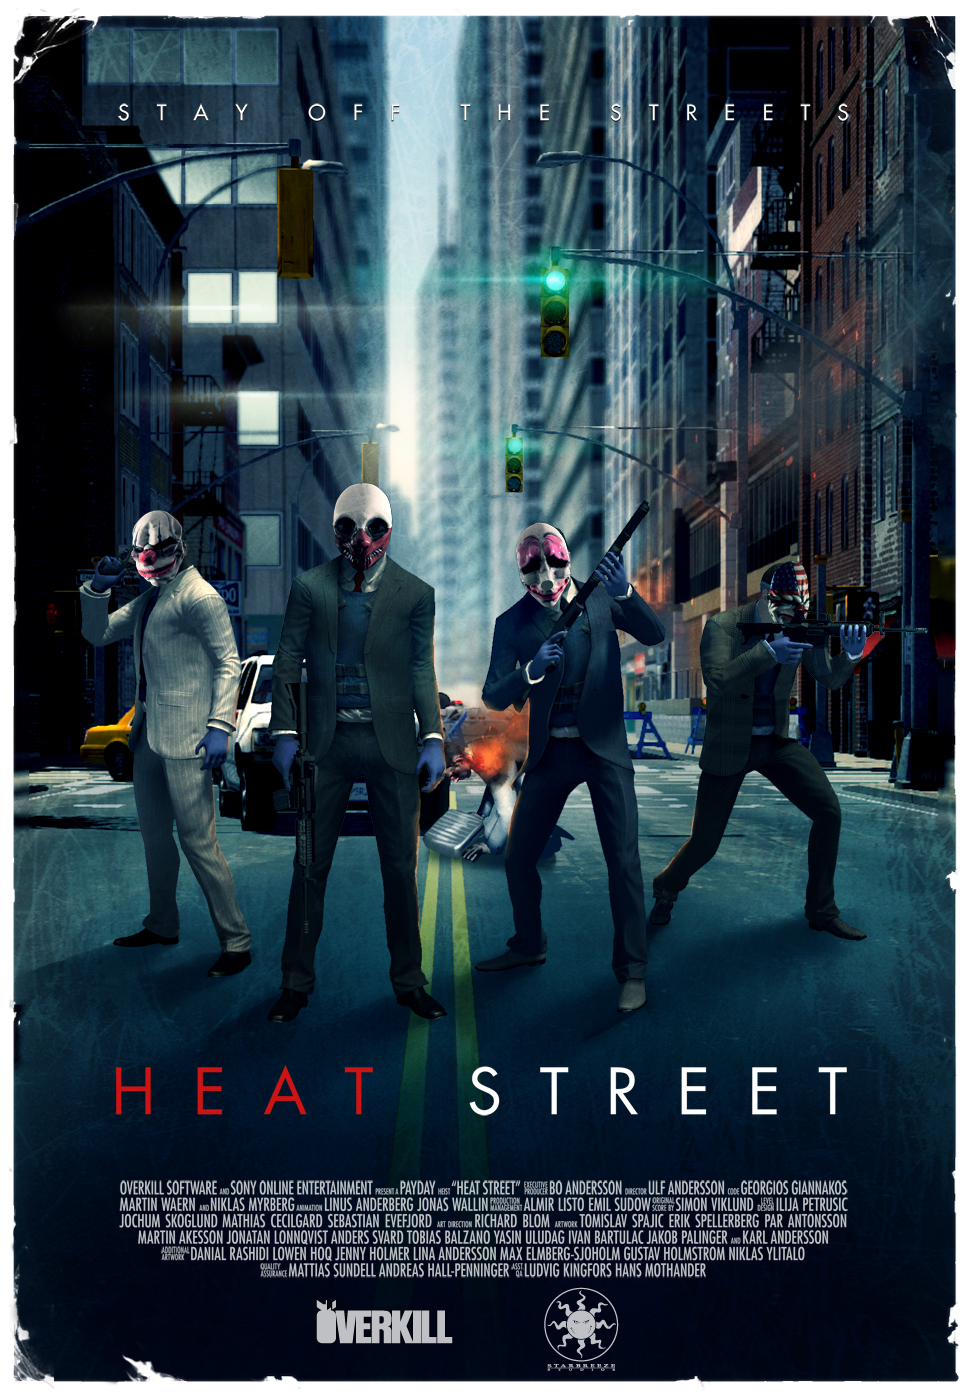 Heat Street is probably the most hated map in the entire game because of its difficulty. However, many can say that they love it for the same reason. The main difference on OVK145+ is the chopper that contains 4 dozers, which spawns right before the extraction point when starting to walk uphill. The helicopter spawns regular units on lower difficulties. This is mainly a long range map, so using the M308 is the best choice, but a Reinbeck can be still very useful to clear the mid-low distance cops.
- A pair of police cars often stop at the beginning of the map. Four regular cops spawn from this. You don't even have to open the embassy door for this event to trigger. The alternative is that the police car speeds through and stops at the first blockade.
- The assault won't start until you cross the black car on the right side of the street, after the first police block in Scarlet St.
- Crossing the swat trucks will usually stop the cops spawning from them.
- Two helicopters with swats can spawn on Major Ave. The first at the intersection with Scarlet St. and the second at the taxi in front of the crane. These choppers will spawn swats of both types.
- When you reach the crash site, a helicopter will often arrive to deliver a dozer and a heavy swat. One more helicopter can spawn at the crash site itself bringing you a mix of enemies: Two heavy swats, a bulldozer and a taser. This event is more random.
- At the crash site, one or two tasers can come down from the containers on the right (or a bit further on the bridge); a swat, taser or cloaker will rappel down the wall at the very end of the area behind the fence every now and then. When you hear "they're climbing down the walls", some swats and specials will be rappelling down on the front left wall, a garage door on the left can open with a shield and some swats inside. Moreover, a sniper can spawn on the building with the Inkwell Industrial sign.
-
Depending on your luck, you have to burn from two up to four gas canisters at the crash site. You can see the last one by looking at the yellow position on the ground. Additionally, after the last gas drop Bain will say "He will be out of oxygen soon". Each step takes 60 seconds to complete with the exception of the last one. It takes 90 seconds from that point on until Matt is out of the van (including the animation).
- After Matt comes out, snipers will start to spawn in different random locations at the crash site, Easy St. and the parking. These events are random with the higher difficulties having a greater chance of these snipers to actually spawn.
- Many special enemies will spawn from the swat trucks while escorting Matt until you've reached the parking lot.
- At the parking, most of the times a chopper will drop some swats and specials.
- When Matt has reached the wooden door leading up to the stairs at the parking, the garage door can open, spawning a shield and three heavy swats.
- The door right above the plateau has a 25% chance of spawning a dozer. You can tell by the red light that you can see between the cracks.
-
Before the next police block there is a door at the right side that is sometimes opened. If it is, you can use it to surround the police more easily.
- When moving uphill, there is a 50% chance that a helicopter will come flying in. On 145+ there are 4 dozers inside. On lower difficulties it's swats instead.
- Before the extraction point, sometimes there are (up to) 4 shields blocking the way. The exact amount and whether this event happens are probabilities that are different for each difficulty.
- Sometimes there is a sniper in front of the extraction zone. He respawns some time after you kill him.
- After Matt is pushed to the extraction point, the extraction chopper will come. At this point, specials and some cops will spawn from behind. This can also trigger either a dozer from a helicopter up on Armitage Ave. or a pair of shields and heavy swats from the garage door at the extraction zone. In order to leave, the zone must be clear of all cops. This zone roughly extends to two meters outside of each fenced side.
- If you fail to clear the zone within 90 seconds, Alex will move the extraction point to halfway on the overpass. This escape will become active as soon as Matt goes in and you don't have to clear anything. Enemies will no longer spawn from swat trucks on Armitage other than from the fenced off area.
- It's one of two heists with an easy difficulty you can actually play.
- It's one of the few heists where you can find loot on the map in somewhat hidden places.
- If you're fast enough you can open the door and jump on the van. You don't need toolkit for this, but that makes this significantly easier to do.
- The map has lots of easter eggs. Many are a variation on the Overkill name, but there's also stores can be seen selling merchandise for the band Concrete Society. Richard Bloom, the model for Hoxton, is a member of this band.
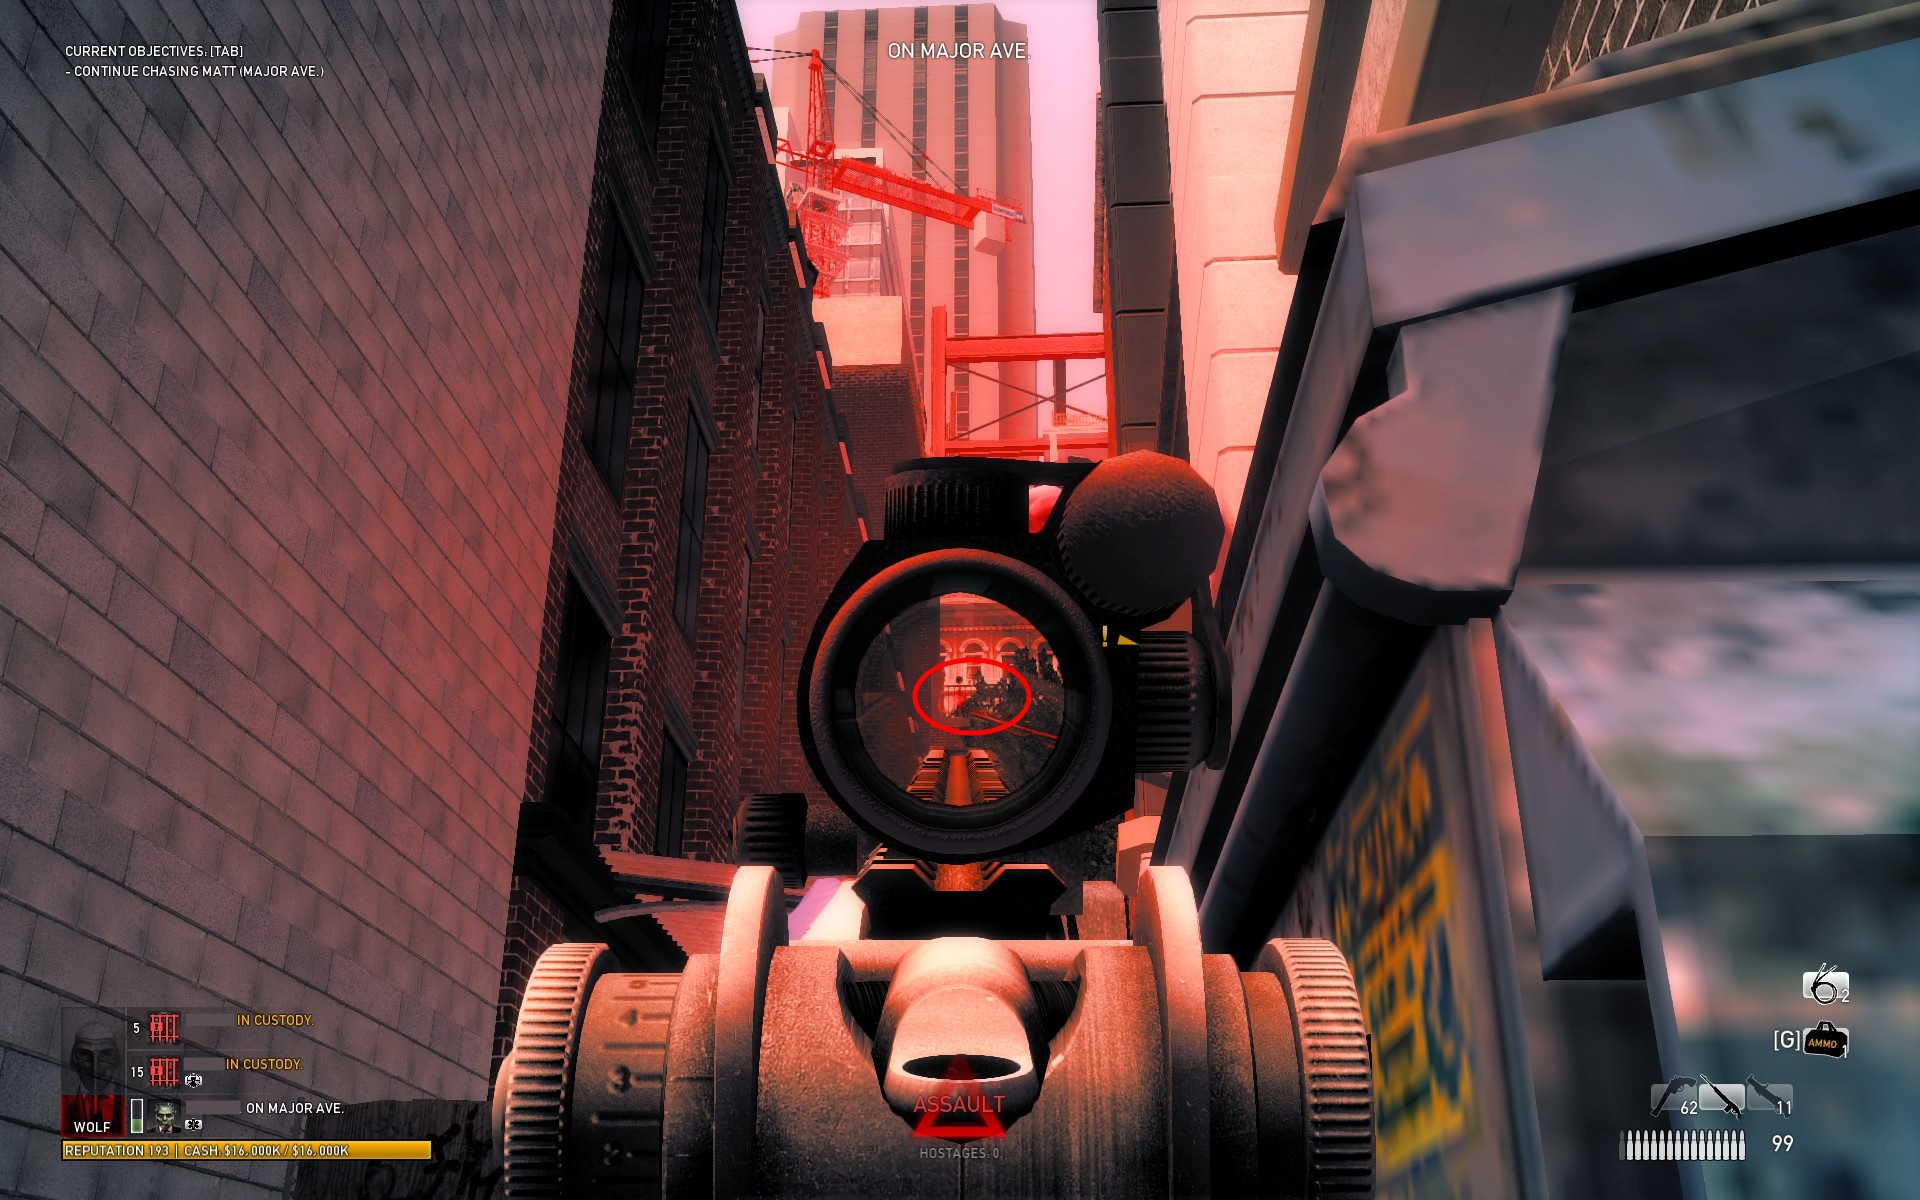
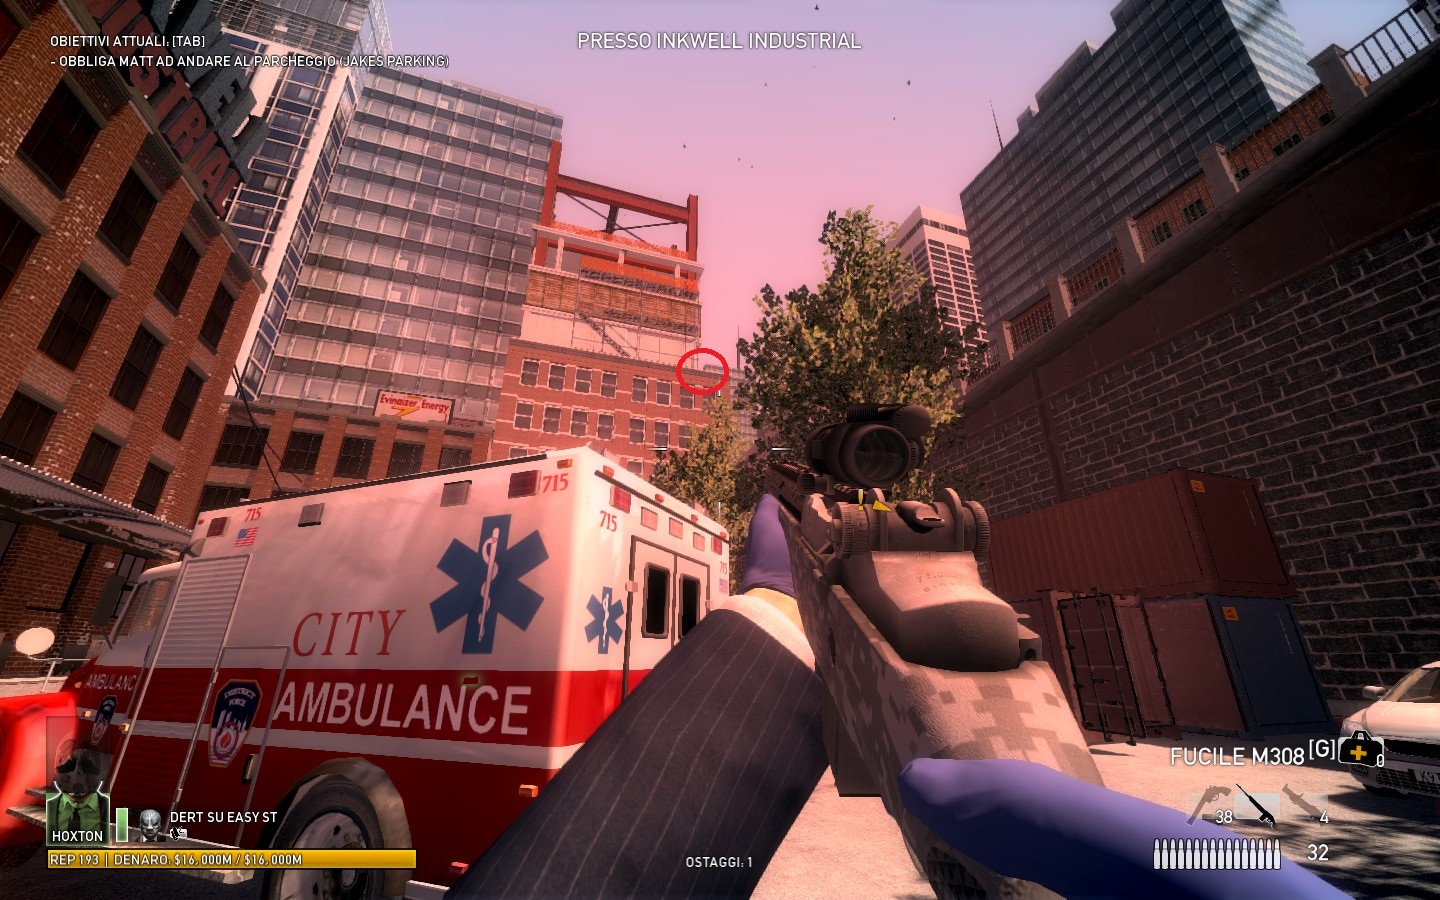
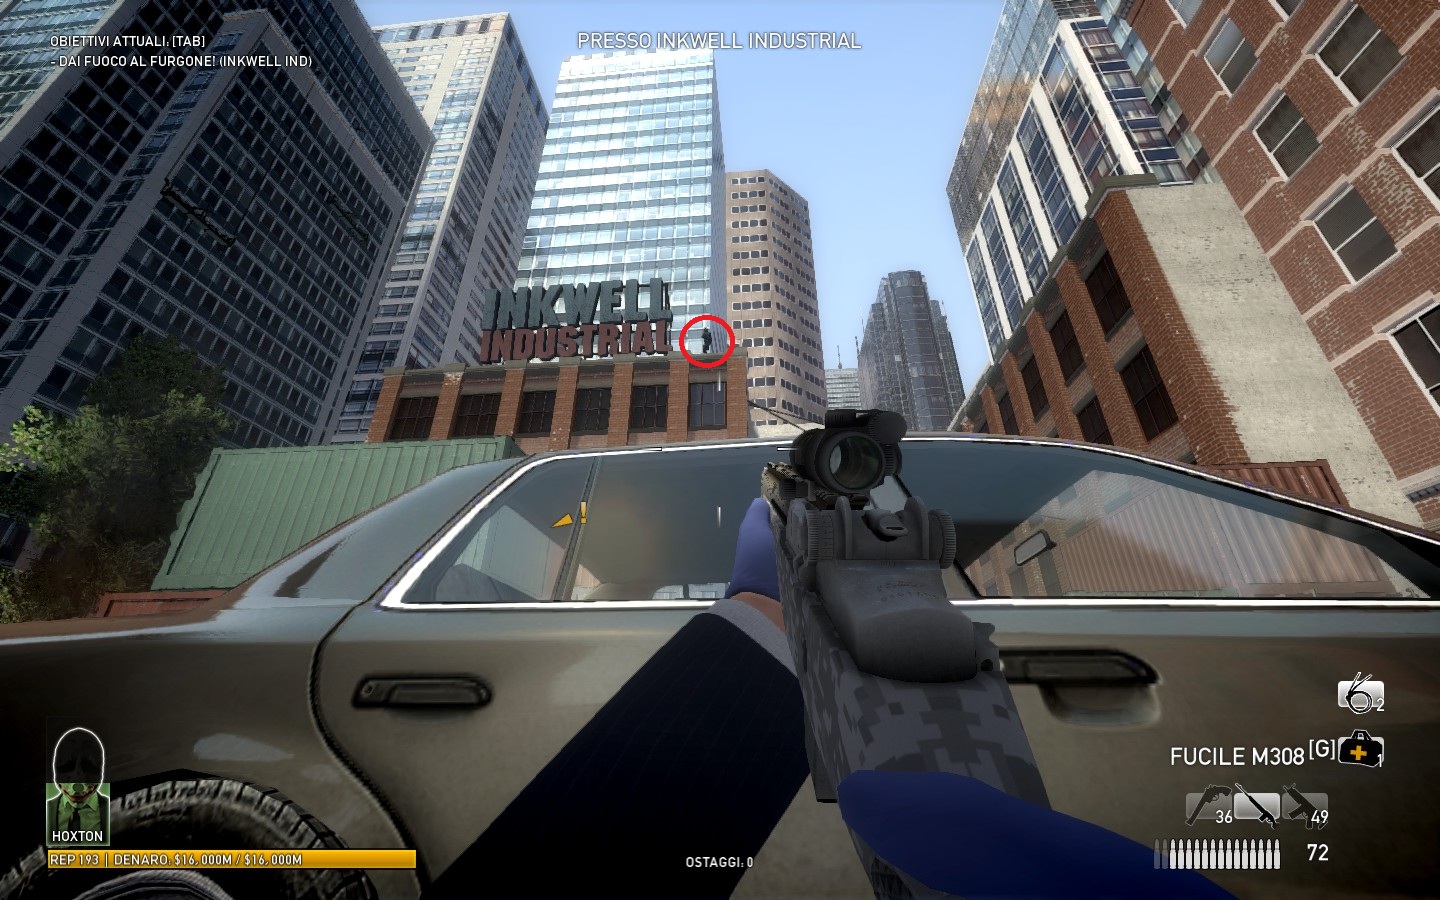
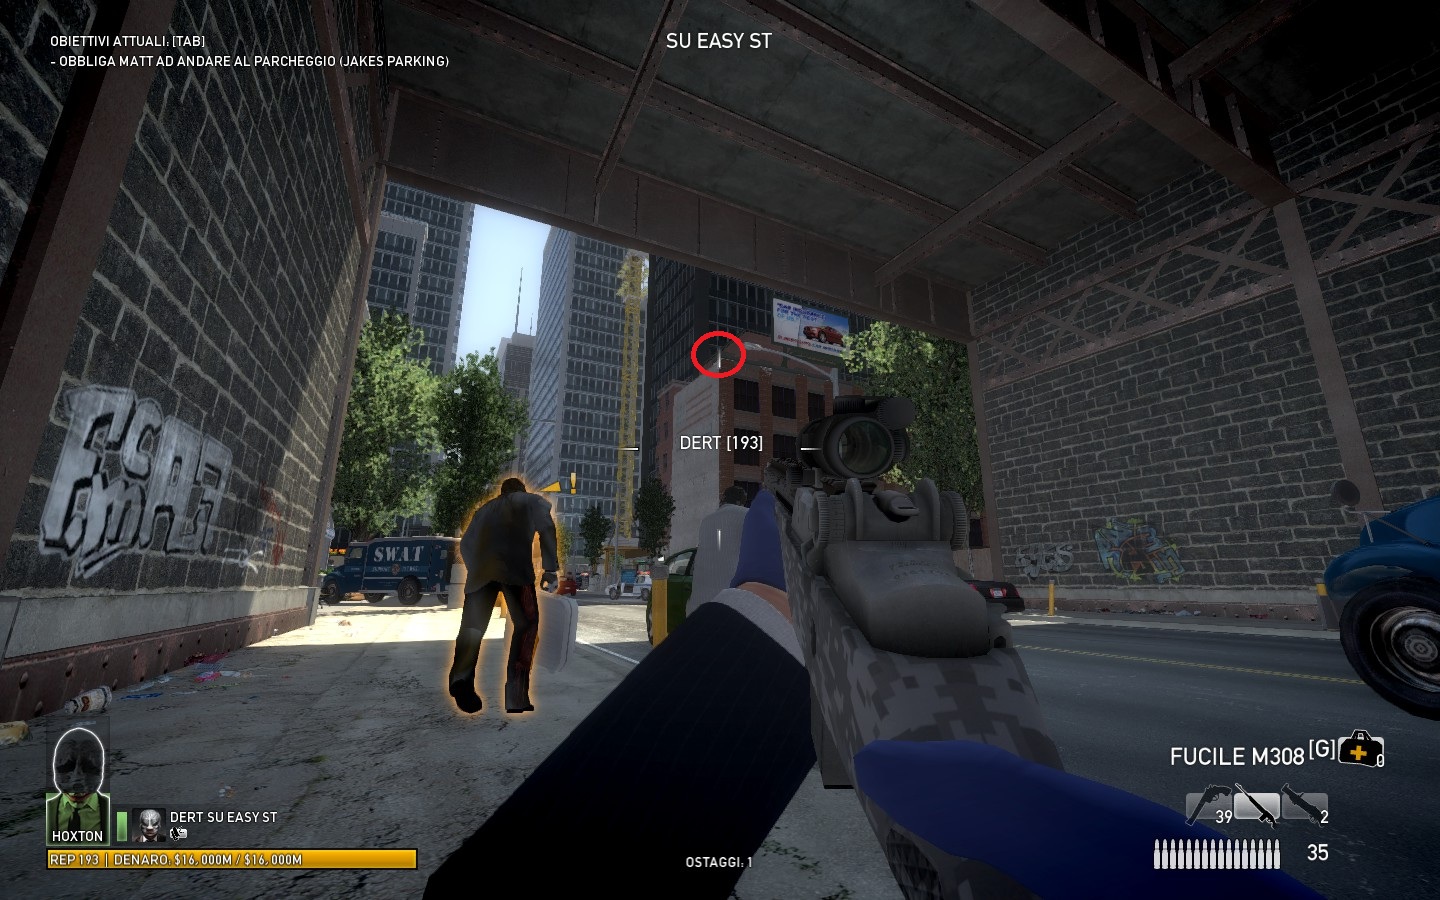
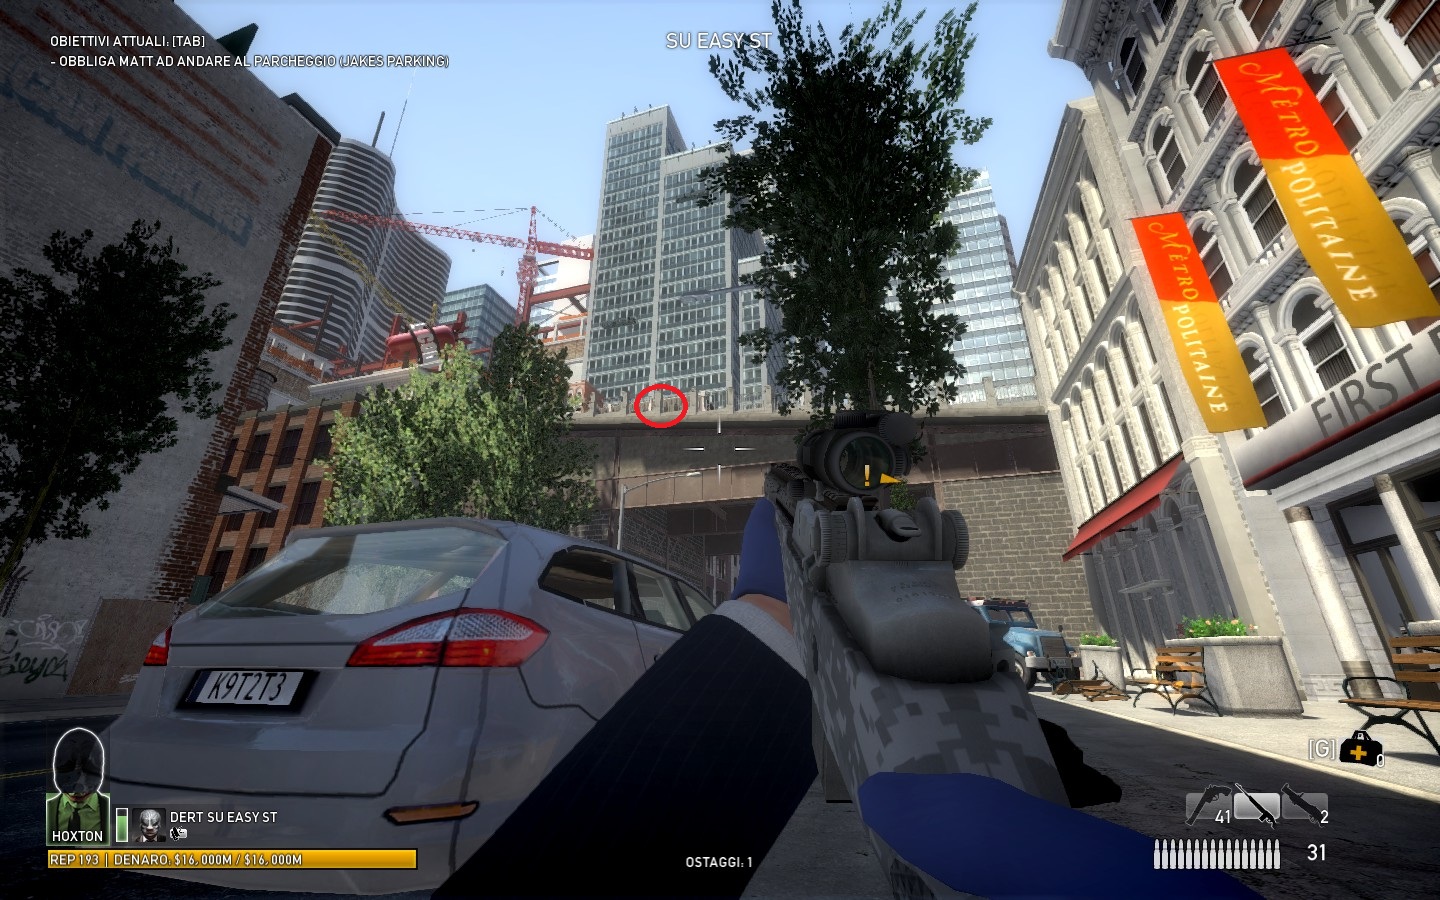
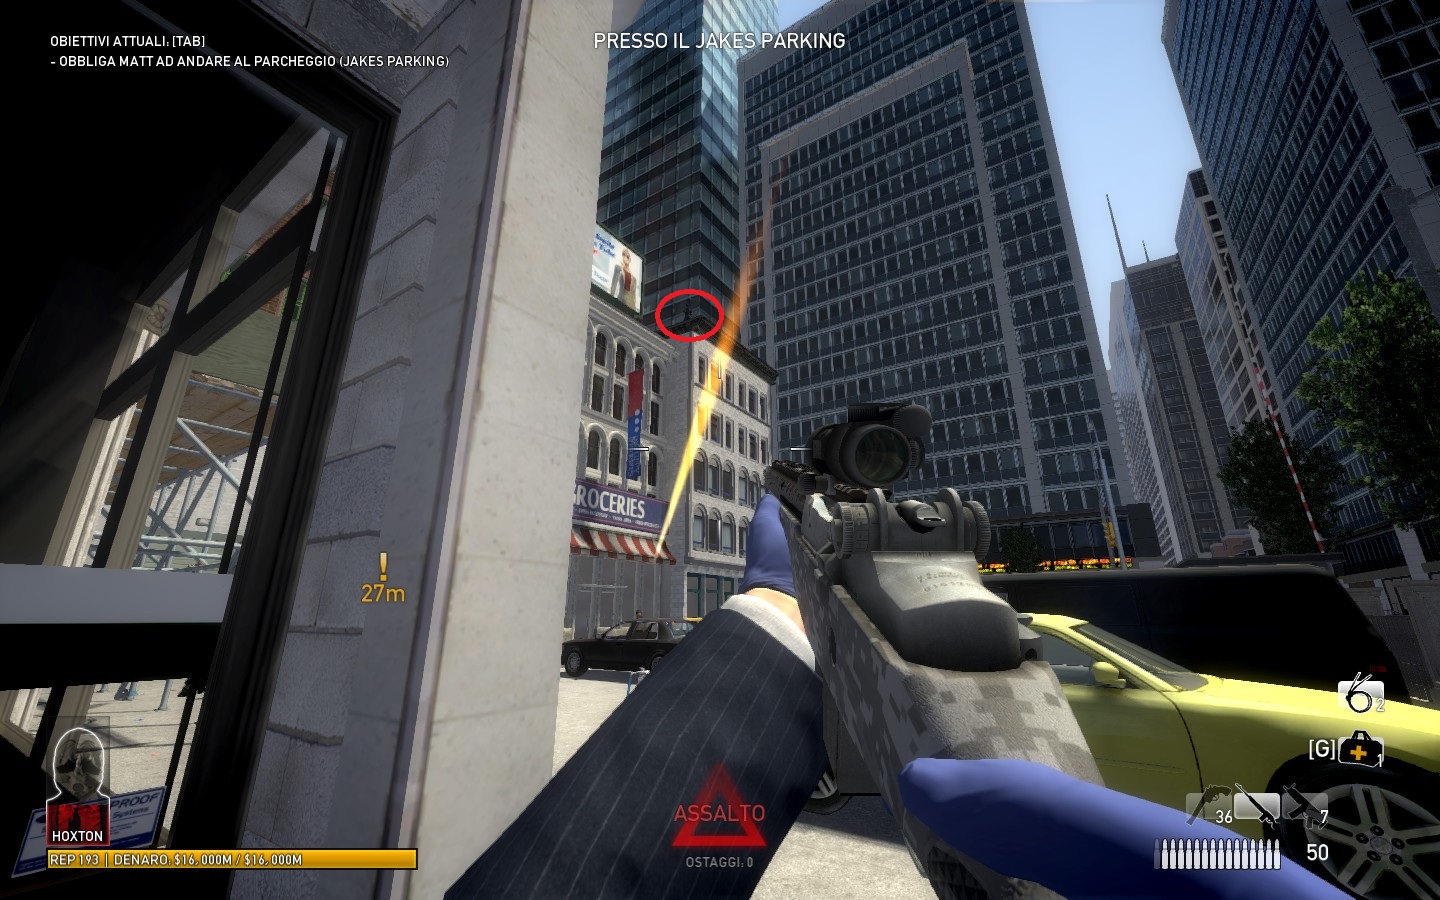
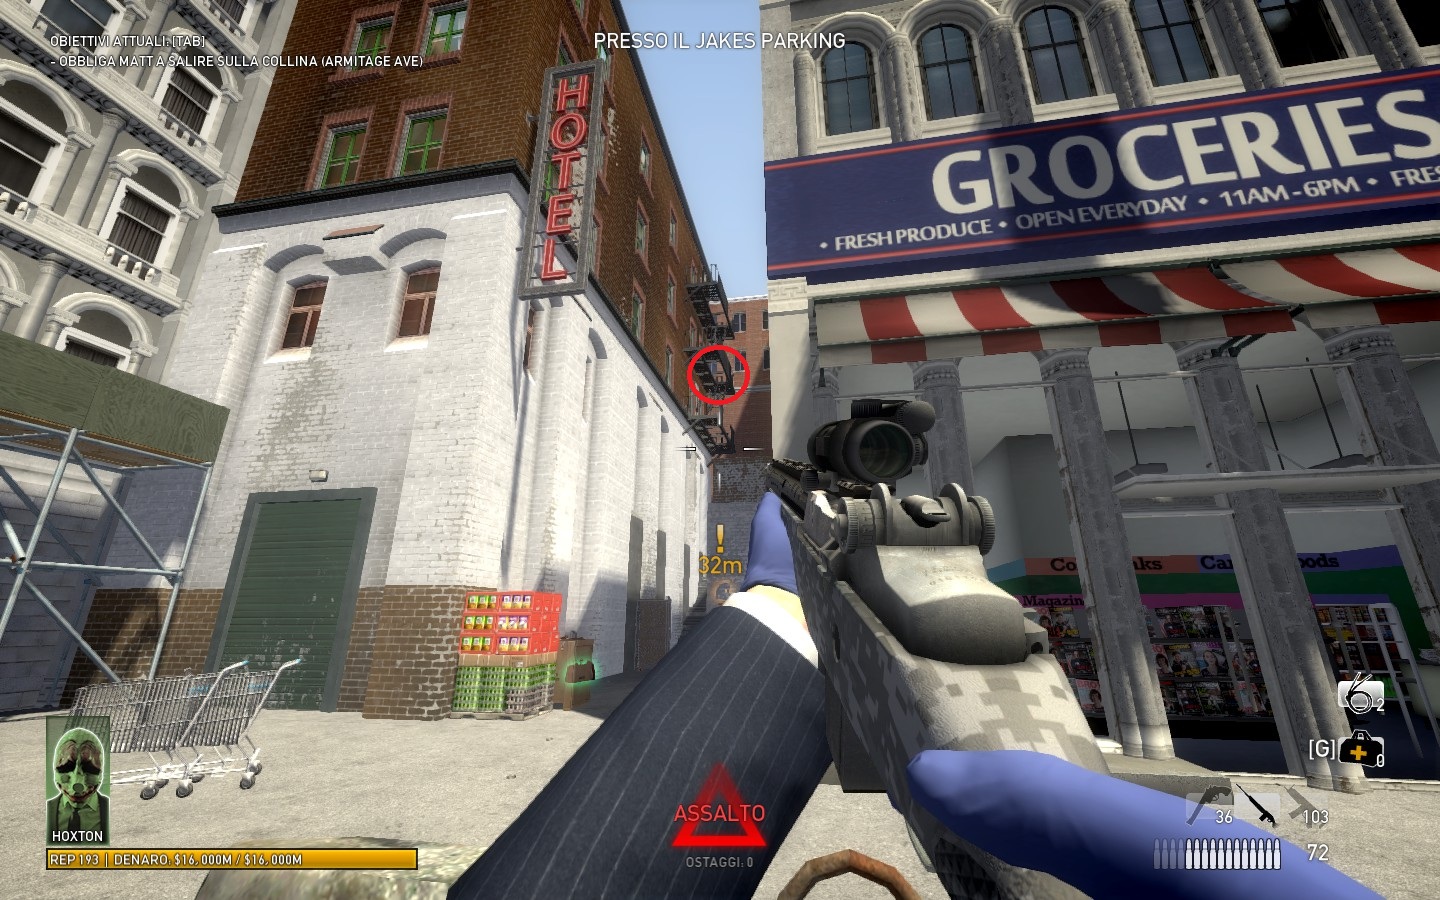
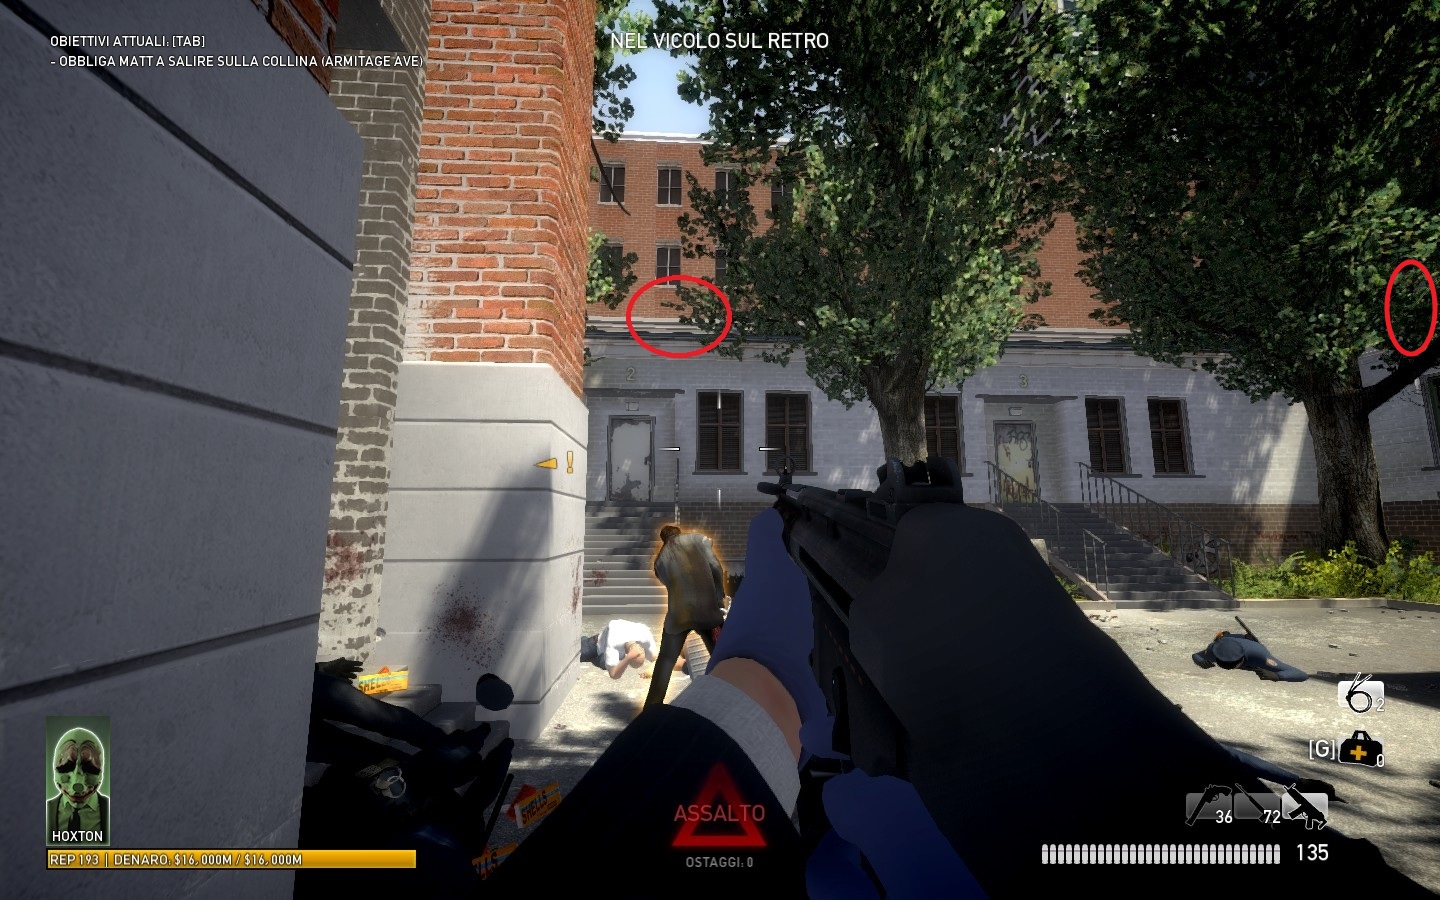
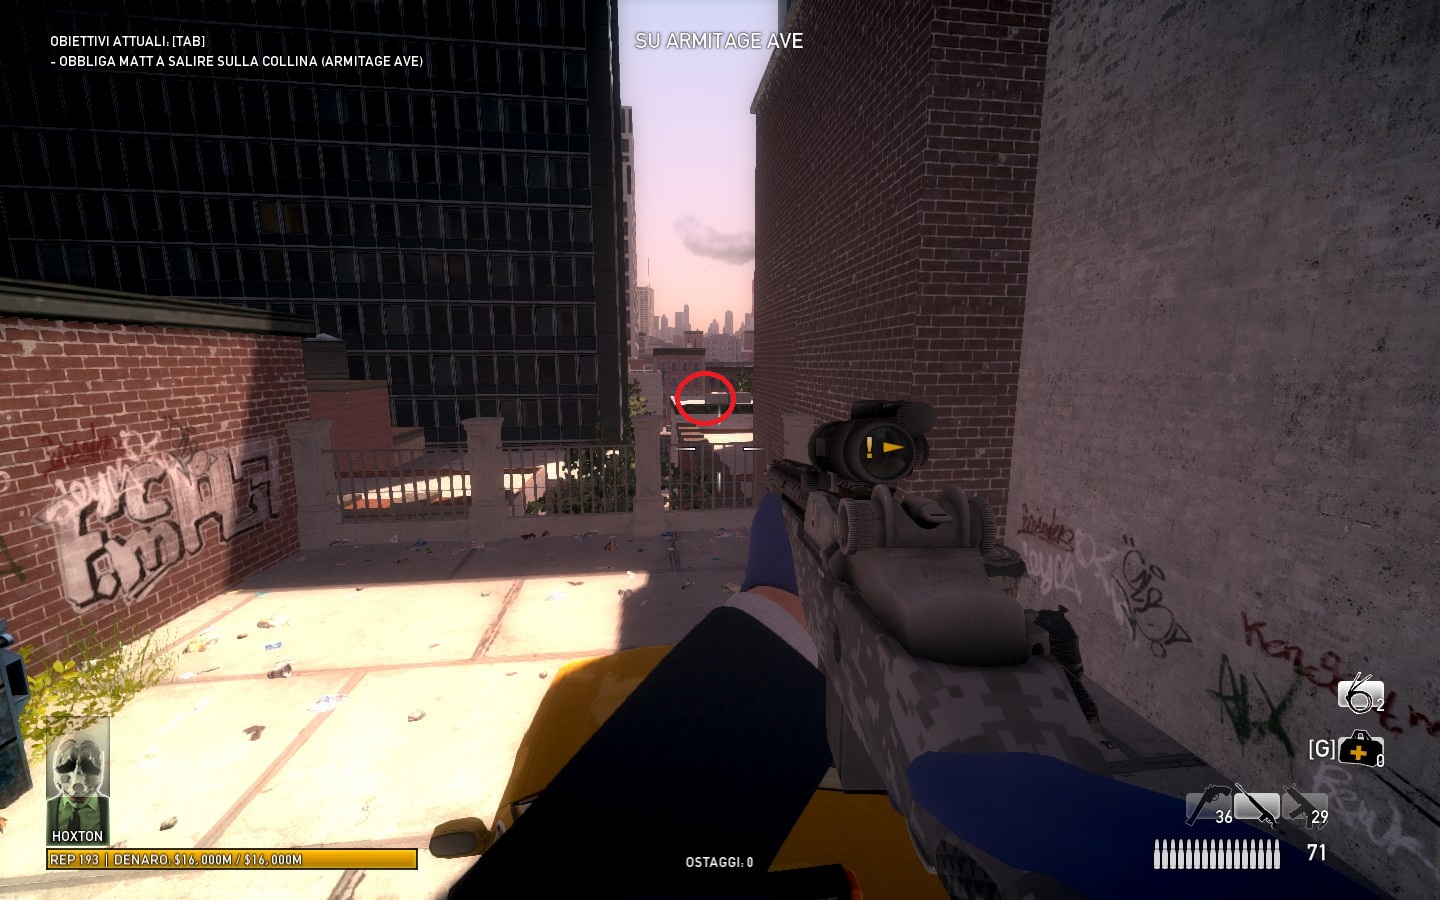
Note: The snipers at the top two screenshots can shoot you from two locations. The first screenshot shows the sniper that can be first seen in a small, fenced off alley on Major Avenue, right after the firs swat car on the left. The second sighting is at the "shortcut" alley that goes between the buildings between the parking lot and the crash site (the loading area). The second sniper spawns behind you right after leaving the crash site after Matt has been forced out. He can also be spotted when reaching Armitage Ave. for the first time.
Heat Street: Easy Street
There isn't really too much difference between the easy and the hard strategy in this heist, both are hard. Only the starting and the ending are different, the rest is always HEAT.
This is the easy strategy, as the title says, and the most used one to avoid a little heat.
As already said, the difference between the easy and the hard strategy is at the beginning, so here it is. Open the door, clear the 2 cars if there are, clear the police block and wait before the black car to the right. Reload your weapons and get ready to run, you're about to feel the heat to your face, but not to fight it. At this point, someone makes a countdown and the host starts to run to the right side, followed by all the crew; All the team has to run without stopping and without helping. But why the host needs to run for first? As said at the beginning of this guide, the host will be targeted more than the clients and he can be traded with full ammunition. So he can just run being a human target, covering the rest of the crew and coming back with full health and ammo. Is really important to die before Easy Street if in critical health, so the police will be baited to the bleedout guy while the rest of the crew is running without problems. If everyone is alive at the beginning of Easy Street, police will start to spawn near the crash site, damaging everyone. Reached the crash site, trigger the van event and take ONLY the needed hostages and release the arrested guys before the starting of the assault.
Now comes the action, choose your camping spot and hold up until all the gas tanks are done.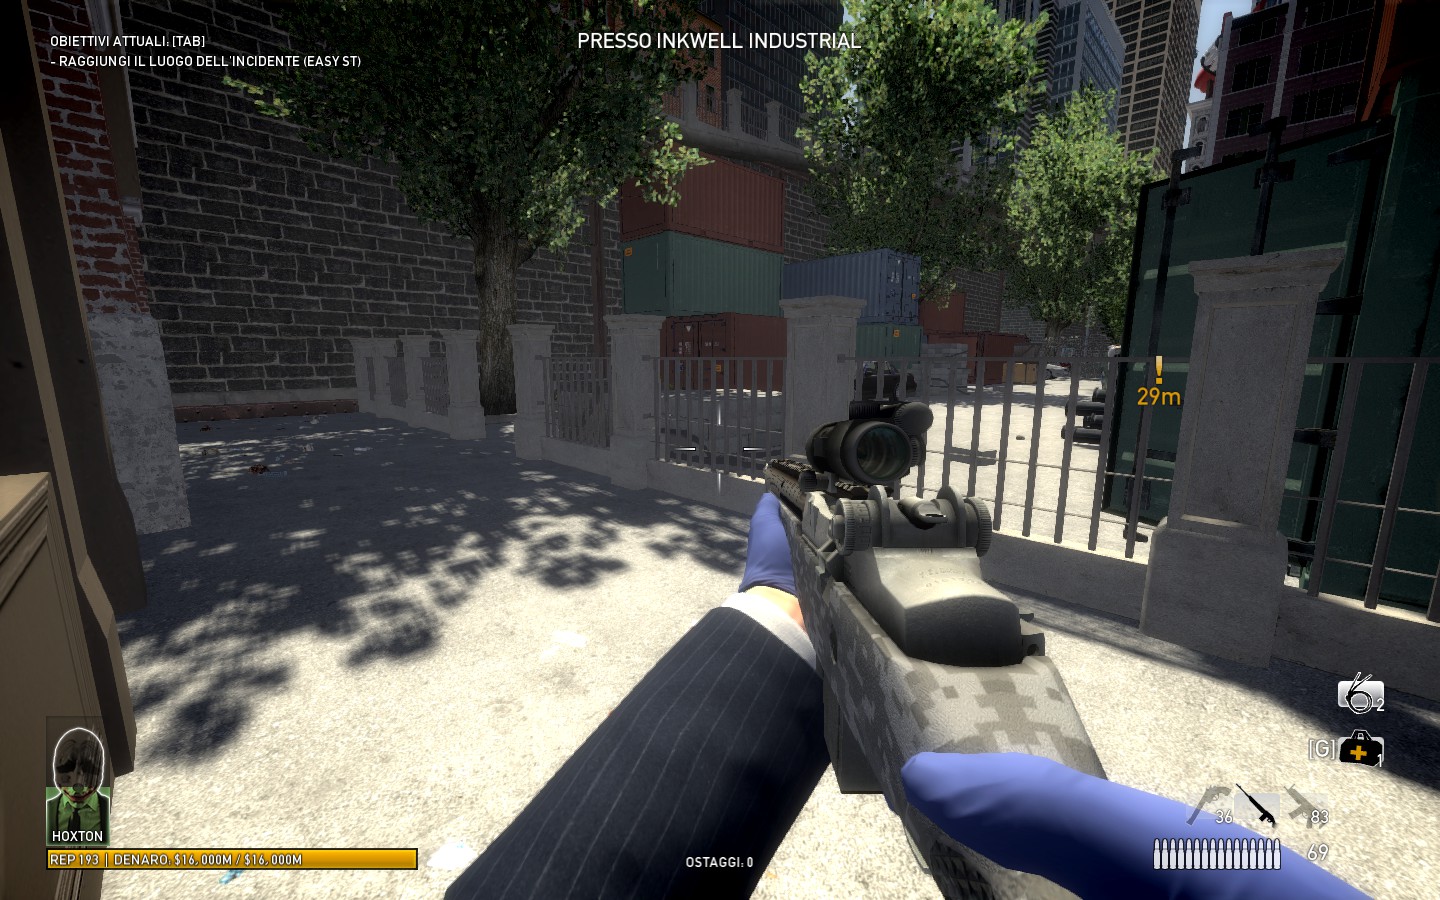 This is the easy strategy, so I'll suggest you to camp here, where your back is covered, but where a swat will come with a rope multiple times from the right wall and where police can jump the railing if too close, so don't let them overrun you. Drop an ammo and a medic (this one only if needed) bag here, the team will need them for the pushing, when Matt will come out.
When Matt is out or about to exit and the assault is about to end, refill your ammunition and health, so start pushing safely and watch out for snipers. If the timing is right, it should be easy and you can take Matt with you. If you are late, just leave Matt and push to the Parking, so wait the starting of the assault and let 1 guy to take him, while the rest of the crew covers the wooden door. if you are incredibly late, just push him a bit, come back to the parking and wait for the next fading.
Reached the parking with Matt, watch out for the garage door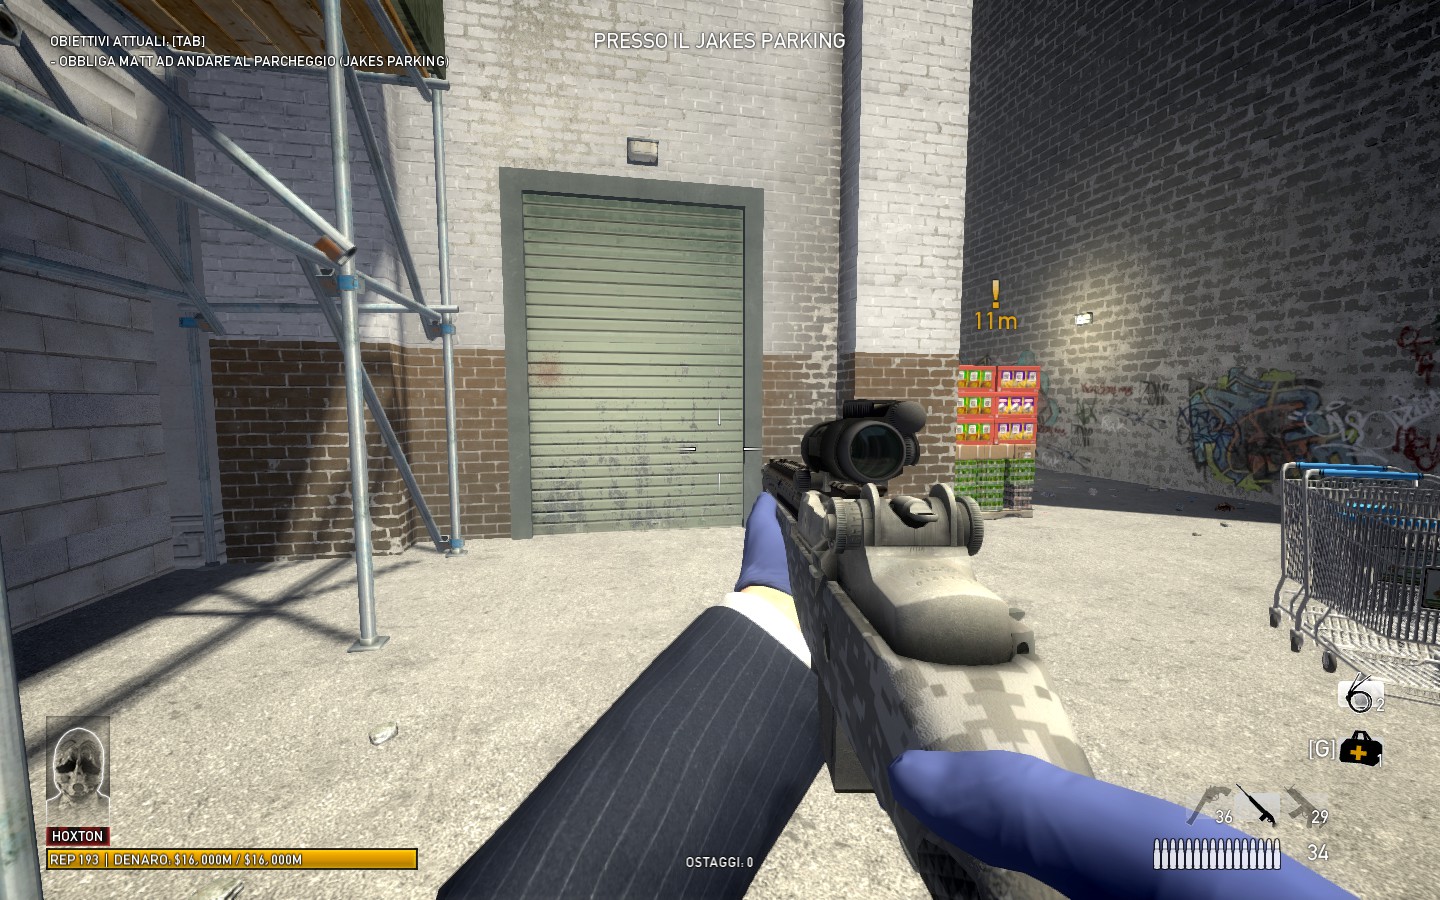 , so push through the next police block and keep pushing if the door is opened. If the door is closed, wait for the end of the assault, then clear a bit and push to the right to surround the block and stop the police spawning from the swat trucks. Now one guy has to reach the blue bus stop and listen to what his character says; if he says "swat helicopter incoming", 4 dozers are being dropped from it, so fall back to the stairs and wait them there, where they can be killed very easily. At this point, the assaults are very short, fadings are very long and it's full of civilians, so if you are low on health you should be traded. If you still have 2 medic bags, just drop one and heal. Now you are ready to push, so clear a bit the police block in the middle of the street and run to the right, taking cover from the cars and the signboard until you reach the blue swat truck. Drop your bags here and push Matt NEAR the end, but leave him before the extraction zone and come back to the swat truck.
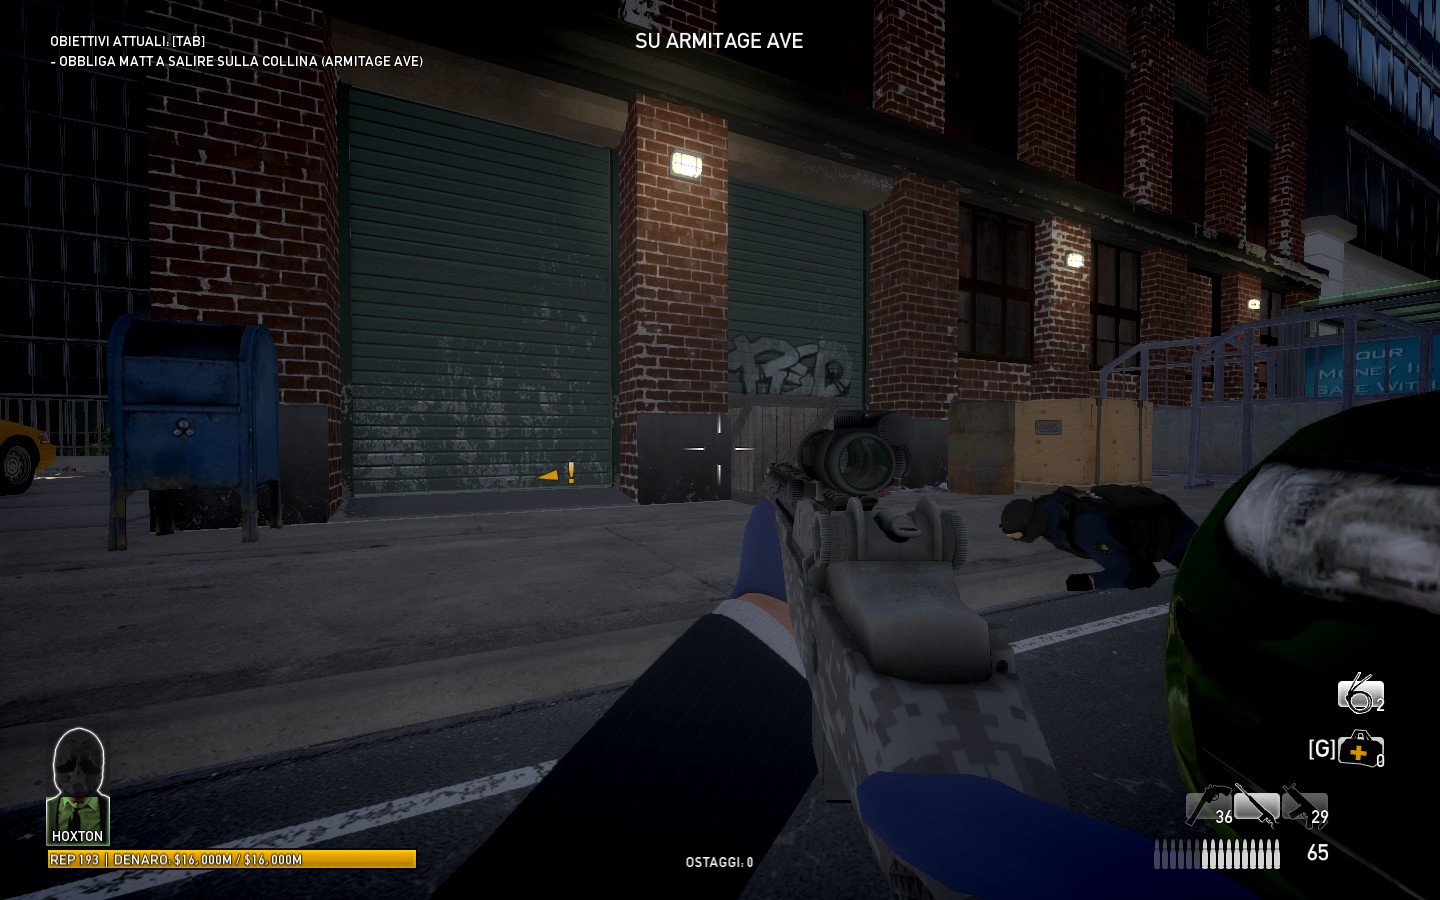 Now wait for the assault to start and hold up to the police block until the police starts to be a little less aggressive. At this point, heal yourself and ammo up, reach Matt and push him to the extraction zone. If the assaults fades now that Matt is at the extraction point, it's good. If the assault fades before it, you're late. Anyway, watch out for the garage door, clear the place and cover the extraction zone while 1 or 2 guys take out the police coming from the back, so the chopper can trigger the escape easily.
Chakki et. al made an awesome video again, so enjoy watching this strategy in action:
HS: HEAT STREET
This is the hardcore strategy, as the title says, and the most used one to be burned by the heat.
This is like the easy strategy, with a little difference: you don't run at the beginning and you don't push Matt before the ending of the assault to have a clear escape. Also, you can camp in a different spot at the crash site or don't camp at all.
Open the door, reach the black car and reload your weapons, you're going to kill every cop at Major Ave and Easy Street. An equilibrated pushing should be 2 guys pushing to the right and 2 guys pushing to the left. The right way is easier, so the host should be there, while the left way is much more opened. Fight your way quickly to the first swat trucks at the beginning of Easy St., then quickly split to the parking and the left construction site if someone has close quarters weapons or stick in the middle killing at distance if everyone has long range weapons. Watch out, staying behind the cars for too long is deadly if you get overrunned, so stay always aggressive and fast. Also, watch out at the back, sometimes some police still can spawn from there. Safely kill everyone and reach the swat truck near the crash site; the assault should be out soon if you didn't mess it up, so clear the place pushing to the left and taking cover from the cars. If you are in a critical condition, if the place is clear, if the break is about to come or it's just started and if you didn't kill more than 2 civilians, you can suicide to be traded right away.
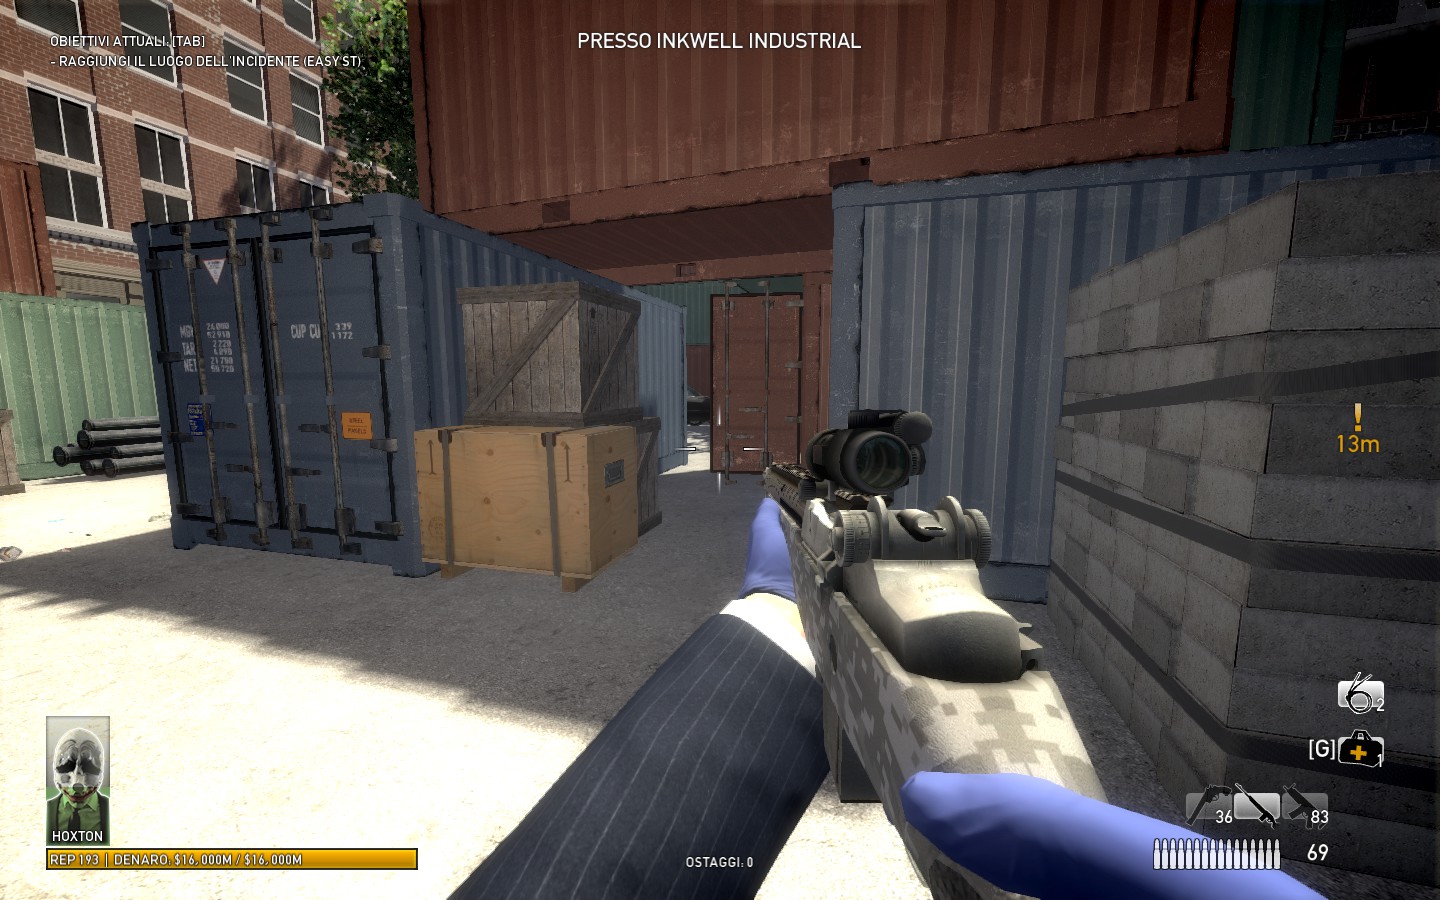 And now it's like the easy strategy, just hold up until the gas is done and push when the assault is out. But this is the hardcore strategy, so you can camp in different locations or fight splitted up. My favorite spot is here, in the middle, because you can reach more or less easily all the gas tanks, because you can take ammo from dead bodies and because there is much more action for shotgunners like me.
Continue with the level like the easy strategy, but push Matt to the extraction point without waiting at the swat truck, so you have to clear the place with an active assault. Like the easy strategy, 1 guy takes the back while the other 3 guys are covering the barricade and the garage doors. Be always aggressive and don't let them cross the barricade, it's really important, or the chopper will never leave and you'll be stuck. You can go back if the chopper can't leave after a while, but this is like a failure if you are trying this full hardcore.
Panic Room
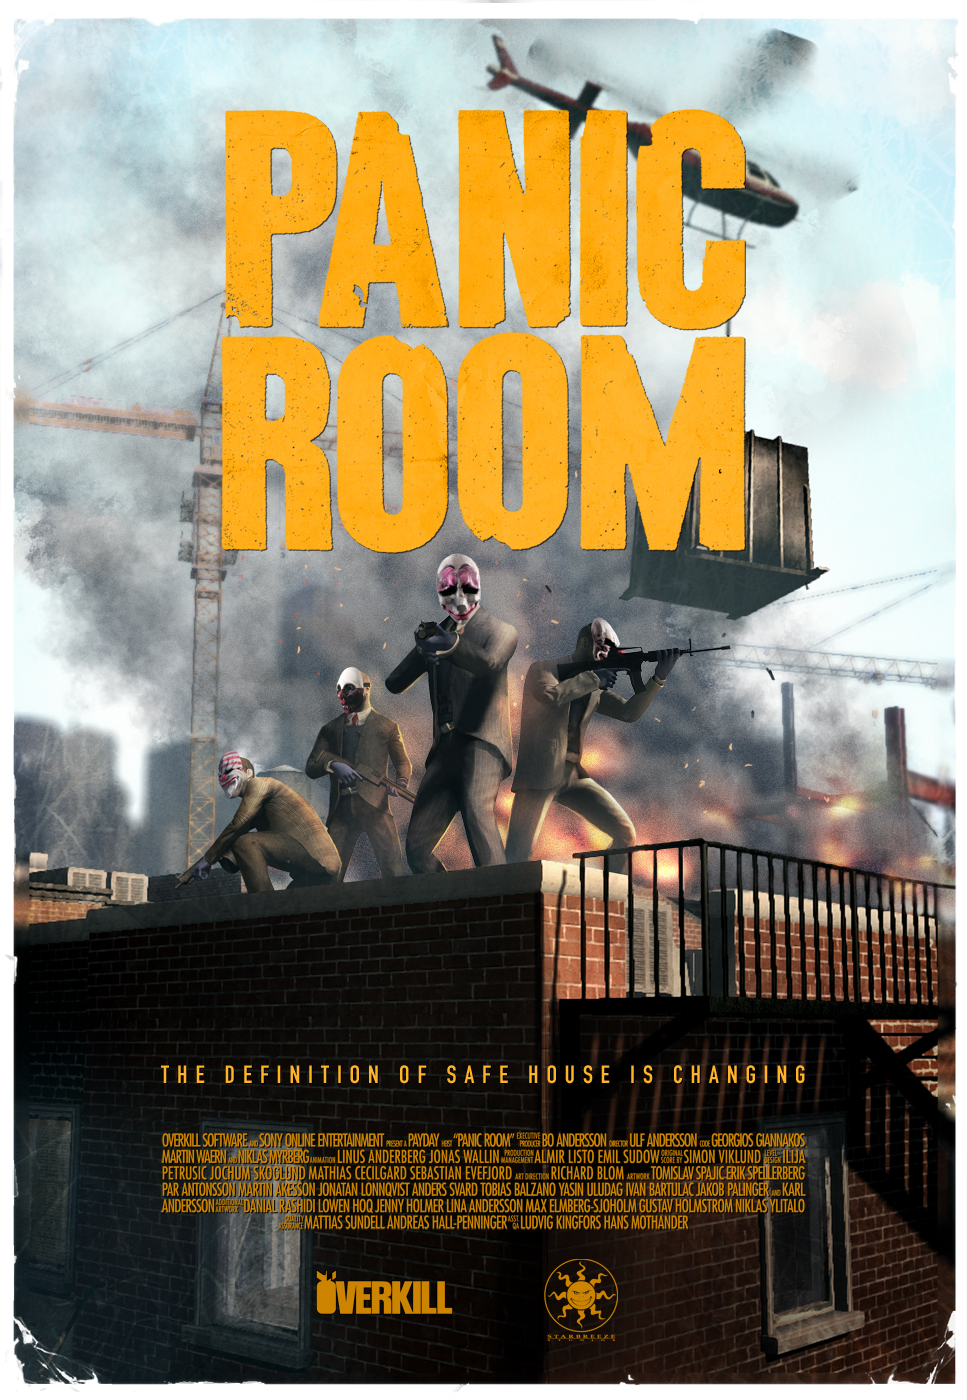 Panic room is one of those maps that does not change much between difficulties. Probably one of the most fun maps to objective thanks to the windows, which allows you to climb down the building without being killed by tons of policemen.
- On OVK145+, there is a crowbar that can be used to open a room on the 2nd floor. This room contains lots of money, making the 'are there more than two?' achievement really easy. Of course, you have to be level 145 or higher to do get it this way. The crowbar can be located in the (possibly locked) laundry room or in the basement near the escape.
- Chavez is a really nice hostage to have; he does not escape and cops do not free him. Still, remember that a hostage on the roof is completely useless.
- The assault will start only when you enter the panic room, so be sure to kill all the thugs before opening it.
- On OVK145+, there are heavy swats that spawn in the back alley. They come from both the left and the right side.
- The are static policemen in the street: 4 blue cops and 6 respawning blue swats. After those, the street will be clear and you will be able to reach the roof much more safely.
- Sometimes, the stairs leading to the roof aren't available, so you are forced to take the outside stairs to reach the roof. Watch out, when the stairs are opened specials and swats will wait for you inside the smoke.
- When you have to take out the snipers, there are (usually) 6 of them. There are at most two snipers at a time. These snipers are always in the same location, but the order in which they spawn in random. Facing the street, they are located on the front-left, front-right, left, back-left, back-right and right. When doing this first round, there is a small chance for the spawning of a chopper which will drop some police and a dozer in the middle of the roof.
- When the snipers are taken down, you will hear a line referring to the arrival of Alex, the helicopter pilot. He'll drop the package either in the back alley or on the front balcony (on OVK and above).
- After the C4's explosion, the roof can be cleared from floor 5. Still, sometimes some cops will be hidden and you need to reach the roof in order to clear it.
- When your team is on floor 4 or below, the spawn on the roof will (eventually) stop.
- For the first objective in which you have to clear the roof, "secure the roof", you have to take out the guy in the back watching over the roof and all other cops still on the roof.
- You can attach the magnet from the panic room. This provides much more cover than doing it from the floor above.
- For the "defend the helicopter" objective, you have to take out at least two heavy swats watching over the roof. One on the building in the back and one on the right side building.
- The safest way to go to the escape (or to the ground floor in general) is to use the windows.
Examples of camping spots are the rooms at the outside of the building on the 2nd floor or the room with the couch on the 4th floor. You can actually camp in any room you like, as long as the room is not on the fifth floor (to prevent them from spawning on the roof). Actually, you can and you can even camp on the roof, but you have to hold out the assault and clear the roof when the assault is over. This is you only time window when the cops are spawning on the roof.
Chakki et. al made a nice pair of videos that shows the strategy from 2 viewpoints, from the team and the objective guy respectively.
The roaming strategy is based on baiting the cops away from the roof: you do objectives, go back to a lower floor (either the ground floor or the 2nd floor), wait for the cops to appear and go back to the roof to do objectives. You should note that there is only one route from the 2nd floor to the 3rd floor, and that's via the main stairs.
CommanderCH has a nice video where he solos Panic Room using this strategy:
For each of these strategies, remember that you can use the windows to climb down the building much more safely. At the beginning it requires some training, but it is quite easy and it can be learned in no time. Just remember that you need to be able to stand up when crossing to the other window or you'll be probably pushed outside and fall when trying it.
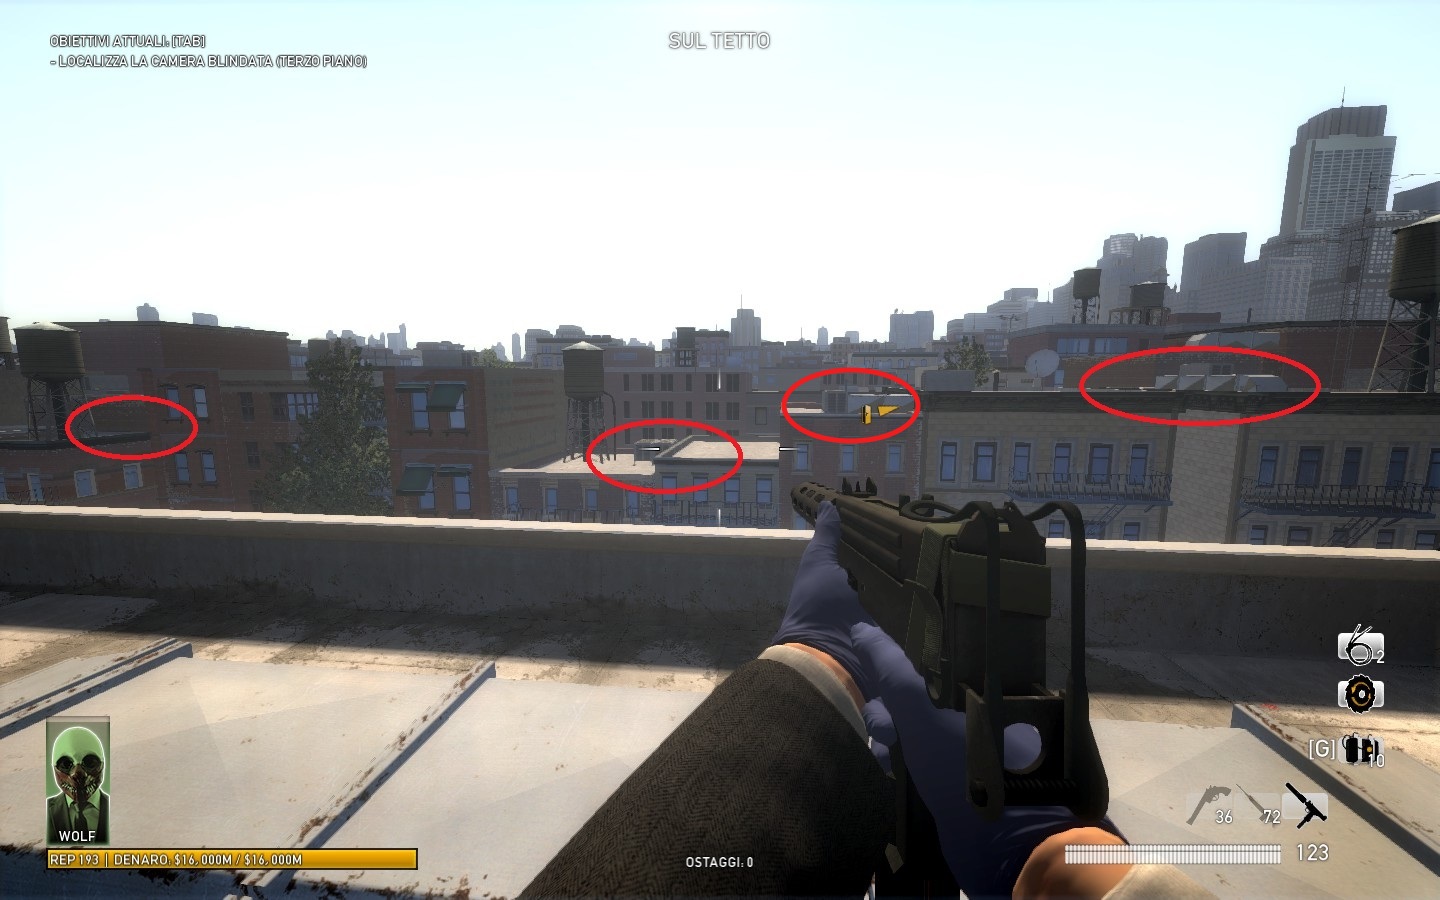
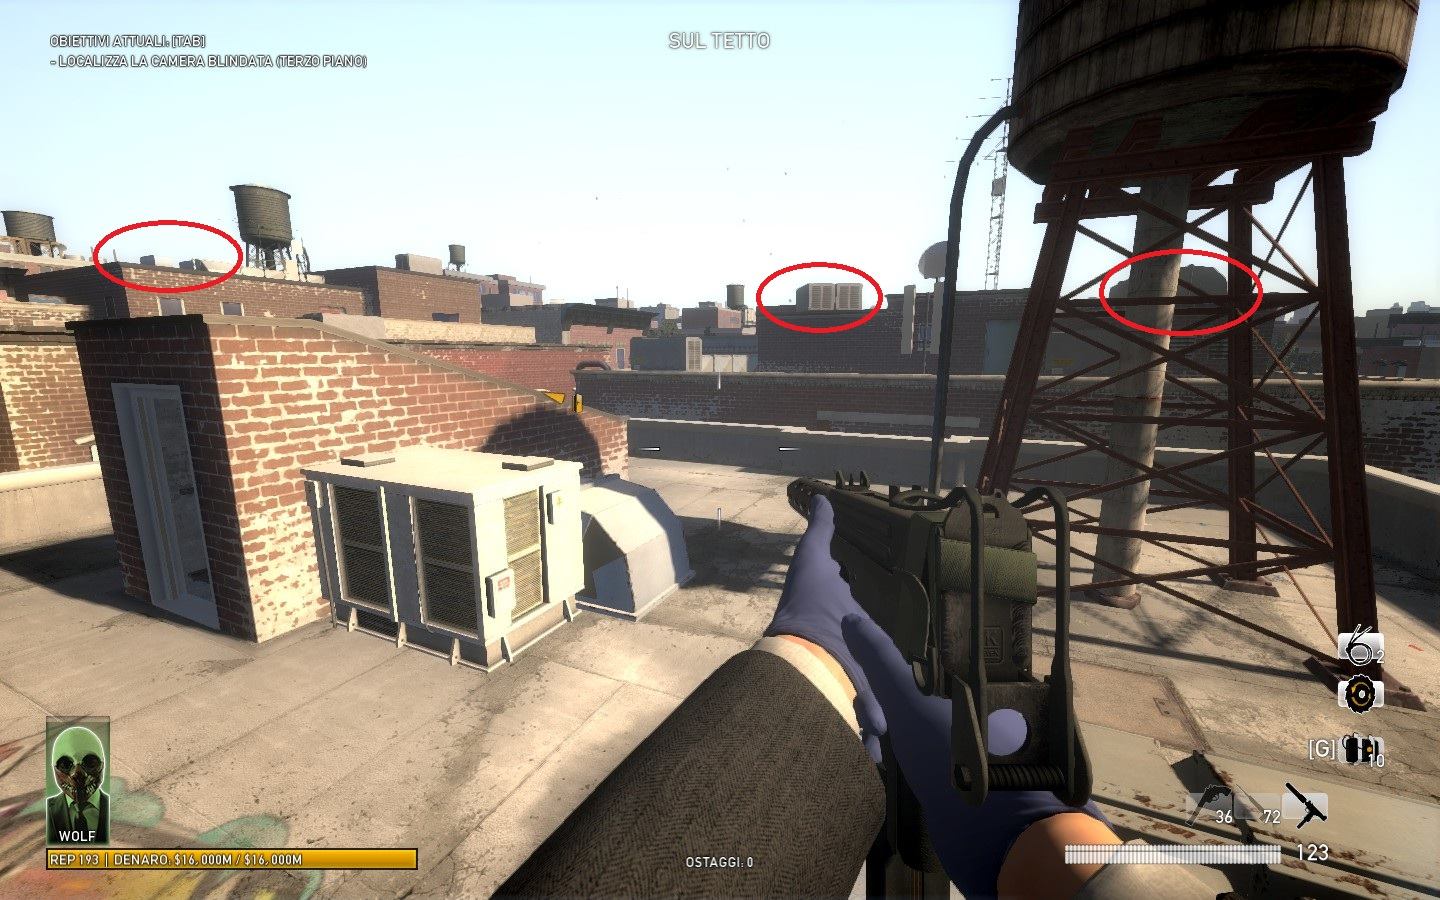
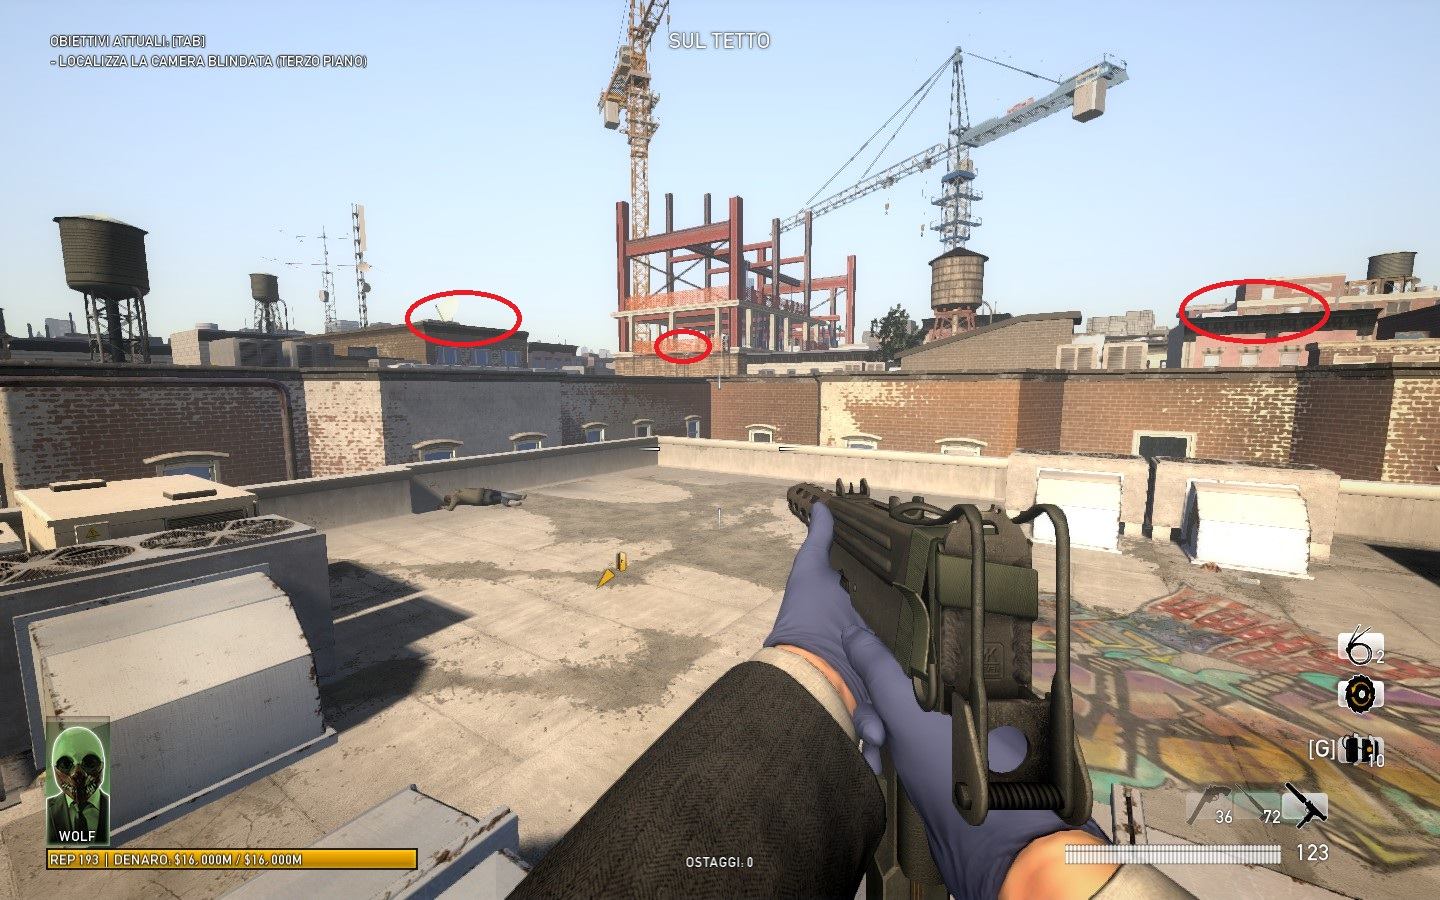
[1] For simplicity I ignore the room in the middle of the main lobby.
Green Bridge
Green bridge is considered one of the more difficult maps, but in reality it's not that bad and in fact it's one of the easier maps to do with the team AI.
- When placing saws, sometimes the last van slides away. If this is the case, the target won't be inside, so there's no need to place a saw and hence you won't get a remark about a broken saw that's completely unnecessary.
- When a helicopter goes down almost to the street level, next to the big truck in the middle, one or two dozers will spawn from that chopper.
- Once you start pushing the prisoner, the assault is focused on the scaffolding.
- The assault will start when the prisoner reaches the red container.
- Several special units can spawn on the scaffoldings when you reach them.
- A helicopter will spawn 4 snipers on the other tower.
- On OVK145+ you sometimes get dozers that come in from the other tower (using the cable lines).
- You don't actually have to defend the scaffolding once the Chinese dude is in the chair. However, George usually fails to pick him up on the first attempt, so you have to stay there to setup the balloon. You're free to leave after setting up the second balloon. By doing this, you will trigger a never-ending assault.
- A sniper will spawn on the crane once the Chinese prisoner has been picked up (if there is not already one there).
- You can avoid the shields near the boat by jumping over the truck.
- Once you reach the end of the bridge, don't go around the truck. There is a staircase on the right where the escape is. 2 shields can sometimes spawn at the entrance of it.
- There's a small chance for the spawn of a shield or a dozer inside the staircase.
---------------
Again, Chakki et. al have made a video that demonstrates the gameplay. Their strategy for the first part is to move around the bridge from front to back to fix the saws and hide behind the swat truck at the very end of it. One guy, usually the host, stays behind to push the Chinese guy:
Diamond Heist
 Diamond Heist is probably the most played AND most failed heist in the whole game. People often want to complete it in stealth, but often fail or the codes simply don't work. Let's start by clearing this up: The codes will never work OVK145+ ever since they changed that (see below).
- Guards have fixed routes. Be careful however, since some routes look similar. There are 12 of them except on OVK145+, where 8 more spawn with routes not used in the lower difficulties.
- During stealth you can also pick up 10 blue sapphires. Four of them are located on floor 23, the rest is on floor 22.
- If the codes fail, you have to get the CFO. He spawns in one of two locations. He always takes the same, long route to the helipad.
- Sometimes the CFO will spill the codes, but more often you have to get Ralph. Like the CFO, he can be in two places: He's hiding on the roof above the party, or he's locked up in a closet with some ladies next to the large stairs that go from floor 22 to floor 23.
- You usually have to wait for the vault to open. This can be 30 seconds, 1 minute or 3 minutes.
- Entering the vault and taking a diamond or placing the cutter triggers an endless assault. Be careful when you want to get the achievement involving the red diamond.
- If there's a door on the right side of the vault, that means the red diamond is there. You have to open the door, go in and then get the glass cutter at the spawn point. You don't have to be in stealth for this, but don't shoot the glass or let it be shot by cops.
- Most escapes are on the roof (3 out of 4). If you're not in time (or have a teammate with too much desync), the helicopter will return after a short while. A roof escape will also spawn a sniper on top of the fire escape.
- You cannot destroy all cameras unless the door to the red diamond spawns. You can however shoot the cameras inside the vault using the grenade launcher, even when the vault is still closed.
[1] There are three cameras that are excluded from this. The camera in the room next to the stairs to floor 23 with the glass roof and the laptops in it is not included, but it stops other spawns when destroyed. Moreover, the two cameras you see when the big vault door has opened don't count. However, the two cameras in the little vault do count.
Most people prefer the strategy where you run around. This works even if you play this heist alone, but if you're with multiple people you should have one player that goes for the objectives. Chakki et. al have a nice video that demonstrates this running strategy, from both the perspective of the team and the perspective of the runner:
Slaughterhouse
 Slaugher House is the only heist where random events might force you to take a completely different strategy: The kitchen can be closed and/or there can be no meat hanging around. You have to be prepared to handle with all four scenarios.
- Shooting the black SUVs makes them crash. Crashing the cars means a slower response from them. The murkies from the last car won't enter the building if their car is crashed.
- A helicopter might arrive with murkies inside.
- There can be an ambush on OVK145+. You'll see a swat car that stops nearby after the SUVs stopped. You can both detect this swat and safely shoot the murkies that come out of it from the spawn point.
- After you have gone inside, an assault will trigger (after several seconds). Moreover, this will spawn several murkies on the roof. They can enter the building from everywhere, except the kitchen.
- Around the time that the first assault starts, a helicopter might arrive either above the truck or at the entrance of the slaughter house. This chopper will spawn multiple murkies and possibly a bulldozer.
- A dozer might be inside the truck. Be careful when you blow the doors.
- You need to place at least one bag of gold to trigger the spawn of gas. Since you most likely have to go back in the building, you do not need to take all gold the first time.
- When you go to the container yard after taking the gold, a sniper will be waiting for you. He can be in any of three locations: above you, on the container on the front-right, or on a container on the front-left (whose view is blocked by other containers when seen from the door of the building).
- After placing the first gas, a second sniper will spawn once the helicopter has left.
- You can drop the gold in the container until the second can of gas has been placed.
- A helicopter with murkies can arrive on the right side corner of the container yard. Watch out when you stay here.
- Setting the trap, the second interaction with the control panel, triggers an endless assault.
- There can be four dozers at the escape, just after the trap.
- You should get your Christmas present. Look back when you're halfway through the containers and see the escape.
Destroying cameras on this map alters the event that determines how often bulldozers spawn. For overkill 145+, there are four delays, 60, 80, 140 and 160 seconds for when the cameras are still active. Destroying half of the eight cameras adds another delay of 300 seconds. The delays are randomly picked, so when destroying the cameras there's a 20% chance of having a delay of 5 minutes to spawn a dozer for the first loop. Note that killing this dozer will restart the process.
Destroying all eight cameras alters a second loop. This one has delays of 60, 80, 90, 100, 140, 160, 180 or 200 seconds and destroying all cameras adds a ninth delay of 300 seconds. So the chance is only 1/9th of having a 5 minute delay between spawns, which makes destroying these cameras a fun (or maybe necessary in case of ocd) thing to do, but the effect is negligible.
The most commonly used strategy is to camp behind the belt, close to the drill. This allows you to easily fix the drill whenever it's broken, and you can stay together as a team. However, you should only do this when you can use the meat as cover. If there is no meat, fixing the drill is not as easy and you should change your strategy, holding up in the kitchen for example. The following video by Chakki et. al shows them camping behind the belt:
When you have gotten through the drilling part, the fence to the container yard will be open. This is what I call the 'escape' part, since you're setting up your escape. Again, there are multiple strategies for this part, such as camping and looping around, but I only find the looping strategy interesting enough to mention here. Anyone can camp, but imho it's not the best strategy. Looping around the yard is really easy, actually. In short, it comes down to moving around the outer side of the yard and wait for cops in the corners. When they come to close, move to the next point. This strategy is used in the video above.
If you're up for a change, you can do something that's not very common. For example, instead of camping on the drilling part, you can also defend the whole area by covering each of the entry points. If that's too much for your team, you can try to hold up in the yard or in a container (any will do):
Counterfeit
 Unlike what some people think, this heist cannot be stealthed. However, you can buy enough time to hack the devices by doing the first part silently. There are only three ways to break stealth: going outside the house/property, going near the tv in Mitchell's basement (is outside the house, is a bug) or the host/a bot shooting a non-silenced weapon.
- If you're a client, you can use a loud gun without breaking stealth due to a bug in the game.
- Mitchell opens the door to the basement when you speak with him.
- All crowbars can be picked up without being seen by the neighbors.
- No, you cannot pickup the phone.
- Letting the cops alive (for a while) buys you more time in stealth.
- Technically speaking heavier enemies will spawn in the assault if you don't stealth the first part: the difficulty value is increased more when you go loud by actions of your own.
- Stacks of money beside the printer will alert you of C4 being present. Be sure to defuse all 7 if you don't want the whole thing to explode!
- Dozers guarding the power boxes are not very smart. You can restore the power without killing the dozer guarding it. For the boxes on the street you can use the doors as cover. The dozers will always turn off the same transformer and power box or the same water pump.
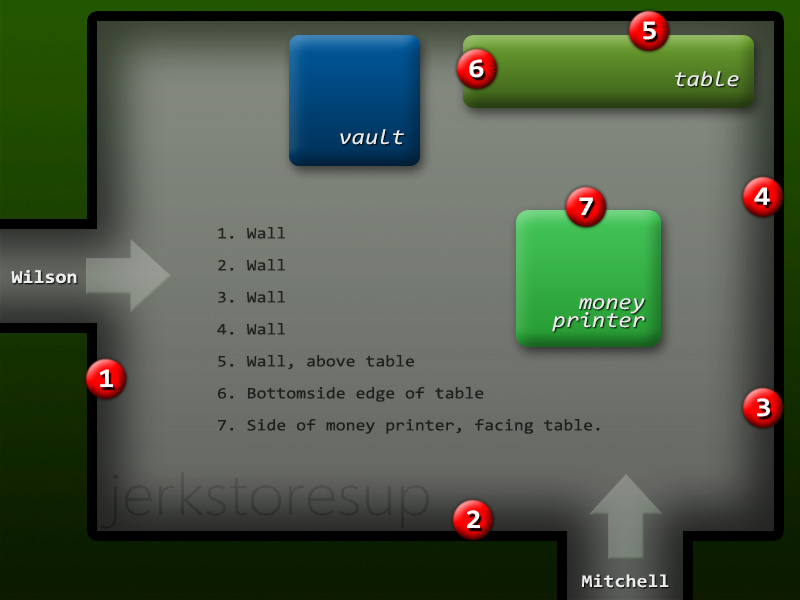 11) The assault will be endless once C4 can be placed on the safe.
- Shields guard the correct escape. Use this to your advantage to know which manhole you'll have to open for your escape route.
- If the escape is at Wilson's house, you can trigger the escape by staying near it when it pops up, then opening it through the next to wall. This is pretty useful when doing a pacifist run.
- Some units can spawn in the sewers. The long route with the entrance at Wilson's house can have two groups of a heavy swat, a cloaker and a taser, in any combination. Moreover, in the middle section there's a chance for a dozer to spawn. The other escape has a possibility for a group of units to spawn in front of the second door. If you don't work together on OVK145+ and have some units spawn, the timer will run out if you spend more than 5 seconds on killing them.
- On OVK145+ there's not much time for the escape; doing a perfect escape from the entry beside the wall means you have about 10s left on a perfect run, the escape at the boat gives you about double that time. Be prepared before you take the last plate! If you don't wanna take any risk, take the toolkit and a crowbar with you.
If you have done it stealth, you should have a person near the water once you have confirmed there is no c4 in the basement. After setting everything up, you can move to your camping spot or go to your positions if you want to face the assault. The safest play is to stay in Wilson's basement and keep the stairs clear of cops. If you stay there, the cops will not come from behind and therefore gives you a way out if you need it. Since the assaults are focused on where the majority of the players is, you should have only one player that goes for the objectives. A few minutes before the vault has been filled with water (around 2-3 leaks), you should switch to the other basement to lure the assault away from the escapes. This is important, since you don't have time to take out lots of cops once you have taken the plates, and therefore you should only take the last plate if someone with the crowbar is right on top of the sewer entrance, ready to open it.
The following videos by Chakki et. al show this strategy from the perspectives of the team and the objective guy, respectively.
Undercover
 Undercover is well known for its amount of specials. If you're (un)lucky, you get an insane dozer spawn where 10 dozers can attack you simultaneously, as well the same number of simultaneous cloakers and tasers all on top of the regular force*, depending on the RNG. If that does not kill you, there are about 20 snipers on the roof all trying to make you fail this heist. If that's not enough, on OVK145+ there's always the infamous jump at the end, where there aren't planks on the ground to help your jumping. However, to help your teammates, you can plank the ground once you're to the extraction zone.
- You can shoot walls with your GL40 that can be broken later on by the police. Anyway, it's better if certain walls are intact, like the one next to the random server room.
- You can plank windows, vents and fences (and the ground at the escape on OVK145+).
- You can tell where the car is going to land by an invisible object blocking your path.
- When the car stays on the roof, be extra careful: snipers will be all around, even on the building on the back.
- When Bain says "Vents! Watch out the vents!" Cloakers spawn out of the vents. Be careful when a vent is near you during the spawn of the cloakers or you will be downed in no time. You can listen to the breaking sound of the vent if you're close enough.
- Tasers, cloakers and dozers usually spawn in pairs.
- Snipers respawn when you hear a voice line about them.
- Doing the last step on the computer, transferring the files locally, will trigger the escape and a neverending assault. Be ready when you do this, because you do not have much time to make your escape!
- Depending of the RNG luck you have, the little path near the escape can be closed or not. If it's closed, you are forced to reach the escape by the middle of the roof, being exposed to sniper fire, so kill all the snipers before trying it. If the path is clear and the escape zone is all planked, you can just run without too many problems. Still, some snipers can hit you once you cross the escape door, so always try to kill every sniper or as much snipers as you can before escaping.
- At the escape, there are either two shields OR two dozers waiting for you, as well as a good amount of blue swats on the upper side of the front building. Sometimes there is a taser as well right around the corner on your right, once you go through the gate.
Then there are the fences. The one next to the power box on the middle of the roof is missing 60% of the times on hard and 75% on overkill and 145+. The plywood fence between the door (left staircase) and front of the building has the same odds. The fences on the other side of the building, those that allow you to go to the power box safely, have a 50% chance being present. At the escape, the fences at the edges of the buildings where u have to jump are always hidden on hard and above, because there's a decent chance that you have to jump there without any help from the boards.
The location where the limo is dropped is either on the balcony or the roof. It should land on the balcony once every four attempts and if it lands on the roof, it has a 20% chance of staying there. Then there's the snipers. They have a 60% chance of spawning every time the event is executed (too many to list all). If it succeeds, the chances for the next event are reduced by 10%, however, if it fails the chances are increased by 10% and the next event is 45s later. So basically they can respawn every 45 seconds.
The most commonly used strategy is to camp in one place and have one player do the objectives. If you choose to camp, do not plank the floor you're on as this makes them spawn elsewhere (and you might trigger a bug that spawns lots of dozers). A good place to hold out in is the bathroom (you'll know which room I'm talking of, it has a bath in it) as it is far enough from both server room spawns and has three escapes (left, right and straight).
Your objective guy should not fight too much, since he needs the ammo to take out the snipers. He should always prepare for the possibility that the power box is going to be on the roof. Since there are still a lot of specials around on this map, there should always be both a medic and an ammo bag available to him. You should generally do the objectives as soon as possible, except for the transfer of the files (last step on the computer). You should really take out the (relevant) snipers (and possibly wait for a respawn) before taking this step, the escape timer will be at 0 before you know it.
Chakki et al. have made a pair of videos that show the strategy that I described above. Again, the first video shows the perspective of the team and the second shows what the objective guy does:
Another strategy is to kite around. It's basically holding up on the stairs until it gets too hot, at which point you move to the other side. There should always be a floor that's (relatively) clear, so you can use that to cross to the other side without getting killed. With this strategy there is no real objective guy, but you can choose to use the floors furthest away from the server room to make doing the objectives a little safer (excluding the roof, of course).
* This bug has been fixed in DAHM. For a detailed explanation see a post on the group forums for that mod.
No Mercy
 Prepare to kill lots of civilians, dozers, tasers, cloakers and shields. This is the map with the heaviest assaults in the whole game, but also the one where cops can sometimes shoot through walls and shields can push you in them.
- The more you are in the crew, the more cameras there will be.
- There are 3 panic buttons, which are in the main lobby, under the desk; in the elevator room; In the north corridor.
- Killing a civilian triggers the assault immediately.
- You can shoot with a loud gun without triggering the alarm if you're a client.
- After getting the first valid sample, you can call for the elevator. Doing so triggers the second part of the heist, which is more intense and the cops will turn off the power.
- Getting downed might break samples.
- Give the nice witch a visit. She's in the room across the locker room when you hear her crying (after the lights have gone out at least once).
- Smoke in the elevator (once the doors have closed) indicates the presence of cloakers. There can be up to 6 cloakers (3 pairs).
- When the elevator goes to the roof, two dozers can come in.
- When the elevator goes down to the morgue, you can get your Christmas present. It's on the far right side of the door you have to break open.
Chakki and his team made a video showing this very strategy, but you should note that many rooms are glitched and both shields and cloakers can really hurt you through the walls (either by kicking, shooting or pulling you through walls).
If you really want to, you can do this heist with 2 players, but it requires some luck. It might still be interesting to see how it's done (credits to CommanderCH for recording):
Doing it solo
When playing solo there are two main strategies: avoiding and camping. While the first strategy always works with a team of human players, the second strategy may be a bit different. If you're playing with AI, then you can't just camp anywhere. The pathing is just too limited and the bots run off. You want them close, so they can be used as meat shields and they can kill quite a few cops. However, don't expect them to do everything without help. A single special unit can easily wipe out all of your AI teammates. This doesn't include only a dozer or a cloaker, but even a single shield can wipe them out without too much of an issue.
You should note that there is a difference in difficulty when you're playing on single player vs. on multiplayer. Generally speaking, when playing on multiplayer, there are more cops. The difference on non-street maps is 5 cops (20 on single player vs 25 on multiplayer). The only exceptions to this are the maps on the easy and 145+ difficulties: easy is just easy (again, with the exception of street maps, which are more difficult) and on 145+ the spawn cap limits the cops on all maps except the street maps to a point where it makes absolutely no difference. Heat street and Green Bridge on the other hand are much more difficult, as the difference is around 10 cops on 145+.
If you want to try this, it's best to start on a difficulty you can manage. For highly skilled players, overkill may be a challenge that's still quite easily beatable, but overkill 145+ requires some luck on most maps. You can get an idea of how to do the maps by looking at how other people have beaten the maps.
As far as we know, only two people have managed to complete all the maps on 145+ by themselves and provided videos as evidence. These two people also happen to be the authors of this guide. In December of 2019 JohnL successfully completed his runs as well:- Tromboncino's YouTube channel
- Dorentuz' YouTube channel
- JohnL's youTube channel
- Crosley Bendix's YouTube channel
There's a handful more players that claim to have beaten (most of) the heists, but the lack of video evidence makes inclusion in this section pointless. But that doesn't mean they're any less of a player of course. If you've beaten the heists, have videos showing it and want to be included, just let me know.
Credits
Putekiller and -[H]-Major-Naise™ for some crazy and fun strategy testing.
Zdann for the exact percentage from the game files for some of the equipment.
Dussel for being my teacher since I was a newbie.
Chakki and Coo1man (and their team) and CommanderCH for recording those awesome videos.
Frankelstner for posting some of the necessary game files in a custom format that's much easier to read.
Some of the images were (probably) taken from the PAYDAY: The Heist wikia[payday.fandom.com], even though most are extracts from the game files.
- OVERDRILL Guide★ 5 (1.3k)68k views1.6k ♥6 minUpdated Feb 26, 2014
- Payday: The Heist: Weapon Unlocks★ 5 (437)27k views370 ♥11 minUpdated Feb 8, 2025
- Русификатор текста от ZoG★ 5 (1.1k)24k views904 ♥1 minRussianUpdated Mar 3, 2024
- Quick & Clean 1-145+ Guide★ 5 (817)23k views1k ♥59 minUpdated Aug 11, 2017
- OVERDRILL Guide (Russian)/Руководство по выполнению OVERDRILL★ 5 (1.2k)22k views963 ♥5 minRussianUpdated Sep 25, 2016
- Выполнение достижений, советы, ЧАВО★ 5 (1.8k)19k views2k ♥16 minRussianUpdated Jan 27, 2024



- Upgrading to PremiumTeam Fortress 2★ 5 (20k)1441k views11k ♥6 minUpdated May 11, 2022
- No More Room in Hell Official ManualNo More Room in Hell★ 5 (2.8k)569k views2.1k ♥29 minUpdated Apr 22, 2019
- NMRiH Community Hosting GuidesNo More Room in Hell★ 5 (526)351k views653 ♥1 minUpdated Aug 10, 2022
- ULTIMATE GUIDE FOR GAME DEV TYCOONGame Dev Tycoon★ 5 (5.8k)326k views10k ♥4 minUpdated 23 Jan, 2014
- How to 'Git Gud' Soon™MORDHAU★ 5 (2k)318k views3k ♥68 minUpdated Nov 16, 2024
- Лучшие кооперативные игры SteamPAYDAY 2★ 5 (1.5k)315k views2.1k ♥56 minRussianUpdated Apr 27, 2025






This guide was created by its original author on the Steam Community. Are you the author and want it removed? Request removal.