「2026」Flaws' APB Guide
Introduction
Hello. My name is Flaws, I am an APB Reloaded Twitch streamer and I play on Citadel EU.
APB has always been punishing towards new and returning players and many of them quit because of how difficult it is to get into it and to understand how certain things work. Thus, I have decided to create this guide and teach as many players as possible everything they might not know about APB and how to get into it as well as to give a refresher to returners.
All content in this guide is subject to change or removal depening on which direction All Points Bulletin (APB) develops in the future.
Note: The reason the in-game graphics are poor on some of the screenshots is because my game is heavily modded with configs to maximize performance and visibility among other things. Those screenshots are not representitive of the actual graphical quality of the standard game.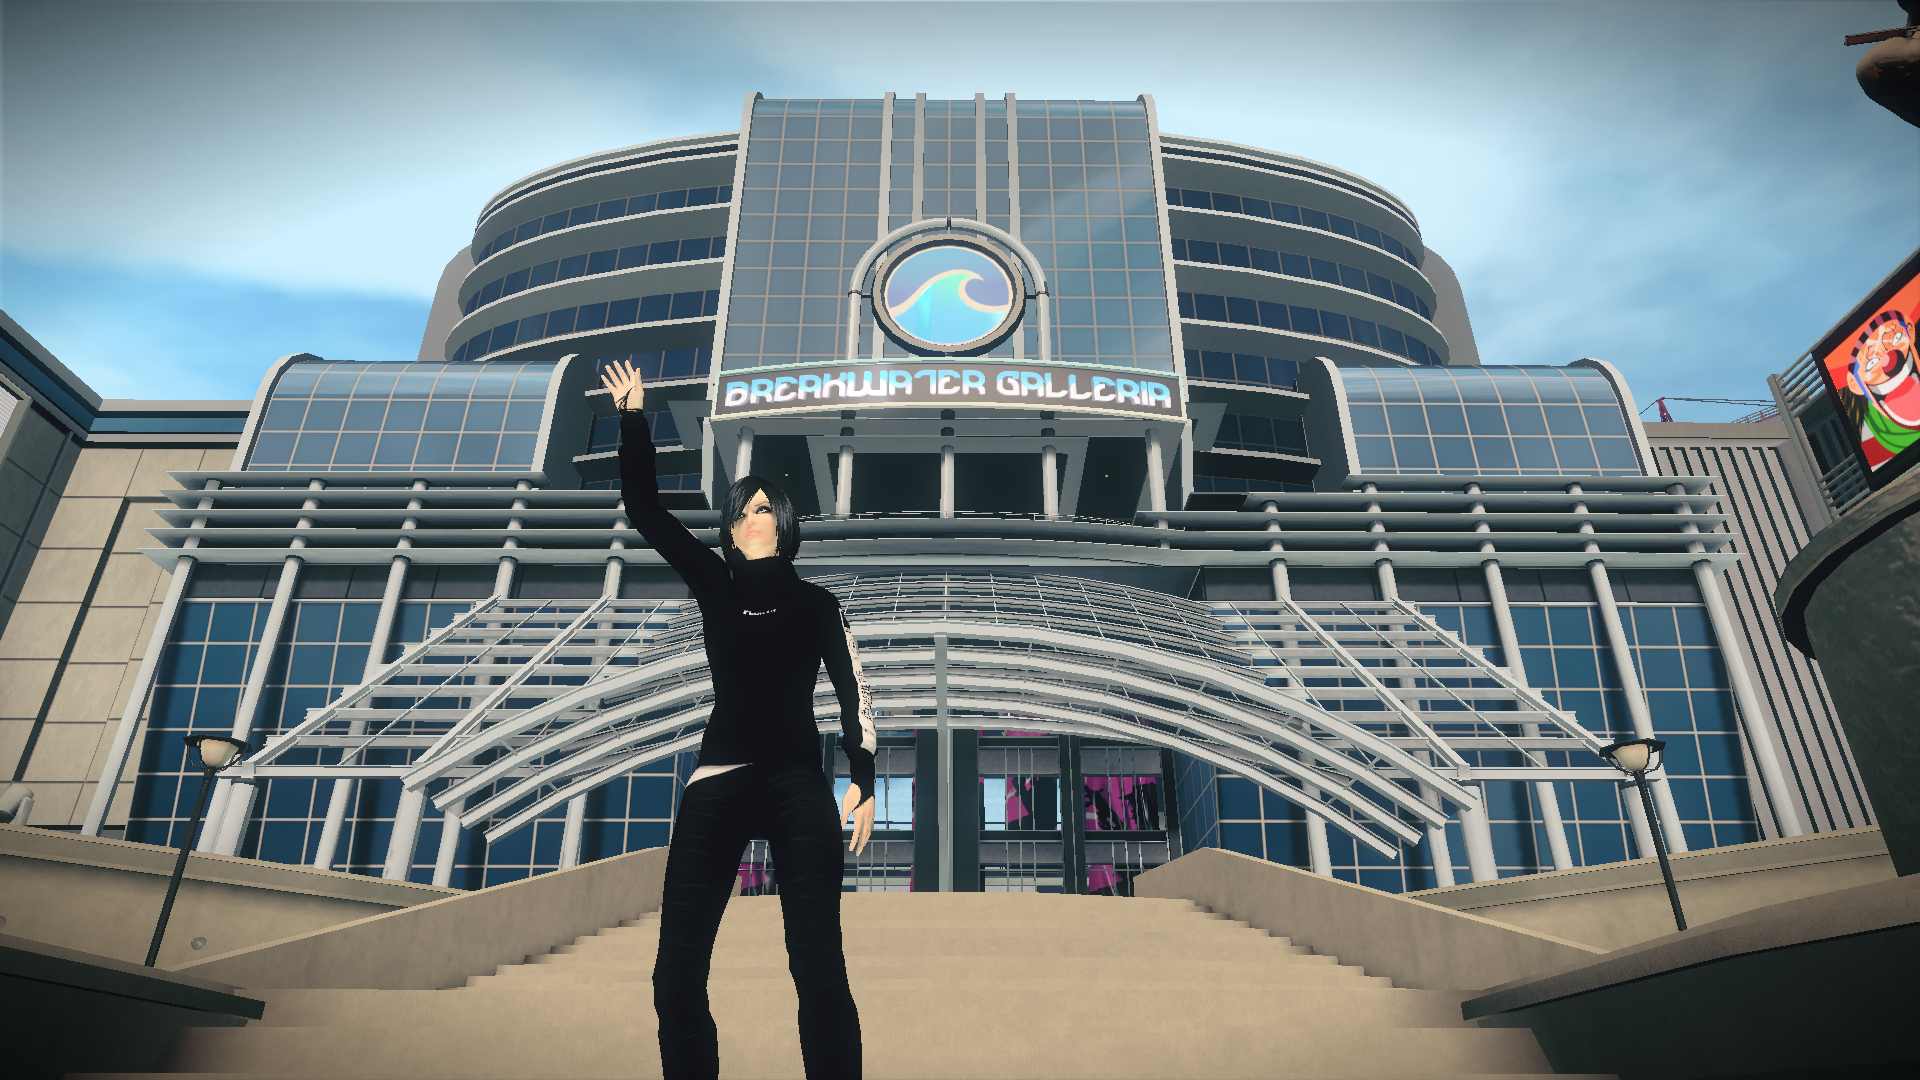
Creating an Account and Steam integration
The first thing to do, if you haven't yet, is to create your GamersFirst (G1) account on the GamersFirst website.
Registration: https://register.gamersfirst.com/register/
Once you have created your account, you will need to verify it through your e-mail address. As soon as that's done, you're ready to download the game.
In order to download APB you have two options:
Steam (Recommended):
https://store.steampowered.com/app/113400/APB_Reloaded/
Official Website: https://www.gamersfirst.com/apb/
Once you've downloaded and started it, you will be presented with APB's launcher which will update your game to the newest version. Simply click 'Start' once the button appears.
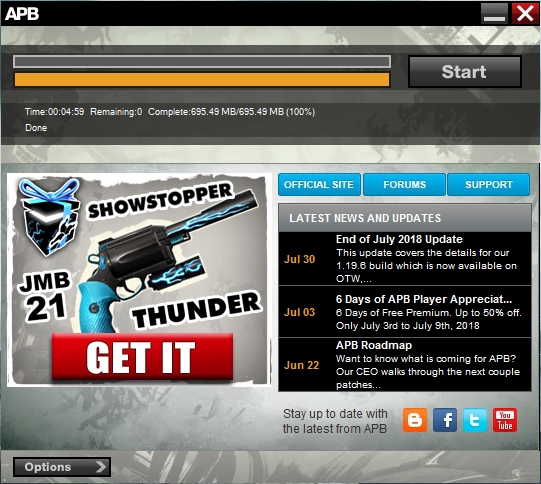
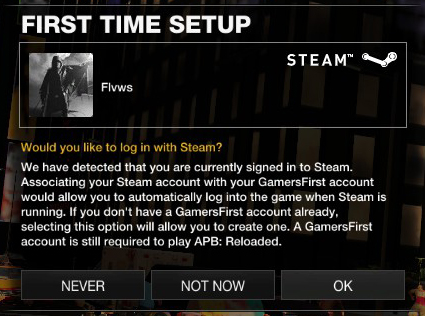
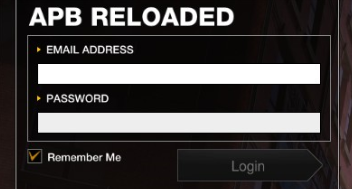
Click 'OK' and then login with your GamersFirst account.
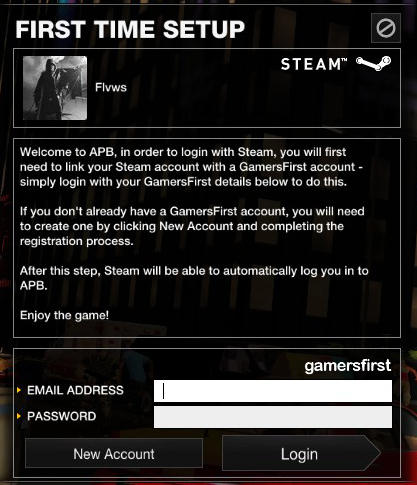
Otherwise just login like you normally would without Steam.
Creating a Character
First, you need to pick whether you want to be an Enforcer or a Criminal. Don't worry too much about it because you get two character slots on your account by default so you can create the opposite faction of whatever you pick later and you can always delete your character.
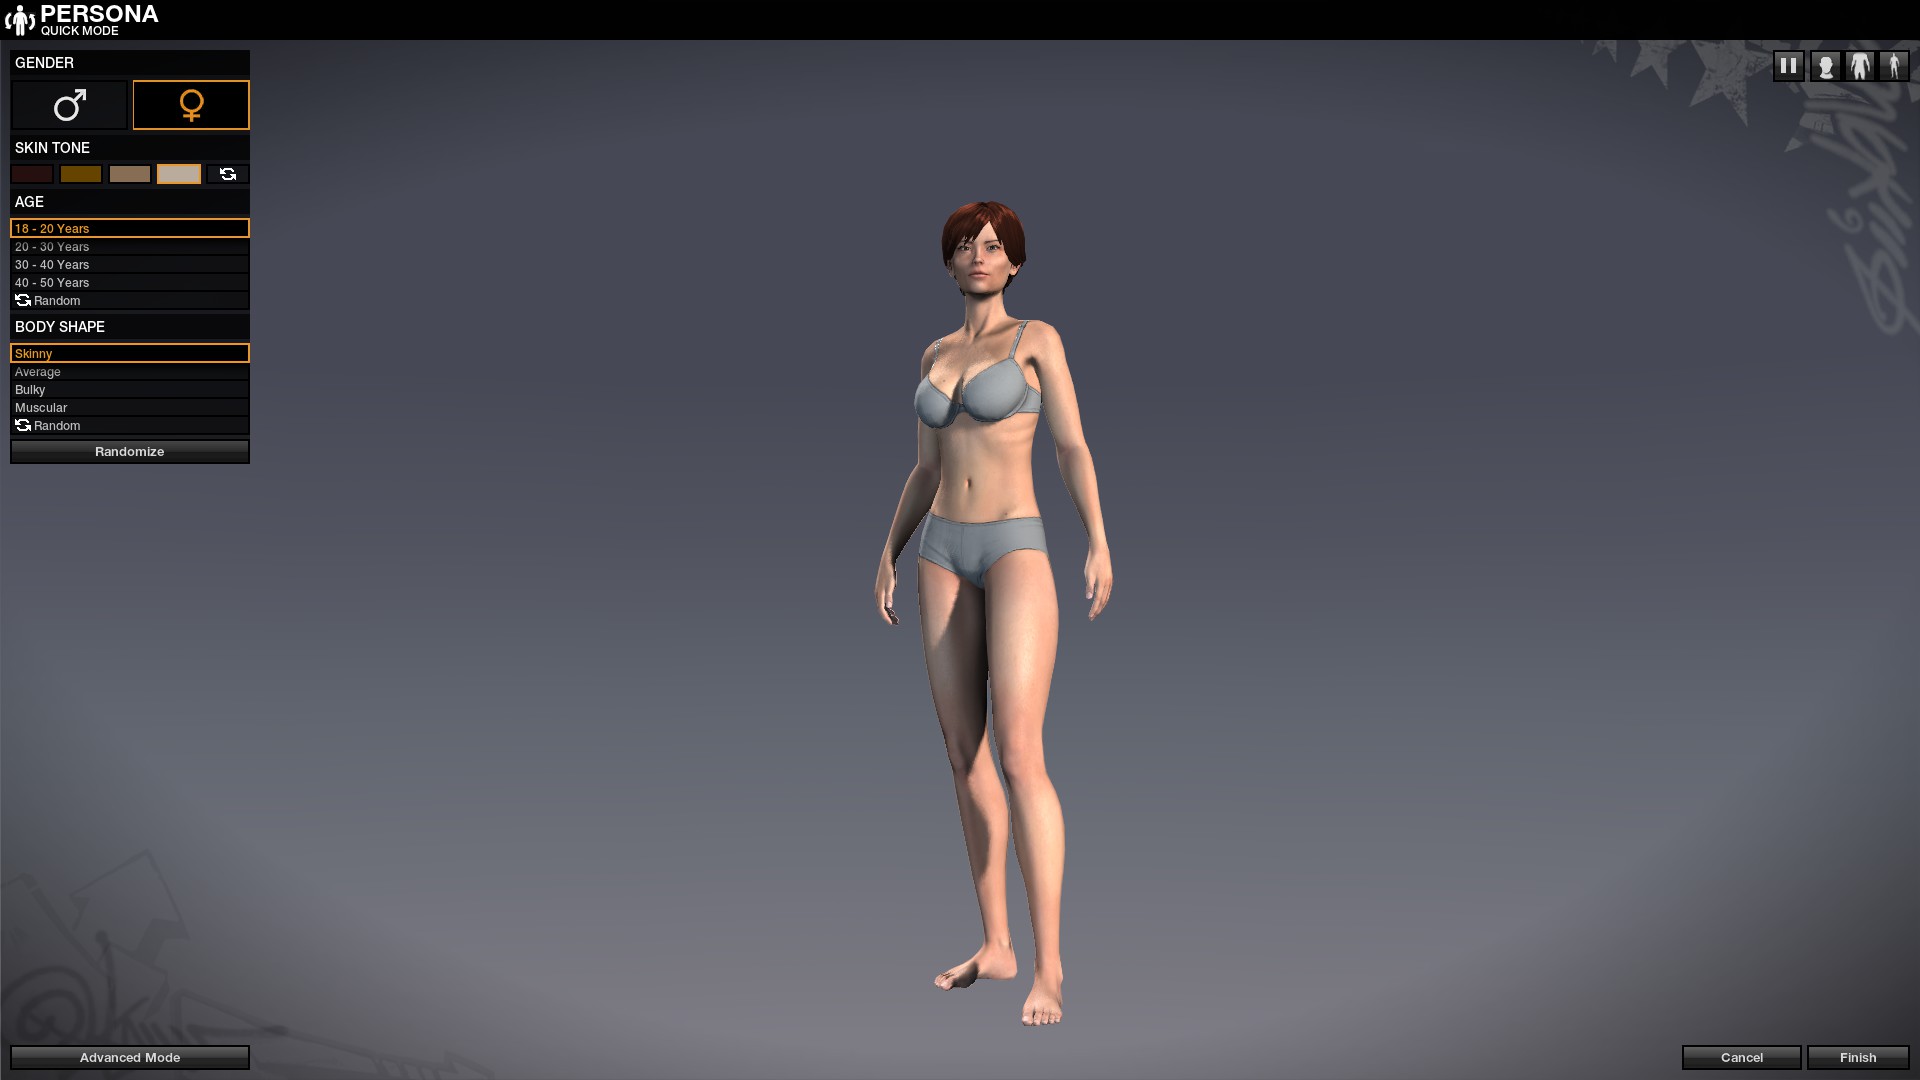
The 'Quick Mode' consists of picking your most general preferences and then 'Randomizing'. Randomize until you find something that you kinda like as a base and then click on 'Advanced Mode' down on the left bottom corner. You will be presented with many options and the controls are pretty simple so I will not be going over those.
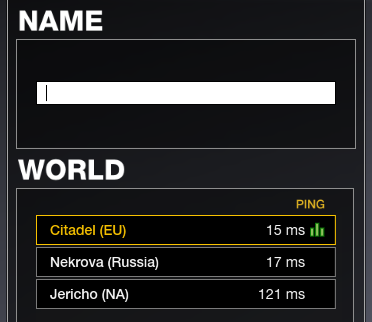
Joining Mission Districts
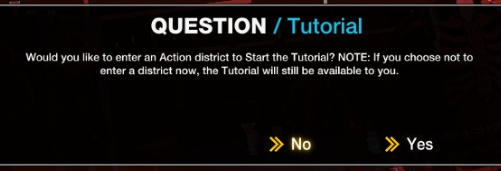
Click 'No'.
Once the following screen appears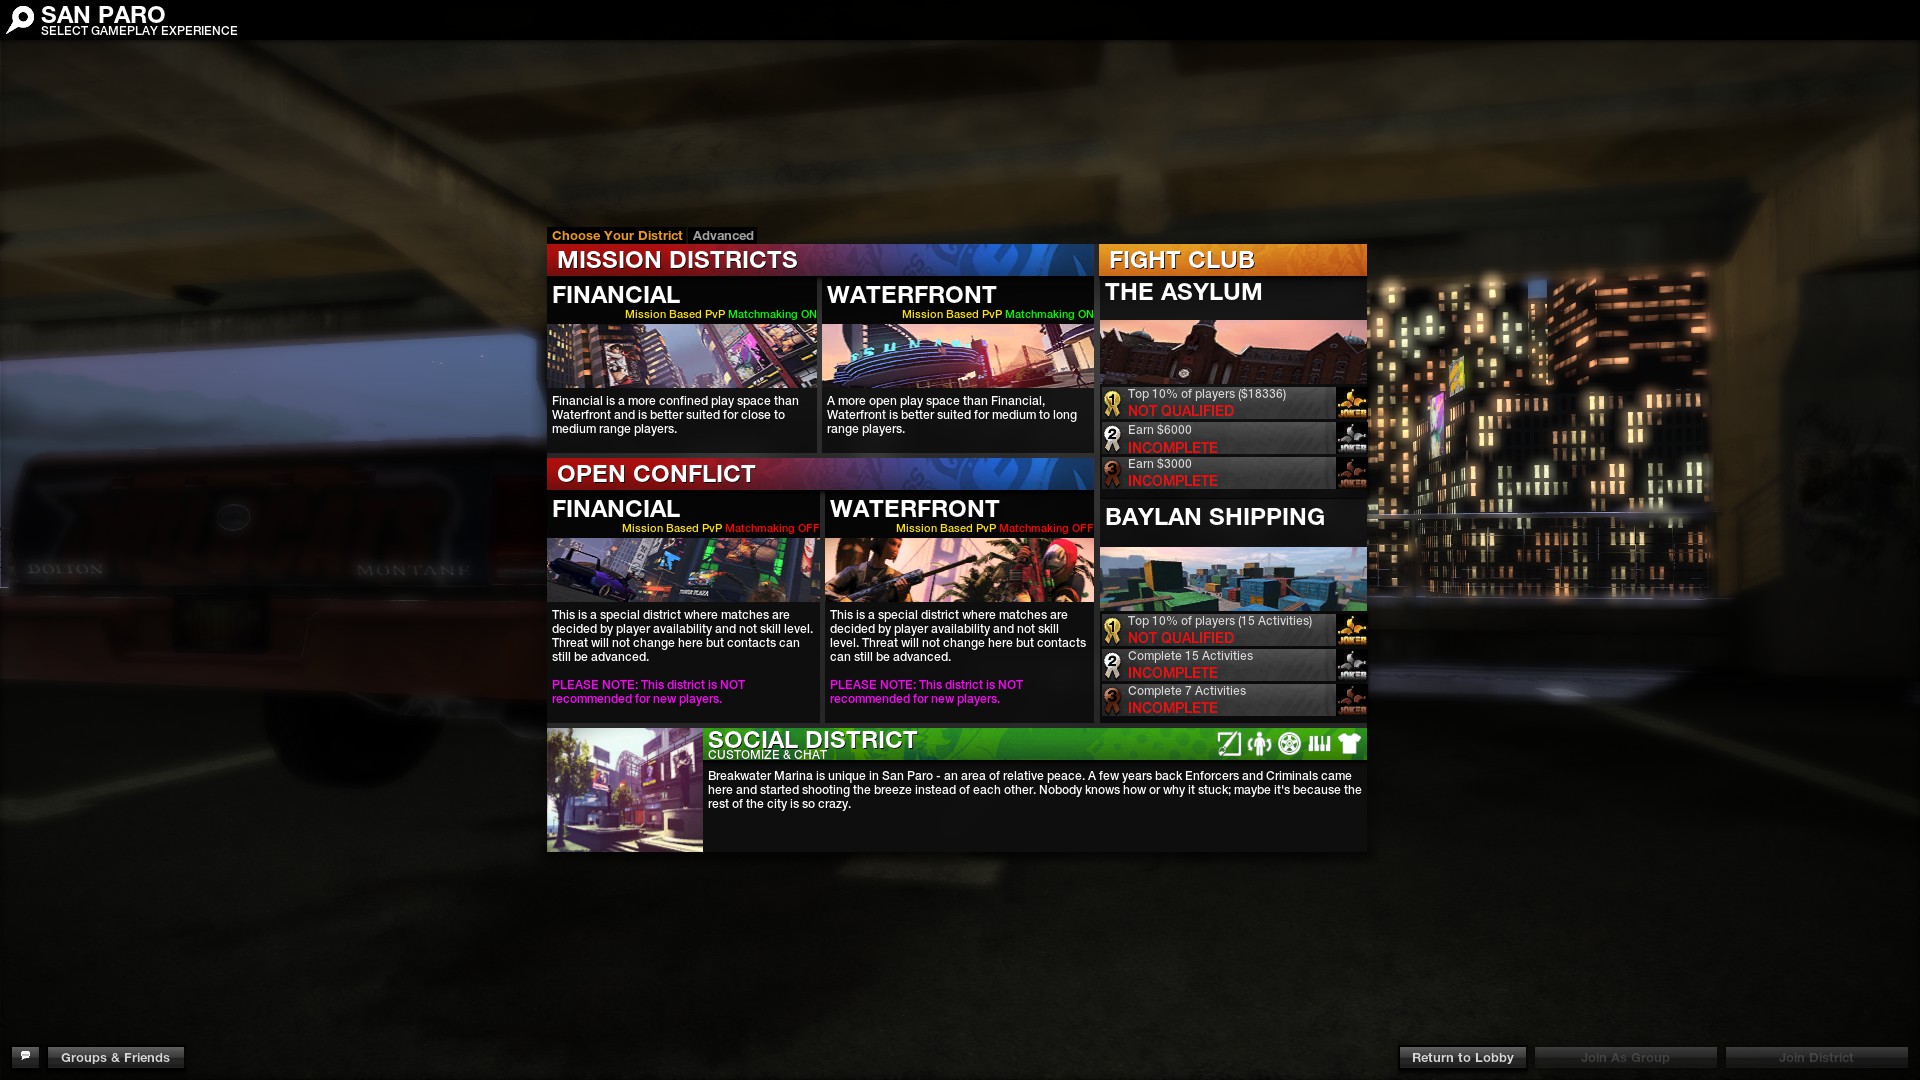 Click 'Advanced' to reveal all available instances in your world server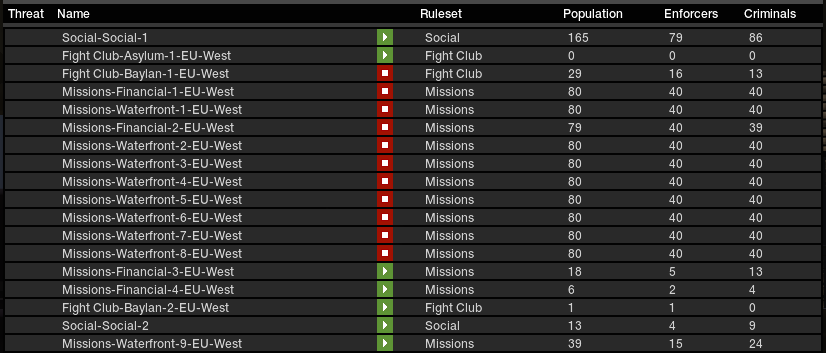
I would recommend starting off with the 'Financial' district. It doesn't matter which number it says on it, they are all the same. With the introduction of "Cross-District Matchmaking" (CDMM), you may now join a completely empty financial/waterfront and ready up. The game will automatically find you the best match possible and either move the other players to your district or move you to their district.
Specific district population no longer matters for matchmaking. The entire matchmaking system is now on world level instead of district level.
Threat Levels (Skill indication)
The "Threat Levels" are the skill ranks in APB. They apply to your entire account and all characters on it. Not to be confused with your character's "Rank". The character's rank simply displays how far you've gone into progressing your character and leveling it up. Those two things are not related to each other in any way.
When you first join a district, you will see a blue or red T symbol (depending on your faction) which means 'Tutorial' player or 'Trainee'. You will eventually lose your trainee status and become higher threat as you play missions against other players, depending on how well you play.
From best to worst the threat levels are as follows: Gold, Silver, Bronze, Green, Trainee.[apbdb.com]
You can find out what your threat level is by looking at the color of the badge next to your character's name up top left.
Basics
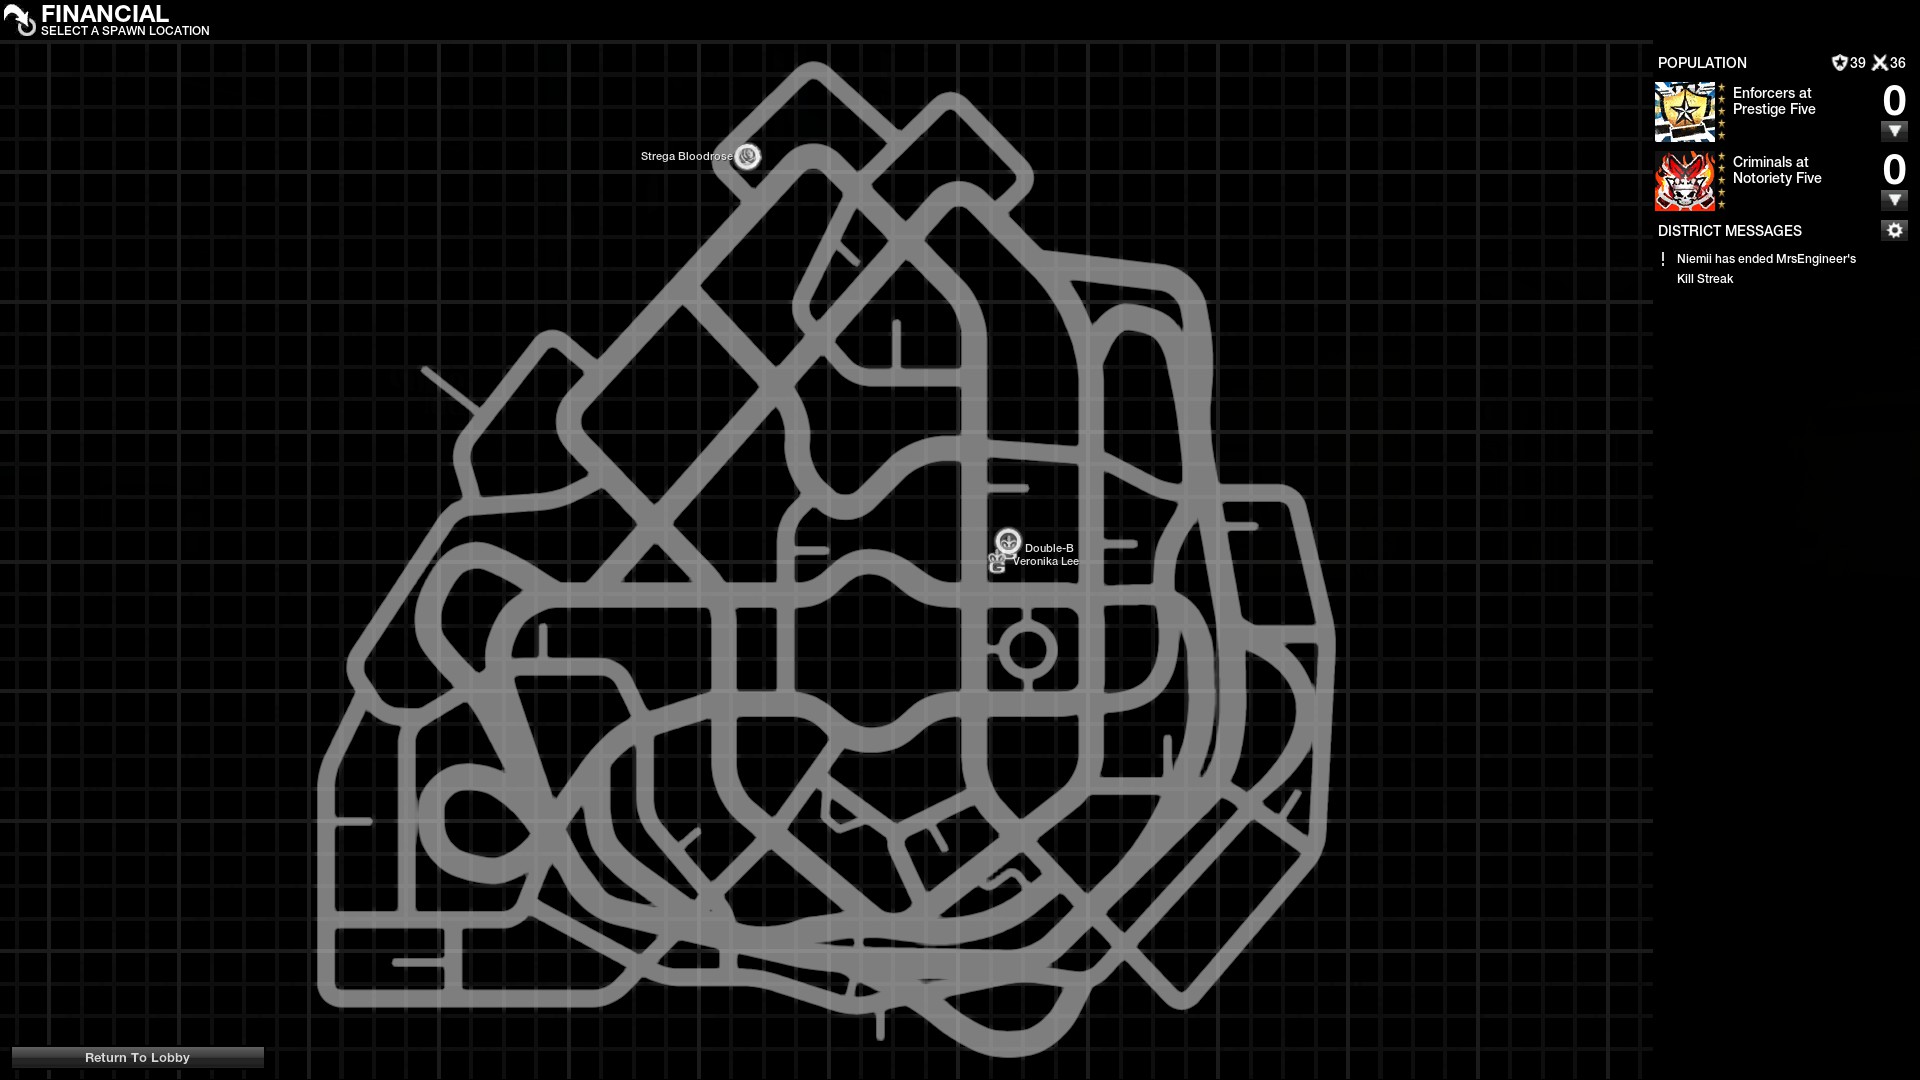
The white circles are areas that you can spawn in. More of those will appear in the future as you progress your character's rank. These spawns are only used for when you are not currently on a mission. When you spawn, your camera will look something like this
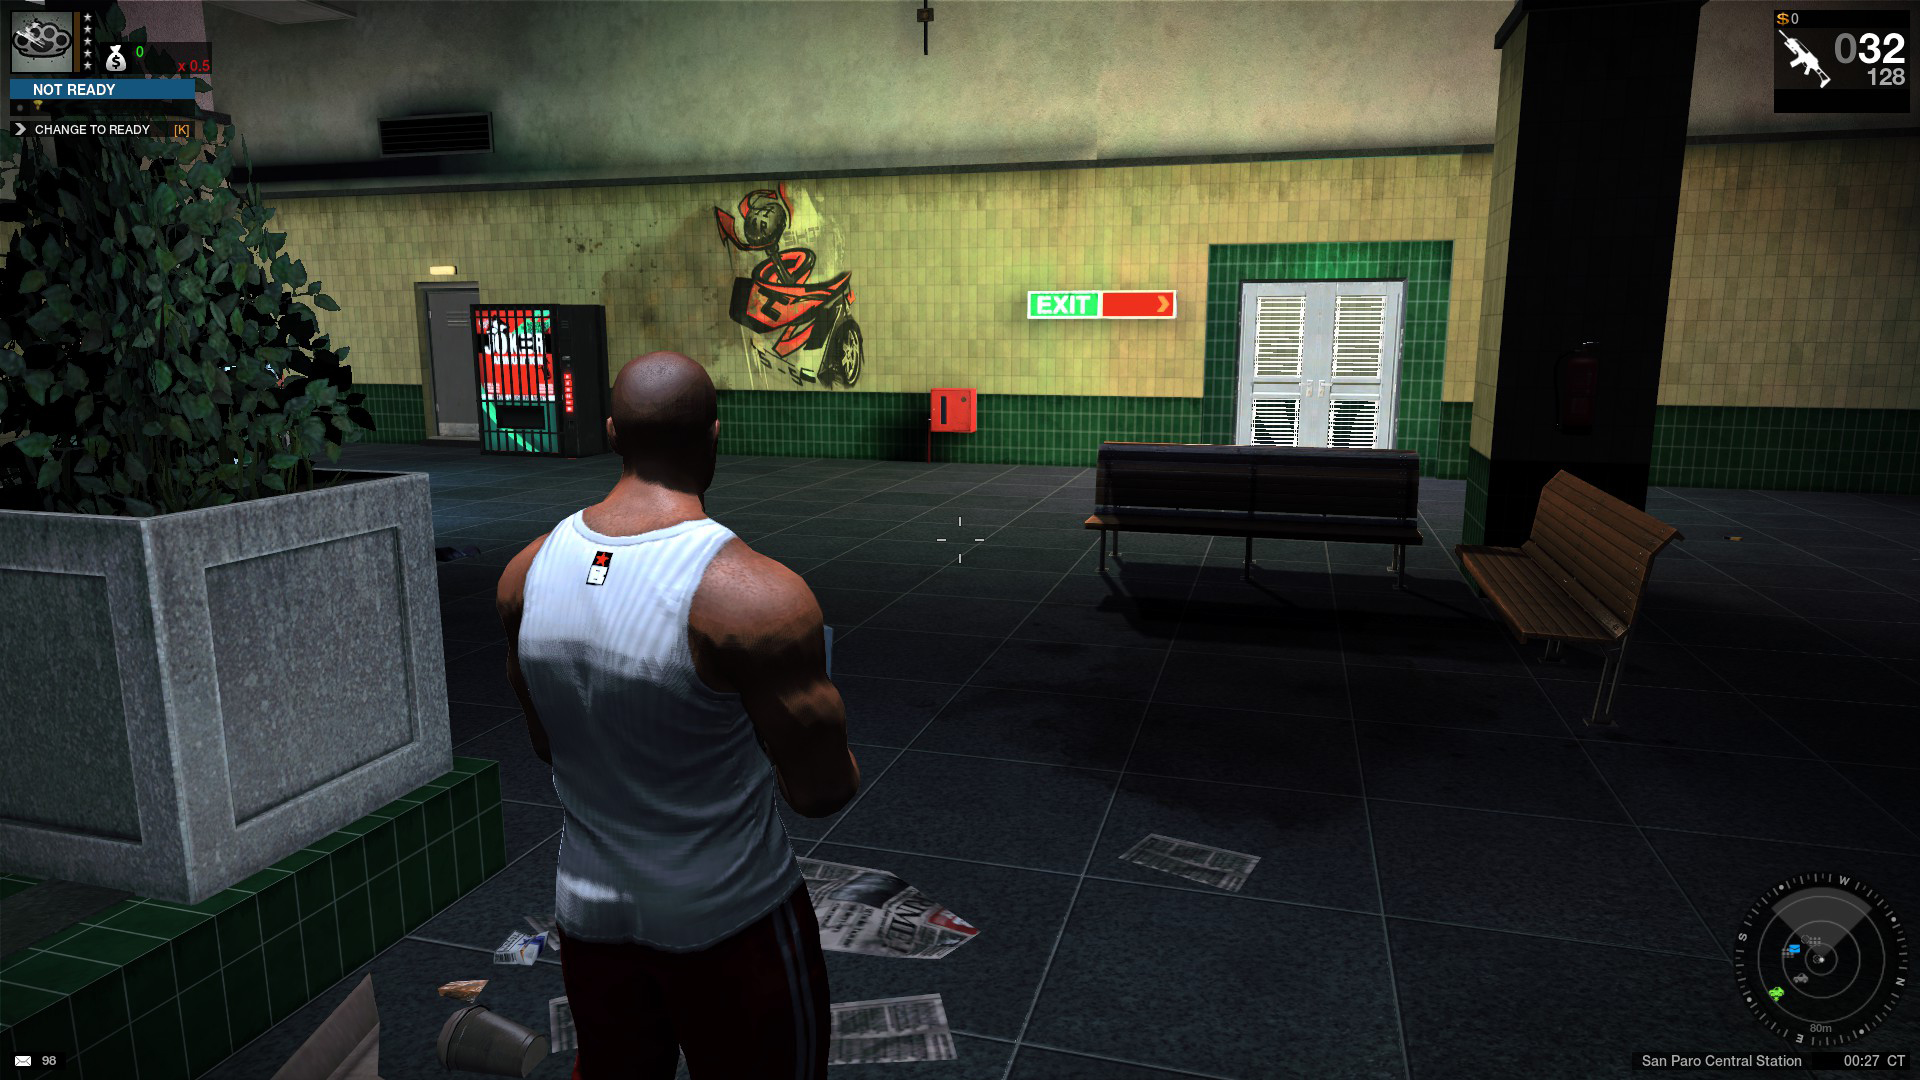
First I recommend that you zoom out the camera from your character. To zoom it out, press the - and = buttons on your keyboard, right after the 0 on the '1234567890' number buttons at the top row. It should now look more like this
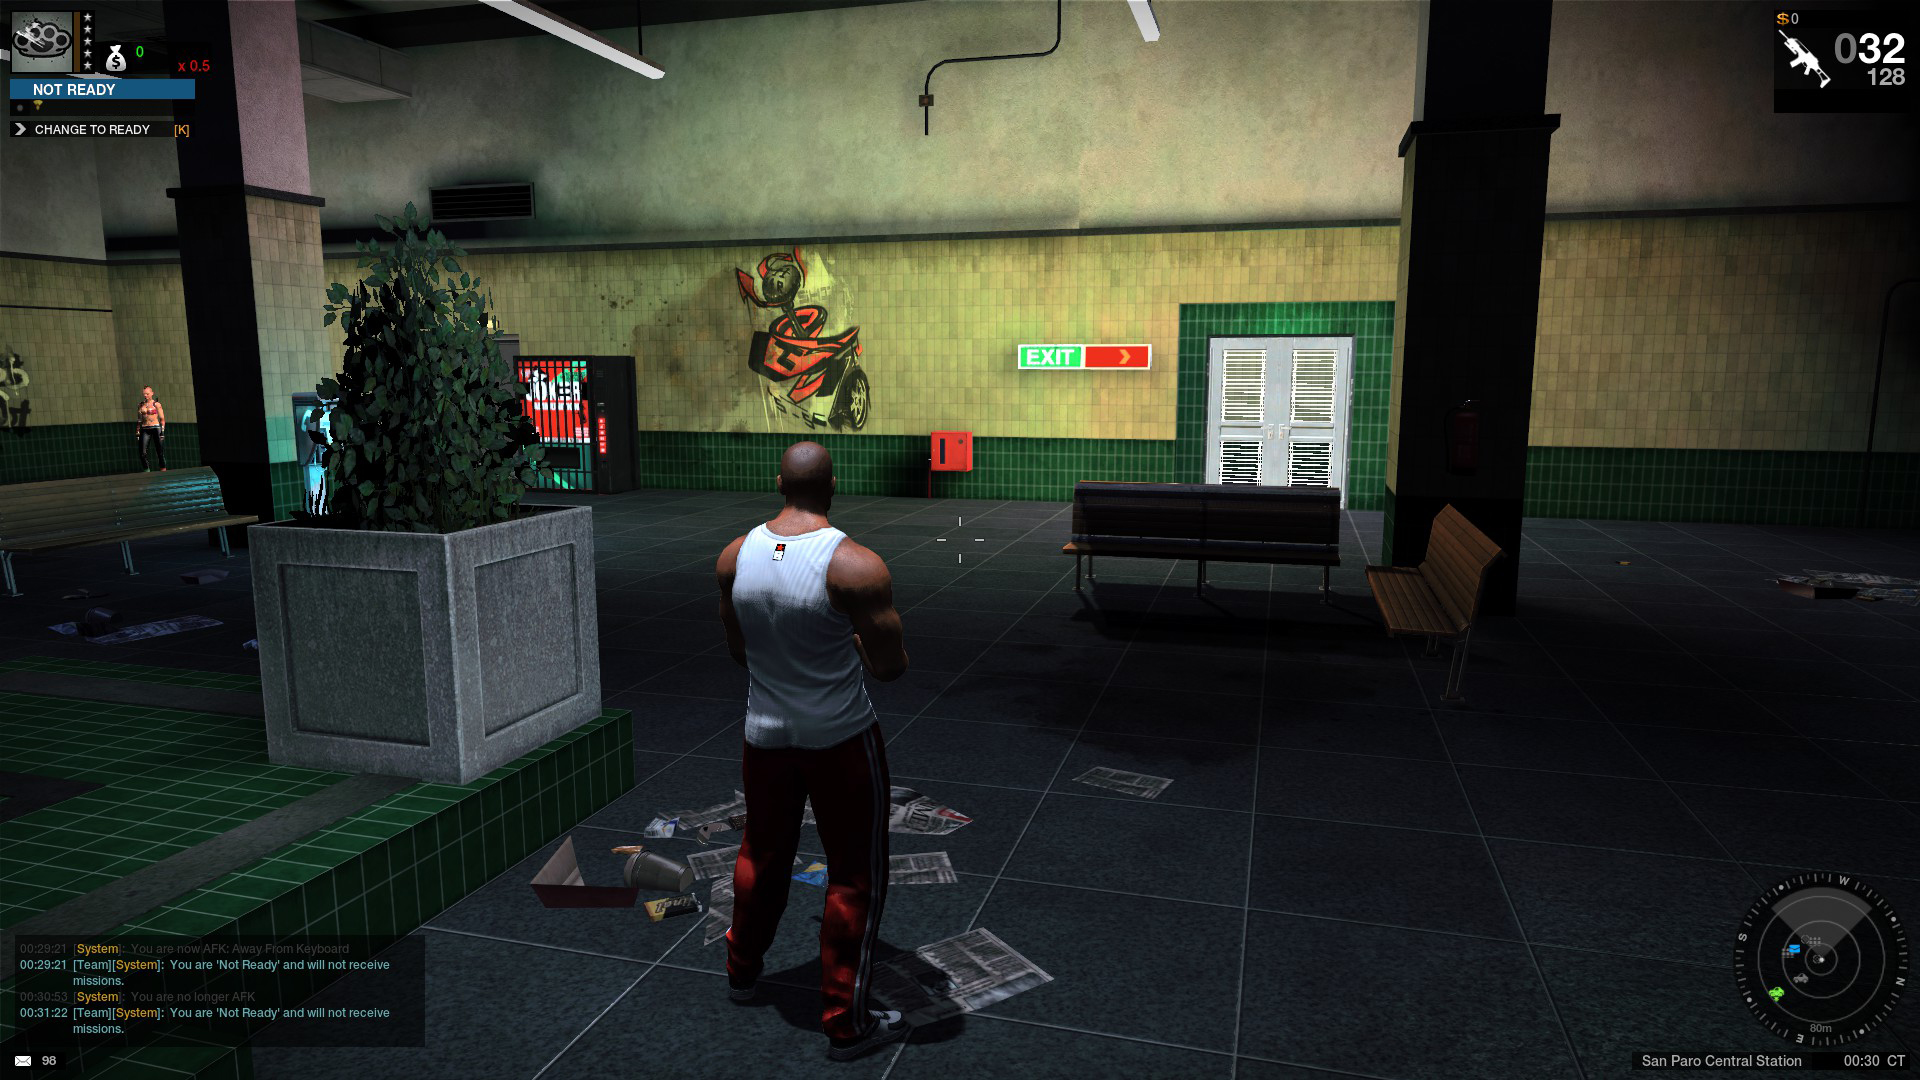
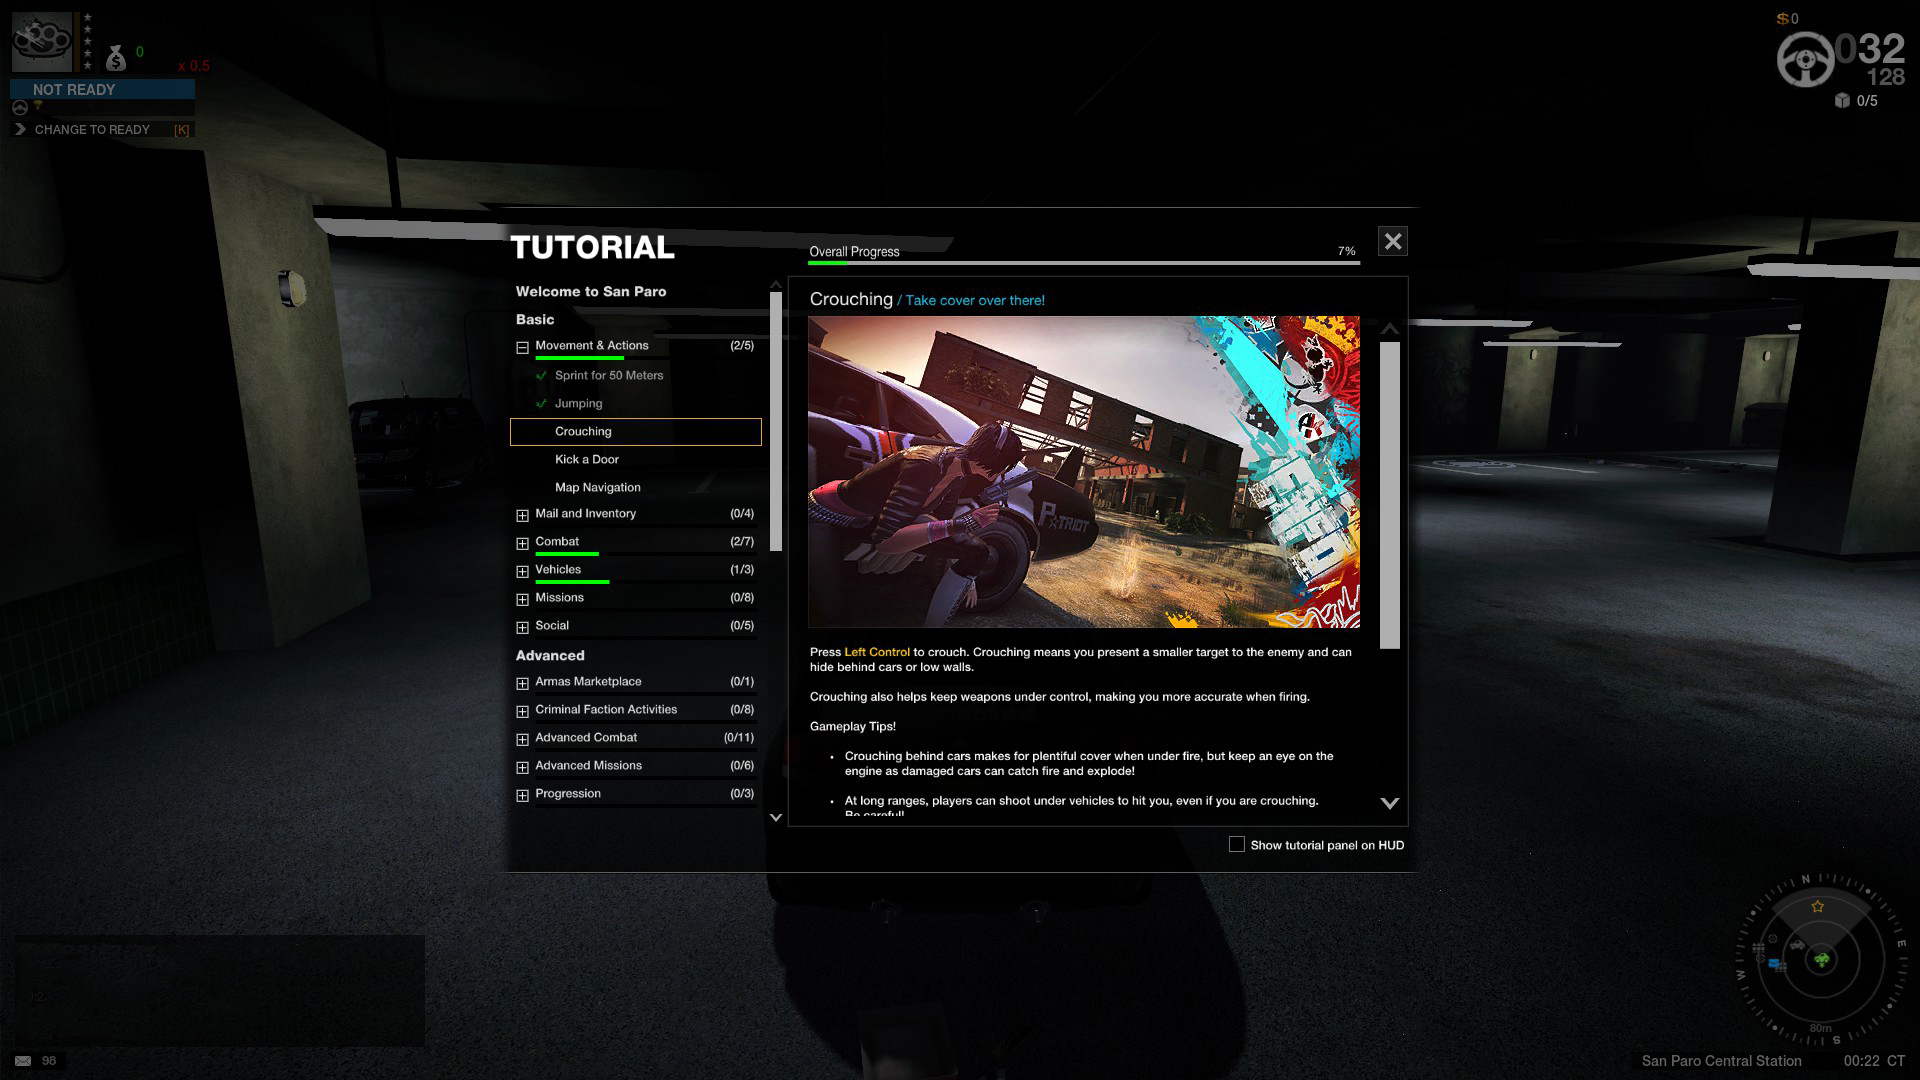
You must complete the basic tasks that are listed there:
- Sprint 50 meters. (W + Shift)
- Jump. (Space)
- Crouch. (Left CTRL or C)
- Open a door. (F) Only double doors can be opened. Openable doors are indicated once you aim at them
- Press M on your keyboard to reveal the map.
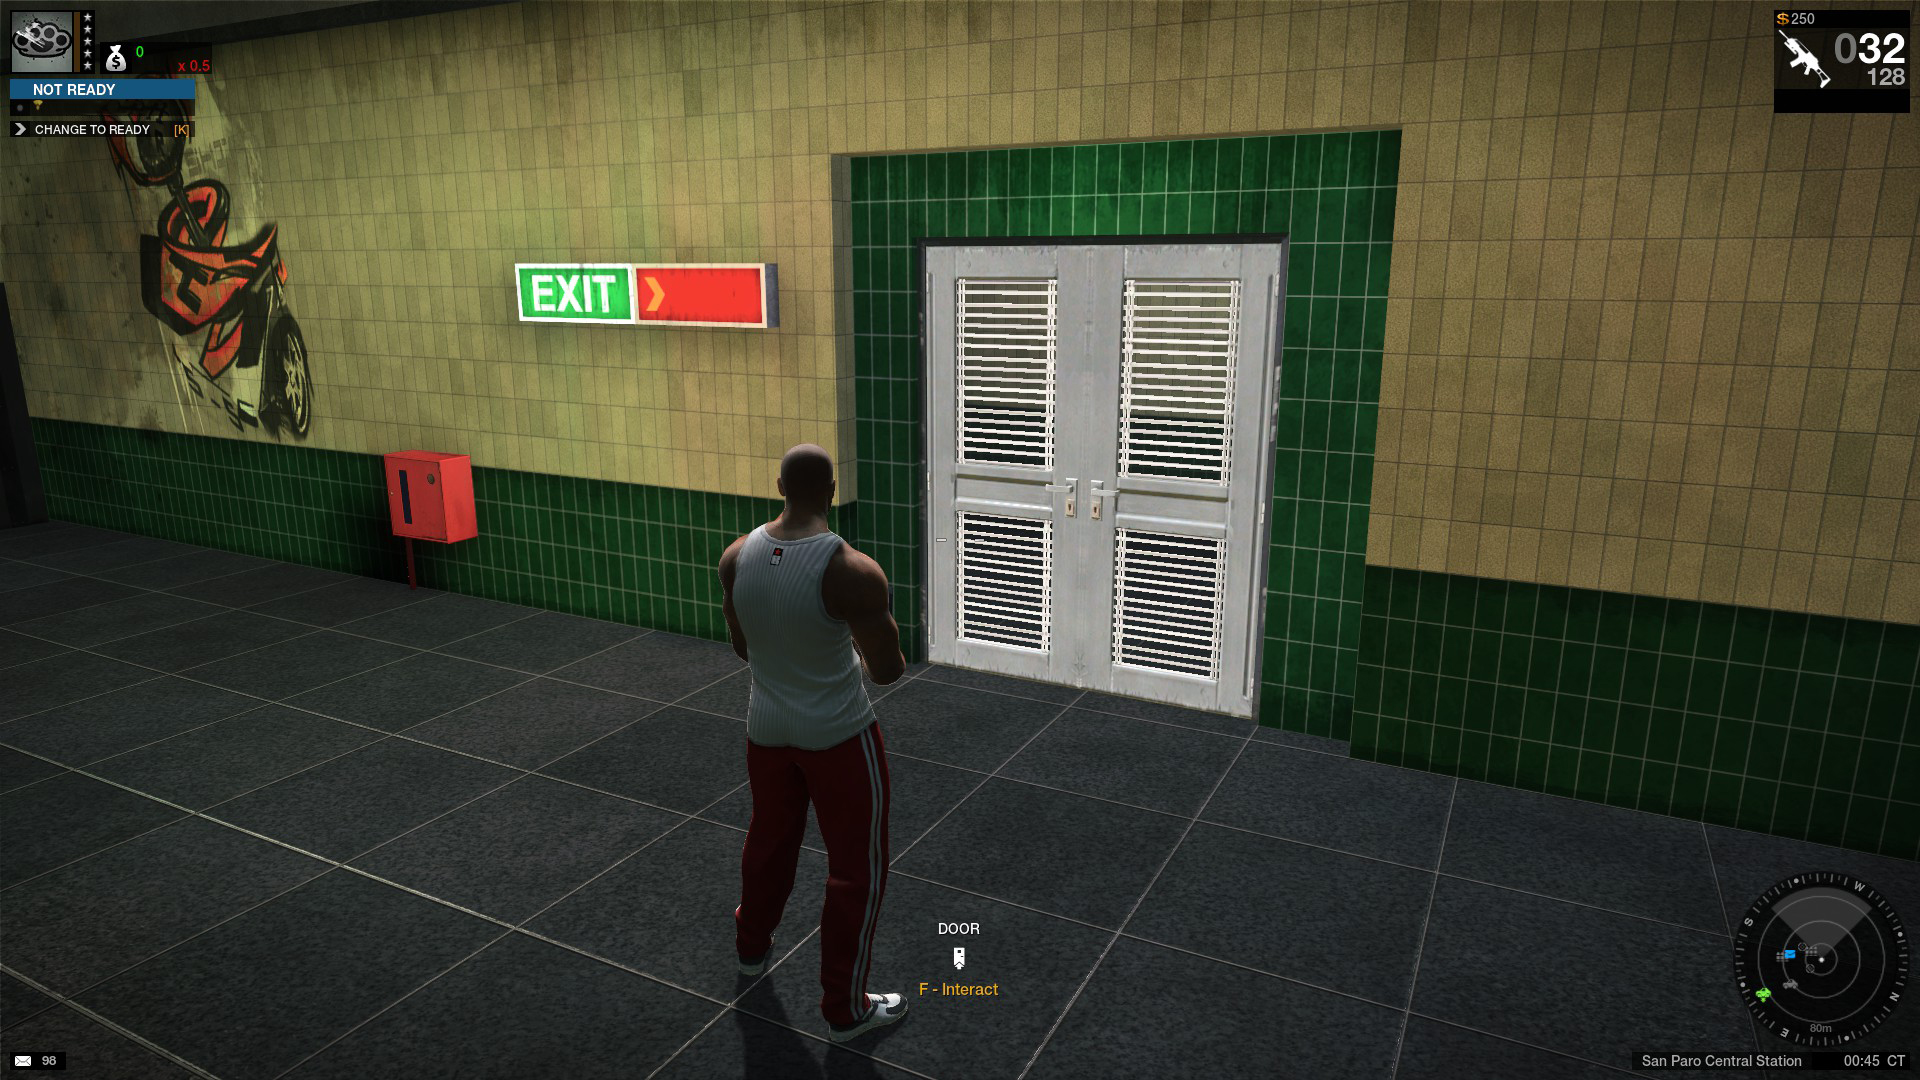
Completing those will reward you with a Field Supplier mod in your mailbox which you must retrieve.
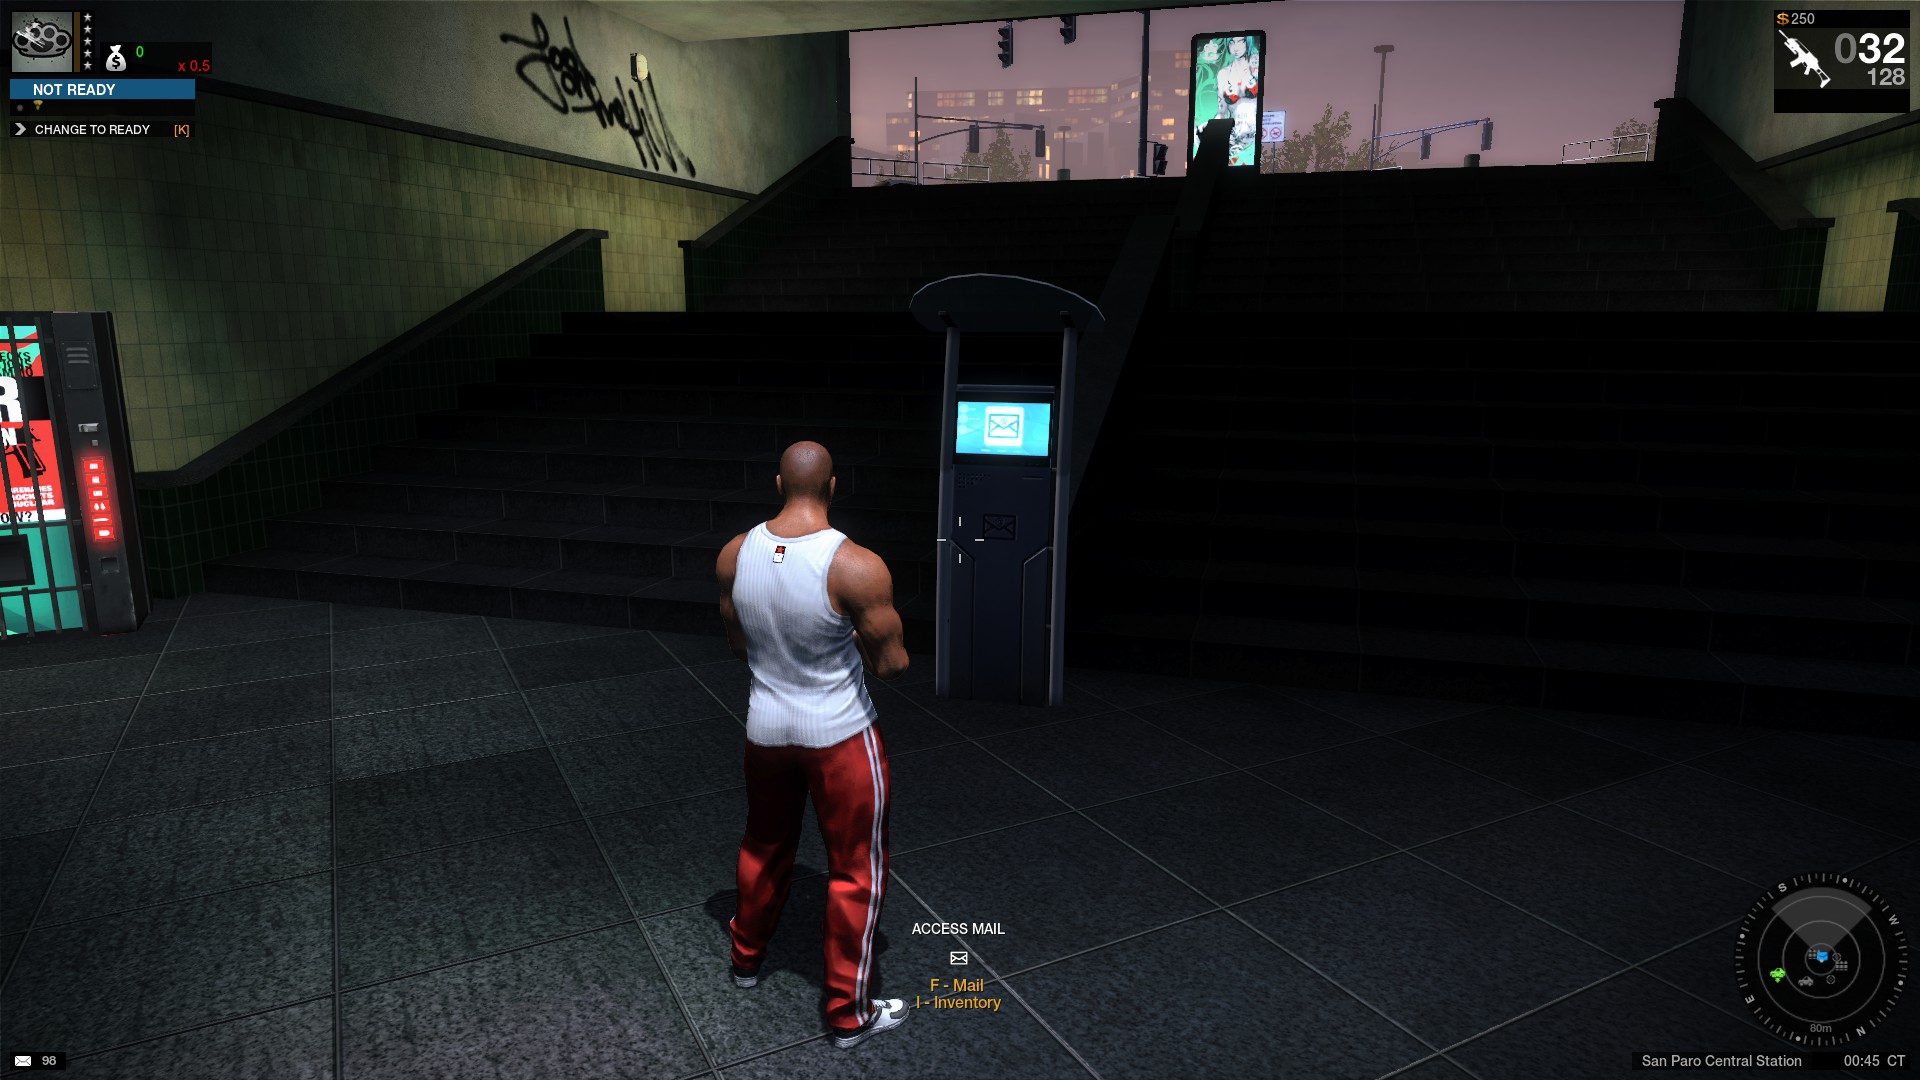 Press F on it and find the newly received mail with your Field Supplier attached to it then click on it and then click on the paper clip on the right where it says 'Field Supplier'.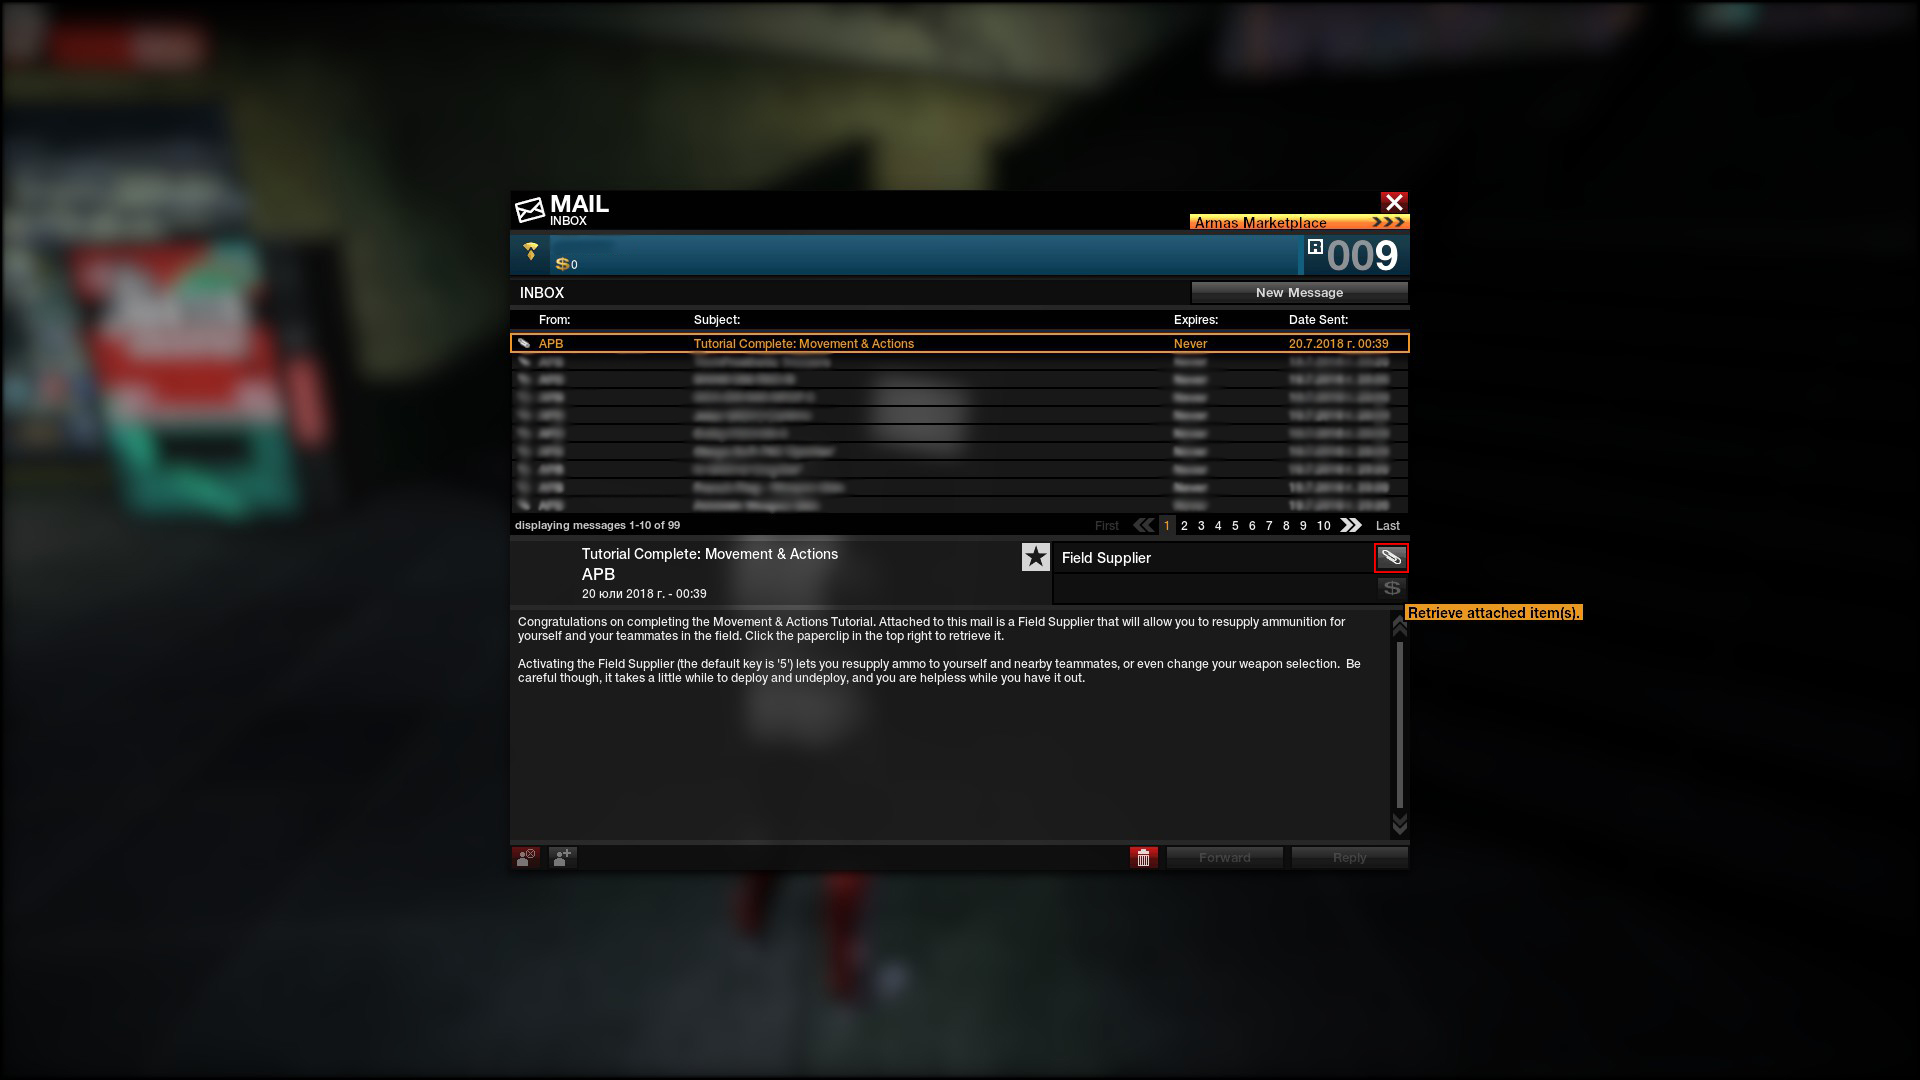
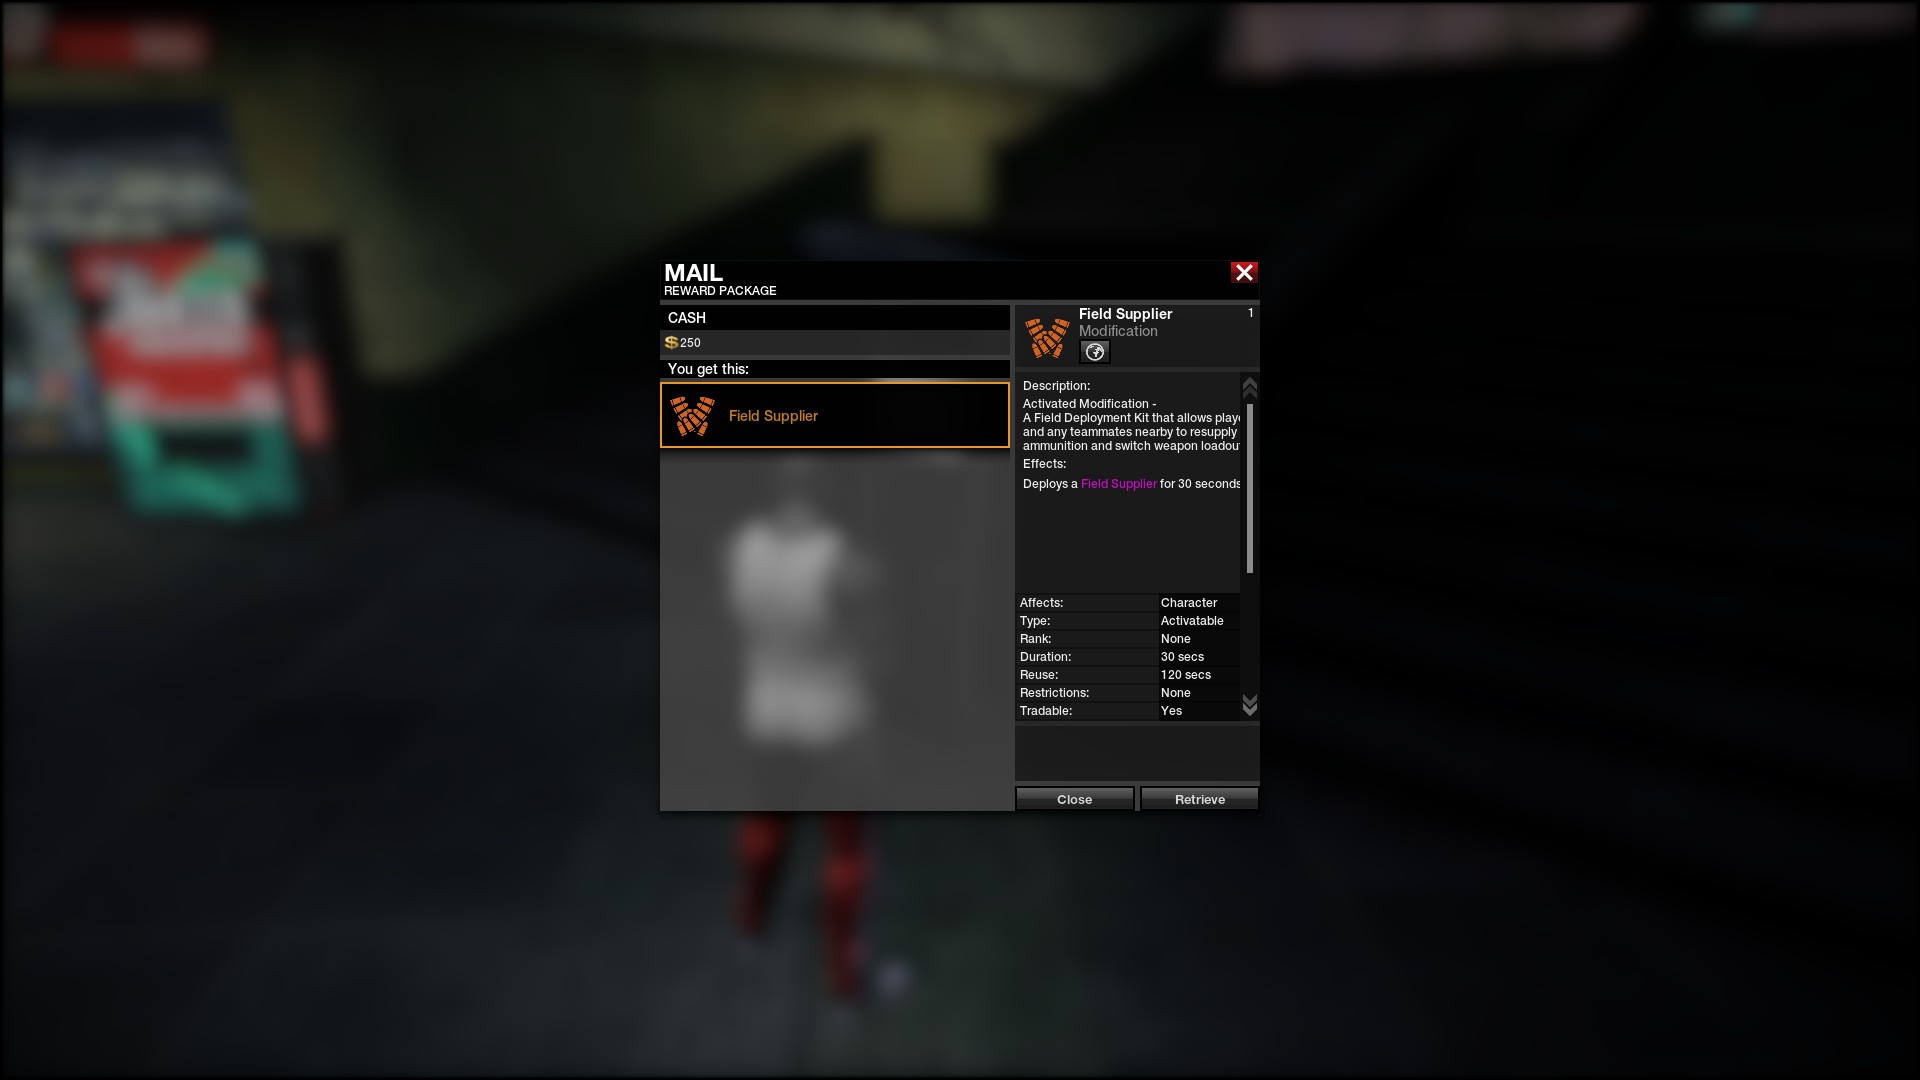 The next step is to go to one of the Joker Ammo vending machines.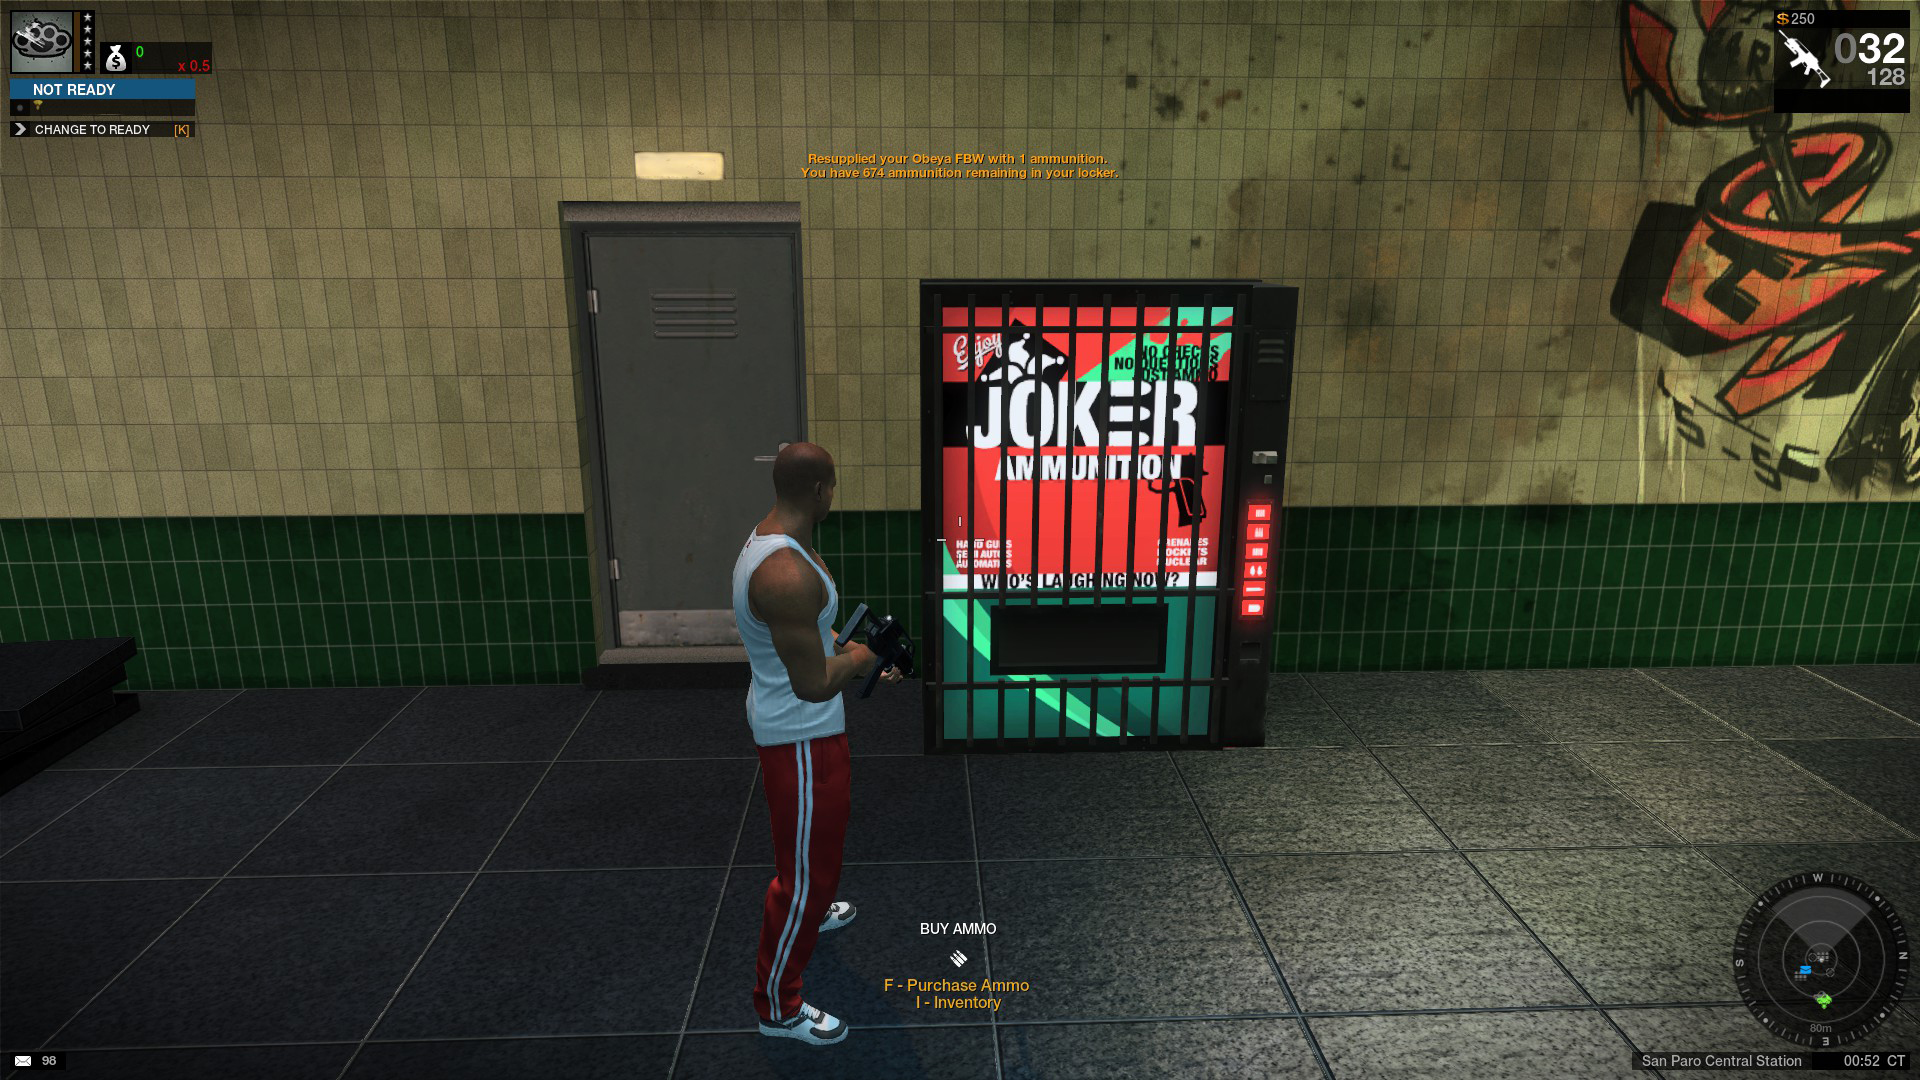
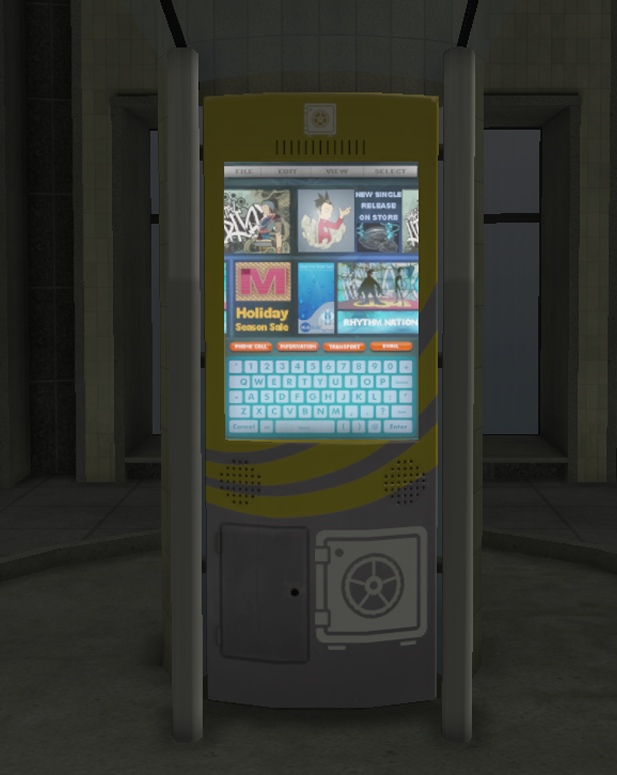
These can be used to resupply ammo, buy more ammo to add to your locker and equip weapons. Your current task is to press I on one of those machines and equip your Field Supplier. Pressing I on it opens this window.
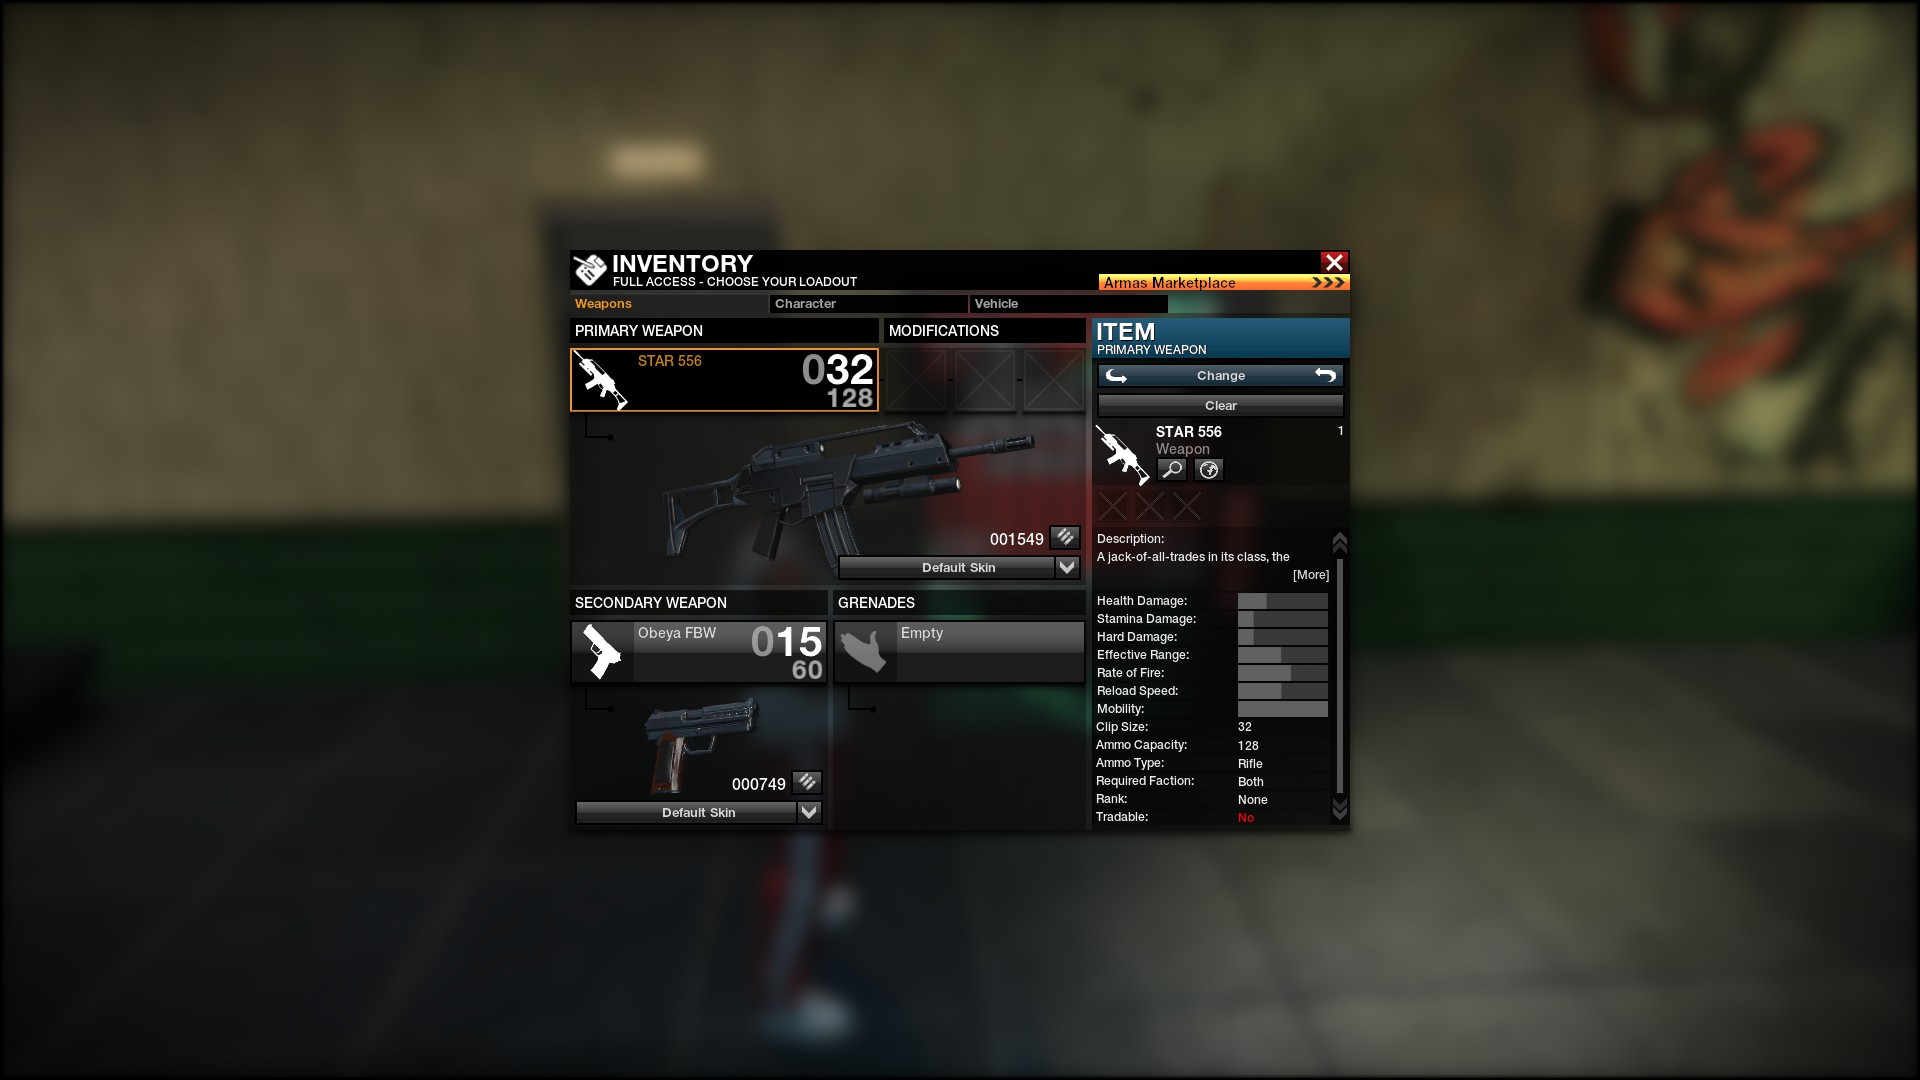
You then click on the 'Character' tab
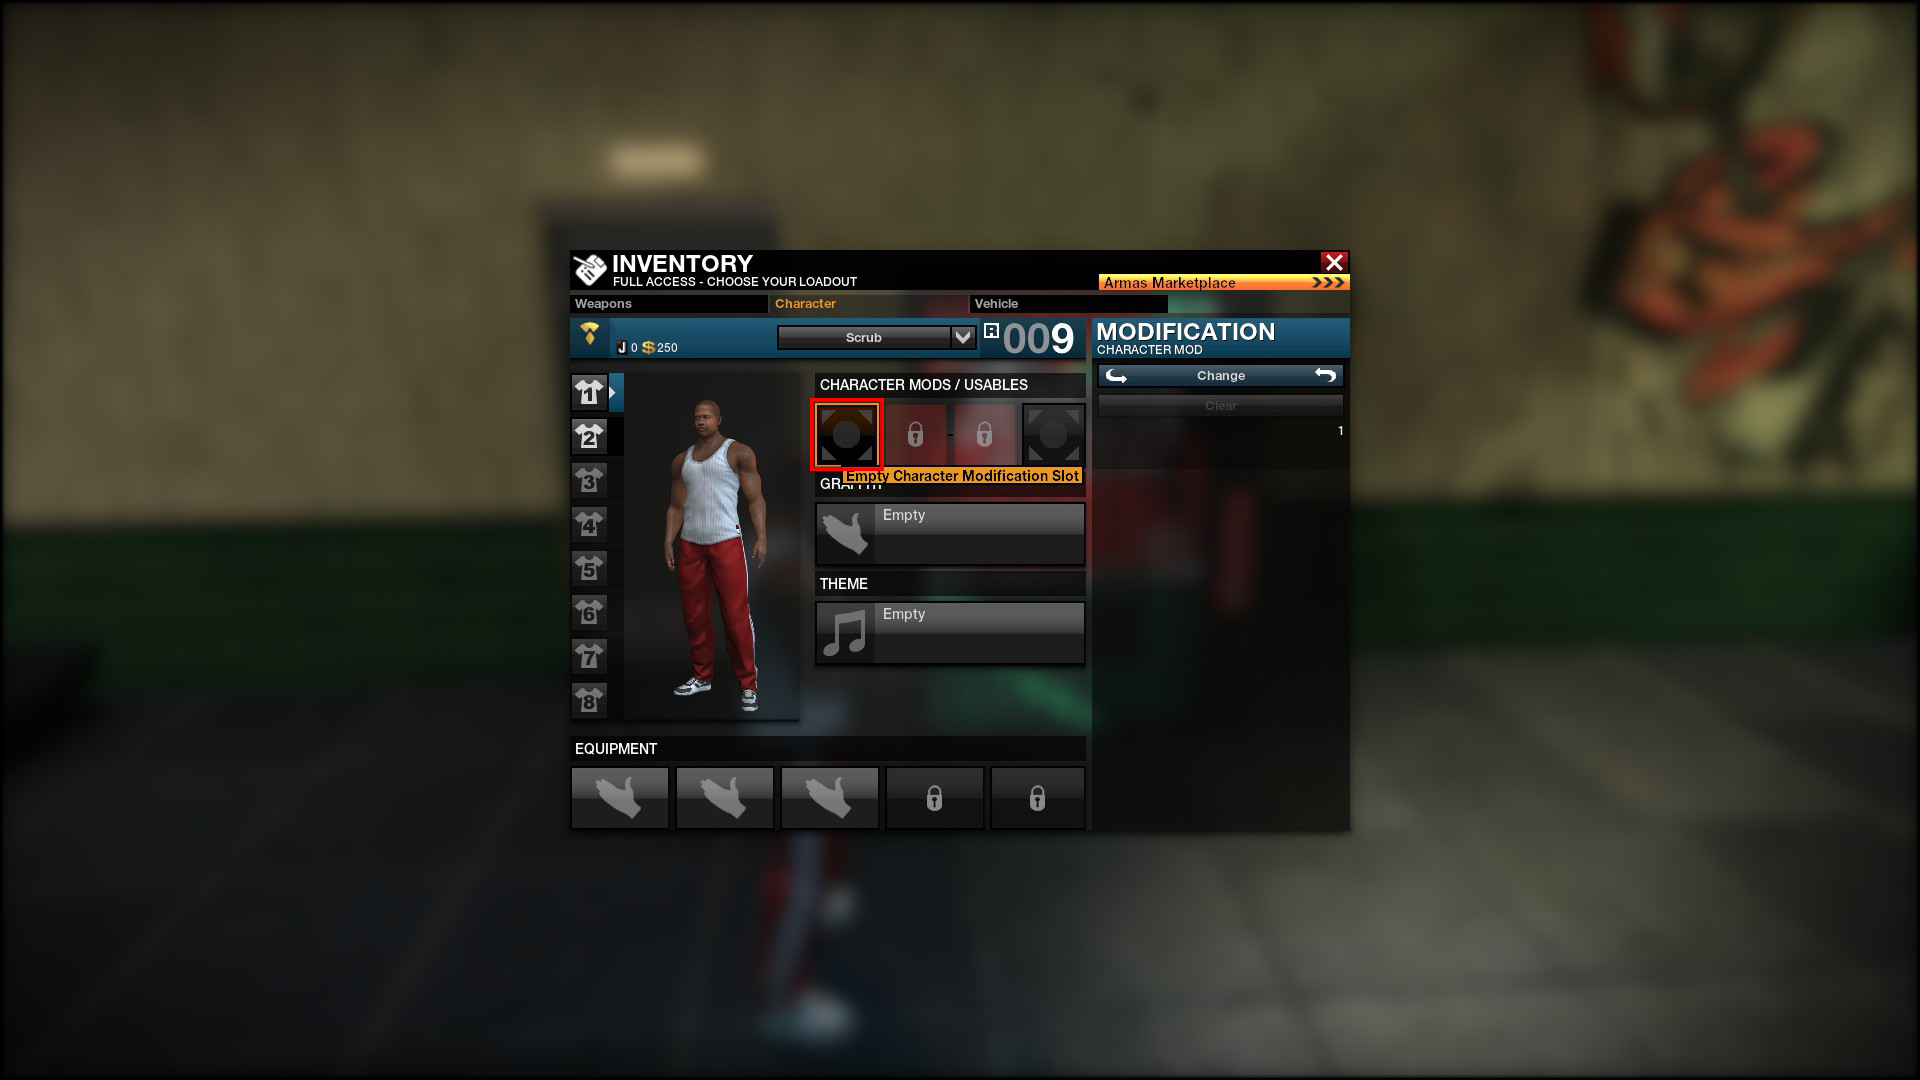
And double click the empty mod slot (marked with a red square on the image) which will allow you to equip your Field Supplier. Then go back to the 'Weapons' tab and click the ammo purchase button.
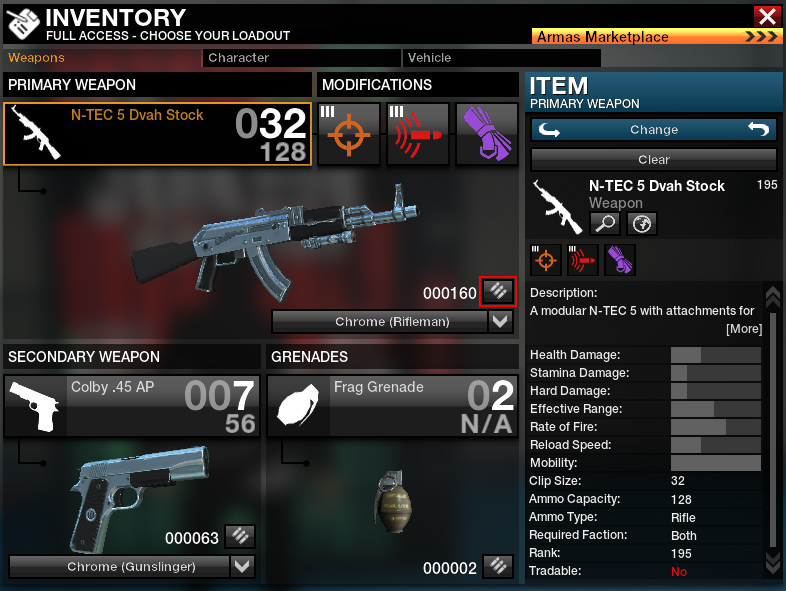 Purchase the minimum amount for either your primary or secondary, to complete the tutorial.
Completing that just awarded you with another mail in your mailbox that contains grenades. So do the same process of going to the mailbox and retrieving those. Then go back to the Joker Ammo Vending Machine, press I again and double click on grenades and equip your newly received 'Frag Grenades'.
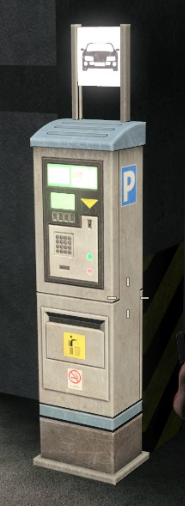
In most spawn areas, there is a garage in the building or somewhere underground. Simply go there and look for one of these and press F on it. These car spawners are spread all over the map and can be used to resupply ammo, change loadouts and spawn your car. Once you've spawned it your car will be indicated with a green car marker on your minimap.
Progressing your Character's Rank
Character progression and leveling happens through leveling 'contacts'. Each faction has it's own set of contacts that you must progress by doing missions for them. Each faction has 2 under factions with it's own set of contacts.
Pressing J on your keyboard will reveal your character information panel.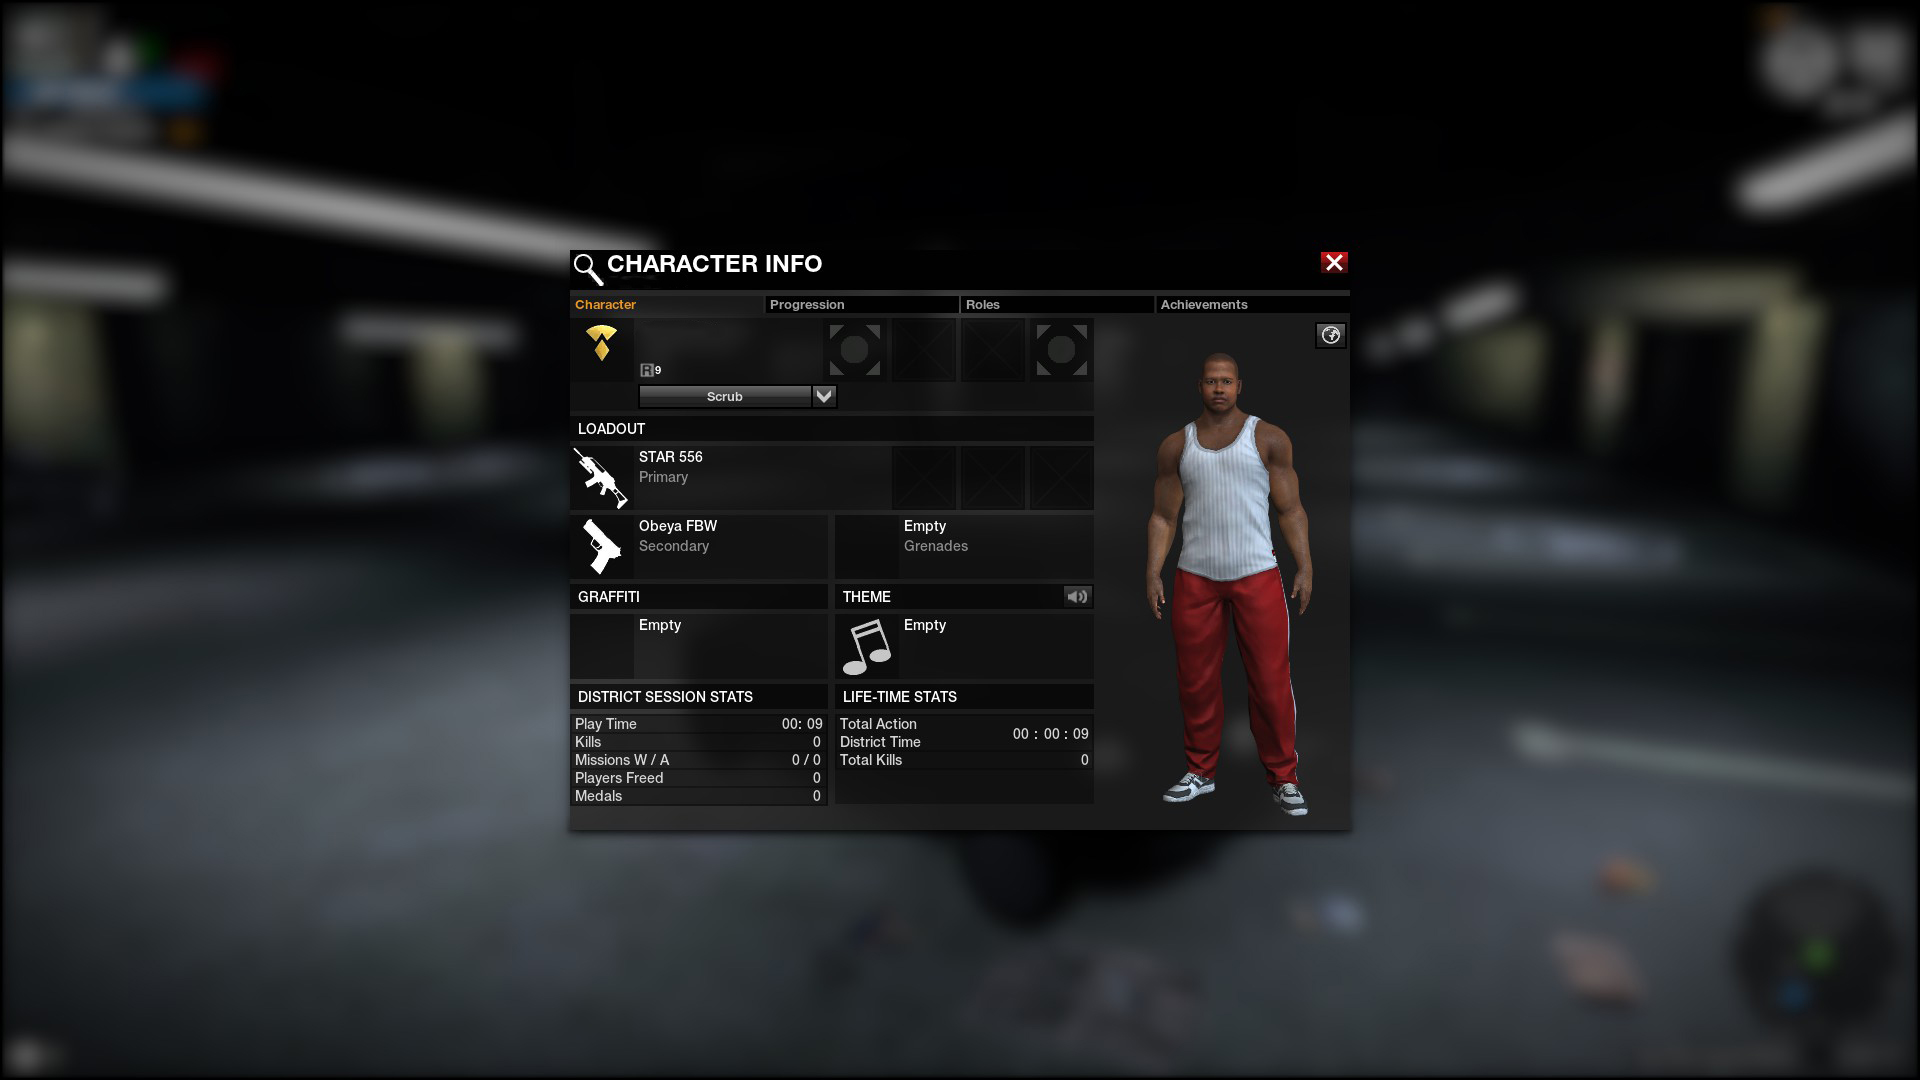
This is where you can see how many total kills you have on your character, how many days and hours you've spent in action districts (mission districts) and other stats.
Clicking on the 'Progression' tab at the top will show you the contacts panel.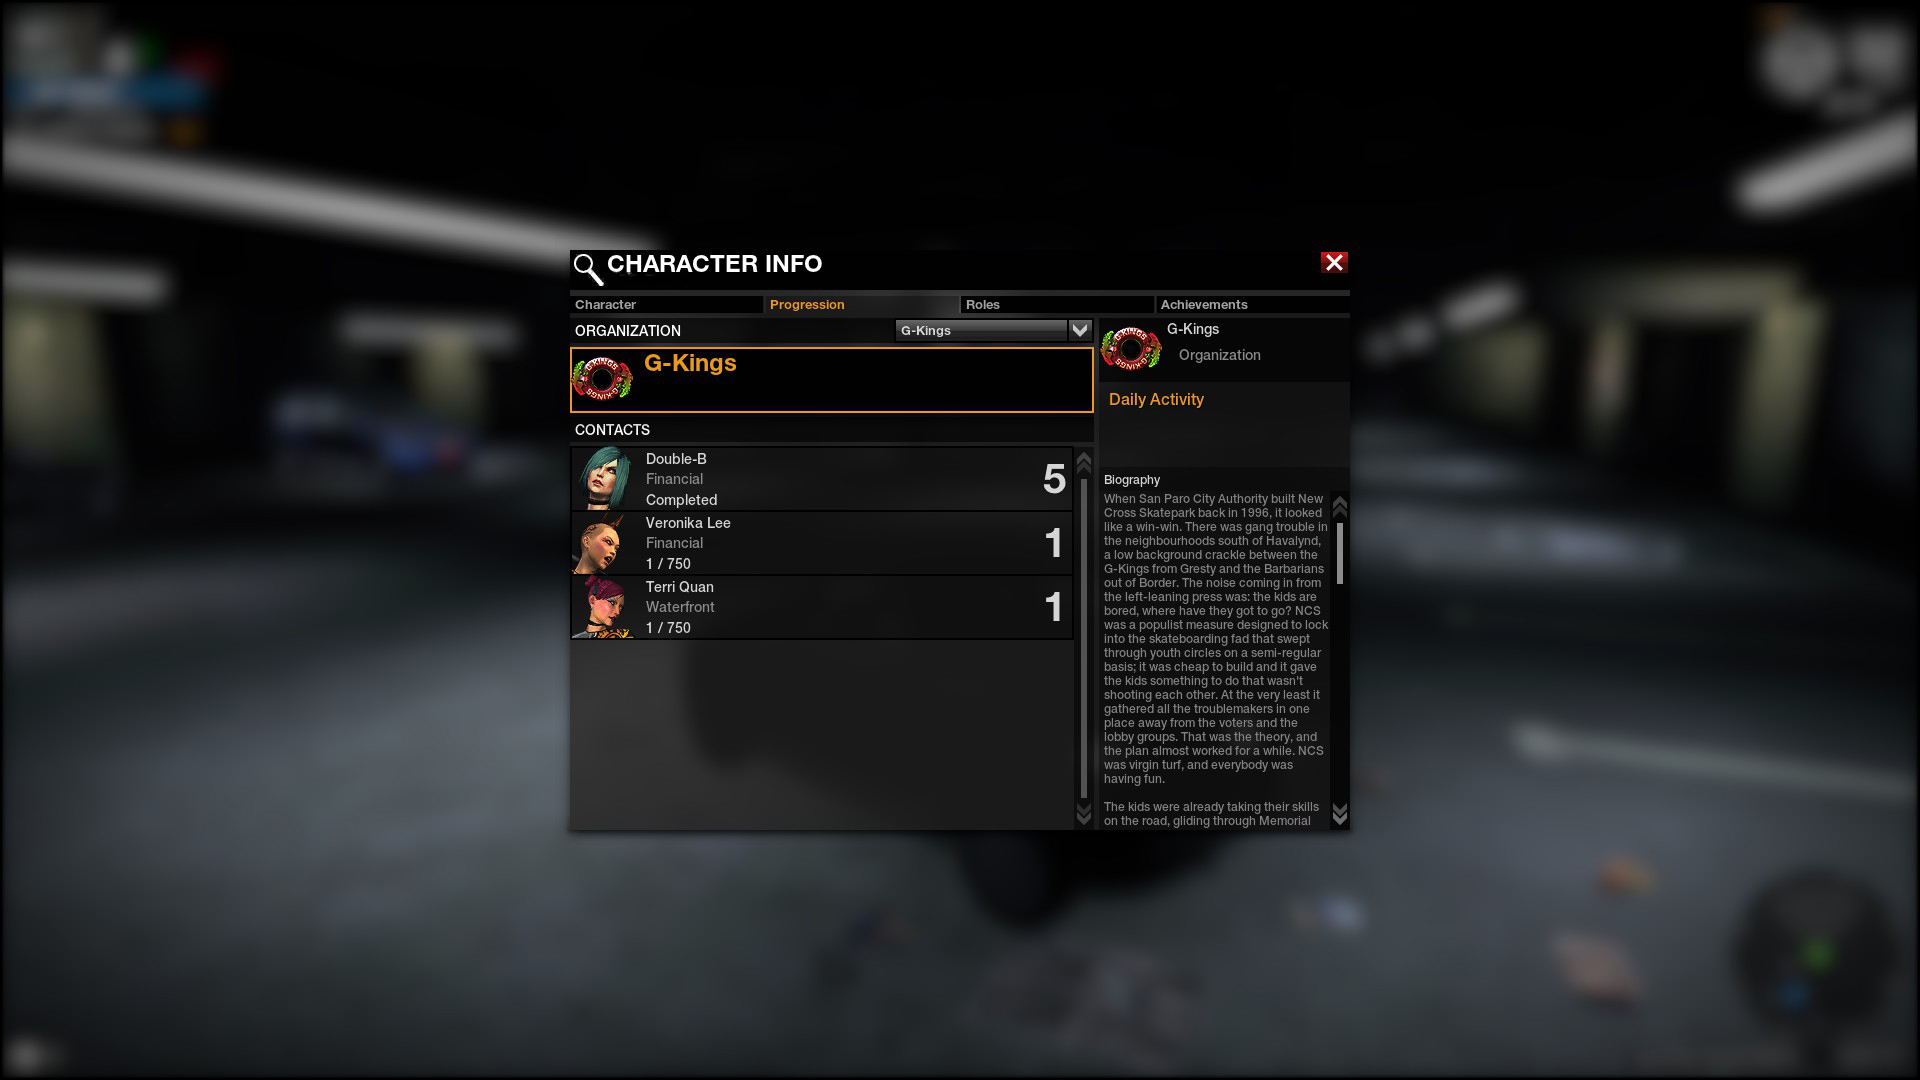
You will notice that there is a drop down menu where you can pick between the two under factions and that will reveal each contact that you can currently progress for each under faction. The very first contacts go up to level 5 and they will say 'Completed'. The next ones go up to level 10. Then later into the game, higher tier contacts are 15 and 20 levels. Some contacts are in Financial, others in Waterfront. You can only level each in their respective district. Once you finish a contact anywhere, it will unlock the next one. Some Financial ones might unlock Waterfront ones and vice versa.
The easy way to pledge to a contact is to double click on their portrait until it opens their specific window then just click the Pledge button at the bottom right.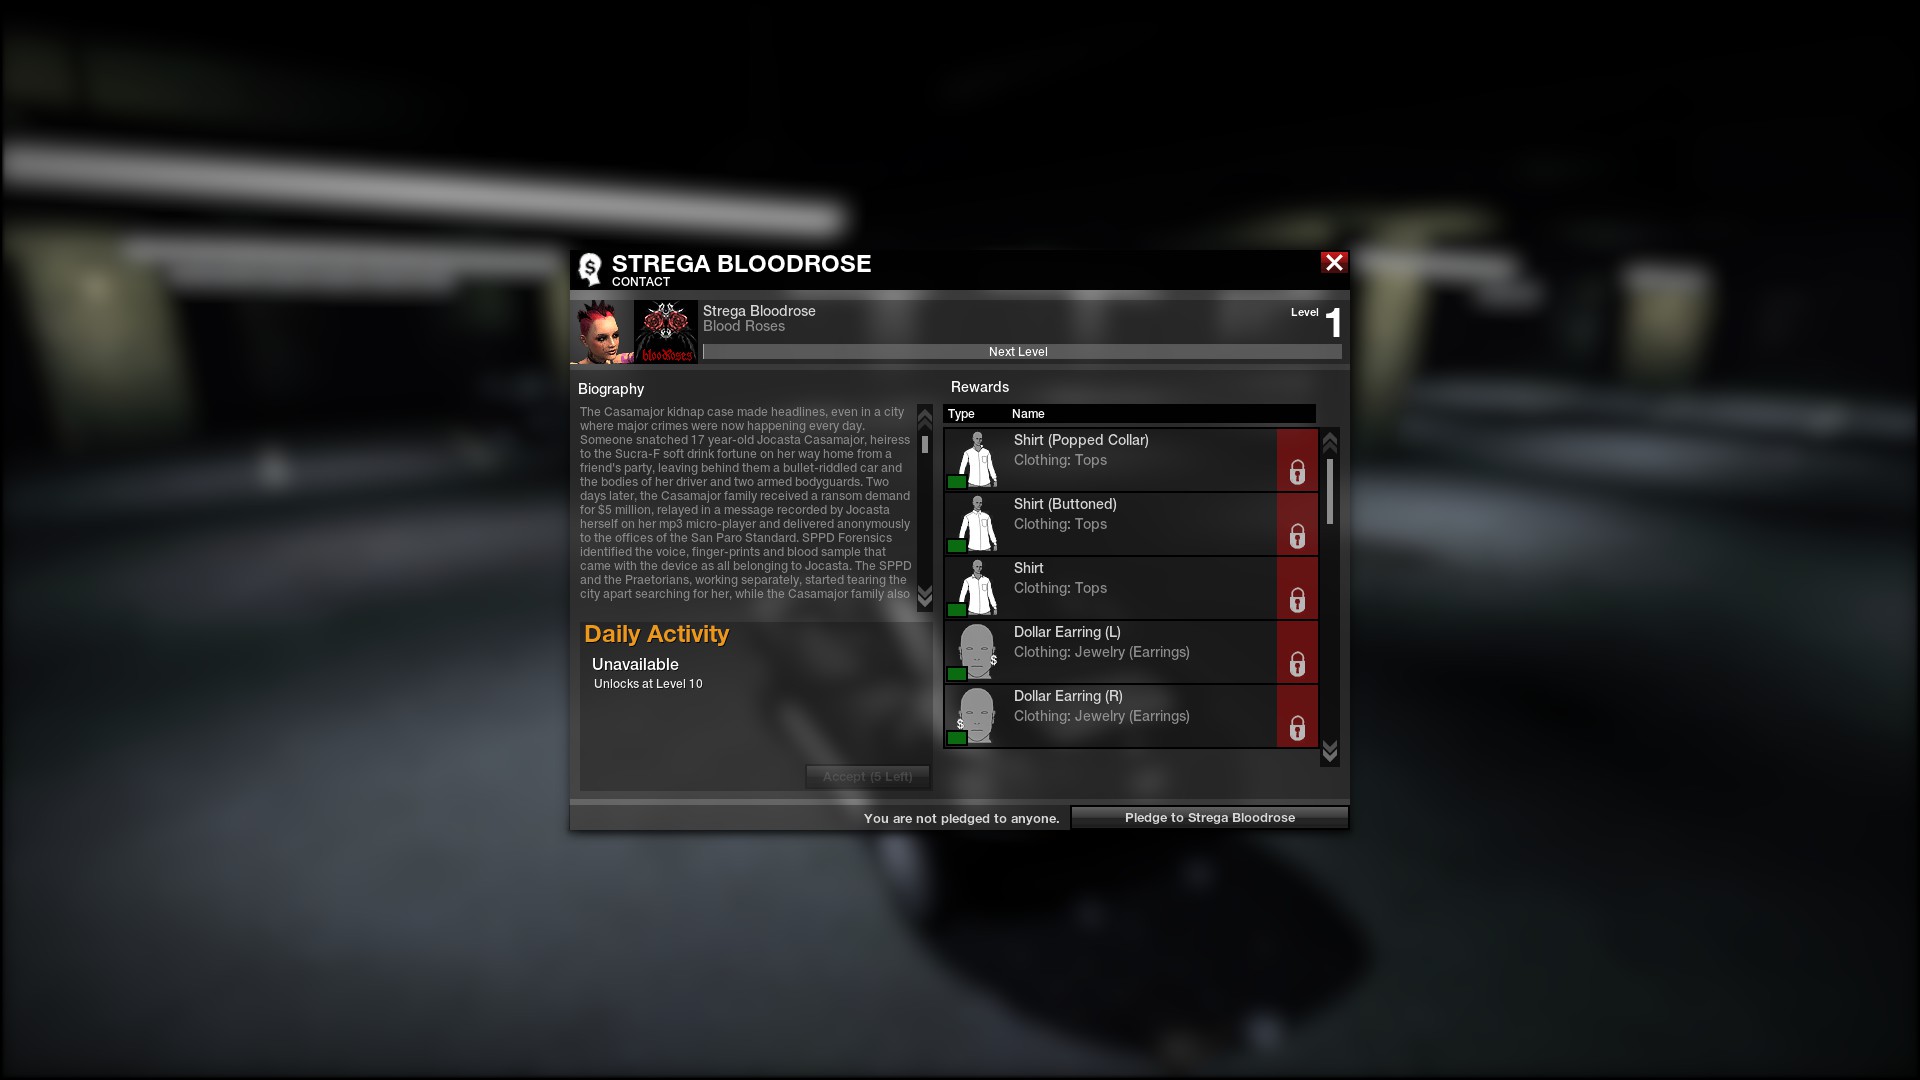
It doesn't matter which ones you pick first or which district you start with. In the end, all contacts must be maxed out no matter what. Your main goal as a beginner is to first reach R40 so that you can equip some vital mods for your character and weapons. You can see the rank required for each weapon, vehicle, mod by clicking on them in your inventory.
Missions
Missions are the main game mode of APB and they are exclusively Player vs Player (PvP). You need to do these in order to level up your character and unlock pretty much anything in the game. These happen in the Financial and Waterfront districts.
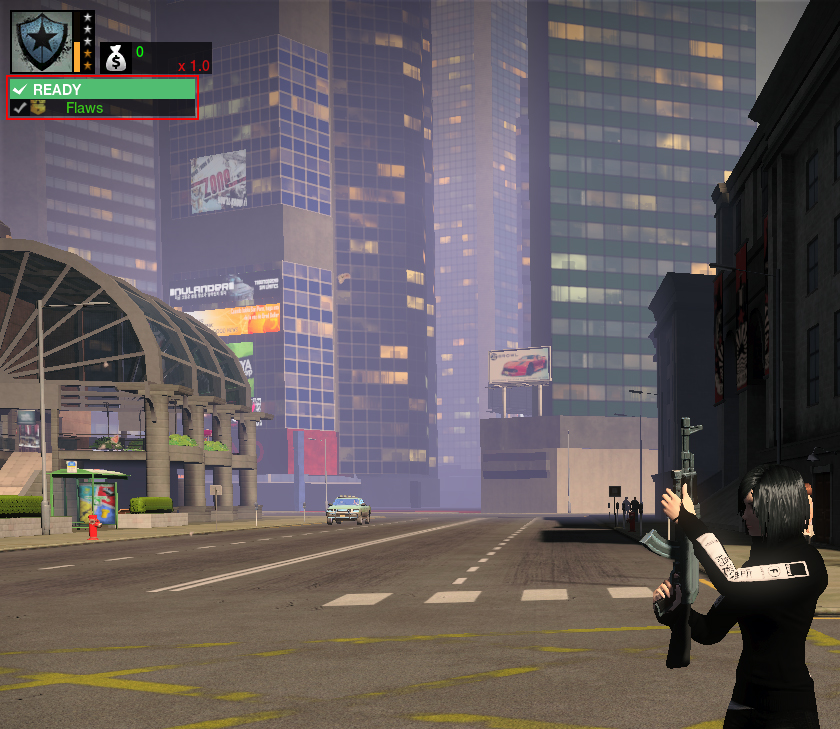
In order to queue up for missions, press K on your keyboard to ready up and be placed into the matchmaking pool for the current district you are in.
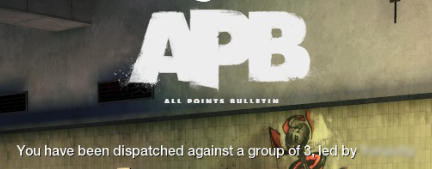
Once you get a mission, you will see a red and blue glowing APB logo and you will hear a police siren.
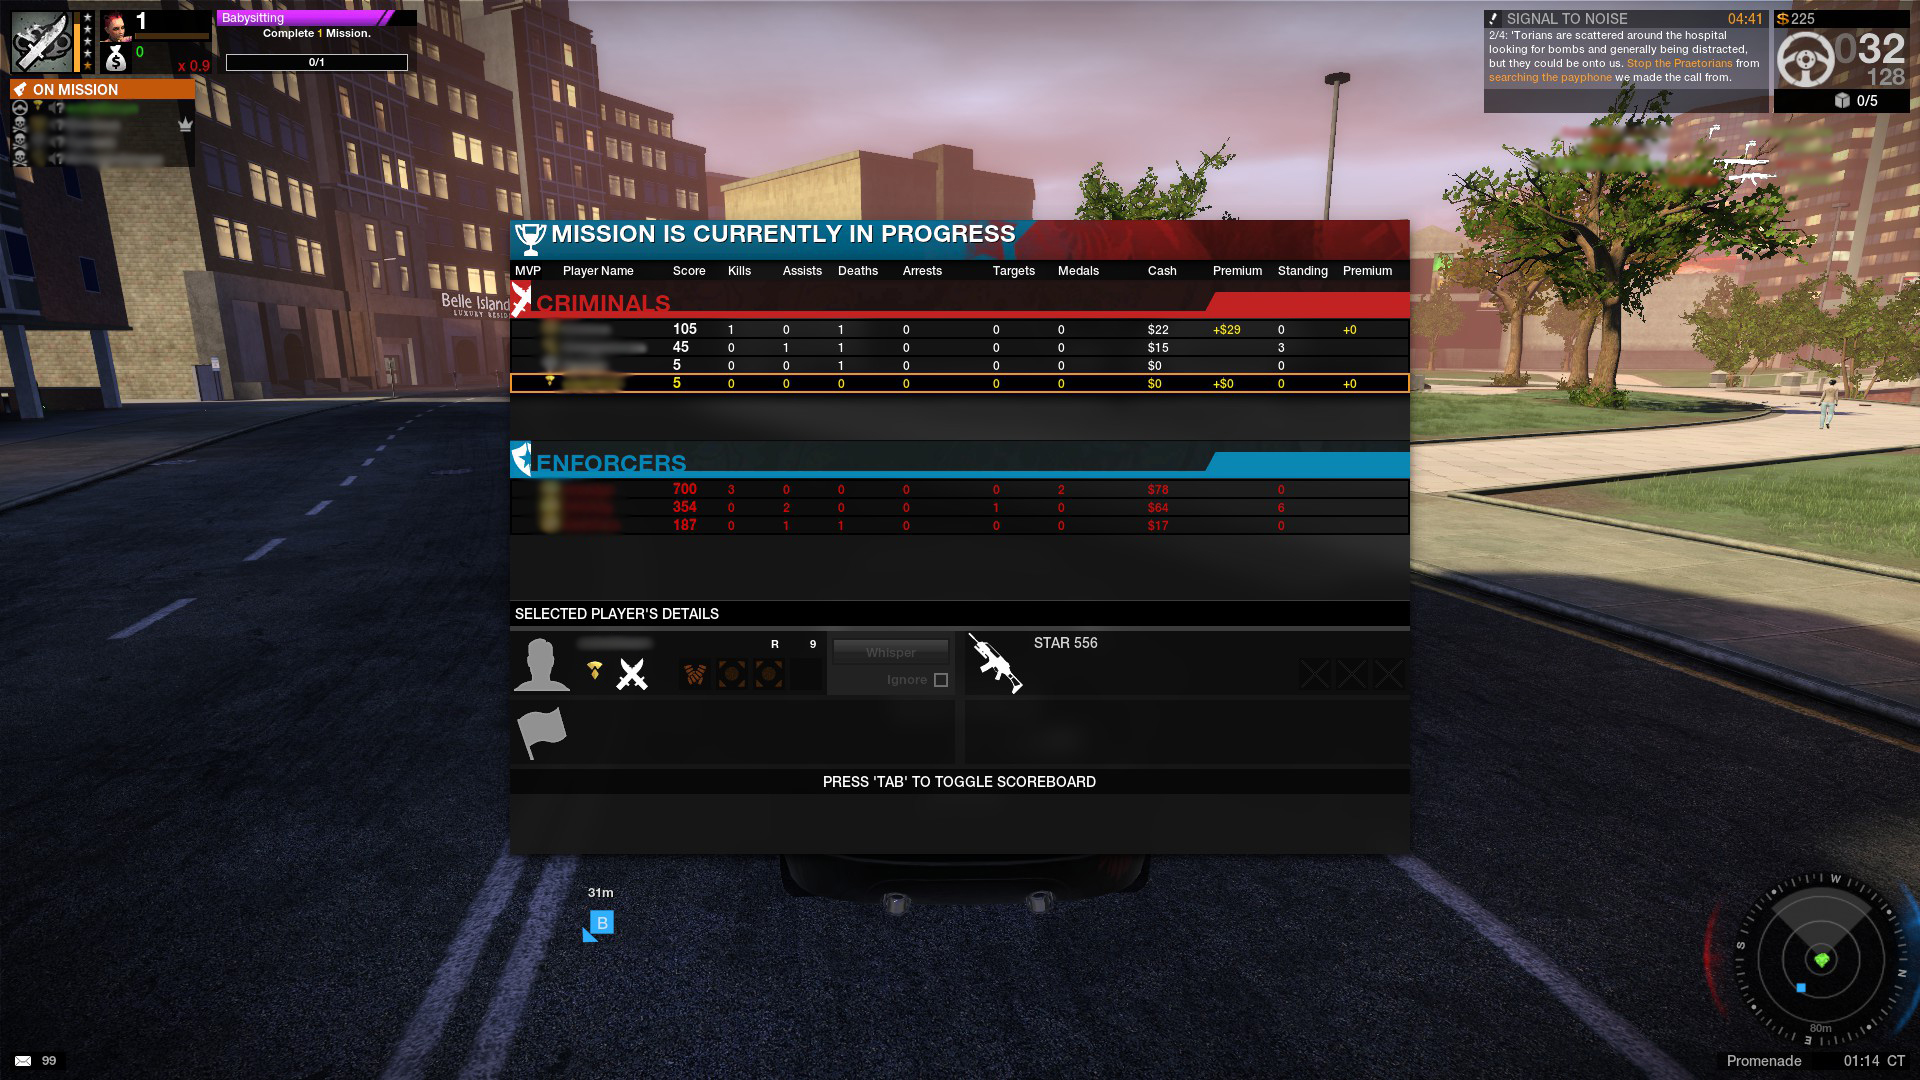
Pressing TAB on your keyboard will reveal the scoreboard. Moving your mouse around allows you to click on other players that are in the mission, inspecting what weapons and mods they have equipped, among other things.
Missions mainly consist of attacking and defending objectives such as raiding spots, spraying graffiti on walls, dropping off items, stealing cars etc
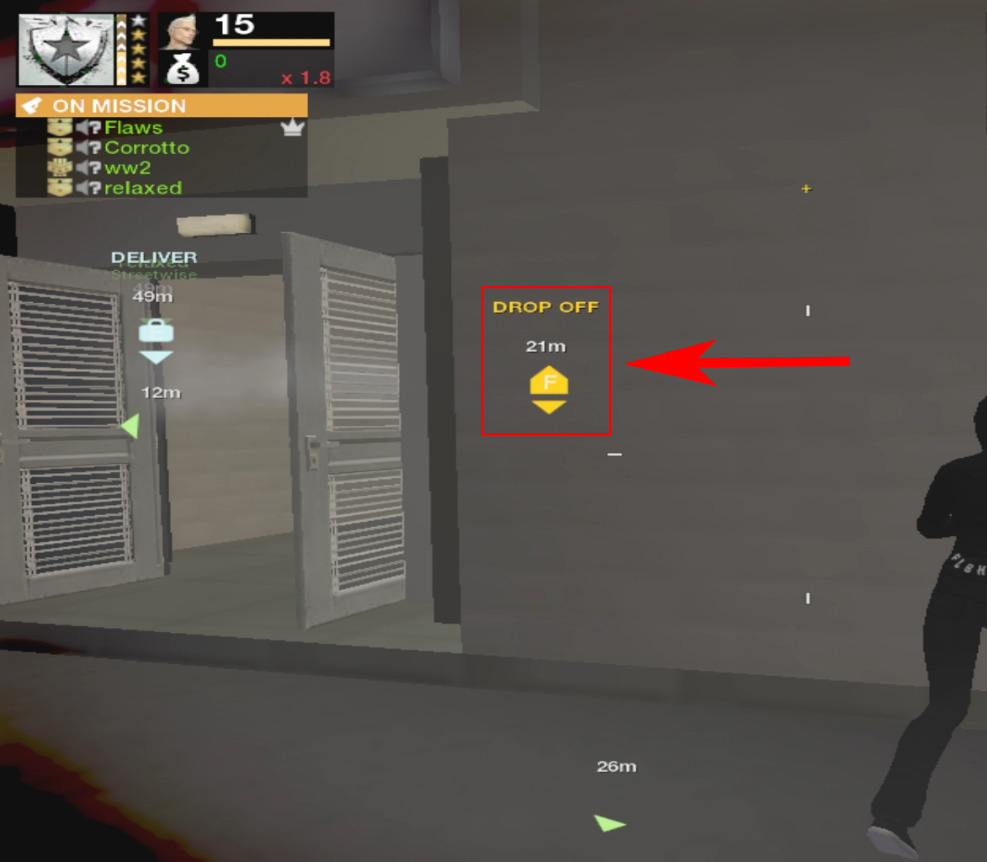
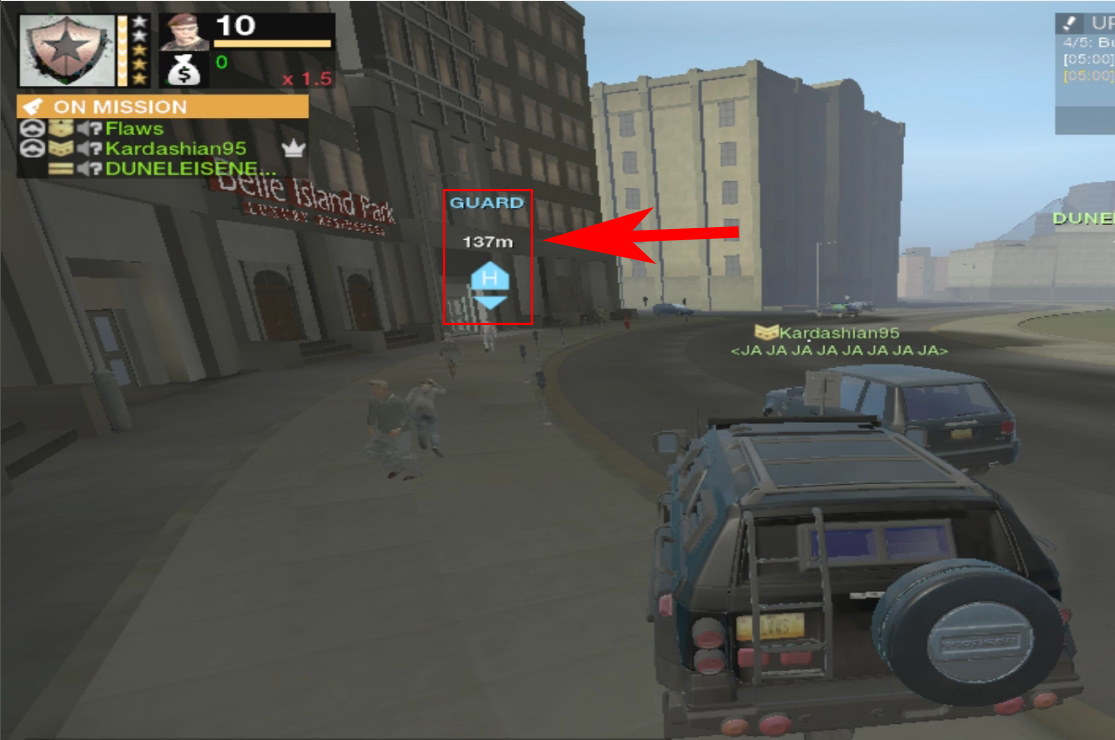 Attack objectives are marked with an orange color, while defending is marked with blue.
Each mission consists of multiple stages, usually between 3 and 10 where the last stage is always called "Final Stage" and can be something like Takeouts (team deathmatch), 3 point hold (conquest/domination), item hold where you must protect an item or 'Scavenger' where you must deliver items to your base and prevent the enemies from delivering them to theirs.
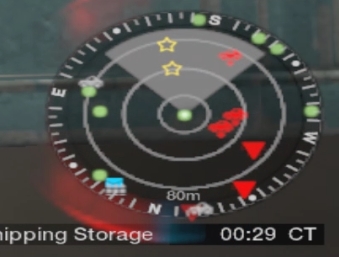
- Green Dots - Friendly players (team and group members)
- Red Upside-Down Triangles - Enemy players (when they shoot or are in a moving vehicle)
- Yellow Stars - Players that have a bounty on their head (Fight Club only)
- Green/Red Car Icons - Friendly/Enemy Vehicle with a Mobile Spawner Mod
As you complete missions, you will earn standing and money. Standing is your XP that progresses your contacts and unlocks new items to purchase. You start from Rank 9 (R9) and your end goal is reaching max rank. Your character progression does not affect your threat level in any way. You could be a max rank but green threat level.
Prestige/Notoriety (Bounty System)
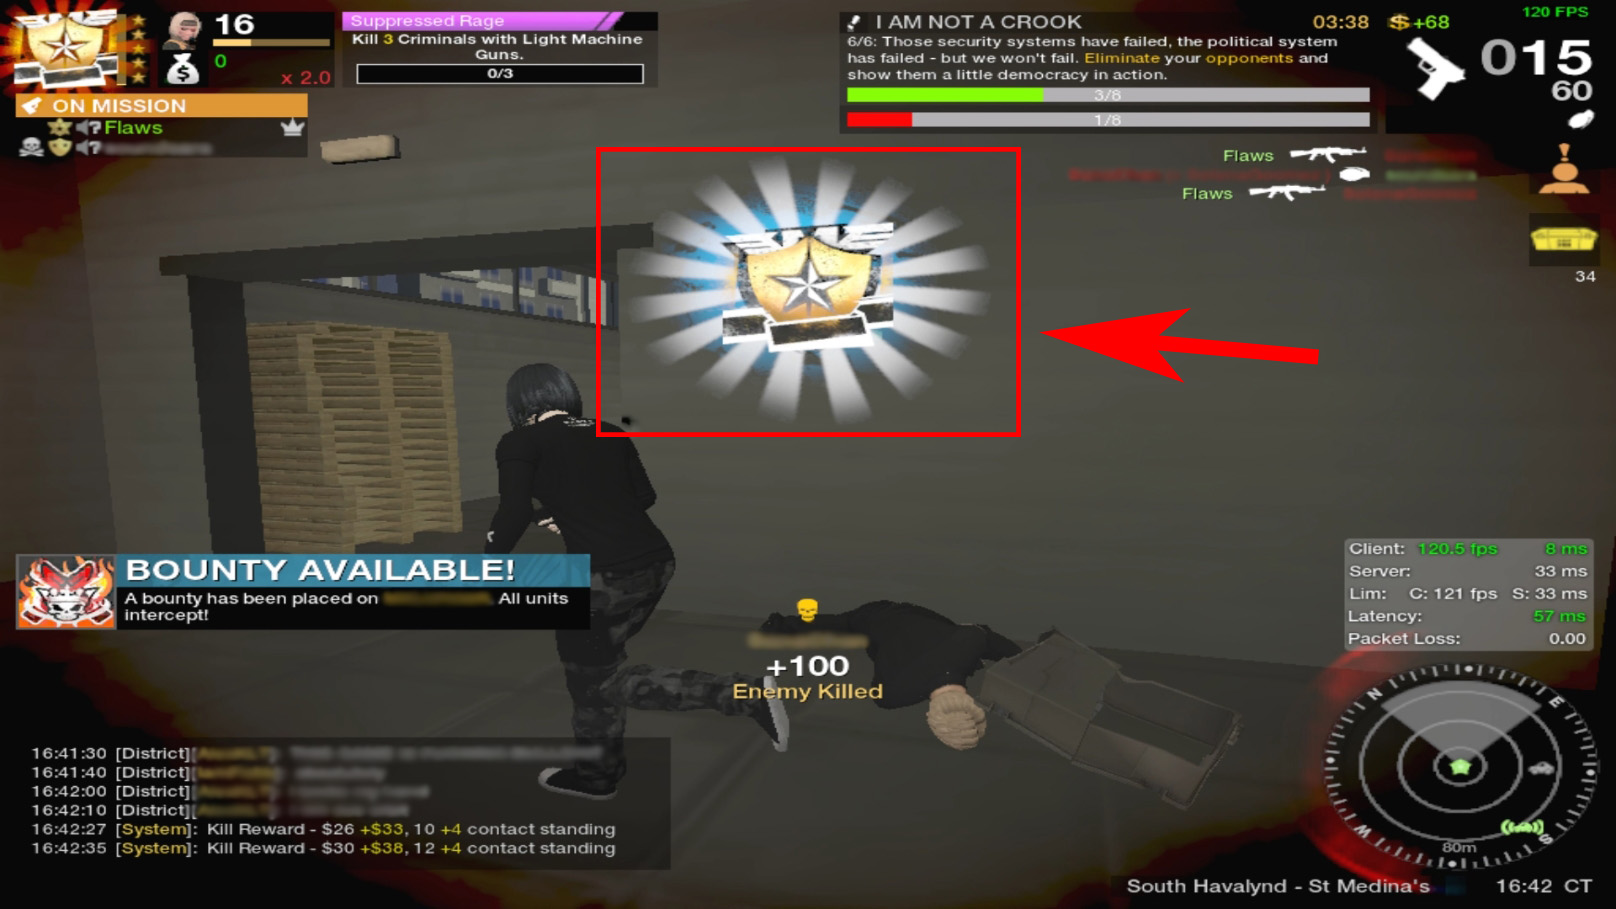
Your Prestige (enforcers) or Notoriety (criminals) will increase or decrease depending on what you do and how well you perform in missions. The levels are 0-5 where 5 is the highest ("bounty").
The bounty system no longer has much of an impact outside of Fight Club. You will turn Prestige/Notoriety 5 by just playing normally and the only differences are that you will earn slightly more APB$/XP with each level. Also, the enemy player that kills you next will collect a larger amount of APB$ for killing you when you are bounty.
The same rules apply for Fight Club but the difference is that in those districts you will be marked with a star on the minimap for everyone (including enemies) and they will hunt you down for the bigger cash reward.
The golden stars represent which level you are currently and the orange bar represents your progress towards gaining/losing a level.
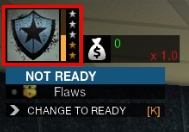
- Killing/arresting enemy players (in a mission or criminal bounties) or getting kill assists.
- Doing objectives in missions.
- Winning missions.
Activities that decrease your Prestige as an Enforcer:
- Killing other Enforcers (especially killing an Enforcer bounty).
- Receiving demerit medals of any kind.
- Killing/running over civilians or destroying city property like signs, fire hydrants etc.
- Losing missions.
Activities that increase your Notoriety as a Criminal:
- Killing enemy players (in a mission or Enforcer bounties) or getting kill assists.
- Doing objectives in missions.
- Winning missions.
- Killing/running over/mugging civilians on the street and destroying city property like signs, fire hydrants etc.
- Ram raiding.
Activities that decrease your Notoriety as a Criminal:
- Killing other Criminals (especially killing a Criminal bounty).
- Receiving demerit medals of any kind.
- Losing missions.
Matchmaking, Backup and Escalation
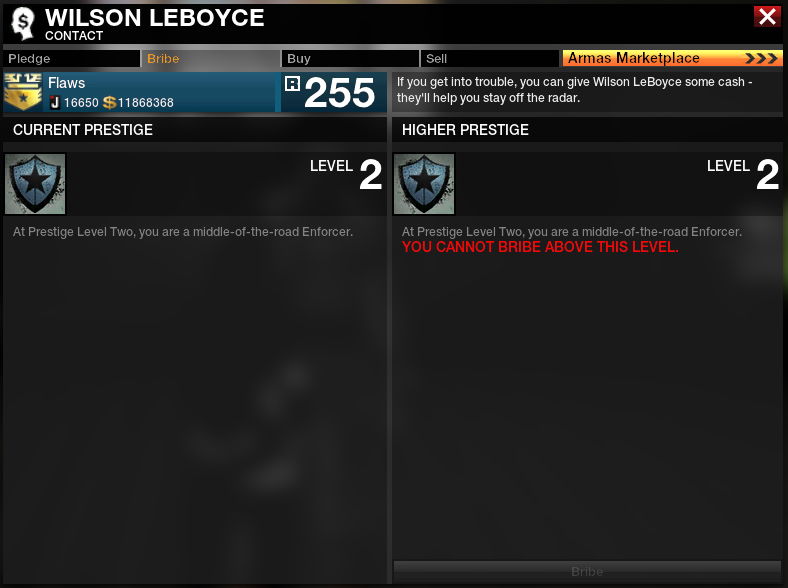
In some missions, from the beginning, one side could have an overall weaker (combined lower threat) make up of players and the team leader of the weaker team will be able to call backup. Calling backup will add more player/s to one or both teams depending on the already existing match-up and also on who else is readied up and waiting for a mission.
 means that that player is the leader of the team. The team is the entirety of your team that is on the mission, including you, your group mate/s and any random players that got matched into your mission on your faction. A group leader is separately indicated by a golden crown
  . A single player can be both at the same time, in that situation you will see the silver crown during missions and the golden one outside of any missions.
Team leaders can:
. A single player can be both at the same time, in that situation you will see the silver crown during missions and the golden one outside of any missions.
Team leaders can:- Call for backup (B key by default) if the matchmaking system decides that the teams are unbalanced.
- Request/vote for escalation.
- Kick/remove players from the team (from the mission) if they have at least 1 demerit (read below).
Group leaders can:- Kick/remove players from the group they are in with (that does not remove them from the mission, but instead will separate the kicked player from the group once the mission is over. They can be re-invited at any time).
- Select whether group invitations for that particular group are only limited to the leader or every member can invite others into it.
- Turn "Prevent joining escalation matches" on and off, which doesn't fully prevent them but signals to the game that you prefer not to get into those, if turned on.
- Team kill someone on your team during a mission.
- Stun a teammate (only applies to Enforcer players).
- Kill an arrested Criminal (only applies to Enforcer players).
- Commit suicide too many times during a mission.
- Go AFK for too long during a mission.
Once you receive just 1 demerit, the team leader can kick you out of the mission immediately.
Social District
The Social District is the only peaceful district where both factions come together to talk, customize their characters and cars, trade and relax.
In Social you can:- Edit your character's physical appearance.
- Edit your character's outfits.
- Edit your vehicle's appearance.
- Create symbols for use as your character's avatar (graffiti) or to put on your character clothing, as a tattoo or on your car.
- Buy/sell items on the Marketplace(auction house).
- Create death themes(short snippets of player created music or tunes that will play for each enemy you kill or for everyone if you are MVP of a mission at the end).
- Purchase 'premium' weapons from the Joker Store for Joker Tickets. (More about this in the next section of the guide.)
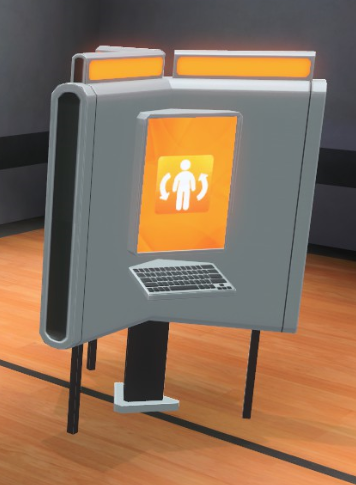
Here are the kiosks that you are looking for for each thing. Physical Appearance
 Outfits
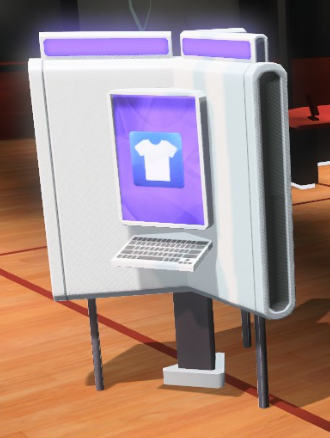 Vehicles
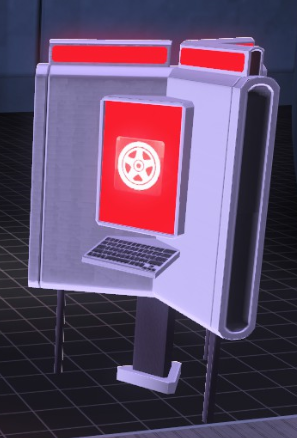 Symbol Designer
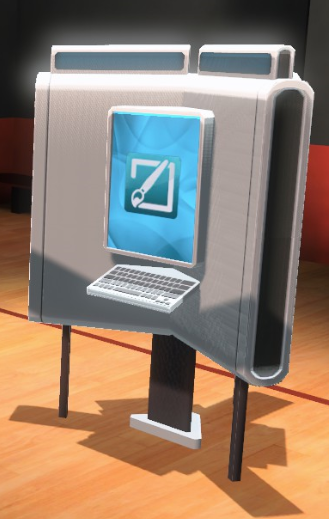 Marketplace (auction house)
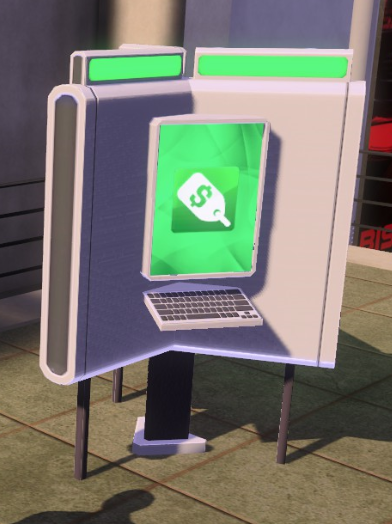 Music Studio (Theme and Song creation)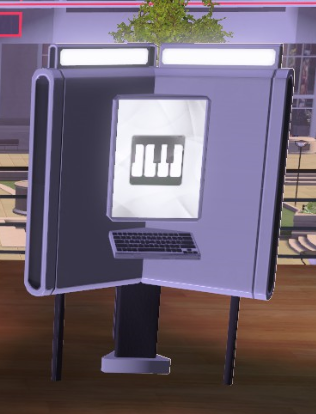
Social District: Joker Store
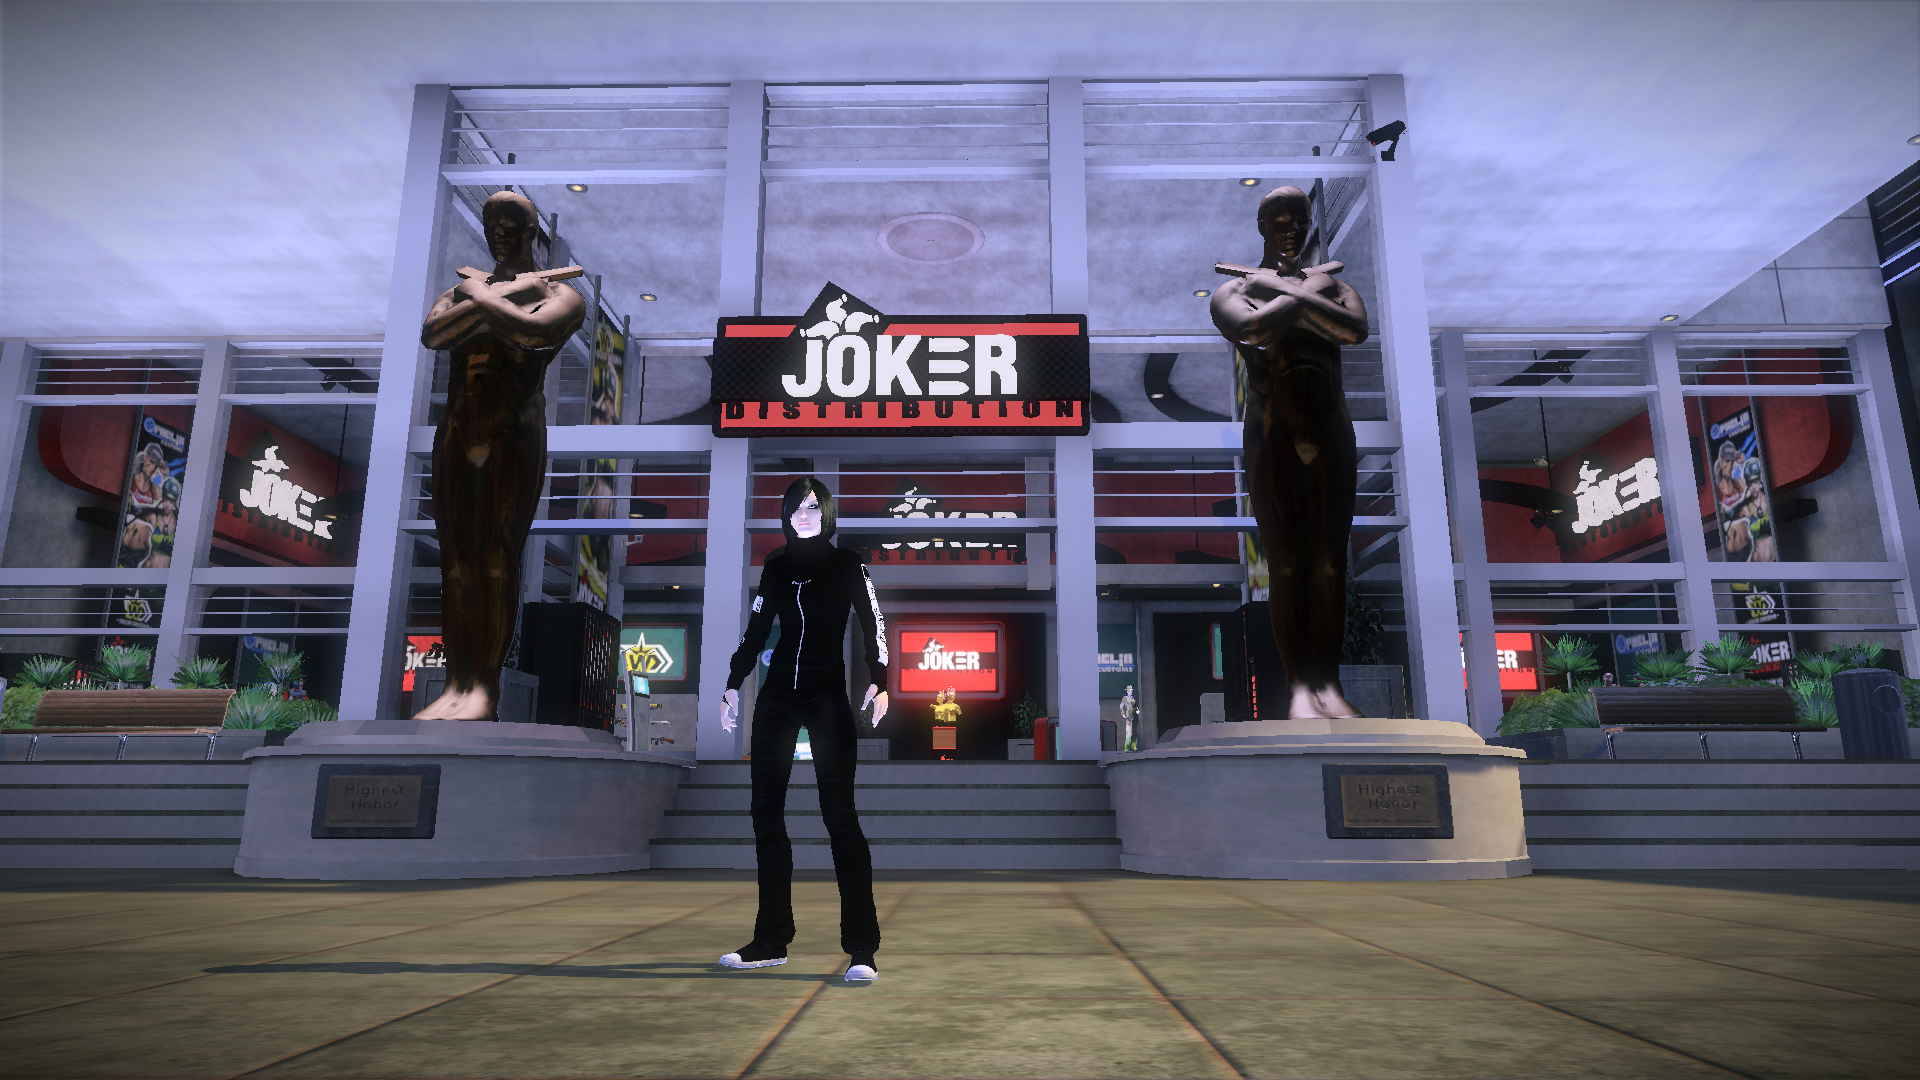
The Joker Store (JT store) in Social allows you to purchase a wide variety of Armas Marketplace (microtransaction shop) items such as weapons, legendaries, vehicles, character cosmetics, titles and more permanently for your character without spending a dime on the game. This is where you use the Joker Tickets (JT) currency.
Some of the items you can find in the JT Store:- Trials, leases or character permanent Armas weapons with preset mods or open slots.
- Leased or permanent Legendary weapons which can be traded/sold to other players.
- Character permanent vehicles such as the Patriot Vegas 4x4/Firebomb or Han Coywolf.
- Character permanent Armas clothing such as High-Tops, holsters and clothing bundles.
- Leases of all modifications for your character, weapons or vehicles without rank restrictions.
- Character permanent community made outfits and vehicles exclusive to the JT store.
- Character permanent player titles exclusive to the JT store.
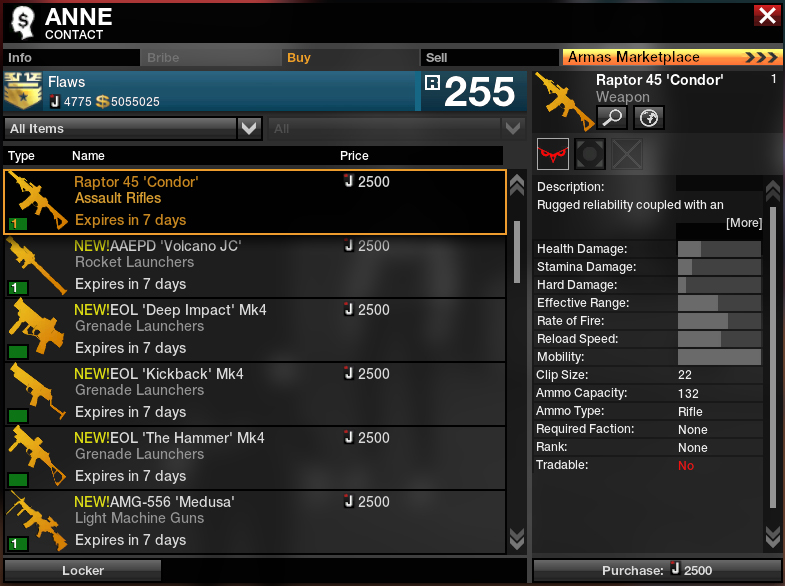
The green bar fills up each time you purchase your weapon of choice but the % chance does not increase with more purchases, it remains 5%. Once the green bar is filled completely, your next purchase is a guaranteed permanent copy of that weapon. Once you get a legendary weapon permanently, the bar resets and you can start over with it if you so desire or move onto another one.

All weapons acquired permanently from Anne will become tradable and all legendaries previously obtained through the old JMB system are still usable and tradable and will behave identically as ones obtained from Anne.
All legendaries, both previous and upcoming, are sold by Anne except for the FFA 5.56 R&D III (3-slot) as that is not considered a legendary.
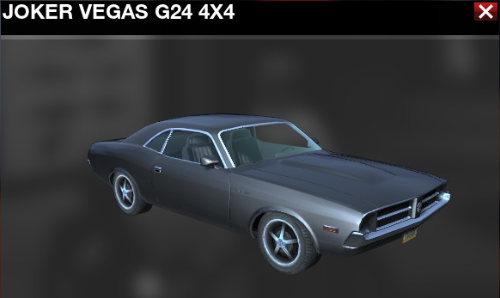
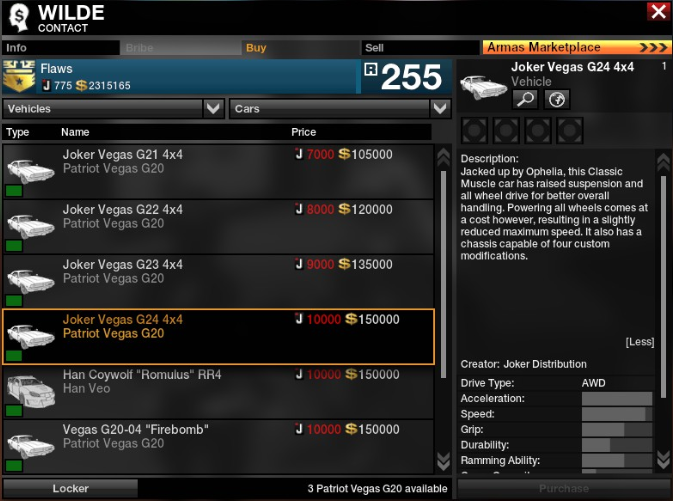
It may look boring and bland here, but buying it from the Joker Store gives you a fully customizable version of it, so if you happen to obtain body kits for it, they will be fully usable on this car.
VERY IMPORTANT NOTE: If you do decide to grind JT for this vehicle, do NOT give into the temptation of buying anything less than 4 slots, just because it's cheaper and faster to obtain. The 4 slotted variant is the only one that's worth it.
Once you complete a contact to their max level, you will be able to take on a daily activity from them, while leveling your other contacts. Each contact you complete will unlock 1 daily activity for you to do. These reward you JT and are usually pretty simple such as blowing up enemy vehicles, winning 2 missions, getting 5 kills, resupplying a certain amount of ammo for teammates, etc.
Rare activities: Once you finish the highest tier contacts, you have a very small chance of a rare activity popping up which, if completed successfully, will reward you with a special character permanent weapon. If you want to catch one of those, be sure to login daily and check every level 15 and 20 contact that you've maxed out.
Daily activities can only be done in the same district as where the contact giving them out is located and you can only do 5 per day per character. They reset every 24h.
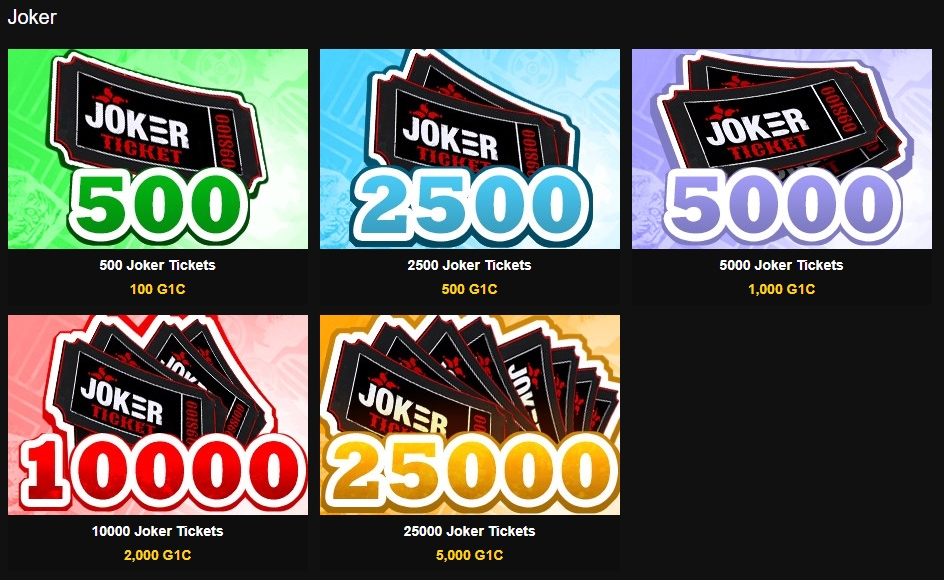
And last but not least...
Fight Club
Fight Club is an alternative game mode to the regular missions/action districts. There are two maps with different goals and different playstyles in each for this mode. Fight Club districts are mixed and have no threat level restrictions.

Close to mid range focused 20v20 combat.
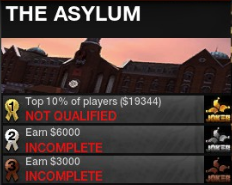
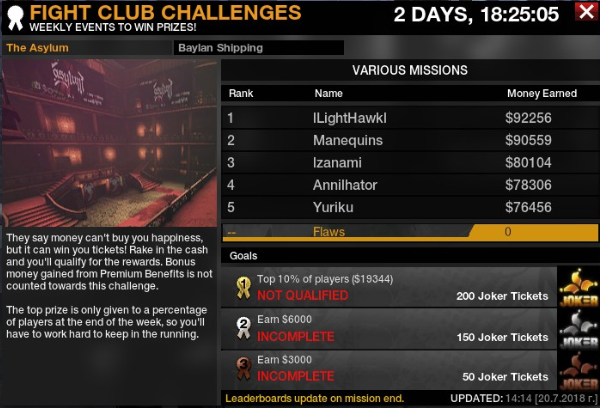
JT Goal: Collect money by getting kills, doing objectives and finishing matches in this district to receive JT rewards each week.
Tier 1 (Gold) - Collect X amount of in-game cash - 200 JT (received upon weekly Fight Club Challenges reset)
Tier 2 (Silver) - Collect $6000 of in-game cash - 150 JT (immediate)
Tier 3 (Bronze) - Collect $3000 of in-game cash - 50 JT (immediate)
Tier 1 requirement always depends on how much cash other players have collected during the week. It usually lands around $20,000 right before it resets, so aim for that amount or more to be sure.
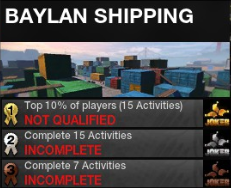
Mid to long range focused 16v16 combat.
JT Goals: Complete different small tasks (similar to the daily activities from contacts) in this district to receive JT rewards.
Tier 1 (Gold) - Complete X amount of activities - 200 JT (received upon weekly Fight Club Challenges reset)
Tier 2 (Silver) - Complete 15 activities - 150 JT (immediate)
Tier 3 (Bronze) - Complete 7 activities - 50 JT (immediate)
Tier 1 requirement always depends on how many activities other players have completed during the week. It usually lands around 20+ right before it resets, so aim for that many or more to be sure.
Pressing F6 on your keyboard opens this window that gives you information about the ongoing Fight Club challenges also how long until they reset.
Unlocking Weapons and Weapon Roles
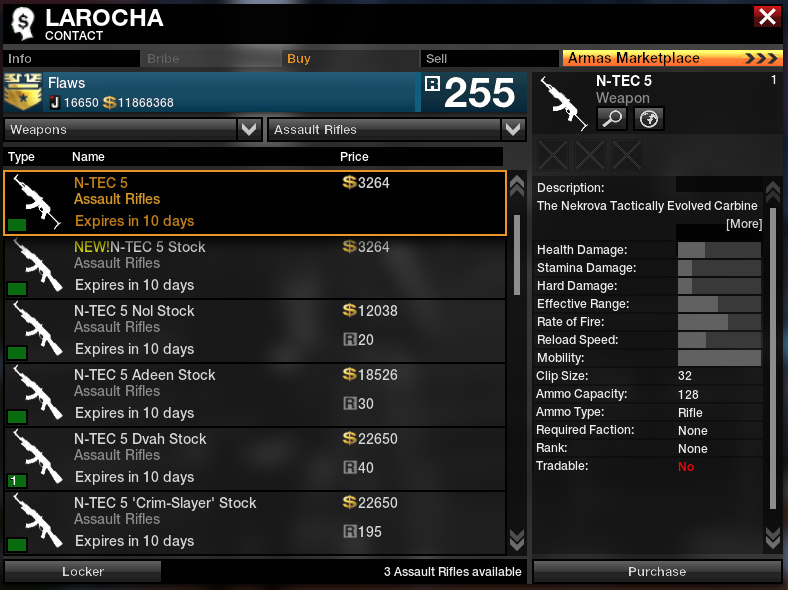
You can purchase any free-to-play (F2P) weapon once you've unlocked it from any of the contacts that are currently availabe to you around the action districts and 2 in Social that are unlocked by default.
Most preset modded F2P weapons are unlocked by progressing contacts. However, unlocking 1, 2 and 3 slotted versions (that you can edit the mods of freely) of different weapon categories is done differently.
Pressing J on your keyboard then clicking on the 'Roles' tab reveals this menu.
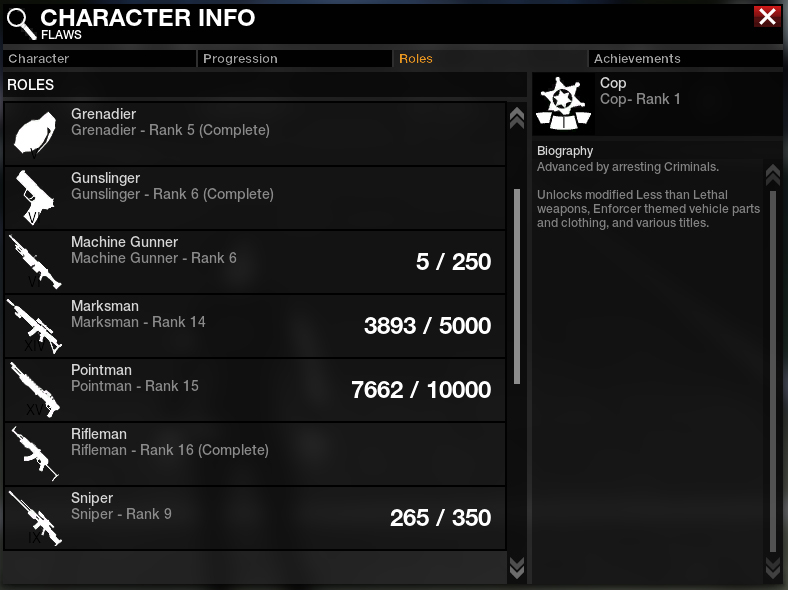
Progressing the roles includes using a weapon from the desired category and getting kills in action districts or Fight Club until a certain amount of kills is reached and a level is advanced.
- Rifleman - Assault Rifles (N-TEC 5, STAR 556 and others) - Max Level: 16
- Pointman - Close Range Weapons (OCA-EW, Colby PMG, JG and others) - Max Level: 16
- Marksman - Semi-autos and burst rifles (Joker SR15 Carbine, Obeya CR-762, OBIR, OSCAR and others) - Max Level: 16
- Sniper - High-velocity rifles (N-HVR 762, DMR and others) - Max Level: 16
- Machine Gunner - Light Machine Guns (SHAW 556, ALIG and others) - Max Level: 16
- Gunslinger - Every secondary weapon in the game (Obeya FBW, RFP, SNR, N-FA 9, PDW...) - Max Level: 6
Level 10 unlocks 2 slot versions.
Level 15 unlocks 3 slot versions.
Level 16 unlocks a fully chrome weapon skin for every weapon in that role category + version of some of the weapons with a different stock (cosmetic change).
Grenadier Level 1 unlocks a character permanent grenade type known as "Percussion Grenades" that have a smaller blast radius and less damage but blow up upon impact with an enemy player, vehicle or any surface.
Grenadier Level 2 unlocks a character permanent grenade type known as "Concussion Grenades" which have smaller blast radius but higher damage than the default Frag Grenades. Mainly used to disable enemy vehicles but they also deal extreme amounts of damage to a player if blown up close enough.
Grenadier Level 3 unlocks a character permanent grenade type known as "EMP Grenades". When thrown at vehicles it damages them and temporarily disables the engine and their mods for an amount of time depending on the vehicle. When a vehicle is EMP'd it also deals damage to any players sitting inside the car for the duration of the EMP's effect. The grenade also deals a miniscule amount of damage to players on foot.
Leveling the Grenadier Role is done by getting kills with grenades on enemies that are on foot. Grenade kills by blowing up a car with an enemy in it or close to it, does not count towards this role. All kills that show a grenade icon killing the player in the red/green kill feed on the top right of the screen, count towards the grenadier role. If they show a skull icon instead then it does not count as that means that your grenade blew something up that was what actually killed the enemy.
Unlocking and Purchasing Vehicles
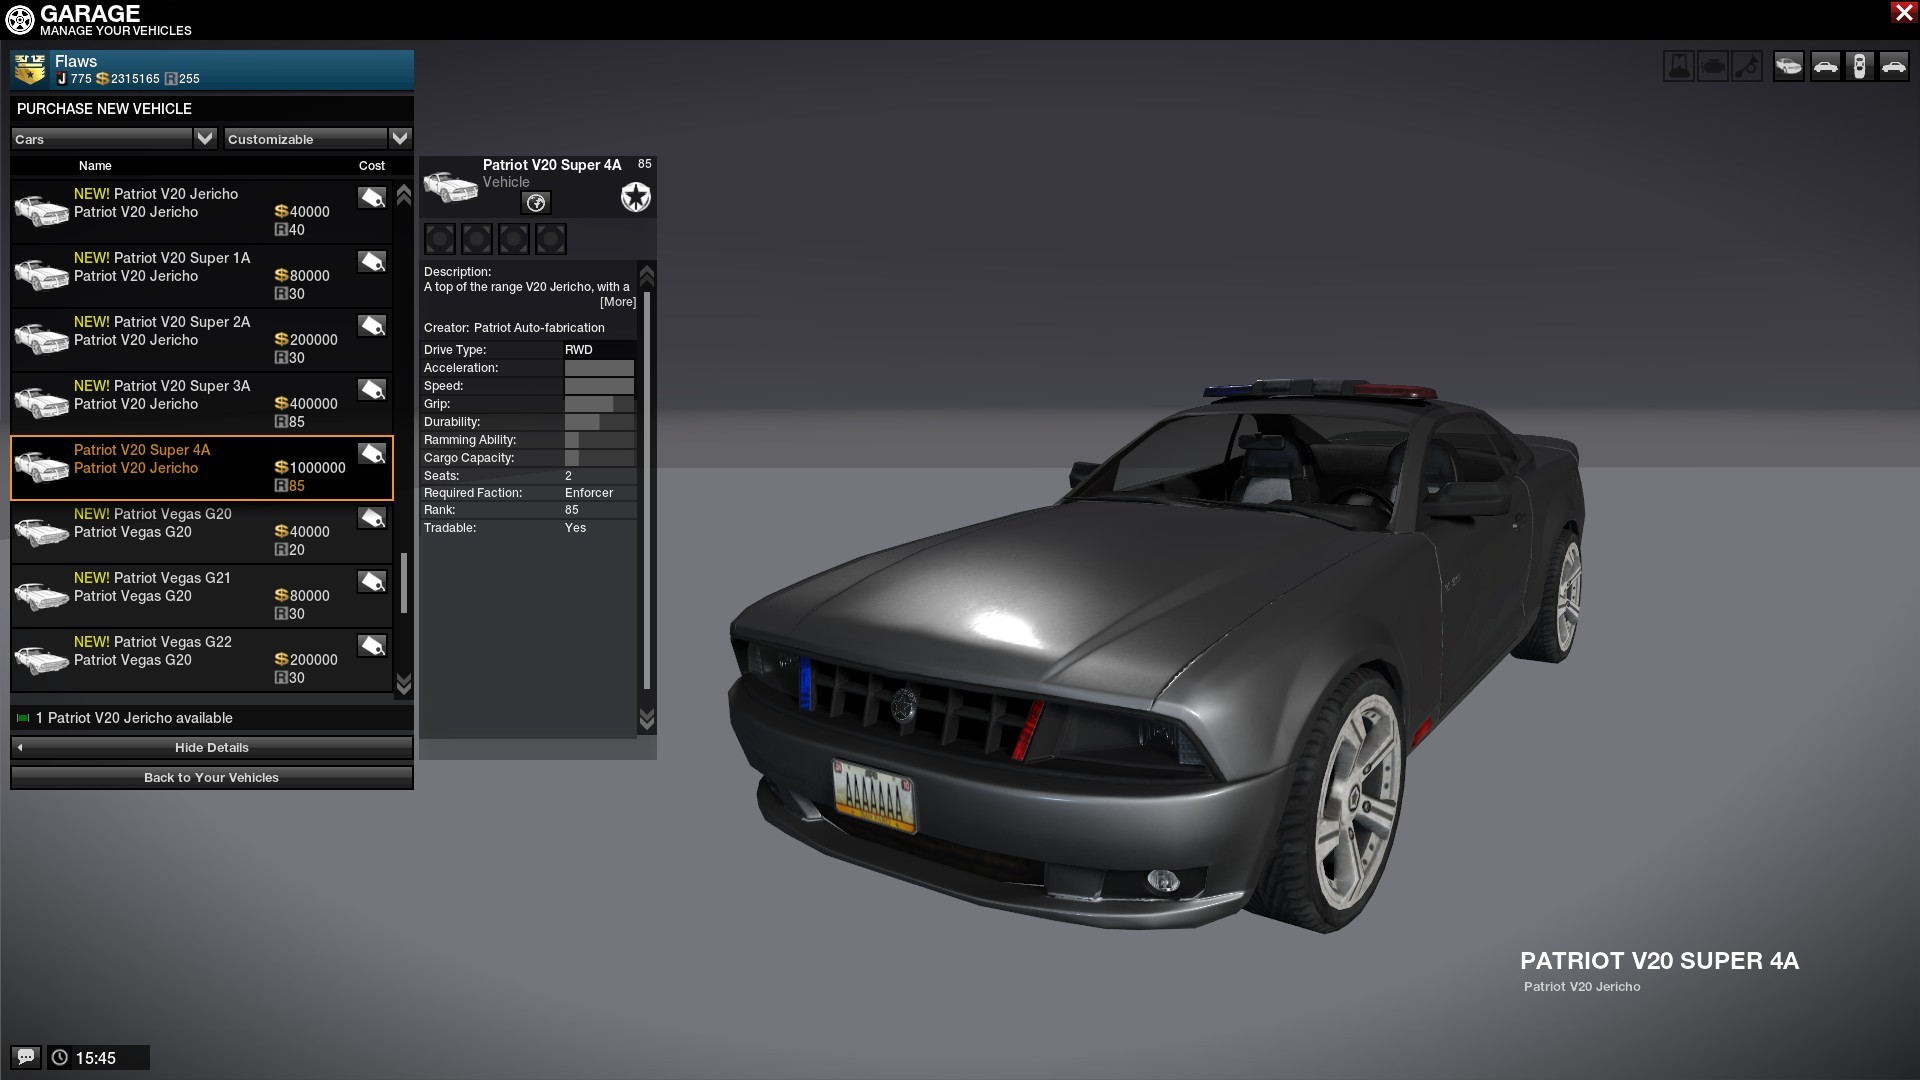
Almost all F2P mod preset and open slots vehicles are unlocked by progressing contacts. The open slot ones come in 1, 2, 3 and 4 slotted variants and are fully customizable. Body kits can either be purchased from the Joker Store or for real money from the ARMAS marketplace.
In the Joker Store section I recommend grinding JT for the Vegas 4x4 as its the overall best car in the game and is accessible to either faction completely free to play. If you don't care about having the best and most optimal setups you can go ahead and drive whatever you want but for the purposes of this guide I will only go over the 'meta' vehicles, stats-wise.
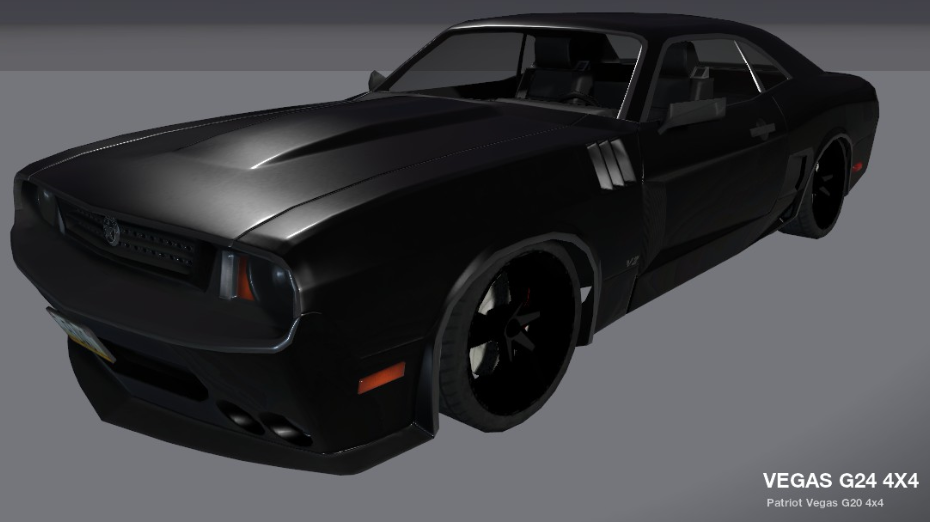
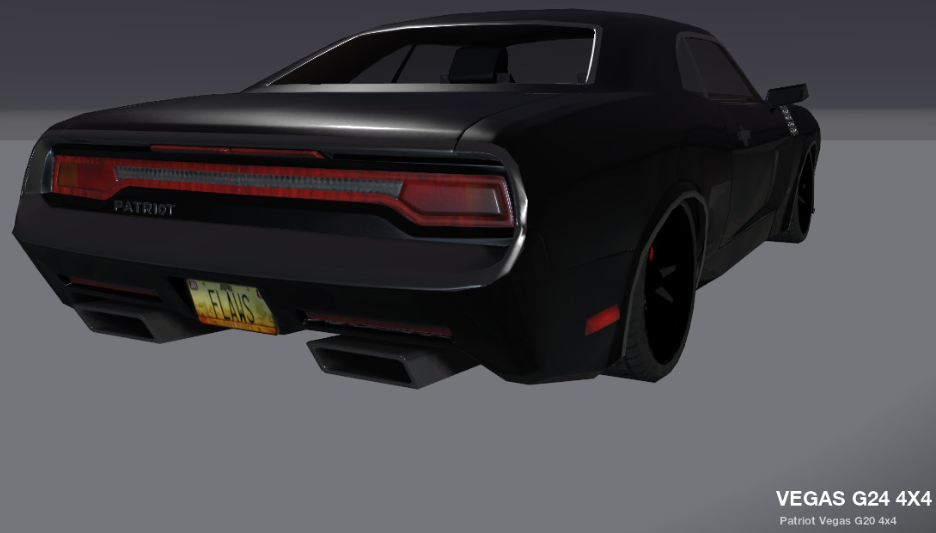
The Vegas 4x4 has fast acceleration, speed and very good durability. Its downsides are that it is a 2-seater and is not as maneuverable but still more so than the Pioneer and Espacio. The Vegas 4x4 can be obtained through Armas or the Joker Store.
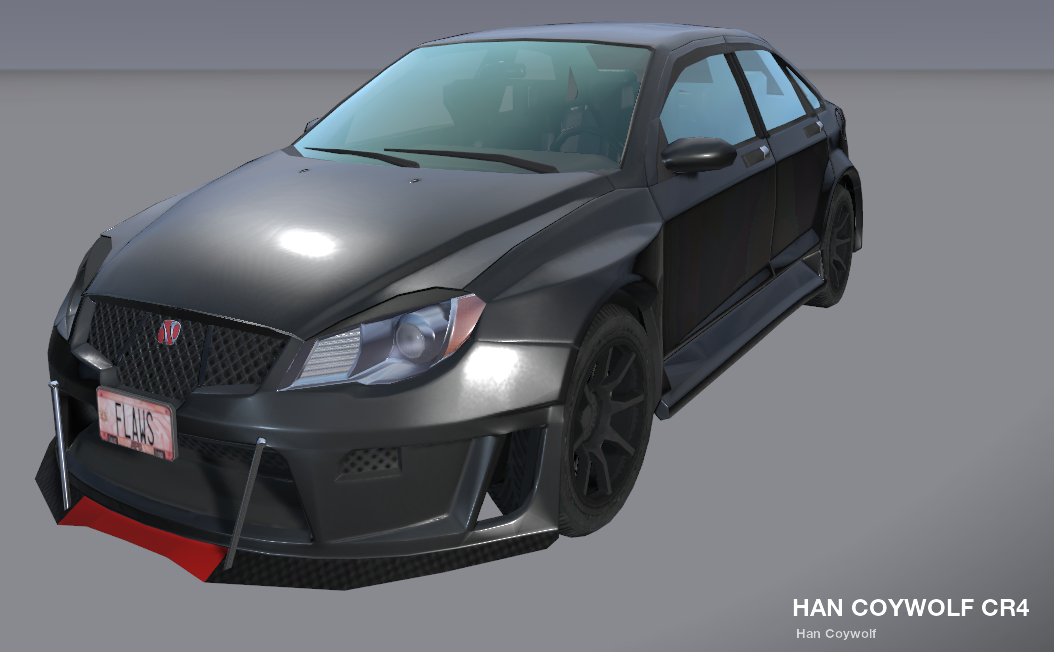
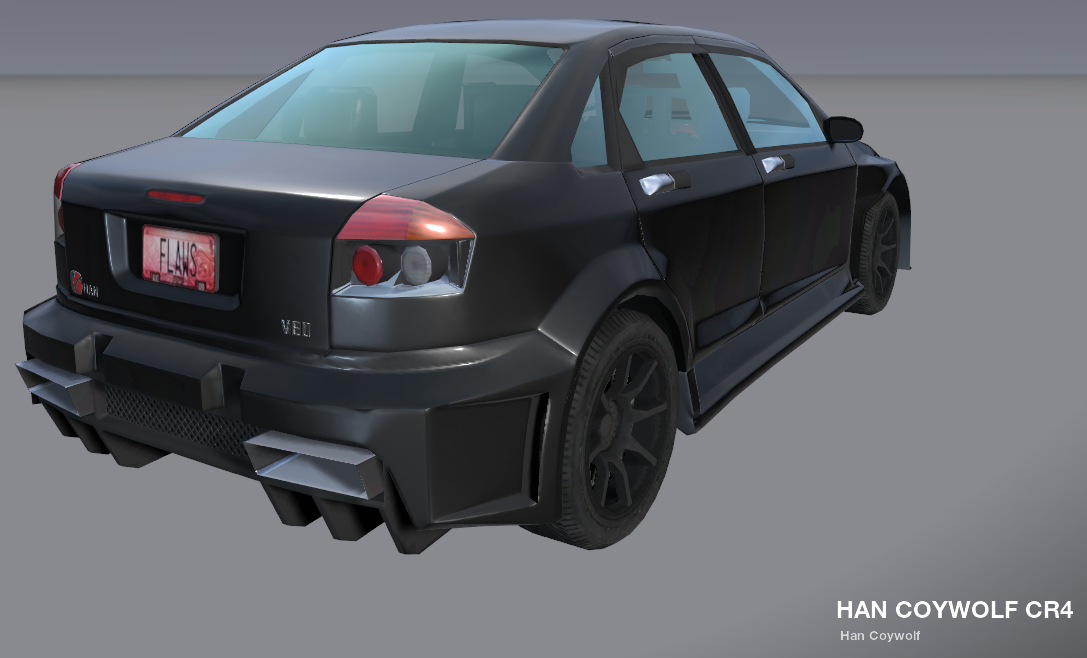
The Coywolf is extremely maneuverable and can easily go into tighter spaces, has the easiest handling overall and offers 4 seats unlike the Vegas. The Coywolf's downside is the car's HP as it is quite fragile and sets on fire quite fast. To obtain a customizable 4-slot Coywolf you'll need to buy it off of Armas, but a preset with the best mods for it can be purchased from the Joker Store.
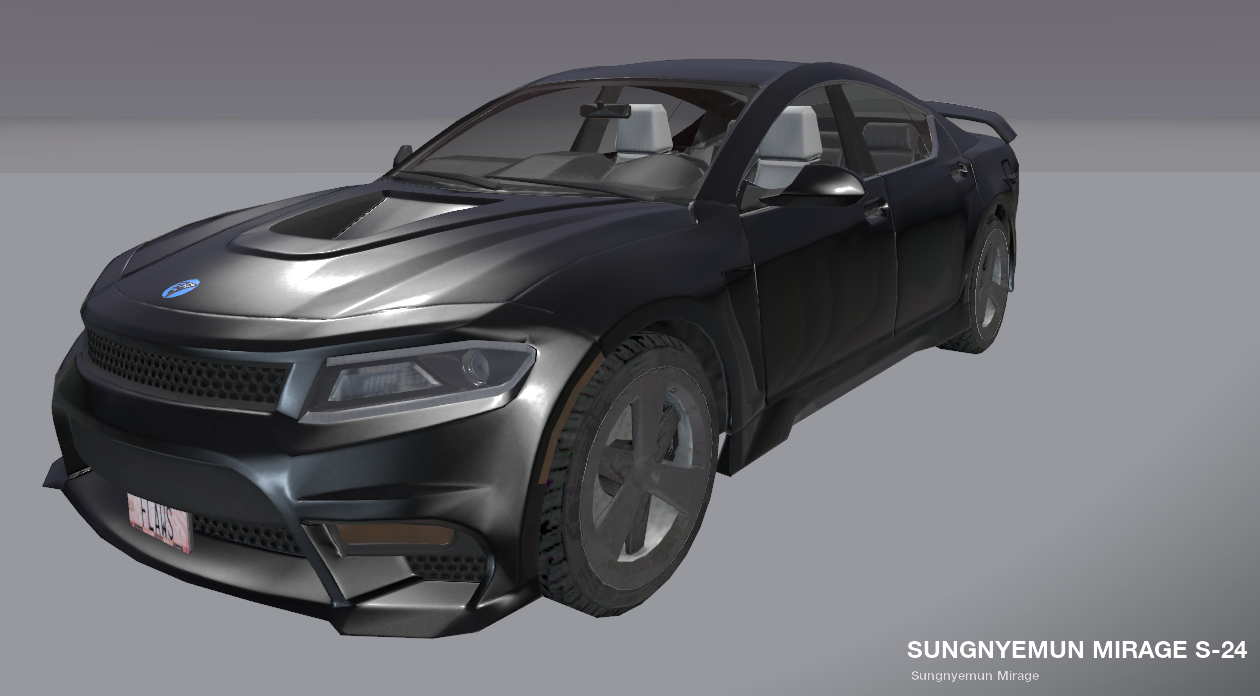
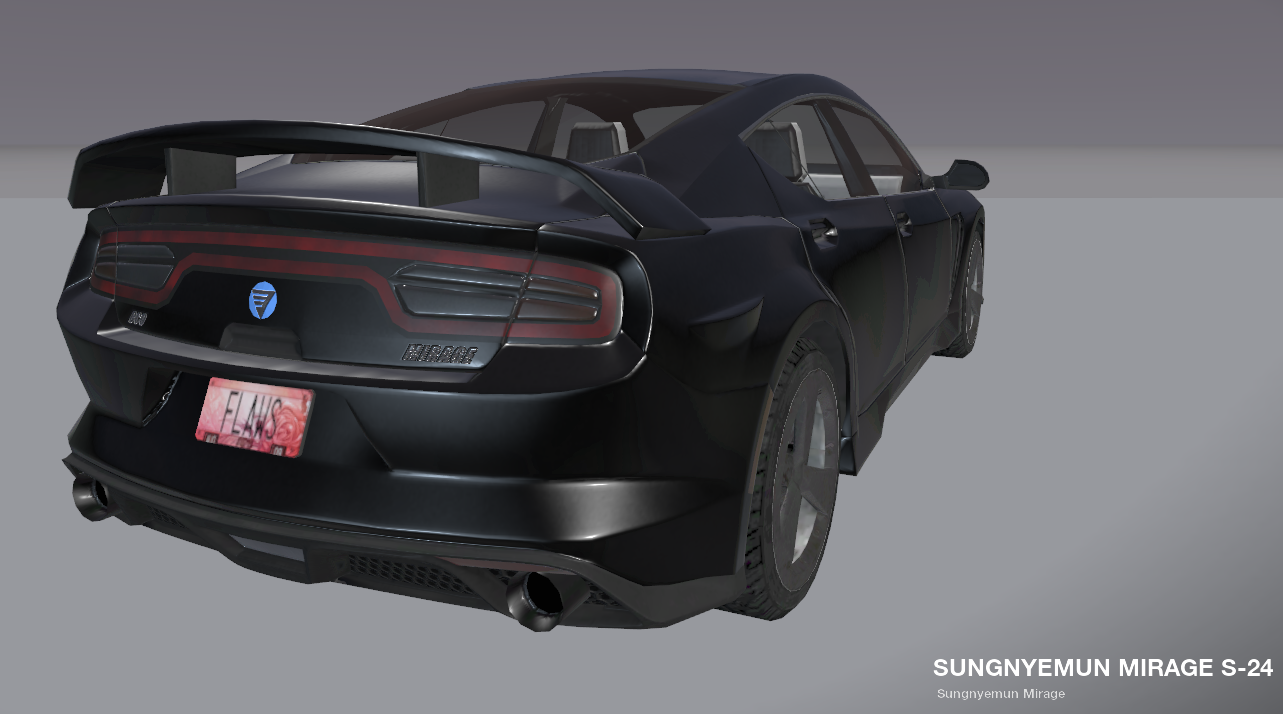
A relatively new addition to the game, the Mirage is a decent car that is something of a mix of the Vegas and the Coywolf. Its quick and offers fast acceleration but also takes some time getting used to handling it albeit not as much as the Vegas. Its also a tad bit more durable than the Coywolf but not as durable as the 4x4. Similarly to the Coywolf, you have two options to obtain this car. Either through the Armas marketplace or through the Joker Store with a preset design and preset mods which cannot be changed.
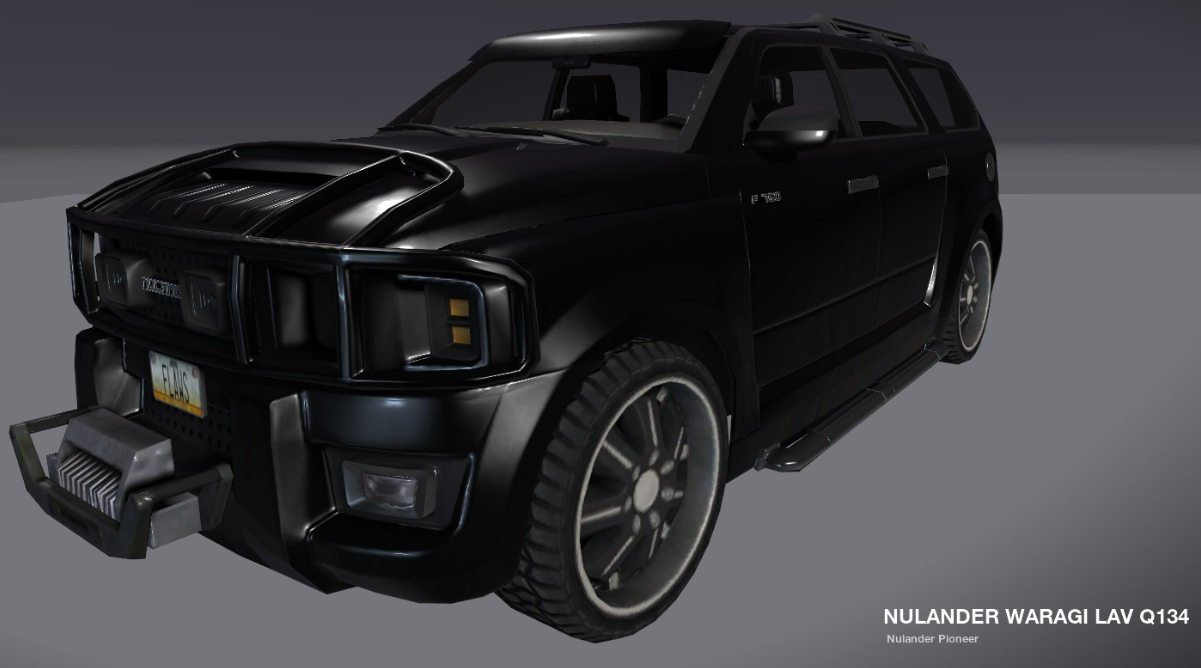
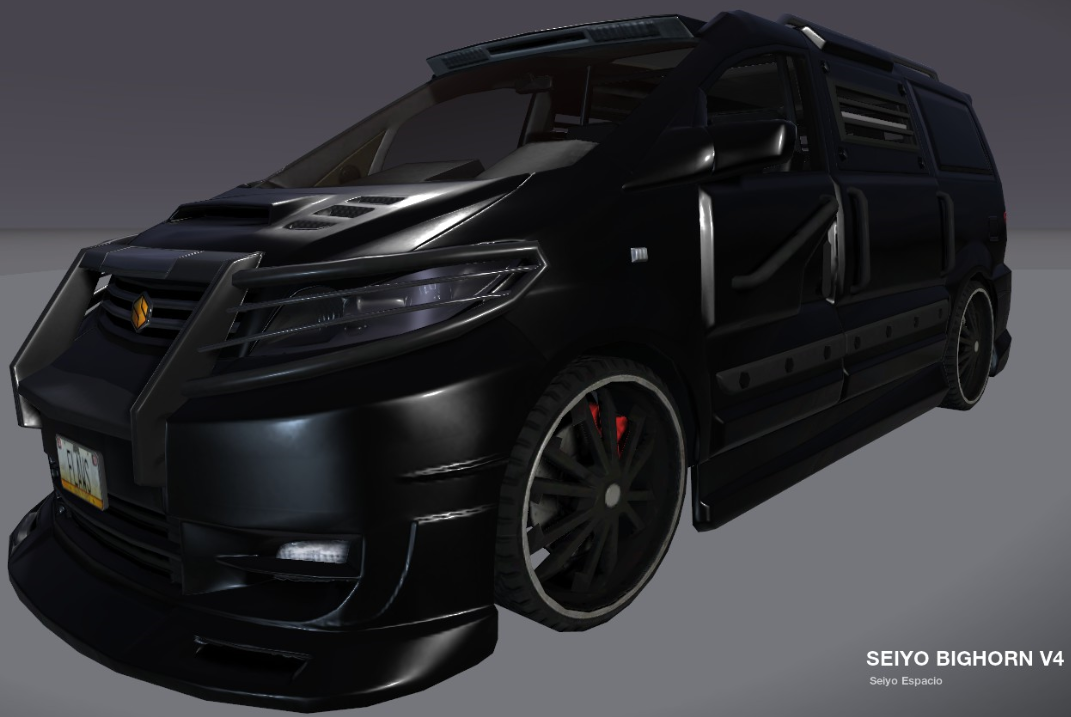
The Pioneer and the Espacio are more durable than either of them and can go decently fast with Nitro 3. They're great for ramming other vehicles and are perfect to use as cover when you need to do an objective safely due to their sheer size. The reasons I rank the Pioneer above the Espacio are that the Espacio's handling is a bit wonky and unstable at times, the passanger seats in the back do not allow you to look/shoot around in 360 degrees when you lean out, but only 180 degrees, and you cannot jump on top of the car from the back/trunk side, unlike the Pioneer which does allow it. The Espacio, however, is very slightly taller so it allows for more hitbox protection when hiding behind it.
The Pioneer and the Espacio can also be obtained from the marketplace (auction house) in Social, usually with body kit cosmetics purchased by other players, applied to F2P versions of the vehicles and put up for sale, also with some kind of design to it.
The Pioneer's F2P version is only available to Enforcers, even on the marketplace from other players. The only ways to obtain it as a Criminal is to purchase it with real money from Armas OR unlock it from a top tier contact with preset (crappy) mods and a preset design that cannot be changed.
The Espacio's F2P version is only available to Criminals, like the Pioneer for Enforcers. The only ways to obtain it as an Enforcer is from Armas or by unlocking it from a top tier contact, again with crappy preset mods and a preset design that you cannot change.
Unlocking and Purchasing Clothes (Customization)
All F2P clothes are unlocked by progressing contacts, both preset and customizable ones. (Except for 2 Enforcer only items that are unlocked by leveling the cop role.)
The symbol designer allows you to create anything you want and then put it all over your clothing or your vehicles
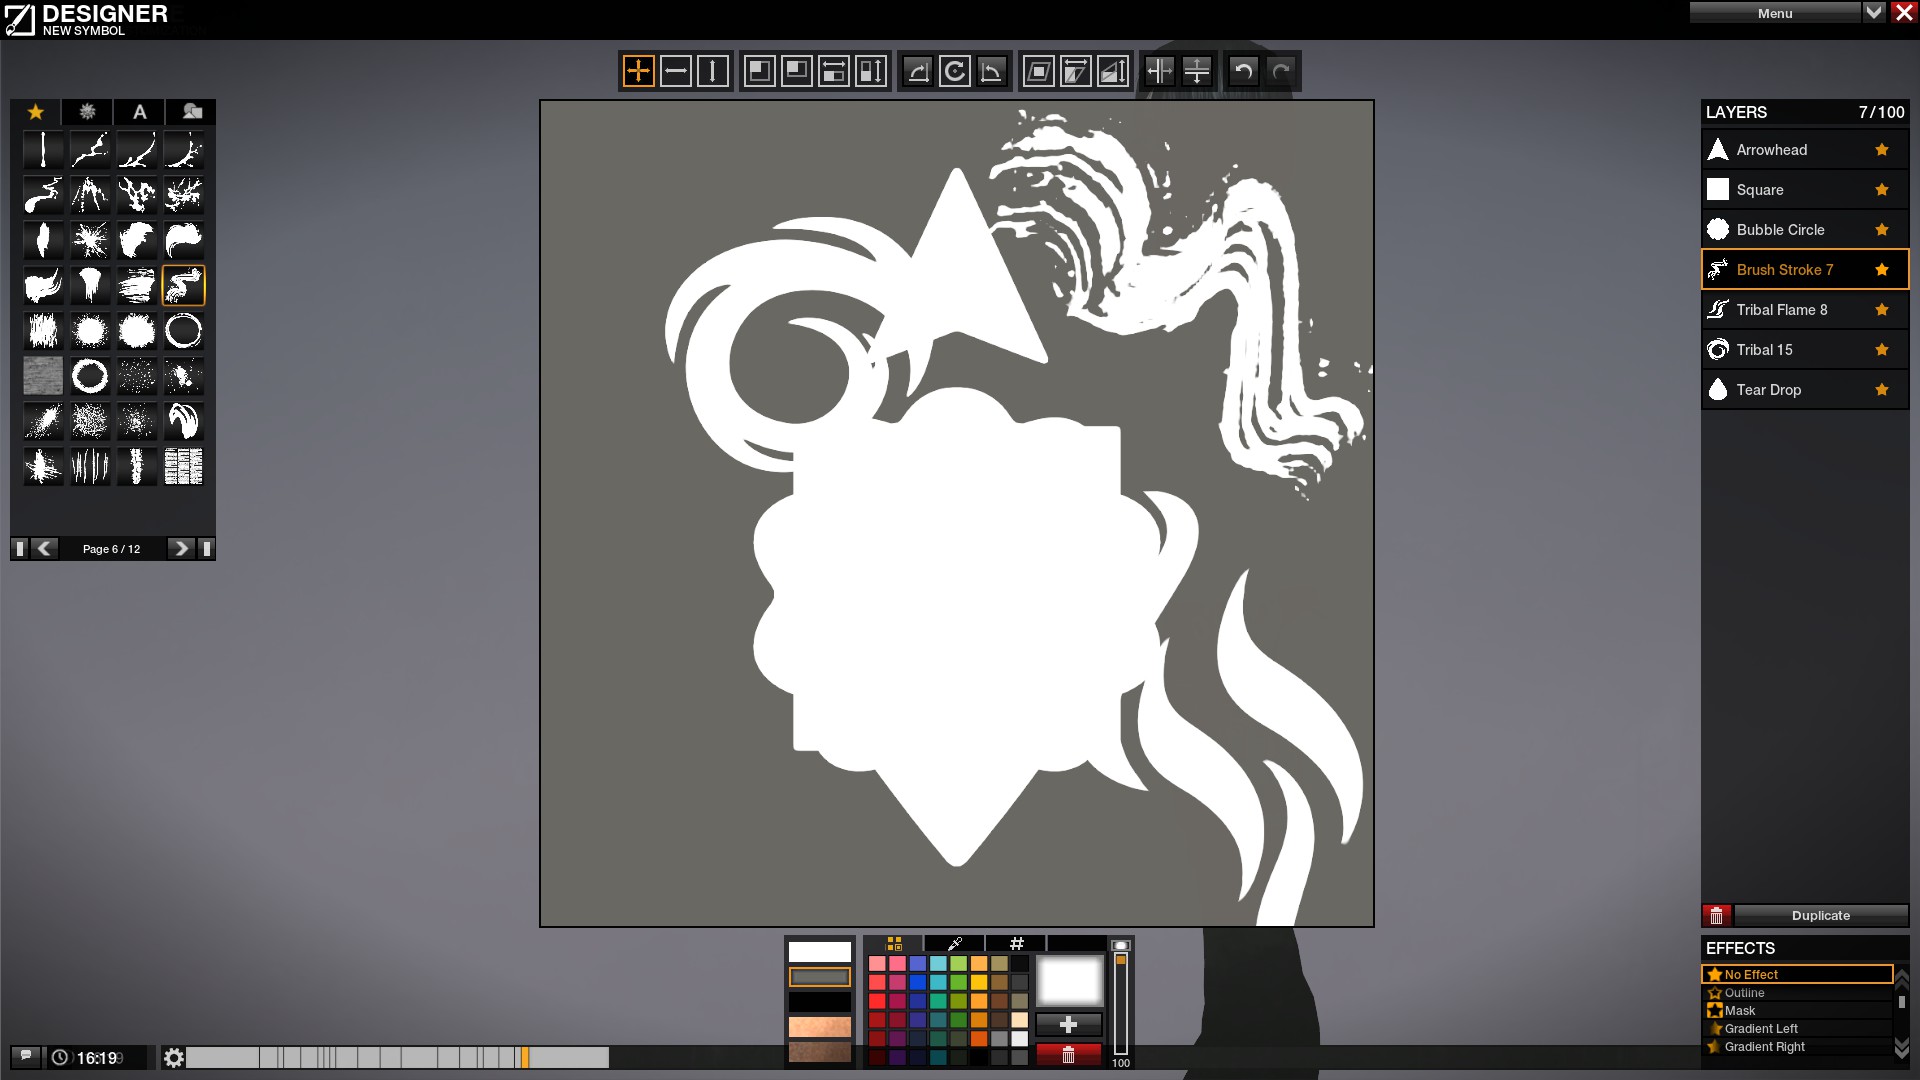
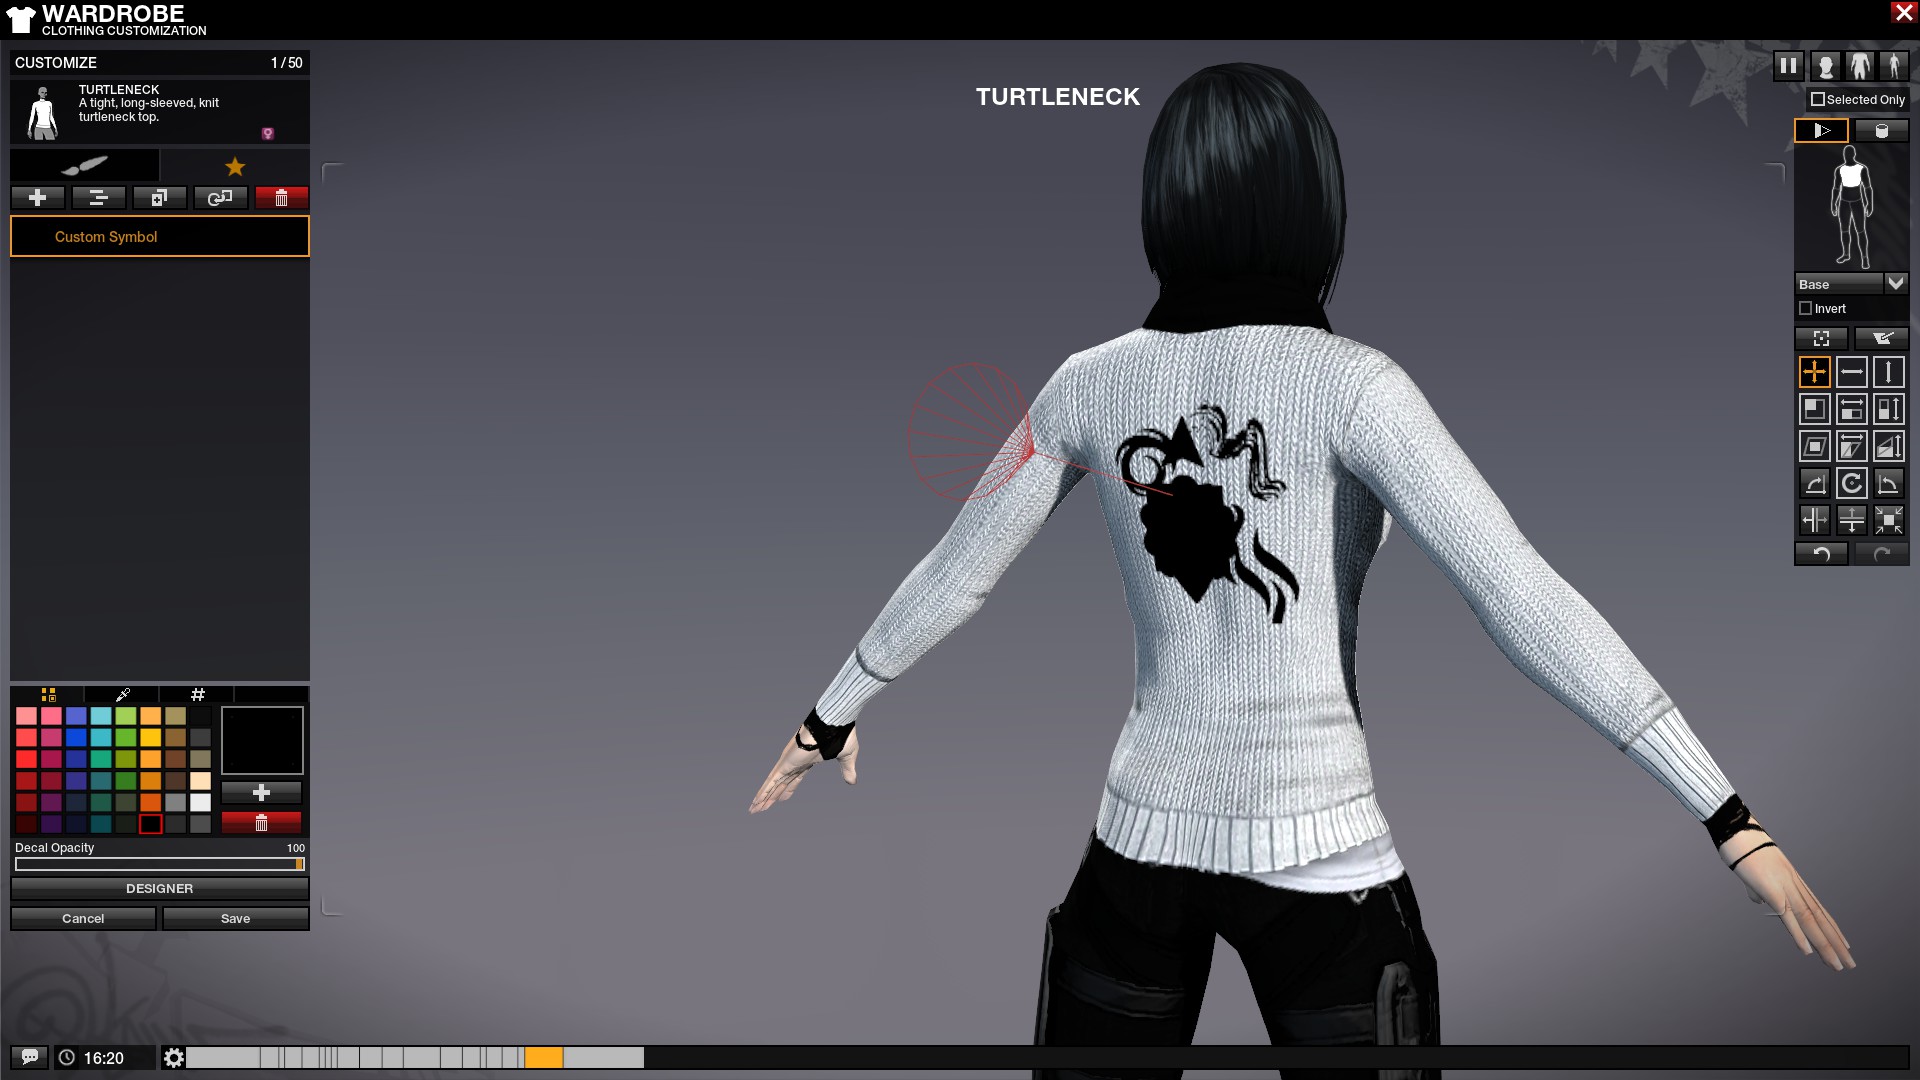 This hoodie design for example is not a default design in the game, it's entirely player generated, based off of a real life hoodie. (Not made by me.)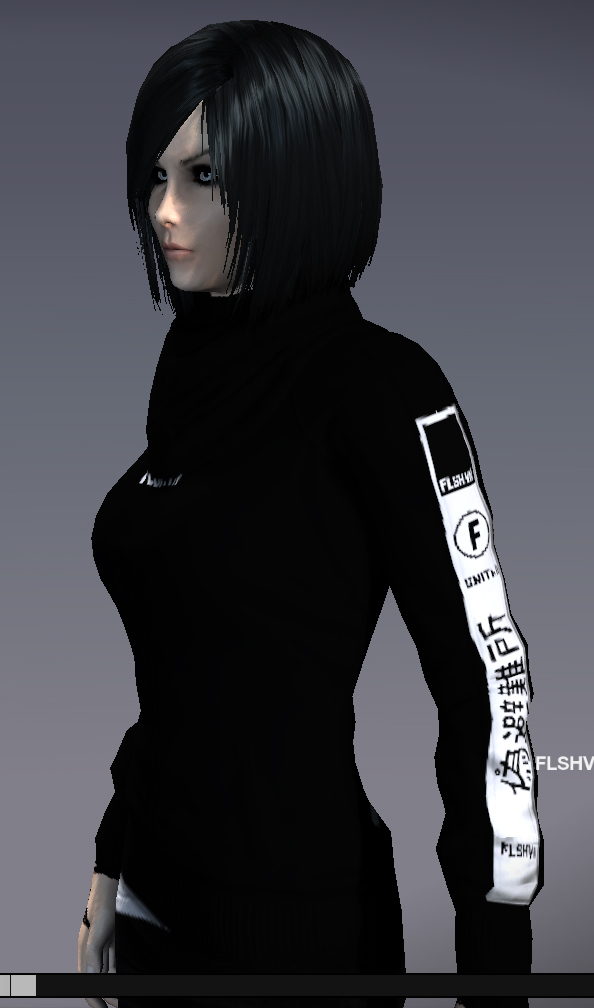
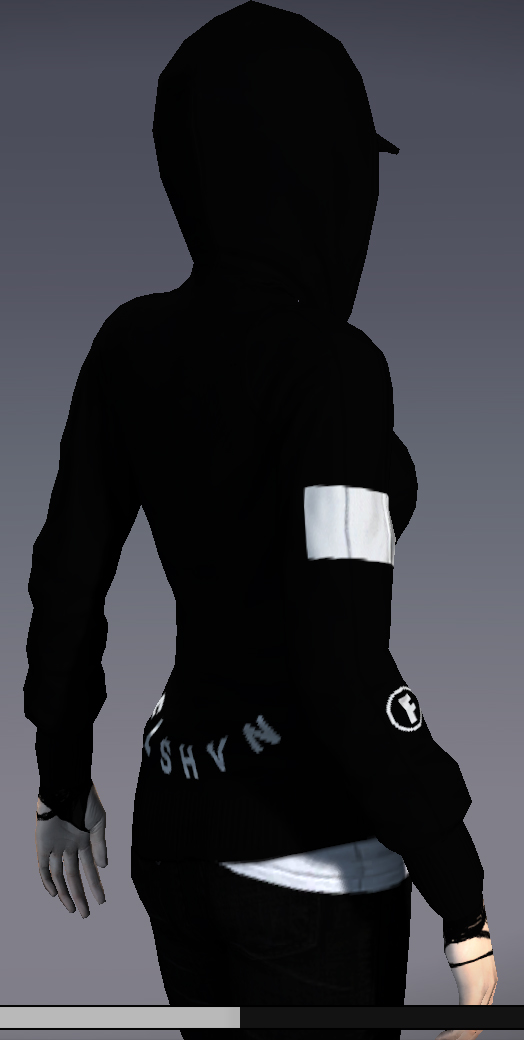
Its best to just try out the outfit designer yourself and see how powerful it can be.
Creating Death Themes/Songs
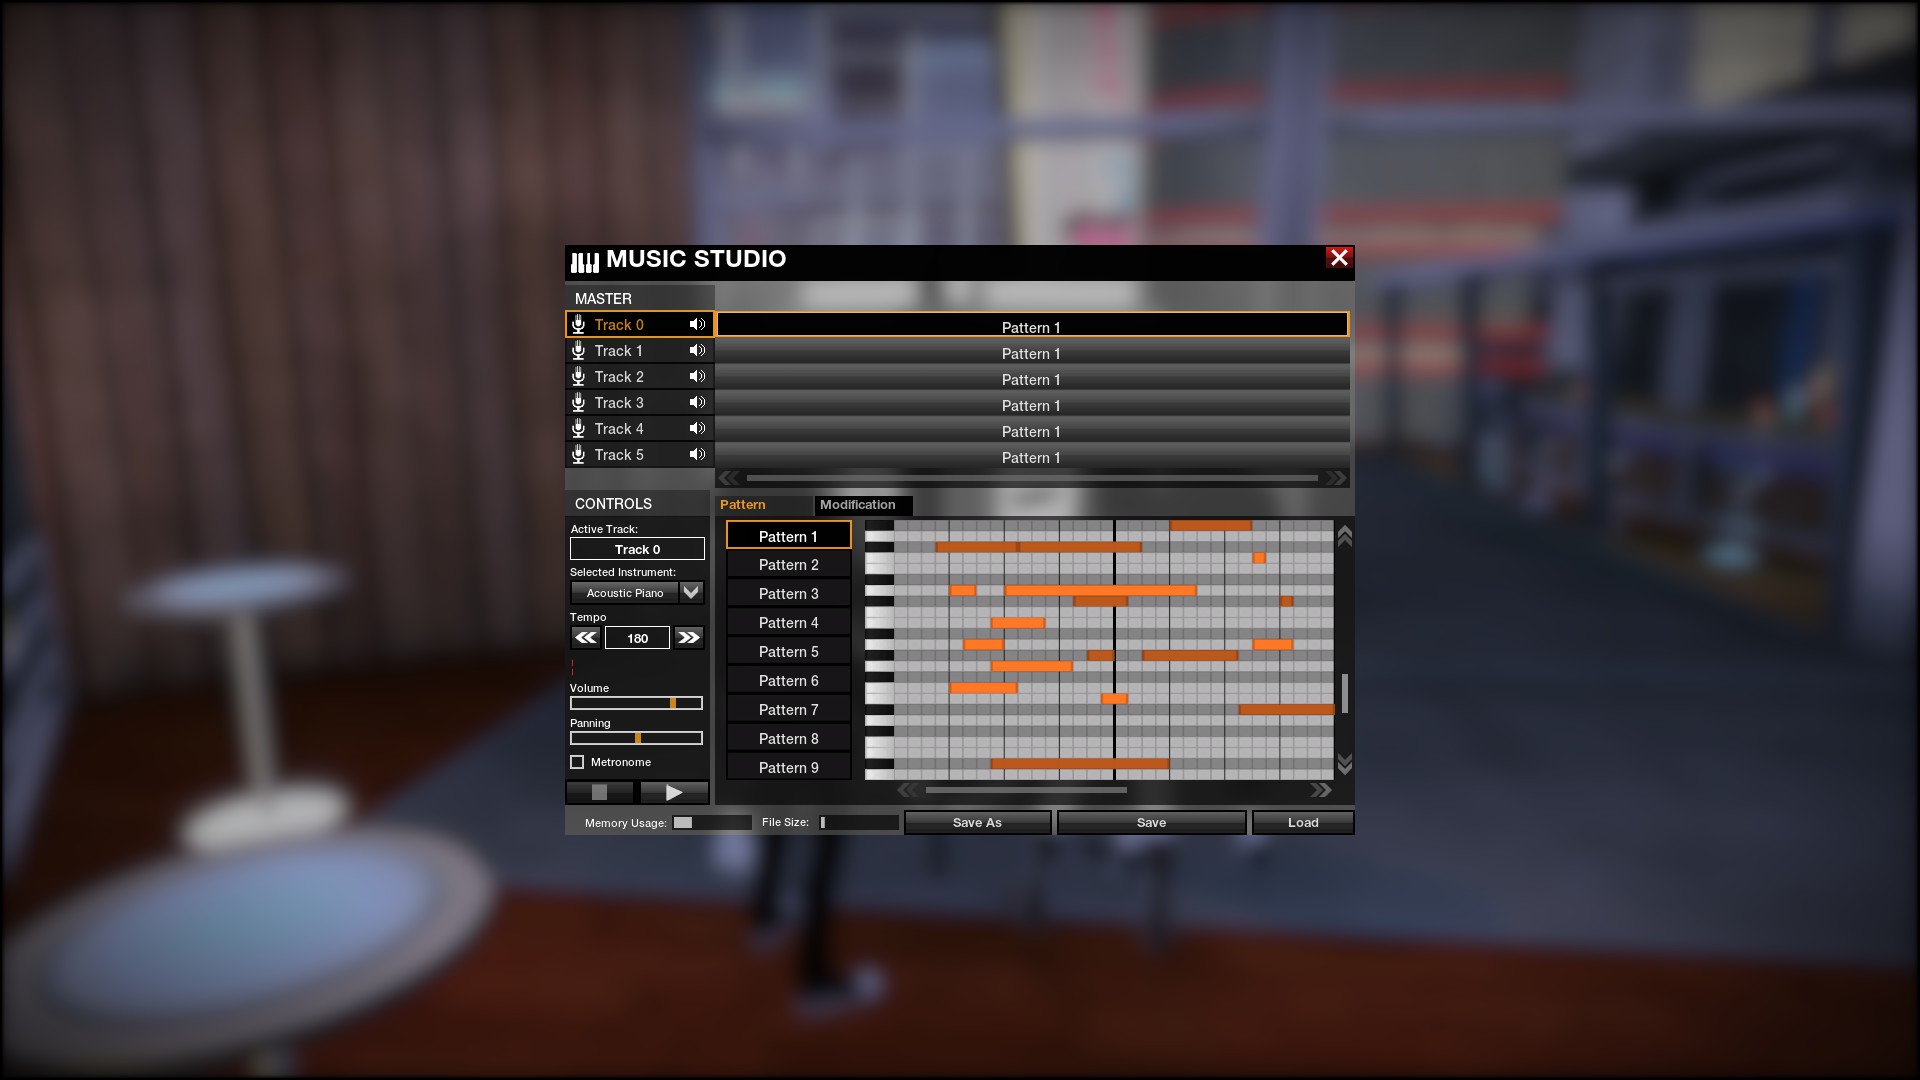
This is what the theme/song creator looks like. I'm personally not big on music-making but if you are - this is where that happens in APB.
Marketplace (Auction House)
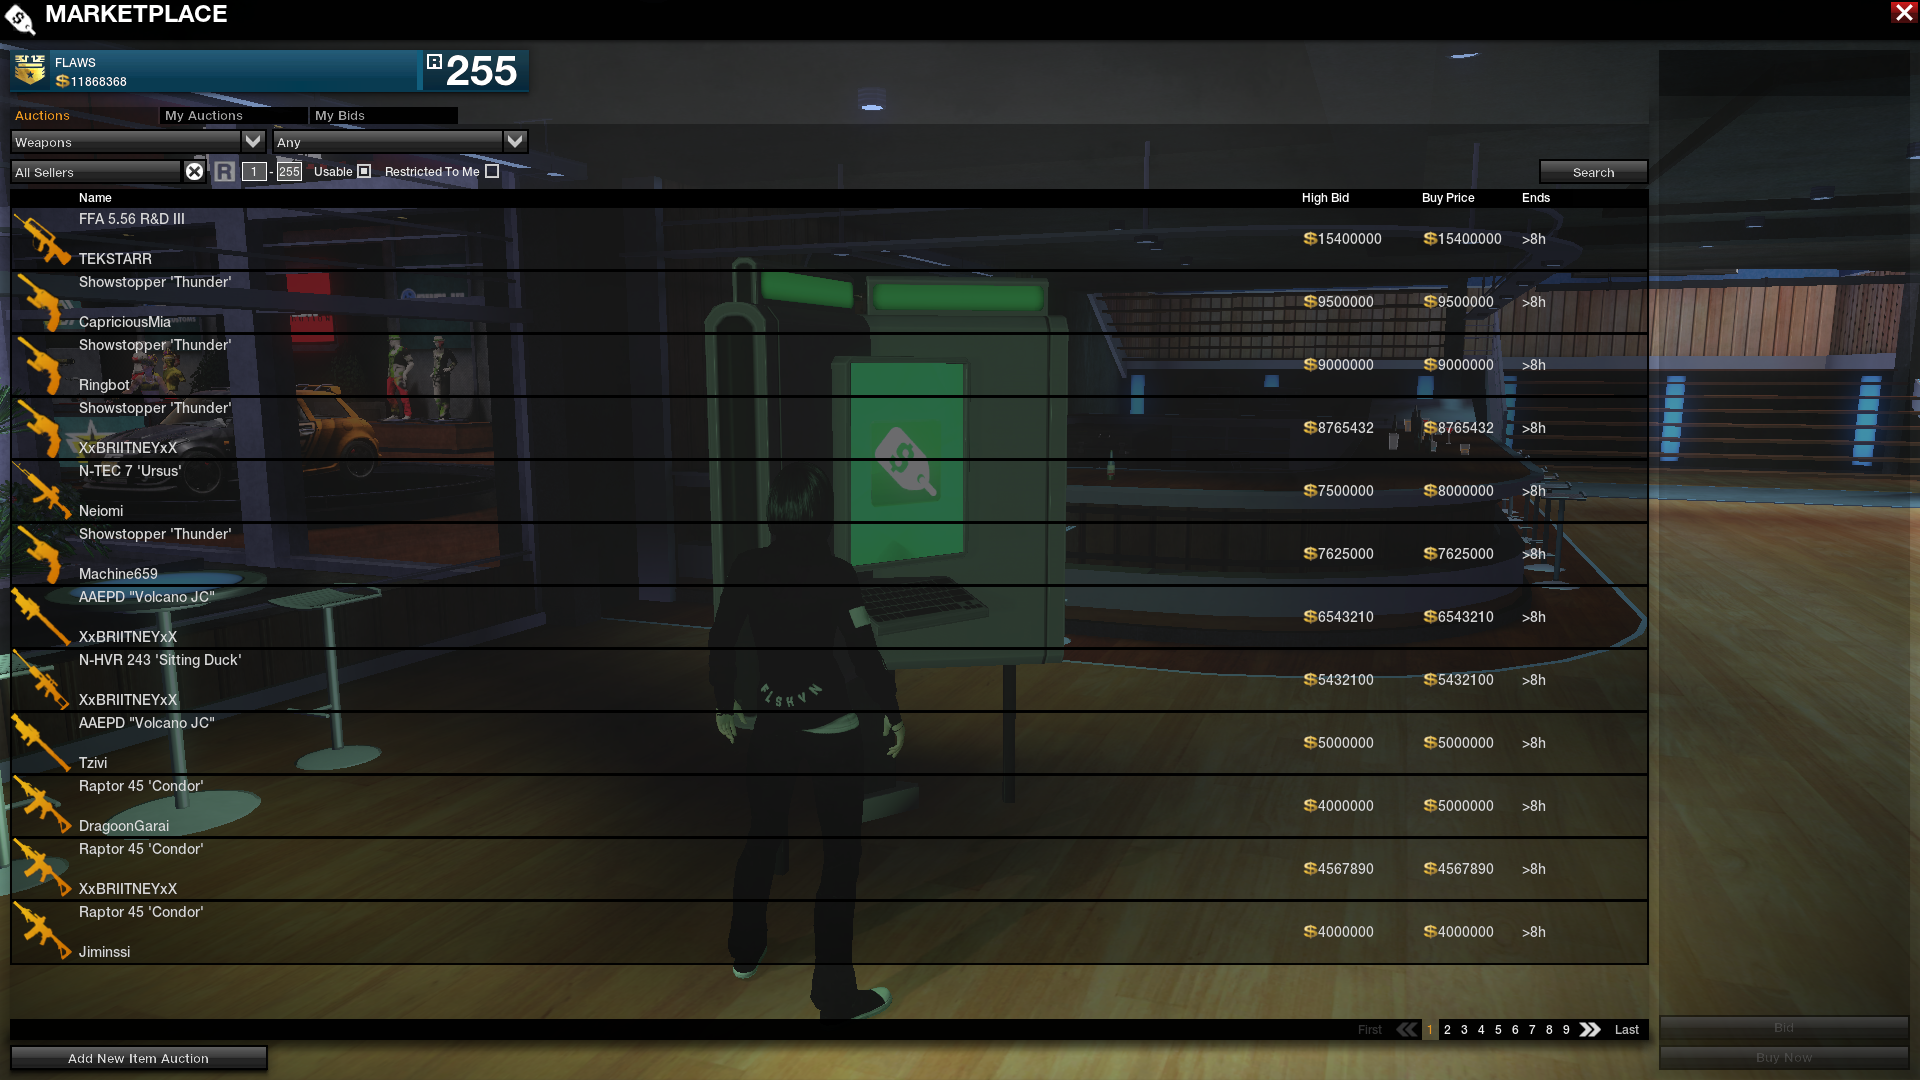 This is what the marketplace looks like (it might not be transparent for you).
Here's what you can buy/sell on the marketplace:
- Legendary Weapons
- Clothing
- Vehicles
- Symbols
- Themes
- Songs
- Mods
- Equipment
- Etc
ARMAS (Real Money Shop)
If you ever get into APB enough to want to drop some real money, the ARMAS Marketplace[www.gamersfirst.com] is the place to go.
- Premium
- Clothing pieces or bundles
- Weapons with open slots or preset mods
- Vehicles with open slots and body kits
With the latest changes to Premium, you can now choose to either subscribe[checkout.gamersfirst.com] to it for $4.99 per month or you can buy it single-time[www.gamersfirst.com] directly from Armas for 500 G1C. If you plan to actually play APB for a while, this is one of the best deals as it makes the new player grind quite a bit lighter.
The first new big benefit to Premium is that you now receive 1500 JT for each month of Premium you purchase in the form of a redeem code on Armas. The second new benefit is The Armas Premium Vault which contains special items with bigger discounts which are only available to you while you are Premium status. Some of these may sometimes contain out of season items such as, for example, Valentine's day weapons when its not Valentine's day and other rarer items.
- 30% bonus to all Contact Standing (XP) gains.
- 125% bonus to all APB$ (in-game currency) gains.
- Up to a 20% discount in the Armas Marketplace.
- Access to the ARMAS Premium Vault.
- The ability to use your Clan Name as a Character Title.
- 1500 Joker Tickets redeem code for every month of Premium purchased.
Unlocking Character Mod Slots
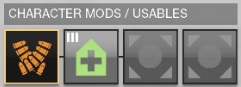
Upon reaching Rank 40 (R40), you unlock the ability to equip a lot level 3 mods. These mods are absolutely crucial in order to survive in APB. There are plenty of different mods in the game, but today we will only look at the most widely used ones.
Keep in mind that, just because you've reached R40 doesn't mean that you've unlocked the second mod slot on your character. Additional character mod slots are unlocked from specific contacts for each faction, so it might be a good idea to prioritize leveling those contacts first as you level to R40.
Second and third mod slots are unlocked from the following contacts for each faction. Each contact unlocks 1 extra mod slot once the required level is reached with said contact.

- Location: Financial District.
- Contact unlocked by maxing out Ty Durrant.
- Extra mod slot unlocked at Level 3.

- Location: Waterfront District.
- Contact Unlocked by maxing out Chung-hee.
- Extra mod slot unlocked at Level 3.

- Location: Financial District.
- Contact unlocked by maxing out Veronika Lee.
- Extra mod slot unlocked at Level 3.

- Location: Waterfront District.
- Contact unlocked by maxing out Britney Bloodrose.
- Extra mod slot unlocked at Level 3.
Character Mods and Consumables
You may only equip one mod of each color at a time. For example, you cannot equip both Clotting Agent and Kevlar Implants at the same time. The same rules apply to weapons and vehicle mods.
The quickest way to obtain a character mod is to save up ~70,000 APB$ +/- and then purchase it from the Auction House (Green Marketplace in the Social District). Its not ideal but its the best option a new player has.
Green - Clotting Agent 3 (occasionally 2), Flak Jacket when playing against explosives (OSMAW / O-PGL)
Blue - Valzipram Tablets, Car Surfer, Hard Landings
Yellow - Epinephrine Injector, Resupply Box if not using Field Supplier

- Deploys a Field Supplier for 30 seconds allowing you to resupply and change all weapons but prevents you from moving until you close it
You've already received a Field Supplier from the Basics tutorial and have equipped it, so that should serve you just fine as an orange character mod for now.

- Primarily used to repair vehicles on the fly but can also repair certain metal breakable objects in the world
- Requires R80

- Places a Mark above enemies that you target (while the mod is activated), a short time allowing you to see them behind cover and through walls. Enemies can see that they are spotted
- Requires R80

- Detonates your Deployed Vehicle after 2s + 0.05s per meter.
- Requires R80

- Deploys a Field Supplier for 20 seconds allowing you to resupply and change all weapons but prevents you from moving until you close it
- Teammates can resupply from you from further distance
- Requires R80

- 50m Radar Jamming on enemies
- Appear on Radar for unjammed enemies
- Requires R80

- Spawns a Mobile Shield
- Can be used as cover once dropped but also while holding it
- Duration: 60s

- -80% Health regen delay
- +100% Health regen time
Clotting Agent is absolutely vital to have as soon as possible as its going to be the main thing keeping you alive. It makes it so your character begins health regeneration much quicker after you stop taking damage, but it increases the total amount of time thats required to fully regen back to max health. Without it you will take forever to begin health regen and you will get killed by players who do have it more often than not. Its the absolute meta for all players across the game.
A handful of players prefer to run Clotting Agent 2 instead of 3 due to personal preference but Clotting Agent 3 is the solid meta to this day for the overwhelming majority of players. The Clotting Agent 2 numbers are -50% health regen delay and +50% health regen time.

- +14% sprint speed
- +14% run speed
- -14% health
- Requires R60

- -40% explosion damage taken
- -1 Grenade count
- Requires R60

- +30% player health
- -20% sprint speed
- -20% run speed

- -100% Falling damage taken
- -0.15m/s Falling speed at which you need to brace for impact
While it removes all damage taken from falls from any height, it does come with a fairly annoying landing animation that might get you killed more often than taking fall damage will, as it prevents you from moving until the animation finishes playing.

- Increases resilience to vehicle impact. Cars can still run you over at high/full speed
- Requires R60

- Allows you to stand on the top of moving vehicles without being knocked off
- Requires R60

- +75% damage to enemies if landing on them
- +100% fall recovery time
- Requires R60

- Injects you with Epinephrine, allowing you to run at great speeds for a short period of time
- Hurts you when applied

- Spawns a Boombox that will play music selected in your Music Player
- It will appear on the Radar to enemies as a target, allowing you to use it as a distraction
- Duration: 45s

- Immediately triggers health regeneration for you and everyone else around you (including enemies)
- Mostly useless if you have Clotting Agent 3 equipped

- Spawns a Satchel charge that deals extreme damage to Vehicles
- Will detonate after 15 seconds or when damaged

- Spawns a droppable resupply box that lets you and other players to resupply ammo and change weapons. Has a limited ammo supply. Does not resupply explosives or grenades.
- Can be blown up and kill players by damaging it. Explodes on its own after 90s
Weapon Mods
Every weapon in the game has optimal mods that are widely used by the majority of the players. Not every mod goes well with every weapon.
All mods are written in order of importance for each weapon. This list will be updated as weapon mods receive changes and as the meta changes with them.
OCA-EW - CJ3, RS3, 3PS3 - CJ2 is also viable
JG - IR3, 3PS3, MP3
Colby PMG - CJ3, RS3, 3PS3 - CJ2 is also viable
Joker SR15 Carbine - IR3, RS1/2/3, 3PS3 - CJ2 is also viable but not meta
N-HVR 762 - 3PS3, AI/HS3, CJ3
Obeya CR-762 - IR3/LRR, AI/HS3, 3PS3 - CJ3, Tagger are also viable but not meta
OBIR - IR3, AI/HS3, 3PS3 - Tagger is also viable
OSCAR - IR3, RS3, 3PS3 - Tagger is also viable
* Advanced Ironsight (AI) is now meta as it provides all the accuracy benefits of Hunting Sight 3 but without the additional zoom in marksmanship mode which improves your awareness of your surroundings while aiming down the sights. Its particularly useful in close range engagements. However, if you actually like the zoom, you can still use HS3 just as well.
It does NOT matter which mod you put in which of the 3 slots of a weapon, the effect is always the same.
All of these can be obtained either through progressing weapon roles or simply by purchasing them off the marketplace in Social.
- Substantially improves benefit of marksmanship mode
- Substantially decreases accuracy while running
- Identical to Hunting Sight 3 but without the additional FOV zoom in marksmanship mode

- Improves benefit of marksmanship mode.
- Decreases accuracy while running.
- Increases FOV zoom in marksmanship mode

- Improves accuracy when moving.
- Lowers benefit of marksmanship mode.

- Substantially increases accuracy gain when crouched
- Substantially decreases accuracy while running

- Substantially improves benefit of marksmanship mode
- Sets zoom level to 15 degrees
- Substantially decreases accuracy while running
- Changes Marksmanship Crosshair
- Removes Non-Marksmanship Crosshair

- Increases weapon firerate.
- Decreases minimum accuracy.
- Increases spread on shotguns.

- Increases weapon effective range.
- Increases maximum reticle bloom.

- +25% effective range
- -10% fire rate
- -20% burst rate (OBIR, OSCAR, etc)

- Increases weapon accuracy per shot.
- Decreases weapon damage.

- -30% vertical recoil
- +7% horizontal recoil

- -15% horizontal recoil
- +15% vertical recoil

- Decreases weapon equip time (when swapping from your other weapon).

- +50cm/s movement speed in marksmanship

- Places a Target Marker above targets that you hit (does not show through walls).
- Enemy player can see when they are tagged.

- Removes existing movement speed penalties
- Strongly reduced effects for shoulder-fired Rocket Launchers
- Substantially decreases accuracy when jumping

- Decreases reload time.
- Decreases magazine size.

- Increases stored ammo you can carry for the weapon.
- Increases resupply time.

- Increases magazine size.
- Increases reload time.
Grenades & Throwables

- The basic grenades you receive from the game's tutorial.
- Decent blast radius and high damage.
- Explodes on impact with any surface, car or player.
- Low damage and blast radius but easier to use. Can be used to stun.
- Unlocked at Grenadier Role Rank 1.
- Smaller blast radius than frags but higher damage, useful for blowing up vehicles.
- Turquoise (blue-green) smoke trail.
- Unlocked at Grenadier Role Rank 2.

- Lower damage and blast radius than frags but lighter so they can be thrown further away.
- Shorter fuse timer than other grenade types and can carry 3 of them at a time.
- Unlocked from Devil Dog / Tiptoe at level 10.
- EMP grenades deliver a large scale electromagnetic energy burst to disable unprotected electronics over a wide area.
- When thrown at vehicles it damages them and temporarily disables the engine and their mods for an amount of time depending on the vehicle. When a vehicle is EMP'd it also deals damage to any players sitting inside the car for the duration of the EMP's effect. The grenade also deals a miniscule amount of damage to players on foot.
- Unlocked at Grenadier Role Rank 3.

- Can kill instantly upon impact with player if thrown from far enough distance.
- Can carry 3 of them at a time.
- Unlocked from Ernst 'Mule' Templeton / Birth at level 10.

- Can kill instantly upon impact with player if thrown from far enough distance.
- Can carry 3 of them at a time.
- Unlocked from Ernst 'Mule' Templeton / Birth at level 10.

- Used to stun players for arrest as they deal great stamina damage.
- Only available to Enforcers at Cop Role Rank 4.
Vehicle Mods
All of these mods can be obtained through leveling contacts or through purchasing them from the marketplace in Social.
Blue - Car Spawner, Radar Tower, Car Ammo
Orange - Nitro 3
Green - Steel Plating 3
Red - Armored Engine 3, Fireproofing 3
Purple - High Burn Fuel
The most optimal mods for most vehicles are all the same, but you get to pick which ones you want to mix with which as it is down to playstyle.

- Allows player to Spawn in their Vehicle
- Can only use any mobile spawn once every 120 seconds
- Disables on Critical Damage
- Reveals Vehicle on Enemy Radar
- Invalid if within 20m of death location
- Invalid if enemy within 55m

- Vehicle trunk is a Field Supplier
- -3 cargo capacity
- Disables on critical damage

- Detects enemies within 20m
- Vehicle appears on Radar of detected enemies
- Disables on critical damage
- Requires R60

- Increases cargo capacity

- Increases engine output torque upon activation
- Increases top speed upon activation
- Decreases turning speed upon activation

- Upon activation vehicle accelerates constantly for the duration of the modification even if a driver is no longer present in the vehicle

- Decreases damage taken from firearms
- Decreases max speed

- Decreases damage taken from vehicle collisions
- Decreases damage done by vehicle collisions

- Increases ramming damage
- Increases collision damage
- Decreases brake efficiency
- Reduces the Effectiveness of EMP Strikes by 40%

- Increases delay before engine fire
- Increases engine fire damage

- Decreases engine fire damage

- -50% Suspension Dampening
- -50% Suspension Stiffness
- Requires R60
- Increases steering angle 0ms by 10%
- Increases steering angle 12ms by 25%
- Increases steering angle 22ms by 30%
- Requires R60

- Hides Vehicle from radar while coasting
- -65% Engine Braking
- Requires R40

- Your vehicle deals 0 damage when exploding
- Reduces the vehicle's base HP by 15%
- Requires R60

- Faster repair time (at GA5 stations or by Blowtorch)

- Increases blast radius
Equipment

Equipment goes in the 3 open slots at the bottom of the character loadout menu.
Currently there are only 3/5 open slots and the other 2 cannot be unlocked in any way yet.
All of the equipment pieces become usable once you reach R30 so it is recommended that you pick 3 that you think are best for you. Make sure to always go for Level 4s which is the maximum and they aren't expensive either. Level 4 Equipment goes for ~20,000 APB$ each which realistically isn't that much at all and its worth it because it can and will be the difference between win or loss. They can also be purchased from the Auction House (Marketplace) just like mods.
The meta when it comes to equipment is to own one of each (for your appropriate faction + the universal ones, all at level 4!), keep them in your inventory and quickly swap them at an ammo machine/car spawner/field supplier at the beginning of a mission depending on what you will need for said mission. This is where mission stage configs come into play, but that is a more advanced topic to be tackled later on.

- Completes Spray/Graffiti objectives faster.

- Completes Raid objectives faster.

- Arrests stunned Criminal players faster.

- Completes Spray/Graffiti objectives faster.

- Completes Burgle objectives faster.

- Frees arrested fellow Criminal players faster.

- Completes Arson objectives faster.

- Completes Bomb Plant objectives faster.

- Mugs civilians faster.

- Completes Hack objectives faster.

- Completes Investigate objectives faster.

- Completes Defuse and Sabotage objectives faster.

- Unlocks locked cars faster.
Weapon Reskins
Weapon reskins are weapons that are available on ARMAS or through the Joker Store and are functionally the same as one of the Free 2 Play weapons but simply have a different look and a different sound. We will go over most of them in this section.
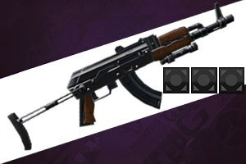 Joker CR-5 (Reskin)
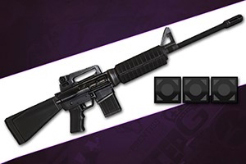 VAS-R2 'Sword' NFCP 3 (Reskin, ARMAS Loyalty Reward)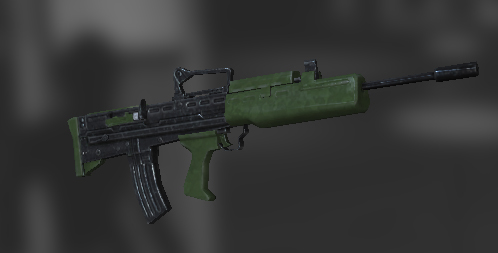
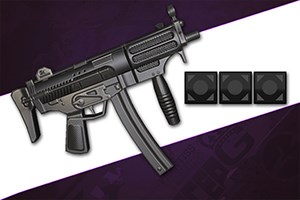 PDW-57 'Dagger' (Reskin):
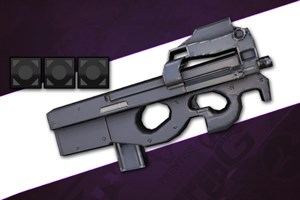 PDW-57 'Stiletto' (Reskin, ARMAS Loyalty Reward):
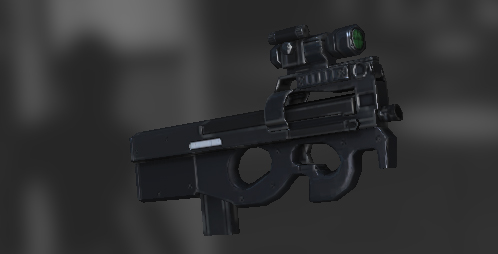 Joker C9 'Hornet' (Reskin):
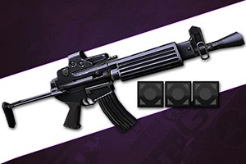 Joker C9 'Wasp' (Reskin, ARMAS Loyalty Reward):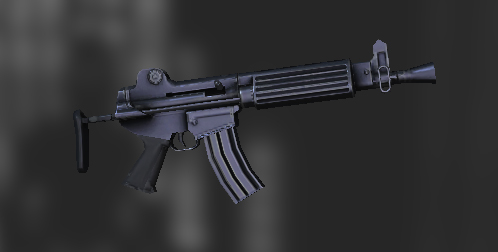
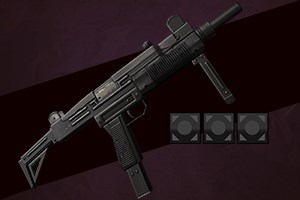 CBMP-45 'Dart' (Reskin):
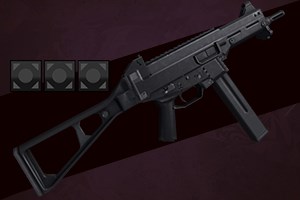 CBMP-45 'Bolt' (Reskin, ARMAS Loyalty Reward):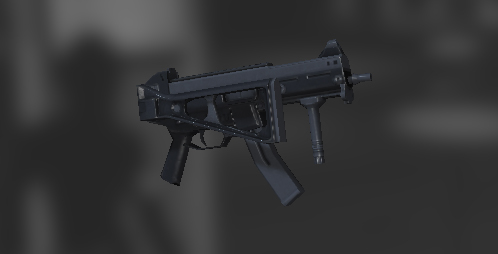
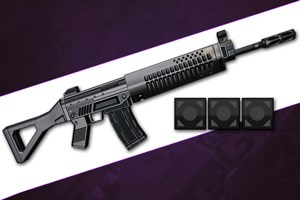 STAC 10 - Scope R&D III (Reskin):
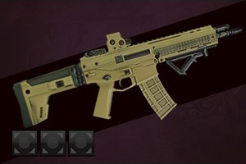 STAC 10 Tactical R&D III (Reskin):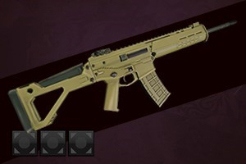
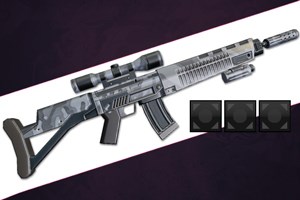 Obeya SLR762 'Spartan' (Reskin):
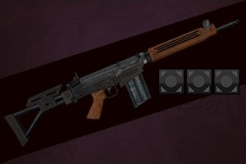 Obeya SLR762 'Hoplite' (Reskin):
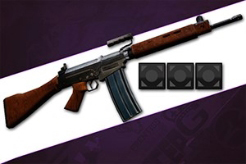 Obeya SLR762 'Broadside' (Reskin):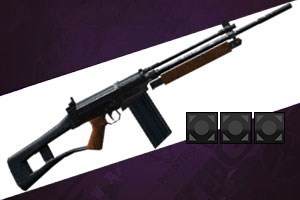
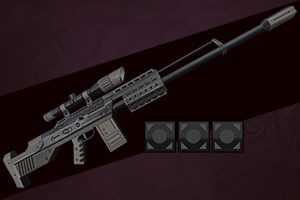 PSR 'Kite' R&D III (Reskin)
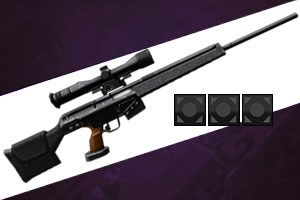 PSR 'Harrier' R&D III (Reskin, ARMAS Loyalty Reward)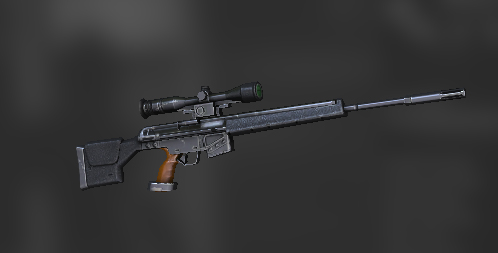
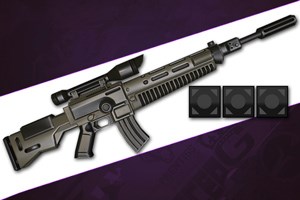 FFA 5.56 R&D III (Reskin, Special/Rare Joker Box Legendary Weapon):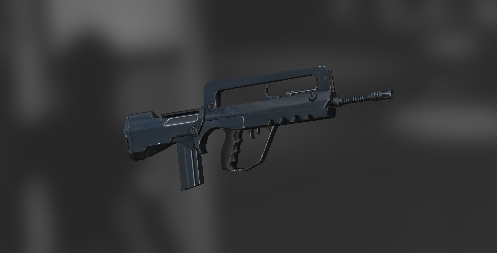
The FFA has very slight differences in zoom in marksmanship mode to the OBIR but it is 99.9% the same weapon.
Trading
The trading system in APB is as easy and safe as any other. Here's how you initiate a trade.
You find the player you are looking to trade with in the district and you press the Player Interaction button ( ">" or "." by default on your keyboard) on them once you are close enough.
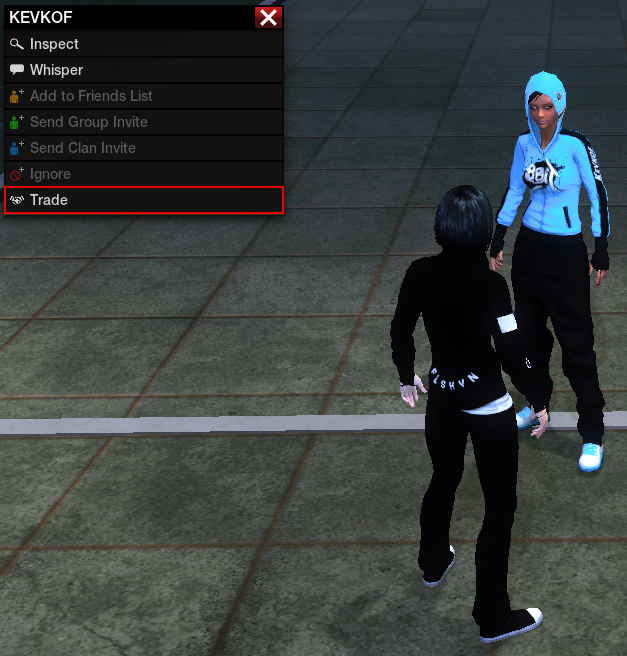
You click on "Trade" and then you wait for the other player to either Accept or Decline your offer. This is what they see (and what you'd see if someone requests a trade with you).
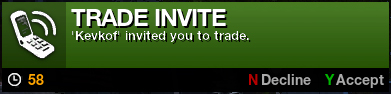
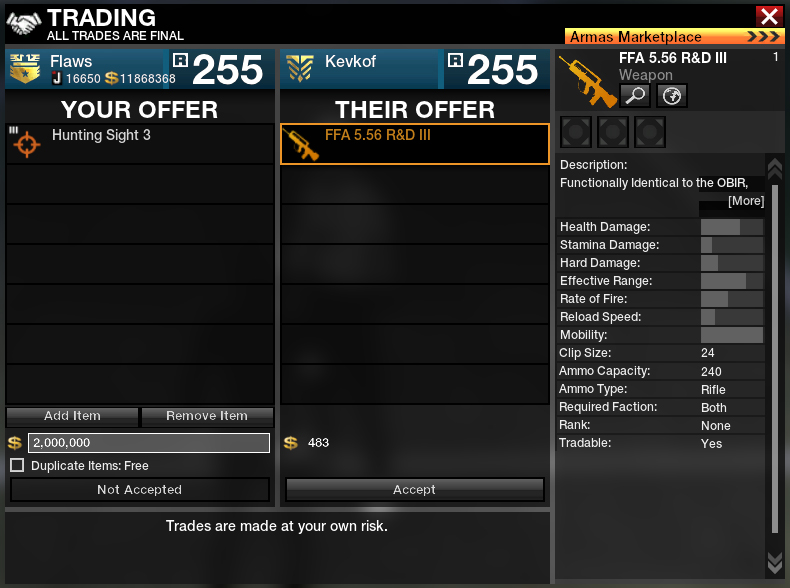
If the other player accepts your trade, you are greeted by the trade menu. The rest is pretty easy to figure out on the spot.

Look out for this pop-up to find out if the trade was successful.
If you have a longer (or permanent) trade lock, you likely violated the APB ToS and you would have to get in contact with Customer Support[www.gamersfirst.com]
Ram Raiding & Car Theft
A lot of newbies who pick up APB go straight for ram raiding because they want to get millions of APB$ quickly to buy legendary weapons or cars off the auction. In reality it's a waste of time because you don't progress ranks, you don't unlock weapons or clothing or anything at all. You are just purely grinding APB$ and that can be a colossal waste of time if you end up getting witnessed by an enforcer after hours of stacking your stash and then lose everything in minutes. It's infuriating even for hardcore veterans of APB. It's extremely high risk and not as high reward as you'd think long term. A few million might seem like a lot to a new player but it really isn't that much. I strongly advise AGAINST doing this.
If you want my personal educated opinion - stick to missions, fight club and trading to make your APB$. Missions progress your ranks, roles and unlocks whilst earning you APB$. Fight Club earns you Joker Tickets and weapon role progression whilst earning you APB$. Trading is simply safer and you don't run the risk of getting your hard work thrown down the river.
Ram raiding and Stealing and delivering cars. Both of those can be countered by Enforcers however.
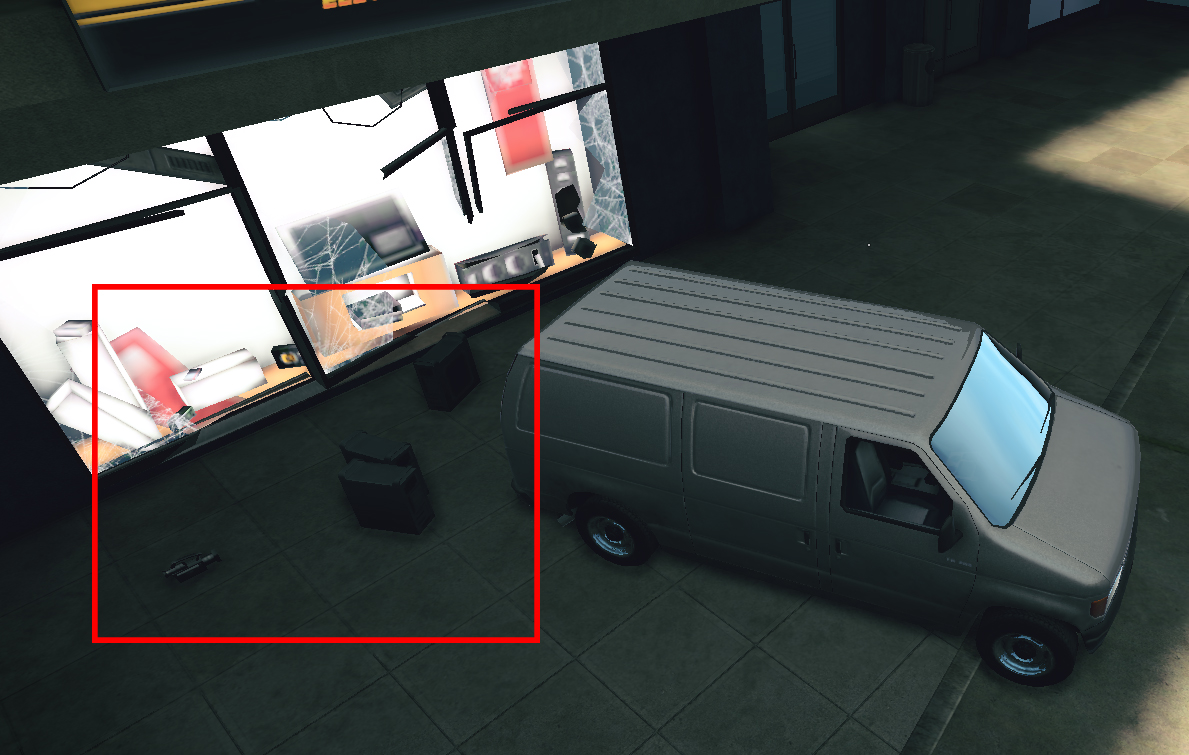
Ram raiding is all about breaking shop fronts and garages around the city with your vehicle* which then drop small, medium and large items on the ground.
* Packer Ceresco vans are recommended as they have the biggest cargo capacity and can hold the most amount of items at a time.
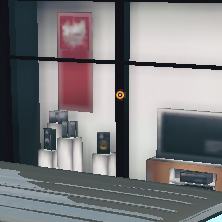
You can tell which shop fronts/garages are breakable by aiming at them. If an orange circle appears around your vehicle dot-crosshair and also a text at the bottom of the screen saying Ram Raid appears then it is breakable.
You can then grab them and put them in the back of your vehicle by pressing F near the trunk/back door while holding said item.
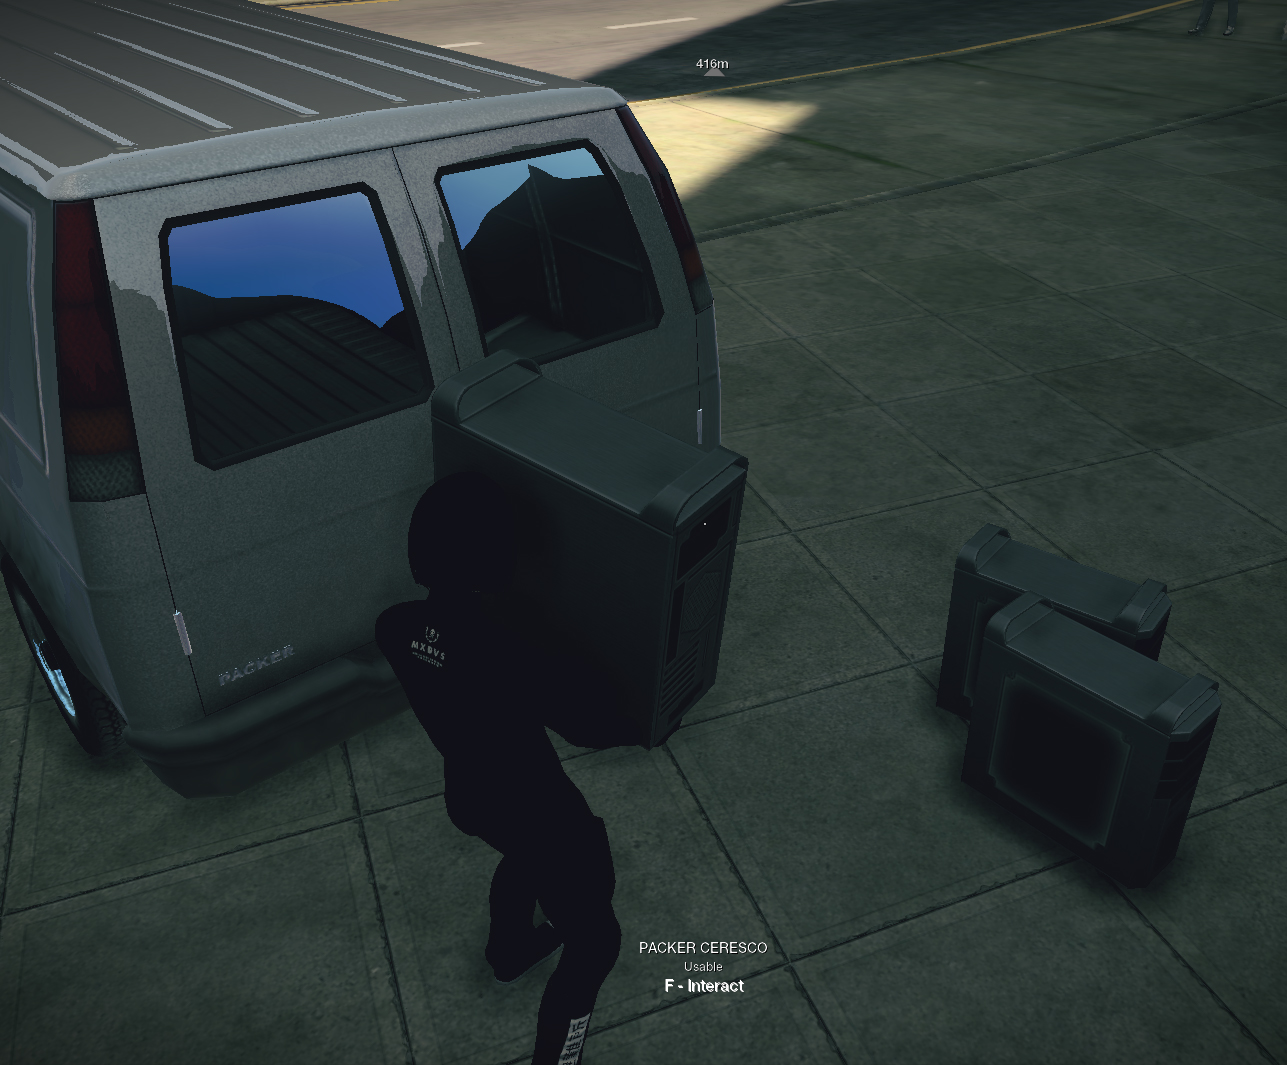
If it drops a small item then those small items can be picked up by your character without the need of storing them anywhere. You can carry up to 50 small items on your person at a time. Ram raiding activities increase your Notoriety level.
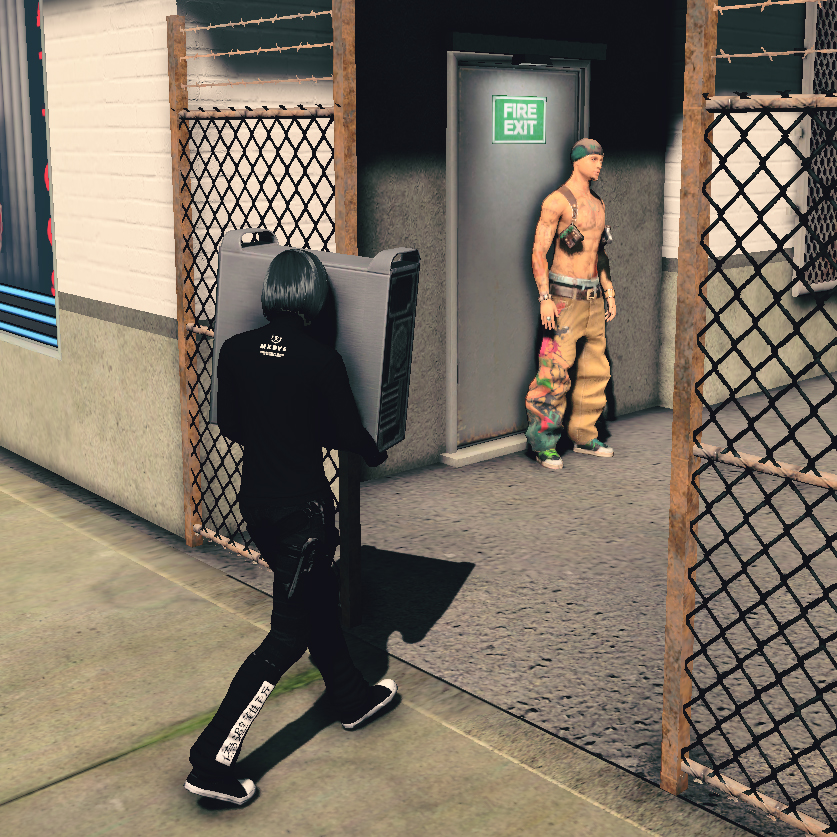
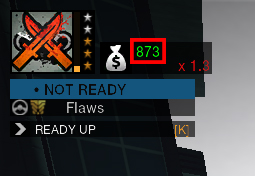
The next step is that you must go to a criminal contact where you must carry each of those items back out of the trunk of your vehicle and to the contact which will grant you APB$ to your stash (green number top left).
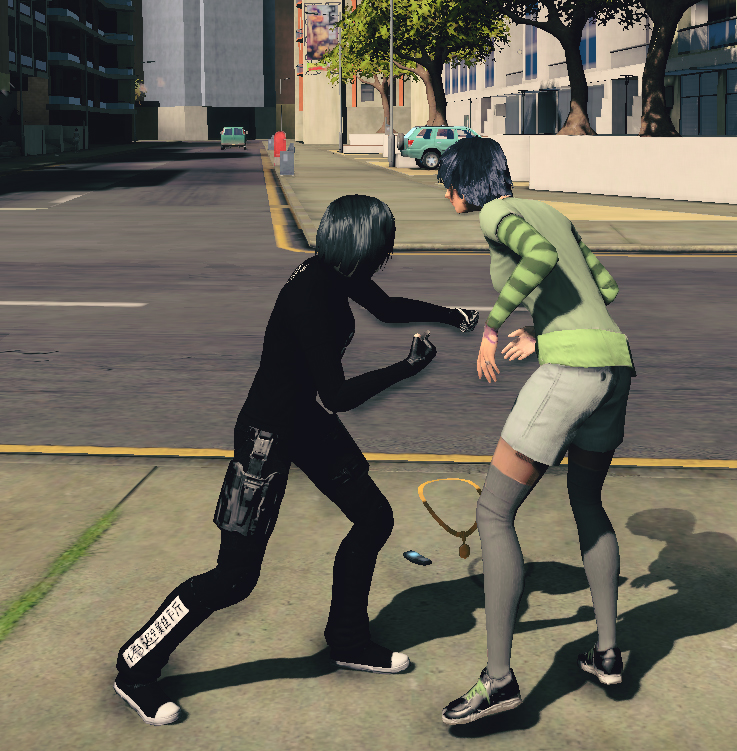
The other open world crime you can commit is mugging civilians. Simply go up to pedestrians on the street and press F.
They also grant money to your stash and sometimes they might drop small or even medium items upon finishing a mugging. Mugging also increases your Notoriety level.
Once you're satisfied with the amount you have in your stash, you must go launder the money to actually receive it at the Money Laundry:
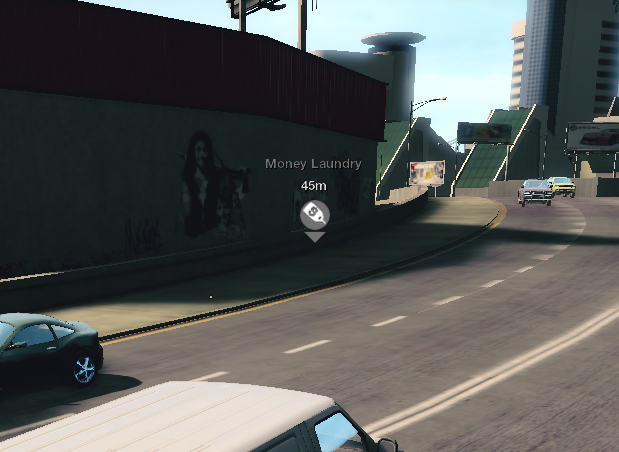
Keep in mind that the higher level your bounty is at the time of money laundering, the bigger multiplier you get of the stash you receive, where the biggest is while you are Notoriety 5 which yields x2 of what you have in your stash upon laundering.
The moment you successfully launder, your Notoriety drops to 0 and your money is safe and ready to be used.
If however you get witnessed and a mission begins, you must look for the Your Drop marker on the map and go there as fast as possible to quickly drop off the stash that is on your person so you don't lose your stash money. Forget about any items you are carrying currently to drop to a contact, those become useless the moment you get witnessed. If however you get killed during the mission, an enforcer can then pick up your stash and deliver it at the Their Drop marker which loses you the mission and the money and they get it for themselves. Whoever is carrying the stash currently is constantly marked on the map so you will know who it is exactly and they will know it is you. If you manage to kill said enforcer back you can retrieve the stash once more and so on.
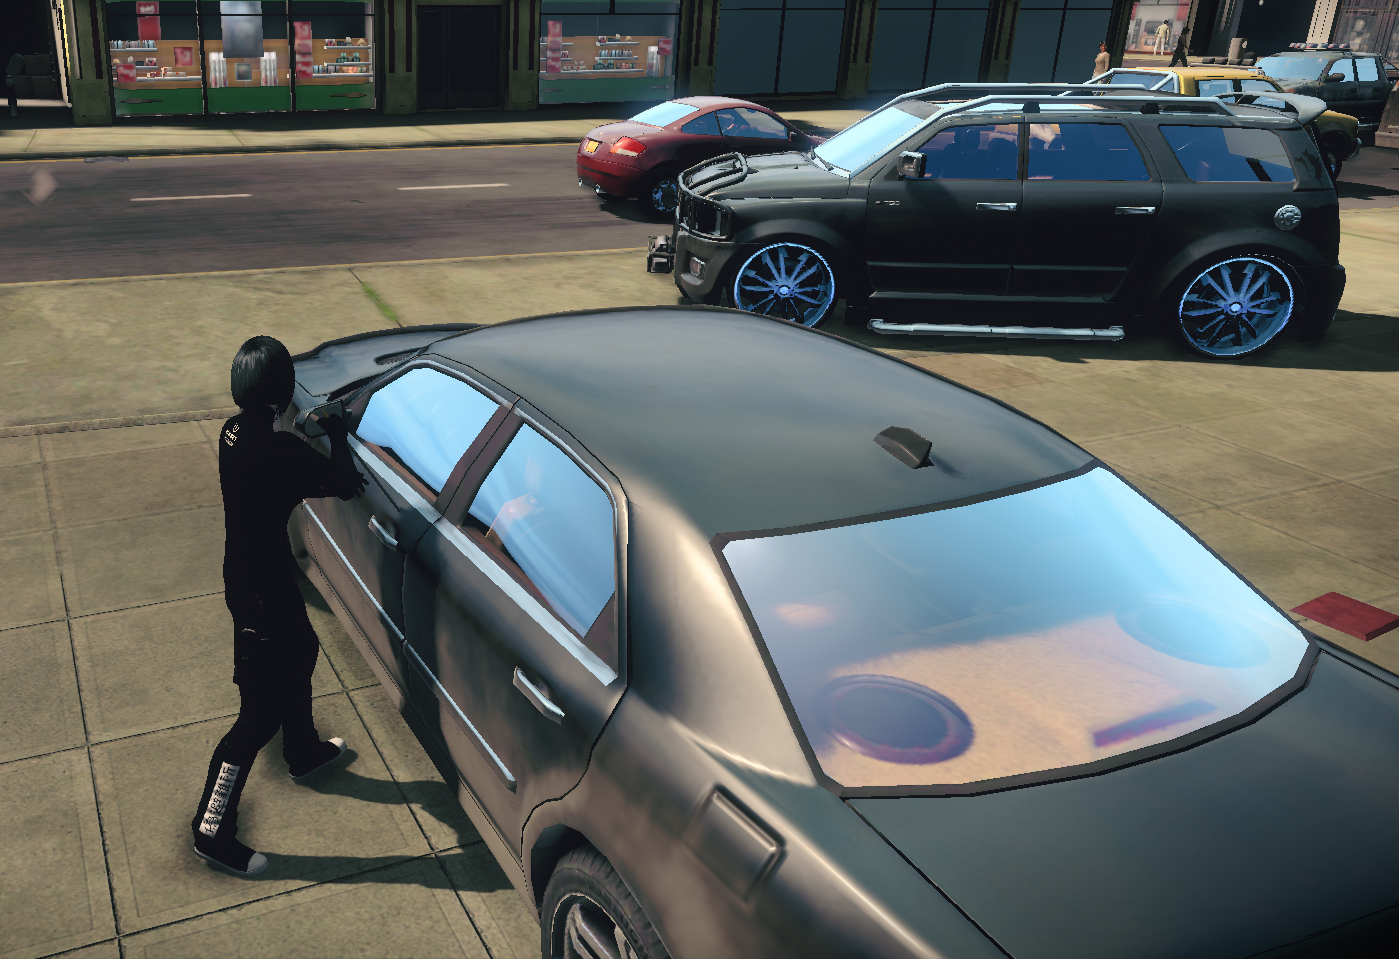
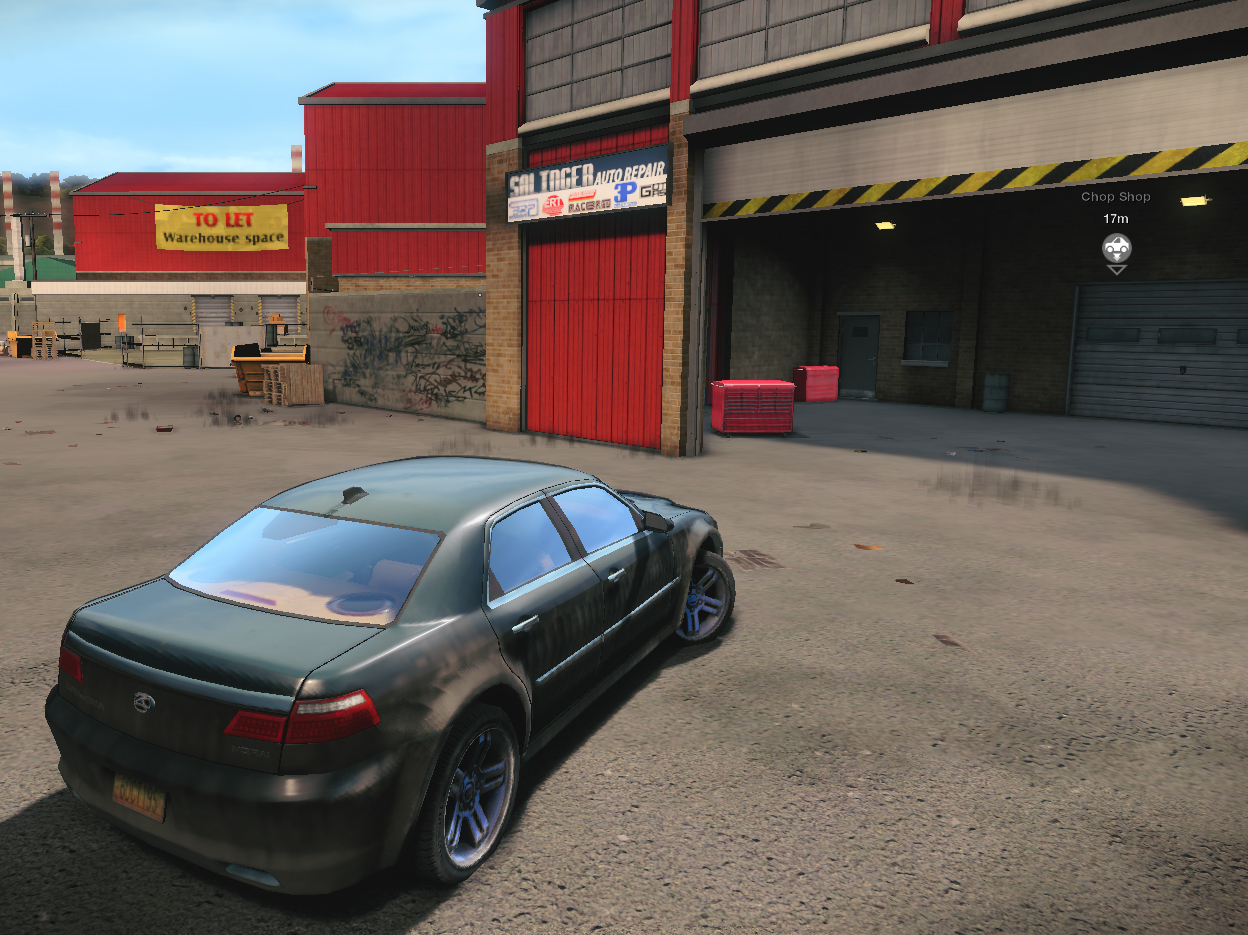
This largely works in a similar way, except that you just find cars to steal and deliver to Chop Shop markers around the map which grant you stash money depending on the condition of the car upon delivery and also what type of car it is, so make sure to fully repair prior to delivering.
The process of money laundering is the same and you can still be witnessed while doing this all the same.
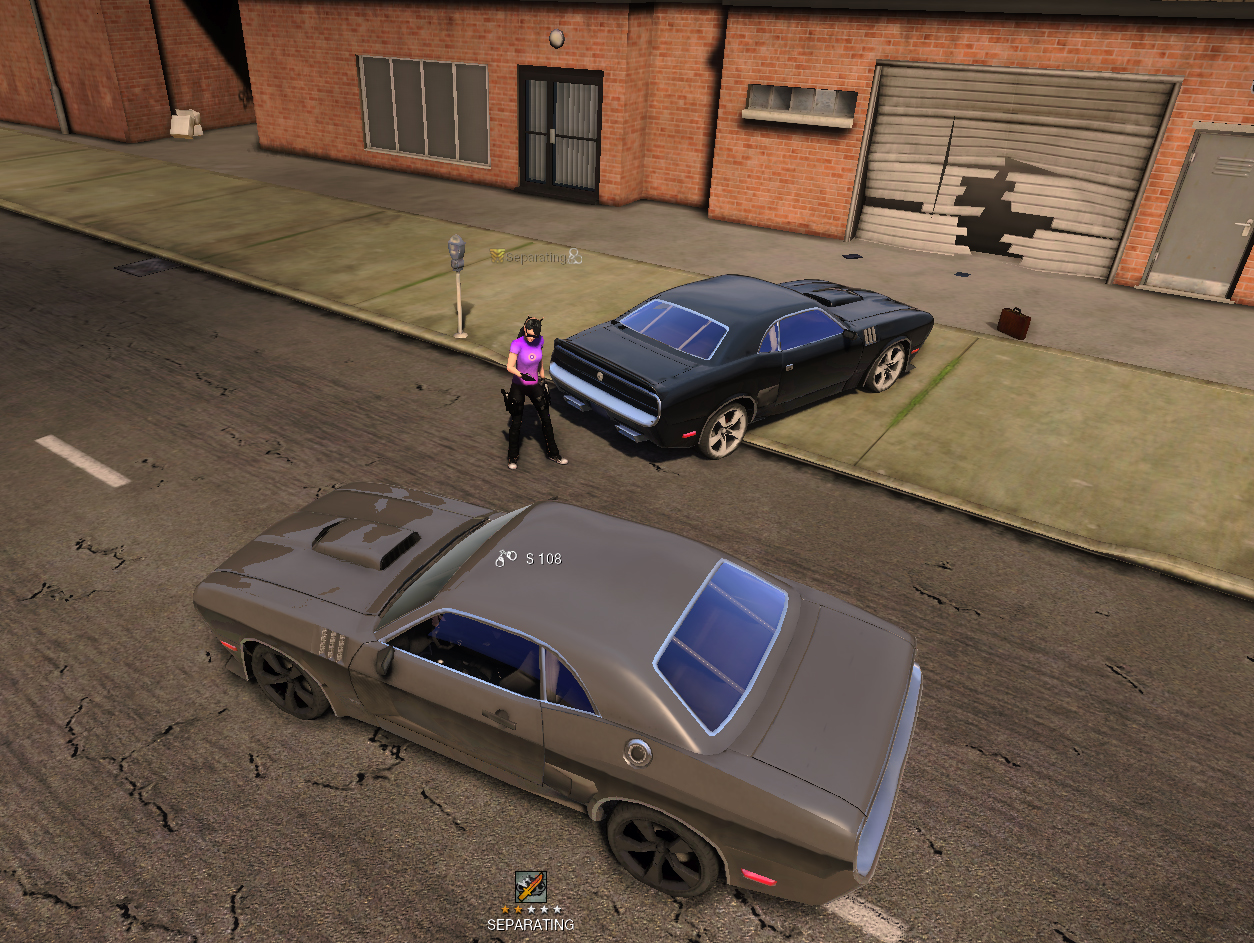
As an Enforcer you can stalk Criminals who commit crimes and witness them when prompted to. You will know when a Criminal player is able to be witnessed when a small cuffs icon appears next to their name. Simply aim at the player and press your witness button (Left Alt by default but you might want to double check your keybindings first).
You can pick up abandoned cars that were originally stolen by a criminal player to deliver them to an impound station which functions the same way as Criminals delivering them to a chop shop. These cars are marked as Usable - Stolen when you aim at them.
You can drop off their stolen goods to your own Enforcer contacts and then go to an Evidence Vault to collect your cash.
Chatbox and Chat Commands
The chatbox is used like in any other MMO game. You can type by pressing Enter on your keyboard. Alternatively you can press "Home" on your keyboard to open up a bigger version of the chat.
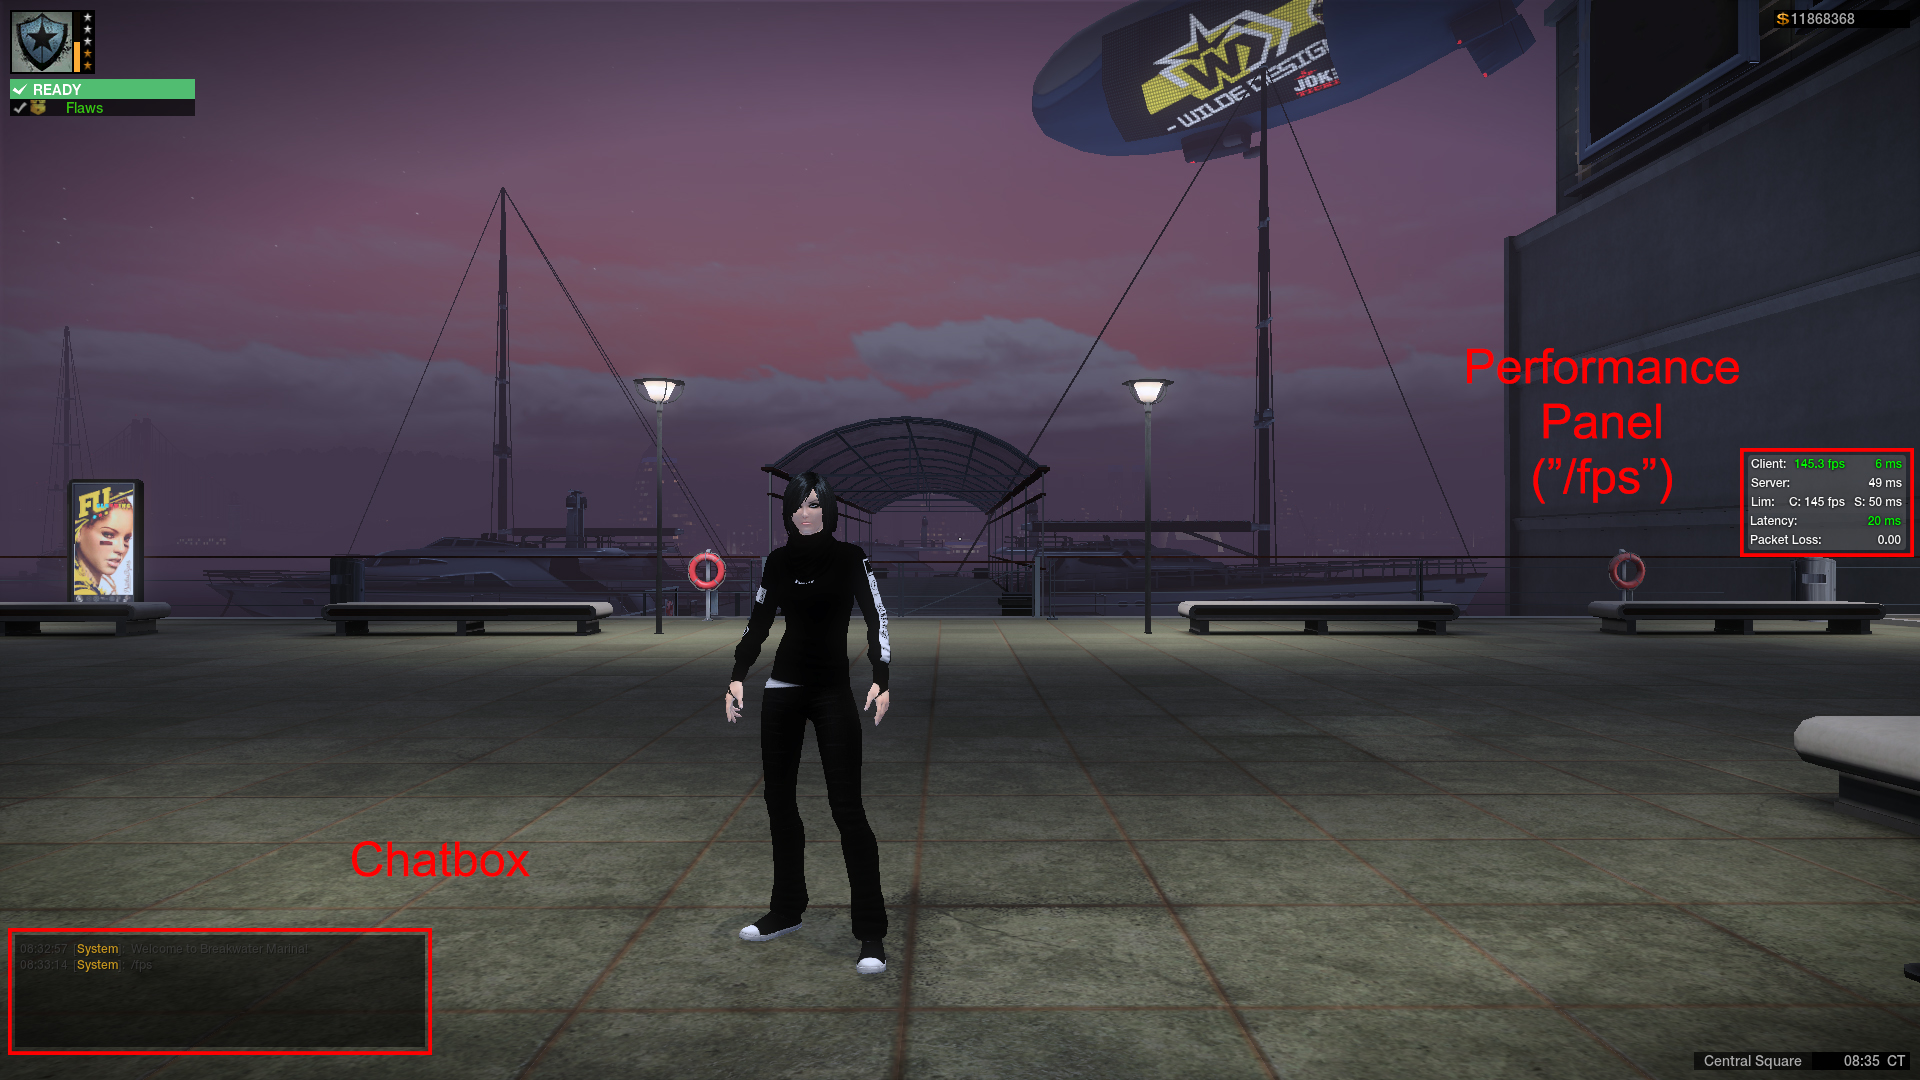
This is what the chatbox looks like once you press "Home":
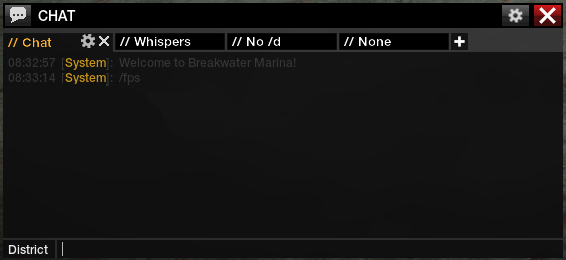
Here are the chatbox commands for switching chat channels:
/say or /s - Say (Chatting in close proximity around you)
/district or /d - District Chat
/yell or /y - Yell (Again, for chatting in close proximity around you)
/group or /g - Chat strictly between you and your group (not team) mates
/team or /t - Chat strictly between you, your group mates (if any) and your fellow team members.
/clan or /c - Chat strictly between you and all of your currently online clan mates.
/whisper <Player_Name> or /w <Player_Name> - Chat strictly between you and said player.
(example: /w Flaws Hi!)
/trade or /tr - Chat strictly between you and the person you are currently trading with (unavailable outside of on-going trade with a player)
/fps - Pulls up the Performance Panel (widely referred to as simply "slash fps") as shown in the screenshot above. It shows your FPS, your latency to the server, the server itself's connection and other things. Writing /fps once more hides that panel.
Important Note: You can answer other players' whispers to you by simply pressing "Backspace" on your keyboard! If you prefer writing it yourself, you can use /r <Message>.
You can create and delete tabs by clicking the + and then editing which chat channels appear in every tab by pressing the cogwheel. Like in my case I have a separate tab that only shows Whispers. Pressing X on a tab deletes it.
You can also personalize your chatbox colors and some other things. Pressing "Home" on your keyboard to reveal the big chatbox, you will see a cogwheel at the top right. Clicking it will reveal a menu where you can select "Options":
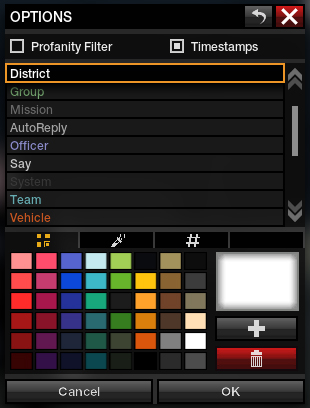
In this menu, you can select each chat channel's color individually as well as enable the "Profanity Filter" which censors any profanity in nicknames or in messages from other players across all chat channels and also enable/disable timestamps on all messages that you send/receive in the chatbox.
The arrow at the top right, next to the red X button, resets all colors to the default of the game, in case you mess your colors up.
Reporting Players
There are two methods of reporting players in APB: Through the interface which allows you to write a custom message or through a direct chat report if you don't want to bother with the UI.
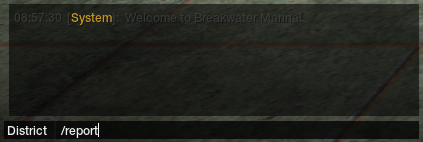
That command will open the following menu:
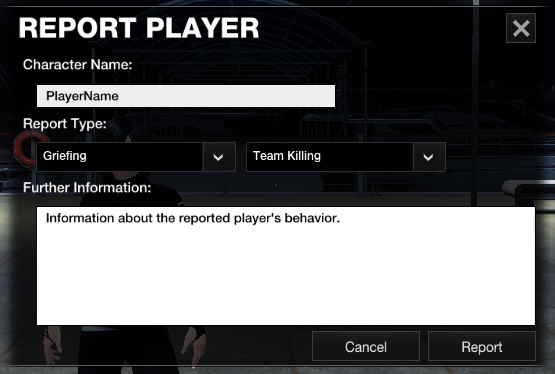
You need to write the reported player's exact nickname, then pick the offense you are reporting them for as well as a sub-category and explain very shortly what the player's behavior was that violates the APB Terms of Service. Then just click "Report".
Pro Tip: If you are trying to report a player with a complicated nickname or you are just lazy, you have more than one option to copy the exact nickname.
- Press TAB to open the scoreboard, click on the reported player's name and click whisper which will open the chatbox automatically and write out:
/w PlayerName
So then delete the "w" and replace it with "report" so you get:
/report PlayerName
and hit enter.
- Press HOME on your keyboard to open up the large chatbox window and click on the reported player's nickname on one of the messages they've sent (if any), then follow the same steps as instructed above.
- /report PlayerName car
- /report PlayerName character
- /report PlayerName cheating
- /report PlayerName communicationharrassment
- /report PlayerName dethreating
- /report PlayerName griefingharrassment
- /report PlayerName hatespeech
- /report PlayerName links
- /report PlayerName missionblocking
- /report PlayerName personalinfo
- /report PlayerName rmt (Real money trading)
- /report PlayerName song
- /report PlayerName spam
- /report PlayerName symbol
- /report PlayerName teamkilling
- /report PlayerName theme
- /report PlayerName vehicle
Advanced APB Launcher
APB has always had problems with its optimization since it's release: Low FPS, FPS drops, stutters, input lag, etc. As such over the past decade+, the community has come up with many ways to configure and tweak it to make it run as good as it can where in almost all cases that takes a toll on the overall graphics of the game. Configs can also provide some quality of life changes which I will cover in the next section of the guide.
There is very little that you can adjust graphics wise within the in-game video options, so alternative methods are required. The most popular utility players use to adjust their graphic settings for APB is the "Advanced APB Launcher" (AL). AL is software created by the APB player USPStyle that allows you to change every possible aspect of how your APB graphics look which in turn increases or decreases performance.
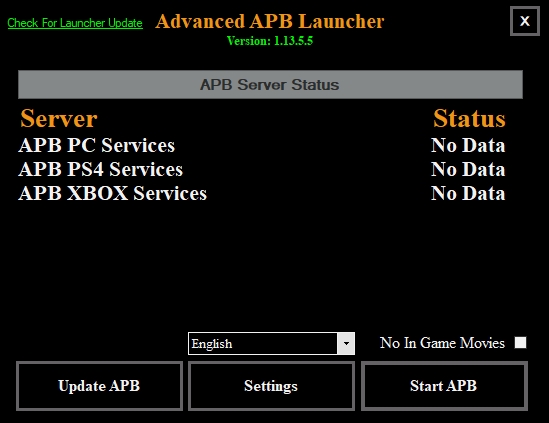
In essence, the AL is a simple interface that lets anyone edit basic .ini file values without needing any knowledge on tweaking game files:
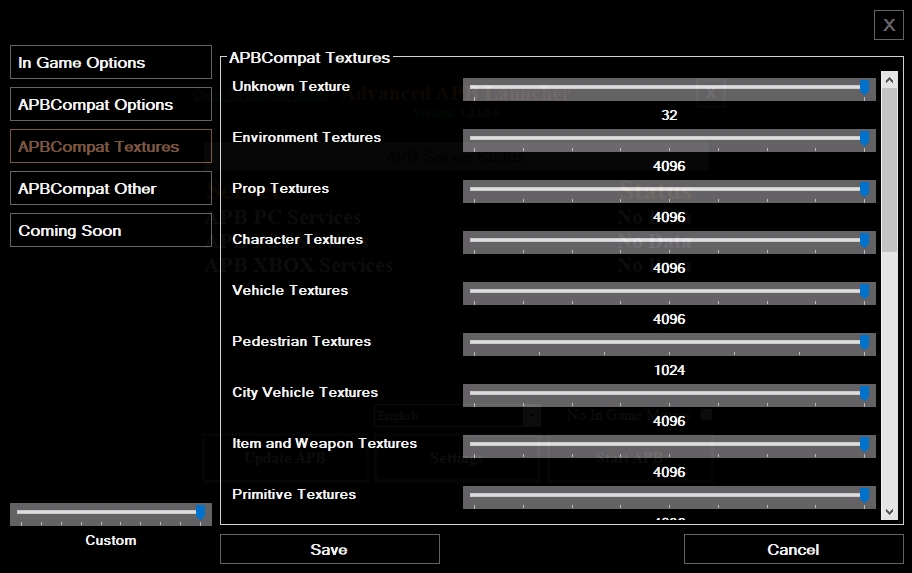
It automatically detects your graphics configuration file in your APB folder and directly edits it's values to whatever you pick within the AL interface. The file in question is APBCompat.ini located in APB Reloaded\APBGame\Config
AL also has the "No In Game Movies" feature which gets rid of in-game loading screens and movies which slow down game load times significantly. It's a neat feature but it can be achieved easily without AL as well (will cover that further below).
You can download the Advanced APB Launcher here[media.gamersfirst.com] (direct download).
In order to install it, simply copy paste "Game Launcher.dll" and "Advanced APB Launcher.exe" from the ZIP file over to your main APB Reloaded installation folder as shown below:
Typically found in C:\Program Files (x86)\Steam\steamapps\common\APB Reloaded
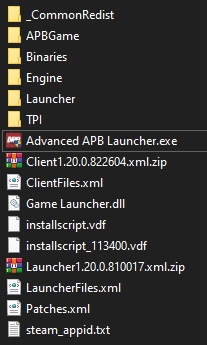
Keep in mind that you do NOT actually need to launch your game through the Advanced Launcher everytime in order to keep your customized graphics. Since AL edits APBCompat.ini inside the APBGame/Config folder, you can simply edit it with AL, save, then find the file in the folder and copy paste it elsewhere on your PC for future use.
Every time you launch the regular launcher of the game (the updater), it will automatically replace your edited files with the vanilla files from the GamersFirst servers (which you definitely do NOT want at this stage). So here are some tips on how to avoid APB updates from messing with your game:
- Navigate to APB Reloaded\Binaries and make a shortcut of APB.exe to your desktop.
- Setup your desired graphics with AL, save them and then find APBCompat.ini and make a copy of it elsewhere. (APB Reloaded\APBGame\Config)
- Every time there is an update for the game, simply open the updater and let it update, then close the updater and re-apply your APBCompat.ini file back in the APBGame/Config folder.
- Always launch the game from the newly created desktop shortcut which skips the updater and directly launches your game (yes, it does still fully function with Steam).
Important: If you wish to start the game without AL but you want to get rid of the loading screens and movies that slow down game loading times, simply right click the APB desktop shortcut and click Properties.
There look for the "Target" field and at the end of the file path, after the quotations, add a space and then -nomoviestartup as shown here:
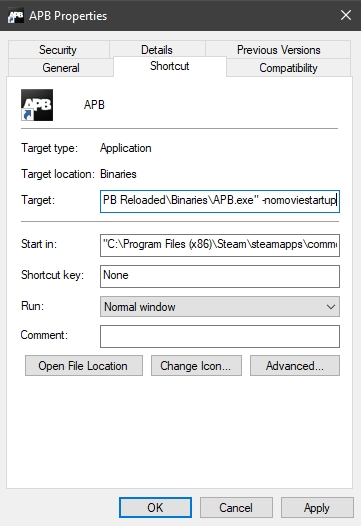
Ex. "C:\Program Files (x86)\Steam\steamapps\common\APB Reloaded\Binaries\APB.exe" -nomoviestartup
Make sure to have a space in front!
Alternatively, you could of course open up APBCompat.ini with a text editor (such as Notepad++) and adjust values manually but that's not recommended unless you actually know what you are doing.
Other Configs & Tweaks
Other user made configs for APB include but are not limited to:
- "Always Sprint" - You will no longer need to hold down Shift in order to Sprint. Holding down W alone will make you sprint at all times.
- "Hold Crouch" - You will have to hold down your crouch key in order to stay crouched. (Useful for peeking over cover quickly).
- "Mission Stages Description" - Changes the description of each mission at the top right to show each stage of the entire mission as they come and it highlights the stage you are on currently.
These configs are not available within AL but they can be accessed easily from my own public APB config available here[github.com]. I update it periodically when there are new improvements available to the general public. I've included everything that is currently allowed.
PSA for AMD GPU users
This is a known issue to the APB devs.
GamersFirst Anti-Cheat (GFAC) Error solutions
- Restart the game.
- Restart your computer.
- Open the APB Launcher/Updater, click Options and then Repair.
- Navigate to C:\Program Files\GFAC and launch Updater.exe (as administrator).
- Uninstall "GFAC Anti-Cheat System" from the Windows Control Panel then navigate to APB Reloaded\TPI\GFAC and launch "GFAC_Installer.exe".
- Uninstall APB and GFAC completely from your computer. Wipe both the GFAC and the APB Reloaded folders clean so there is no trace of them and install everything fresh.
If still none of this works you might have to contact Frosi LO (frosilo) directly in the official Little Orbit discord server[discord.gg].
Conclusion
For all information of everything APB related, I strongly encourage you to visit the community made APB Database[apbdb.com] (Special thanks to Speed and all the others who've contributed to it's creation.)
Unofficial APB Reloaded Community Discord[discord.gg]
APB Reloaded Forum[forums.gamersfirst.com]
APB Customer Support[www.gamersfirst.com]
Little Orbit Official Twitch Channel[www.twitch.tv]
APB Reloaded Official Twitch Channel[www.twitch.tv]
APB Reloaded Official Twitter
APB Reloaded Official Facebook[www.facebook.com]
I believe that I've covered the most important parts of All Points Bulletin and how to get into the game. I'd greatly appreciate constructive feedback about the guide and if anyone thinks I've missed anything or has any questions, I'd be happy to add more sections explaining those things and adding screenshots if need be.
I am a Streamer[www.twitch.tv] and YouTuber if you're interested in seeing more stuff from me.
- APB Reloaded - FREE CODES *2020*★ 5 (2.8k)57k views2.9k ♥1 minUpdated Apr 12, 2021
- (23rd January 2015 update) APB:R WEAPON GUIDE, TIPS, AND HOW TO AVOID NEWBIE TRAPS★ 5 (558)26k views637 ♥193 minUpdated Jan 25, 2015
- APB:R Vehicle Guide for the absolute dummy★ 5 (216)17k views236 ♥67 minUpdated Feb 4, 2015
- Totally awesome guide to git better at APB! [Beginner to Advanced]★ 5 (228)9.9k views218 ♥47 minUpdated Aug 31, 2024
- Как получить "OCA Nano".★ 4 (84)9.4k views96 ♥1 minRussianUpdated Jul 6, 2016
- How to not fight Golds (Also how to find bronze districts)★ 3 (43)5.7k views14 ♥2 minUpdated Jun 3, 2015


- Upgrading to PremiumTeam Fortress 2★ 5 (20k)1441k views11k ♥6 minUpdated May 11, 2022
- No More Room in Hell Official ManualNo More Room in Hell★ 5 (2.8k)569k views2.1k ♥29 minUpdated Apr 22, 2019
- NMRiH Community Hosting GuidesNo More Room in Hell★ 5 (526)351k views653 ♥1 minUpdated Aug 10, 2022
- ULTIMATE GUIDE FOR GAME DEV TYCOONGame Dev Tycoon★ 5 (5.8k)326k views10k ♥4 minUpdated 23 Jan, 2014
- How to 'Git Gud' Soon™MORDHAU★ 5 (2k)318k views3k ♥68 minUpdated Nov 16, 2024
- Лучшие кооперативные игры SteamPAYDAY 2★ 5 (1.5k)315k views2.1k ♥56 minRussianUpdated Apr 27, 2025






This guide was created by its original author on the Steam Community. Are you the author and want it removed? Request removal.