Beginners Guide to Rail
The Golden Rule
This is the universal rule when using rail, and will work in all situations. By placing a chain signal before a junction, and a rail signal on every exit, pathfinding issues are eliminated from your network.
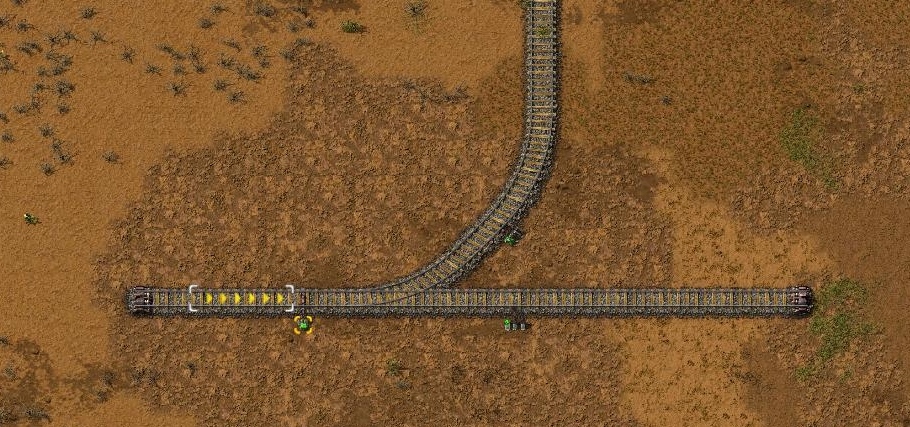
Rail Directions
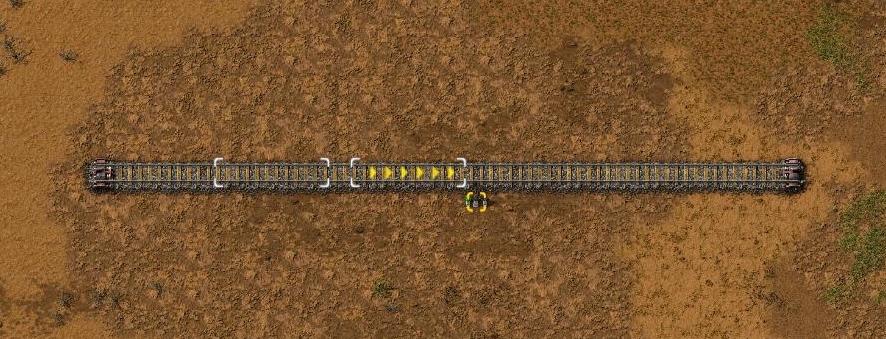 A rail signal placed above the track designates it one way in the direction right to left.
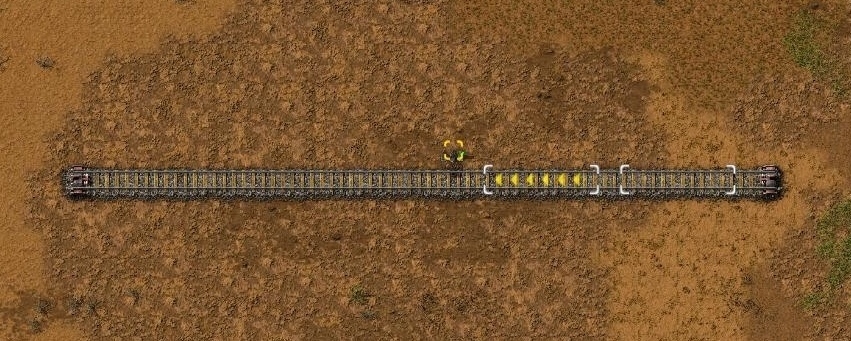 A track with a rail signal above and below designates the track two way (eg trains can go in both directions).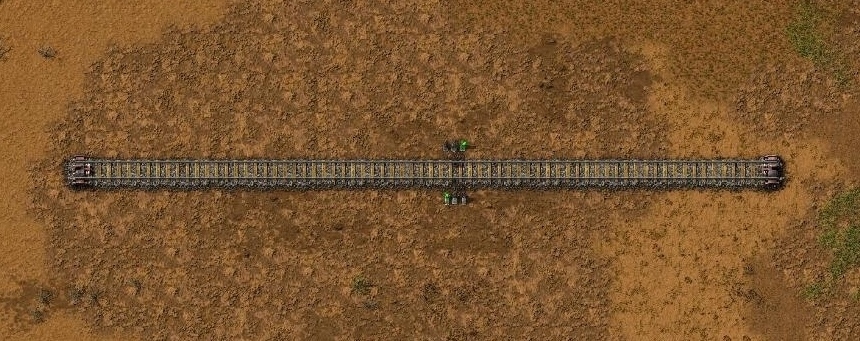
The white position, on the other side of the rail track, indicates the space to place the rail signal in order to make the track two way.
Rail Signals
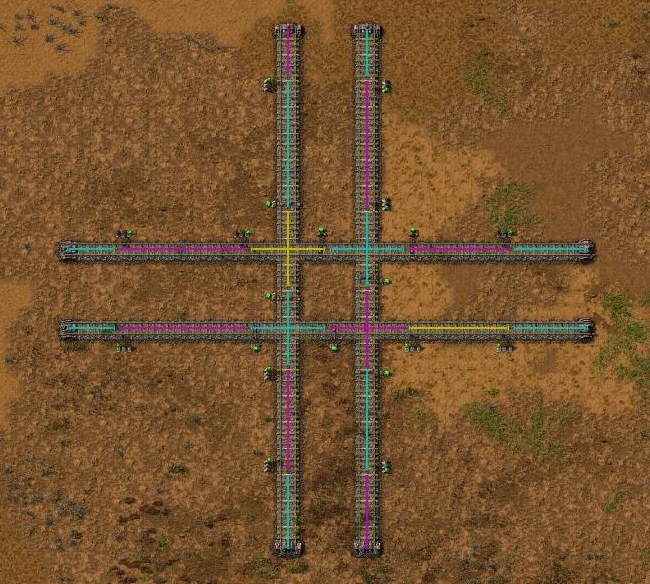 There are two types of rail signal in Factorio, the standard rail signal, and the chain signal.
The standard rail signal will be open (green), provided the next block is free (no train present).
The chain signal will be open (green/blue), provided the next block is free and the next signal after it is open.
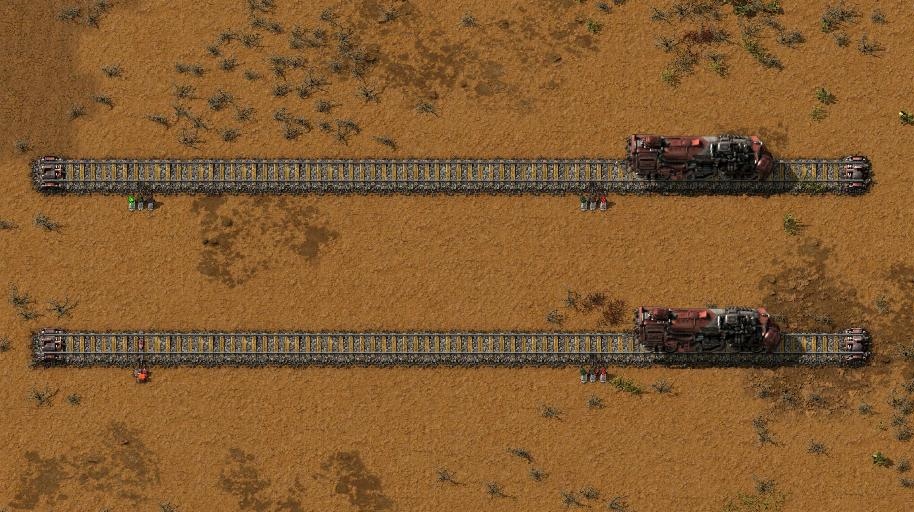
Since a chain signal reflects the state of the next signal, they are especially helpful in preventing blockages in busy segments of track. They can be incorporated easily by using the Golden Rule; Chain Signal In, Rail Signal Out.
The colours of the signals areGreen-Next block is free
Red- Next block is not free
Yellow- Next block is reserved for that train (all other tracks that cross, their signals turn red)
Blue (only chain signal)- Some blocks are available for the train, but some are not. Train will continue on it's route, provided the next signal on it's route is open.
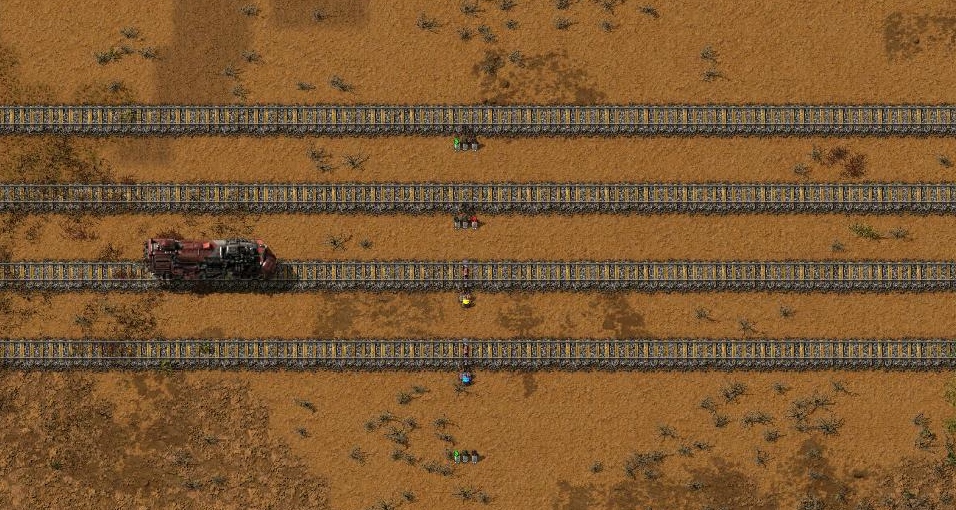
A flashing signal indicates it is unable to divide the track. Either the track needs another signal somewhere, or the signal needs repositioned.
Track Designs and Junctions
There are pros and cons of each track type, one way vs two way, and different track designs.
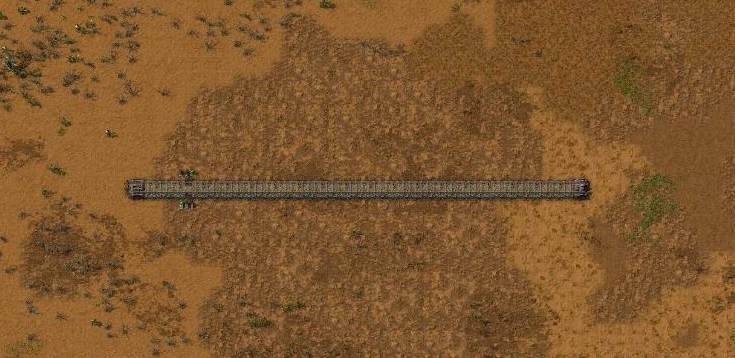
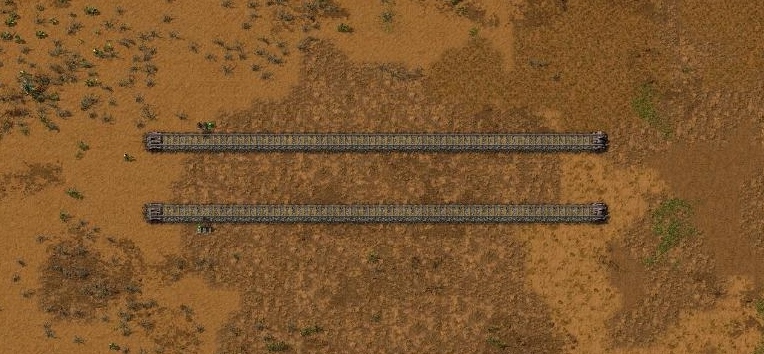
It is useful to include electric poles within track designs, as electricity will be needed to power buildings at outposts and resource patches.
Track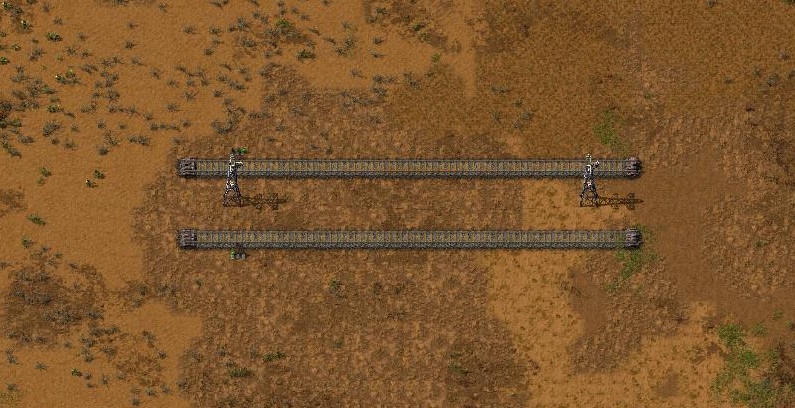
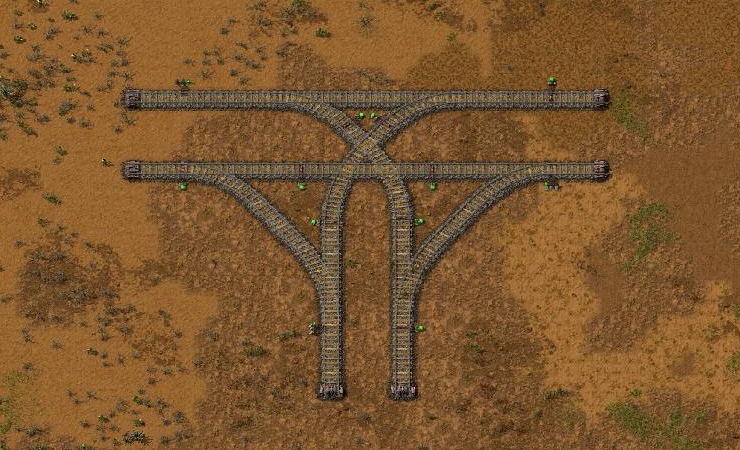
Junction
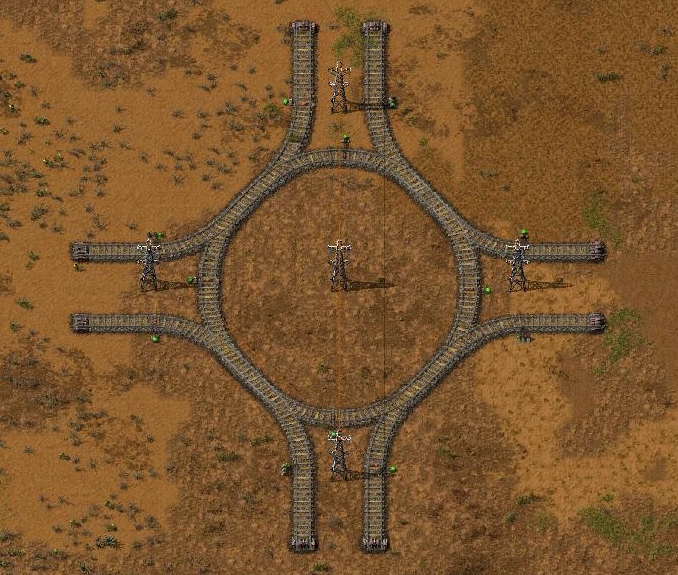
Roundabout
Stations and Train Designs
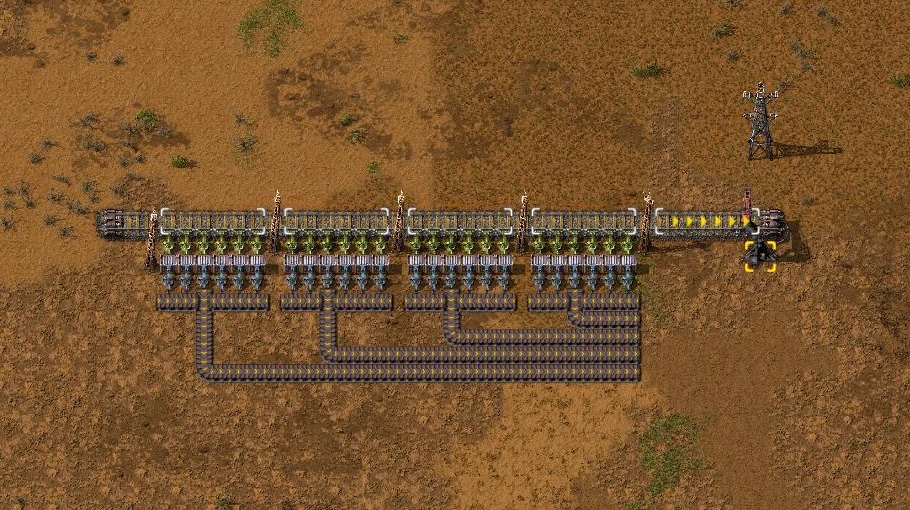 Two way track, requires a train to have two locomotives; one at the front and the other at the back. It will travel into the station, loads/unload, then travel back out along the same track.
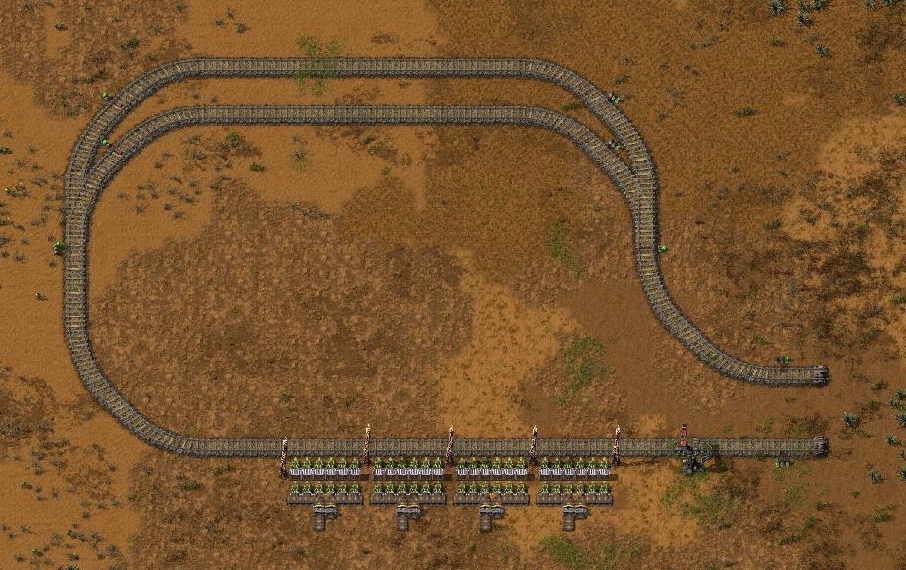
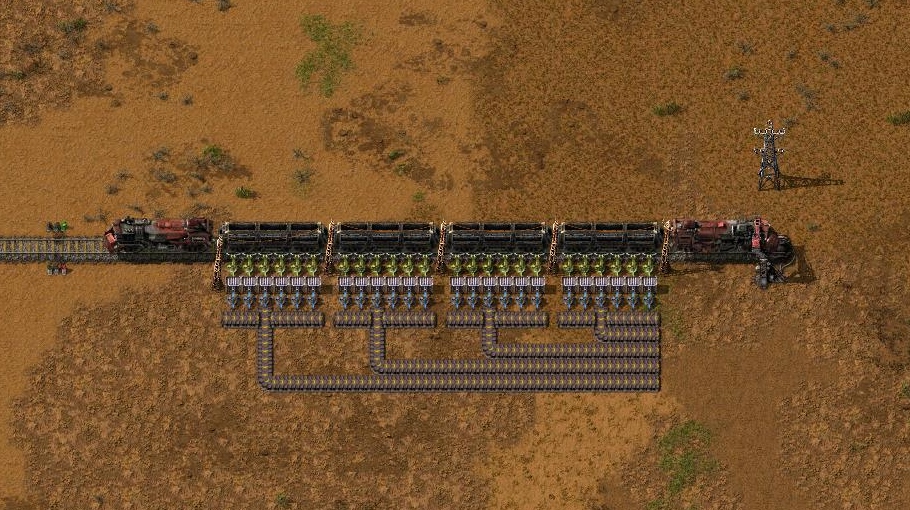 One way track, requires a train to have a single locomotive at the front. It travels into the station, loads/unloads, then the track is looped back onto the main rail system.
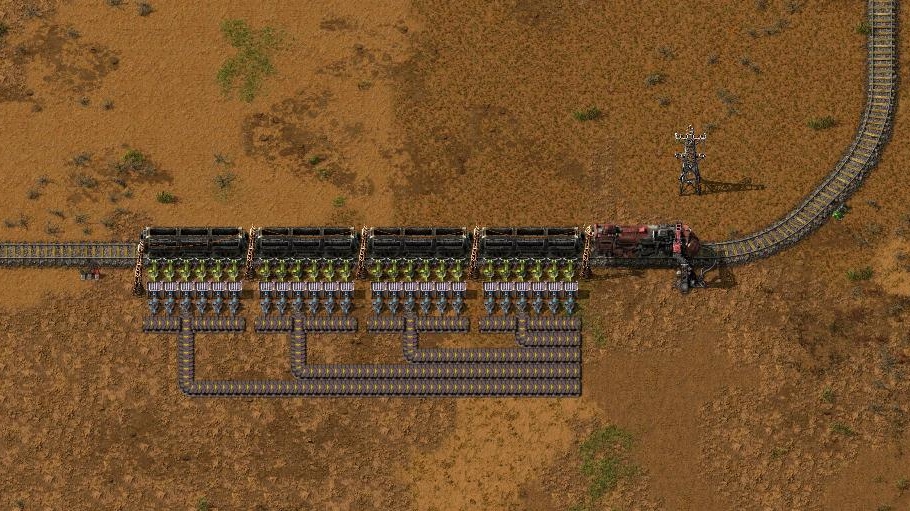 Ideally stack inserters are used when loading and unloading trains, as they are efficient at moving large amounts of items. Locomotives require refuelling too.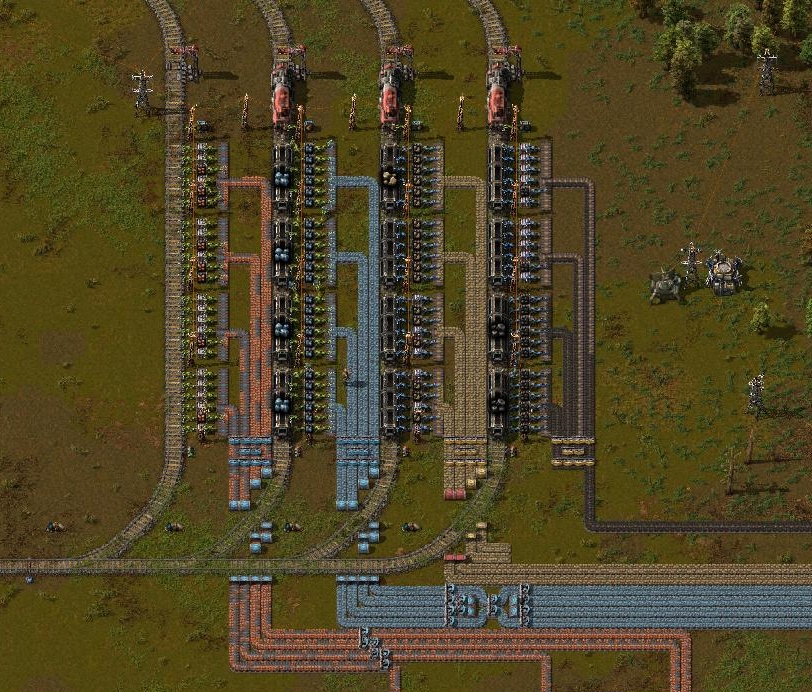
The default game setting is 1-4 (one locomotive and 4 wagons), however faster trains can be created using more locomotives, or more wagons could be included for greater capacity. Higher grade fuels can also be used to boost locomotive speed and performance.
Stackers
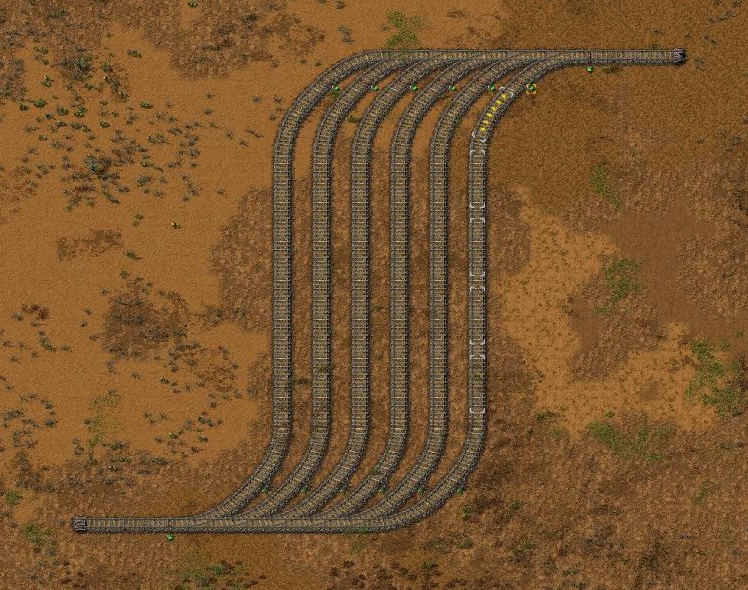
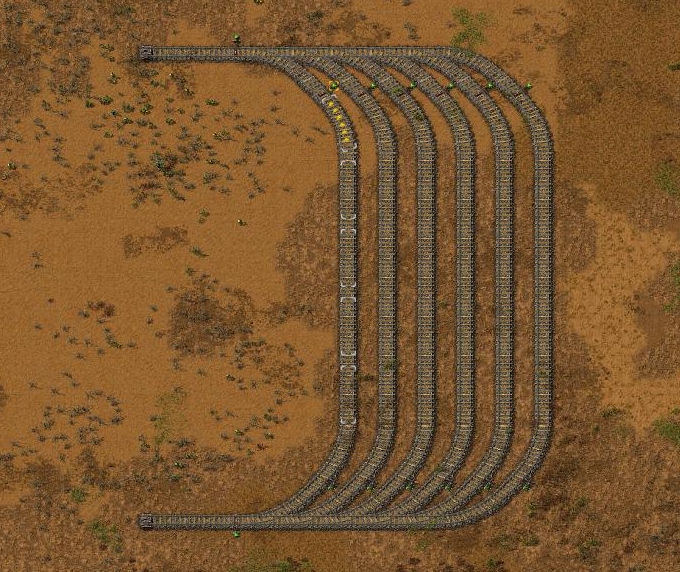
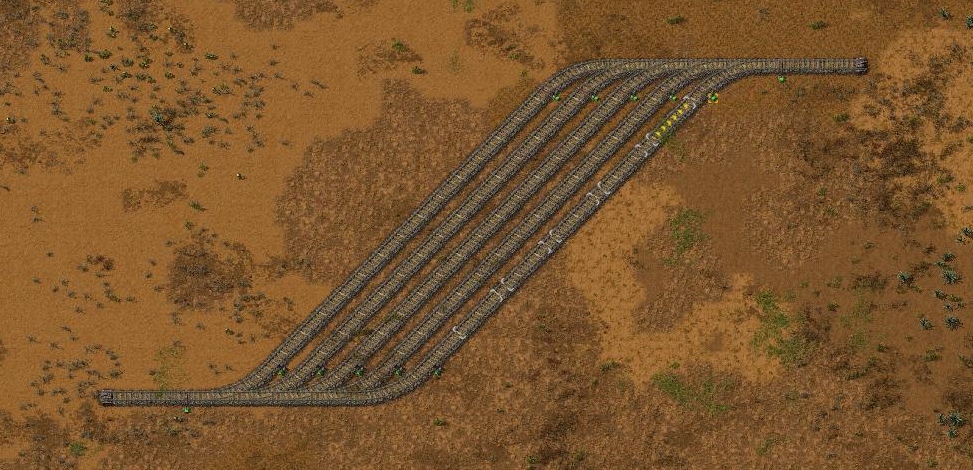
The design uses a chain signal to determine if there is space within the required parking slot without blocking the junction. Each parking space has a standard signal at the entrance, and a chain signal at the exit.
Note the chain signal at the exit, is one of the few times where the golden rule is not applied in the same way as before, especially if multiple stations are used. When a train is in a stacker, the idea is that it will only leave when there is space available down the line. The required rail signal(s) will be inserted further ahead, and will open up (when a space becomes available), and relay it's status to the chain signal within the stacker. So the exit for a stacker is a chain signal, until the end position, which will then be a rail signal.
One Way Station with Stacker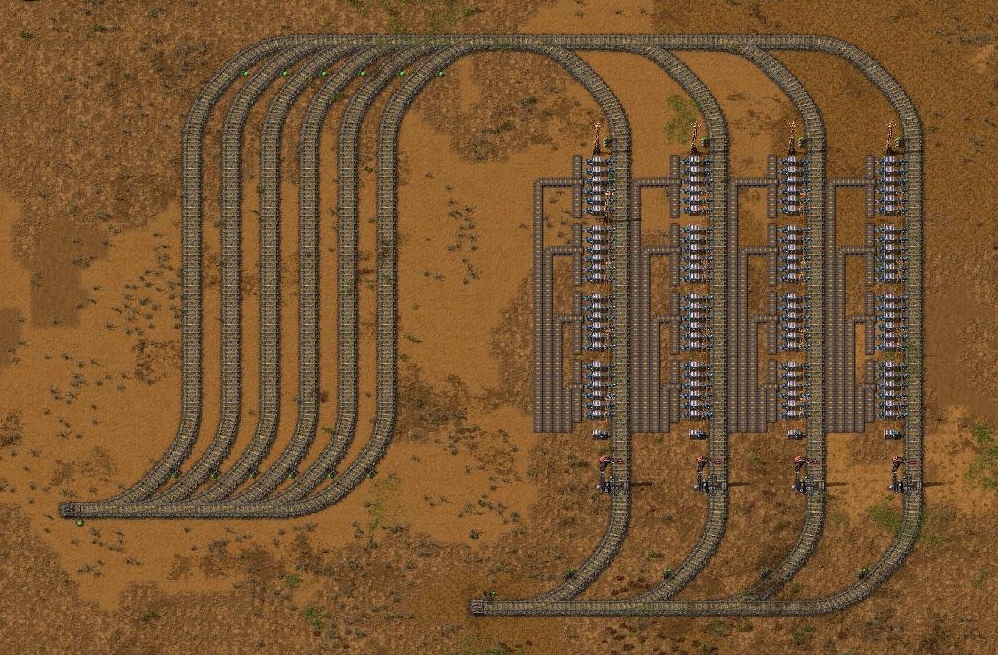
In this example, the golden rule has been applied, by placing a chain signal for every entrance into a junction, and a rail signal for every exit.
Station Outposts
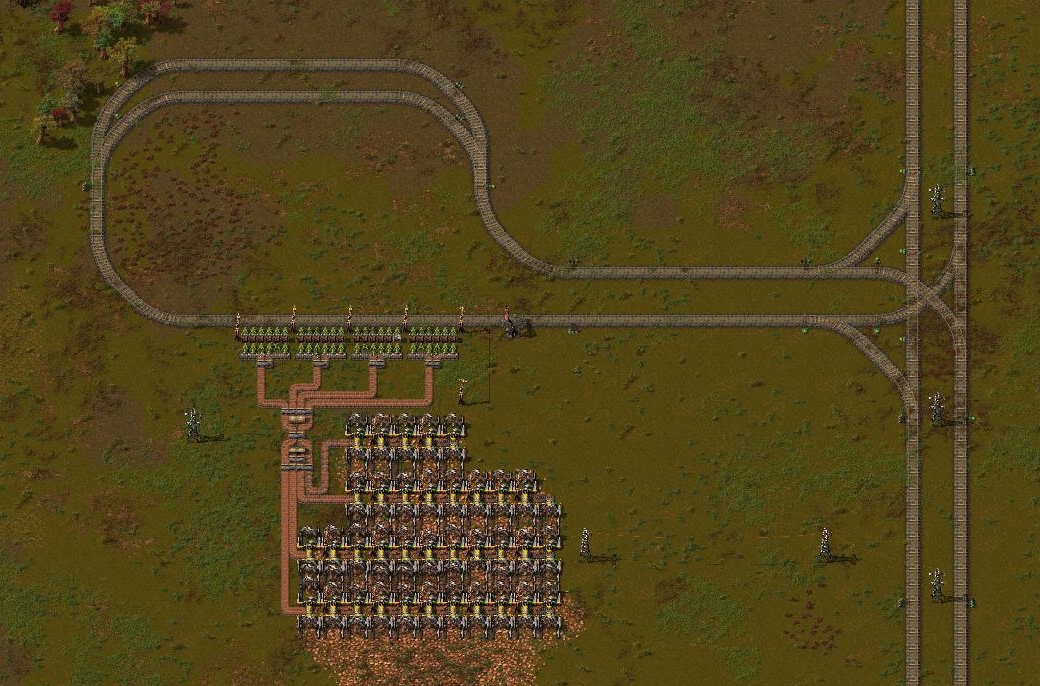
It is also useful to include "Belt Balancers" whenever loading or unloading trains. These will evenly distribute resources amongst all the belts, removing the risk of costly time delays that can arise through bottlenecks.
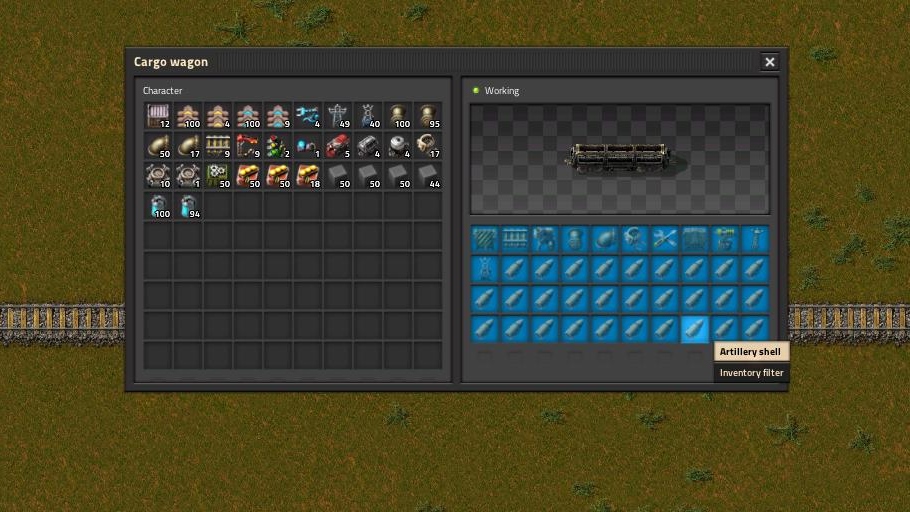
Station Names and Limits
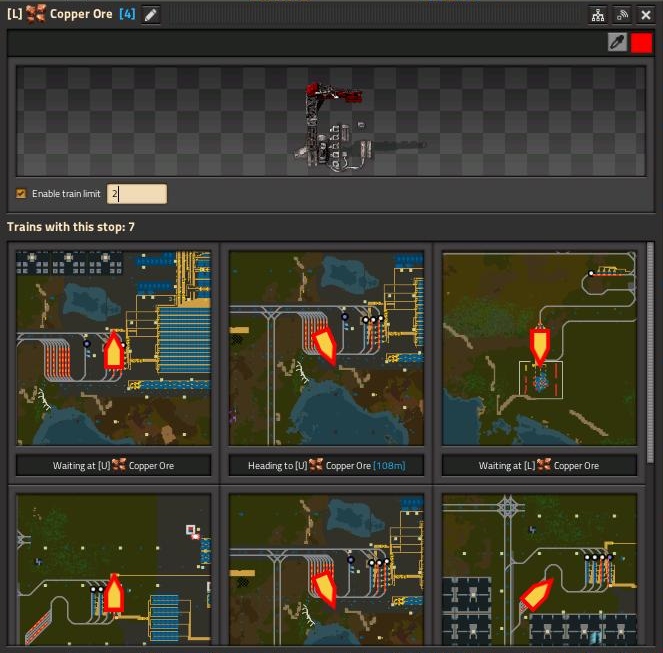
The game facilitates this feature further by allowing limits to be placed on the number of trains that can visit individual stations. For example, by giving a train limit of 2 for a specific station, this means only 2 trains can be accommodated there at any one time. So if there are 7 trains in total that have the same route, 2 will visit that station and the other 5 will go to other stations. This makes full use of the network and their capacity.
The limit feature is a very useful tool within Factorio, as without it trains will always go to the nearest station within their route.
Wait Conditions and Circuit Network
Aside from the standard "Full Cargo" and "Empty Cargo", there is a large range of wait conditions that can be used to control trains. A specific time could be used as a condition, a number of items within the cargo could be used, or even a combination of several conditions.
Several separate conditions could be used using "OR", or multiple conditions together using "AND". For example, the train only leaves the station when there is at least 1,000 iron plate "AND" 50,000 sulphuric acid present. The train leaves when both of these conditions are met, as shown in the picture.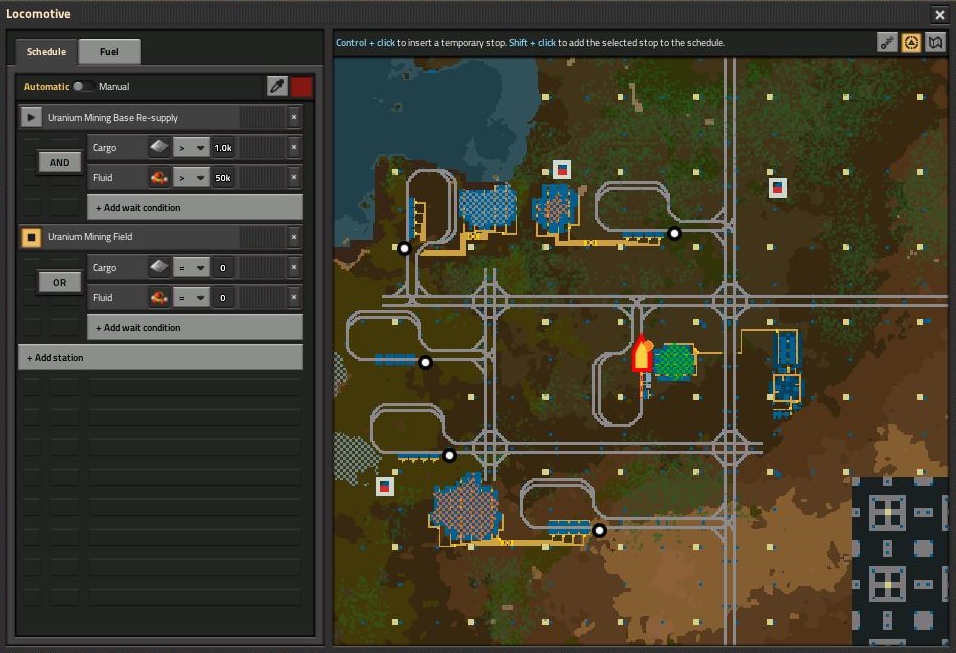 More complex conditions can be set up using circuit network conditions. Connect a station to the circuit network by selecting either the green/red wire, and hooking it up to signals. Stations can also be turned on and off using the circuit network. This could be useful for stations that are resupplying specific items to locations eg defence or energy requirements. For example station turns on when solid fuel is less than 300.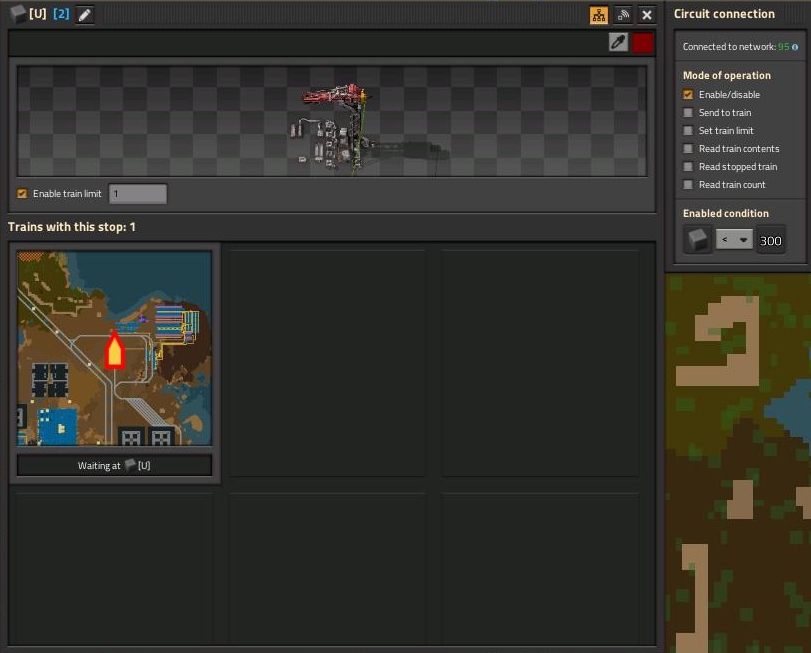
Depots
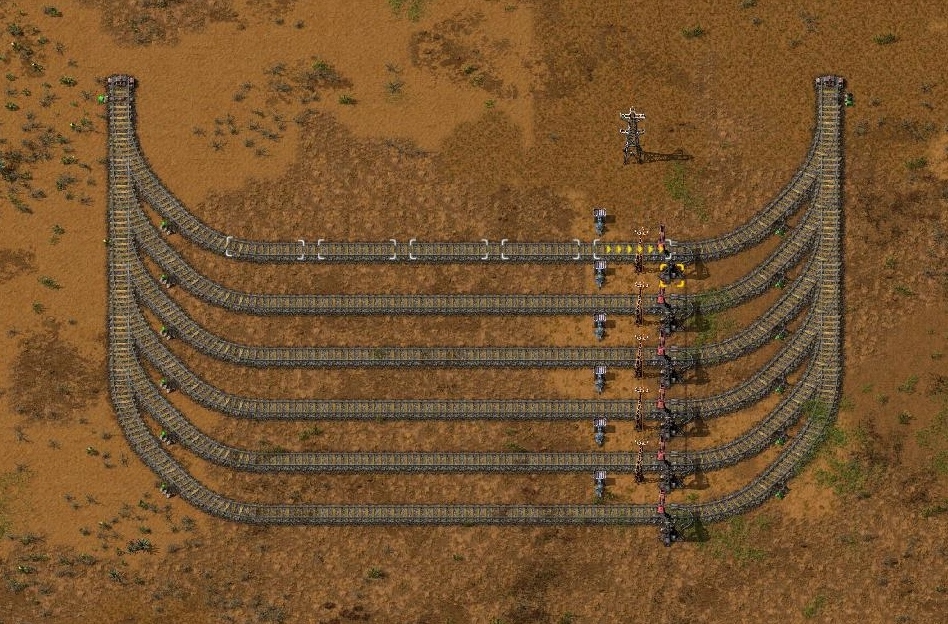
Each individual station at the depot has a train limit of 1. A time passed/inactivity wait condition provides the opportunity for refuelling.
Rail Network Overview
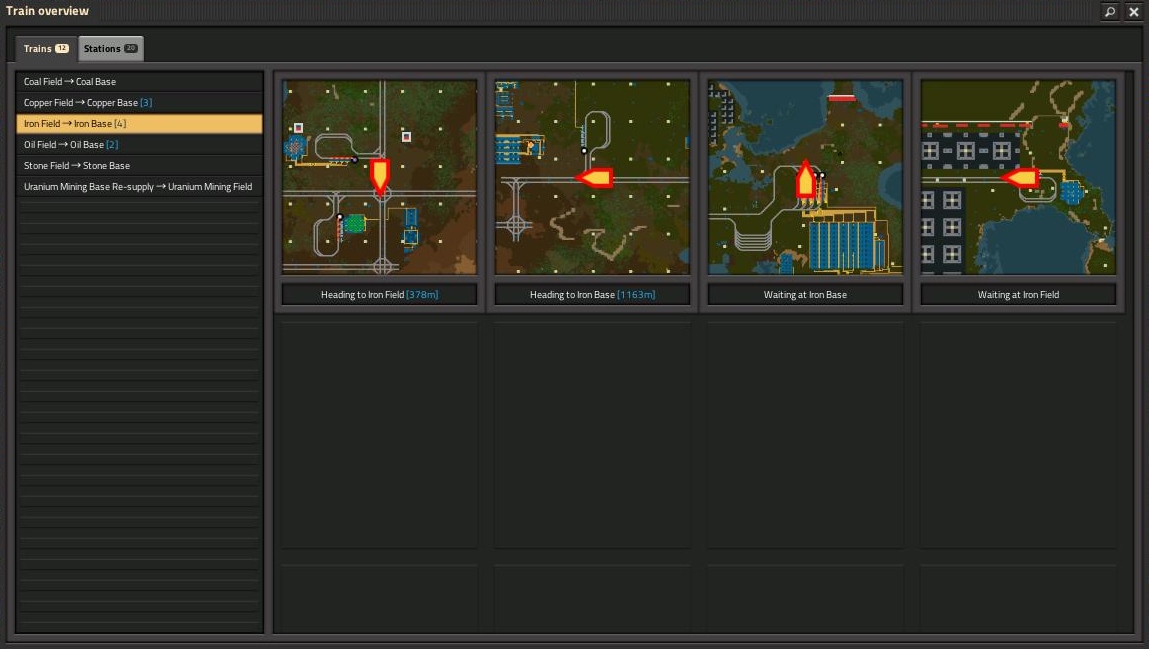
Remember to change a train's route fast, on a locomotive, "Shift+Right Click" copies a train route, "Shift+Left Click" pastes a route to a train. This is a time efficient way for changing many train routes efficiently.
It is also possible to set up temporary stations, to direct trains to certain parts of rail, by using the command "Ctrl+Left Click" on the map screen. This can be helpful, as it enables the player to use a train, to taxi them automatically to a specified destination (saves time).
Dynamic Stations (Beyond Beginner)
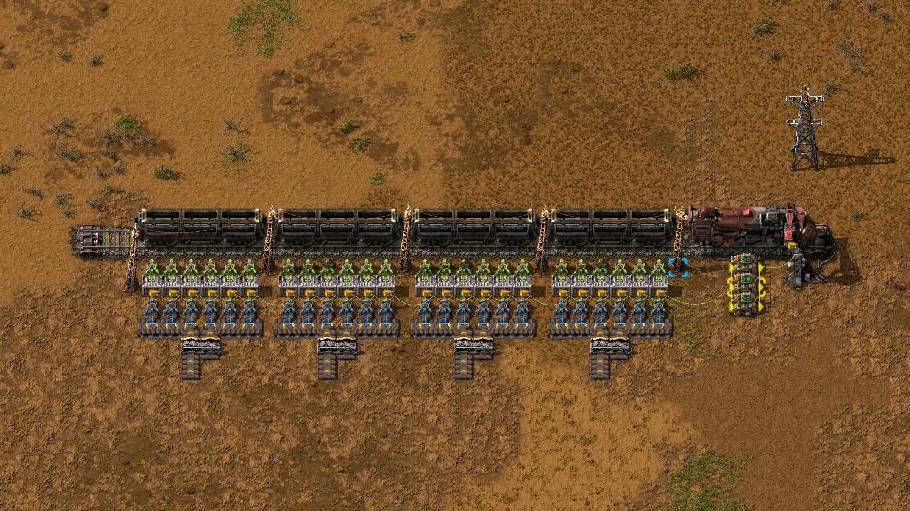
The easiest way to set this up is to link up all the boxes at the station to the circuit network, and connect them as input to decider combinators. The decider combinators will monitor the levels within the boxes and output a signal (L), when a certain amount has been reached. This output signal will be the "dynamic train limit" for the station, and will vary depending on the levels of resources present.
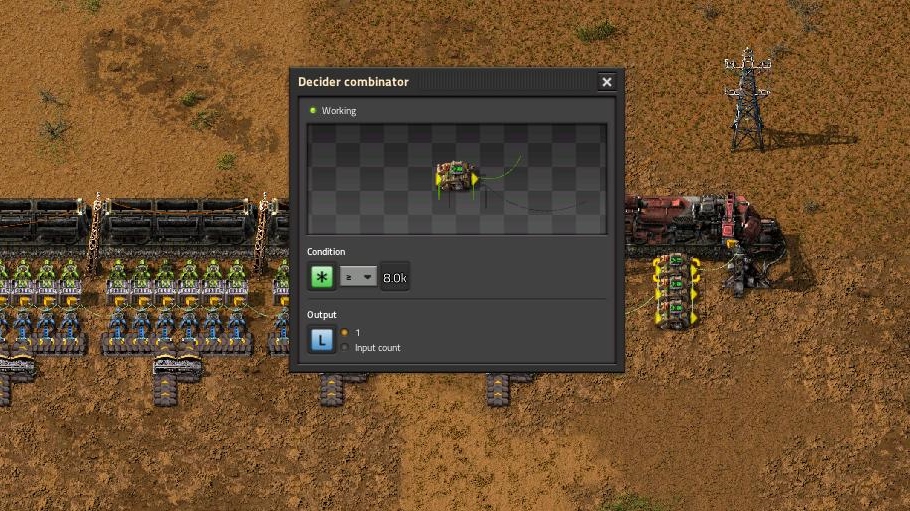
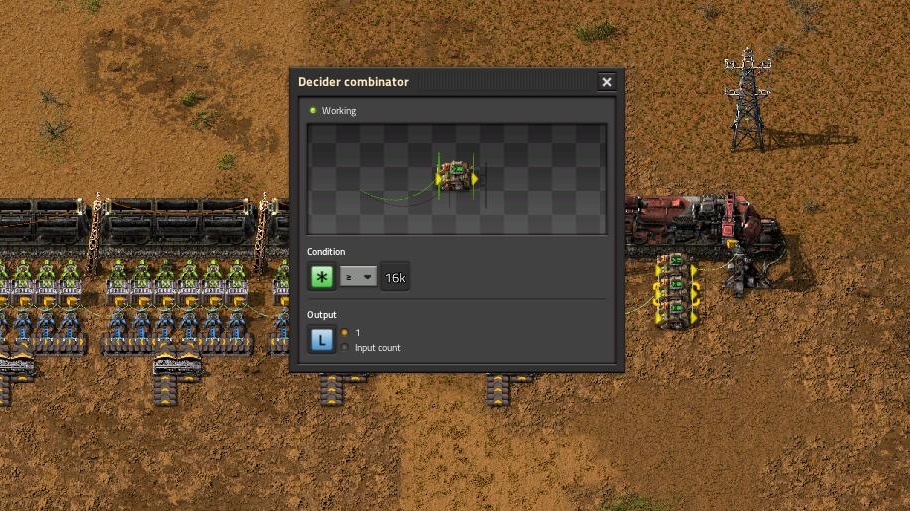
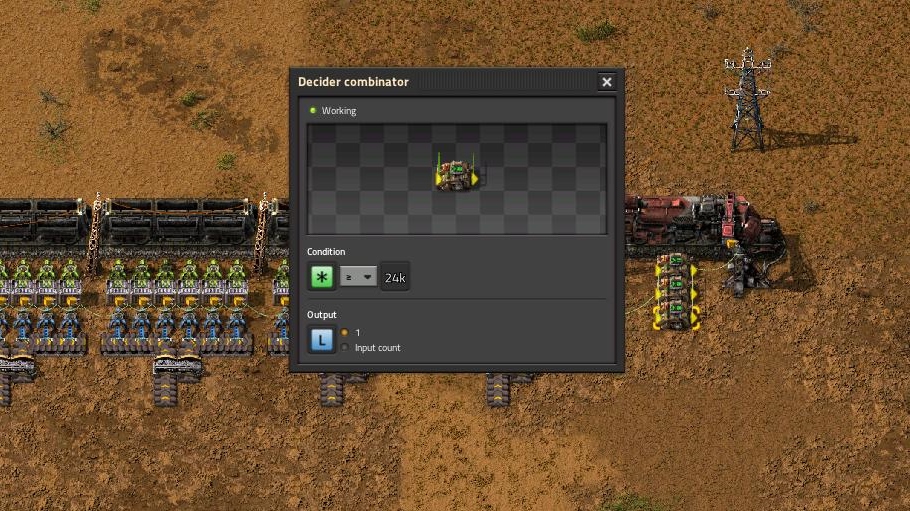
It takes 2K ore to fill one train wagon. So when there is enough resource available to fill one train with four wagons (8K), one decider combinator will output L, resulting in a train limit of 1 for the station. Since signals add up on the circuit network, when the 16K level is reached, another combinator will output L, so L is now 2. The more resources that are available at the station the higher L will be. The train limit will never be more than 3 in this example as L can never be more than 3.
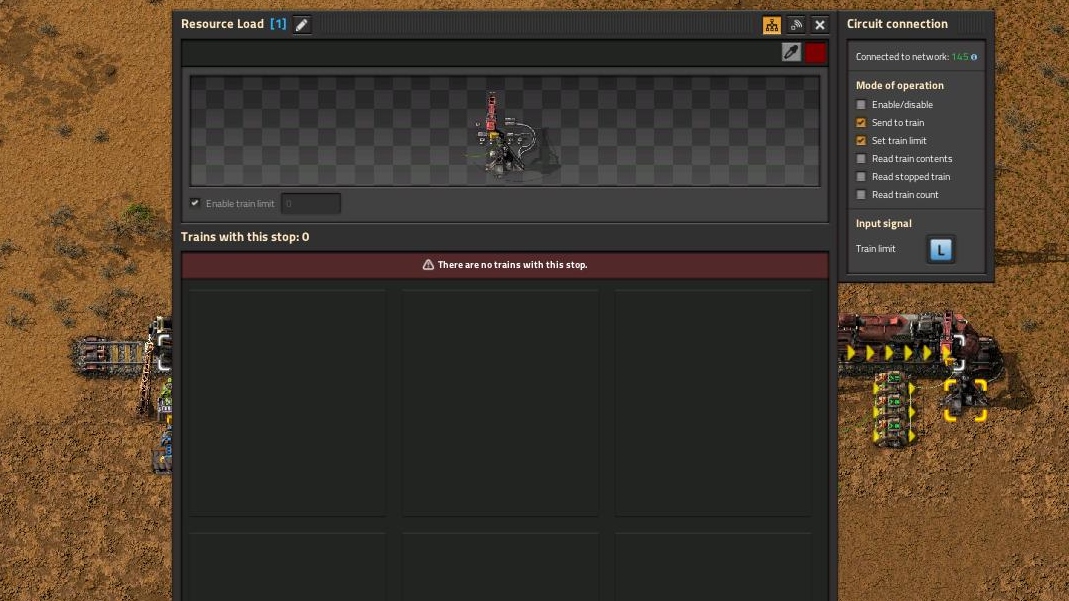
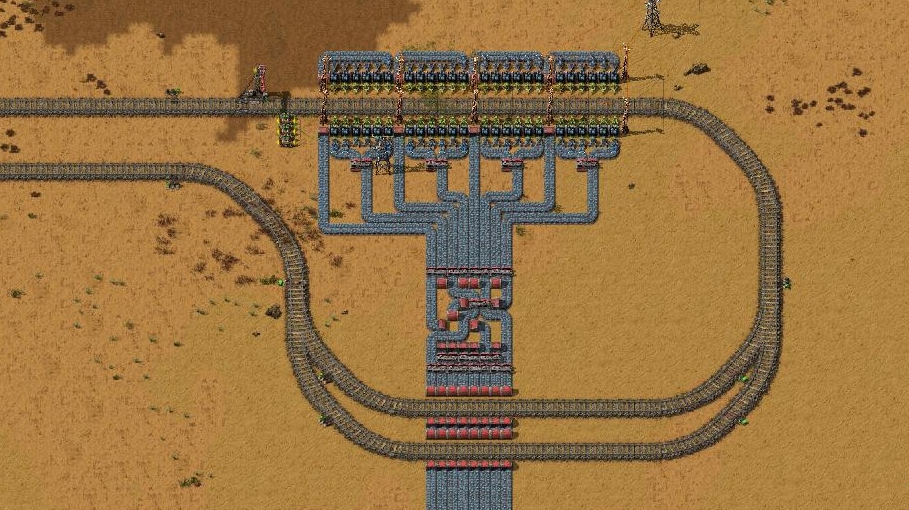
It is essential when using dynamic stations, that there is a depot present within the train system. If resources run low, there is the possibility of traffic jams occurring, as trains may not have a destination to go to after unloading their resources.
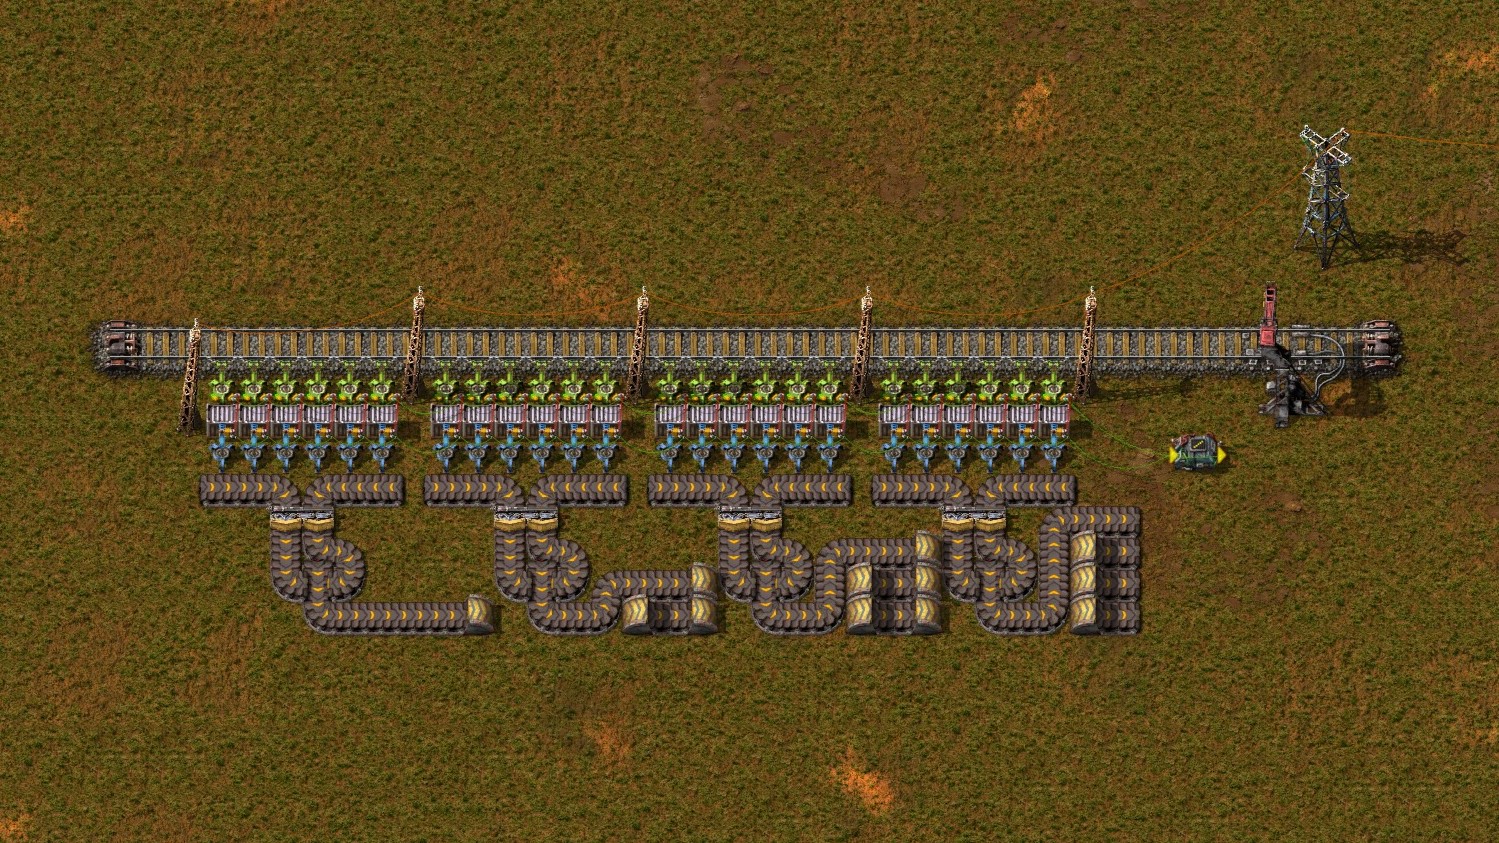
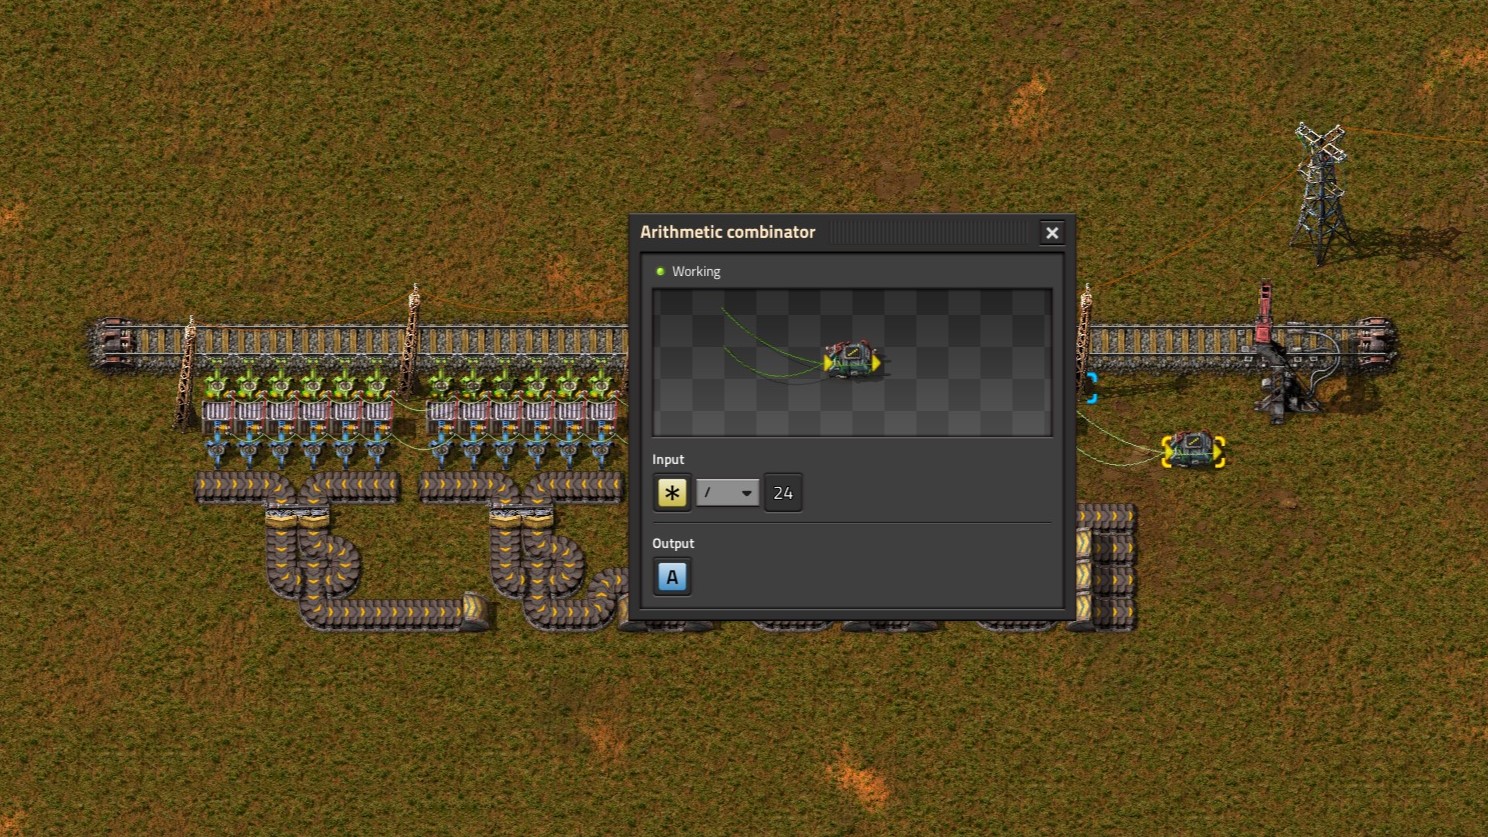
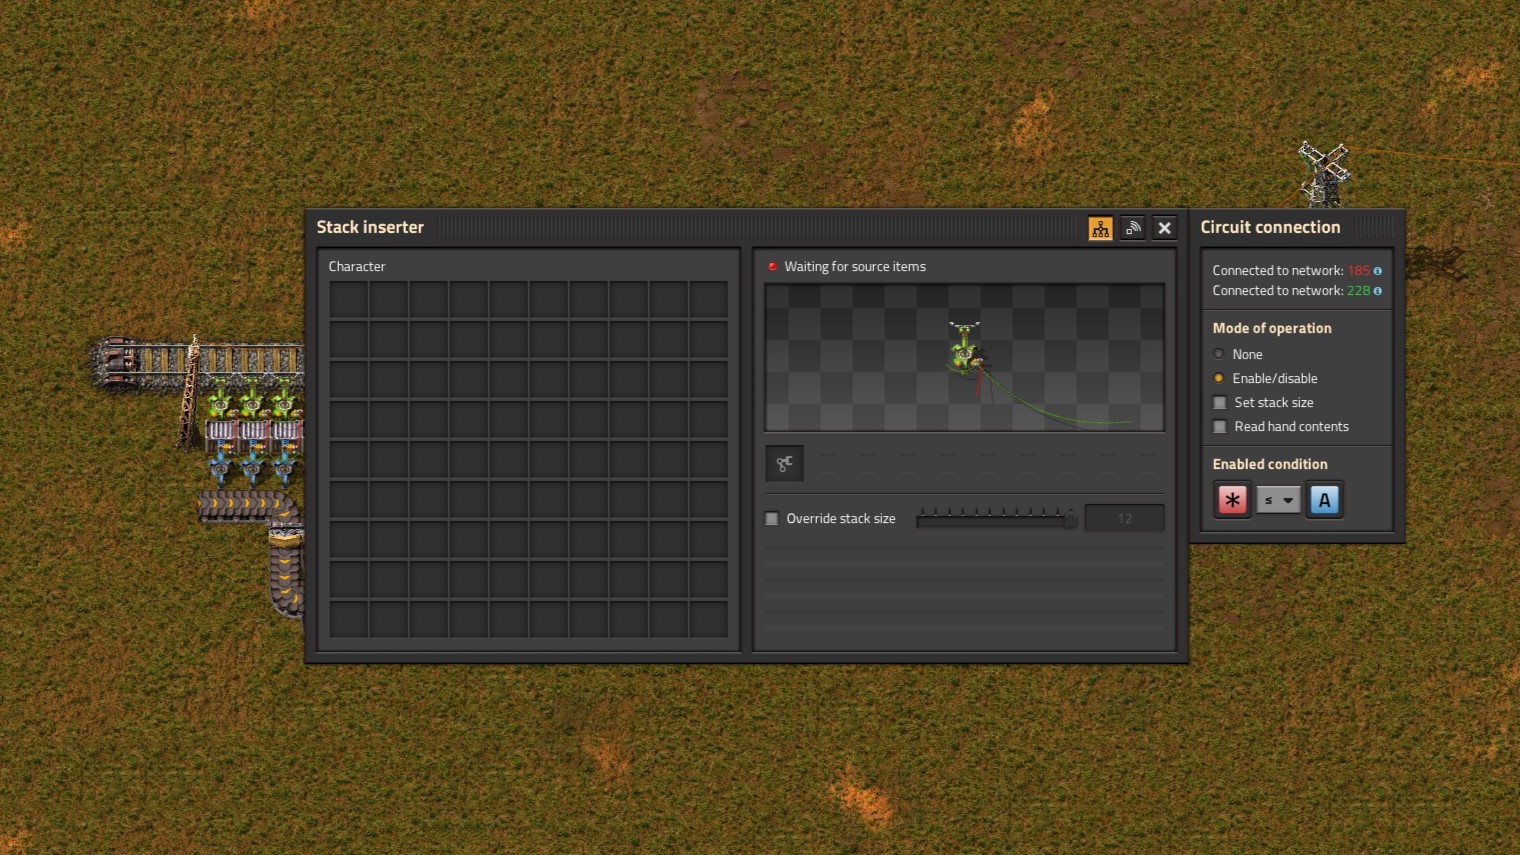
By hooking up the inserters that unload the train to the circuit network, then adding up all the station box contents and obtaining the average; it is possible for extremely efficient train unloading, as the inserters can be told to only operate if their box is equal to or below the average.
Final Thoughts
- Factorio: How to Build a Main Bus★ 5 (6k)231k views15k ♥15 minUpdated Aug 31, 2025
- Factorio: Observations, Tips, Tricks, & Efficiency★ 5 (3.2k)111k views7.1k ♥85 minUpdated Aug 4, 2020
- Blueprints for early, mid and lategame (updated)★ 5 (757)83k views2.4k ♥3 minUpdated Sep 3, 2022
- Factorio - Everything To Do With Smelting: Belt & Bot Based★ 5 (629)80k views1.6k ♥16 min
- Factorio Builds★ 5 (1.1k)63k views2.7k ♥5 minUpdated Jun 7, 2021
- High-Level Strategy for New Players★ 5 (880)62k views2.8k ♥43 minUpdated Oct 15, 2025

- Upgrading to PremiumTeam Fortress 2★ 5 (20k)1441k views11k ♥6 minUpdated May 11, 2022
- No More Room in Hell Official ManualNo More Room in Hell★ 5 (2.8k)569k views2.1k ♥29 minUpdated Apr 22, 2019
- NMRiH Community Hosting GuidesNo More Room in Hell★ 5 (526)351k views653 ♥1 minUpdated Aug 10, 2022
- ULTIMATE GUIDE FOR GAME DEV TYCOONGame Dev Tycoon★ 5 (5.8k)326k views10k ♥4 minUpdated 23 Jan, 2014
- How to 'Git Gud' Soon™MORDHAU★ 5 (2k)318k views3k ♥68 minUpdated Nov 16, 2024
- Лучшие кооперативные игры SteamPAYDAY 2★ 5 (1.5k)315k views2.1k ♥56 minRussianUpdated Apr 27, 2025






This guide was created by its original author on the Steam Community. Are you the author and want it removed? Request removal.