Each Light Setting and What it Does
Preliminary
In this guide, I will go over every single setting in SFM's long list of light settings, starting with intensity and ending with edgeHeight. I will not explain the color settings since they should be self explanatory, or the transform settings since they don't do anything.
The functions of these settings that I will be covering in this guide are just my understanding of them. Some have unknown functions that no one really knows.
Please note, many of the light settings are non-functional for standard lights. Rather, they are reserved for "uberlights". Uberlights are a very complicated subject with their own "quirks and features" that I go over in depth in this guide. Anytime I mention uberlights, refer to that guide.
Enjoy.
intensity
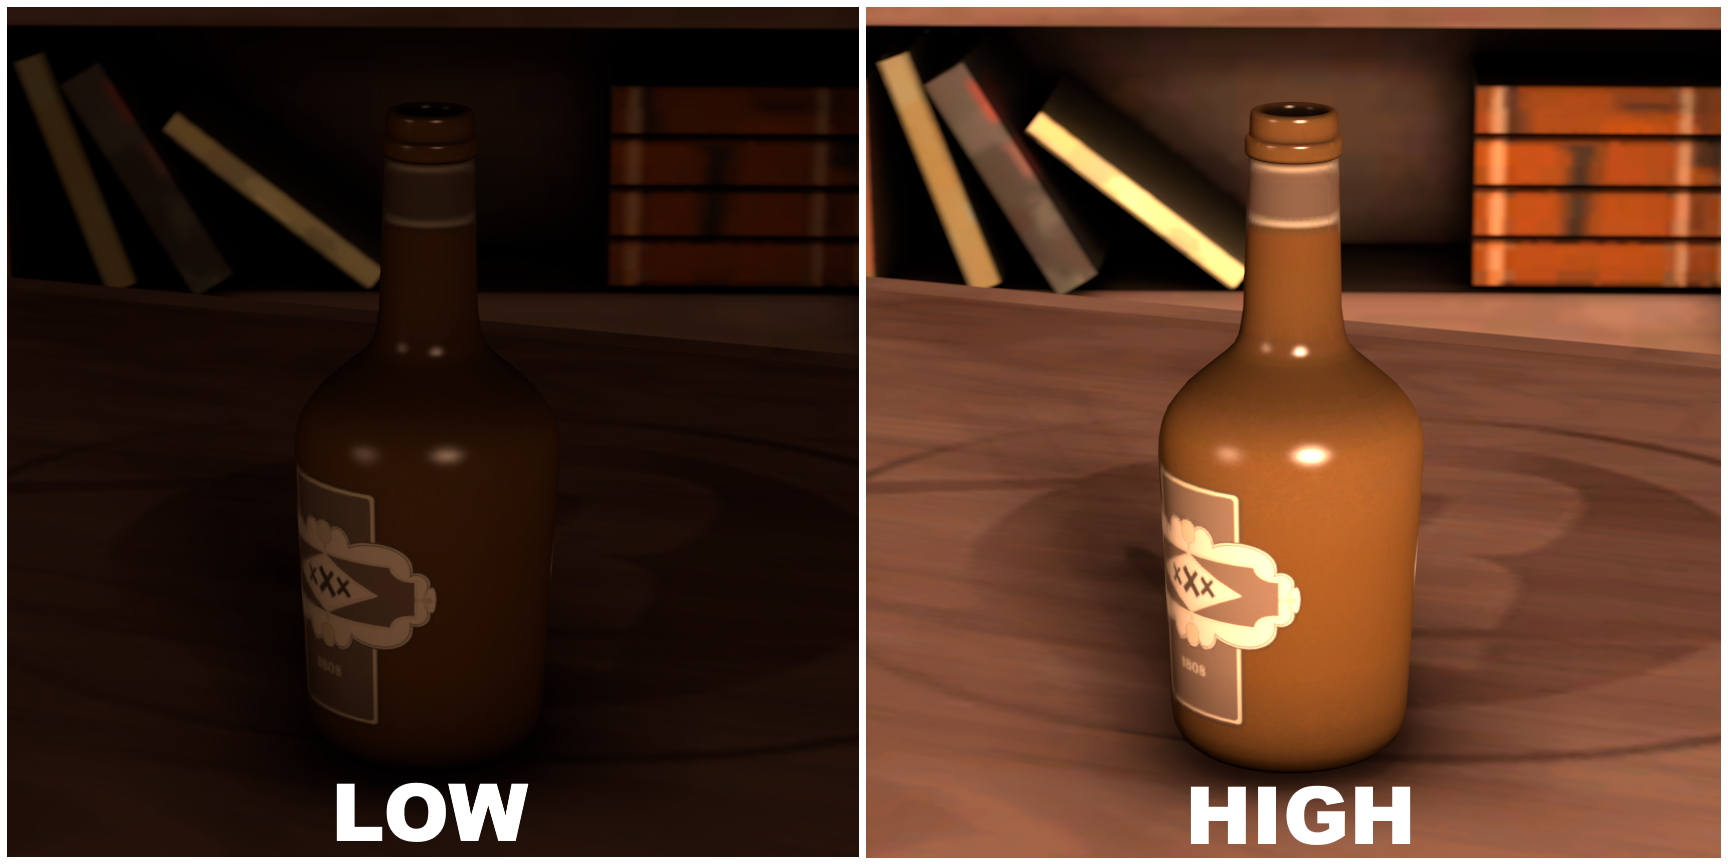
ambientIntensity
Note: This does actually do something in S2FM, but I wont get into that here. This slider also cannot be remapped, not that it matters though.
horizontalFOV and verticalFOV
This one is also very simple. horizontalFOV describes the horizontal diameter of the light, while verticalFOV describes the vertical diameter of the light. Most of the time, these two values will remain equal and produce a circular light, but if you wish, you can make an oval light with these two values as well.
These two values can also be more easily manipulated by simply dragging the light from the Animation Set Editor to a viewport, and moving it just like you would a camera.
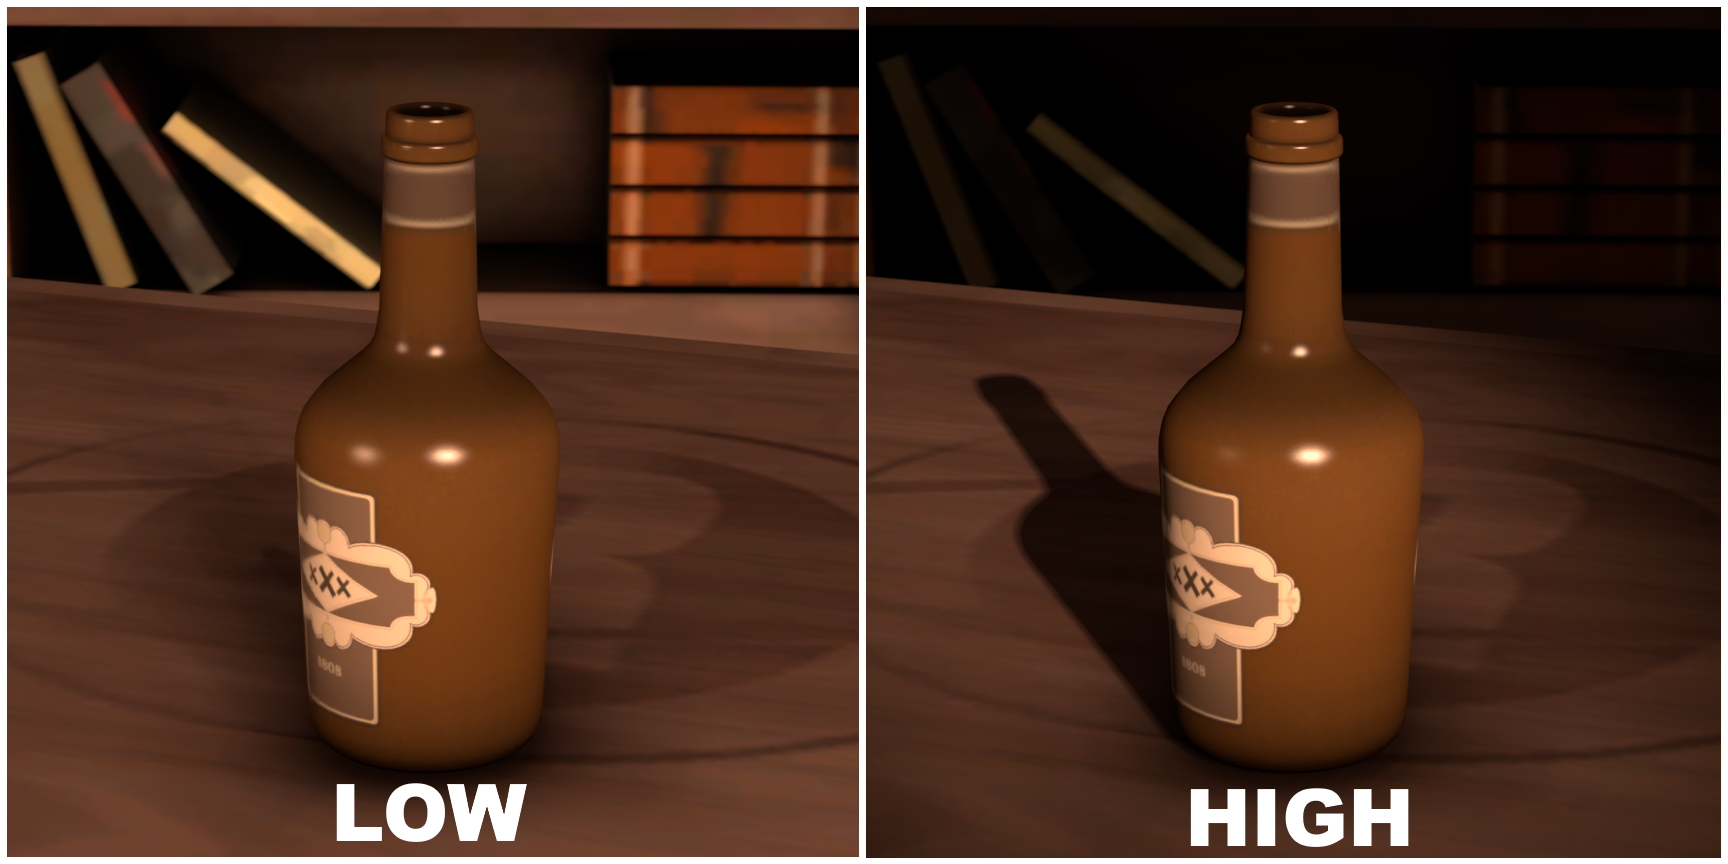
radius
The radius setting changes the "size" of the point light. Basically, it mimics a larger light source.
For example, a low radius light could be something like a flashlight. A higher radius light would be more akin to a spotlight. The biggest difference that this makes is shadows become less harsh, smoothing out and coming to a point as it goes on.
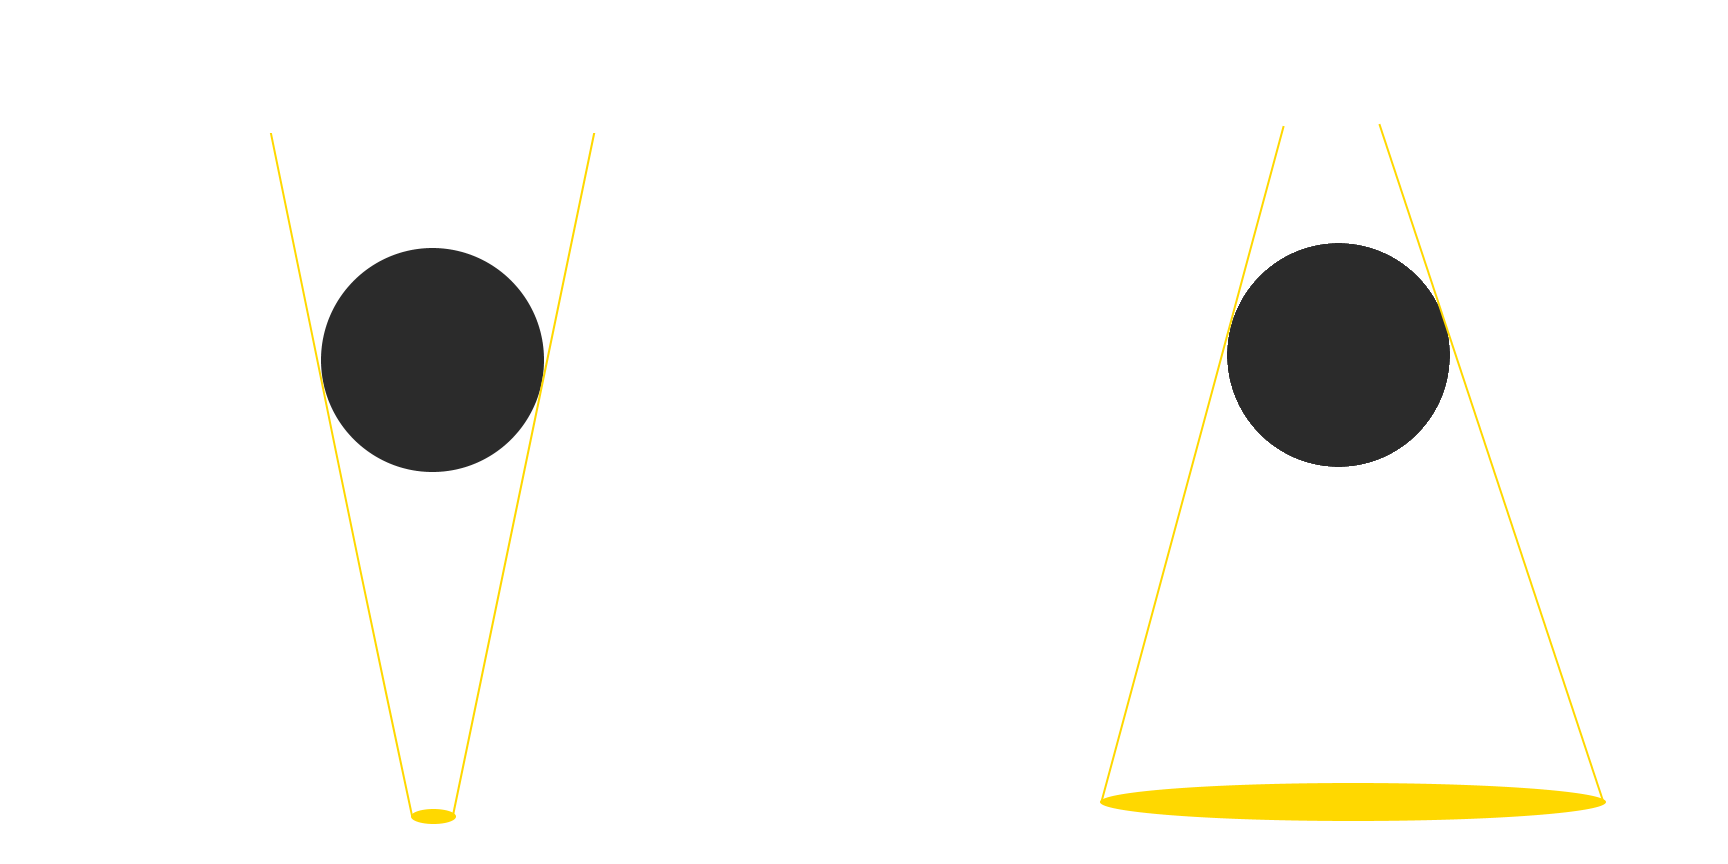
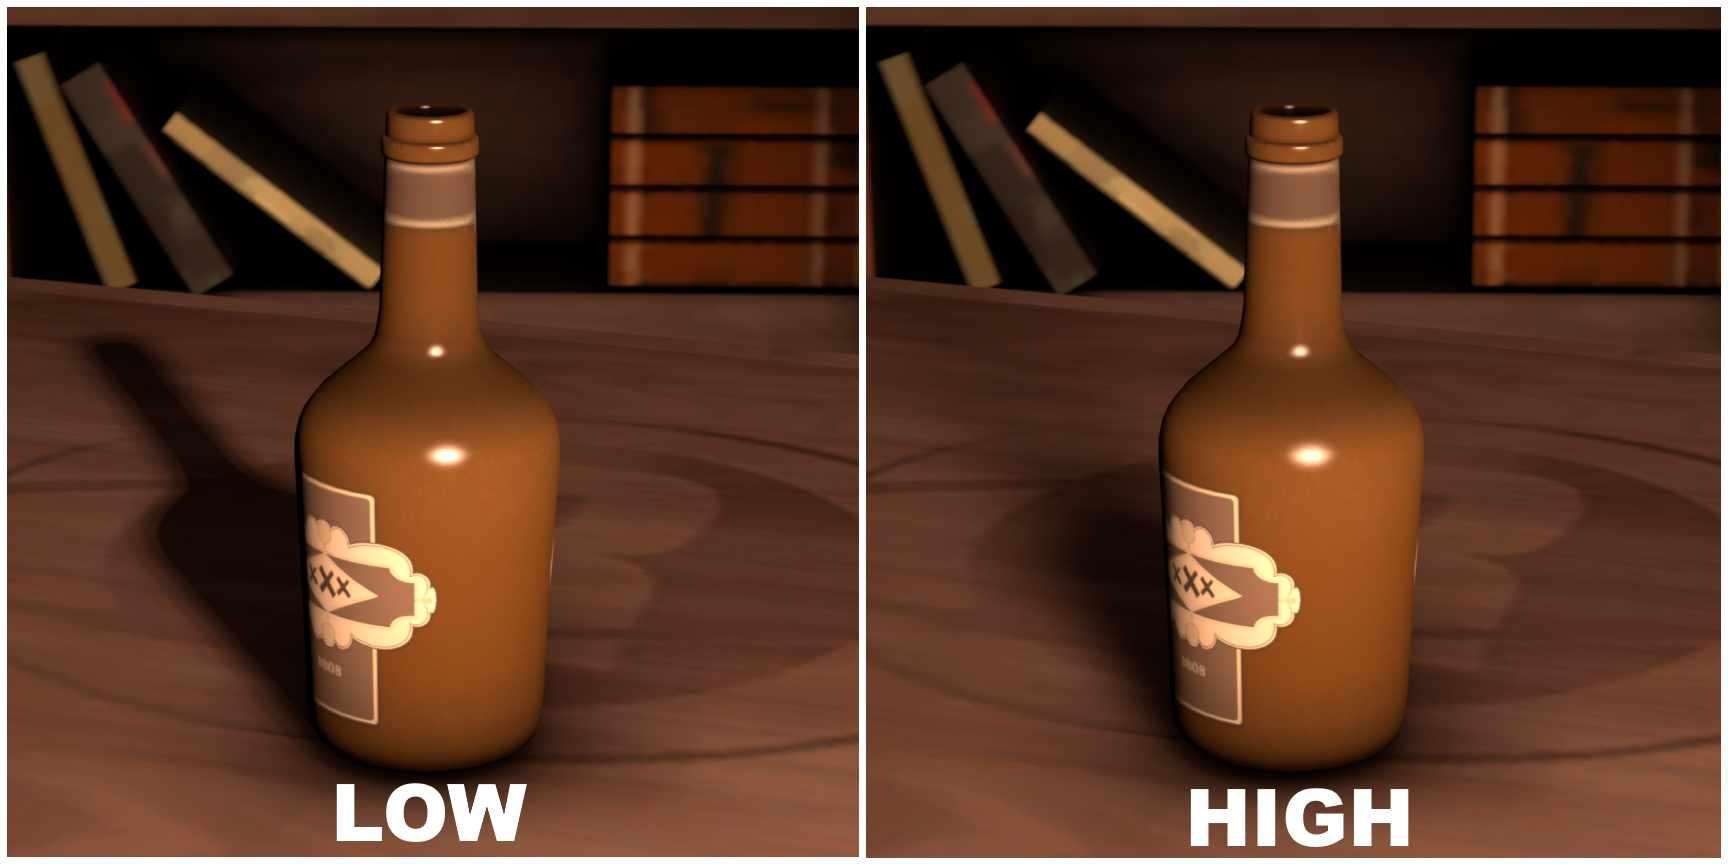
Since radius is basically changing the "size" of the point light, it will also cause light to wrap around objects, making it have a softer appearance.
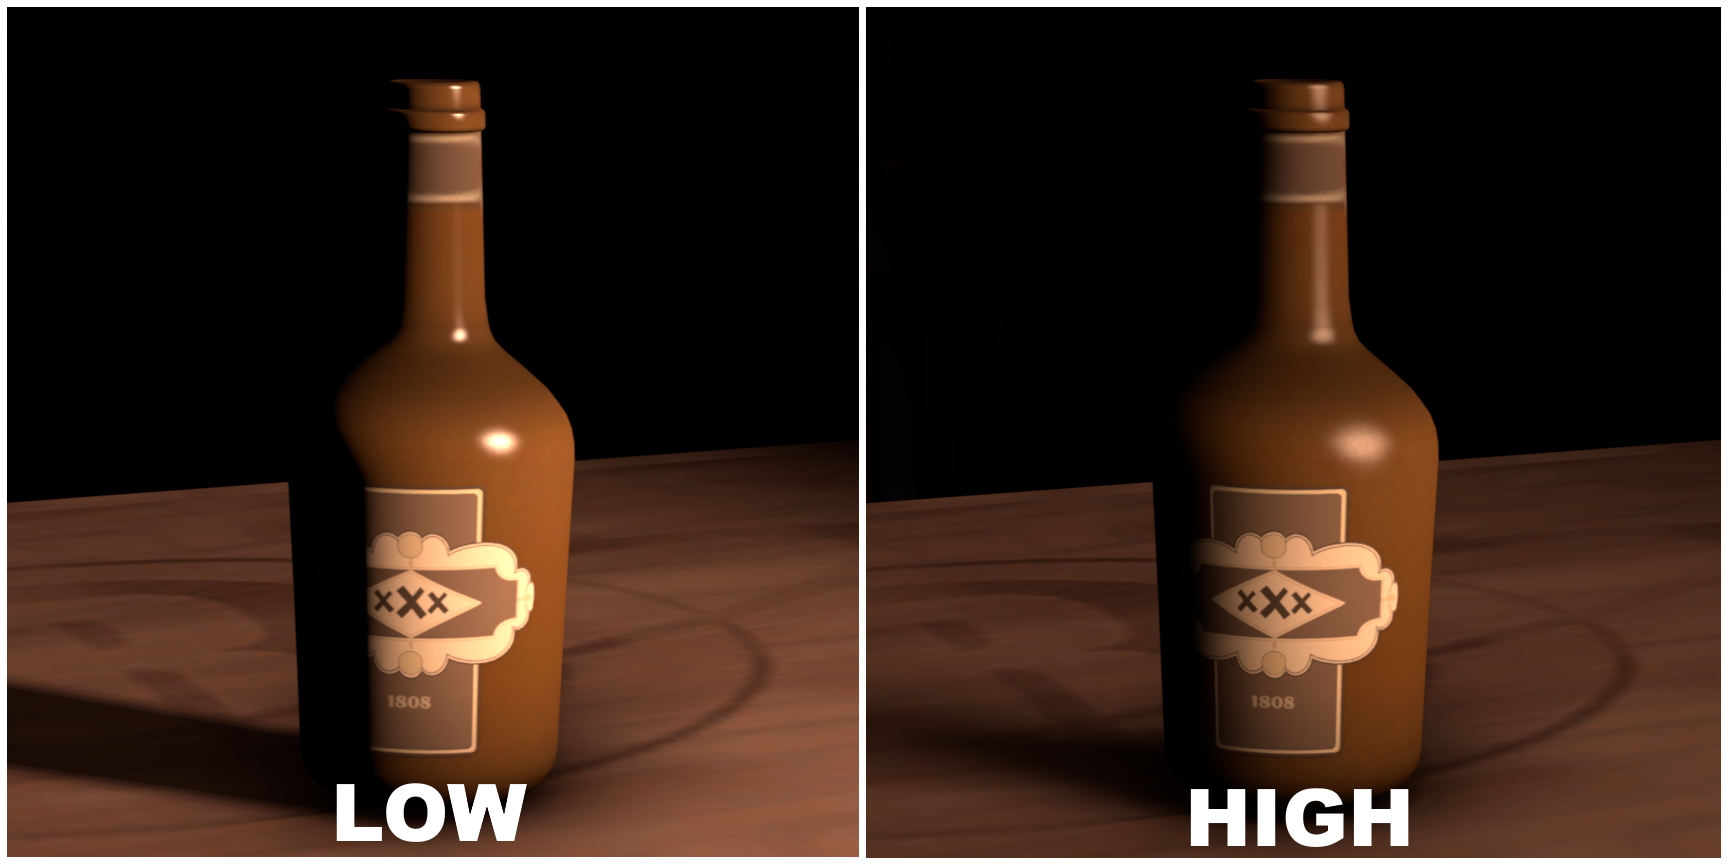
This is most useful for key lights, where softer shadows, unlike rim lights where bright and shiny edges are important.
shadowFilterSize
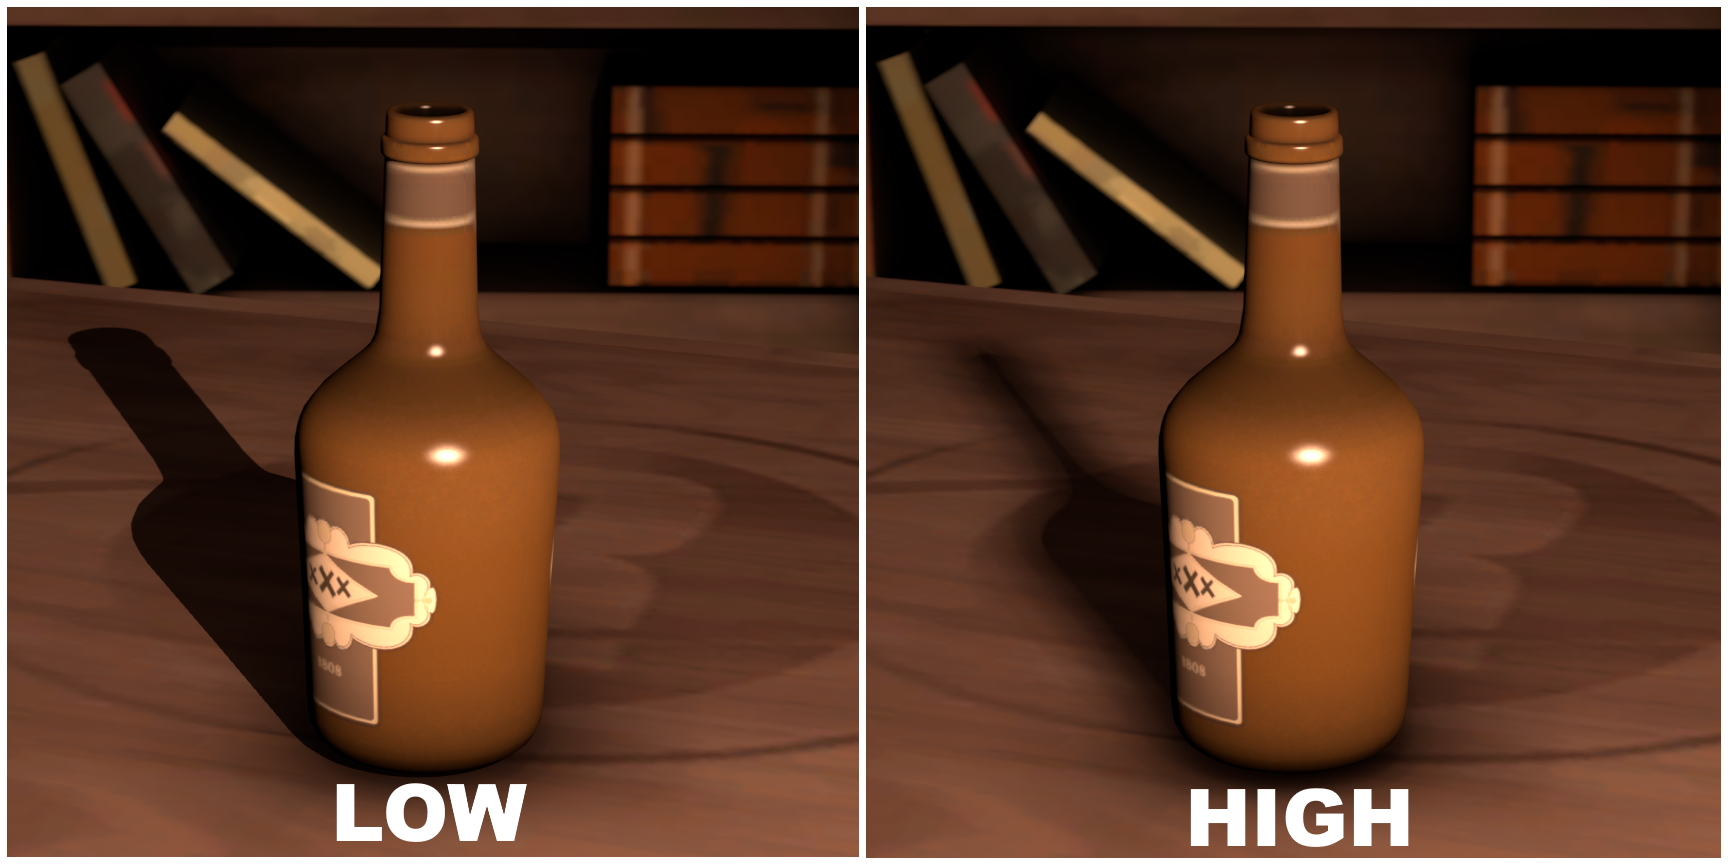
Unlike radius, shadowFilterSize will not distort the shape of the shadow, just the edges of the shadow. Lower values result in sharper edges, while higher values result in softer edges.
The key difference between higher shadowFilterSize and higher radius is shadowFilterSize will not cause light to "wrap around" objects, and it will also not cause the shadow to narrow as it goes farther.
shadowAtten
shadowAtten is simply how dark the shadows created by the light will be. Lower values will result in darker shadows, and higher values will result in lighter shadows.
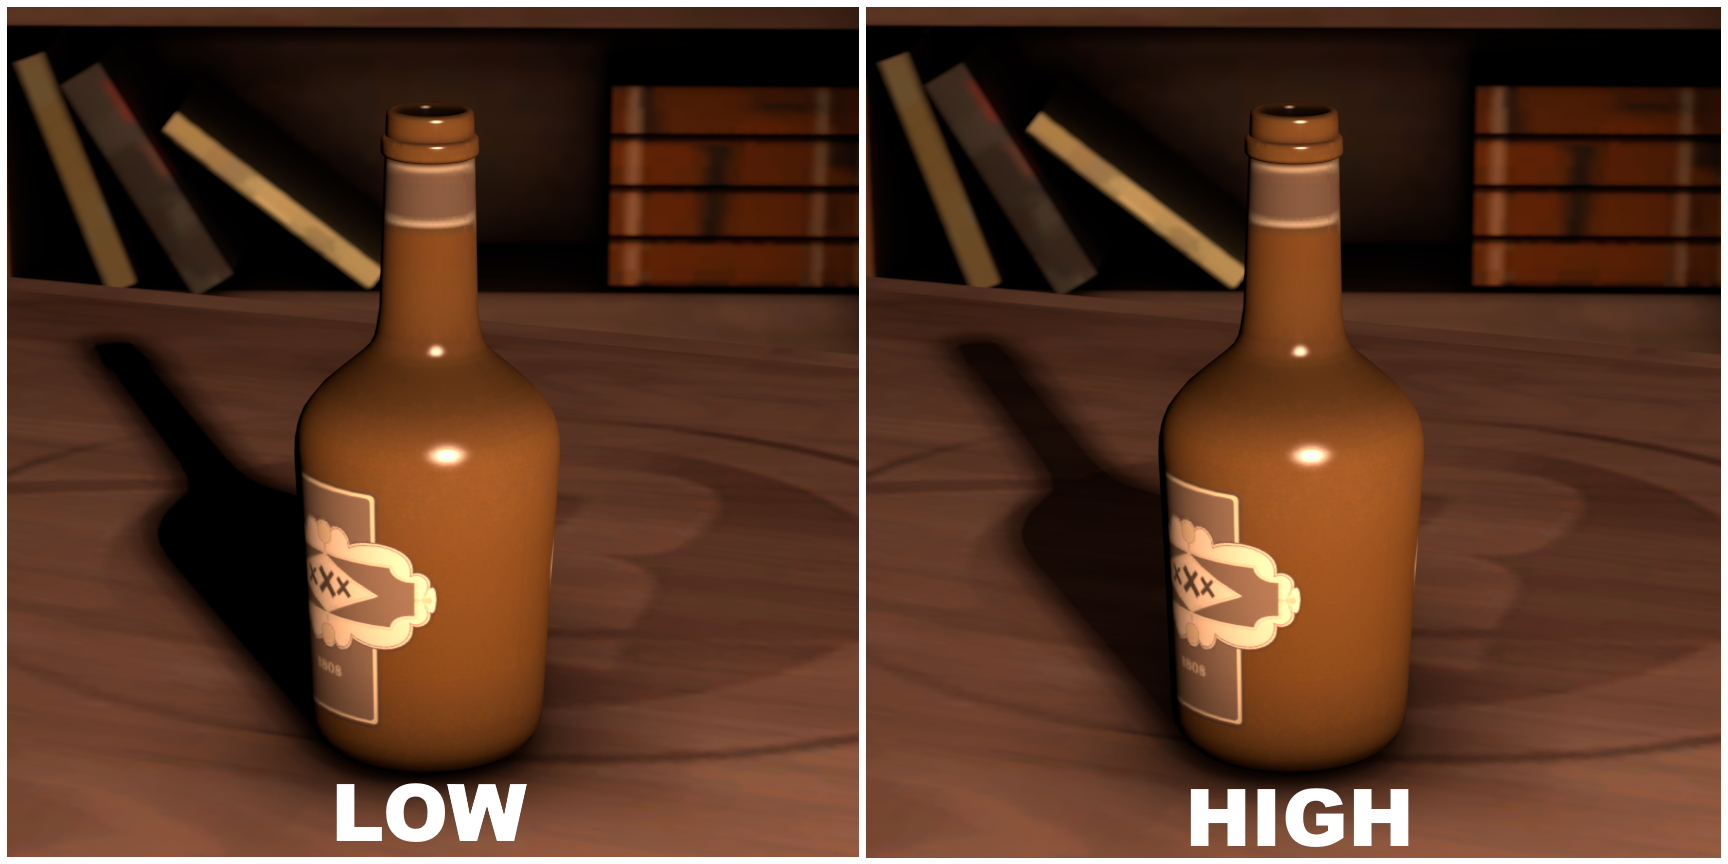
Note: this slider cannot be remapped
minDistance and maxDistance
These two are strange ones. On the surface, they simply change the minimum and maximum distance away from the light objects will be lit.

However, there is something to note here. Sometimes you might notice that certain areas are being lit up, even though they are outside of the bounds defined by min and max distance. This is because of the way that SFM does lighting. If any part of the object is within the bounds, the entire object will be lit normally.
If you look at the above video, the table does not become dark until the min distance boundary has moved past the entire table, so that no part of the table is in the bounds. If you don't like this, you can change the light to an Uber light, which I will not talk about here.
constantAttenuation, linearAttenuation, quadraticAttenuation
In SFM, lights by default start bright at the base, and slowly dim as the distance from the source increases. These 3 settings change the way that this functionality works.
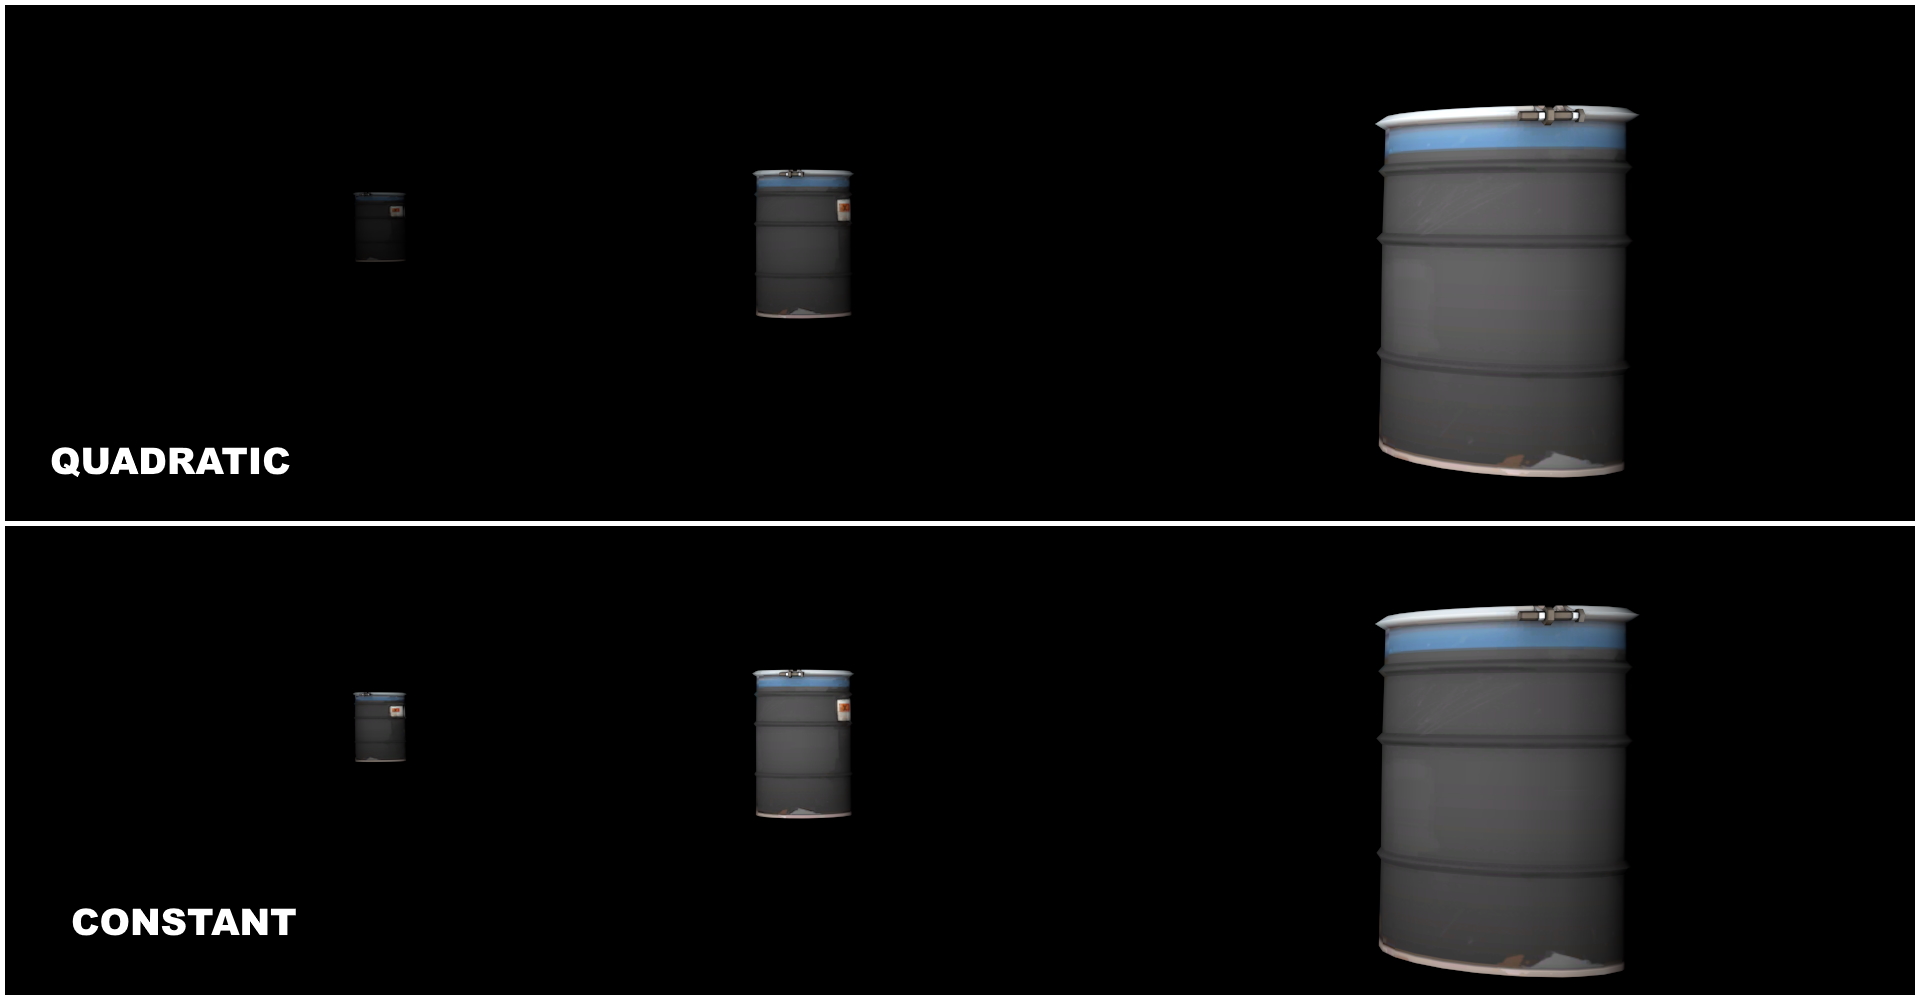
When you set the light to be constant, you will notice that the light becomes overwhelmingly bright. This is because the brightness of the light at its source is now the brightness of the entire light, so you will need to decrease the light's brightness by a lot.
shadowDepthBias
By default, shadowDepthBias has a maximum value of 0.001, so it really doesn't change anything. However, if you remap this to lets say 1, then you will notice a difference.
shadowDepthBias, kind of like minDistance, adjusts when SFM will start to render shadows. This isn't really useful in 99.9% of situations, so don't really bother with this.
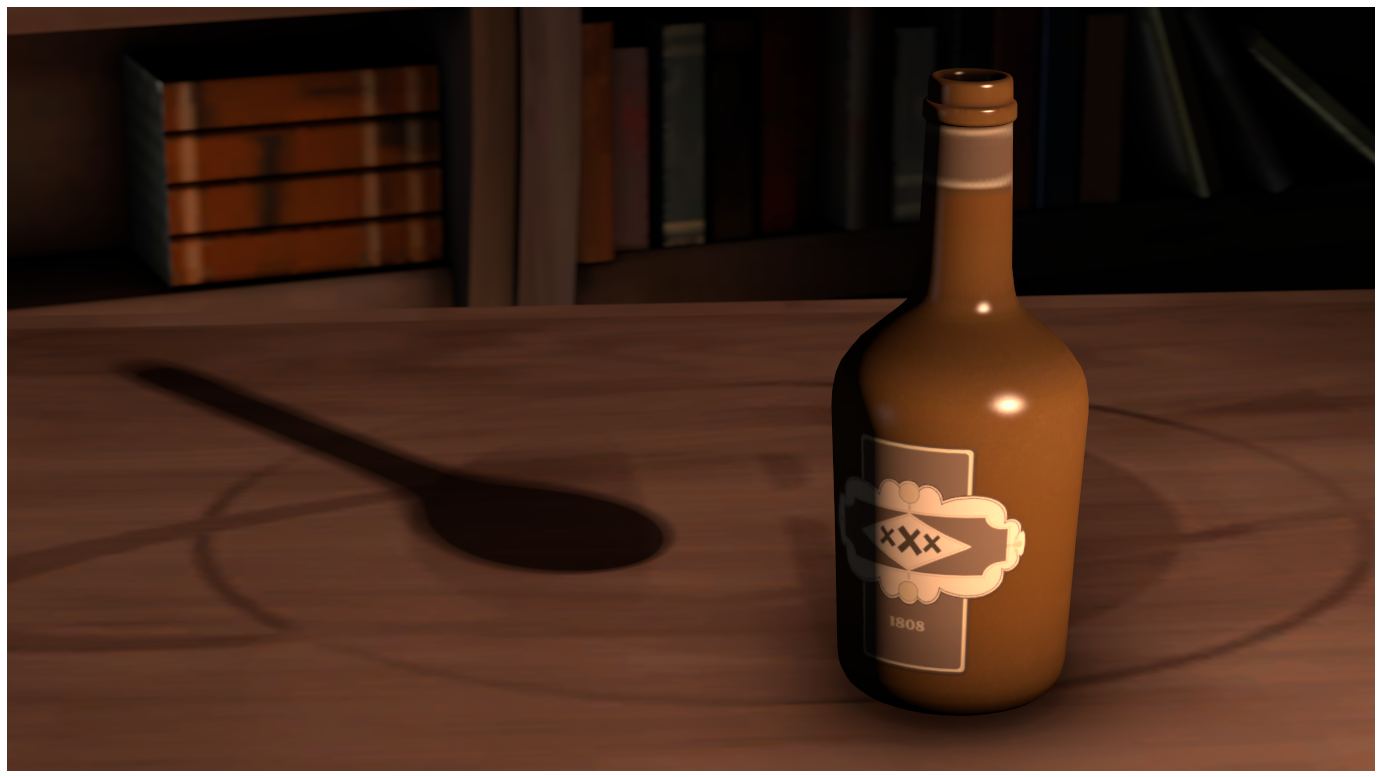
As you can see here, the shadow of the bottle doesn't start at the base like it normally would, instead it starts part way up the bottle. This is incredibly unrealistic and jarring, and not a good look. This is really only useful for when you have a model with small details that are causing weird shadows. You can increase the shadowDepthBias in these cases to remove these small shadows.
shadowSlopeScaleDepthBias
farZAtten
farZAtten is also quite confusing in its exact function, but most commonly it is used to further extend the range that your lights can reach. The maxDistance slider, even when remapped, can only allow a light to extend so far. However, combined with farZAtten, your lights will be able to go much further. This is very useful for relighting entire maps, where you need to place a light high in the sky to light the entire map.
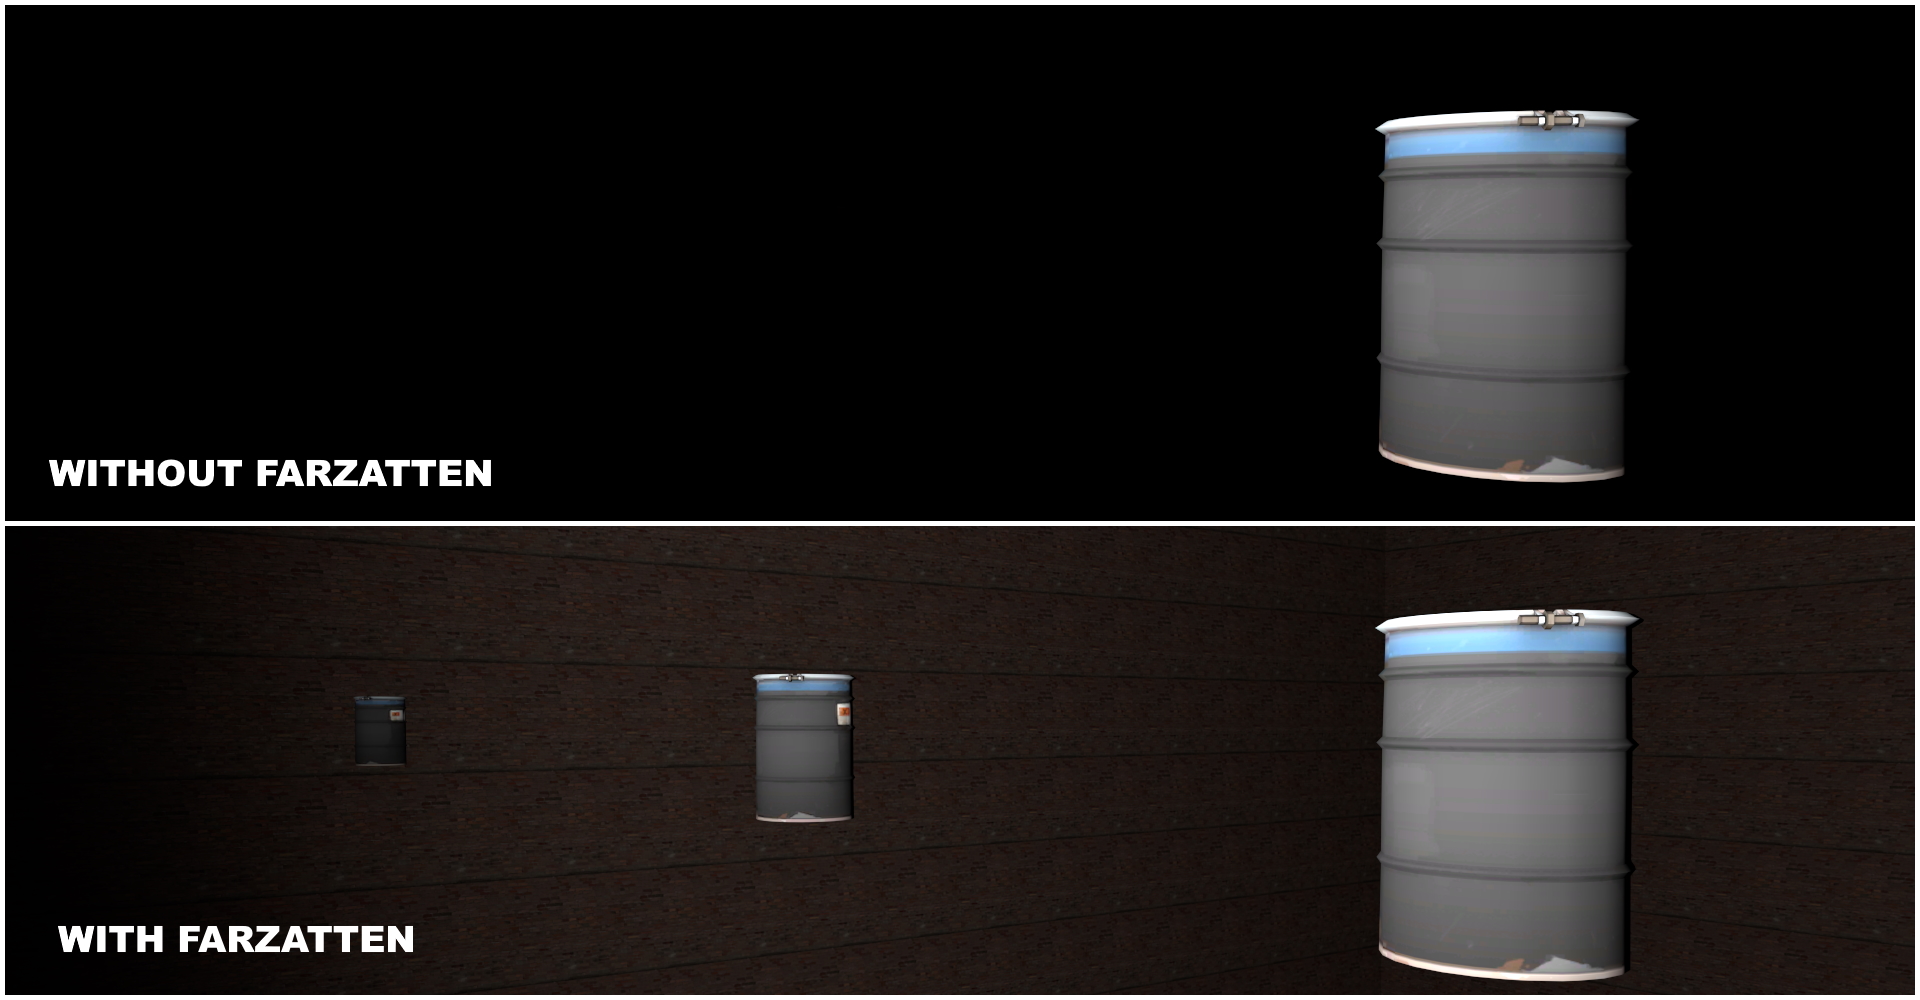
As you can see, without using farZAtten, we can't even see the second and third barrels. However, after using a remapped farZAtten, not only can we see those barrels, but we can also see the walls past the barrels. The light's brightness dropoff is also reduced. I have no clue why.
Im sure someone has a much better explanation for how farZAtten works, but in my experience this is all I have used it for.
nearEdge and farEdge
cutOn and cutOff
However, unlike minDistance and maxDistance, nearEdge and farEdge can light portions of an object. Meaning that SFM will not check to see if any part of the object is in the light's path then light the whole object. Instead it will just light whatever portion of the model is in the light's bounds, and only those parts.
Volumetrics
- Intensity
By changing the intensity, you will increase the density of the volumetric. However, you will also increase the brightness of the light itself. This can be bad when you want to separate the lights keeping your scene properly lit, and the volumetric lights.
- volumetricIntensity
Volumetric will change the density of the fog effect without changing the brightness of the light when it shines on a surface. - noiseStrength On the surface, noiseStrength and volumetricIntensity do the same thing. However, there is a slight difference. The texture of volumetric lights is very distinct. Increasing noiseStrength will just wash out this texture. So if you don't like this weird "cloudy" texture, just increase the noiseStrength and decrease the volumetricIntensity.
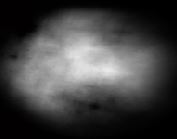
width, height
edgeWidth, edgeHeight
Final thoughts
I hope this guide helped you understand the different light sliders better, good luck on your future SFM projects :)
- Changing Textures Using Material Overrides★ 5 (1.4k)41k views2.7k ♥5 minUpdated Jul 26, 2014
- Manually Updating TF2 Content★ 5 (1.3k)35k views1.9k ♥2 minUpdated Nov 26, 2025
- The Fundamentals of SFM: For Beginners★ 5 (1.3k)25k views3.3k ♥55 minUpdated Apr 29
- Ваш первый постер★ 5 (1.1k)22k views2k ♥5 minRussianUpdated Oct 22, 2024
- Getting Gmod Workshop stuff too SFM★ 5 (510)15k views1.3k ♥1 minBulgarianUpdated Aug 4, 2015
- Animation Guide★ 5 (704)14k views1.9k ♥6 minUpdated Apr 9, 2023



- Upgrading to PremiumTeam Fortress 2★ 5 (20k)1441k views11k ♥6 minUpdated May 11, 2022
- No More Room in Hell Official ManualNo More Room in Hell★ 5 (2.8k)569k views2.1k ♥29 minUpdated Apr 22, 2019
- NMRiH Community Hosting GuidesNo More Room in Hell★ 5 (526)351k views653 ♥1 minUpdated Aug 10, 2022
- ULTIMATE GUIDE FOR GAME DEV TYCOONGame Dev Tycoon★ 5 (5.8k)326k views10k ♥4 minUpdated 23 Jan, 2014
- How to 'Git Gud' Soon™MORDHAU★ 5 (2k)318k views3k ♥68 minUpdated Nov 16, 2024
- Лучшие кооперативные игры SteamPAYDAY 2★ 5 (1.5k)315k views2.1k ♥56 minRussianUpdated Apr 27, 2025






This guide was created by its original author on the Steam Community. Are you the author and want it removed? Request removal.