Encyclopedia Deathmatchica
Important: Regarding the 20th Anniversary Update
Unfortunately, while the new update came with some bug fixes, but also created some new ones that need to be ironed out. However, the update to updating the game to 64-bit has a much worse side effect...It unintentionally ended up breaking a lot of dedicated server-related things, such as server plugins, and custom server binaries (custom server code, usually ones that fix long-standing bugs on the server's side).
To make things worse, there is no existing Source SDK code to get a 64-bit version of the Source Dedicated Server working for Deathmatch - so the short version is your favourite server had to revert to an earlier version of the game, and ended up being hidden on the server browser because of it.
However, it's still possible to both play on, and host on these dedicated servers by reverting the game to a previous patch.
- Right click it, and then click "Properties".
- On the left hand side, click "Betas".
- Next to "Beta Participation", click the drop down box, and then click prerelease.
* Stock map changes - The patch notes are a bit vague, so this will require a good look at
* Long standing bug fixes - Some minor UI ones, some that can be patched server side, and some that are very welcome, such as the broken/inconsistent listen server physics bug (things won't randomly fall through the floor as much, a massive annoyance fix for mappers).
* Added 64-bit support to the game and existing modding tools- Outside of playing nicer with current operating systems, it should result in less crashes...It should be a pretty big boon once the dedicated server issue has been fixed.
* Additional console variables and commands - Some commands, like friction, weapon swaying, and more are now accessible, even without the use of SourceMod.
* Added VScript support - This is the holy grail of Source Engine mapping (Squirrel language version). It allows for far greater possibilities and event control for mappers, without needing to rely on server plugins as much. Considering how huge of a game changer this is for modders, it makes you wonder why wasn't this listed in the release notes?
* Game config - As far as I can tell, there hasn't been any settings that have needed to be changed to get the game to look and play as normal (minus lacking dedicated servers!!!)
* Mod installation - The custom folder still works, same as before.
* HUD mods - As DM didn't receive the under-the-hood UI changes, HUDs created before this update are likely unaffected, including HPH-made HUDs. However, you might notice that some of the fonts, such as in the console, have changed.
Why Play HL2:DM?
Whether it be simply throwing toilets, to launching yourself to the moon with your gravity gun, its like a breath of fresh air compared to other modern multiplayer First Person Shooters that have come out ever since.
How to Buy
https://store.steampowered.com/app/320/HalfLife_2_Deathmatch/
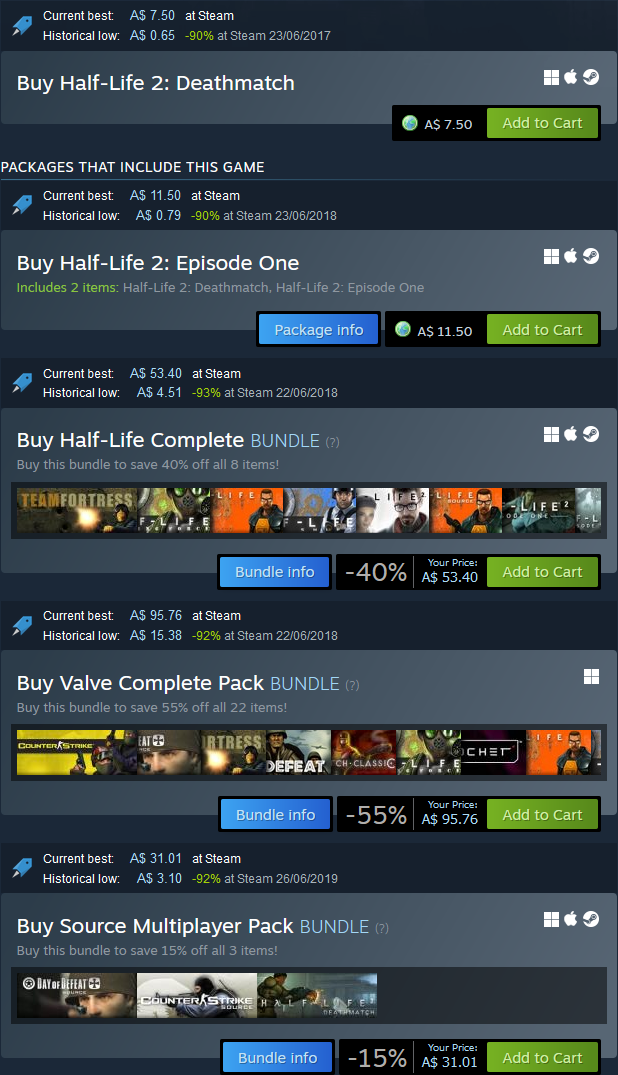
Half-Life 2: Deathmatch can be bought fairly cheaply by itself, and comes alongside the purchase of Half-Life 2 Episode 1.
Game Optimisations
I recommend you use any modern source-code editor to change your configuration files, such as Visual Studio Code[code.visualstudio.com] or Notepad++[notepad-plus-plus.org].
If you've messed up your game configuration beyond recognition, backup and then delete "config.cfg" & "autoexec.cfg" from "...\Half-Life 2 Deathmatch\hl2mp\cfg" and everything inside "...\Half-Life 2 Deathmatch\hl2mp\custom".
The game will then create clean, default configuration files for you on the next startup of the game.autoexec.cfg: This configuration file will always apply whatever you write in here to your main "config.cfg" file whenever you launch the game. It also handles special configuration tools, such as aliases. If you do not have this file, create it.
overrides.cfg: If you use Xeogin's HL2:DM Community Patch (recommended, see below), put anything you'd usually add to your "autoexec.cfg" here instead. It'll make things much less messy to deal with later.
Copy and paste the text from Xeogin's GitHub[github.com] to your "autoexec.cfg", then create a file named "overrides.cfg". Stick anything that you'd usually put into your autoexec into this new file (such as keybinds and aliases).
You can either fix this with a mod, or by copy and pasting a fix into your autoexec and hitting a button whenever it changes.
Client side mod fix: Download this[gamebanana.com], and extract the "fix_model_change" folder to "...\steamapps\common\Half-Life 2 Deathmatch\hl2mp\custom"
Autoexec Fix: Add the following to your autoexec.cfg:For HPH HUD Users: HPH includes the client-side mod fix with all generated HUDs.
Most custom HUDs either reduce or outright remove it, but if you'd rather stick with the default HUD , you can fix it yourself.
Vanilla Solution: Download[community.pcgamingwiki.com]
With that said, when you normally first connect into a server, you'll see a welcoming screen with text and a close button on the bottom of the screen. This is called a Message of the Day (MOTD) page. By default, HTML (web browser) MOTDs will be loaded; this can cause lag from loading websites, to potentially triggering exploits on your computer under certain circumstances.
Finally, some servers also enable the ability to tag images onto walls called sprays. While most people use joke sprays, there are people out there that will spray unpleasant or unwanted (NSFW) stuff to try to get a reaction from you. Luckily, these can be disabled as well.
Solution: Add the following to your autoexec, and uncomment (remove the two slashes) the lines that you don't want.Luckily, these errors can be filtered out.
Console spam fix: Add the following lines to your autoexecThere are two ways to fix this; either block these servers on a Firewall level, or to use a blacklist that only works in-game. Either way, the method to do so can be found linked below as a Steam Guide. https://steamcommunity.com/sharedfiles/filedetails/?id=2502626384
Quality of Life Changes
These are changes that will make your gameplay better. They aren't essential, but are highly recommended.
Solution: From the gameplay menu, go to Options > Controls tab > Advanced > Enable console (`)
Console Key Rebind: If you find yourself accidently hitting tilde a lot, you can rebind the key and then remove it from tilde.HL2:DM lacks the quality-of-life features for jumping like Quake Live/Champions or Diabotical possess (jump buffering and autohopping), so the best way to consecutively chain bunnyhops is by using the scroll wheel to spam jump commands (without the use of external programs or modifications).
Solution: Unbind scroll up and down using the developer console, then rebind jump in the same manner.Once you've got a rough grip with how the weapon grouping works, its highly recommended to turn this off. You will still be able to toggle through the same weapon categories, but now at a much faster rate.
Solution: Open the developer console and type:I've found that both myself, and competitive longtime players have found autoswitching to be more of a hindrance than a boon, so we disable it.
Solution: Disable auto-weapon switching by typing the following into the developer console:- Keep your most used weapons as close to your movement keys as possible.
- In the options menu, the "Gravity Gun" function that isn't in all caps is a straight upgrade to the Previous Weapon key (it works this way: Gravity Gun > Previous Weapon > Gravity Gun > Previous Weapon, and so forth, allowing easy back-to-back grenade combos)
- It's not practical to bind both Crowbar and Stun Stick separately, so scrolling through the first weapon category is fine. Just keep in mind pressing Weapon Category 1 three times with a full inventory brings up the Gravity Gun.
Both the Gravity Gun and Frag (thrown) Grenades typically are more potent starting weapons by far, as they will almost always deal more damage in the same amount of time it takes to fully unload half your magazine (minus outliers from very weak props, weak splash damage or outright missing your target).
As Deathmatch is a fast-paced game, manually switching to other weapons can also get you killed due to being stuck in weapon switching animations.
As for your held spawn weapon of choice, switching your starting weapon to the Frag Grenade is more often than not the best option, as it has the strongest kill potential when comboed with the Gravity Gun.
Solution: Add the following to your autoexec.These can be found at https://hl2dm.net/osg/download/list.php and Gamebanana[gamebanana.com].
You can also give HUD customisation a shot, yourself. See the Extra: HUD Modification section for more details.
Note: If a mod tells you to replace files, instead go to "...steamapps\common\Half-Life 2 Deathmatch\hl2mp\custom", create a folder with a name you'll recognise later, and finally add the mod's files in the same folder structure it came with, or how its readme instructs you to do so.
Joining a Game
After starting the game, press "Find Game". This will open a list of all publicly available servers.
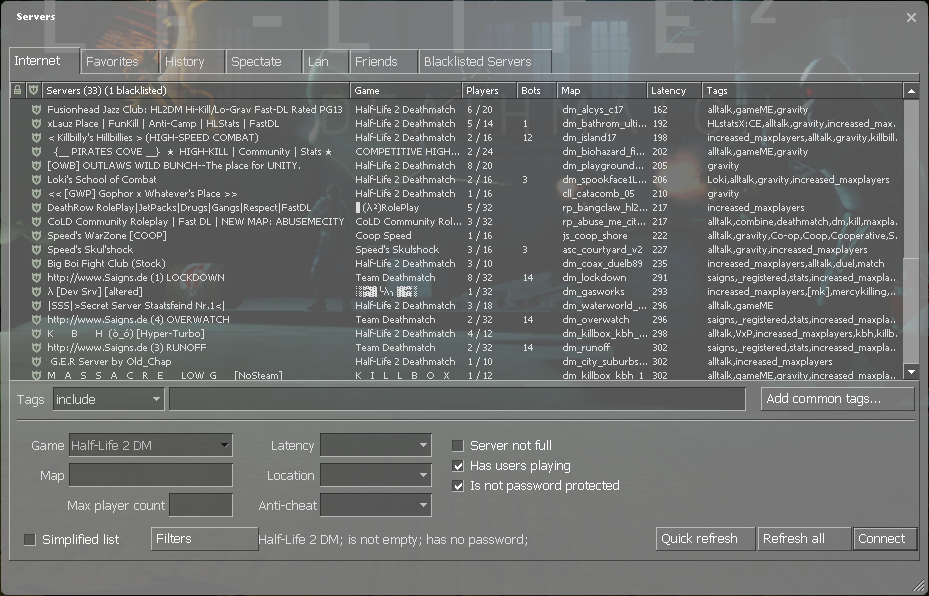
Protip: Disable "Simplified List" in the bottom-left hand corner so you can see more servers.
Padlock - This server is password protected.
Shield - This server employs Valve Anti Cheat (VAC) to both protect against and ban cheaters. It's not recommended to join a public server without it.
Servers - The name of the server.
Game - What mode the HL2:DM server is currently running. If the field isn't "Half-Life 2 Deathmatch", the server is running a custom server mod.
Players - The current number of players are on left side side, the maximum player count on the other. You can't join full servers without being giving priority by the server admin.
Bots - If this isn't blank, this is how many non-human players are currently on the server.
Map - The current running map on the selected server. The map name can also give a hint what the server is currently running.
Latency - How long it takes for the server to respond to your actions. This is more commonly referred to as ping. The lower number, the better your connection will be.
Tags - These can give a rough idea what the server settings are.
At the bottom of your screen, you will see filtering options. If you just want to find a populated game, tick "Has Users Playing" and "Is Not Password Protected". I don't recommend playing on servers that have over 200 ping, as the the high latency will both delay your actions and give people with lower pings a big advantage over you.
By default, you can open the Steam Server Browser by clicking View on the top of the Steam application window, then clicking on Servers. Please note that methodology may be different if you're using a custom Steam skin.
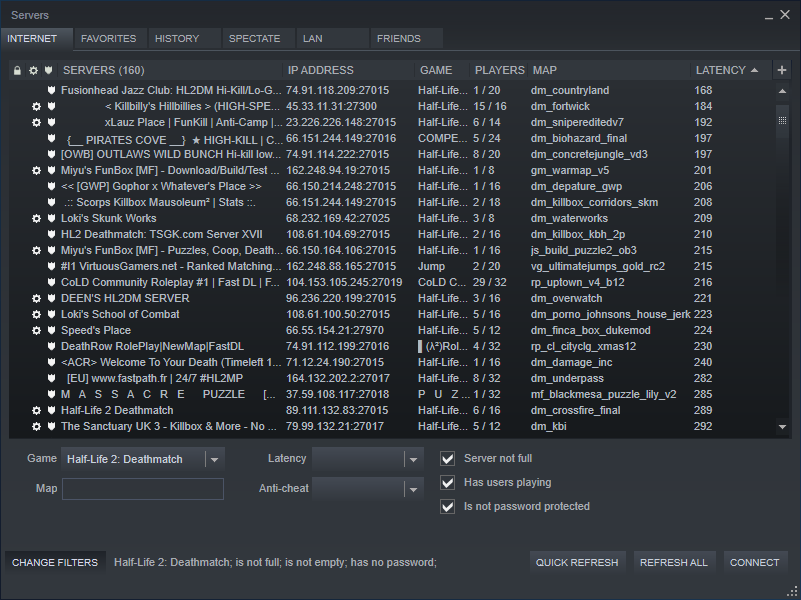
Once you've opened up the server browser, click on the Game drop-down menu, and select Half-Life 2: Deathmatch. This server browser operates similar to the one in-game (and other Valve games), but has a few quirks:
- Your favourite servers are shared between both server browsers, but not your server blacklists (you'll see servers you'd otherwise wouldn't).
- You cannot view server tags
- The History tab does not filter per game
The largest congregation of players right now is the HL2.community Discord server[hl2dm.community], with 300 users as of the time of this guide's creation. That server also acts as a hub to other Discord communities that play Deathmatch as well, which are listed under the info tab.
If you'd rather play HL2:DM competitively, you can give the Half-Life 2: Deathmatch University Discord server[discord.com] a shot, too.
Failing that, you could try playing bots on other dedicated servers, or setting them up locally on your machine (such as through RCBots 2). They can be a bit finicky to setup, so I suggest reading a guide before attempting to set those up by yourself. Just keep in mind that even though bots aren't a great replacement for human players, they won't feel embarrassment when you mock them for being stuck on a prop they walked into.
Basic Gameplay
A mostly complete list of modes can be found in the guide below.
https://steamcommunity.com/sharedfiles/filedetails/?id=2814294329
This guide, though, focuses on the two main modes that the game came with - Deathmatch and Team Deathmatch.
Around the map, there are assets you can either pick up or utilise to help you slay other players. Some items give armour, some restore health and some replenish your ammo supply for weapons that you can equip.
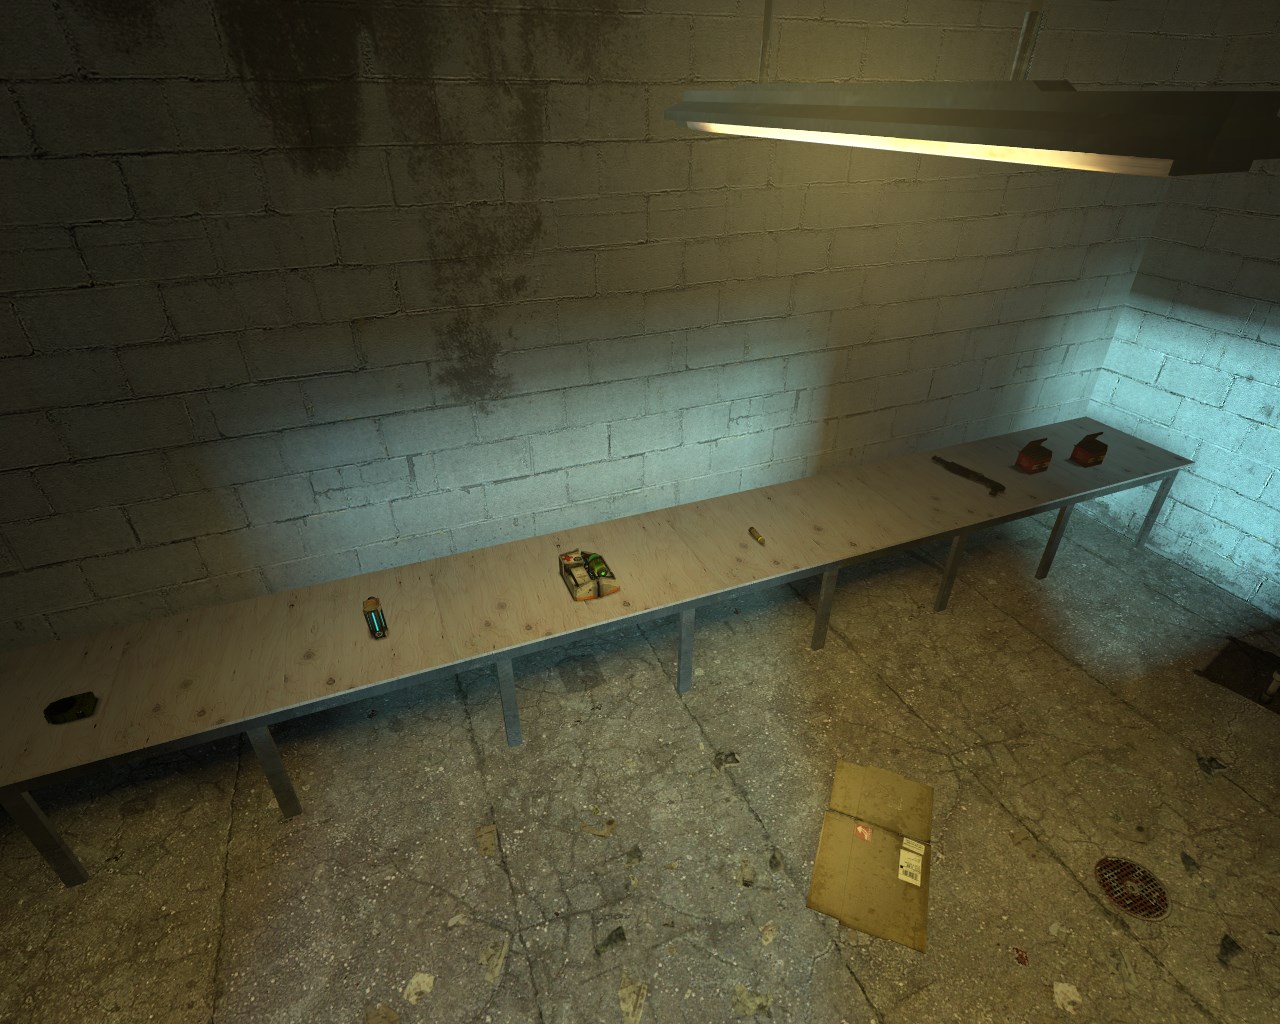
As soon as you spawn, you'll need to rush to get better weapons than what you've started with; a submachine gun will always lose to an rocket in a fair fight!
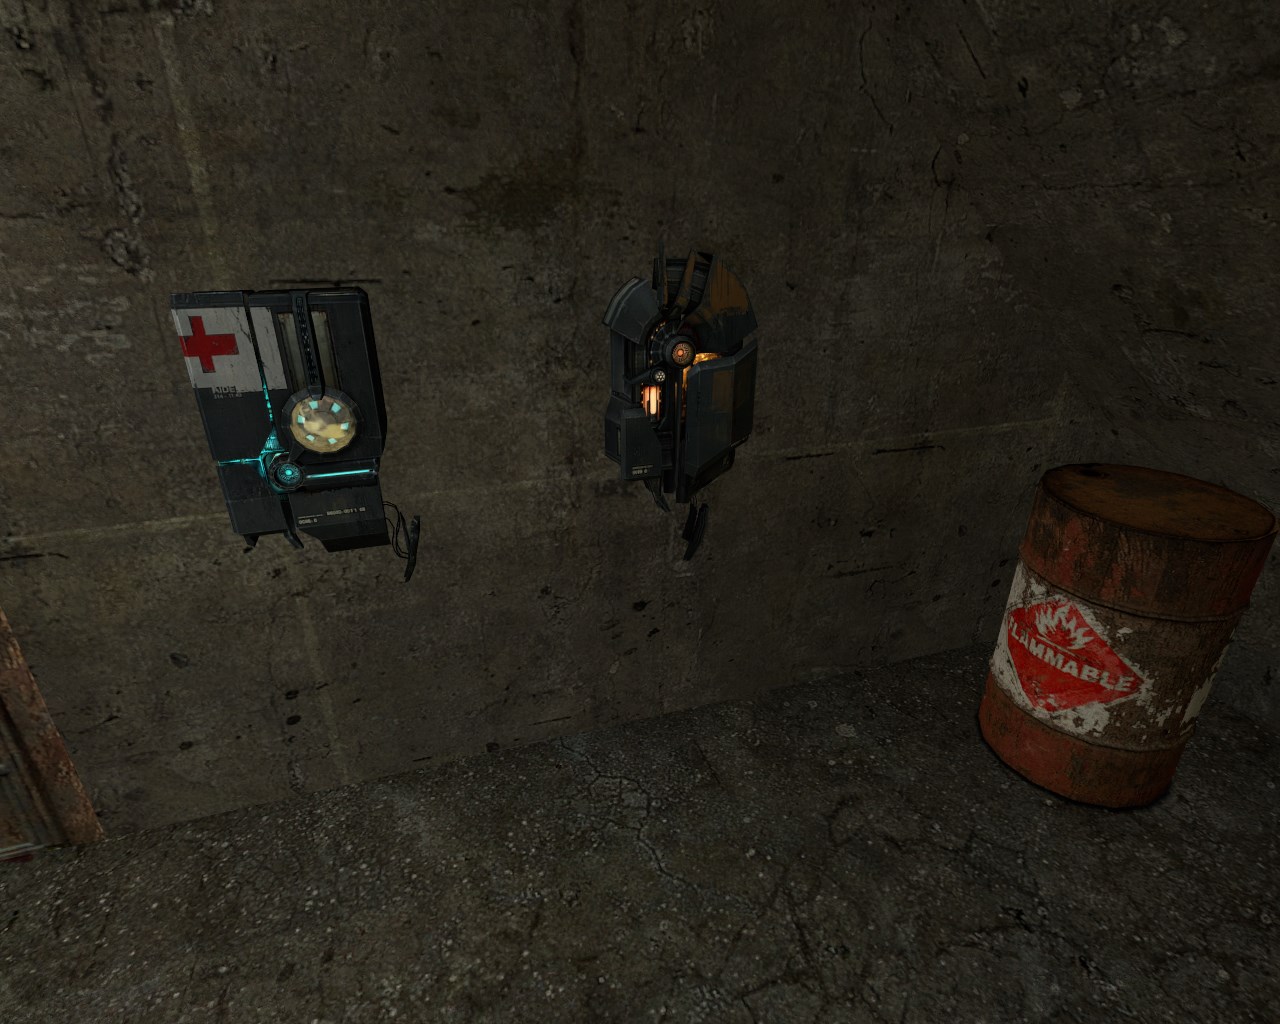
There are also stations located around the map that can restore health or gain armour by holding the use key (default "e") while facing them until they deplete.
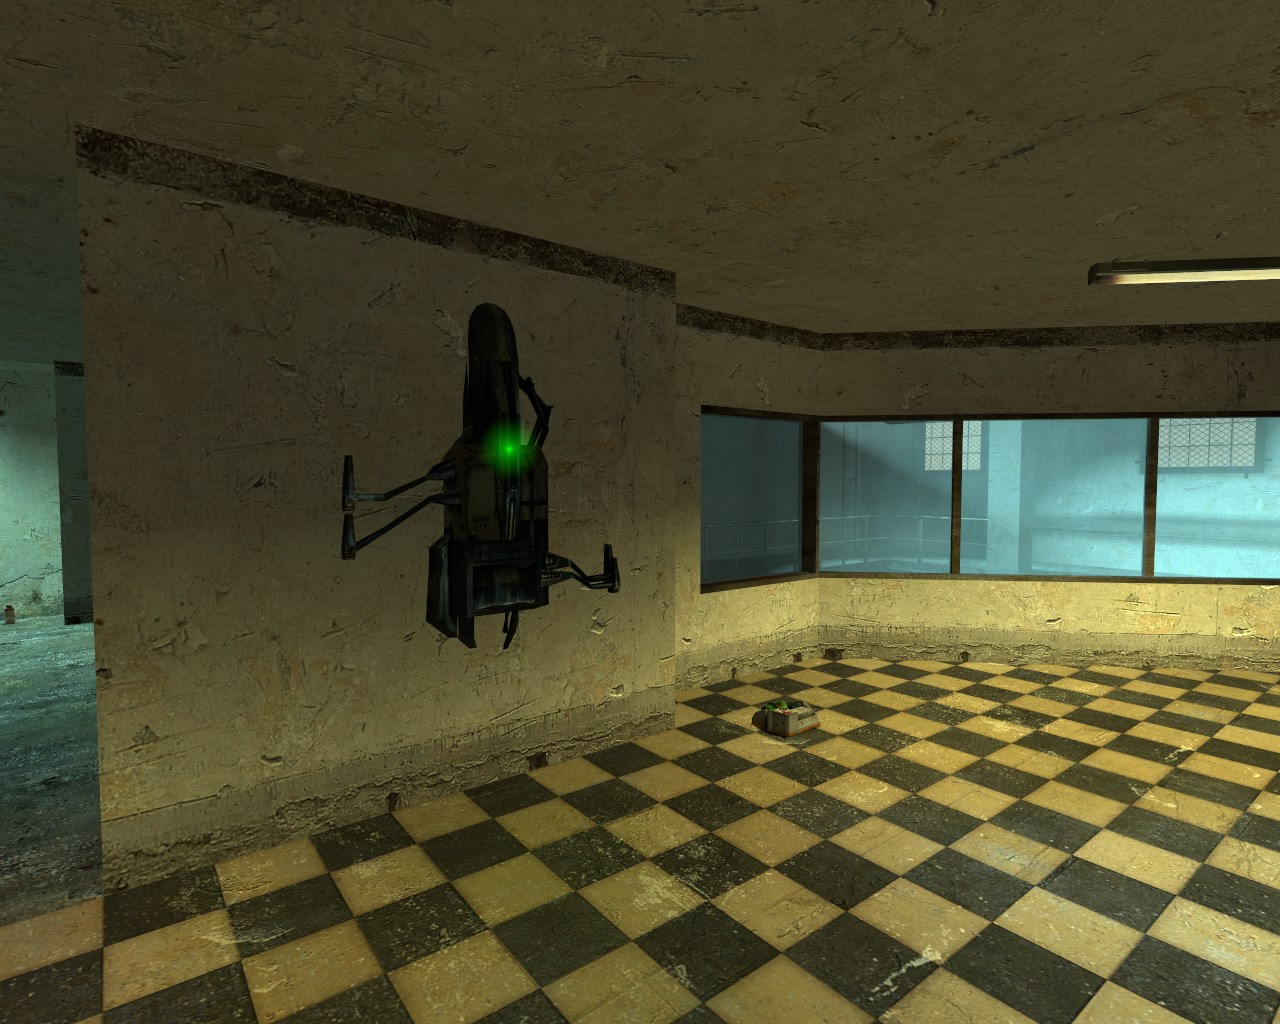
The big charging station not only restores both health and armour, it will let you overcharge your armour to 200! Facing the wall to do this for a prolonged period is incredibly risky, though.
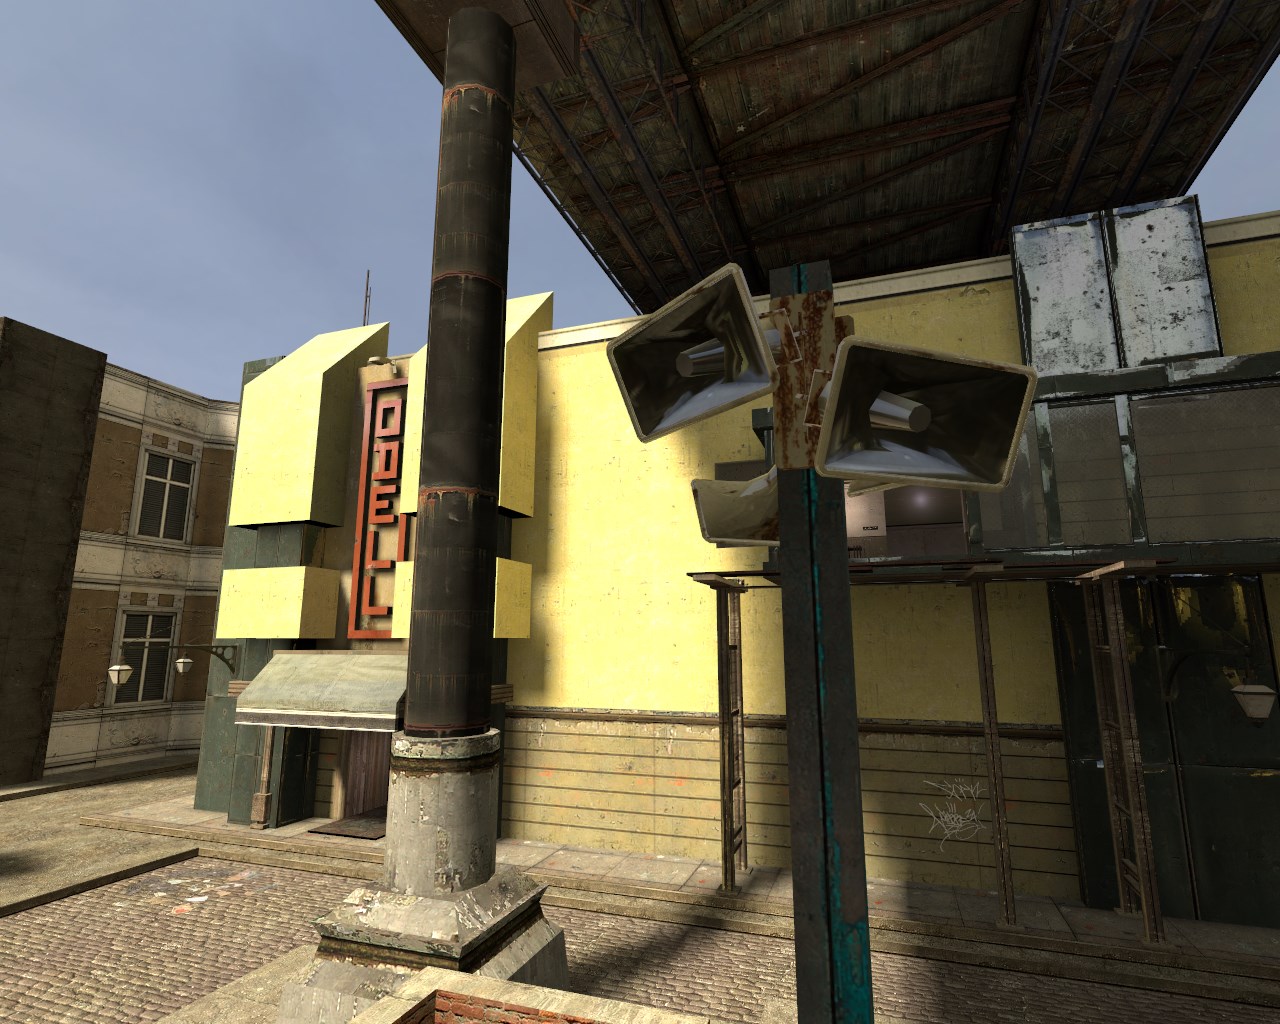 If you hear an alarm, or generally any other strangely loud noise that can be heard across the map, someone has picked up the RPG! In HL2:DM, it's practically a superweapon, so either kill the player that's holding it or get to cover quickly!
Standard Player Movement
However, the game has a complex movement system that is easy to learn, but hard to master.
- Do not bind toggle crouch or toggle sprint; they are bugged and will hinder you in multiple ways! (Toggle crouch is finicky and can't be used quickly, meanwhile toggle sprint burns Aux Power at an insane rate on uneven ground and in the air)
- Many servers have deviated from the standard movement physics, but the general movement mechanics remains the same.
- Your weapon's accuracy are not effected by movement, so going fast is usually the optimal way to play.
Turning your mouse in the same direction while moving sideways (strafing) will make you turn in midair and gain speed as long as the cornering's not too sharp.
You should do this in but in smaller movements while alternating left or right when you can to gain momentum, then follow up with bunnyhops after you land.
- Start by both sprinting and moving forward
- While holding sprint, turn your mouse and strafe in the same direction.
- Release sprint and then jump.
Advanced Player Movement
To do it, you will initially need momentum to start it, such as from a strafe jump. Hold crouch and repeatably jump. Strafing and turning your mouse in midair will cause you to gain acceleration, eventually surpassing sprint speeds.
If you master crouch hopping, you'll never run out of Aux Power again!- First, grab your prop (if able) with the Gravity Gun.
- If it's a barrel, flick your mouse upwards and release the prop repeatably it until aligned right side up.
- Otherwise, release the prop.
- Crouch jump on top of the prop.
- Fire your Gravity Gun repeatably while trying to ride the prop for additional height.
Lighter props tend to get better results (the toilets and sinks especially), but the momentum from these props can be lethal.
- Jump parallel to a slanted surface
- Release the forward/backward movement keys and strafe against the slanted surface
- Bob your camera up and down to gain momentum
Starting Weapons
- Gravity Gun
- Crowbar or Stun Stick (Rebel/Combine side respectively)
- Pistol
- SMG (with no grenade rounds)
- Grenades (x2)
Gravity Gun Mechanics
- For the most part, the mechanics of the Gravity Gun are shared with Half-Life 2 single player; Primary Fire to punt things, and Secondary Fire to grab them.
- You'll automatically pick up items that you're not fully stocked with. Grabbing items this way is usually quicker and safer than walking over them.
- You can pick up a lot of environmental props as well, such as explosive barrels and crates. The general rule is wooden items can break when held or thrown, and metal is indestructible.
- Your grab range is surprisingly high, but it'll take a long time to grab things that are very far away.
- Prop damage widely varies based on the object's velocity and weight. Generally speaking, props that spin in flight (like propeller and saw blades) are the most powerful, followed by lightweight objects (such as toilets and buckets of paint).
- G (Equip a grenade)
- MOUSE2 (Throw it with Secondary Fire)
- Q (Equip your Gravity Gun)
- MOUSE2 (Grab the grenade with its Secondary Fire)
- Wait until you believe you can both throw it far enough to hit another player, but also have cooked the grenade enough to have to not be returned back by them.
- MOUSE1 (Push it away with Primary Fire)
- 5 (Pull out your Pulse Rifle)
- MOUSE2 (Fire the Orb using alternate fire)
- Q (Switch your Gravity Gun)
- MOUSE1 (Primary fire the Gravity Gun to fastball the orb)
Note: There is a glitch where if you switch too quickly from the Pulse Rifle while charging an Energy Orb, it will play the sound and animation when you next pull the AR2 out. This is usually a cosmetic bug, but it uncommonly can fire an Orb out of sync, too.
This trick is easiest to perform if the Gravity Gun/Previous Weapon action is bound to an easily accessible key (it can be found in the Options menu called "Gravity Gun"; it is the one not titled entirely in uppercase). I personally have it bound to "Q", so I'll be using it to explain how it works.
In it's purest form, yo-yoing is essentially repeating this sequence ad infinitum:- Q (Gravity Gun Selected)
- MOUSE1 (Gravity Gun Push)
- Q (Previous Weapon Switch)
- Q (Switched Back to Gravity Gun)
- MOUSE2 (Gravity Gun Grab)
Protip: You can perform yo-yoing on faster objects as well, but you'll need a lot of forward momentum to catch it again.
Let's go for a practical example; you want to Yo-Yo an unlaunched Energy Orb (the best thing to practice this trick on, by the way). You have Gravity Gun set to Q, Pulse Rifle as 4, and everything else is on their default keys.
This is how you'd combo it:- 4 (Pulse Rifle selected)
- MOUSE2 (Energy Orb Launched)
- Q (Gravity Gun Selected)
- MOUSE1 (Gravity Gun Push)
- Q (Previous Weapon Switch)
- Q (Switched Back to Gravity Gun)
- MOUSE2 (Gravity Gun Grab)
- MOUSE1 (Gravity Gun Push)
- The Gravity Gun can reset both grenade timers and energy orb bounces when both punted and grabbed. This means you can grab these, and throw them back to to their original owner!
- Held items can block bullets, but they will not block other player's thrown props from their Gravity Gun.
- Some heavy props like cars and dumpsters can be pushed around
- The Gravity Gun's push can be used to break windows
- The Gravity Gun does minor damage to props, eventually causing them to break. When punted enough, some volatile ones such as the red Explosive Barrel will explode.
Standard Weapon Mechanics
- Bullets have instantaneous travel time to their destination
- The bullet spreads are both random and are not effected by the player's movement.
- Weapon spread is also not effected by your suit's zoom.
- Alongside bullet spread, bullet weapons also possess both horizontal and vertical recoil (this is most apparent on the revolver).
- All bullet weapon damage can headshot, multiplying their damage by 3. This includes individual shotgun pellets.
- Is potentially a better starting weapon than the SMG due to higher average damage and increased accuracy.
- Accurate but slow shots when primary fire is held; fast but less accurate shots when primary fire is rapidly tapped
- It's a weak weapon on spawn due low damage output, especially on armoured targets.
- Secondary fired impact grenades are fairly powerful, but you'll need to lead your target, alongside calculating the distance and compensating for the projectiles arc.
- Firing an impact grenade with the secondary fire and then finishing off weak players is the best way to use this weapon
- It's a heavy machinegun - Higher overall damage than the SMG, but with a slower fire rate.
- Secondary fire takes about a second to shoot an instagibbing Energy Orb in a line; see "Energy Orb Mechanics" for more info.
- Very overpowered at close range due to it's extremely powerful secondary fire.
- Best aimed at the head where possible.
- Has an annoying quirk where it will always need to be pumped after it's been shot; this includes after being backpack reloaded, and after being retrieved from dead players after they've fired it but didn't pump it before dying.
- The best overall weapon at long range, but still very strong at close to medium range.
- Should be treated as a sniper rifle at long range (make sure you've binded toggle zoom to take advantage of it's accuracy).
- Possesses a combination of high vertical & moderate horizontal recoil after shots.
- You will always spawn with extra ammo for this gun
- A revolver headshot is enough to kill almost all players unless they’ve overcharged their armour
- Detonates on impact.
- Infinite flight time.
- Travels in an arc.
- Double damage to armour (impossible to track this in a free for all).
- The Energy Orb is the glowing, bouncy thing of death that will instantly kill anything it touches. It will also push props around that it contacts.
- The Orb will harmlessly pass through the person who either fired it, or launched it with their Gravity Gun.
- The Orb's lifetime is reset when pushed by the Gravity Gun's Primary Fire.
- When shot from a Pulse Rifle, the Orb's velocity can be sped up with the use of the Gravity Gun. See Fast Orb for more details.
It additionally possess a zoom function with the secondary fire, although this does not effect the projectile in any way.
The bolt is unique as it can bounce after being fired from acute angles between walls and floors. Aiming just below a player and having the bolt reflect upward to hit them is an effective method of aiming at close range.
If you learn a map well enough, you can traject crossbow bolts to ricochet around curved corners as well.
Bolt Jumping: For about roughly a second after landing, an enemy crossbow bolt can briefly launch you at high velocity (~2000 Hammer units) if you walk near it. Good luck coordinating it in a typical pub game, though.
The Primary Fire will throw it, unless you've been facing close to wall or stable surface for a second or so, then you may place it as a trip mine. Either way, SLAMS will detonate when either shot or within blast range of an explosive.
After you've thrown a SLAM, you can detonate it with the secondary fire button; however, the delay between throwing a SLAM and being able to activate it is usually too slow for most encounters. It's best to lay them as trip mines.
Trip mines, outside of being shot, can additionally be triggered by props moving into the beam. Overall, the best place to plant trip mines are either low on staircases trim, or above them where players won't usually look. Brightly lit areas will greatly help blend the trip mine's red beam into the background.
Protip: All thrown SLAMS will automatically detonate on their owner's death.
Due to being obnoxious to play against, SLAMS are uncommon on community maps.
When either picked up from it's spawn or from dead corpses, you'll always have 3 rockets to play with.
To balance out it's power, most maps make the RPG hazardous to obtain, usually by surrounding it with environmental hazards or spawning in a a risky, enclosed area.
If you are holding a prop in your Gravity Gun while sprinting forward into a teleporter, you will likely be holding it at the destination. If you are holding a grenade instead, you will almost always be holding it on the other side.
Because the Gravity Gun's interactions with teleporters are glitchy, the best way to figure out if you're still holding an item on the other end is to check if Gravity Gun is still glowing and listening out for it's hum.
Gameplay Annoyances
- If you can't move when you spawn, equip the Gravity Gun and try to pick up the prop below you. Failing that, type kill in the developer console to respawn, hopefully elsewhere!
- You can get stuck if you teleport into another player. The best way to get unstuck is is to kill the other player before they kill you, preferably with a shotgun!
- The shotgun can sometimes fire ghost bullets (no shells used) when swapped to under certain conditions. It most commonly occurs after alt-firing the shotgun, quickly swapping to the Gravity Gun, grabbing something, and then swapping back to the shotgun.
- Your weapon models can sometimes become invisible due to a variety of factors (people joining the server, people spectating you, or weapon glitches usually). You can partially negate this bug by using different crosshairs for each weapon.
- You can sometimes hear loud fire looping without a sound source. You can use two console commands to fix this; either "snd_restart" to flush all sounds, or "retry" to rejoin the server. (This bug is usually caused by ignited explosive barrels.)
- You can mute other players by pressing "Esc", and then clicking "Player List", and then selecting the offending player and press "Mute in-game voice". Note that this will not stop them from hearing your voice chat.
- Sometimes you'll get spawn killed. At least the respawns are near instant.
Extra: Health Mechanics
If the total damage is higher than what the player's armour can absorb, it bleeds through to the player's health.
Fall damage and radiation is not reduced by armour.
Gaining 1 extra point of Armour will let you survive a revolver headshot
However, the possibility of taking fall damage is checked based mostly on your fall velocity and total time in the air.
Extra: Weapon Damage
*The Shotgun calculates damage differently from other hitscan weapons, so the maximum possible damage is displayed instead. See HL2DM University[university.hl2dm.pro] for more info.
*Also deals prop damage on impact before exploding; a direct impact will likely cause an instant kill
†The SMG Impact Grenade appears to do x2 damage to armour, and may possibly deal 1 extra prop damage on direct impact due to its mass. See HL2DM University[university.hl2dm.pro] for more info.
Extra: HUD Modification
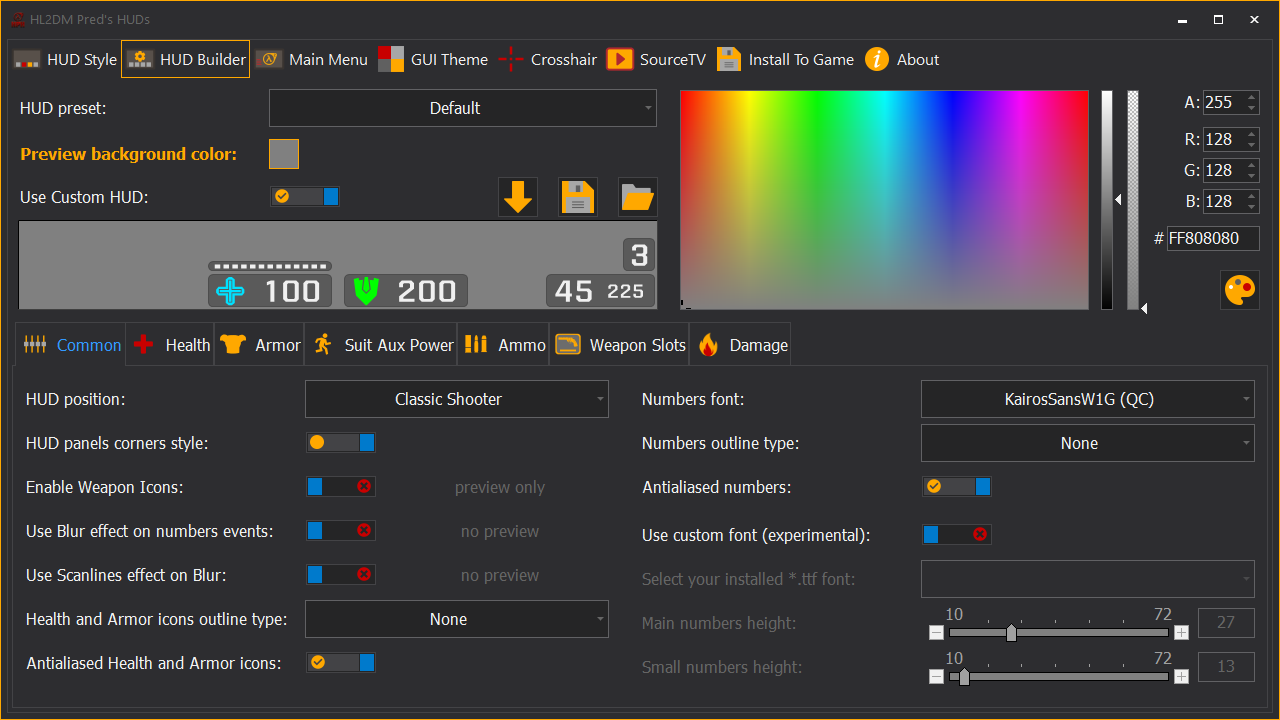
The HPH graphical HUD maker is the simplest way to both create and modify custom HUDs. HUDs generated by this tool also include UI fixes to problems mentioned in the guide above.
It allows customisation of elements such as the HUD panels, custom crosshairs (with the option to change it per weapon), and both the pause and main menu.
https://youtu.be/63MYdIWTgGI
Download Mirror: A mirror download link on Google Drive is found on the S-Force's Steam Group "About" section (near the top): https://steamcommunity.com/groups/SFHL2DM
After doing anything special the author has instructed, copy and paste all files and folders from the part of the zipped file that has folders labelled like resource and scripts to "Half-Life 2 Deathmatch\hl2mp\custom\hud_name_here".
Note: If you see a "sounds" folder with a small (1KB in File Explorer/16 Bytes in properties) file inside the file, that's normal. It's the game precaching all sounds in the mod's custom directories (or lack of it for HUD mods). If you delete it, the game engine will recreate it on next startup.
However, if your game makes corruption (not normal) sounds after installing the HUD, close Deathmatch, delete the "sound.cache" file and reload the game; that'll usually fix it.
https://steamcommunity.com/sharedfiles/filedetails/?id=161652635
The only other thing you should know is that you don't have to create/copy HUD elements that you don't modify to your HUD's "Half-Life 2 Deathmatch\hl2mp\custom\name_here" folder, as files on that folder only overwrite existing files on load (you don't need to change the HUD if you edit your crosshairs, for example).
Anything else about HUD modification that's inconsistent with this guide (Encyclopedia Deathmatchica) should be ignored, as the the linked guide (HUD development guide) above is likely correct.
If you purely want to replace your default crosshair with a custom one (or more - the game supports it), that is easily accomplished.
Custom crosshairs can be downloaded from hl2dm.net's Download page[hl2dm.net]
HUDs store their graphics as font files (*.ttf), so they can't be easily edited like normal images.
Add the new crosshairs font to "...custom\name_here\resource\fonts".
You'll need to precache the new font, otherwise you'll be aiming with the alphabet instead. Add the crosshair's font name to the bottom of "ClientScheme.res", under "Custom Font Files".
The added line should look like this.You'll then need to add the custom crosshairs for each gun. Create a "scripts folder" inside the base of your custom crosshair's folder, then edit "weapon_weapon_name.txt".
You can create a fresh copy of these files by opening "hl2mp_pak_dir.vpk", opening scripts, and then extracting all "weapon_weapon_name.txt" into the custom HUD's "scripts" folder.
Extra: Offline Physics Commands
You can restore the broken console commands by installing SourceMod to your game's directory.
- Download the latest stable[www.sourcemod.net] version of SourceMod.
- Download the latest stable version[www.sourcemm.net] of MetaMod, as it's needed to get SourceMod working.
- Extract MetaMod to "\steamapps\common\Half-Life 2 Deathmatch\hl2mp".
- Extract SourceMod to the same base directory as above.
- Navigate back to "steamapps\common\Half-Life 2 Deathmatch", right click on "hl2.exe", Send To > Desktop (Create Shortcut).
- Right click on "hl2.exe - Shortcut", and left click "Properties" at the bottom of the list.
- Copy and paste the following lines at the end of the Target field, ensuring that you leave a space after the quotation mark:-insecure -novid -game hl2mp +map dm_lockdown +sv_cheats 1 +sv_lan 1The bolded lines are absolutely necessary. In short, this shortcut will launch the game without anticheat, allowing SourceMod to load. Just keep in mind you'll need to quit and relaunch the game normally to join the majority of online servers again. The rest of the commands aren't strictly necessary, but they speed things up and prevent people from joining your game.
- Launch HL2:DM using the shortcut.
- If you didn't include the "+map dm_lockdown" line, create a game.
- To test if see if this works, type (or copy and paste) the following line into chat!sm_cvar sv_friction 0If it worked, the game will tell you the console command worked in chat, and if you or a prop moves, it should slide around like crazy. Type the same command but with "4" again to reset the friction back to normal.
- If the command didn't work, you likely didn't launch with the "-insecure" line.
- Offline SourceMod with VAC is not possible.
- Most of the default server settings and their values are in this Steam Guide
- For the purpose of Googling, you're using a listen server, not a dedicated server.
Failing the above, consult SourceMod documentation[wiki.alliedmods.net] on the AlliedMods Wiki.
Other Game Information Sources
This are sites that have helped in the creation of this guide.
An old, but incredible resource that lays out a lot of the intricacies of Deathmatch gameplay.
Poor grammar and formatting aside, this Steam guide has a lot of information about the game that's not listed elsewhere.
This Steam guide is a good general reference for the game's gameplay bugs, with links to video examples to boot.
Credits and Thanks
Xeogin - Created and maintaining the Community patch autoexec config, alongside both supporting and provided a gargantuan amount of assistance to the creation of this guide
Harper - Guide name
Da11aS - Grammar fixes
Arya - Additional info and links
Community Links
Currently the largest Deathmatch Discord server, with 300 users as of the time of this guide's creation. That server also acts as a hub to other communities that play the game as well.

From 2022, this Discord where the most exciting Half-Life 2: Deathmatch mapping developments have occurred.
Multiple quality maps compete against themselves to try and win prize money from the community donated prize pool.
A showcase of the maps that were spawned from the 2022 contest are shown in the YouTube video linked below.
Join Viperbird's Mapping Contest Discord![discord.gg]
Although the forums are nowhere near as active as it used to be, this site possesses a lot of discussions about the game, alongside a lot of custom files to download, like maps and custom HUDs.
Shutdown Notice: hl2dm.net is planned to be taken offline at the end of March 2023. You may need the Wayback Machine[archive.org] to access it's content in the future.
One of gaming's oldest mod repositories, it's the main place where new mods for older Valve games are posted.
- "Yo-yo" trick video-guide★ 5 (201)10k views172 ♥2 min
- How to block fake servers like Fastpath★ 5 (208)7k views251 ♥5 min
- HL2: DM - Movement Training by Ade★ 4 (122)5.5k views169 ♥19 minUpdated Nov 2, 2024
- Первый Русский РП сервер (открыт в 2010)★ 4 (106)5.1k views142 ♥8 minRussianUpdated Jan 25
- Chaos Crew Roleplay Guide - HL2:DM★ 4 (68)4.8k views66 ♥9 minUpdated Dec 1, 2023
- Учебный курс HL2DM 103 - Основные навыки★ 4 (85)4.1k views133 ♥15 minRussian




- Upgrading to PremiumTeam Fortress 2★ 5 (20k)1441k views11k ♥6 minUpdated May 11, 2022
- No More Room in Hell Official ManualNo More Room in Hell★ 5 (2.8k)569k views2.1k ♥29 minUpdated Apr 22, 2019
- NMRiH Community Hosting GuidesNo More Room in Hell★ 5 (526)351k views653 ♥1 minUpdated Aug 10, 2022
- ULTIMATE GUIDE FOR GAME DEV TYCOONGame Dev Tycoon★ 5 (5.8k)326k views10k ♥4 minUpdated 23 Jan, 2014
- How to 'Git Gud' Soon™MORDHAU★ 5 (2k)318k views3k ♥68 minUpdated Nov 16, 2024
- Лучшие кооперативные игры SteamPAYDAY 2★ 5 (1.5k)315k views2.1k ♥56 minRussianUpdated Apr 27, 2025






This guide was created by its original author on the Steam Community. Are you the author and want it removed? Request removal.