FEZ: A Guide for the Dimensionally Challenged. (V 0.21)
Version History.
I will list the most recent version of this guide first. I will try to update it as frequently as I can.
V 0.21 Completed Unsolved Mysteries Part 1 and 2.
V 0.20 Made a multitude of fixes and touch-ups, such as replacing every mention of 45º-head turning with 90º-head turning and clarifying the game's QR codes. Also began work on Unsolved Mysteries, which had to be split into multiple sections.
V 0.19 Added the foundation for an Unsolved Mysteries and Odds and Ends section.
V 0.18 Added some pictures for various sections. I think I'm pretty much 100% done with the walkthrough at this point, and by extension, almost completely done with the guide. I think I'll do a chapter for Unsolved Mysteries and then call it finished.
V 0.17 Finished New Game+.
V 0.16 Went back and added some pictures. Added Ancient Polis, Nu Zu, Nu Zu Secrets, Zu, Zu Secrets, Beyond, and New Game+'s intro, first part, second part, and third part.
V 0.15 Once again changed the guide's structure. I've removed all information that would require sequence-breaking to understand, hopefully giving the guide a more organic flow and allowing the player to make more decisions on their own. This required a lot of editing past portions of the guide. I also stitched some parts together. Lastly, finished writing out the Zu Ruins section.
V 0.14 Began work on the Zu Ruins, including the Hub Area and the Clock Tower. Added pictures for those areas and some areas within the Cemetery.
V 0.13 Completed the Ancients' Cemetery (the Owl Effigy, Glade of Skulls, and Mausoleum Yard), and added pictures for the Cemetery and Owl Effigy.
V 0.12 Completed the Sewers, added pictures to Geyser Alley, added and completed the Gateway, Gateway Spoilers, and Redwood Road. Tentatively added the Cemetery.
V 0.11 Added The Sewers and Geyser Alley.
V 0.10 Added the Pipeline.
V 0.9 Changed the whole structure of the guide. "Dimensions" are now "Parts", and Hubs get their own Part so they're not lumped together with their own branches. Finished the Incline and Windmill Towers. Removed the sections I haven't worked on yet, as they don't need to be there.
V 0.8 Added Dimension Six. It'll probably need to be split into THREE parts, oh boy...
V 0.7 Edited something in Dimension Four, added/finished Dimension Five.
V 0.6 Changed some pictures, re-worded a lot of stuff, added/finished Dimension Four. Also added a picture that details the Zuish language.
V 0.5 After going on a long hiatus, I've begun to rework this guide. I'm adding some things and switching them around. For starters, there are no more Spoiler Centers, but I will include some spoilers in separate chapters due to character limitations. I'll work on Dimension Four soon.
V 0.4.1 After not updating for a while, redid some codes that I got wrong. Whoops.
V. 0.4 Finished all of Dimension Three.
V. 0.3.3 Added Dimension Three Spoilers. Removed Herobrine.
V. 0.3.2 Started extensive work on Dimension Three's spoiler center. Added Herobrine.
V. 0.3.1 Added in pictures for Dimension Three.
V. 0.3 Finished Dimension Two and Dimension Two Spoilers. Beginning Dimension Three.
V. 0.2 Updated Welcome to FEZ. Fixed some typos, and continued work on Dimension Two. Added Dimension Two Spoilers, due to there not being enough space to fit it in one section.
V. 0.1 Published the guide. Finished Welcome to FEZ, Dimensionally Inclined Controls, Cubic Collectibles, and Dimensions Zero and One of the Walkthrough. Dimension Two in progress.
Welcome to FEZ!
 Hello, three-dimensional (hopefully) reader. First, something to get out of the way. If you are not three-dimensional and are reading this guide, welcome to our universe! Anyway... Hello, reader, and welcome to the wonderful world of FEZ! This game was developed by Phil Fish and Renaud Benard, with music by Rich Vreeland, or "Disasterpeace."
So, let's get right into it. This game is represented two-dimensionally, so you only see two dimensions of the world at any given time. However, the game is actually set in a three-dimensional environment. The crux of the game is navigating a 3D world in the confines of 2D, and that's where the titular fez comes in. You, a two-dimensional thing named Gomez, have acquired a fez and can use it to "flip", if you will, between four 2D perspectives that comprise the 3D world.
The goal of the game is to collect shiny golden cubes that have been scattered all around the world. If you don't, well, let's just say bad things will happen to you and your environment. To collect these cubes, you're going to need your trusty fez. You'll use this fez to access previously unreachable platforms, or to reveal hidden nooks with cubes.
Right now, I must warn you that this is a guide devoted to exposing the secrets of FEZ to the dimensionally challenged (you). However, if you are a person who wants to solve the secrets for themselves, that is good, because I have arranged this guide as such for you. The answers to hidden puzzles and secret rooms will be spoilered in black text! You will only be able to see them if you move your cursor over them. Refer to these if you want quick and easy answers.
Keep in mind that you can access any of the areas detailed in this guide in any order, except for the first few areas and the last one. That's just the type of game FEZ is. The way I have the rooms ordered in this guide is just how I play through FEZ. If you like the guide or have some criticism, feel free to comment below.
Without further ado, let's get right into FEZ! First, we'll be looking at the controls.
Dimensionally Inclined Controls.
FEZ's controls are fairly simple, but they can be remapped to any key you want if you decide you don't like how they're laid out. I'll list the controls as they are in the start of the game without any remappings.
Walking: Press the Left or Right keys at the right end of the keyboard to make Gomez walk either right or left.
Jumping: Press the Space key to make Gomez leap skyward. Tapping the key will result in Gomez doing a short hop. Holding the key will make him jump higher.
Looking Around: Press I to make Gomez look up and have the camera move up as well. Press J to make Gomez look to the left and the camera will move in the same way. K will do that with down, and L will do that with right. You can do this to look around the area you're in, but your viewing area is limited. Tap Right Shift to snap the camera back to Gomez.
Flipping: Press A to make Gomez flip his perspective one notch to the left. Press D to flip it to the right. You only gain this ability after acquiring the fez. This is crucial to navigating the world and solving puzzles.
Talk to People: Press the Left Shift button near someone who can talk and they will talk to you. When Dot flies out and stays in a spot and Left Shift appears near it, Dot usually has something to say. Sometimes it's useful, and sometimes... not so much.
Interact: Press the Left Control button near an object which can be tinkered with to, well, tinker with it. For example, pressing it near a Crate will let you pick it up, and grabbing a Pivot will turn the Pivot around. The Left Control key is kind of hard to reach, so remapping it may help you. (I remapped it to F.)
Inventory: Press Tab to call up your inventory. This will show all of the collectibles you have. There are four sides to your inventory, and you can manage them by pressing A or D. To examine one of your collectibles, simply press Space, and use A or D to look around the collectible.
Pause: Press the Enter key to stop the game and pull up the Pause Menu. From here, you can use the arrow keys and the onscreen prompts to navigate the Menu, or exit back to the game.
World Map: Press the Escape Key to pull up the World Map, the convoluted map of all the areas in FEZ, stretching through space and time. From there, look at the onscreen prompts to navigate the Map. If an area on the World Map has a ?, then there are still secrets you haven't found there. If it has an icon of four gold cubes, there are still Cube Bits there. If there's an icon of a whole cube, there's a whole Cube there. If the area is golden, you've found everything there.
Cubic Collectibles.
This section will serve as a list of all the items you'll find in the world of FEZ. Since FEZ is a huge game and there are so many areas, there's going to be a lot you'll need to collect. The game's entire point is collecting items, after all. Here's a list of FEZ's collectibles.
Cube Bits.
 Cube Bits are the basic components of the Hexahedron, the giant golden cube that you're trying to rebuild over the course of the game. They are little golden cubes that can be found in nearly every level of the game. Every time you collect one, a little jingle plays, and it is added to your inventory. When you get eight Cube Bits...
Golden Cubes.
 ...You get a Golden Cube! Golden Cubes make up the Hexahedron's order and stability. These Cubes will help in re-stabilizing the universe, but their true power can only be unlocked by collecting all of them... They can be found by either collecting eight Cube Bits or finding a whole Golden Cube. Whole Cubes can be found across the world as well, usually in Treasure Chests or near Little Gates. There are 32 Golden Cubes in all.
Anticubes.
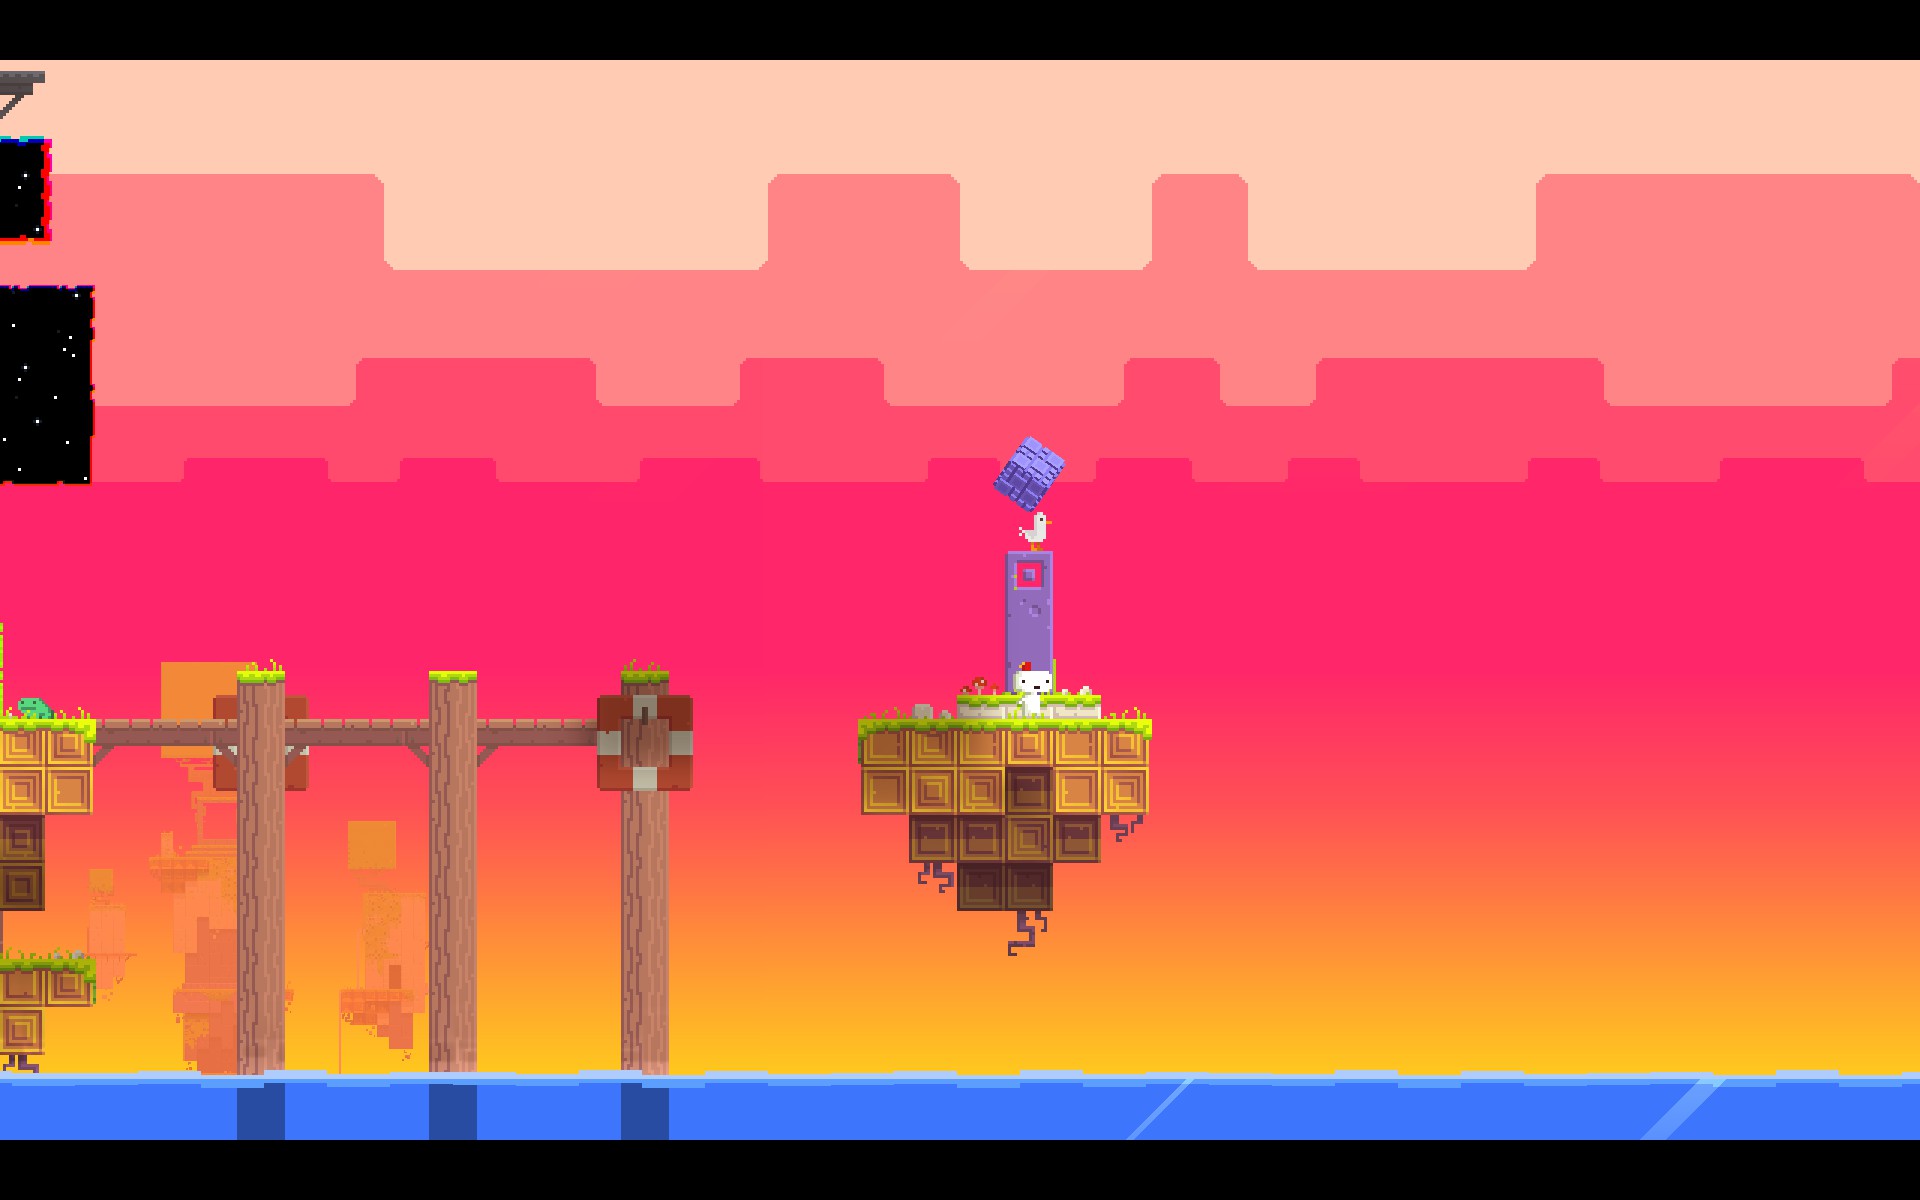 For every action, a reaction. For every positive, a negative. This is the basis of Anticubes. Anticubes are made of negative power, and although they look peculiar, they are necessary in restoring the Hexahedron as well. Anticubes are much harder to find than Golden Cubes, and are generally found by solving puzzles. Information on finding Anticubes will be encased in spoiler text as to not ruin the surprise of finding them. There are 32 Anticubes in all.
Small Keys.
 Small Keys are golden disposable keys that look like they came straight from The Legend of Zelda. They are used to unlock Locked Doors and open the paths to new areas. They are only found in Treasure Chests.
Treasure Maps.
 Treasure Maps are old and weathered pieces of paper that detail how to find treasure throughout the world. They can either be found in the open or in Treasure Chests. There are nine in all. Four of them look very similar, don't they?
Artifacts.
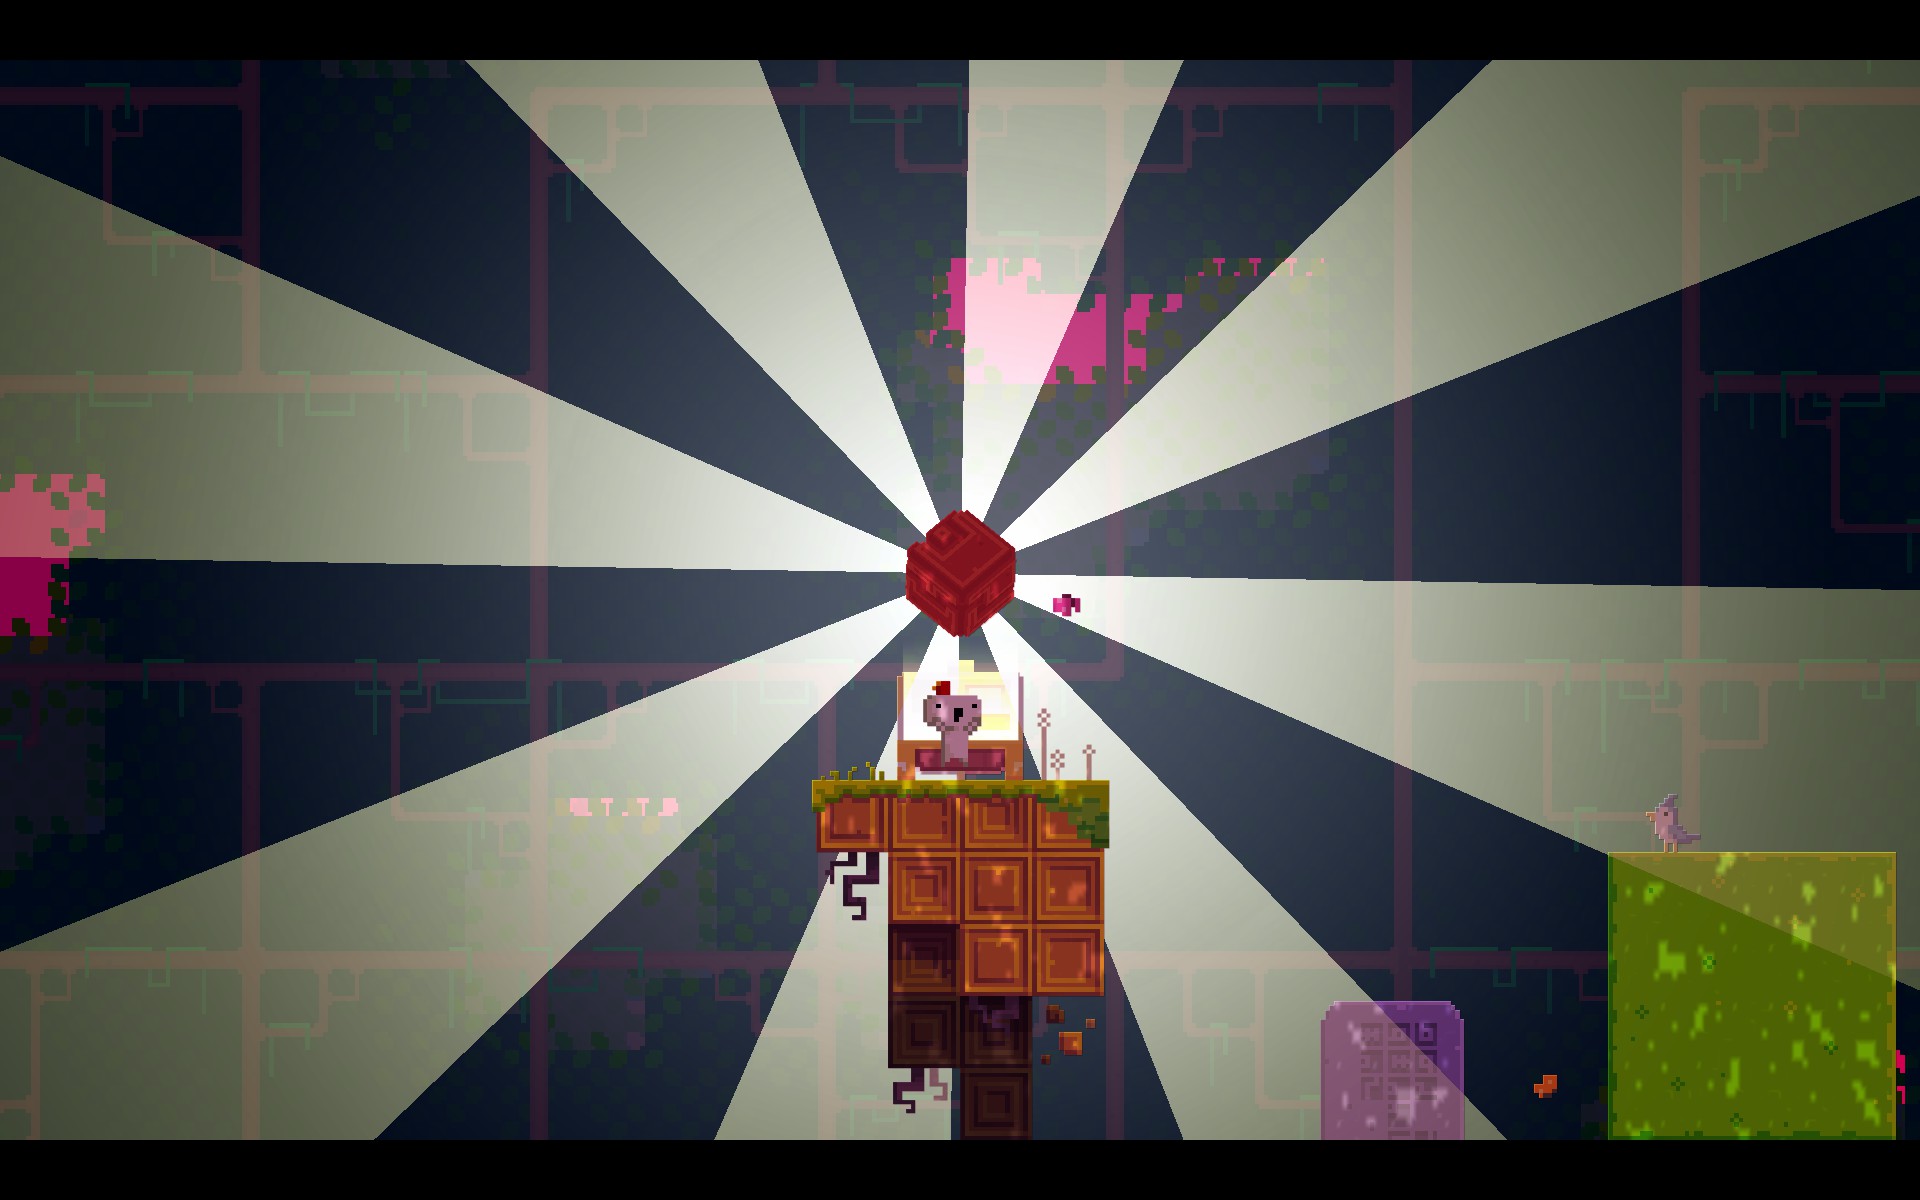 Ancient artifacts from a distant civilization that may or may not be completely fictional. They can be found in various places by solving puzzles. They are only found in Treasure Chests. There are 4 in all: The Writing Cube, the Counting Cube, the Skull, and the Tome. You must figure out what they do for yourself.
Heart Cubes.
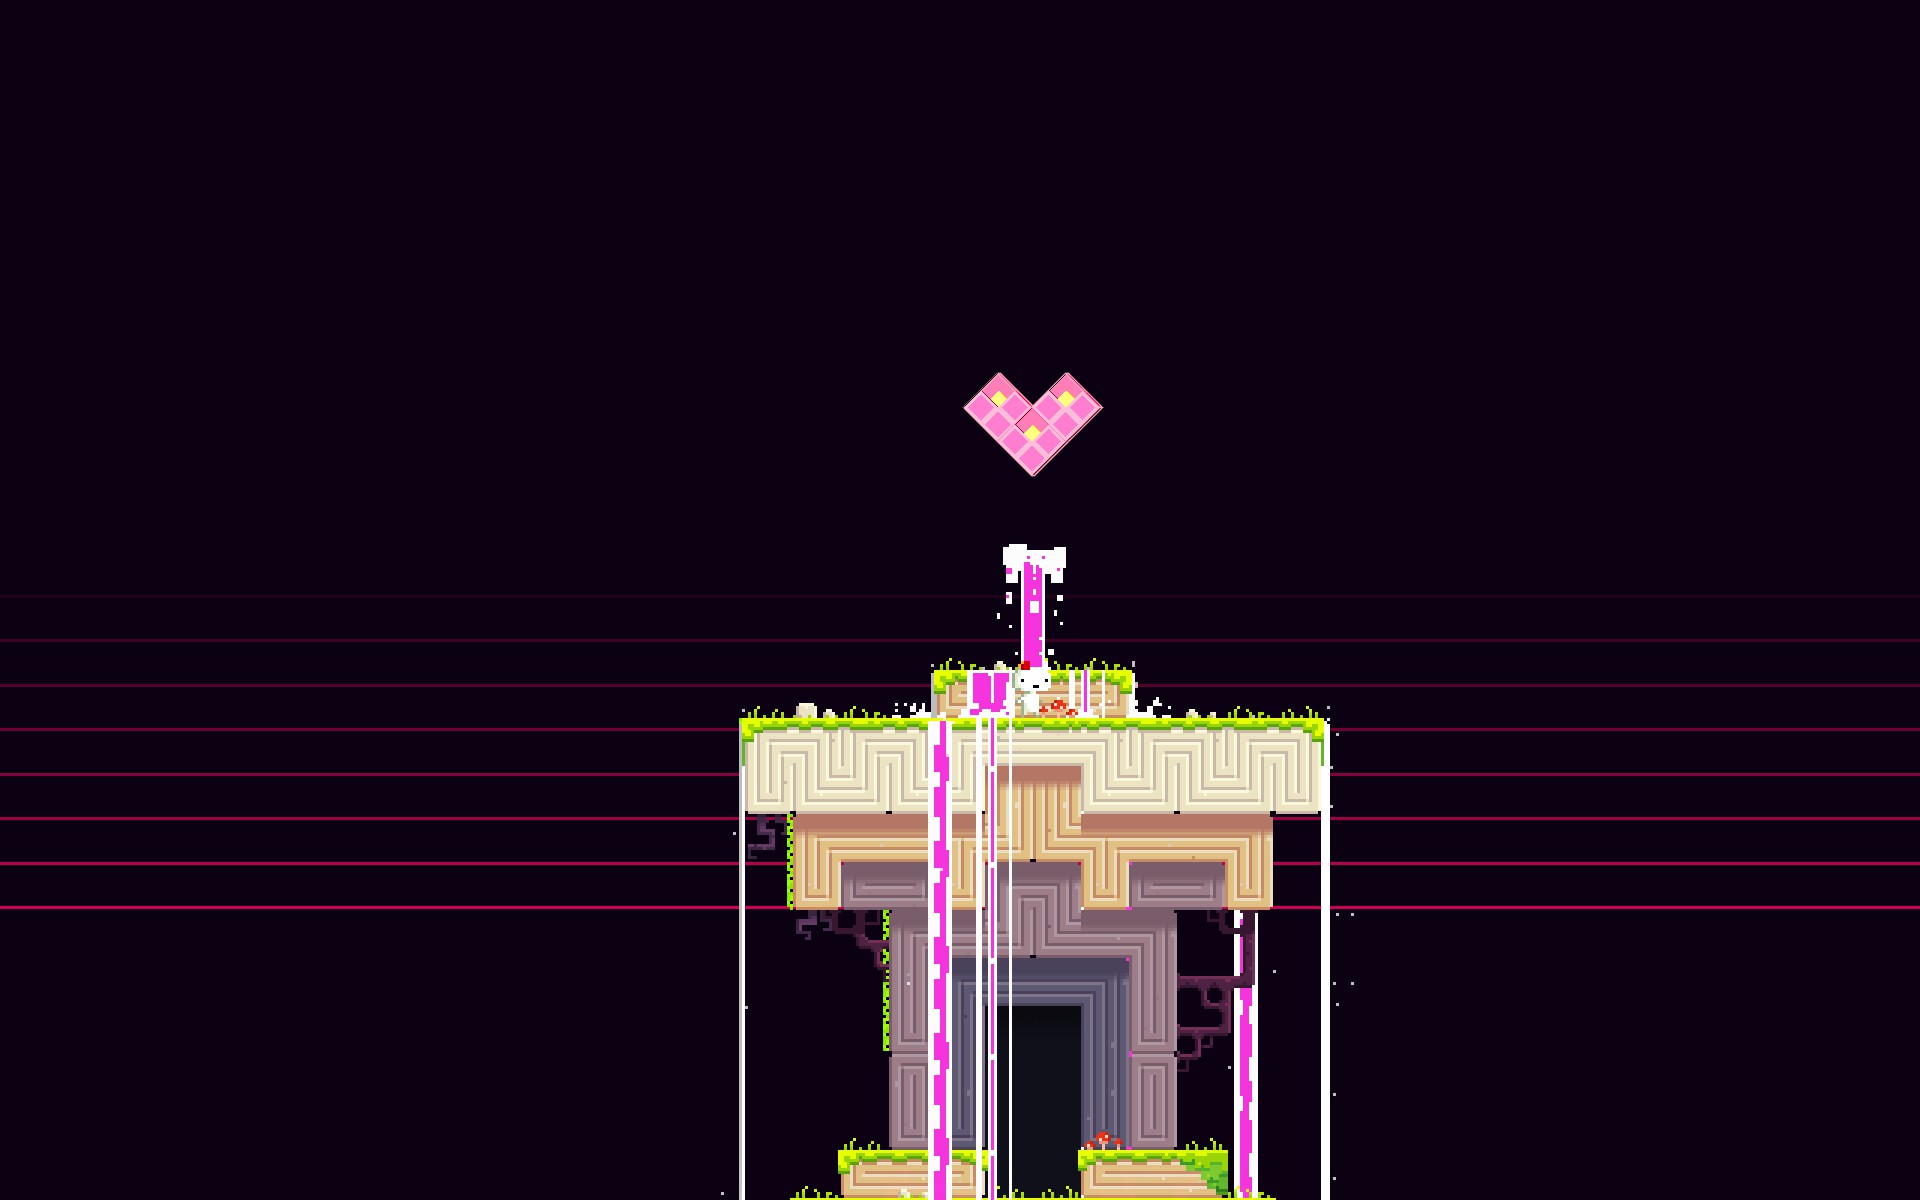 The Heart Cubes are red cubes with yellow pieces in the middle. They are sealed away behind the hardest puzzles in the game, and are nearly impossible to obtain. There are three in all, and do not count towards the completion of the Hexahedron. You can view the Heart Cubes you have obtained at any time in the Temple of Love, behind a door that requires every Golden Cube and Anticube in the game to open.
Walkthrough, Part Zero: Prologue.
Section Zero: Villageville.
Gomez, as any sane video game protagonist would do, begins his adventure by sleeping. After a second or two, Gomez will wake up inside of his own house. Notice how everything is 2D, from the lights strung around the house to the shelves to his Legend of Zelda poster. Follow the onscreen prompt to walk out the door.
 Here we see Geezer, the village elder, at the top of the village delivering some mail. Watch as the mail goes all the way down the chute, passing by each house and each villager, until stopping at Gomez's house. At this time, Gomez will walk out of his house. Follow the onscreen prompts to collect the mail.
Once you've read the mail, use the onscreen prompts to familiarize yourself with moving Gomez if you haven't already. You can talk to the villagers if you want, but you don't have to. Note that they all seem to know of a third dimension, but they just refuse to believe it actually exists. You can go through the doors as well, even though there's nothing in the rooms of value. Not yet, anyway.
Eventually, you should make your way up to the top of the village. Listen to what Geezer says and then... Wait a minute... Is that the outline of a... cube?
 Once the light show is over, you will appear in a foriegn chamber filled with statues of beings wearing fezzes. Hovering above you is a giant golden cube forged from tetrominoes, the Hexahedron. He mantains the order of all of reality. And he is speaking to you, even if you can't understand what he's saying.
The Hexahedron speaks in a language I will call Zuish. You'll see why later. This is not the last time you will see this language. For the sake of clarification, I have included what the Hexahedron says here in spoiler text. If you want to know what it says right now, go ahead and look. If you don't, don't worry. You'll figure out the language in due time.
"Hi there! How are you? I will be your Hexahedron today. So, this is just a routine procedure, but I do need someone here just in case something goes wrong. If something does go wrong, you are going to have to clean up the mess. Hey, wait a minute! Can you even understand what I am saying? And what is wrong with your head? Oh well, you are here now. Might as well do this thing! Prepare to have your mind blown!"
 Watch Gomez get abducted and cruise through three dimensions at hyperspeed, and then continue through the dialogue.
"All right. Welcome to the club. Enjoy your free hat! I kind of thought maybe this would not work because of your weird head, but everything looks A-OK from over here. Thanks for the hand. You can go home now. It was very nice to meet you!"
With that, the Hexahedron departs and you are granted the fez from a long line of light. Behold! You can now flip between perspectives using the A and D keys. Try it out now! Hey, wait a minute.

Is something wrong with your computer?
...

Uh-oh.

Walkthrough, Part One: Villageville, Reflection Tower, and the Vertex.
Alright, don't panic. That stuff back there was just the set-up for the story of the game. Let the game "crash" and "reboot". When you come back to the now-glitching title screen, start up the game again. You will be back in Gomez's room, and you might almost dismiss what happened earlier as a dream, if it wasn't for the fact that Gomez still has his fez. Exit the room once Gomez wakes up.
Watch as a floating hypercube spirals down your village. Huh, your home really is three-dimensional! Let the hypercube work its way down the village, eventually stopping at you. The hypercube's name is Dot. Listen to what Dot has to say. It will explain what mess you've gotten yourself into, and what you can do to fix it.
Section One: Villageville.
 Your current goal is to get a Golden Cube. You can start your collection by grabbing the Cube Bit right next to you. [1/8 Bits.] As a side note, if you talk to the villagers, their dialogue will be different than before you broke the Hexahedron. Now enter the room above your house.
The Picture Room.
 This room is a room full of pictures. It seems there are pictures for every person in the village... along with a few others. If you flip twice in either direction (or press Up in front of the fireplace), a hidden room with a Treasure Chest will be revealed! Press Left Control to open the chest and reveal a Small Key! You will need it.
However, that is not all you can do in this room. There is still a hidden collectible you can get that requires looking at a certain picture. See if you can figure it out. If not, here's a hint: it involves the picture with the villagers in fezzes. If you're still stumped, read below.
 This puzzle has to do with the picture of villagers in fezzes. You must flip in a pattern that corresponds to where the fezzes are positioned on the villager's heads. If they're on the left side, press A. If they're on the right side, press D. The sequence you must flip to is D D A D A A A D. Doing this will give you your first Anticube and also earn you an achievement! Achievement Get: Equal and opposite. [1/32 Anticubes.]
Walk out of the room. Make your way up to the house directly above this house. This house's door is locked, but you have a Key! Use it and enter the room.
The Boiler Room.
A giant boiler dominates most of the room. There are also many notes taped to the wall. Investigate the center of the room to pick up your very first Treasure Map! [1/9 Maps.] Achievement Get: Cryptographer. Like the previous room, there is still a hidden secret here. However, this requires knowledge of two codes that we won't find the answers to until much later in the game. Leave this room alone for now.
Exit the room. Climb up the village and flip to the right twice to reveal another Cube Bit hidden in a nook. Grab it. [2/8 Cube Bits.] Then, jump up, grab the ledge, and make your way up to a house. Enter into an abandoned room. Grab the sole Cube Bit in there and head out. [3/8 Cube Bits.]
 Head out and flip to the right to reveal another Cube Bit in a hidden nook. Grab it. You're halfway there! [4/8 Cube Bits.] Now, leap to the left to land on the platform with a Treasure Chest. The platform would normally be unreachable, but now you can get to it! Flip to the front of the Chest and open it. Inside is another Small Key! Jump back to the mainland and continue onward.
Make your way back to the top of Villageville, where Geezer was. There is another Cube Bit up there. [5/8 Cube Bits.] Pocket it and drop down to the door below you. You will arrive in the Kitchen. At the top of the room is the sixth Cube Bit. [6/8.] Head out, flip to the right, and enter another abandoned room. Another Cube Bit lies in here. Only one more to go! [7/8.] Finally, get out, flip to the left, and enter the last closed door on the mainland, the Classroom. The final Cube Bit is in here.
The Bits form one Golden Cube! [1/32 Golden Cubes.] You can now unlock the door, and you also get your first achievement! Achievement Get: Get a cube. While we're on the subject, perhaps you should check out the achievements? Before you exit the area, make sure you've visited every room in the village. Doing so will count towards your percentage cleared.
 If you followed my advice and looked at the achievements, you should see one called Achievement unlocked. Its description is RTRTLTRTRTLTLTLT. These correspond to controls for FEZ's XBOX version. Transfer this into PC controls to get D D A D D A A A. Flip to this sequence to earn an Anticube and the achievement! Achievement Get: Achievement unlocked. [2/32 Anticubes.]
After that's done, head down to the bottom of the village, climb down the vines, and stand in front of the door to unseal it. Head through.
Section Two: Reflection Tower.
 When you exit Villageville, Navi Dot will speak to you again. Listen to what it has to say about the World Map and then continue onwards. This area of the game is built into a large stone tower continually spiraling upwards. Your goal is to reach the top, and it will take some platforming and flipping to do so. When you reach the end of a path, just flip to continue. Do this, and you'll make it to the top in no time.
At the top of the tower are four floating stone-heads and another door. This one requires two Cubes to open, but since you're up here, you should have collected all eight Cube Bits on the way, forming your second Golden Cube! [2/32 Golden Cubes.] Unseal the door and enter.
Section Three: The Vertex.
 As Dot puts it best, this is some kind of door place. There are three doors here, that require four, eight, and sixteen cubes to open, respectively. If you've gotten all available Golden Cubes and Anticubes so far, then you can open the four-cube door.
We'll come back to this area at the end of our adventure, so that we can cover the entire area in one go. Make your way to the top of the room by flipping and jumping on platforms. A door that requires no cubes to enter awaits you at the top of the area.
Enter.
Walkthrough, Hub One: Seaside Pillars.
Hub One: Seaside Pillars.
 This is the first Hub you will encounter in the game, and it is the biggest. The area consists of three or so landmasses jutting out from the sea below. Various doors are installed onto the rocky surfaces, leading to various places. There are two Cube Bits in this area; grab them now. [2/8 Cube Bits.] If you've noticed the strange structure at the top of the Hub, that's a Warp Gate. It will become useful once we venture into Lighthouse Harbor.
Anyway, it's time to pick a door to enter. We'll start with the Waterfalls. The Waterfalls' door is the boarded-up one on the left pillar, visible in this picture. Walk and flip towards it, and then open it.
Walkthrough, Part Two: The Waterfalls and Incendiary Caves.
Section Four: The Waterfalls.
 This area is taken up by a huge stone structure. Carved into it is a face that constantly spews water. The face is interesting in and of itself, but it's what's behind the waterfall that's of value... When you enter the area, climb up the starting platform and obtain the sole Cube Bit in this area from atop an obelisk. [3/8 Cube Bits.]
By now, I'm sure you've noticed the strange marking on the obelisk. It looks like a long scratch, branching off in various odds and ends! What on earth could it mean...? Make a mental note of this weird structure, and then jump off of the starting platform onto the mainland.
 Flip twice to reveal the backside of the waterfall. A bomb rests there. Listen to what Dot has to say about it, and then pick up the bomb and flip to the right to reveal a doorway with a strange sort of loose rock. This loose rock can be broken by bombs. Place the bomb at the doorway, which is shown in the picture. Let it blow up and then enter the new area.
Infinite Cliffs.
 Well, this place certainly seems odd. Anyways, pick up the two Cube Bits in this area by heading downwards. (Or upwards. It doesn't matter, as you'll see in a second.) [5/8 Cube Bits.] Make your way down/up and find a whole Golden Cube out in the open! Pick it up. [3/32 Golden Cubes.] In this area lies your first Little Gate. You can enter it to go back to Seaside Pillars. However, if you keep going down, you'll see you'll end up right back at the door which you came from.
...By now you should realize why I've called this place the Infinite Cliffs. It endlessly repeats, and for good reason. Because in the very level itself lies a puzzle, and an answer as well. This requires one of the game's secret codes to solve, so we won't figure it out until later.
Now, head back to the Waterfalls, and make your way to the top of the giant stone face. There should be a giant tree there, and if you flip around, you will find a doorway carved into it. Go through the door to enter a new area.
Rosetta Grove.
 Wow, this area is so peaceful! A lot of wildlife thrives in the area, not recognizing the universe falling apart around them. By now you should have noticed the huge mushrooms around the area. If you jump on one, you are instantly propelled upwards! Flip and jump to make your way up to the main platform of the area.
 Once there, head up to the tree and bounce off the obelisk, collecting the area's Cube Bit along the way and landing on a platform with a Chest. [6/8 Cube Bits.] Open the treasure chest to reveal an ancient artifact, the Writing Cube! [1/4 Artifacts.] Achievement get: Mightier than the Sword. Say, the writing on that obelisk (and the Writing Cube, if you care to inspect it) strikes a chord from the beginning of the game...
This area holds a huge secret involving one of the game's codes. If you want to solve it, keep in mind the actions of the animals in this area... And if you're still stumped, you might want to look up what a pangram is. You can see the answer in the next chapter.
Now, exit the area and climb down the waterfall. Head to the back of the waterfall to see a large sealed-off door. As we demonstrated by bombing the Infinite Cliffs open, this door can be broken by a bomb! Bring the bomb off its pedestal and throw at the door to enter a new area.
Section Five: Incendiary Caves.
 This area is a cave full of the ghostly clinking of pickaxes and the harsh noises of bombs. When you enter, flip and make your way up the column. At the top, flip around to find a bomb in the wall. Grab it and flip twice to reveal a large portion of loose rock. Throw the bomb there to reveal another door. However, there is a Cube Bit in this area you can get.
Head back to the bomb. Grab it and fall down to the platform with the crate to the right. Flip to the right and throw the bomb at the small loose wall. Grab the new Cube Bit and then enter the door. [7/8 Cube Bits.]
Incendiary Mines.
 This is a bigger part of the caves with more rocks and bombs. Upon entering, jump to the bomb platform to your left. Flip to the left, grab the bomb, and jump to the beginning of the loose wall. Set the bomb down and grab the Cube Bit. This brings you up to another full Cube! [4/32 Golden Cubes.]
Now, flip twice to reveal the backside of the column. A section of loose wall starts right at the ground. Grab the bomb and place it there. At this point, things get tricky. When the explosion has uncovered all of the loose wall, you must flip to the right to reveal a new section of loose wall. Continue this until all of the loose wall is gone and another Bit can be seen. Grab it and head up. [1/8 Cube Bits.]
Up here are two blue columns and another bomb. First, grab the bomb and flip to the left to reveal a door of loose wall. Let the bomb explode, but don't enter the door just yet. Instead, flip to the right again, back where you were. Now, repeat what you did earlier with the flipping explosion, just on a bigger scale. Let the explosion go off, and continually flip so the explosion can travel up.
Go up the new path to find another full Cube and a Little Gate! [5/32 Golden Cubes.] However, don't use the Gate. Head back down to the uncovered door. Enter it now.
Incendiary Formations.
 This area revolves around a simple puzzle and a Treasure Chest. Here, grab the bomb and head down to ground level. Flip to the right and see a small section of loose wall. Place the bomb there to uncover yet another Cube Bit. [2/8 Cube Bits.] Head up with the bomb, but don't flip. Instead, walk to the edge of the platform and jump to the next. Place the bomb down against the large wall and let it explode.
Now, climb up the ladders to open the Treasure Chest, which contains a Small Key. Head back, exit through the Little Gate, and head back to the Waterfalls again.
Walkthrough, Part Two Secrets.
These "secrets" sections will call attention to aspects of levels that are very mysterious. If the solution is able to be found at the point in the game at which you first see the puzzle, then we'll cover the solution here. If not, we'll merely discuss the puzzle and return to its solution later, once you're able to properly utilize it. Any new areas found in these sections won't be spoilered, but how you get to them and any puzzles you may find in them will be.
 At this point, it's likely that you're starting to see black holes. Black holes periodically and randomly appear throughout areas, and are a result of the instability caused by the Hexahedron's fragmentation. If you touch one, it will suck you up and kill you. You'll respawn back at the last stable platform, so it's not a huge issue. Still, you'd better watch out!
As we've already noticed, the purple obelisk near the entrance to the Waterfalls contains some pattern of runes on it. These correspond to a code that won't be discovered until much later in the game. What you might have also noticed is that there seems to be a door behind the waterfall, but if you try to access it, it won't budge!
You've also probably noticed that the Waterfalls change quite a bit at night. For starters, an owl always enters the area at nightfall and leaves at dawn. Sure, animals are everywhere in this game, but this owl's behavior is consistent, and that's worth noting. Second, a series of golden patterns appears on the side of the Waterfalls' main stone structure at night, and fades at dawn. The golden patterns seem to resemble the patterns on the obelisk if you look closely. What could these possibly mean?
Unfortuantely, we can't figure these out right now. But what we can attempt to decipher is Rosetta Grove's big secret. Read on to discover it.
 This area in the game is the place where you can dechiper this game's language, Zuish. Remember Zuish? It's the babbling the Hexahedron was saying. A pangram (the thing I said you should look up) is a sentence with every letter of the alphabet in it. The most well-known pangram is "the quick brown fox jumps over the lazy dog."
As it turns out, there are a lazy dog and a quick fox jumping over said dog in this very area! Furthermore, the obelisk reads that very sentence in Zuish! You can read it by tilting your head 90 degrees to the right so the message can be read from left-to-right rather than top-to-bottom. The obelisk reads "the quick brown fox" on two sides, and "jumps over the lazy dog" on the other two! With this in mind, you can dechiper the entire Zuish language!
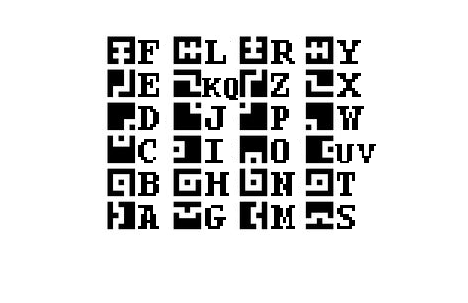 Here is a convenient picture of what the Zuish letters are when read at a 90-degree angle to the right. Note that K and Q share the same letter, as do U and V. With this in mind, you can now go back and decipher what the Hexahedron was saying if you want! You can also feel free to translate any message in this language that you see from this point onward. Though they aren't used much for puzzling purposes, they appear quite frequently throughout the game's world...
Walkthrough, Part Three: The Belltower.
Section Six: The Belltower.
 Now that we're done with the Waterfalls, it's time to move to the next area, the Belltower. The door to the Belltower on Seaside Pillars is on the far right pillar. The Belltower itself is a long stone column with a predictably large Bell resting at the top. When you enter the area, make your way up the stone nooks etched in the tower until you come across a door. Enter it.
Adore Island.
 This place is just a small stone pyramid sunk in the water. Hmm. If you flip twice and go to the bottom, you can hear a sort of weird noise... At any rate, there's nothing you can do here right now, so head back.
You'll collect two Cube Bits as you head up until you reach the Bell. [4/8 Cube Bits.] Hey, you can ring it! The bell makes a different sound on each side you ring it, and each side has a different symbol on it. Have you seen those symbols before? Jump up the platforms and through the door at the top to enter a new area.
Forgotten Shapes.
 This area consists of two square-like structures hovering in thin air. Upon entering, flip to the right and jump across the platforms to reach a door. Press Up at the door to flip twice and enter the backside of the platform. Jump across the platforms to get another Cube Bit. [5/8 Cube Bits.] Head down to see a purple door. Enter it.
Symbolism Puzzle.
 Upon entering this room, you are greeted by an island with four purple cubes. Each of the island's walls have a symbol on them. Surrounding you is pink water that you can swim in. Dot is of no use to you here; it convinently forgets what a truly important puzzle means quite often.
Keep in mind that you can move the purple cubes around. The puzzle in this room, if you haven't figured it out yet, involves this. If you're still stumped, try moving the blocks together. The answer to this puzzle will be covered next chapter. Head back outside and climb to the top of the platform. Up here, jump up and climb up the vines to the very top. Hop off and flip to the left to reveal a platform with a bomb and a section of loose wall. Look familiar?
Grab the bomb and let it explode next to the loose wall. This will reveal another Cube Bit. [6/8 Cube Bits.] Grab it and head through the doorway to appear on the other side of the structure. Jump across the platforms in your way until you reach the end of the road. Flip to the right to reveal a Cube Bit in an alcove. [7/8 Cube Bits.] Flip to the right again to appear back at the section with the bomb.
Jump across, head up the vines, and head through the door to enter yet another new area.
Forgotten Ring.
 Upon entering the area, instantly flip twice to reveal a sole Cube Bit resting on the backside of the structure. Grab it to create a whole Cube! [6/32 Golden Cubes.] Now, jump onto the floating platform and climb the vines up to the mainland. Don't enter the door you see just yet; there are some other things we can get here.
Climb up the vines right next to the door. They may seem to lead to nowhere, but if you flip to the right, your vines will connect with the other vines at the other side of the wall, allowing you to climb onto them! Amazing! Use this to make your way onto the other side of the ring Flip right again, and you should be able to touch down into the middle of the ring and grab another Cube Bit. [1/8 Cube Bits.]
Now, flip twice and climb up the vines until they stop. Flip to the left and continue up the vines so that they join another set of vines leading up to the top of the ring From here, flip twice to open a Treasure Chest containing a Small Key! Now you can head back down and go through the door.
Forgotten Alcoves.
 This place consists of two square structures with lots of platforms carved into them. Jump to the left, then jump up to the squares on the right until you reach the edge. Flip twice to enter the backside. There's a cube bit at the far end. It's too far to jump across, but there's a trick to getting it. Flip to the right and then move a little. Flip left to see that you are on the platform with the Cube Bit! Drop down, collect it, and continue. [2/8 Cube Bits.]
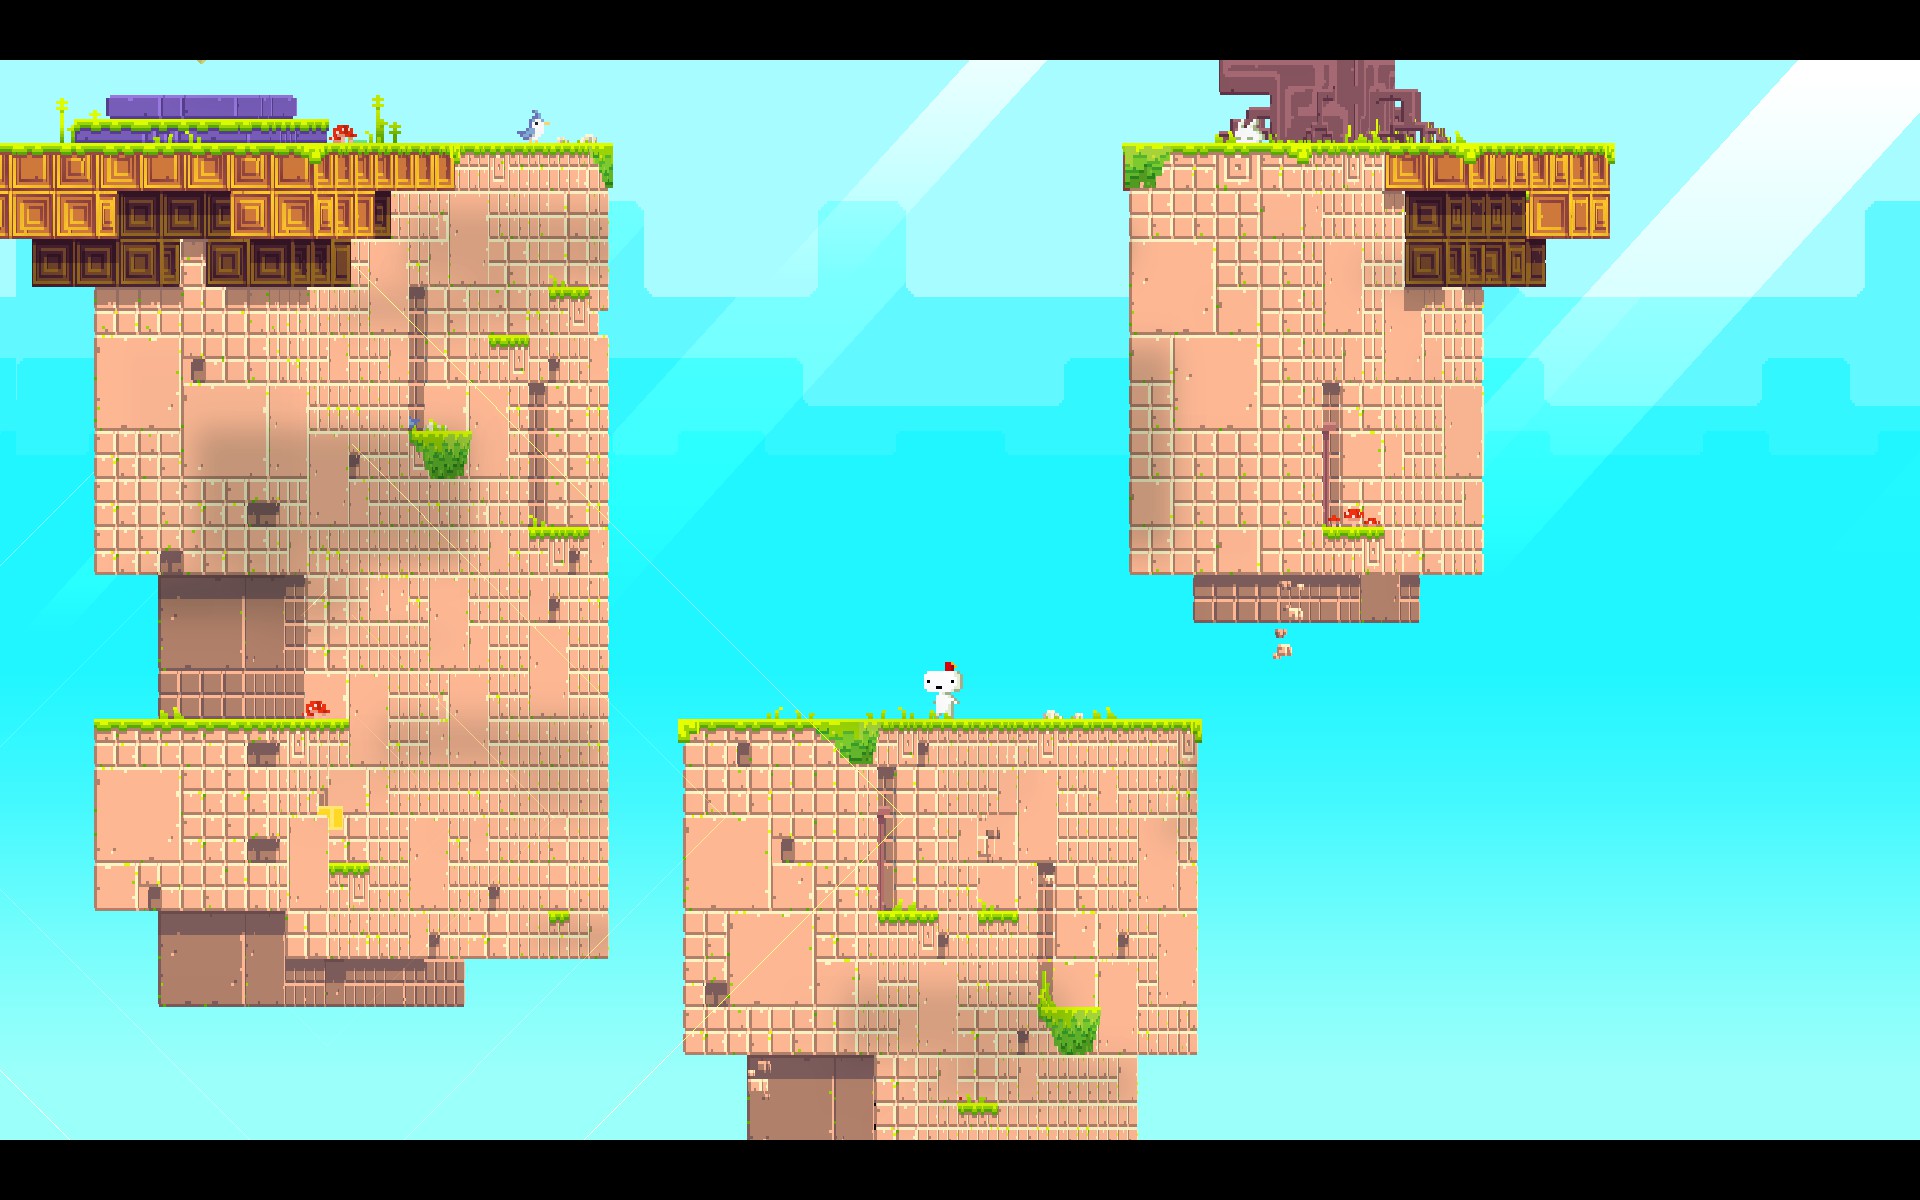 Flip to the right and jump up the platforms to head through the doorway. Now, flip to the left to find yourself on top of a square. Flip to the left to see a Cube Bit in an alcove. Jump to it. [3/8 Cube Bits.] Jump back and flip twice to see the entrance to the next square. Jump to at and flip to the right to see another Cube Bit! [4/8 Cube Bits.] Now head back up to the entrance and this time, flip left.
Jump up the platforms, then jump across to the doorway. Enter it, then jump up the remaining platforms to land on the top of the area! A whole Golden Cube and a Little Gate can be found up here. [7/32 Golden Cubes.] But don't leave just yet. There's another door...
Totem Sanctuary.
 As soon as you enter this forest area, Dot notices something wrong. You can't flip here! The Totem resting in the middle of the area is blocking your fez from working correctly. Surely there must be some way you can circumvent this? Collect the one Cube Bit you can get in this area, then head through the Little Gate back to Seaside Pillars. [5/8 Cube Bits.]
Walkthrough, Part Three Secrets.
If you pay attention to the World Map, you'll notice that the Belltower's initial area - the one with the actual bell - still has unexplored secrets. Unfortunately, we can't decipher the bell's code right now. The only thing I can say is to pay attention to the symbols on each of the bell's sides.
As it turns out, Dot was right about the Totem Sanctuary. The totem's big secret is that it can be turned. By pressing the Interact button at the totem's base and pressing A or D, you can turn the totem and, in doing so, rotate the entire level. Doing this will let you grab two more Cube Bits that you couldn't earlier, as well as a new area. [7/8 Cube Bits.] Head through the newly revealed door.
Patternism Puzzle.
 This room is a lot like the Symbolism Puzzle room in that it has moveable blocks and purple water. However, the actual puzzle is different. There are holes in the walls in this area, that, of course, are the size of the blocks. Now, where do you put the blocks?
Below are the answers to the Symbolism and Patternism puzzles.
 Symbolism Answer: You have to arrange the blocks so that they look like the pattern on the wall. Since there are four walls, and four symbols, you have to arrange the blocks so that they match the symbol on the wall no matter what perspective you're in. It will take some moving around, but in time, you should get your third Anticube. [3/32 Anticubes.]
 Patternism Answer: Each hole has different lines running through it. You should see that the blocks also have lines running through them! The way to solve the puzzle is to match the blocks with the proper line pattern. If there's a horizontal line running through a hole, the block with a horizontal line has to go there! You'll know you have it right when the wall's line glows gold. If you don't match the right block, it will be ejected from the hole. Solve the puzzle correctly to earn another Anticube! [4/32 Anticubes.]
If you've been collecting Golden Cubes and Anticubes, by this time you should have 8 total cubes. That means that you can access two of the doors in The Vertex! However, we'll go back there once we've explored every other area.
Walkthrough, Part Four: Broken Arches.
Section Seven: Broken Arches.
 Since we're done with the Belltower, let's continue to the next area, Broken Arches. The door to this area is on the main pillar of Seaside Pillars. When you head through, you'll end up on a small island. Jump to the top (or use some vines), and jump to a larger island. Climb and flip around the island. When you reach the top, you'll see the island has another door on it and a crate, as well as an odd purple plate sticking out from the ground.
Don't head through the door just yet. Flip to the right so that you can jump to the other island. In doing so, you'll see that this area is, quite literally, a broken arch. Flip twice and climb up the network of vines on the arch. Flip when necessary, and you'll eventually be positioned above a Cube Bit in an alcove. Drop down and fill up another Golden Cube! [8/32 Golden Cubes.]
 Continue to the right of the arch and drop down to the floating platform in the arch's middle, which contains another Cube Bit. [1/8 Cube Bits.] Then jump to the arch's right side. Drop down to the top of the platform on the other island. You'll land on the crate we saw earlier. Push the crate down to the ground and position it over the purple plate, opening up a secret passage into a new area.
Tetromino Hideout.
 This new area is a fairly large island with an array of floating platforms. Flip to the right to make your way up some platforms, and then flip to the right again to make it to the top of the island. There's another plate up here, and a Cube Bit you can't reach. Move across two more platforms and grab another Cube Bit on a small island. [2/8 Cube Bits.] There's a crate here!
 What happens next should be obvious. Grab the crate, make your way back to the main island, and place the crate on the plate. This reveals some columns of rock and a new area! Now you can jump up and grab the previously unreachable Cube Bit. [3/8 Cube Bits.] Enter the new area.
Impressionism Puzzle.
 This room consists of a large stone area with some more columns. The "puzzle" here is fairly obvious. Flip twice to find a crate, and bring it up to the top of the area, putting it on the plate. Do this and you'll open another door, which leads to another area.
 This area has a whole Golden Cube! [9/32 Golden Cubes.] There's also a Little Gate here. Take it if you want, but regardless, make your way back to the main Broken Arches area. Climb up the Arch's vines and make your way to the top. Open the Treasure Chest to find another Small Key! Flip to the right and drop down to an alcove with another Cube Bit. [4/8 Cube Bits.]
 If you've paid attention, you should notice a far-off Treasure Chest out of the way of the arch. It looks unreachable... But there's a way to get to it. We'll find out what it is later. Now, drop down to the lower island and finally open the door to a new area.
Broken Pillars.
 This new area is composed of an island and several floating stone pillars. Flip through the platform and climb the vines until you enter an alcove in the island that contains a purple door and a gateway. Head through the door.
The Pyramidion.
 This room is made of two pyramids, and contains a Treasure Chest with a Treasure Map inside! [2/9 Maps.] This looks a lot like the other Map we've found... Now head back to Broken Pillars.
Move through the gateway and then climb up the island, to the actual pillars. You'll see a Warp Door that leads to the Belltower. Climb up the vines on the pillar, and then when you run out of room, jump to the next pillar. Continue this until you see an alcove with a Cube Bit. [5/8 Cube Bits.] Jump across to find another alcove with another Bit! [6/8 Cube Bits.]
 Jump to the top of the pillars and then flip right, heading to another pillar. Climb up and head through a gateway, going to yet another pillar. Flip to the left and jump to another Bit. [7/8 Cube Bits.] Jump through some gateways and floating platforms to the top of the final pillar!
 At the summit is a Golden Cube and a Little Gate! [10/32 Golden Cubes.] Head through the Little Gate and back to Seaside Pillars.
Walkthrough, Part Four Secrets.
The Broken Arches only has one major secret, and that's the Treasure Chest floating off to the side in its initial area. To get to it, you'll need something you don't quite have right now - a Treasure Map that will show you the way. Although you don't have this Map now, you'll come into possession of it soon enough. Once you're sure you've found the object you need, and only then, head back here and see if you can figure out the puzzle. (Don't worry, it won't be very long from now!) If you're stumped, read below.
The Treasure Map we need is in the Lighthouse Cabin, an area within the next segment of Seaside Pillars. It tells us the location of two invisible platforms that, if jumped on, will get you to the island with the Chest. You'll need to get there in a specific way, though. Jump onto the large tree at the top of the arch, then flip so you're seeing the left side of the chest on the island. Jump to the first platform, then jump again, flipping twice while doing so, to get to the second platform. From there, jump to the Chest. Open it to find an Anticube! [5/32 Anticubes.]
That's all for this area. It's time to move on to the next one! Onwards!
Walkthrough, Part Five: Lighthouse Harbor.
Section Eight: Lighthouse Harbor.
 Now it's time to explore the penultimate branch of Seaside Pillars: Lighthouse Harbor. You can find the door to this area on the left pillar. This area is a small island in the sea, dominated by a tall lighthouse. There's a wooden bridge leading to the sea as well. You should see a Cube Bit on top of the platform above you, but you can't reach it yet.
Hop over to the main island and explore a little. You should see a small island to your right with a purple obelisk on it. It doesn't resemble the other one we saw with scratches on it... What could this one mean? (Leave this alone for now. It will have relevance after we've beaten the game.) Flip twice and you should see a house built into the lighthouse with a locked door. Since you should have a surplus of Small Keys, you can open it.
Lighthouse Cabin.
 This area has a Cube Bit that you can jump to by flipping once in either direction. Collecting it will give us a whole Golden Cube! [11/32 Golden Cubes.] Flip once again in whatever direction you flipped to get to the Cube Bit and you'll be able to open a Treasure Map! [3/9 Maps.] Hey, this one looks really familiar, doesn't it...?
In addition, you'll also uncover a metal door. Let's go through it.
The Ladderworks.
 This area appears to be inside the lighthouse, and consists of constantly rotating metal blocks that form a tower upwards. Each platform has a ladder on one side, but the platforms are constantly changing their perspectives, which means that the ladders will only align at certain times! Time your ascent carefully and you'll make it to the top. The top contains a Cube Bit [1/8 Cube Bits.] and a new door to head through.
 You'll end up at the top of the lighthouse, which contains a new Cube Bit. [2/8 Cube Bits.] Flip twice and jump to a new island with a boarded-up door. Drop down from the island to get the Cube Bit we saw when we first entered the area. [3/8 Cube Bits.] Now head back through the Ladderworks and head through the boarded-up door.
Brick-and-Mortar Way.
This place is made up of a white stone pillar, a plated cubic structure, and a tall brick spire. Right now you're inside of the cubic structure. Drop down to the ground and examine the structure, which is controlled by a pivot. You can turn the pivot by pressing F on either handle, which will turn the pivot (and the structure) in a corresponding direction.
 Turn the pivot left, and then flip twice, climbing up the backside of the white pillar until you reach the top. Flip twice again to appear on top of the cubic structure, and then drop down to head inside it again. Since you flipped it to the left, you've turned the structure into a gateway to the brick spire, as shown in the picture.
Head through the gateway to enter the other side of the spire. Climb up the ladder to make it to the top, which contains a wooden house. Enter it.
The Station.
 This area's another metallic area, like the Ladderworks. Flip to the left and climb up the ladders to find another structure controlled by a pivot. Turn the pivot twice and flip to the left, uniting the two ladders! Cllimb up these ladders to make it to the top. Flip to the right and climb up to earn a Cube Bit. [4/8 Cube Bits.]
Flip to the left again to see a Warp Door! This one takes you to the Vertex. Interesting! If you've been diligent in your Golden Cube and Anticube collecting, you can now access all three doors here! But don't head down to them just yet. We'll be saving those areas for last. Also worth noting is that, if you check the World Map, there's supposedly a Treasure Chest in this area, even though you can't see one... Regardless, head through the door to enter a new Hub!
Walkthrough, Part Five Secrets.
Examining the World Map will show that there's still a secret within Lighthouse Harbor's initial area, and that there's an area connected to Brick-and-Mortar Way that we haven't yet gone to! In fact, looking across Seaside Pillars, it seems that there's a lot of areas that we haven't been to... What gives? Make a note of this oddity for later.
Now take a look at the Treasure Map you just found. If you're particularly eagle-eyed, you should be able to see that it depicts Broken Arches! More importantly, it tells you how to find the Treasure Chest that was previously inaccessible! Head to the Part Four Secrets section of the walkthrough for more details.
 Now, for the Station's secret... If you head all the way to the top and press I to look up, you should see a platform with a Treasure Chest far above your current location! The answer to this puzzle is much like the one for Broken Arches: You'll need to jump across invisible platforms to reach the platform, and you'll need to find a Treasure Map to know how to do so!
As such, this area can't really be completed without this key information. But once we find it (and we will find it not that long from now), come back here. The Map will show you that there's a series of invisible platforms leading right to the chest. You'll have to flip to match the Map's orientation, and then jump to the right to land on a platform! Jump to the left slightly to land on another, and then jump to the right slightly to land on another! Repeat this until you've made it to the top! Jump to the platform and open the Treasure Chest to find an Anticube. [6/32 Anticubes.]
Unfortunately, that's all we can do in this area until we find more about the game's hidden codes and collect thirty-two Golden Cubes. Let's move on.
Walkthrough, Hub Two: Industrial District Five.
Hub Two: Industrial District Five.
 This is the next Hub Area, Industrial District Five. In stark contrast from the natural beauty of Seaside Pillars and its branches, this place is mostly mechanical and gives off a pixel-steampunk vibe. The area is made of bricks, mortar, and preposterous amounts of metal plating. Runes are etched on the walls, there are flickering neon signs, and even moving platforms! The sky is green and the trees are orange... How interesting!
 You can't do much without flipping, so flip to the left. Jump to the moving platforms. If you're on a platform when it moves, you'll involuntarily flip along with them! Jump up both platforms and let the second platform flip with you on it, flipping you to the left once more. Jump off of the platform and onto new ground. Jump up the metal platforms and head through the door. The room is in disrepair... Jump up and grab the one Cube Bit in there, then head out. [5/8 Cube Bits.]
 Jump up a set of three moving platforms, flipping back to your original position if they cause you to flip with them. Head to the left and jump across the two alcoves in the wall to make it to the top of the District! Now that you're here, you'll see this Hub's Warp Gate! Since you've found two Hubs, this Warp Gate will link to Seaside Pillars' Warp Gate and vice versa! You can travel between the two by pressing Up, but don't right now.
Flip twice to notice another door on the other side of the wall. Walk to the right and drop down to enter it. Behind the door is a metal room. Watch out for black holes and grab its sole Cube Bit. [6/8 Cube Bits.] Flip to the left and you'll see an inactive Warp Door in the wall! This means we haven't found the area on the other side yet... Leave the room.
Drop down to the platform with the orange tree on it. Built into this platform's plating is another Warp Door! This one's unactivated too, but once we've found the area that accompanies it, it'll be a nice shortcut! Flip twice to find an actual door built into the platform that leads to a new area. Head through.
Walkthrough, Part Six: The Incline.
Section Nine: The Incline.
 This area is absolutely huge, I'll get that out of the way first. It's split up into many different platforms, all floating through the air, and all with various gimmicks to them! The first leg consists of two sets of platforms connected together by scaffolding and pipes, with moving platforms throughout them. Jump across the stable and moving platforms to reach the top of the area.
 The tops of both platforms have pistons that periodically launch upwards, then retreat back into dormant positions. If you're on one when they launch up, you'll be launched up too! Use this to your advantage and stand on the one near you, flipping to the left. You'll grab a Cube Bit and land on a new platform! [7/8 Cube Bits.]
 Head to the top of the other platform. Flip to the right and stand on its piston. You'll fly next to a new brick tower with vines on it. Grab them and flip across the platform, climbing to the top. Flip to the left and you'll see a Cube Bit in an alcove. Grab it and form a whole Cube! [12/32 Golden Cubes.]
Jump across a moving platform to make it to a new stable platform with a new type of moving platform, moving cubes! They rotate vertically, not horizontally. This means that if you're caught on one and it moves, you'll be pushed off and fall! When one of them is about to move, jump up so you're not pushed off.
 Jump up the first moving cube to the top of the stable platform. Flip to the right and the others will line up. Jump across them to make it to a new stable platform! Connecting this platform and the next are two large moving cubes. Jump up them both. Now flip to the right to reveal a new series of platforms. These are rectangular and have four orientations: up, left, down, and right. Whenever they switch orientations, they'll throw you off of them, like the cubes! Jump up the rectangle to your left and up to the top of the stable platform.
Jump and flip across the cubes to make it to a new platform, which has two bigger versions of the moving cubes. Jump up them and flip to the right to find a new type of moving platforms, moving rectangles! They rotate vertically and have four orientations: up, left, down, and right. Whenever they switch orientations, you'll be pushed off! Jump up the rectangles.
 You'll make it to a tower with pipes on it. Flip and jump to make it to the top. To the left of the tower is a line of blocks that are constantly shifting in small waves. If you're caught in a wave, you'll shift along with the blocks and you'll fall! Run along the line of blocks, but time it right.
Flip and jump up some more moving platforms to make it to a new device, a Nut-and-Bolt. The Nut can be stood on, and it acts like a pivot in that you can hold its handle with F. From there, you can use A or D to twist the Nut up the Bolt either left or right respectively. Doing this will flip your perspective accordingly. Twist the Nut up until you can jump to a nearby platform with a Treasure Chest. Do so and open the Chest to find another Treasure Map! [5/9 Maps.] This one looks familiar, too... Is it of an area we've already been to? Hold on, of course! The Station, we were just there!
Twist the Nut all the way up the Bolt and grab a Cube Bit. [1/8 Cube Bits.] From here, jump up to a new Nut-and-Bolt and twist it all the way up. Jump onto the final platform. It has a door. Head through.
Incline's End.
 This is another metal area, like the Station. Flip twice and climb up a ladder. Flip twice again to climb up another ladder. This ladder leads nowhere, but the platform above it flips perspectives often and contains a ladder. Wait until this platform meets up with the ladder you're on and climb it. Now that you're on this platform, wait for it to meet up with a ladder on the other side of the area. Climb up that ladder to reach the top, which contains a Golden Cube and a Little Gate! [13/32 Golden Cubes.] Head through to return to the Hub.
Walkthrough, Part Seven: Windmill Towers.
Back at the Hub, flip to the right to reveal a new door constructed roughly in the middle of the Hub. Head down to the door and open it to enter a new area.
Section Ten: Windmill Towers.
 This area consists of three sets of platforms: the middle set is interconnected by pipes and leads up to a large house with a windmill on it, hence the area's name. The other two are smaller. Pivots and more floating platforms can be found around the entire area. To start, flip to the right to reveal an obscured Cube Bit. Move down and grab it. [2/8 Cube Bits.] Then flip back to the left and jump to the top of the brick platform you entered through. Jump up the moving platforms to get to another set of stable platforms.
There's a pivot on this platform. Turn it to the right by standing at its right side and pressing Left Control. Now climb up the vines on the platform and walk across it, jumping to a floating platform with a Cube Bit. Grab the Bit and move back to mainland. [3/8 Cube Bits.] Flip the pivot back to its main position and jump across the moving platform to the left to head to another set of stable platforms.
 This platform has a pivot as well, and there's also a floating platform above you that you can't reach. To solve this puzzle, flip the pivot you're on to the right, and then jump back to the center platforms and flip that pivot to the left. Doing this will cause the platforms connected to the pivots to meet, allowing you to climb up the vines on the platforms and climb the ladder of the floating platform.
 Jump across the two small moving platforms from here to make it to the main island with the windmill on it. Flip to the left to see a locked door on the windmill house. Ignore it for now and climb onto the orange tree on the island. From there, jump up to the top of the house and grab the Cube Bit up there. [4/8 Cube Bits.]
Now head to the locked door and open it with a Small Key. Head through.
Windmill Interior.
 This room is dominated by a clay house-like contraption with a shape cut through it resembling an open door. It periodically shifts its own perspective around, independent of your own actions. Even though the machine has what looks like a door, when it finally shifts into your view, it only reveals a wall! The key here is to flip to the left and wait for the machine's door to align with your view. When it does, an open door will be revealed. Head through.
Windmill Metalworks.
 Yet another metal area. Drop down and open the Treasure Chest to find a whole Golden Cube! [14/32 Golden Cubes.] Then, flip twice to find a Cube Bit in an alcove. Grab it and leave the area. [5/8 Cube Bits.] Leave Windmill Interior as well, returning to the main area.
Flip to the left to reveal a metal door built into the bottom of the windmill's island. Drop down and head through it to enter another new area.
Windmill Contraptions.
 This area consists of four separate platforms built from either bricks or metal plating, and sometimes a combination of both. Jump across the metal platform to your right and land on the far right platform, dominated by a Nut-and-Bolt. Twist it to the top and then flip to the right to land on a new platform, which contains a pivot.
 Twist this pivot to the right, then jump across the contraptions and head to the far left platform, which also contains a pivot, as well as an opening and a ladder. Twist this pivot to the right then flip to the left. If you do all this successfully, you will have created instant passage between the far left platform, left platform, and right platforms, and can gain access to their Cube Bits, as demonstrated in the picture. Climb the ladder and grab the Cube Bit in the gateway. [6/8 Cube Bits.]
Now head through the gateway to end up on the other platform. Climb up its ladder and then flip to the left, grabbing the Cube Bit at the top. [7/8 Cube Bits.] Lastly, jump across the tops of the platforms to grab another Cube Bit at the far-left, creating another whole Golden Cube! [15/32 Golden Cubes.]
Jump across the tops of all the platforms now, heading to the far-right platform. Flip to the right to reveal that the platform contains a door. Open it and head through.
Brick Construction.
 This area's a simple column made of brick and plating. Jump across the floating platforms (this will involve some flipping trickery and also waiting for the platforms to be positioned right) to make it to the top of the structure. There, you'll see a valve. Turn it all the way up to reveal a metal structure with a Cube Bit inside. Grab it and head back to Windmill Contraptions. [1/8 Cube Bits.]
Flip to the left to reveal a golden door constructed into the main platform of the area. Open it and head through.
Rotation Rotunda.
 This area consists of two platforms connected by pivots and joined together by a large cubic structure made of plating. Jump up the moving platform and try turning the pivot. You'll see that it twists the interior cube of the structure, but not the exterior. Climb up the exterior's vines and head up to the other pivot. Sure enough, this one twists the exterior. Hey, there's a Golden Cube and a Little Gate up here!
 Twist the exterior to the left three times and flip to the left to reveal that a portion of the interior has been cut away, revealing a brick wall. Hop down to the bottom pivot and twist the interior three times to reveal a door! If you've done all this correctly, the structure will resemble the above picture. Head through the door.
Rotunda Metalworks.
 There sure are a lot of metal areas. This area is made of several platforms with devices on them (the ones that push you upwards if you stand on them.) Stand on them and flip accordingly so that when you land, you land on other platforms. Eventually you'll make it to a platform with a ladder. Climb it and head through the door.
You'll end up on top of Rotation Rotunda! Grab the Golden Cube and take the Little Gate back to the Industrial Hub. [16/32 Golden Cubes.] Hey, you have 16 Golden Cubes! That means that unless you can head through every door in the Vertex now! But don't worry about that too much - we'll be investigating those areas at the end of the walkthrough.
Walkthrough, Part Seven Spoilers.
If you've gone to the Windmill Tower at night and you've made it to the top of the area, you should see another owl perched on the orange tree next to the windmill. Just like the one in the Waterfalls, the owl heads into the area at night and leaves as soon as day begins. Curiously, checking the World Map reveals that there's a secret in this level... Perhaps the owls are connected to it all? But how? Make a note of this and move on.
Walkthrough, Part Eight: The Pipeline.
Section Eleven: The Pipeline.
 Now that you're back at the Warp Gate, flip to the left and drop down to the remaining door of the area, which is just below you. Enter it to head to the Pipeline. This area is made of a series of metal columns with pipes twisting around them. New floating platforms can be seen around them as well.
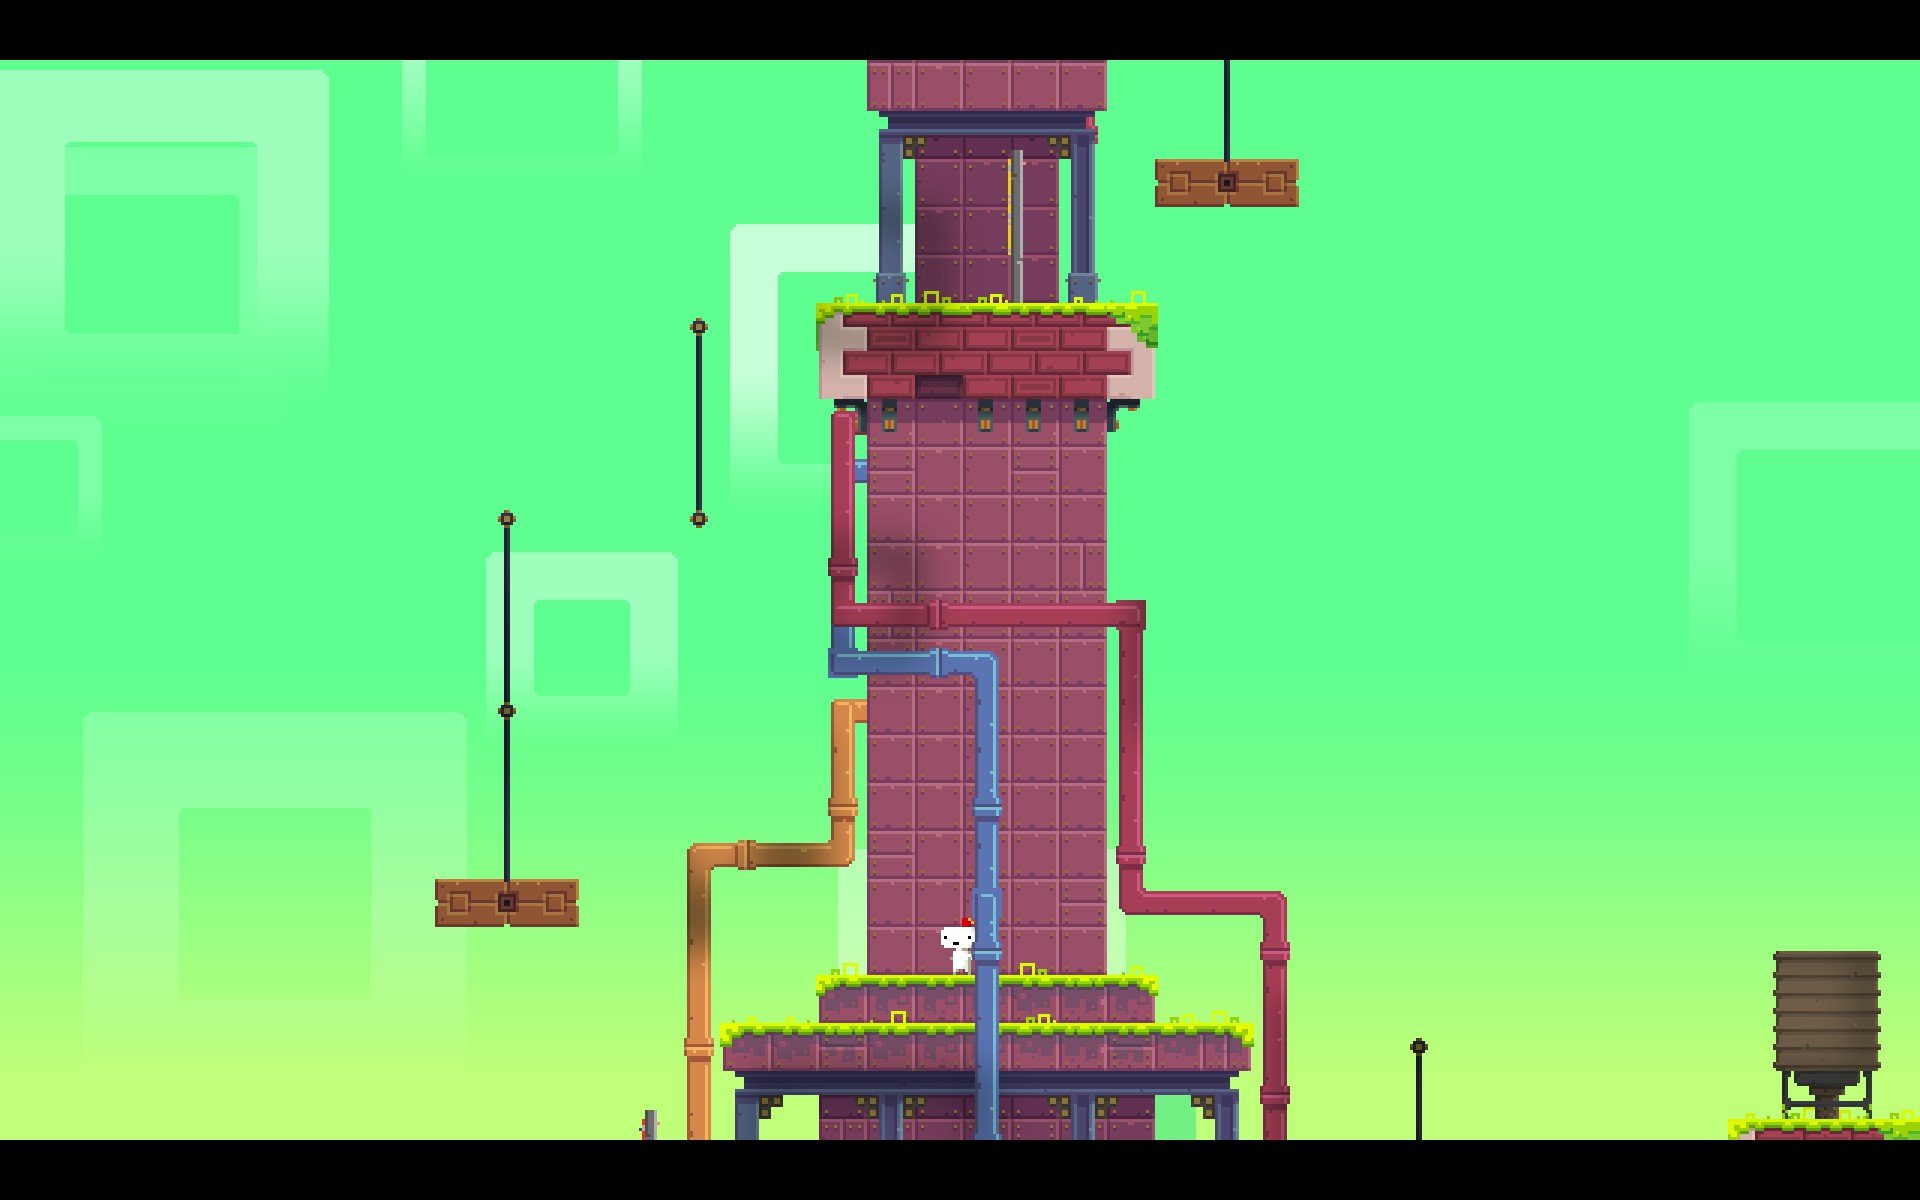 Jump to the platform onto your left. It starts to move upwards when you touch it, like an elevator! When it reaches the top of its climb, jump off to the area above you and jump to the right to see a new elevator. Whenever this platform stops moving, flip to the right to make it move across a new section of track. Repeat this until the platform reaches the top of its climb and jump off to the top of the metal column.
Jump to your left and hop onto another elevator, jumping to the next metal column. Flip to the left and jump up to another elevator. Then flip to the right so its path merges with another path, allowing it to climb further upwards. Flip left when it climbs up to the top so it merges with yet another top, and flip right when that's done to jump further up the metal column.
 Jump to yet another elevator, flipping to make sure it gains more track when necessary. When you're done, you'll end up further up the metal column, oriented like in this picture. Climb up the ladder to a new elevator, flipping to the left and then to the right when it runs out of track. You'll end up at the very top of the area, next to another door. Head through.
Pipeline Metalworks.
 Climb up the ladder and then flip to the left, causing three other ladders to meet up. Climb up them all and you'll see a large metal column and two Cube Bits floating side by side. Flip to the left and you'll see there are actually three metal columns, each with a section of a ladder on them! Turn the pistons at the bottom of the columns so that when you flip back to the right, all of their ladders meet up and you can climb up to the top of the platforms!
 Do this and collect the two Cube Bits at the top of the area. [3/8 Cube Bits.] Then flip to the right and head out the door.
The Corkscrew.
This area's just a long upwards climb. Flip to the left and climb up the vines, then twist the Nut and Bolt all the way up to head up to the next segment of the area, with rectangular platforms and moving platforms. Flip and move around to find a Cube Bit hidden in an alcove. [4/8 Cube Bits.]
 The next segment of the area is an interlocking golden machine that's twisting several platforms around itself at random times. Jump up the platforms (they'll change your perspective if you're caught on them while they're moving) and make it to the top of the area, which contains a Golden Cube and a Little Gate! Collect the Cube and head through. [17/32 Golden Cubes.]
 If you look at the World Map, you'll see that we've finished everything in the Industrial District except for one thing - there's a Locked Door in the Pipeline that we haven't found! Head back to the Pipeline and make it to the top of the first metal column, then flip to the right. You'll see a Locked Door! Open it with a Small Key and head through to the last area of this Hub.
The Well.
 This area's just a mix of brick and metal floating in the middle of nowhere. Curiously, there's a green structure poking out of the top. Hop onto the small elevator and flip around when you run out of track, making it to the top of the area. Dot calls the structure a well... Now where have we seen something like this before? Maybe in another game? If you're confused on how to proceed, read below...
This thing's exactly like a Warp Pipe from Super Mario Bros.! And in that game, if you find a Warp Pipe, you stand on it and press down to go down it... That's what you need to do here! Stand on top of the well and you'll progress to a brand-new area!
Walkthrough, Hub Three: The Sewers, the Qube, Acid Walkway, and the Gateway.
Sewers Entrance.
 When you come out of the well from the other side, you'll be in a completely new area made entirely out of green hues, like a Game Boy. Metal pipes and platforms are the only visible structures in a sea of green muck. Unlike normal water, you don't want to step in this stuff - one touch will kill you! Flip to the left and jump across the two platforms to come across a new platform with a valve.
 Turn the valve by standing in front of it and pressing L Control and then holding down A. Doing this will cause the water level of the area to recede to its lowest point, allowing you to continue. Backtrack to the platform where you started and pick up another Cube Bit. [5/8 Cube Bits.] Then, flip to the right and head through the door to enter the new Hub.
Hub Three: The Sewers.
 Like Seaside Pillars, this Hub Area is made of three brick pillars. The left and right pillars have valves on them, and the middle pillar has this Hub's Warp Gate on it. You can now travel between Seaside Pillars, Industrial District Five, and the Sewers, although you don't have a reason to currently. Jump from the left platform to the middle platform and climb the ladder at the platform's edge. Then run to the left and jump to the top of the left platform, grabbing a Cube Bit. [6/8 Cube Bits.]
 Now stand next to the valve and rotate it by holding down D, rising the water level to its highest point. Jump to the right platform (hopping across a floating platform which traveled up along with the water) and climb its ladder to gain another Cube Bit. [7/8 Cube Bits.]
Flip around until you see a Locked Door built into a column at the top of the screen. Jump over and unlock the door with your remaining Small Key. Head through to enter... this place.
The Qube.
 This place is made up of a large platform with two floating platforms that are periodically lifted up by geysers. Flip twice to find a Cube Bit in an alcove, completing a Golden Cube! [18/32 Golden Cubes.] Now, head up to the top of the area to find a floating block. Dot has no clue what this means, so it looks like you're on your own for this puzzle...
 Head back to the Hub and lower the water level to its complete minimum. Drop down from the floating platform until you find a door built into the base of the platform. Open it and head through.
This area is simple, containing a Treasure Chest and a floating platform suspended on a geyser. Use the floating platform to get to the Chest and then open it. Inside, you'll find a Small Key! Once again, head back to the Hub. There's one more small area we can get to from here.
 Jump up the platform you're on and jump across to the middle platform. You'll see another door built into this platform. Head through it to enter a new area.
Acid Walkway.
 This area consists of a platform with a valve and a piston on it. There's a floating platform above you with a Treasure Chest on it! You're going to have to get there somehow... For starters, grab the Cube Bit above you. [1/8 Cube Bits.]
To get to the Treasure Chest, you're going to need to find a way to manipulate both the valve and the piston so you can jump from the main platform to the floating platform below you to the floating column above you. Lower the water level by three notches so you can access the piston below you. Then, push the piston to the right so the platform it controls extends to the right.
Raise the water level back up and then lower it back down. If you do this right, the floating platform will be stuck on the piston's platform, unable to move! Now, push the piston's platform so it extends directly under the floating column. (You may want to flip yourself so you're looking at the entrance to this area for convenience.)
 Fully raise the water level and the floating platform will be under the floating column, just like in this picture! Jump up the floating column and reach the Chest. Open the Chest to find a whole Golden Cube! [19/32 Golden Cubes.]
Back in the Hub, raise the water level back up and look for a door directly below the Warp Gate. Don't go through it just yet, though - head to the platform to your right and flip around until you see a door. Head through it to enter another small area.
The Gateway.
 This area is made up of a large platform with a lot of pipes running through it. Grab the Cube Bit above you and then lower the water level all the way down using the valve next to you. [2/8 Cube Bits.]
 Jump all the way down the platform now that the water level is lowered, and you'll see an odd door built into the platform with a weird scratch running through it. Does this look familiar, somehow? I'd swear we've seen something like this before. Regardless, there isn't much you can do with it right now, so leave it alone.
Go back to the Hub, returning to the door directly below the Warp Gate. Head through to enter the only real branch of levels within the Sewers.
Walkthrough, Hub Three Spoilers.
If you scan the QR Code on the block within the "Qube" area, you'll recieve the following message: RT RT LT RT RT RT LT LT RT LT LT LT RT LT RT LT. These correspond to the controls of the game's XBOX version, where RT had the same function as D, and LT had the same function as A. With that in mind, changing these to PC controls gives D D A D D D A A D A A A D A D A. Inputting this will give you an Anticube.
Keep in mind that this is intended as an alternate solution to another puzzle that is found later in the game, and scanning this QR Code is entirely optional. With that in mind, the prize recieved from this QR Code will not be counted in this guide's running count - it will be counted once the actual puzzle is completed.
As for the thing that's in the Gateway, if you pay close attention, you'll see that it resembles the runes present in the Waterfalls - which means you don't have the tools to solve it yet. But still, keep this in mind for later, when you inevitably return.
Walkthrough, Part Nine: Geyser Alley.
Section Twelve: Geyser Alley.
 This area is made of two giant brick pillars and a series of floating platforms. At random times, geysers will appear below the floating platforms, suspending them in the air for a short time. Jump across all the floating platforms and flip to the right when the last platform is in the air. This will take you to the left pillar (not the one you came in through).
There's a door available to you, but if you flip to the left, the right pillar will reappear and you'll see another Cube Bit on top of it. Grab it. [3/8 Cube Bits.] Now head back and go through the door.
Sewer Pillars.
 A series of three giant brick pillars floating in a sea of acid. Flip to the left so the floating platform near you lines up with the right and middle pillars, jumping across it. Then flip to the left and jump right to the left pillar. Grab the Cube Bit and then open the Locked Door here. [4/8 Cube Bits.]
 This area is made of brick and pipes, and it has an oddly shaped object at its top, like an obelisk with a narrow strip of it cut out down the middle... What's this object for? And what are those strange noises in this area? Seems like there's a secret afoot... Grab the Cube Bit here and head back to the right pillar. [5/8 Cube Bits.]
The right pillar has netting on it in place of vines. Climb them and head to the top of the pillar, which has a valve. Turn the valve so the water level reaches its highest point and then flip to the right, jumping across the floating platform to the middle pillar.
Flip to the left so the floating platform lines up with the middle and left pillars, jumping across both. Flip to the right to reveal a Cube Bit in an alcove. [6/8 Cube Bits.] Then flip twice to reveal a door. Head through it.
 You'll end up in an area with a Treasure Chest. Flip around to the area's backside, jumping across the floating platforms, and open the Chest. You'll get another Small Key! Now head back to where you were previously.
Jump back to the middle pillar and flip to the right to reveal some netting. Climb it to the top and you'll see another valve on top of this pillar. Turn it to make the water level go to its new maximum and then flip to the right, jumping to the left pillar and climbing up its netting.
 Turn the valve at the top of this pillar almost all of the way, just enough so that when you jump down to the floating platform to your left and then flip left, you can jump to a new Cube Bit in an alcove. Grab this Cube Bit and then climb back up to the left pillar. [7/8 Cube Bits.]
Now turn the valve all the way up, heading back to the top of the right pillar. You'll find a door. Open it up and head through.
Sewer Pillar's End.
 Jump onto the floating platforms here and ride them upwards, claiming a whole Golden Cube! [20/32 Golden Cubes.] Now head through the Little Gate and head back to The Sewers.
Walkthrough, Part Nine Spoilers.
Remember that weird obelisk we just saw? Here's the answer to its riddle.
 That odd structure is indeed called a Tuning Fork. It emits pulses of sound that correspond to button presses depending on what speaker they come out. If you hear sound from your left speaker, press A. If you hear sound from your right speaker, press D. With that in mind, this Tuning Fork's code is A A A D A D A D. Input this and the Fork will disappear with an Anticube in its place. [7/32 Anticubes.]
Keep these obelisks in mind! They appear quite frequently throughout the game's world, and once you know how to solve one of them, you can solve all of them.
Walkthrough, Part Ten: Redwood Road.
 When you return to the Sewers Hub, immediately take the Warp Gate back to Seaside Pillars. When you get there, jump up to the top of the Warp Gate. There's a tree built into it, and there's a door built into the tree! This is the one branch of Seaside Pillars we haven't explored yet... Head through.
Section Thirteen: Redwood Road.
 This place is a purple tree submerged in peaceful seagreen water. Woodland critters frolick around the tree's roots, having a great time as the universe is slowly being destroyed. At the very least, this is a nice change of pace from the underground darkness of the Sewers. Jump across the tree and climb the vines at its top until you come across a wooden door. Head through it.
The Nature Hideout.
 This place is very peaceful as well! There are several purple tree trunks here, and there's a nice cabin on the platform where you came in from. Maybe someone lives inside...? Flip to the left to find a tunnel carved through the platform. Head through it to enter another platform. Hey, there's another one of those obelisks here! The first one we saw was back in the Lighthouse.
 Flip to the right to find a Locked Door in another platform to your left. Since we have a Small Key, we can open it. Do just that!
Crumbling Trees.
 This area's made of a stone platform and a large tree with several stone platforms scattered around it. First, grab the Cube Bit above you by jumping to the tree's platform next to you and then up to the small tree above you. Do this and you'll gain a whole Golden Cube! [21/32 Golden Cubes.]
 Now, jump across the stone platforms around the tree. Be quick about it, though. When you step on one, it starts crumbling away and falling apart! If you don't want to fall to your death, you'll have to jump across all of them in sequence by flipping your way around the tree! When you reach the top, you'll see a Treasure Chest. Open it to gain a Treasure Map! [5/9 Maps.] This one looks a lot like two other Treasure Maps you've collected... Head back to the Nature Hideout.
 Jump back to the cabin, and then make your way up the tree trunk by hopping and flipping across all the mushrooms stationed around the tree! When you need to, climb up some vines and head through some alcoves. There's a door at the top of the tree, but don't head through it just yet. That'll lead to another Hub, but there's another Hub that we can get to first, from this very area!
Walkthrough, Part Ten Secrets.
 The Nature Hideout has several secrets hidden inside of it. First off, as you may have noticed, an owl comes down from the skies at night, perching on a tree near the cabin. That makes this the third owl we've seen! What could possibly be up with them?!
There's also a white obelisk in this level that you can't interact with, so make a note of it and move on. (Curiously, it resembles a purple obelisk that you saw in Lighthouse Harbor. Maybe they're connected?)
Last but not least is the big secret of this area - the cabin. In fact, this isn't as much a secret as it is essential to progressing in the game. But yes, the cabin does hold a secret, so let's enter it.
The Cabin in the Woods.
 This place is... odd. It looks like there's no one home. Maybe there's never been anyone home. The Cabin is full of red curtains that drape from the ceiling to the floor. There's apparently nothing to do here at all, so I guess we should just head out.
 ...Uh.
Walkthrough, Hub Four: Ancients' Cemetery, the Owl Effigy, and the Glade of Skulls.
Cemetery Entrance.
 I definitely don't think we're in Kansas anymore... Er, the Nature Hideout. That's what I meant. This place is stuck in a perpetual rainstorm, and the floating platforms are chiseled from white stone. Are those headstones coming out of the ground?
Flip to the right to reveal some vines and a door on the platform to your left. Jump to it and climb up the vines to snag a Cube Bit. [1/8 Cube Bits.] Then, flip twice to reveal another Cube Bit in an alcove below you! [2/8 Cube Bits.] Now, head through the door to enter the Hub of this brave new world.
Hub Four: Ancients' Cemetery.
 This is certainly an odd change of pace. The fourth Hub Area is quite large, possibly as big as the Industrial District's Hub! All of the structures in this Hub are made from white stone, overgrown with green grass and pockmarked with gravestones. There's the small platform where you entered from, a very large cubic platform with the Hub's Warp Gate on it, another small platform to your left, and a column with a giant skull on top resting above the Warp Gate. The thunderstorm that's raging around you serves well to set the mood.
 Jump to the top of the small platform and leap across to a ledge on the bottom of the massive cubic structure next to you. Flip twice to reveal a Cube Bit in one of four alcoves on the side of the structure. Grab it! [3/8 Cube Bits.] Now climb across some vines, flipping twice to make your way to the other side of the cubic structure. There's another Cube Bit here. [4/8 Cube Bits.]
 By now, you should have noticed that the thunderstorm plaguing this area isn't for show - it's trying to tell you something! Every time lightning flashes, the sky turns white and the area turns black - as do hidden platforms that you wouldn't be able to see normally! These platforms are invisible, not intangible, so once you know where they are, you can jump across them with ease! (You can also tell where hidden platforms are by seeing rain bounce off of them, but this is harder to spot.)
 Jump across the set of hidden platforms to your left and then flip left, ending up here. Jump across the alcoves to grab another Cube Bit, and then flip twice to find another Cube Bit. [6/8 Cube Bits.] Now, jump across the set of three hidden platforms to your right to make it to the top of the structure!
 From here, jump to the top of the small platform at your left, and then walk across a set of two hidden platforms above you. Drop down to a small tree with a Cube Bit on top of it, and then jump across the Warp Gate to another tree with another Bit. Doing this will earn you a whole Golden Cube! [22/32 Golden Cubes.]
 Head back to the hidden platforms above you, and make your way to the column with the skull on it. Jump across another set of hidden platforms, and then flip to the right so they align with a third platform. Jump on that and flip to the left so you can head to the top of the platform and collect the last Cube Bit of this area. [1/8 Cube Bits.]
 Now it's time to explore this world. Drop all the way down, coming across a wooden door in the lower level of the massive cubic structure. Open it and head through.
The Owl Effigy.
 This place is... disturbing. Perched atop a column of stone is the Owl Effigy, a horrifying facsimilie of the owls you might have seen sprinkled throughout the game. It's presumably here for decor and to set the mood, but no matter how you change your perspective, the Effigy's head will turn with you, watching you. Following you.
If you go up to the Owl Effigy, Dot has some choice words to say: "Owls creep me out." Yeah, they're starting to creep me out too. Regardless of the creepiness, flip twice to reveal a Cube Bit in the underside of the area. [2/8 Cube Bits.] Even though the World Map says there's a secret here, this is really all you can do in this area... unless you think creatively elsewhere.
 Return to the Hub and head up to the top of the area - the column with the skull on it. There's a wooden door here that we haven't opened, so open it and head through to a new area.
Glade of Skulls.
 This place is just as creepy as the Owl Effigy... It's made of several platforms, each one with a skull tombstone on it. The largest platform (the one you're on) has an absolutely massive skull tombstone on it - one that follows your movements, just like the Owl Effigy! You can't stand on the flat skulls, but you can move across the area to collect three more Cube Bits. [5/8 Cube Bits.]
 You'll end up on top of the large skull. There's another ghost here, but not much else. The World Map indicates that there's some kind of puzzle here, but what could it be? What would you have to do? Does it involve the skulls on the platforms? Dot seems to think so. If you investigate the tombstones, Dot says that she thinks you can rotate the tombstones just like a valve or a piston, by holding the Interact key and pressing either A or D.
If you try it out, you'll find that Dot's theory is correct! You can rotate the tombstones, bar the big one. Now what do you do with this knowledge? If you can't figure out the puzzle on your own, the answer lies just up ahead...
Walkthrough, Hub Four Spoilers.
The big secret to the Owl Effigy is found elsewhere in the game, and it's unlikely that you're going to figure it out on your own unless you're really paying attention to it. It relies on other things stationed around other parts of the world of FEZ that only appear at certain times, and although the game gives you hints as to how to solve this puzzle, you haven't even found all the necessary components to complete the puzzle yet anyway!
However, that doesn't mean you can't start solving the puzzle. The only hints I can offer you are to think back to the owls you've seen throughout the game, and that those owls aren't just for decoration. If you're completely stuck, then read on.
You should have noticed that I've made a point of mentioning the locations of owls spread throughout the game - and there's a good reason. There are four owls in the game, and they're all crucial to solving the Owl Effigy. You can talk to each of the owls as you would Dot or a Villager, and they'll give you a message before flying away to the Owl Effigy itself. Of course, as you no doubt remember, the owls only spawn at night, and they leave in the morning. You'll have to make sure you're in the right spot, and at the right time!
We've already seen three of the four owls - one of them is in the Waterfalls, on top of the starting platform. Another is on top of Windmill Tower, on an orange tree next to the actual windmill. The third is right next to the cabin in the Nature Hideout. Go to each of those places at night and talk to those owls, and when you do, you'll be almost done with the puzzle! There will be one more to find, and you'll know it when you see it.
For reference, the owls you've seen so far have said: "A POINT OF ORIGIN. AFTER AND BEYOND," "THE MANY ARE ONE. THE ONE IS MANY," and "HEXAHEDRON. OCTAHEDRON. DODECAHEDRON. HER SACRED GEOMETRY."
There's not much else you can do with the Owl Effigy, so let's move on to the Glade of Skulls' mystery.
So, we know that we can rotate the tombstones just like we can any other tool, and we know that there's a puzzle to solve, probably involving the tombstones. But how do you solve it? Well, since the big tombstone is permanently following you around, perhaps you should make it so that all of the smaller tombstones are facing in the same direction the big one is - towards you.
Use the tombstone next to you as a template, and then set all of the other tombstones in the area to its perspective. When you do this, all of the tombstones - and the big skull - will be facing the same way, and you'll have completed the puzzle! When you're done, the large skull will stop moving, and you can flip twice to access a door built into it.
Climb up this new area to find an Anticube! [8/32 Anticubes.] Head back to the Hub via Little Gate.
Walkthrough, Part Eleven: Mausoleum Yard.
Now, make your way back up to the top of the cubic structure and flip twice, making the floating column to your left appear at your right. Interestingly, there's a wooden door built into it. Open the door and head through.
Section Fourteen: Mausoleum Yard.
 This place is made of a large platform with a huge mausoleum on it, and several adjacent platforms floating around it - some next to it and one above it. There appears to be an inscription on the mauseolum, and if you flip twice, you'll find a Locked Door! Unfortunately, we have no Small Keys left. Head right to grab a Cube Bit in an alcove. [6/8 Cube Bits.]
 Head to your left and jump down to the lower left platform, jumping up to a column on it. Then flip to the left to reveal a hidden platform to your right. Jump on that and then jump up to the mauseolum. From here, flip to the right and walk to the right side of the platform you're on, revealing another hidden platform that lets you jump up to the platform next to you.
From here, climb up onto the tree, then flip around and jump across all the trees in the area, flipping when you run out of room, and collecting three Cube Bits along the way, forming a whole Golden Cube! [23/32 Golden Cubes.] [1/8 Cube Bits.] Flip to the right to jump to the platform on your left once more. If you pay attention, you can see that lightning doesn't only reveal hidden platforms - it also reveals ghosts! There's one next to you! Feel free to talk to it if you wish, then continue onwards.
 Flip to your left and jump across a series of three hidden platforms, landing on a platform above everything else with a Treasure Chest on it. Open it up to find a Treasure Map! [6/9 Maps.] It should look familiar to you by now. Flip to the right to reveal a wooden door below you. Head through it to enter an area with another ghost and two Cube Bits - one in an alcove, and another at the top of the area. [3/8 Cube Bits.]
 Since you can't do anything in the mausoleum, head back to the entrance of the area and move to the right platform, flipping to the right to reveal a wooden door. Open it and head through.
Floating Graves.
 This area's just a series of floating islands interconnected by hidden platforms. Flip to the right and jump up to the top of your platform, collecting a Cube Bit. [4/8 Cube Bits.] Then flip to the left and jump across a series of three hidden platforms to the next stable platform. Collect another Cube Bit here. [5/8 Cube Bits.] Then, flip twice to reveal a wooden door. Open it and head through.
Graveyard Tower.
 This area's a winding stone tower. Flip twice here to find a Cube Bit. [6/8 Cube Bits.] Then, climb up some vines and flip to the right to find another Bit. [7/8 Cube Bits.] Climb up some more and make it to the top of the tower, which contains a whole Golden Cube! [24/32 Golden Cubes.] There's a Little Gate here, but don't take it. Head back down to Floating Graves, and jump across some hidden platforms to a larger island.
 This island's significantly bigger than the other two. Flip to the left to reveal two things - a wooden door and a section of purple rock both built into the wall. That purple rock's familiar - it can be destroyed by bombs, which means there must be one nearby! Sure enough, flipping to the left will reveal a bomb. Carry the bomb to the purple rock and let it explode, opening up a passage to the other side of the platform!
 On the other side, climb up the vines and collect a Cube Bit, creating another Golden Cube! [25/32 Golden Cubes.] Then, head down and open the wooden door, passing through. You'll come across another island with a ghost, a Cube Bit, and a whole Golden Cube! [1/8 Cube Bits.] [26/32 Golden Cubes.] Head through the Little Gate to return to the Hub. Since we don't have a Small Key, sadly, we're done here.
If you've been busy with your Anticube collecting, you should now have over 32 total cubes! Dot said you needed 32 cubes to reach the end of your journey, but since it's now apparently obvious that there are 64 cubes, one has to wonder if Dot knows what it's talking about... Nevertheless, you're halfway there, and that's worth commending!
Walkthrough, Part Twelve: Road to Enlightenment.
 We're done with the Ancients' Cemetery at this point, bar the door in the Mausoleum and whatever's up with the Owl Effigy. Take the Warp Gate back to Seaside Pillars and make your way up Redwood Road. Keep climbing up the tree, avoiding the Cabin this time, bouncing across mushrooms and navigating through vines until you make your way to a door at the very top of the tree. Head through it.
Section Fifteen: Road to Enlightenment.
 It looks like you've climbed so high, you've made it above the clouds! You're almost in space, even! The blue sky fades away, revealing tetromino constellations. How about that? This area contains some kind of pillar etched in the Zuish language, a white obelisk, and a platform containing a Treasure Chest! Unfortunately, it doesn't seem like you're able to access the Chest. Flip once to the right to reveal a door, and head through it.
The Throne of God.
 This area consists of a wide platform. A gigantic stone structure is built on top of it, and flipping twice reveals that the figure of some kind of king sits on what appears to be a throne. How interesting... Make your way through the alcoves and vines at the area's bottom to eventually reach the actual platform.
 Climb up the vines on the throne's surface to jump onto a pink tree. Then, flip and jump your way across the being on the throne. When you reach the "crown" on the structure's top, you should see a Cube Bit hovering over it! [2/8 Cube Bits.] Now make your way back down to the being's "head." Flip to the left to reveal a door built into the throne's side. Head through.
Polyhedronism Puzzle.
 It's another puzzle room! This one contains six pink blocks and a large tablet. Etched on the tablet is what seems to be a list of patterns, with every one being made from six blocks. As per usual, the blocks in the room can be picked up and moved around at whim. Looks like you'll have to arrange them in a certain way? See if you can figure it out. If not, head back out. Flip to the right to find a huge door built into the body of the king. Open it to enter another area.
Inside the Throne.
 This is a small yet ominous area made of floating platforms. Two Cube Bits, another white obelisk, and a door can be found in here. Grab the two Cube Bits by flipping around the area, and when you're done, head through the door to enter the next Hub Area. [4/8 Cube Bits.]
Walkthrough, Part Twelve Secrets.
 It's time for some secrets. Head all the way back to the Road of Enlightenment's beginning, which still contains a floating Treasure Chest. You don't have the means to access it now, but very soon, you will, so head back once you do! That Treasure Map you just picked up is the key. Much like earlier puzzles with Treasure Chests, there are hidden platforms leading to the Chest that the Map shows you. Align yourself properly and jump up the platforms.
Opening the Chest earns you a Treasure Map! [7/9 Maps.] This one contains another QR Code, which is completely optional, just like the other QR Codes in the game. Scanning it gives you the code D D D A D D D A, spawning an Anticube. The prize earned from scanning the Code won't be counted.
 Now, for the solution of the Polyhedrism Puzzle. As it turns out, every single pattern on the slab is a "net" - a two-dimensional representation of the six sides of a cube. In other words, every pattern on there, when folded, should create a perfect cube. The goal of the puzzle is to arrange the blocks into a functional net, but not one of the nets shown on the slab. You'll have to make your own. The answer to the puzzle: organize the blocks in the pattern shown in the accompanying picture.
 Arranging the blocks like this will net you another Anticube! Go grab it. [9/32 Anticubes.]
Walkthrough, Hub Five: Zu Ruins.
Hub Five: Zu Ruins.
 Forged from pink and purple brick, littered with vines, rushing water, bright pink trees, and small animals, and high up in the clouds, these gargantuan ruins must have been truly majestic in their prime. This is the last Hub Area, meaning you can now warp between every Hub in the game at this point! Achievement get: Warp Zone. To start your trek, jump and flip to the very top of this area to find a Treasure Chest on a floating platform. Open it to claim another Treasure Map! [7/9 Maps.] Haven't we seen the place it depicts already...? Wait, we have! That's the start of the Road to Enlightenment!
 Drop down to reveal a door built into the ruins. Head through to find a tiny little room containing a Cube Bit. [5/8 Cube Bits.] Flipping to the right will reveal pictures of people etched into the wall. Seems like a heirarchy of some kind. And are some of them wearing fezzes...? Who lived here, exactly?
 Flip to the right to find another small door. Head through to find another tiny room full of torn curtains, and another Cube Bit. [6/8 Cube Bits.] Collect it and move on.
The Throne Room.
 Flip to the right to find yet another small door. This one contains what looks like a miniature throne, similar to the one you saw outside. Flipping around reveals some kind of runes on the wall that are cleverly obscured by the throne, meaning you can't make heads or tails of them right now. Perhaps they're tied to the secret in this area... Collect the Cube Bit in here and move on. [7/8 Cube Bits.]
Flip to the right to find another small door. This one contains a QR Code, the second one you've seen - the first was in the Sewers. Ultimately, it isn't really that important. This QR Code is meant as an alternative solution to a puzzle that can be solved elsewhere in the game, so only scan it if you'd like to avoid that puzzle. Scanning the QR Code gives you RT RT LT RT LT LT LT RT, or D D A D A A A D when converted into PC controls, which will spawn an Anticube. However, if you've been following along with this guide, then you'll have found what this code gives you already! This code is identical to the one that the fez-wearing people in Villageville's Picture Room gave you - the very first Anticube you acquired in the game! As such, this QR Code won't count in the guide. Head back out.
 You should see another small door above you, so make your way to it by flipping around. This one contains a Cube Bit and a series of pictures. Apparently, the people of this city were building some kind of device, and then... Well, those pictures are pretty vague. That could mean anything! Grab the Cube Bit to get a whole Golden Cube! [27/32 Golden Cubes.] Head out afterwards.
 Flip twice and drop down, heading to a rather tall door that seems to be broken. It looks like you would have needed a bunch of Cubes to head through it if it was actually working! Head through to find...
What Lies, Broken.
 This place is full of some kind of looming darkness... Jutting out from a sea of pink is the very structure you just saw in those pictures. It's been absolutely demolished, and black holes are swarming all around it! Dot is at a loss as to what could have happened, leaving us to wonder as well... Grab the two Cube Bits here, taking care to avoid the black holes, and head out. [2/8 Cube Bits.]
Walkthrough, Part Thirteen: The Clock Tower.
 After you've exited that looming area, flip to the right and run all the way across the Zu Ruins to a floating platform with a purple door on it. Head through to enter the first true area of the Zu Ruins that isn't just a small room with pictures.
Section Sixteen: The Clock Tower.
 This area is just a long vertical pillar forged from purple and pink stone, not unlike what you've seen throughout the game already. Well, it's going to be a long walk, so let's get started! The two sets of platforms to your immediate right aren't exacty normal, mind you. When you step on one, the one you're standing on and the one above it will slide together, squashing you flat! You'll respawn on the last stable platform you were just on. With that in mind, jump across these platforms with care, flipping to the right once you've finished to move on to the next segment of the tower.
 You'll find yourself next to a switch, one that Dot calls a Time Switch. According to Dot, they can be wound up like Pistons using the Interact key and D or A, although you'll have to hurry up before they wind back down. Trying it out shows that Time Switches actually flip the portions of the wall around them when wound up so that you can navigate across them! Do this, climbing up the vines until you can't anymore. Once the Time Switch winds back down, the vines will reposition, and you can climb to the next platform. This one is a purple cube with a smaller purple cube inside of it that continually shifts position. You'll have to find the side of it with vines and climb on as it repositions itself until you can actually climb up to the top of the Clock Tower.
 Doing so will bring you up to the epynomous clock. The thing is pretty huge, and it has four sides with four hands - one hand is red, one hand is blue, one hand is green, and the other is white. They each seem to move at different paces. Interesting... Perhaps you should stick around to see what happens? Make your way to a Time Switch located a distance away from the clock and wind it up.
 This will raise the small platforms surrounding the clock, allowing you to jump across them and reach the Golden Cube at the very top! [28/32 Golden Cubes.] But don't take the Little Gate back to the Hub Area just yet - there's still more to do here. Head back down the Clock Tower until you reach the first Time Switch. There's a door next to it that you haven't opened. Head through it.
Knowledge's Pantheon.
 This area is a floating mass of purple stone. Constructed on top of it is a sacred rectangular building with columns and a gilded triangular roof. You'll have to exploit the patterns of the squashing platforms by flipping to get one below the other, and then flipping away so that the platform rises in the air, letting you reach the next portion of the area. Do this several times and you'll make it to the entrance of the pantheon. Be sure to grab the Cube Bit floating above the building, though! [3/8 Cube Bits.] Now head inside.
Pantheon Entrance.
 The inside of the pantheon is small and fashioned from old wood. There are a lot of pictures within, and a lot of them should look familiar to you. They seem to be of areas you've already been to! The Waterfalls, the Zu Ruins, the Cabin, heck, even Villageville! And one in particular stands out... It's the key to a puzzle! Read on for the answer, or try it yourself. See the painting next to the bookshelf? The painting... of that bookshelf? It depicts a portion of the bookshelf replaced with a door. Interacting with the bookshelf will result in Gomez pushing it away, revealing said door. Now head through.
The Pantheon Library.
 This expansive area seems to be a gargantuan library! It's filled to the brim with books and desks, as well as weird statues and pillars, and what looks like a globe of the world. Hop across the pillars and make your way to the globe itself. According to Dot, the globe can be rotated like a pivot! Testing this out will reveal that Dot speaks the truth for once! Rotating the globe will reveal a Cube Bit [4/8 Cube Bits.] and another door! Head through.
Alcove of Tomes.
 This small hideyhole of books contains a plush chair and, interestingly, another Treasure Chest. Open it to claim your second Artifact - the Tome! [Artifacts: 2/4.] Achievement get: Haikus, not Epics. According to Dot, it's a book. Wow. Like we needed help with that one. If you'd like, you can head into your inventory to investigate the Tome itself. You can open it by pressing L Control, and you can flip through its pages with A and D! It looks like it's written entirely in Zuish... And even if you're familiar with the language, the letters are just gibberish! How are you supposed to translate this thing??
Head out of the Alcove of Tomes and exit the Pantheon, returning back to the Zu Ruins. We're done here.
Walkthrough, Part Thirteen Spoilers.
As you probably expected, the clock at the Clock Tower's summit contains a stupefying secret. The odds are pretty good that as you were investigating the clock, at least one Anticube appeared at one of the platforms surrounding it. If you saw this happen, then you probably know the solution to the puzzle.
 If not, I'll list it here: every time one of the clock hands reaches the twelve o'clock position, an Anticube will appear. Sounds easy, right? Well, not exactly. The problem is that although the red clock hand reaches that position once every minute, the others aren't so speedy. The blue clock hand takes an hour to cycle around, the green hand takes a whole day, and the white hand takes an entire week! If you're not up for waiting around to complete the puzzle, then don't worry - you can adjust the system clock of your computer to speed up the process manually. (You'll have to close and reopen the game for the changes to take effect, though.) Regardless of what path you choose, completing this puzzle will earn you four - count 'em, four - Anticubes! [13/32 Anticubes.]
 With that puzzle out of the way, what about the Tome? Well, it's certainly in the language you've seen throughout the game, Zuish. But as I said earlier, if you try to translate it normally, it's gibberish! So how do you crack the code? Be warned: this is a very complicated puzzle, and I'll offer a hint. If the Tome is giving you trouble when you read it two-dimensionally, why not try reading it three-dimensionally? By this, I mean that you read the tome front-to-back as well as top-to-bottom/right-to-left. For an example, every character in the top-right corner of the Tome's pages belongs to the same sentence, and then the characters below that continue that sentence.
Trying this out, you should get "FOOTRMUO." But that's just more gibberish! It looks like there's a specific order to the pages that you need to flip to in order to decode the Tome - going straight front-to-back won't cut it. But how do you determine the order? If I were you, I'd look for a word that you're pretty sure would be in the Tome and then unscramble that word. How about HEXAHEDRON for a candidate? Once you do this, you should figure out that the correct order is 1, 5, 2, 6, 3, 7, 4, 8. And from this, you're able to decode the Tome. For reference, that earlier passage should now read "FROMOUTO", which is a lot closer to proper English, don't you think? (No, I don't know what the huge letters have to do with this.)
Here are the completed haikus of the Tome. (Well, the last one isn't a haiku. But whatever.)
FROM OUT OF NOWHERE / IMPOSSIBLE VISITORS / OUR BENEFACTORS
WATCHING OVER US / IN THE HIDDEN FOLDS OF SPACE / IN FRONT OF BEHIND
GIVE THE GOLDEN GIFT / A DEEP REVELATION / OUR EYES WIDE OPEN
SHAPES TO TESSELLATE / WITH SACRED GEOMETRY / AN EMPIRE TO BUILD
A NEW PERSPECTIVE / THINGS UNSEENS BUT ALWAYS THERE / A NEW DIRECTION
THE HEXAHEDRON / THE SIXTY FOUR BIT NAME OF GOD / THE POINT OF ORIGIN
A PATTERN A CODE / A DEEP UNDERSTANDING / A GATE TO THE STARS
ALL OF TIME AND SPACE / AND THE SPACE OUTSIDE OF SPACE / WHERE DOES IT END
"A golden gift..." "A new perspective, a new direction..." "The Hexahedron..." What does this all mean? Could it be that these people got the same gift that you did? That they gained awareness of a third dimension through the Hexahedron and their own fezzes? You did see people with fezzes back there, after all. But who are the "impossible visitors?" And the "gate to the stars..." Comprehend it or not, this book is a pretty key component to the game's lore - a lore that still isn't yet fully understood. But it's still something to think about.
Walkthrough, Part Fourteen: The Observatory.
 Now that you're back in the Zu Ruins, make your way to a floating island at the bottom of the Ruins, which contains another purple door - the only one we have yet to open in this Hub Area. Head through it to enter an entirely new section.
Section Seventeen: The Observatory.
 This area - a gigantic cube of purple rock containing Zuish glyphs and a couple of Time Switches - is home to yet another massive man-made construction - judging by the golden scope leering from its domed roof, it seems to be an observatory of some kind.
 First things first - jump up and wind up that first Time Switch. It'll peel back some square patterns on the cubic wall, replacing them with vines. Next, orient yourself to the position of the accompanying picture so that all the vines line up, lettimg you walk up them! When you reach the top, flip to the left and jump to the next platform, which contains another Time Switch.
 Repeat the same trick for this one - wind up the Time Switch and force the vines into one line. Then, when you reach the top, flip to the left, jumping to another platform with another Time Switch. You'll notice that we passed by a door on our way up here. Don't worry, we'll return to it later. Jump to the top of the vines and land on the top of the cube above! You've made it!
Now we're able to enter the Observatory proper, but first, grab the Golden Cube hovering above the Little Gate next to it. [29/32 Golden Cubes.] Don't head through that Little Gate just yet, though. Head into the Observatory first.
Observatory Interior.
The Observatory's interior seems to be a lot like the library we went into earlier - full of wood and bookshelves - but at the top of the area lies a massive golden telescope. Jump up the floating pillars to make it to the telescope itself. According to Dot, you can turn the telescope by interacting with its base, and you can look through the telescope by jumping to its eyepiece and interacting with it. Neat! Let's try it out.
 Looking through the telescope during the daytime will just show you the color of the sky, which isn't very useful! But at nighttime, then you can really see the stars! Depending on where you position the telescope, you can even see differing constellations! How cool! Have some fun with this observatory thing and then move on.
Head back to the door you passed by earlier and open it to enter a new area.
The Temple Cosmic.
 Erected on top of slab after slab of vine-adorned purple stone lies some kind of construction in the shape of a weird creature with three eyes and tentacles. How... peculiar. Jump around the platforms to get to the Time Switch in the far end of the area. Activating it will cause every slab in the area to wildly spin around until all the portions of vines slide together, forming a coherent path!
 Now the race is really on to reach to the top before the timer runs out. You'll have to employ the same perspective trickery you used earlier to pass, as well as jumping between two different sections of vine when the time permits. If you accomplish everything in time, you'll make it to the top of the area.
 A couple of squishy platforms are positioned away from each other at this place's summit. Stand on one of them, then flip perspective so they collide. Switch away at the last moment to be propelled up, reaching the top of the temple. There's a Golden Cube up here! [30/32 Golden Cubes.] As usual, ditch the Little Gate and enter the temple itself.
The Cosmos.
 Inside the temple is more shelves, more books, and a large orrery - it represents celestial bodies orbiting around each other. This orrery seems to depict the sun, the earth, the moon, and... another, purple moon? Earth doesn't have two moons, does it? Make a mental note of this curious display, then hop across the pillars and flip to the left to reveal a door at the area's other end. Head through.
Temple's Core.
 This scholarly room consists of another representation of the Earth, this one a cross-section cut away to reveal the planet's core. On the other side of the column holding the Earth up is a Treasure Chest. Open it to obtain your third Artifact, the Counting Cube! [3/4 Artifacts.] Achievement get: A numbers game. Dot is pretty sure the artifact was used to count. Investigating the artifact reveals each of its sides are composed of weird lines. A couple of the symbols wouldn't look out of place in the Zuish alphabet, but others obviously aren't a part of it. What could this cube be representing, then? And what are the weird sets of symbols engraved in the wood around you? The logical conclusion may be obvious, but where do you go from there...?
Head back out and flip to the right, revealing an open door within the pink tree's trunk. Head through it to enter a puzzling area.
The Tetrominomicon.
 This puzzle area has no sliding blocks or anything to that effect. Instead, it has an obelisk with a long scratch running down it. You've seen this type of structure before at various points throughout the game, and yet you haven't ever been able to decode it... But why's one here? Of greater importance, however, is the rectangular artifact pockmarked with dots above the obelisk. Flip to the right and jump across the platforms to reach this artifact.
 Whoa... When you flip to the left to reset your perspective, the artifact's dots light up with a peculiar image! It looks like a Z, almost. Flipping to the right creates another image, one kinda resembling an S. Further experimentation will reveal that jumping creates a square, walking left or right creates arrowhead-esque icons in the direction you walk, and pressing the Up or Down keys creates similarly oriented arrowheads.
What could this mean? These symbols... do they look familiar to you at all? Have you seen them at any point in the game? Take great care to note this room - it's important. If you think you can solve its greater puzzle, even though we haven't yet found the final clue, then do so. If not, head out and use the Little Gate to return to the Zu Ruins.
Walkthrough, Part Fourteen Secrets.
It seems that the Observatory still has secrets, according to the World Map. But what could they be? The only thing you can mess with is the telescope, and turning it any number of times doesn't reveal any hidden passages. So what is it? Something in the stars? A pattern, a code? Something you've seen before...?
The Counting Cube's solution is decidedly more obvious - if the Writing Cube contained letters, then the Counting Cube must contain numbers! Indeed, the world of FEZ has a number system as well. But unlike the alphabet, where you had an easily obtainable key containing every letter, such a key isn't as readily apparent here. Sure, there are the sets of symbols on the walls, but those aren't as obvious... Or are they? Stop me if you've heard this before. A group of numbers arranged together, followed by two lines parallel to each other, followed by another number. Could these be math equations? But you still don't know how to read them...
 One last piece of information to note - the tree by the Temple of the Cosmos contains the game's fourth and final owl! Just like the others, it perches at its tree every night and flies away by daybreak. Now's really the time to figure out what the purpose of all these owls are, and how it could relate to that mysterious Owl Effigy... If you already know the answer to the puzzle, then the time is already at hand! Once you talk to the fourth Owl, which says "THE THIRTEEN CIRCLES. THE 64-BIT NAME OF GOD," it will fly away, meaning all four Owls have been spawned around the Owl Effigy!
 Upon revisiting the Effigy, you'll find that a door has opened on its own! Heading through it, you will enter another area with yet another Owl Effigy. Pick up the Cube Bit in this area [5/8 Cube Bits.] and then travel to the Effigy's head, which will net you a well-deserved Anticube. [14/32 Anticubes.]
The weird set of symbols you just found in the Tetrominomicon are "tetrominoes." They're weird geometric shapes most known for their usage in Tetris. Their inclusion in that level was no mere one-off gag, though - these tetrominoes are the key to the game's third encrypted code! You still aren't fully equipped to solve a large amount of the puzzles surrounding them, but there is one you can solve right now, and that's the Observatory! Head back to it once night falls.
As it turns out, there's one glaring place where you've definitely seen tetrominoes before - the constellations! And since the only place in the game where you can clearly observe the sky's constellations is the observatory, perhaps the constellations you can see in there mean something! Your goal is to go across the sky's four quadrants, mapping the constellations into their respective button presses.


 Doing this successfully yields the code Right D Left D D Space Space Right. It might sound too good to be true, but it works! Input the code to recieve an Anticube! [15/32 Anticubes.] Curiously, even after this puzzle is completed, the World Map still indicates that a secret is in the area... Perhaps further investigation of the stars is required?
Walkthrough, Part Fifteen: Ancient Polis.
At this point in the game, you should have pretty much been to just about every room, and collected almost every Cube Bit. Looking around the World Map will tell you that there are still plenty of secrets to be found - and there are! Just not right now. The only major areas we have left to explore are the three other rooms in the Vertex.
 With that in mind, return to the Seaside Pillars and enter the Vertex through there, dropping down to the four-cube door. You should easily be able to open the door with your surplus of Golden Cubes, allowing you entrance into a new area.
Section Eighteen: Ancient Polis.
 This place is old. Like, unspeakably old. You'll have to flip to the right to be able to see the actual area at all - whoever built this place must have only had cognizance of two dimensions, otherwise their civilization would have spread to all four planes, like the Zu Ruins. Statues of one-eyed beings populate these ruins, from large to small. First things first - trek up the largest square in the area and nab the sole Cube Bit floating at its summit. [6/8 Cube Bits.]
 Then, drop down and enter the door closest to you to find... a bunch of black holes. Reality must be seriously destabilizing, huh? You can't even change your perspective in here! There's obviously nothing you can do, so head back out.
 Walk down the stairs and head through another door. This one contains what looks like a large pot and a Cube Bit. [7/8 Cube Bits.] Hmm... You can't flip here, either! And there certainly aren't any black holes obstructing your ability to do so... Could it be that these rooms are literally just two-dimensional?
 Walk further down the stairs and enter the door at ground level. Tucked away in an alcove near the ceiling is yet another Cube Bit, which will give you your penultimate Golden Cube! [31/32 Golden Cubes.] We're so close...!
 Enter the single door on the right square building to find a Cube Bit hovering in front of an etching on the wall. It depicts what looks like the one-eyed beings praising... an owl. That's odd. Why would they be worshipping an owl? The idea that it was some kind of religious figure is certainly backed up by the effigies you've seen... [1/8 Cube Bits,] anyway.
 Now head all the way to the door on the left square building. There's no Cube Bits in here, although there are a series of etchings on the wall depicting these one-eyed beings hunting, killing, and cooking some of kind of square-based beast. Looks like they were making ends meet!
We've done all we can in this slow, aging area. Leave the way you came. It's time to move on.
Walkthrough, Part Sixteen: Nu Zu.
 Once you return to the Vertex, flip to the right in order to activate the eight-cube door. Head through to enter yet another entirely new area.
Section Nineteen: Nu Zu.
 This area has all sorts of things wrong with it. The somber, spiraling music coupled with the pouring rain that ocassionally changes to bright sunlight before switching right back sets the tone very well. "Nu Zu" - its name can be gleaned from the Zuish signs scattered throughout - is nothing more than a series of brick cubes floating in nothingness. Judging from the frequent neon signs, it looks like it was intended as a permanent settlement, maybe after the Zu Ruins... collapsed. But there's no one here.
Flip twice and run for the nearby ladder, climbing up to a door. Head through it to enter what looks like a washroom containing a single Cube Bit. Grab it and head out. [2/8 Cube Bits.] Then, flip to the right, climbing up another ladder and entering another door.
 This area seems like a classroom - but it's much more informative than the one in Villageville. Immediately upon entering, the chalkboard depicts the obelisks with scratches you've seen throughout the game's world. Interesting... Flipping to the right reveals what looks like a face of the Hexahedron, and flipping to the right again reveals a map of the world in the style of a net. Flipping to the right a third time... Now things get interesting.
 The chalkboard on this wall depicts a long scratch - just like the ones we've seen earlier. It's then split up into a bunch of different components, which are then rotated 90° counterclockwise to create a set of familiar shapes... Just above these diagrams, a figure is depicted standing next to a rectangle with a bunch of dots on it. It feels like you've just been handed the keys to the universe... Do you understand what they mean? If not, the answer lies just up ahead.
 Once you're done in the classroom, climb up the ladder directly to your right and then flip to the left, revealing another door. Head through to find a bunch of beds, and not much else. Exiting and flipping to the left again reveals another door. This one contains a series of shelves and some mining equipment, plus another Cube Bit. [3/8 Cube Bits.]
Just one more door to head through! Flip to the left and drop down to a door to your southwest. Open it to find a boiler room much like the one in Villageville... with nothing else inside. That's all for this area - unless you've figured out its secret. Head on out.
Walkthrough, Part Sixteen Secrets.
The classroom of Nu Zu contains the final piece in the tetromino code's puzzle. In the Tetrominomicon, you figured out that button presses could be mapped to tetrominoes, and since the Waterfalls, you knew about long scratches on obelisks. But now, this area has shown you that those long scratches are tetromino codes - and it tells you how to read them, too!
 Just seperate the tetrominoes on the obelisks into their parts, and then rotate them 90° counterclockwise! Then input them using the keys on your keyboard, and voila! You've activated the code's secrets. Let's try it out in this very room using the obelisk visible right upon entering. Applying this strategy gives you the code Up Left D Space A Space Right Space Down. Using the code gives you an Anticube! [16/32 Anticubes.]
You now have the power to go back and solve all the puzzles involving tetromino obelisks that you couldn't do earlier! However, since that would involve a lot of backtracking and we're already so close to the game's final level, the guide will cover all these puzzles afterwards. But don't forget the tetromino code! It's vital to your success.
Walkthrough, Part Seventeen: Zu.
 Once you're back in the Vertex, flip to the left in order to open what's quite possibly the game's final door... Head through it to enter an area that isn't quite entirely new.
Section Twenty: Zu.
 There it is. Rendered in all its majesty and glory is the crown jewel of this land - the city of Zu. And it's still in construction! How is it possible that you've accessed the same city in two different time periods? Does it matter? What matters now is that you're nearing the end of your journey, and for the first time since Villageville, you've found yourself in familiar company. ...Kind of.
Trying to talk with all these bigheaded villagers will result in a startling surprise - they all speak Zuish! If you know the ins and outs of the language, you should be able to decode their speech fairly easily. Everything the villagers say will be included here, in spoiler text, for reference. Keep in mind that a few villagers say the same thing.
"How do you do?" "What is wrong with your head?" "He wears the fez." "Ha ha ha, check out Mr. Rectangle-Head over here!" "I think it is nice to have a visitor for once." "Woah! How did you get in here?" "Nice to meet you!" "Hello! ...Can you understand any of this?" "Where did you get that hat?" "Welcome to Zu." "Where did you come from?"
 Drop down to the city's underbelly to pick up a Cube Bit. [4/8 Cube Bits.] Then climb up to the city's second level! When you head through, you'll find two Zuish villagers constructing the very QR Code you encountered in the Zu Ruins earlier! In case there was any doubt that this was the same village... Grab the Cube Bit in here. [5/8 Cube Bits.]
The Throne Room.
 Flip to the left to encounter another door on this level of the city. Heading through will reveal a restored version of the throne room you encountered earlier. This one's all decorated with red drapery! Collect this room's Cube Bit. [6/8 Cube Bits.] Hey.. This throne room even has the same runes on it as the Zu Ruins...
Zuish Effigy.
 Flip to the left to encounter yet another door. Heading through will reveal a room full of candles... And another Owl Effigy that tracks your movements! Gah! As if one wasn't enough! Dot seems drawn to the Effigy. Talking to it near the statue makes Dot tell you to "hear the owls," " see their effigy," and "assemble the parliament." Hear the owls... What could that mean? After all we've seen, I doubt that Dot means their hoots. And a parliament is a group of owls... Dot's specifically instructing you to listen to the owls of this world, and to assemble them. But how? In case you haven't figured it out already, this is the big clue to solving the game's owl puzzle.
Zuish Classroom.
 After you exit that creepy room, flip twice and climb up some scaffolding to head to Zu's third level. There's a door right here, so head through it. This room is another classroom, and it's got a bounty of information to share. Grab the Cube Bit in here and then investigate the chalkboards. [7/8 Cube Bits.] The wall you first see seems to be depict some numbers. If our earlier hypothesis of math equations holds true, it seems to be saying that these different symbols mean the same number. It also shows a three-eyed tentacled being with a number below it. Curious...
Flipping to the right reveals a series of diagrams. Each contains a number, and then some kind of geometric shape. A dot, a line, a square, and then... two squares? Weird. The next wall contains some math equations, all of which are equal to the same number. The final wall contains some numbers arranged in a net, as well as another series of numbers next to it.
Just like the classroom of Nu Zu gave you the keys to a tetromino code, this classroom is meant to give you the keys to the game's number system once and for all! But how do you process all this information? See if you can figure it out. If not, read on for the answer...
 Flip to the left to reveal another door. Head through it to enter a small chamber with a Treasure Chest. Open it to acquire the game's final Small Key! At last, we can head through the locked door in the Mausoleum Yard! But now is no time to backtrack. There are a series of etchings on the walls of this room that seem to depict a story. There are three villagers, and then the tentacled beings you've seen throughout the game appear, carrying with them an object and giving it to the villagers. One of the villagers is then crowned king, seemingly with an extra "eye"... Interesting.
 Leave the room and head up the scaffolding to reach the top of the city. Hey, they're even building the Warp Gate! Collect the Cube Bit hovering above the Warp Gate to complete the game's final Golden Cube! 32/32 Golden Cubes! You've done it!
Now... it's time for Zu's final door.
Walkthrough, Part Seventeen Secrets.
But first, it's time to crack this game's number code. The first clue to understanding the number system can be found in the series of four documents with drawings. Point, line, square, two squares, all accompanied with varying numbers. What's the deal with these? Well, they represent the different spatial dimensions. A dot is zero-dimensional, a line is one-dimensional, a square is two-dimensional, and the two squares are indicative of three dimensions - we've seen that same glyph used in Warp Doors, artifacts that "fold space" and let you pass between areas! As a result, it's not a stretch to assume that the blank square is 0, the square with a line pointing up is 1, the square with a line pointing right is 2, and the square with lines pointing both ways is 3.
But that's not all we can figure out from this room. Flipping to the wall that shows that two numbers are equal to each other, this shows that there are two ways to write the number "3" - as a square with lines pointing up and right and a square with just a line pointing down. From that, we can assume that there are multiple ways to write every number - or at least, some of them. That can also be used to assume that the tentacled being is carrying the number 3 beneath it... Interesting.
WARNING: MATH AHEAD.
Now, to the math equations. Based on what we know, all these equations equal the same number - a square with lines pointing in all four directions. So, 1 + 2 + w = x, 2 + 3 + y = x, and 1 + z + y = x, where w, x, y, and z are all different numbers (hypothetically; there might be some repeats since one number can be represented by multiple symbols, as we just saw). Well - bear with me here - we're going to use actual math to figure this out. Set 2 + 3 + y and 1 + z + y equal to each other, since they're both equal to x. This adds up to 5 + y = 1 + z + y, which turns into 4 + y = z + y (by subtracting 1 on both sides of the equation). Then, you can turn that into 4 = z (by subtracting y on both sides of the equation). This means that the square with a line pointing to the right is equal to 4. And it makes sense, after all - 1 through 3 have just been single lines, so it's easy to assume that 4 also fits into this pattern.
Our revised equations are now 3 + w = x, 5 + y = x, and another 5 + y = x, which leaves us with the mystery of what y is. Well, we know that 3 can be represented by a line going up and to the right - in other words, an addition of 1 and 2's symbols. (And 1 + 2 = 3, doesn't it?) Well, y is represented by a line going up and to the left - in other words, an addition of 1 and 4's symbols. (And 1 + 4 = 5, doesn't it?) Therefore, y is 5, and since 5 + 5 = x, x is 10. This also makes sense - of course a number represented by a full grid is the biggest number in the Base10 system. And hey, 10 is represented by lines in every direction - and 1 + 2 + 3 + 4 = 10.
From this, you can then figure out that w is 7, meaning that just through deduction and math equations, we've figured out 0, 1, 2, 3, 4, 5, 7, and 10 in this game's math system. Nice! But something that I touched upon just a little while ago is probably the biggest component of this game's math system - if any amount of numbers are added together, the resulting number's symbol will be the symbols of the numbers used to create it combined together. This doesn't work if the numbers being added share lines in their symbols - so 1 + 3 won't work, as they both have lines pointing up. However, if you use the other symbol of 3, a line pointing down, then you'll create a straight vertical line, which would make that the other symbol of 4.
With this principle in mind, you can now figure out the rest of the game's number system by combining these symbols together. The whole number system will be listed here.
0 (blank.)
1 (line pointing up.)
2 (line pointing right.)
3 (line pointing down; lines pointing up and right.)
4 (line pointing left; vertical line.)
5 (lines pointing up and left; lines pointing right and down.)
6 (lines pointing up, right, and down; horizontal line.)
7 (lines pointing down and left; lines pointing up, left, and right.)
8 (lines pointing up, down, and left.)
9 (lines pointing right, down, and left.)
10 (grid.)
And voila! You now know FEZ's number system. That... that was a lot of work, and I probably overcomplicated it. Hell, you don't even really need the number system for many puzzles within the game itself! But it was still pretty fun to derive - or very needlesly confusing, depending on your point of view. No matter your opinion of that number system, the fact is that it's the last code in the game, and the last puzzle we can do before the game's end.
Flip to the right and drop down to come face to face with a door that requires 32 cubes to open. Since you've found every single Golden Cube at the game at this point, the door will slide open for you. Head through to enter your destiny.
What Lies Beyond.
 The device you saw earlier is completely intact at this point in time. Surrounded by a sea of purple and framed by red curtains, Dot calls the structure a Stargate. And it's working. Not long after you step into the room, its concentric components swirl around in perfect harmony, a THX-esque blare filling the room. After several seconds, the light show subsides, revealing...
 ...A completely alien landscape on the other side. Could it be the moon? Perhaps, but I'm pretty sure the moon is white, not purple... It's time to settle this mystery once and for all. Step through the Stargate.
Walkthrough, Part Eighteen: Beyond.
Section Negative One: Beyond.
 Hovering in a foreign planet drifting through the cosmos is the game's final area - an absolutely gargantuan structure built from alien rocks and crafted in the shape of tetrominoes. The summit of the area is an impossibly long distance away from you. Calling up the World Map does nothing, which means you're on your own now. It's time to ascend.
The first thing you'll notice in this area is that you're a lot... floatier. Wherever you are, gravity has much less of an effect on you, meaning it'll take longer for you to walk and to change your perspective, and your jumps will go both farther and for longer. Keep this in mind as you navigate the awe-inspiring structures in this new land.
 There really isn't much to say here. Not much can be said. You've stumbled upon something truly magnificient. A shrine to impossible aliens drifting through the cosmos, made from sacred geometry. Just keep climbing through the area, bounding across replicas of these tentacled creatures and taking in the truly vast scenery.
 At the top of the area is a gigantic pyramid, capped off by - what else - another Owl Effigy. A strange device rotates slowly above the Effigy. Wait for it to shift into your perspective and then jump into it to complete the game.
 Now, watch the end sequence. No spoilers here. This is best discovered on your own. Achievement get: Kill screen.
Walkthrough, New Game +.
 Congratulations! You've beaten the game. That ending sequence probably messed with your head a fair bit, but hey, at least Gomez was cool with it. That drum solo was pretty sweet. After the credits roll and you reboot your save file, you'll notice that the option to continue your old game has been replaced with the option to start a New Game+. Don't worry, your old data isn't erased. The game's continuing on!
 When you start New Game +, you'll spawn in your room in Villageville, as if the game had just started anew - however, you still have your fez, and the amount of collectibles you've earned so far will briefly pop up, confirming that you're indeed continuing your old adventure.
 Despite this, you'll still need to repeat the same intro as before - although Geezer won't send you mail this time around, he's expecting you at the village's summit, so head on up there! The same ritual with the Hexahedron will play out exactly as it did before (try decoding his text on your own this time!) - Gomez will be plucked into a room full of statues, he'll cruise through hyperspace, yada yada.
 However, instead of giving you a second fez, the Hexahedron will impart onto you another cool gift - a pair of shades. What? You wanted another fez, and you're upset you got this instead? Well, looks like you'll just have to deal with it. ...No, you're right, I'm sorry. That was a terrible joke.
 Although these shades disappear shortly after you put them on, they're not just for show - you're now able to view the game in First-Person Mode! Pressing the right Alt key on your keyboard (though it's set to this key by default, you can rebind it just like every other control in the game) will show the game's world through Gomez's eyes, placing everything into a truly three-dimensional perspective. Although you can look around in this mode, you can't do anything else. Try out this new feature and then let the rest of the intro play out.
Once you regain proper control of Gomez in Villageville, you'll be able to start New Game + proper! With knowledge of all three of the game's codes and first-person view, you now have the tools to solve every puzzle in the game and truly get 100% completion! One other thing worth mentioning - by pressing the Up key three times in quick succession and then holding down Space, you'll be able to make Gomez fly. This is meant to be a shortcutting tool to cut down on backtrack times. Plus, it also looks pretty funny!
Alright, there's no time to waste! Get ready to solve the game's remaining puzzles...
Walkthrough, Part One+: Villageville Revisited.
The only secret we haven't yet found in Villageville is the Boiler Room's puzzle. A quick look around doesn't reveal any obvious hidden passageways or puzzles, so perhaps a closer look is required. Notice any familiar symbols? Any patterns? If you do, then you should understand how to solve this puzzle. If not, read the spoilered text for guidance.
This puzzle makes use of the game's tetromino and number codes. There are several tetrominoes on papers throughout the room, and each is accompanied with a number, representing the order in the sequence that said tetromino goes! With that in mind, the number/tetromino matches you should find are 1/Up, 2/D, 3/Left, 4/Space, 5/Right, 6/A, and 7/Down, making the code Up D Left Space Right A Down. But if you try out the code, it doesn't work... What could you be missing?
 Well, if you paid close attention while flipping through the room, you should have noticed that there was an eighth tetromino that you couldn't normally see, as whenever it was supposed to be in your field of view, it was hidden by the room's boiler! To actually see this missing piece, you'll need to activate First Person view, revealing that the eighth piece of the code is D.
 With that said, exit First Person view and input Up D Left Space Right A Down D to claim Villageville's second and final Anticube. [17/32 Anticubes.]
Walkthrough, Part Two+: Waterfalls Revisited.
 Now it's time to take a trip back to the Waterfalls. Head over there through the Vertex, re-entering Seaside Pillars. Now that we're back here and we understand the game's tetromino code, we're finally able to decode this area's two tetromino-based puzzles! First off, start with the actual obelisk. Its code is Left A Right D Up Space Down D D. Successfully inputting the code will part the Waterfalls, allowing you to access the door that you'd seen hidden behind the falls so long ago... Head through to enter a new area.
The Valve.
 This area is taken up by several statues and a valve. Do as Dot says to turn the valve. The goal here is to turn the valve all the way down so the water recedes to its lowest point. Doing this will lower the water level of all areas of Seaside Pillars, allowing you to enter several new areas that were previously closed off! It will also reveal a door within this very area. Enter it and open the Treasure Chest to get the final Treasure Map! 9/9 Maps! This one's burnt for some reason... Now head back up.
 Your next task is to solve the code of the golden tetrominoes that only appear at night. This one is Left A Left Right D Down Up A. Input the code to open another door and enter a new area.
CMYKave.
 This area has a few things going on with it. First, it has awesome music. Second, there are pink platforms all around that appear and disappear in tune to the music. You'll hear a ding when they appear and two dings when they start to vanish. With that in mind, this basically means all you have to do is climb up, which I don't really need to help you with. However, there is one thing of note...
 After progressing through the cave for a little while, you'll find a door. Enter it to see a new area that contains a weird obelisk split down the middle. Interesting... Do you remember seeing something like this before? Those weird sounds coming from it sure seem to strike a chord with me. If you're stumped, read below.
 This device is another Tuning Fork. For a refresher, Tuning Forks create sounds, and the speaker those sounds come out of correspond to a button you're supposed to press. If they come out the left speaker, you have to press A, and if they come out of the right, you have to press D. With that in mind, this is the Fork's code: A D D D A D D A. Input this and the Fork will turn into another Anticube. [18/32 Anticubes.]
 Head back out and climb all the way to the top of CMYKave to enter a new area. Climb up the appearing blocks to get another Anticube! [19/32 Anticubes.] Now enter the Little Gate and head back to the Waterfalls.
It's time to solve the puzzle of the Infinite Cliffs, since you now have the means to do so. Perhaps going through the entire level will help the answer resonate in your head. And if that doesn't work, then taking a step back and looking at it from far away might do the trick. If you're stumped and can't figure it out on your own, then read on.
 This area contains another tetromino code, but it's not engraved on an obelisk - the platforms themselves are tetrominoes! If you tilt your head 90° to the right and read the platforms, you'll get the code, which is Right A Right Space D Down Space Up. Input this to get an Anticube at the Little Gate! [20/32 Anticubes.]
You may have noticed that a new door has appeared within the Waterfalls thanks to the water level being lowered. Leave it alone for now - we'll come back to it later.
Walkthrough, Part Three+: Belltower Revisited.
 Now let's return to the Belltower. Lowering the water level has revealed a purple door built into the bottom of the Belltower's structure. Open the door to enter... Uh.
The Matrix.
 Well... This is odd. It seems that the world's destabilizing isn't just limited to causing black holes... Entire terrain from other areas is being ripped out and place here in a mismash of corrupted pixels and blocks... Heck, the music here is even taken from other tracks in the game! Anyways, in this area, you have to jump and flip across an array of platforms taken from other areas in the game.
The catch, as you've no doubt already figured out, is that you have to do it while a sea of incorrigible pixels have invaded most of your field of vision. Thus, some of this is probably going to be reduced to trial and error. Just try and see where you can jump next, and if you can't jump, flip. The end is marked by a red Little Gate and an Anticube. [21/32 Anticubes.] Take the Little Gate out of the area, then return to the Belltower.
 Checking out Adore Island reveals that even it's been affected by the change in water levels - if you flip twice, you can finally see what was kept hidden under the water. It's a door that requires 64 cubes to open! Every Golden Cube, and every Anticube... Of course, Dot's stumped as to what could be behind it, which means we're going to have to figure this out on our own.
Checking the World Map reveals that even though you've uncovered the Matrix, there's still a secret in this area - the Bell! Head up to the Bell, ringing it again as your mind is refreshed with codes and perspective changes. Notice anything familiar about it now? Anything that might help you solve the puzzle? If not, keep reading for the solution, as always.
 The symbols on each side of the Bell are numbers! From there, it's fairly easy to guess what to do. You have to ring each side of the bell as many times as the number on that side. So, ring the side with a 3 three times, the side with a 1 once, the side with a 6 six times, and the side with a 10 ten times. Doing this correctly will vaporize the Bell, leaving an Anticube in its wake. [22/32 Anticubes.]
Walkthrough, Part Four+: Lighthouse Harbor Revisited.
 In the next leg of our journey, let's head back to Lighthouse Harbor, which has also been affected by the lowered water levels. A new door has been revealed below the lighthouse! Flip to the right to access it, and then open it. Head through to enter a puzzling room.
 Hey, it's another Tuning Fork! If you're familiar with the earlier puzzles involving this device, you should know what to do. Listening to where its sounds comes from will correspond with the code A D D A A A D D D D. Input this code to recieve another Anticube! [23/32 Anticubes.] Now head back out of the area.
The Lighthouse Harbor still contains a secret - and considering that there's a peculiar purple obelisk in the area that Dot happens to know nothing about, it's a safe bet that said obelisk is involved somehow! But how? It has no letters, numbers, or tetrominoes, and nothing changes to the object at night... Perhaps you'll have to look elsewhere. If you're stumped on how to proceed, read on to solve the mystery of these peculiar obelisks.
 Whenever an obelisk like this is present within an area, it's cluing you in on the fact that you'll need First-Person View to solve the puzzle! Activating First-Person View within this area will reveal a tetromino code imprinted on the lighthouse's boardwalk - something you wouldn't have been able to see without your trusty shades!
 Decrypting the tetrominoes reveals the code Up A D Up A Up D Up. Successfully inputting this code will spawn an Anticube above the obelisk. Nice work! [24/32 Anticubes.] Now you know how to solve every puzzle involving one of those obelisks! They appear sporadically around the game's world, so it's good to get used to them.
Now progress through the lighthouse and enter the next area, Brick-and-Mortar Way. Turns out lowering the water level's changed this area too, revealing another puzzle door.
Beyond the Mortar.
 Whoa... This place looks like a standard puzzle chamber, but there's another Owl Effigy at the center of the chamber's tallest platform! The World Map indicates that there's a puzzle to be solved here, but there aren't any immediately obvious symbols or codes to fall back onto... Another perspective might be required. The solution is listed below.
 Just like the obelisk above, you'll need First-Person View to solve this conundrum. If you stand next to the Owl Effigy and active First-Person, you'll reveal a curious sight - etched into the grass surrounding the Effigy are caricatures of the one-eyed beings in Ancient Polis! What are they doing here? Well, if you take a closer look, you'll see that each one-eyed being has a tetromino over its head that corresponds to either A or D. They're spelling out a code!
 You'll have to go around the Effigy, recording the tetrominoes over these figures' heads. Once you catalogue them all together, you'll have the completed code of D D D A D D D A. Input this code, and an Anticube will spawn in front of the Owl Effigy. [25/32 Anticubes.] (This will nullify the Treasure Map with the QR Code - it was meant to help you solve this puzzle.)
Walkthrough, Part Five+: Redwood Road Revisited.
Now head through the Cabin in the Woods to enter the Ancients' Cemetery. We have unfinished business with the dead.
Walkthrough, Part Six+: Mausoleum Yard Revisited.
 Navigate through the Ancients' Cemetery until you make it to the top of the area, entering the Mausoleum Yard. Now that we have a Small Key, we can finally open the locked door in this area! Do so to enter one of the game's weirdest puzzles...
The Labyrinth.
 Hovering within the mausoleum is a cubic labyrinth, overgrown with vines, covered with peculiar symbols, and infested with doors. Door upon door upon door litters the area, and for good reason - this place wouldn't be much of a maze without lots of false entrances, right? Heading through one of these doors will only result in you exiting from another door within the Labyrinth, meaning you're going to get nowhere... unless you head through the correct sequence of doors. But how would you know that offhand? This is the first time you've seen this place! ...Isn't it?
 The answer is no. It isn't. The Labyrinth's four sides have been represented on four of the nine Treasure Maps you've picked up so far in your journey. Each side has a single red door highlighted on it, and next to it, a red symbol (which you can now correctly identify as a number). This throws the puzzle into a whole new light - now you know which doors to head through, and in what order! Just follow the Treasure Maps!
 The first Treasure Map tells you to head through this door.
 The second Treasure Map tells you to head through this door.
 The third Treasure Map tells you to head through this door.
 And the fourth Treasure Map tells you to head through this door.
If you follow this sequence correctly, you'll end up in an entirely new area...
Golgotha.
 This macabre area is comprised of two skulls - one huge, one small - a withered, dead, tree, and a sea of blood. Talking to Dot in this area will reveal that it "can feel the cosmos..." Whatever this place is, it's nightmare fuel incarnate. There doesn't seem to be much here on first glance - but if you flip through the area, you'll probably see something whizz by your field of vision. It's a Treasure Chest! And it's pretty far away from you. Better start swimming. Hope you don't mind blood!
 After swimming for far, far too long, you'll make it to another skull, upon which lies the coveted Treasure Chest. Inside is your fourth and final Artifact, the Skull. Fitting. 4/4 Artifacts! Achivement get: Phrenologist. Upon seeing this, Dot remarks that "the legends were true. They did come here." Examining the Skull will show that it has three eye sockets and three holes in its underside, presumably for tentacles... It would seem that you now have a genuine alien skull in your hands.
...Let's get the hell out of here.
Walkthrough, Part Seven+: Sewers Gateway Revisited.
 Use the Warp Gate in the Ancients' Cemetery to head to the Sewers, dropping down from the Warp Gate and heading to the Gateway - the door shown in the corresponding image. In case you forgot, this area still has a puzzle to it, and now you know how to solve it! It's just a tetromino code! Translate the tetrominoes to get Right Up Left Down Space A D Space. Input this and the door will slide upwards, granting you entry to a new area... Are you ready for this? I hope so.
Section Twenty-One: Hell.
 Welcome to Hell. This area, in stark contrast from the Gameboy-esque green hues of the Sewers, is painted entirely in red, as if it was being played on the Virtual Boy. Instead of merely acid waters, the water in this area is red-hot lava. What have you stumbled upon...? Flip to the left to find a door you can access. Head through it.
 This area's made of four platforms: the one you're on, one that's thrusting itself upwards, a stationary one, and a final one with another Tuning Fork on it. Stand on the second platform and, when it throws you upwards, land on the platform with the Tuning Fork.
 You know what to do here: listen to its sounds. Input A A D A A D D D. Doing this will give you an Anticube. [27/32 Anticubes.]
Head out of that area now. It's time to tackle Hell's real challenge. As you can see, the base platform of Hell is very large and contains a valve on it. Two sets of mechanical pistons are pushing up and down at random intervals. Jump on them and make your way to the top of the main platform. Make sure that you're prepared when you turn that valve.
 The instant you turn that valve, a ladder comes down from above and the lava starts rising! Your goal is now clear - outrun the lava, by any means necessary! What comes up ahead is the most grueling obstacle course that you'll find in the game. You'll have to put all your platforming skills to the test to get past it. Make sure to flip, stay still on the moving platforms so you don't fall off (that could be disastrous) and to watch out for the spikes that you encounter. Those won't kill you instantly, but they'll make sure the lava will!
 If you touch the lava, you'll have to restart the entire thing from the beginning. However, when you come across a platform with alternating lines on it (the one in this picture), you'll have to wait for the lava! It will carry you upwards, across the next segment of this obstacle course.
When you finish the entire course, the lava will stop and you'll be able to head through a door. Go through it.
The Cranium.
 This eerie area marks the end of Hell. You've made it! At the top of the large skull in the lava is an Anticube - your prize for your hard work. [28/32 Anticubes.] Head through the Little Gate to return to the Hub.
Walkthrough, Part Eight+: Road to Enlightenment Revisited.
Take the Warp Gate back to Seaside Pillars, climbing up Redwood Road to re-enter the Road to Enlightenment. This area has a couple of puzzles that we have yet to solve, so let's get right into it! In this section's very first area, there's a peculiar obelisk much like the other two we just saw. You know what to do here. Activating First-Person Perspective reveals a tetromino code written on the ground.
 Translating this code yields A Space D Up Down A D Space. Inputting this will spawn an Anticube above the obelisk. We're almost there! [29/32 Anticubes.]
Now, head through the Throne of God and go Inside the Throne, which also contains an unsolved puzzle. Sure enough, this area has a peculiar obelisk as well! Standing on top of the obelisk and activating First-Person Perspective will allow you to see the tetromino code written on one of the area's platforms. It's pretty hard to see it if you don't stand on that obelisk.
 Translating this code yields Left Left Down Down Right Right Up Up. Inputting this will spawn an Anticube above the obelisk. Now we're really almost there! [30/32 Anticubes.] Now head through this area's other door to enter the Zu Ruins.
Walkthrough, Part Nine+. Zu Ruins Revisited.
Zu Ruins contains a few secrets - there's even one sitting in the Hub area! Make your way across the abandoned city until you reach the Throne Room. Head inside. As you may remember, this area had runes on the walls that you couldn't really see, since they were obscured by the throne, and were only visible while changing perspective. Well, you now have the keys to solving this puzzle.
 Using First-Person Mode will reveal the runes on the wall, allowing you to actually see them! And now that you have a good look at them, they should look really familiar... They're tetrominoes! Transcribing these tetrominoes into a proper code gives you D D D A A A A A. But when you try to input this code in the room, nothing happens... You must be missing a piece of the puzzle, somehow. But where would you find this other piece, and how?
Investigating the World Map reveals that there are only a few rooms left containing secrets - the Observatory, the Tetrominomicon (which we'll deal with shortly), Adore Island (because of its 64-cube door), the QR Code in the Sewers, and, curiously, Zu's Throne Room. Of course! The second piece of the puzzle must be over there! It can't be that it's the same code for both rooms, otherwise you would have actually gotten an Anticube from inputting D D D A A A A A! We'll save backtracking all the way to Zu for last.
Regardless, head back to the Tetronomicon, which still contains a secret in the form of a tetromino obelisk. You're now able to solve this puzzle quite easily by cracking its code. Input Up Space D A Space Down A D. Doing this will spawn your penultimate Anticube! [31/32 Anticubes.]
 Now head all the way back to Zu by warping to Seaside Pillars and heading through the Vertex. Entering its Throne Room and investigating with First-Person Perspective will, sure enough, reveal another set of tetrominoes on the wall. These translate to D A D A D A D D. You then have to stitch these two codes together - the first letter of the Zu code goes first, followed by the first letter of the Zu Ruins code, followed by the second letter of the Zu code, followed by the second letter of the Zu Ruins code, et cetera. This creates the completed code D D A D D D A A D A A A D A D A.
Input this code in either Throne Room to recieve your thirty-second and final Anticube! (This will nullify the Sewer QR Code - it was meant to help you solve this puzzle.) 32/32 Anticubes! Achievement get: Hexahedronaut. Congratulations! You've collected all sixty-four cubes, meaning the Hexahedron has been fully restored! Dot tells you to go check out the Stargate, and since you're in the neighborhood, go do so.
 Jump all the way through Beyond once more, and when you reach the end of the level, a different cutscene will take place. You've earned FEZ's best ending. Well done.
Walkthrough, Part Ten+: Kokoromi.
Well, you've done it. You've beaten the game twice, and collected every single Golden Cube and Anticube in the game. You've unlocked every locked door, you've collected every artifact, you've solved the game's three codes, and you've hunted down every chest and map. And yet there are still unsolved mysteries. Looking through the game, you should see that Adore Island is still unsolved (as you haven't yet unlocked its 64-cube door), as is the Observatory, and there are two doors within Seaside Pillars that you haven't even opened yet! The time has come to solve the game's last few challenges.
Kokoromi is a Japanese word roughly equating to "trial," if Google Translate is correct. And a "trial" is exactly what you're about to be going through. Buckle up.
 For starters, you'll have to select the "New Game +" option in order to play the game with all your collectibles still intact, and you'll have to go through the same Villageville spiel for the third time. This time, the Hexahedron gives you 3D-glasses which activate stereoscopic vision. As far as the game's community is concerned, these serve absolutely no use whatsoever other than headaches, so disable it in the game's options and let the rest of the intro happen.
From there, leave Villageville and head through the Vertex, entering Seaside Pillars and from there, entering the Waterfalls. There's a door right below you, one that I intentionally told you to skip earlier. Now is the time to enter it. Head through.
Trial One: Sixty-Four Bit Name.
 This area consists of a set of blocks with letters on the Zuish alphabet on it, and floating in the middle is a huge tablet inscribed with what seems like Zuish sentences. You'll need a firm grasp of the alphabet to solve this puzzle, so go ahead and decode it. If you'd prefer to have the text just given to you, here: Please answer this security question: what's my name? Security question hint: My first half is what it is, my second half is half of what made it.
So, you have to find whatever this... thing's name is. I'm not going to lie to you - this is a very hard puzzle. There aren't many ingame clues at all, and I can only offer you two hints. One is to think metaphysically. And the other is to think outside of the game's box - don't limit the solution to what can be found in the game. Think bigger. If you can solve this on your own without resorting to the following spoiler text, then you're a god among men in my opinion.
The answer to the question is METATRON. Its first half is what it is - that's a pretty self-referential idea. In other words, it's meta. Its second half is half of what made it - Polytron being the game studio that developed FEZ. Its second half - tron. Put these together and you get the 64-bit name of God.
Alright, so you have this being's name. But now what? Well, your goal is to arrange these blocks so that they spell out its name from left to right when your perspective is two notches away from the entrance. This will take a lot of repositioning and flipping around to accomplish, but keep at it (and frequently check the alphabet guide shown earlier in this walkthrough) and you'll earn your coveted prize.
 Upon spelling out the word METATRON, all the cubes will vanish, replaced with some kind of red artifact. Dot is at a complete loss as to what this thing is, but Gomez accepts it all the same. You've just found your first Heart Cube. [1/3 Heart Cubes.]
Walkthrough, Part Eleven+: Kokoromi II.
Trial Two: A Pattern, A Code.
Our second trial takes us all the way to the Zu Ruins once more. It's time to crack the Observatory's ultimate puzzle. We've already used the constellations as the method to solving a puzzle, but there's something else written in the starts that's meant to draw our attention. I pointed it out earlier, but if you've forgotten, you can figure out what it is just by looking through this room!
If you pay close attention, you'll see that the observatory contains a chalkboard depicting a view of a certain section of space. As evidenced by the two tetrominoes, you can see this view through the telescope. What the chalkboard has also highlighted, however, are two small dots in the upper-left corner of the view. Interesting! Perhaps you should investigate these...?
 To view this part of the sky, flip the telescope so that you can use it two perspective flips away from this room's entrance. Looking through the eyepiece at nightfall will, sure enough, reveal red dots in the upper-left corner of your field of view. But these things aren't static dots. One only ever appears at a time, and only for a moment - the two are blinking in a peculiar way... In some sort of pattern, perhaps? See if you can figure it out. If not, read on for the solution.
These two dots are blinking in binary code! Whenever the dot to the lower-left is visible, it represents a "0" in the code. Whenever the dot to the upper-right is visible, it represents a "1" in the code. With that in mind, the entire code of the stars is 01010010 01010100 01001100 01010100 01001100 01010100 01010010 01010100 01010010 01010100 01001100 01010100. Running this through a binary translator yields the string RT LT LT RT RT LT, and converting this into PC controls gives you the code D A A D D A.
 Upon inputting this code, your second Heart Cube will materialize above the telescope! [2/3 Heart Cubes.] Keep in mind that if you want to solve the stars' puzzle, you'd best be watching them as soon as night falls to ensure you have the maximum amount of time to figure out what they could be saying.
Walkthrough, Part Twelve+: Kokoromi III.
Trial Three: Outside Of Space.
 Our third and final trial brings us right back to Seaside Pillars. Drop all the way down and flip to the right to reveal a purple door built into the bottom of the center pillar. Head through it to find yourself thrust into this game's final puzzle.
This room consists of a raised platform strewn with candles, and not much else. There doesn't seem to be much you can do here - looking around doesn't reveal any codes, and nothing exactly jumps out at you. So what are you even supposed to do? Perhaps you'd benefit from a new perspective?
 Activating First-Person View at the top of this area will reveal a very strange pattern of concentric squares folded over each other burned into the ground. The squares in the middle of these patterns seem to represent a zero and a one. That sure is mystical, but it doesn't exactly present a solution to a puzzle for you. You'll need something else to help you. Something you've already found, no doubt. But where have you seen that burning symbol before?
 You've seen this symbol before, make no mistake. It was on the last Treasure Map you picked up in the game - the only one that's burned! Sure, only half of the symbol is visible on this map (since the other half has been disposed of for some asinine reason), but it's definitely a match. Flipping twice while viewing the Map will show you the Map's other side, which has what we want - arrows pointing to one of the pattern's middle squares and a classic tetromino code! This one reads Up D Up Space Down A Up Down.
 So, now you have a code, but what to do with it? Inputting it doesn't do anything to the area. Well, that map didn't just tell you what code to use. It told you where to use it. You have to be standing on that middle square when you input the code, or else it won't work! To make sure you're standing exactly on this square, you'll have to check with First-Person View.
 If you do this correctly, the entire area will rumble, and something will appear, rising out of the platform! This mystical construction is the Black Monolith, and its only function is to eerily rotate in the middle of the area. There's no writing or codes on it or anything. It just... floats there. So you may be asking yourself, "I've gotten this far, and there has to be something in the game to help me solve this, so I just have to find it, right?" Well, here's the thing. There isn't.
No one has an official solution to the second half of the Black Monolith's puzzle, because it isn't in the game. There are no overt references in any of its areas, and none hidden in its code. The community spent many long, hard hours trying to crack the Monolith's code until people resorted to brute-forcing every possible combination. It was only through this way that the answer was found. There are many theories as to how the true answer can be gleaned (a popular one was that it was tied to the game's release date) but in my opinion, none of them really seem accurate.
 With that in mind, here's how to solve the Monolith - align yourself so that you're standing on the center square with a line running it, making sure you're doing so by checking in First-Person View. Then, when you're sure you have it right, input the code Down Down A D D Space Up. Even though no one knows why, the Monolith will vanish, giving you your third and final Heart Cube. 3/3 Heart Cubes!
And now, there's only one thing left to do. Head on down to Adore Island. Its sixty-four cube door will slide open for you now. Walk through it to enter the game's final area.
Temple of Love.
This peaceful, lush area full of pink water contains the three Heart Cubes you just collected. Through your trials and efforts, you have truly restored the heart of the world, and brought balance to existence. This room serves as a chance for you to contemplate your journey, and your ultimate destination.
 The end.
Unsolved Mysteries, Part One.
So, that's that. By this point, you should have a score of 209.4% completion - FEZ's equivalent of 100%. I don't know how Zuish exchange rates work.
You've visited every room, unlocked every door, opened every chest, nabbed every Cube Bit, every Golden Cube, every Anticube, and the three coveted Heart Cubes. You've ventured deep underground, through the pits of hell, and the cosmos itself. But despite all of that... You haven't solved every puzzle. No one has. Although we've gone through enlightenment and back, FEZ still has a motherload of conundrums to... unconundrum.
In this section, we're going to be taking a look at these mysterious mysteries. Although it's been years since the game's release and they still haven't been solved, I'm not going to give up hope yet. Who knows? Maybe by looking through this text, you'll find some hidden connection that no one else has made. Even if you don't, I hope that it'll still be interesting to see just how deep the geometric rabbit hole goes...
The Black Monolith.
Let's talk about 2001: A Space Odyssey.
Throughout 2001, monoliths appear across the solar system, triggering with them a dramatic evolution of the species around them. In the film's climax, they bring its protagonist into a surreal kaleidoscopic stargate, multicolored lights and grids blaring across the screen.
Sound familiar? It should. The Black Monolith evokes many of FEZ's themes and scenes - the Hexahedron giving you the fez at the beginning of the game, the 32-Cube Bit ending, benefactors guiding a primitive race through extradimensional knowledge... The monolith is even tied to sacred geometry, its sides a perfect 1:4:9 ratio - some claim it's a metaphor for a cinema screen!
But this is beating around the bush. The real problem with the Monolith, as I've already outlined, is that it has no solution. To be clear, it does. But there's no logic behind it. Devoted groups scoured the game and the internet for any sort of clue, compiling their notes. Some sought a connection to the Tome (more on that later), but it was soon felt that there were no real leads.
Solace came in Trey Reyher, a game developer who had connections with FEZ's dev team and acquired the code. Through his insight - the code had seven total inputs and five unique inputs - the amount of possible solutions was dramatically lowered... from 2,097,152 to 78,125. Which is. Let's be clear. Still a lot to get through. But the community was up to the task, creating spreadsheet after spreadsheet that catalogued each incorrect solution.
The next big break came from Michel Billard, who created a site that automatically generated ten sequences at a time that hadn't been confirmed wrong, then allowed users to test them, confirm them, and generate more. Eighteen hours and 66,227 solutions later, a GameFAQs user, gregSTORM, got Down, Down, LT, RT, RT, Jump, Up... and that was that. The answer to FEZ's most challenging puzzle had been brute-forced.
Denied their "a-ha!" moment, the community went through an anticlimactic period. That was it? It was all over thanks to spreadsheets and algorithms?? Well... Perhaps not. The community had a lot of time to think about the Monolith after the dust cleared, with people creating retroactive explanations to the intended solution. Easily the most popular of them was the Release Date Theory, penned by FraustDogger.
It goes like this:
- FEZ was released on April 13, 2012 - 4/13/2012.
- Convert that to 4132012 - seven digits, five of them unique.
- The order the pages in the Tome are read is 1, 5, 2, 6, 3, 7, 4, 8.
- Rework the numbers to that model: 4011322.
- Rewrite those numbers vertically in FEZ's number system: left line, blank square, up line, up line, down line, right line, right line.
- Since the Tome has the game's symbol for four dimensions, it would cast a 3D shadow: the Monolith.
- Have the line cast a shadow, becoming up line, up line, right line, left line, left line, blank square, down line.
- If those lines are arrows, they become down arrow, down arrow, left arrow, right arrow, right arrow, no arrow, up arrow.
- Change those to Down, Down, A, D, D, Space, Up.
I've had problems with this theory. It ignores the Tome's eighth page, the Tome's symbol isn't associated with the fourth dimension, and the mutation of lines to arrows is dubious. No other puzzle does that, and there's no reason for a new code this late in the game. It felt like something that could only be created by working backwards from the answer.
Sure enough, I had reasons to be suspicious. Some time after I wrote this, Renaud Bedard, FEZ's lead programmer, broke Polytron's silence and debunked the Release Date Theory! He says the dev team didn't know FEZ's release date while creating the Monolith puzzle. You can read his post here. https://reddit.com/r/Fez/comments/aggf3z
I think the Monolith was never meant to have any answer, ingame or in real life. I think it was always intended to be a rallying cry for the game's community - to get people to band pool all their resources for one last effort, and to be ultimately disappointed, disbelieving, and confused.
I think that lack of clarity - the inability to understand the final step of the puzzle - is a crucial theme to FEZ. As we continue on, hopefully you can understand why.
Concentric Circles.
I know what you're thinking. "FEZ has circles?! FEZ doesn't have circles! Gomez is made of rectangles! You collect cubes! The terrain is made of cubes! Even the earth, the sun, the moon, and the alien planet are all cubes!" Okay, I'll concede that. They aren't circles. They're squares. But they're definitely concentric. And since they evoke alien "crop circles," the "circles" name stuck.
This imgur album, compiled by BrunoValads, does a good job of summing everything up. https://imgur.com/a/kgYiB6R
In essence, there are eight of these concentric circles scattered throughout FEZ's world, and they're only viewable by examining the room they're in through First-Person Mode. They'll be rendered pure white against the ground, speckled with dots. Although you can see where each circle is in the album, I'll go over it here.
The one-rung circle is at the top of Villageville.
The two-rung circle is at the top of the Broken Arches.
The three-rung circle is at the top of the Belltower.
The five-rung circle is off to the side of the Ancient Polis.
The six-rung circle is at the top of the Waterfalls.
The seven-rung circle is at the top of Zu.
The eight-rung circle is at the top of the Zu Ruins. (One is also carved into the bottom of Beyond, along with four owls.)
Of course, there's one missing - the four-rung circle. Supposedly, it's located in the Totem Sanctuary. But since that room is one of the only areas in the game where you can't flip on command, you can't enter First-Person Mode either. Through hacks and noclip, people have found that it is definitely there, but as it stands, it's impossible to see normally ingame.
What purpose do the circles serve? Like the Monolith, many theories were proposed. Some say that they're functionally identical to tree rings, serving as a record of how much time has passed; the rungs in Zu and the Zu Ruins seem to confirm this. Some seemed to think that the seven visible ones were connected to the Monolith's solution. Others thought it could be a reference to crop circles - aliens are a part of FEZ!
But if I had to guess, I'd say it's another link to the "incompleteness" I mentioned earlier. Just like the Monolith, we're missing another crucial piece of the sequence - we have no way to see it in the game. And that very room has a "fractal cube" - a chunk torn out of the wall, revealing an infinitely repeating series of cubes, no end in sight.
And there's no end to the mysteries, either... Let's continue.
Unsolved Mysteries, Part Two.
The Skull's Rabbit Hole.
FEZ has four Artifacts. There's the Writing Cube, which has clues containing to the game's alphabet code, Zuish. Then, the Counting Cube, which similarly points towards the game's number system. The Tome has a set of three-dimensionally-read haikus outlining the game's lore. And then there's the Skull.
Look, it's from an alien. Which is probably obvious to you - you saw the carvings in Zu and the statues in Beyond. But it's worth noting that the skull is actually different from most other depictions of these aliens. Their heads have three eyes - two on one level and one above them - and then three tentacles. But this skull's eyes are all in a row, and its bottom - where its tentacles would be - has the two plus one pattern. So why the discrepancy? Are its "eye sockets" for its tentacles, and vice versa?
Well, maybe. But there is one place with a skull like that - Villageville's Boiler Room - a room with a Labryinth Treasure Map. A room containing secrets about the game's codes - tetromino and number codes alike, symbols of the third dimension, the letters "XYZ," and even a map of what looks like of the Hexahedron's faces. Never mind the Skull - what's Villageville's deal?
The place was inhabited by people who knew the third dimension. There are rooms in its other planes that are long abandoned, but have pictures of Zuish authority figures. So what happened? Why do they shun the third dimension? Why do they speak Engrish, not Zuish? I hesitate to put my theories too much into this, but I'll leave you with this...
What's Geezer's deal? His house has pictures of all four owls - owls that the "one-eyeds" worshipped, that ghosts learned to fear, that the Zuish built effigies of, even on the aliens' planet. When you talk to him after the game's intro, he has this to say: "It's been so long time. It's your turn now. I'm tired. Plus there's the eye thing." It seems that Geezer knows about the fez, the Hexahedron, the owls, and the aliens - he's been dealing with the third dimension, presumably keeping the universe stable, for a "long time," and is now passing it on to you, Gomez. But is he? Could he be passing it on to... himself?
A bug circulating after the game's release was that following any of the game's fake crashes, when the game is zooming back to Gomez's room, it displays infinite copies of his room arranged on a grid before finally settling on the center one. It evokes the 64-cube ending - infinite worlds with infinite Gomezzes, trapped in a cycle of restoring the Hexahedron. Geezer could be the end of that cycle - a future version of Gomez, restricted by age and a lack of depth perception, who must uphold the stable time loop.
Sounds a lot like a fractal, doesn't it? A series of concentric journeys, a puzzle with a piece missing. And all of this rambling from one alien skull - the heritage of the impossible visitors.
The Tome Letters.
If the Skull is a missing link to the game's lore, the Tome is all other links combined. Despite its inscrutable nature, the community's tireless efforts managed to yield its haikus, and with them, "a pattern, a code, a deep understanding" - at least this was one community goose chase that had proper resolution, right?
Well... not entirely so. One aspect of the Tome was a mystery from the outset - and has remained a mystery since. Opposite from each page with writing on it is a page with a single large letter on it, making eight letters in all. From front to back, they read "PAEAEB(U/V)B." In the intended order, "PEABE(U/V)AB."
And no one knows what they mean.
Like all of FEZ's big mysteries, many thought they were connected to the Black Monolith code. Indeed, it was a popular bandwagon while the Monolith hunt was ongoing (though bruteforcing was already in progress). There were also people connecting them to the Writing and Counting Cubes, trying feverishly to extract RT and LT codes from them. Still others attempted to find links to... well, I was about to jump the gun there.
Discussion sites for FEZ are still littered with people unable to make heads or tails of the eight-letter sequence, which is usually just denoted as "PEABEUAB," I guess since it's more easily-pronouncable? I make no claim to understand them - even though they're the most directly observable mystery the game has to offer. Here they are, lying smack-dab inside a book outlining the foundation of the universe, completely inscrutable.
Yet another missing link etched into all of time and space - and the space outside of space. Where does it end? Does it even end?
"Classroom Numbers."
Well, uh, no, as it turns out.
This is probably the most obtuse unsolved mystery, to be blunt. It doesn't have the same weight as an incomplete set of concentric circles, or an intergalactic monolith, or the Attack of the Infinite Gomezzes. But it's still a huge point of discussion across the community, and as such, I'll bring it up.
The classroom in Zu is one of the rare levels that gives you the key to deciphering a code - here, as you may remember through my extensive equations and symbology, it was the number system. One of its walls showed the two symbols for "3," and a visitor giving the Zuish people the third dimension. Another gave three math equations. A third showed the game's symbols for the zeroth, first, second, and third dimensions, with corresponding numbers. All of these are huge assets to figuring out the game's number system as a whole.
The fourth wall has a blackboard with a net - an unfolded model of a cube's six faces - of the Counting Cube. The middle faces are up line, vertical line, vertical plus right line, and up plus left line. The top face is a grid, and the bottom is blank. Nets have been shown throughout the game - the Nu Zu classroom has a net of the world, and there's an Anticube puzzle centered around the concept as well. Most likely, the net (and the corresponding Counting Cube) are meant to show every possible permutation of number symbols, with the Writing Cube doing the same for letters.
But the fourth wall has... stranger things. On a piece of paper next to the net is a set of numbers that appear to have no use. There's no equations or symbols. They're just... there, out of place. The sequence is as follows, with an "X" indicating empty space:
2 4
2 5
3 X
X 6
4 1
5 4
4 4
3 3
3 6
5 X
There's a lot of peculiarities about the sequence. One: all the numbers add up to 64 - quite a telling number. Two: different symbols for the same number are used interchangably - both of 3, 4, and 6's symbols are used, yet not both of 5's. Three: 7 through 10 (and 0) are absent entirely. Four: what's with the spaces? No other use of numbers in the game have them (not that there are many others). Five: why is it here? There's nothing teachable about it - it's just a set of numbers, listed as though they were scribbled in a margin.
Fans tried to place the numbers in all sorts of contexts, using them as Polybius Square ciphers (or, in line with the Tome, "Polybius Cubes"), linking them to a cafe in Montreal, or pairing them with... ah, almost got ahead of myself again. Still, like every mystery before it, nothing seems to add up.
There is one theory I'd like to note, though. A user named PsyMar2 thought to rotate the sequence by 90º so it reads like a tetromino code or Zuish code would, creating an entirely new sequence in the process:
33 746324
112 633553
Jumping from the idea that the numbers were coordinates, the user ran through various coordinate permutations. When they got to 33.746324, -112.633556, they found... well, something: the exact center of a huge triangle in the middle of nowhere, Arizona. Someone even visited the place, despite discouragement from the dev team, and found, unfortunately, nothing of note.
"The numbers, Mason... What do they mean?"
We may never know.
Unsolved Mysteries, Part Three.
Heartbreak.
...
The Soundtrack.
...
Odds and Ends.
This section will consist, true to its words, of various odds and ends throughout FEZ's universe that I just didn't put into the walkthrough itself. They'll range from shortcuts to codes, and perhaps other things in between, too. There isn't much else to say here, so let's get right to it.
List of Warp Doors.
You've seen Warp Doors around, even if you didn't make much use of them. Etched into the walls of specific areas are tiny doors with a peculiar symbol on them - two squares, the lower-right point of one matching with the upper-left point of the other, so that they interlock. This is the game's symbol for three-dimensional shape, and, true to this symbol, heading through one door will take you through another, corresponding door.
This section will list every Warp Door pair in the game. If you're looking for shortcuts throughout the world and don't want to rely on the Hub Warp Gates, this is a good place to check!
List of Zuish Codes.
Although FEZ has its own alphabet, it's not really utilized in a puzzle sense. Only one puzzle in the game, the Security Question, actually requires the use of the alphabet - everything else is just for flavor text, like the Hexahedron and the Zu Villagers. That's why I didn't go over the game's snippets of alphabet code that much. However, if you're interested in seeing what everything says, and don't feel like decoding it for yourself, then that's what this section's for.
List of Dialogue.
This one's pretty self-explanatory - it's a list of every piece of dialogue in the game. And since the world's so open and empty, there isn't a whole lot of it. Dot's definitely the most talkative character, but the Villagers have stuff to say too! And, interestingly, the ghosts in Ancient's Cemetary are willing to share a few words to anyone that finds them...
- A Complete Guide to FEZ!!!★ 5 (2.1k)64k views2.3k ♥37 minUpdated Jan 30, 2014
- The Ultimate Guide to FEZ★ 5 (1.5k)40k views1.9k ♥64 minUpdated Mar 1, 2016
- Alphabets, Numbers & Tetrominos★ 5 (539)19k views649 ♥1 minUpdated Nov 14, 2015
- SOLUTION-FREE Guide to Avoid....Guides. And Frustration.★ 5 (611)19k views745 ♥9 minUpdated Feb 21, 2018
- Cube meet translation.★ 5 (223)16k views93 ♥1 min
- You Need Help, Not Answers!★ 4 (174)12k views282 ♥5 min


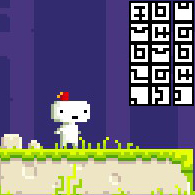

- Upgrading to PremiumTeam Fortress 2★ 5 (20k)1441k views11k ♥6 minUpdated May 11, 2022
- No More Room in Hell Official ManualNo More Room in Hell★ 5 (2.8k)569k views2.1k ♥29 minUpdated Apr 22, 2019
- NMRiH Community Hosting GuidesNo More Room in Hell★ 5 (526)351k views653 ♥1 minUpdated Aug 10, 2022
- ULTIMATE GUIDE FOR GAME DEV TYCOONGame Dev Tycoon★ 5 (5.8k)326k views10k ♥4 minUpdated 23 Jan, 2014
- How to 'Git Gud' Soon™MORDHAU★ 5 (2k)318k views3k ♥68 minUpdated Nov 16, 2024
- Лучшие кооперативные игры SteamPAYDAY 2★ 5 (1.5k)315k views2.1k ♥56 minRussianUpdated Apr 27, 2025






This guide was created by its original author on the Steam Community. Are you the author and want it removed? Request removal.