FTL Weapons
Lasers
Lasers are the bread and butter of the Faster Than Light universe, they are the most common weapons and usually the backbone of any weapons system. Lasers do not require any resources to fire, only the required power supplied to the system.
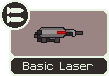 Basic Laser - A weak laser and does basically nothing if it's the only weapon you have. Get other weapons ASAP to either replace it or to use in conjunction with.
 Damage: 1 laser/damage
Power Consumption: 1
Cooldown: 10s
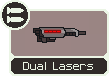 Dual Lasers - A much better laser than the Basic but sadly can't be bought in stores. Power efficient and a good cooldown means that this is usually worth keeping for the entire game.
 Damage: 2 lasers/damage
Power Consumption: 1
Cooldown: 10s
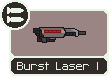 Burst Laser Mark I - Much worse than the Dual Lasers. Requires extra power and a longer cooldown for the same amount of lasers/damage. Very common in stores however so they can be picked up if you do need extra firepower.
 Damage: 2 lasers/damage
Power Consumption: 2
Cooldown: 11s
 Burst Laser Mark II - Arguably the best weapon in the game. For the same amount of power as the BL I, you get an extra laser for a fractionally longer cooldown. If you find any in stores (as they are rare), buy them immediately unless you already have your ideal setup.
 Damage: 3 lasers/damage
Power Consumption: 2
Cooldown: 12s
 Burst Laser Mark III - Very powerful, but the very long cooldown and huge power usage means that it is much less viable than the BL II. Still potent in any setup however and can usually destroy enemy shields by itself unless the enemy have a medium-high dodge chance. The Weapon Pre-Igniter makes this weapon so much better.
 Damage: 5 lasers/damage
Power Consumption: 4
Cooldown: 19s
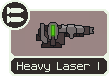 Heavy Laser Mark I - Quite a decent laser for only 1 power, has the shortest cooldown of any laser weapon and does extra damage if it hits with a good chance at creating a breach. Just don't have this as your only weapon against shields.
 Damage: 1 laser / 2 damage
Power Consumption: 1
Cooldown: 9s
 Heavy Laser Mark II - Don't bother with this weapon, this is a significant downgrade compared to the Mark I. For double the damage, it requires thrice the power and a not insignificant cooldown increase. The higher breach chance of the weapon doesn't save it. Burst Laser Mark II is better in every way except damage.
 Damage: 2 lasers / 4 damage
Power Consumption: 3
Cooldown: 13s
Heavy Pierce Laser - A starting weapon on the Shivan, this is a modified Heavy Laser I. This laser is unique in the regards of being a laser that is able to pierce 1 level of shields. Compared to the Heavy Laser I, the shield piercing is compensated by the cooldown being increased by 1 second and the power usage also being increased by 1. A decent weapon, but doesn't have the drawbacks of the crystal weapons of the crystal being shot down by defense drones. This is a solid weapon especially early in the game, but does get worse the further into the game you go.Damage: 1 laser, 2 damage, pierces 1 level of shields
Power Consumption: 2
Cooldown: 10s
 Hull Laser Mark I - A good alternative to the BL I if you want to do more damage by targetting the hull. A decent hull breach chance with the double damage against systemless rooms is offset by the longer cooldown than a lot of other laser weapons.
 Damage: 2 lasers / 2x damage against systemless rooms
Power Consumption: 2
Cooldown: 14s
Hull Laser Mark II - Reasonable alternative to the BL II. Fires the same number of lasers, requires more power and has a longer cooldown, but a high chance of a hull breach and double damage to systemless rooms. Probably best to stick with BL IIs if you want multiple lasers in your weapons setup however. Damage: 3 lasers / 2x damage against systemless rooms
Power Consumption: 3
Cooldown: 15s
Charge & Chain Lasers
I'll put both of these categories together, because there's only 5 weapons total for both weapon types and both were released together with the Advanced Edition.
Chain Lasers start off weak just after you jump and get stronger throughout the battle. Each volley that you shoot with these weapon reduce the cooldown of further volleys (up to a cap). If you can get into a long engagement without taking much or any damage, then these weapons will be quite strong. However, if the weapons room is damaged and the Chain Lasers lose power, then they will have to start from scratch again, not from what volley the Chain Laser was already up to. The better your defenses, the better that this weapon type becomes.
 Chain Laser - An alright weapon when compared to the Burst Laser I. Same power consumption and the cooldown genereally deviates around what the BL I cooldown is. At it's capped cooldown, this is closer in power to a BL II, depending if you want more lasers per volley or a shorter cooldown. Of course the BL II has had 3 better volleys before this point. This weapon can be useful in capable hands, especially if your defenses are high and are more likely to grind other ships out. However, it's not all that powerful and on it's own it's not great, with a number of ships starting with this weapon.
 Damage: 2 lasers/damage
Power Consumption: 2
Initial Cooldown: 16s
Cooldown Reduction per Volley: 3s
Capped Cooldown: 7s
 Vulcan - This weapon is definitely one of the most unique in the game. Only 1 laser per volley? 4 power consumption? This weapon is incredibly weak in the first few volleys, OK in the middle volleys and incredible at the capped volley. When capped, this weapon can dish out incredible amounts of damage and will single-handedly take out any number of shield bubbles. However it does take time to get this point and it is a 4 power consuming weapon. If your defenses are great and you need a powerful weapon, then this can work wonders. However, unlike all the other powerful weapons in the game, having a Weapon Pre-Igniter does not significantly improve this weapon (it does help, but it only helps eliminate the first volley). This weapon is also very bad in early sectors but does get better the later sector you are.
Damage: 1 laser/damage
Power Consumption: 4
Initial Cooldown: 11.1s
Cooldown Reduction per Volley: 2s
Capped Cooldown: 1.1s
Charge Lasers are weapons that have great flexibility. You can fire them for a single laser at a very low cooldown, or you can charge to fire additional lasers in a volley in exchange for a longer cooldown. You can also mix up volleys, you could charge 3 lasers for the first volley, then shoot 1 laser in the second at a very short cooldown. The volleys themselves aren't exactly powerful or efficient, but the flexibility of the weapon is their greatest strength. This is a high skill cap type of weapon, as intelligently varying your volley size when needed will increase the mileage you get out of these weapons.
 Charge Laser (Small) - Again another weapon that is close to a Burst Laser I, if you simply only use it as a 2 laser / 12 second cooldown weapon. But the upside of being able to shoot a laser every 6 seconds is nice as well, especially if you have a beam weapon that can utelise the potentially erratic cooldown.
 Damage per Laser: 1
Max Number of Charges: 2
Power Consumption: 2
Cooldown per Charge: 6s
 Charge Laser (Large) - A barrage of options abound with this weapon. There are 4 different volleys that you can use with this weapon. 1 laser every 5 seconds, 2 lasers at 10 seconds, 3 lasers at 15 seconds and 4 lasers at 20 seconds. So you have a fast firing Basic Laser, a Dual Lasers, a slightly worse Burst Laser II, or a moderately worse Burst Laser III. None of these on their own are amazing, but the flexibility to be able to change what you need on the fly, all at a bearable 3 power consumption means that this is a reasonable weapon. It's not super powerful, and you will likely need other weapons as brute force is definitely a thing, but the finesse is unparalleled.
 Damage per Laser: 1
Max Number of Charges: 4
Power Consumption: 3
Cooldown per Charge: 5s
Charge Laser (Simo-H) - Much, much better than the normal Small Charge Laser. The cooldown is slightly reduced, but the main benefit is the power consumption being reduced to 1. This weapon is very efficient and is basically the equivalent of a Dual Lasers with potential upside. I'd generally never sell this, as it's too efficient for only 1 power. Damage per Laser: 1
Max Number of Charges: 2
Power Consumption: 1
Cooldown per Charge: 5.5s
Ion Lasers
All Ion weapons (including the Ion bomb which will be in the Bomb section of this guide) do no damage to the hull or enemy personnel. It simply disables a system for 5 seconds times the Ion Damage done to the system (reduced from 6 seconds per Ion damage in the basic game). And introduced with the Advanced Edition conent, there is a low chance of stunning the crew in the room you aimed for (not just enemy crew however, be careful if you use boarders). Ion Lasers do not require any resources to fire, only the required power supplied to the system.
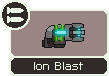 Ion Blast Mark I - Low power, low cooldown ion damage. Useful on any ship especially against Zoltans, but a nice weapon with the Engi Ships and their higher use of Drones.
 Ion Damage: 1
Power Consumption: 1
Cooldown: 8s
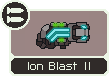 Ion Blast Mark II - A ridiculous weapon except for the fact that it requires 3 power. This can fire faster than a system can recover from the previous ion damage so if the enemy doesn't dodge the blasts, then a system can be continuously disrupted.
 Ion Damage: 1
Power Consumption: 3
Cooldown: 4s
 Heavy Ion - Not worth your time. It does more ion damage than both Ion Blasts but is worse than both. A longer cooldown is the major reason why this is worse than both the other Ion blasts but this requires more power than the Mark I as well.
 Ion Damage: 2
Power Consumption: 2
Cooldown: 13s
 Ion Stunner - It's basically a tweaked Ion Blast Mark I. The cooldown is increased by 2 seconds in exchange for stunning crew for 5 seconds. If you use boarders, then this can be very useful, you stun a room, then teleport your boarders in and get damage in on their crew before those crew can react. Just make sure your crew aren't in the room you are aiming for. Likely more useful than the Mark I with boarding, but still probably worse than the Mark I if you aren't boarding (the crew stuning still can be useful though)
Ion Damage: 1, stuns crew for 5 seconds
Power Consumption: 1
Cooldown: 10s
 Ion Charger - Basically the mid point between the Mark 1 and Mark 2 if you don't charge it and fire it every 6 seconds, which is a decent Ion weapon in it's own right. However you get the ability to charge this and again the flexibility shines here. If you have high cooldown weapons, like a Halberd Beam or higher, then charge 3 and fire away. You can't permanently keep a system down with this, but firing 3 in the first volley and firing every 6 seconds after this means a system will be down for a long time (assuming you don't miss). If you want to use Ion weapons, then this probably even beats out the Mark 2 unless you must keep a system down permanently.
Ion Damage per laser: 1
Max Number of Charges: 3
Power Consumption: 2
Cooldown per charge: 6s
 Chain Ion - A unique chain weapon, in that the weapon cooldown is not reduced with each successive volley, but the Ion damage is increased instead. This means that at later volleys the system will be permanently disrupted, but it does take a while to get there. And the first 2 volleys are quite terrible. For the same power, you can have a weapon that allows you to permanently keep a system down (Mark 2) right from the start even if the Chain Ion is possibly better once maxed. Not to mention if your weapons room is hit, then you'll lose the higher damage volleys.
Initial Ion Damage: 1
Damage increase per Volley: 1
Maxium Ion Damage: 4
Power Consumption: 3
Initial Cooldown: 14s
Flak Guns
Flak guns function in a similar way to lasers, but instead of shooting lasers, they shoot pieces of shrapnel instead. Due to this, the accuracy of these weapons is much lower than their laser counterparts. The pieces of flak can be shot down by defense drones, but only 1 piece is shot down per volley. There are only 3 types of Flak Gun and only 2 of them can be bought in stores, but they are still a reasonably common sight throughout the universe.
 Flak Gun Mark I - This weapon is incredibly good. Compare this to a Burst Laser II, the power consumption, damage are the same and the Flak Gun has a shorter cooldown by 2 seconds. Sure, defense drones cut the damage down by a third, and flak guns can naturally miss small rooms and corridors ( a strange drawback to be sure), but this weapon is better than a Burst Laser 2 when it's good and is not much behind in it's worst case. The area of effect is also medium sized, so is not too much larger than a 2x2 room, so it should only miss that room occassionally. This weapon is simply one of the best weapons in the game and you should never ever sell these if you get any.
Damage: 3 flak/damage
Power Consumption: 2
Cooldown: 10s
Area of effect: Medium
 Flak Gun Mark II - This weapon is very powerful with the normal drawbacks of a high power consumption and very long cool down. The closest comparasion is to a Burst Laser III, with the Flak having 2 more raw damage, 1 less power usage and a 2 second longer cooldown. Defense drones are less effective than compared to a Flak Gun I, only decreasing effectiveness by a seventh than a third, but the area of effect is much much larger. The area is large enough that it's quite likely that 1 or 2 shots will naturally miss rooms, but those flak pieces can hit shields anyway so it's not even that large a drawback. This weapon is definitely better than the Burst Laser III but is worse than the Flak Gun I simply because of the more than doubled cooldown.
It is still quite a good weapon though, and worth using if you are in the market for a slow but powerful weapon. If you have a Weapon Pre-Igniter, then this on it's own can wreck ships.
Damage: 7 flak/damage
Power Consumption: 3
Cooldown: 21s
Area of effect: Large
Advanced Flak Gun - Why is this a weapon? This weapon is already based upon one of the best weapons in the game and this version gets 3! improvements over the base gun? Power consumption is halved to a measly 1, the cooldown is reduced by 2 seconds and the area of effect is smaller? The area of effect is small enough that it should almost never miss a 2x2 room. It's drawbacks are that you can sadly never get more than 1 and it is a starting weapon on only 1 ship (Shrike, Lanius B). This weapon is by far the best weapon in the game, it's simply overpowered and there's no weapon that even comes close.Damage: 3 flak/damage
Power Consumption: 1
Cooldown: 8s
Area of effect: Medium-Small
Beams
Beams only do damage if no shields are currently active, apart from the Halberd and Glaive which can do partial shield piercing. Therefore, make sure that your beams have other weapons that can take down shields easily, whether they be missiles, bombs or lasers. Beams also take skill in the way that you can choose what rooms get hit with each beam.
 Mini Beam - Only found as a starting weapon on a couple of ships. This is a nice weapon overall due to the short cooldown and low power consumption. Has a very short beam length but can still hit up to 4 rooms with careful aiming. Against some ships where a bunch of important systems are next to each other, you can still hit all of these.
 Damage per room: 1
Power Consumption: 1
Cooldown: 12s
Beam Length: Short (3 tiles)
 Pike Beam - A ridiculous beam length, although it only does the same damage per room as the Mini Beam. Against certain NPC ships, you can hit every room in the ship with this so can do some large damage.
 Damage per room: 1
Power Consumption: 2
Cooldown: 16s
Beam Length: Very Long (6 tiles)
 Halberd Beam - Your above average beam weapon, it's a more powerful beam weapon than standard but does have a longer cooldown with high power consumption. Probably the best beam for any given situation in the game given the damage to power and cooldown ratio.
 Damage per room: 2
Power Consumption: 3
Cooldown: 17s
Beam Length: Medium (4 tiles)
 Glaive Beam - The most powerful weapon in the game in terms of sheer damage it can do, this can take out entire ships with just 1 beam fired if they have no active shields. Just beware the huge power consumption and huge cooldown so is not the most ideal beam in most situations. The Weapon Pre-Igniter plus some other weapons to drop shields turn this into an absolute monster.
 Damage per room: 3
Power Consumption: 4
Cooldown: 25s
Beam Length: Medium (4 tiles)
 Hull Beam - Similar to the Pike Beam in many ways, this beam has a shorter cooldown and beam length in return for doing double damage against systemless rooms. A very viable weapon overall if you want to damage the hull more.
 Damage per room: 1, 2x damage in systemless rooms
Power Consumption: 2
Cooldown: 14s
Beam Length: Long (5 tiles)
 Fire Beam - This beam does no direct damage to rooms, but has a extremely high chance of creating a fire in every tile it hits. Not very viable as a weapon although it can be fun with a couple of Rockmen boarders.
 Damage per room: 0, Very high chance of creating fires
Power Consumption: 2
Cooldown: 20s
Beam Length: Long (5 tiles)
 Anti-Bio Beam - This beam does no damage to the hull or systems, but hurts enemy crew significantly. Not very viable apart from the Slug Cruisers which can see where the enemy crew are without sensors and in nebulae. Especially since this beam does 60 damage to enemy crew, so you need to fire this beam more than once to kill the enemy crew. Additionally, it does damage to YOUR crew as well if you use boarders.
Damage per room: 0, 60 damage to crew when hit directly with the beam
Power Consumption: 2
Cooldown: 16s
Beam Length: Long (5 tiles)
Missiles
All missile systems use 1 missile every shot and pierce all shields except the Zoltan shield. Missiles generally are worse than bombs as missiles can be shot down by Defense Drones, but they still have their uses.
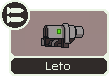 Leto Missiles - Low power, low damage, low cooldown. Can be useful to penetrate shields for your other weapons to deal damage.Not great on it's own but is still viable in a multiple weapons system.
 Damage: 1
Power Consumption: 1
Cooldown: 9s
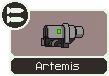 Artemis Missiles - Can't be bought and only found on enemy ships. Medium power, medium damage, low cooldown. Can be useful to penetrate shields for other weapons to deal damage although this can take out a full level of shields by itself.
 Damage: 2
Power Consumption: 2
Cooldown: 10s
Artemis Missiles (Kestrel and Bulwark) - These special Artemis system are much better than the standard system but can't be bought anywhere. Reduces power consumption by 1 and increases the cooldown by a measly 1 second. The best missile system so keep this around if you want to use missiles. Damage: 2
Power Consumption: 1
Cooldown: 11s
 Hermes Missiles - High power, high damage, medium cooldown. The high power consumption means that this is slightly worse than the Artemis but the extra damage from it makes it viable.
 Damage: 3
Power Consumption: 3
Cooldown: 14s
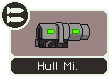 Hull Missiles - Double damage to systemless rooms, but since you want missiles to be targetting enemy system almost all of the time, this is inferior to the Artemis.
 Damage: 2, 2x damage to systemless rooms
Power Consumption: 2
Cooldown: 17s
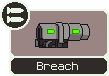 Breach Missiles - Extremely long cooldown but the (almost) certain breach chance with the extreme damage means that this can disrupt a system for a huge amount of time.
 Damage: 4, Very high breach chance
Power Consumption: 3
Cooldown: 22s
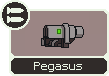 Pegasus Missiles - Fires 2 missles at the same time for the cost of 1 missile. The best missile against defense drones, as they'll usually only be able to shoot down 1 of the 2 missiles. Missile costs will also generally be lower using this weapon than most of the other missiles.
Damage: 2 each missile, 2 missiles fired
Power Consumption: 3
Cooldown: 20s
 Swarm Missiles - This is effectively a charge missile launcher and is actually a good weapon because of some unique features on a missile weapon. Because of the charge nature, this weapon helps overcome 2 of the major drawbacks of missiles. At max charge, even though there's 3 missiles in the volley, it only consumes 1 missile per volley. And because it shoots 3 missiles in the max volley, Defense Drones will only be able to shoot down 1 of the 3. The reasonable power consumption is also a nice plus. It also has the flexibility of the charge lasers, being able to shoot at 1 missile at 7 seconds or 2 missiles at 14 seconds if you really need to. But because unlike lasers, missiles actually cost scrap the flexibility is worse here than on the laser weapons. The weapon does have an area of effect like the Flak weapons, however the AoE is smaller than a 2x2 room so it should only miss 2x1 rooms sometimes.
 Damage per Missile: 1
Max Number of Charges: 3
Power Consumption: 2
Cooldown per Charge: 7s
Area of Effect: Small
Bombs
Bombs use a missile per use but teleport onto the target ship. This means that they are better than missiles due to the fact that they can't be shot down by defense drones and that they can target your own ship.
 Small Bomb - Quite a useful weapon when used in conjunction with other weapons, but not very good on it's own. This can damage shields which allows other weapons to get more hits on the enemy ship.
 Damage: 2 damage to systems, 30 damage to crew
Power Consumption: 1
Cooldown: 13s
 Fire Bomb - Better than the fire beam because it can get past shields easily even at the additional cost of a missile, this instantly damages crew and has a high chance of starting a fire. Damage: 30 damage to crew only, very high chance to create a fire
Power Consumption: 2
Cooldown: 15s
 Breach Bomb Mark I - Better than the Small Bomb, in that the cooldown is shorter and that a breach + 1 system damage is harder to repair than 2 system damage.
 Damage: 1 damage to systems, 30 damage to crew, Certain chance of a breach
Power Consumption: 1
Cooldown: 9s
Breach Bomb Mark II - A very useful weapon overall and better than the Breach Bomb Mark I in terms of sheer power, but offset by the higher power and longer cooldown. This weapon singlehandedly can take out a system for a long period of time though so is well worth using. Damage: 3 damage to systems, 45 damage to crew, Certain chance of a breach
Power Consumption: 2
Cooldown: 17s
 Ion Bomb - A very good weapon, it has a long cooldown but it deals 4 ion damage to any system which disrupts it for a huge period of time. You can keep a certain system continuously down with this bomb. Does require missiles to use which is one downside to this weapon and does not damage the hull. The cooldown was increased by 4 seconds with the Advanced Edition content.
Ion Damage: 4
Power Consumption: 1
Cooldown: 22s
 Healing Burst - A starting weapon on The Stormwalker (Slug Cruiser B) because there is no medbay, the Healing Burst is an interesting weapon especially for boarders. You can instantly heal your boarding crew while they battle the enemy crew. Not as good as a proper medbay however as it costs missiles, even with the couple of tricks you can play with this weapon.
 Damage: 0, Instantly heals your crew in that room
Power Consumption: 1
Cooldown: 18s
 Repair Burst - This just seems like a waste of a weapon slot to me. You should always be able to have crew that are able to fix systems and this even costs a missile to boot. Sure there might be times where this is useful, an example is that you are engaged in a very difficult fight where you've taken a bunch of damage and are able to instantly fix a critical system. The problem is that this weapon does literal nothing trying to bring down the enemy ship or even their crew
Damage: 0, repairs a damaged system by 8 in that room
Power Consumption: 1
Cooldown: 14s
 Stun Bomb - Can be very useful with boarding, 15 seconds is an extremely long time in terms of melee combat, but there are problems with this. Missing with this weapon means that you'll have to wait even longer to get your boarding crew in, and the fairly long cooldown means that even from the start, if you do need the Stun Bomb to win crew battles, then you won't be able to board until you do hit the enemy ship with this. Additionally, if you have already boarded and then use this weapon, this will affect your crew as well. Seems super weak if you have a 4 crew teleporter. It does seem fine if you have a 2 man teleporter, would like to board ships and don't have the greatest boarding crew and are willing to wait the at least initial 17 seconds.
 Damage: 0, stuns all crew in that room for 15 seconds
Power Consumption: 1
Cooldown: 17s
Crystal Weapons
Here it is, by popular demand, the crystal weapons! All of the crystal weapons apart from the lockdown bomb shoot crystals that can pierce through 1 level of shield and deal that damage to the enemy hull. However, any shields greater than 1 means that the crystals will be blocked by the shield. Additionally, a major drawback is that these crystal can be shot down by defense drones, which means that these weapons generally are much worse in the later stages of the game. Also as far as I'm aware, these can only be bought in the crystal sector, although I've found the Lockdown Bomb in just regular sector stores before (might be because it's classed as a bomb weapon as well).
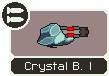 Crystal Burst Mark I - A starting weapon on the Bravais, this closely resembles the Burst Laser Mark I with only a couple of minor differences. The shield piercing is compensated by the cooldown being increased by 4 seconds. A decent weapon, but the crystal being potentially shot down means that the long term usability of this is quite low.
 Damage: 2 crystals/damage, pierces 1 level of shields
Power Consumption: 2
Cooldown: 15s
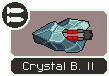 Crystal Burst Mark II - A larger version of the Crystal Burst, this weapon shoots more crystals but is offset by a higher power consumption and a longer cooldown on the weapon. The damage to power consumption might be the same, but the cooldown increase means it is ever so slightly inferior to the Mark I, even being able to take down an extra shield level.
 Damage: 3 crystals/damage, pierces 1 level of shields
Power Consumption: 3
Cooldown: 17s
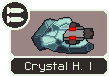 Heavy Crystal Mark I - Another starting weapon on the Bravais that is based off a regular weapon, this weapon is based upon the Heavy Laser Mark I. The strengths of a high damage to power consumption and the low power consumption are replicated here, but the cooldown length is not, with the Heavy Crystal having a much longer cooldown. The shield piercing is nice in the early game, but the Heavy Laser Mark I is still better overall. This is better than it's Crystal Burst counterpart though.
 Damage: 1 crystal, 2 damage, pierces 1 level of shields
Power Consumption: 1
Cooldown: 13s
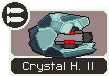 Heavy Crystal Mark II - This has the single highest damage for a single shot, with the crystal doing 4 damage whenever it hits and has a extremely high chance of a breach (not entirely sure on this). However, the shortfalls of this weapon are fairly prevalent. The high power consumption along with the highest cooldown of any laser like weapon means that it won't be doing damage very often due to the other drawbacks of all crystal lasers. Overall it is much worse than the Mark I.
 Damage: 1 crystal, 4 damage, pierces 1 level of shields
Power Consumption: 3
Cooldown: 19s
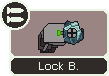 Lockdown Bomb - Works in the same way as the crystal active, but in a weapon (bomb) form. This means that it gets all the strengths and weaknesses of the bomb weapons. If you are being overwhelmed by boarders, you can target your own ship and help stem the tide for a good chunk of time. It's best use is to lockdown enemy ships to either allow your crew to deal damage to systems or take out some of the crew uninterrupted. However, the cooldown is longer than the period of time the lockdown is, so you cannot continuously keep a room locked down. You are also using missiles every time you fire this weapon. Crystal crew are better than this weapon due to the weaknesses of bombs. Also, without the weapon pre-igniter, this weapon cannot fire immediately unlike the crystal active ability.
 Damage: 0, Locks down a room for 12s
Power Consumption: 1
Cooldown: 15s
Best Weapons
Of course every weapon has a place in this game, but the weapons that are the most useful in most situations are the weapons I consider to be the best weapons of this game.
Lasers - Dual Lasers / Burst Laser Mark IIDual Lasers are only avaliable as starting weapons on certain ships and Burst Laser Mark IIs are rare, but both give a great laser ratio verses power consumption and cooldown, especially compared to other lasers. More individual lasers means more likelyhood of getting through shields (Burst Laser Mark II) and the extra damage of the other lasers doesn't matter if they can't pierces shields as well. Both these lasers fit into any weapon setup but their strength is the efficiency, low power usage and that each additional weapon only increases the damage these lasers can do.
Ion Lasers - Ion ChargerNarrowly beats out the Ion Blast Mark II. Simply firing this every 6 seconds is fine, and the flexibility of charge weapons means that this has all upside on that base rate. The power consumption is also reasonable at 2. If you must have a system permanently disabled then the Mark II is what you must have though, as this weapon cannot keep a system permanently disabled.
Flak Guns - Advanced Flak / Flak IThe Flak 1 is simply too good to ever not use. Reasonable power consumption, short cooldown, and simply just shoots more stuff than anything at this cooldown. It does have a few minor drawbacks that the Burst Laser Mark II doesn't have, but the Flak I is incredibly common in stores compared to the BL II for a similar power level. I do think I prefer the Flak, but both are excellent weapons. The Advanced Flak is simply incredible and by far the best weapon in the game. Sadly it is only avalible on 1 ship in the entire game but having 3 improvements over a weapon that is already considered one of the best in the game? This weapon is simply overpowered.
Missiles - Artemis / SwarmThe other missiles systems just do not compare to the Artemis and the Swarm. The reasonable damage, low cooldown and reasonable power requirements of the Artemis means this is an efficient weapon at all stages of the game.
The Swarm missile reduces 2 of the major drawbacks of missile weapons when compared to the rest.
It does have other drawbacks, but these are much more minor than being easily being shot down by Defense Drones and using large numbers of missiles.
Beams - Halberd BeamThe Halberd beam is the middling beam in all regards. High damage, average cooldown, mid to high power consumption. However it is the best beam due to being the most reliable beam in most situations and can pierce 1 enemy shield and still inflict damage.
Bombs - Breach Bomb Mark II The Breach Bomb can disable a system for an extended period of time, by causing a breach, forces a repair of the system and deals damage to enemy crew in that room at the expense of a high power requirement.The Ion Bomb is worse than in the original game, as Ion damage was reduced slightly, as well as the colldown of the Ion bomb being increased by 4 seconds. It is still a good weapon however
Crystal Weapons - Heavy Crystal Mark I / Lockdown BombThe Heavy Crystal Mark I has the best combination of power consumption, cooldown and damage to power ratio of any crystal weapon. It is a very good weapon early game, but drops off significantly in the later game so will likely need to be replaced. The lockdown bomb is predominantly for ships with boarding parties and should be used either
to lock down a room or kill some of the crew without the entire enemy crew interfering. Worse than multiple crystal crew, but can be excellent if you don't have crystal crew in your boarding party.
One note is that the Weapon Pre-Igniter augmentation has not factored into the above reasoning. This is because the Weapon Pre-Igniter is the rarest of all augmentations and is therefore not reliable to obtain even though it is one of the best augmentations overall. The Weapon Pre-Igniter can change many weapon strategies, in the fact that weapons cooldowns are not majorly important (and non-existant if you only need 1 volley) due to being able to cripple or destroy entire ships in the first volley. The Burst Laser Mark III becomes as good as the Burst Laser Mark II and the Glaive Beam overtakes the Halberd Beam as the best beam with the Weapon Pre-Igniter. The Flak II is also insane with a weapon Pre-Igniter. If you want to focus on Ion weapons and drones then the Weapon Pre-Igniter is not very good.- At 200 Hours In: An FTL Master's 42 Top Tips★ 5 (1.7k)94k views2.6k ♥23 minUpdated Apr 2, 2023
- How to install FTL: Multiverse 5.5★ 5 (520)72k views1.3k ♥4 minUpdated Jun 1, 2025
- How to Avoid losing to "Luck"★ 5 (1.3k)66k views1.6k ♥14 minUpdated May 25, 2021
- Quick reference on unlocking ships★ 5 (1.3k)61k views1.9k ♥11 minUpdated Jun 29, 2014
- Practical FTL★ 5 (1.6k)57k views3.4k ♥180 minUpdated Sep 12, 2022
- Know Your Ship: Guide to using Kestrel Class★ 5 (655)51k views1.2k ♥12 minUpdated Jul 31, 2015


- Upgrading to PremiumTeam Fortress 2★ 5 (20k)1441k views11k ♥6 minUpdated May 11, 2022
- No More Room in Hell Official ManualNo More Room in Hell★ 5 (2.8k)569k views2.1k ♥29 minUpdated Apr 22, 2019
- NMRiH Community Hosting GuidesNo More Room in Hell★ 5 (526)351k views653 ♥1 minUpdated Aug 10, 2022
- ULTIMATE GUIDE FOR GAME DEV TYCOONGame Dev Tycoon★ 5 (5.8k)326k views10k ♥4 minUpdated 23 Jan, 2014
- How to 'Git Gud' Soon™MORDHAU★ 5 (2k)318k views3k ♥68 minUpdated Nov 16, 2024
- Лучшие кооперативные игры SteamPAYDAY 2★ 5 (1.5k)315k views2.1k ♥56 minRussianUpdated Apr 27, 2025






This guide was created by its original author on the Steam Community. Are you the author and want it removed? Request removal.