Seamless Space-Saving Blueprints (18x18 tiles)
Take Note!
Try to build on a 18x18 tiles grid from the beginning and don't set other stuff inside your first setup until you are able to upgrade.
This is the best way to use your space efficient and just update your production from the beginning to the end instead of completely rebuilding it.
Also take note that all blueprints can be turned in 90 degree steps to work from left to right, top to bottom, or bottom to top.
My examples are mostly made from right to left.
Stone Furnace (Beginning)
Let's start with a simple 18x18 Furnace setup. The Iron/Copper Ore and the coal line coming from the middle right of the grid and goes to the left.
You can easily upgrade your production by placing more of this setting on the left or right side. (Seamless)
Info: I have used Long Handed Inserters for the outcome materials cause i want the outer belts on the same height as the Electric Furnace Setup for easier upgrading.
Stone Furnace Blueprint[www.chrisgpoint.eu]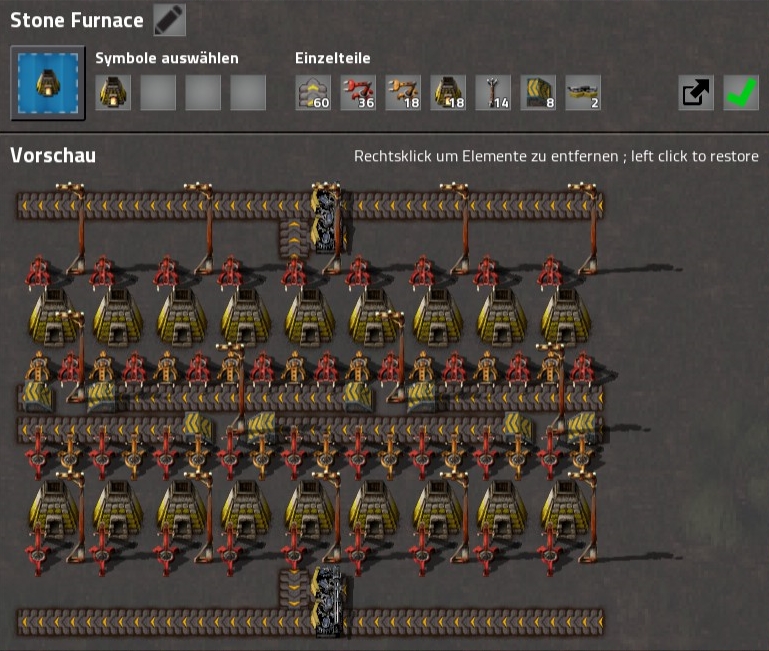 As you can see in this example the iron plates going to the upper and lower side of your 18x18 grid and can be seamlessly attached to the next part.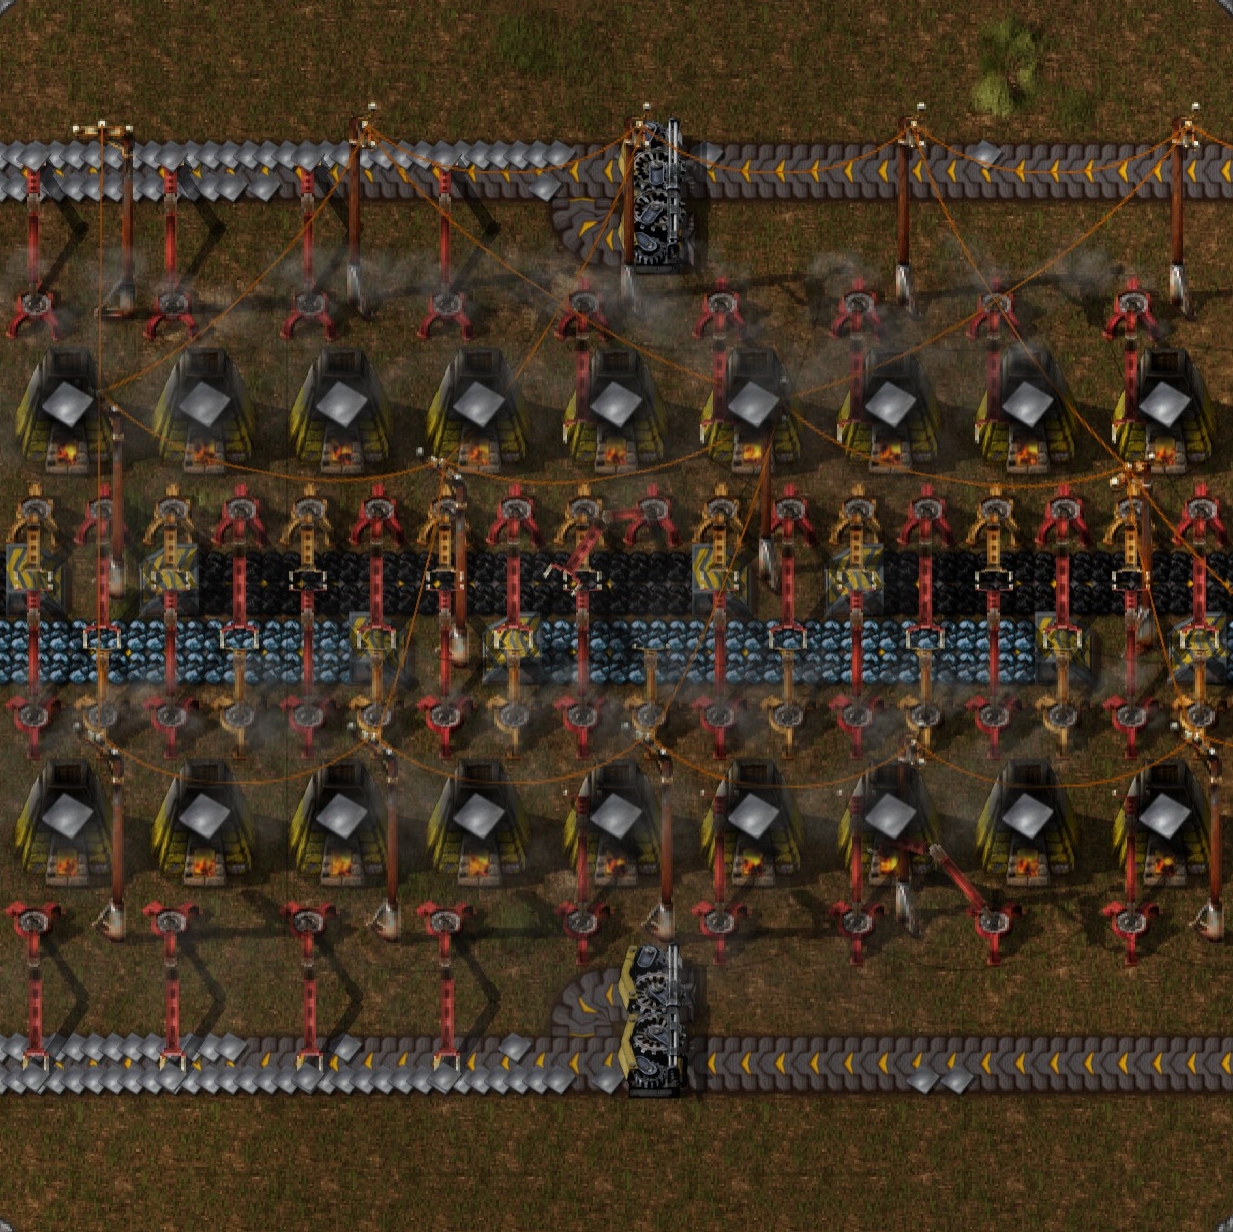
Well, that was easy right? Now let's check out the midgame setup.
Steel Furnace (Midgame)
Since the melting is the most important part i will show you how to perfectly use your 18x18 grid for the Steel Furnace.
Steel Furnace Blueprint[www.chrisgpoint.eu]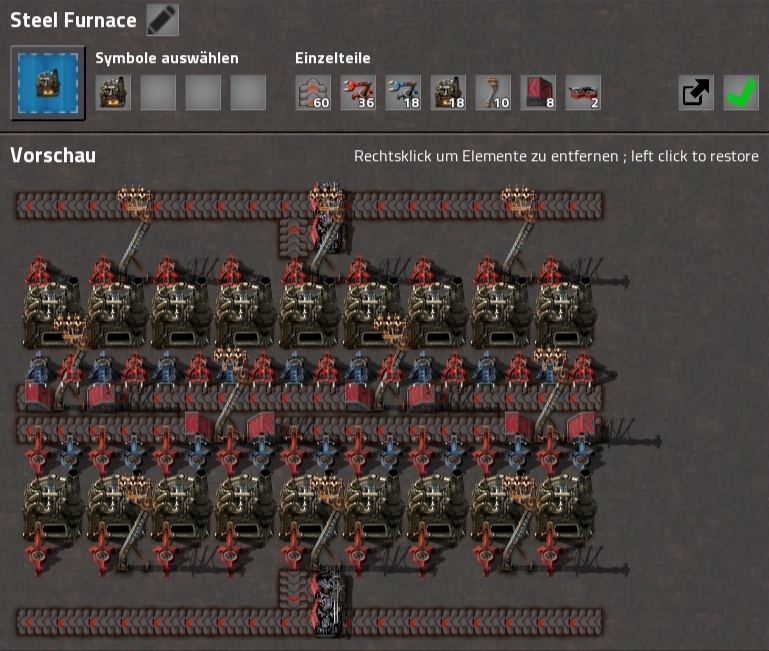 There is no big difference to the stone furnace.
This setup just uses different belts/ inserters and electric poles.
And again, it's fully seamlessly upgradable.
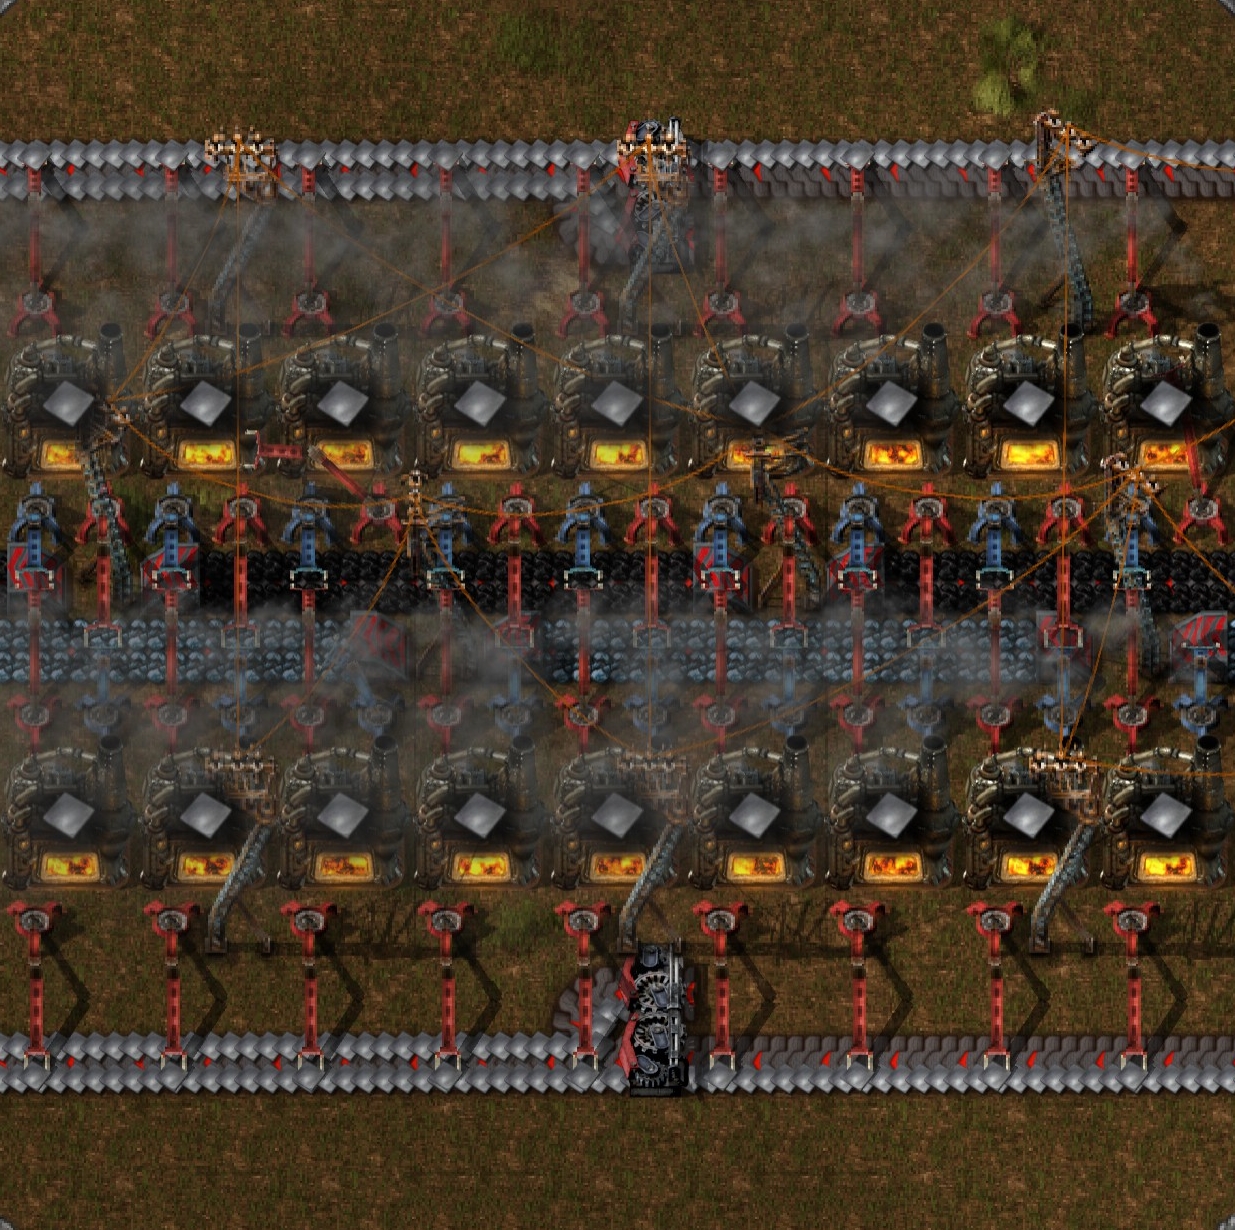
Much faster but nothing against the Electric Furnace and the substation we use in the Endgame.
Electric Furnace (Endgame)
Now, that's it. You unlocked the substation? The Electric Furnace? Yes?
Then we can finally build space saving setups.
Negative is, it needs electricity.
Positive is, we don't need the coal line anymore.
Negative is, it's not faster as the Steel Furnace.
Positive is, you can use modules on it to speed it up.
Electric Furnace Blueprint[www.chrisgpoint.eu]
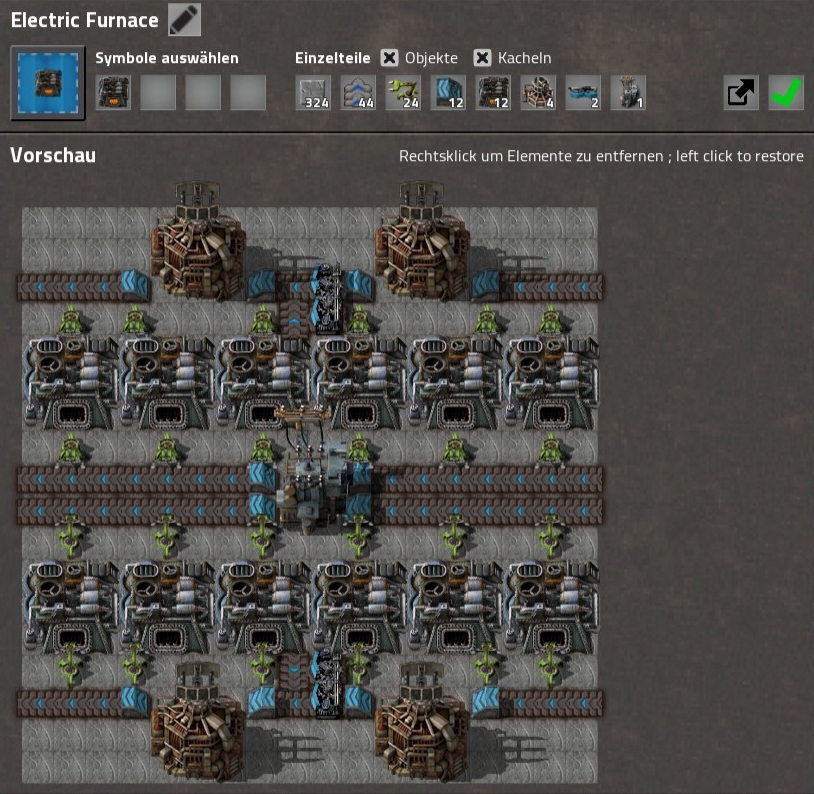 As you can see i used beacons around the 18x18 grid.
You can easily copy the setup and it will fit perfect seamlessly on all 4 sides.
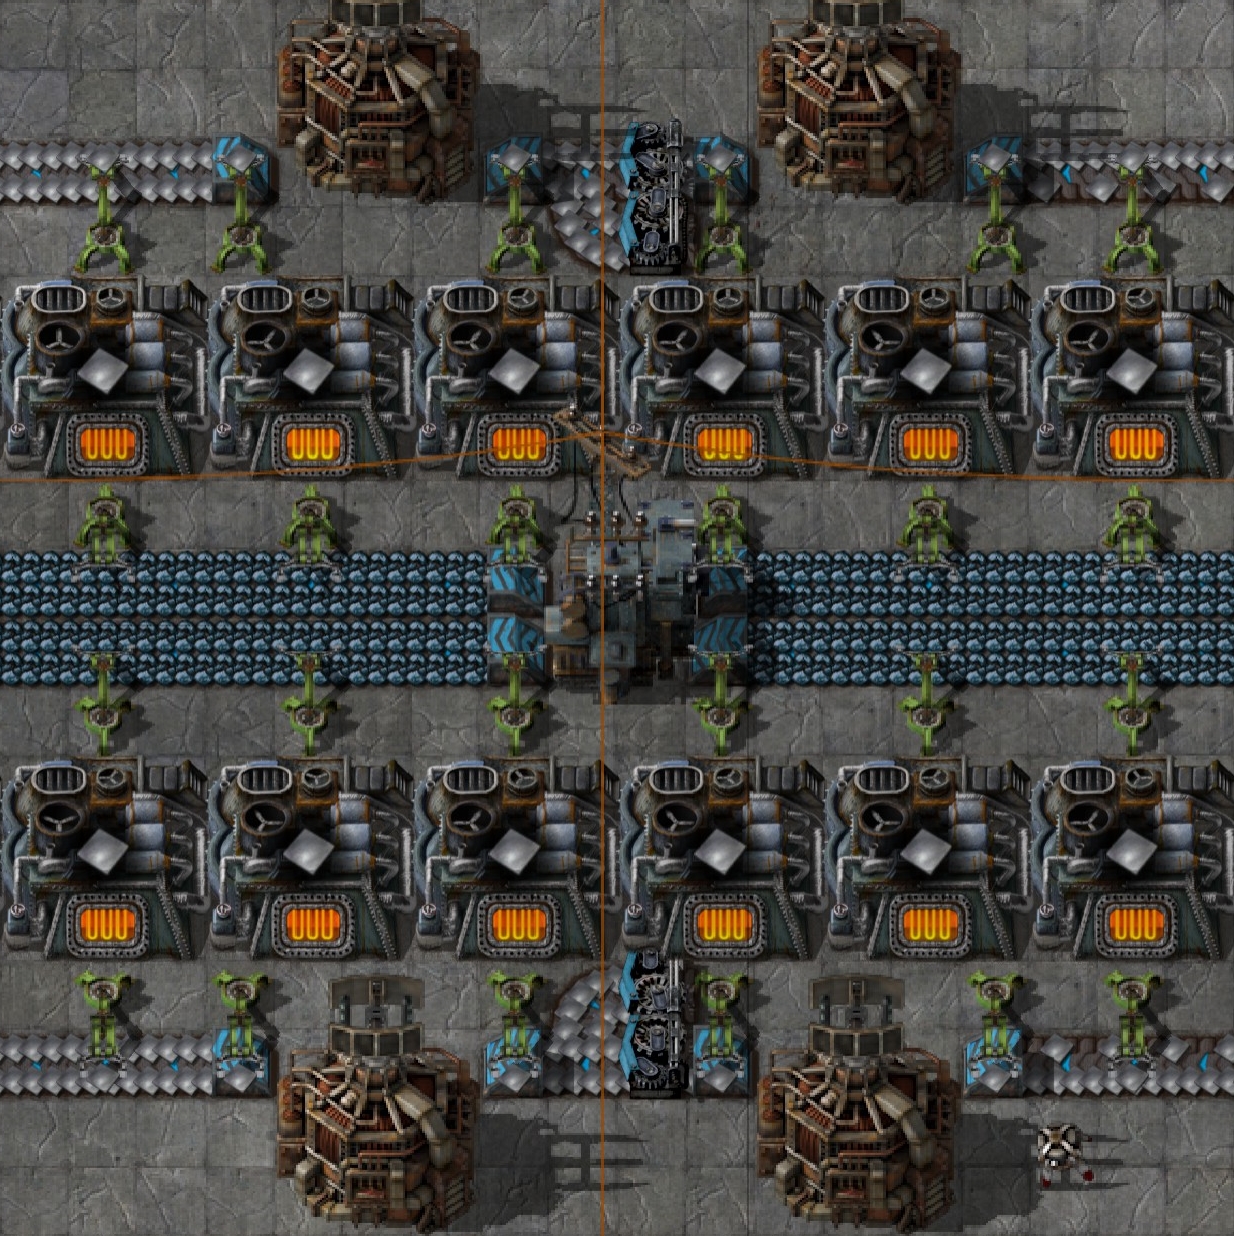
Now you've got a good space saving melting production and you only need 1 substation per 18x18 grid and no other electric pole is needed. In this example you can see how it looks like if you have 4 setups seamlessly conntected.
All the electricity comes from substations only.
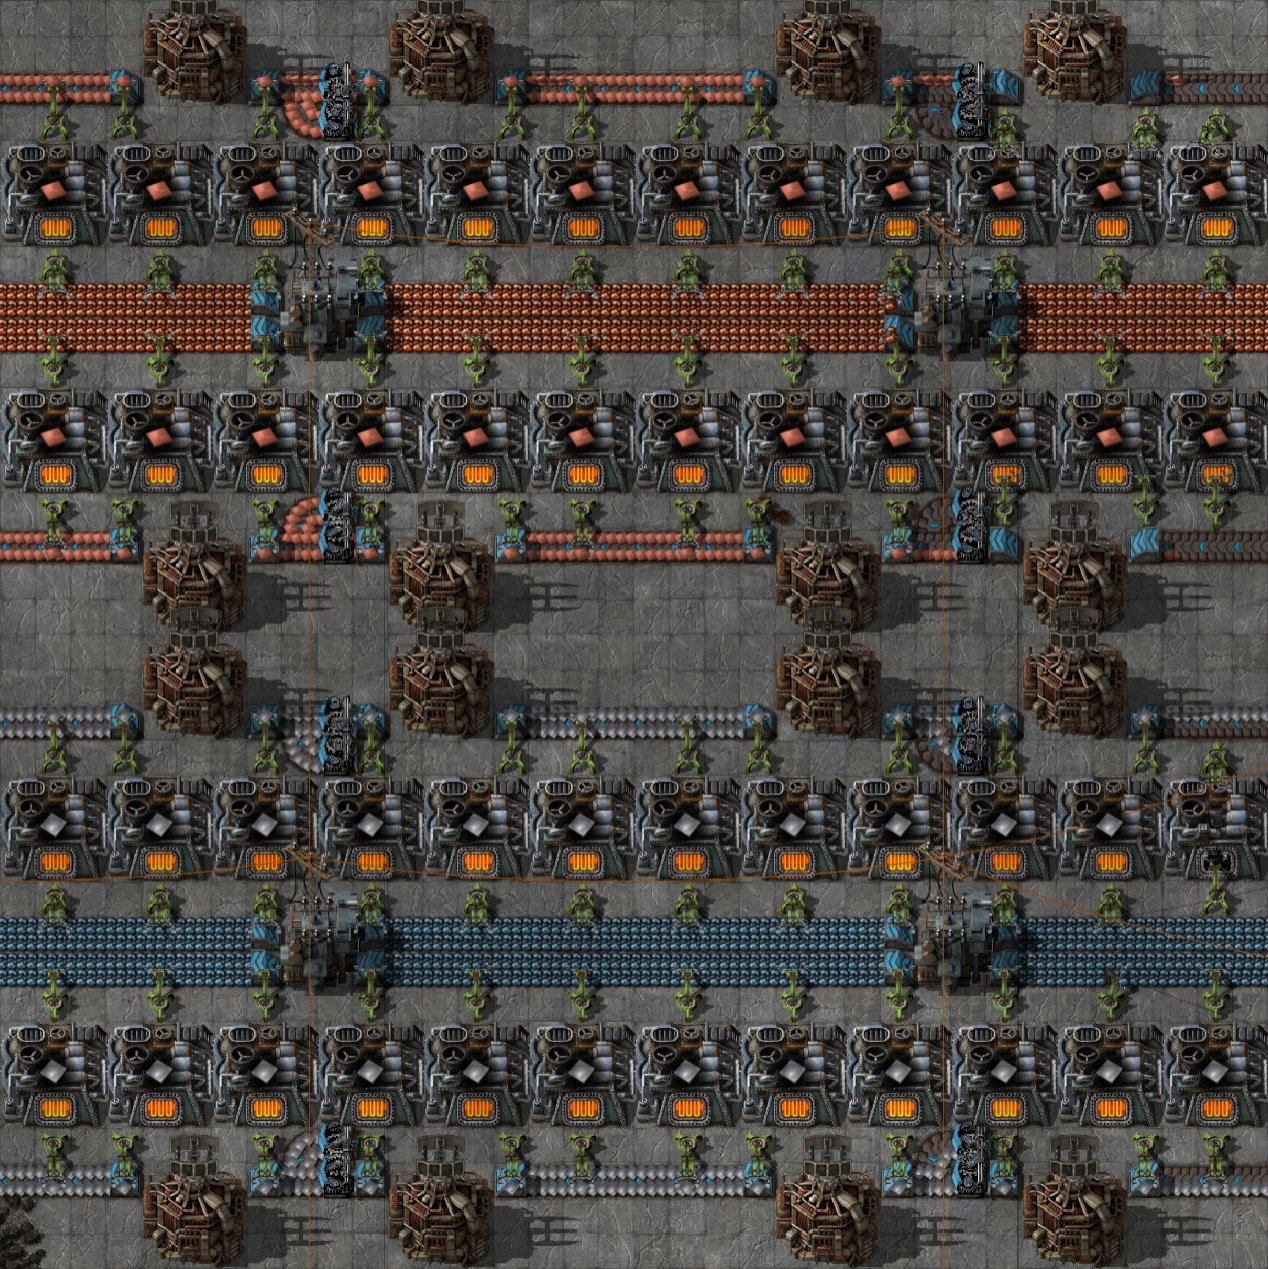
In the next parts i will show you many examples how to build other production lines on this smallest possible grid.
Other Furnace Usage
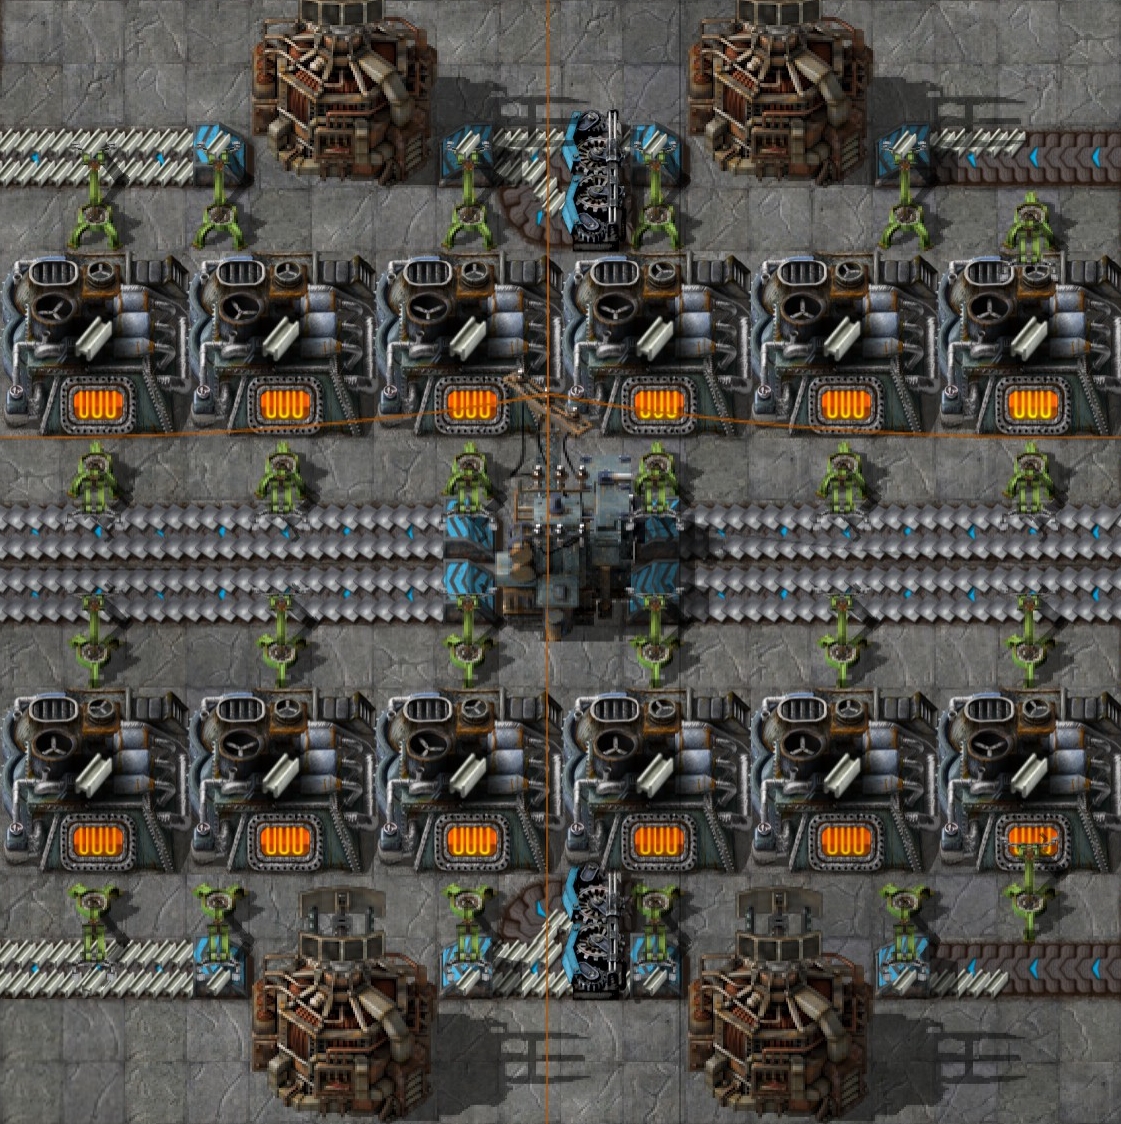
You see i use the same setup, i just set the income line to iron plates and i will get steel plates.
Of course, you can also use it for stone to bricks, copper ore to copper plate... etc.
In this example you can see how you can switch the belts from outer to inner sides.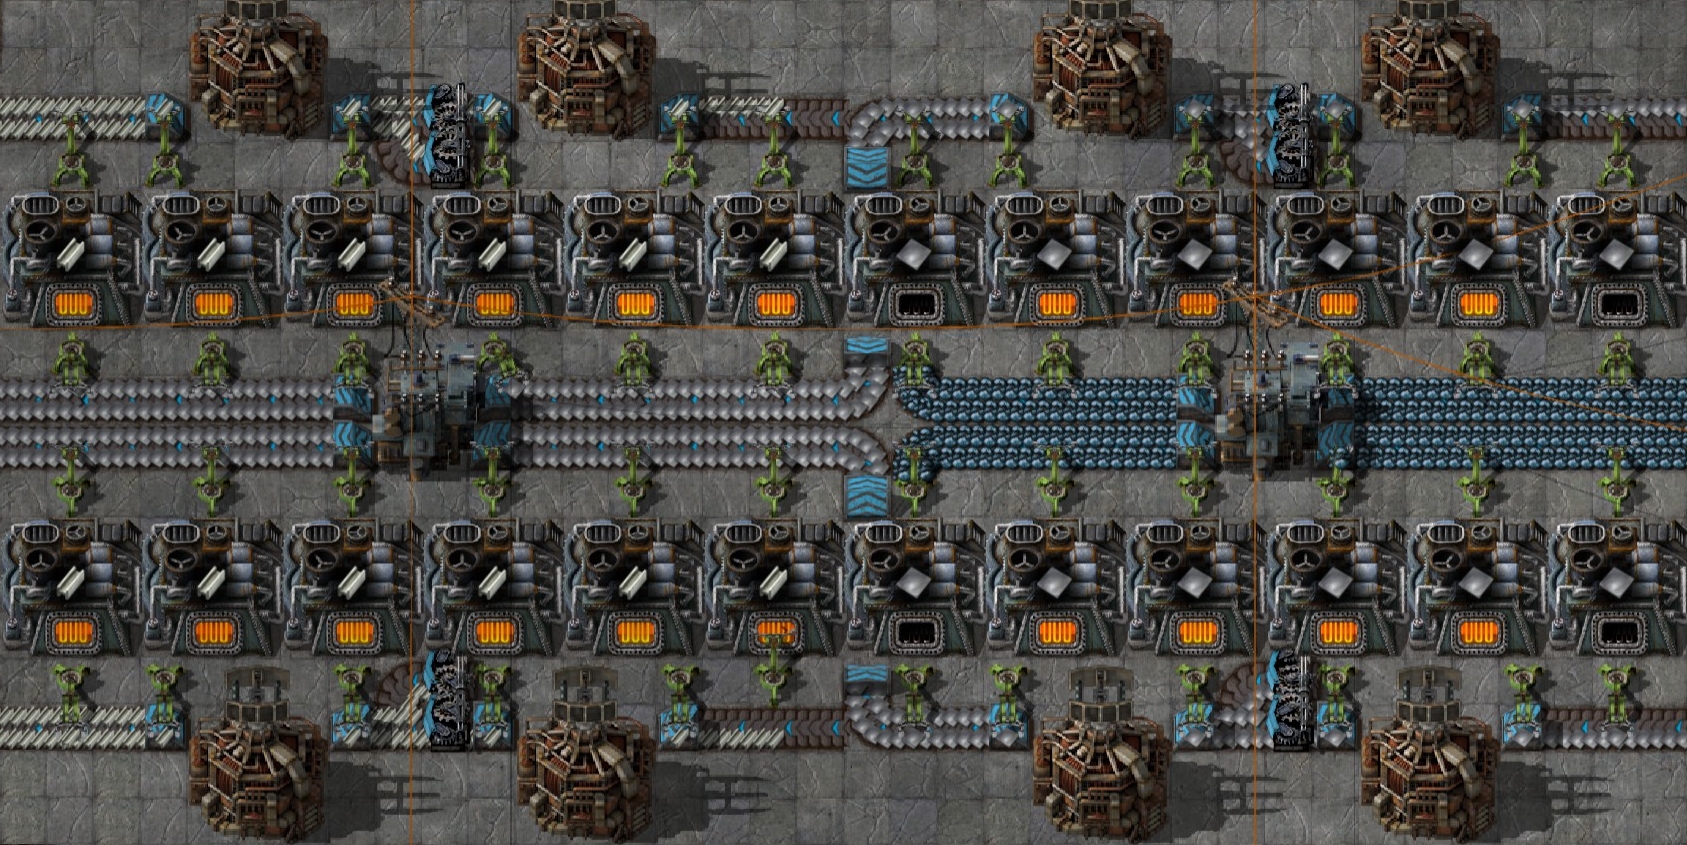
Assembling Machine (1 Income)
Now the fun part. This arrangement is also compatible to assembling machines.
What a surprise!!!
Here the Basic Assembler Setup Blueprint.
Assembler Basic Blueprint[www.chrisgpoint.eu]
Just replace the furnaces with assembling machines and it ... it just works... AMAZING!
Fully seamlessly aswell!!!
Income: Iron Plate
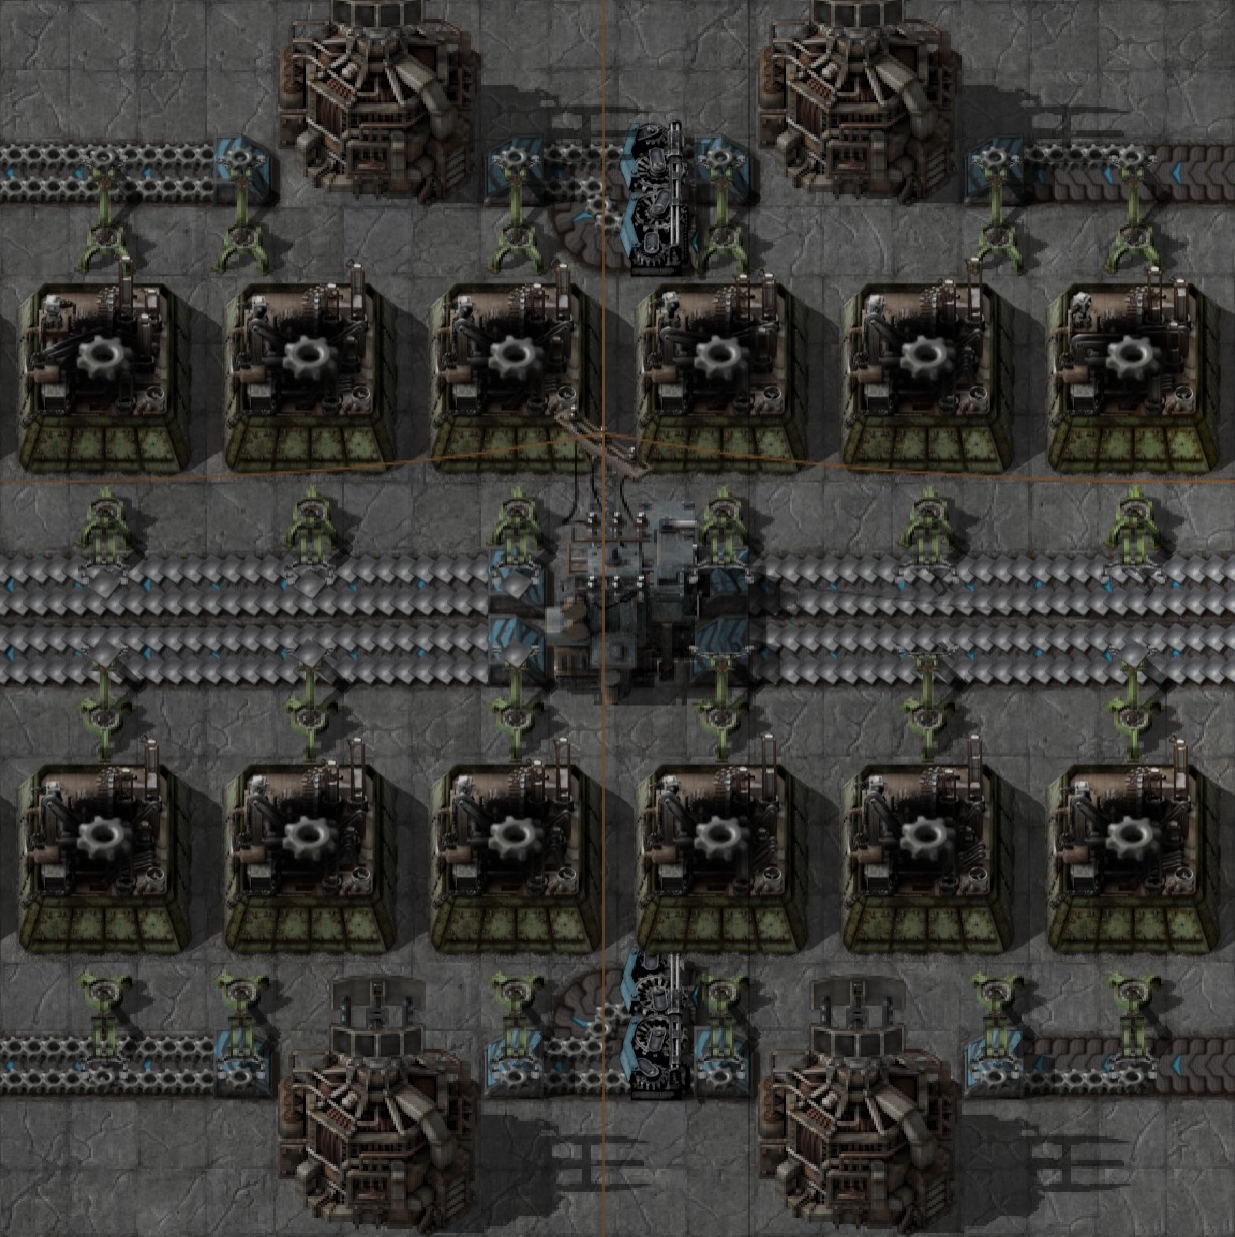 Example 2: Copper Cable
Income: Copper Plate
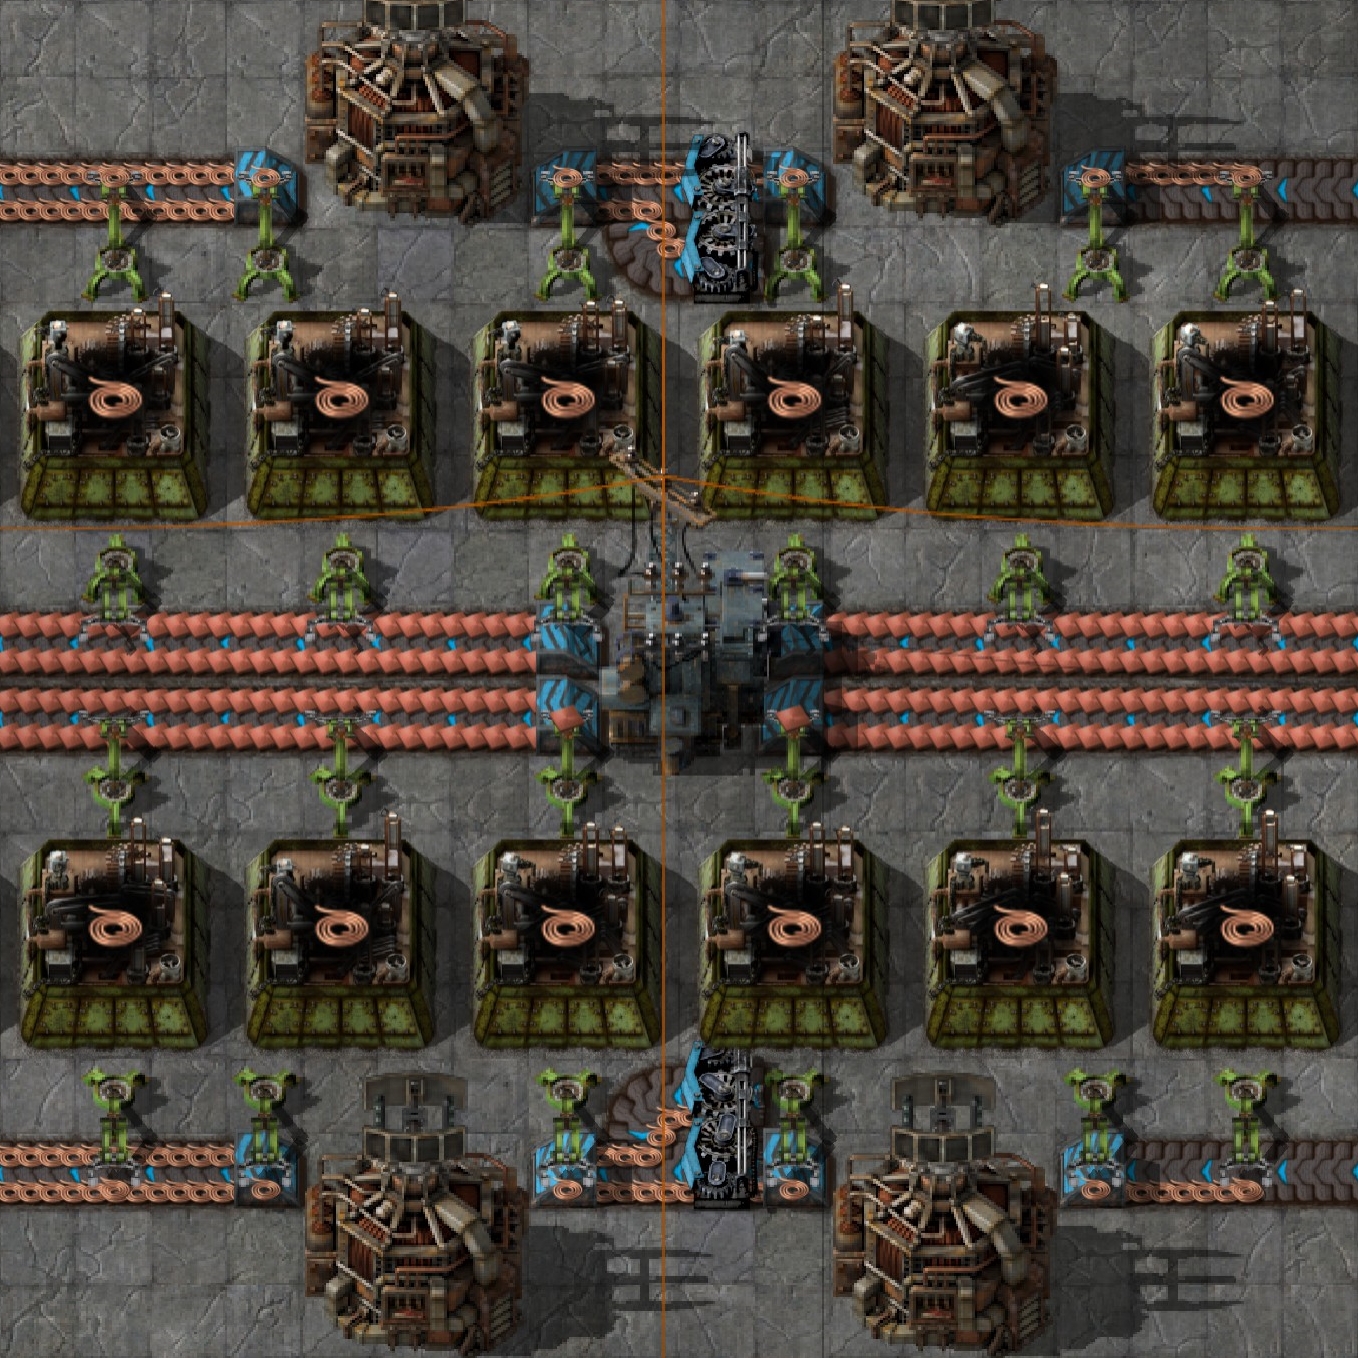
That wasn't so hard right?
Let's go to the next part then...
Assembling Machine (2 Income)
Now it gets complicated... naaah, not really.
A 2 item income line? That's so easy since you already got 2 ingoing lines.
You just need to choose which one gets which item.
Then just place 12 Long Handed Inserters between the middle inserters.
So every assembling machine can reach both lines.
Income: Iron Plate/ Copper Plate
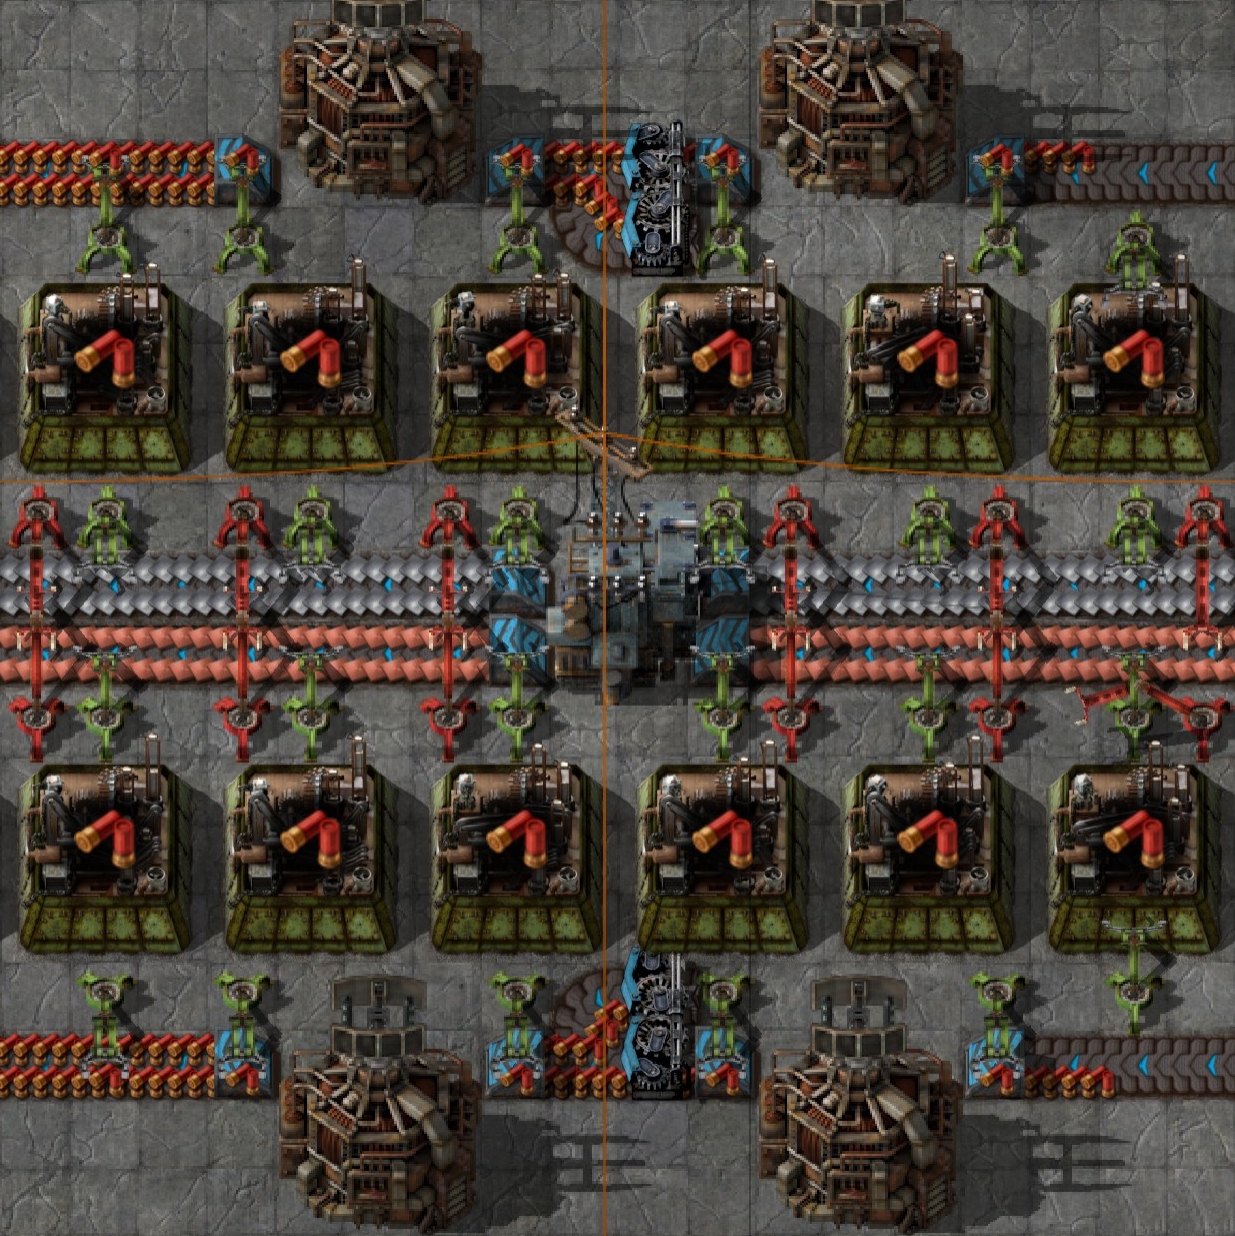
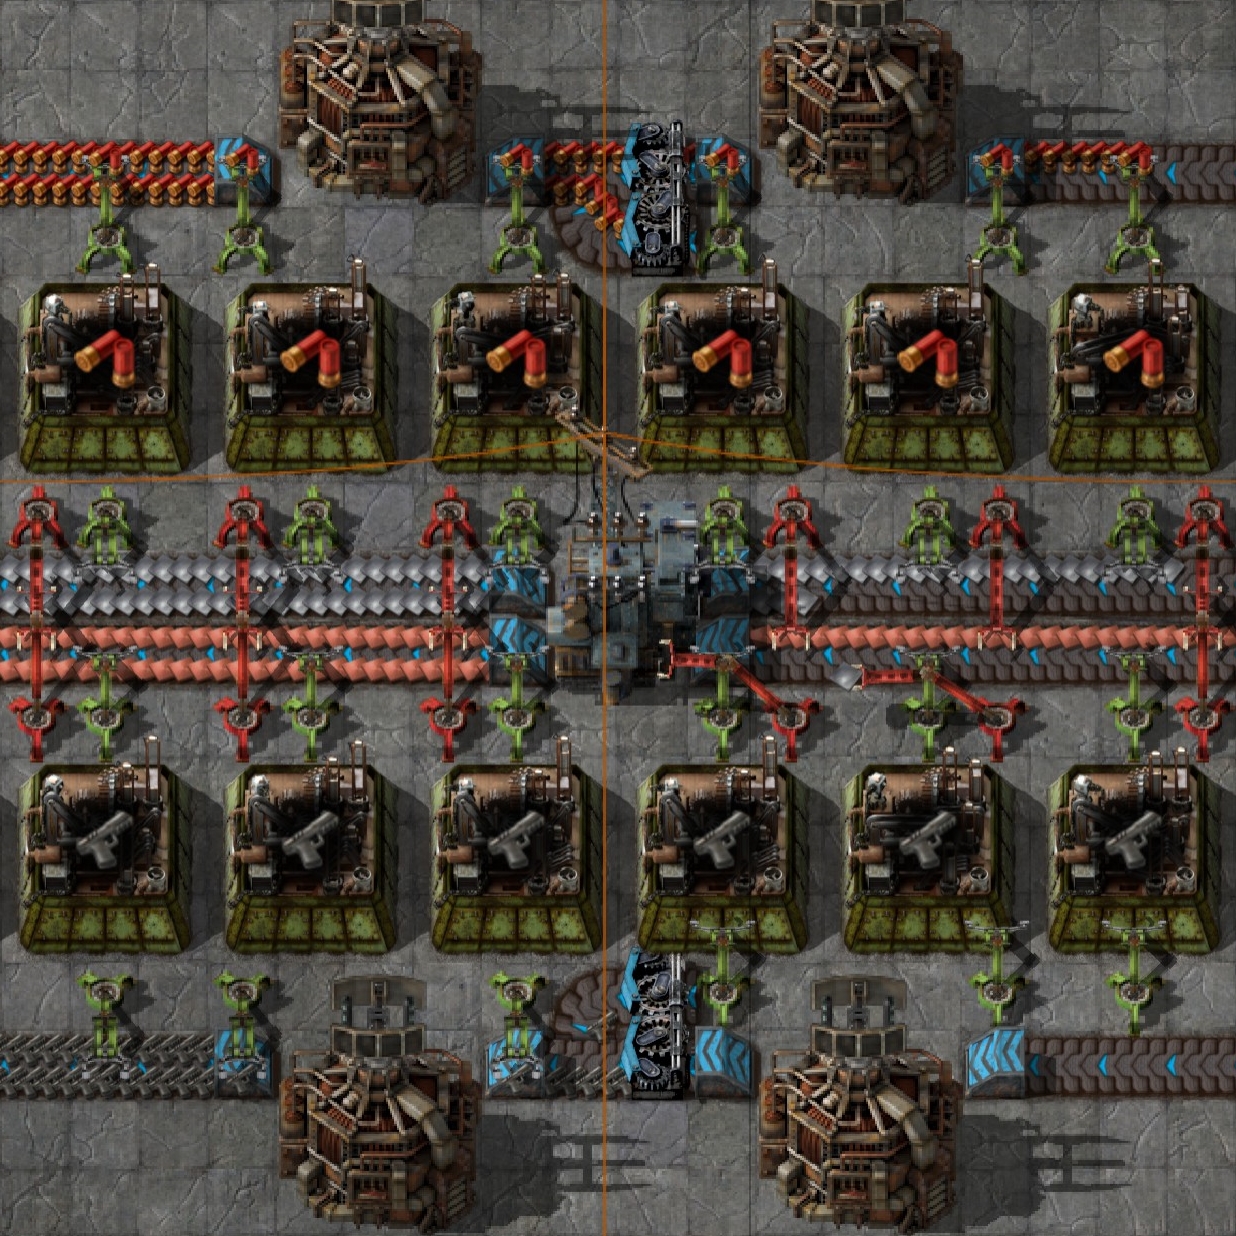
You could also craft 2 items if they share the same income materials.
Example: Shotgun Shells (Upper Belts) and Pistol (Lower Belts)Income: Iron Plate/ Copper Plate
Assembling Machine (3 Income)
Are we already at 3 items incoming lines?
Yes, we are!
It's not very complicated, you just have to check which item you need most
and this one should get the full line, the other 2 items have to share the other line.
Don't forget, it's still fully seamlessly.
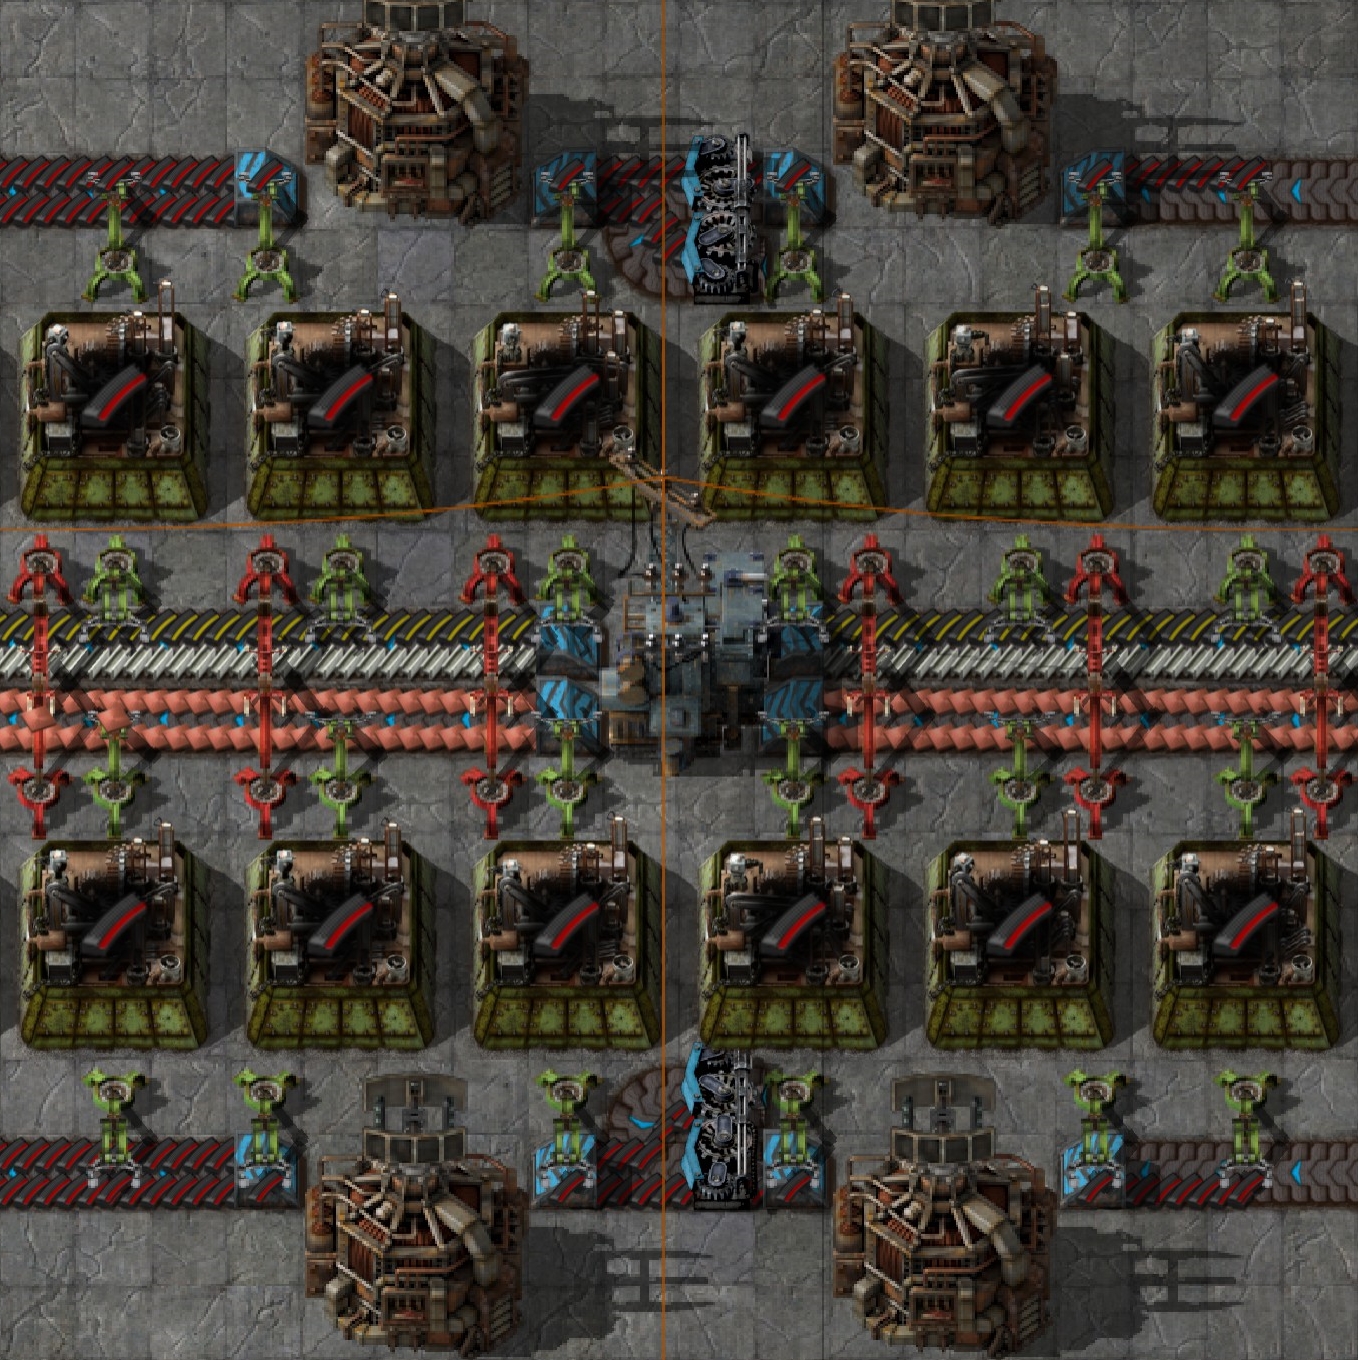
Example: Piercing Rounds MagazineIncome: Regular Magazine/ Steel Plate/ Copper Plate
Assembling Machine (4 Income)
That's the most complicated part. So listen carefully.
Instead of only 1 line which has to store 2 items it needs to be both lines. :O
Ya, that's too easy for you, i know.... :/
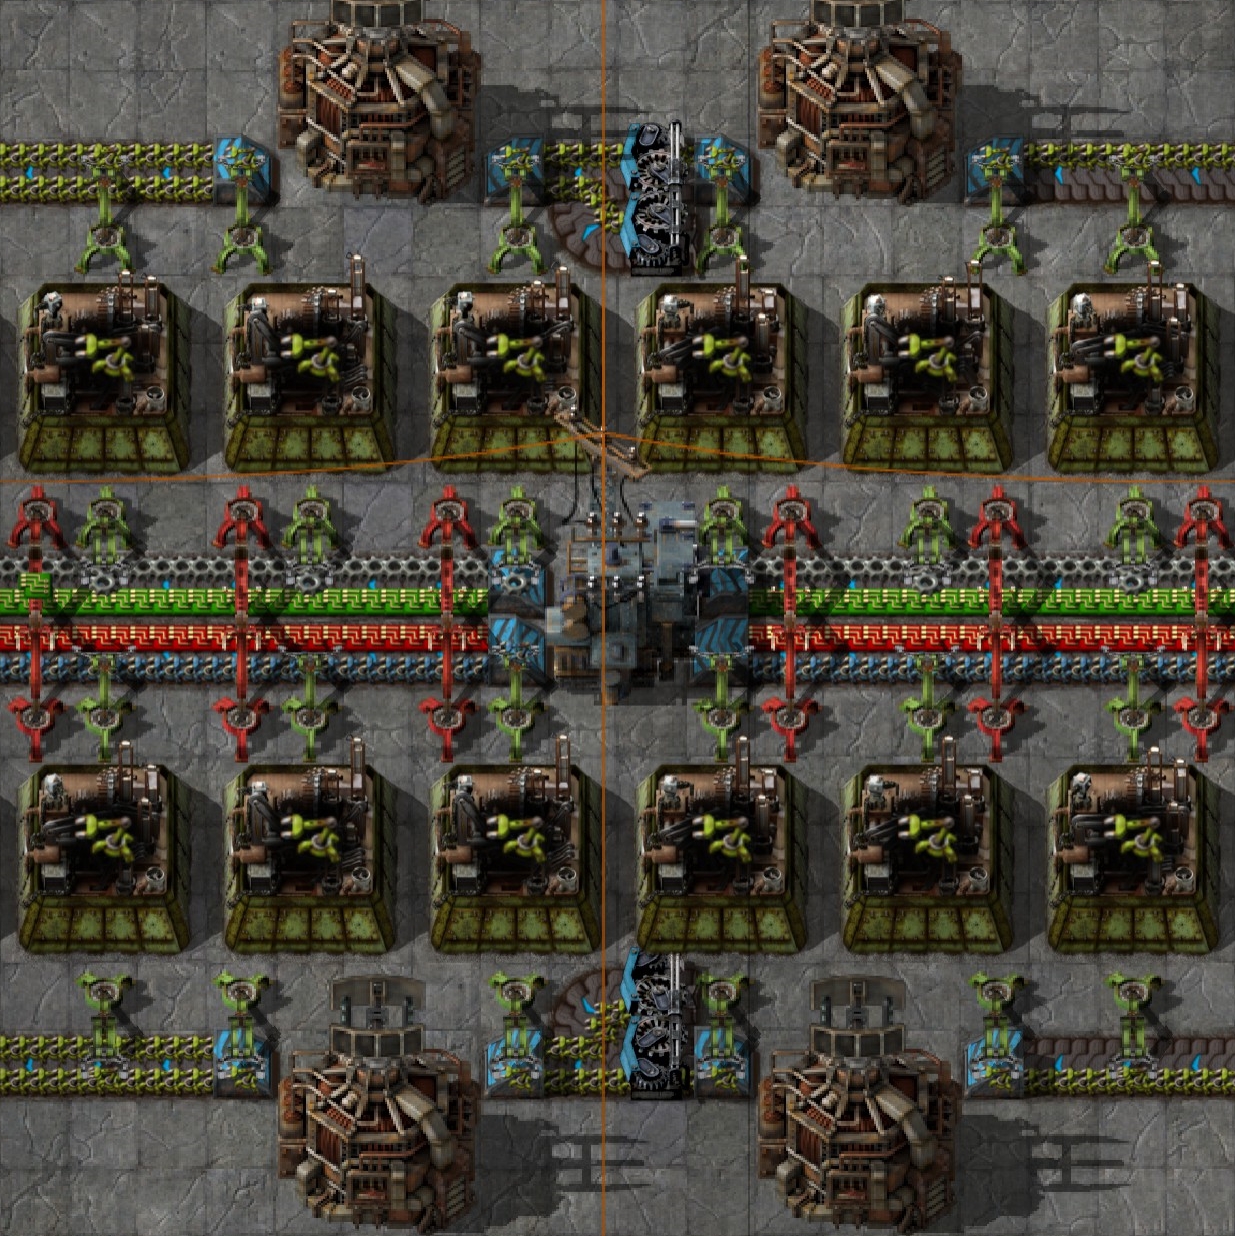
Example: Stack InserterIncome: Iron Gear Wheel/ Electronic Circuit/ Advanced Circuit/ Fast Inserter
You think that was too easy for you?
Then check out the next part and see how to get fluids into your assembling machine.
Assembling Machine (Fluid Income)
How to deal with that less space and fluids? It's not easy, but still possible.
Negative effect is, you have to remove the top and bottom beacons to get space for the pipes.
Positive is, you can still use modules inside the assembler if needed.
Here the Basic Assembler Fluid Setup Blueprint.
Basic Assembler Fluid Blueprint[www.chrisgpoint.eu]
Income: Electronic Circuit/ Advanced Circuit/ Sulfuric Acid
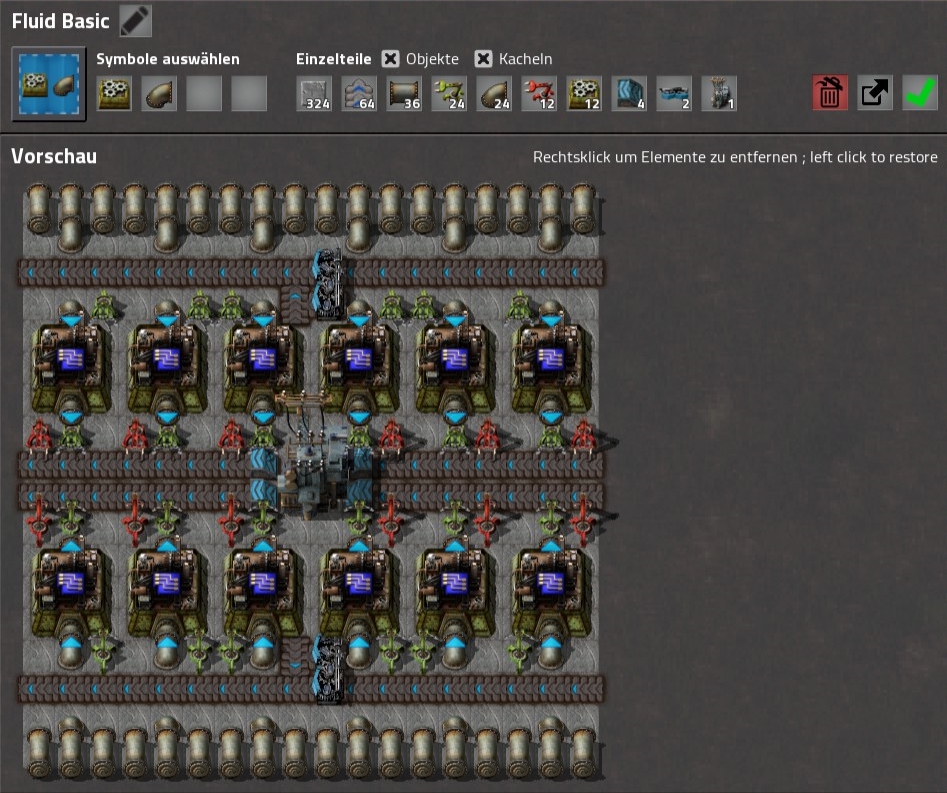 The Sulfuric Acid source can be placed on the top and bottom or left and right of the grid.
Also it is still a seamless build.
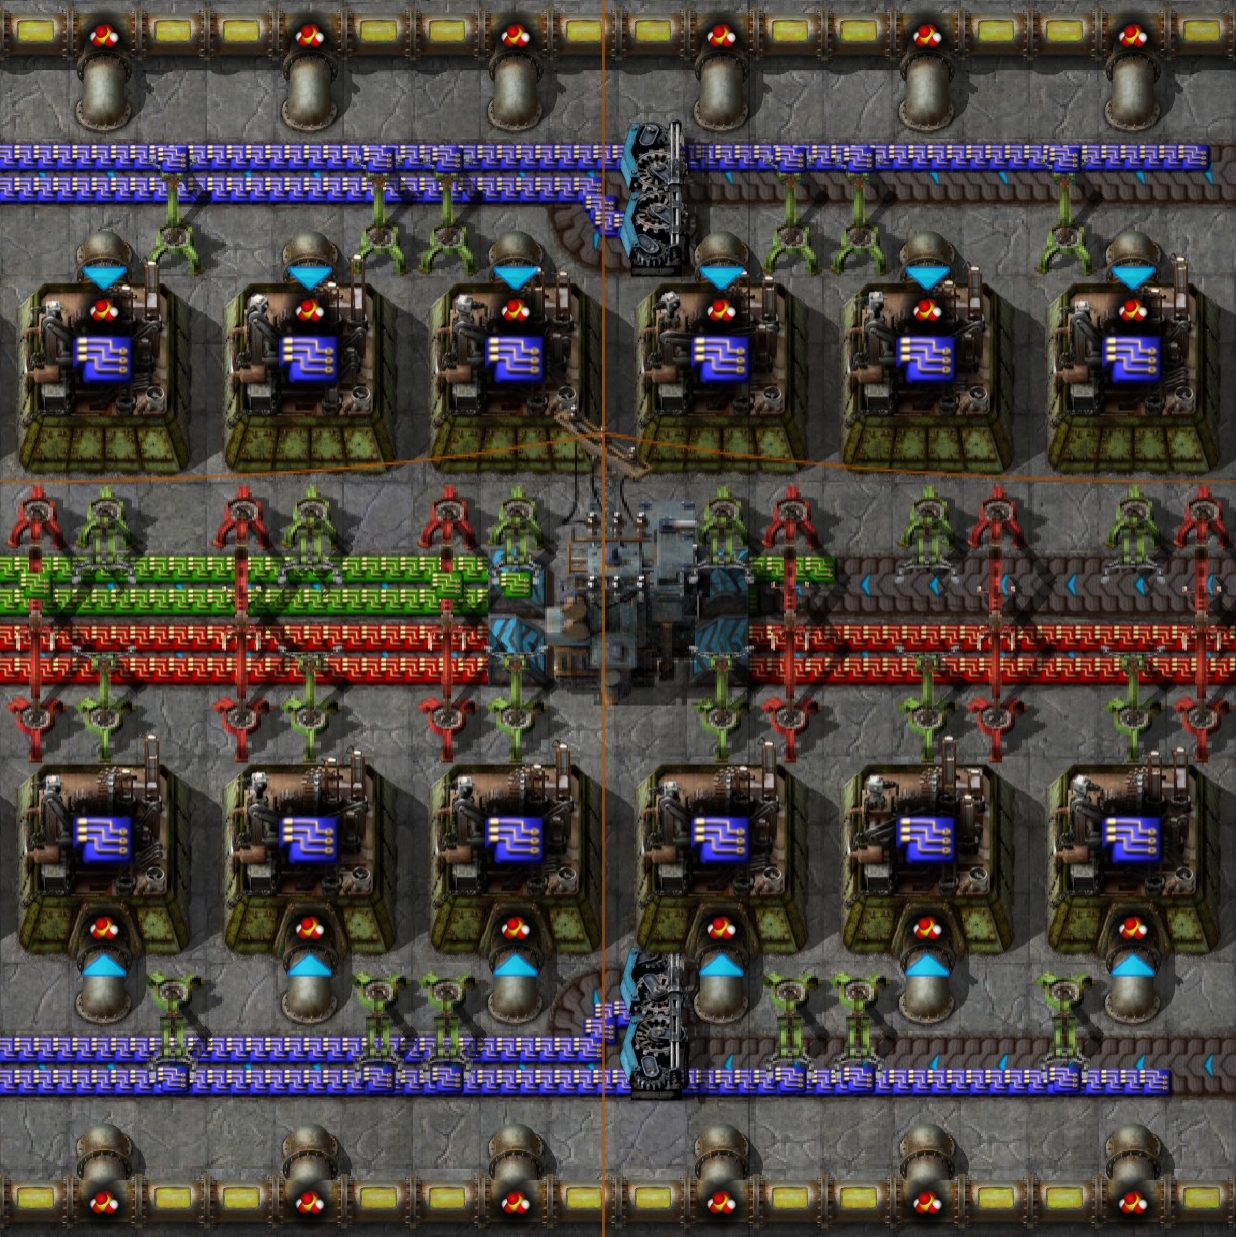
That was the basic build ups. Let's see the next parts.
Solar Panels/ Accumulators
This section shows how to use the substation 18x18 grid for solar panels and accumulators in a separate way and in combination. The Concrete Underground is optional.
Example 1: Solar Panels separatePositive: You still have a path to walk between your Solar Park. And again, it's seamless.
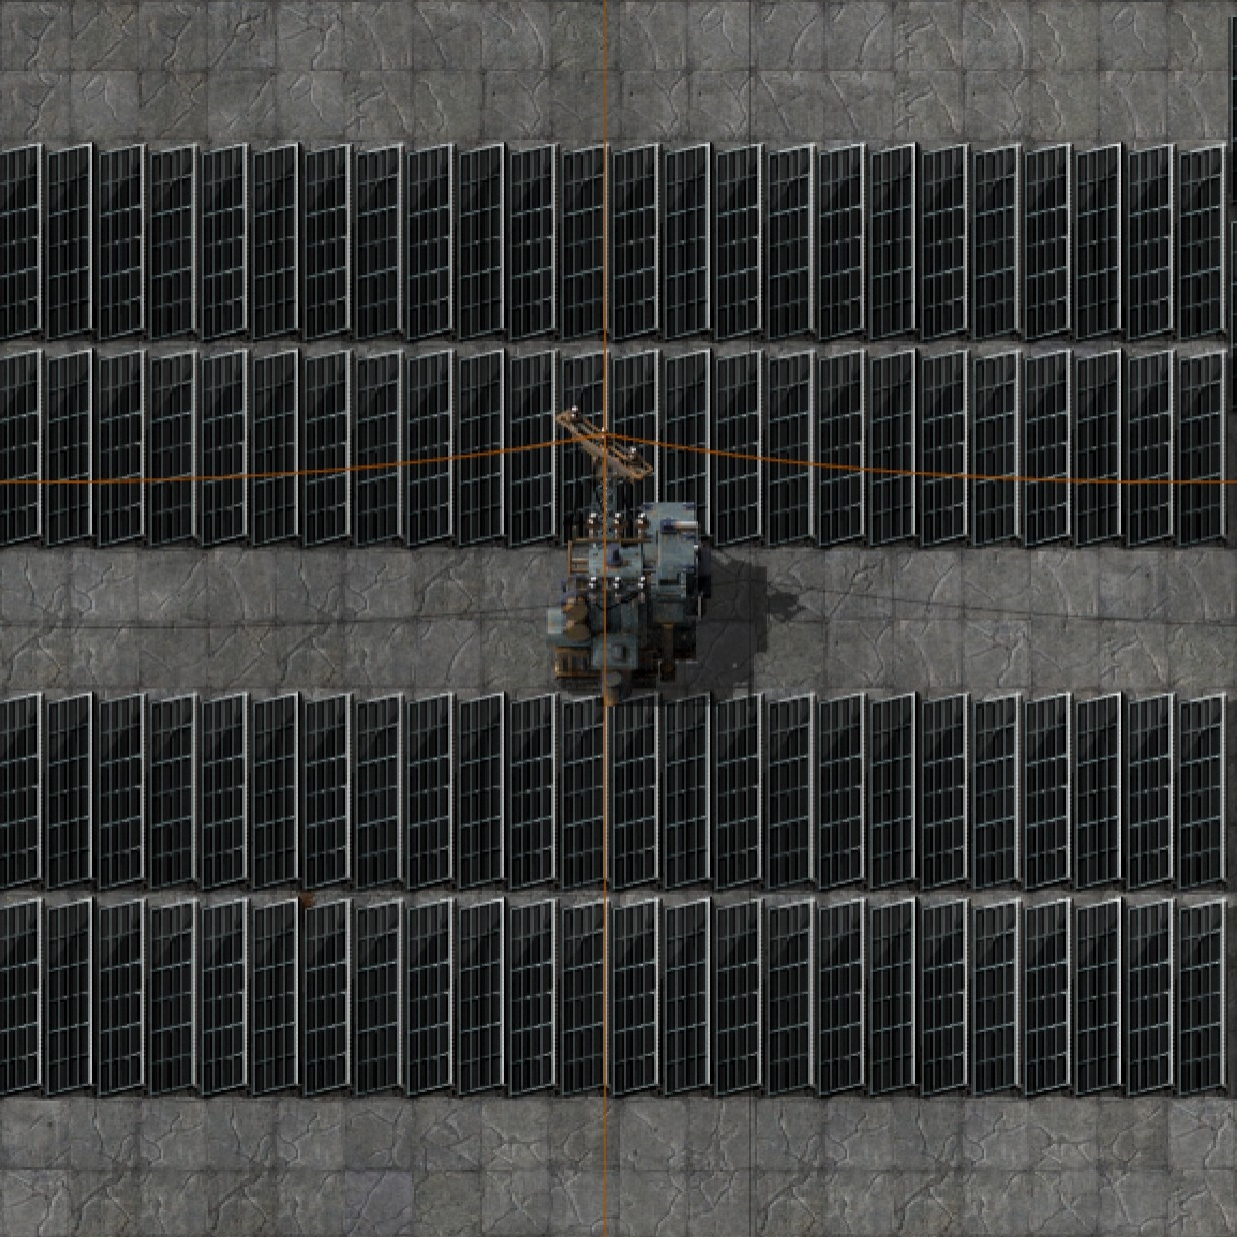 Example 2: Accumulator separate
Positive: Full usage of the 18x18 grid and perfect seamless.
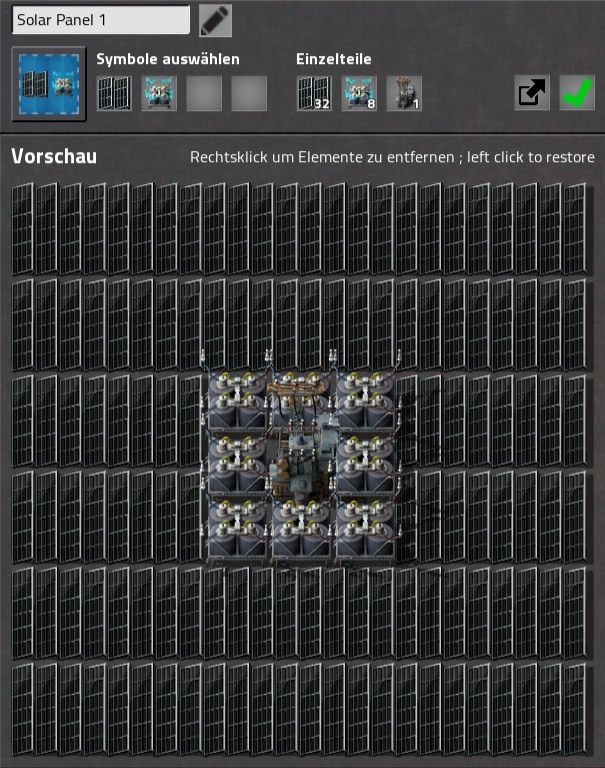
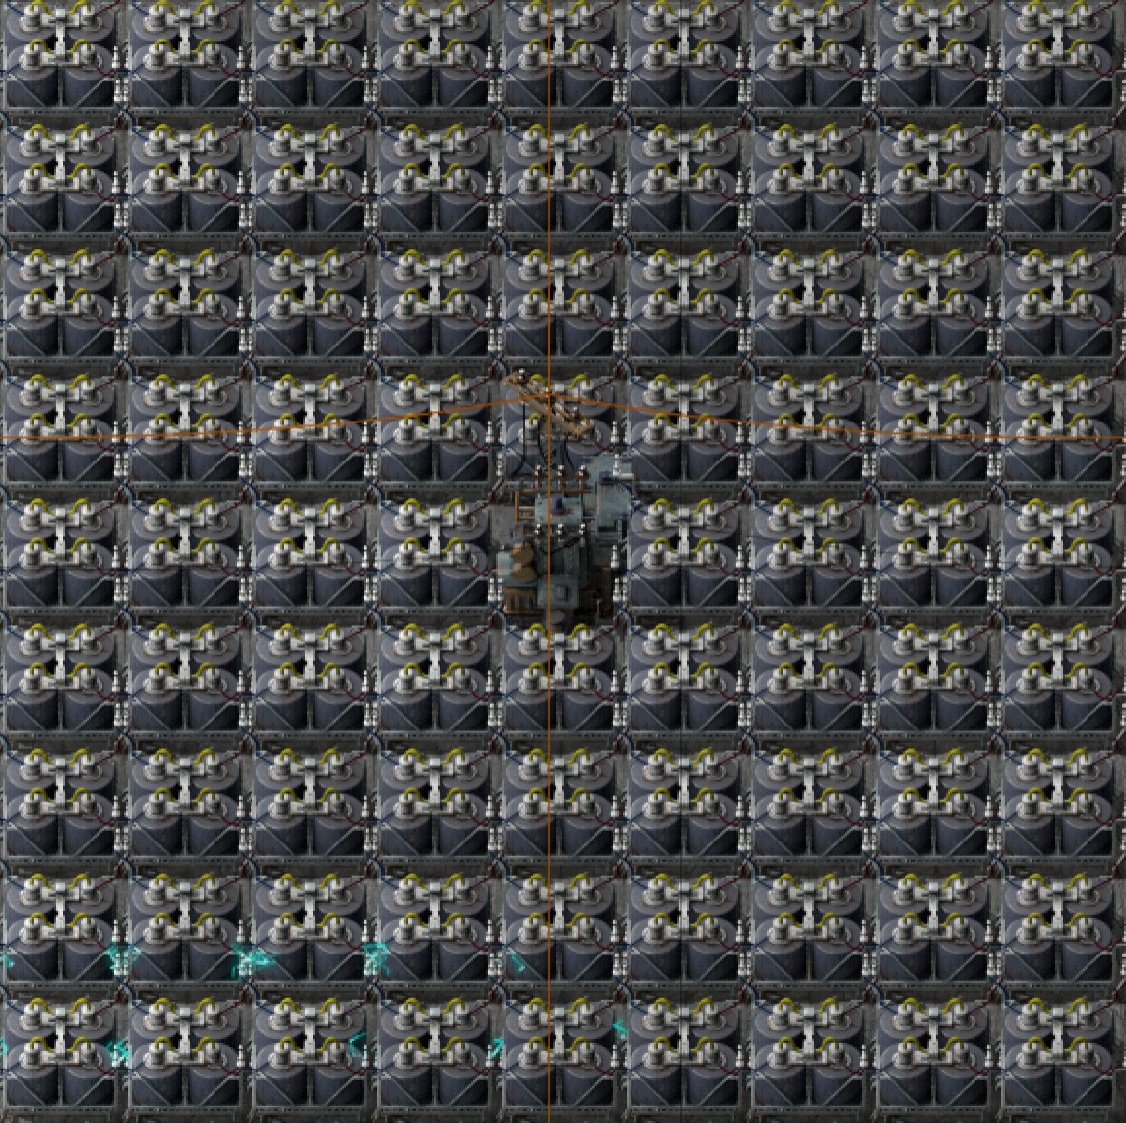 Example 3: A combination of Solar Panels and Accumulator.
Solar Panel Combi 1 Blueprint[www.chrisgpoint.eu]
Postive: Full usage of the 18x18 grid and seamless connection to the next part.
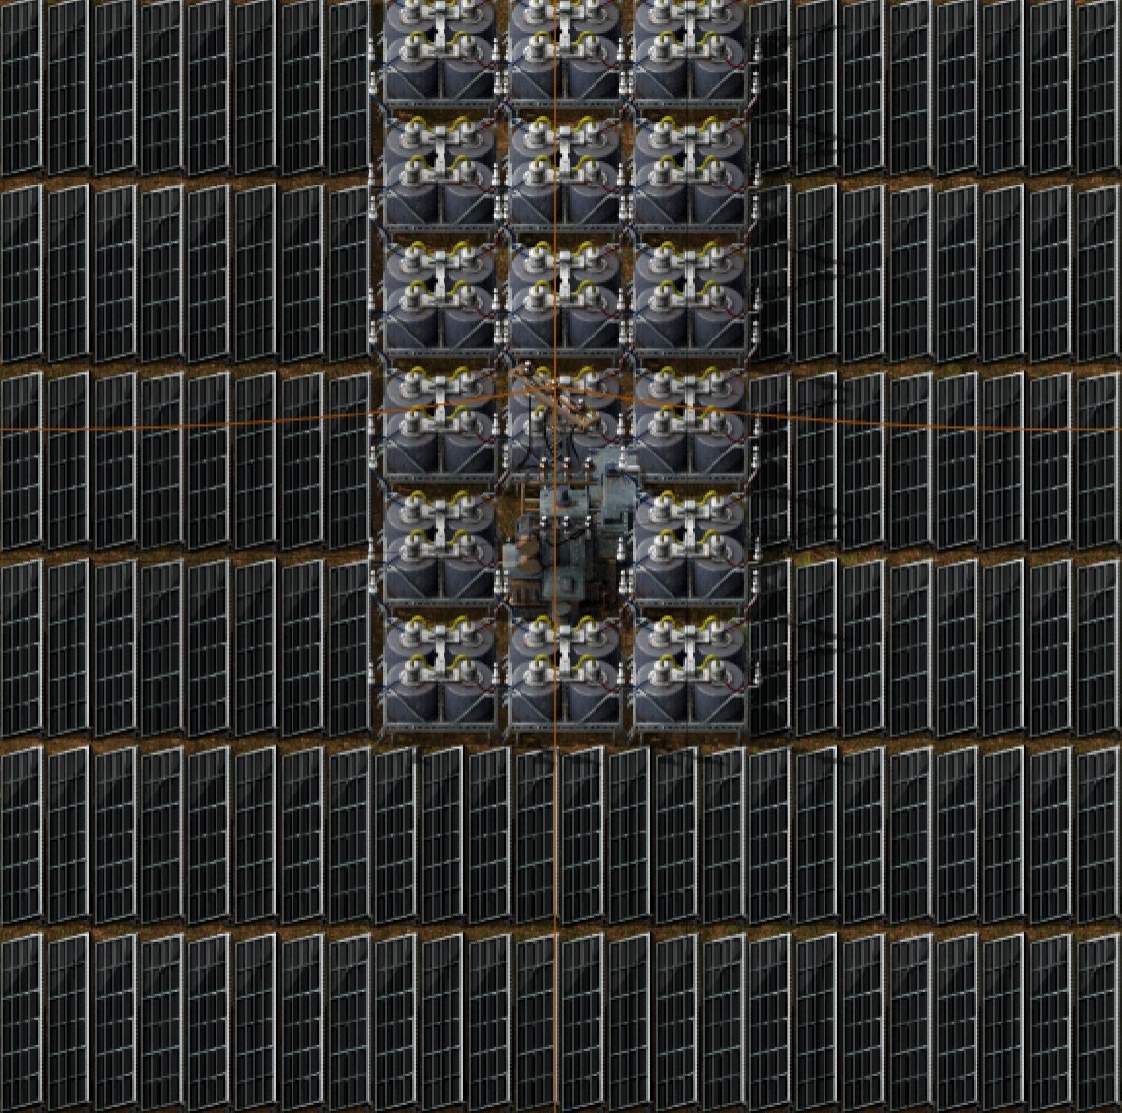
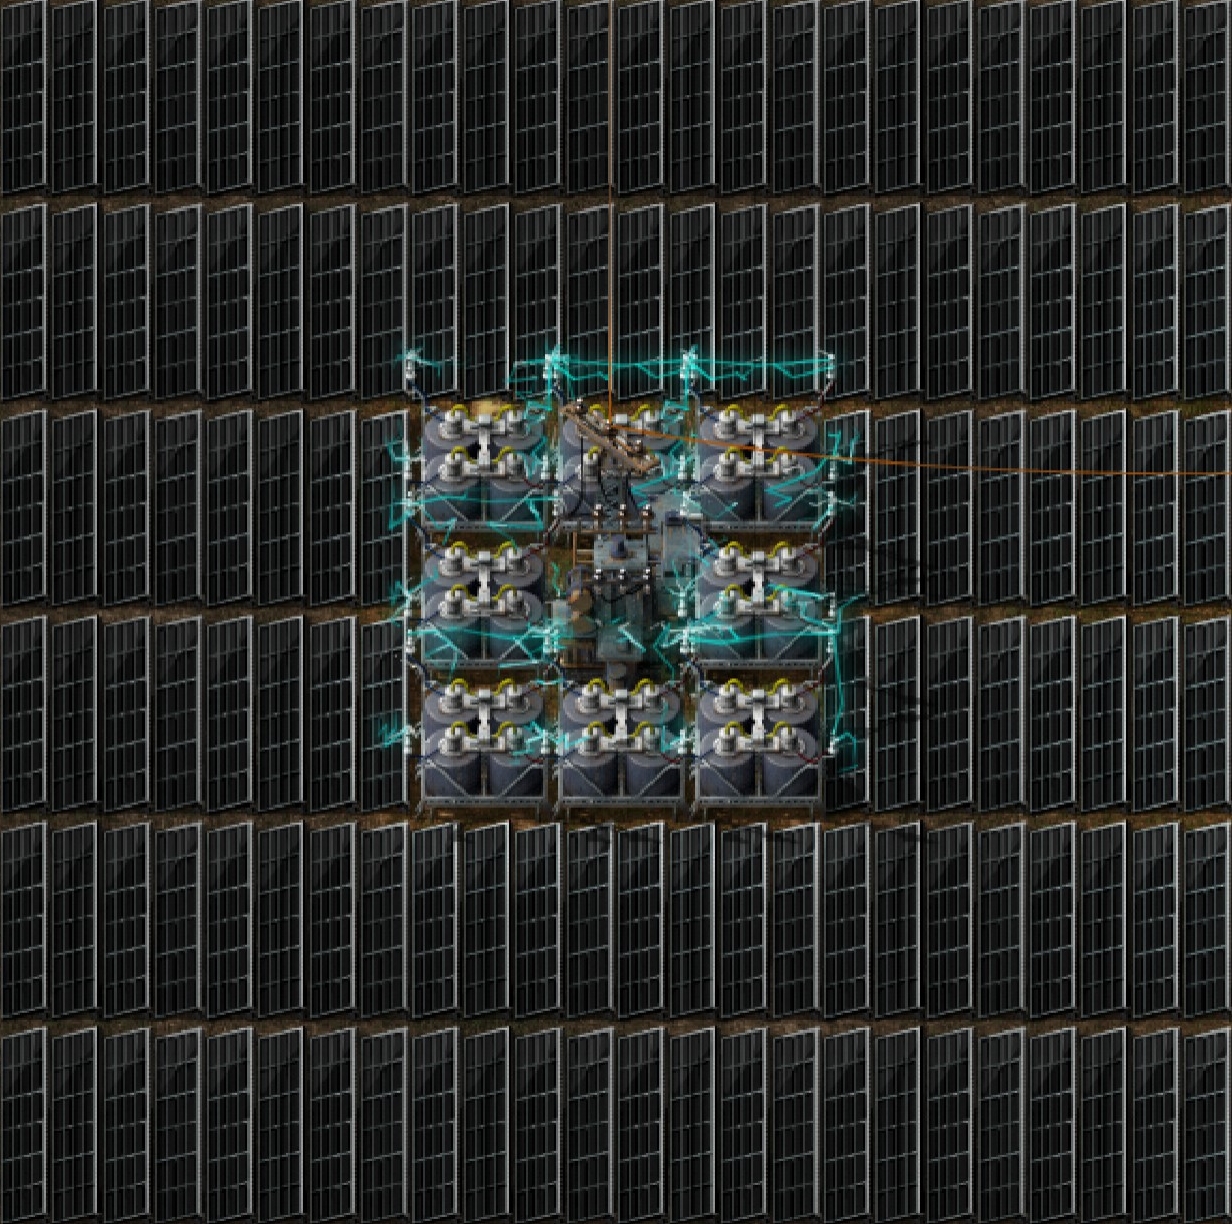 Example 4: Another combination of Solar Panels and Accumulators.
Solar Panel Combi 2 Blueprint[www.chrisgpoint.eu]
Positive: Full usage of the 18x18 grid and nearly optimal ratio between solar panels and accumulators. And seamless connection to the next part.
Oil Refinery + Production
This section shows how to use the Substation 18x18 grid for Oil Refinery including an production example.
Single Setup: Oil Refinery Basic Setup (Advanced Oil Processing)Oil Refinery Basic Setup Blueprint[www.chrisgpoint.eu]
Income: Crude Oil/ Water
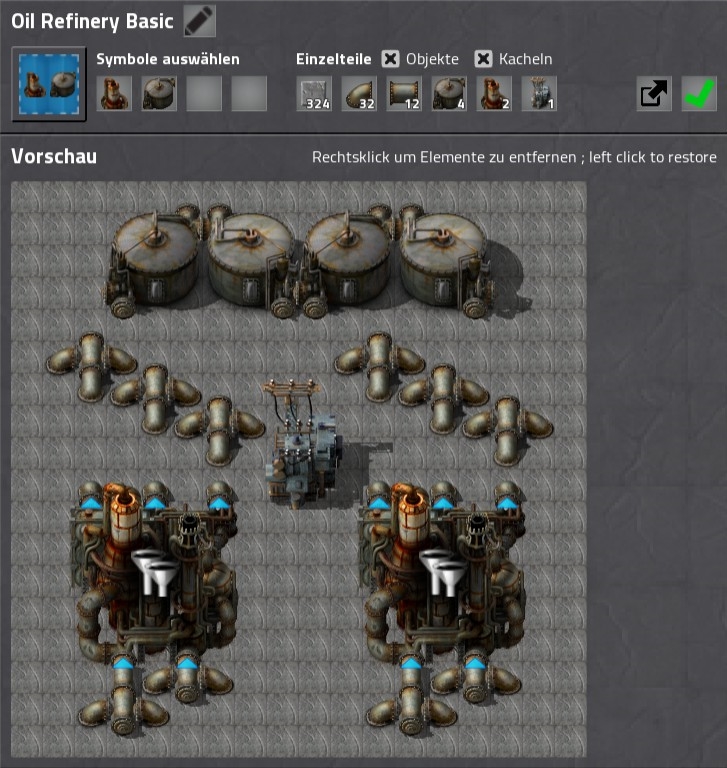
The Single Basic Setup has no connection to the storage tanks, that's up to you. Combi Setup (x3): Oil Refinery Combi Basic Setup (Advanced Oil Processing)
Oil Refinery Combi Basic Setup Blueprint[www.chrisgpoint.eu]
Income: Crude Oil/ Water
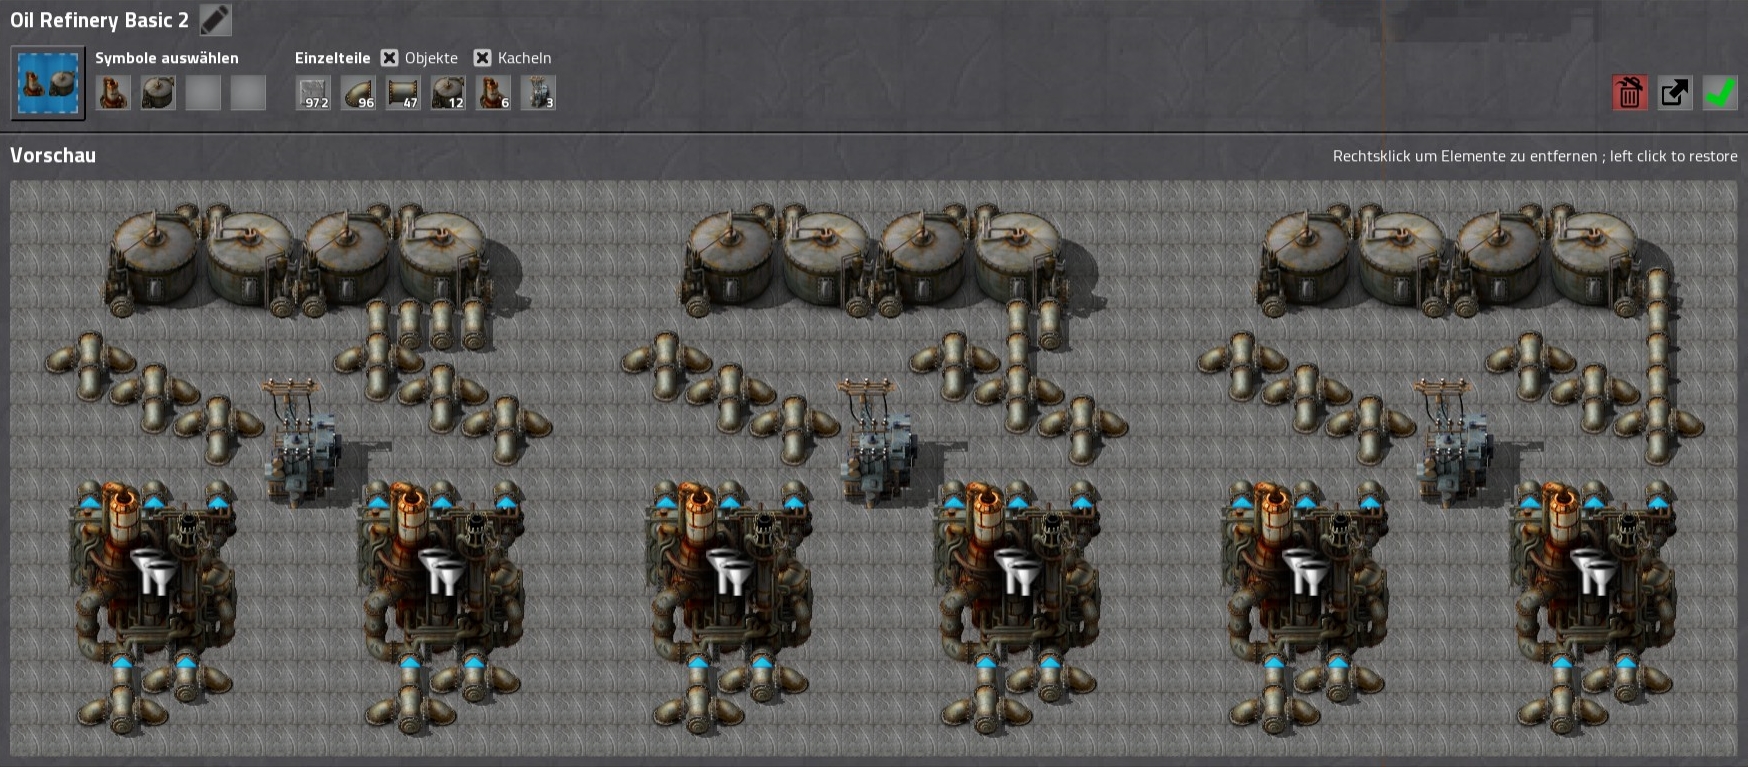
The Combi Basic Setup is ready to use and all fluids goes into separate storage tanks. That's how it will look in game.
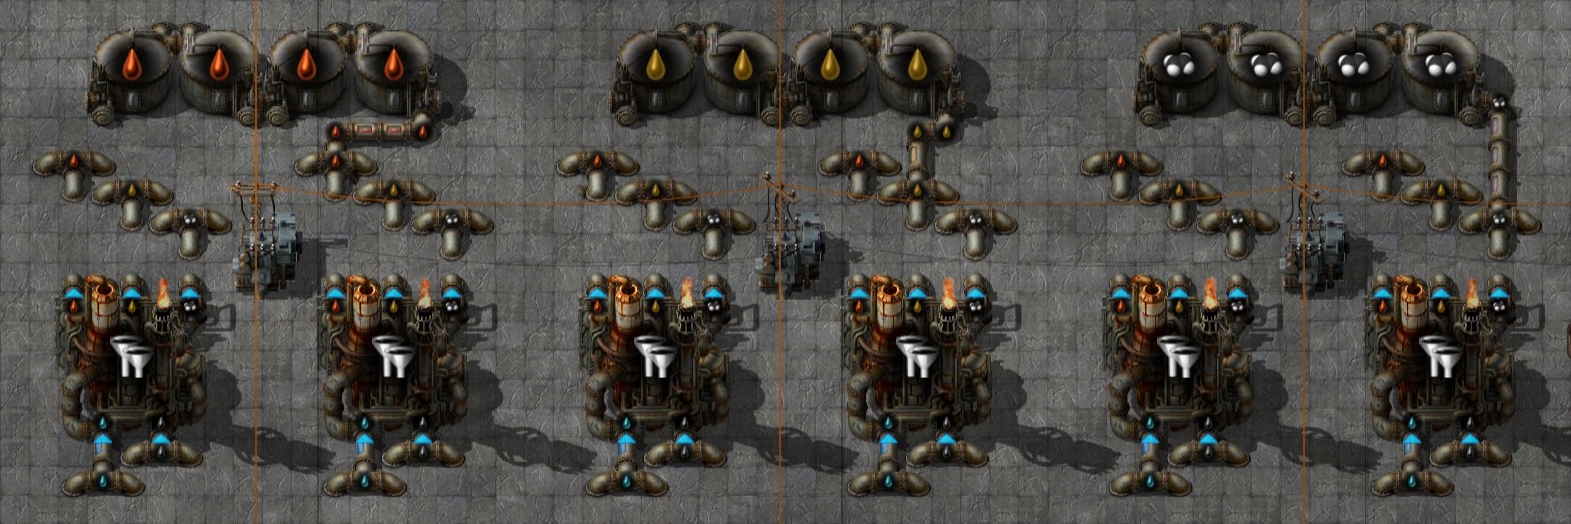
I prefer Storage Tanks between the production just cause it gives you a good stock overview and you always have a little reserve if you get low on a liquid.
The following Production Example is using 6 18x18 Substation Grids in Total.
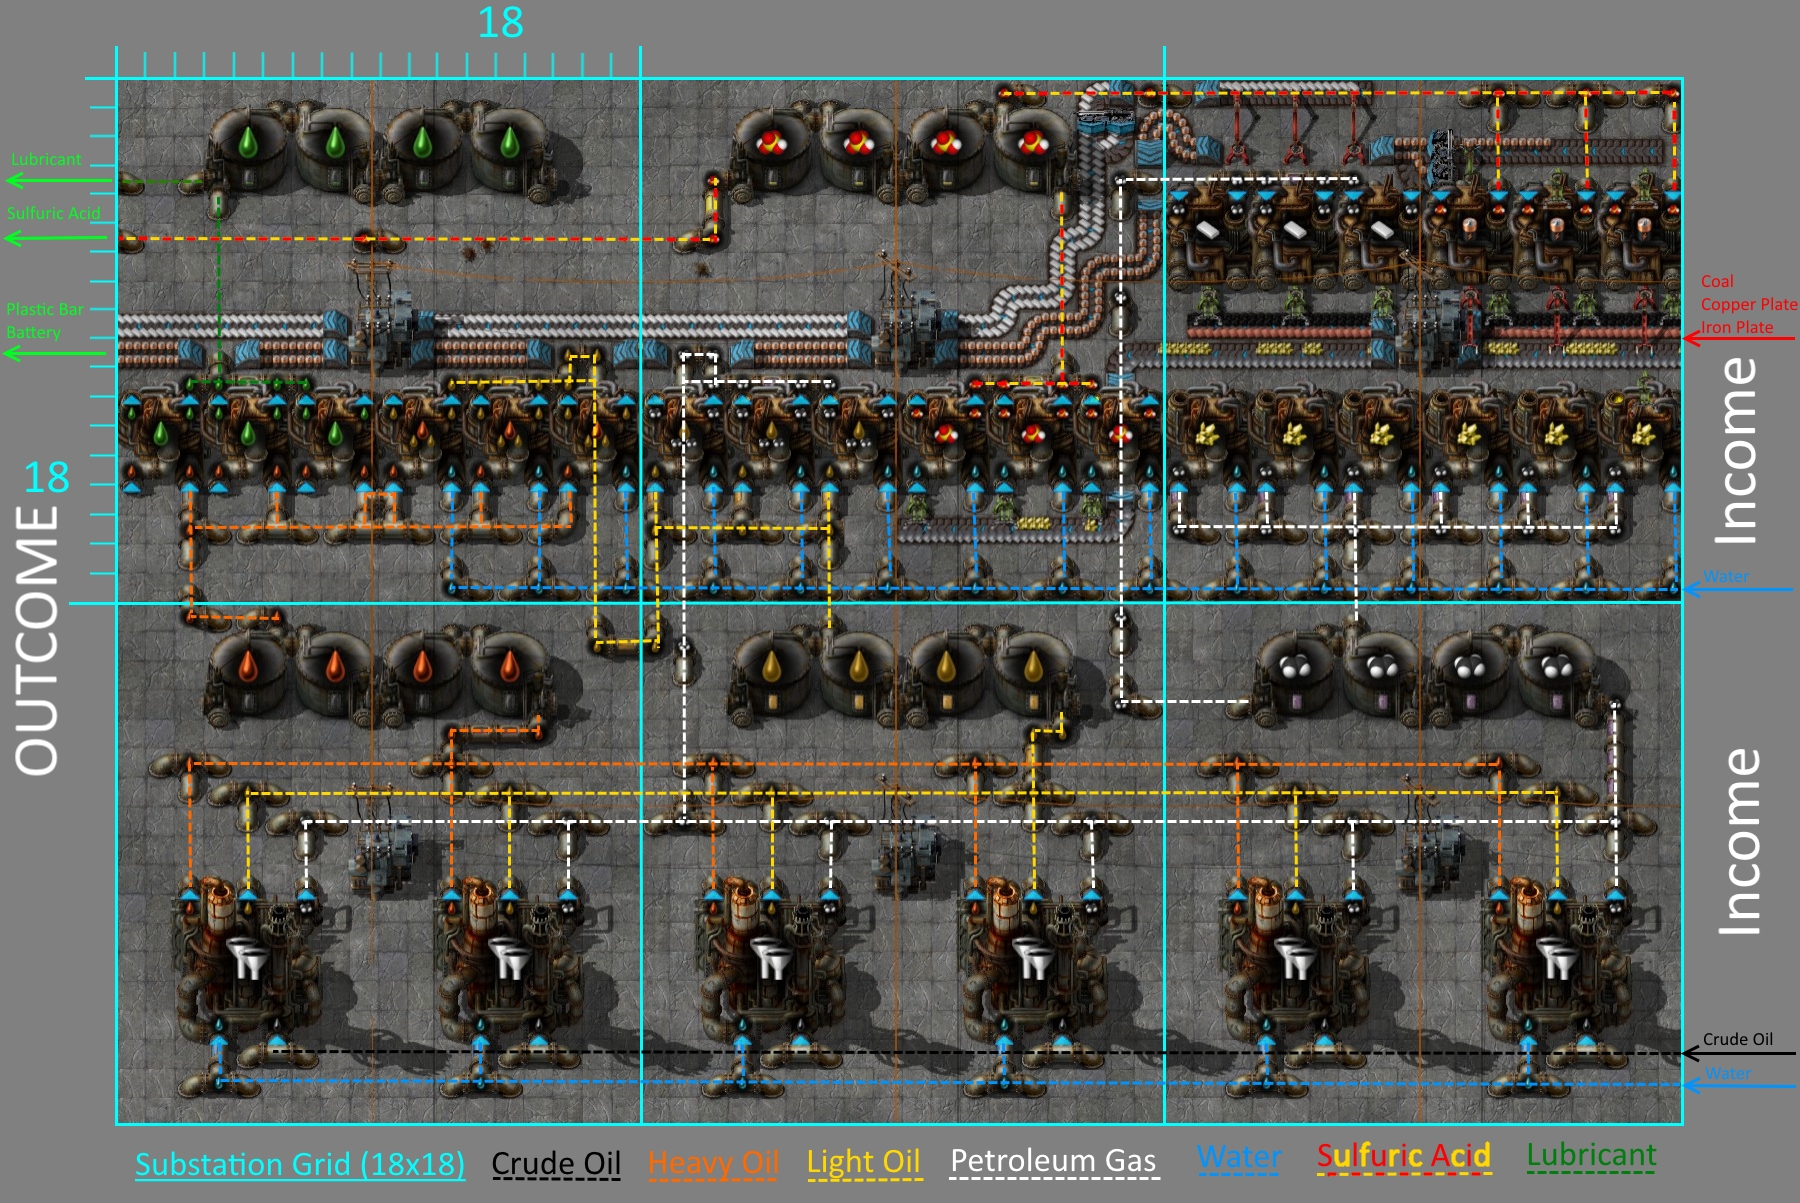
Example: Multiple ProductionOil Refinery Multiple Production Basic Setup Blueprint[www.chrisgpoint.eu]
Income Belts: Coal/ Copper Plate/ Iron Plate
Income Pipes: Crude Oil (1x)/ Water (2x)
Outcome: Lubricant/ Sulfuric Acid/ Plastic Bar/ Battery
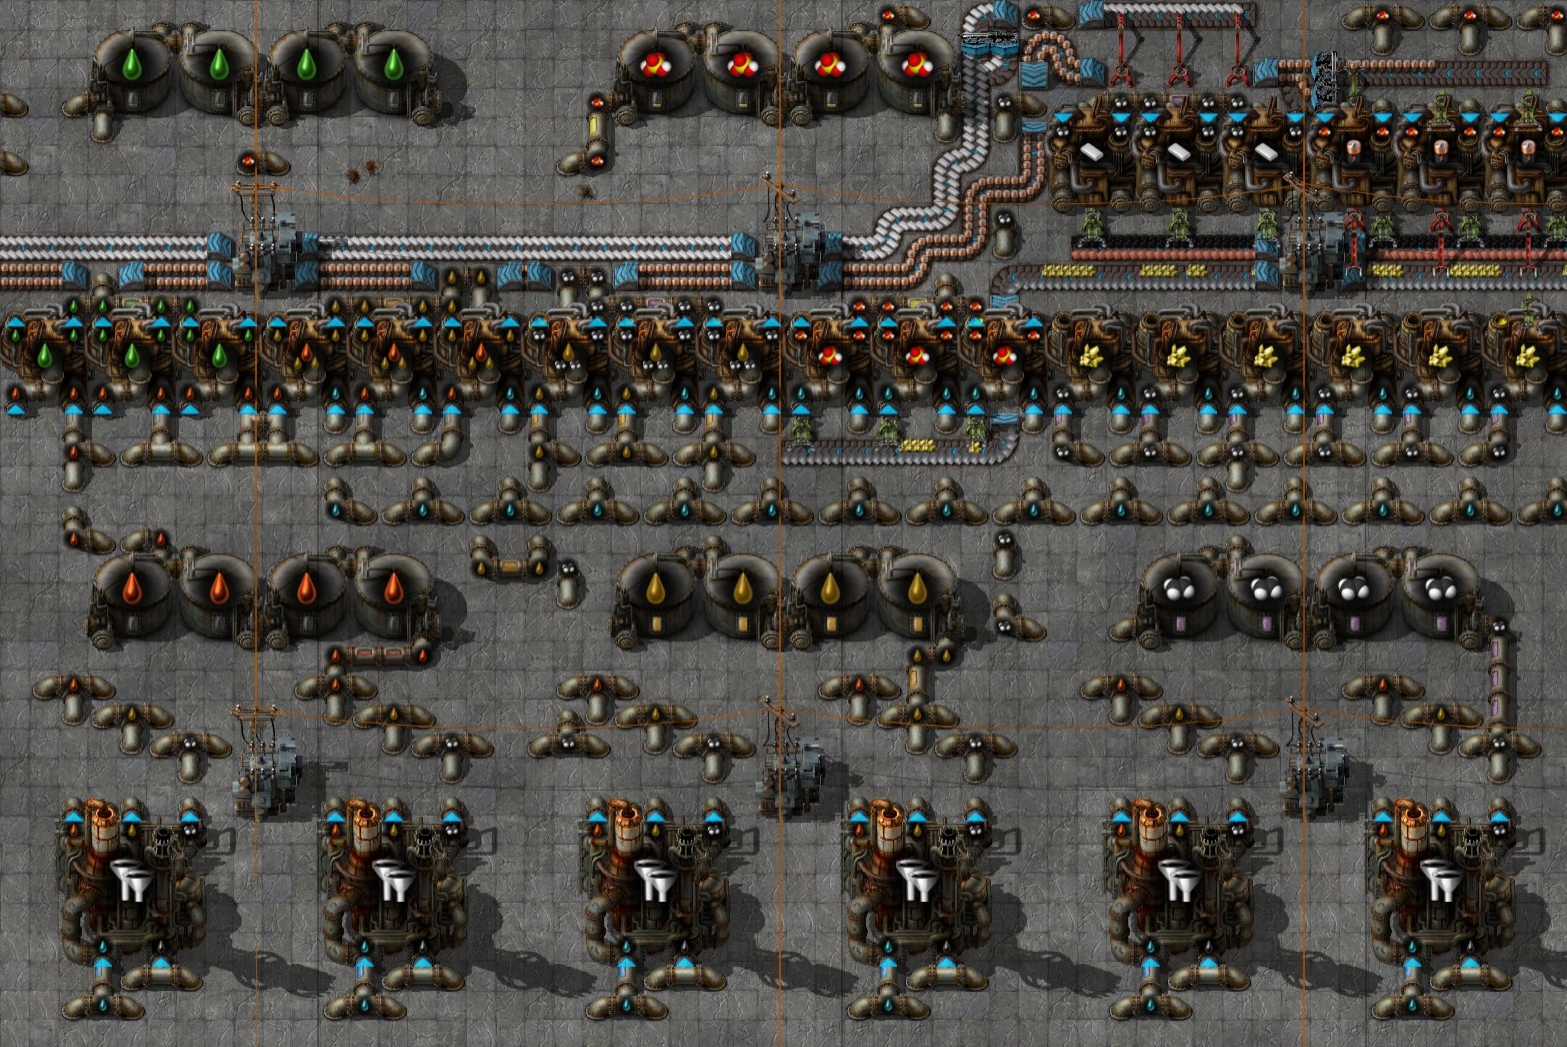
The Heavy Oil converts to Lubricant and to Light Oil and the Light Oil converts to more Petroleum Gas. So all fuilds gets used. For a better understanding i made a connection scheme.
Get ready for the next chapter.
The Uranium!
Uranium Production
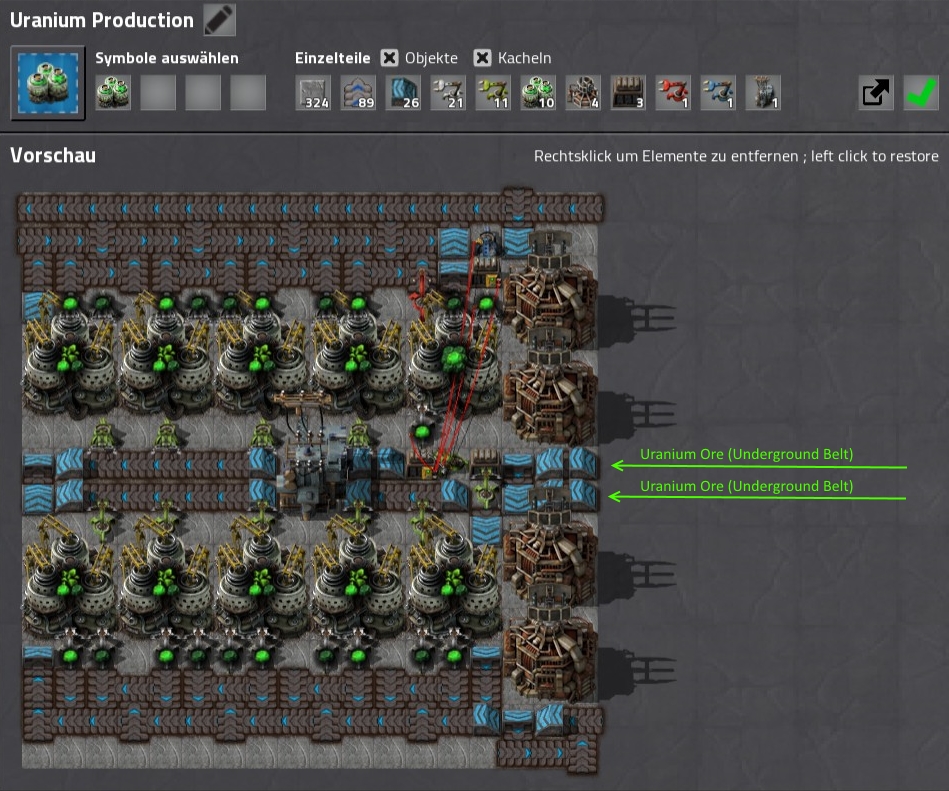
My seamless solution for a Uranium-238 and Uranium-235 production.
You don't really need that much centrifuge but i want to use the whole grid. :)
Also, as more you have as faster you get the necessary 40x Uranium-235 for the Loop Production.
The Setup works right after you feed it with Uranium Ore in the middle belts.
Due to the very low chance for Uranium-235 it can take several hours before the Kovarex Centrifuge will start to work.
Just be very patient and put some speed modules in the beacons and centrifuge.
And use the outcoming Uranium-238 for ammo and more while waiting for the Uranium-235 cause once the Outcome Belt is full it can stop your production.
Example: Uranium-238/ Uranium-235Uranium Production Setup Blueprint[www.chrisgpoint.eu]
Important Income: Uranium Ore

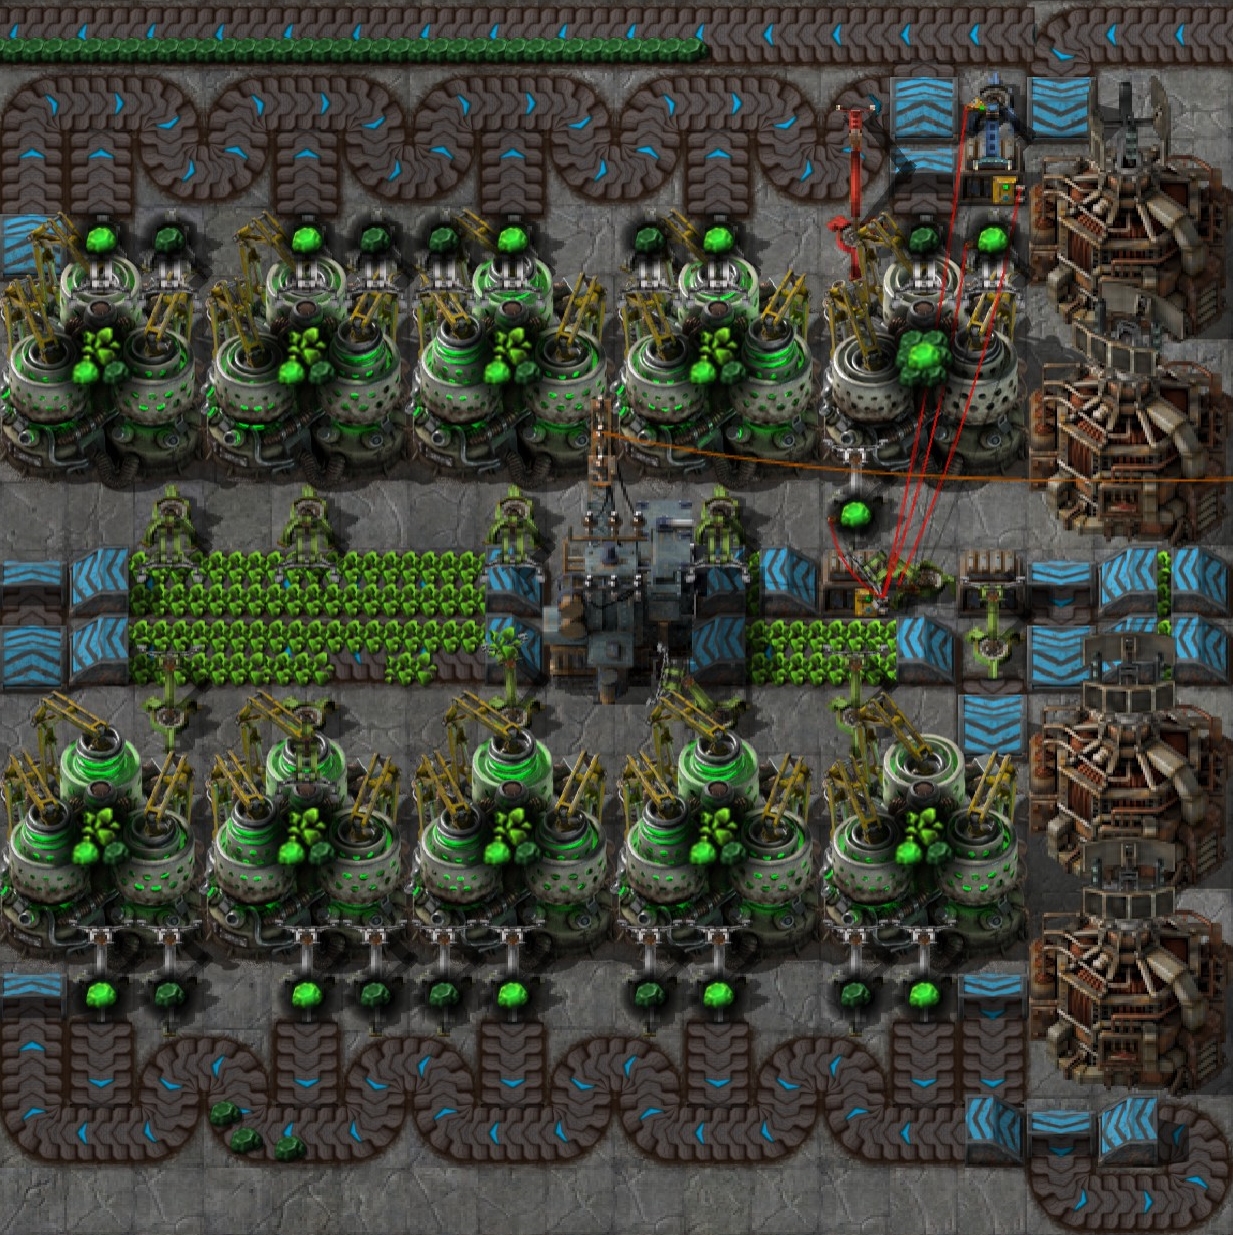 At start it will look like this.
The Uranium Ore in the middle goes into the 9 centrifuge and creates Uranium-238 on mass and with a very low chance Uranium-235. The Belt is separated so that both elements will not get mixed.
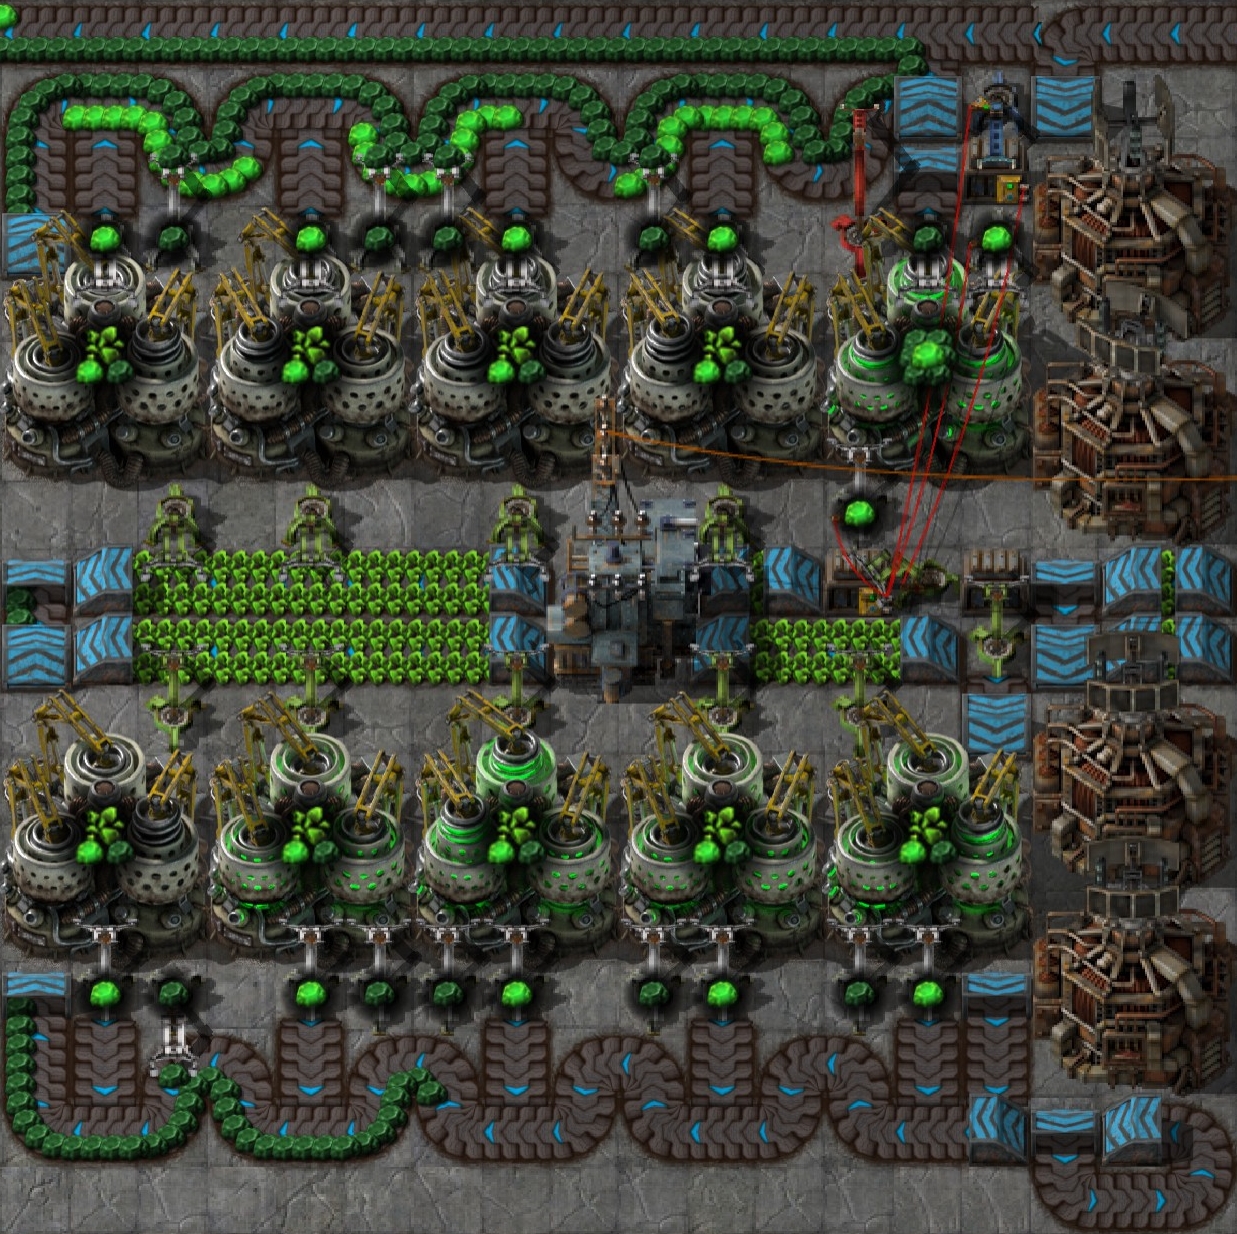 Once all the centrifuge have send 40x Uranium-235 in total to the Kovarex Centrifuge your Loop will start.
After one Kovarex Process is done it will send 40x Uranium-235 to a storage box and then back to the belt for the next loop and 1x Uranium-235 to the upper belt for you to use.
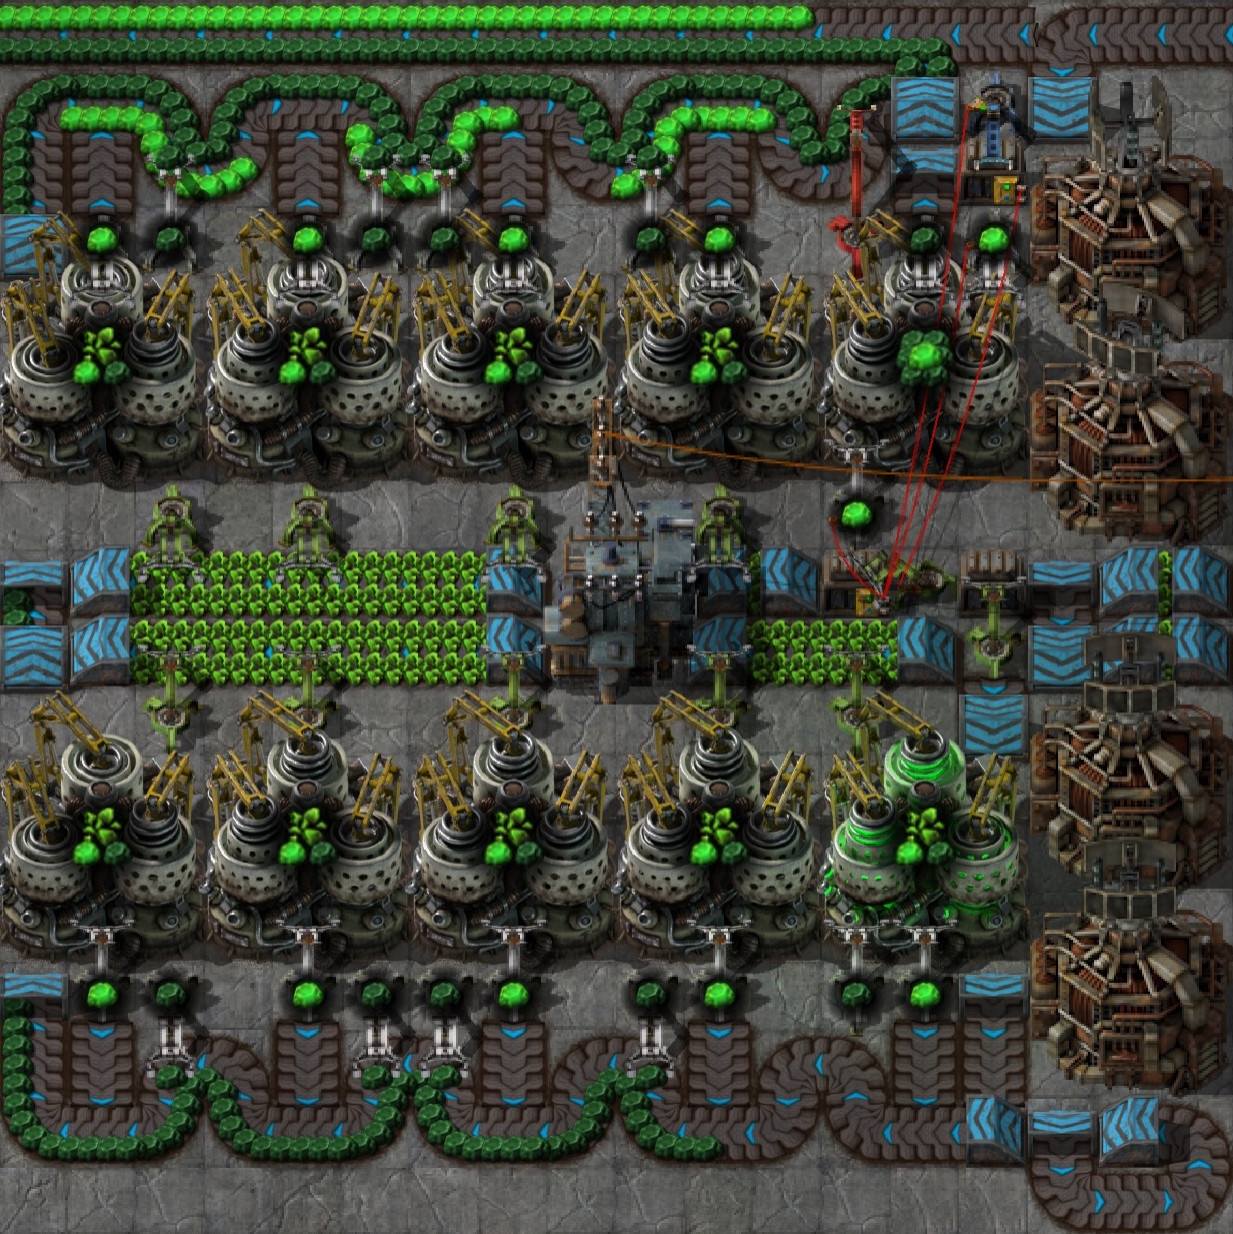 After a while you will have more and more Uranium-235 on your upper belt but still only 40x Uranium-235 on the Loop Belt.
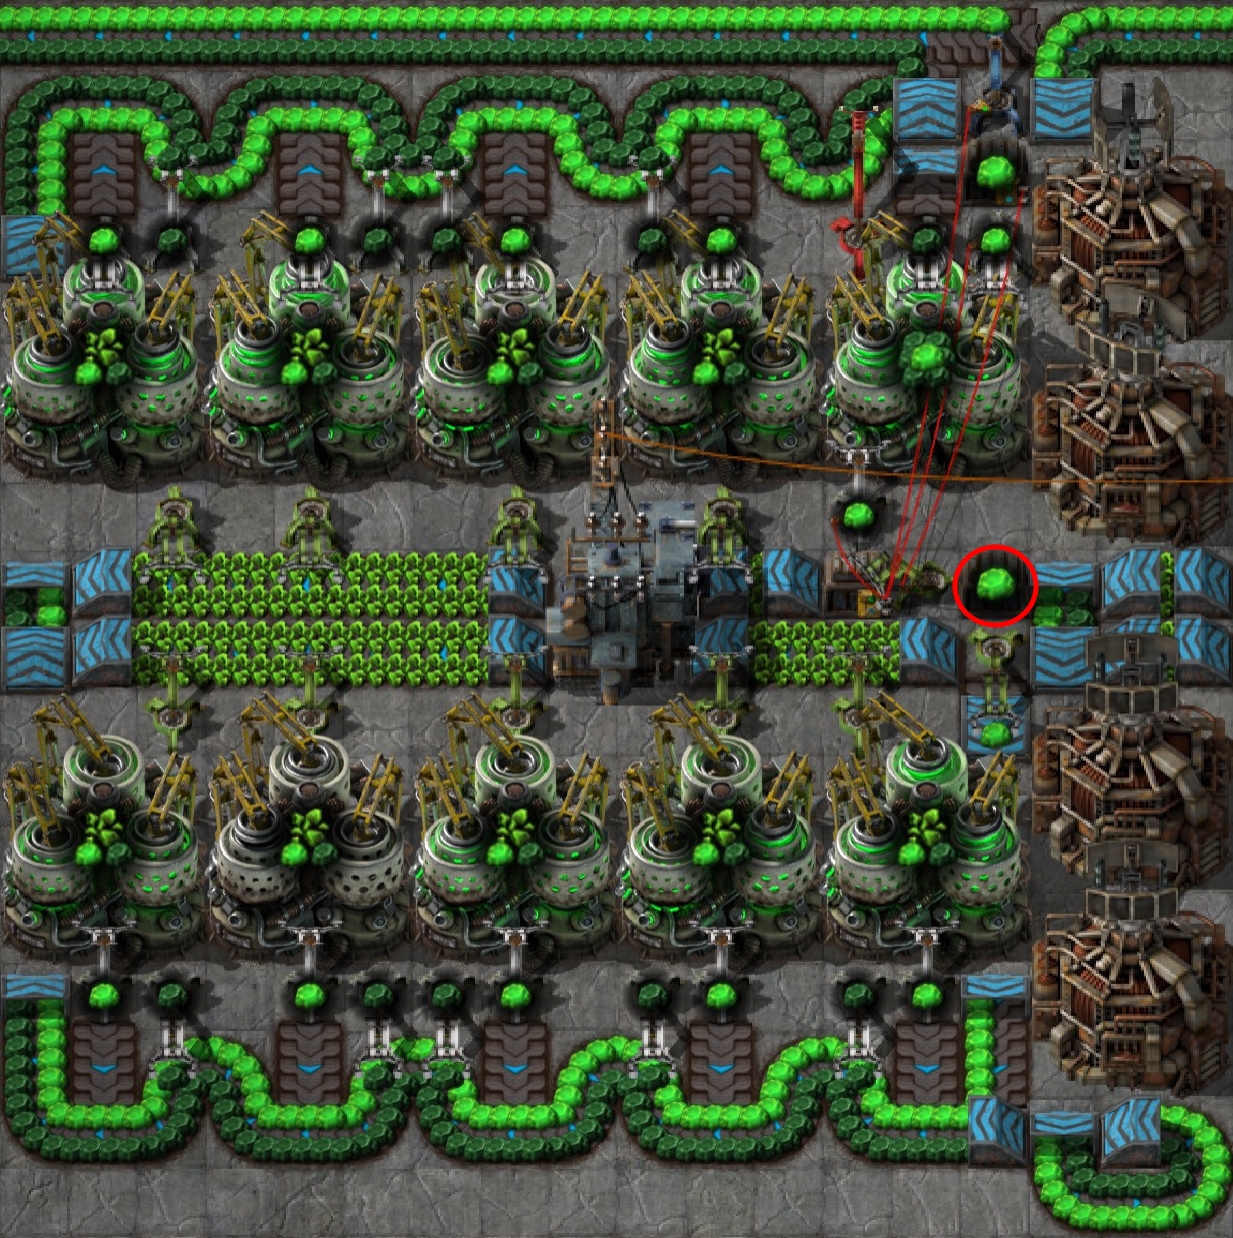 If you want you can put your outcome Uranium-235 inside the marked storage box.
That will lead to a full production belt. This will not affect your Kovarex Production Speed.
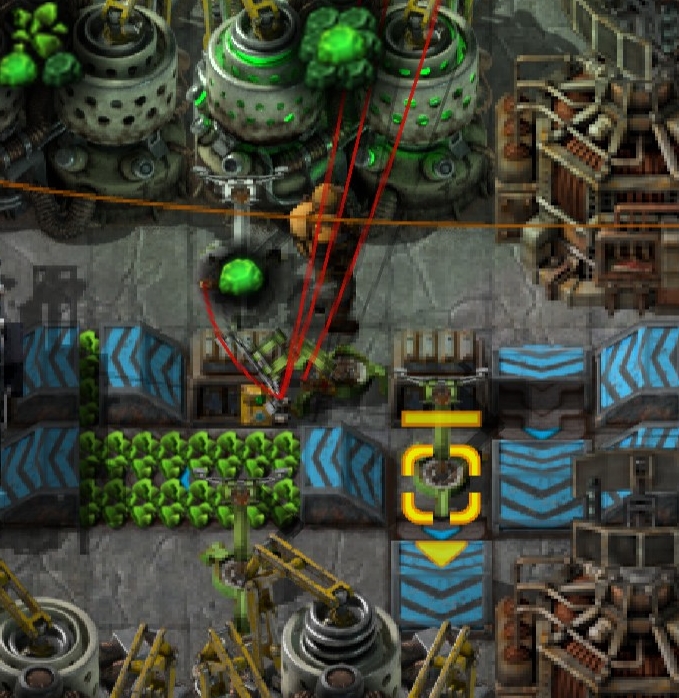 For me i think it looks nice that the 40x Uranium-235 wriggle all the way arround your Grid to the Kovarex but if you want it to be a little bit more efficient you can make the following change.
Remove the marked inserter under that storage box and...
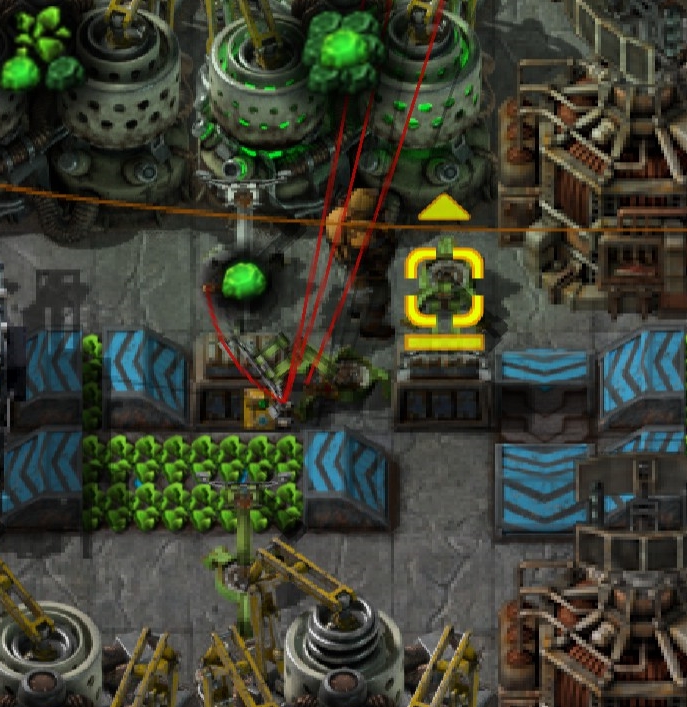 ... place it like this on the upper side of the box.
And then you could also remove the little underground belt under that removed inserter.
This will immediatly put the 40x Uranium-235 back to the Centrifuge instead of that funny wriggle effect. :P
Ready for the next part?
I show you some examples for a complete production line in only one 18x18 grid.
Complete Production in (1) Grid
Now i show you some examples how to efficient use that small place.
Always look for the Income Lines or the blueprint will not work correctly.
Some Income Lines are optional and not important but they could speed up the Setup.
Also all blueprints don't have modules in it, that's up to you to add some.
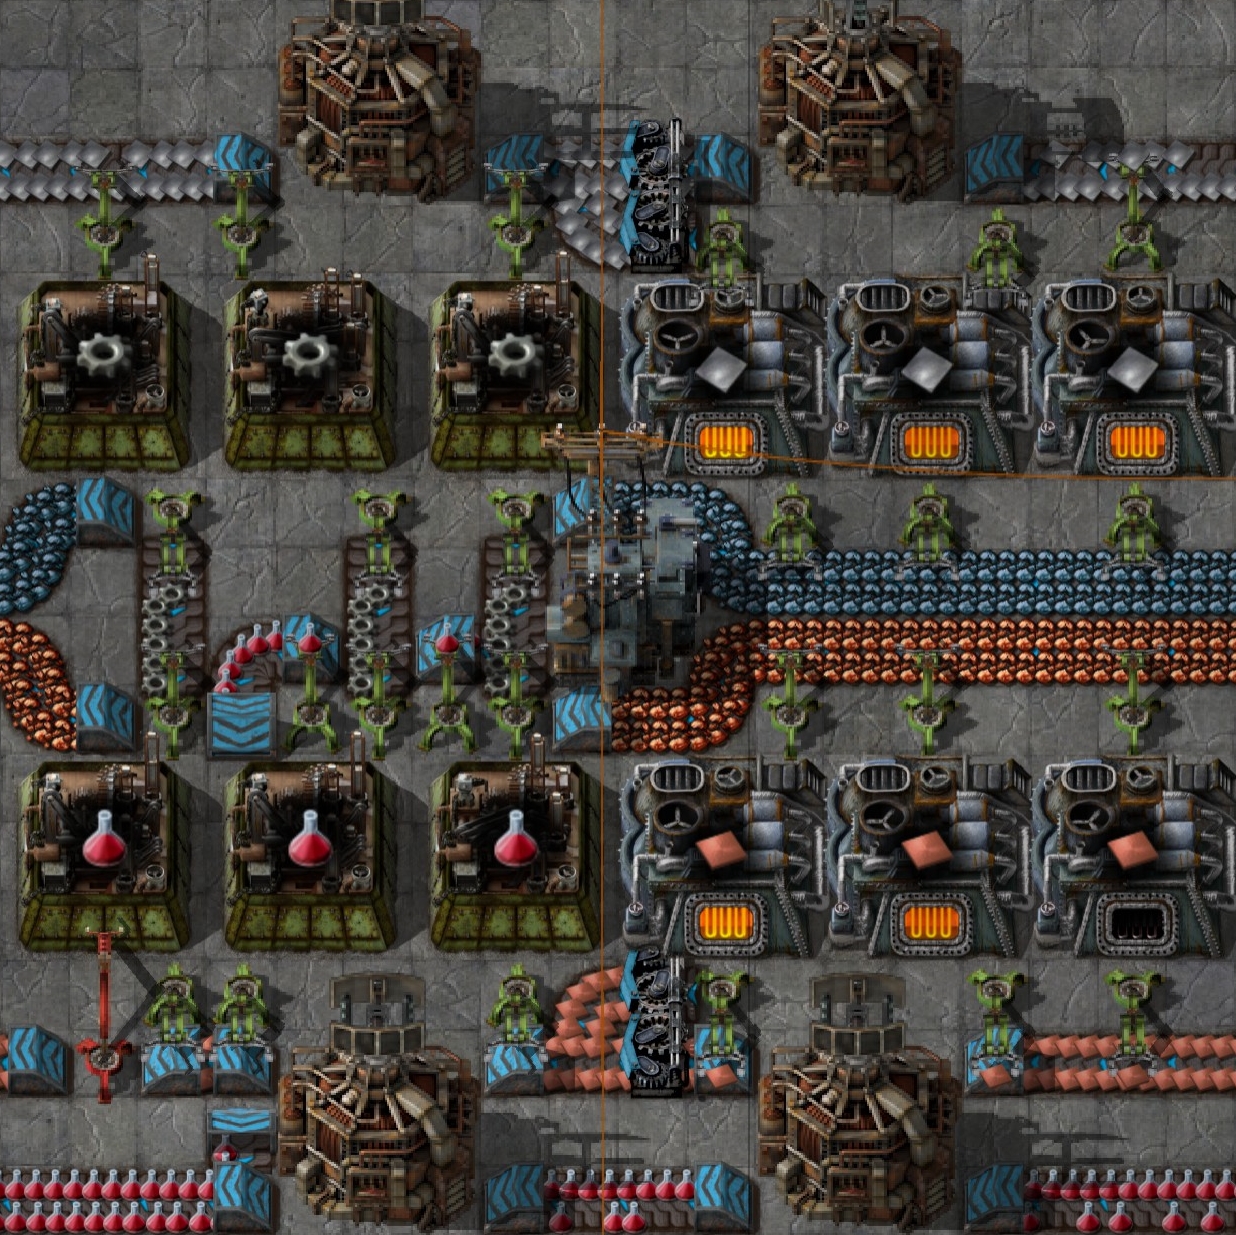
Automation Science Pack Blueprint[www.chrisgpoint.eu]
Important Income: Iron Ore/ Copper Ore
Optional Income: Iron Plate/ Copper Plate
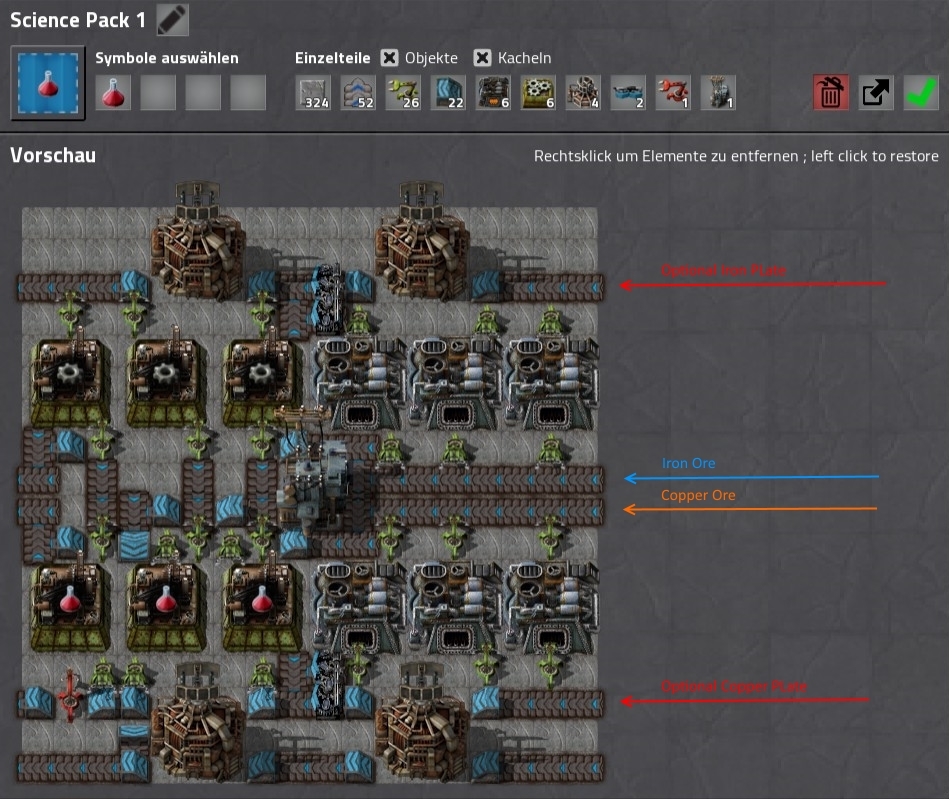 You can see how the raw materials come from the right.
Both get melted to iron plate and copper plate.
Iron Plate converts to Iron Gear Wheel and then everything goes to the final assembler.
And at the end you get 1 belt full of Red Juice at the bottom.
And the whole grid is seamless for expanding your Red Juice Production.
 Example 2: Logistic Science Pack (Green Juice)
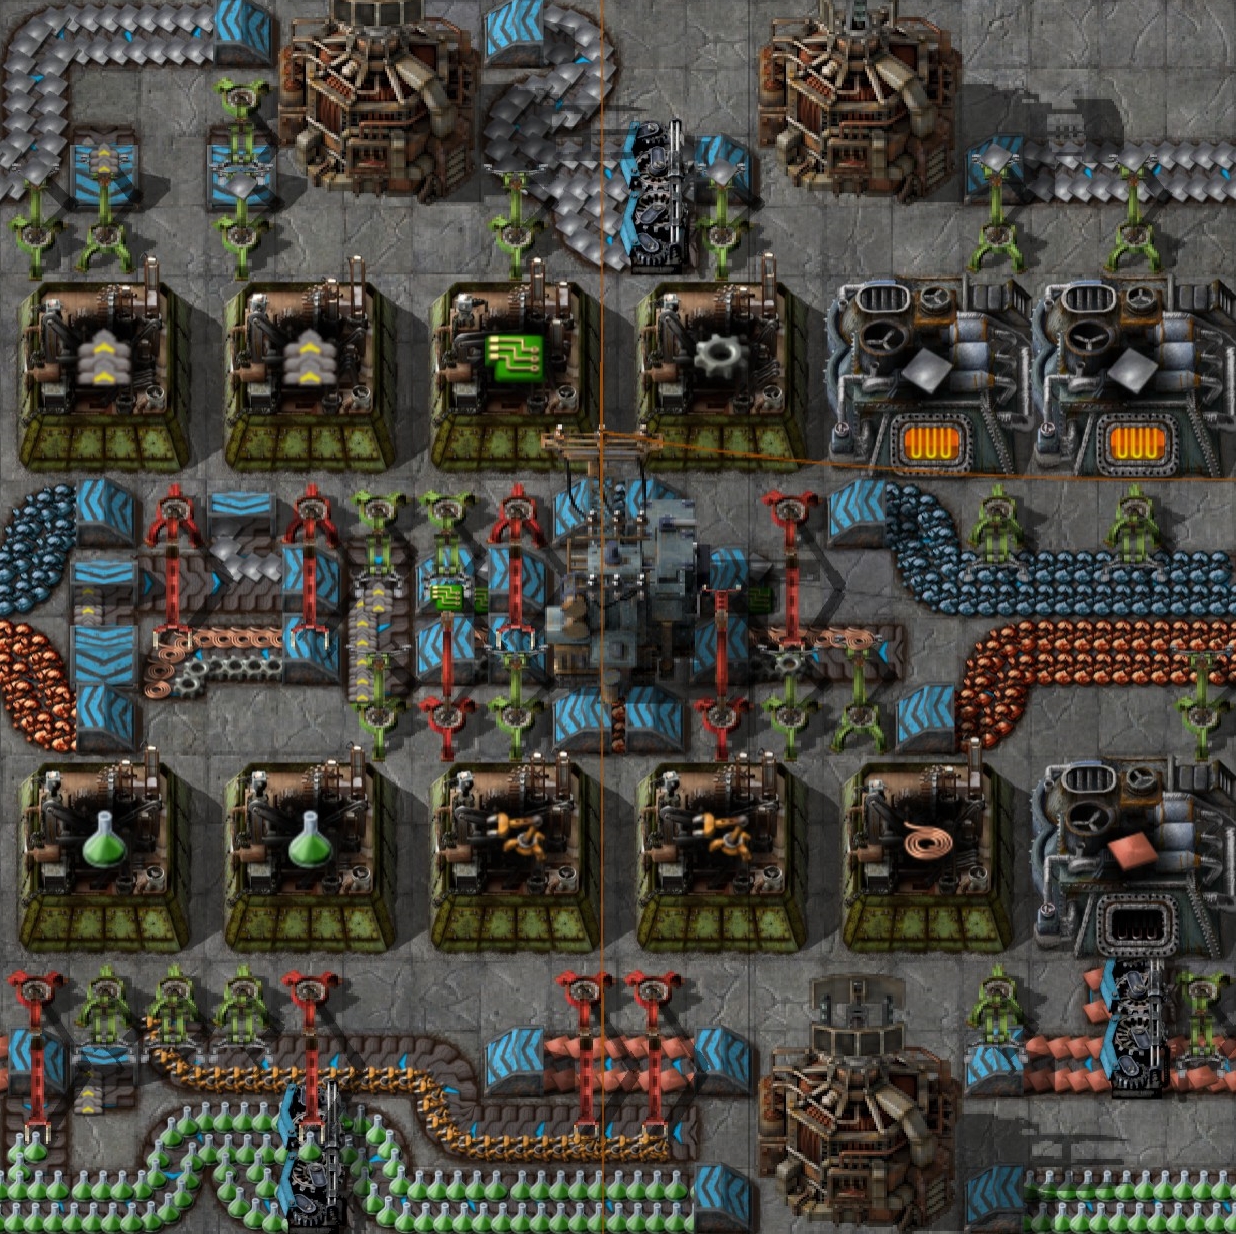
Logistic Science Pack Blueprint[www.chrisgpoint.eu]
Important Income: Iron Ore/ Copper Ore
Optional Income: Iron Plate/ Copper Plate
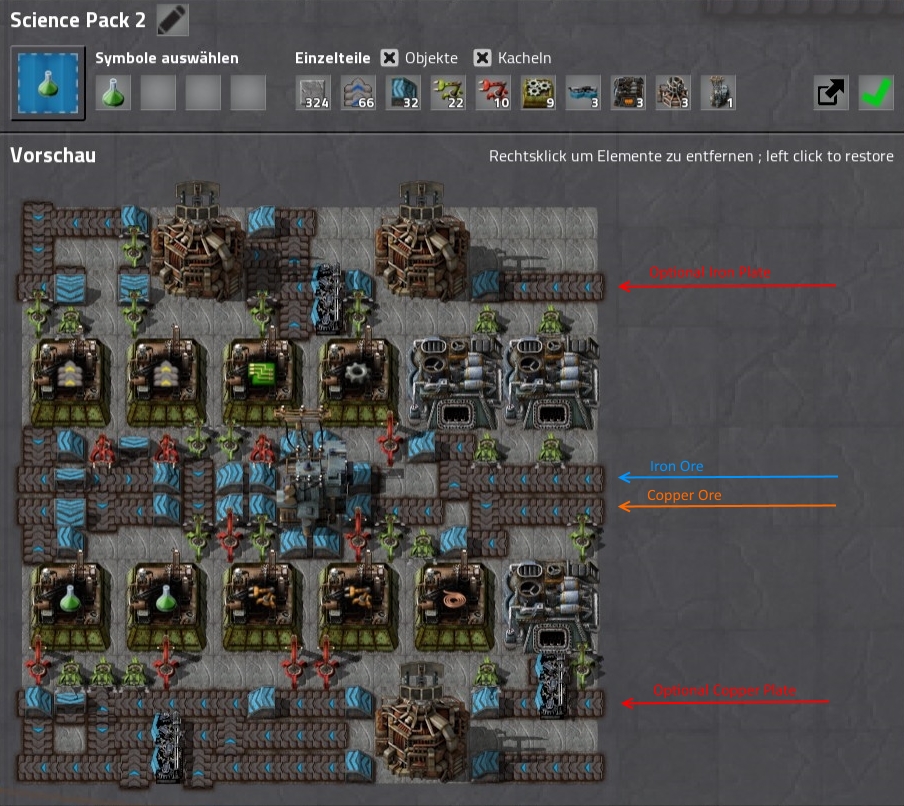 First it looks very complicated and on the second it kinda is.
Raw comes again from the right and gets melted to the top and to the bottom.
And the Green Juice goes to the left. And seamless.
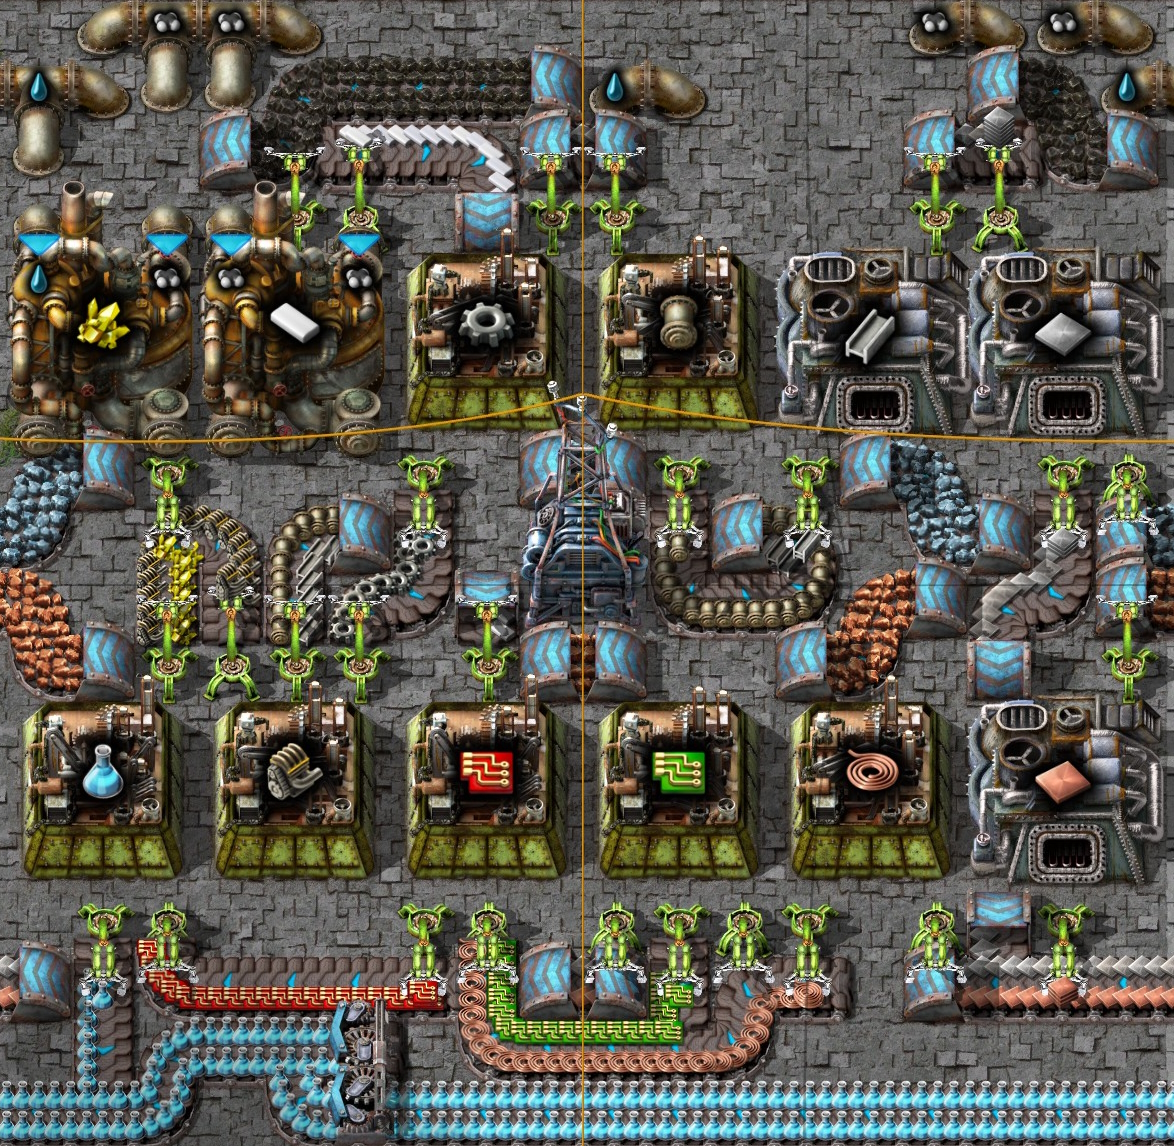
 Example 3: Chemical Science Pack (Blue Juice)
Chemical Science Pack Blueprint[www.chrisgpoint.eu]
Important Income: Petroleum Gas/ Water/ Coal Ore/ Iron Ore/ Copper Ore
Optional Income: Iron Plate/ Copper Plate
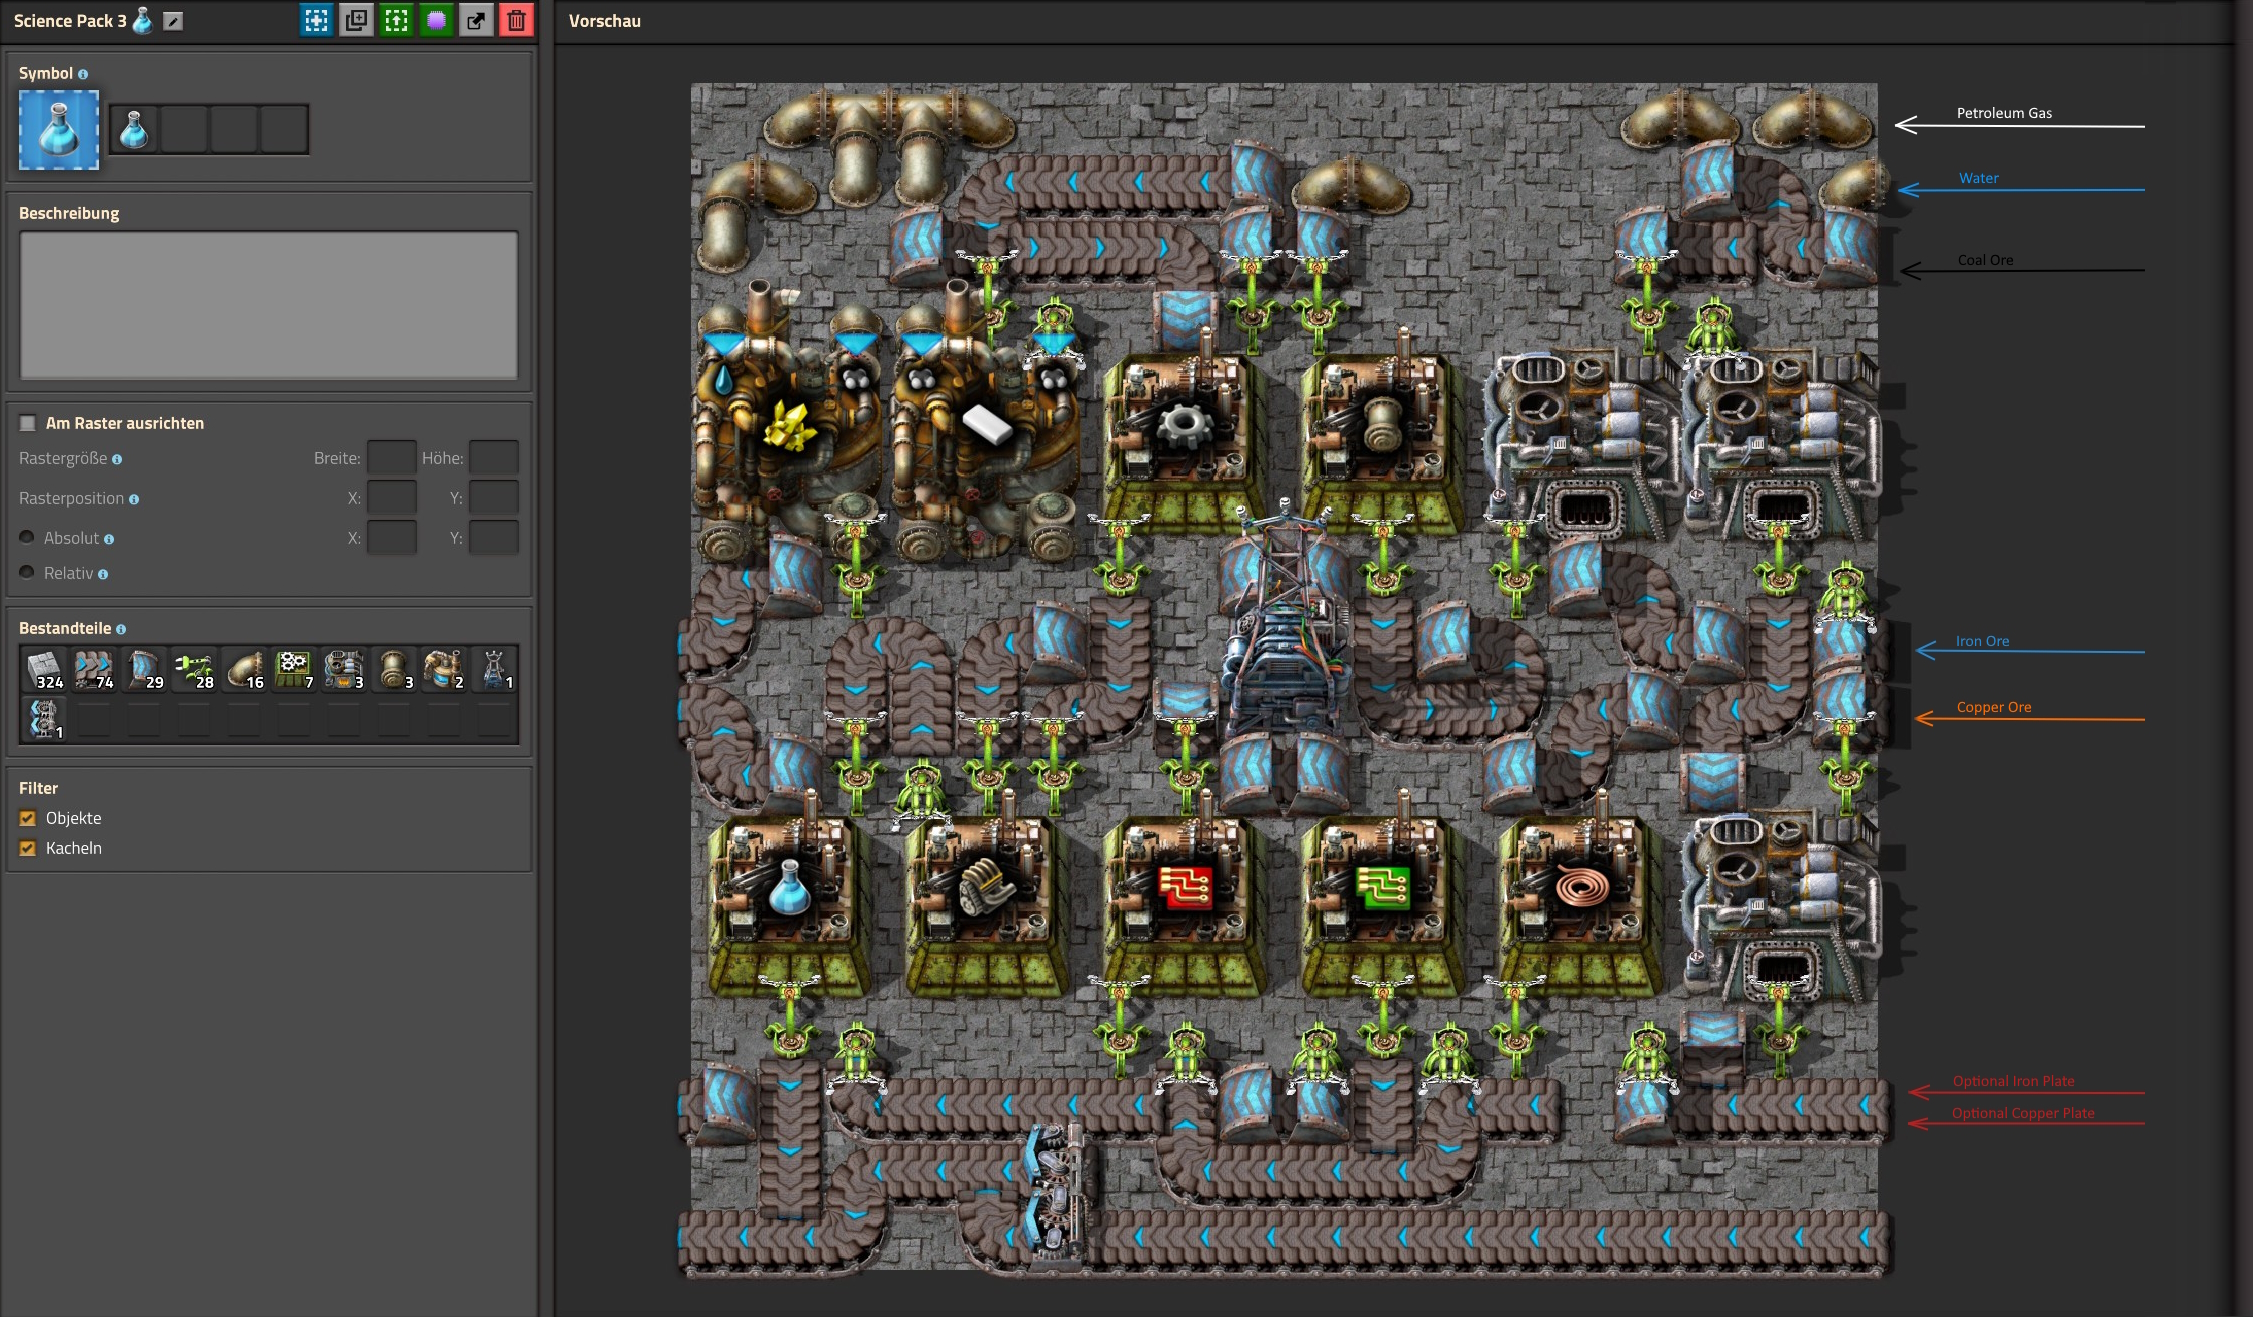 I just leave this here. :S
It's pretty much inefficient but hey, it works. :D
Take note to connect the Petroleum Gas and the Water from the underground if you come from the right side.
And the 5 Income materials goes seamless to the next setup.
 Example 4: Military Science Pack (Grey Juice)
Military Science Pack Blueprint[www.chrisgpoint.eu]
Important Income: Coal Ore/ Stone/ Iron Ore/ Copper Ore
Optional Income: Iron Plate/ Copper Plate
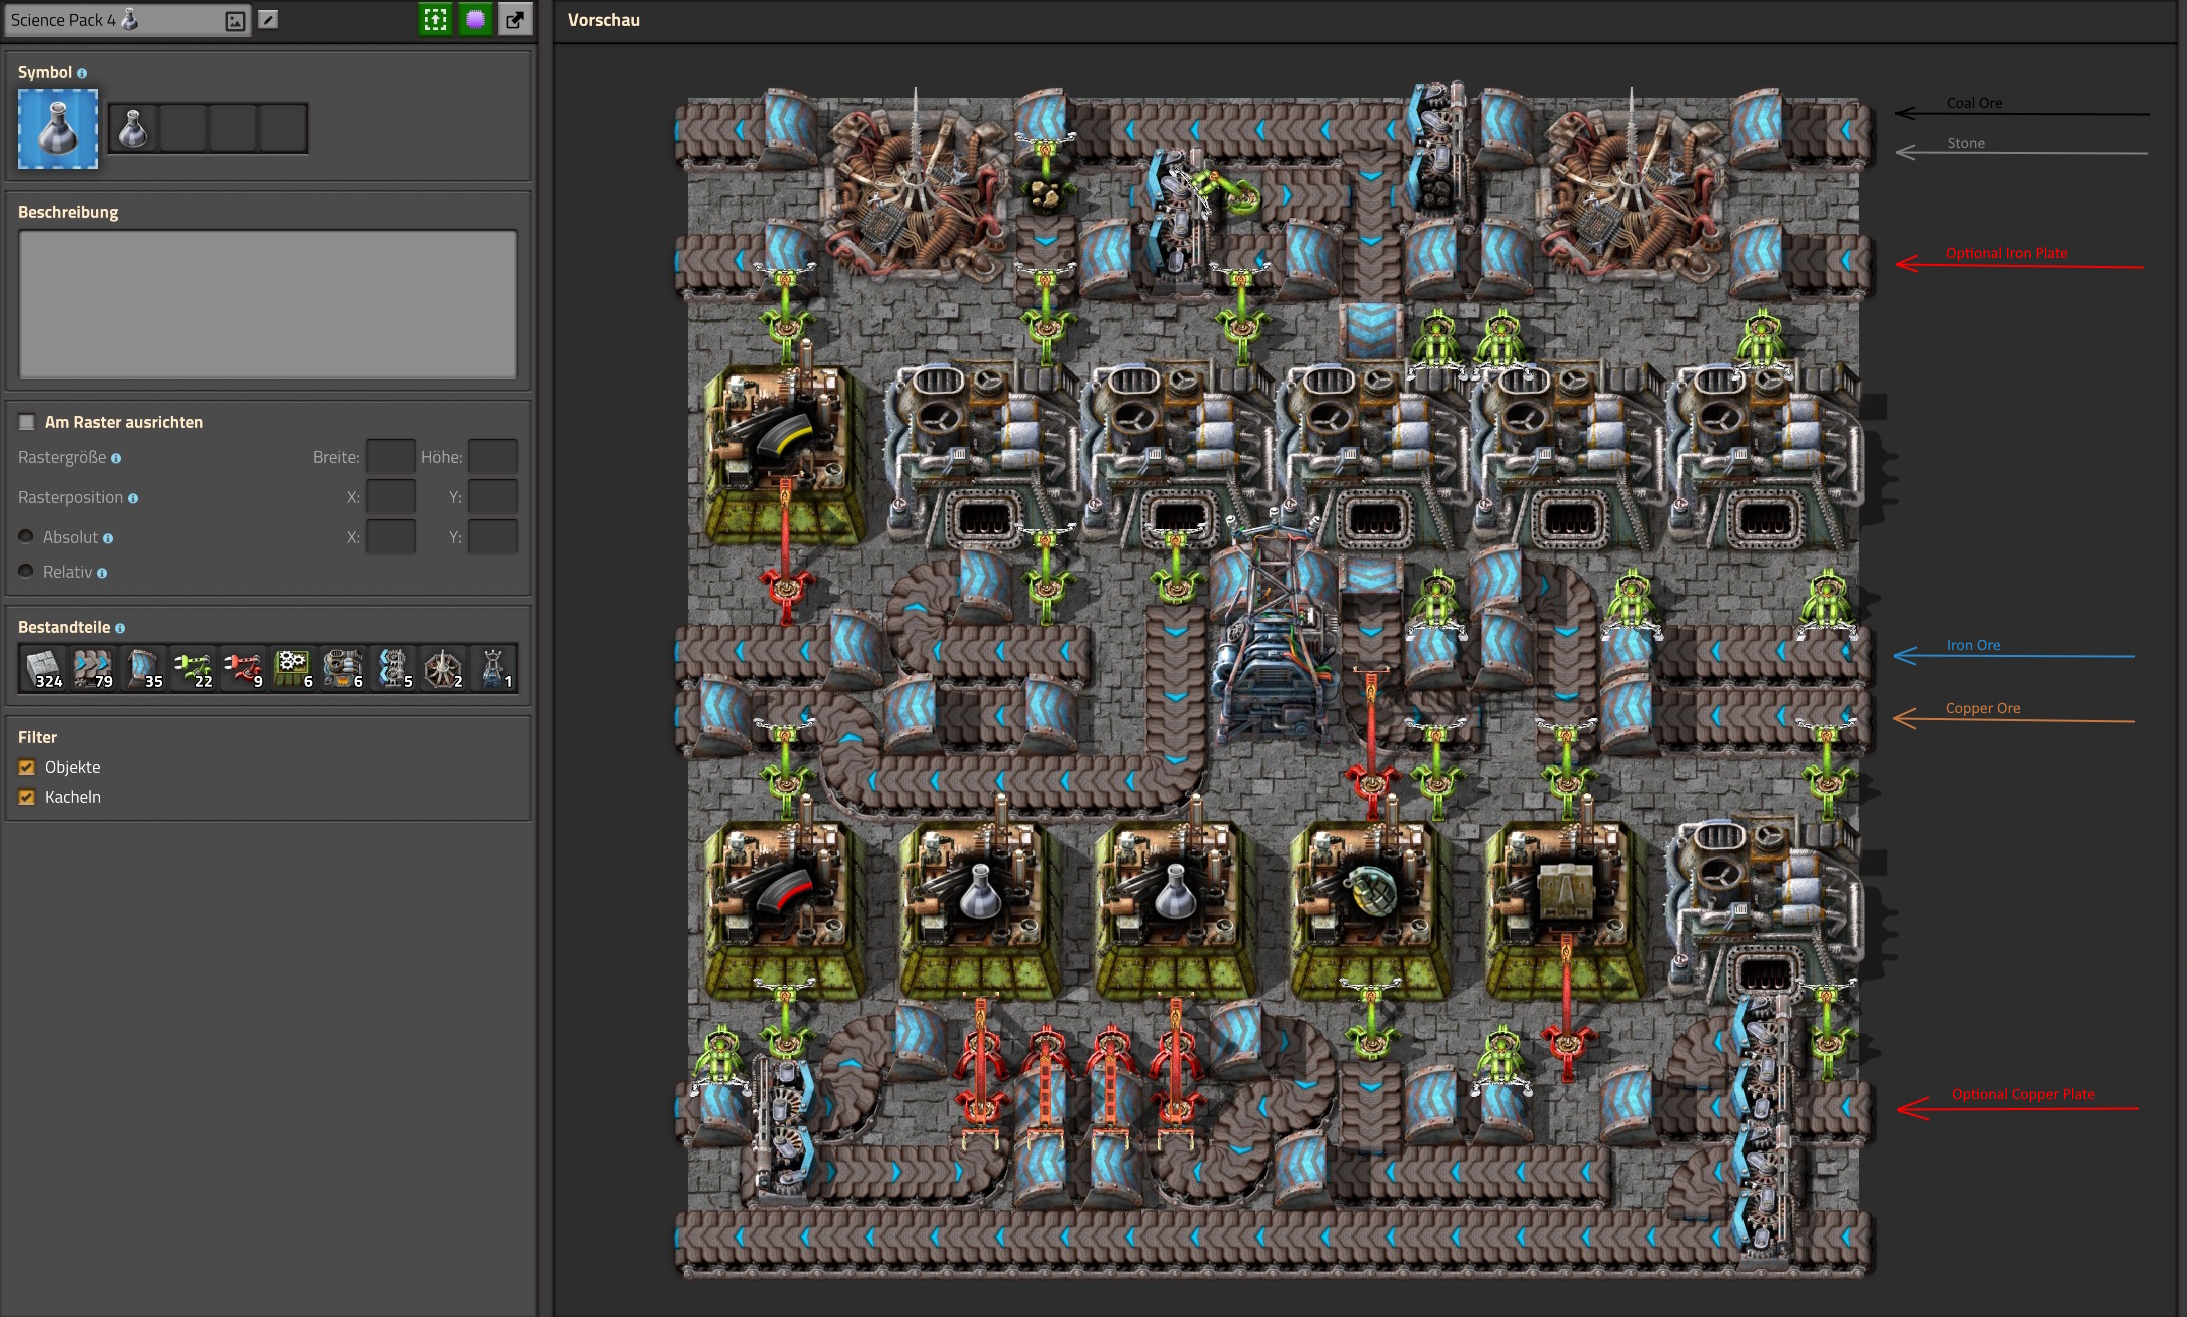 Don't think too much about it, it works and it's seamless!!!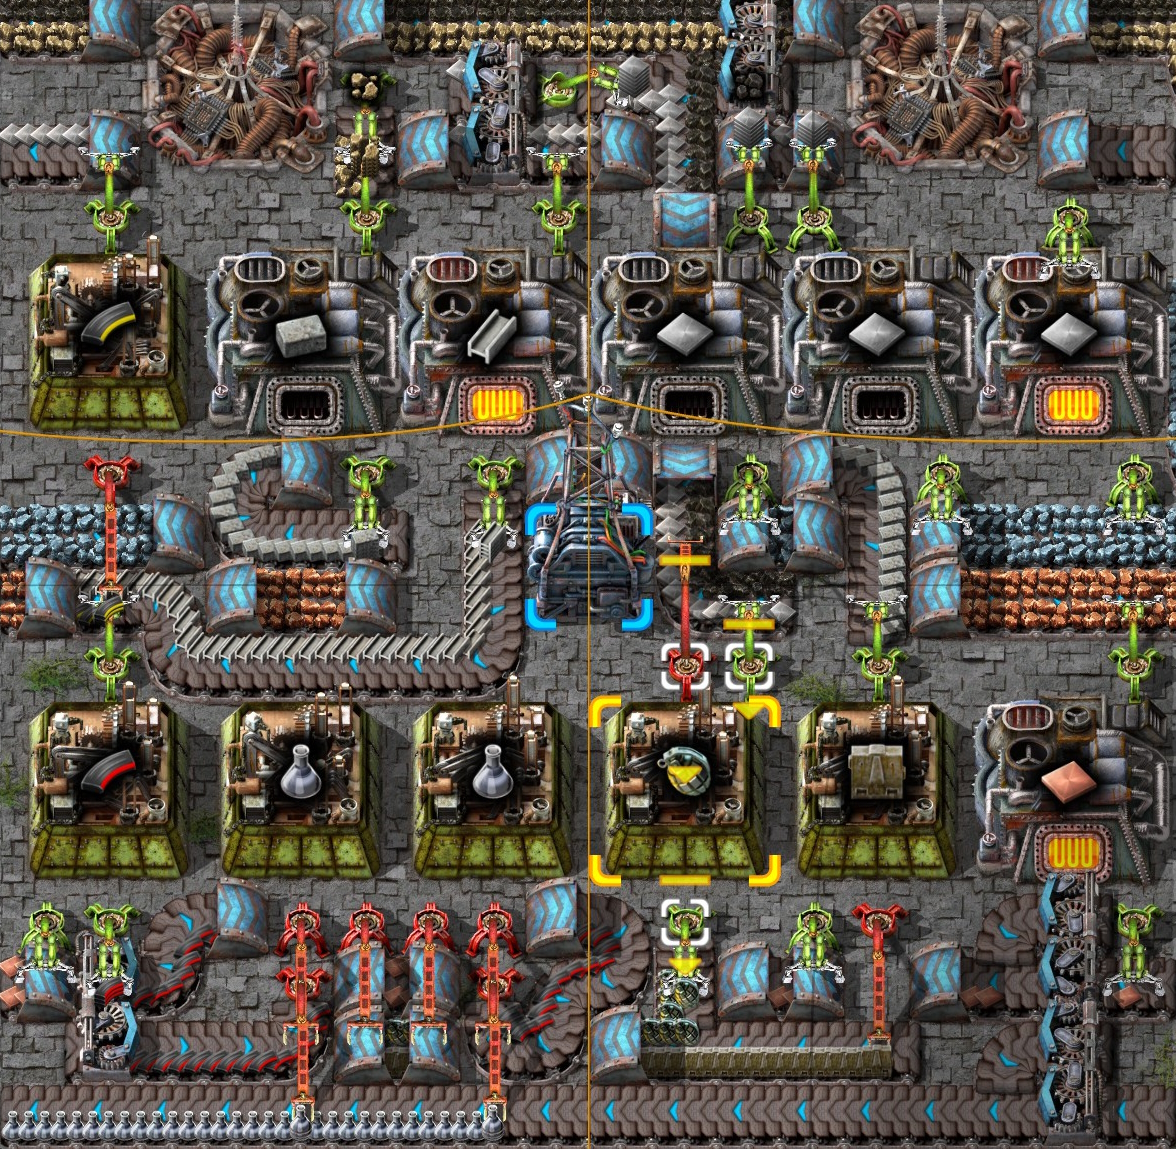
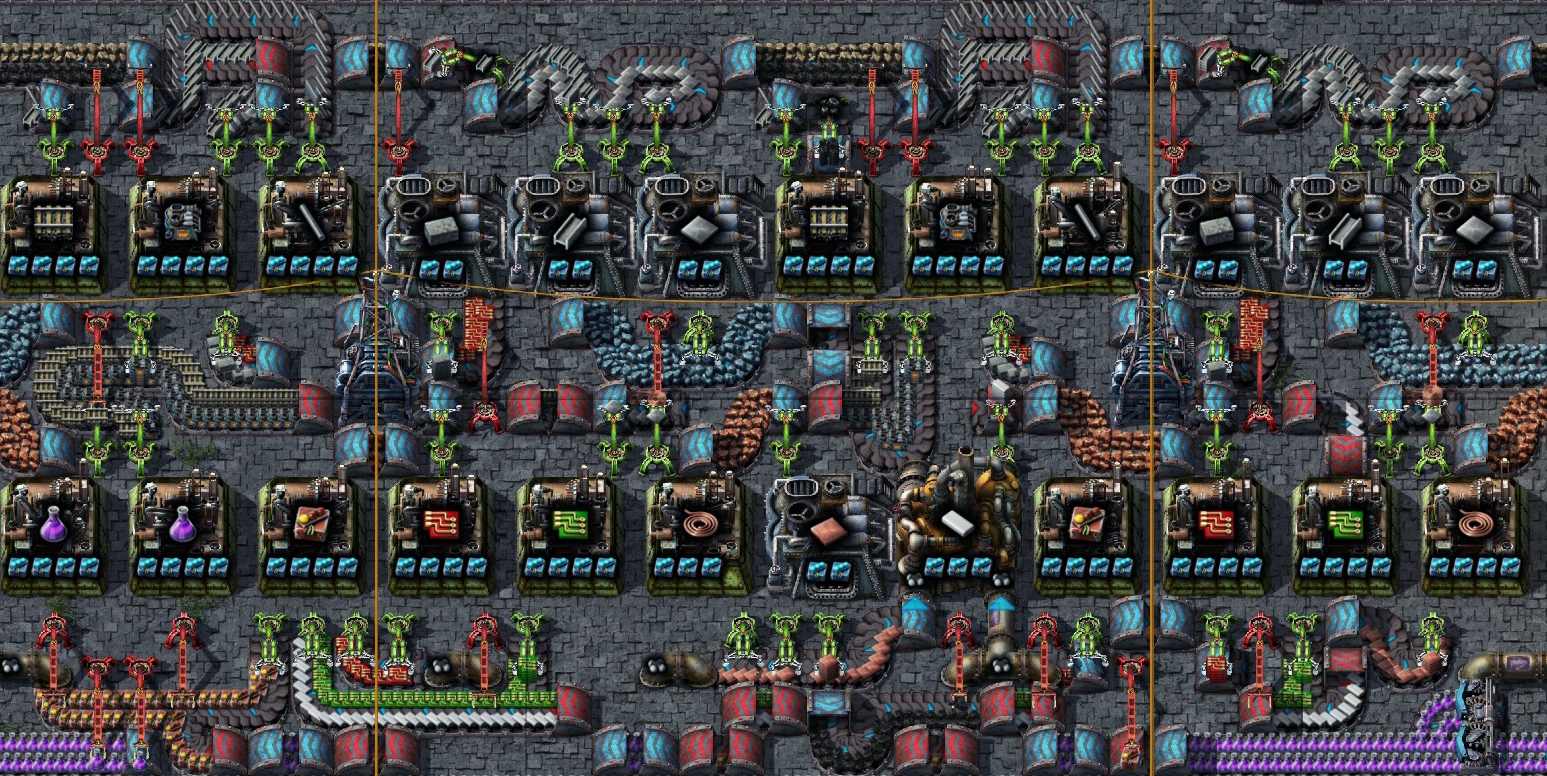
 Example 5: Production Science Pack (Purple Juice)
I really tried to bring all on 1 Grid but the purple juice just needs too much space. :S
So it's using 2 seamless grids of 18x18 tiles. :)
Production Science Pack Blueprint[www.chrisgpoint.eu]
Important Income: Stone/ Coal Ore/ Iron Ore/ Copper Ore
Optional Income: None
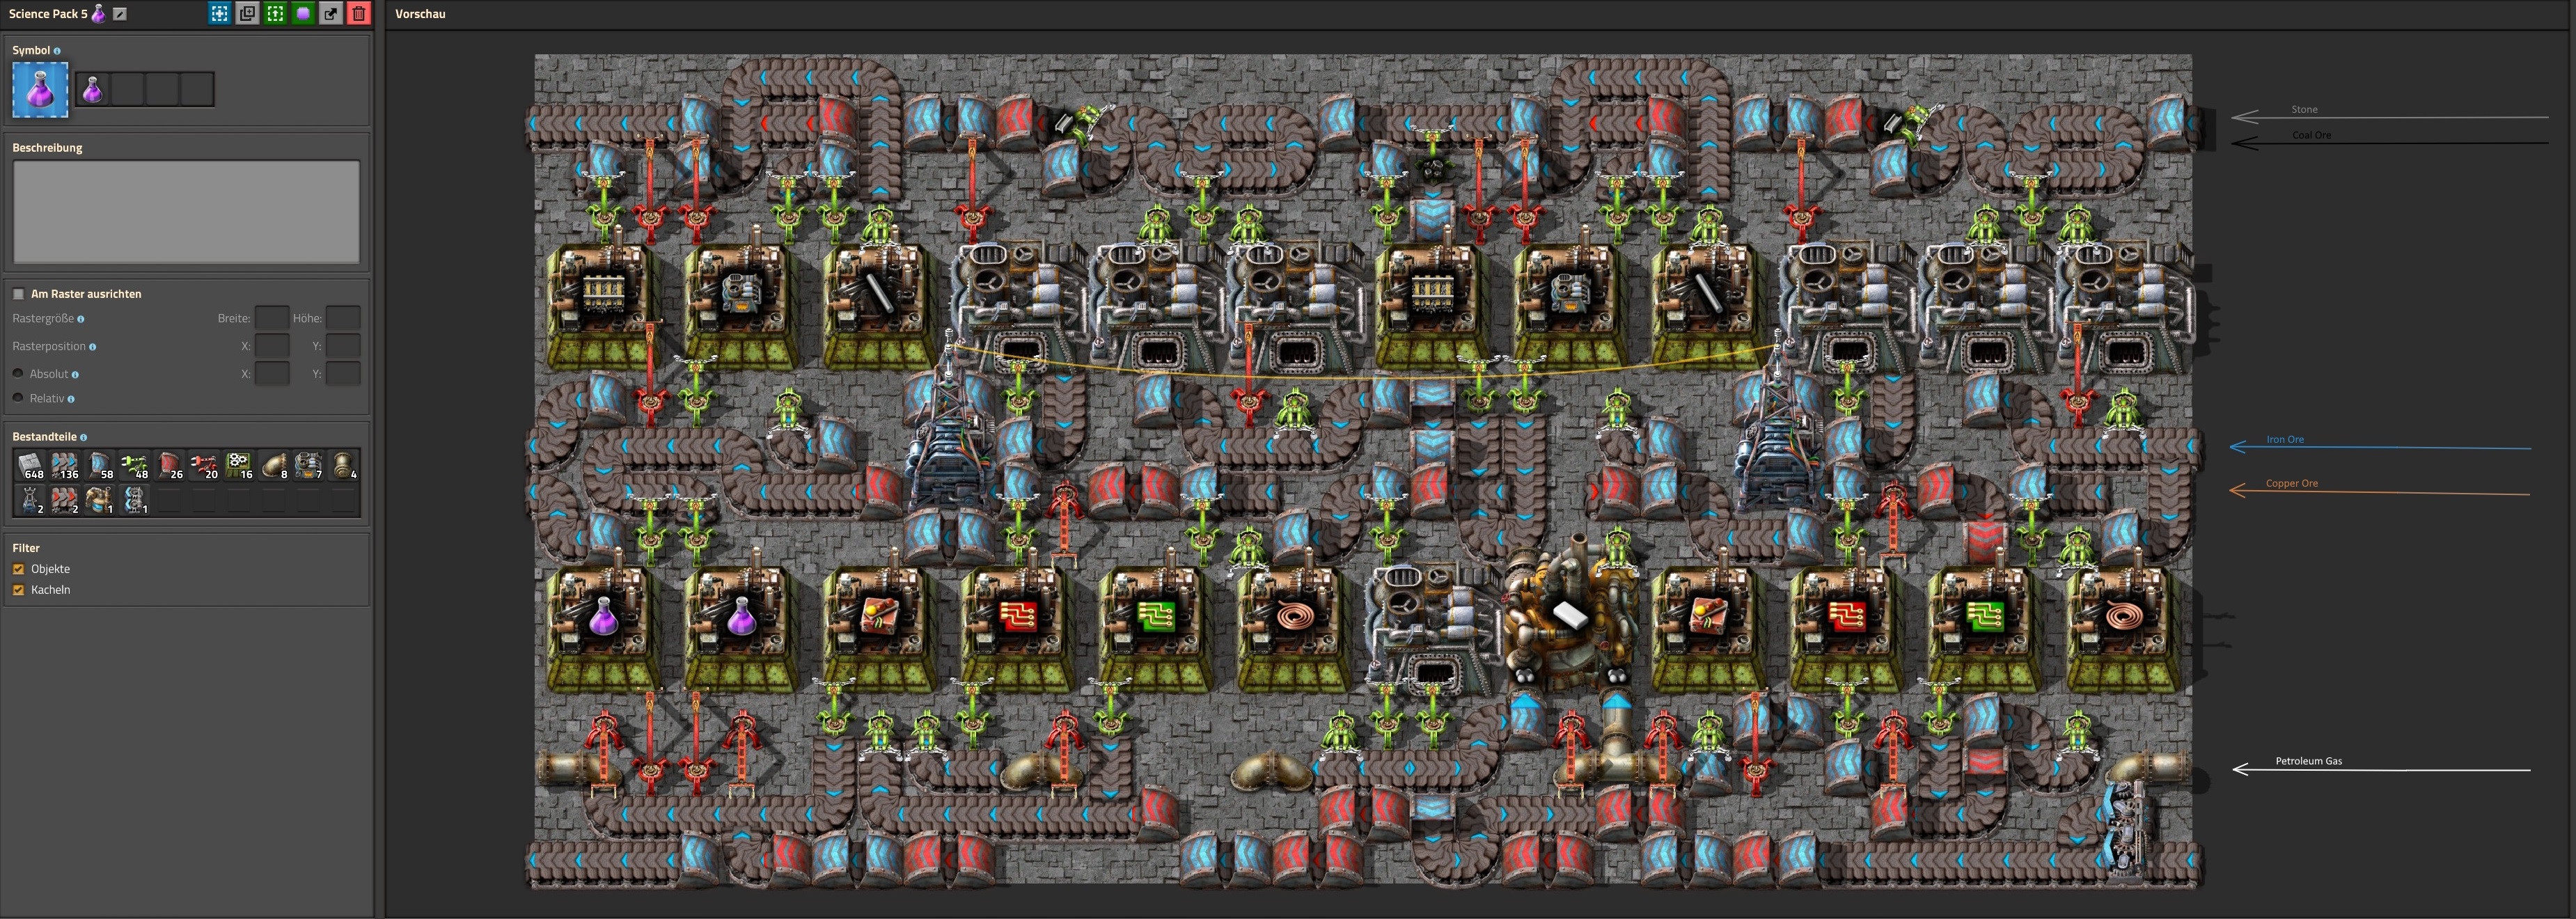
This Setup takes some time before you will see any movement at the Juice Assemblers.
You can fill up everything with speed modules.
If these items come in on the wrong side of the belt the setup could stop to work!
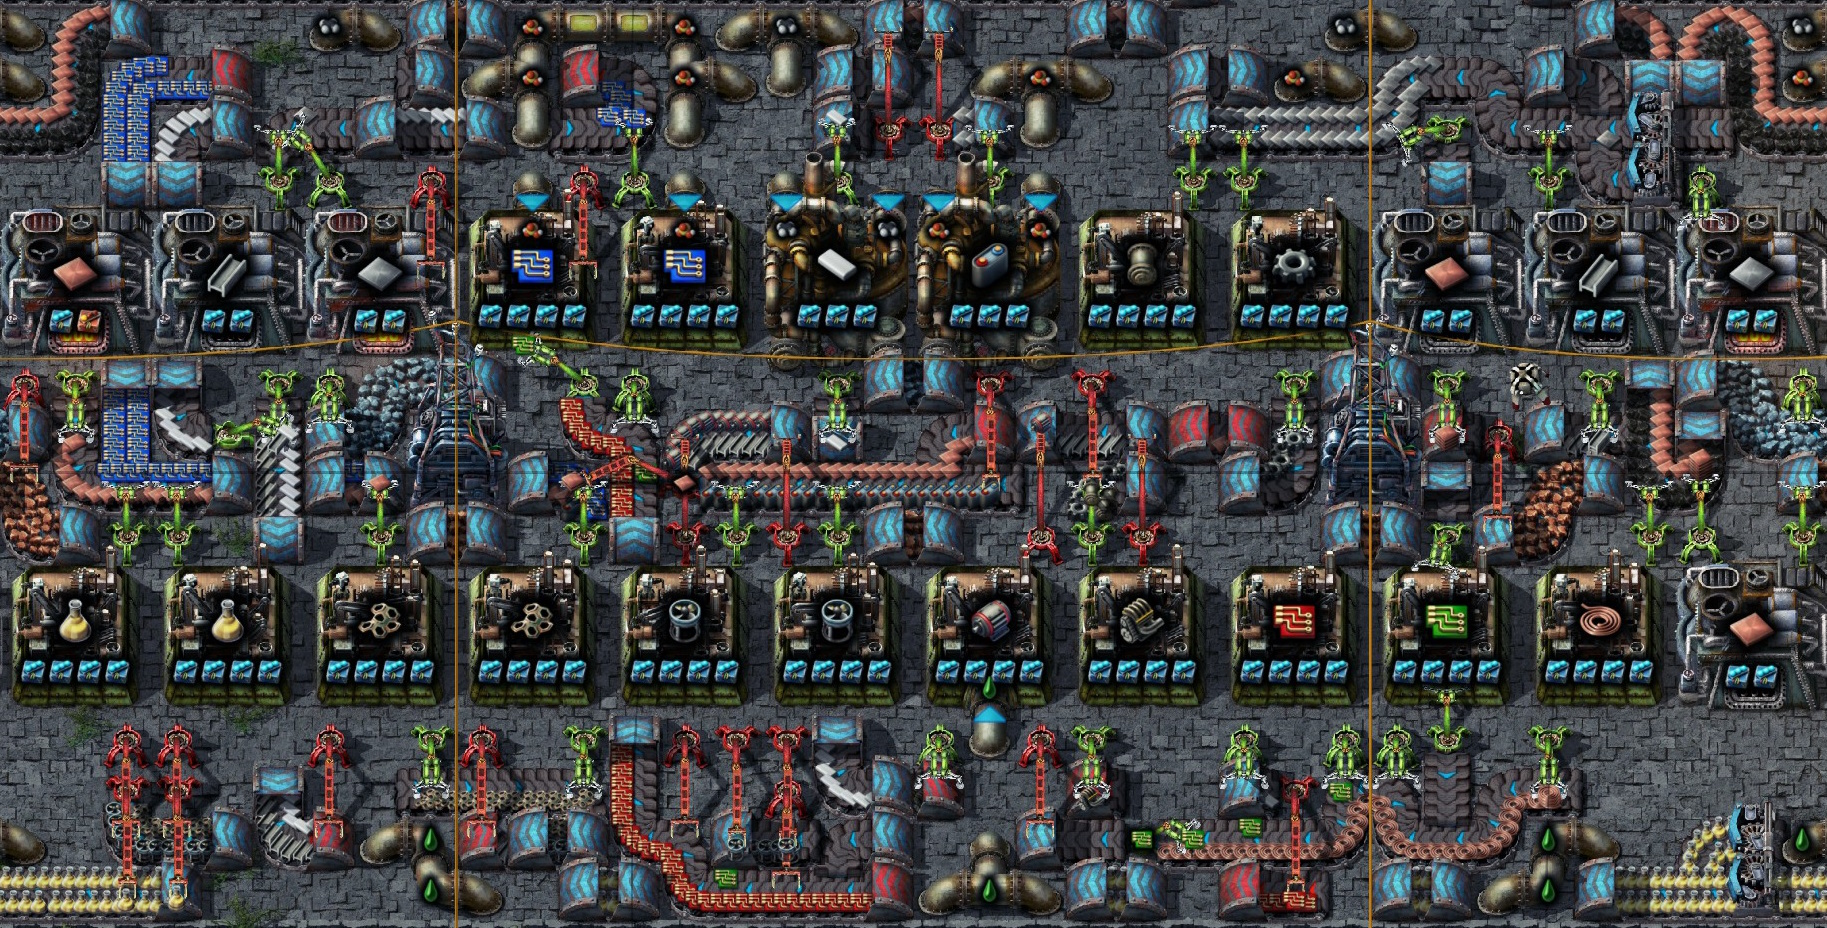
 Example 6: Utility Science Pack (Yellow Juice)
I also needs 2 grids.
!!! Take care of the Coal Line, only place coal on the lower side of the belt !!!
Utility Science Pack Blueprint[www.chrisgpoint.eu]
Important Income: Petroleum Gas/ Sulfuric Acid/ Coal Ore/ Lubricant/ Iron Ore/ Copper Ore
Optional Income: Copper Plate
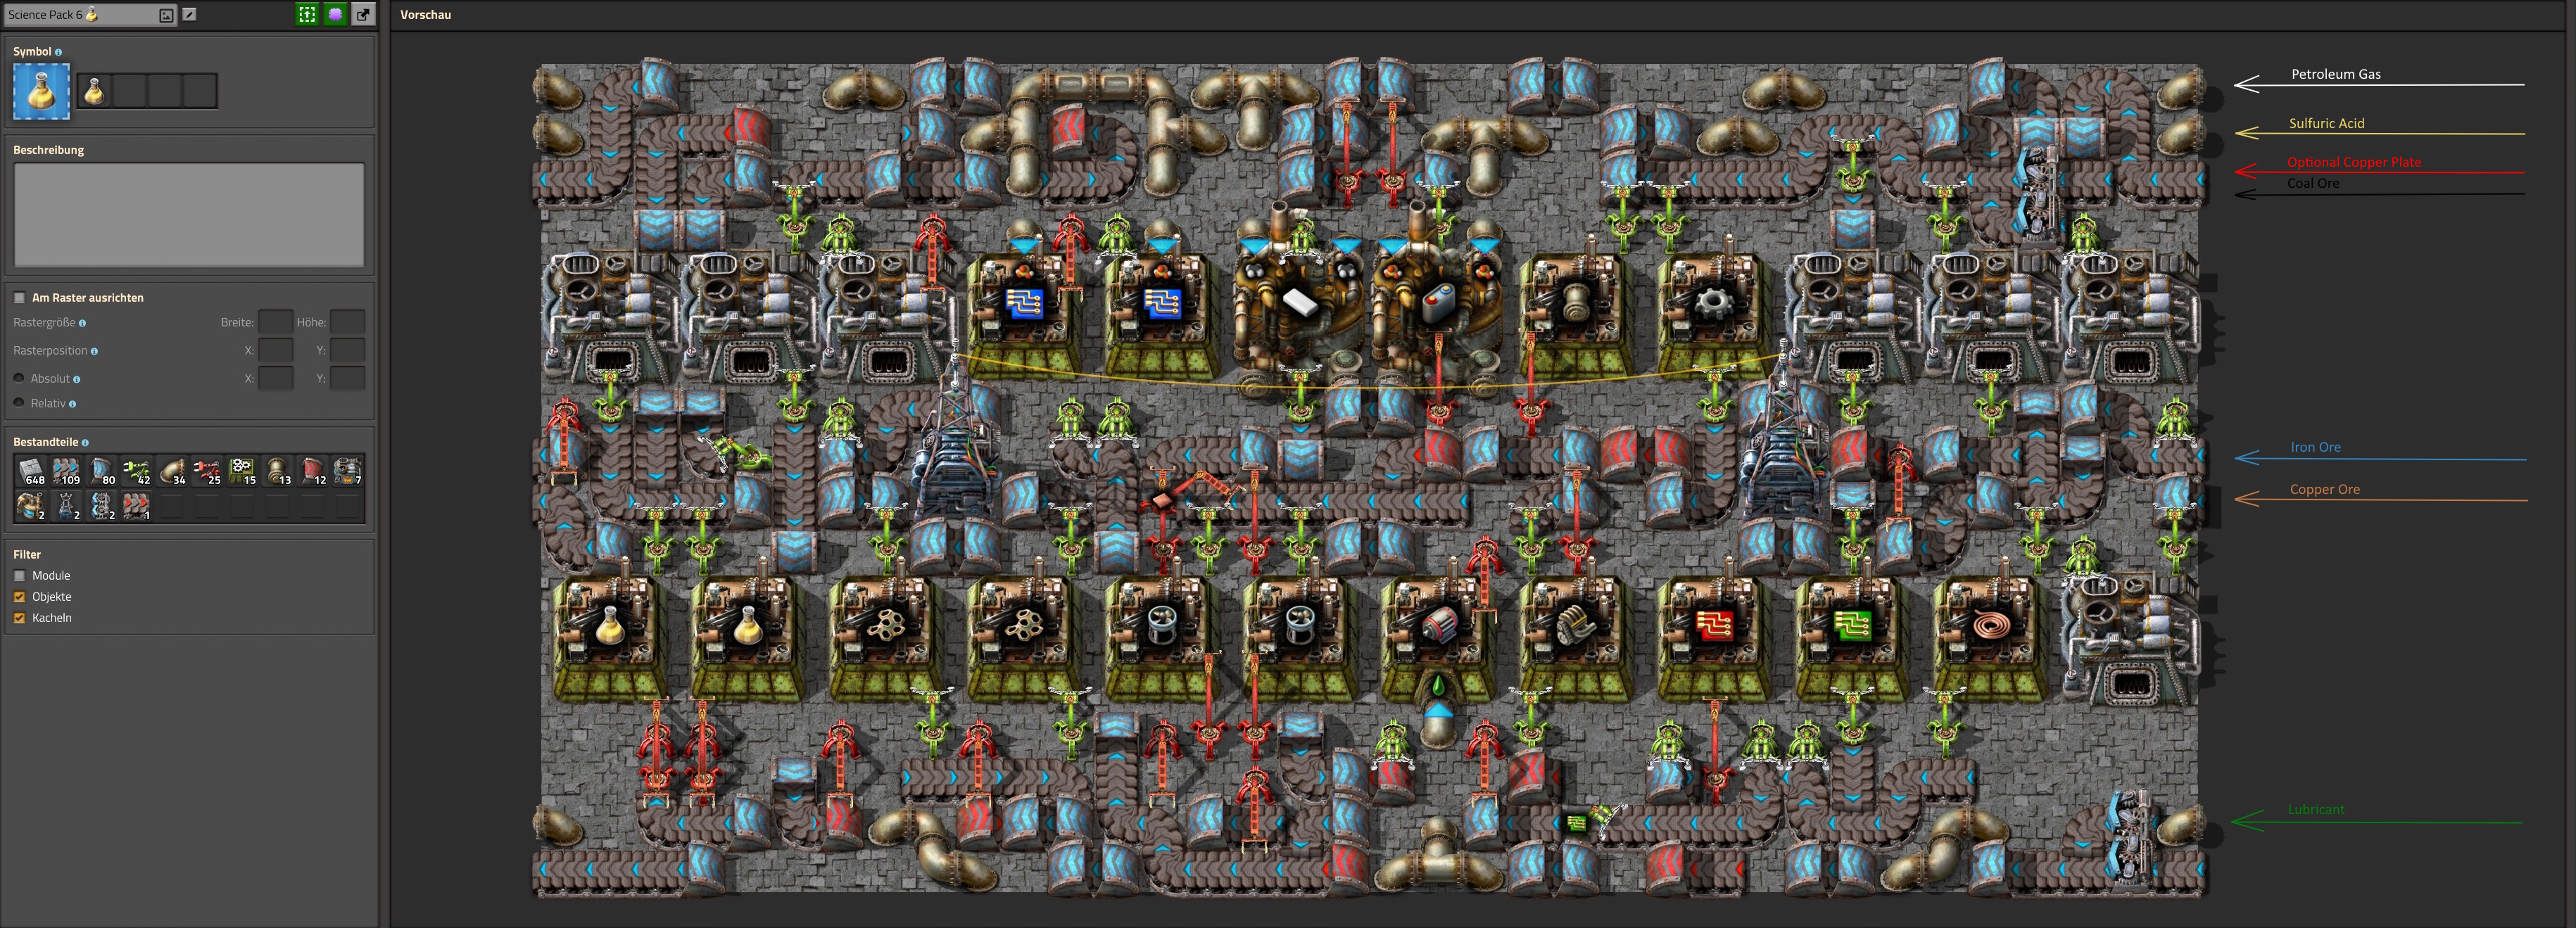 It will take several minutes before you see a first movement on the Juice Assembler due to some item stacks at the beginning but then it goes faster and faster
You can use Speed Modules everywhere for pushing it a bit.

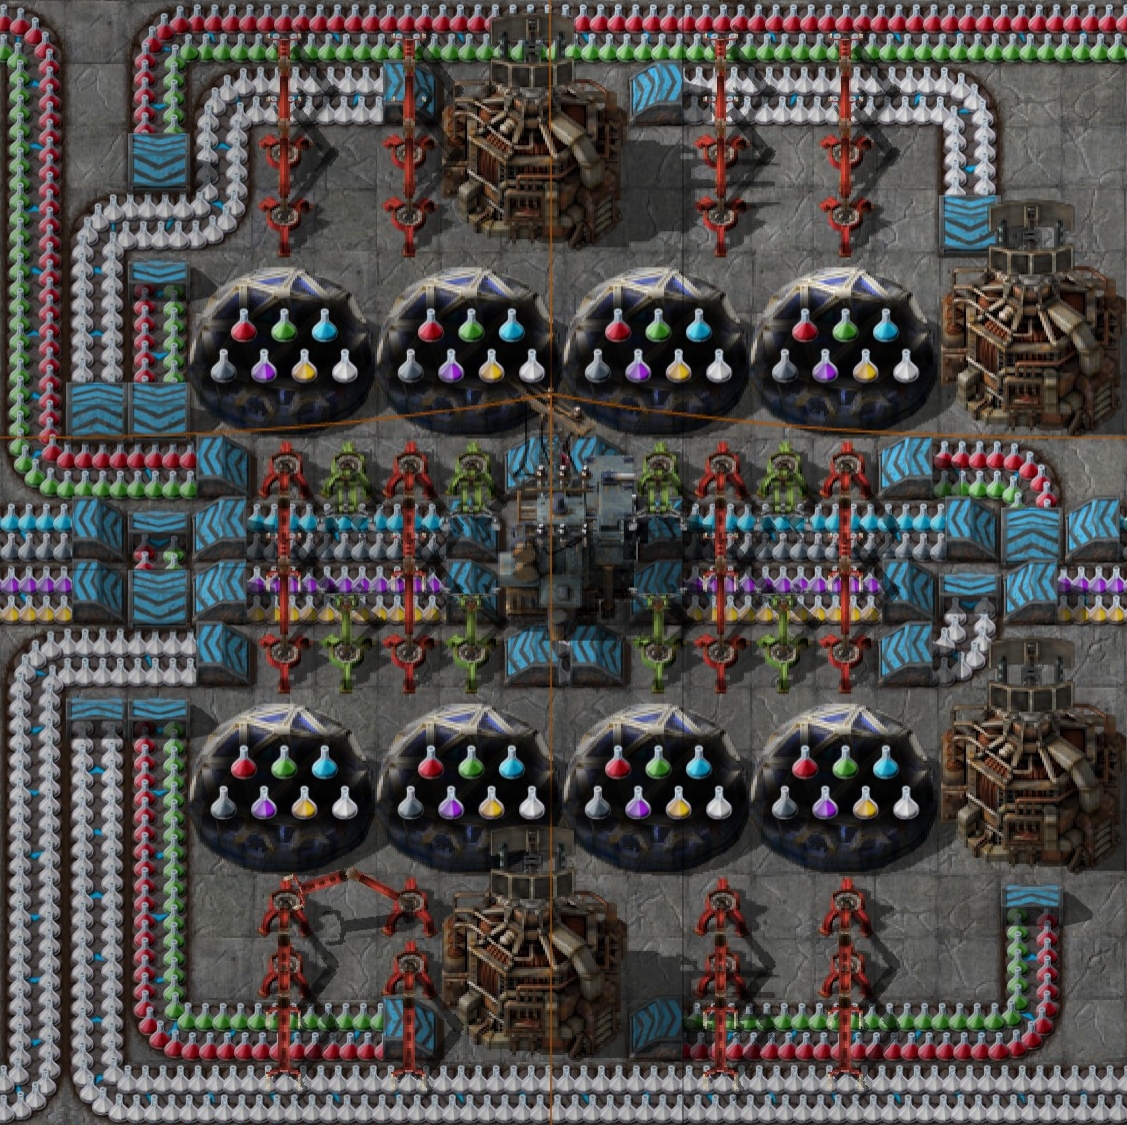
 That's it! We did it!!! Now we can bring all the juice to the thirsty scientists in your labs.
Science Lab Setup Blueprint[www.chrisgpoint.eu]
Income: All the delicious juices! :d
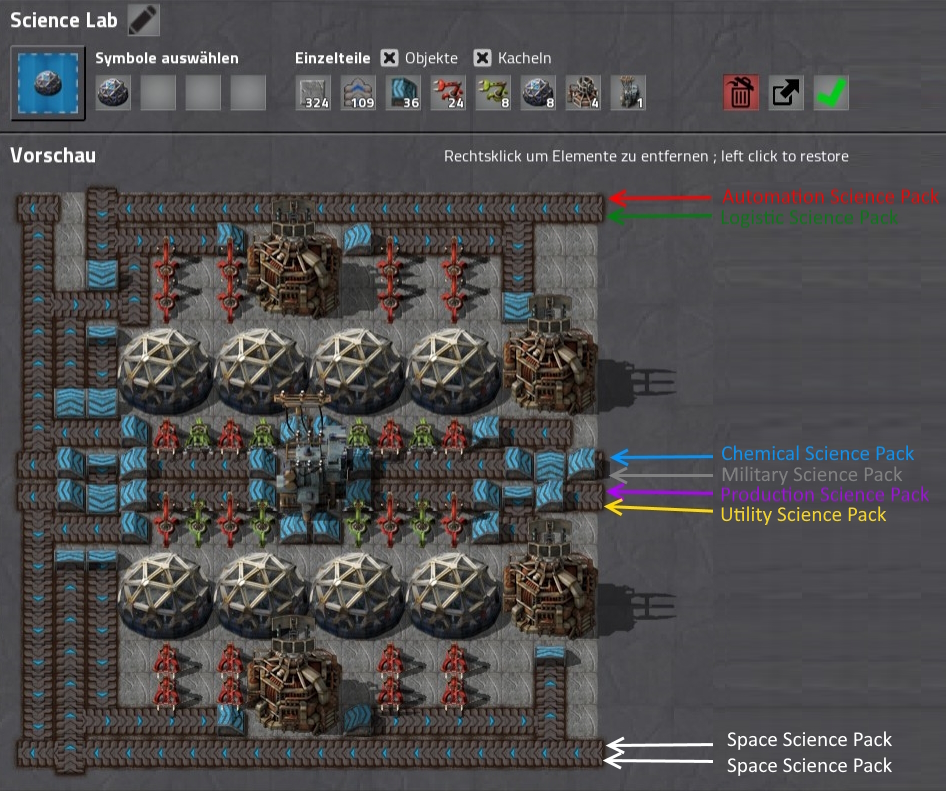
Yes, it's seamless!!! :D
The End
Thanks for reading. Leave a like or not. Your choice. :)
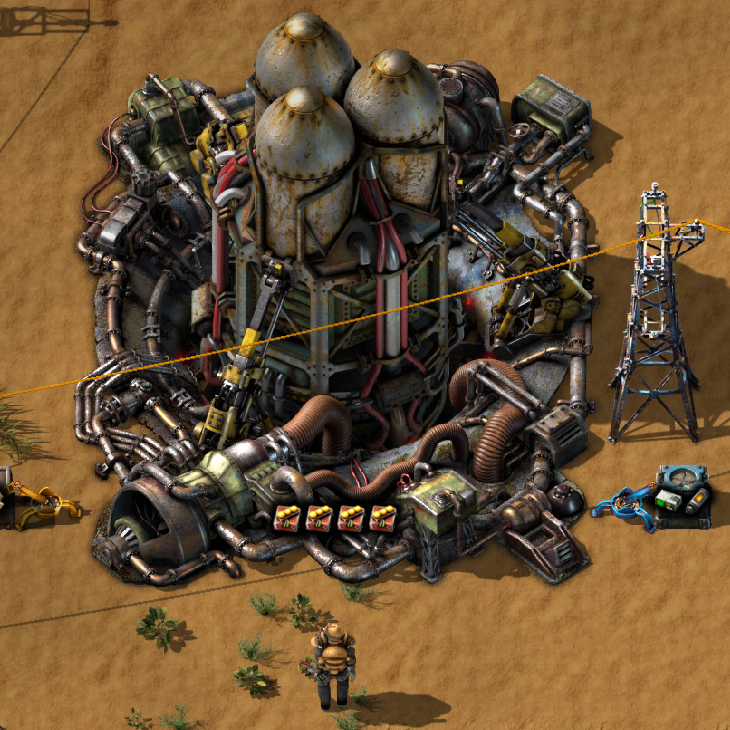
At the end, an actual picture of a part from my game.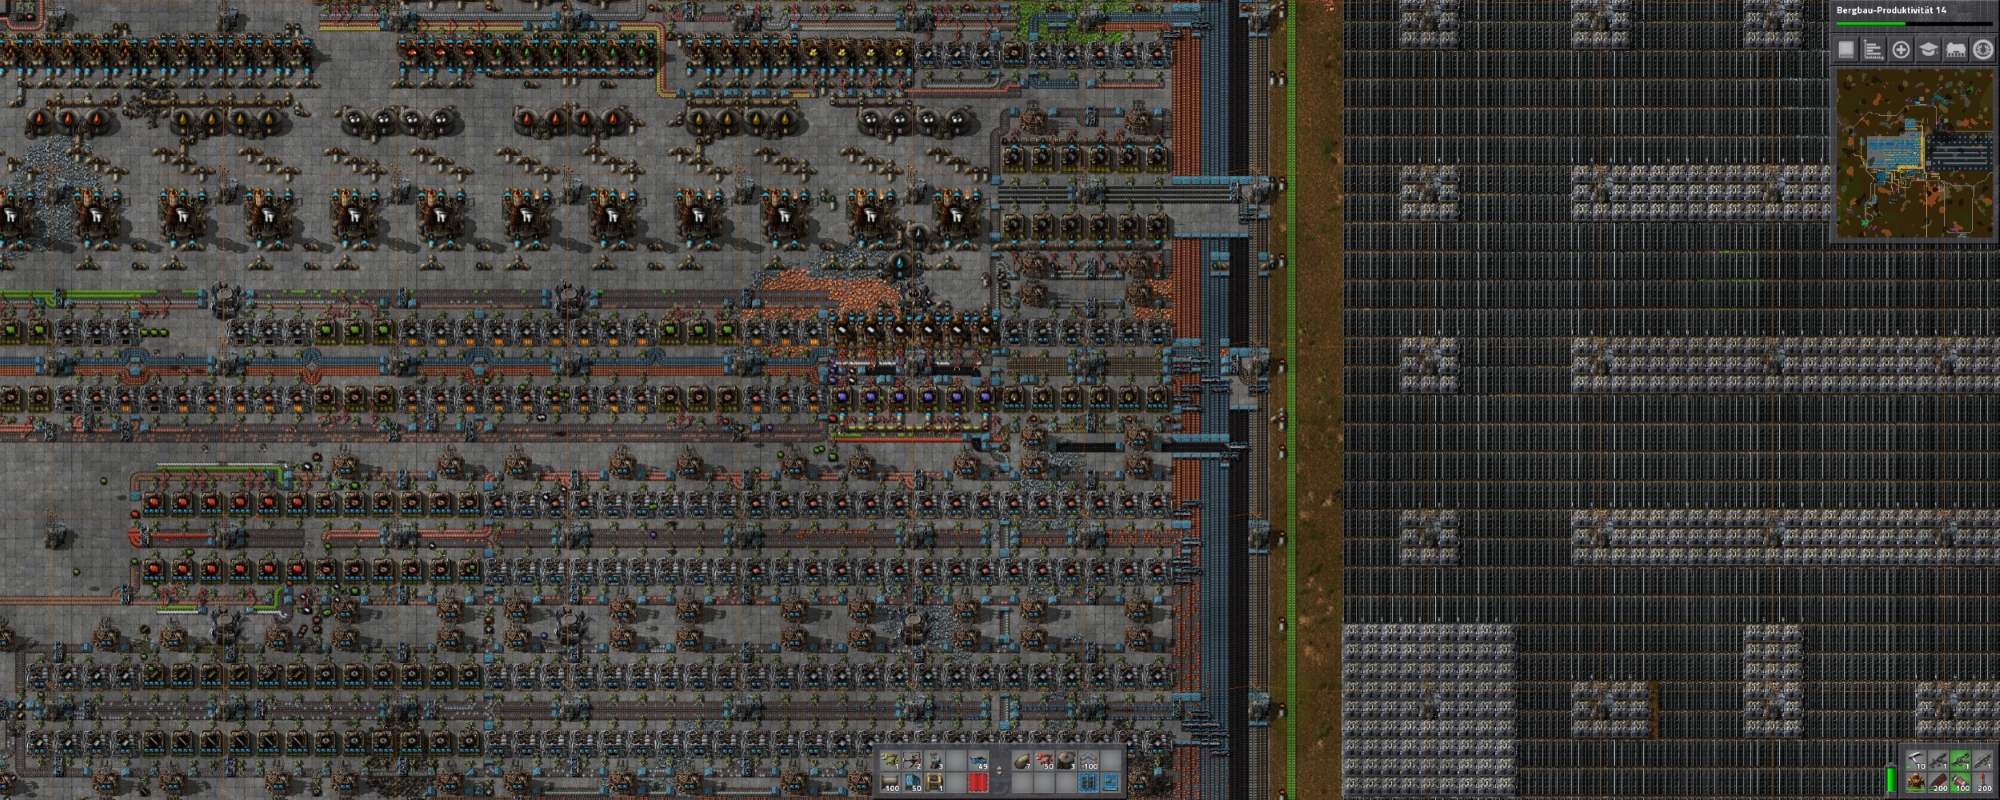
- Factorio: How to Build a Main Bus★ 5 (6k)231k views15k ♥15 minUpdated Aug 31, 2025
- Factorio: Observations, Tips, Tricks, & Efficiency★ 5 (3.2k)111k views7.1k ♥85 minUpdated Aug 4, 2020
- Blueprints for early, mid and lategame (updated)★ 5 (757)83k views2.4k ♥3 minUpdated Sep 3, 2022
- Factorio - Everything To Do With Smelting: Belt & Bot Based★ 5 (629)80k views1.6k ♥16 min
- Factorio Builds★ 5 (1.1k)63k views2.7k ♥5 minUpdated Jun 7, 2021
- High-Level Strategy for New Players★ 5 (880)62k views2.8k ♥43 minUpdated Oct 15, 2025

- Upgrading to PremiumTeam Fortress 2★ 5 (20k)1441k views11k ♥6 minUpdated May 11, 2022
- No More Room in Hell Official ManualNo More Room in Hell★ 5 (2.8k)569k views2.1k ♥29 minUpdated Apr 22, 2019
- NMRiH Community Hosting GuidesNo More Room in Hell★ 5 (526)351k views653 ♥1 minUpdated Aug 10, 2022
- ULTIMATE GUIDE FOR GAME DEV TYCOONGame Dev Tycoon★ 5 (5.8k)326k views10k ♥4 minUpdated 23 Jan, 2014
- How to 'Git Gud' Soon™MORDHAU★ 5 (2k)318k views3k ♥68 minUpdated Nov 16, 2024
- Лучшие кооперативные игры SteamPAYDAY 2★ 5 (1.5k)315k views2.1k ♥56 minRussianUpdated Apr 27, 2025






This guide was created by its original author on the Steam Community. Are you the author and want it removed? Request removal.