[6.9] A Complete Guide to All Okri's Challenges
Introduction
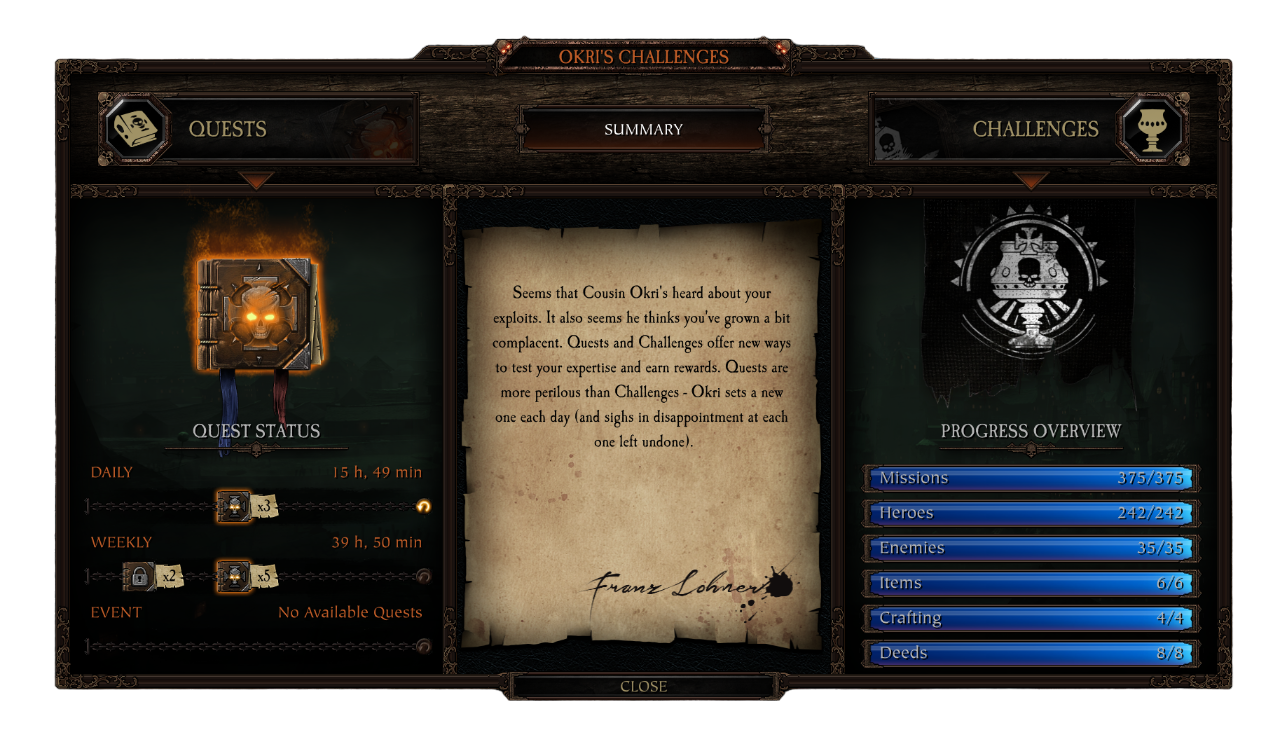
Seems that Cousin Okri's heard about your exploits. It also seems he thinks you've grown a bit complacent. Quests and Challenges offer new ways to test your expertise and earn rewards. Quests are more perilous than Challenges - Okri sets a new one each day (and sighs in disappointment at each one left undone).
Author Notes
- This guide includes all the basic challenges and all DLC challenges! Most of them appear after you purchase the Winds of Magic DLC.
- I don't know English very well, so I may make mistakes. If you find a mistake, please write it in the comments, and I will try to correct it.
- To quickly find a particular challenge - press “Ctrl+F” and type in its name or the name of the DLC in which it is present.
- I decided to focus only on the challenges that can rightfully be considered as such! I didn't emphasize the less significant and obvious сhallenges.
- If you want to know how to speed up the challenges associated with the “Complete 100 missions”, go to the “Deeds” section at the very bottom.
- Regarding “Difficulty Challenges”, I would like to inform you that you do not need to solve each challenge at a separate difficulty level. You only need to complete the “Cataclysm” or “Legend” difficulty level once, and all previous difficulty levels will be counted as completed.
I will not mention this again in the further, as similar сhallenges are included in every DLC. - At the moment, there are only about 1000 Challenges in the game.
- Most of the challenges can be completed solo, but there are 8 challenges that require at least two players. (Master of Convergence, Chainbreaker, Demolitionist, On The Count Of Three, Fast Regulations, Chaingang, Deeds, Weaves)

Missions
Helmgart

The first half of the challenge is completed as you progress through the game. The main difficulty appears in the second half.
- By default, all Helmgart challenges are completed on Legend difficulty level, but after purchasing Winds of Magic DLC you will be able to complete these challenges again, but on Cataclysm.
- However, it is worth considering an important nuance: if you decide to do the challenge immediately on the Cataclysm, then after completing it, you will still have to pass the same challenge on the legend.
- The tactics and strategies should not change much depending on the level of difficulty, just some nuances.
- I tried to focus more on the solo game with bots, as it doesn't require extra help, from teammates.
- Act 1
 1. Heldenhammer Time
Have the Statue of Sigmar kill 3 Chaos Warriors on Righteous Stand
The easiest way to complete this challenge is in a group, agreeing with your teammates not to attack the Chaos Warriors. If you decide to play with bots, you will essentially have to complete the final event in true solo. This will be very difficult for the average player, as any mistake will require you to complete the mission again from the beginning.
In addition, there are differences in this trial between the Legend and Cataclysm difficulties:
In Legend, the Chaos Warriors may either not spawn at all in the final event, or spawn in small numbers — a maximum of 2, in rare cases 3.
On Cataclysm, a maximum of 4 Chaos Warriors are guaranteed to spawn, in rare cases 5. At the same time, there will be more enemies, and a boss is guaranteed to spawn.
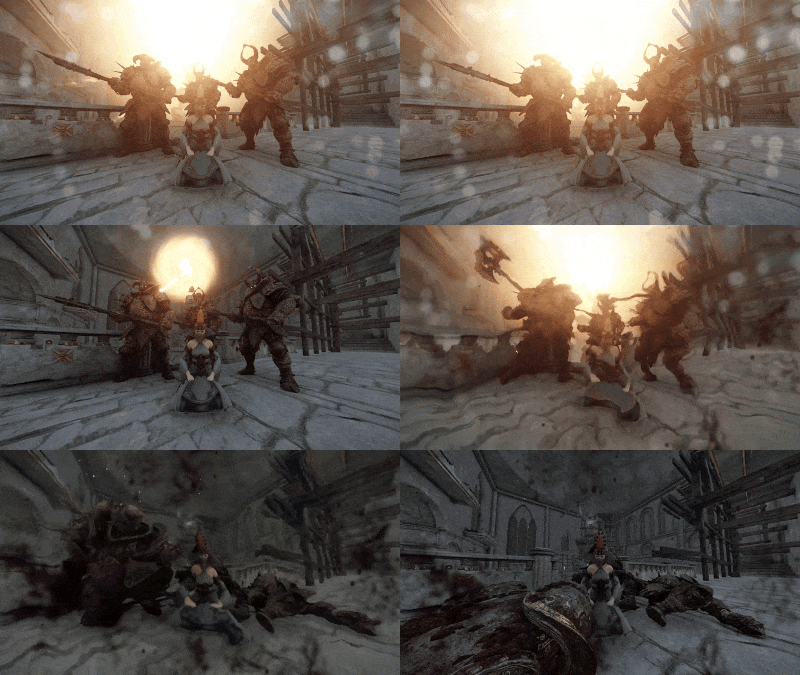
There is a small chance of encountering a patrol or roaming Chaos Warriors near the temple. In this case, you should kill the bots and aggro the Chaos Warriors inside the temple. Once inside the temple, try to lure the Chaos Warriors behind the Sigmar statue. Drink the purple potion in time and, while invisible, press the bell, then run to revive the bots. The Chaos Warriors must remain near the statue throughout the event. At this time, you will just need to stand near the gate and fight waves of enemies until the event ends. Note: Chaos Warrior with Shield does not count towards the challenge requirement.
Before starting the map, you need to connect to Twitch mode. There are two ways to do this:
- Enter the nickname of any user who is currently streaming on Twitch.
- Use the Vermintwitch program to vote for your results.
After launching the map, set the following Twitch settings: 90/90/100%, blessings and weekly events disabled.
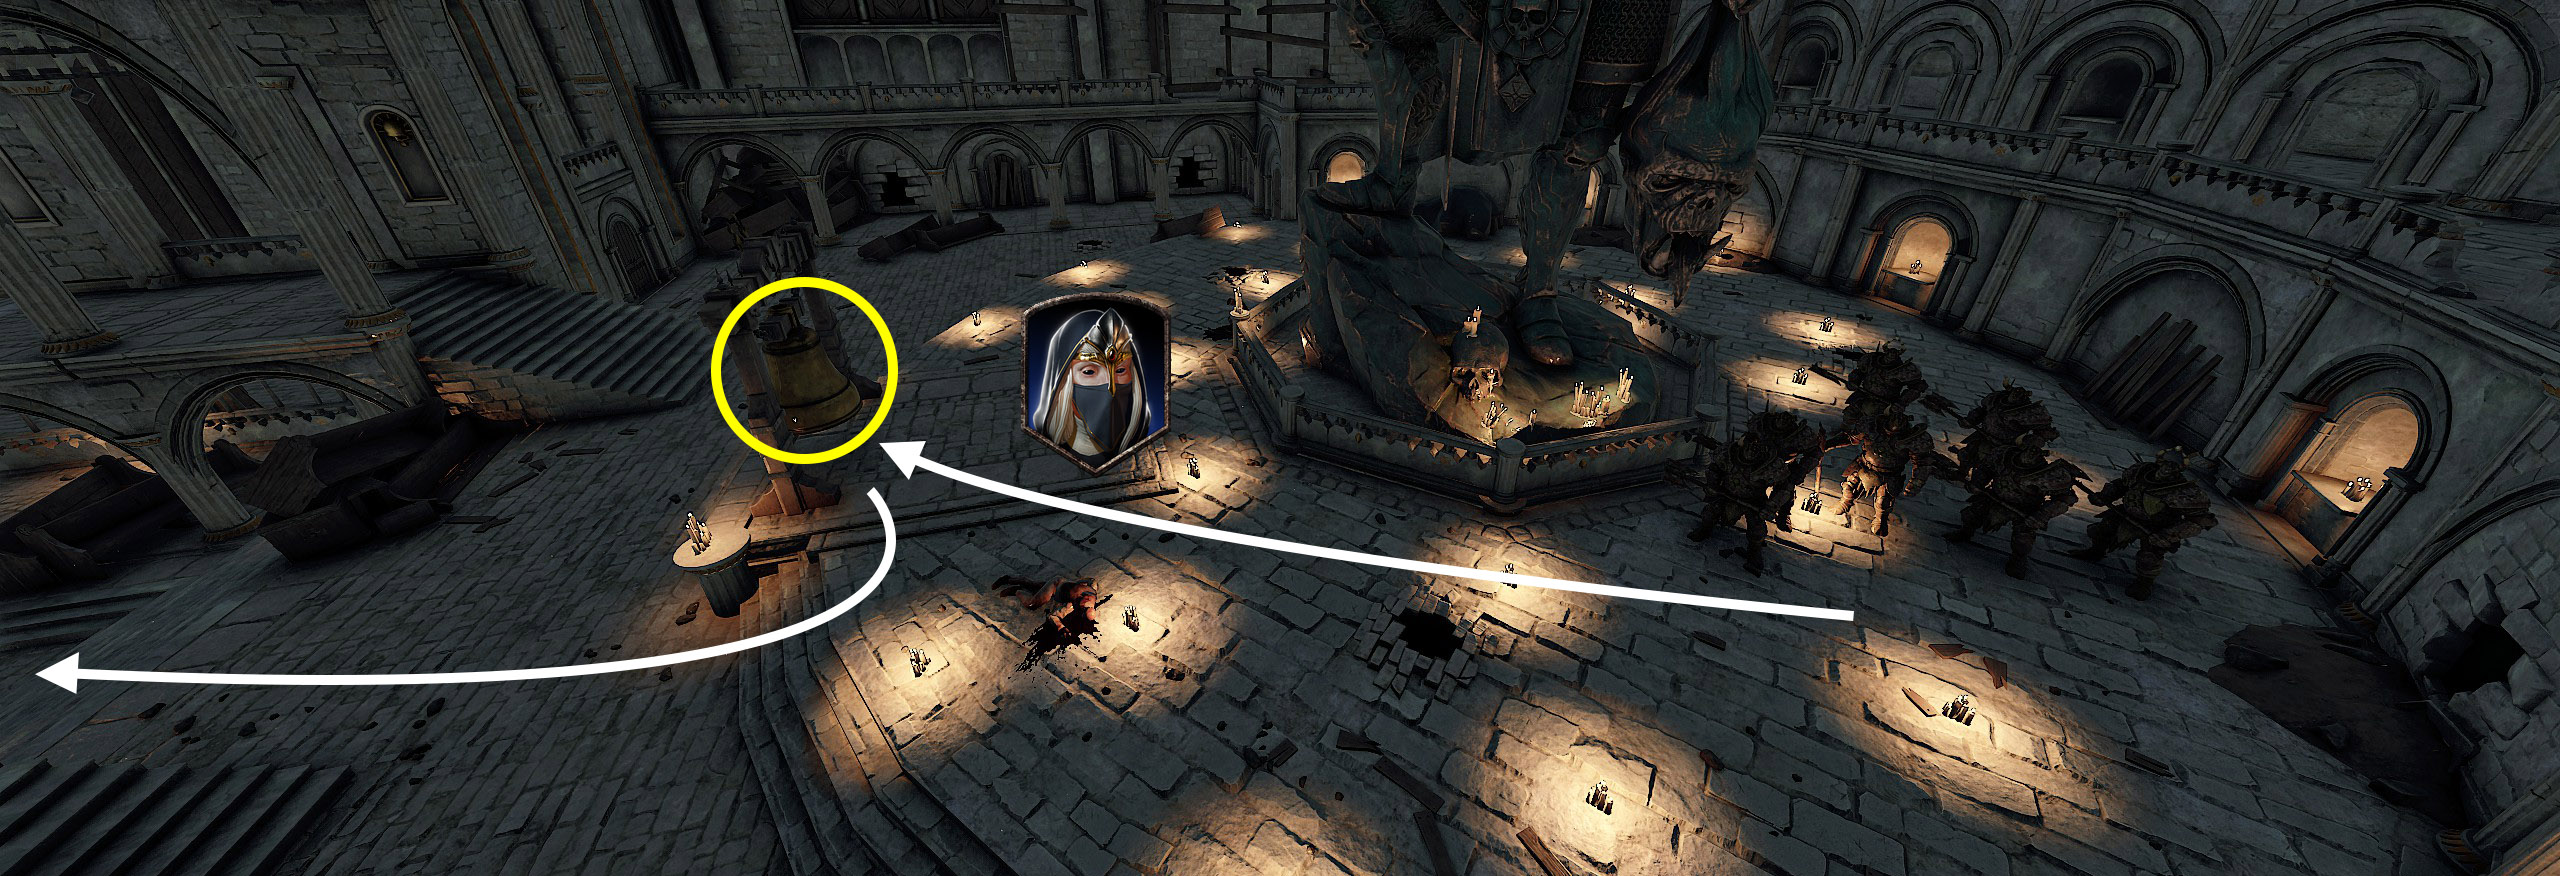
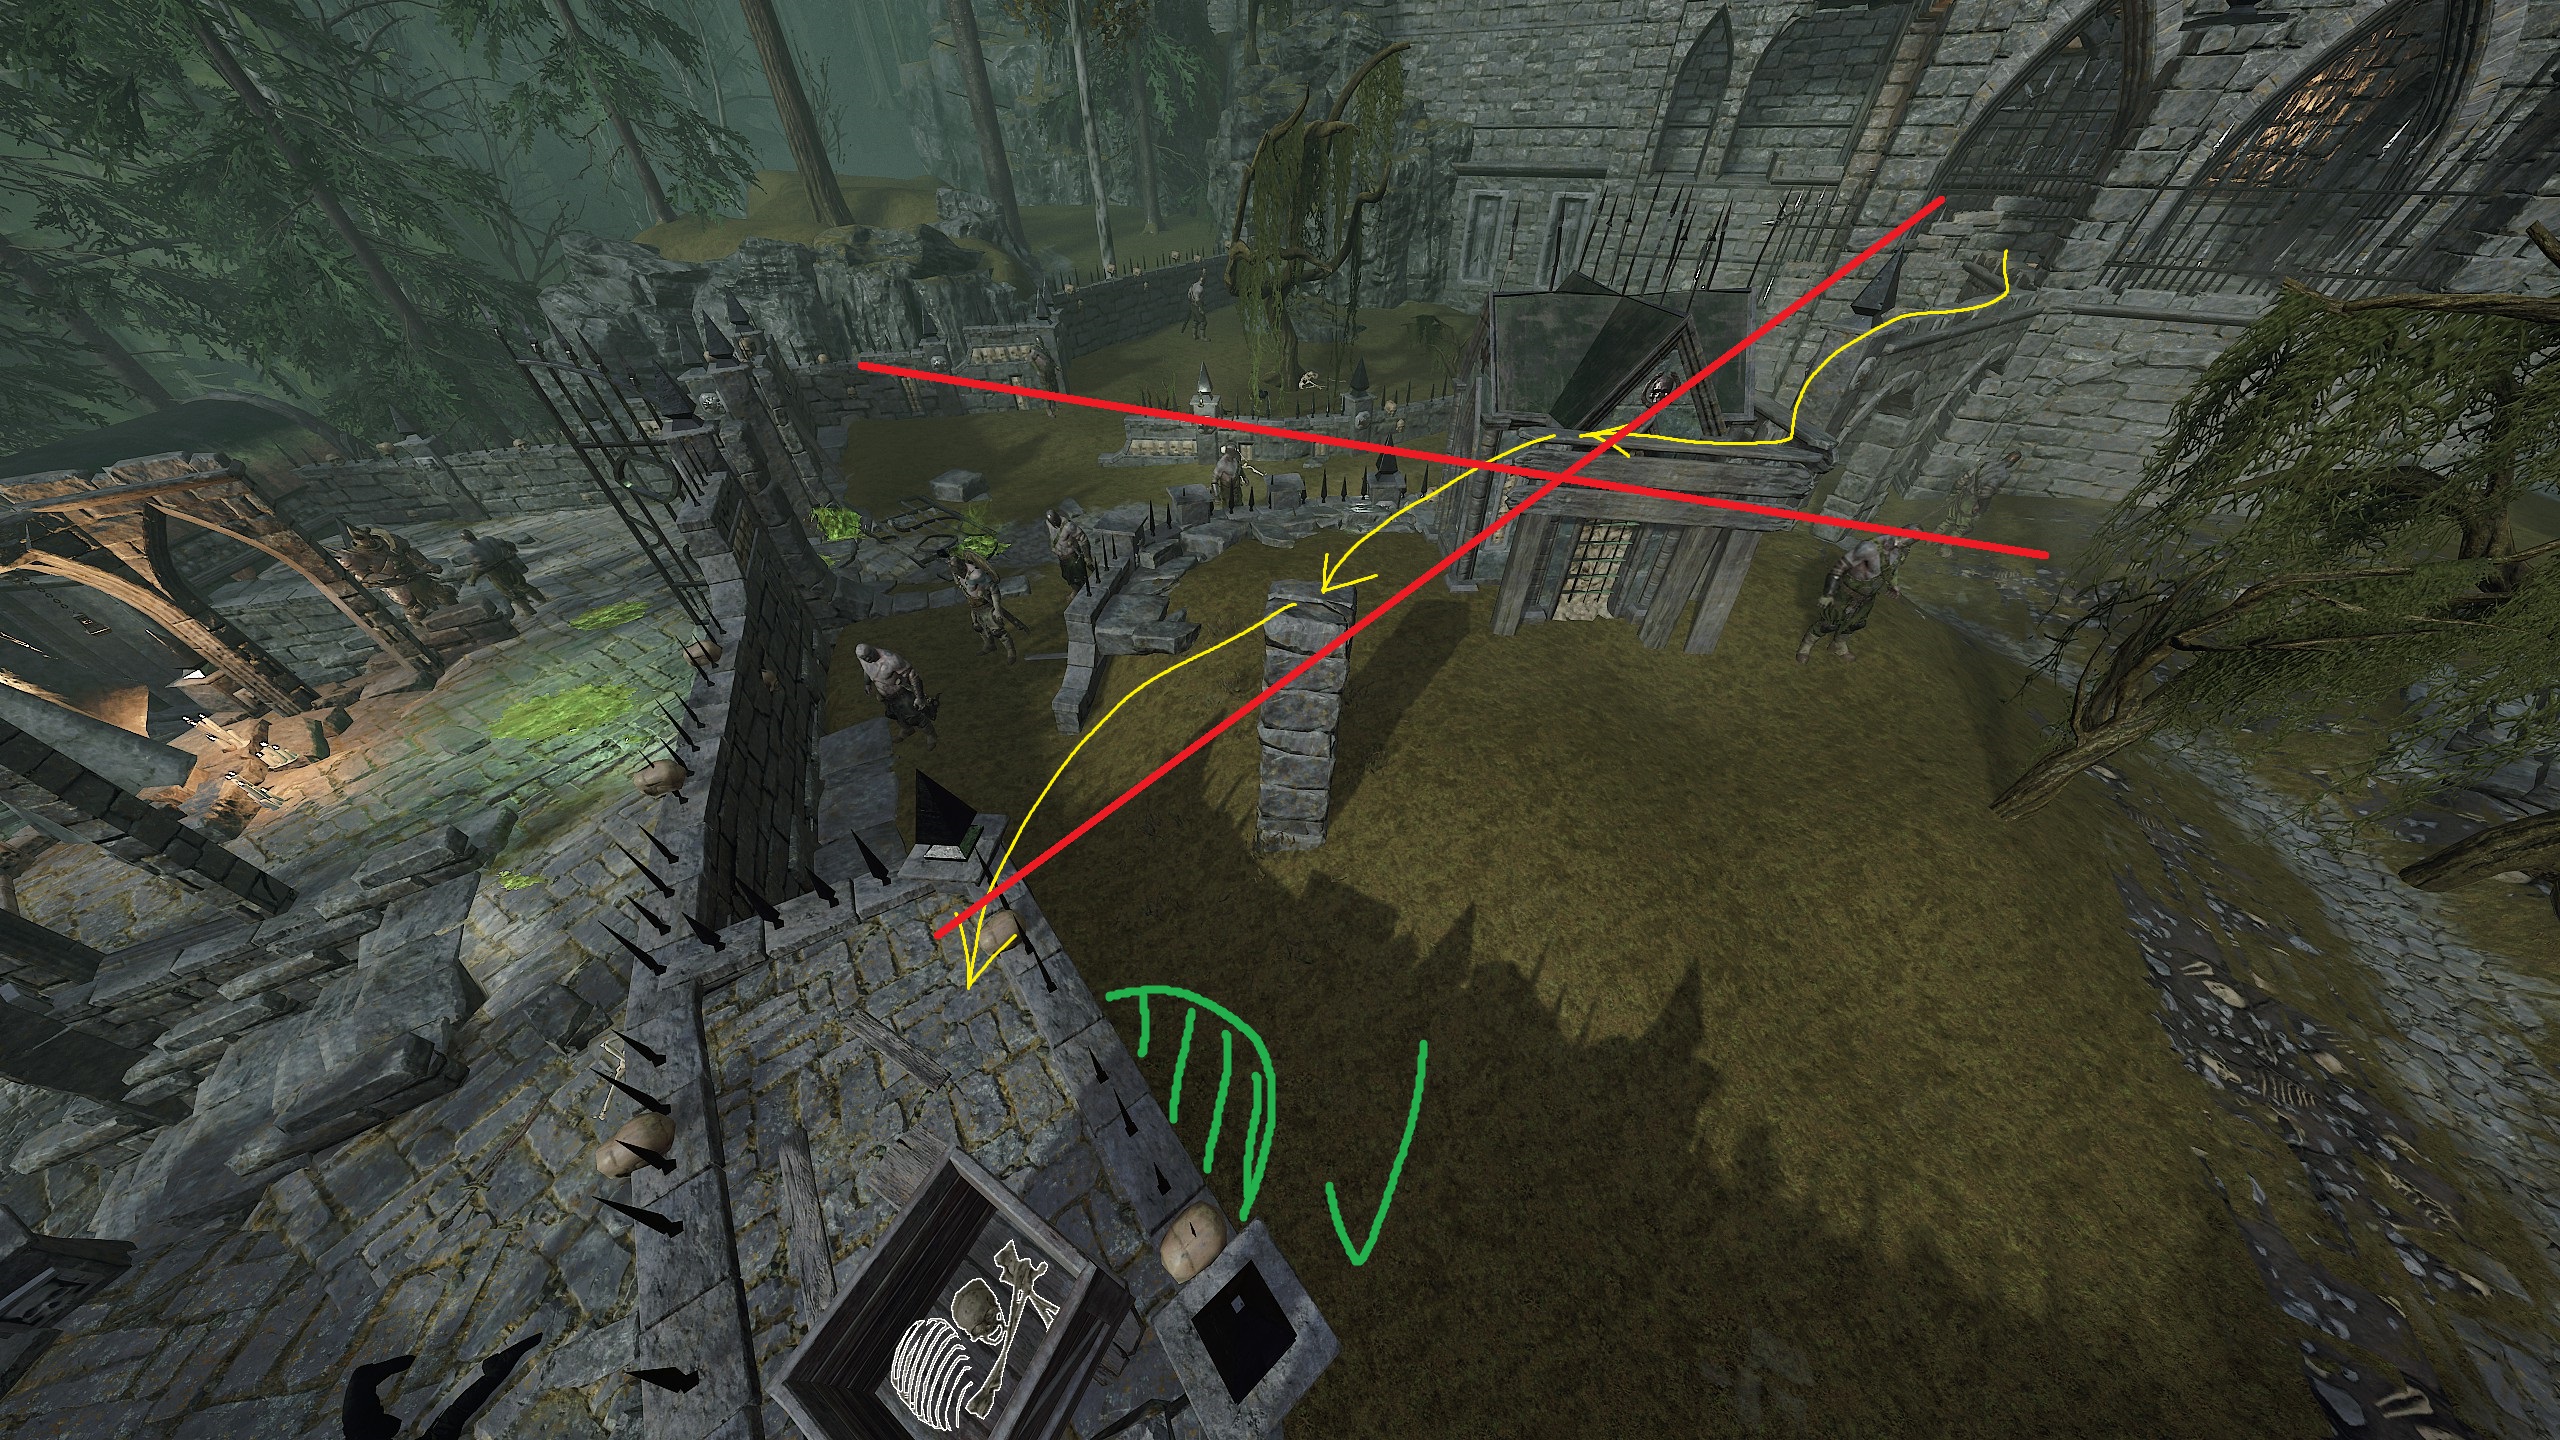
When you find yourself inside the temple at the end of the map, change the Twitch settings to 15/5/100%. Press the bell and quickly run to the far door on the right side of the temple (as shown in image 1). Then, using the teleport, you will find yourself in OOB, where enemies cannot reach you. Wait until the all bots are killed. During this time, damage enemies through walls to speed up the completion of the event. When the Chaos Warrior patrol appears, change your Twitch settings to 90/90/100% and enable all blessings. Deal a little damage to them and kill the remaining enemies by moving from one side to the other.
After the final explosion, when all enemies are dead, use teleport (as shown in image 2) to get out of OOB and complete the mission.
Notes: If you are performing on Cataclysm, you do not need to connect Twitch.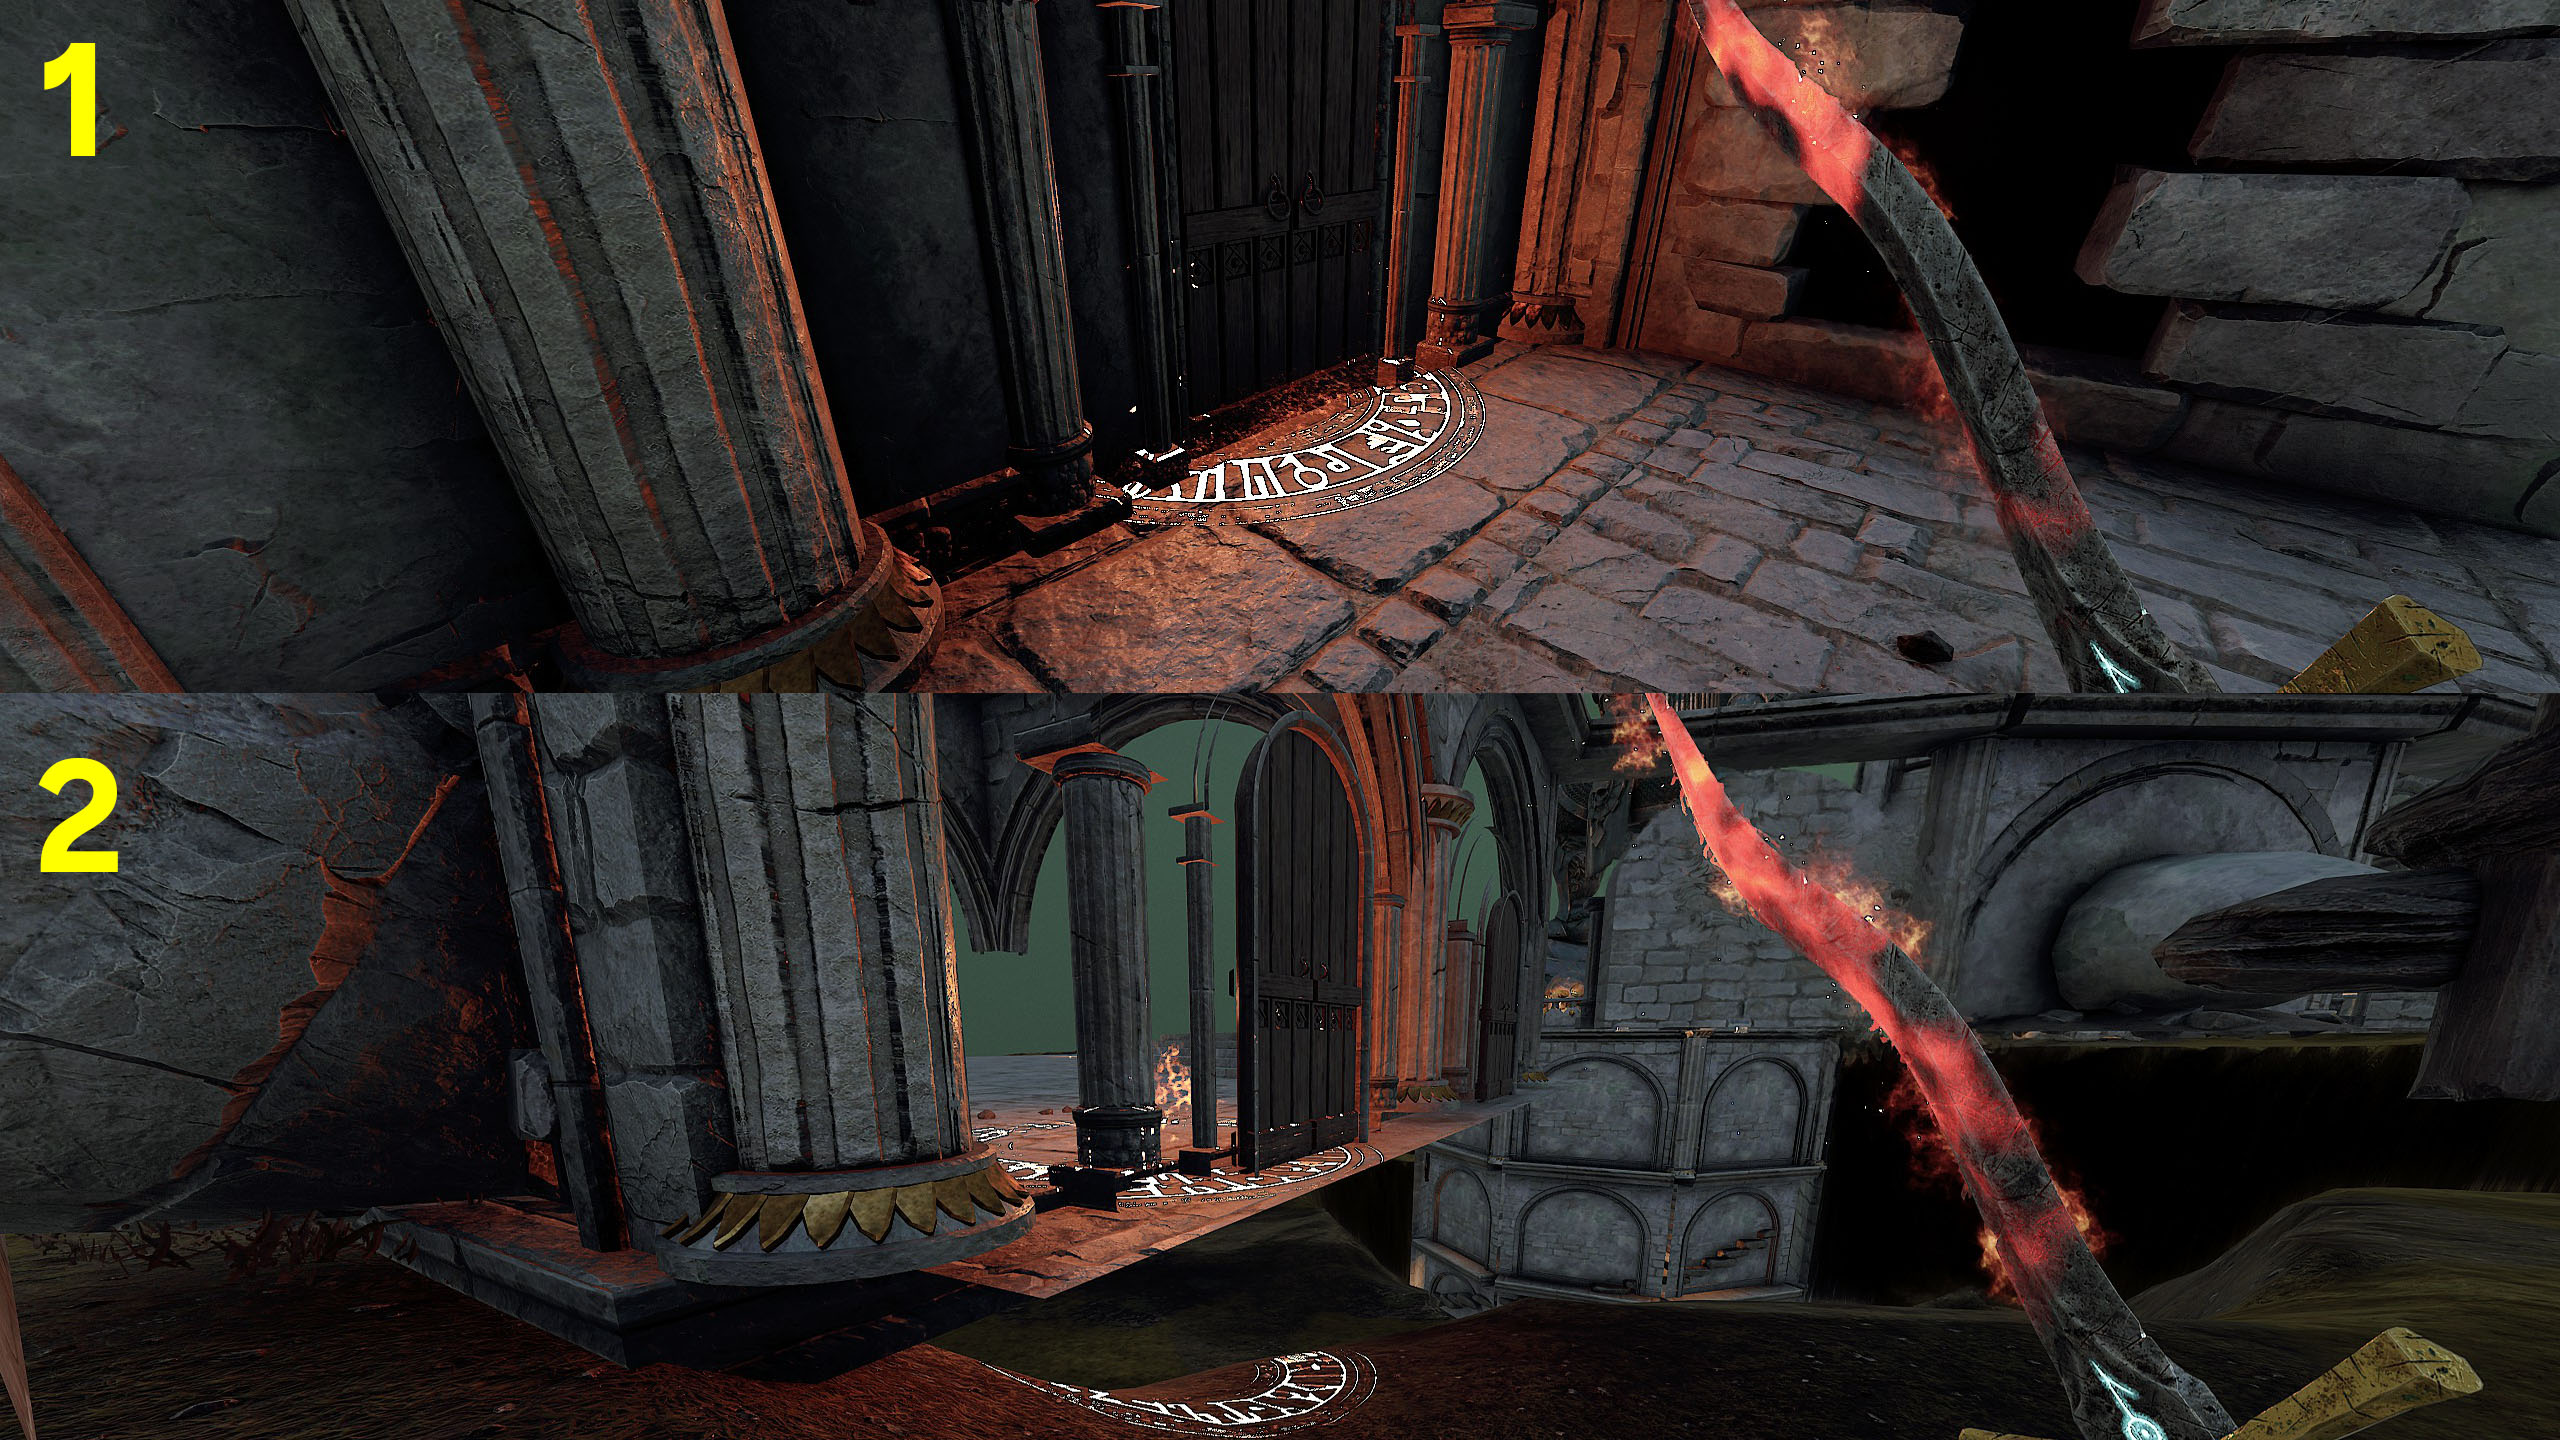
https://youtu.be/WeOlje6vUFk
 2. Feed Me, Sinner!
Have all four party members stand inside the ritual pool for 120 seconds in Convocation of Decay
In my opinion, these challenges are easier to complete with bots because the conditions affect only the players, making it easier to control the situation. For example, if you or another player is knocked down or grabbed from the pool, it will lead to failure, but if a bot is involved, that won't happen. Avoid jumping into a pool, as this can also lead to failure. Choose any career that has invisibility or good protection, and don't forget to find on level a conc potion. It can become your salvation.
A message in the chat indicating that the challenge has been completed appeared about 15 seconds before the ritual was actually completed.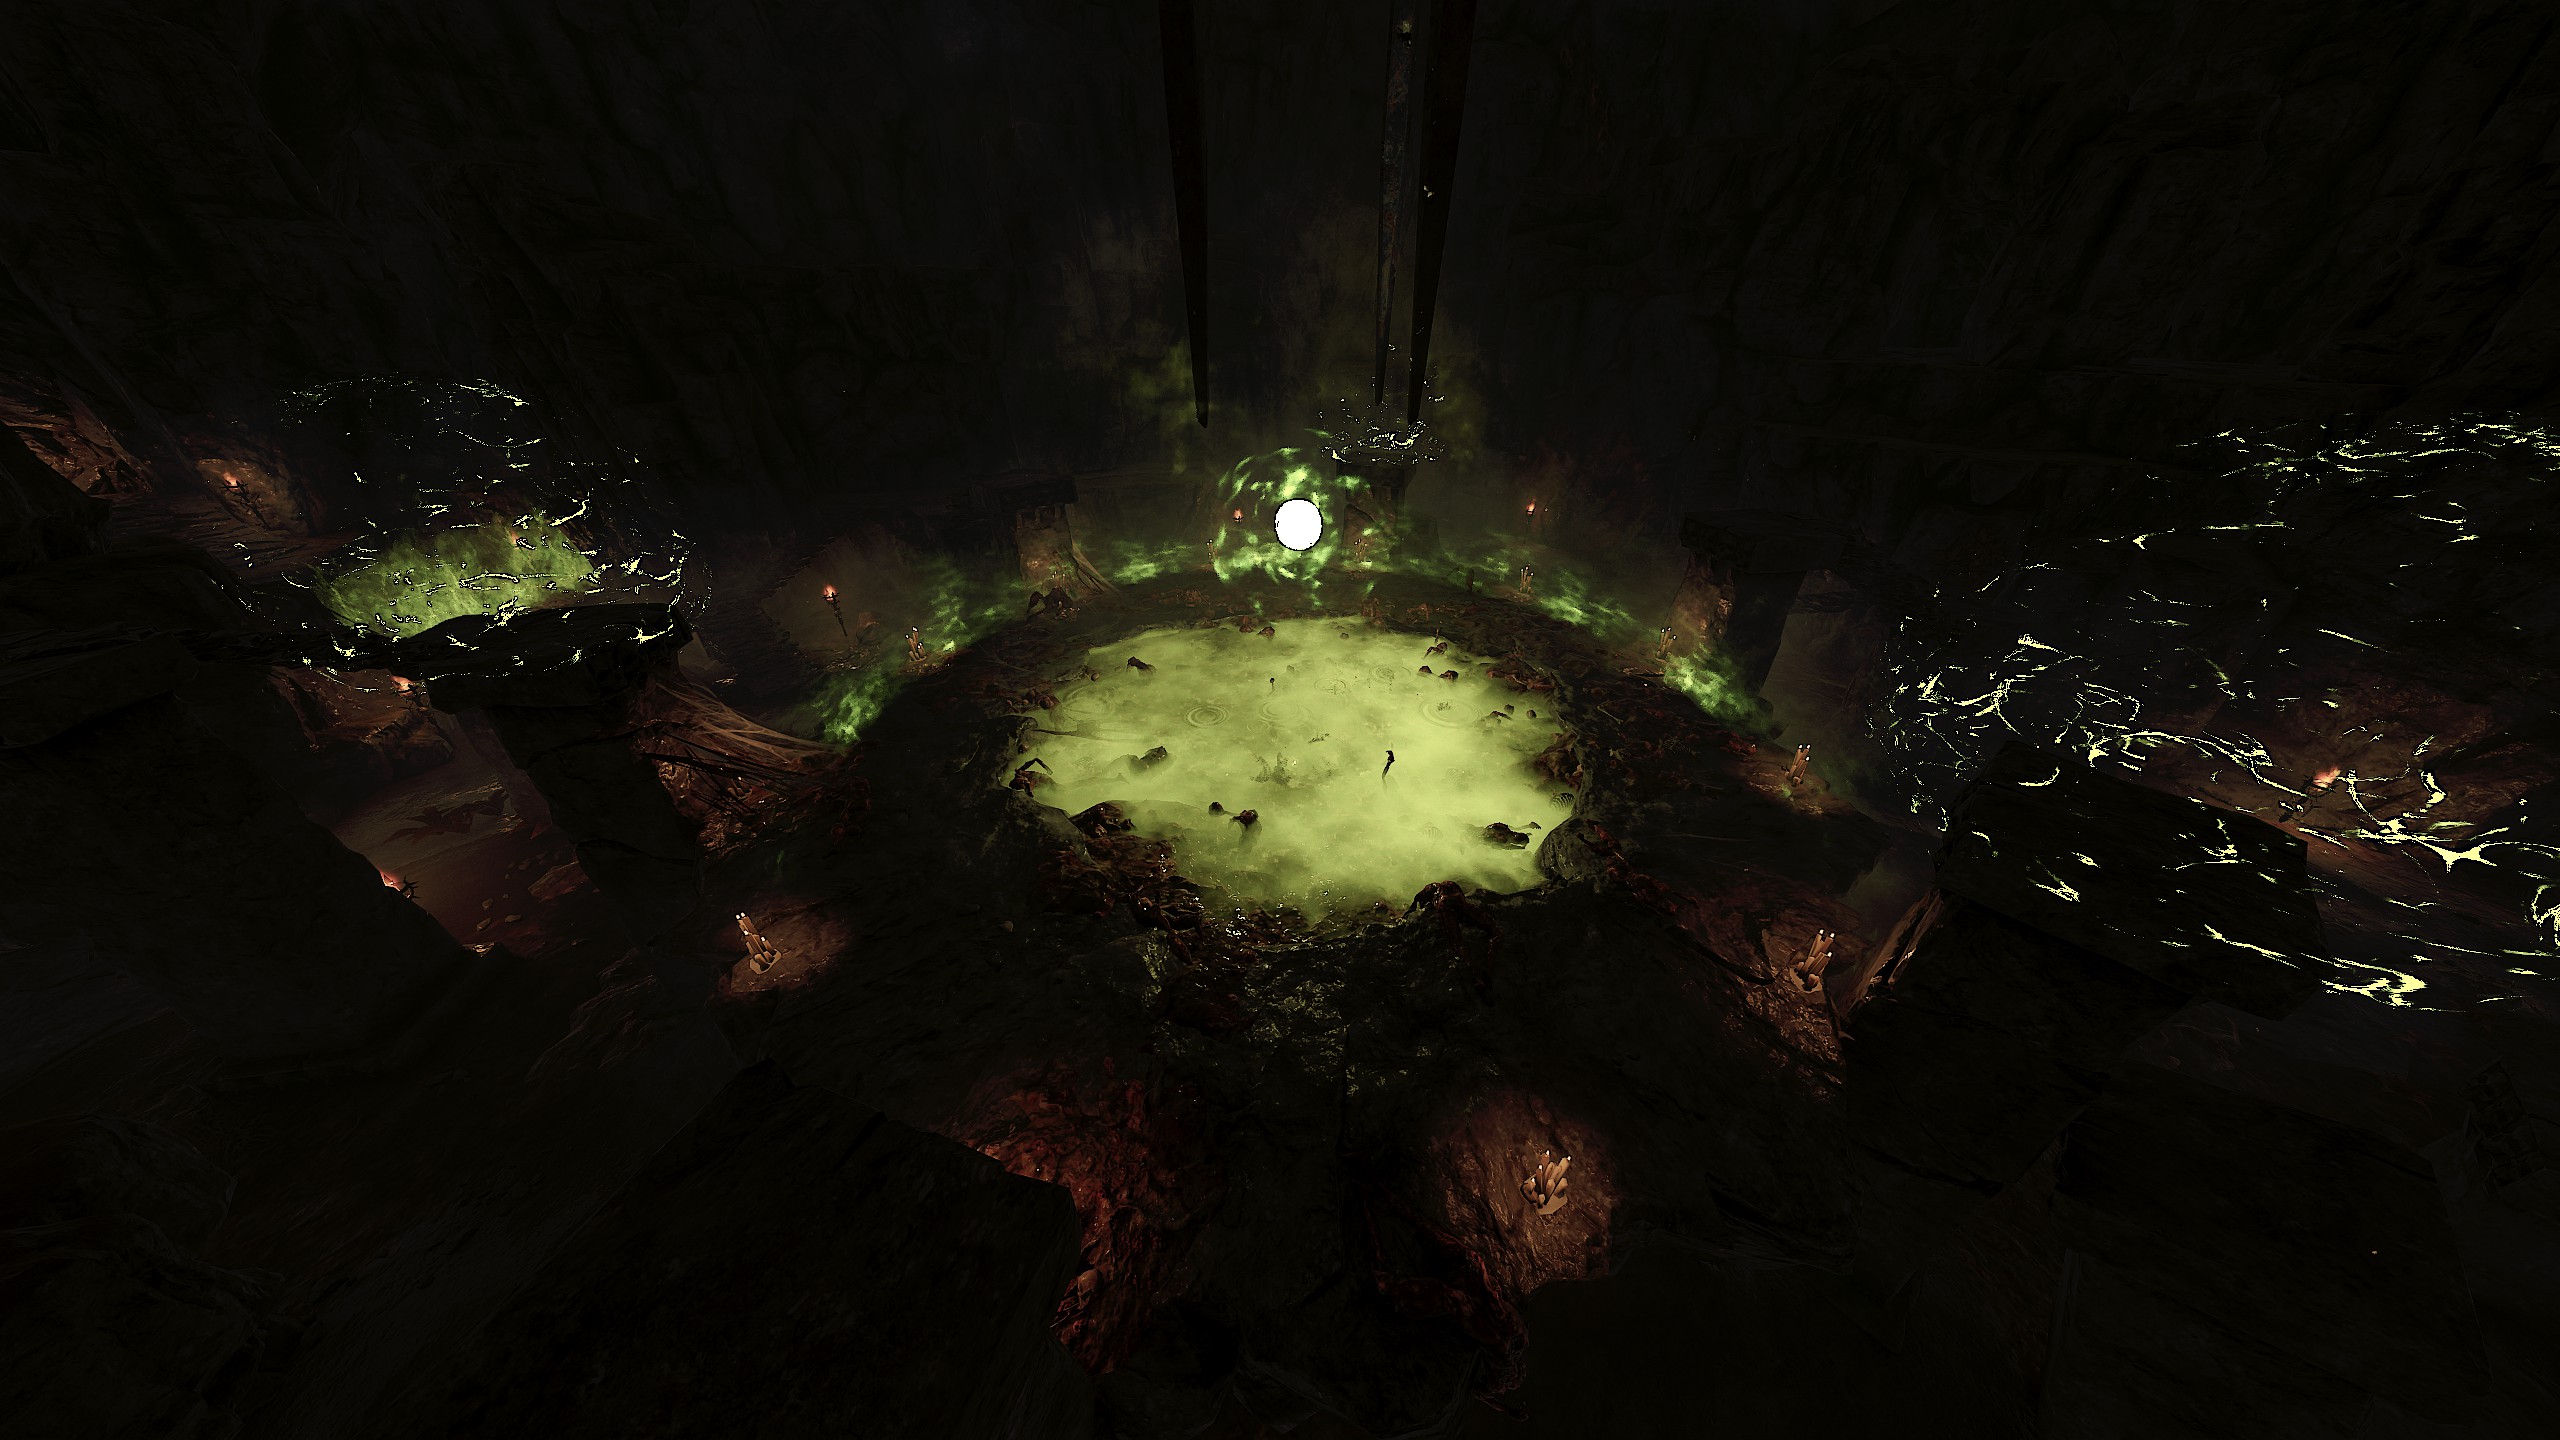
While in Corpse pit, last 2 sec on the player, reduce move speed by 50%, and dodge distance/dodge speed by 60%. Taking stamina damage(half-shield per tick, ignore BCR) and HP damage absent. Time between ticks: 2 sec.https://www.youtube.com/watch?v=HmjRD9bebjo
 3. Glutton: Punishment
Ring the Dinner Bell and kill the Troll in less than 15 seconds in Hunger in the Dark As in the previous challenge, passing with bots will be easier than with unpredictable players. For a successful completion we will need a hero with 10s invisibility, for example Ranger Veteran, Huntsman or Shade.
In the course of the level find conc potion, then when we with bots roll the wagon to the end, call the bell, drink the potion, enter invisibility and go to meet the Troll. Be sure to ignore him (do not attack) and go on to the end up to the closed passage.
At this time, the Troll should reach the middle of the bridge and disappear the moment it collapses.
Don't worry about the bots: they will instantly teleport to you :)
 https://youtu.be/5BpvRe_HMxw
 4. You Take Me Up
Have 15 enemies be sucked up in one of Burblespue Halescourge's tornados
This challenge can also be completed solo. To do this, swap out the bots for weaker ones, for example Huntsman, Ranger Veteran, or Battle Wizard.
Next, choose Handmaiden or Ironbreaker, making sure to have a Shield.
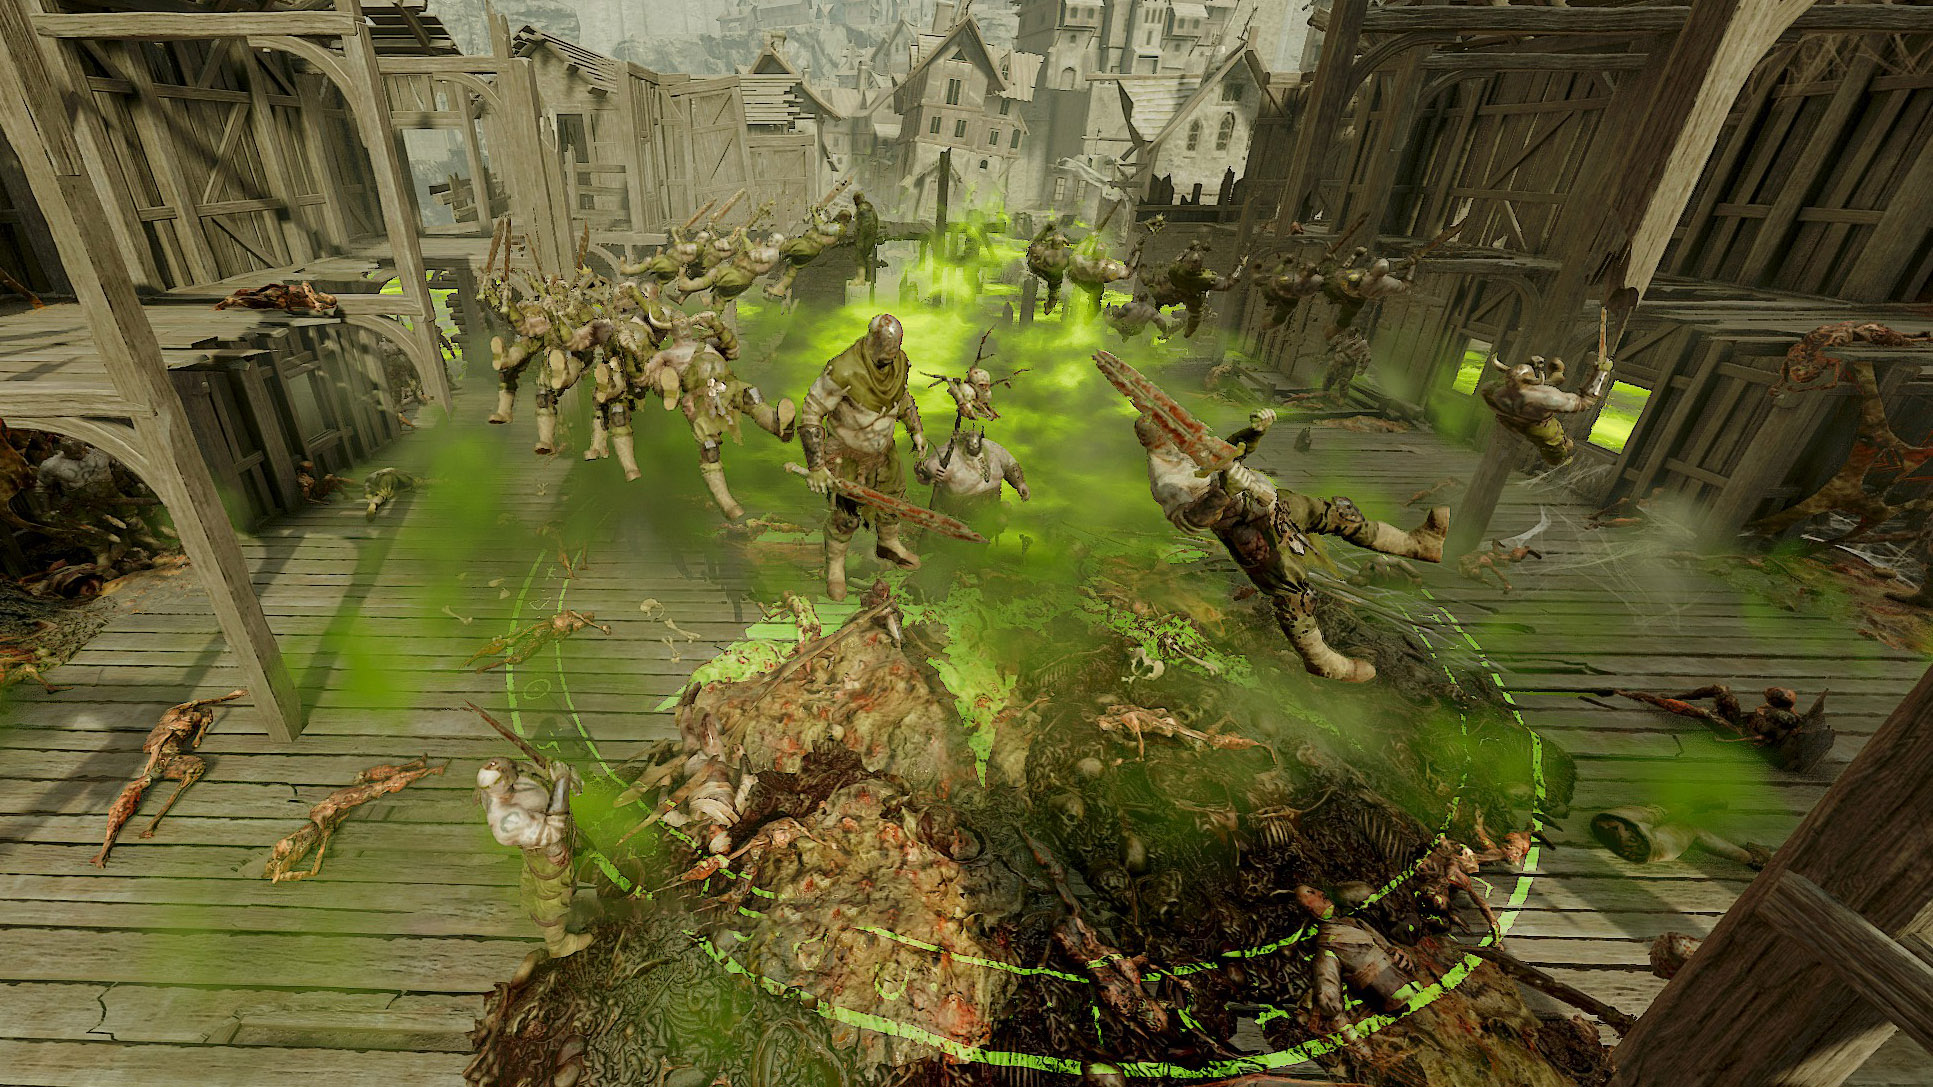
During the event, when enemies start spawning, block them and stand roughly in the middle. Before the tornado appears, there should be a decent number of enemies near you, who will be sucked into the massive tornado. If successful, you will see a chat message confirming the challenge has been completed.
https://youtu.be/4dDGd_Q-CrI?si=7wAfr9DL4kjVTjGH
- Act 2
 5. Master of Convergence
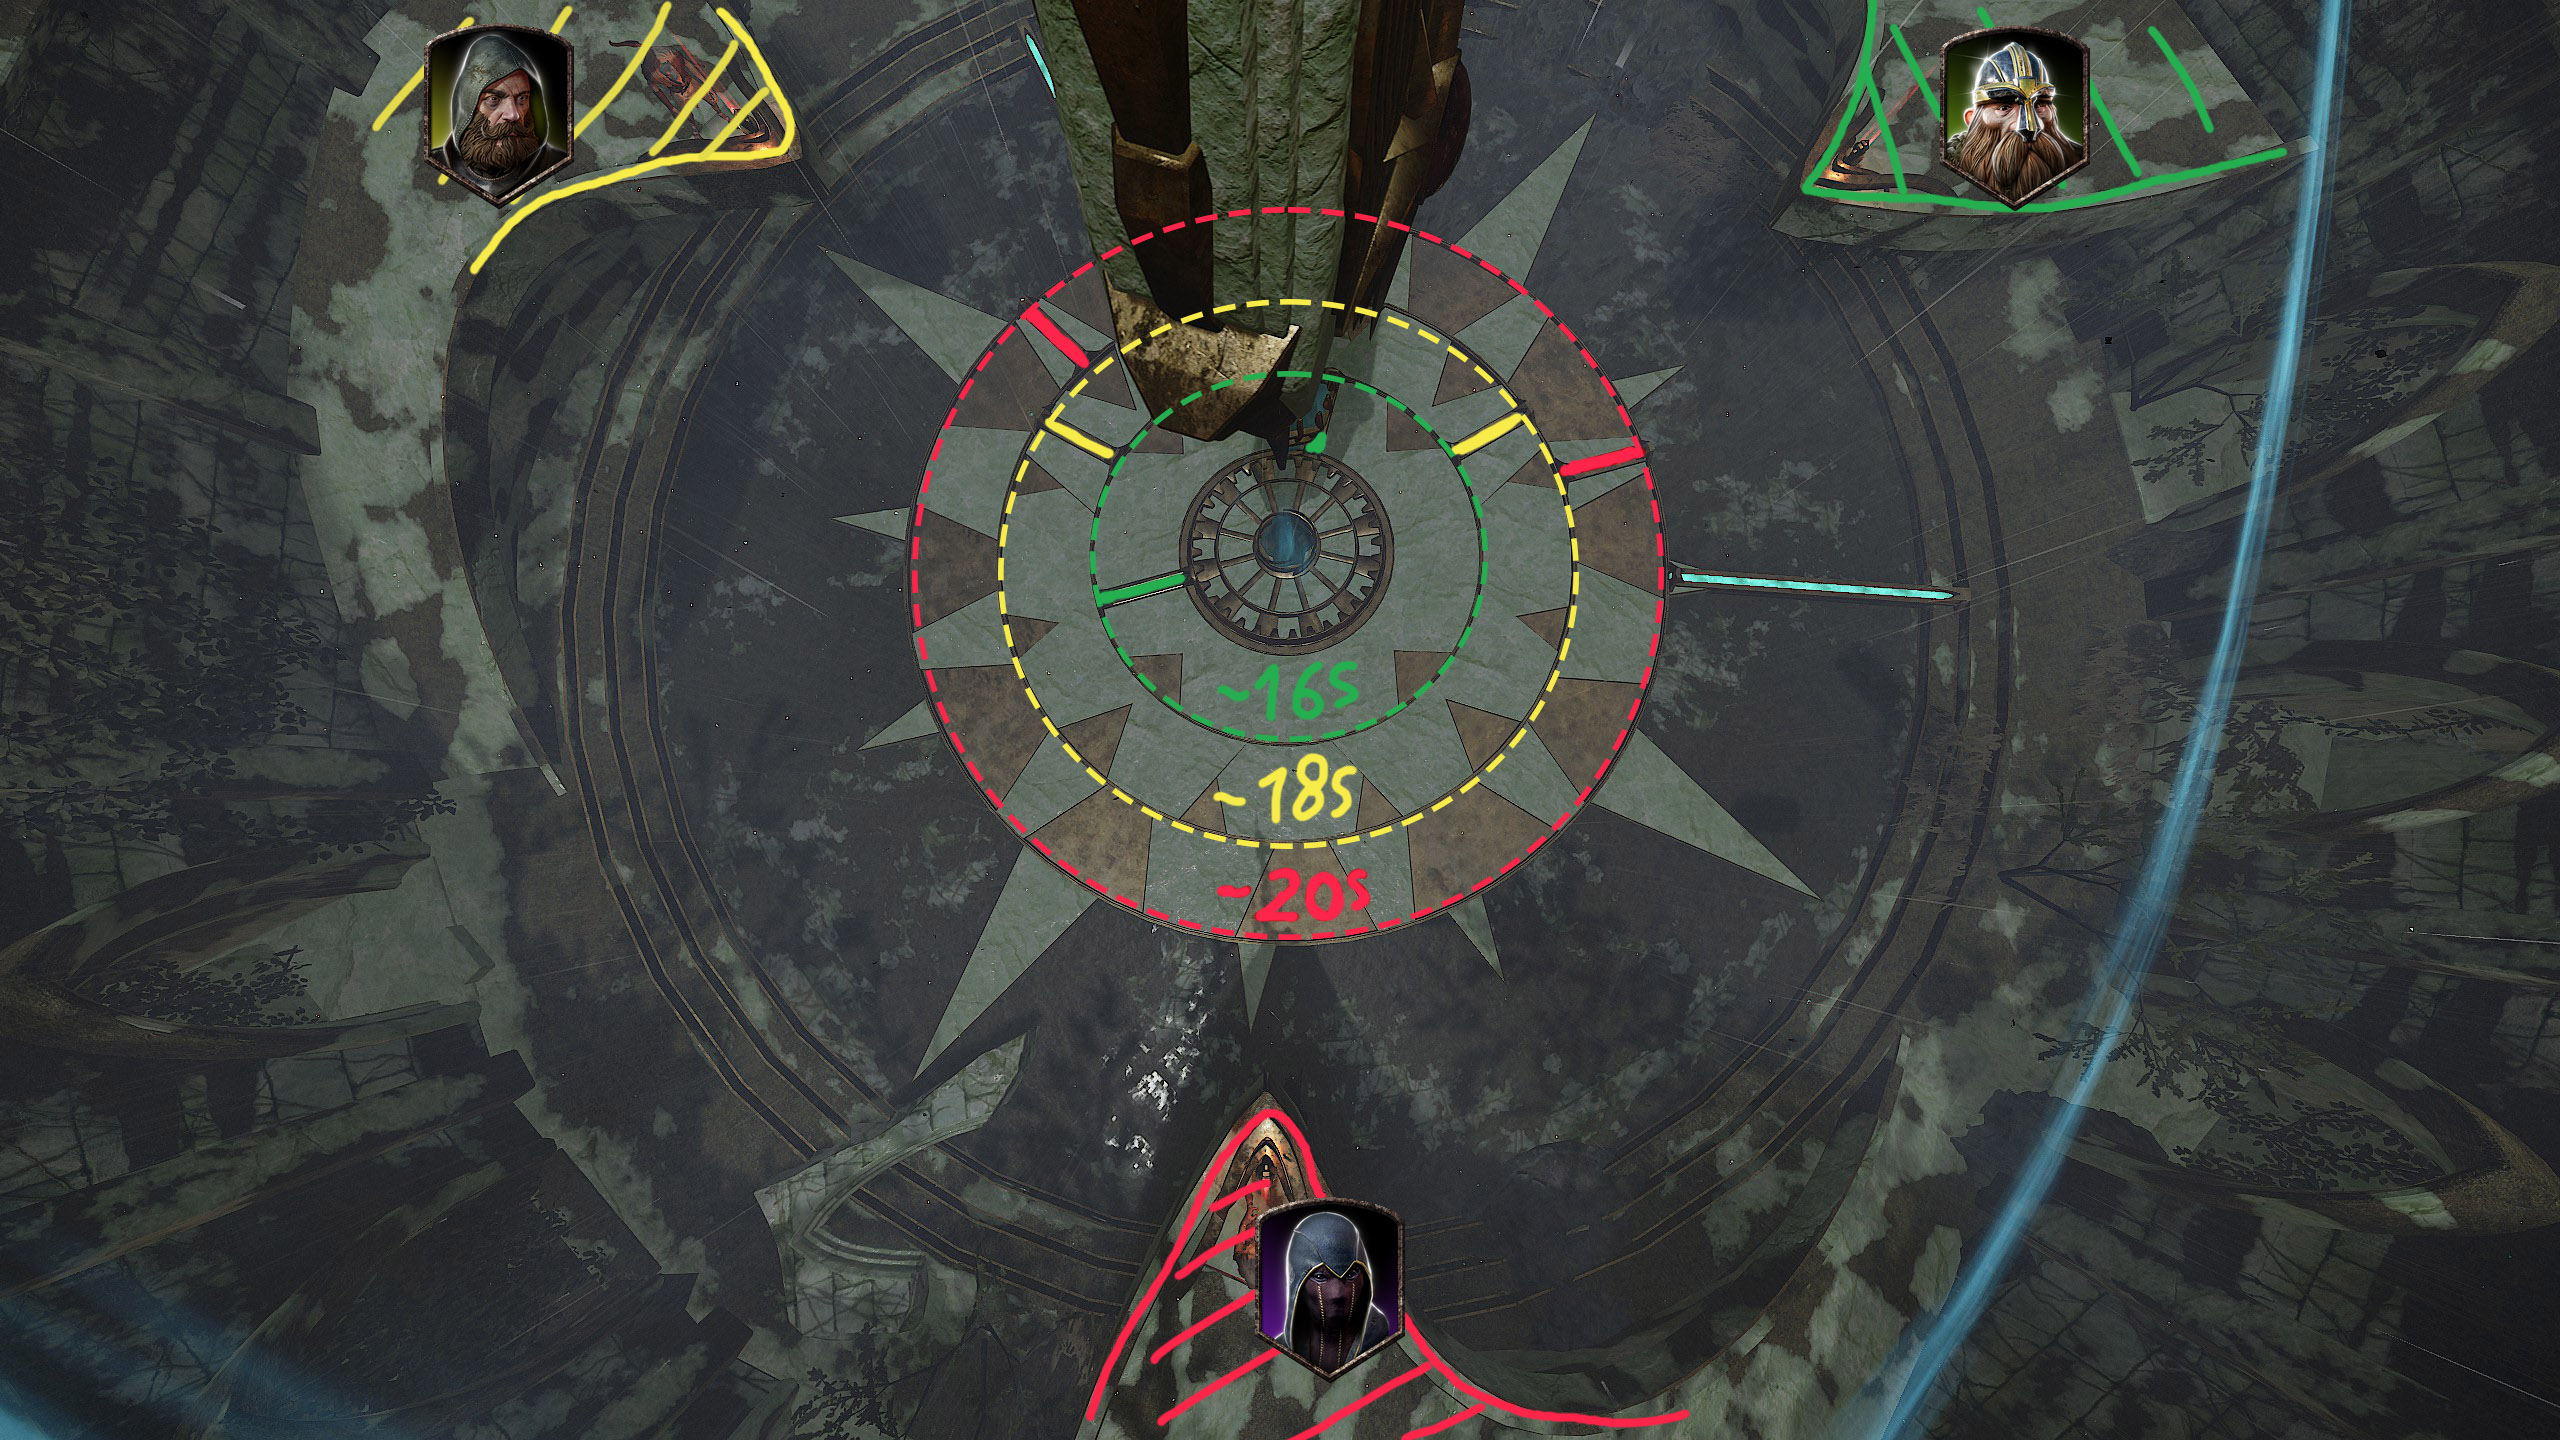
Line up all 3 Athel Yenlui leylines within 30 seconds For this challenge, you will need a team of at least three people. The optimal choice will be heroes with invisibility, such as Ranger Veteran, Huntsman and Shade (with 10s invisibility). When you reach the final event, spread out into positions. (As shown in the picture)
Once everyone is in position, start the countdown and spin the dials at the same time (before you enter invis, don't forget to drink a conc potion)
 https://www.youtube.com/watch?v=VnaQZioj5Sw
 6. Evacuation Bell
 Destroy the Screaming Bell and escape in less than 85 seconds after starting the event
The principle of the challenge is similar to Cage Breaker. You'll need a mobile hero, such as a Handmaiden or Slayer. You and the bots will also need several conc/speed potions. Using a weapon with a movement tech allows you to move faster. More detailed info about movetech can be found in this table.
Once you're in the arena, drink the potion and move to the first set of chains, then the second, and then the third. Stand near the passage ahead of time. When it opens, drink the second potion and continue running through the level. A little later, drink the third potion. When you reach the portal, a challenge completion message should appear in the chat.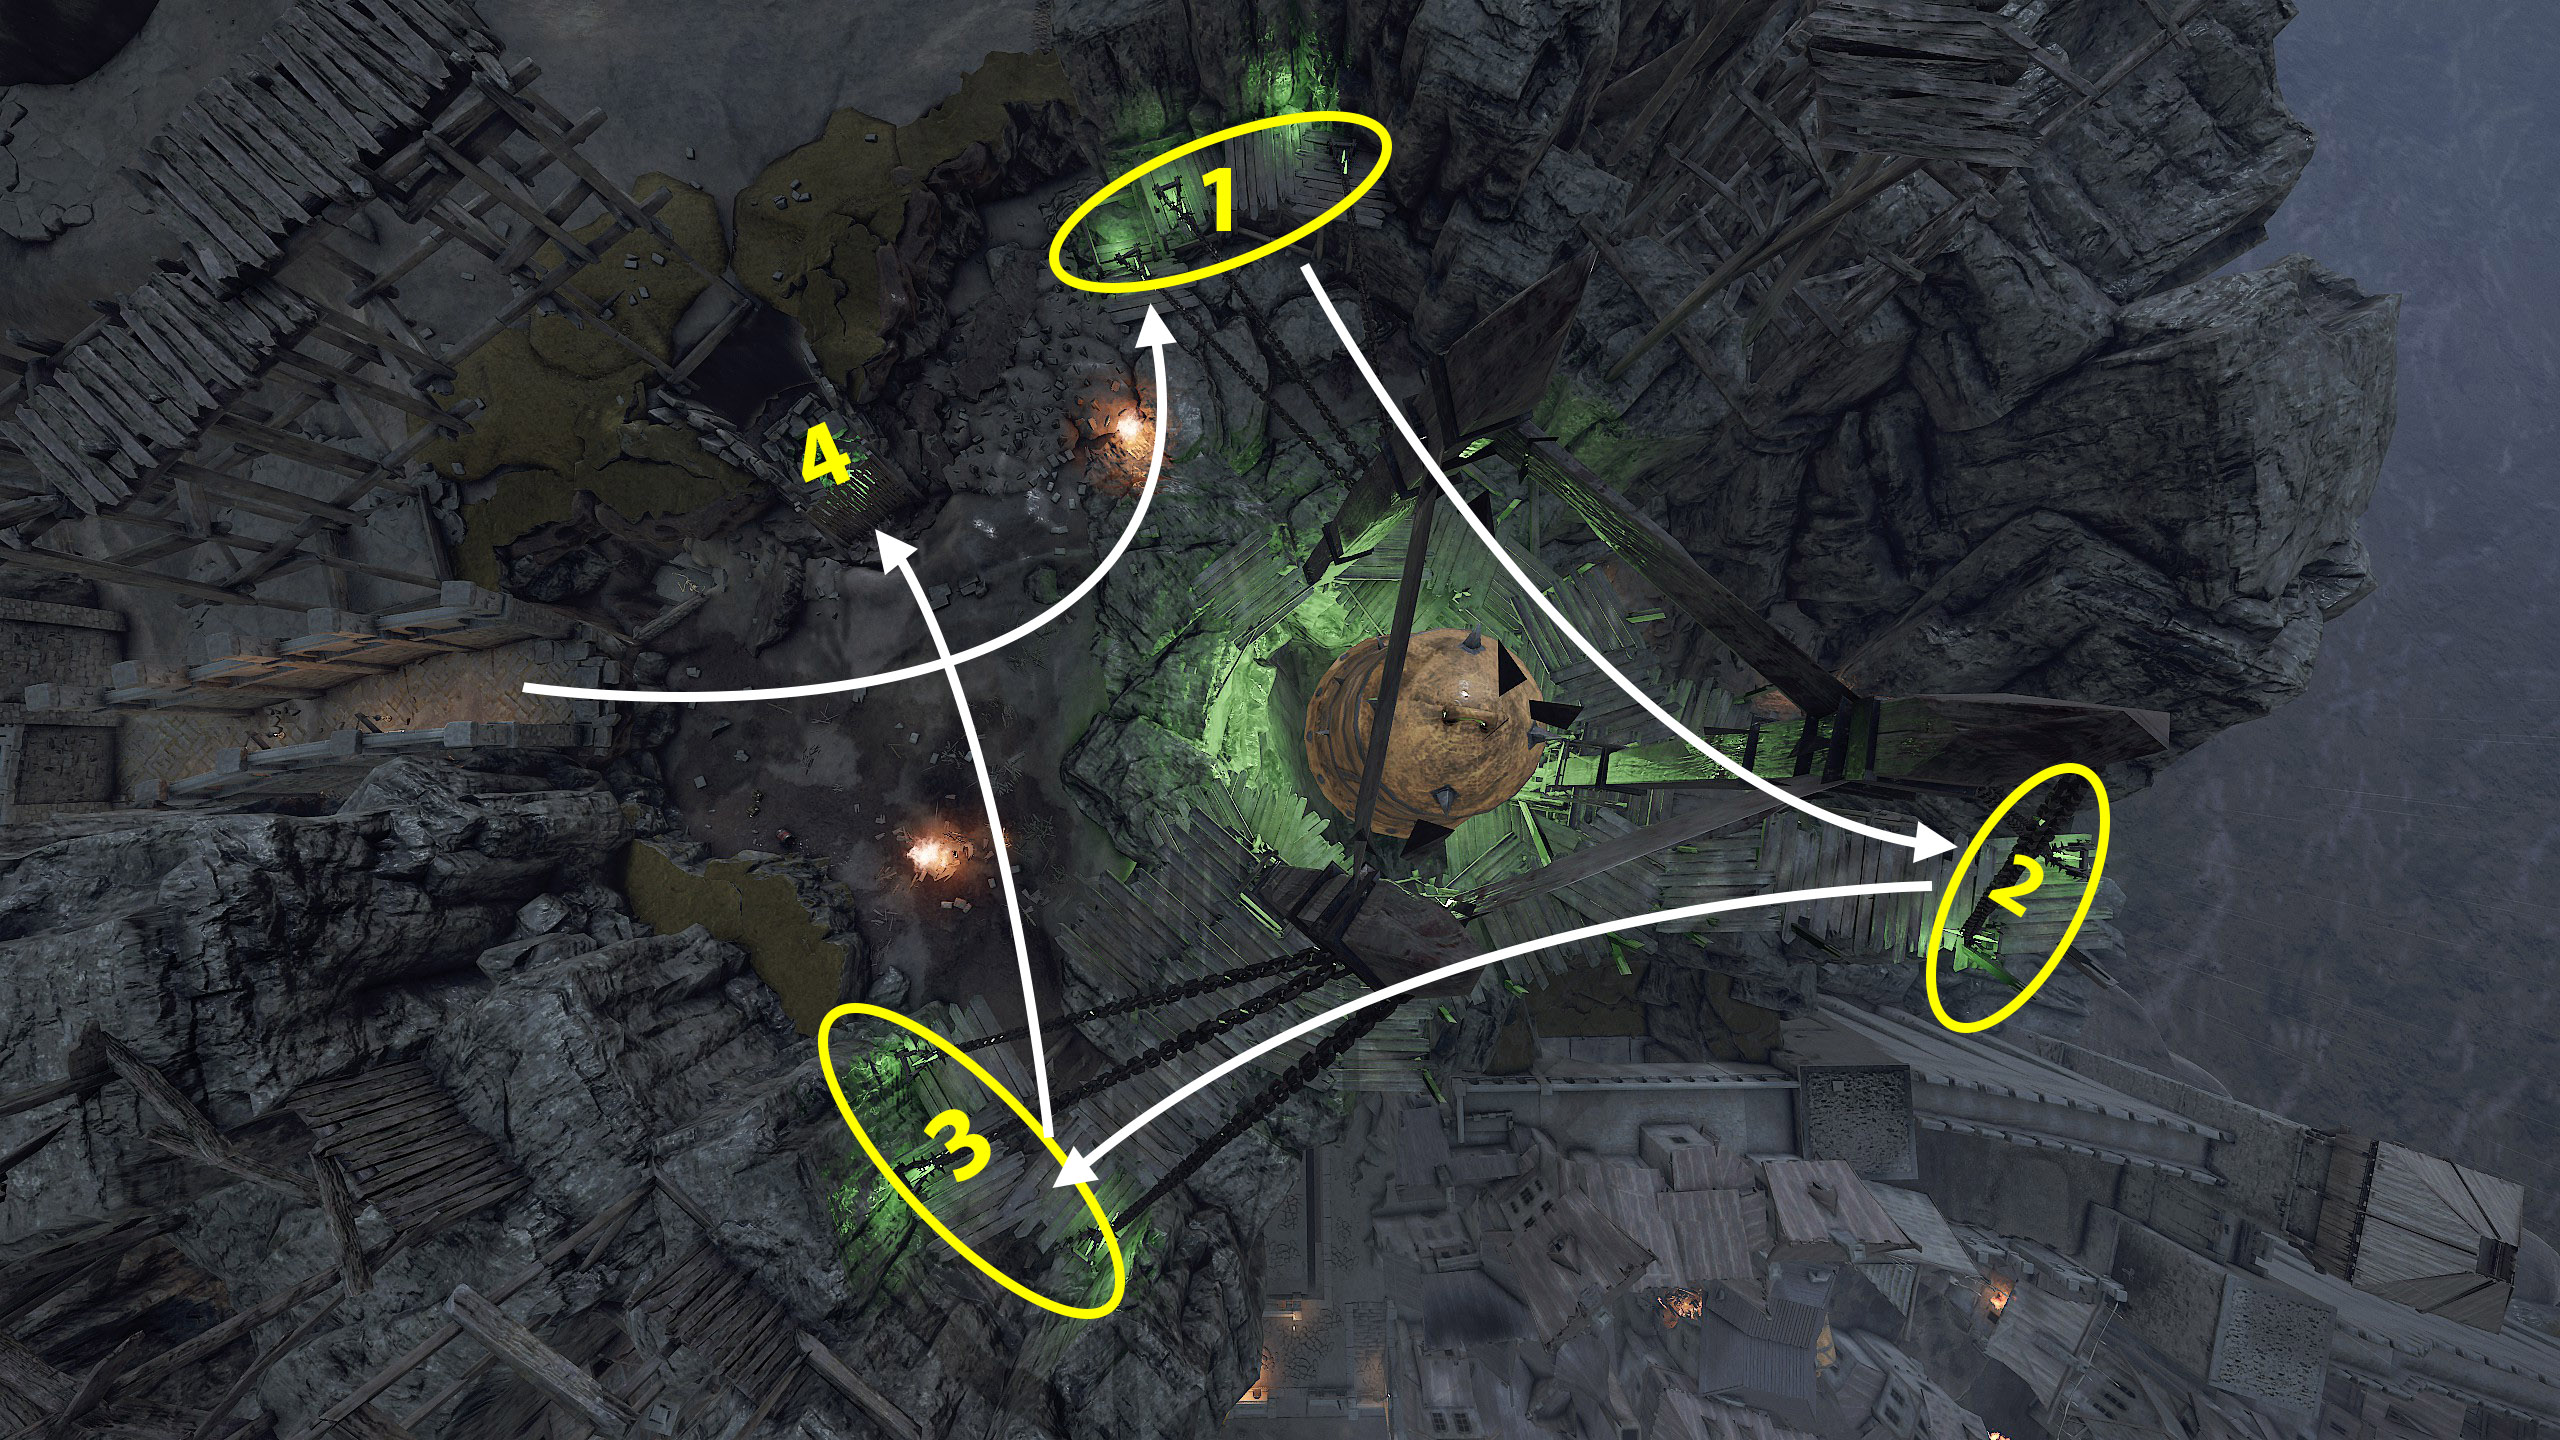
Notes:
- The timer starts counting from the moment you enter the arena and ends near the portal.
https://youtu.be/5dQWgySj7uc?si=QUtN8cNF956xmEL-
 7. A Little Something in You Eye
Kill 25 enemies by dropping the Cannonball on their heads in Fort Brachsenbrücke
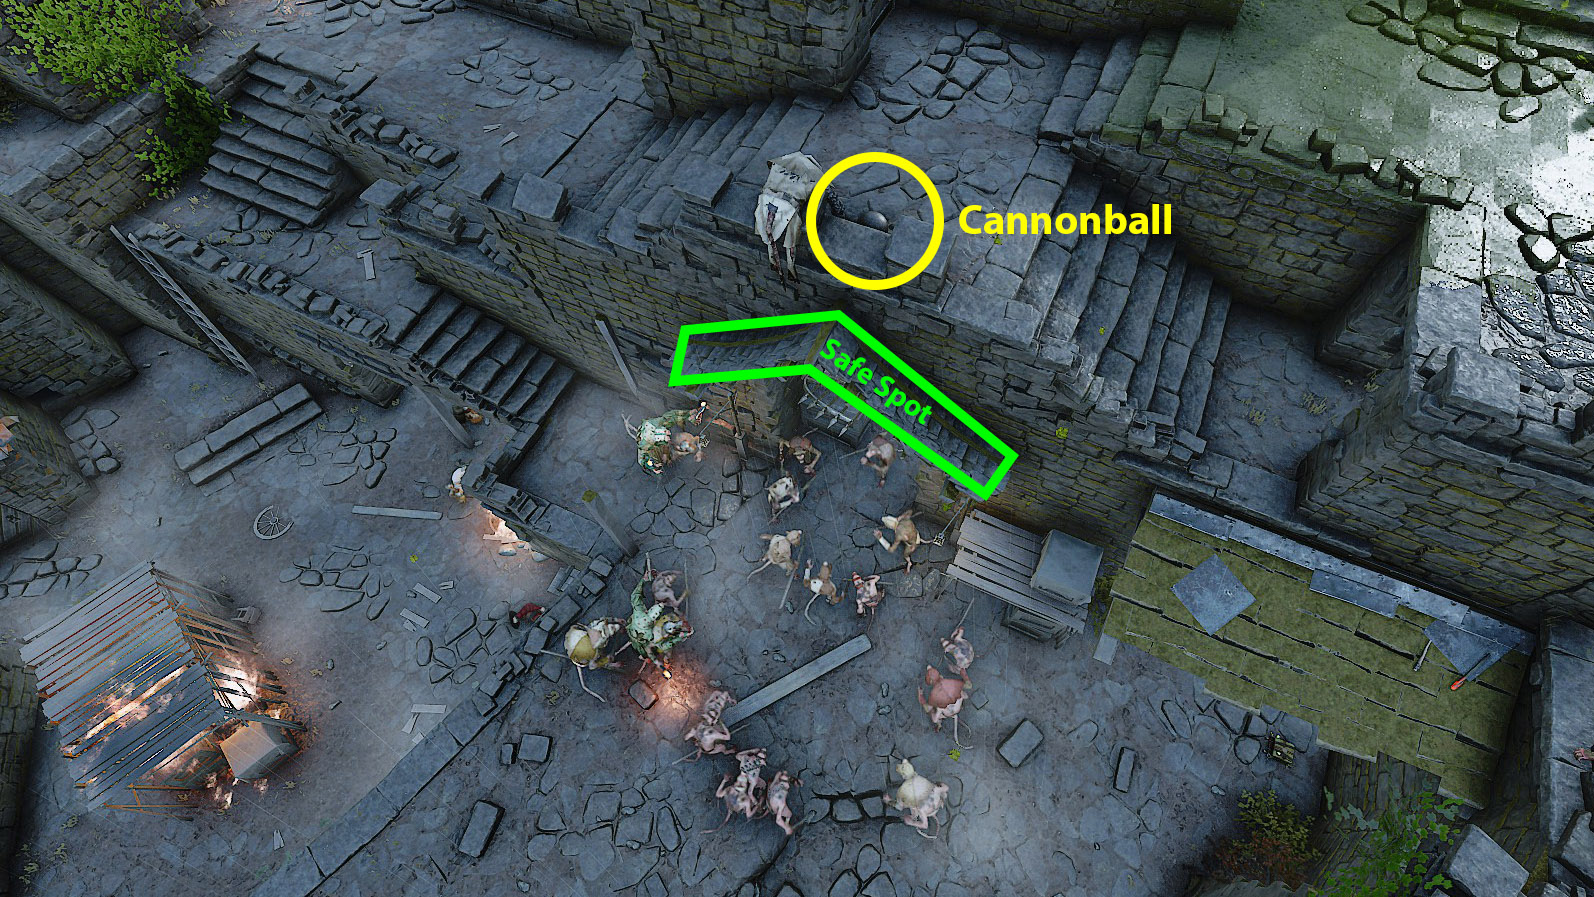
Most players have overcome this challenge with a teammate who aggro the mobs below. However, there is an option to tackle it solo. Let me explain how to do it:
Choose any hero with 10s invisibility (for example, Huntsman, Ranger Veteran, or Shade).
Once you reach the final event, go ahead and use all the healing items beforehand, then return to the ammo box, stand next to it and damage the bots, but don't kill them! Once the bots are almost dead (wounded), head into the event. The bots should die quickly, before or during the large wave of rats appears.As soon as the cannonball appears, go to it, pick it up, and place it next to the dead rat above the fort exit. Next, climb onto the canopy so that enemies gather below and no one attacks you (except for specials). There are two ways to spawn a large wave of rats:
- Wait a long time.
- Kill small waves of marauders, and at some moment a large wave of rats will appear.
https://youtu.be/VfCJ5Ft64aM
 8. More Where They Came From
Have Skarrik Spinemanglr kill 40 Skaven in Into the Nest
For this challenge, we need Ironbreaker with Trollhammer, for better DPS on Lord. During the level, be sure to collect strength potions and bombs by passing them to the bots.
Once you reach the final arena, go ahead and use all the healing items beforehand, then return to the ammo box, stand next to it and damage the bots, but don't kill them! Once the bots are almost dead (wounded), head into the arena. The bots should die quickly, leaving behind the items you need.
Then deal maximum damage to the Lord using a strength potion and a bomb, but so that he has about one shot worth of health left. Carefully kite around in a circle, trying to push enemies away and using Stam Tech whenever possible. After a while, the Lord will take a position in the corner and begin performing horizontal attacks. These attacks deal a lot of damage and can hit you even through a shield. Get close to the lord to launch this attack, and quickly move away from it to avoid taking damage.
After a few such attacks, Skarrik will kill enough Skaven and you will see a message in the chat about the completion of the challenge. After that, kill the Lord and run to the portal.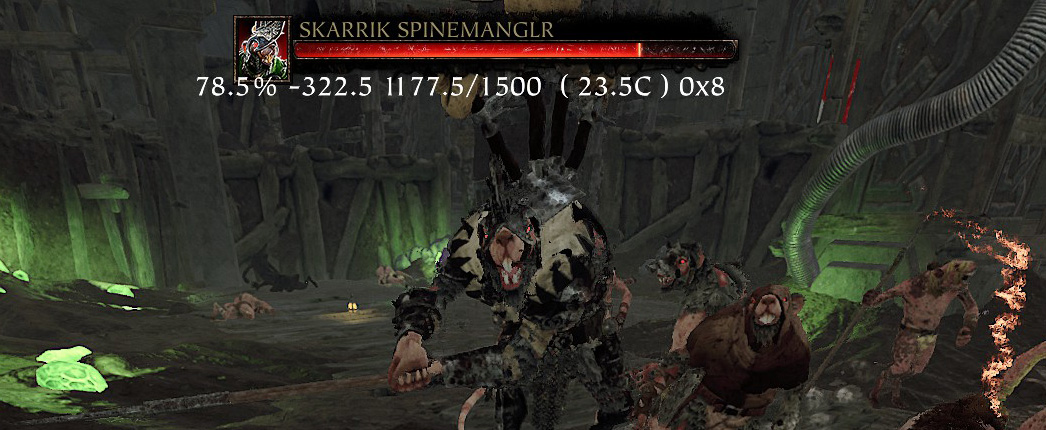
(If the lord has roughly <80% health bar, he will perform horizontal slash, if >80%, he will not)
https://youtu.be/32i06ZTSXQE
- Act 3
 9. Cage Breaker
Rescue all prisoners within 60 seconds on Against the Grain
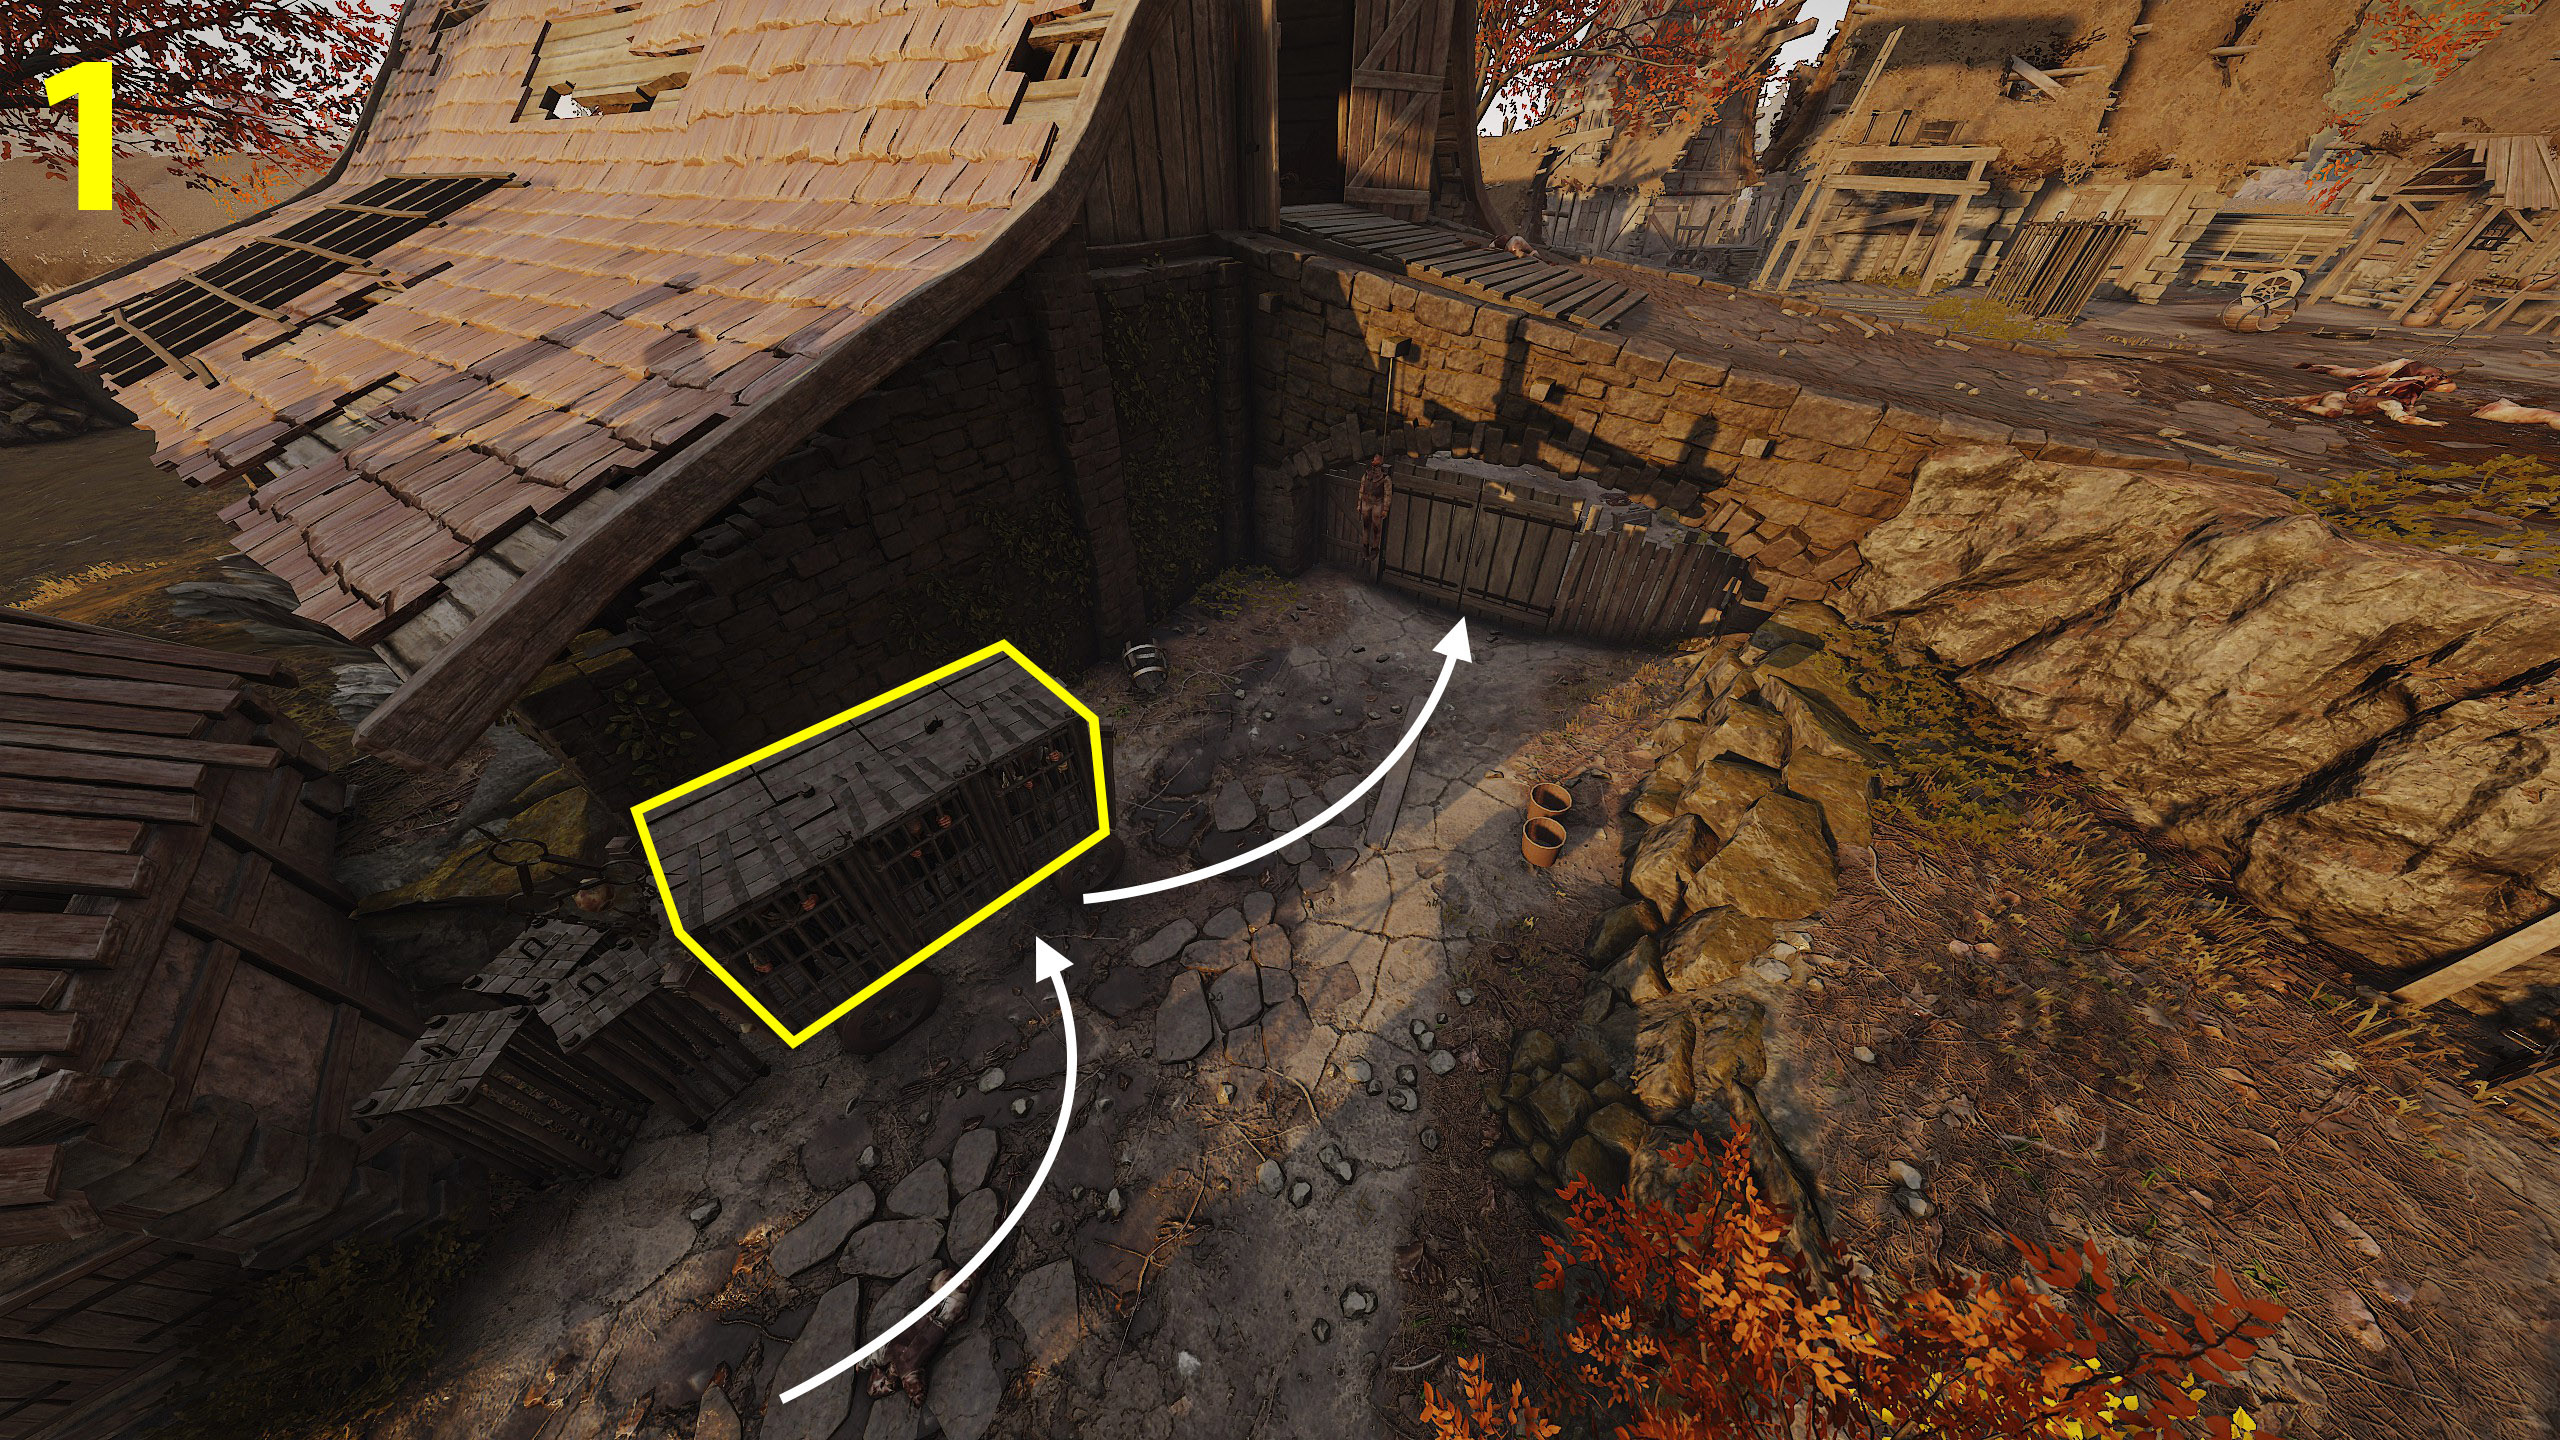
In total, you need to open 11 cages. You'll need a mobile hero, such as a Handmaiden or Slayer. You and the bots will also need several conc/speed potions. Using a weapon with a movement tech allows you to move faster. More detailed info about movetech can be found in this table.
(1) Start the timer by opening the 1 cage.
(3) Then drink the potion and quickly run to the 4 cages in the barn.
(4) Once you are up top, drink the potion and open the 2 cages, then climb the stairs to the second barn.
(5/6) Here, you jump over and reach the 2 cages on the upper level, then jump down and open the last 2 cages.
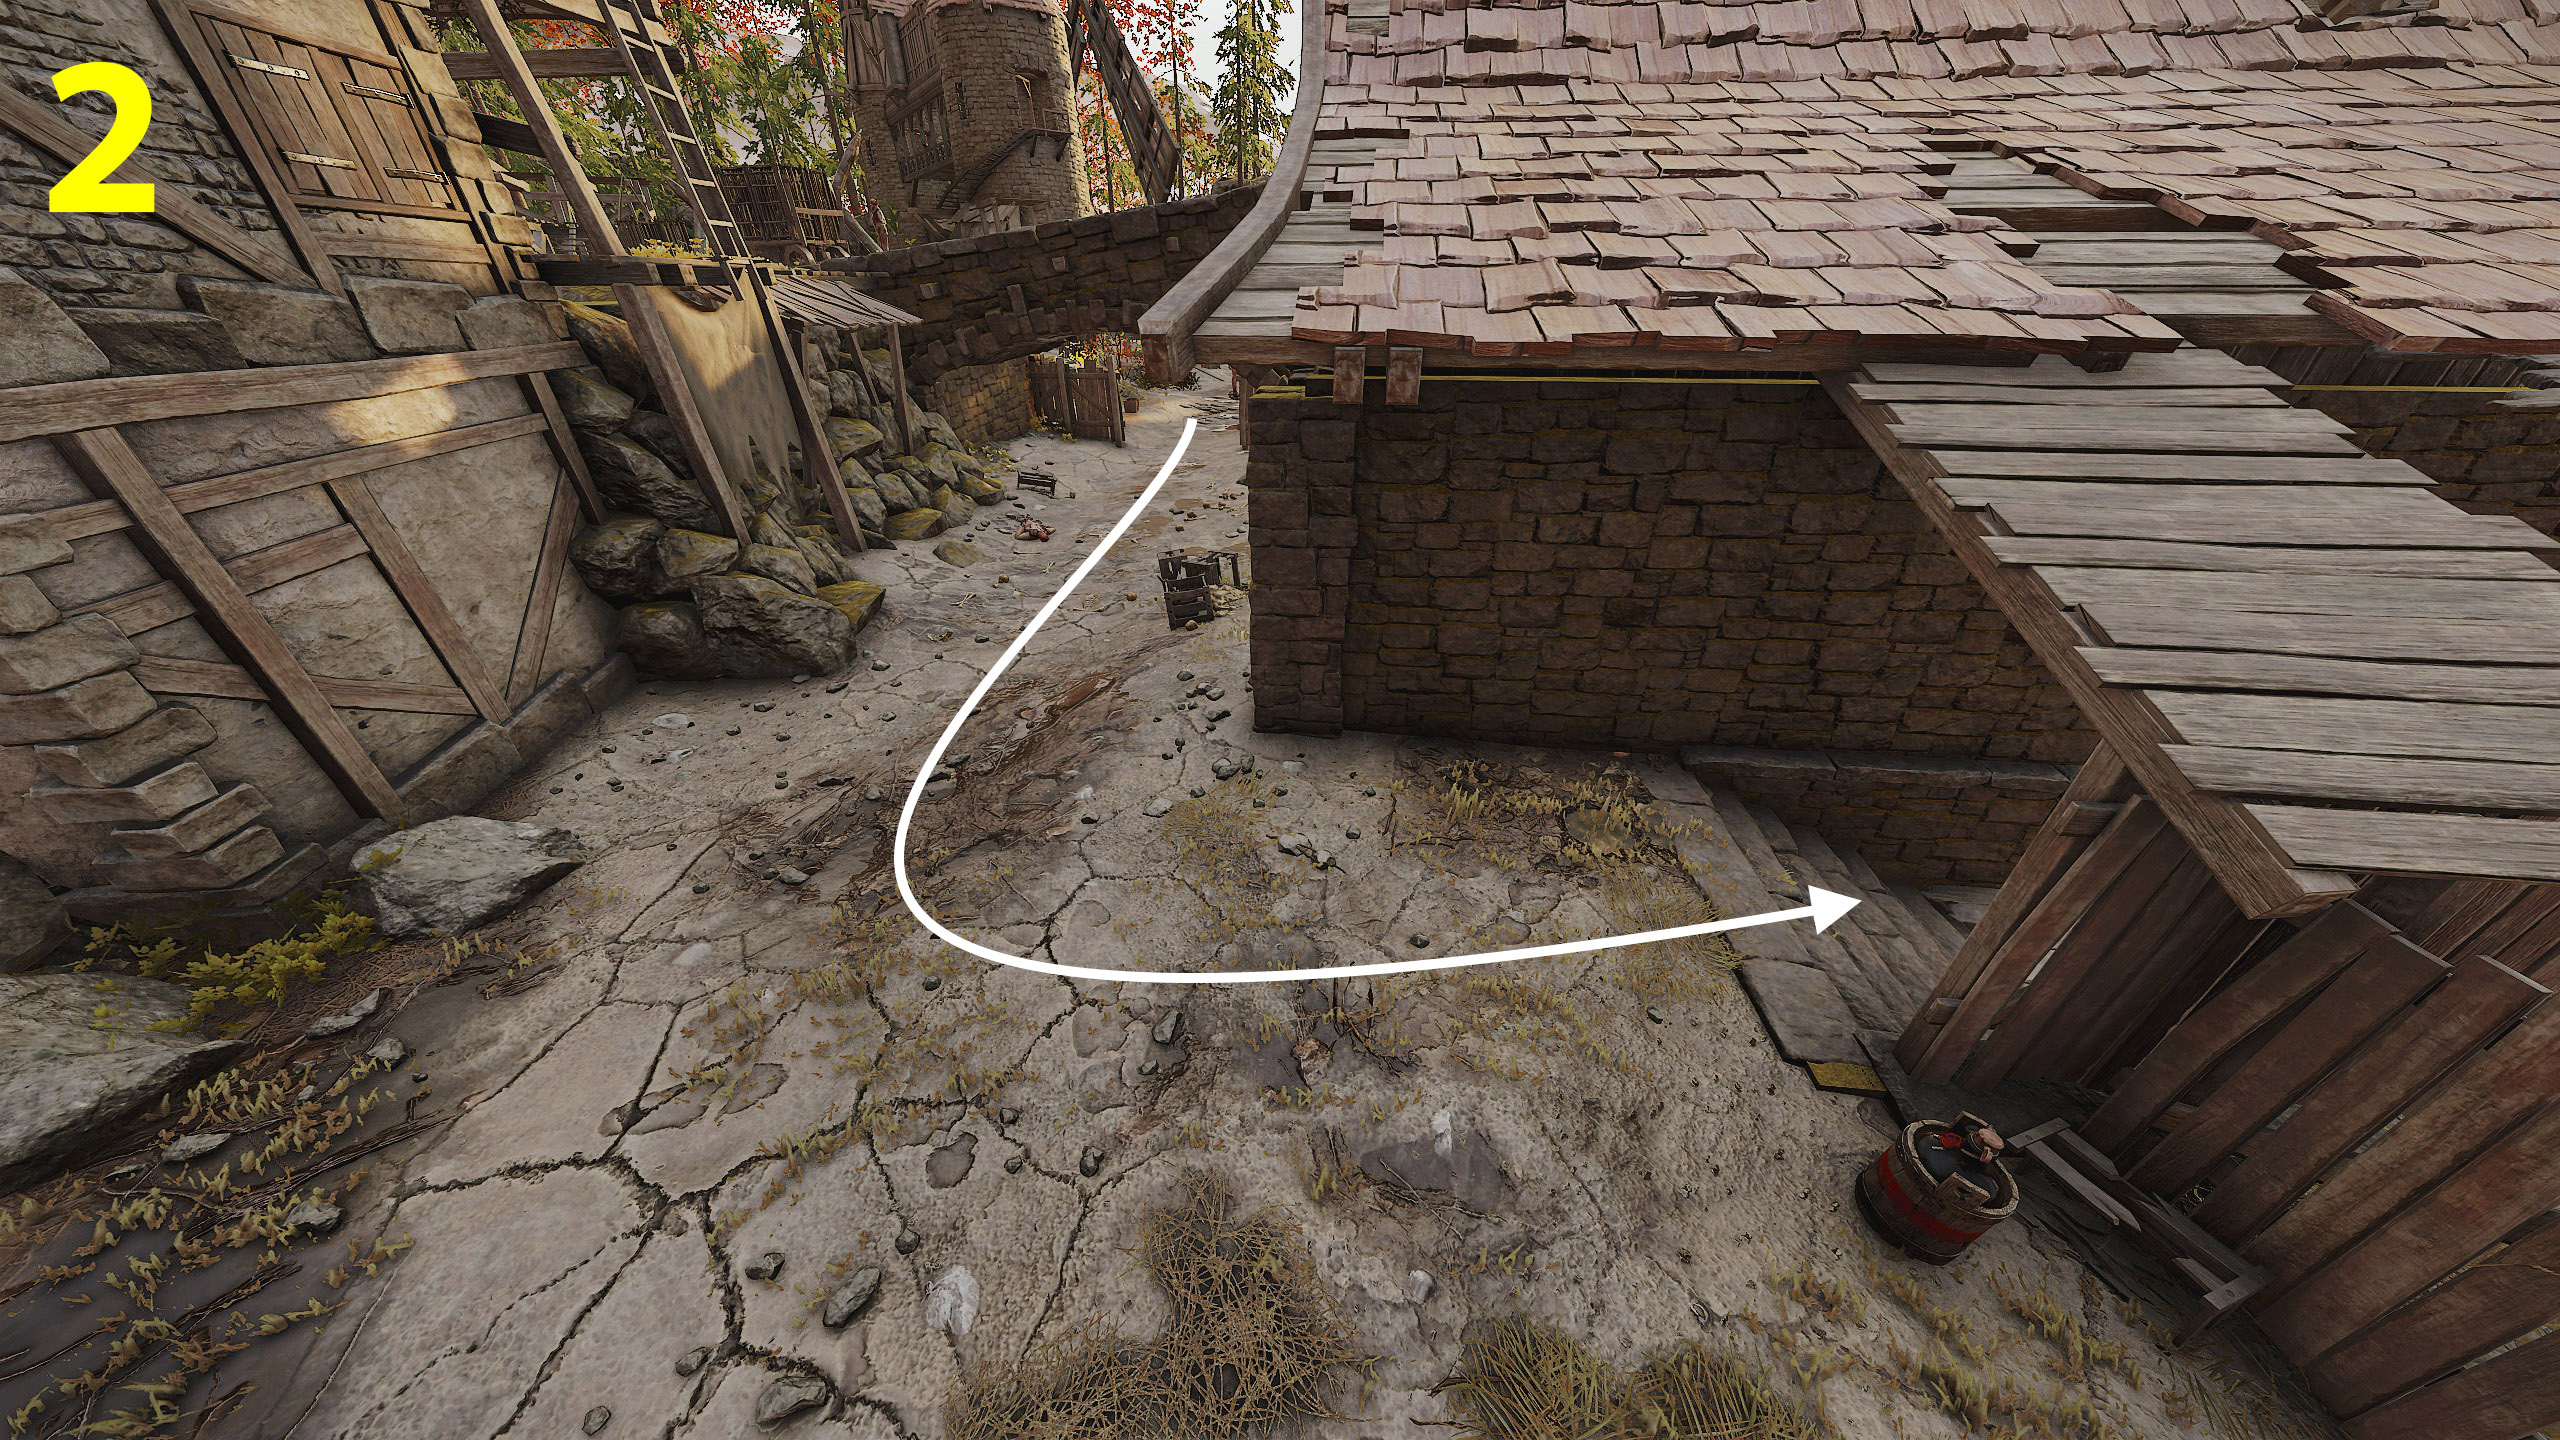
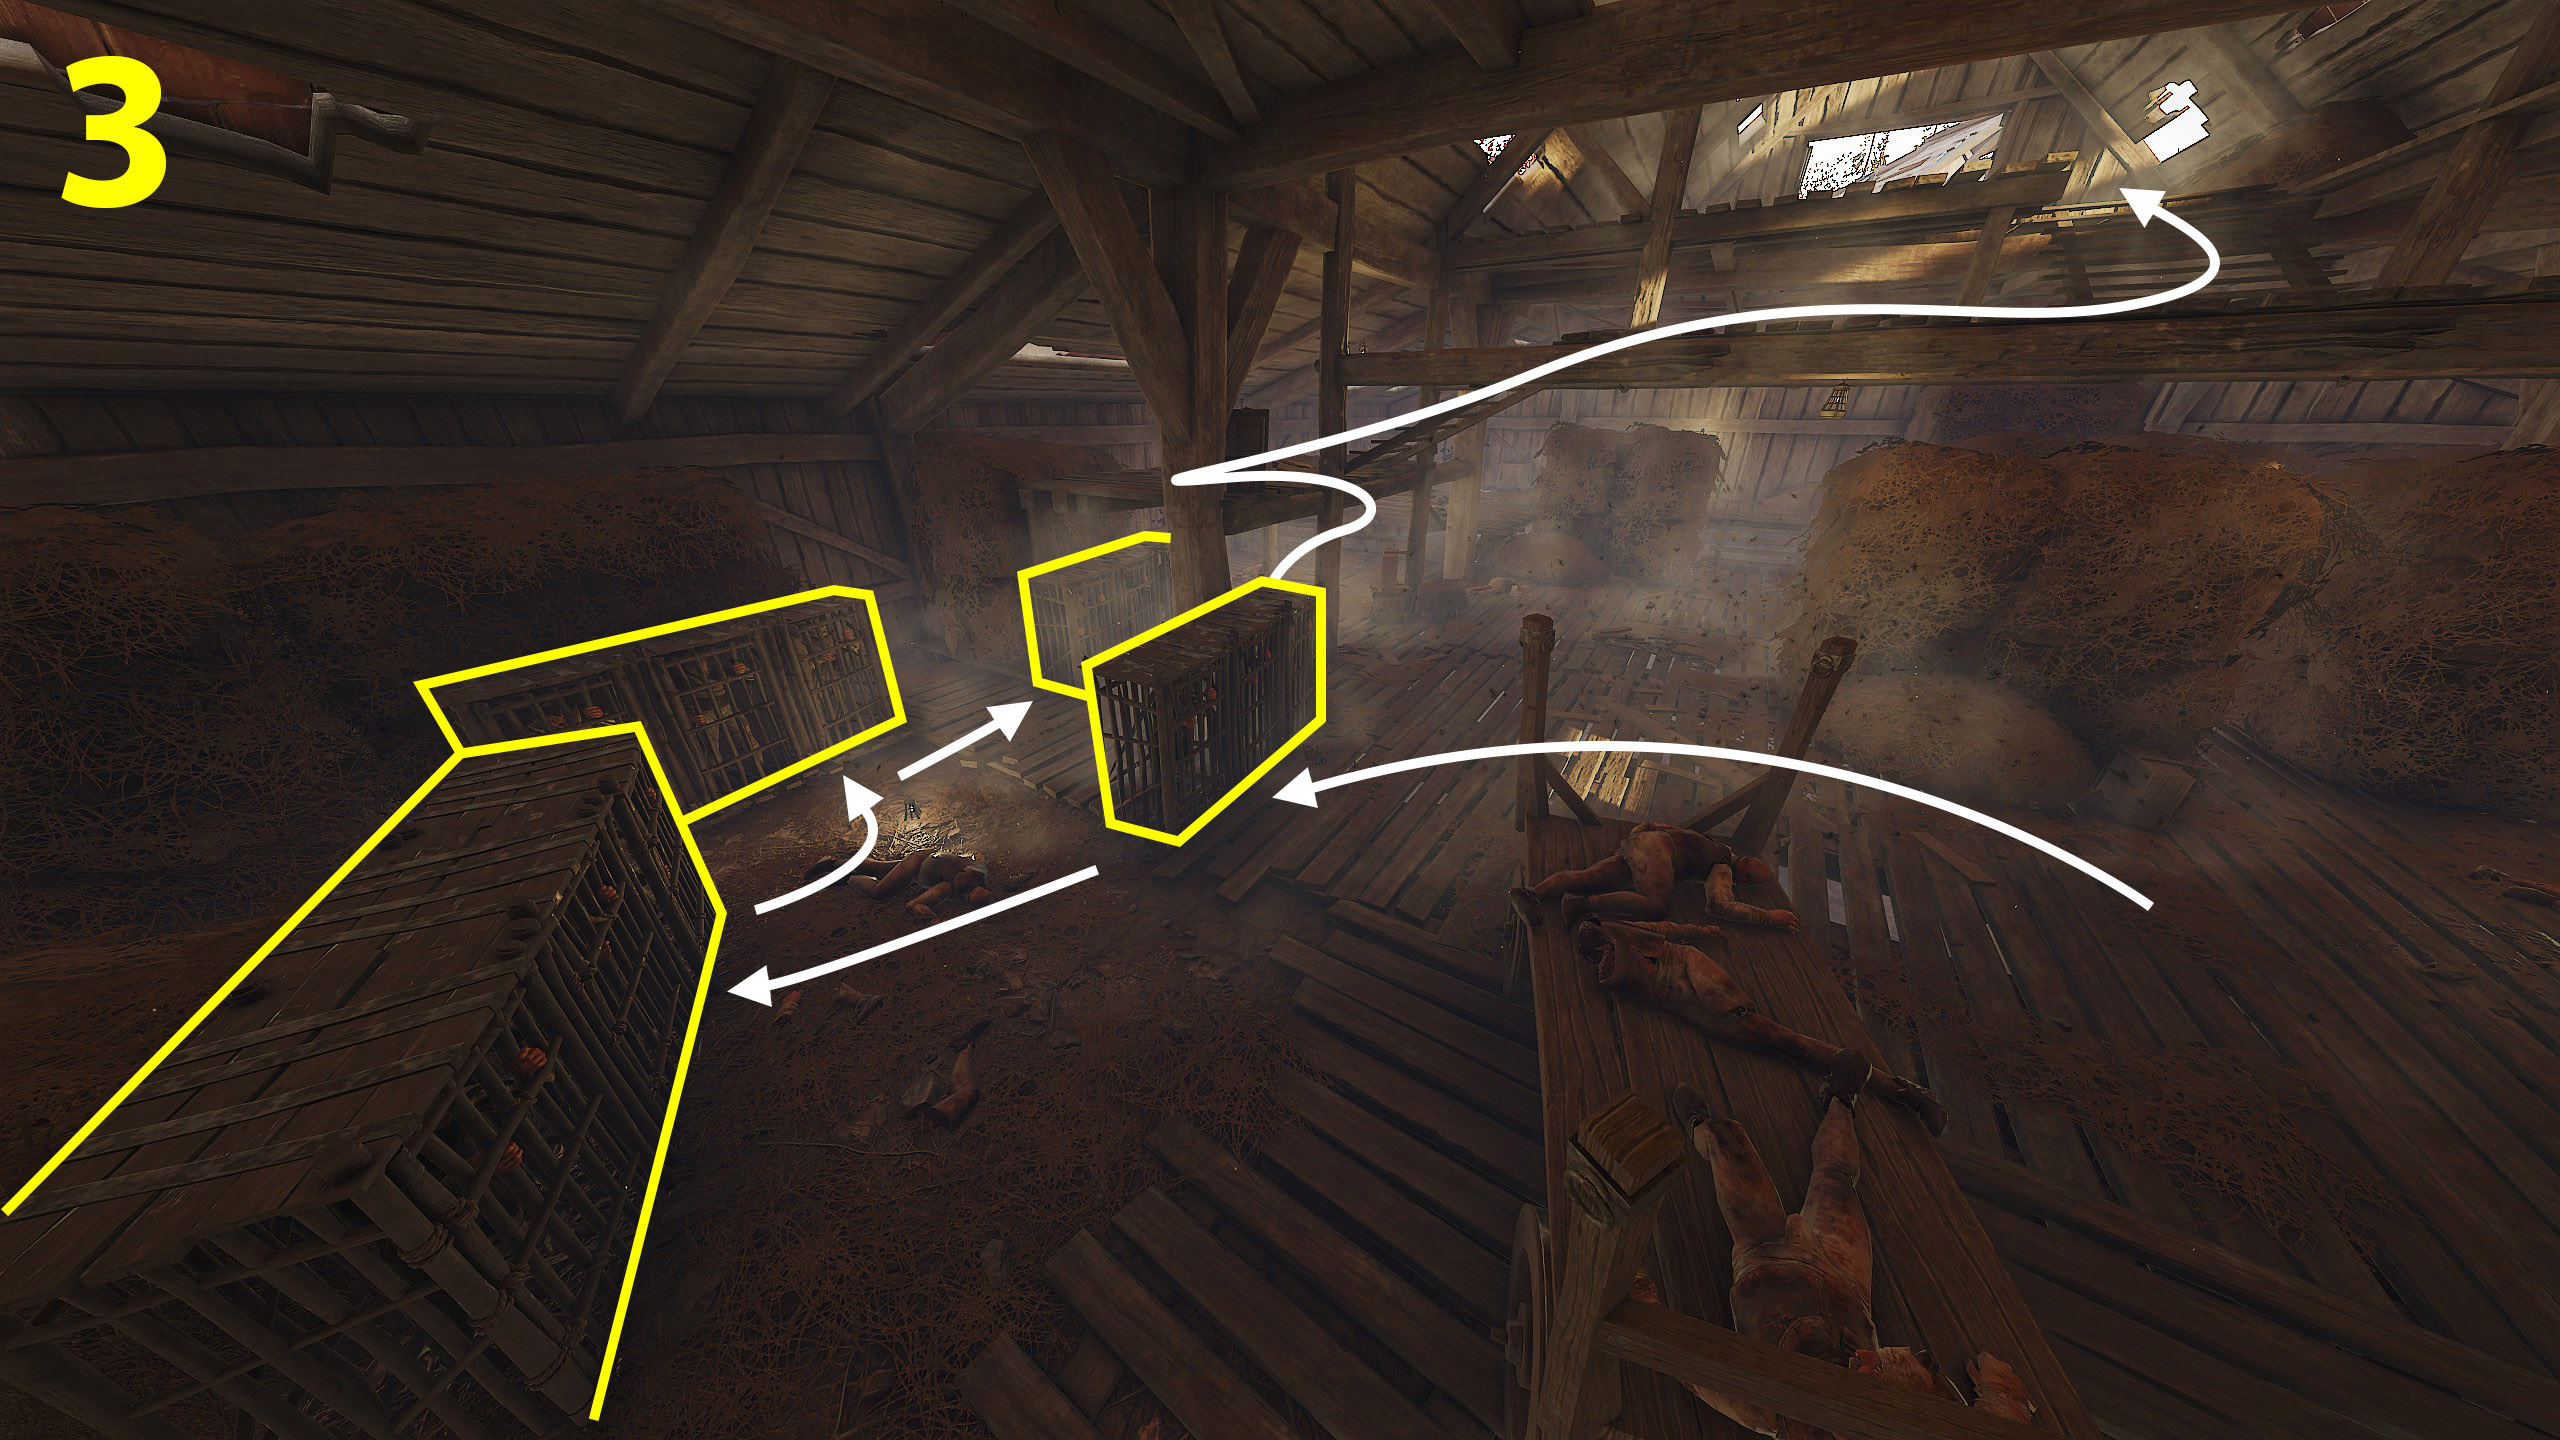
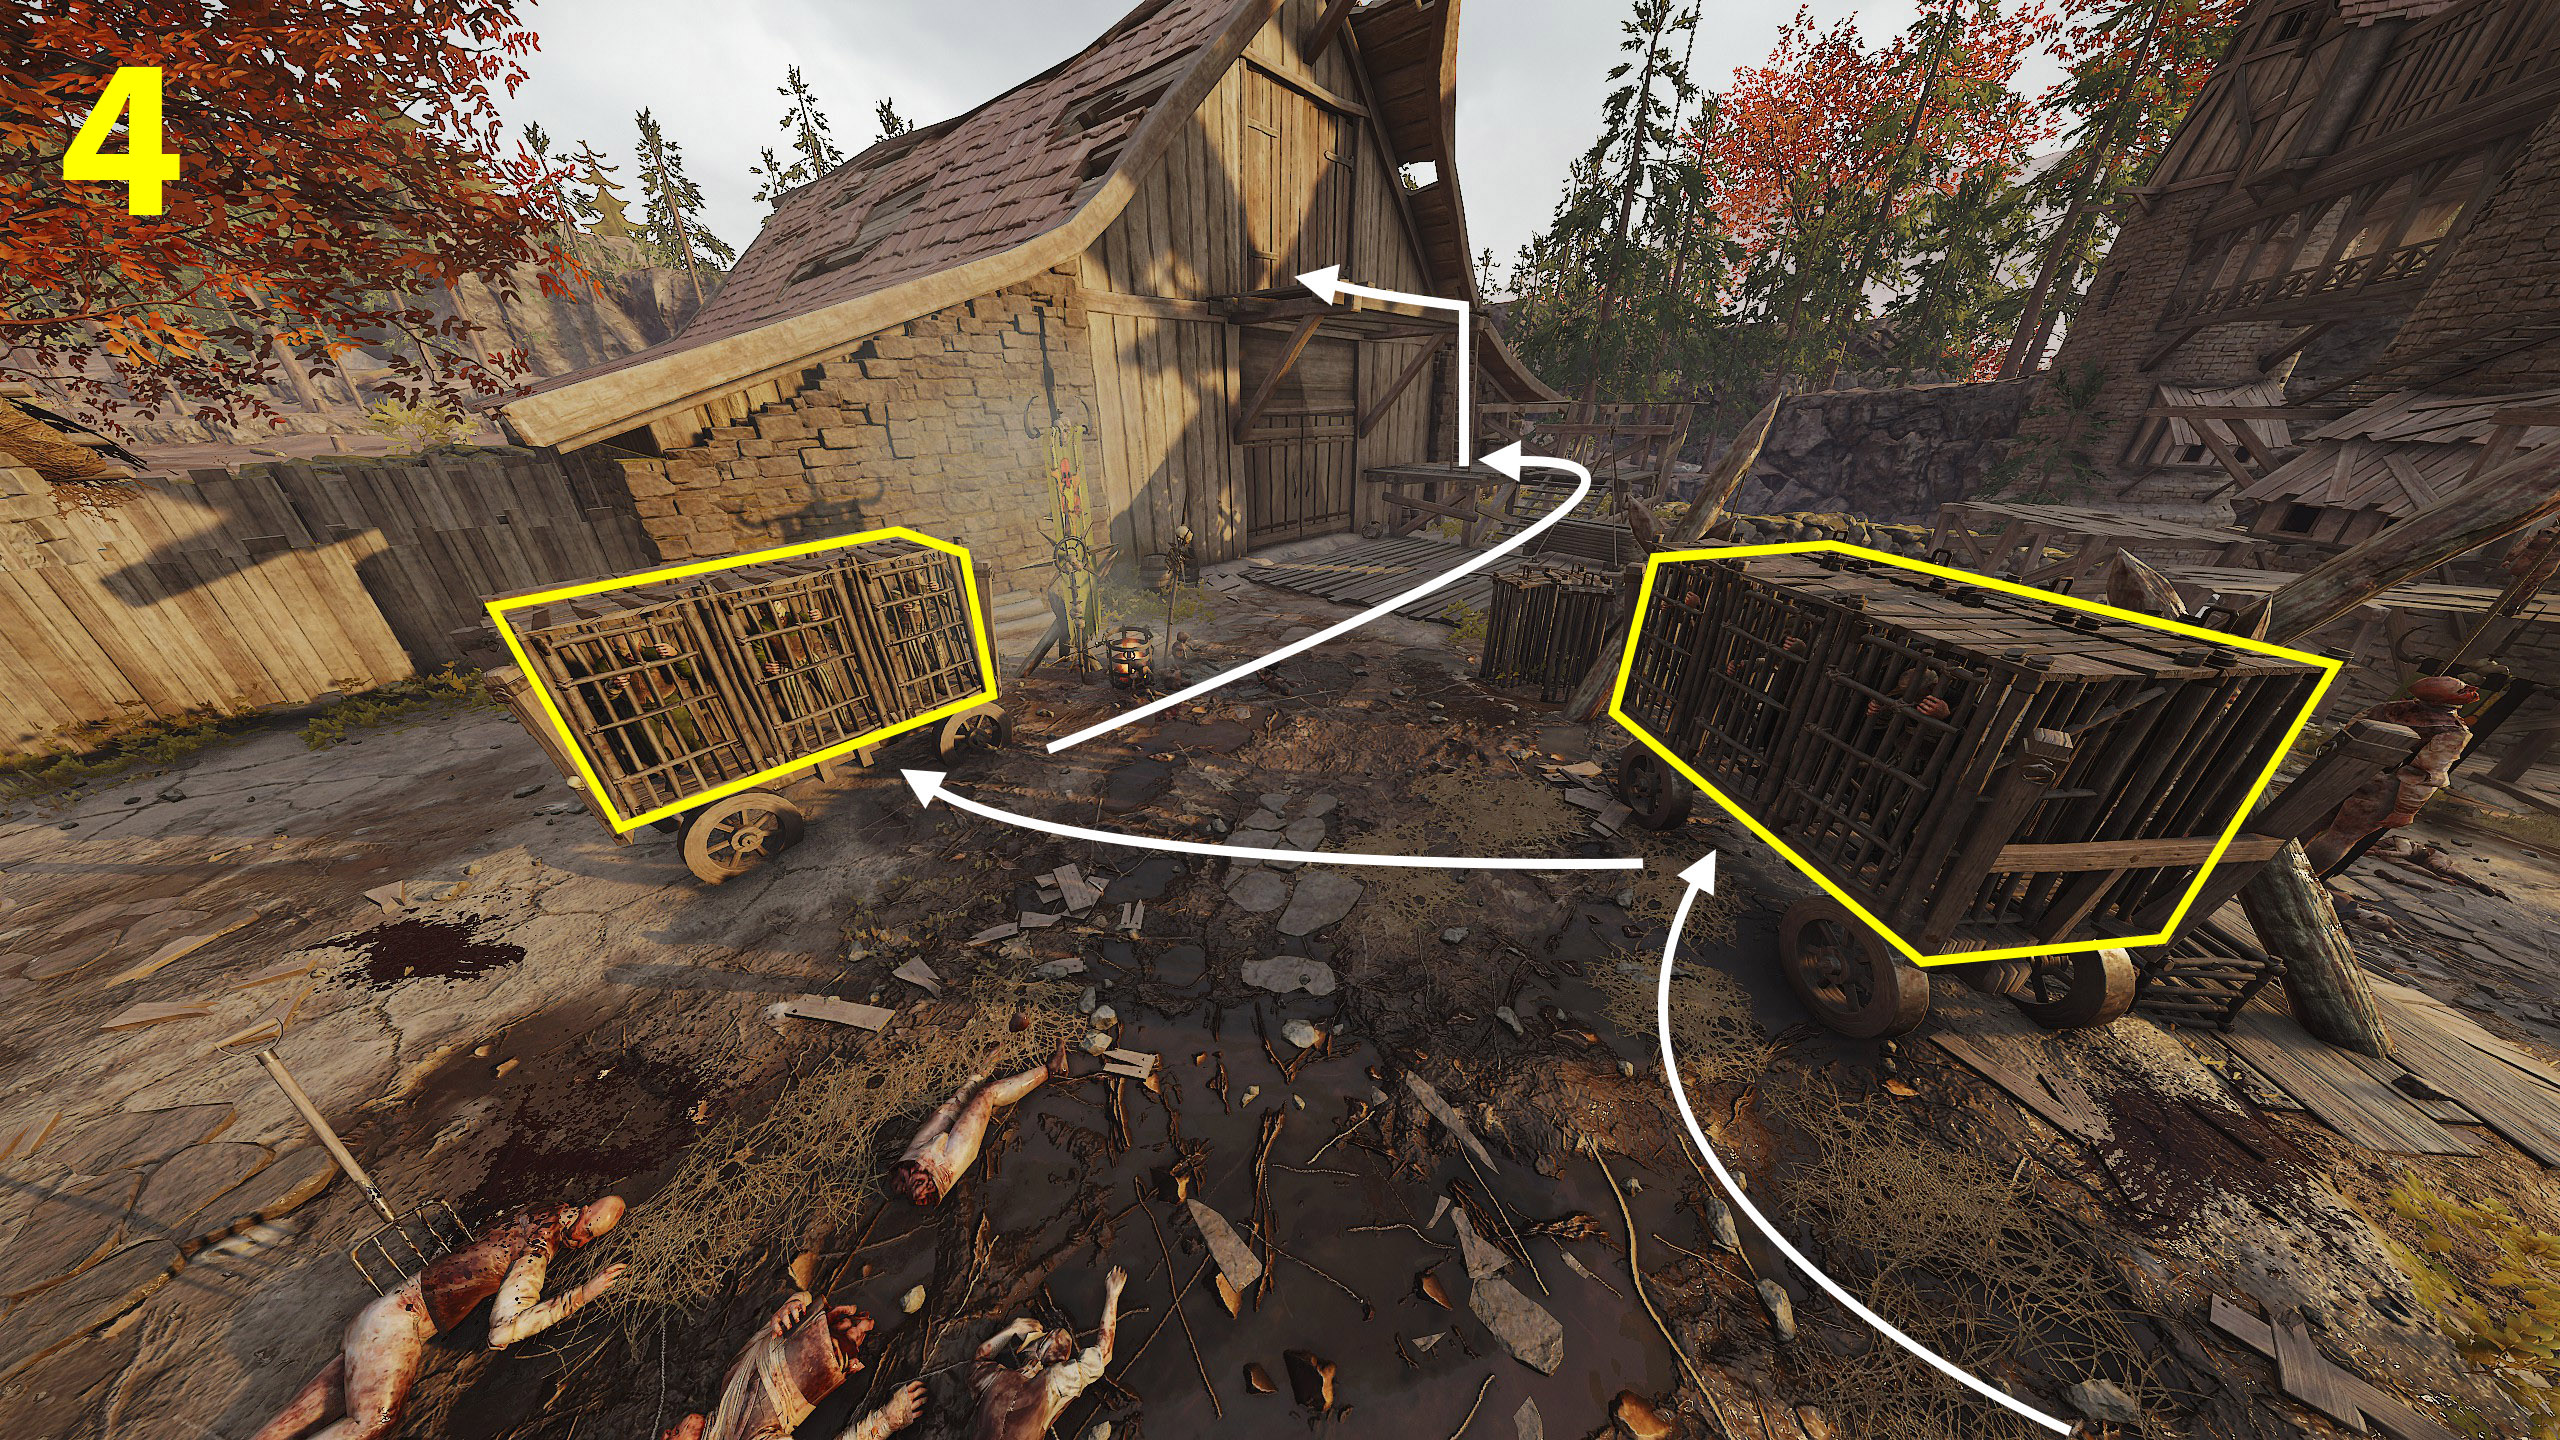
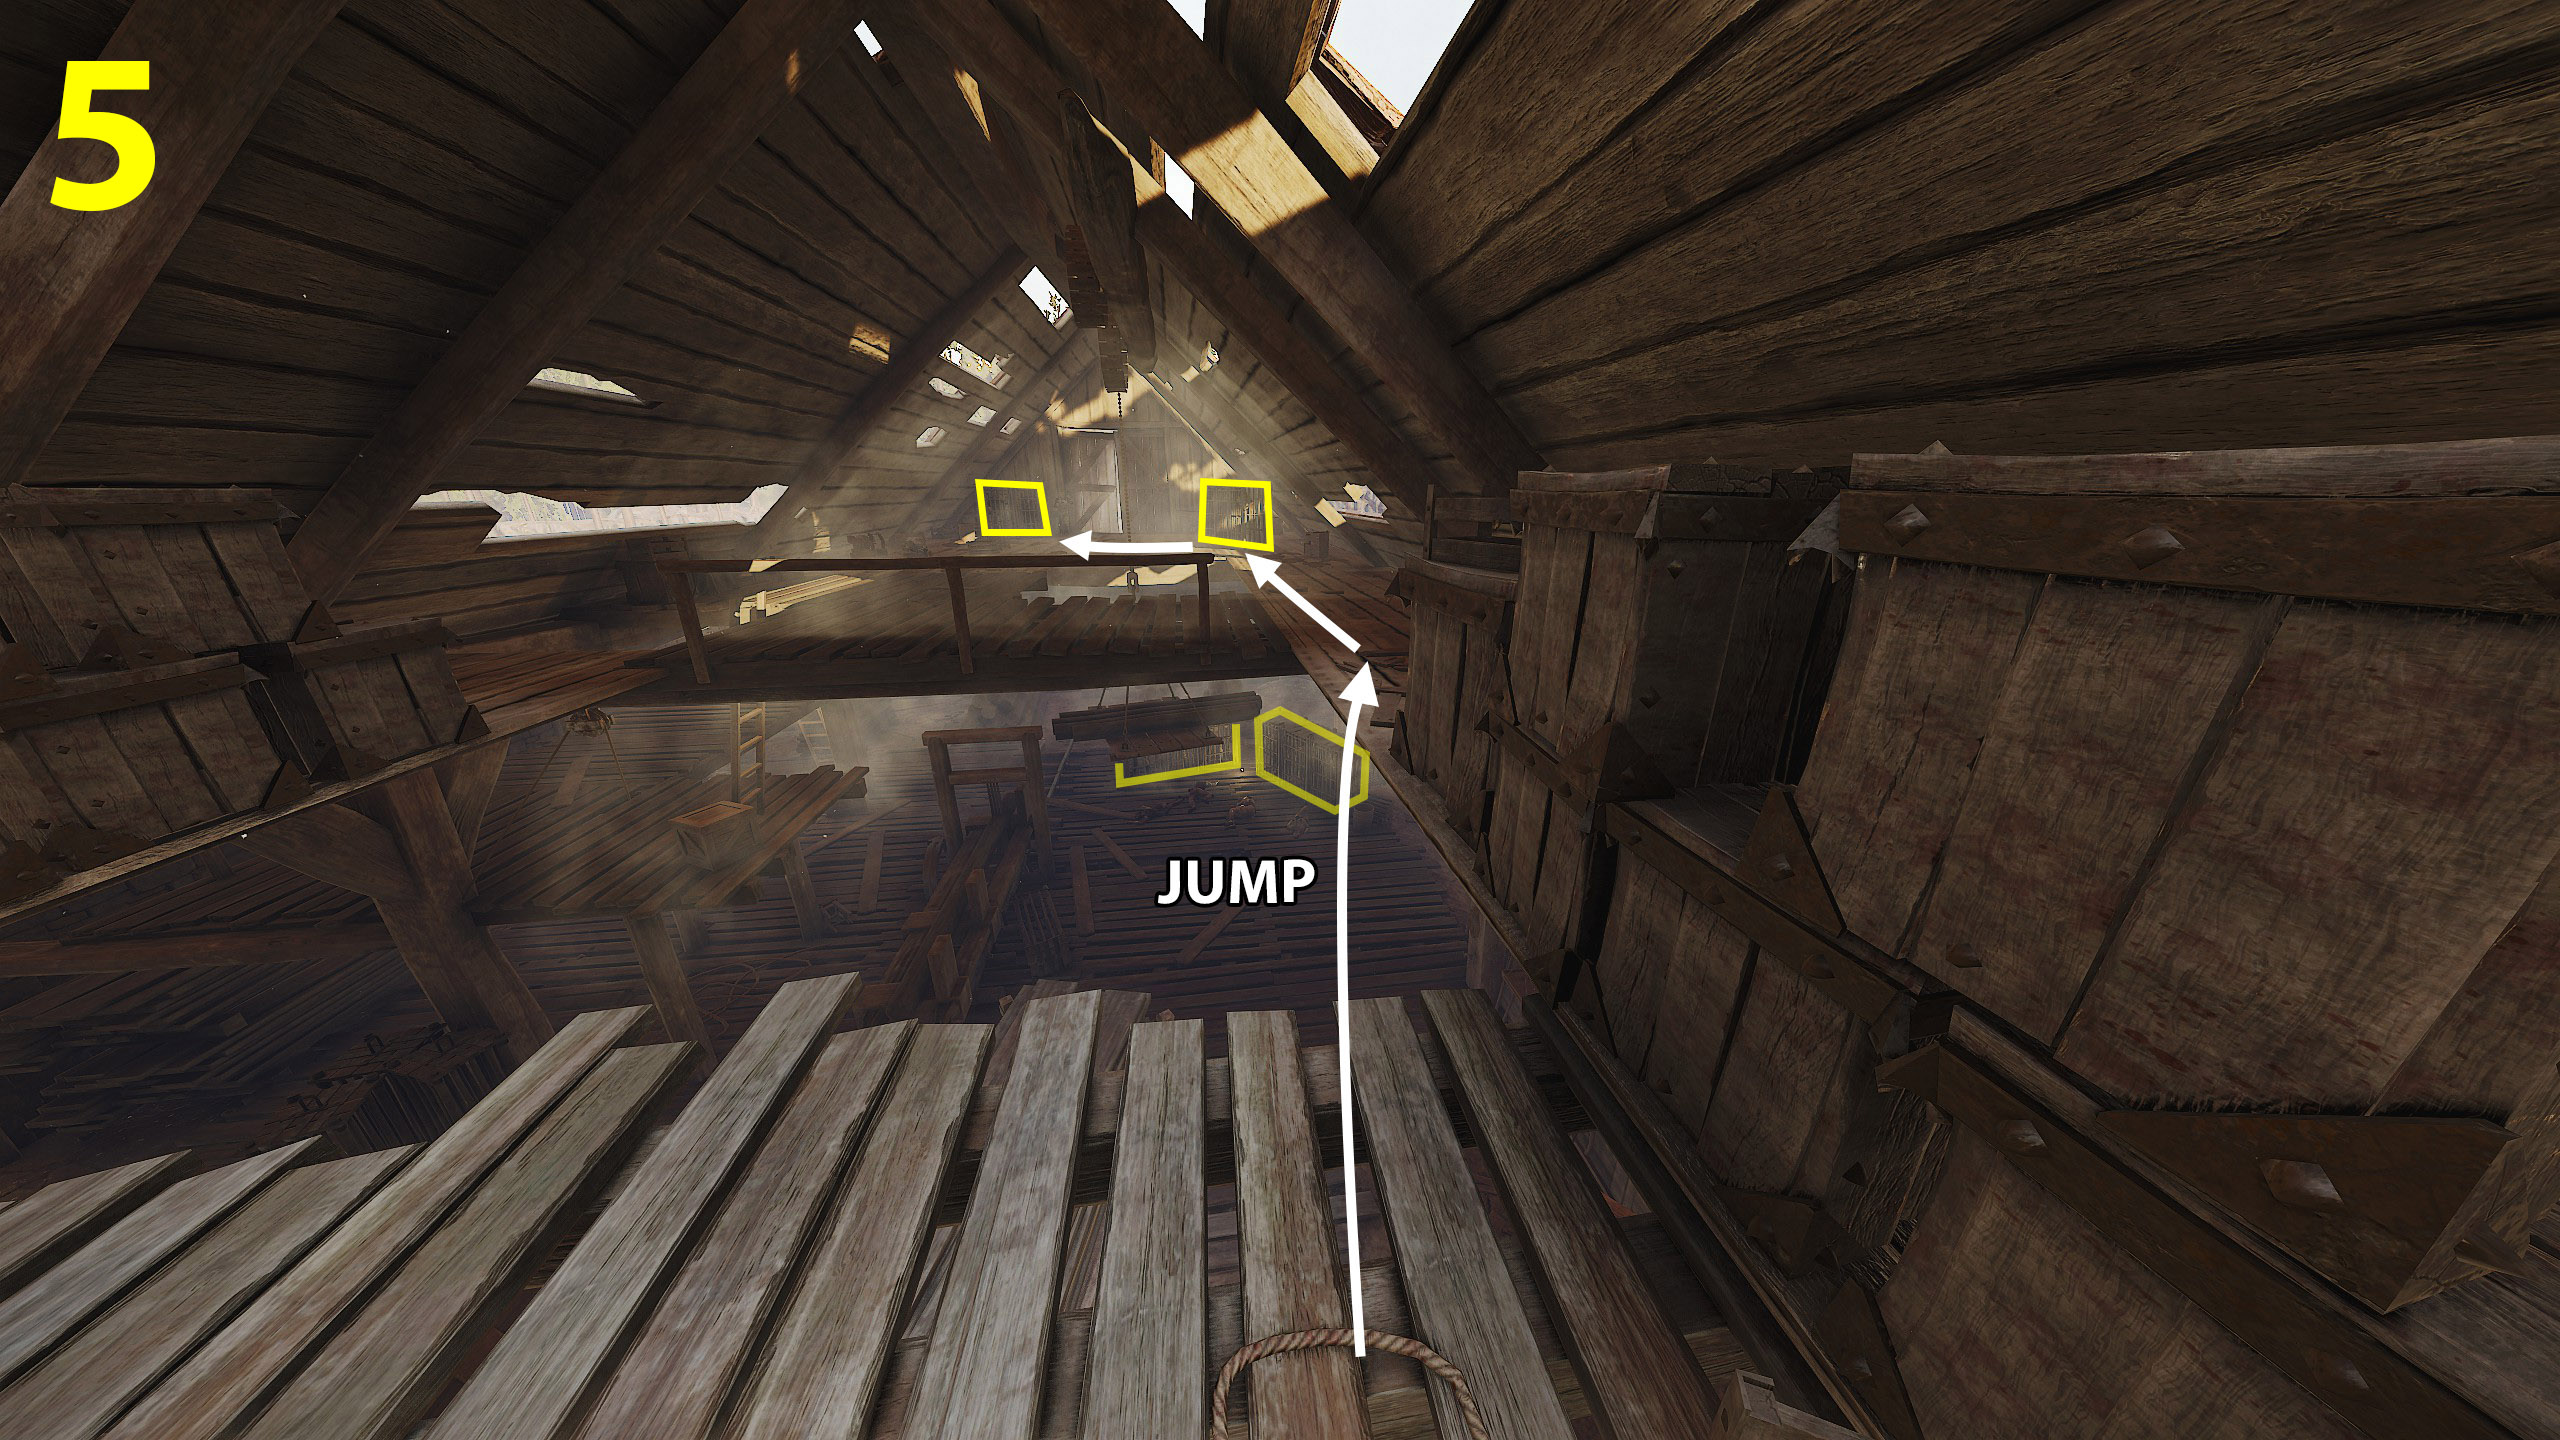
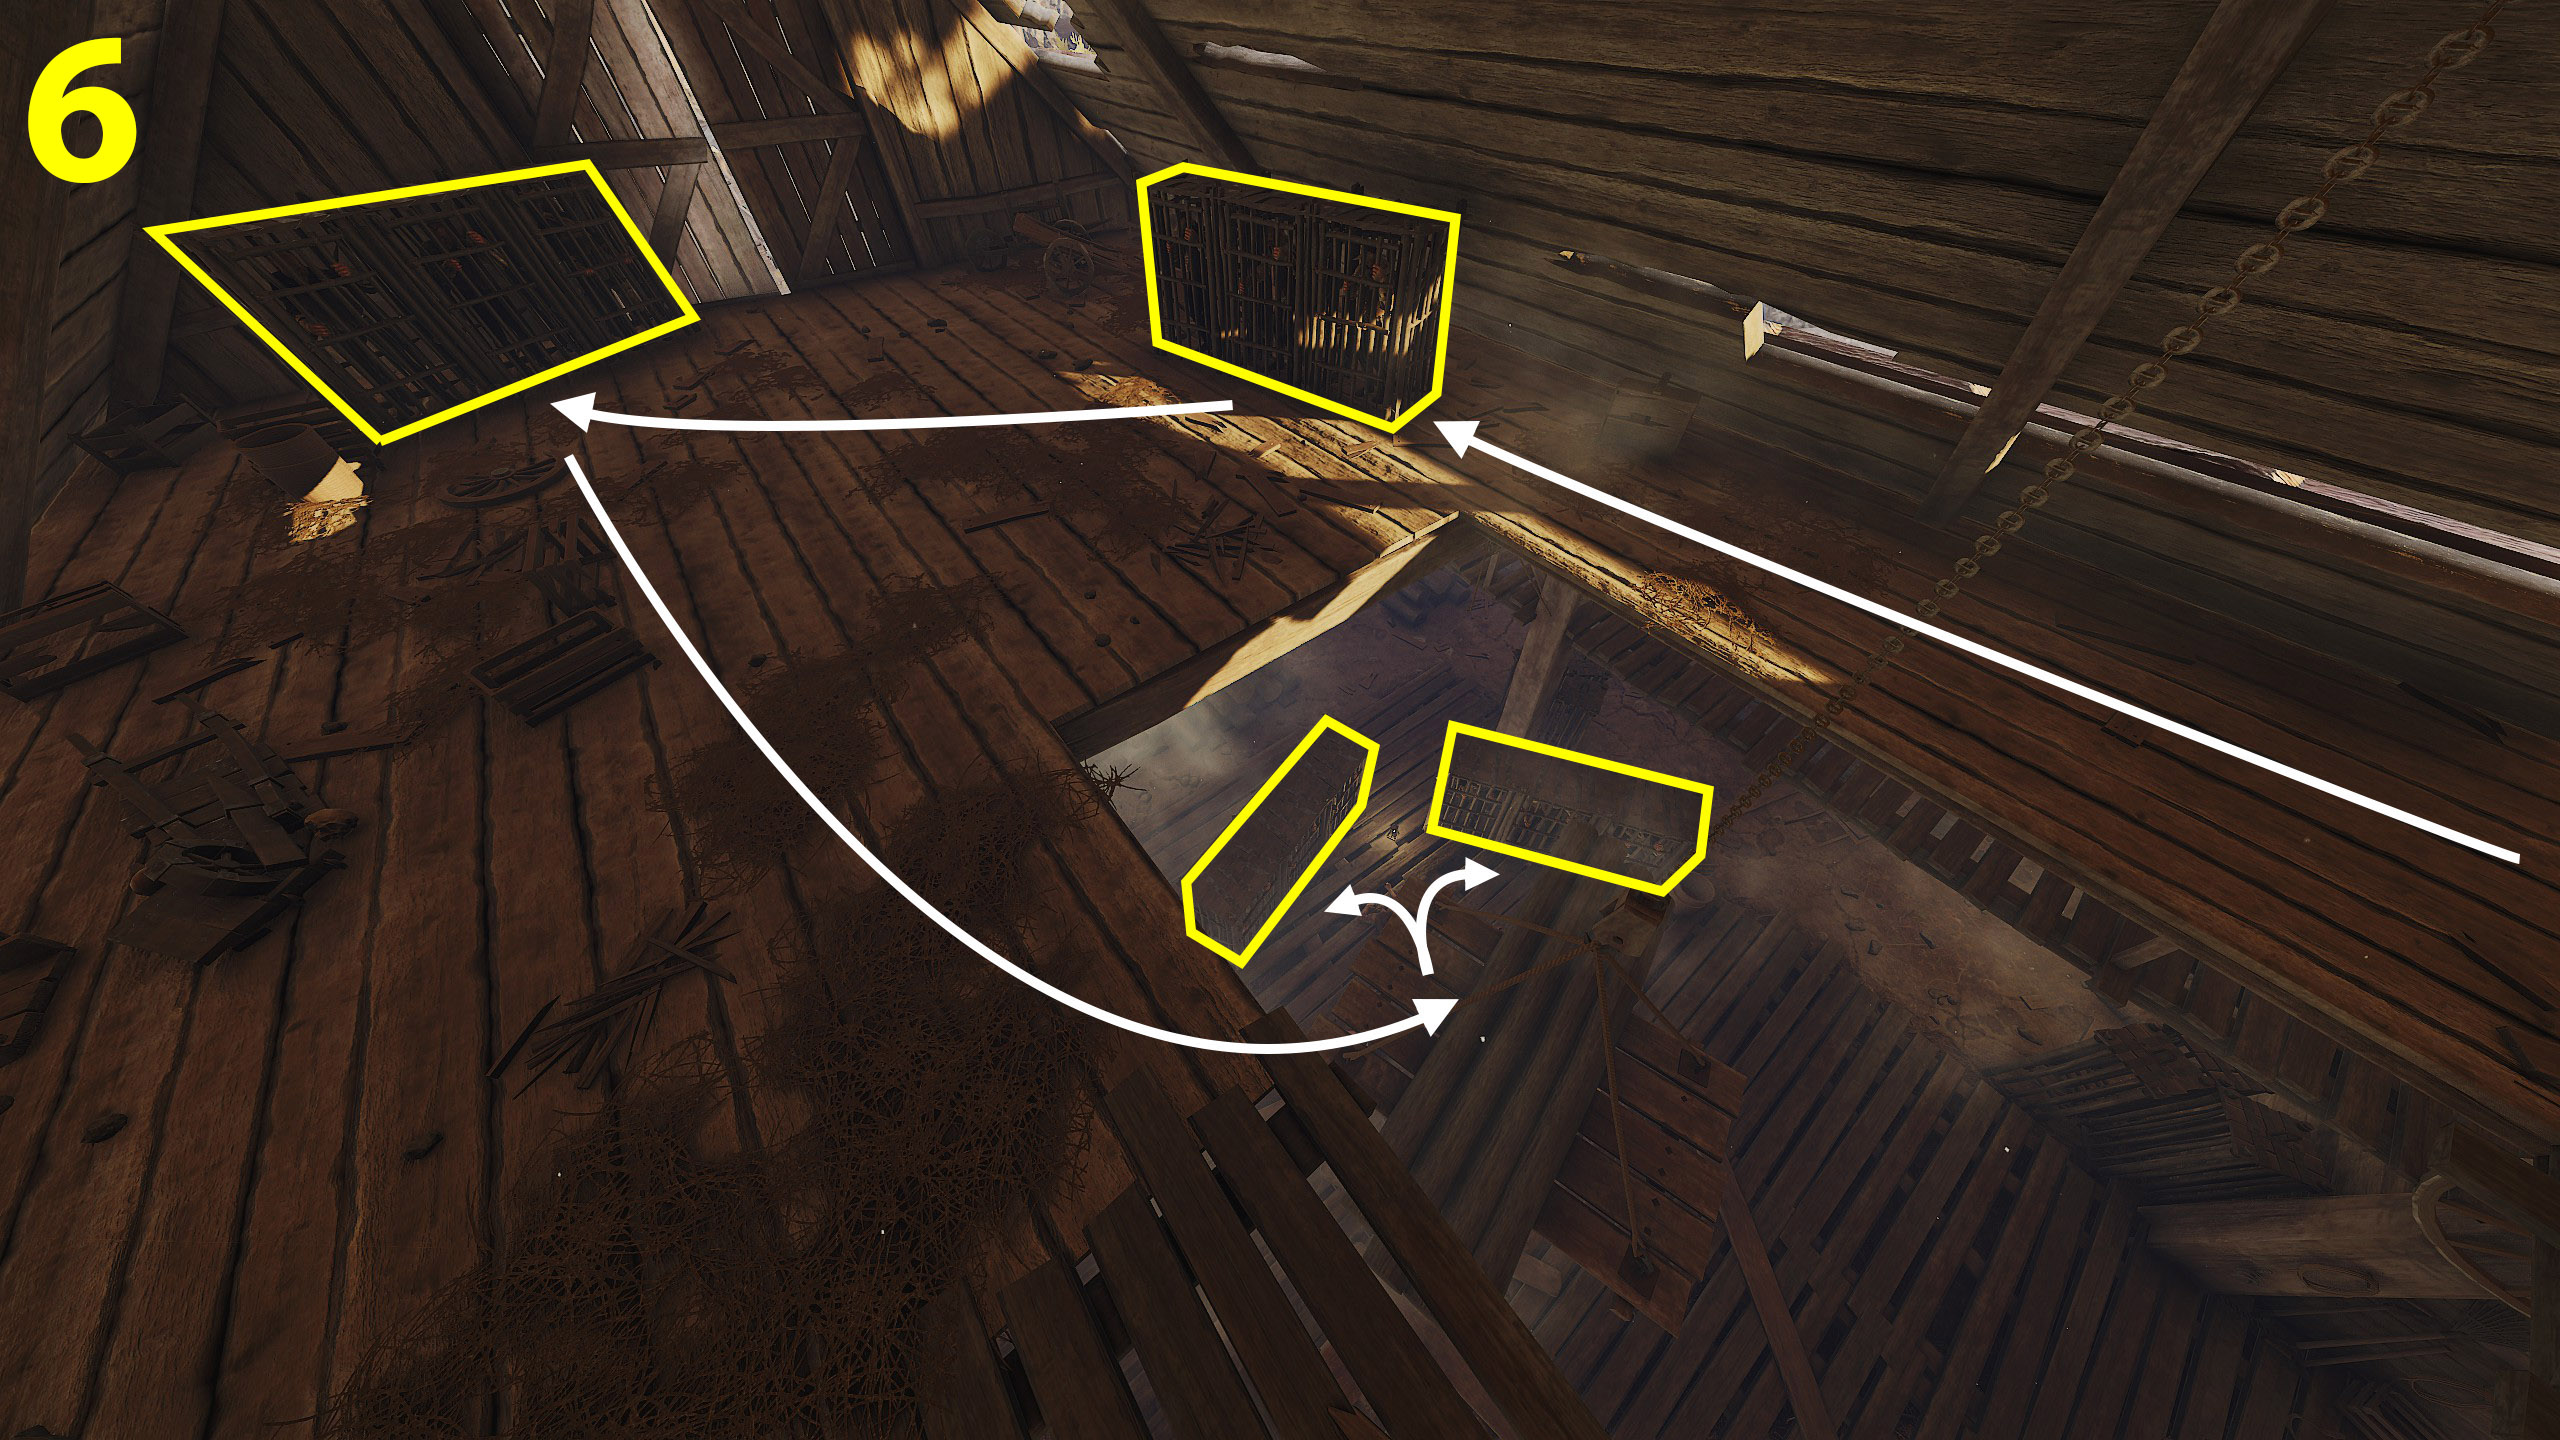 https://youtu.be/fAGFxRLwbZo?si=LS7NOCbYGdzsAsuO
 10. Powder Monkey
Complete Empire in Flames without using any of the event spawned Explosive Barrels
Quite a challenge, but doable if you keep your cool. In total, we'll need to find three barrels for the final event. There are of 4 guaranteed barrel spawn spots:
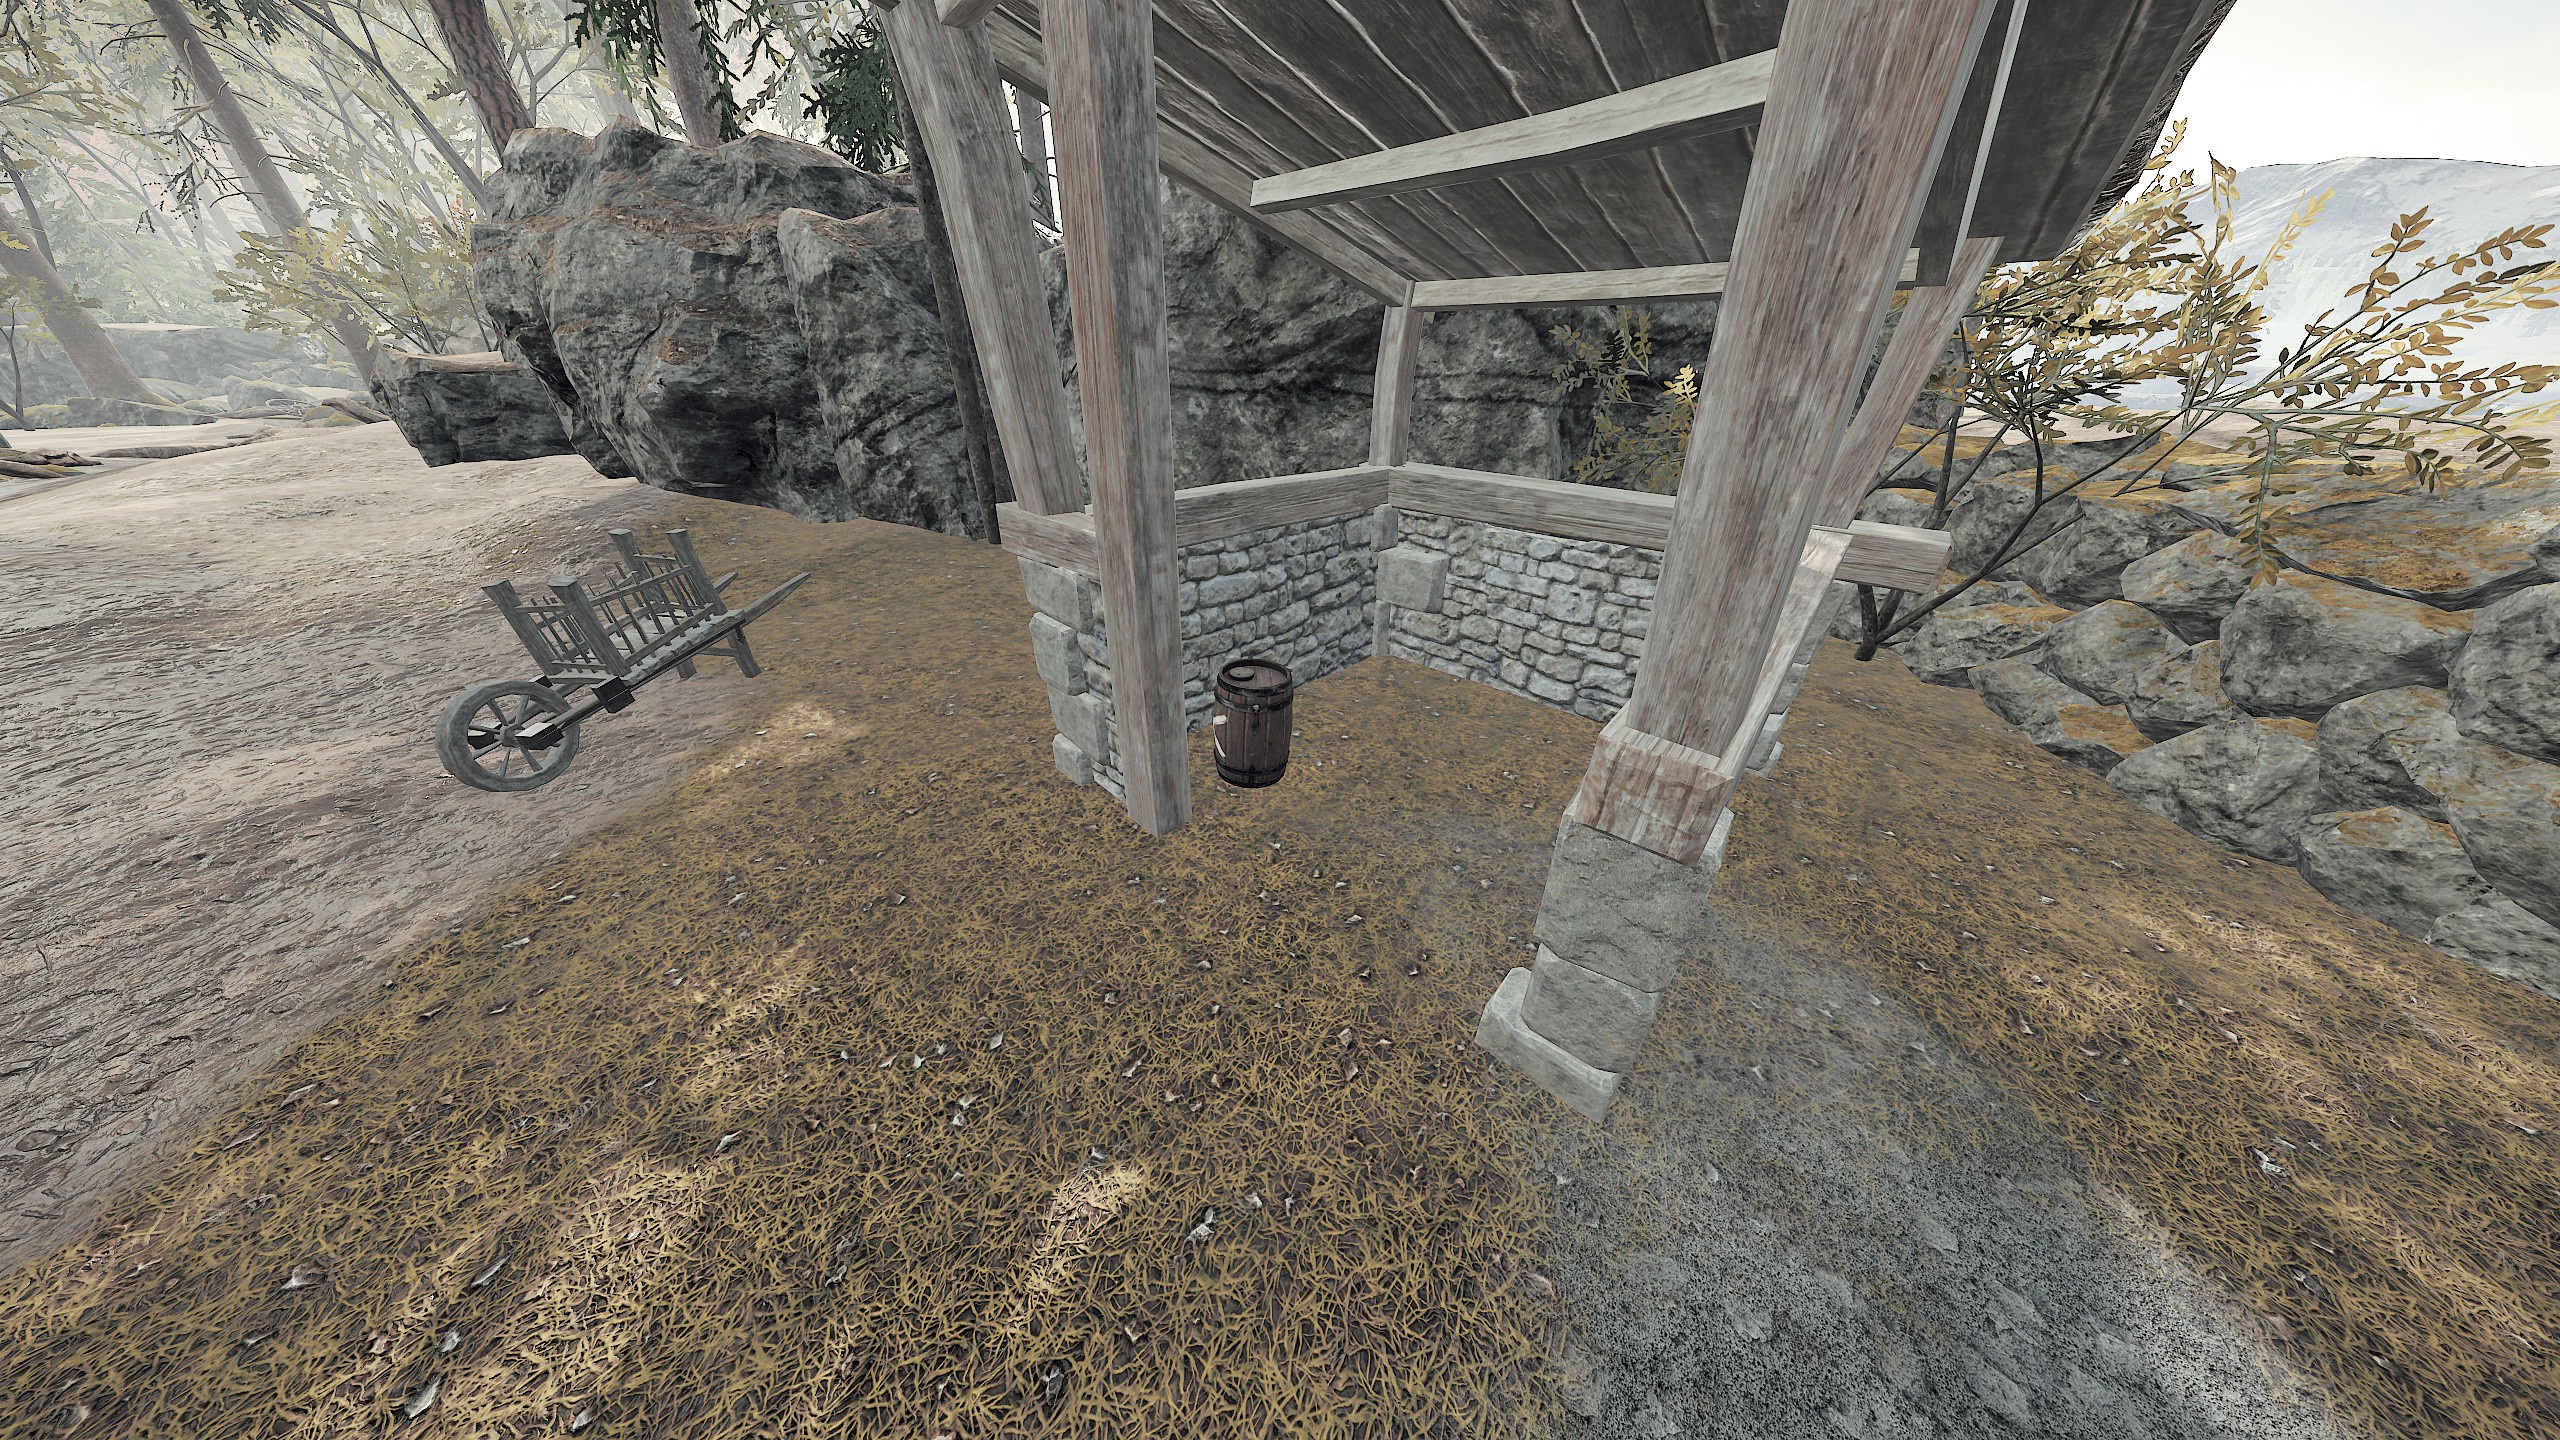
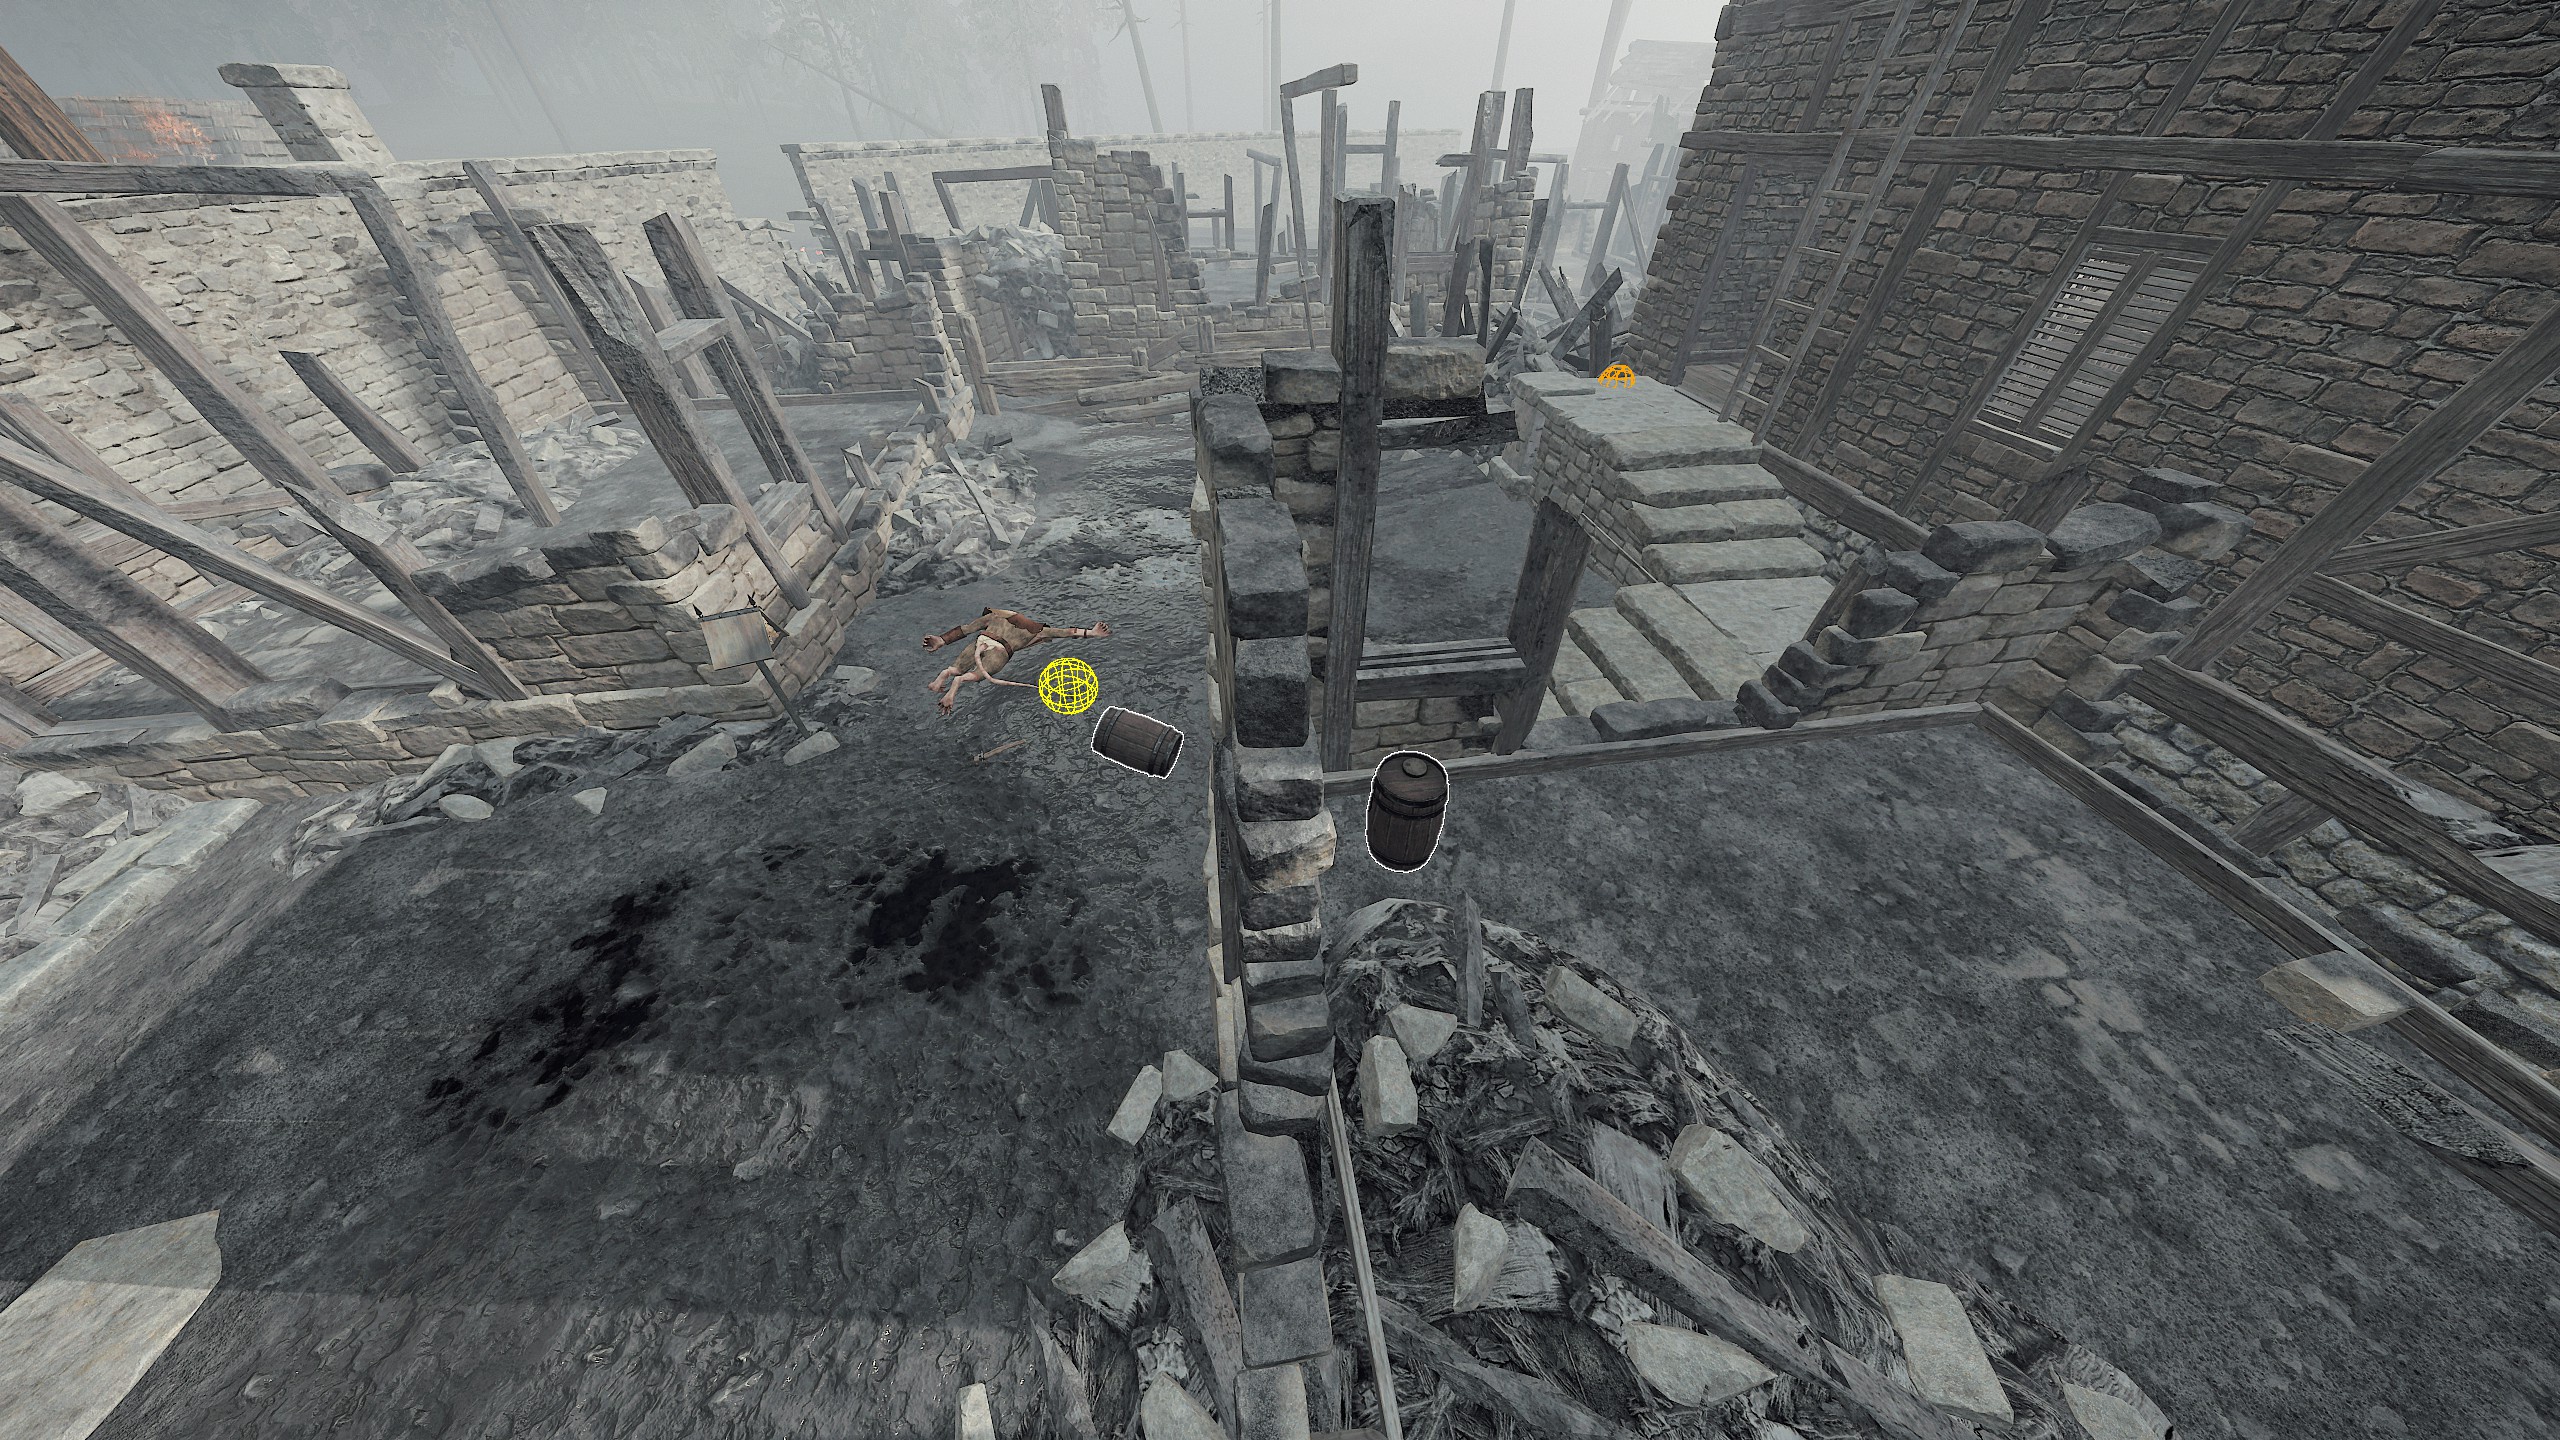
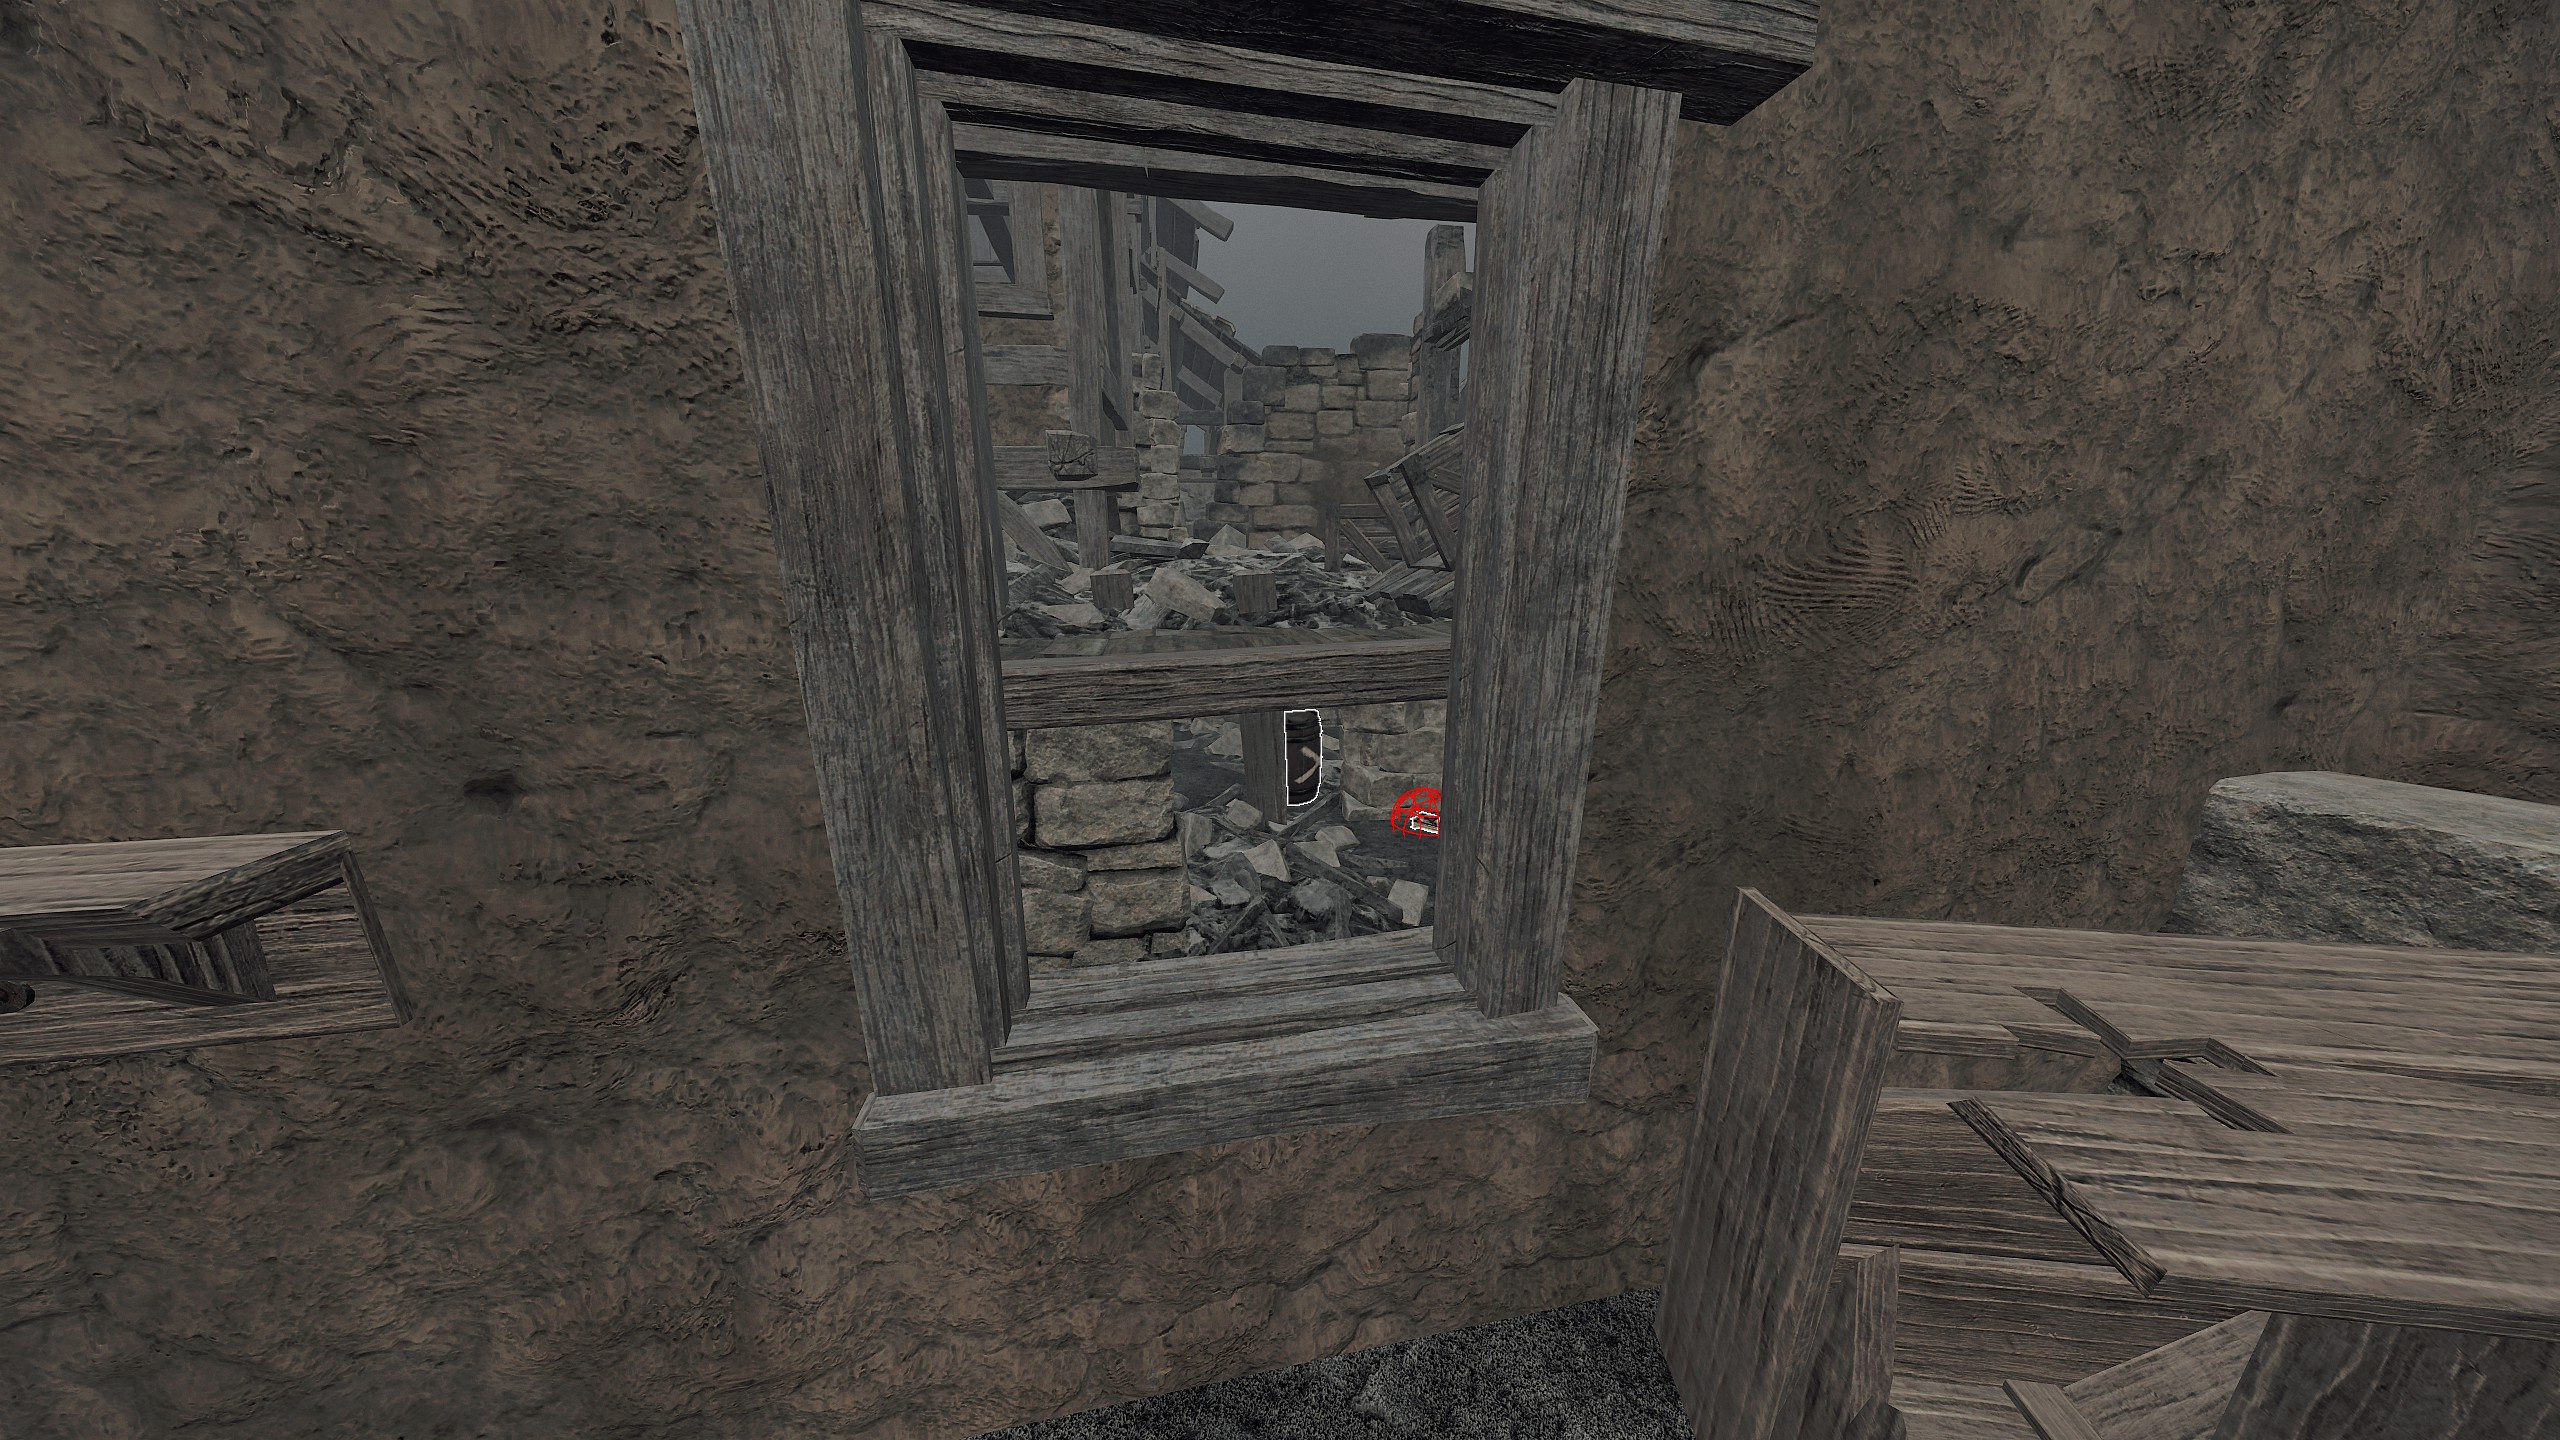 https://youtu.be/7raX0FLQIDg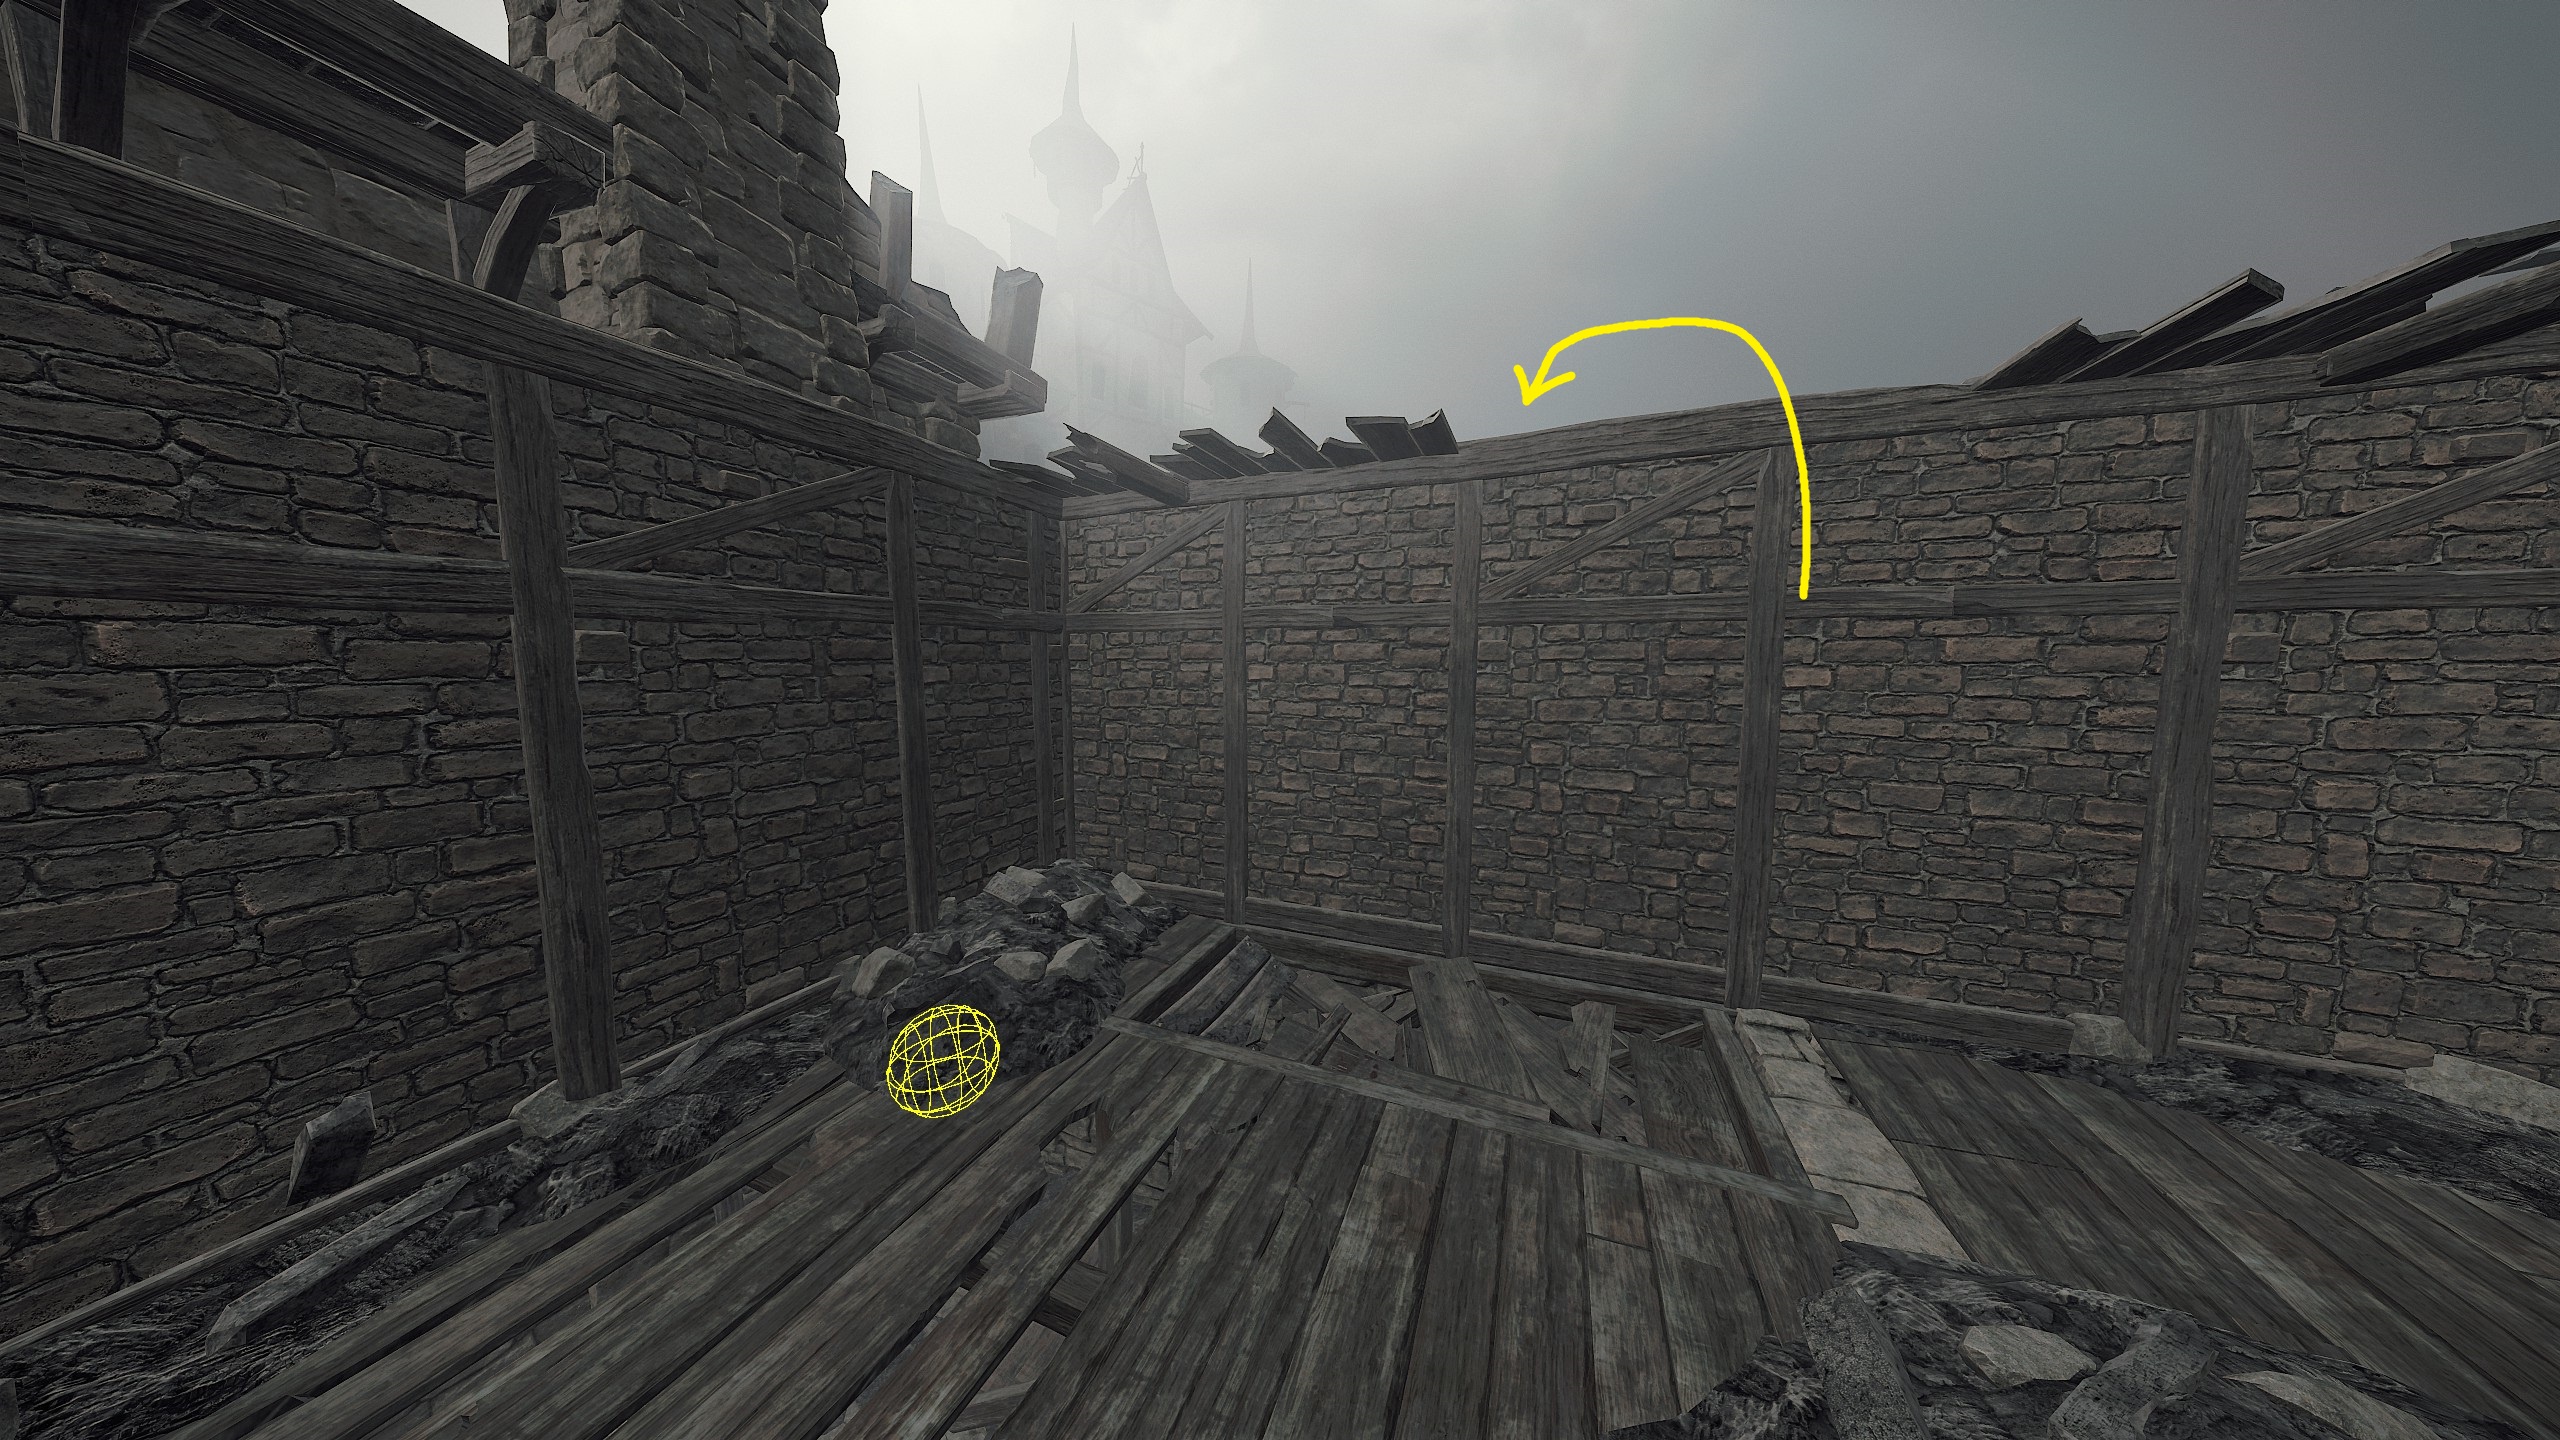
Before you drop into the cellar where the 2nd tome is, there is a building on your right. If you throw your barrel over it, it will land where you exit the cellar. This significantly reduces the delivery time.
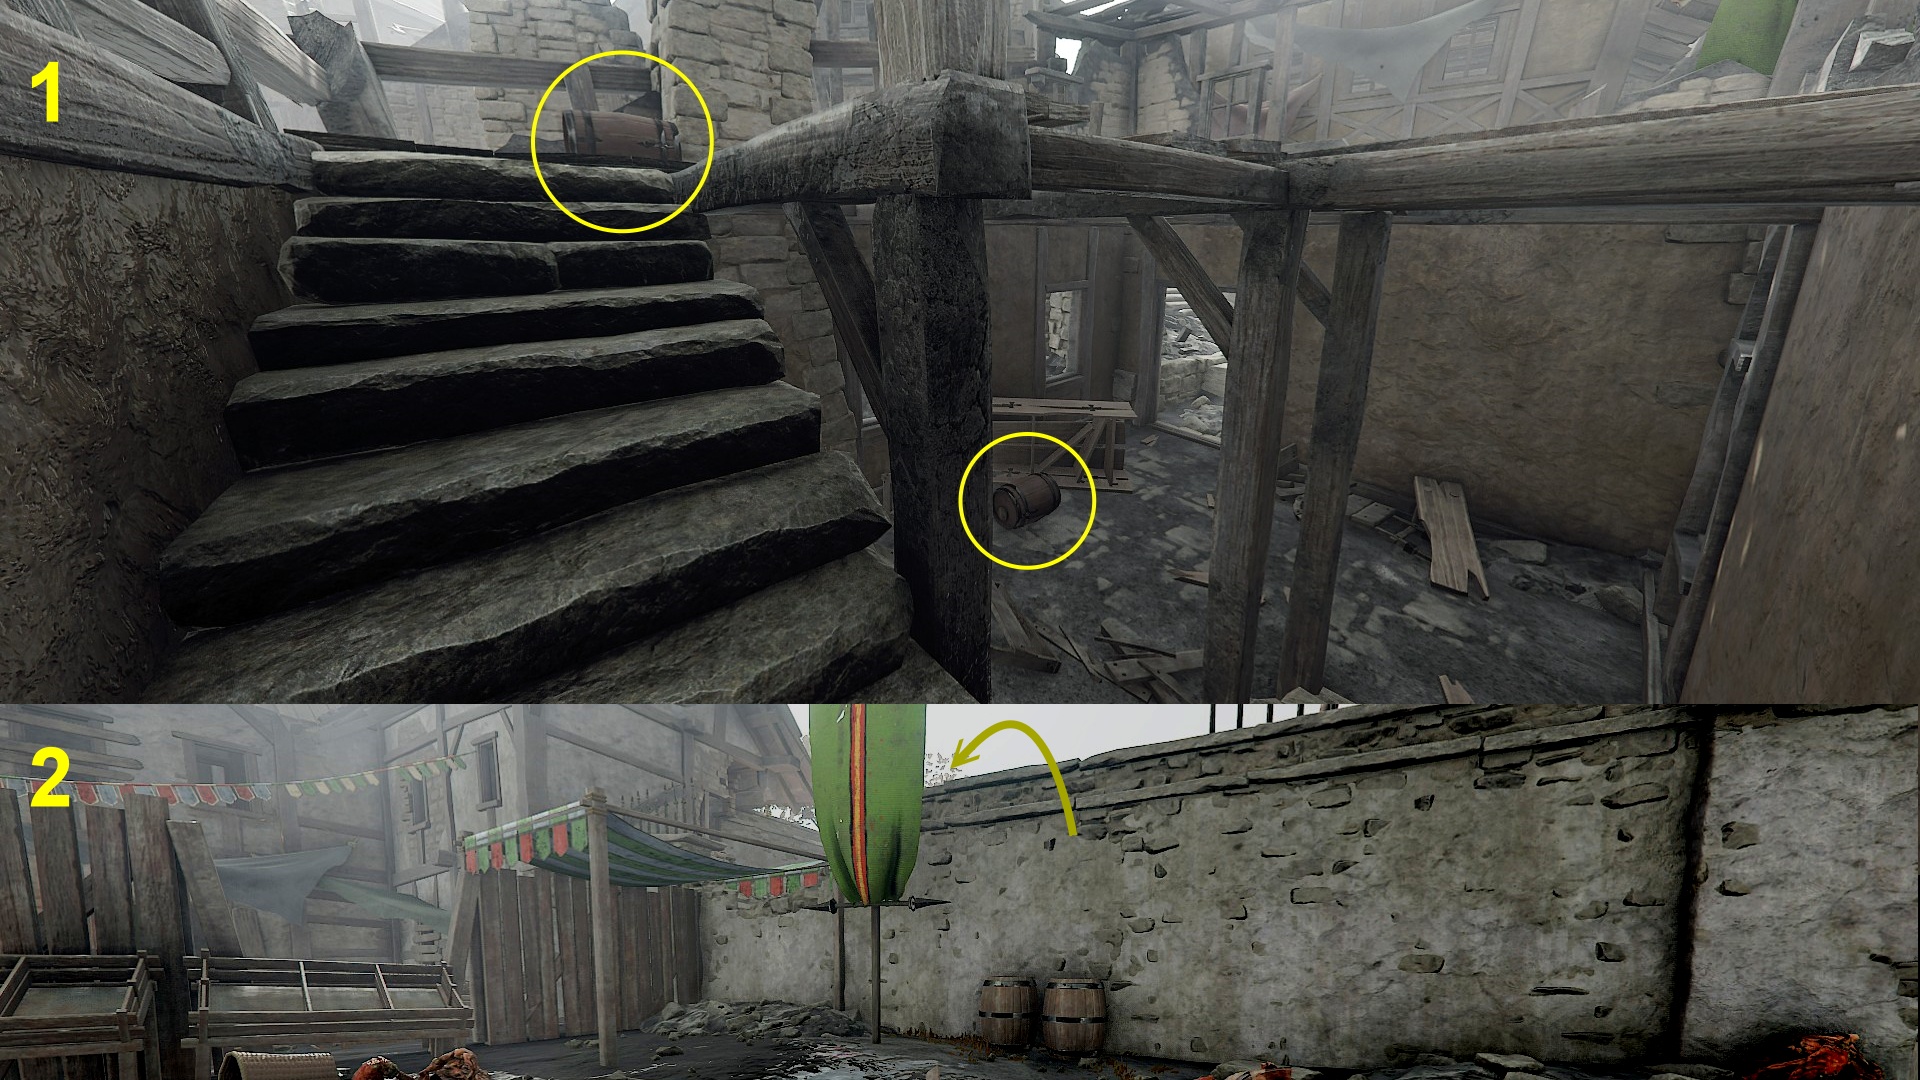
(1) In the second house on the left that you can enter, right before the area of the second grimoire, there is a fixed barrel spawn location (you can get lucky and get two barrels, as pictured).
(2) Take barrels with you and throw it over the wall. Load them into the cart when starting the finale.
THE LOCATION OF ALL BARRELS
- Don't push the cart all the way to the gate before setting up the barrels! If you do, you will not get credit for this challenge. Push the cart halfway, then stack the barrels before pushing the cart all the way.
 11. Blessed by the Father
Have one player get "bathed" by all Nurgle buboes in the end event of Festering Ground
All that is required to successfully complete this challenge is for someone participating to take damage from the poisonous pus of each bubo in the final event.
Total 29 buboes (In the first area 9, in the second area 13, in the third area 7).
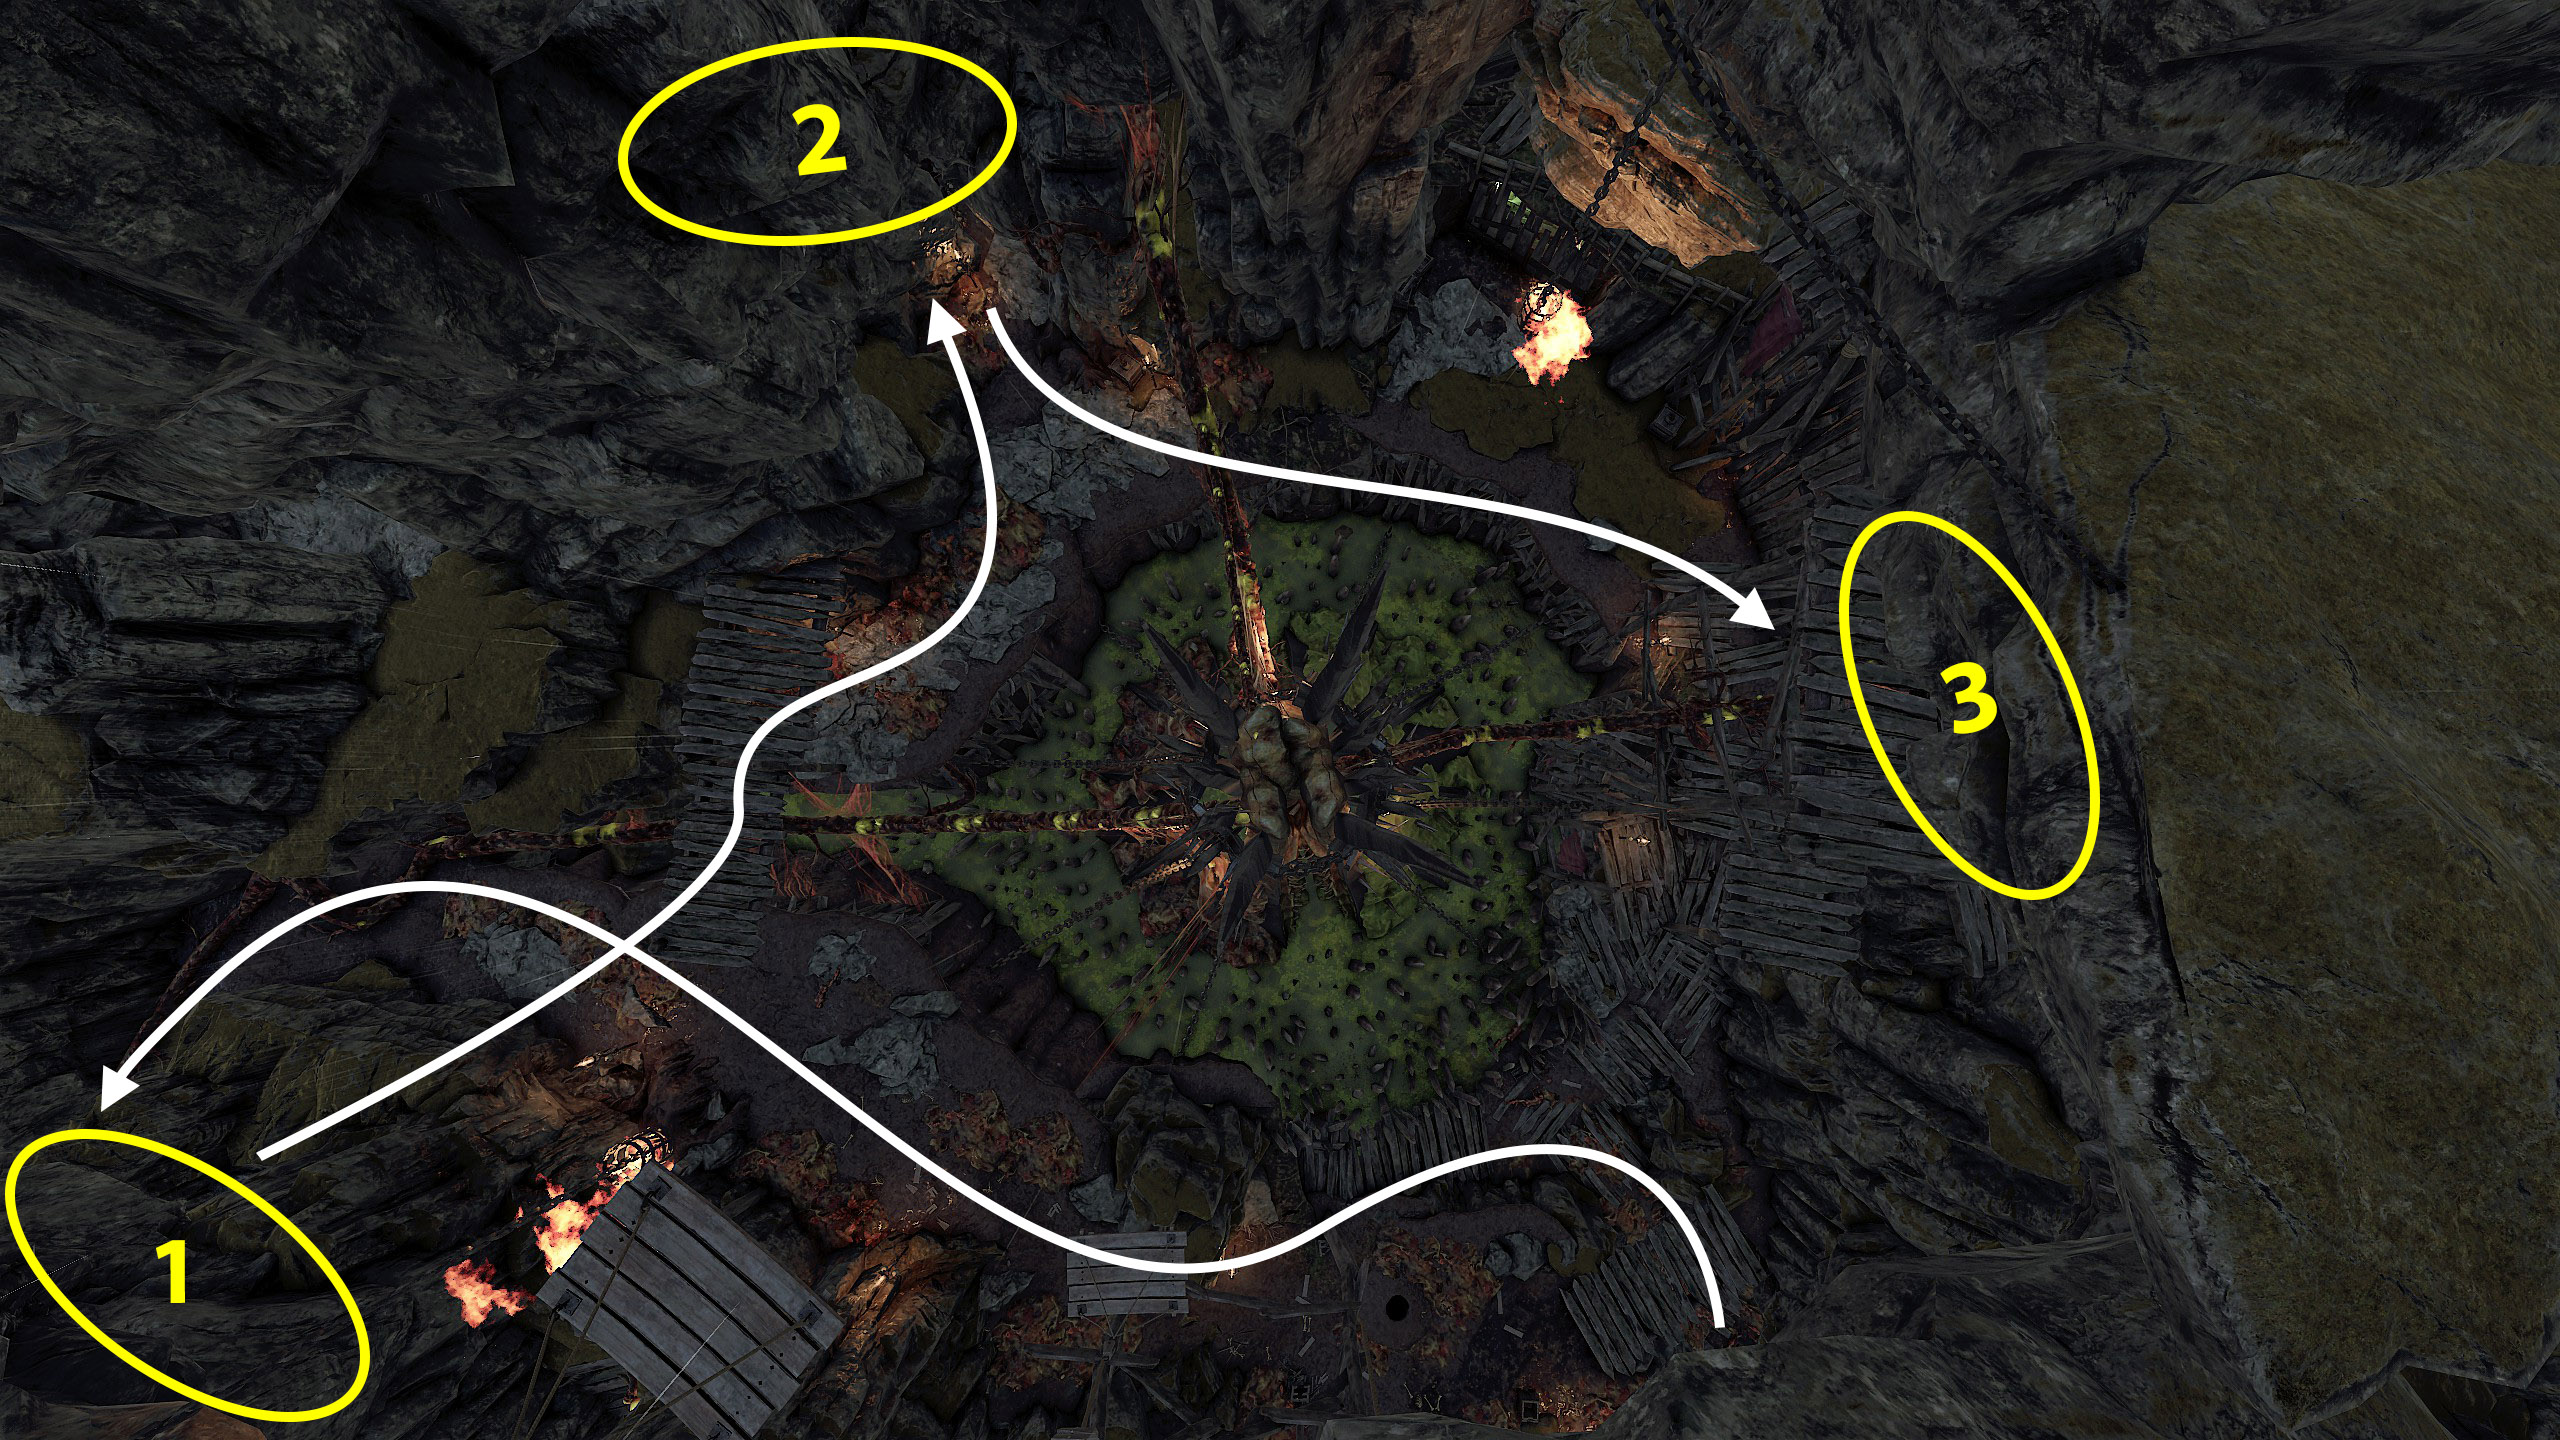
Notes:
- For some reason, bots lose HP very quickly while in the puddle, so ideally, it's best to do this with players.
- If you don't know/forgotten the locations of all the buboes, I recommend watching this video:
https://youtu.be/gPUF_T41ZqE?si=eWL4l1MKLzVy7XIj
 12. Unstoppable. Unsteerable.
Have Bödvarr charge into a Chaos Warrior 5 times in War Camp
For this challenge, we need Ironbreaker with Trollhammer, for better DPS on Lord. During the level, be sure to collect strength potions and bombs by passing them to the bots.
Once you reach the final arena, go ahead and use all the healing items beforehand, then return to the ammo box, stand next to it and damage the bots, but don't kill them! Once the bots are almost dead (wounded), head into the arena. The bots should die quickly, leaving behind the items you need.
As soon as you see a message that the challenge has been completed, wait until Bodvar stops attacking you, then kill him with a torpedo and run for the portal.
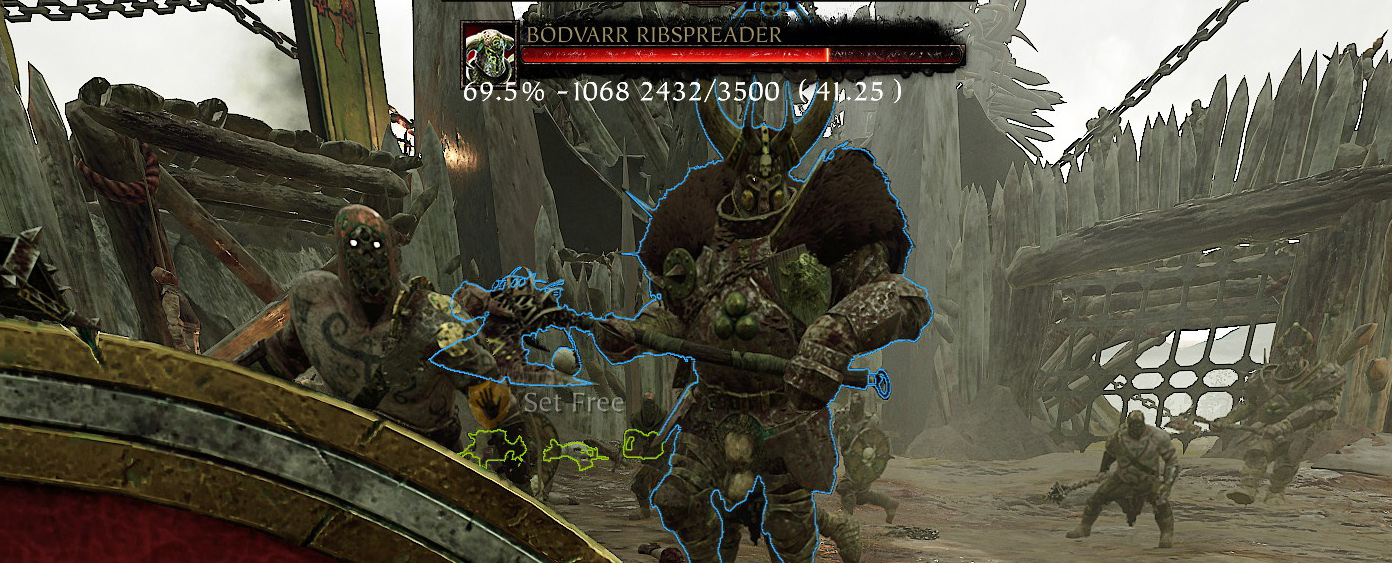
(If the lord has roughly <70% health bar, he will start summoning enemies, if >70%, he will not summon enemies.)
https://youtu.be/QwXAMLOr-8o
- Act 4
 13. Ride Together, Die Together
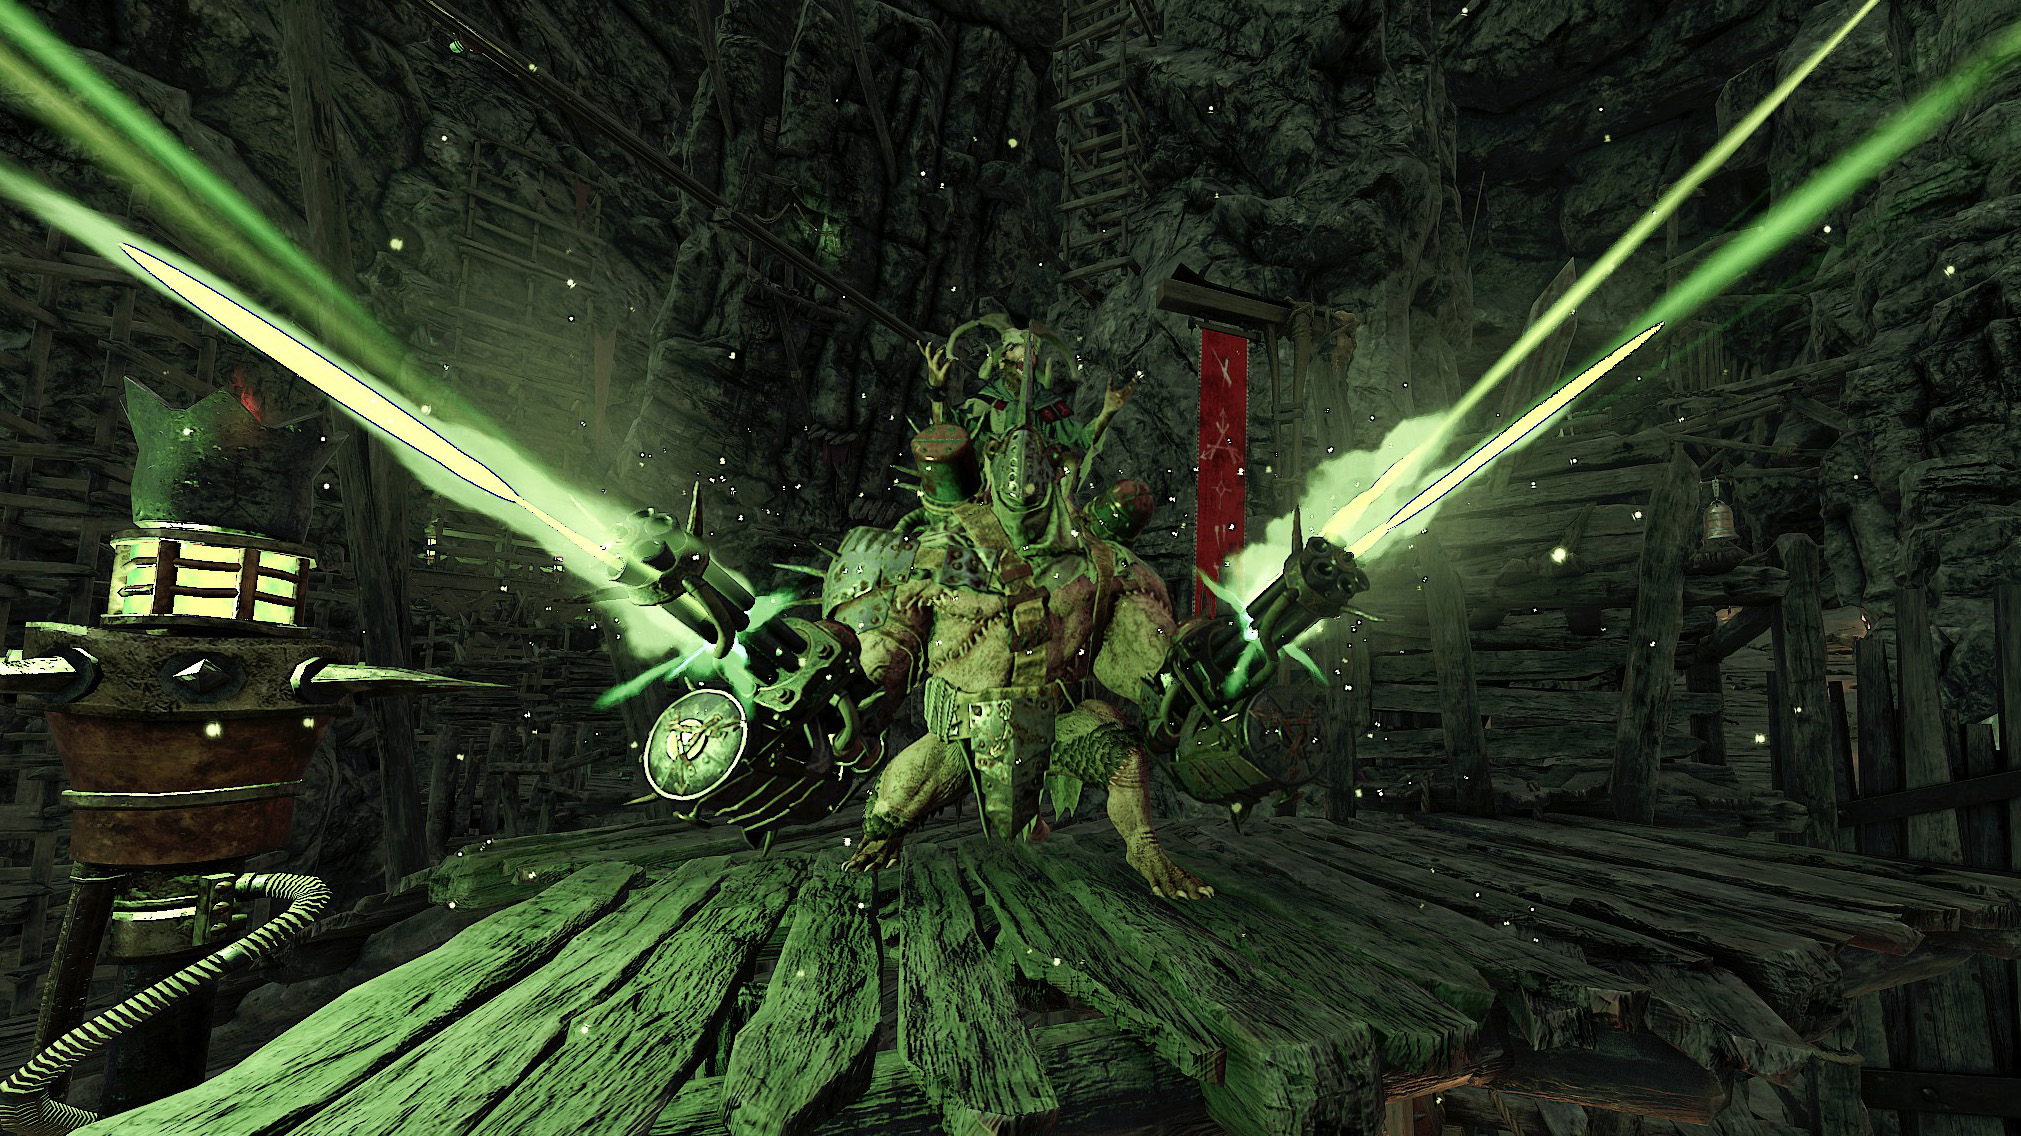
Kill Deathrattler and then Rasknitt within 20 seconds in The Skittergate Before starting this challenge, choose a hero with high DPS on bosses (e.g. Shade, Engineer or Grail Knight)
Next, in the final arena battle in Skittergate, you need to lower health Deathrattler to a certain level three times to get enough time to deal maximum damage to Rasknitt.
First drop: below 75% HP.Between these three drops, Rasknitt becomes vulnerable, and damage will flow through it. The maximum damage you can do to Rasknitt before killing Deathrattler is reached when Rasknitts start randomly teleporting in the second phase, after this Rasknitt will no longer climb on Deathrattler. It is important to note that simply damaging the panel on Deathrattler back does not drop Rasknit. As soon as the Deathrattler is killed, immediately go to get the Rasknitt.
Second drop: below 50% HP.
Third drop: below 20% HP.
The 20-second timer starts as soon as the Deathrattler is dead, and the time spent before his death is not relevant. This strategy is applicable whether done as a team or solo, the only difference is the time and difficulty completion.
 https://youtu.be/yHZJewLks2k?si=tfRSJBShHJ8uBOFY
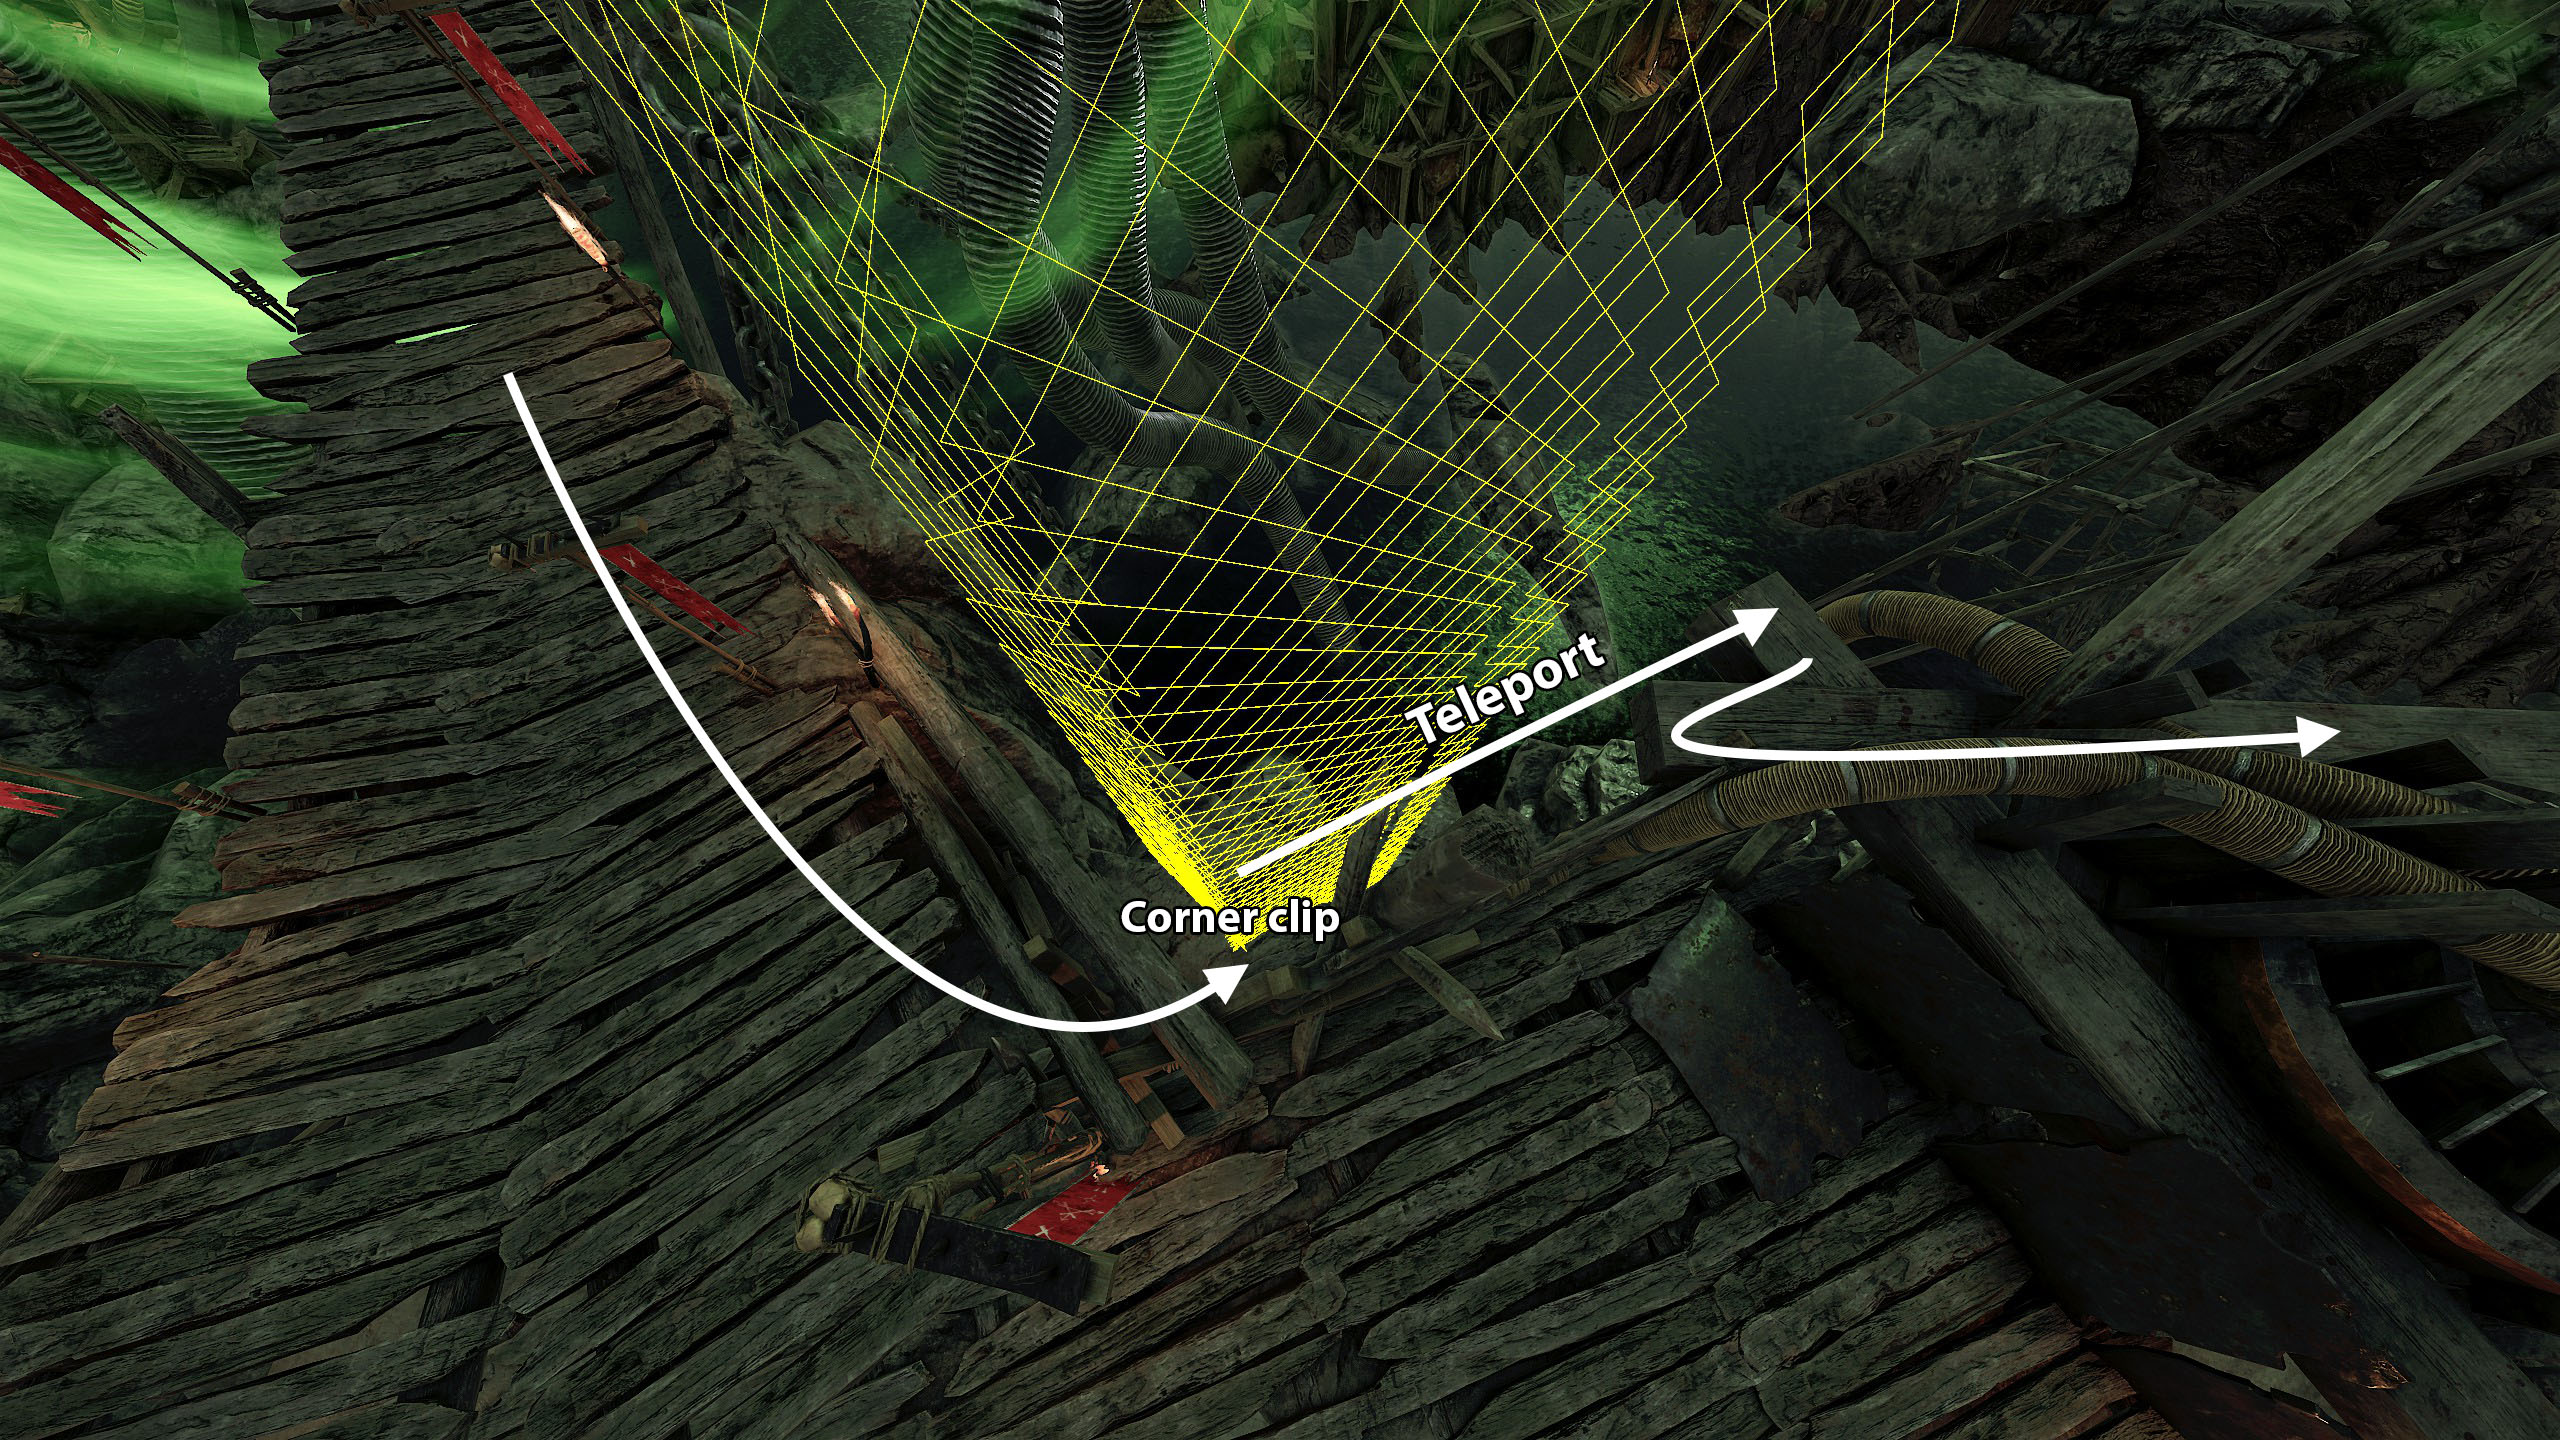
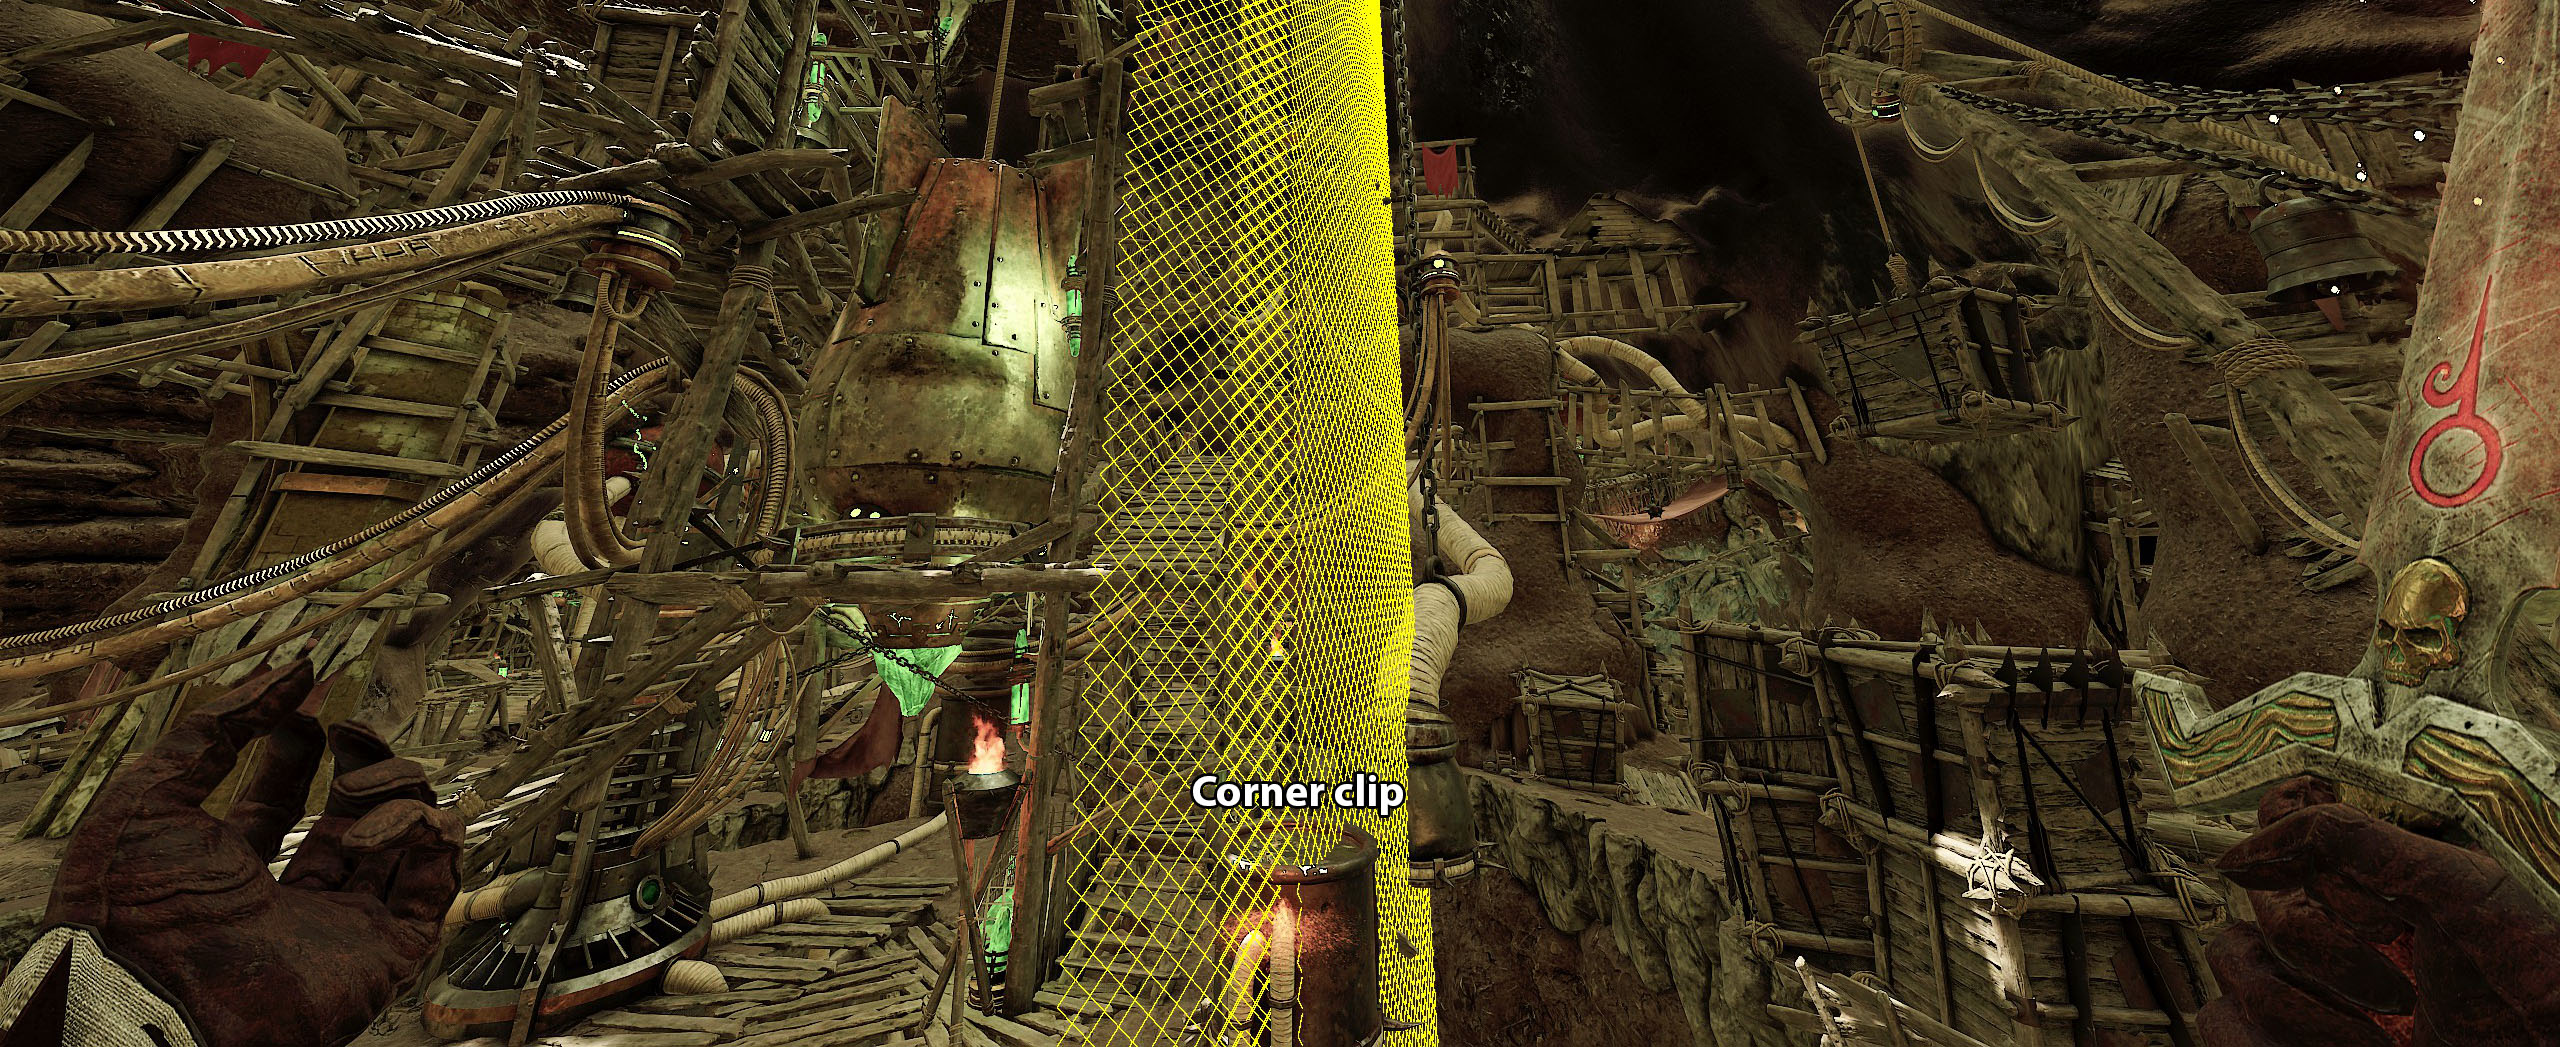
Once you exit the portal after destroying the three generators, do not jump down into the arena. Carefully, on the left side, feel for the invisible corner, hold down the LMB on the beam staff, and jump so that you fall onto the rocks (thus performing a corner clip) and teleport from them to the protruding wooden block next to the generator. Climb onto the pipe, go around the generator, and walk a little forward along the fence to the second generator.
As soon as Rasknitt appears, go back and hide behind the generator. If the bots are still alive, wait until they are killed or disabled. Next, deal damage to Deathrattler until Rasknitt gets off him. Climb a little higher on the generator and deal damage to Rasknitt until he starts teleporting.
After that, switch to Deathrattler and deal damage to him (the process will go faster, as he has less resistance than Rasknitt). Once Deathrattler has low health, first kill Rasknitt, then Deathrattler.A message about the completion should appear in the chat. After that, revive the bots and run to the portal.Please use this skip for solo playthrough only!
https://youtu.be/y1i_o_weCZM
 14. Empire Resurcent
Complete the following Helmgart mission challenges on Legend difficulty This challenge will be completed once you complete all 12 Helmgart сhallenges on Legend difficulty.
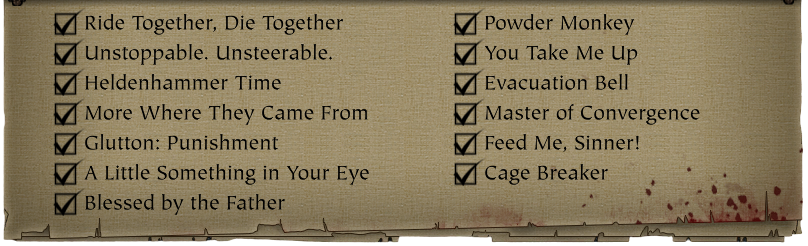
- The Helmgart Challenges. All Parts by ThePartyKnife
- Many thanks to Sarahhh<3 for a well written guide that is still relevant today.
- There is also a text guide from Alcyonaria, but in my opinion it is very outdated.
https://steamcommunity.com/sharedfiles/filedetails/?id=1402194033&searchtext=Helmgart+Challenges
Shadows over Bögenhafen

- The Pit
 1. Like Cousin Okri Used to Take
Find a way into and visit Okri's Secret Stash. In one playthrough, you need to push 10 Suspicious Bricks are scattered around the Pit district. The locations of all bricks are shown in this guide and video:
https://steamcommunity.com/sharedfiles/filedetails/?id=3554622649 https://www.youtube.com/watch?v=UQ6aQ6hmBnc
 2. Eagle-Eye View
Get a bird's eye view In this challenge, you need to get to the bridge and climb to the very top of the tower. You can find out how to do this in this guide or video:
https://steamcommunity.com/sharedfiles/filedetails/?id=1496670171&searchtext=Challenge https://www.youtube.com/watch?v=g1uLhigsWtw
 3. Glazier's Holiday
Legend: Survive the hideout event without allowing a single Barricade to be destroyed In this challenge on the Legend difficulty, you need to prevent the barricades from being destroyed in an event involving burning the tainted food. You can find out how to do this in this guide or video:
https://steamcommunity.com/sharedfiles/filedetails/?id=2974800638 https://youtu.be/Y1wJZmlUf7k?si=zoIZWK8FKkoGwy0N

 4/5. Spray and Pray & Old World Dash
Legend: Finish The Pit while taking no damage from Ratling Gunners
Legend: Reach the Bridge of Shadows within thirty seconds of starting the gauntlet
Fairly simple challenges that can be performed simultaneously on Legend difficulty.
Both Battle Wizard and Handmaiden are great for these challenges. Handmaiden has a Shield & Spear that can block Ratling Gunner's shots, and Battle Wizard has a teleported that can be used to easily avoid shots, which will be useful in the final run. I also recommend getting the Concoction trait in Charm and find one potion (any type), which must be brought to the switch.
The 2nd potion during the run is a guarantee spawn (random type) as long as a "Deprivation" deed is NOT ACTIVE
The 2nd and 4th wooden boards are guarantee to break on the right side. The rest are random.
If you want to be guaranteed to complete Spray & Pray in one attempt, you can use the Skip Pit.
https://www.youtube.com/watch?v=WET0TMlHp8c https://www.youtube.com/watch?v=44SvcGaoEj4
- The Blightreaper
 1. One More for the Road?
Gather all 20 bottles of Ruggbroder 2468 Vintage in one game In one playthrough, you must collect 20 bottles, which are scattered throughout the map. The locations of all bottles are shown in this guide and video:
https://steamcommunity.com/sharedfiles/filedetails/?id=3539798938 https://www.youtube.com/watch?v=HQSLZi6Jfaw

 2/3. Journey in the Dark & Me? I Thought You Had It?
Legend: Navigate the sewers without lighting a single brazier
Legend: Navigate the sewers without picking up a Torch
These two challenges are performed at the Legend difficulty and usually simultaneously.
The easiest and most effective way to navigate in the dark is to use Sienna's Coruscation Staff or Sienna's Conflagration Staff. Once you enter the dungeon, do not pick up torches or light braziers. Instead, simply spam the right mouse button. This will allow you to maintain your movement speed and constantly illuminate the area.
There are other weapons that can illuminate the area: for example, most of Sienna's Staves, Bardin's Drakefire Pistols, and Kerillian's Moonfire Bow. With them, you can shoot projectiles which illuminates the impact area (enemy or terrain) for a second. However, I do not recommend using them, as they replenish heat or poorly illuminate the area.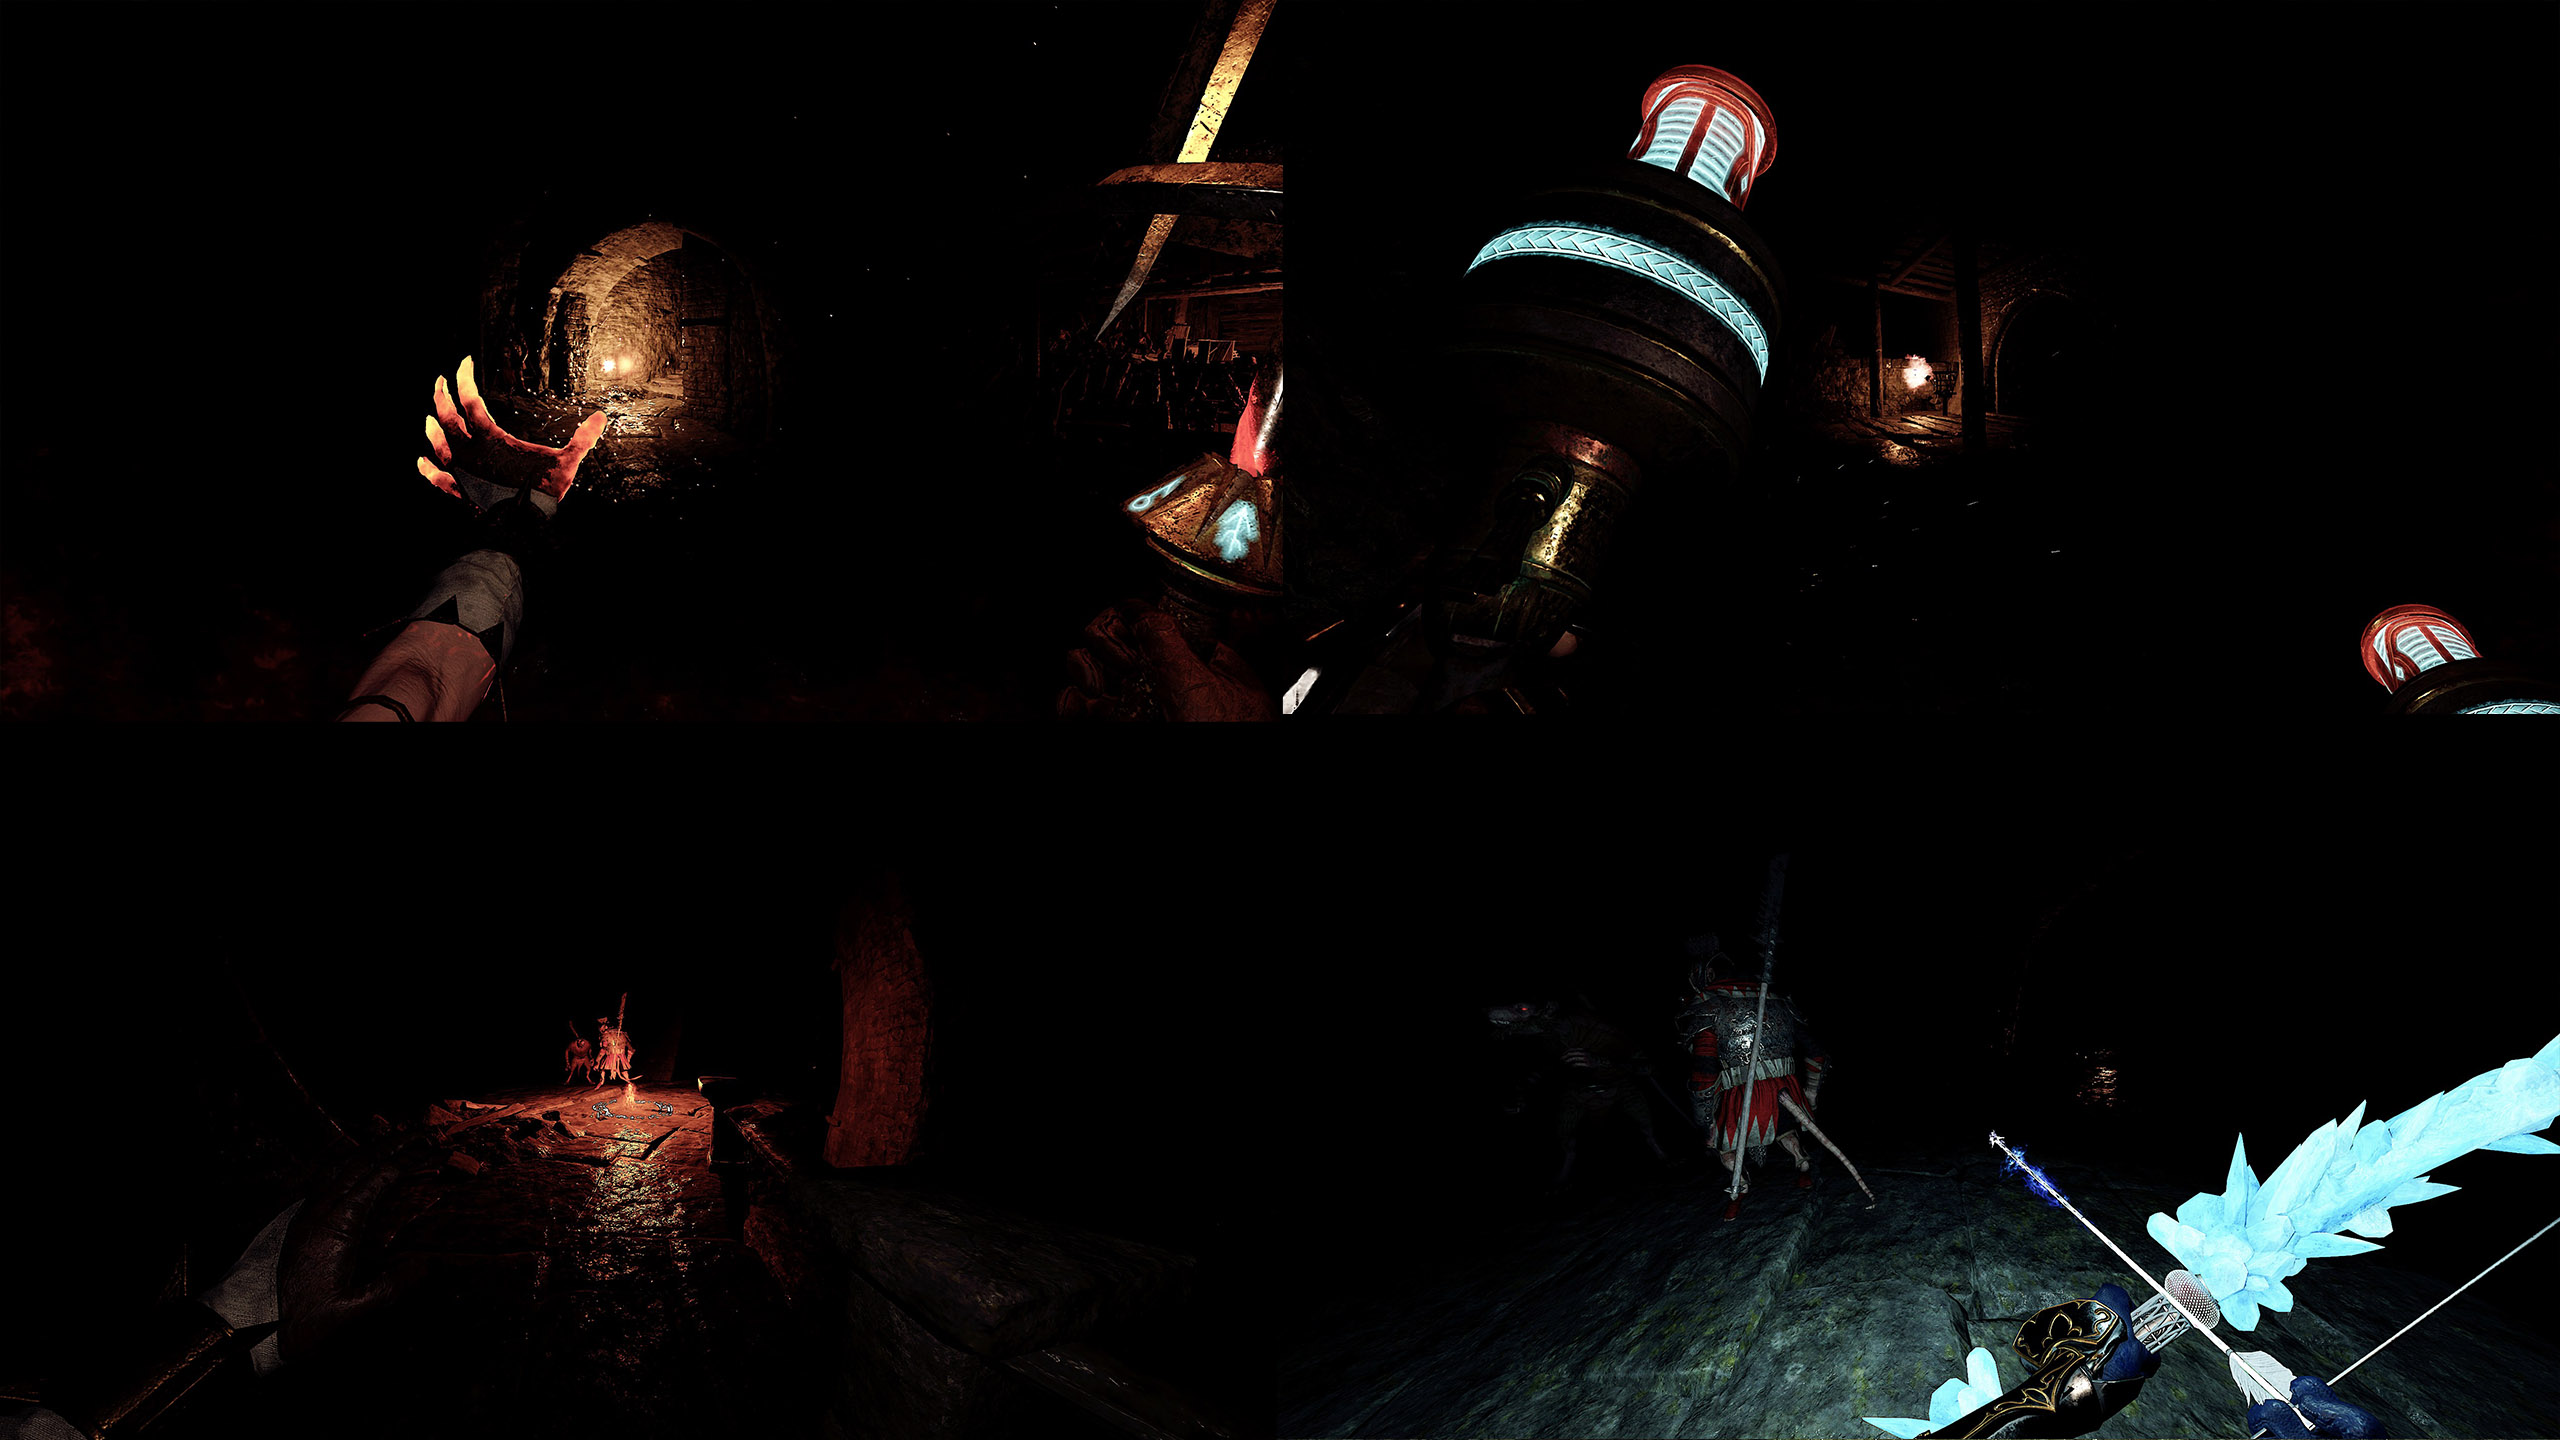
https://youtu.be/R7afg1GmNbc?si=z9j6jHEUXiKn5-Hy
 4. Insurance Premium
Find and reimburse the Bögenhafen Shipping Company for damaged property
Find and interact with the property ledger inside the Stevedore's Guild.
This is located above the upper part of Rosen Allee on the way to the Dreicke Platz after leaving the sewer, and will require some difficult platforming to reach. Be careful doing this with bots, as you can be grabbed by Assassins during the platforming sections, and they will not help you.
- When you are on the bridge, turn left onto and jump onto the wall and then onto the railing.
- Look down to your left here, there should be a wooden pole jutting out of the edge of the building opposite. Carefully jump down to it, then hop across a series of poles curving around the edge of the building.
- Make a long jump from the final pole to a pair of stacked crates in the middle of the street, then onto the stone awning across from it.
- Next, you want to hop up onto the buttress on the right, with the pub sign above it. This can be difficult as the pub sign can knock you down mid-jump, so shooting the sign to make it swing and then timing your jump can help.
- Next, jump across onto the wooden covered awning above some stalls.
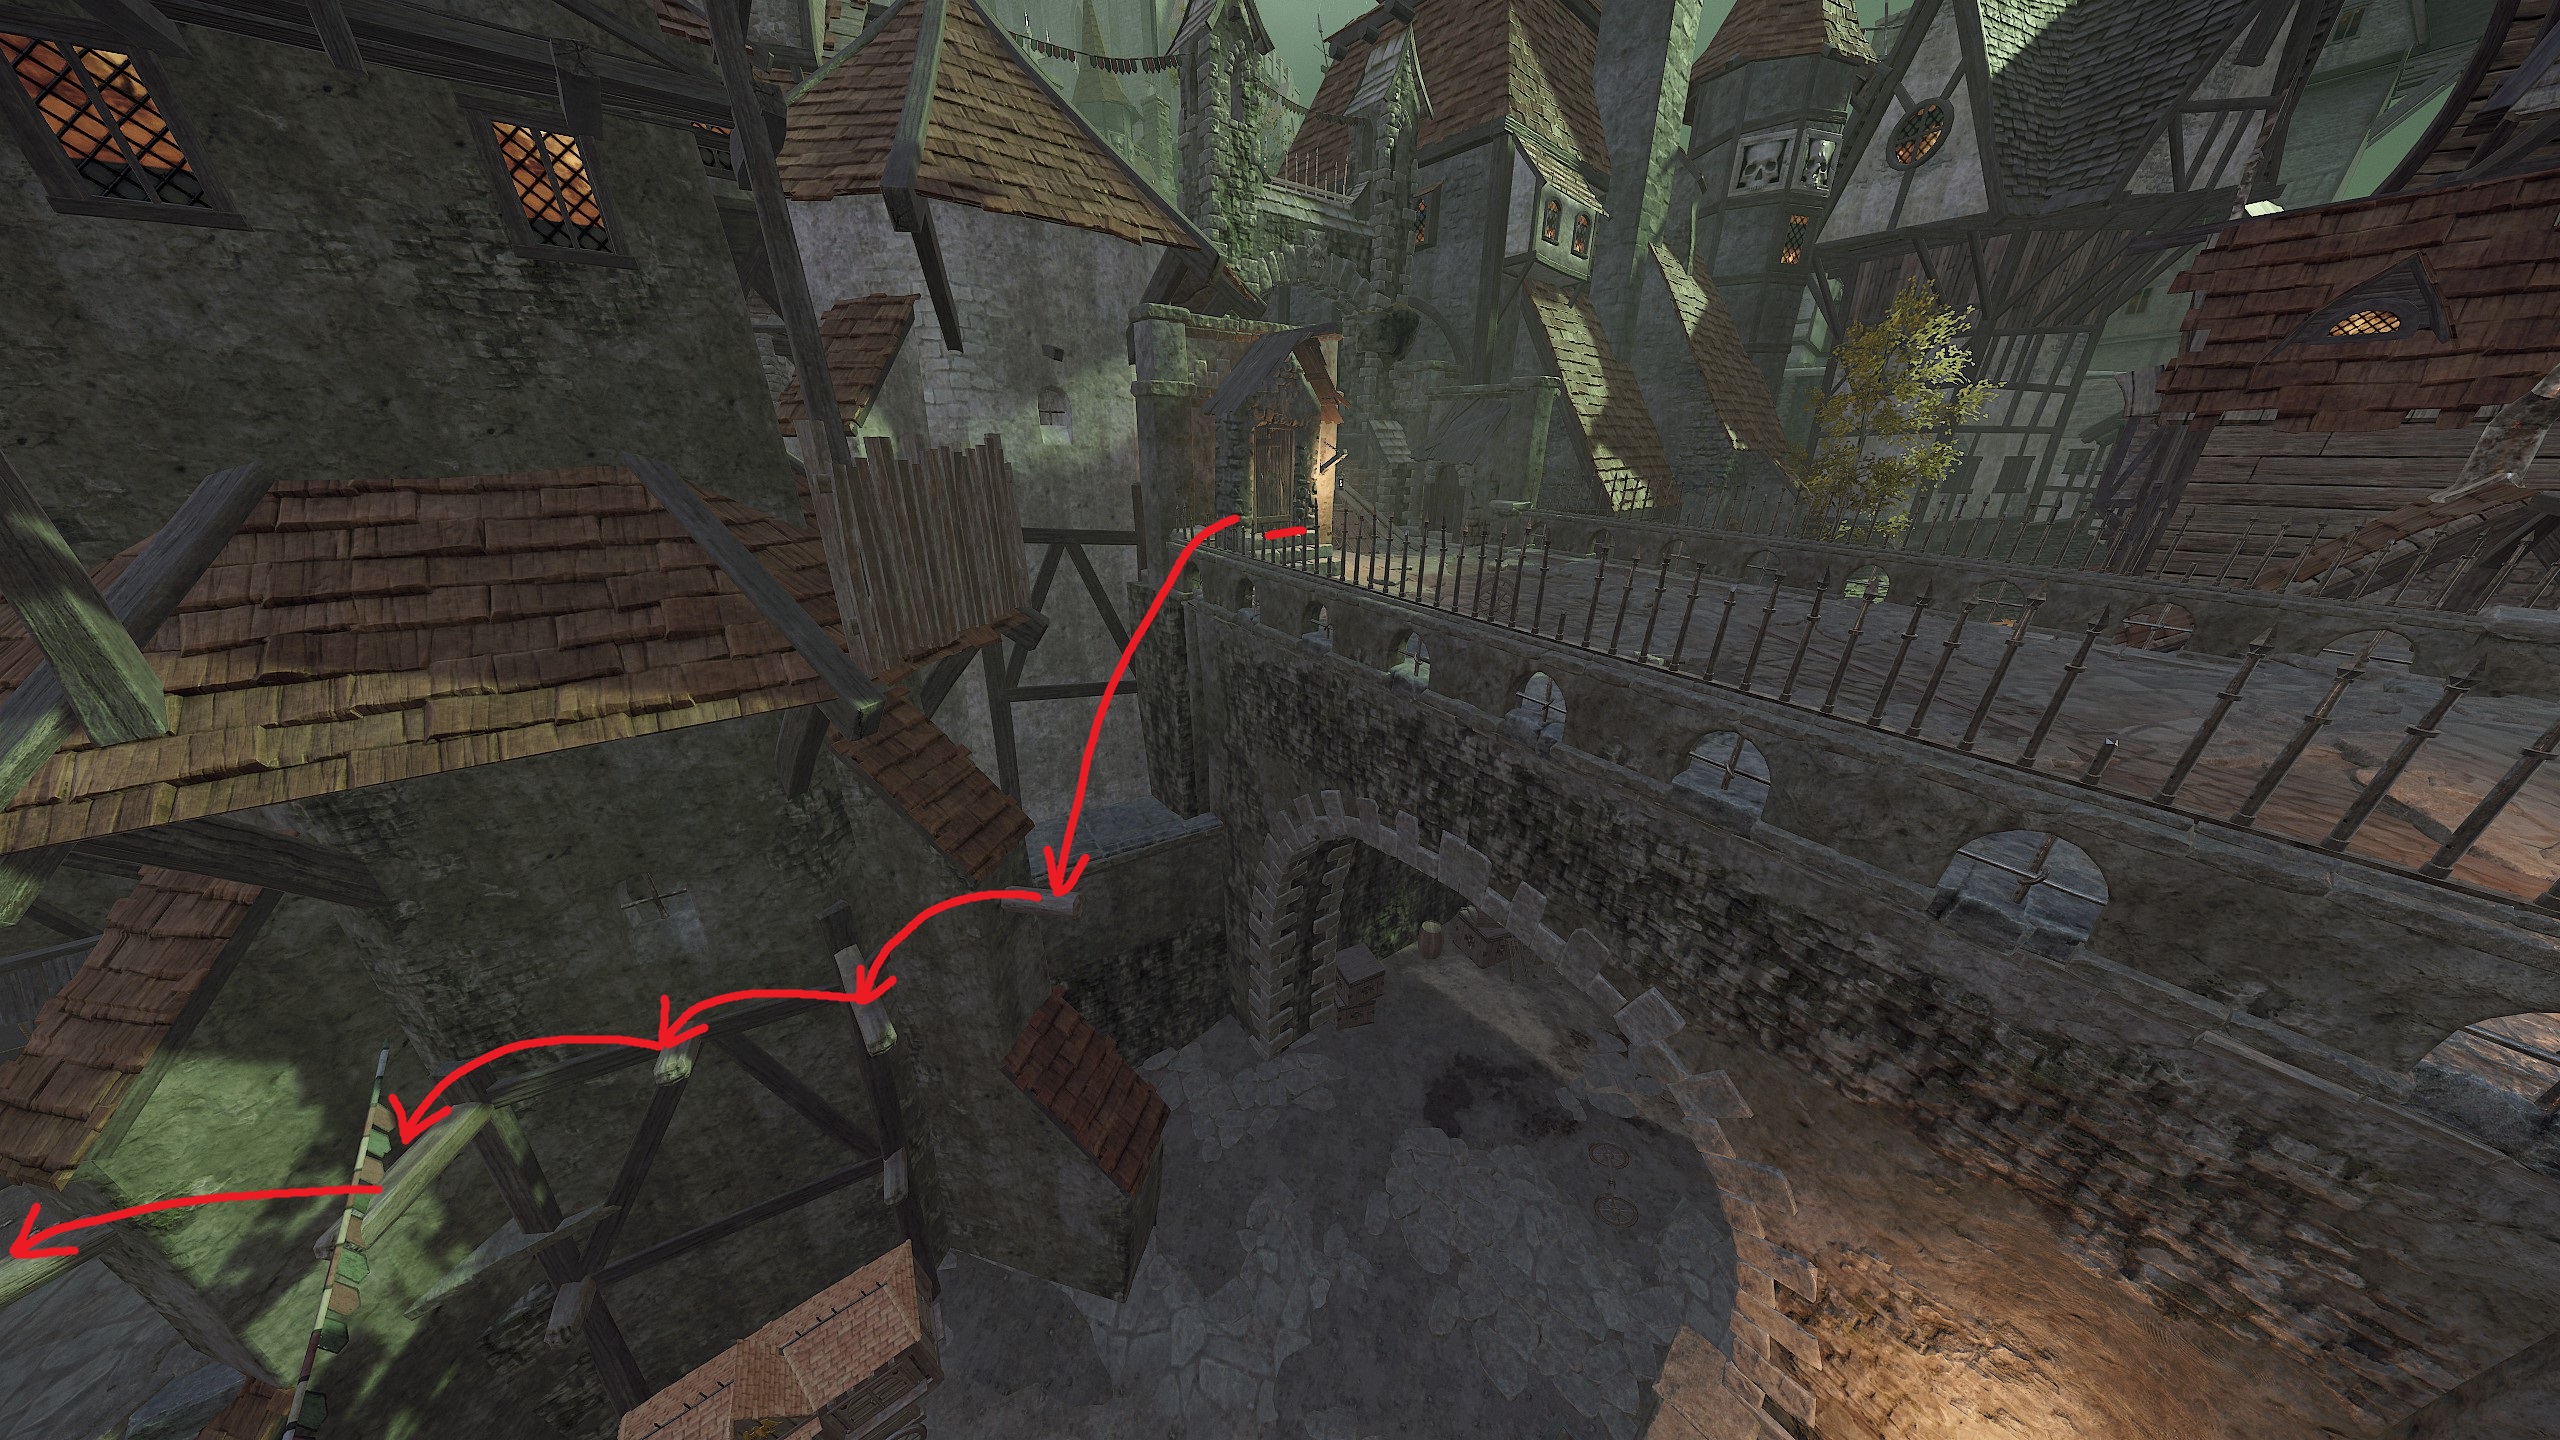
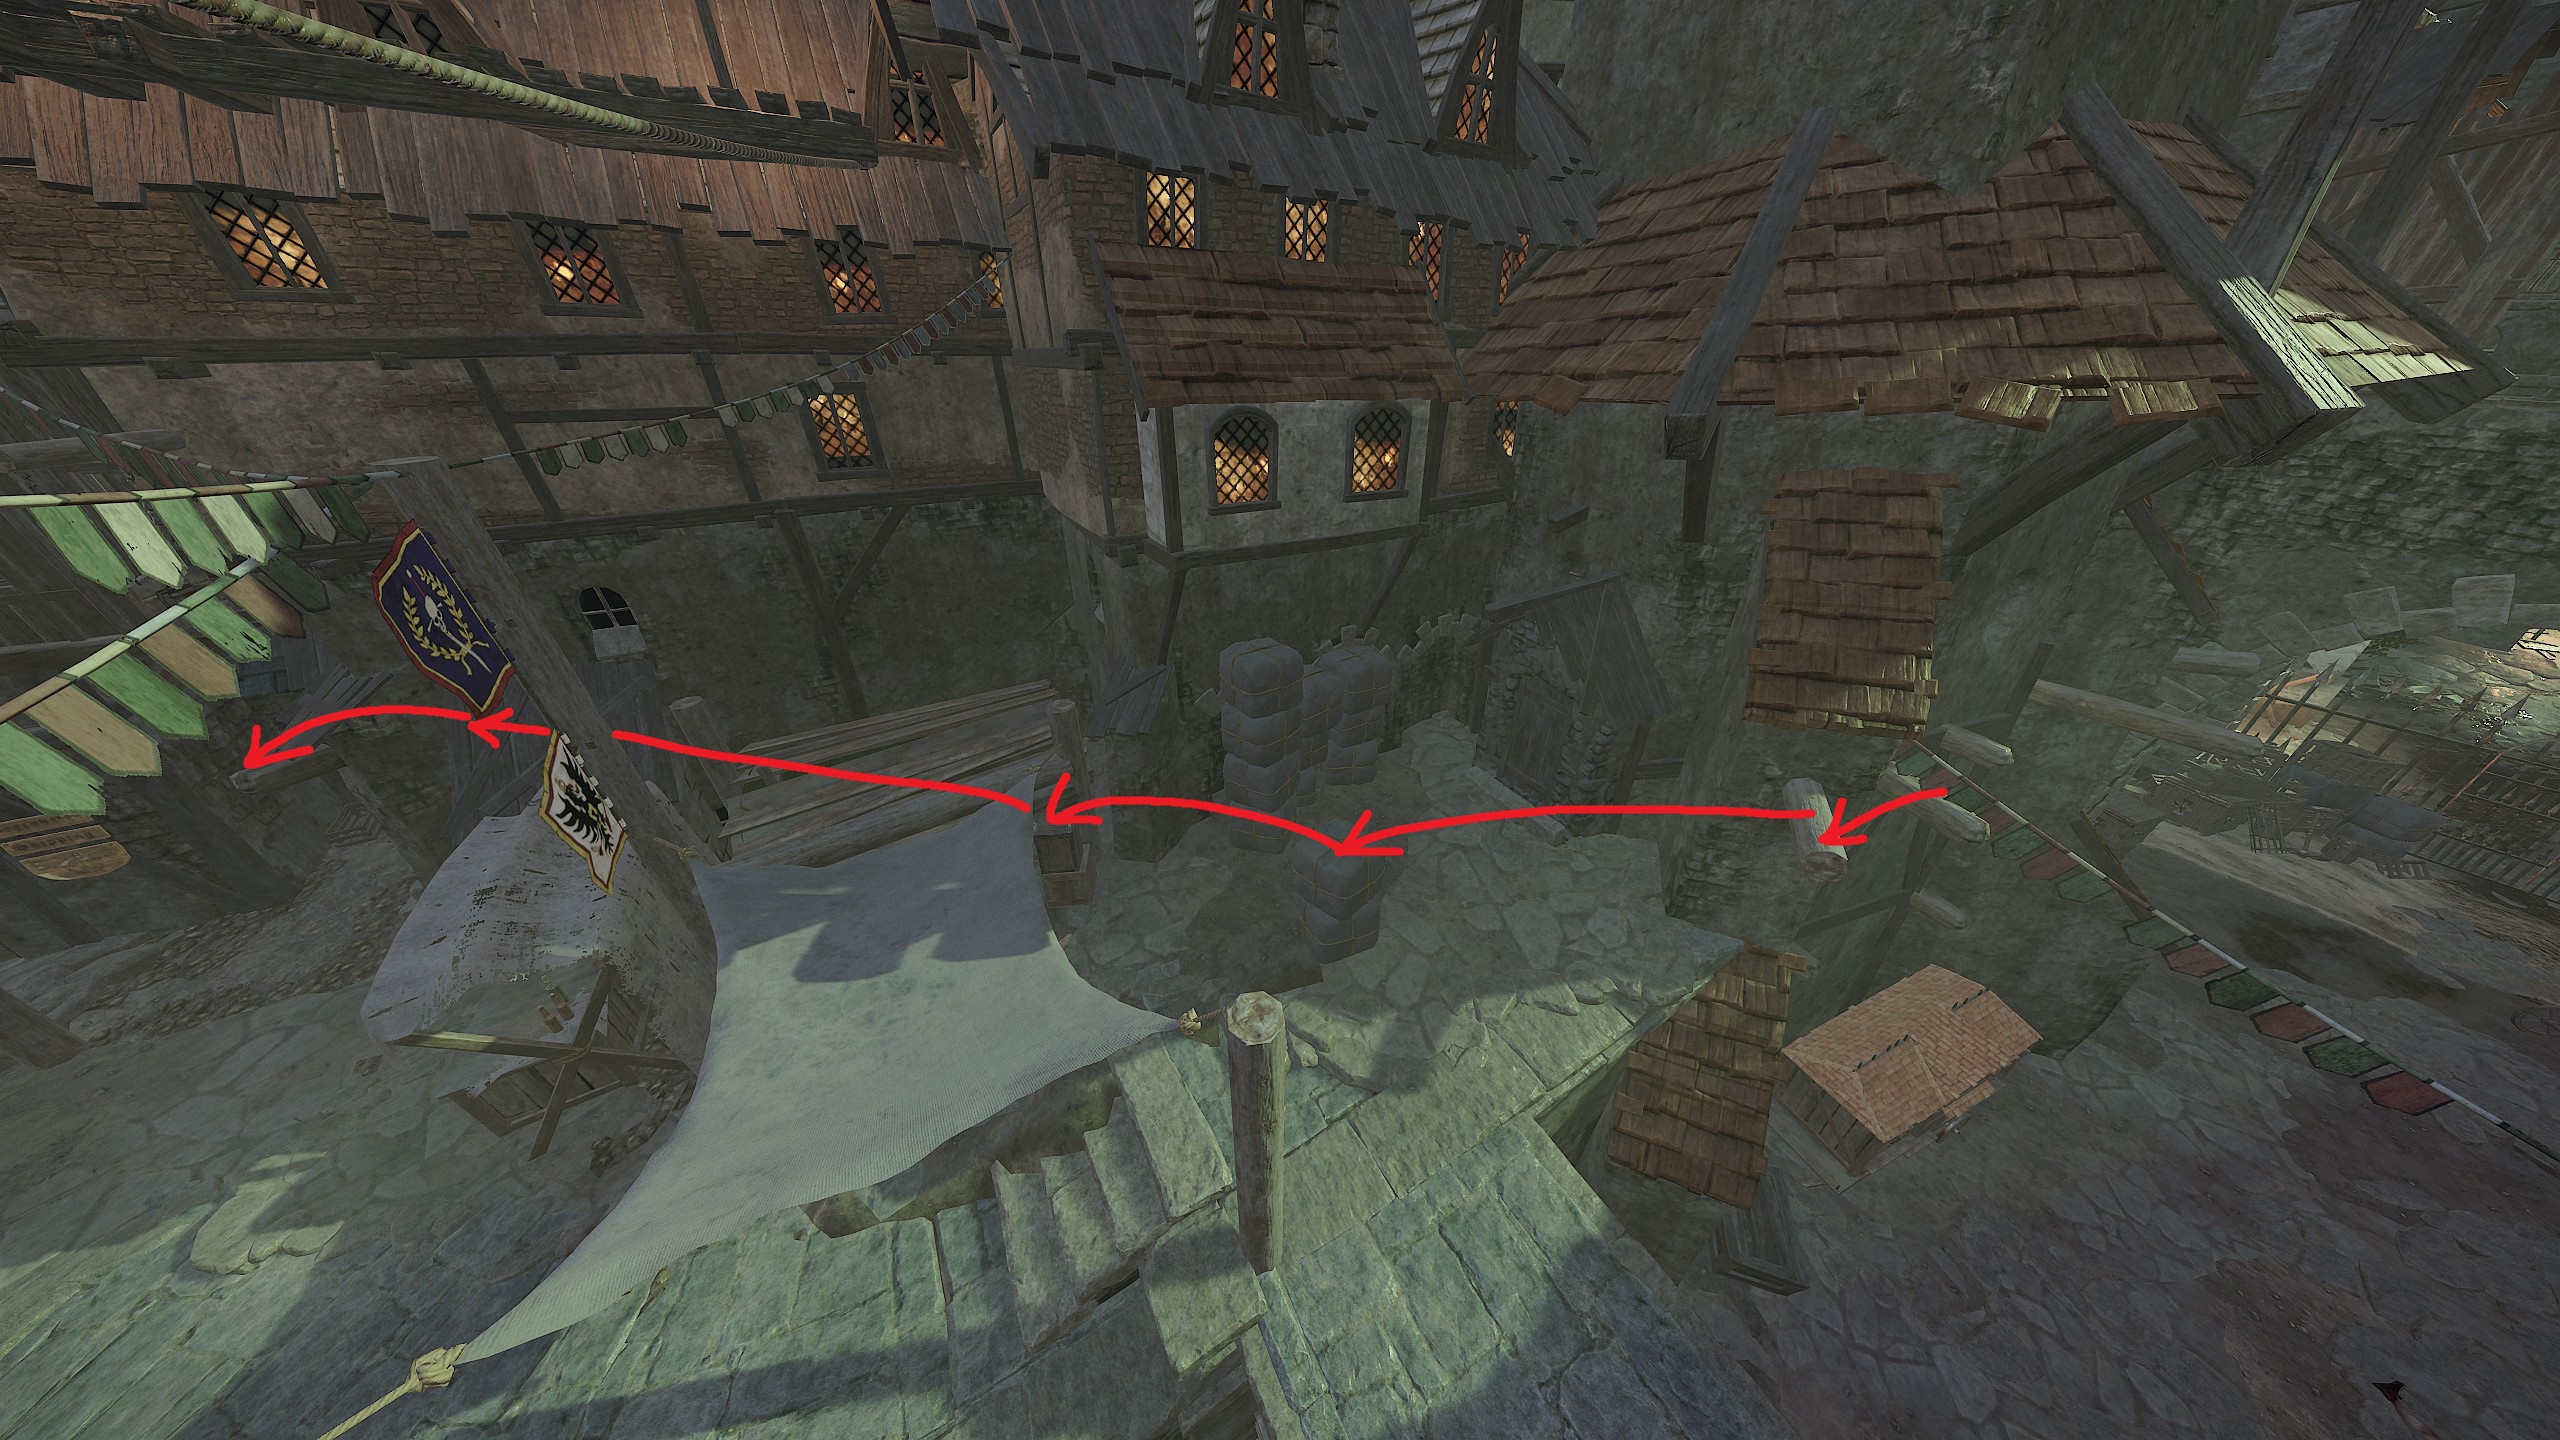
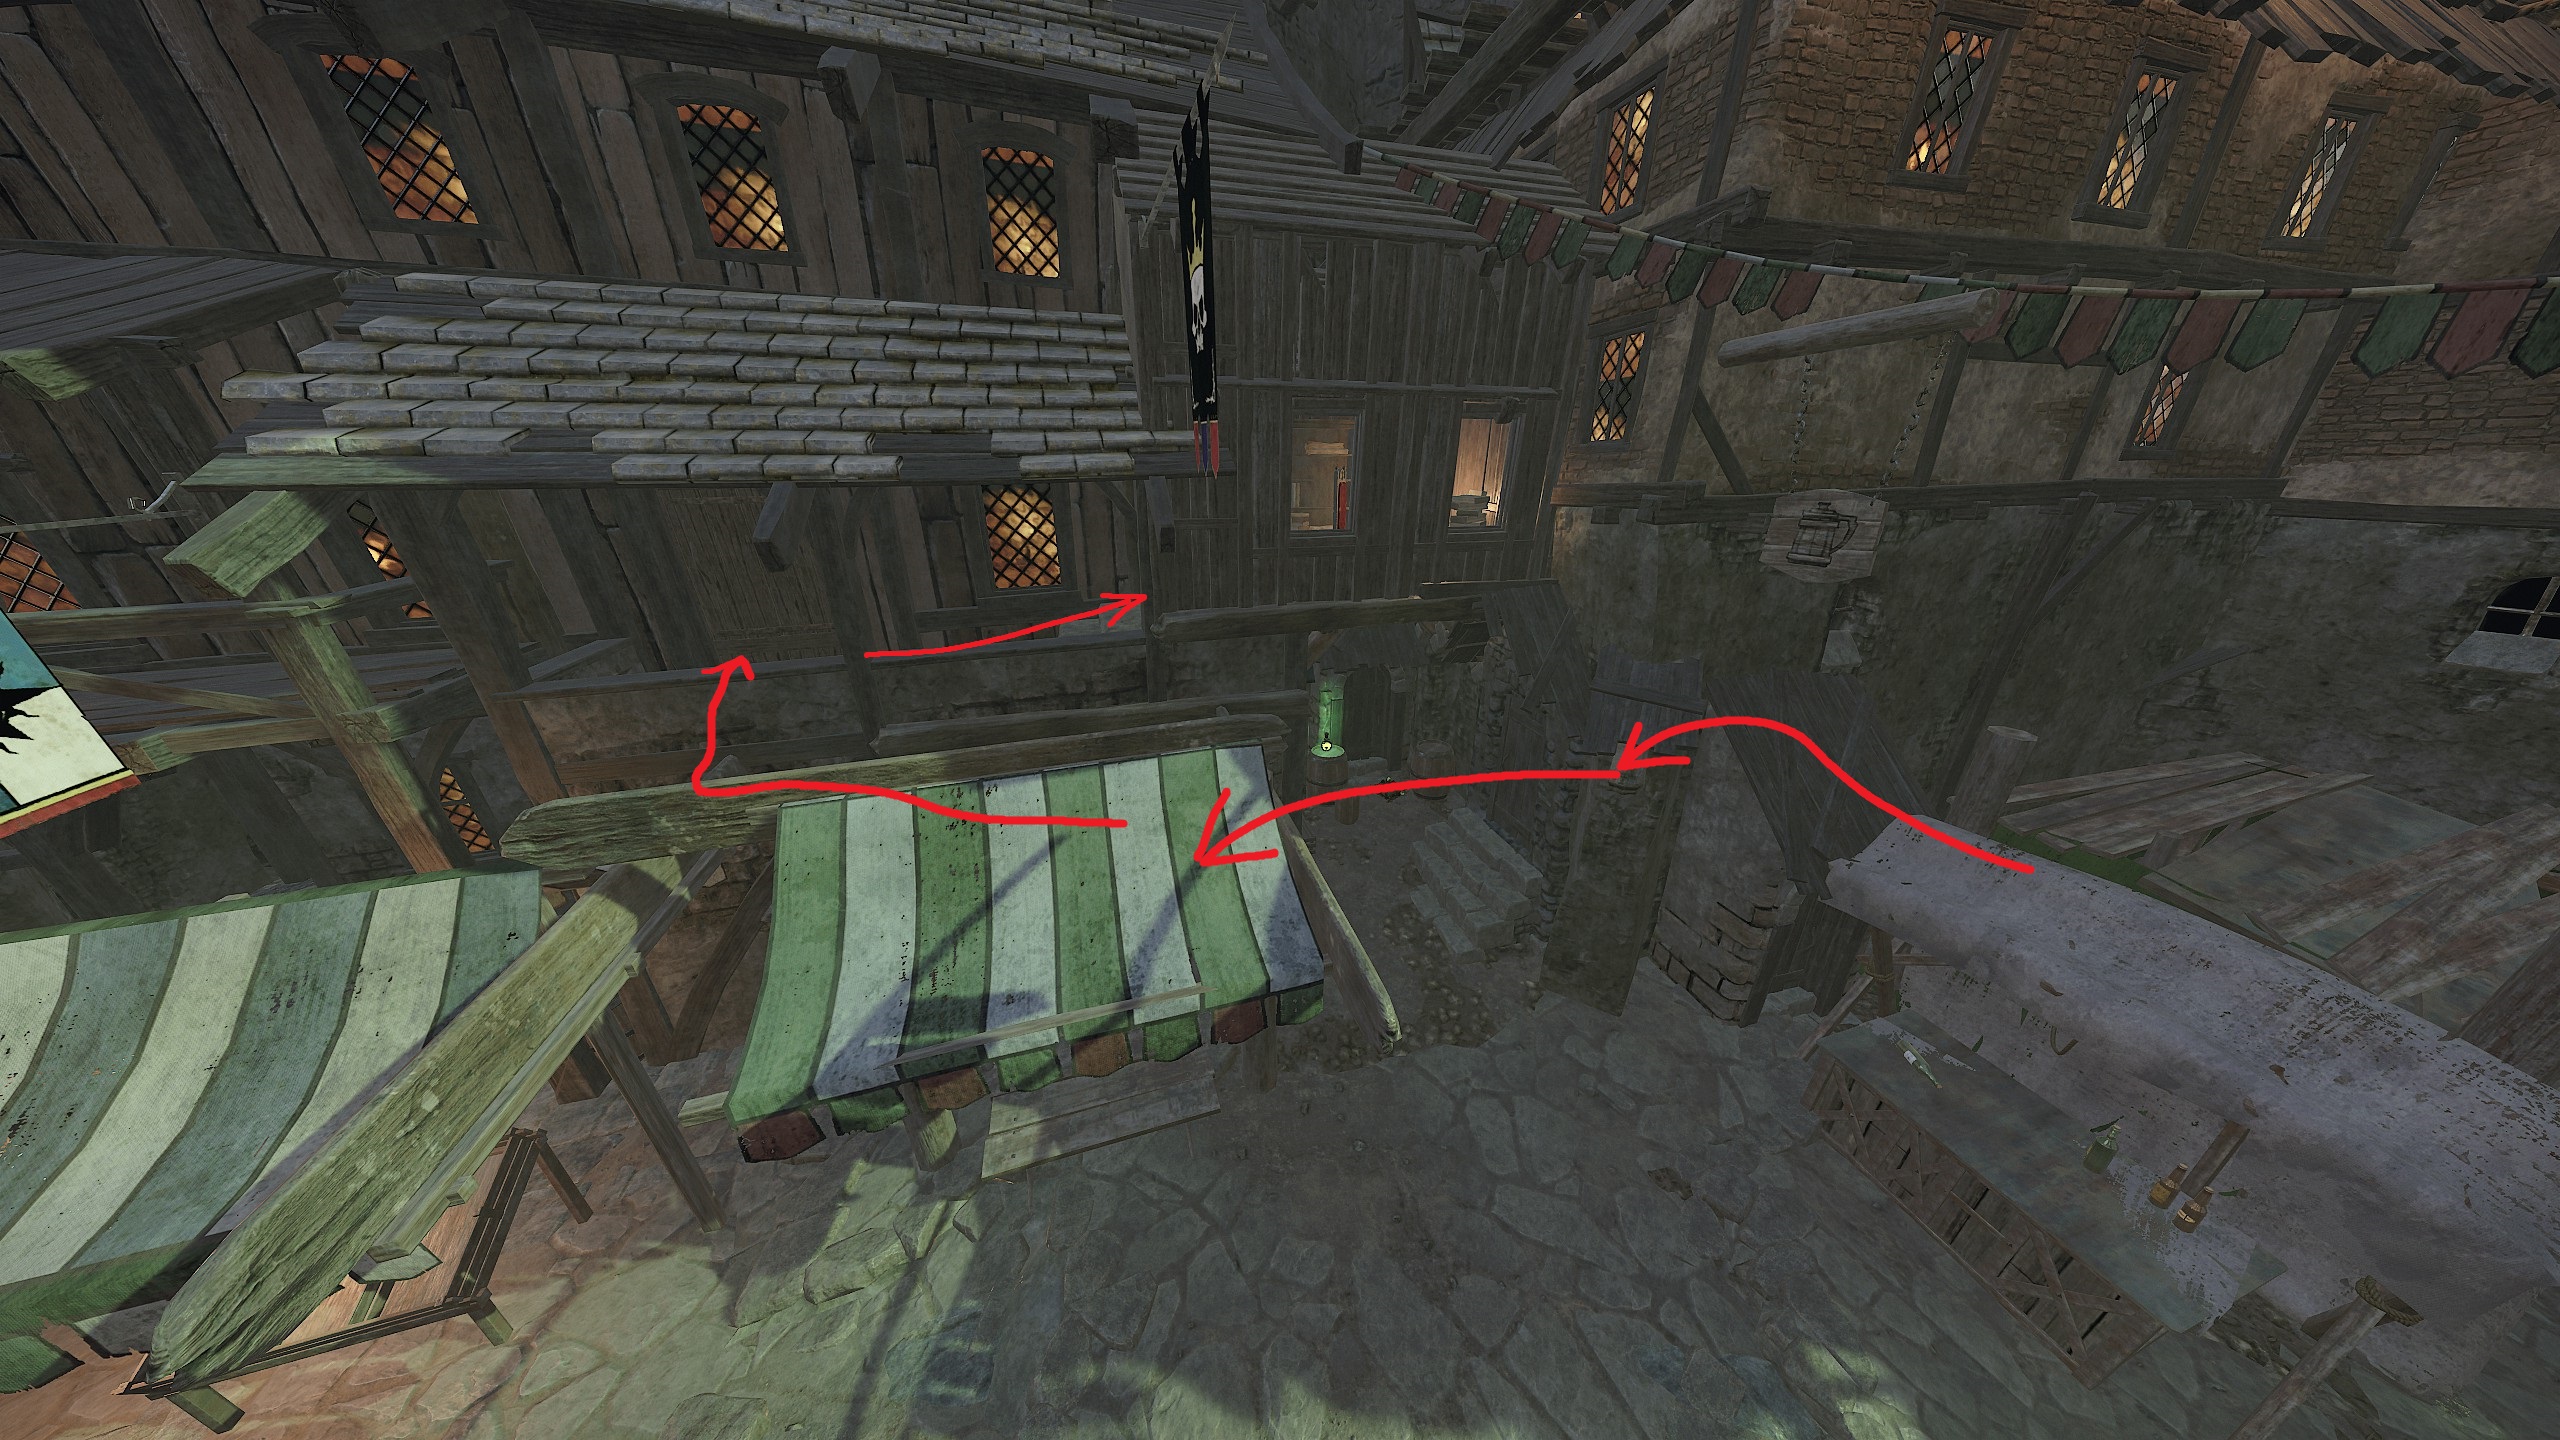
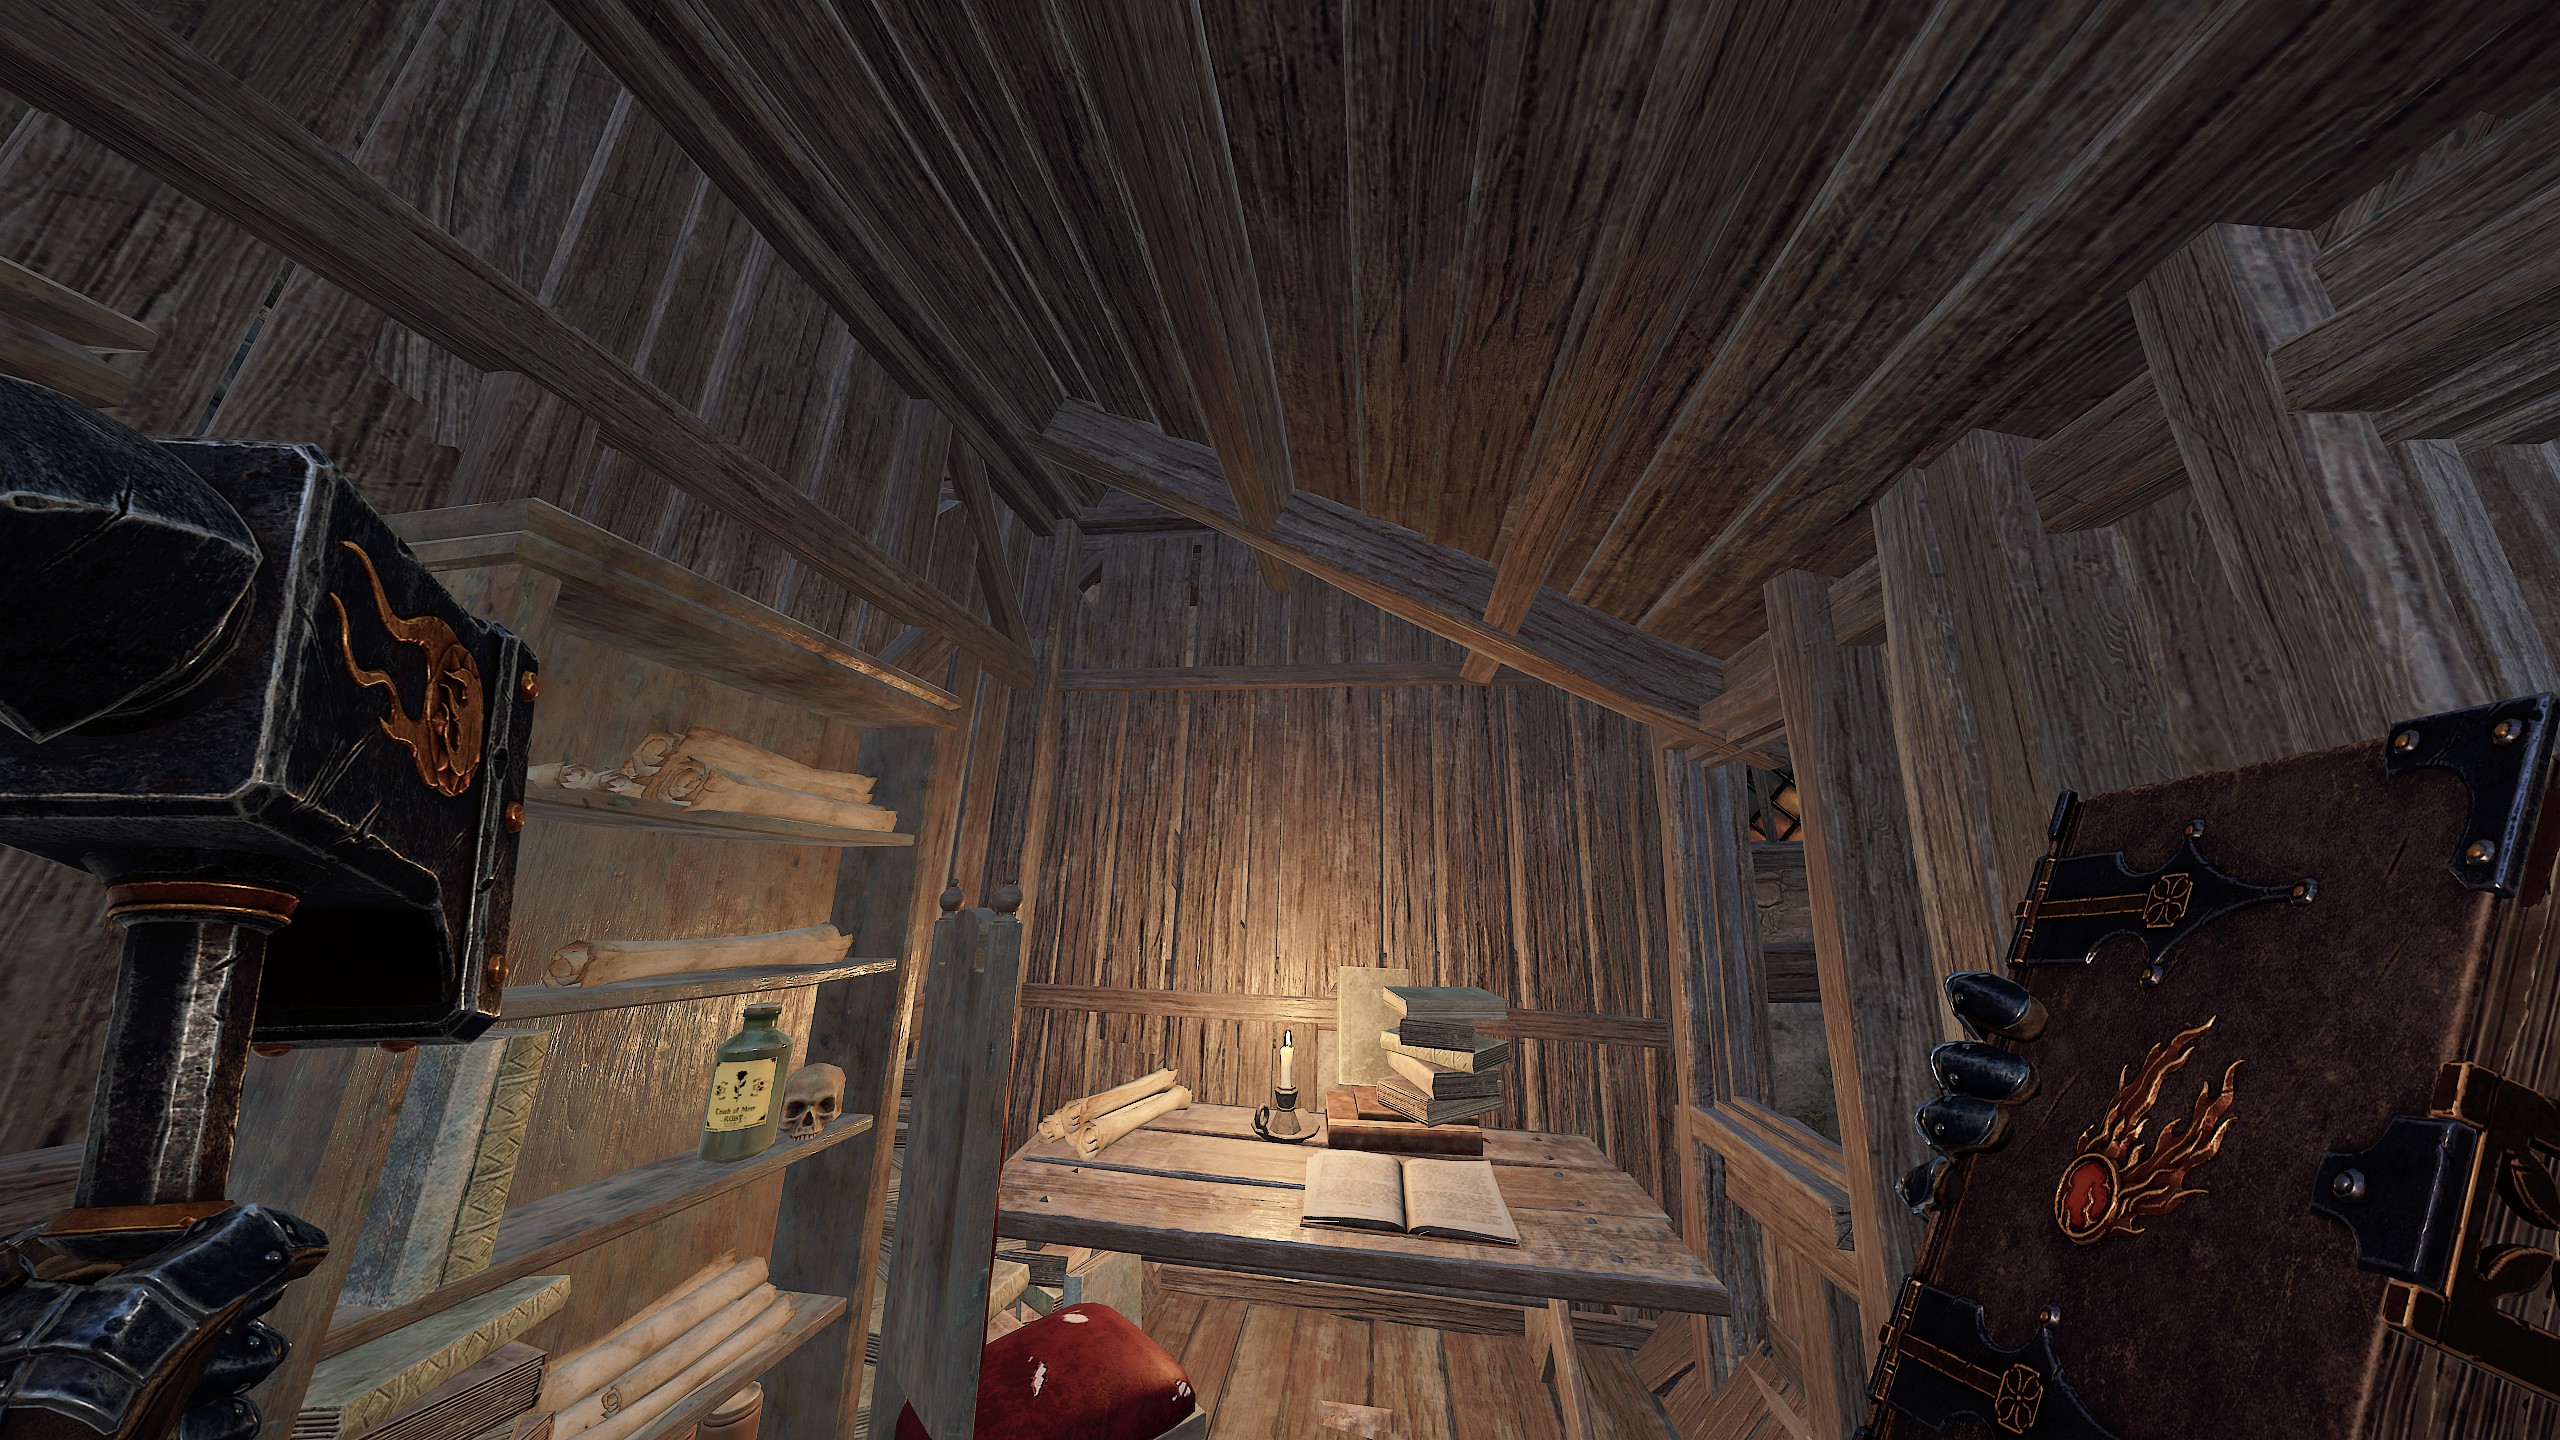
Just jump to that corner, hold w and carefully climb the fence, then the stone railing and the two stacked crates using your dash. From there, just jump onto the overhang and then directly onto the balcony of the Movers Guild next to you.
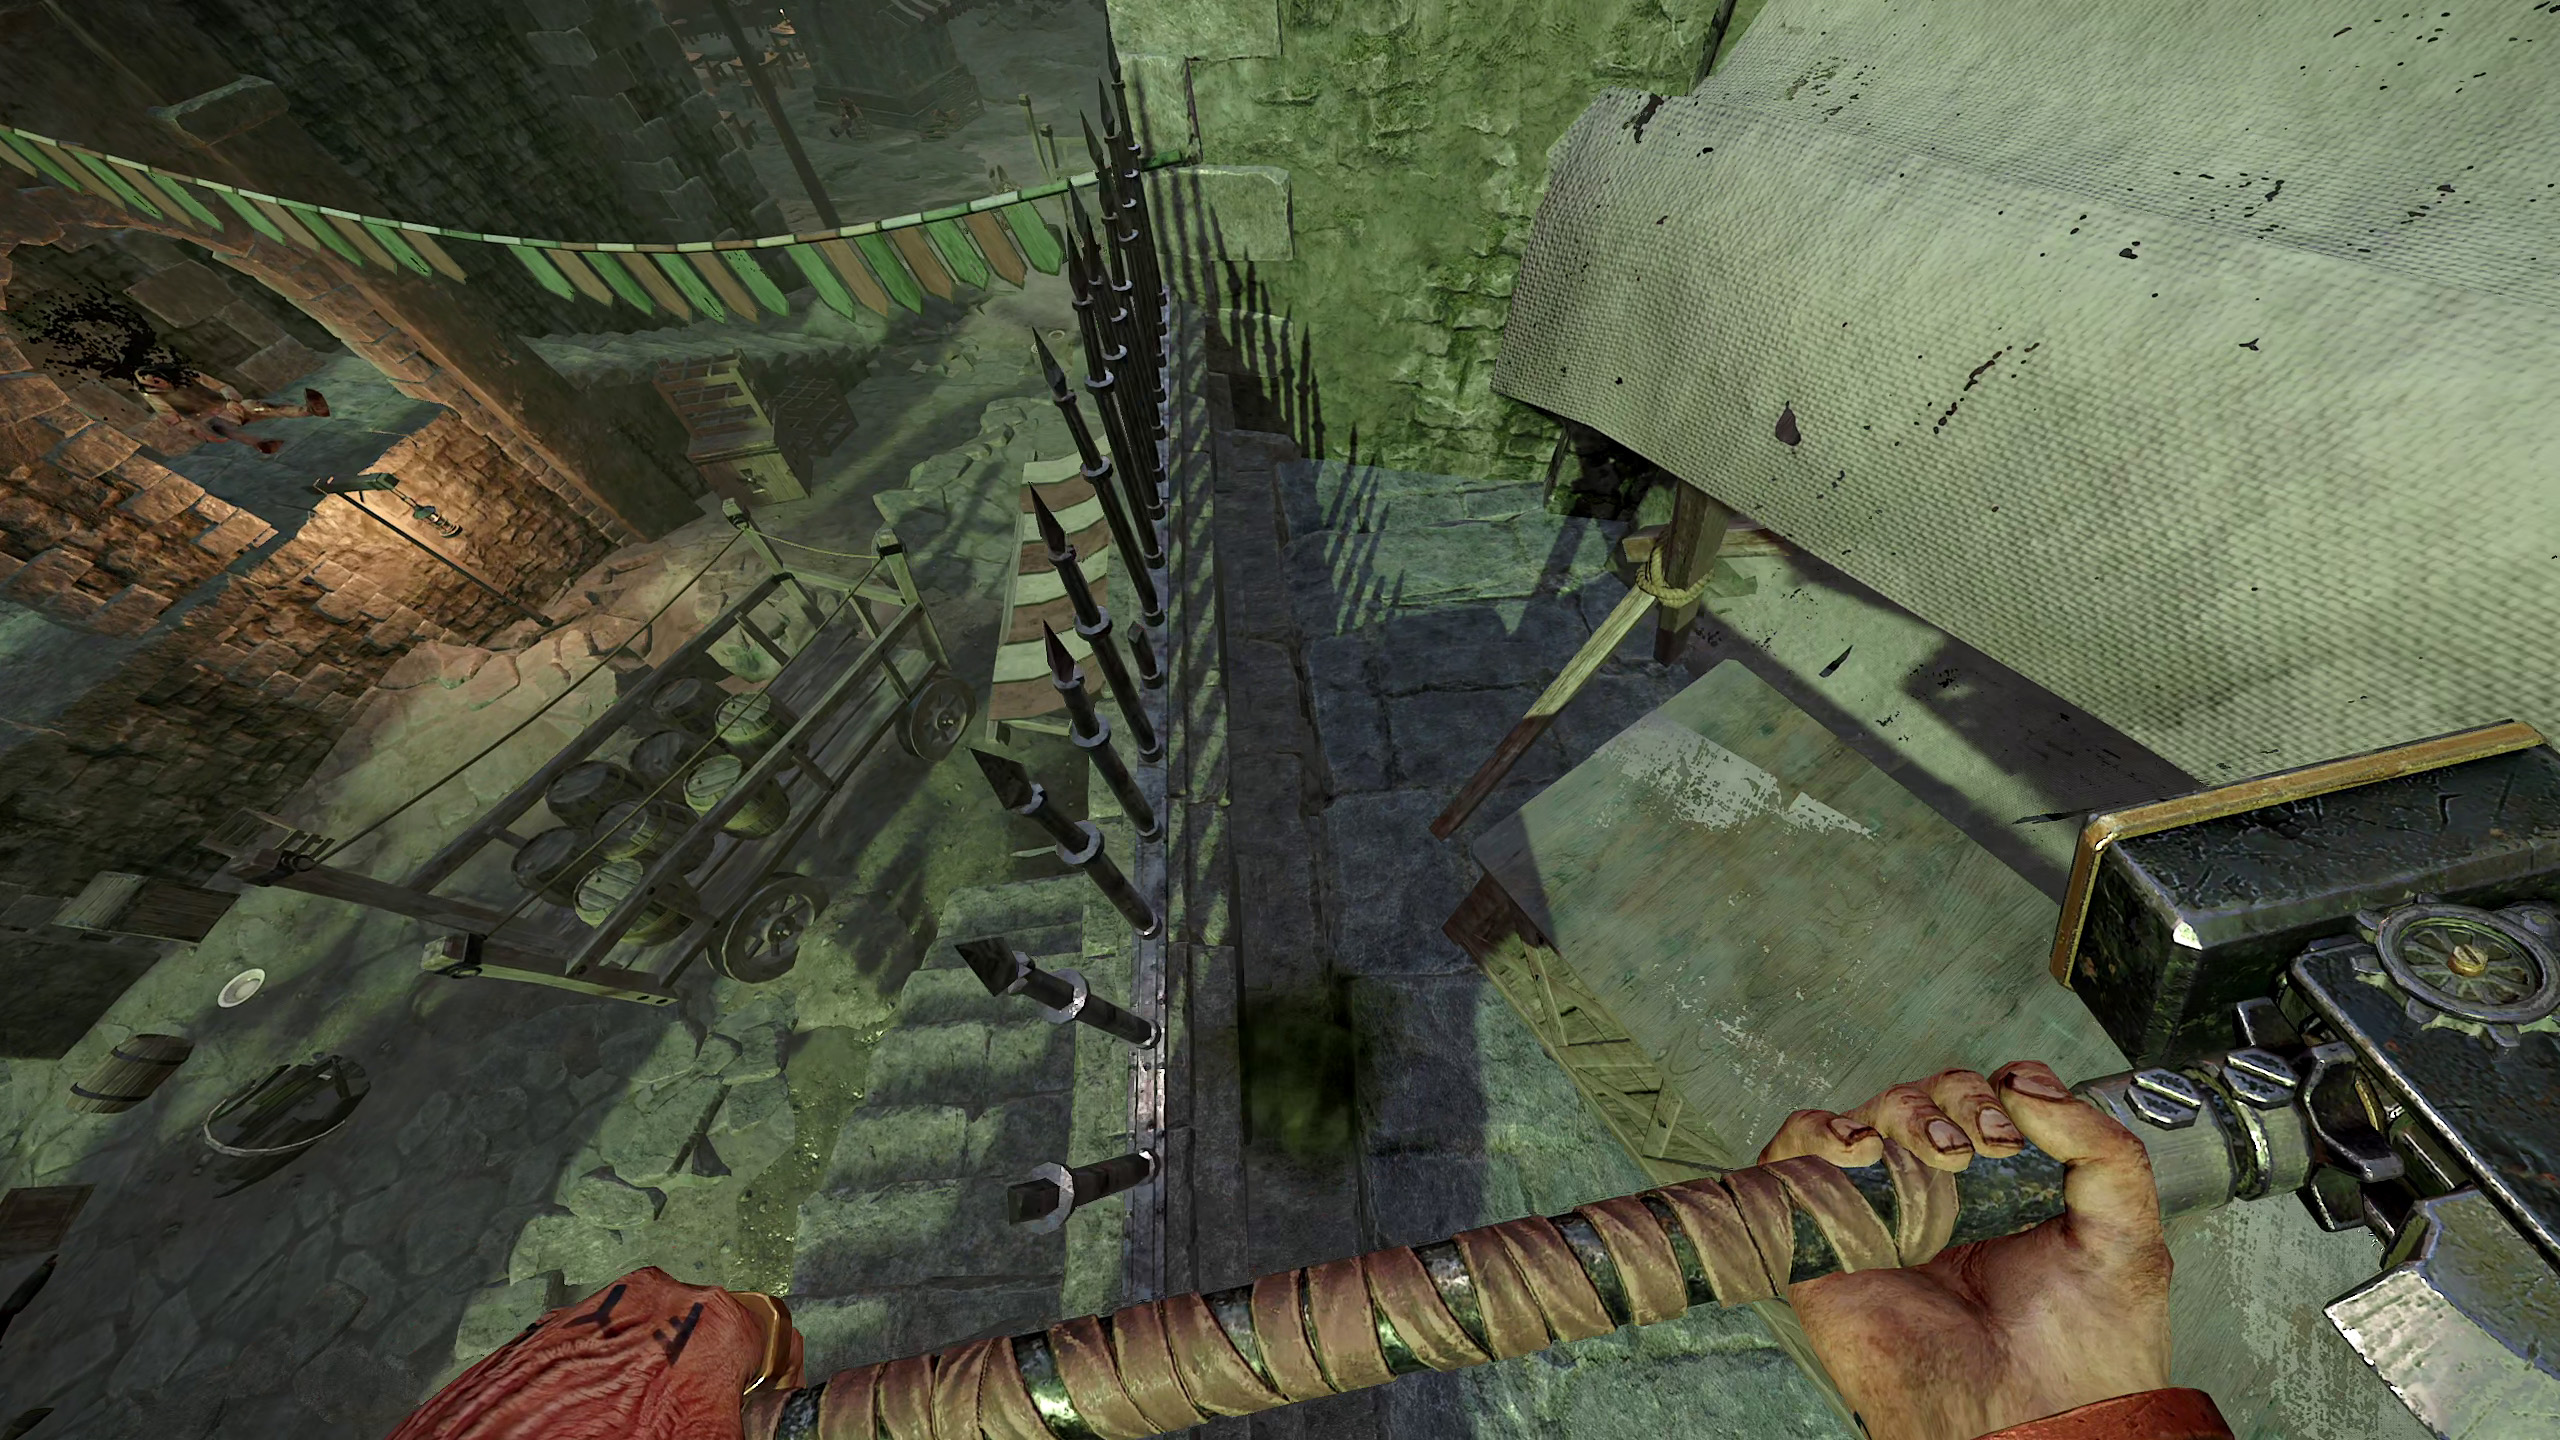
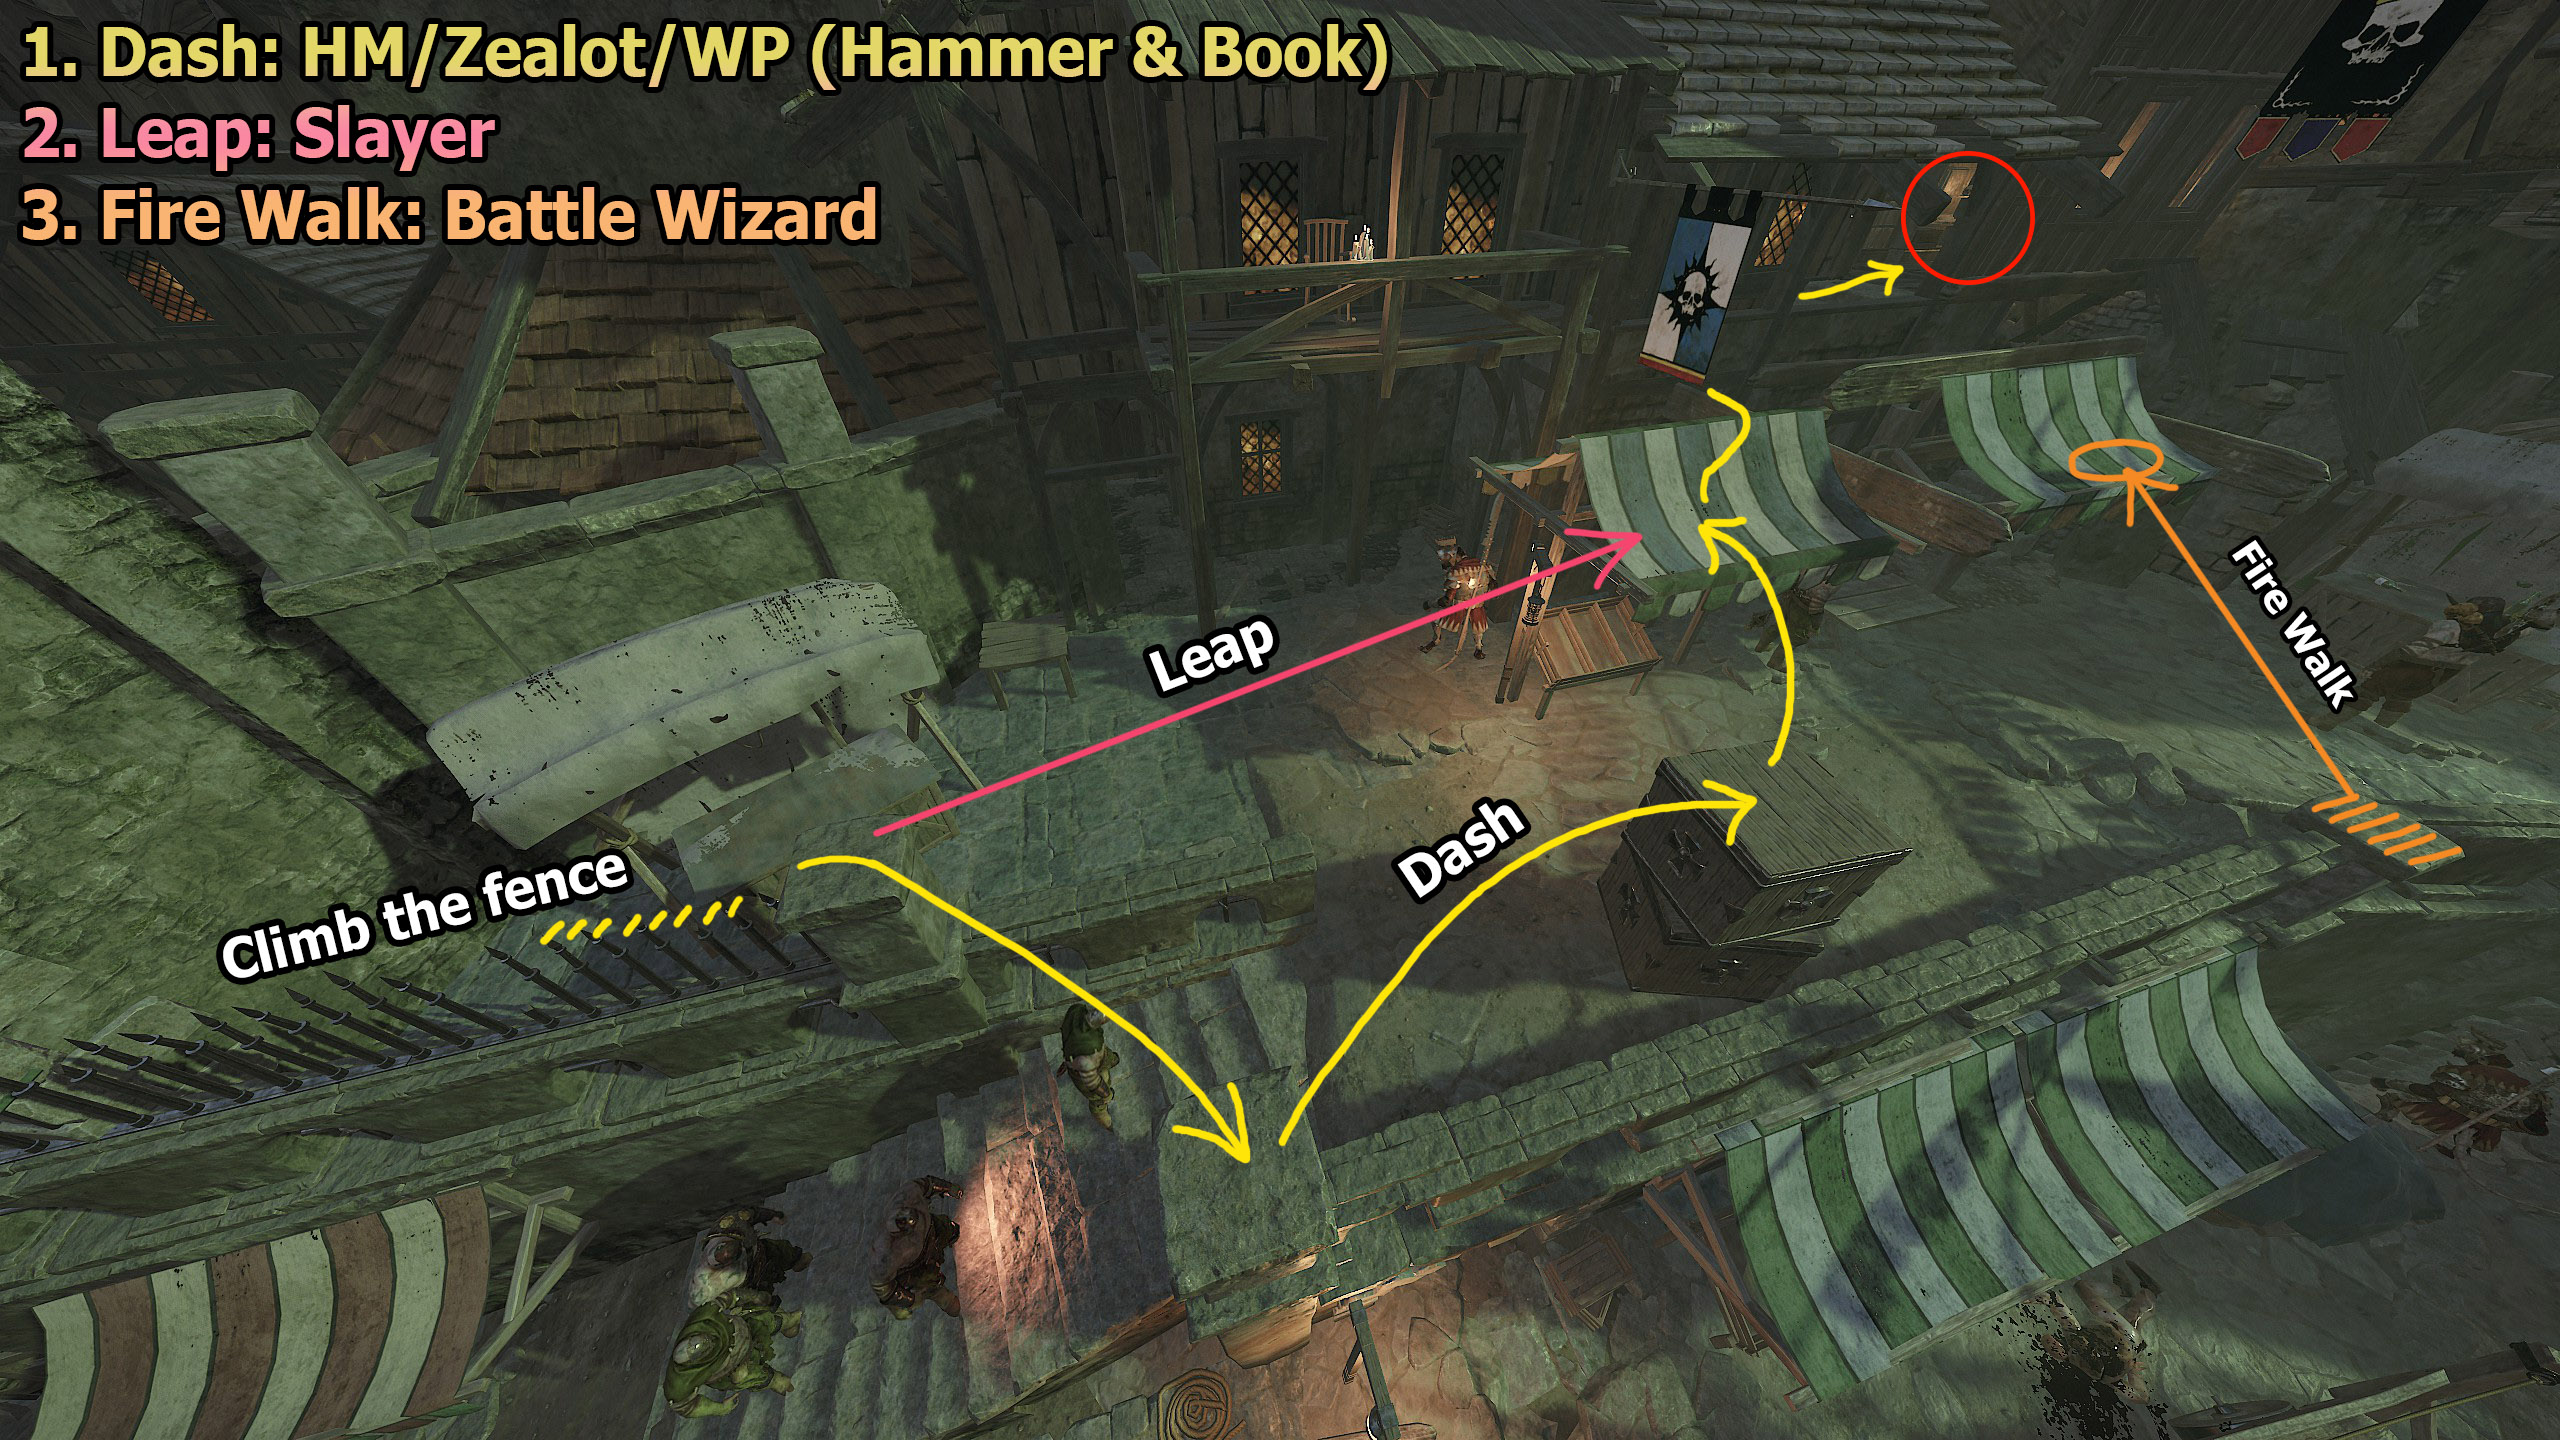 https://youtu.be/O9A1AmXfI0I
 5. Fast Flipper
Legend: Leave no hidden switch unturned for longer than 3 seconds, end event.
The switches are located in five place, but the order in which they become activation is always random.
After pressing the very first switch that activates the event, the first random switch will be available after about 15 seconds, and all subsequent switches will appear at 30-second intervals. Be sure to memorize the sequence of the switches you've already pressed so that you know roughly where the next switch will appear. Also note that this challenge can only be completed on Legend difficulty.
There are two strategies for this challenge:
- High chance of completion: This requires at least one teammate.
- Low chance of completion: This requires no teammate.
Your teammate will be on the left side of the temple on the second floor and will be controlling 2 switches at once (lower and upper).
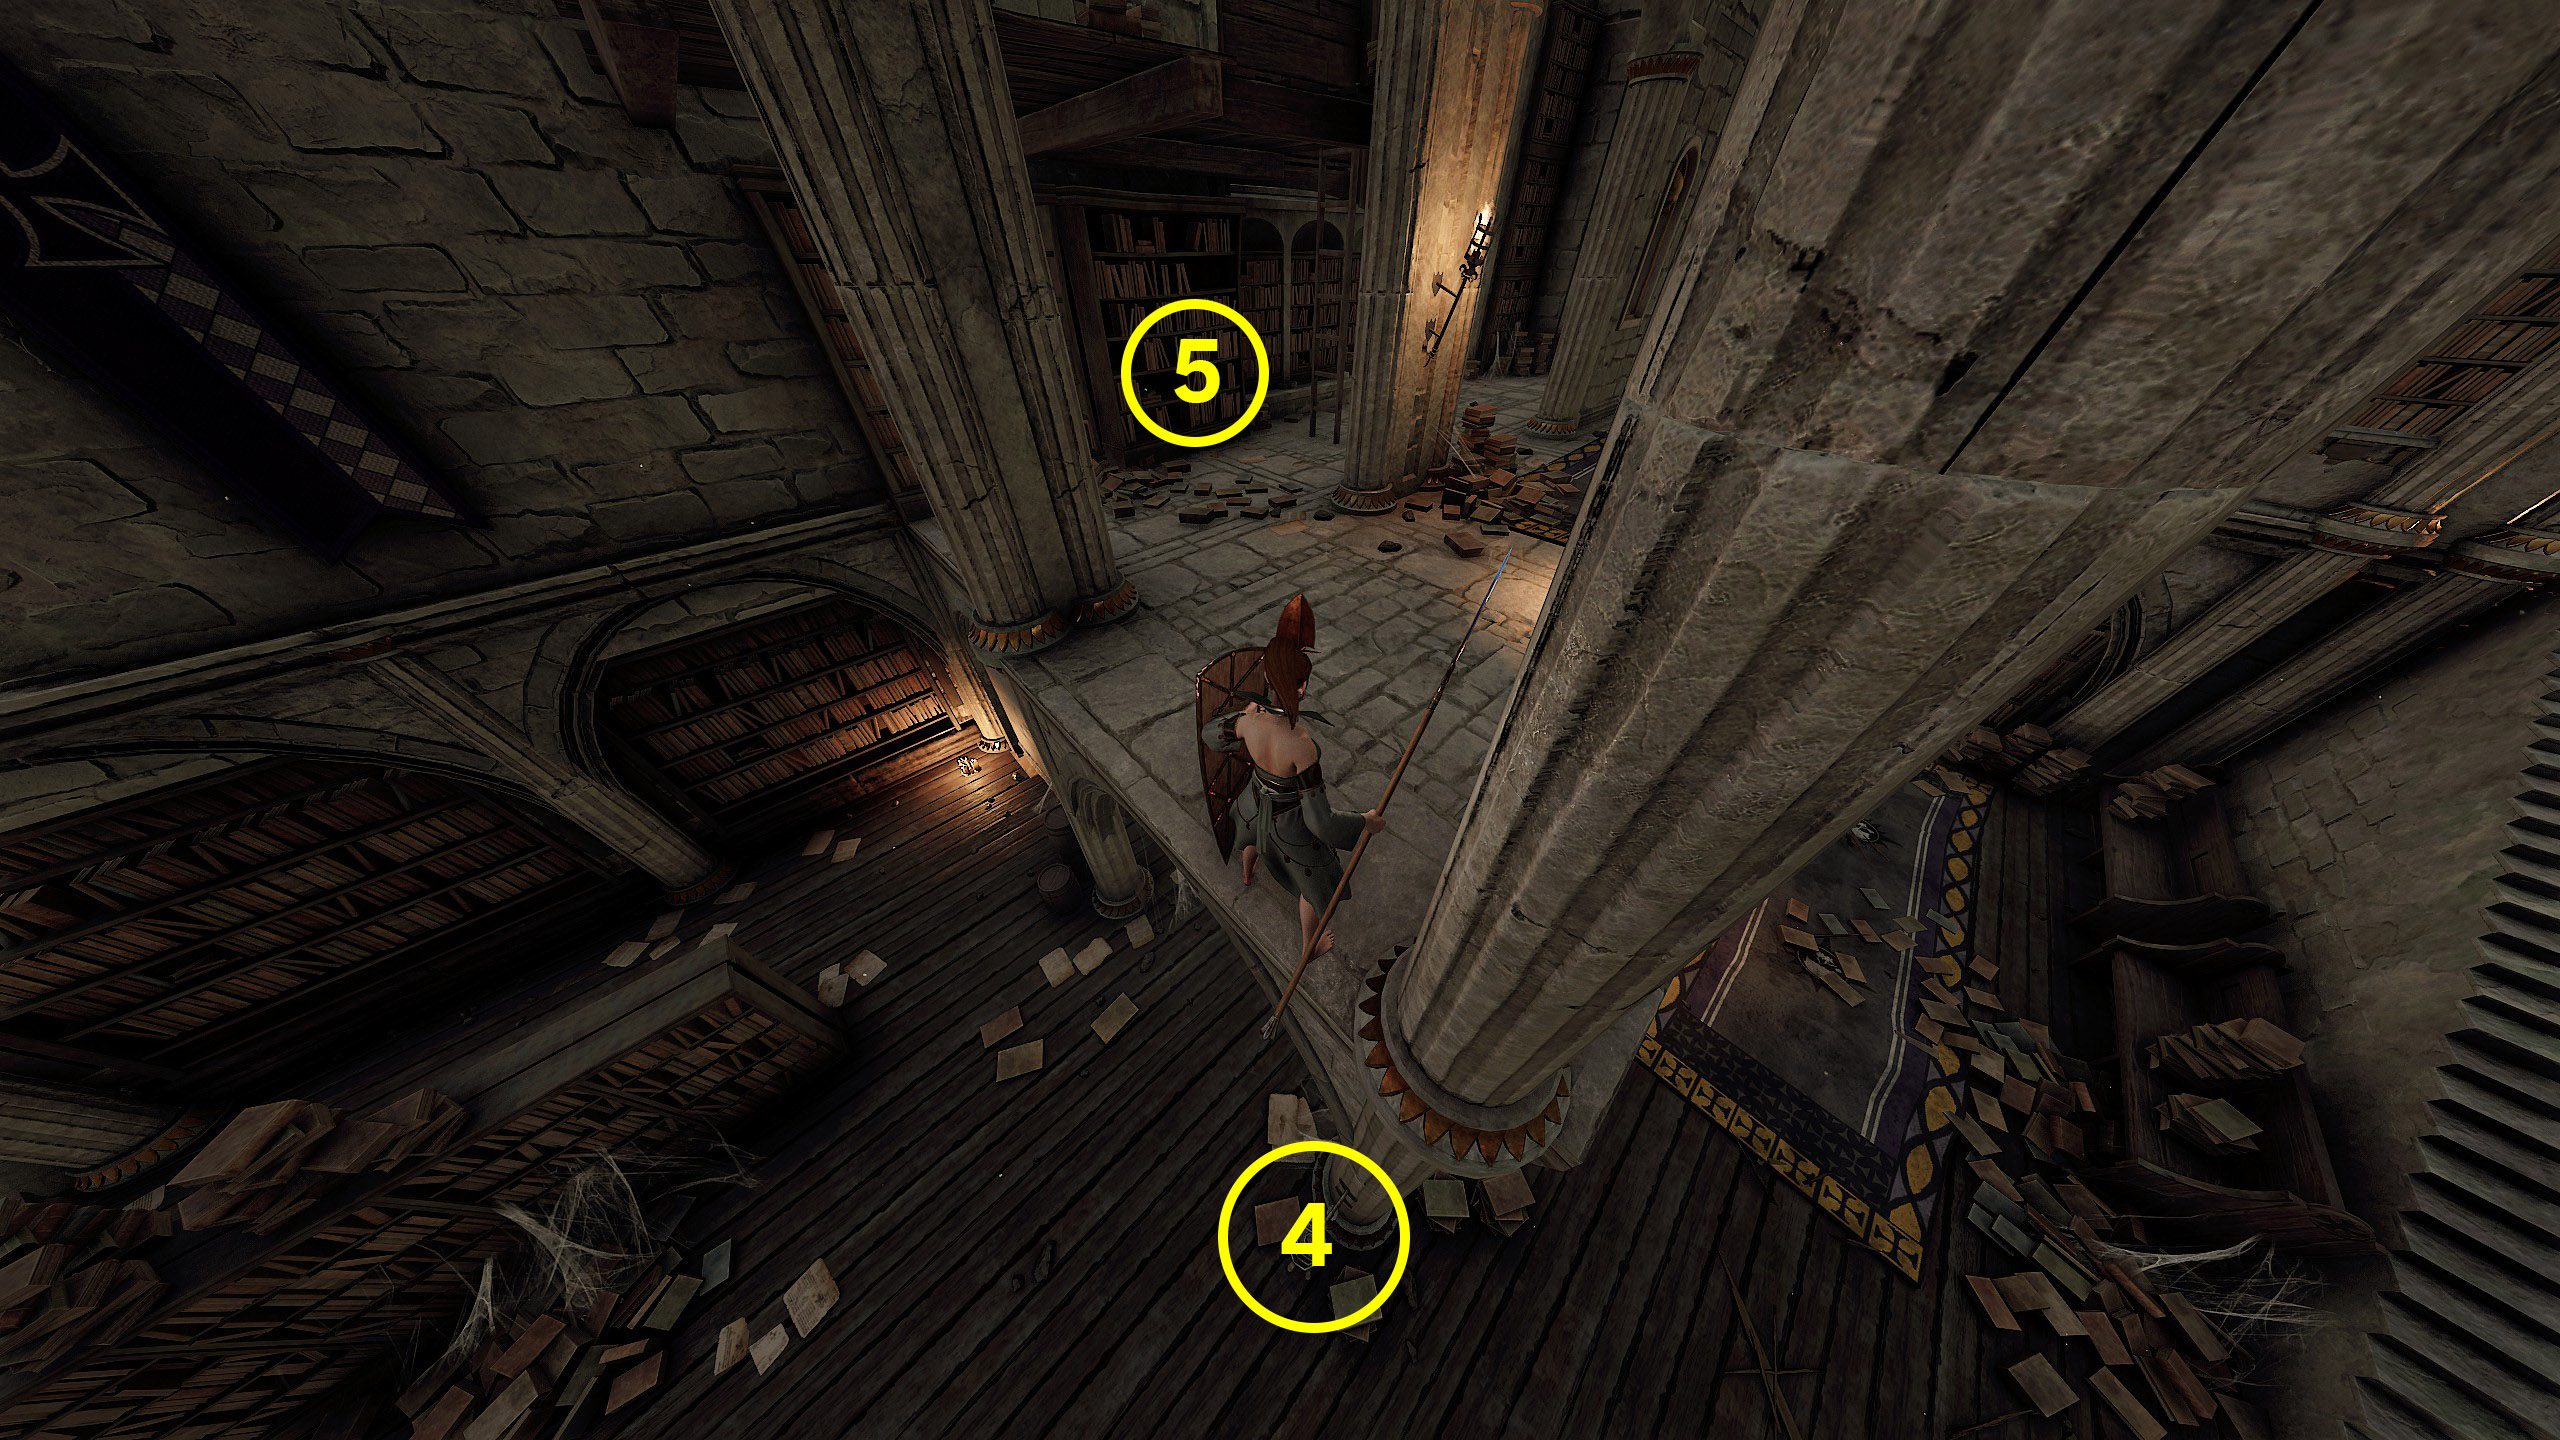
Use the Battle Wizard with Double Teleport to quickly shorten the distance to the switches, then climb back up to the top and repeat this until all three switches in that area activate.
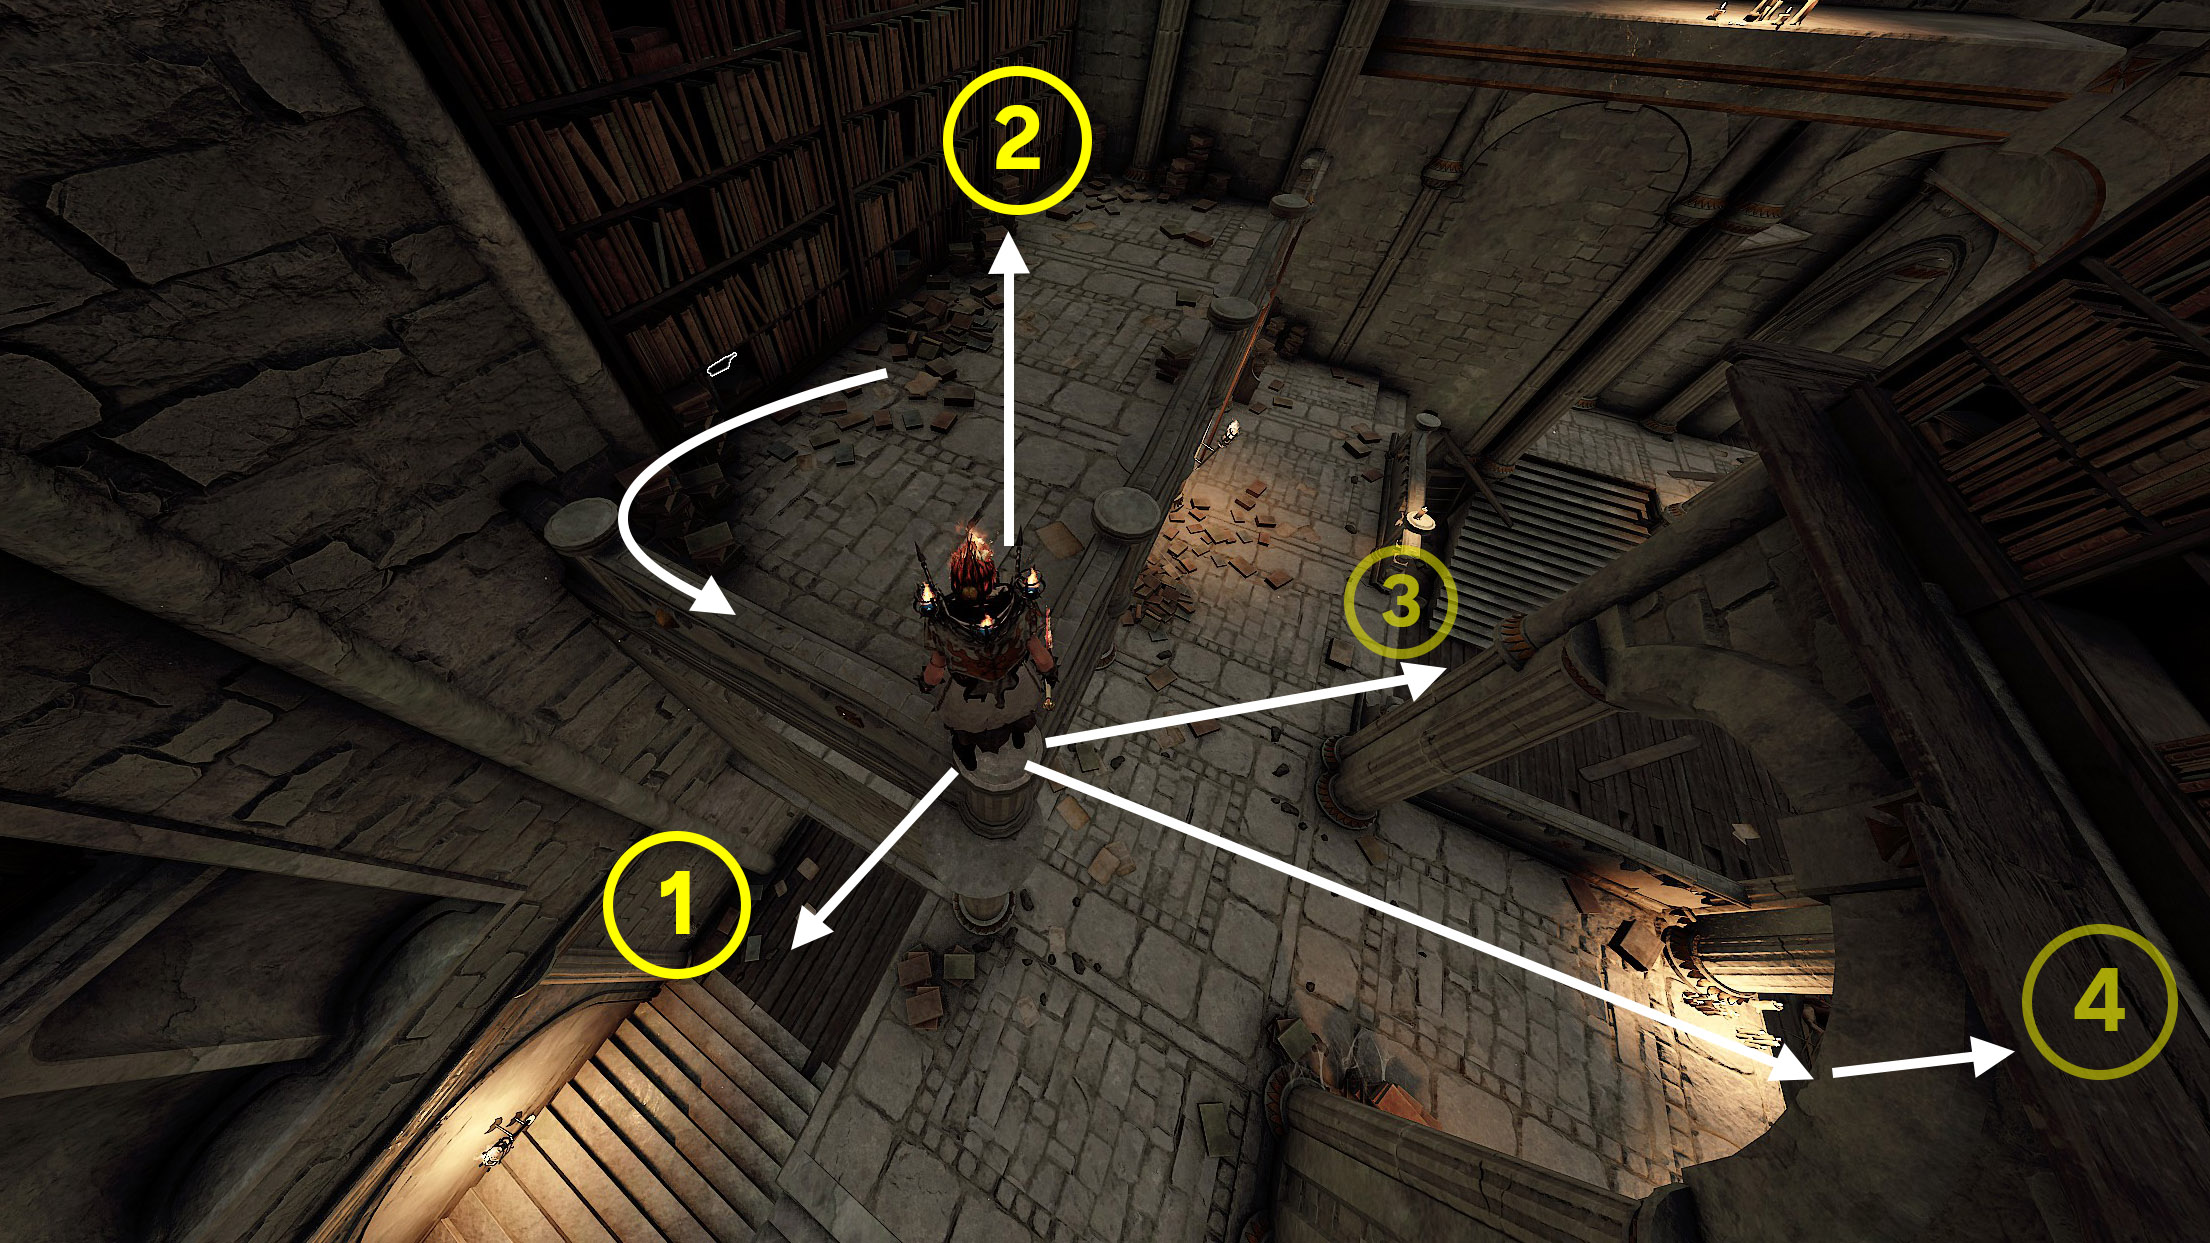
As soon as you activate the event, immediately run to the upper corner parapet on the right side of the temple, near the bookshelves. There, you will have to control 3–4 switches at once.
The first switch is at the bottom of the stairs, the second is on the bookshelf, the third is at the bottom of the wall, and the fourth is on the other side of the temple (you can quickly reach it using two teleports). The fifth switch (which is also on the shelf next to the books on the other side of the temple) cannot be reached in the allotted time of 3 seconds, unfortunately. In this case, you will have to restart the map and hope that the right switch will appear this time.
The most important thing is to activate the second switch (on the bookshelf). Once you do that, you can go to the other side of the temple to the fifth switch and control the remaining switches.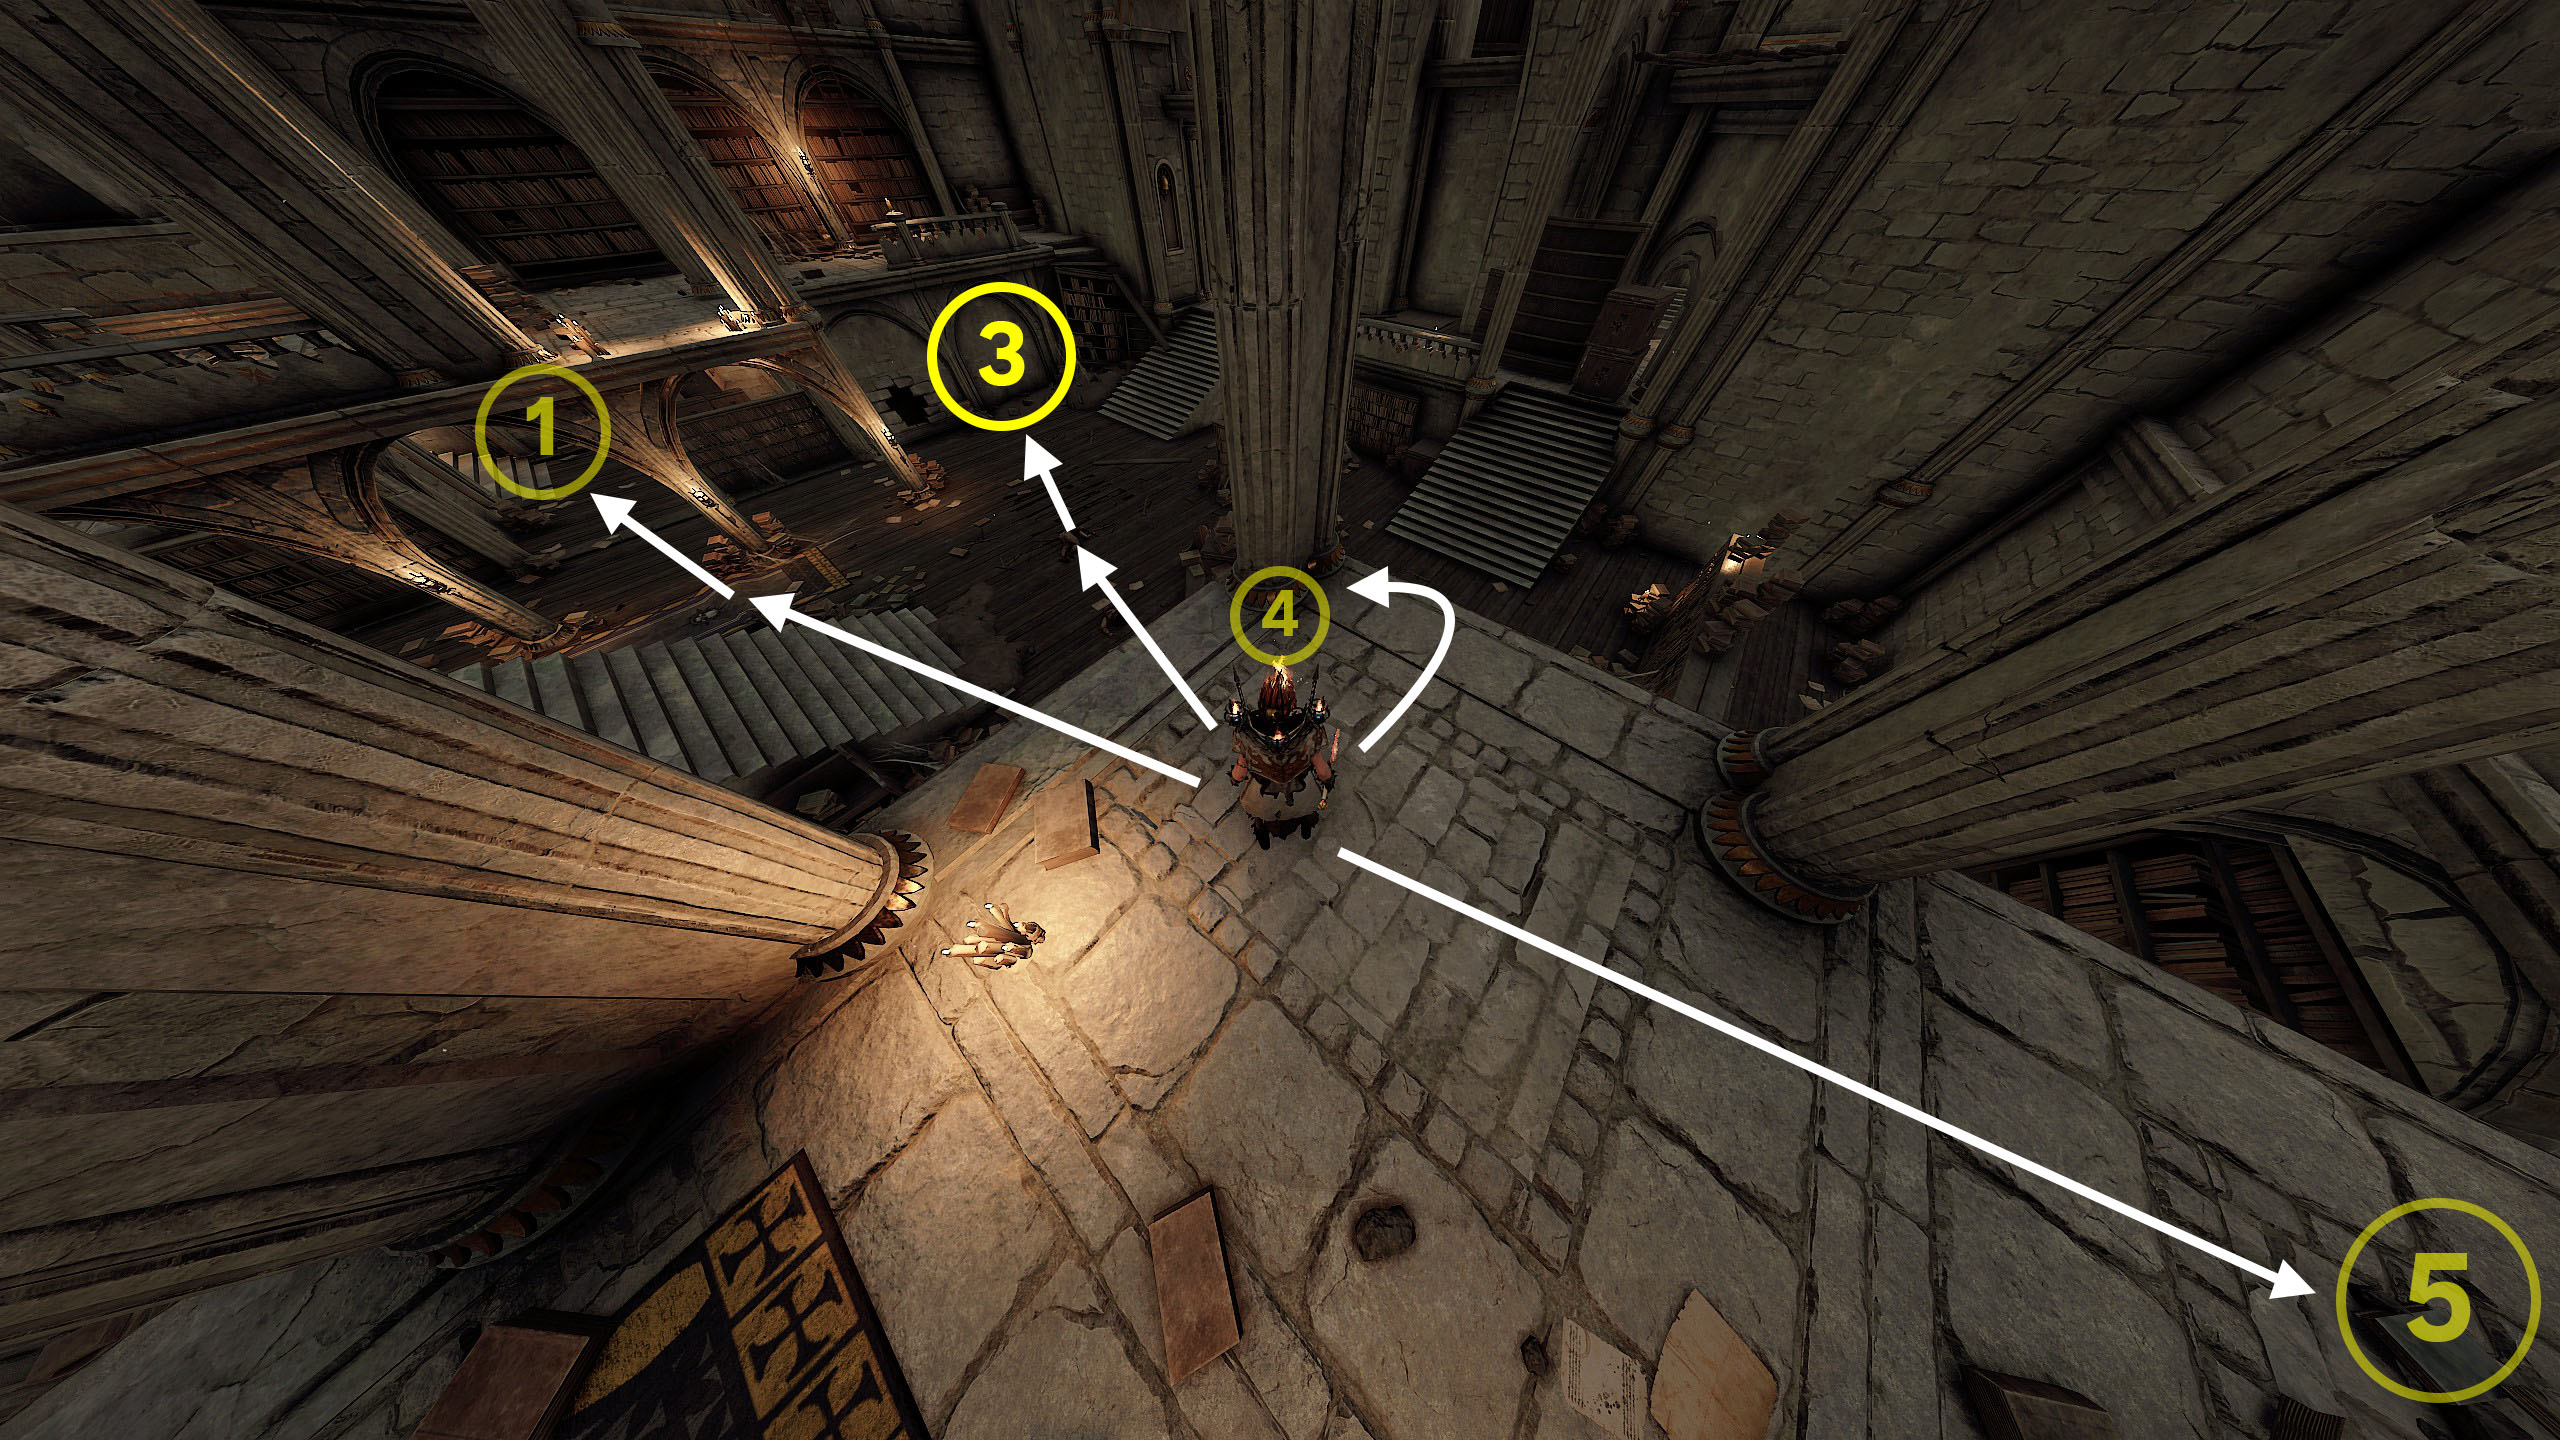
https://youtu.be/MUKOb4jHJE8
 6. Shadows over Bögenhafen
Collect all Shadows over Bögenhafen cosmetic items
 Just buy all the purple illusions at the Emporium of Wonders. They are inexpensive, only 50 shillings apiece, but there are quite a few of them — 84 to be exact. It would take 4,200 shillings to buy them all.
Back to Ubersreik

Regarding the challenges Barrels of Fun & Pouch Pilferer & Chainbreaker & Demolitionist.
I recommend going straight through them on the Legend difficulty so you can complete both challenges beforehand and not have to go back to them again.
- Fortunes of War
 1. Scrivener
Transcribe all three Runes onto the Lodestone To unlock the Fortunes of War map, you need to find a rune on each of the three remastered maps and successfully complete the mission. The locations of all the runes are shown in this guide and video:
https://steamcommunity.com/sharedfiles/filedetails/?id=1587880129&searchtext=Challenge https://youtu.be/b8284fzAJxY?si=r6f5eiVrvs2VGWU3
 2. Blood Fortune
Complete Fortunes of War on Cataclysm difficulty.
This challenge is considered quite difficult. Basically, it can be completed after a few attempts, thanks to a good team or an experienced captain. But in order to better understand strategy, kiting and others, there are complete guides for this map on the Steam.
https://steamcommunity.com/sharedfiles/filedetails/?id=2866912351 https://steamcommunity.com/sharedfiles/filedetails/?id=2223141945 I think this will help some players avoid making mistakes. Also, to better understand some micro moments, there are many True Solo walkthroughs on this map available on YouTube.
https://youtu.be/TarrESxP20c
- Horn of Magnus
 1. Barrels of Fun
Blow the door within 30 seconds of the first Barrel dropping on Horn of Magnus Just watch the video below, I think it will surprise you :)
Your momentum contributes towards the barrel's throw distance. You can toss the barrel mid-dash, and it will go all the way towards the gate from where it spawned. While it's trickier to pull off, it's a good thought exercise to think if it can be done with a single purple pot in a pub lobby. Which I'm too lazy to try deliberately and didn't have the chance.https://www.youtube.com/watch?v=-VxNsqfdvpA
 2. Overdue - Returned to the Library
Visit an old hiding place in Horn of Magnus Simply open all five chests in Oliver's Inn and the entrance to the old hiding will be open.
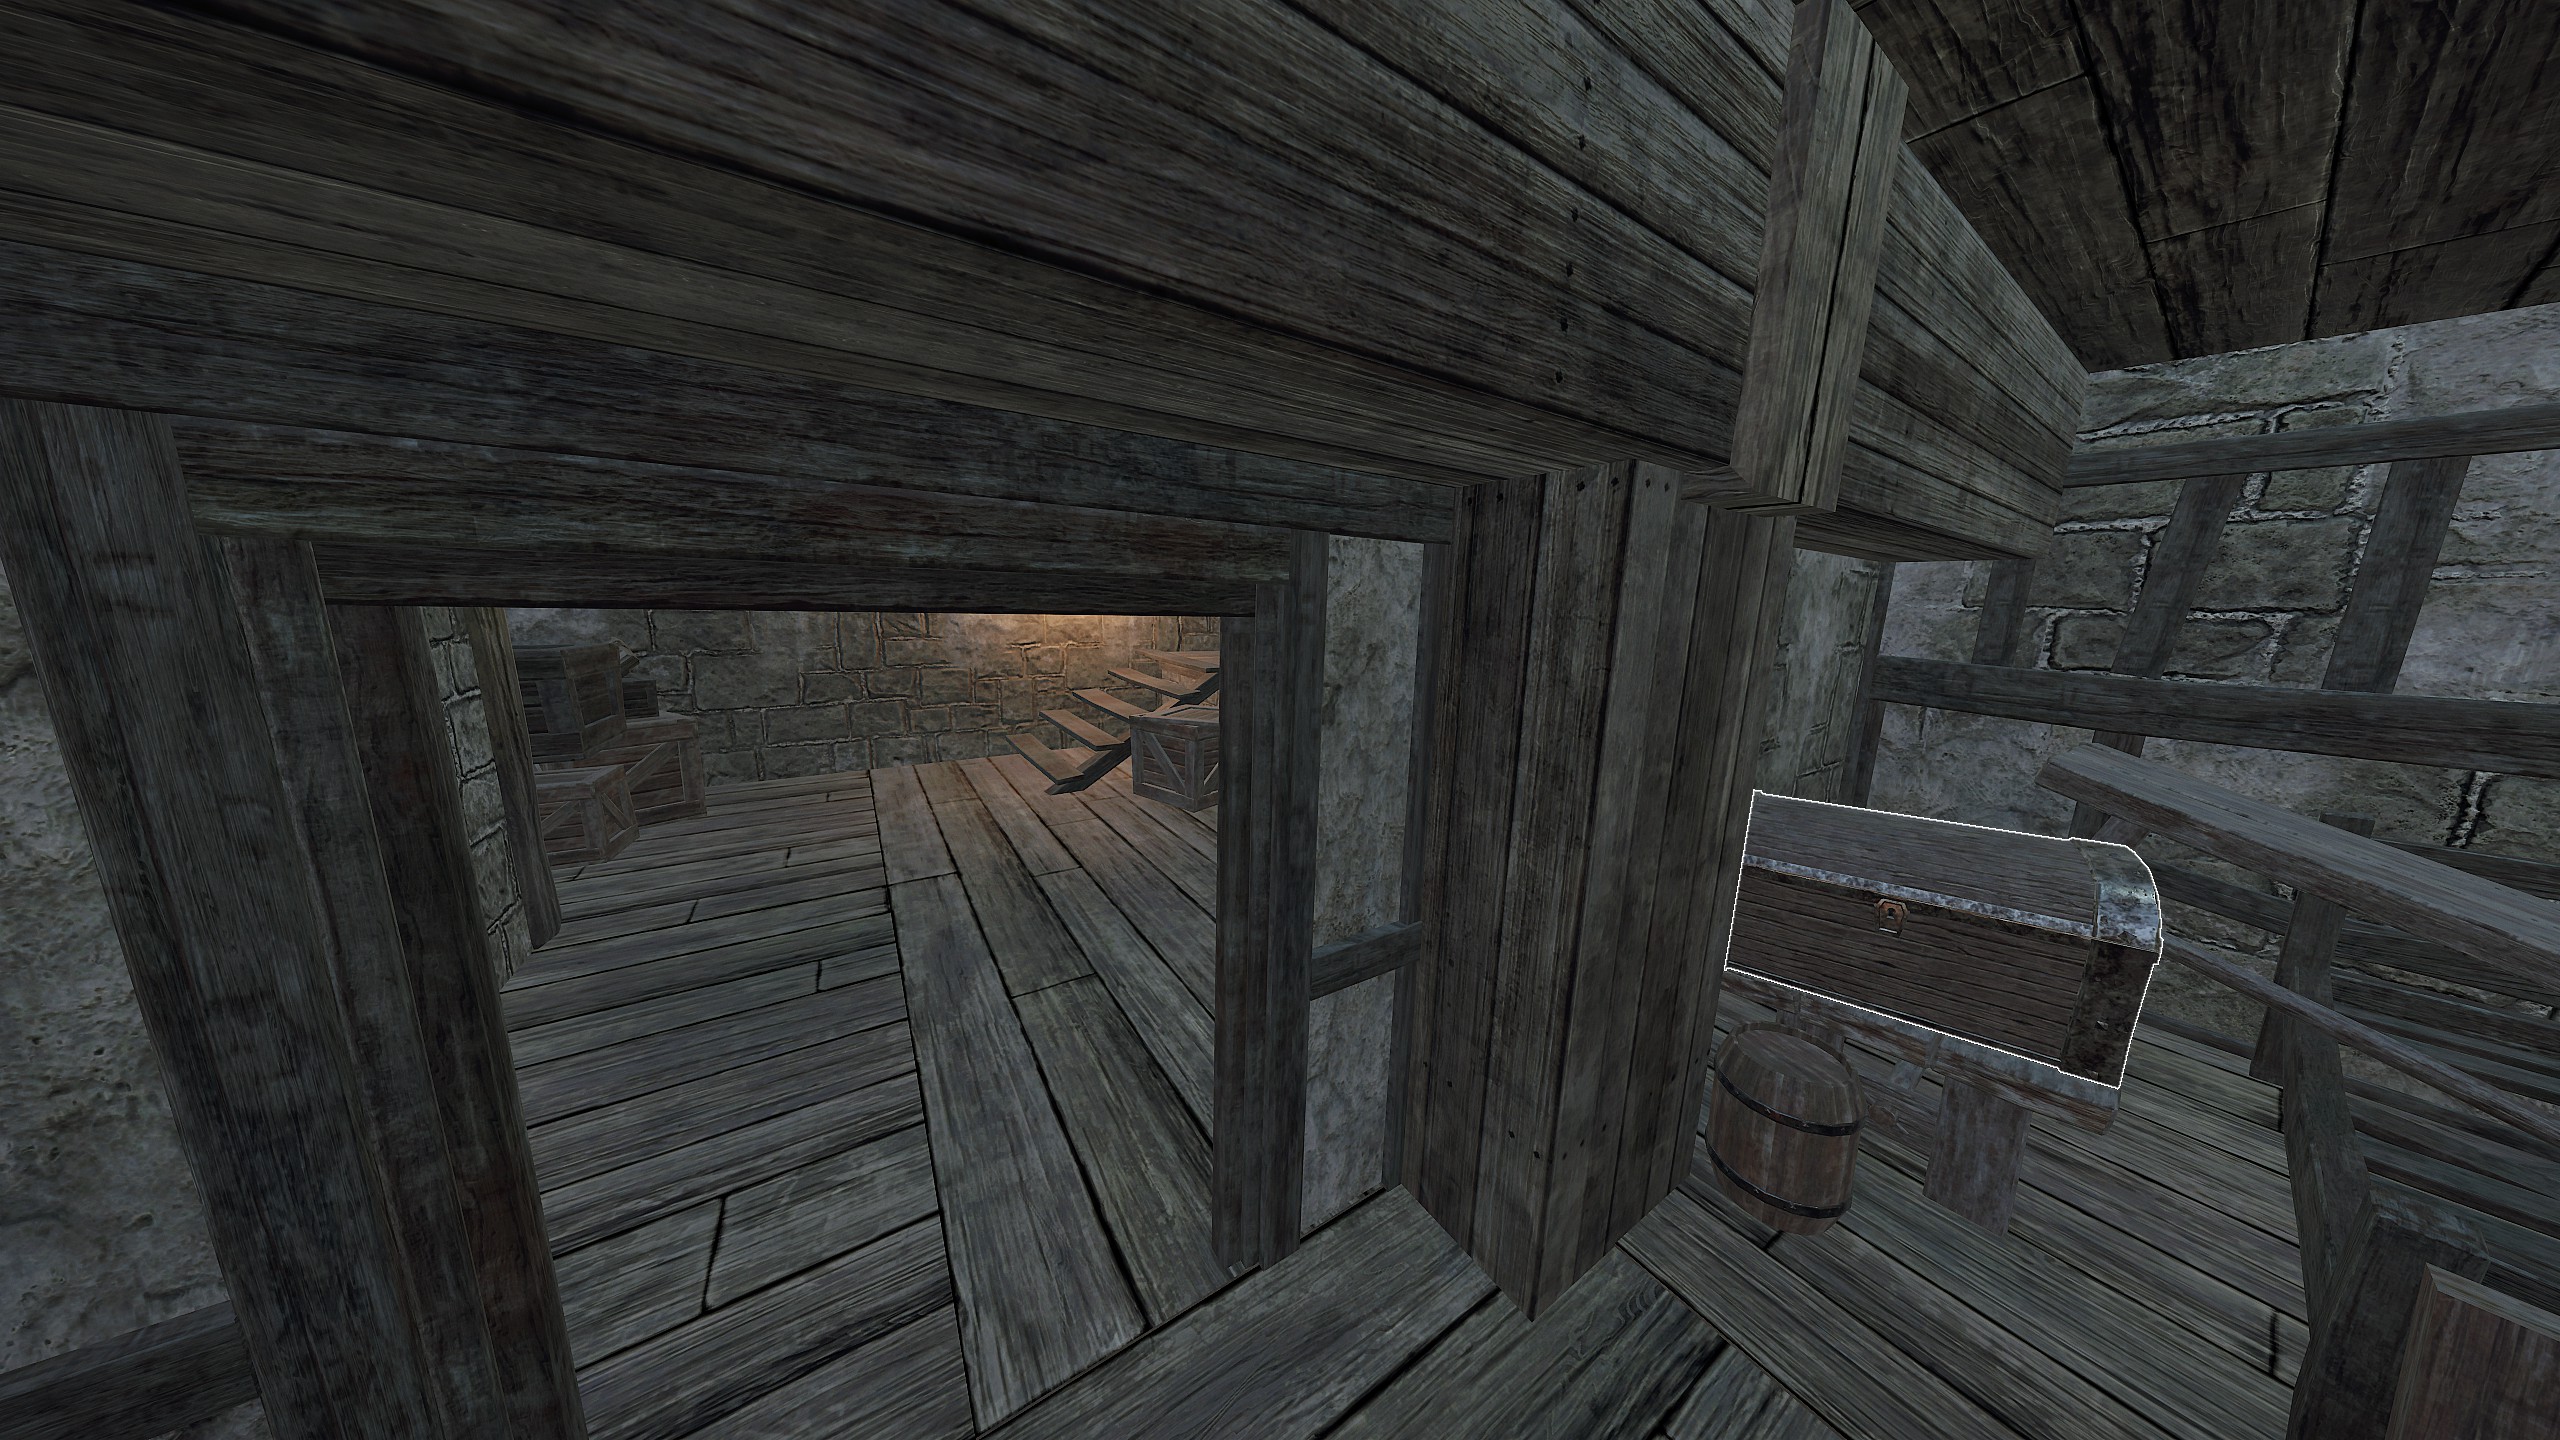
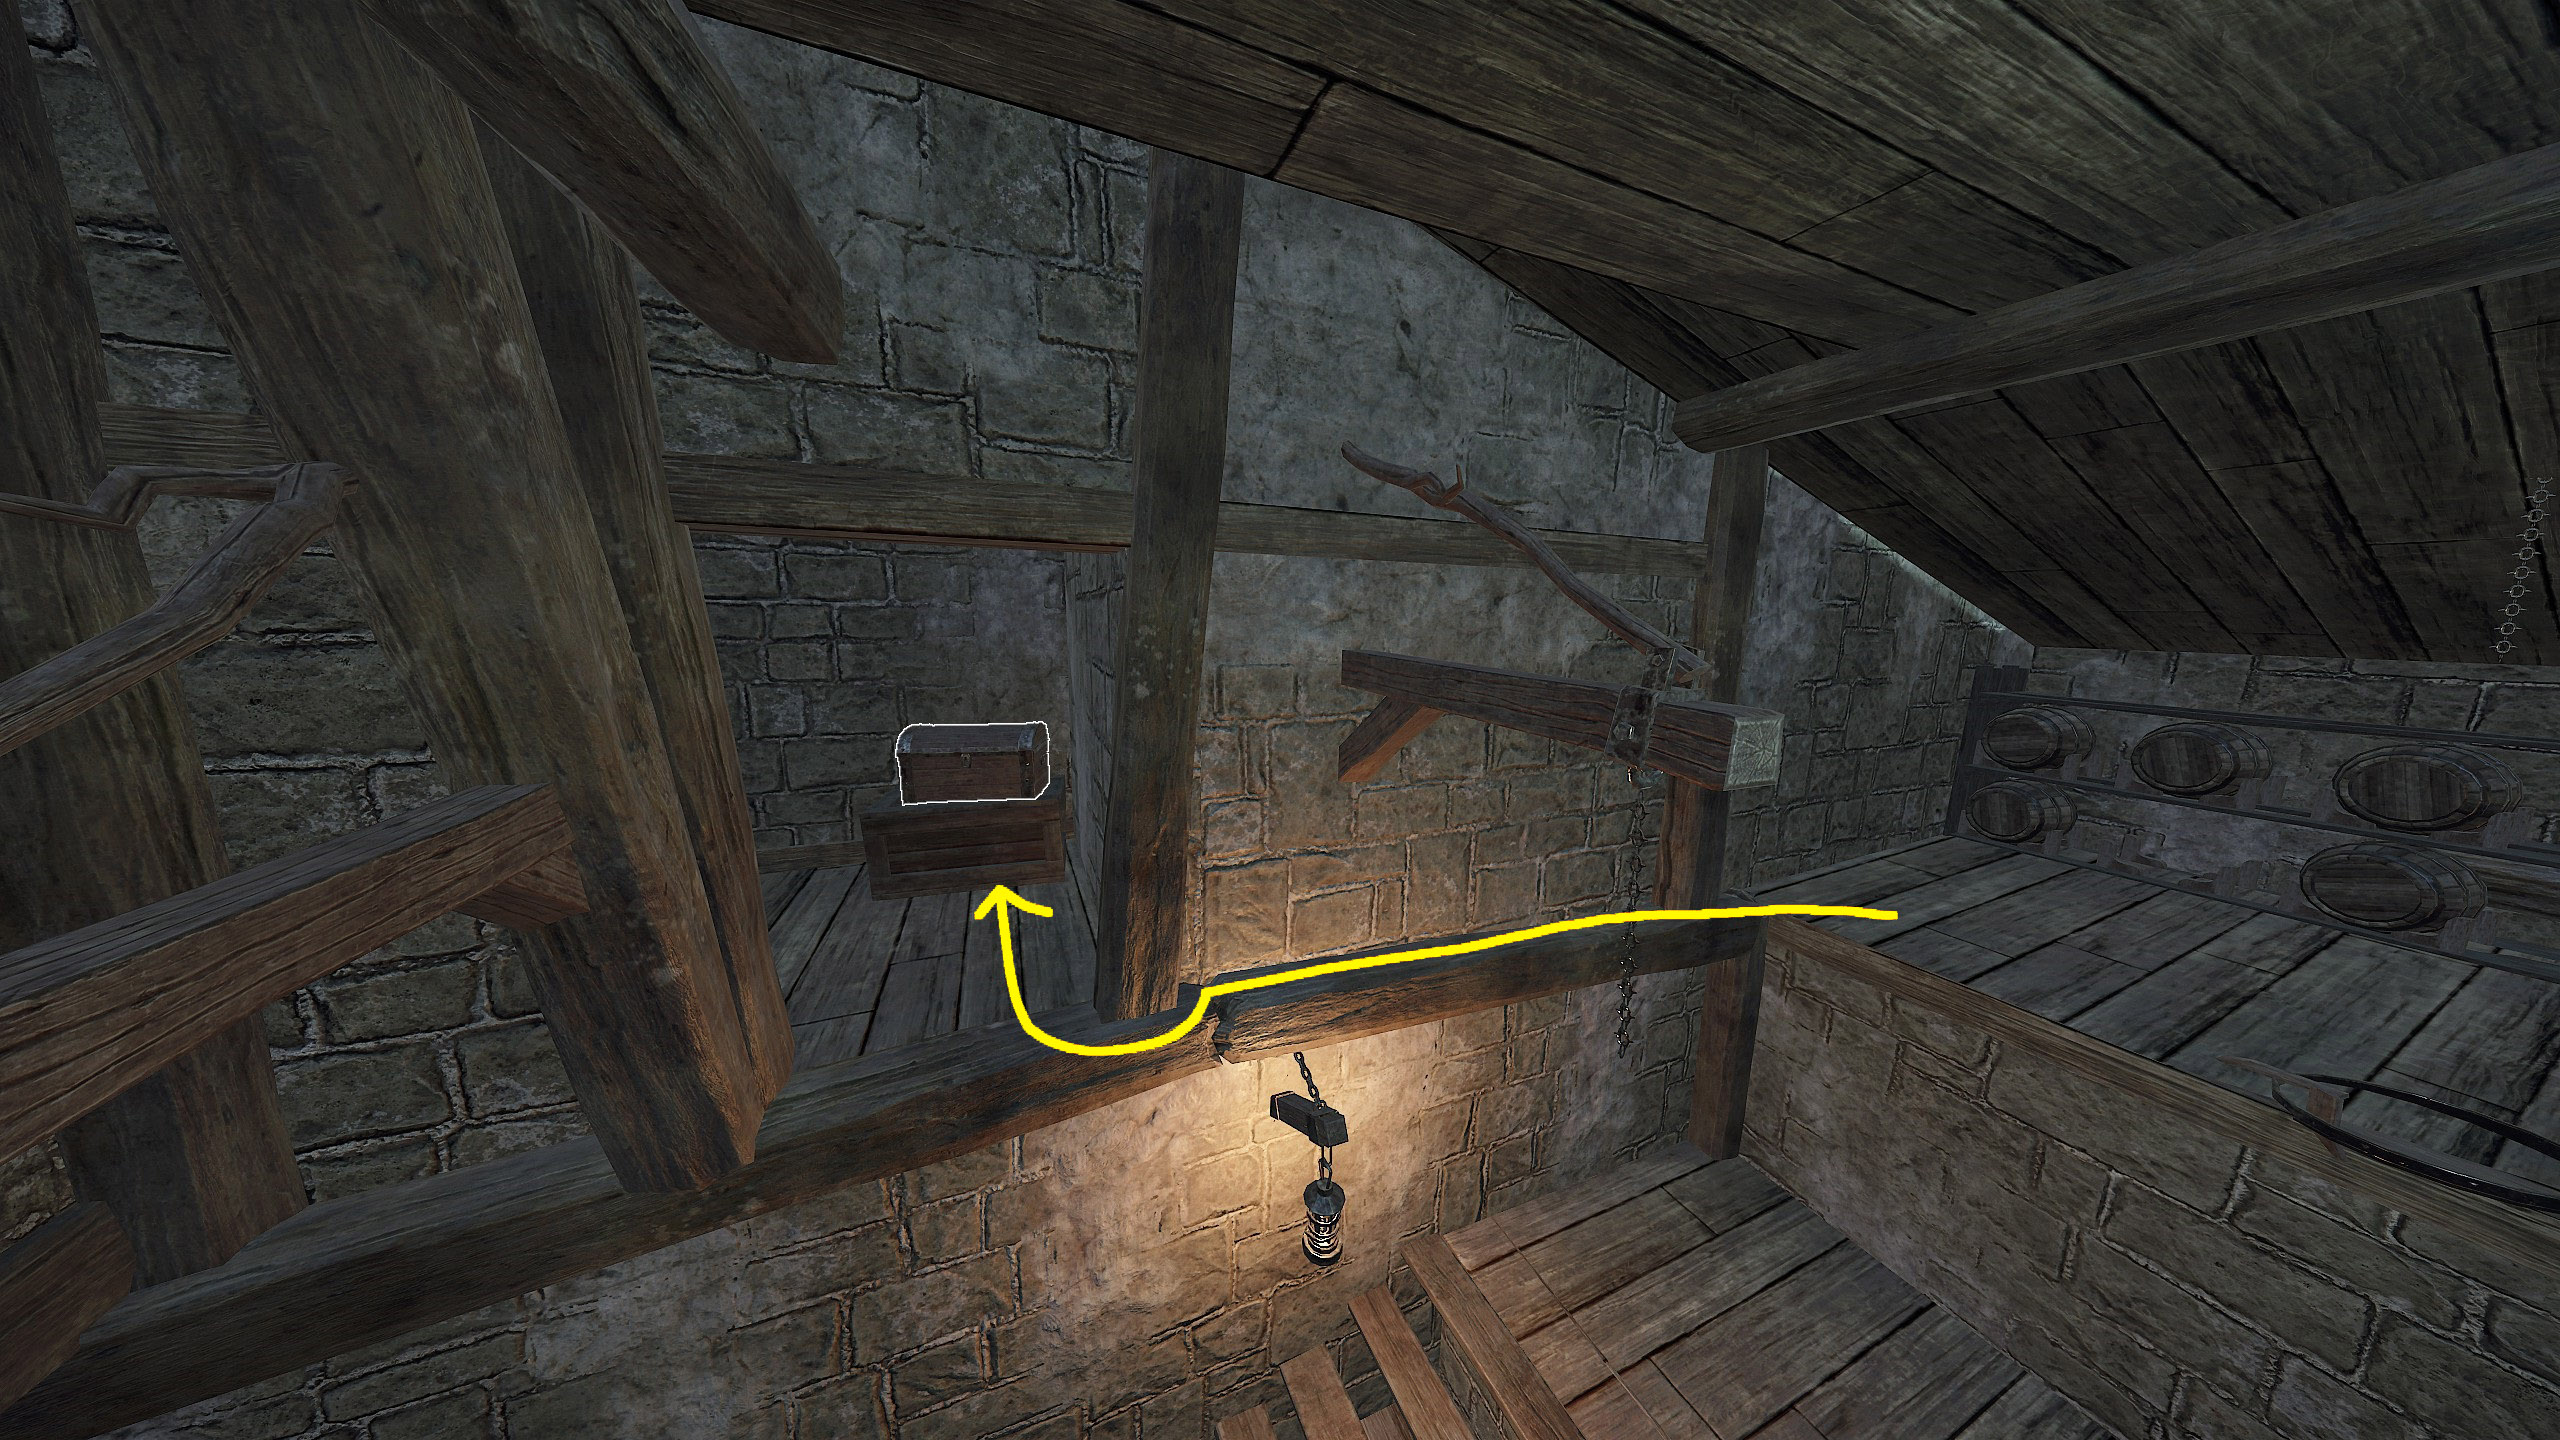
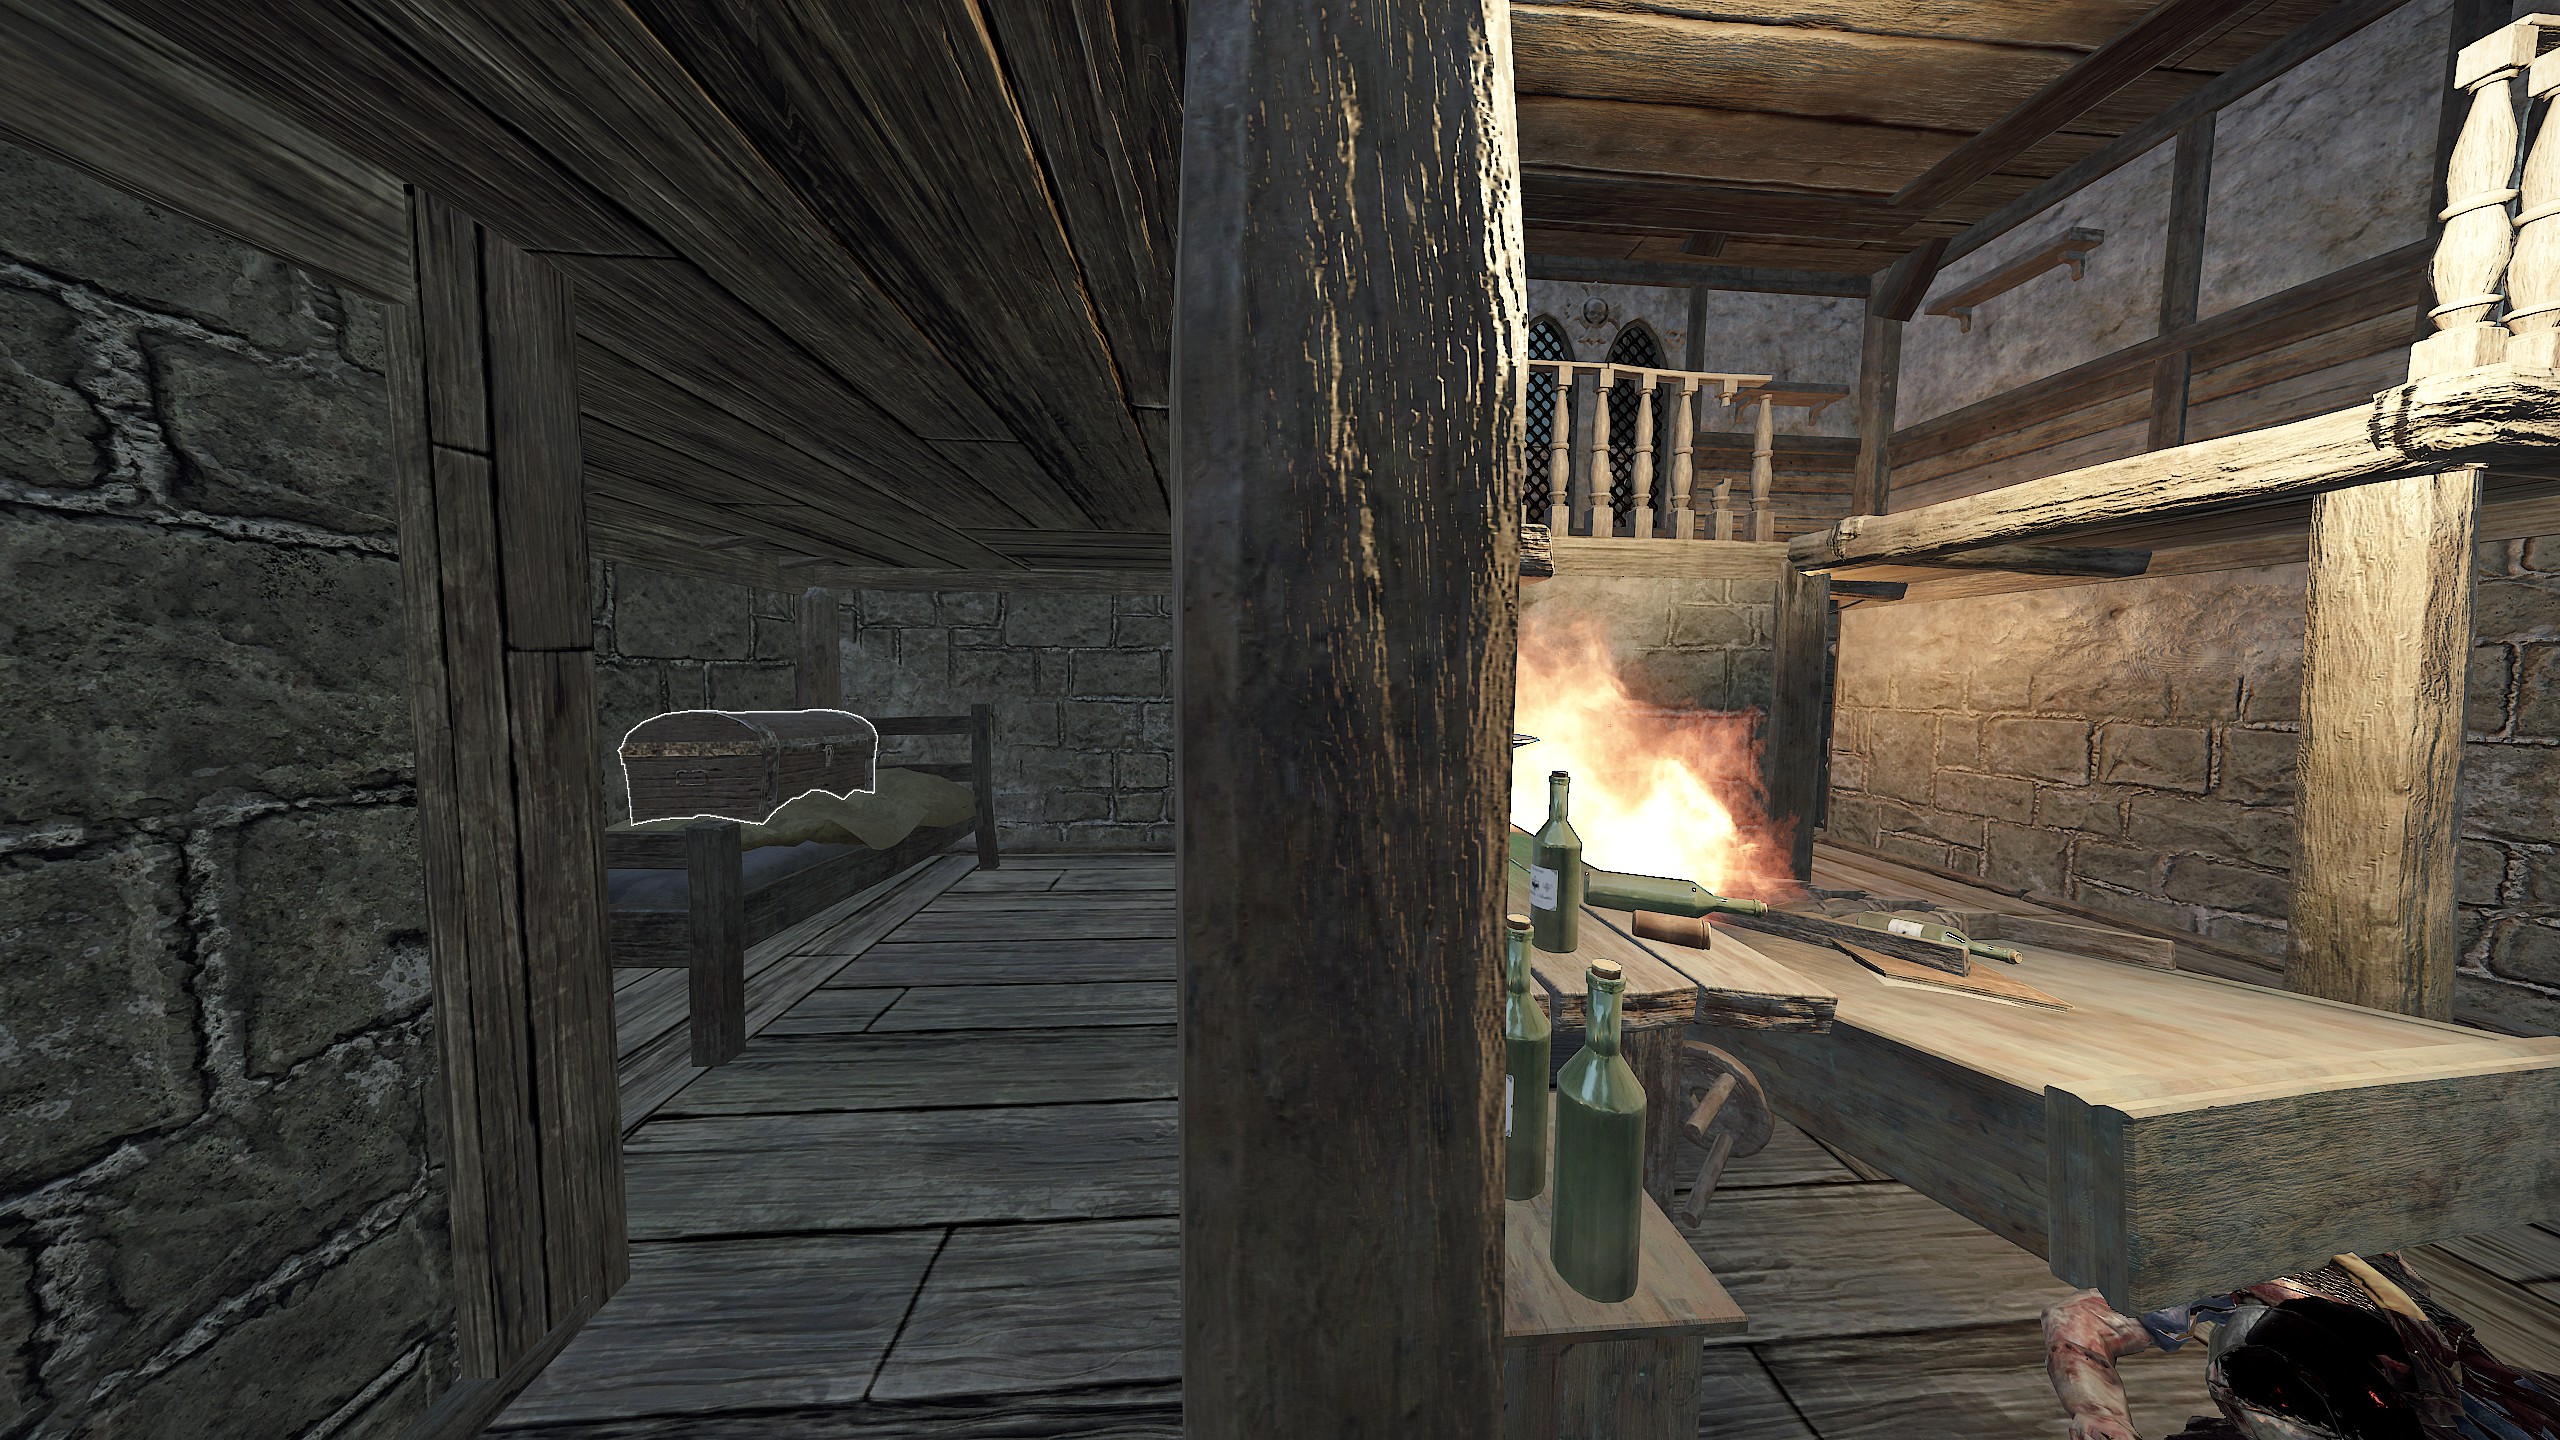
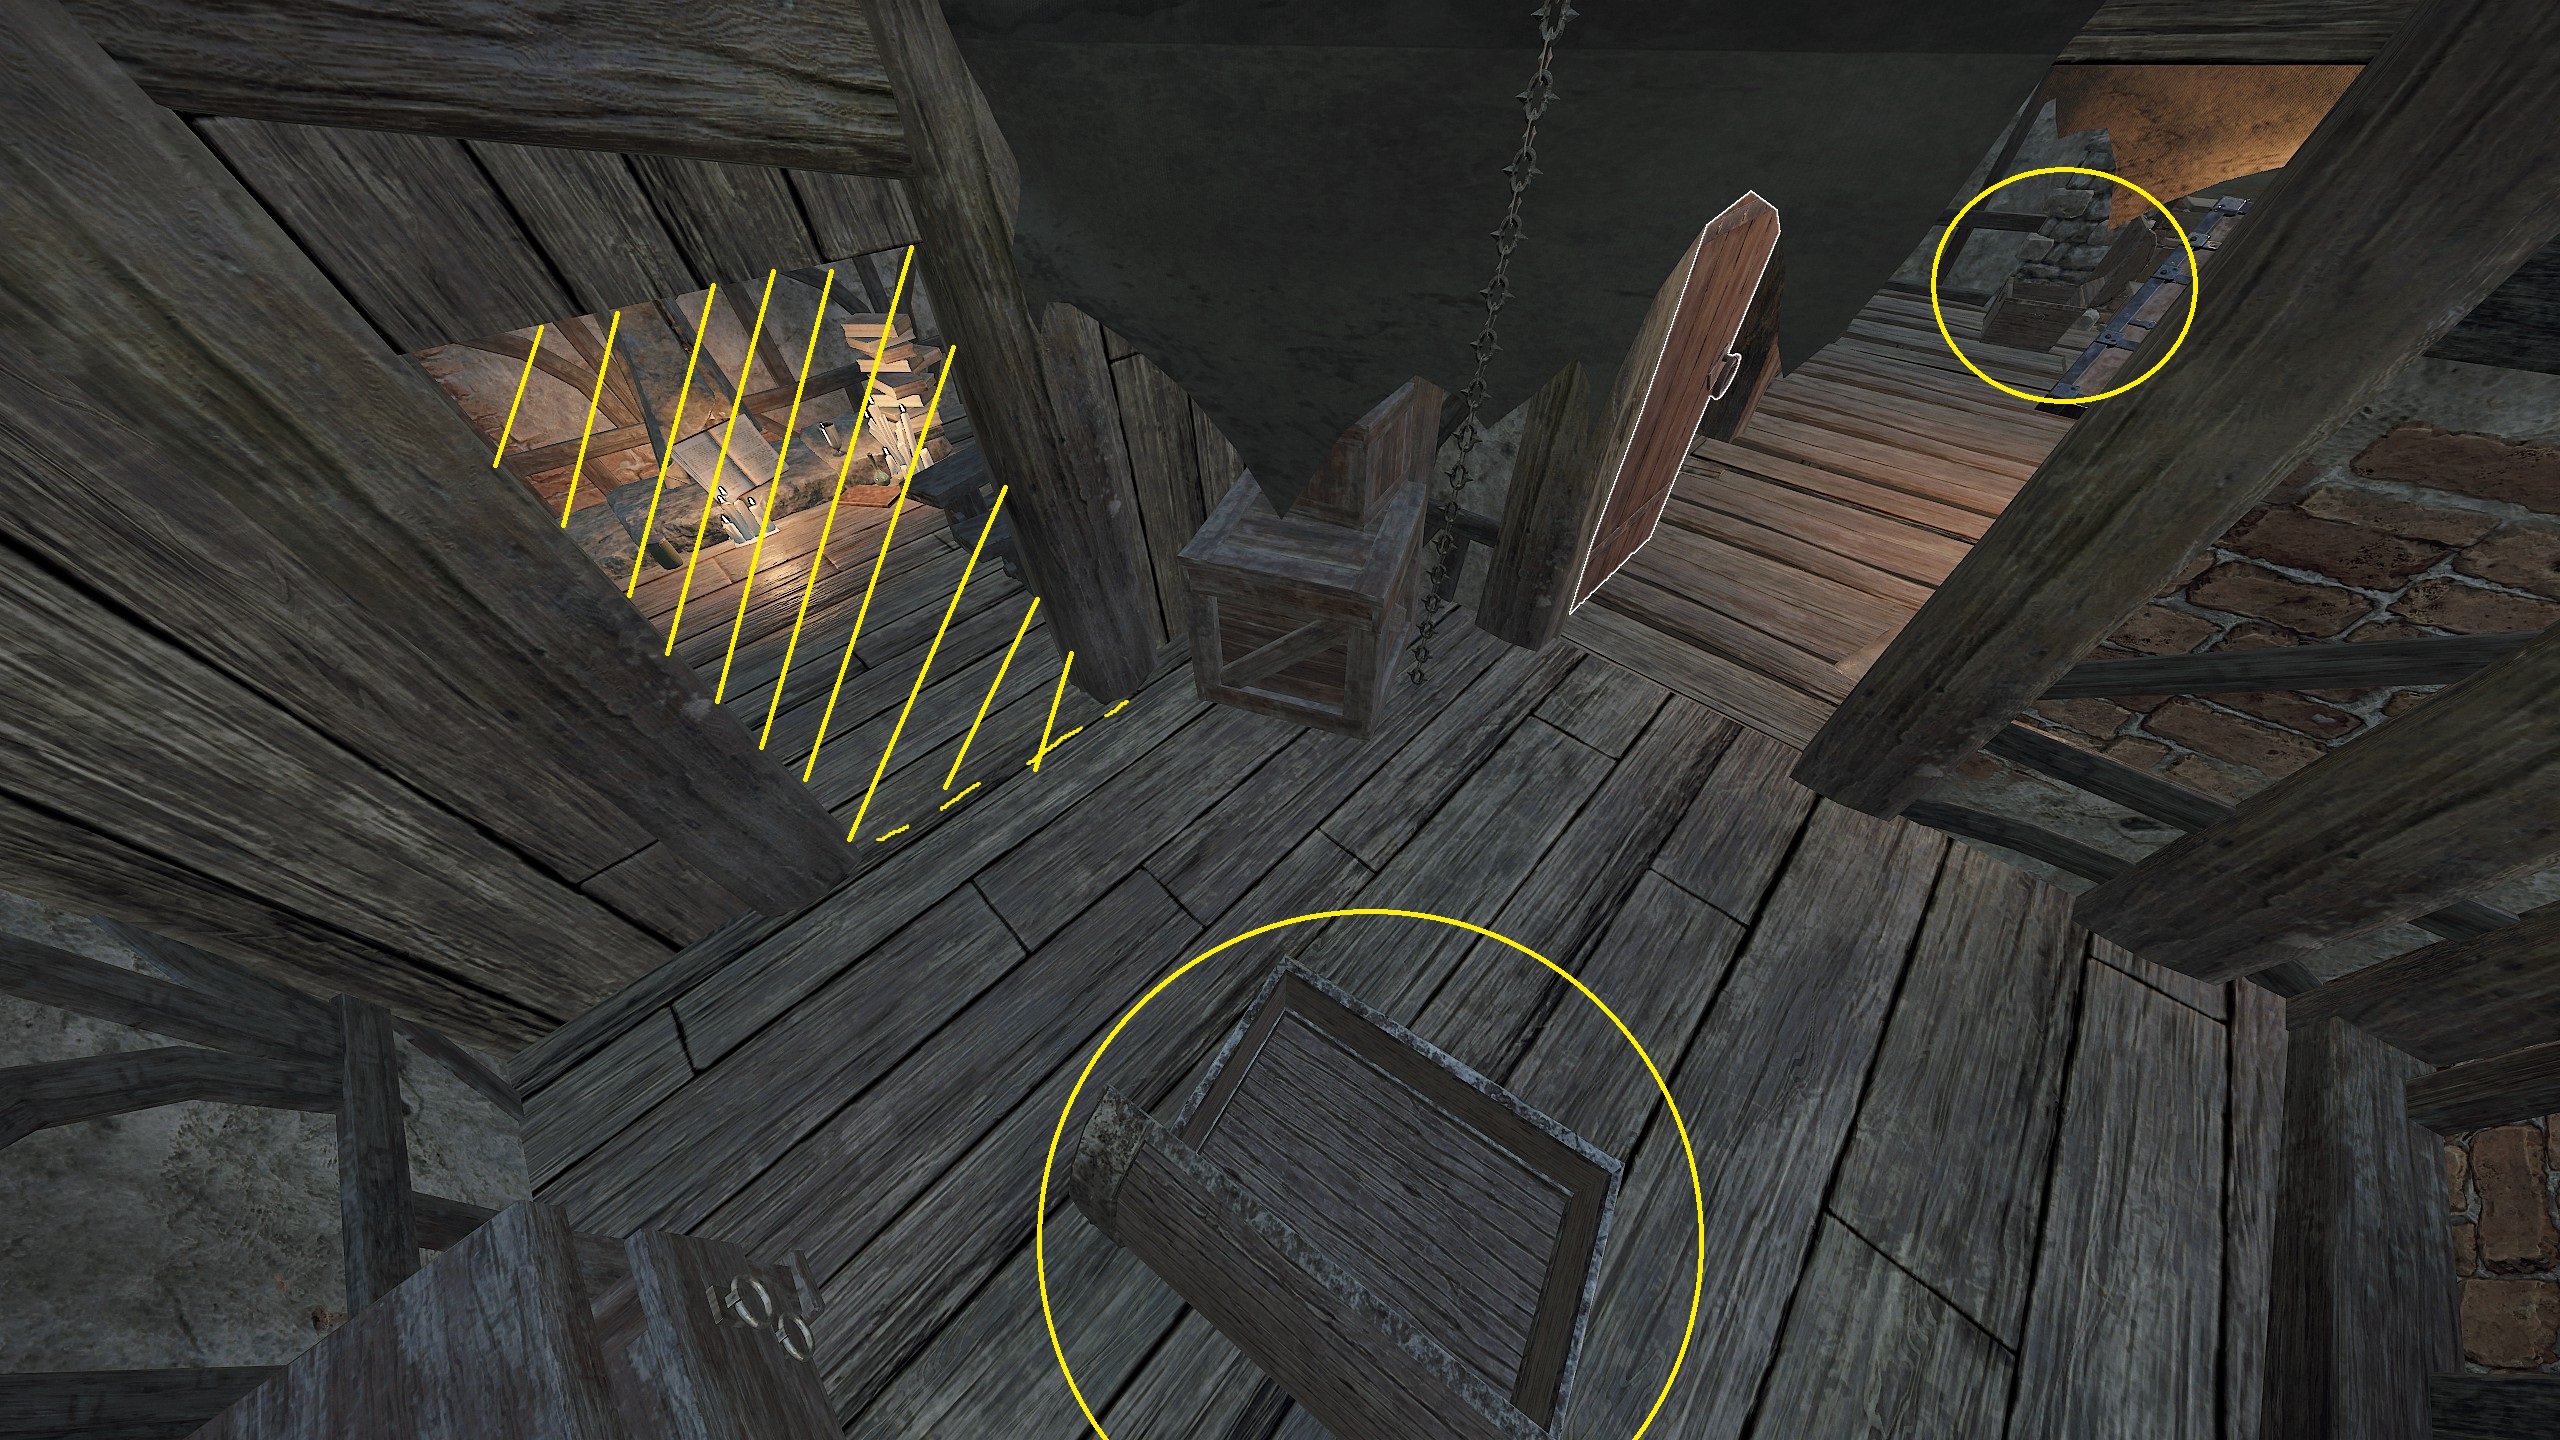 https://www.youtube.com/watch?v=18ePlx4DCYk
 3. Pouch Pilferer
Find and survive stealing the Gutter Runner's Stash on Horn of Magnus The secret stash is located in "Horn of Magnus" level near the beginning (the hog pit)
When you will go through a stone building and jump down to hog pit area, go straight to the end and turn left, there's a sewer tunnel and near it is the secret stash.
Good luck fighting a horde of gutters!
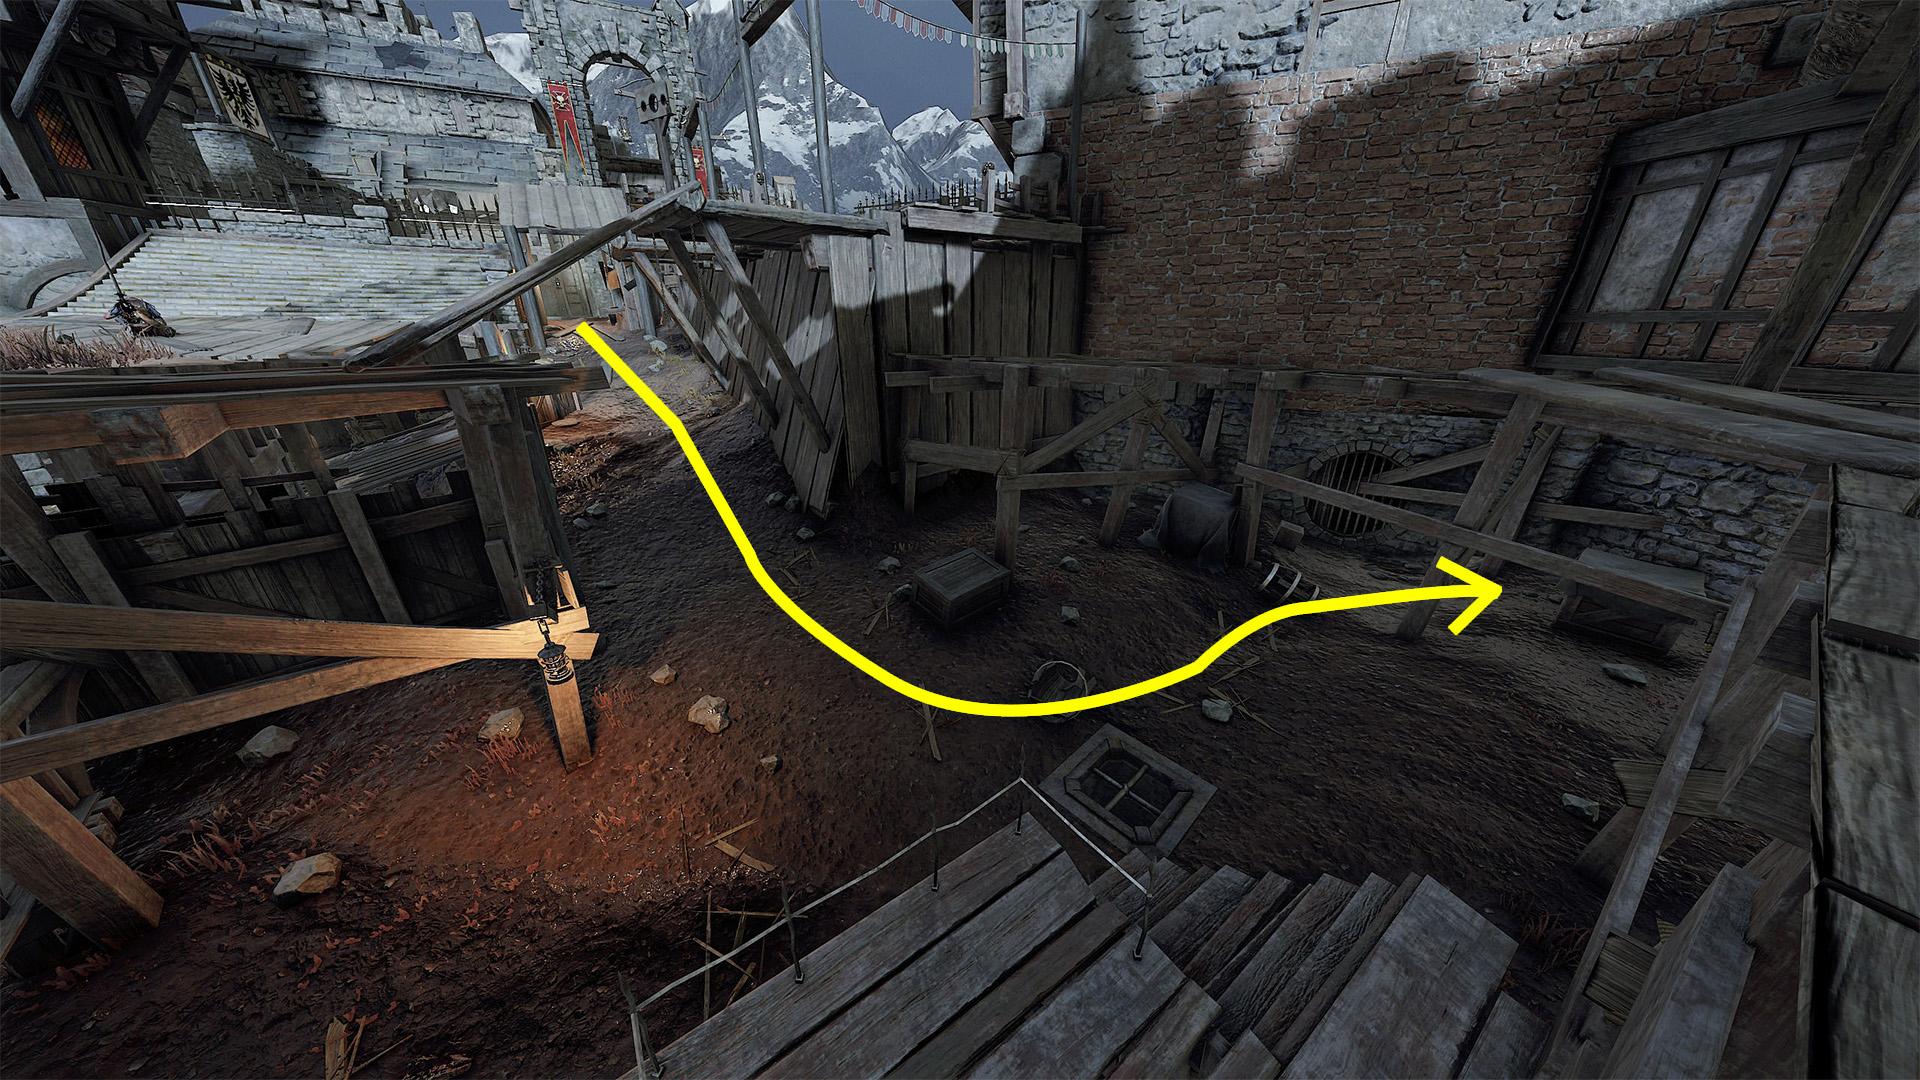
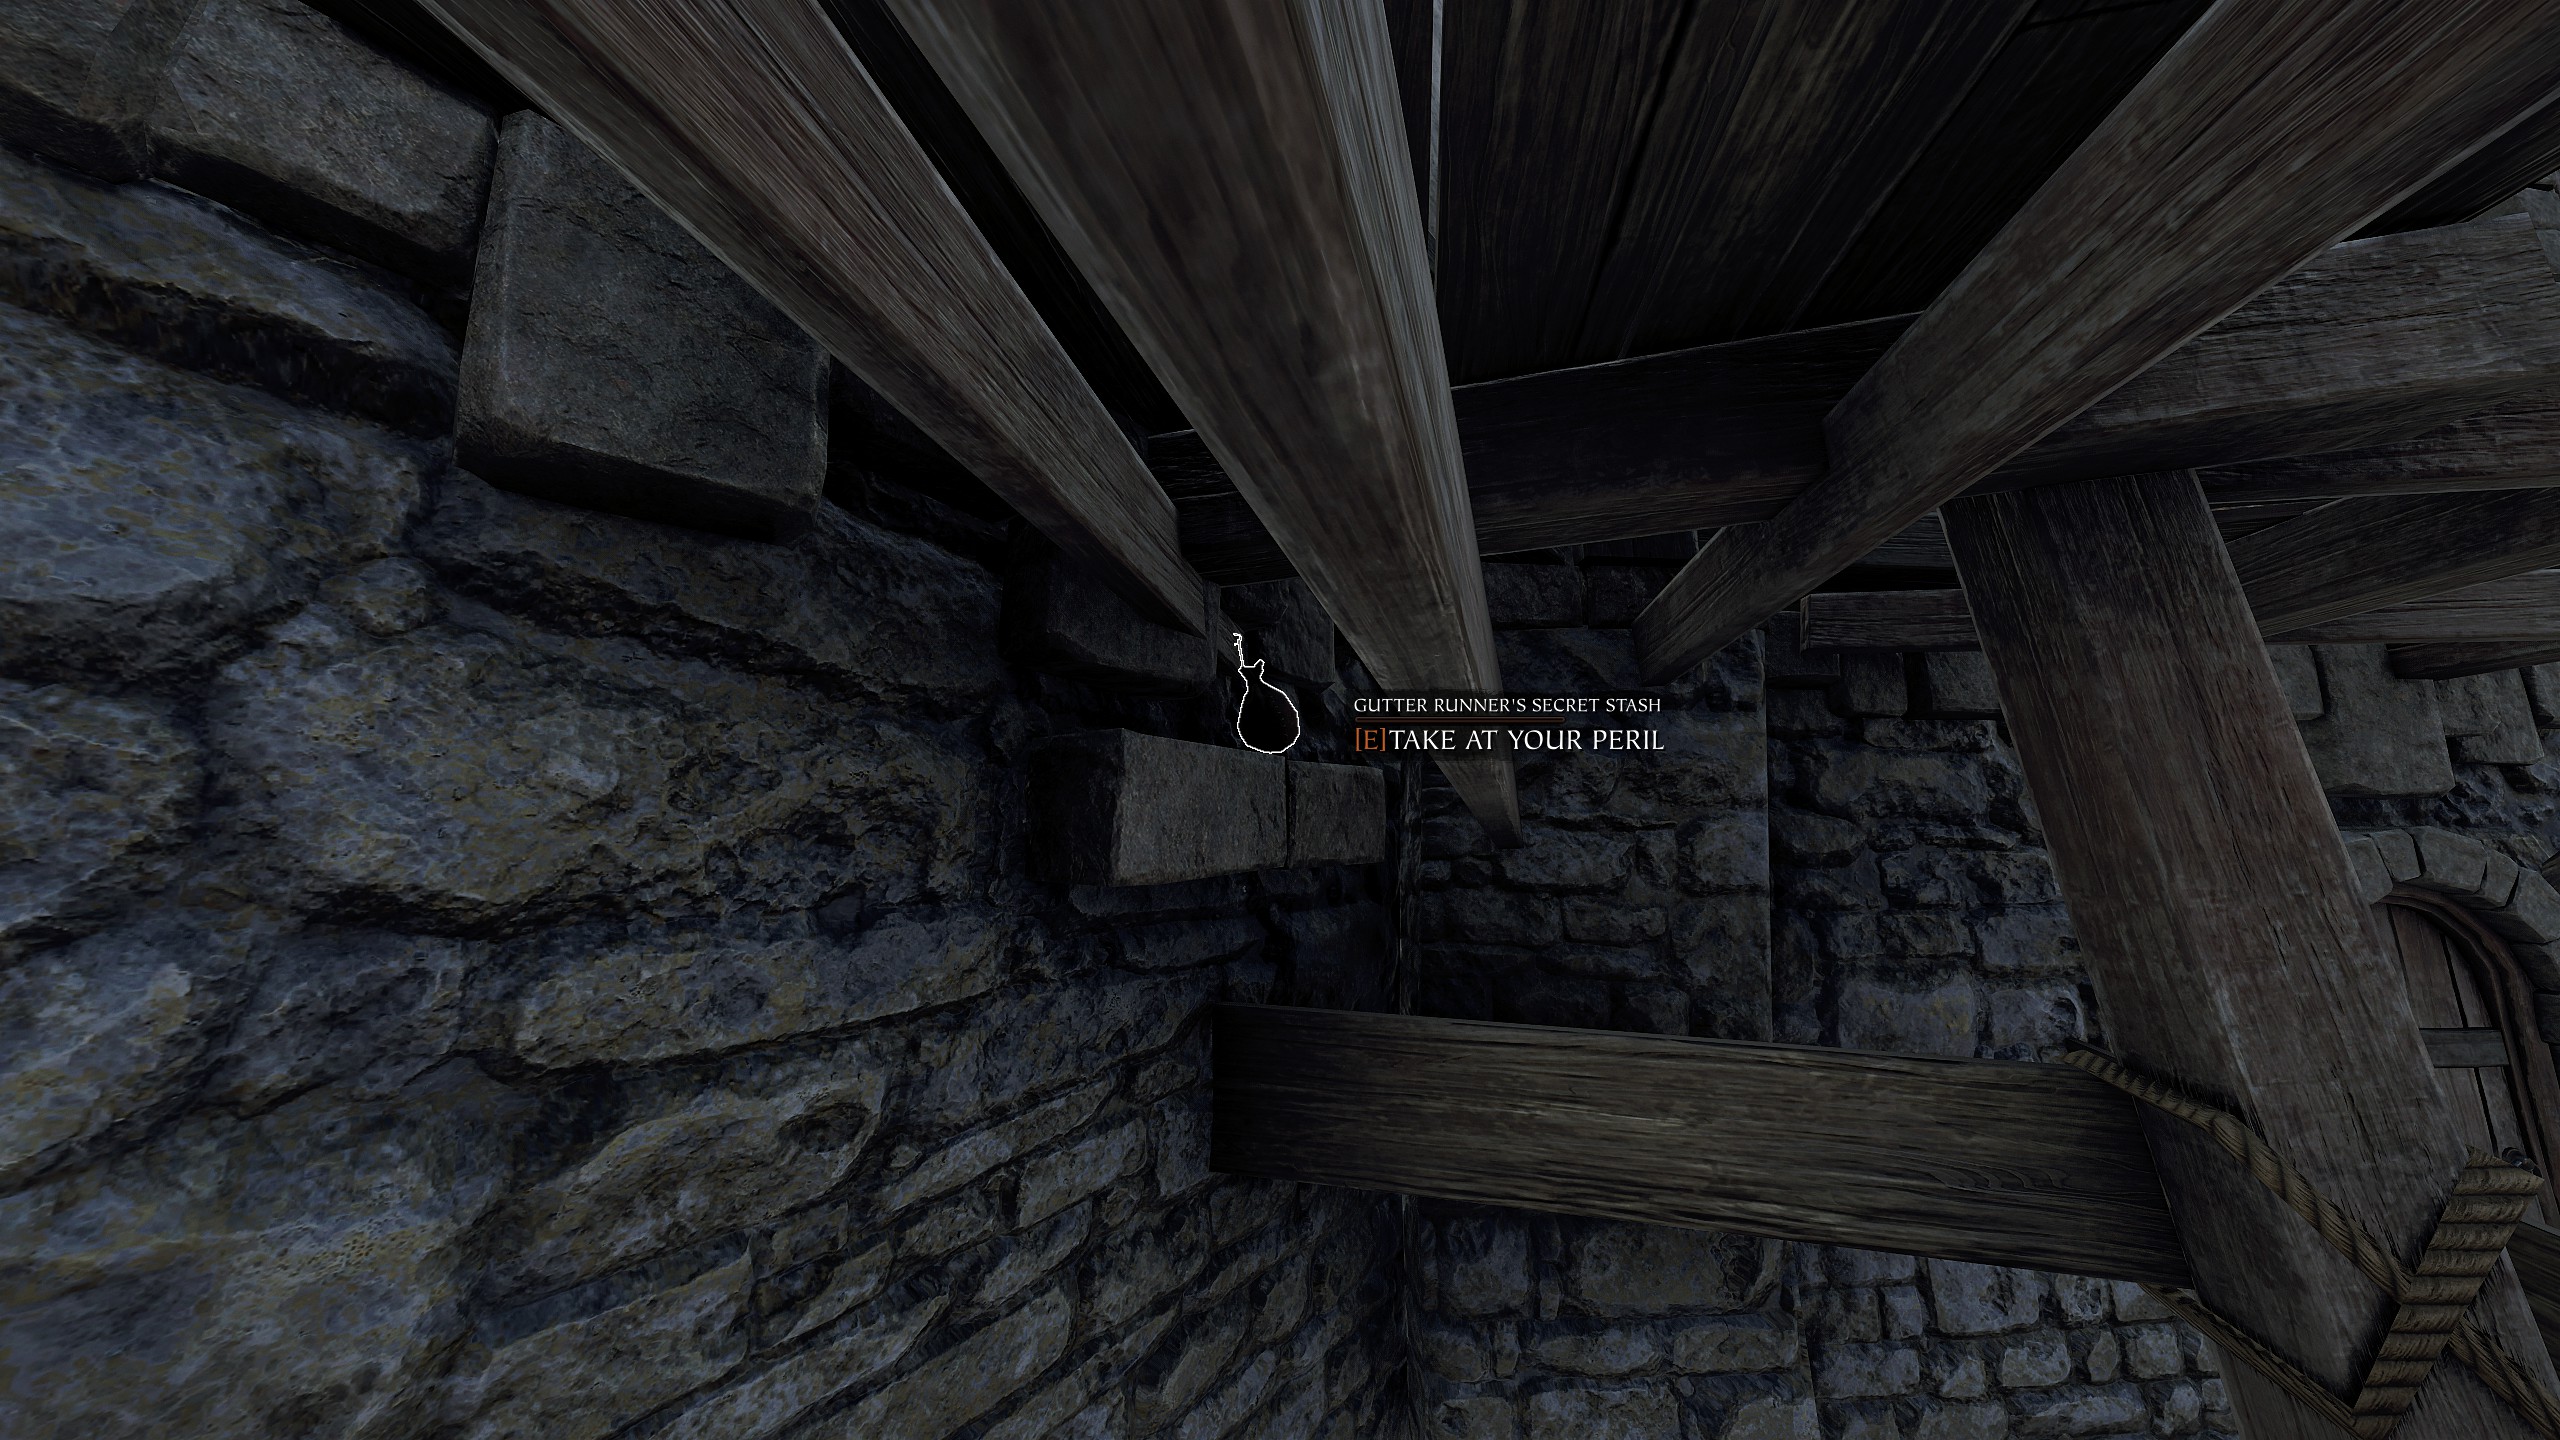
https://www.youtube.com/watch?v=vqpbgfGJI4g
- Garden of Morr
 1. Snore on the Roses
Rest on a Bed Of Roses somewhere in Augur's Embrace on Garden of Morr
Before reaching the first large open graveyard, there will be a tomb on the right which you can enter. Inside the tomb is an open coffin, lined with flowers. Simply stand inside this coffin for around 30 seconds, until the challenge complete sound plays.
This is not a party challenge, each player will have to do this individually.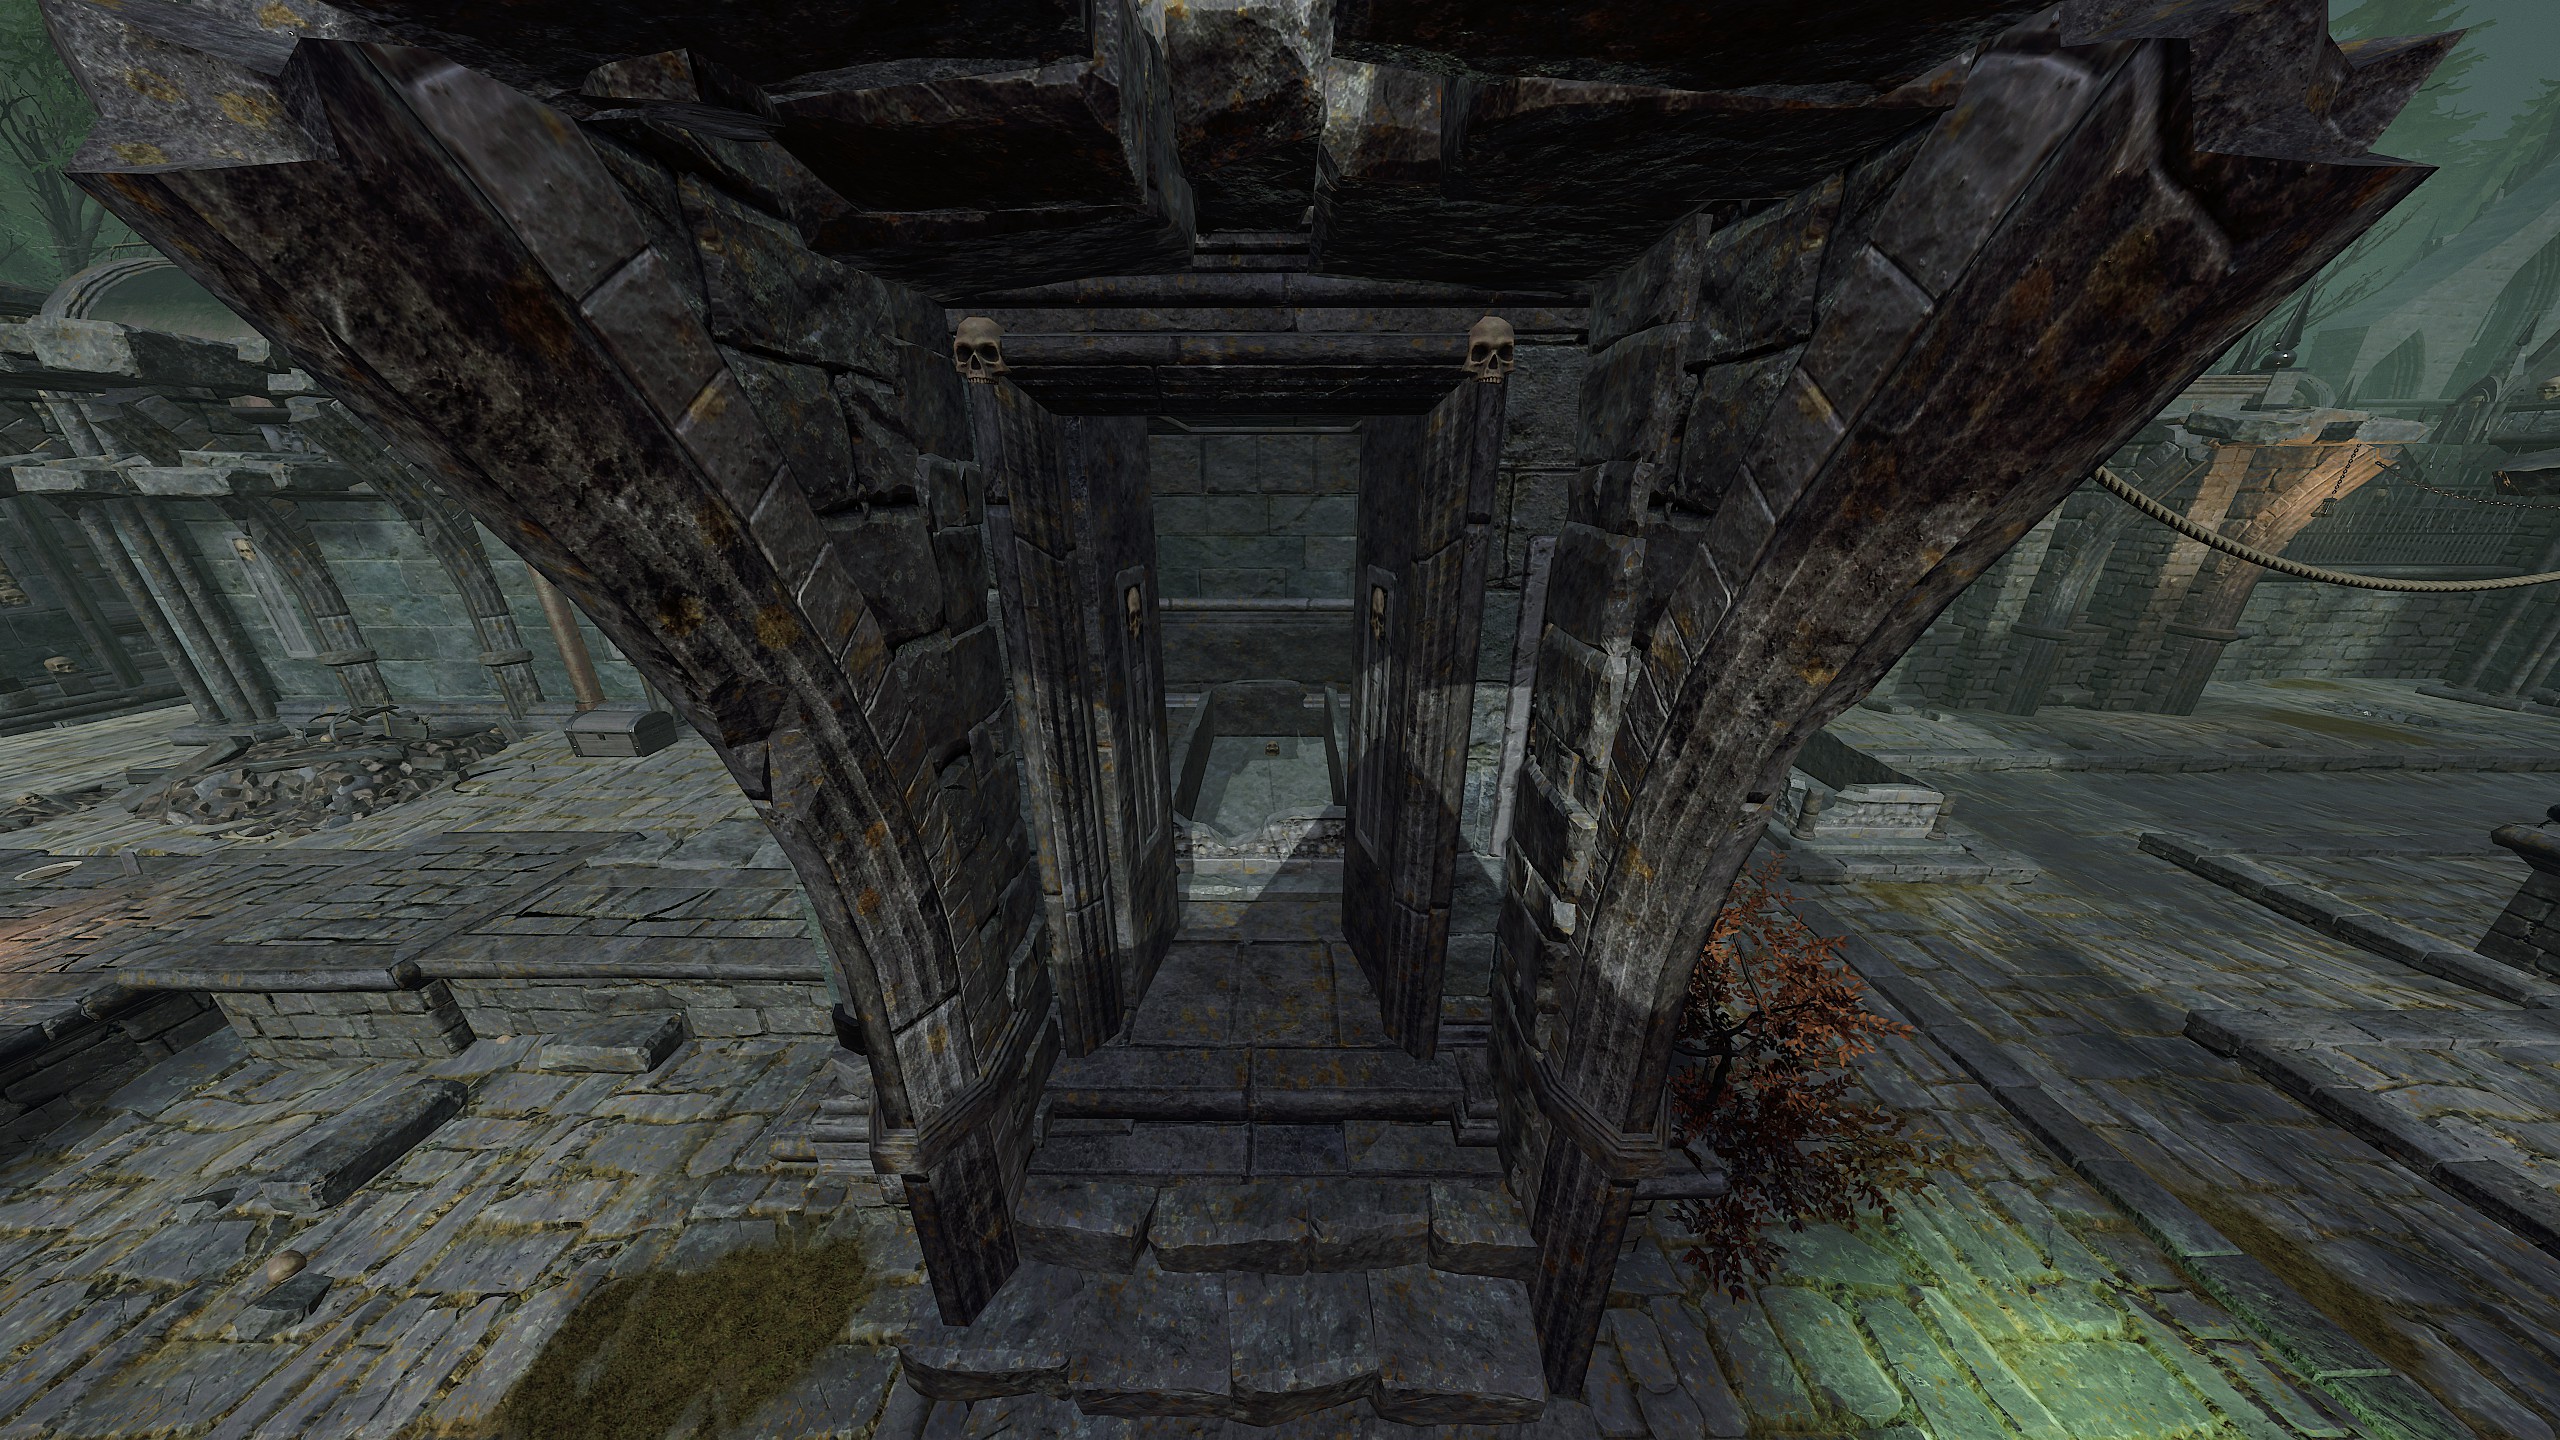 https://youtu.be/Ia61FvqqJg4?si=GpD-wqRynKTlqJyS
 2. Chainbreaker
Cut down all the Cauldron Chains within 5 seconds of each other on Garden of Morr
I've come up with a way to do this two-player challenge. So, the first player must play as a Battle Wizard (BW) and the second player must play as a Handmaiden (HM).
Battle Wizard requires a Crowbill (with increased attack speed and enhanced power), without the talent Famished Flames, and the MOST IMPORTANT thing is to find a strength potion.
Handmaiden will require: Dual Daggers (with increased attack speed and talent Focused Spirit), and the MOST IMPORTANT thing is to find a strength potion.
BOTH PLAYERS SHOULD ONLY USE HEAVY ATTACKS TO DESTROY THE CHAIN IN ONE HIT.
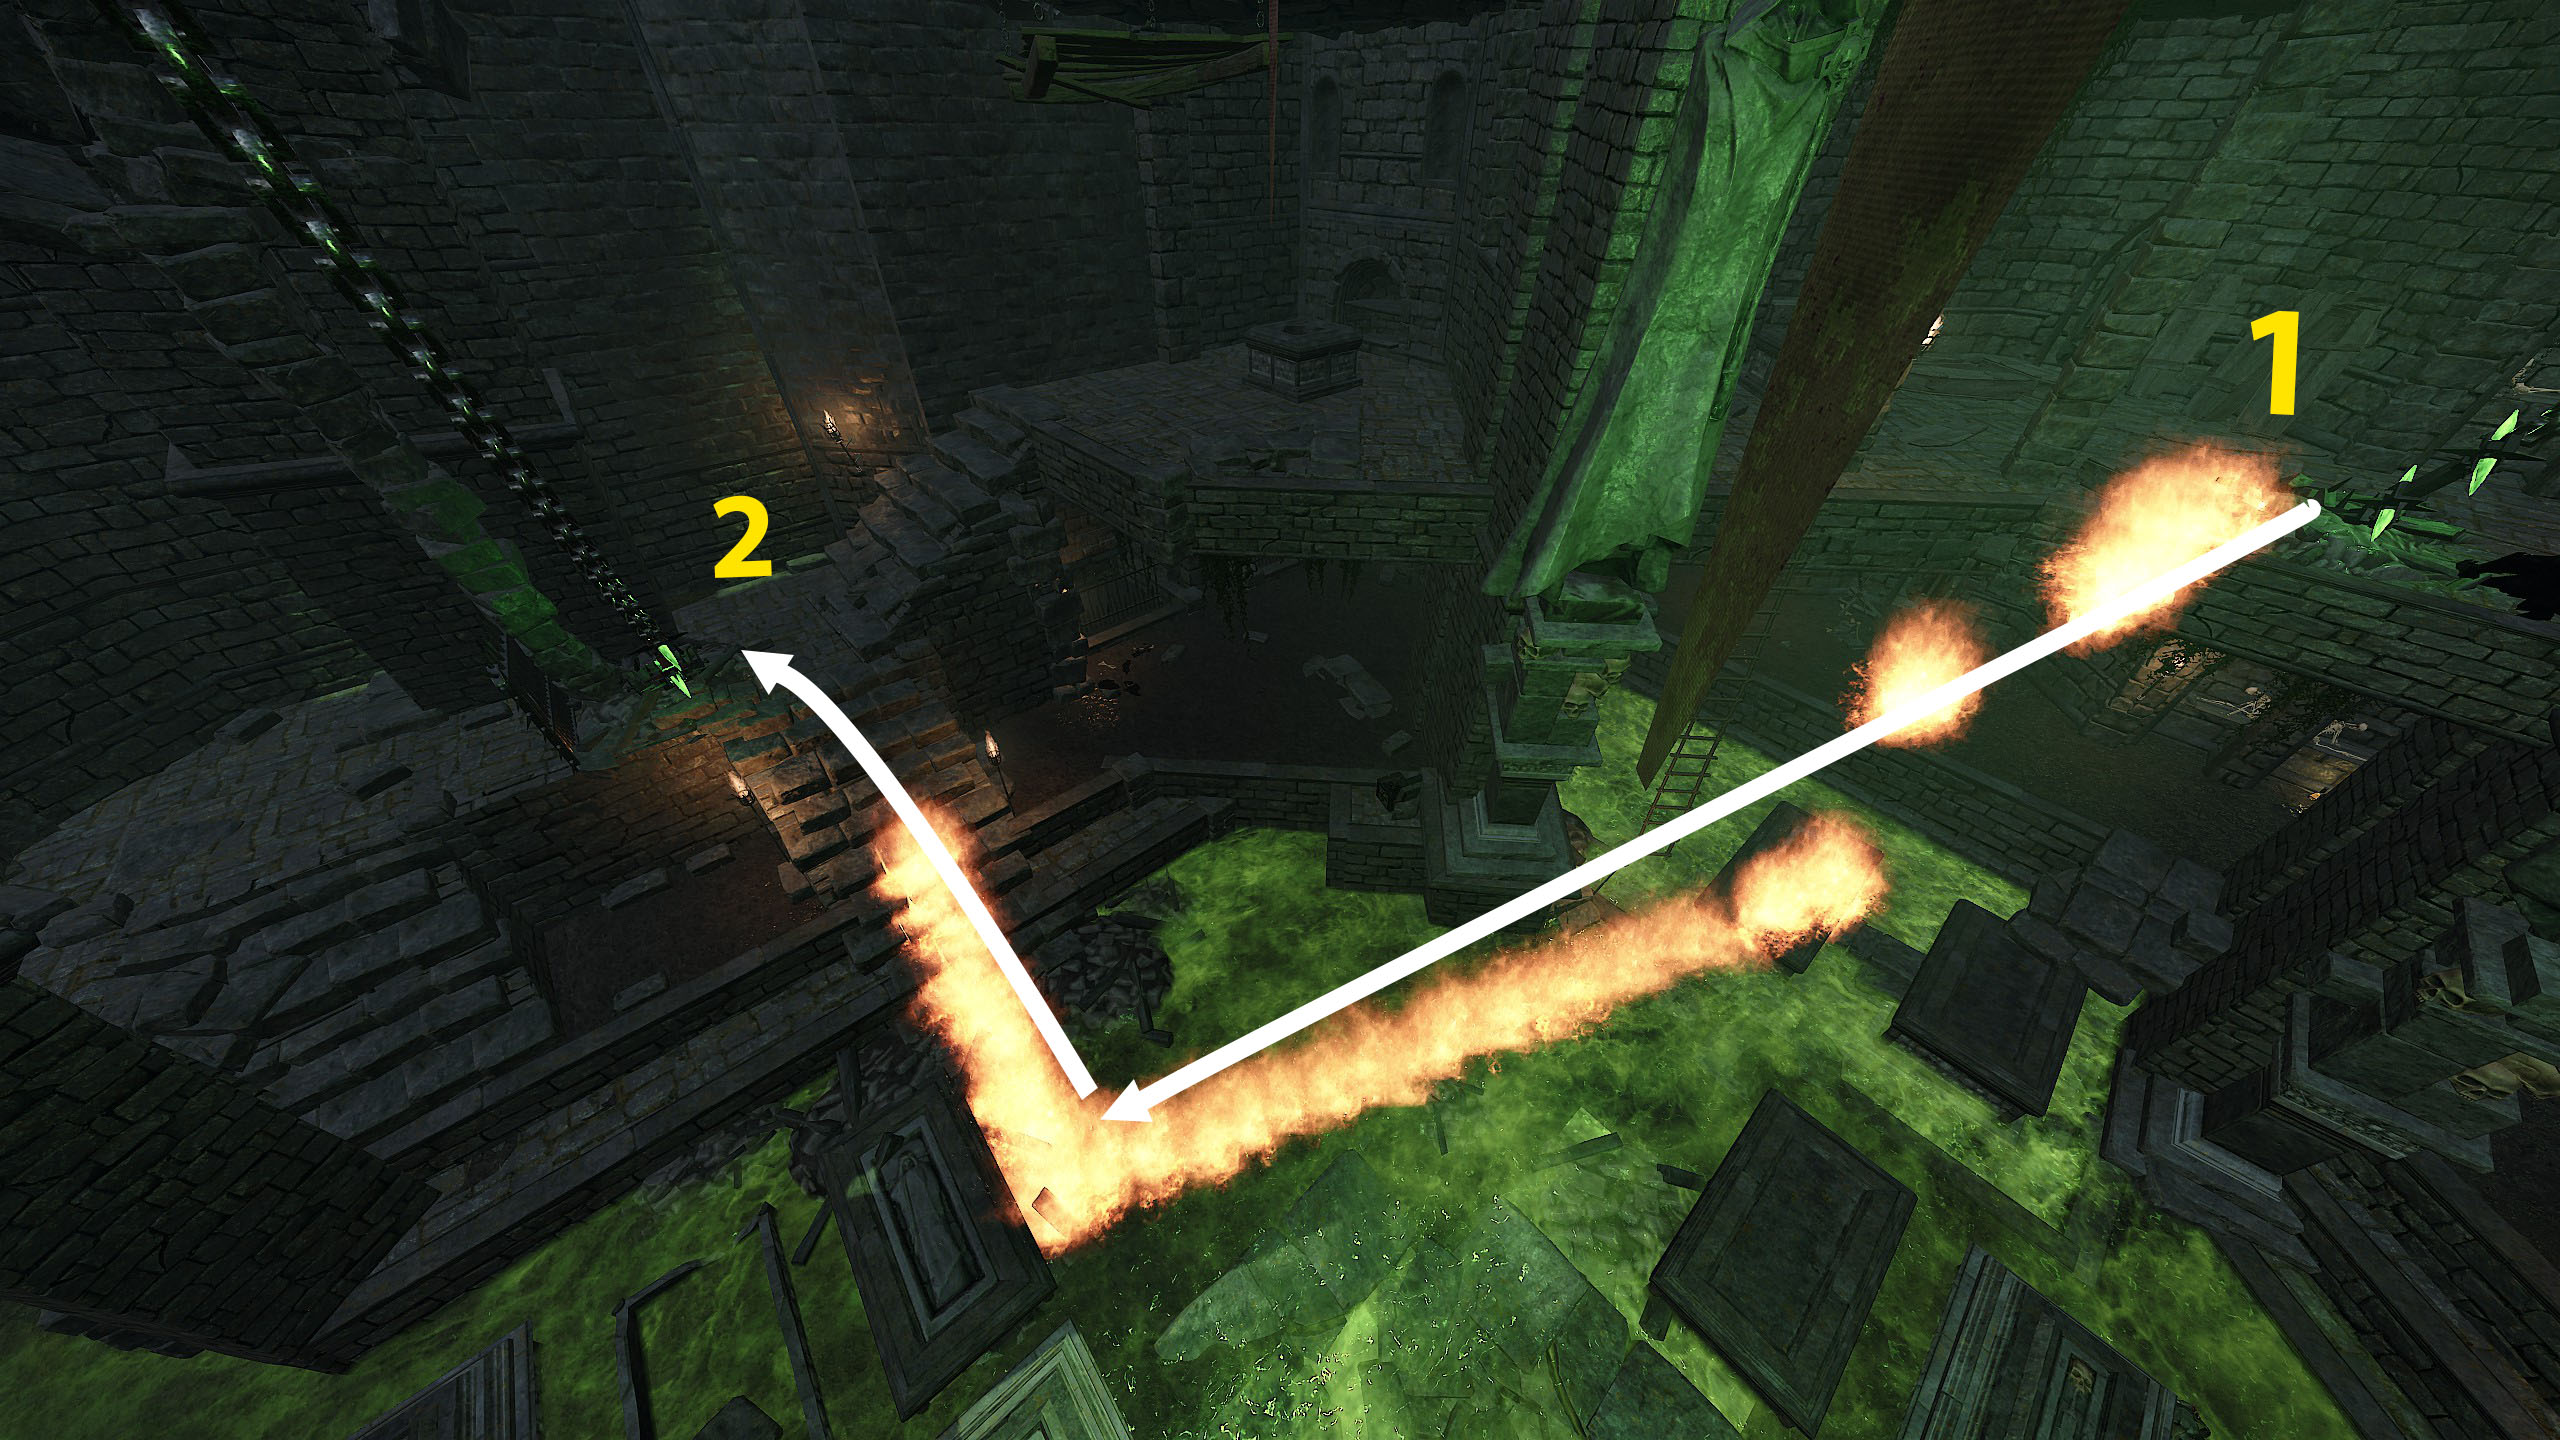
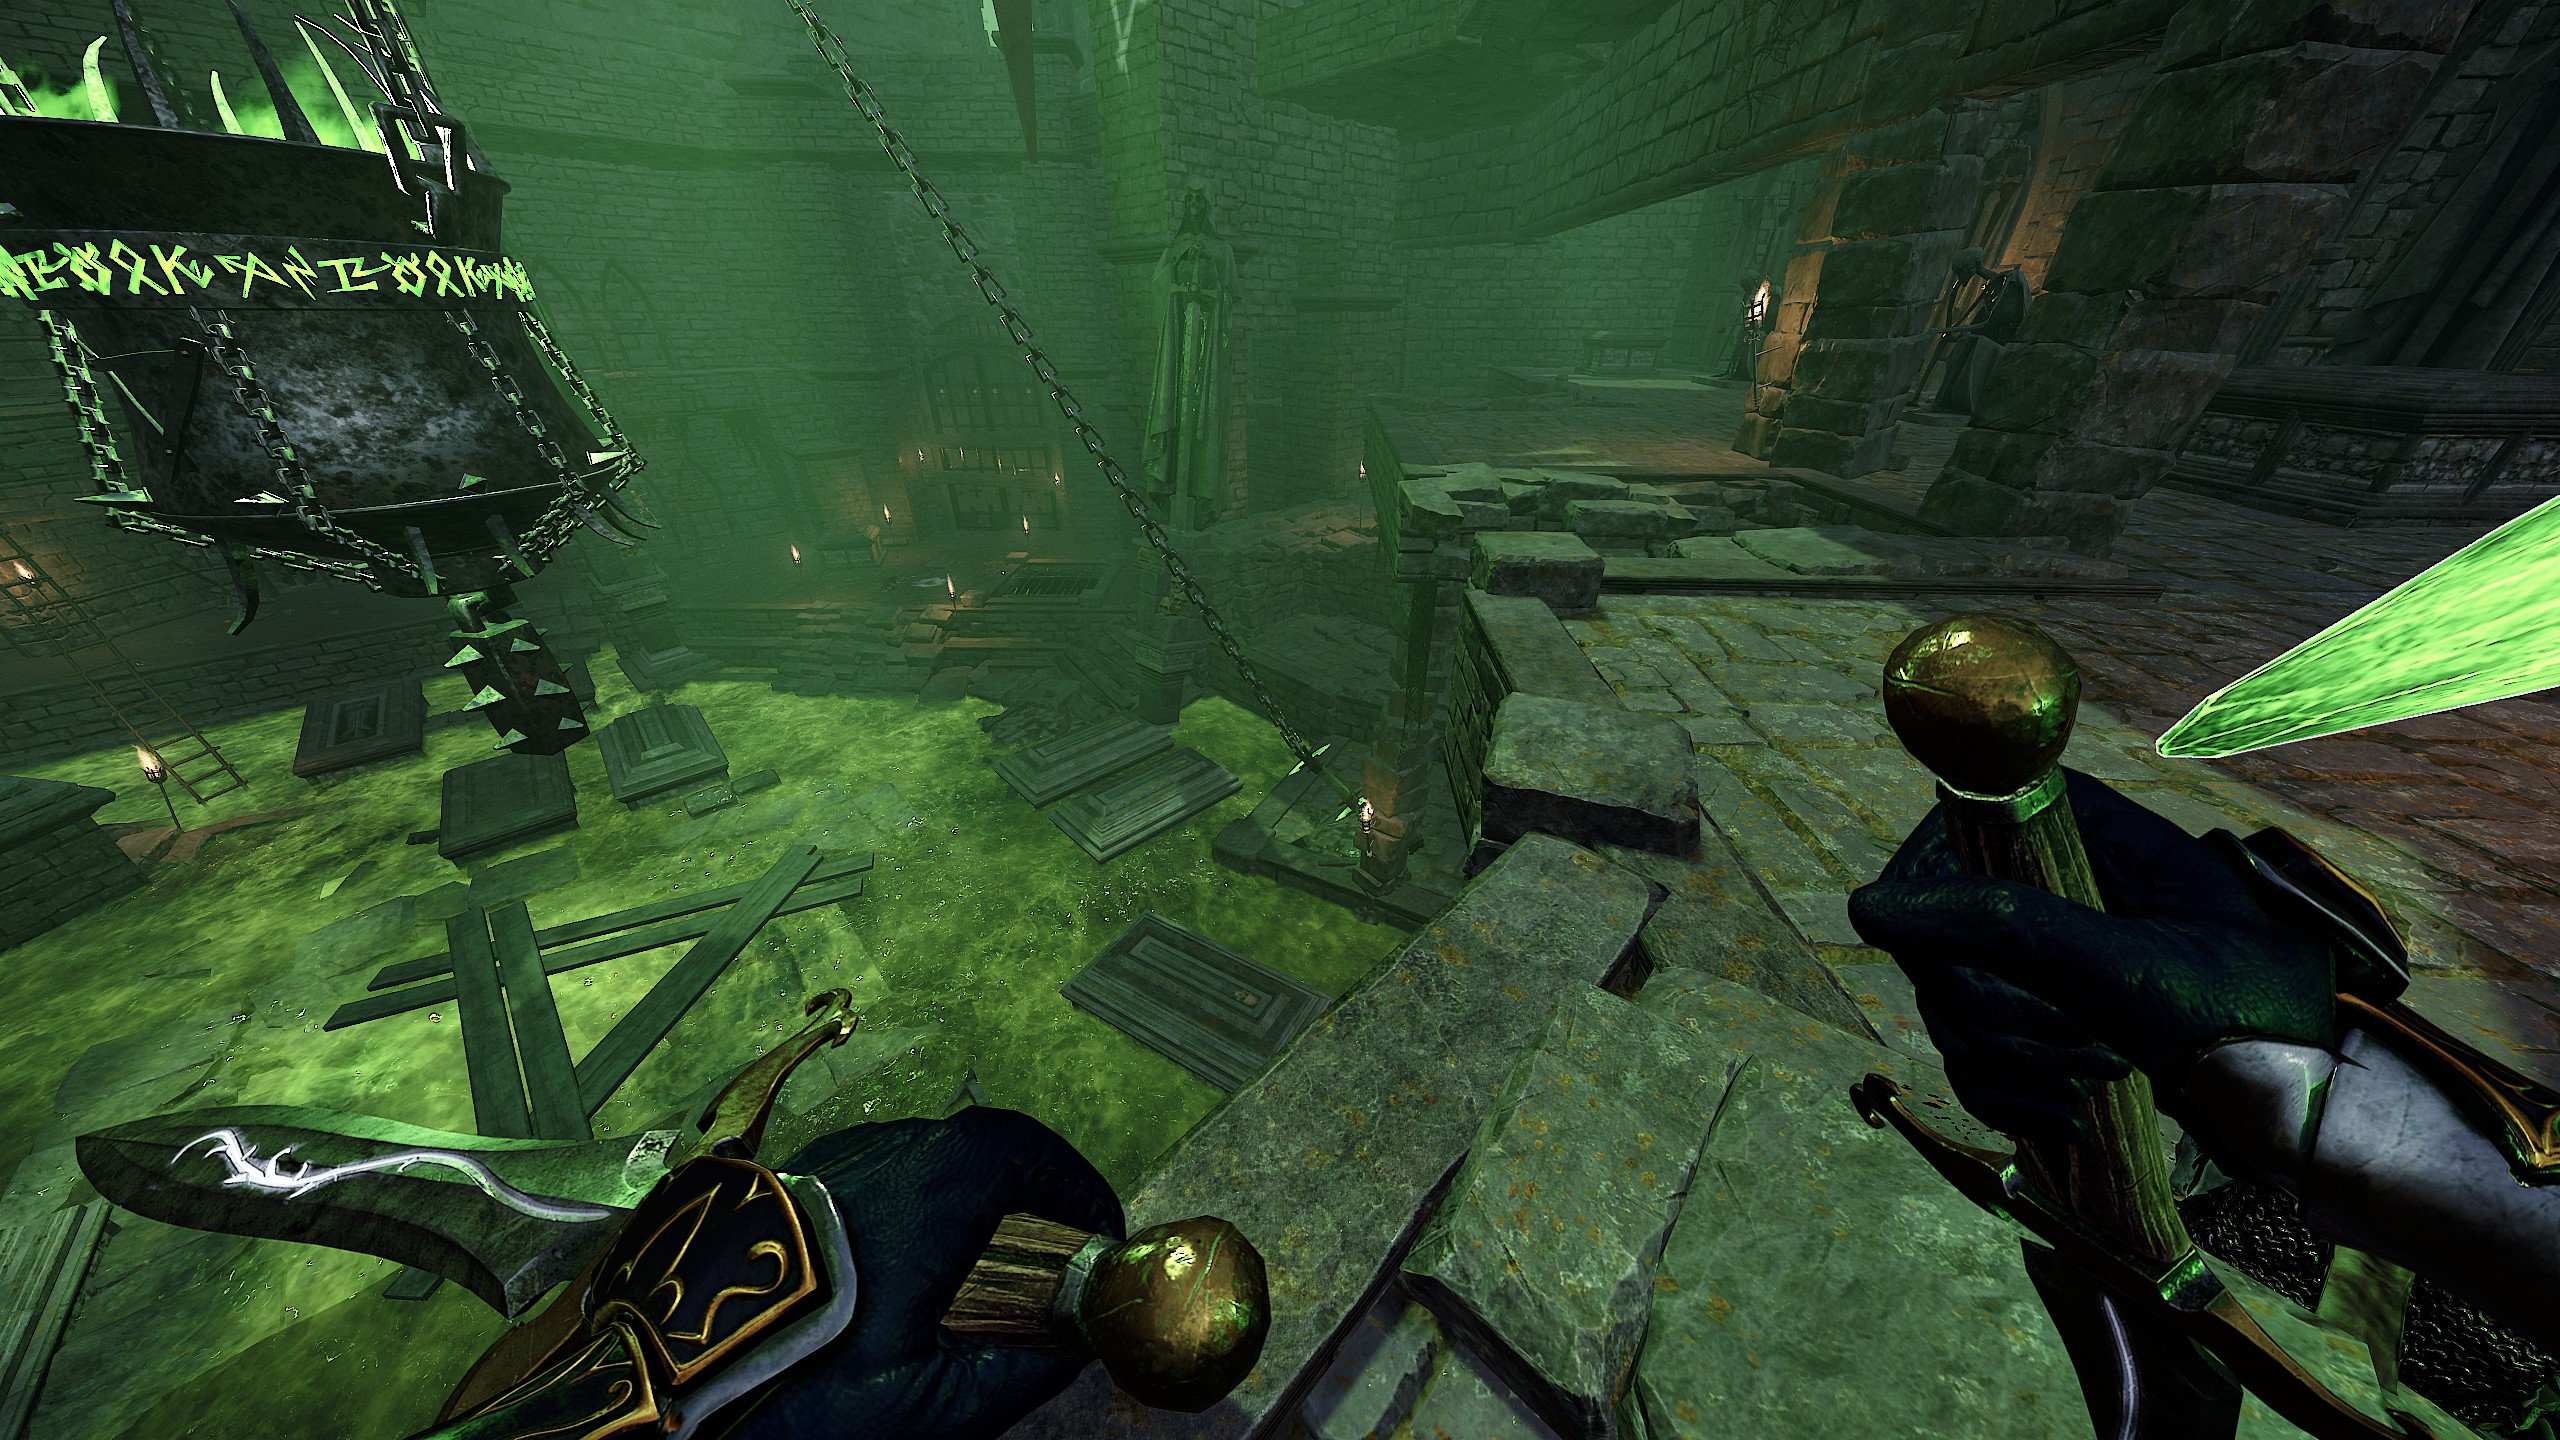
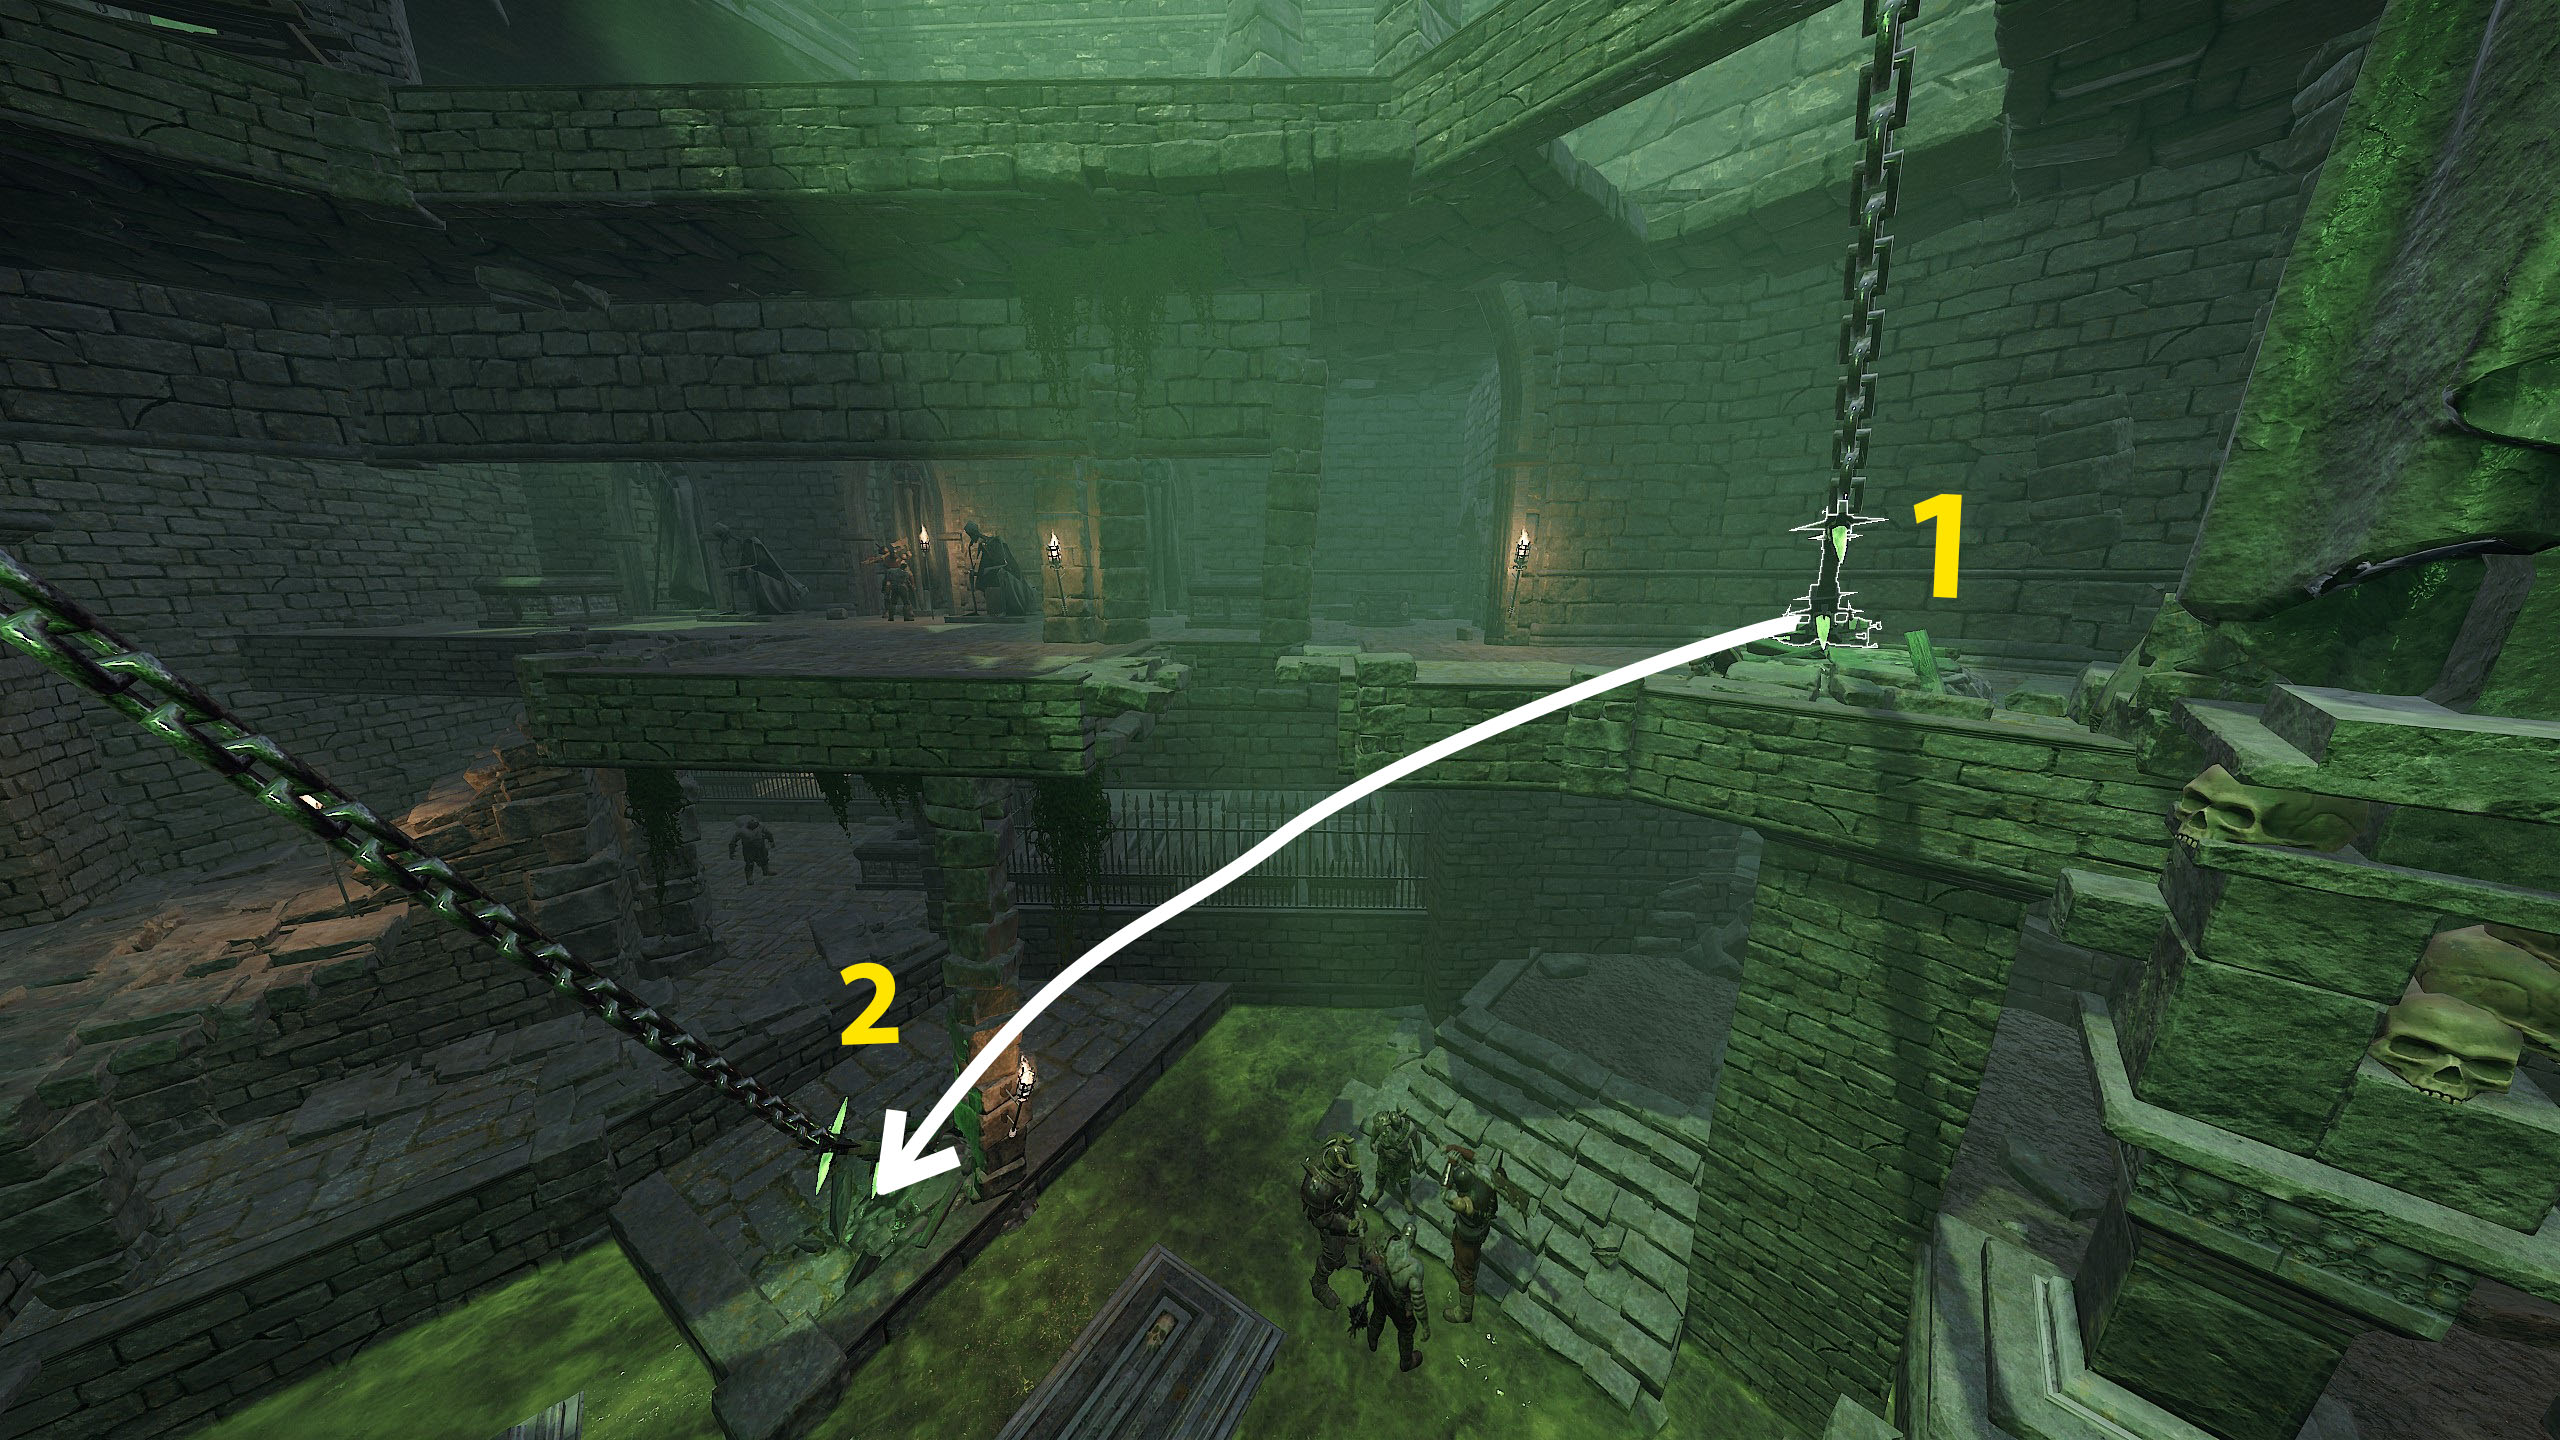
Next, when you enter the final arena, the first player on BW goes up the ladder and climbs the chain. The second player on HM goes to the furthest chain at the top.
Once you are both ready, the BW player starts the countdown, drinks a strength potion and destroys the chain. Then quickly turns around and teleports to the second chain and destroys it as well. The second player on HM during the countdown also drinks a strength potion, destroys the top chain, turns around and makes a dash to the lower chain and destroys it.
There should be a message in chat that the challenge was successful. If it doesn't, it means that something was done wrong.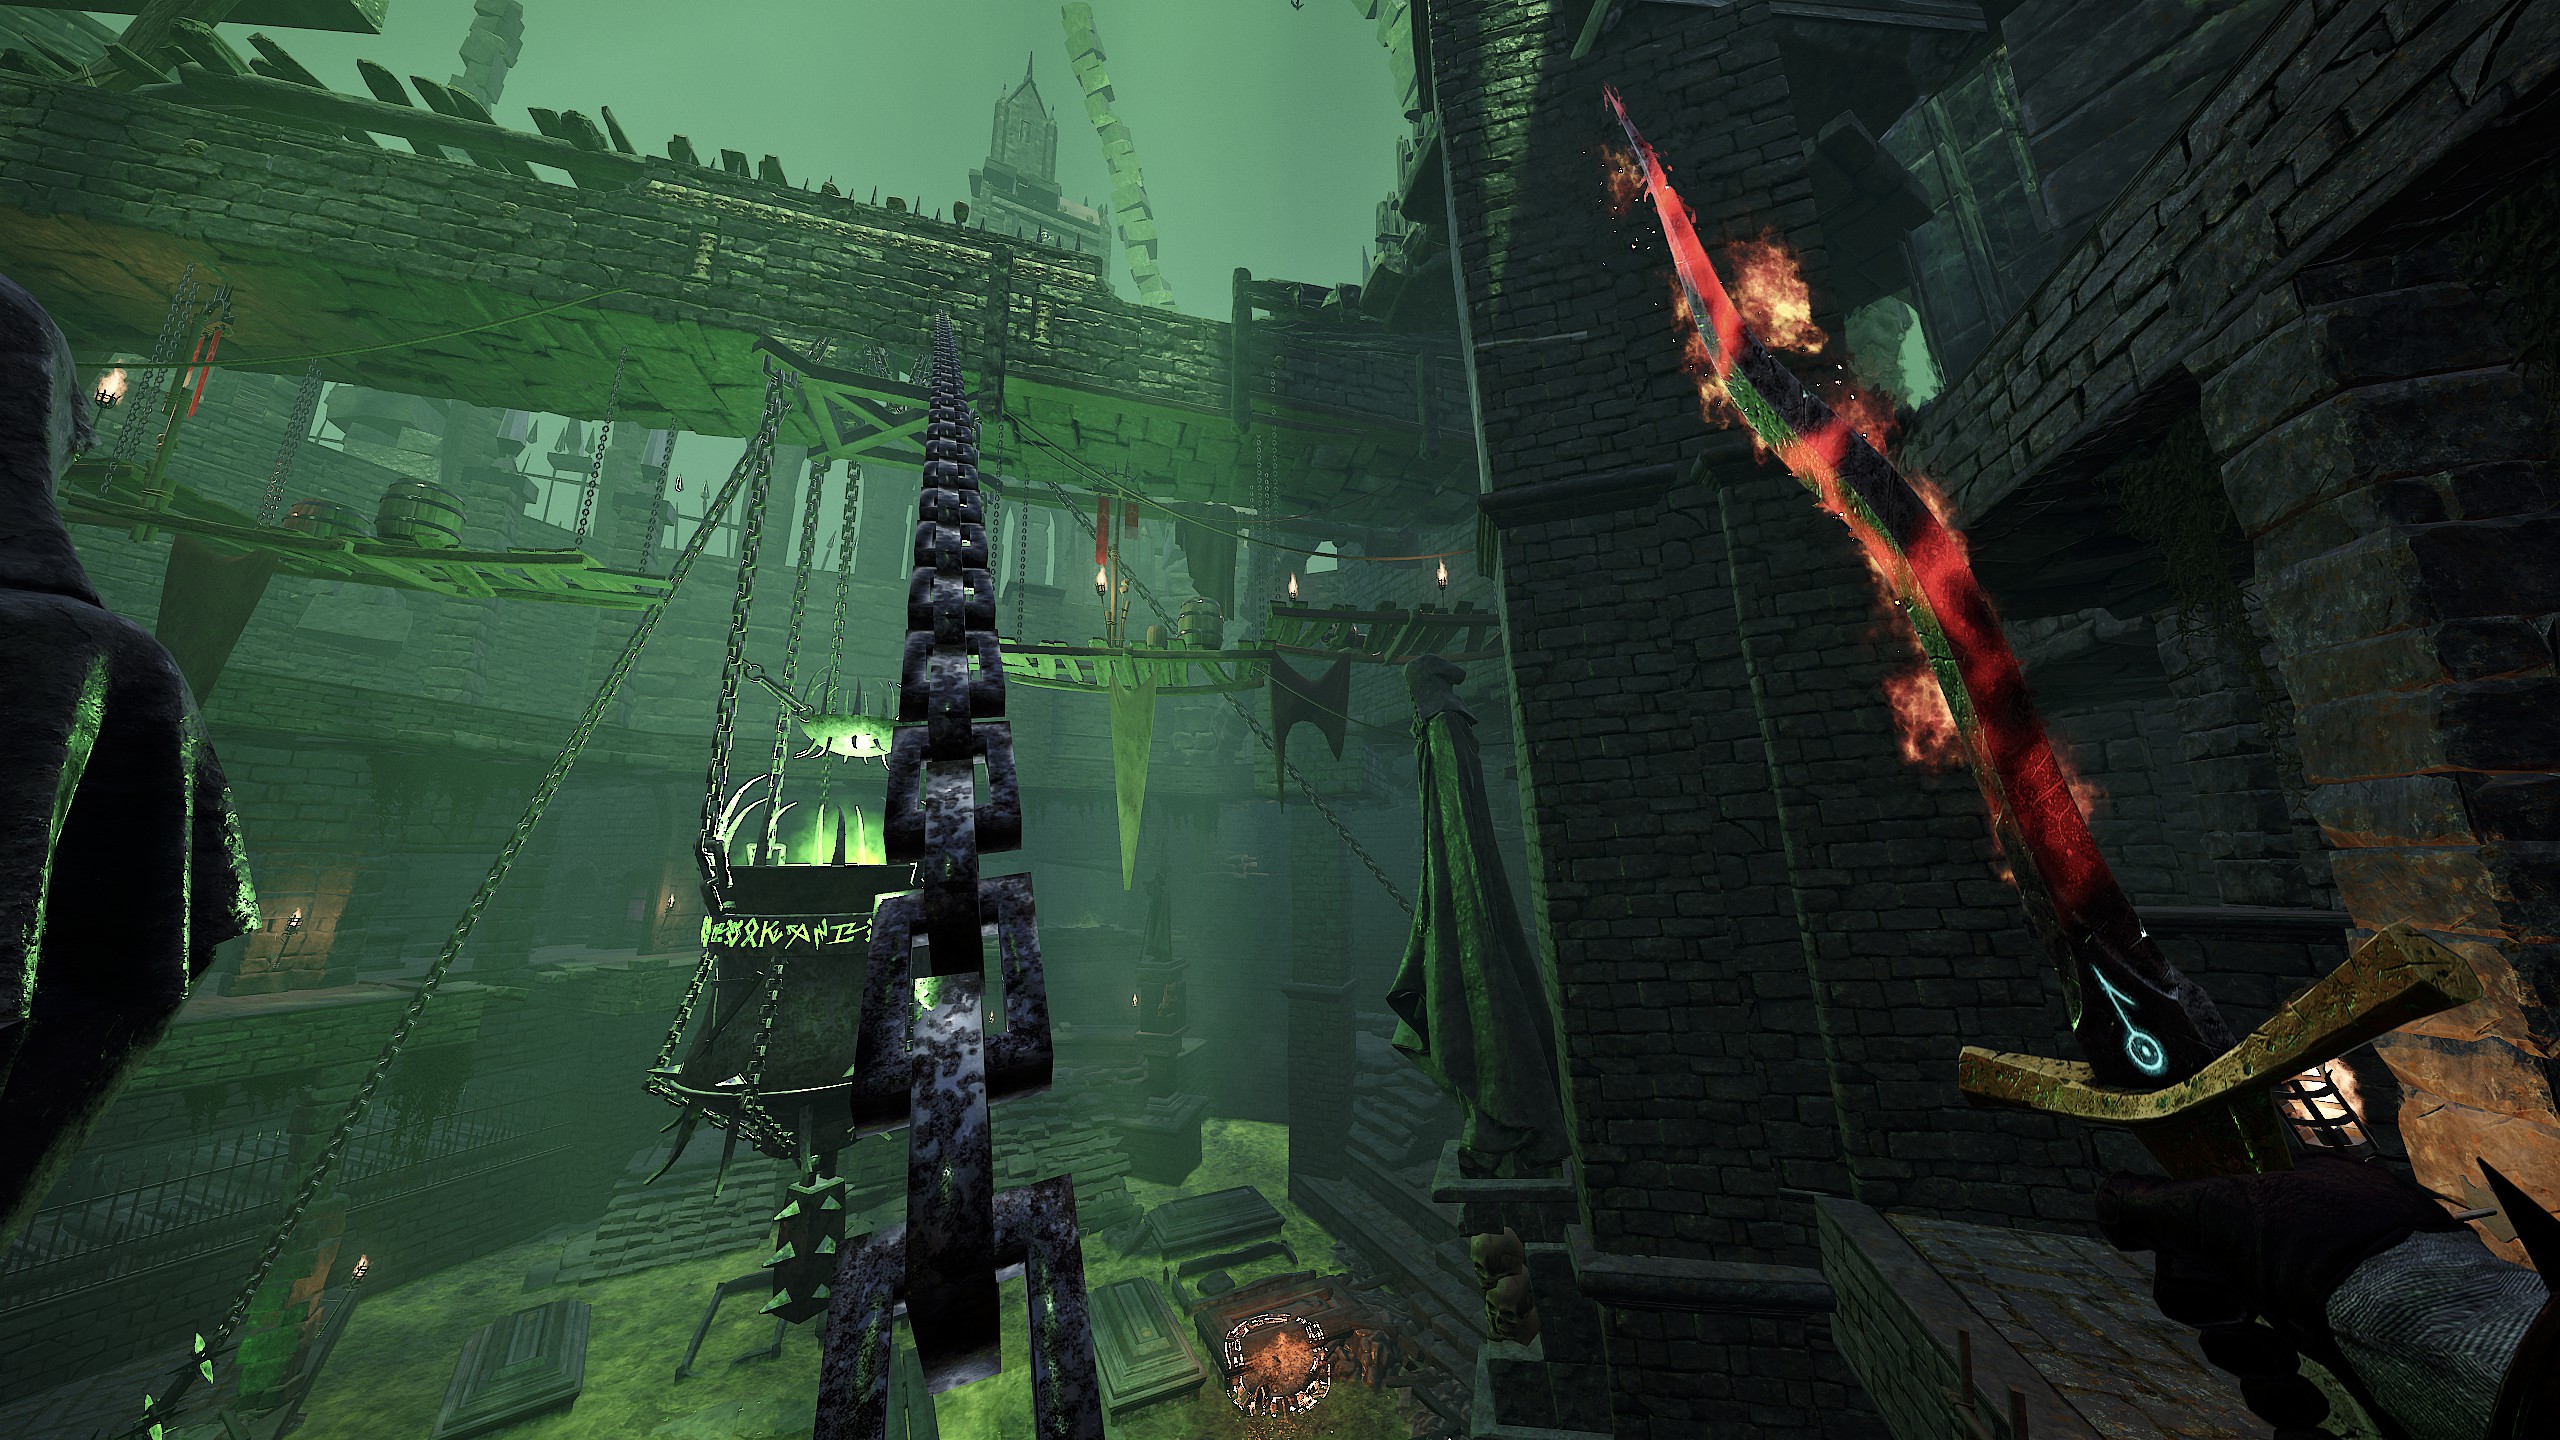
 https://youtu.be/yTYEVAkry8U
 3. Last Respects
 Find Grandmother Zingler's Bones and Lay Them To Rest I noticed that in most of the guides the way to the bones is through tedious parkour, however I managed to find a more elegant solution. Instead of having to suffer through jumping, all you have to do is lean against the wall and start jumping while looking at the crate as shown in the picture.
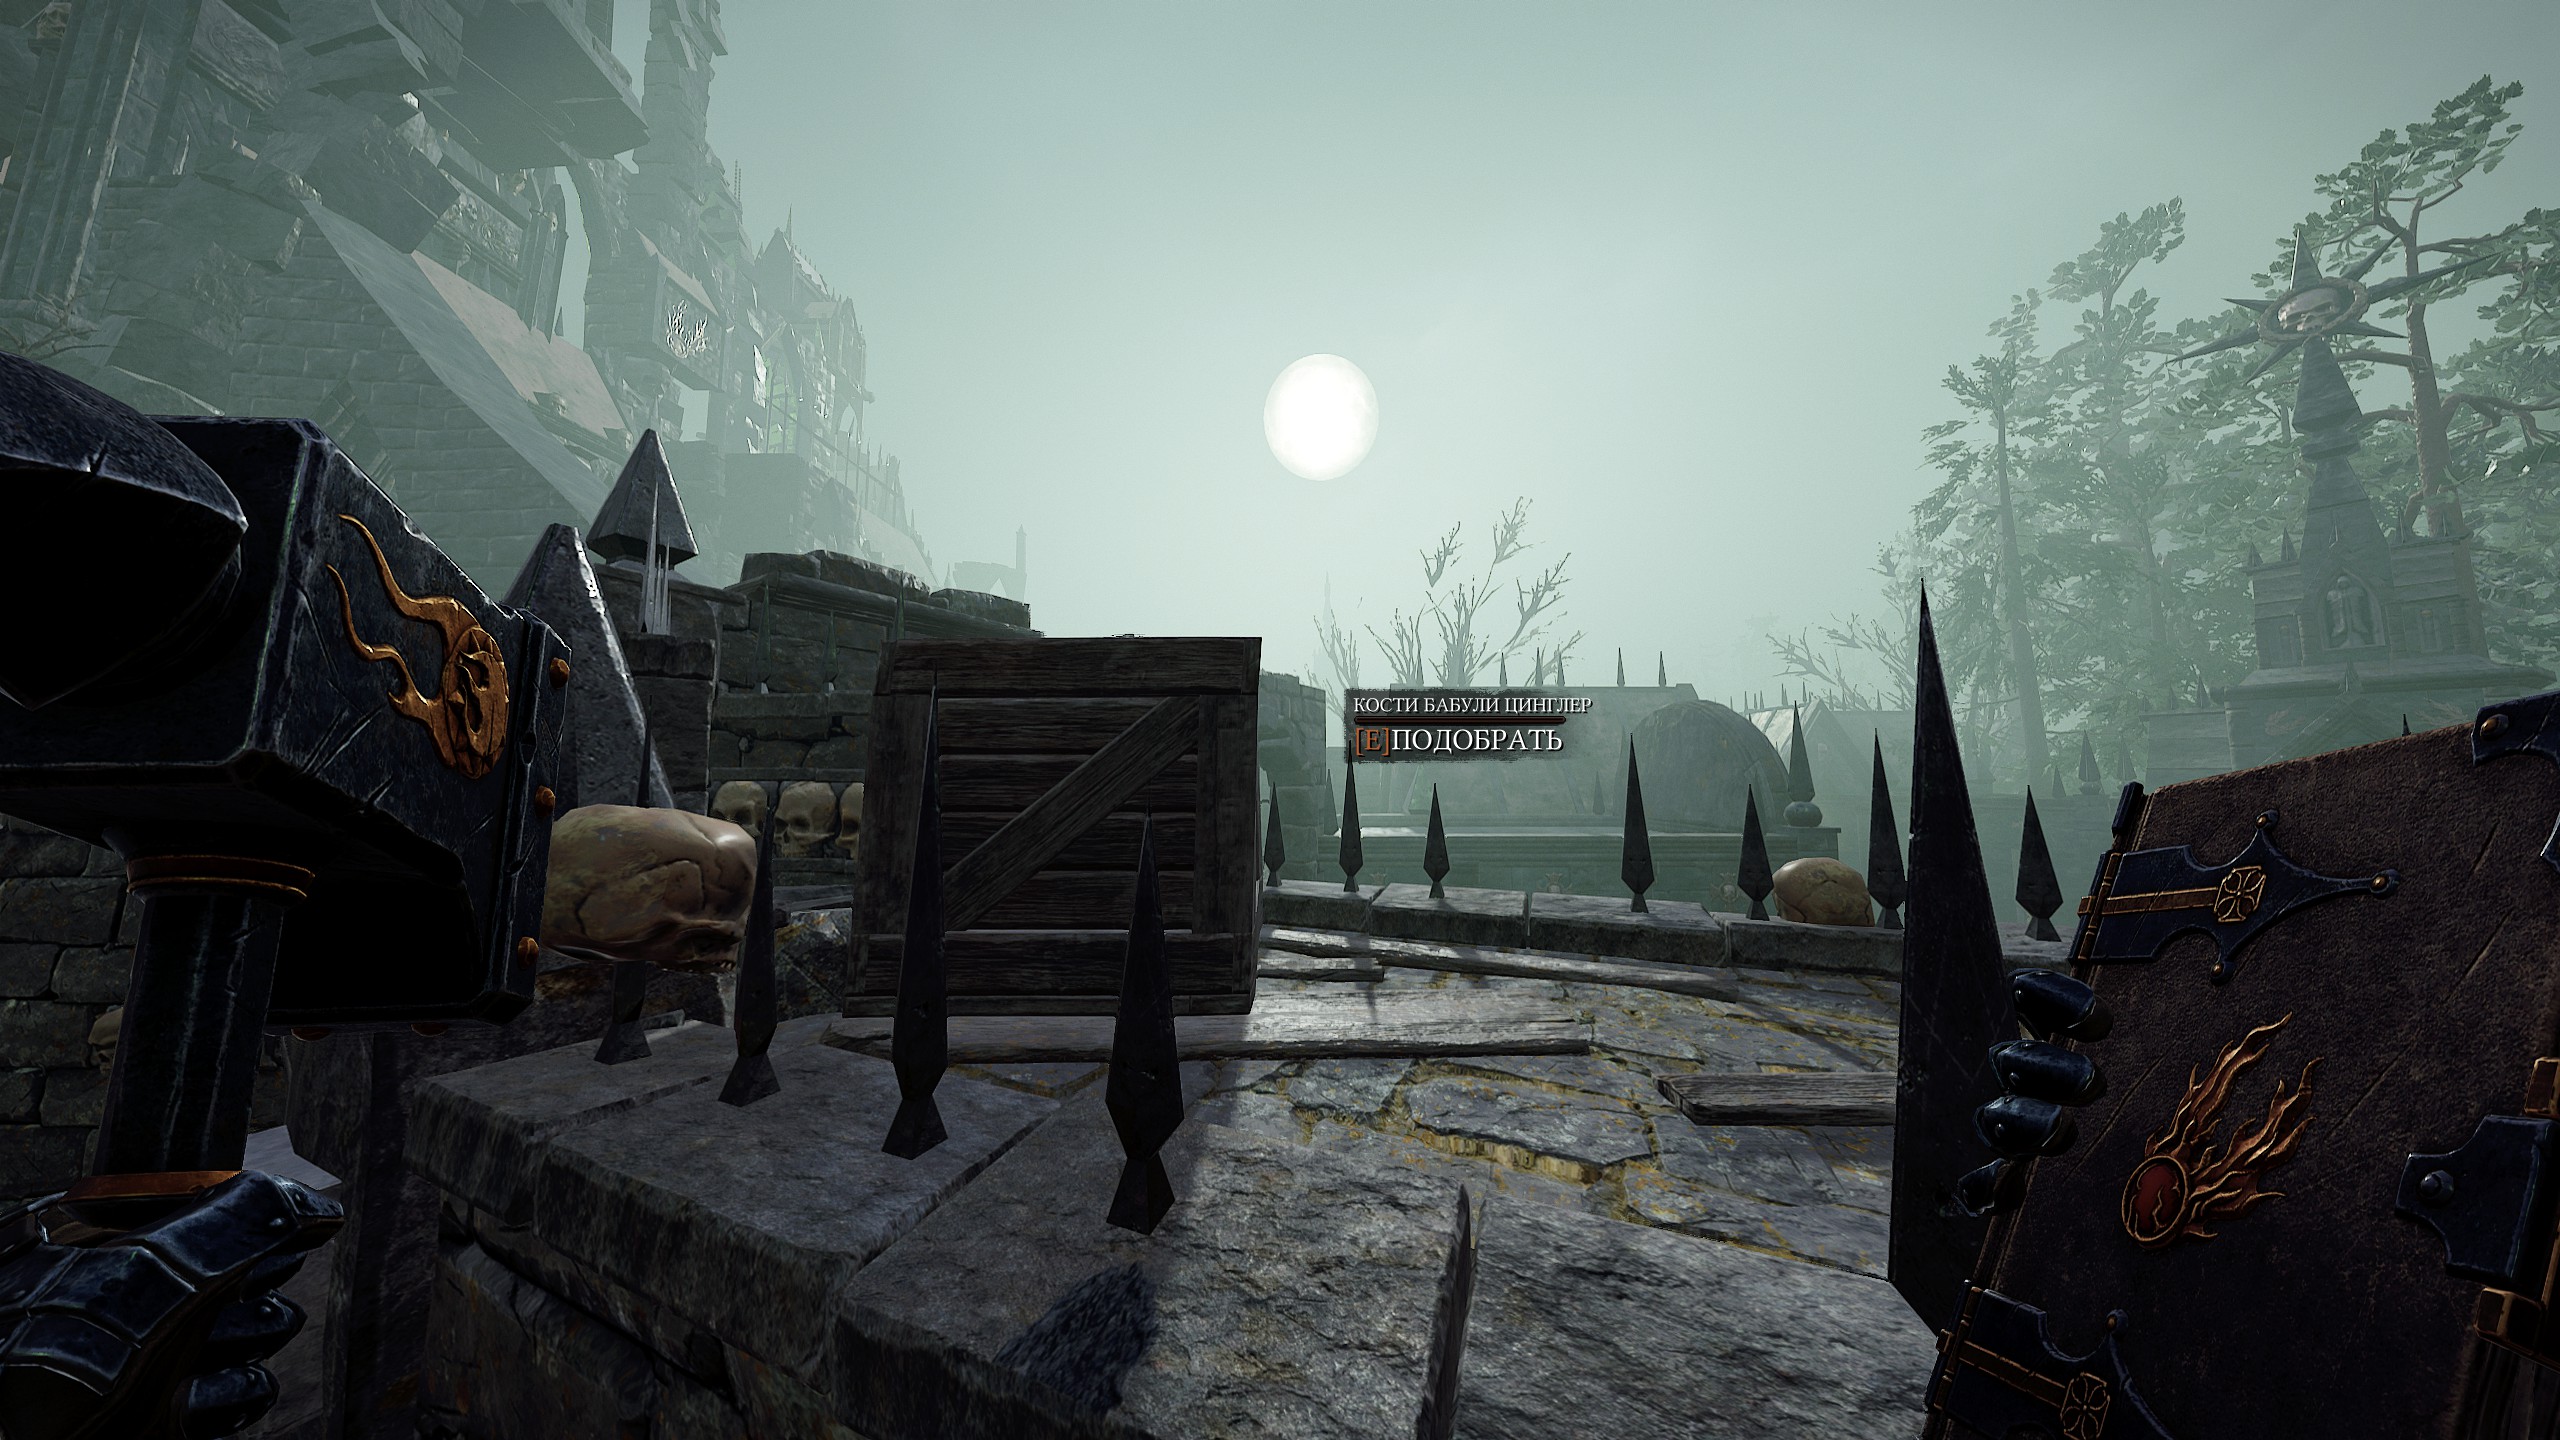
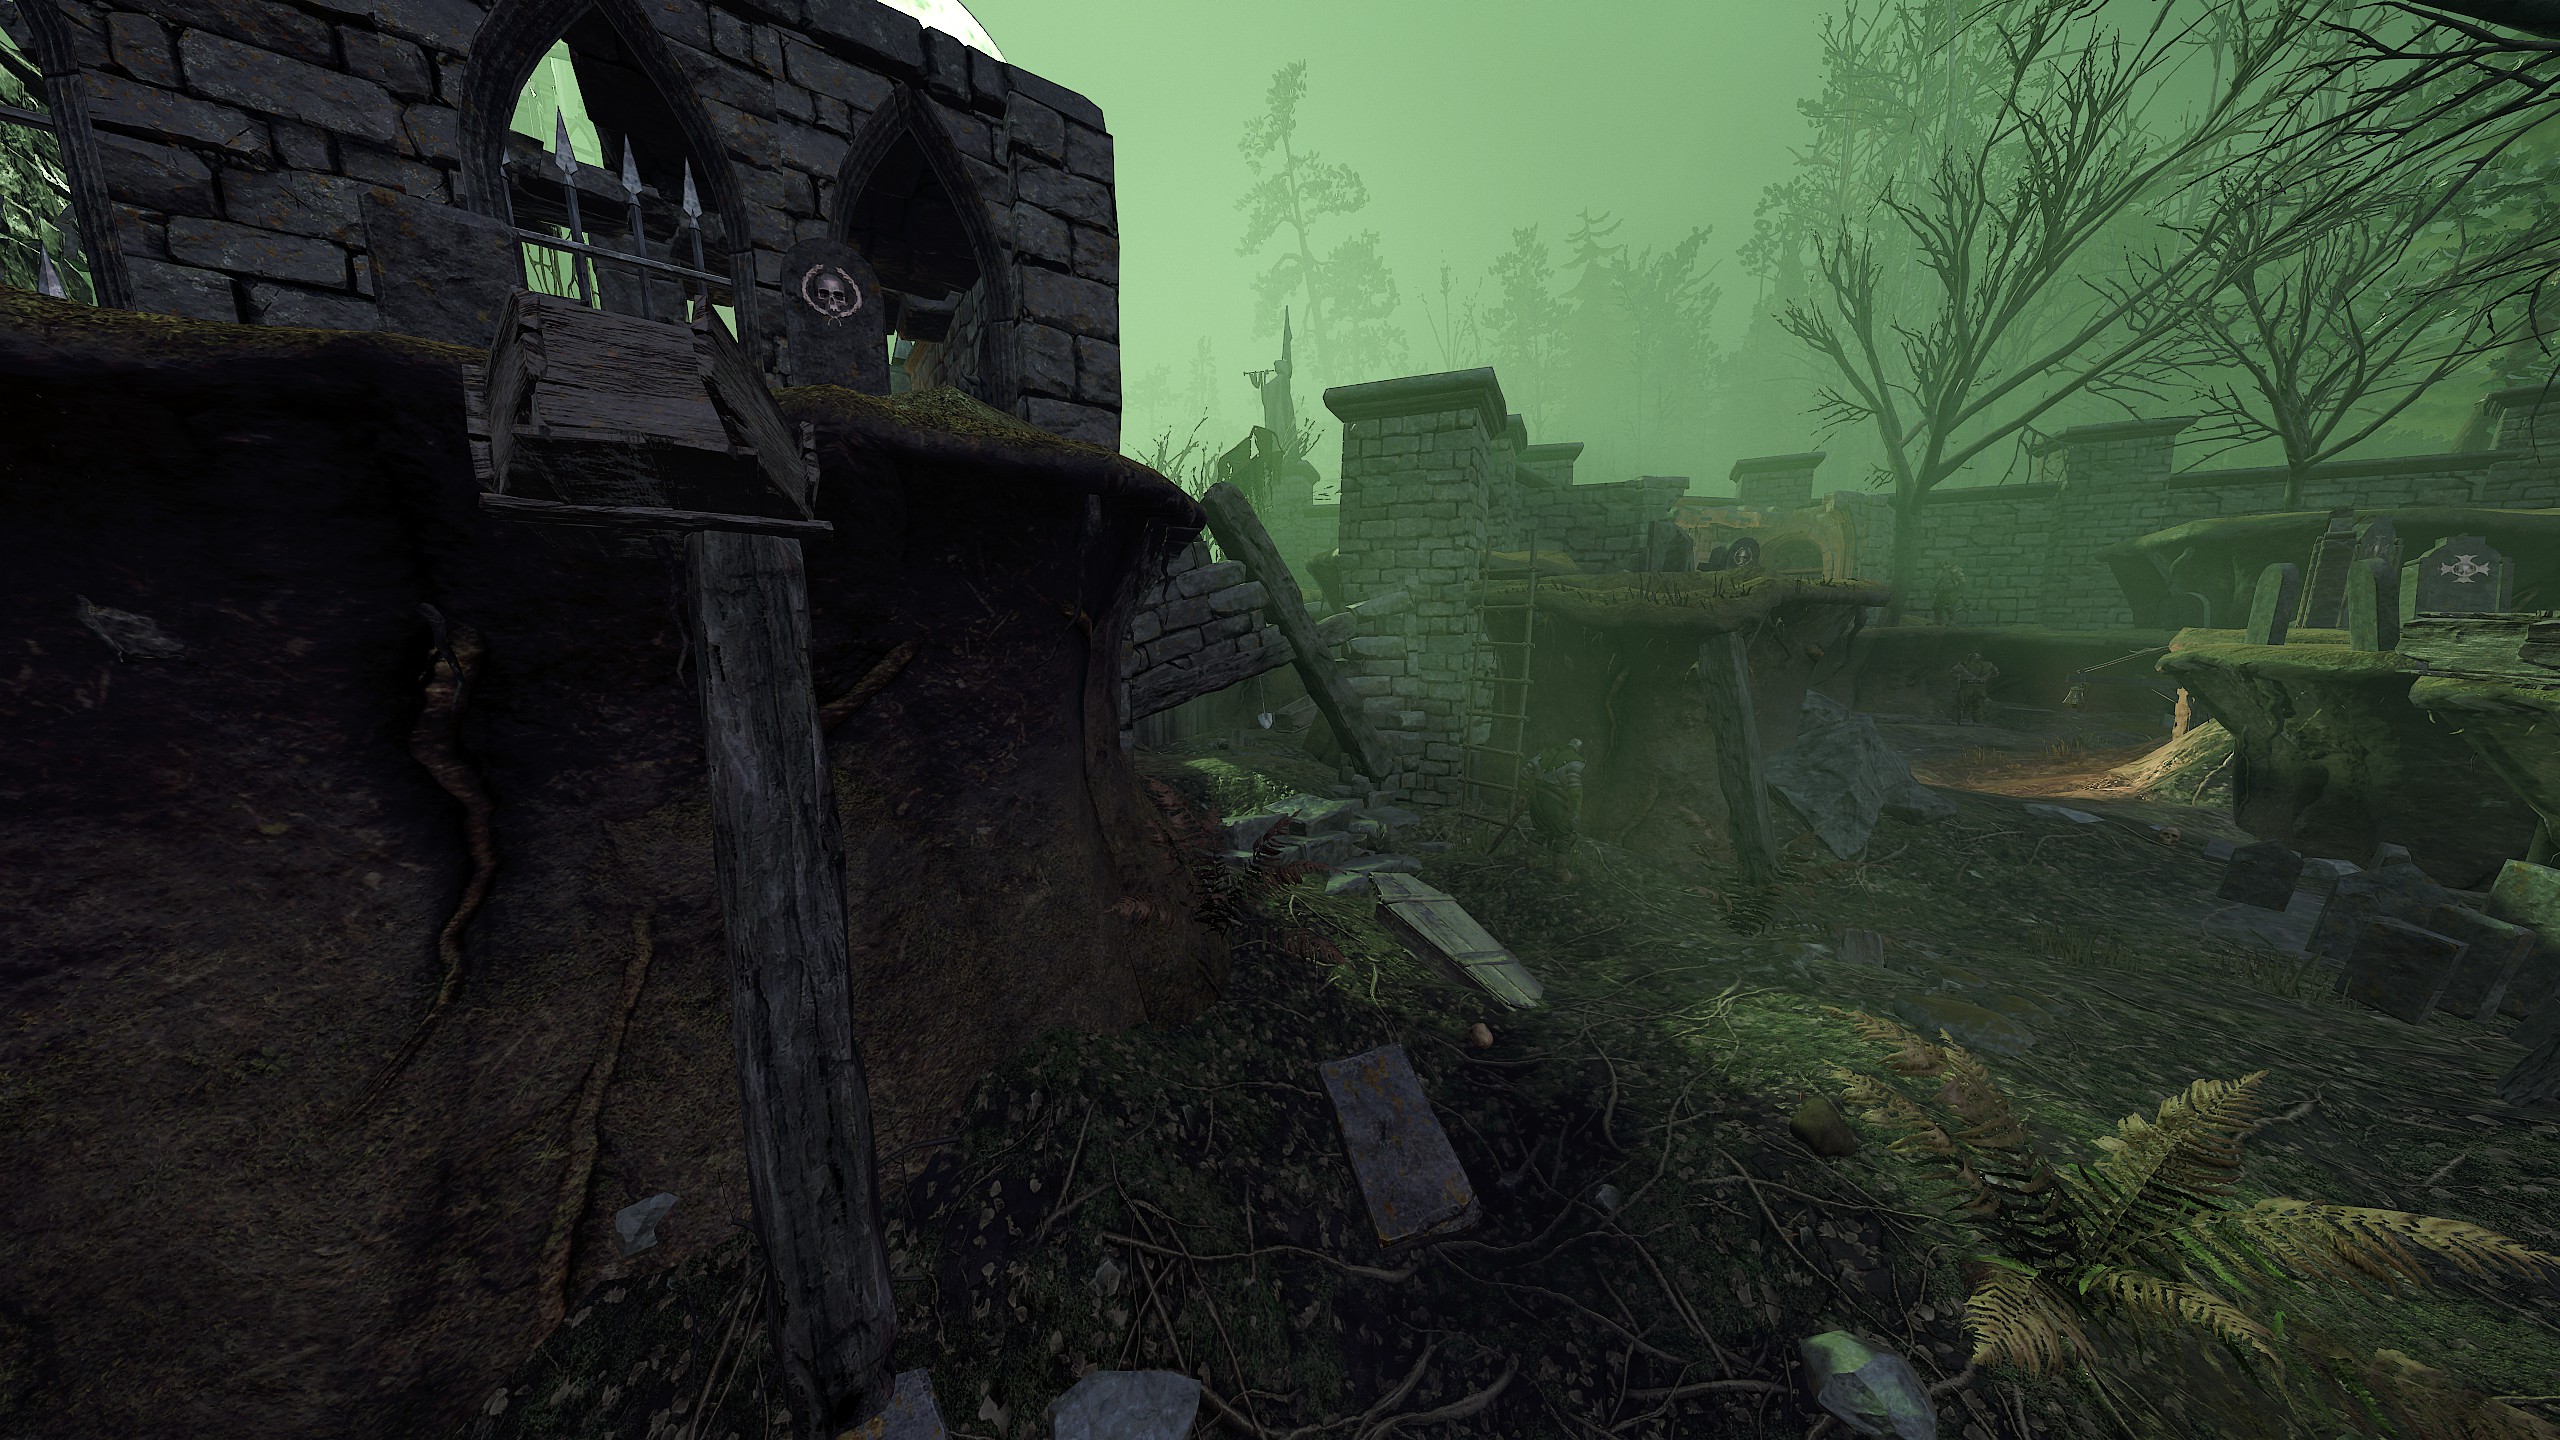
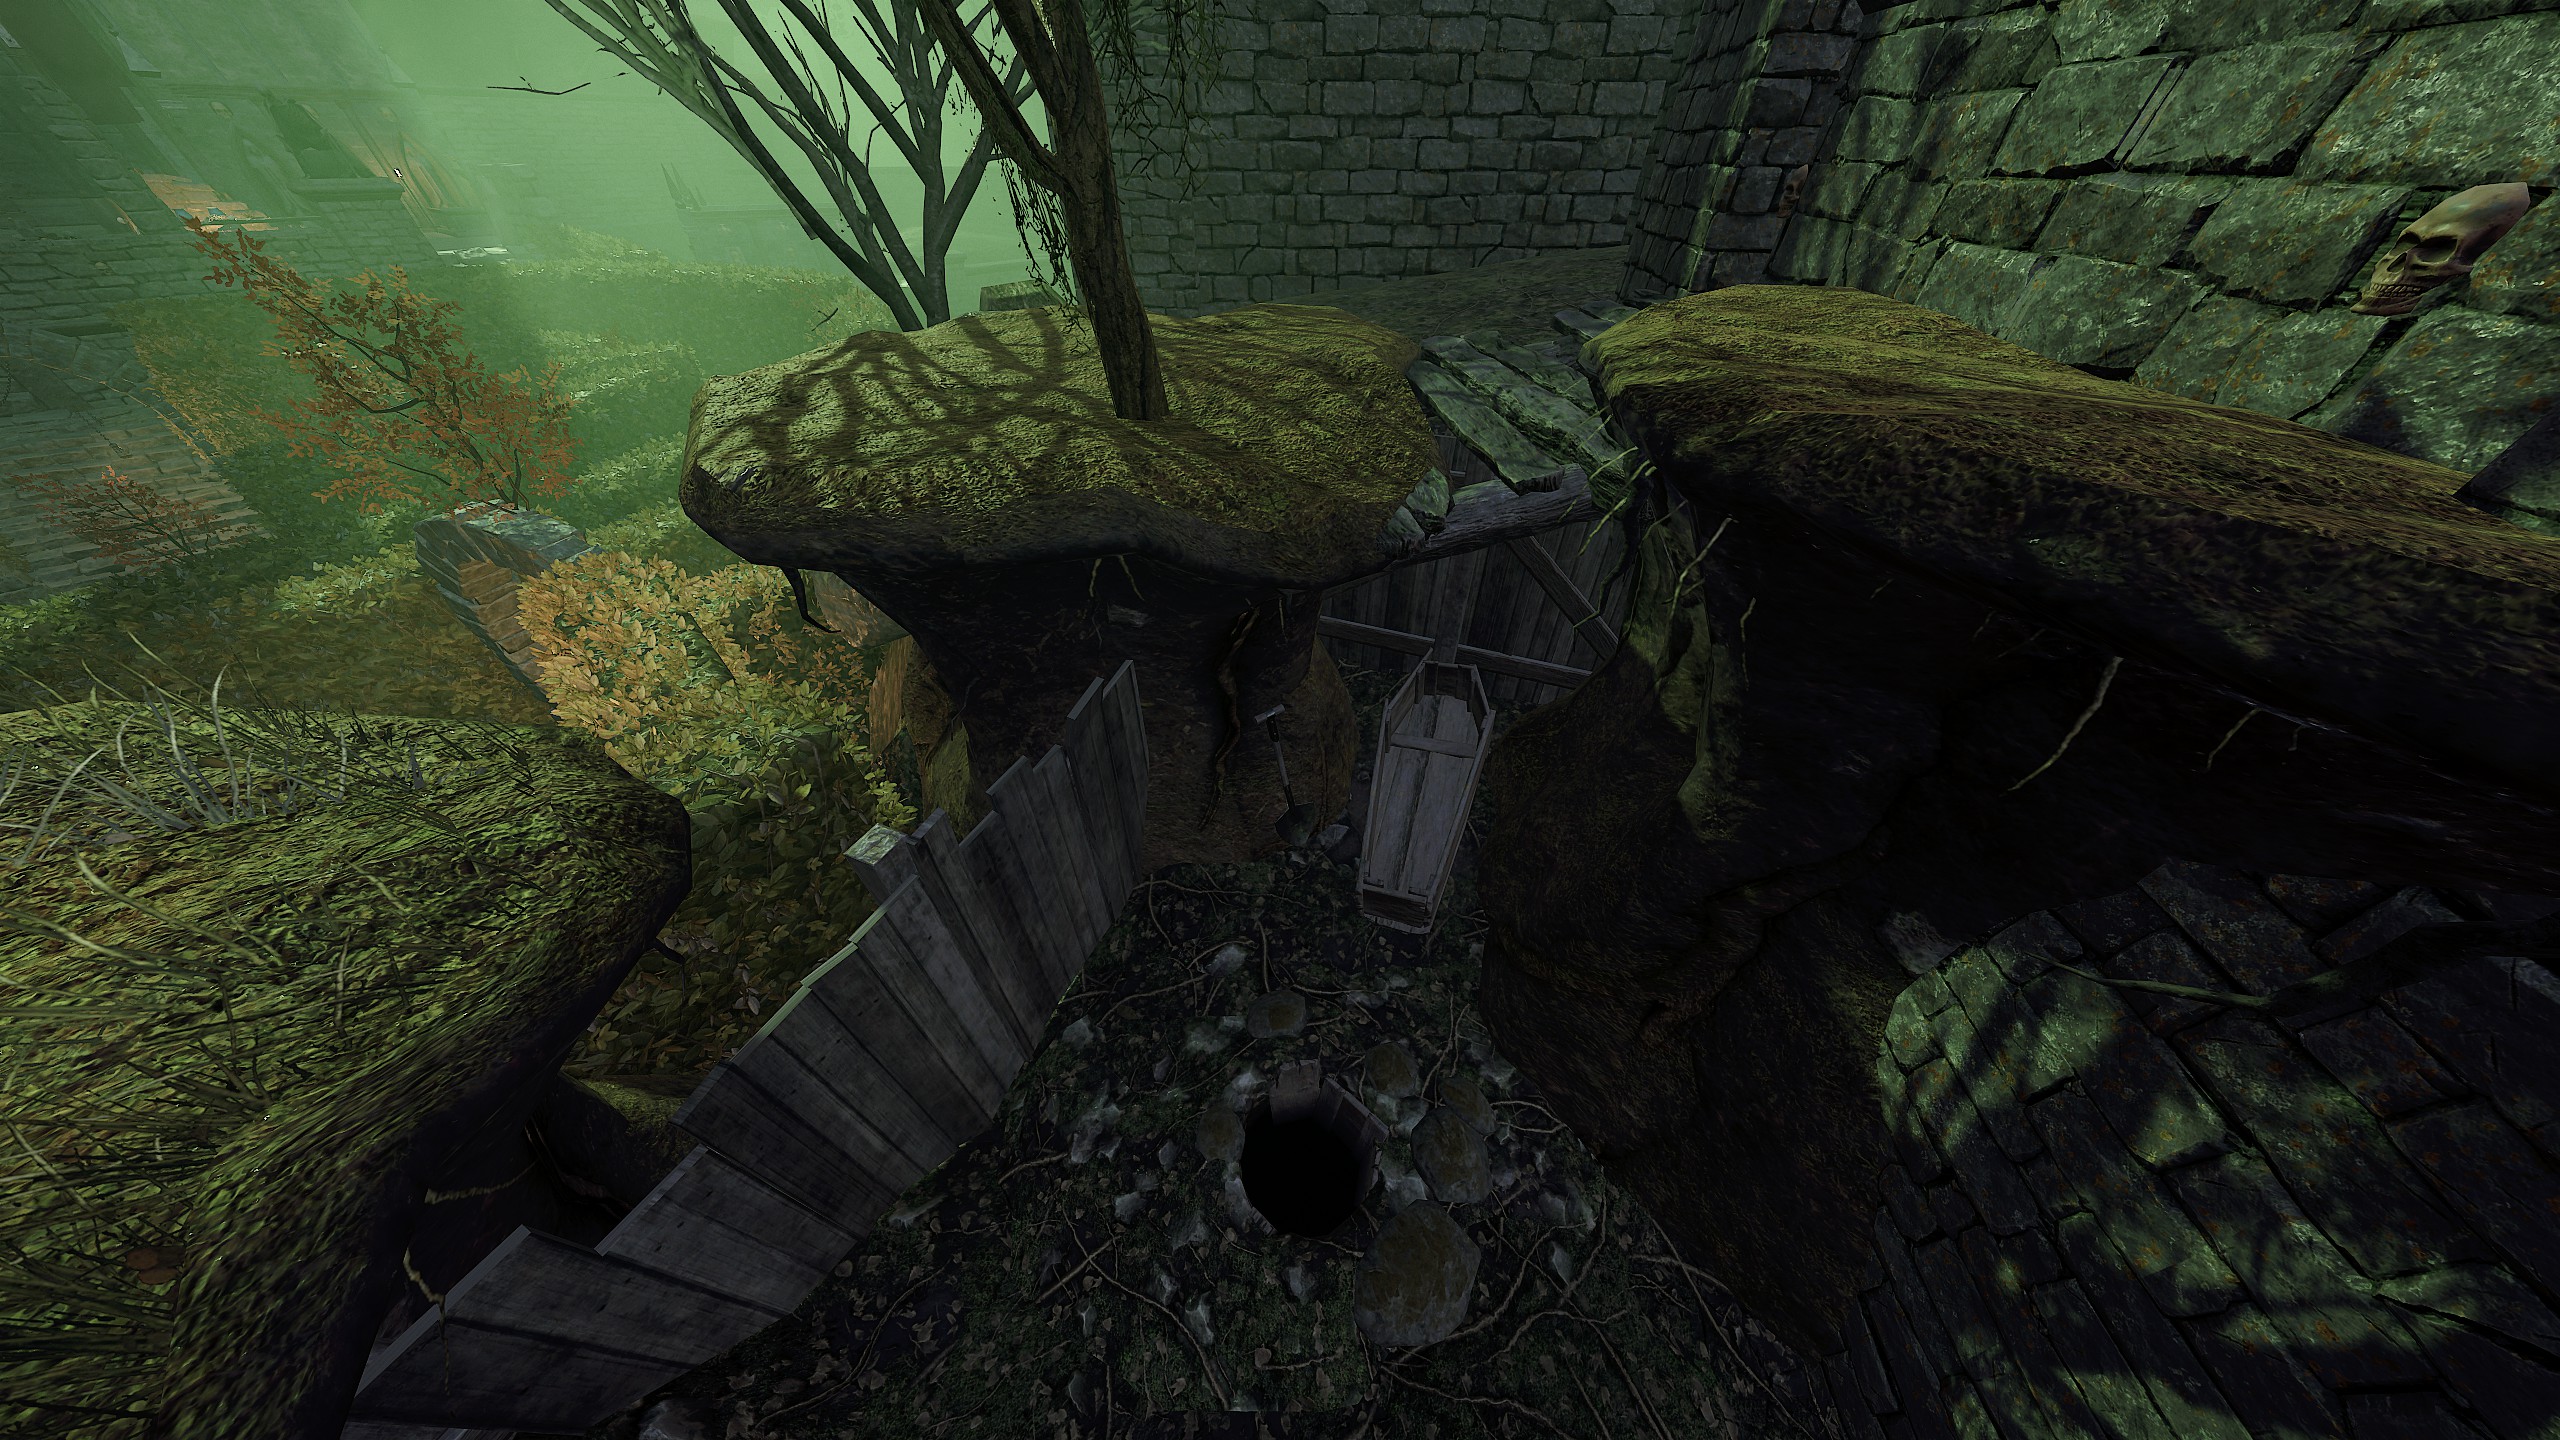
After picking them up, continue the level as normal until they drop down into the trench area ("Peasant Hill"). Shortly after arriving in this area, there is a side path to the left with a ladder. Ignore the ladder and head just past it, where there is a freshly dug grave with an open coffin. Place the bones in the coffin to complete the challenge. This challenge will be completed for the entire party as long as one player completes it.
- Engines of War
 1. Demolitionist
Blow up all three Doom Wheels within 5 seconds of each other on Engines of War The goal is to blow up all Doomwheels at the same time. First order of business is to clear the whole area of extra Skaven, as additional to the spawning Infantry waves and Plague Monks, there are also Infantry and Stormvermin guarding the wheels. While doing this, take the Kegs up to each Wheel and drop them next to it for later use. Once these preparations are complete, split up and make your way to the Wheels. It is best to do this immediately after killing some Specials, as it will take some time for them to respawn. As there are three wheels and four players, it is advised to group up the two players with the least crowd control and survivability.
When all players are in place, count down and place the barrels. Let the player without keg count down in chat or use voice communication. Make sure to call out as soon as something goes wrong, so other players don't accidentally place the kegs too soon.
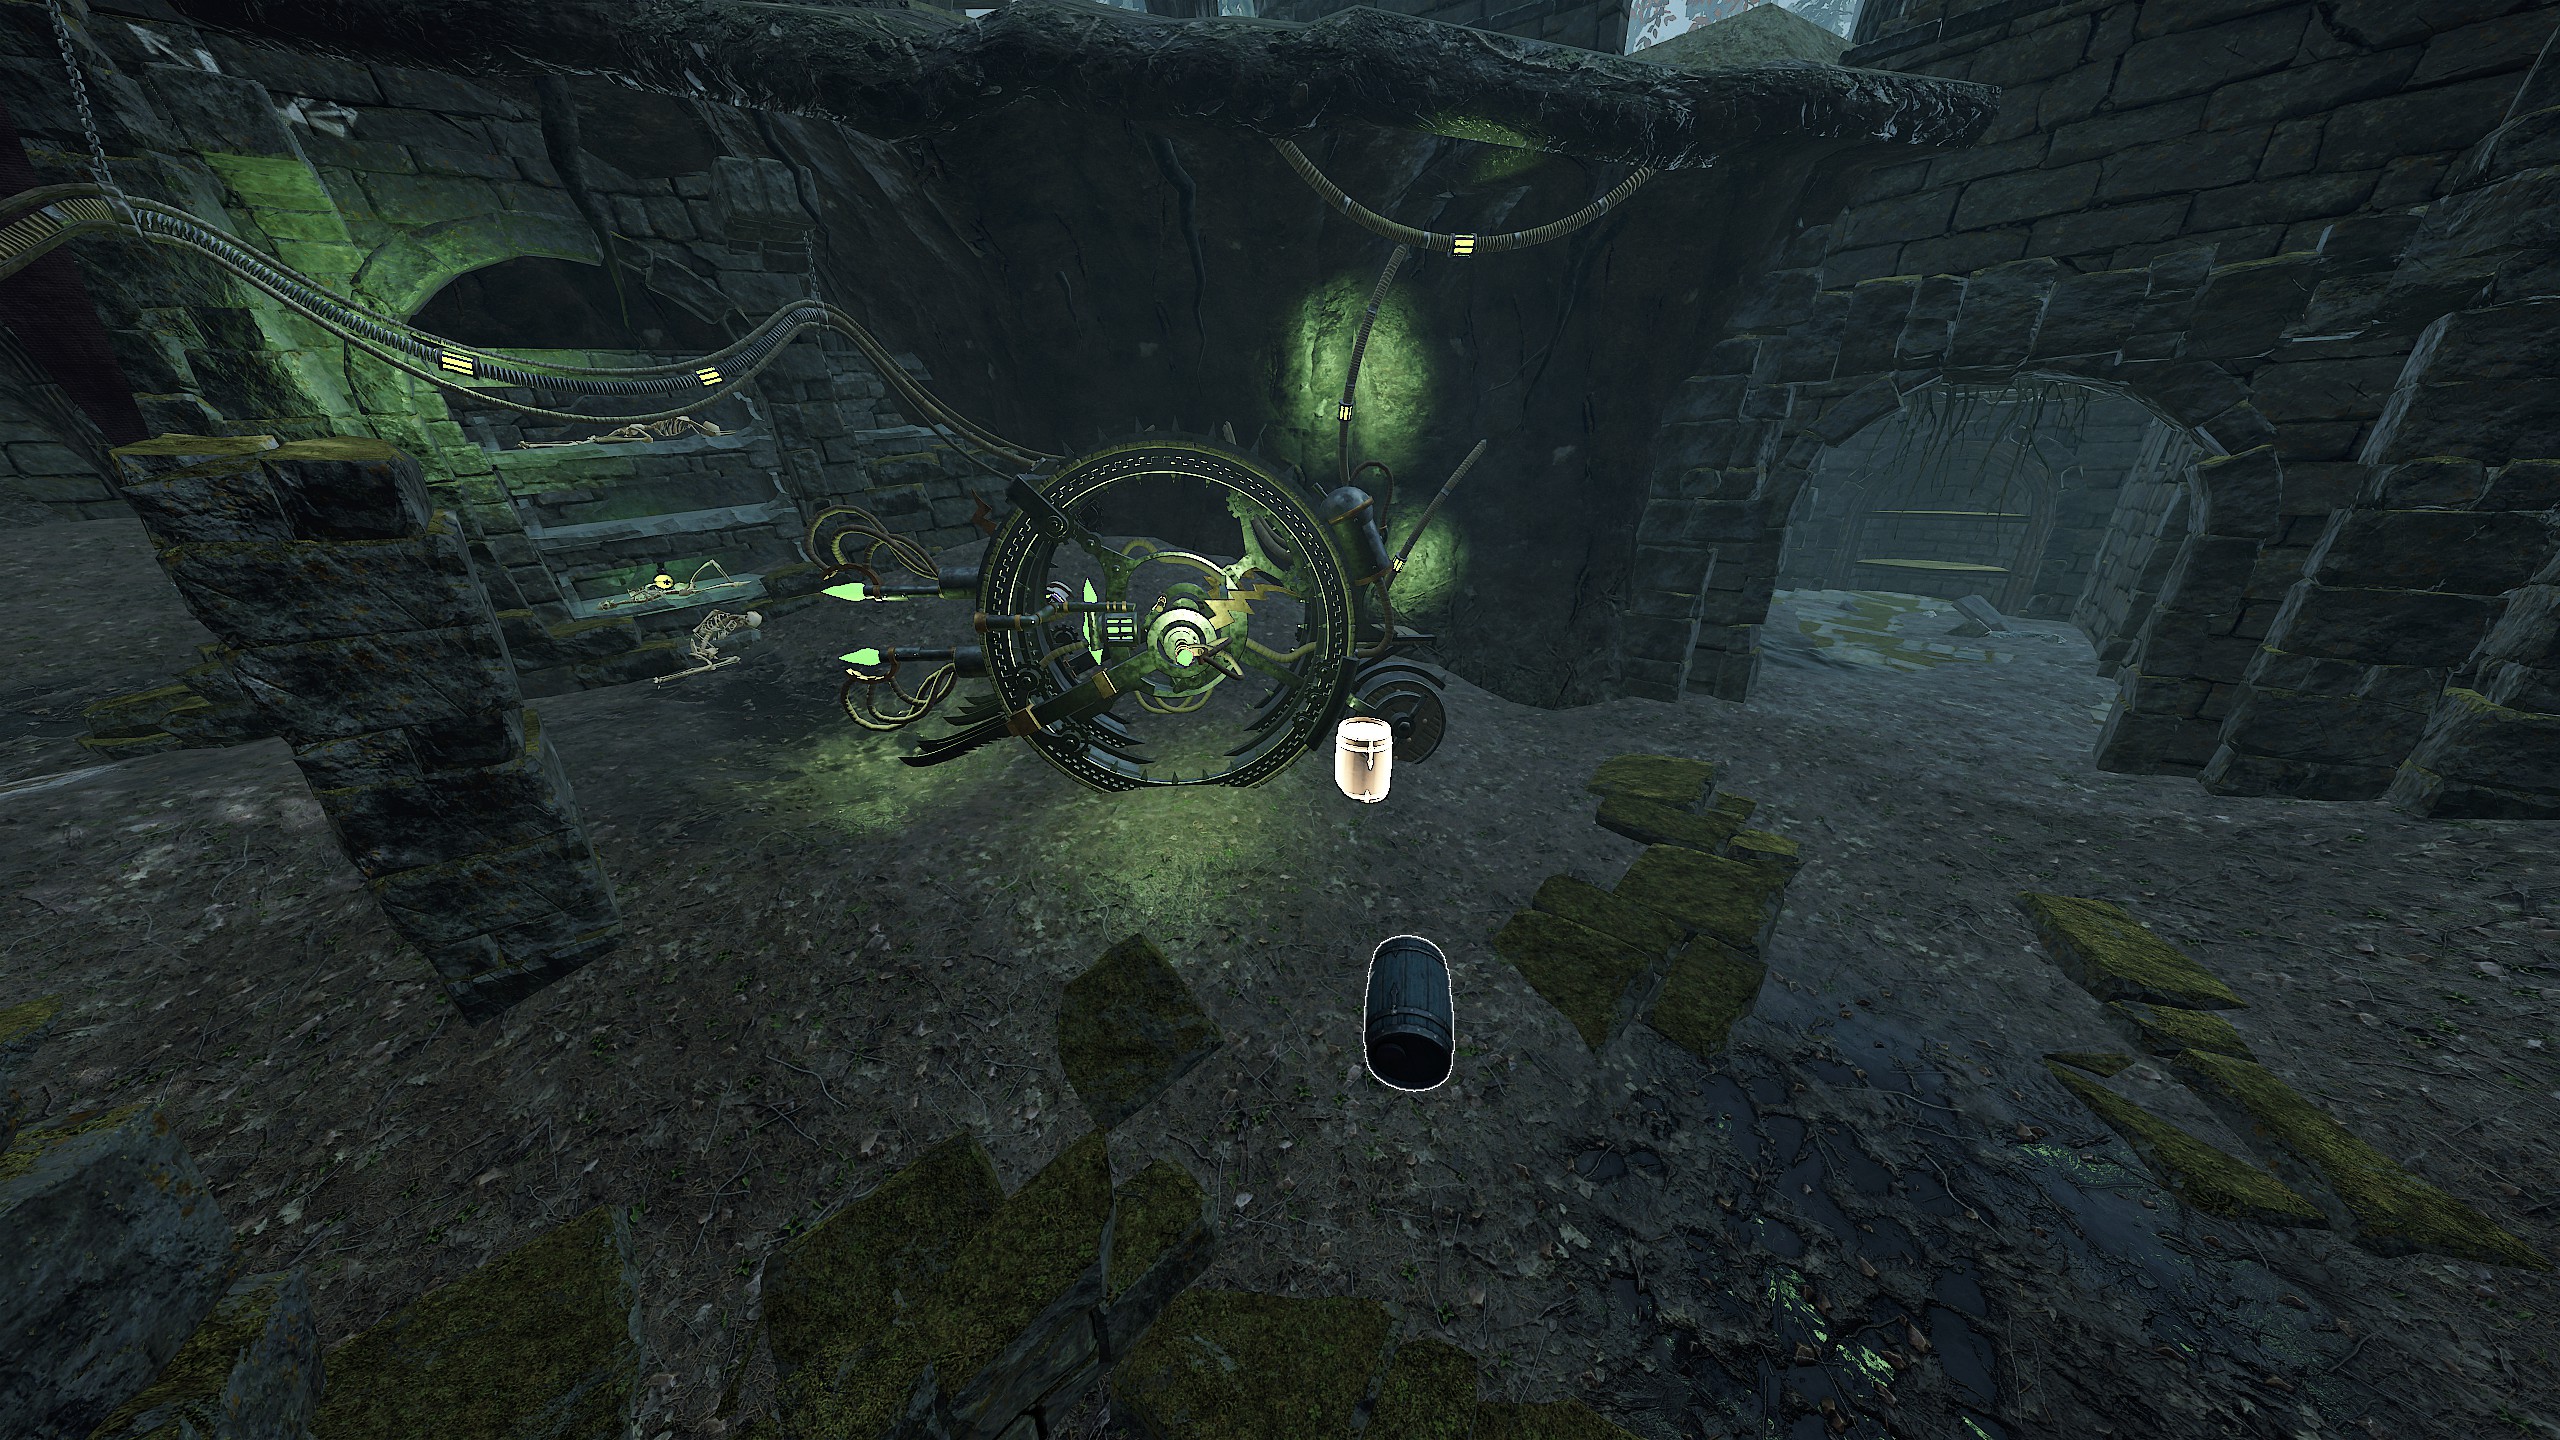
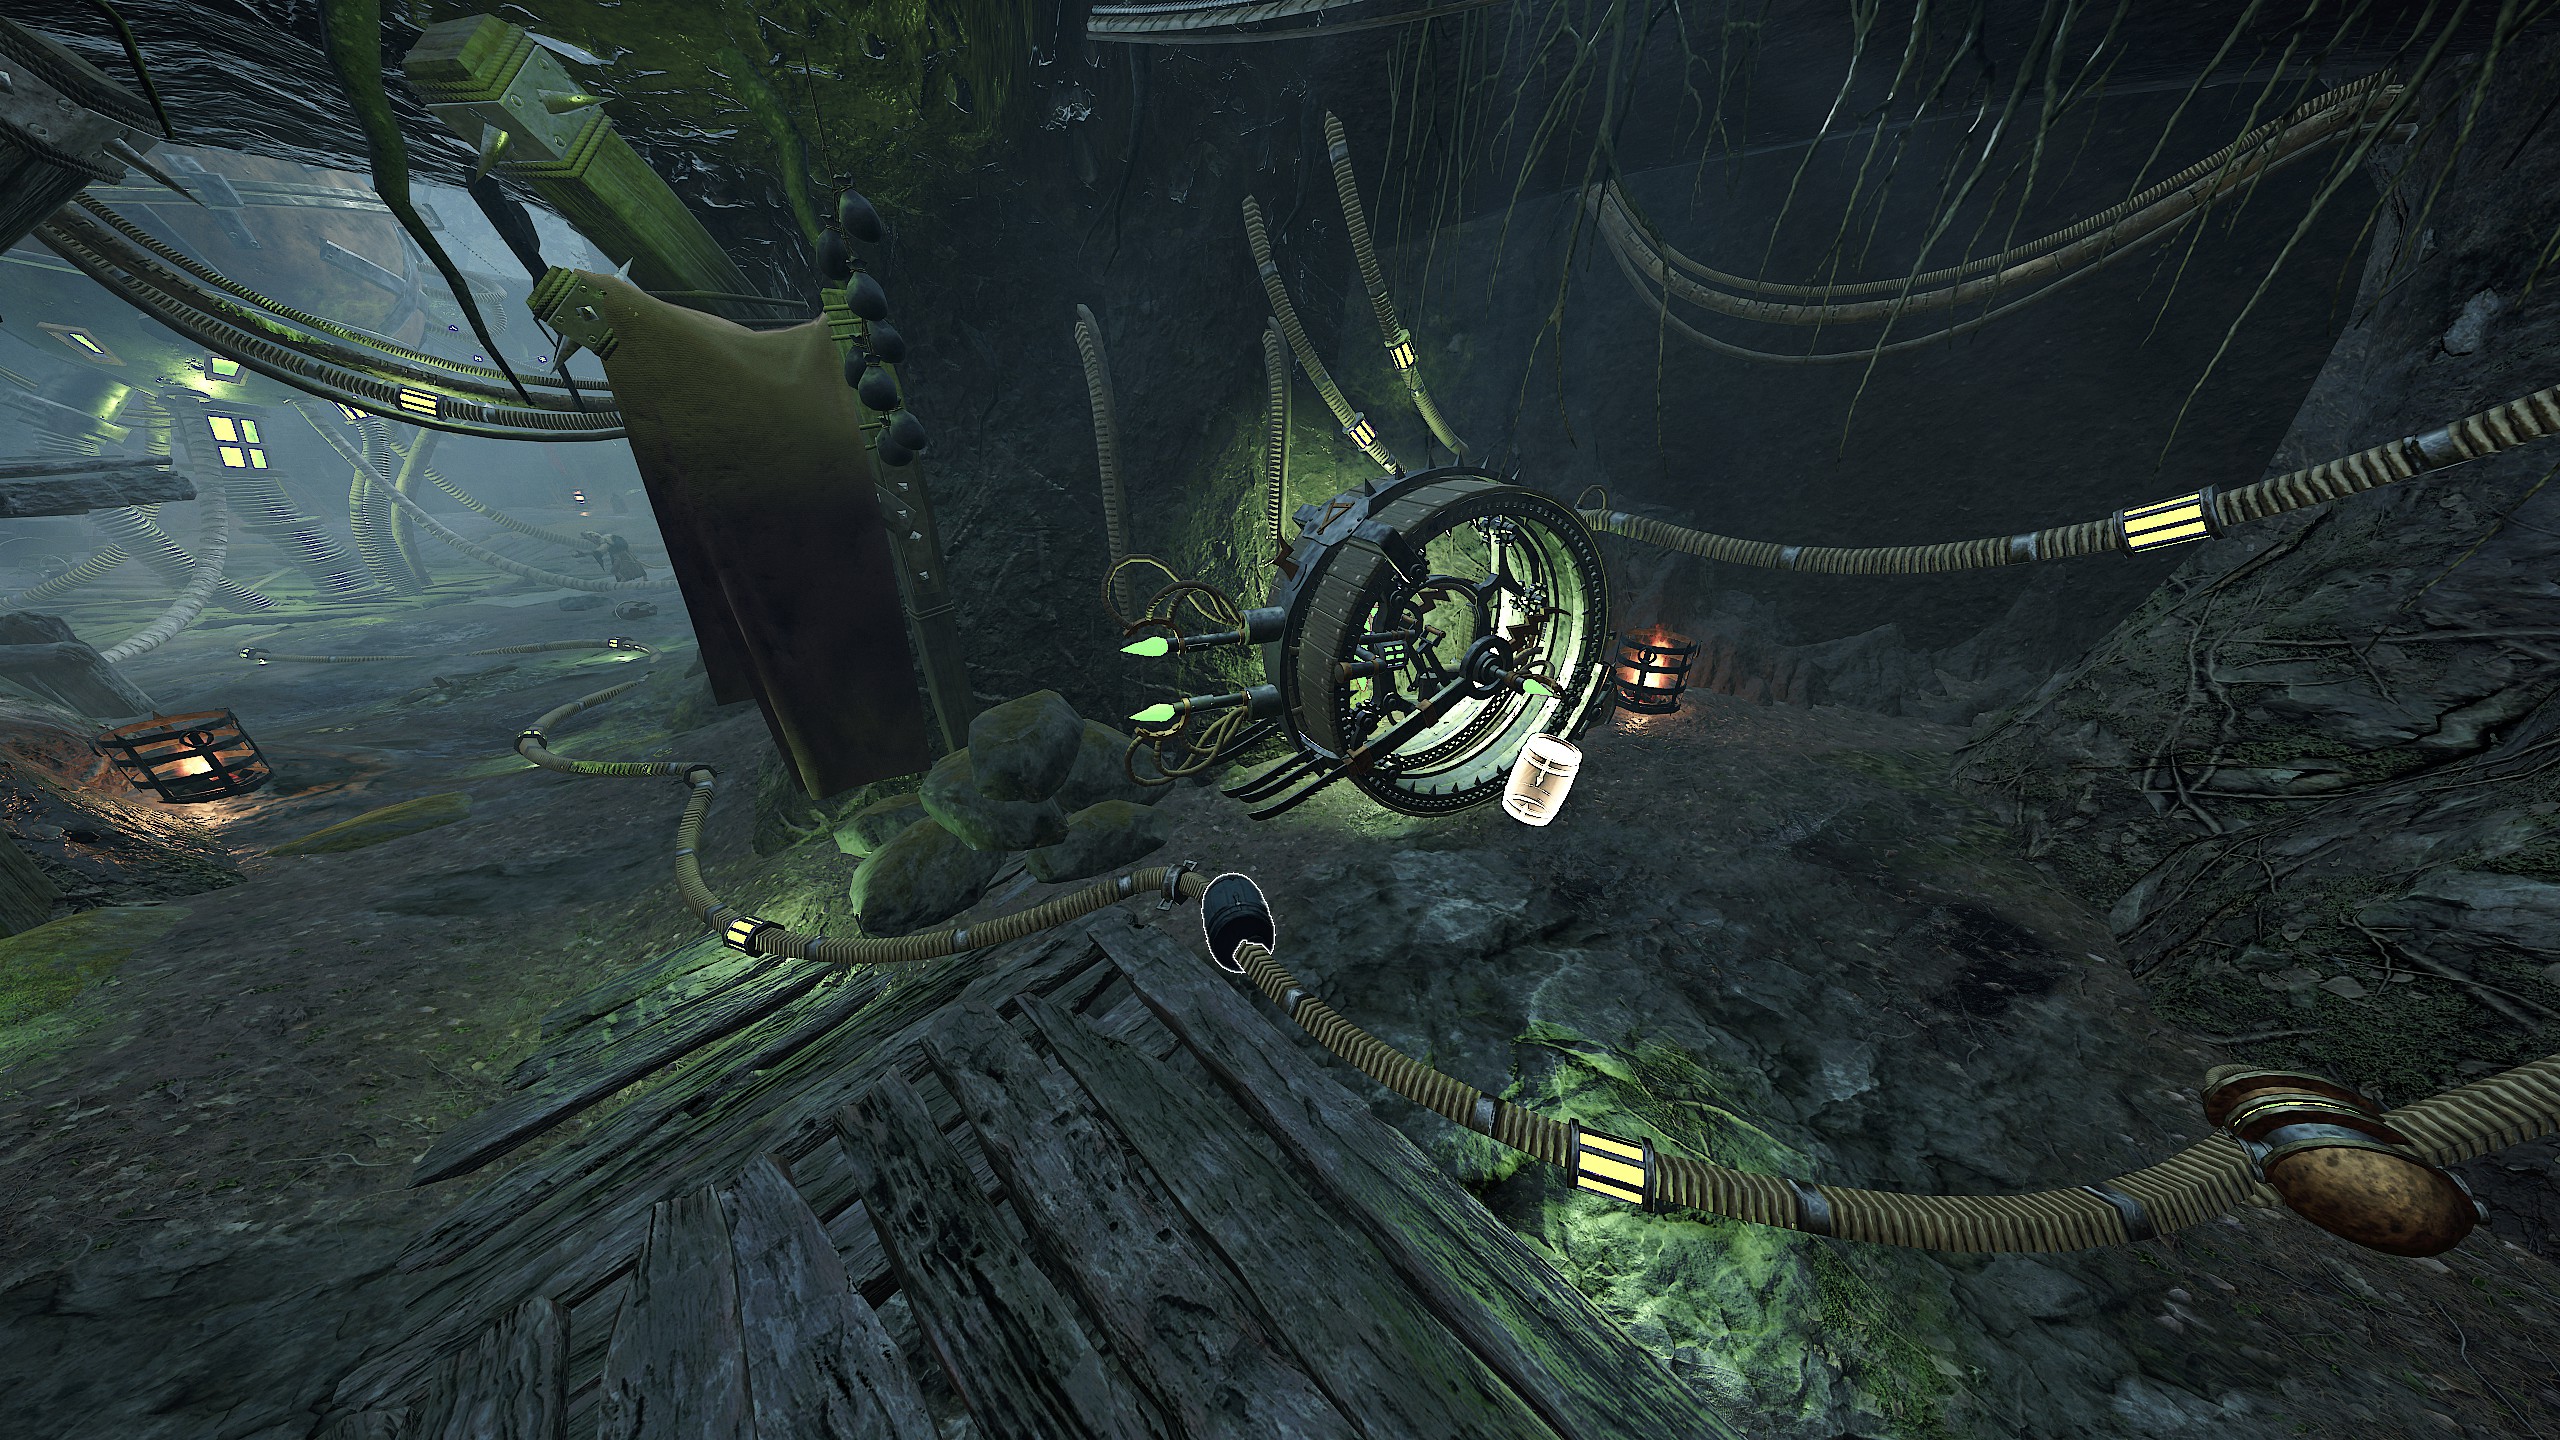
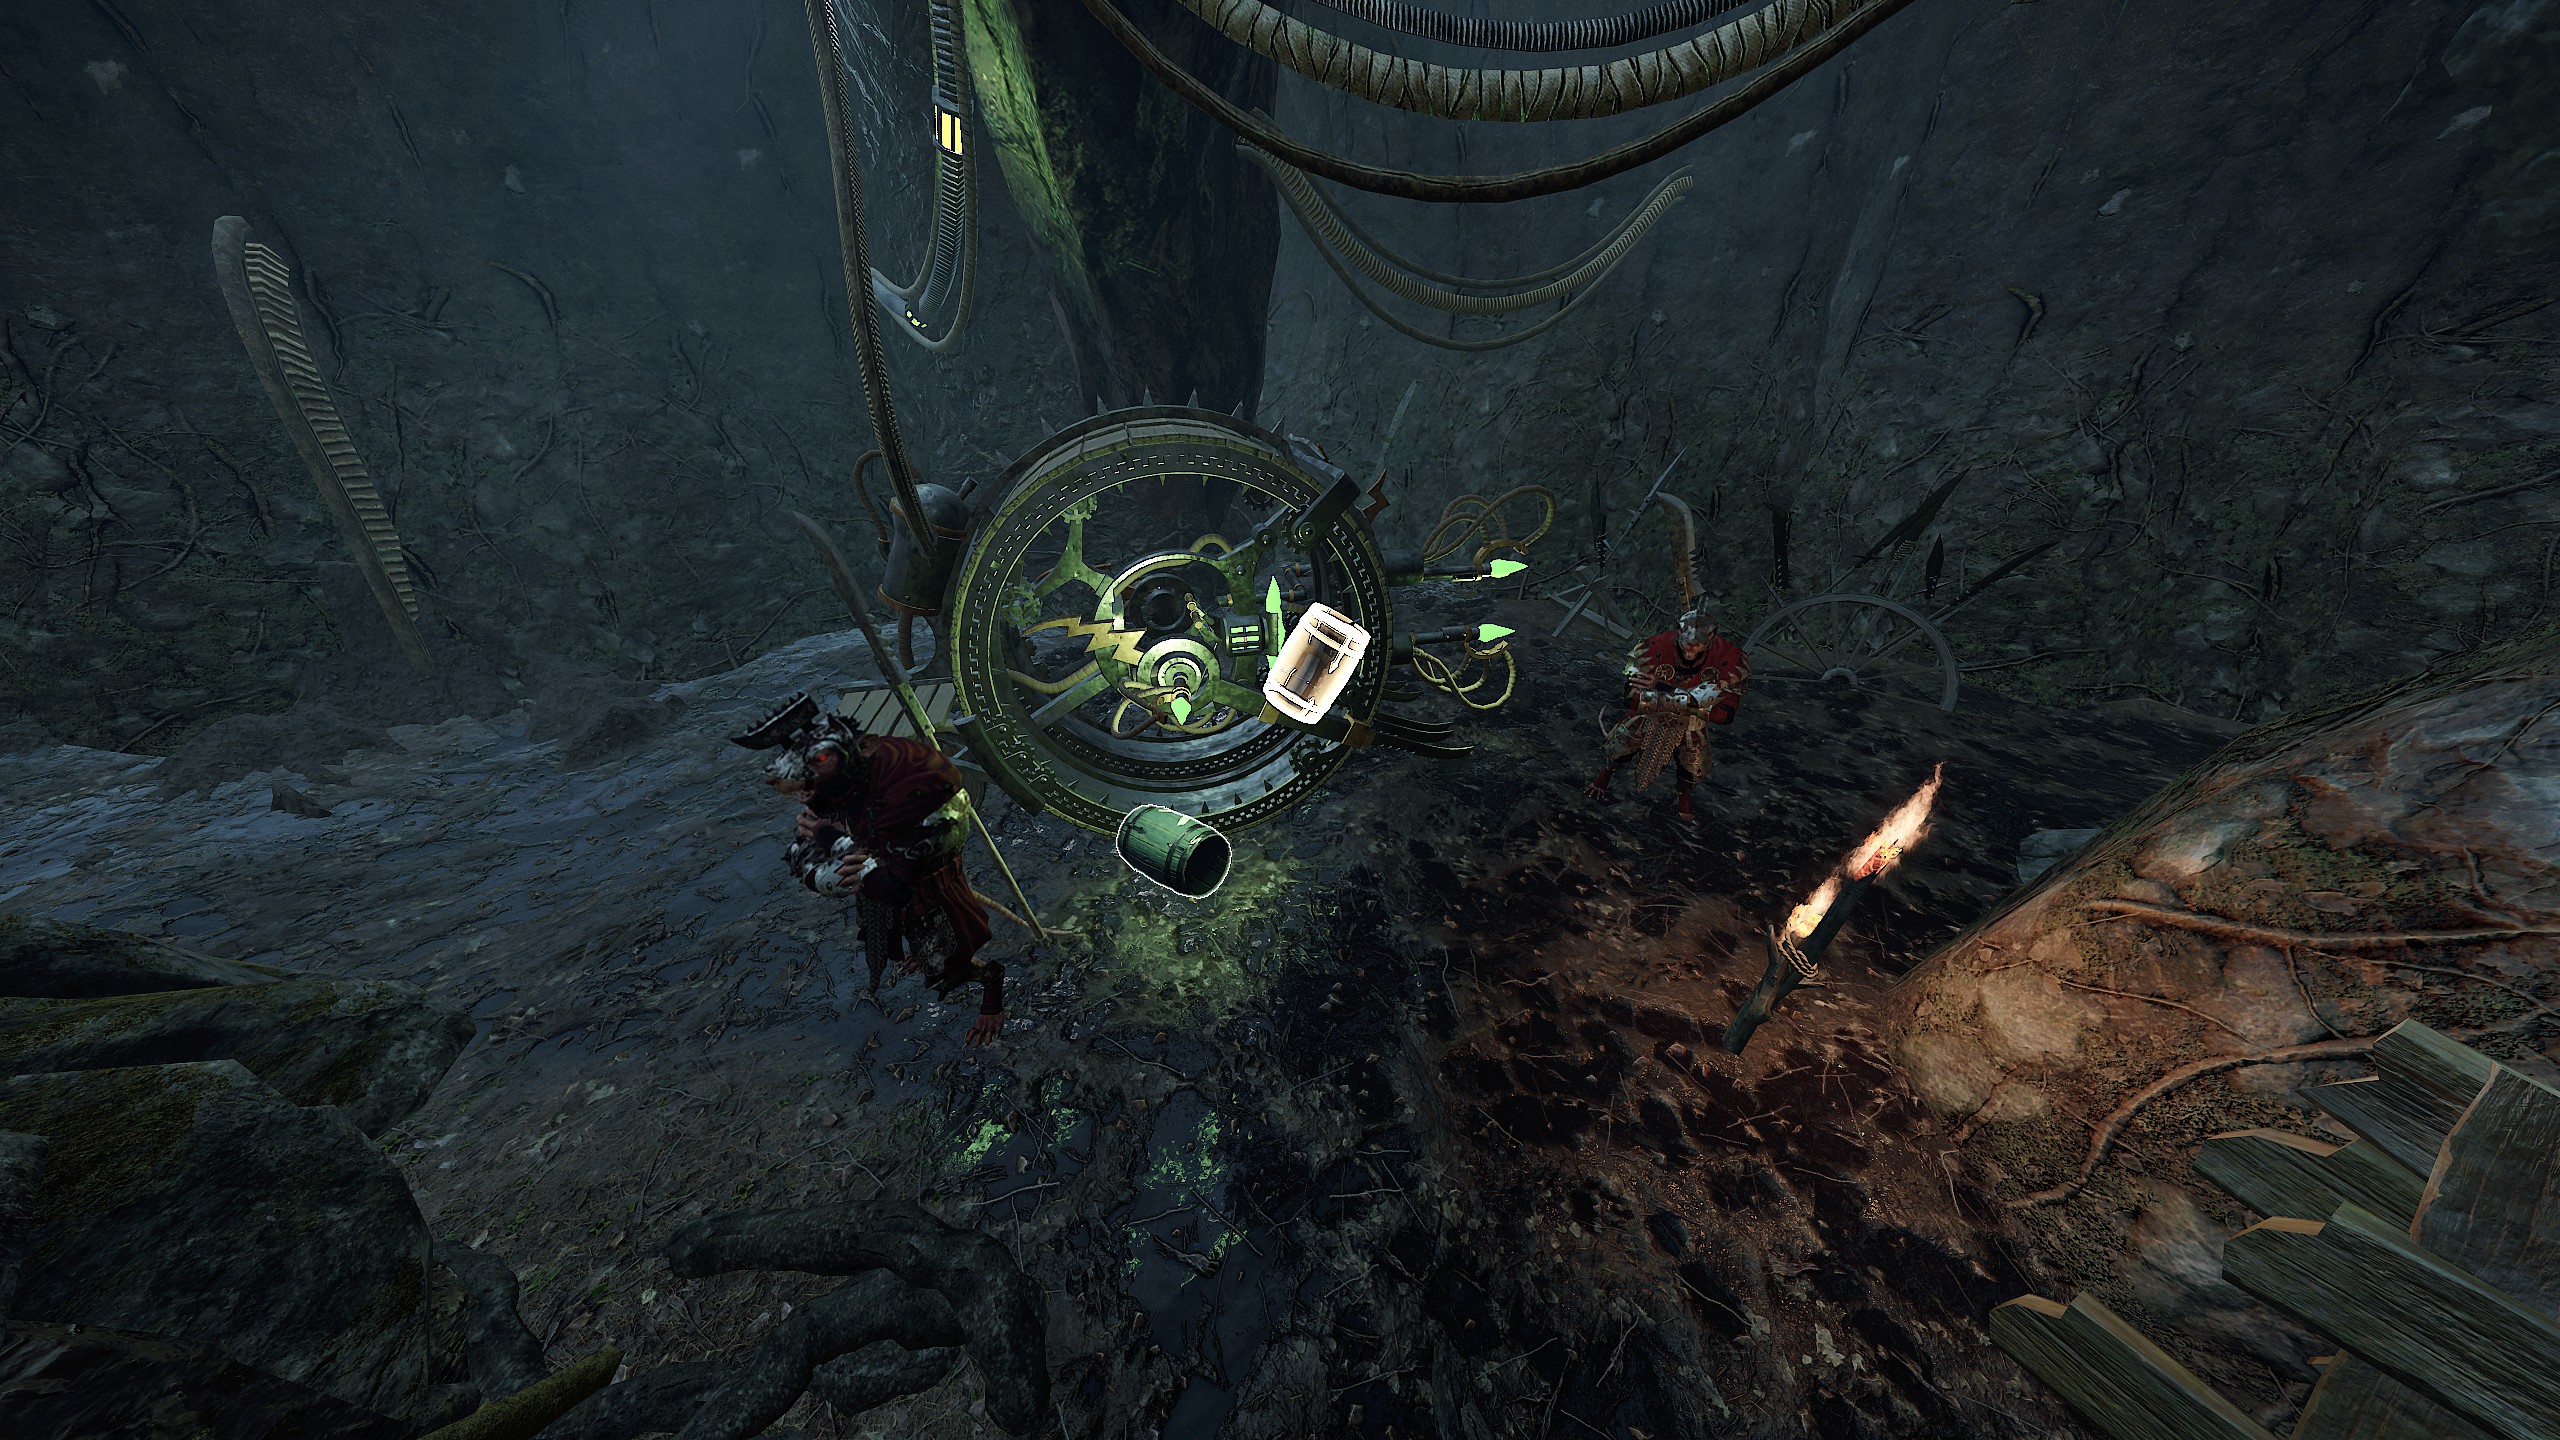
https://youtu.be/zdhffX-kLck?si=BZuiE-uZd_LGQY_z
 2. One Last Jig
 Perform a Bretonnian Dance in the Mother Black on Engines of War Play through the level normally, until you reach the final event area, The Mother Black. Do not ring the Bell to signal the ship. Instead, clear out the area of Enemies, then enter the inn. Next, increase the volume of the music and the overall volume in the game.

On the ground floor, at the rear left of the inn, there is a corner where you can hear a rhythmic creaking noise. Standing in the corner, jump in time with the creaks, for about a minute. Gradually, you will start to hear a drum beat, then faint music, which grows louder as you continue. Keep it up until the music stops to complete the challenge. The timing does not change at any point, so setting a keypress macro at a regular interval.
Listening to a 30 BPM metronome can help
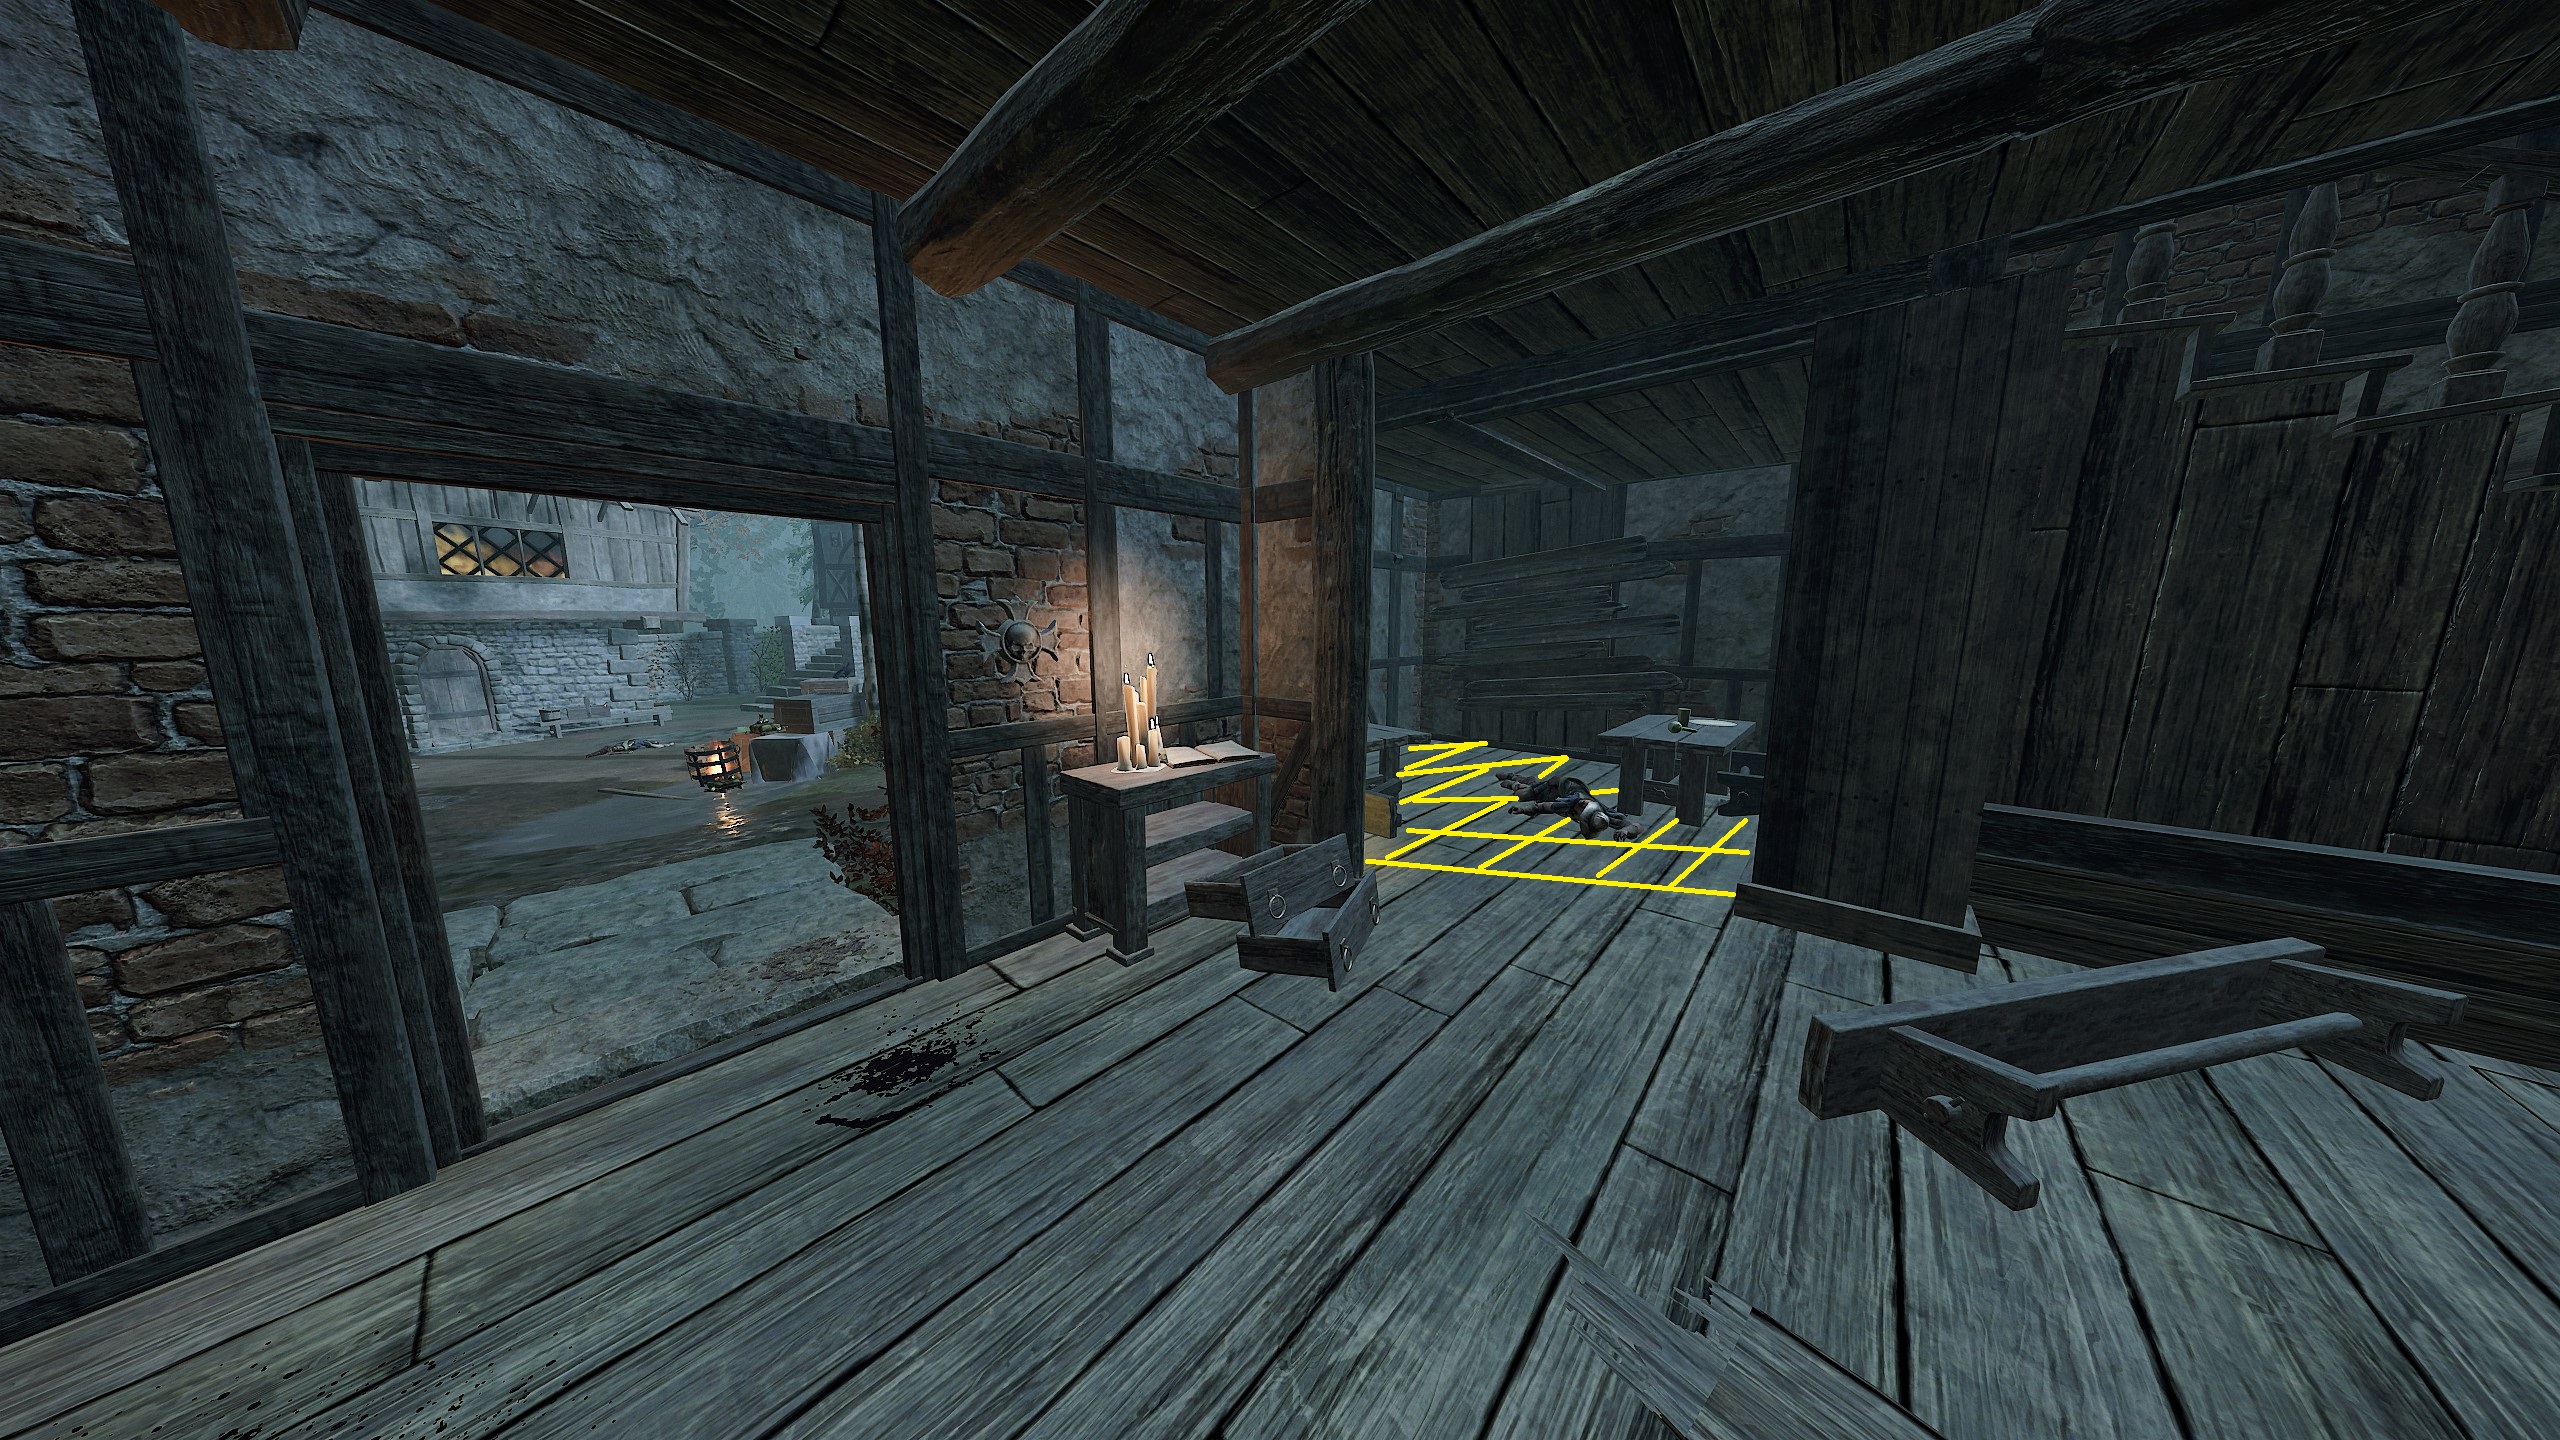 https://www.youtube.com/watch?v=YHNZnQnYcQc
 3. Shiny!
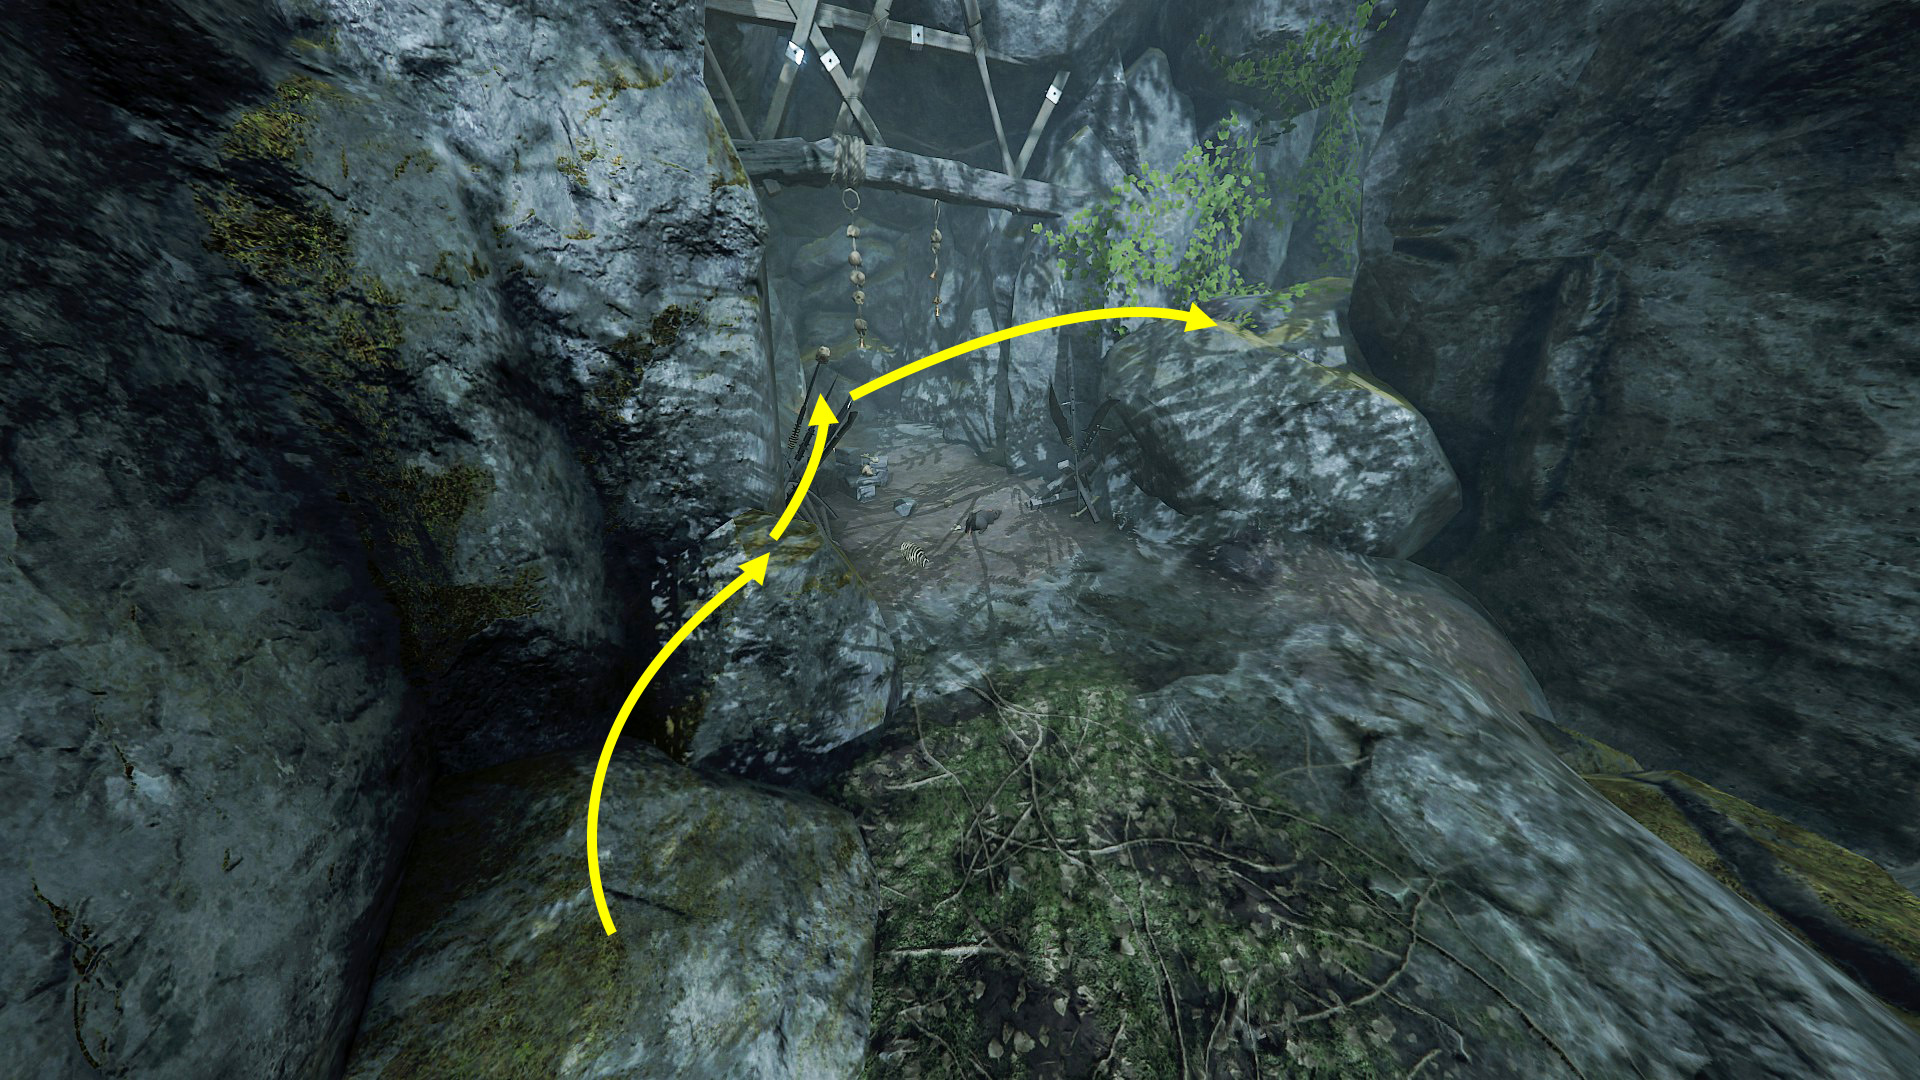
 Take the Dragonbane Gem from the thief's stash on Engines of War Next to the waterfall, there is a small cave. Go to it and climb up the rocks as shown in the image. At the very end of the tunnel, you will find a chest, and not far from it, there will be a Dragonbane Gem.
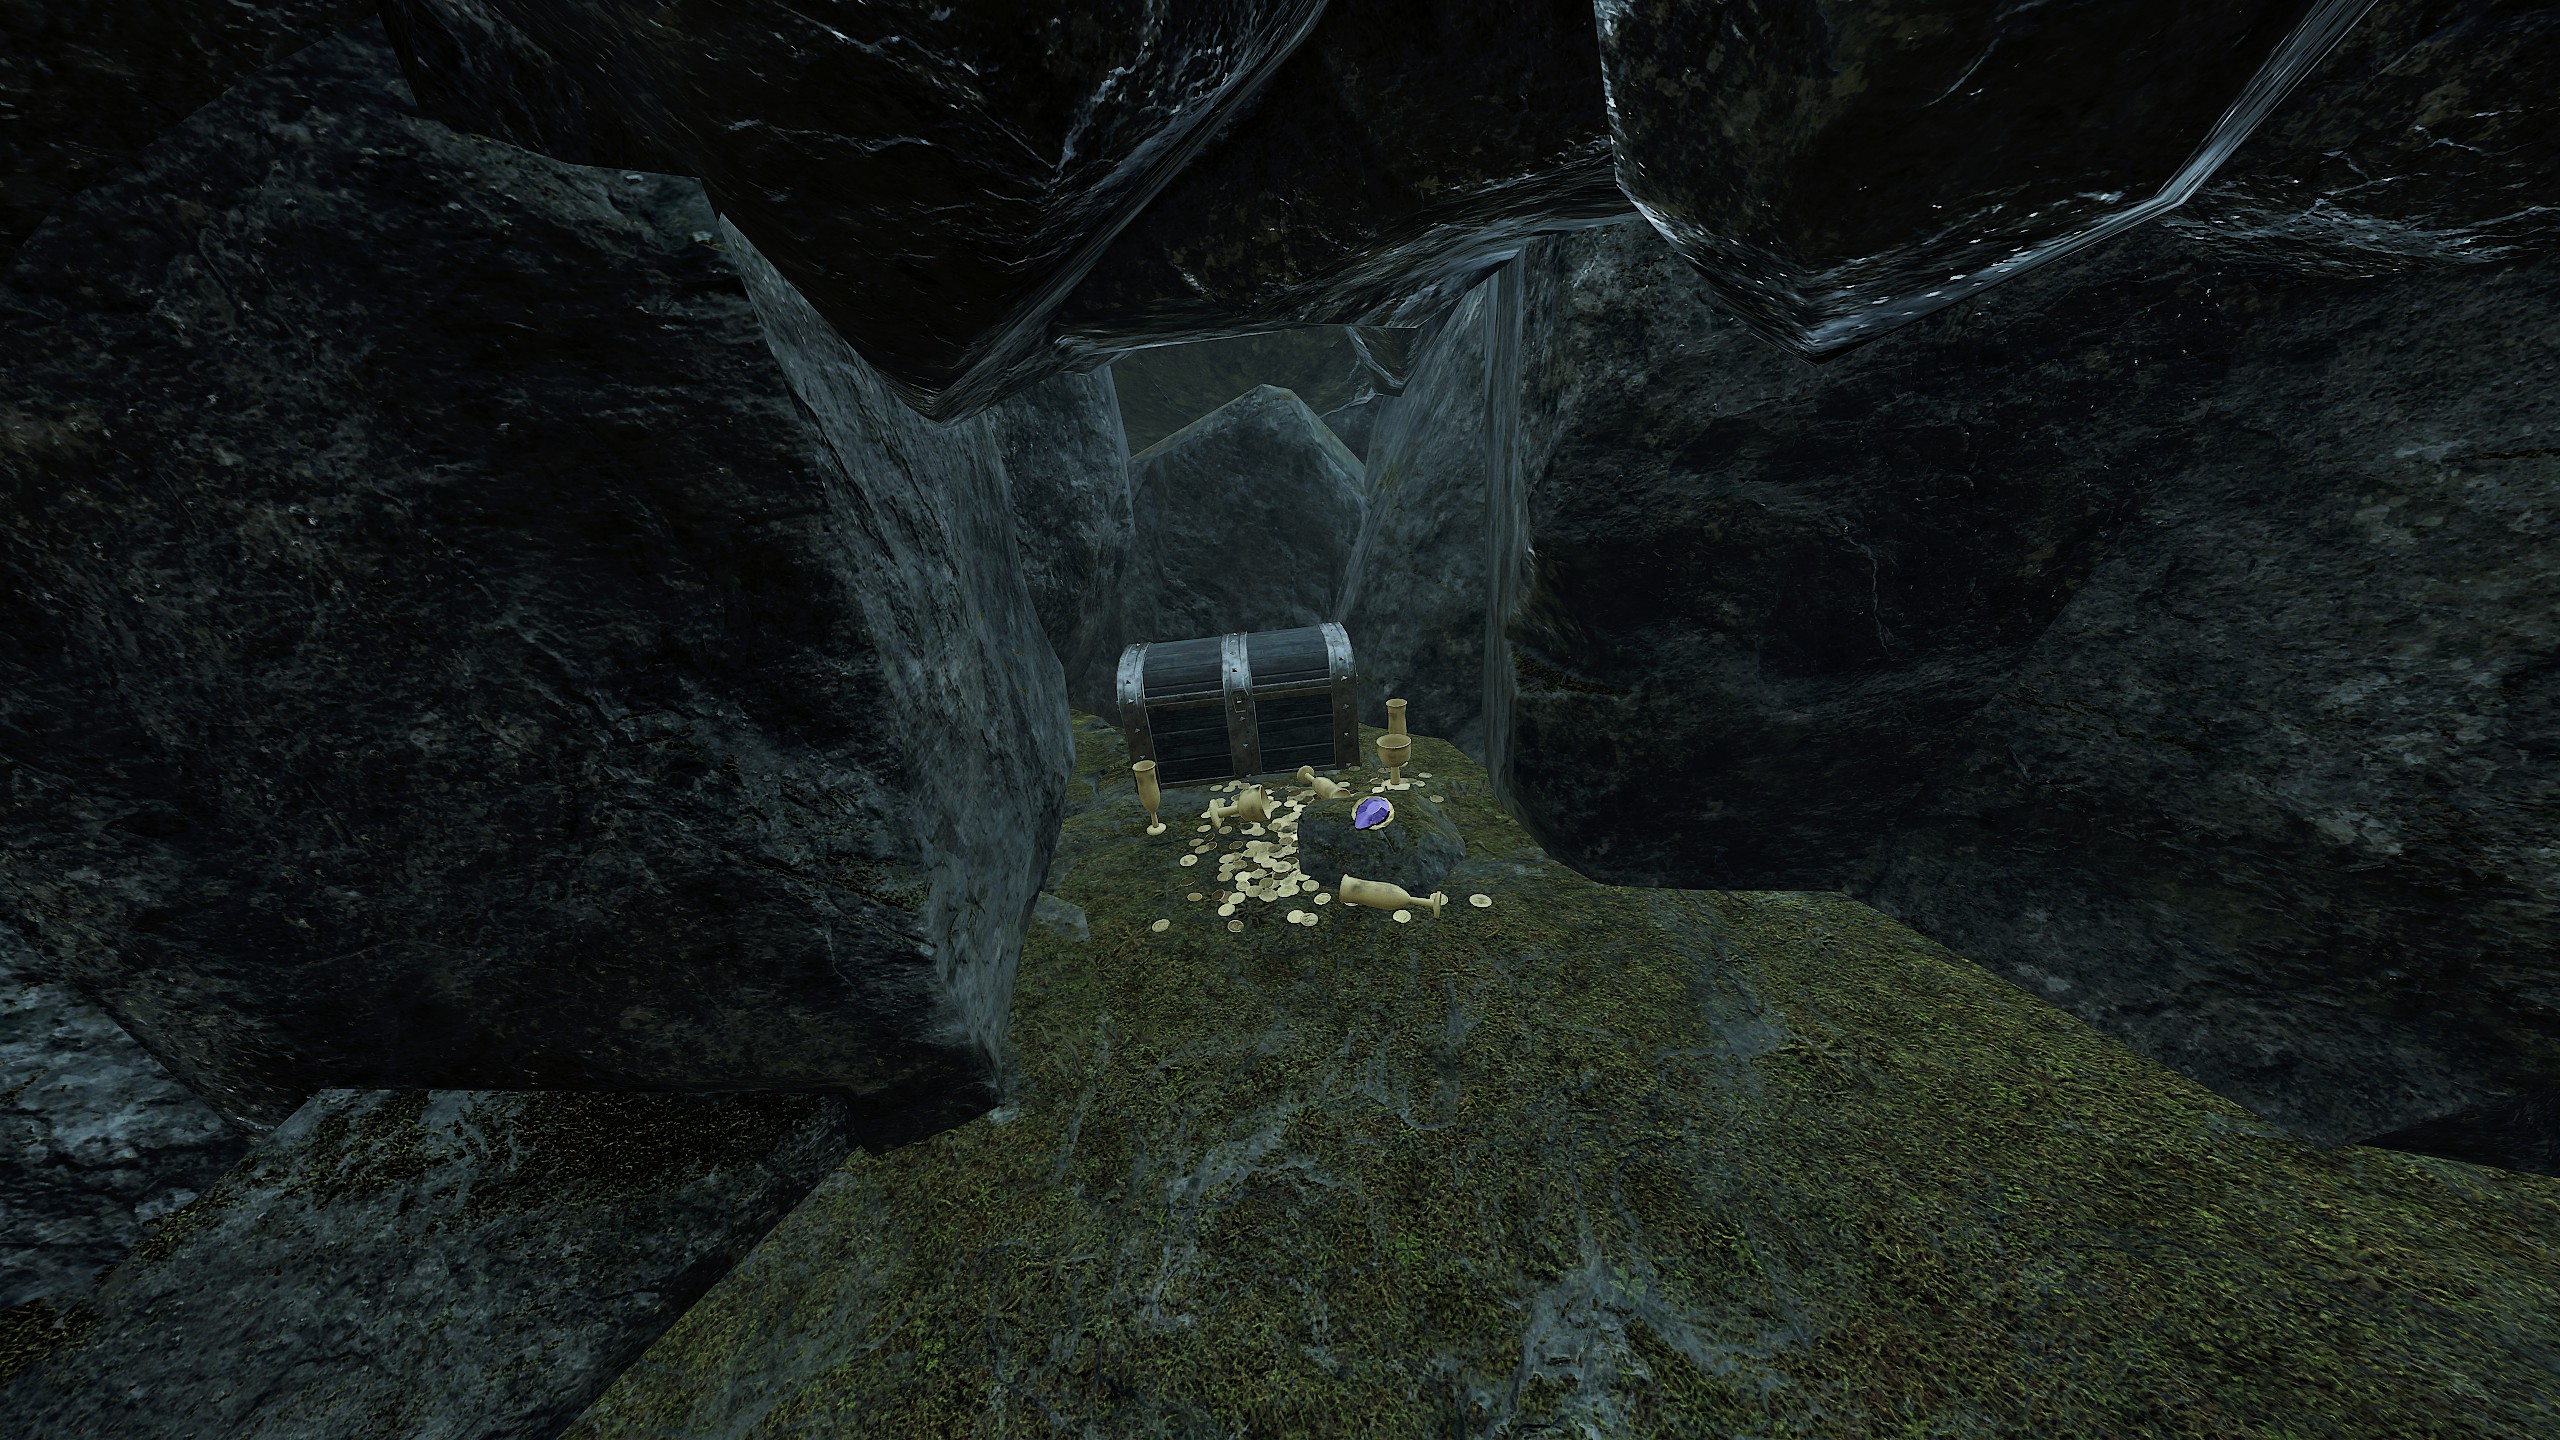 https://youtu.be/lI1xlJJ55fM?si=PsbT1HjlgU060o6N
Ravaged Art
To complete them all, you will need to pass all 13 maps from the main campaign and 5 maps from the DLC. At a minimum, you need to complete one map 10 times to collect all 30 paintings. (Each map contains a maximum of 3 paintings from 20 possible spots)https://steamcommunity.com/sharedfiles/filedetails/?id=1665796843 https://steamcommunity.com/sharedfiles/filedetails/?id=1894854599
There are two guides at the bottom (one contains pictures + text, and the other is just a videos). Choose whichever one you feel more comfortable with, but in my opinion, the first one is better.
Winds of Magic

The first part consists of a difficulty challenge and weave challenges.
To complete them, you can go through any weaves, both fast and ranked. You can learn more about them in the “Weave Expeditions” section at the very bottom of the guide. Note: The unusual lighting in the screenshots below is due to the Night Mode being enabled.


 1/2/3. Dark Tongue I & II & III
Locate all of the runes left by a band of Beastmen
Locate and enter the Beastmen lair
Recover the Beastmen spoils In one playthrough, you must find 10 runes, which are scattered throughout the map. In your second playthrough, you'll need to find the Beastmen's lair, enter it, and then collect the Beastmen's spoils at the end of the map. The locations of all runes are shown in this guide:
https://steamcommunity.com/sharedfiles/filedetails/?id=3559794642
 4. Saw It Coming
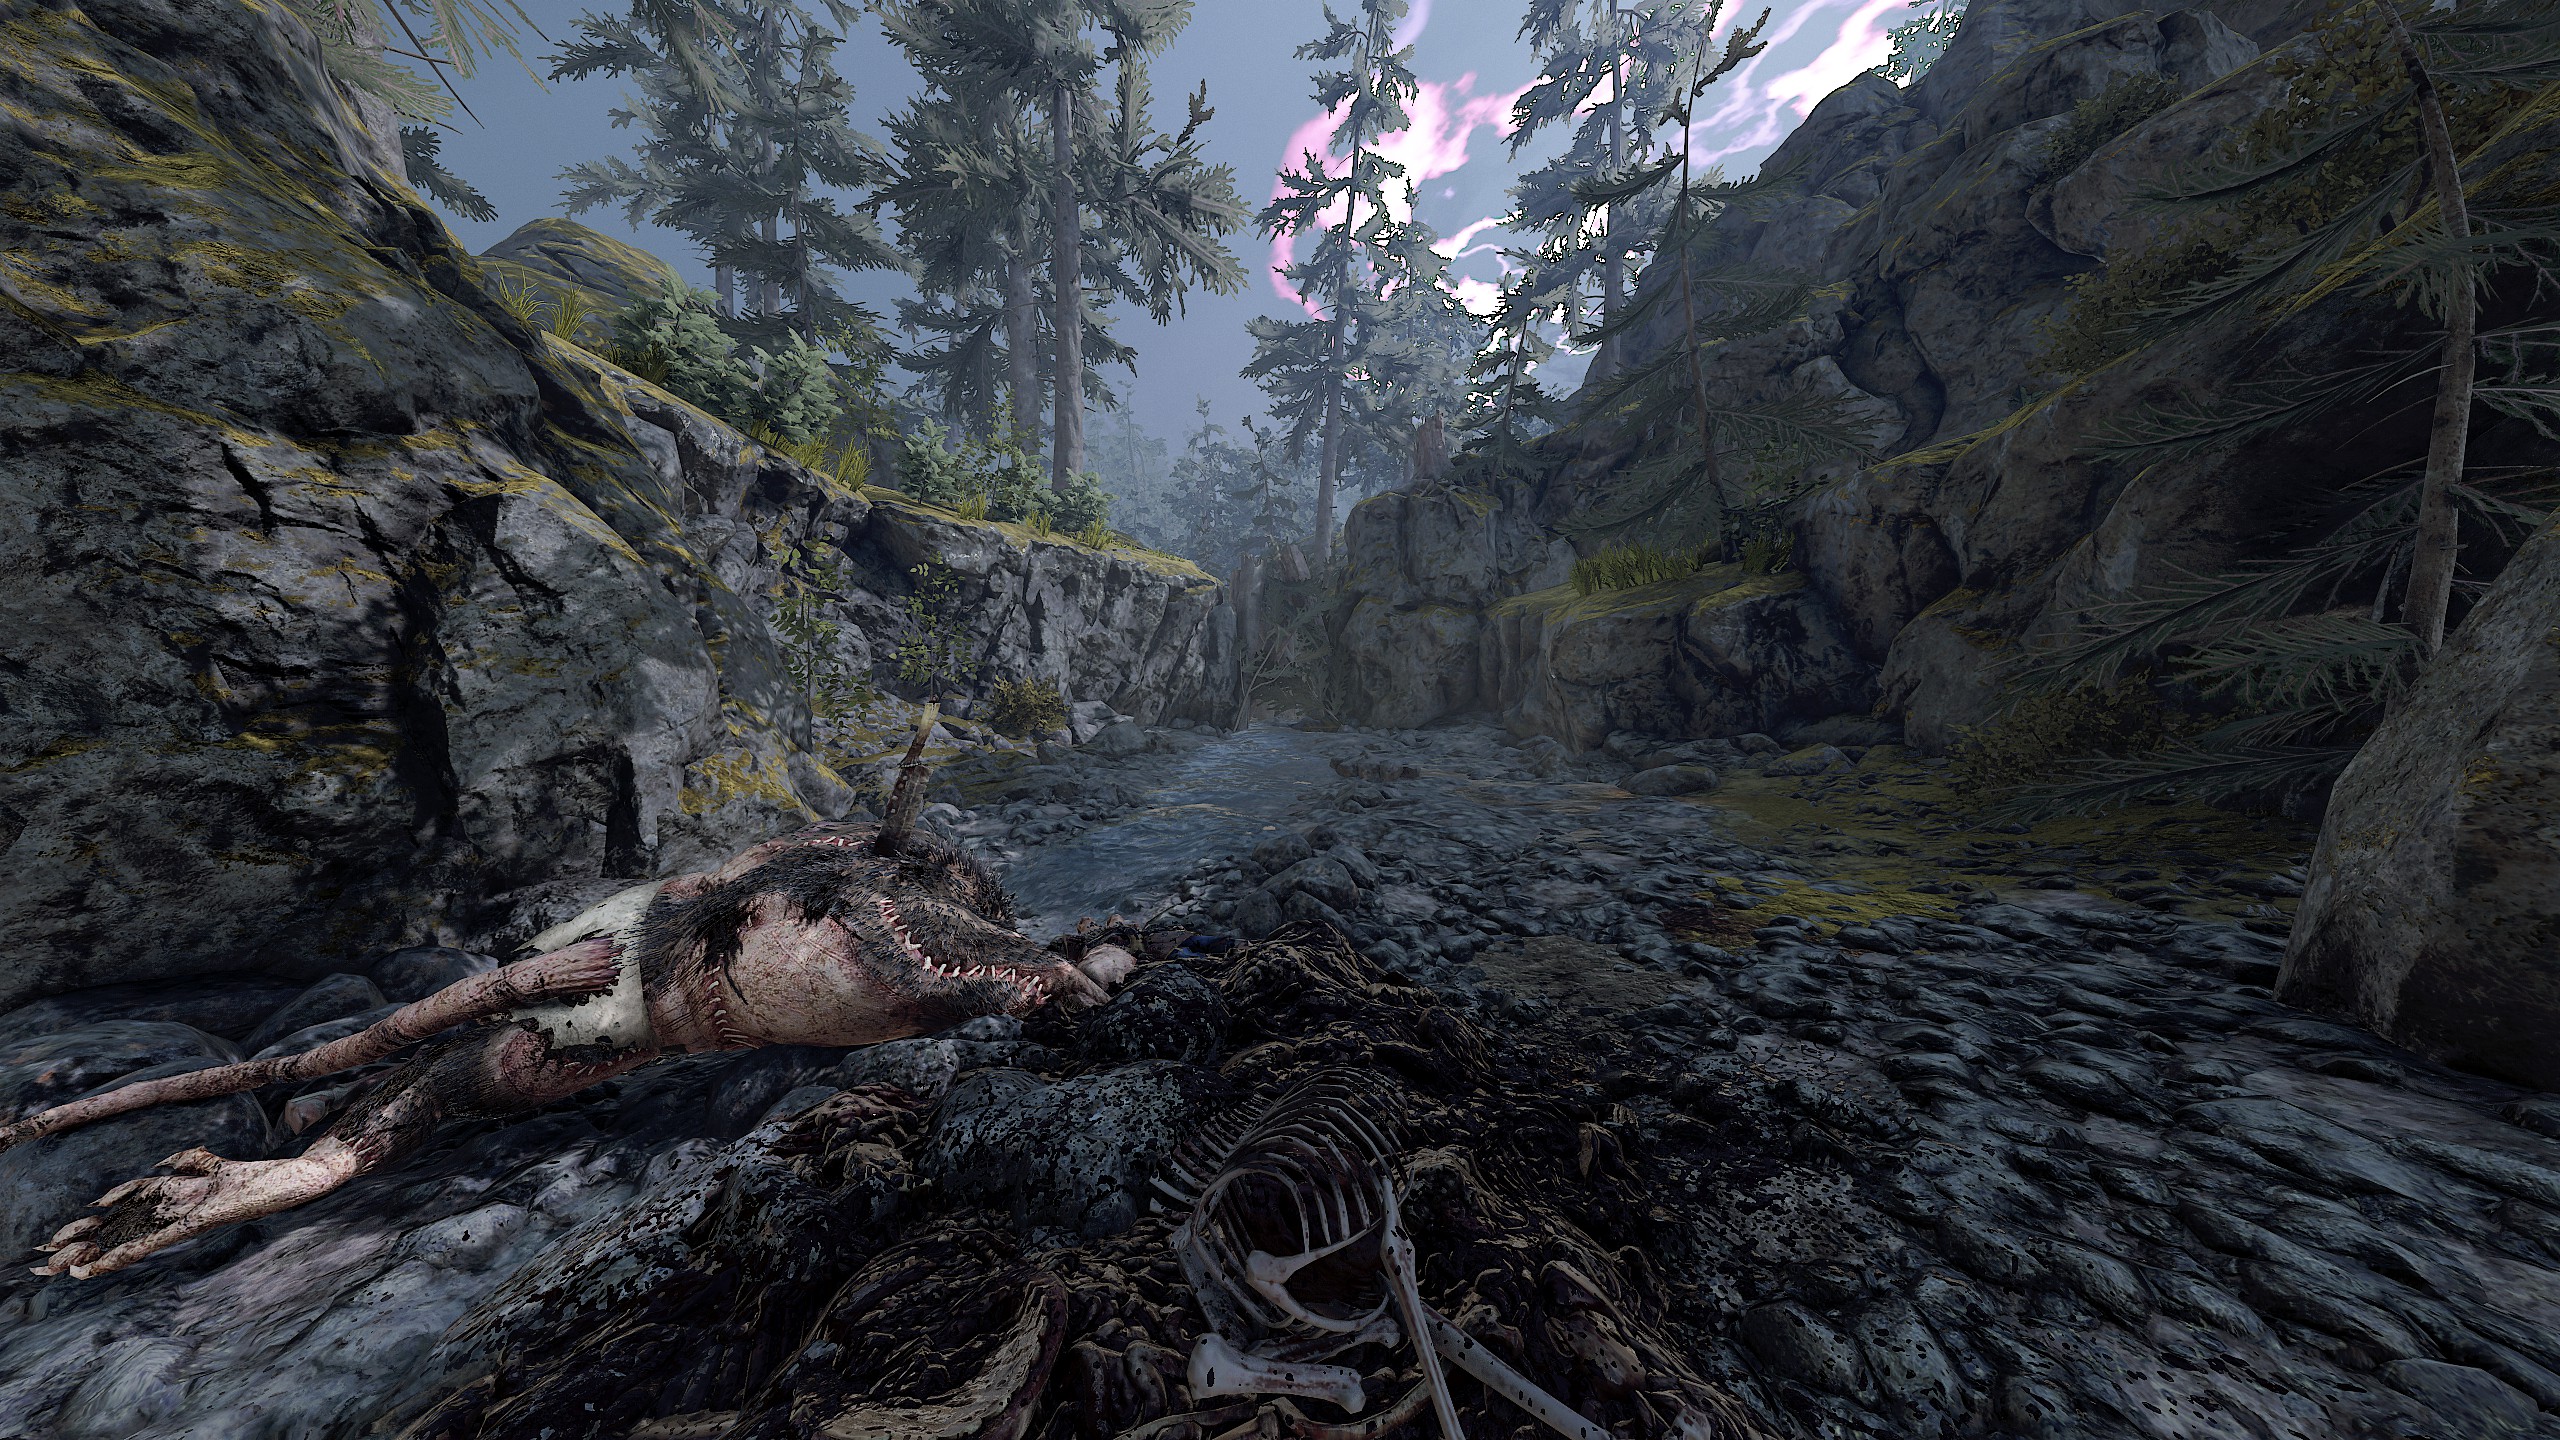
 Finish the ambush within 27 seconds There is no attachment to a specific difficulty in this challenge, so choose a Recruit and Hero that have good Crowd Control and/or multikill abilities. When the makeshift wall is destroyed by the Bestigors in the given time, a message will appear in chat about the challenge completion.
 5. Off The Beaten Path
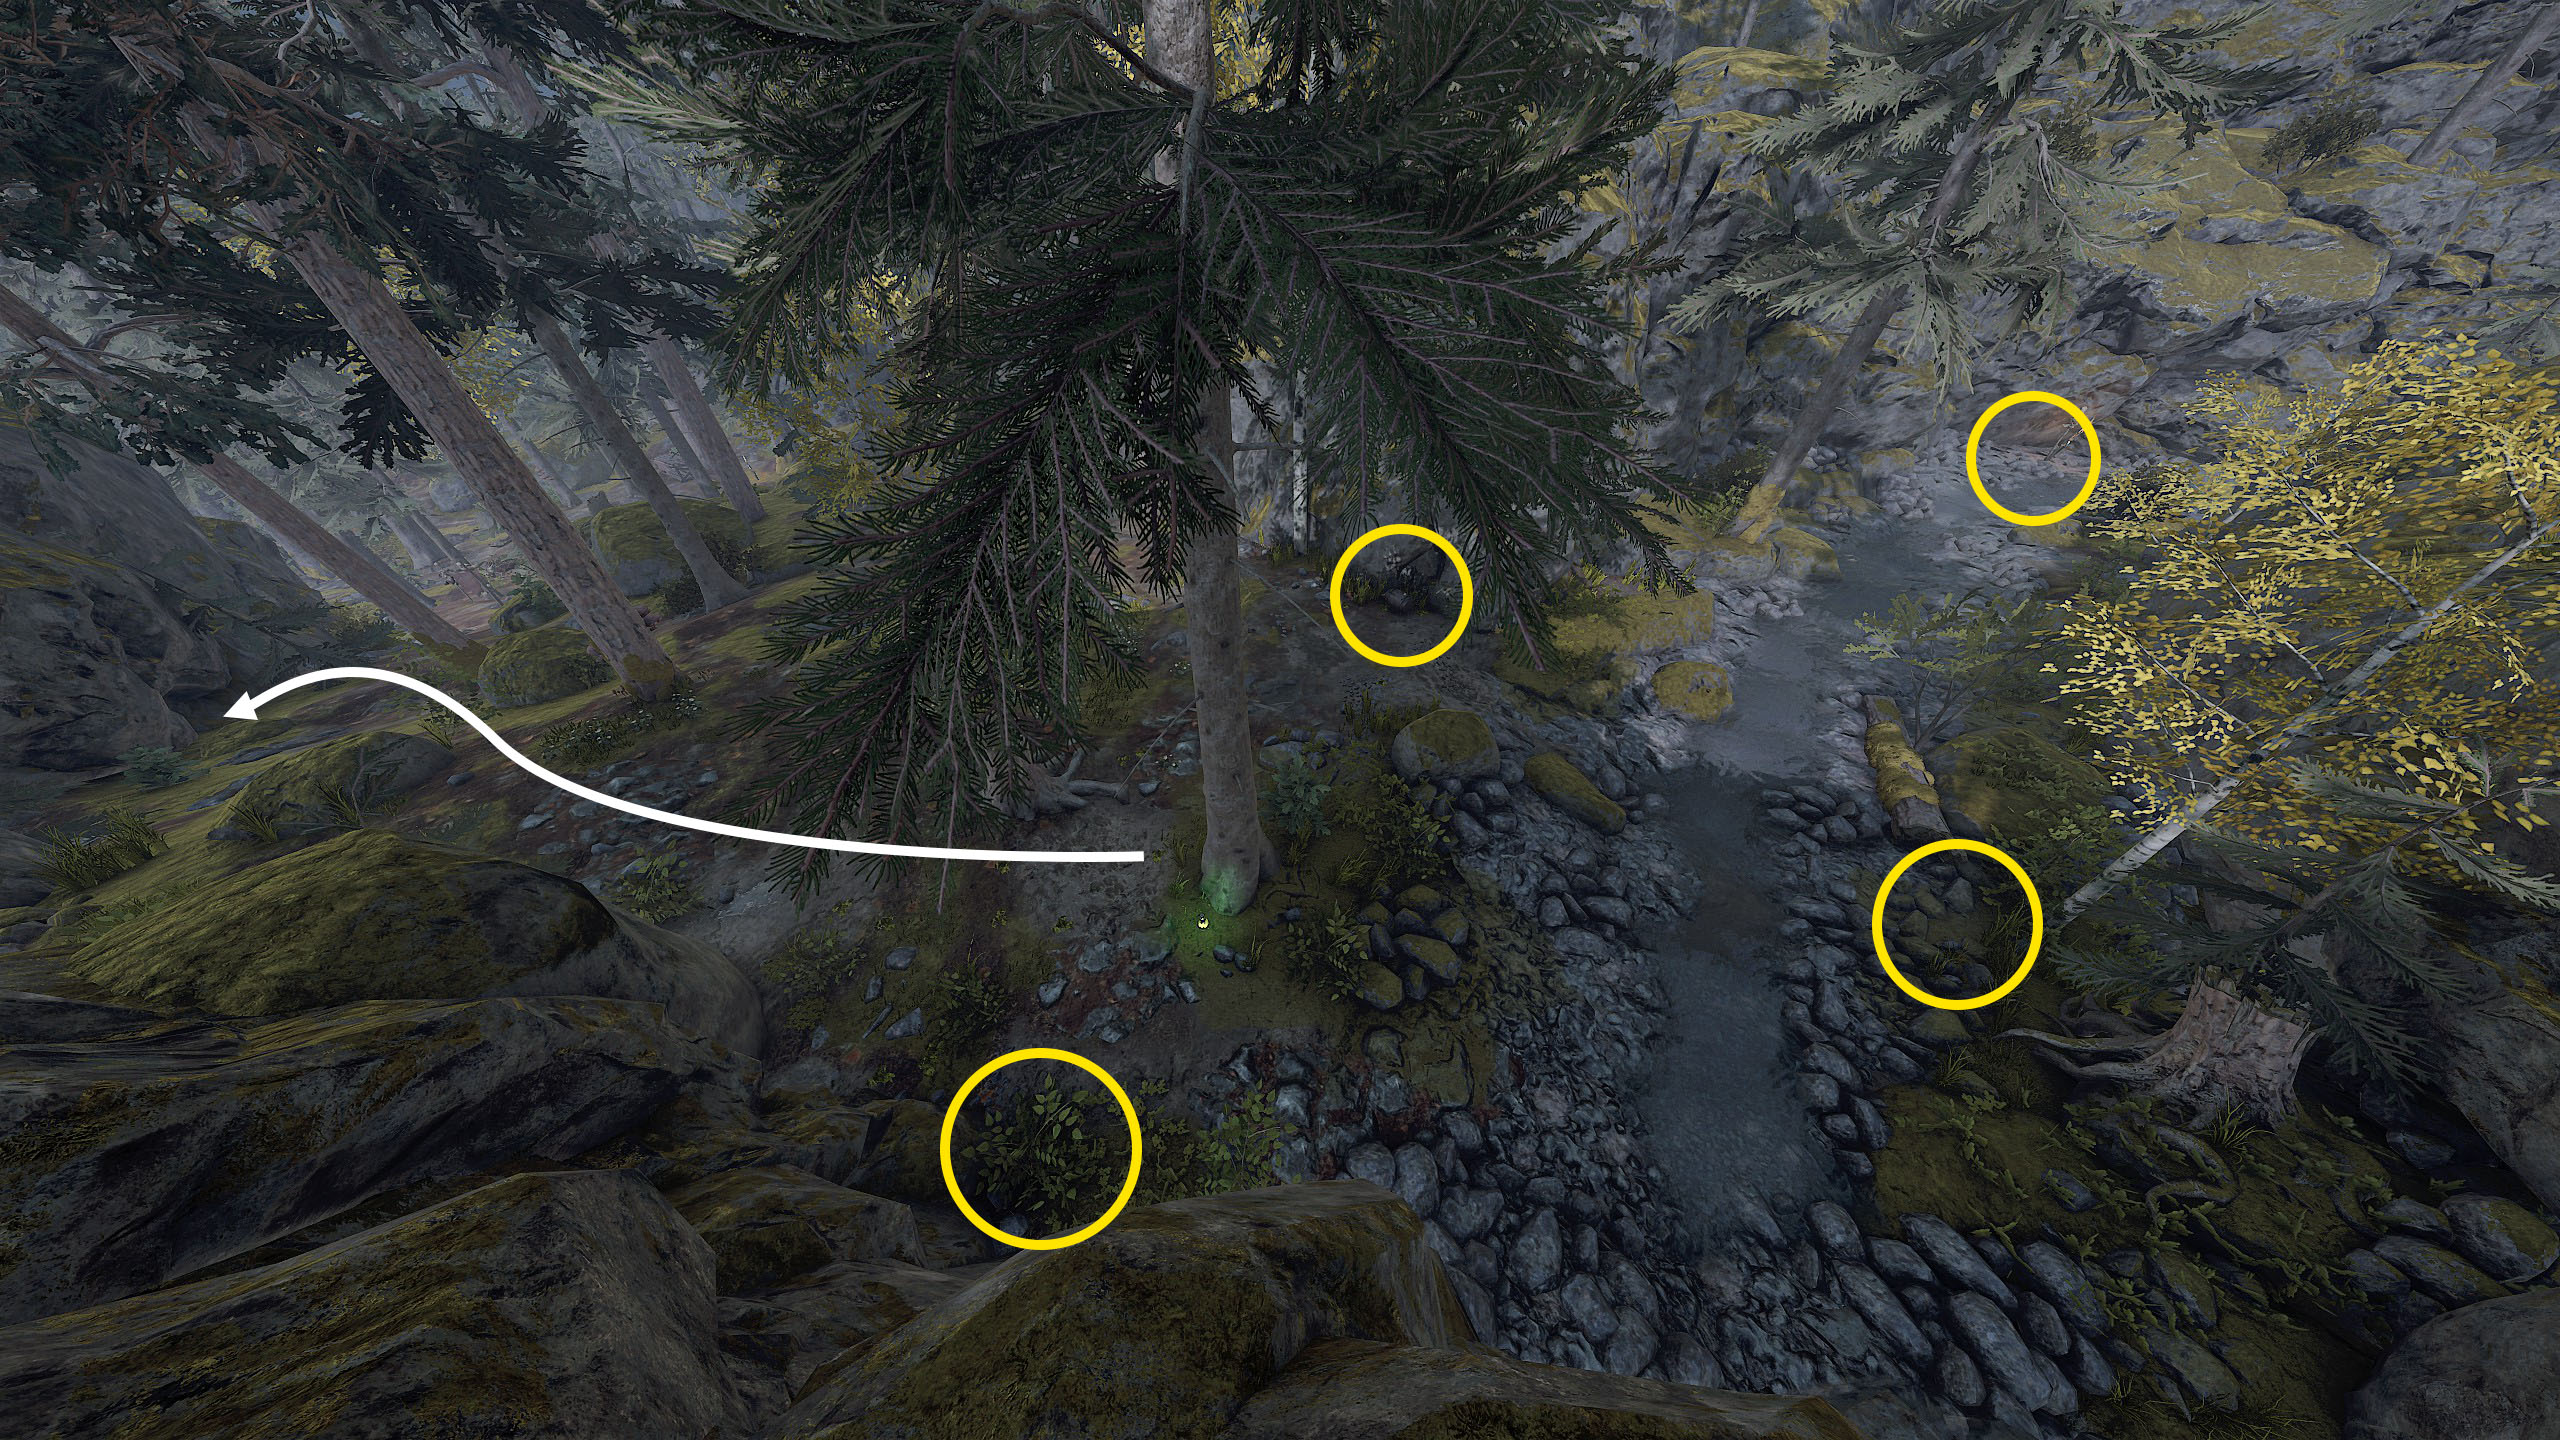
Take the alternate route towards the crater This alternate route allows you to get around the ambush event and end up to a Grimoire. As such, this and "Saw it coming" cannot be obtained in one playthrough. After dropping down into the Encampment, if you hug the right you'll come across a small mine entrance that has been barricaded.
This barricade can be blown up with an Explosive Barrel. You can find it at one of 4 possible spawn points in the river area leading to the ambush.
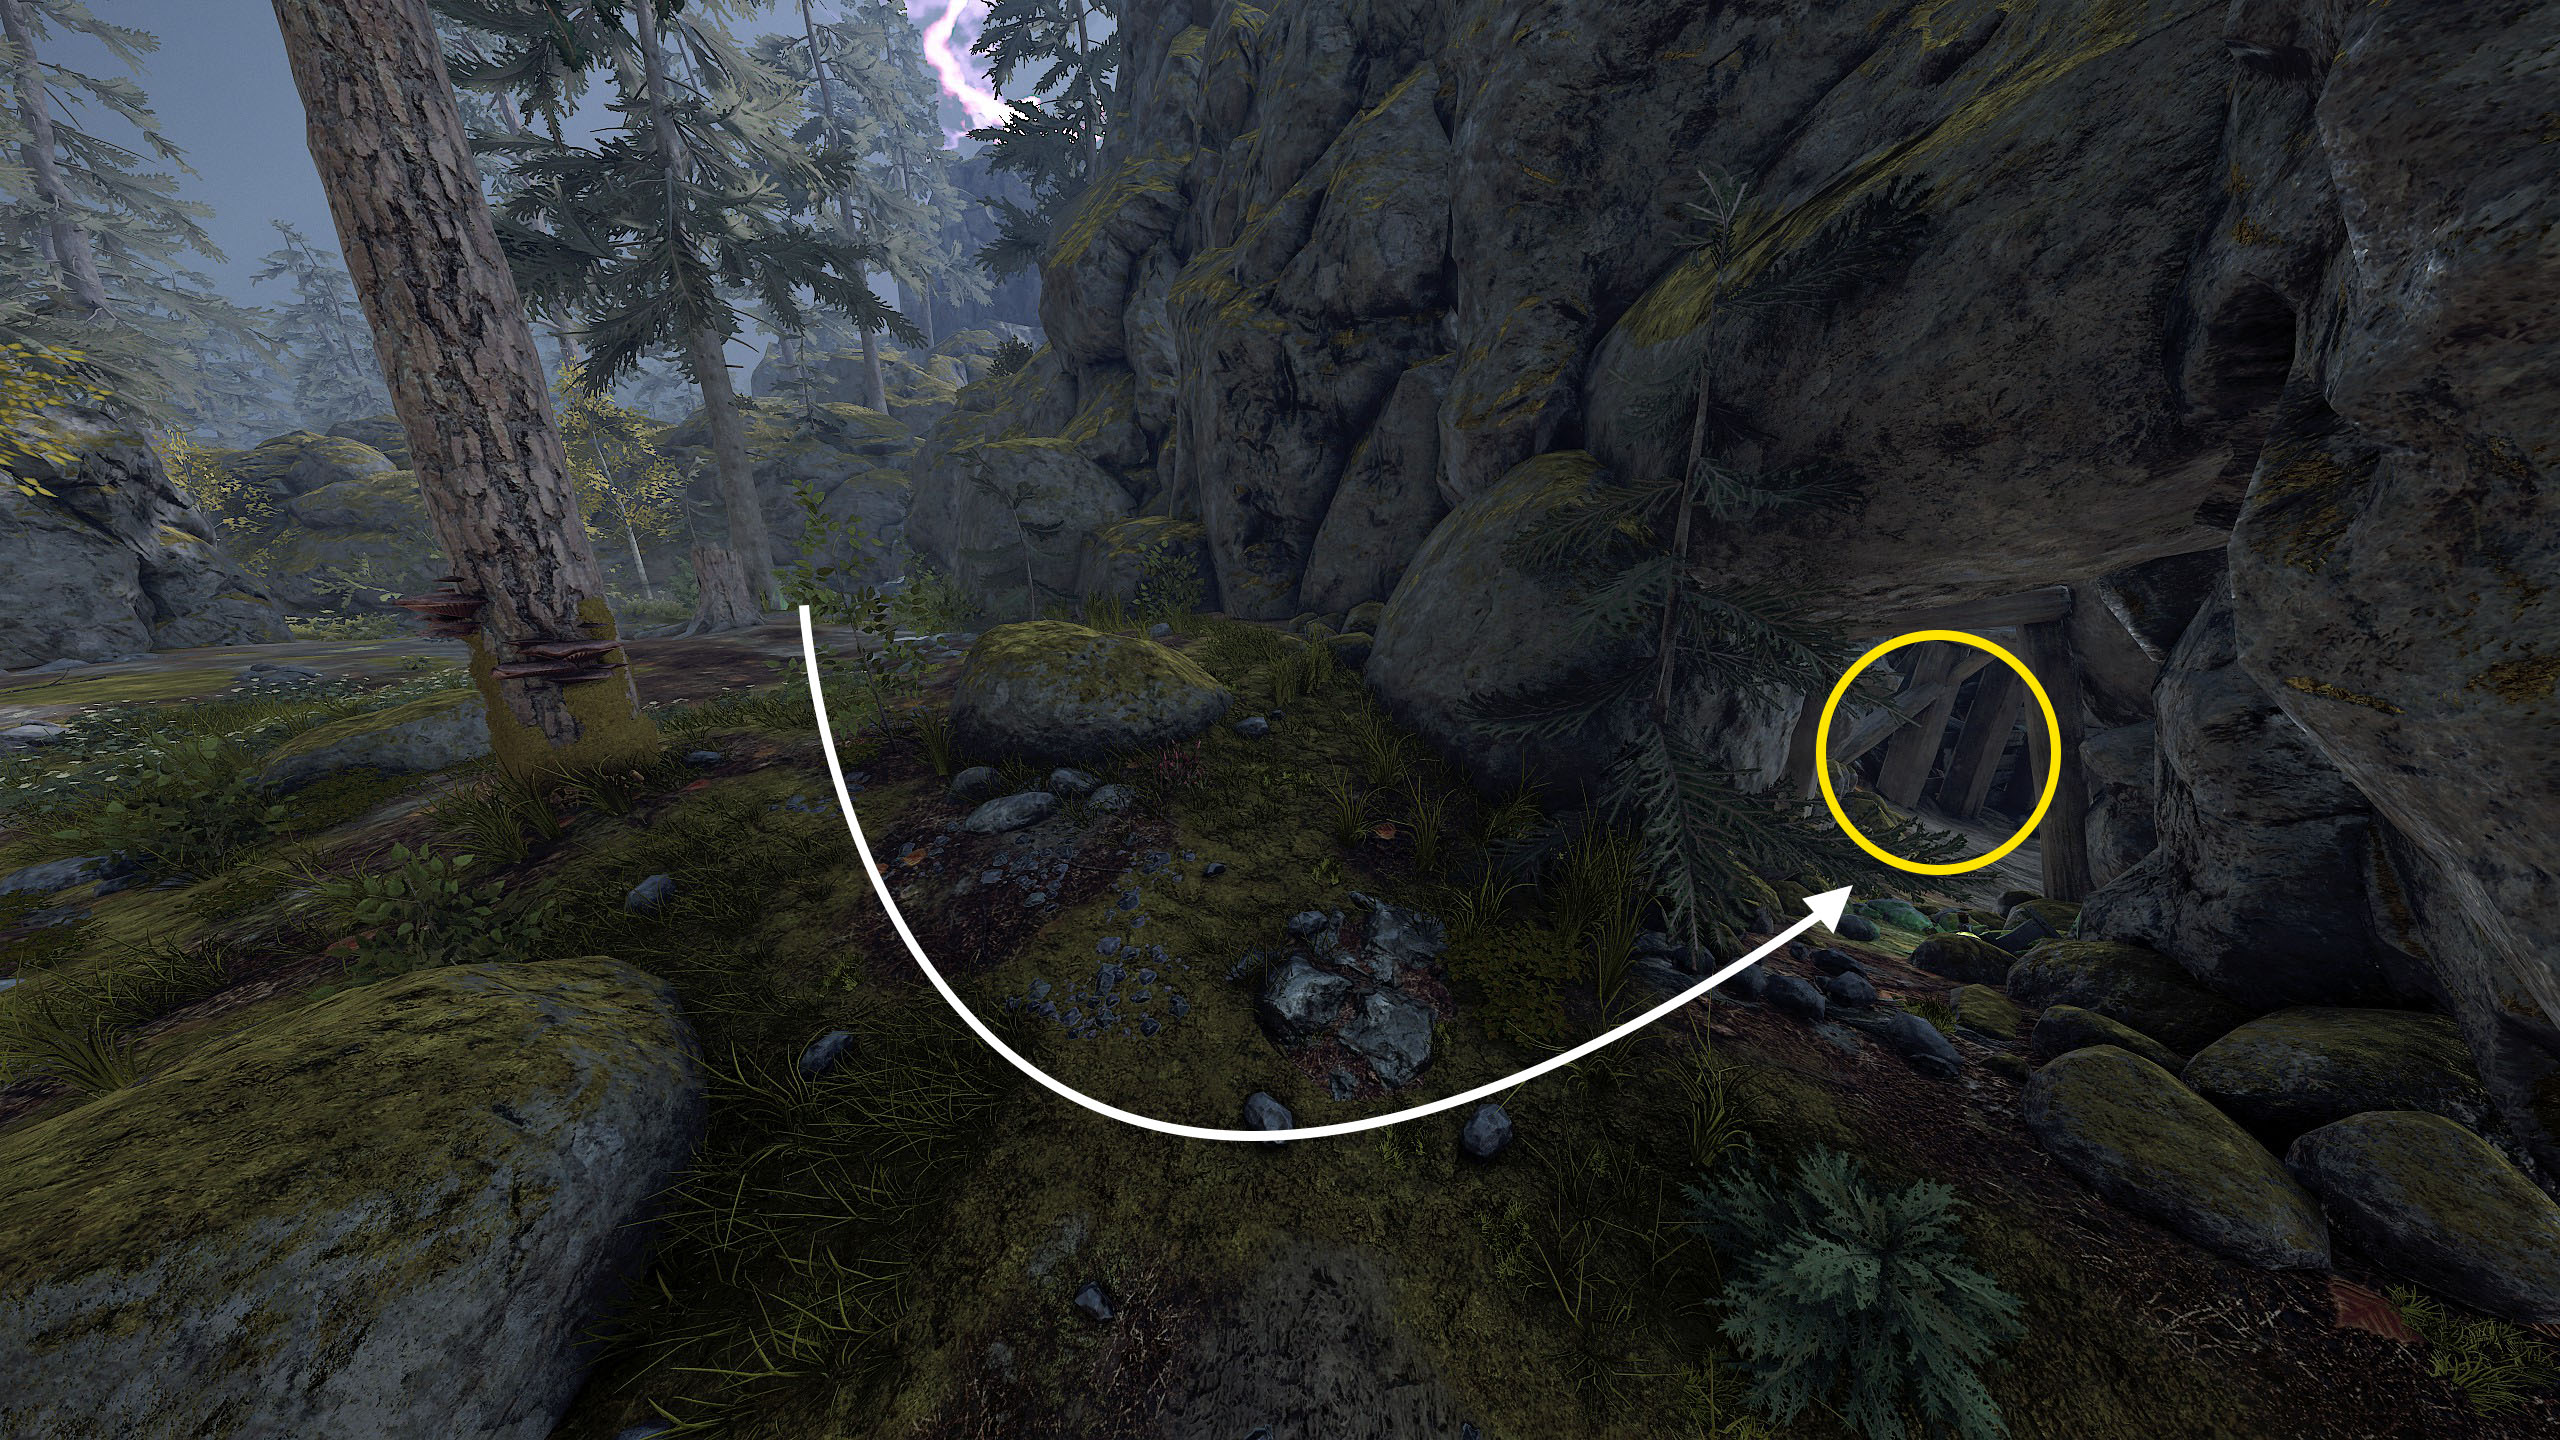
After blowing up the barricade, you get into Old Muntz Mine, where you have to climb some ladders and jump between platforms to reach the top of the mineshaft. From there continue along the mine until you come outside the mines. There you have to jump a broken bridge to cross the river. After that there is a drop to where the first Grimoire is located. After exiting the cave players should get have completed the challenge.
https://youtu.be/kZMZUjm5qqw?si=siMxRvkjurvoocOZ
 6. Keepsake
 Find the lost cameo pendant (1) After the ambush event (or going through the "Off The Beaten Path" challenge) you'll end up in a large area. If you stay left and climb on some higher ground, you may see that there is a ledge you can jump to.
(2) If you jump to the ledge and continue alongside the river you'll make it to a Chest and a Beastmen banner decoration. On the left side of the banner decoration, the Cameo Pendant is hanging from the end of the horn.
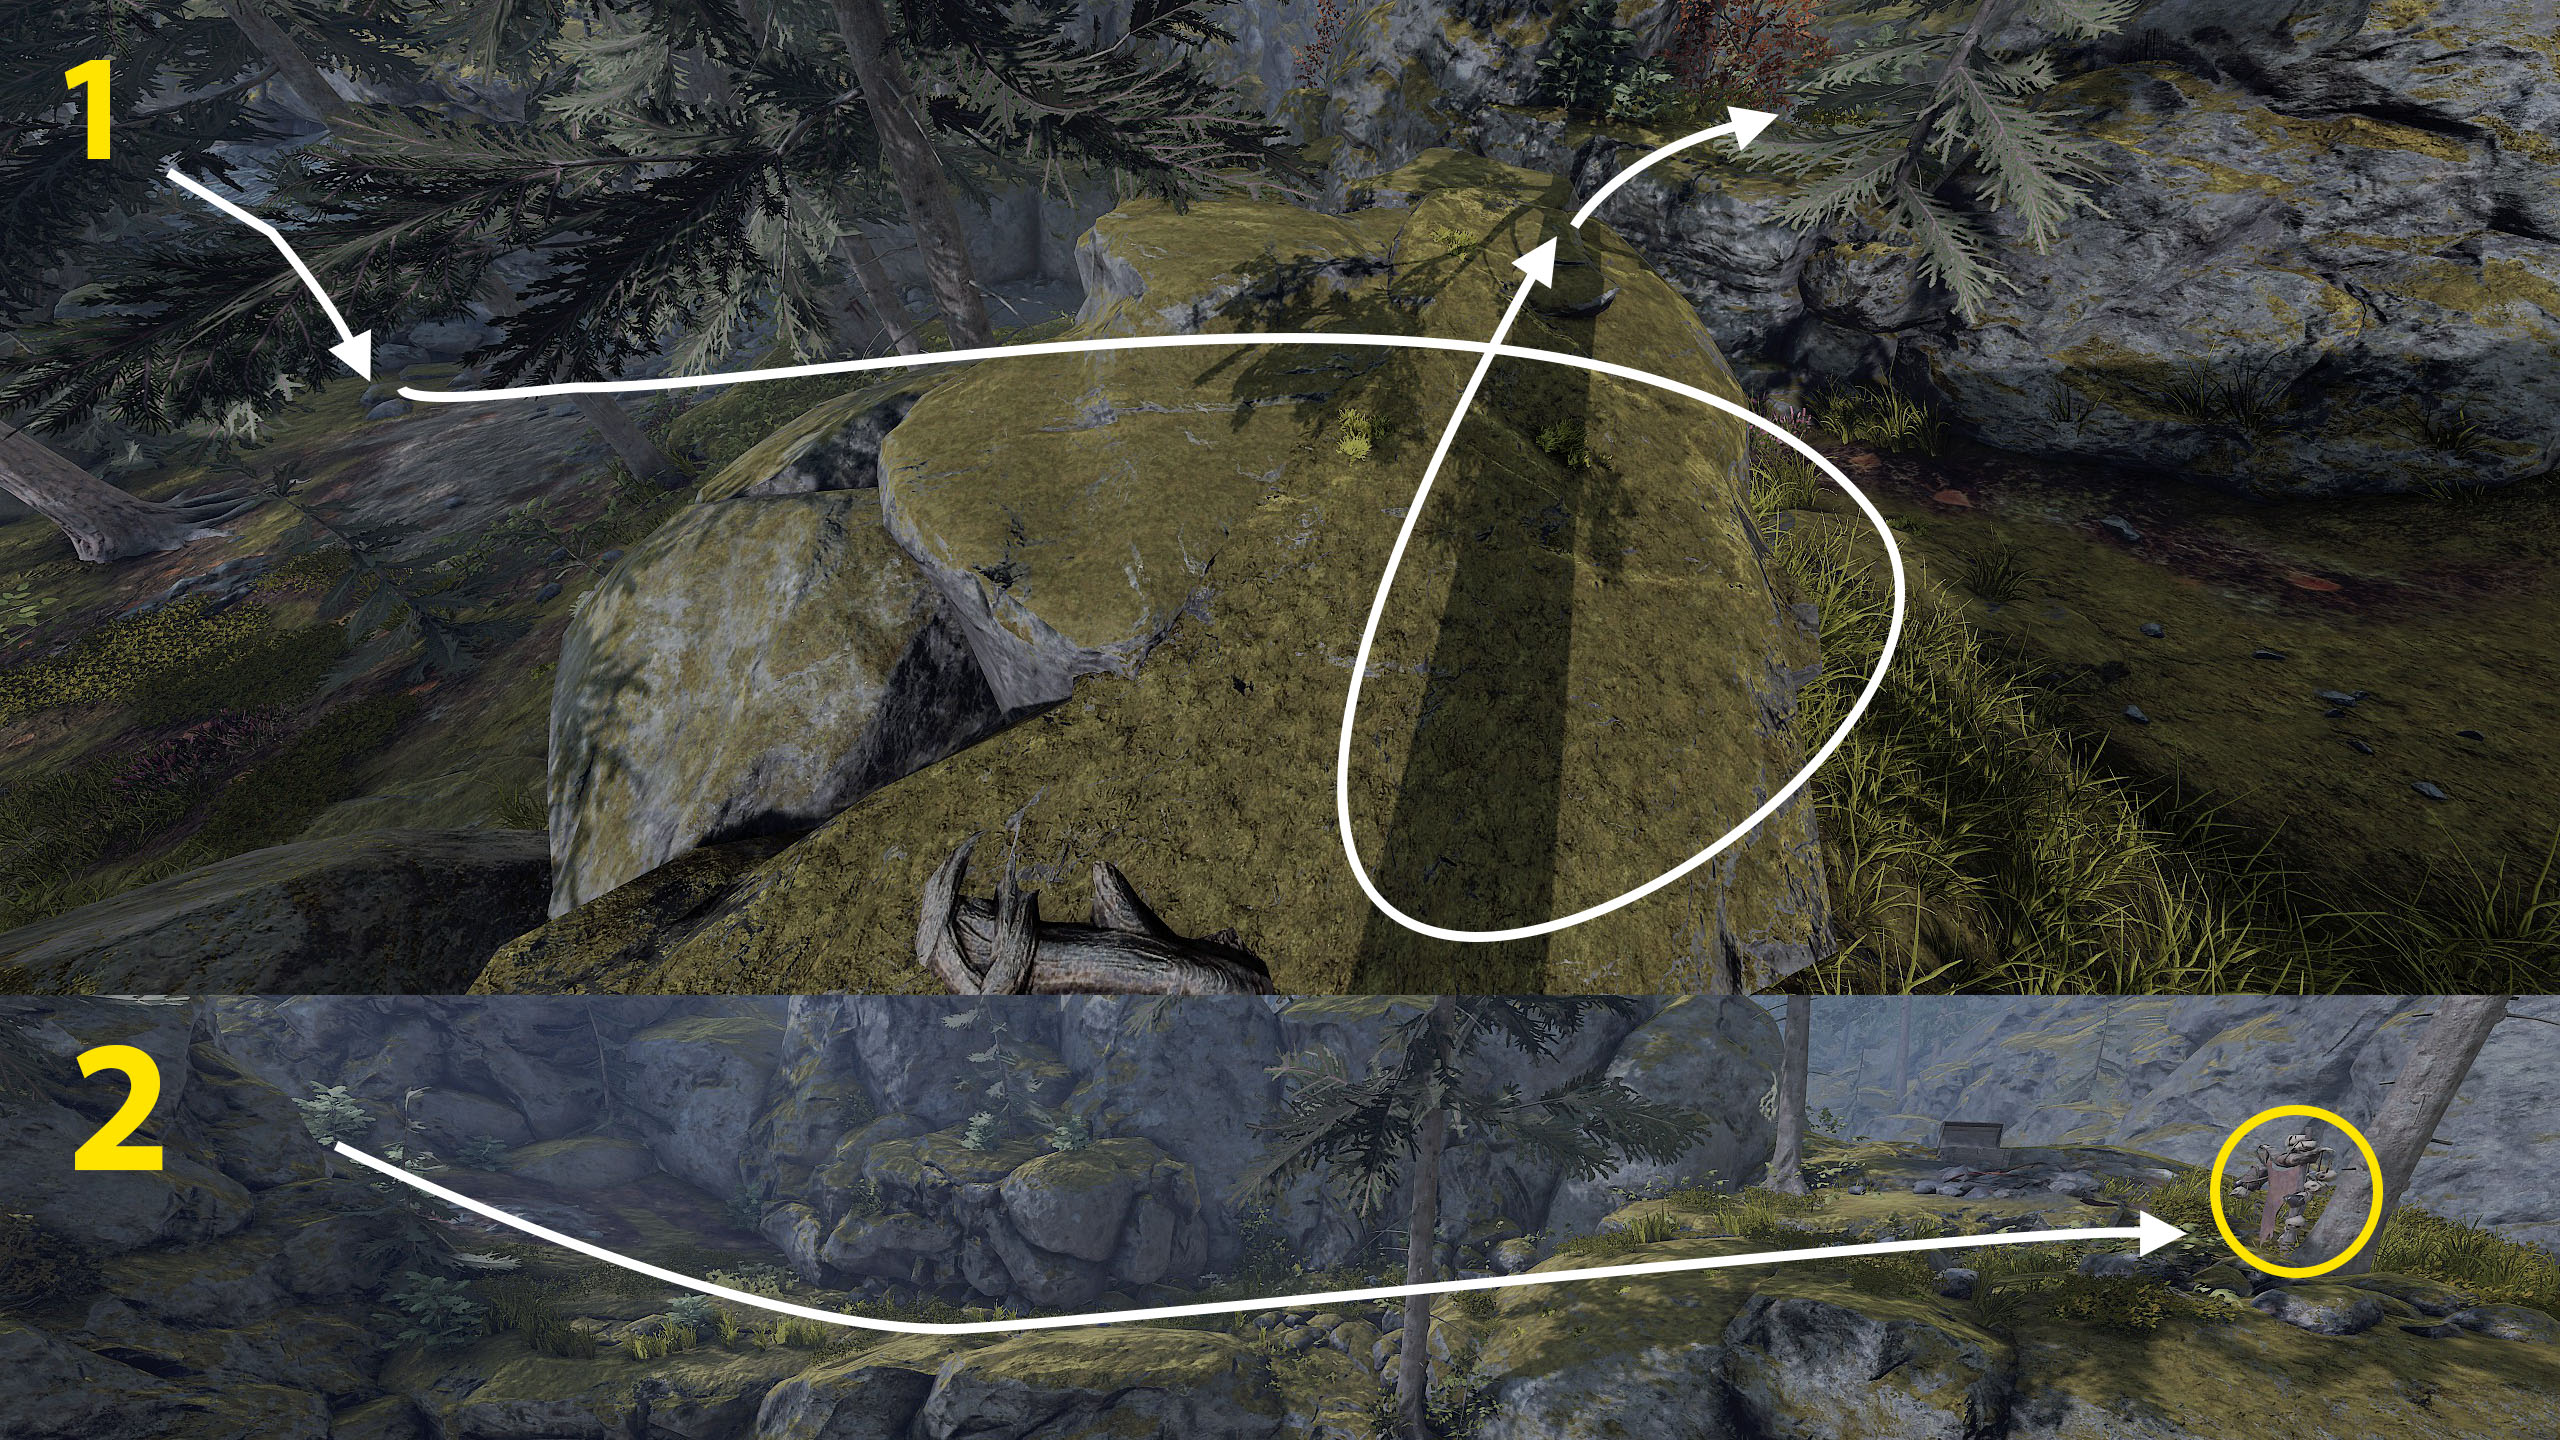
https://youtu.be/cP8Y0RSQvdY?si=_XZVYHKDlEEJf_US
The Curse of Drachenfels

- Old Haunts


 1/2. A Fine Vintage & No Hiding Place
Find all 15 bottles of the Valley Wine in Old Haunts
Find the hideout in Old Haunts In one playthrough, you must collect 15 bottles, which are scattered throughout the map. The locations of all bottles are shown in this guide and video:
https://steamcommunity.com/sharedfiles/filedetails/?id=1976870403&searchtext=Challenge https://youtu.be/sz4nXeFPUKs
 3. Stop Touching Things!
Draw the attention of a Skaven horde by interacting with Skaven tech 3 times in Old Haunts Once you reach the Portal of Decay, head through the gap in the rocks and the follow the path up to a piece of Skaven Tech. Interact with it three times to draw the Skaven Horde, and the challenge is completed.
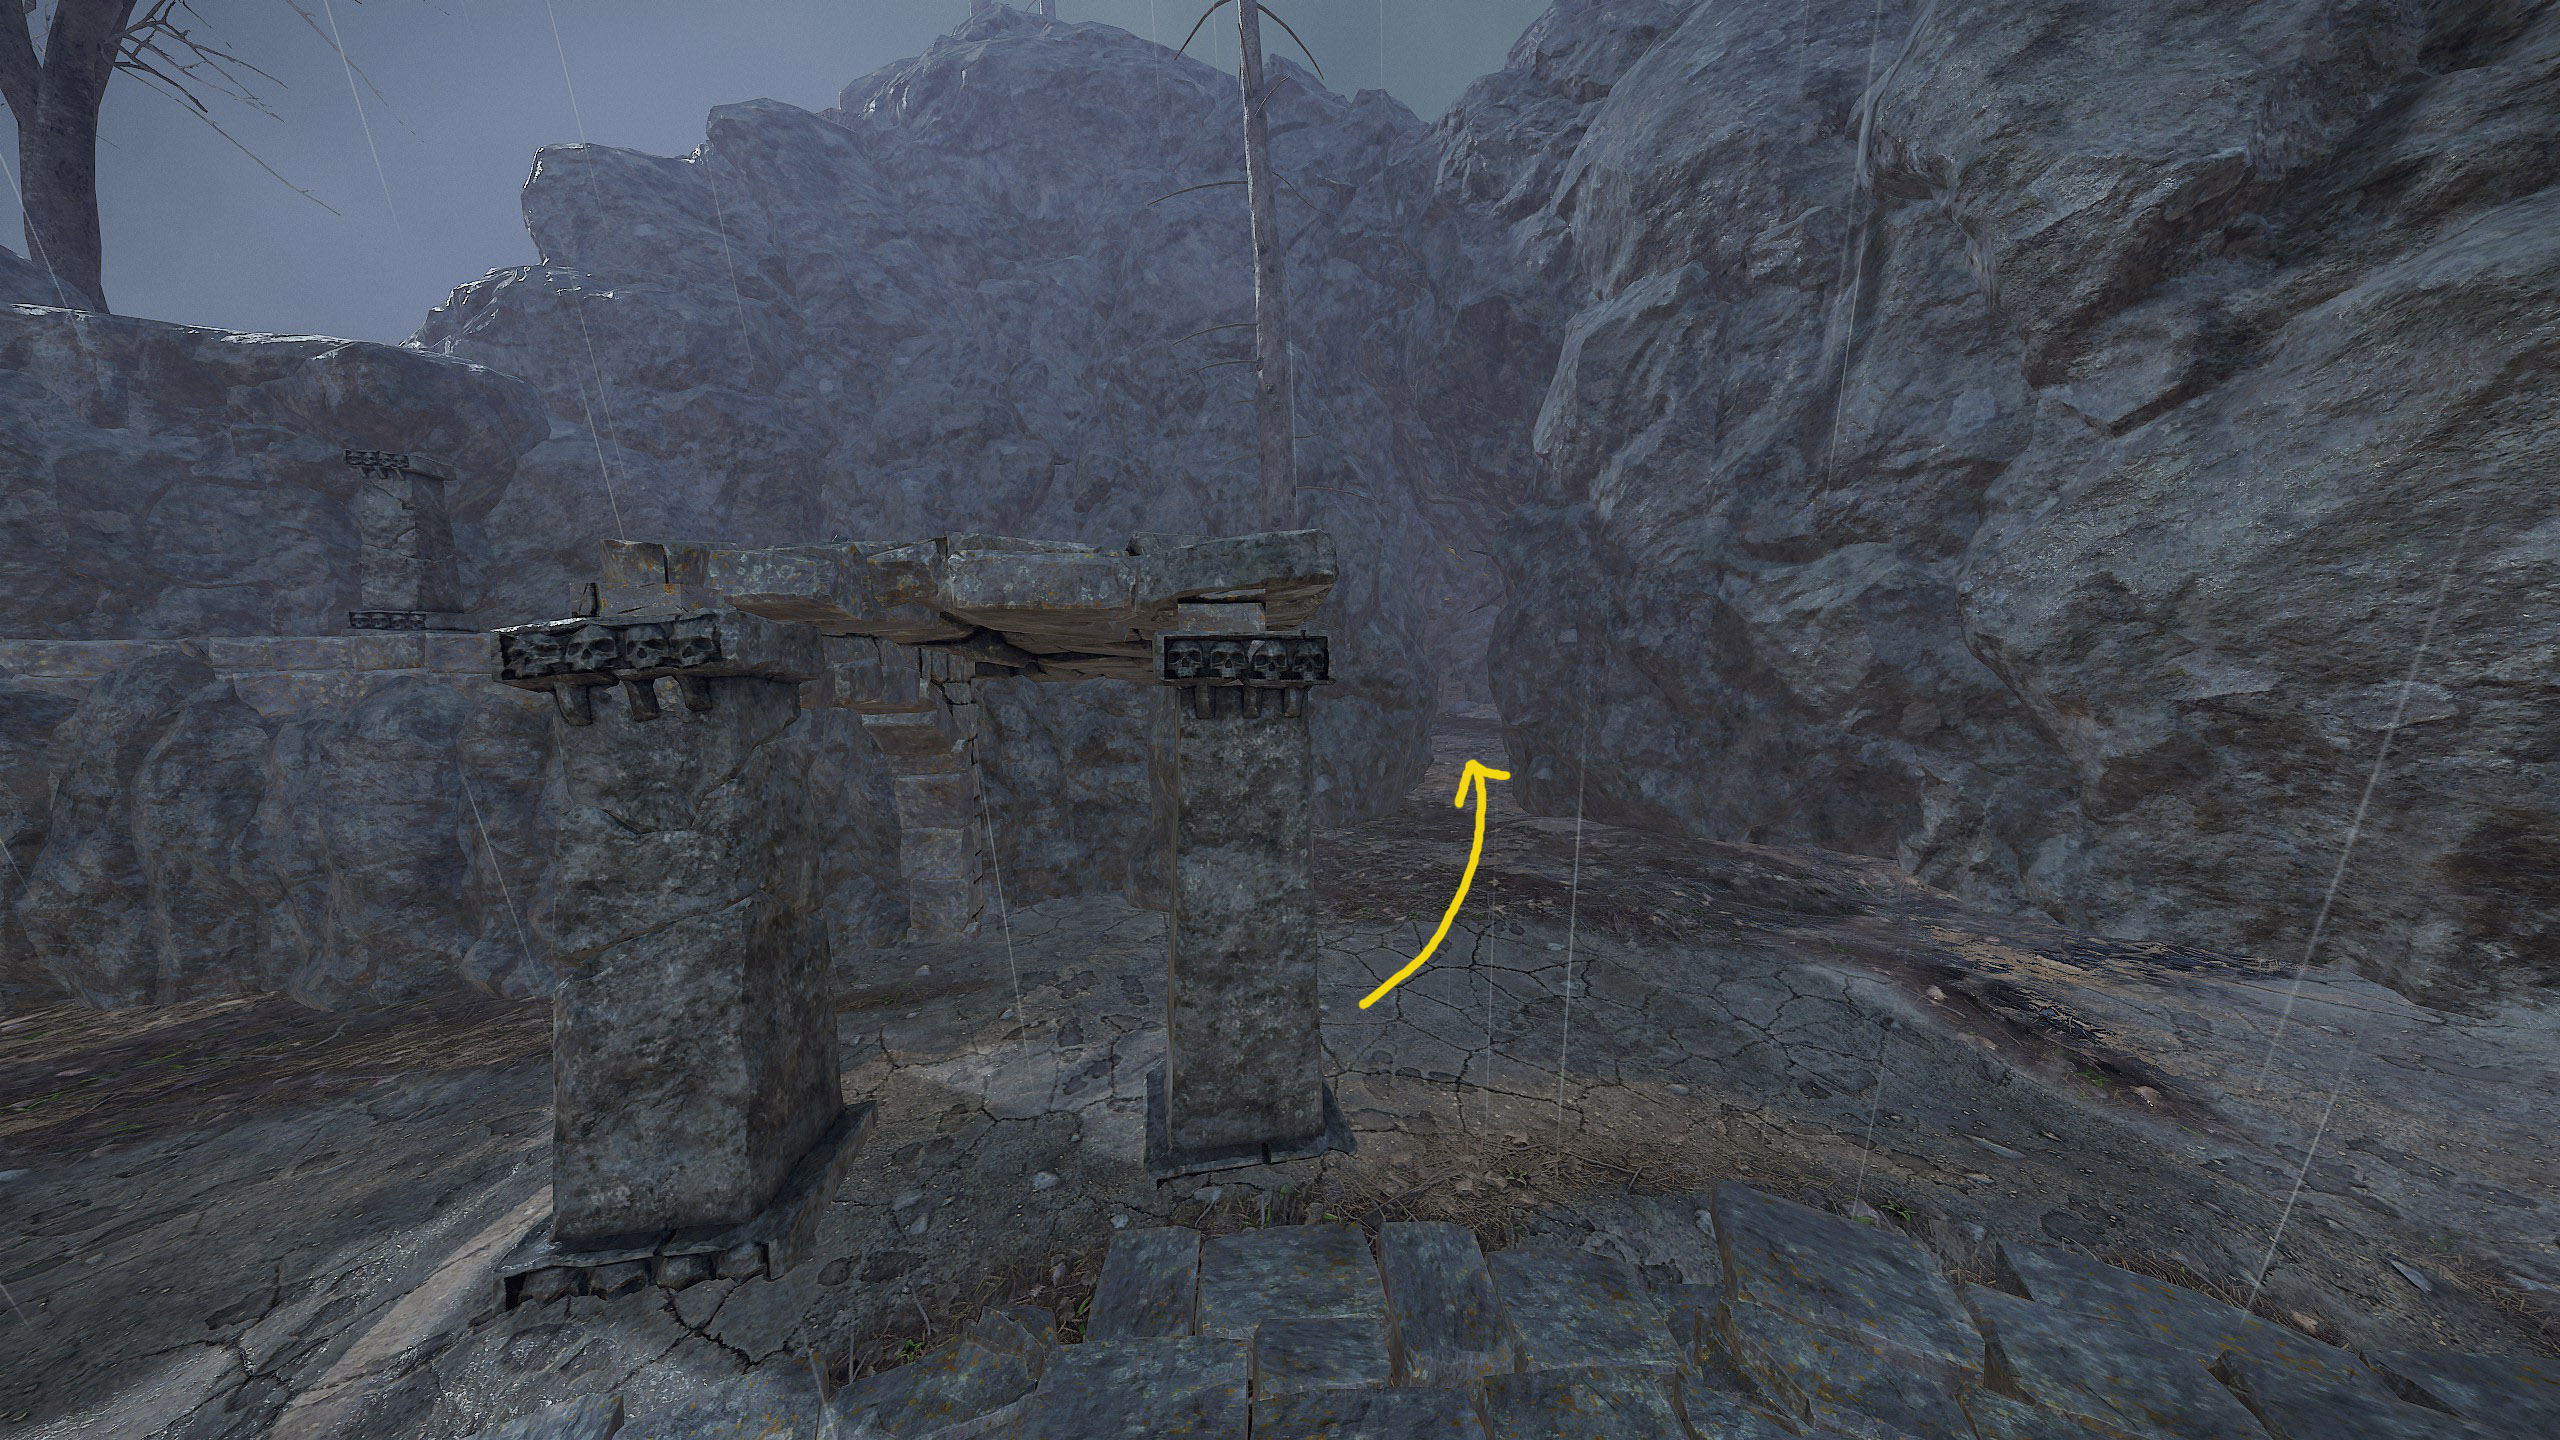
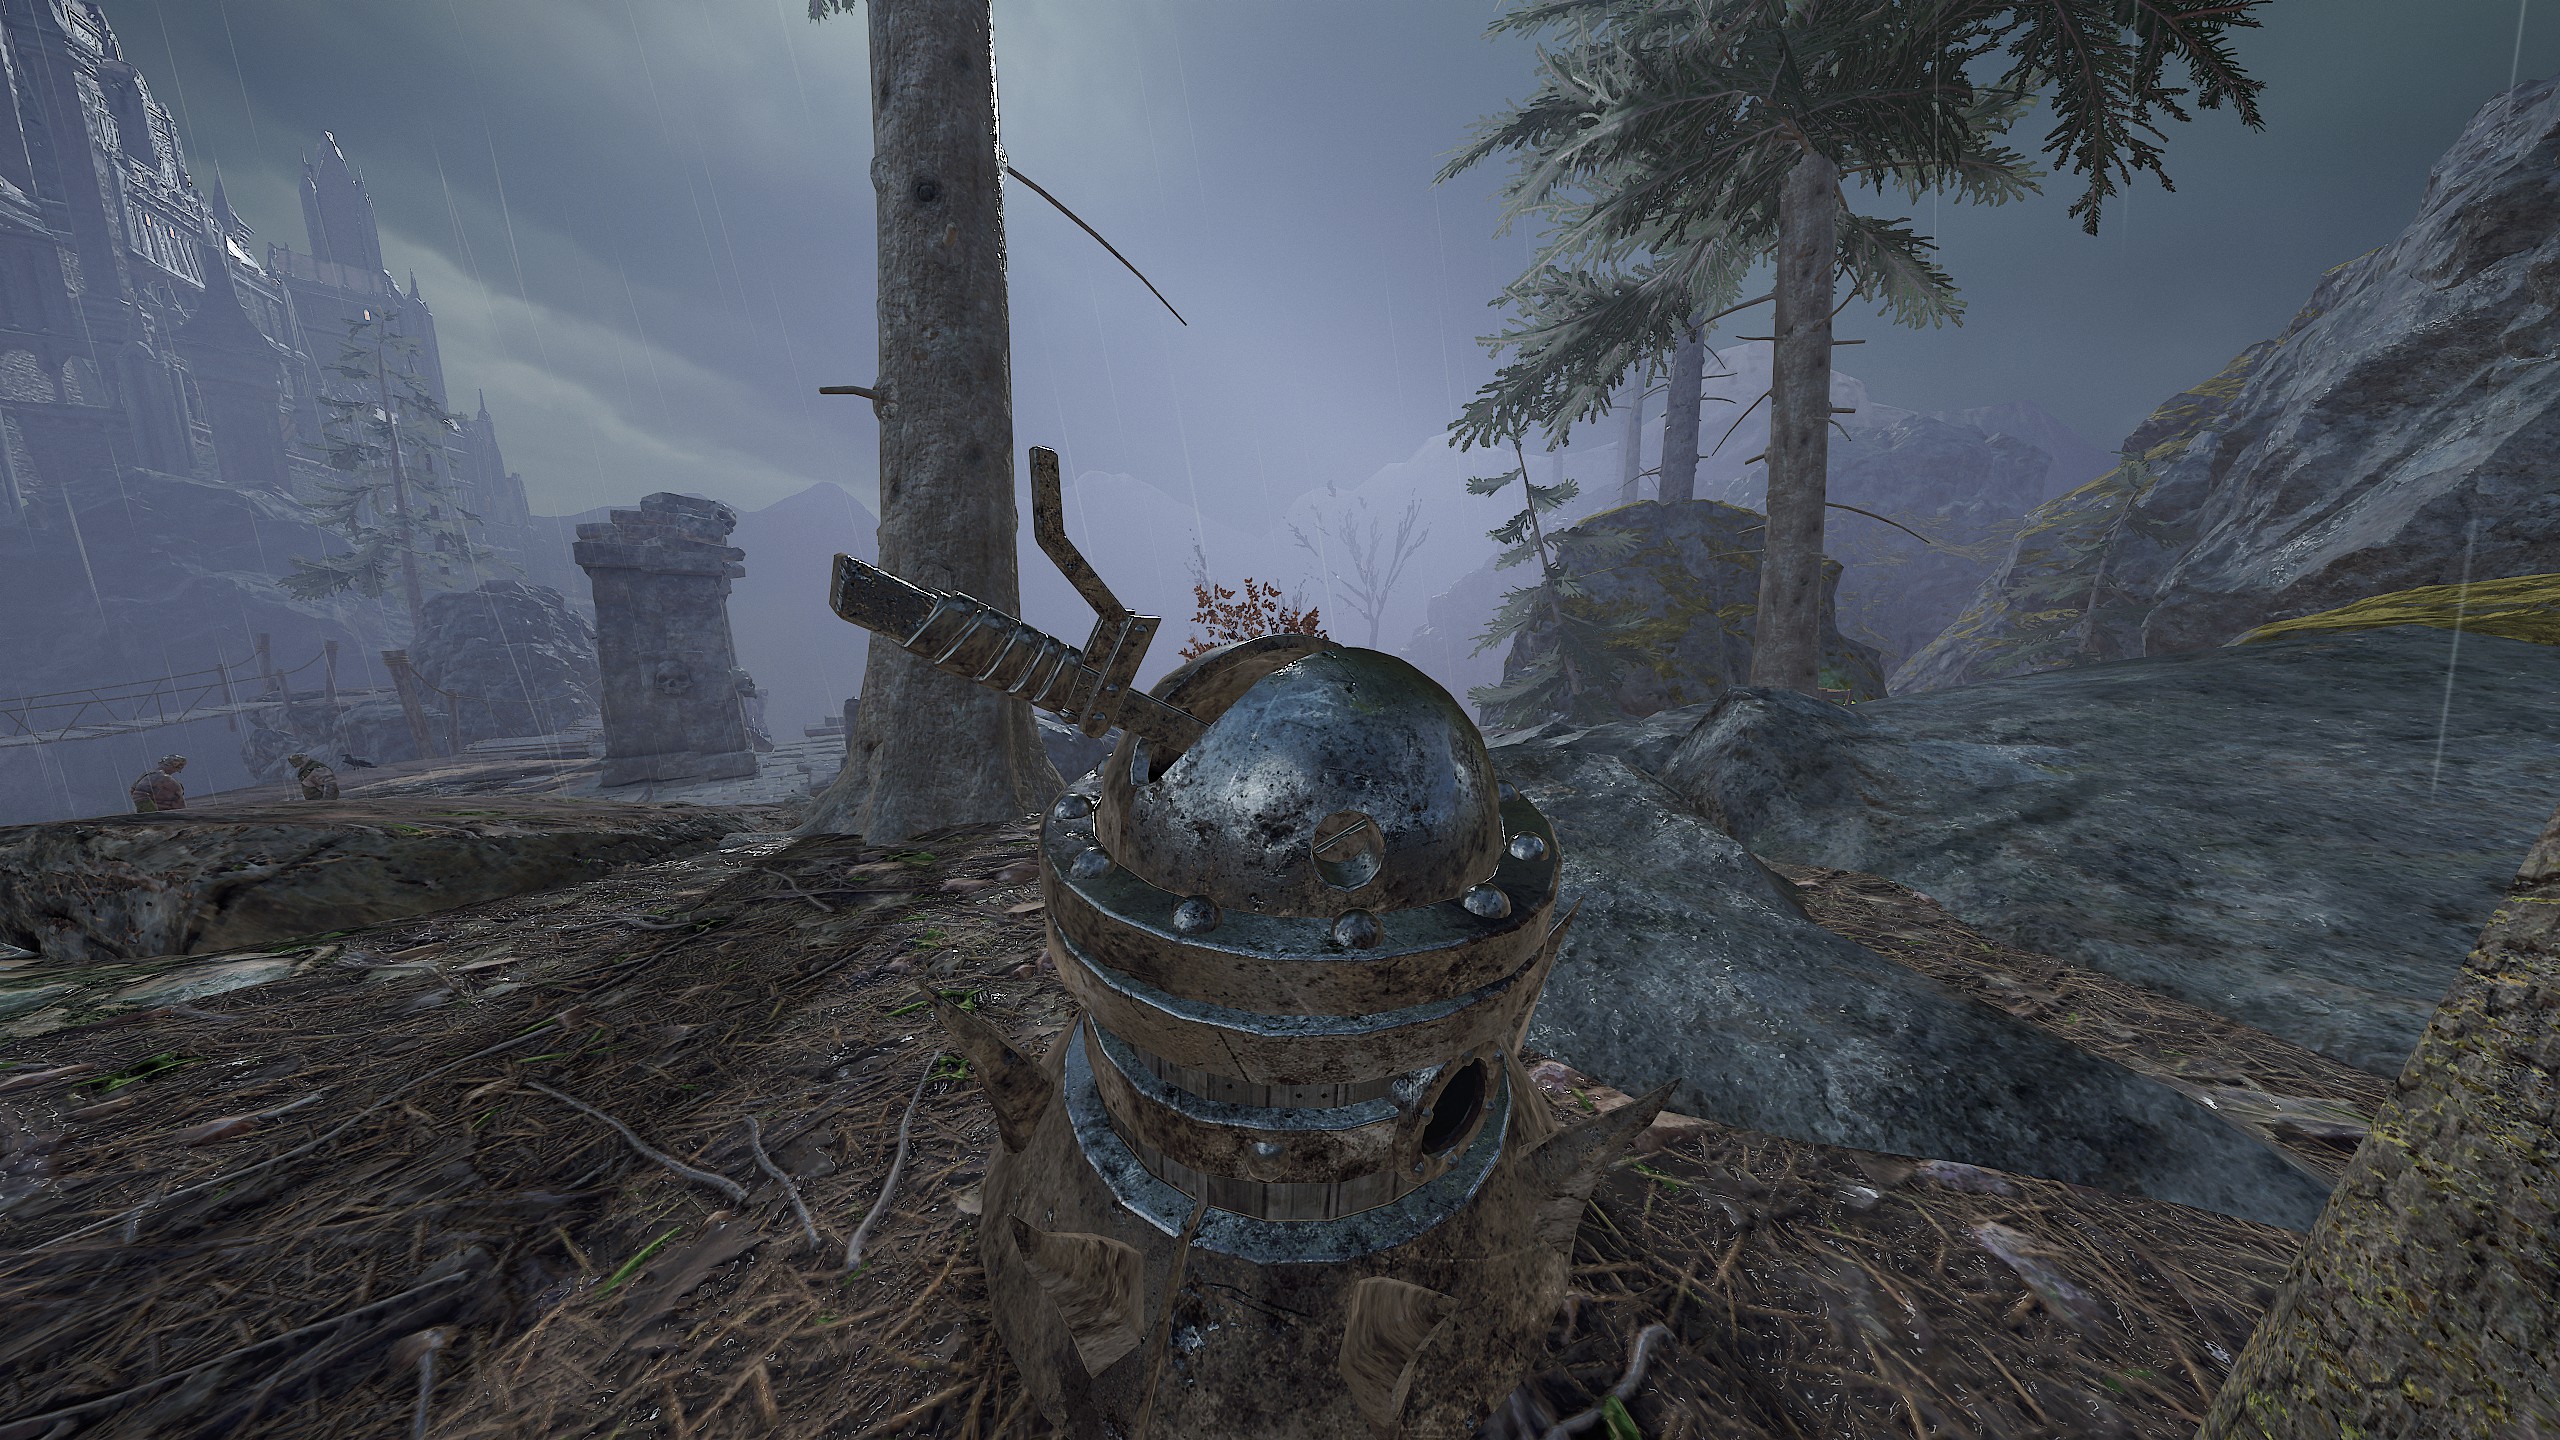 https://www.youtube.com/watch?v=kJKK7qSdkQg
 4/5. Ahead of Time & Clean Sweep
Place the Gargoyle Heads in their place within a 75 seconds time limit in Old Haunts
Destroy all 20 Nurgle buboes in the crypt in Old Haunts Pretty simple challenges, but if you are having problems, watch this video.
https://youtu.be/9F7TT7oCNlw?si=zoAu-3fRr06pXvd2
 6. Old Haunts
Complete all mission challenges of Old Haunts This challenge will be completed when you have completed all challenges except “Difficulty Challenges”.

- Blood in the Darkness
 1. The (Not So) Great Escape
Locate all of the Journal Entries left behind by a former escapee in Blood in the Darkness
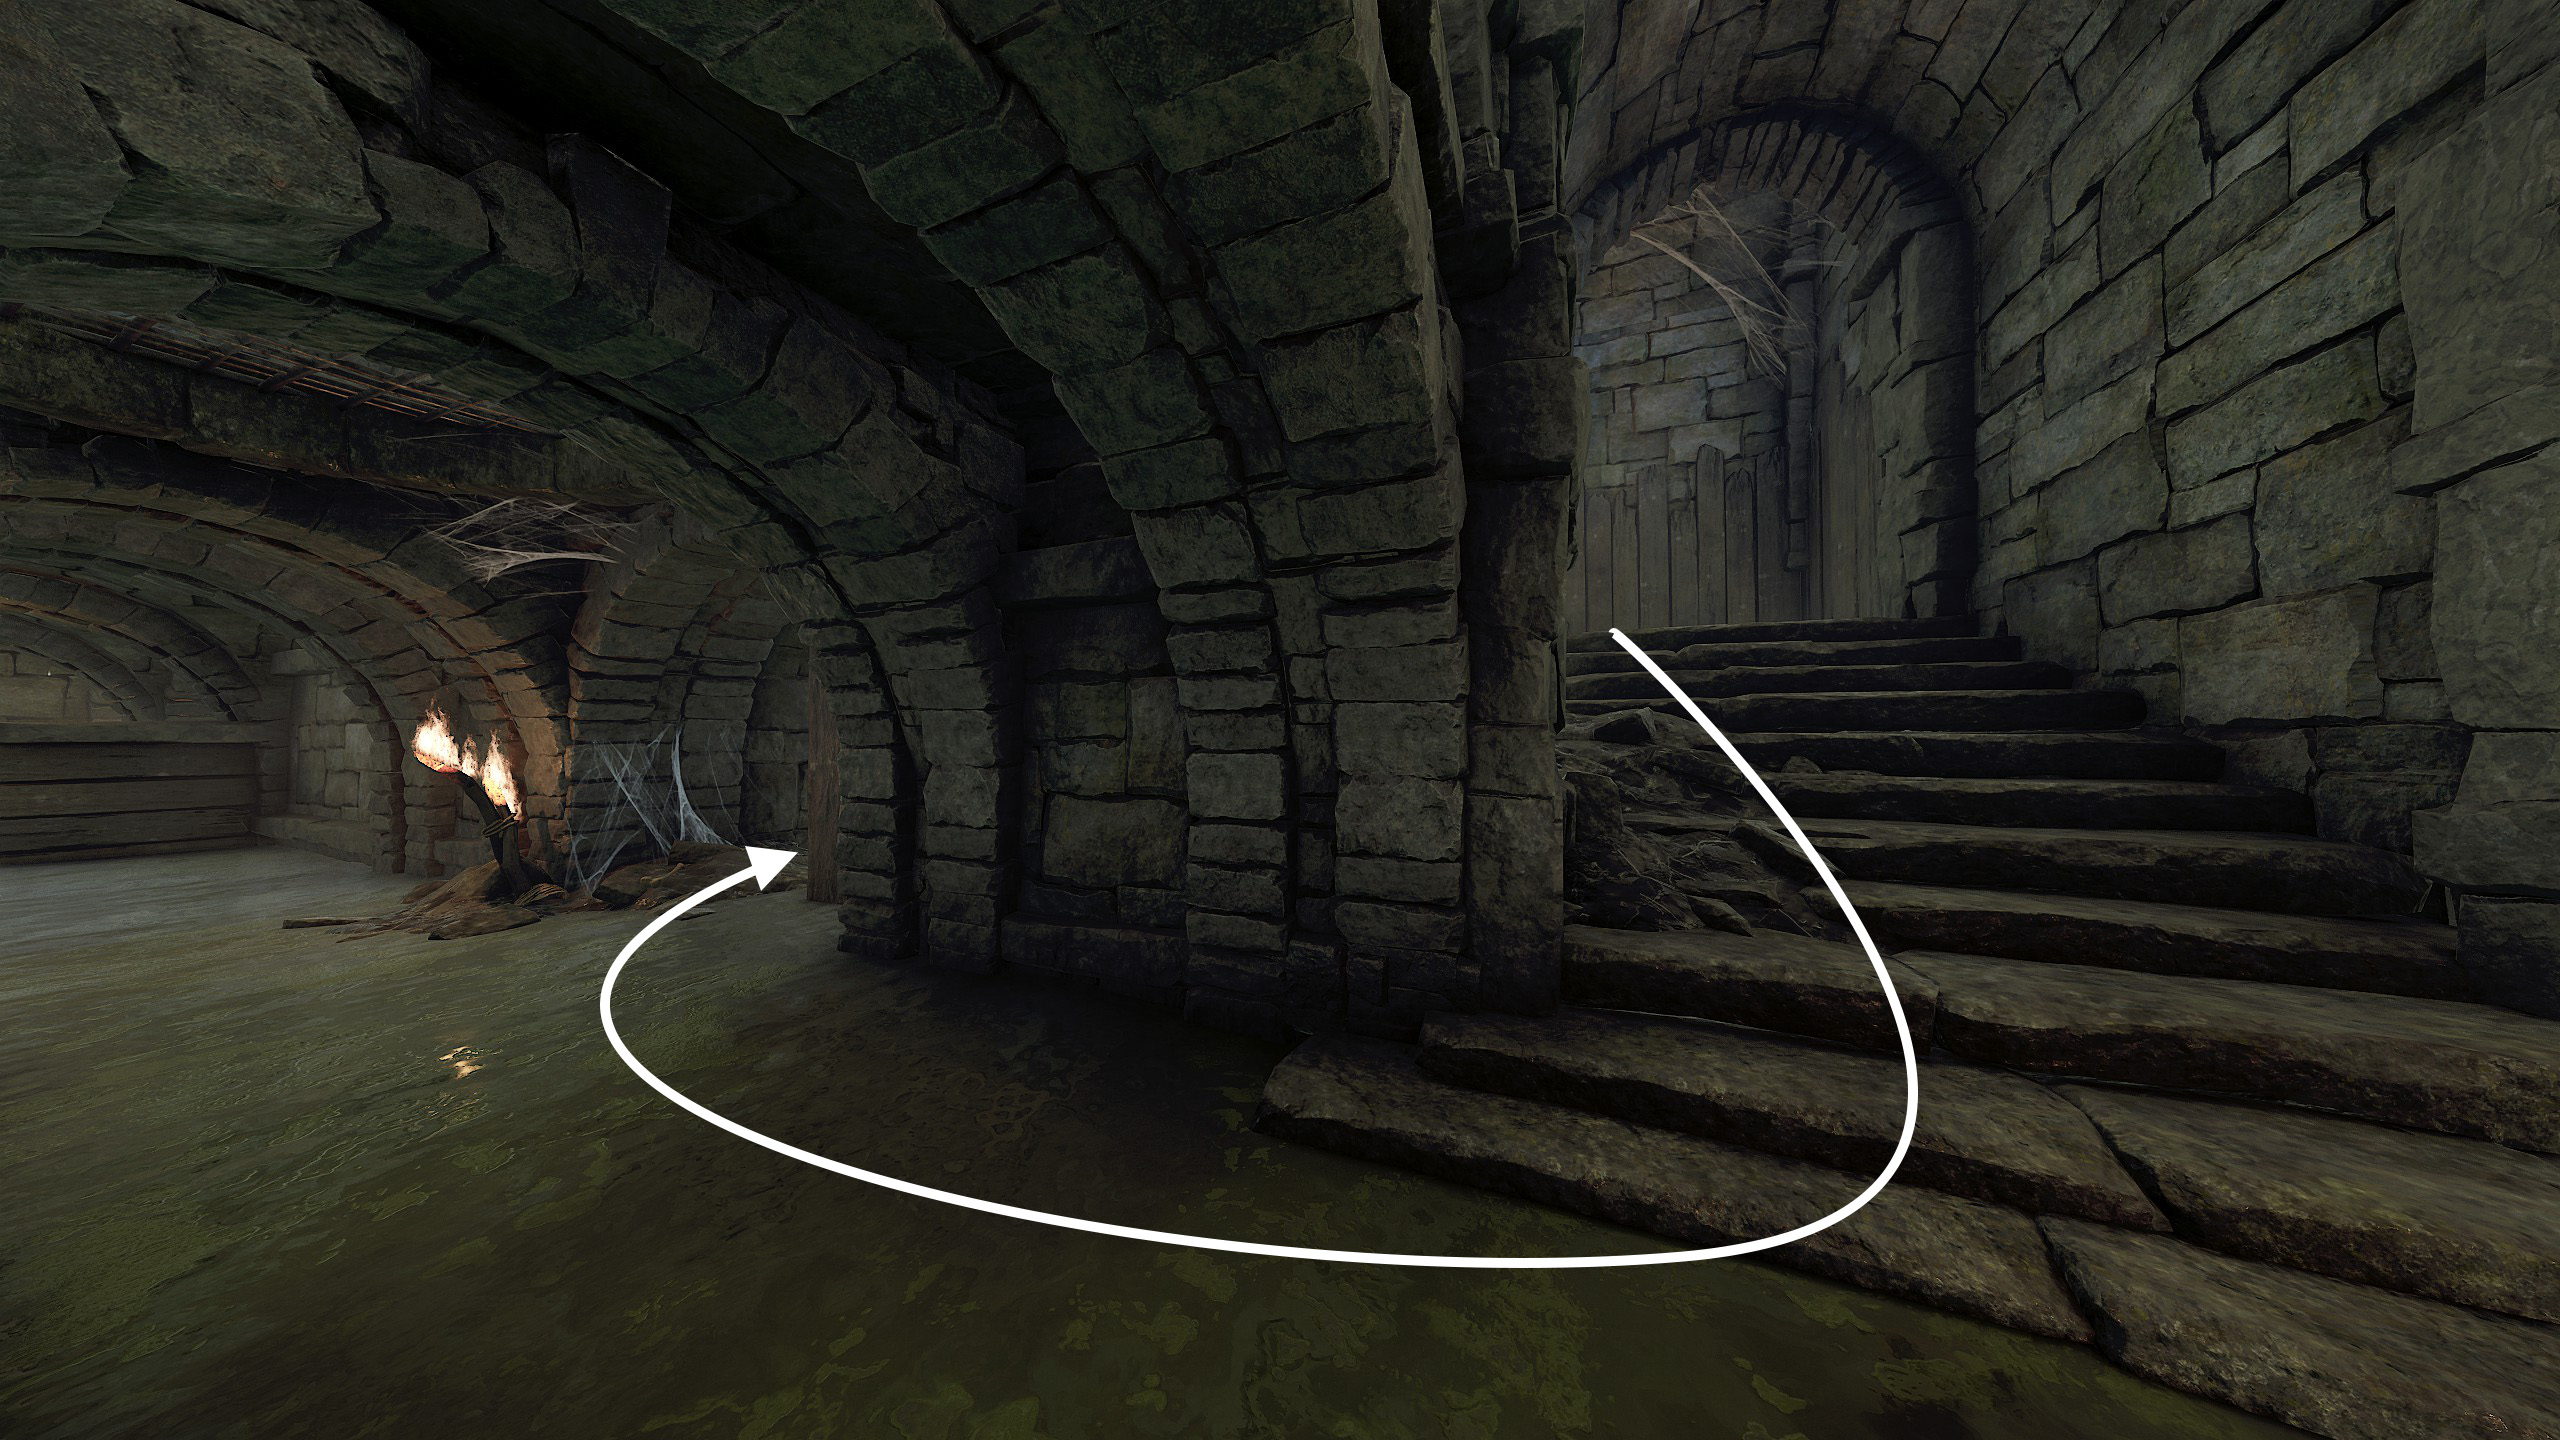
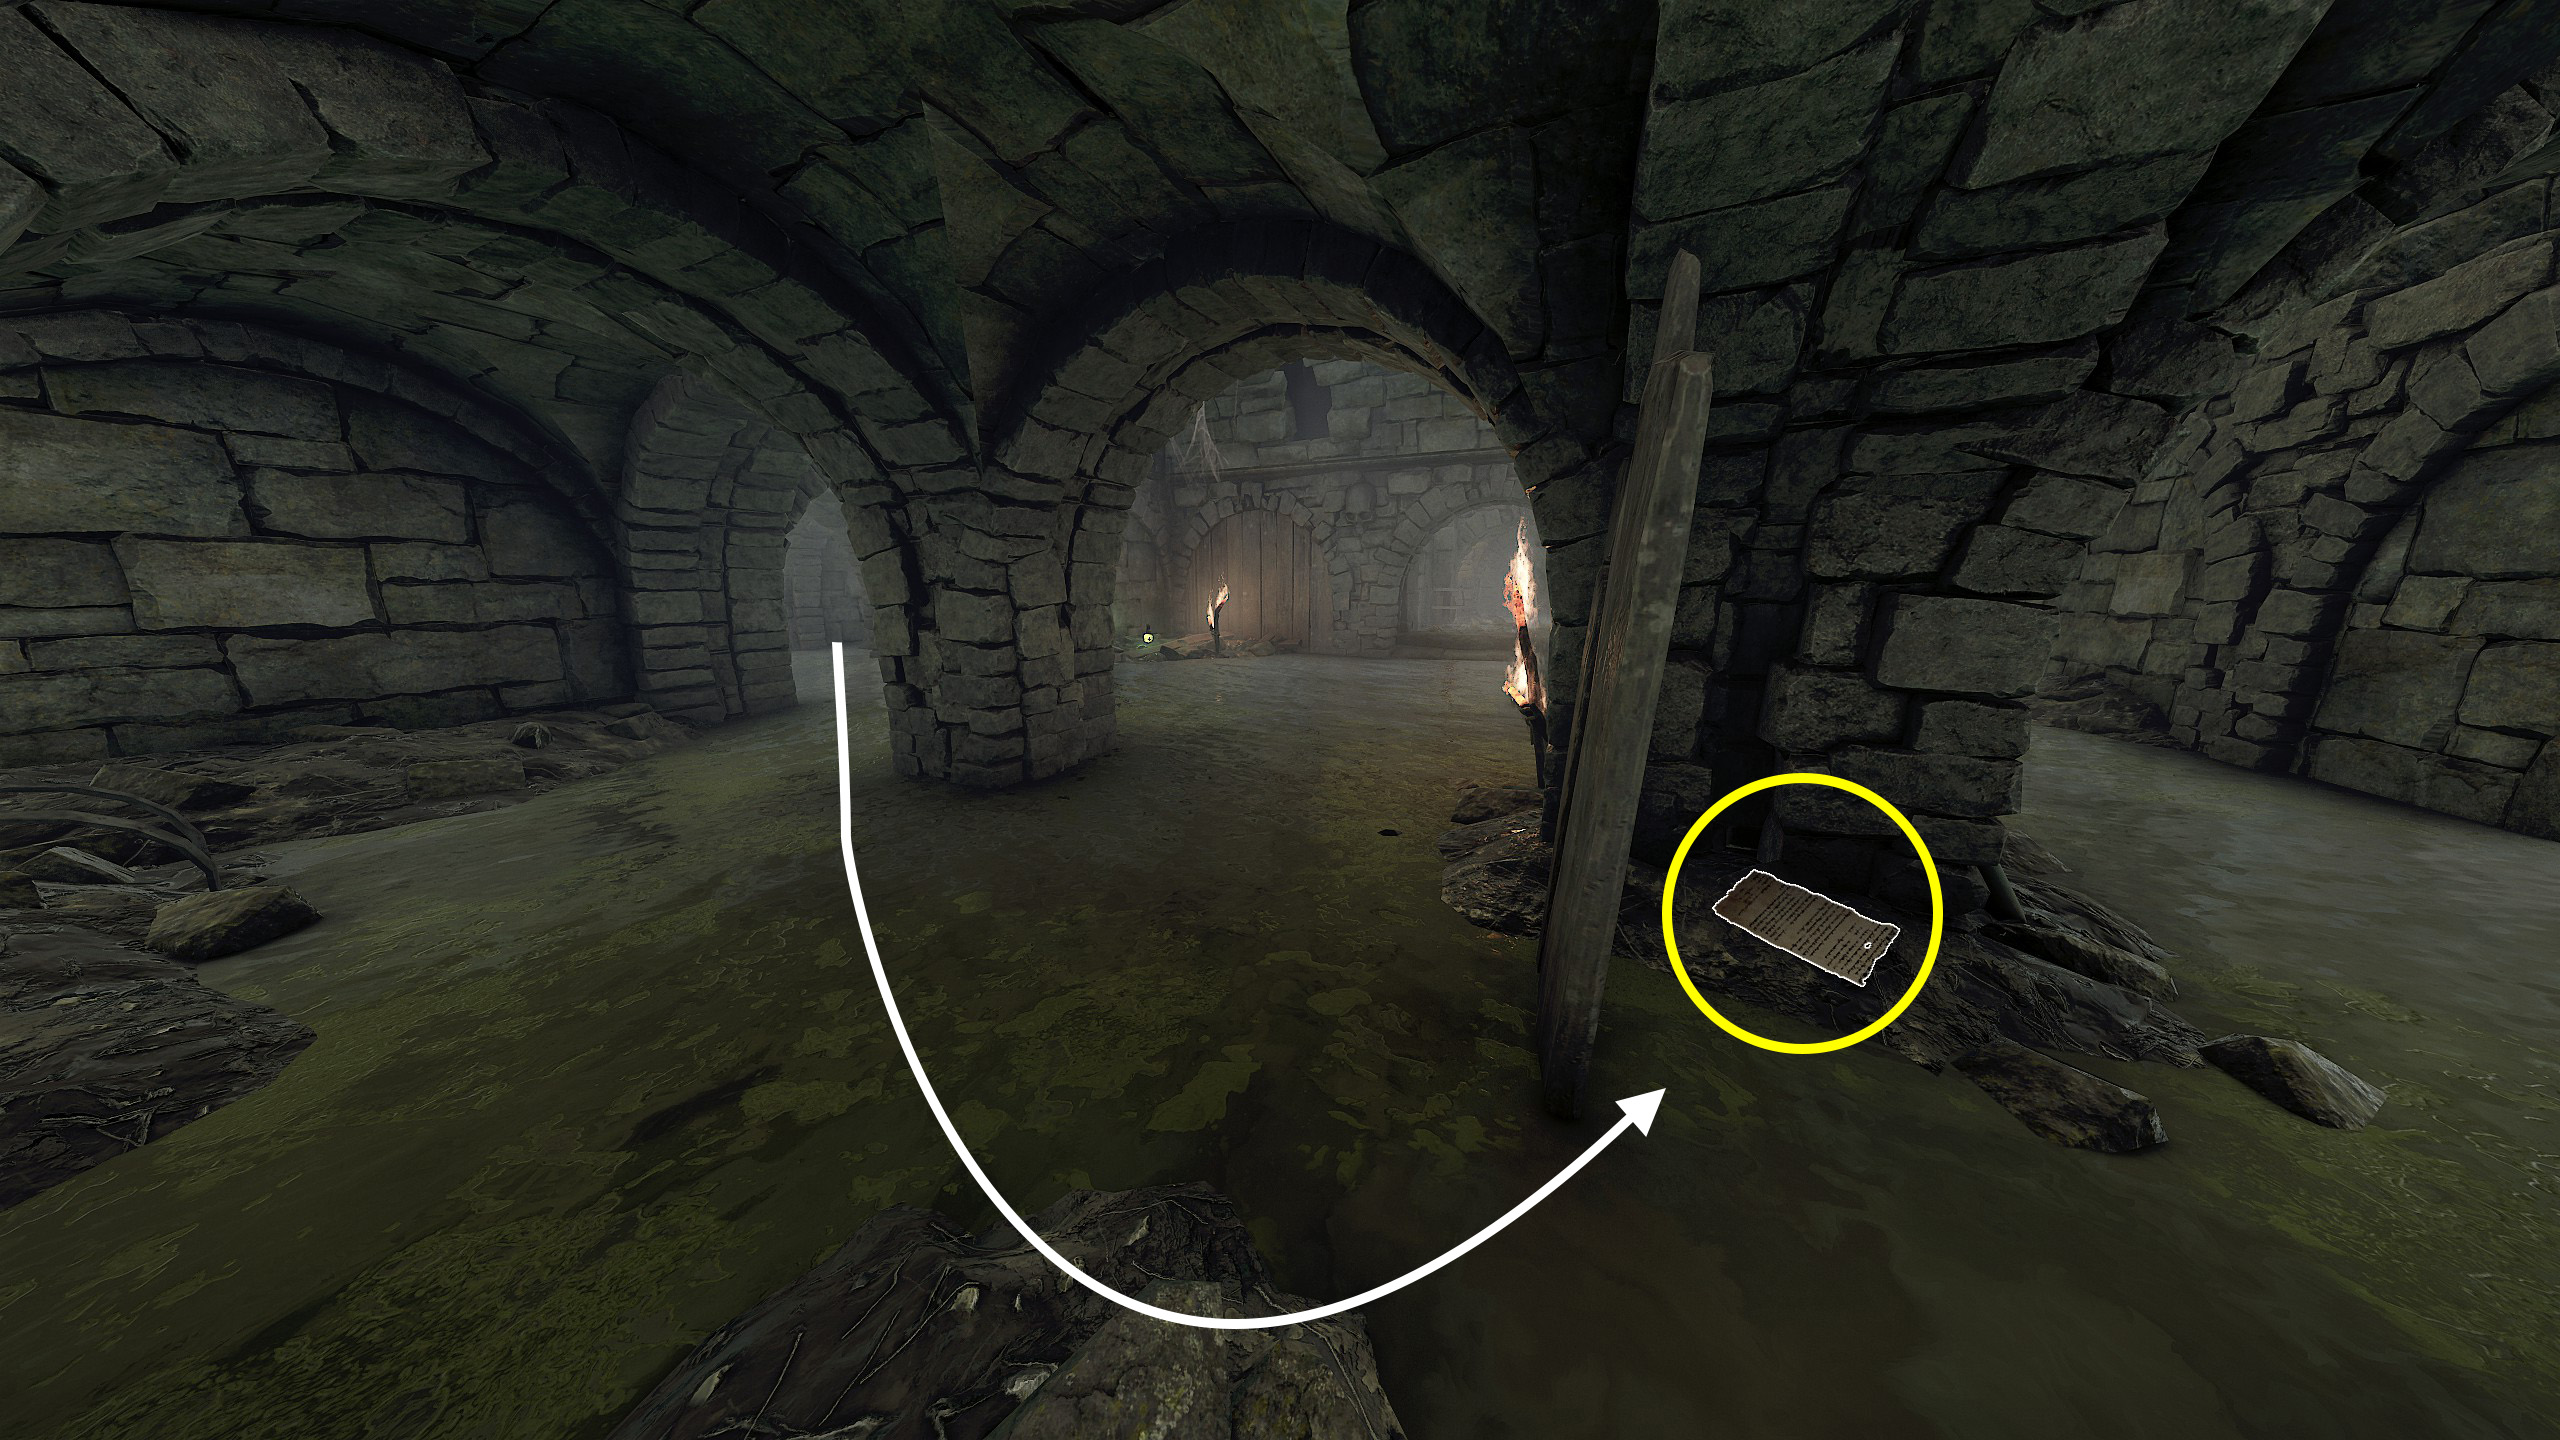
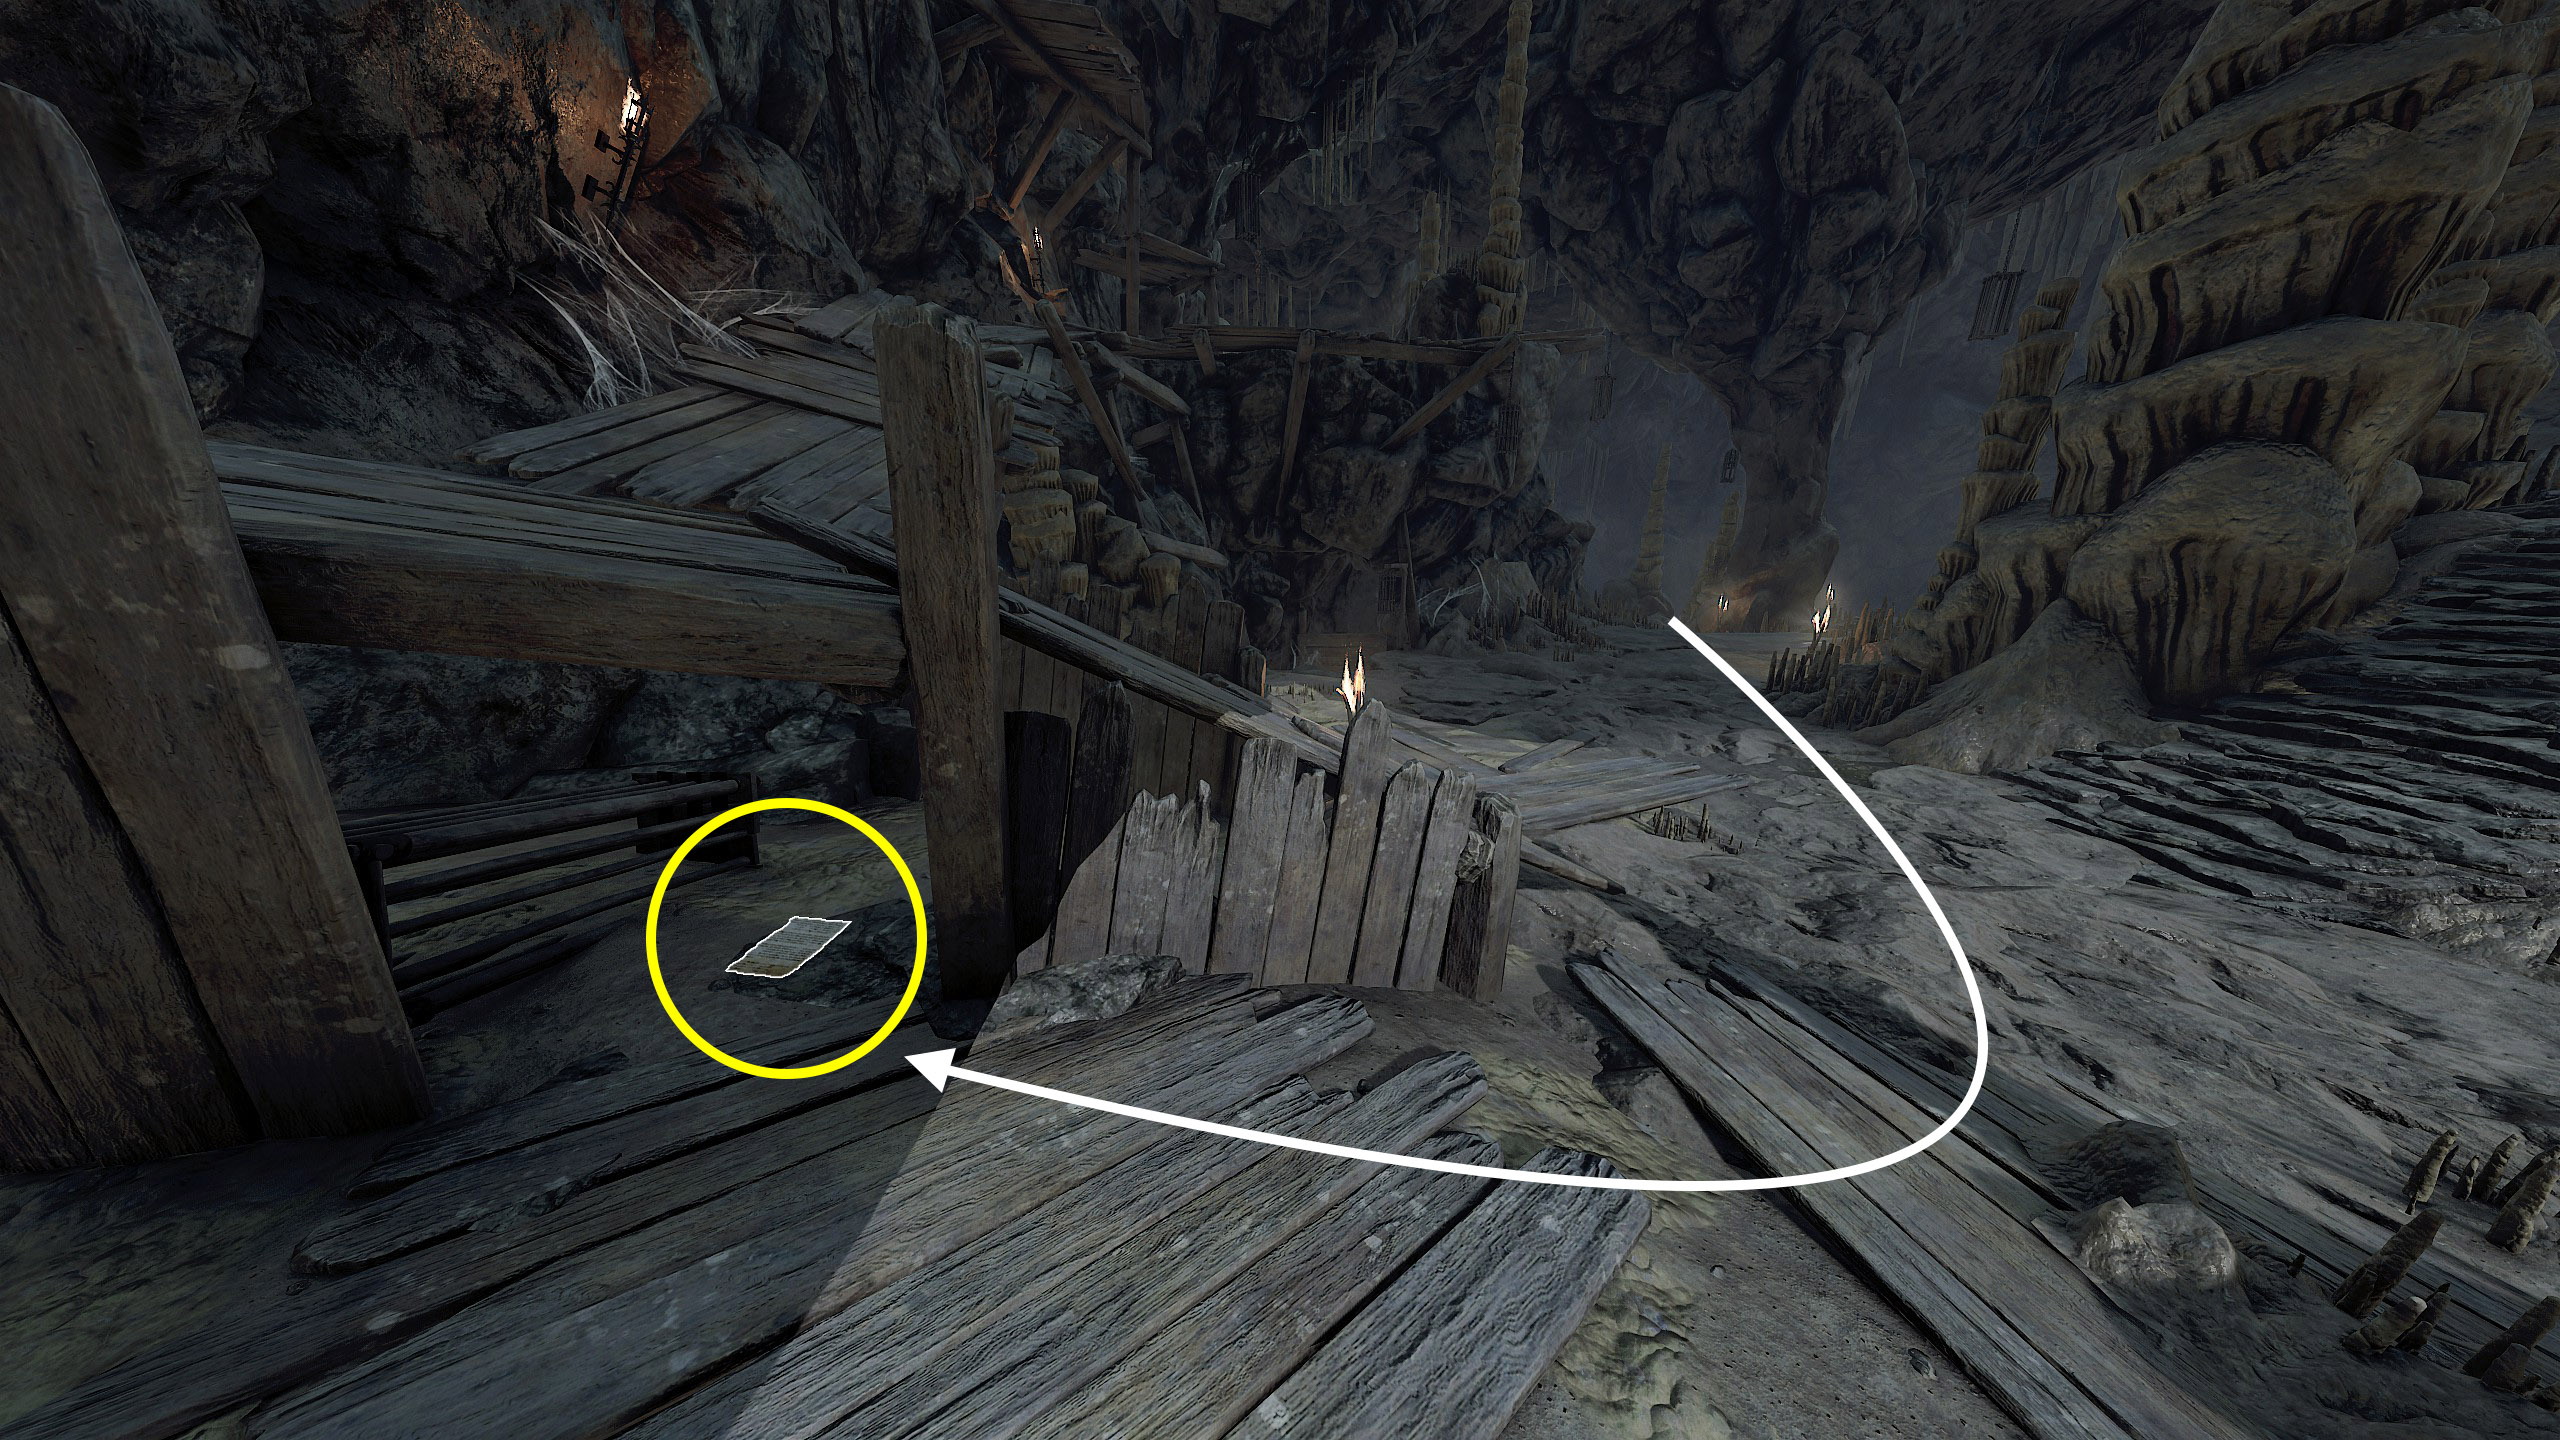
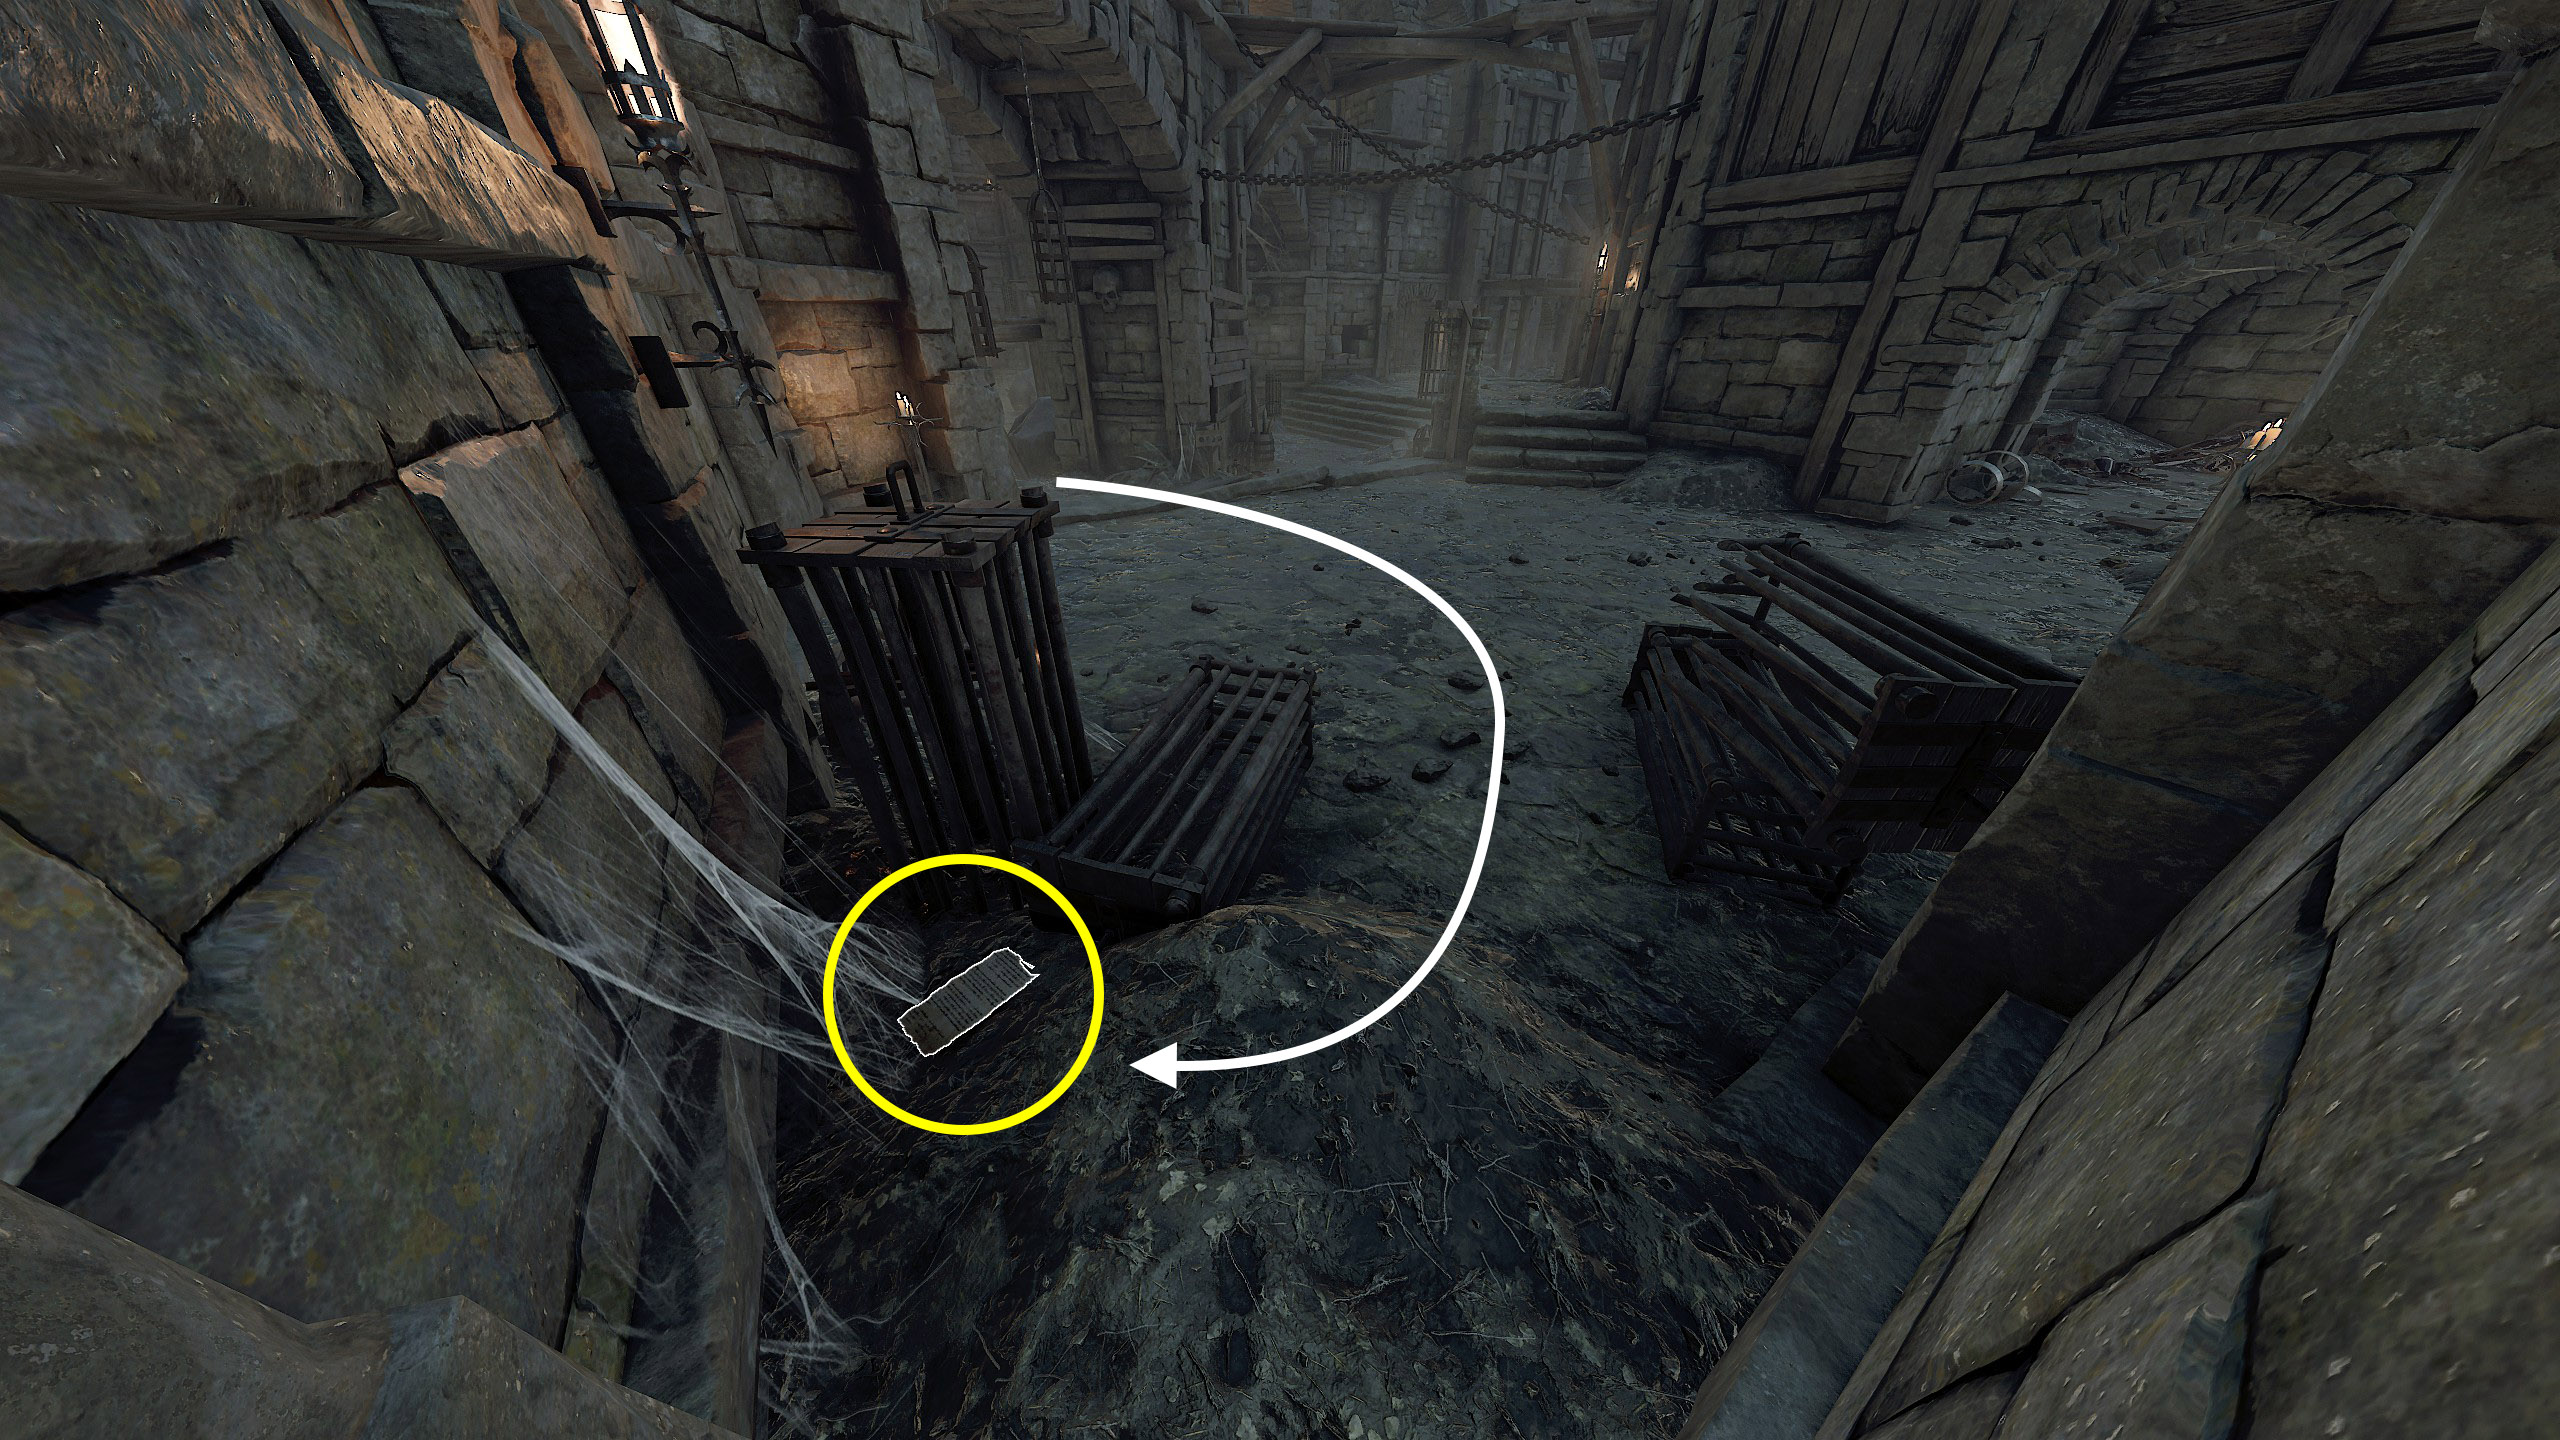
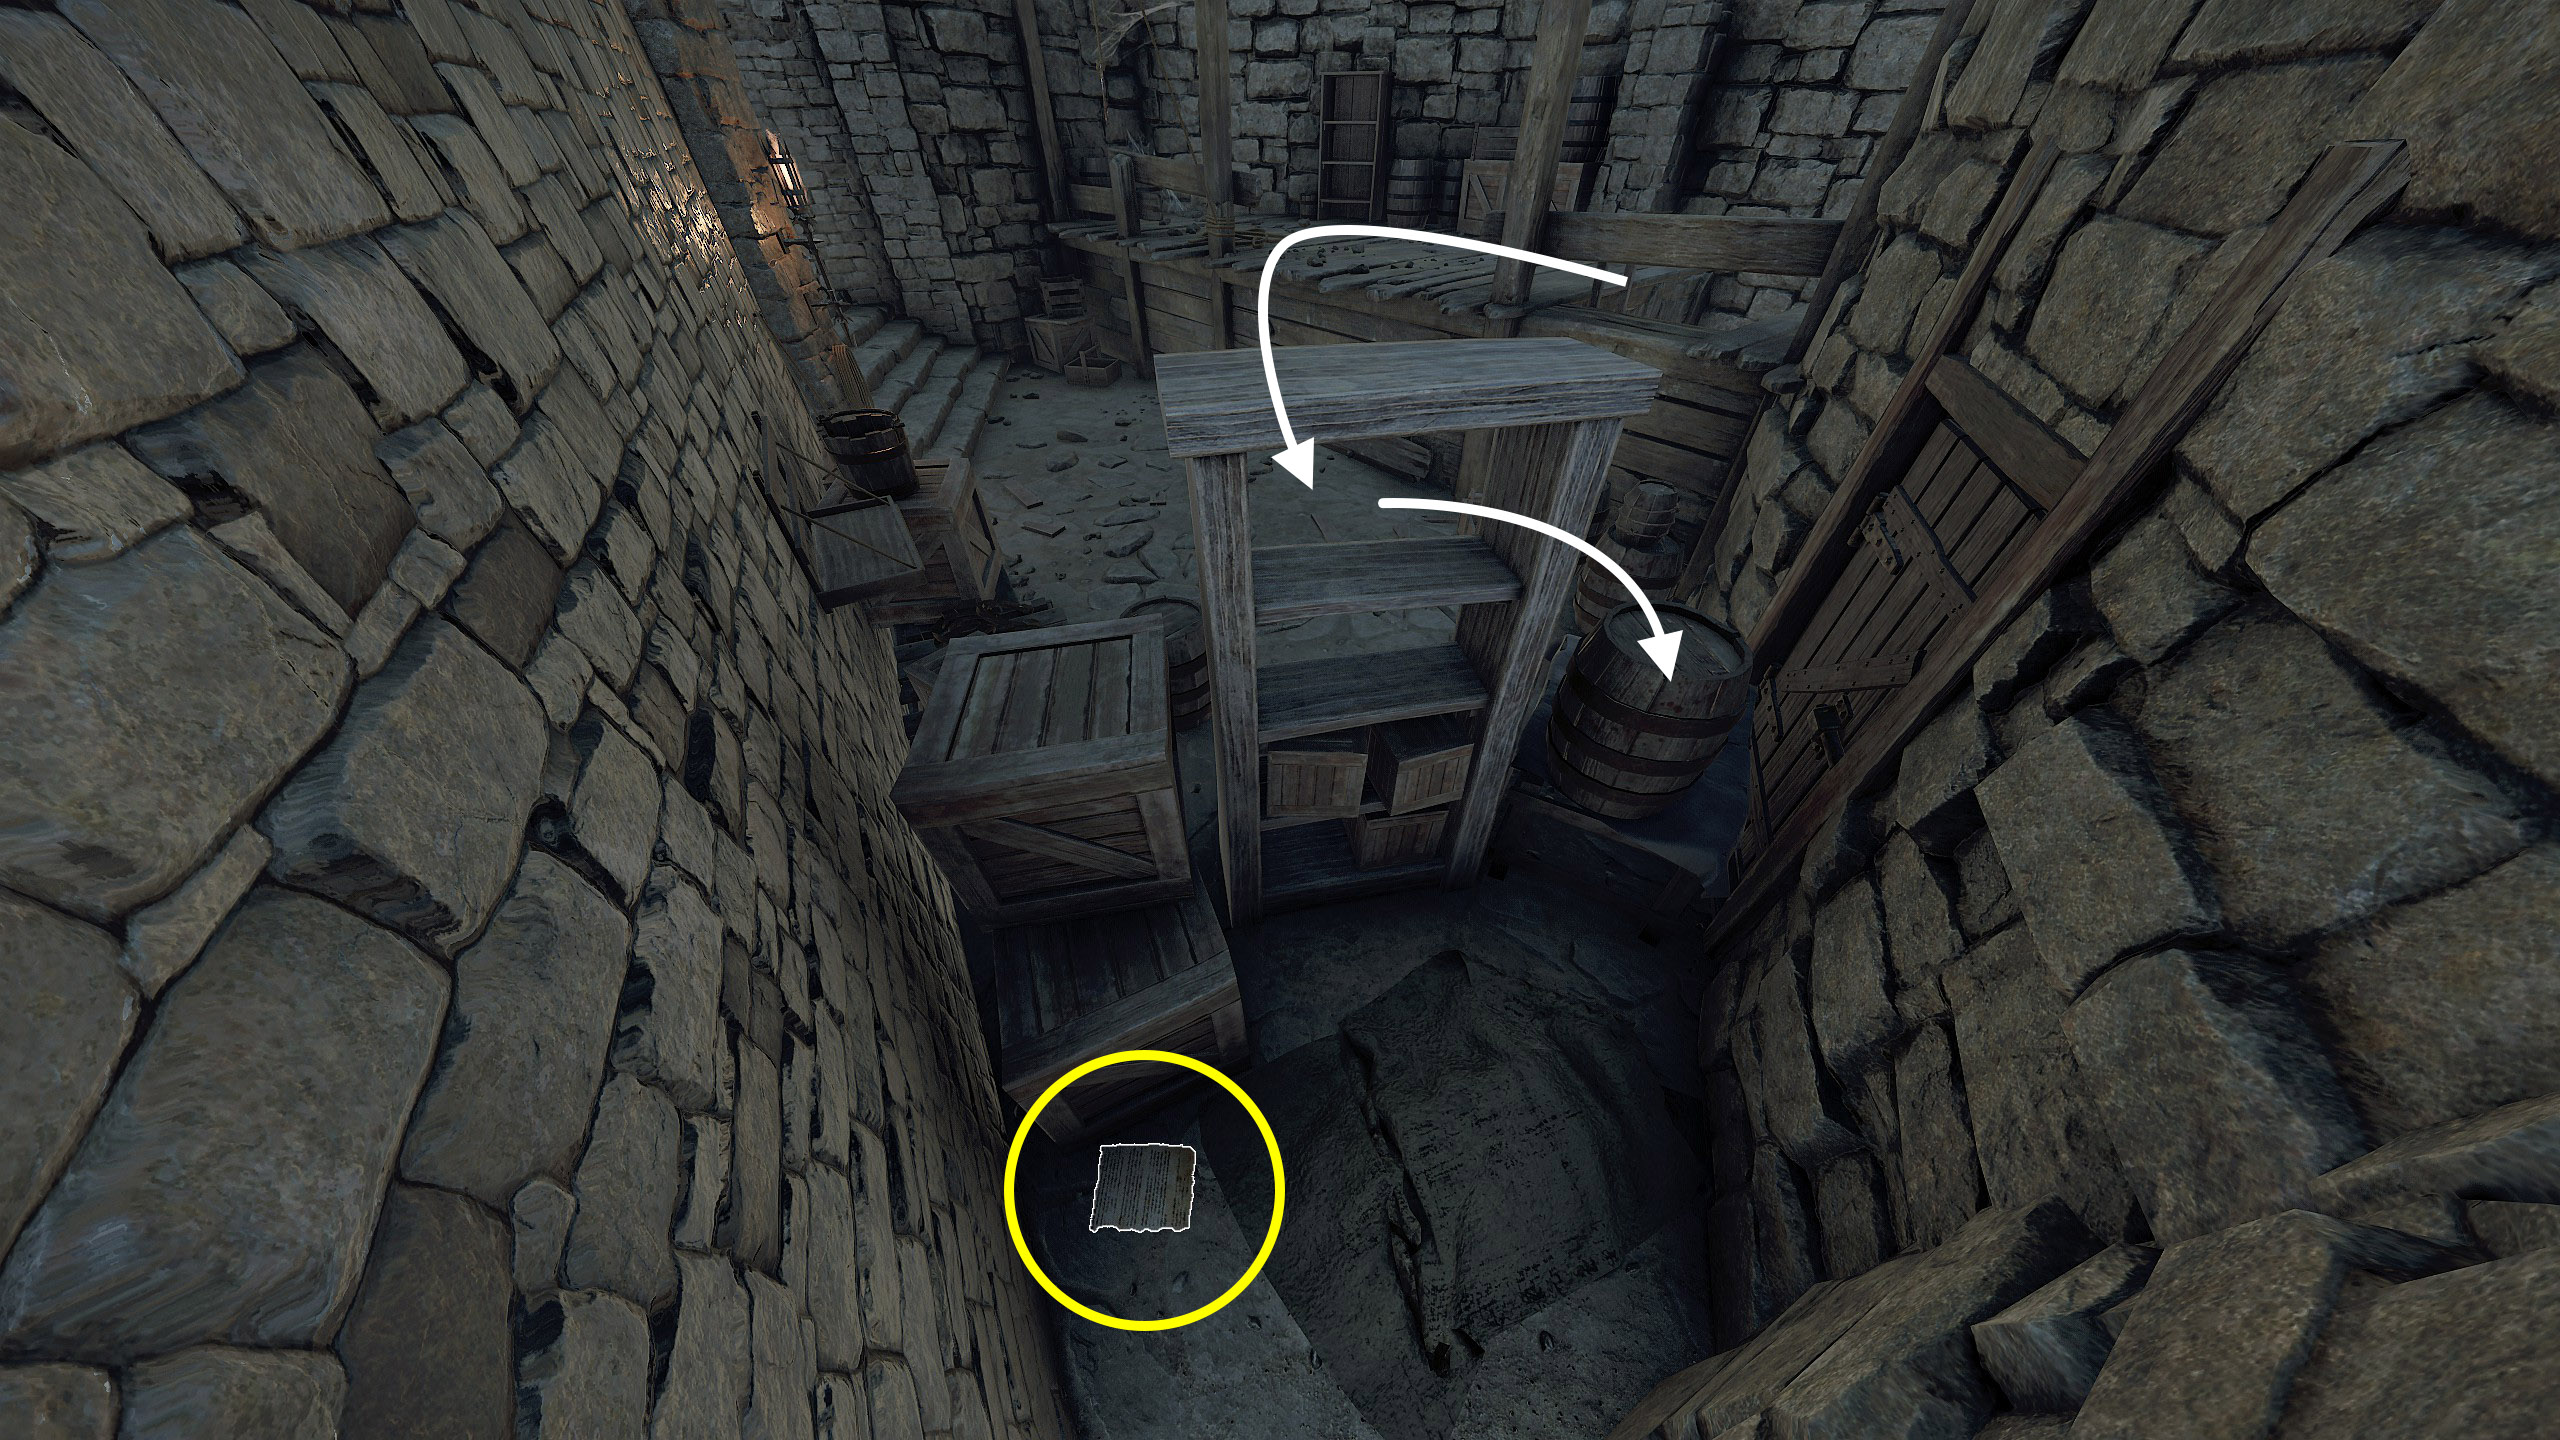
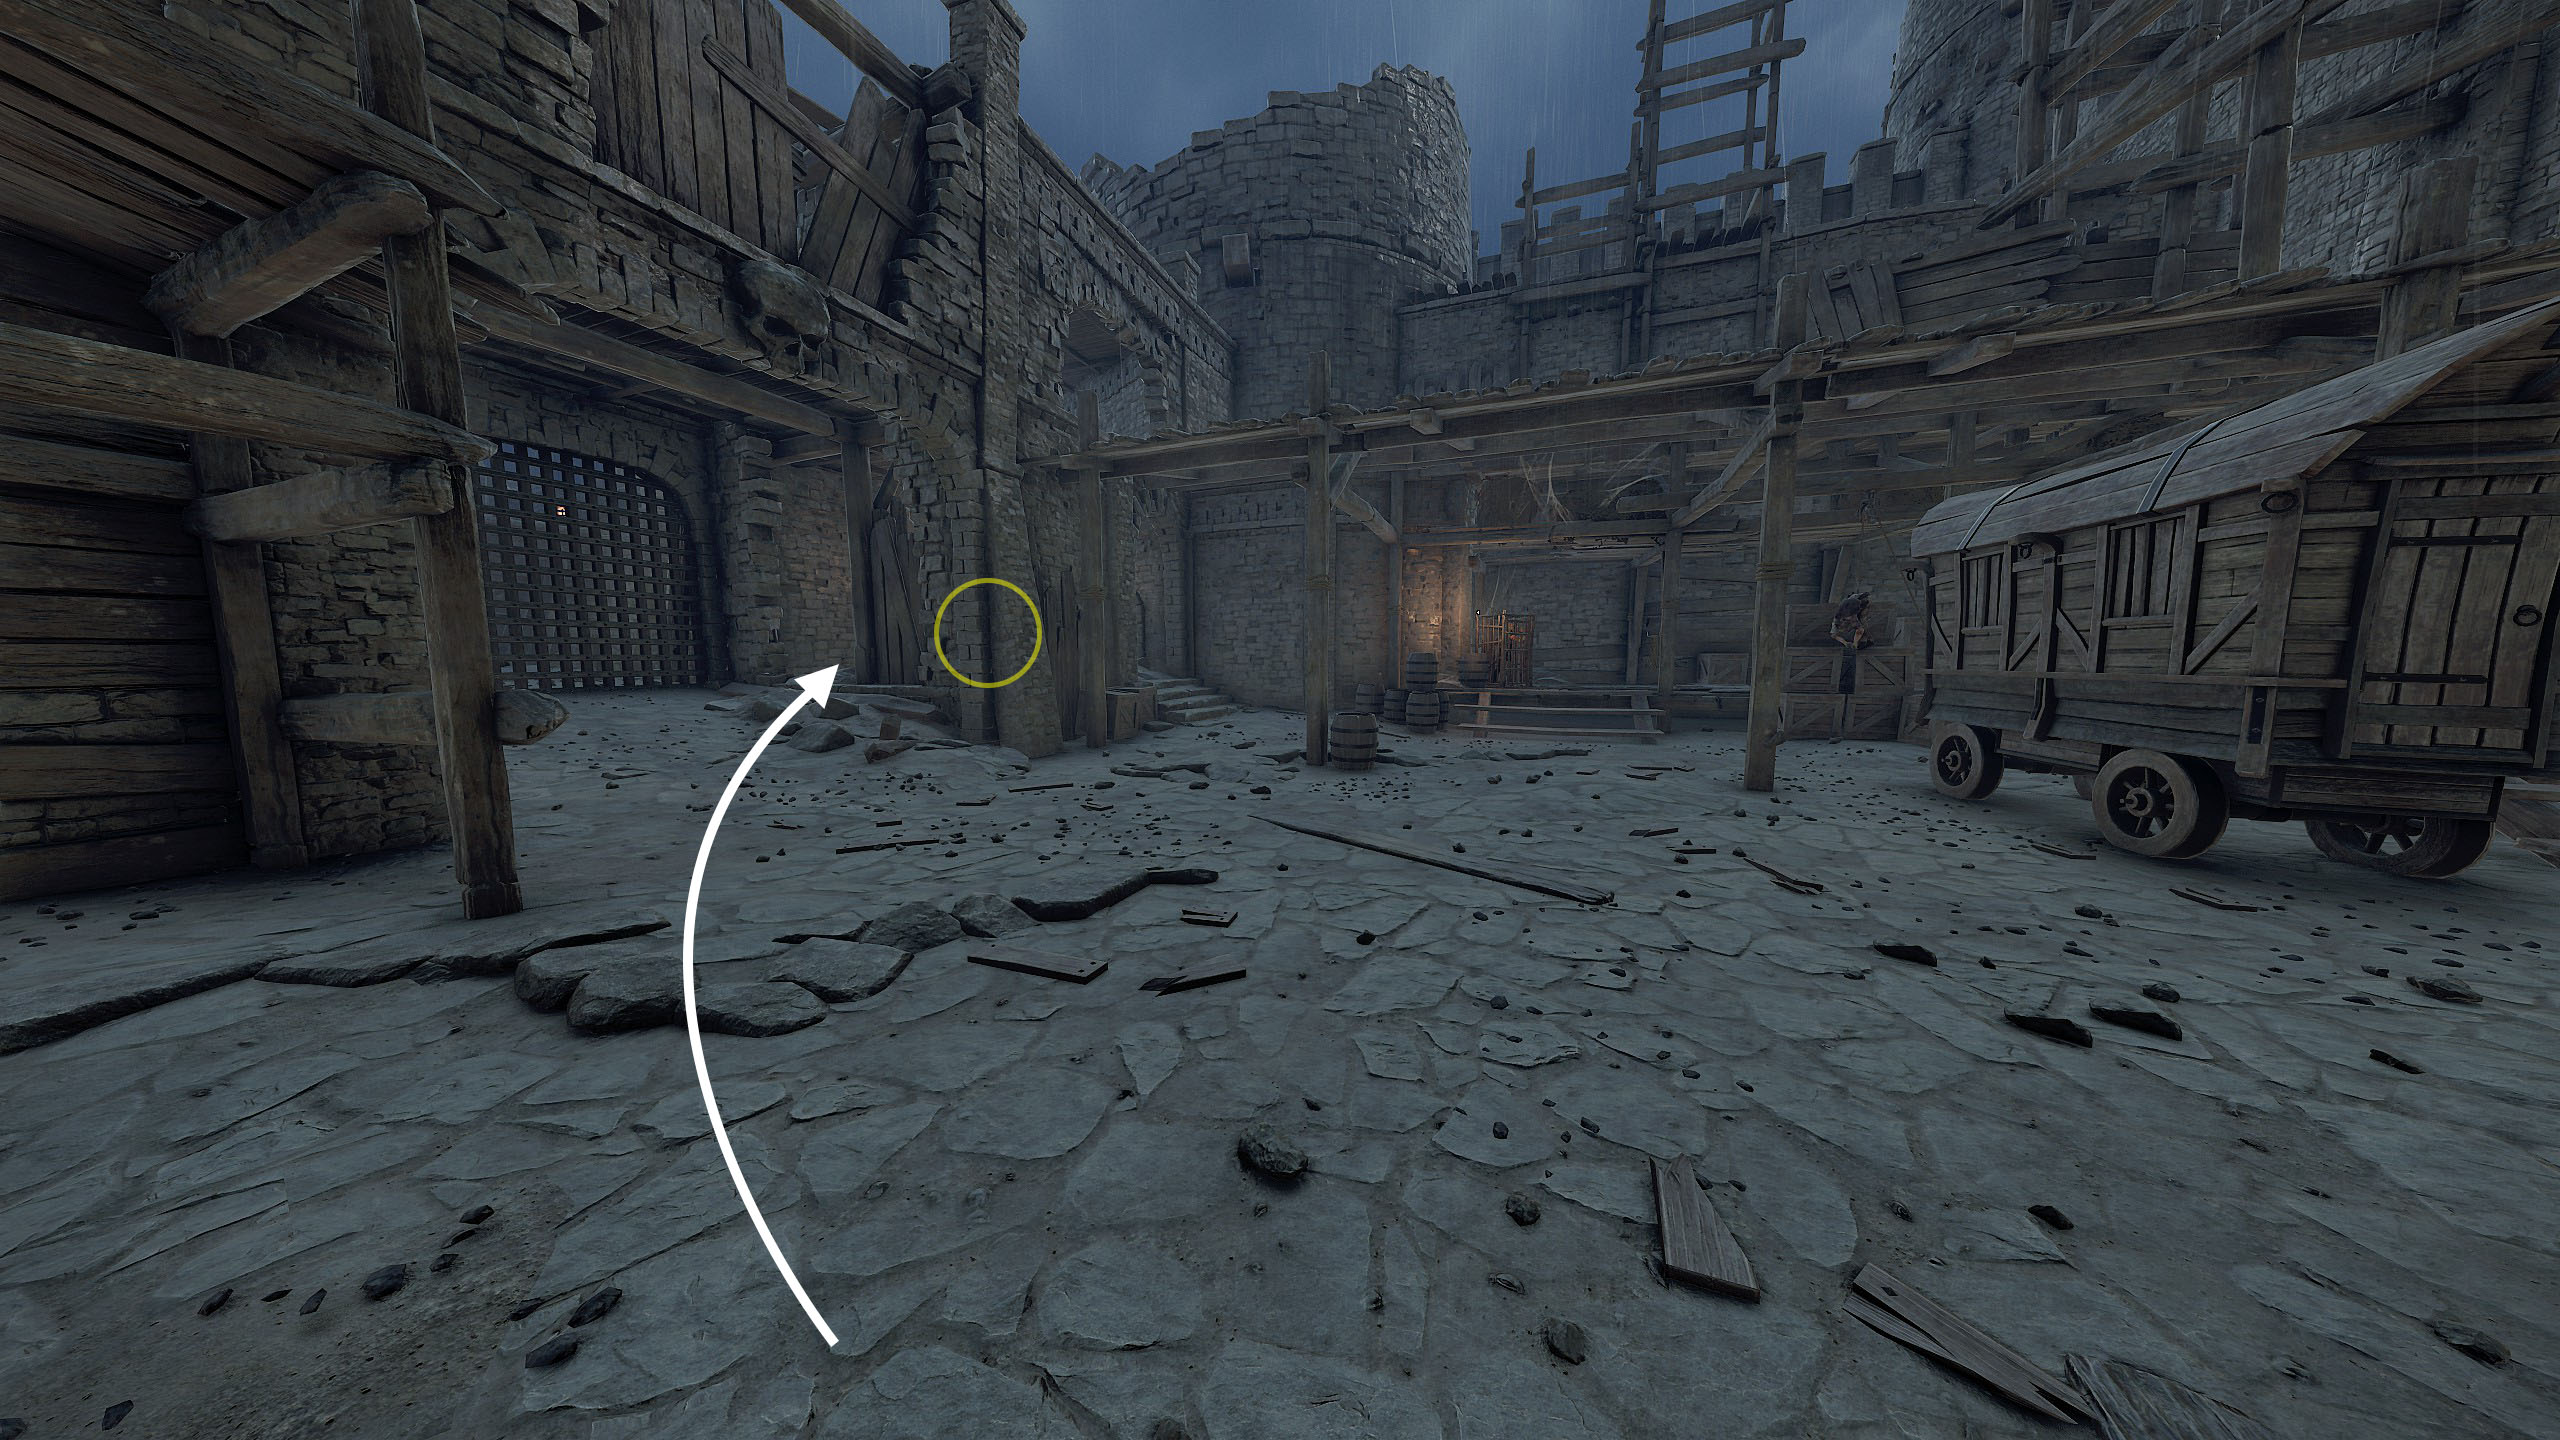
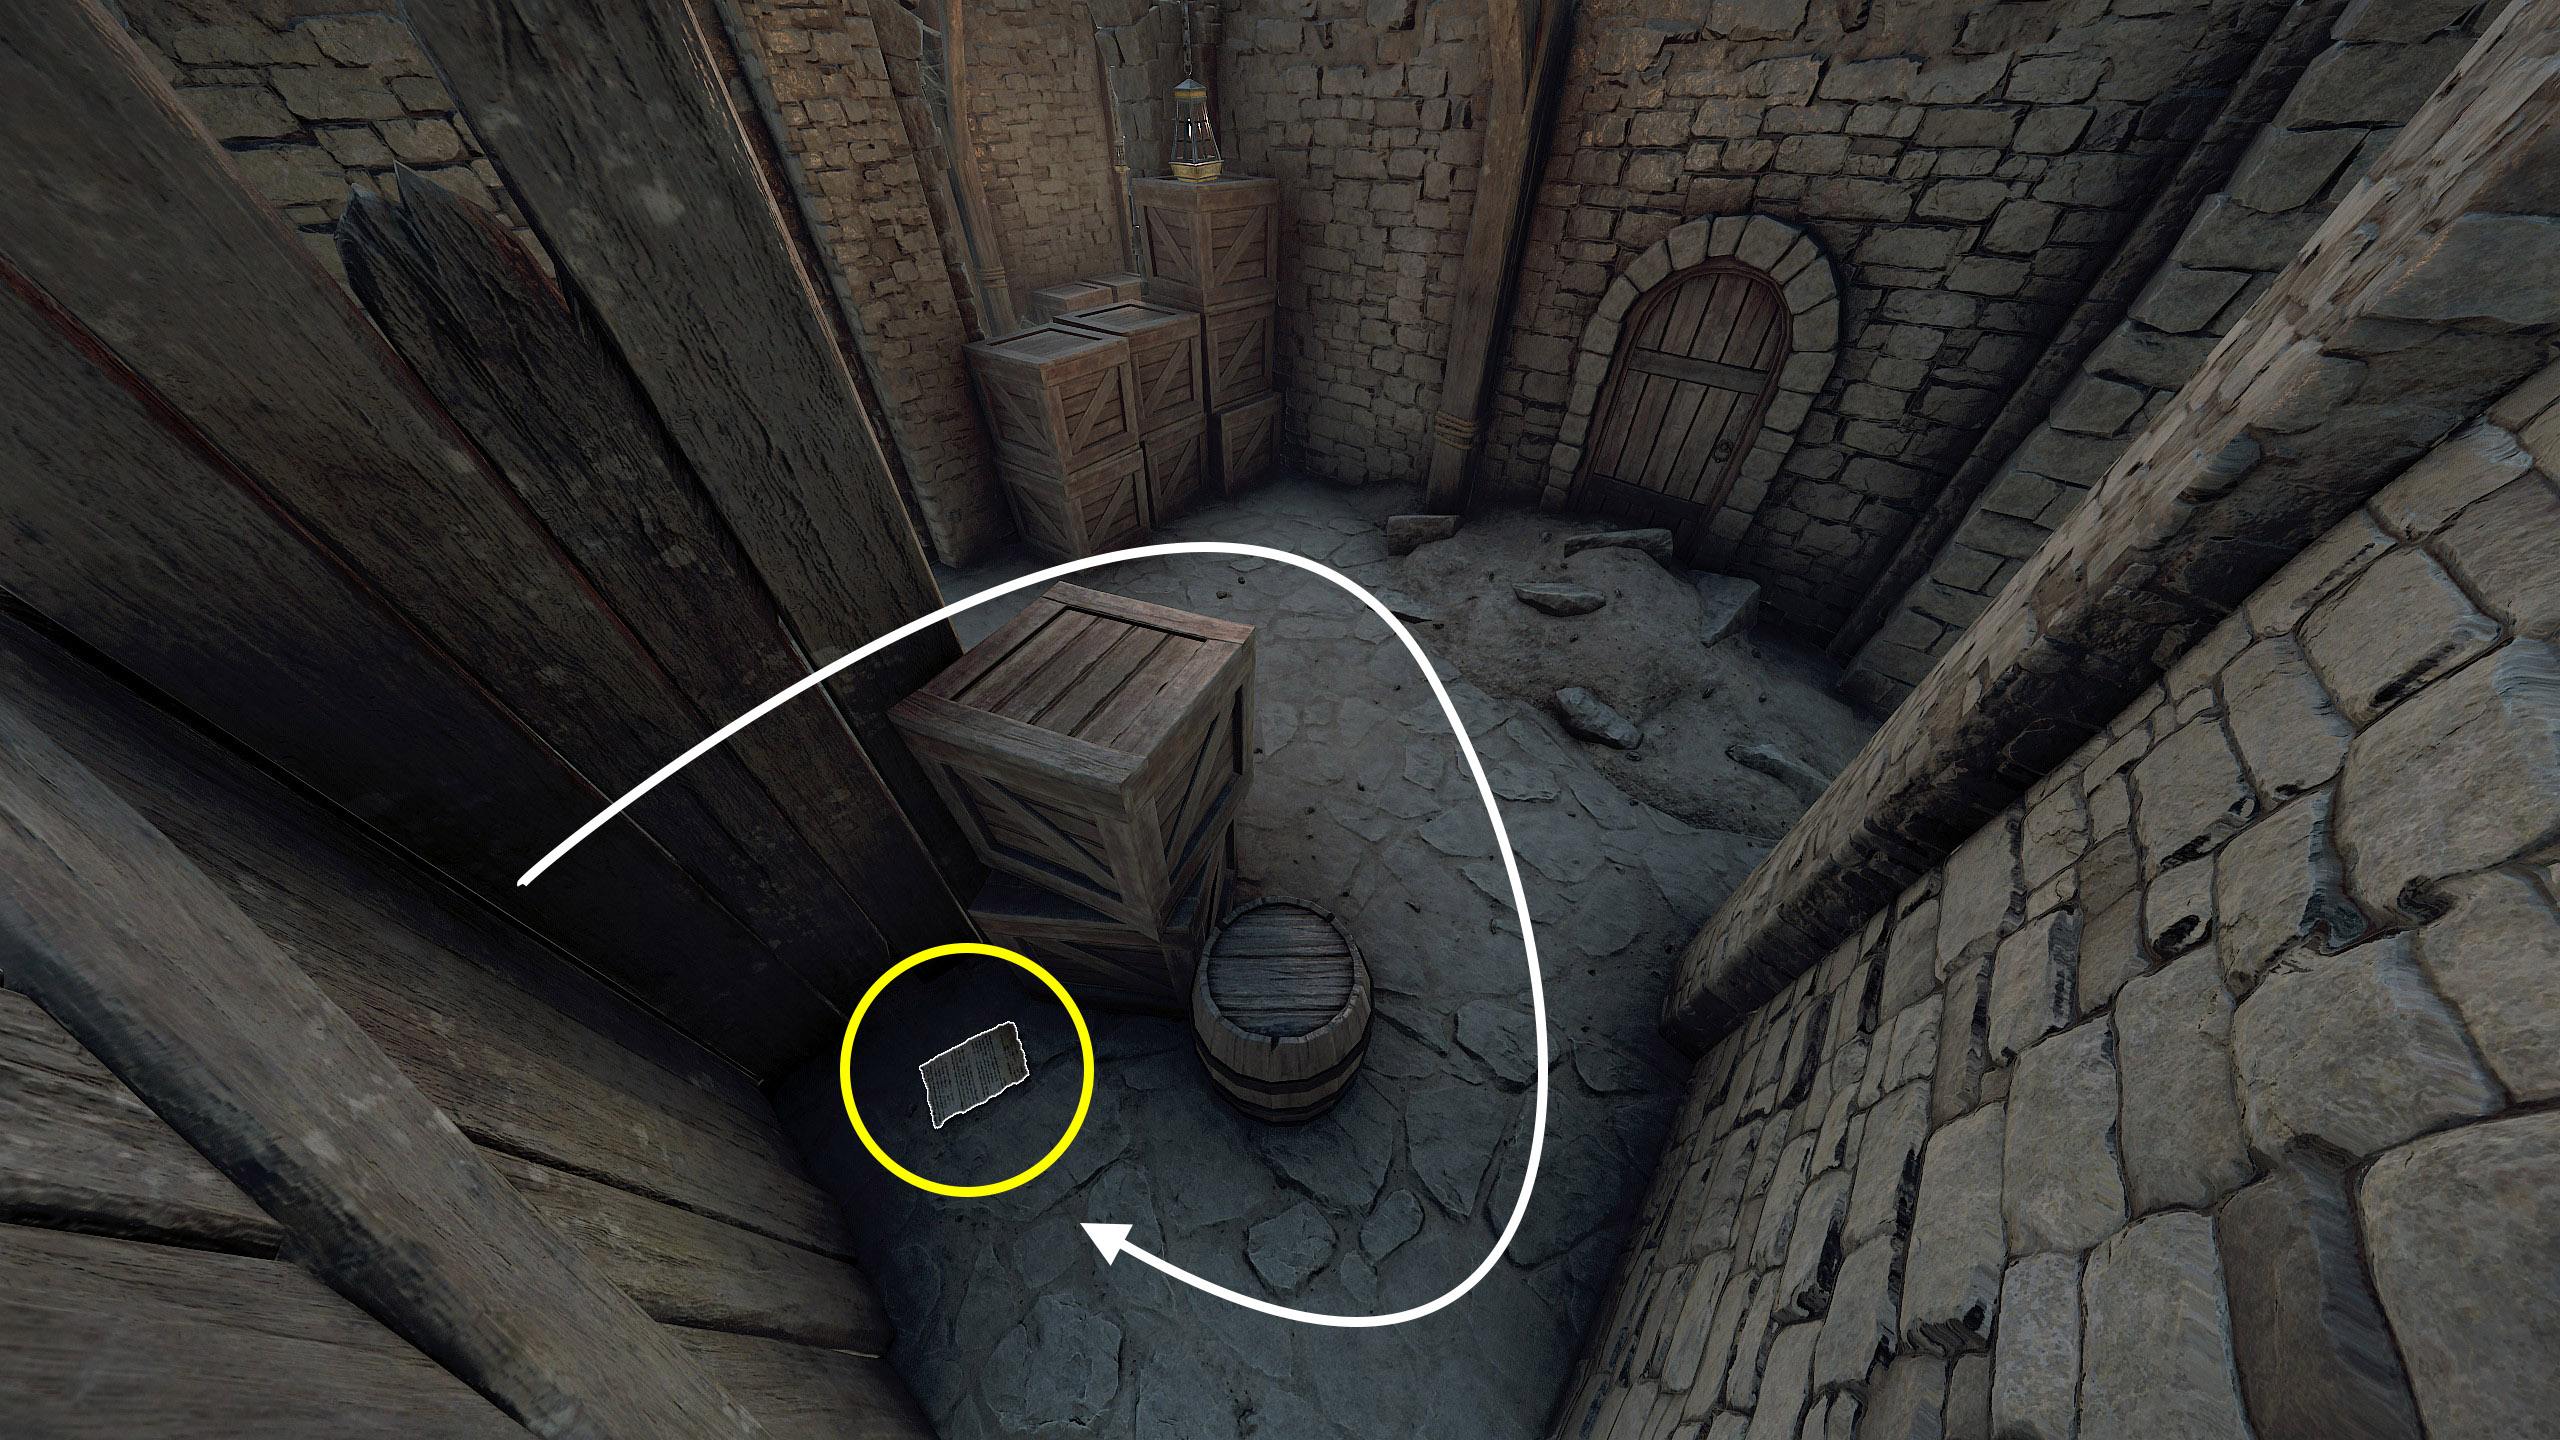
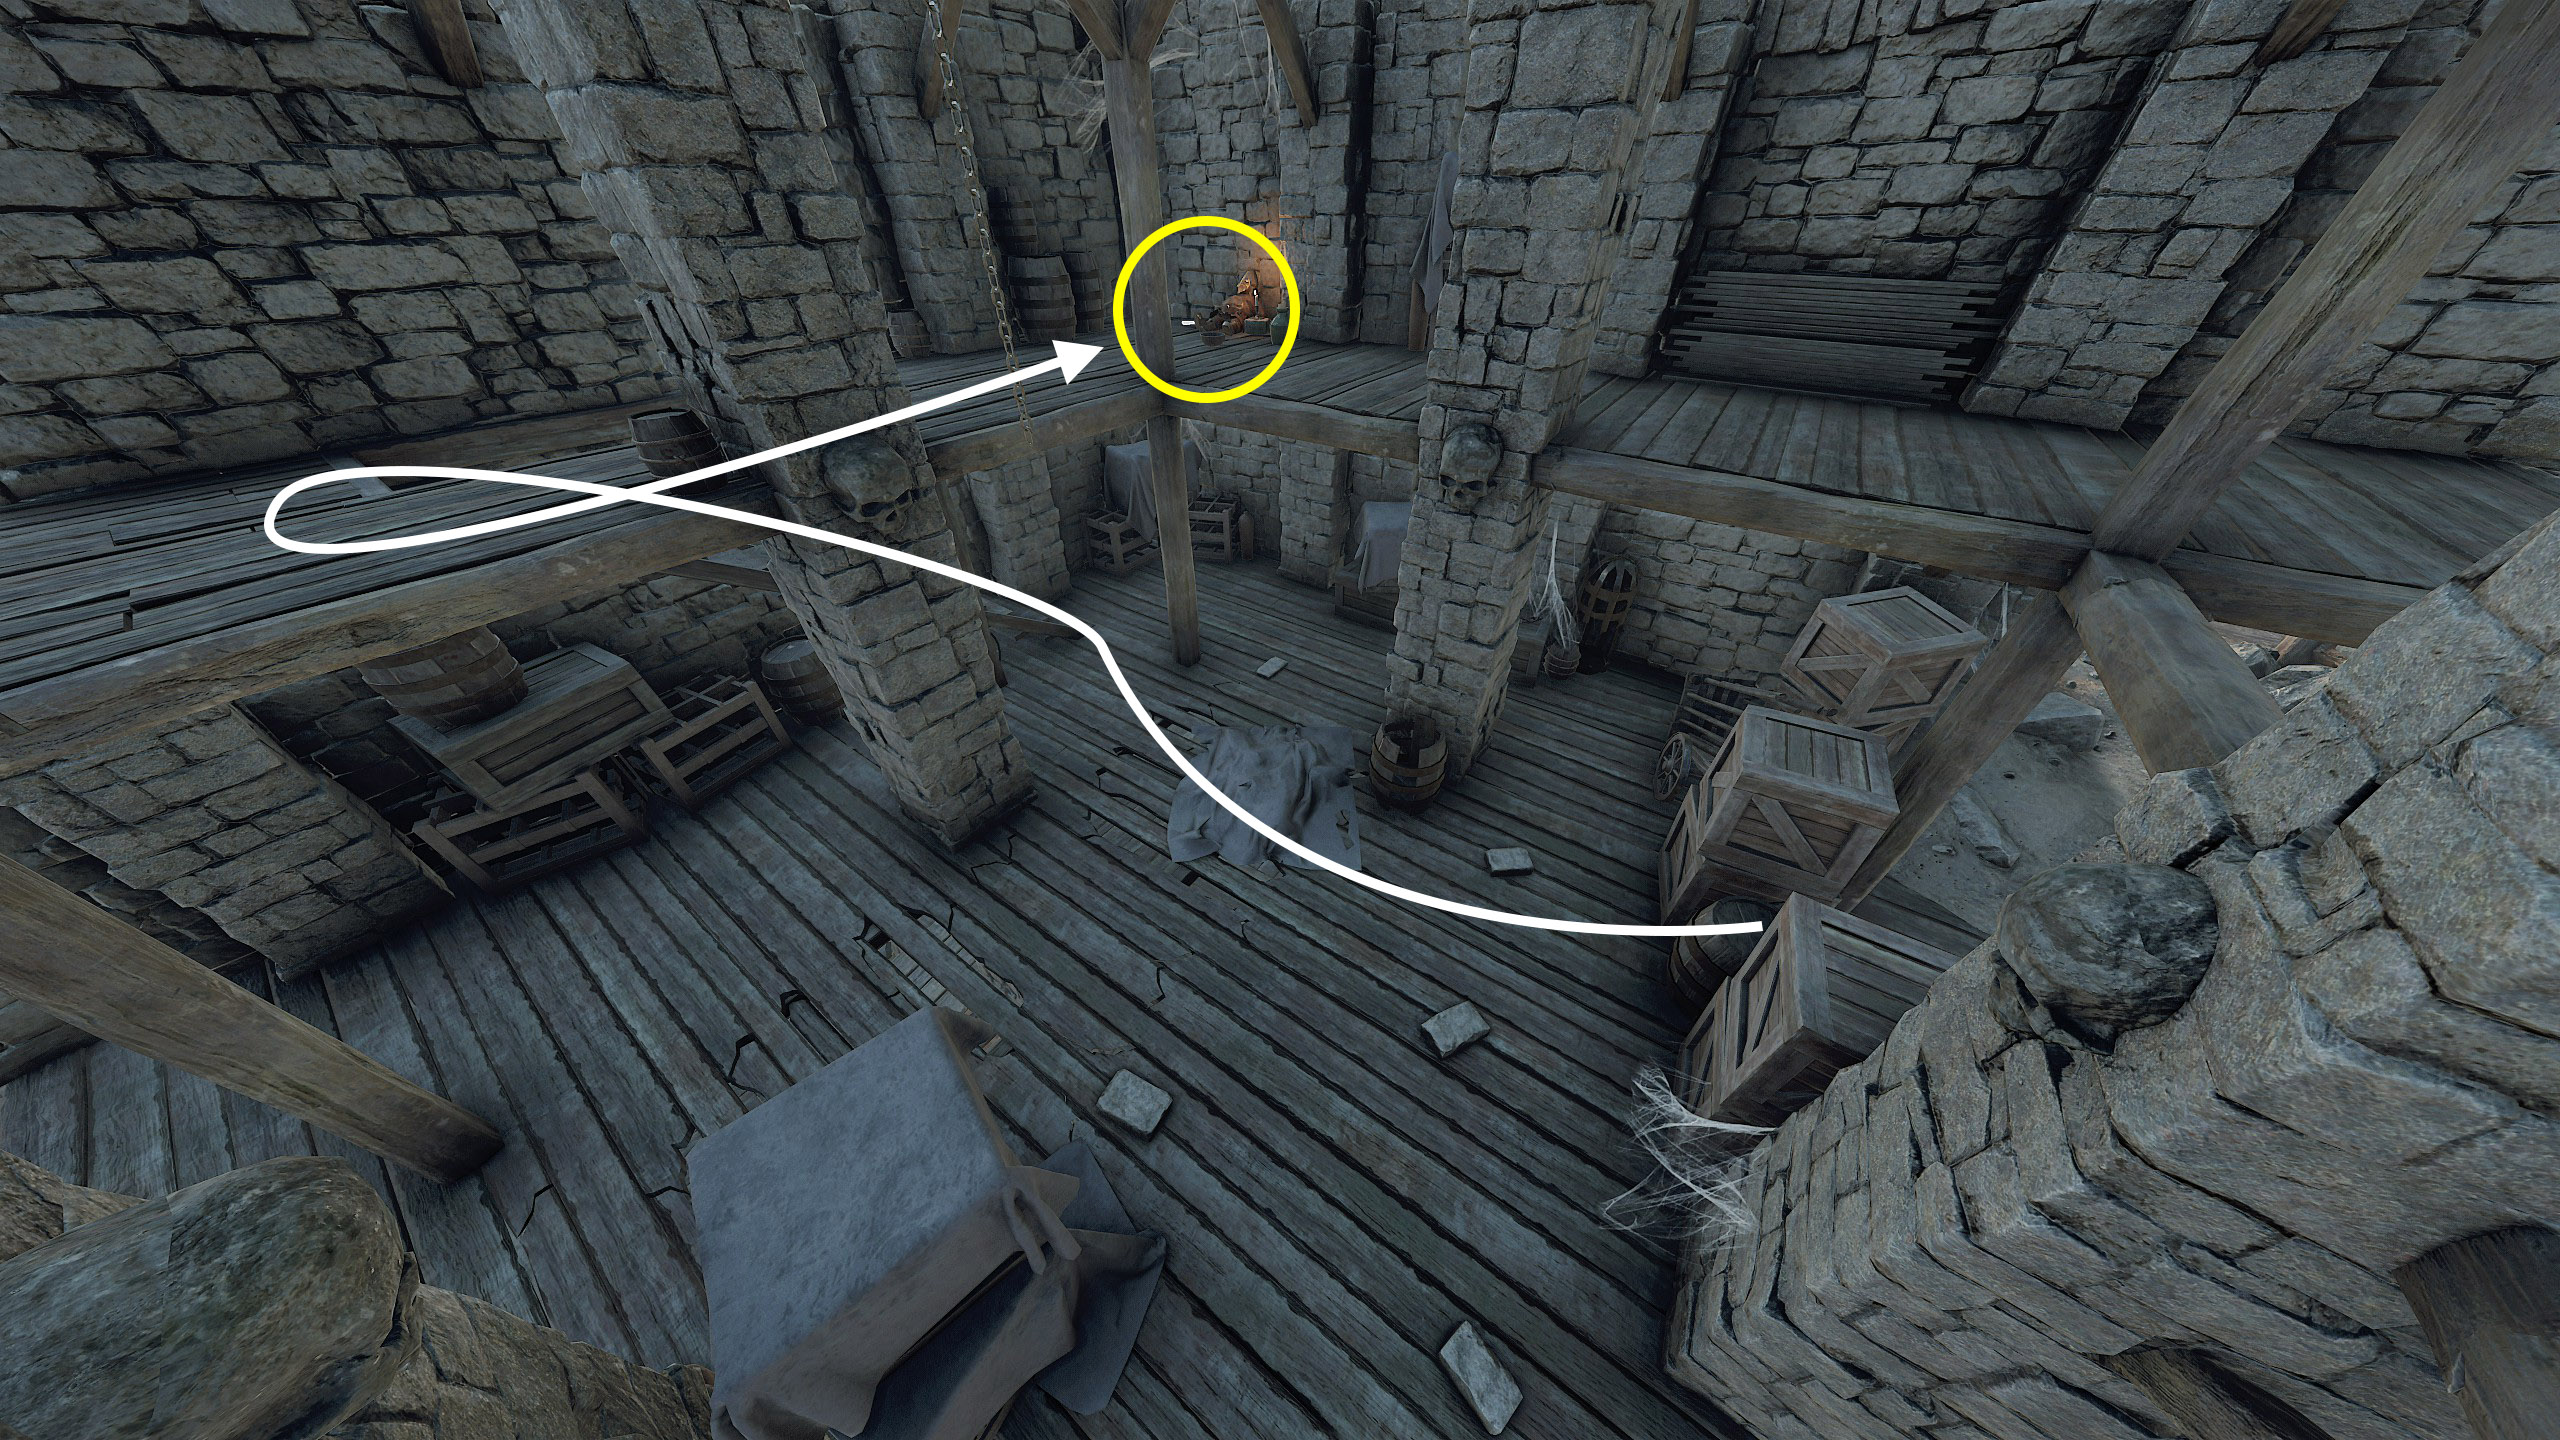
 2. A Fellow of Infinite Jest
Return the Skull in Blood in the Darkness The skull is in the under dropdown to prison area, where you will need to pull the wheel.
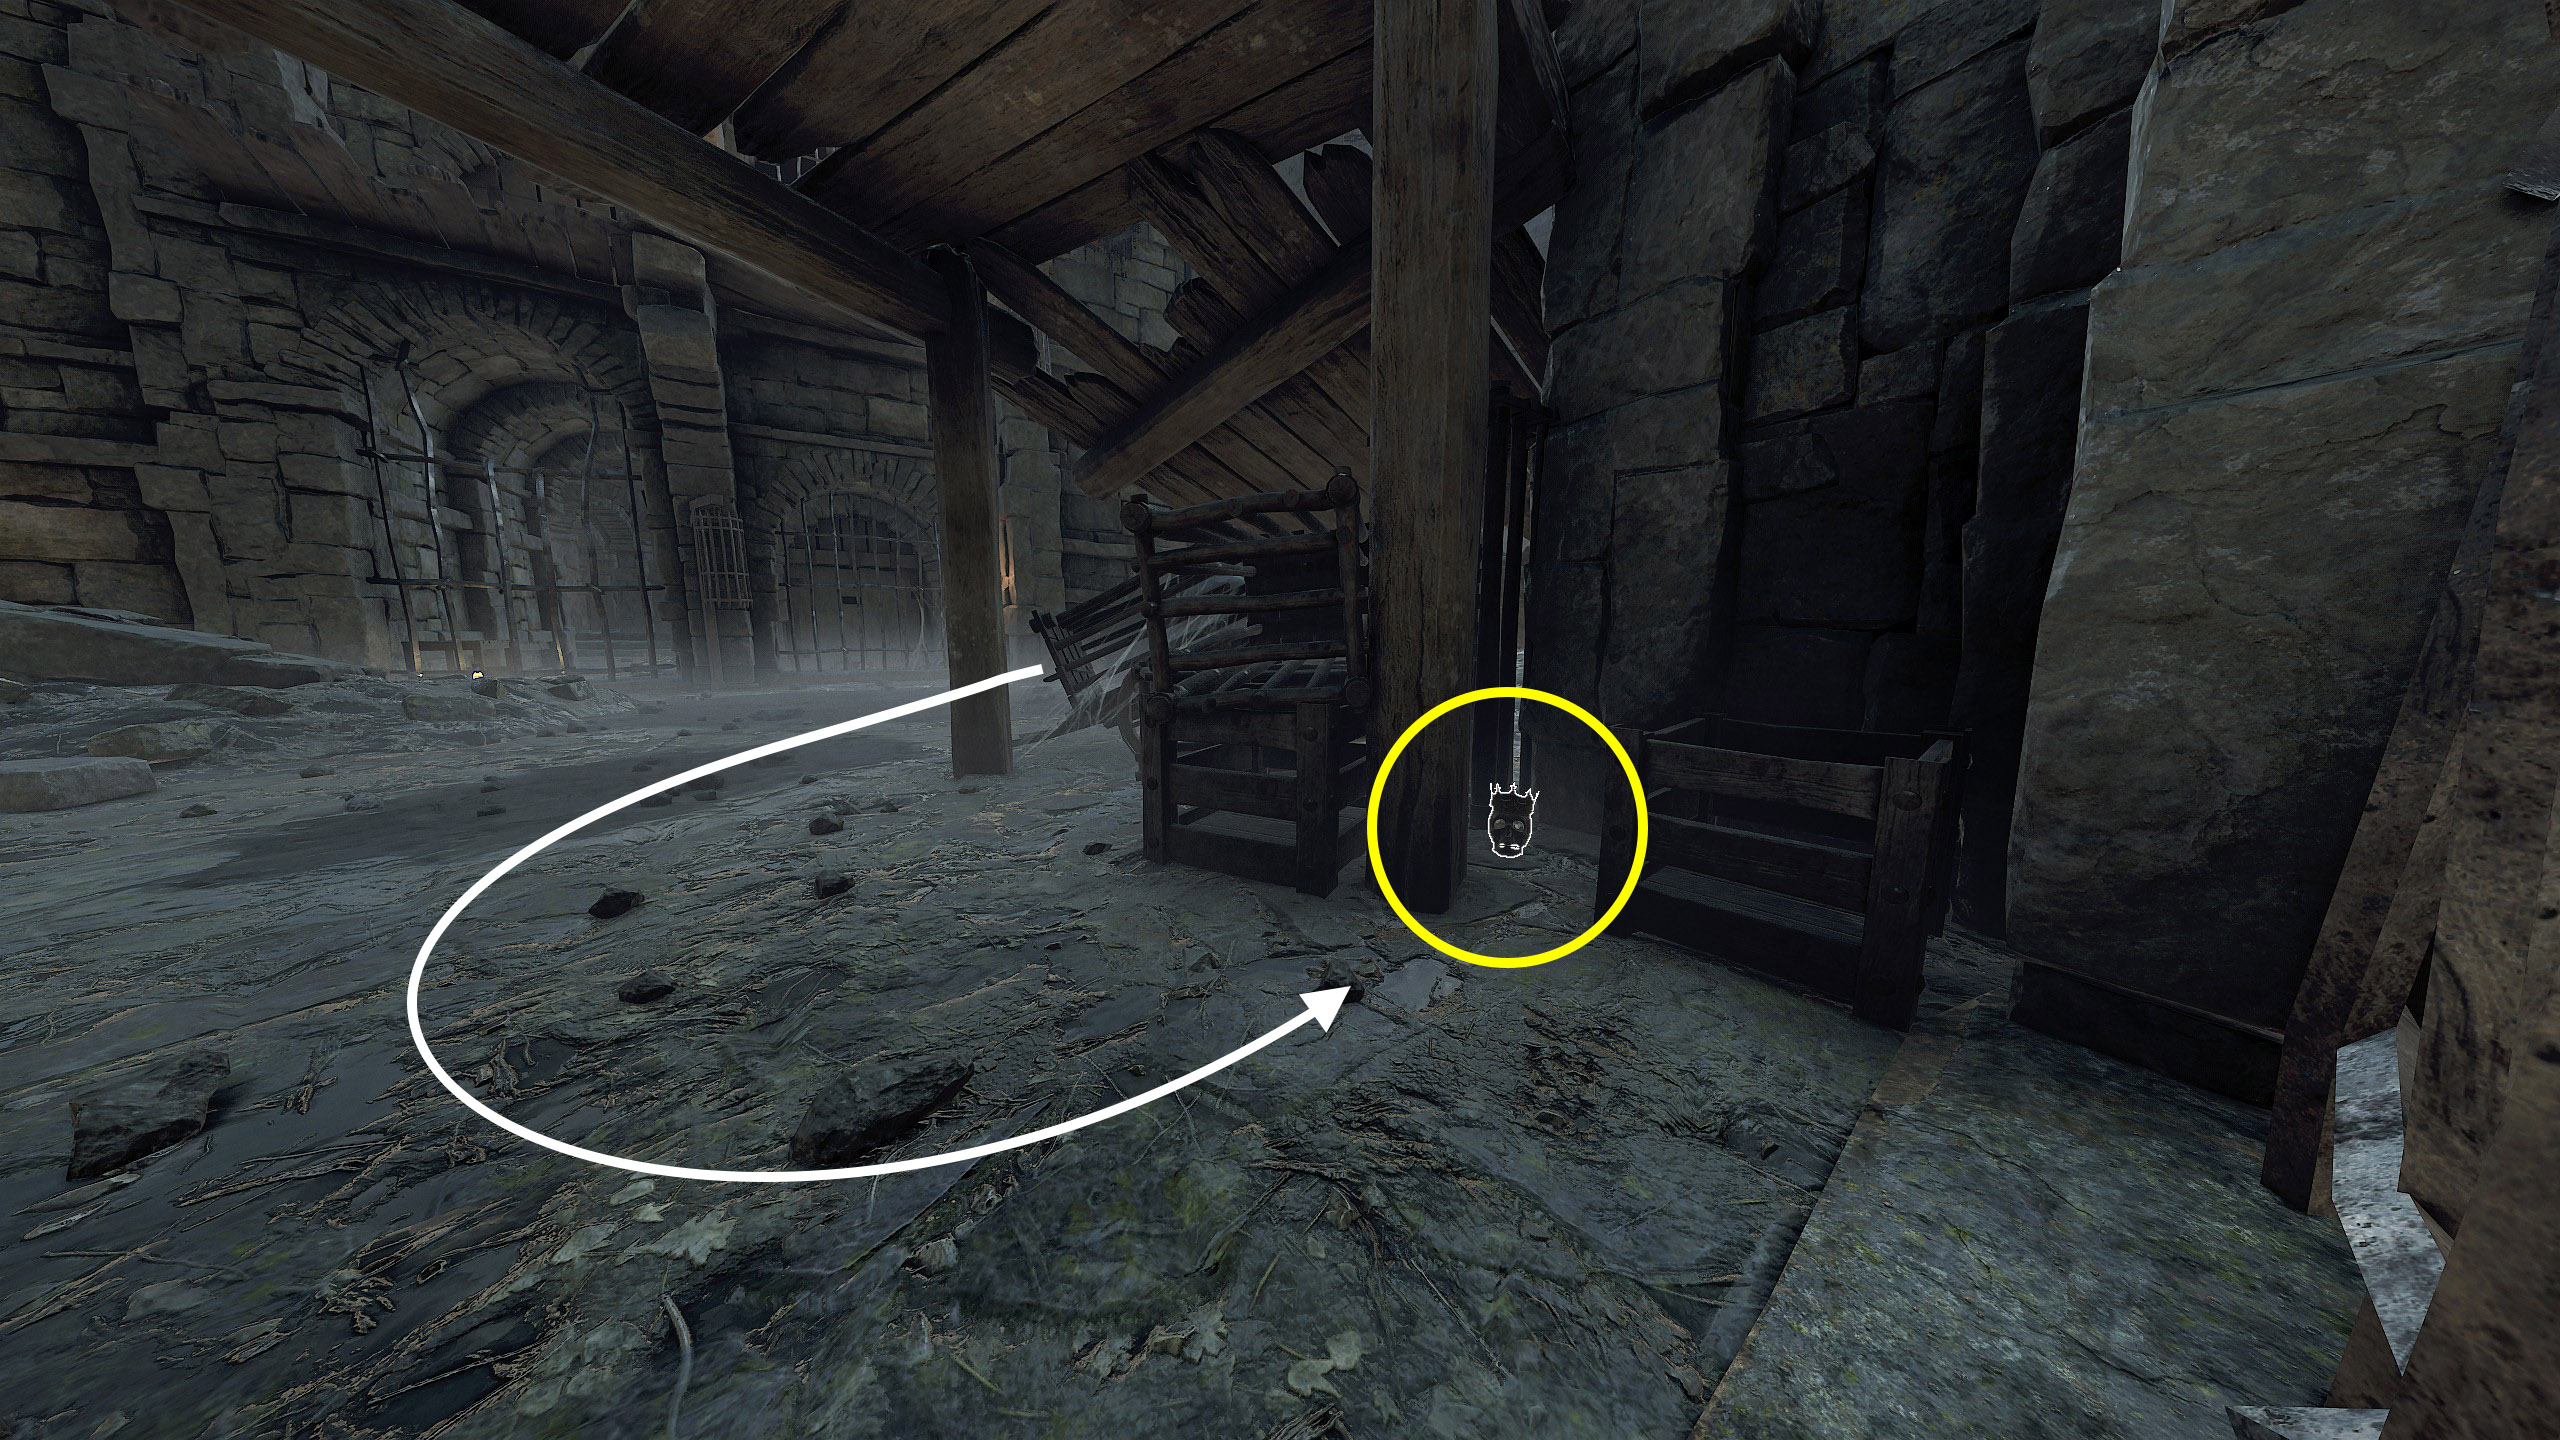 And then just place the skull on this table. It is after courtyard with prisoners, but before dropdown to boss.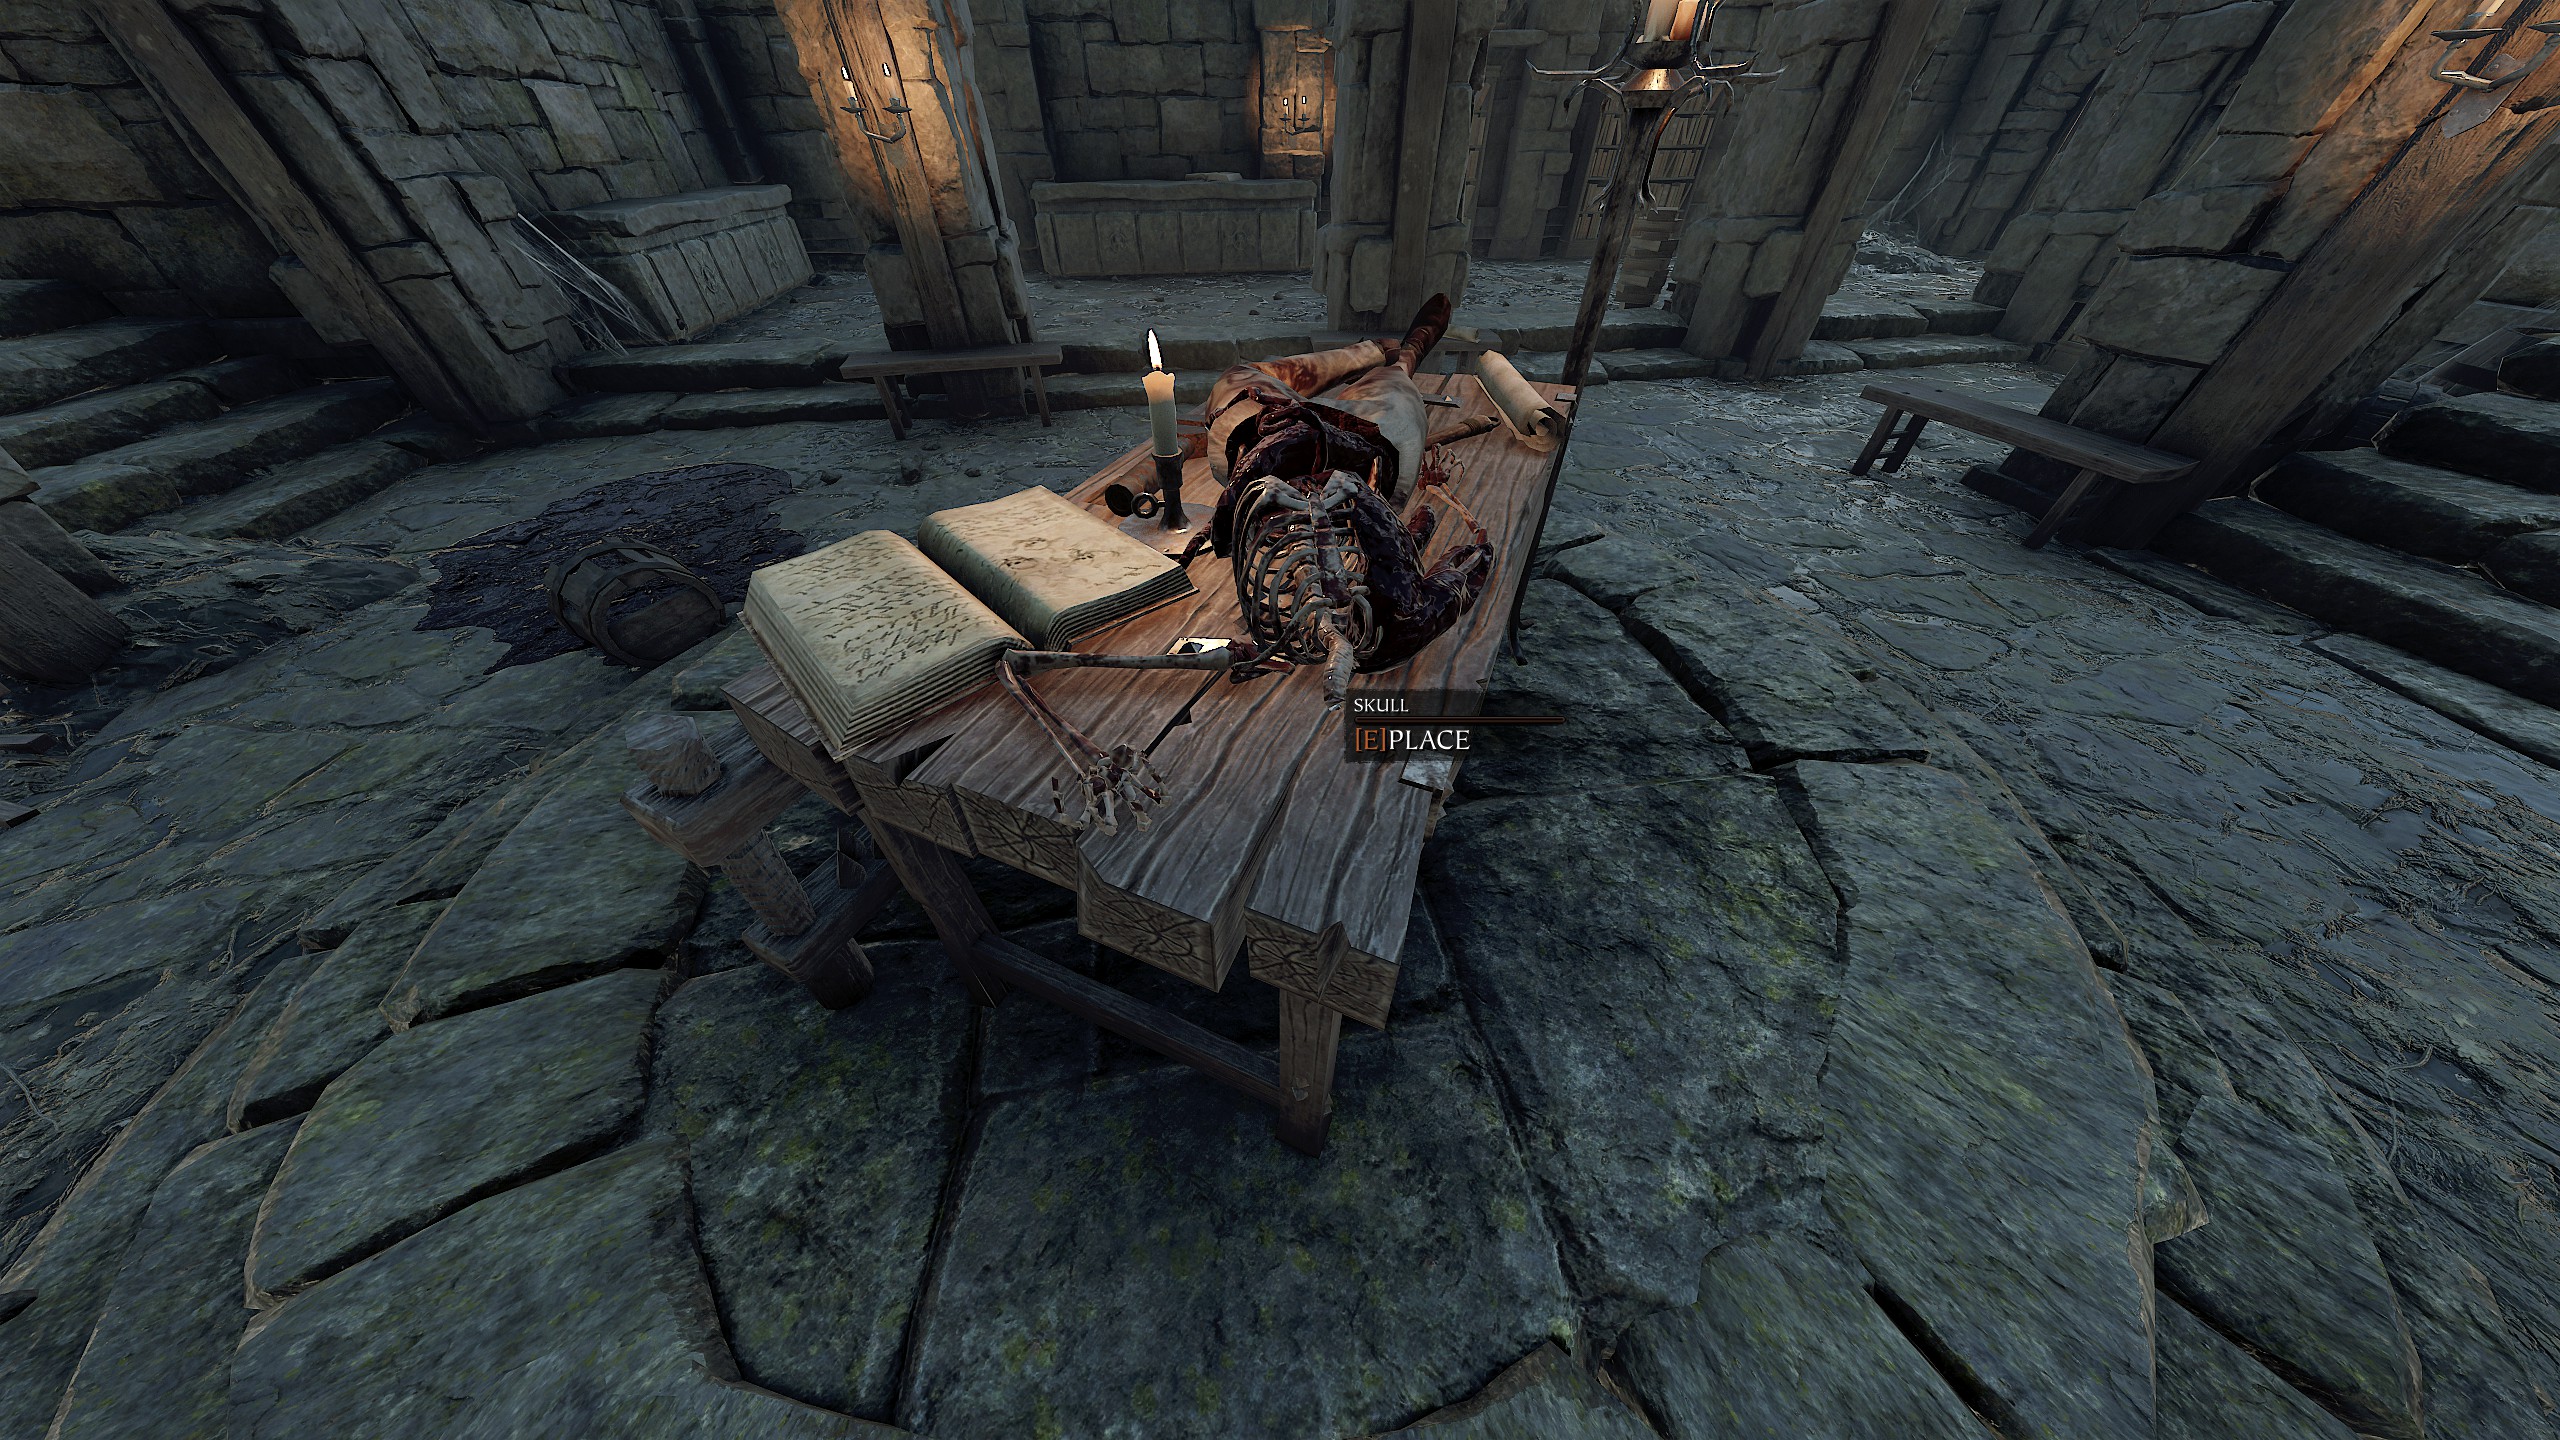
 3. Is That All You've Got?
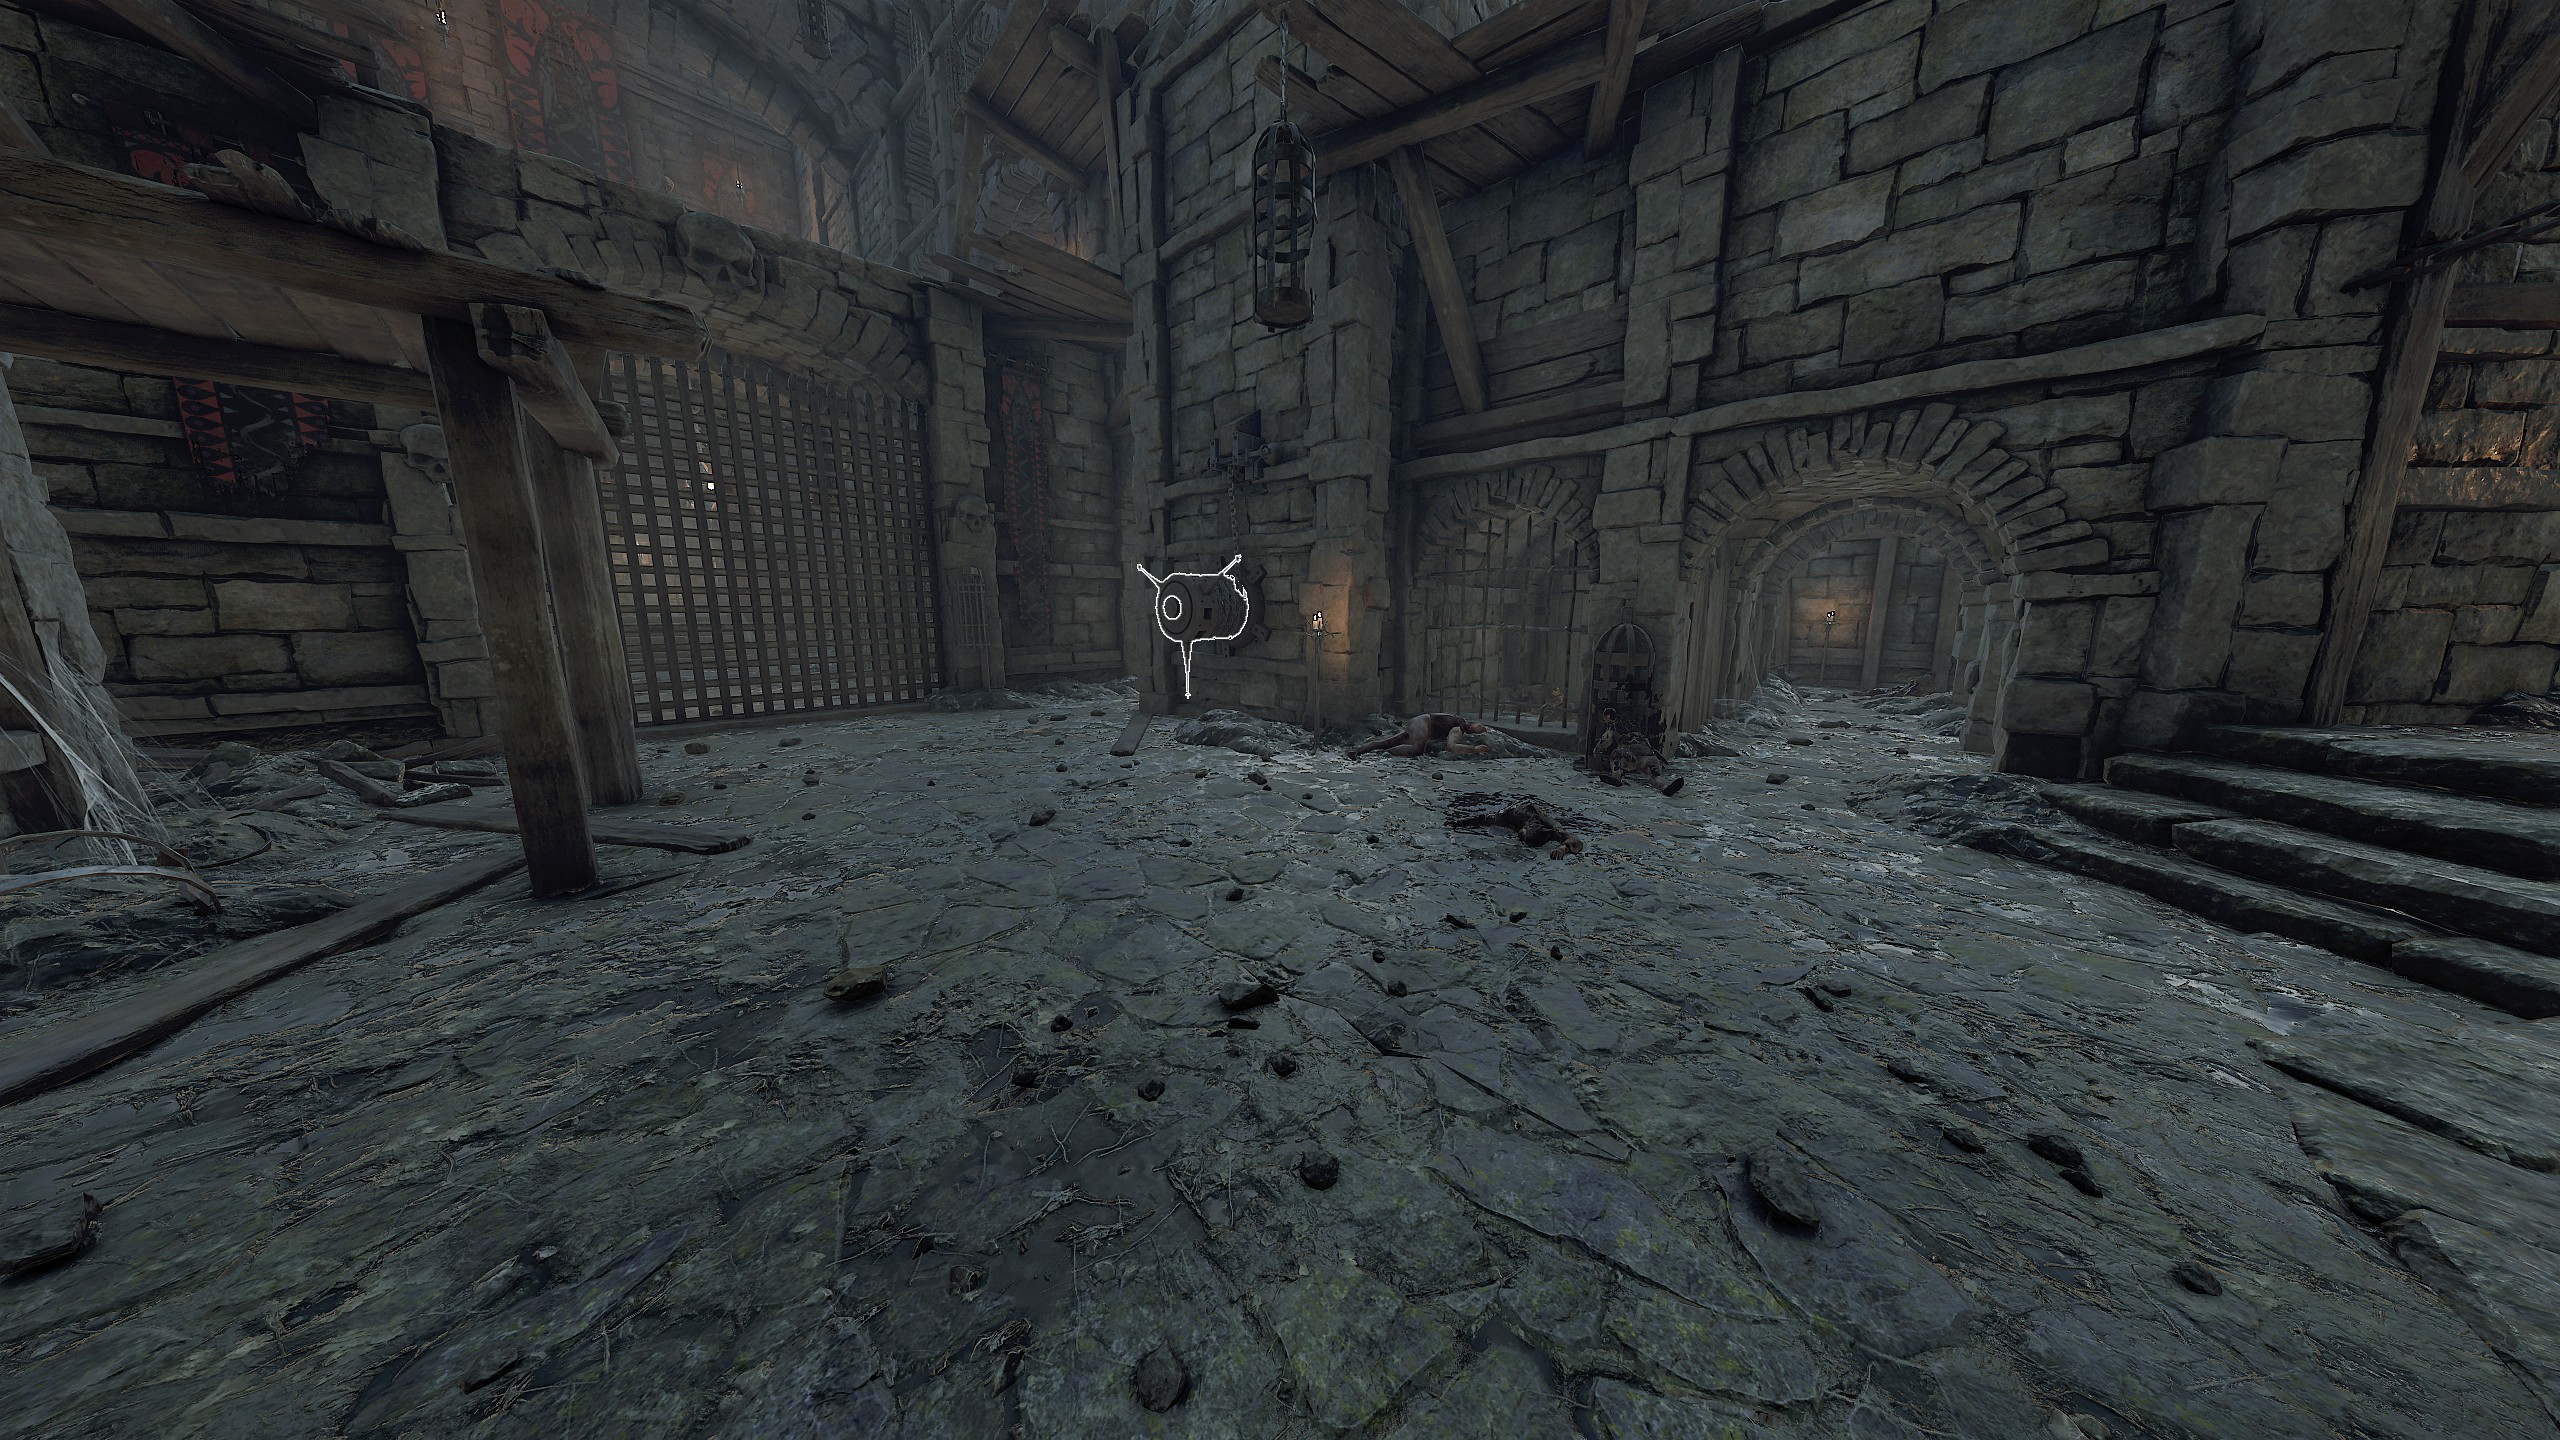
Remain inside the cellblock and defeat all Enemies for the duration of the event in Blood in the Darkness Simply kill everyone after pulling wheel in prison area. The challenge will be completed after death of the last enemy. Last waves of enemies will be with Chaos Warriors.
 4. Courtyard Sprint
Rescue all prisoners from the Courtyard within 50 seconds in Blood in the Darkness
It is recommended to use a mobile hero for this challenge, for example Slayer, Handmaiden, Battle Wizard, and find 2+ concentration/speed potions. To avoid difficulties with enemies during the run, select the “Recruit” difficulty.
The timer starts after the first opened cage. There are nine (9) cages, the challenge will be completed after the last one.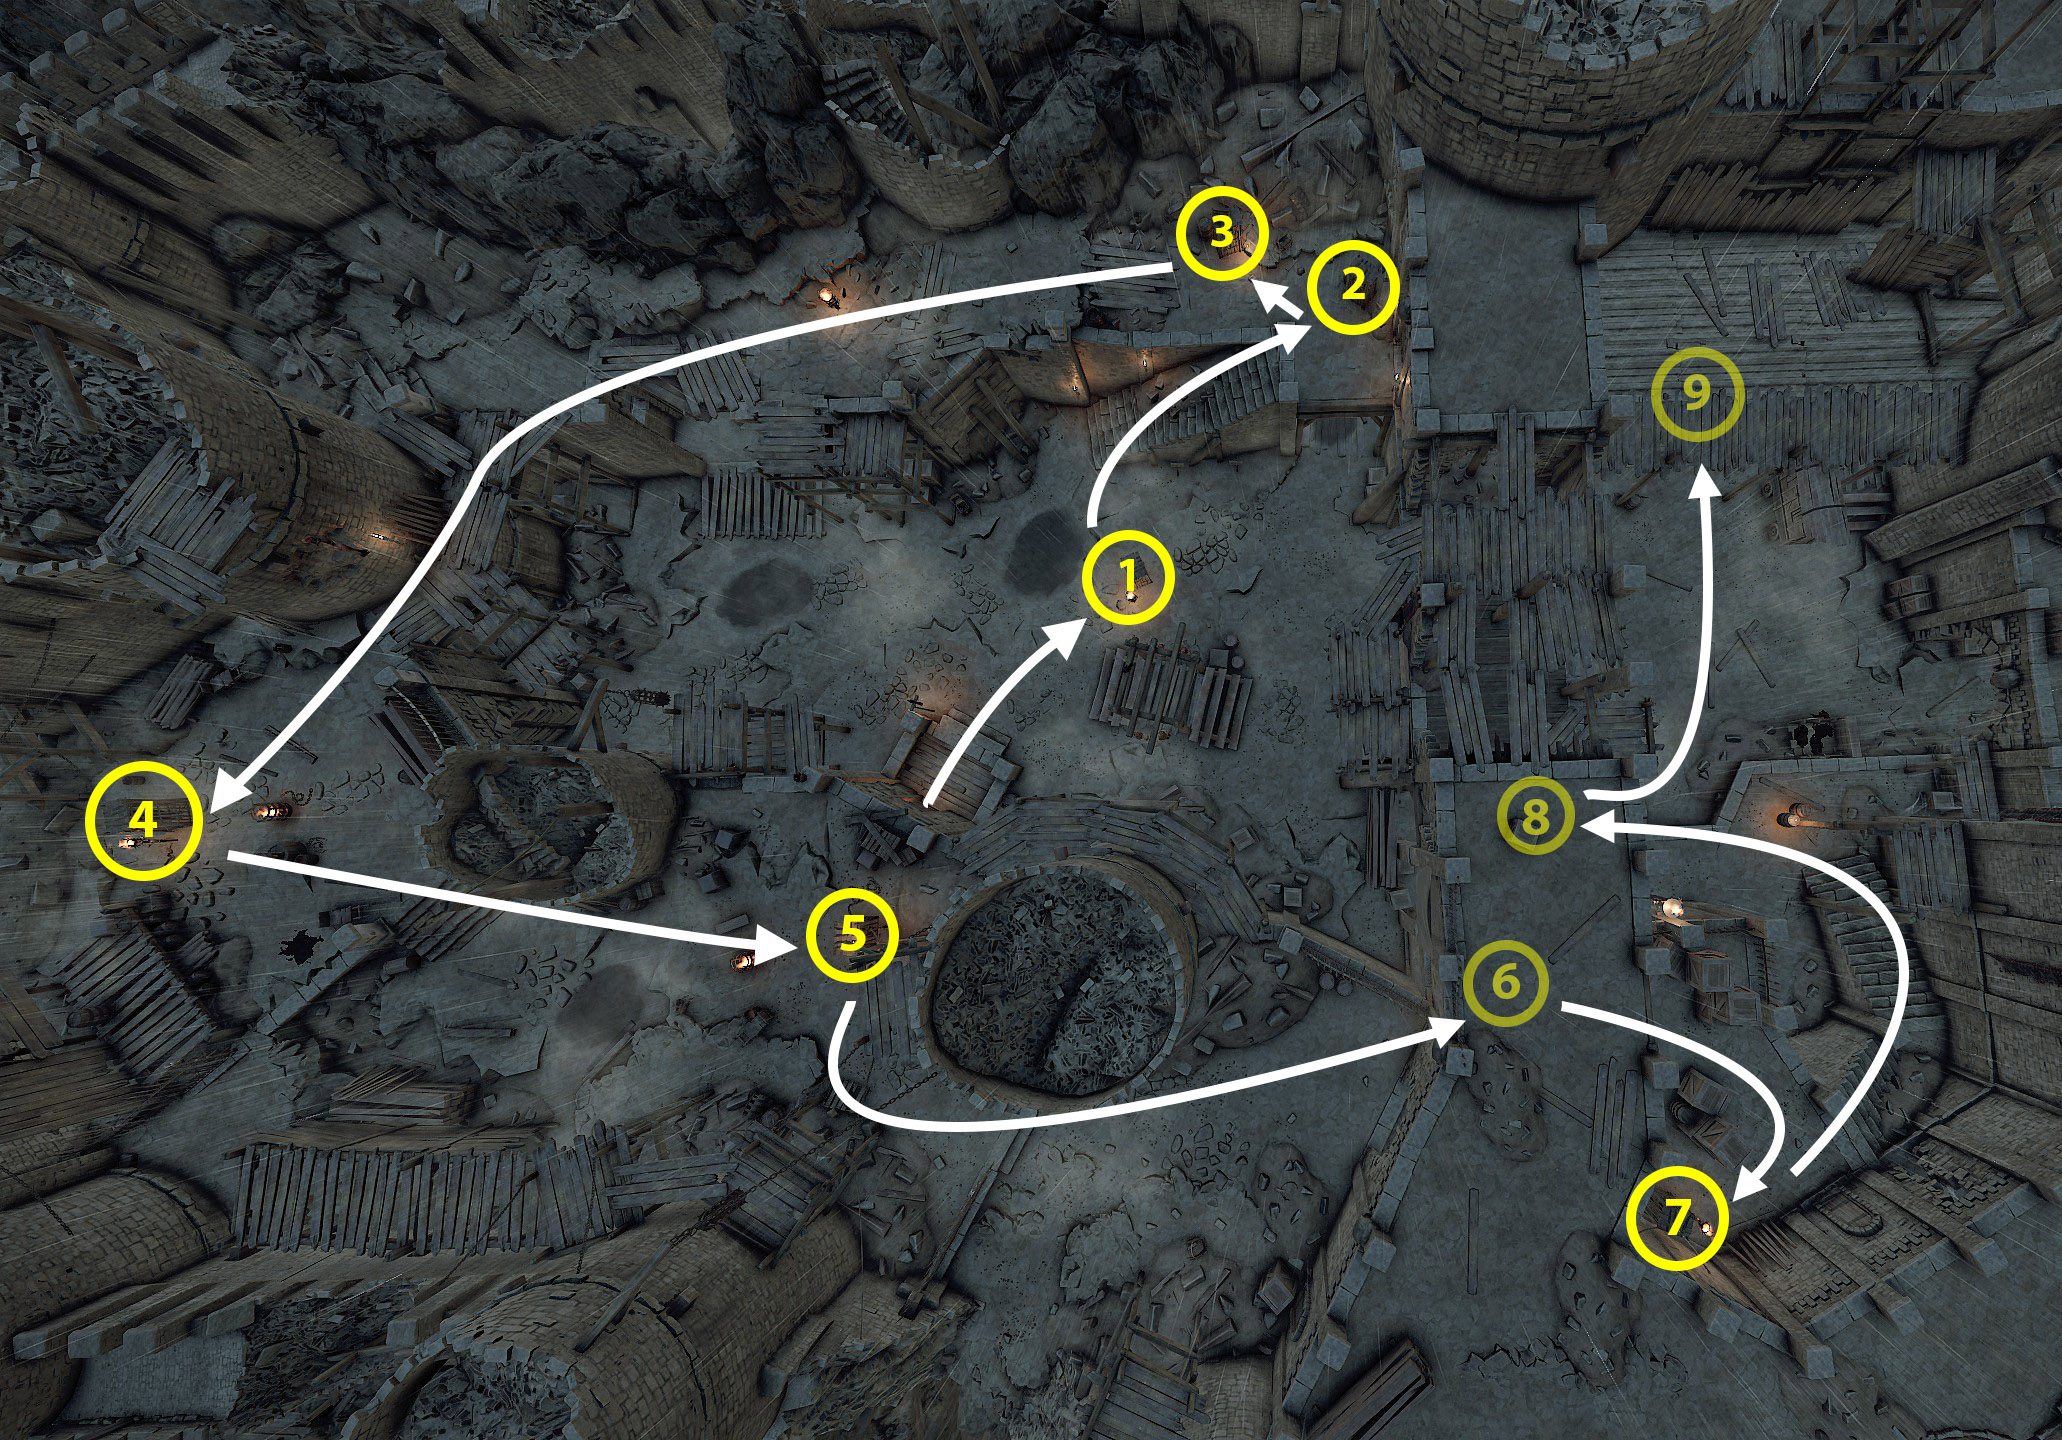
https://www.youtube.com/watch?v=wuAqD54TMoE
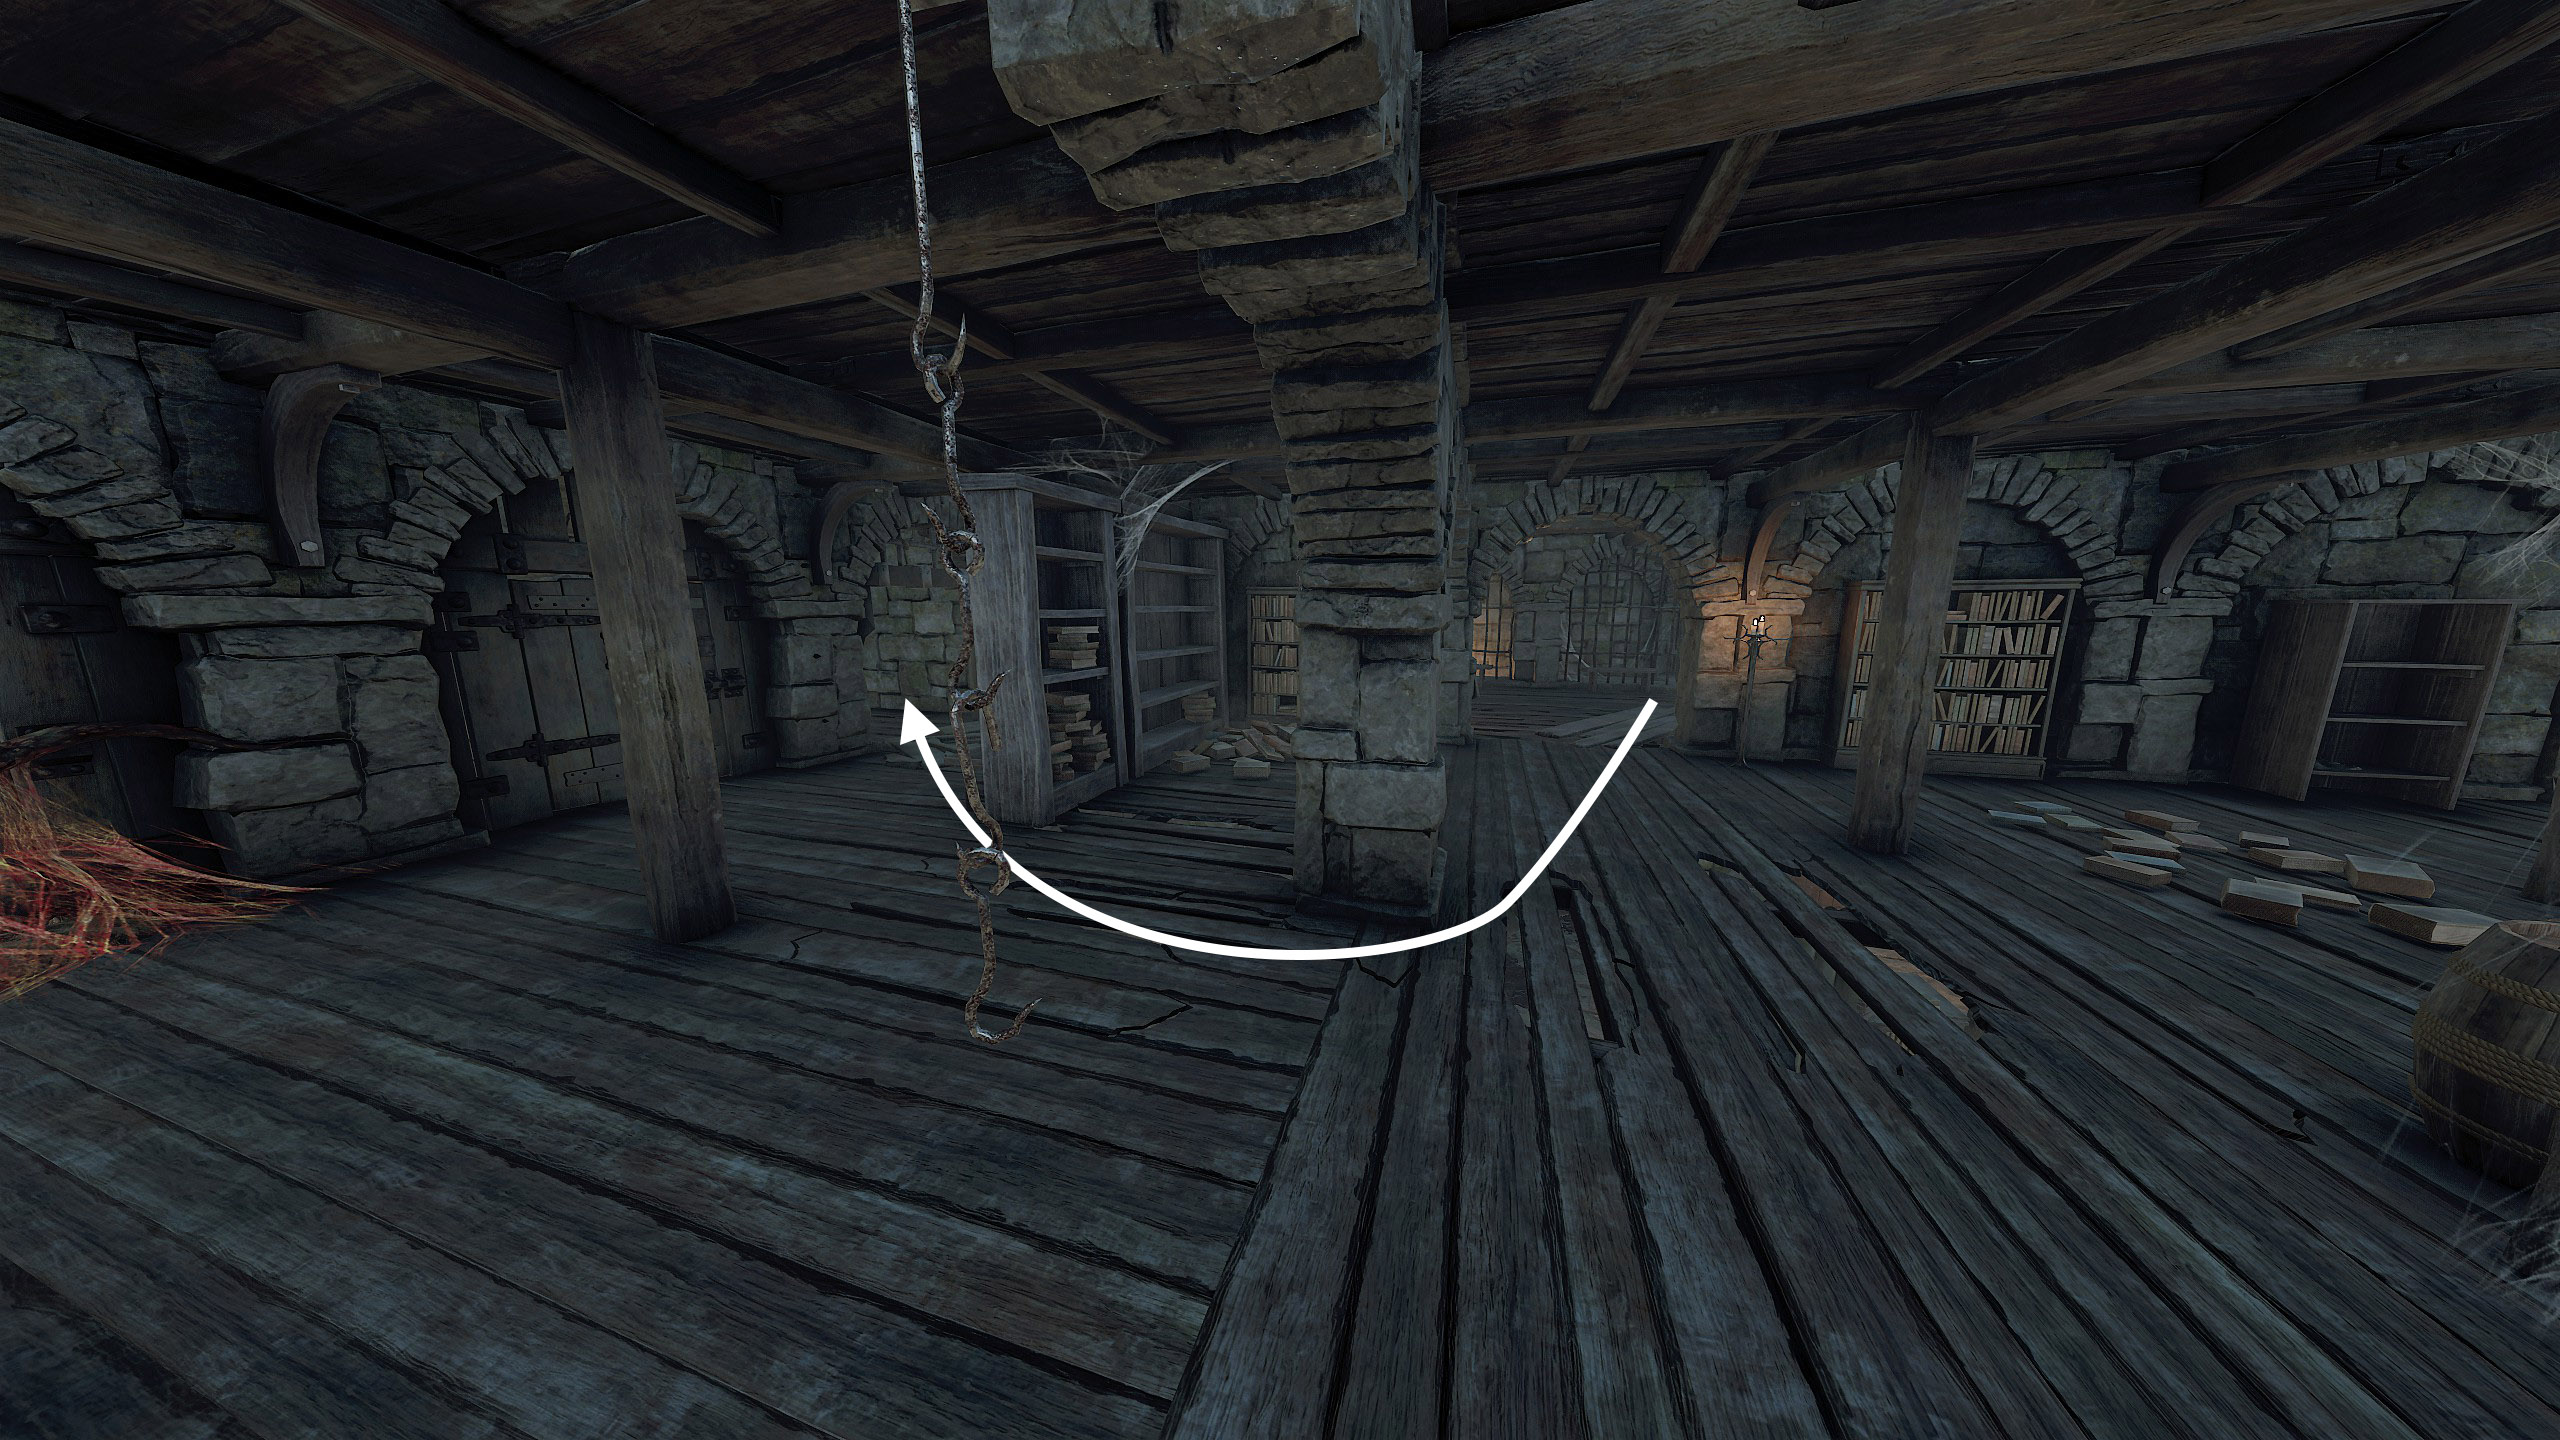
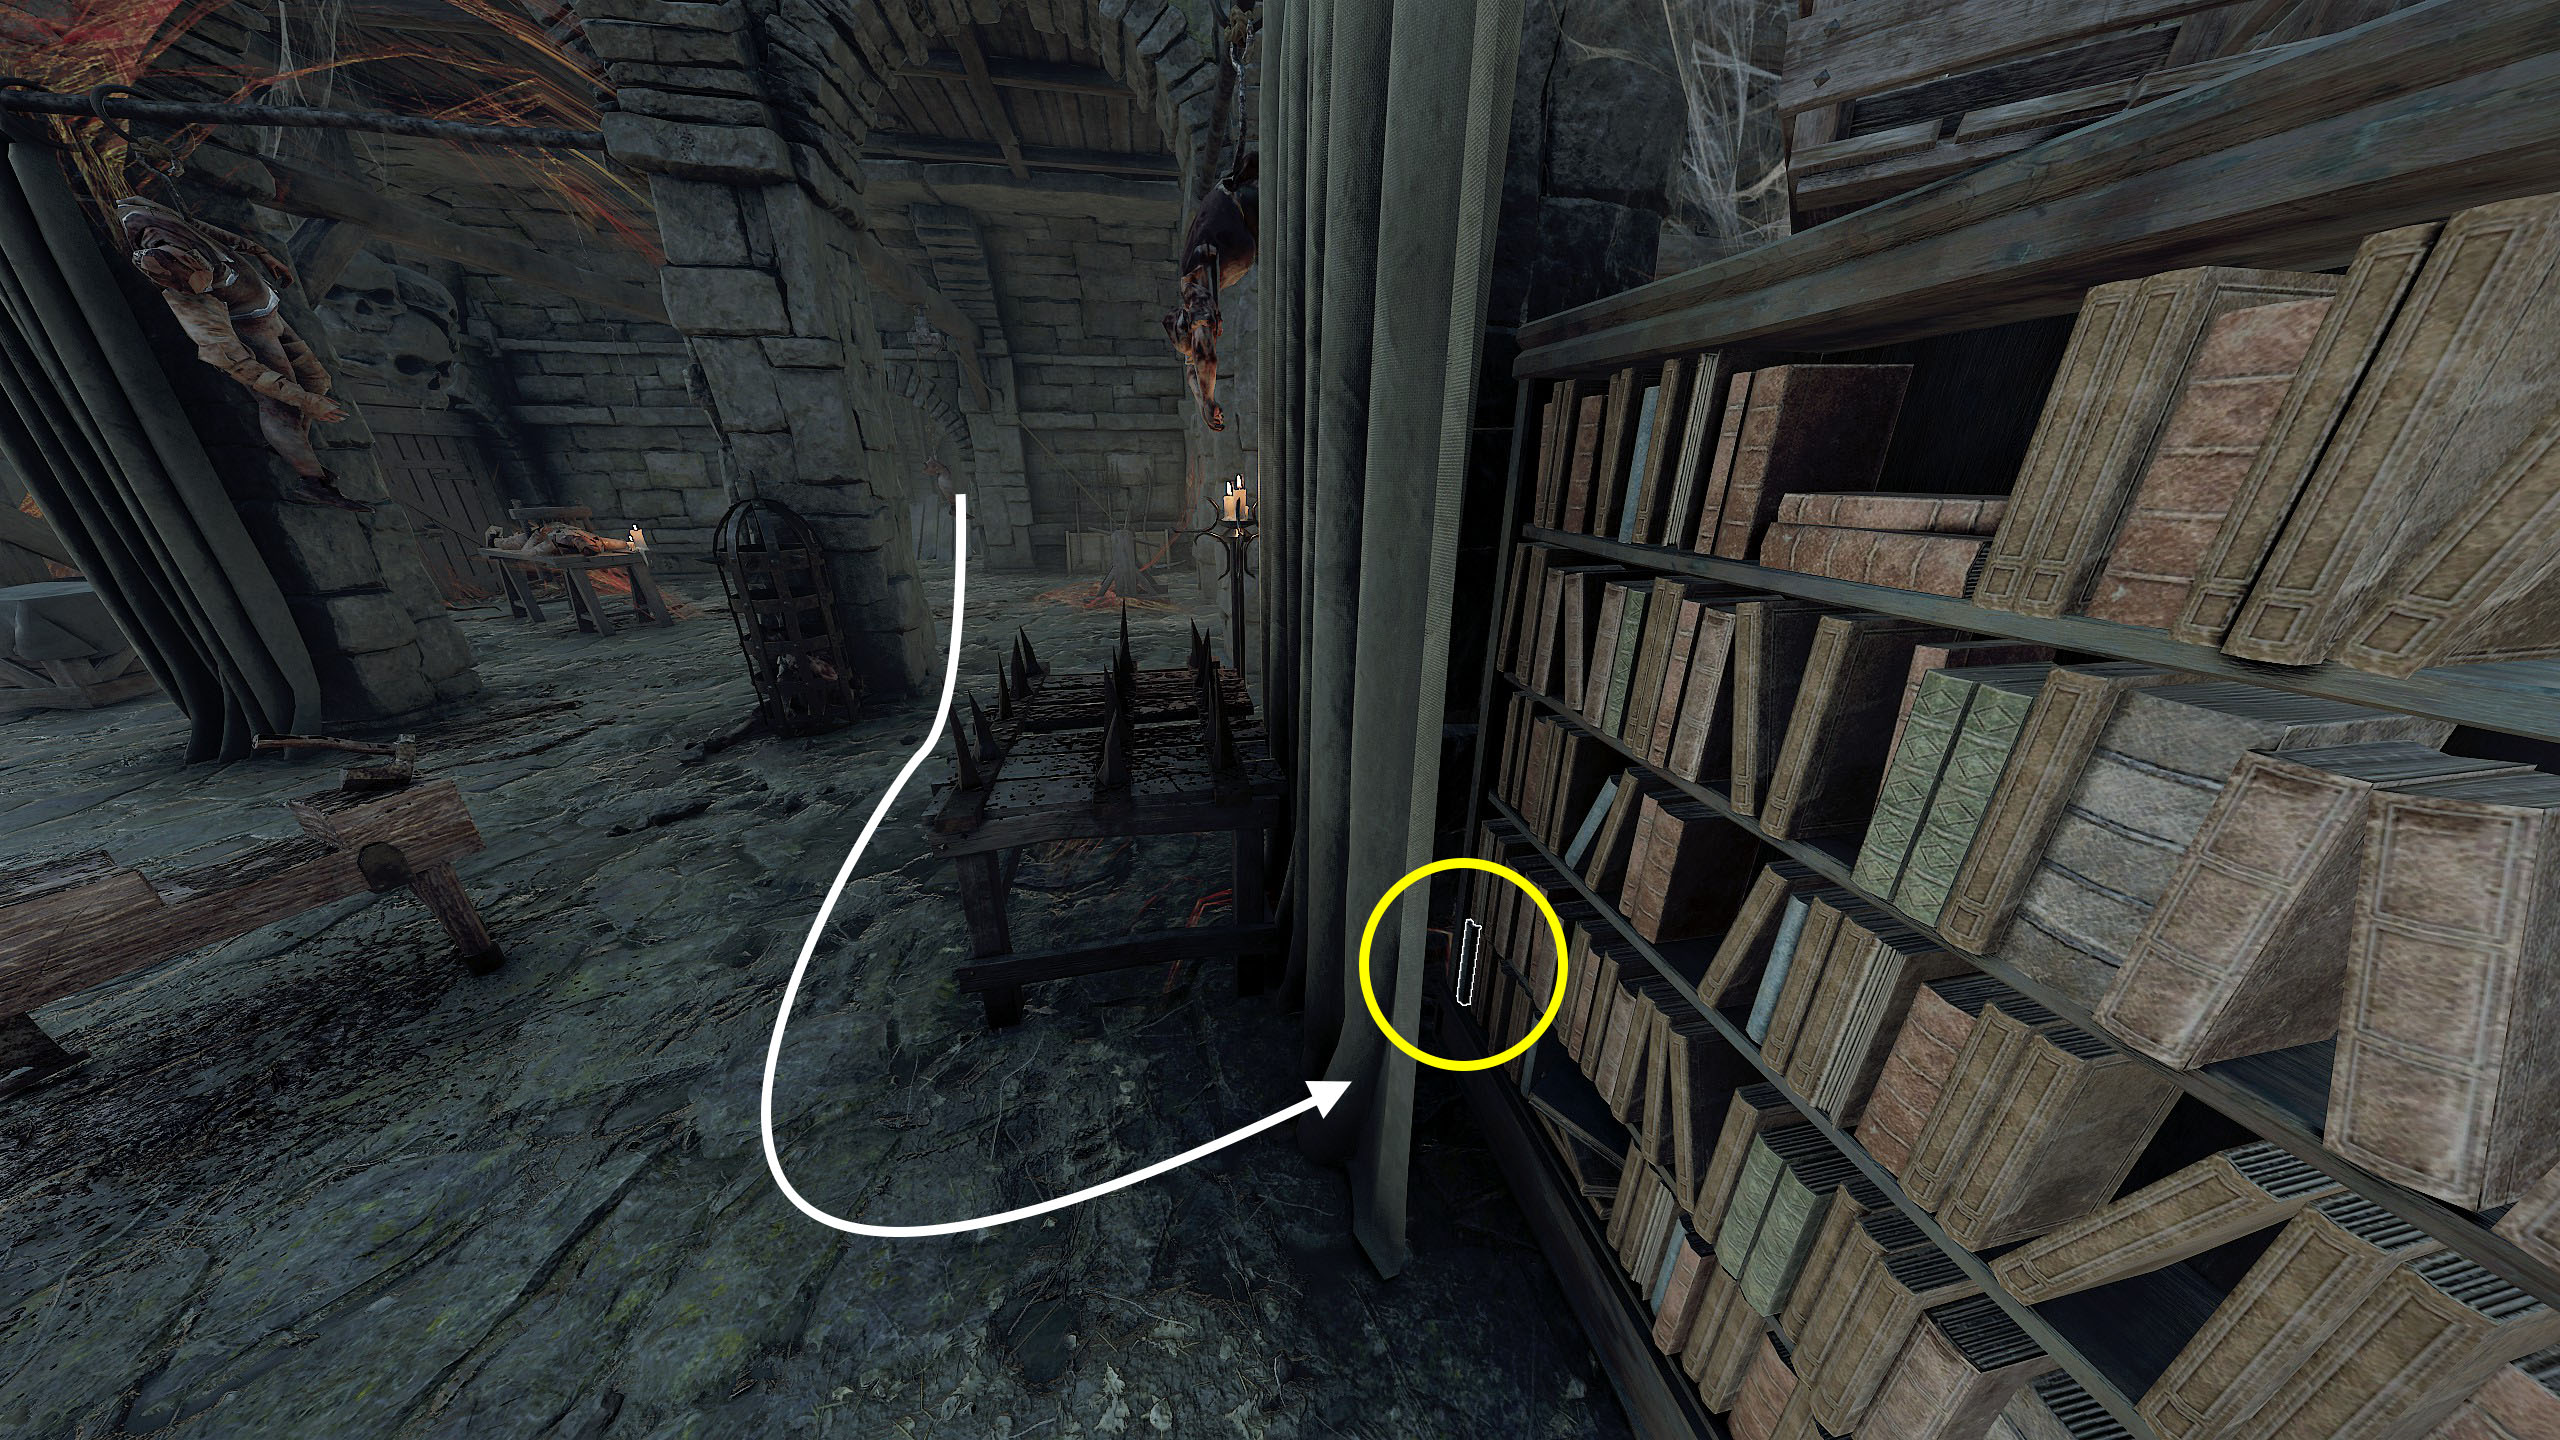
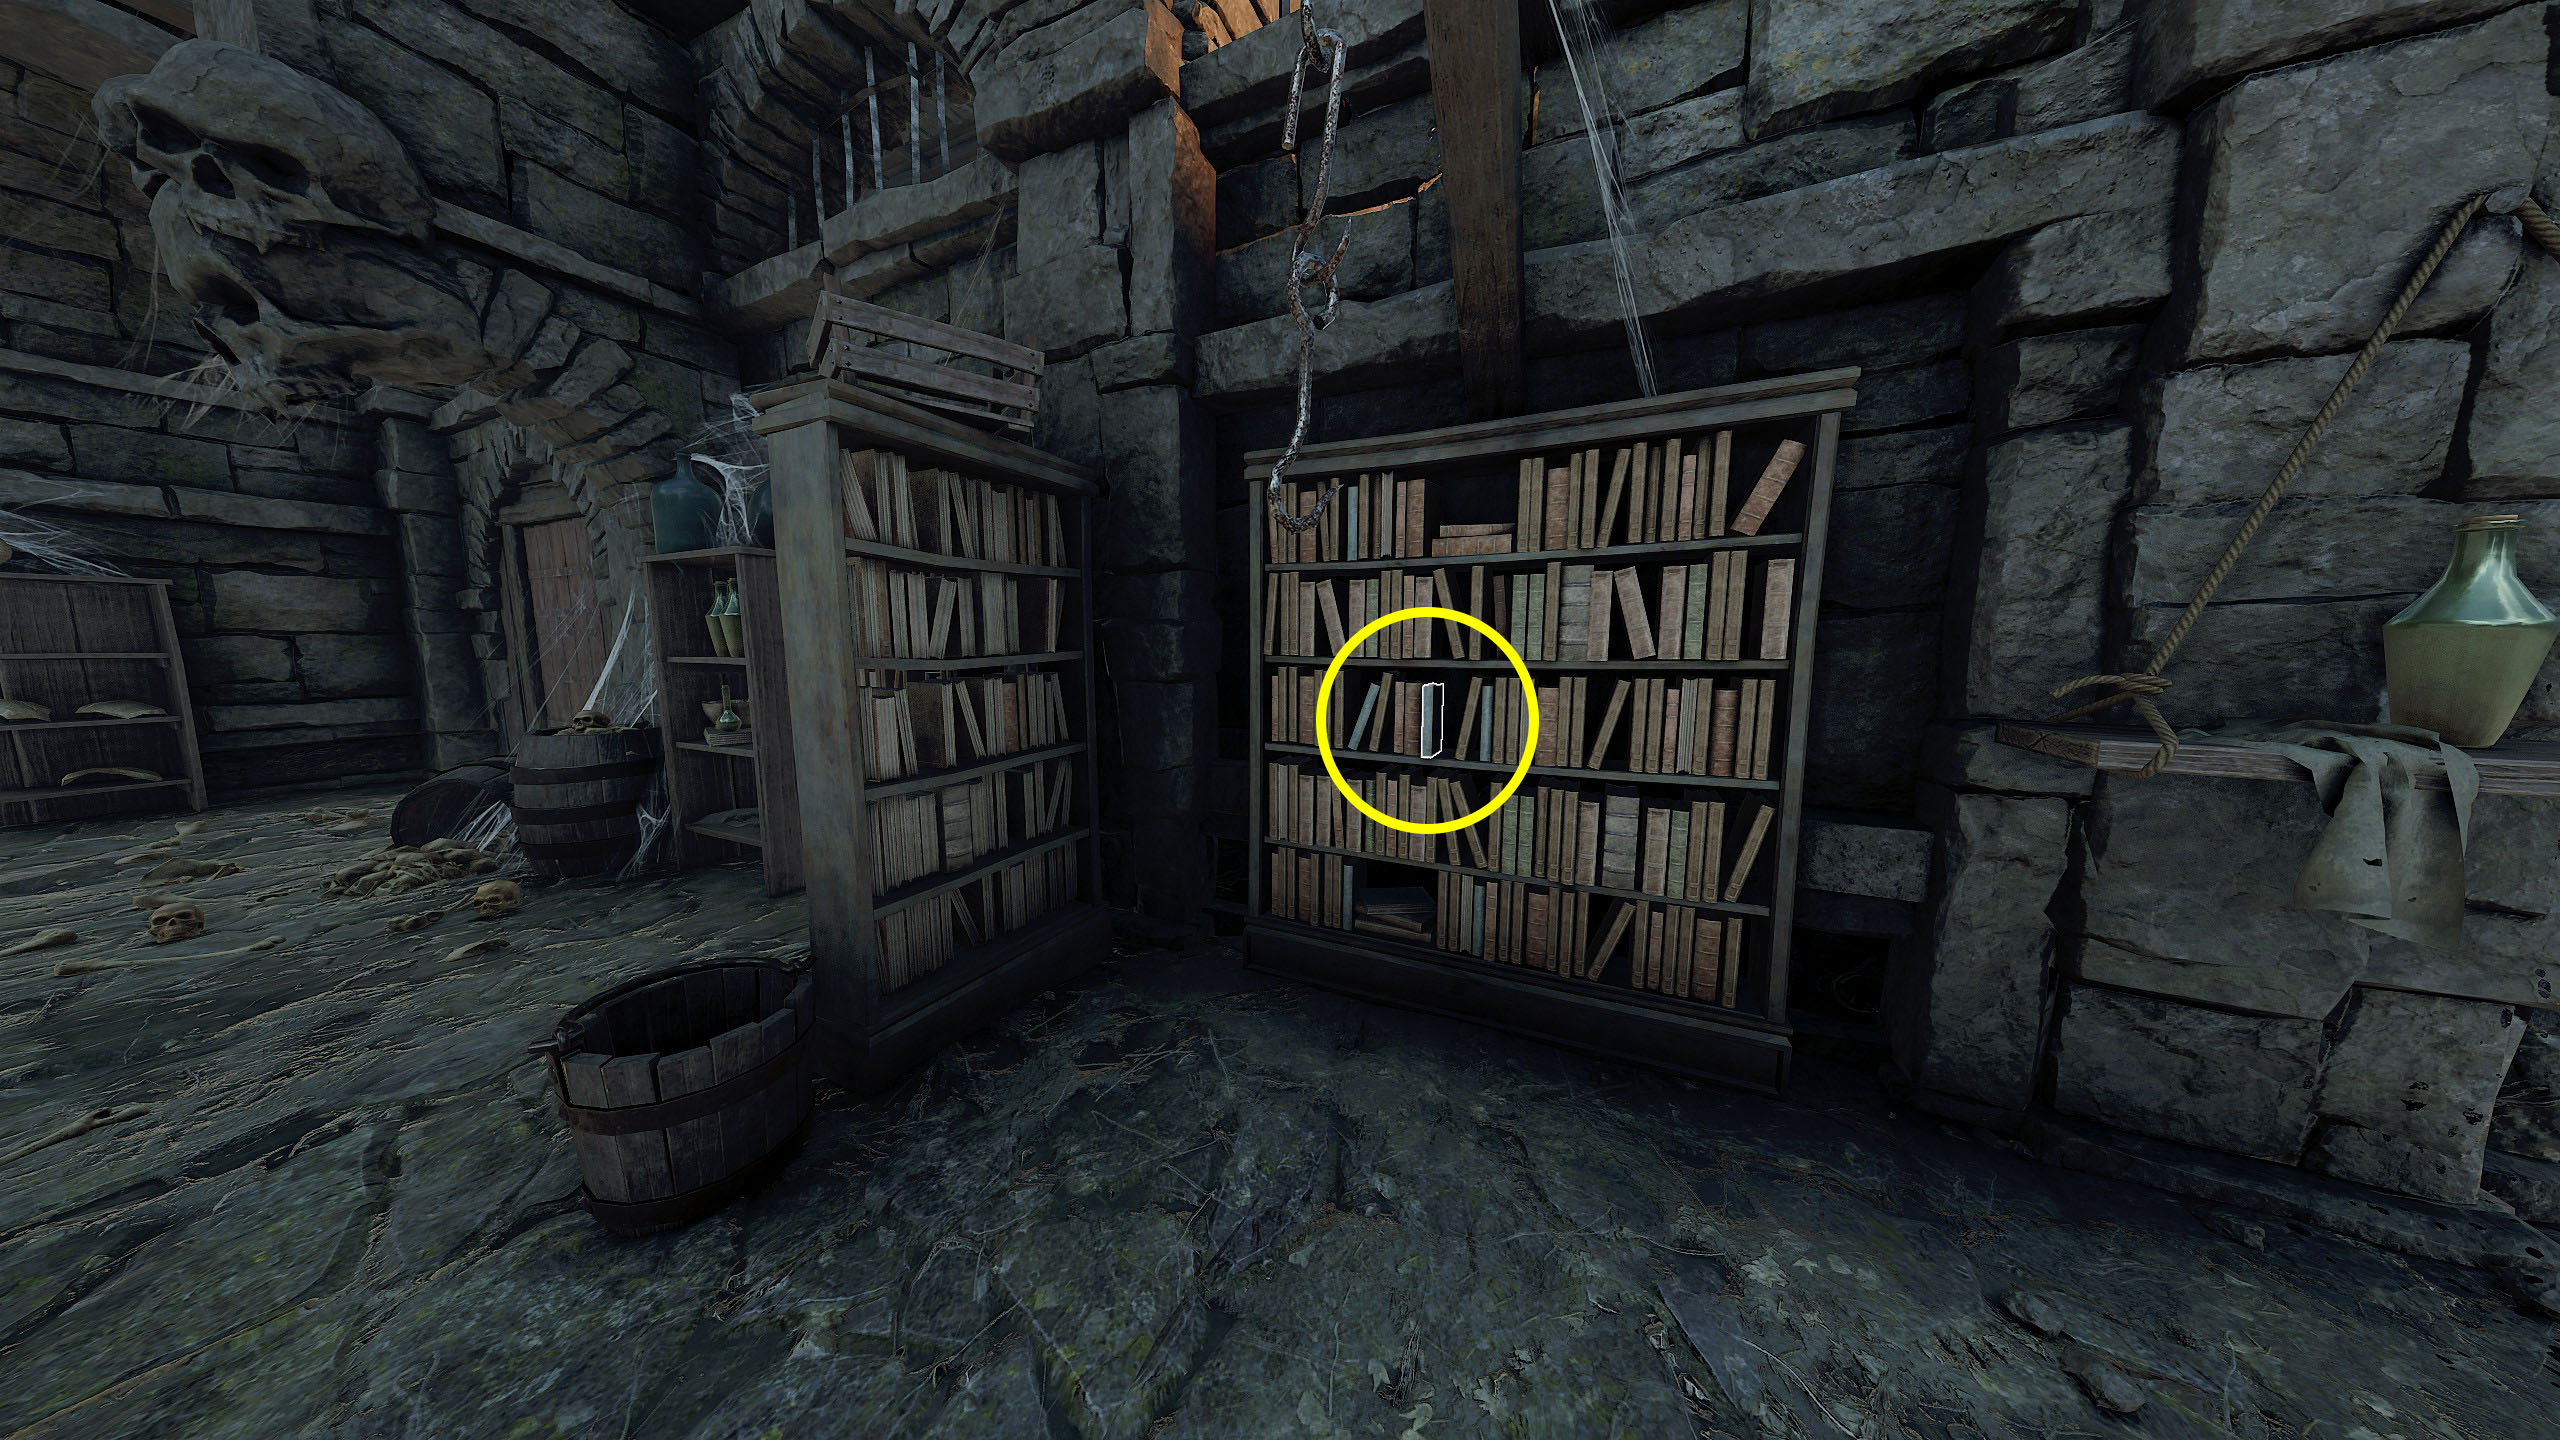
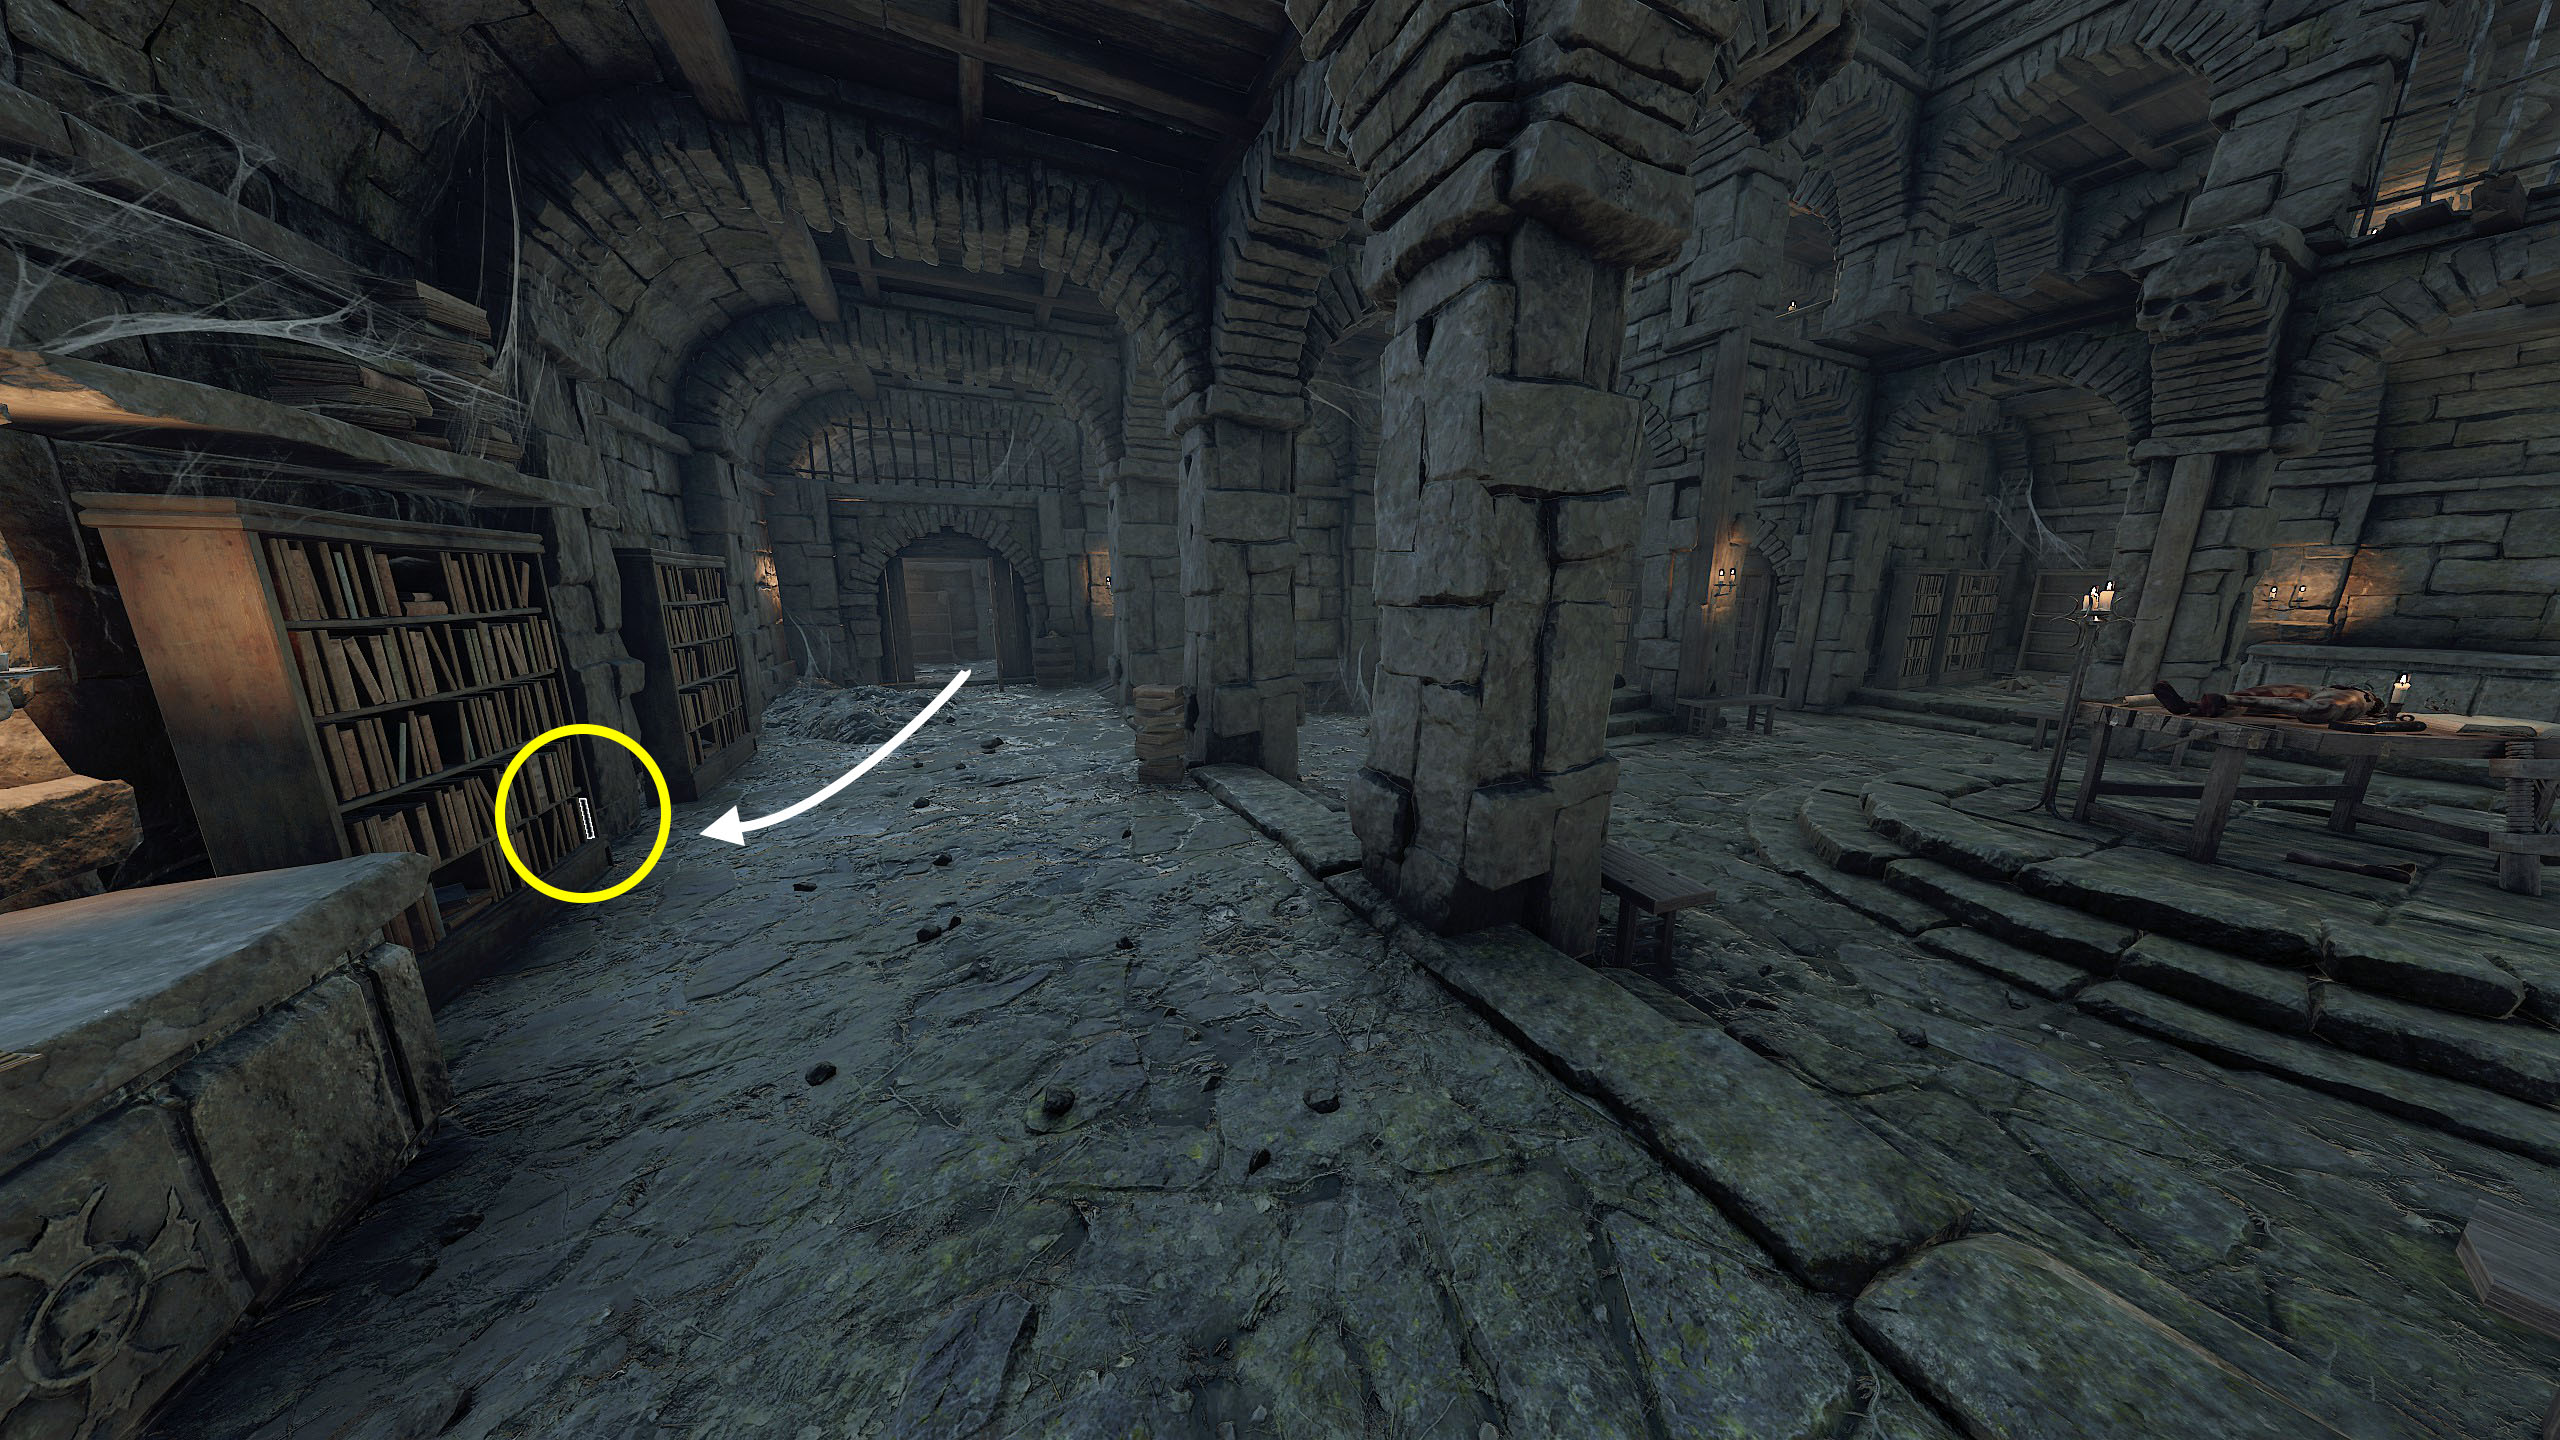
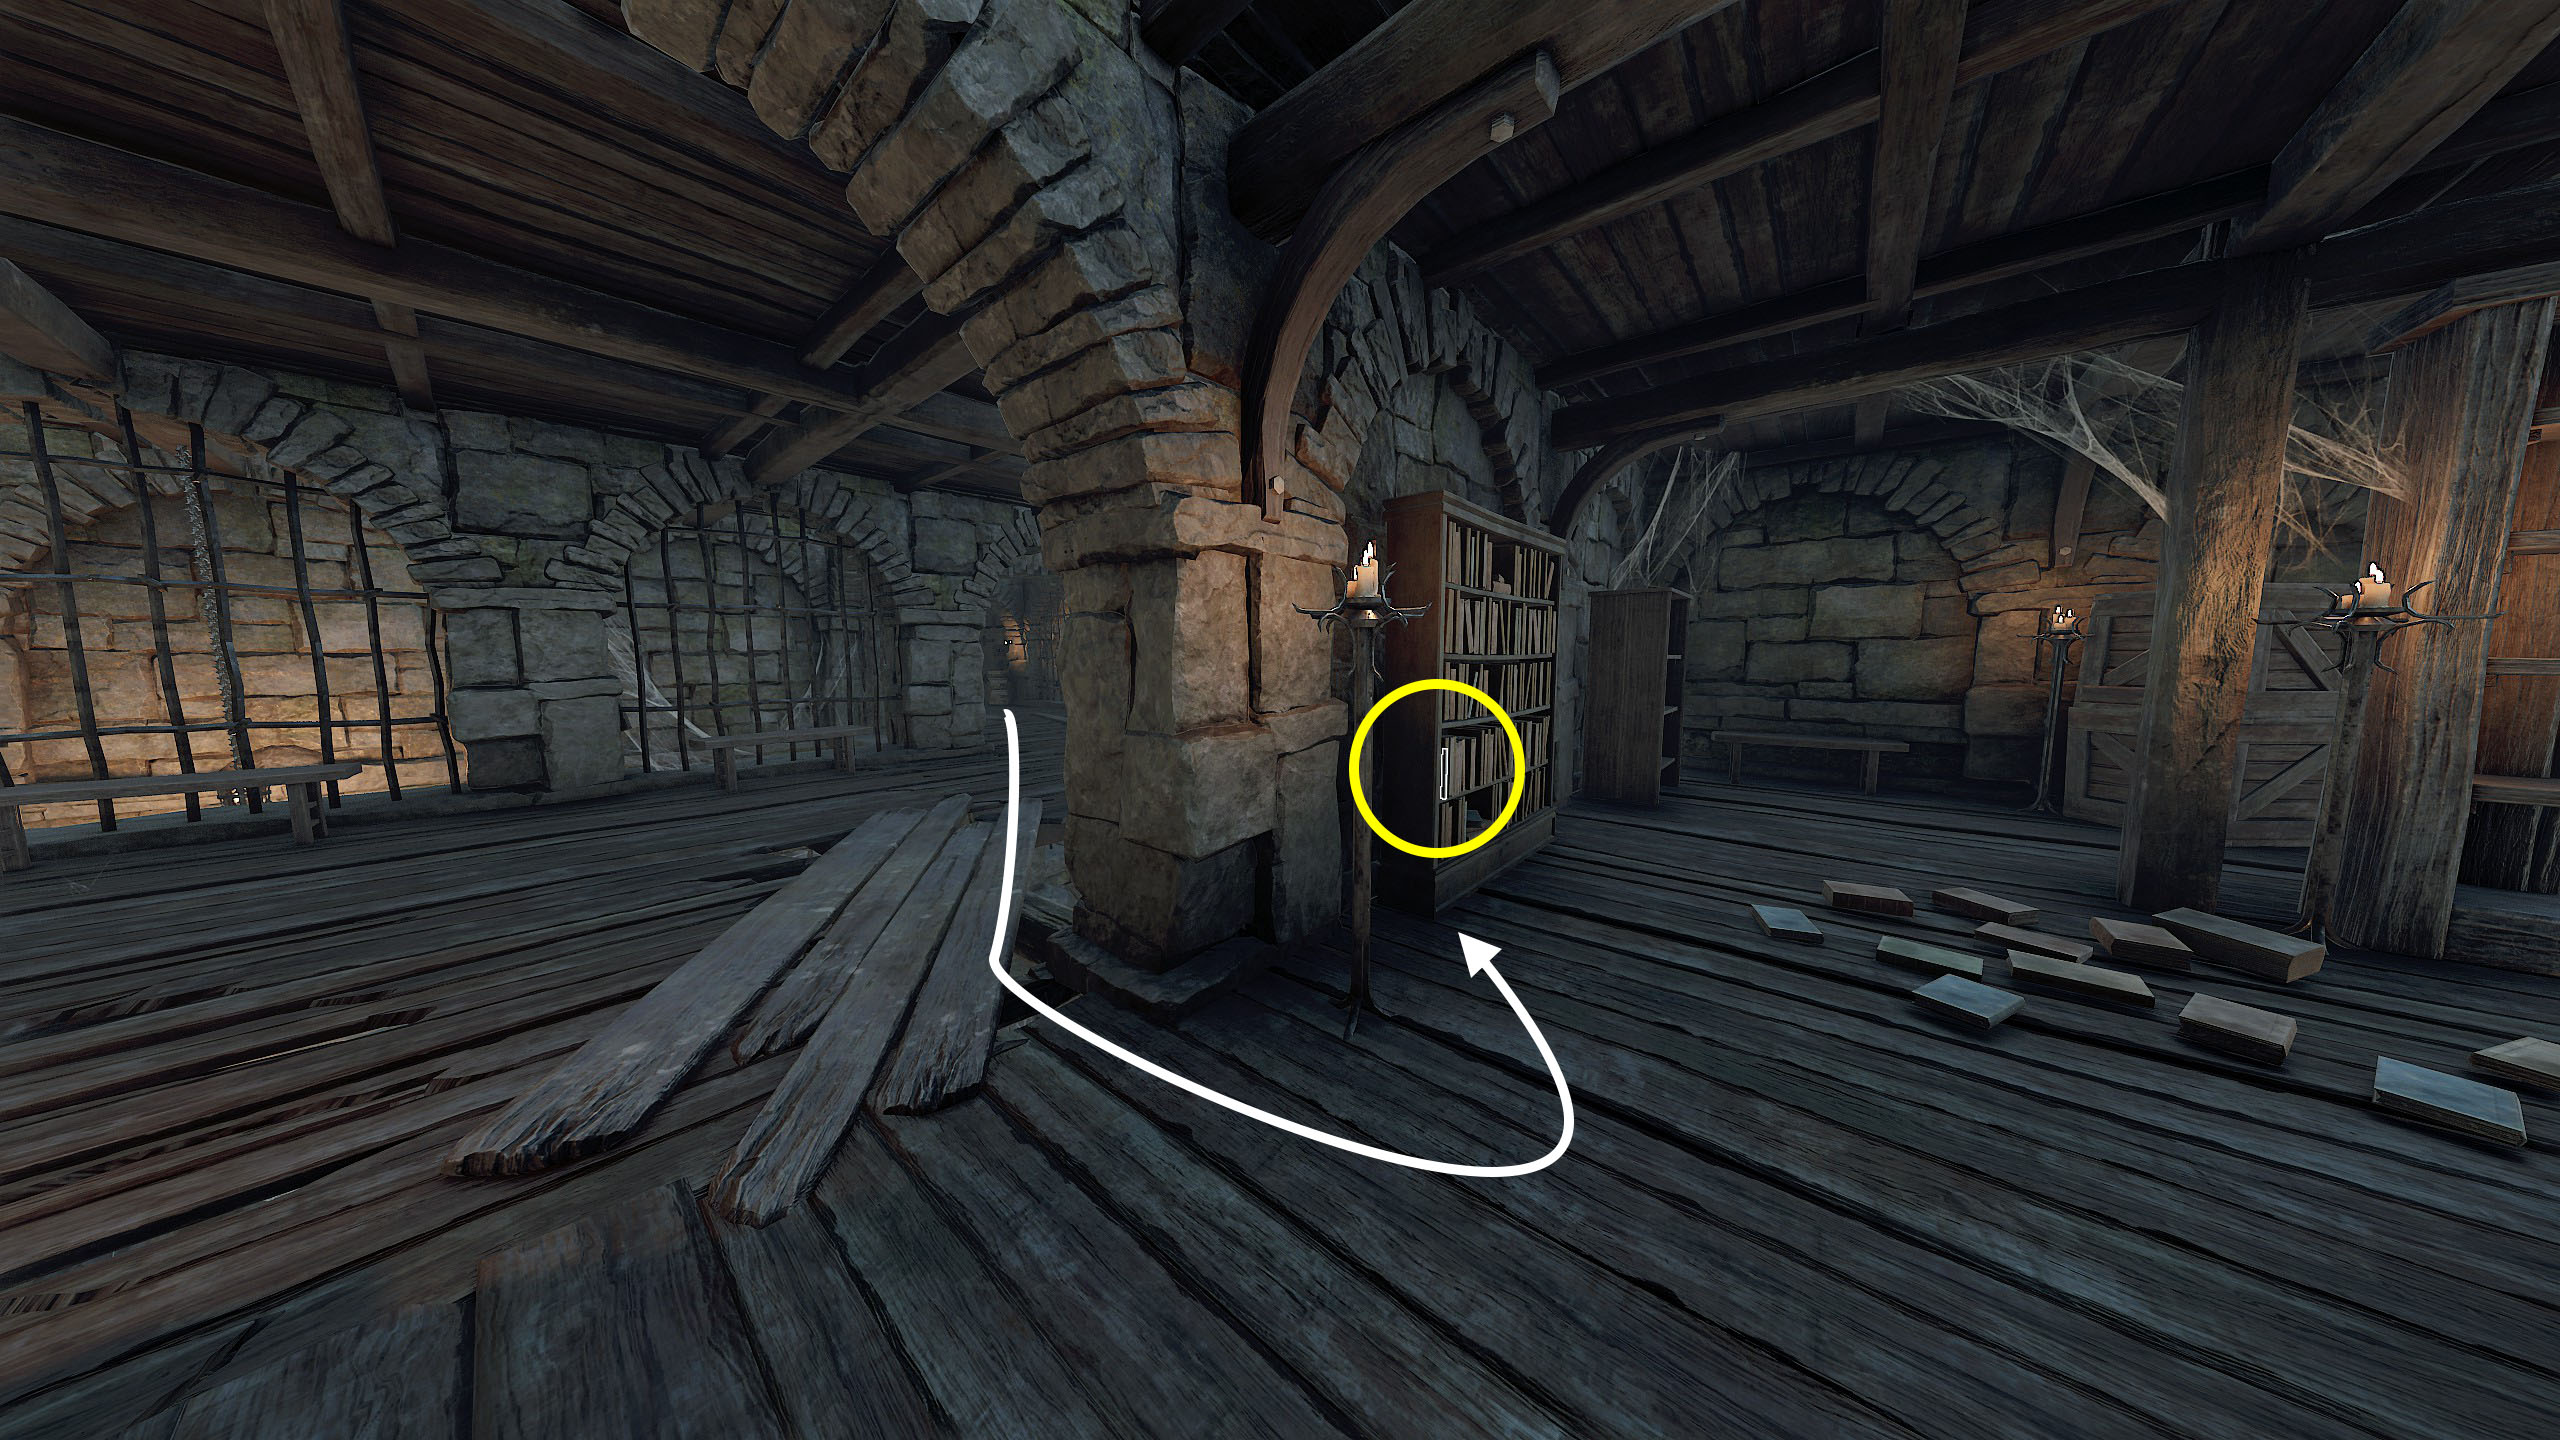
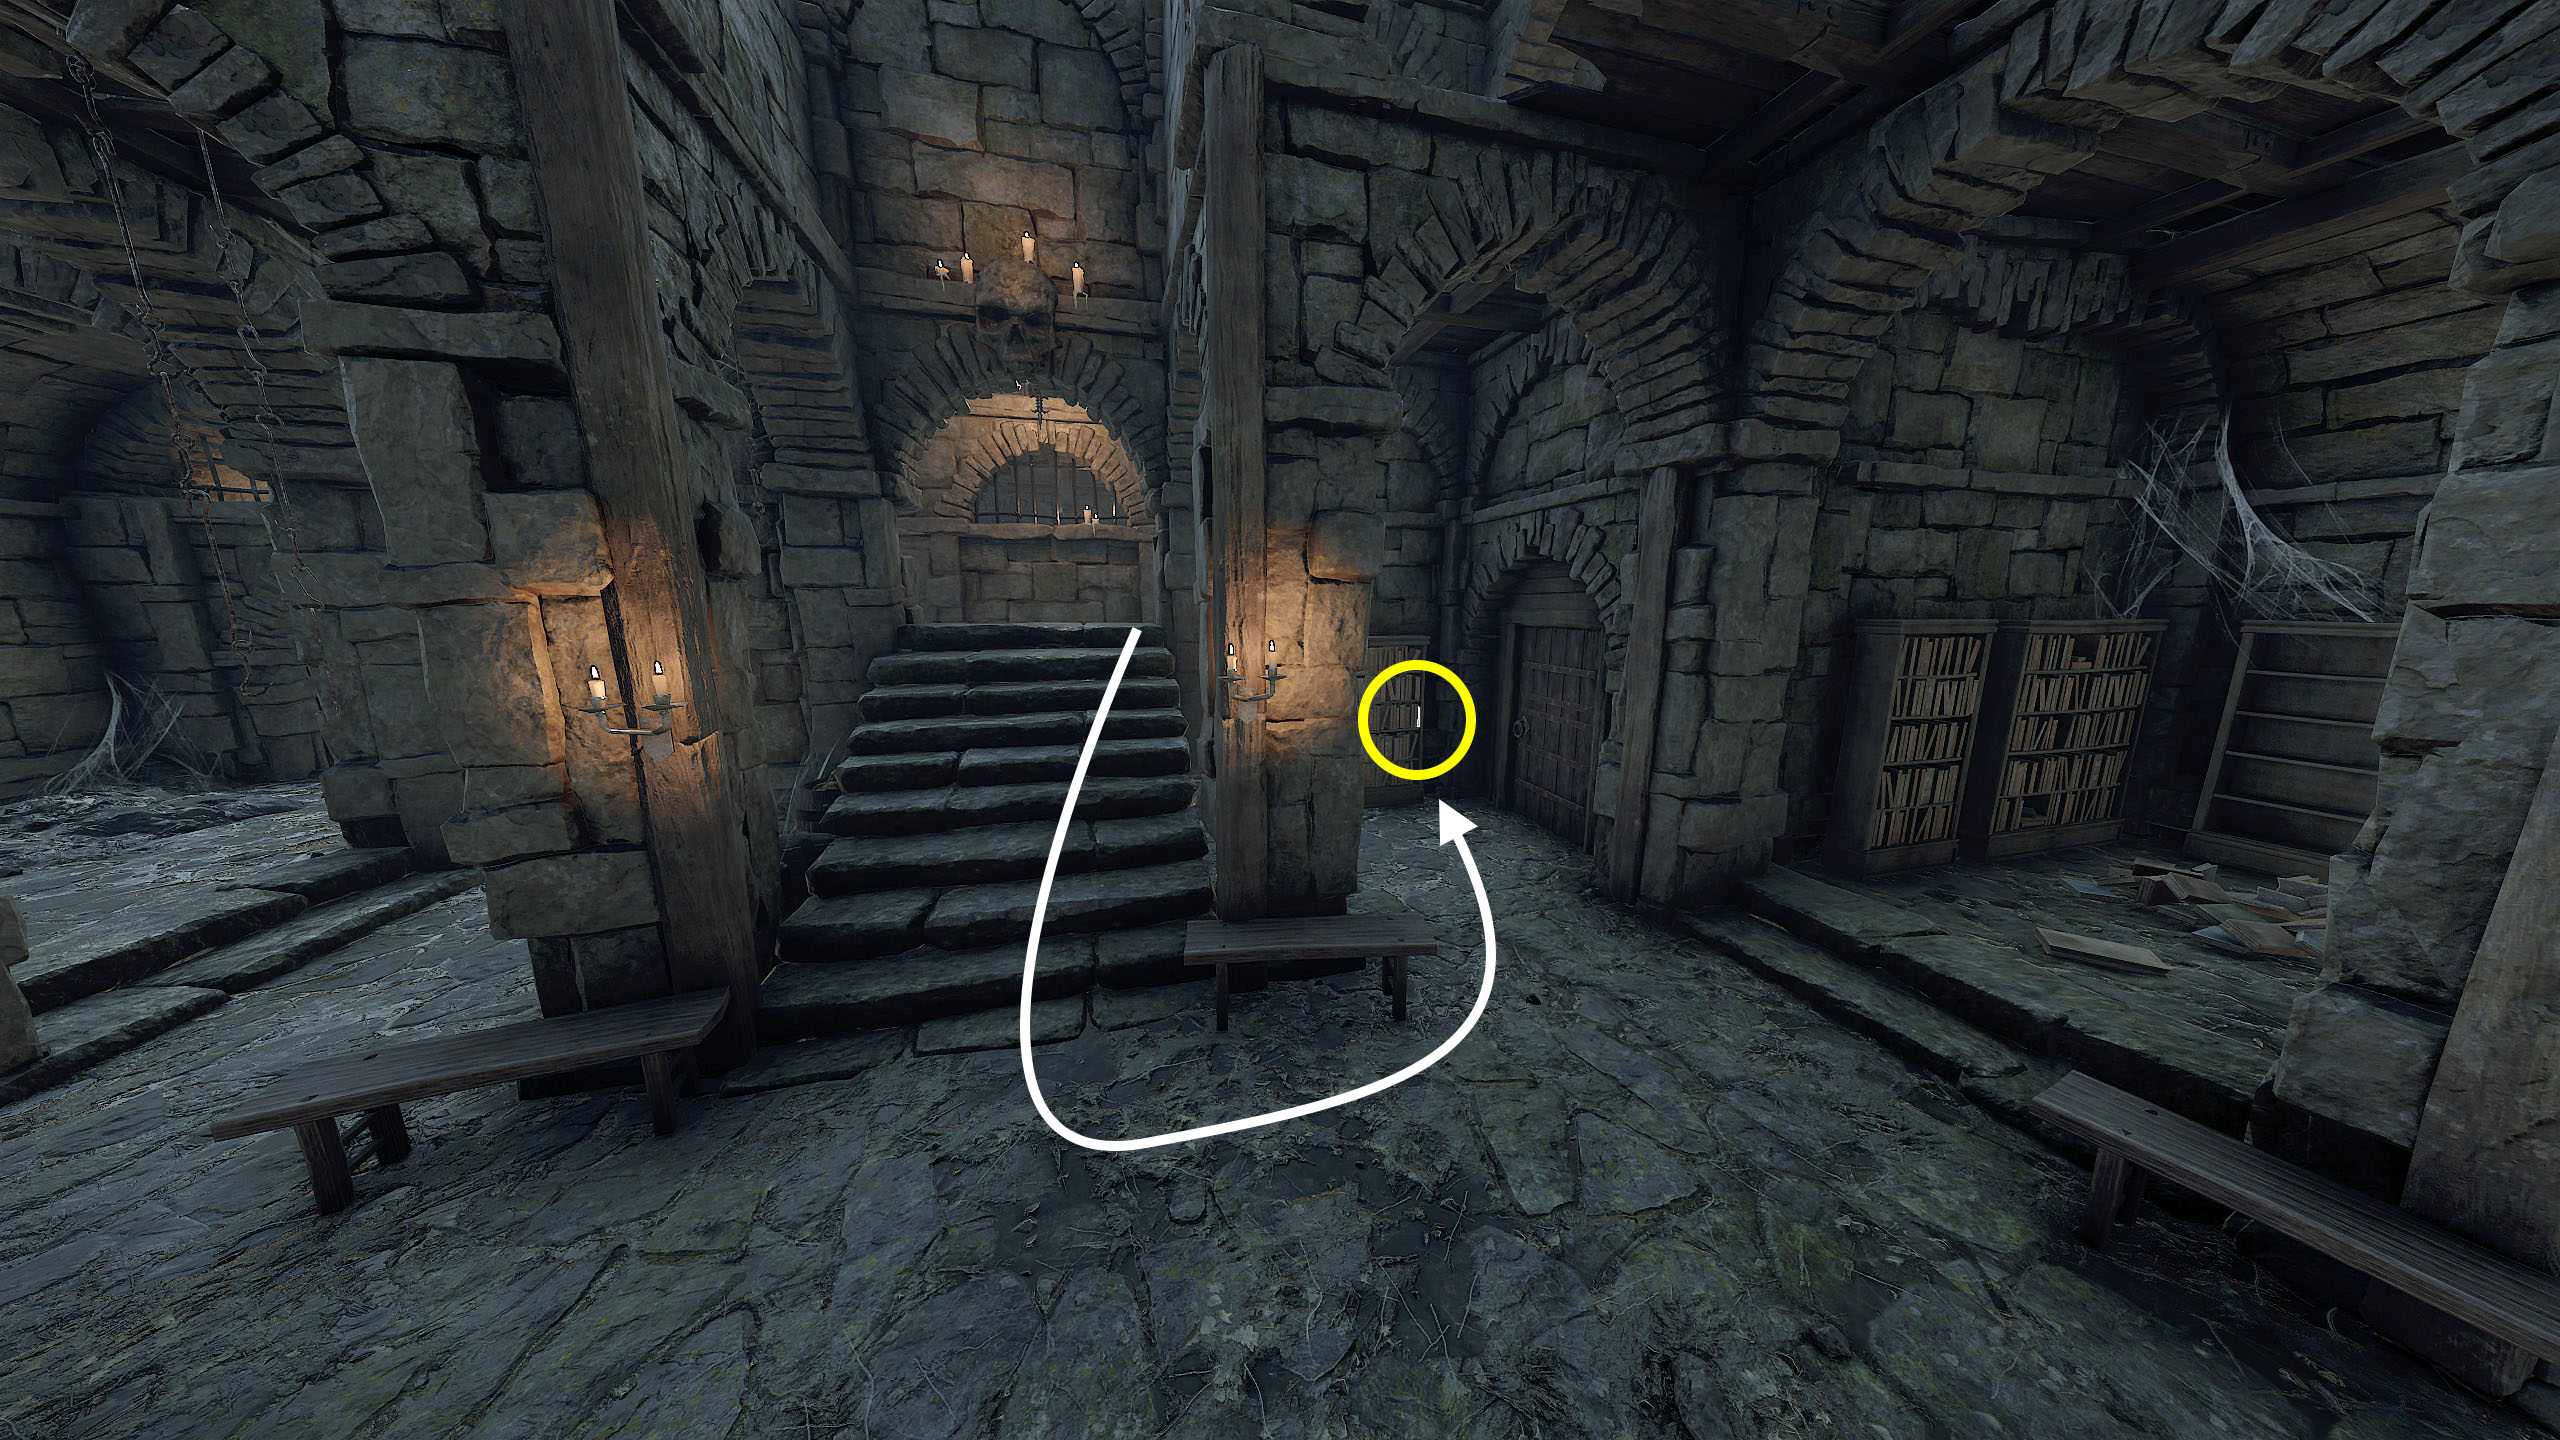
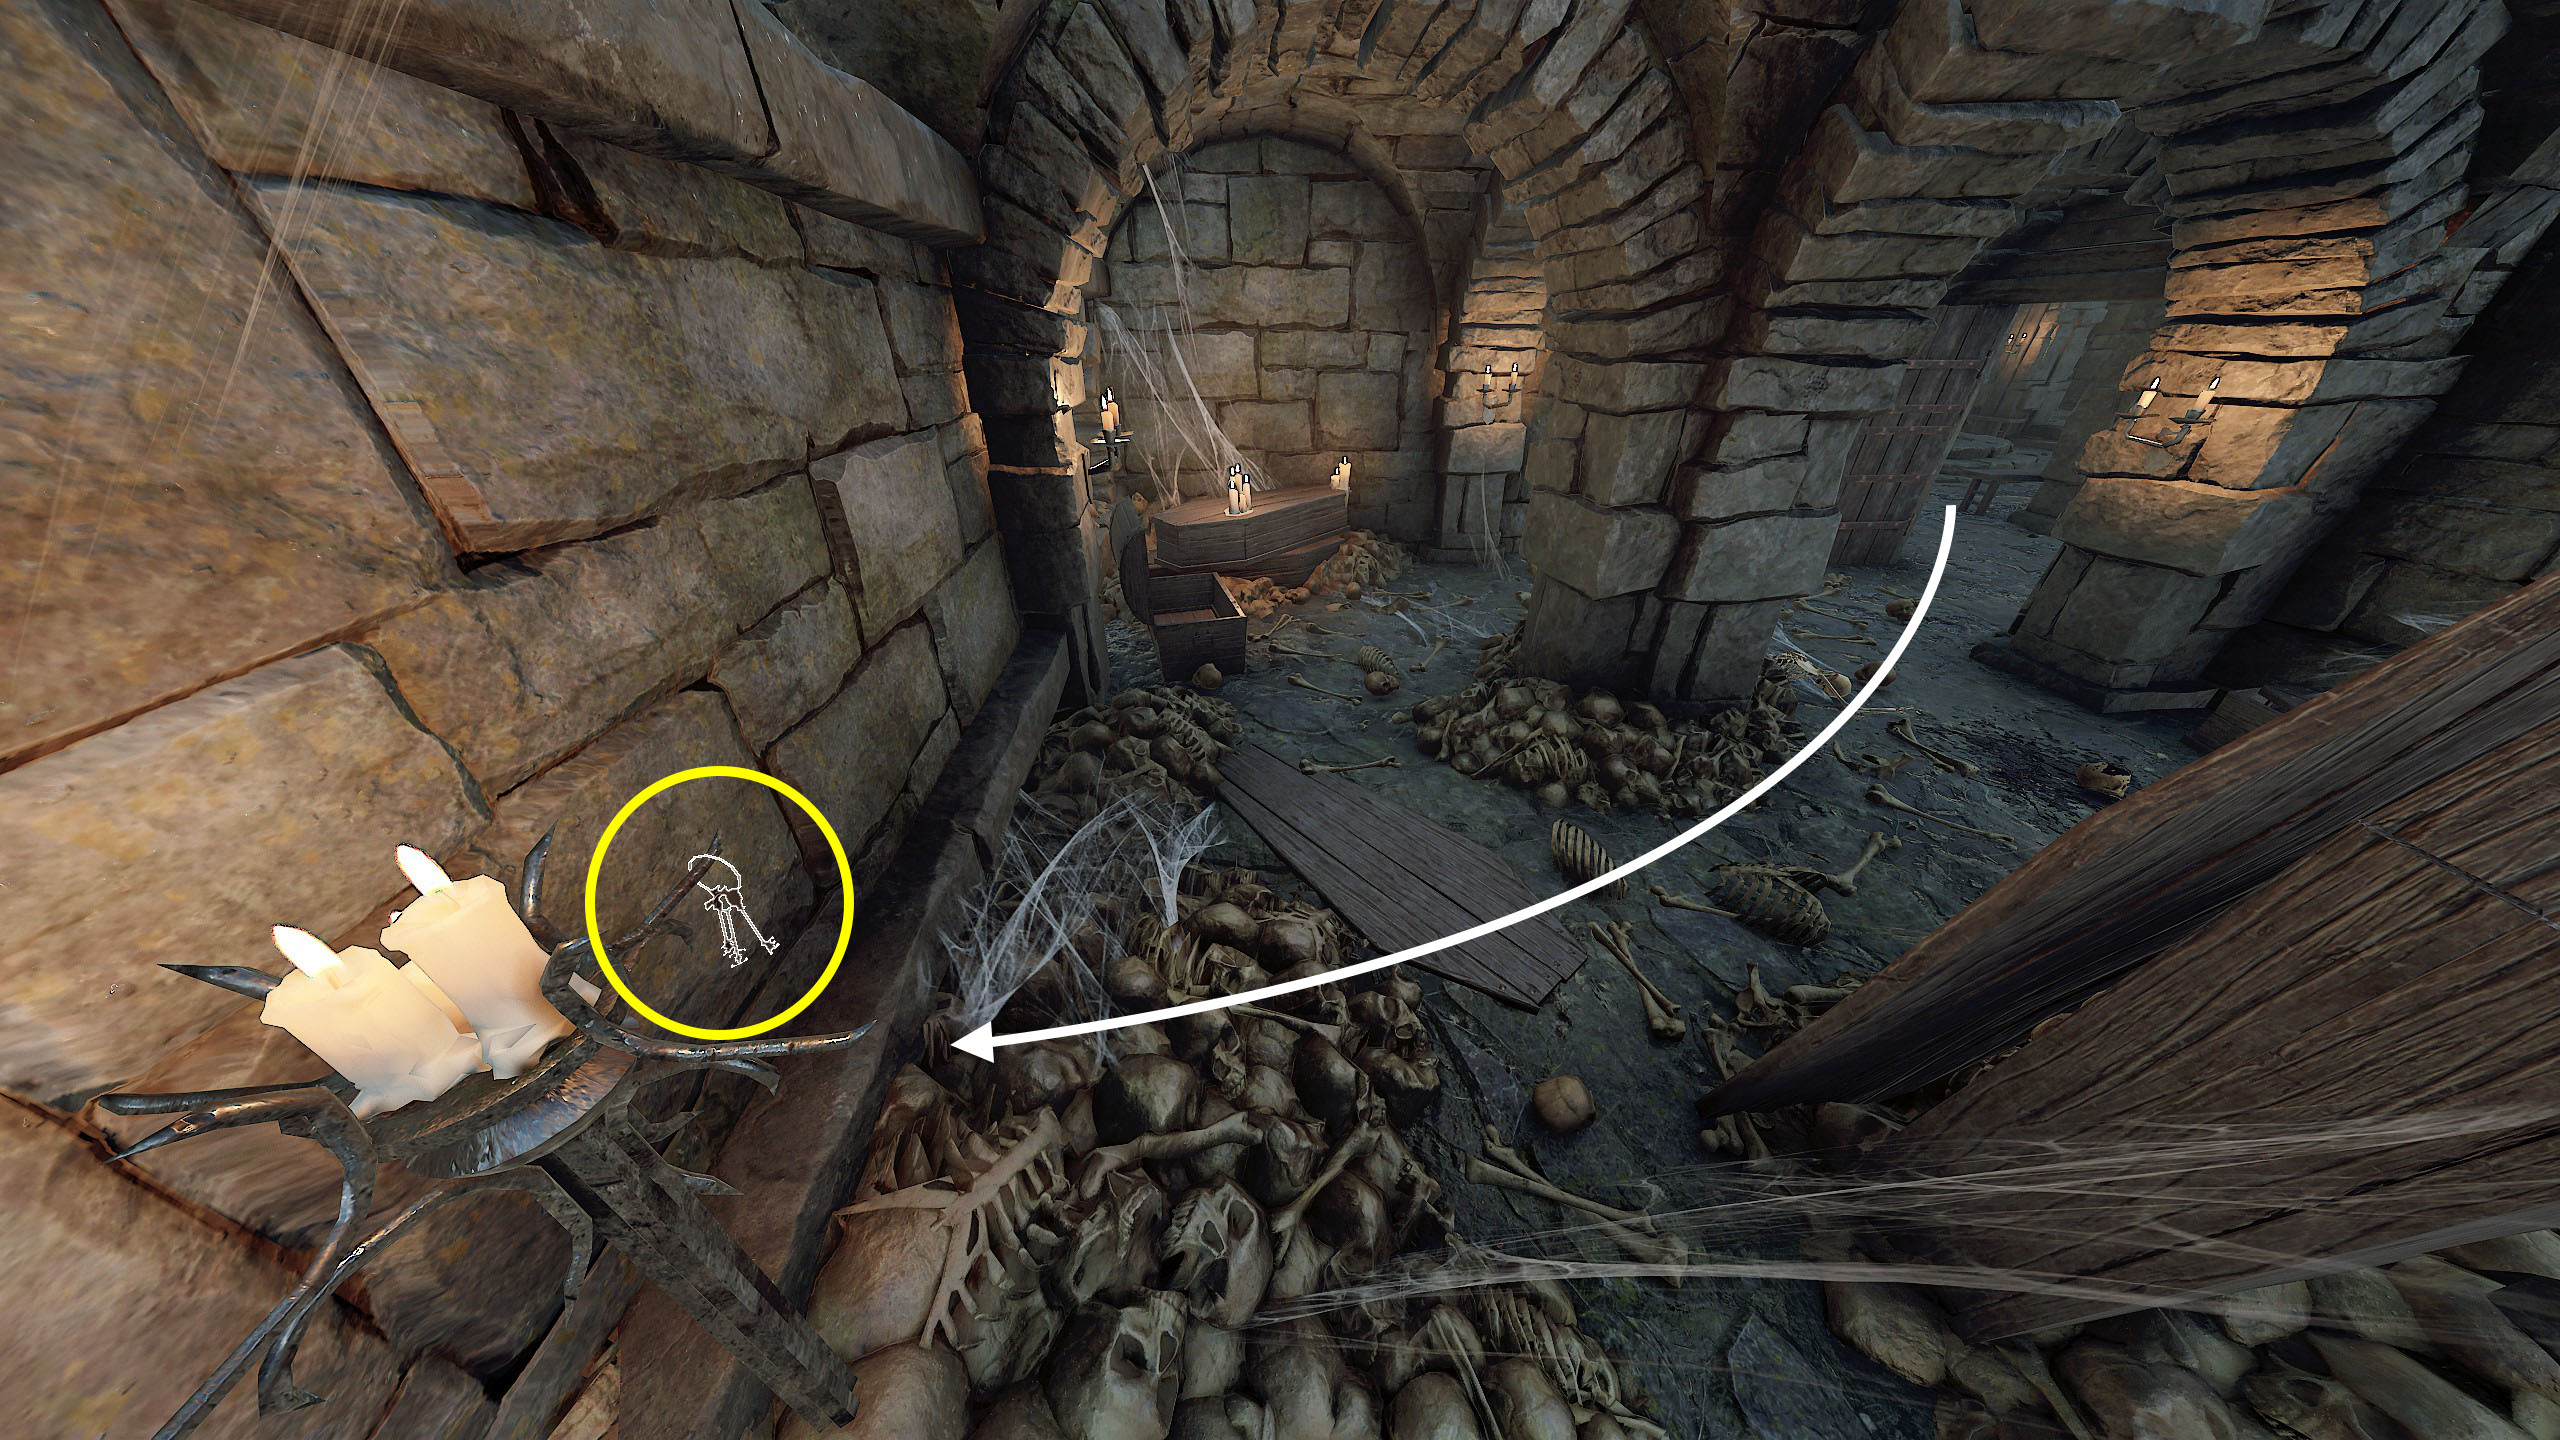
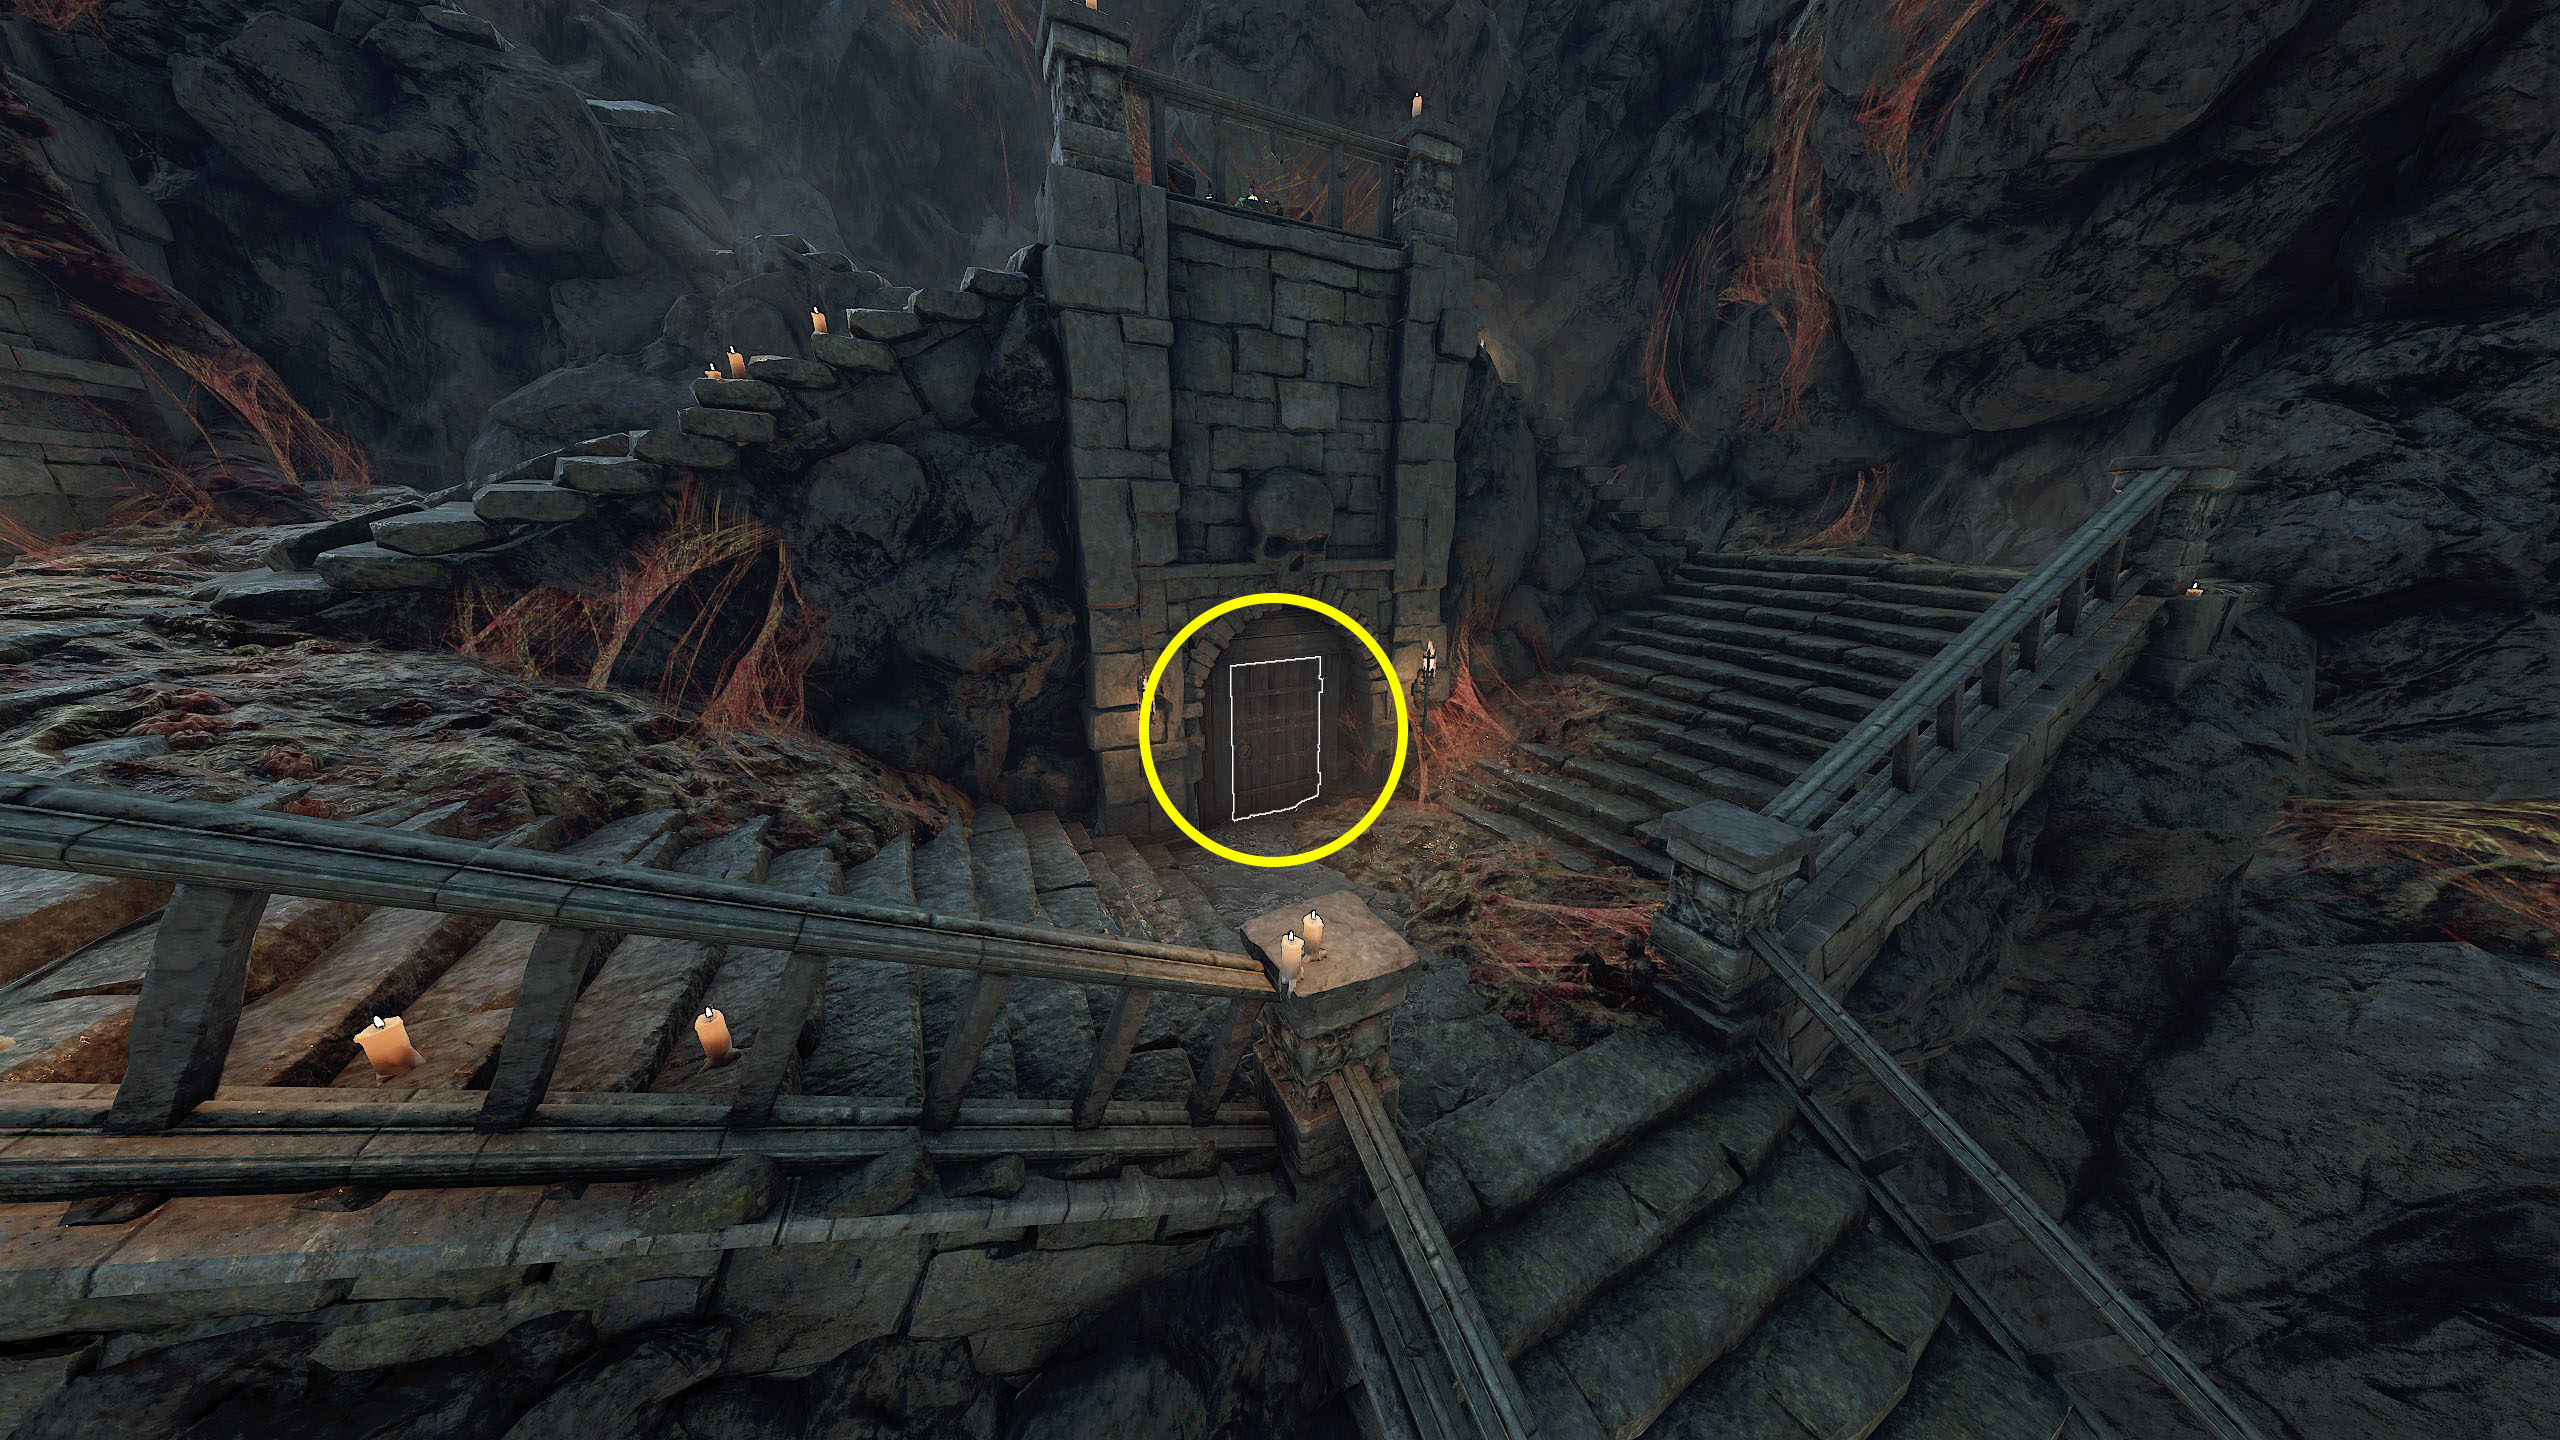
 5. In History's Light
Find the Torch to light the Ritual Chamber brazier in Blood in the Darkness
To perform the challenge, you need to pull 5 hidden books on bookshelves in specific order, get key, open door, get torch and light brazier in boss area, while holding torch.
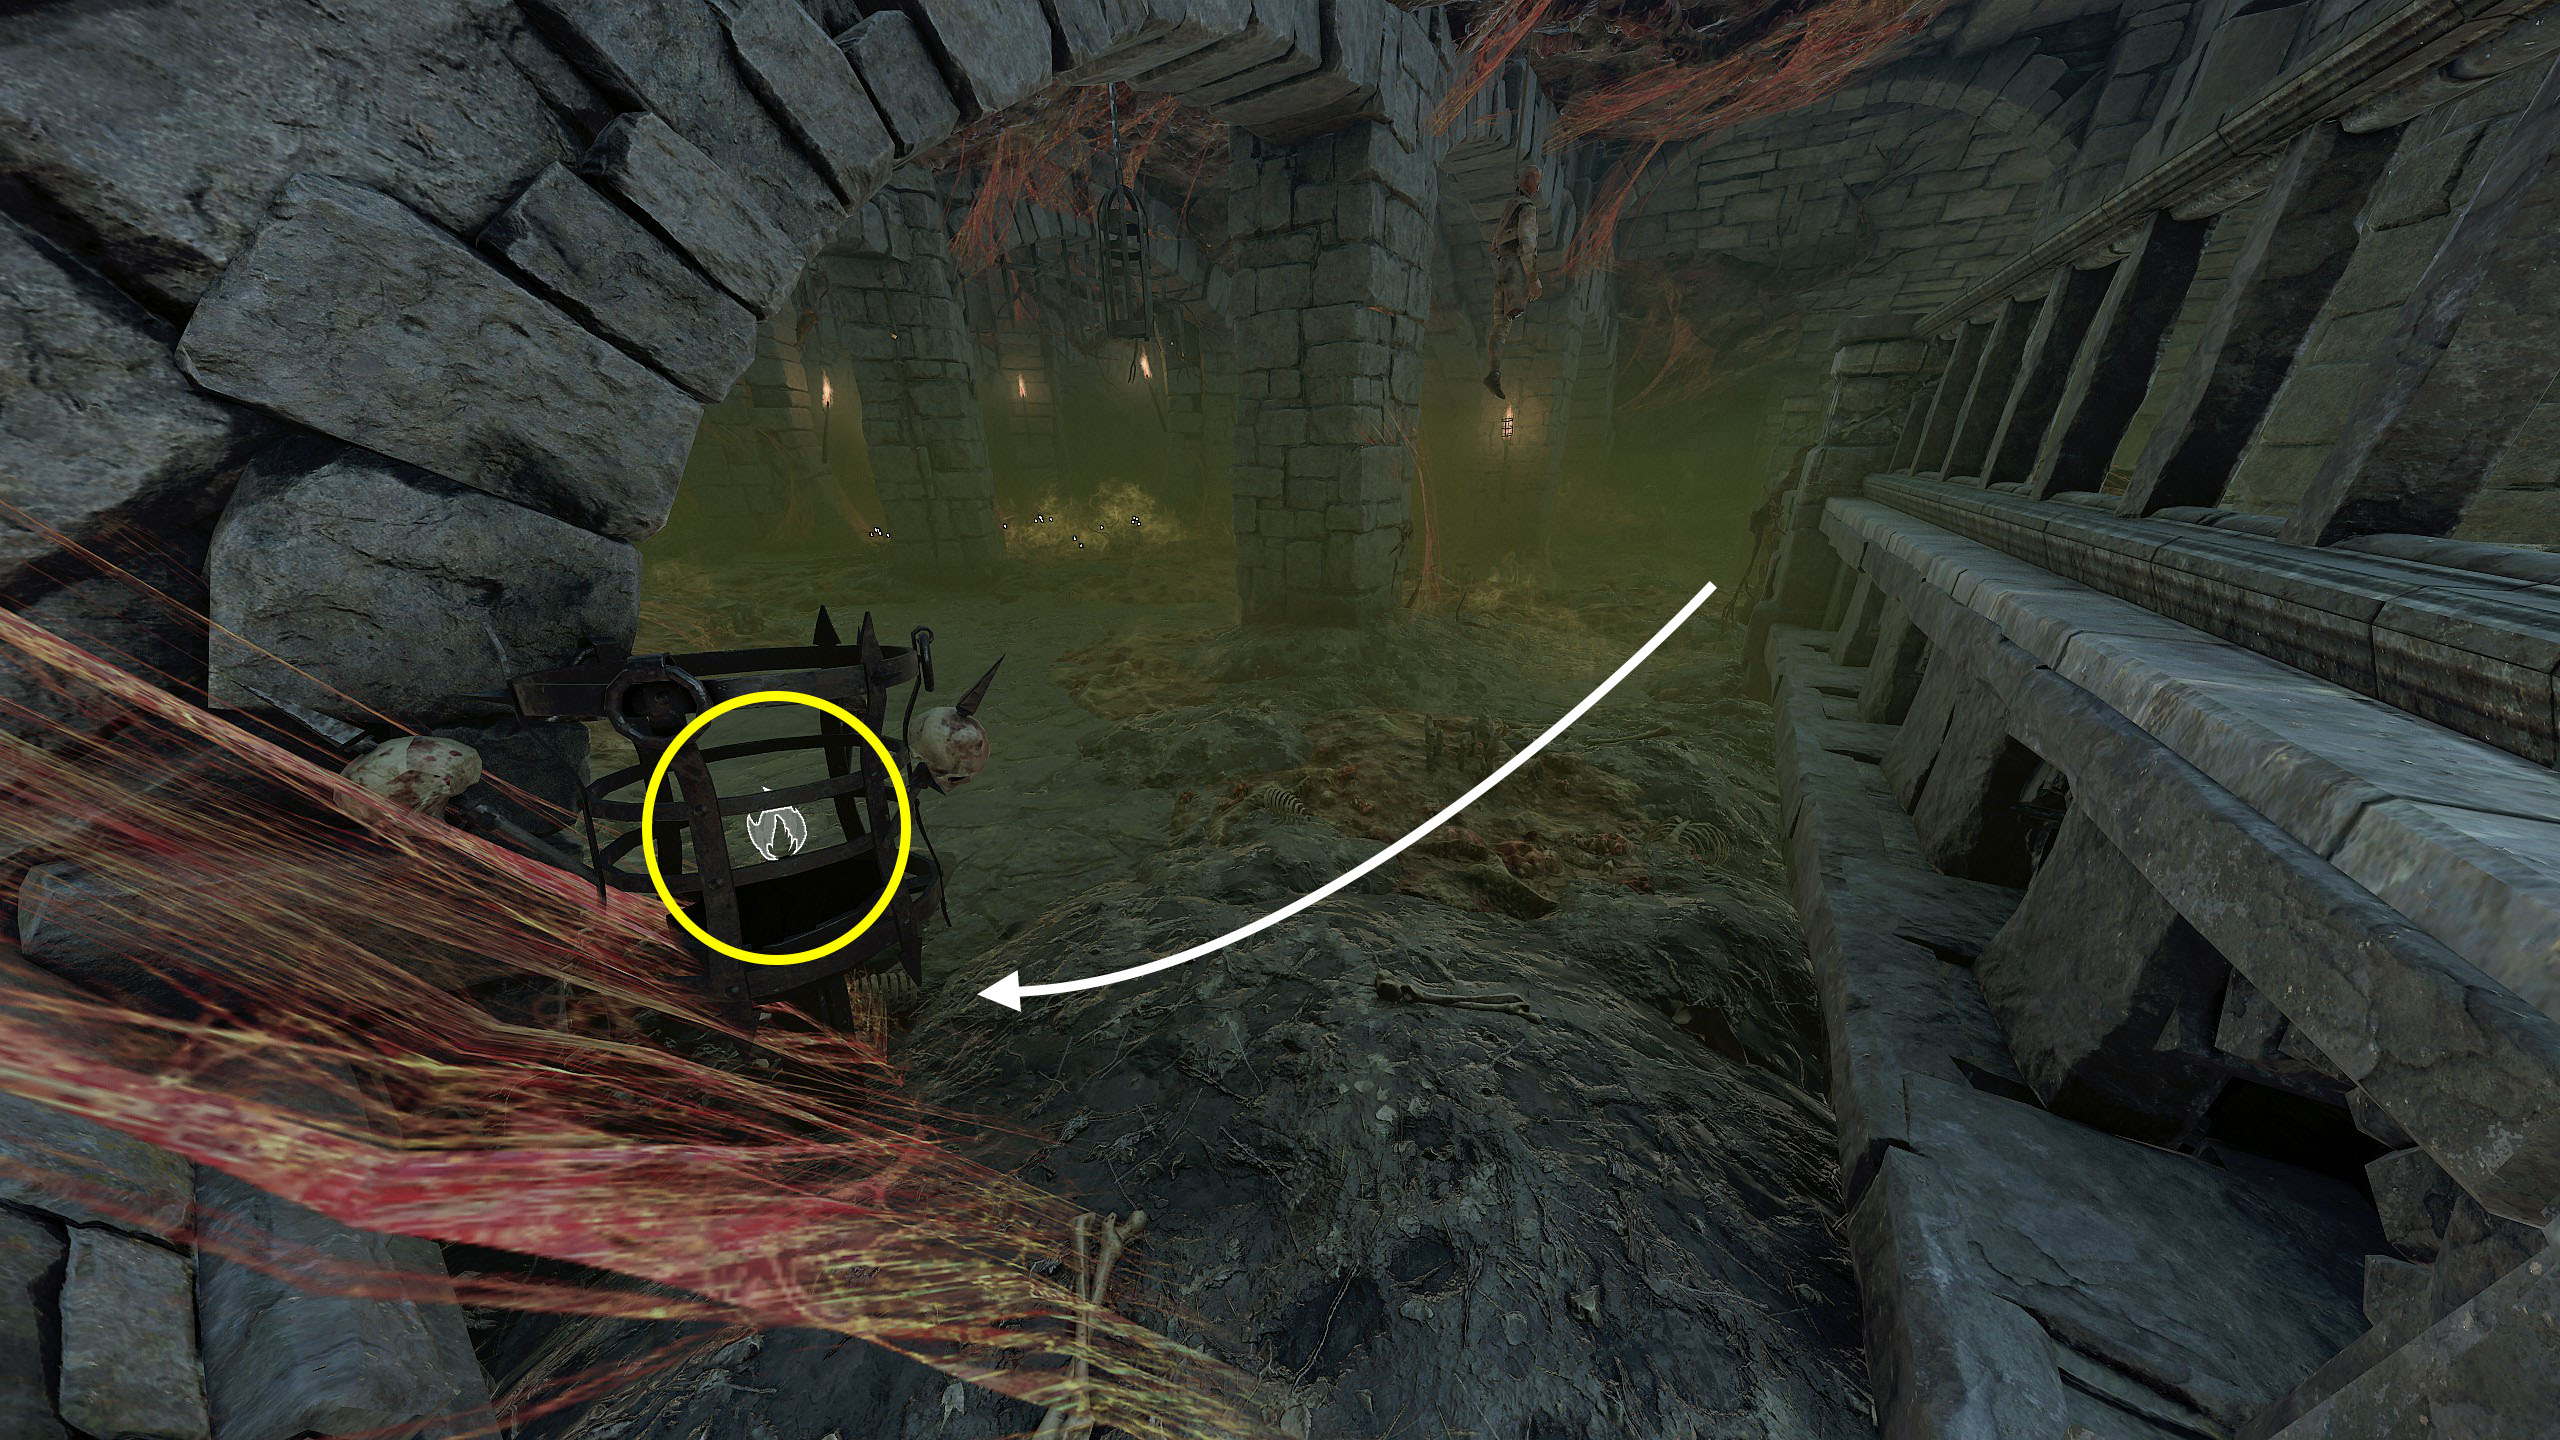
 6. Blood in the Darkness
 Complete all mission challenges of Blood in the Darkness This challenge will be completed when you have completed all challenges except “Difficulty Challenges”.

https://www.youtube.com/watch?v=nzHw_83GaXE
- The Enchanter's Lair

 1. (Un)holy Grails
Grab the 20 hidden chalices in The Enchanter's Lair. (For old time's sake.) In one playthrough, you must collect 20 chalices, which are scattered throughout the map. The locations of all chalices are shown in this guide and video:
https://steamcommunity.com/sharedfiles/filedetails/?id=3540430606 https://youtu.be/A0yYcBX_MrM?si=Yoolv3zQBLmgGkNE
 2. Alas, Poor Eisenfaust
 Retreive the Skull of Eisenfaust.
In this challenge, you need to investigate 4 statues to access the skull.
Drop down, go further down the hallway, climb the steps, jump over and click on the skull at the bottom by the statue.
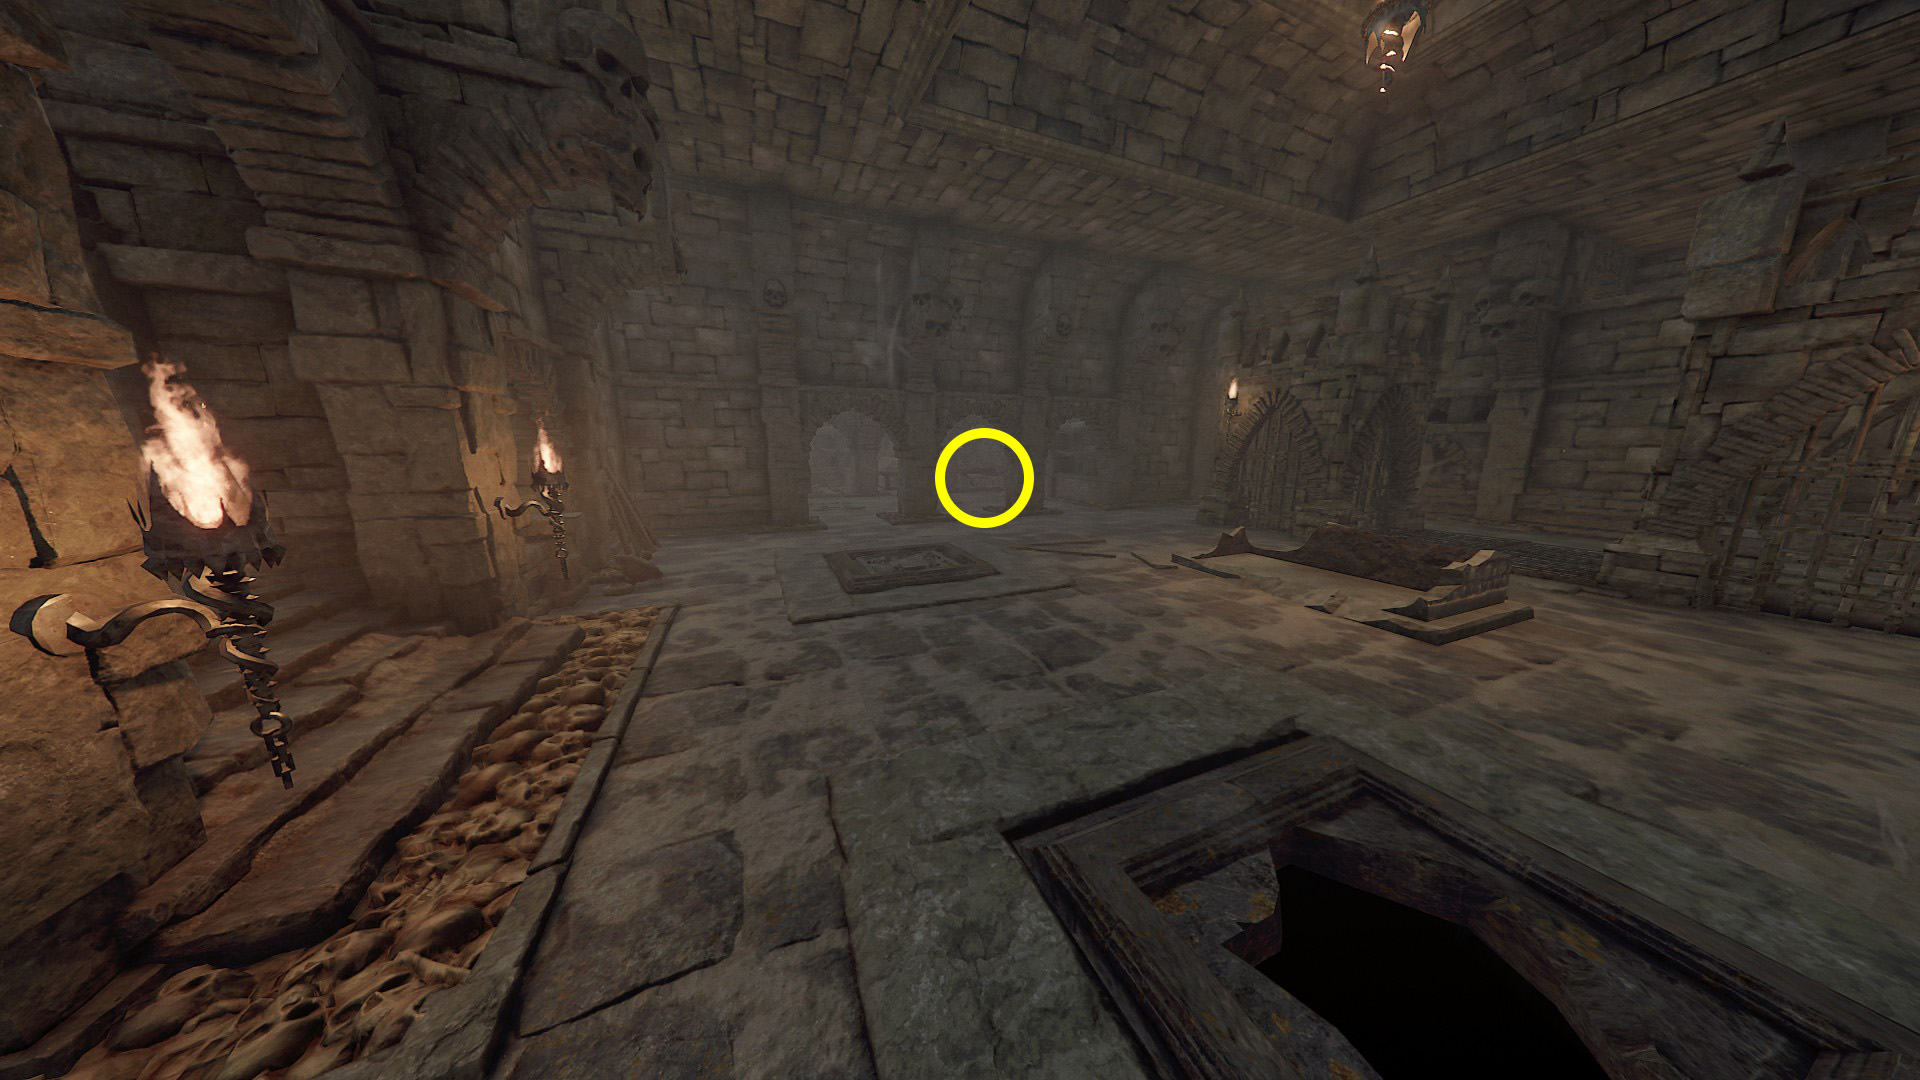
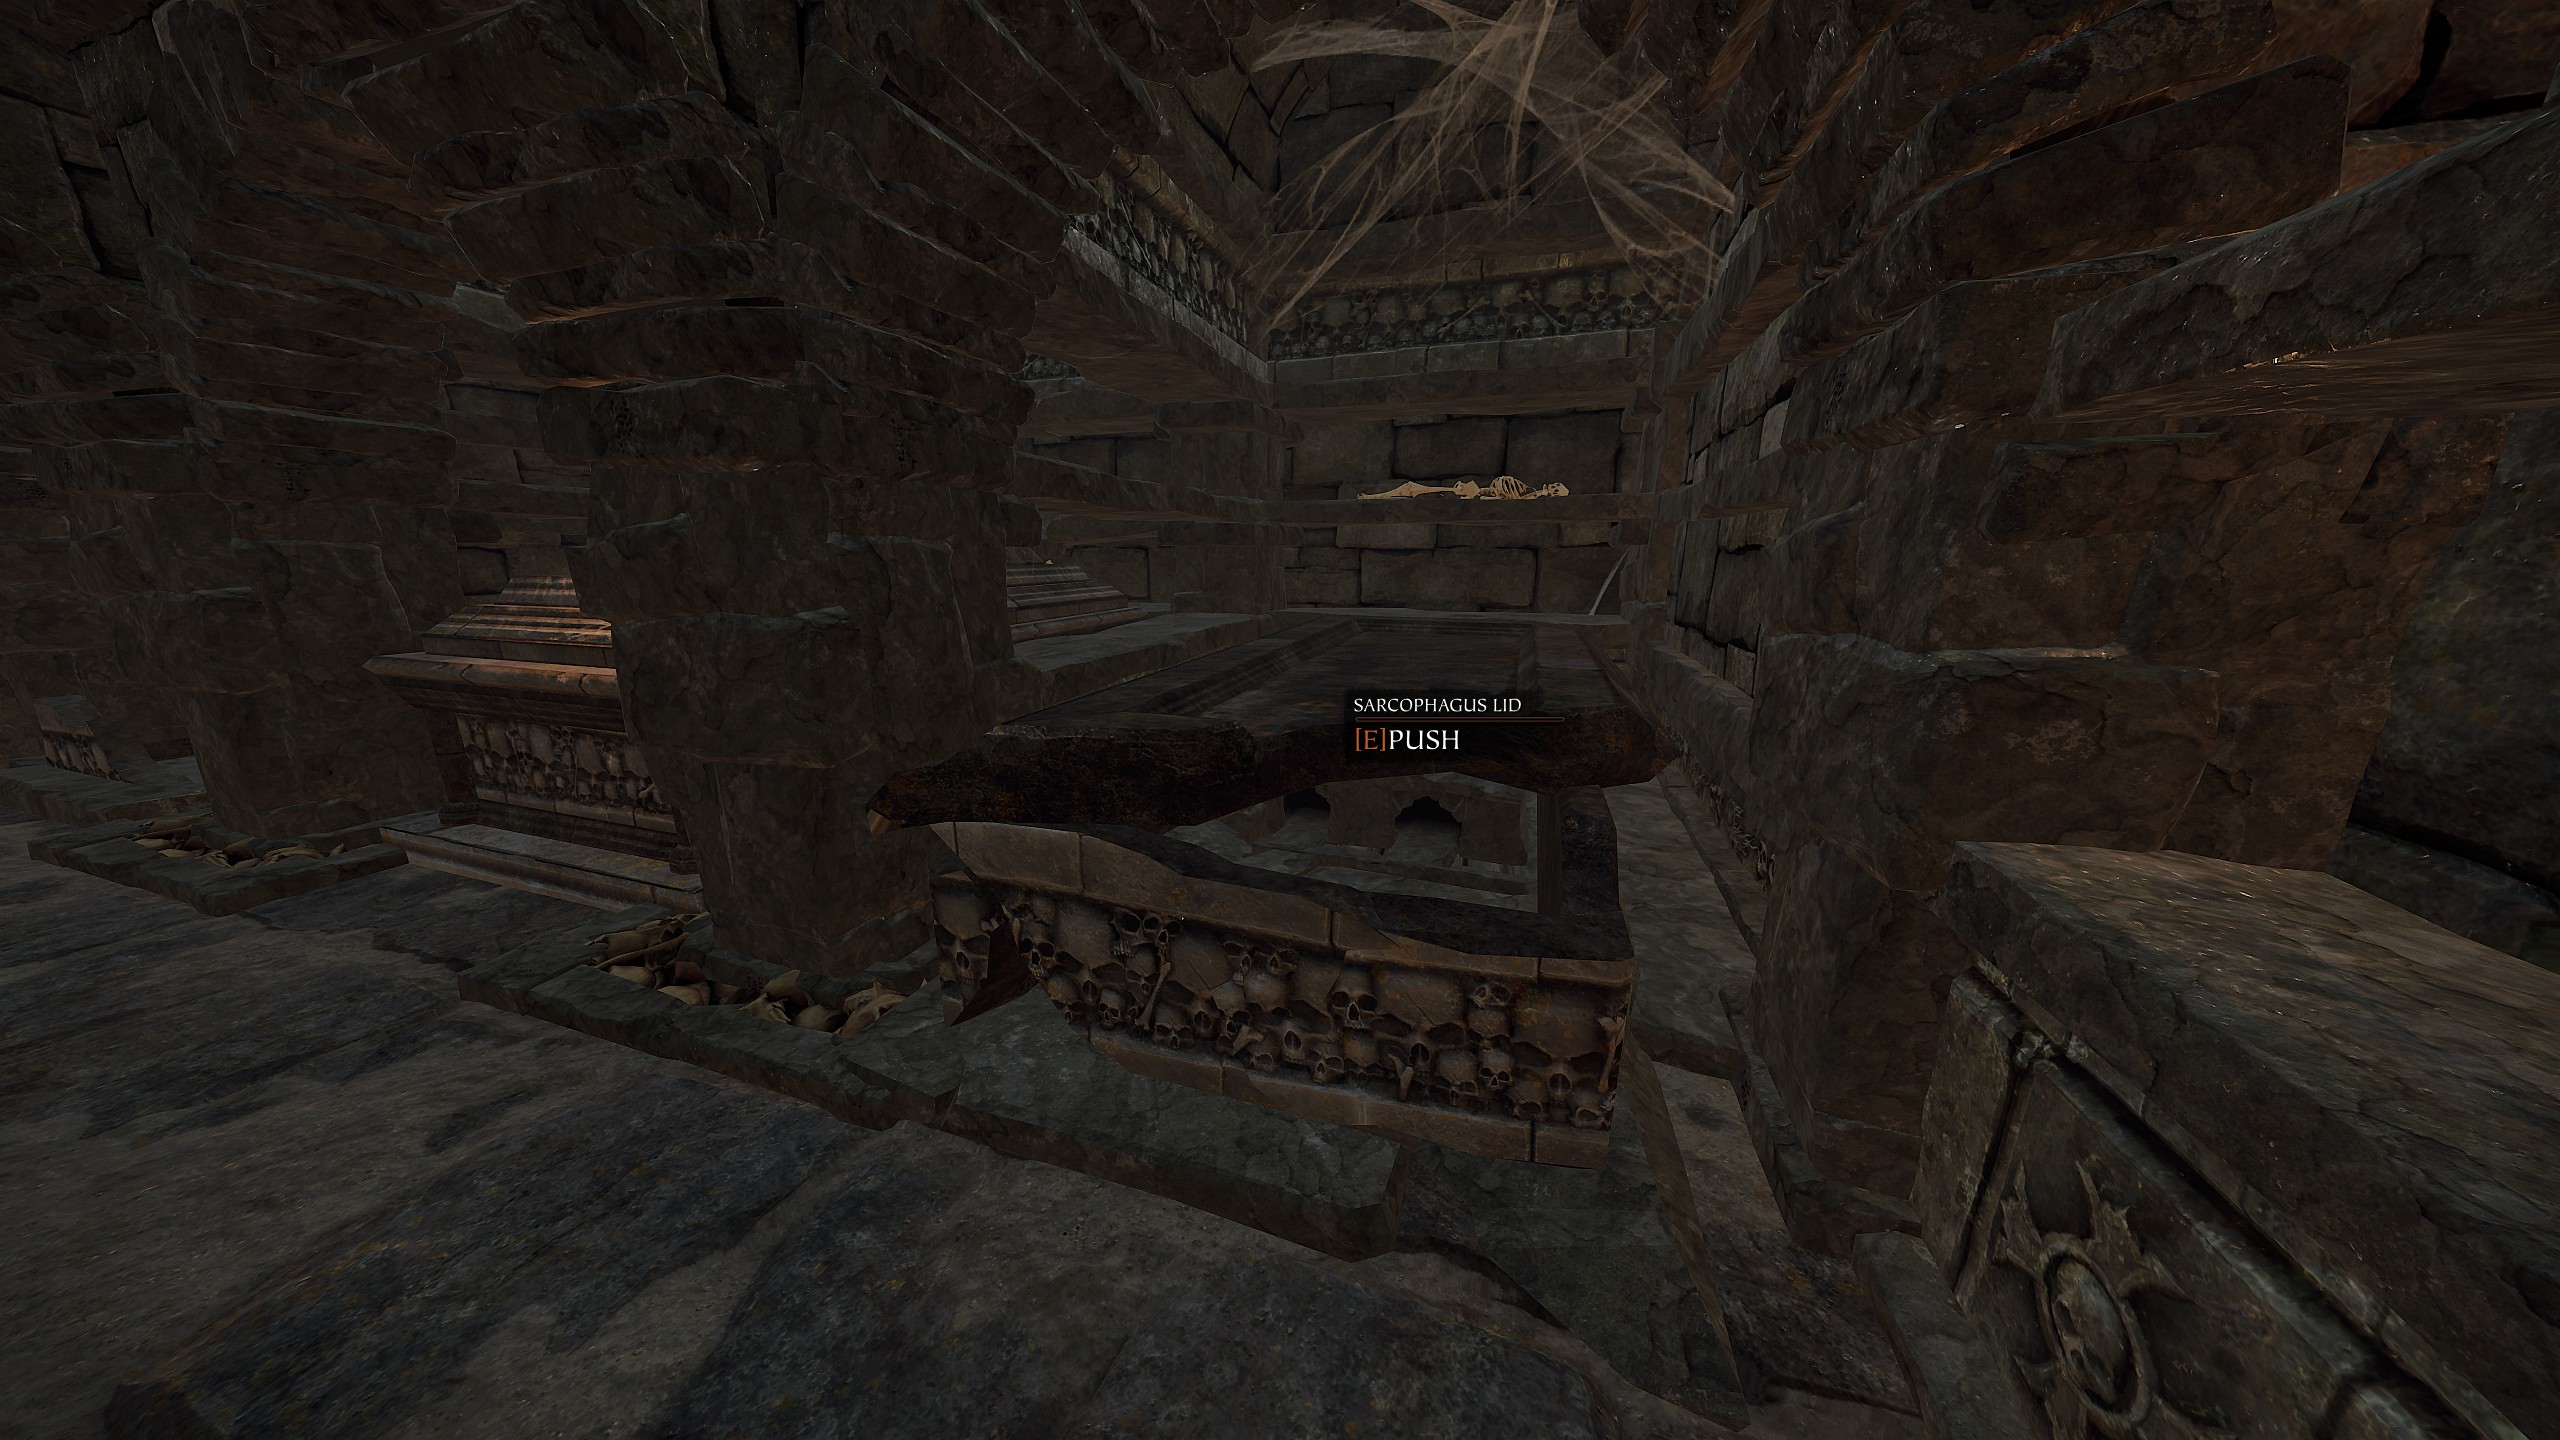
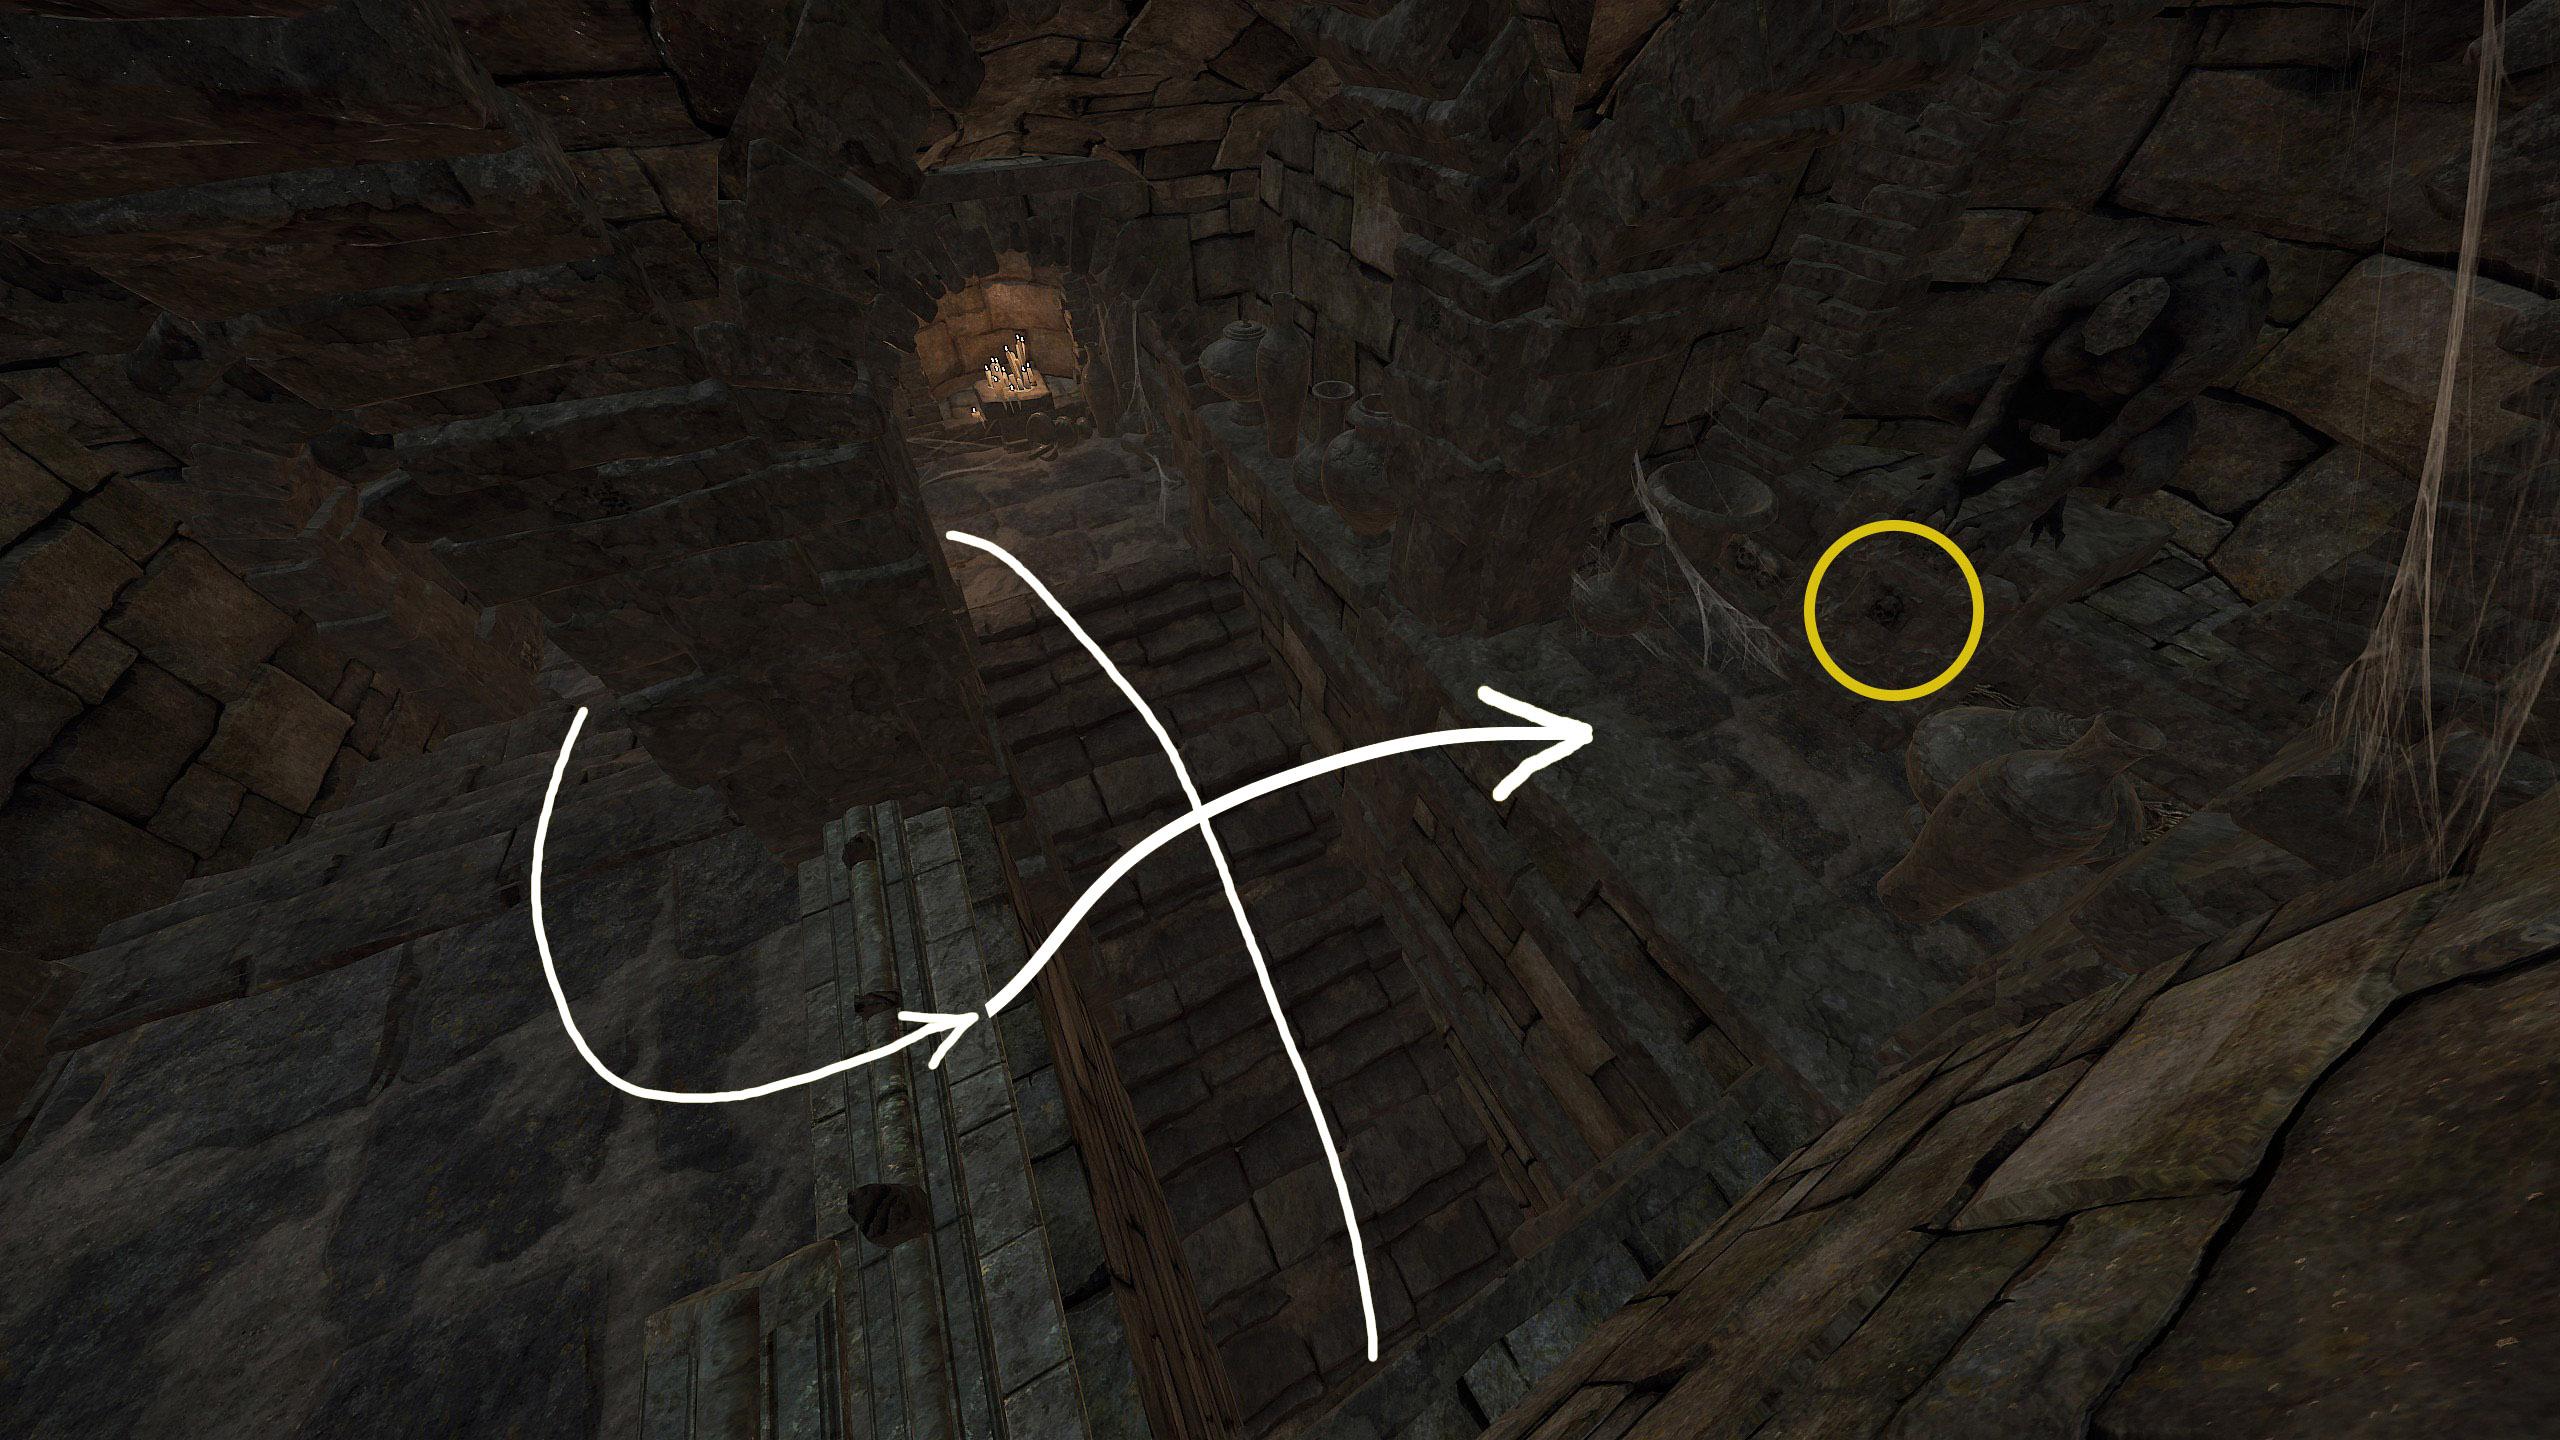
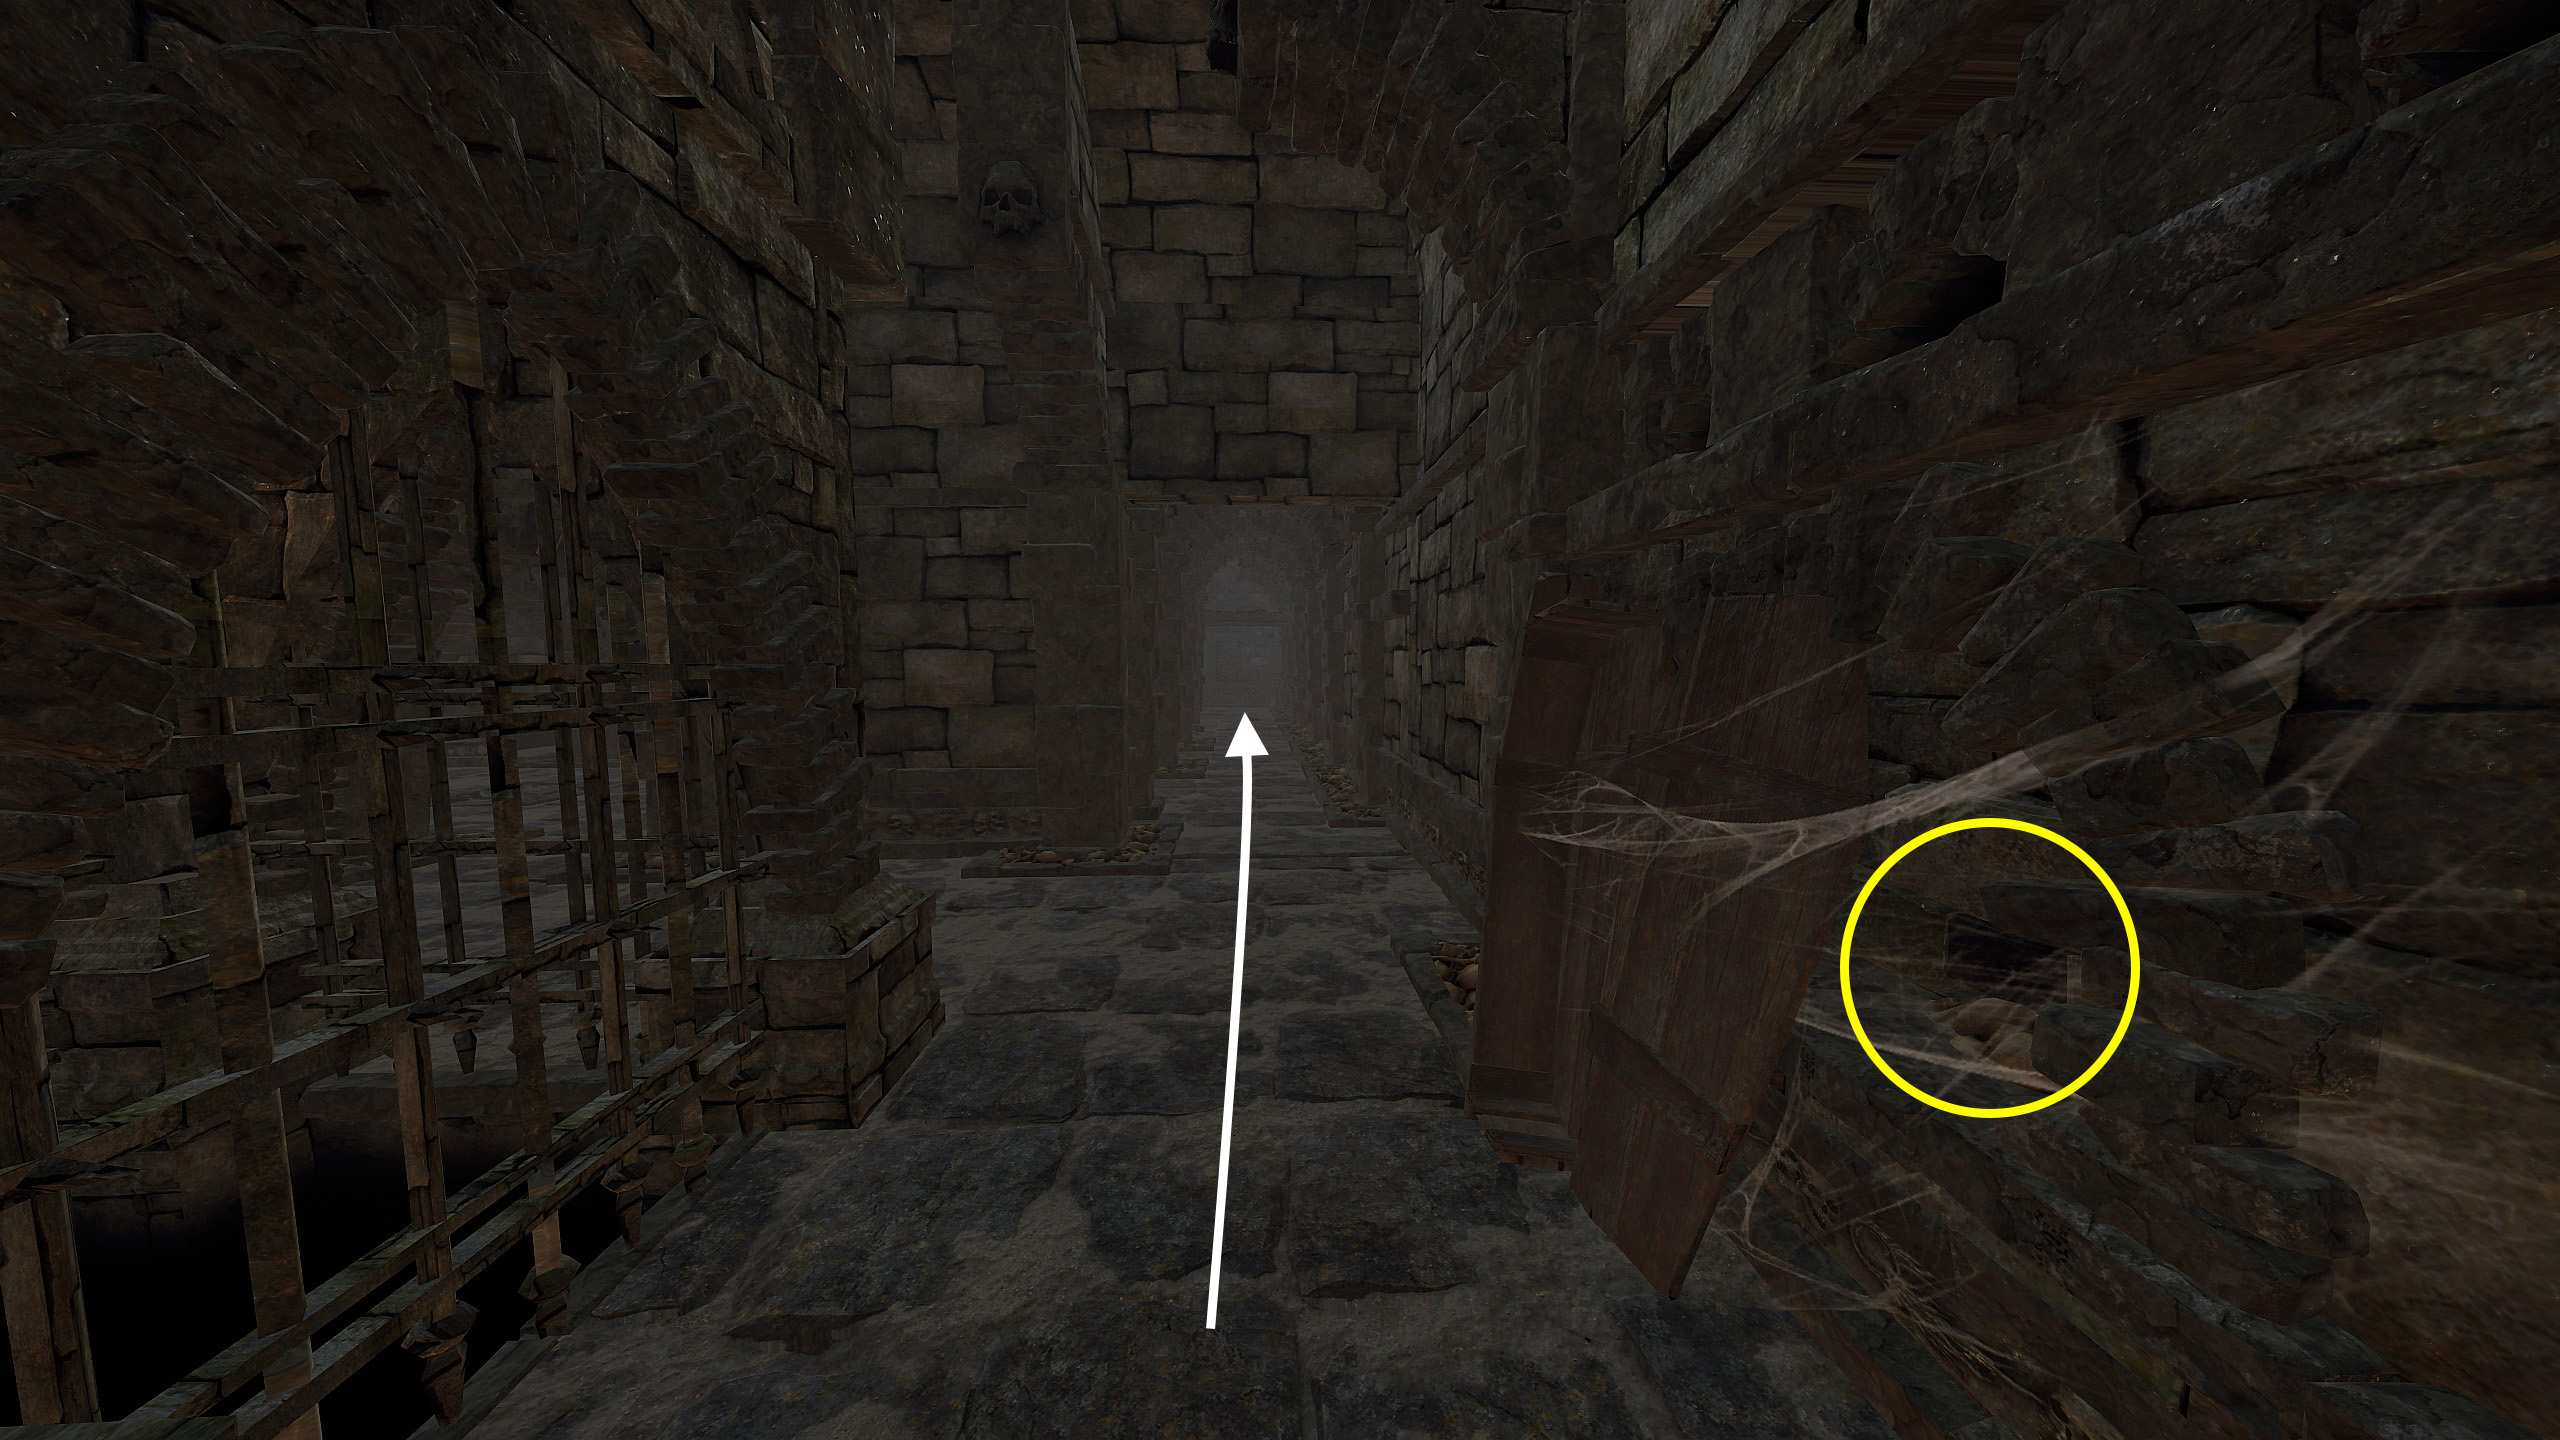
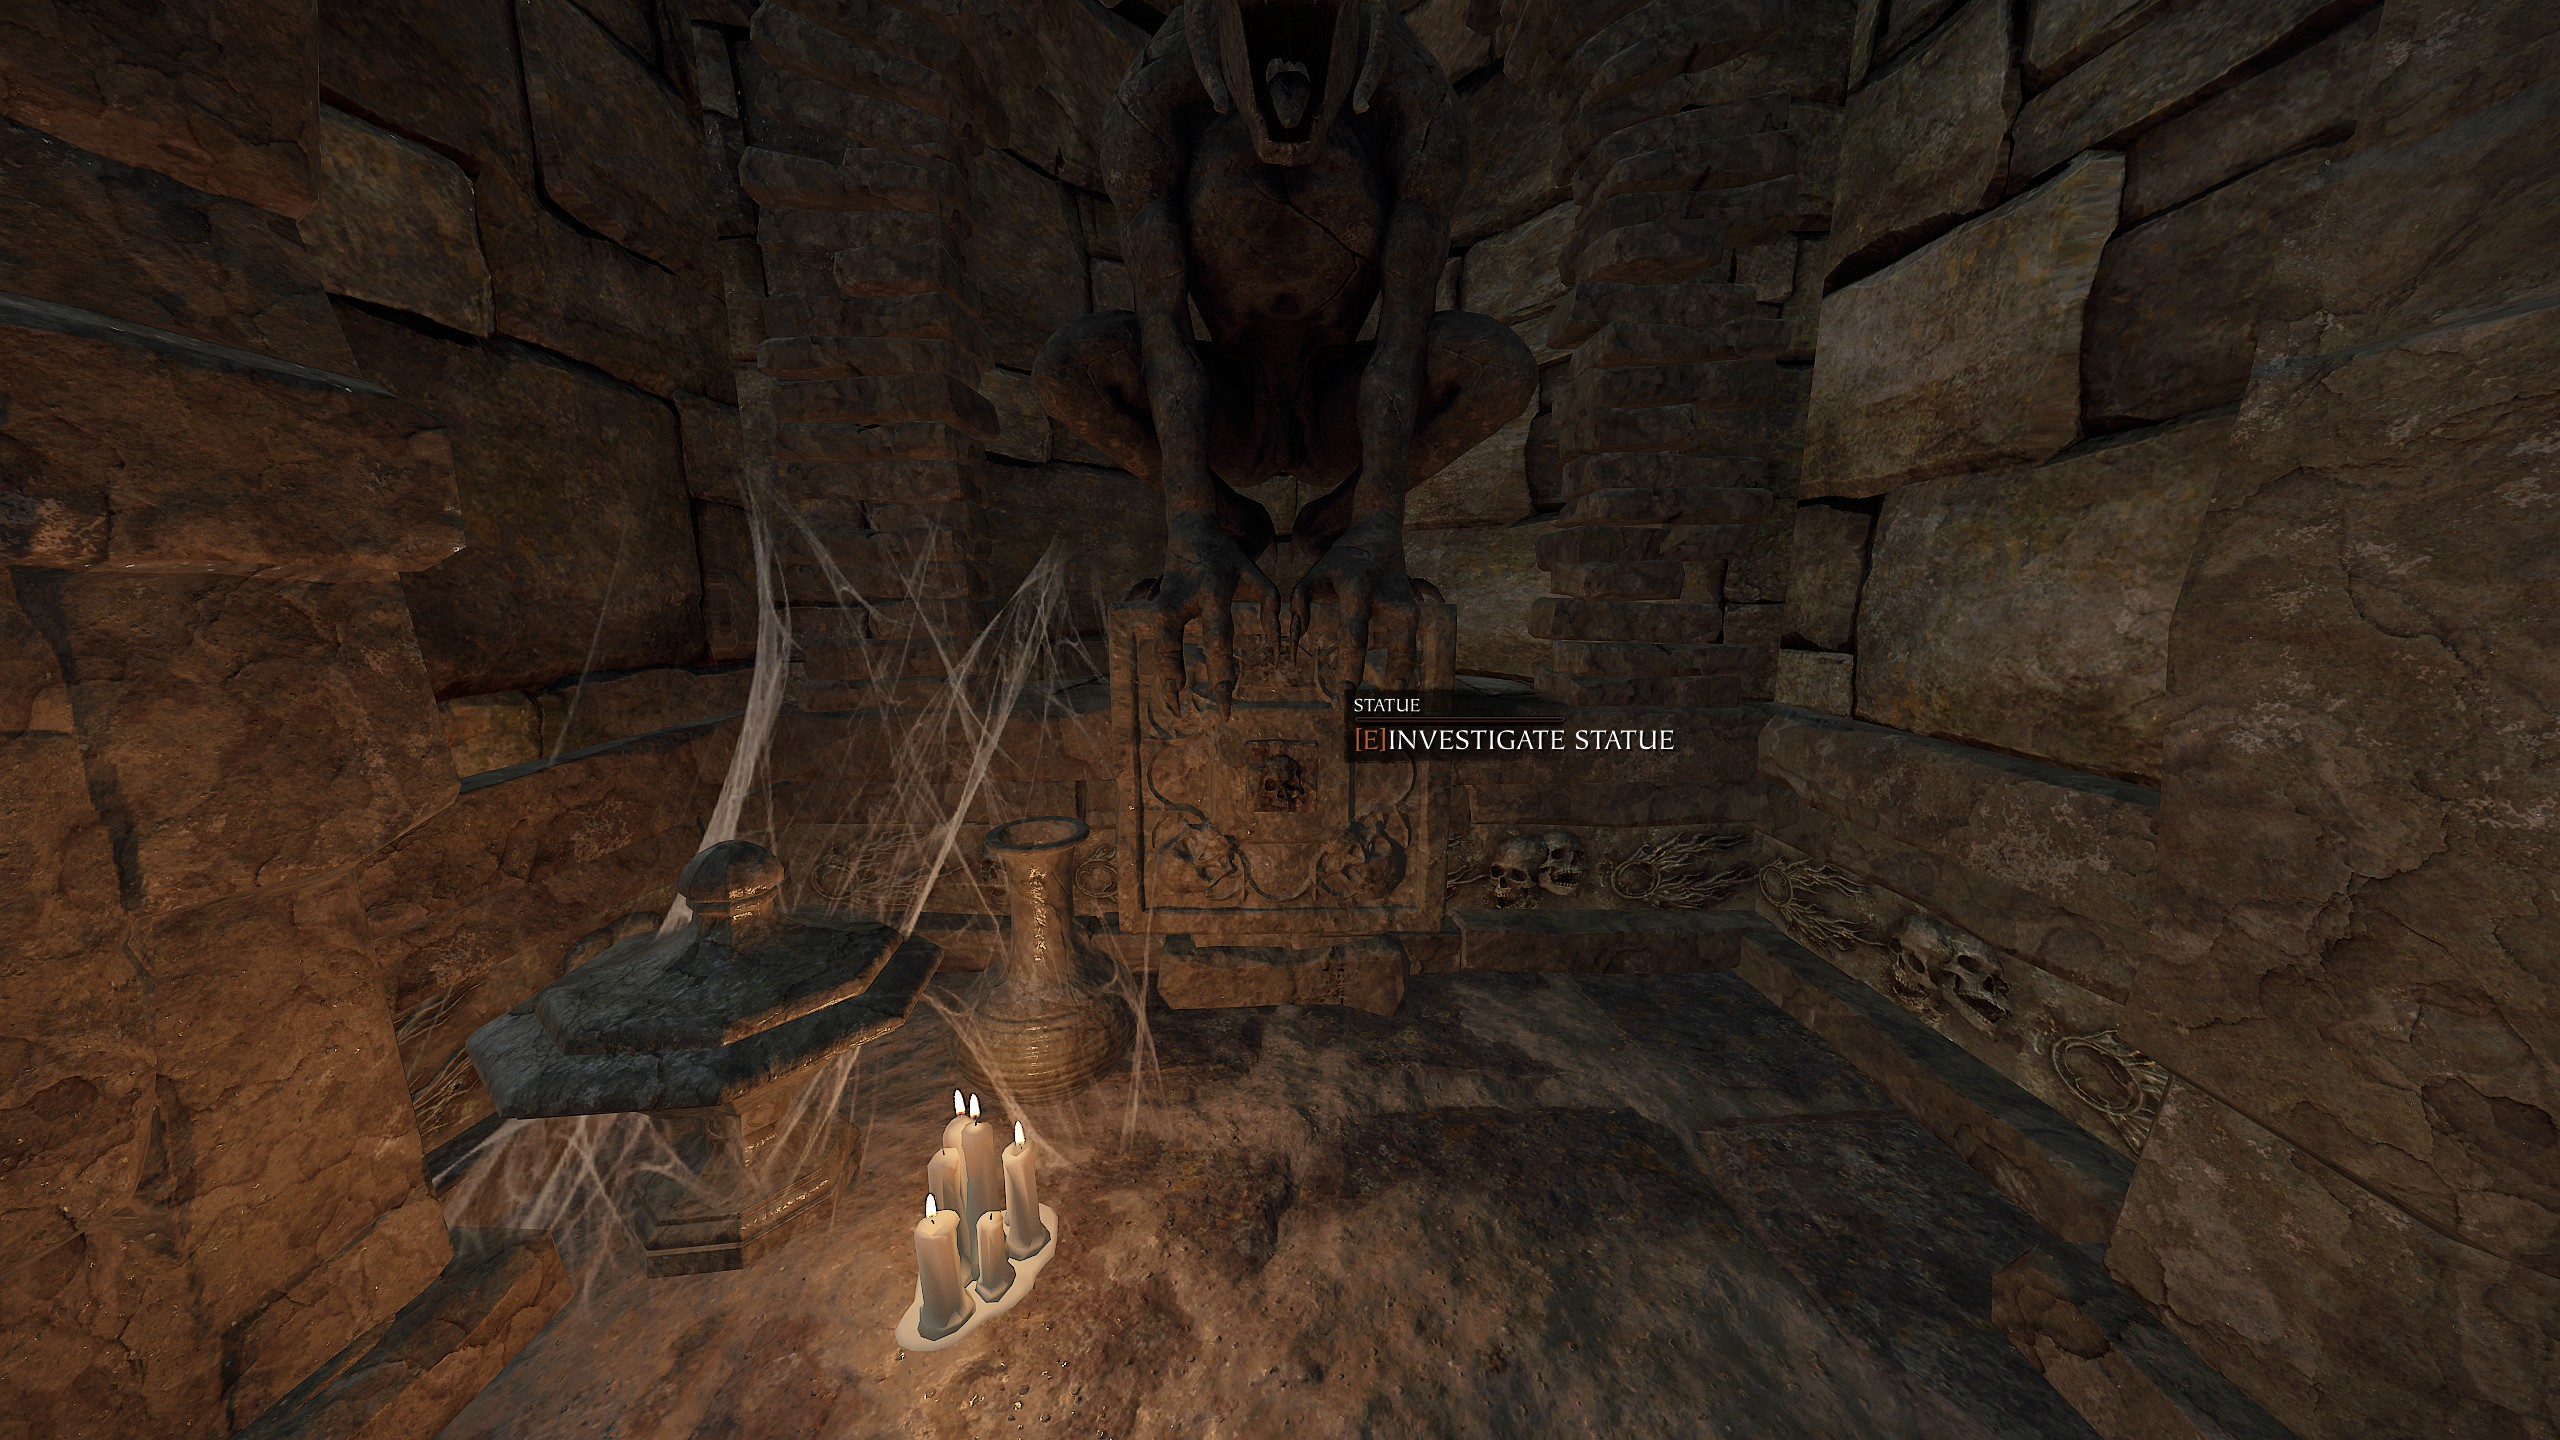
A secret door will open just to your left. Walk forward a bit. In the room behind the two center coffins, you will find a statue. Go to it and press the button.
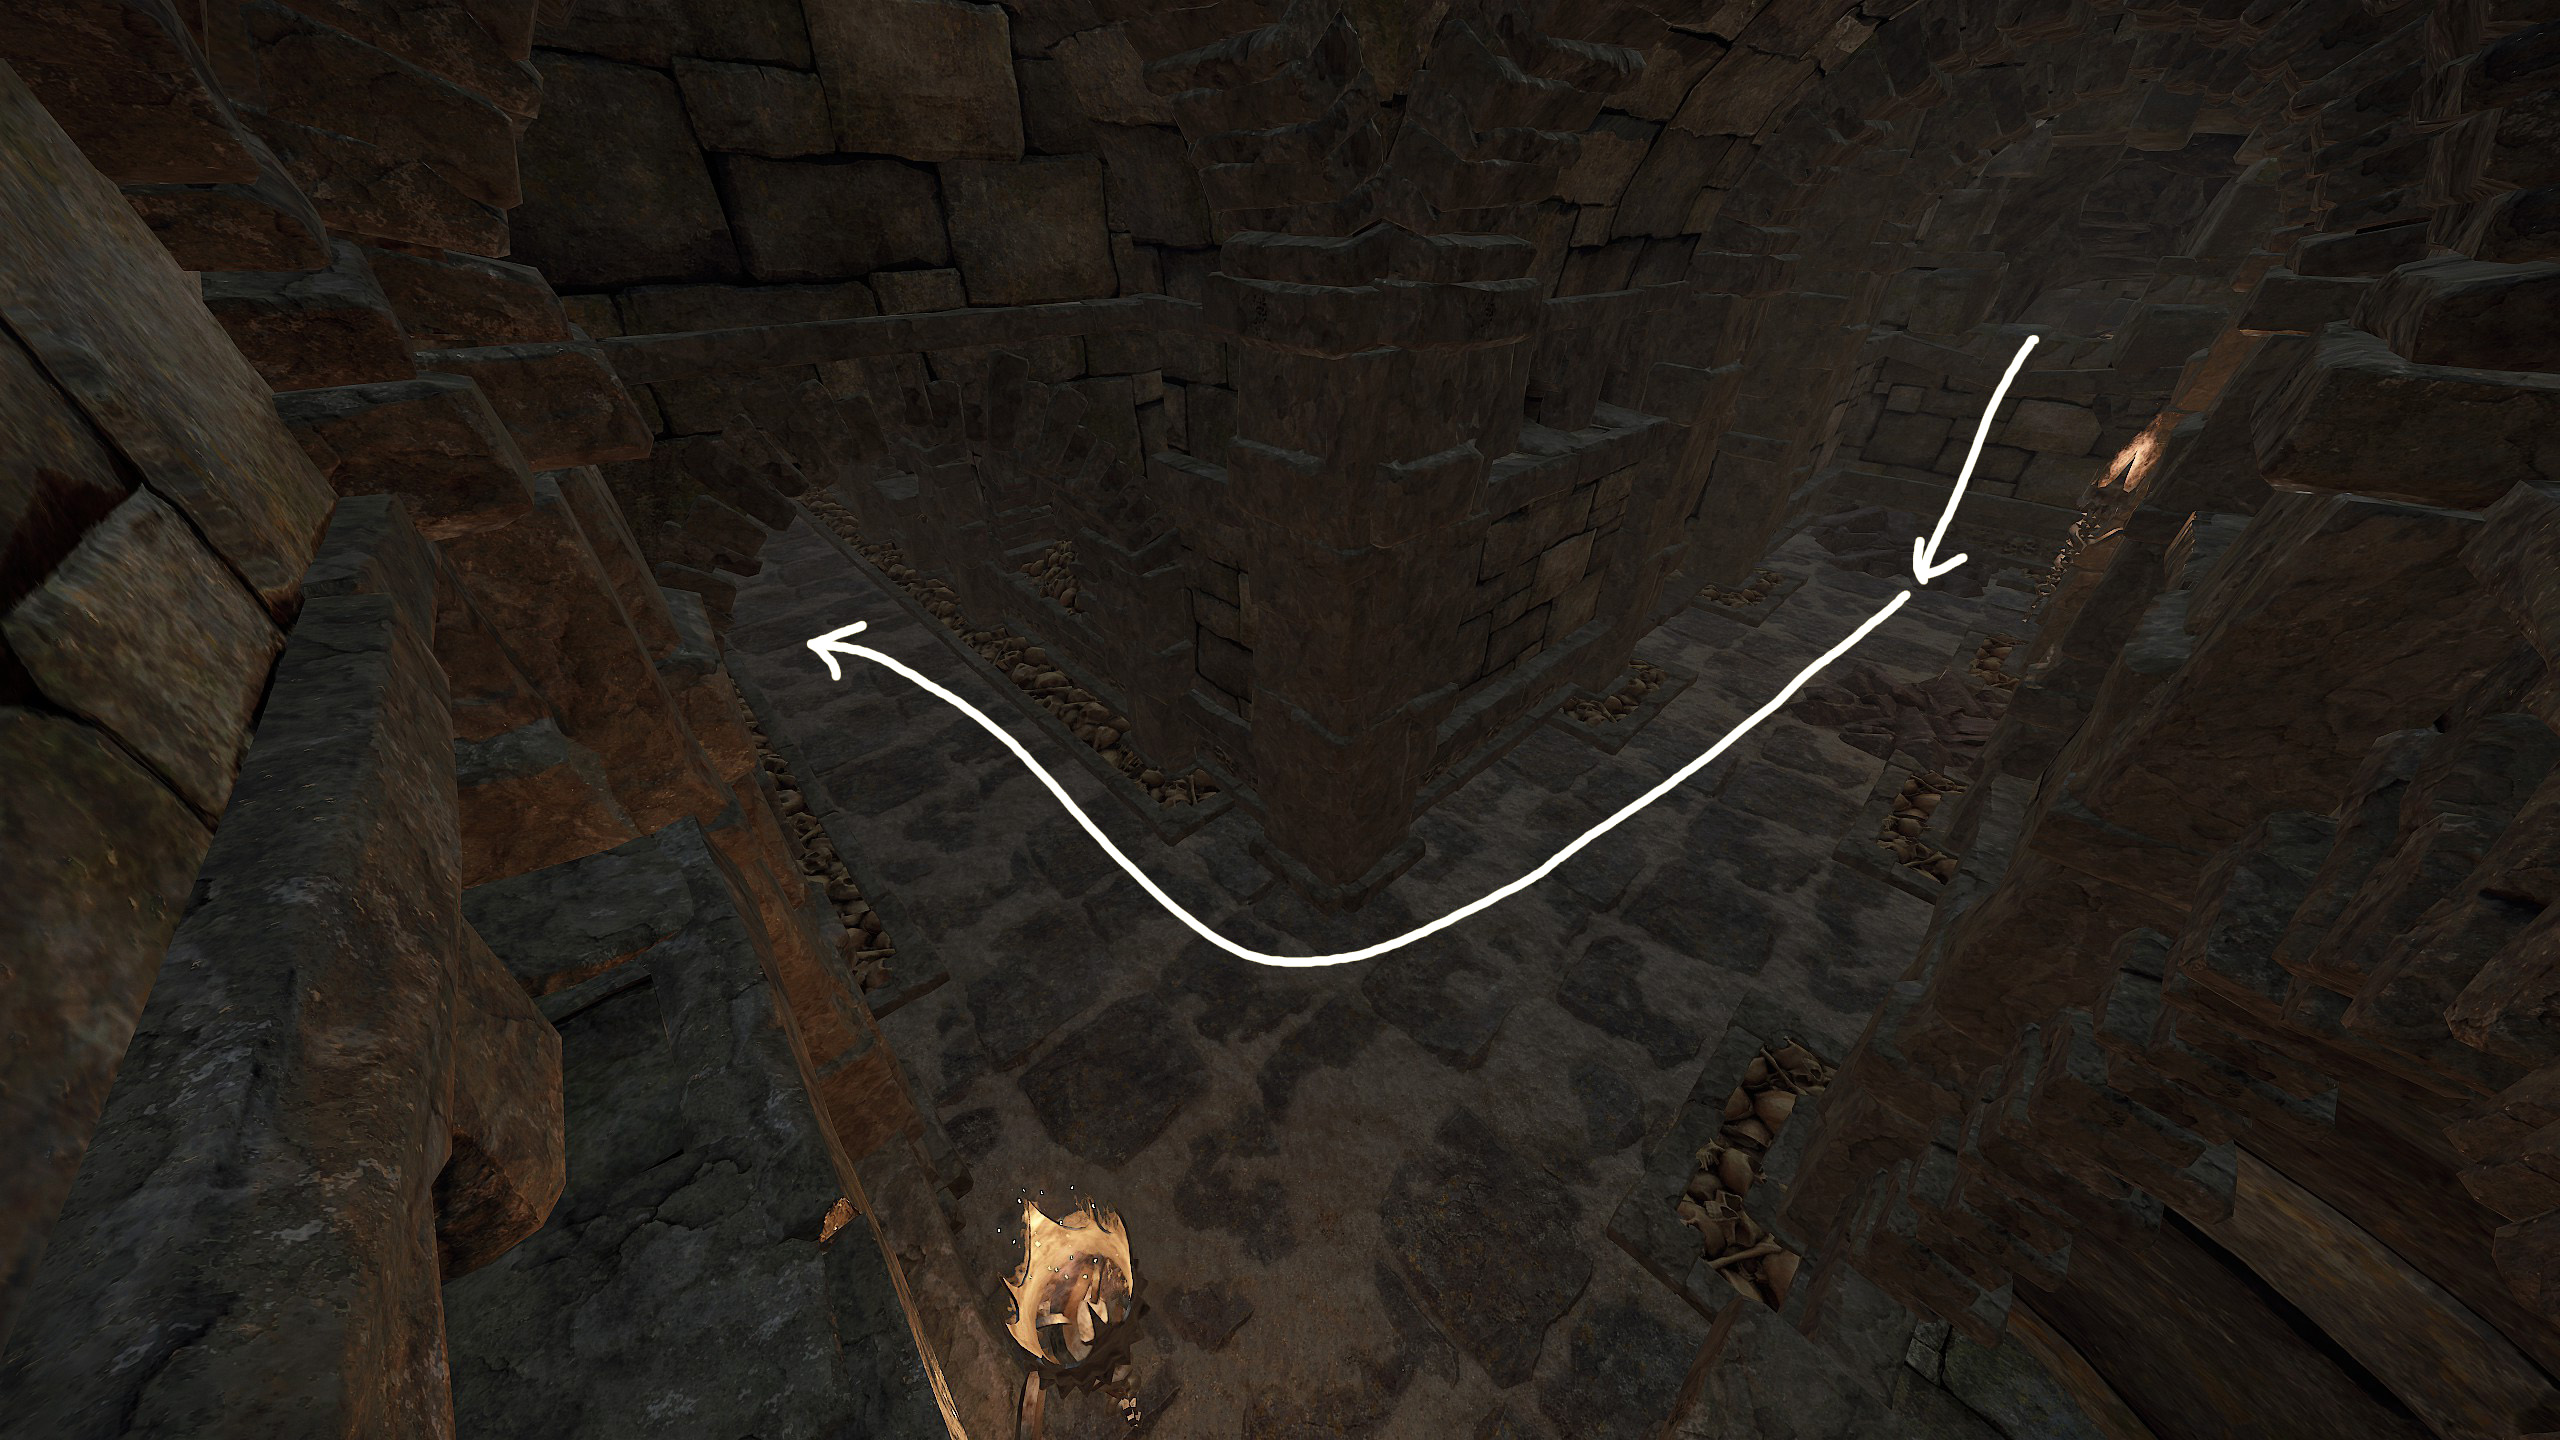
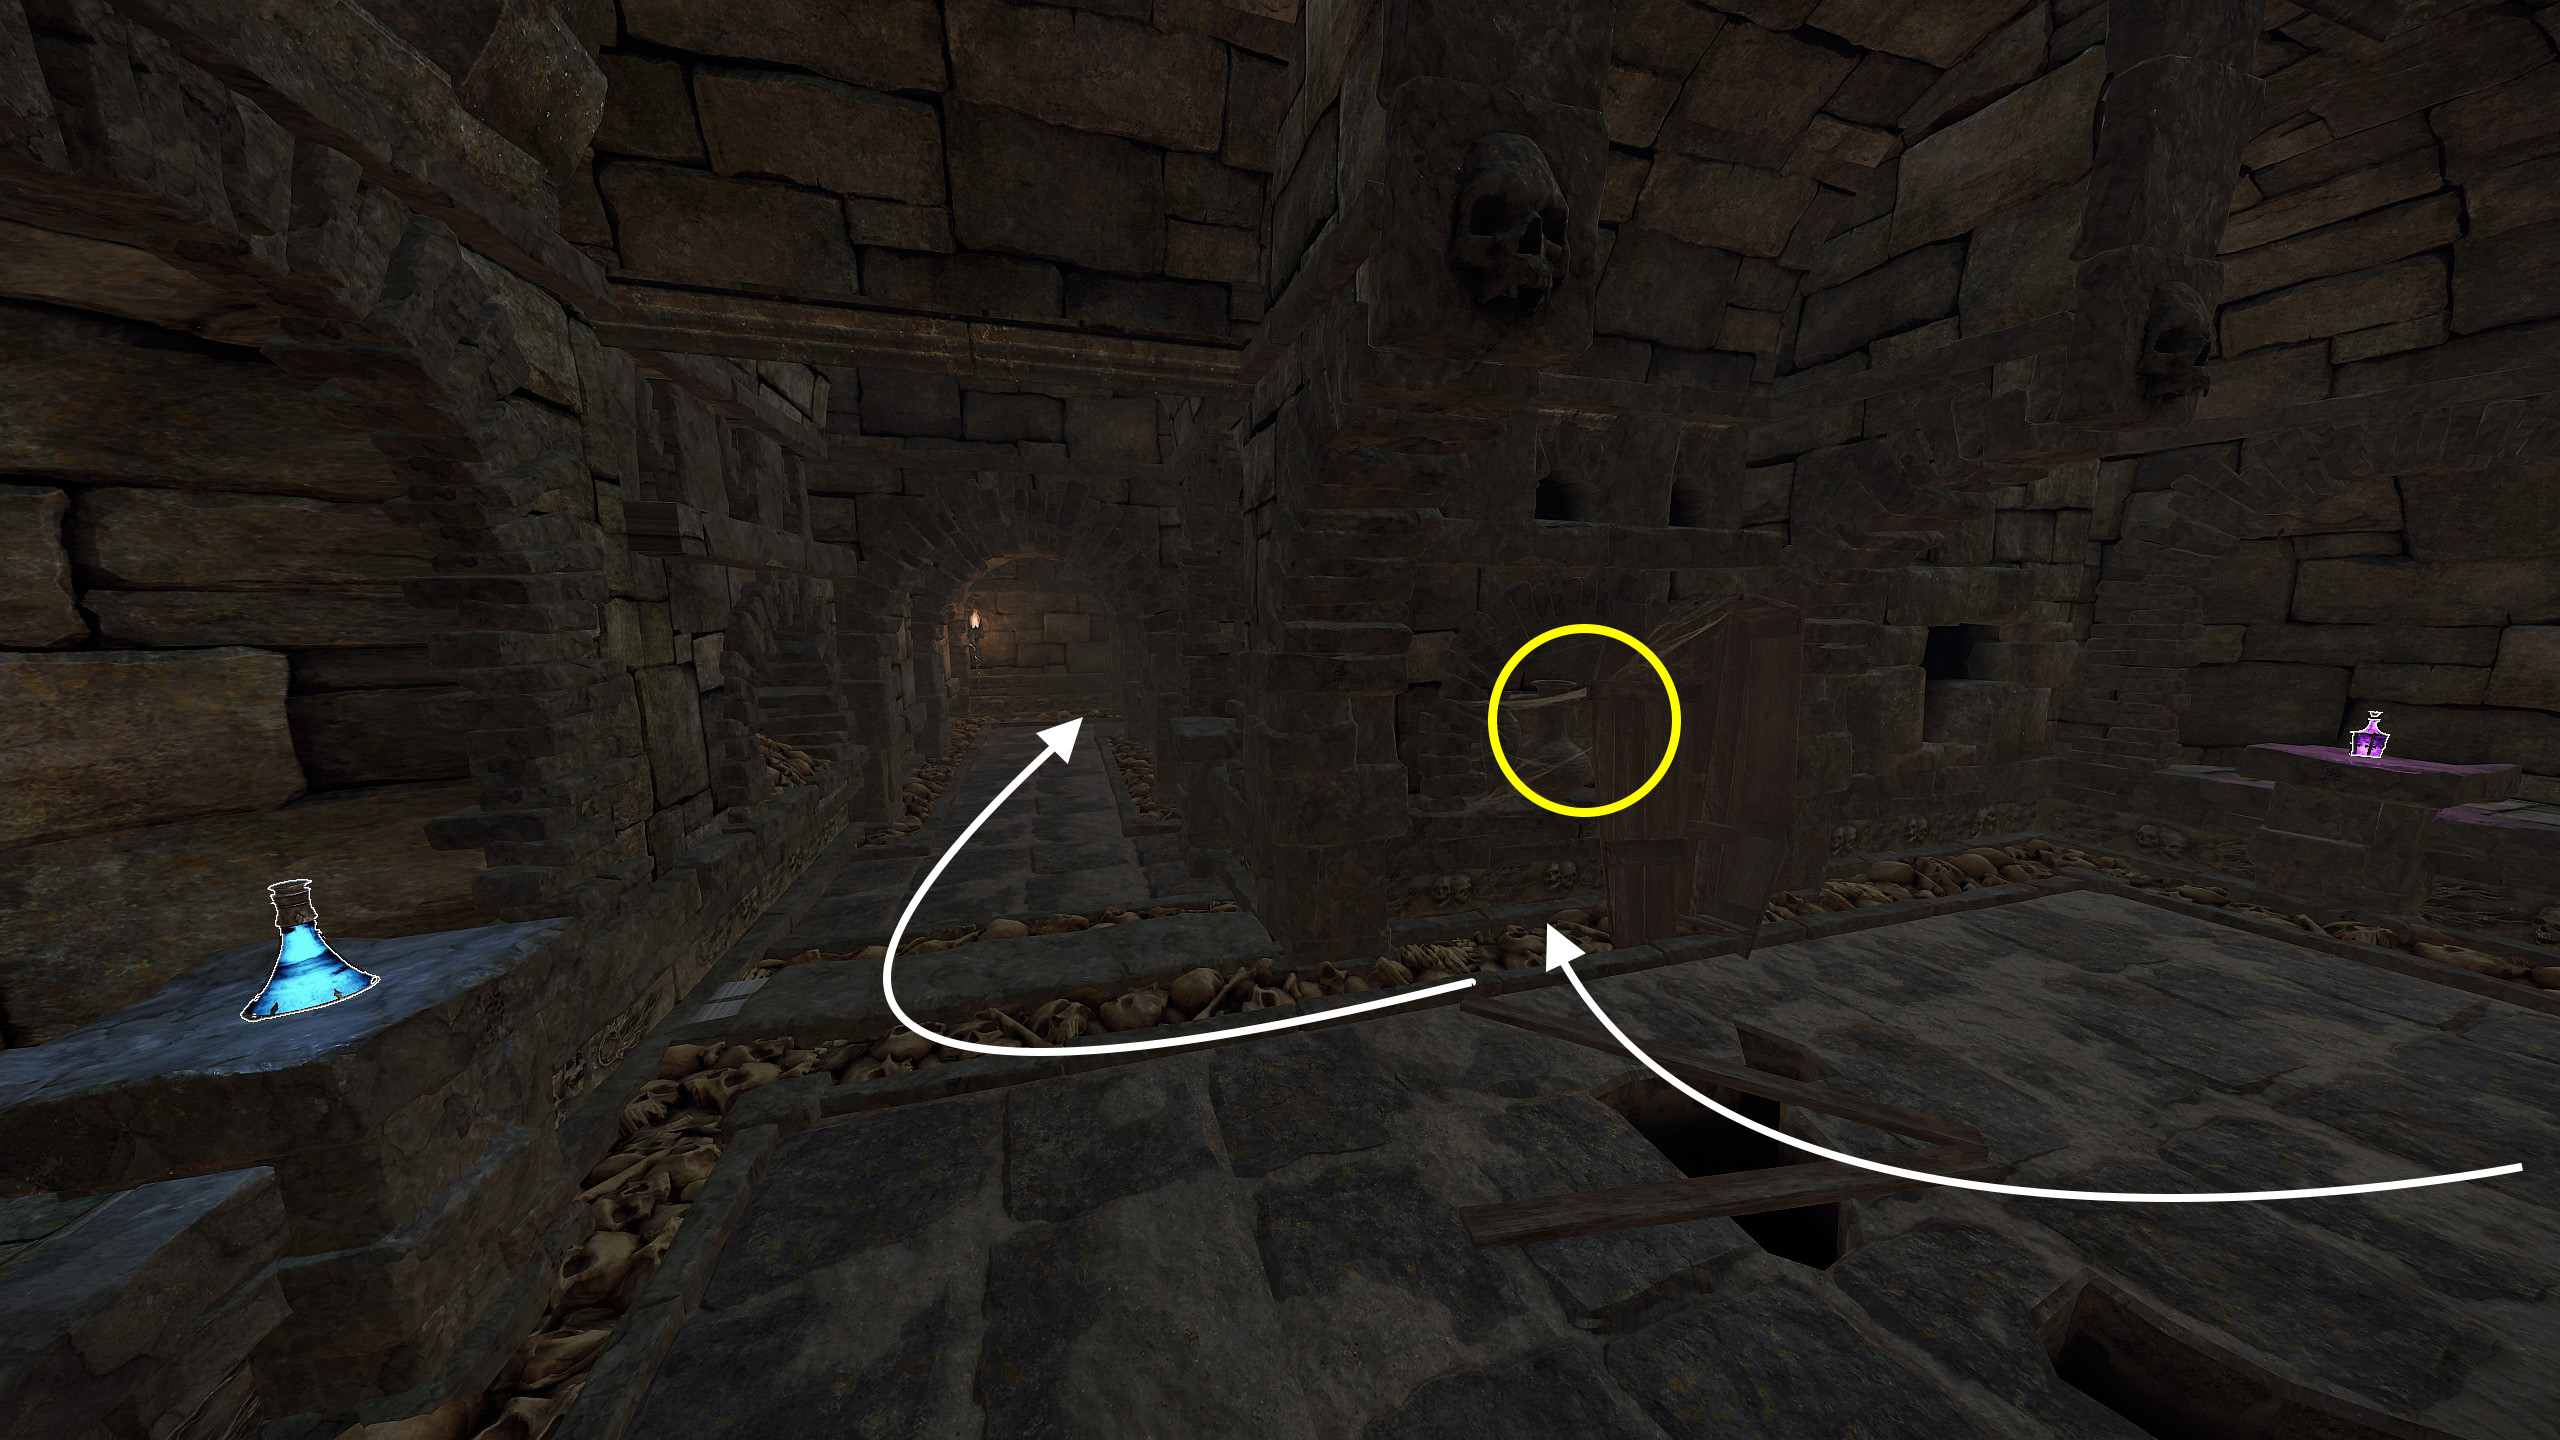
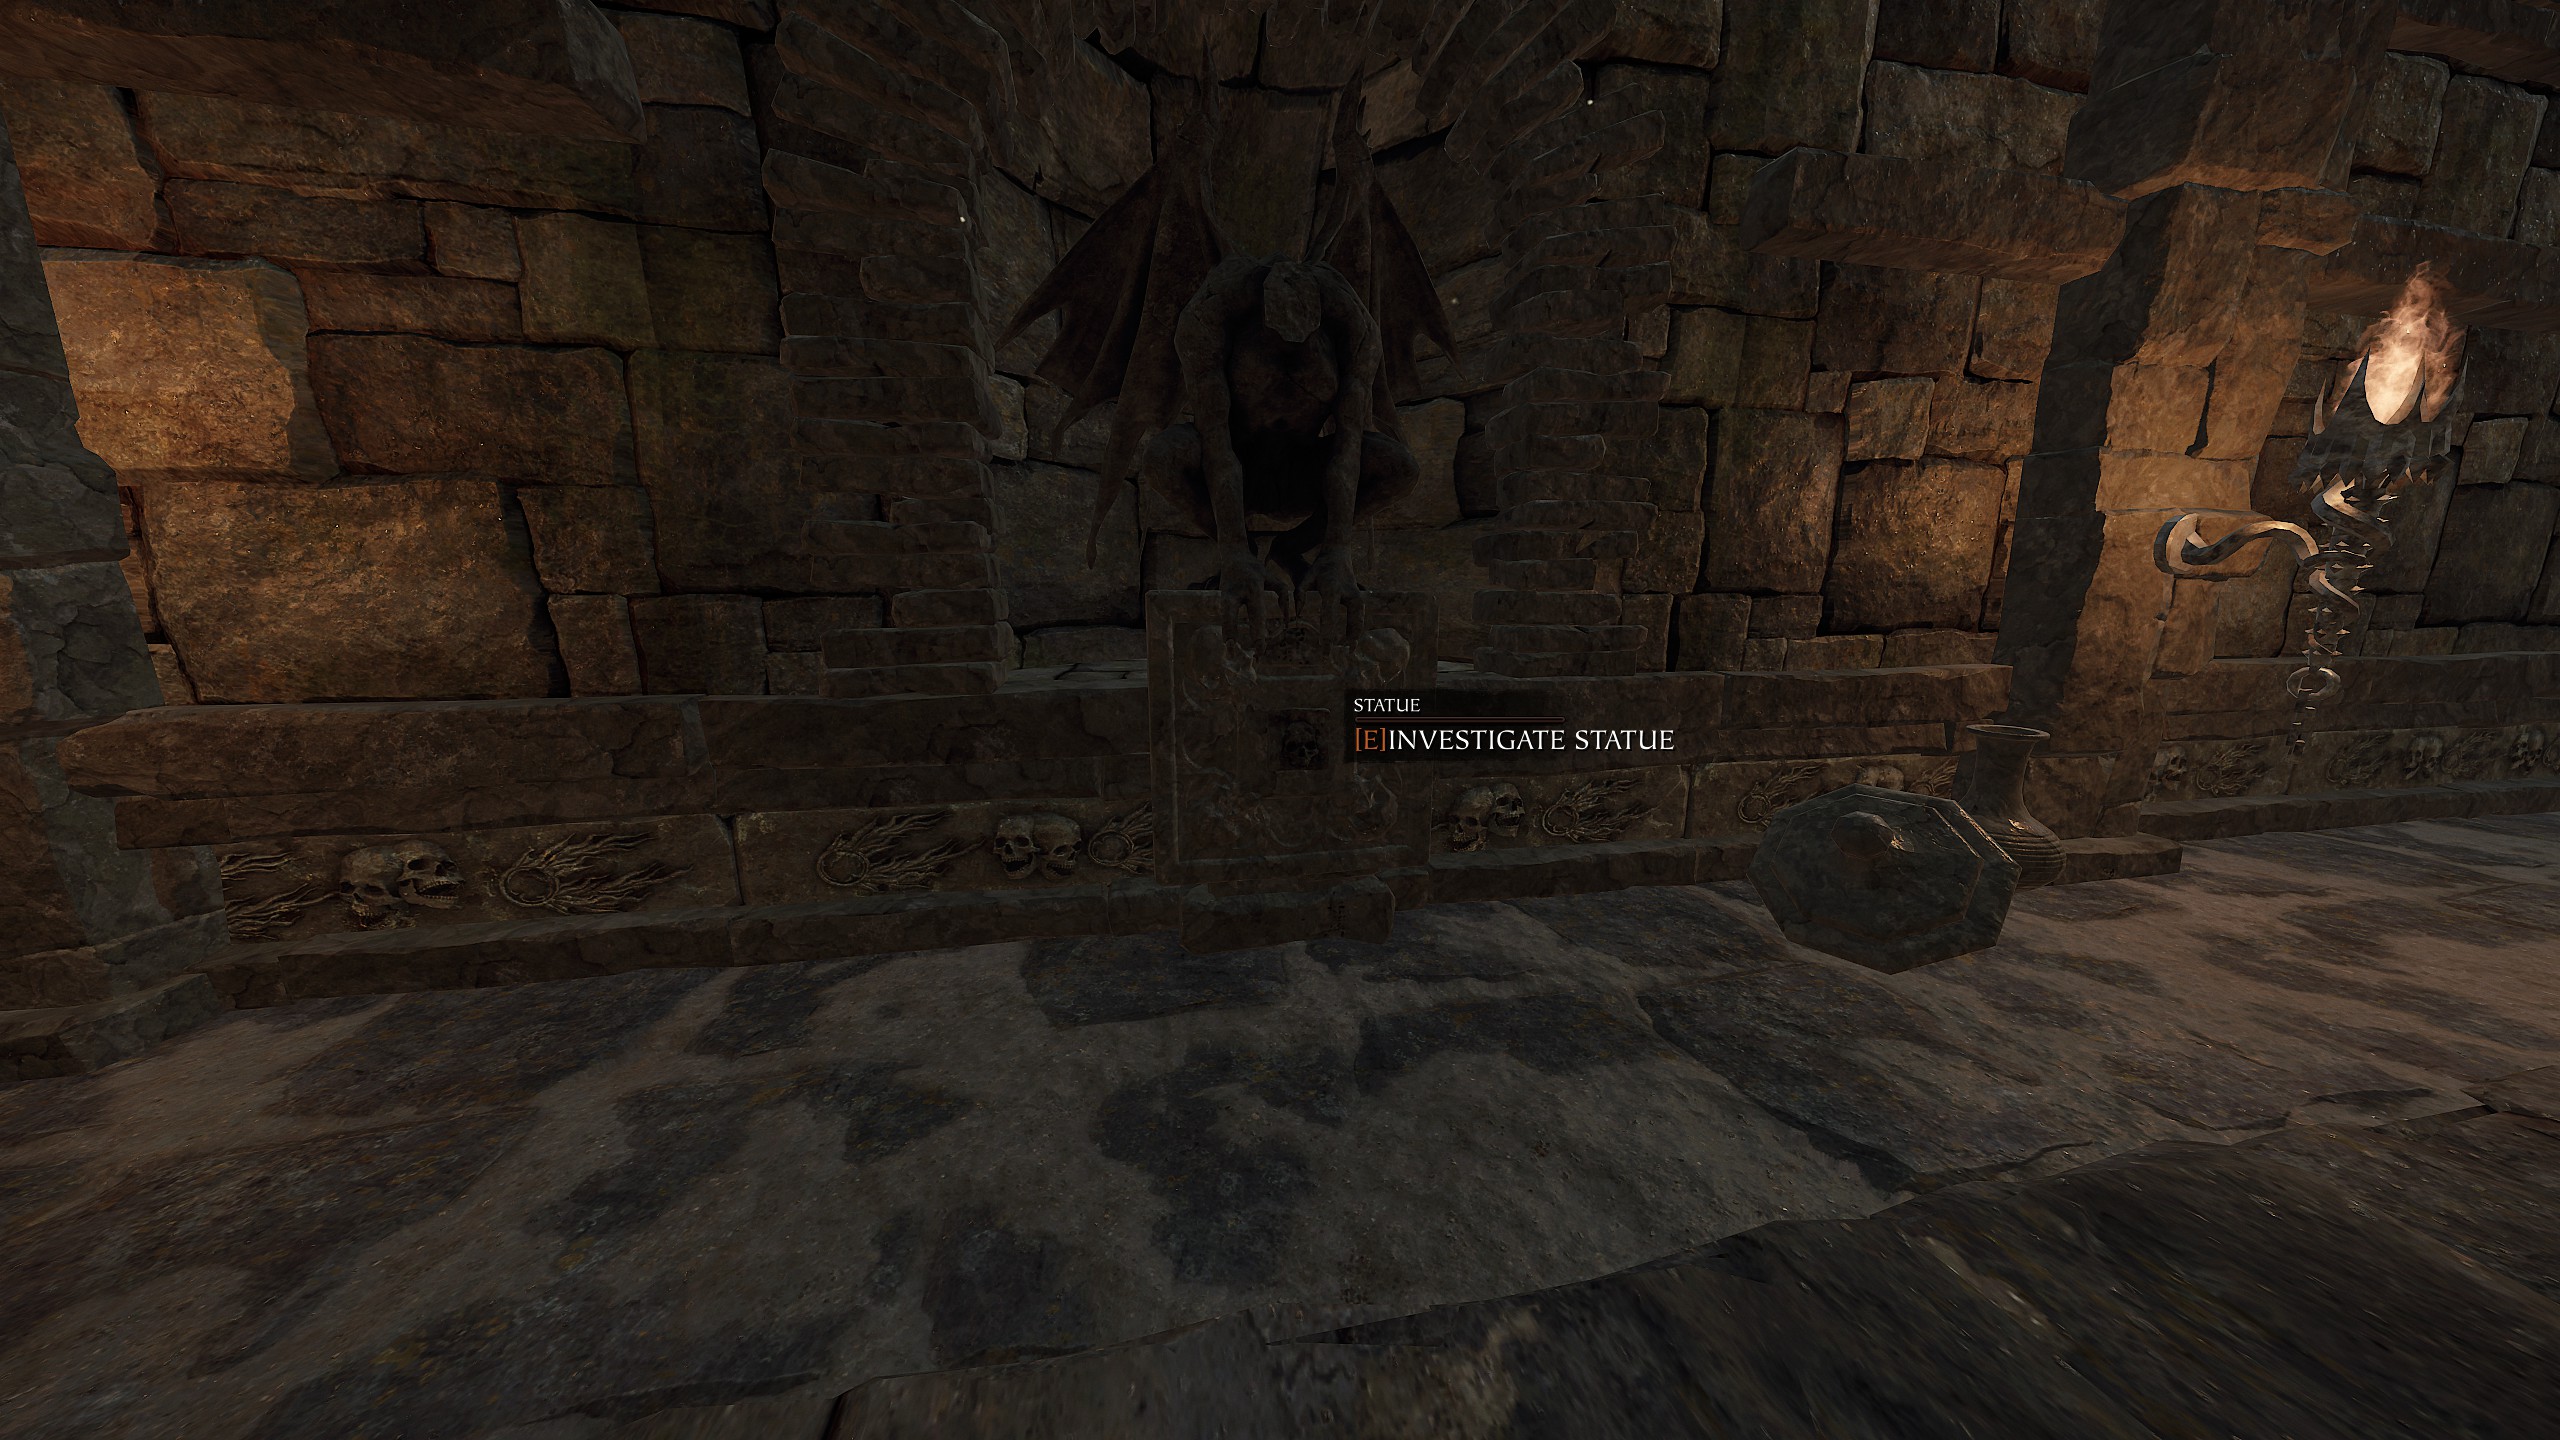
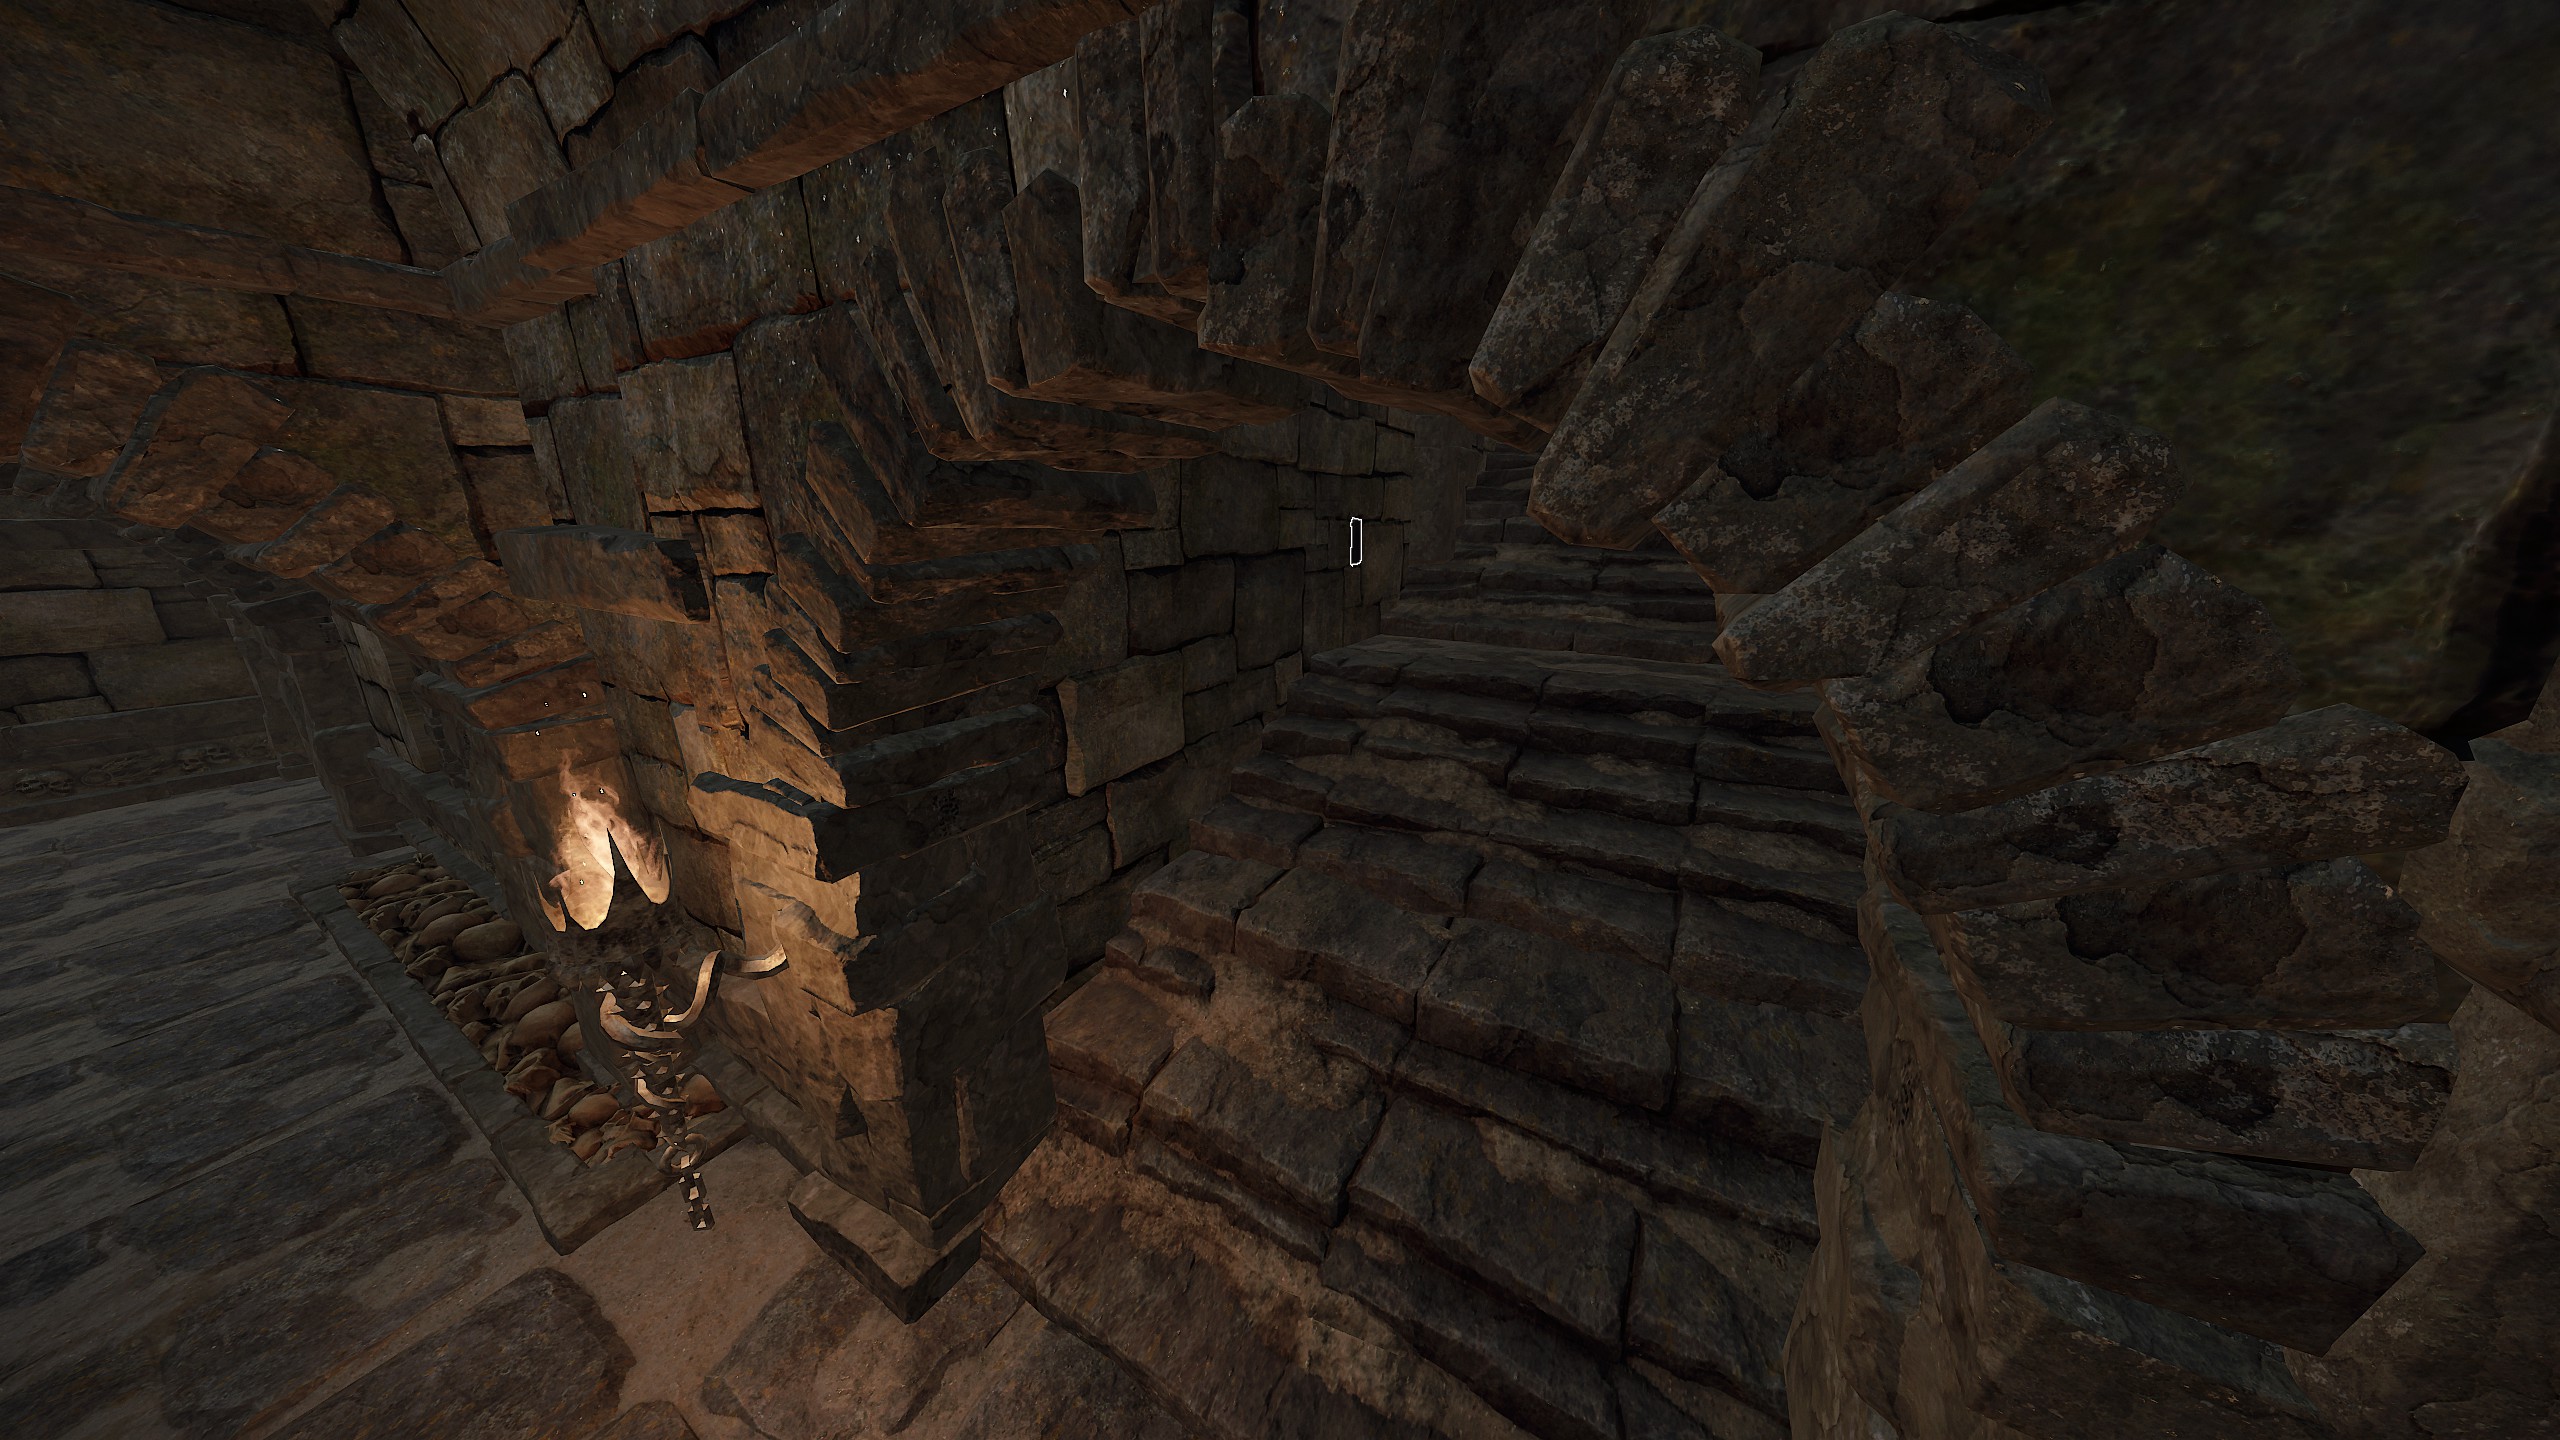
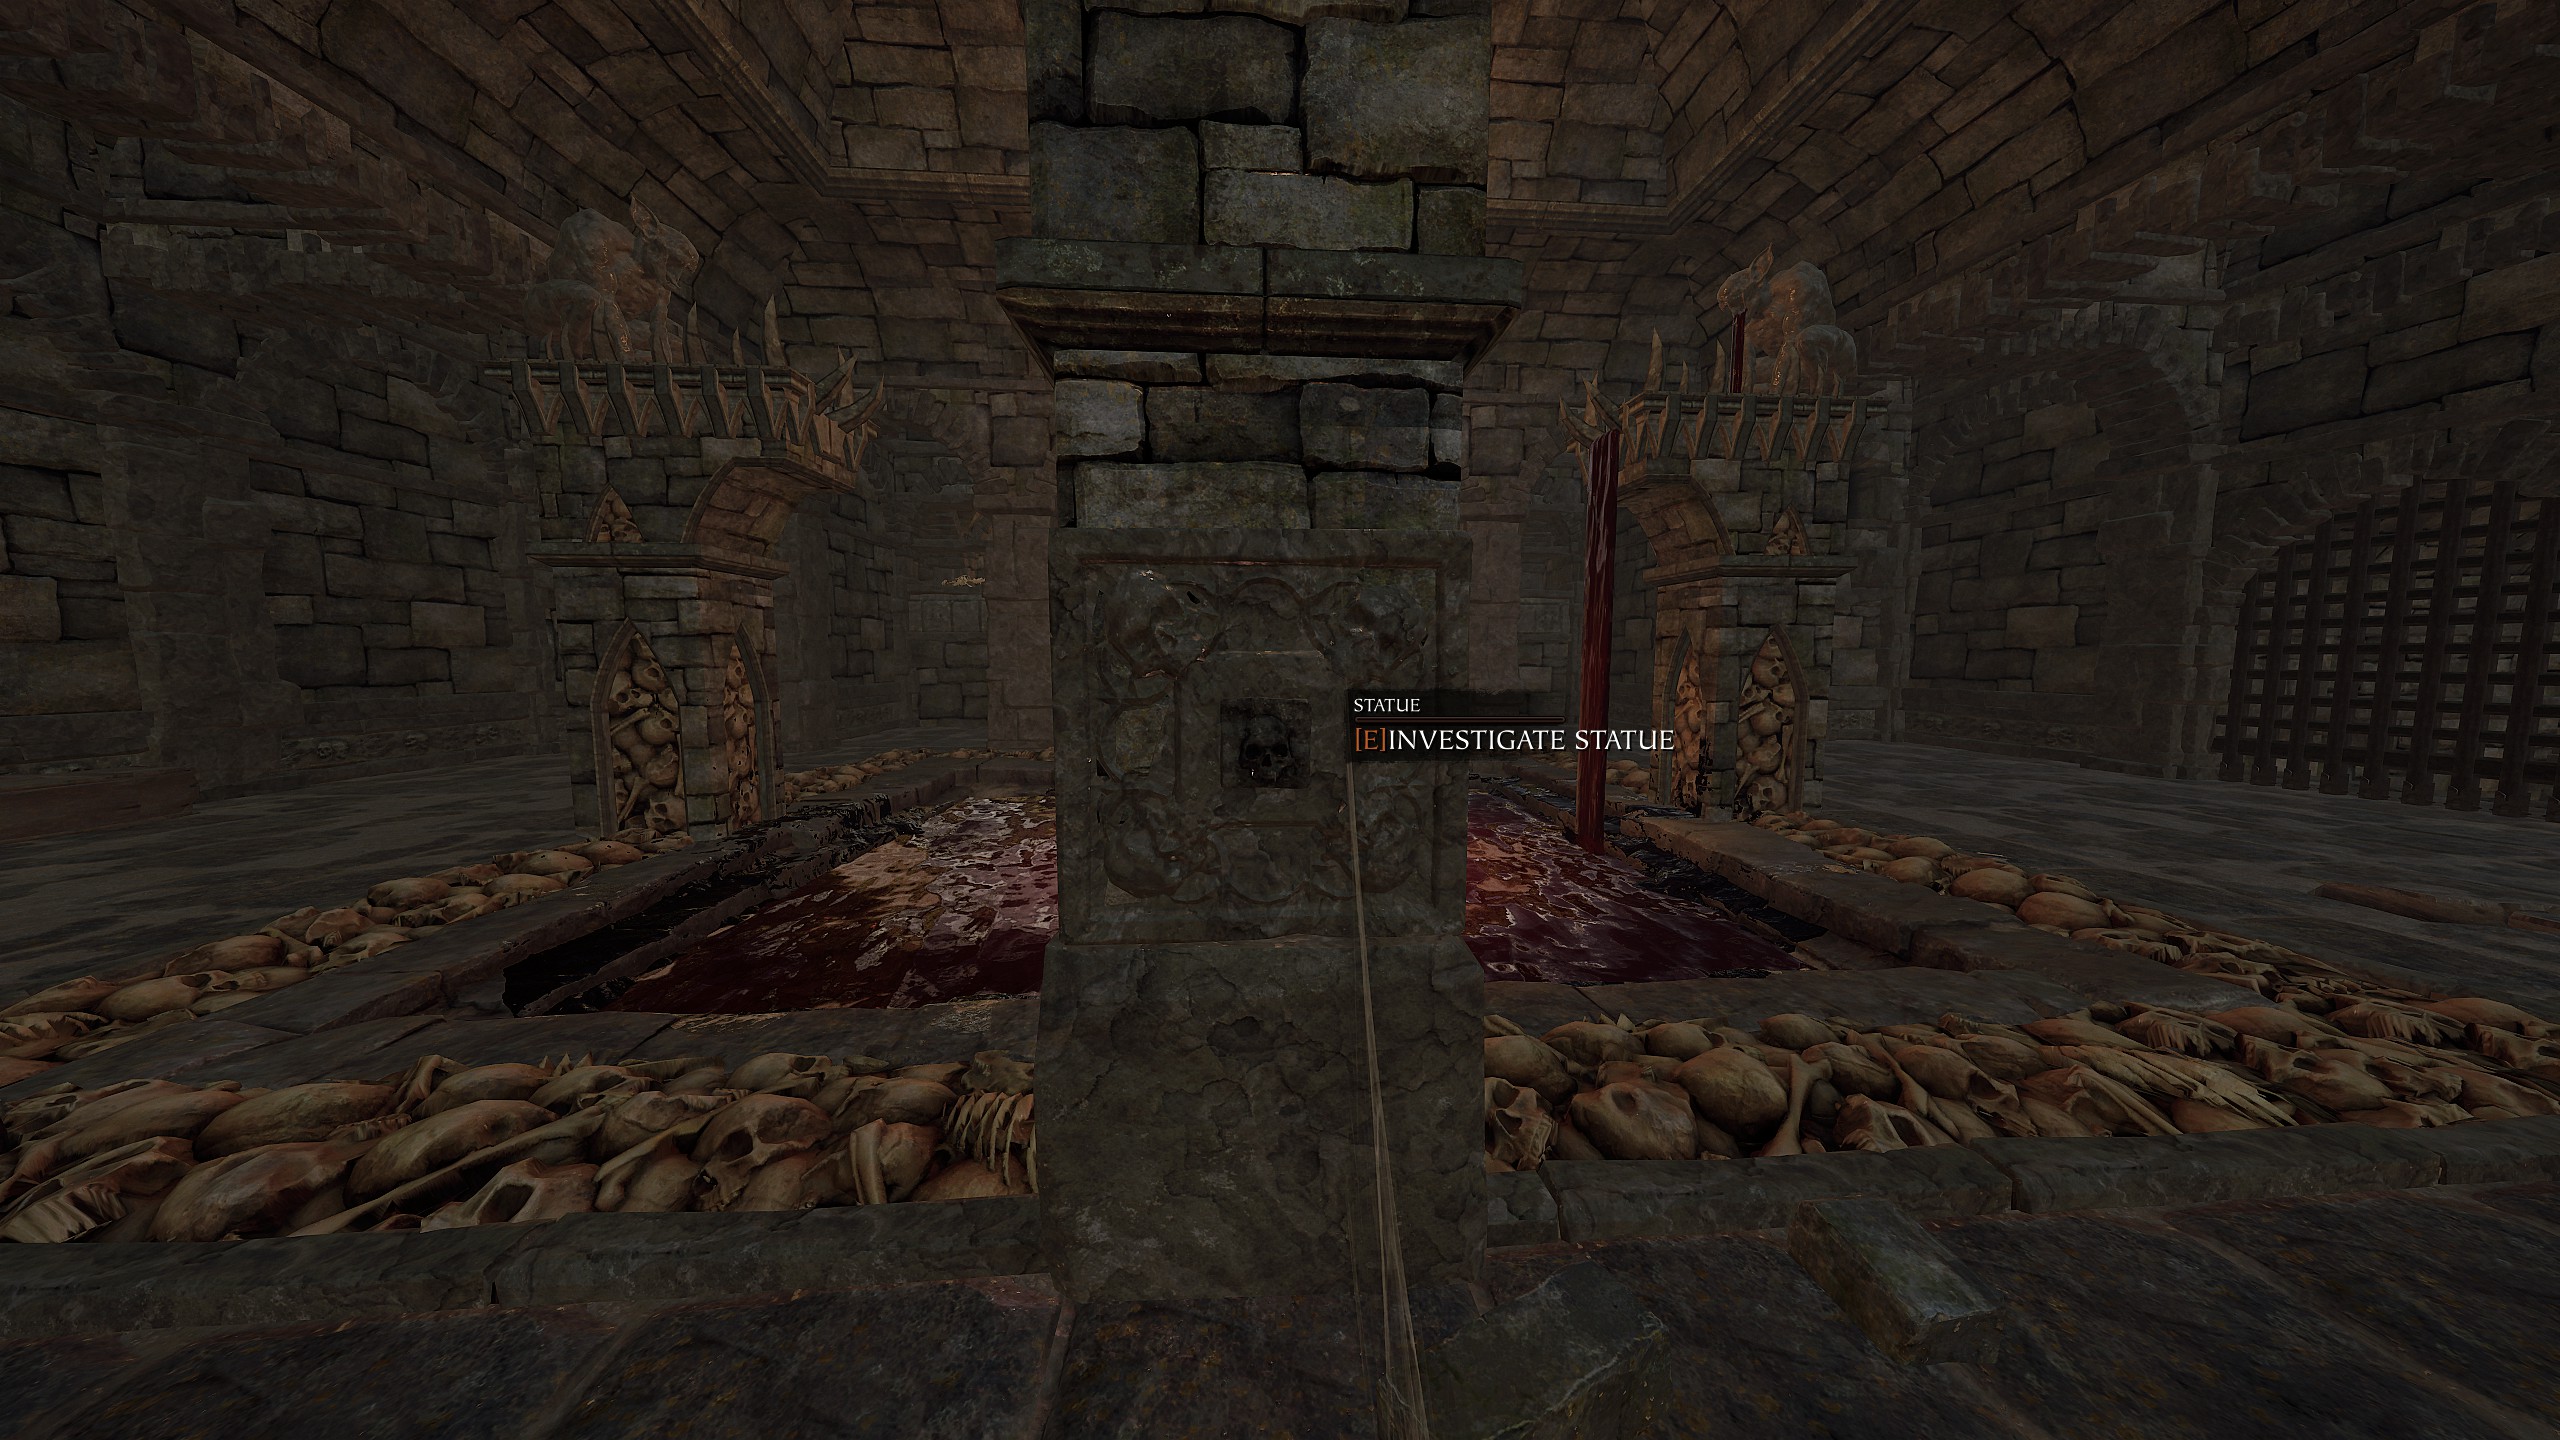
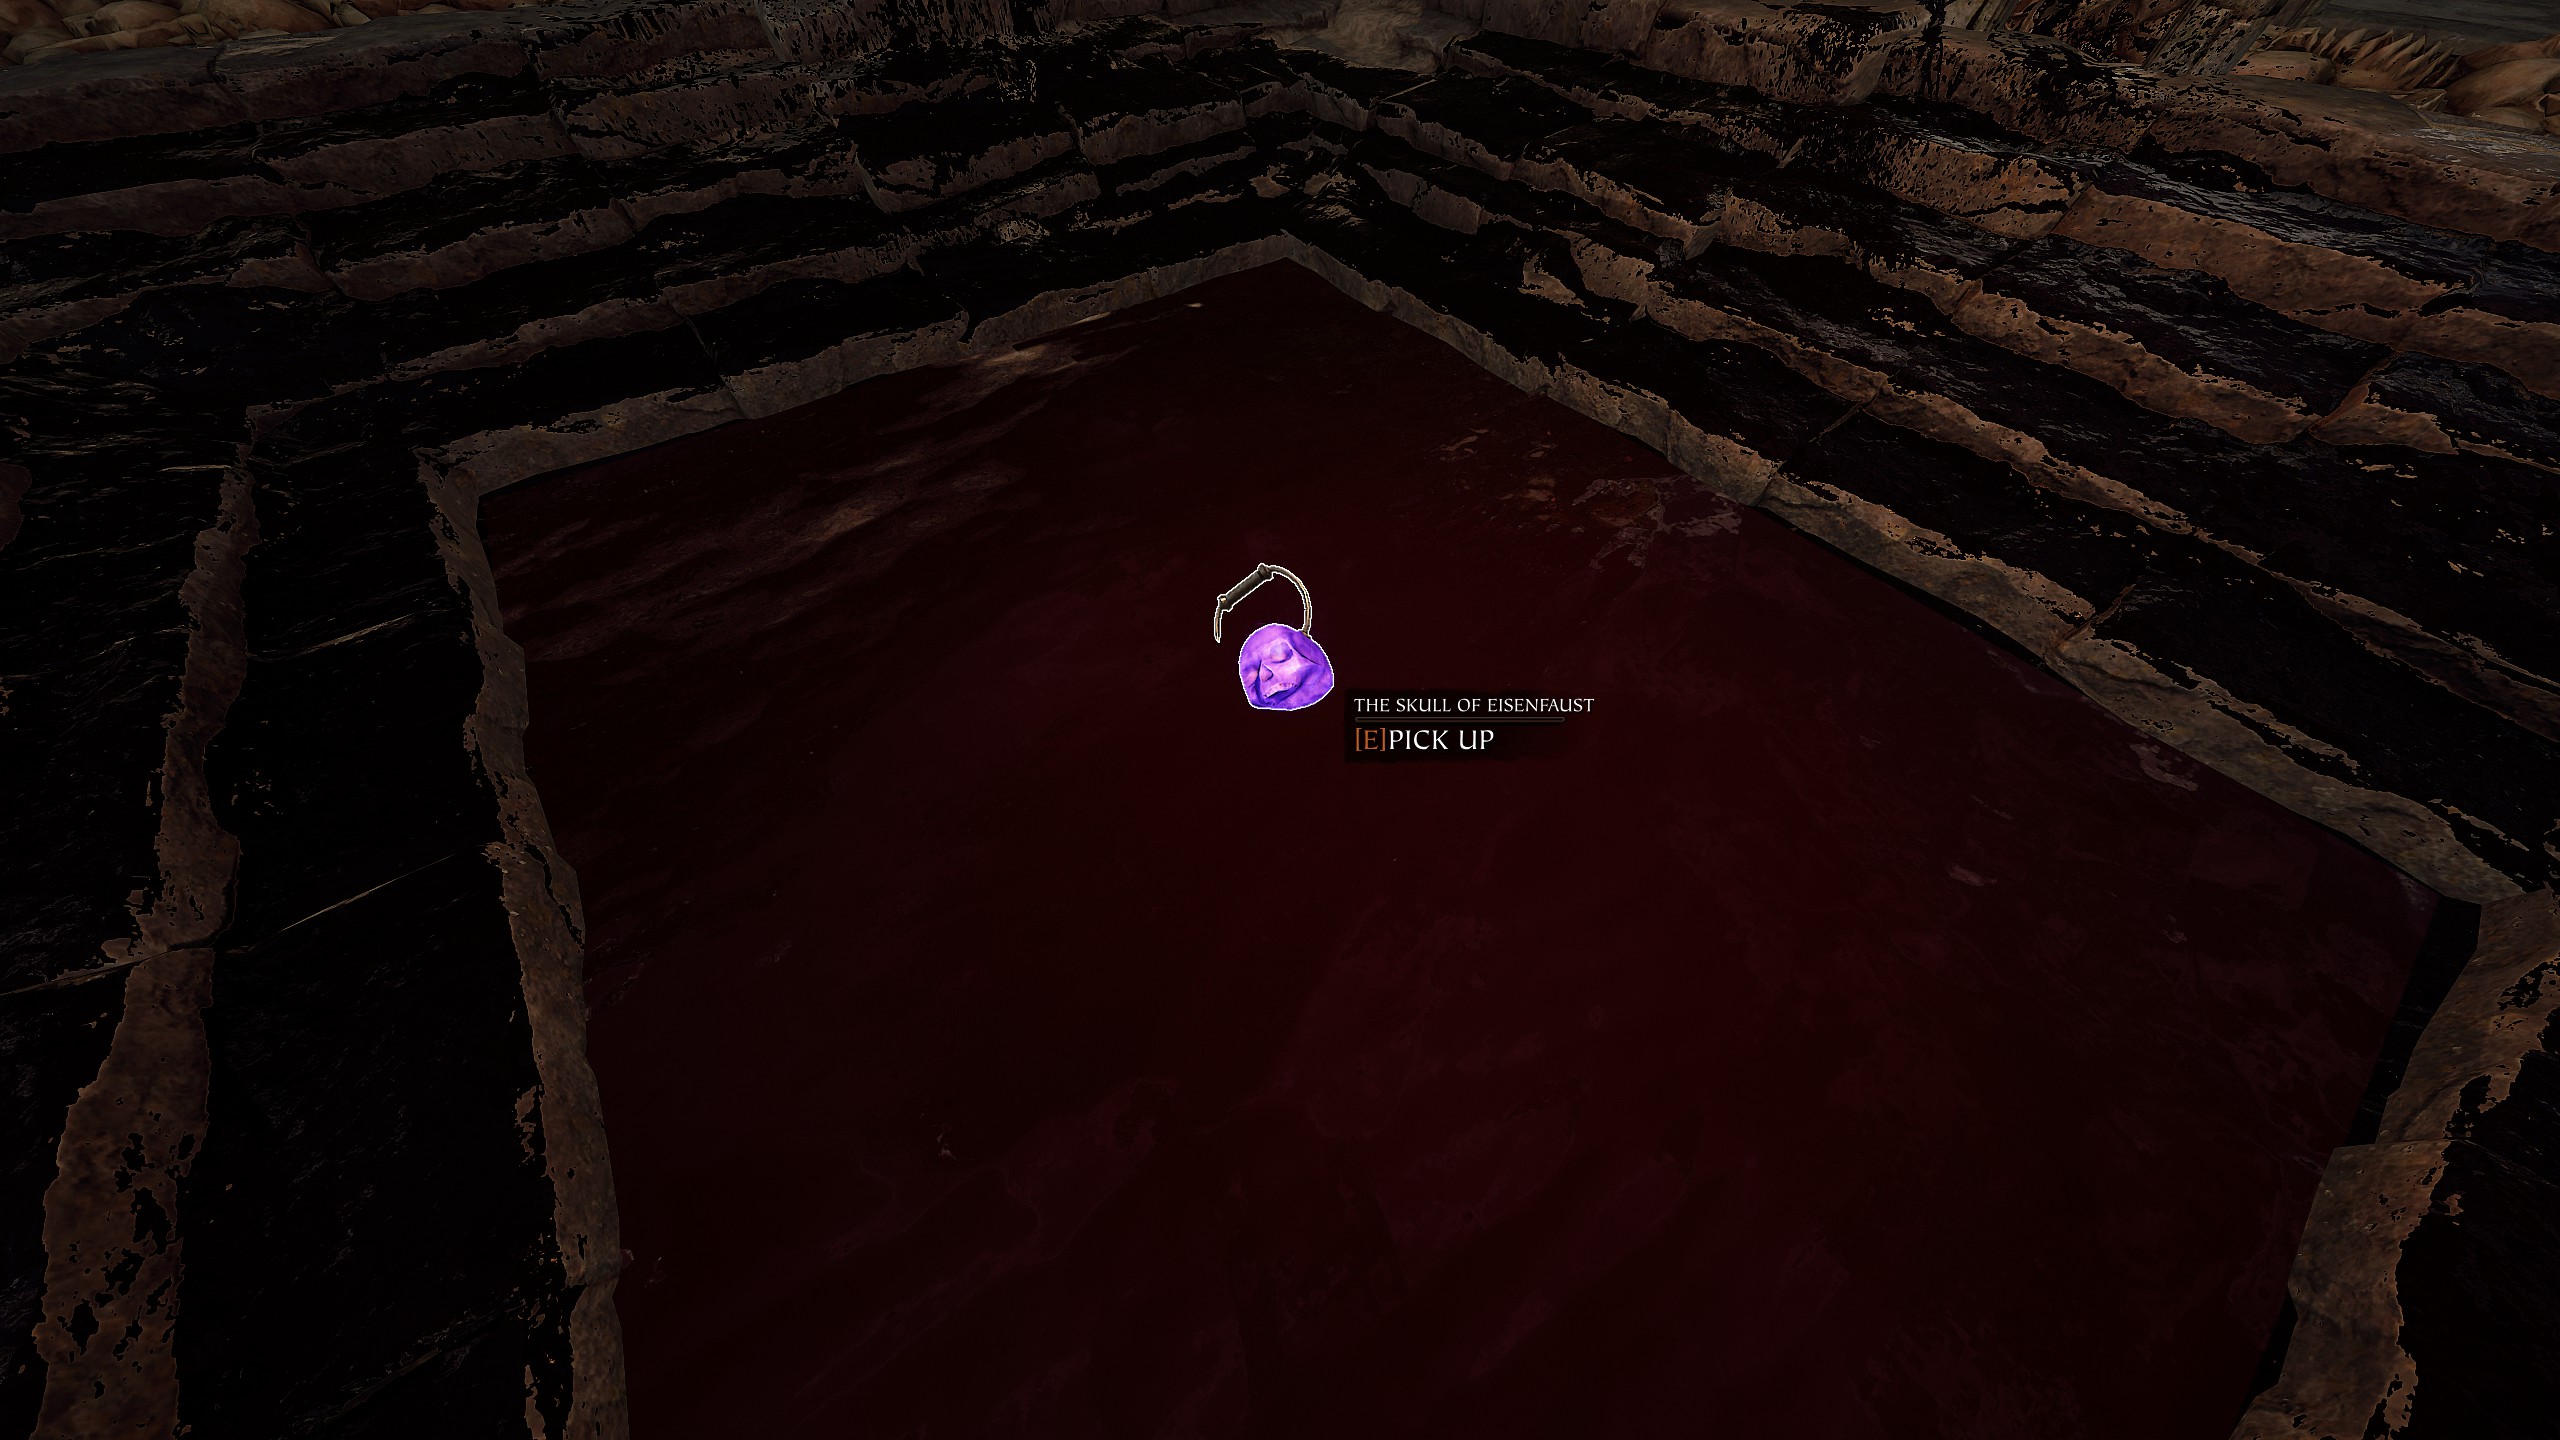 https://youtu.be/Sz1kfSZpjrI?si=CoAuv5wPEwS2SUWR
 3. Extremely Wayward
Retrieve the empty Flask of Wayward Souls. After opening the passage by exploding the barrel, In the next hallway, there are stairs on the left going down to the Enchanters Cellars. Go there and turn left and next to the tome upstairs you will see a statuette holding a Flask. Push the rack on the left side and back on the main path.
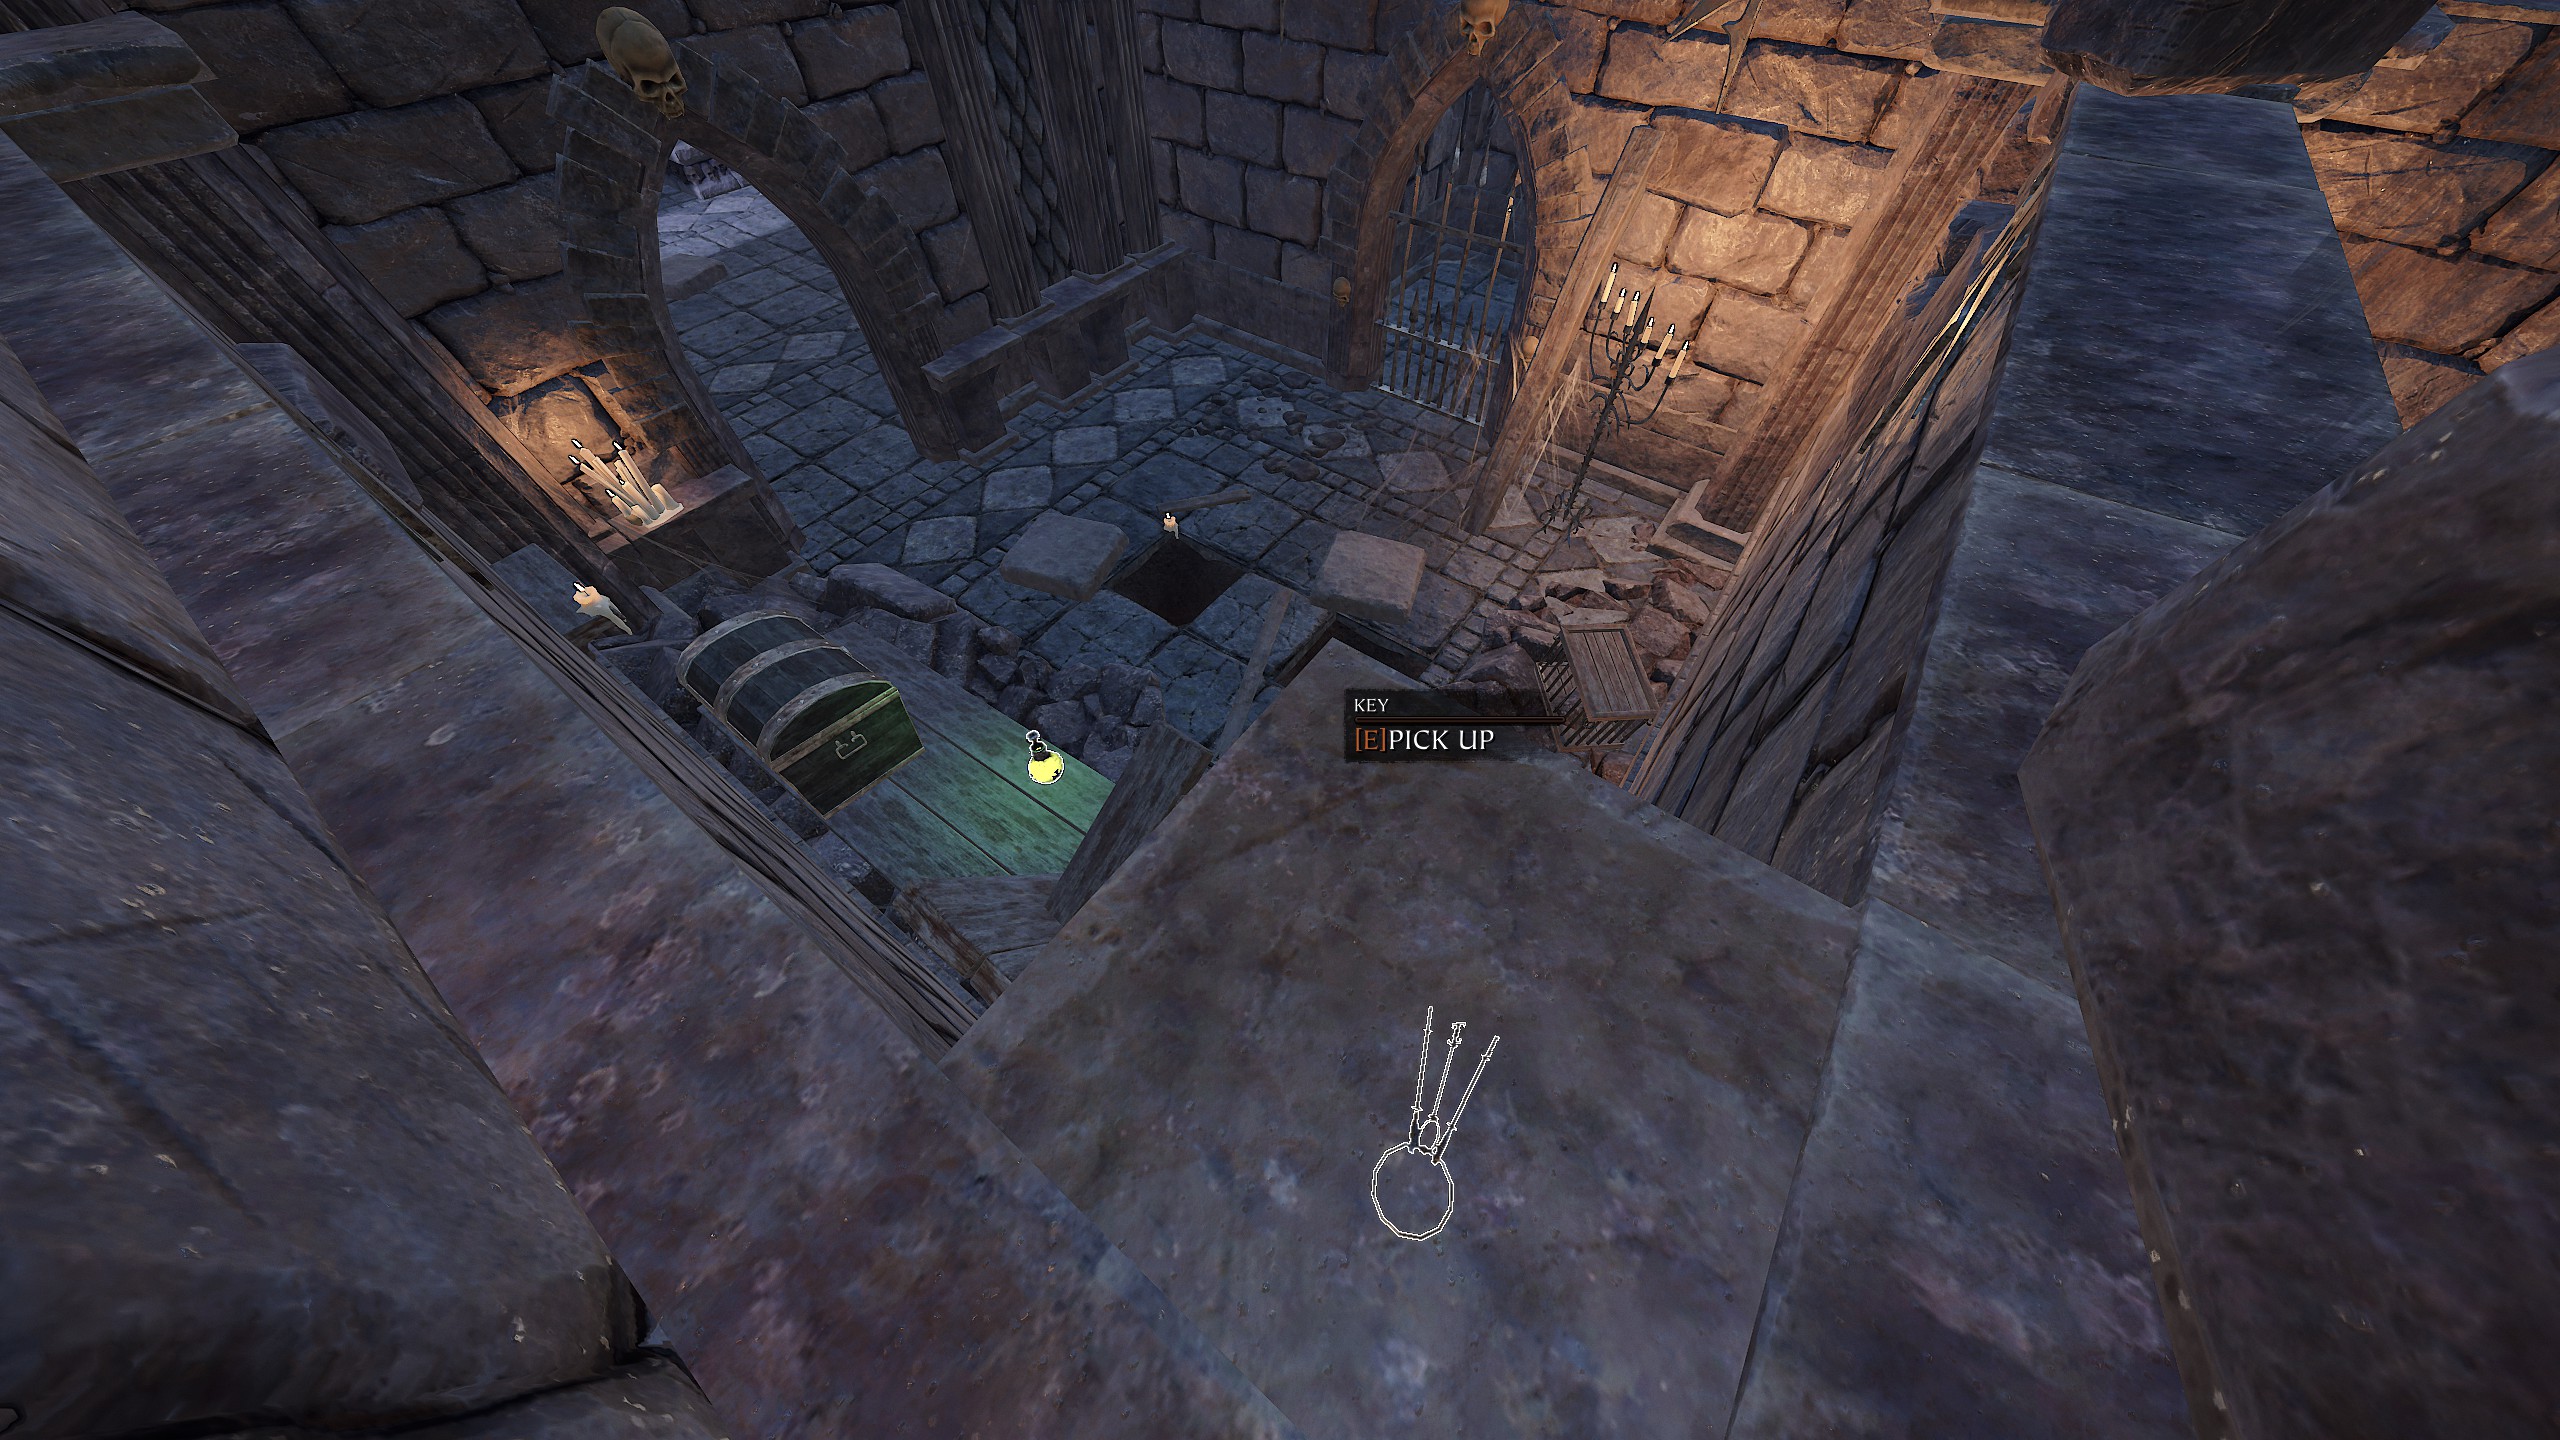
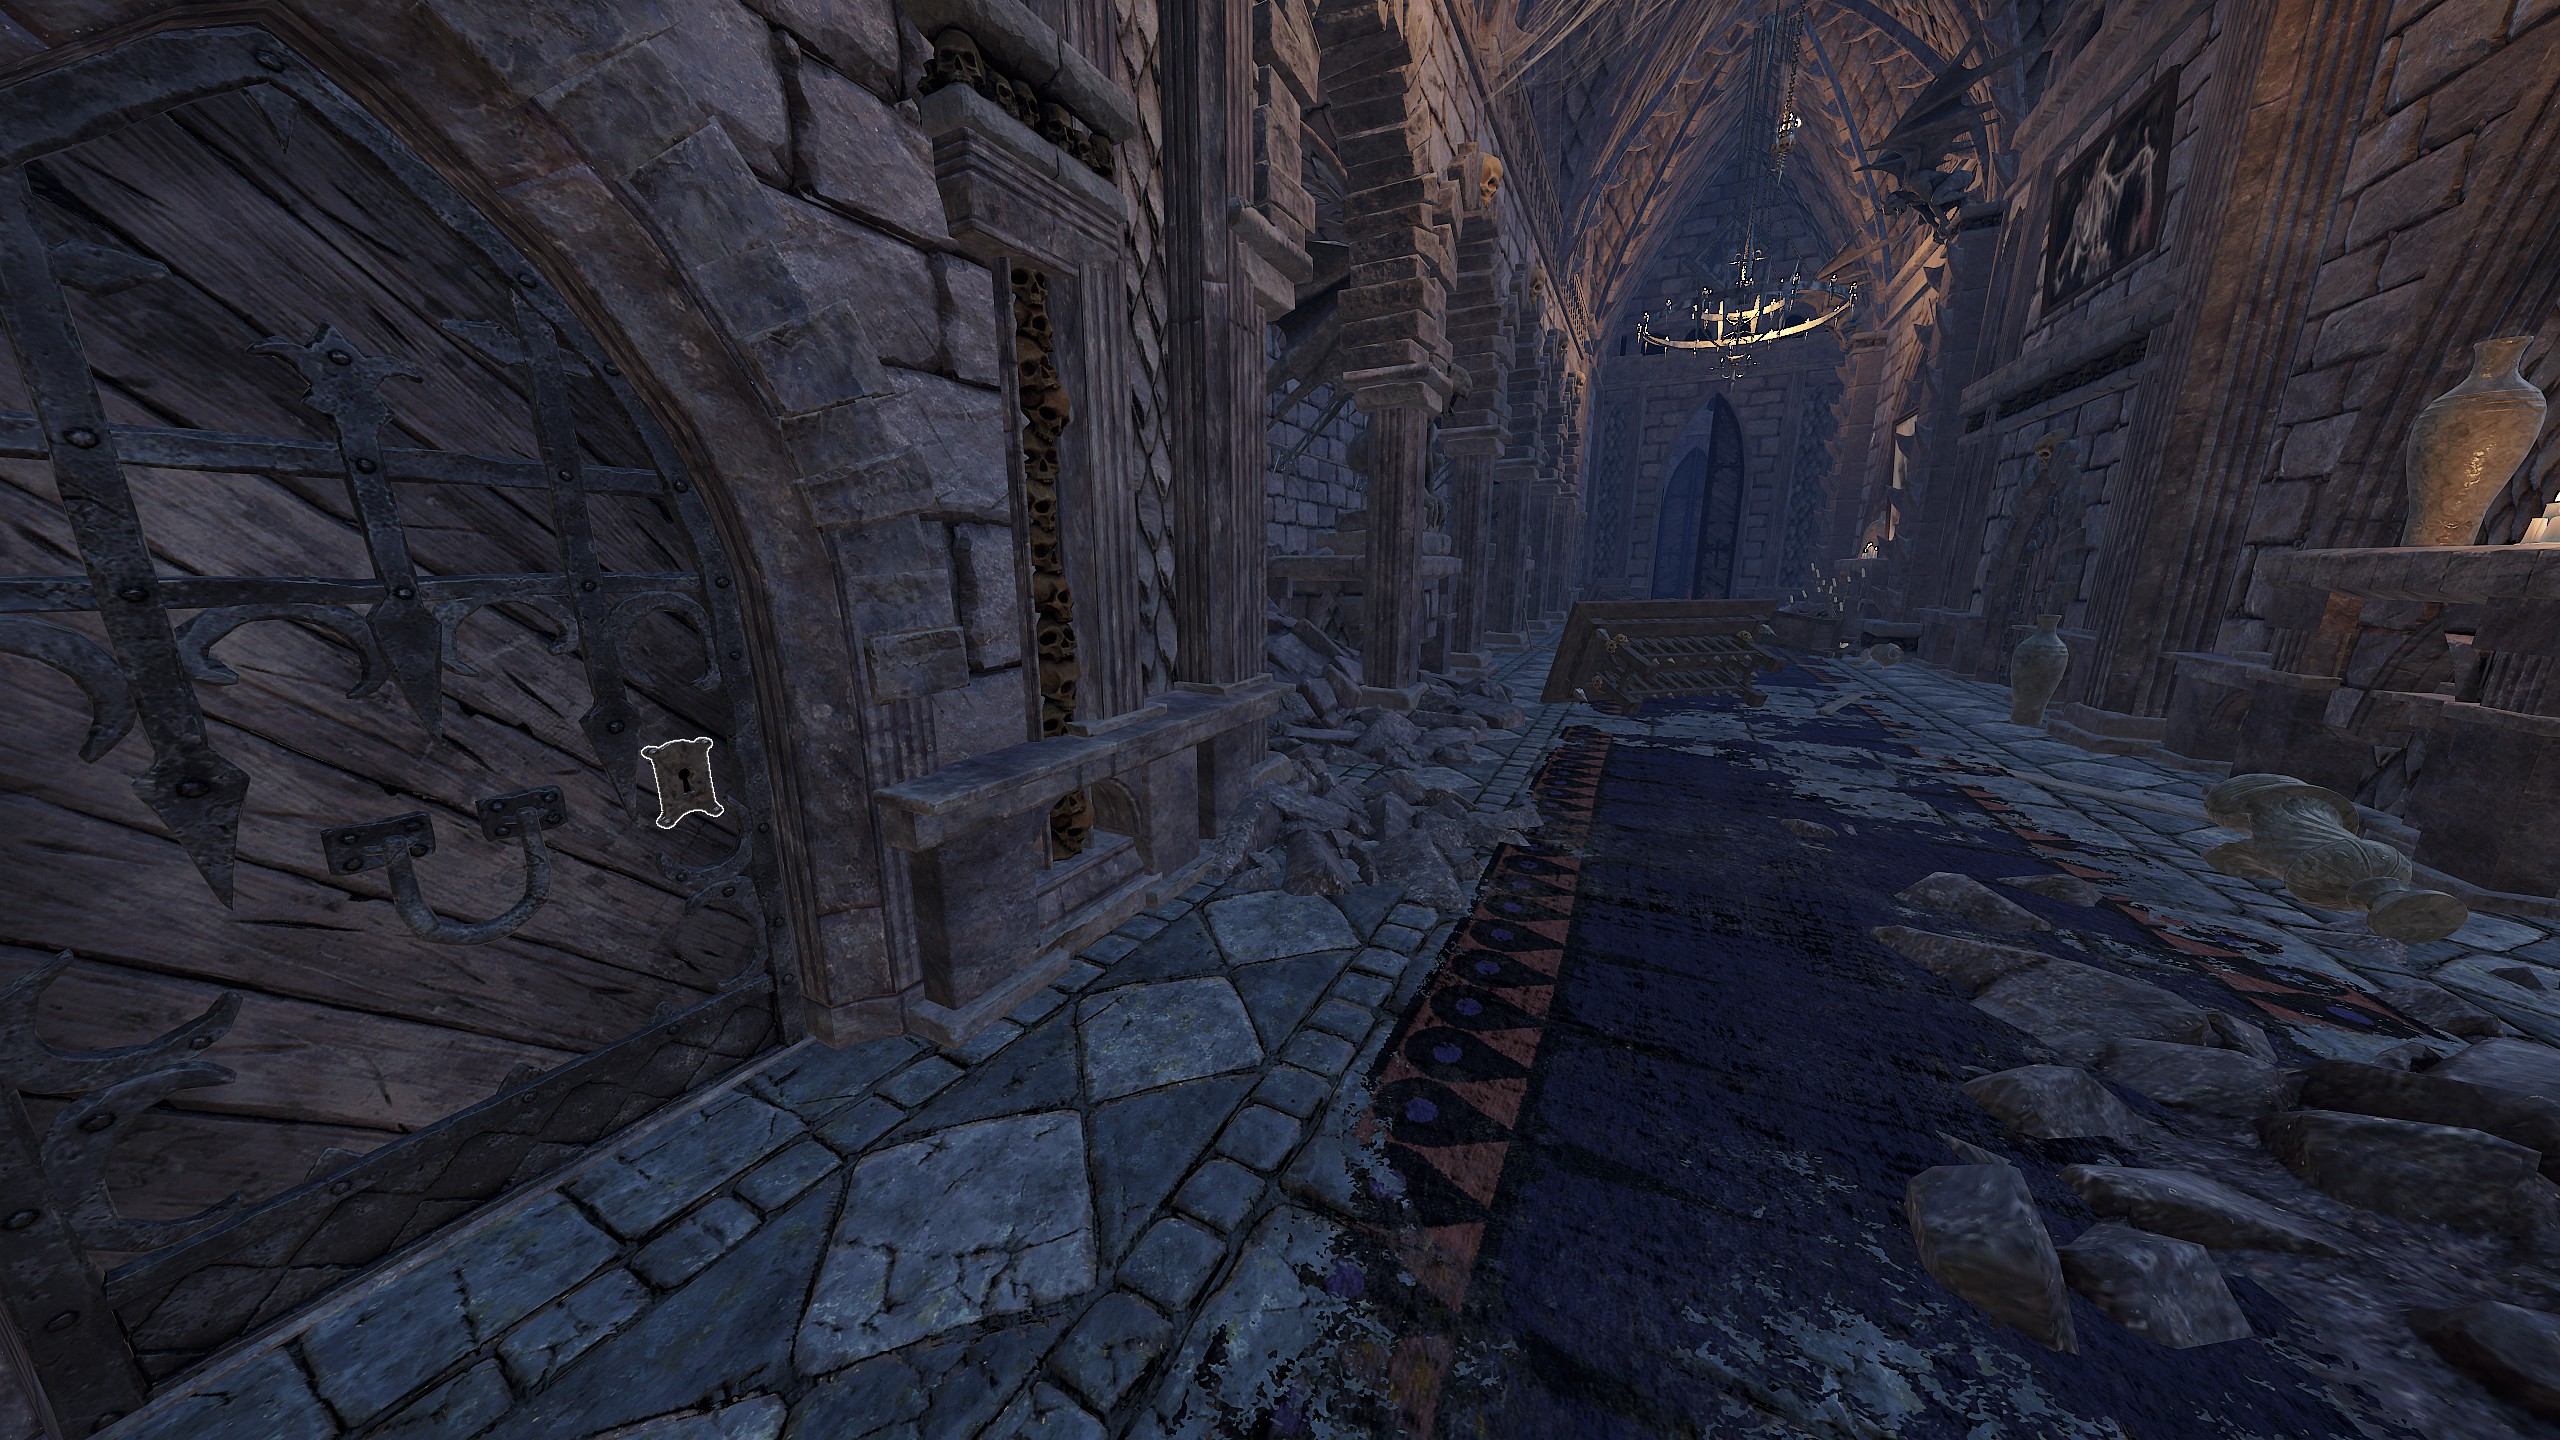
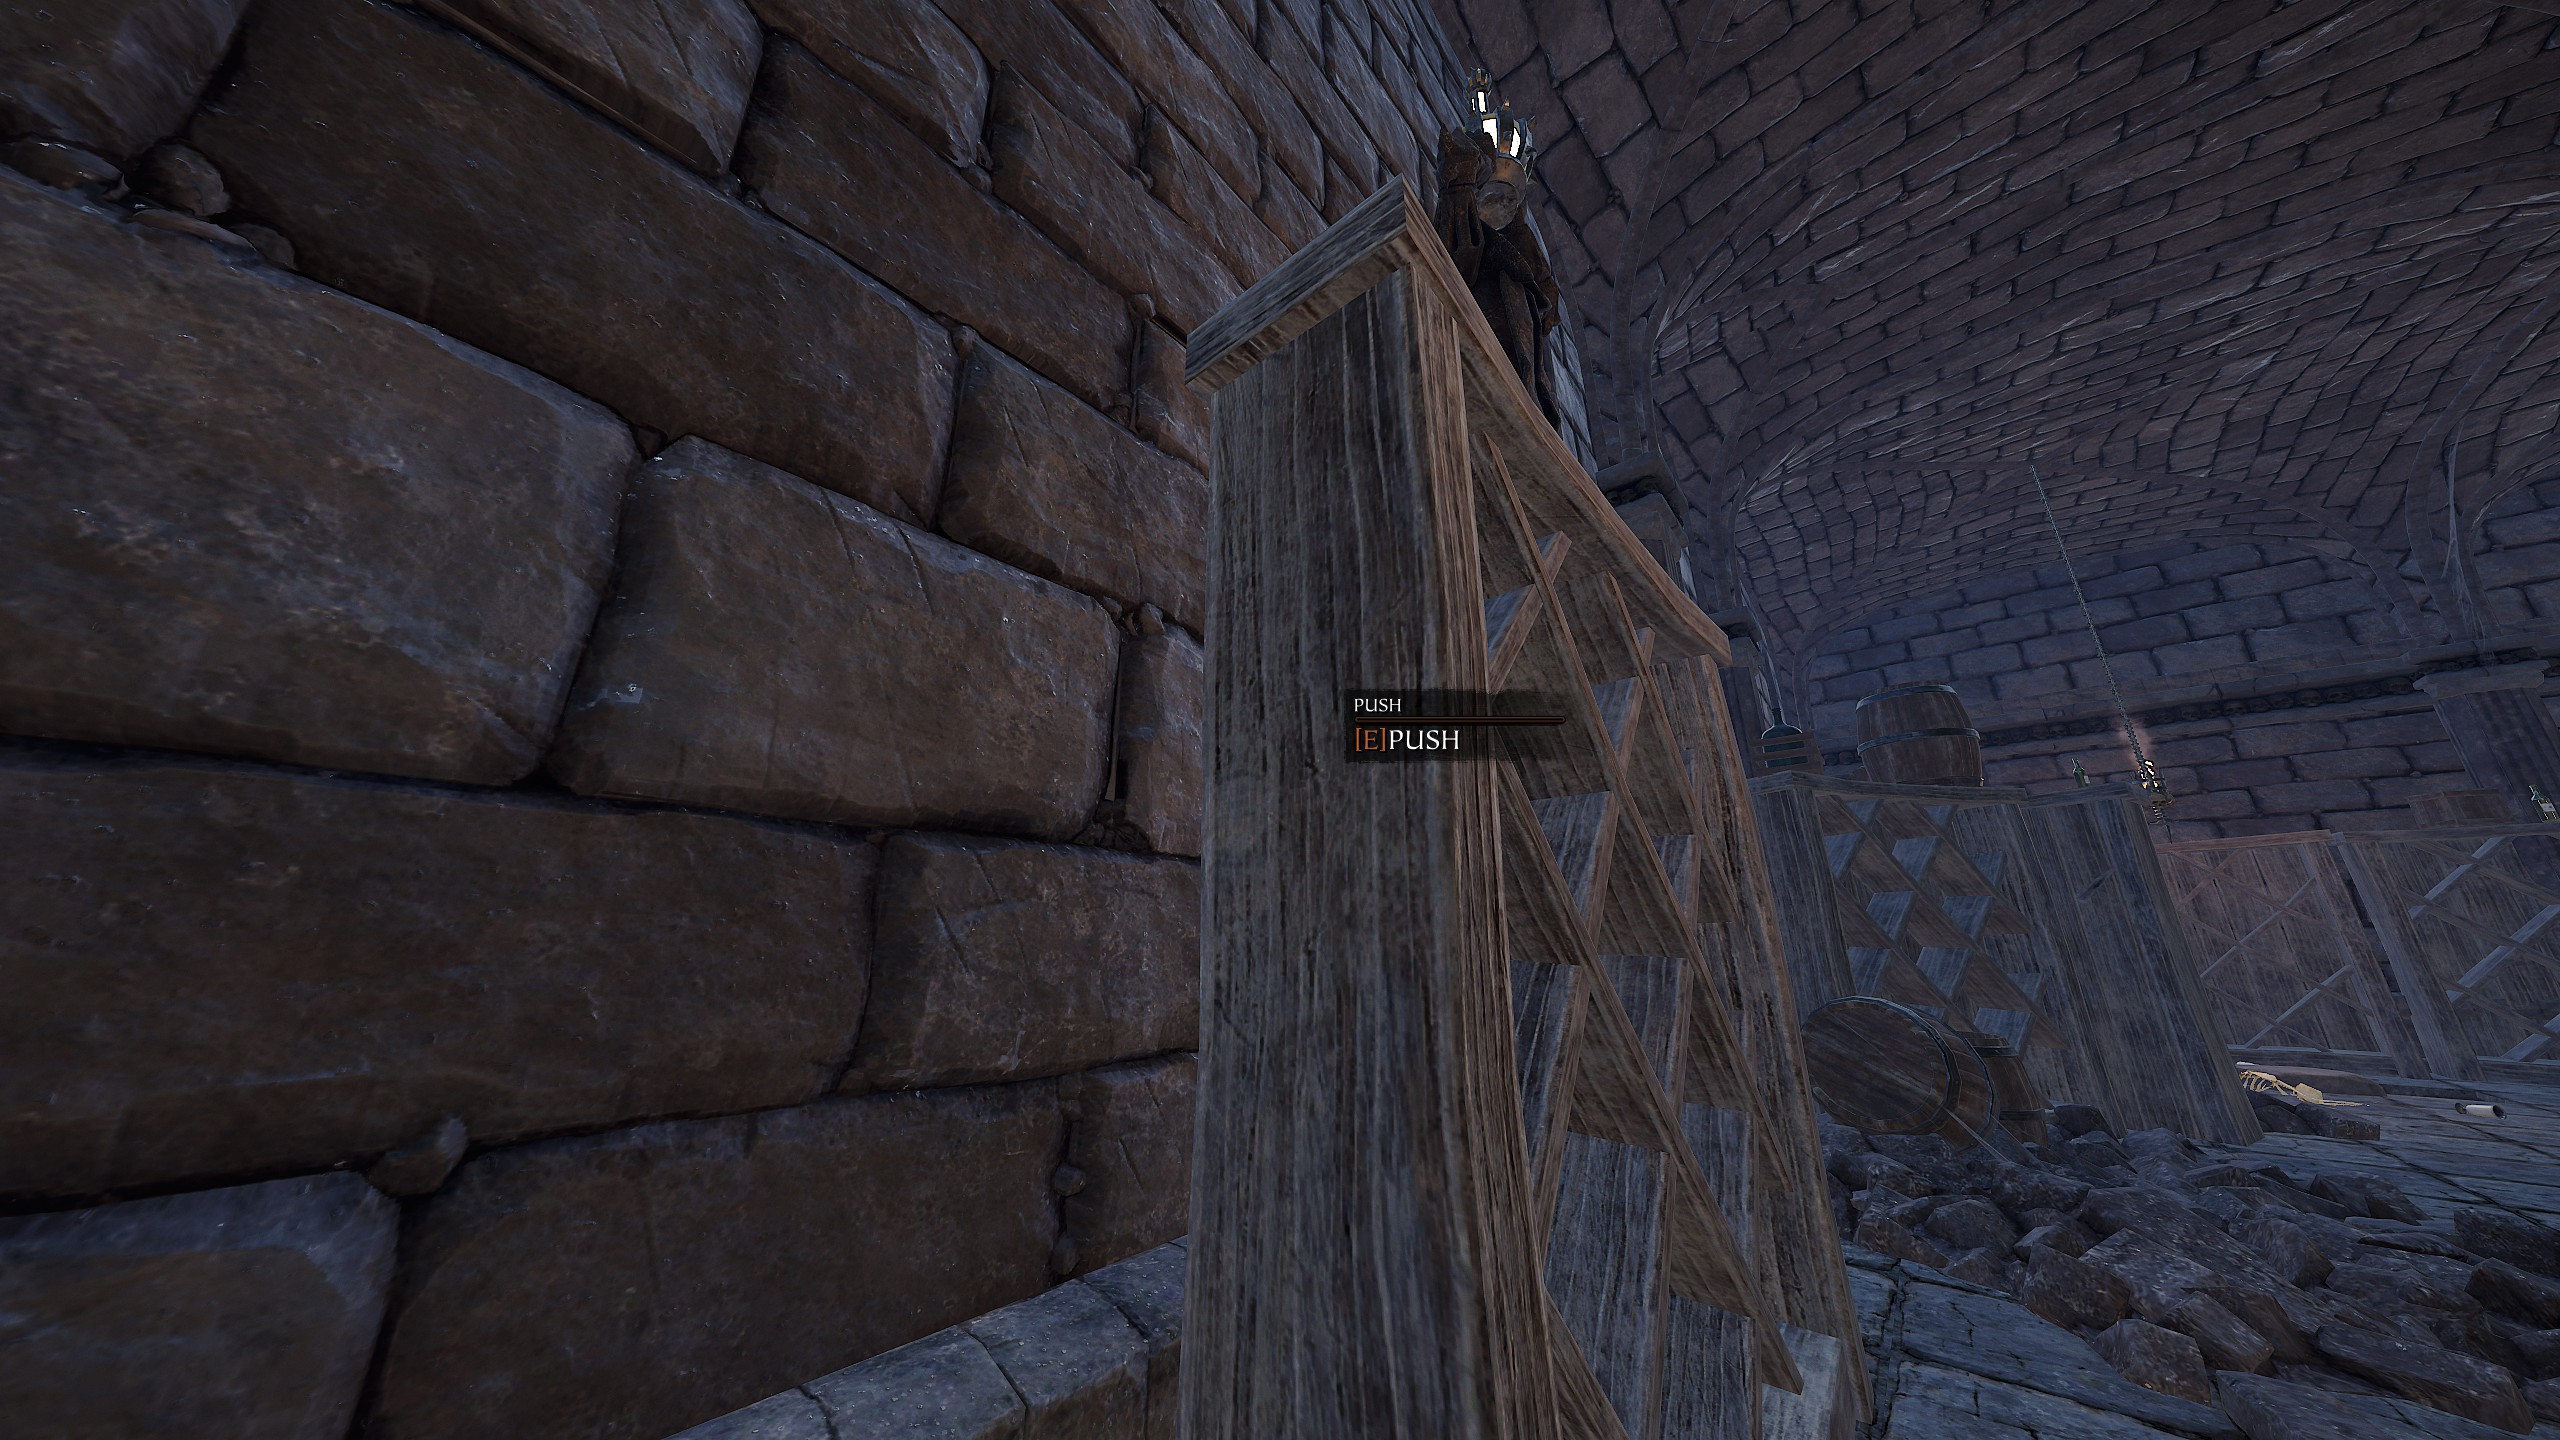 Then, when you enter the grand hallway, don’t rush to fall down. First go through the small door with a skull on top. On the right, jump on the chest, then the leaning table, there’s a key on top of the pillar. Hug the left coming out of that room and go to the end of the next hallway, there’s a locked door on the right.
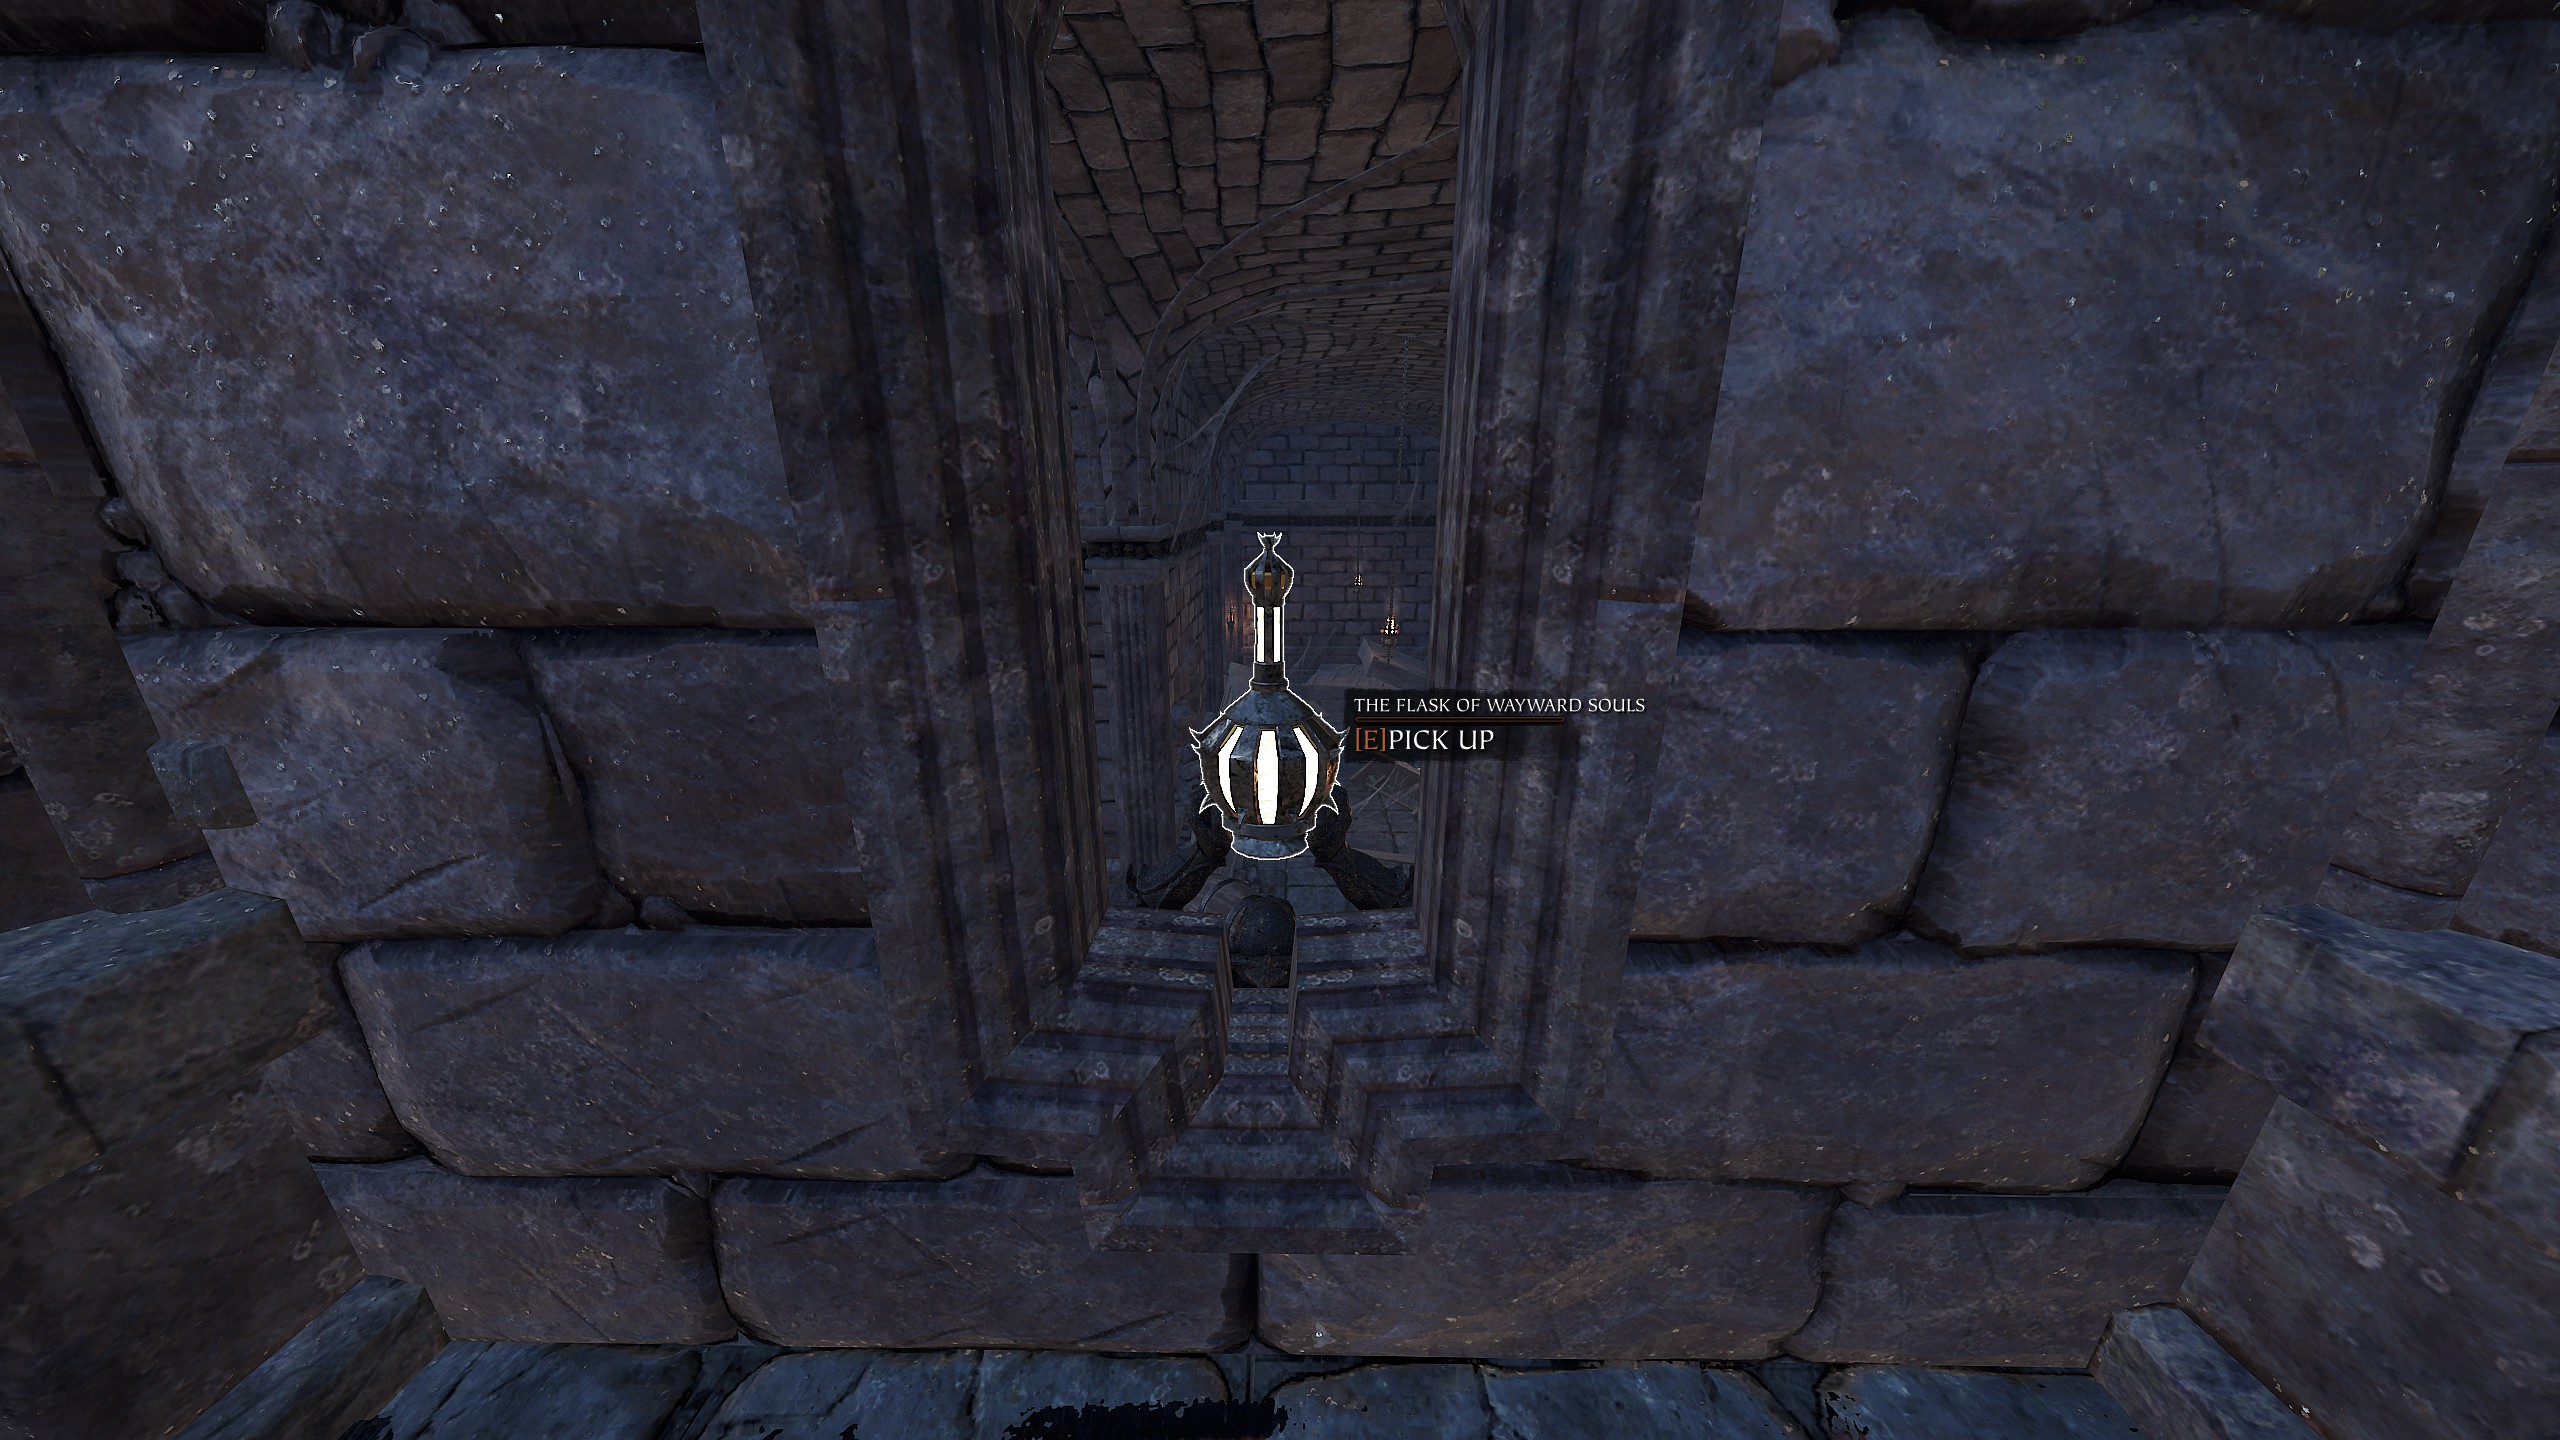
 Open the door and go to the next long corridor. In the second window of this corridor, you will be able to pick up the Flask.
 https://youtu.be/kcej-Zd6qcE?si=T2KP9s7kZLVjQREY
 4/5.Thar She Blows! & Unsafe Work Environment
Complete the final event without anyone taking damage from an eruption.
Complete the final event without killing any of the Chaos minions.
These two challenges are very difficult to complete together, as they are both related to the final event with the lord. The main difficulty is the need to go through the event solo, as bots or other players can easily fail the conditions of the challenges. However, on the positive side, there are no restrictions on difficulty level, so for convenience, choose the “Recruit”.
There are many guides for these challenges on the internet, but keep in mind that most of them were created before the explosive barrel bug was fixed, which was damage both bots and the player on the “Recruit”. Fortunately, there is a new method to replace the barrel trick.
This method is shown in this guide and video: https://steamcommunity.com/sharedfiles/filedetails/?id=3571355090 https://youtu.be/RPhpOagE9FM
 6. The Enchanter's Lair
Complete all mission Challenges of The Enchanter's Lair This challenge will be completed when you have completed all challenges except “Difficulty Challenges”.

Chaos Wastes

- General
https://steamcommunity.com/sharedfiles/filedetails/?id=3156209148 https://steamcommunity.com/sharedfiles/filedetails/?id=2644903542
If you only need to kill a Grudge Marked Rat Ogre in the Menagerie of Murder challenge, then you are guaranteed to be able to do this at the end of Devious Delvings.
If you only need to kill the Grudge Marked Bile Troll in the Menagerie of Murder challenge, then you are guaranteed to be able to do it in The Feast of Grimnir.
Turns out that counts towards the challenge.
- Belakor
It is recommended to do all challenges on Recruit difficulty.
 1. Iconoclast
Complete a level without letting a Shadow Totem live for longer than 10 seconds.
Can only have 1 Totem on the map. The map will spawn a totem in 25–35 seconds near players if the previous Totem was destroyed. Just aim for instant focus on it. For fast totem destruction, I highly recommend using the projectile ults of Waystalker, Pyromancer, and Bounty Hunter.

 2. Bring it on!
Complete a level without anyone in the team destroying a Shadow Totem.
This can be done using the mobility ults of Zealot, Handmaiden, Battle Wizard and Slayer. Run through the level as fast as possible, ignoring all totems.
 3. Skulking Skulls
 Destroy 5 Shadow Skulls that are just about to hit an ally.
It's best to do this with a teammate, but bots will do too. I recommend taking melee bots, as they won't shoot the skulls flying at them, and you'll be able to shoot them all. Also, I recommend using the invisibility ult of Handmaiden with Swiftbow.

 4. Getting Ahead of A Head
Complete a level without being hit by a Shadow Skull.
This can be done using the invisibility ult of Handmaiden. Run through the level as fast as possible, ignoring all Skulls.
All of them can be completed in one go. Find two teammates in advance for the 8th challenge.
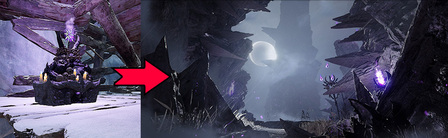
 5. Thwarting The First-Damned
Complete the Temple of Shadows
Destroy the Shadow Locus in the level to proceed to The Temple of Shadows.
 6. Mortal Victory
Complete the Temple of Shadows without anyone in the party having any character or weapon upgrades.
All players should not take any boon/upgrades/chests. Run through all levels like this until the Temple of Shadows appears.

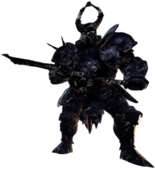 7. Thrice Damned, Thrice Fallen
Have all Shadow Champions active at the same times in the Temple of Shadows.
First you need to clear the area of enemies surrounding the Shadow Locus, then quickly activate them one by one and ignore all enemies.
 8. On The Count Of Three
Destroy all three Shadow Locus in the Temple of Shadows within 3 seconds of each other.
 In this challenge, you will definitely need teammates - at least two, to simultaneously destroy all Shadow Locus.
After activating all Shadow Locus, destroy all Shadow Champions, then each player must take their Crystal and stand next to the Locus. When everyone is ready, one of the players starts the countdown, and all three Shadow Locus are simultaneously destroyed.
 9. Speed Daemon
Complete the Temple of Shadows in 230 seconds.(~4 minutes)
The countdown starts from the moment you jump off into the temple and ends when all three Shadow Locus are destroyed. Don't waste a second, act quickly and decisively!
 10. Back To The Shadows
Complete all Belakor challenges. This challenge will be completed when you complete other challenges related to Belakor
Karak Azgaraz

- Remastered Maps
https://steamcommunity.com/sharedfiles/filedetails/?id=2988967863
Solution guides for specific challenges, made by kuli https://steamcommunity.com/sharedfiles/filedetails/?id=2988773751 https://steamcommunity.com/sharedfiles/filedetails/?id=2988740392 https://steamcommunity.com/sharedfiles/filedetails/?id=2988811017
- A Parting of the Waves
A Treacherous Adventure

- Trail of Treachery

 1. Shatterer
Break all the Icicles on the Trail of Treachery In one playthrough, you must break 10 Icicles that, which are scattered throughout the map. The locations of all icicles are shown in this guide and video:
https://steamcommunity.com/sharedfiles/filedetails/?id=2804697721 https://youtu.be/mQXPsnk_iOQ?si=tfHJuJEvfvHfCvCd
 2. The Beacons Are Lit
Light all three Beacons on Trail of Treachery
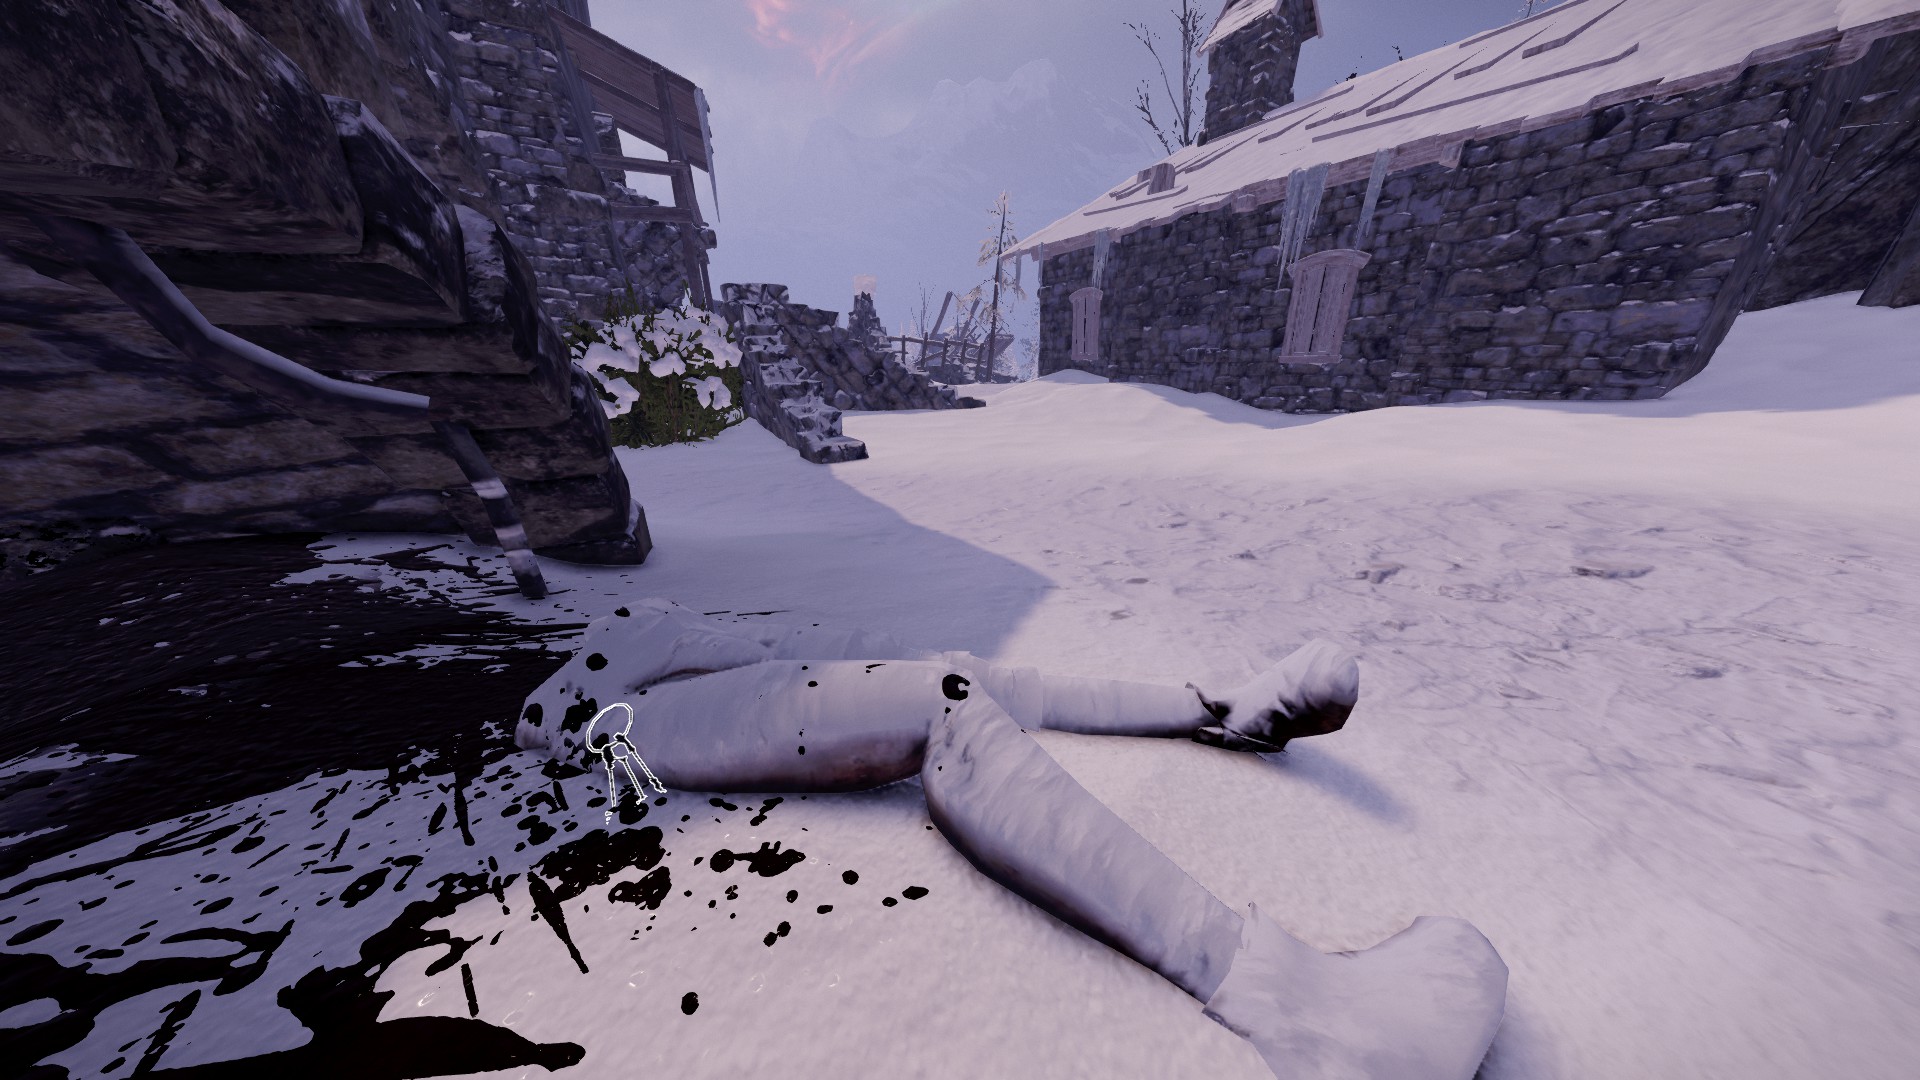
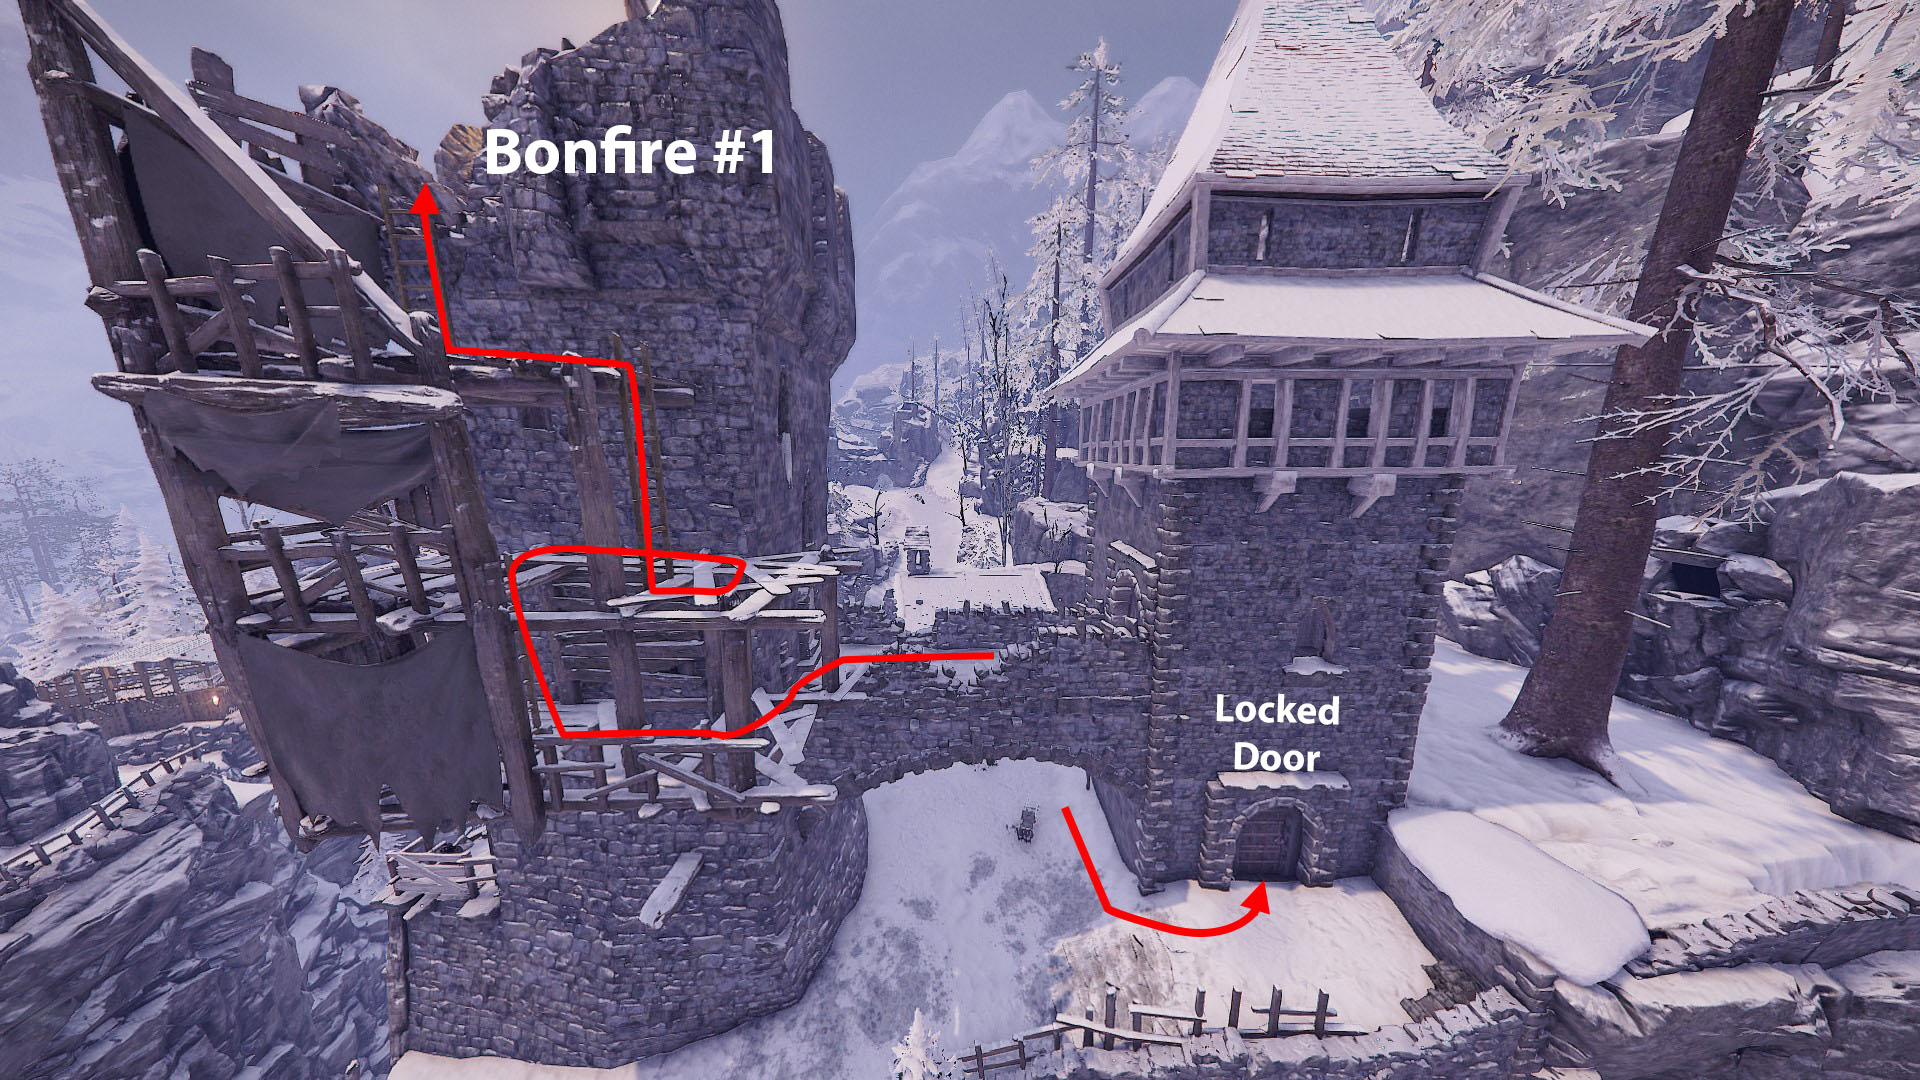
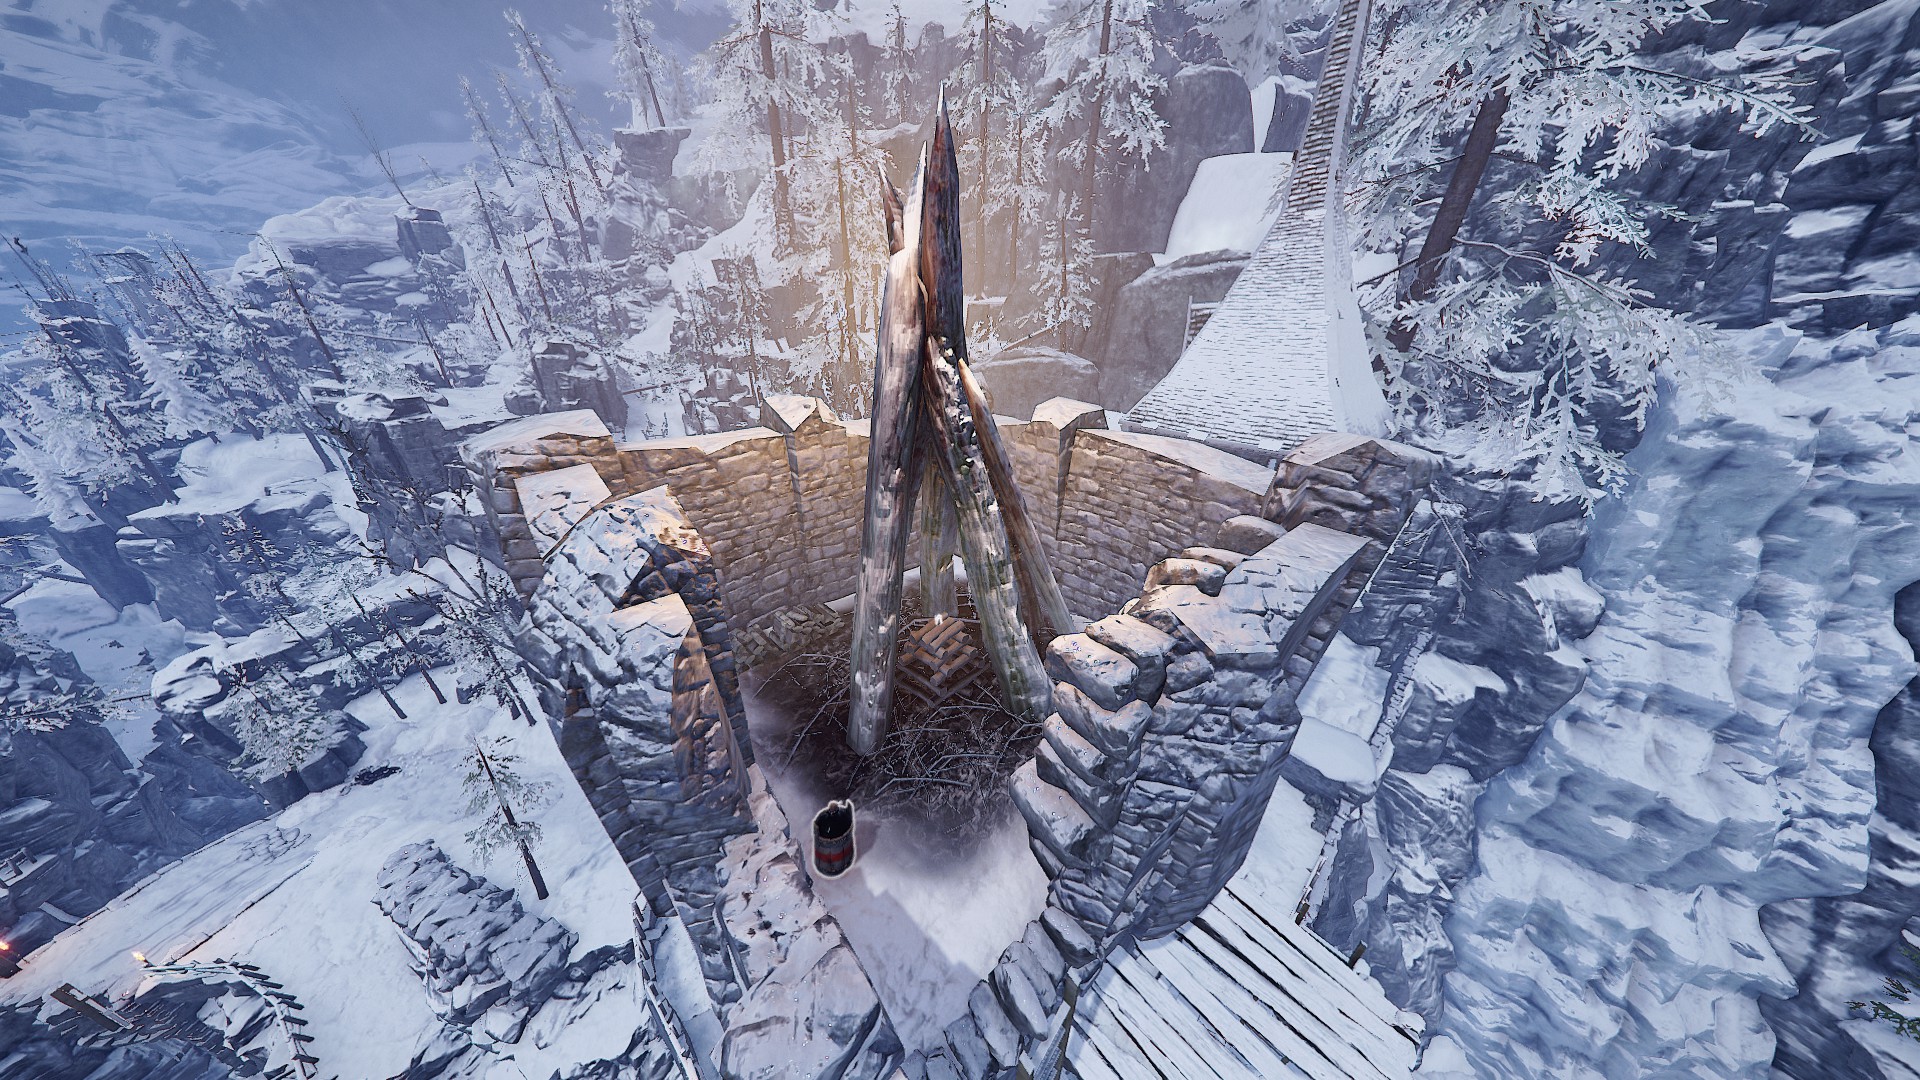
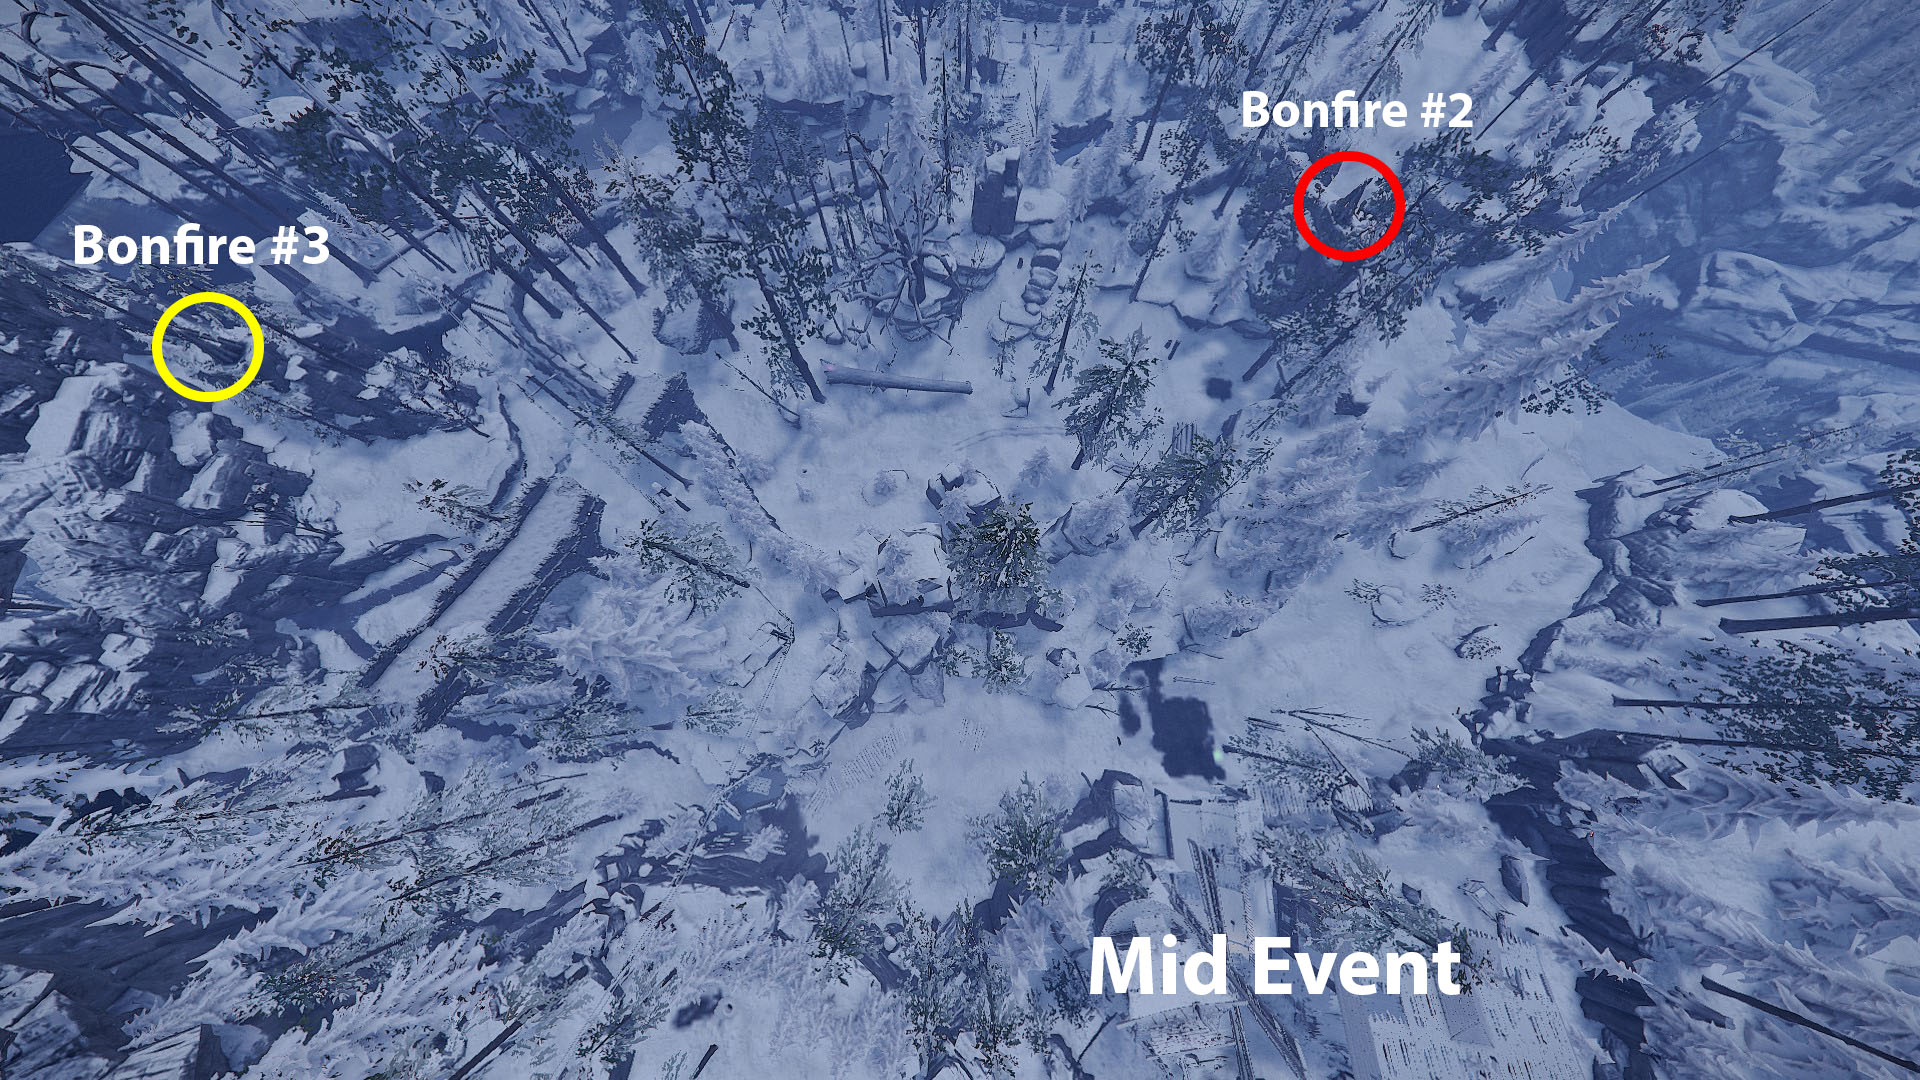
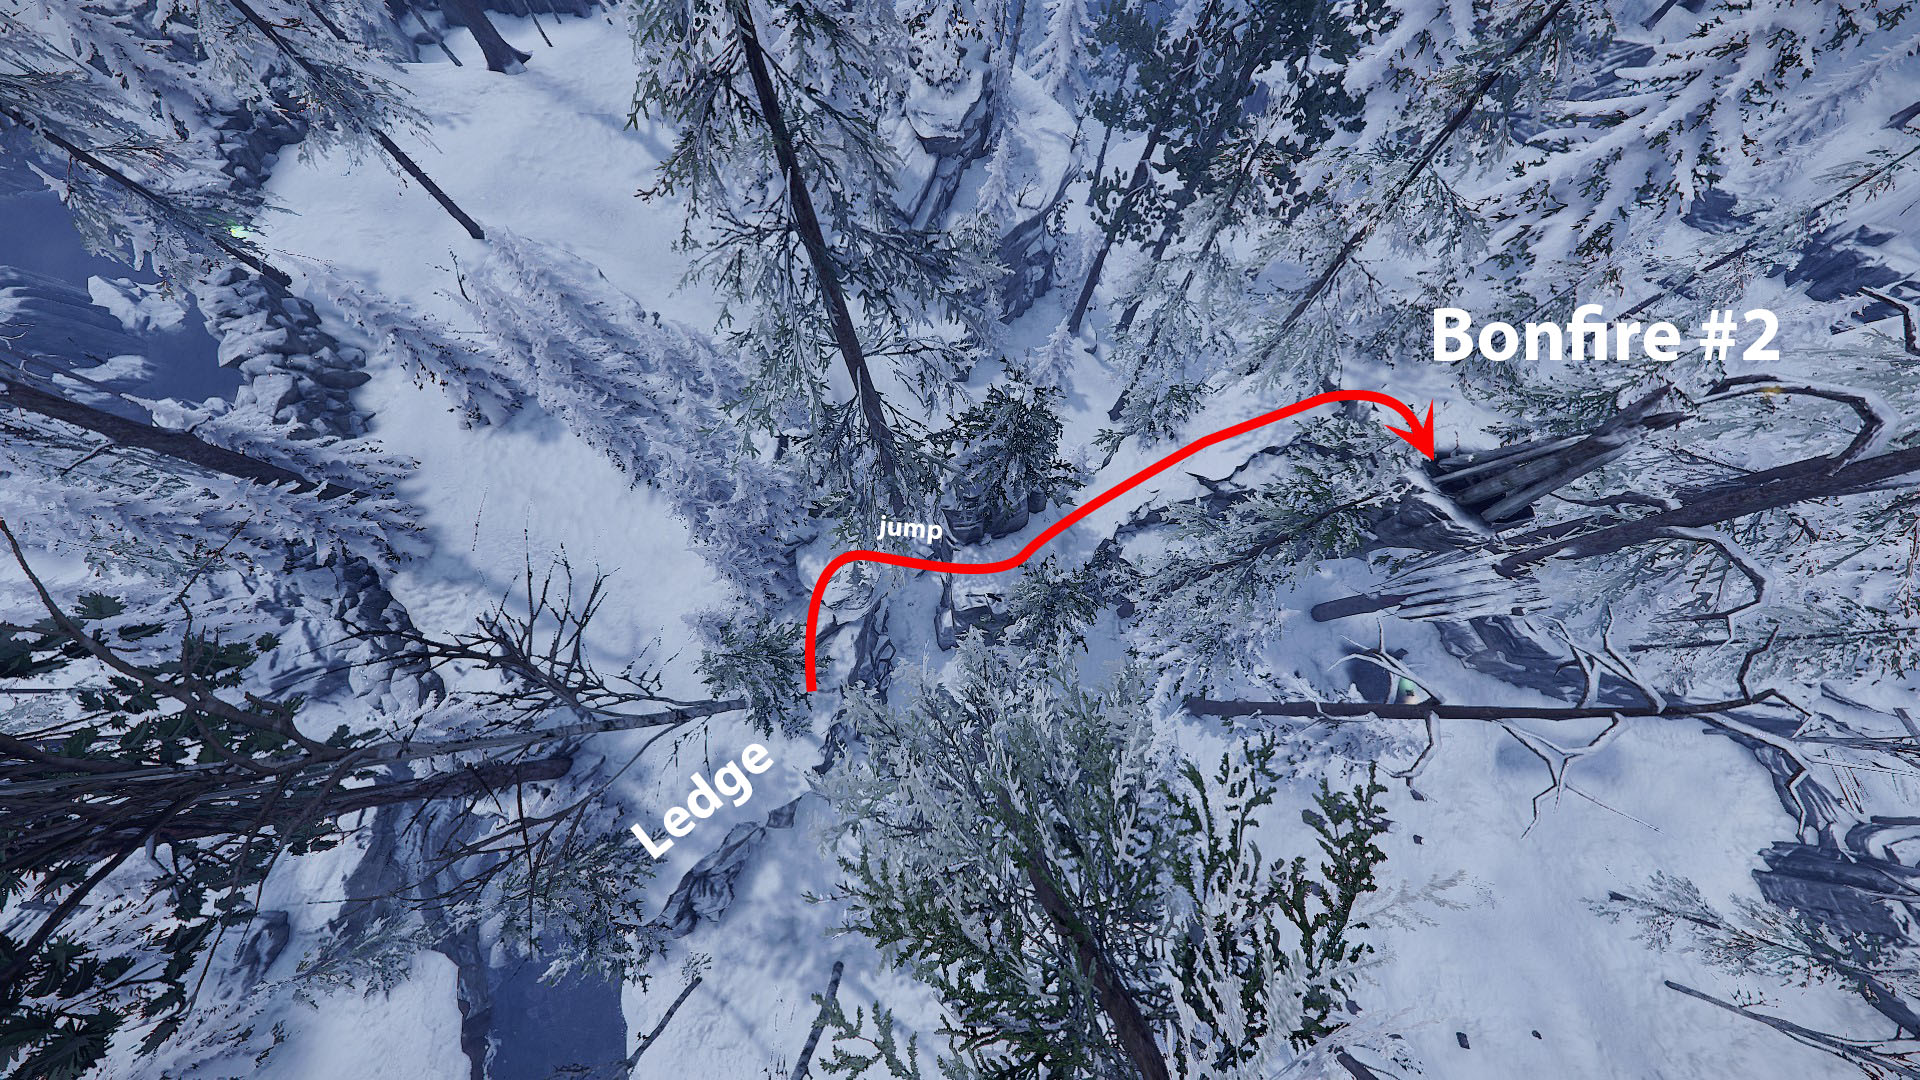
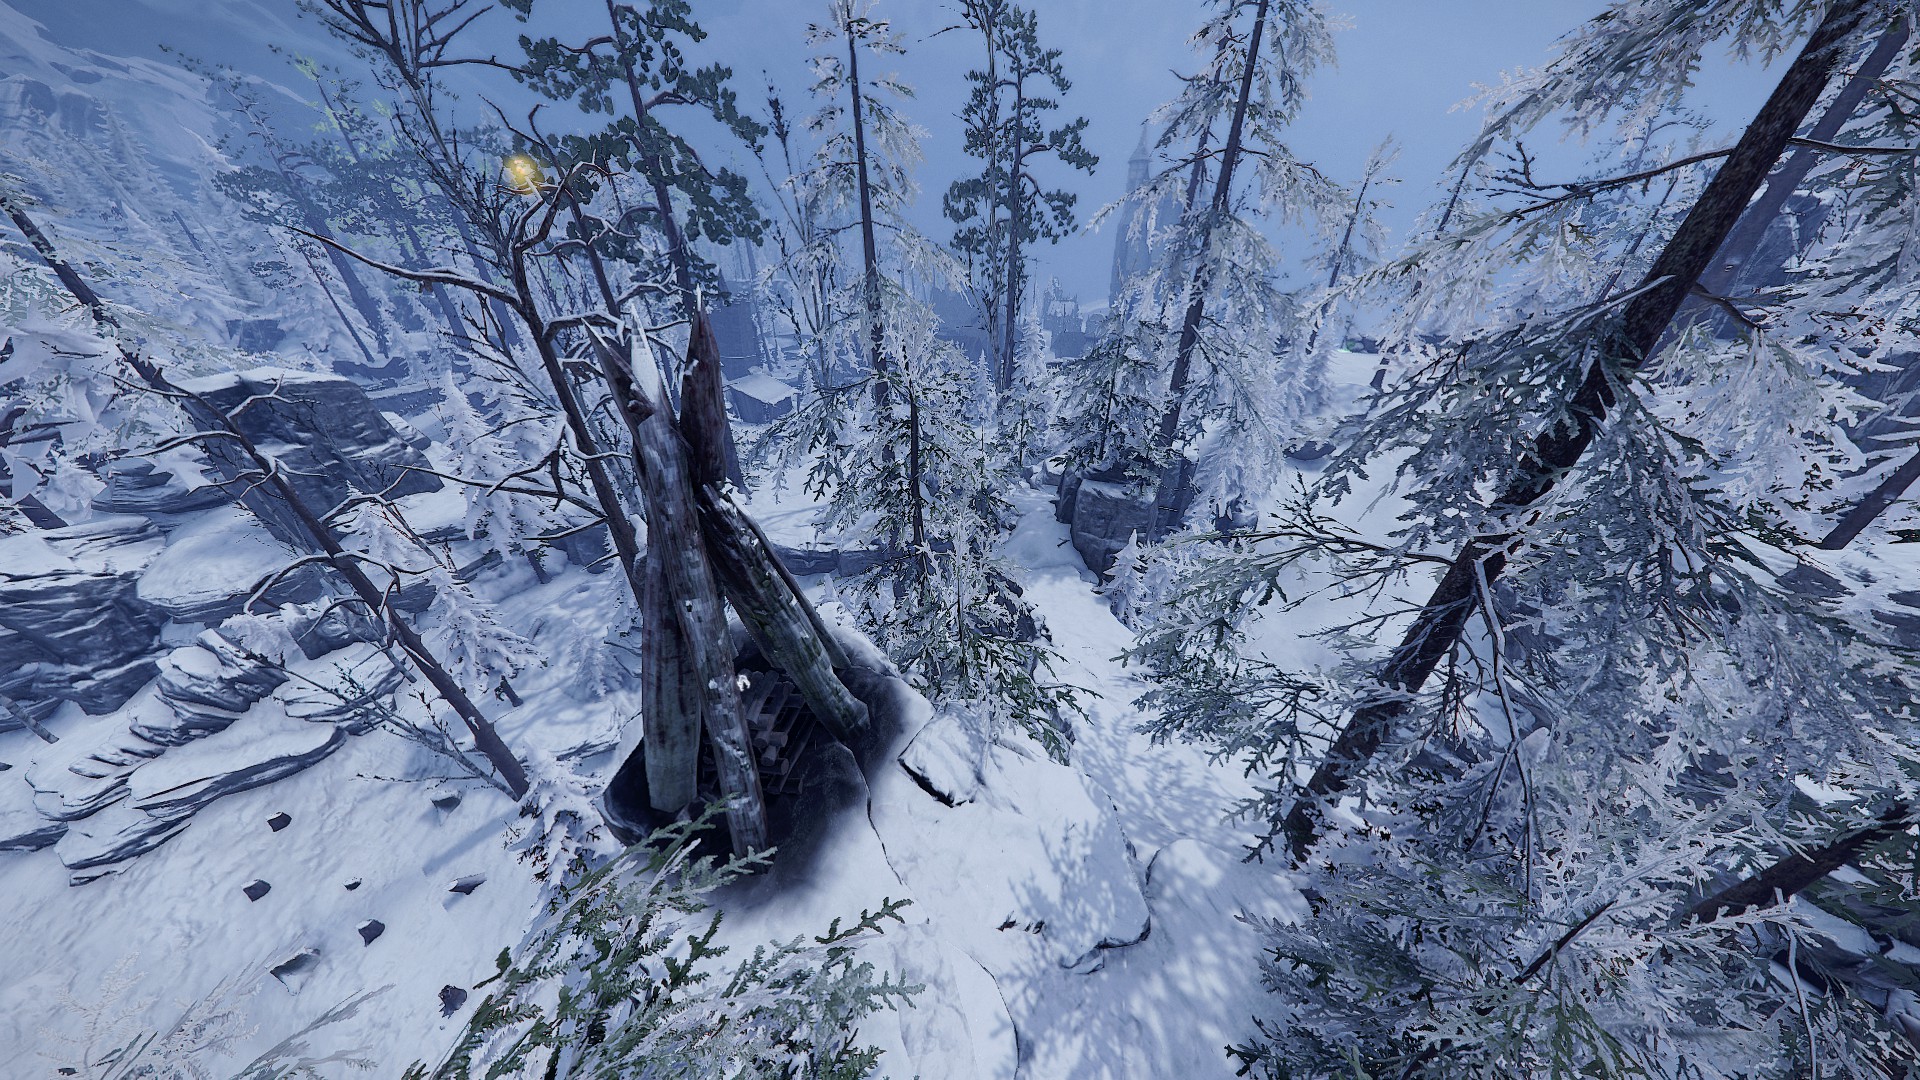
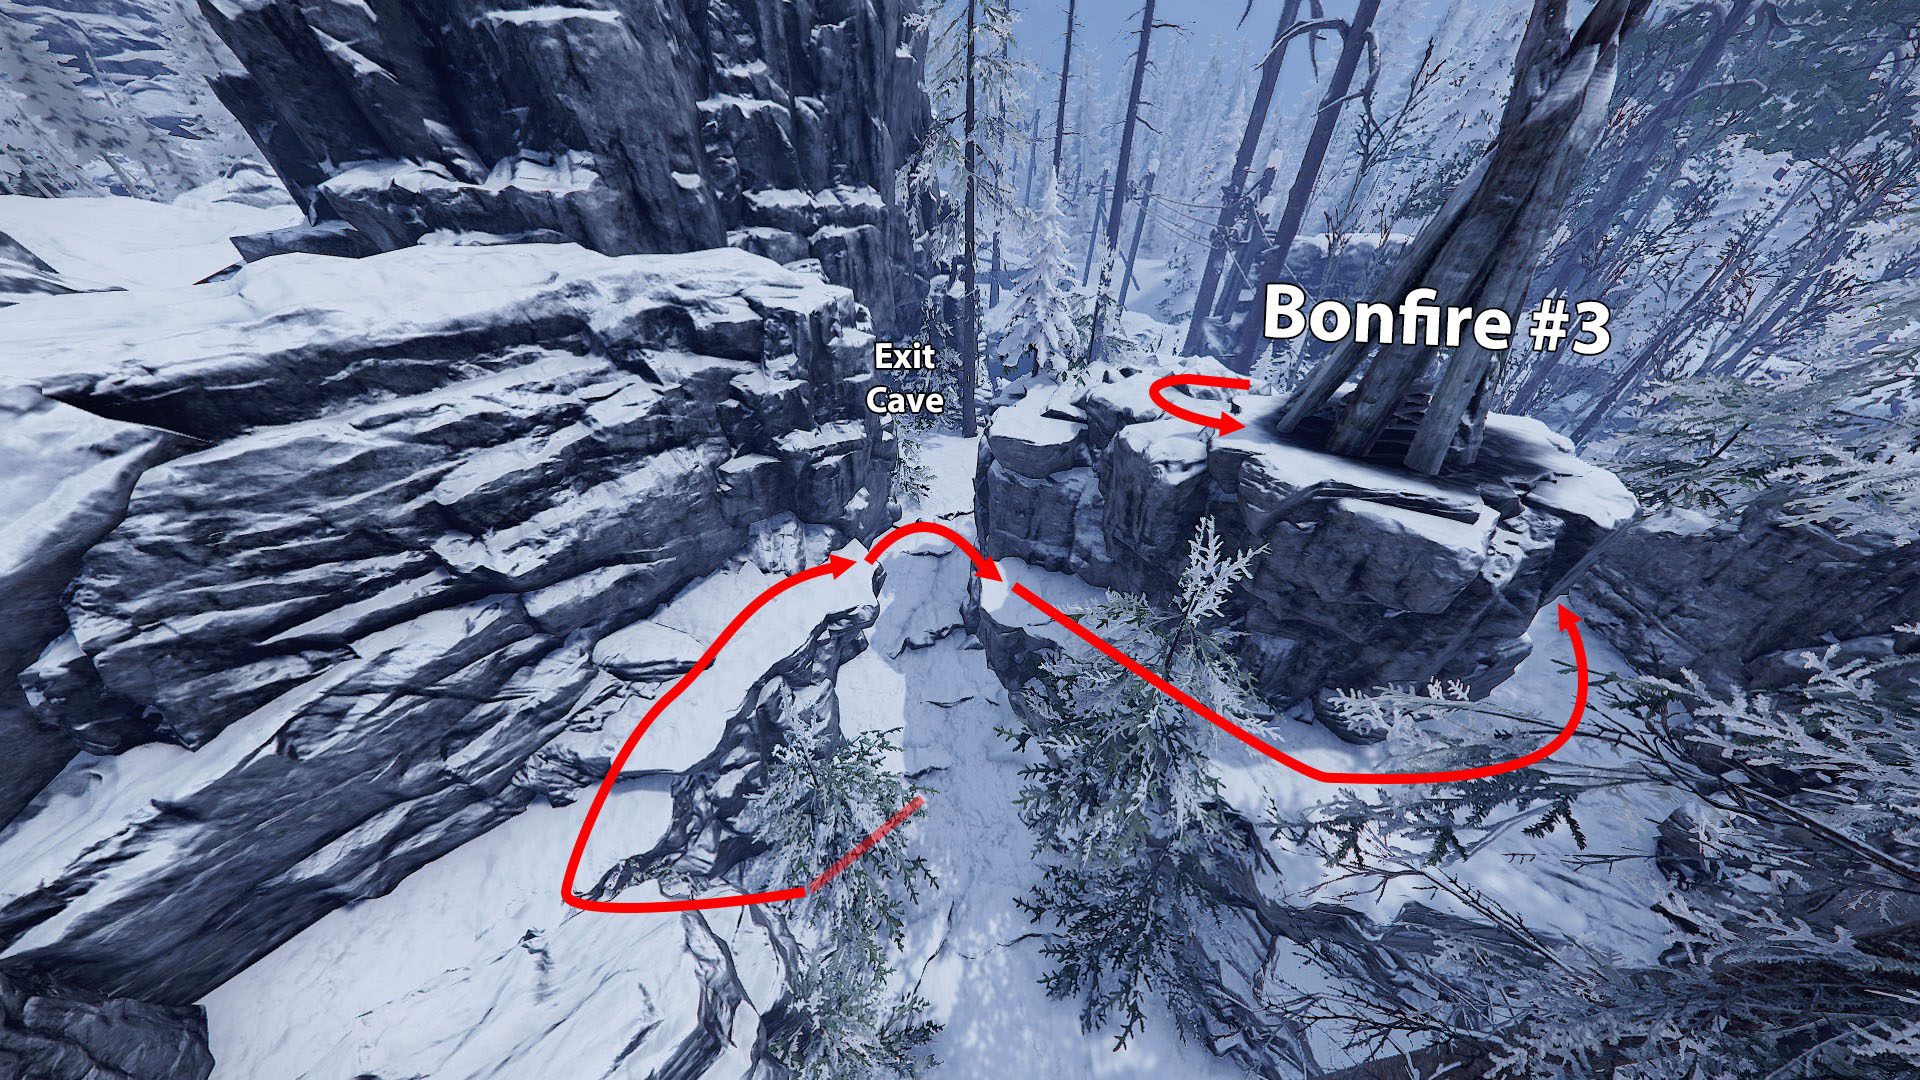
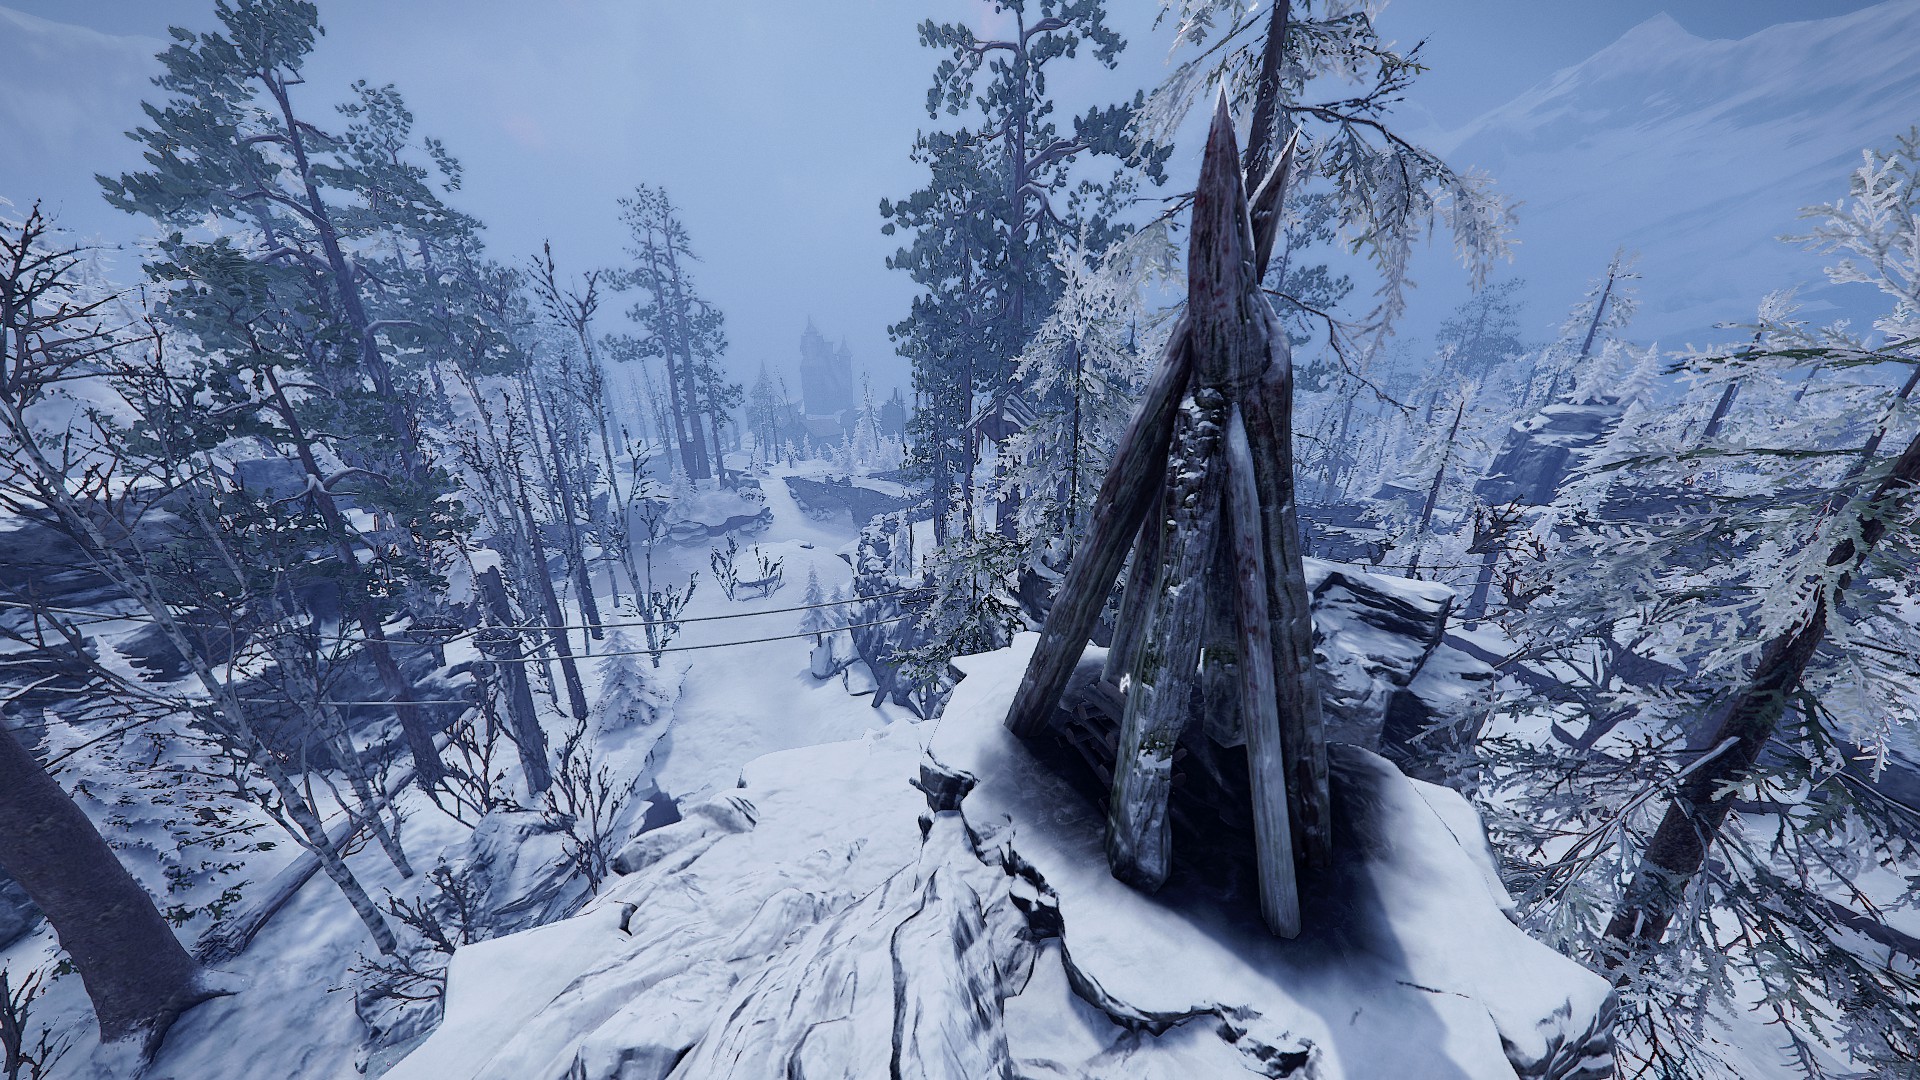
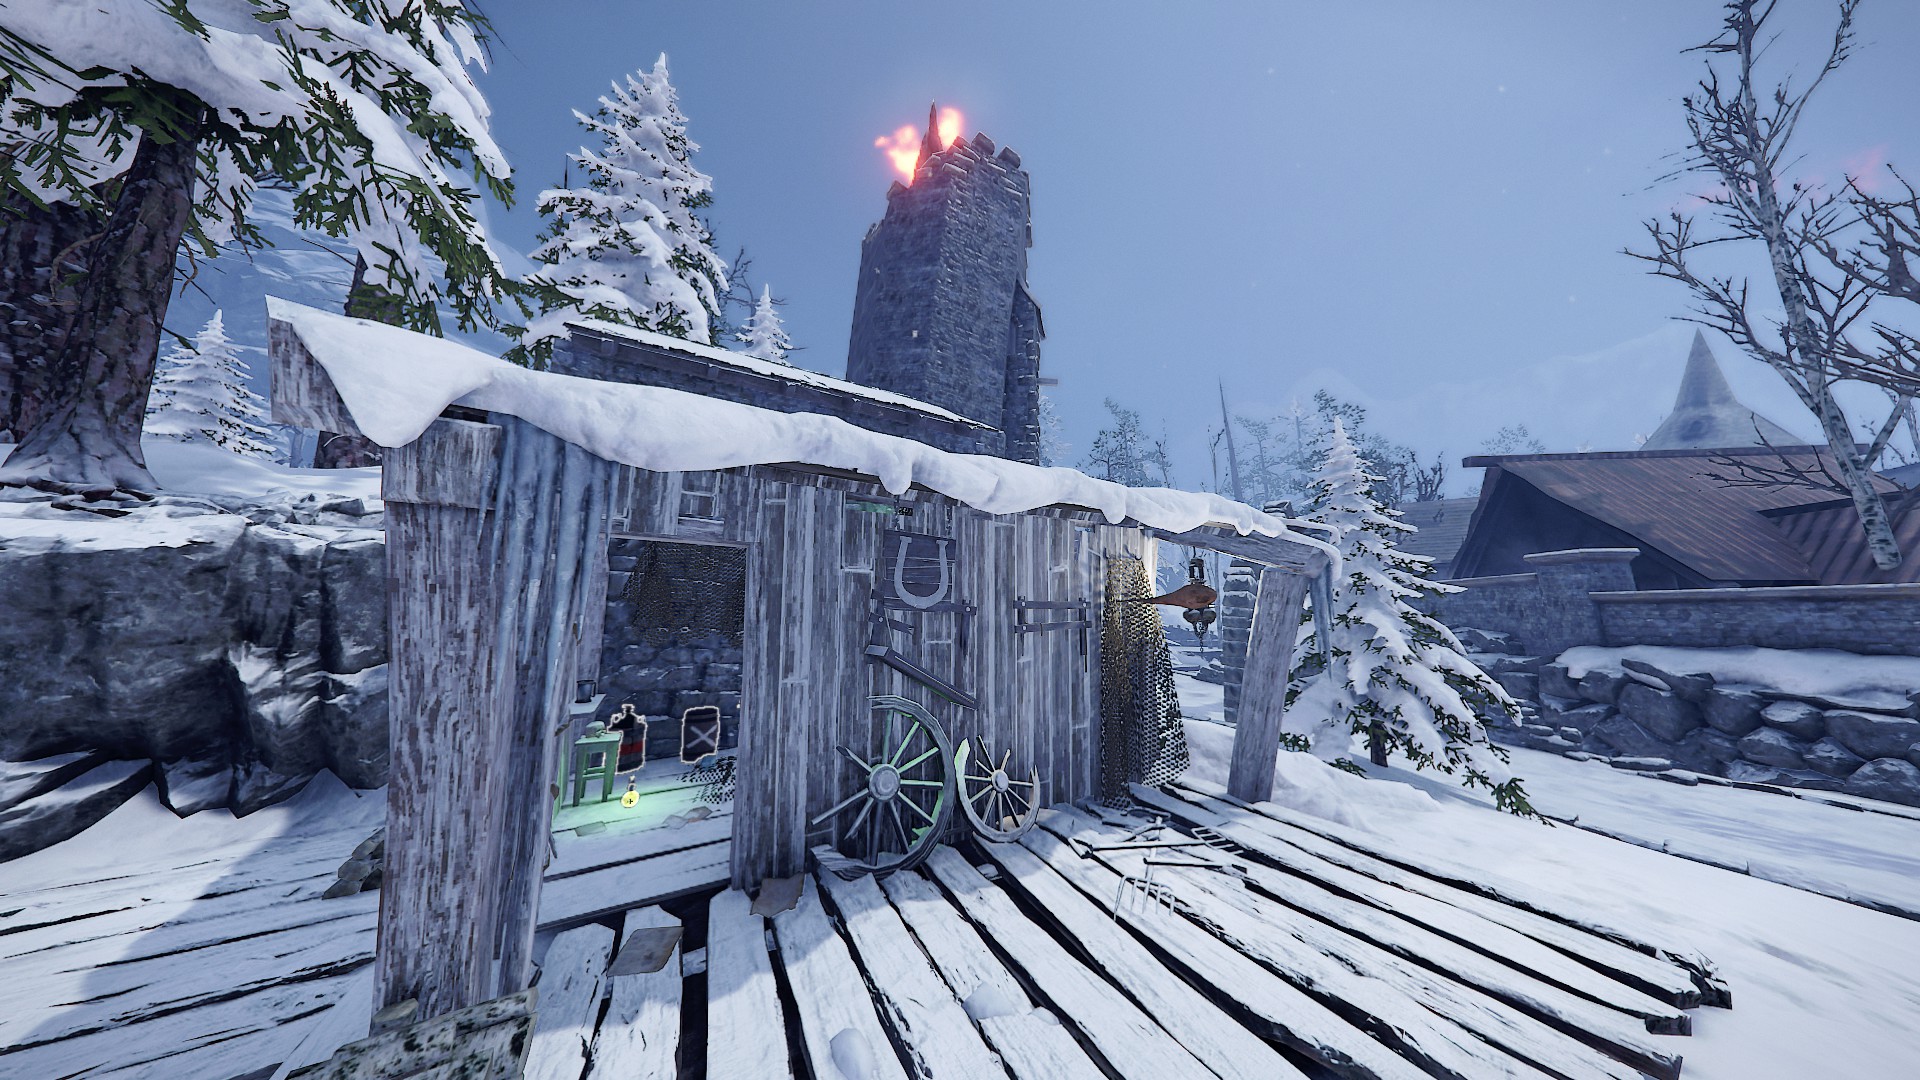
The bonfires in the dungeon area beneath the end event do not count towards this challenge.
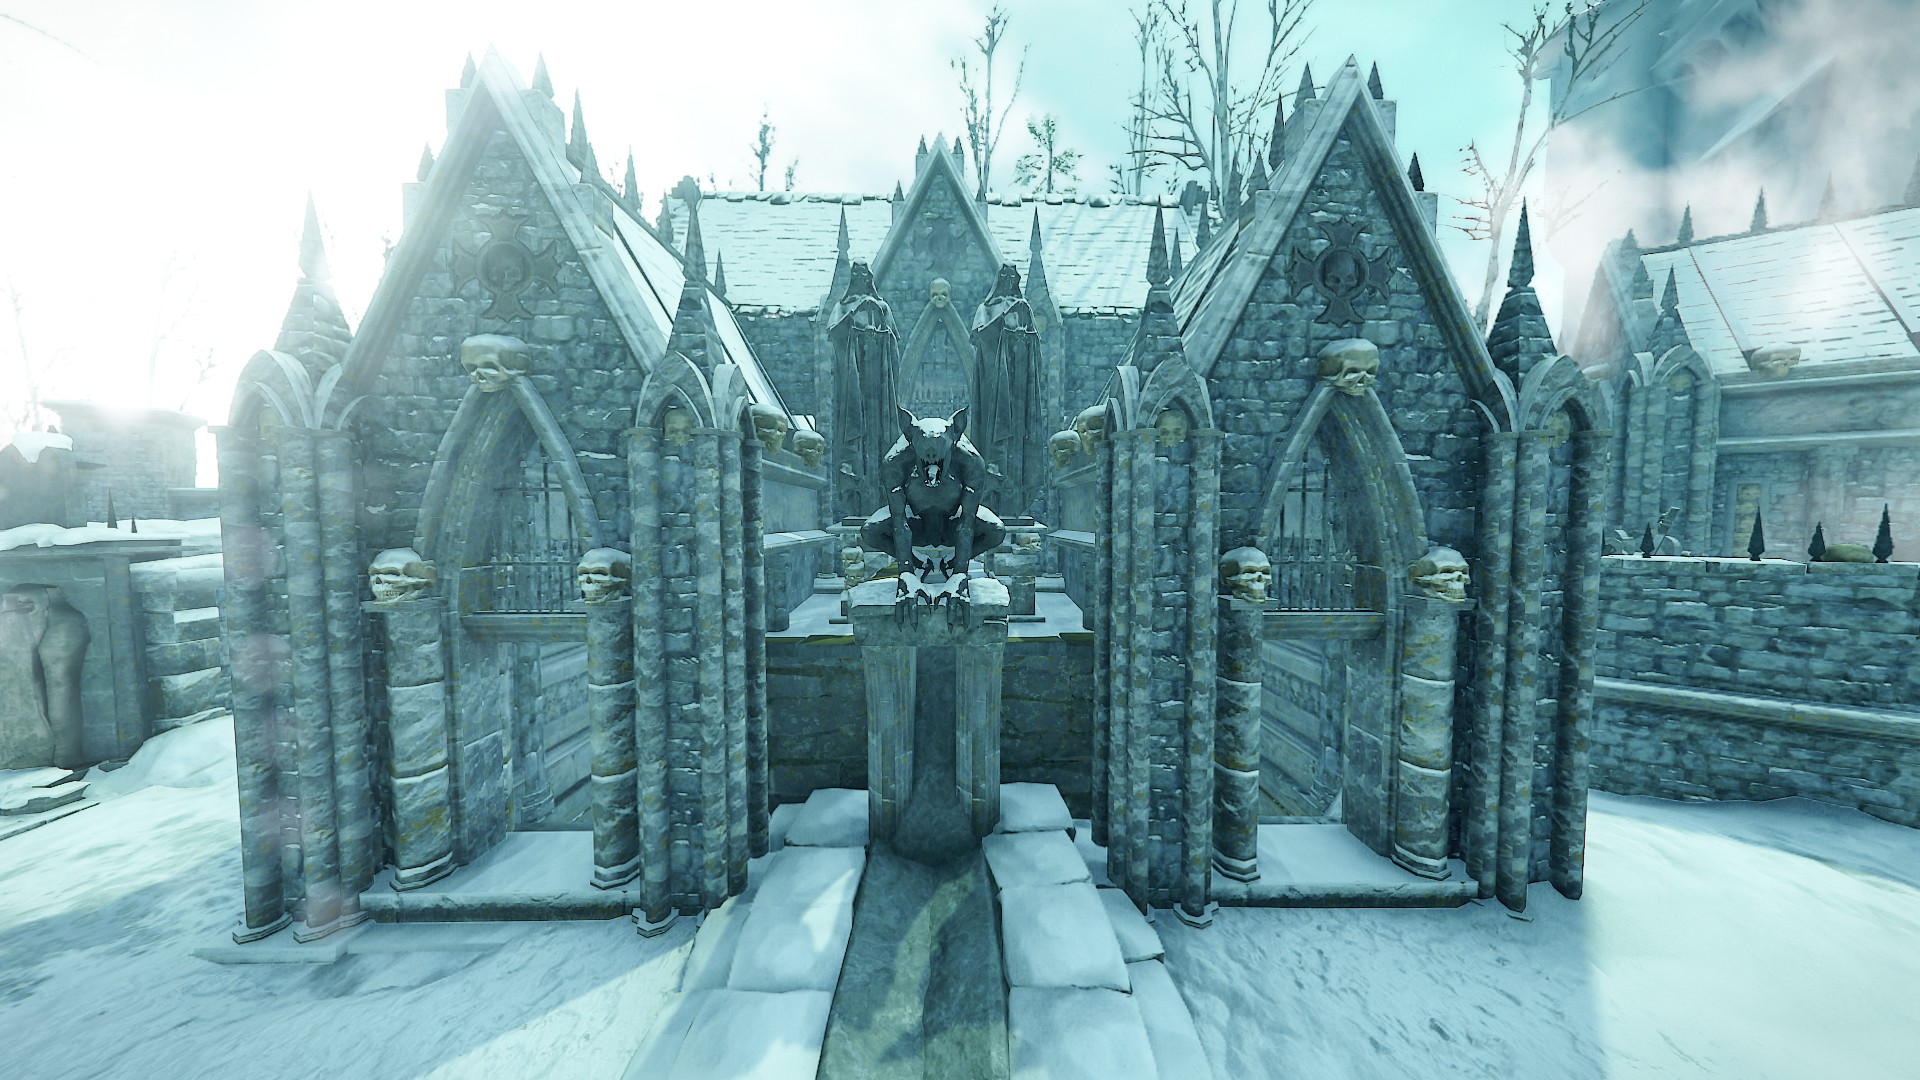
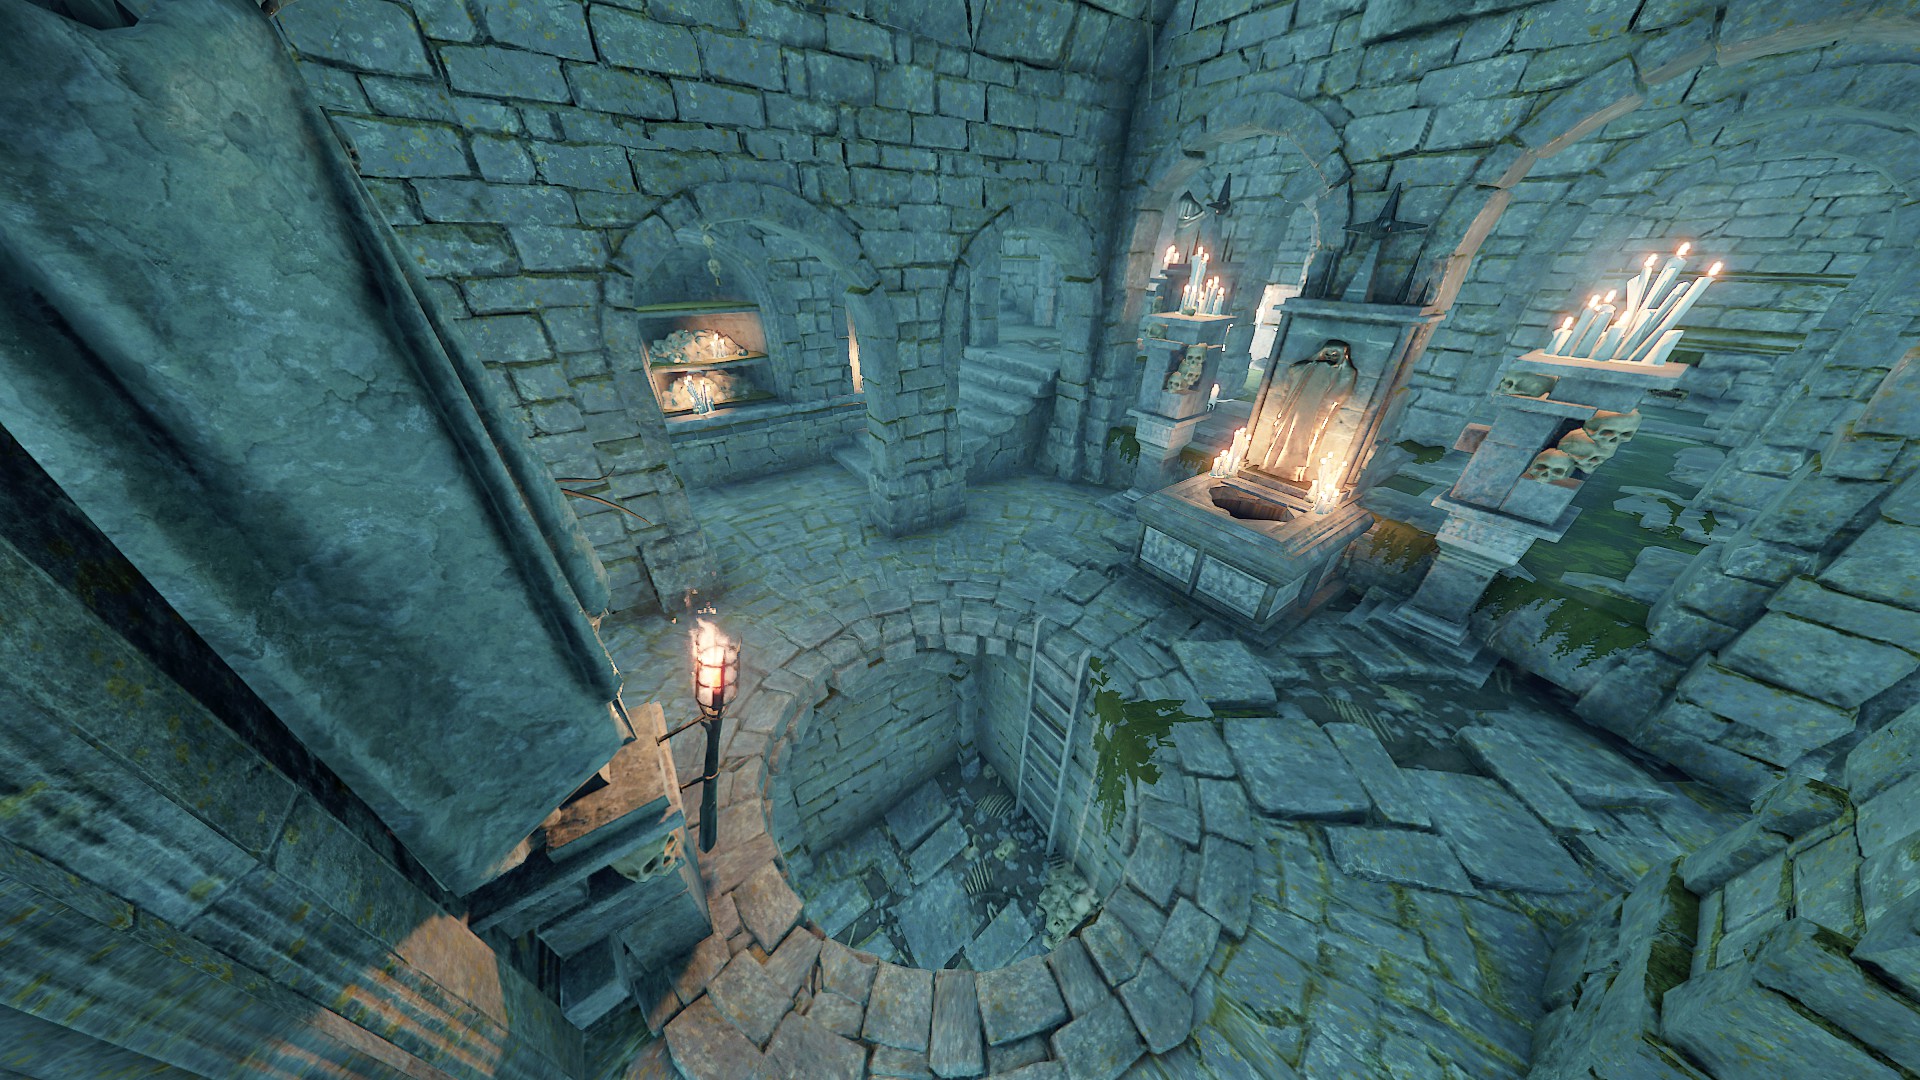
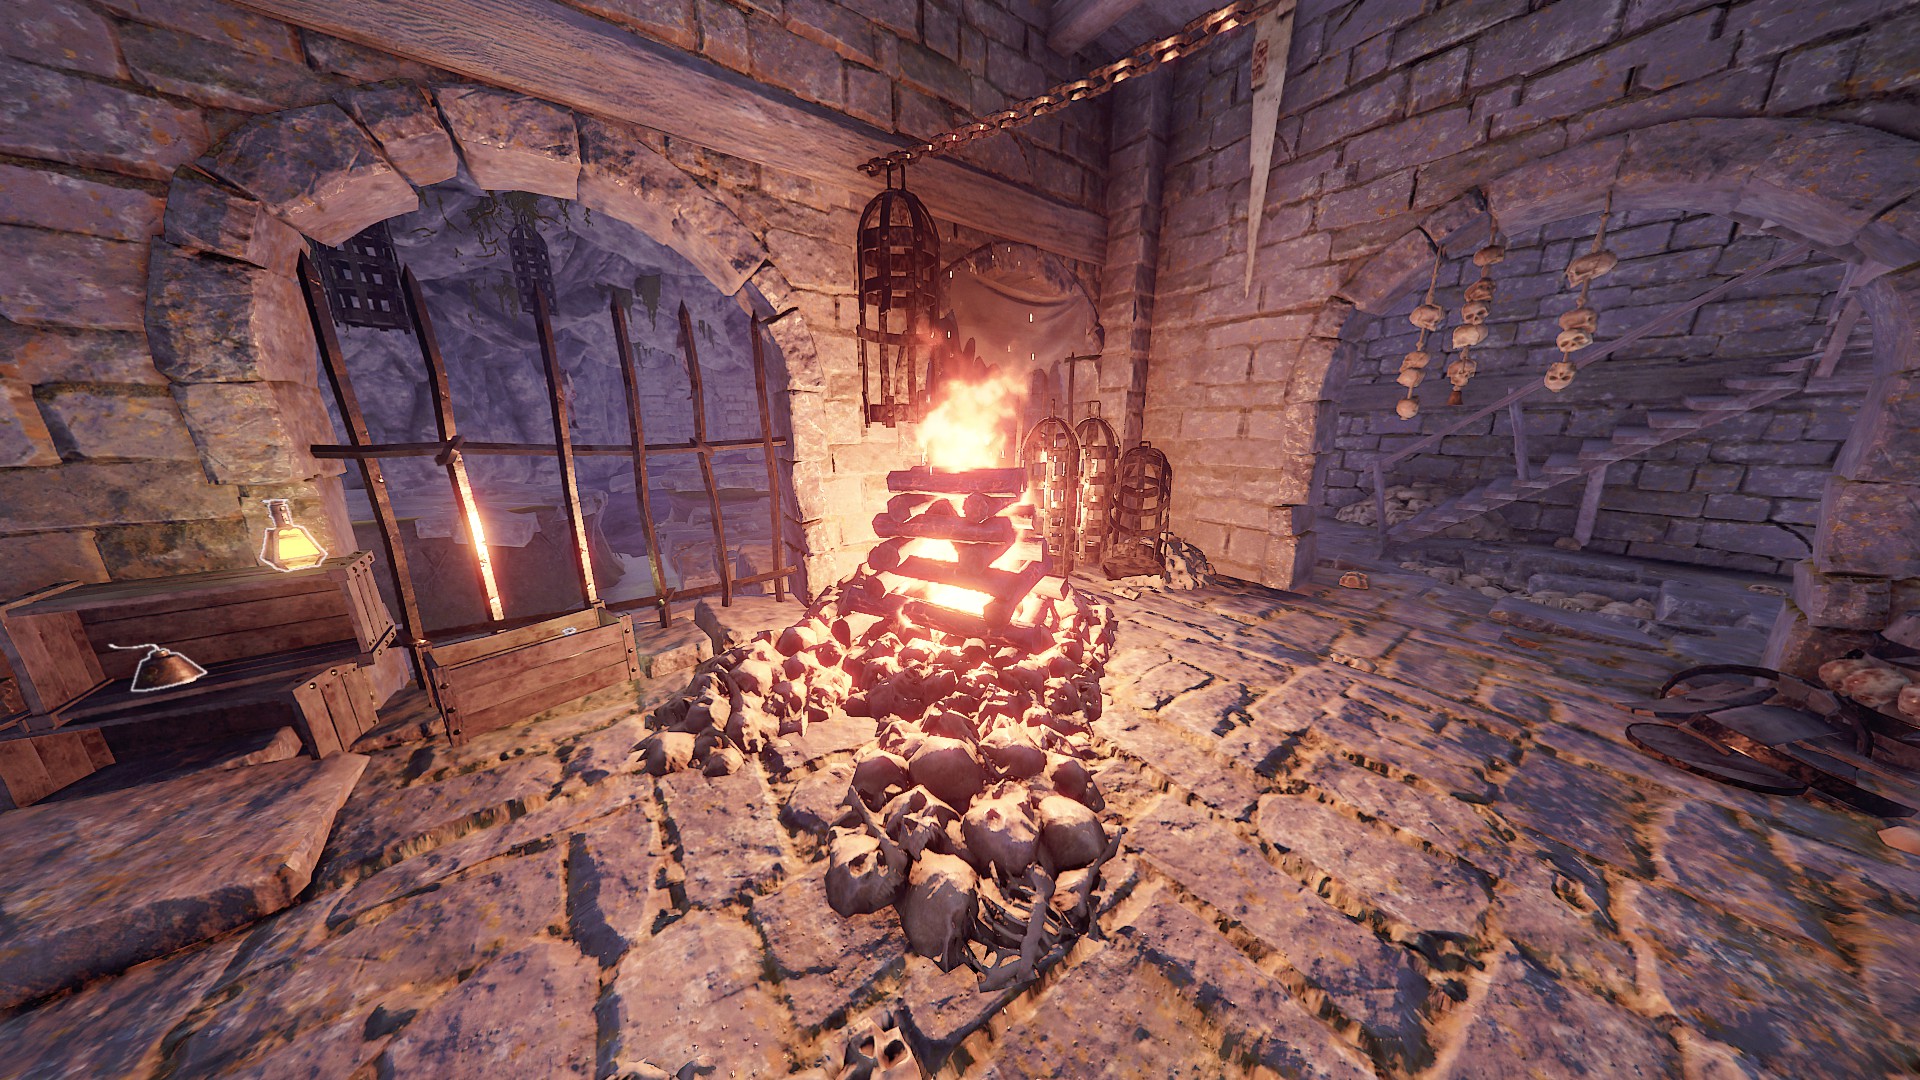
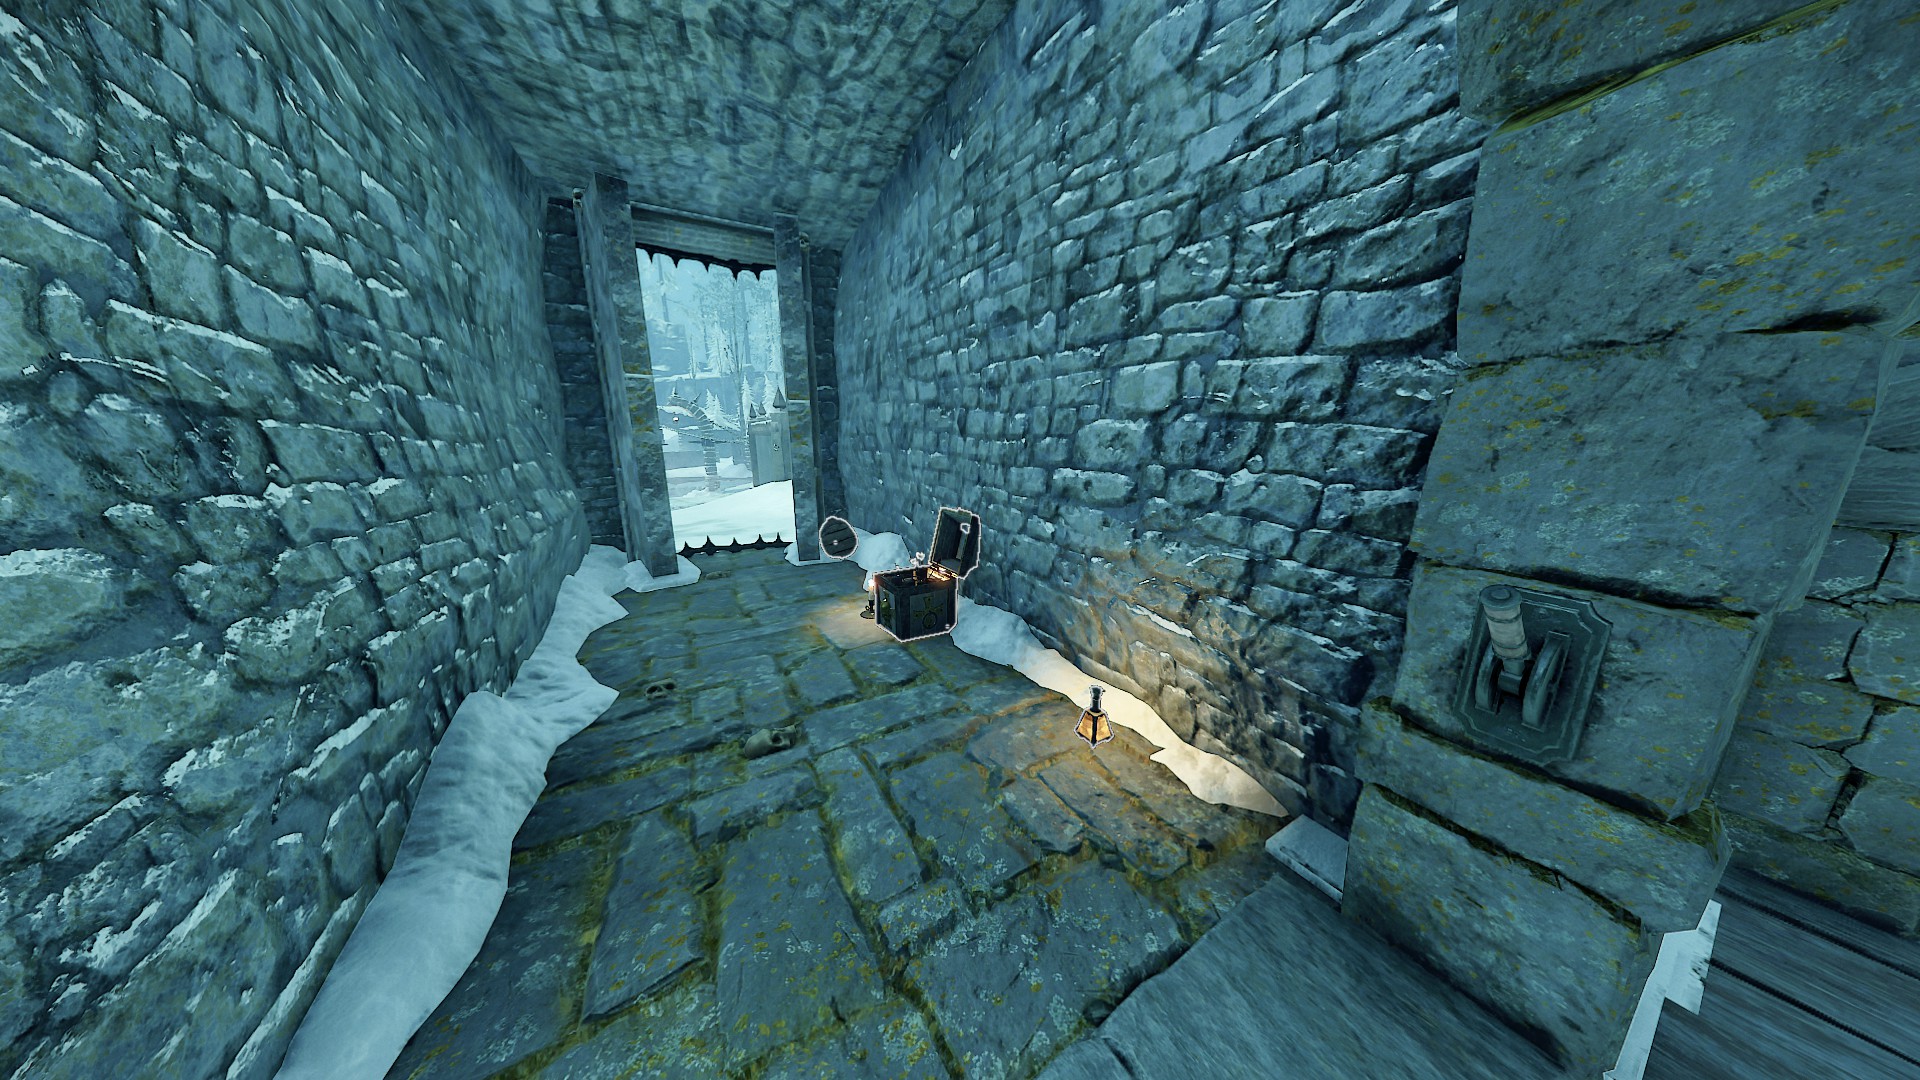 https://www.youtube.com/watch?v=-BlHN0nZhEM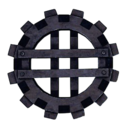
 3. Strike
Hit a Strike
Hit 10 enemies by cogwheel during the event at the sawmill. Cogwheels can only appear in 2 chests out of a possible 11, and their spawn is always random.
Strategy:
- Select difficulty: Champion
- Choose either Shade or Huntsman.
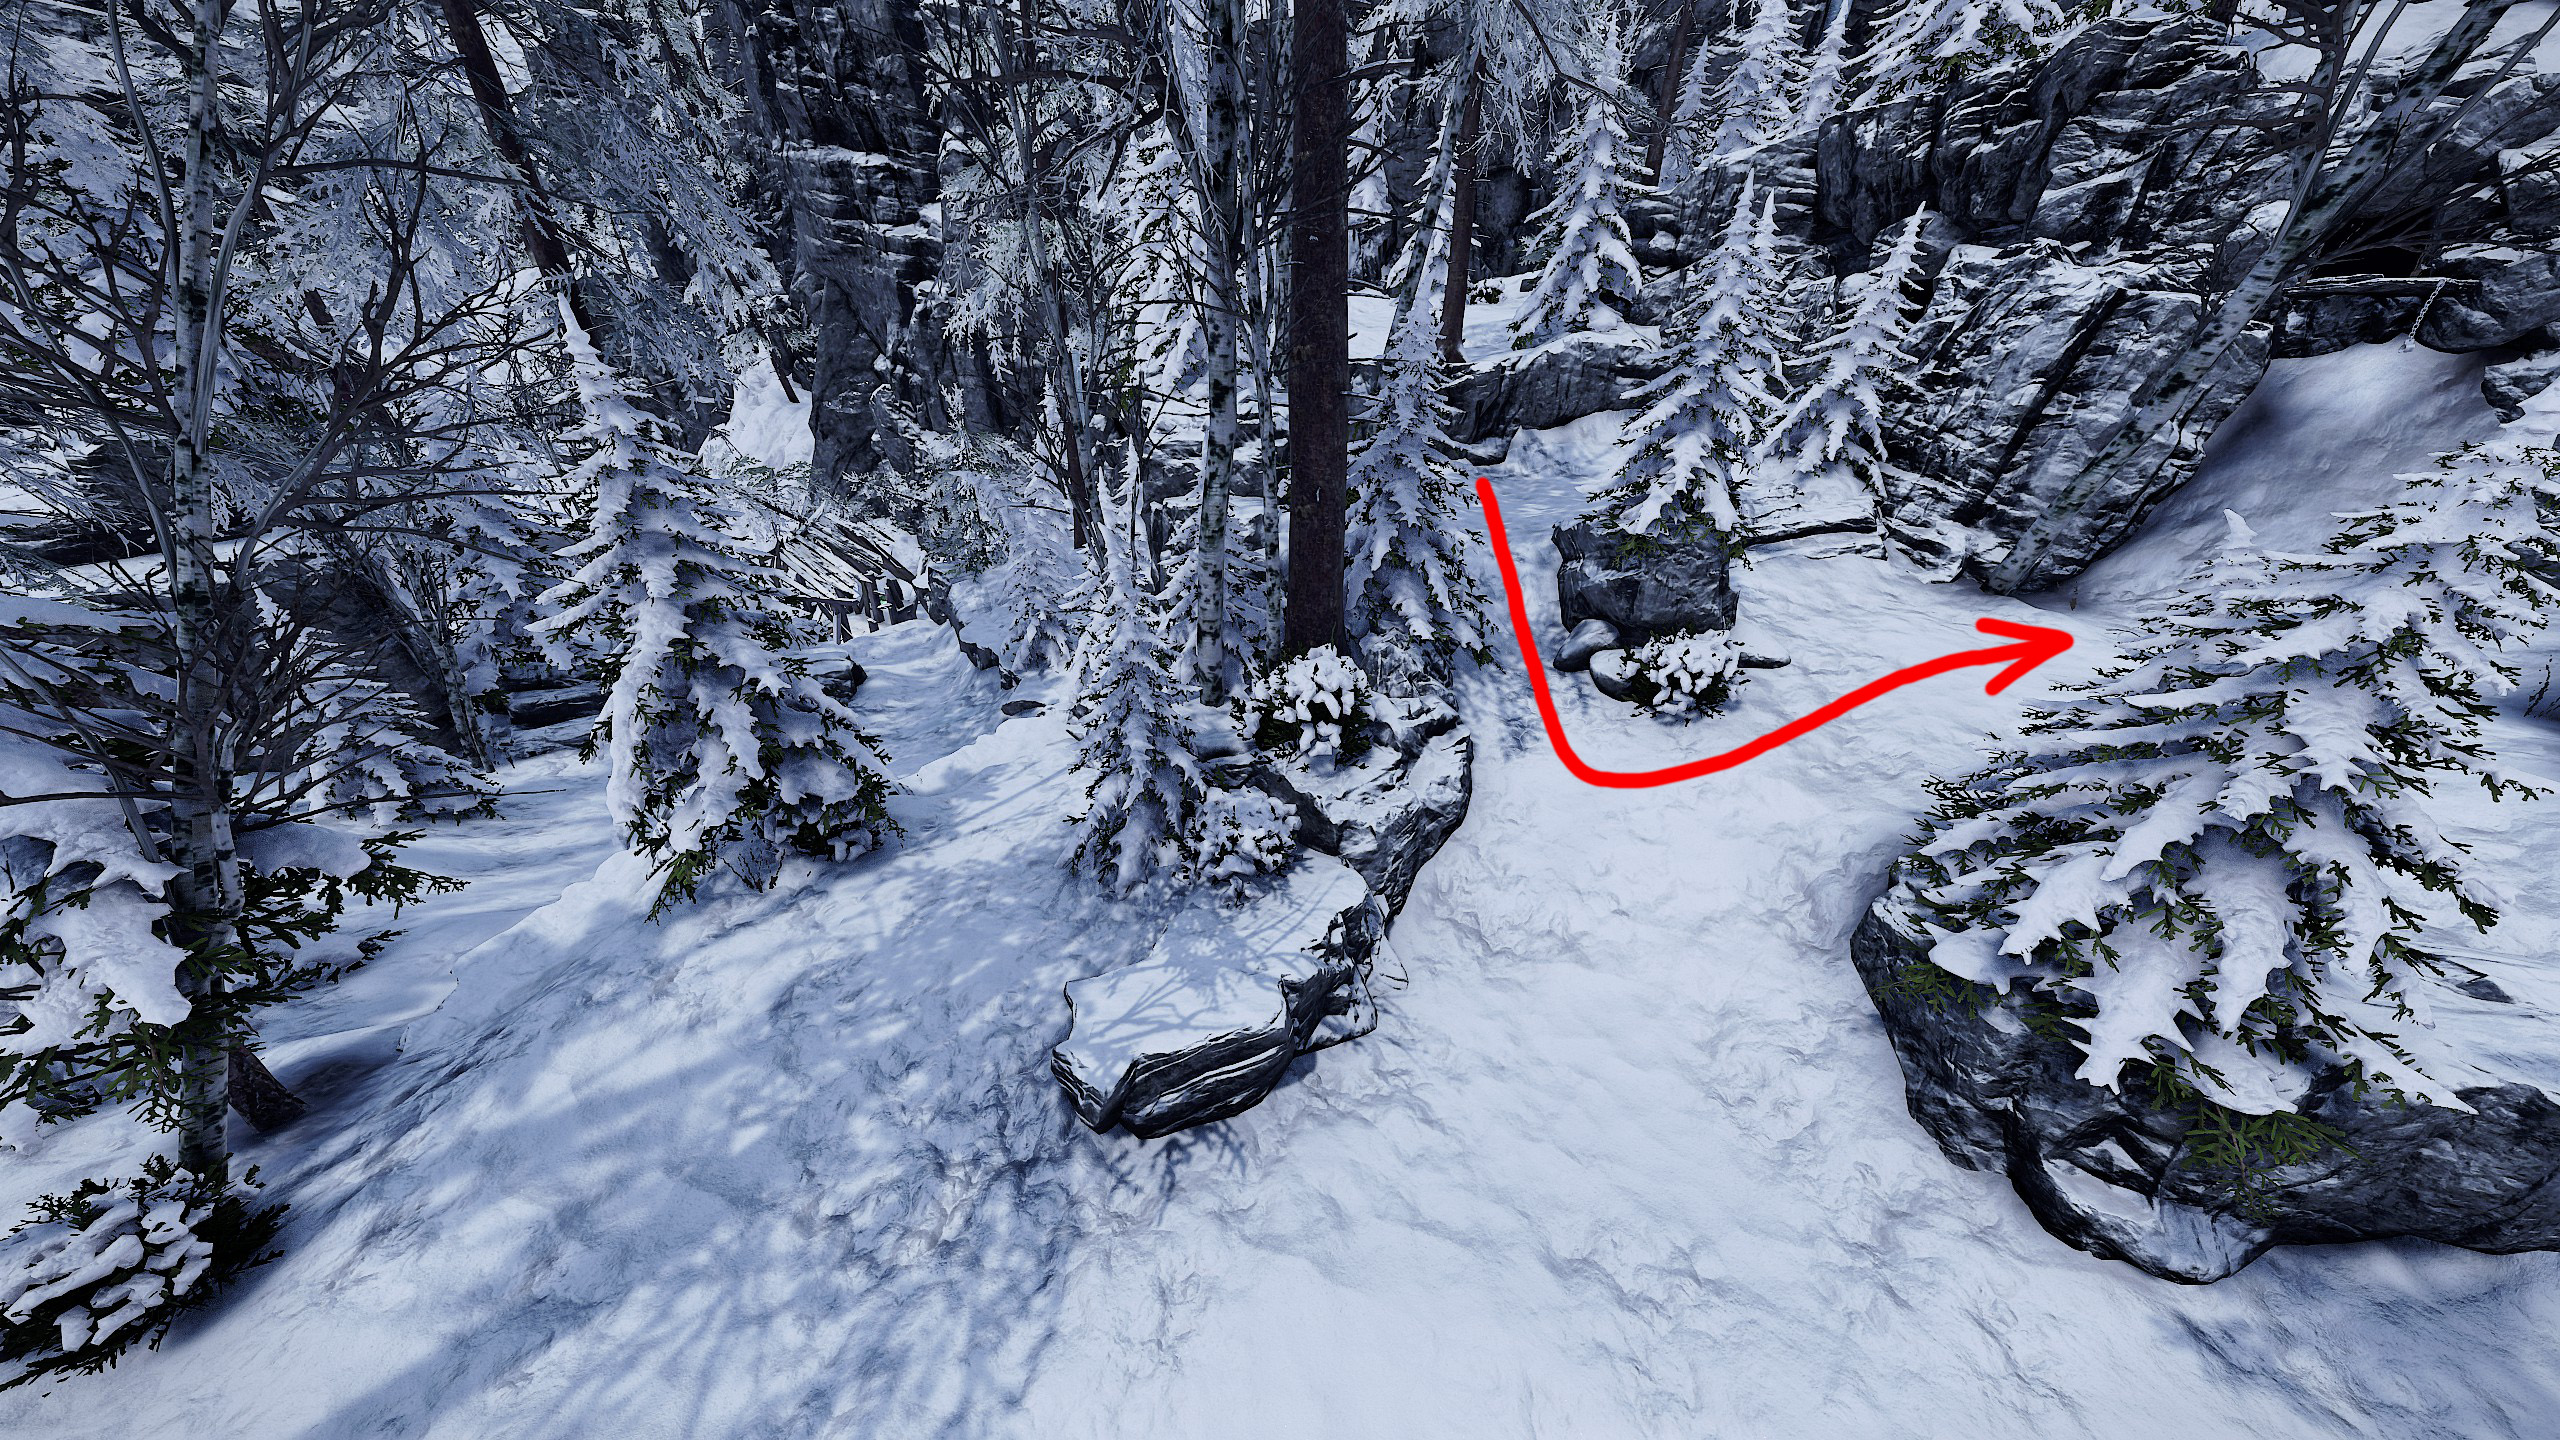
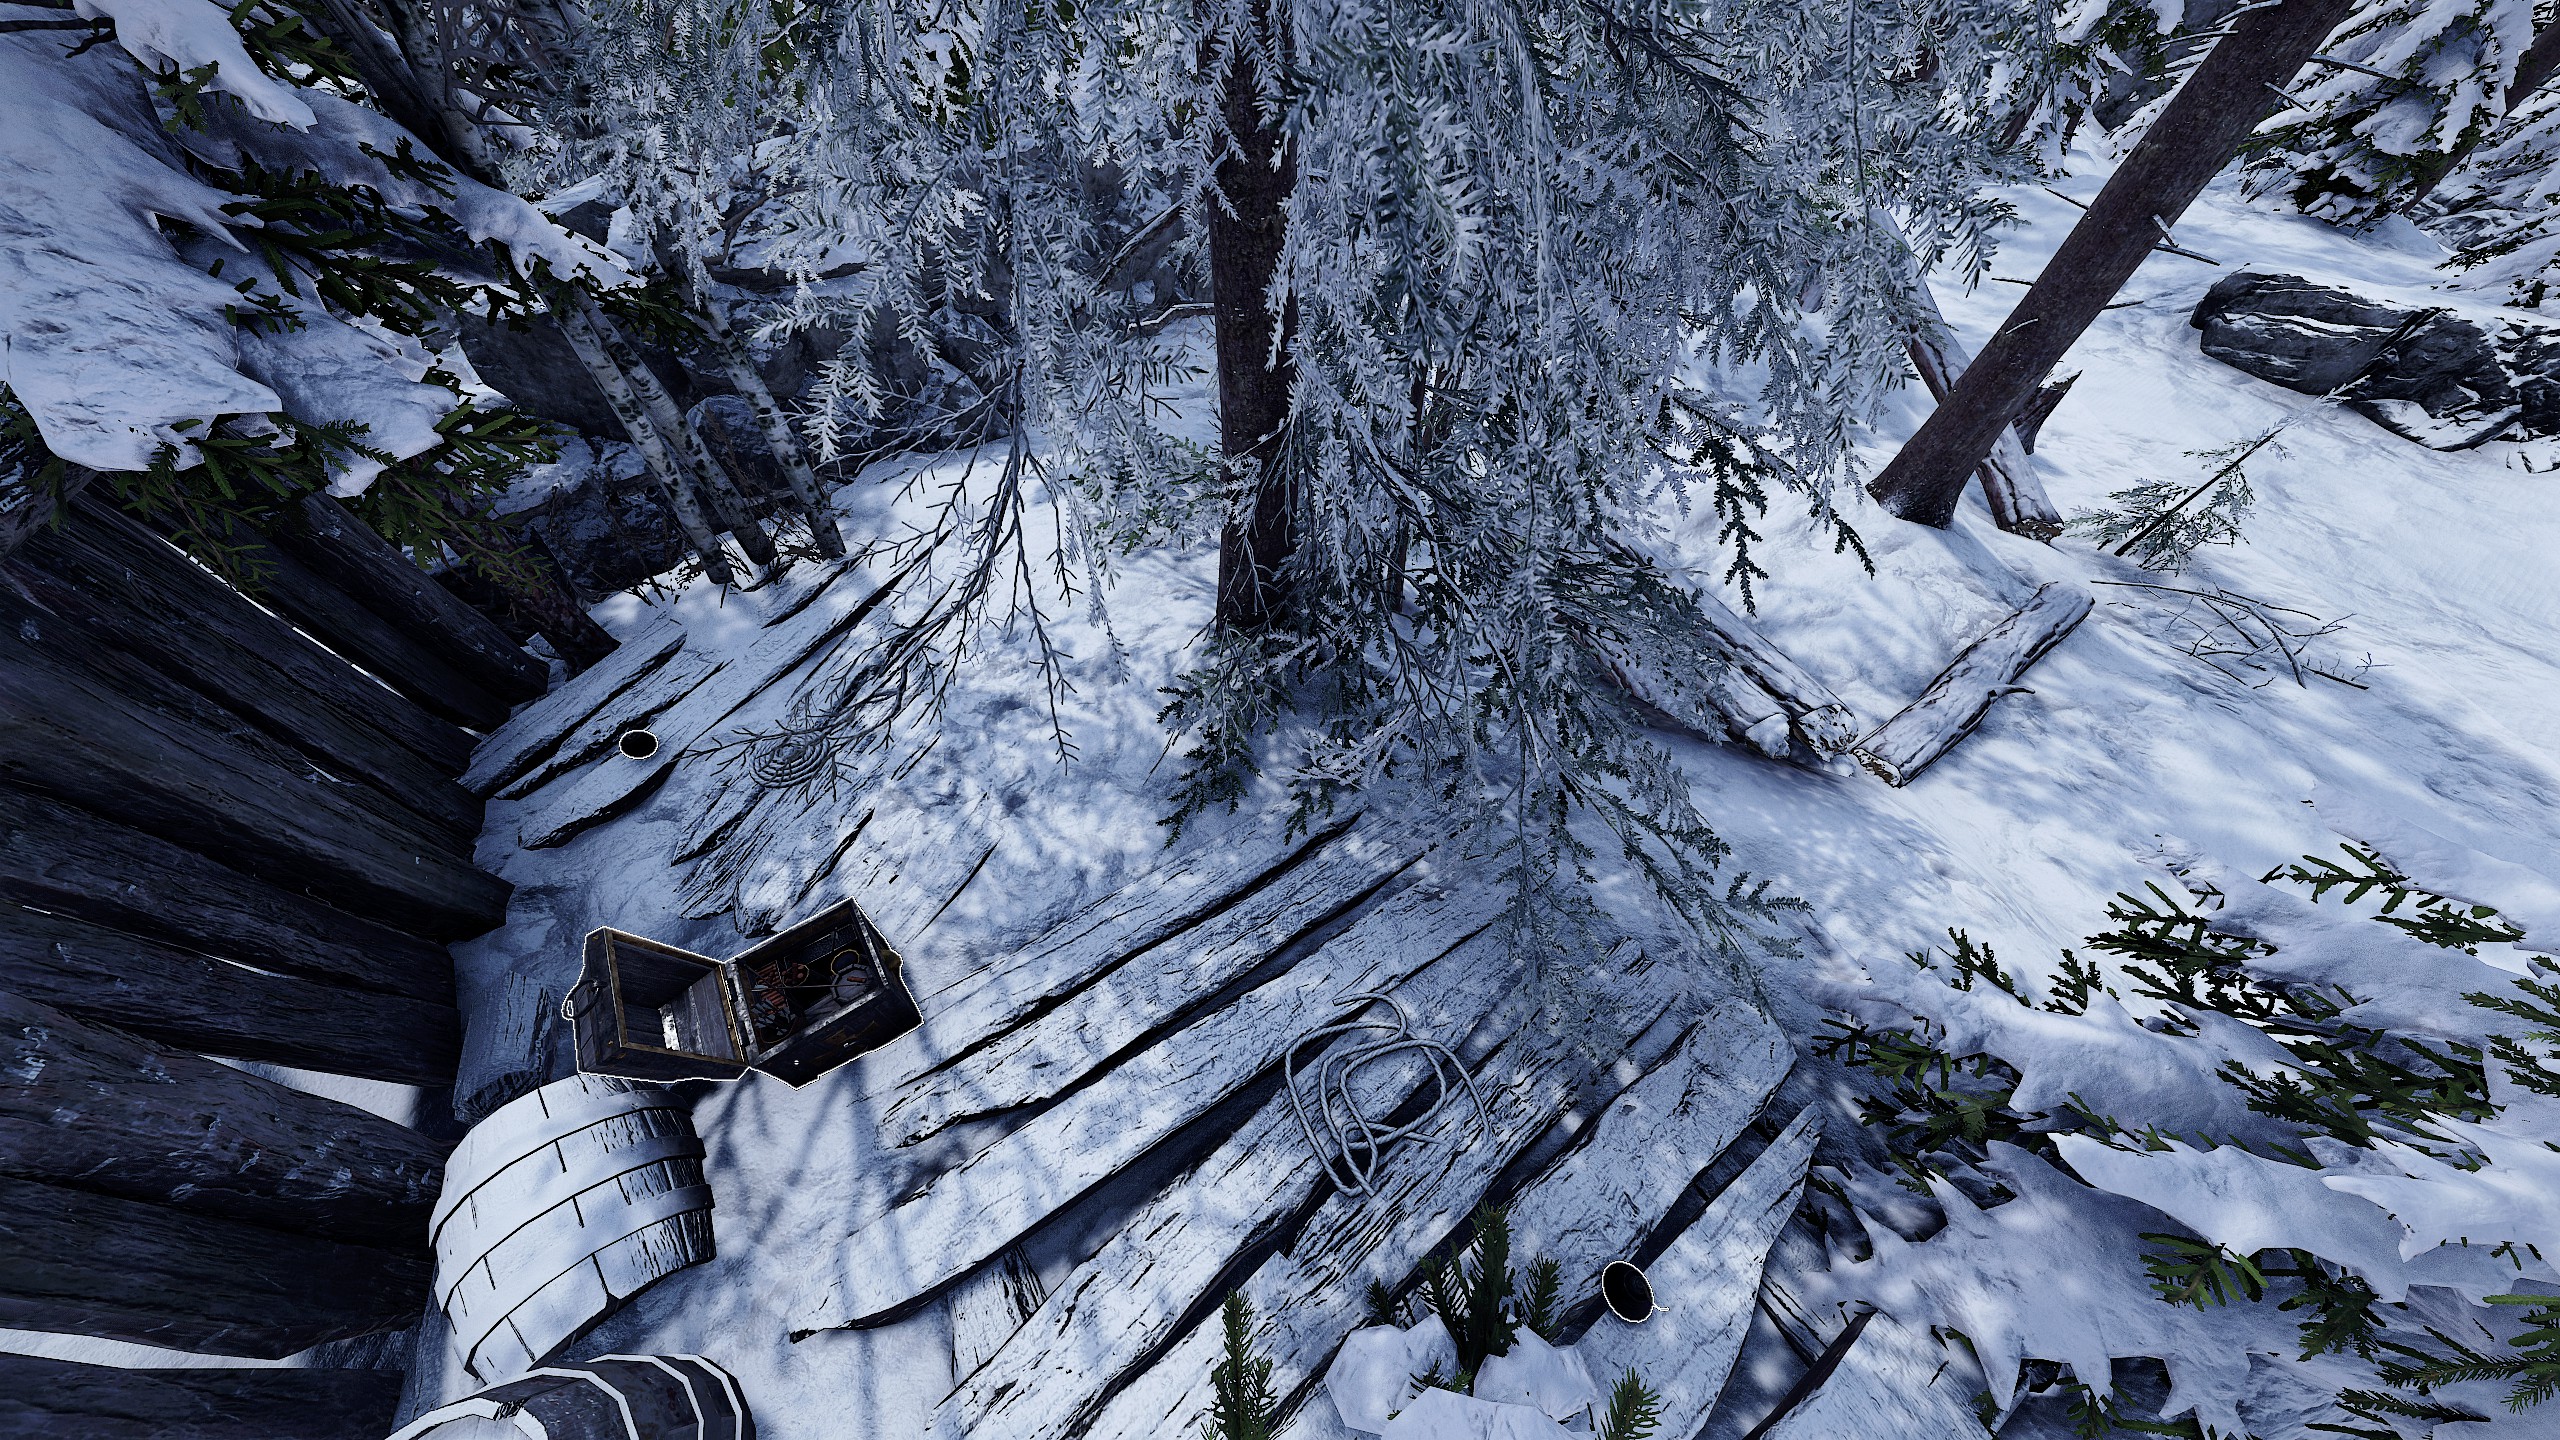
- Then go to the sawmill, climb up and pull the lever.
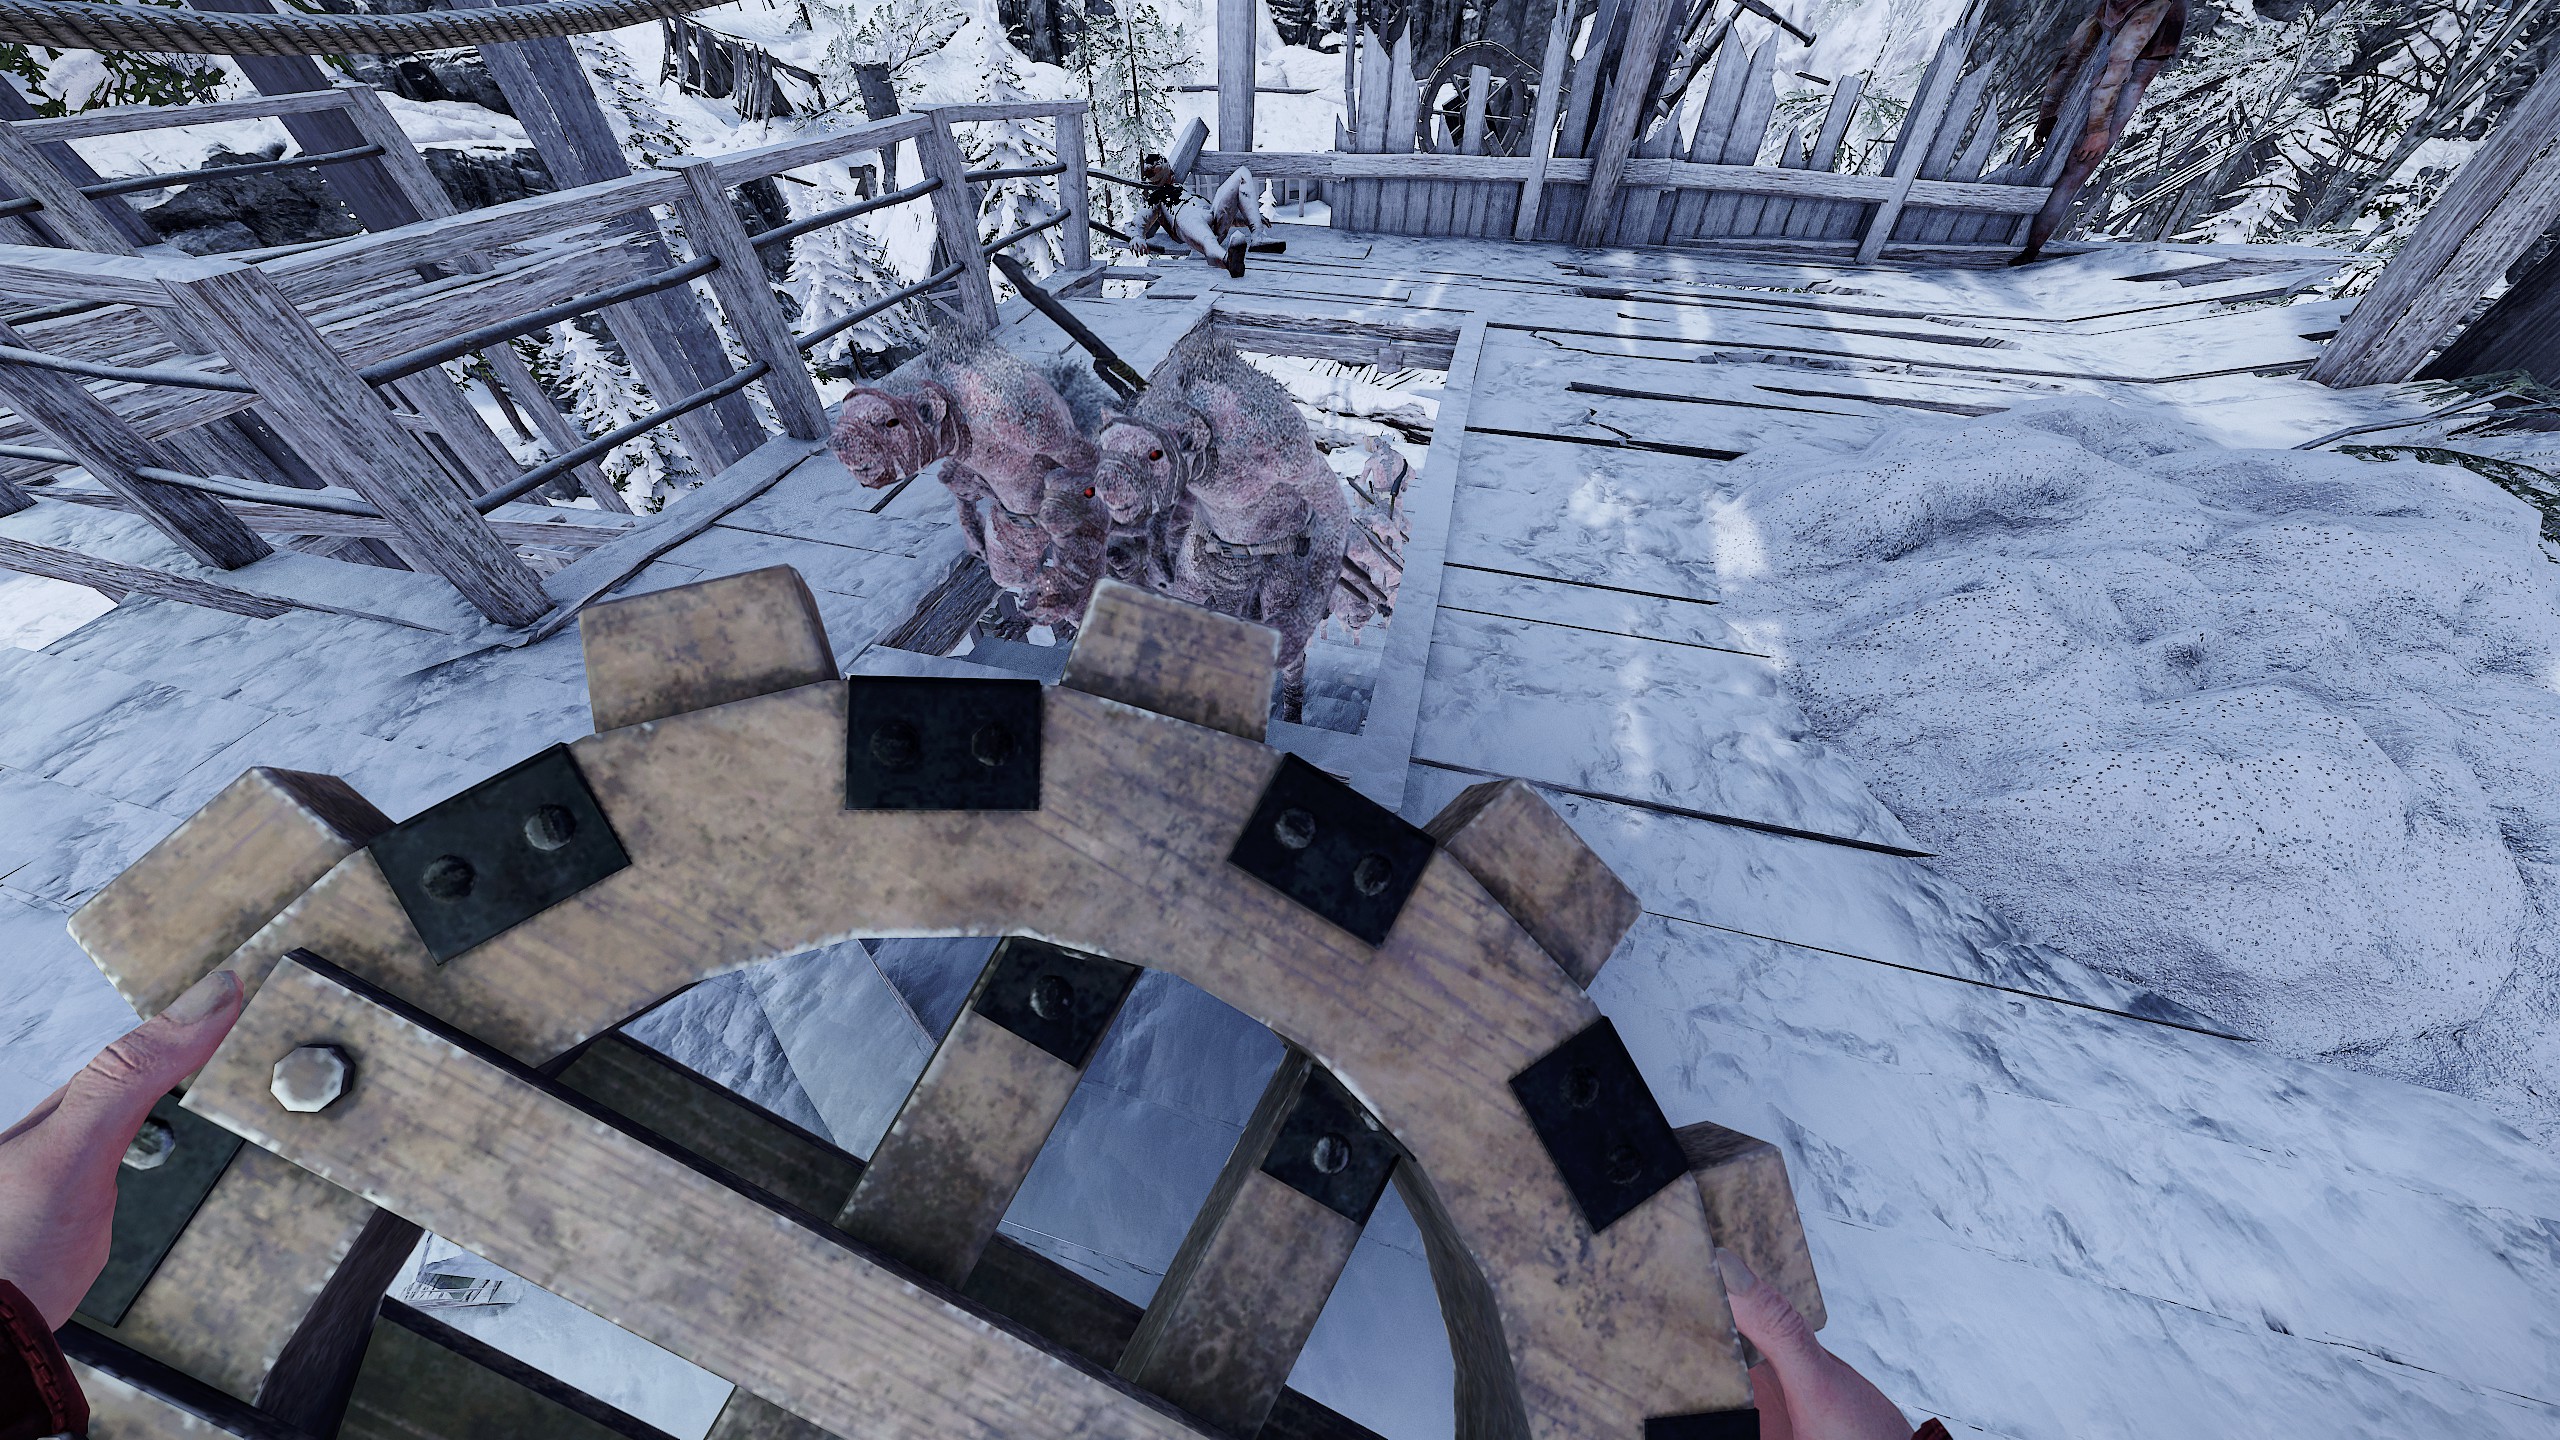
- Get to the cogwheel, gather a group of mobs near the narrow passage, use invisibility and pick up the cogwheel. Once invisibility wears off, throw the cogwheel at the enemies.
- Challenge completed!
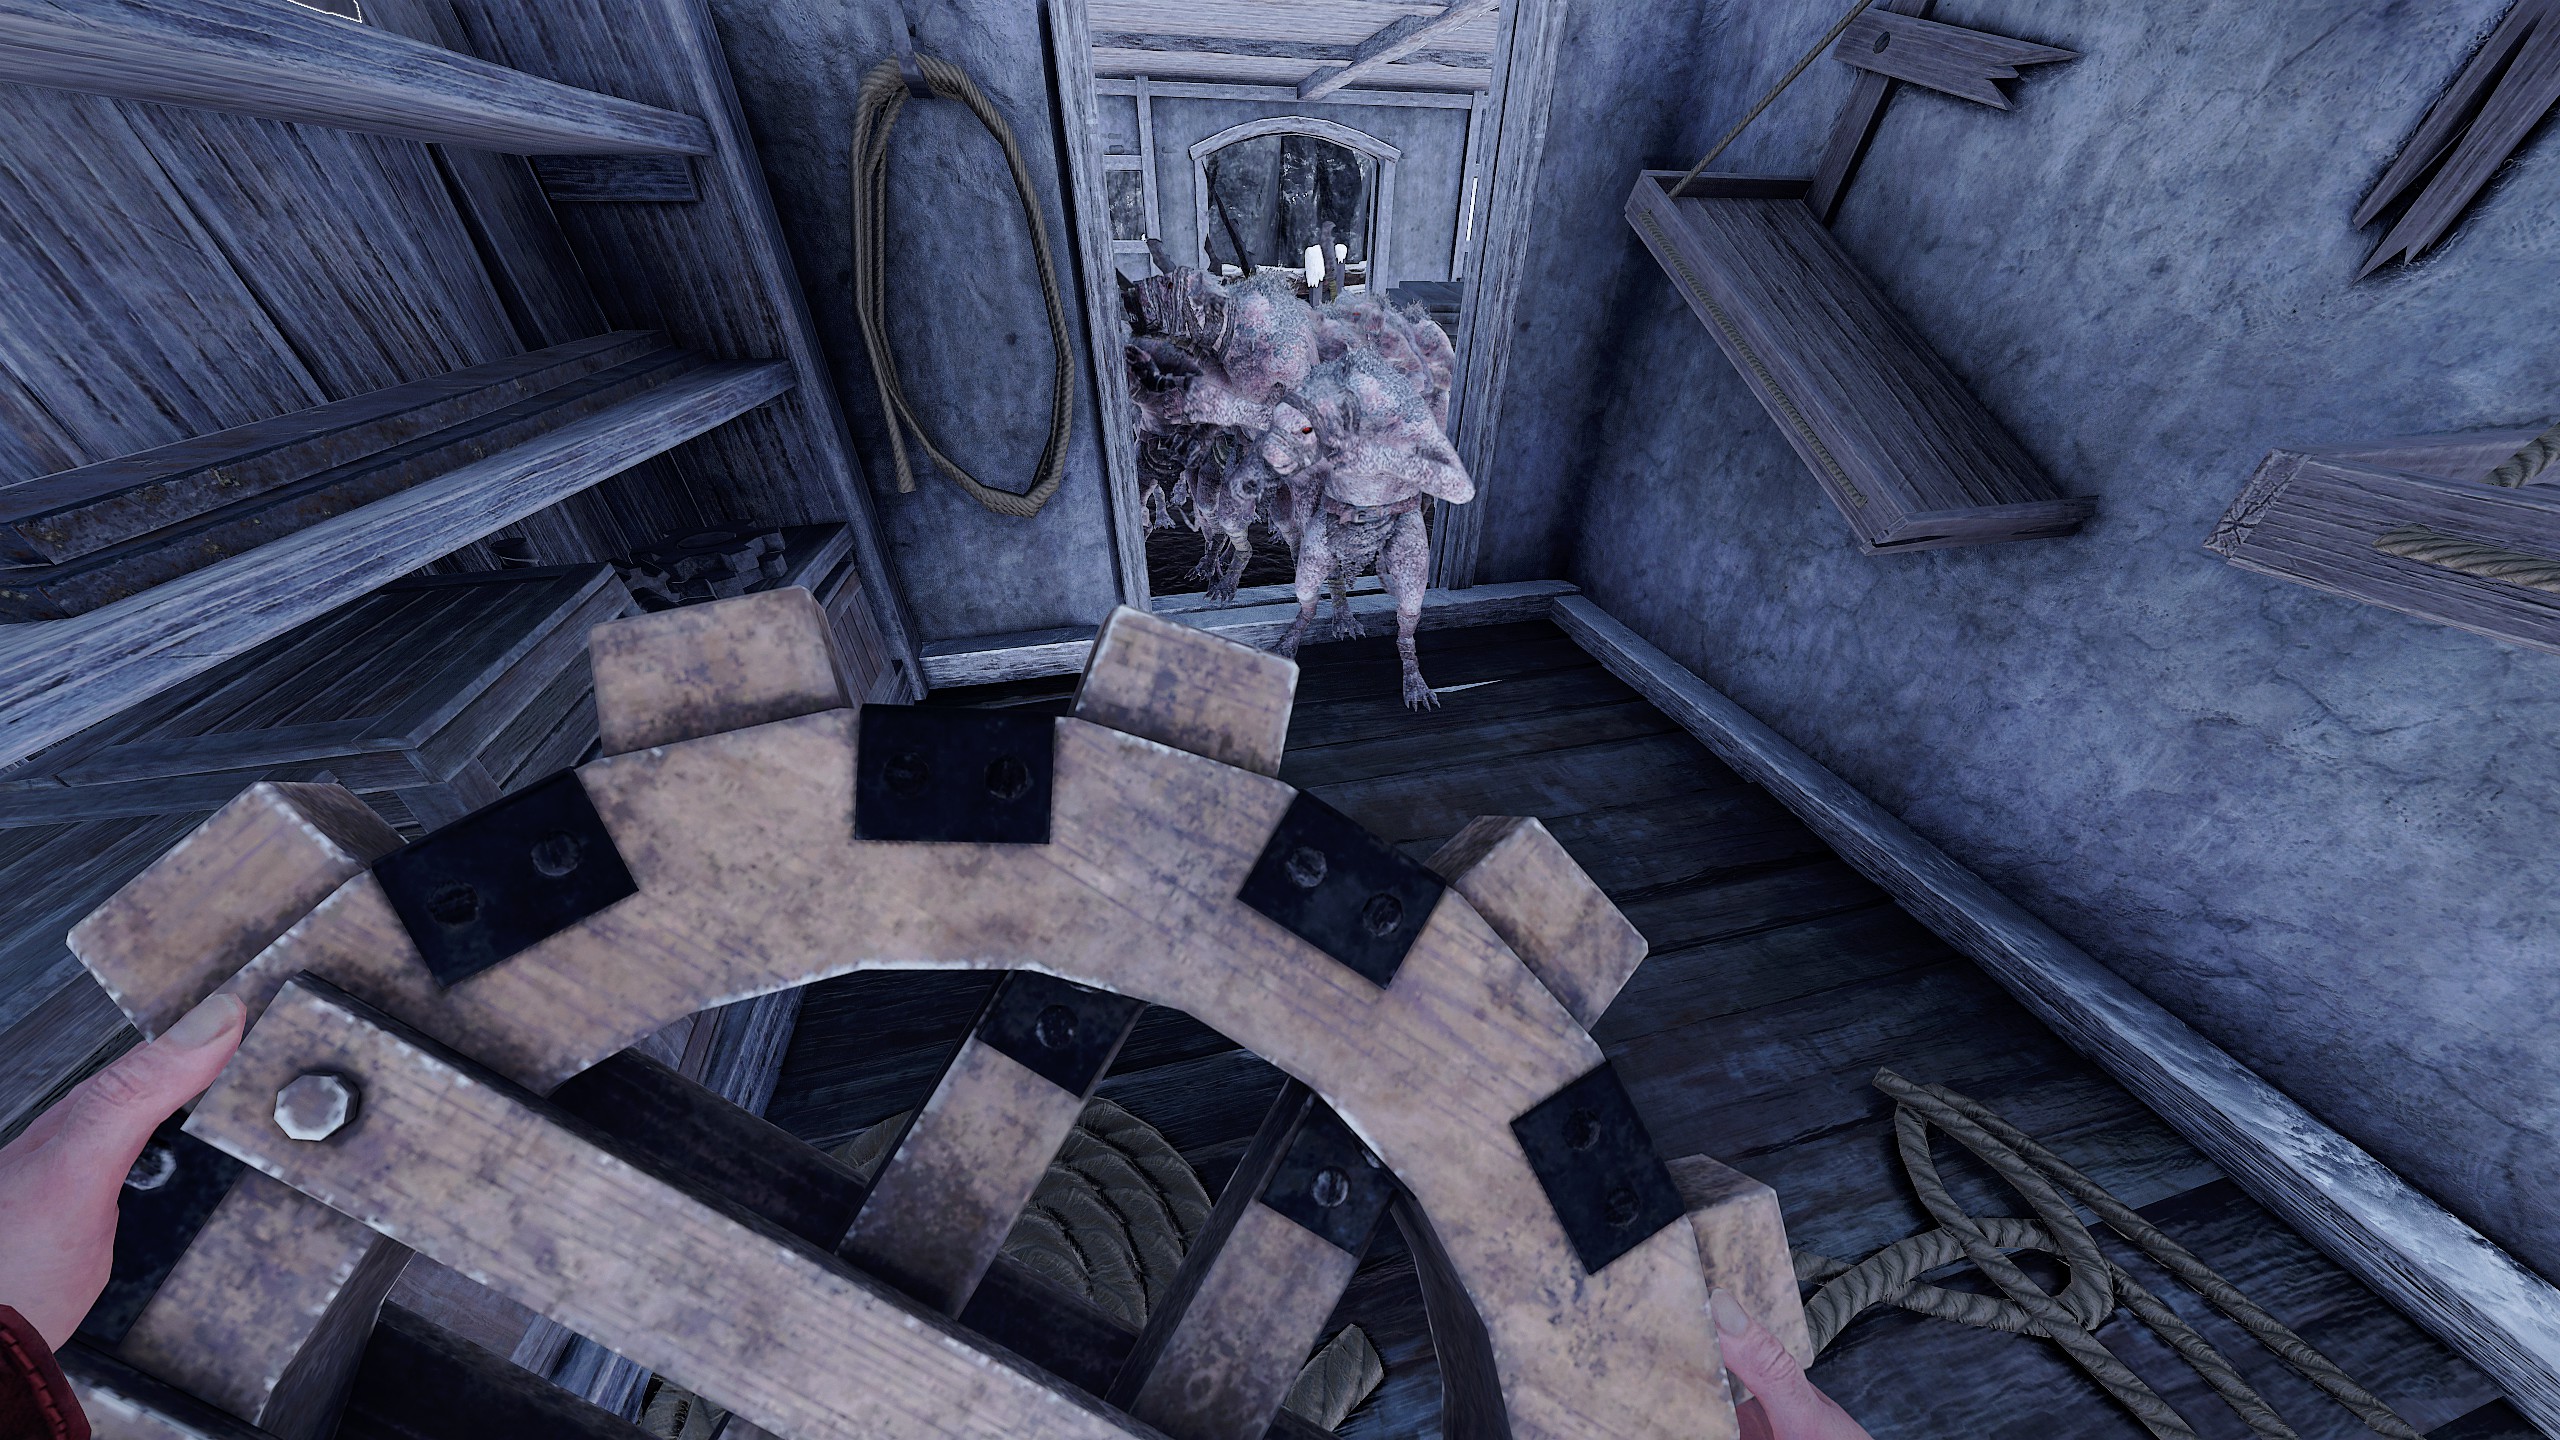
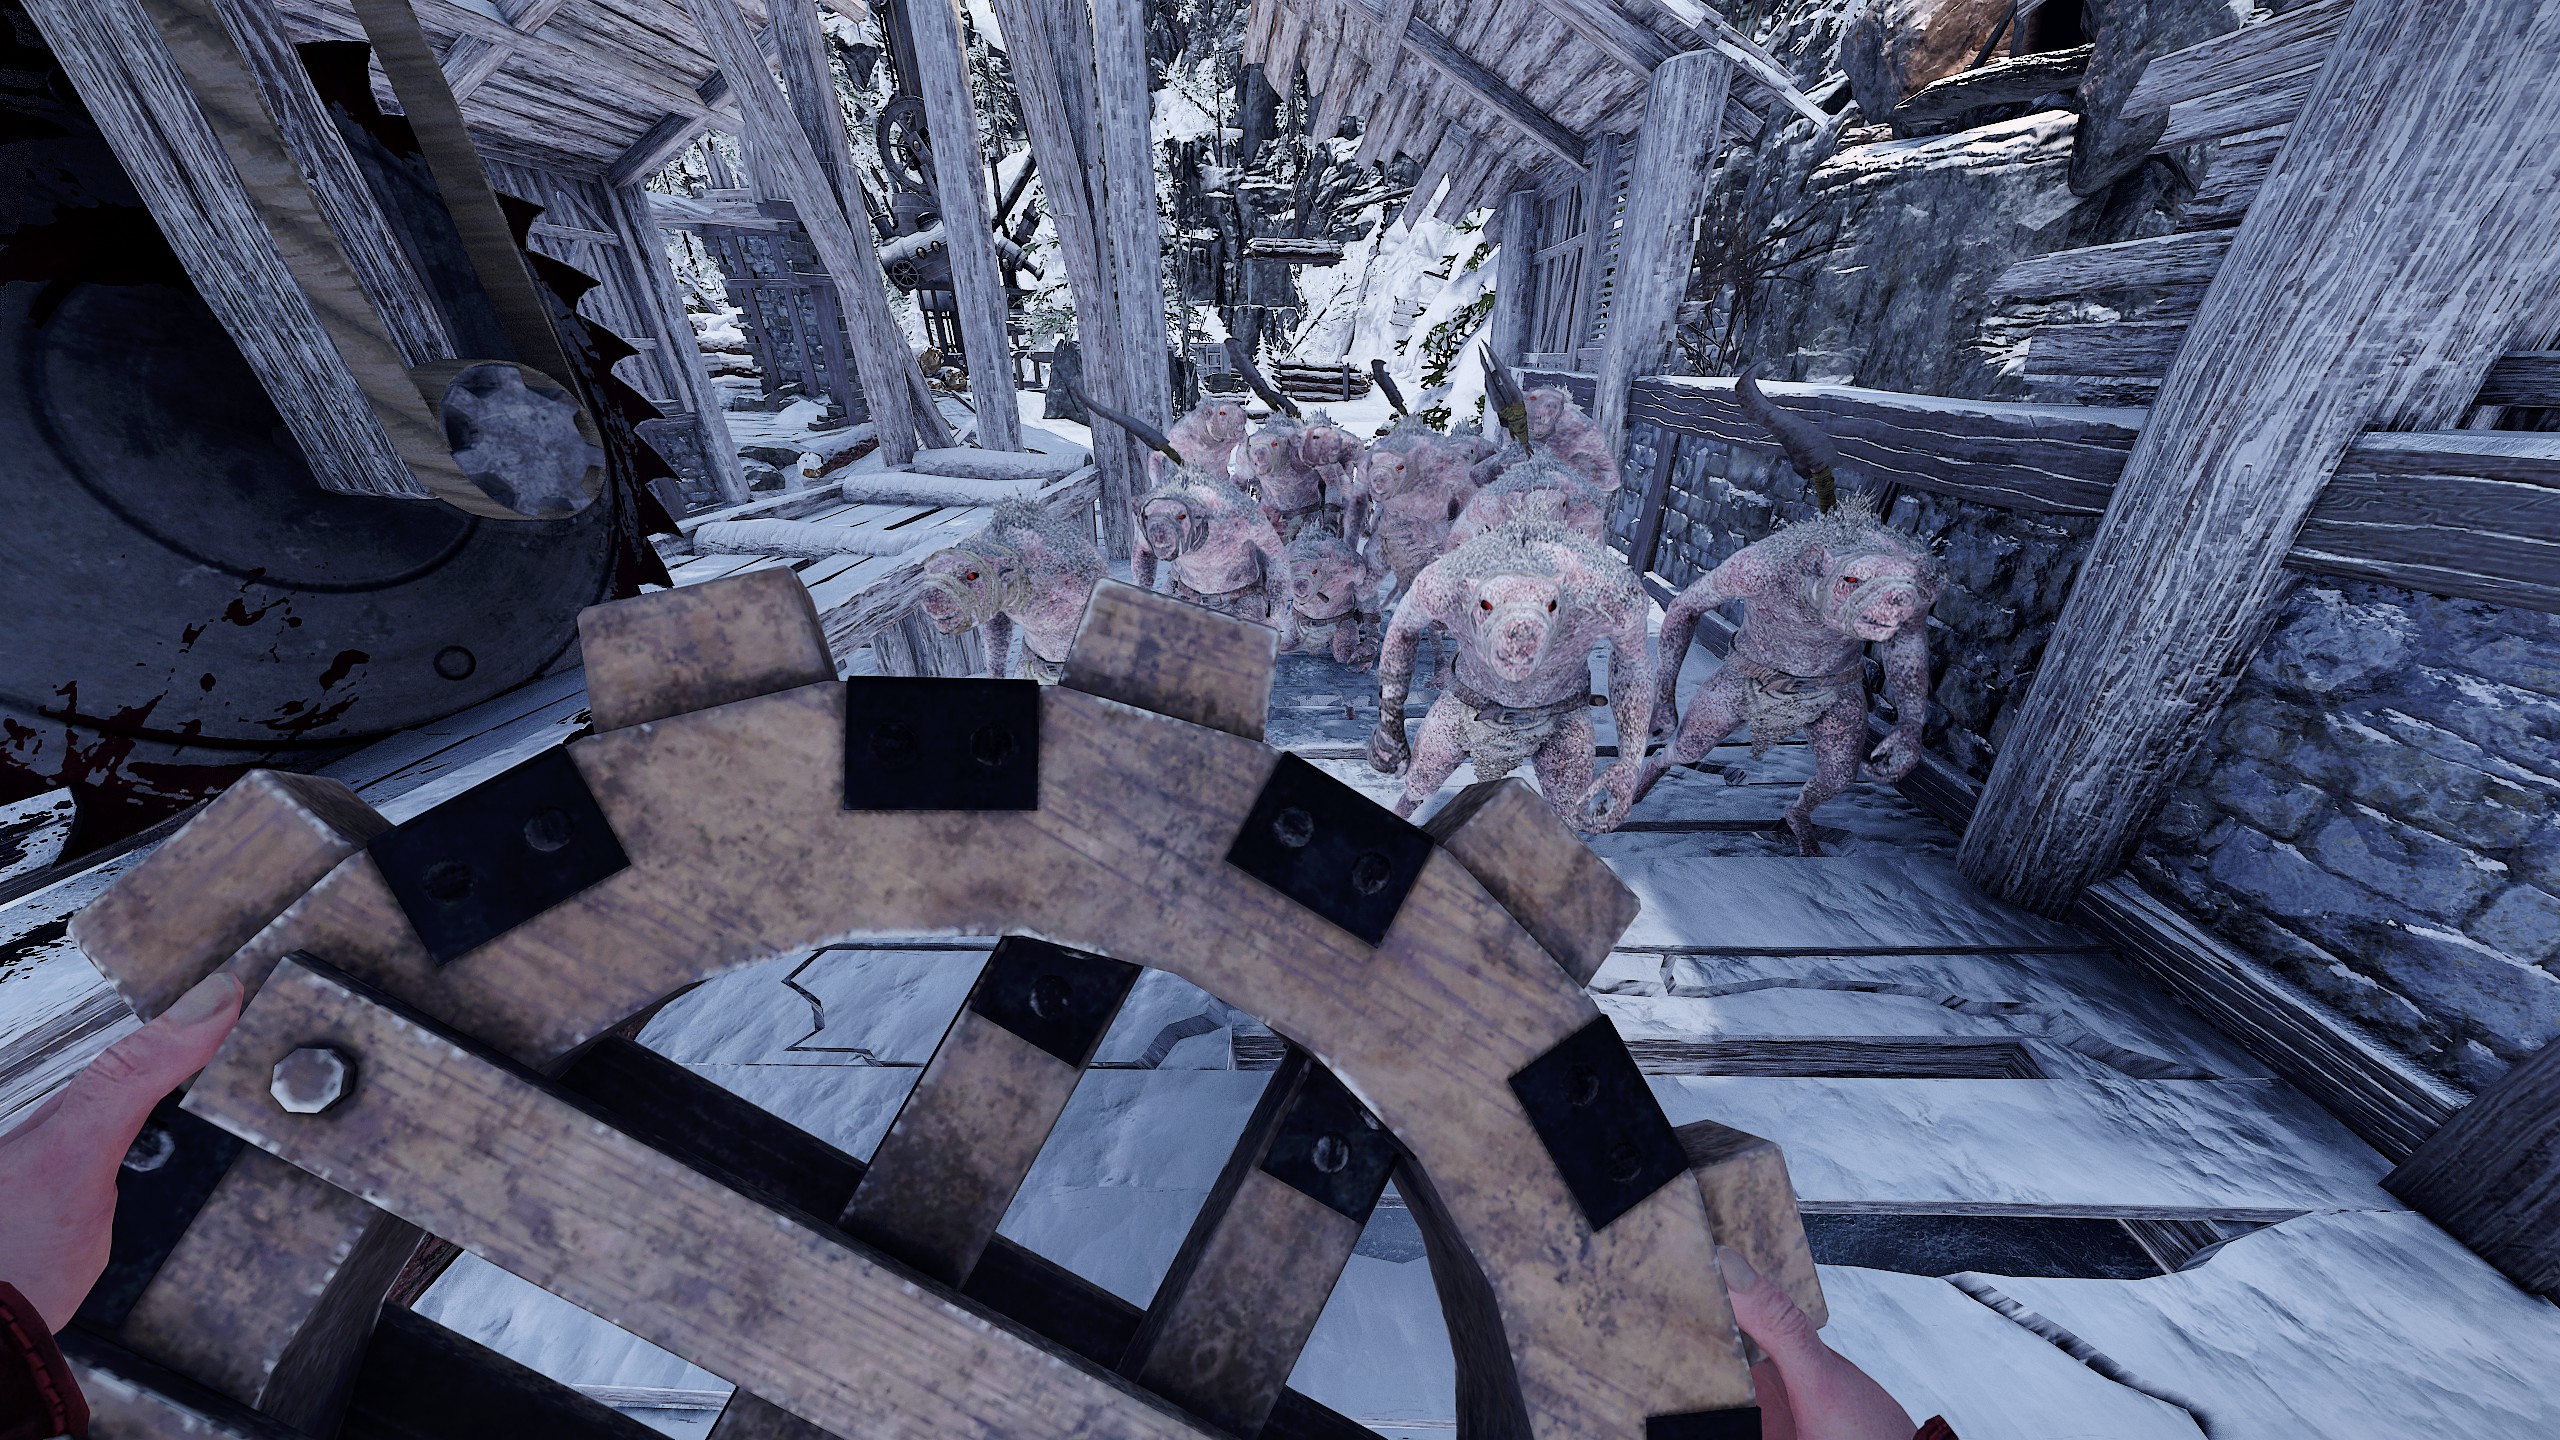
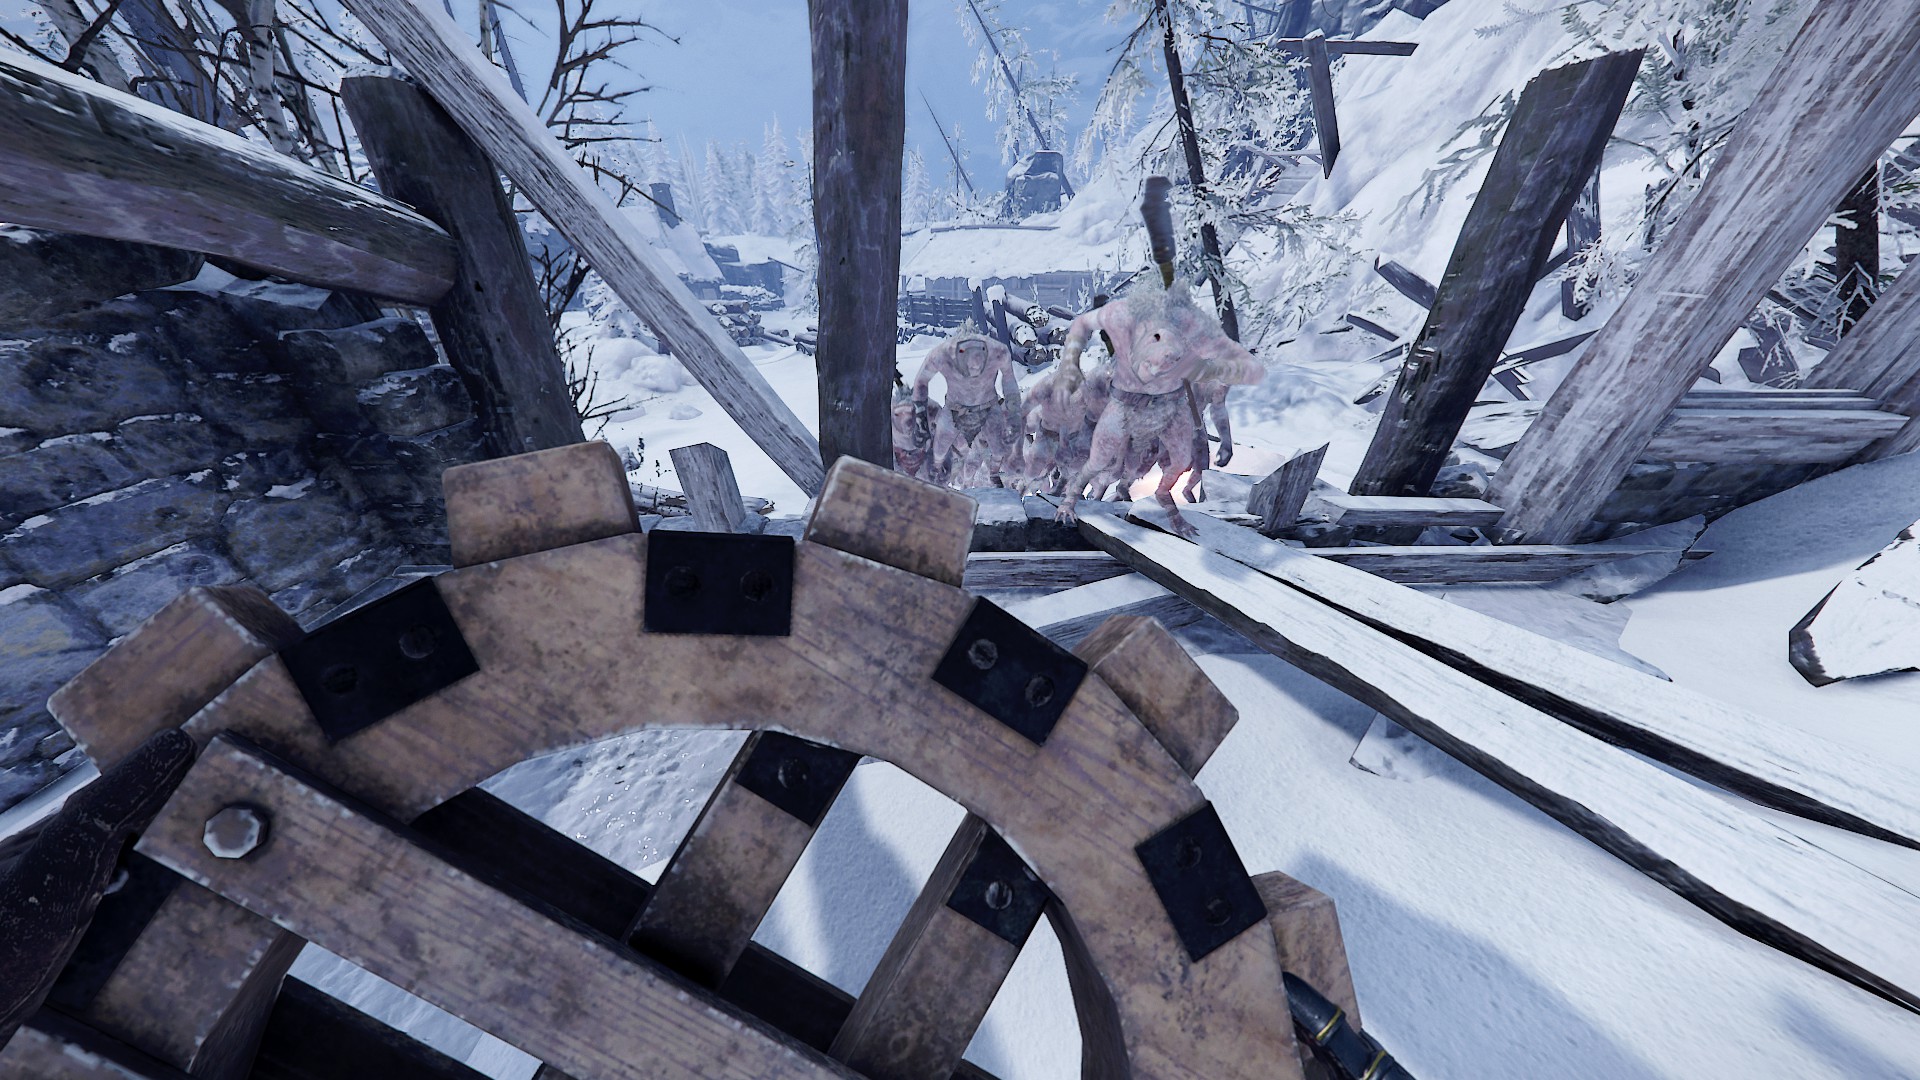 https://www.youtube.com/watch?v=tzDwfwBS2Sk
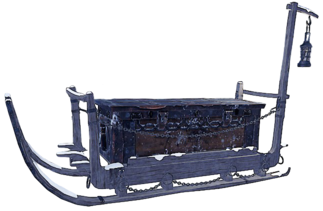
 4. Sleigh-er
Kill 50 enemies with the Sleigh on Trail of Treachery This works as a cumulative counter, so you don't have to kill 50 enemies with the sled in one mission. You can use upward slope sections to kill enemies more efficiently. For example, like in this place at the sawmill:
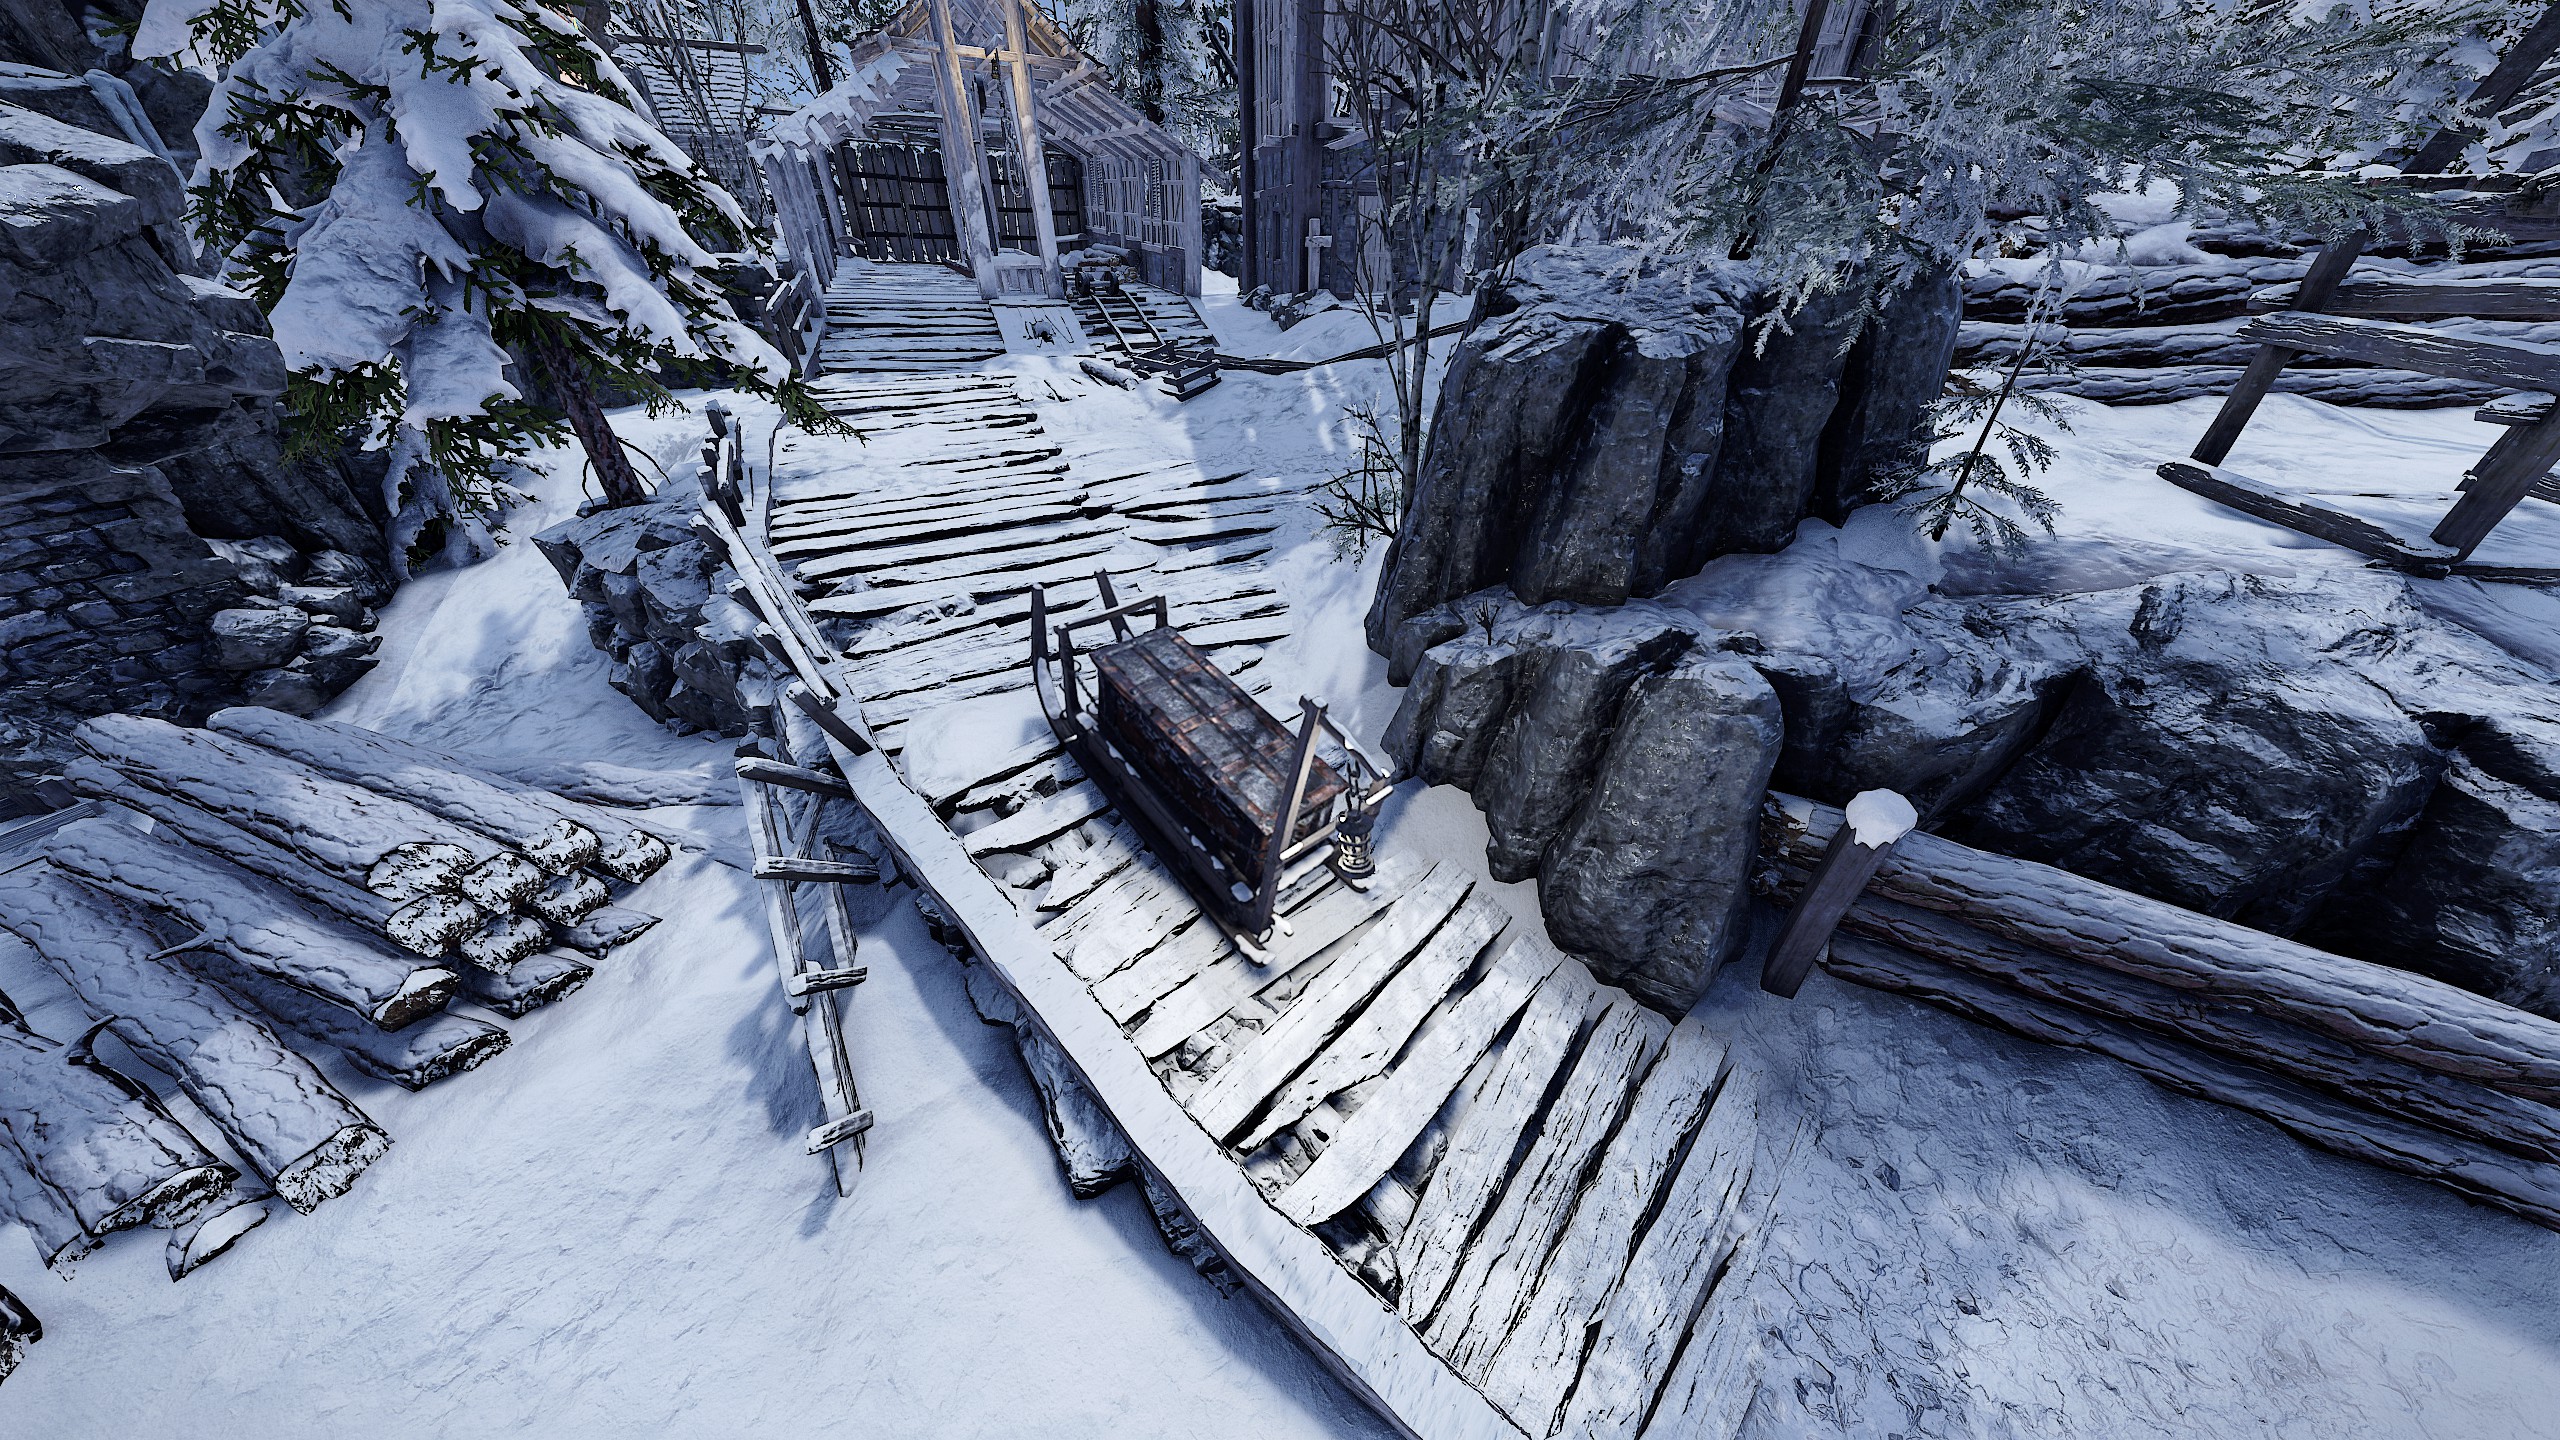
Repeatedly moving away from the sleigh and back towards it so it moves up and down in the same area, while a horde surrounds it and dies.
It should be taken into account that the minimum damage caused by the sleds is small and is ≈ 2-5. The amount of damage directly depends on their speed and difficulties: the lower it is, the less damage, and vice versa.
 5. A Long And Winding Road
Complete all Trail of Treachery Challenges This challenge will be completed when you have completed all challenges except “Frosty Trailblazing”
- Tower of Treachery
https://steamcommunity.com/sharedfiles/filedetails/?id=2953925050
Wiki Guide to All Challenges Tower of Treachery[vermintide2.fandom.com]
Verminous Dreams

- The Forsaken Temple

 1. (Re)Decorator
Find and remove all Skaven markings in the Forsaken Temple.
In one playthrough, you must remove 16 markings, which are scattered throughout the map. In particular, near the end, to get the 15th marking you will need to find one barrel to lower the bridge.
The locations of all markings are shown in this guide and video:https://steamcommunity.com/sharedfiles/filedetails/?id=3381721281 https://youtu.be/u8_iyhAPzcw?si=JcPQ2C0eJID2yux6
 2. Ding. Dong. Done.
Destroy the Skaven bell in the Forsaken Temple.
For this challenge, you will need to find two explosive barrels in advance and bring them to the Skaven bell, which is located to the left of the wide open plaza. Two barrels are guaranteed to appear in the plaza out of 4 possible places.
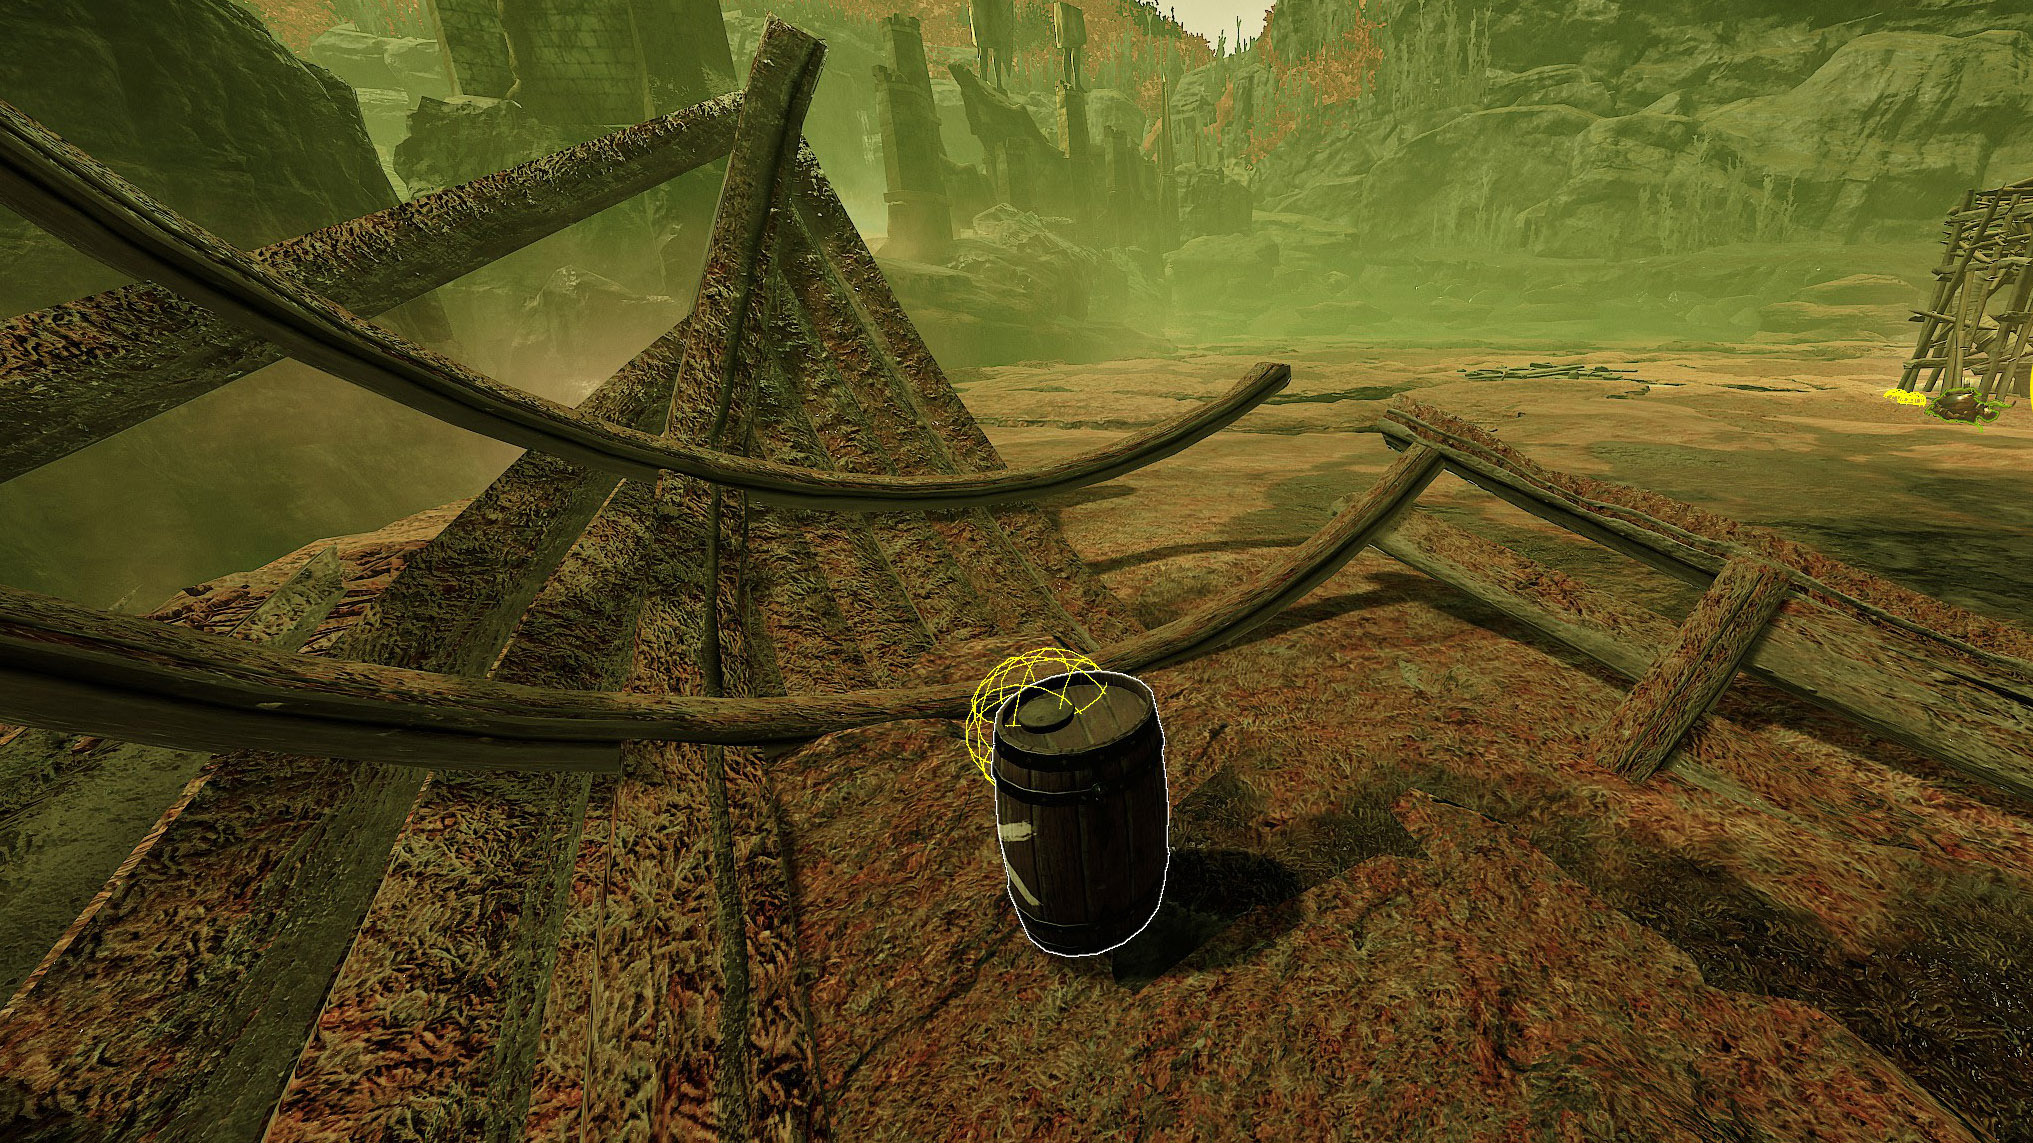
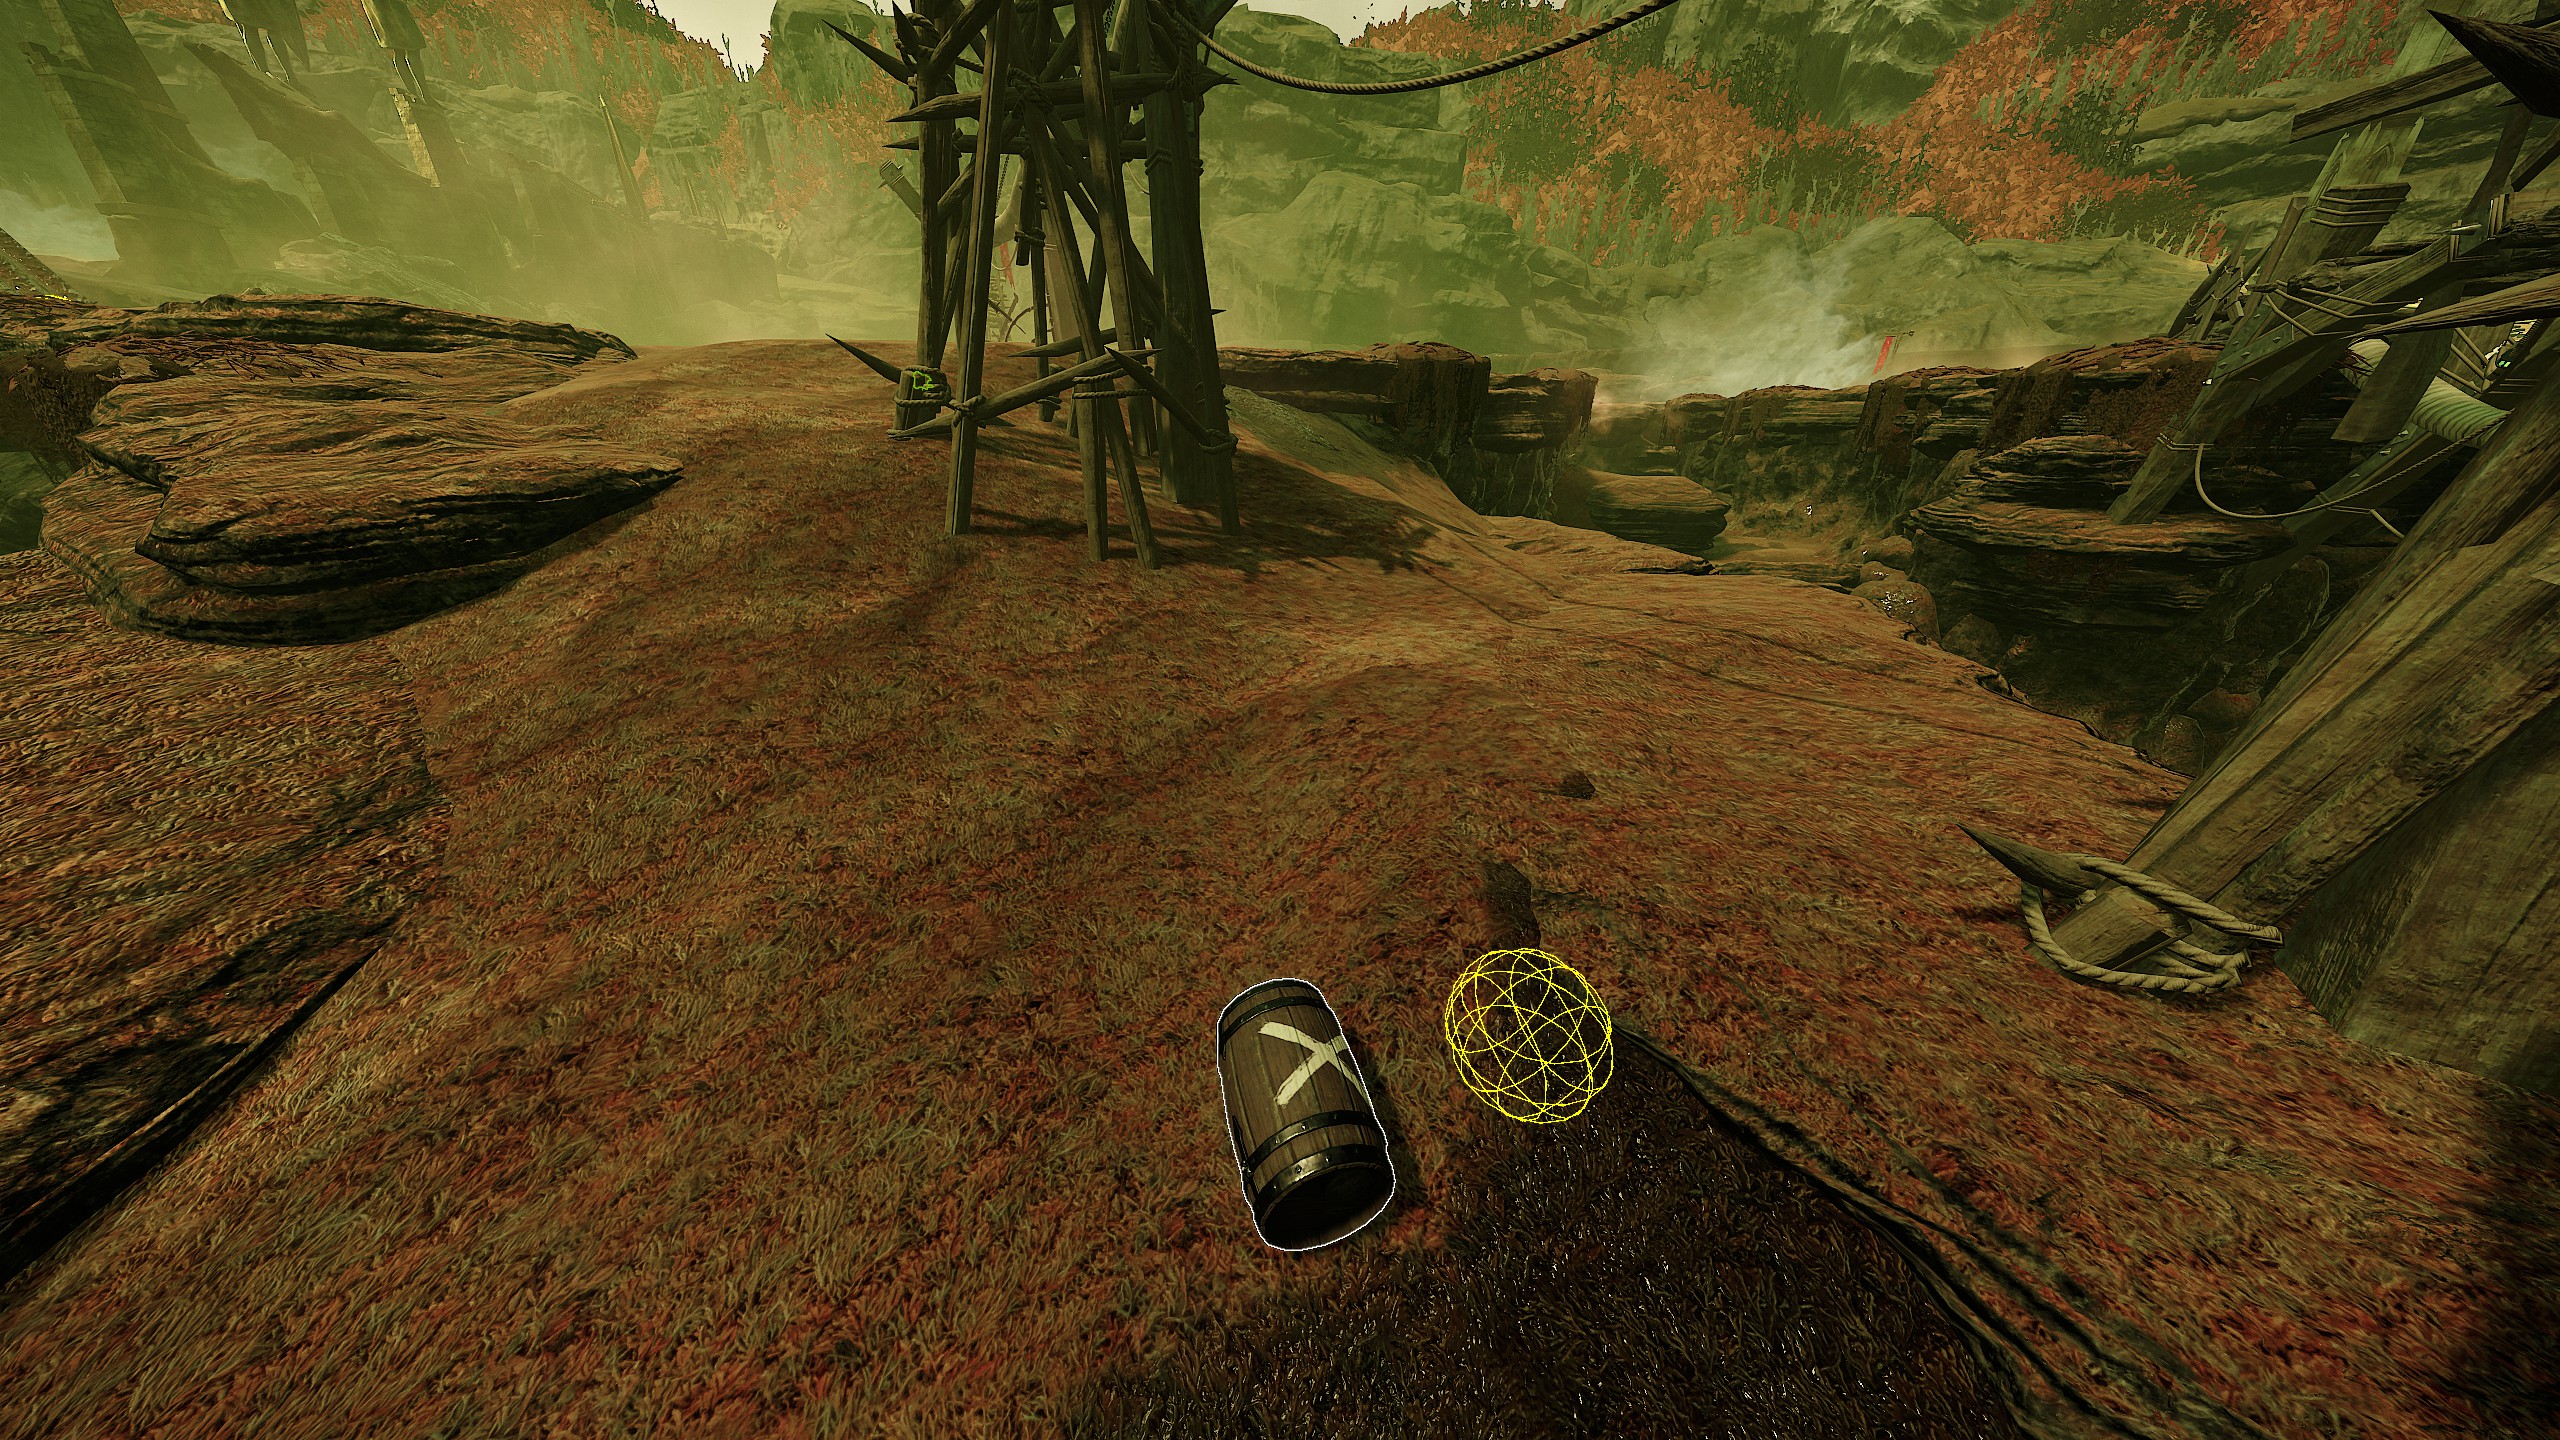
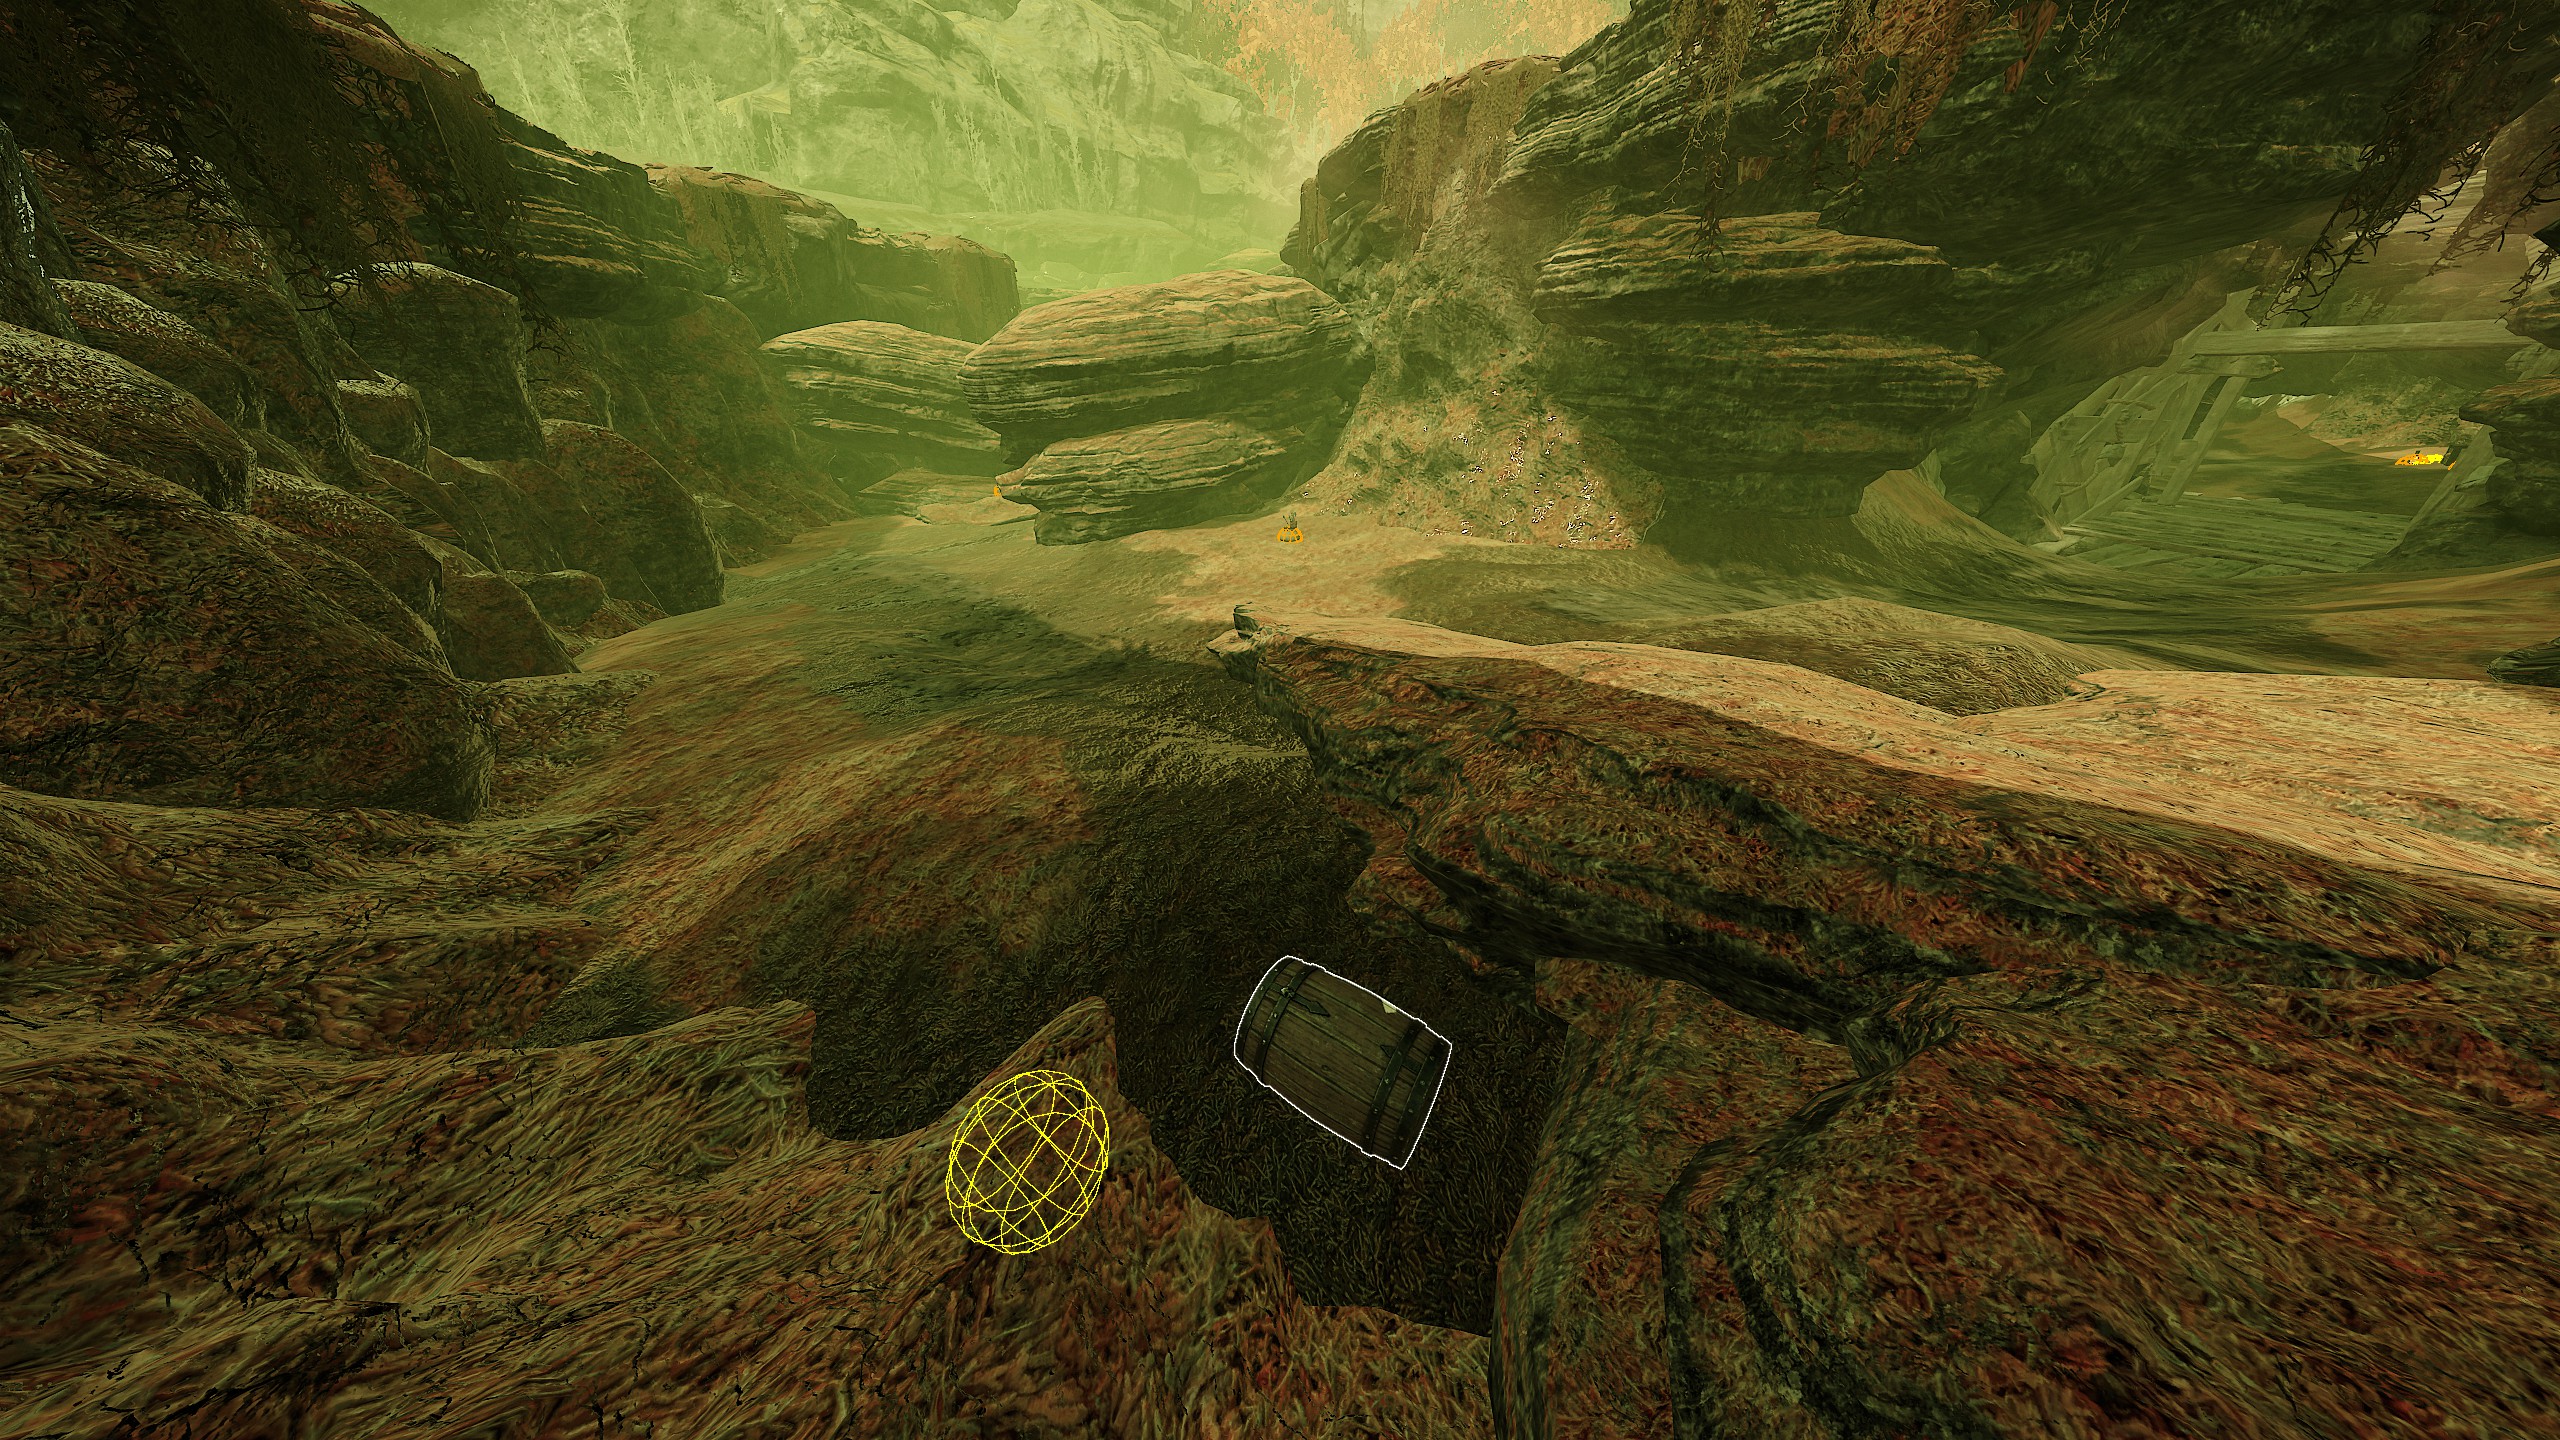
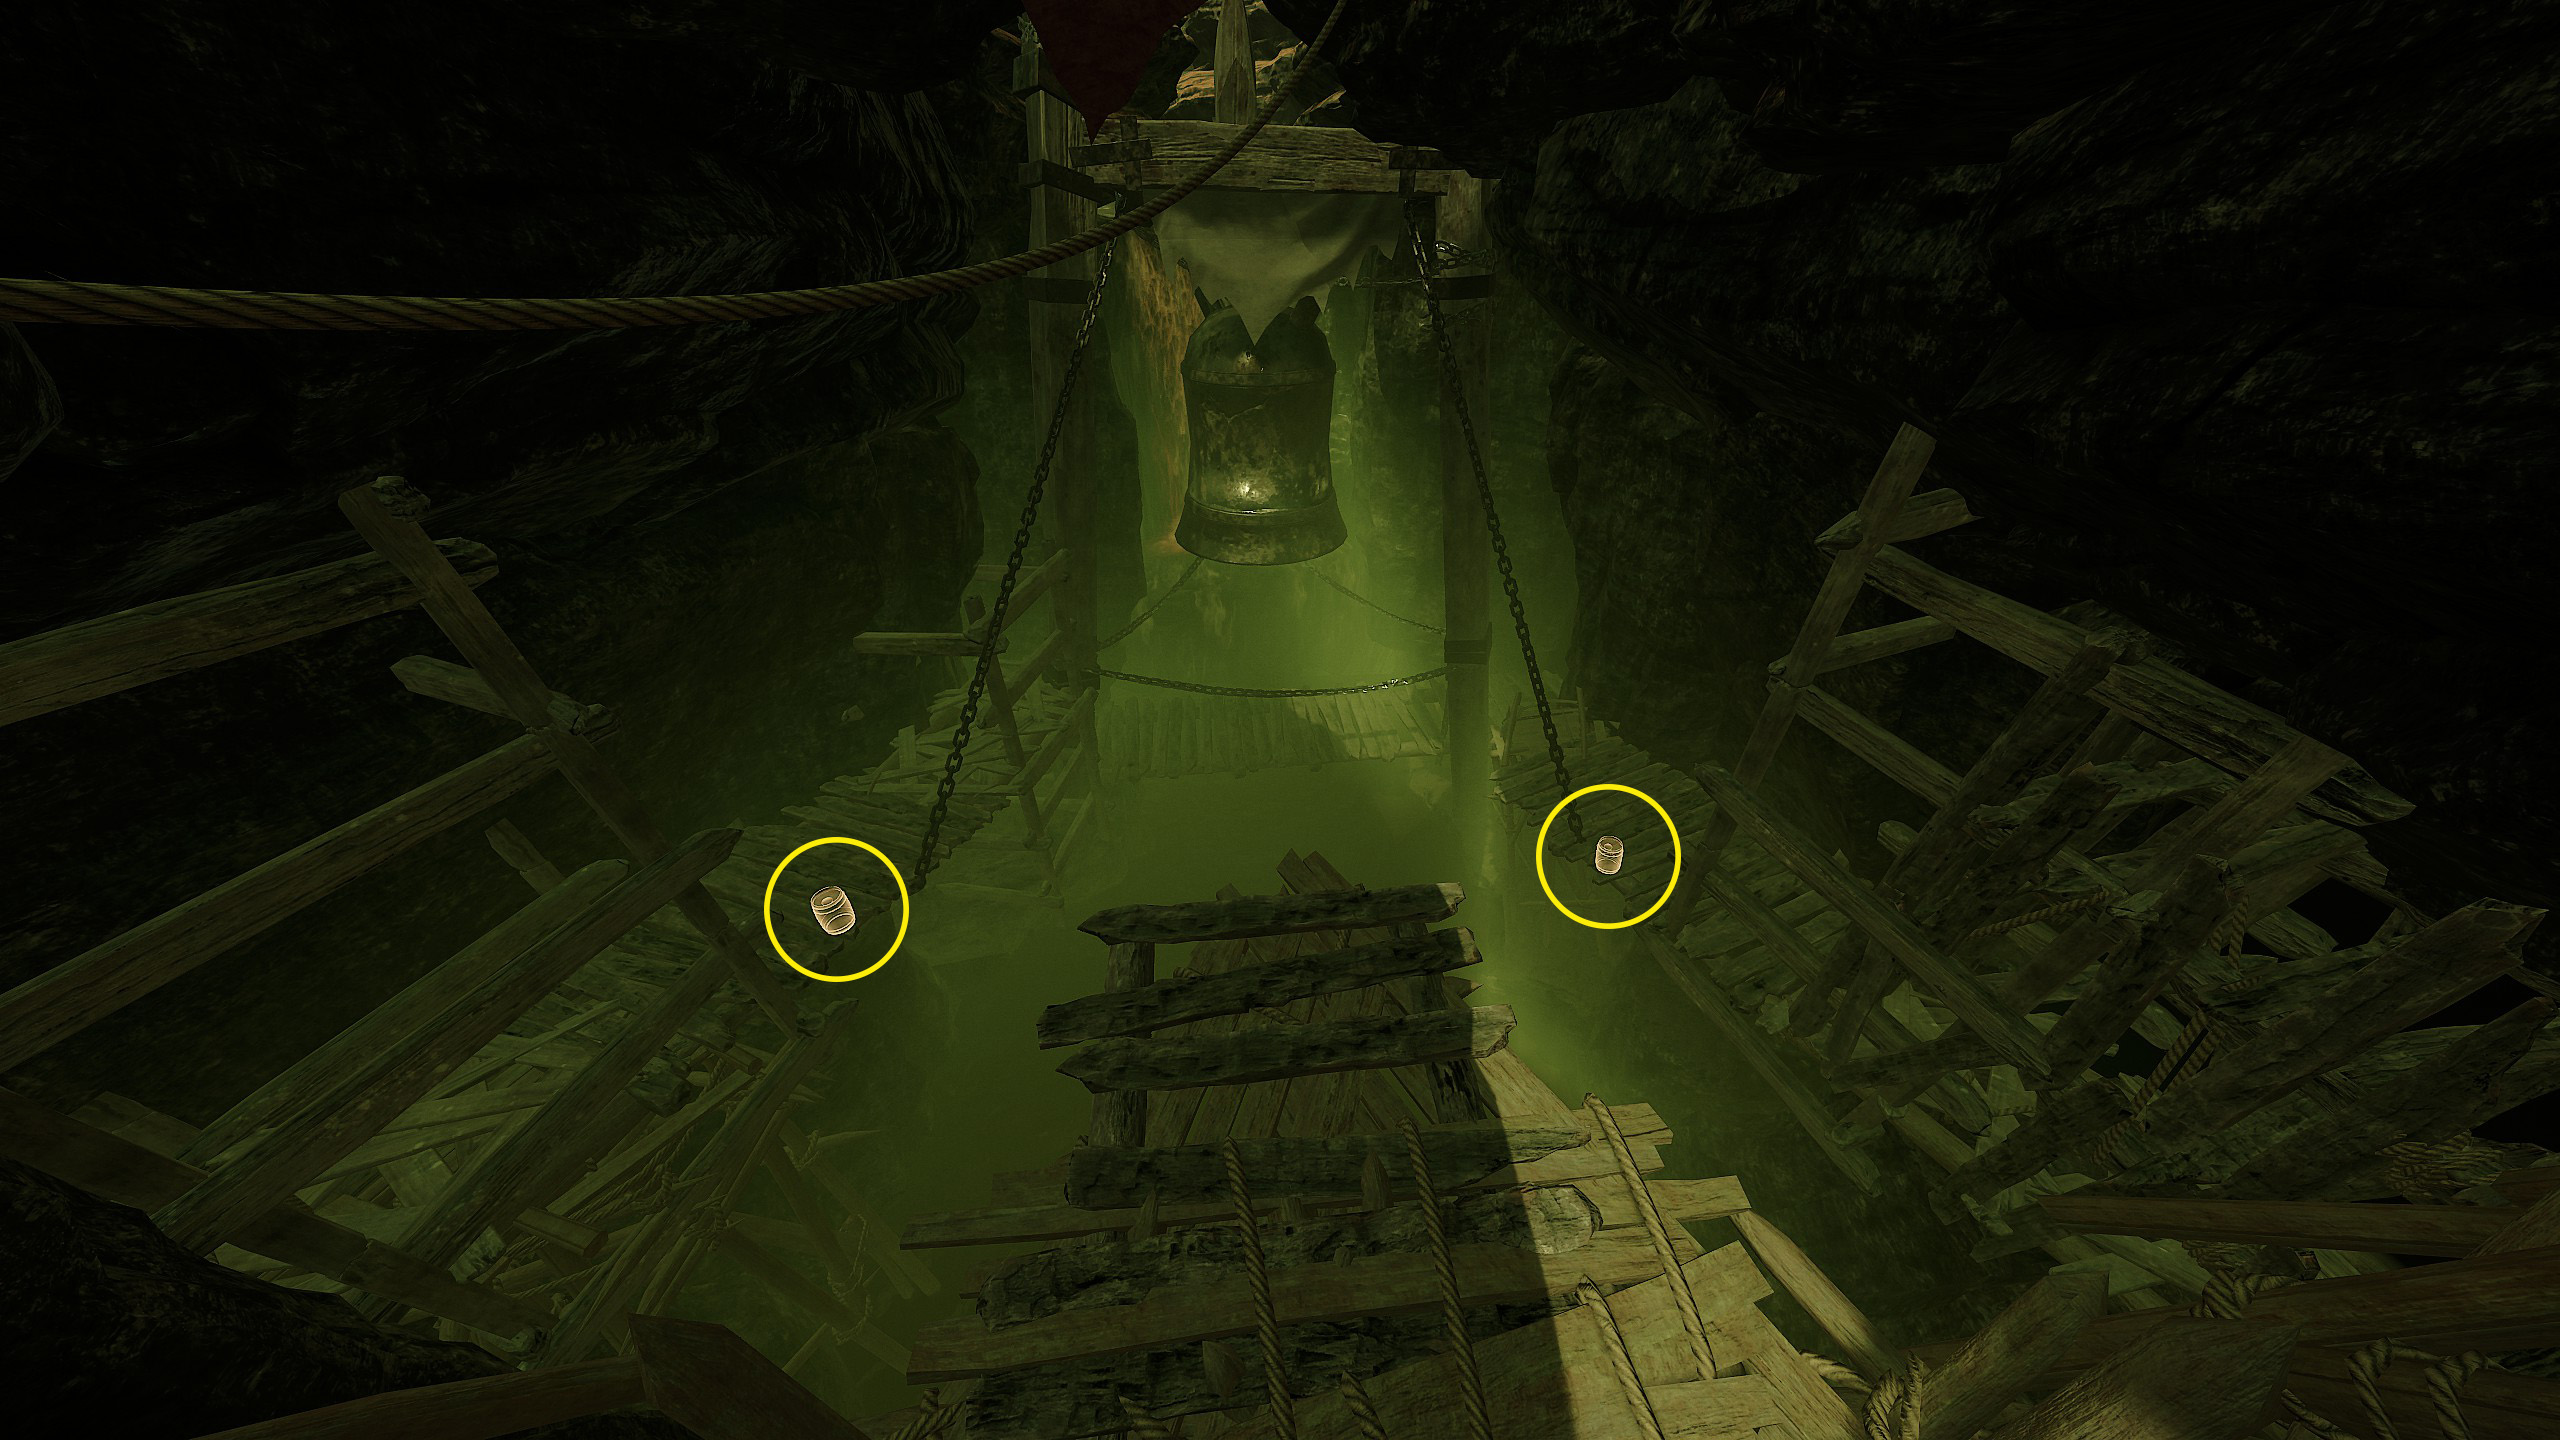
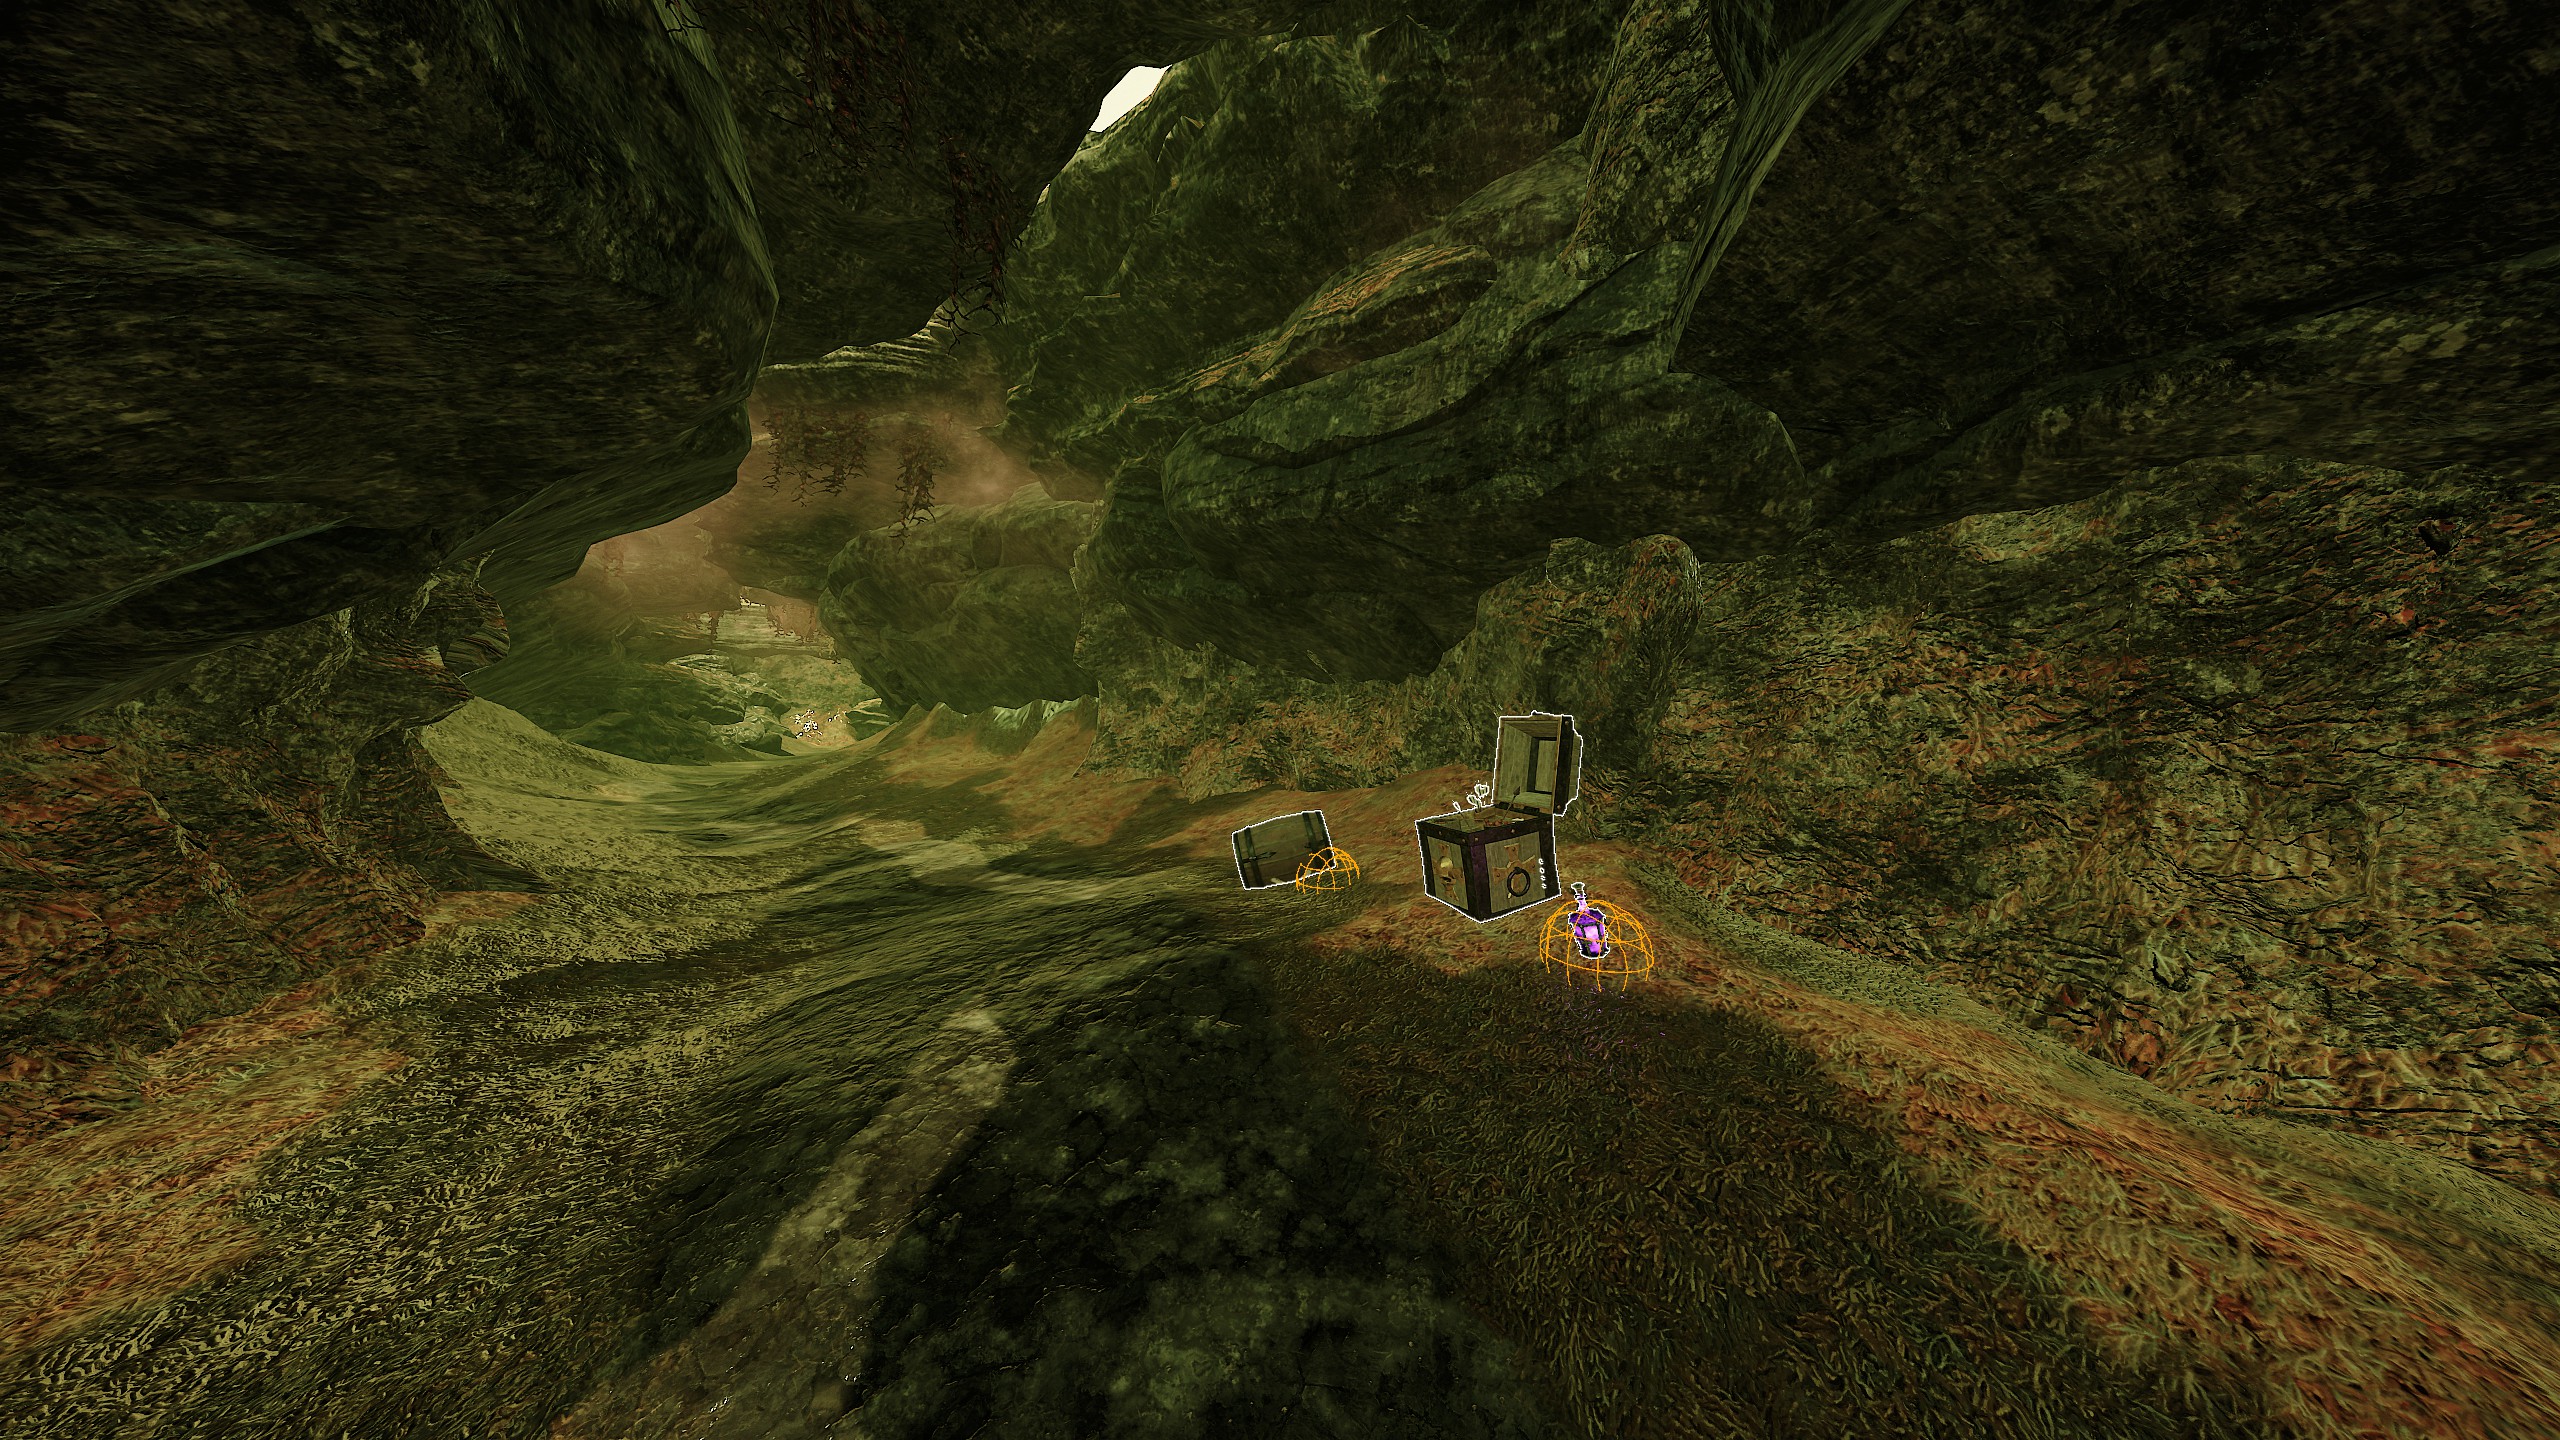 Once you reach the Skaven bell, throw the barrels on different sides, and you should see a message in the chat indicating that the challenge is complete.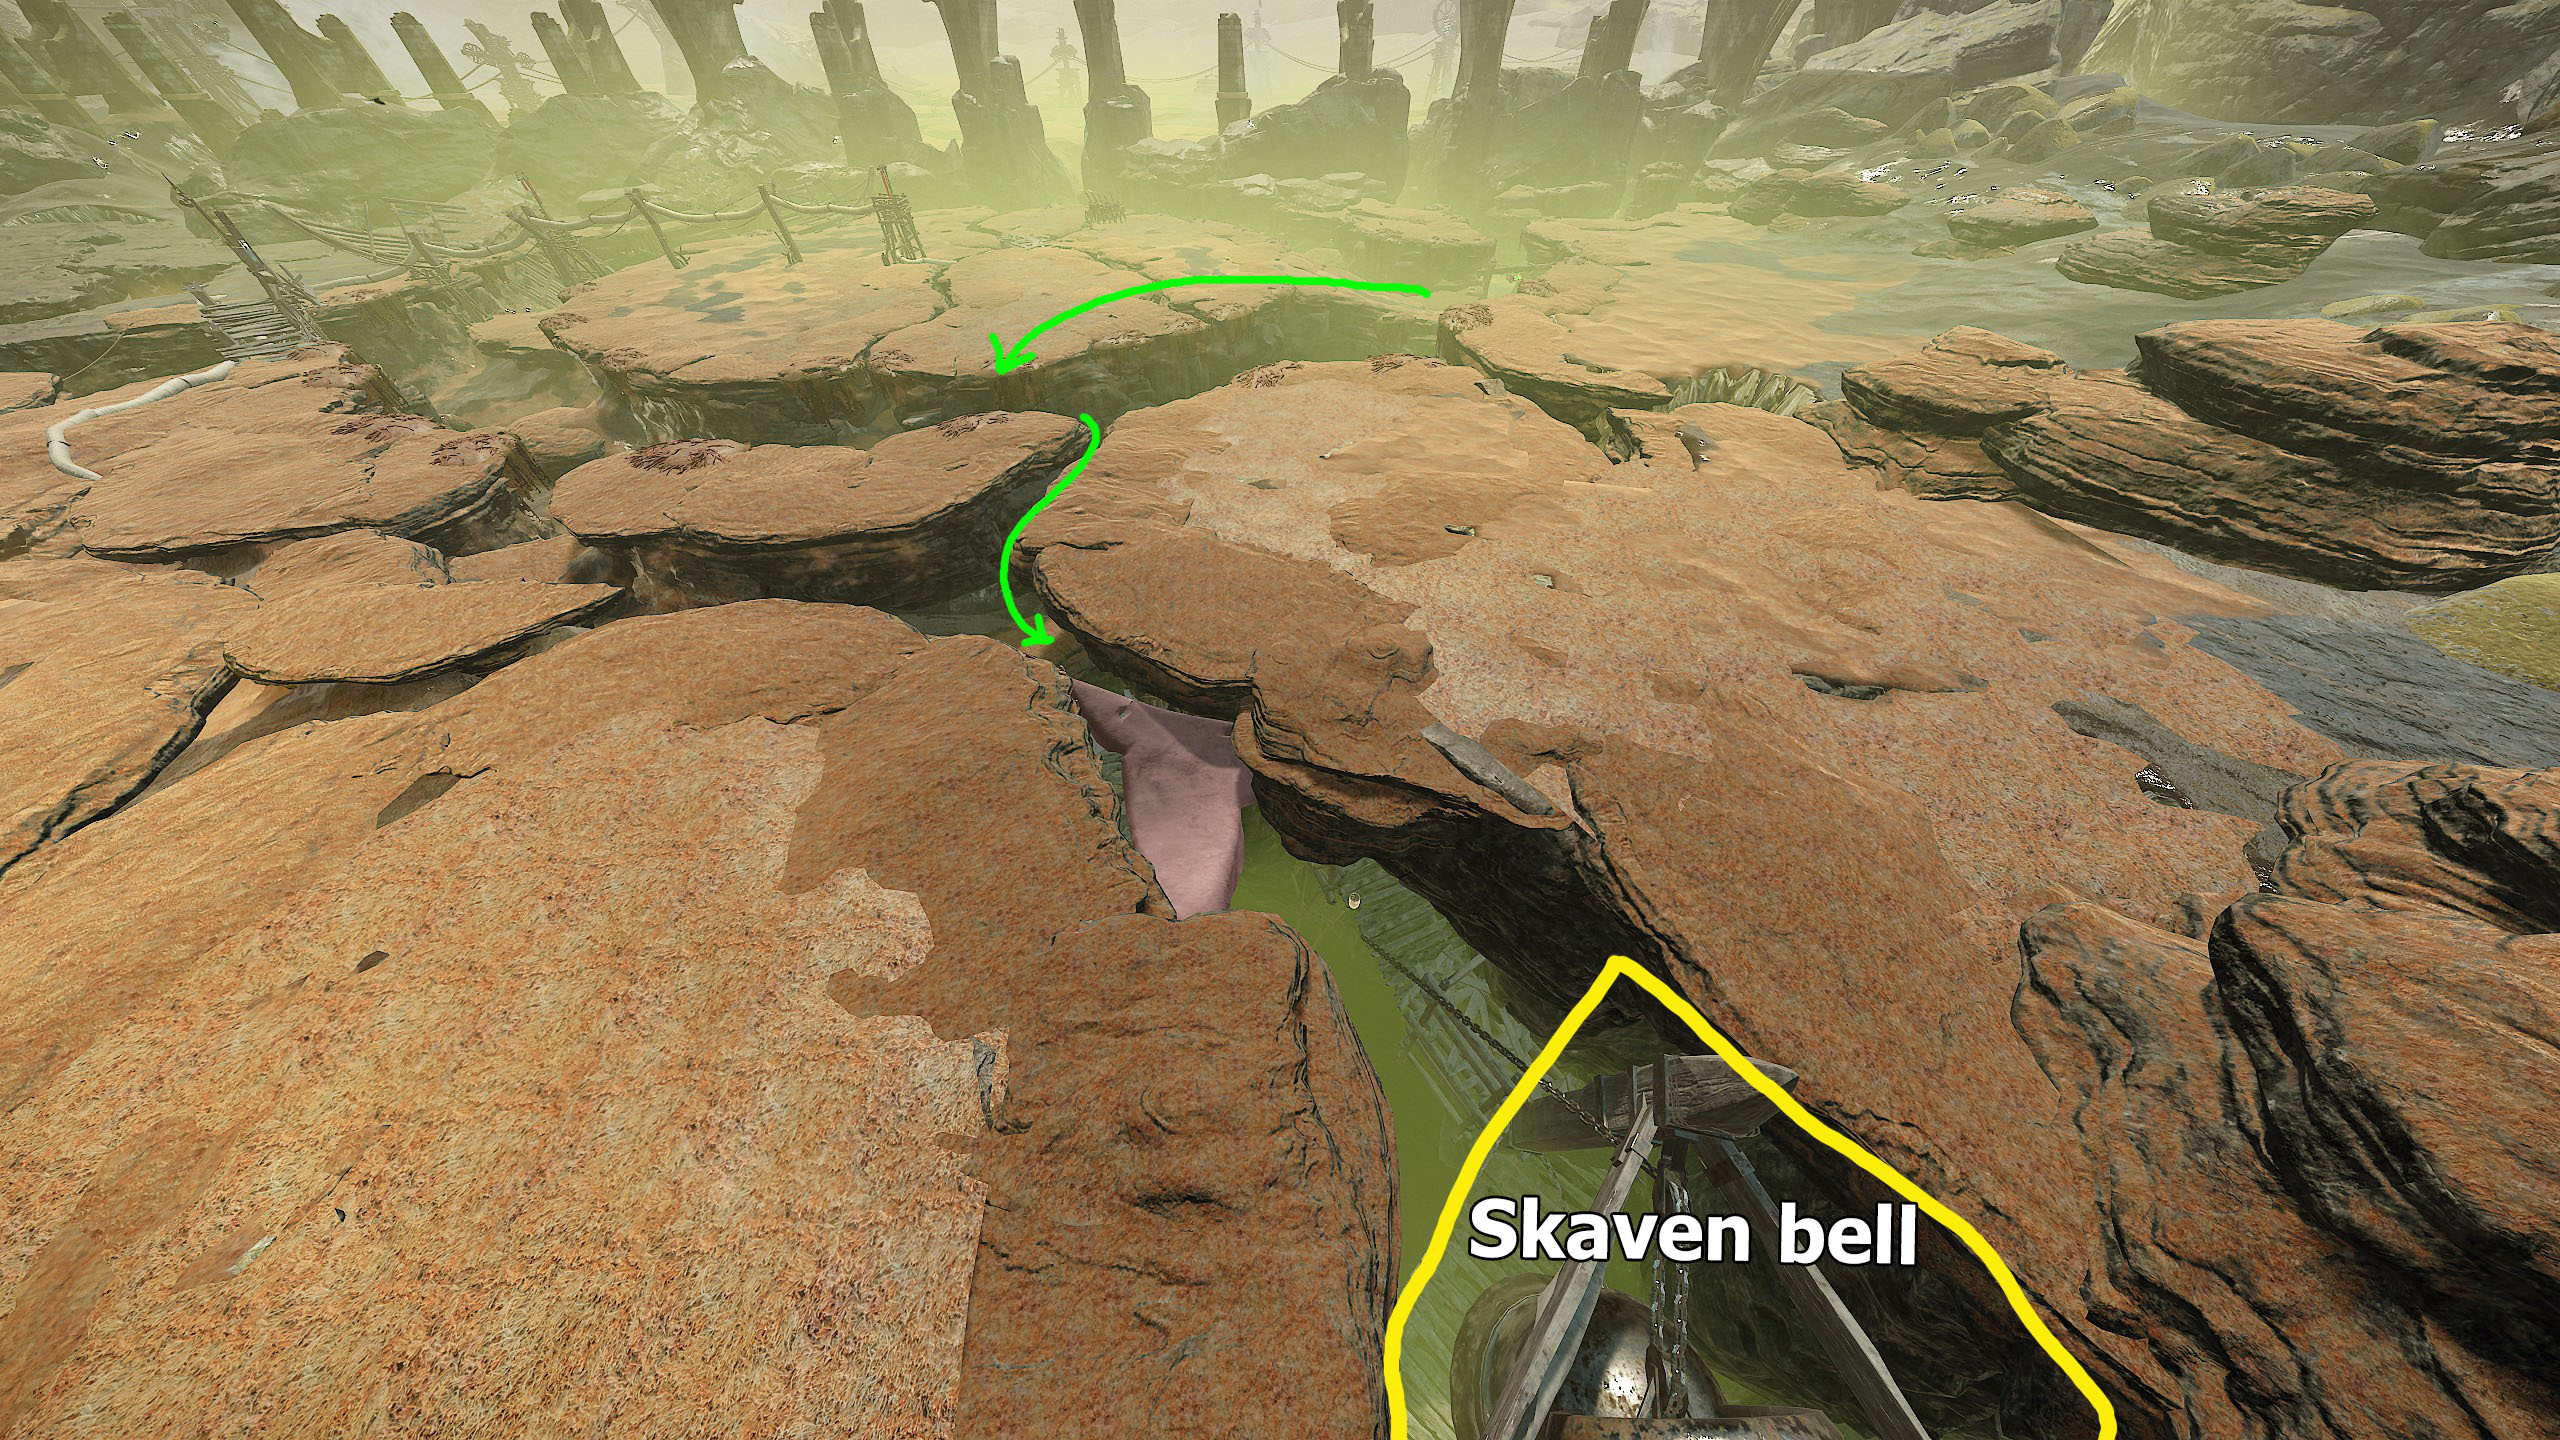
https://youtu.be/g0vL_LhAQAo?si=yQ4tnM5z2y6Mp997
 3. Star Bound
Restore the Stars of Saphery in the Forsaken Temple.
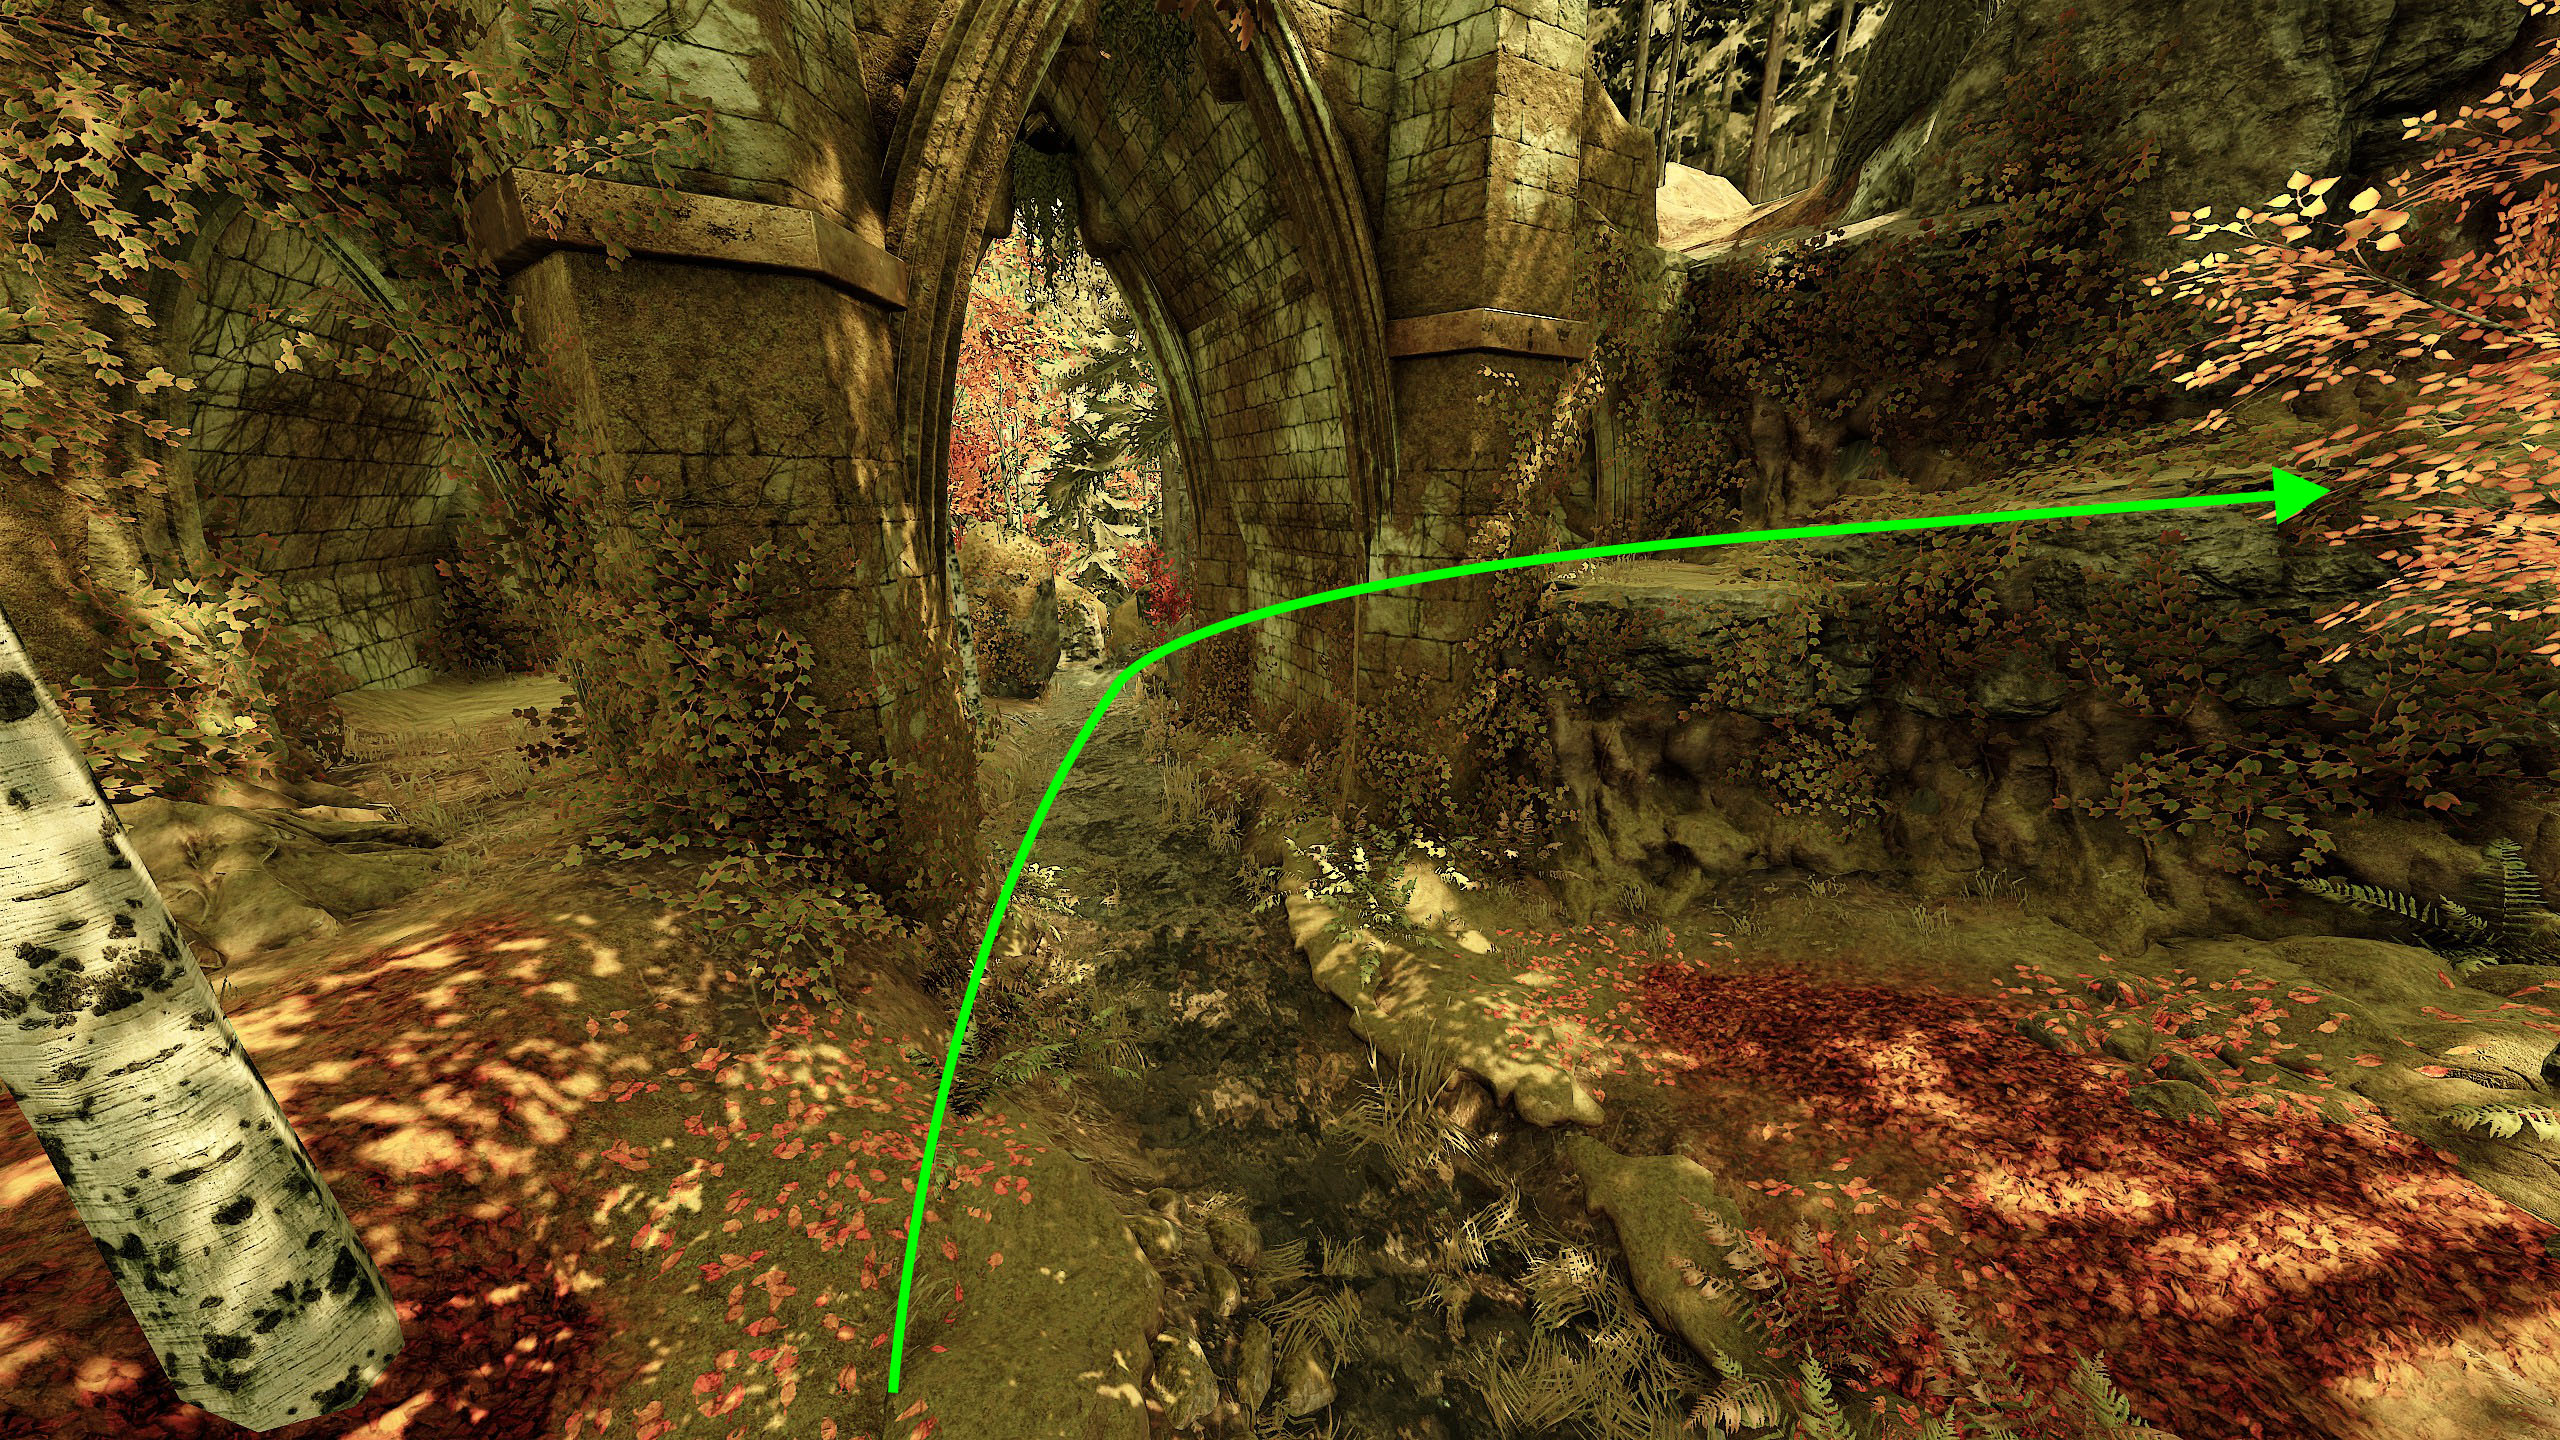
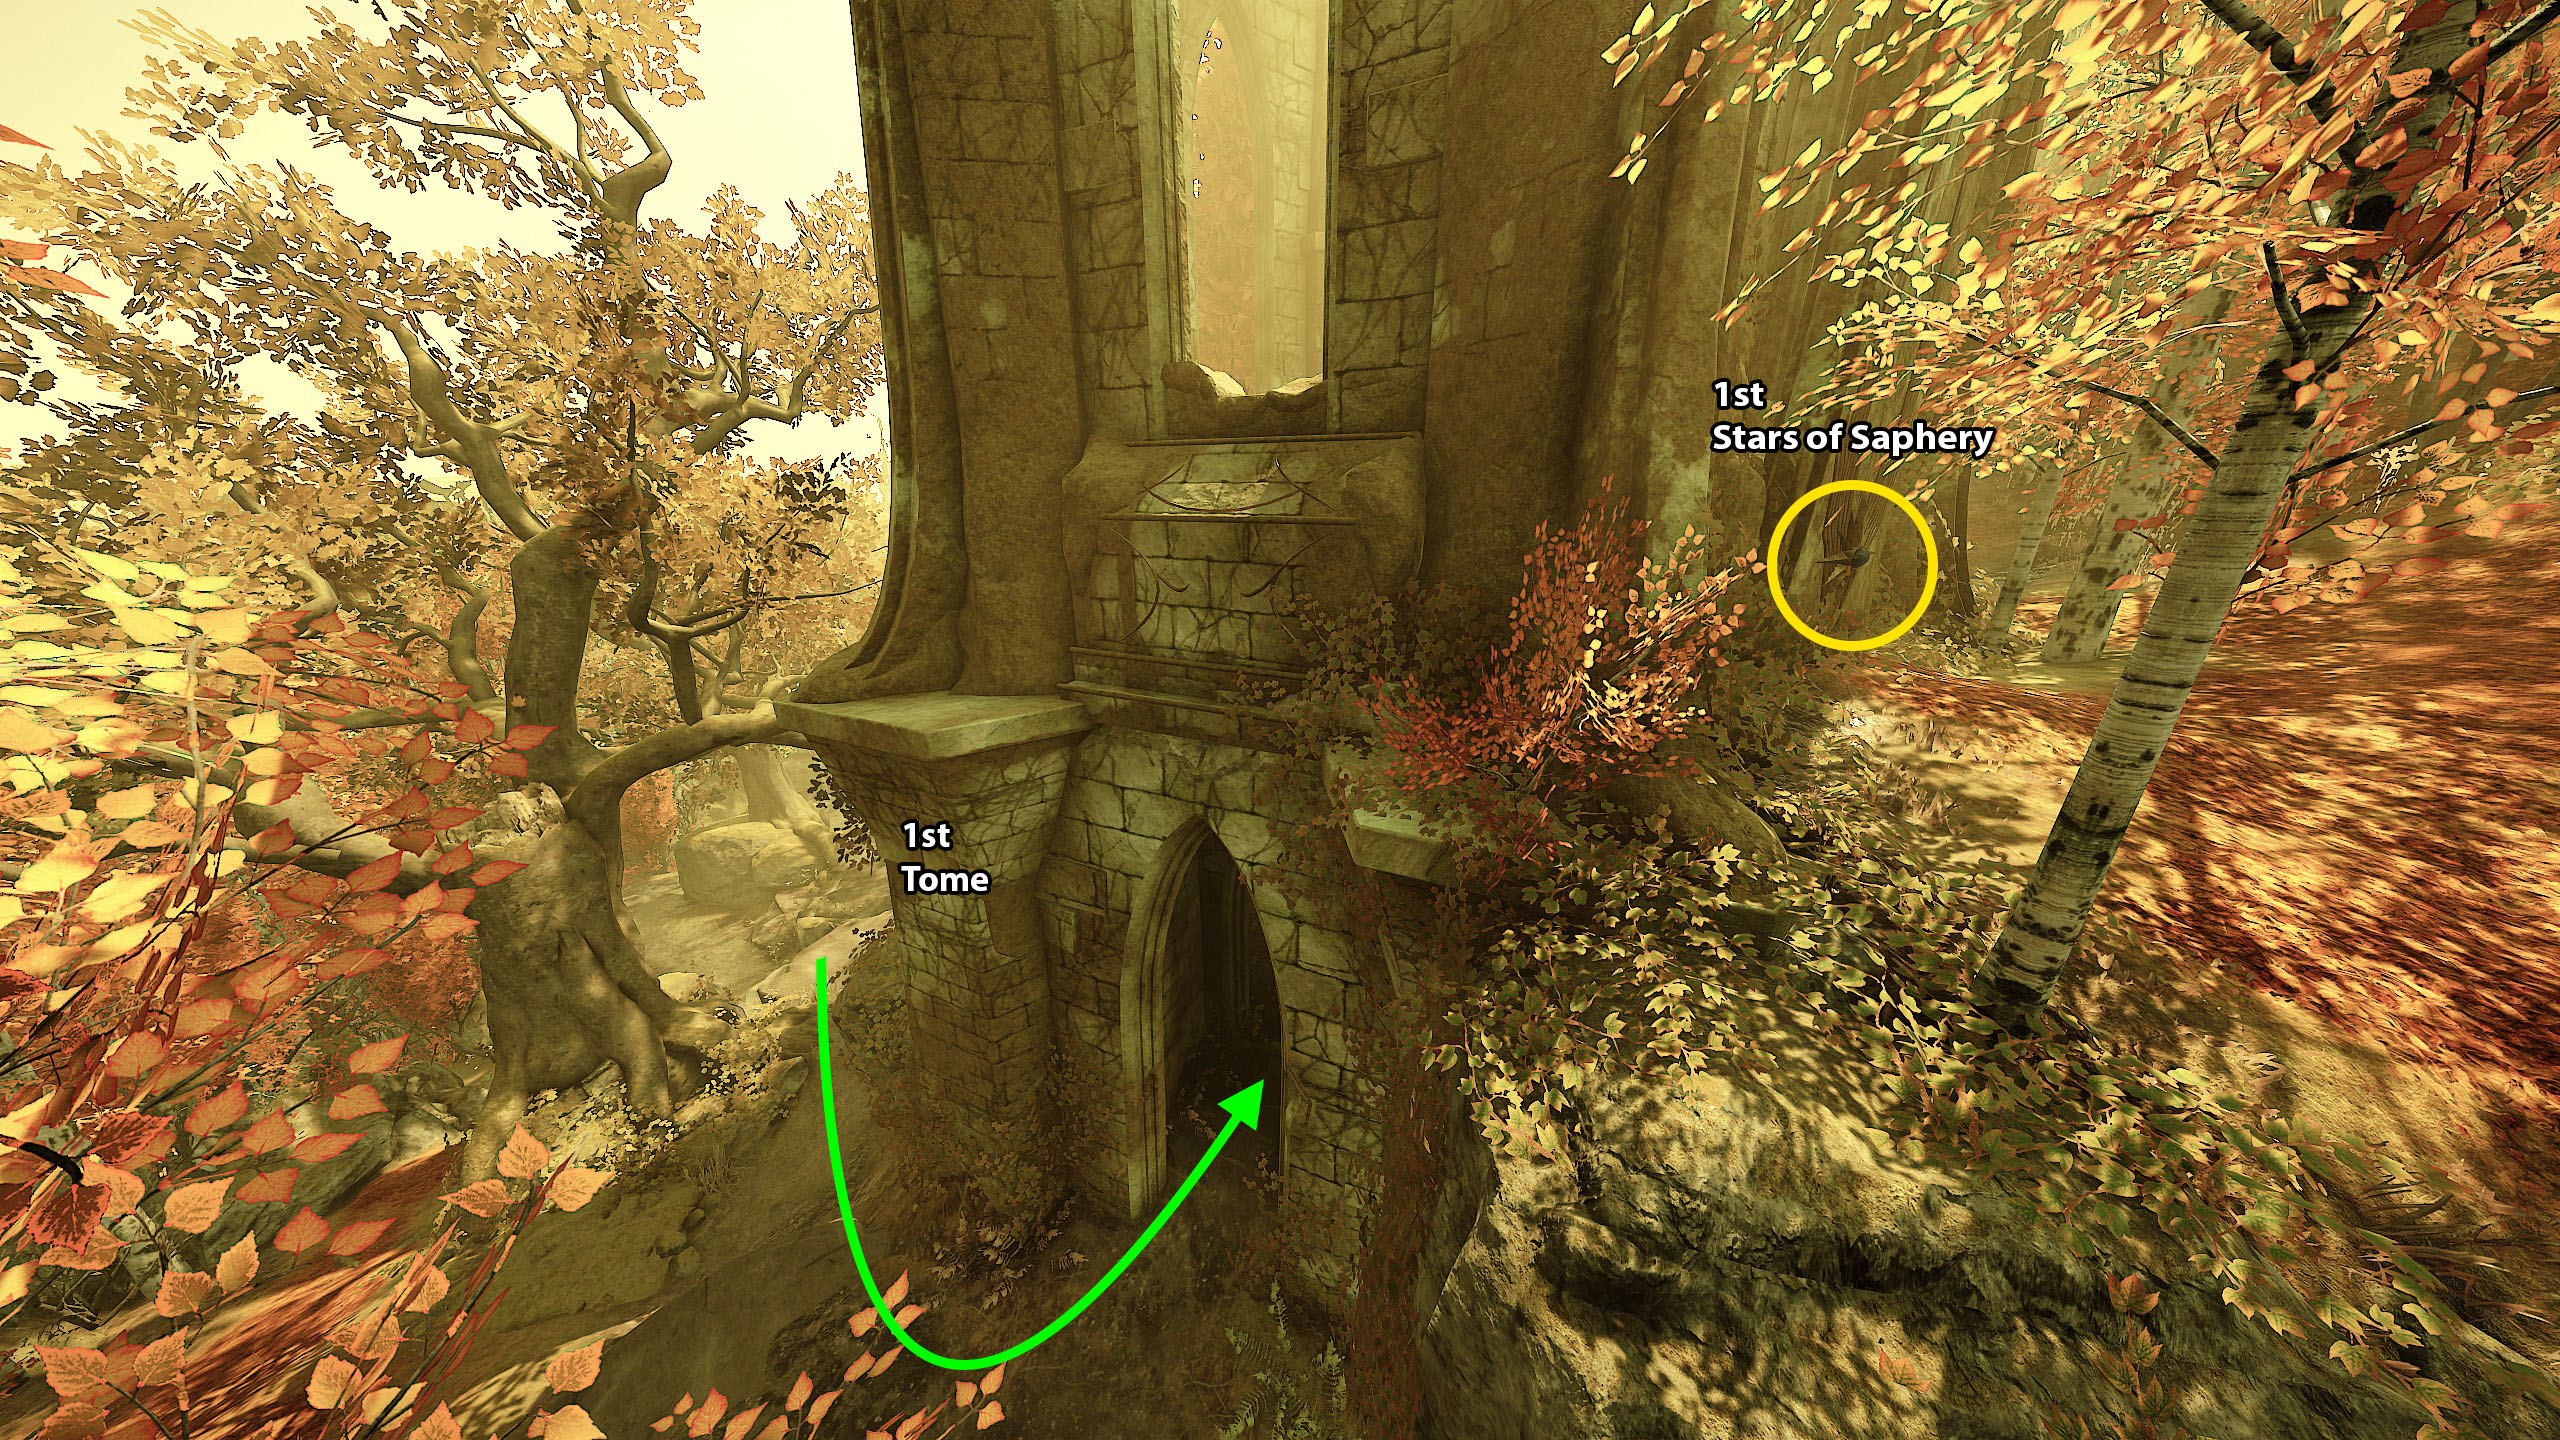
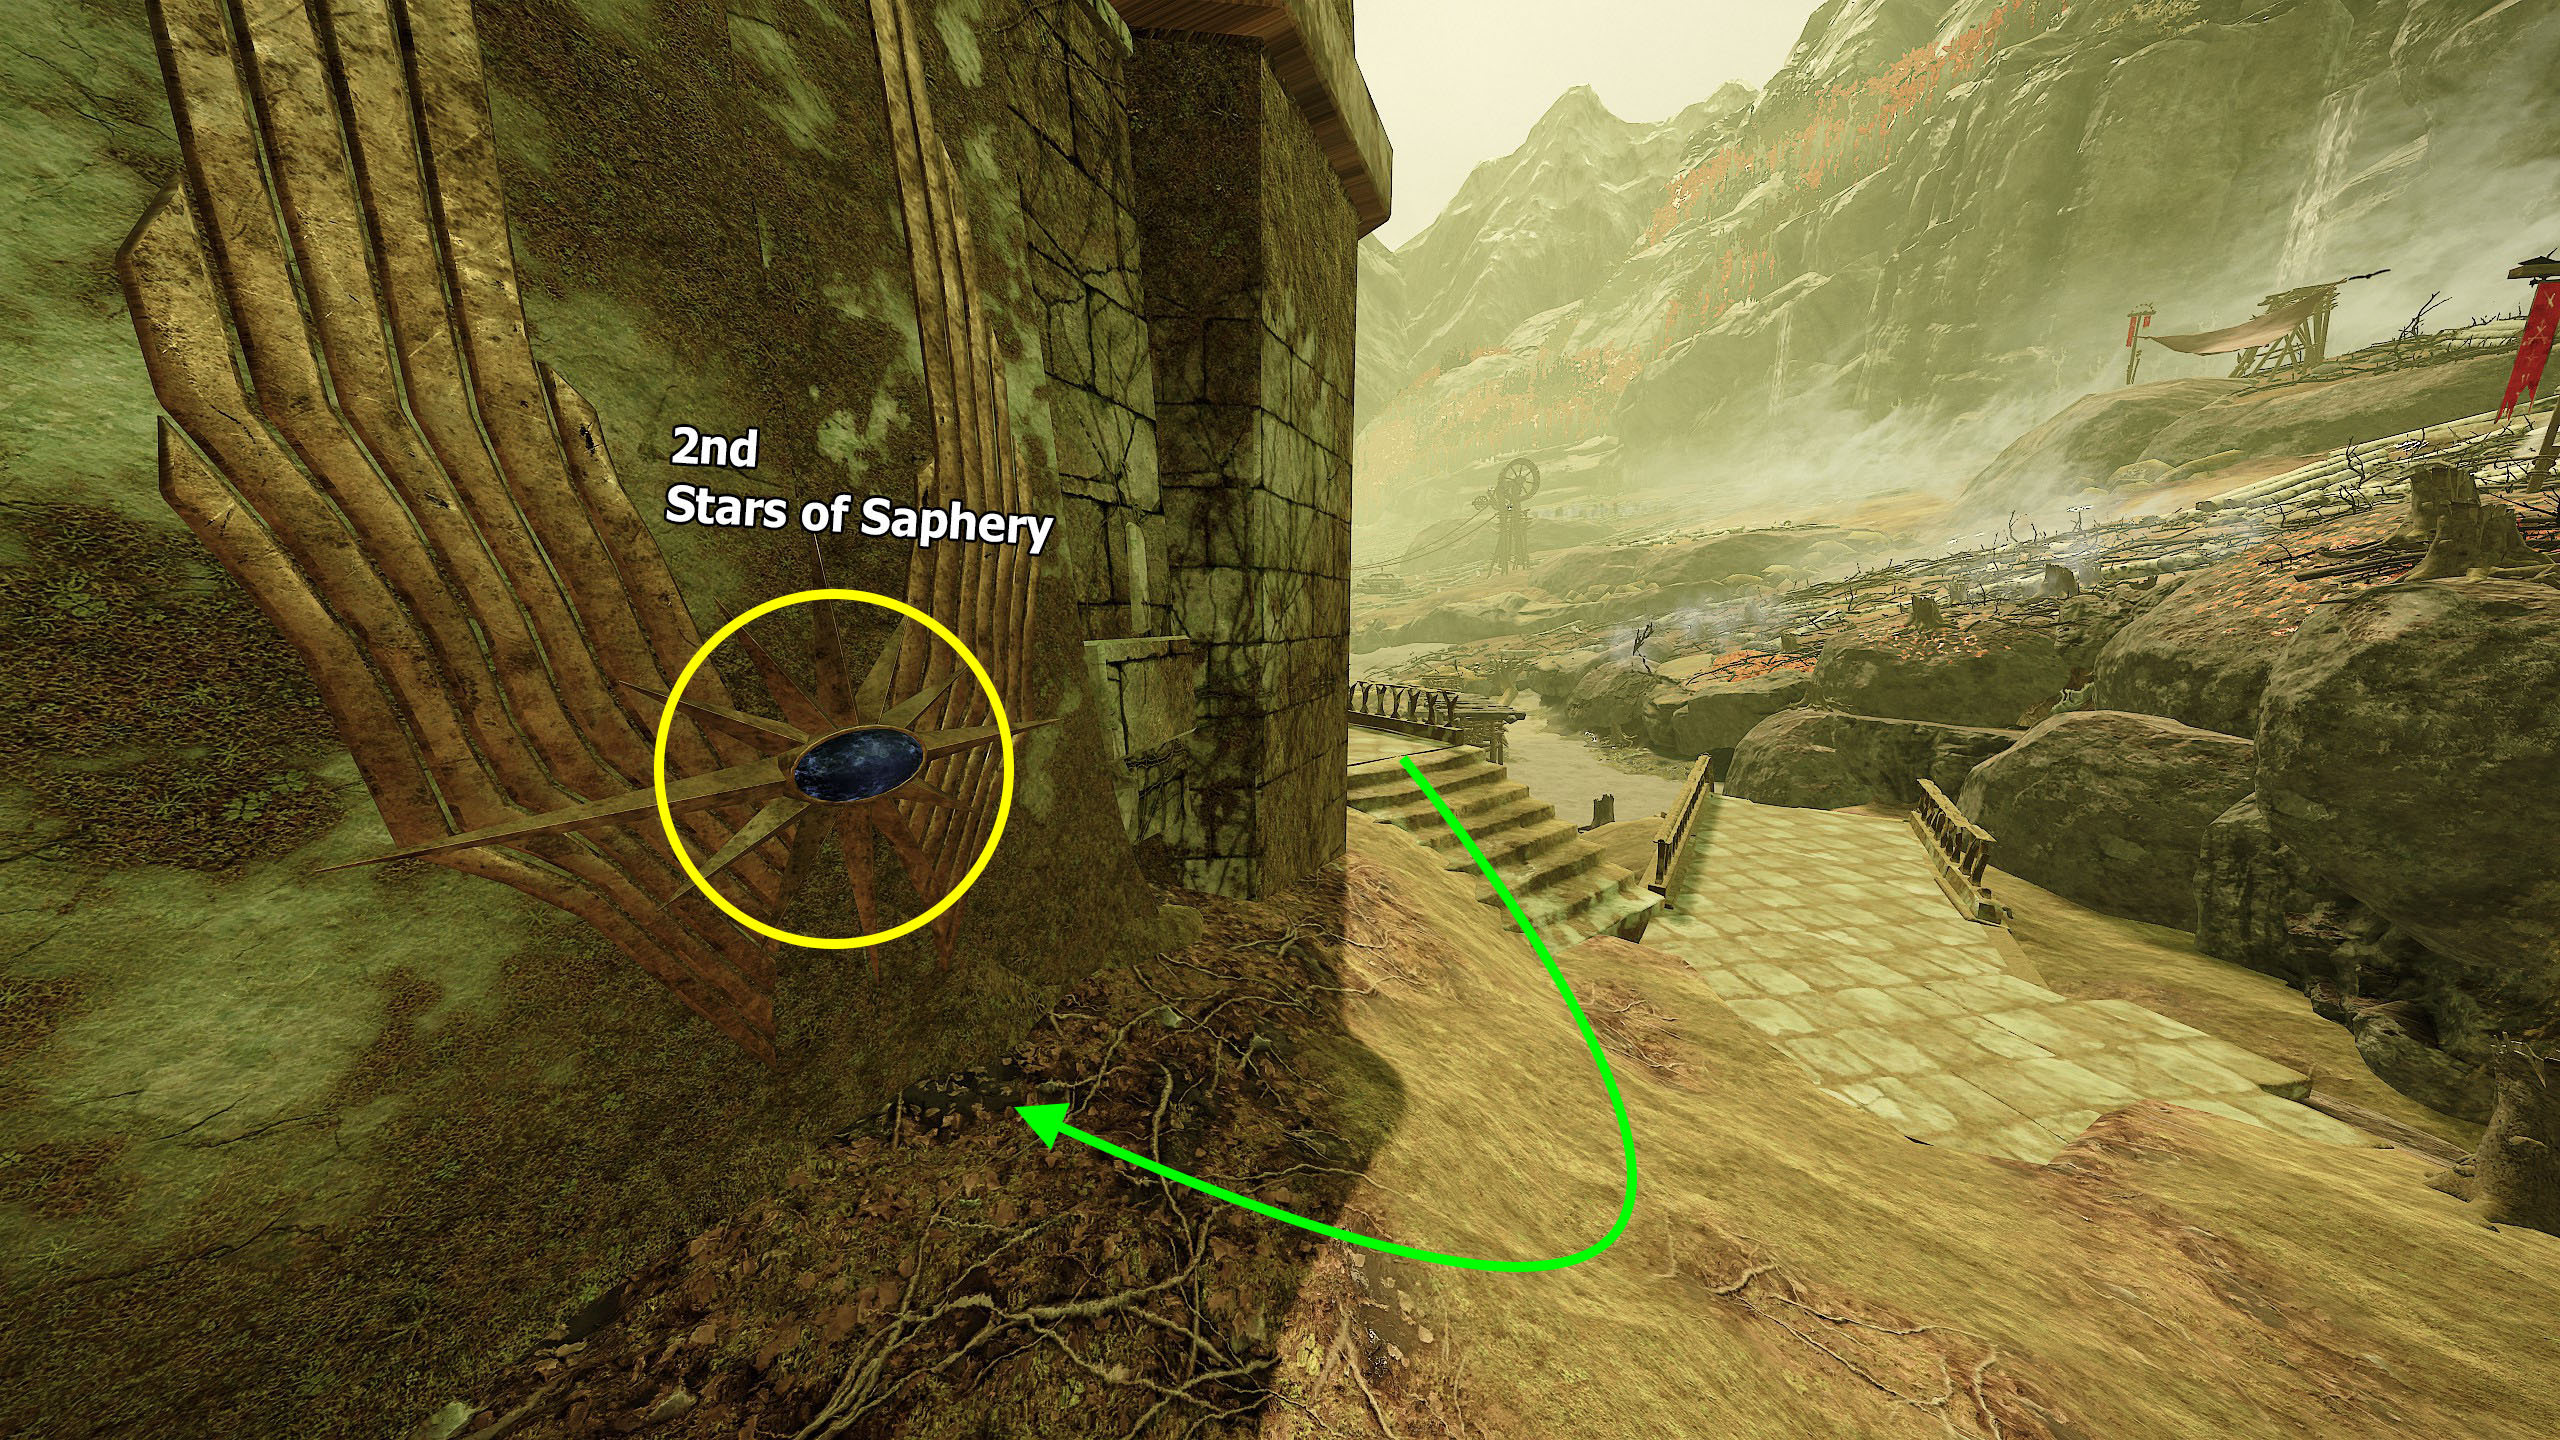
You can find it by walking a little forward from the drawbridge (in front of the rope bridge) and destroying wooden planks.
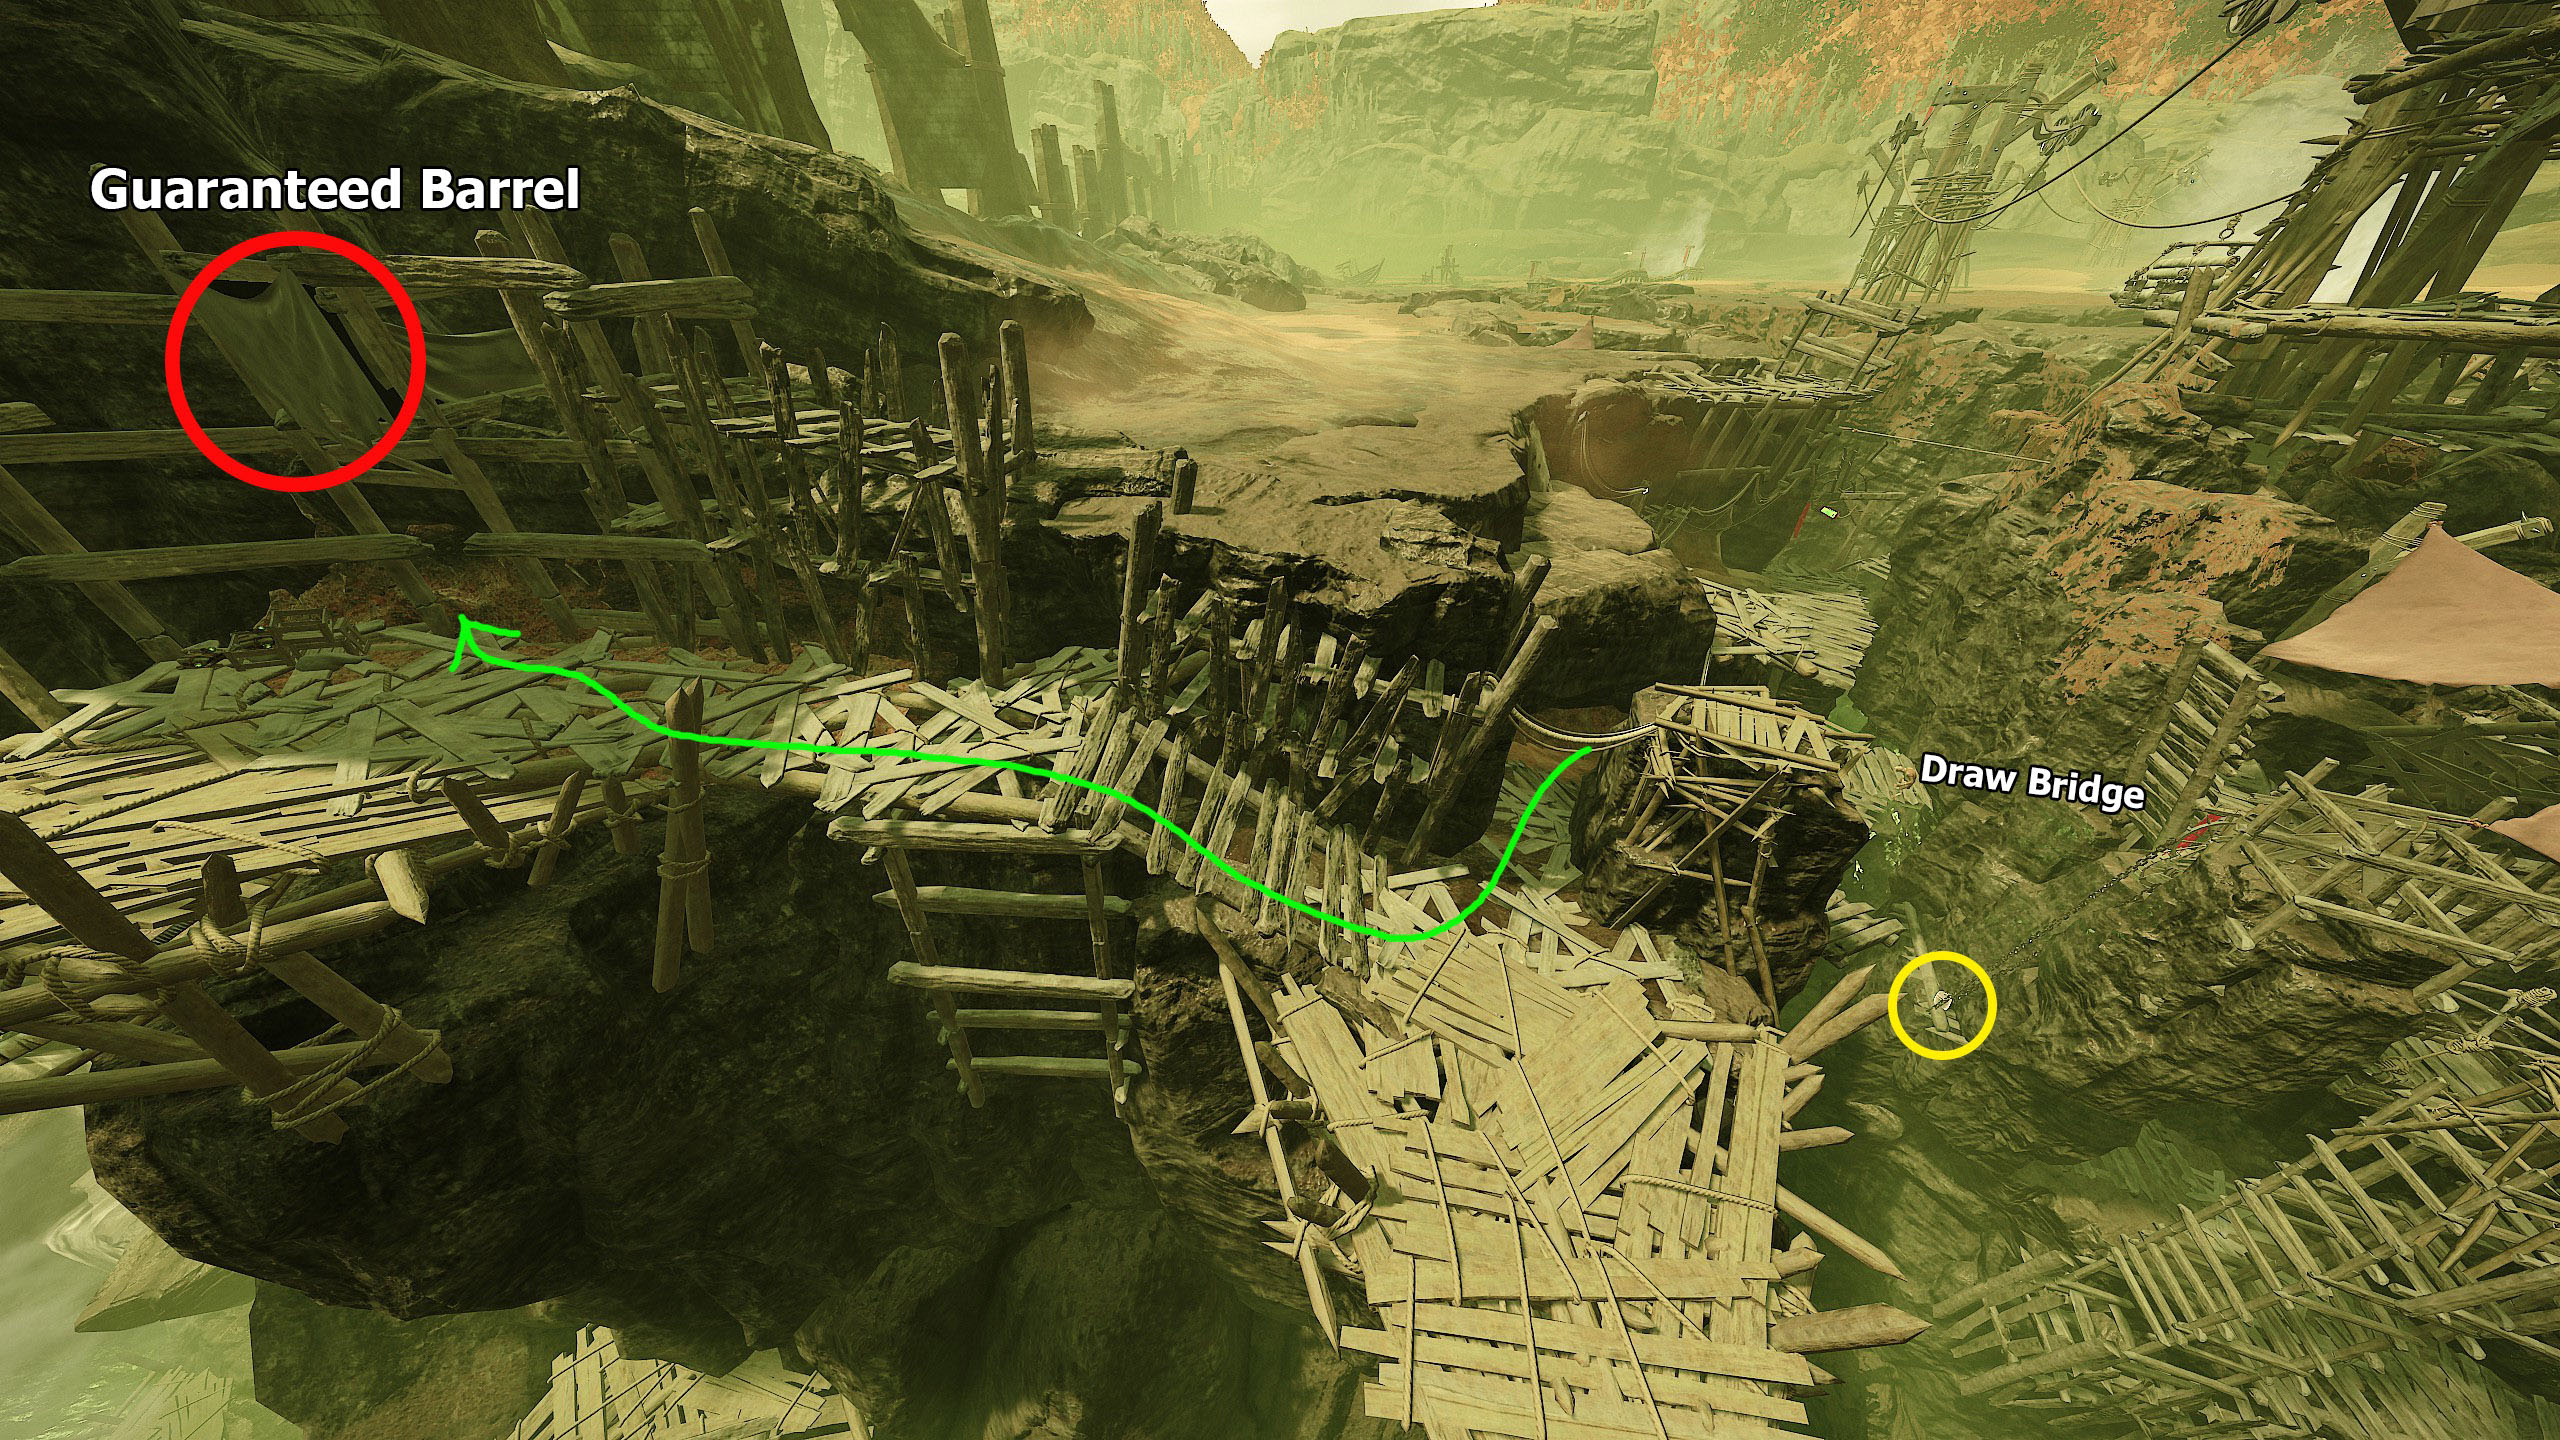
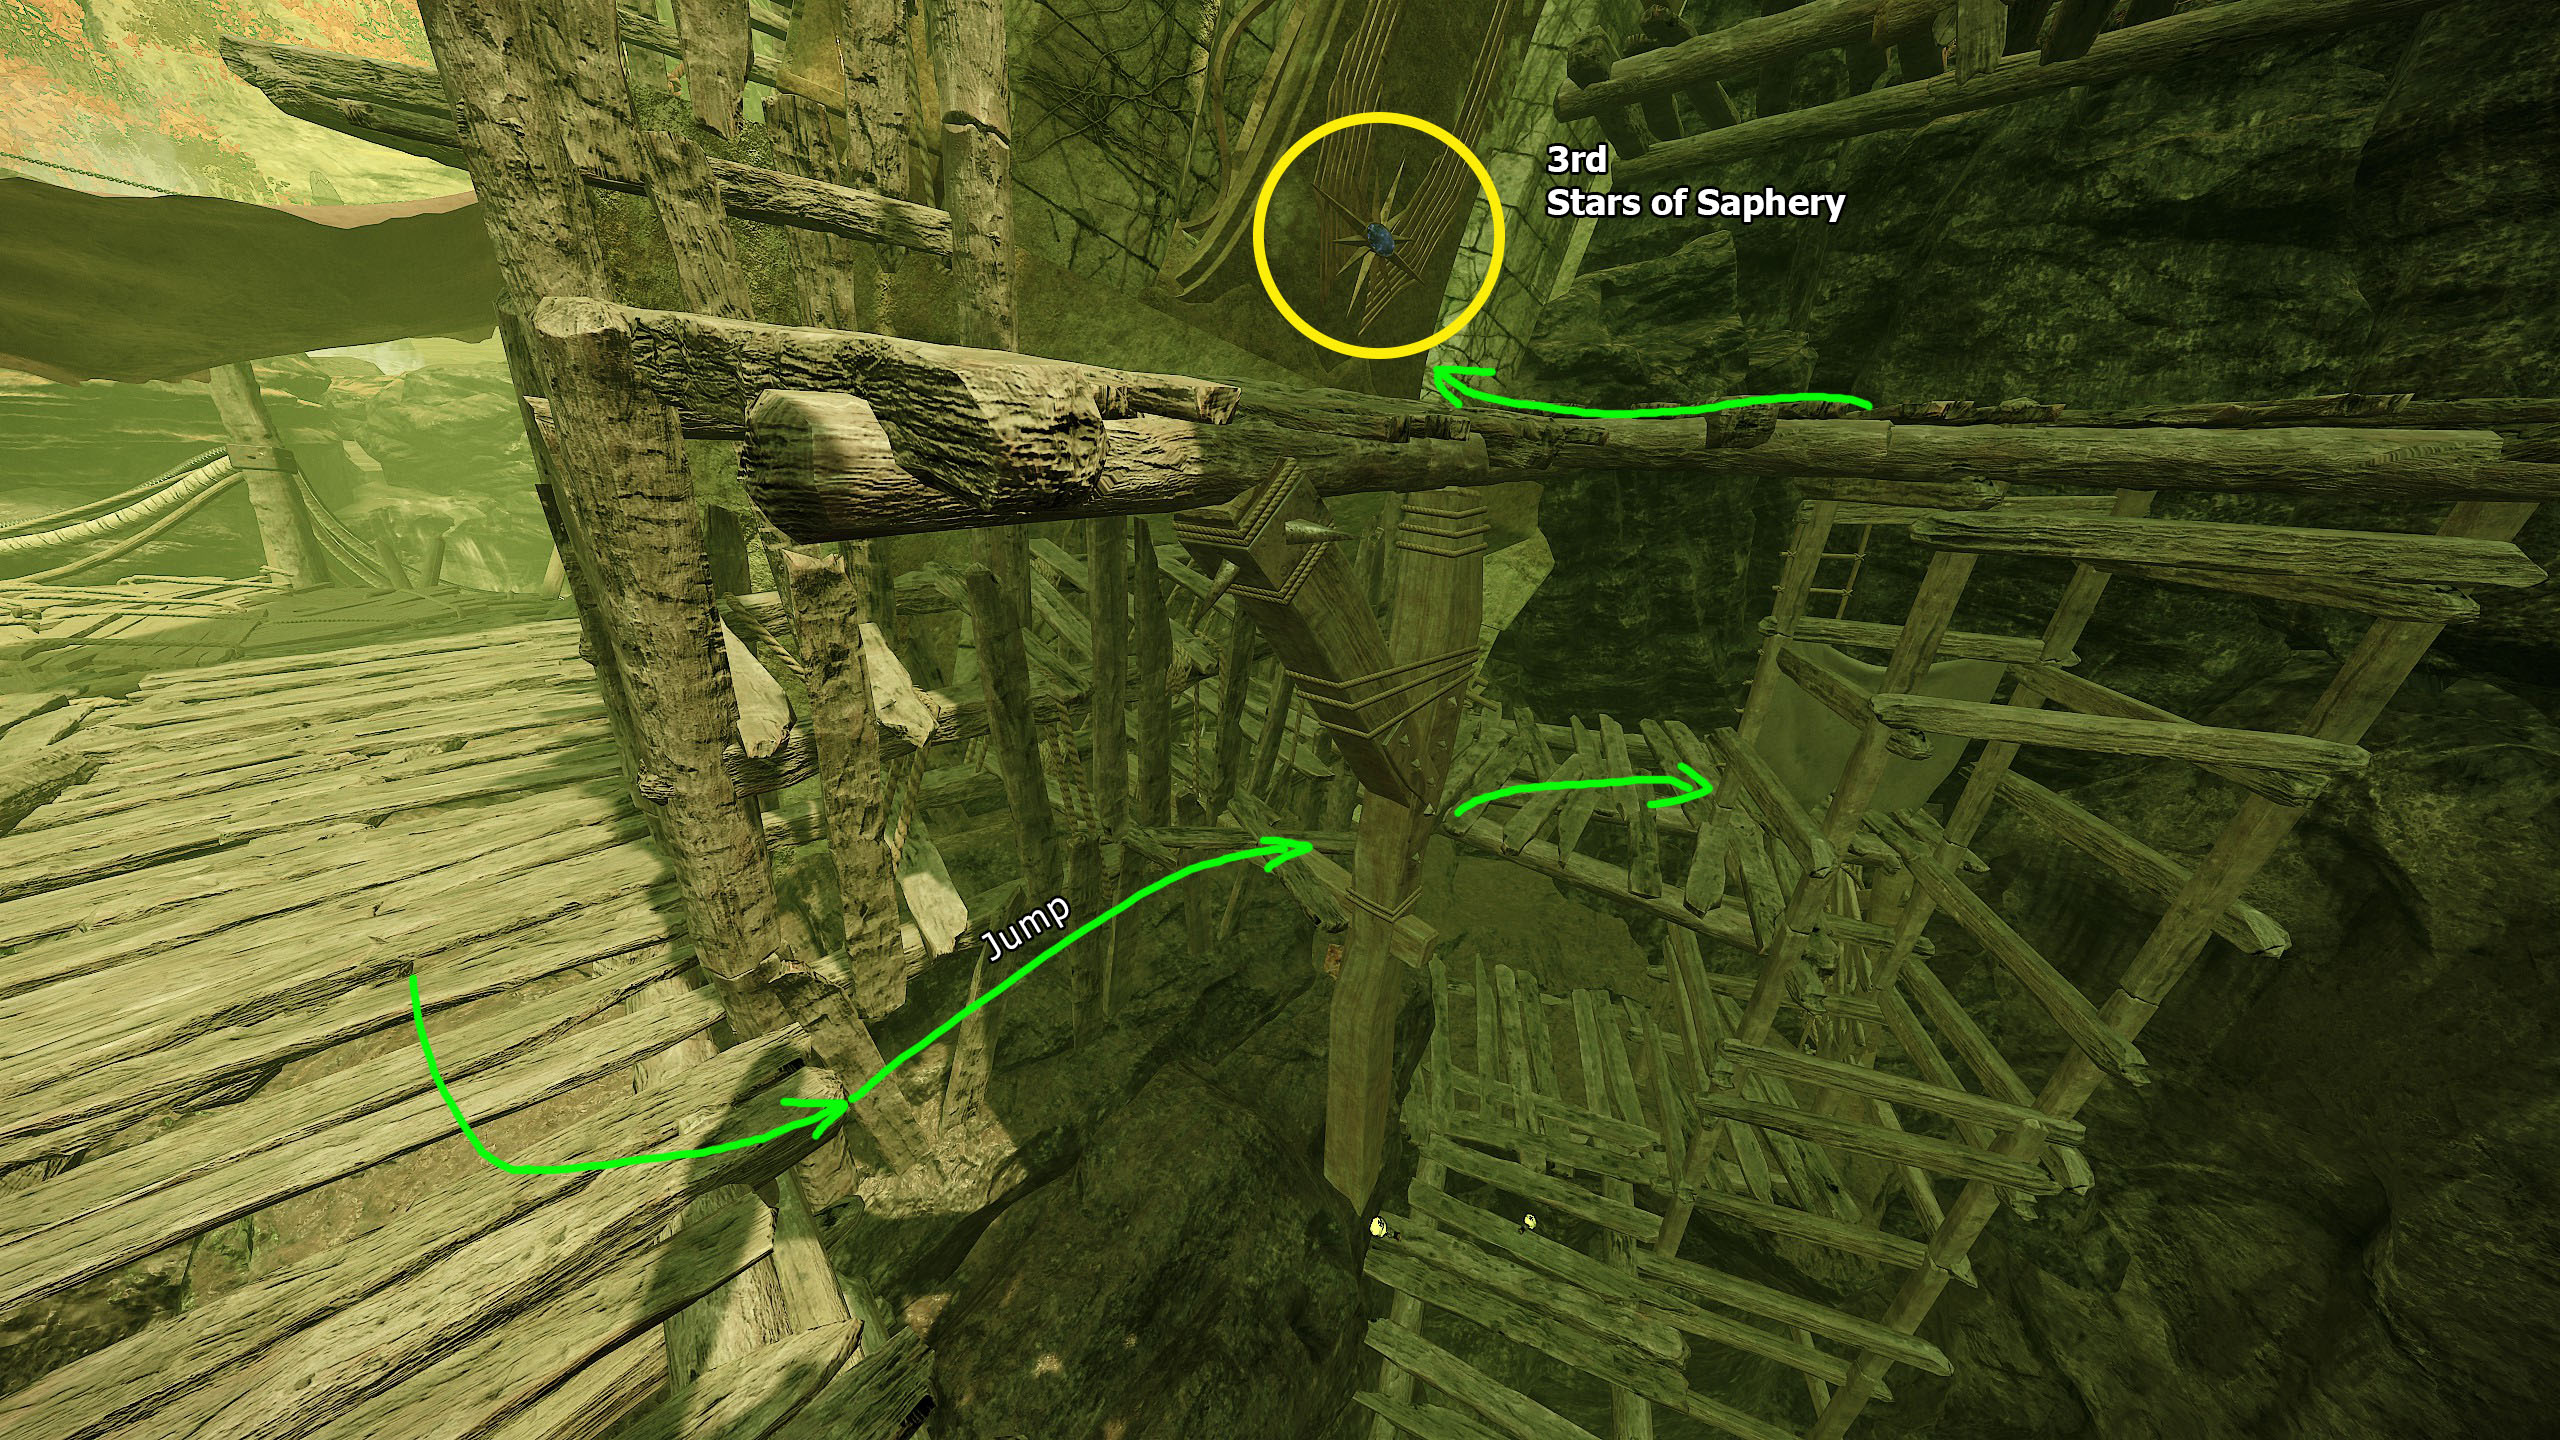
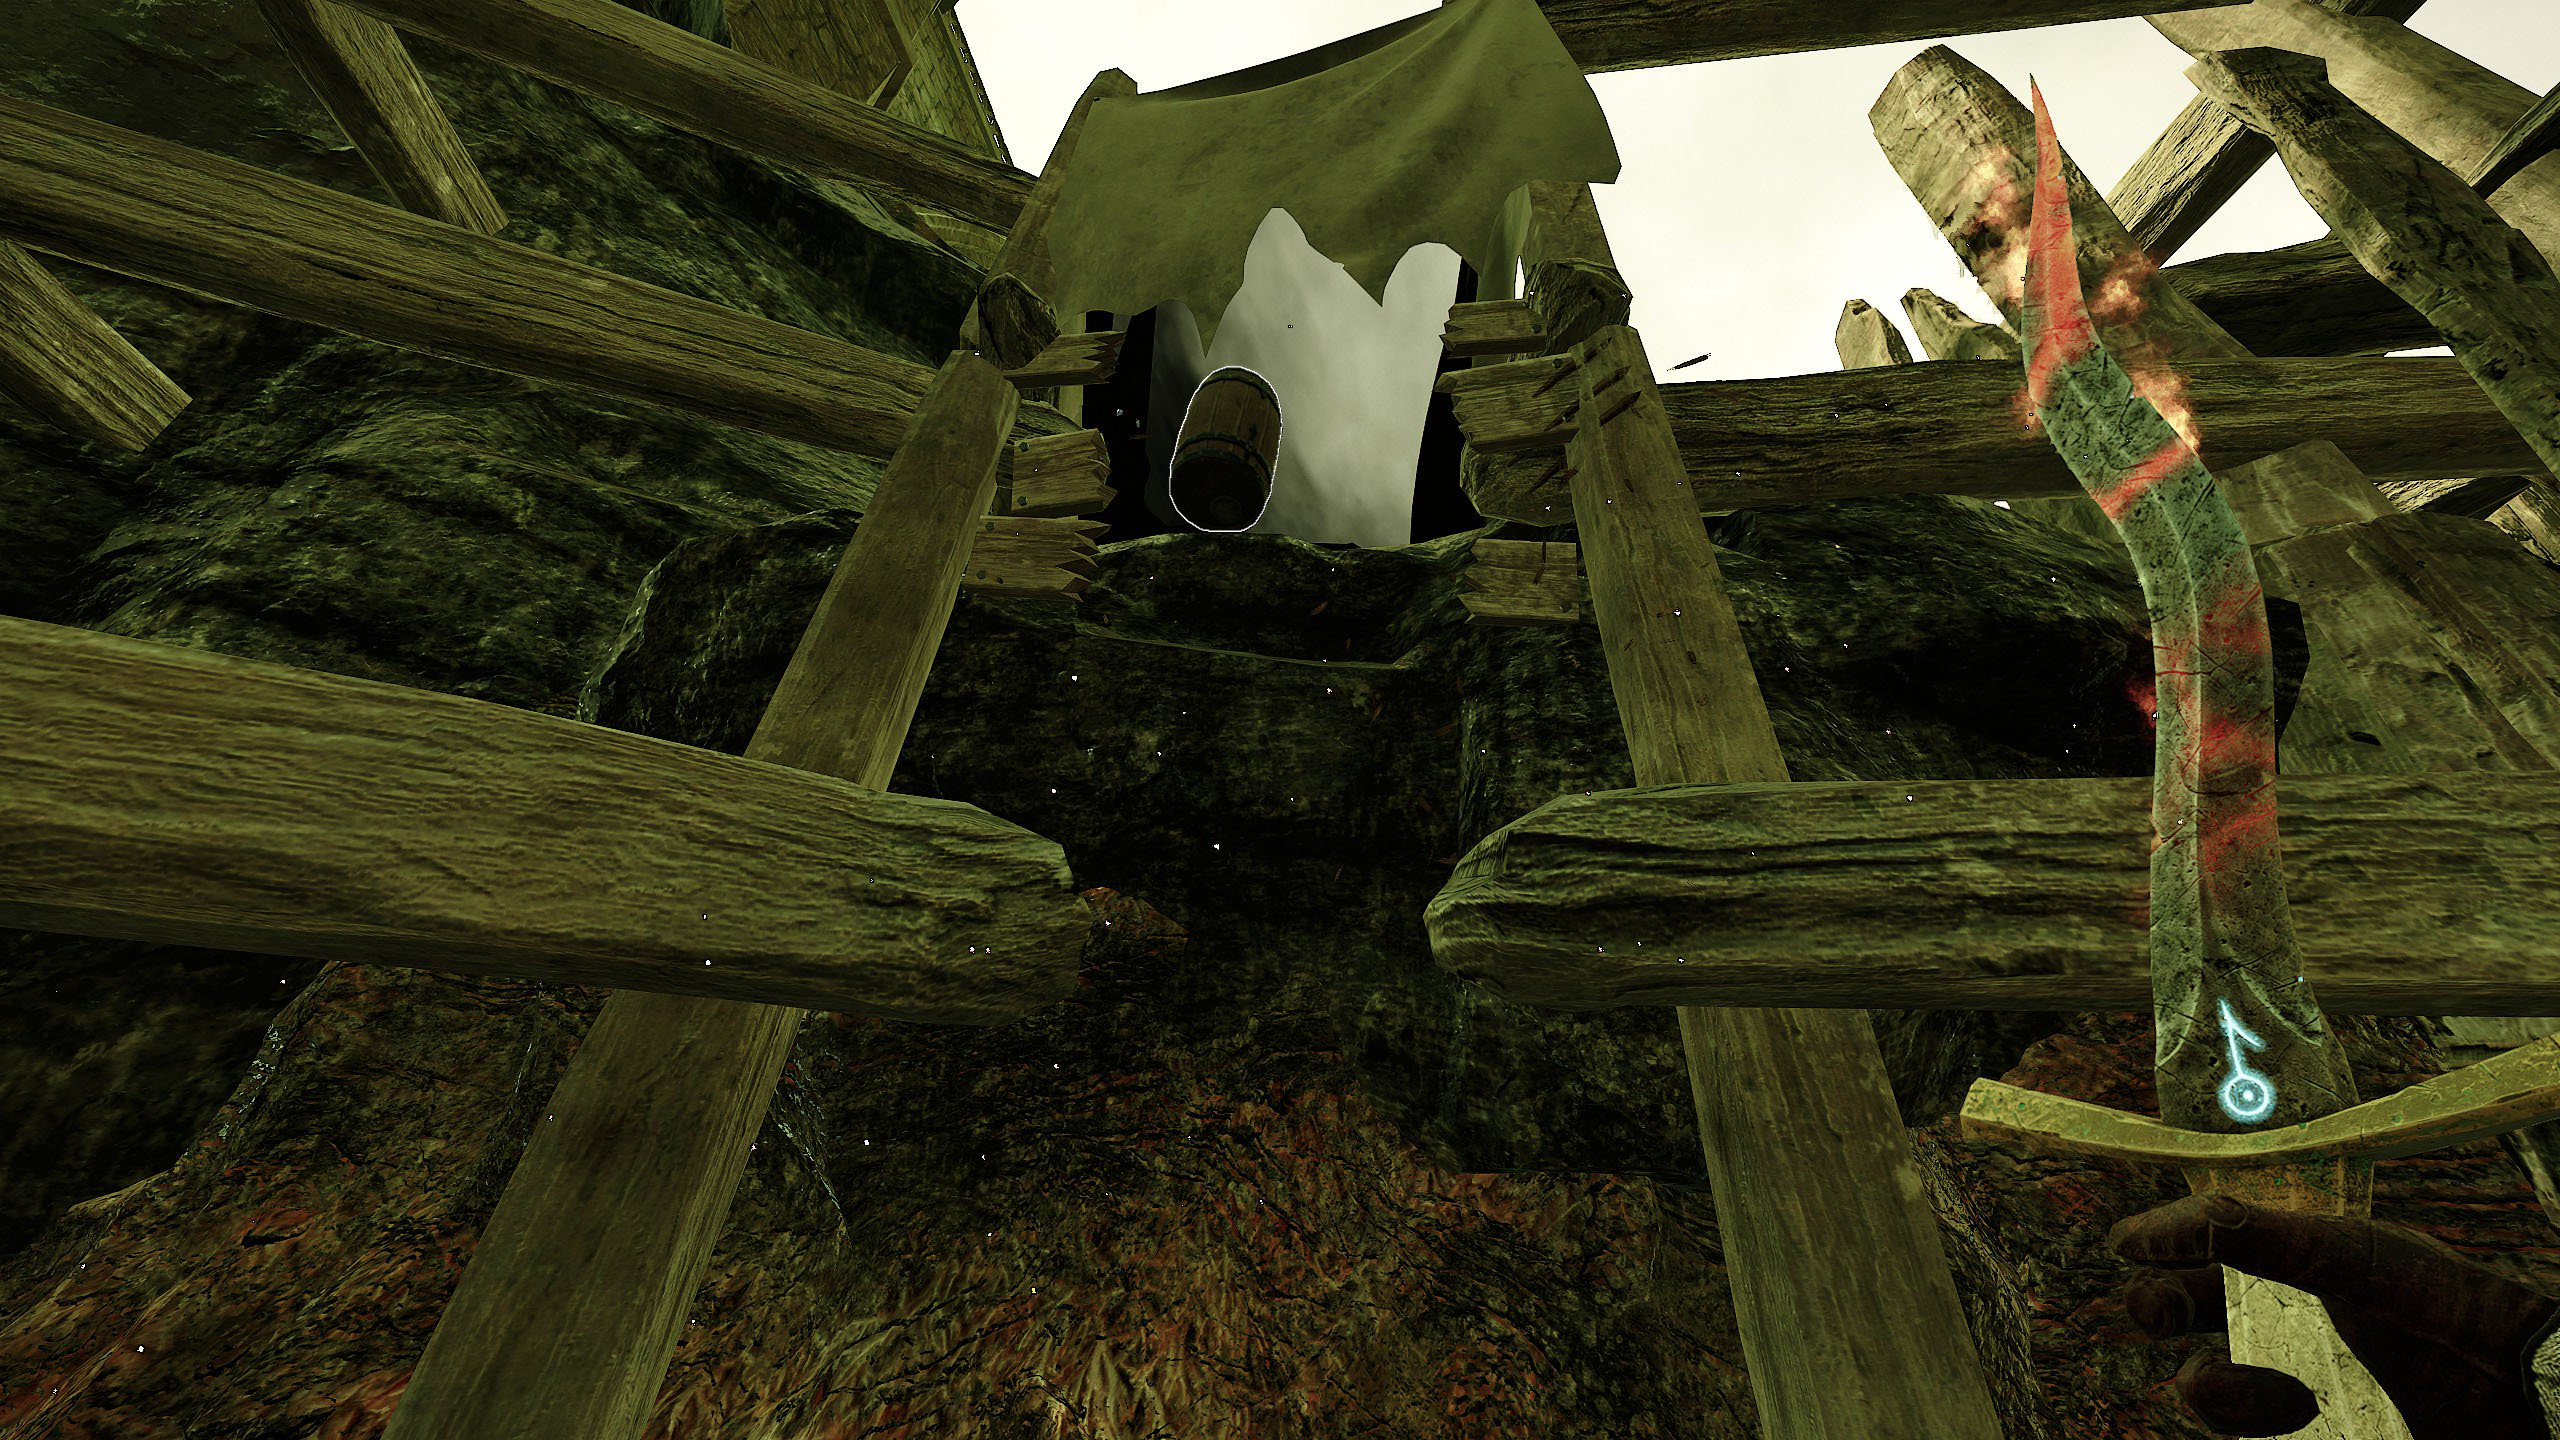 Thus opening the way to the second grimoire. Continue forward and opposite the Skaven Crane, jump on the boards and climb up using the ladder.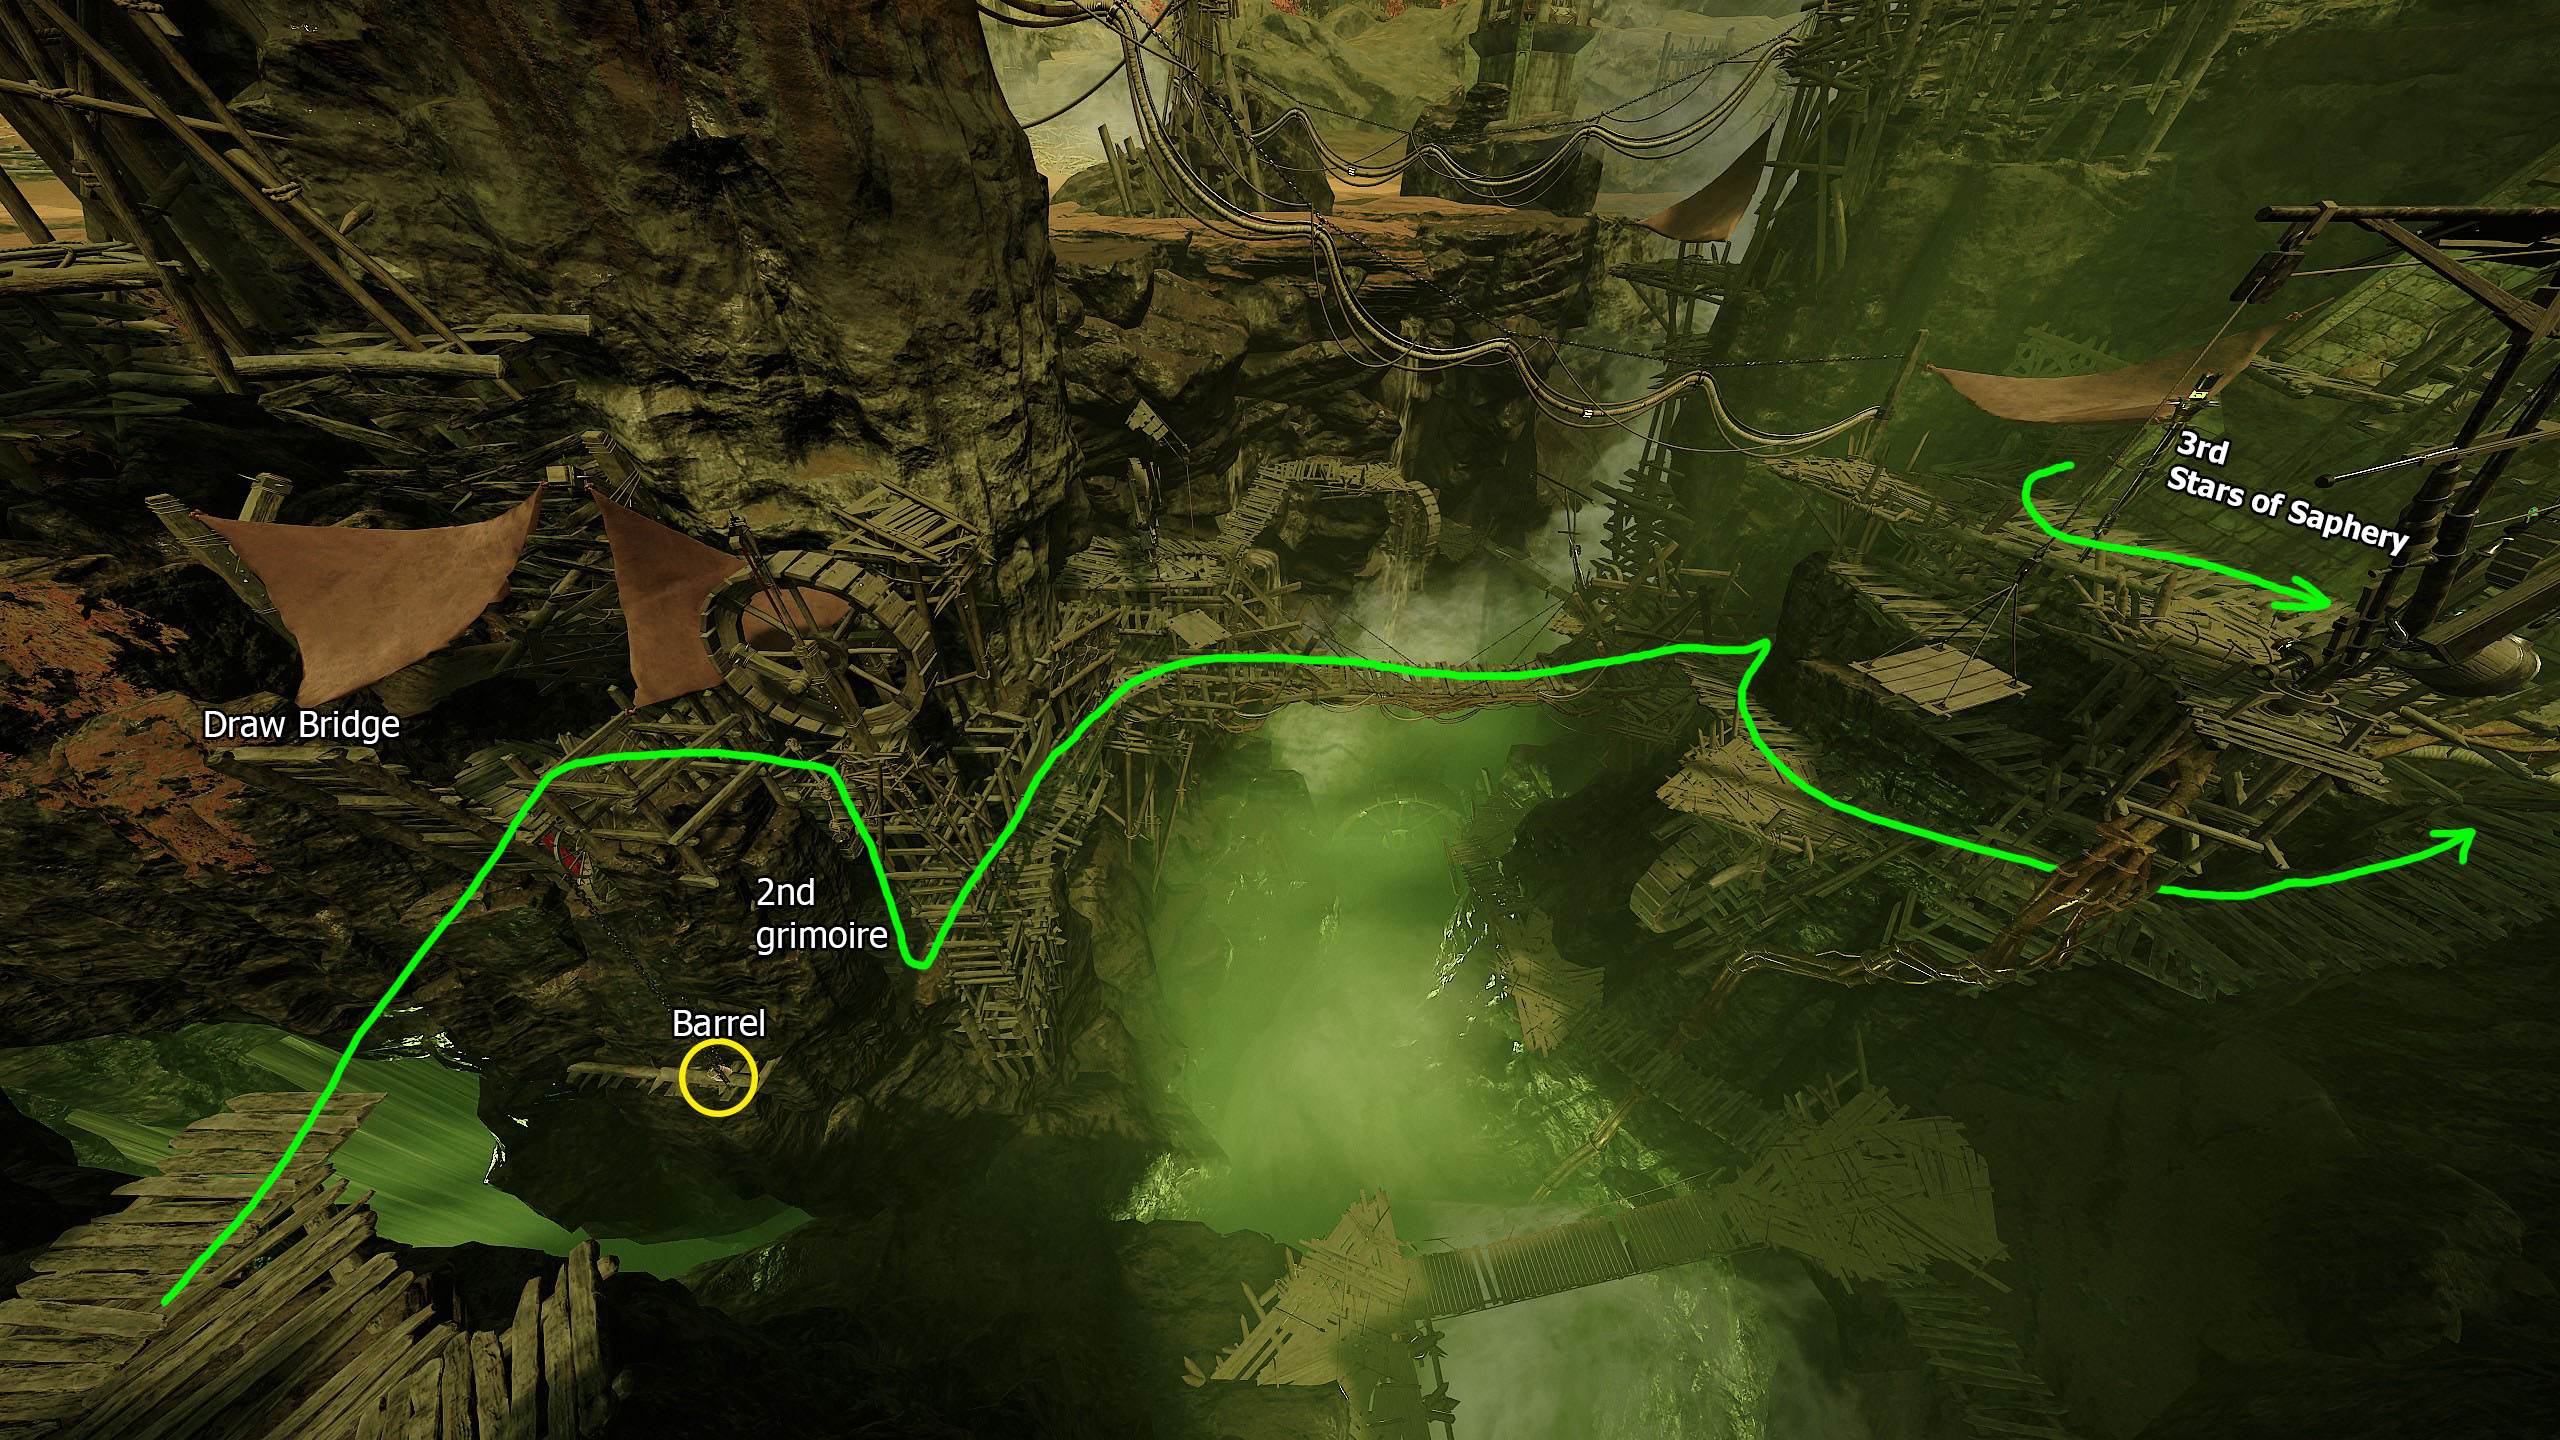
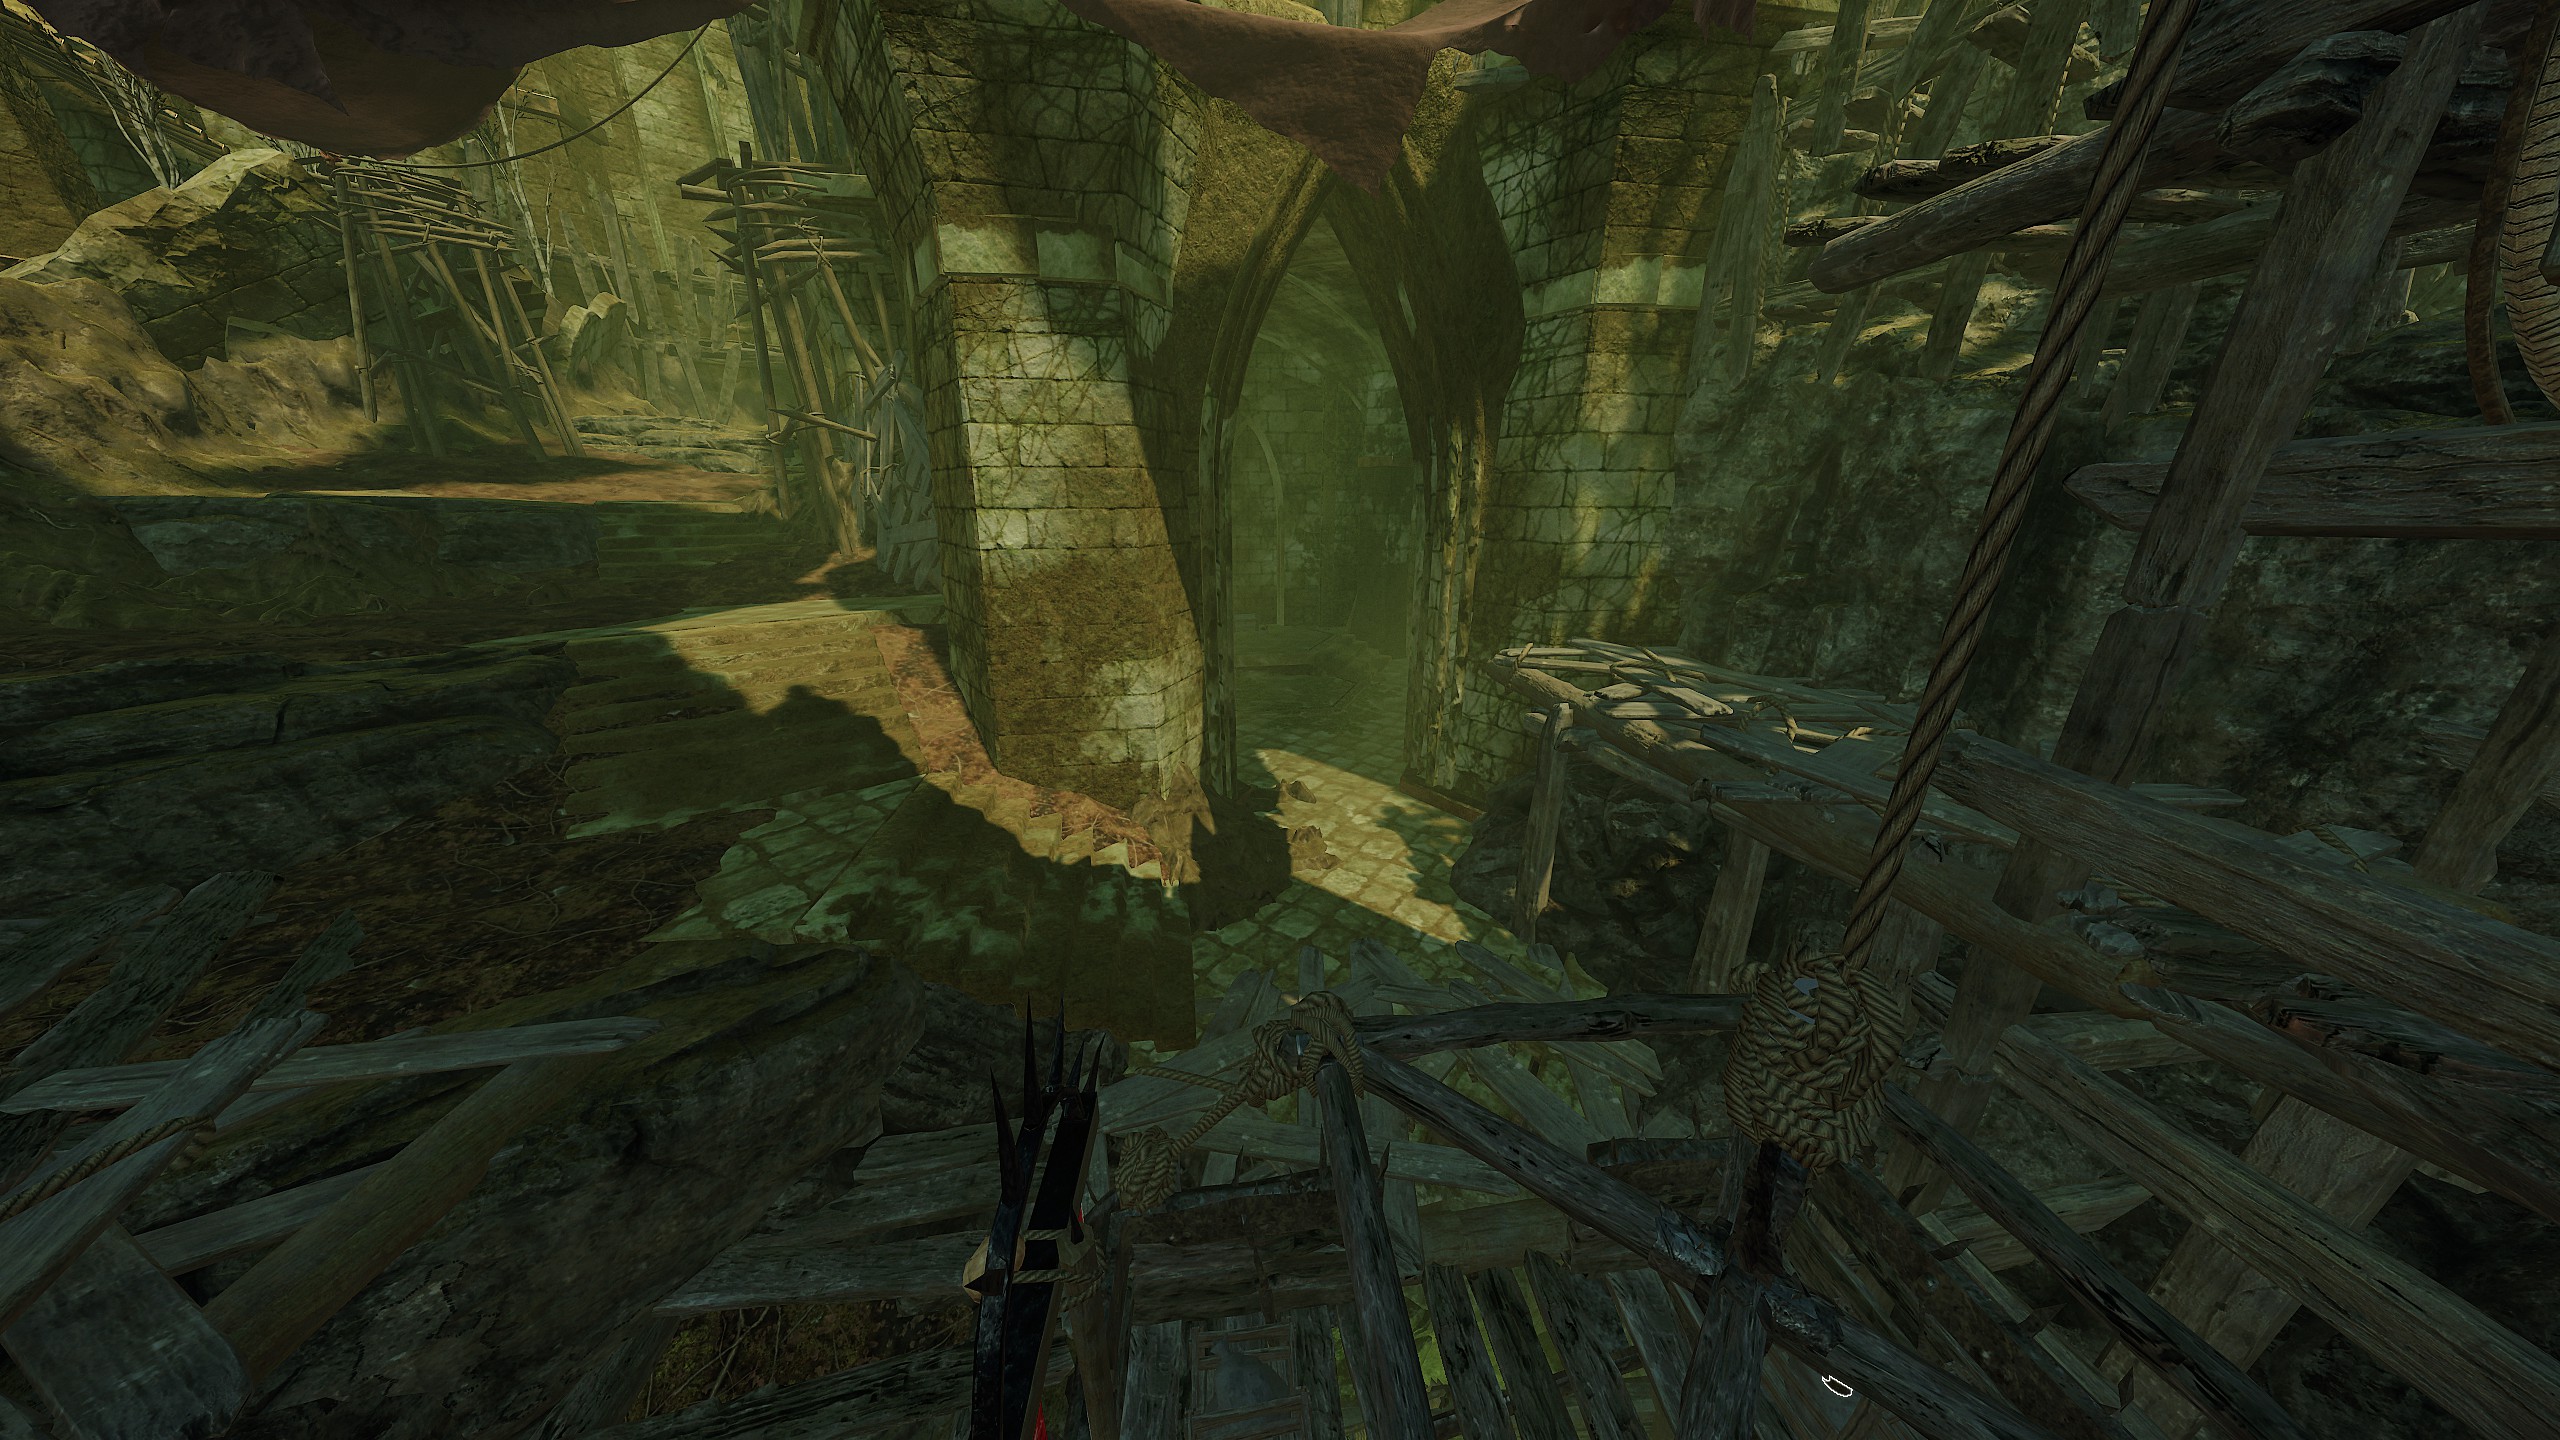
In Supplicant's Walk (right picture) the entrance to the altar opens, which contains a chest, 2 random items, and 2 random barrels.
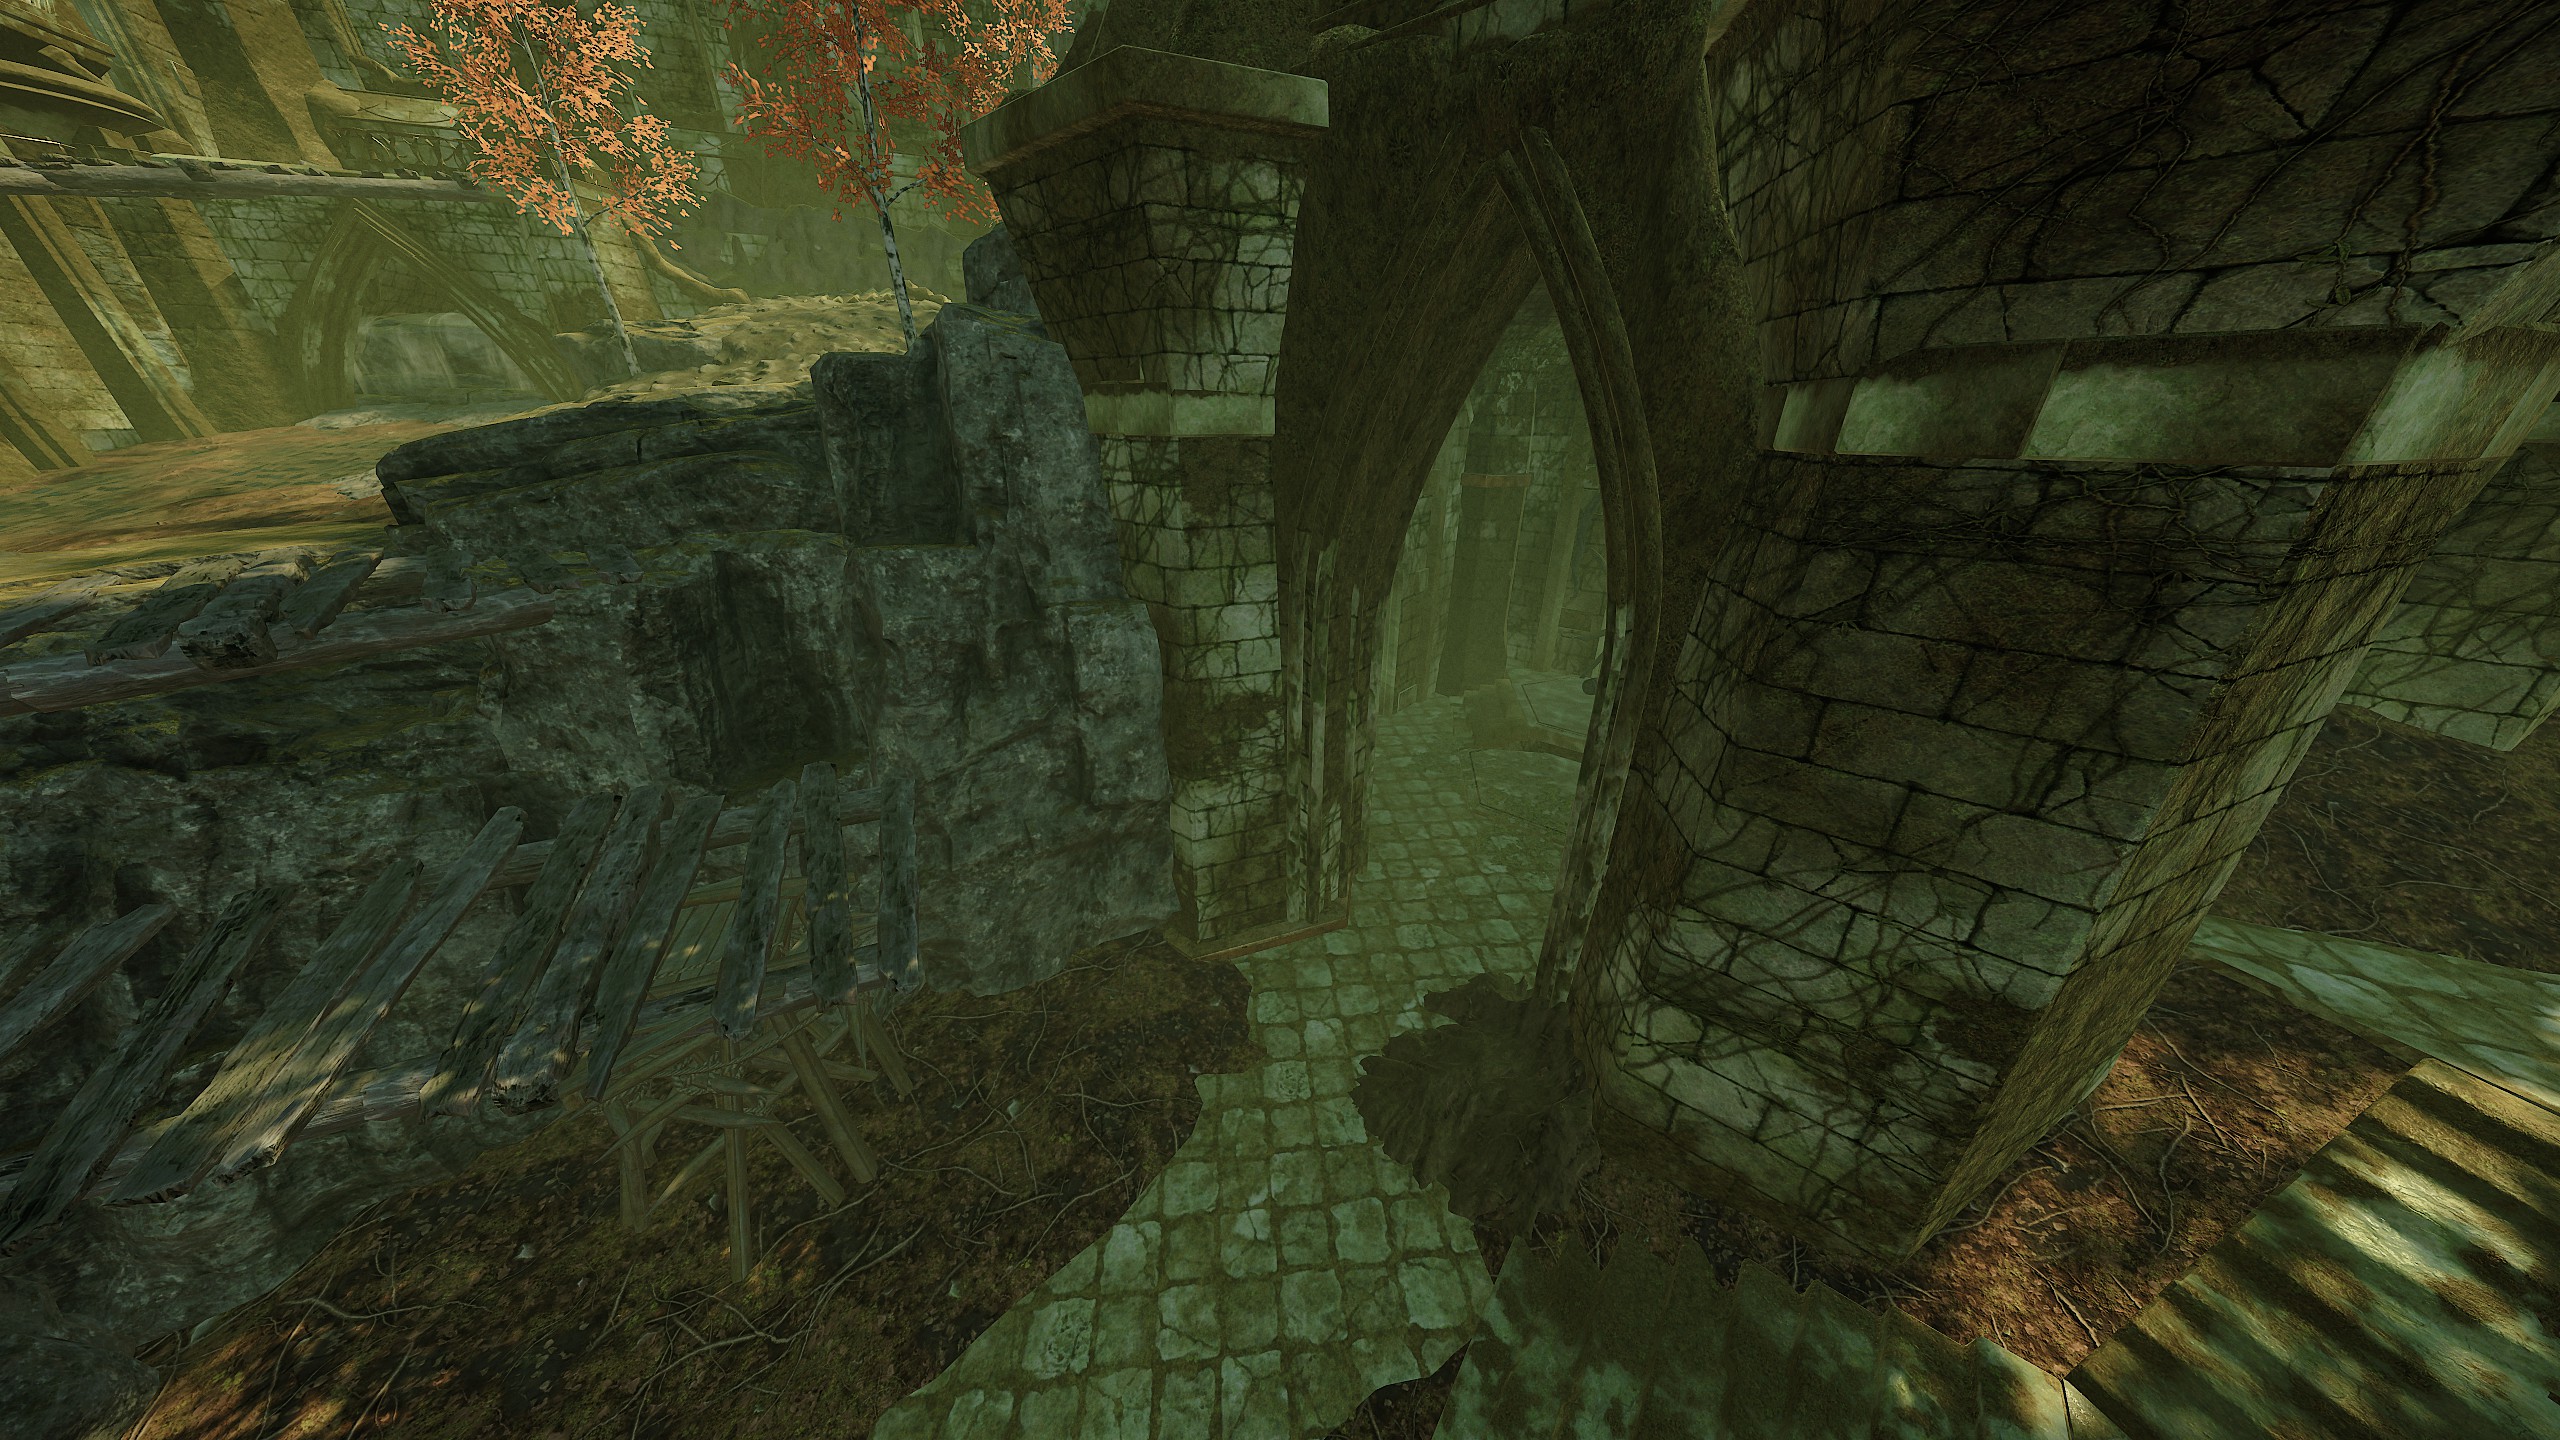 https://youtu.be/nHosoYMKUVs?si=sxcgi8xbVSzDz7JD
 4/5. Stone by Stone & Stone Smith
In the Forsaken Temple, rebuild the waystone within 180 seconds.
In the Forsaken Temple, rebuild the waystone within 90 seconds. These two challenges are linked to the final event and can be done together.
Most importantly, they have no attachment to a specific difficulty level, so I recommend choose Recruit and using the mobility ults of Zealot, Handmaiden, Battle Wizard and Slayer.
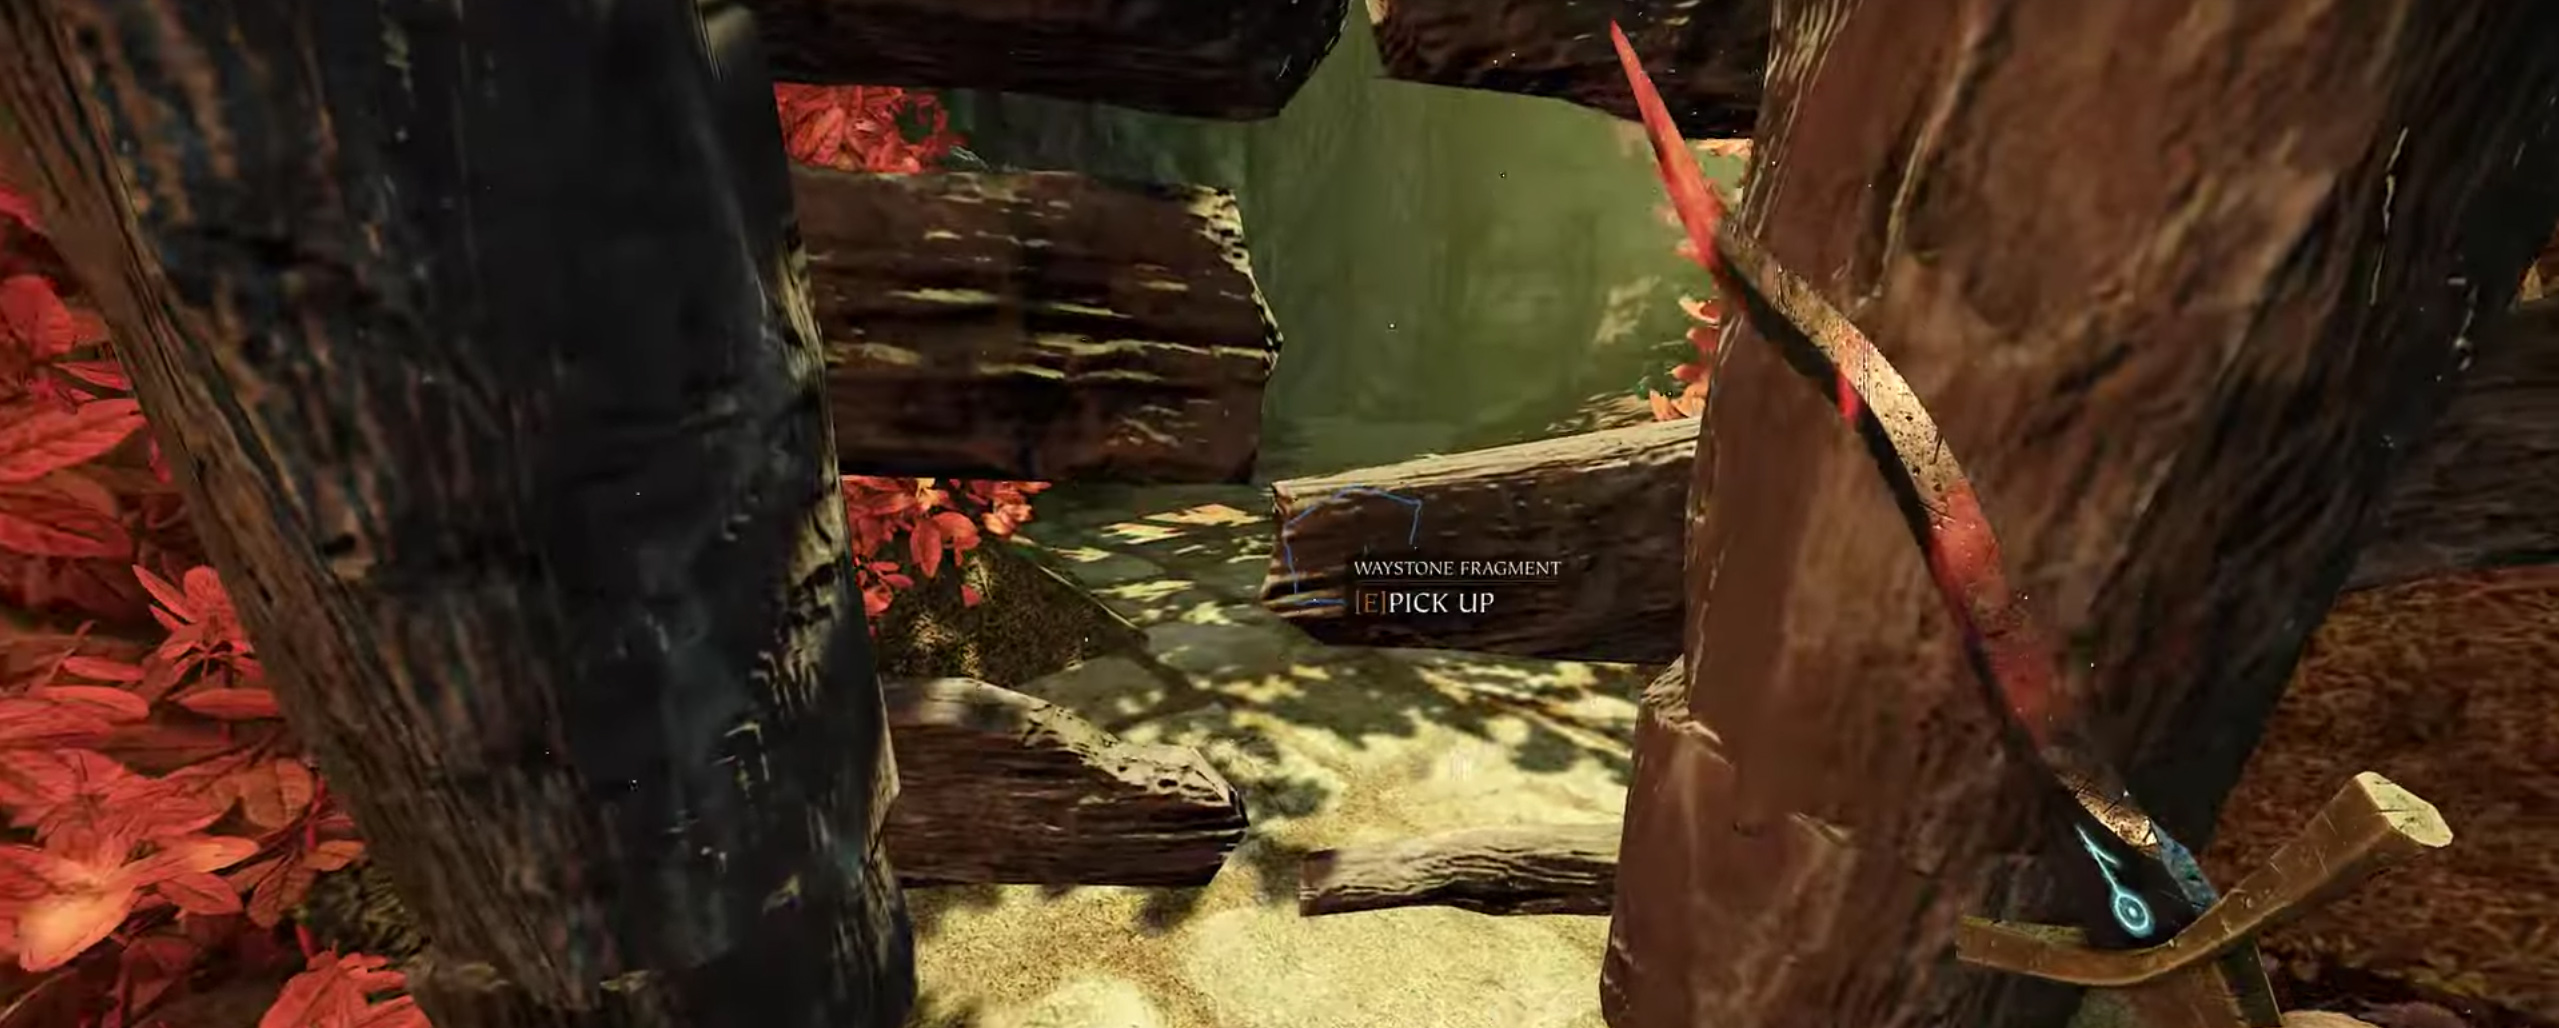
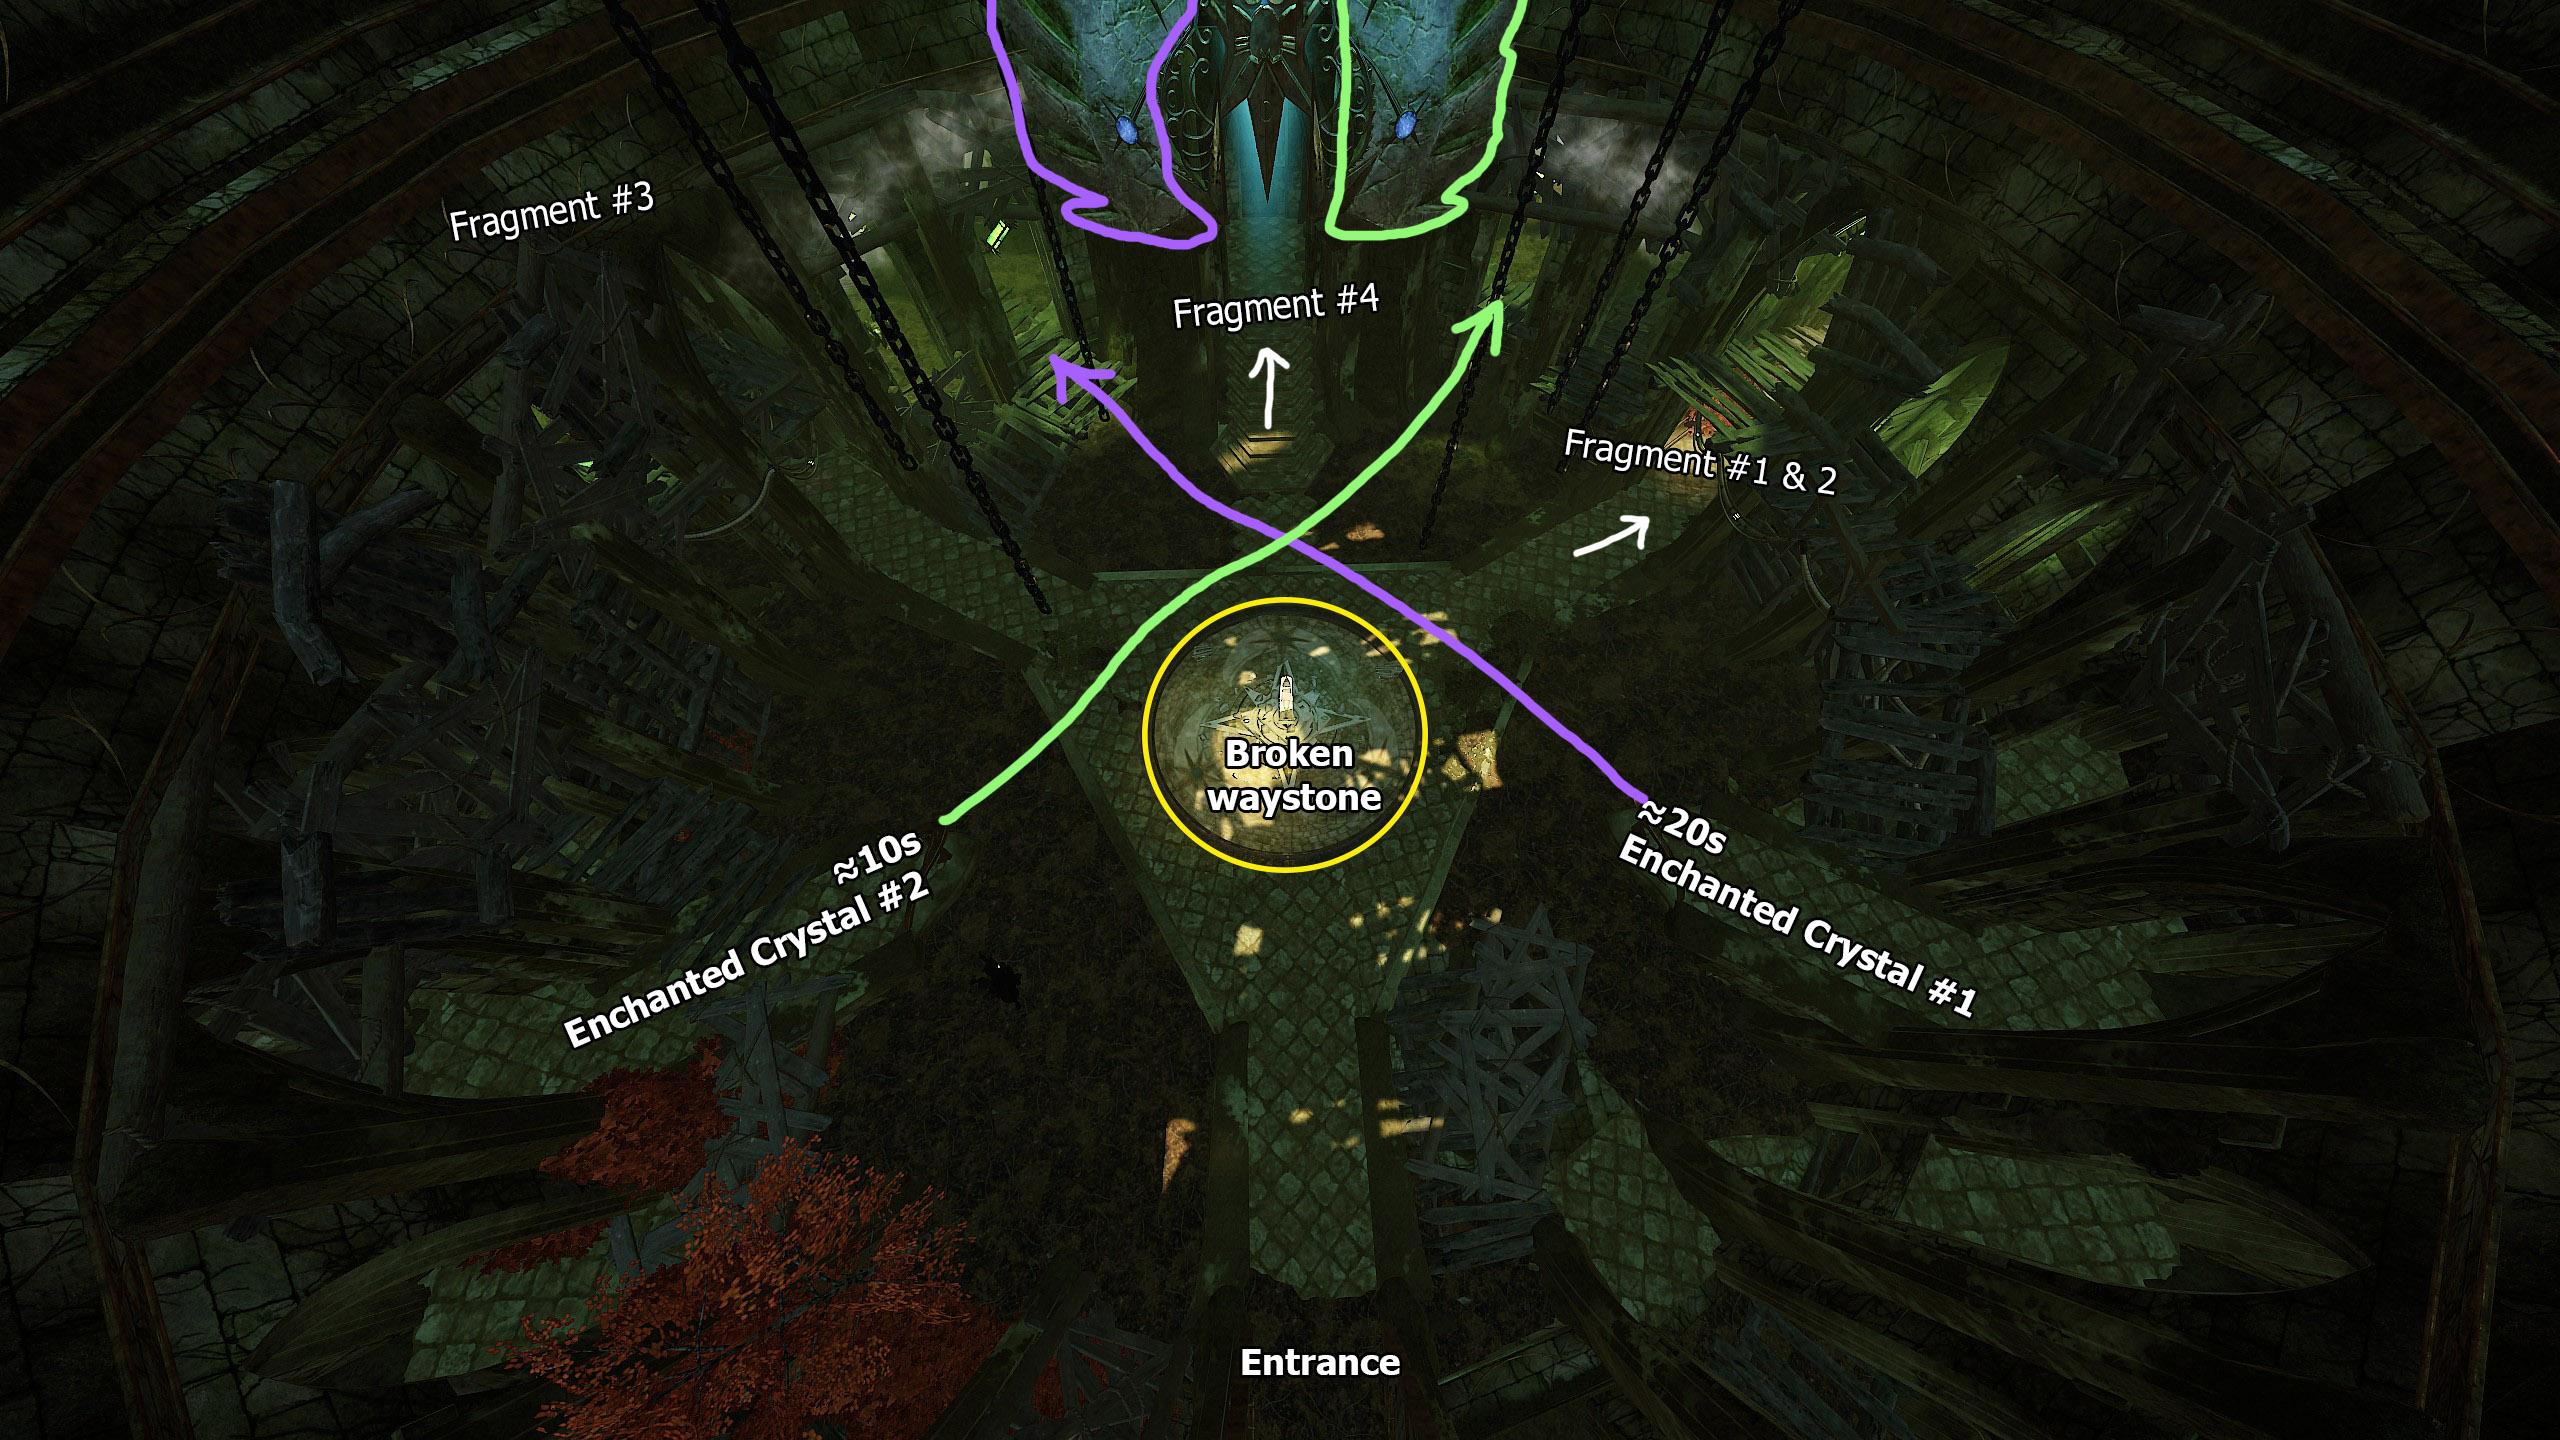 The timer starts after the 1st stone is thrown into the broken waystone, and will only end when the waystone is rebuilt with 4 collected stones.
 If you are very lucky, you can pick up a 2nd stone through a hole, thus saving time.
 You will need at least one player on your team to complete the rebuild the waystone in 90 seconds. His job is to stand in one of the three aisles in advance while you align the construction and bring the stone to the arena as quickly as possible.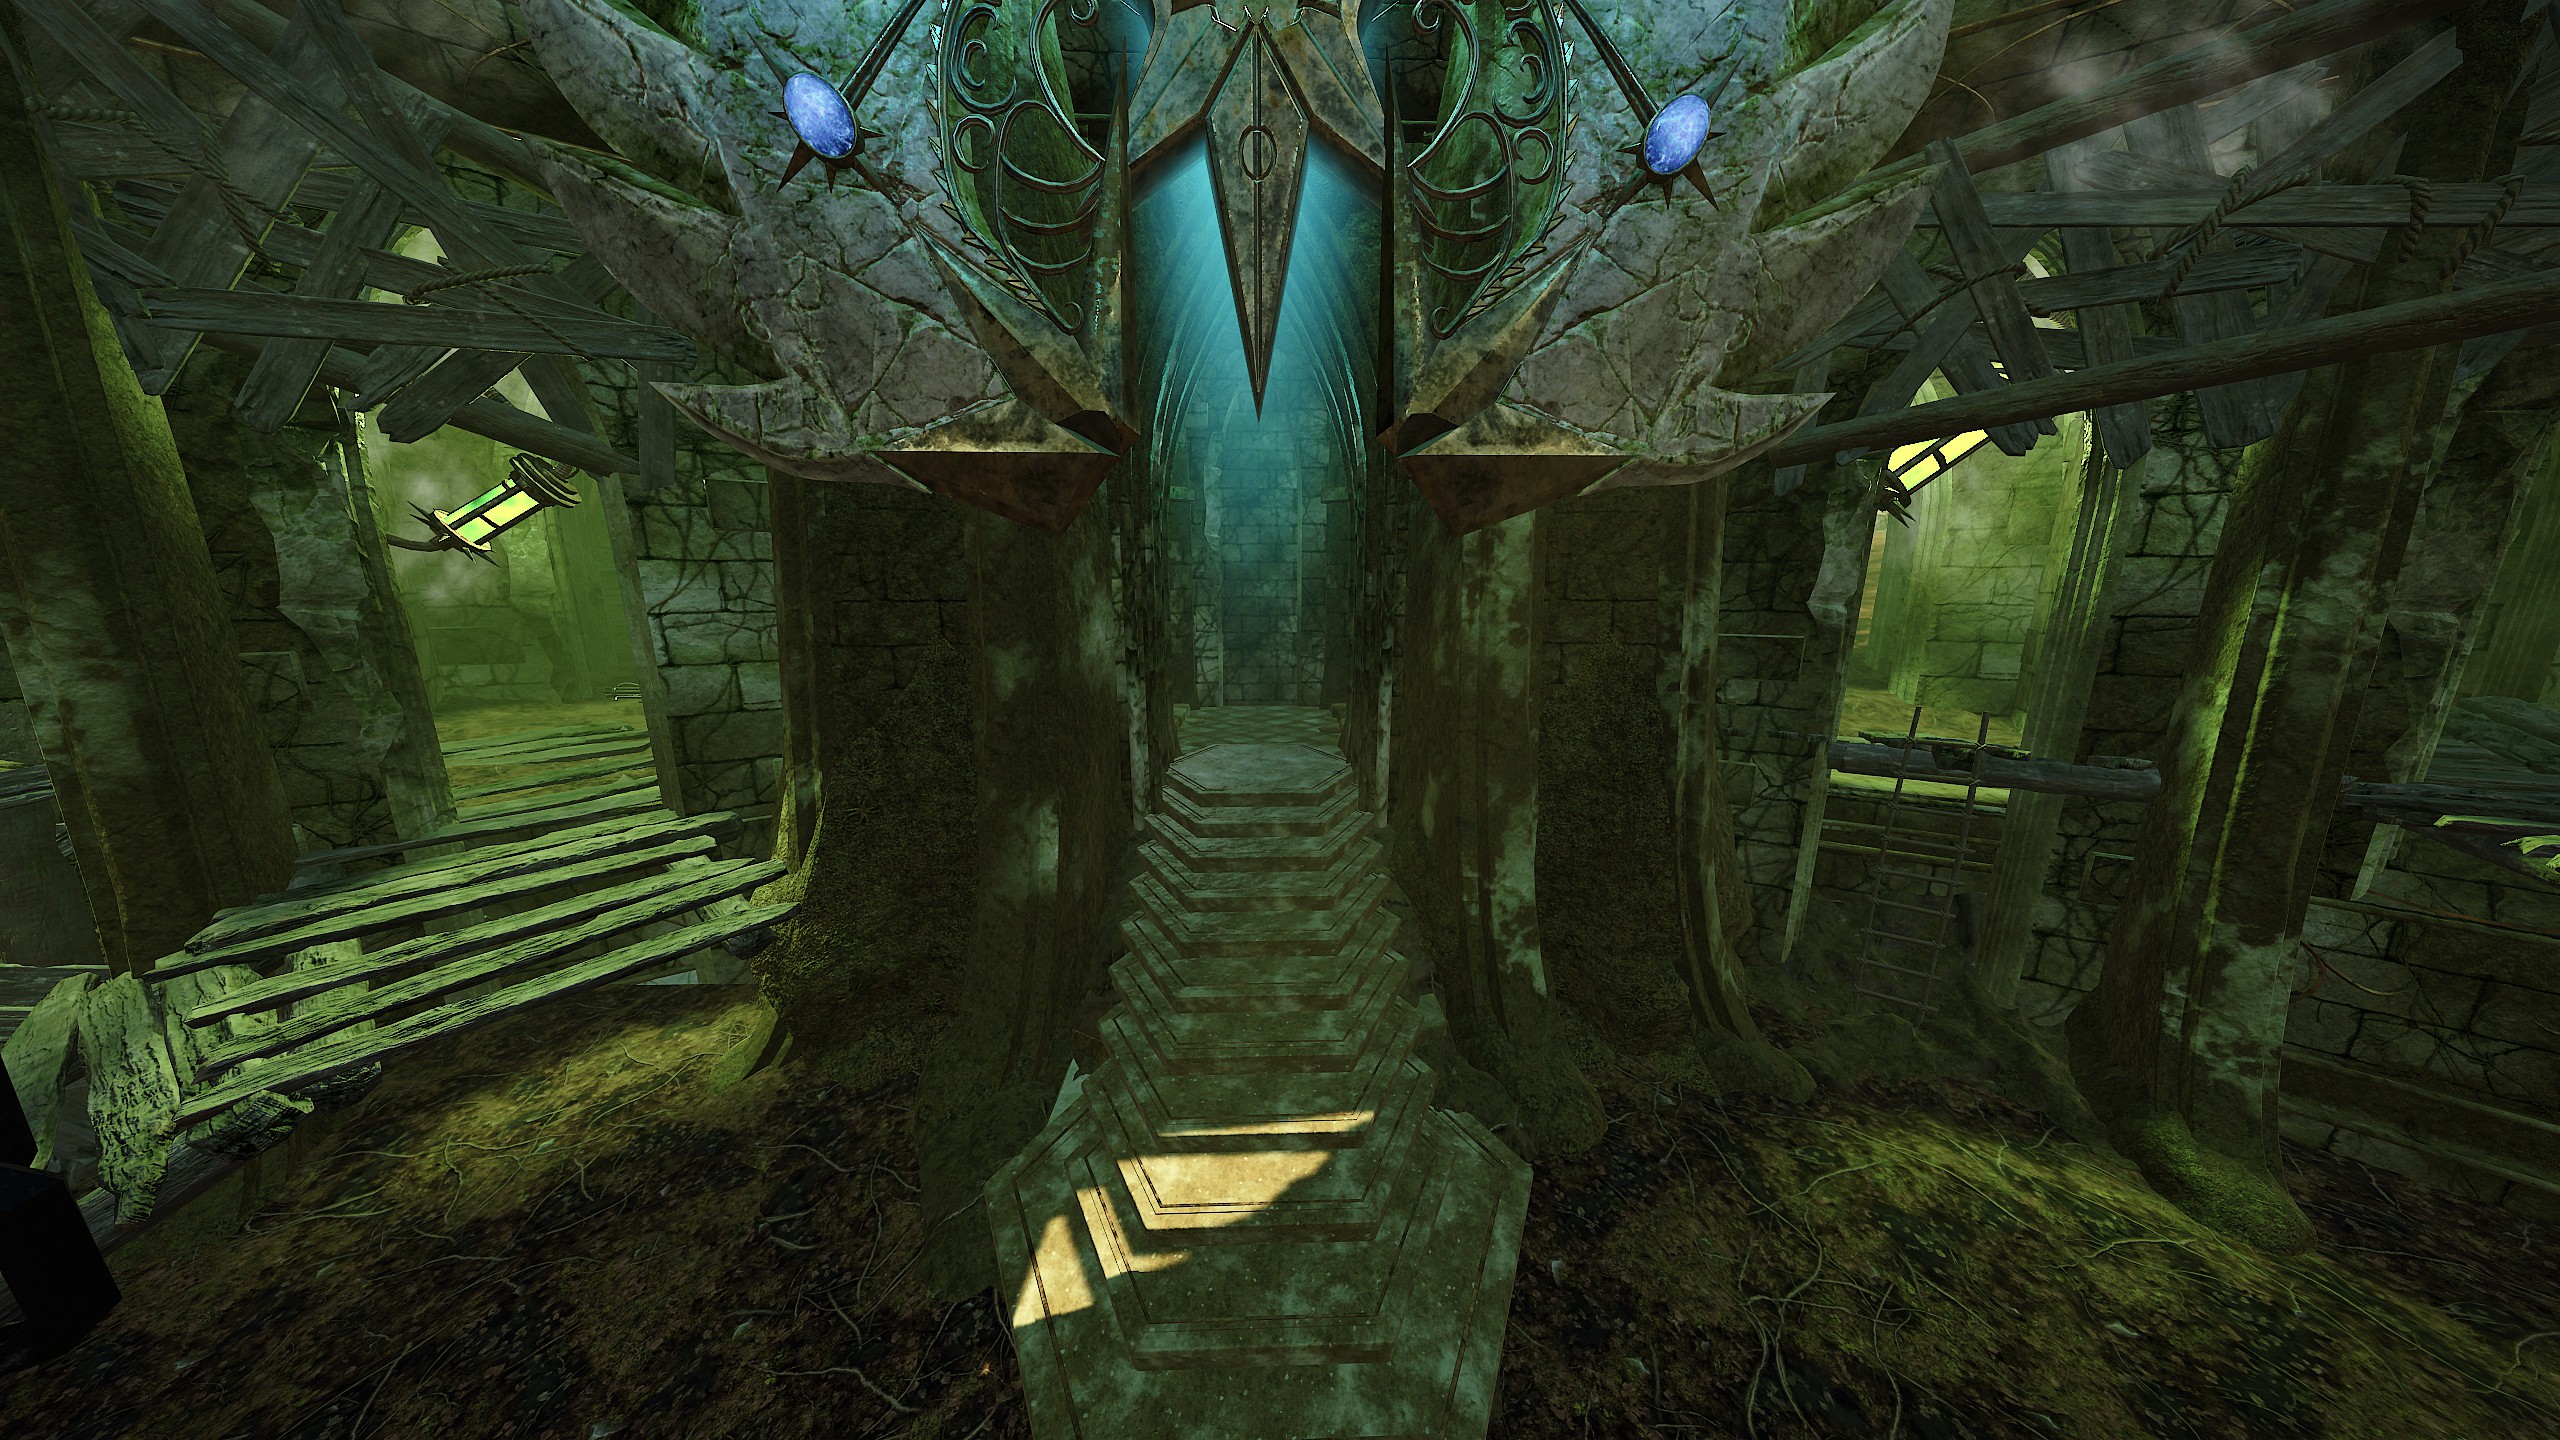
Lifehack on align elven constructions using Enchanted Crystal:
You can lower the use button as soon as you see the aisle open/crystal will go out; the construct itself will automatically stop in the centre.
Time spent to align the elven constructions:
- Enchanted Crystal (To the right of the temple entrance) ≈ 20s
- Enchanted Crystal (To the left of the temple entrance) ≈ 10s
https://youtu.be/Q1PonReIo5I https://steamcommunity.com/sharedfiles/filedetails/?id=3382066596&searchtext=Stone+Smith Advice: The main point is that you should not throw the 1st stone into the waystone, but instead collect all 4 stones near it in advance.
There is an even simpler way.https://youtu.be/GKbDACo9F7w?si=XMJb3aQE4DXv9JoZ4. Insert the last stone and get the achievement in 90 and 180 seconds
- Join the host
- Leave the group when 3/4 of the stones are installed
- Join back to the same group, for you personally the timer will be reset to 0.
 6. Not Stone Unturned, No Fragment Unfiddled
 Complete all Challenges in the Forsaken Temple. This challenge will be completed when you have completed all challenges except “Mystic Trailblazer” and “Stone-Smith”
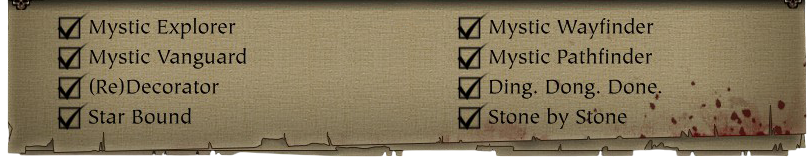
- Devious Delvings

 1. You're A Real Fun Guy
Find and destroy 50 hidden Blight-Burst Mushrooms. In one playthrough, you must destroy 50 Mushrooms that, which are scattered throughout the map. The locations of all mushrooms are shown in this guide and video:
https://steamcommunity.com/sharedfiles/filedetails/?id=3555797082 https://youtu.be/Q5frRqtLpLI
 2. Walking on Air
Complete Devious Delvings without taking damage from the toxic water. This is a fairly simple challenge — you just need to stay away from the toxic water, which is mostly located near all four power sources. Please note that completing each step (up to the last generator) raises the water level in the cave, making some areas more difficult to reach.
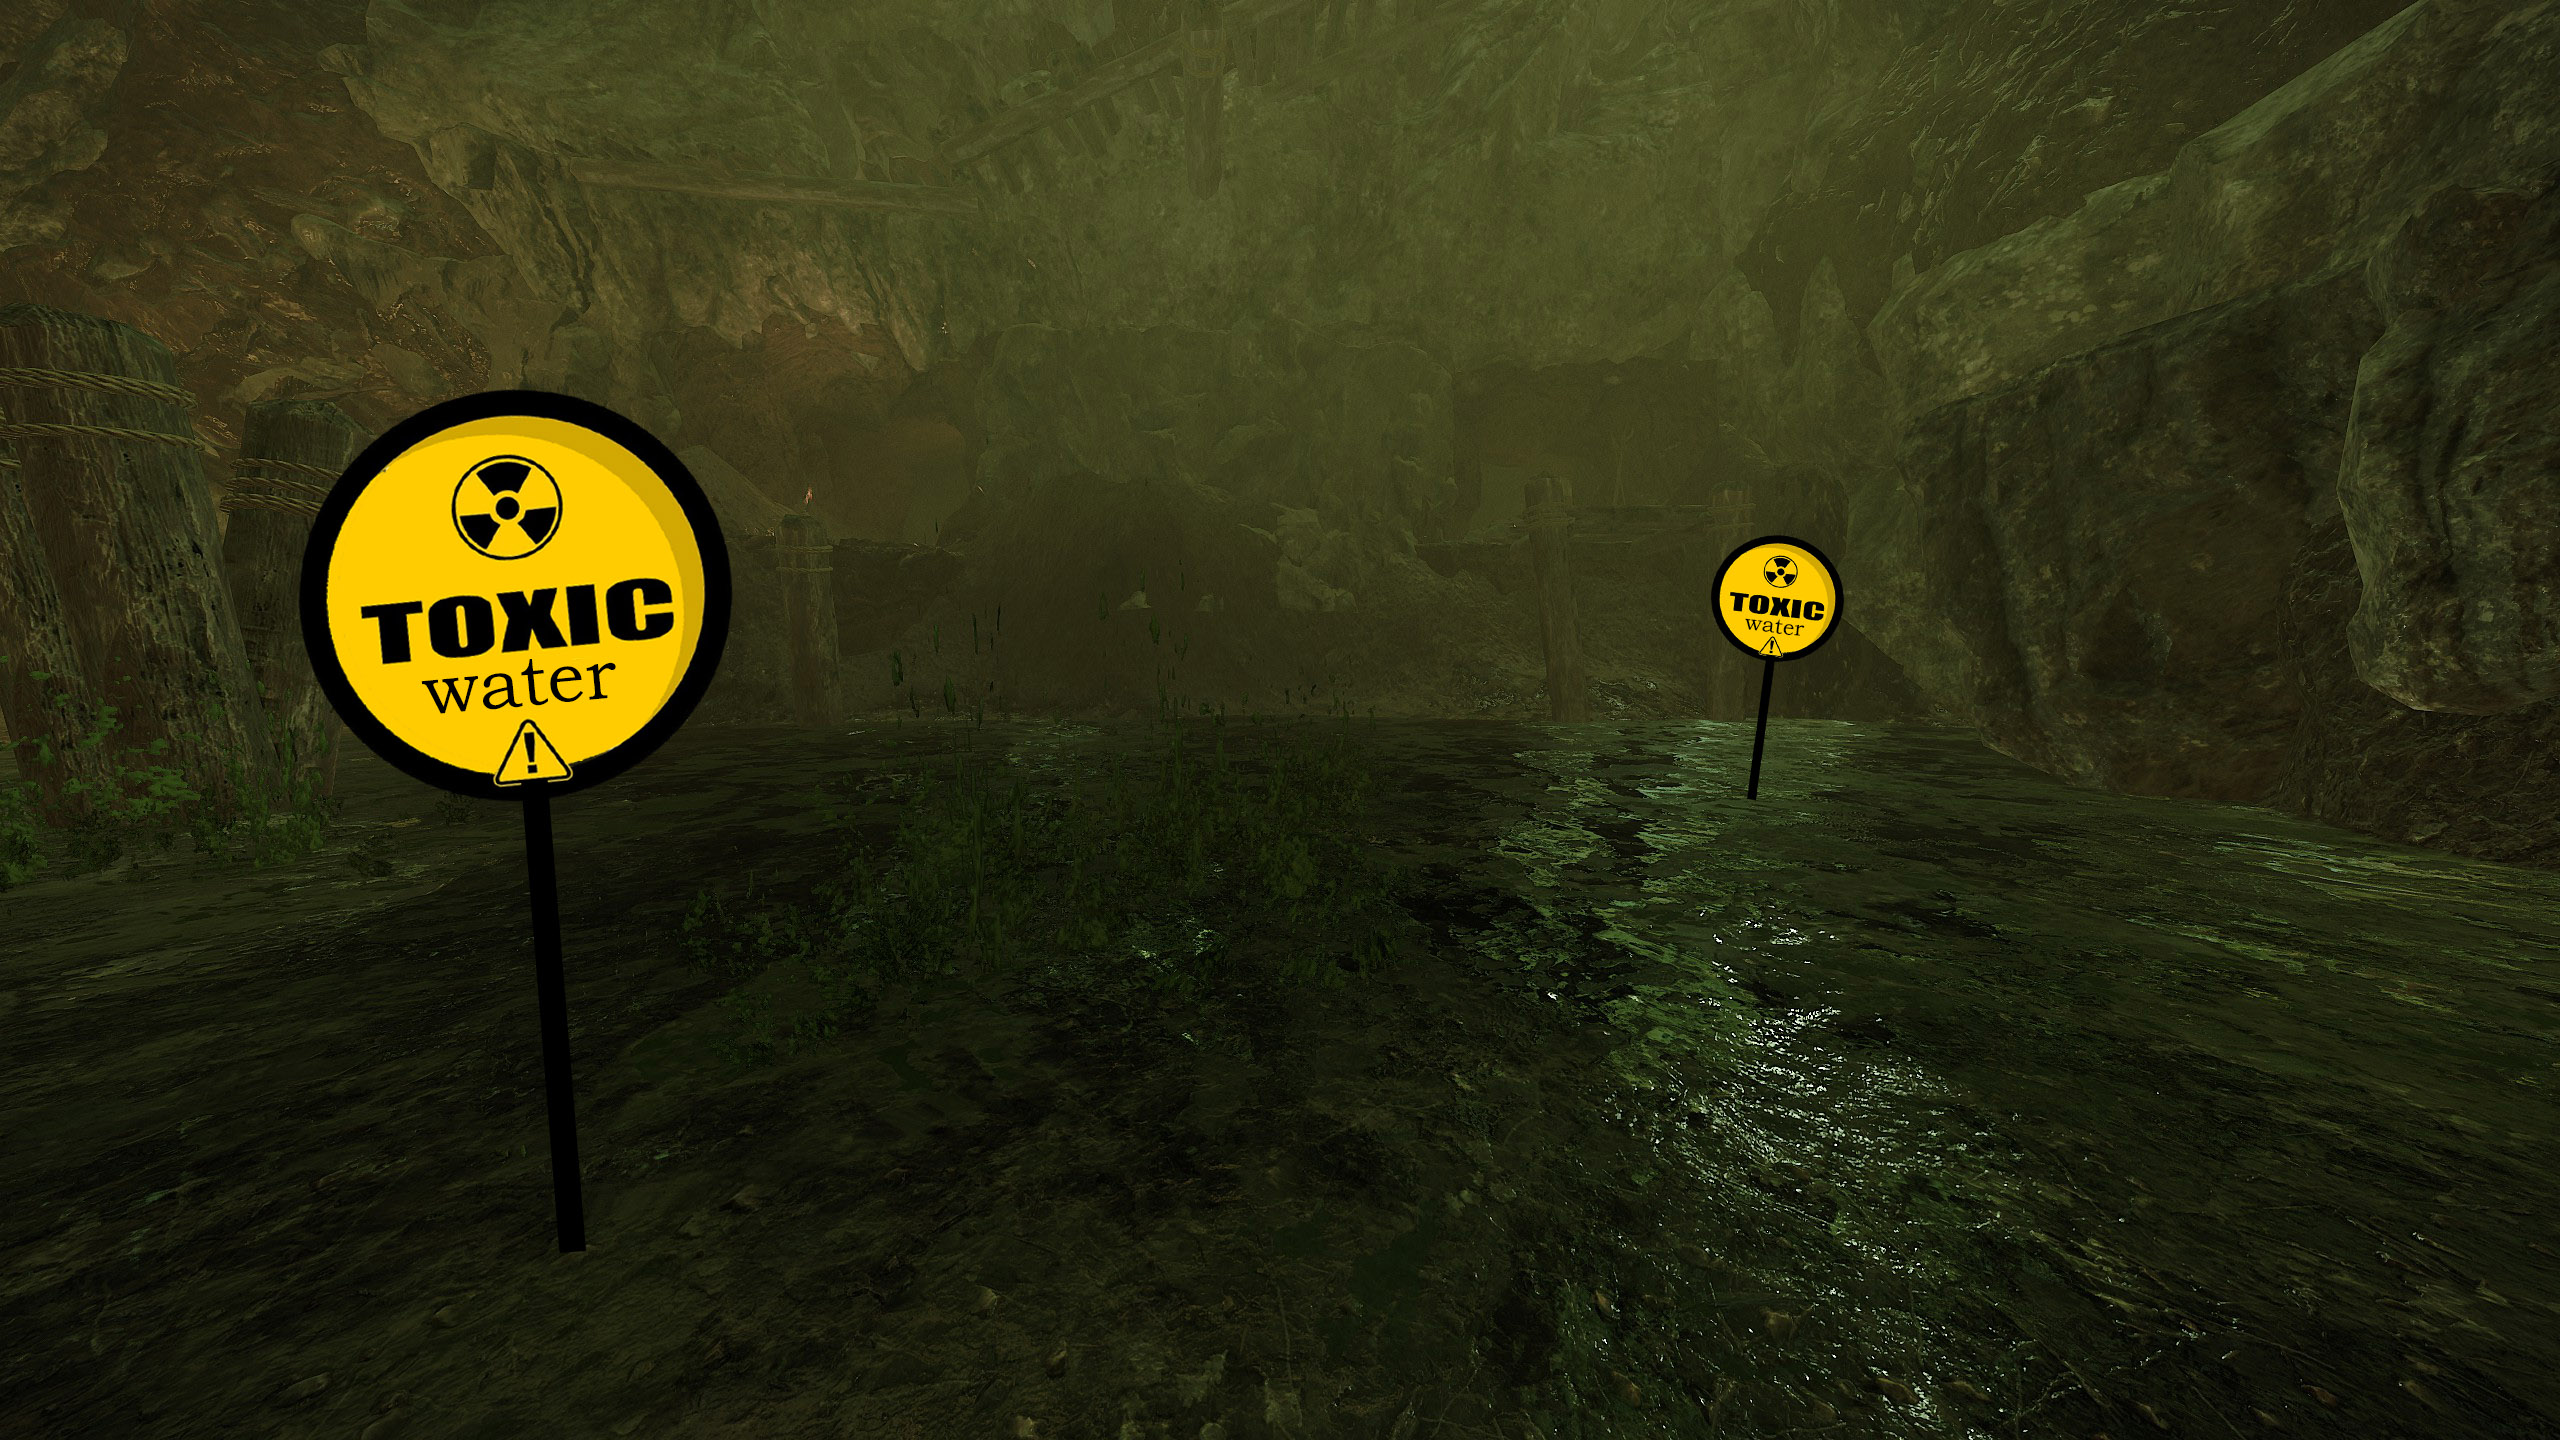 When you destroy the last generator, it triggers an explosion that deals 1 damage. Because of this damage, the challenge might not be counted as completed. To avoid taking damage, climb onto the warpstone crystal and attack the generator from there. After destroying it, the water will start rising. So, climb up as quickly as possible and leave the platforms.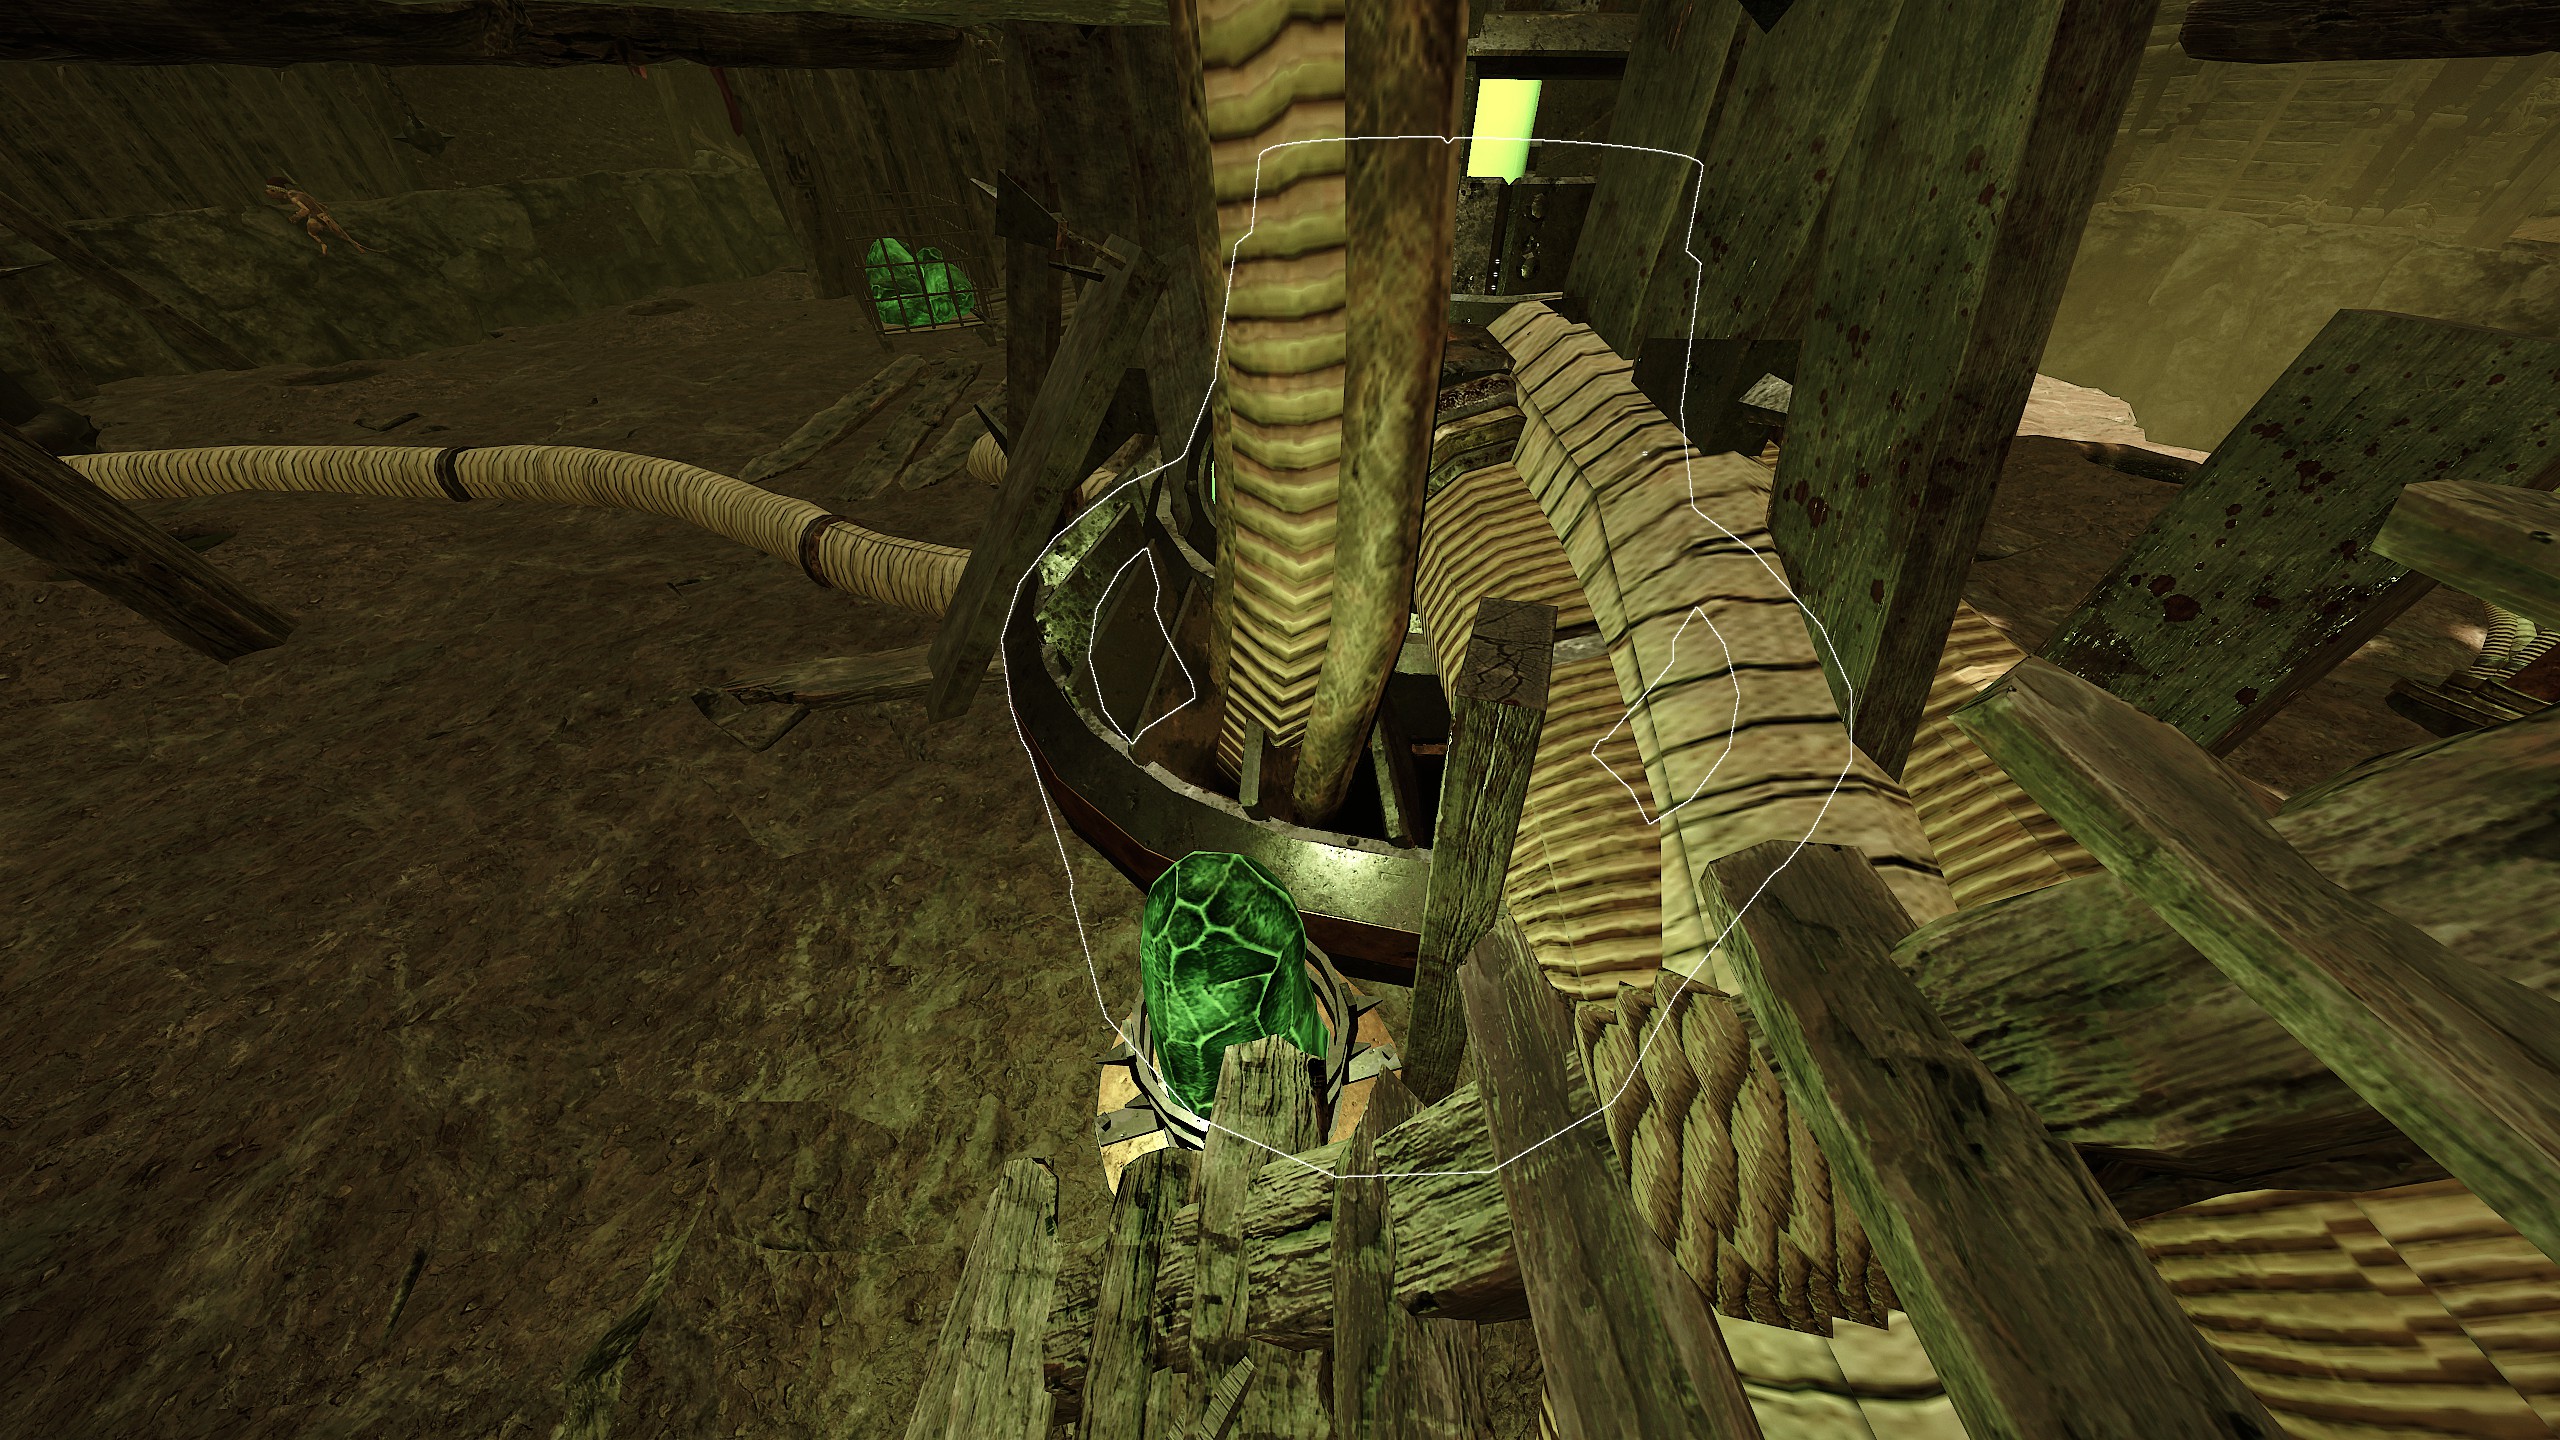
Keep in mind that there won’t be a message in the chat confirming the challenge completion. (at least that's how it is for me)
 3. No Time Like The Present
Complete all 5 objectives in Devious Delvings within 4 minutes.
In this challenge, you need to disable all 5 power sources, including the central generator.
To perform this challenge solo, follow this video:
https://www.youtube.com/watch?v=xKOsMC2vflk First, make a speedrun build on Slayer, as shown in the beginning of the video. (Be sure to equip Dual Axes). To move fast, use the L1 - QQ combo. For convenience, I made macro that automates this process: https://github.com/ChadMasodin/L1-QQ-Spam-DualAxes
I also recommend following that sequence for power off:
Windlass → Orb covered in Warpstone Crystals → Generator → Second Windlass.
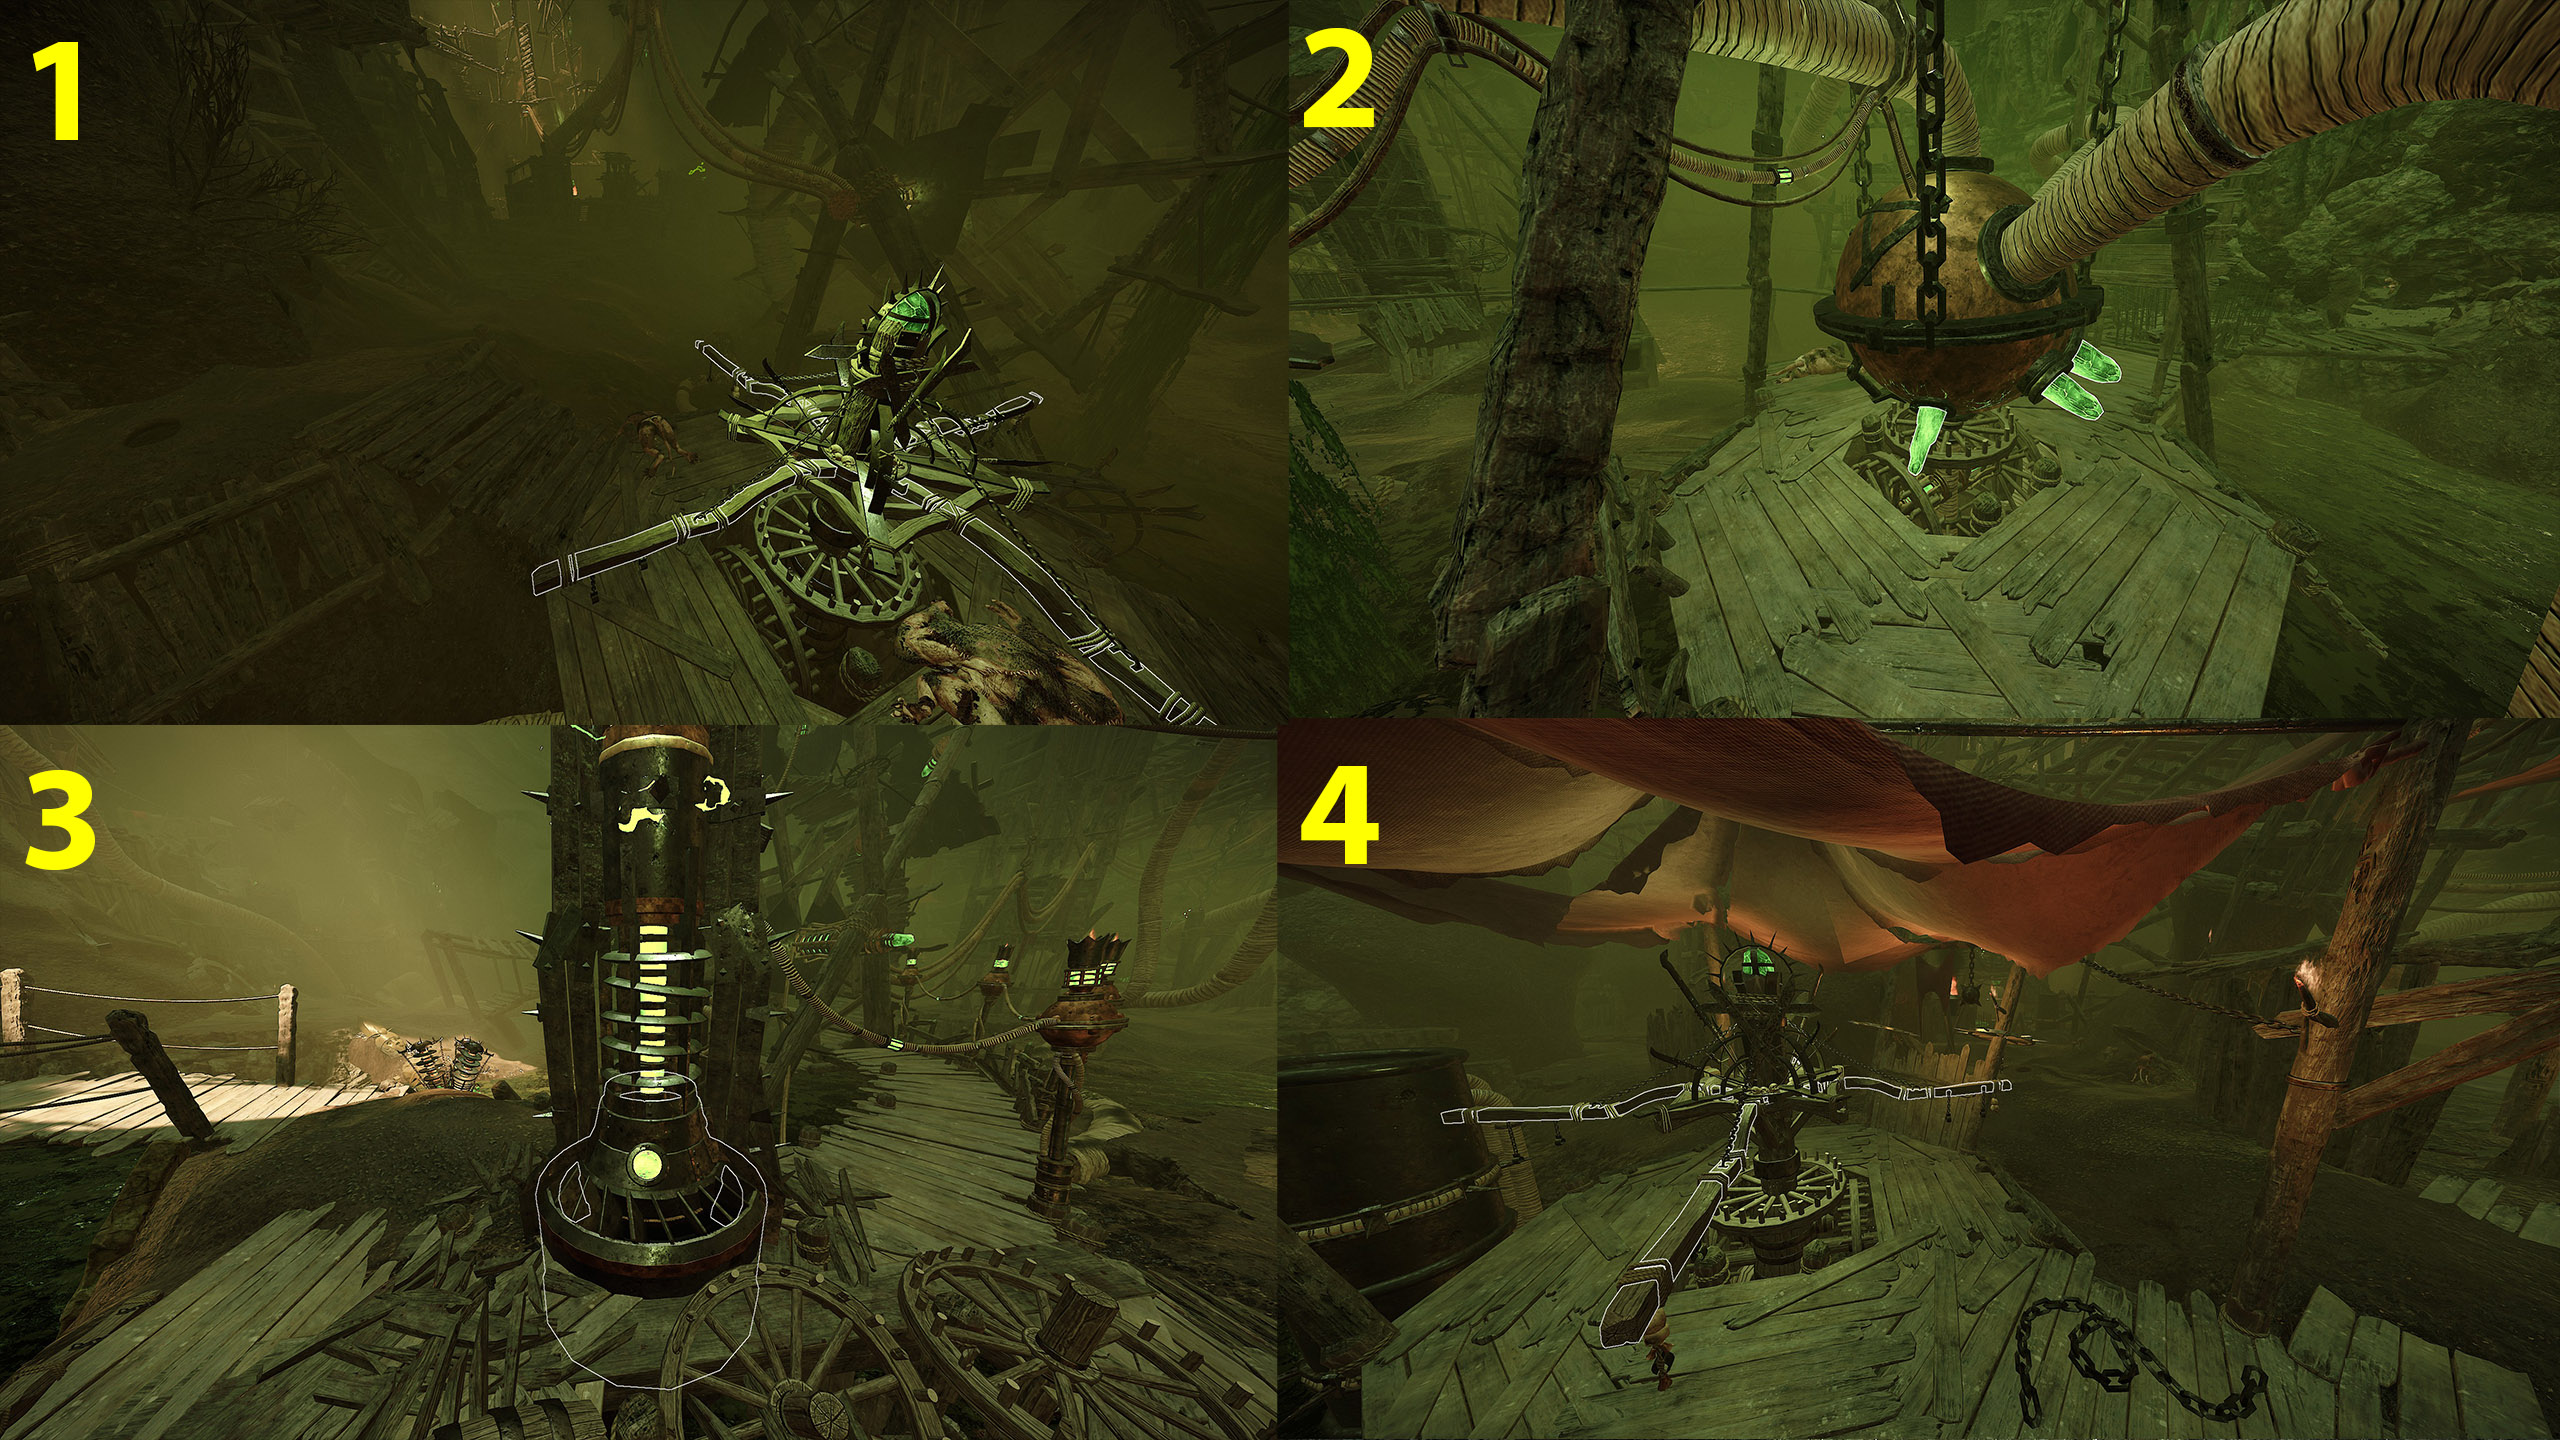
Please use this skip for solo playthrough only!
https://youtu.be/lZejZu6Iv-M
 4. A Measure of Retribution
Complete all challenges in Devious Delvings. This challenge will be completed when you have completed all challenges except “The Lake's Last Revenge” and “No Time Like The Present”

- The Well of Dreams

 1. Heritage Restored
Scrub the dirt from 20 elven shields in The Well of Dreams. In one playthrough, you must clear 20 elven shields. The locations of all shields are shown in this guide and video:
https://steamcommunity.com/sharedfiles/filedetails/?id=3555849651 https://www.youtube.com/watch?v=u_yvukNHn18
 2. With Rat-Like Tread
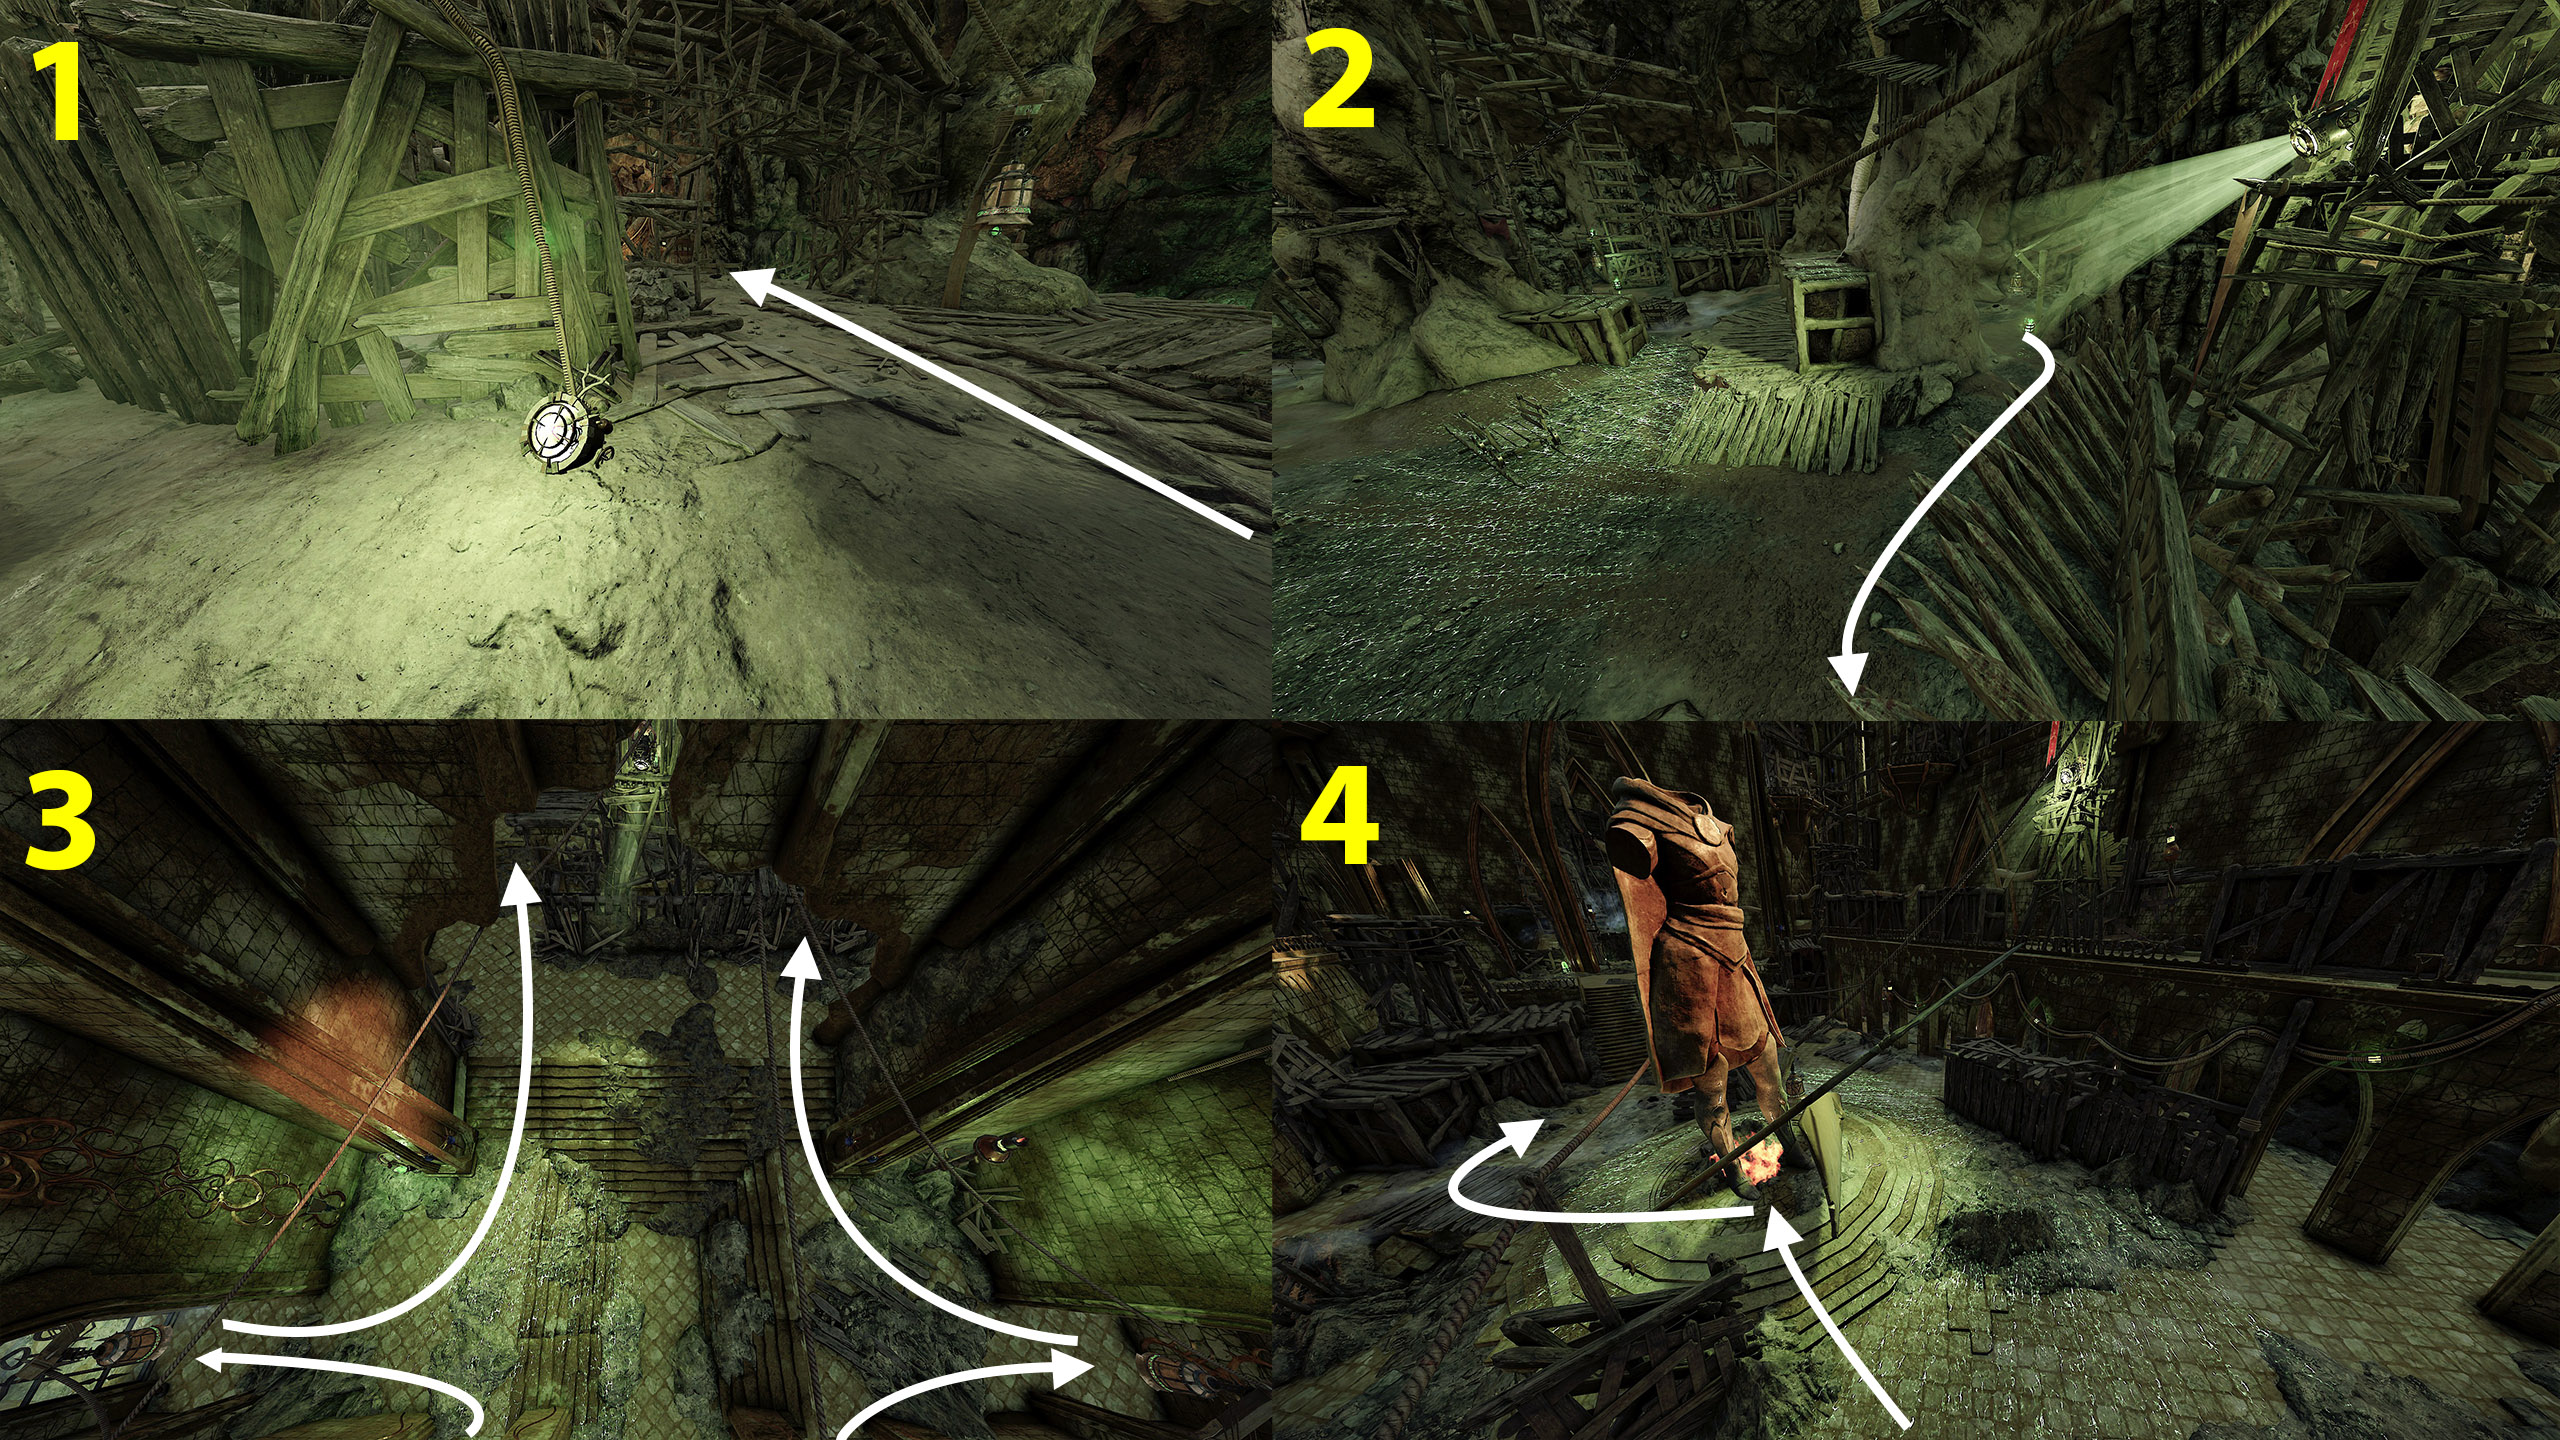
Complete The Well of Dreams without being caught in a searchlight
Let's have a closer look at each searchlight:
- The first searchlight is already broken and can be safely ignored.
- The second searchlight can be safely bypassed by holding on to the wall with stakes.
- The third searchlight, it’s unlikely that you’ll be able to just run past it, so it’s better to wait next to the left or right bell.
- The fourth searchlight is also better to wait it out, hiding behind a large shield or wooden structure.
 3. Power Unsupplied
Sabotage 4 skaven generators around the portal. An impact from something heavy might also do the trick... (The Well of Dreams)
For this challenge, it is recommended to choose the "Champion" difficulty and kill the bots before the final event.
The Well of Dreams room will have four generators, which are evenly spread from each other in the room. The pipes from the contraptions next to the books have pipes, which should lead to them. To destroy them, you must kite monsters (rat ogre, stormfiend) to use their attacks near it and destroy them. An indicator for them being destroyed is lack of glow on it's surface.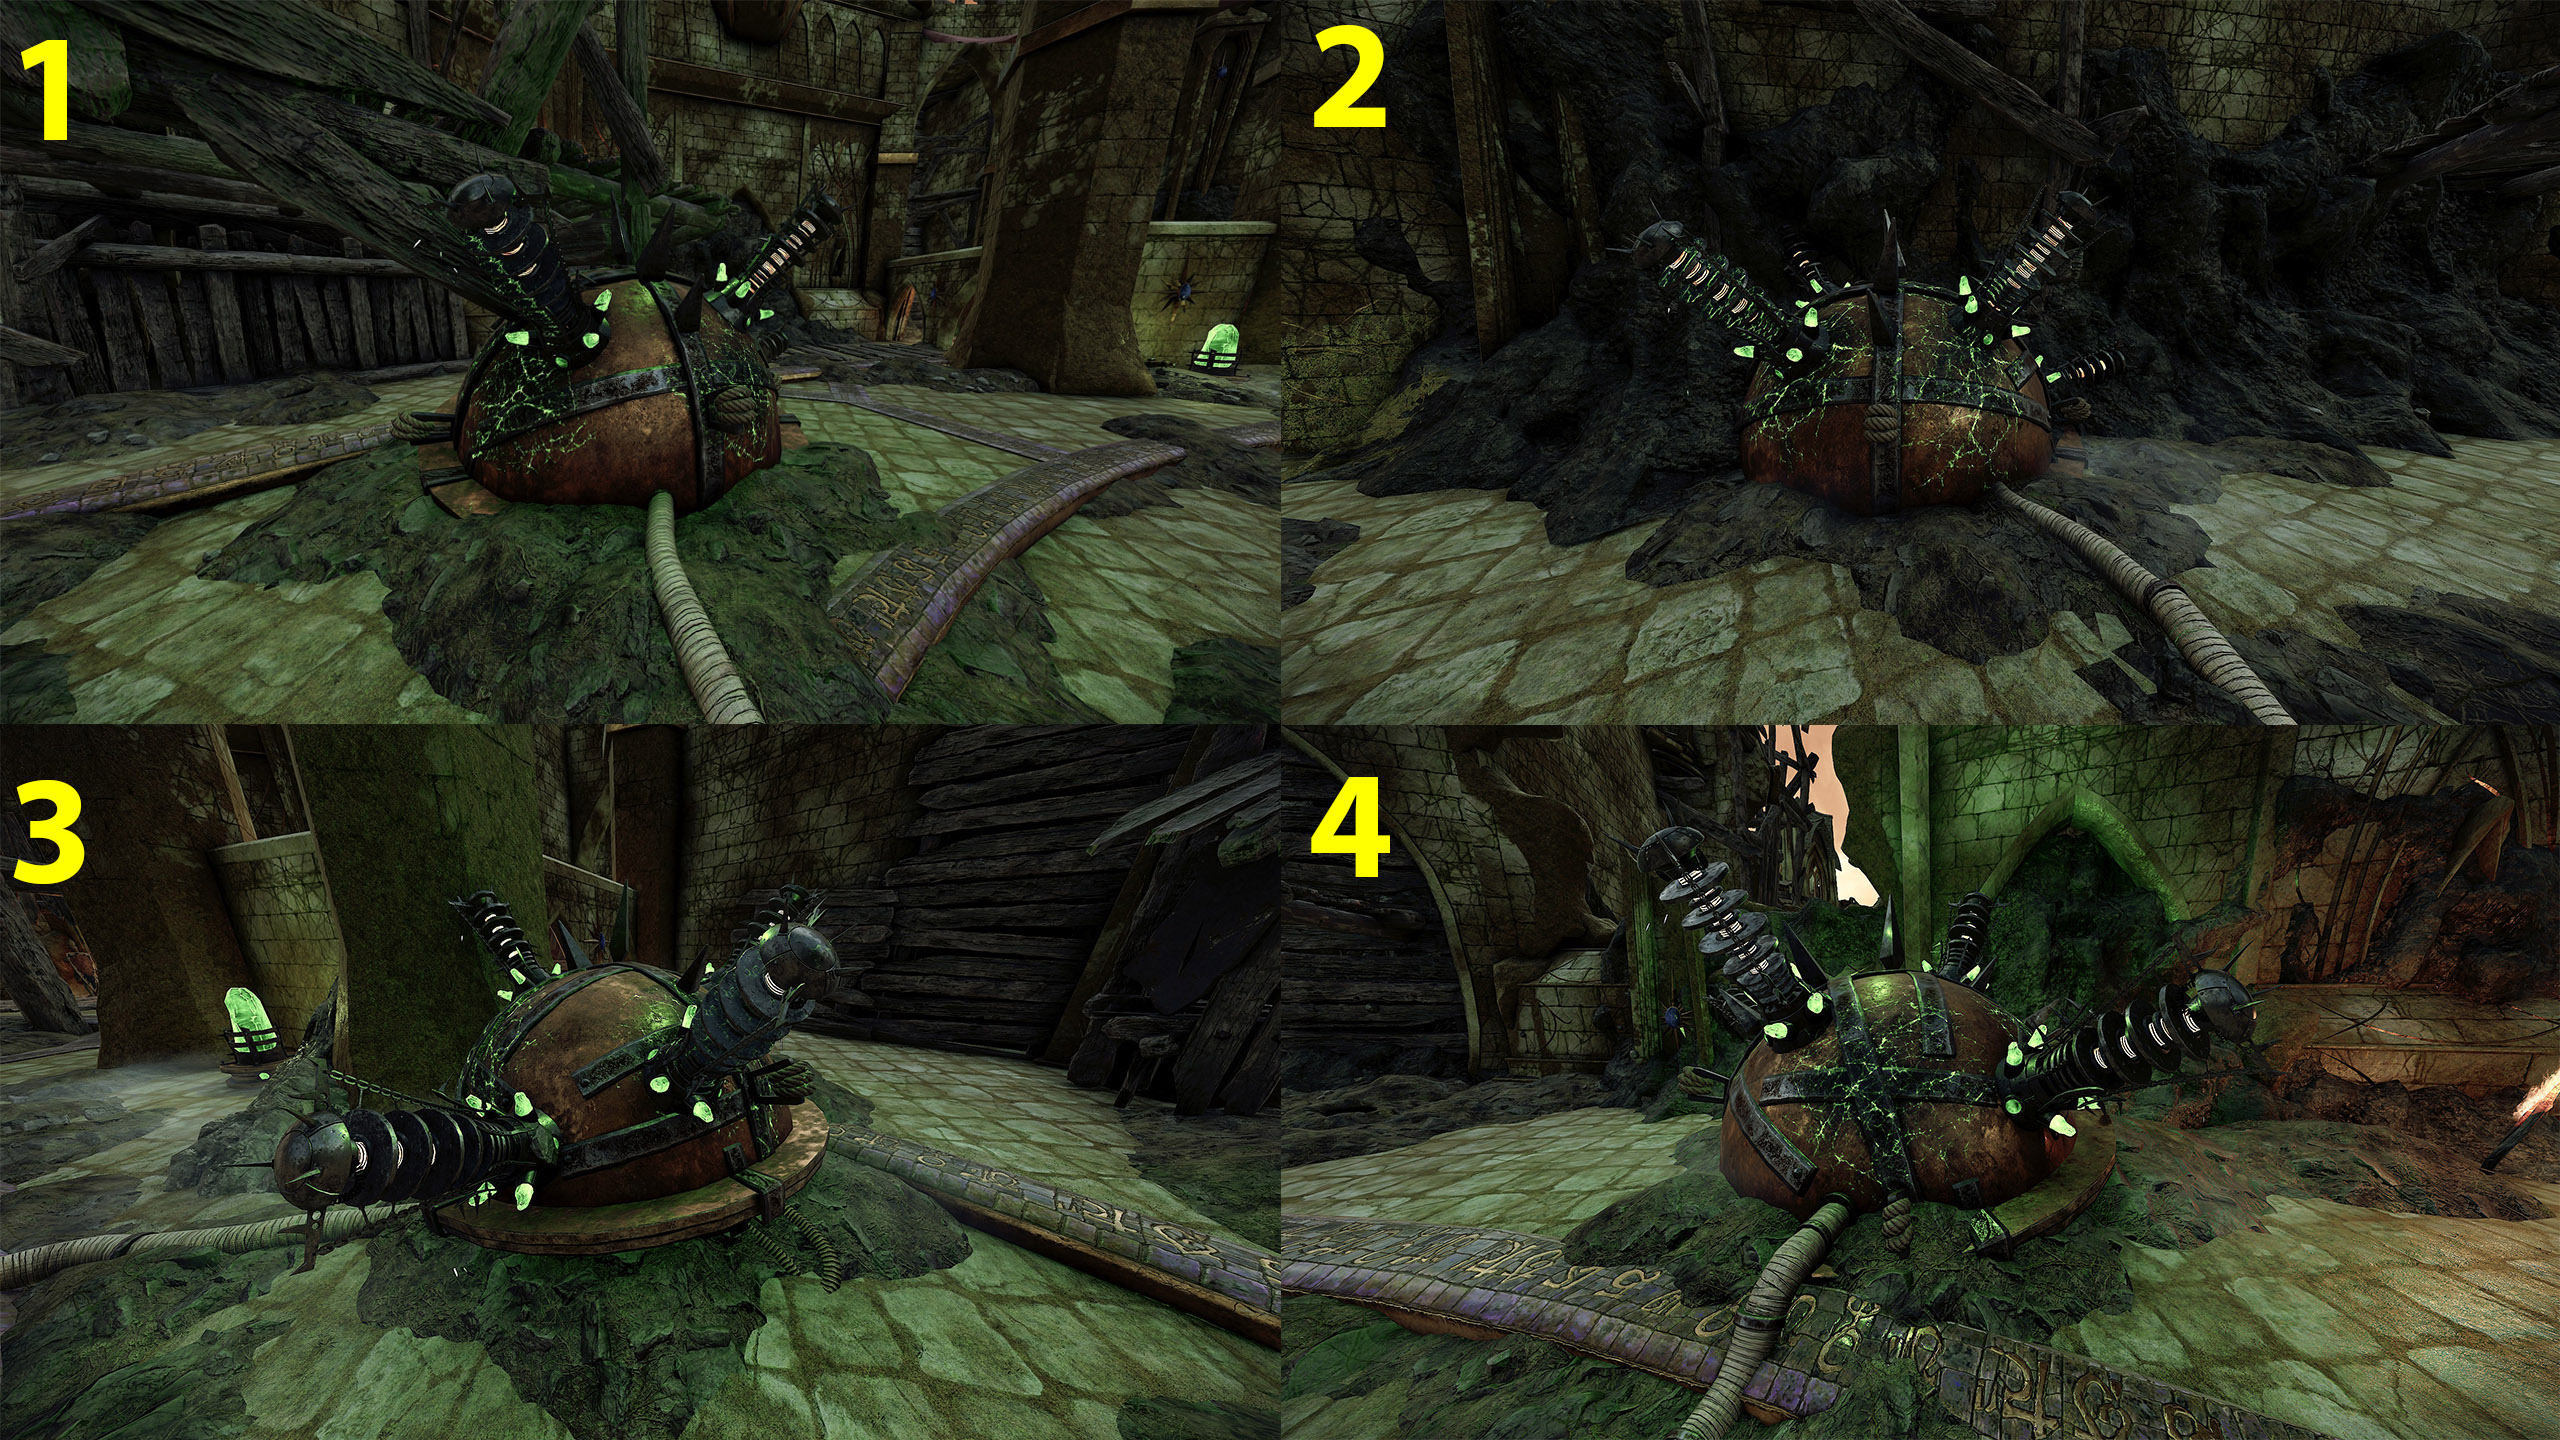 https://youtu.be/Y1ZfZIj1ayI?si=_jAEwWIw9PQOdWJx&t=353
 4. Early Closing
After finding it, close the portal in under 3 minutes (The Well of Dreams)
This is a fairly simple challenge that's unlikely to pose any problems. However, to complete the final event as quickly as possible, I recommend choosing the "Recruit" difficulty. Once you're in the arena, start clearing the shields to the left of the entrance, moving clockwise.
Once you have found all 3 runes, two bosses will spawn: a Rat Ogre and a Stormfiend. After defeating both bosses, you must enter the runes you found into the books - on each book, select the page that displays the same rune as the nearest shield. Once this is done, the portal will deactivate and a bomb will drop onto the floor, destroying one of the Skaven constructions at the edge of the arena and opening a path to the exit. After this, the challenge will be completed.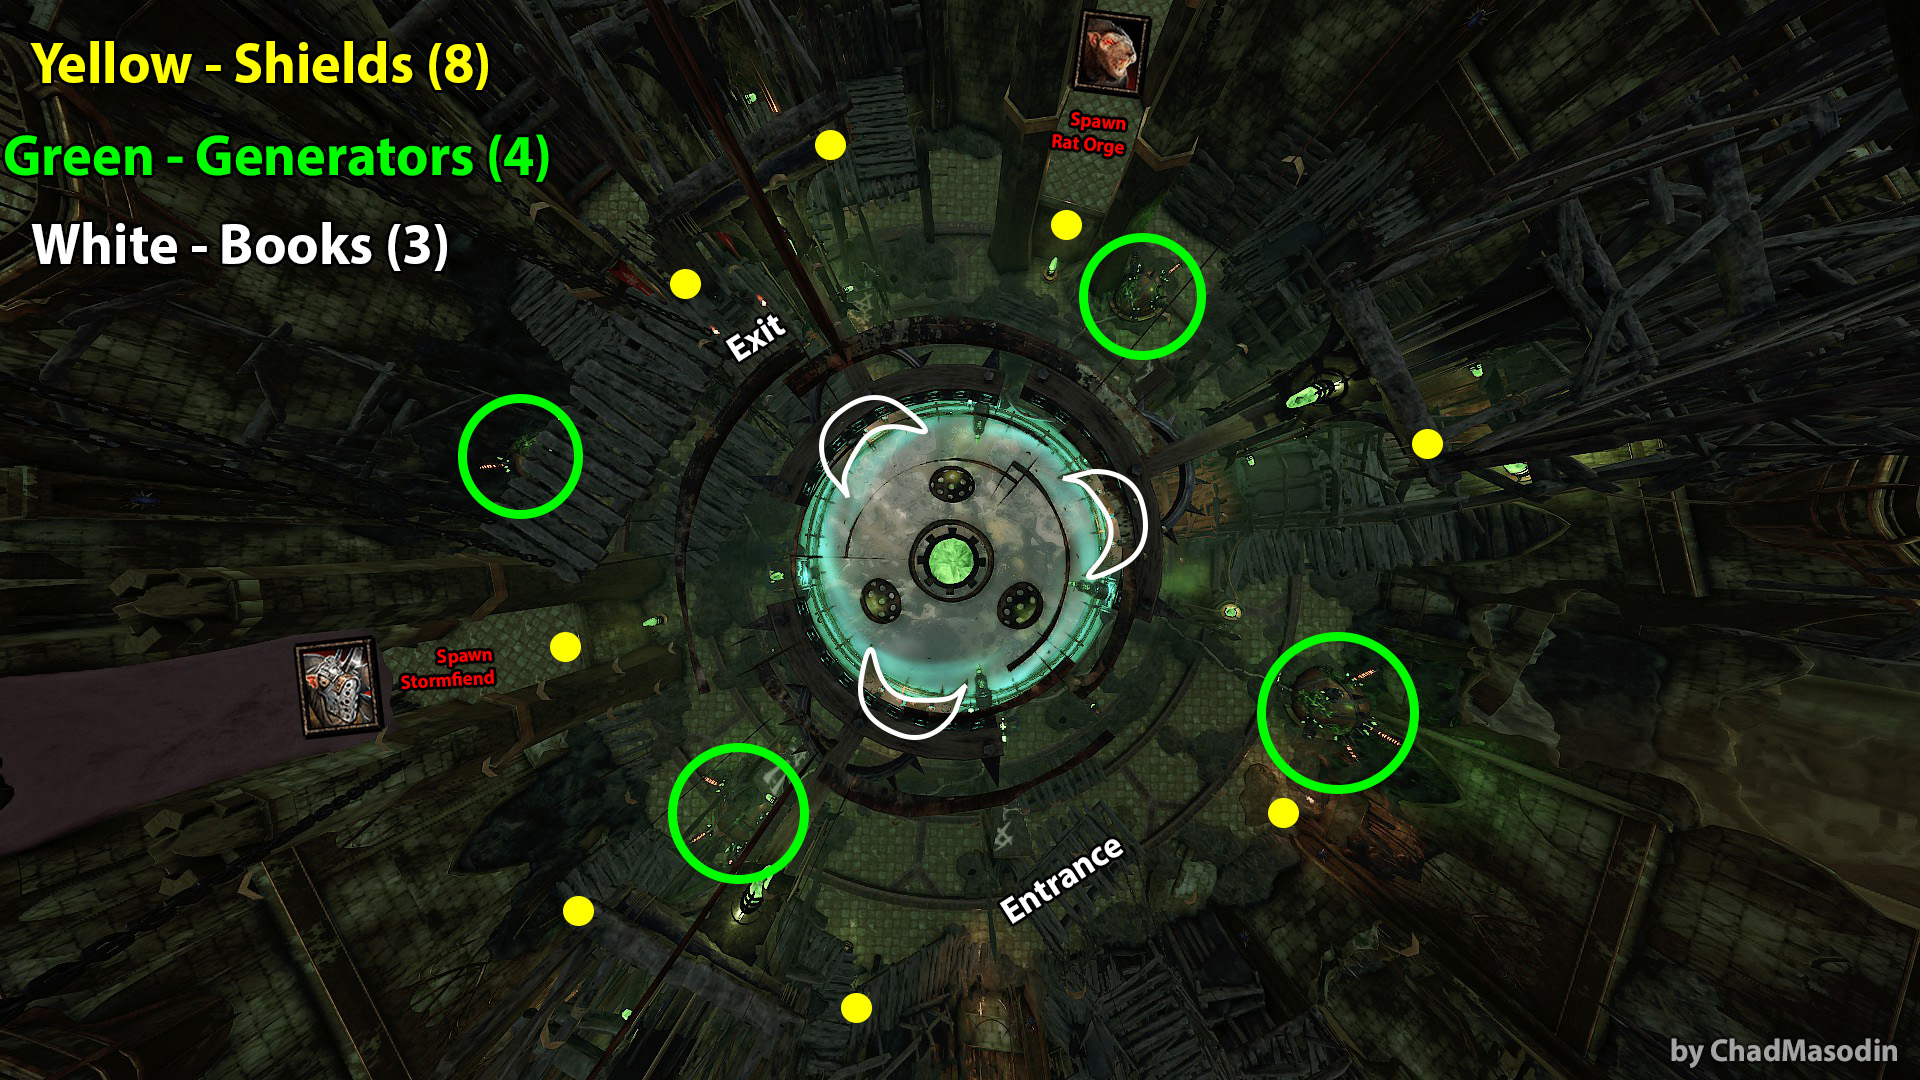
 5. Verminous Dreams Dispelled
Complete all Challenges in The Well of Dreams. This challenge will be completed when you have completed all challenges in The Well of Dreams.
Reikland Tales

- Return to the Reik
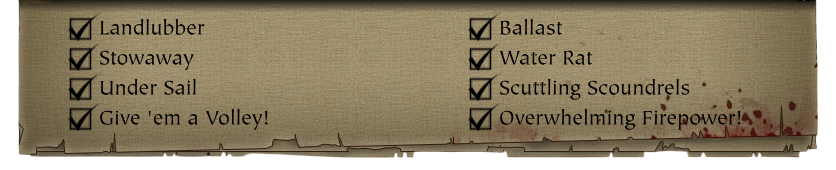
 1. Under Sail
Sail a full nautical mile.
Each completion of Return to the Reik adds 0.4 to the mile. There are 3 missions to complete in total.
 2. Casting Off
Do not let Pactsworn grapples remain attached to your ship for longer than a total of 60 seconds.
This challenge requires coordination with a full team, as bots do not target the grapples effectively. However, one tip to speed things up is that the Grail Knight’s Blessed Blade and the Shade’s Infiltrate deal significant damage to the grapples. Crucially, hitting the grapples does not break the Shade’s invisibility.
You must quickly destroy three sets of hooks on the first ship, as this task contributes to the overall 60-second timer. Aim to destroy all the hooks on this ship within 1-2 seconds, which will leave ample time for the final stage where you will be pulled in by two hooks.
Immediately fire your cannons once the enemies begin boarding your ship to eliminate all rats on the deck. Afterwards, split up to smash the warpstones. Two players must climb to opposite ends of the ship to break the sphere fragments, while the other two focus on the larger machine in the center (the generator). The players must then return to the ship and prepare to break the grips at each end.
 3. Scuttling Scoundrels
Sink all Pactsworn ships in under 45 seconds. When the ship turns to your starboard side, lining up with the barrel of the starboard cannon and the mast of the enemy ship, fire that gun, and then immediately the left one. If timed correctly, you’ll hit the first ship as its health bar appears. Wait a few seconds for the second ship and repeat the salvo: right cannon, then left.
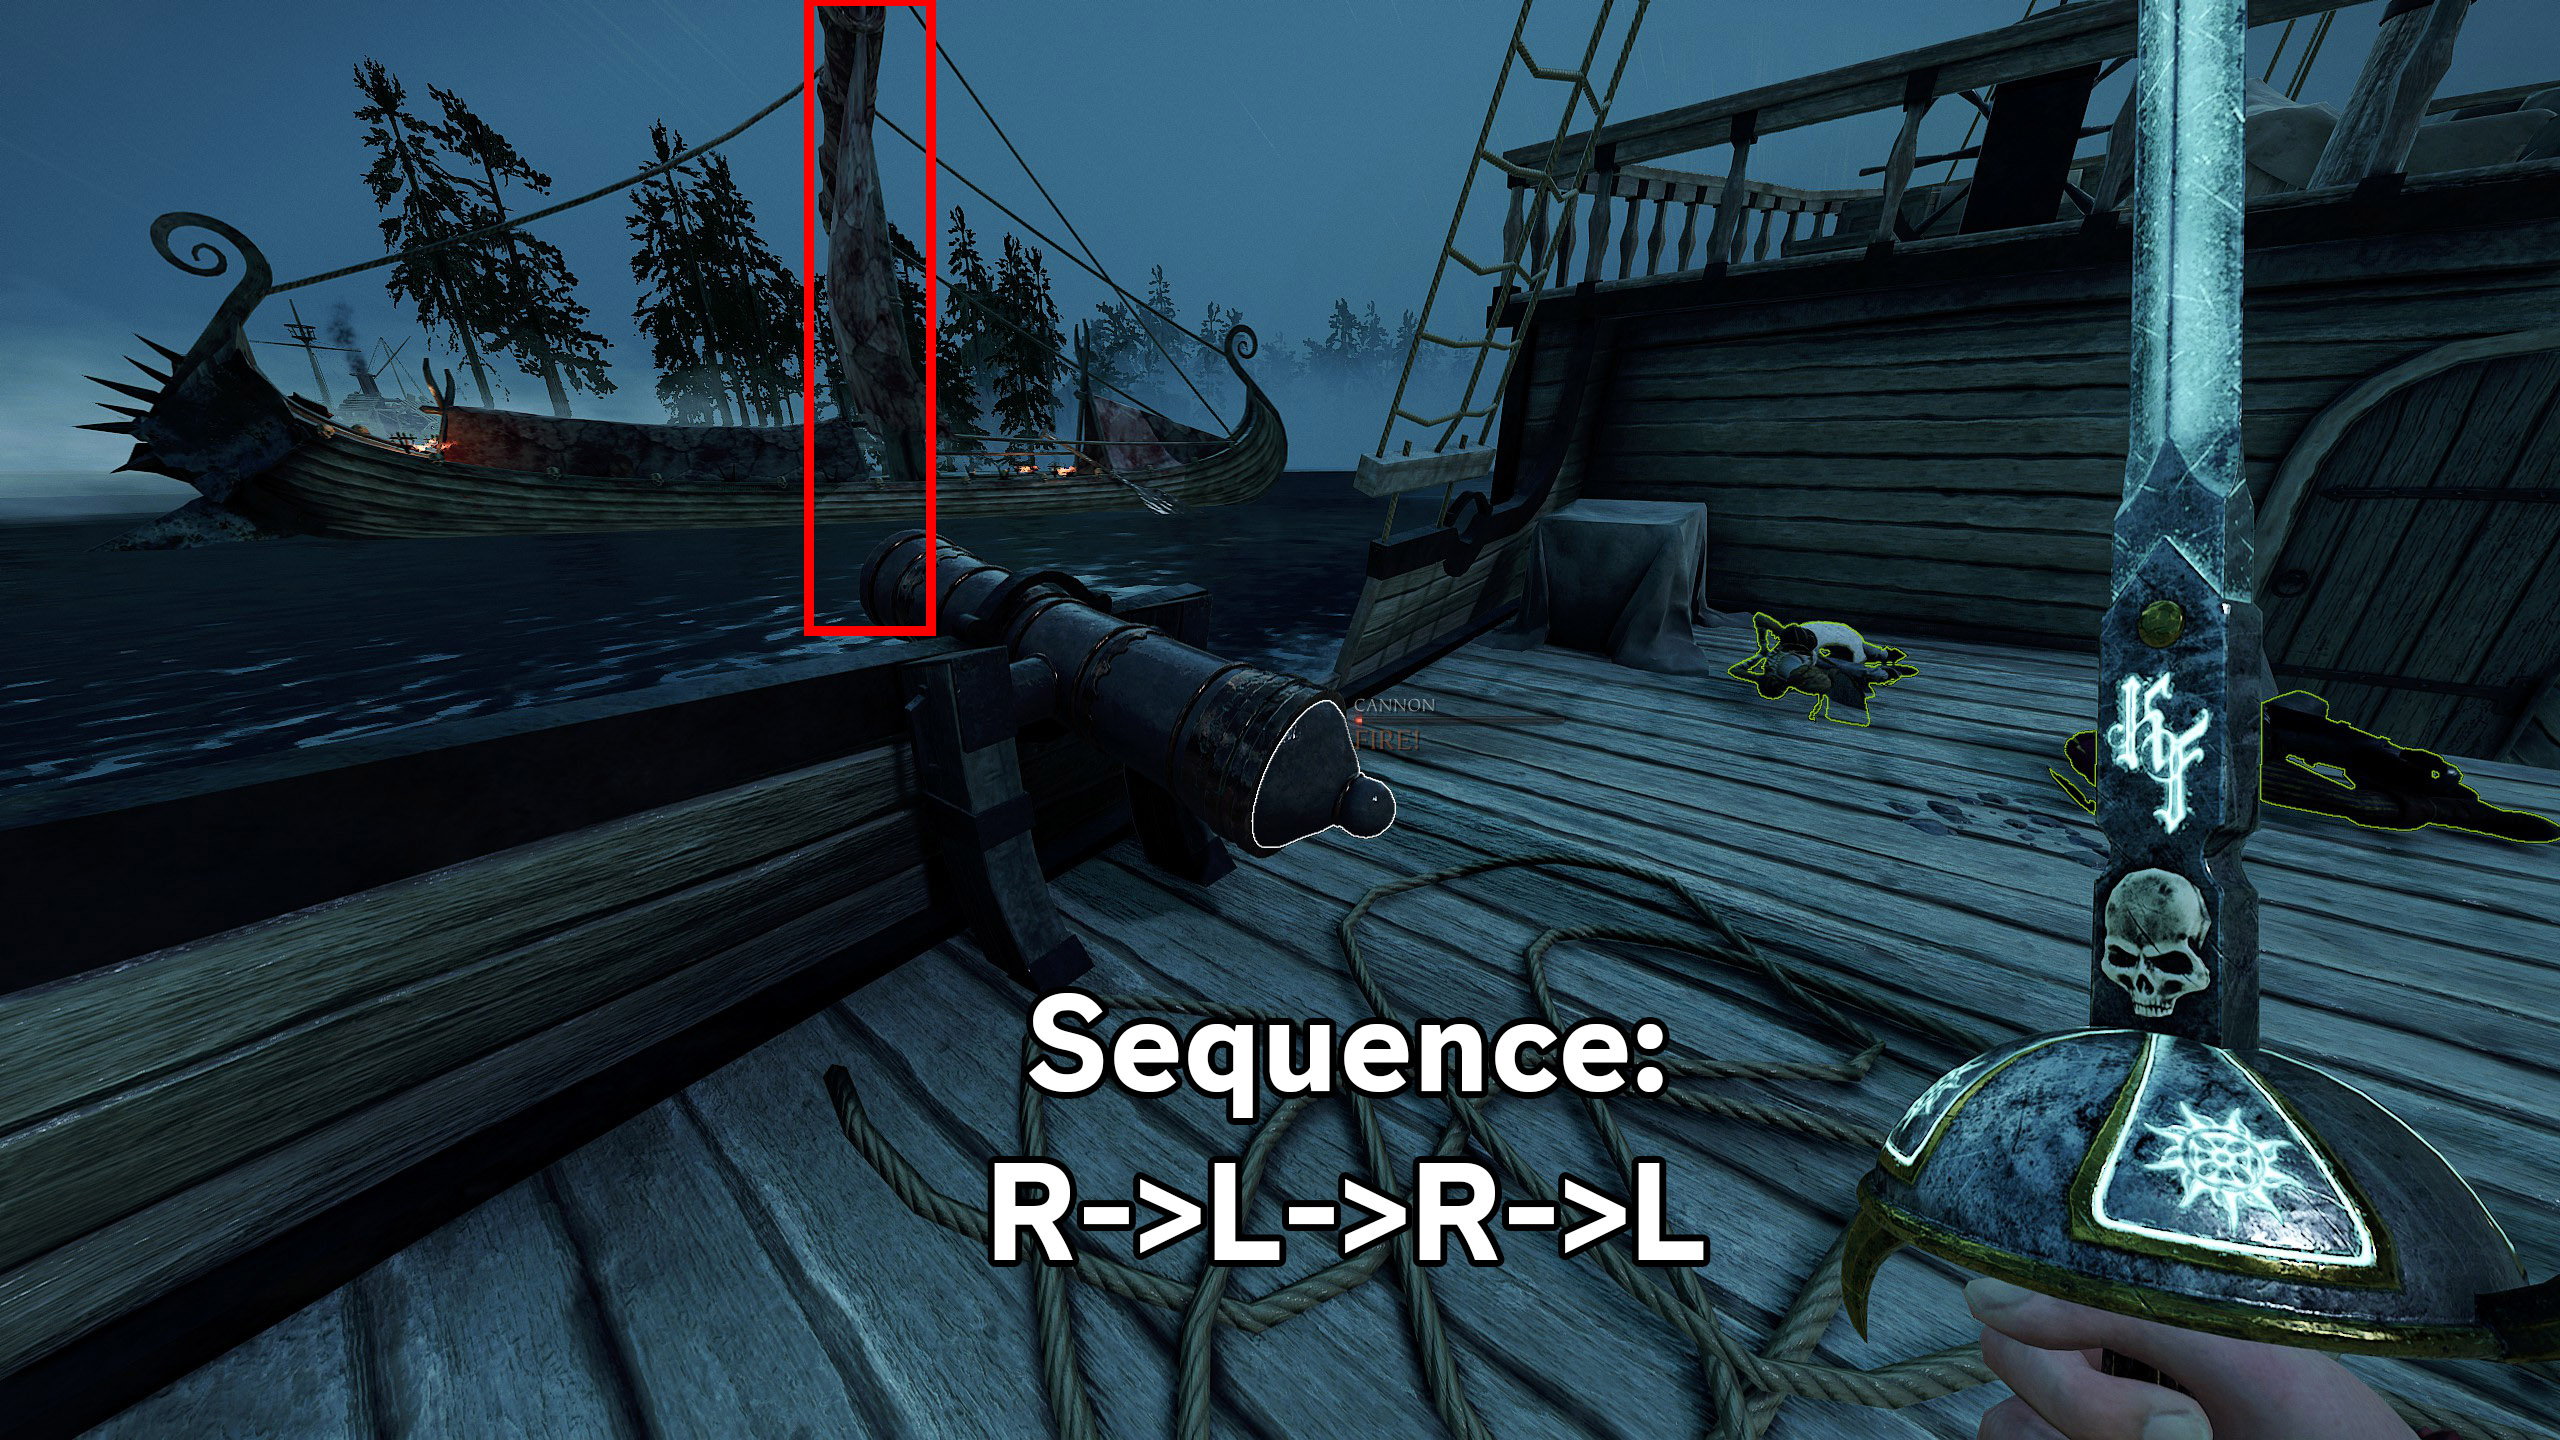 The first ship should have nearly crossed over by then. Move to the port side and fire both cannons again, waiting a few seconds for the second ship before firing once more.
 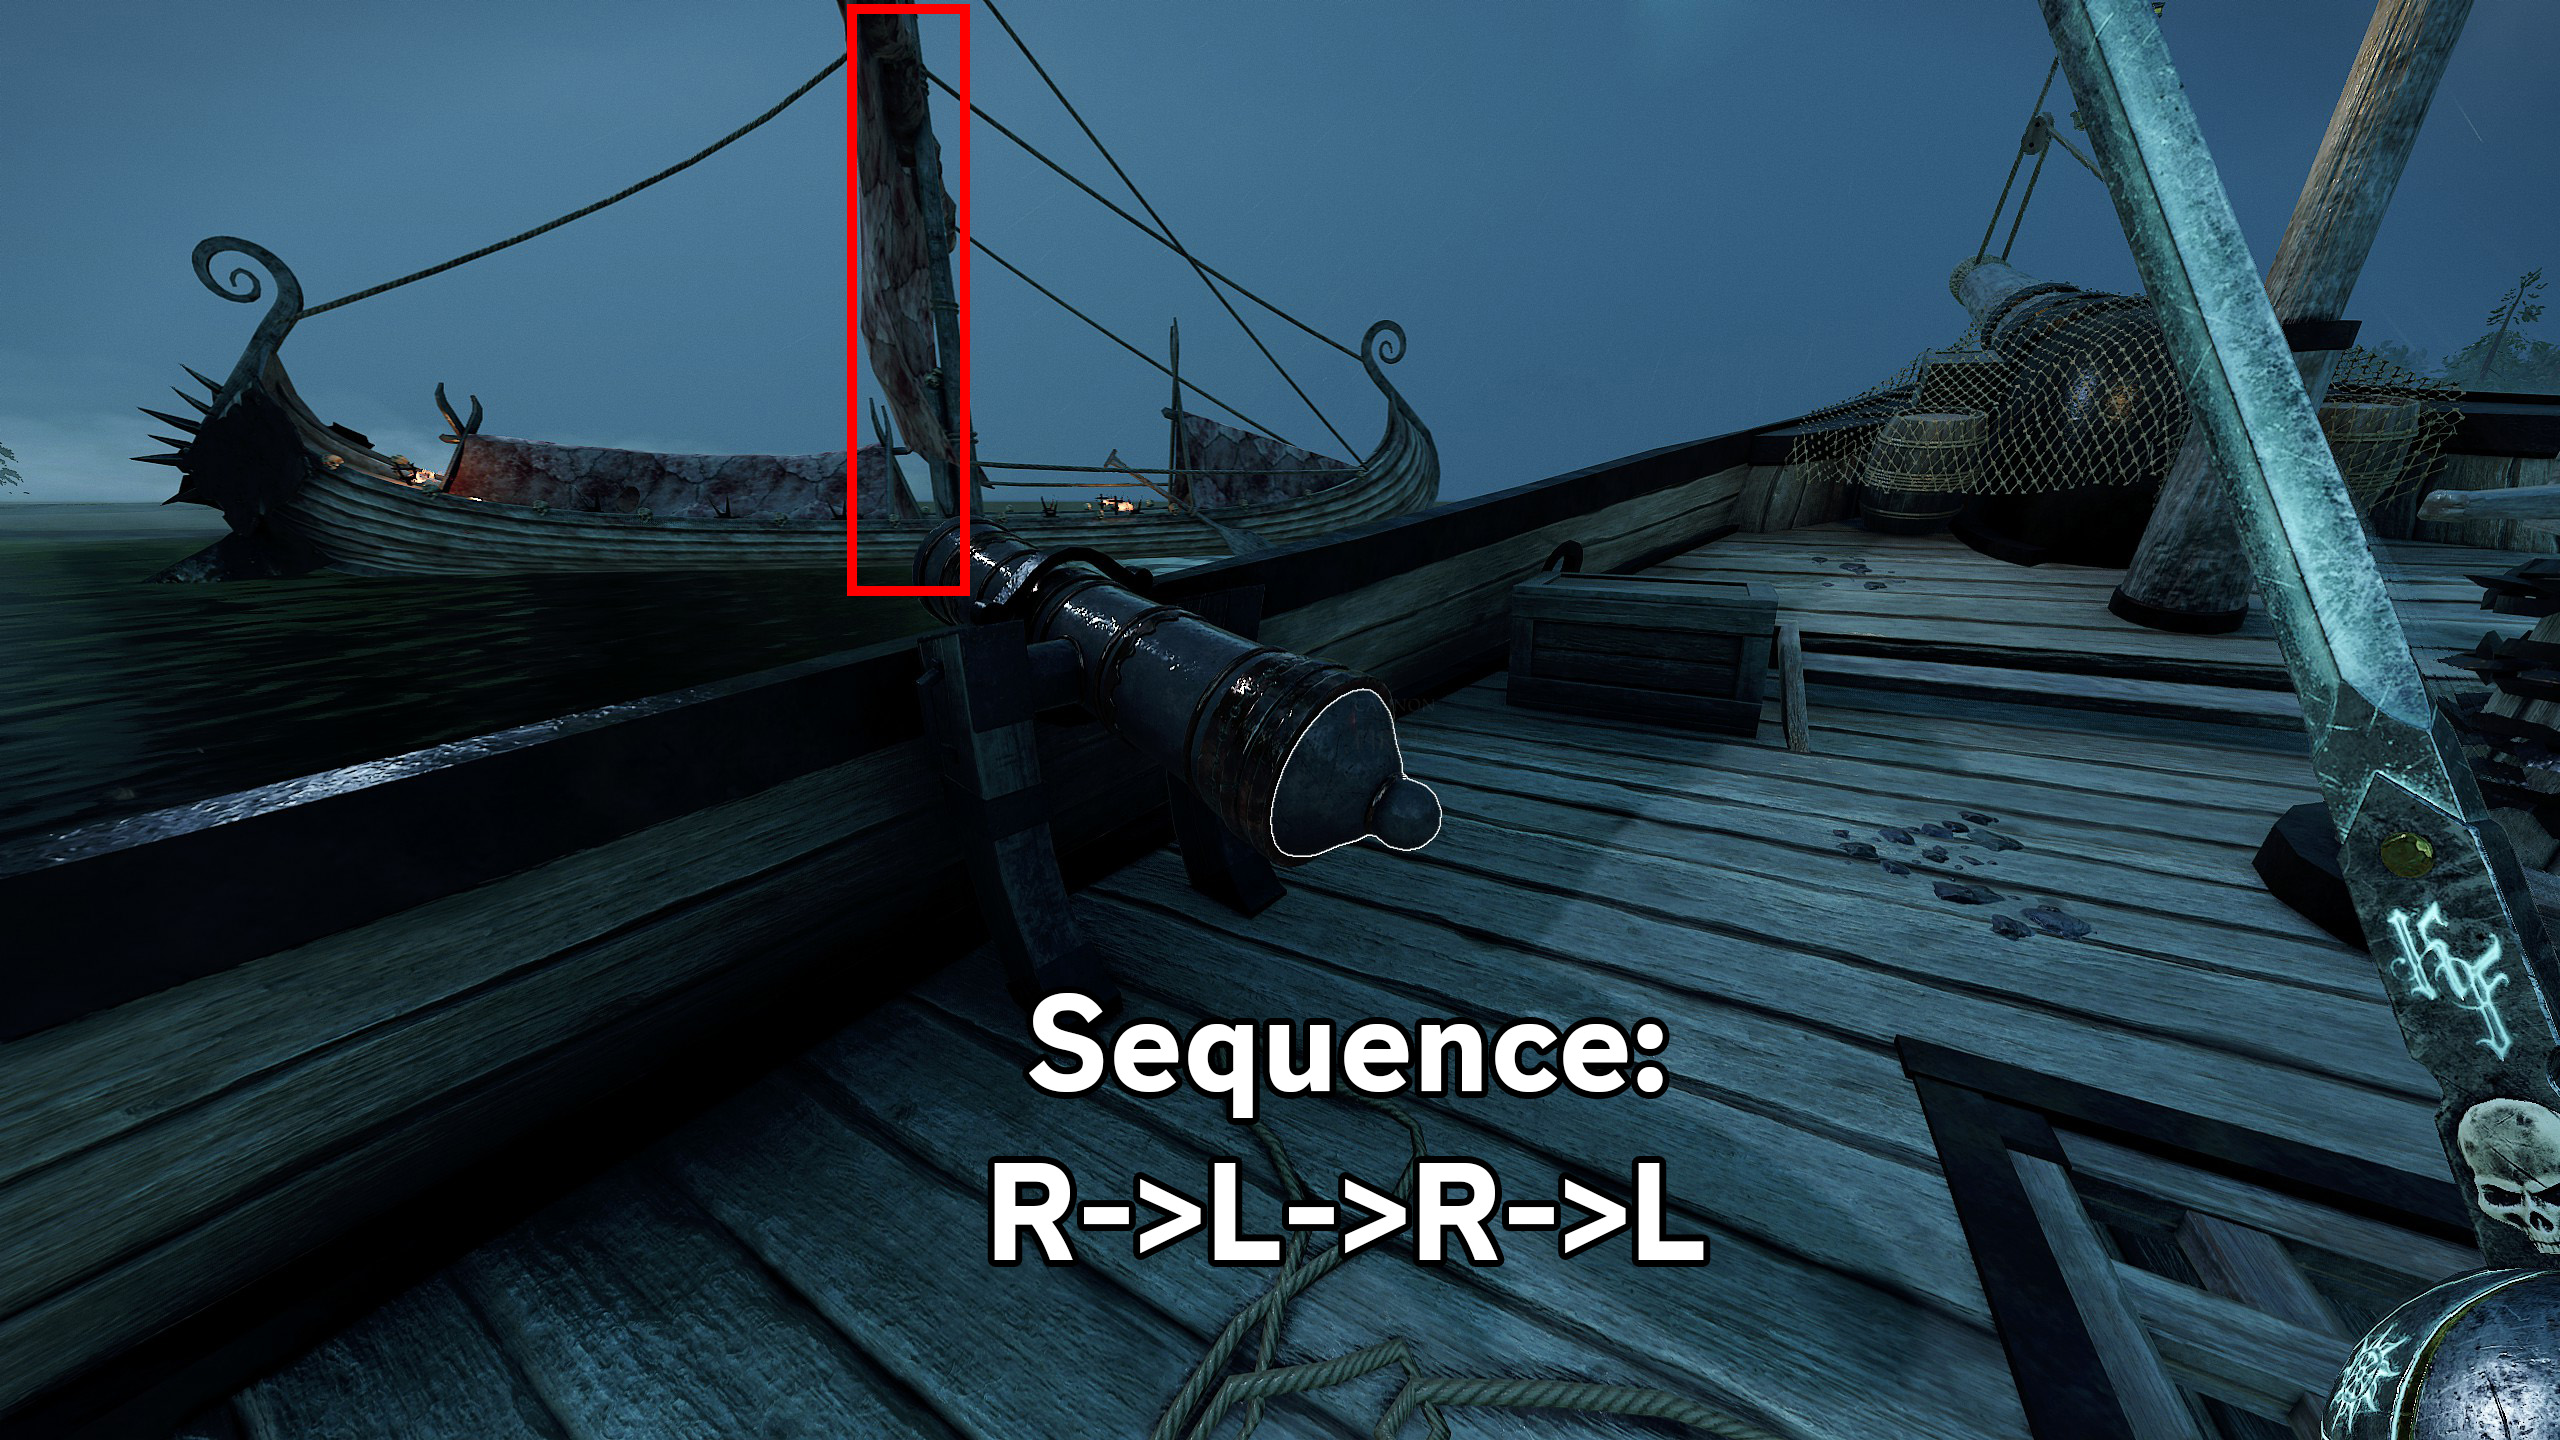 Both ships should be destroyed by this point. If you missed the timing on the first ship, it might remain with a quarter or half health bar. You should have just enough time for it to circle back and align with the cannons on the opposite side.
https://youtu.be/VuiKs51GAq4?si=SCKUvMNpuHf7jUAw
 4. Give 'em a Volley!
Destroy the two bank-side Skaven fortifications: the Clawshooter and the Watch Tower. Once the ship is underway, immediately move to the port side and position yourself directly behind the right cannon. Fire the right cannon just as this tree aligns with it.
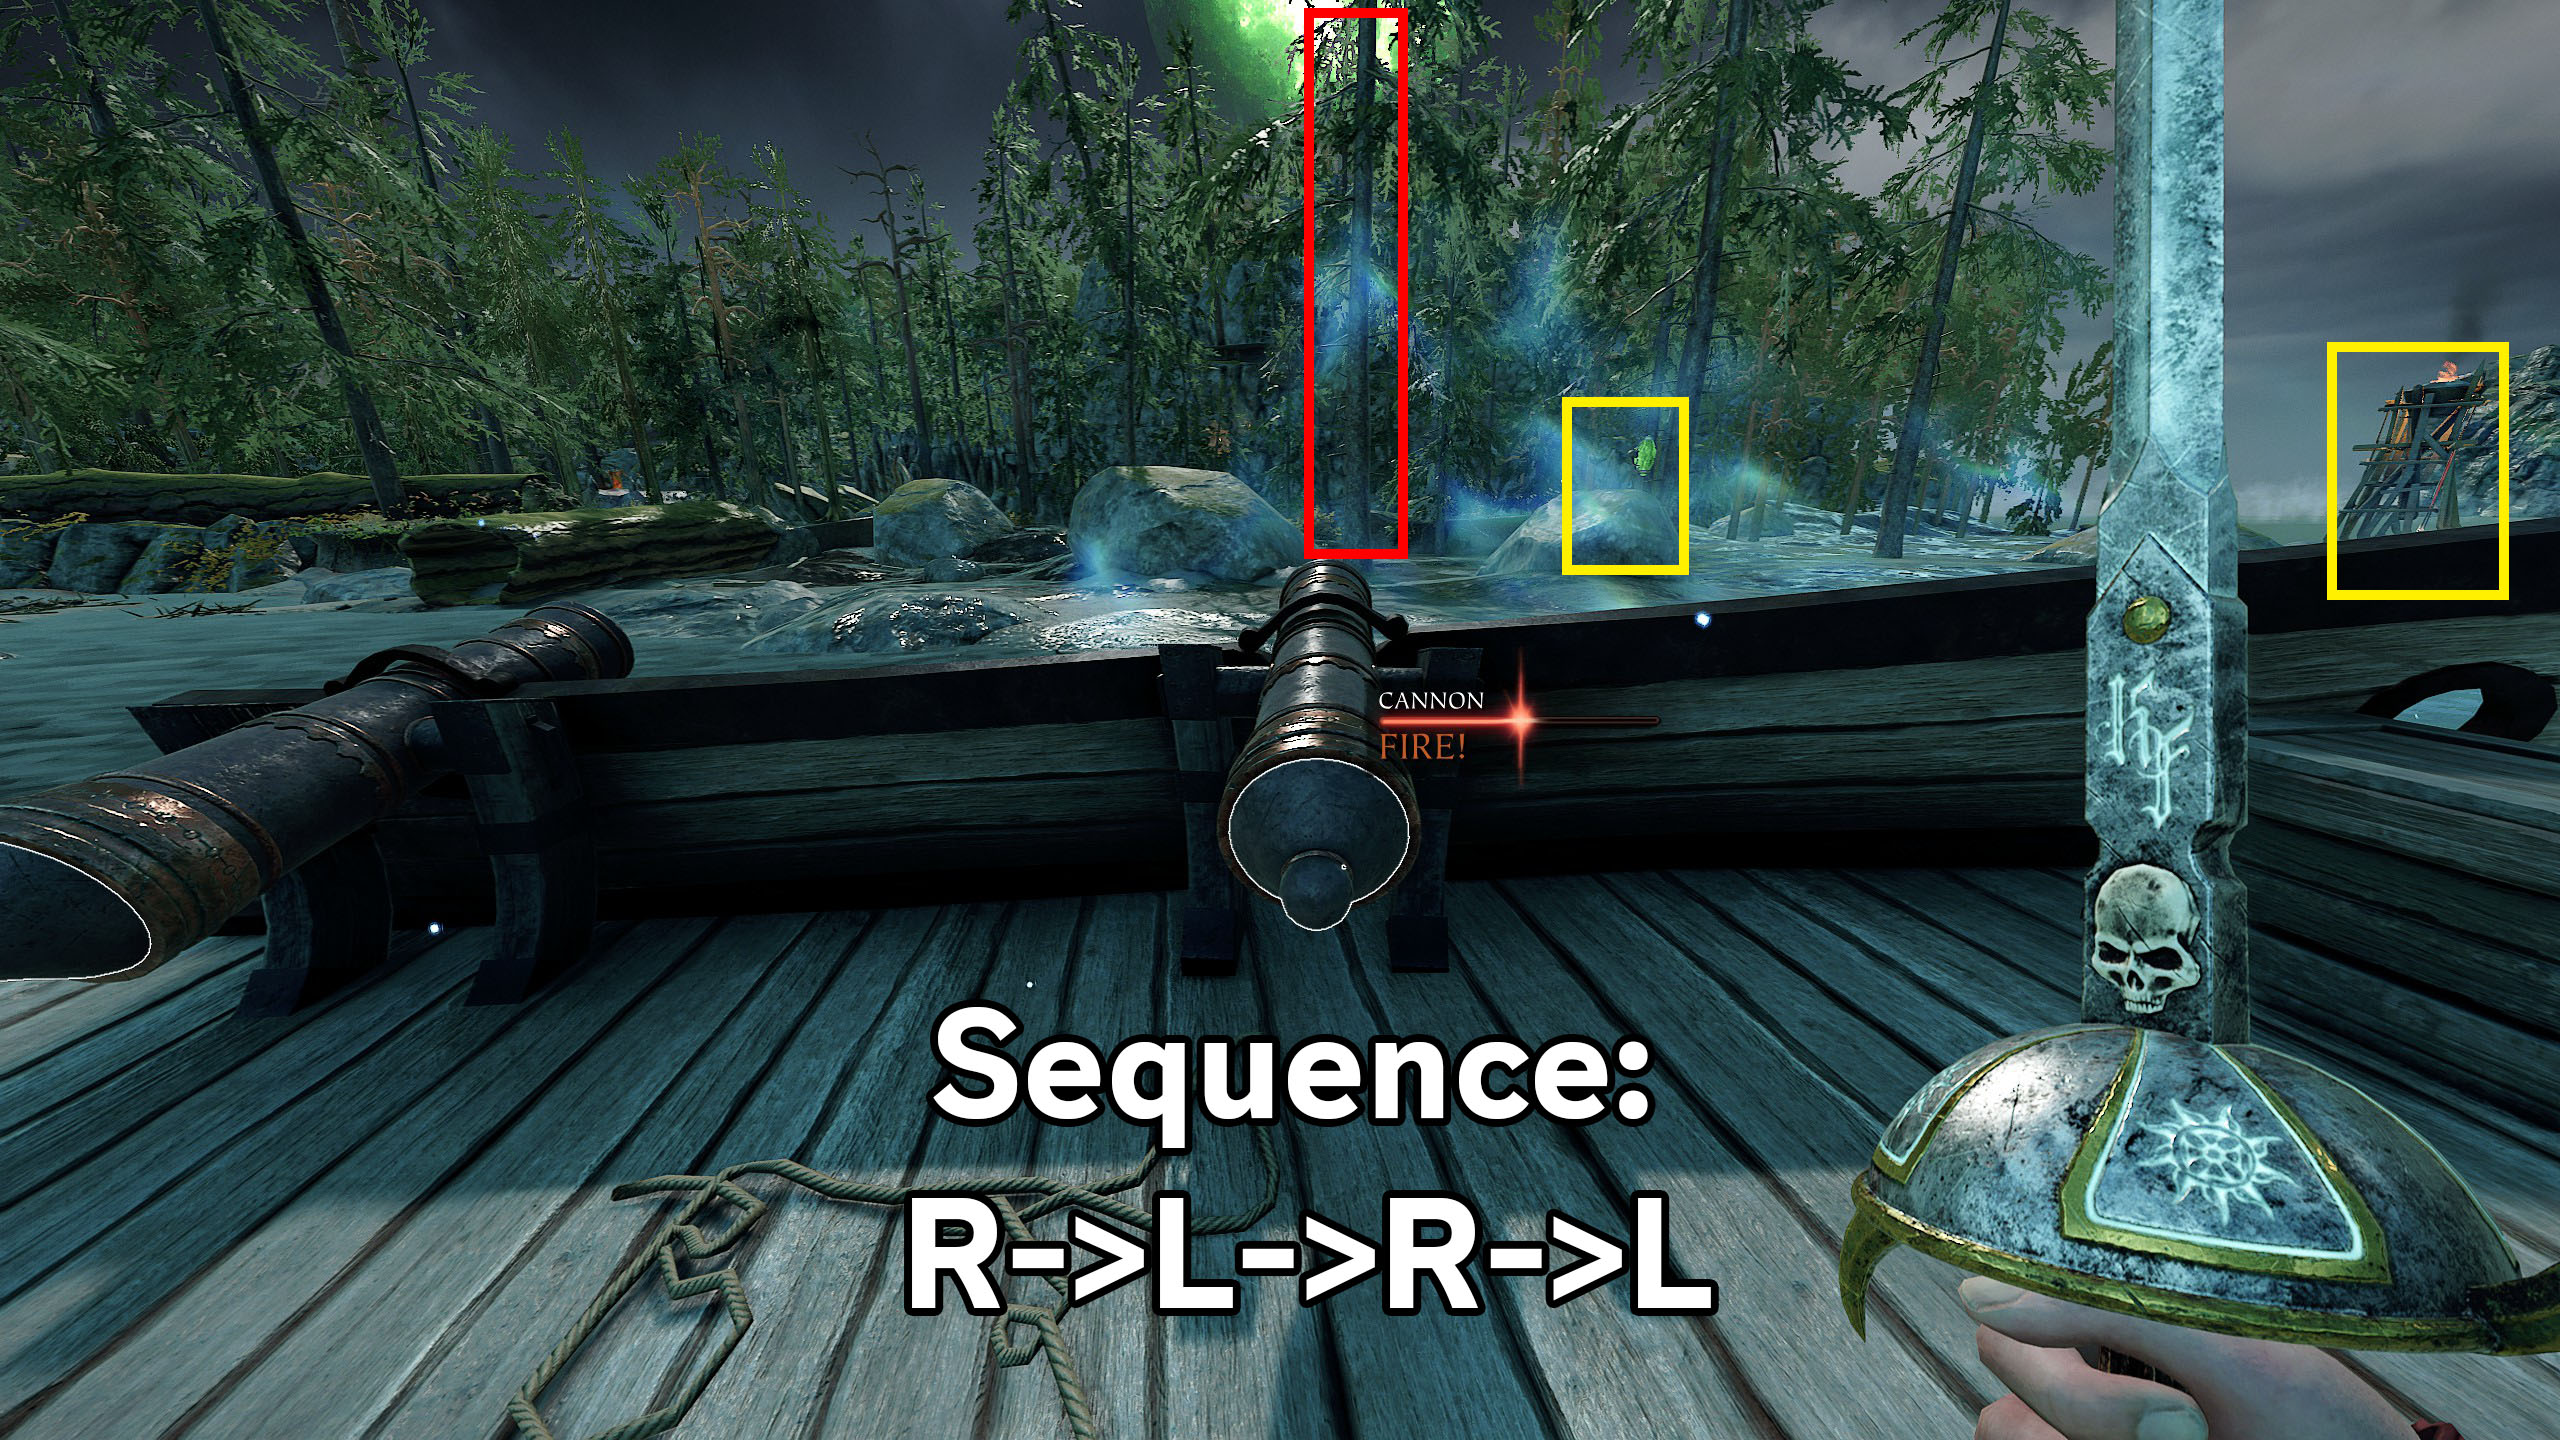
Then, switch to the left cannon and begin firing. Return to the right cannon and fire it as soon as it’s reloaded, followed by the left cannon again. This sequence should ensure both targets are hit by the right cannon. If the right cannon misses, the left cannon will secure the hit.
https://youtu.be/C3jIOuTkNdc?si=bqaaYrWeHPjgRZRY
 5. Overwhelming Firepower!
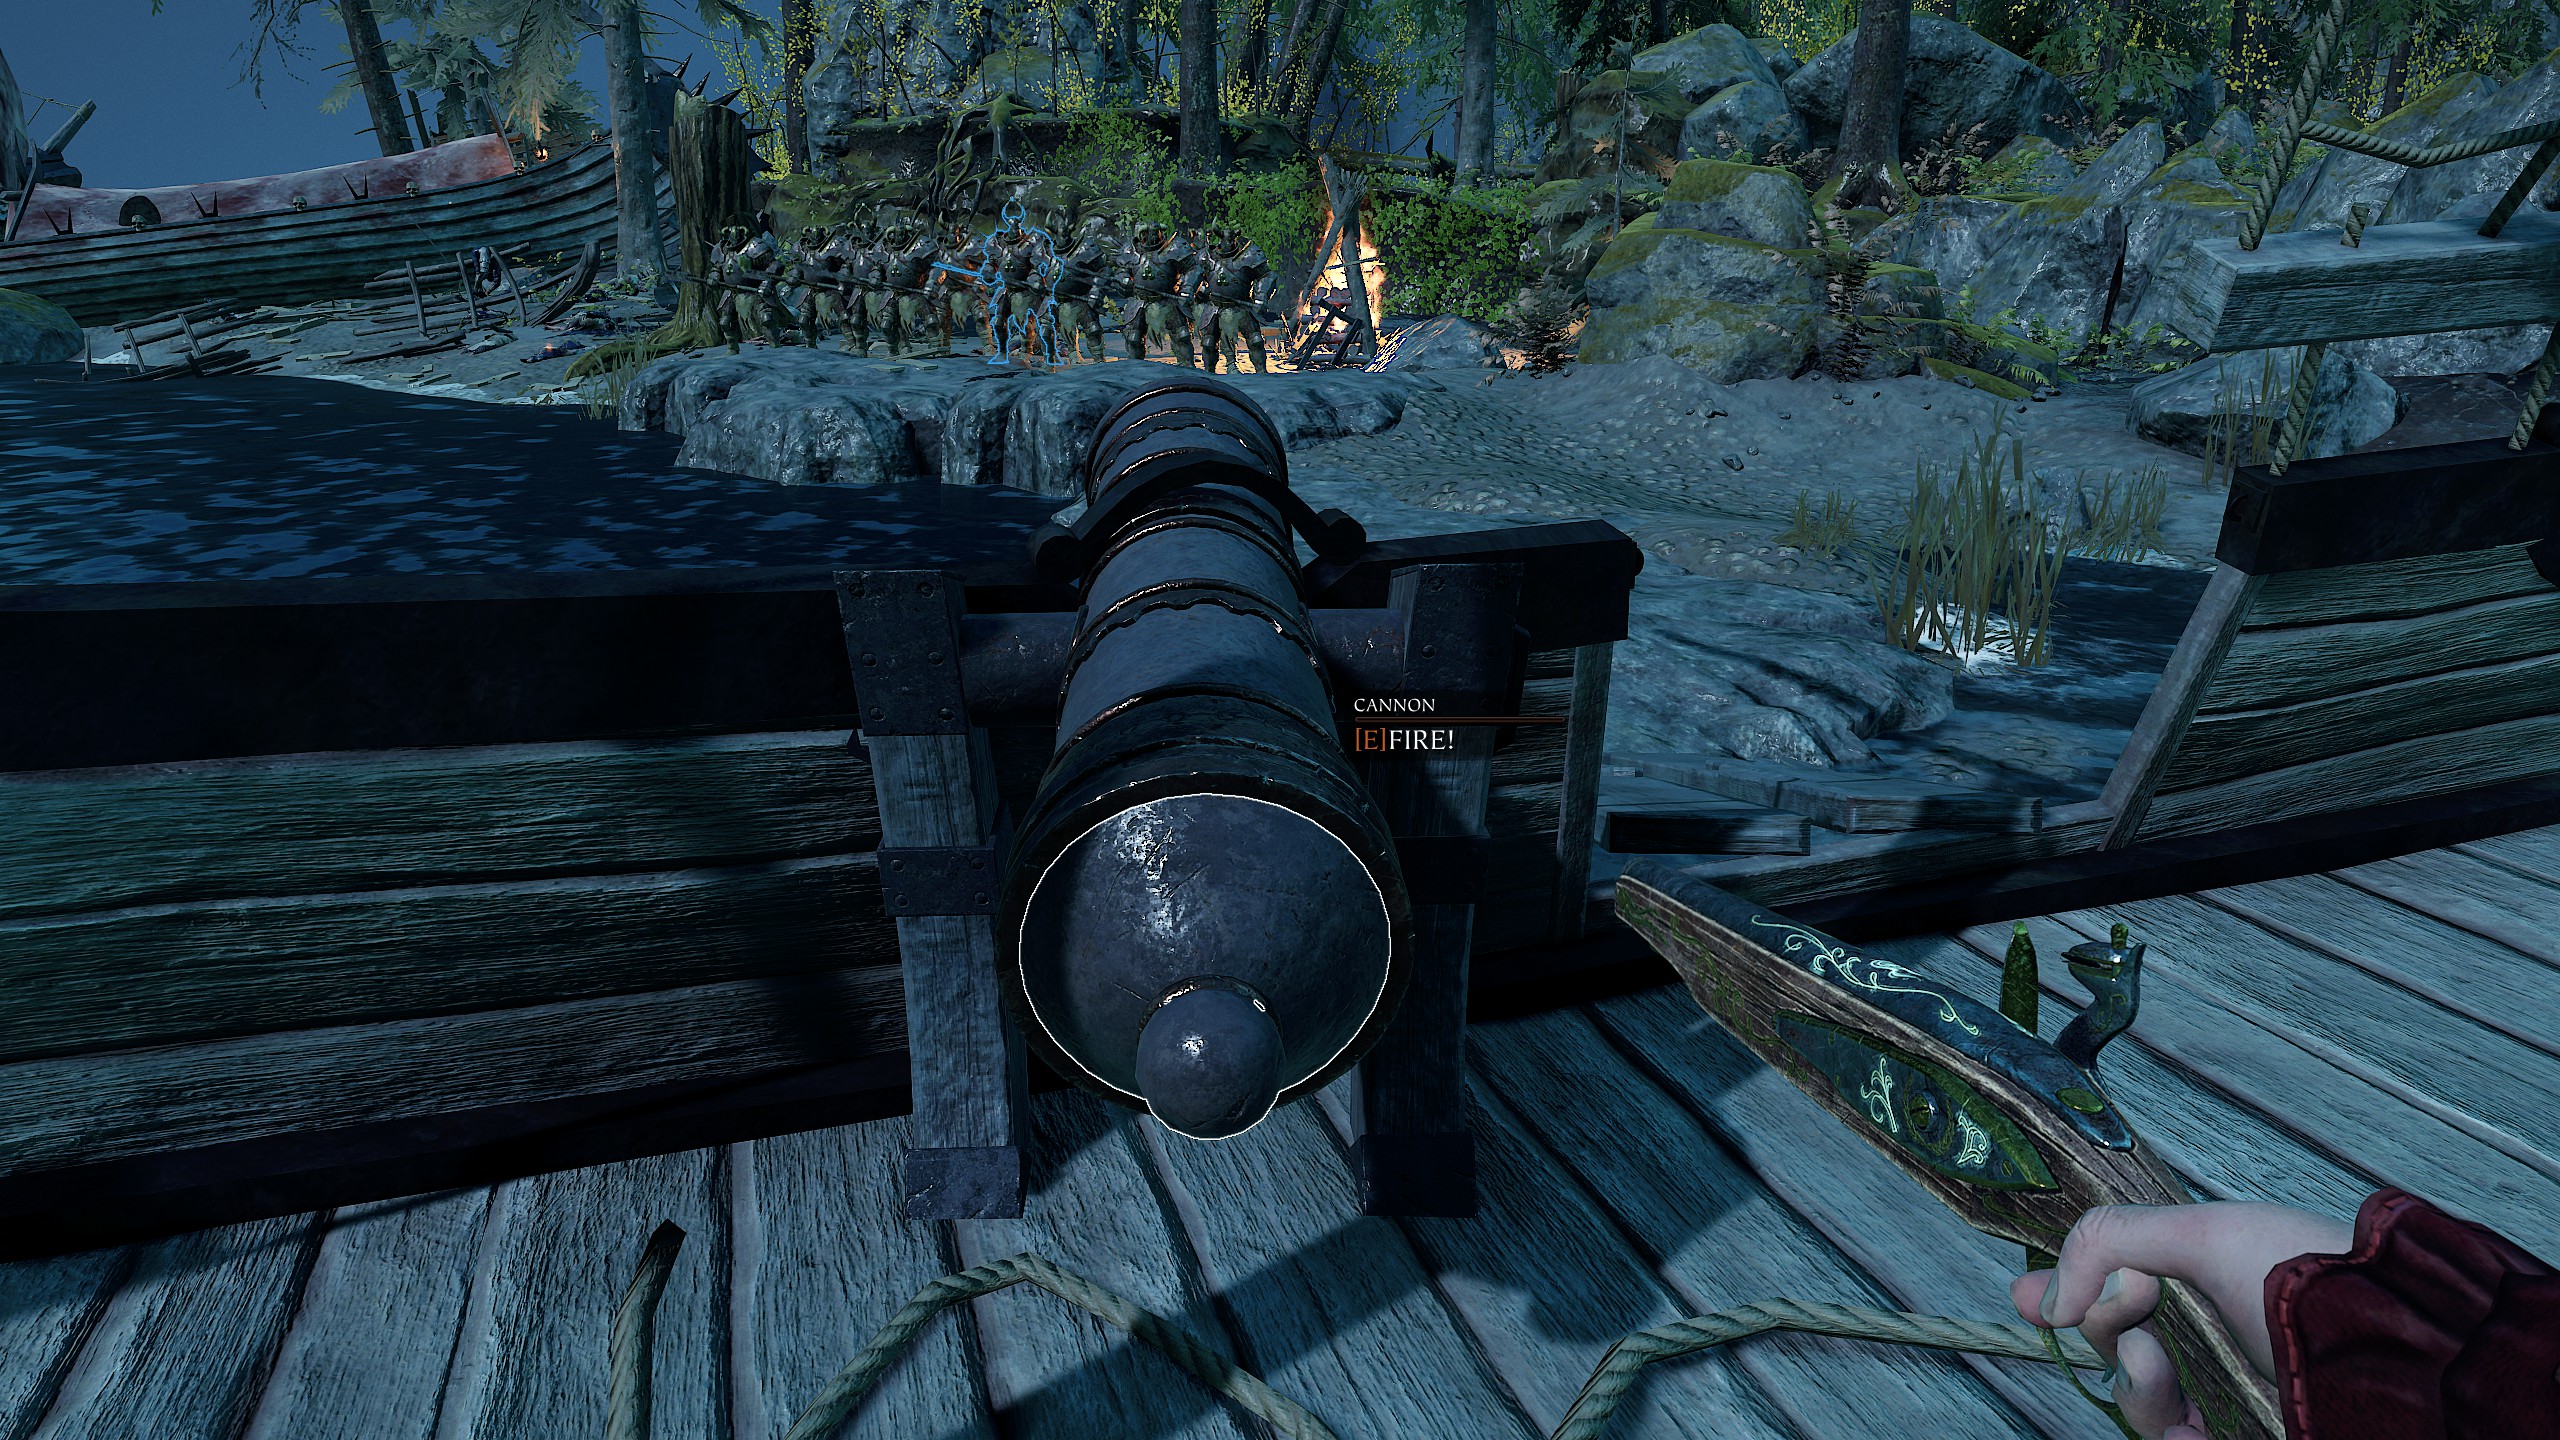
Kill a Chaos Warrior with a cannon.
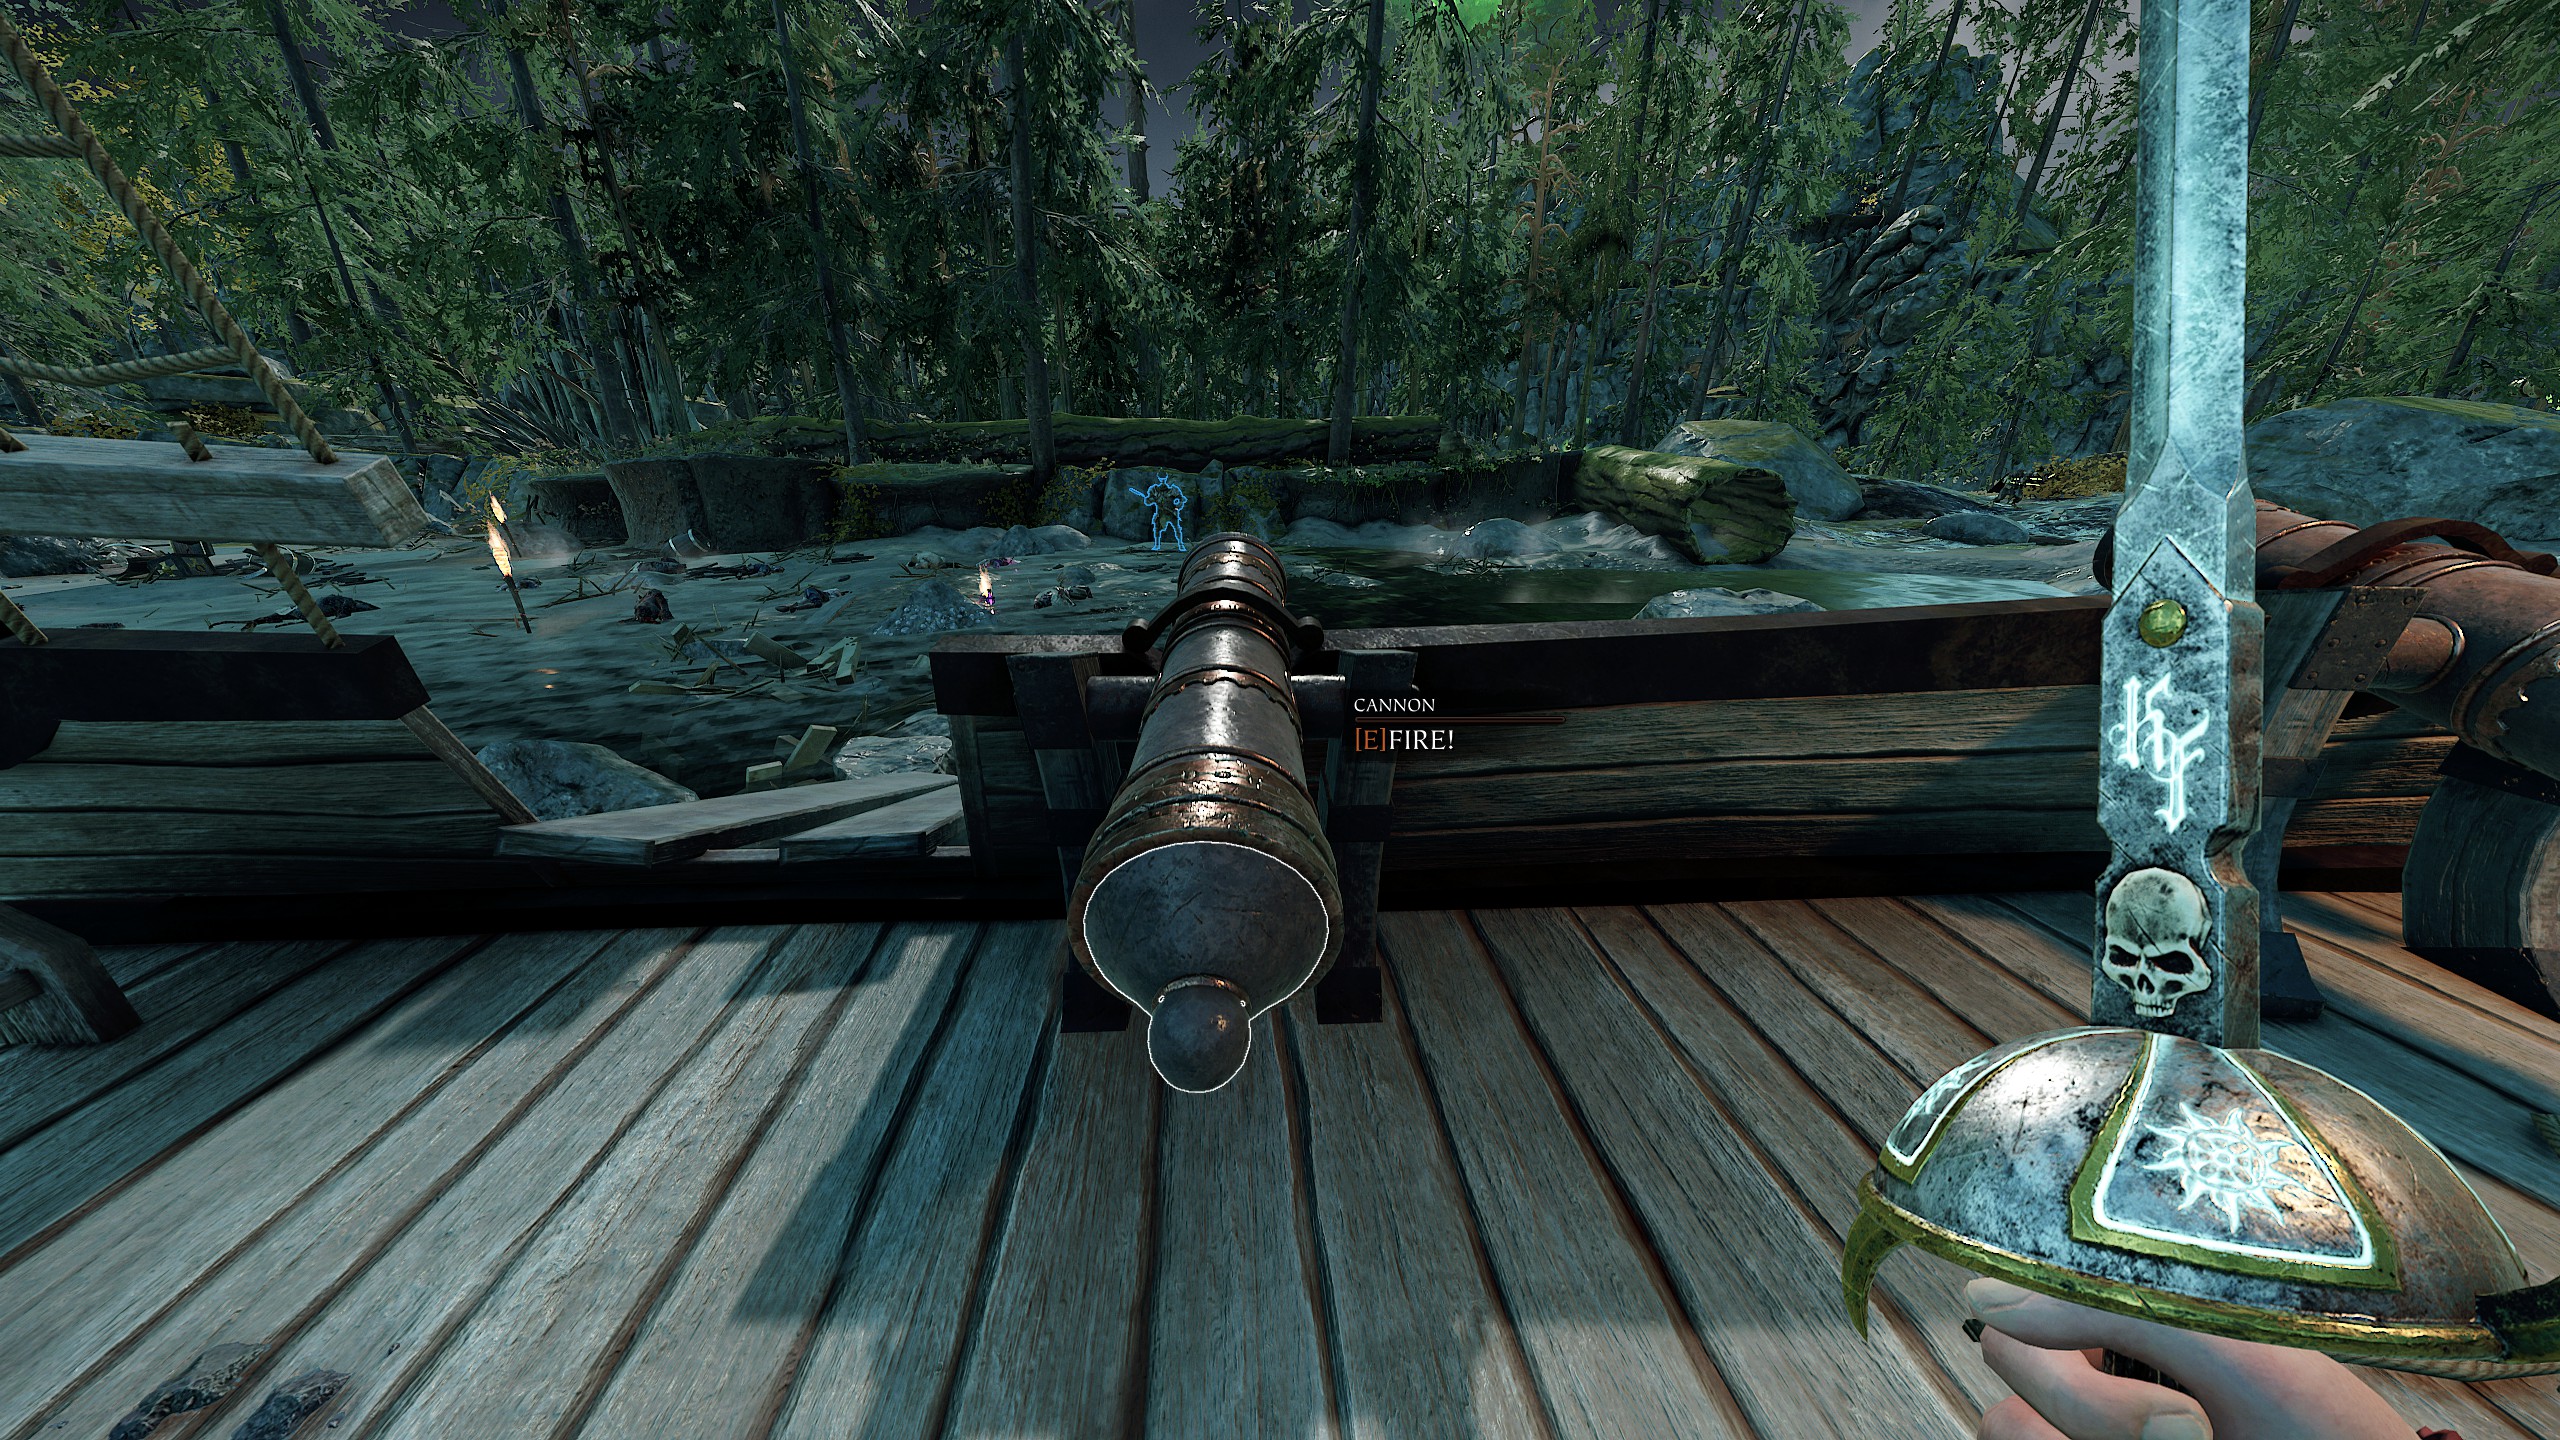
- You can reduce the field of view (FOV) in the game settings to better see the Chaos Warrior in the distance.
- Firing the cannon also instantly kills any bosses.
- Killing a Chaos Warrior with Shield can also count towards the completion.
 6. Up the Reik
Complete all challenges in Reikwald River This challenge will be completed when you have completed all challenges except Casting Off and Not-So Jolly Sailor
Heroes
 1. Virtuoso
Complete a mission as every Hero
Complete 1 mission with every character, so Sienna, Kerillian, Kruber and Bardin. In addition, u can use whatever career u like on them.
(Mission have to be the exactly this same for every class/character, for example, "The War Camp.")
 2. Tempered by War
Unlock 1st Talent point
You will unlock this by picking whatever talent on first category after getting level 5 on any character.
 3. Exemplar
Unlock all Talent points for 1 career
You will unlock this by picking whatever talent on all category after getting level 30 on 1 character.
 4. Pantheon of Heroes
 Reach level 30 with all characters
This challenge will unlock after picking every talent on each of category's on 1 character.
 5. Difficulty Challenges
Complete all Helmgart Missions with all careers
All of these can be completed by finishing the map on Legend once. You don't have to solve every Helmgart mission separately.
Markus Kruber
The challenges are pretty easy and are done automatically as you play the game, so I didn't add them here.

https://steamcommunity.com/sharedfiles/filedetails/?id=3422329533
Bardin Goreksson
The challenges are pretty easy and are done automatically as you play the game, so I didn't add them here.

https://steamcommunity.com/sharedfiles/filedetails/?id=2298473664&searchtext=Achievement
Outcast Engineer Challenge Guide by OenKrad [forums.fatsharkgames.com]
Kerillian
The challenges are pretty easy and are done automatically as you play the game, so I didn't add them here.
https://steamcommunity.com/sharedfiles/filedetails/?id=3244954452
Victor Saltzpyre
The challenges are pretty easy and are done automatically as you play the game, so I didn't add them here.

https://steamcommunity.com/sharedfiles/filedetails/?id=3001094612
Sienna Fuegonasus
The challenges are pretty easy and are done automatically as you play the game, so I didn't add them here.

Quests

250 (weekly) + 105 (daily) + 140 (daily rewards) = 495 shillings per week (25 740 shillings per year). source:[github.com]
 The value of the entire Versus store in the game at the moment is 5424 Marks! Assuming we get Marks only from challenges, leveling up the all ranks and for 5 wins a day, it would take us about 24 days to buy up the entire range.
 Every day, one Daily quest is given to the player, up to a maximum of three unclaimed quests. Each quest rewards 5 shillings. Additionally, one quest per day can be changed for another random task.
Daily quests include:
*Grimoire & Tome will not count towards the quest: If you pick it up and then drop it or dead with it.
 With the Introduction of Lohner's Emporium of Wonders, all players now receive four weekly quests, with one extra per DLC owned (Excluding the Collector's Edition). They are reset at the start of the week (Monday 00:00 CET) and each reward 50 shillings. Unlike daily quests, a weekly quest cannot be changed for another task.
Weekly quests include:
*A Simple Re-Quest and Trickery and Tribulation will always be available each week.
*Grimoire & Tome will not count towards the quest: If you pick it up and then drop it or dead with it.
Enemies
Most of the challenges in this section will be executed automatically as the game progresses.
I have simply listed them all, and for some of them I have left tips for their successful completion.


 1. Firing it Up! & Unstable Combustion & Unfriendly Fire
Kill a Warpfire Thrower before he fires
Blow up a Warpfire Thrower by shooting them in the power cell
Have a Warpfire Thrower kill 10 enemies for you


 2. Liberator & All in the Reflexes & Something of Let-Down
Kill a Packmaster abducting an ally
Dodge a Packmaster's hook
Rescue an ally hoisted by a Packmaster


 3. Caught in the Act & Shove off! & Pushy Fellow(ess?)
Shoot a Gutter Runner out of the air
Push a Gutter Runner off a pounced ally
Push a pouncing Gutter Runner


 4. No Boom Today & Fallow Fumigation & A Whiff of the Good Stuff
Kill a suiciding Poison Wind Globadier before he explodes
Kill a Poison Wind Globadier before he throws a globe
Have 10 enemies die from globadier poison


 5. A Gun to a Swordfight & Suppressed Suppressor & In the Line of Fire
Kill a Ratling Gunner with your melee weapon
Kill a Ratling Gunner pinning an ally
Block the fire from a Ratling Gunner using your shield


 6. Soulsucker Sidestep & Saw it Coming & Enforced Diet
Dodge a Life Leech projectile
Kill a Life Leech within 2 seconds after it teleports
Kill a Life Leech grabbing an ally before they take damage


 7. Forecasting Clear Skies & Wind Cheater & Wizard Whacker
Kill a Blightstormer while he's conjuring a vortex
Kill a Blightstormer while an ally is caught in its vortex
Kill a Blightstormer with your melee weapon

 8. Lunch Break & Hands-Off Experience
Kill a Chaos Spawn while a party member is grabbed by it
Kill a Chaos Spawn without anyone in the team being picked up

 9. And Stay Down! & A Rough Night Out
Kill a Bile Troll without it regaining health while downed
Kill a Bile Troll without any party member taking damage from bile

 10. Flame Proof & Braindead
Kill a Stormfiend without taking burn damage
Kill a Stormfiend by shooting them in the controller

 11.Bring it Down! & Rat Roast
Kill a Rat Ogre without anyone in the team taking damage
Have 3 Gors die by warpfire

 12.Incoming! & Interception Barrage
Kill a Rat Ogre mid leap
Hit a Leaping Rat Ogre with a bomb as Outcast Engineer. Additional information can be found in the description of the video.
https://steamcommunity.com/sharedfiles/filedetails/?id=1778072651 https://www.youtube.com/watch?v=WnbkNWjnU4U


 13. Unsteady Aim & Rhya's Offering & Iconic Presence
Have Ungor Archers score the killing blow on a Minotaur
Slay a Minotaur under the oak on Against the Grain
Keep a Wargor and its banner alive for 120 consecutive seconds. Iconic Presence is easy to perform together with Unsteady Aim. Just read through this guide.
https://steamcommunity.com/sharedfiles/filedetails/?id=3226126067 https://www.youtube.com/watch?v=Ekms7UjHq4c
 14. Pointed Interruption
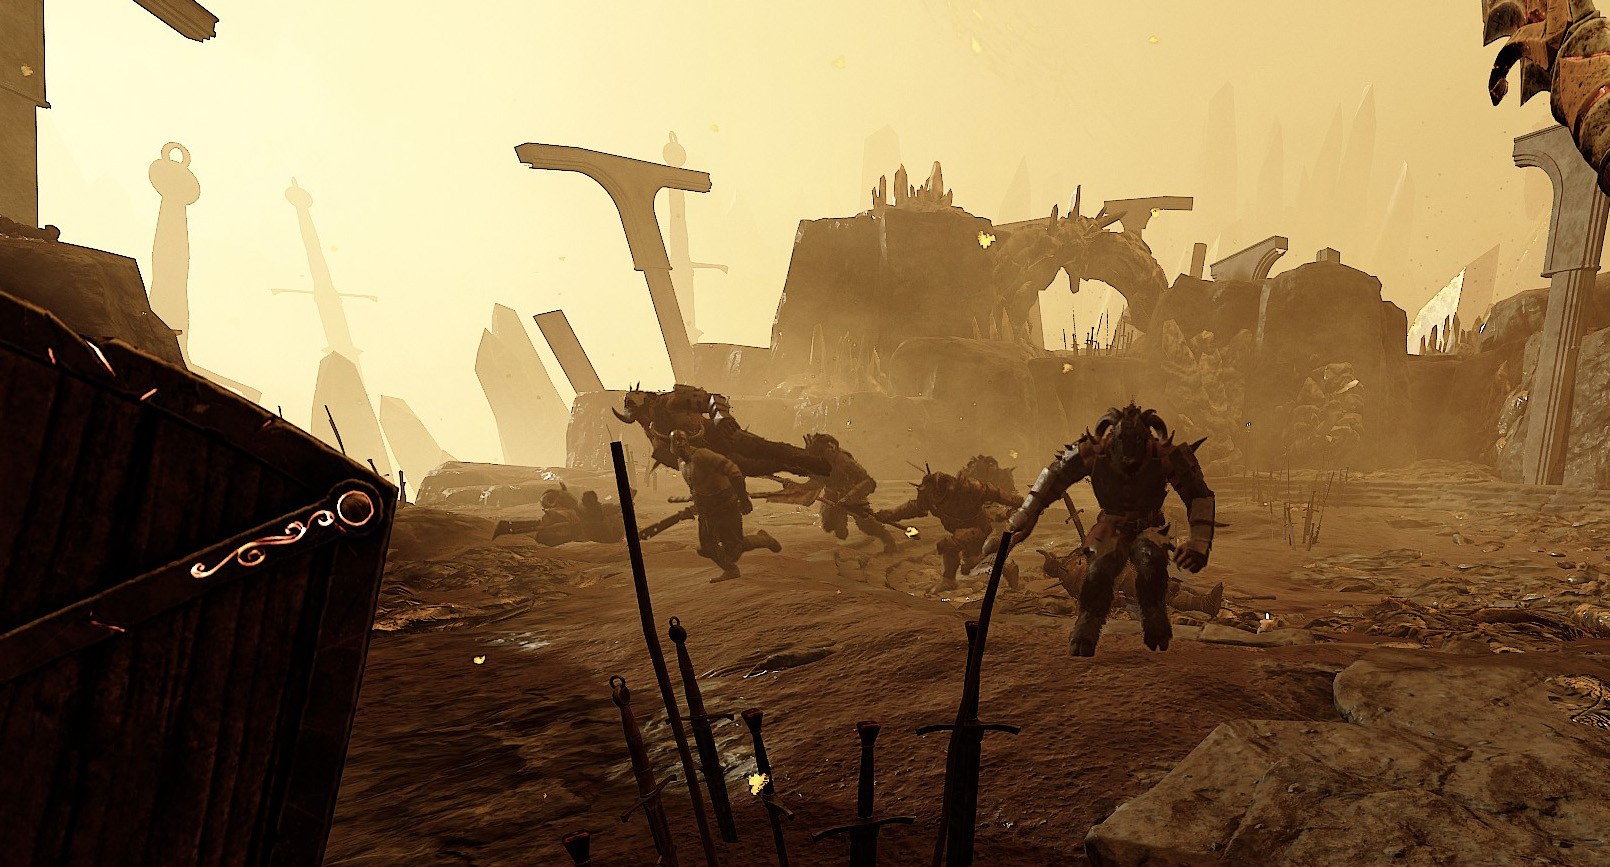
Have a Bestigor charge a Chaos Warrior This challenge usually goes by itself, but to speed things up, you should head to ranked weave №4. I recommend choosing a Handmaiden with invisibility to keep distance for charges bestigors. Next, go through the mission, and already in the arena at the beginning 2 Chaos Warrior will appear. Be sure to kill one of them to trigger the spawn bestigors. Then make a dash so that the bestigors can charge into the Chaos Warrior.
A charge of bestigor does not damage other enemies, it just staggers them as much as possible.
 15. One's All it Takes
Kill a Lord as the last player standing
These challenges usually take a while to complete, but if you're looking for a quick completion, go to the map where the lord resides.
I recommend choosing Into the Nest or The War Camp maps, as the lords are pretty easy on them. Next, select the Champion difficulty to deal damage to bots and choose Any bosskiller (BH, Shade, Huntsman). Before the arena with the lord, there will be an ammo crate nearby; use it to kill the bots and then fight the lord afterward. Use all available resources to finish the lord fight as quickly as possible.
This challenge can be done in conjunction with the Thar She Blows! & Unsafe Work Environment challenges.
Items

 1. My first Wargear
Equip a Common Item.
Simply equip item with Green background

 2. Quite the Find
Equip a Rare Item.
Simply equip item with Blue background

 3. Heirloom
Equip an Exotic Item.
Simply equip item with Orange background

 4. Mark of expertise
Equip a Veteran Item.
Simply equip item with Red background
 5. Now You're Showing Off
Equip Exotic items in every slot. Simply equip items with Orange background on every slot, for example.


 6. That's Some Fancy Clobber, Mate...
Equip Veteran items in all slots Simply equip items with Red background on every slot, for example.


Crafting

Performed automatically as you progress through the game.
 1. Craftsman
Craft an Item
 2. Master Craftsman
 Craft 50 items
 3. Waste Not, Want Not
 Salvage an item
 4. Make Do and Mend
Salvage 100 items
If you want to learn more about crafting, I recommend watching this video or reading the article on the wiki.
Deeds
 Liber Mortis-Bubonica I
 Complete 10 deeds
 Liber Mortis-Bubonica II
 Complete 25 deeds
 Liber Mortis-Bubonica III
 Complete 50 deeds
 Liber Mortis-Bubonica IV
 Complete 100 deeds
 Liber Mortis-Bubonica V
 Complete 200 deeds
 Liber Mortis-Bubonica VI
 Complete 300 deeds
 Liber Mortis-Bubonica VII
 Complete 400 deeds
 Liber Mortis-Bubonica VIII
 Complete 500 deeds
Quite a grueling task - it will take a significant amount of time to complete all the challenges. However, there is a very well-known way to speed up this process. Yes, it may not seem completely honest, but its reliability and effectiveness are beyond doubt. We are talking about the application of deed glitch and skip pit. The Pit allows for a fairly fast and simple travel, while we need deed glitch to select a specific map, namely the Pit.
If you don't have the Shadows over Bögenhafen DLC, you can choose the maps Devious Delvings, Tower of Treachery, The Screaming Bell or Against the Grain for a quick run.
Step 2: Player 1 selects a specific Deed with two chests and starts vote
Step 3: Player 1 accepts, but Player 2 does not accept yet
Step 4: Player 1 now physically moves to the map and opens it
Step 5: Player 2 accepts the mission now
Step 6: Player 1 now selects a Custom Game with Legend difficulty, a specific map and starts a vote
Step 7. Both players now accept the mission
Done It is important that the first player is a client and not a host. In this case, after completing the Deed with two chests, it will not disappear from the list and can be done again. This Glitch can also be done with Quick Play, Twitch Mode or Dwarfen Lodestone (FoW).
https://youtu.be/JACTybrCi5Q?si=LE_lggdicjvivOsP
P.S. I also recommend going through this at the same time, along with the challenges associated with the “Complete 100 missions” on each of the unfulfilled characters.
Weave Expeditions
To complete all the "colored" achievements, you will need to complete 40 weaves.

 Druid
DruidFinish the first five Jade Weaves Performs only in ranked weaves. Has a green color

 Alchemist
Finish the first five Gold Weaves Performs only in ranked weaves. It has a yellow color

 Soothsayer
Finish the first five Celestial Weaves Performs only in ranked weaves. Has a blue color

 Heirophant
Finish the first five Light Weaves Performs only in ranked weaves. Has a white color

 Spirit King
Finish the first five Amethyst Weaves Performs only in ranked weaves. Has a purple color

 Animist
Finish the first five Amber Weaves Performs only in ranked weaves. It has a brown color

 Shadowmancer
Finish the first five Grey Weaves Performs only in ranked weaves. It has a gray color

 Pyromancer
Finish the first five Bright Weaves Performs only in ranked weaves. Has a red color

 Warrior of the Weaves
Finish Weaves 41-60 The Difficulty of Cataclysm

 Veteran of the Weaves
 Finish Weaves 61-80 The Difficulty of Cataclysm 2

 Champion of the Weaves
Finish Weaves 81-120 The Difficulty of Cataclysm 3

 Weave Runner
Complete 40 Quickplay Weaves

 Weave Warrior
 Complete Ranked Weave 1-40

 Weave Champion
 Complete Ranked Weave 41-80

 Weave Conqueror
Complete Ranked Weave 81-120

 Weave Vanquisher
 Complete Ranked Weave 121-160
An even more grueling task was for me to complete all 160 weaves, on which I spent more than a month. The difficulty was in finding teammates: at first I decided to go it solo, but it turned out to be not a good idea, because at that time no one had ever completed all the weaves solo. It took a lot of effort and time to complete at least two weaves, and in the end I stopped at 54. Soon I met a great teammate, and we continued our journey with a full team. Thanks to him, I learned where I could find companions to overcome those damn weaves. Community Steam Group:
 Community Discord Server:[discord.gg]
P.S. Once again, I would like to express my sincere gratitude to everyone who helped me in this difficult task!
If you still decide to go through all weaves solo, firstly, knock yourself out, and secondly, there is a YouTube channel with walkthroughs of 120-160 weaves solo using cheese. I think certain moments from these walkthroughs will be useful even when playing in a group, such as safe spots, skips, etc.
Versus

There are 65 challenges in total at this point. All of them are pretty easy and are done automatically as you play the game, so I didn't add them here.
For example, challenges for Skaven are mostly designed to deal damage or are tied to the abilities of each Pactsworn.
As a reward, you no longer get shillings, but the new in-game currency Helmgart Sellsword Marks and New Frames.
Congratulations and Credits!
Congratulations!
You have managed to overcome all of Okri's challenges and win many awards for doing so, which is certainly admirable! I hope this guide has made it easier for you to face certain challenges.
A heartfelt thank you for reading, and thanks to everyone who contributed content for the Okri challenges!
References & Resources
[2] All Icons Okri's Challenges (Pack Images)[drive.google.com]
[3] Okri's Challenges Guide - Playlist by 3t che3
[4] My Playlist for Сompleting the Сhallenges
[5] Vermintwitch program
[6] How to automate a number of routine processes in Vermintide 2
[7] About Active Reload[docs.google.com]
[8] Об Активной Перезарядке[docs.google.com]
[9] All Enemies Damage Breakpoints & Cooldown Calculator[docs.google.com]
- 【Updated to Patch 6.10】【All Careers】Legend Builds Collection★ 5 (2.6k)99k views7.6k ♥87 minUpdated Mar 10
- 【Updated to Patch 6.10】【Cataclysm Builds】Kruber all careers★ 5 (1.8k)60k views5.7k ♥33 minUpdated Mar 10
- 【Updated to Patch 6.11】Optimal Melee Weapon Combo★ 5 (1.9k)58k views5.2k ♥26 minUpdated Jun 11
- 【Updated to Patch 6.10】【Cataclysm Builds】Saltzpyre all careers★ 5 (1.7k)57k views5.6k ♥36 minUpdated Mar 10
- 【Updated to Patch 6.10】【Cataclysm Builds】Bardin all careers★ 5 (1.8k)57k views5.6k ♥33 minUpdated May 12
- 【Updated to Patch 6.10】【Cataclysm Builds】Sienna all careers★ 5 (1.7k)57k views5.4k ♥37 minUpdated Mar 10




- Upgrading to PremiumTeam Fortress 2★ 5 (20k)1441k views11k ♥6 minUpdated May 11, 2022
- No More Room in Hell Official ManualNo More Room in Hell★ 5 (2.8k)569k views2.1k ♥29 minUpdated Apr 22, 2019
- NMRiH Community Hosting GuidesNo More Room in Hell★ 5 (526)351k views653 ♥1 minUpdated Aug 10, 2022
- ULTIMATE GUIDE FOR GAME DEV TYCOONGame Dev Tycoon★ 5 (5.8k)326k views10k ♥4 minUpdated 23 Jan, 2014
- How to 'Git Gud' Soon™MORDHAU★ 5 (2k)318k views3k ♥68 minUpdated Nov 16, 2024
- Лучшие кооперативные игры SteamPAYDAY 2★ 5 (1.5k)315k views2.1k ♥56 minRussianUpdated Apr 27, 2025






This guide was created by its original author on the Steam Community. Are you the author and want it removed? Request removal.