Custom Playermodels (Proportiontrick & Face Flex)
Foreword
This guide is made to explain how to create playermodels using proportion trick and face flexes.
The core information applies to any model in any source engine game.
This information can be used for any character in any source engine game.
No matter if you replace L4D2 players, infected, HL2 npc, gmod players, ect.
Attachments and face flexes will be different for other games, as these are only for l4d2.
But at least there's a section specifically made with gmod armatures for the proportion trick.
Above ~50k triangles might need to be separated into multiple smd chunks to compile.
Above ~70k triangles need "$nodecal 1" in vmt's to prevent crashes when pounced.
Above 100k triangles are going to crash the game if it appears multiple times at once.
Above 120k triangles will barely compile and crash L4D2 no matter what.
The average polycount for player models is 13,836 tris. (l4d1 having 11k, l4d2 having 15k)
If you need help, please join the Dead 4 Mods discord server[discord.gg].
The #modding channel is where you can ask for help.
It's easier to ask there, in a live chat, because i will not check on my notifications every few minutes to see if i get new comments.
Requirements
I'd reccomend "Reloaded" because it is a bit better.
(ref-poses, attachment helper, declaresequences, anim swap base)
This guide works for almost all games, but some things are a little different for other games.
For
 Garry's Mod:
Using another survivors animations
First off, here's is some important information you need to know if you want to use someone elses animations on your model, it is a tutorial written by ZeqMacaw.
If you don't want to use another survivors animations, skip to "Getting Model Files".
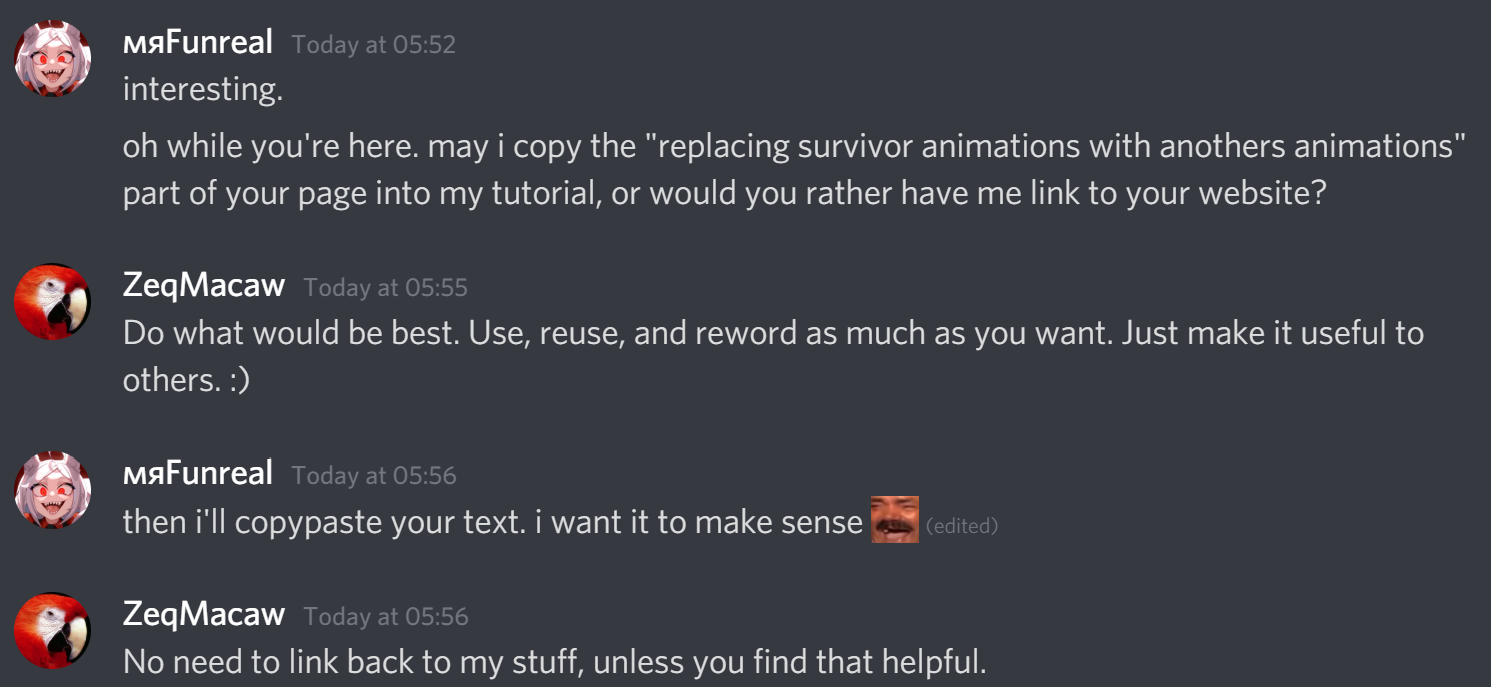
See, he said so!
Check his website[sites.google.com] for various tutorials. It does have a few dead links from facepunch and L4Dmaps (RIP) though.
Say you want an all-woman team of survivors. By following the other sections of this tutorial, you could replace Coach, Ellis, and Nick with a woman each, but each would be using the respective man's animations. Not that bad, but not ideal having a man's animations for a woman.You could go a step further and rig each woman model to either Zoey's or Rochelle's animations. However, in online multiplayer campaigns, many of the animations will not show correctly. This is actually worse than seeing a man's animations for the woman. The problem is that each survivor's set of animations are listed in a different order in the mdl file, and the server says which animation to play based on this ordering.
I'll give an example to show the problem. Keep in mind this is simply the gist of, and not exactly, what occurs. The server says to each client player, "play Nick's reload shotgun animation", and each client knows this simply by receiving the number "3", meaning "play the third animation". If Nick is replaced by a custom woman using Zoey's animations, then the client will play Zoey's "third animation", which is not the "reload shotgun" animation.
The trick to make the animations show correctly online is to re-order the list of animations in the replacement model's mdl file. For the example, you need to re-order Zoey's animations to be in the same order as Nick's. You do this in the qc file via the $declaresequence command.
Notice that this means you only have to rig a custom model once and can then use a modified qc file to recompile for each of the other survivors.
Follow these steps unless an update to L4D2 causes this process not to work:
- Download my specially-prepared Survivor Anim Swap source file pack[drive.google.com]
(last updated: 03-Jul-2015) containing qci files ready for ease-of-use.
Included in the "Declaresequence" pack listed in foreword
NOTE: The files are very good and have been used for many released addons already, but they probably could still use some tweaking to make the conversion the best it can be using this method. - Choose the correct qci file from the pack. For example, if you have rigged a woman custom model using Zoey's skeleton (and thus her animations should be used) and you are using it to replace Louis, then choose this file: "Anims_RigToZoey_ReplaceLouis.qci"
- Open the chosen qci file with Notepad++.
- Follow the instructions at the top of the chosen qci file.
For now, unpack the model of the survivors who's animations you want to use in the next step.
IF (and only if) the above declaresequences end up not working, follow tese steps to make new ones yourself
You'll find out if the declaresequences from this "anim hack" won't work at the very end when you test the mod online. If the survivor plays the wrong animation when walking, or healing...
- Open Crowbar.
- Click the Decompile tab.
- Select for "MDL input" the MDL file of the model for which you will rig the custom mesh (call this the "RigTo" model).
- Click the "Use Defaults" button.
- Tick the "$DeclareSequence QCI file" option.
- Click Decompile button.
- Open the QC file and look for $includemodel.
- For each $includemodel line, decompile the given MDL file with the "$DeclareSequence QCI file" option as done in the steps above.
- Combine the $DeclareSequence QCI files into one file, keeping the $declaresequence lines in the same order as the $sequence and $includemodel lines in the first QC file.
- Do all of the above again for the MDL file of the model that will be replaced (call this the "Replace" model).
- Rename the "Replace" model's combined $DeclareSequence QCI file to "Anims_RigTo<rig_to_name>_Replace<replace_name>.qci" where <rig_to_name> is the character name you are rigging to and <replace_name> is the character name you are replacing.
- Open the "Anims_RigTo<rig_to_name>_Replace<replace_name>.qci" file in Notepad++.
- Rename each sequence to the equivalent sequence name used in the "RigTo" model's combined $DeclareSequence QCI file.
What this means is that if you want to use replace nick, but with zoeys animation, rig the mesh to zoey. Or whatever models animations you want.
The Declaresequence.qci file you get from this part should be used in step 8.03 instead of the one from the "Required files".
Getting Model Files
The first step is to decide which model you want to replace and then grab the model files so you can begin your work.
If you want to use another player's animations, get their model. You need their armature for their animations
As in; If you replace nick with a model using bills animations, decompile bill.
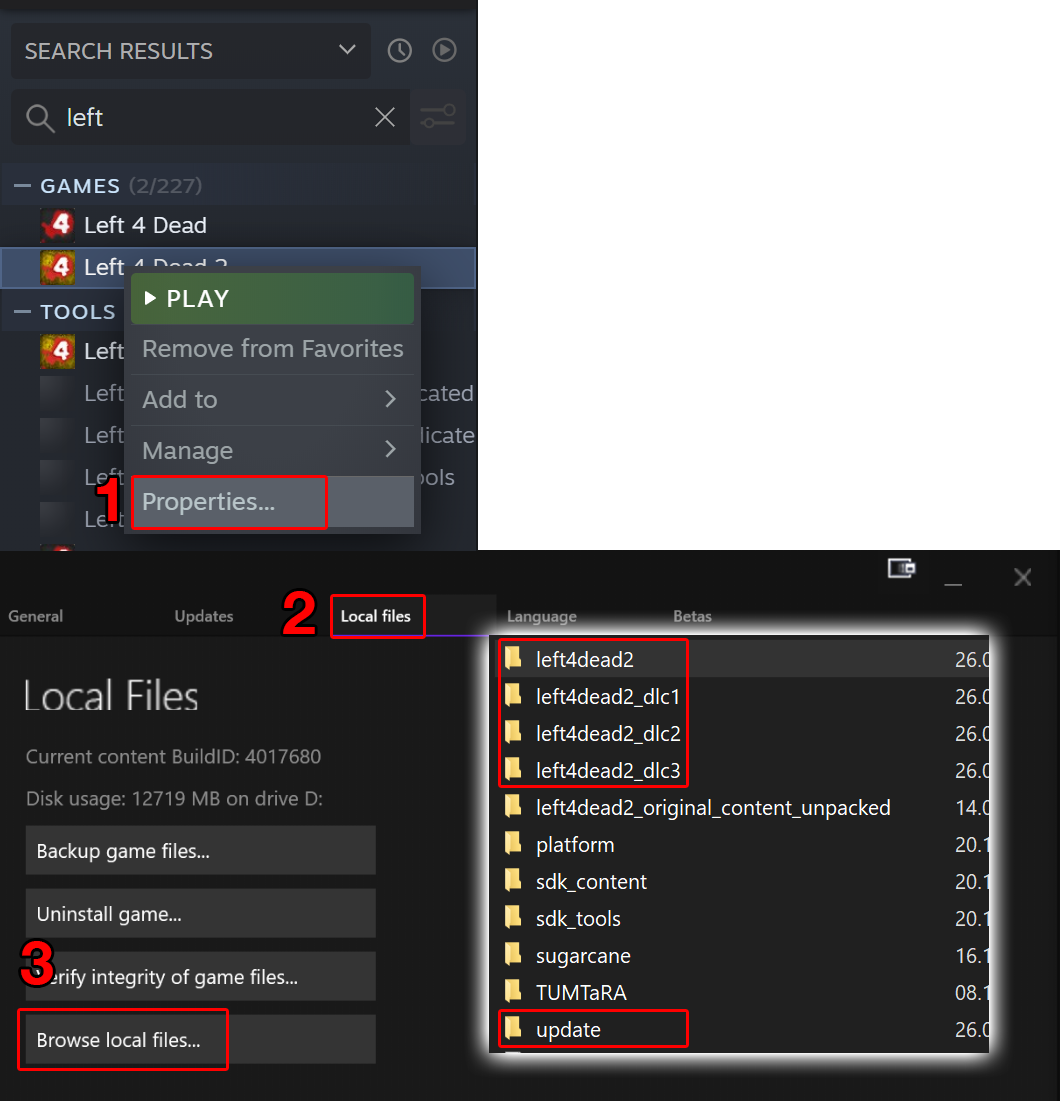
There's a folder called "sdk_content".
Inside of that is a zip file called "Starter_Kits".
That file contains outdated, files used to make the first set of playermodels. Later we will get some files from there. But for now we will continue with the original way of decompiling the required models.
Just letting you know that there's is some sort of source you can look at if you want to.
Open up the pak01_dir.vpk file with either GCFScape or Crowbar.
Survivor models are in: "Models/Survivors"
Their arms are in: "Models/Weapons/Arms" Survivor Modelnames:
survivor_biker_light
survivor_teenangst_light
Francis and Zoey have a "Light" model. Their actual models are identical to the default player version, except that they have different animations. Those models are only used for the "The Passing" Intro sequence. You don't really need them, but you should make those anyways.
Bill's Corpse from "The Passing's" last map is in dlc1 - "Models/Survivors/Namvet".
It is a static prop, which you have to make your own pose for.
Here's where to find their models:
left4dead2 (Gibs)
Models/Infected/gibs
left4dead2 (L4D2)
left4dead2 (L4D2)
left4dead2 (L4D2)
left4dead2 (L4D2)
left4dead2
Lets say we someday get an update which changes the l4d2 smokers arms.
Those arms would then end up alongside the smokers l4d1 arms in update/pak01_dir.vpk
"left4dead2" Contains the L4D2 CI
"DLC1" Contains the wedding CI
"DLC2" Contains the L4D2 variant of the patient and the Surgeon.
"DLC3" Contains outdated L4D1 Infected.
"Update" Contains new L4D1 infected.
Models which contain "_w_" in their name, like "Common_infected_w_Groin" are wounds.
Furthermore, every single CI uses the exact same armature, except the L4D1 Ci.
L4D1 has their jaw bones rotated upwards into the upper lip.
This means you can replace all CI with the exact same SMD, but the L4D1 versions will have their jaws rotated into the upper lip unless you swap armature for those.
Put the files in a folder you can work with.
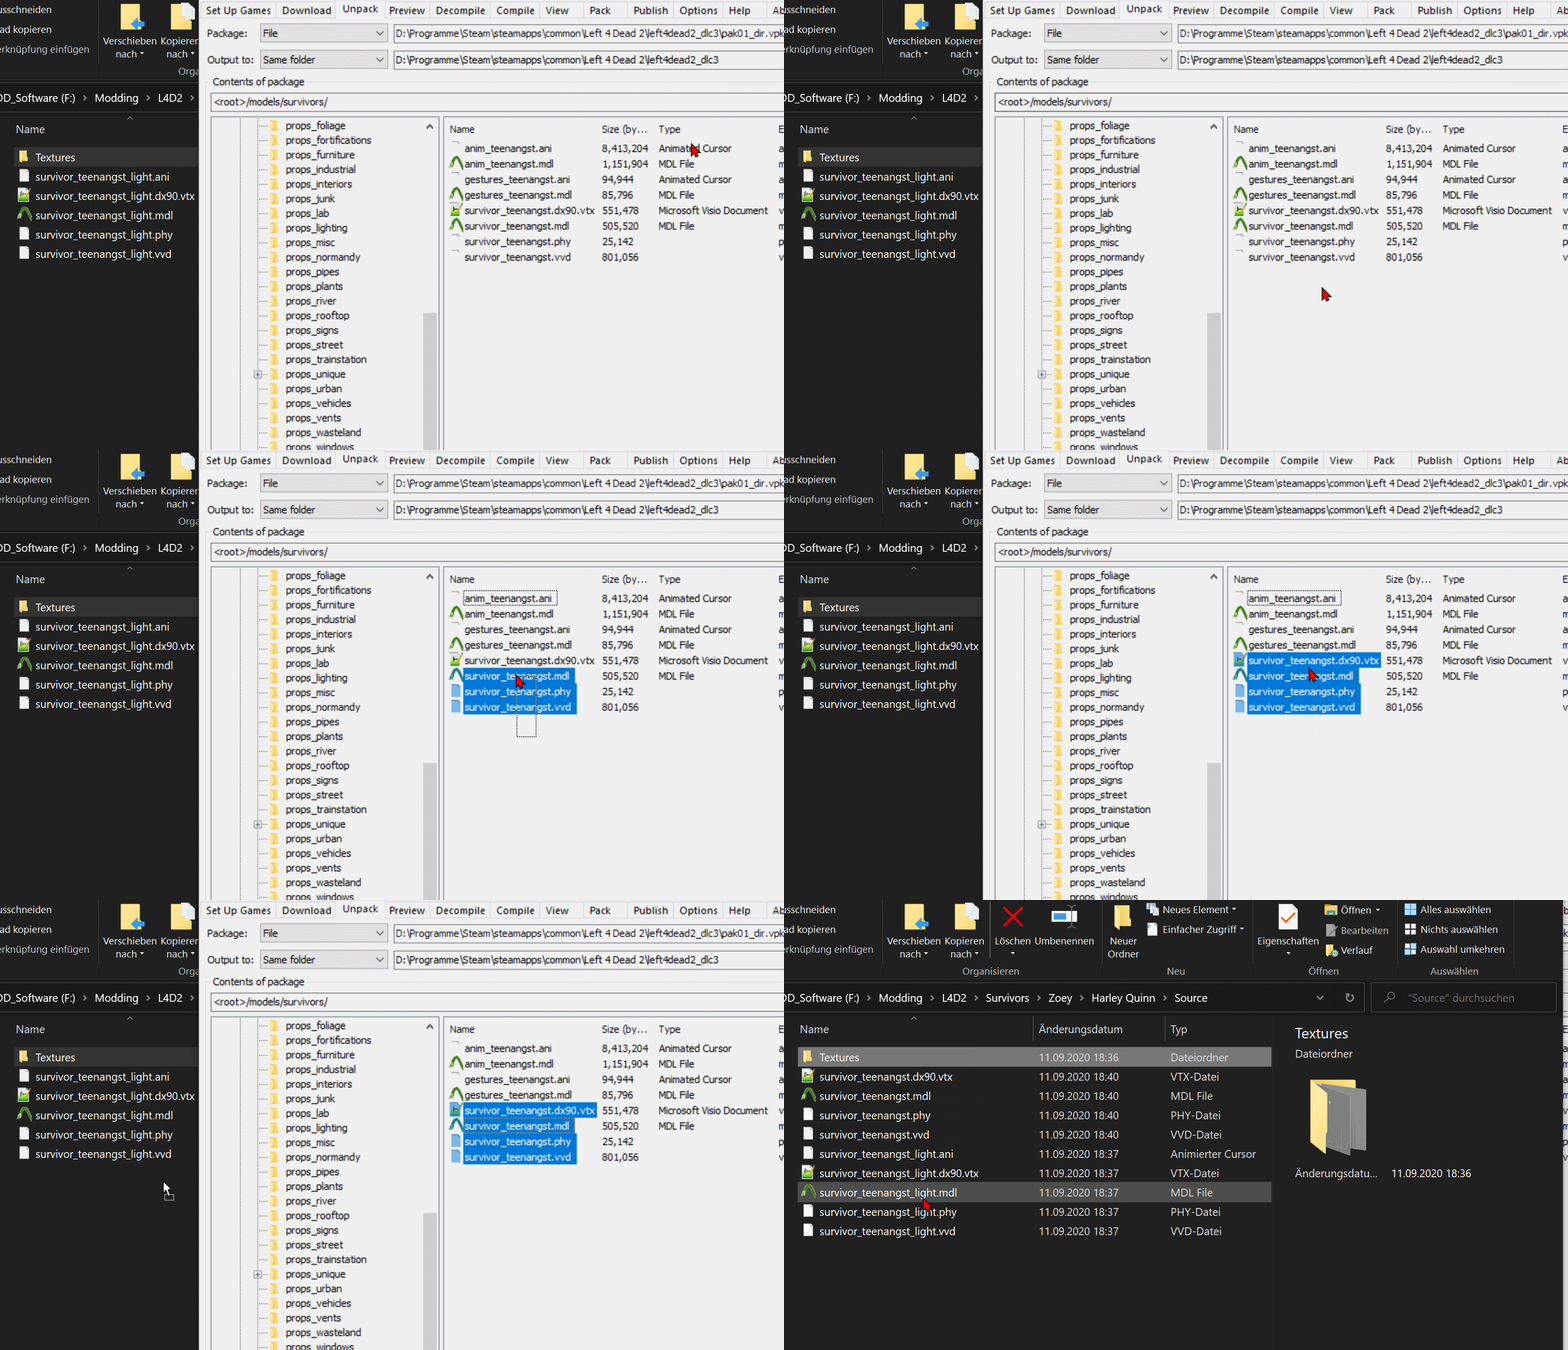
"Anim_" and "Gestures_" files only hold animations. You don't need them.
Decompiling Models
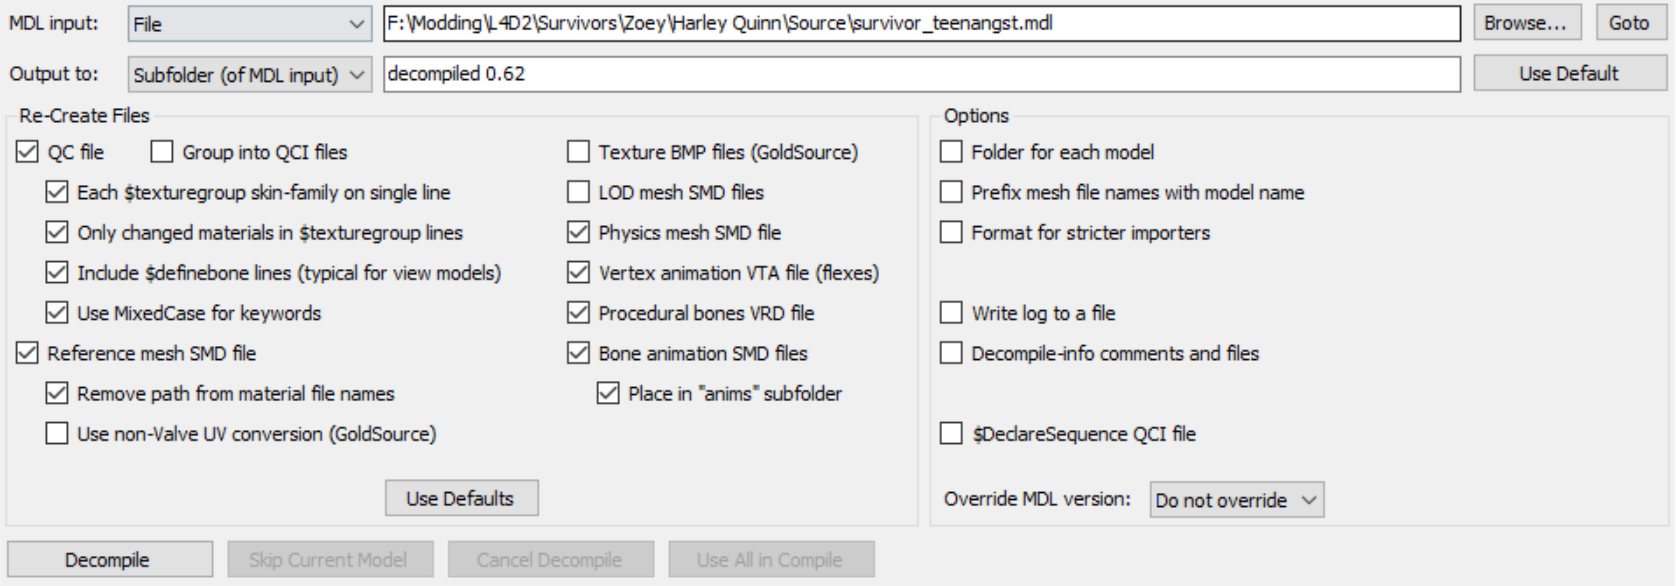
Blender cannot open MDL files, so we need to decompile the MDL, PHY, VVD and VTX files to get a QC file and several SMD files.
Well, there's some tools that can apparently import MDL to blender, but we won't be doing that.
This will allow you to DoubleClick any MDL file and immediately get to the Crowbar Decompile screen.
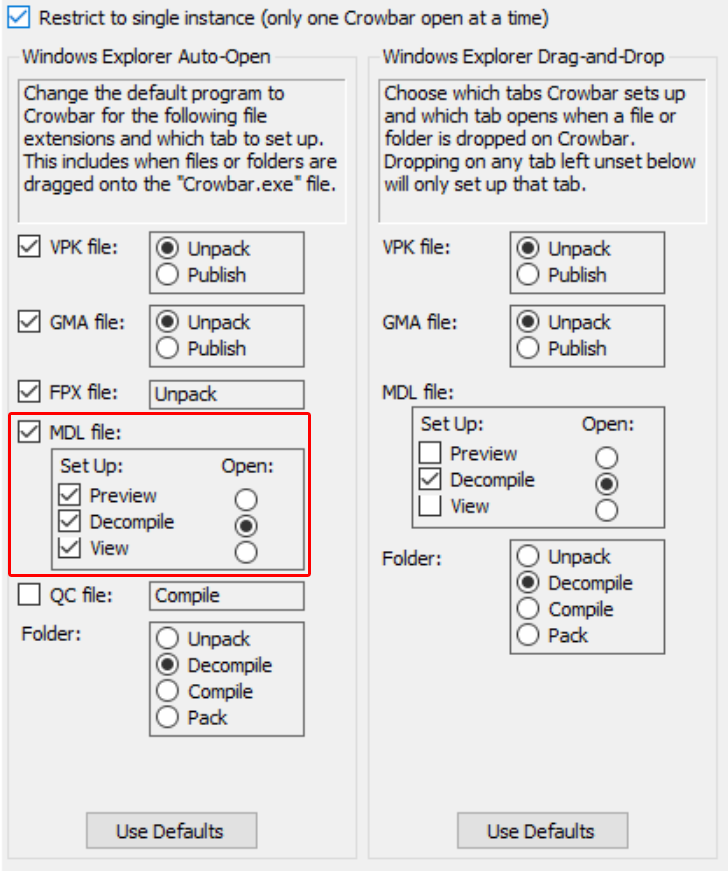
I recommend using the settings I am using here.
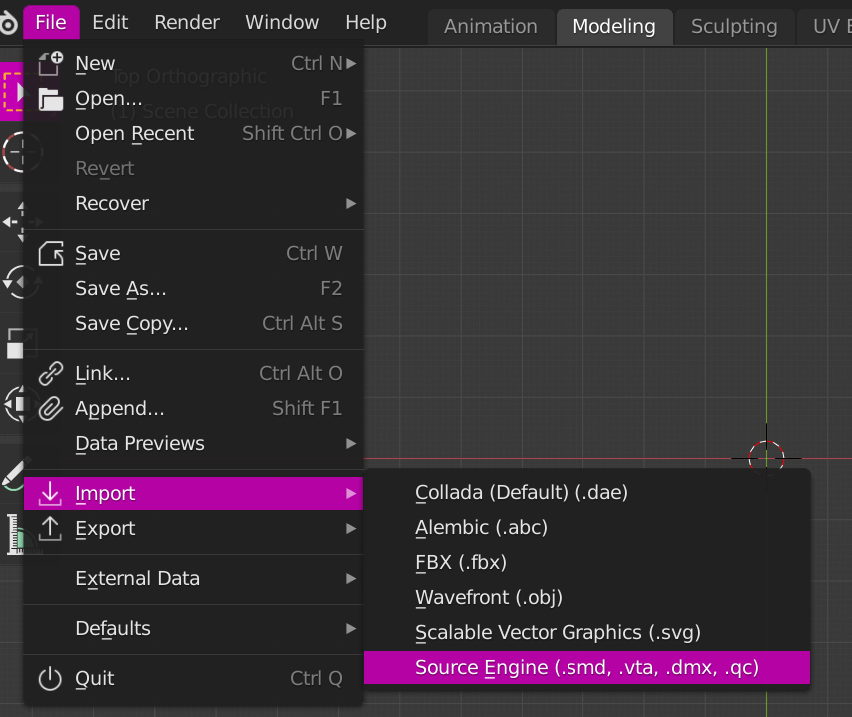
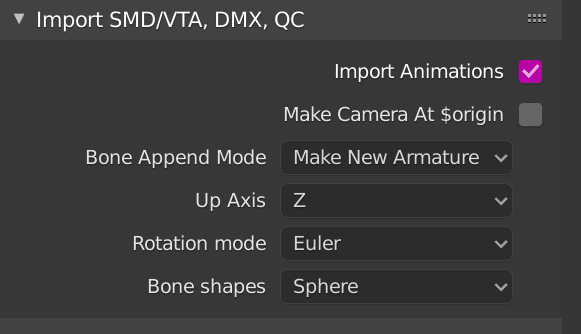
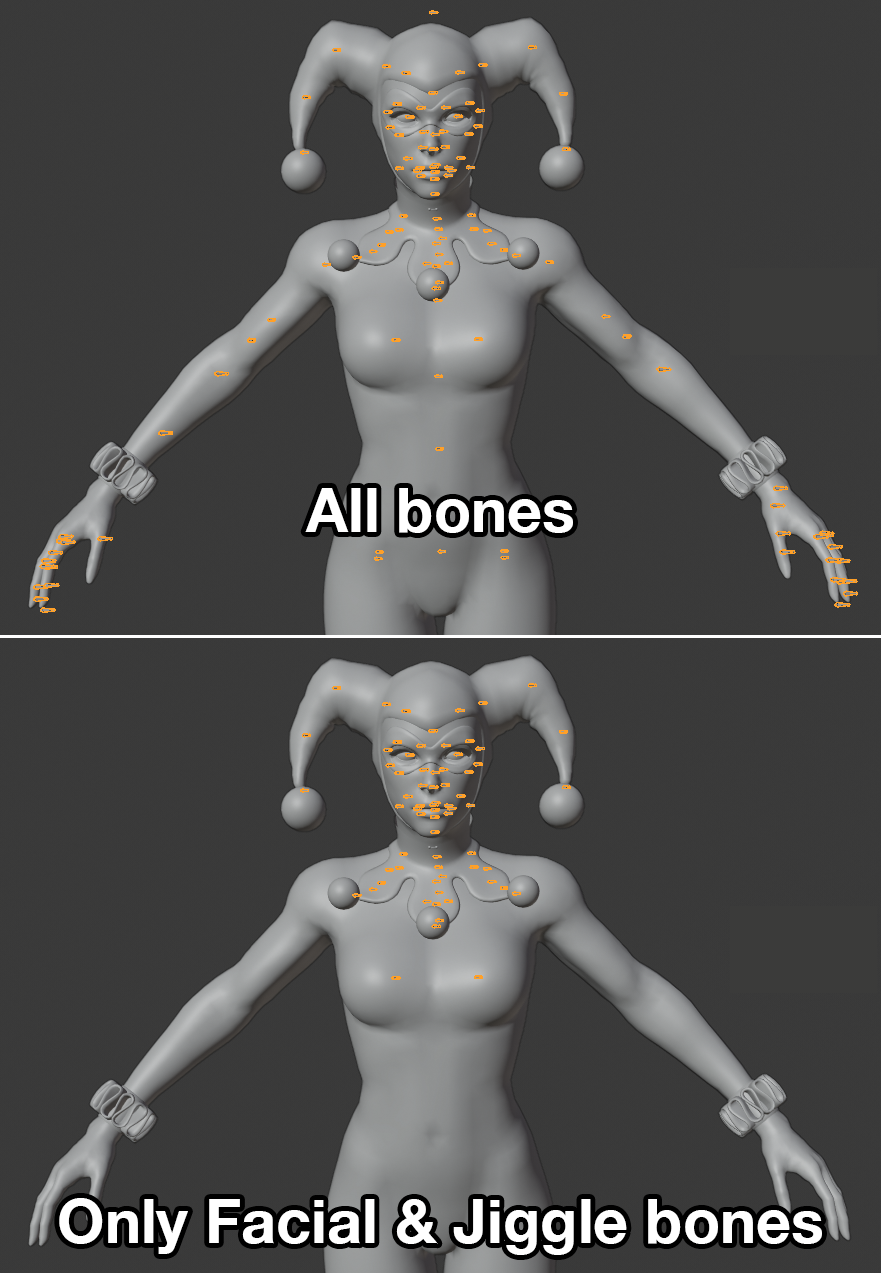
Importing To Blender
If you don't know which of the SMD files you should import: Open the QC file and check the $model line. It tells you which SMD file the actual model is.
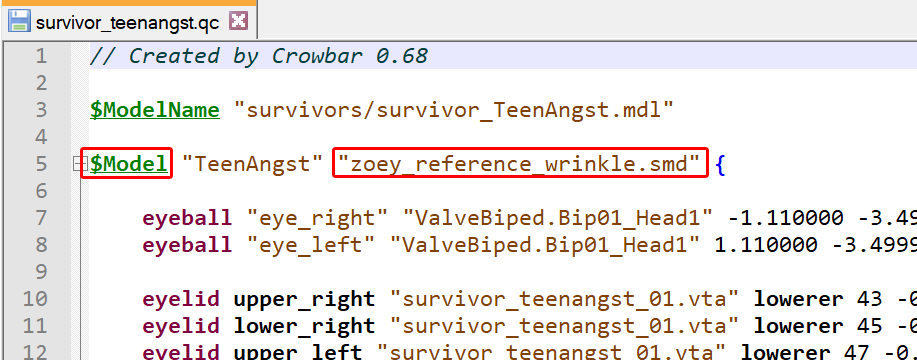
It could be possible that a model for some reason has a $model line and further down the QC file it has a $bodygroup line for any additional SMD files. Import that SMD file of the $model line into Blender.
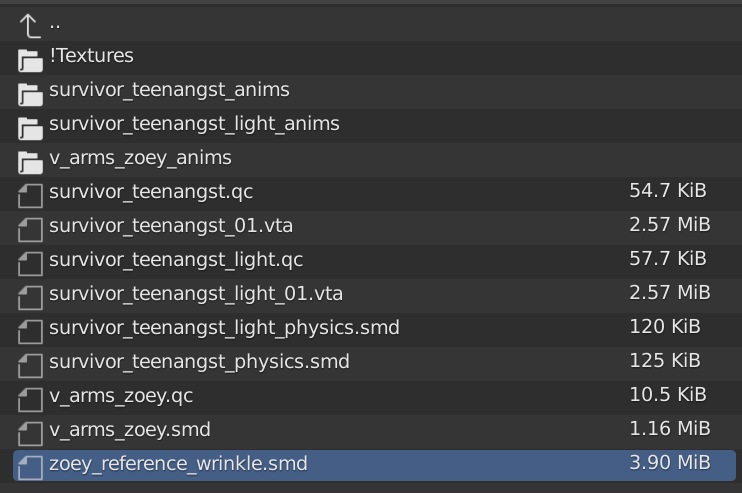
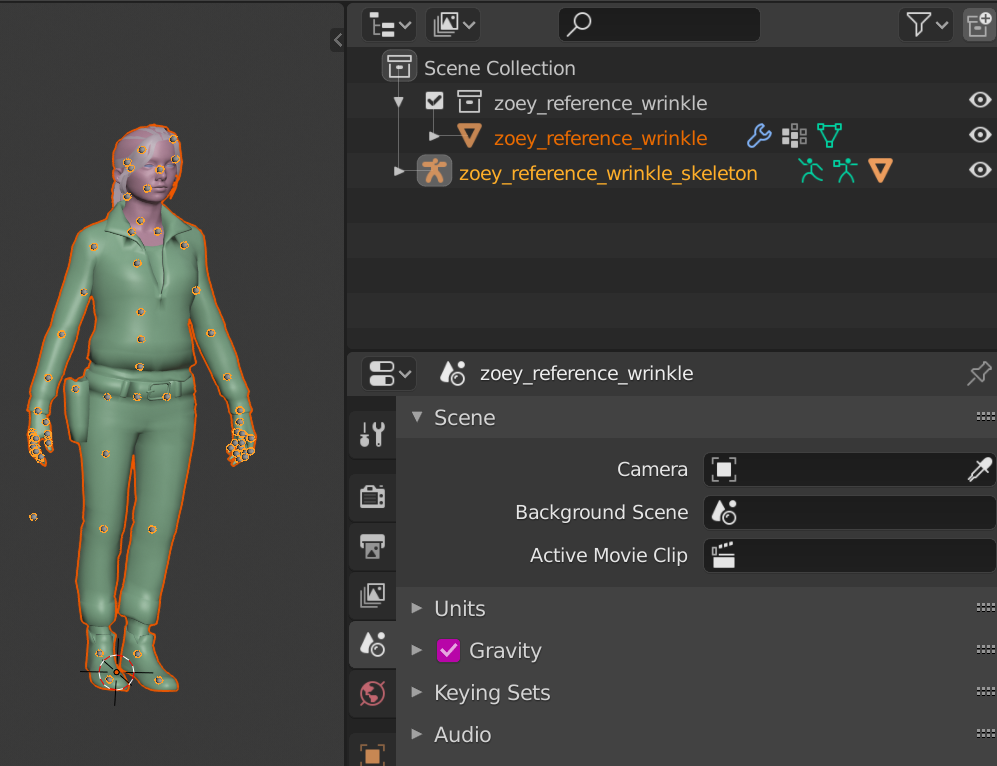
Otherwise your two armatures (skeletons) will mix.
 It is possible that your custom model might have a slightly different scale.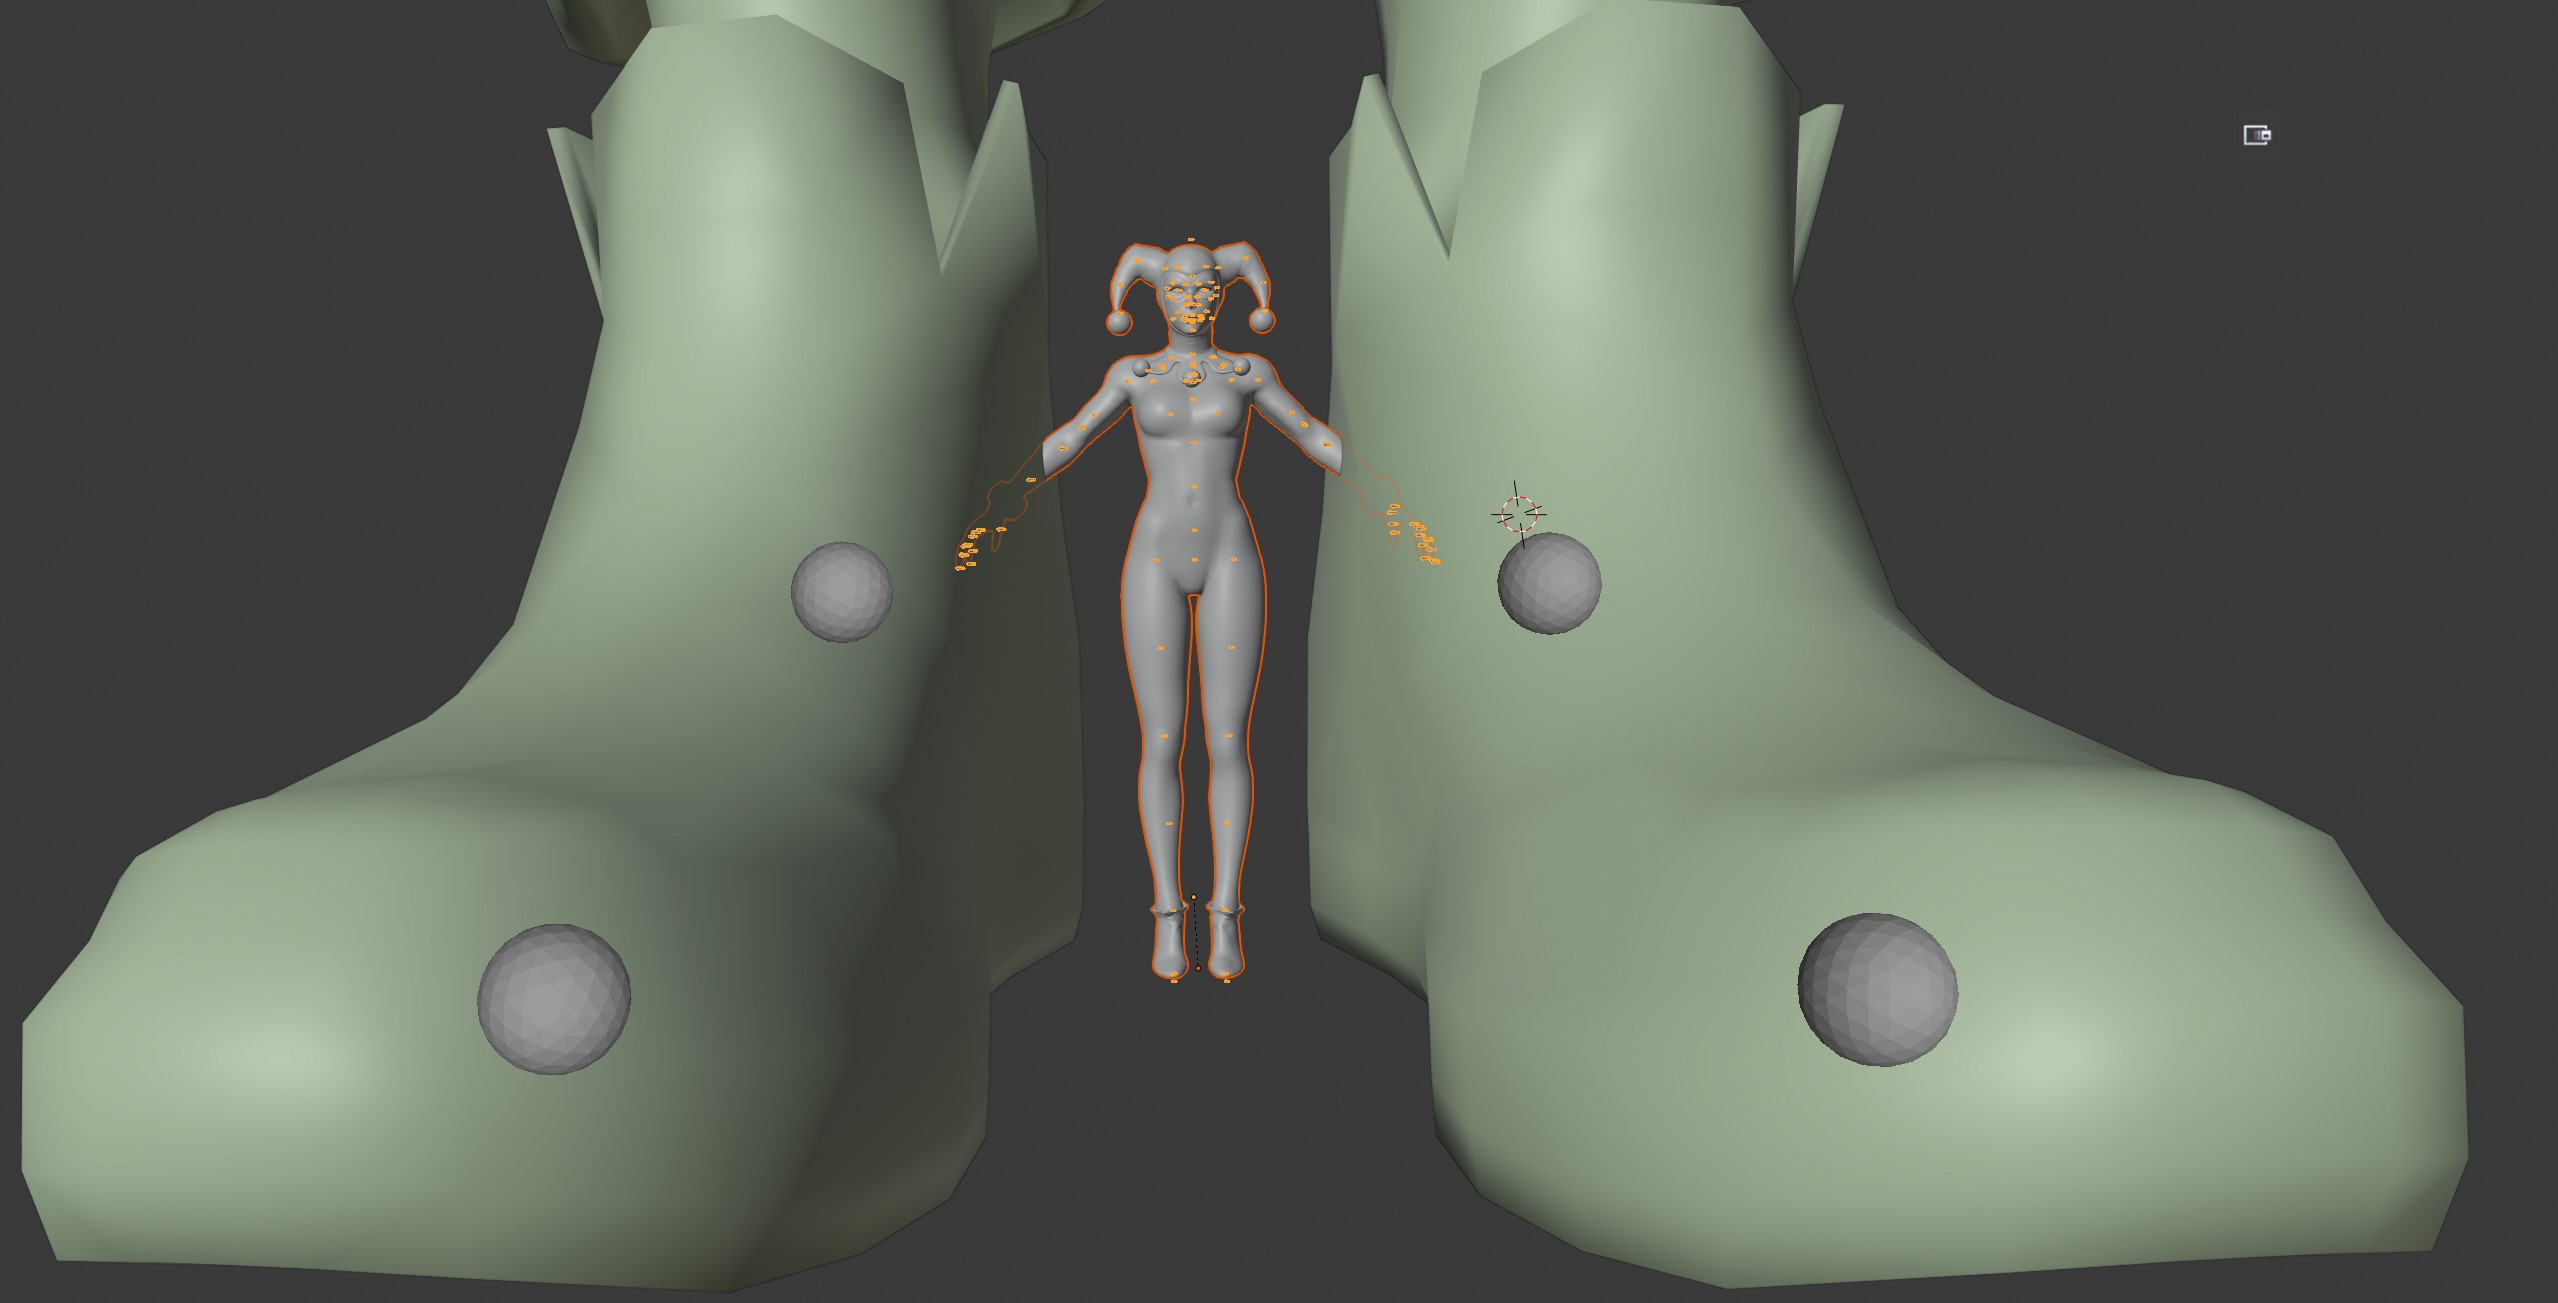
In those cases just scale your custom model until it fits the original model.
Generally, making the chin be in similar places is enough. But if your model is proportionally very different (Like a child) just scale it until it seems right.
NEVER SCALE THE ORIGINAL
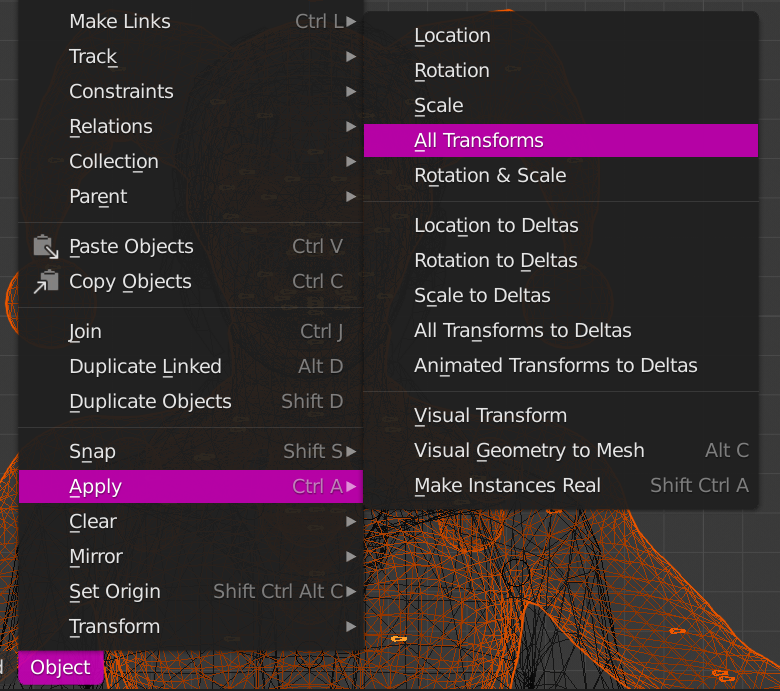
UNLESS it has special bone locations where you could make jigglebones, or bones that transform the face. In those cases delete every bone but the face and possible jigglebones.
Jigglebones will need to be redone, but you can keep the location for now.
Face bones are VERY useful for face flexes. Keep them for now.
The names in that box are what will later be the exact names of the materials (VMT files).
You can rename them by double clicking the names.
Delete any file endings from those materials.
Also very important, Each eye needs its own material.
Call one "eyeball_R" and the other "eyeball_L"
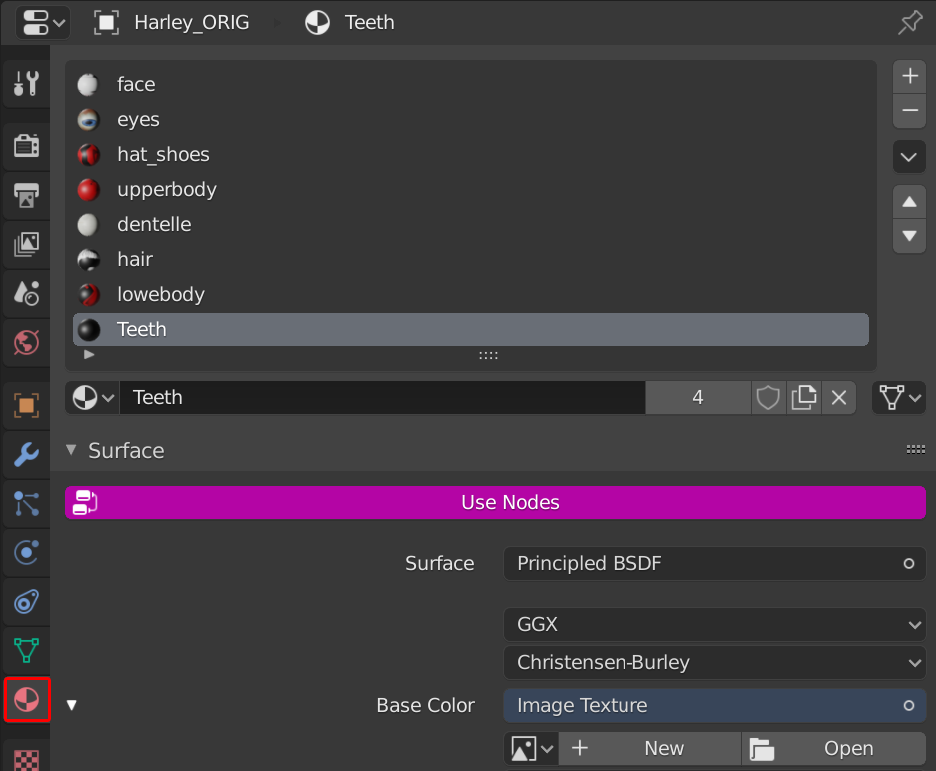
Actually eye material names do not matter as long as they are unique for each eye, but calling them eyeball_R and eyeball_L will save you two seconds when doing the eye posing part.
In the entire tutorial you'll see me use "eye_l" and "eye_r". But whilst proofreading I decided to change this up here and add this disclaimer.
Headhacks
"Head hacks" are mods in which the head of the original survivor remains, while the body swaps.
Alternatively, mods in which the face remains default while anything else changes.
These mods will not require new face flexes to be made, skipping the entire "face flex" section.
Although if you do end up changing head location, the eye tracking needs to be redone.
If you are not making a headhack, just skip this section and all steps beginning with "HH"
Examples of headhacks:
https://steamcommunity.com/sharedfiles/filedetails/?id=194962388 Riot officer ellis uses headhack and proportion changes.
https://steamcommunity.com/sharedfiles/filedetails/?id=357667139 https://steamcommunity.com/sharedfiles/filedetails/?id=148452092 https://steamcommunity.com/sharedfiles/filedetails/?id=142692504
Select the original survivor mesh after import, then import the VTA as if it was a SMD.
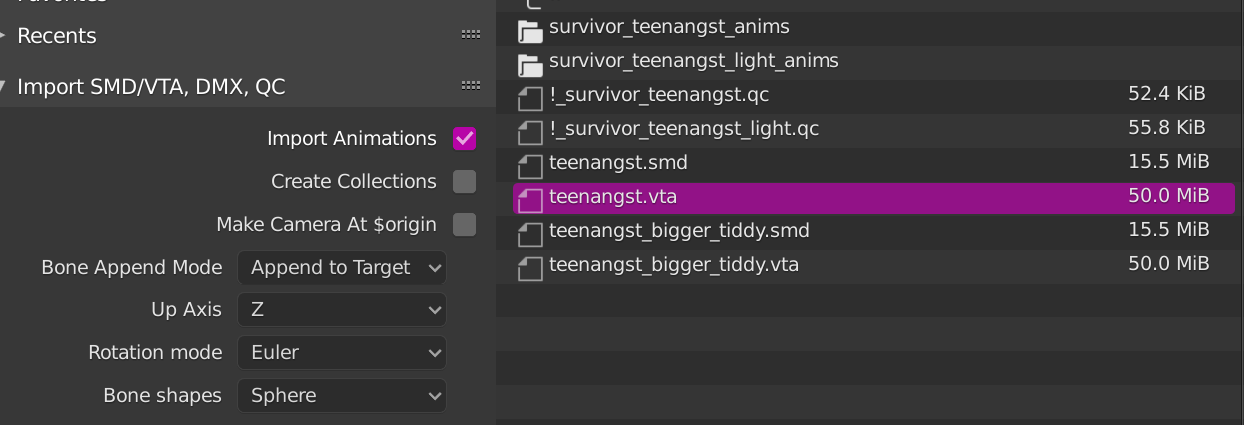 You'll get a "VTA vertices" object, along with the shape keys.
Delete the VTA vertices object.
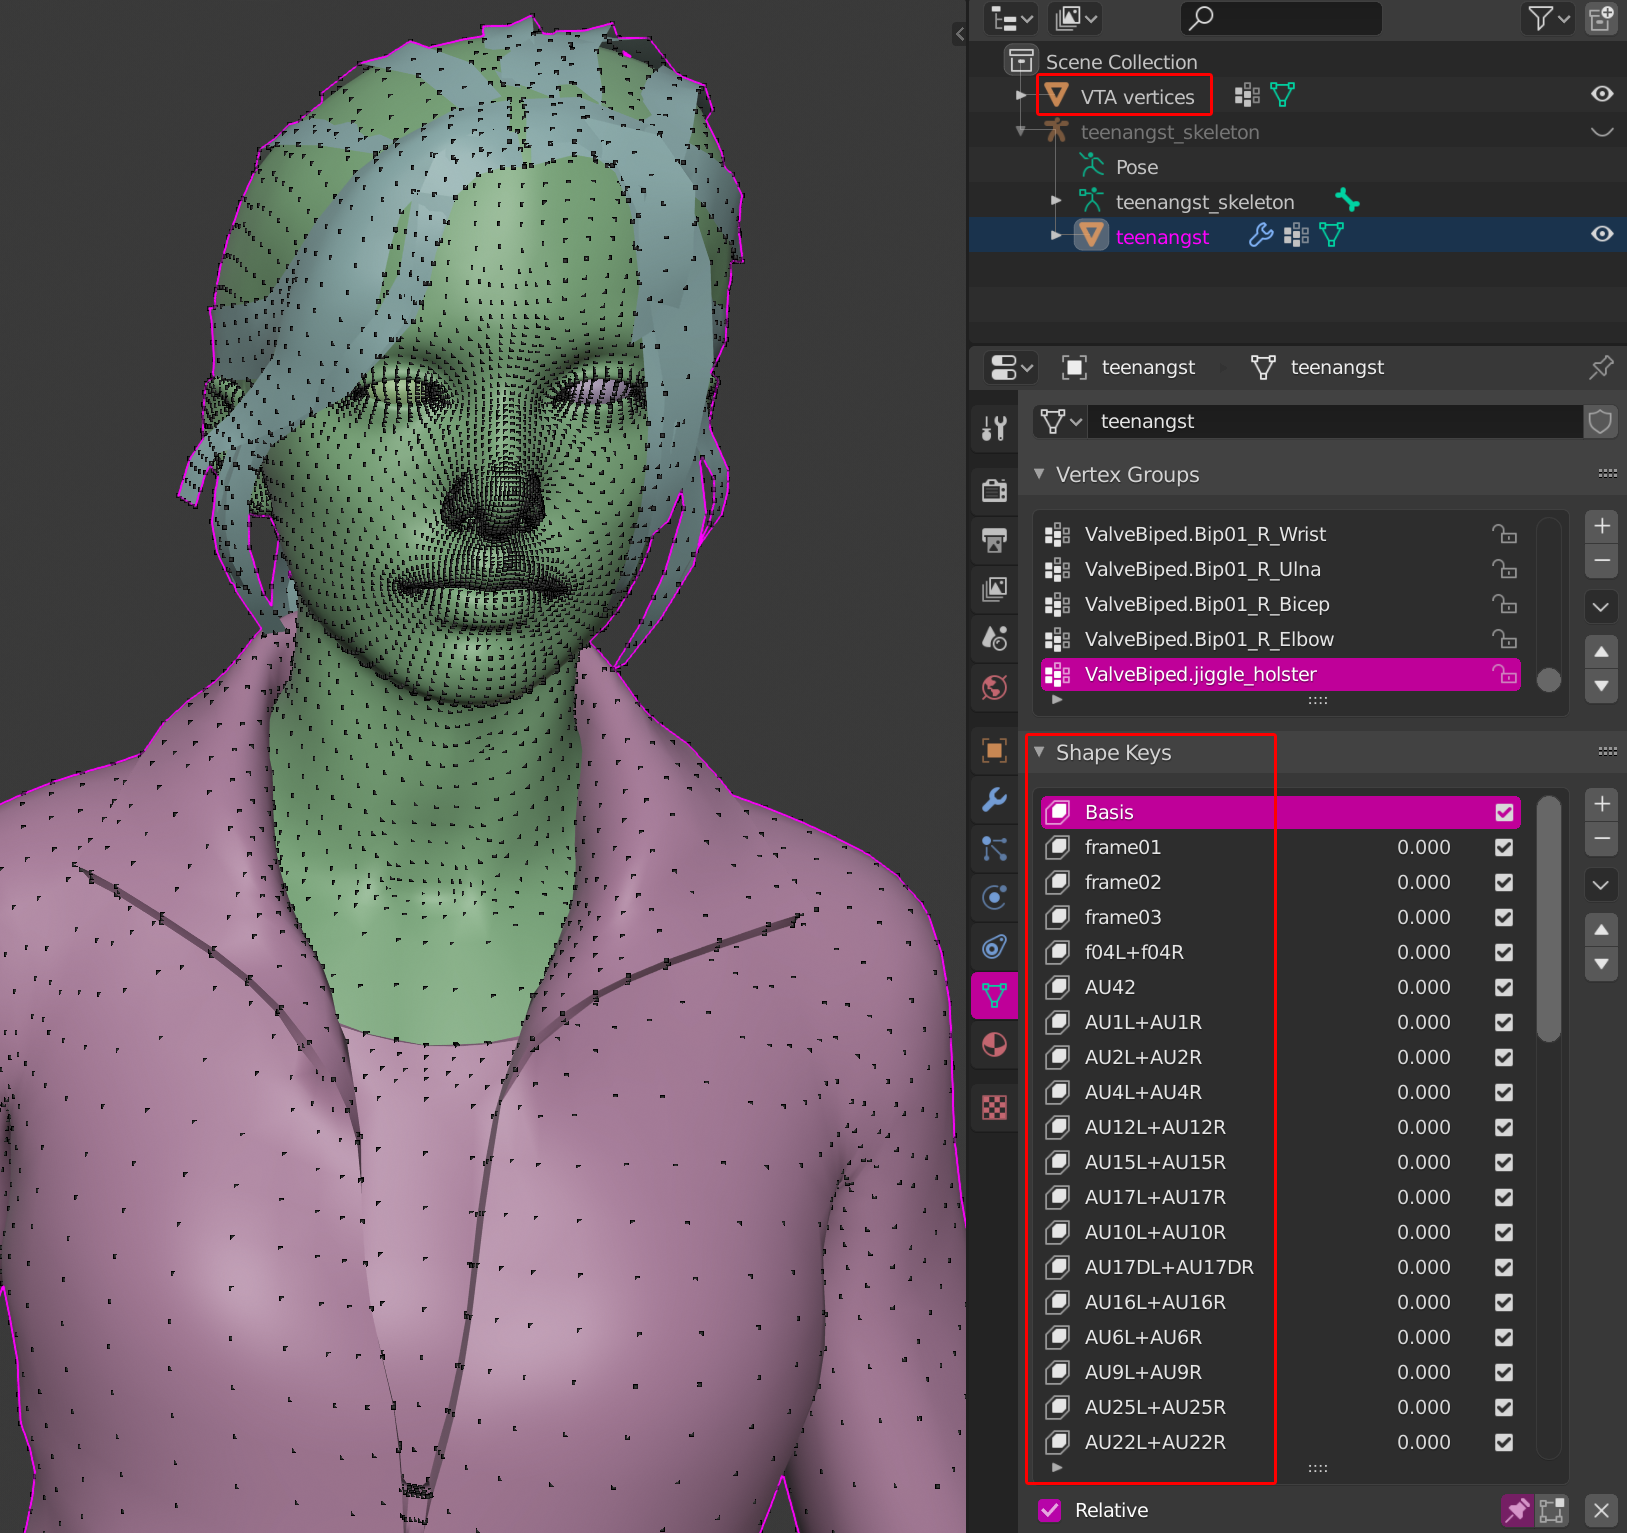
You may now change this model in any way shape or form you'd like.
Delete the body to only keep the head and change the clothes, add a hat, glasses or whatever.
You may continue following the guide and change the players proportions if you want.
You may also just go to Preparing to Rig to start rigging your new body if you want to keep proportions default.
The next "Headhack only" step will be "HH 1.02", in "Base QC editing".
Continue along the guide for now.
═══════════════════════════
Proportion Modification 1/2
We'll use Haggets' Armature toolkit to cut our editing time in half
It can create base armatures for us and mirror pose edits from one arm/leg onto the other.
We'll only use the symmetrical editing because we already got the armature in there.
Which means you can put extra care into making one hand fit perfectly, while the tool does the same edits on the other hand. This allows us to edit the armature way quicker.
You can do this by selecting the armature in the outliner or 3D View, pressing "Shift & D".
This will duplicate your armature, but it will follow your mouse. Just press ESC to reset it to its default position.
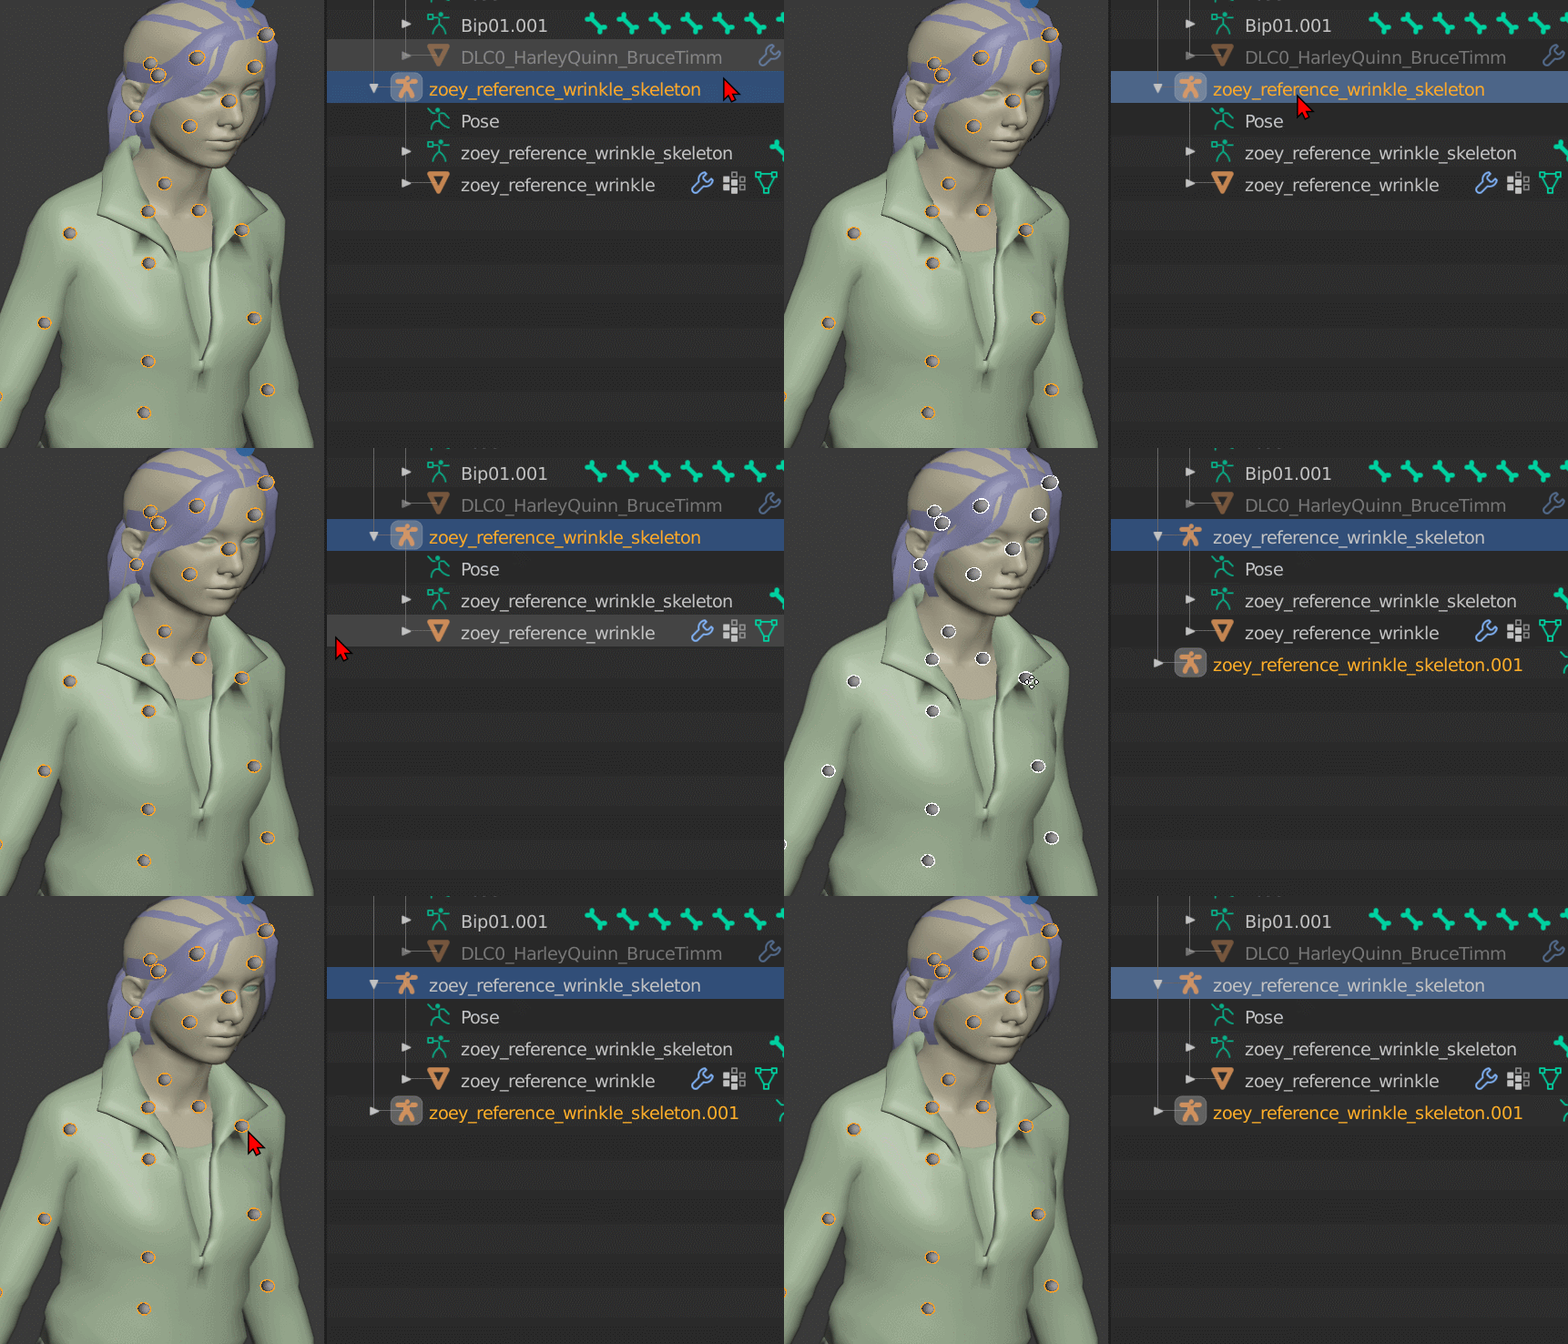
As seen in the GIF, the armature will have the same name with a 001 appended to it.
Rename it to whatever you want. Its name is irrelevant.
We're doing this to keep one vanilla armature. should you end up comparing proportions, bone locations or anything of the likes.
From now on, you'll work on the this duped armature and no longer touch the original.
At no point should you ever edit the original armature, because it is a backup.
Blender uses the arrow keys to advance frames of an animation.
If the pose you build is not saved as a set of keyframes, pressing the arrow keys will advance to an empty frame and undo your entire pose.
Media keys on keyboards (Pause/Play) will not only affect Spotify and Youtube, but also Blender. Blender will start playing your empty keyframes and you lose your progress.
Ctrl+A will also play animations.
If you're used to pressing Ctrl+A to select all files in a folder. Suprise.
Only happened to me at least fifty times :)
This will save every piece of movement as a frame instantly.
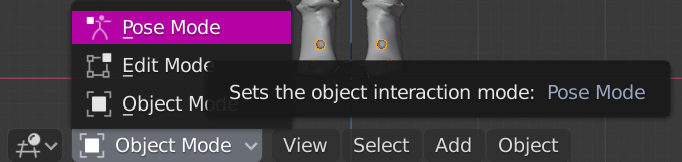
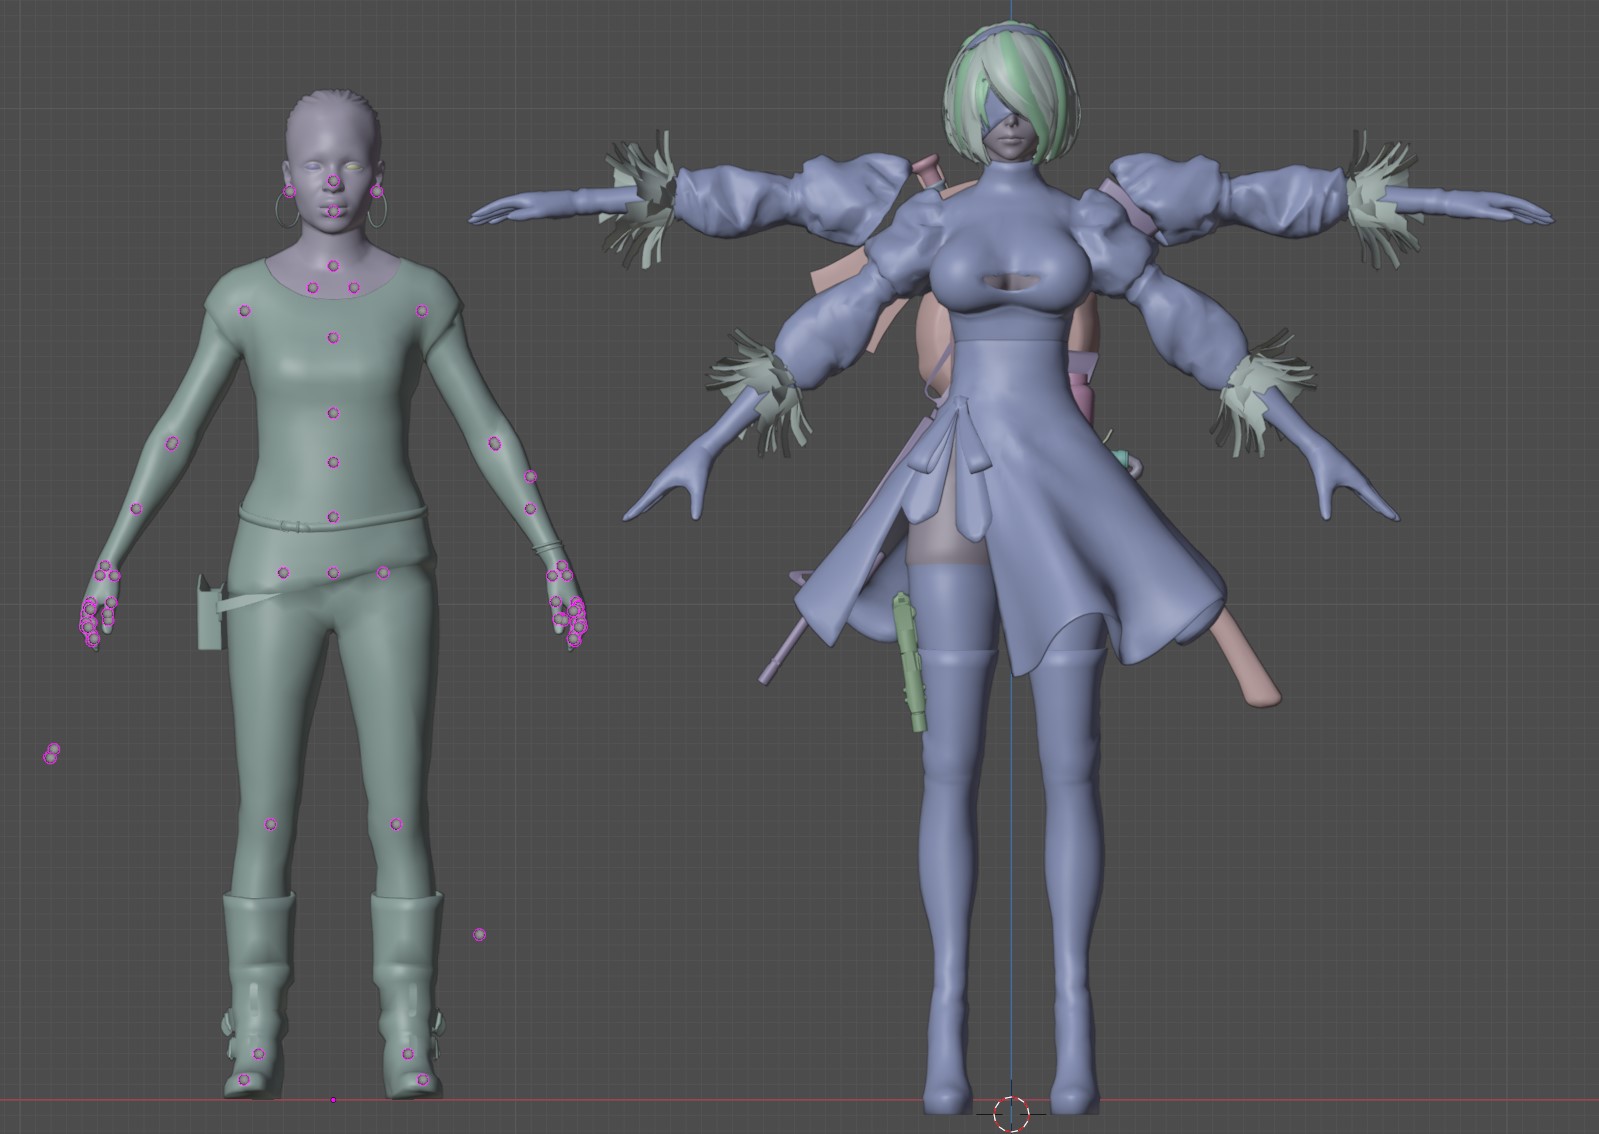
Our model is a taller and has longer arms, we will need adjust the proportions now. First enter pose mode on the duped armature.
Select the armature and press this button. Or use the "Ctrl & Tabulator" hotkey.
 Select the entire duped armature by pressing "A", until all bones are orange.
Scale it by Pressing "S" until the shoulders fit your custom model.
Scale origin tip:
Press "Shift & C" so that blenders crosshair goes to the middle of the scene, where your models feet should be.
In the "Pivot Point" Menu you can select "3D Cursor" so that the model scales relative to the 3D cursor.
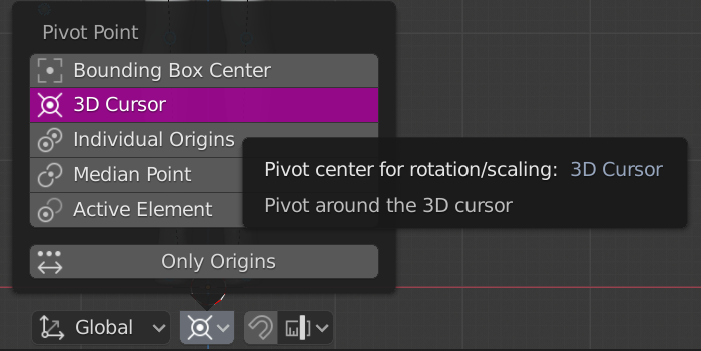
Doing this will allow you to scale from the feet up, as opposed to the pelvis. So that the feet don't go through the floor. Without proper Pivot:
(Look at the feet)
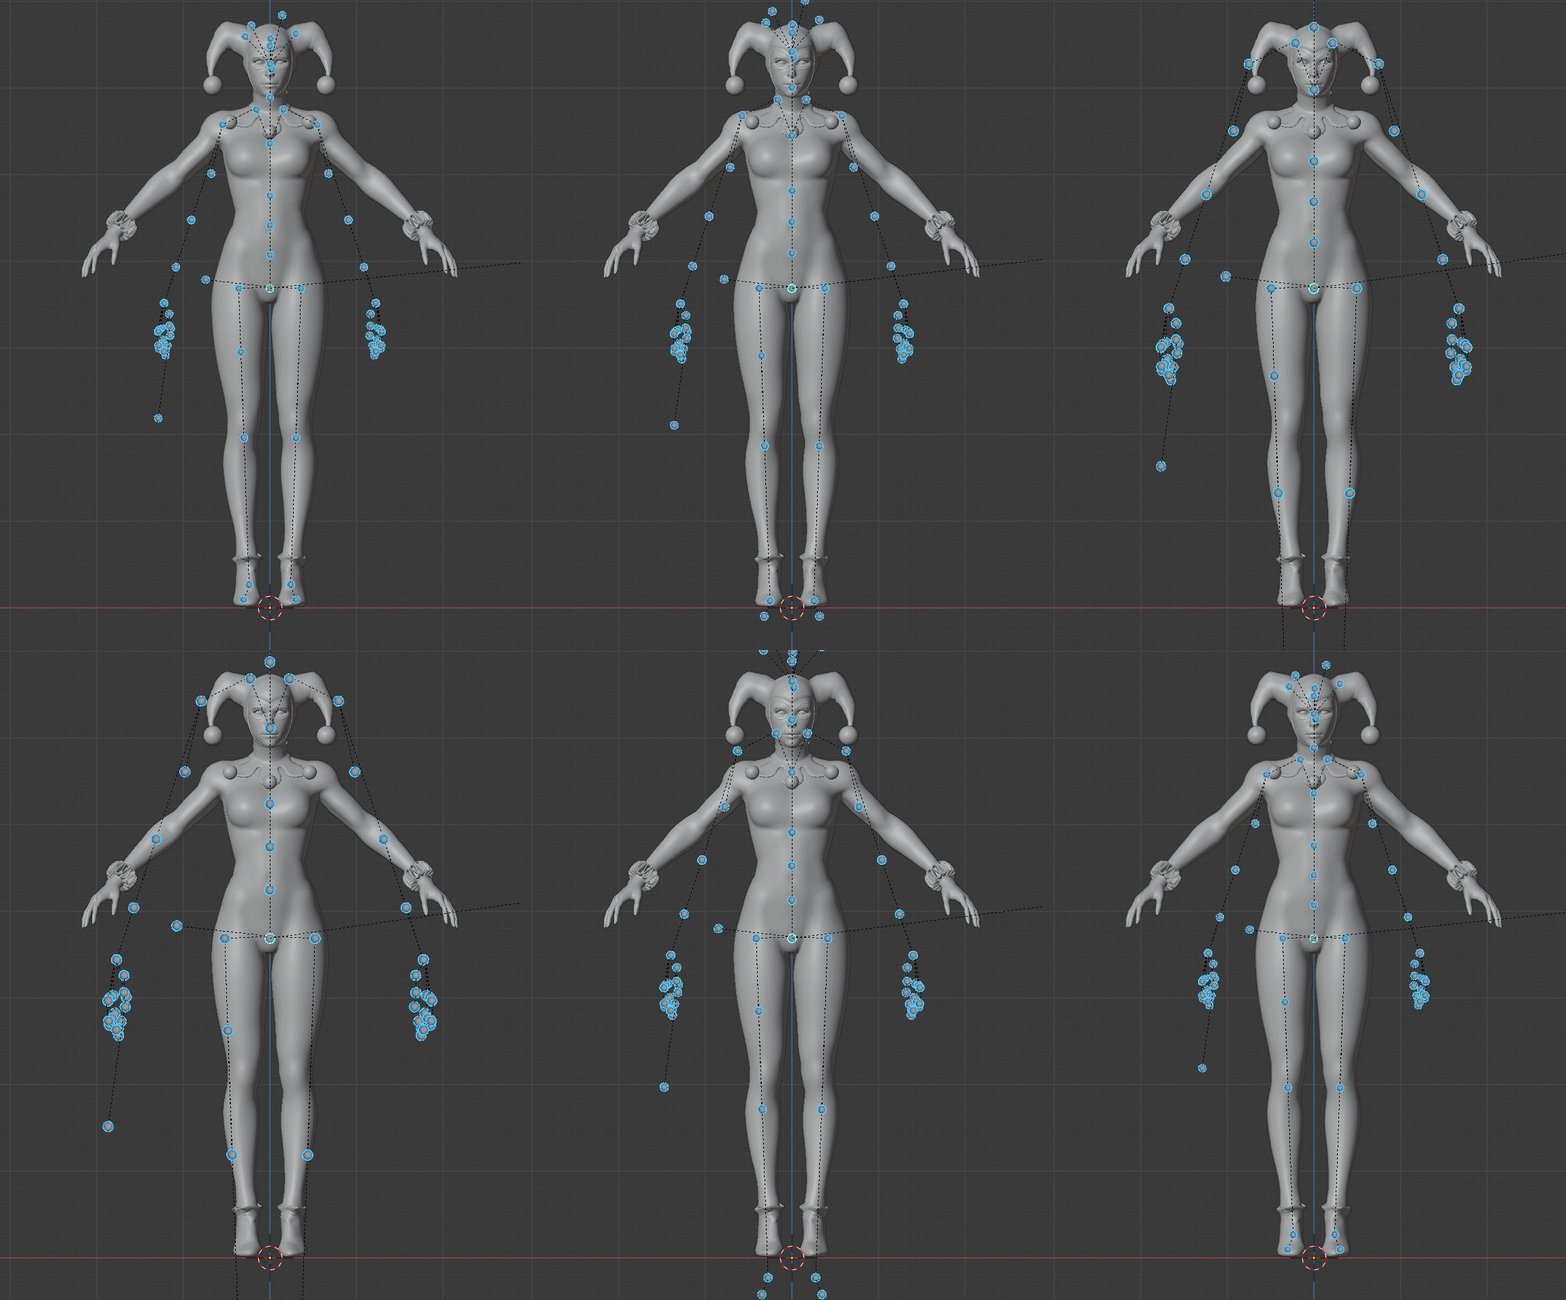 With proper Pivot: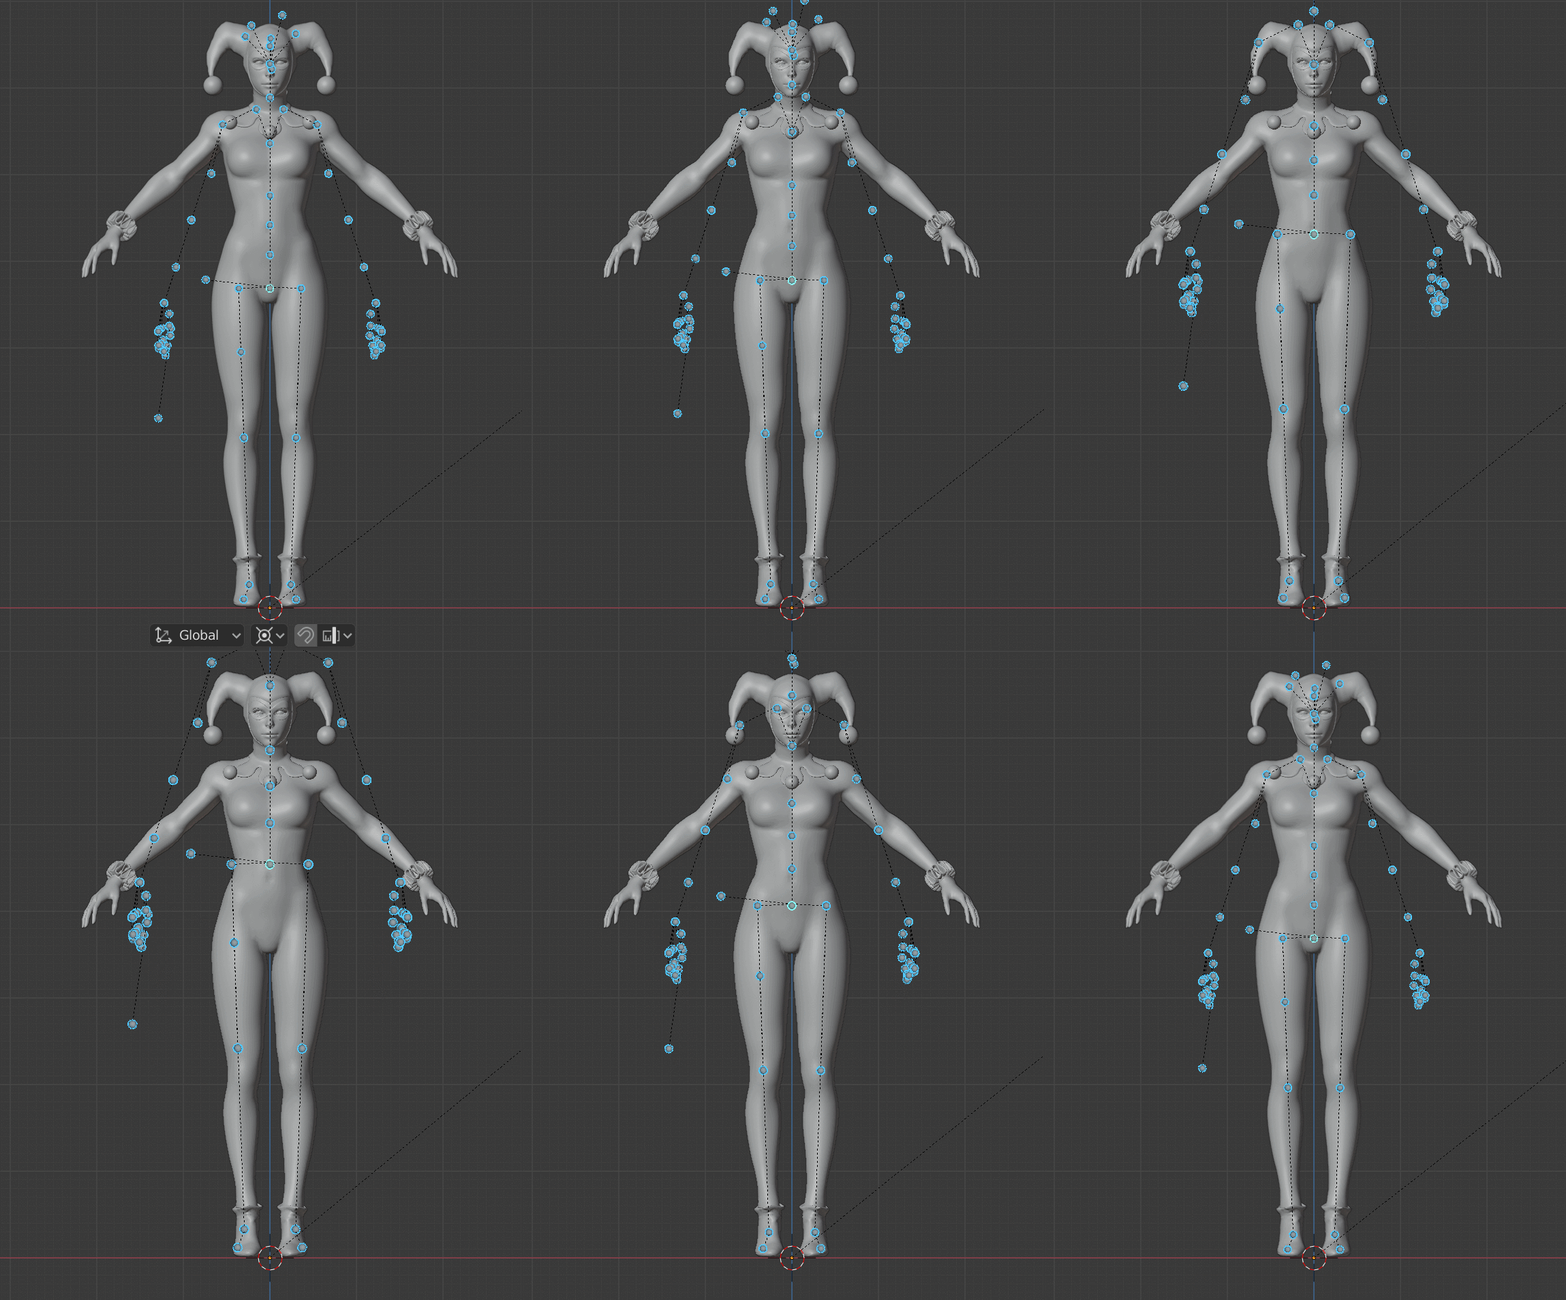
Pelvis Warning:
The pelvis should remain roughly in the same area!
The pelvis bone location directly affects the height at which your player model is placed.
If the pelvis remains at default location but your legs are too short, the legs will be fully extended while standing but never touch the floor.
If your legs were too long, they'll sink into the floor.
Lowering or raising the pelvis bone to compensate will make the feet connect with the floor properly, but the model's crouch and incap height will also be affected by the same amount.
(Incap height has a fix, as seen later in the guide. So it isn't that bad)
Instead of raising and lowering the pelvis to compensate for floating or sinking legs, you should consider scaling the entire model so the pelvis stays where it should be and make the feet match location of the original model.
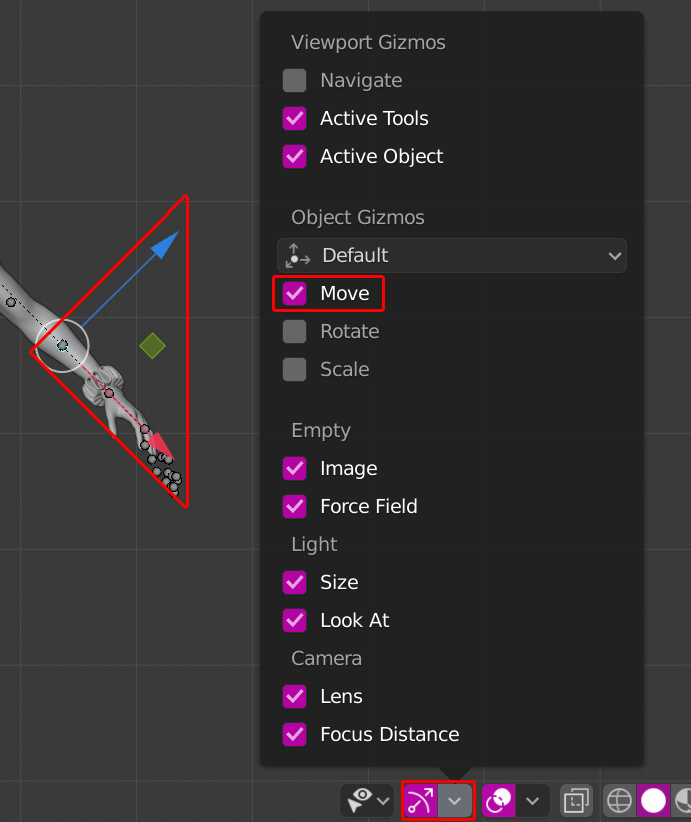
If that is just not possible because your model is either a giant or a little garden gnome, you will simply have to deal with the fact that your model will behave weirdly at all times.I'd recommend you to now turn on your movement gizmos, if you had turned them off.
As you can see, the crosshair with the three arrows on it is tilted. It uses the local axis of the selected bone.
 The pelvis and spine should be in the proper location already.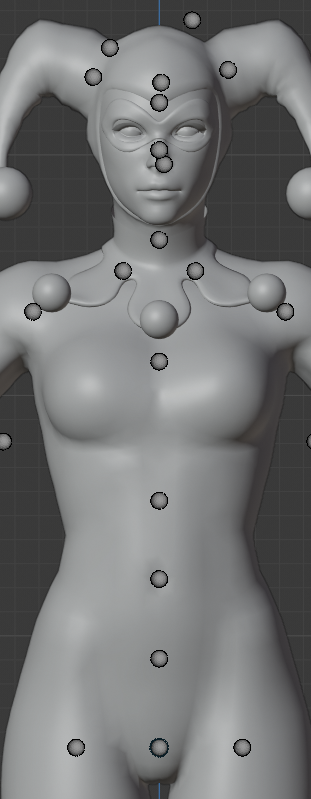
If they aren't, make sure the pelvis is where it needs to be and then move up the spine.
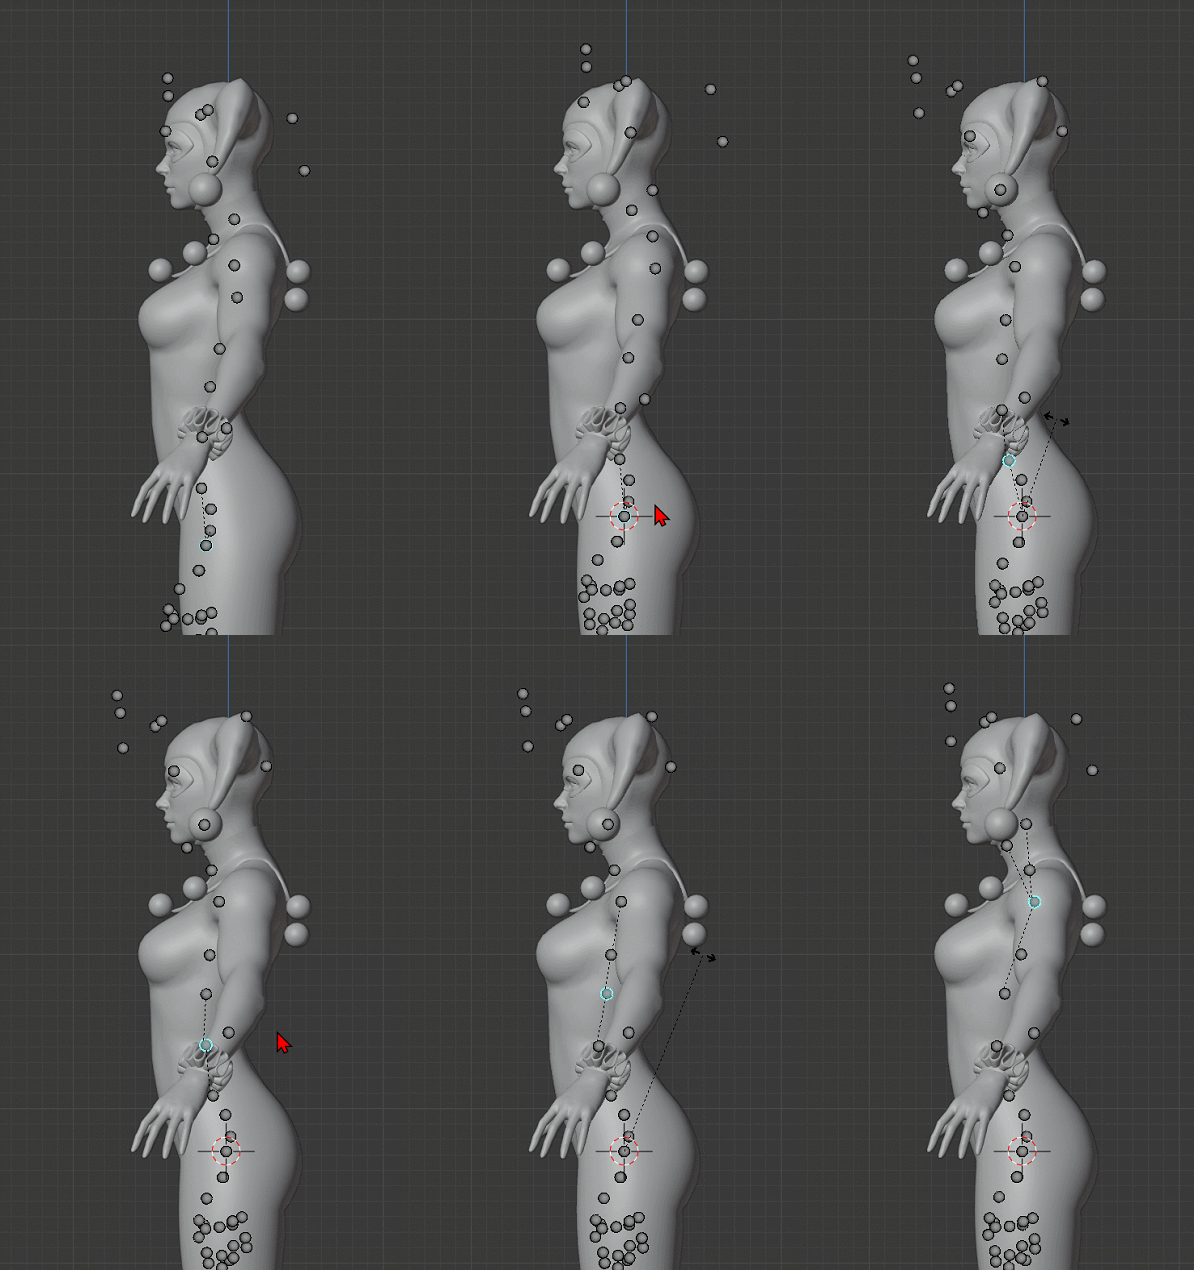
until it fitts.
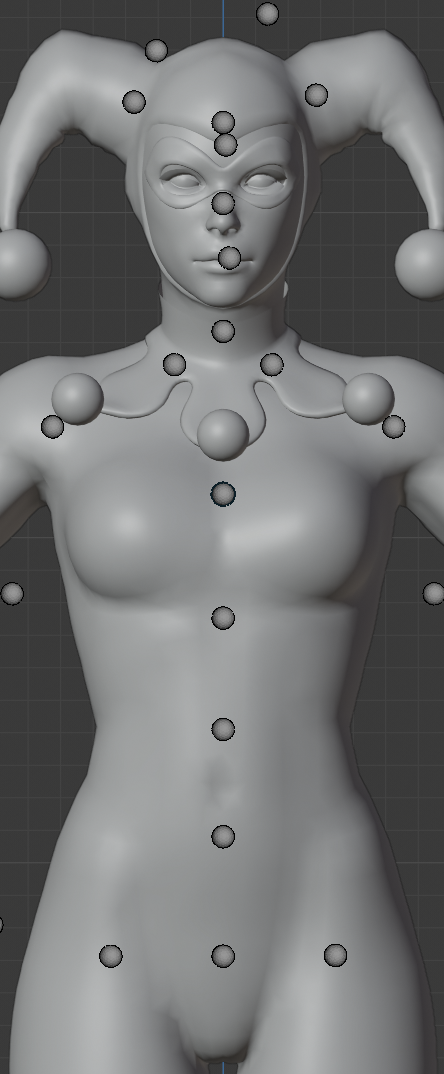
So first the thighs, knees, feet, toes, clavicle, shoulders... For that we'll use Hagget's tools to edit both sides at once.
Select the armature and go to its Object Tab, then expand the Armature Toolkit Section.
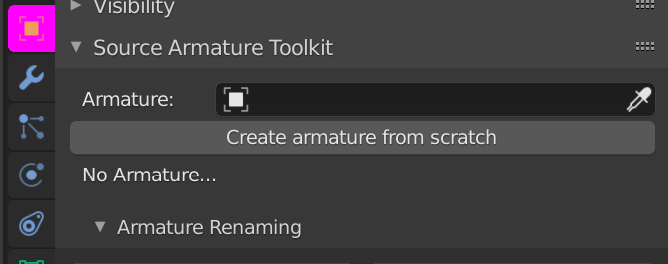
Pick the armature you had just modified.
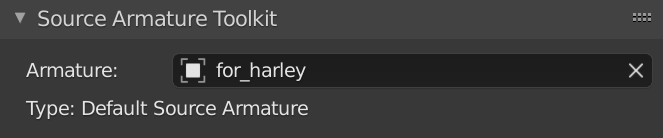
Then the Add Symmetry constrain button.
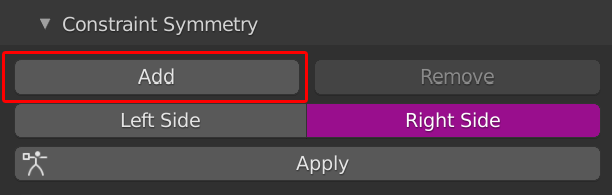 Depending on whether you picked Left or Right, one side will mirror its action to the other.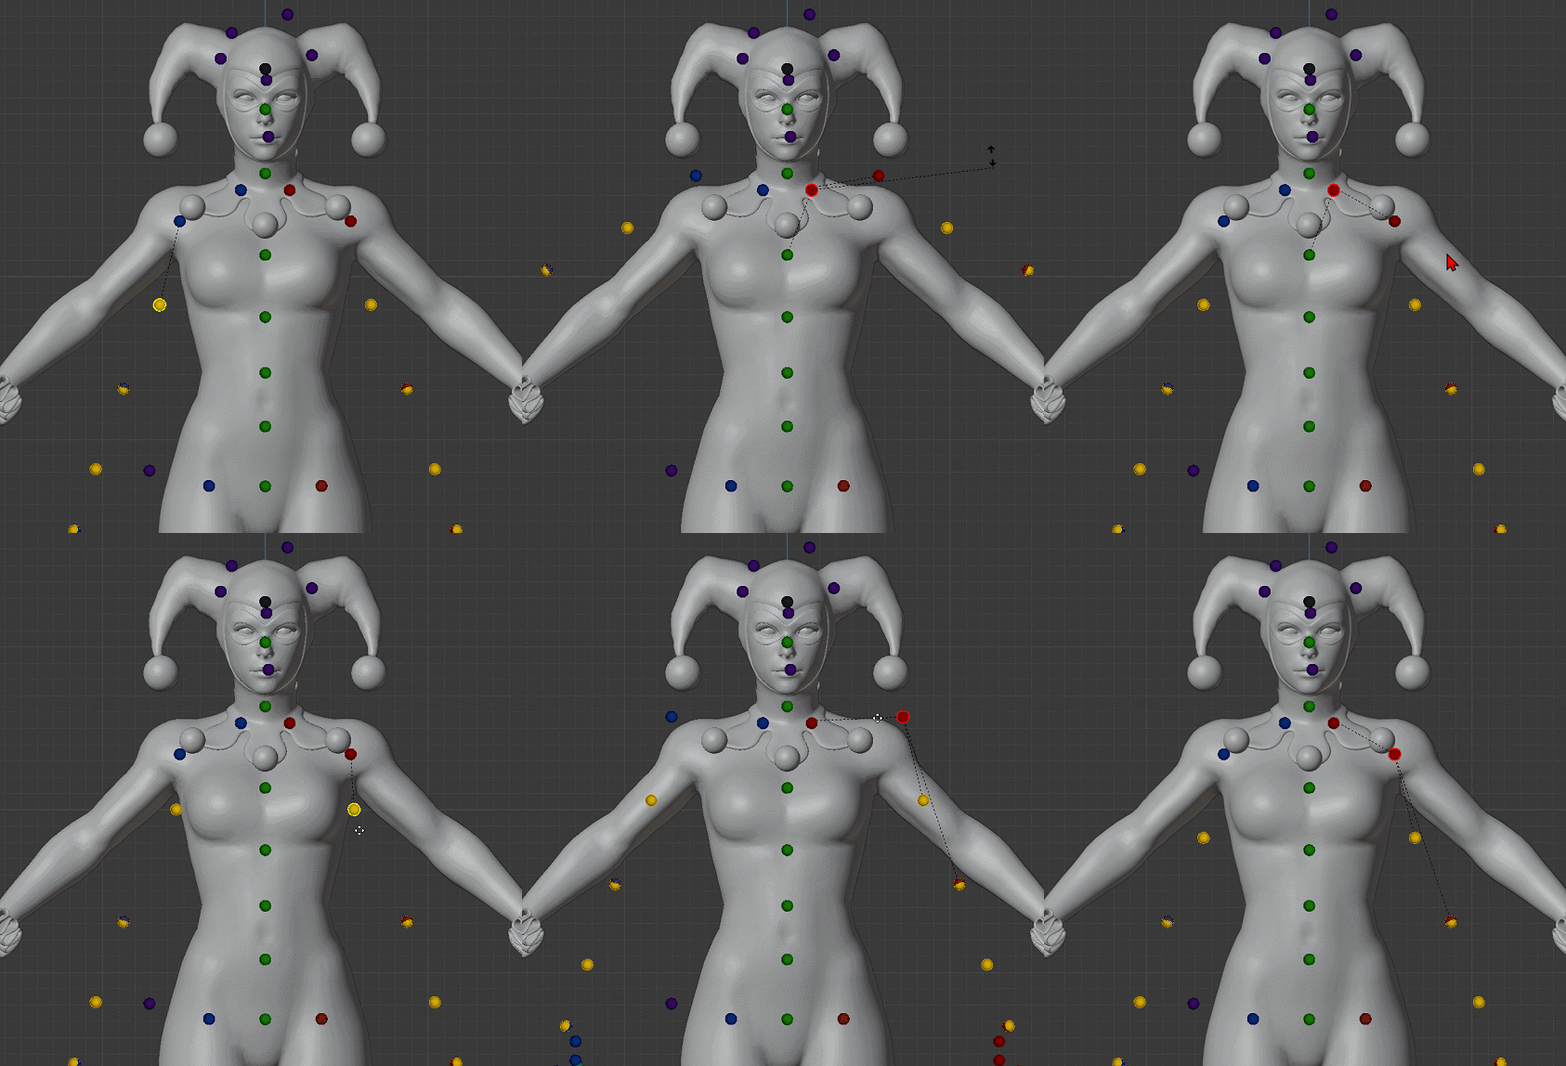
There's no point in moving them around at all because you have no use for those.
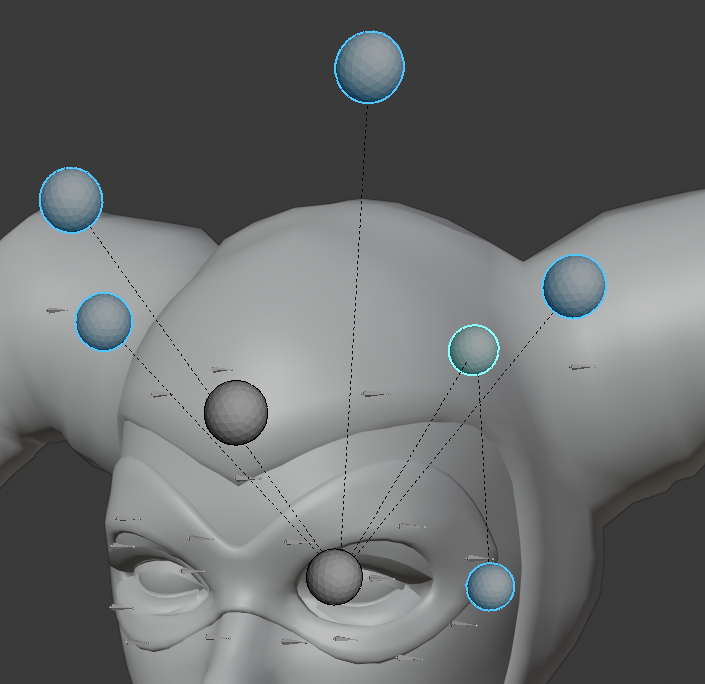
You can also delete all "attach" bones, weapon bones and the forward bone on the face.
We will add them later again using $definebone lines.
Deleting attachment and weapon bones is optional, yet seems to yield better results.
Note: Deleting the weapon bones is easier for the next few steps. However, the guns could end up being misaligned. That can be fixed when you're done with the player, but its extra steps. Would be worth it to delete them for now, just so you can put extra care in fixing it when we're done.
I myself delete the weapon bones at this time.
You should keep those, with possible exception of the glute. At least i never needed that one.
But remember:
You must rotate the parent bones to get the child bones to where you want them.
You are only allowed to move a bone along the direct axis it has to its parent! (Usually X)
Else the Proportion pose will break and your body parts may end up twisting, because the rotation between parent and child is no longer the same.
I need to move the knees, so I rotate the thighs and then move the knees closer to the thighs, on the X axis, instead of just moving the knee bones.
This Gif is recycled, so the bones are not colored.
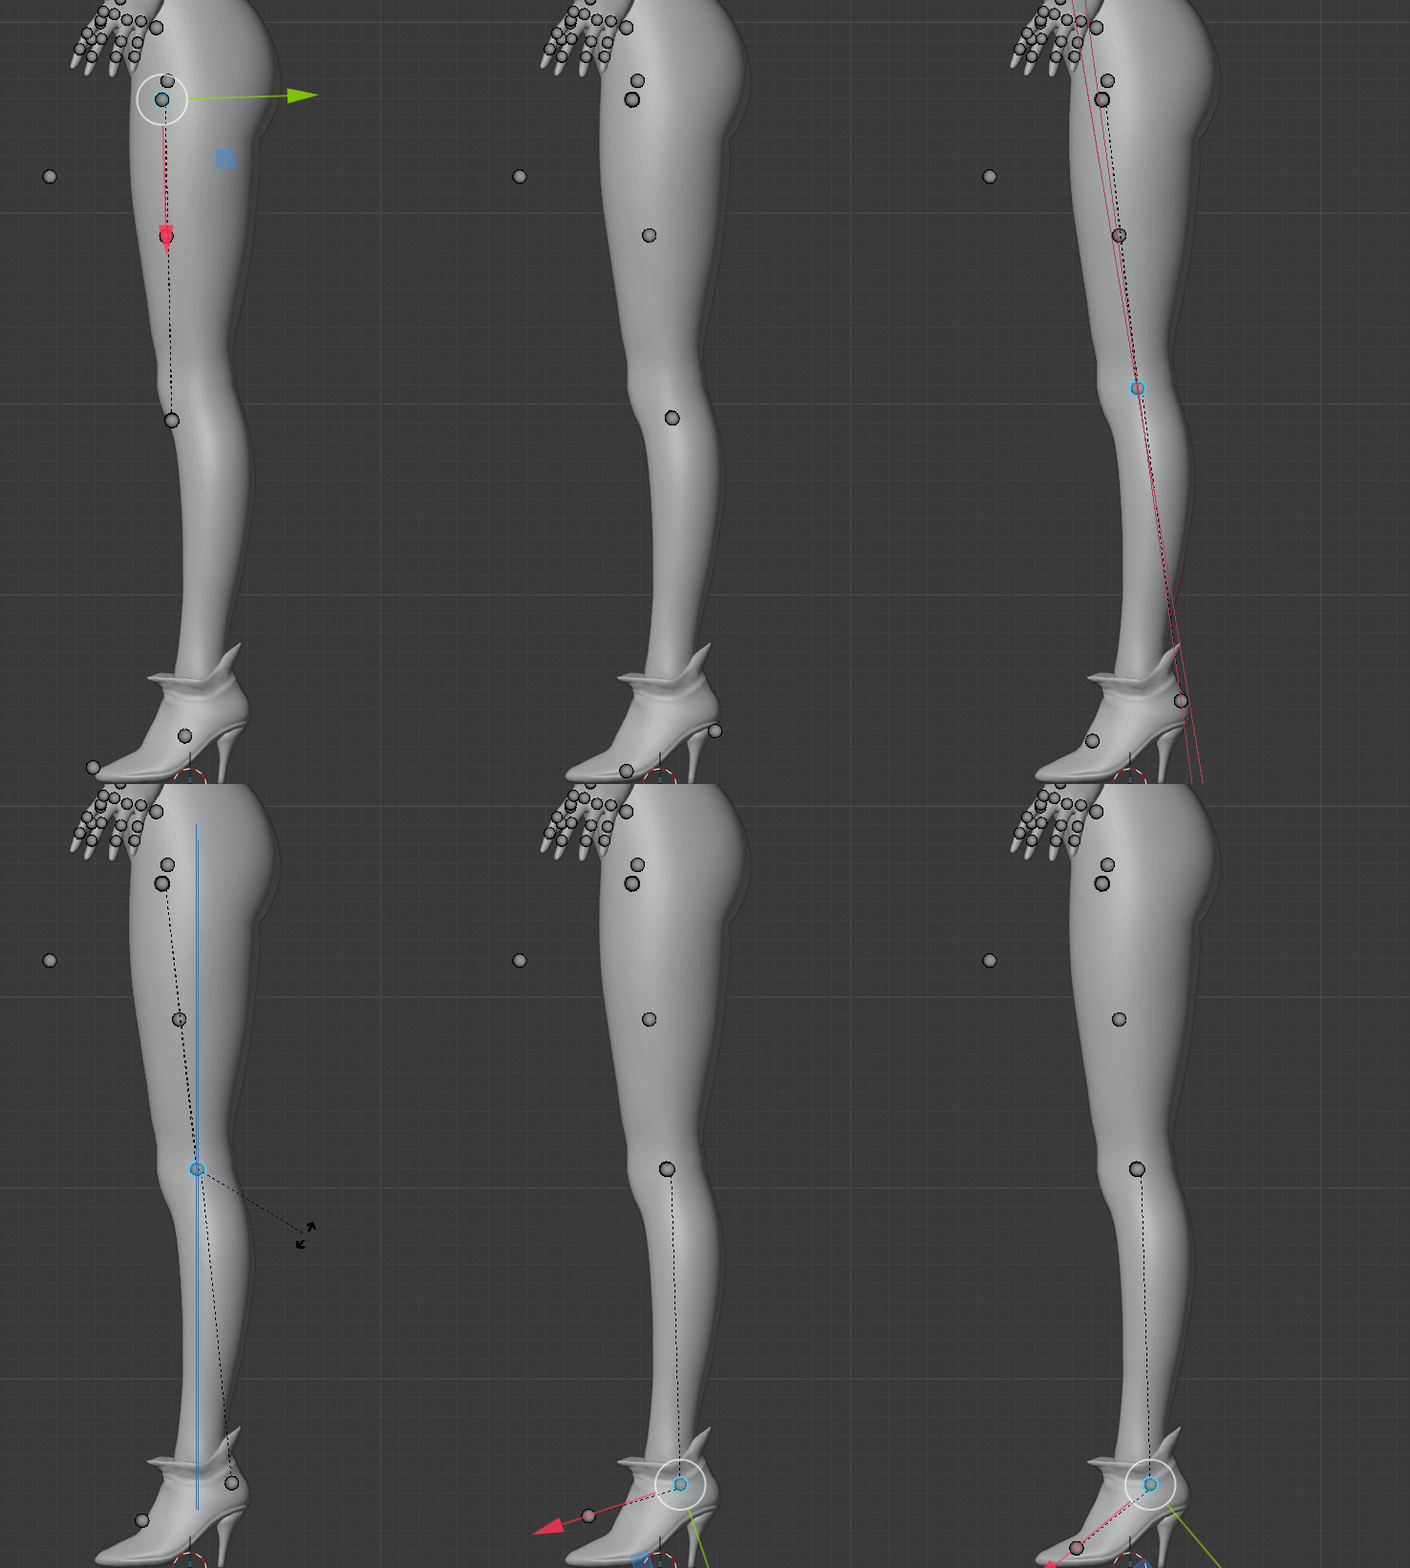 Then do the arms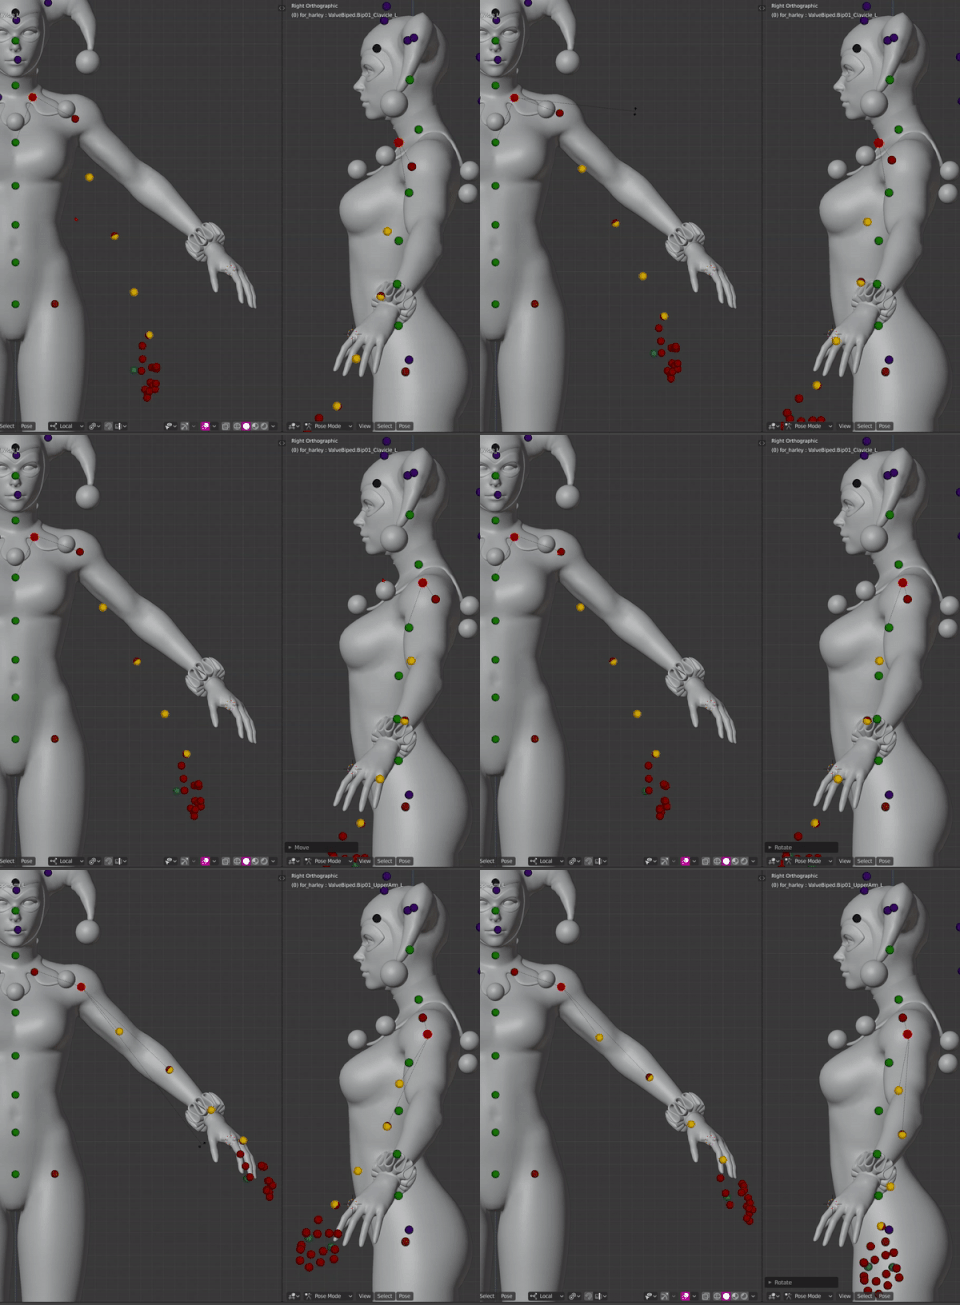
Just move the hand bone and its wrist bone close to where your custom mesh has its wrist.
But only by moving away from the forearm on one single axis.
Just like you had moved the elbow and knees.
Do not rotate the hand bones too much. The weapon bones depend on them!
You may end up with guns that float next to the hands.
Proportion Modification 2/2
Ran out of space again
Doing those is often a chore, but if you're careful you won't have any issues.
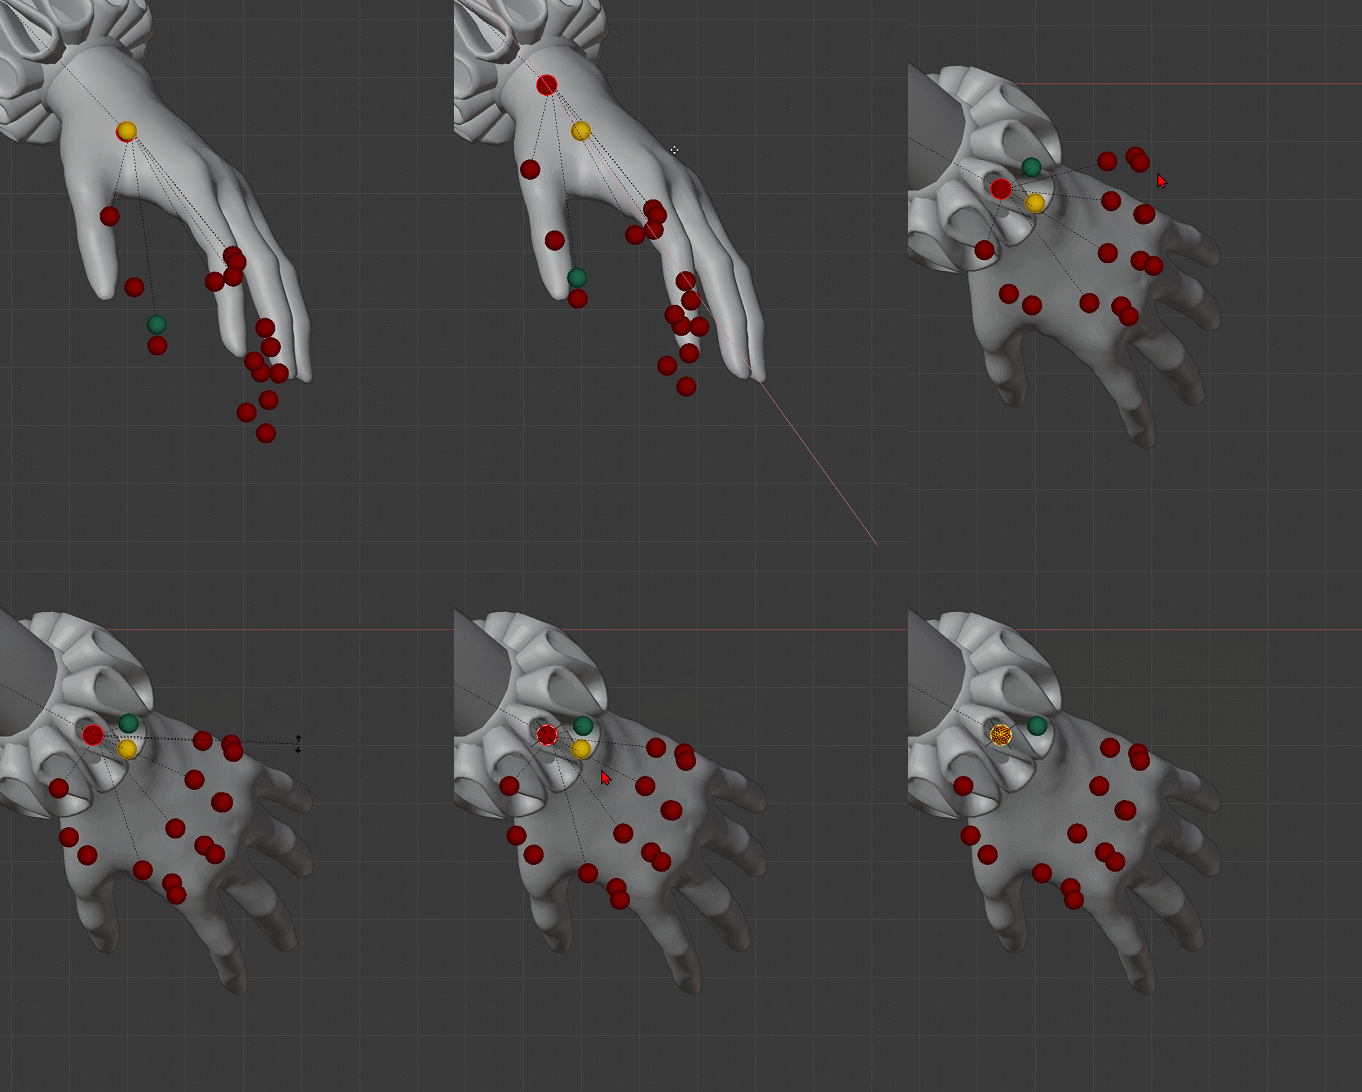
I'd recommend first selecting all finger bones on both hands in pose mode.
Then enter "Edit mode". All selected fingers will still be selected. Don't be alarmed when the pose changes back to default. That's normal for edit mode with a non-applied pose.
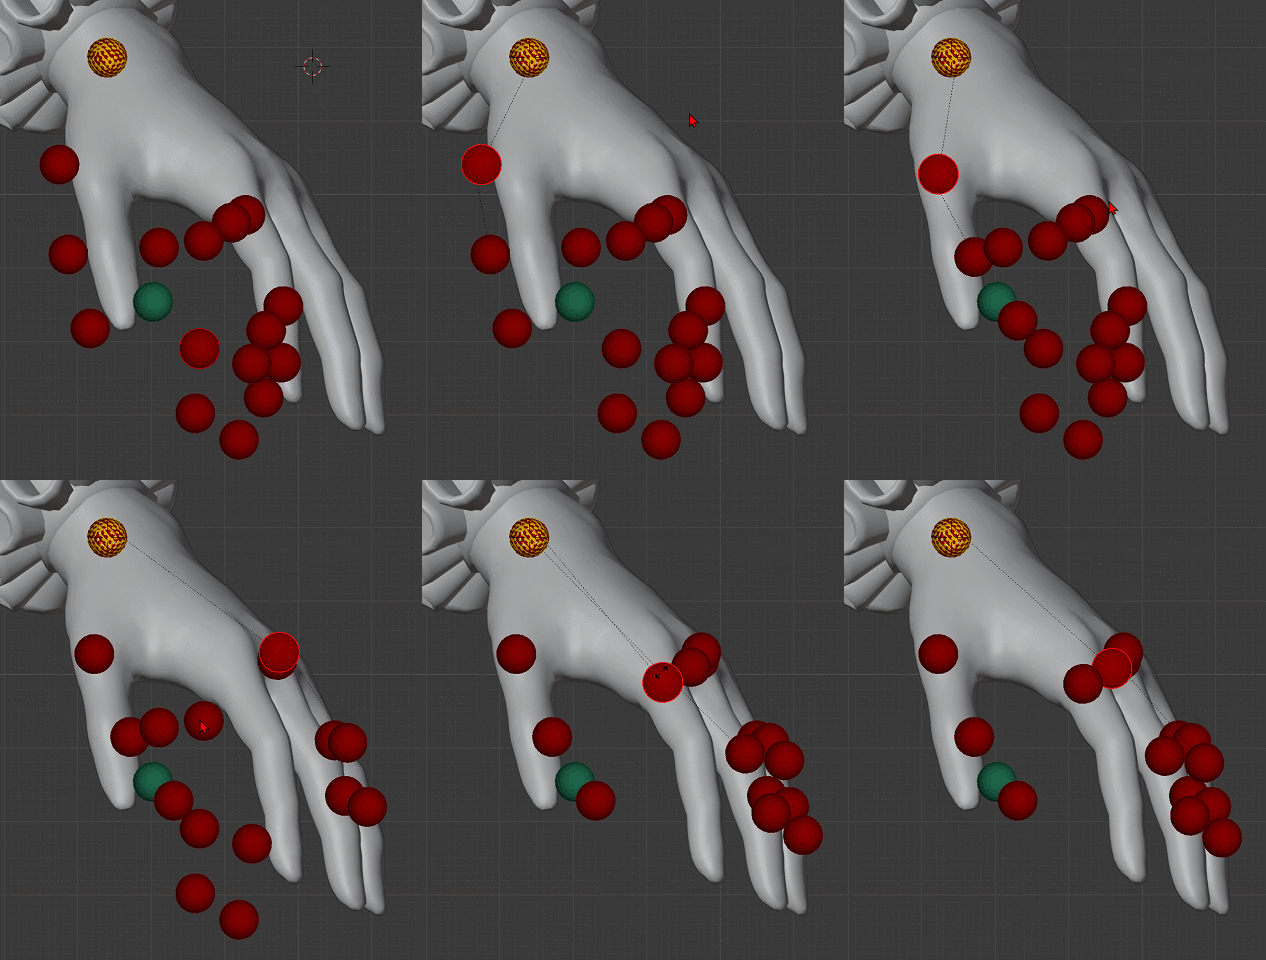
You should still have "Pivot Point" set to "Individual Origins". Then just press S and scale the bones down. I like to just scale it to 0.25.
 Then exit back to pose mode and you'll have smaller spheres!
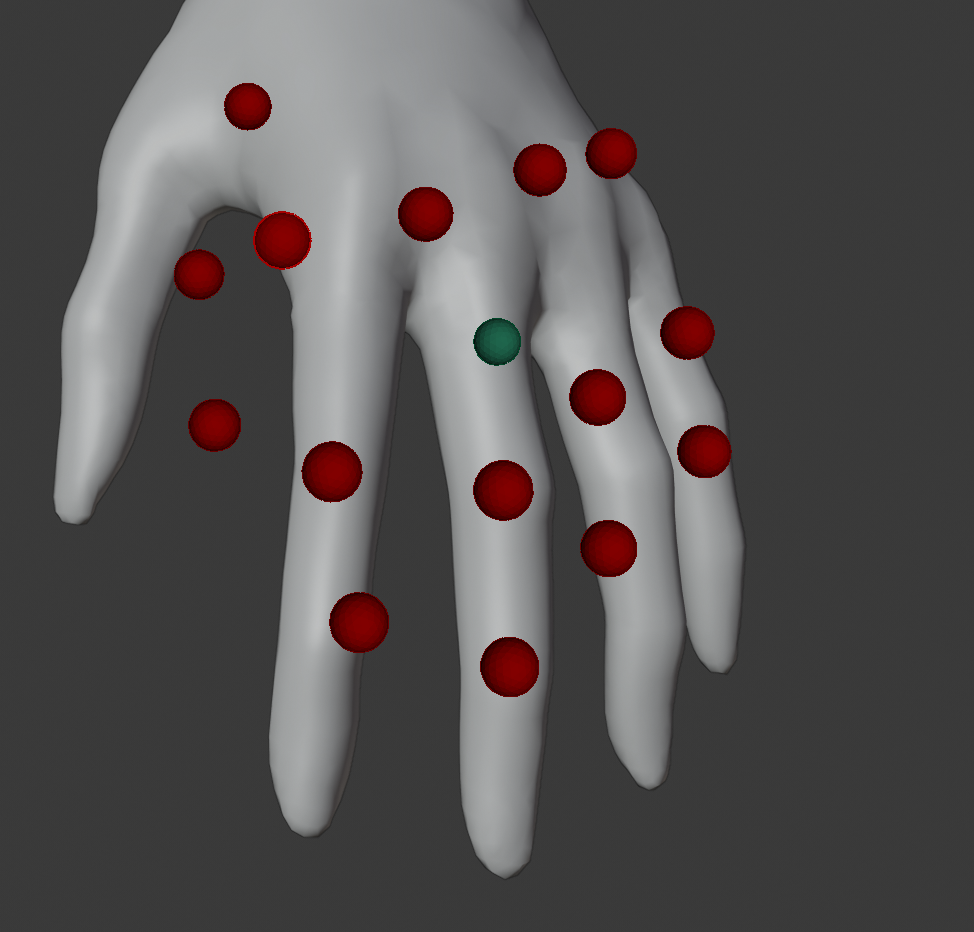 Now to actually pose them.
You need to switch back and forth between all views to nudge those bastards until they're in the correct spot.
First the front
Then from the top
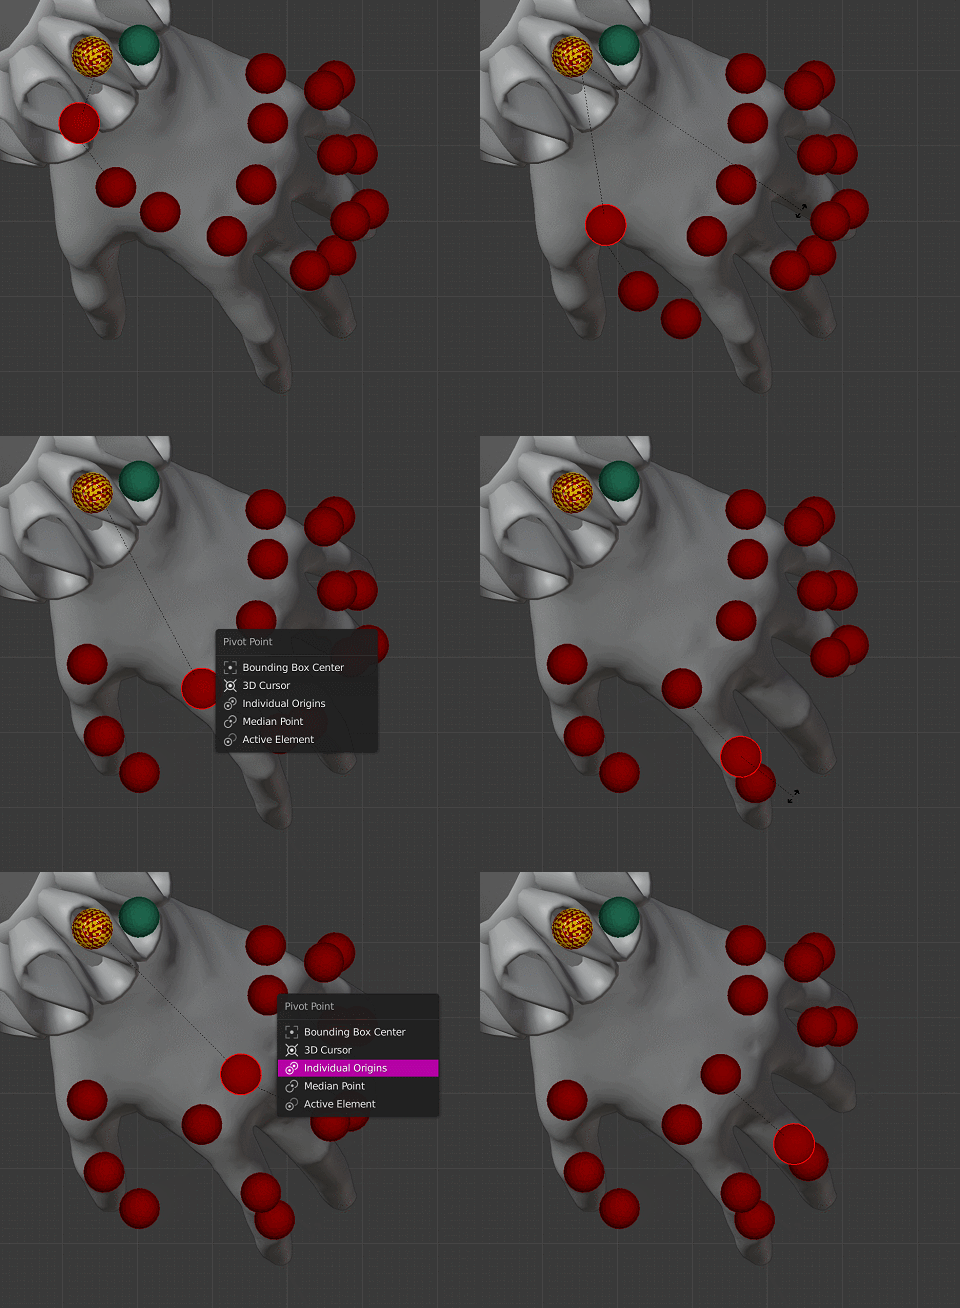
Until you're reasonably happy with the results.
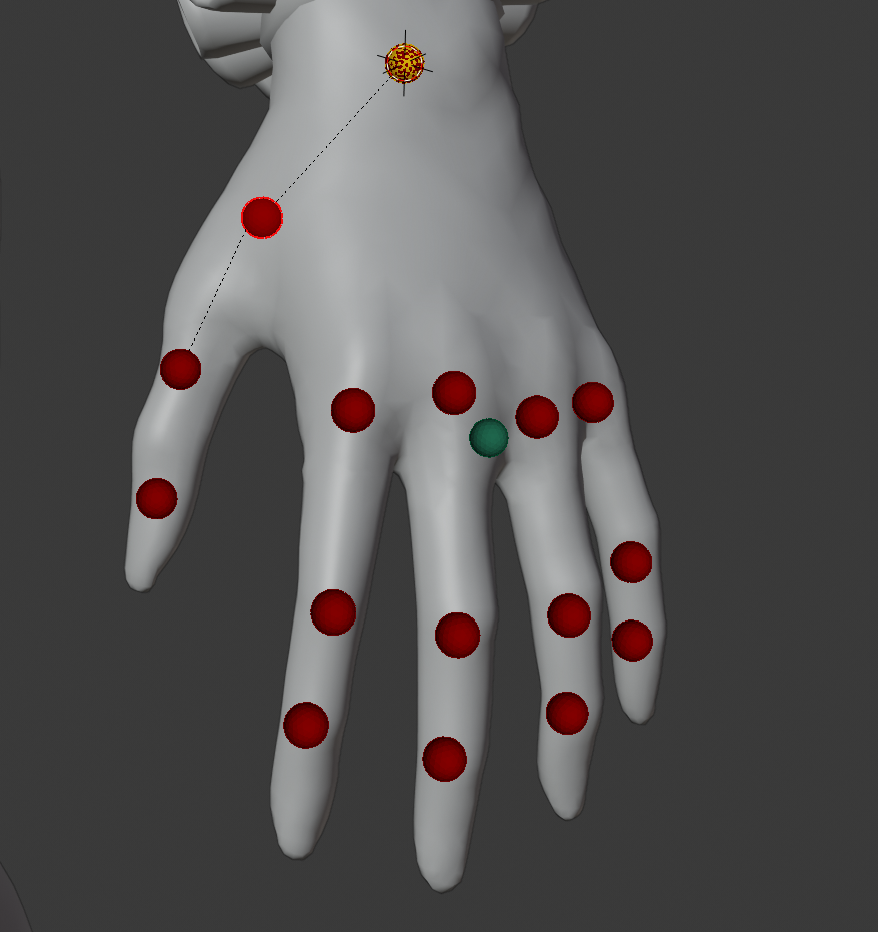
This work is tedious and you might need to fix it later because that's just how it is.
Even experienced modders got to fix fingers, even though they know how it would work.
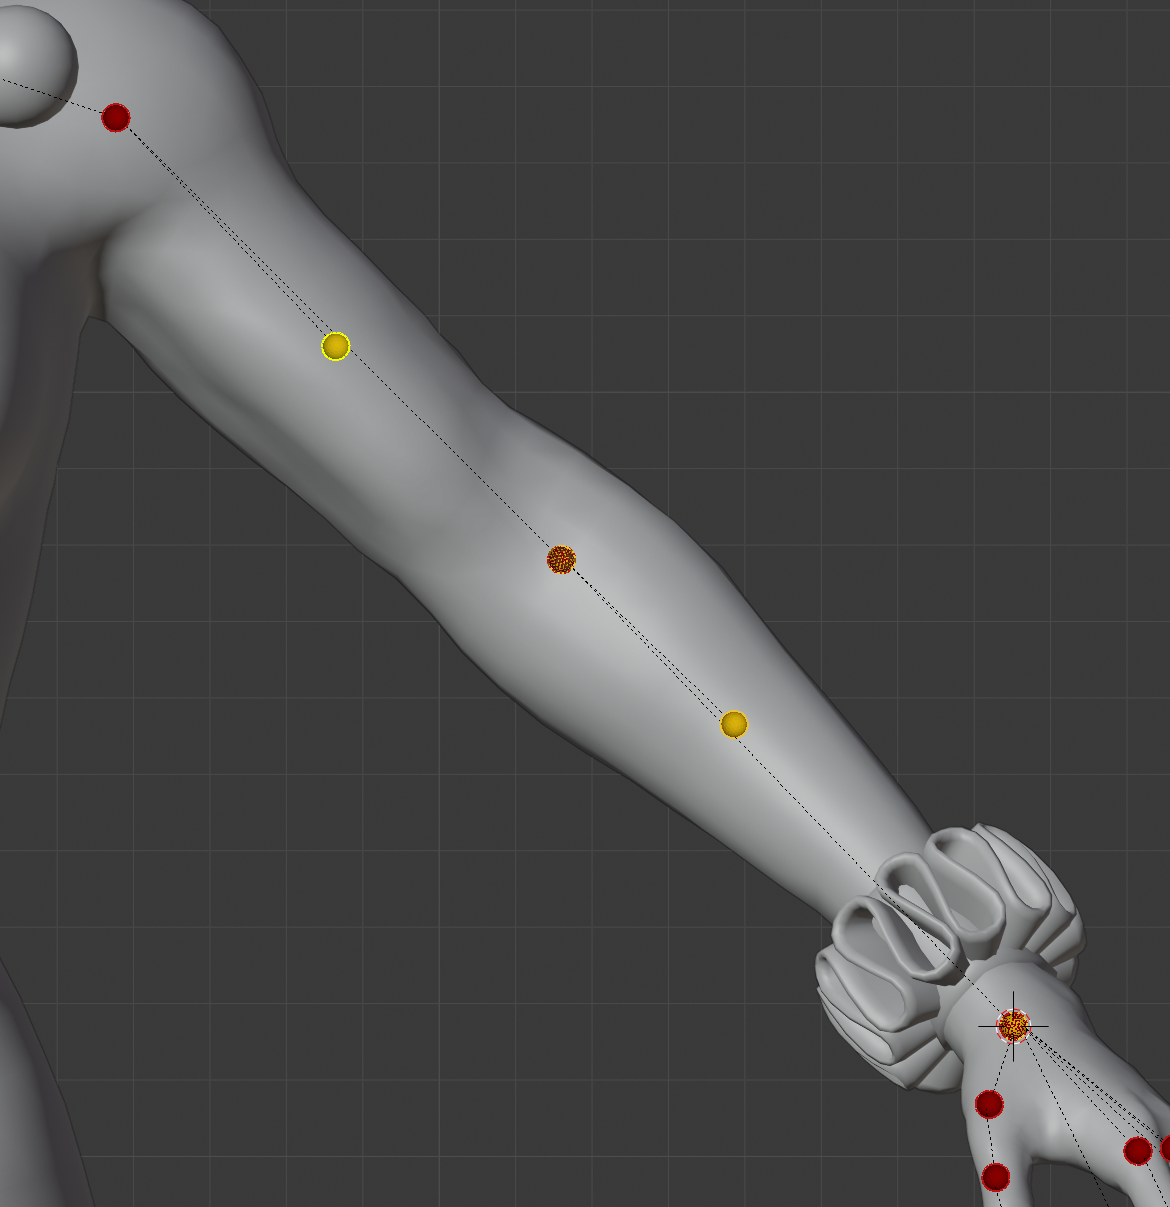
Helper bones allow a piece of mesh to move depending on how much another moves.
i:e: It calculates how much the wrist rotates, if the hand rotates by X amount of Degrees.
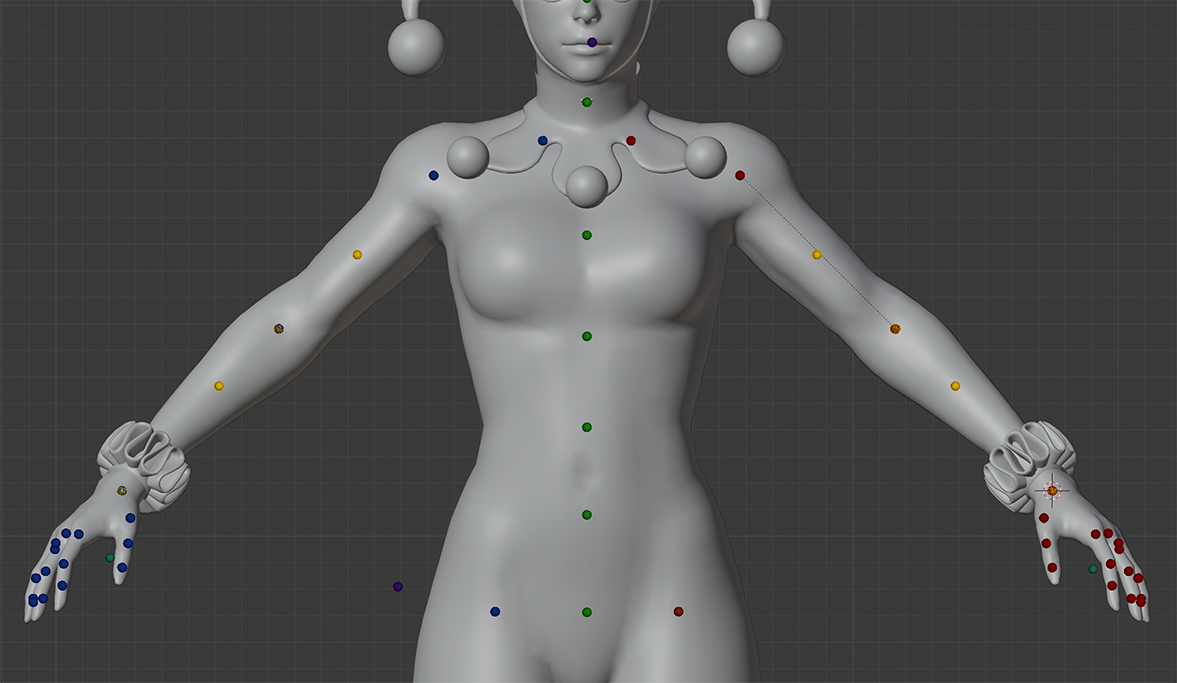 Now that all available bones are posed, save this pose as a new rest pose.
This will save the pose you made as the new default.
 The "Apply" button on the Armature toolkit should also work, but its a bit buggy on 2.8
Remove the symmetry setup by clicking "Remove" in the toolkit
The "Apply" button on the Armature toolkit should also work, but its a bit buggy on 2.8
Remove the symmetry setup by clicking "Remove" in the toolkit
Once the pose is applied, delete animation keyframes that you may have leftover.
Leftover keyframes mess up your pose cause it re-applies the keyframes to your new pose.
Preparing to Rig
Thanks to Hagget's Armature Toolkit this step takes like five seconds.
Without the tool, it would take half a damn hour sometimes.
There's still a little bit of editing we have to do though.
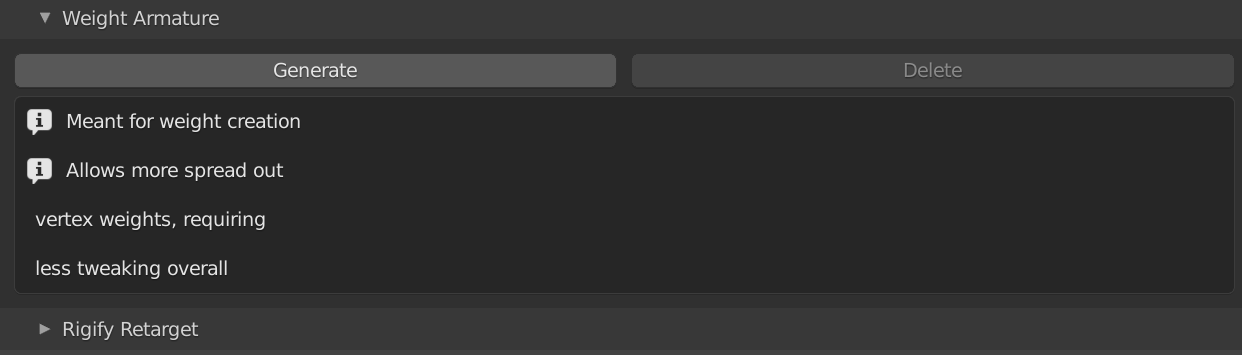 Click the Generate button.
You'll get a new armature that has ".weight" appended to the name.
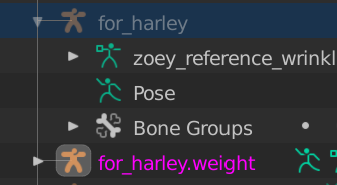 Best of all, it has 99.99% of the crap done for you.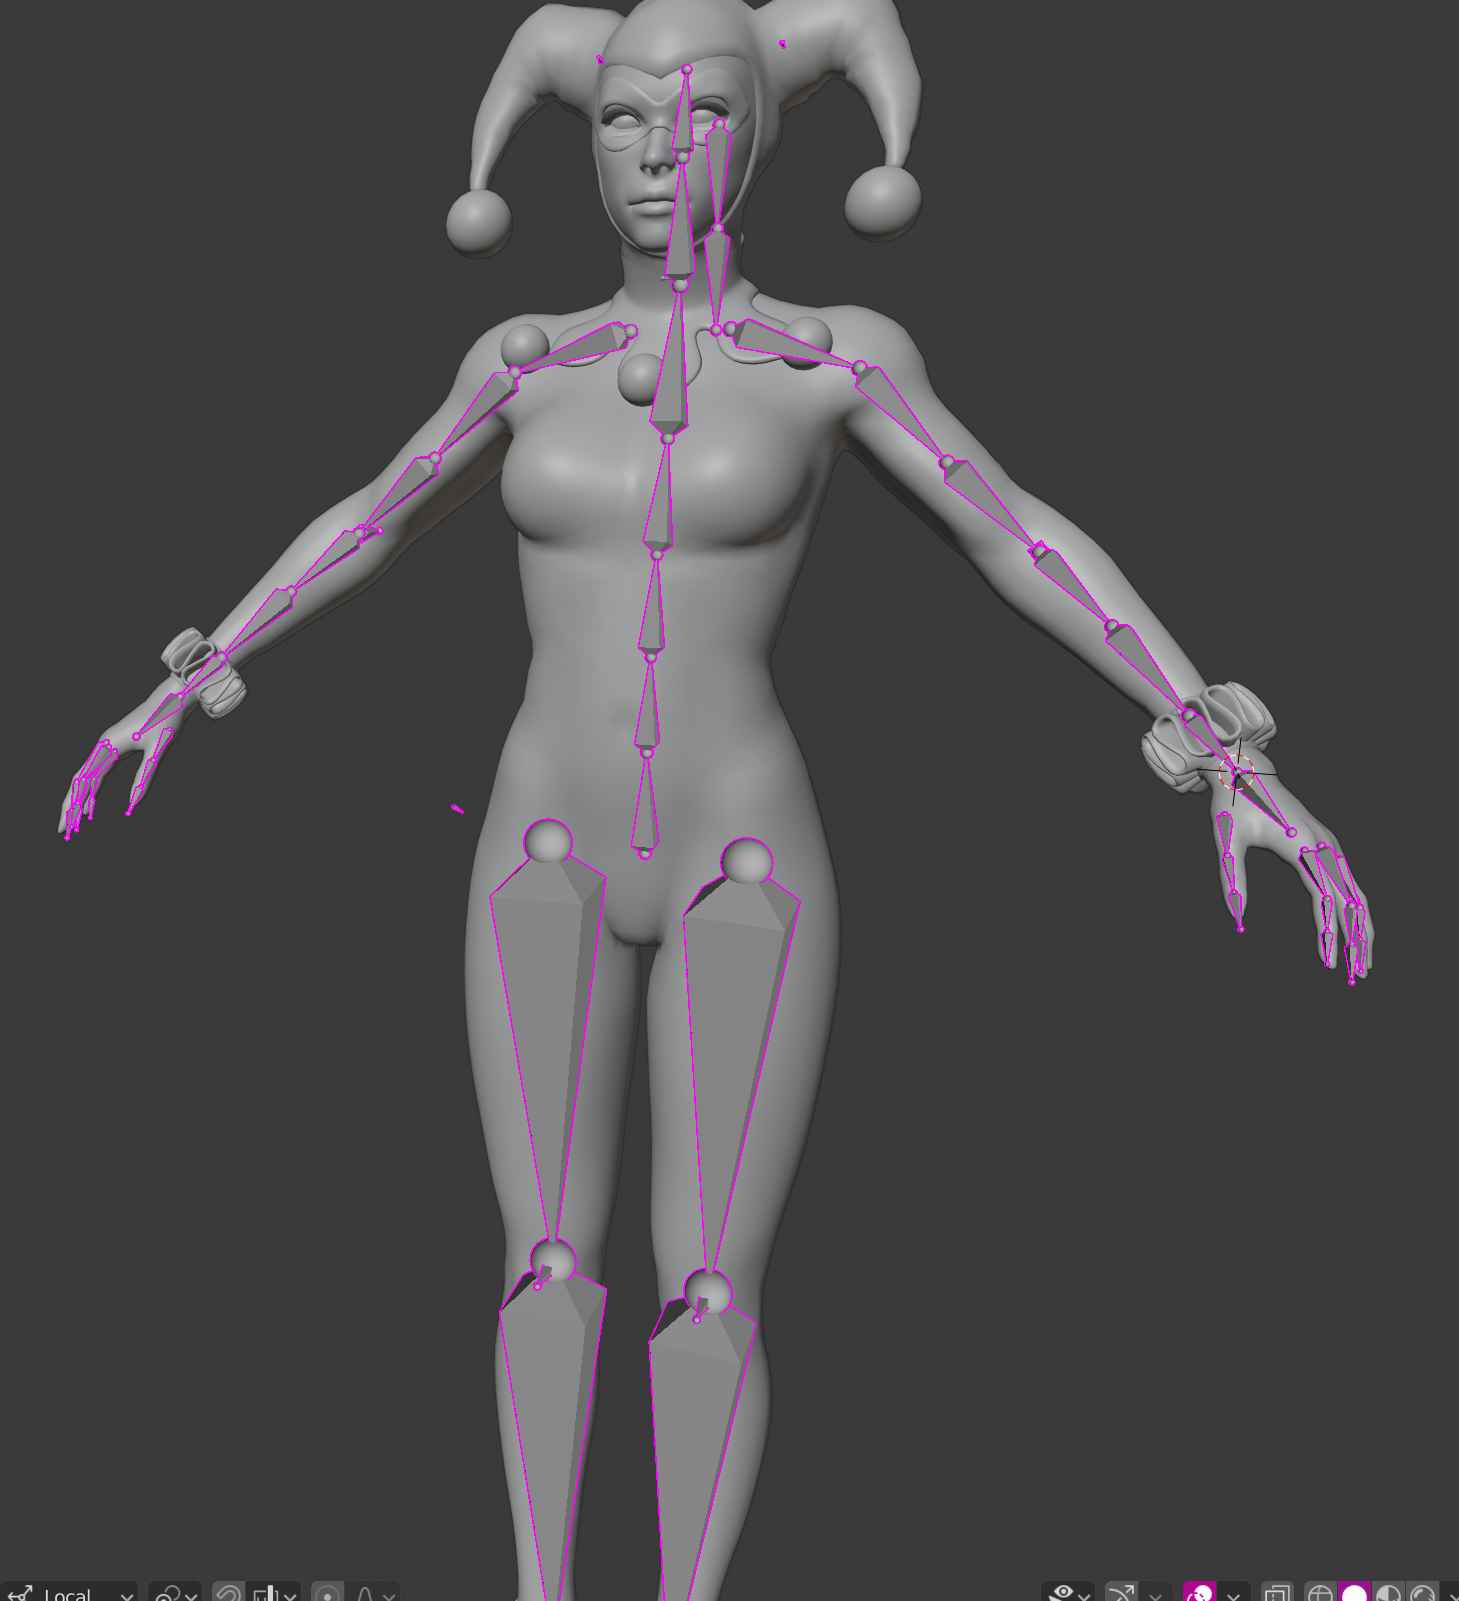
This Armature is now ALMOST in perfect shape to auto-rig the weights for you.
We're Doing automatic weights because it helps you out so much. But even then, you must manually fix some spots.
From personal experience, moving the "Thick end" of the leg bones just under the crotch,
while moving the "thick end" of the pelvis just above the crotch yields better rigging results.
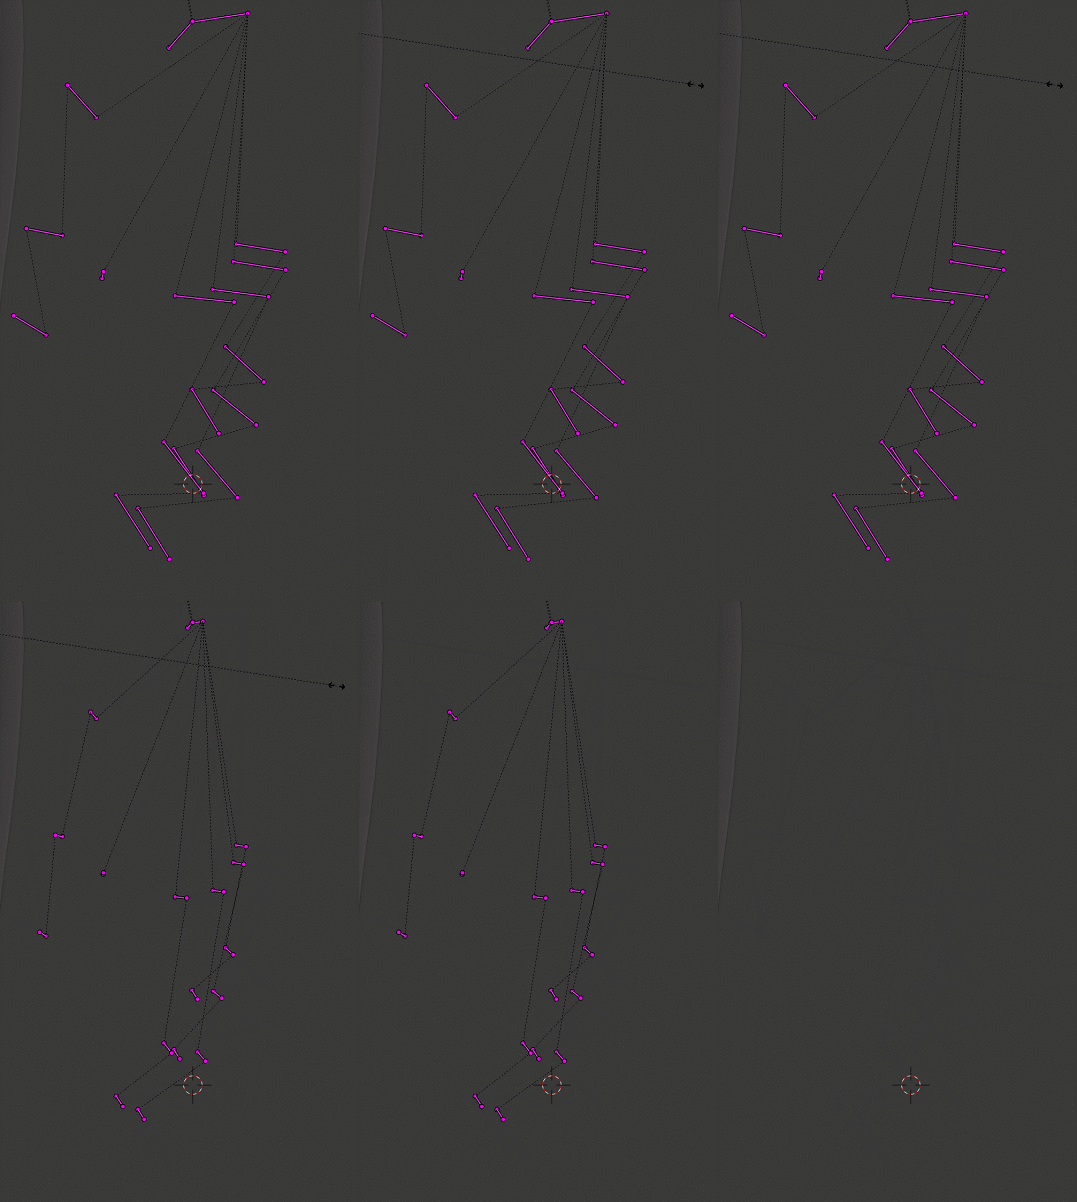
This will cause the thigh bones to not affect the hip as much. In the image below you can see bones that are highlighted orange are where the bones in the default armature are, that i just proportionally modified.
You can also see where my leg bones and pelvis bone bases are in the "Weight" armature.
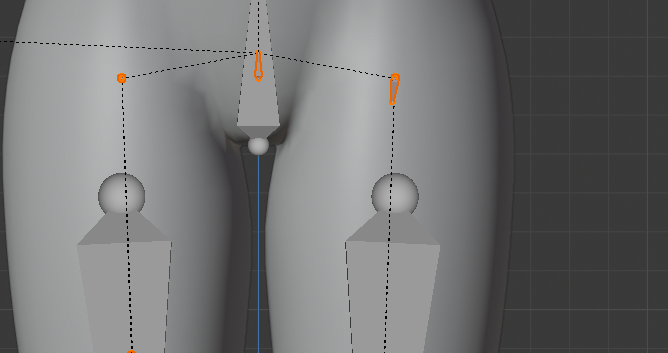 Here is a GIF of just how much the thighs would affect if you would not do this:
The hips cave in like I cave in on a dessert buffet.
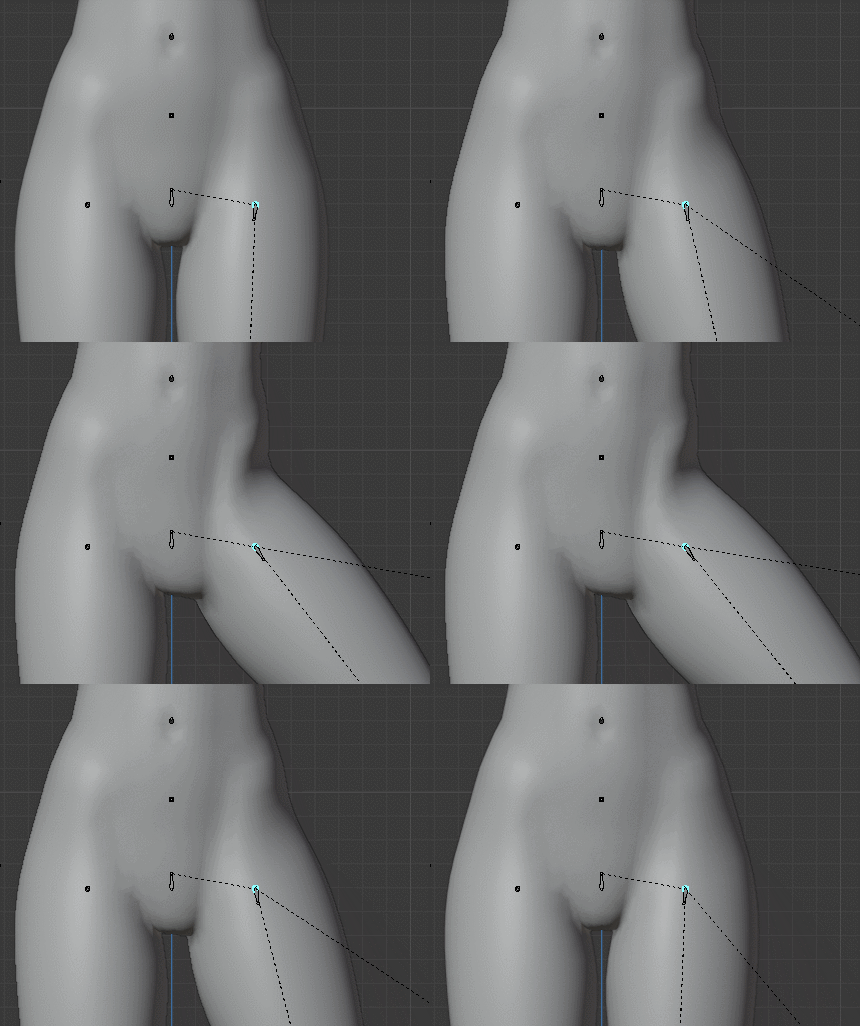 And here is a GIF showing how little the thighs affect if you do move those bones further down:
I later realized that the thighs and pelvis could've gone down even more.
The thigh bones should barely affect the hip. Buts it's an easy Weight paint fix.
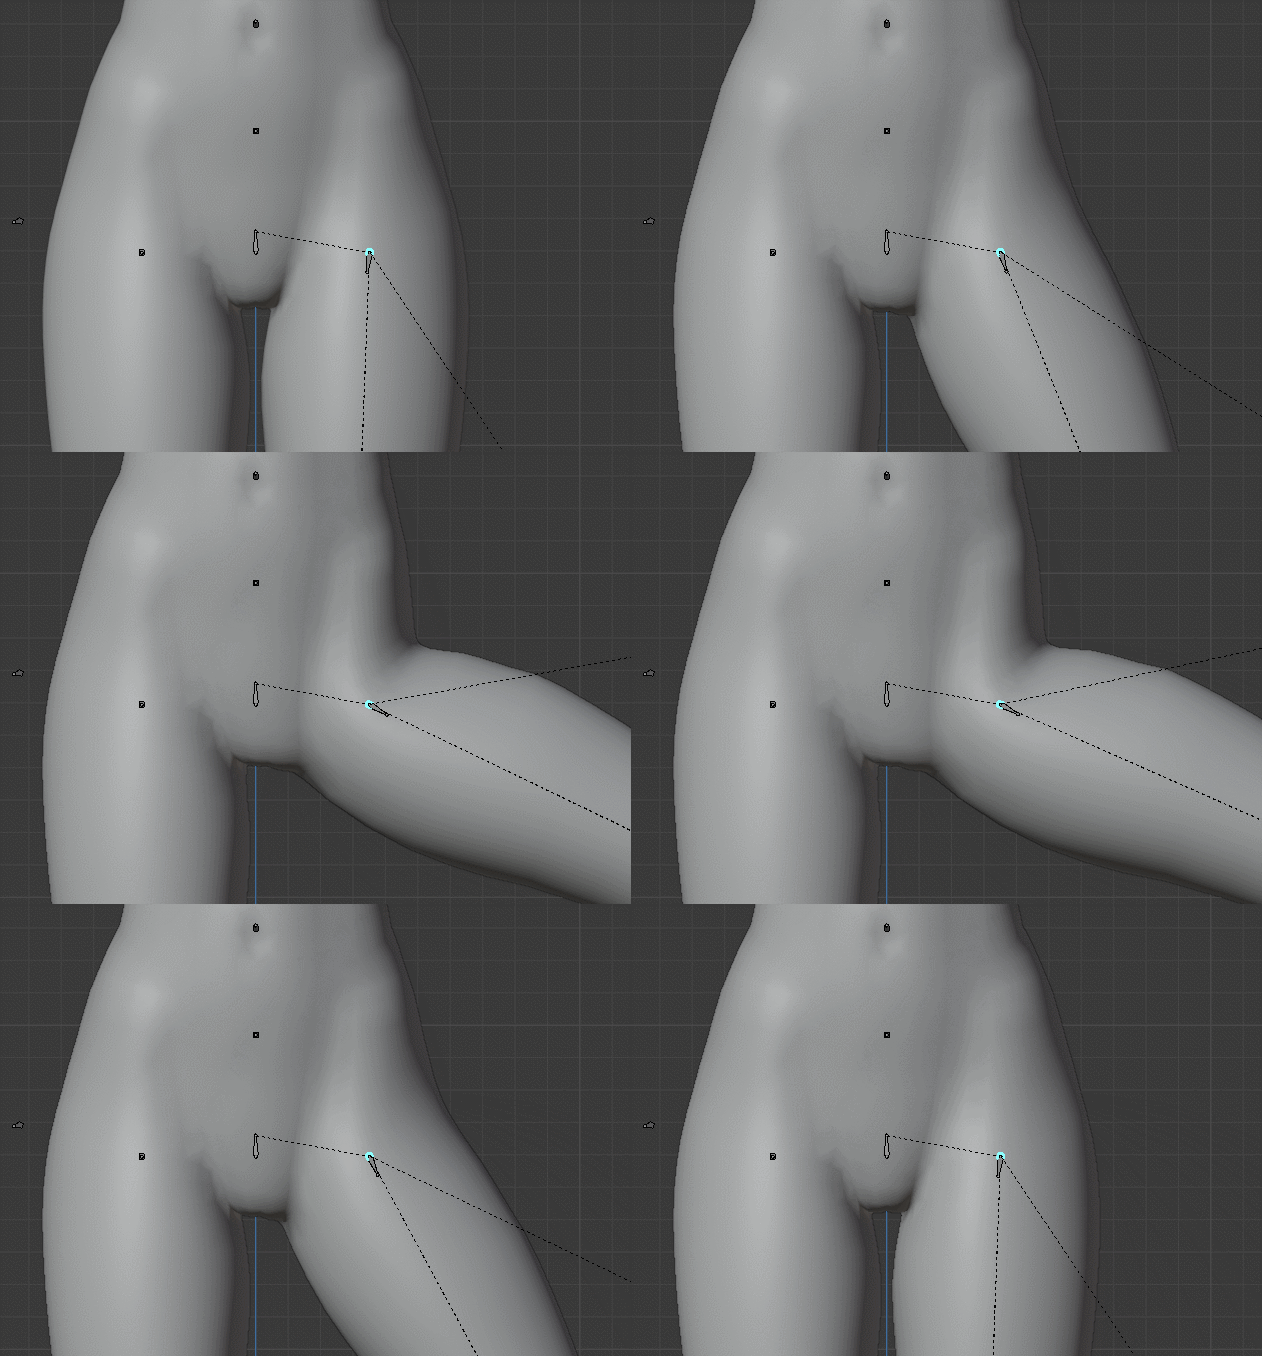
From this
To this
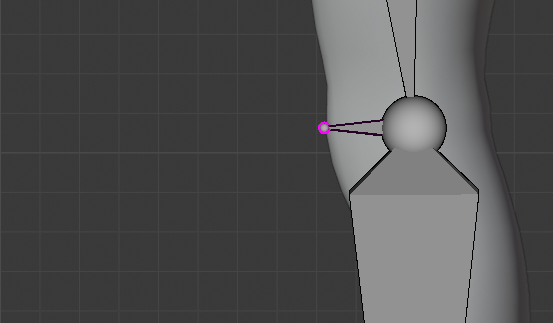
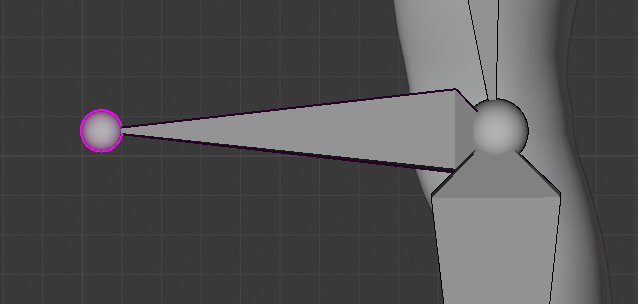 All "End" bones like Toes, and fingers must point towards the end of the mesh it is supposed to rig.
The toolkit doesn't do always to that for you.
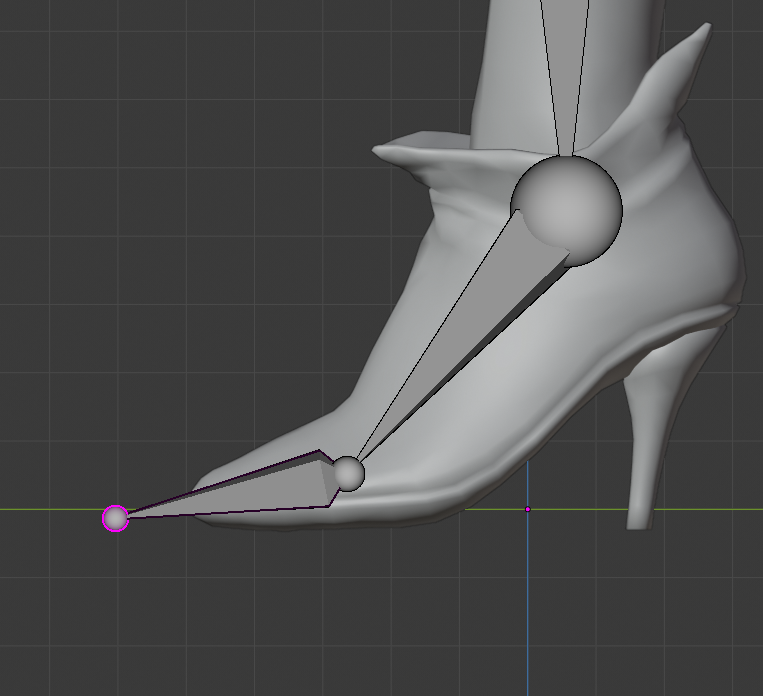
If you don't have any extra bones, skip to 6.2.1.
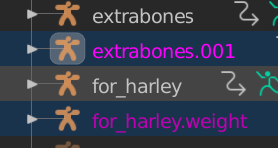
in step 3.03 we deleted all the extra bones except face, possible jiggle and helpers.
If your leftover armature of the custom model both has face bones and the face is still rigged, we will keep the facial rigging.
In one of those two armatures, delete the face bones.
The one without the face bones will be merged to the .weight armature.
The one with the face bones will be merged to the other armature.
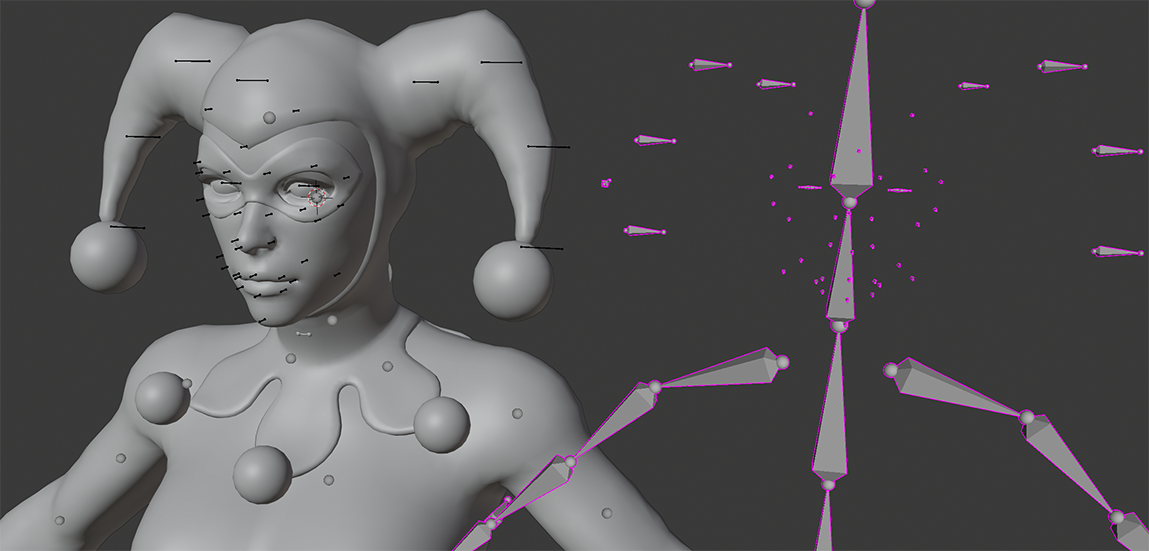
You could pretty much keep the position for most jiggle and helper bones, but sometimes you may need to move them.
If you want to add jigglebones, I'd reccomend you to take a look at this guide:
https://steamcommunity.com/sharedfiles/filedetails/?id=3219785194
The .weight armature should not have face bones IF your face is already rigged.
For now, go to the armature that you'll eventually export your model with. (not .weight!)
First, parent them in edit mode to the closest or most sensical real bone.
For example, the breasts would go to Spine 4
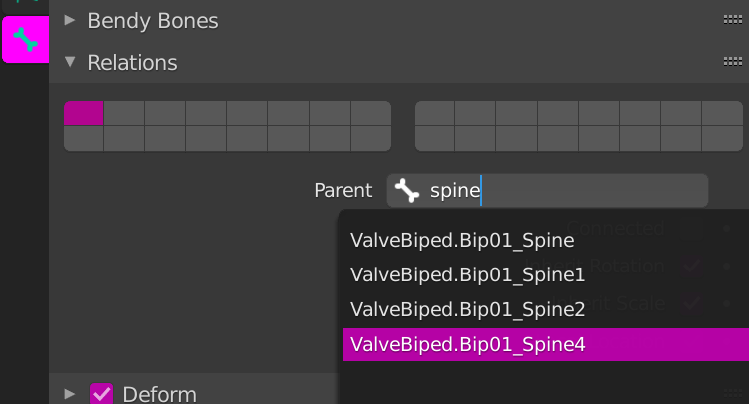
If you got a bone with multiple children, where deleting said bone would give you a lot of "Orphans", (like my head bone with the face bones as children) make that bone a child of whatever makes most sense and then delete it.
This will reparent all those bones to whatever bone is next in the hierachy.
In this gif the parent of all the face bones called "bip01_head"
It has been made a child of the "ValveBiped.Bip01_Head1" bone.
When i delete "bip01_head" all face bones take"ValveBiped.Bip01_Head1" as their new parent.
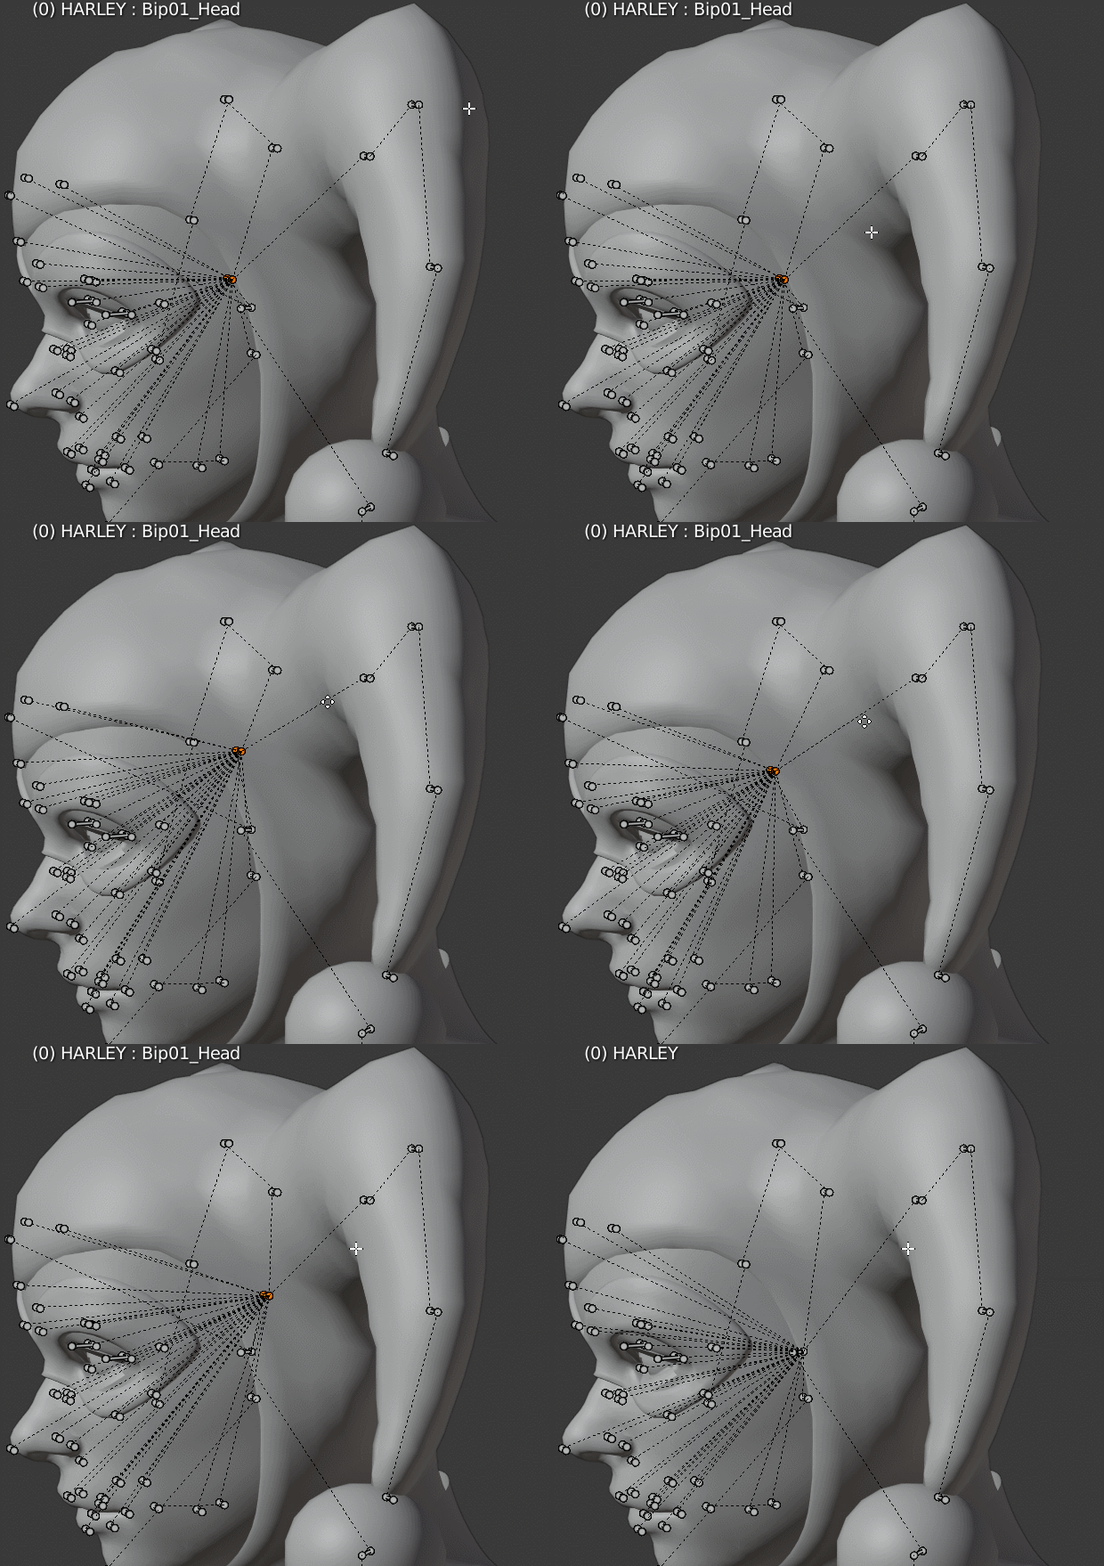
Do the same parenting thing that you did in the other armature,
Then, position the very tip of the last bone in a chain to where it's weight should go to.
Just like you did with the toe.
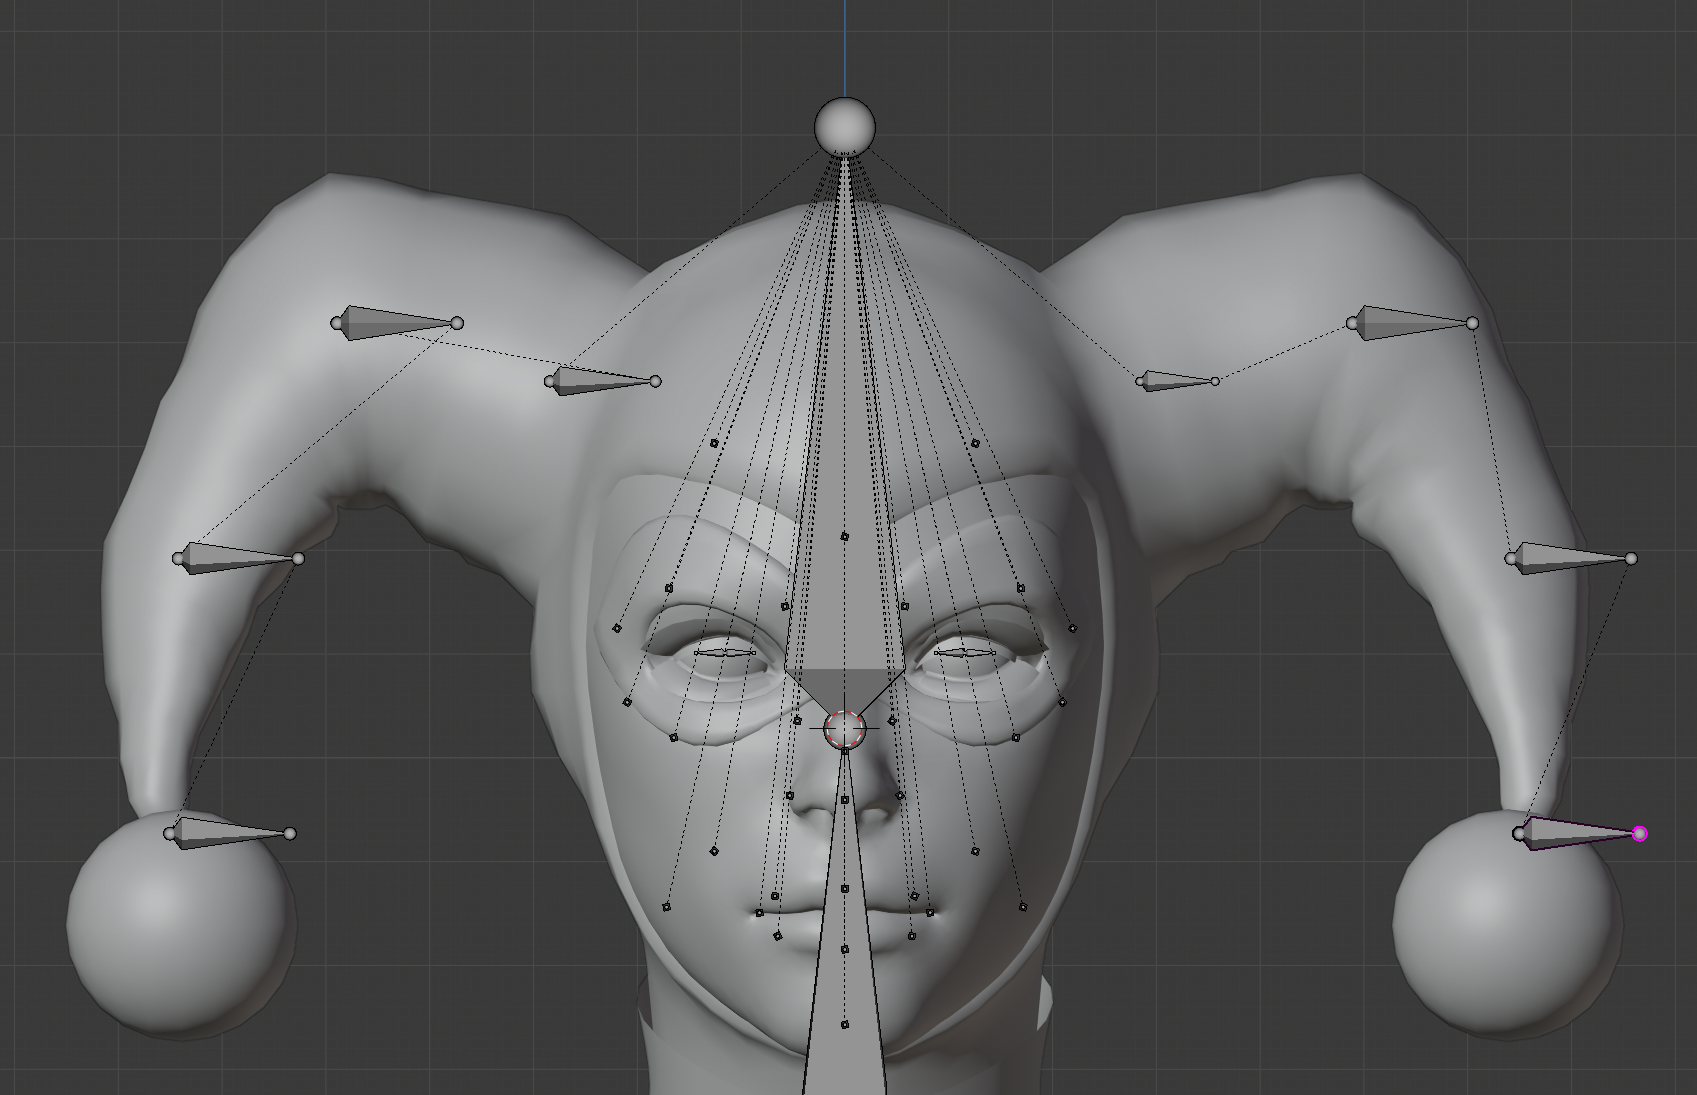
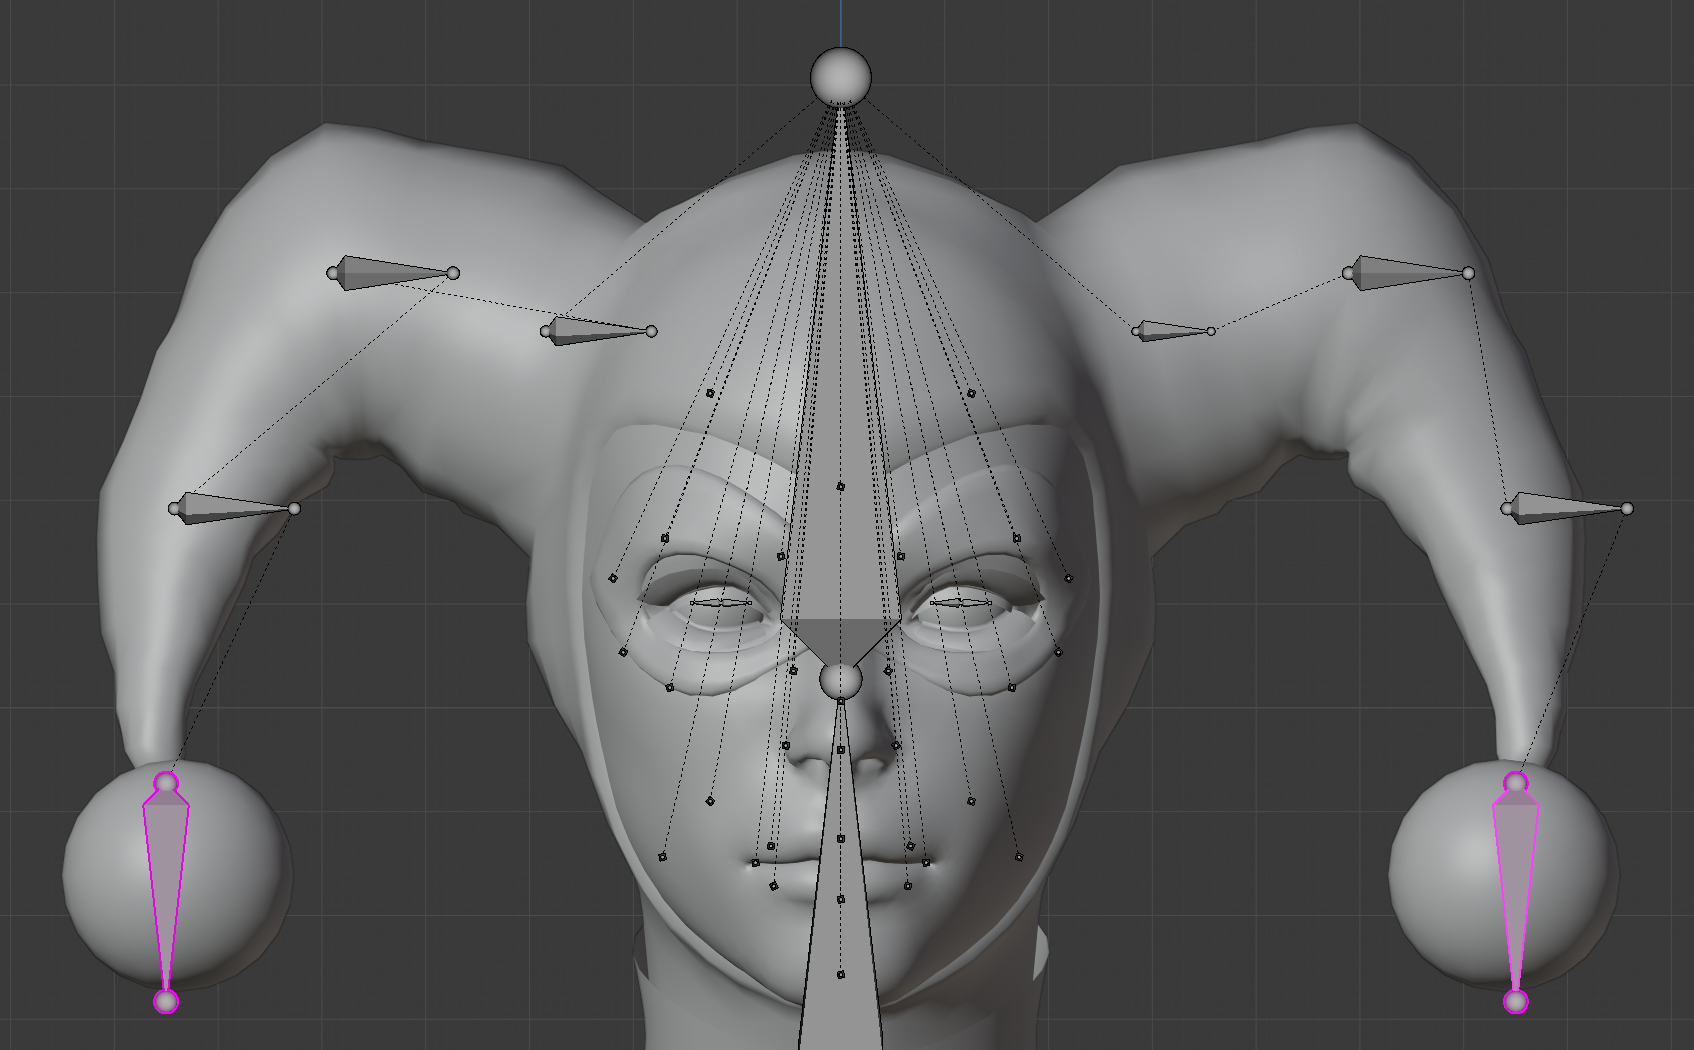 Set "Pivot Point" to "3D Cursor" Shortcut is "." (Fullstop, next to comma)
Select the base the bone you just positioned
Press "Shift & S" and then "Cursor to Selected".
The 3D Cursor will now be at the base of that bone.
Select the tip of its parent, press "S" to scale it and then press 0 (Number Zero).
The tip of the parent bone will now connect to the base of its child.
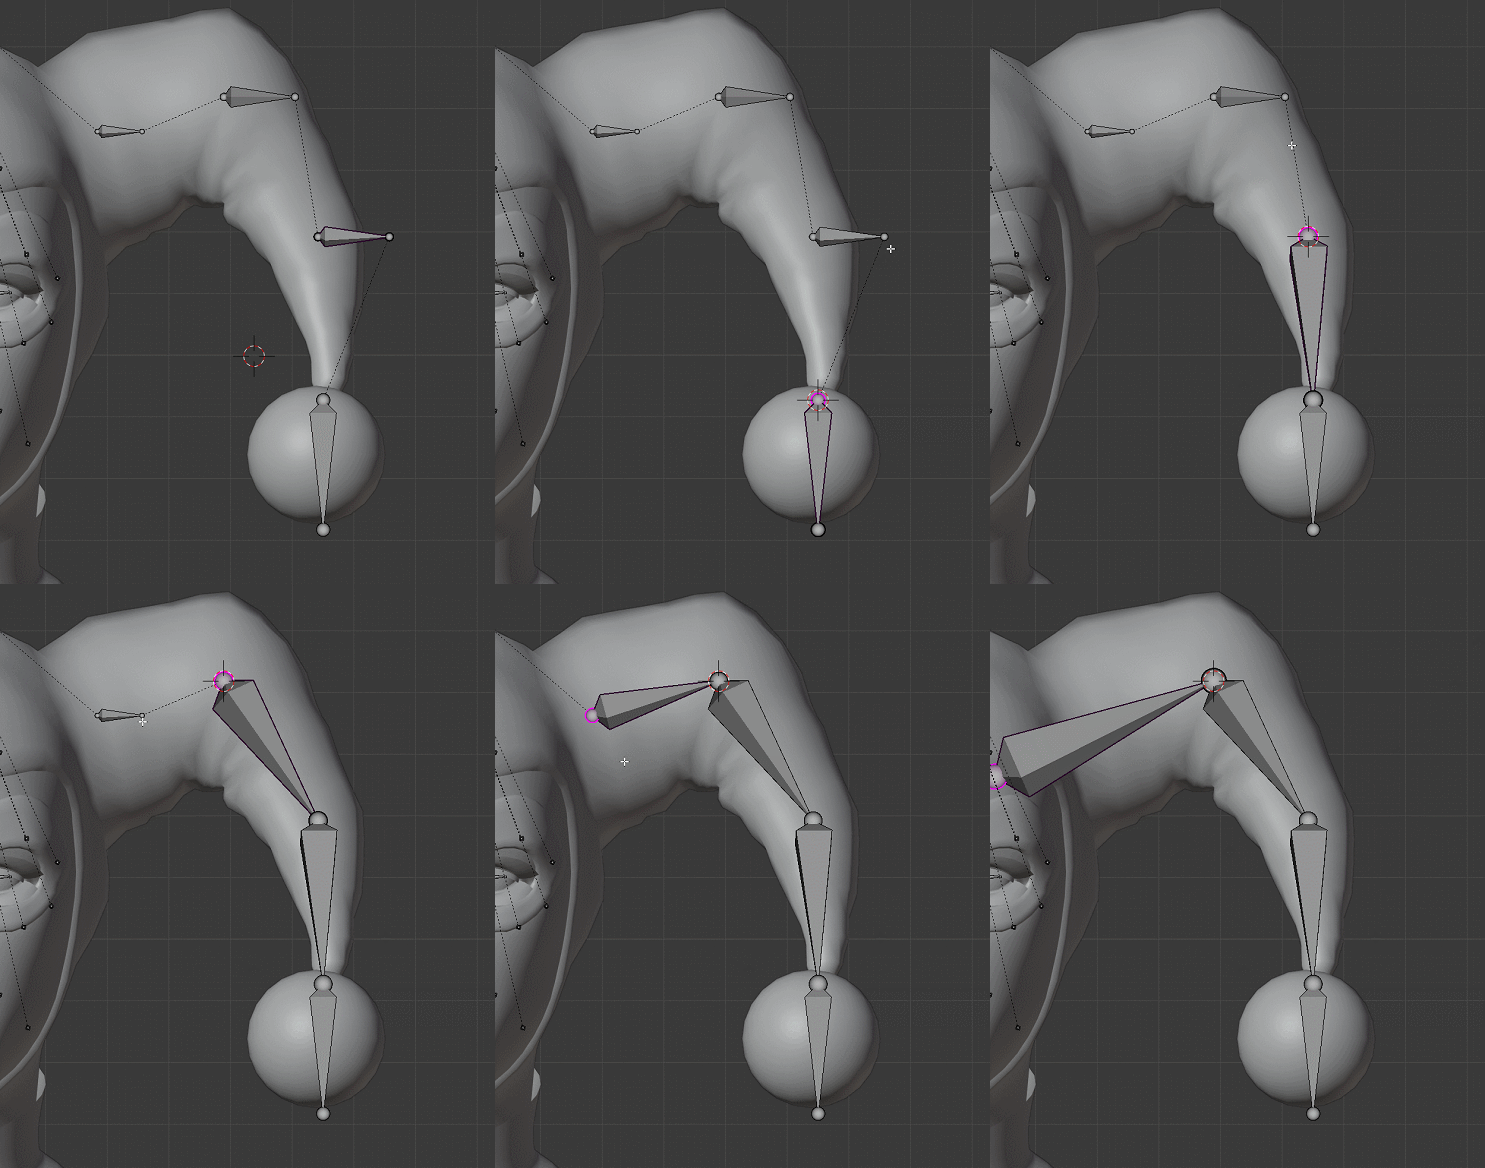
Now all default player bones and your own extra jigglebones are part of the armatures.
Sorry it had to be this way.
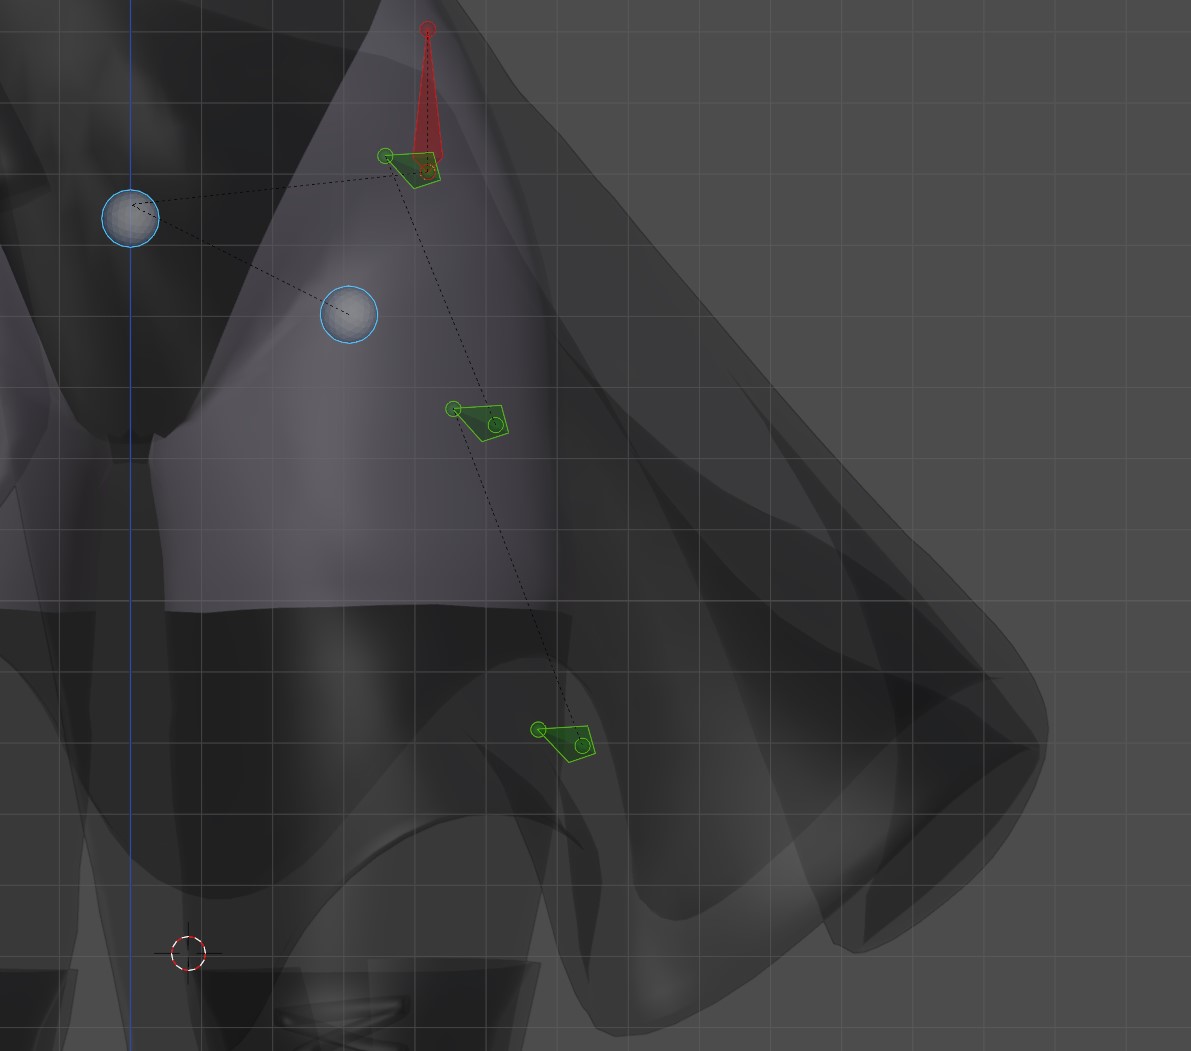
Here as an example is such a setup.
The red bone was a helper bone that is set up to move when the legs move.
this may look good, but introduce wobbling for jigglebones, so i didn't actually use it
Immediately in the same spot as the helper is the first jigglebone, to which the skirt is rigged.
Followed by then two more jigglebones, just to make the skirt flow nicer. The jigglebones themselves have constraints added to prevent bending inward.
Rig, Check Rigging & Export
If you have face bones and your model's face is already rigged, detach the head by entering edit mode on the model, selecting the head and pressing P to separate the selected mesh out into a new model.
It's best to do this from adam's apple upwards.
Or if your model has a choker, or another physical disconnection between head and body somewhere on the neck itself, use that as a barrier of what gets separated.
Use wireframe mode to select the entire head, mouth interior included.
We'll merge back together after the rigging, before we fix the weights.
Also, if your body was already rigged to any armature at all, delete all its vertex groups now.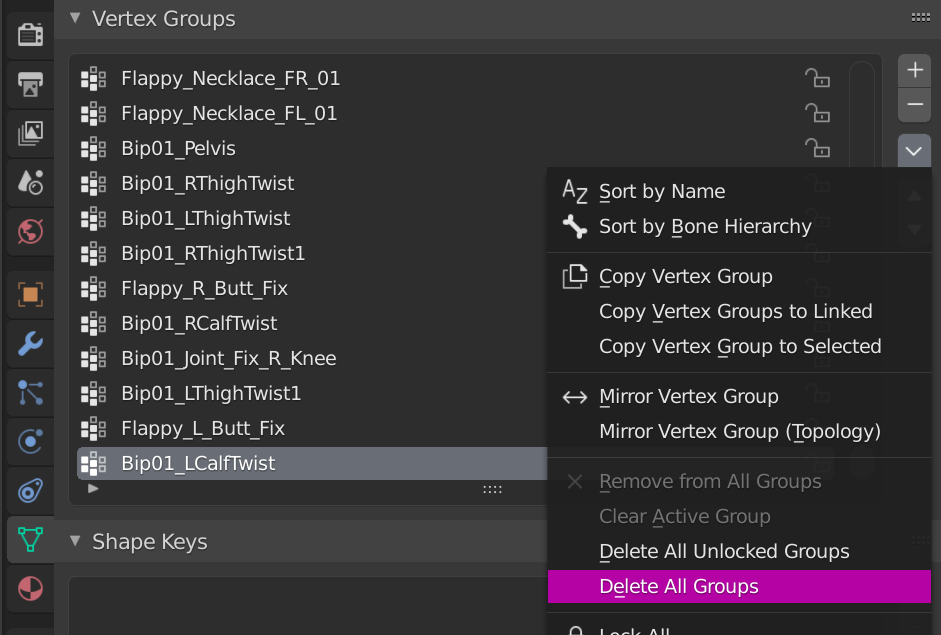
Select your mesh. (If you have a rigged face, use the body without the head)
Hold "Shift" and click on the .weight armature in 3d View, Object mode.
Press Ctrl & P
Pick "With Automatic Weights".
Blender will pause for about two seconds while it rigs the mesh for you. After it's rigged, re-parent your model back to the previous armature.
Do that by just dragging the mesh onto the other armature while holding "Shift".
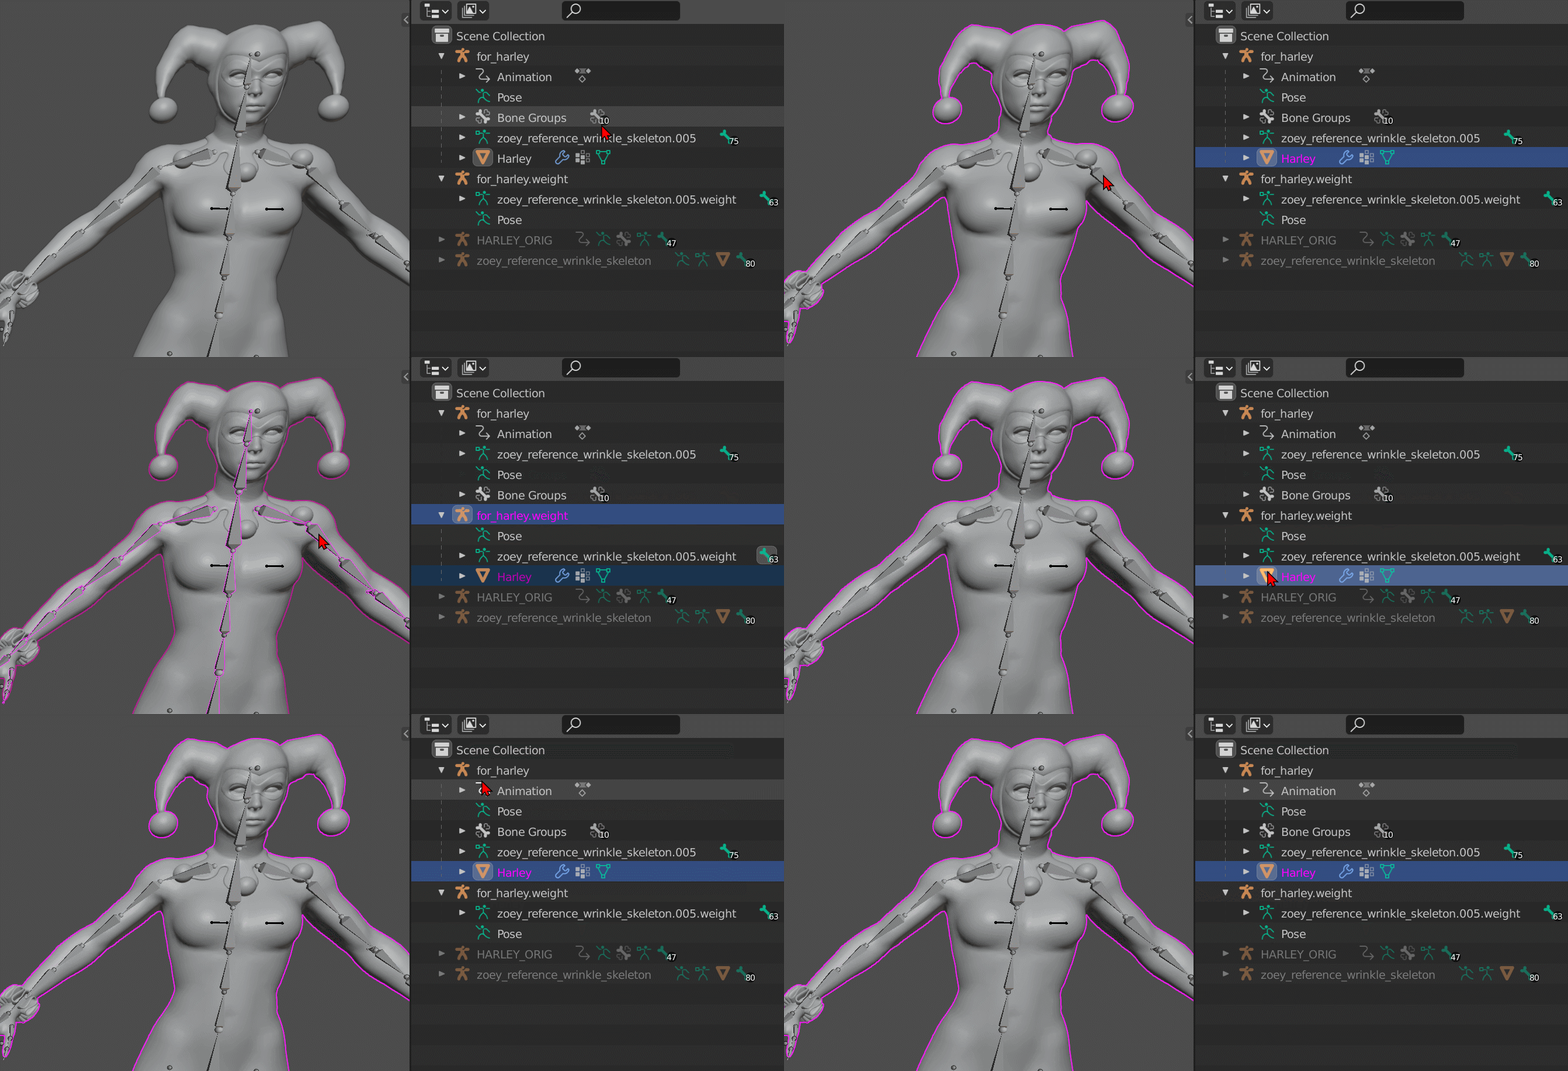
It must only have one single armature modifier.
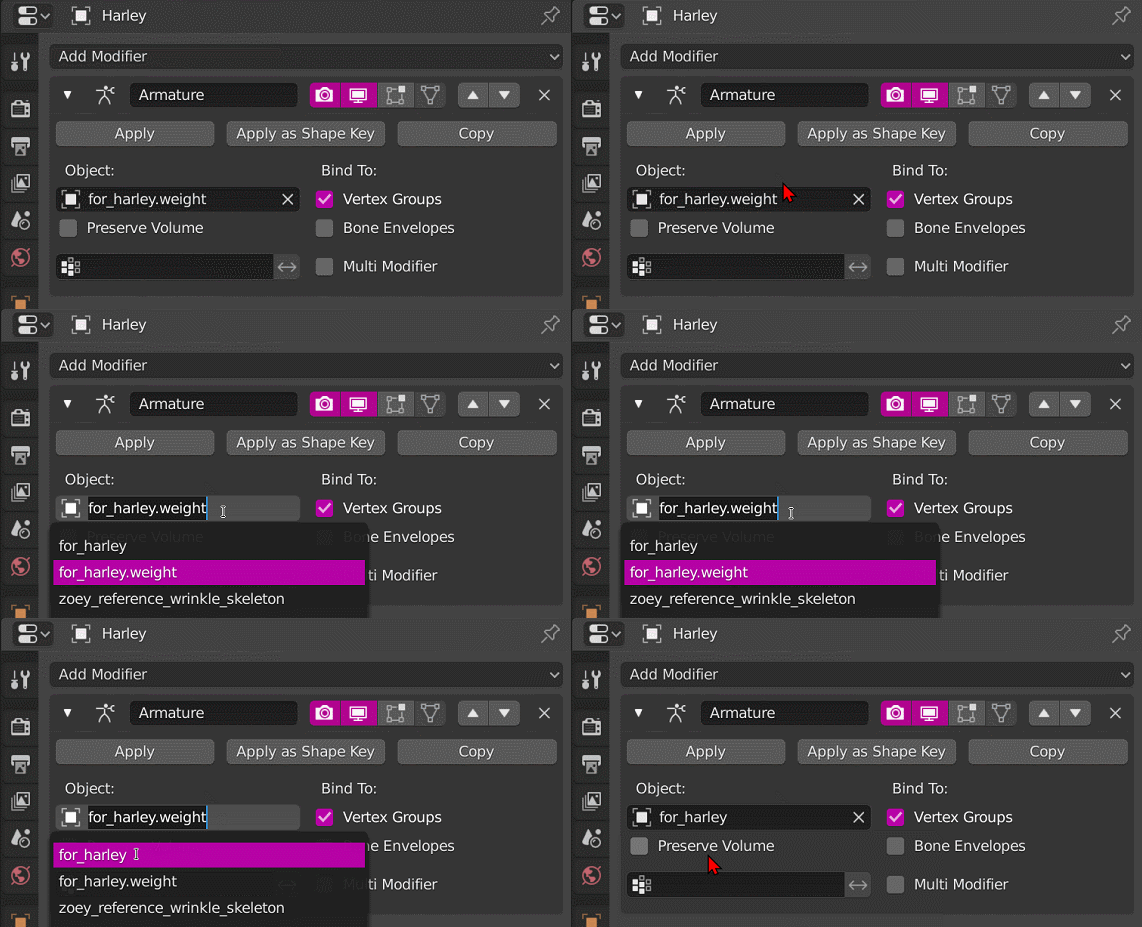
Some spots probably need to be fixed.
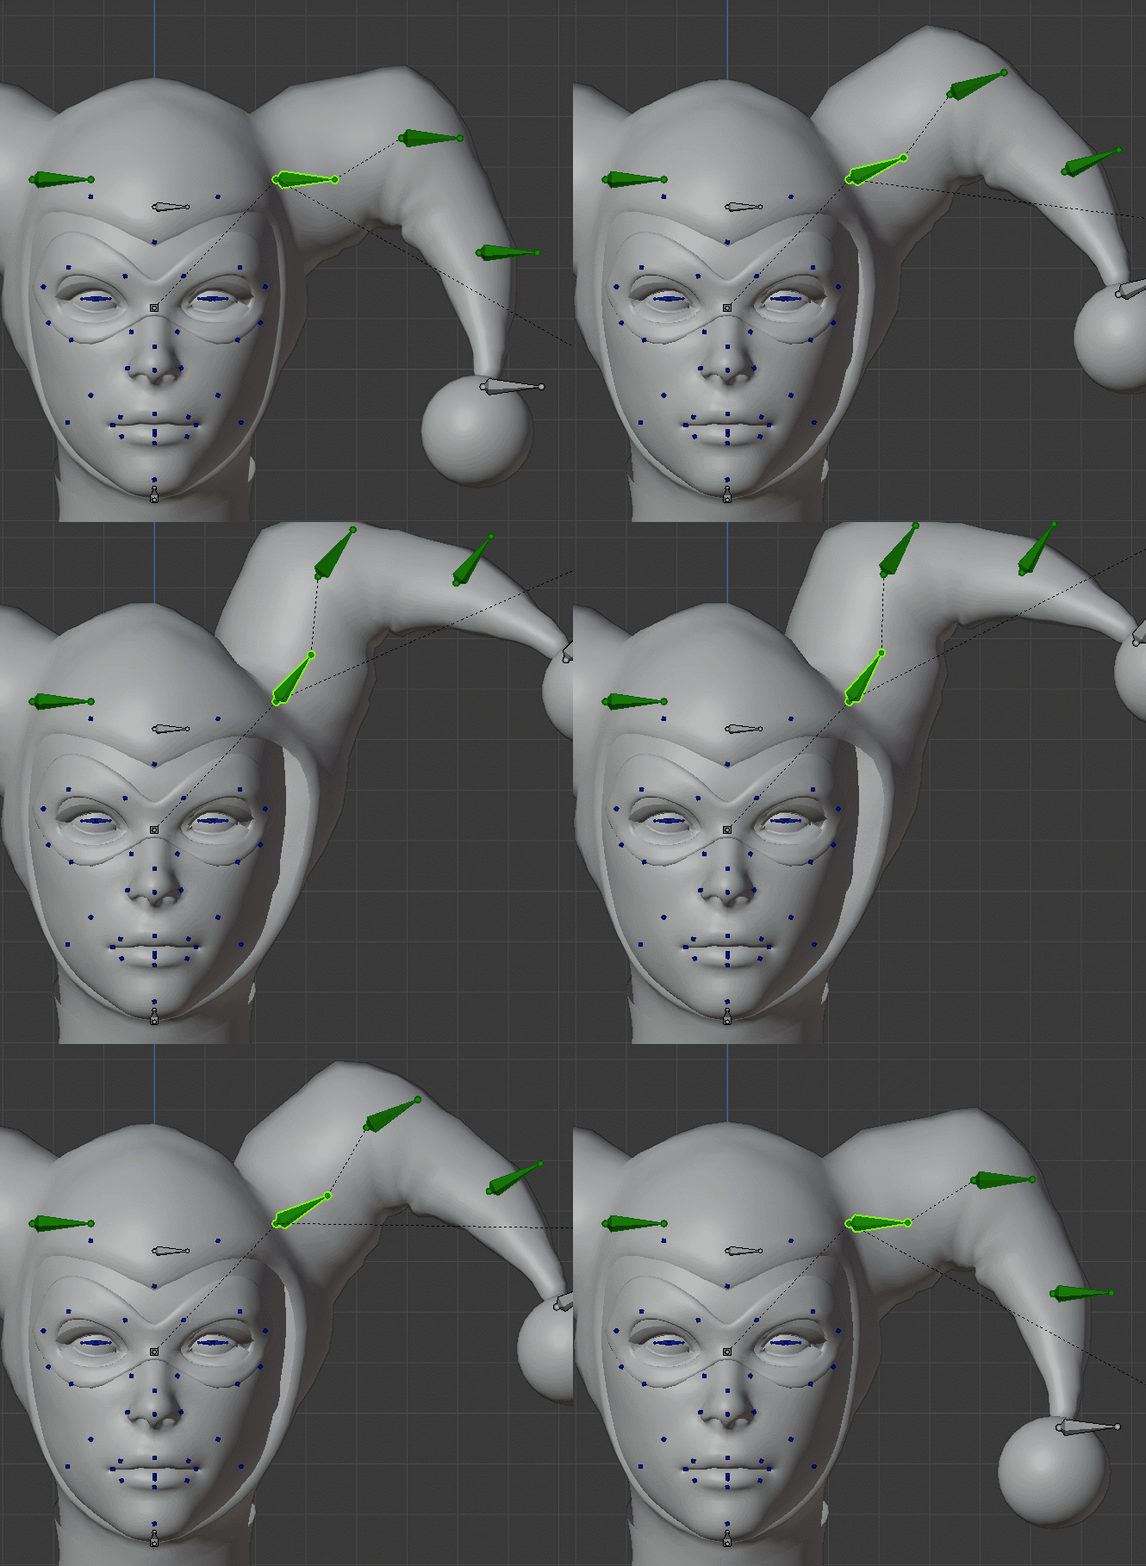
In those cases pose the bone to the point where you can see the obvious mistakes.
Select the mesh and enter "Weight Paint" mode.
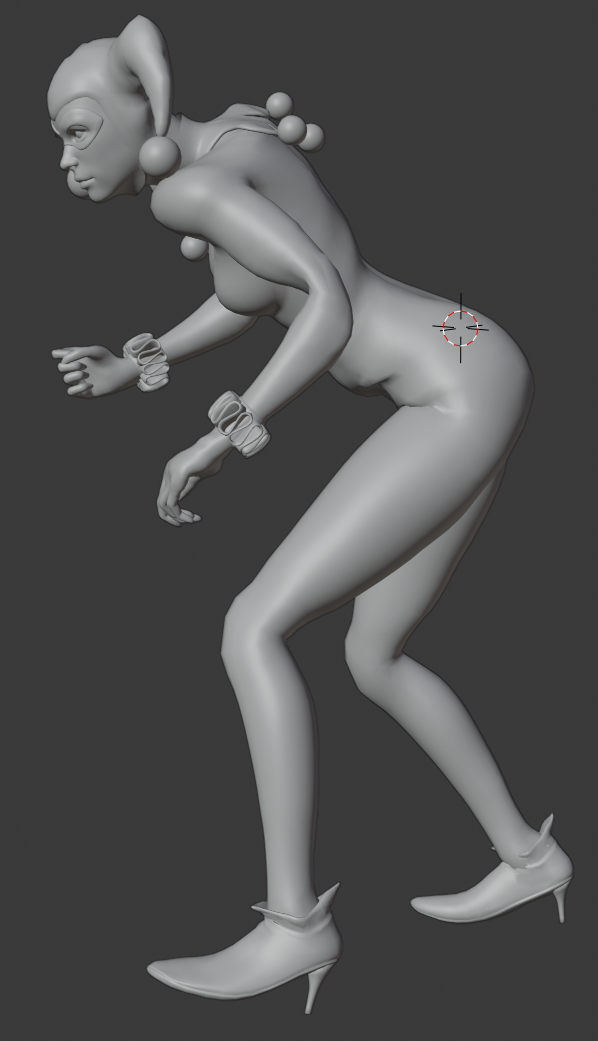
You modified the proportions of your model. It will look stretched.
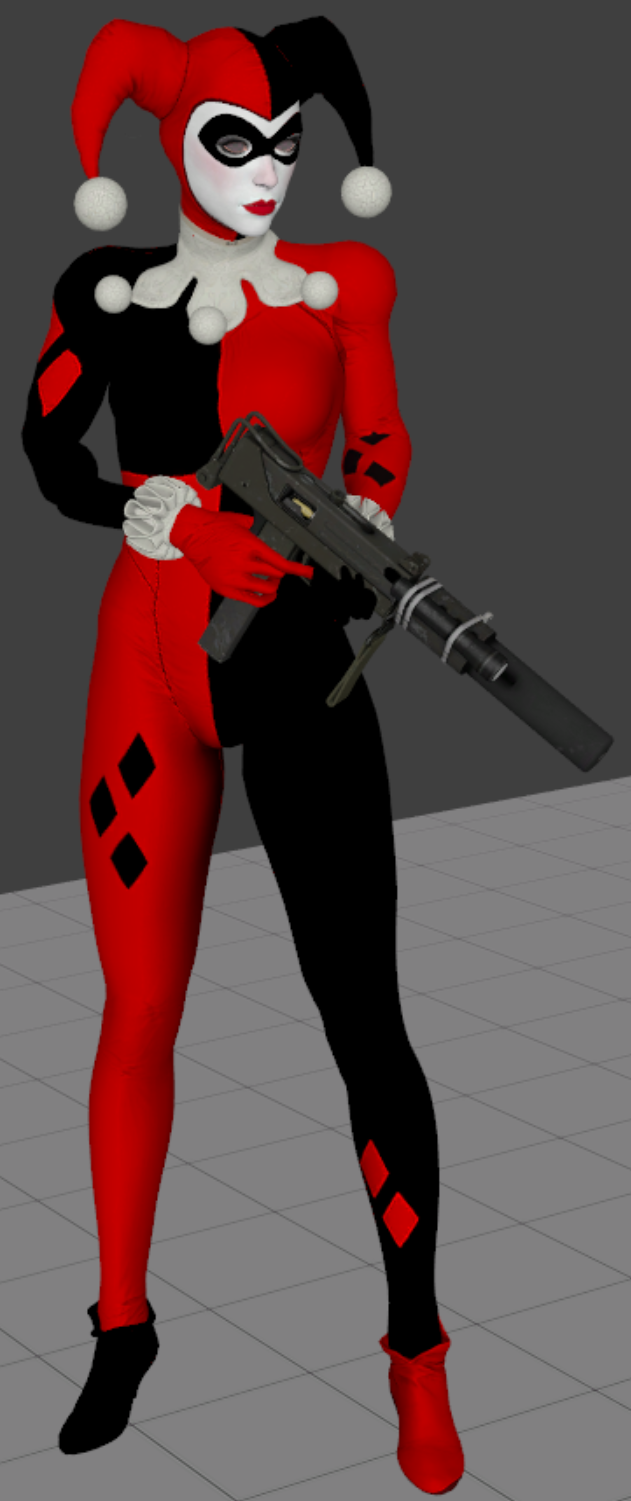
Here's an image of how original Zoey animations look like on the proportionally different Harley model.
Moving on.
I won't go into the details of weightpainting, but I'll explain the basics.
In weight paint mode your model will be blue for parts that are not rigged to anything and red when something is 100% rigged to the selected bone.
The heavier it is weighted to a bone, the more influence that bone will have over your model.
In the 3 minute long video below you can see how I use the "Subtract" and "Add" brush in weight paint mode to remove and add weights to the jiggle part of the hat.
Notice how I go back and forth between two bones to remove weights from one bone and add weights to the other.
I recommend watching it in full screen. The video is real time as well.
THIS would be the time to re-rig that head you had detached entirely to the head bone with a small gradient on the neck bone. Luckily the head is simple this way.
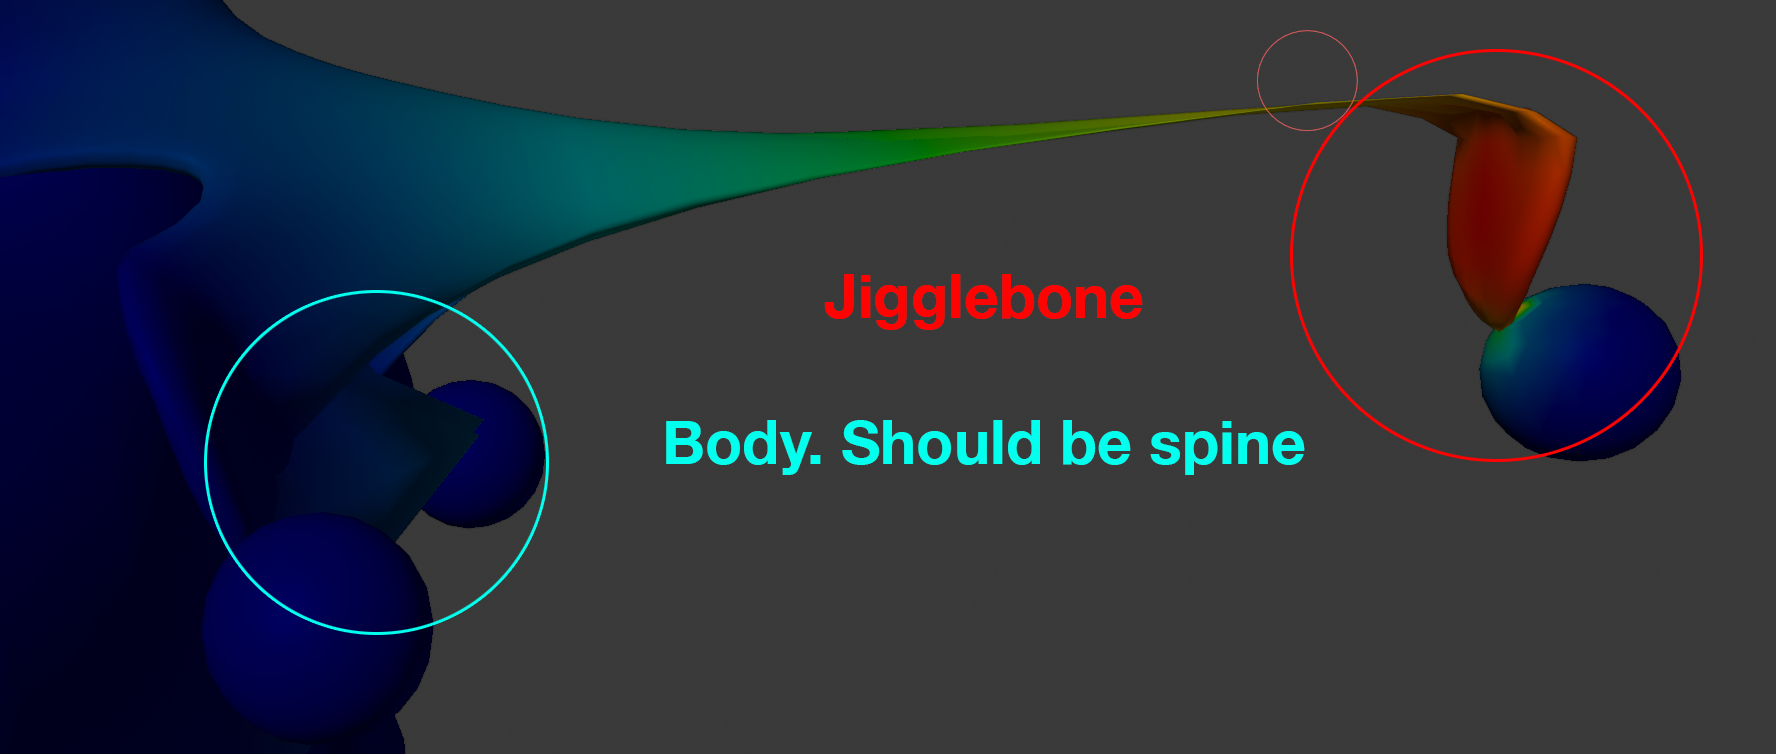
Fixing such instances where one piece of mesh shouldn't be rigged to another bone at all can be fixed quickly and easily. Enter edit mode on the mesh.
In "Vertex Group" select a bone and click the "select button.
Blender will select anything that is rigged to the selected bone.
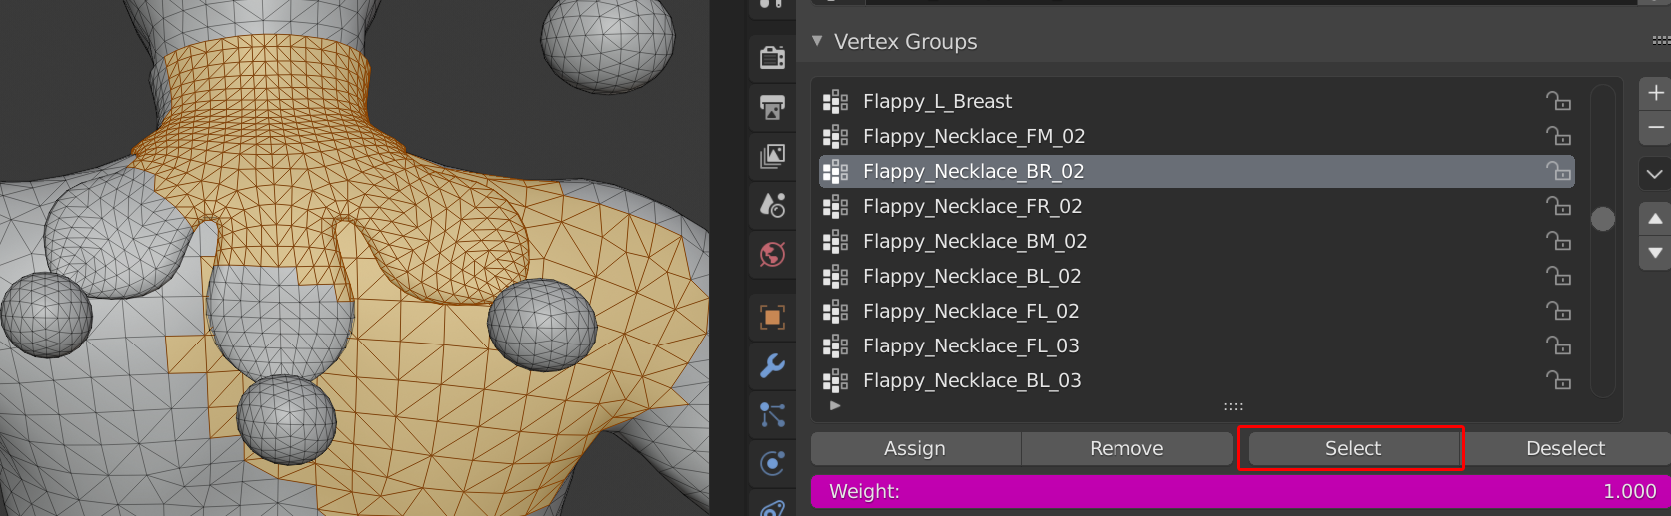 There's a bunch of body rigged to the jigglebone. That's not what we want.
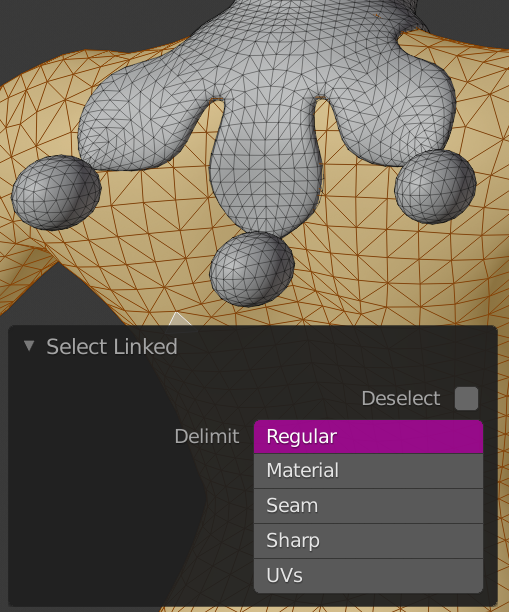
To remove the body from the jigglebone, select the mesh you want to un-rig.
Sometimes you can hover over a mesh and hit "L".
This will select all linked mesh.
On the lower left hand side you'll get a window which allows you to pick what linked mesh you want to select. Usually "UV" is a good option. If not, just manually select it.
In "Vertex Group" hit the "Remove" button to delete all weights of the selected mesh from the selected bone.
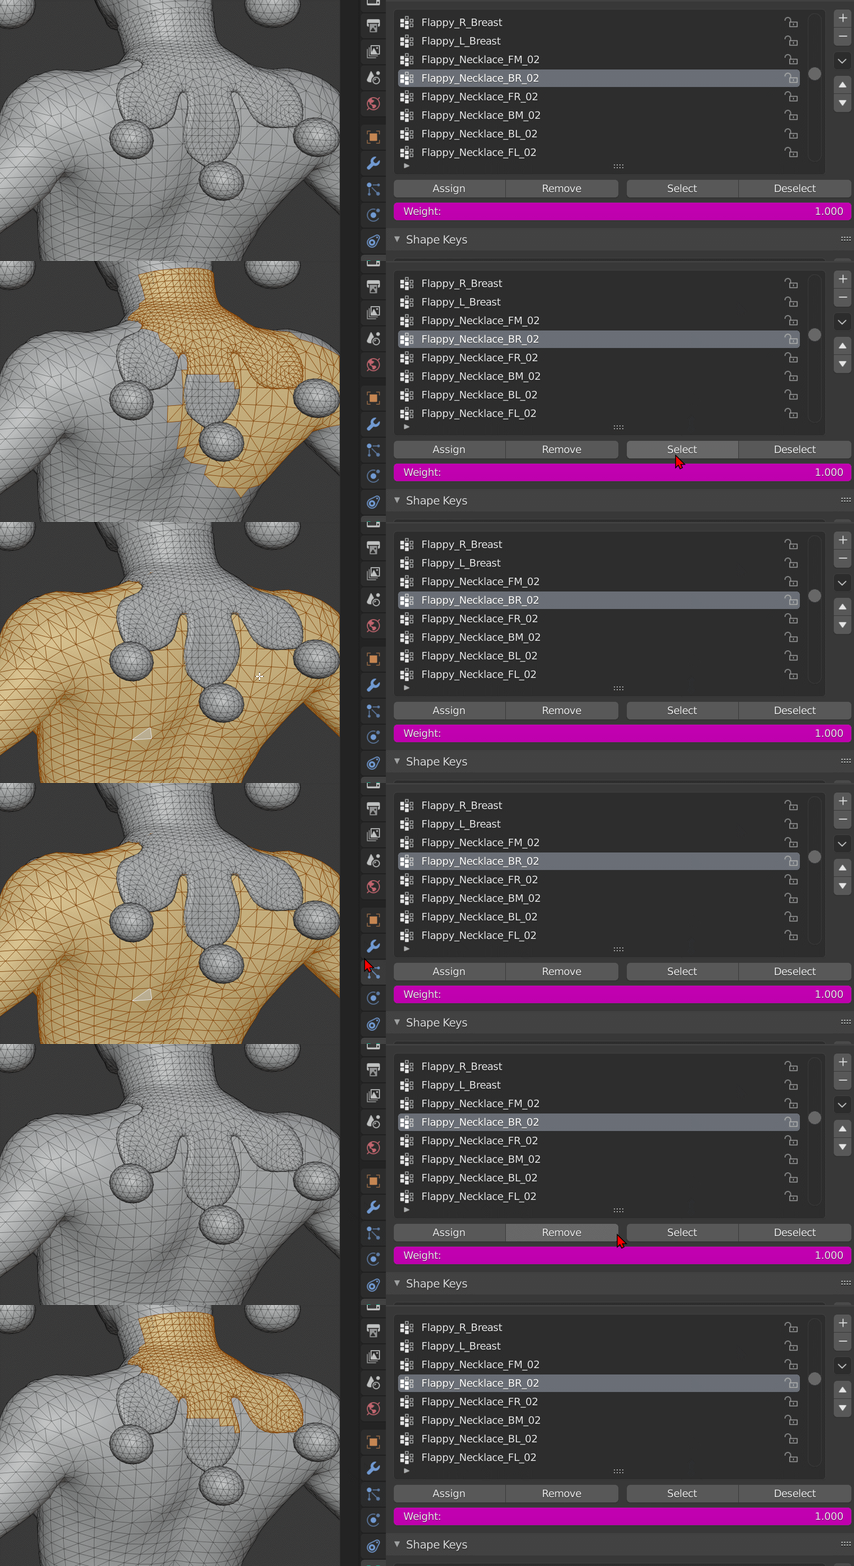
In the GIF above you can see me selecting the jigglebone to check what is weighted to it.
I then select the body I want to unrig from the jigglebone and hit the "remove" button.
Afterwards I select the jigglebone again to see if it was removed correctly.
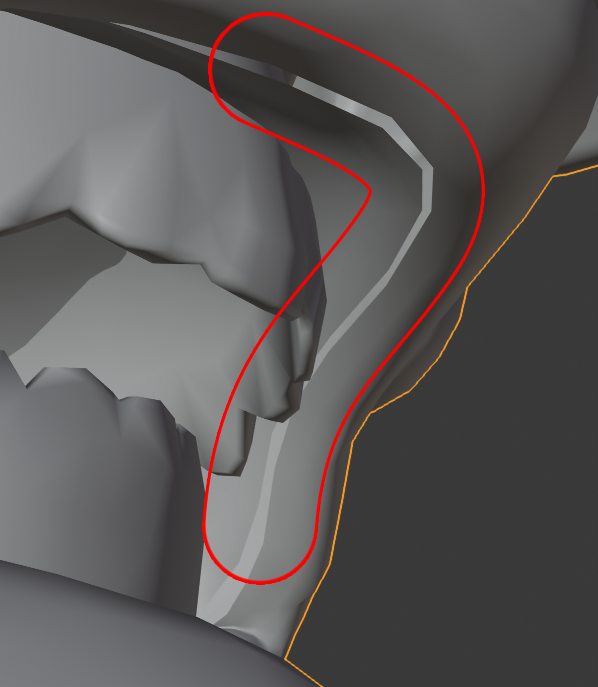 You can fix that by entering edit mode and selecting both edges, pressing "Alt & M" and picking "By Distance"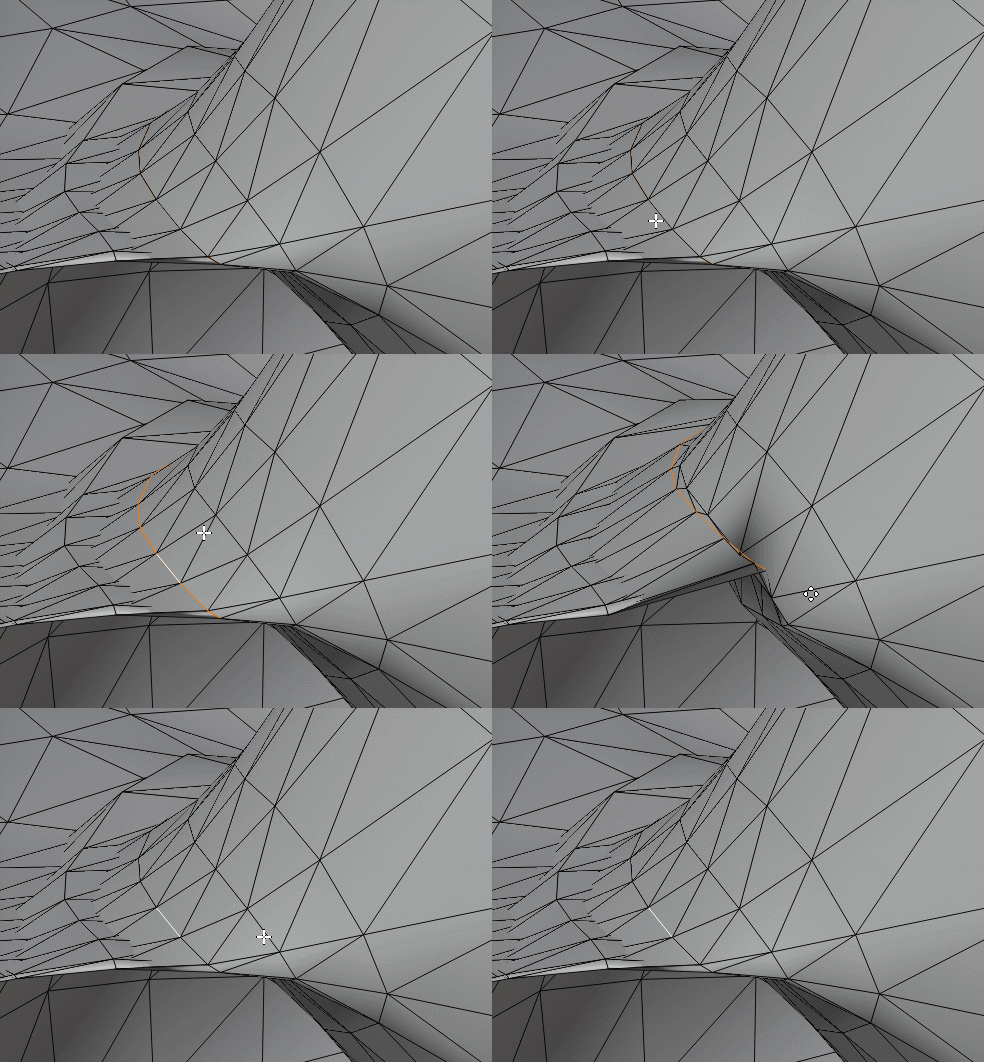
Fixing the entire rigging will probably take you a while. Just modify it until you think its right.
I myself have been fine tuning this model for about two hours before I even compiled it.
Headhacks (or any meshes with shape keys) will also export a VTA file of the same name.
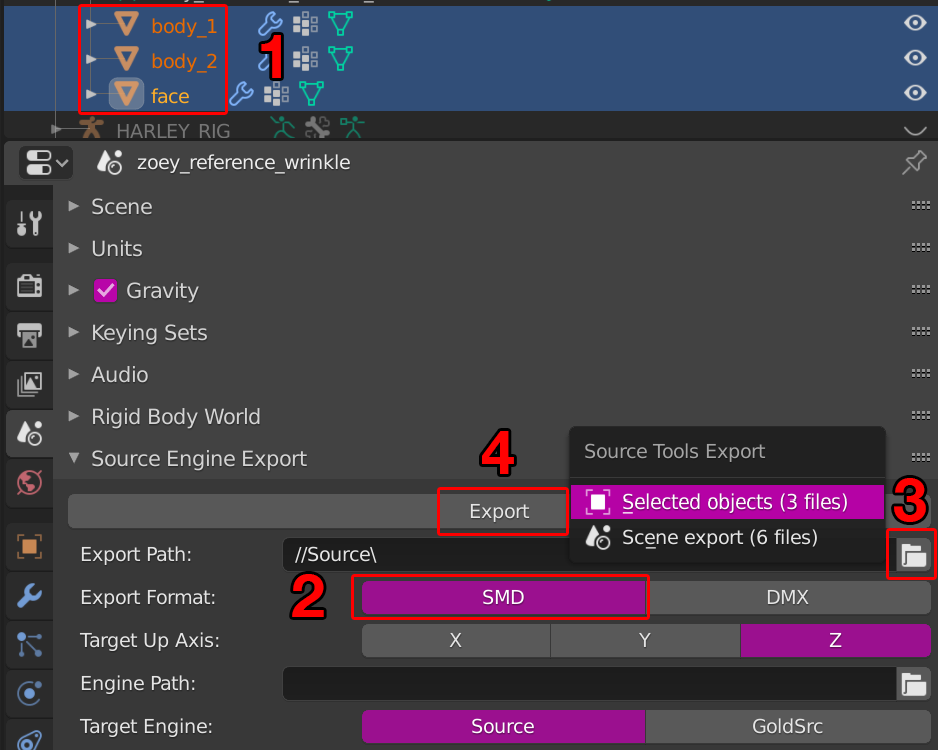
═══════════════════════════
Base QC editing
The $modelname line at the top defines the models location and name.
Duplicate it, comment out the original and change the location/name to use that in HLMV.
Otherwise it'll load the original model from the pak01_dir.vpk
I prefer to swap all folders with an "!"

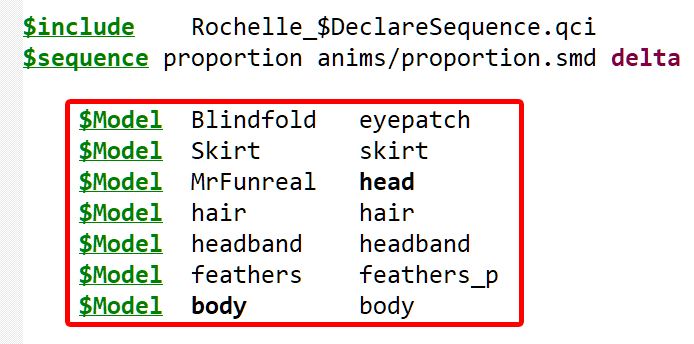
The $Model line decides what local name it has, which mesh to use, and info about face flexes.
The "local" name is irrelevant. Only bodygroups would ever make use of it.
then skip to step 7.03 for the LOD.
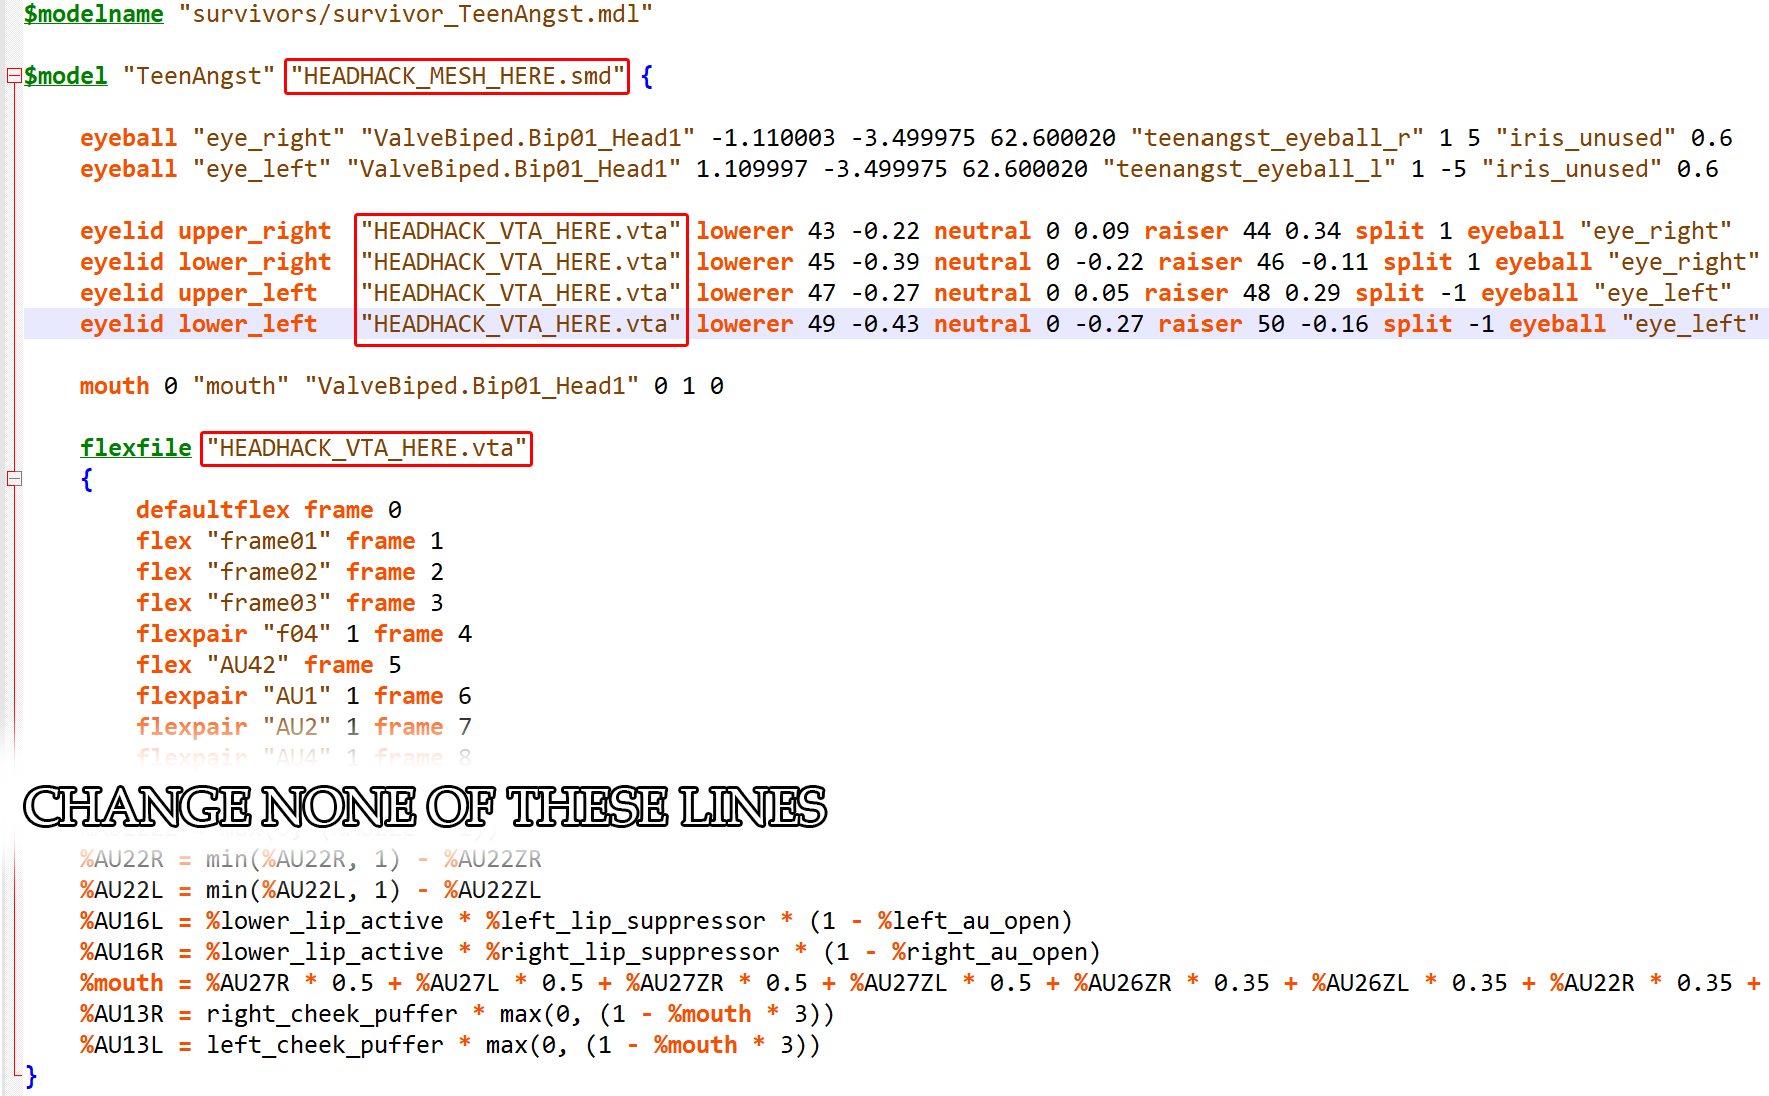
We'll do face flexes later. For now we'll just get the model to compile at all. You'll end up with just the $model line and commented out eye and mouth lines.
Those will later be used for the face flexes.
If you don't want any face flexes, just delete the eye, mouth lines and the { } as well.
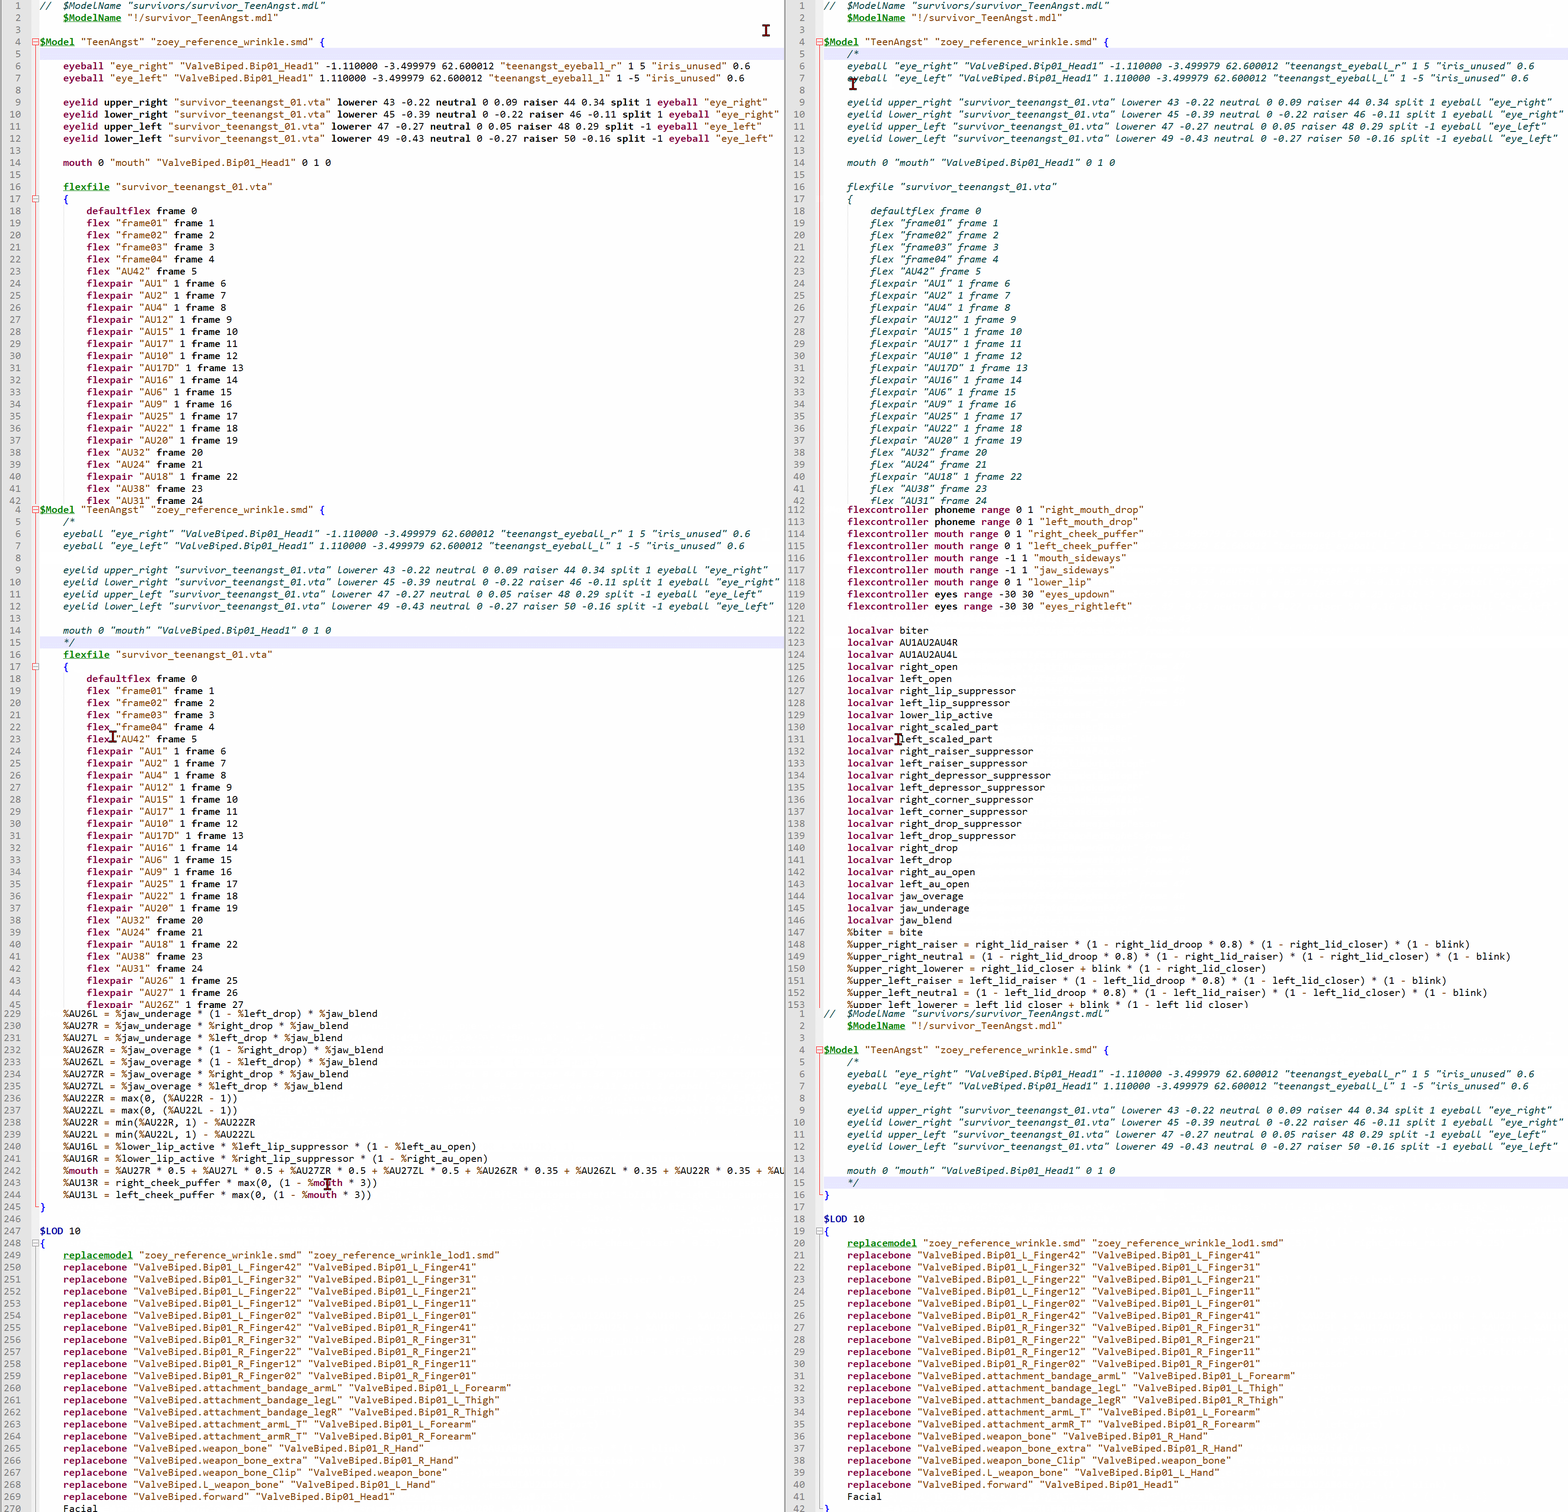
They're used for model optimization for far distances. Either by swapping the model with a less detailed version, not rendering bone movement or ignoring face flexes.
Delete the "replacemodel" line, unless you made a less detailed version of your model to use.
Disabling face flexes and collapsing bone-trees is enough.
Note: Every "Replacemodel" SMD adds to the max triscount. Which looms at around 110k tris.
Therefore; adding replacemodels to swap a super high detail model with a lower detail model might just break your mod entirely.
Delete all $bonemerge lines.
Open your model smd in notepad++.
You'll be able to see all bone names. Copy them into a new empty file.
Press "Ctrl & H"
Make sure "Regular Expression" is turned on
Find ^\s*\d+\s*"(.+)"\s*-?\d+\s*$
Replace with $bonemerge "\1"
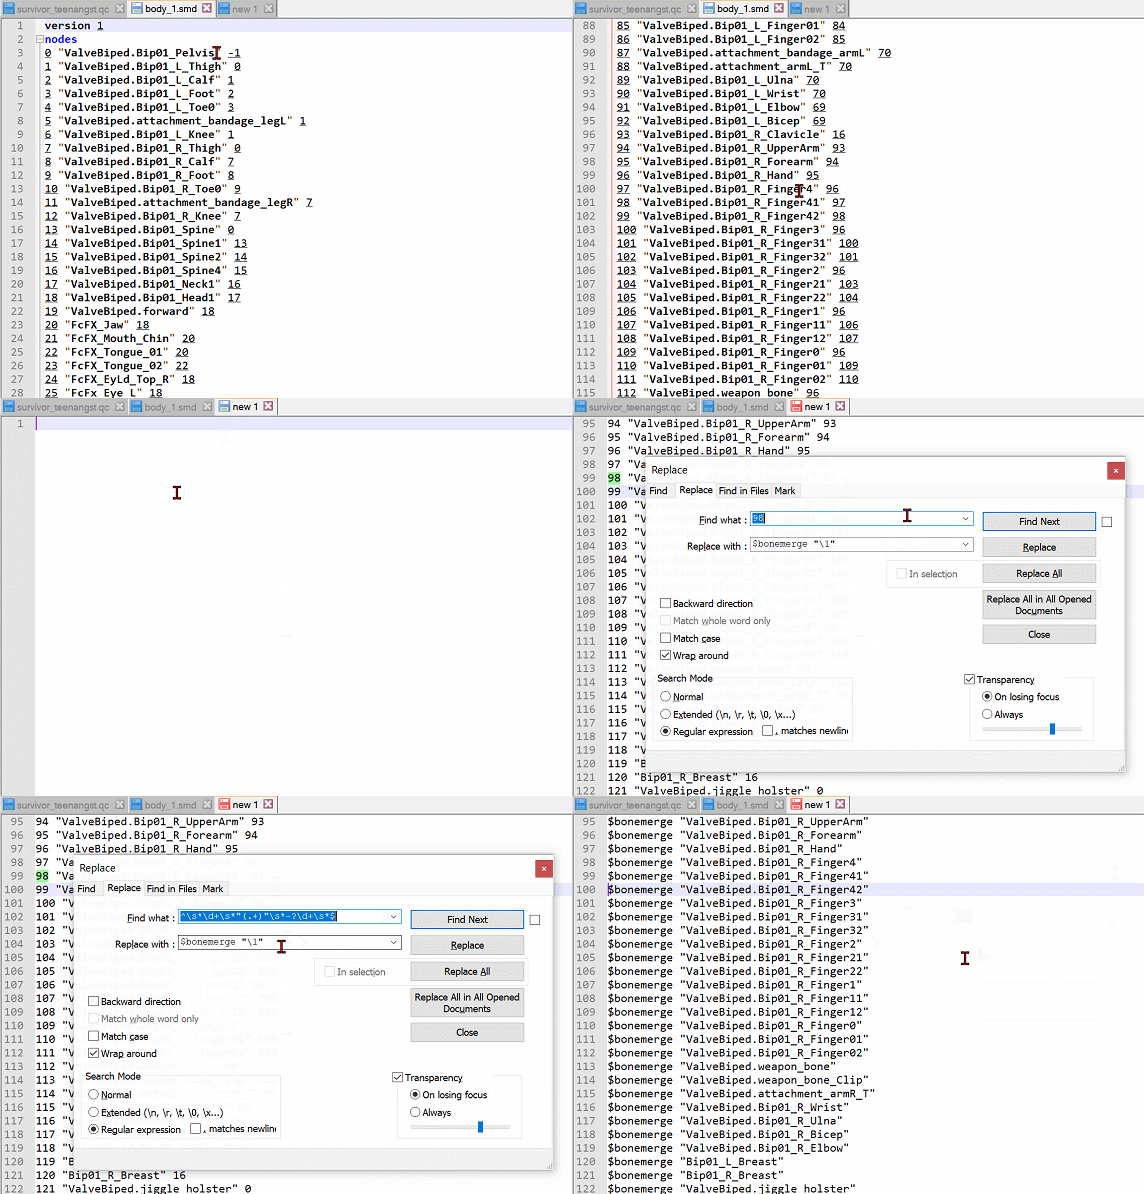 Save this as "!Bonemerge.qci" Next to your QC file.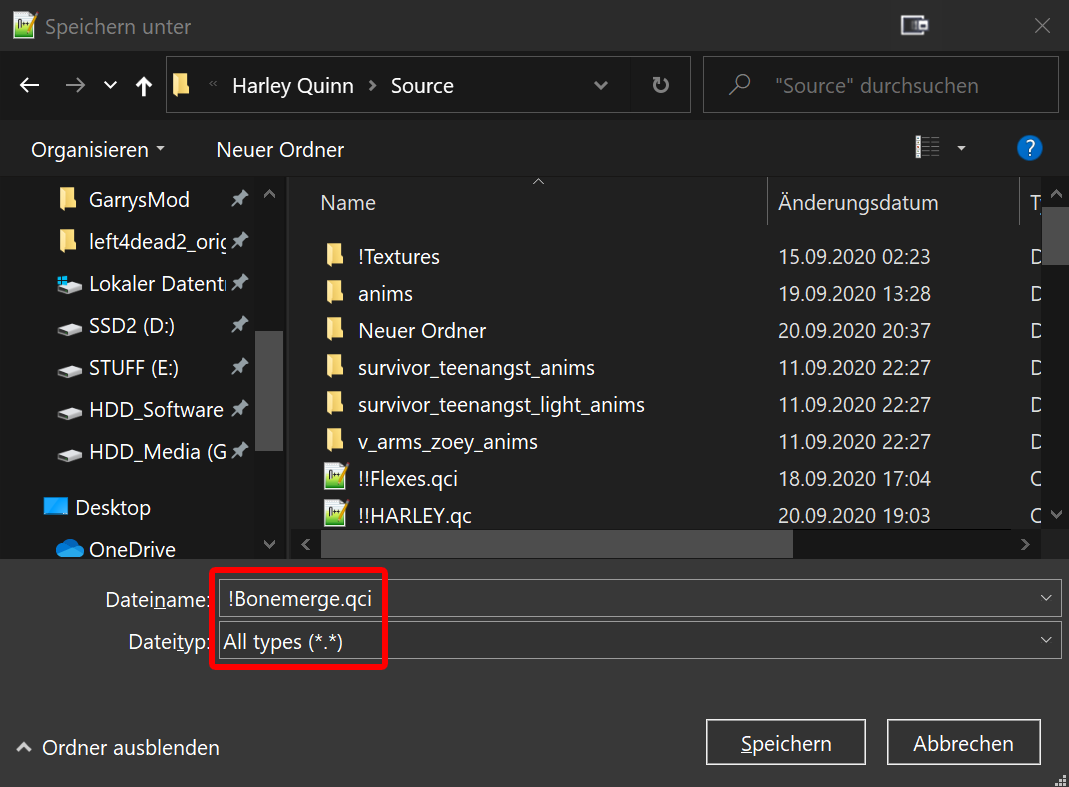
In your QC file add "$include !bonemerge.qci" Where your bonemerges were.
This will include all the info from that qci file into your qc file, without having to paste all those lines right into your qc file.
This line decides where the materials of your model are.
Pick any location you want. Just make sure the folder tree ends with /.
This is only used to swap normal textures for "Covered in vomit" versions. There's two ways of making textures that can be covered in vomit.
You can either:
- Do it like valve and make use of texturegroups to use a completely different VMT for vomit overlays
- make one single material capable of switching to vomit overlay, not needing to make a separate _IT material and therefore upping your material count. (Max is 32 materials)
If your materials make use of $detail textures, you must use _it materials.
If you do not want to have dedicated _IT materials for your mod or reskins, skip this step.
You cannot add these lines but refuse use _it materials. You'll get Missing Textures if you do that.
If you want to do it like Valve:
Make one line which contains all materials that should be able to have the vomit overlay.
Those are usually all materials, except for the eyes.
Valve doesn't let vomit cover hair, but you should. Looks out of place if hair is miraculously clean.

More info on how to actually make these textures in step 10.061
If you do not want dedicated _IT materials, step 10.062 explains how to do this.
Either delete them if you got no use for them, or change/replace them with new ones.
Tee Jigglebone guide i mentioned a while ago holds info on what kind of jigglebone presets you could use, or you can make up your own.
Survivor replacements (and infected) shouldn't use different collision information because that could lead to errors and even crashes. So just delete the entire block.
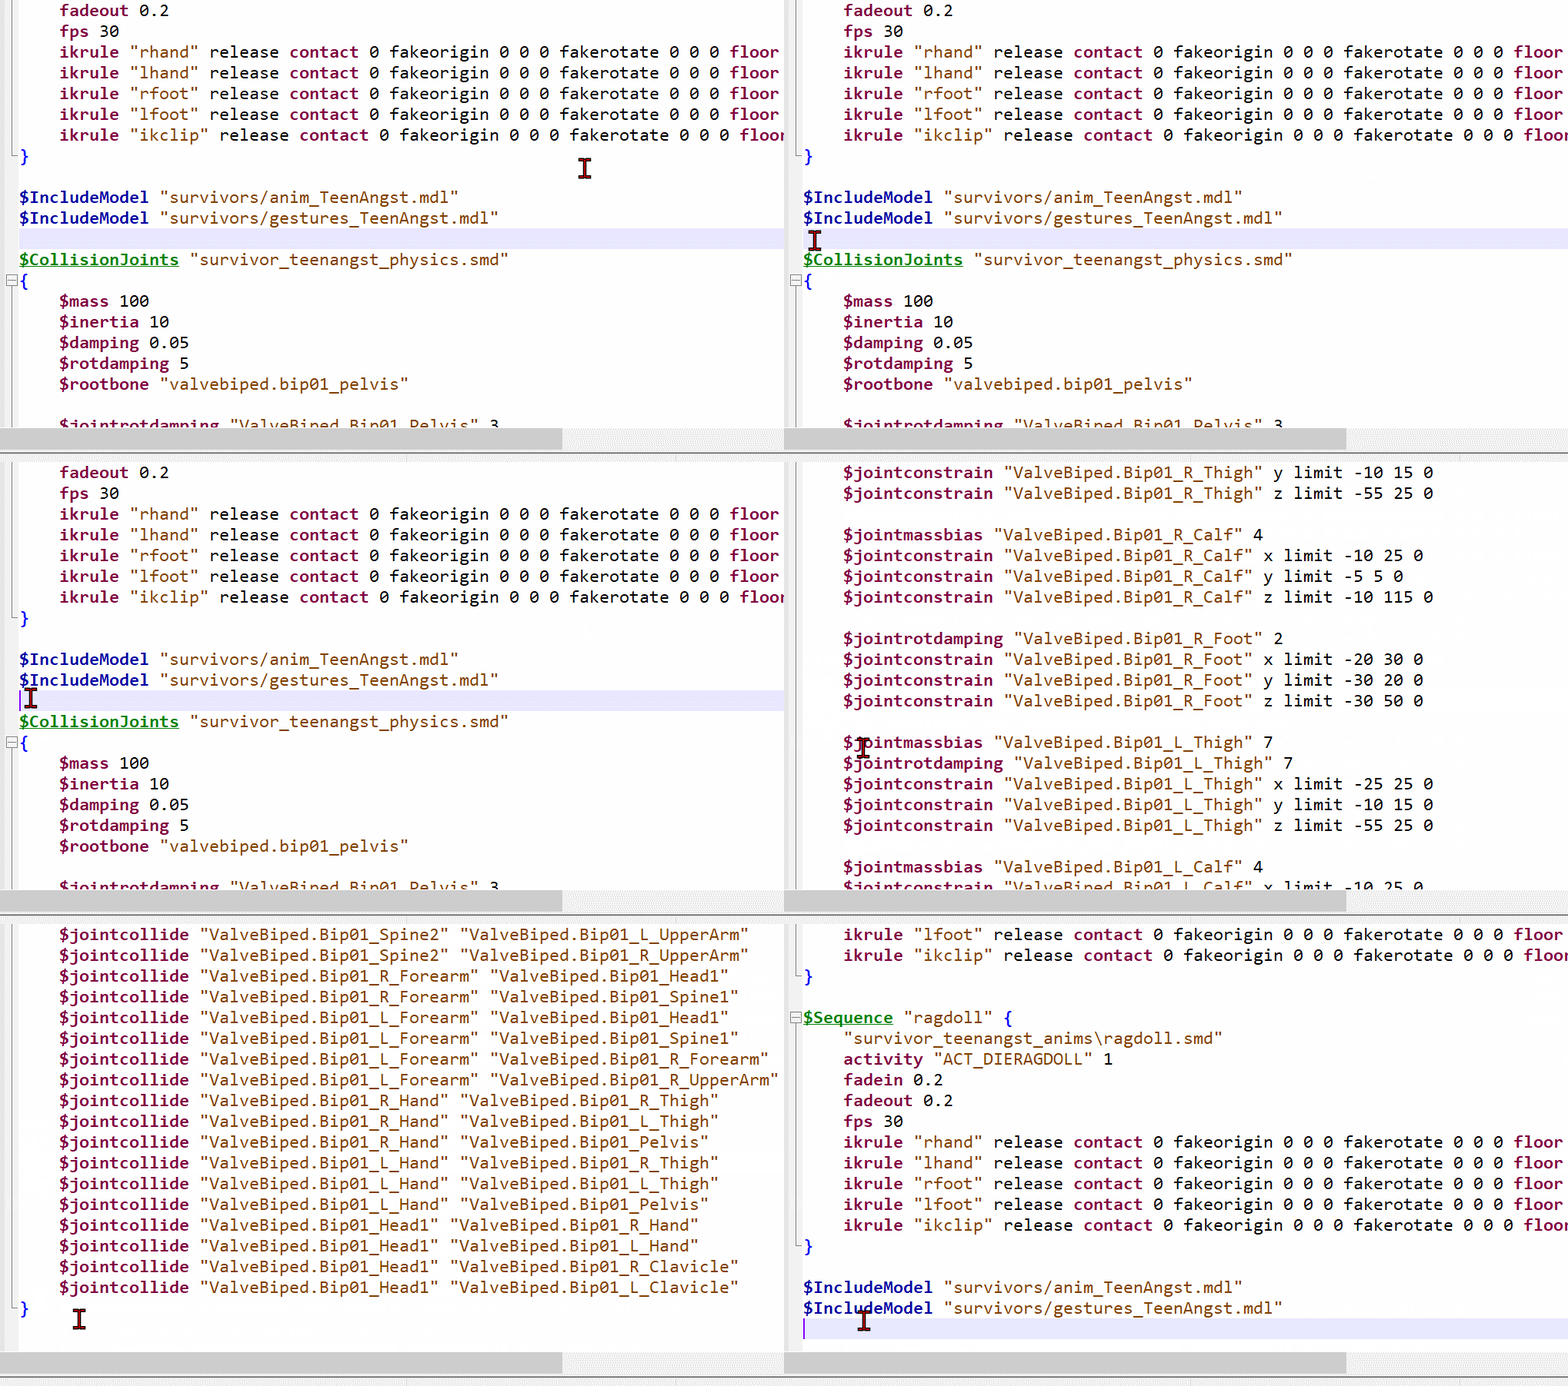
This block is responsible for the .phy file. So now you won't get that file when you compile your model, making the game use the original.
$Definebones
Look for the $Definebone lines. Those will override the bone location and rotation.
Since you moved all bones in blender, every $definebone line is now out of date.
this may cause issues down the line.
We can either generate a new block of definebone lines which takes about three minutes to set up, and a few second to generate, or we can use the super short way of using one single command to skip all of that junk.
Above all $definebone lines, simply add the following command: $UnlockDefineBones.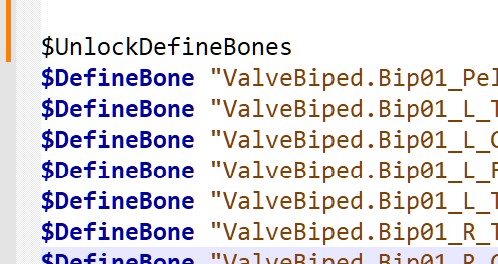
This command makes the definebones keep its order (which is important) but it will update the actual location of all bones based on whichever unique smd has been used last in the entire qc.
I would recommend moving your $model lines to the very bottom of the qc, below the proportion pose lines that will come later. Because the new ref pose you get will be based on whatever that last smd/dmx uses.You do not want it to be based on the subtracted proportion pose. Trust me.
Proportion Pose Creation
If you do not want custom proportions, skip to Procedural Bones (HelperBones)
In this step we will generate that pose we need to make our custom proportions work.
In the next step you're going to use a Ref-Pose_***.smd file from my L4D2 prefab.
But if you're modding Gmod (or any other game), you don't have these files in the prefab, yet.
To make such a Ref-Pose_***.smd file, make a copy of your decompiled playermodel, open it as a text file with notepad++ and delete literally the entire Triangles section completely.Saving this as a new smd file gives you a smd that contains nothing but the ref pose.
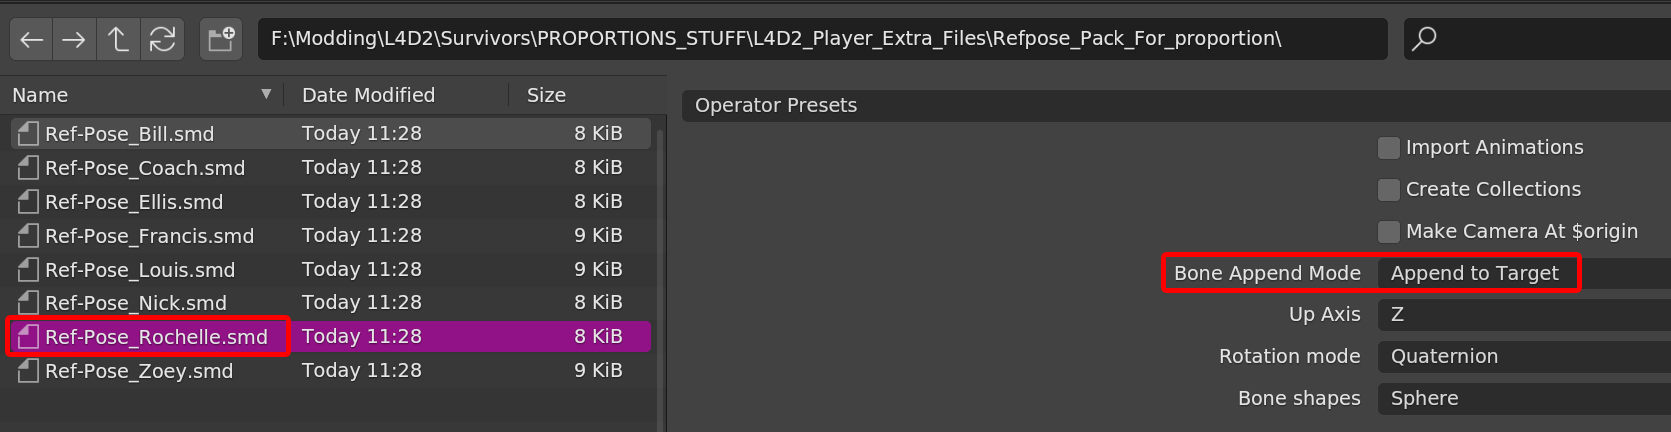
Inside of it are a few Ref-Pose_***.smd files. Select the armature of your player and import the Ref-pose of whatever player you're doing.
Import it with "Append To Target".
 Your playermodel will look real strange for a second. Don't worry about it.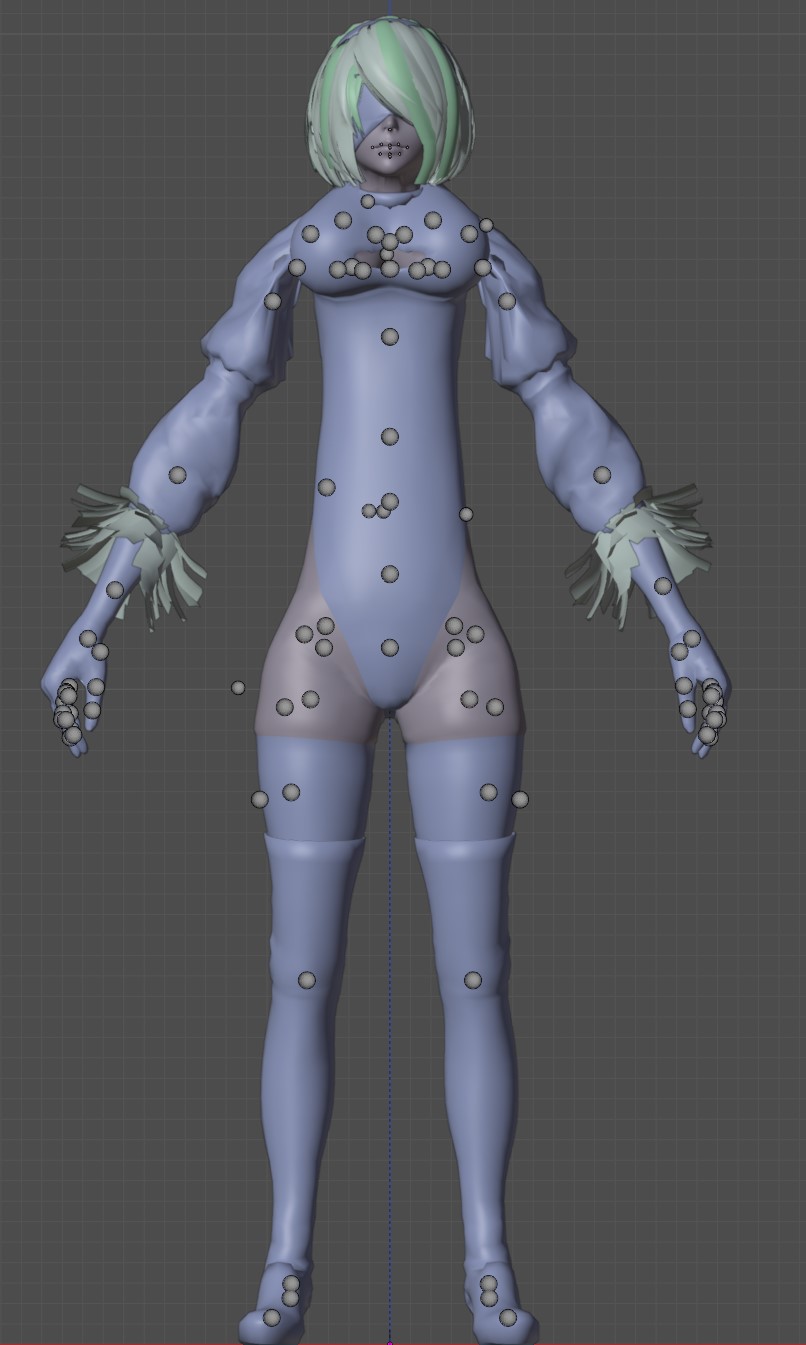
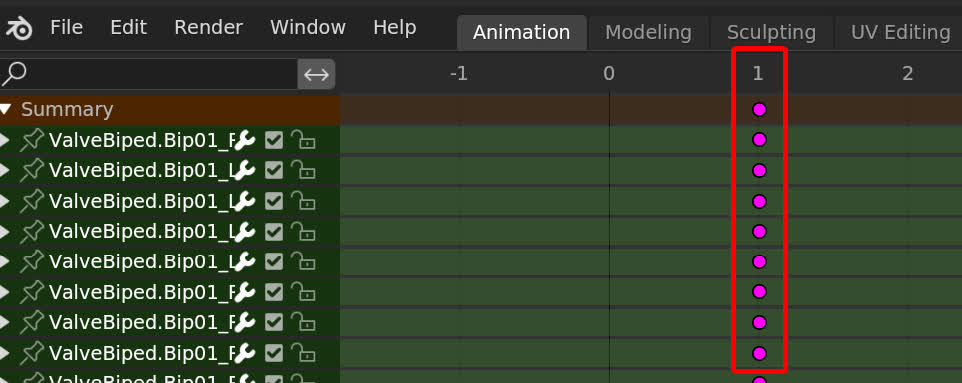
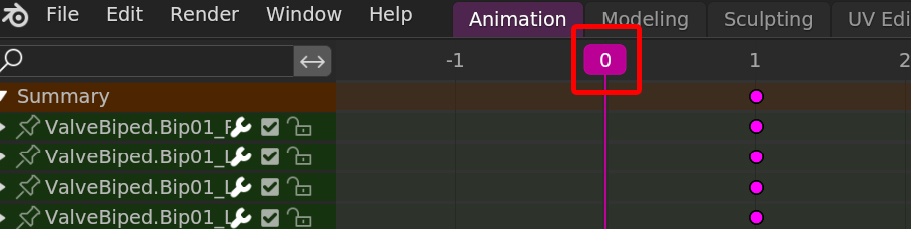
They currently are on Frame 0, but they must be on Frame 1.
Hover over the list on the left, press A, then G, 1 and Enter.
This selects all keyframes and moves them one frame.
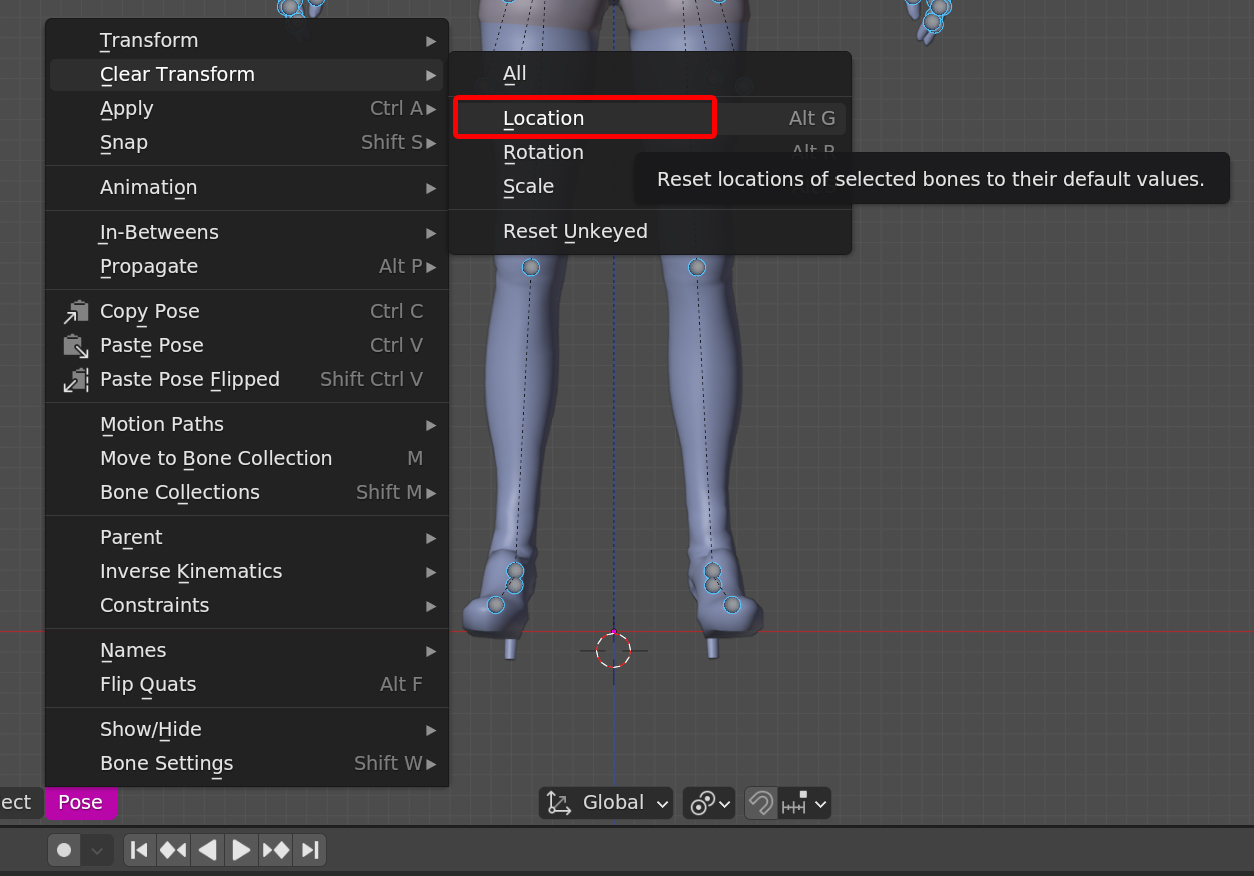
 In pose mode, select all bones and clear locational transforms. Only location!
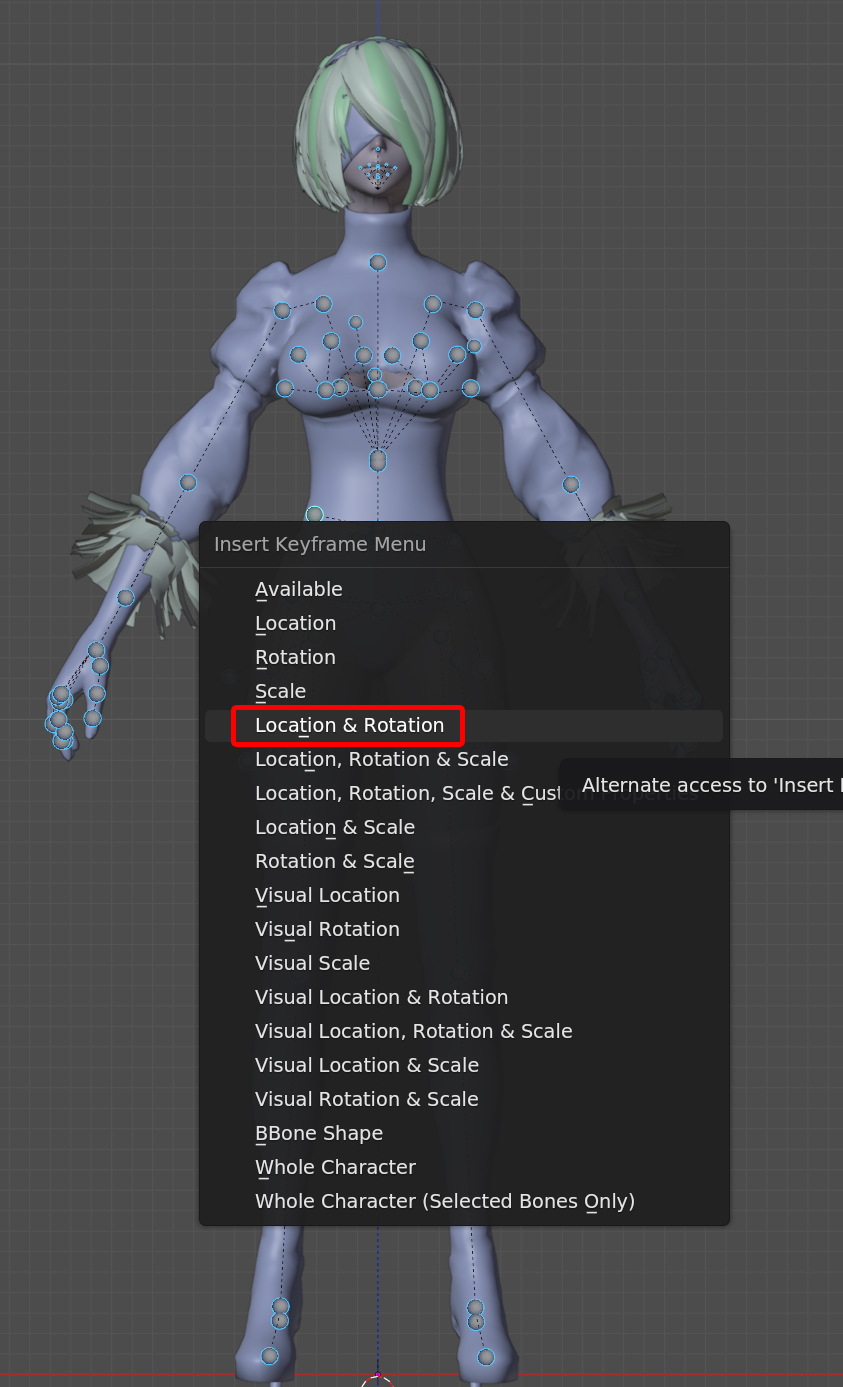
 Press i and insert new keyframes for Location & Rotation.
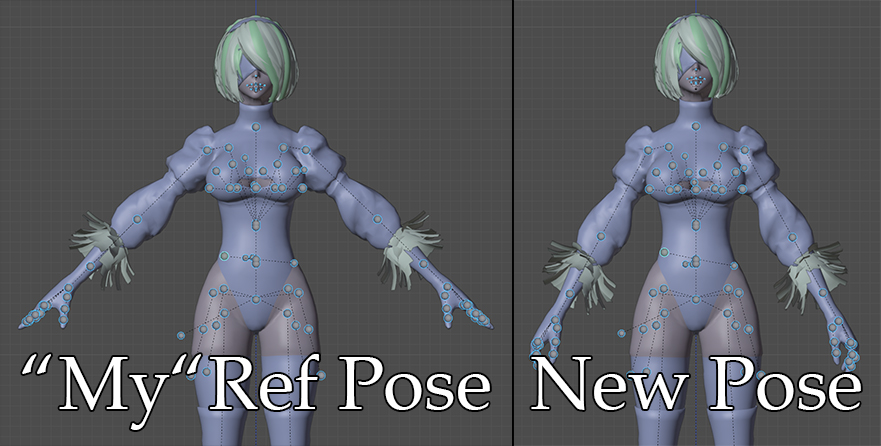
 You now have the proportional pose required for the qc file.
 Assuming you actually did the posing of the armature correct to begin with.
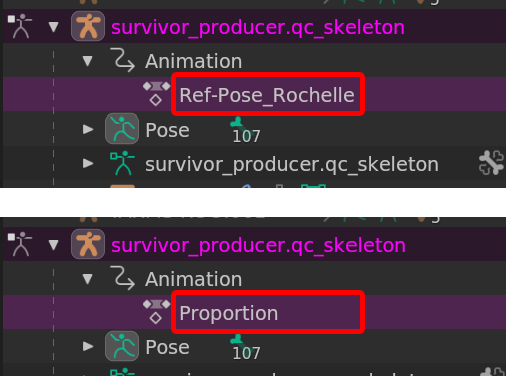
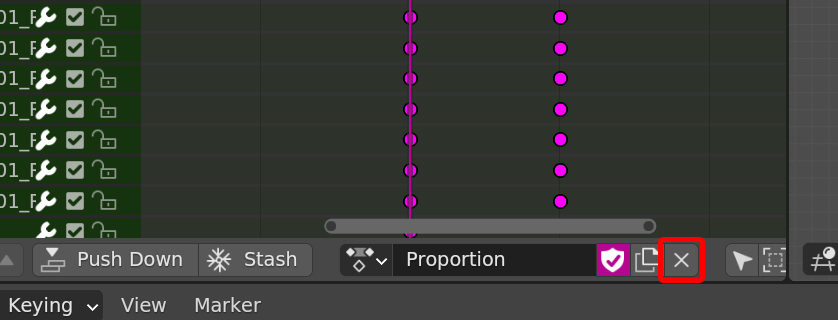
After exporting, you can either keep or delete the this pose.
DO NOT APPLY THIS POSE!
Find the used "includemodel" mdl and decompile it with only the Declaresequence option to get your required declaresequence files.
If you have multiple used includemodels, decomile all of them and use the declaresequence.qci's in the same order as their respective includemodel's are listed.
Gmod doesn't even need one. All proportion changes come first, before the includemodel.
Usually, i would tell you to do the following:
Open the DeclareSequence.qci and delete or comment all $DeclareSequence lines from the top to, and with, the Ragdoll Line.But the DeclareSequence files in my GitHup Repo are already been modified as such.
Most survivors only have two lines, but Francis and Louis have more.
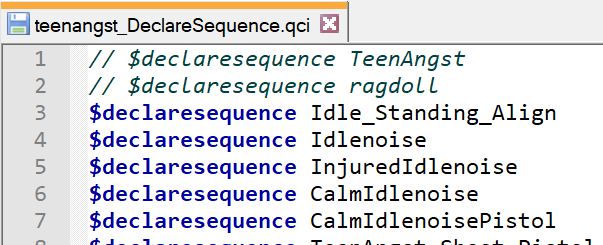
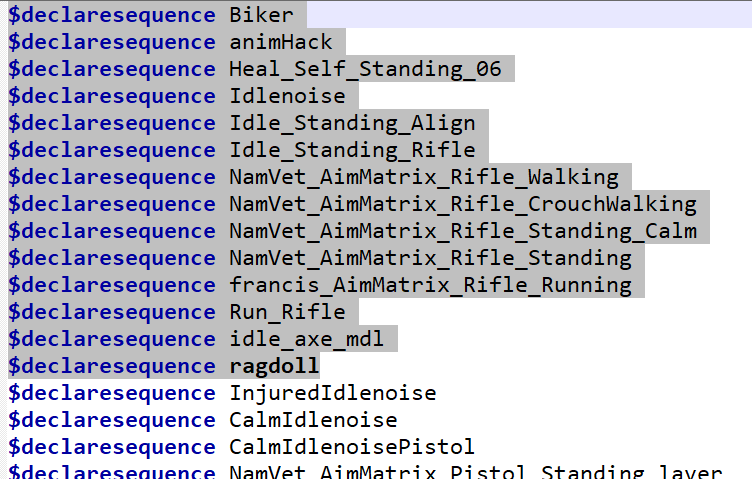
Except for francis and louis, because i made something special for them. More about that later. For Common Infected:
You must list the DeclareSequence.qci files in the order as their respective includemodels.
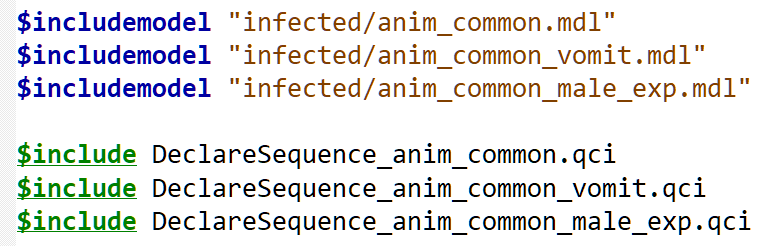
The Declaresequence is required to force the $includemodel sequences to be loaded before our proportion changing sequences (which we'll add shortly).
Not doing this will cause the sequence order to be offset by two sequences, causing animations to be broken in online games. Such as seeing the "charger carry" sequence when walking.
It is of immense importance not to mess this up!
Either the "***_$DeclareSequence.qci" from the Declaresequence_Survivors/Infected folder.
Or if you want to use another players anims (or port a mod to another player) use the "Anims_RigTo***_Replace***.qci" from the "Declaresequence_Anim_Swap" folder.
Open your QC file again and scroll to the bottom.
Add the following lines below all the sequences you have:If these lines are not below your existing sequences, you'll break all anims in online gameplay.
$include ****_$DeclareSequence.qciReplace the ****_$DeclareSequence.qci in the block with whatever qci you want to use.
$sequence Proportion_Trick anims/Proportion.smd delta subtract Proportion_Trick 1 numframes 1 autoplay noautoik
For Louis and Francis
in "Proportion Pose Creation", i mentioned i made something special for Louis and Francis.
Those two guys got a few of their anims inside their own models. Which means, they already contain a whole awful lot of $declaresequence lines.
If you want, check out the folder "New_Includemodels" from that downloaded Github Repo.
That folder contains "anim_biker_new.mdl" and "anim_manager_new.mdl".

Do not forget to ship that file alongside your survivor_biker.mdl or survivor_manager.mdl!
Procedural Bones (HelperBones)
Models without custom proportions, may not need modified procedural bones.
If you're making a headhack, you may skip ahead to 1st Compile & materials.
Procedural bones are the best thing since the other best thing since sliced bread.
They help to move parts of the model without those bones being animated themselves.For example: The animations in L4D2 only rotate the hand bone into what position it should be.
Then the procedural wrist and ulna bone figure out in what way they need to move so that the model looks good.
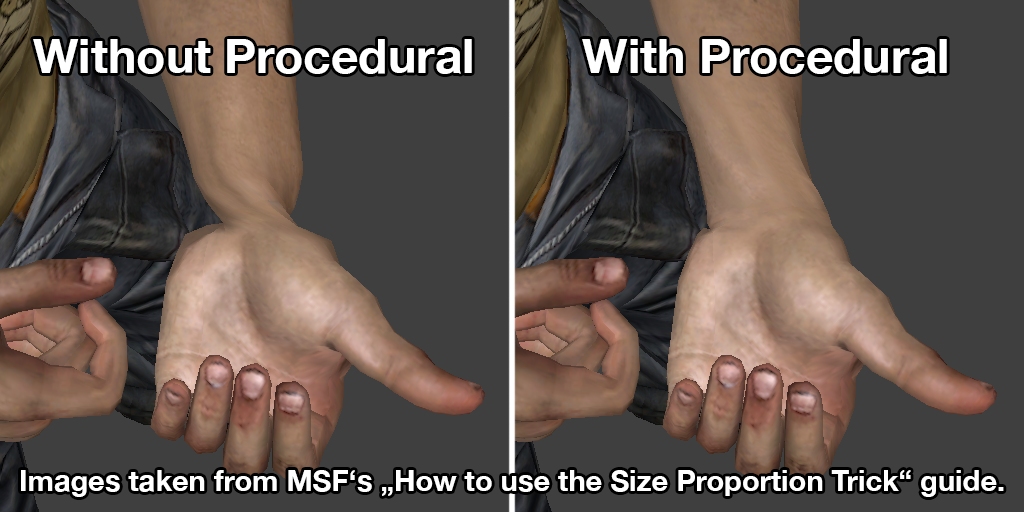
You could make entirely new procedural bones, or modify the existing VRD file.
Making new ones is useful to make sure your specific arms will look good, or when you need to add more bones for coats, skirts or other things.
Follow either the guide in step 9.0 and then skip ahead, or follow the rest of this section.
https://steamcommunity.com/sharedfiles/filedetails/?id=3485026924
The following information is taken from MSF's guide, but explained in a more concise fashion.
If you want to read MSF original guide, look here:
https://steamcommunity.com/sharedfiles/filedetails/?id=887935033
You decompiled the original survivor and got a .vrd file.
Open both the VRD and your own models SMD file in Notepad++
Of course only for the helper bones you are actually using.

Those last three numbers are "Transitional values". For when the Helper bone would move to a different location. But keeping the movement value will mess up the proportions we got, because all bones are moved to a completely different location already by our proportion changes.
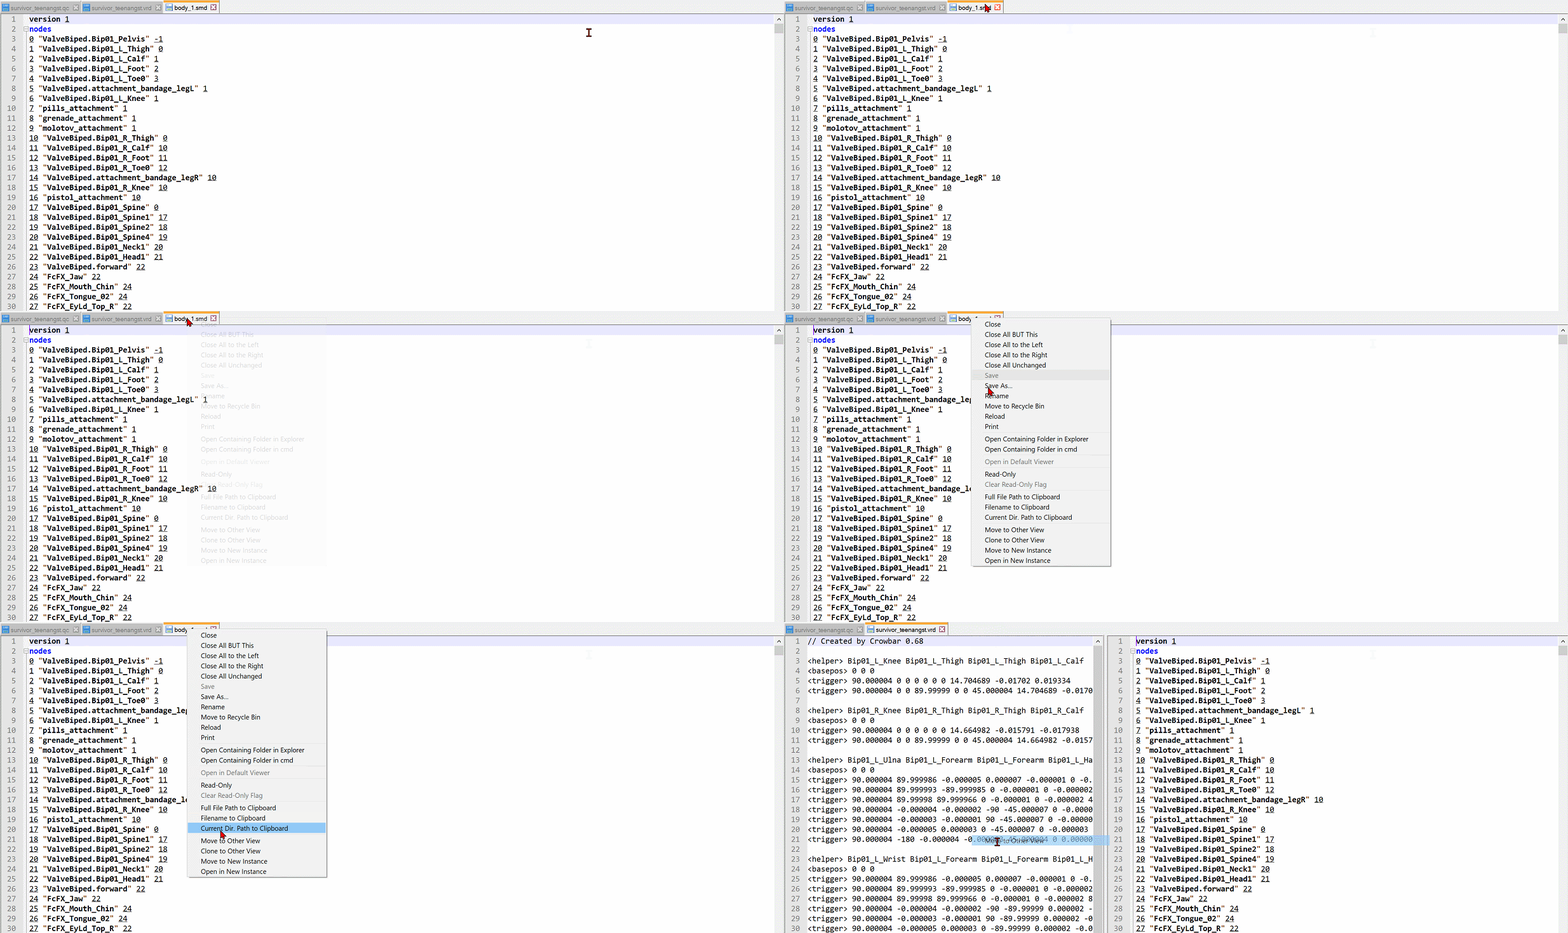 The first bone name in the <helper> line is the name of the helper bone.
 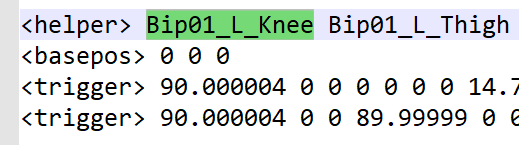 Look for that bone name in your models SMD file.
You can see the number 6 on the very left of that line.
Meaning it is bone nr.6. Your numbers may vary.

Scroll down in the SMD file to the "skeleton" part.
Look for the one line that also starts with the number your bone had.
That line is the bone location information.
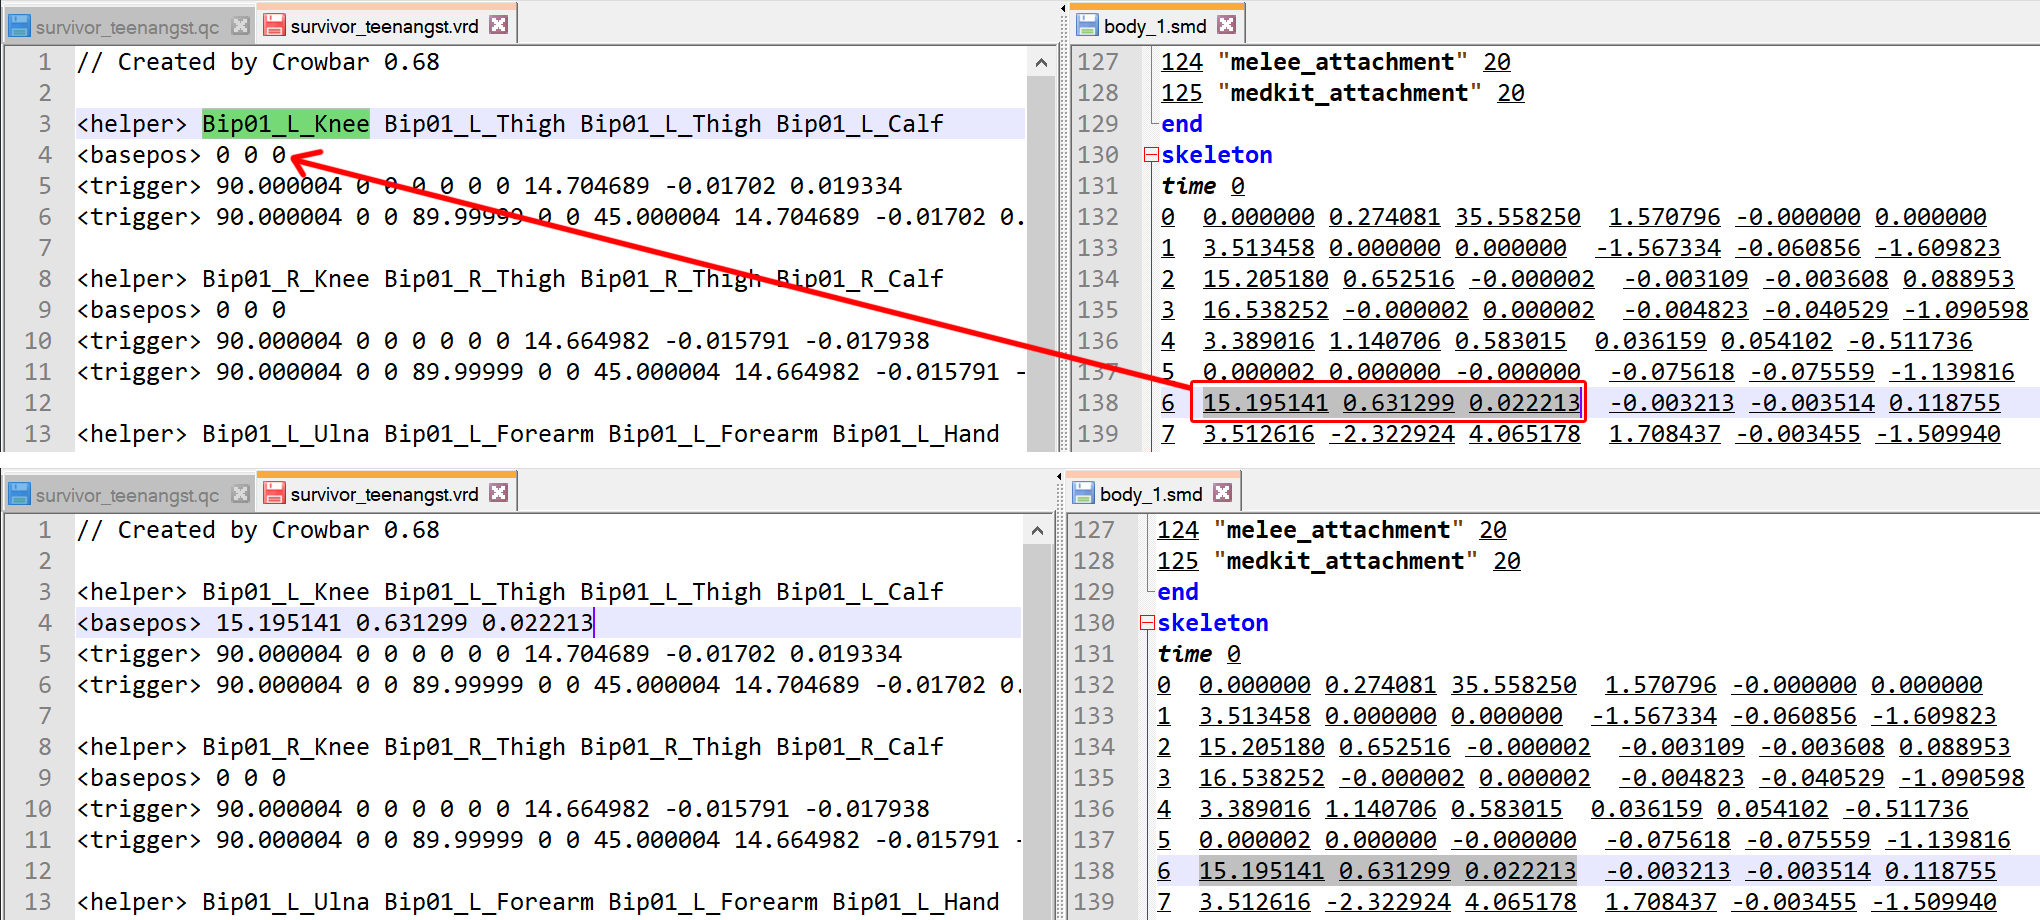
Do that for every helper bone you had used.
Avoiding animation issues when online
Now before we continue make sure your QC's animation and models are set up in this order.
The proportion sequence must be the absolute last sequence in the entire qc, after everything.
Not doing this will cause the wrong animations to play online.
All of this is at the very bottom of the entire QC file.
- Player ref sequence (Gambler, Producer, Manager, ect)
- Ragdoll sequence (except for louis and Francis, but you got my includemodel for that)
- Includemodel(s)
- Declaresequence(s)
- Proportion animation sequence line
- If you used UnlockDefineBones, your model files are dead last.
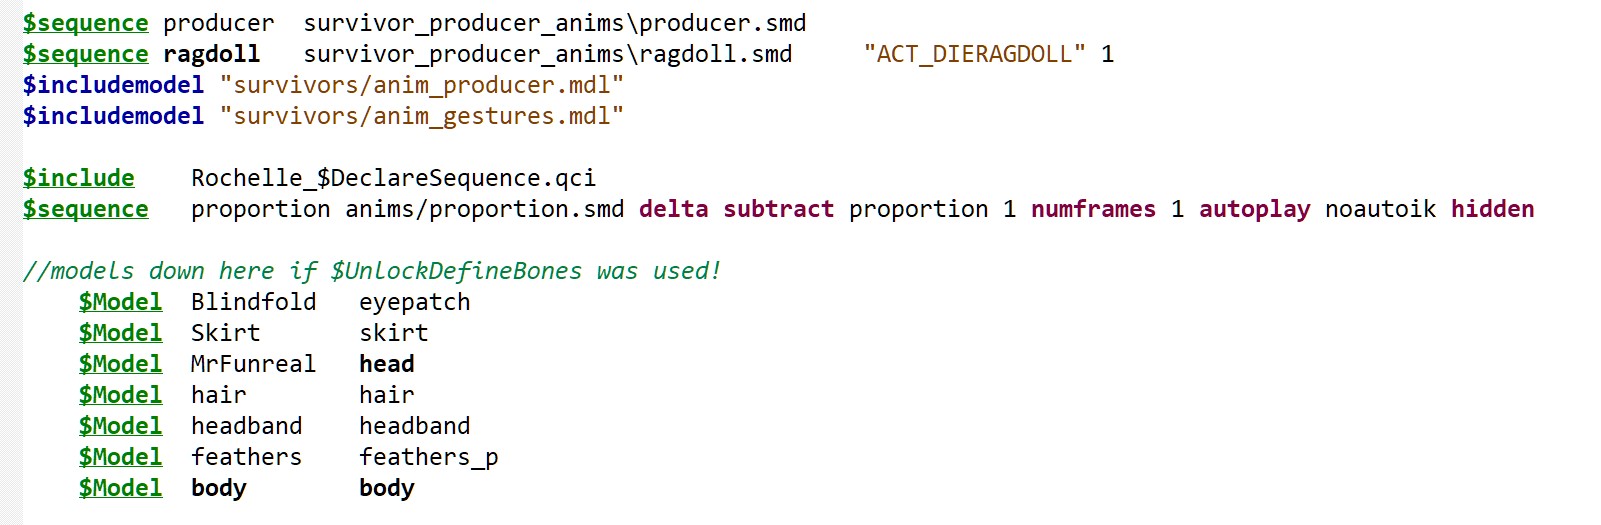
They may require deleting lines from your qc file, or reorder the anims. At least Francis does.
So check those files again to make sure you have not accidentally changed the order of the anims, as this would also break anims online.
As an example, "Rig To X Replace Francis" has the Ragdoll sequence further down into the QCI, as opposed to it being the second sequence in the QC.
For an Animswap method, your QC should look like this:- Including the animswap qci, after you read the content of the qci.
- proportion pose, if it exists.
- If you used UnlockDefineBones, your model files are dead last.
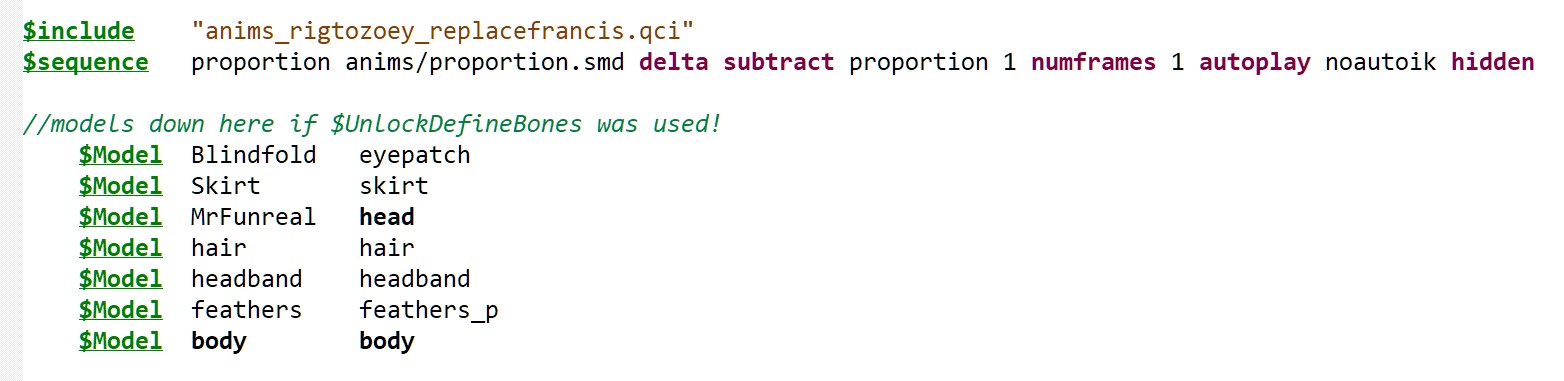 Whilest the Animswap QCI needs its "Idle" sequence and Ragdoll sequence be swapped by what you had in your qc file.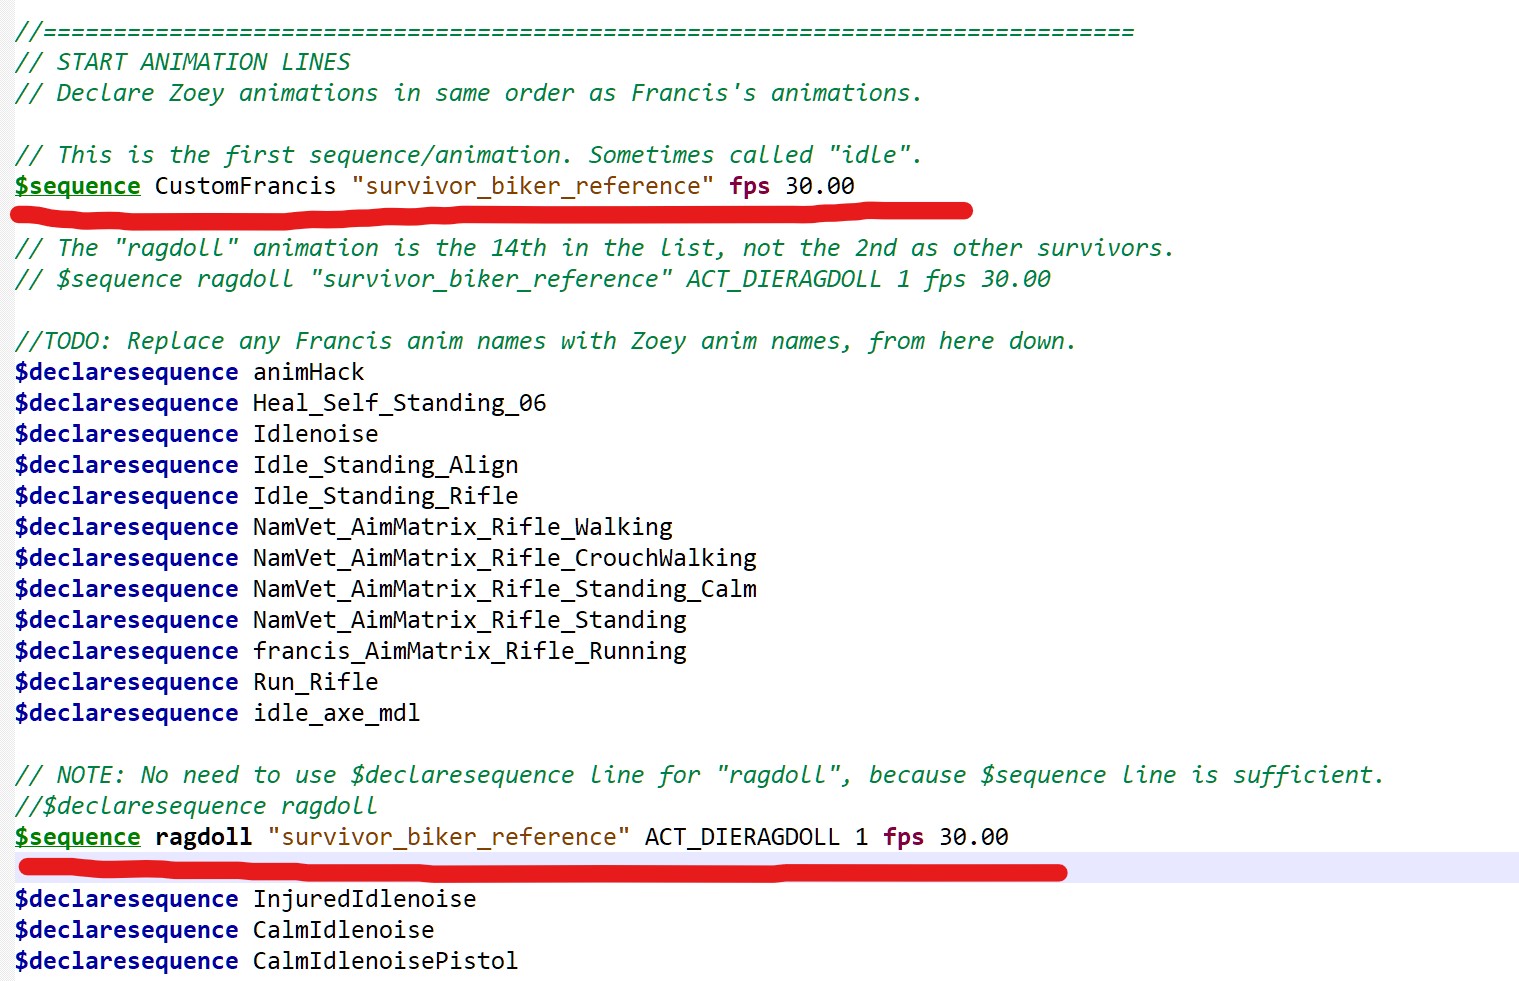
1st Compile & materials
Before you compile anything I would very strongly recommend you to create a new content folder for l4d2, to separate custom content from original content.
Learn how to do this here:
https://steamcommunity.com/sharedfiles/filedetails/?id=1507939076
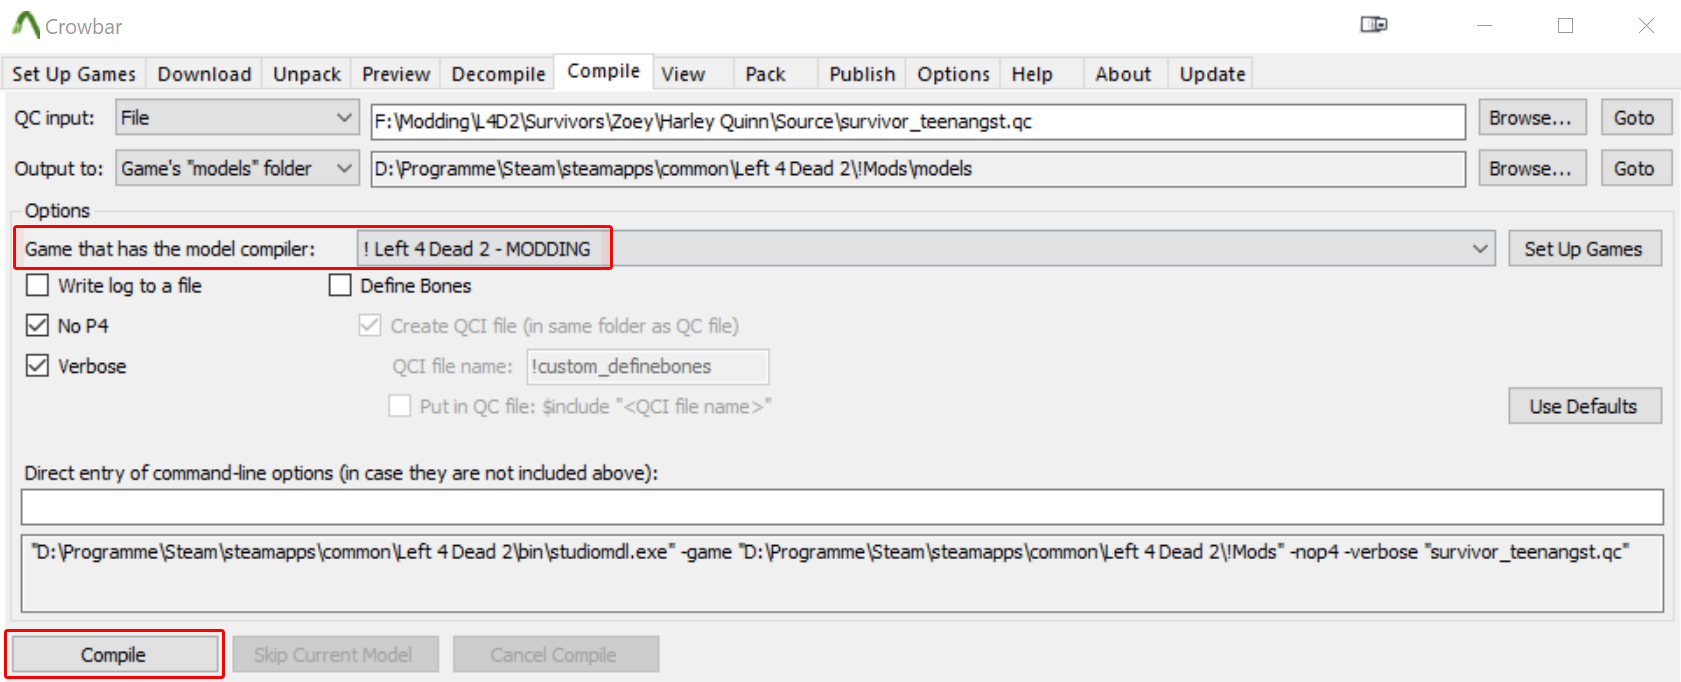
In that tab, make sure it compiles for the correct game' MODDING folder you made.
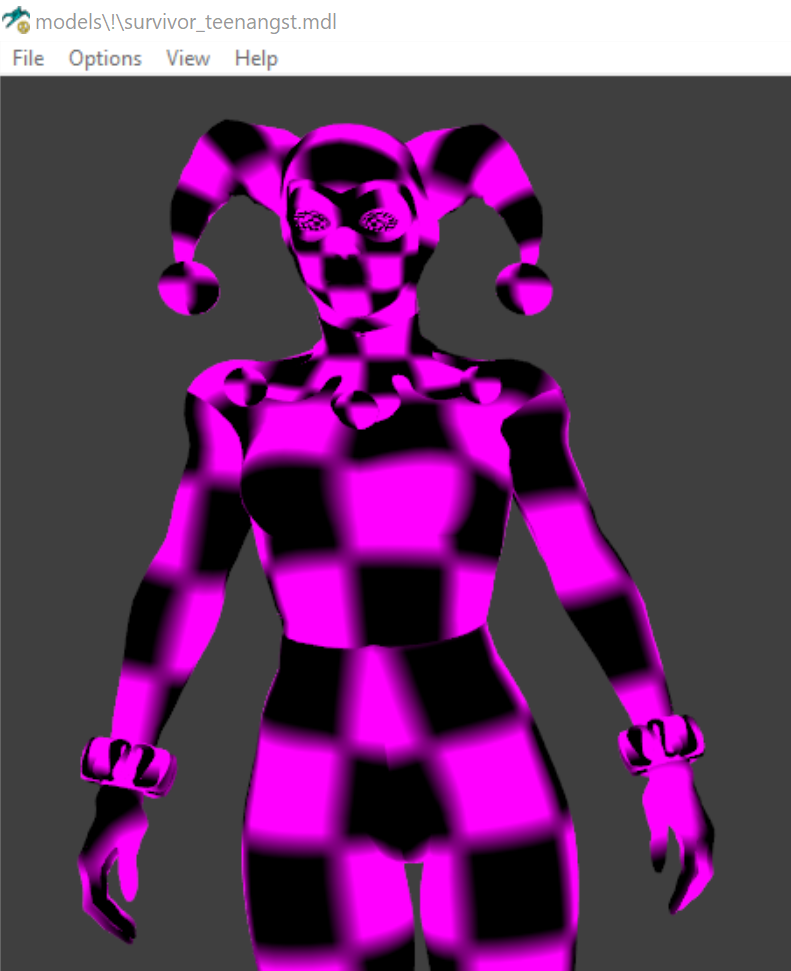
Click "File - Load Model" and then search your model.
It will be pink and black. That's Source Engines way of telling you that it's unable to find/load textures.
Go to the "Sequence" tab and select a few animations to see if the model works and looks okay.
Or go one folder out of that and make one.
This Root folder will later end up being the addon itself. Give it any name you want.
I'm making Harley Quinn for Zoey, so I'll call my "root" folder "Surv_Zoey_Harley_Quinn".
Inside the root create a "Materials" folder.
Inside that materials folder, build whatever folder tree you had chosen in the qc's $cdmaterials line.

The reason we're starting this root folder now is so that the textures will already be packed in the right spot.
I'd suggest naming the textures to whatever material name you had chosen in blender before you even convert them to vtf. For the eyes you'll only need one texture, since both eye materials can use the same texture.
For Common Infected:
Common Infected have special materials, because they use a funky color system.
This guide explains how those textures are set up. If you are not making a CI, ignore this.
https://steamcommunity.com/sharedfiles/filedetails/?id=1567031703
You could keep using the original player eye textures, so that "custom eye" mods are compatible.
But if you want an accurate port of your model, you'd need to port its eye textures too.
Important is just that eyes must be a separate texture with nothing but the eyeball on it.
If you want to port your eye textures:Open your eye texture in an image editing program.
Import one of the original eye textures, which can be found in "materials\models\survivors"
As you can see in the GIF below, my iris is as large as the pupil is. Scale it to match.
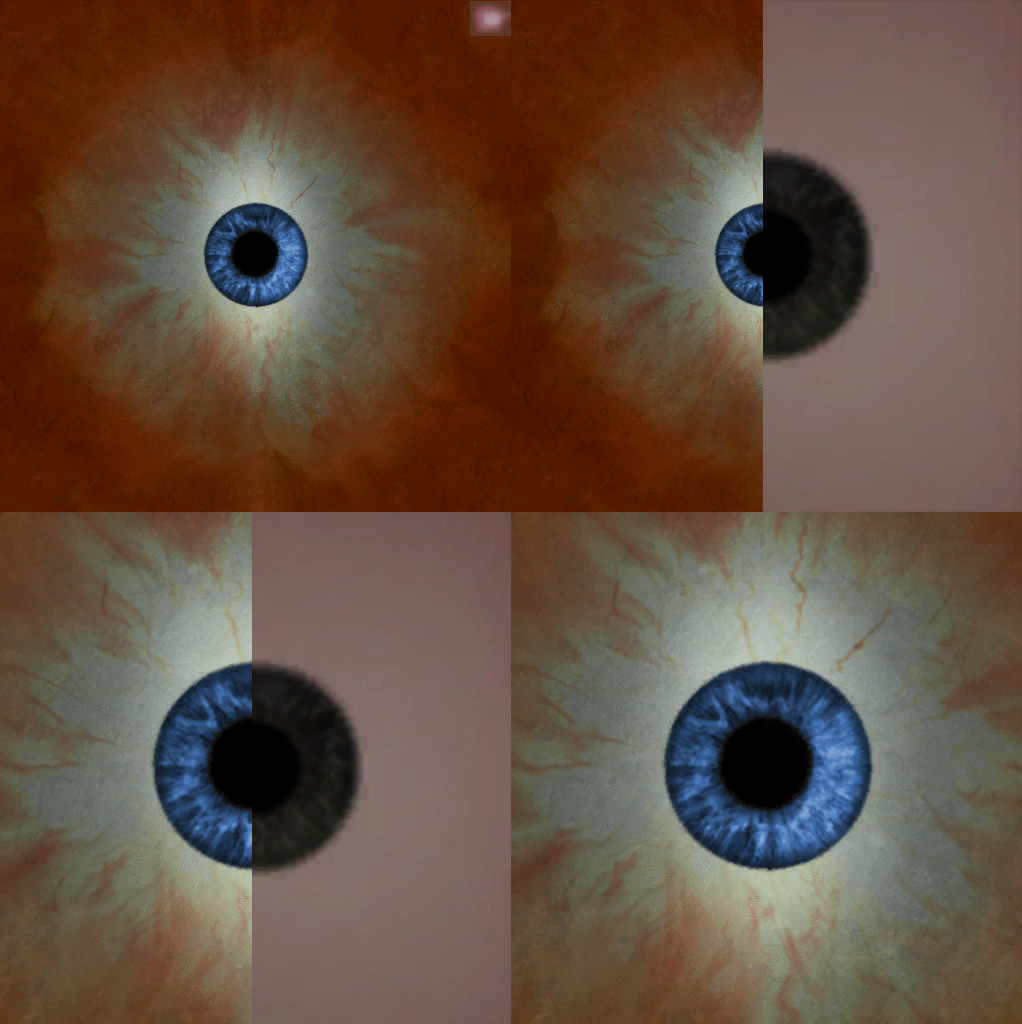 Not mathcing scale causes this weird sperical line to appear on the eyes.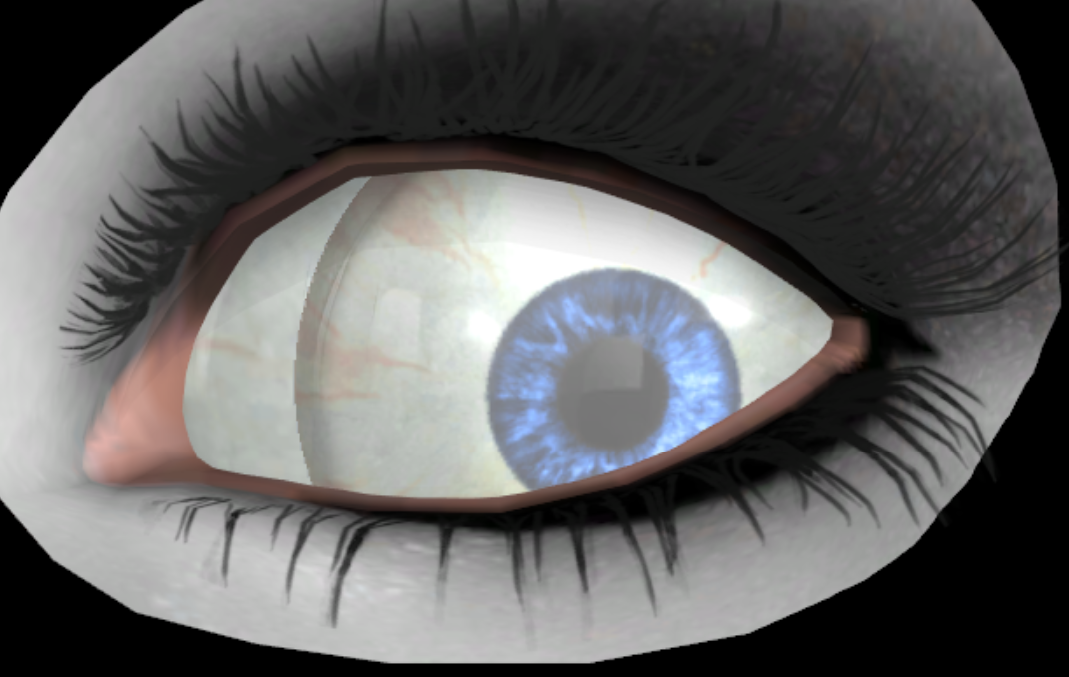
You can convert an entire folder worth of textures to VTF.
Click "Tools - Convert Folder" and pick an input folder, output folder and from what filetype it should convert to VTF.
You can also pick the "Create VMT Files" option.
When set up, click the "Convert" button and wait for it to finish.
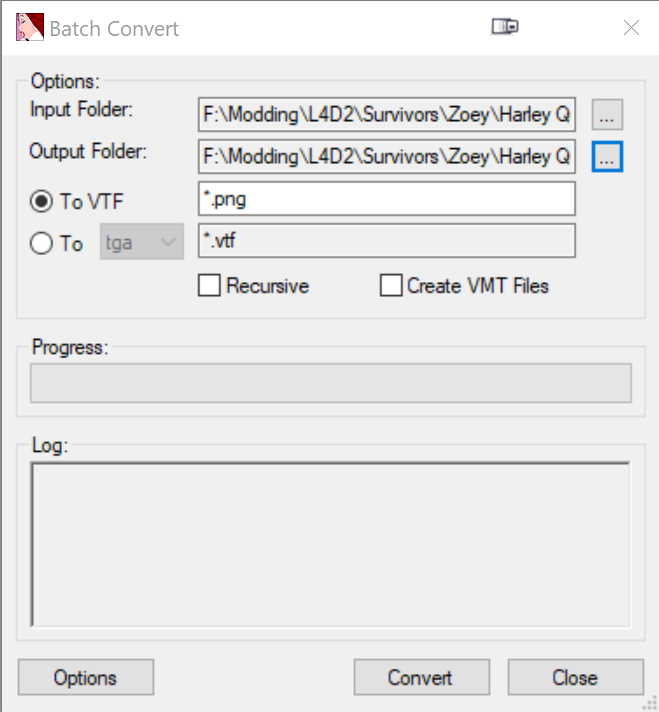 Once finished, visit the folder where the files appeared.
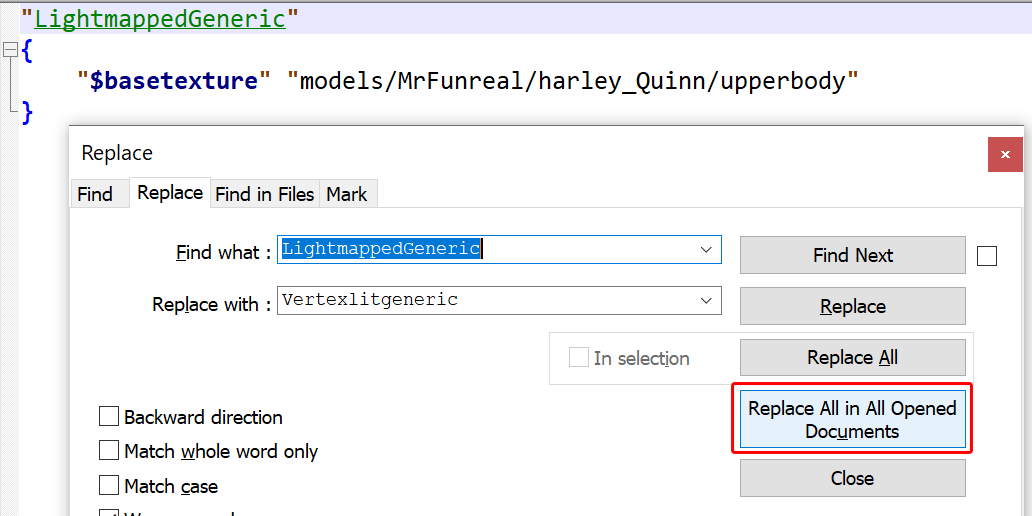
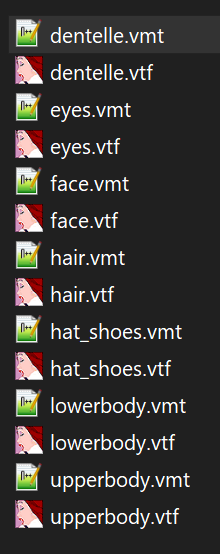 Open all VMT files and change the shader from "LightmappedGeneric" to "VertexLitGeneric".
Just drag all of the vmt files onto Notepad++ and use its replace feature to replace "LightmappedGeneric" in all files at once.
While you're at it, If your model is replacing the Witch, add $allowdiffusemodulation 0 to all of her VMT files. Else the game turns her a funny color because she runs on the same "coloring" setup as all the CI
Note:
Super high poly models may crash the game when pounced by hunters.
Adding $nodecal 1 to the vmt files will prevent those crashes.
Decals spawn on separate meshes distanced from the model to prevent Z-fighting[en.wikipedia.org].
Those "decal meshes" have the same tris count as the mesh they are landing on, upping the triscount. Every decal seems to have its own "decal mesh" to up the triscount even more.
Another fix:
Add a low polygon body over the highpoly, turn it invisible and allow it to show decals.
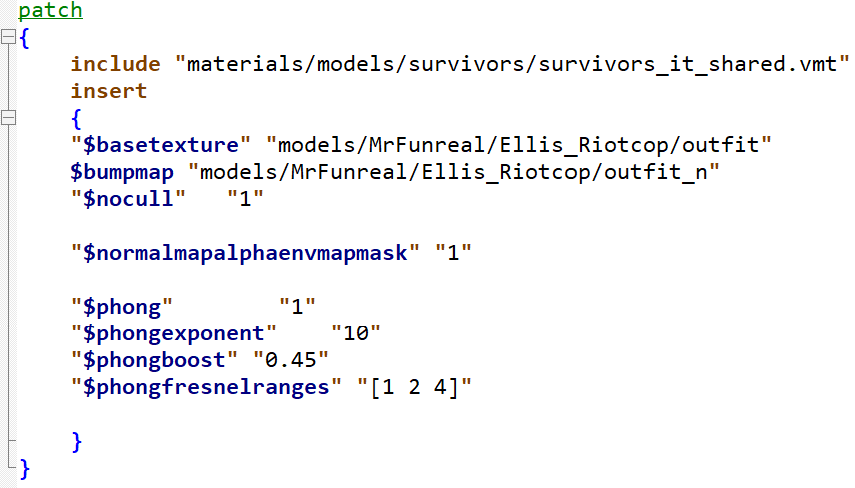
Textures will only show on one side of the mesh, but some things like hair or sunglasses would need texture on both side of the mesh. This can be done without adding mesh to the other side. Just adding "$Nocull 1" to the VMT file is all you need.

Note:
This does not render the texture on both sides with their own shadows and decals (bulletholes)
It only lets you see through the usually invisible backside and see the other side, like a window.
Any shadow and decal on the front will be seen on its back aswell.
As explained in Step 7.06, you can do it with one VMT file, or two.
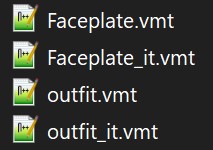 Add a second } on a new line at the very end of the _IT VMT.
Swap the "Vertexlitgeneric" with this:
Add a second } on a new line at the very end of the _IT VMT.
Swap the "Vertexlitgeneric" with this:
No matter if you used dedicated _IT materials or not, the materials with vomit look like this now.
Fun fact: It is called IT texture because of "Tag, you're it"
These textures are basic right now, you can make them look nicer anytime you want.
It's normal that the eyes are broken right now. They'll be fixed once we do the eye tracking setup.
Yes, every single possible reason. I got at least eight people who said this video was useless. But once they sent me their files to check i simply pointed out which step they had ignored.
CI Materials
This section is exclusively for the CI materials.
Ignore this if you're not doing CI models.
If you use the VertexLitGeneric shader, you'll get square shadows.
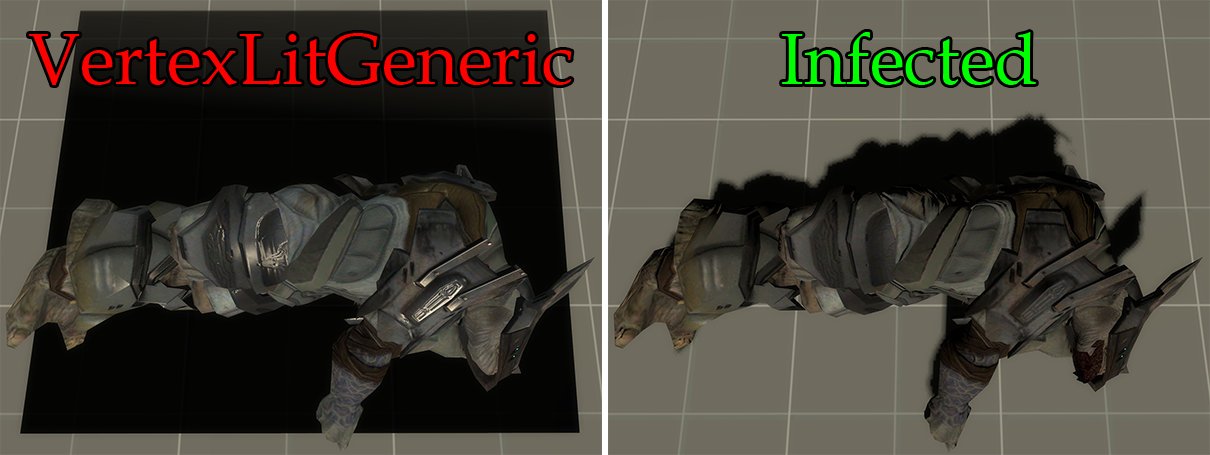
Here's a basic setup that you can just copy paste to get basic materials for your CI:
1. Create a vmt named "!Shared.vmt" containing the following:You can change the values to your liking
The infected shader does not allow for all the options VertexLitGeneric allows.
Rimlight for example does not exist.
Check the VDC page linked in the "Shared.vmt" to check which parameters are allowed.
The commands "Wounded" and "Burning" are only used for the damage variations.
Wounded being for gibbing, when a limb is cut or shot off. Most mods don't use it.
"Burning" is, obviously, when the CI is set ablaze.
These variations must be used in copies of your vmt with the _wounded or _burning suffix.
Meaning you'll have up to four copies of the same material, just with the flags set to 1 each.
If you do want to use any of the extra variations you must keep all the texturegroups of the CI.
And i do mean ALL of them. The CI have maybe up to 80 texturegroups. And you must keep all.
The gibbing system is super weird and relies on the amount of texturegroups.
Having a different amount of texturegroups causes the gibbing system to break in online games.
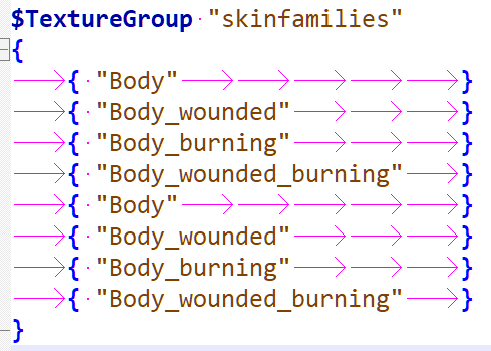
As you can see in the image above, i got the materials listed twice. Because the vanilla model (common_male_dressShirt_jeans) had that many skingroups. So we need to keep the amounts the exact same as well. Furthermore, wounds will pretty much just never work, unless you replace every single CI with the same-ish body and then create your own gib models and change the cutout parameters.
You could just not have the wounded body and only have the burned ones like so:
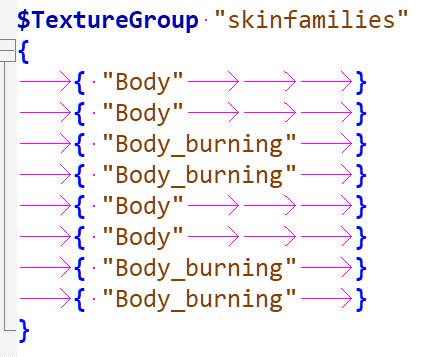
Note that the count of texturegroups is still the same as vanilla, except there's no wounded vmts.
However, if you don't want gibbing, gib models will still show up.
You'll need to set this utility mod as requirement of your CI mod:
https://steamcommunity.com/sharedfiles/filedetails/?id=3284205916
Model Testing
"weapons/Melee" for melee (only w_ affixed models)
Click "File - Unload Weapon" to remove a weapon.
If HLMV gives you an error when opening the folder, you can use crowbar to create the folders so that HLMV can "see" them properly.
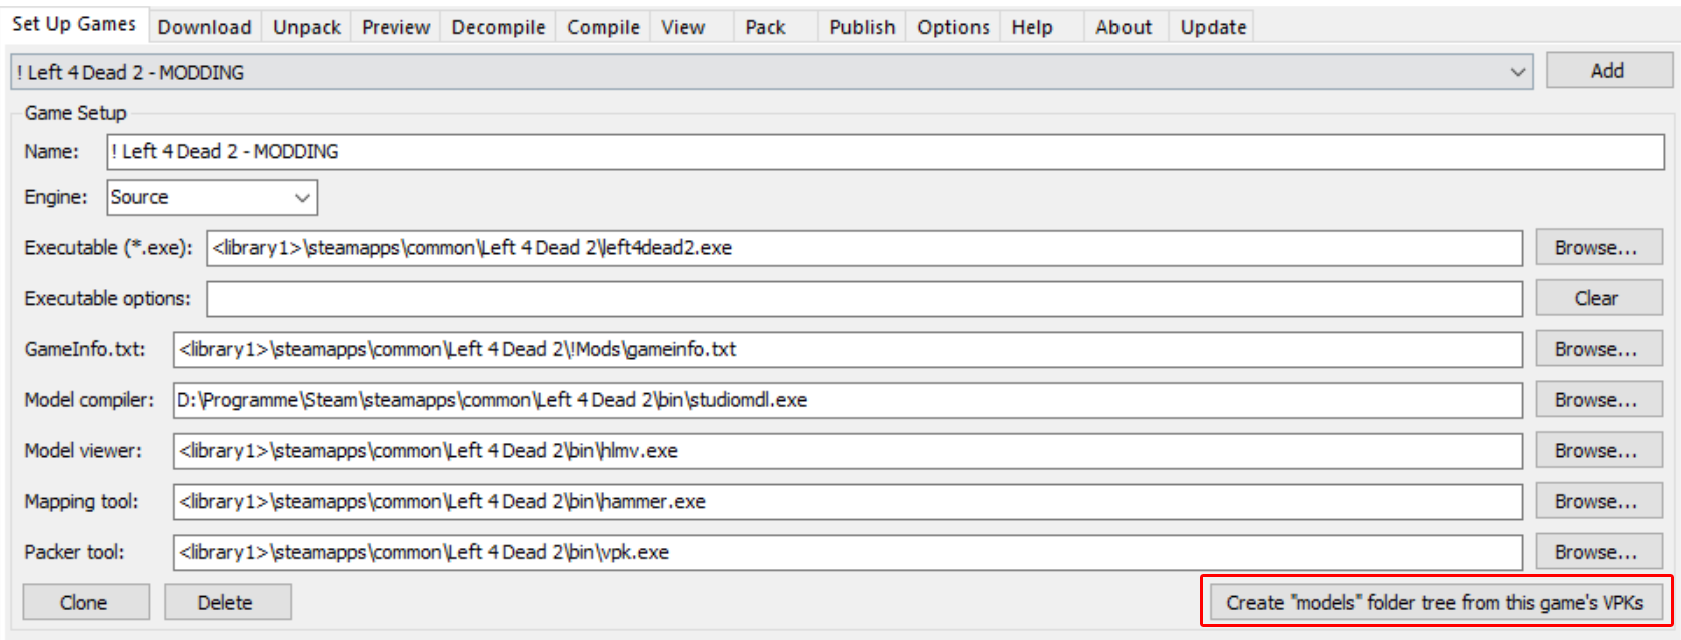
I'd recommend using the following animations:
- idle_standing_elites - test shoulder and armpit rigging
- any idle_crouching - test thigh and knee rigging
- any rifle animation - test left wrist.
- idle_standing_axe - test right wrist and weapon attachment.
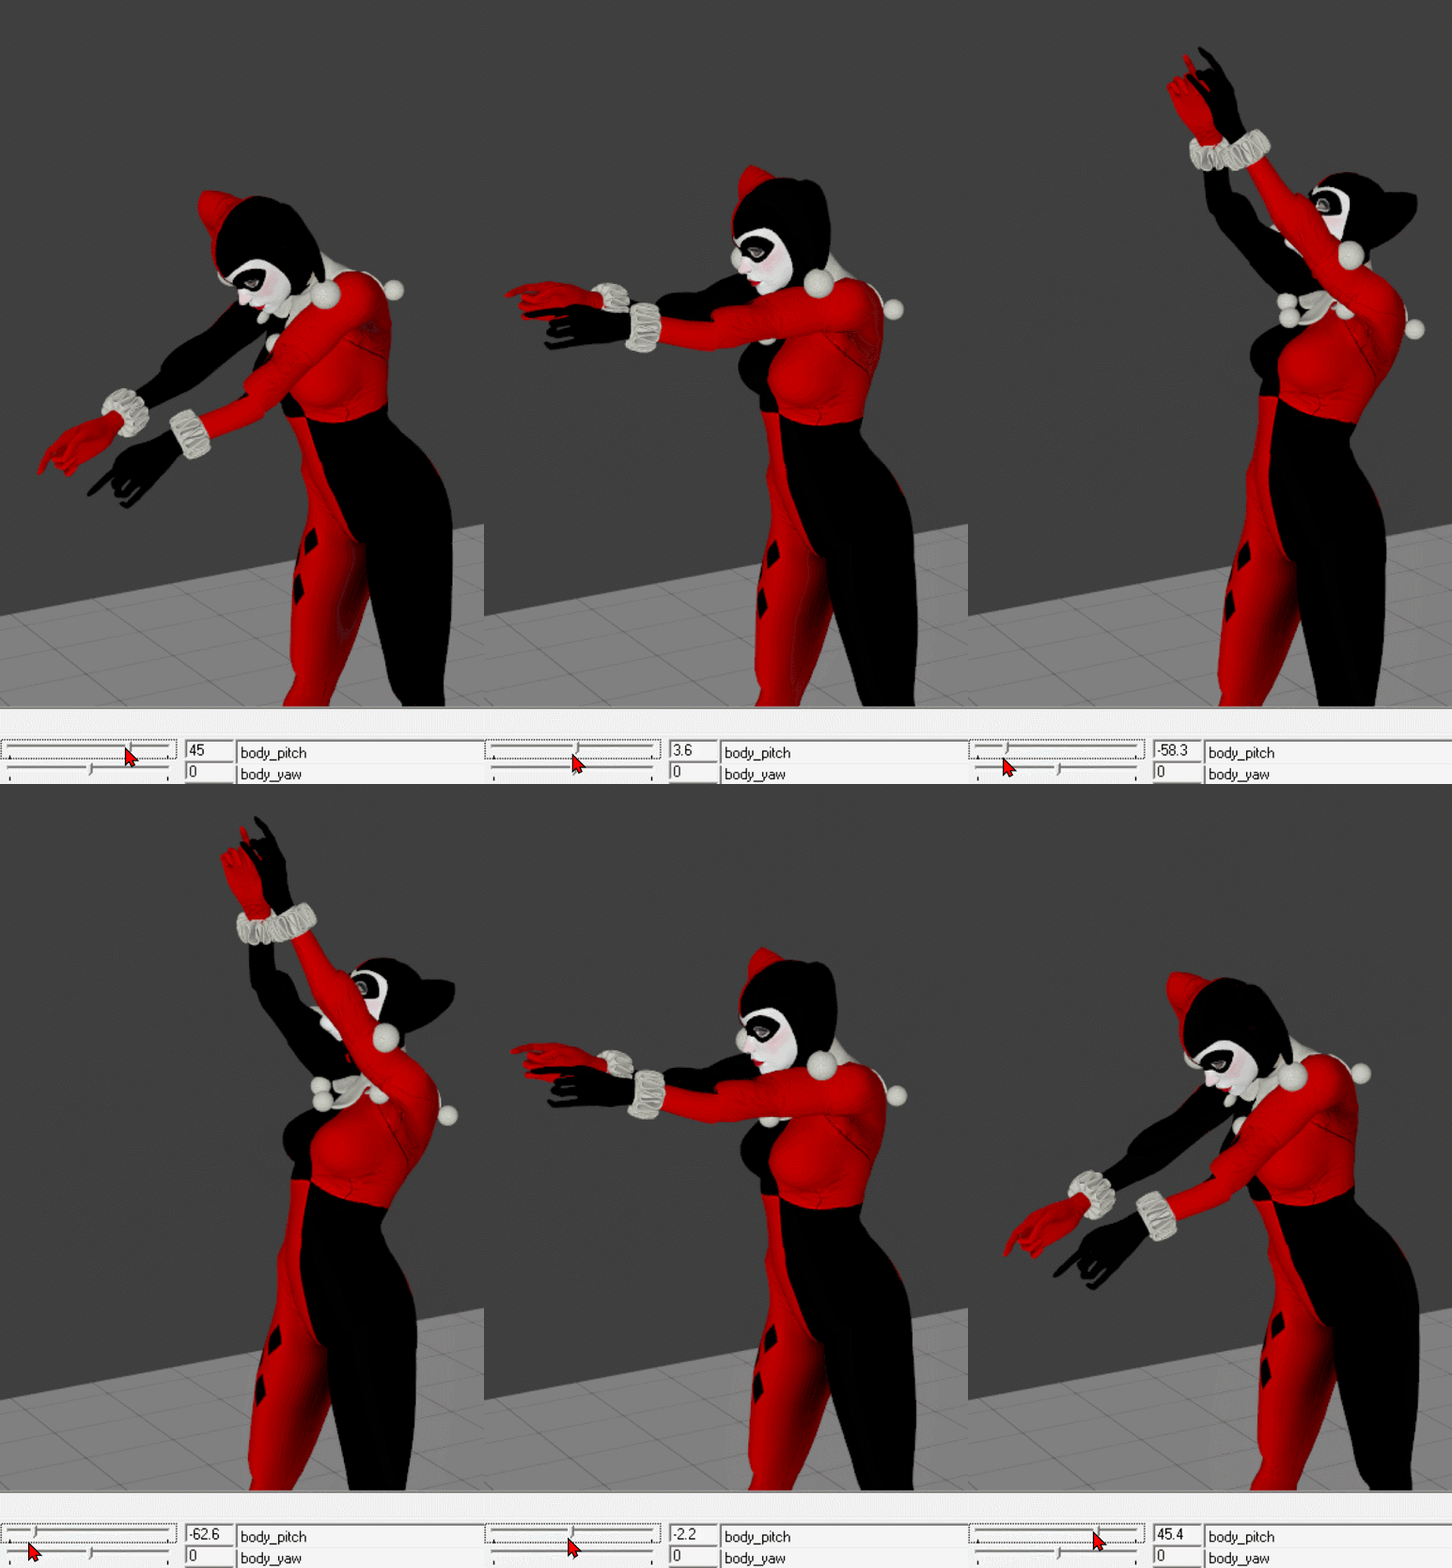
You can now either continue reading through the "Fixing" steps, or skip right through to the attachments, if you want.
═══════════════════════════
Fixing Thin Elbows/Knees/Thighs
In the image below i have super thin thighs, caused by insufficient weights on the thighs. You can pose the armature in a similar way as HLMV shows the trouble spot and then paint the weights onto the model. Because It is possible that the weights don't show exactly the same in HLMV. As it does for my trouble spot.
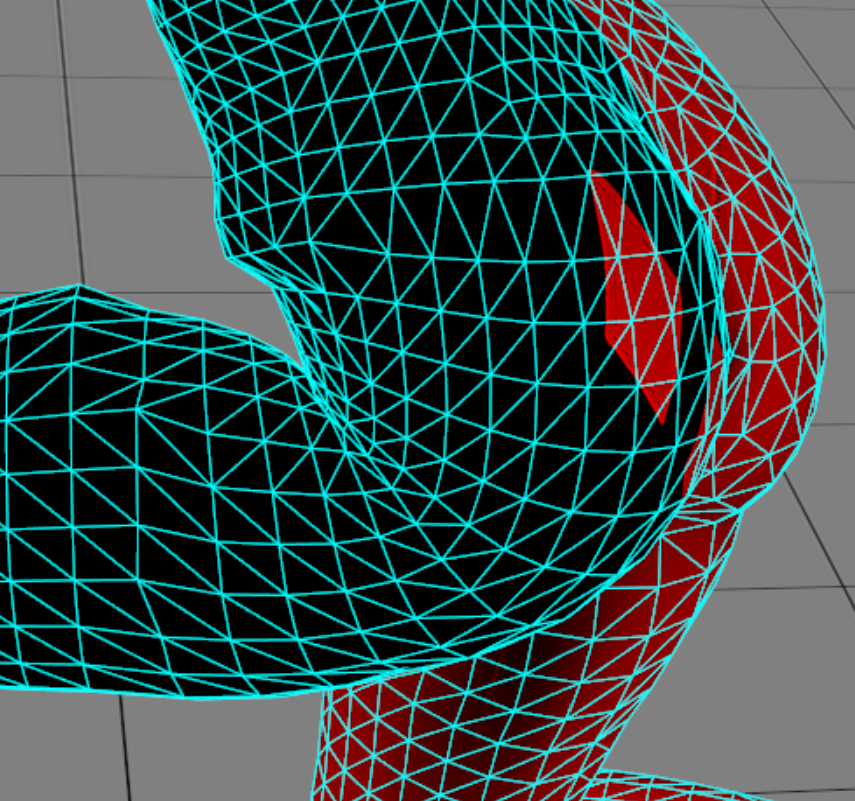
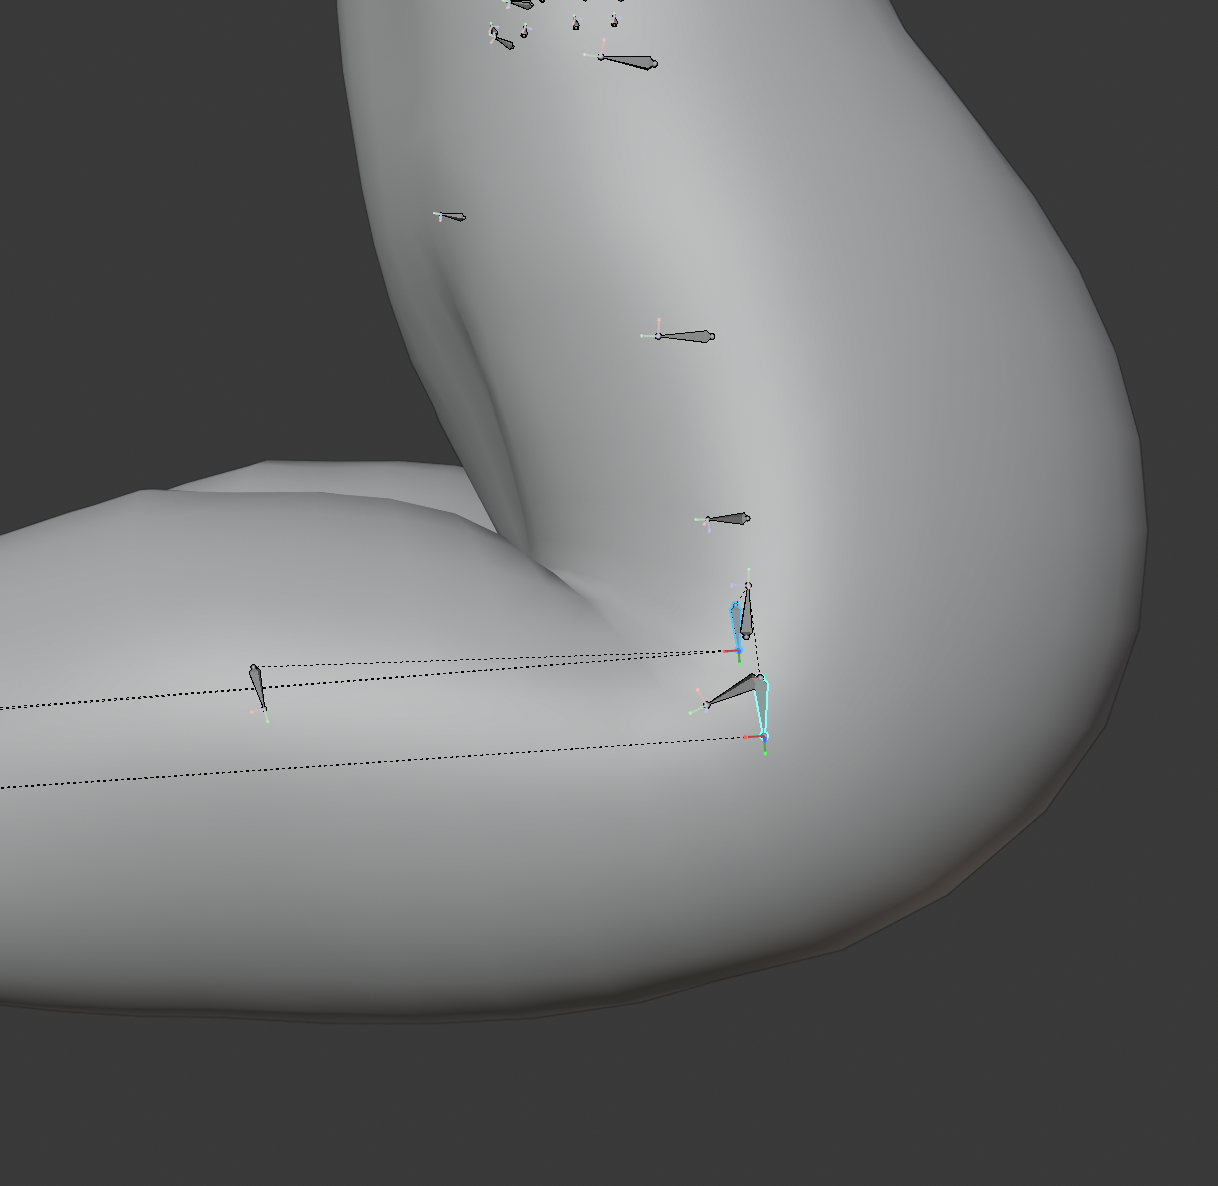
Note the pointy bit above the thighs in HLMV.
If a vertex is too lightly rigged to bones, blender will accurately try to compute stretch with this very light weight painting.
But the source engine isn't good at that part and the weights will look wonky. So all you'd need to do in those places is add weights to the nearest bone.
I've also removed weights from the thigh to undo the indent and now it looks better.
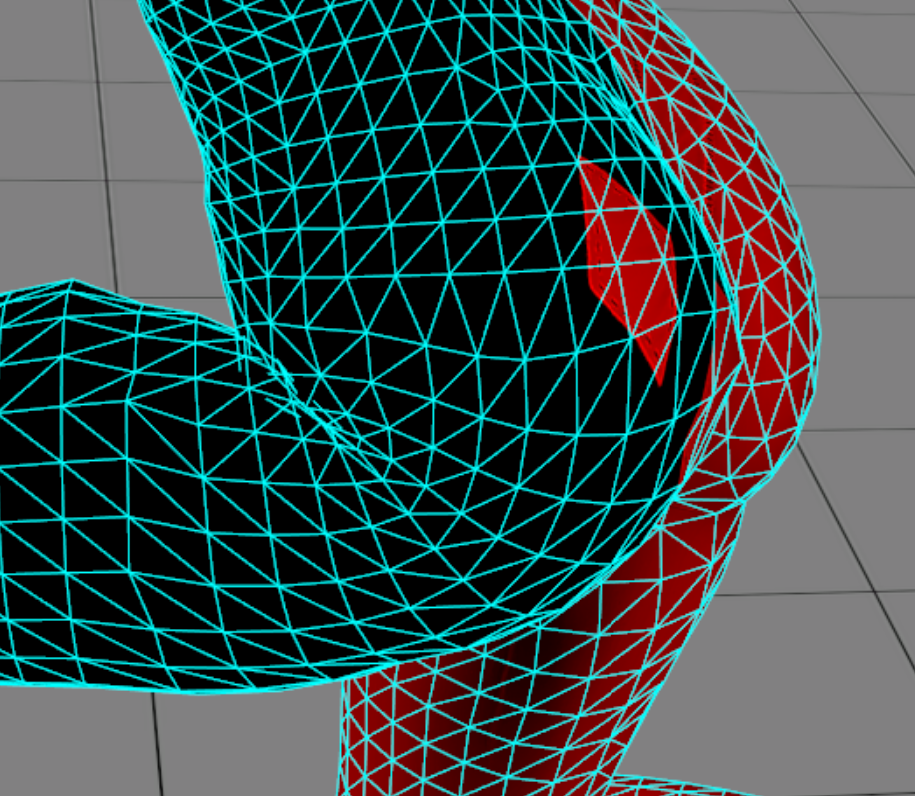
Also, the thigh can clip a bit into the pelvis when crouching, as you see in my image. That's not a problem, considering that every source engine character ever from Valve does that anyways.
You've already seen my weight paint video further up. That's the only help I can give you.
All you got to do is learn the weight paint and figure out which bones affect a bone too much and which affect them too little.
Attention:
If you pose the armature in blender to fix the weights, undo the entire pose before you export the mesh. The mesh will accept that new pose as rest pose, which sometimes will end up looking broken in HLMV.
Fixing "Inverted Normals"
This usually happens when you mirror a mesh in blender.
Example:
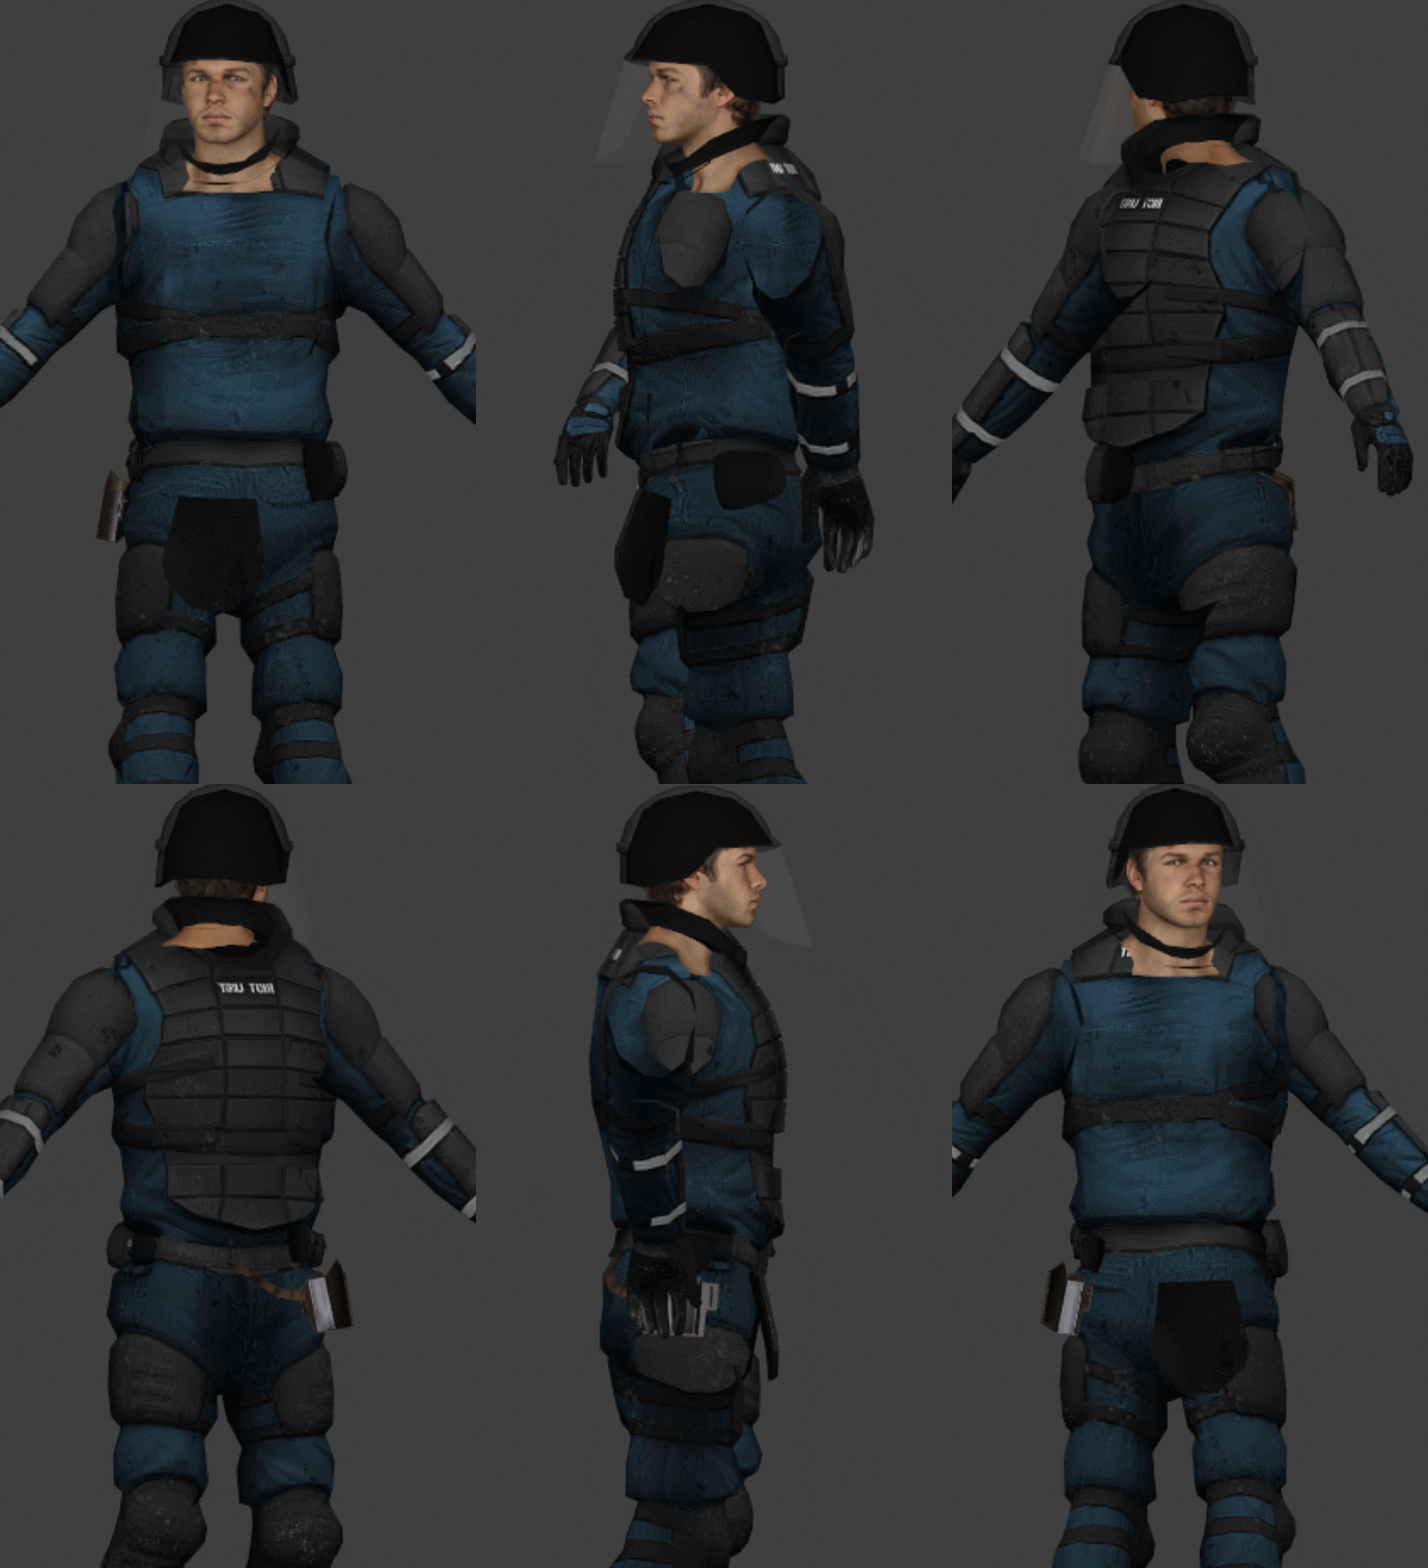
OOOhhhhh.... which way is he spinning?
Clock wise. Just look at his face...
Anyhow. that's caused by inverted normals.
It could be fixed by adding $nocull 1 to the vmt, but It will mess up your models lighting.
Instead, inside of blender, select the inverted mesh and press Alt & N.
The new window got the options to Flip your normals. press it.
You can also select the entire model and recalculate normals on all of it in case you're worried there's more flipped things you don't see. But doing that could very well also flip some normals the wrong way.
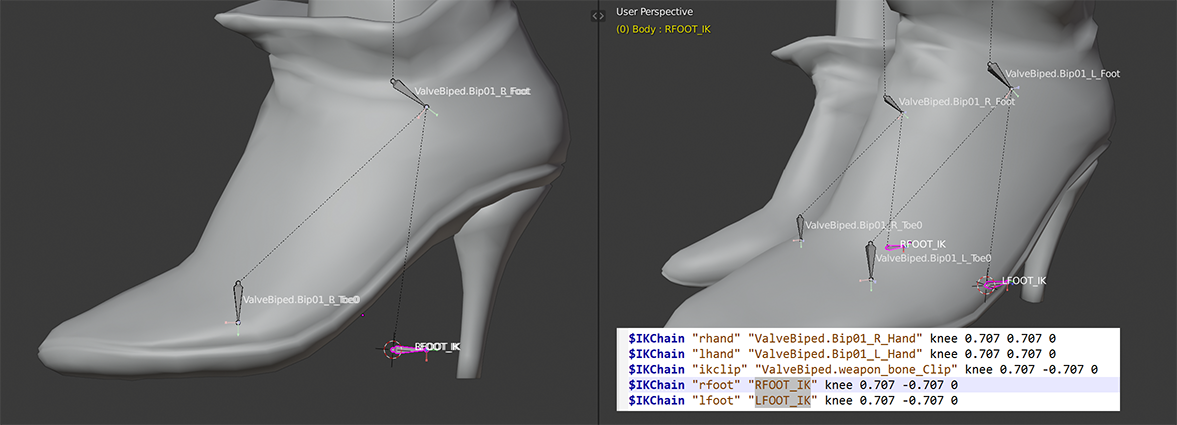
Fixing Feet (When using High Heels)
This can happen when you use high heels, or Satyr (Goat) legs.
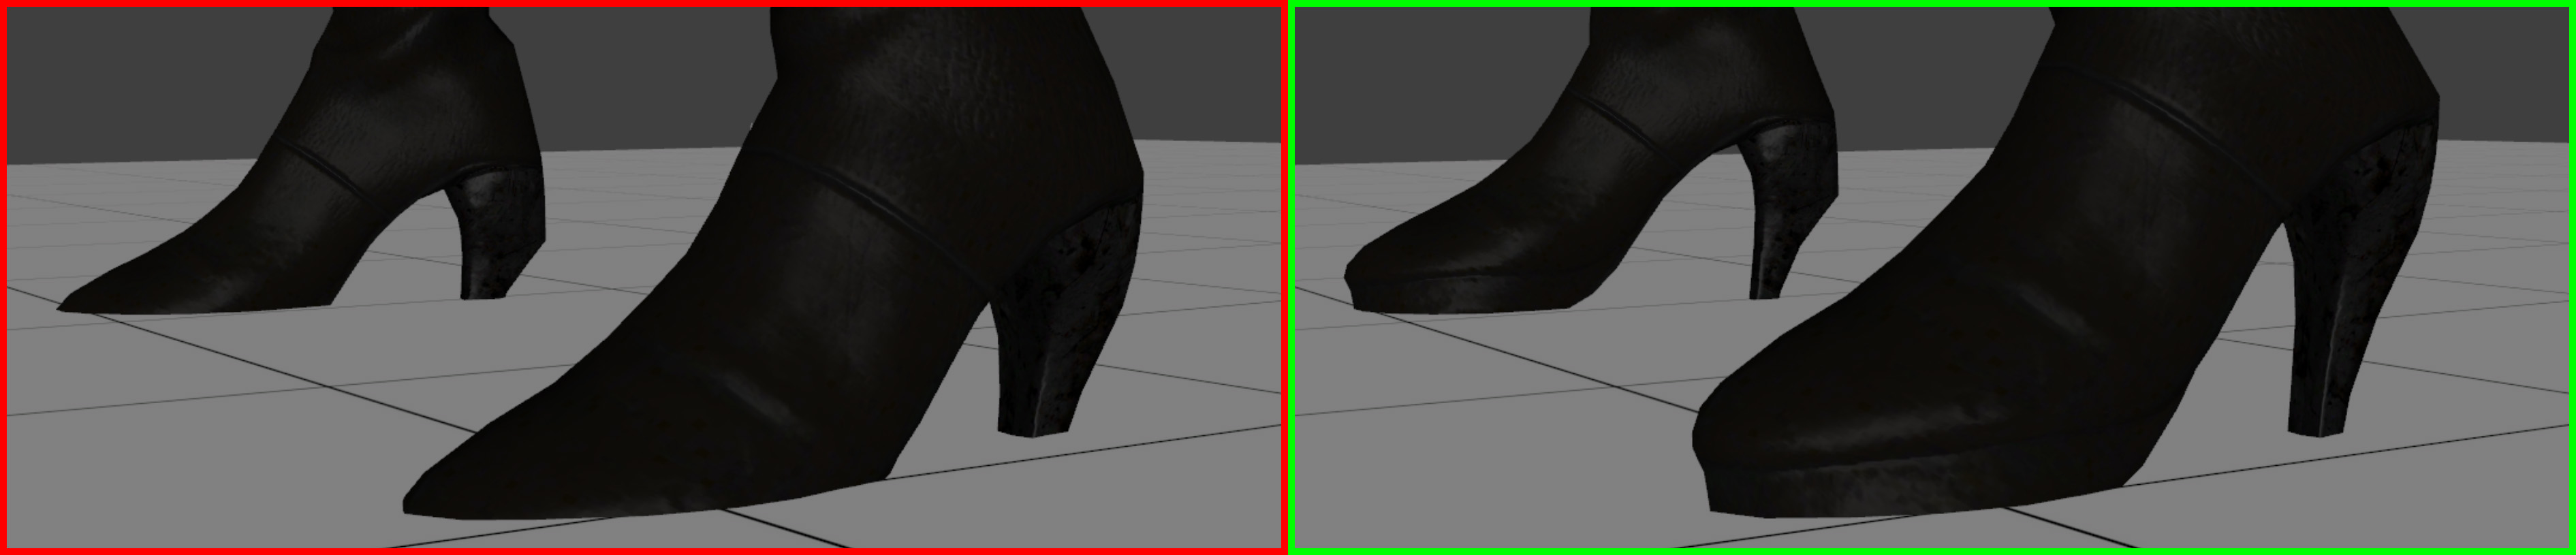
The old fix was making new IK bones for the feet, which did work, but it was a pain.
Thanks to Lt.Rocky, we got a new, easier fix. It lost him his sanity, but it was for the greater good.
- The higher the heels, the less viable this fix is.
- You might even need to make procedural bones to rig the feet to. (not shown)
Do not apply this movement. Just check the amount of distance it moves.
In this image, you can see the value I chose is 0.9.
Keep this value in mind. Write it down somewhere.
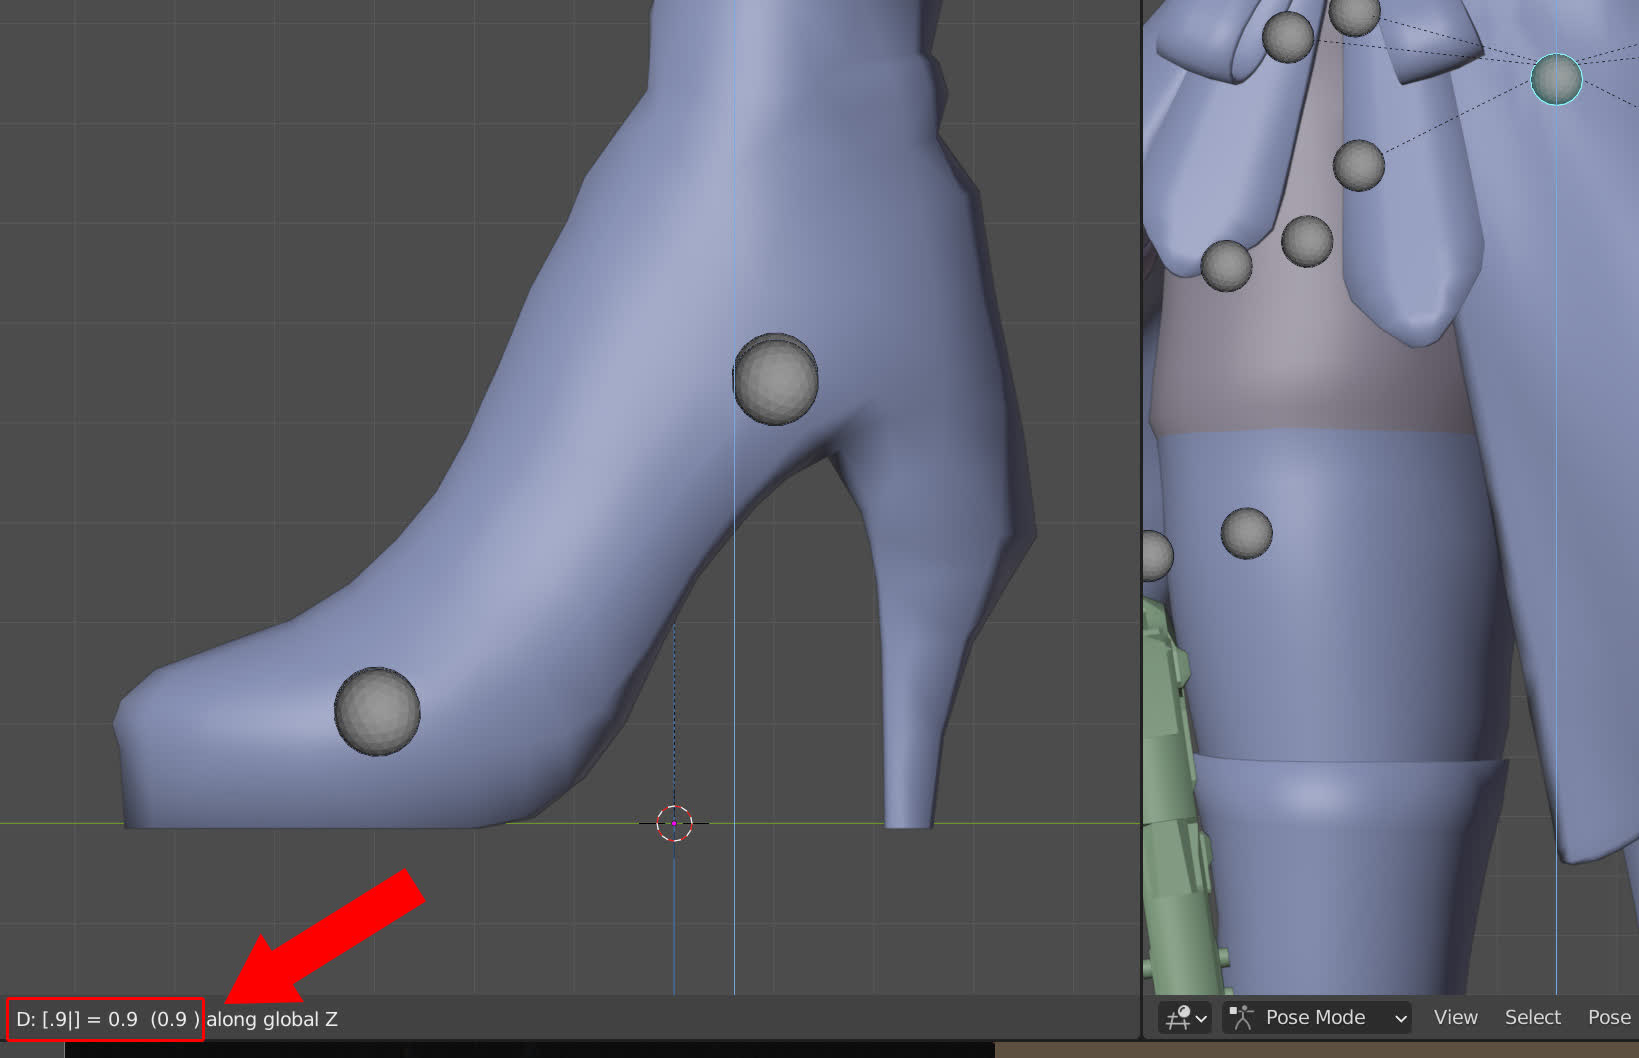
Enter Edit mode of the armature and move the foot bones down by exactly that amount.
Then export the model with the lowered foot bones.
You will need to redo the proportion pose.
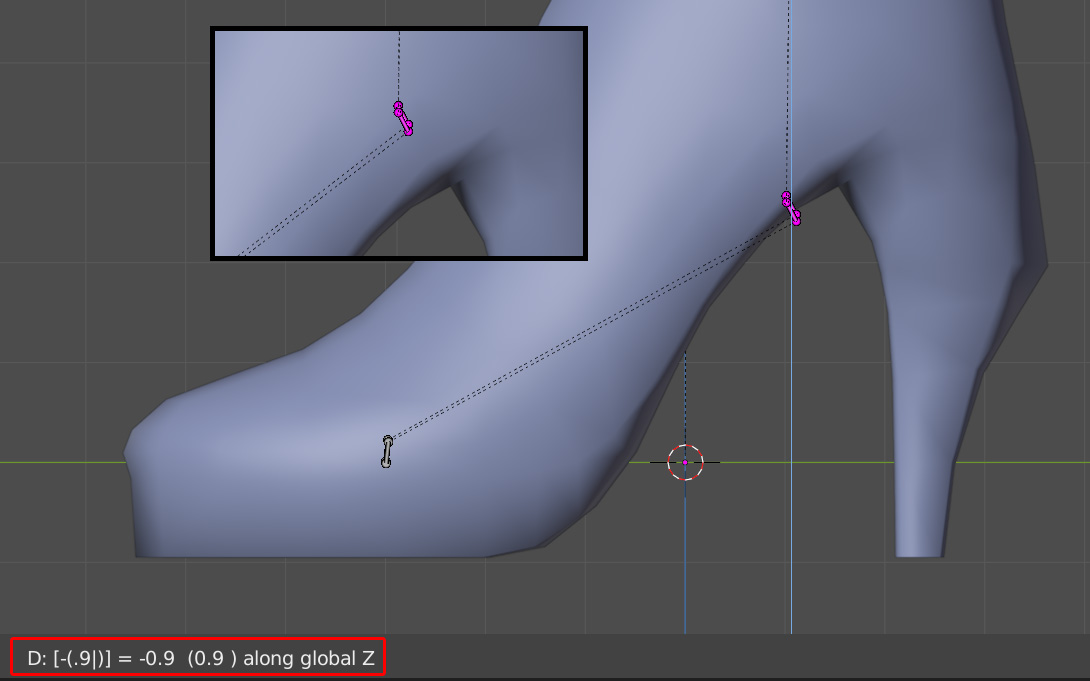
According to Rocky, the foot bones would need to be lowered in this pose by the same amount again. But when testing, this was not required on my end.
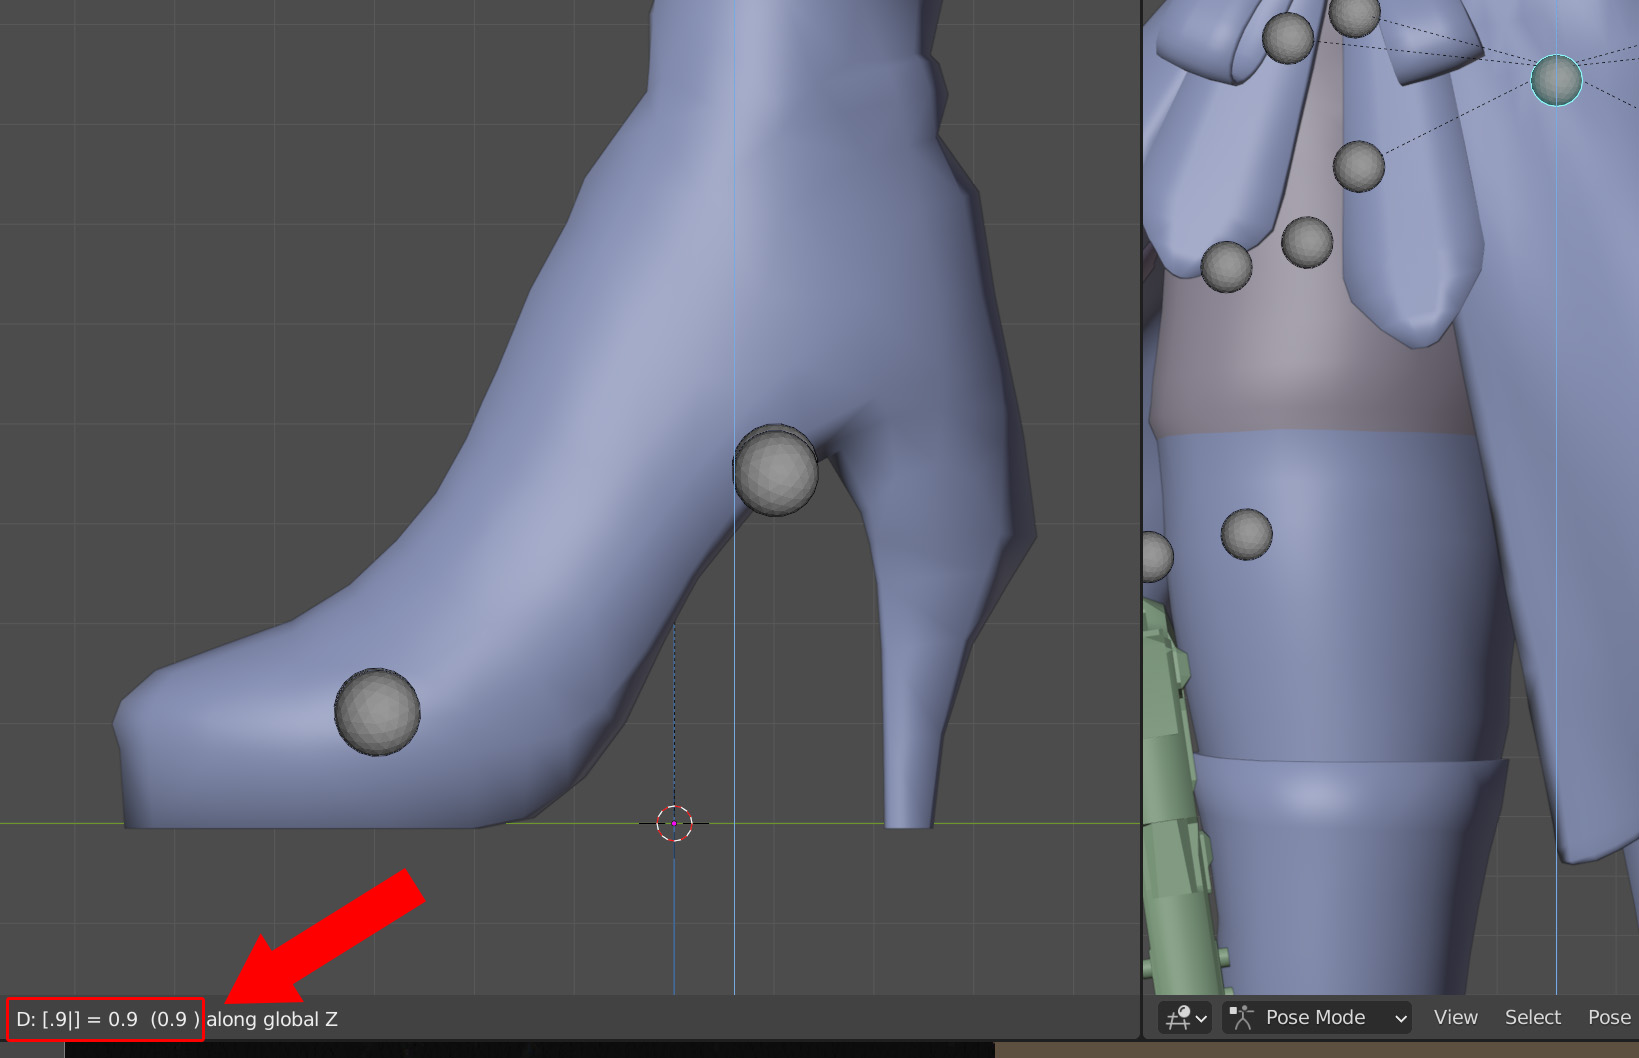 Save this pose as an animation. Call it "FootFixPose"
 In the QC, use the "FootFixPose.smd" for the "a_proportions" sequence.

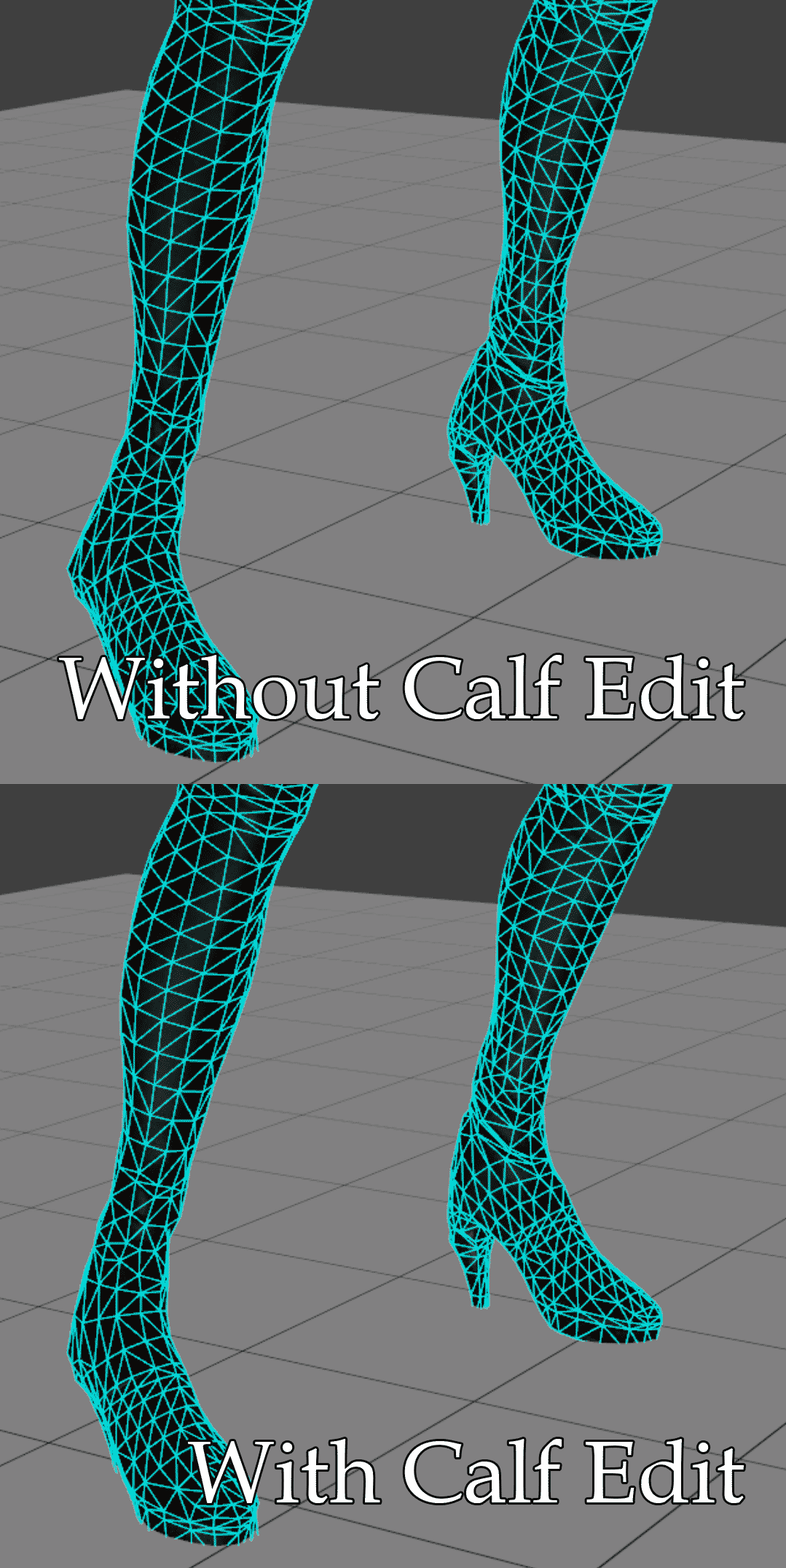 This can be done by editing the second to last value in the $definebone lines to a negative value.
A Good starting value is -5. You may need different values though. (The gif abofe used -5)

I'm keeping them here for legacy purposes
Fixing Floating Incap Animations
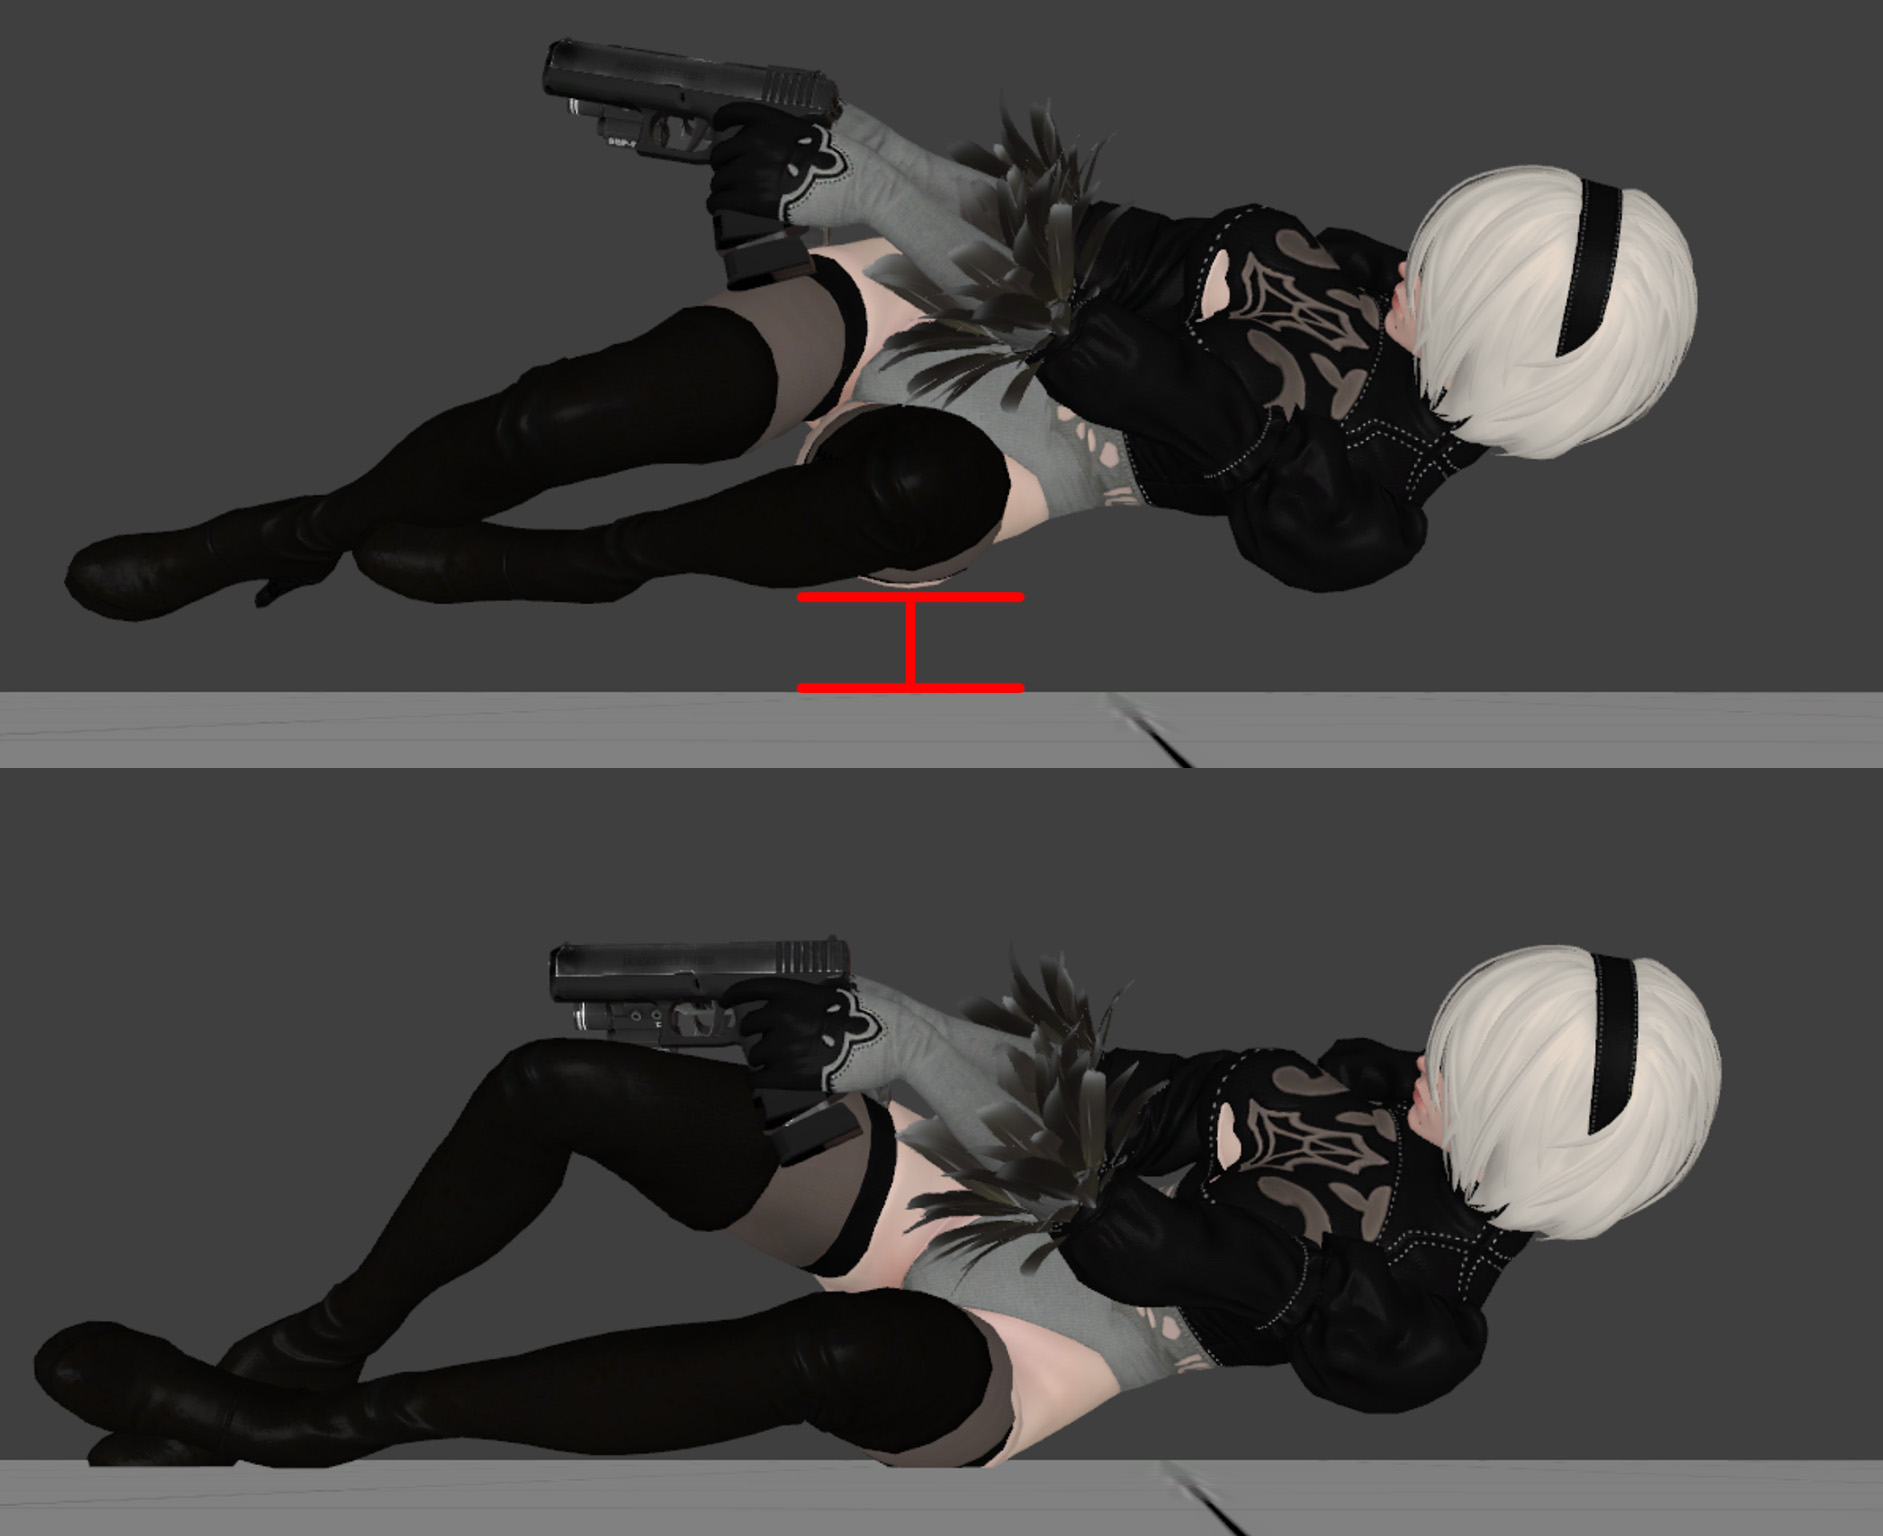
When you move the pelvis up or down, you'll end up with a player either floating or clipping into the floor when incapped.
Luckily, Davi (Debiddo) Gooz has made a prefab that aids in fixing this issue.
It requires manual work and editing a few files so pay close attention!
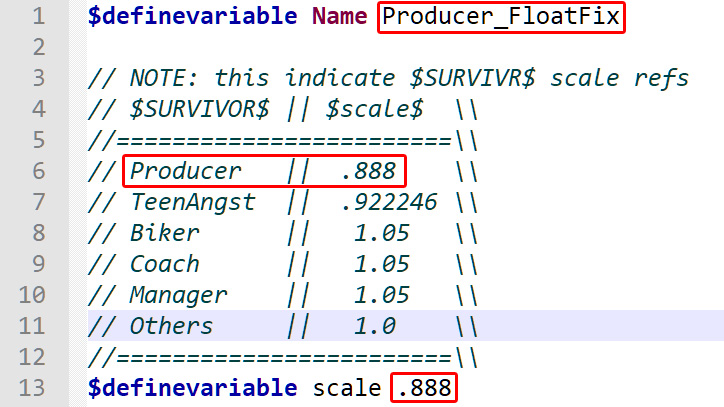
This setup, basically, creates a new includemodel that has offset animation origins, so that the entire model either lifts up, or drops down by whatever value you want.
Important: it replaces the incap animations with bills incap anims. (for now?)
More info on this Prefab can be found in the Dead 4 Mods Discord discussion here[discord.com]
I would reccomend to create a new folder next to your existing QC files called "Animfix"
Unpack the survivor_incap_prefab.zip in that folder.
Replace the second "Name" in the first line to what you want to call the new includemodel.
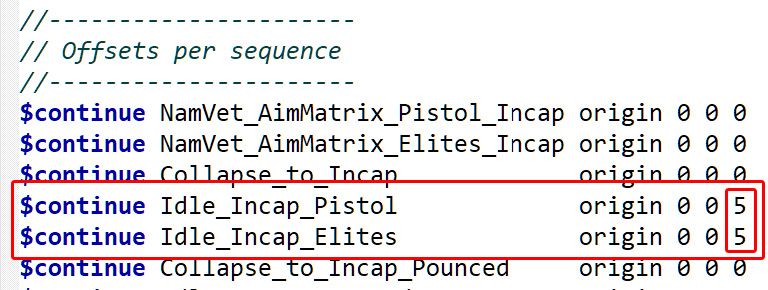
Change the last value in the incap lines to a value you think might fit.
Positibe values to push it to the ground, negative to raise it off the ground.
Open your player's qc file, scroll to the proprtion trick part and above the original includemodels, add the includemodel to the mdl you had just made.
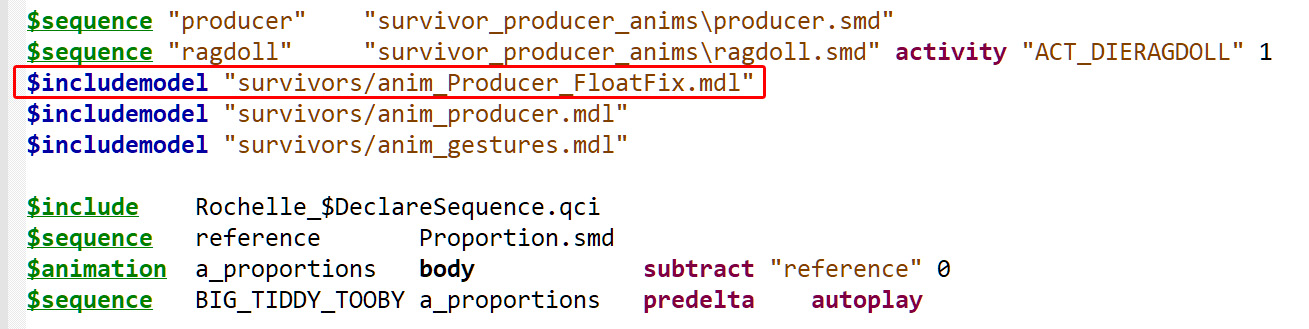
Compile your playermodel as "!/Temp.mdl" or whatever name you picked in Step 7.01
Now you can load the survivor in HLMV. Load the Incap anim and you should see that the model is no longer high as a kite, or digging itself into the floor.
The feet will most likely not adhere to any IK. That's just how it is at the moment.
You can adjust the values set in the offset part of the anim_fix.qc. and recompile just the anim fix model, then reload the playermodel in hlmv until the height is acceptable.
This is important, because the prefab has its own definebone file, but the weapon bones for that might be misaligned and your guns might be rotated in the incap anims.
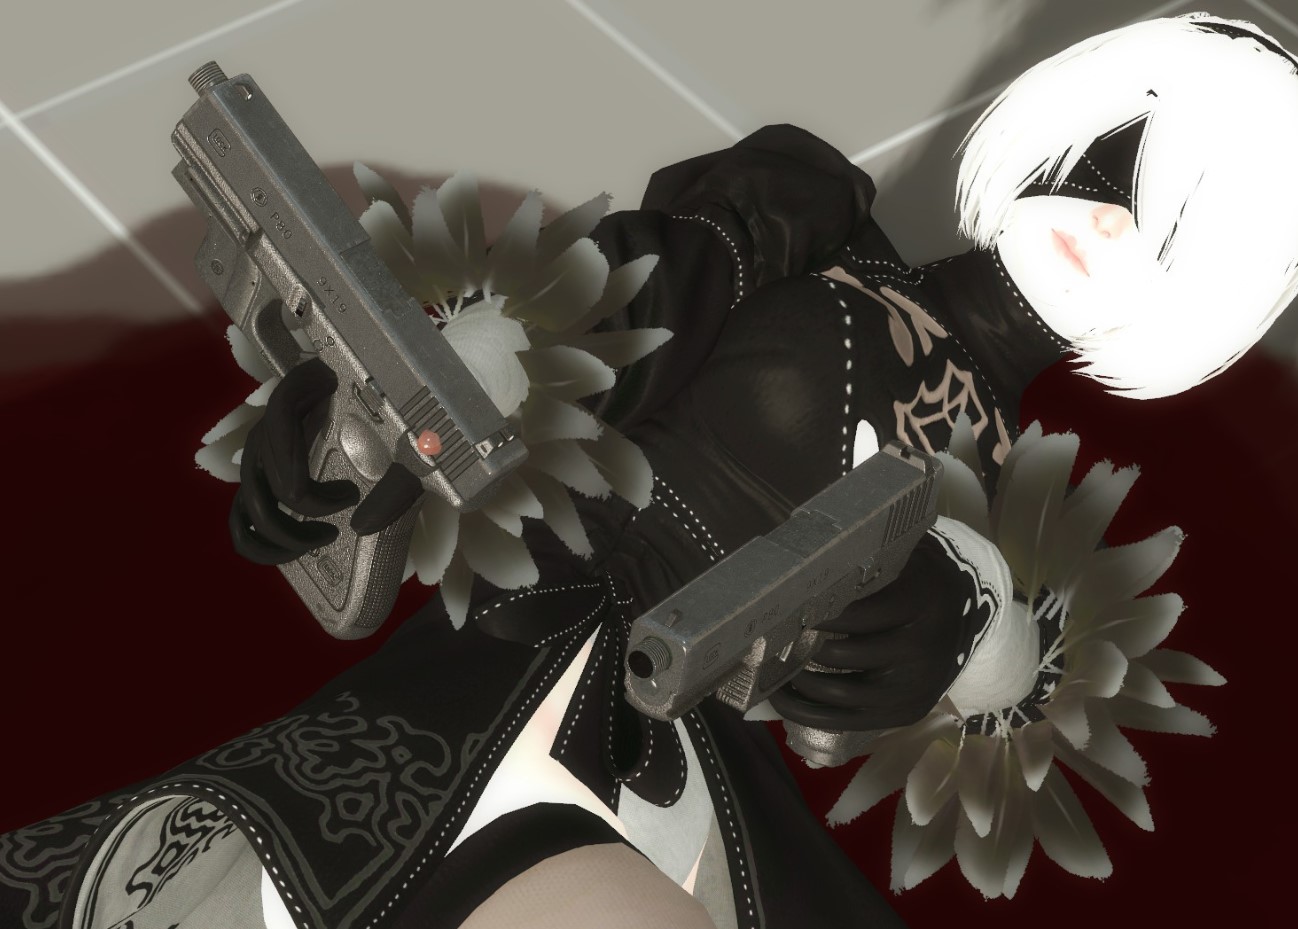
If your guns are rotated, you'll need to fix it now. If they're not rotated, skip to to next step.
In Step 7.05.1 you had separated out the original weapon and attachment bones.
They should be chilling in your qc file for the playermodel.
Copy the 16 weapon and attachment definebone lines.
Open "Animfix\includes - definebones.qci"
Scroll down to where you can see its definebone lines for the weapons.
Replace the definebones in the animfix prefab's definebones.qci with the one from your player.qc
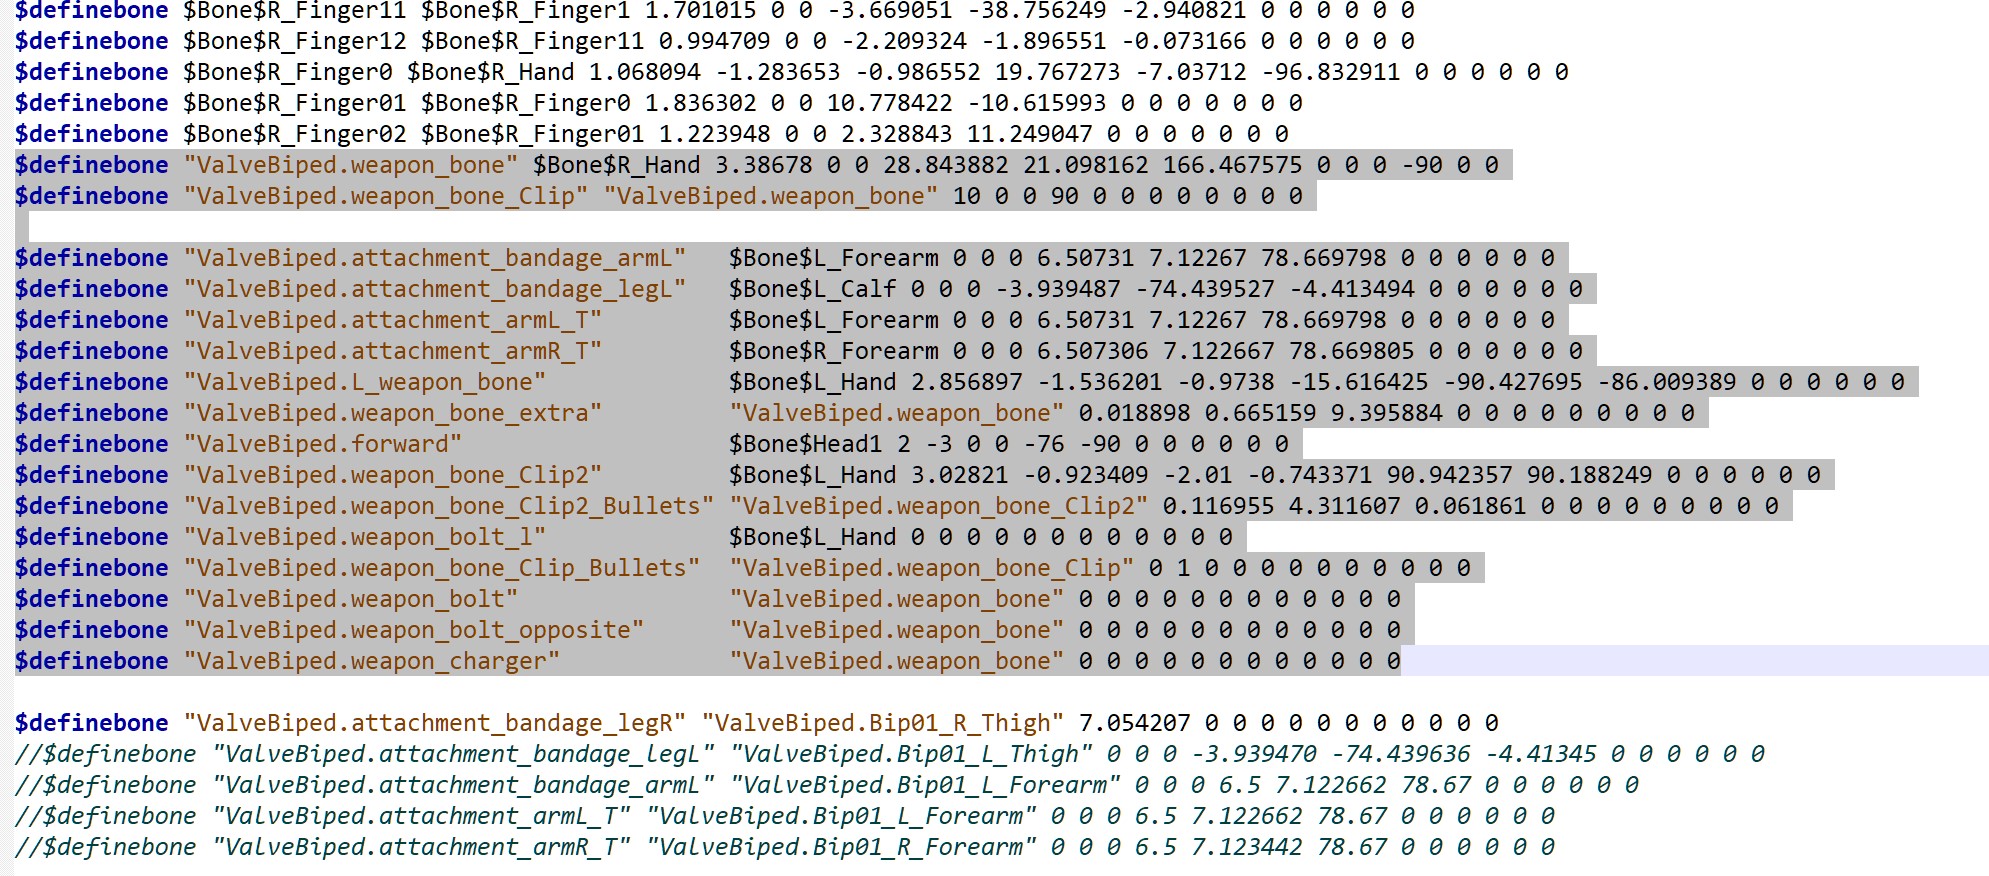
to:
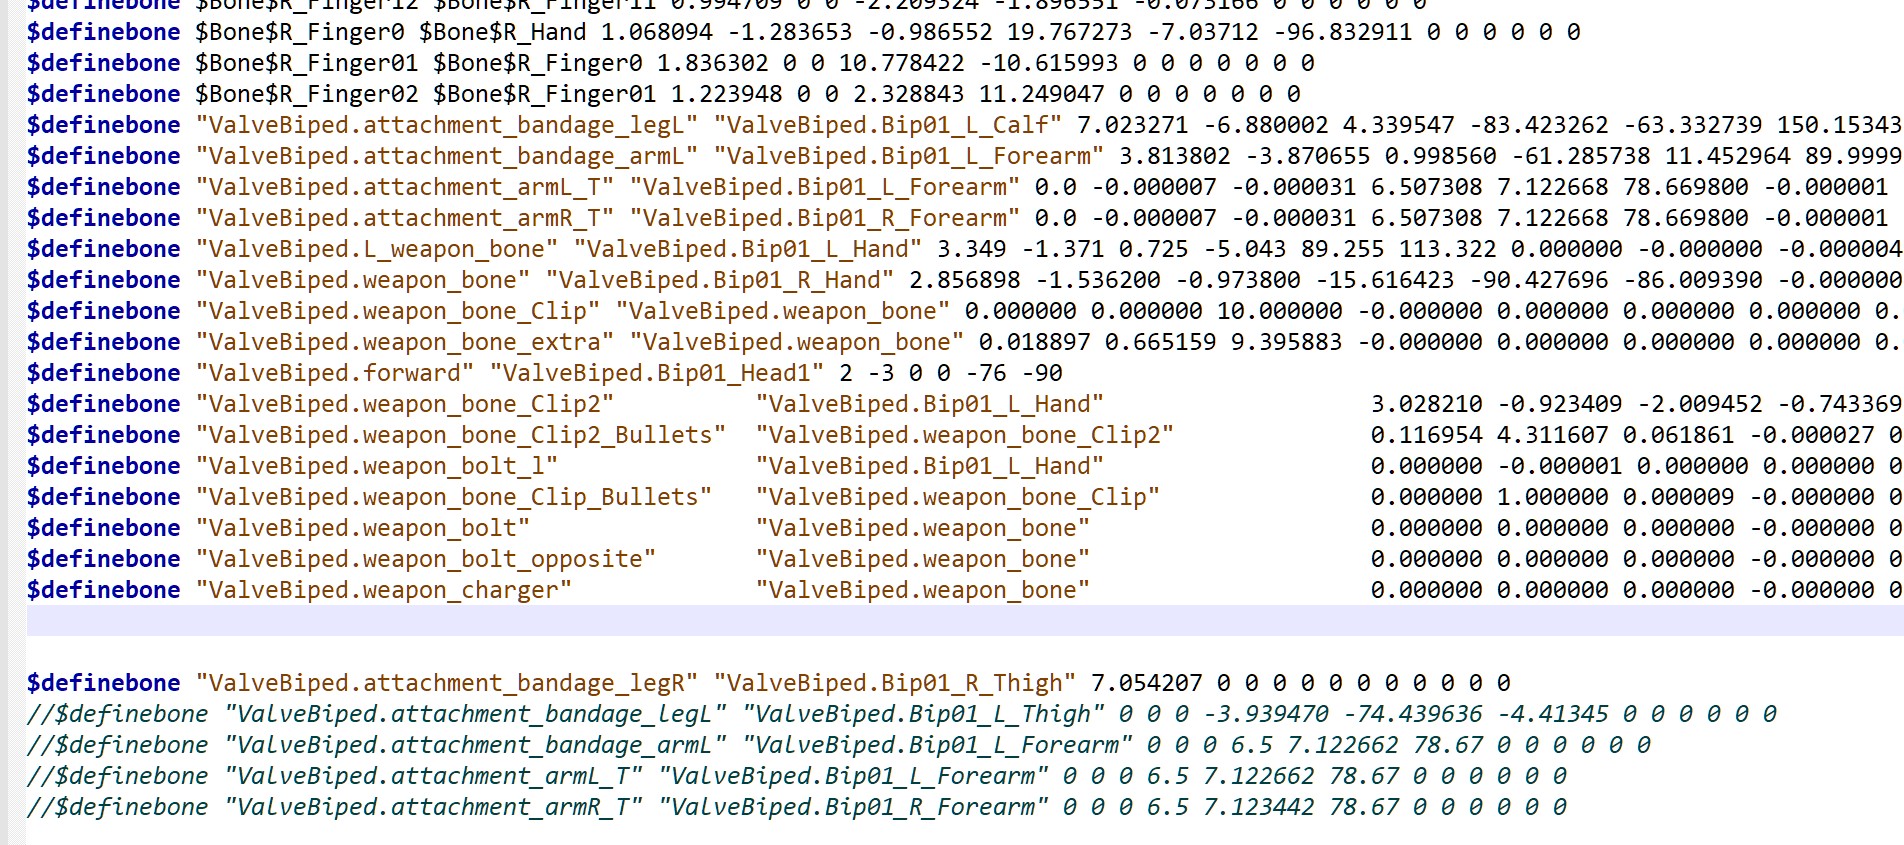
But you must ship this new model with your player mod, else it obviously will not work.
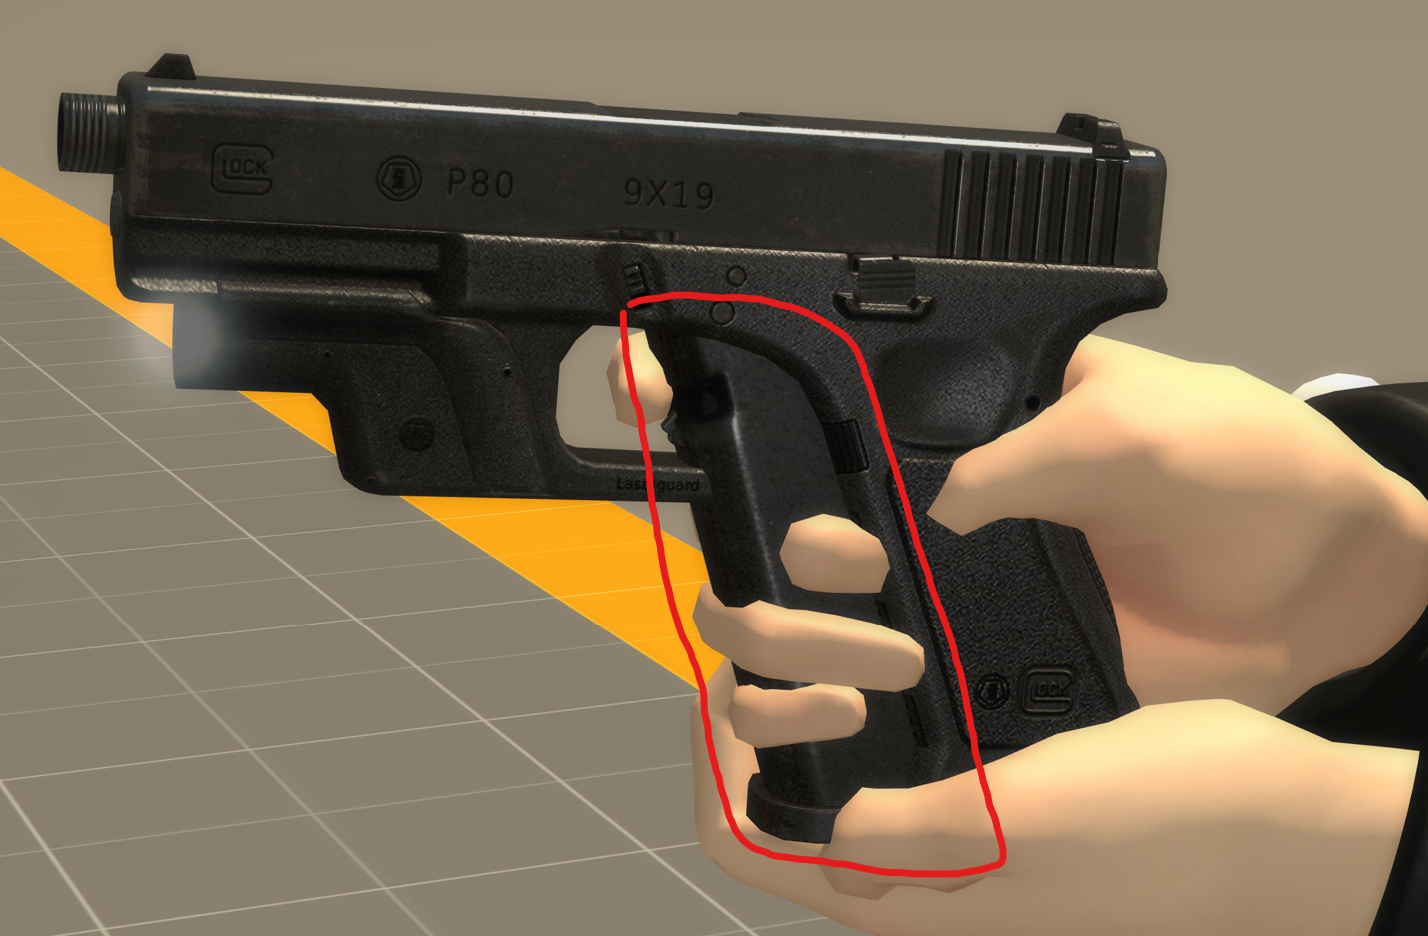
Fixing Misaligned Guns
 Delete the at least the weapon child bones from your model in blender.
We keep the weapon bone, because the gun body itself is in the right spot.
Deleting bones from your mesh requires redoing the proportion pose, so do that now.
Right hand:
- weapon_bone_Clip
- weapon_bone_Clip_Bullets
- weapon_bone_extra
- weapon_bolt
- weapon_bolt_opposite
- weapon_charger
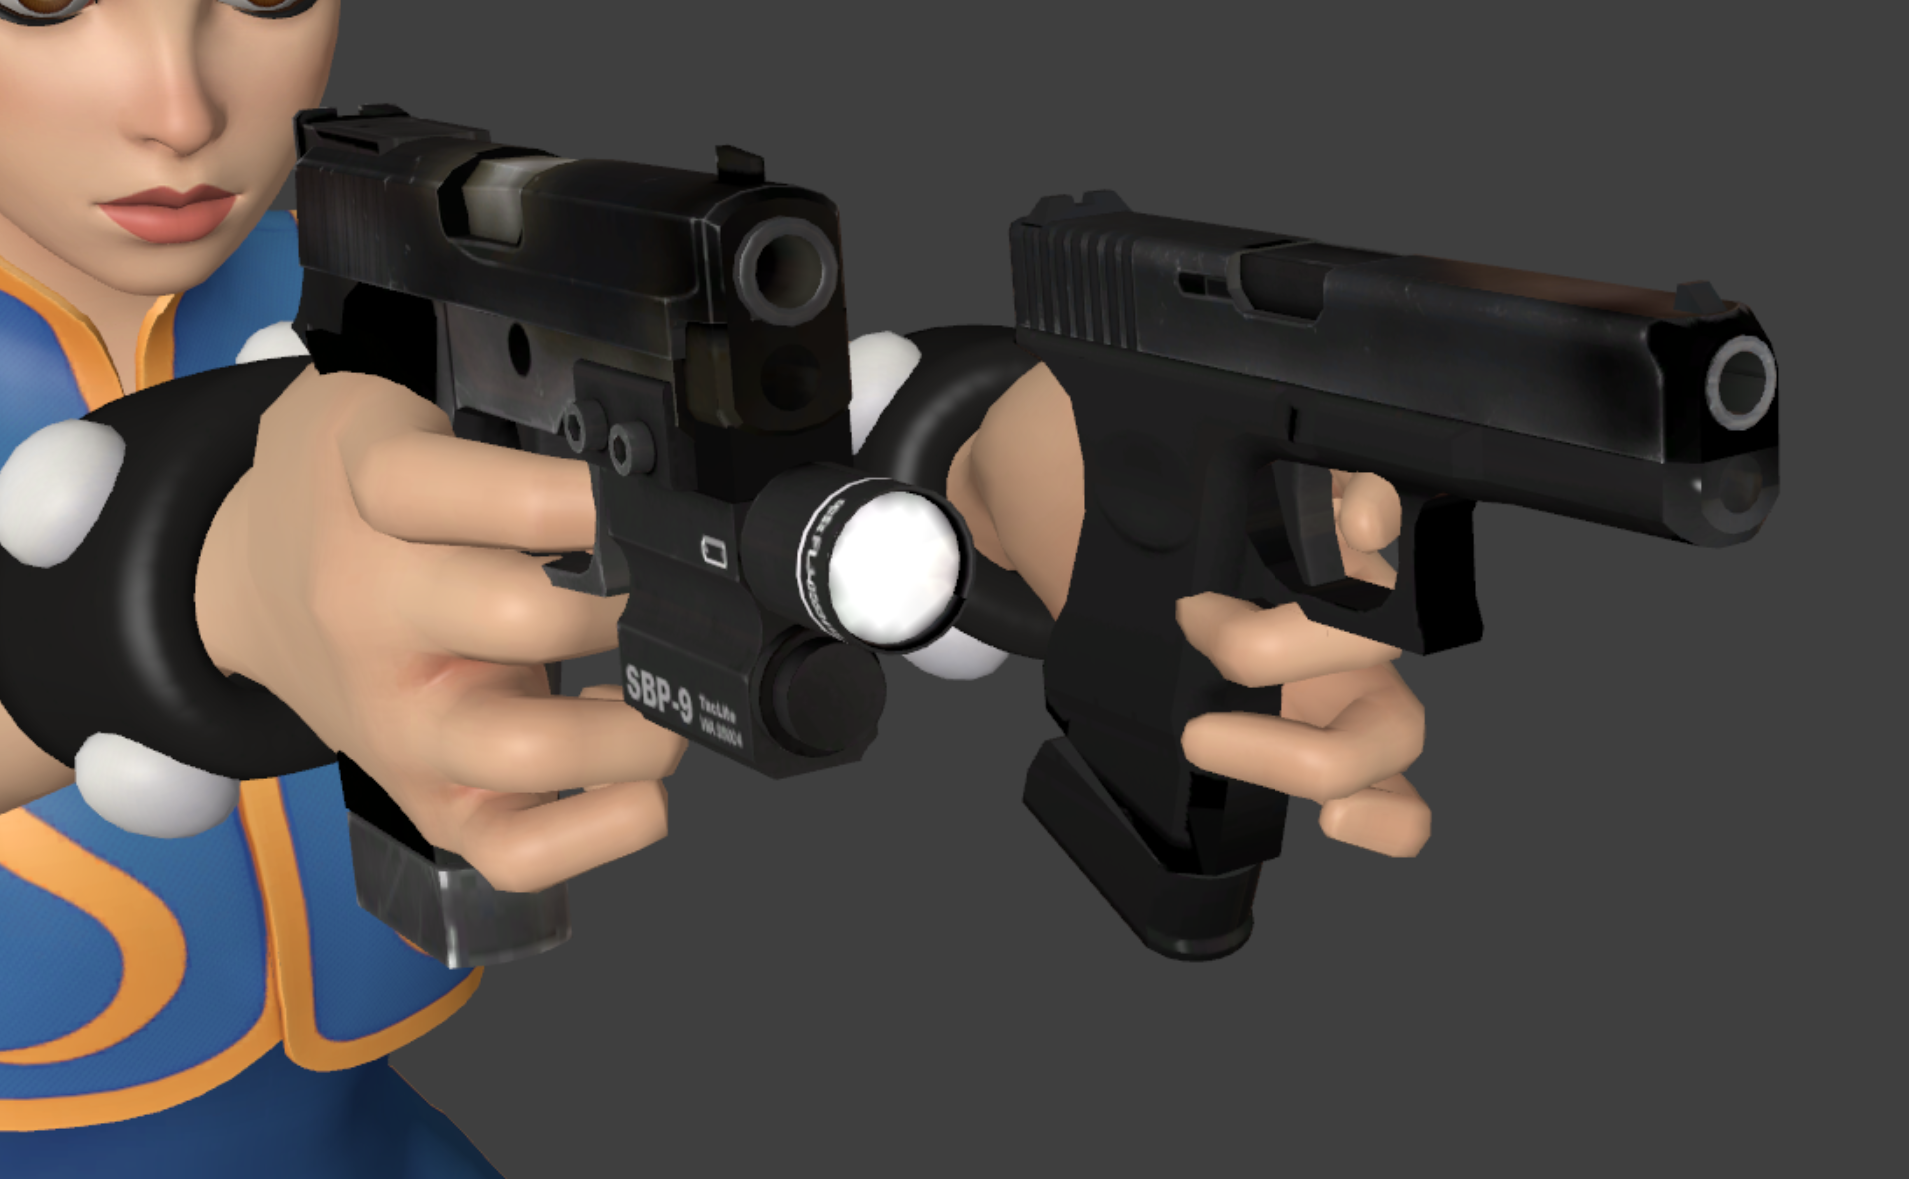
Left hand is more difficult because three weapon bones are directly parented to the hand.
If the left hand pistol parts are misaligned, do the entire next section where we reposition the gun as a whole, because its less confusing than trying to align three separate definebone lines.
Delete the $definebone lines of the weapon child bones in your qc/qci.
Open the qc of a vanilla player and copy the $definebone lines for those bones into your qc. This will make sure that all pieces of the gun are relative to the weapon bone.
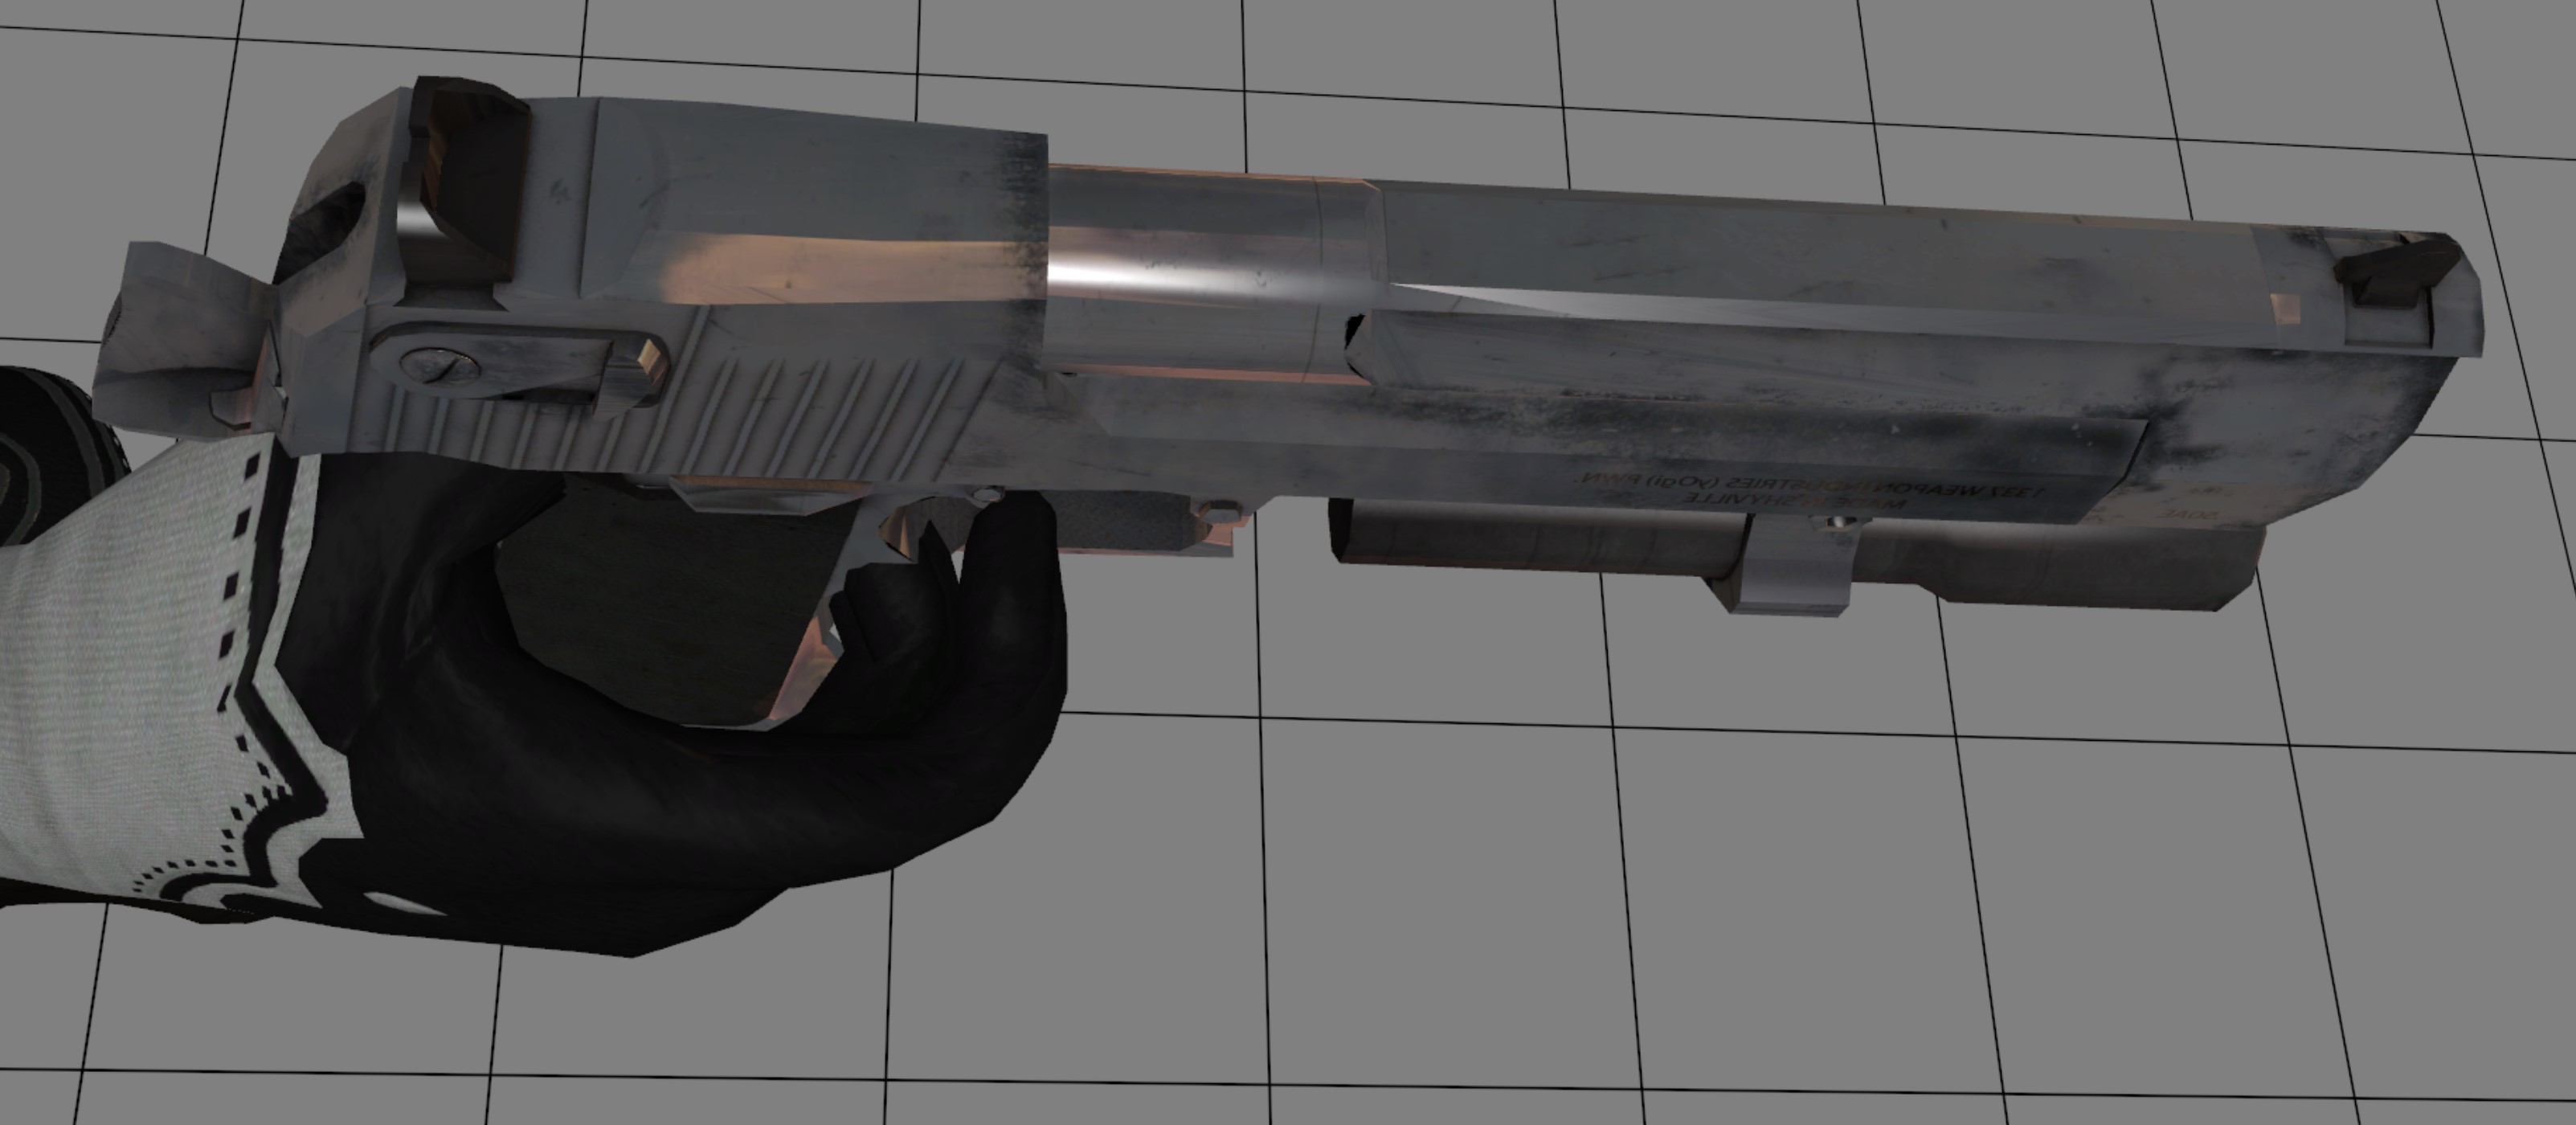
The left hand will always touch and follow the rifle. This fix only applies if the grip is misplaced
Definebone edits will not be able to solve this issue, sadly.
We'll have to do more bone work in blender.
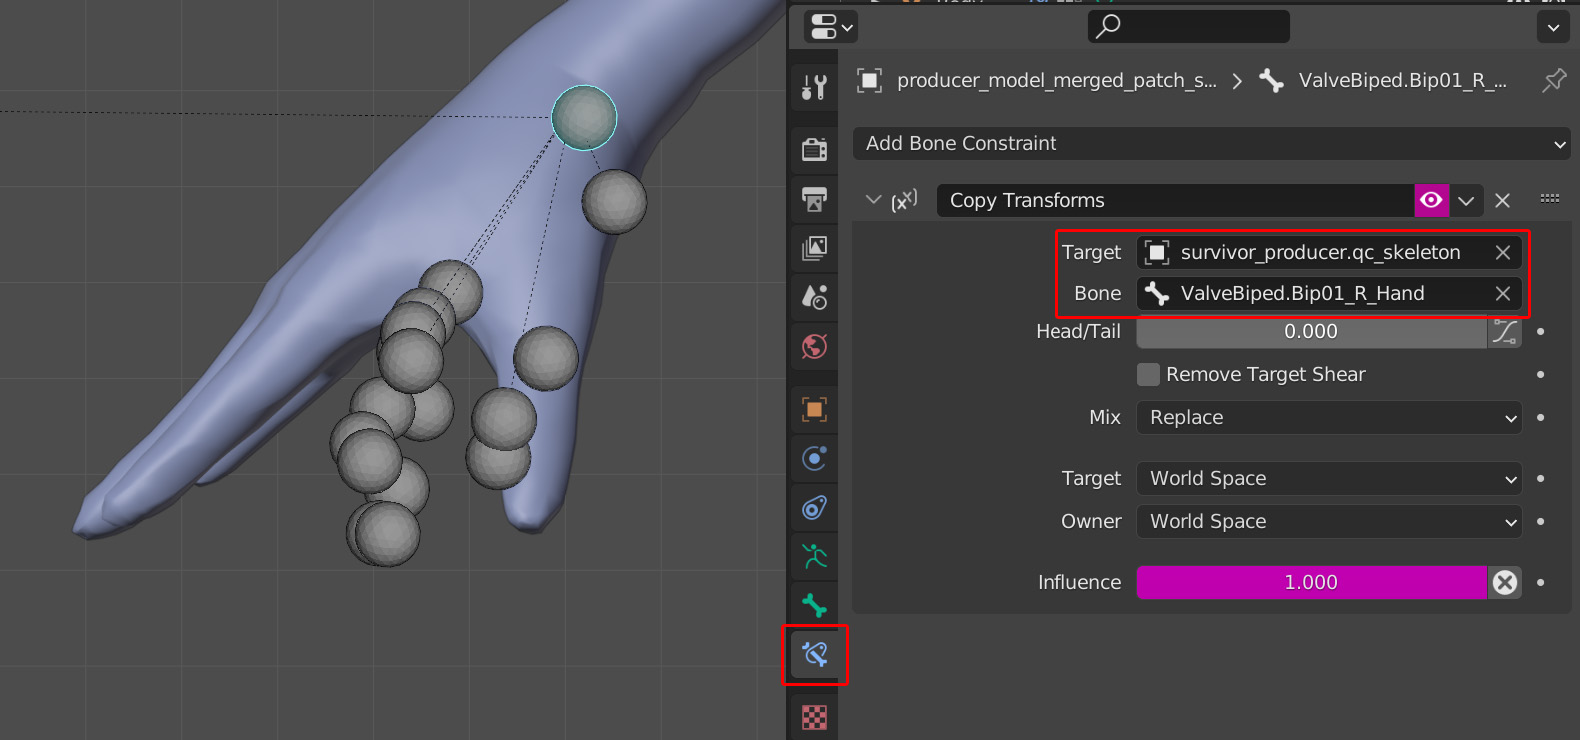
Add the "Copy Transforms" constrain to the original player's hand bone.
Make it follow the hand of your custom playermodel's hand bone.
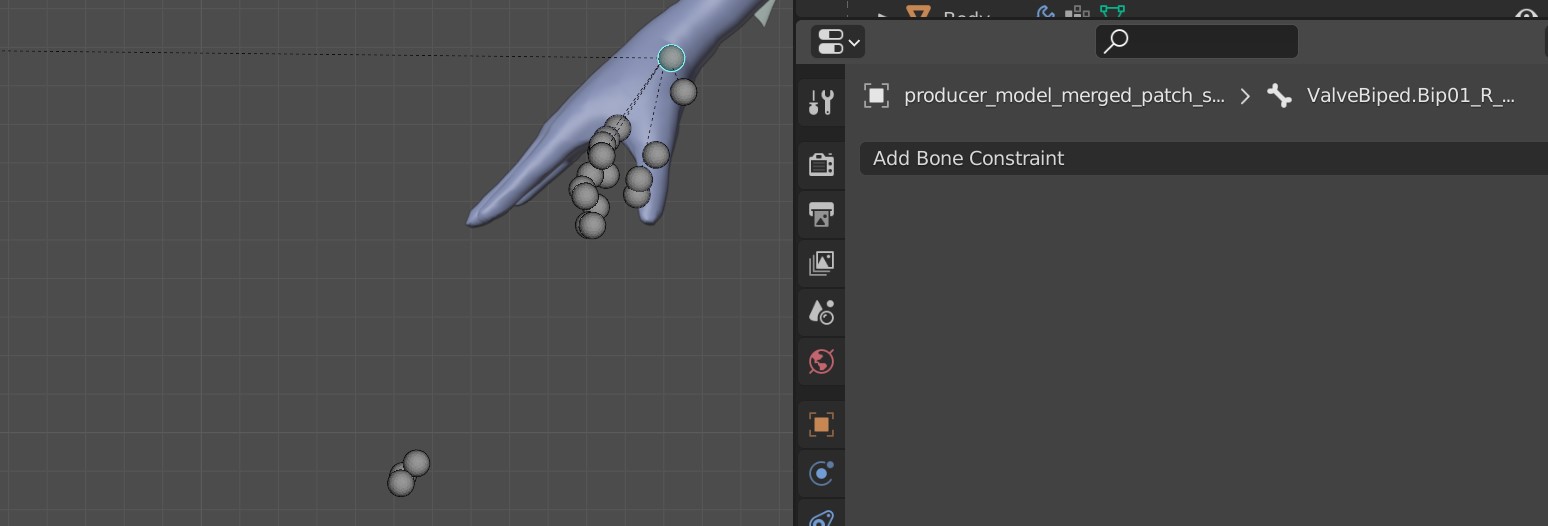
Now the hand bone of the original player will copy the exact location and rotation of your custom player model, while taking all its child bones along with it.
We're doing this so the weapon bone has the correct rotation, in relation to the hand bone.
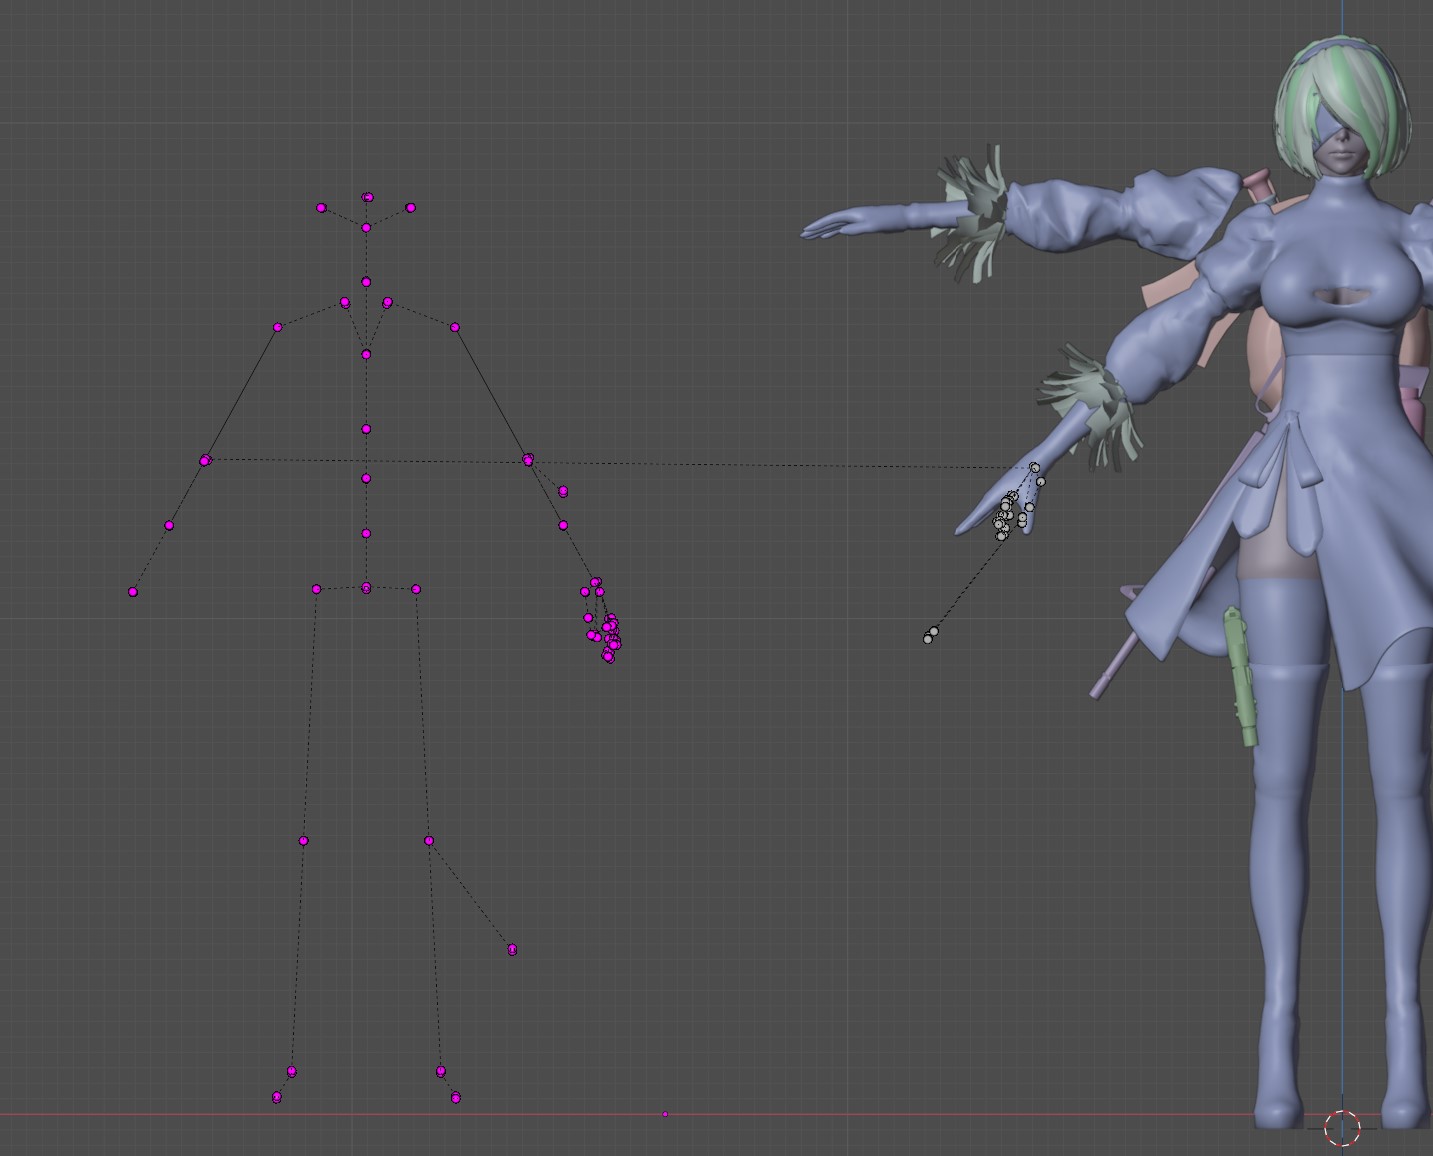
Delete the constraint.
The bone for the hand and all its children should remain right where they are.
So, delete all bones except the hand bone and the weapon bone with its children.
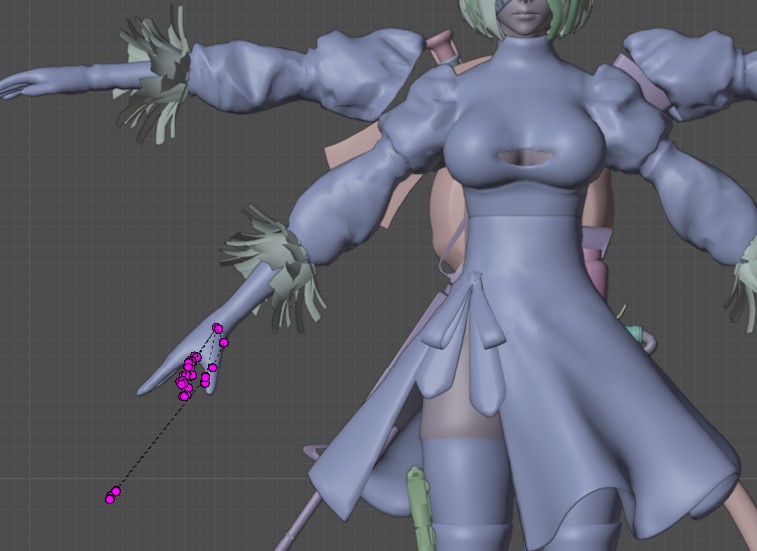
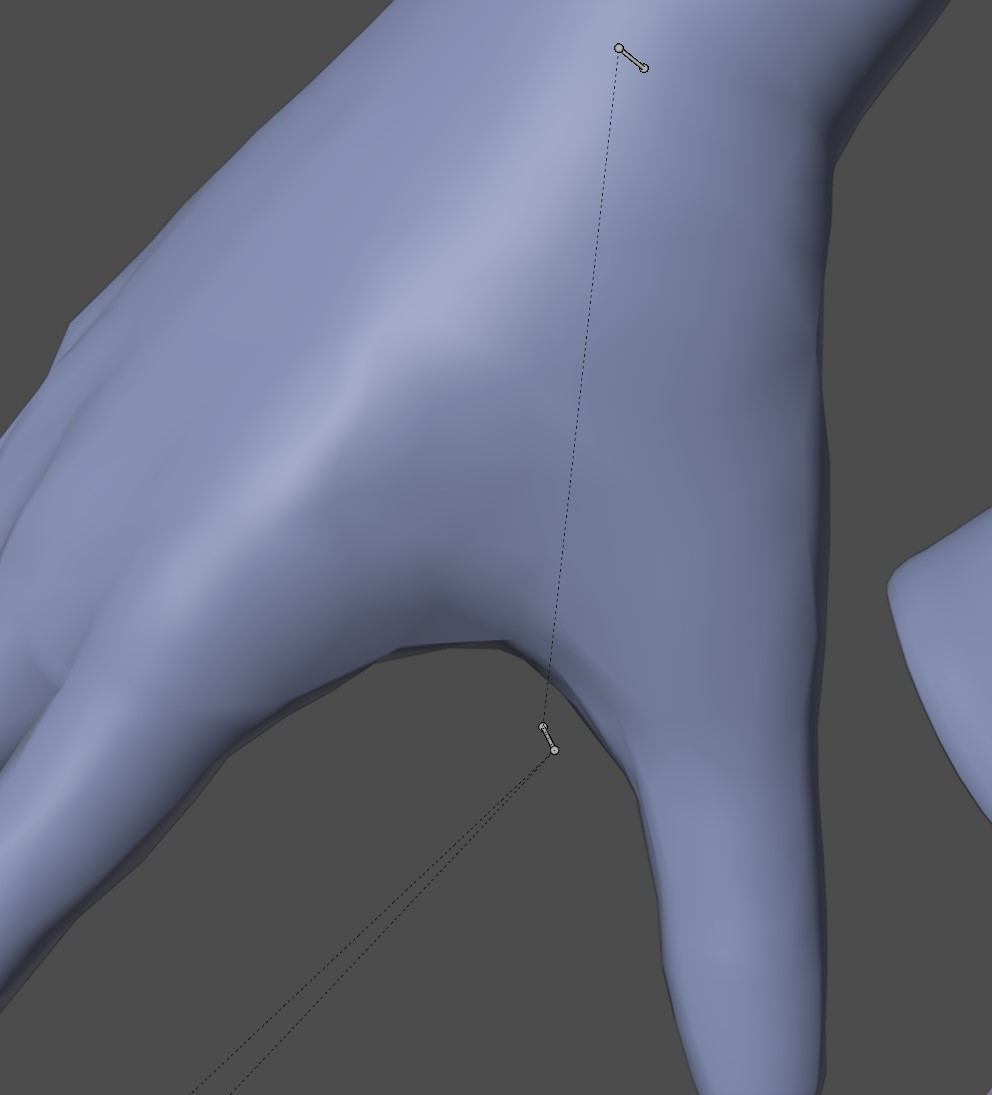 Note:
Note:We really only need the weapon bone and its children, for the right hand.
The left hand does require copying over the entire left hand bone, because it'll be easier to reparent all the child bones of the left hand.The right hand only has one weapon bone parented to the hand, while the left hand has three weapon bones parented directly to the hand.
In the next step i'll show the reparenting procedure that is best for the left hand bone, but shown on the right hand bone.
If you are doing the right hand, you can skip a few steps.
We're gonna use a little trick that is less mouseclicks to parenting all the left hand weapon bones. Move the hand bone out of the way and give it a random name. Just slap the keyboard.
For right hand, just delete the hand bone instead.
 Join the new armature with the randomly named hand bone to the custom player armature.
Select the renamed hand bone and set its parent to be the hand bone of your custom player.
Or just parent the weapon bone to the custom players hand bone, if you're doing the right hand
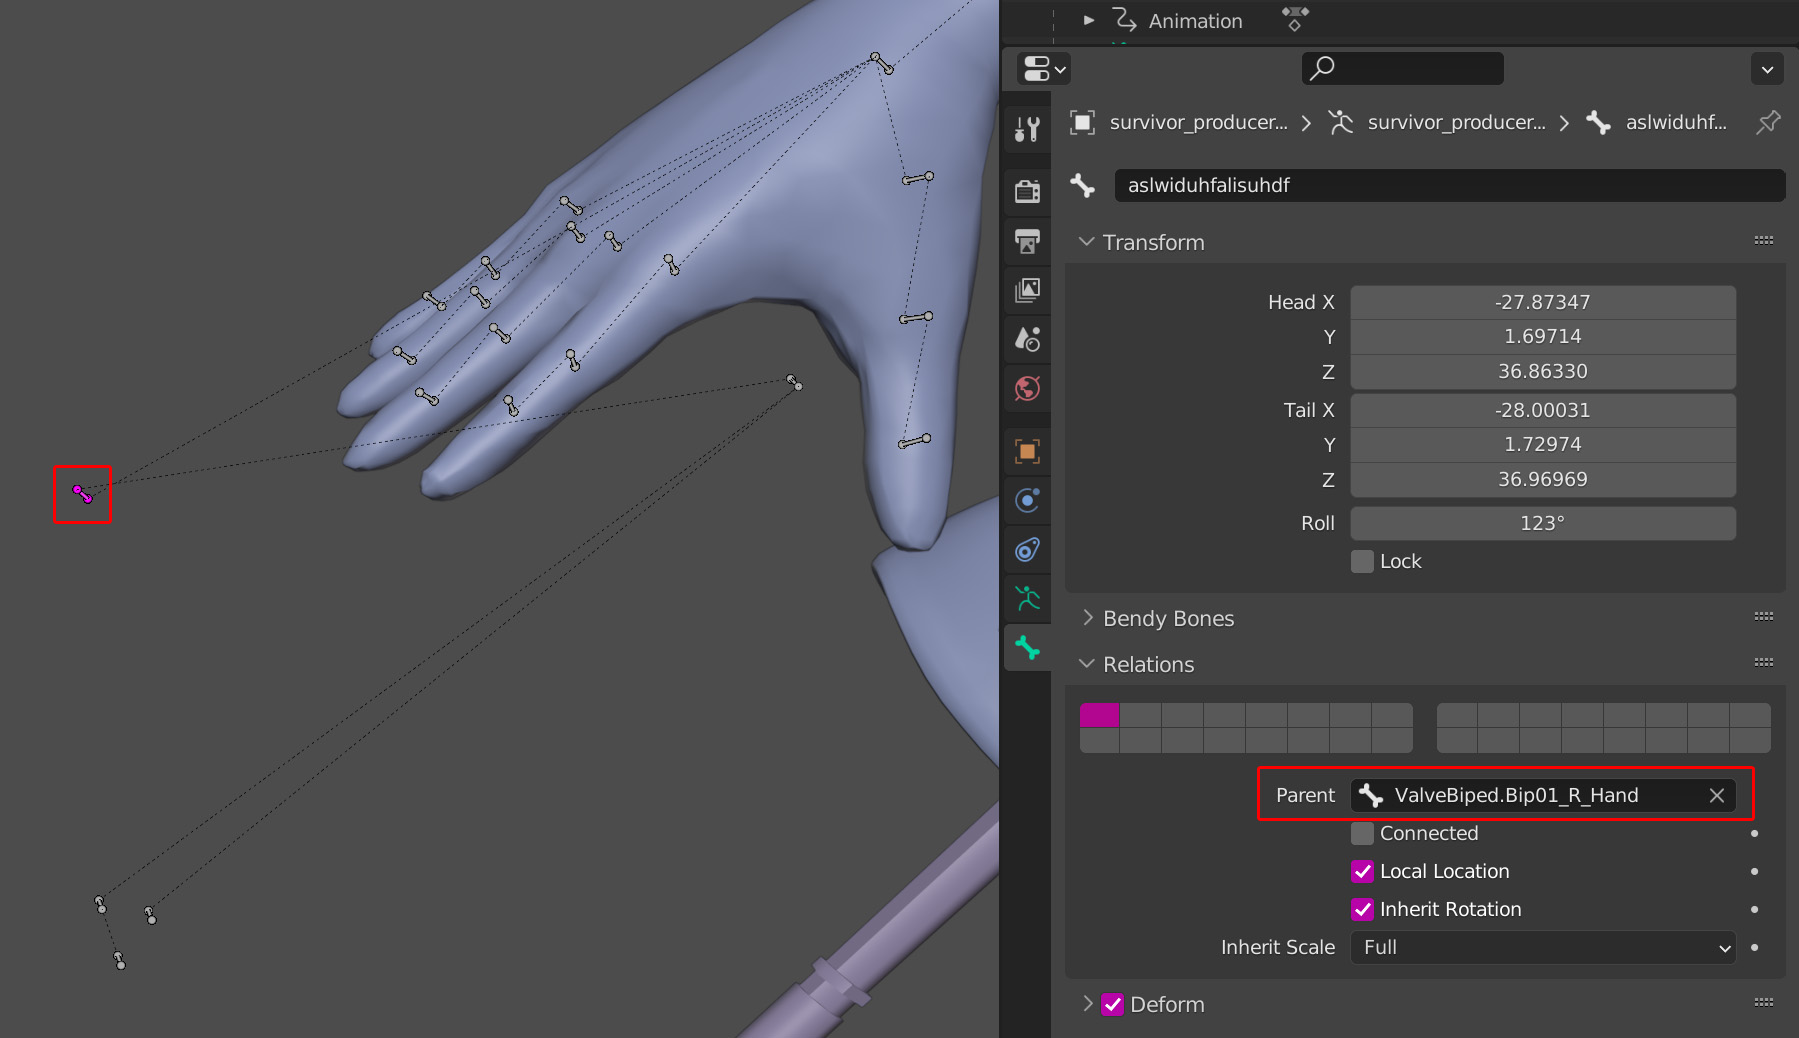 Delete this randomly named bone.
Doing this automatically reparents all the children of the "renamed hand bone" to whatever bone is next in the hierarchy which is the actual hand bone.
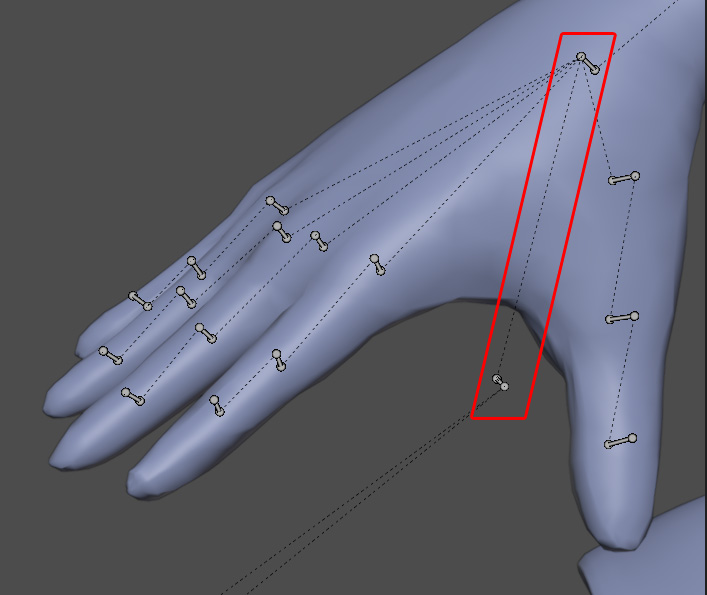
Sometimes just moving long its local X axis is enough.
Do this in pose mode, so that all the child bones of the weapon also move! For the right hand, you only have "ValveBiped.L_weapon_bone"
But the left hand has "ValveBiped.L_weapon_bone" "...weapon_bone_Clip2" "...weapon_bolt_l"
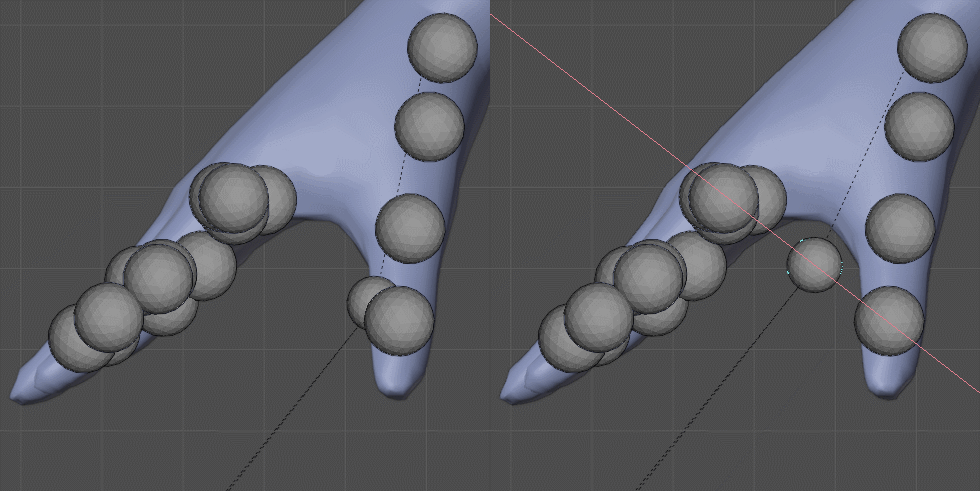 You could even load a worldmodel and do the same Bone Constrain thing to make it follow the weapon bone, so you got some kind of visual representation regarding gun placement.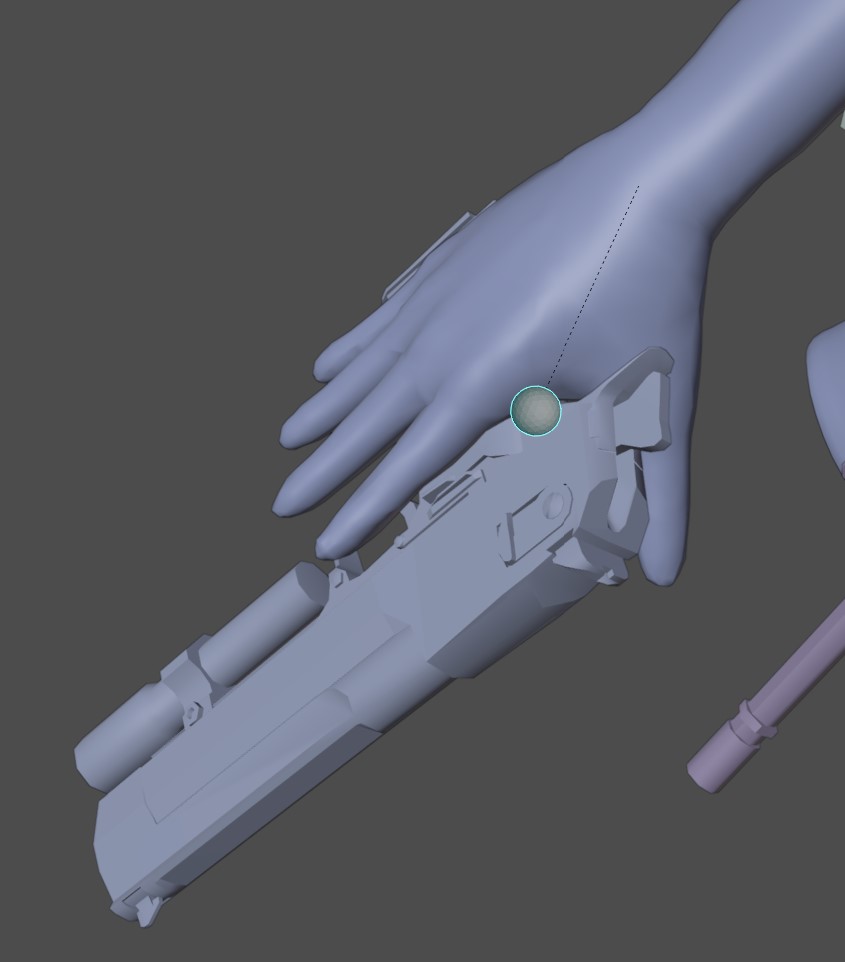
You can pick "Apply Selected as Rest Pose", cause you only touched the weapon bone.
You will now need to re-export all meshes of the player, and also rebuild the proportion pose.
If the proportion pose is made in blender, you can just redo and export the proportion pose.
Cause the proportion pose will move the weapon bone even if you player meshes don't have it.
But doing all at once is just good practice.
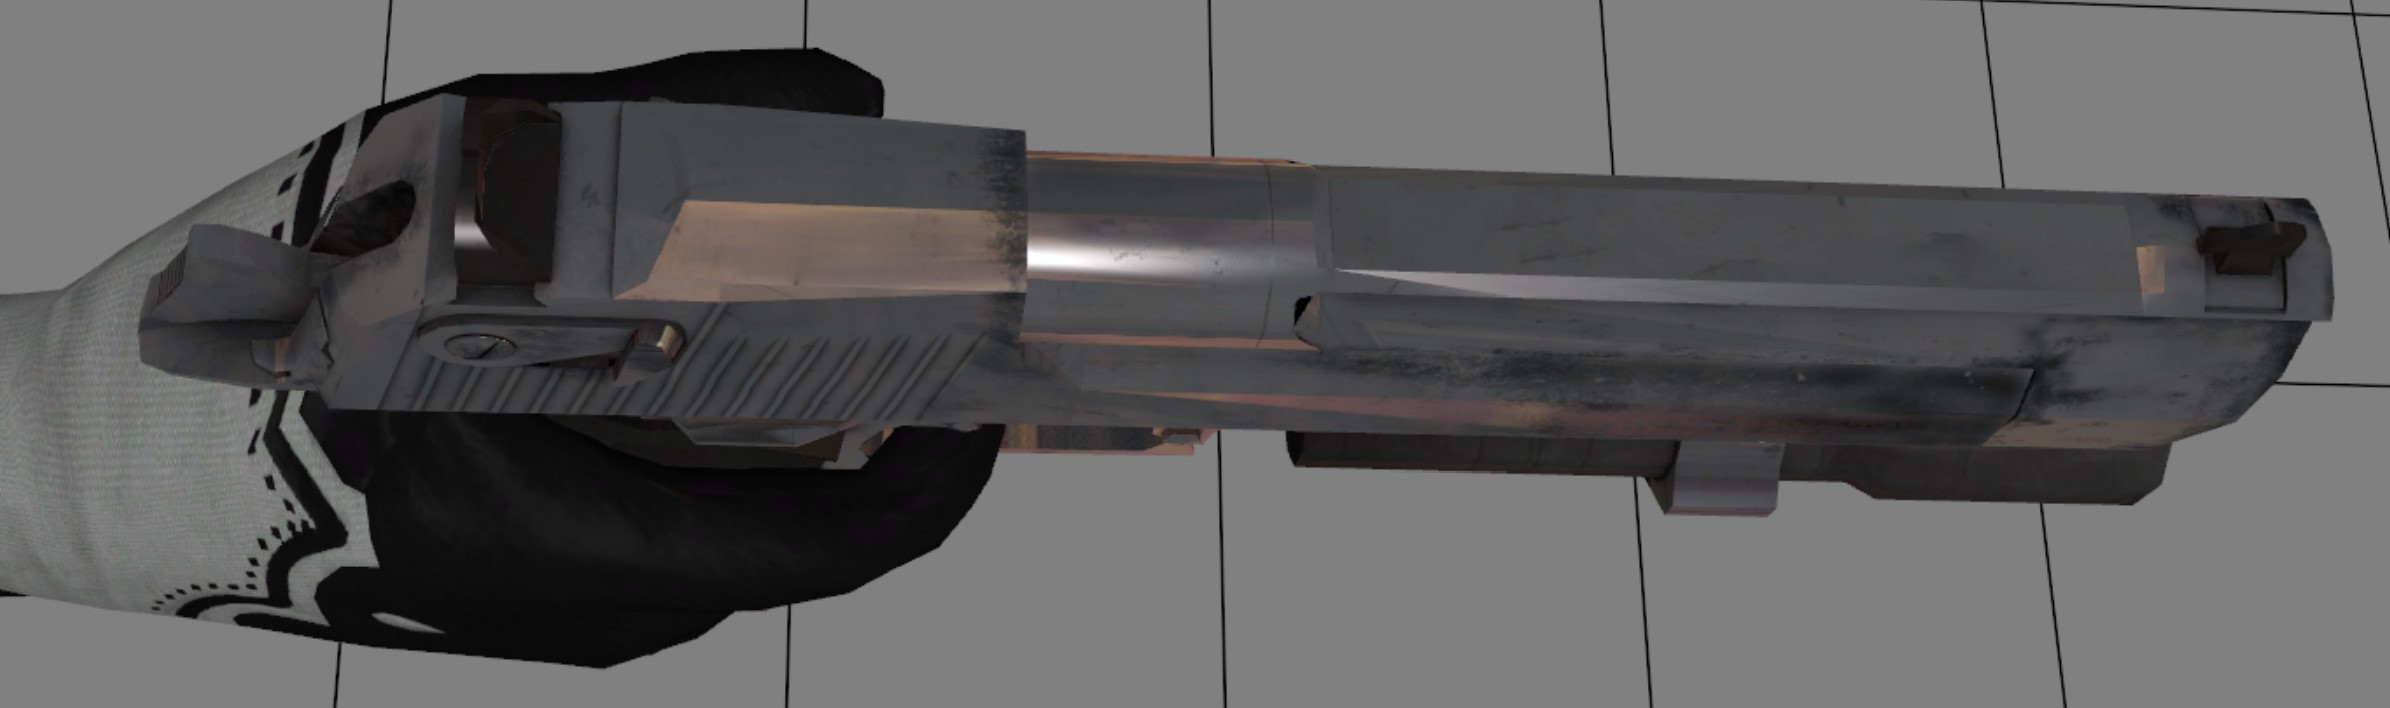
═══════════════════════════
Attachments
Now we'll determine where equipped items will be attached to the survivor .
You'll see a few items and get a bunch of bones.
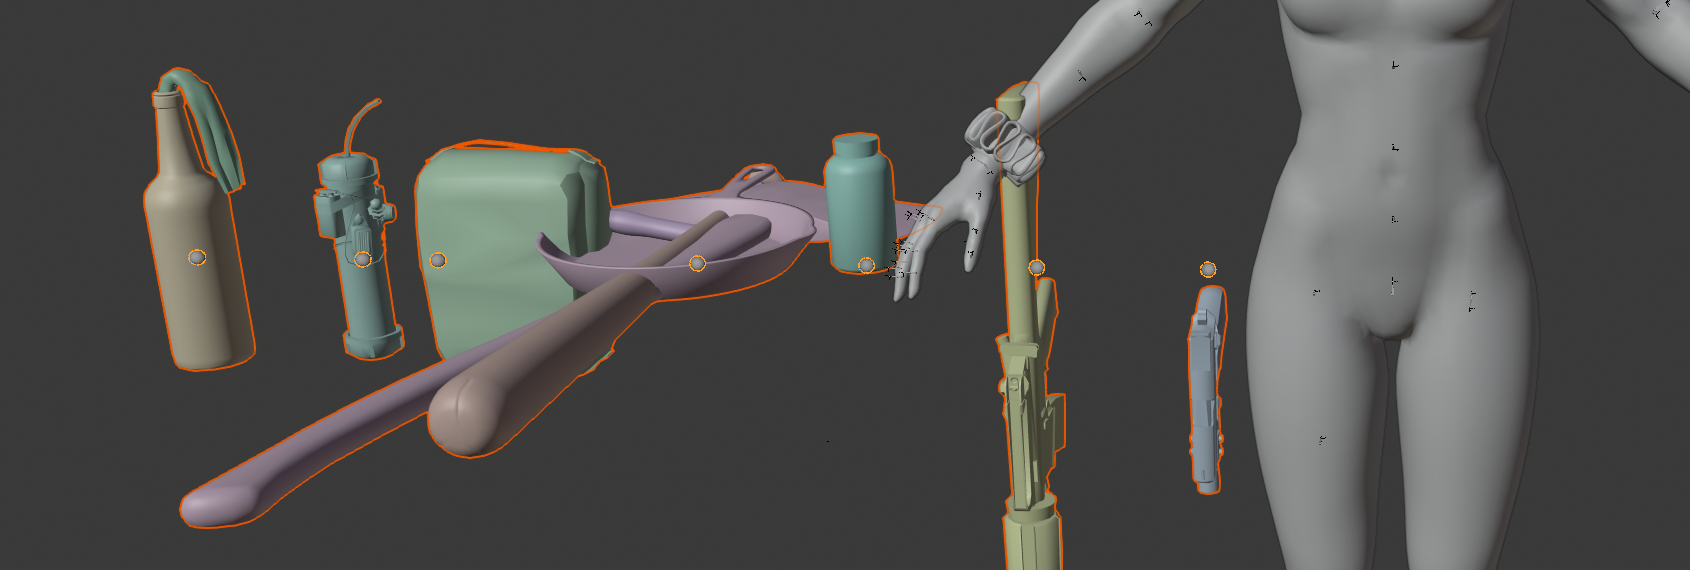 Use pose mode to pose the items where you want them to be.
 Note: Melee weapons are not entirely accurate, but I got them as close as I could.
Also, Adrenaline uses pills attachment, defib and ammo upgrades use the medkit attachment.
Pipebomb and Molotov got their own attachments for some reason. If you want you can make both attachments follow the same bone, so you can delete one of those bones and helper mesh if you are in need to an extra bone on your model.
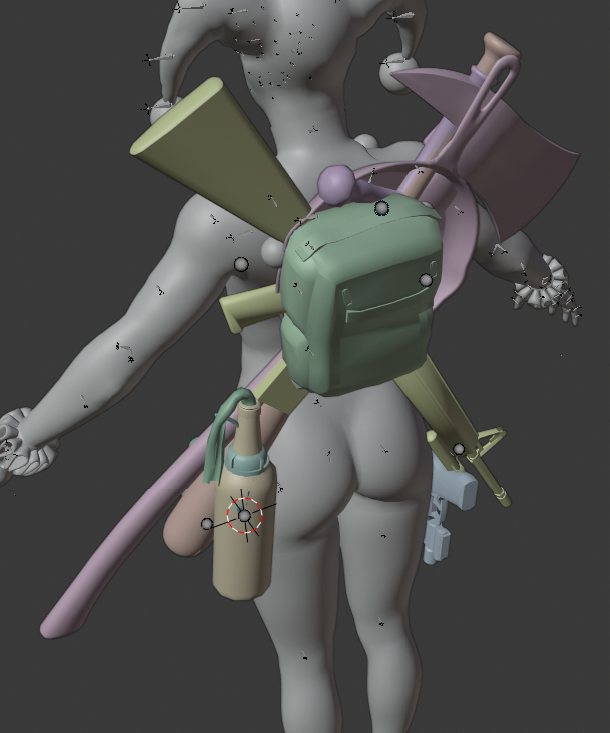
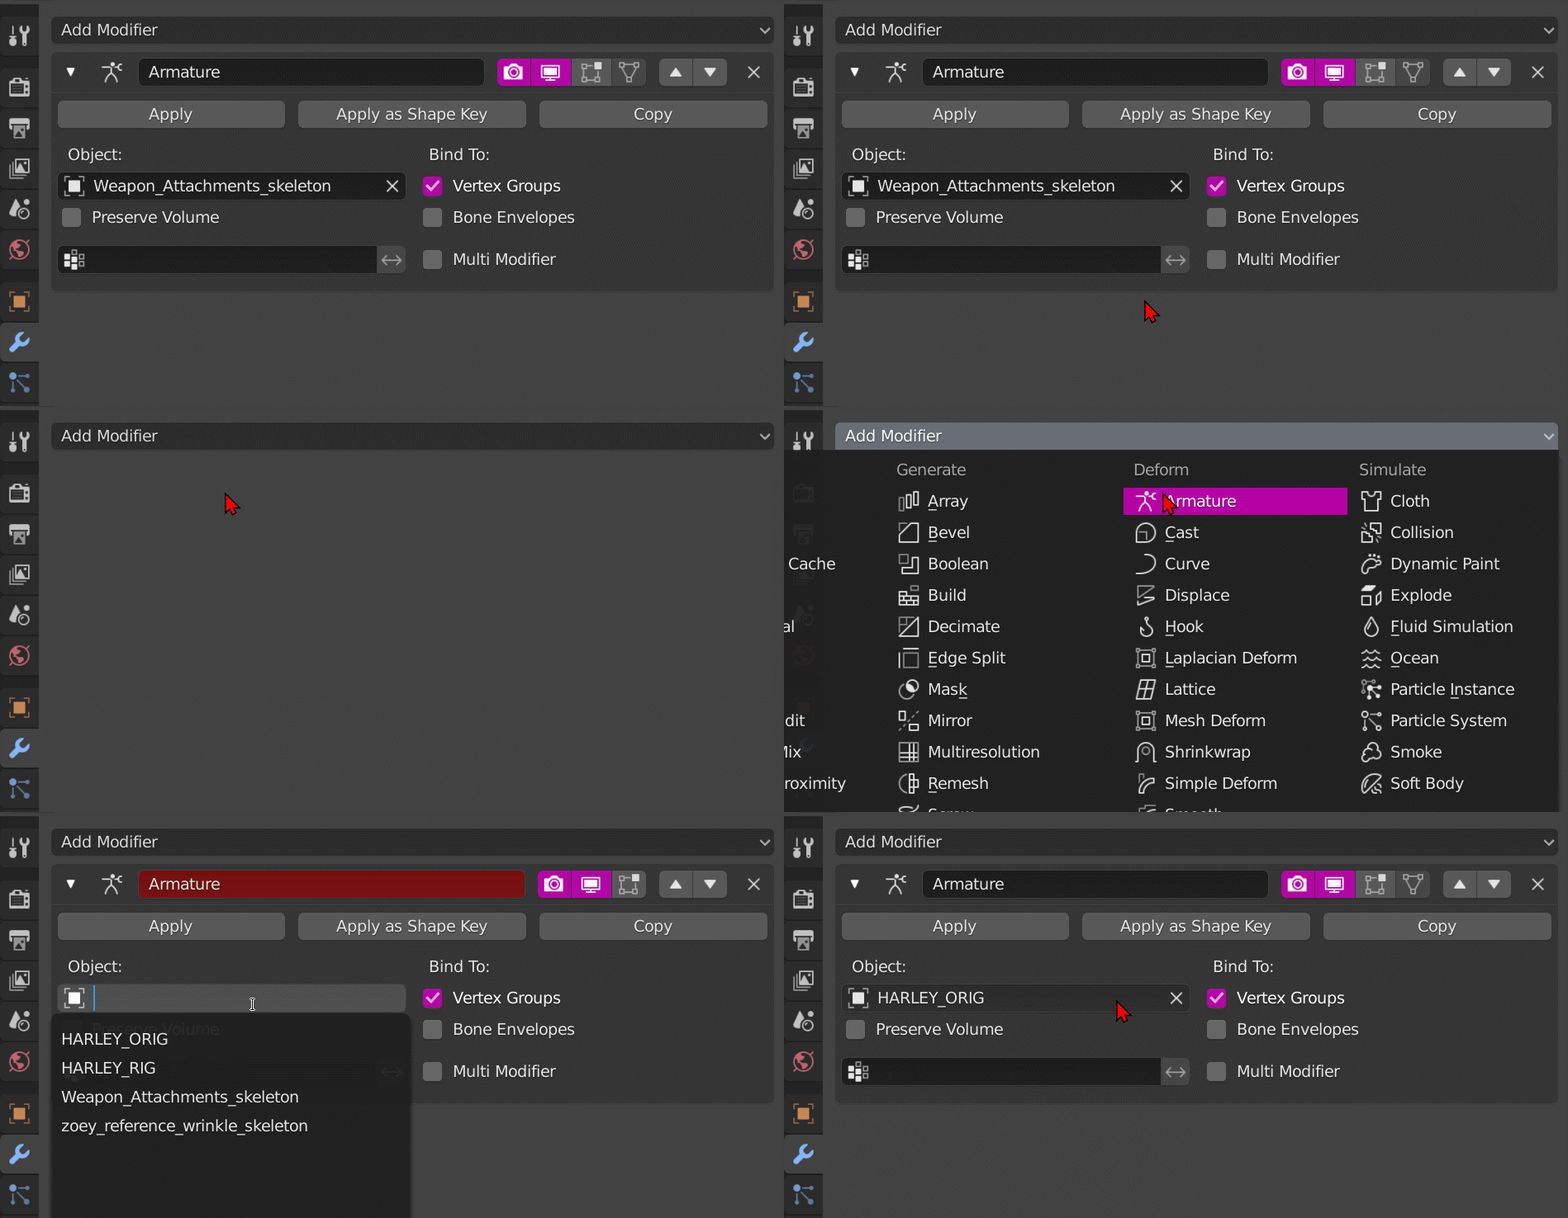 Next, apply the pose you just made as a rest pose, then join that armature to your survivor armature.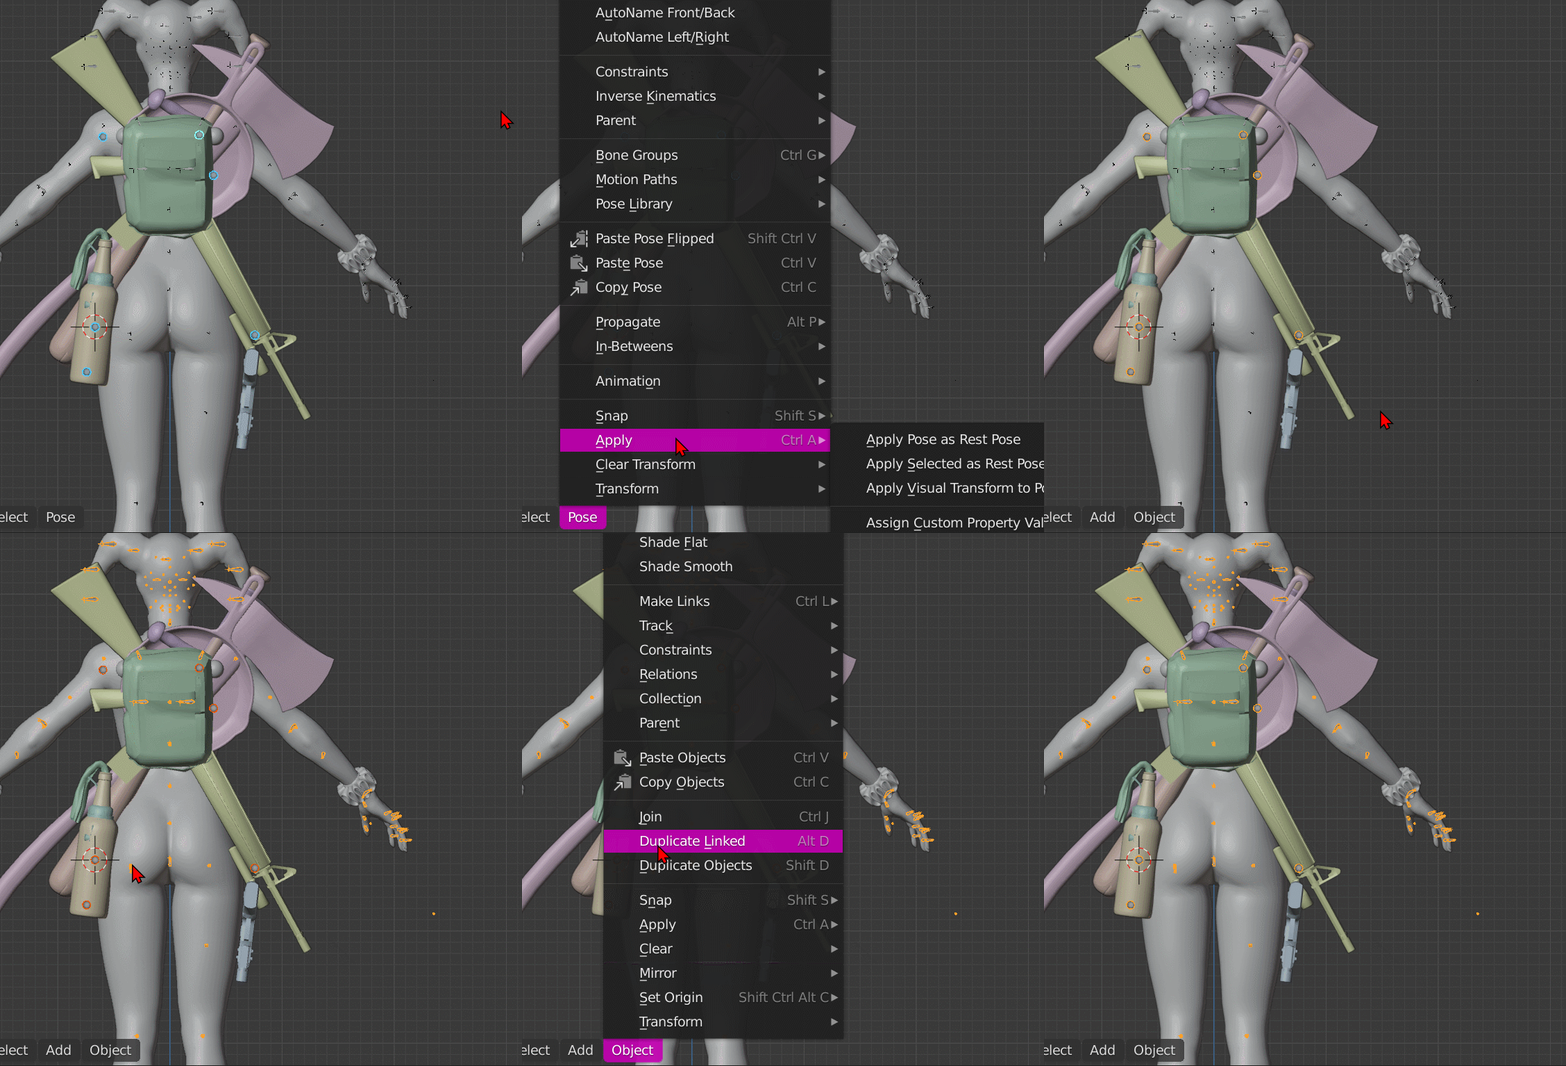
Enter armature edit mode and parent the attachment bones to the nearest survivor bone.
You could also parent them to jigglebones, but don't make the actual attachment a jigglebone because jiglebones always need to be in a very specific orientation to work, while our attachment bones also need their own special orientation.
Now since we made new bones, we need to make new bonemerge lines and run our "Generating Definebone" qc again.
Copy the bone part, open your !bonemerge.qci, delete all of it and paste your bone part from the smd file.
Press "Ctrl & H"
Make sure "Regular Expression" is turned on
Find ^\s*\d+\s*"(.+)"\s*-?\d+\s*$
Replace with $bonemerge "\1"
Save the !bonemerge.qci again.
For example: your melee_attachment bone is a child of Spine4.
The compiler will recognize that the attachment ultimately follows Spine4 and will instead calculate the offset to from teh attachments current location to Spine4 on its own, making the attachment stay where it is, but now directly attached to Spine4. As opposed to being attached to "melee_attachment".
If, however, you want to keep this bone for a jigglebone or maybe a moving attachment, you need to write $definebones for those bones aswell and paste those custom definebone lines below the original bones.
Comment the $include Last_Stand_Weapon_Bones.qci from your qc file. Drag your "!Making_Definebones.qc" onto crowbar again.
In the compile tab, pick the $DefineBones option and its QCI option.
Name the file "!definebones"
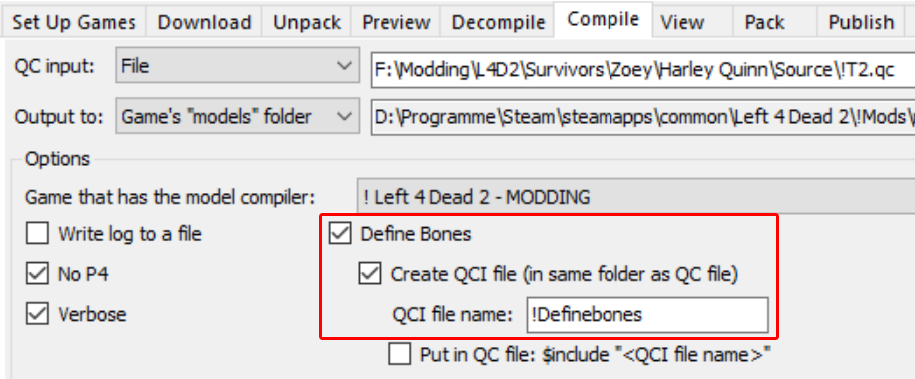
Press the Compile button to write a new !definebones.qci.
Now we got new definebones that include the attachment bones.
We needed to write a new one because those bones have no mesh rigged to it, so the compiler would have removed them from the model. Plus, if the model bones don't match with the $definebone lines for any reason (like not having some $definebone lines for existing bones) the DMX face flexes will break
Uncomment the commented "Last stand qci"
Important notice: IF the attachment order is originally different, rearrange these lines to be in the same order. Different attachment order can mess up the attachments location.
Some attachments appear twice because valve spaghetti work. so just replace all lines of the attachment with the same data.
Some L4D1 characters don't have the melee attachment, so just add that one below all original attachments instead.
Sometime survivors, like Zoey or Coach, decompile without the following attachments:
- L_weapon_bone (For holding two handed melees)
- weapon_bone
- Melee (which we just generated)
- attach_R_shoulder_blade_aim
- attach_L_shoulder_blade_aim
If you don't have them, add the following lines below your already existing ones.
Should you ever mess up the attachment lines, or some are missing;
Here are all original attachment lines for all survivors[pastebin.com].
Face Flexes
If you are working on a headhack, you will already have everything you need. Skip this part and only do "eyetracking" if you had to modify the proportions of your headhack model.
I recommend you to rig your face to a few bones. At the very least the eyelids, jaw and lips.
Cheeks and brows can be modified rather well with sculpt mode. If you use sculpt mode, use the "mirror" function to have both sides of the face scuplted at once. But only use Sculpt mode after you made a flex via posing the mesh, otherwise you edit the base.
Be aware that flexes using DMX format (which we will use) will be broken if your definebone.qci doesn't match with the actual location of the bones.
Those have the original flex data.
Head over to "Left 4 Dead 2\sdk_content" and unpack the "Starter_Kits.zip"
In the new folder, look for the character you want to replace.
In my case "Starter_Kits\Survivors\L4D1\Zoey\models\survivors\Compiling Files"
Inside of it is a QC file. Open that up real quick.
It also has two QCI related to flexes which we can use.
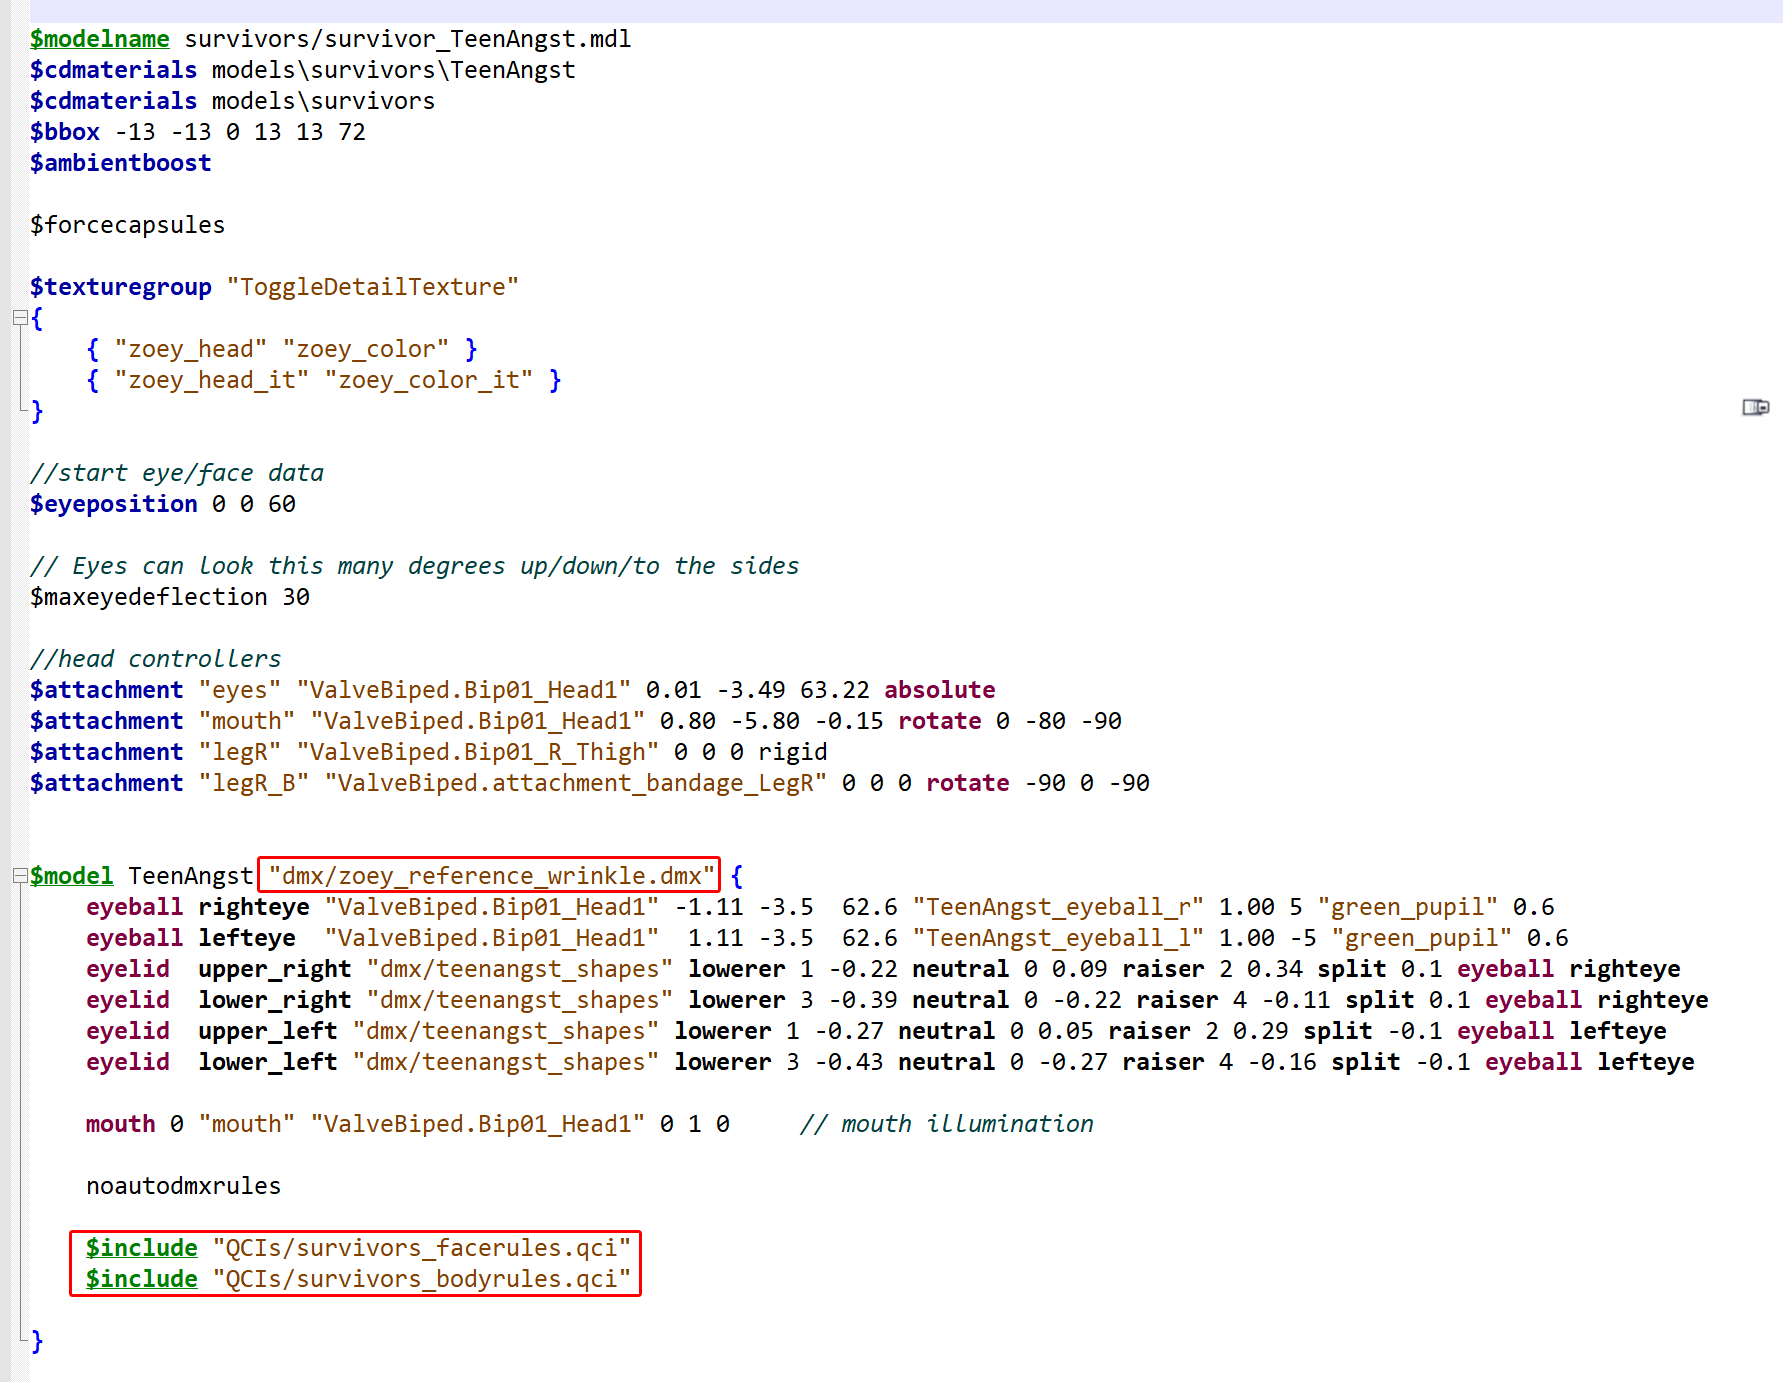
Copy those into the same folder as all your other model files.
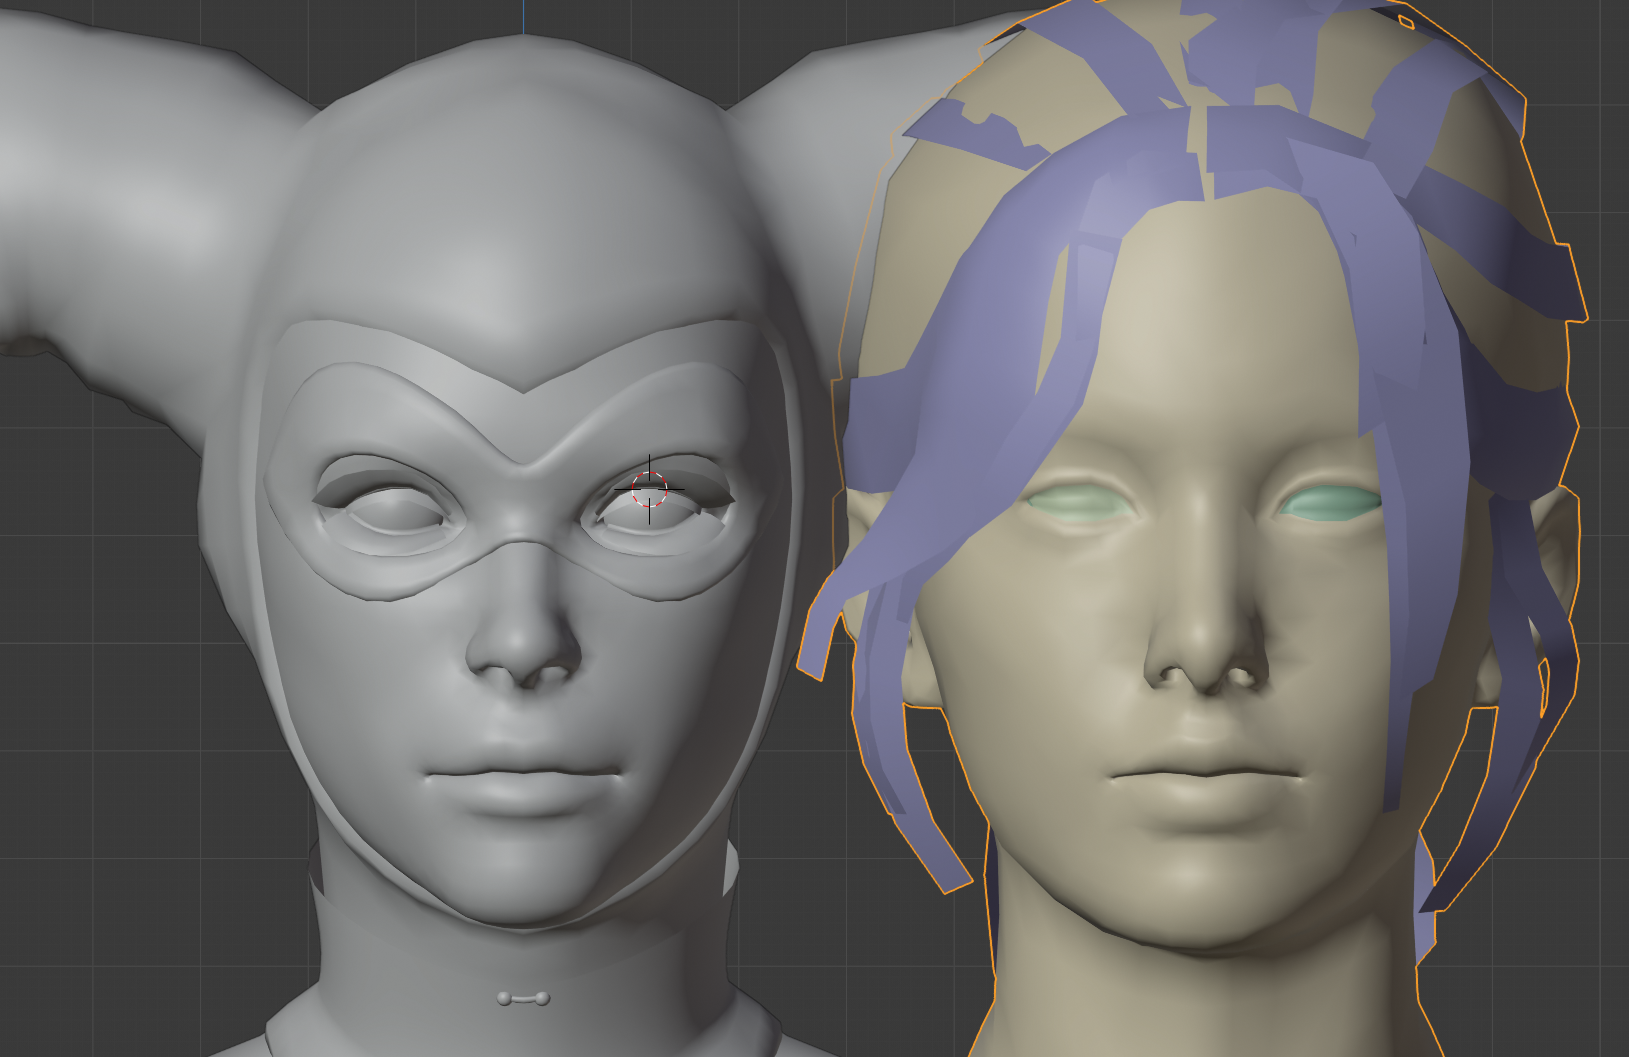
Don't forget to use "Make New Armature" when importing it. You can delete its armature and every piece of mesh that is not head.
Then move it out of the way so that you can see it next to your own head.
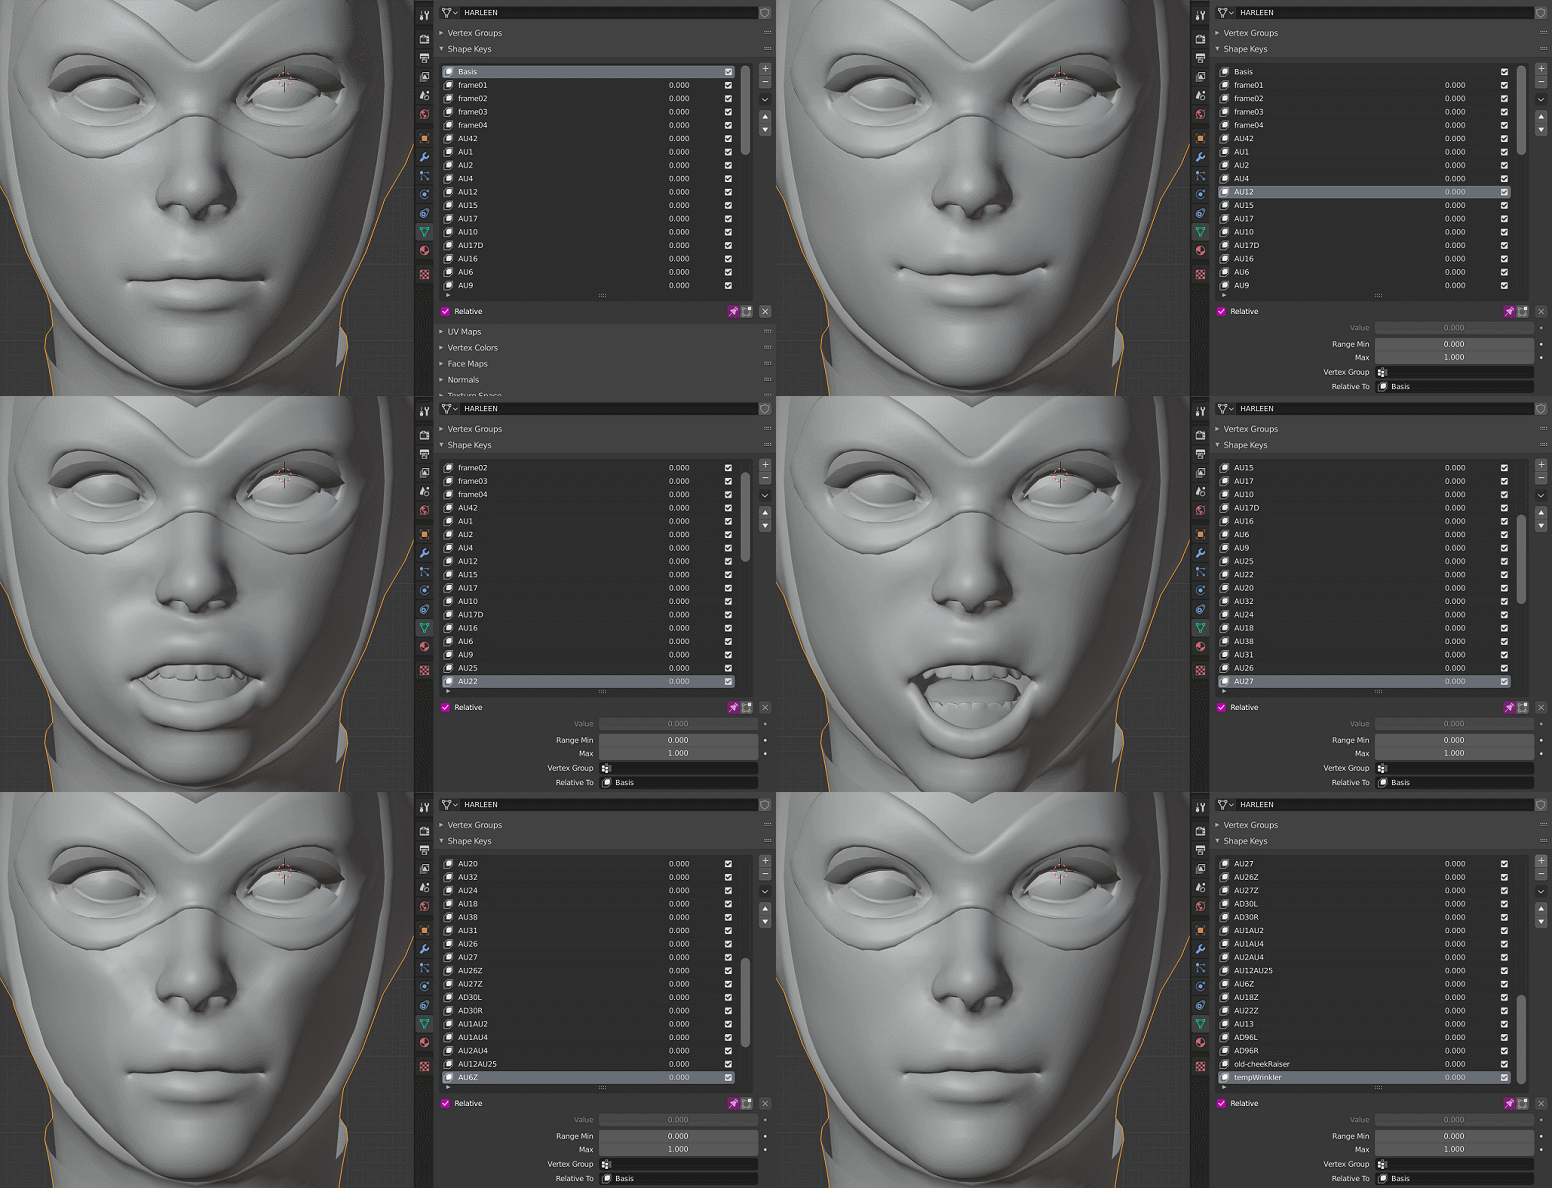
 In the "Object Data" tab, right under Vertex Groups you can see a list of its flexes.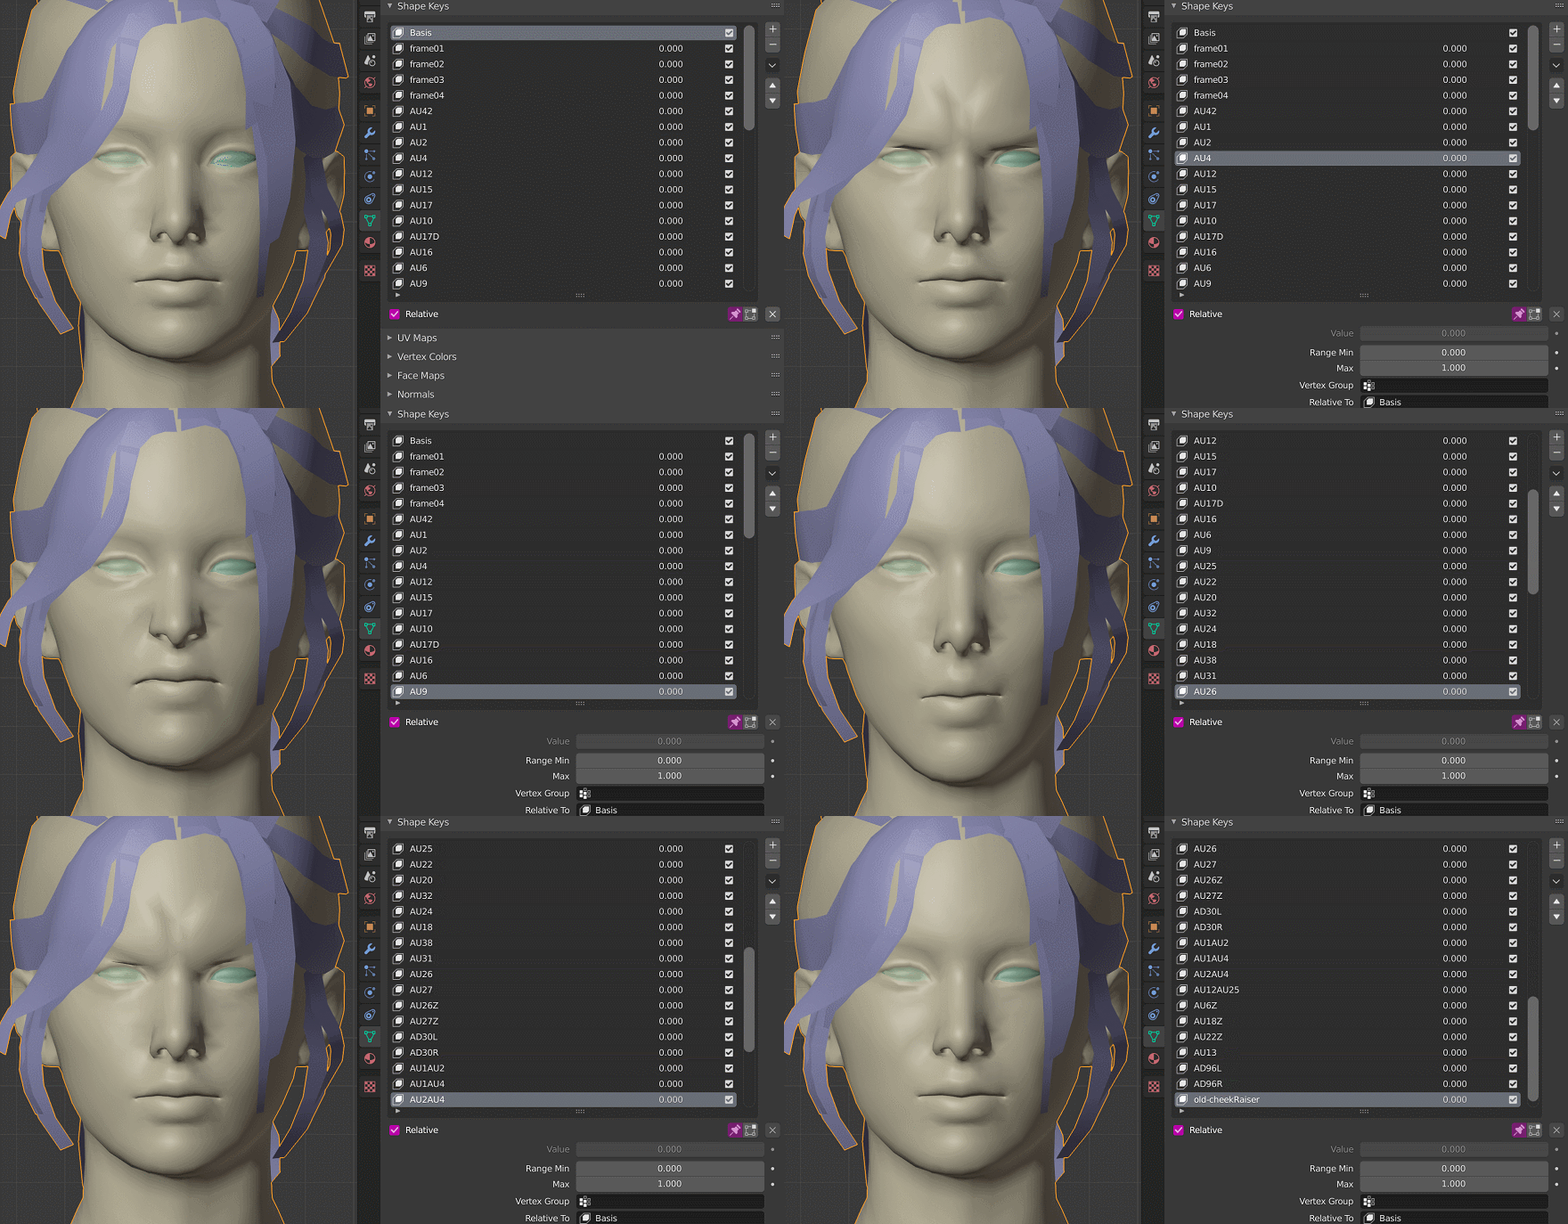
Note, Zoey for example has two flexes at the very end which we have no use for.
"old-cheekRaiser" and "tempWrinkler". They are needed, but unused.
Add them with their proper names, but leave them default face flex. Pick the first flex of the original head and recreate it on your own head.
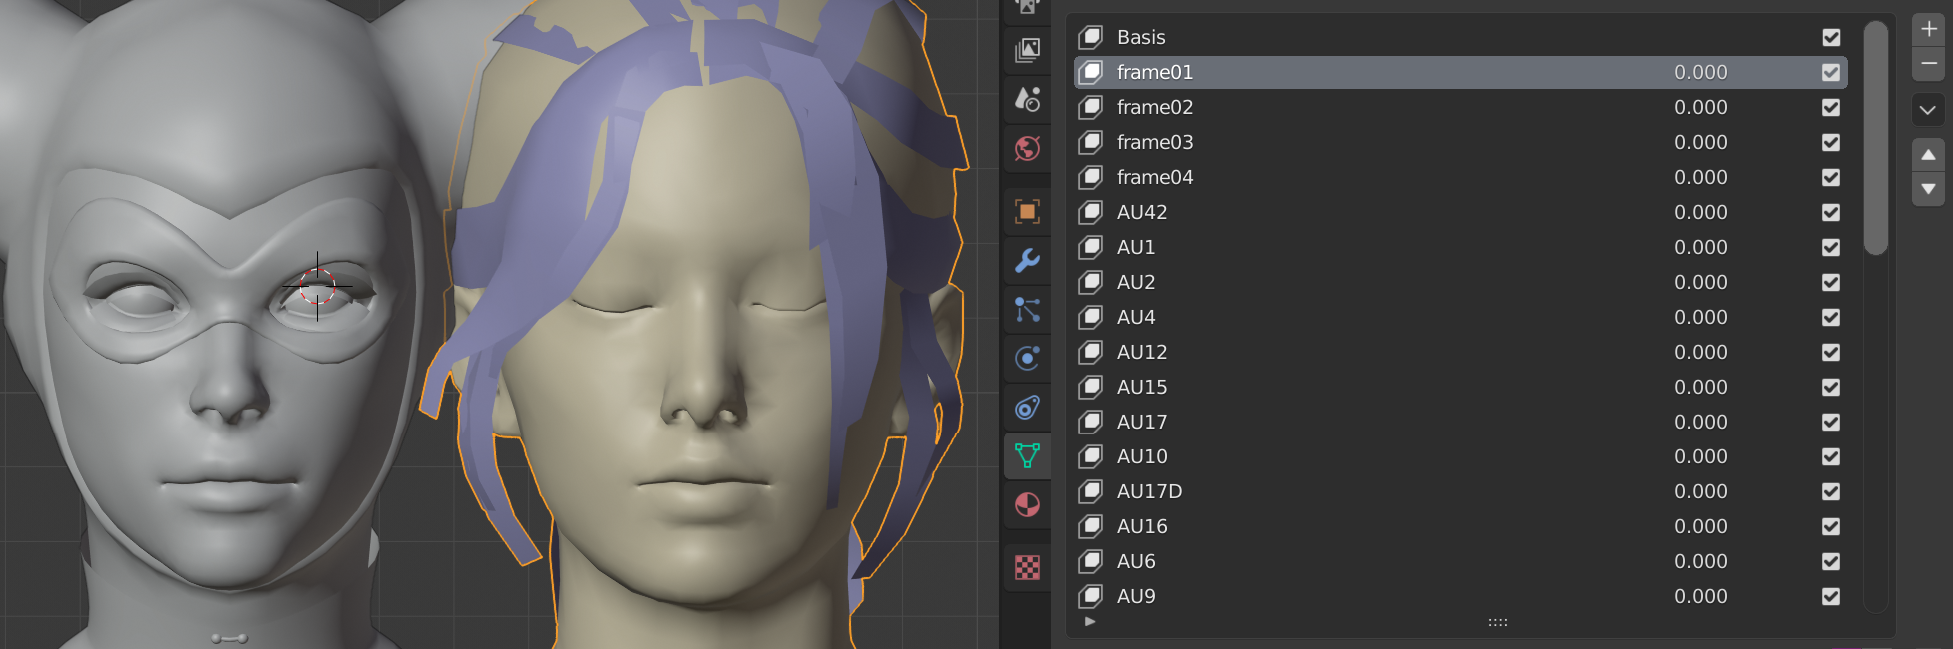
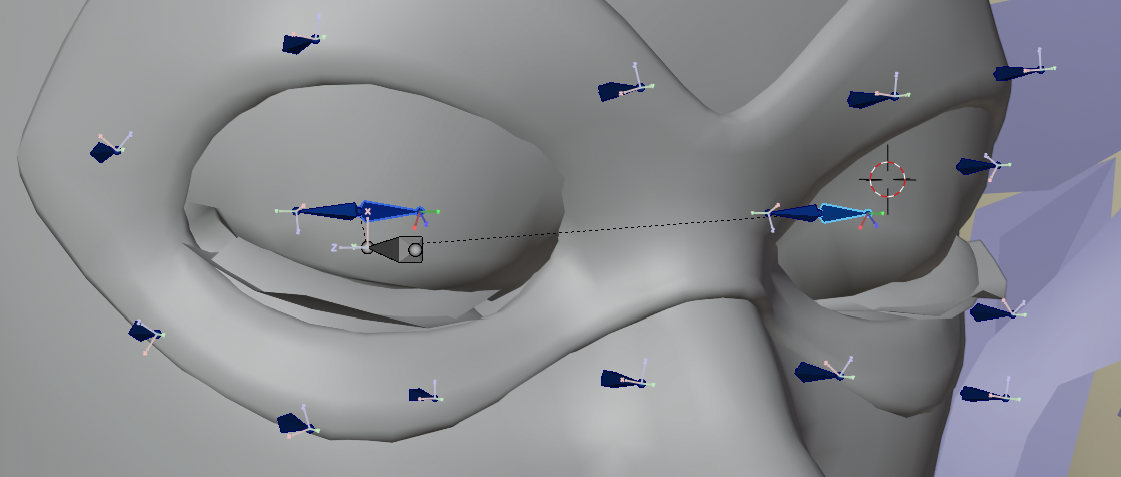 In the models modifier tab, change the name of the armature modifier to the name this flex had on the original head (Case Sensitive!) and click the "Apply as Shape Key" button.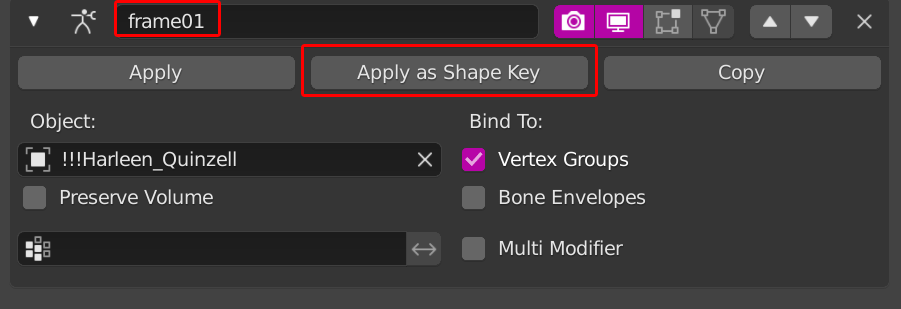
This will remove the modifier and add a flex with the armature modifiers name to your model.
Add the modifier again.
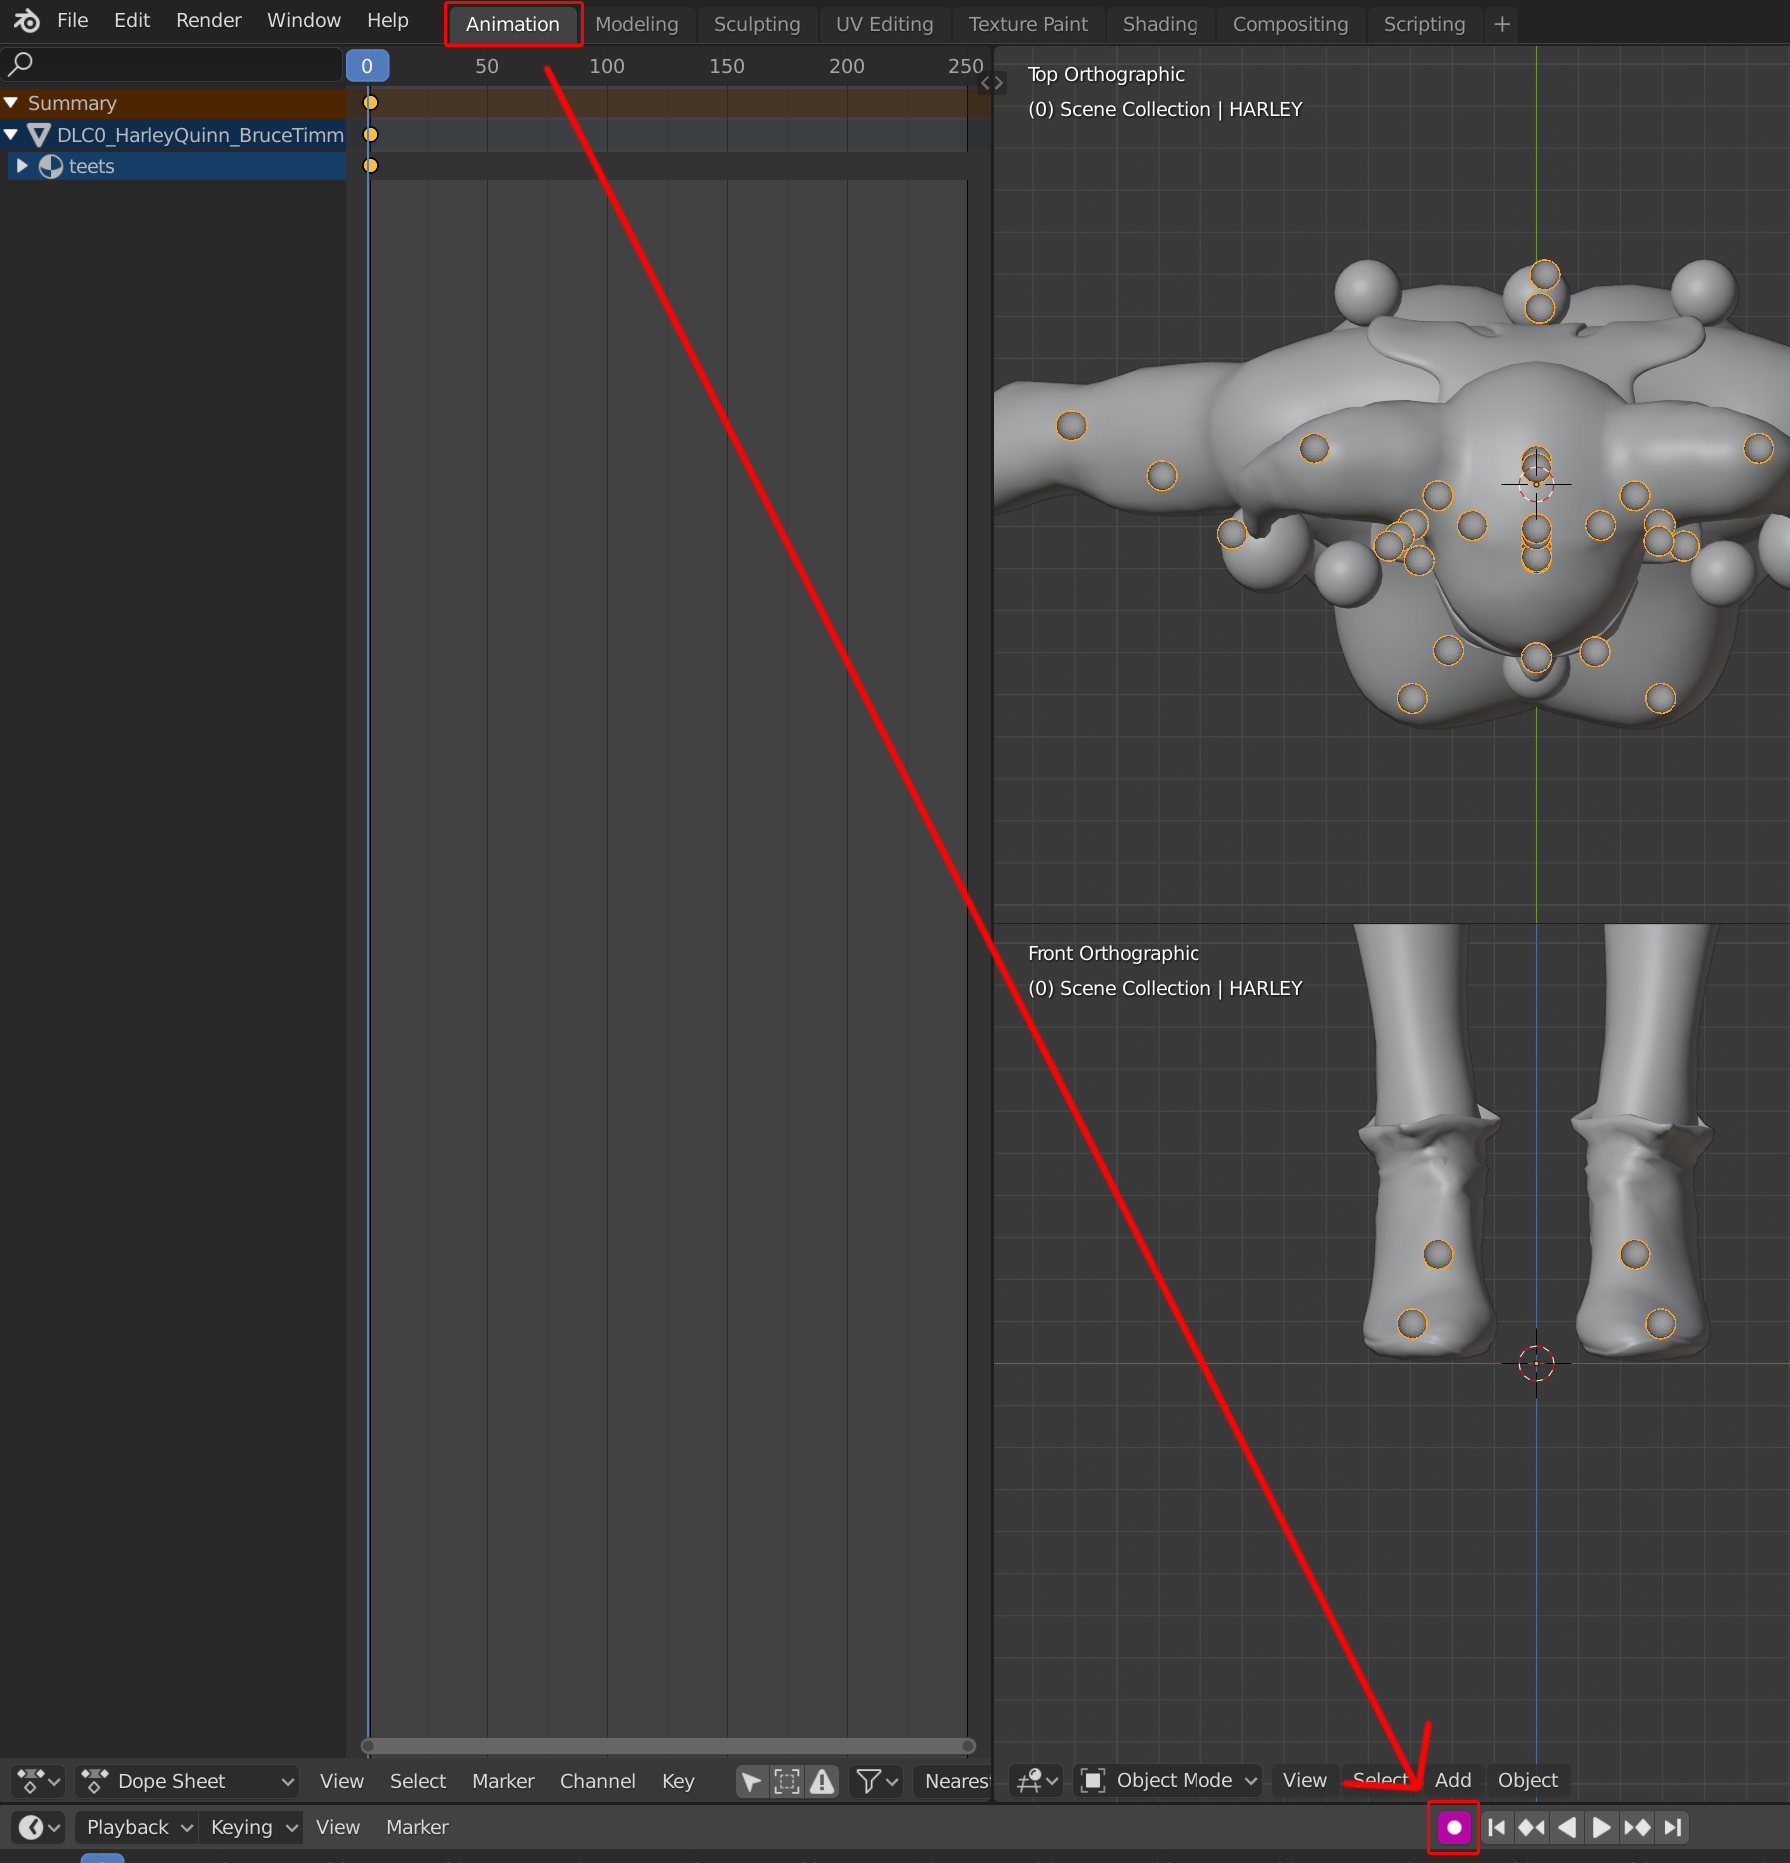
In case you ever need to modify a flex, go to the keyframe and add a fresh flex from the pose. Before you make any new flexes, go to the "Animation" screen and check if this setting that you had enabled earlier in step 4.02 is still enabled.
That button, as you may remember saves all bone modifications immediately as a keyframe.
If done correctly, your pose stays when pressing the right/left arrow keys.This little number in the top left corner is what keyframe you are currently on.
 Once you made a pose, hit "Right Arrow" to step to the next frame.
Clear that pose and make a new one.

Rinse and repeat this process.
Make pose, apply modifier, re-add modifier, advance frame, clear pose, make pose...
Make sure it only affects the face and not the teeth inside the mouth by first entering edit mode and hiding everything that you don't want to have affected in sculpt mode.
Also, make a new empty flex before you modify the face, otherwise you edit the base.
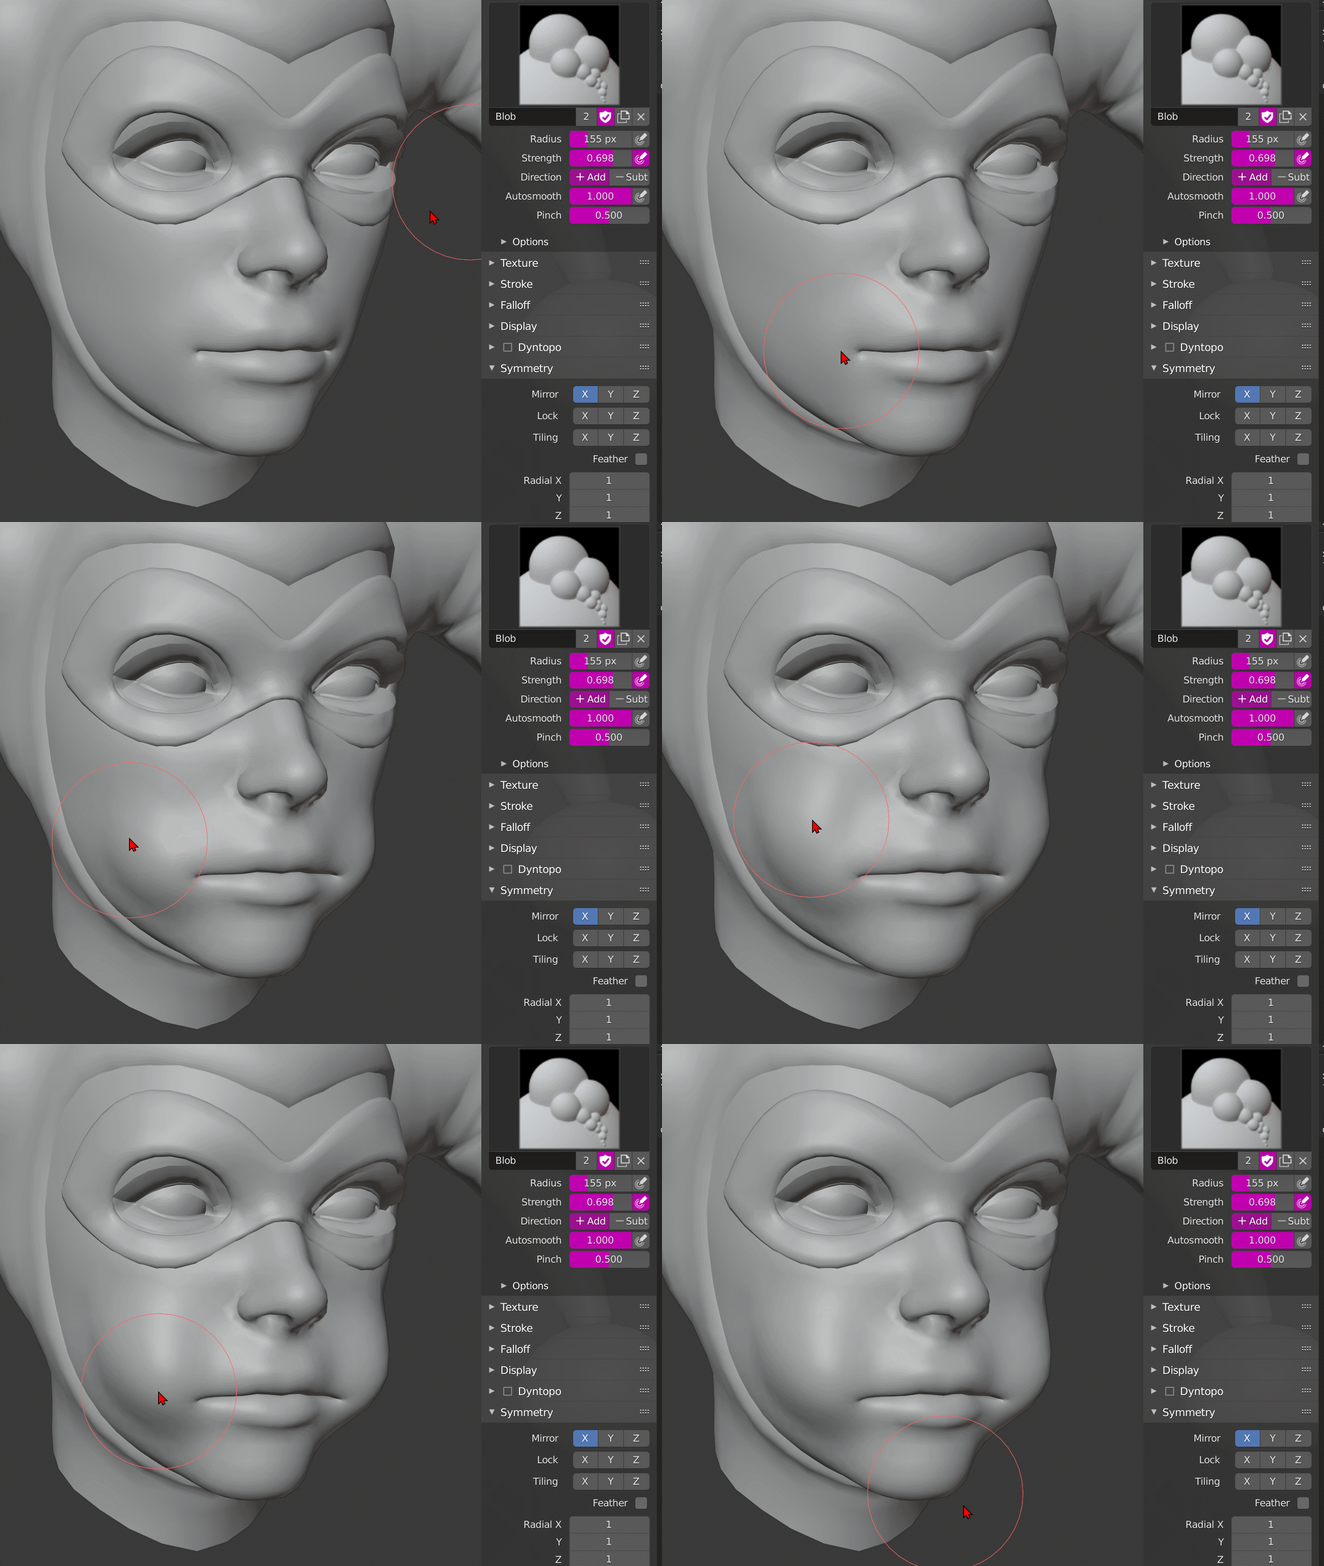
There might be a few flexes where the sculpt mode is more useful than your bones. Eventually you will have a list of all flexes, with the original names. (Remember; Case Sensitive!)
Remove face bones from the Vertex Group list in one of the meshes.
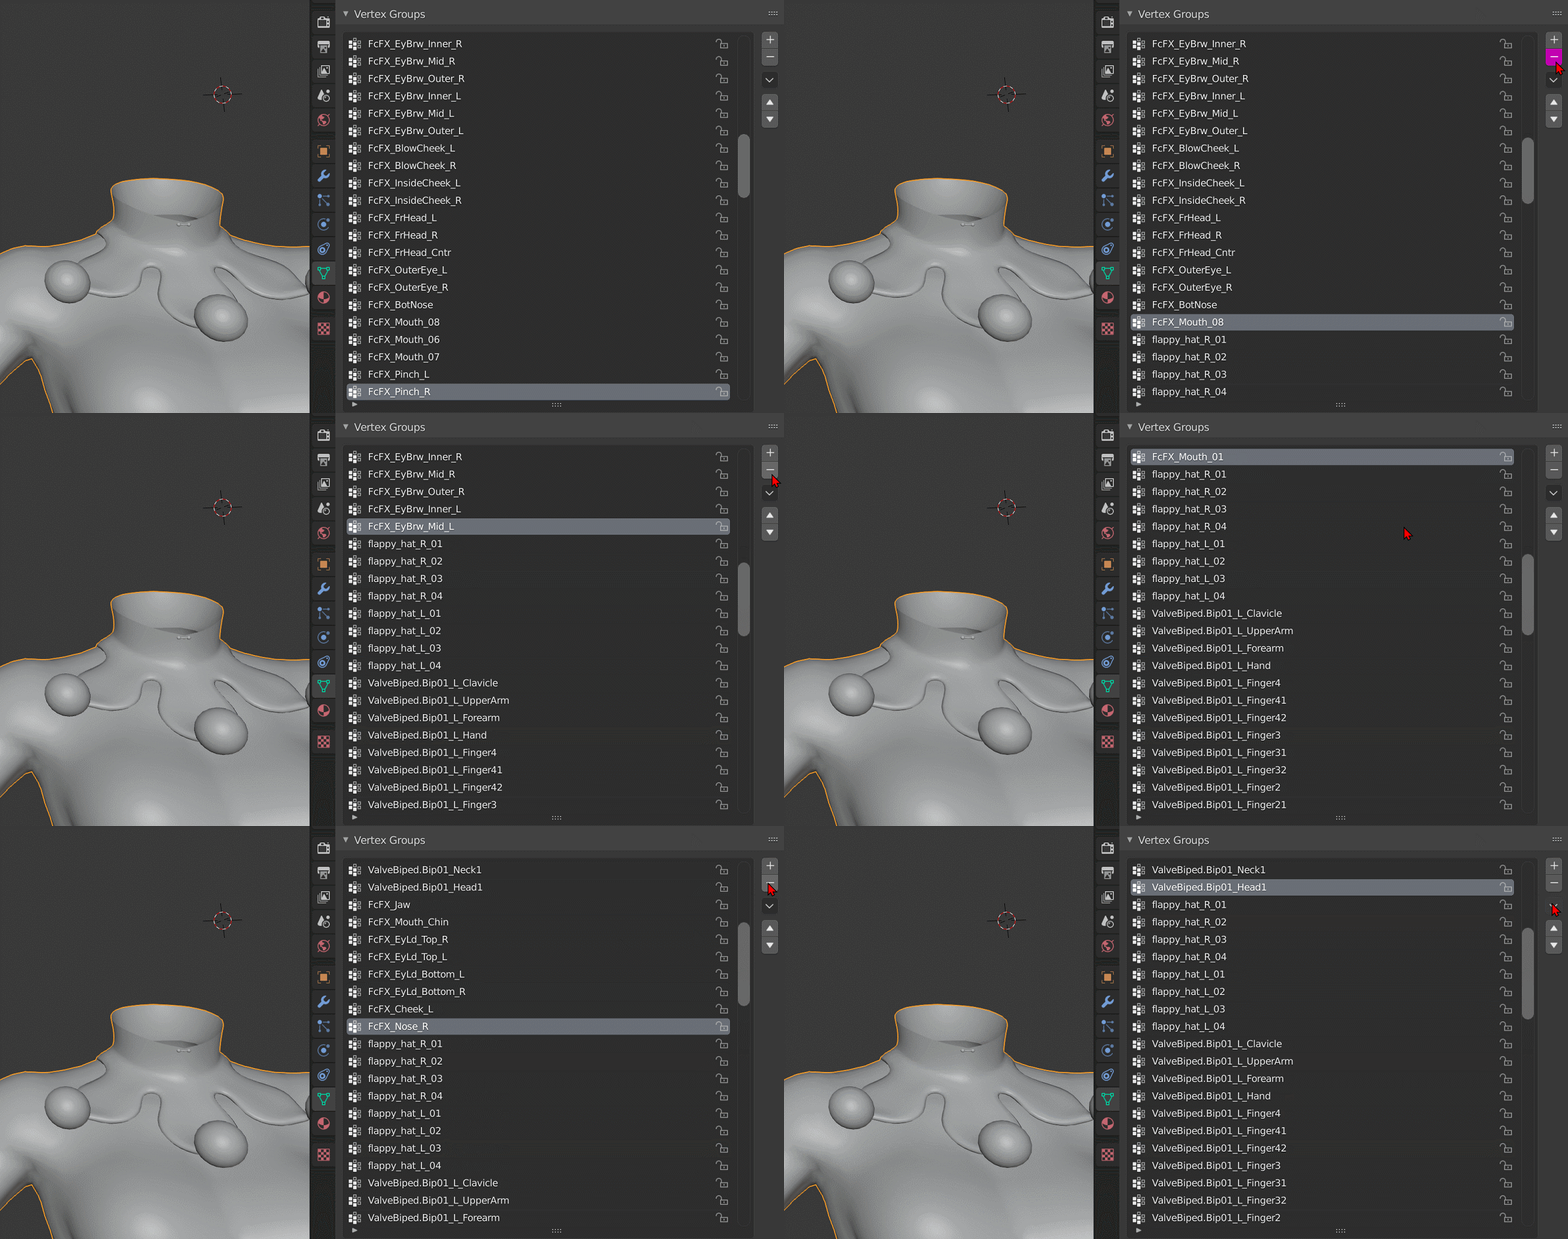
(My mesh has no head in the gif. i had head and body separated. Nevermind that.) Pose the entire armature back a bit to reveal all unrigged vertices.
Re-Rig those vertices to the head/neck bones.
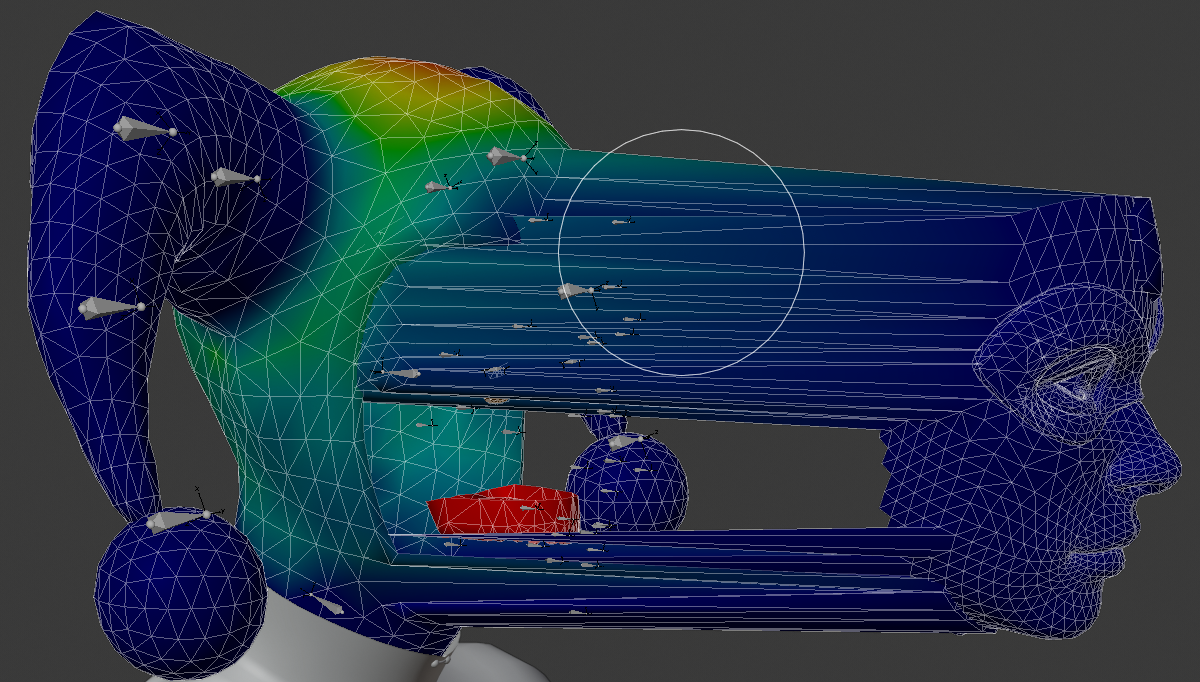
Open $definebone.qci and delete the face bones you removed from your mesh.
$definebones forces bones to be present even if they are not rigged or not actually exist.
Deleting bones from the vertex group only deleted its rigging.
The compiler itself will delete bones without mesh rigged to it.
You'll get a SMD and VTA file. We need the VTA for the eyelid lines later. You can delete the SMD. Select the DMX option.
L4D2 uses "Binary 3 Model 15".
Gmod uses "Binary 2 Model 1"
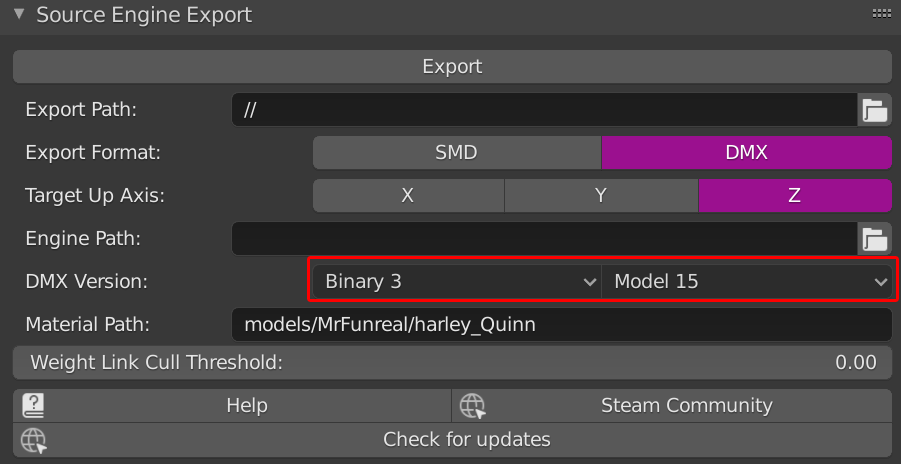
In the Source Exportables, select your head.
In this picture i got a different name from before. I decided to merge head and body.
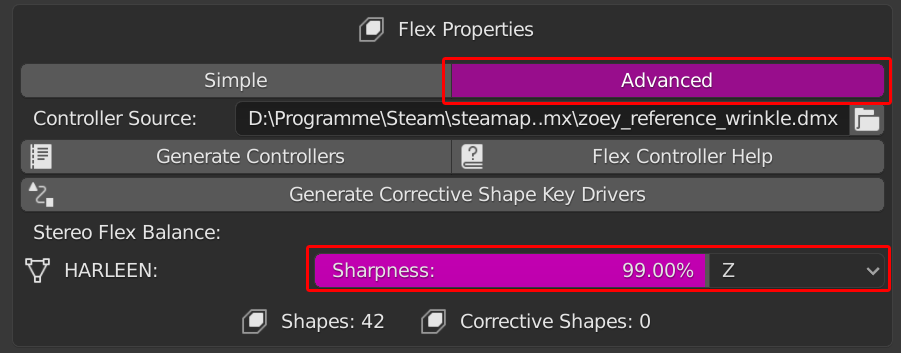
In "Flex properties", click the "Advanced" button.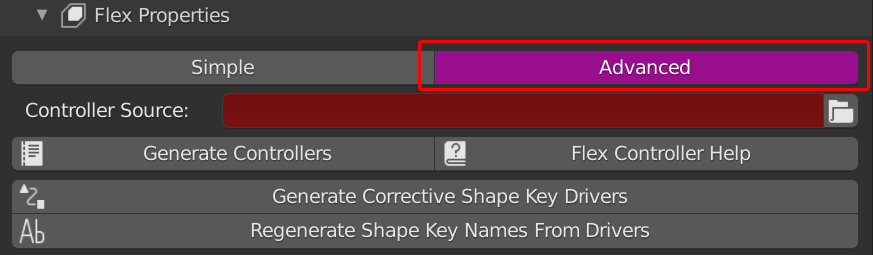
in the "Controller Source" search for the very same Starter Kit head DMX file you had imported.
This will copy the Flex Controllers from that file onto yours.
Its name probably does not matter and no such bone exists either.
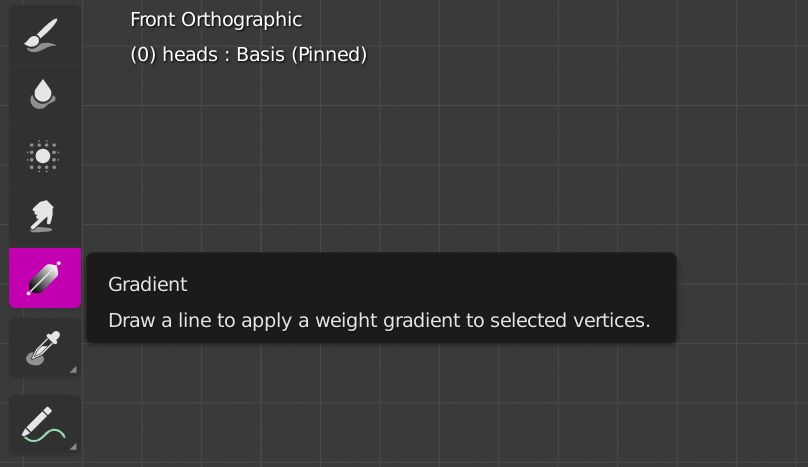
Enter weight paint mode on your head and select "Gradient"
 Paint across the face from right to left on the "DMX Stereo Balance" group only.
Make sure you're painting as horizontal as you can.
Turn on the wireframe and use the vertices as point of reference.
This gradient defines the space in which the Left and Right halfes blend.
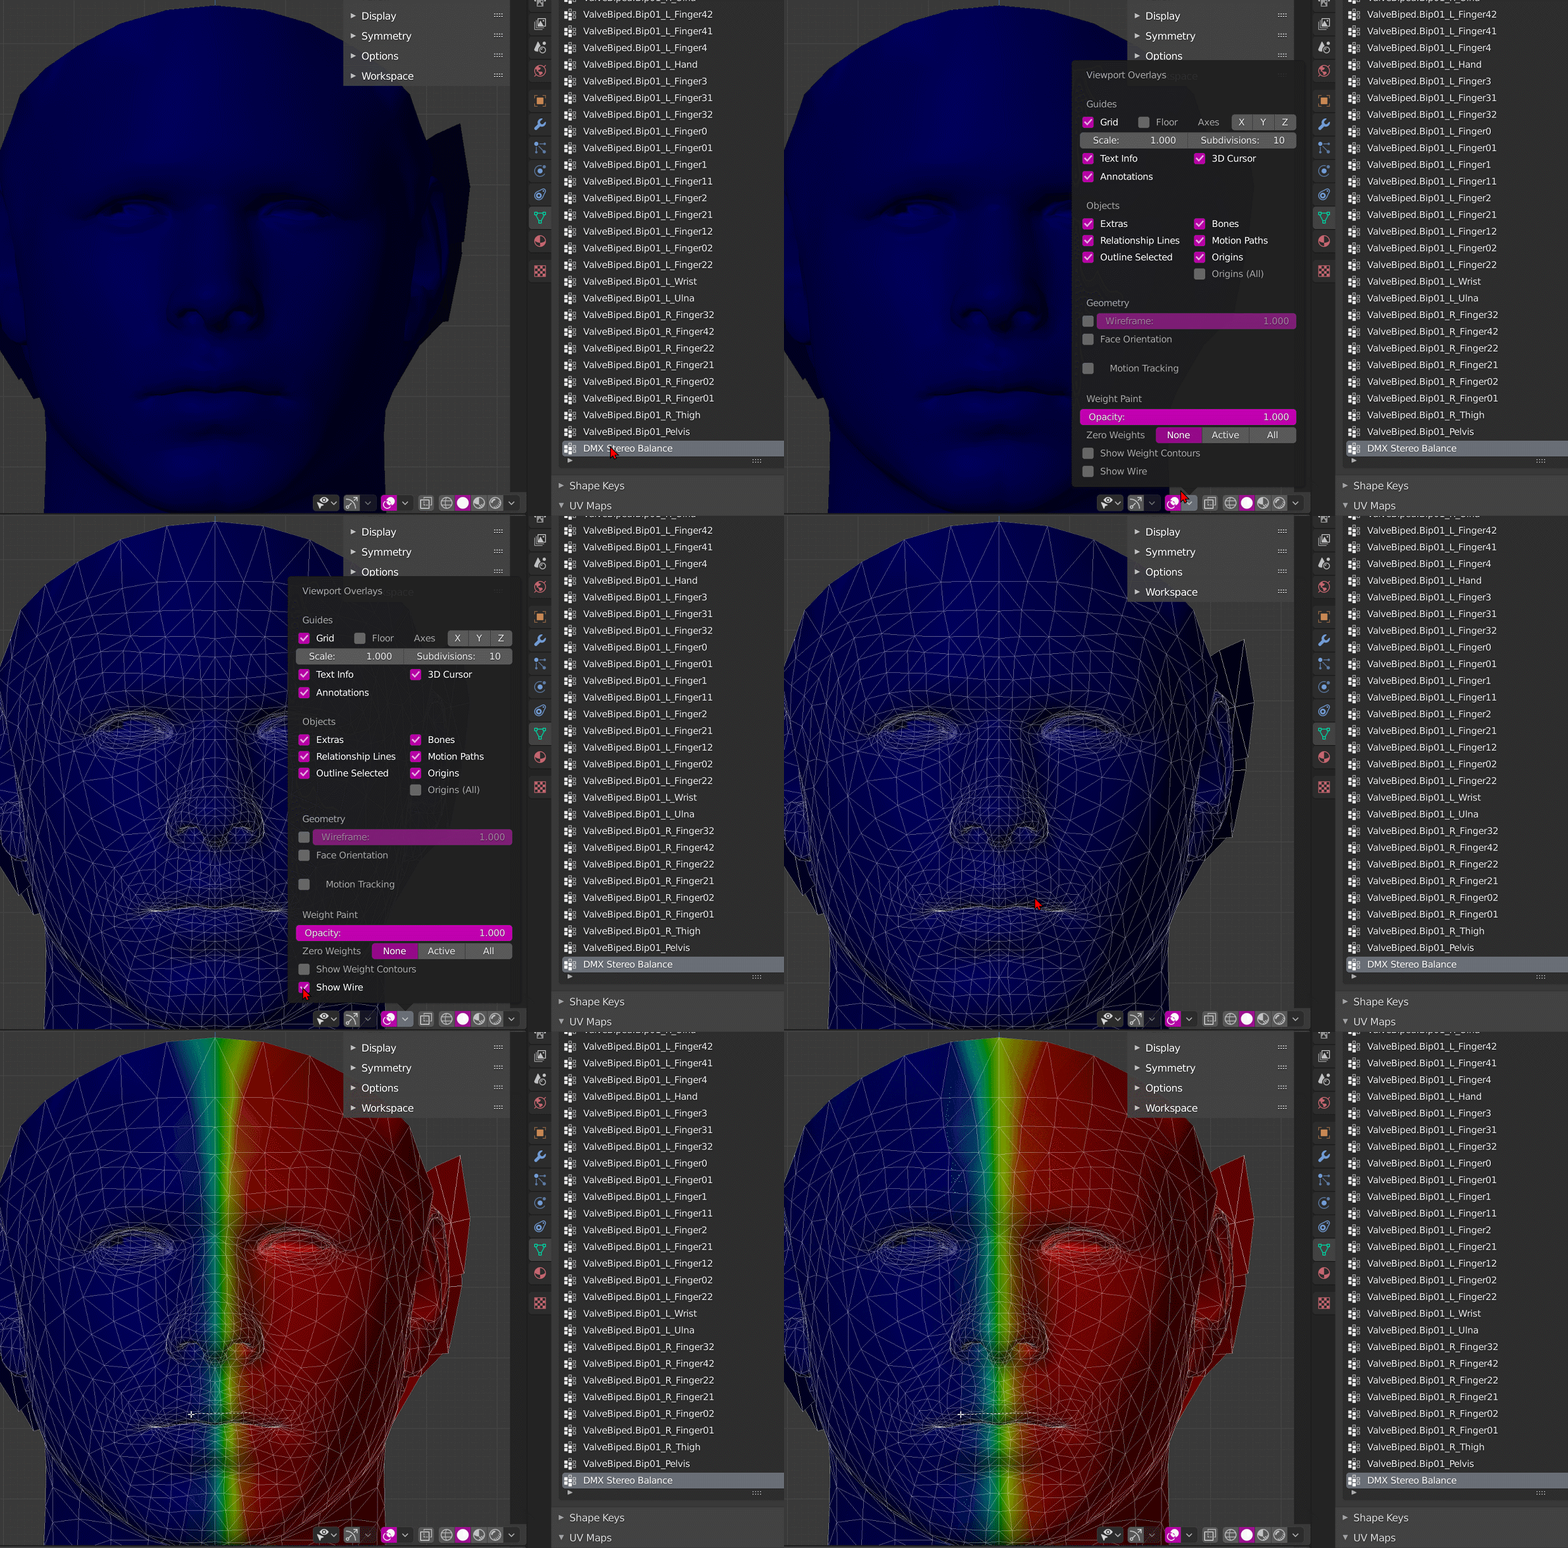
Yes, ellis' head. I was updating my Riot Police mod and learned a new, better way of doing it.
In the "Stereo Flex Balance field, pick the "DMX Stereo Balance" vertex group.
Export the DMX with these settings.
 100% sharpness: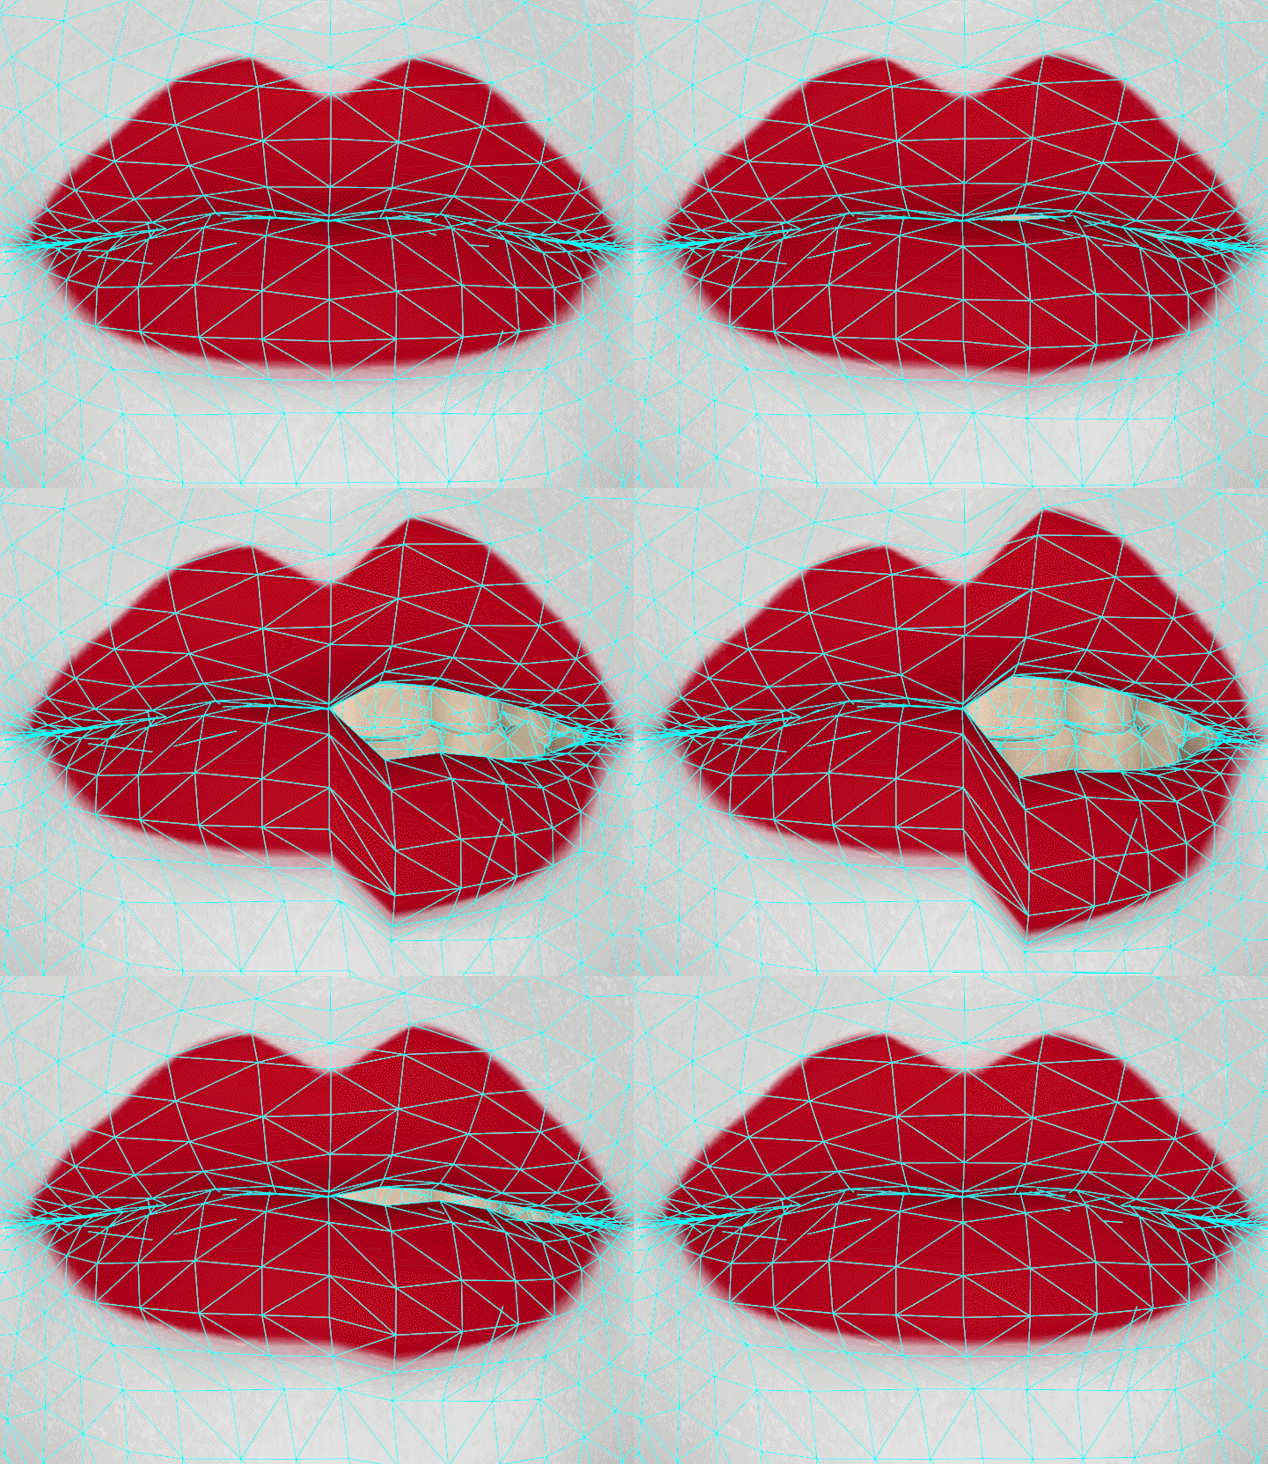
99% sharpness:
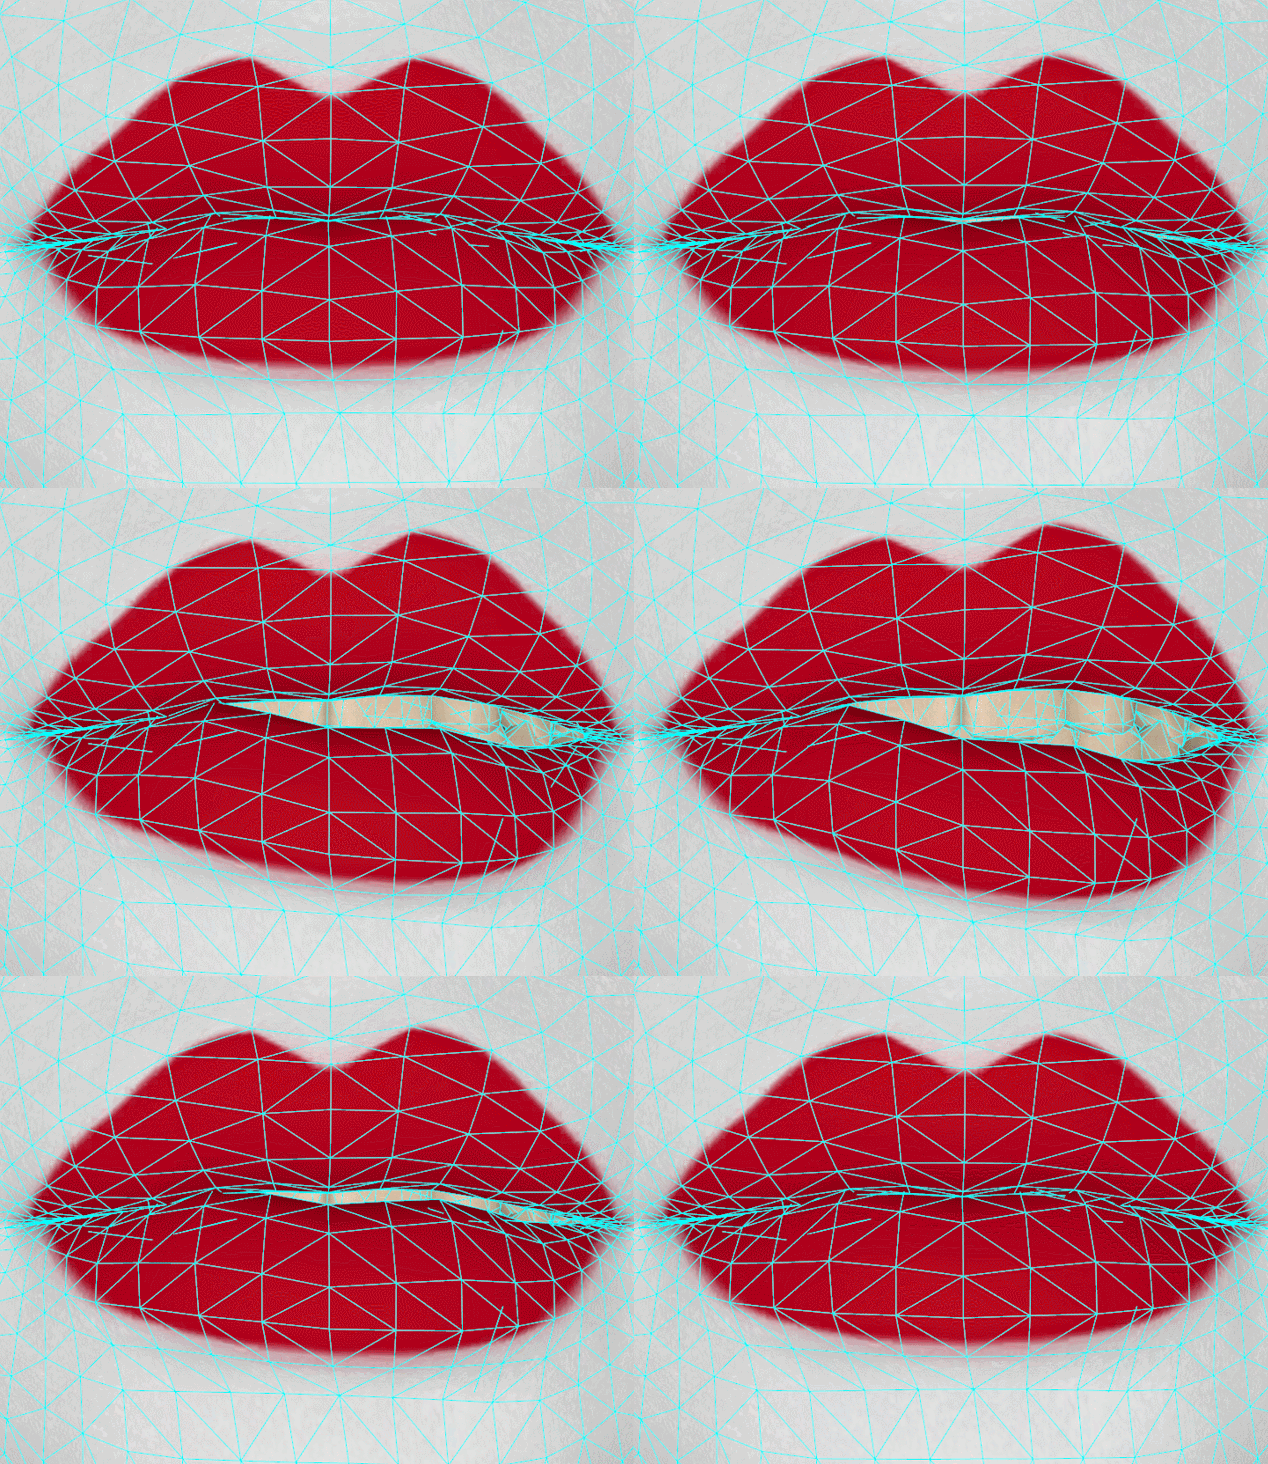
You can set this slider to a different setting if you want.
Start at 100% and work your way down im 0.2 instances.
I've seen 99% being way too low already
Eyetracking
The last part of the worldmodel is Eyetracking.
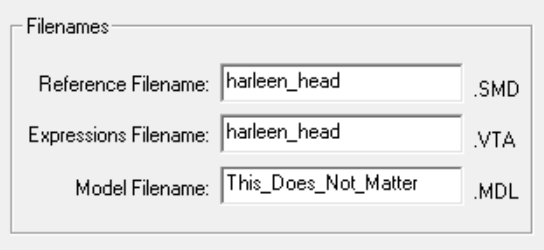
Head over to "Left 4 Dead 2\bin" and launch the tool. You'll see textboxes in which you need to write information.
Lets start with this box.
All we really need is the VTA name. The rest doesn't matter.
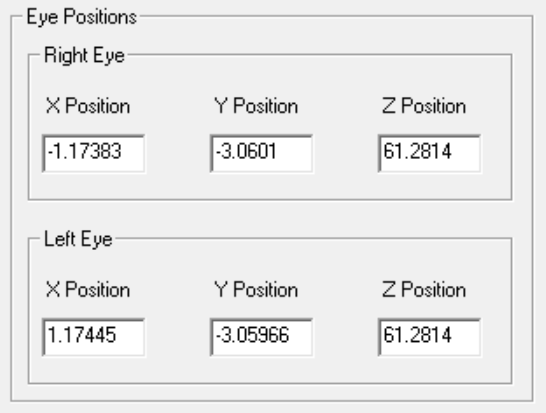
the X value for one eye is pretty much the X of the other, just with a - in front.
Y and Z are pretty much identical aswell.
This might be different if your model is looking to the left or right in blender. Here's how to get the X and Z numbers:
In blender, pick the very front and center vertex of your eye, Then press "N"
The menu on the right will show you the number. Just copy them into QC_Eyes.
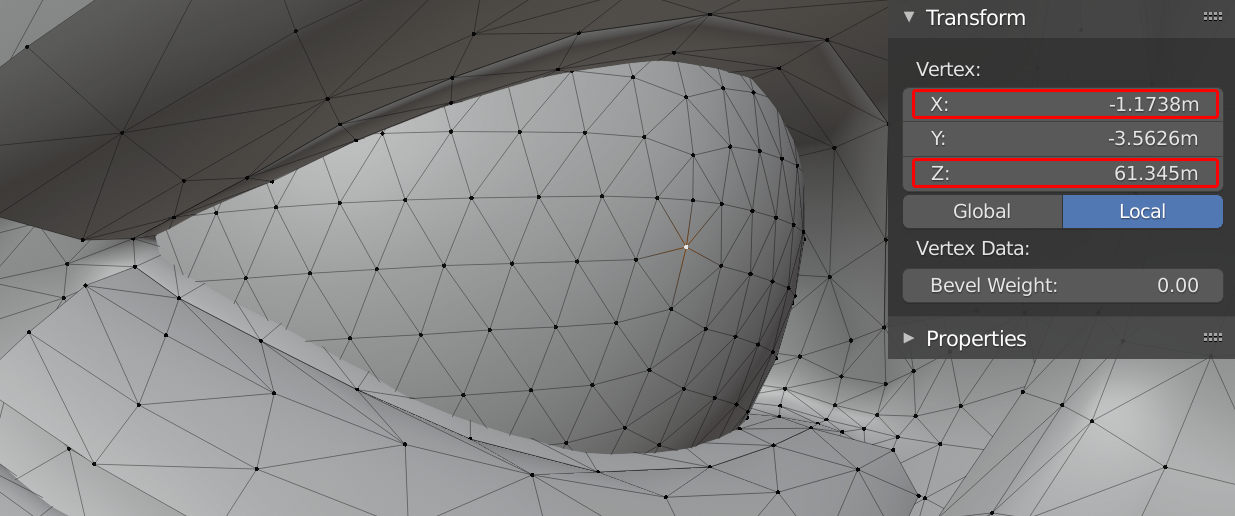 For the Y value you got to find the middle of the eyeball.
Sometimes you're lucky and you get an actual eyeball mesh.
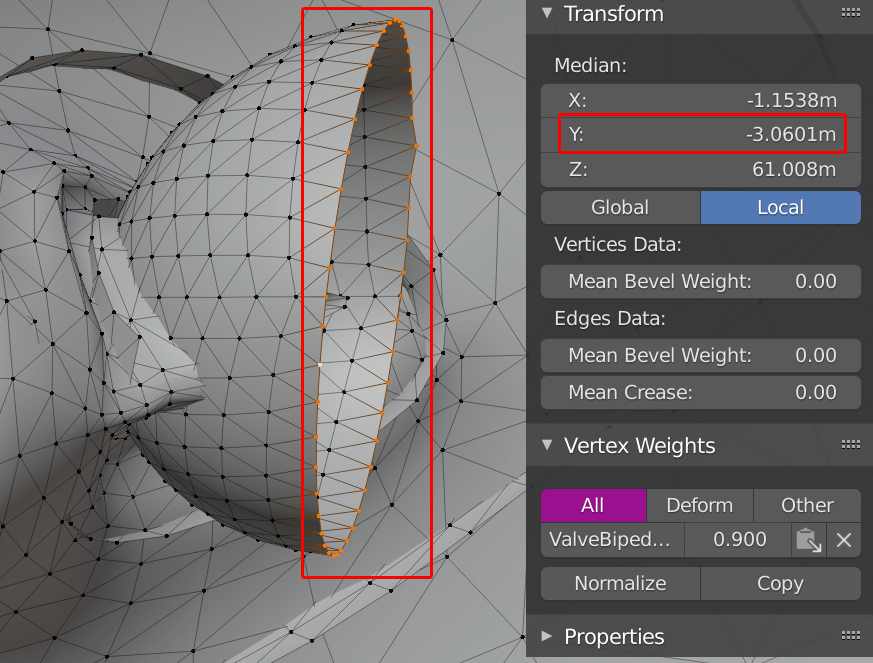 If you do not have at least half an eyeball try this:
Snap your cursor to the front middle vertex. The very same one you used for the X and Z value.In object mode, add an "UV Sphere". It will appear at the 3D cursor you had set.
Scale it down until its about as wide as your eye.
Move the sphere so far back until you can see your actual eye.
You'll have an approximate location of your eye middle now.
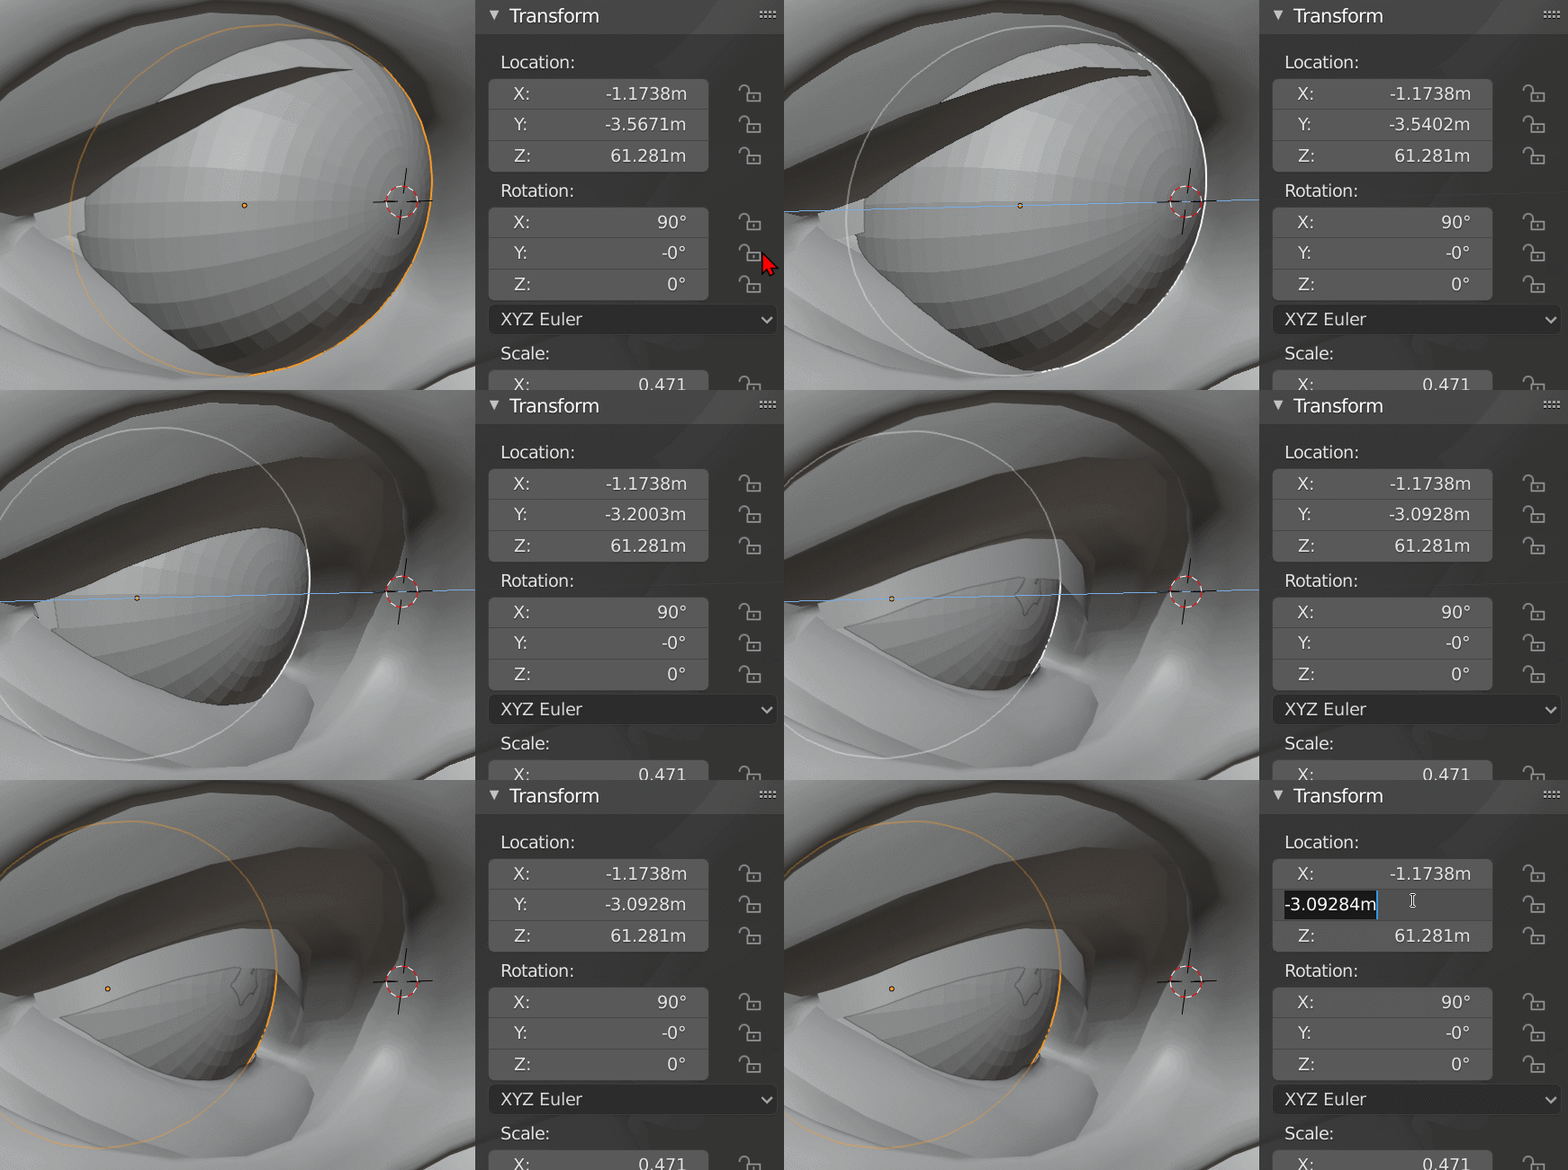
Once you pasted those three values of both eyes into their respective block, continue with the eyelids. Not setting the Y properly causes your eye to malform.
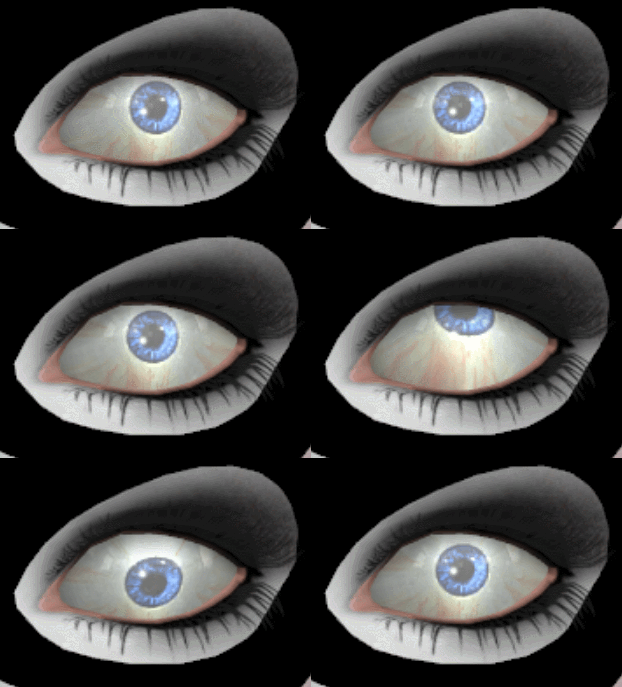
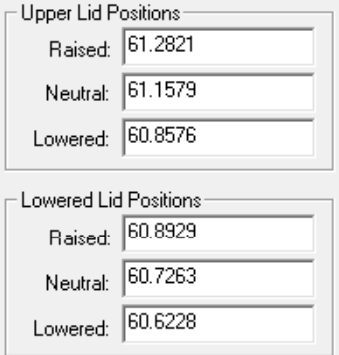
This is pretty self explanatory. The images are also really dang useful.
In case you don't get the QC_Eyes instructions:
Select the uppermost vertex as close to the middle of the eye.
Copy the Z position of that Vertex using the Base face flex into "Neutral".
Then switch to a flex where the upper eyelid is at its highest (Should be frame02) into "Raised.
Then switch to a flex where the upper eyelid is at its lowest (should be frame01, but was AU42 for me) into "lowered"
Then do the same for the lowermost vertex of the lower eyelid.
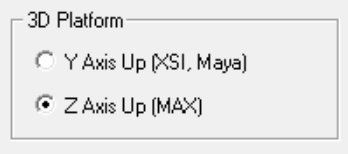
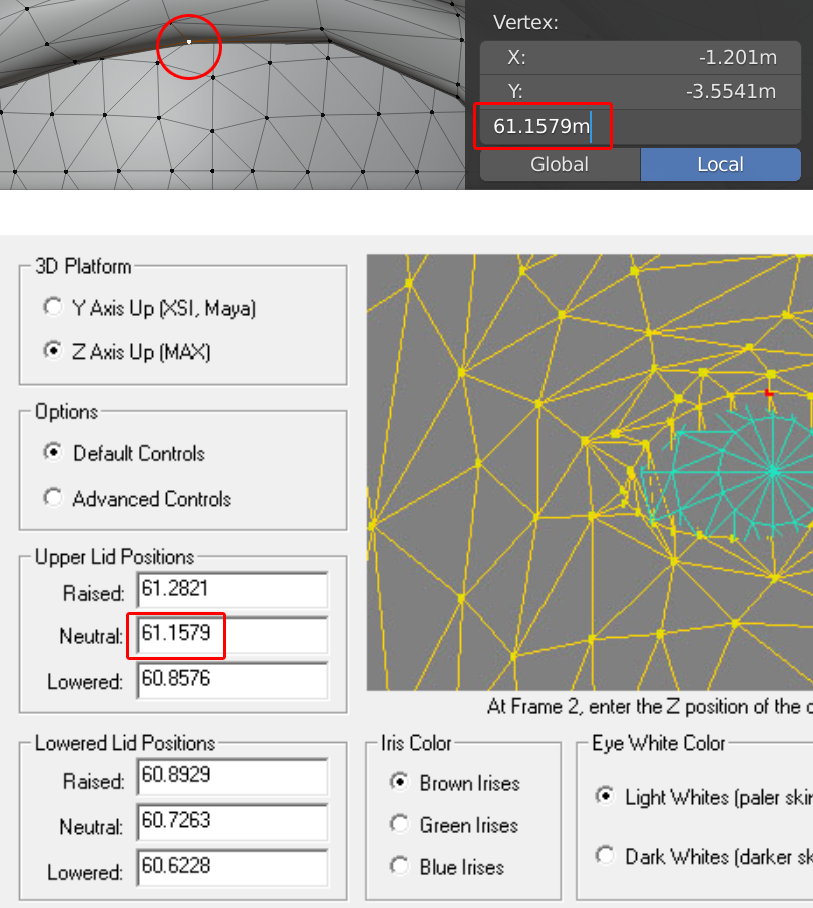 After adding all numbers, check that none of them have a "m" at the end.
Then select "Z Up Axis" here.
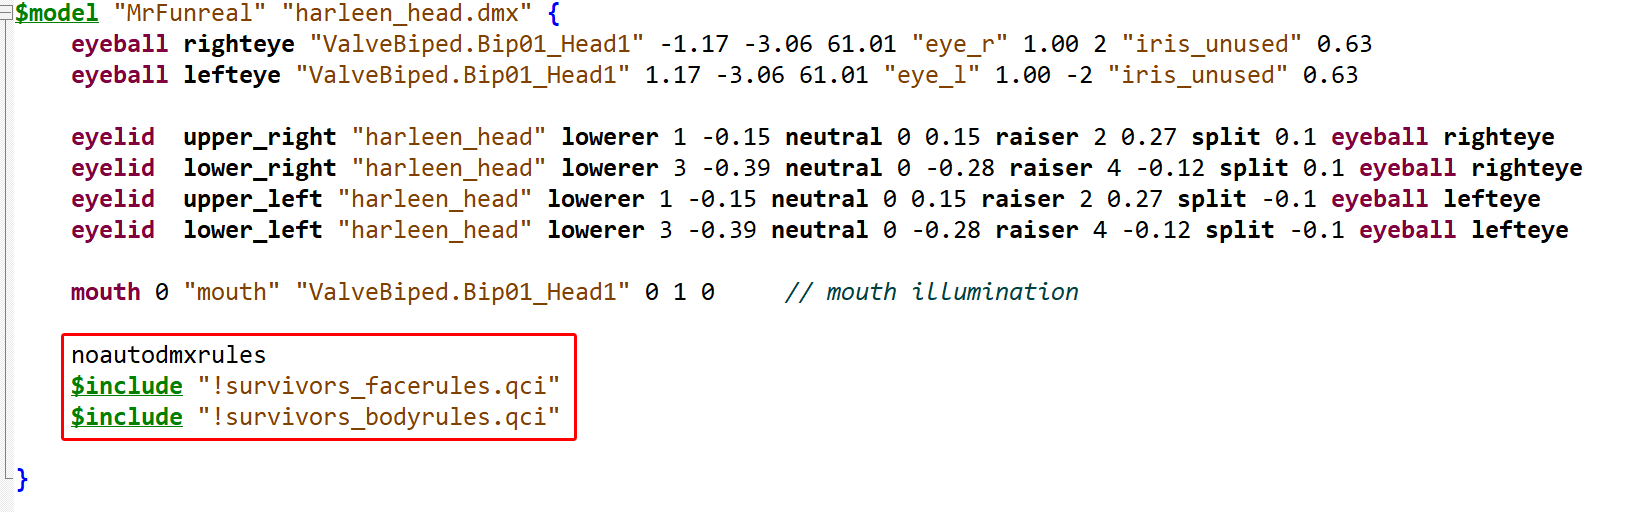
Replace your already existing eyes and mouth attachments, and your already existing $eyeposition lines with the ones you just got. Then copy all the eye lines from QC_Eyes into your QC file.
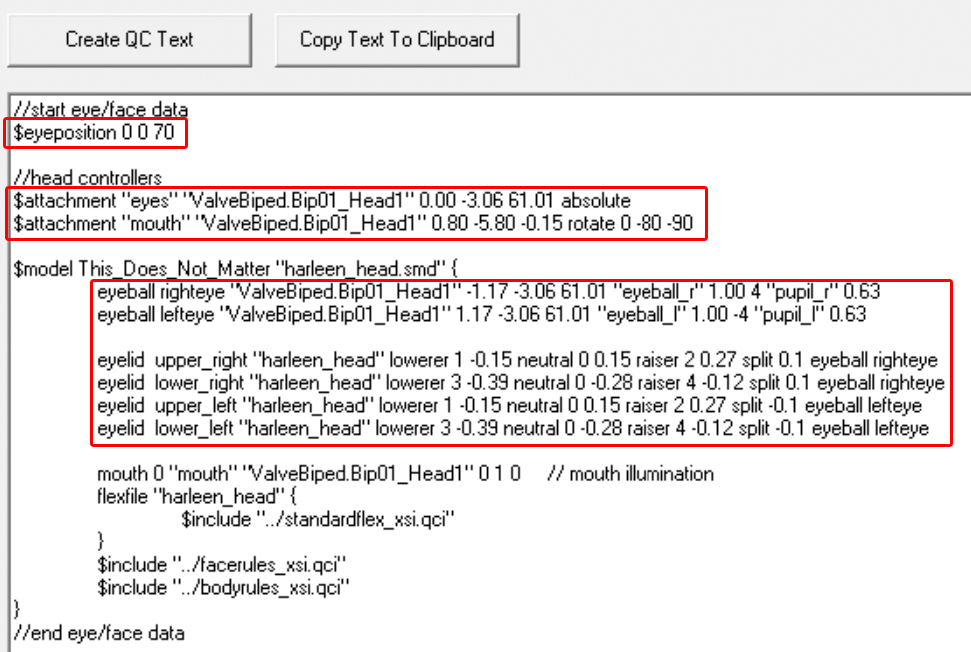 Change the eye materials for the ones your model uses and change the pupil to "iris_unused".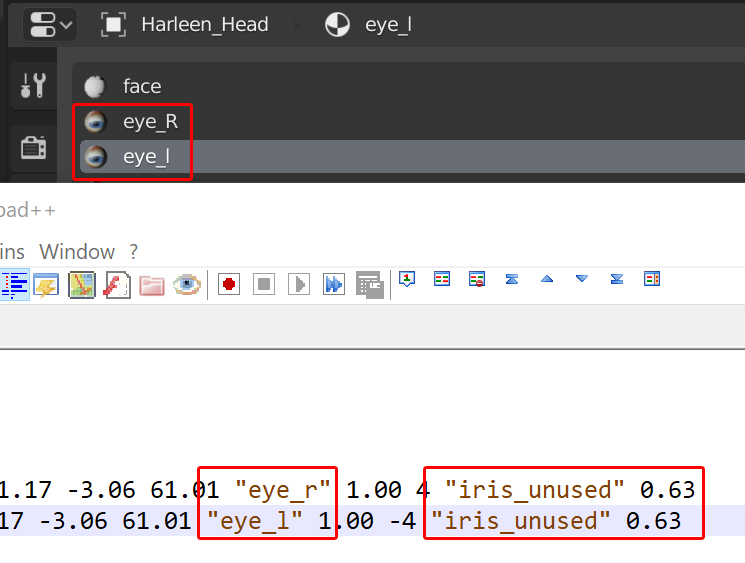
If you feel like your iris textures are too large or small, change the 0.63 at the end of the eyeball lines. That number is the scale modifier for the eyeball texture.
These eye lines make the eyes movable at all.The eyelid lines make the eyelids move with the eyes when looking up/down.
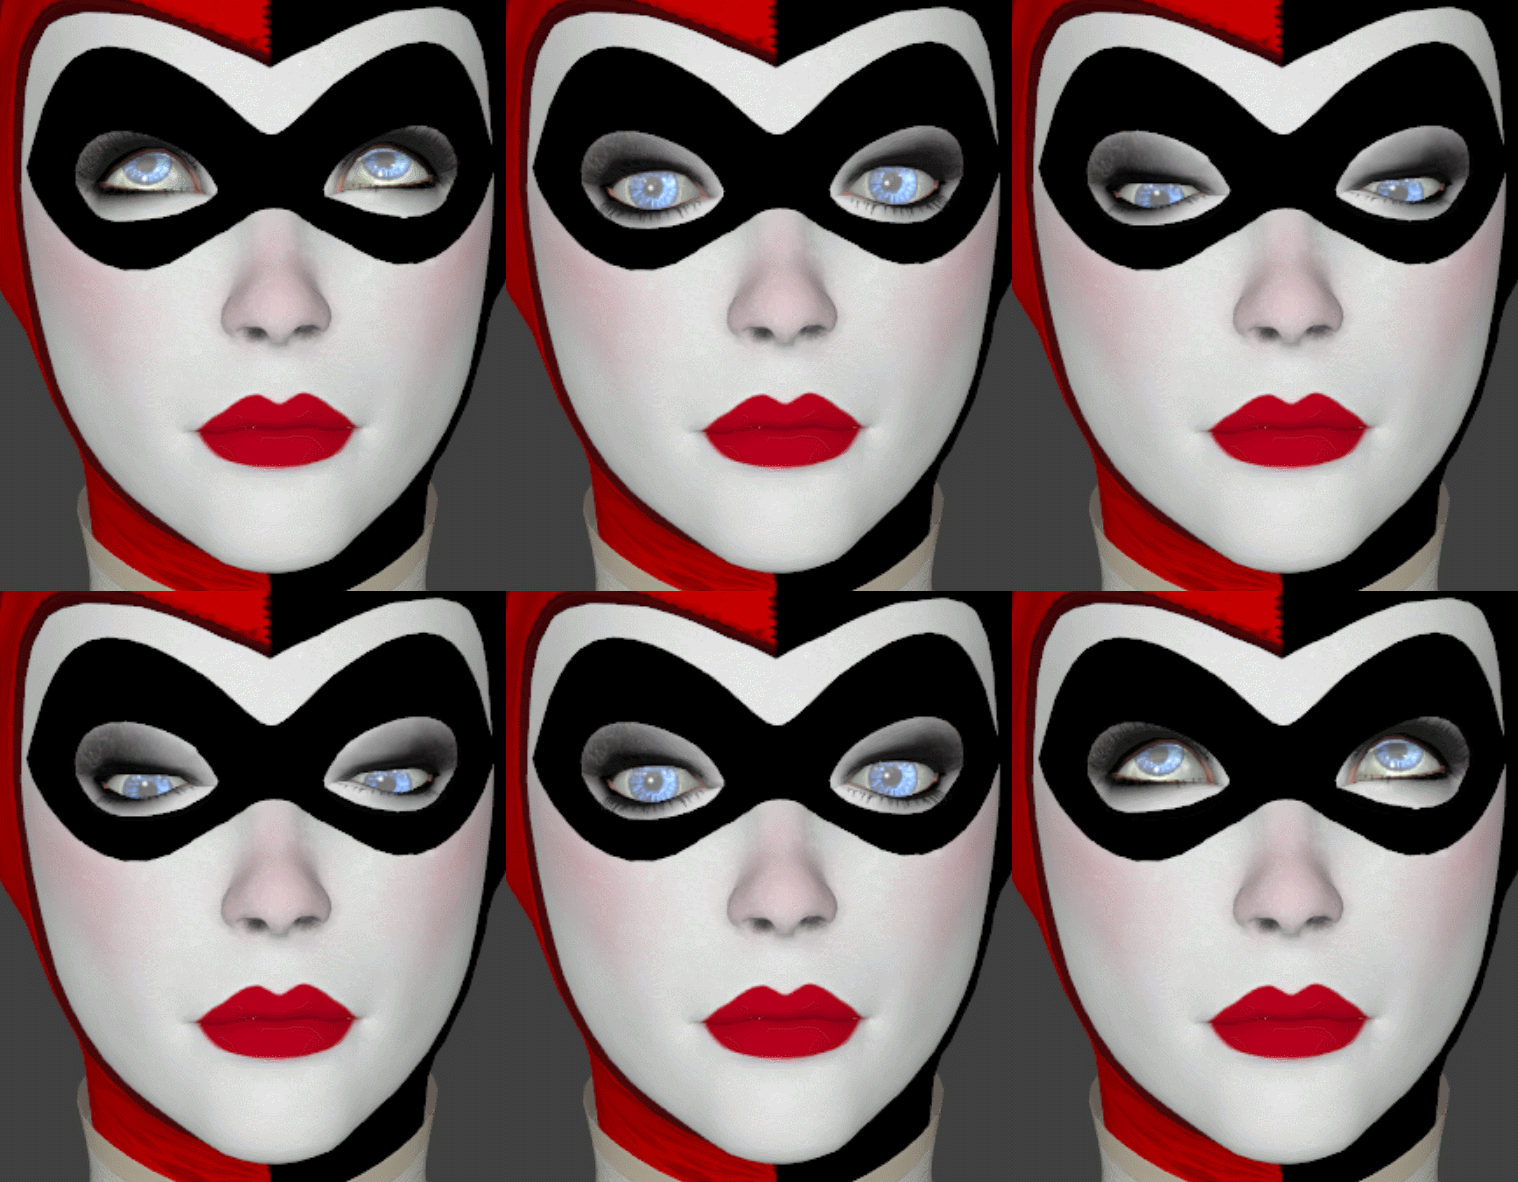
They also make the eyes open automatically when the eyetracking system tracks the eyes to something that might be blocked by the eyelids.
The numbers determine how far the eyes can move using the flexes.
If your eyes roll into the players head when using the eye flexes, lower the numbers.
Technically since that qci only has those two lines you might as well add them to your main qc file. Your QC also has the following line:
Keep them and the flexcontroller numbers the same.
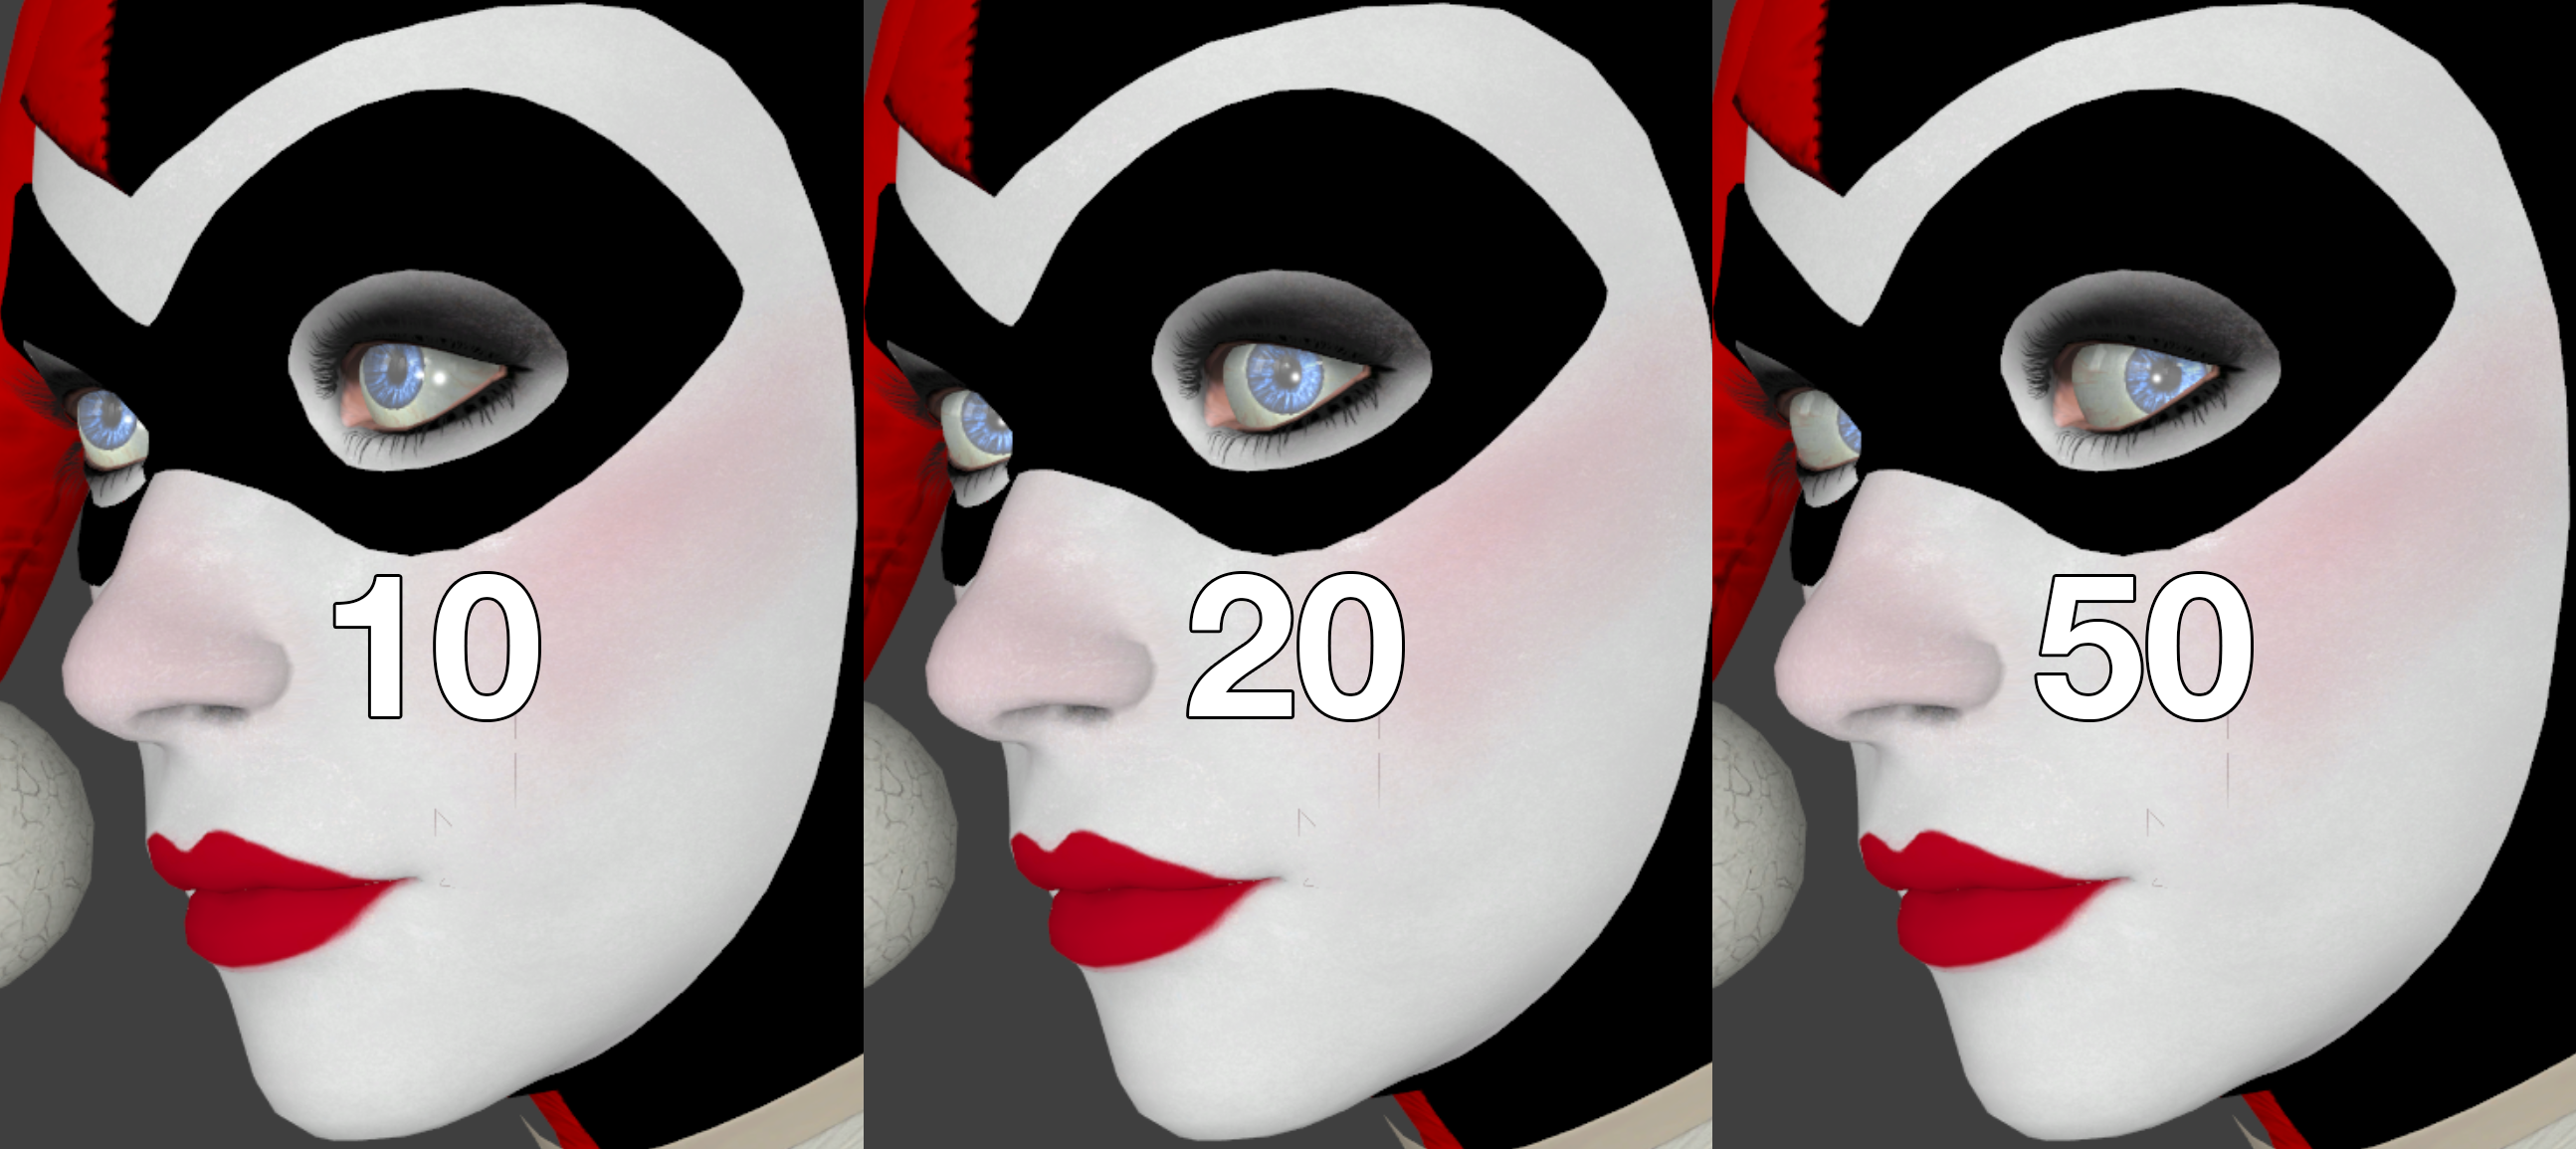
That can be caused by incorrect $RaytraceSphere values in the eye VMT.
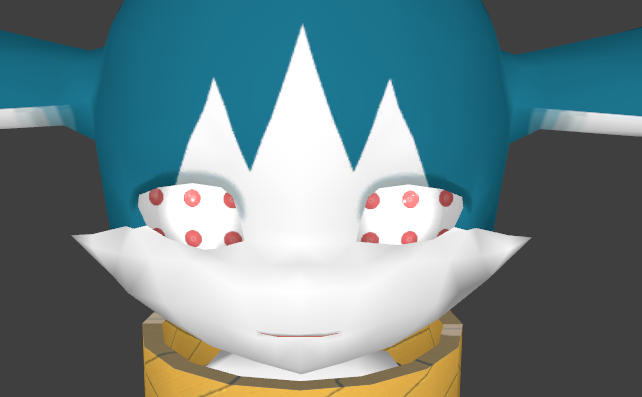
$RaytraceSphere 0, way too small.
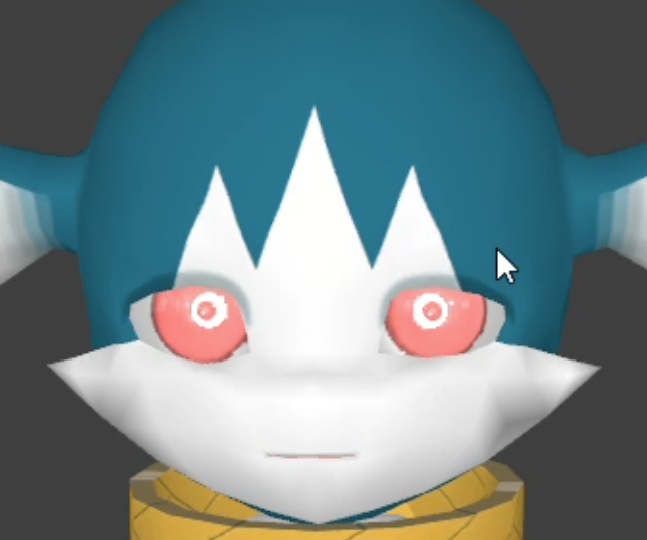
$RaytraceSphere 1, still too small.
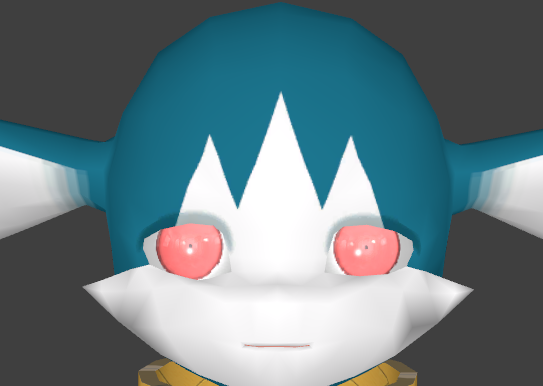
$RaytraceSphere 3, fitts better.
(Mod and images by PocketPossum)
You will need to edit that value in the eye vmt until you're happy.
═══════════════════════════
Biker & Teenangst _light
Francis and Zoey have a "Light" model.
This is only used in the intro map or "The Passing" when they're standing on the bridge.
No clue *why* they made these models, because the only difference is the anims used.
the entire rest of the qc is entirely the same. Which means making those models is really easy.
I've come up with a "new" way of creating these models with even more ease.
that new way uses new $Includemodels, so you do not need to compile any animations.
Either ways, you can use the "new" or the "old" way, whichever you want.
they get the same result, but the "new" way is easier, in my opinion.
New _Light Model approach
The "New" approach to the _light models is using the includemodel and its .ani files.
These can be found in the downloaded Githup Repo's "New_Includemodels" folder.
They're called "anim_biker_light.mdl" and "anim_teenangst_light.mdl" with their .ani files.
Since everything except the animations is the same, we can do a gigachad move.
All we need to do is use a different $modelname, $includemodel, and $include declaresequence.
So you can just copy the $modelname line from the top of the qc to the very bottom.
Then make it look super fancy like this
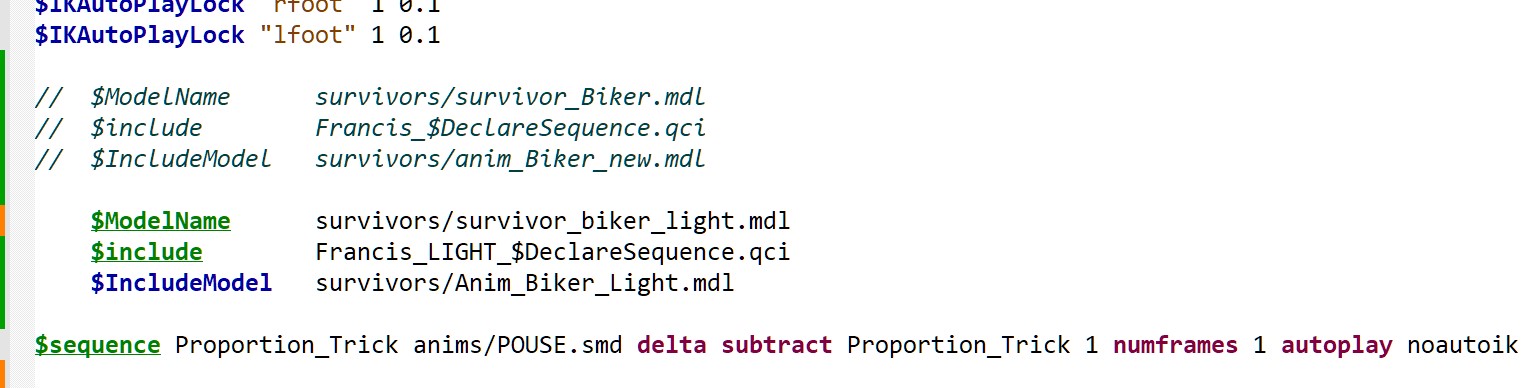 Or for Zoey: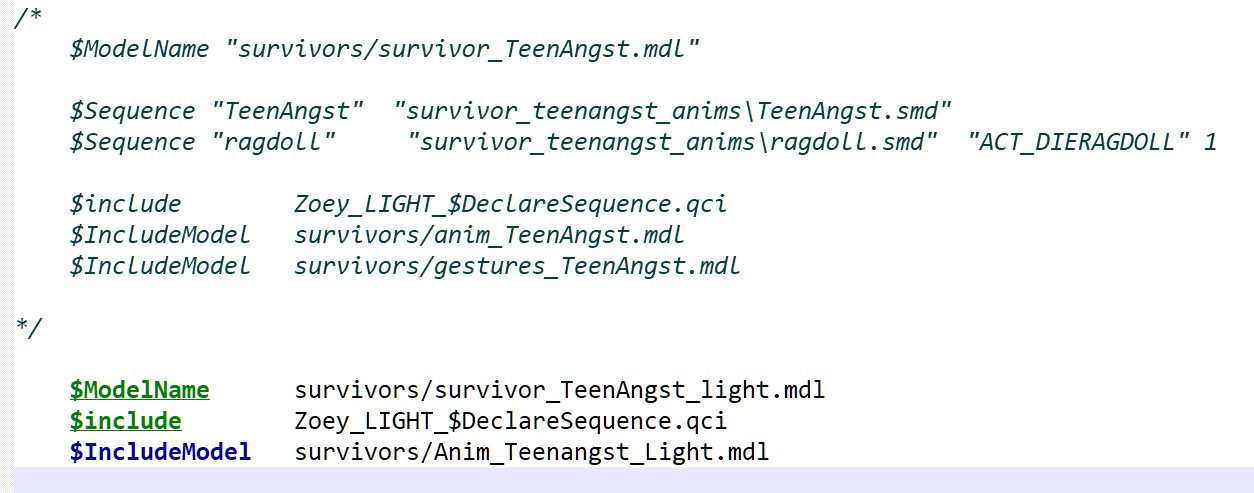
Now you can toggle the comment between the set of default and _light models and you're good.
Yeah. that's literally it. Cool, huh?
Don't forget to ship the required anim_***_light.mdl and .ani file with your mod!
Old _Light Model approach
Replace every line in your _light.qc between its $modelname and the very first $animation line with what you just copied.
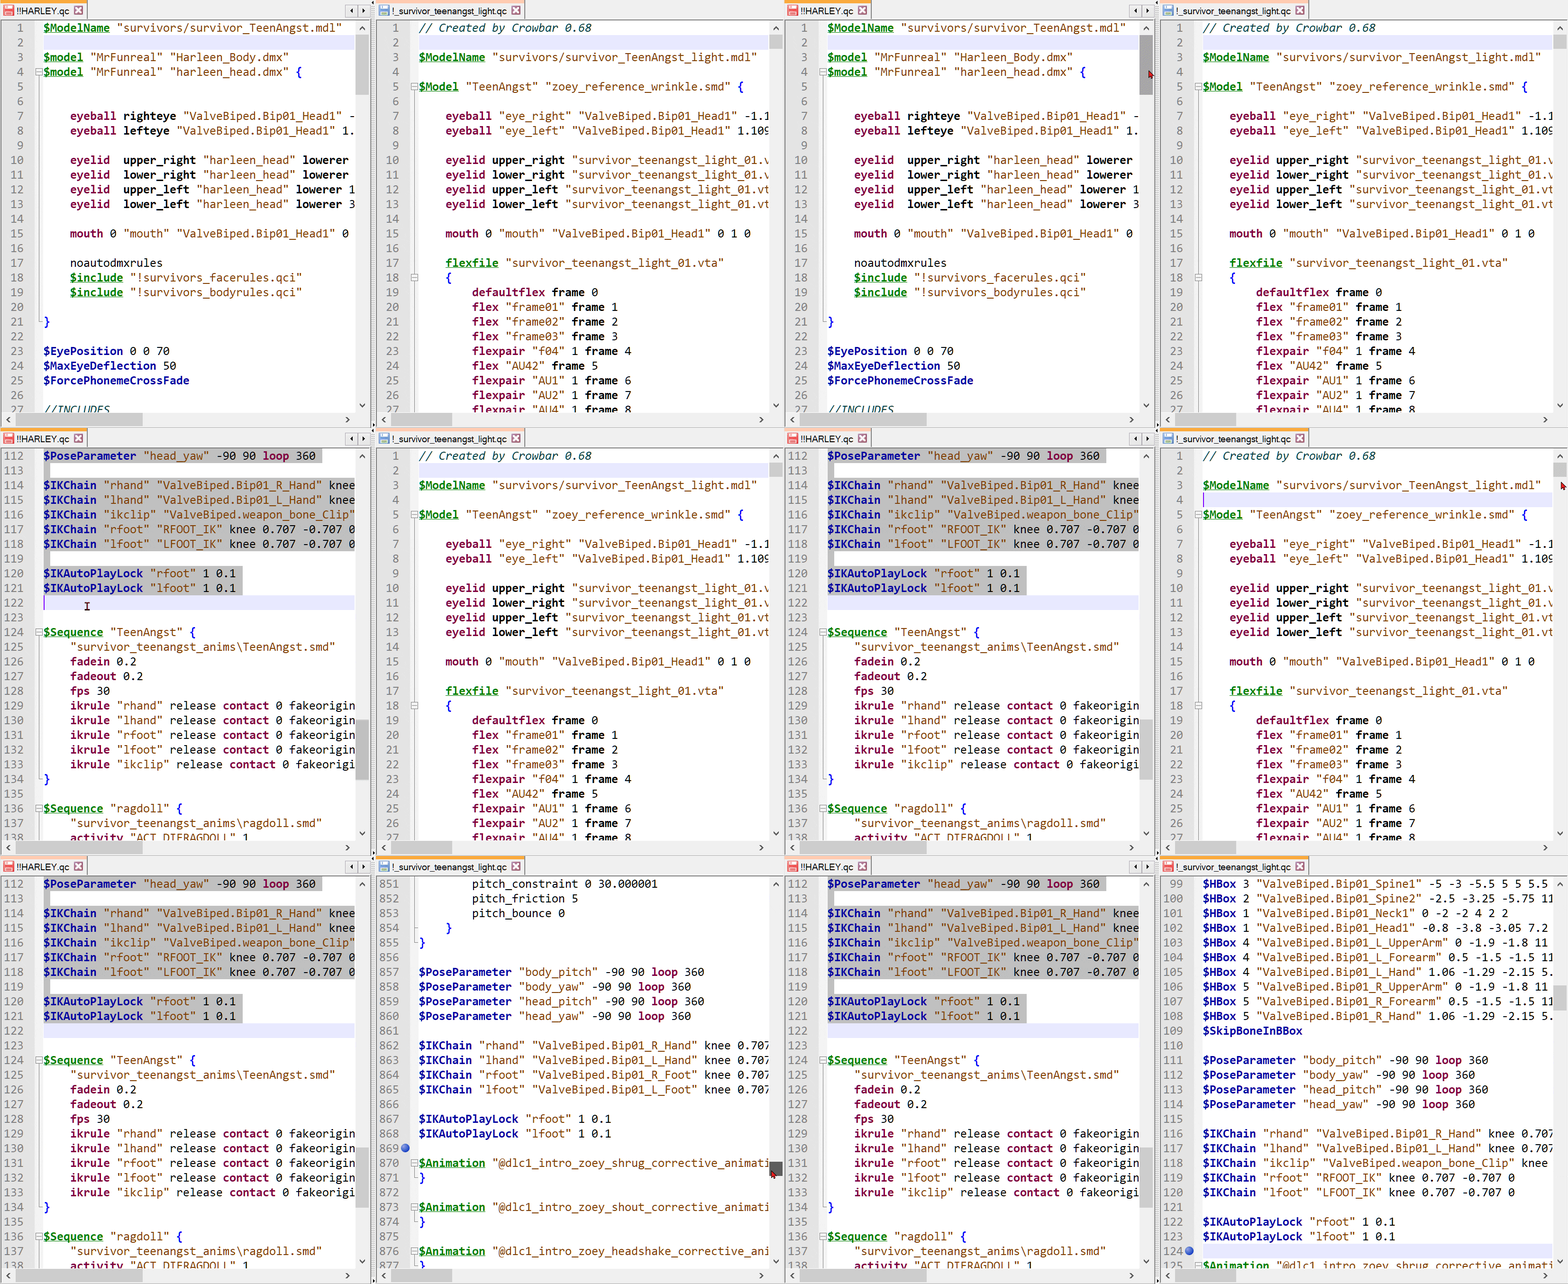 Delete the Collision part at the very end of the _light.qc
replace them with proportion lines after the last $sequence of the _light.qc:
If you have this declaresequence anywhere in your _light.qc, delete it.
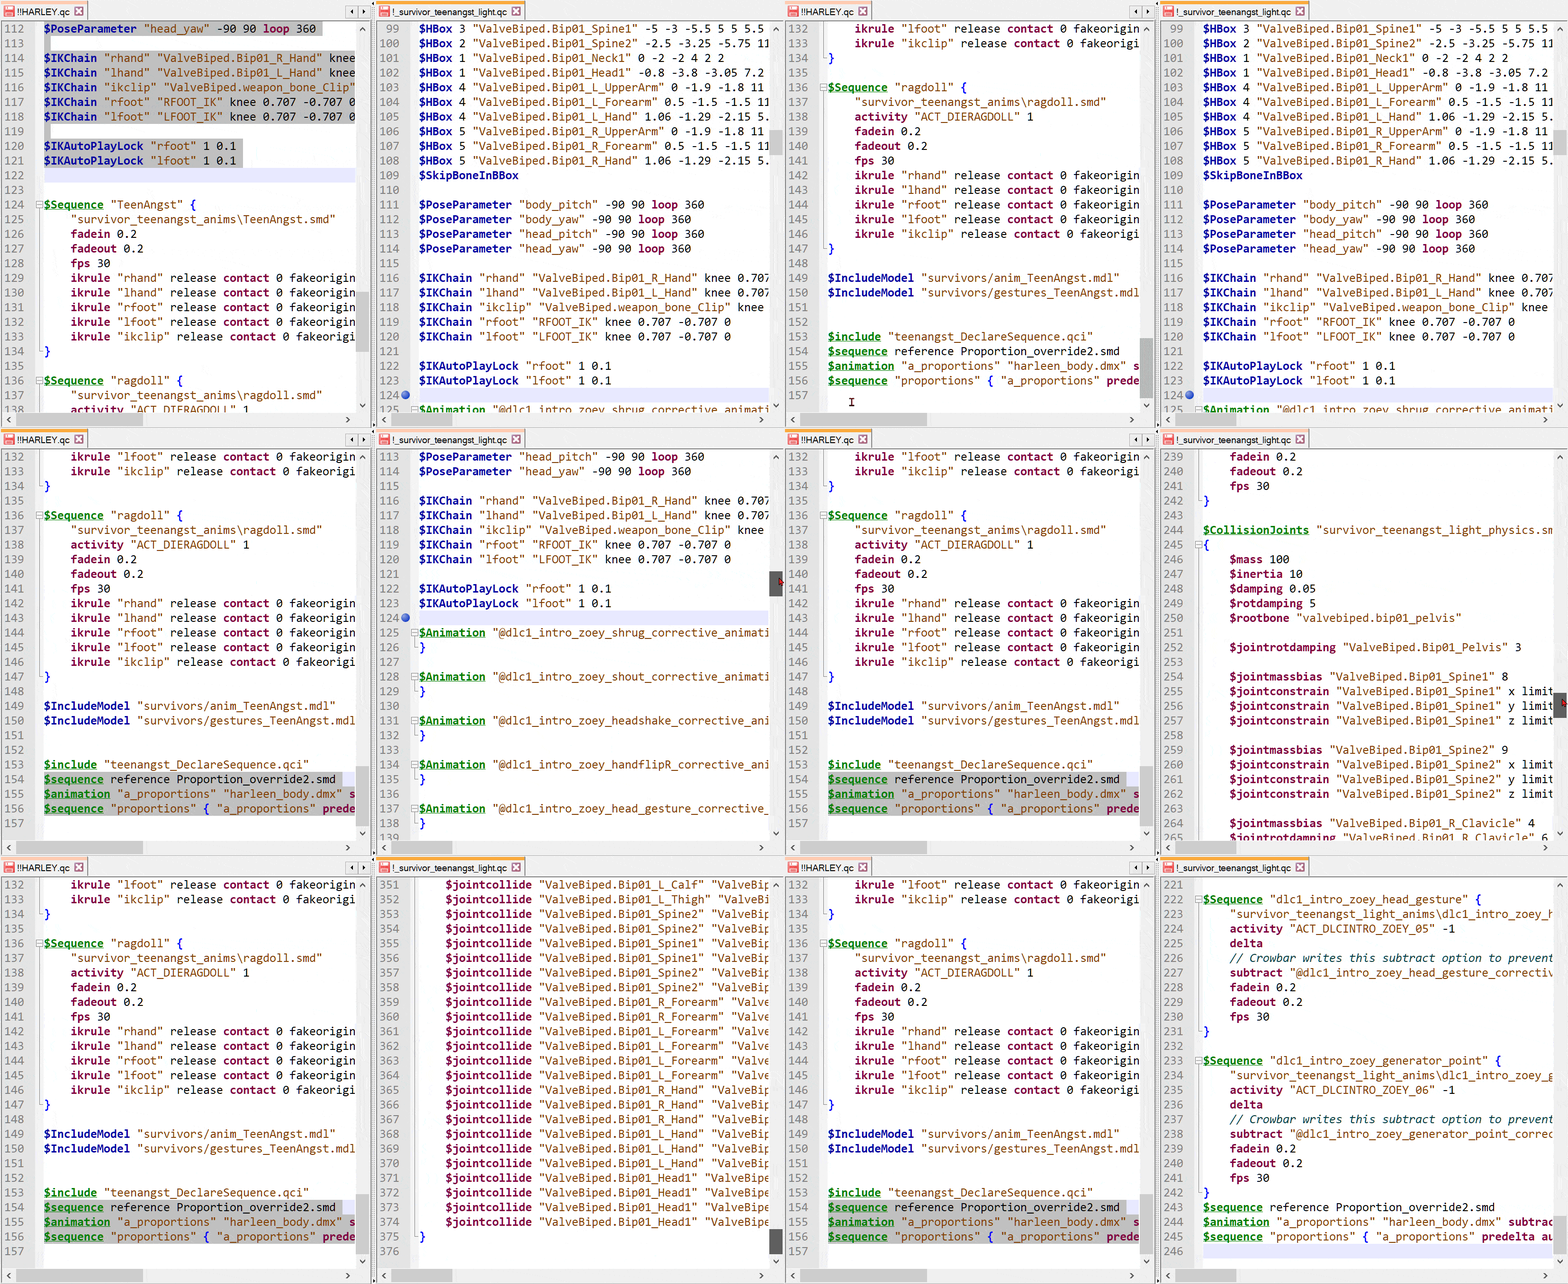
This QCI includes everything between the $modelname and the first $sequence. As above. Add the proportion lines to the bottom of your light qc file, and delete the collision part.
═══════════════════════════
Viewmodel Arms
FYI, Proportion trick does not work on viewmodel arms.
Proportion trick works by changing all animations inside the model, but the arms do not have animations in them. The weapons force their animations onto the arms.
You might need to rotate them to be upright.
They might also be a little larger than your model
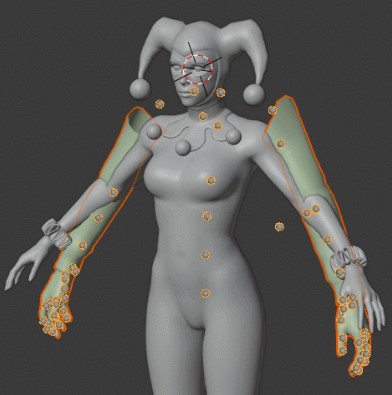
Delete everything that isn't part of the arms in the model and armature.
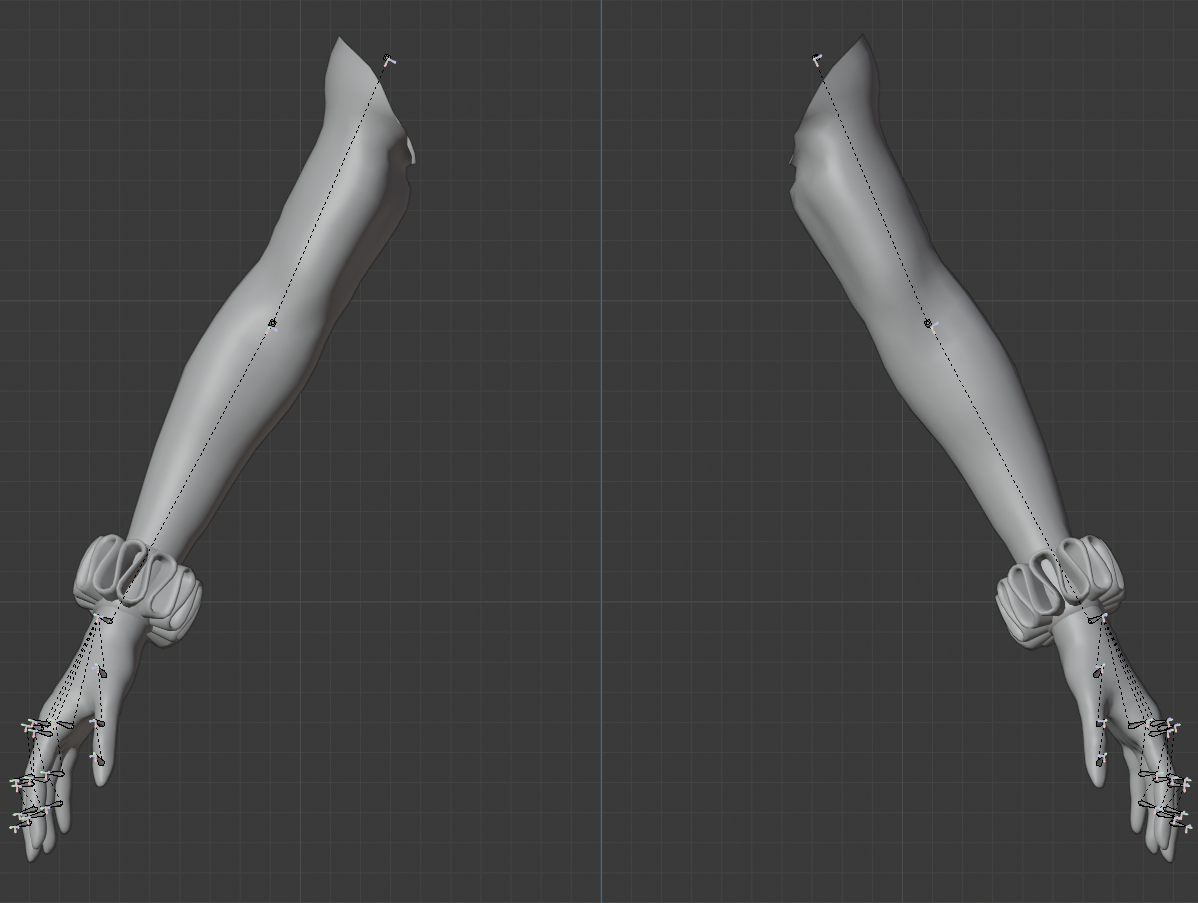
You could even pose both into a T-Pose to help.
The viewmodel arm pose doesn't matter, because all weapons will override this pose.
It is not possible to ever see the reference pose of your arms ingame.
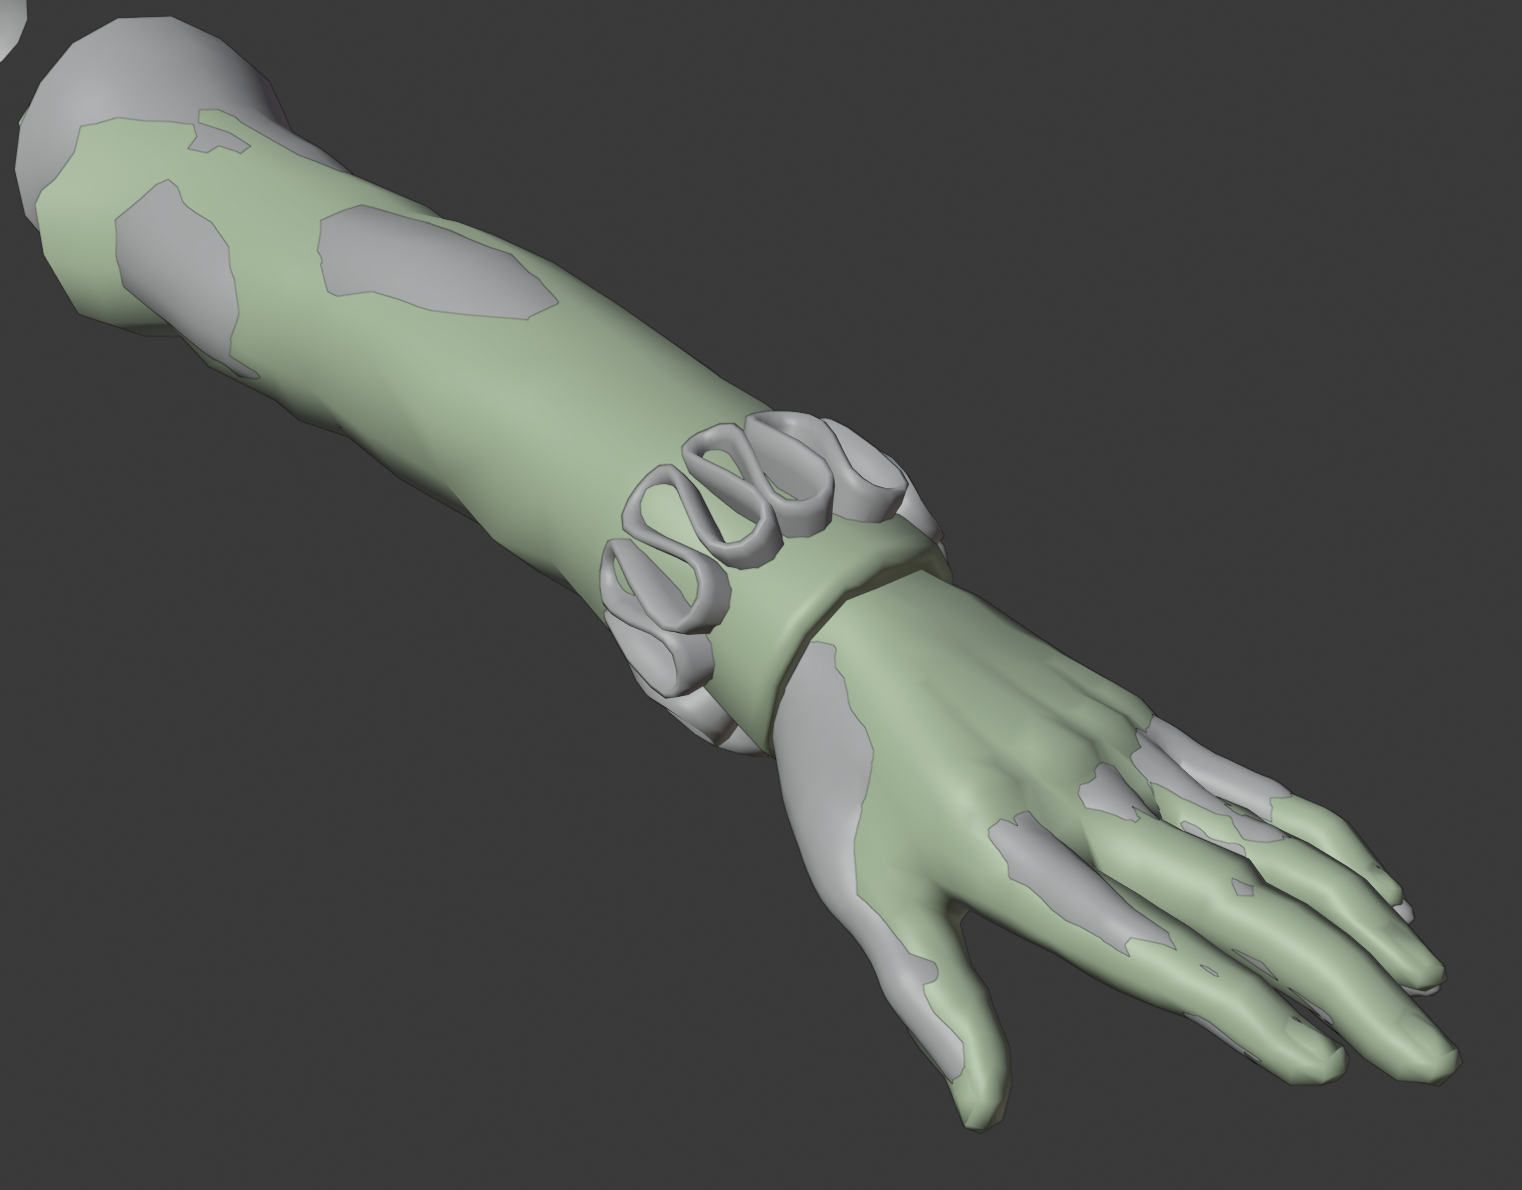
Apply the armature modifier to your custom arms.
if you also posed the original player's arms:
Apply the armature modifier to the original arms and add it again.
Apply its pose as rest pose
Viewmodel arms have two bones on each wrist, named "wrist_helper".
Delete those. They do nothing at all. They're a leftover from when they made the anims.
If you rig mesh to those bones, you'll basically just break your viewmodel arms.
Duplicate the original armature, make the tips of every bone touch the base of its child.
Delete spines, clavivle and wristhelper bones.
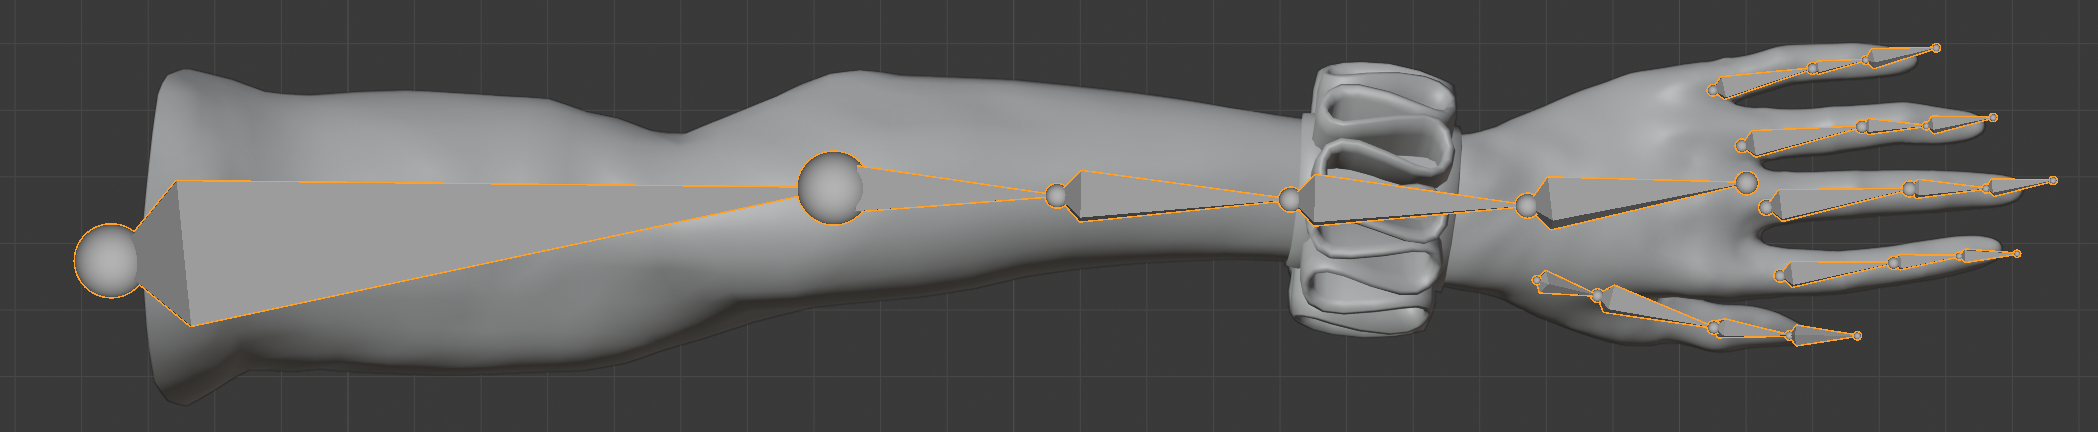 Once auto rigged, make the thumbroots area of effect way smaller.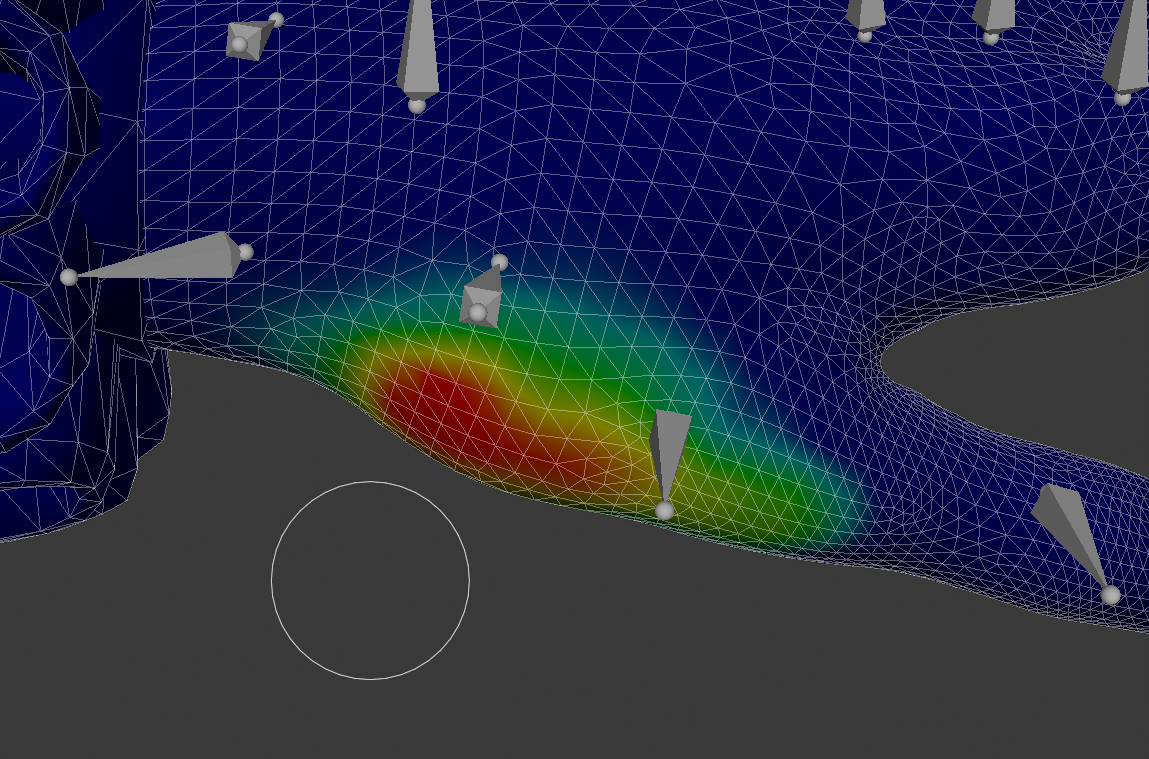
Also increase the hand bone's area of effect. The thumbroot helps the thumb transition.
Rotate the thumb bone by 60° on Z, and the thumbroot by 30° on Z.
Weight paint them to look good in this pose.
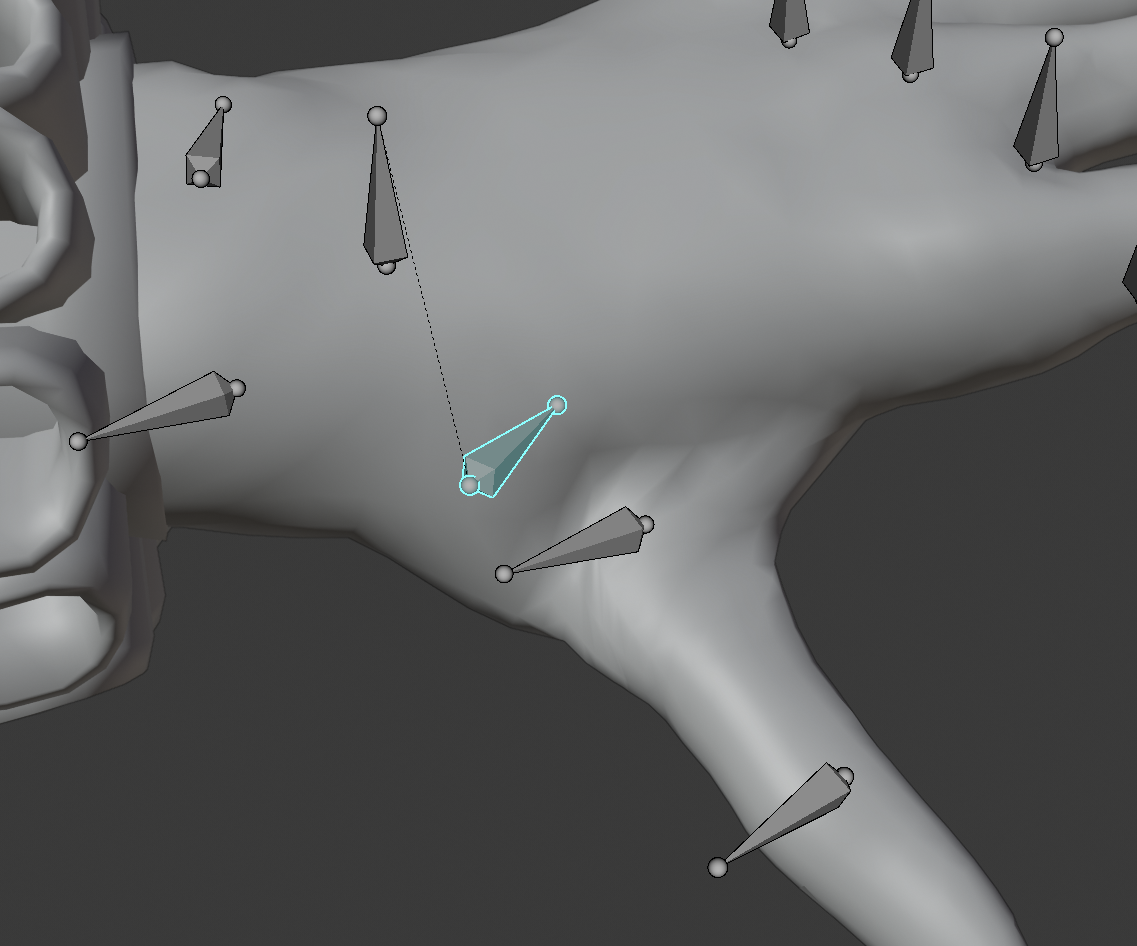
Open HLMV and load a Viewmodel of any weapon.
Load the arms via "Load Weapon".
Ironic, but that's how it works.
"Load weapon" loads a model and applies it to any matching bones to follow the animations.
In L4D2 the weapons hold the animations.
Play with the arm weights until you're happy and then do a proper compile of your arms.
HUD images.
There's two guides, with prefabs, which make it stupid easy to create these images.
The guides use HLMV to greenscreen a player model for the incap anim.
If you download HLMV++ from the official discord server of the developer, which can be found on the bottom of this VDC page you can use the "Options - Make Transparent Screenshot" button to avoid the whole greenscreen thingy and just directly get a transparent image. Super quick and easy!
- Photoshop save of the lobby images, containing L4D2 and L4D1 style.
- Photoshop save of the Ingame Hud images, containing L4D2 and L4D1 style.
- Photoshop save of the Incap texture where the survivors have been removed.
- Original HUD images for reference.
- Text file explaining the correct names of all files and info about testing VS images.
- Text file telling you what Nr# the Incap sequences have so that you don't have to search.
ant this one is made by Splinks:
https://steamcommunity.com/sharedfiles/filedetails/?id=1994377774
Compile for game & Packing

In step 10.03 You made a "Root" folder where you put all your materials in.
We're going to compile the model files right into that folder.
Once you press the compile button, crowbar put your models right into that folder.

The models must be compiled to the real location and modelname.
Once the MDL is compiled you must not rename it or move it from your "!/" folder to "Survivors".
!!! Use the real $modelname line when shipping !!! The MDL contains information about what folder it is meant for.
Renaming the mdl file will not change the fact that the model itself seeks "!/TeenAngst.mdl".
DO NOT EDIT THE MDL AFTER COMPILE.
Your renamed/re-located "survivors/TeenAngst.mdl" attempts to load "!/TeenAngst.mdl".
Everyone who has "!/TeenAngst.mdl" will see it. But since you won't pack that file into your addon, nobody has it and they will therefore see nothing at all.
COMPILE IT CORRECTLY TO BEGIN WITH!
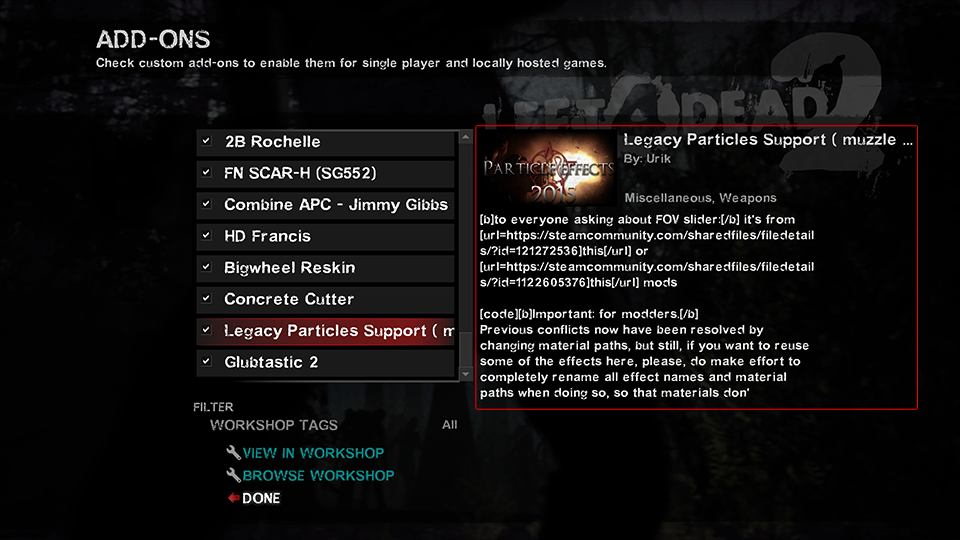
All mods downloaded from the workshop will use the workshop thumbnail and description.
But if the user decides to take the addons out of the workshop folder and install them like in the good old days (usually done to prevent auto updates or deletion of mods) those addonimage and addoninfo files will be used again, if they exist.
Addoninfo.txt is responsible for having the addon show up in the addon menu, if installed locally.
You should always make one regardless!
Because without it, your own addon in your local install will not even show up in the addon menu.
If you want an addonimage, import a 512x512 image to vtf edit and compress it as if you'd do with a texture. But then export it as addonimage.jpg right into your "Root" folder.
 This is what your addon might look line now.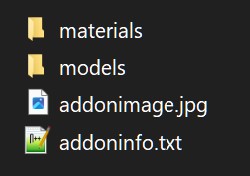
Just open crowbar in the "Pack" tab and drag your Root folder onto it and press the "pack" button.
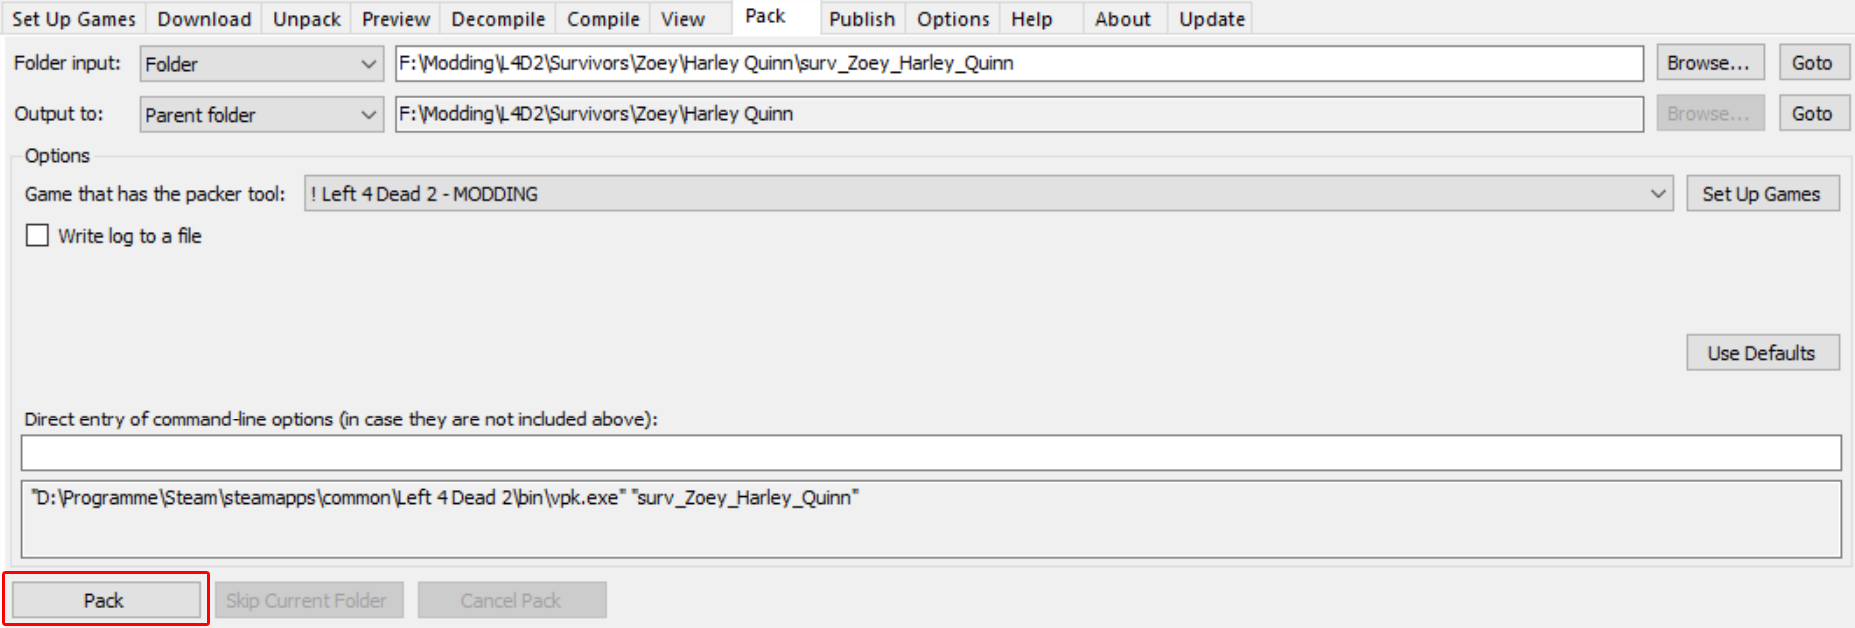 Alternatively, you can make a right-click promt for your computer to pack stuff into vpk files.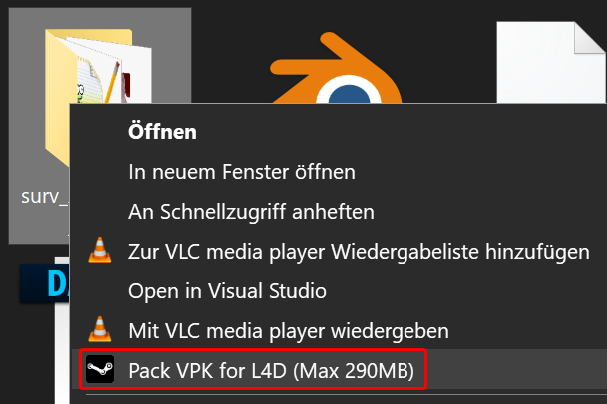
Find out how to do that here:
https://steamcommunity.com/sharedfiles/filedetails/?id=1544981726
Its content should look like this:
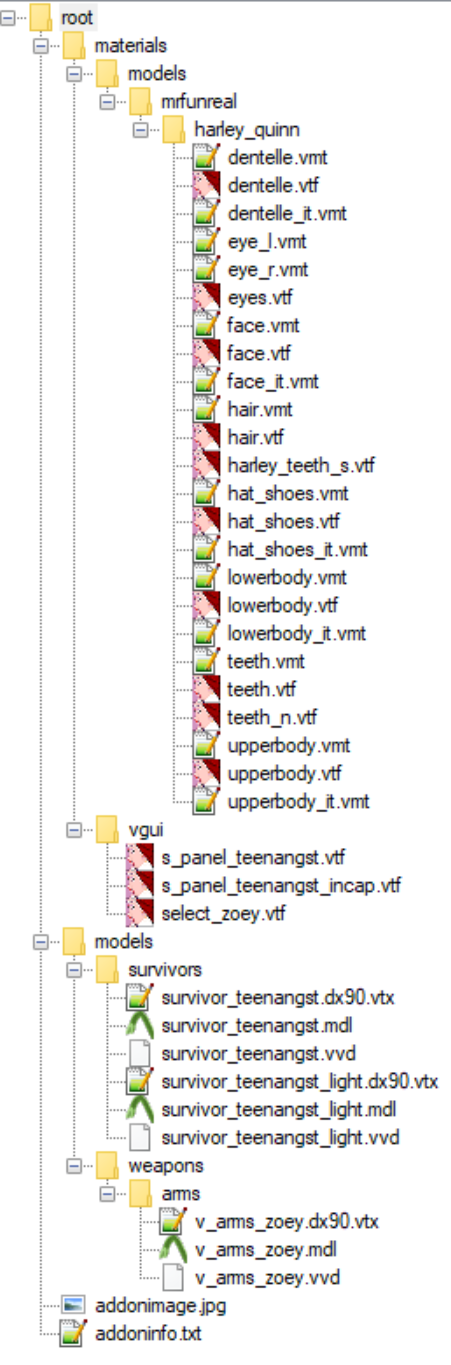
This vpk file can now be dragged into your addons folder; Left 4 Dead 2\left4dead2\addons.
Test your model ingame.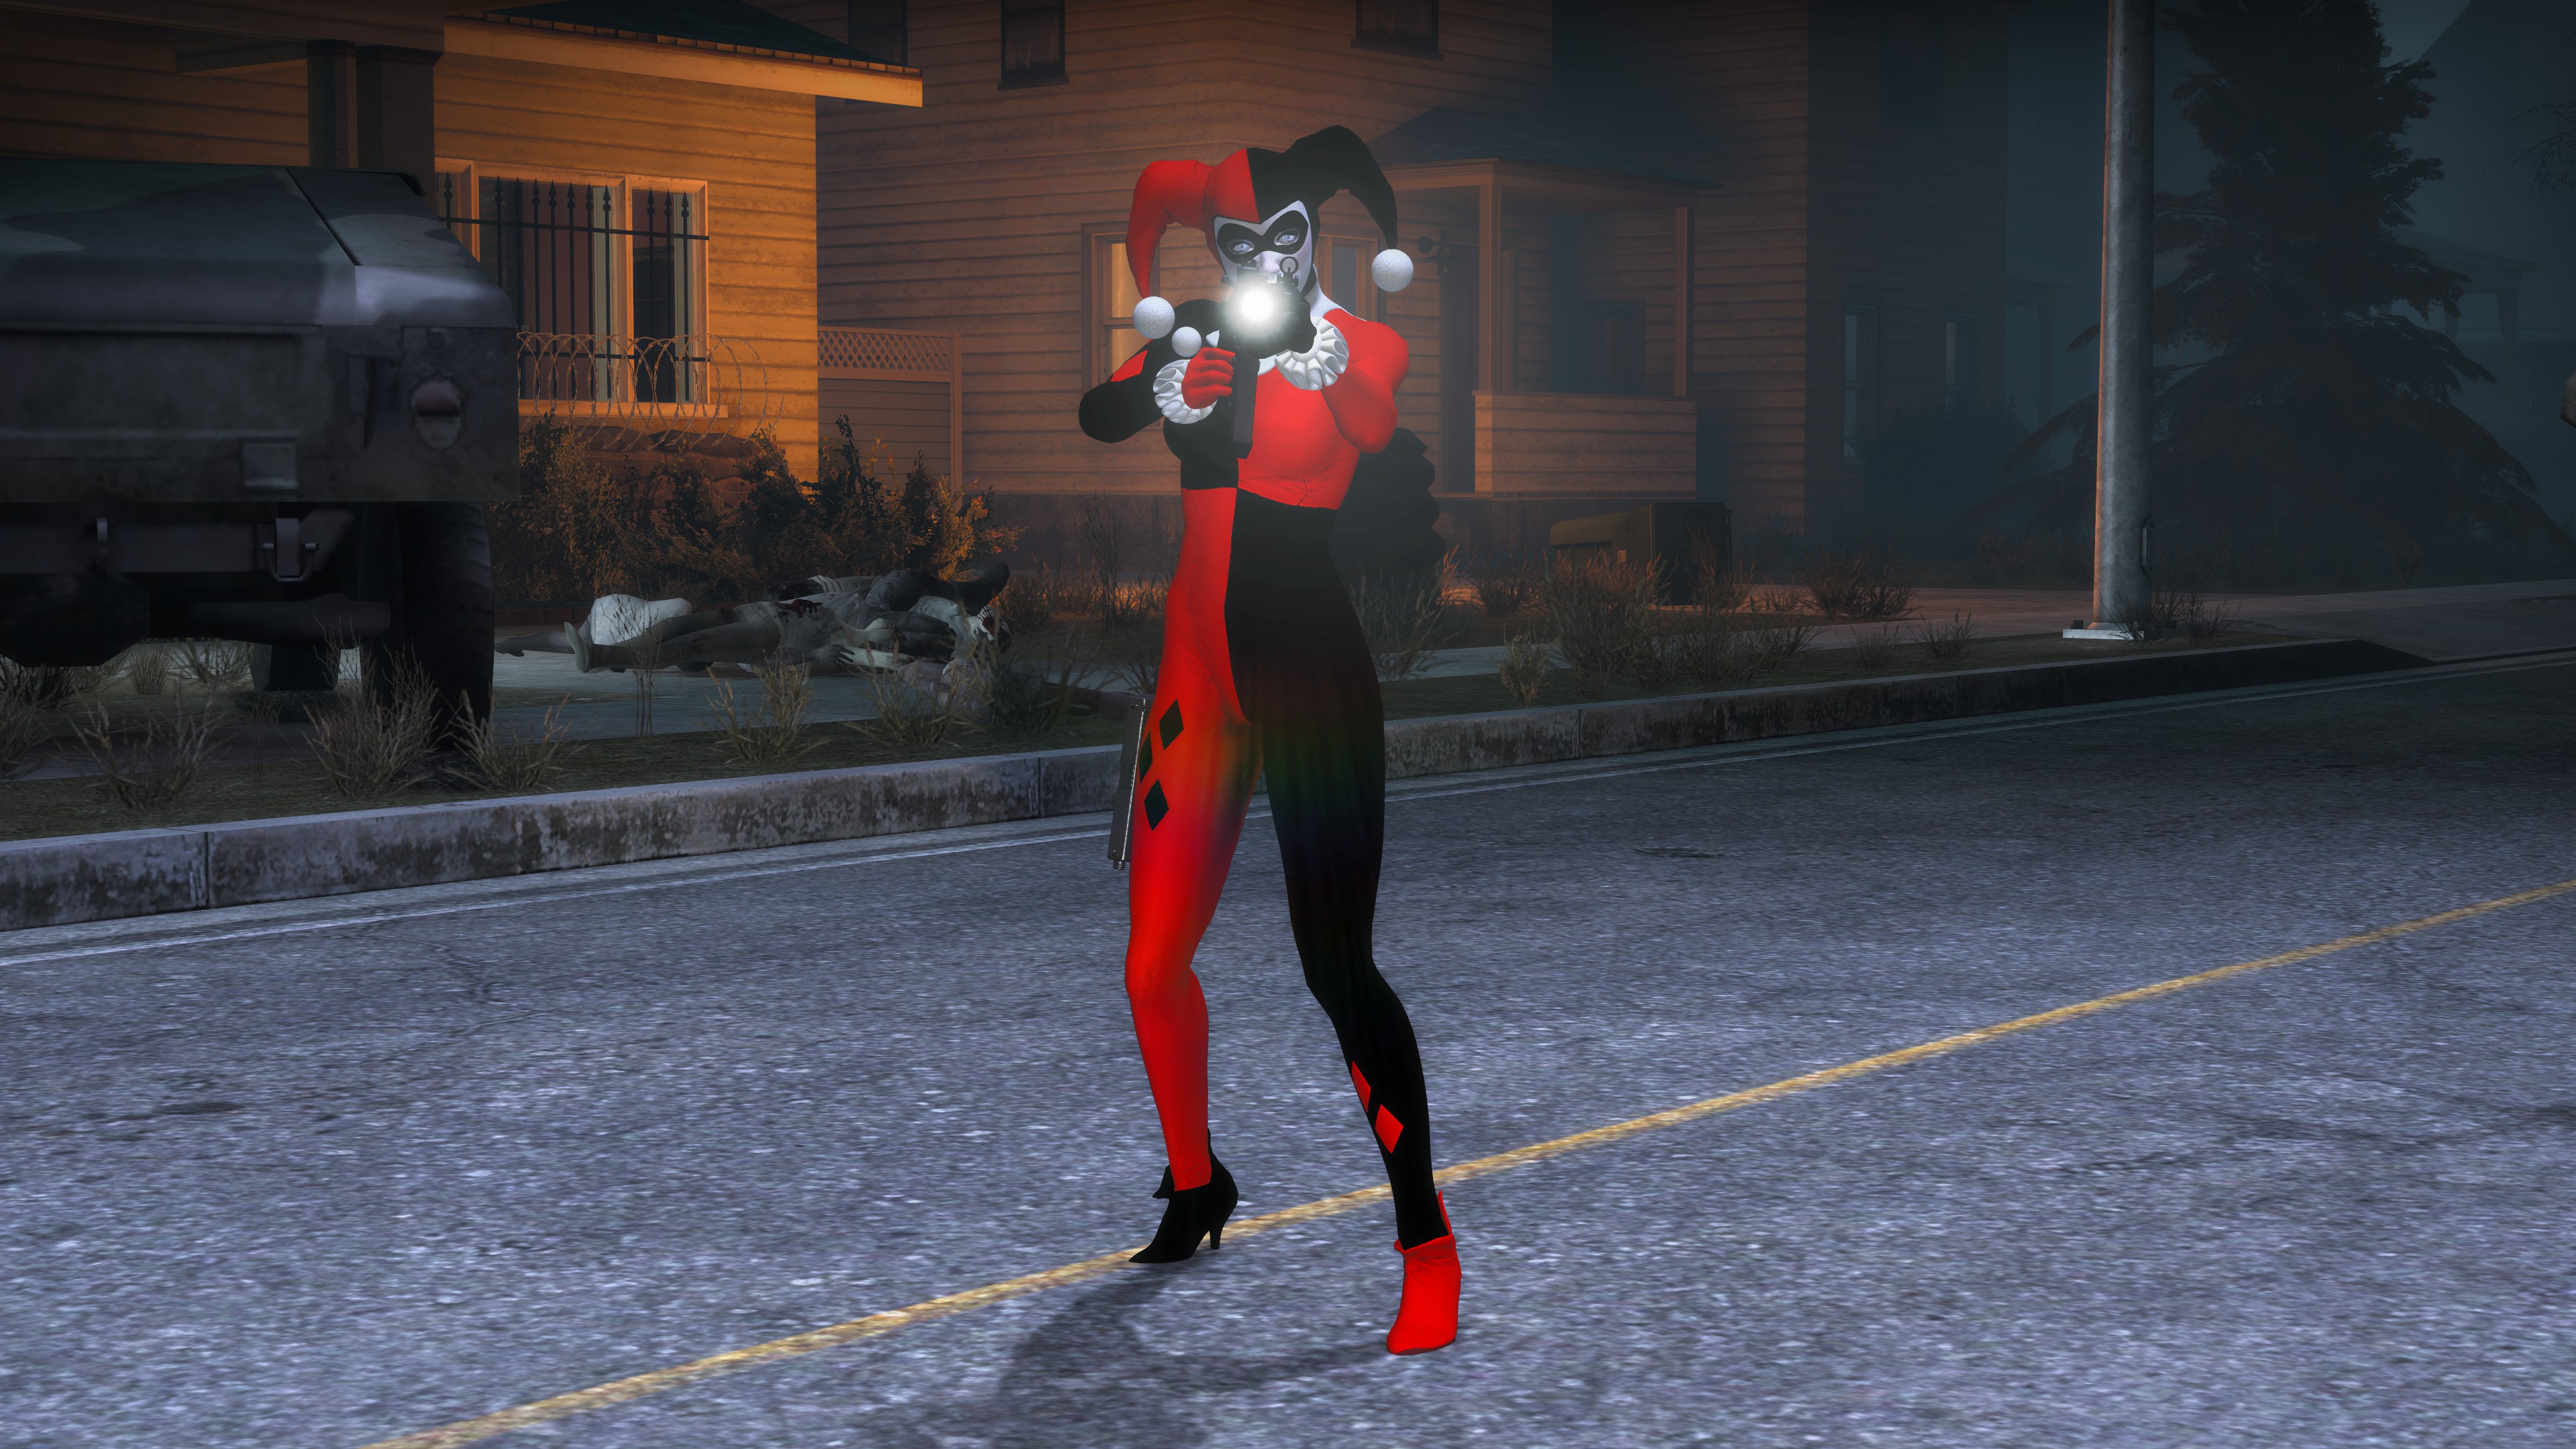
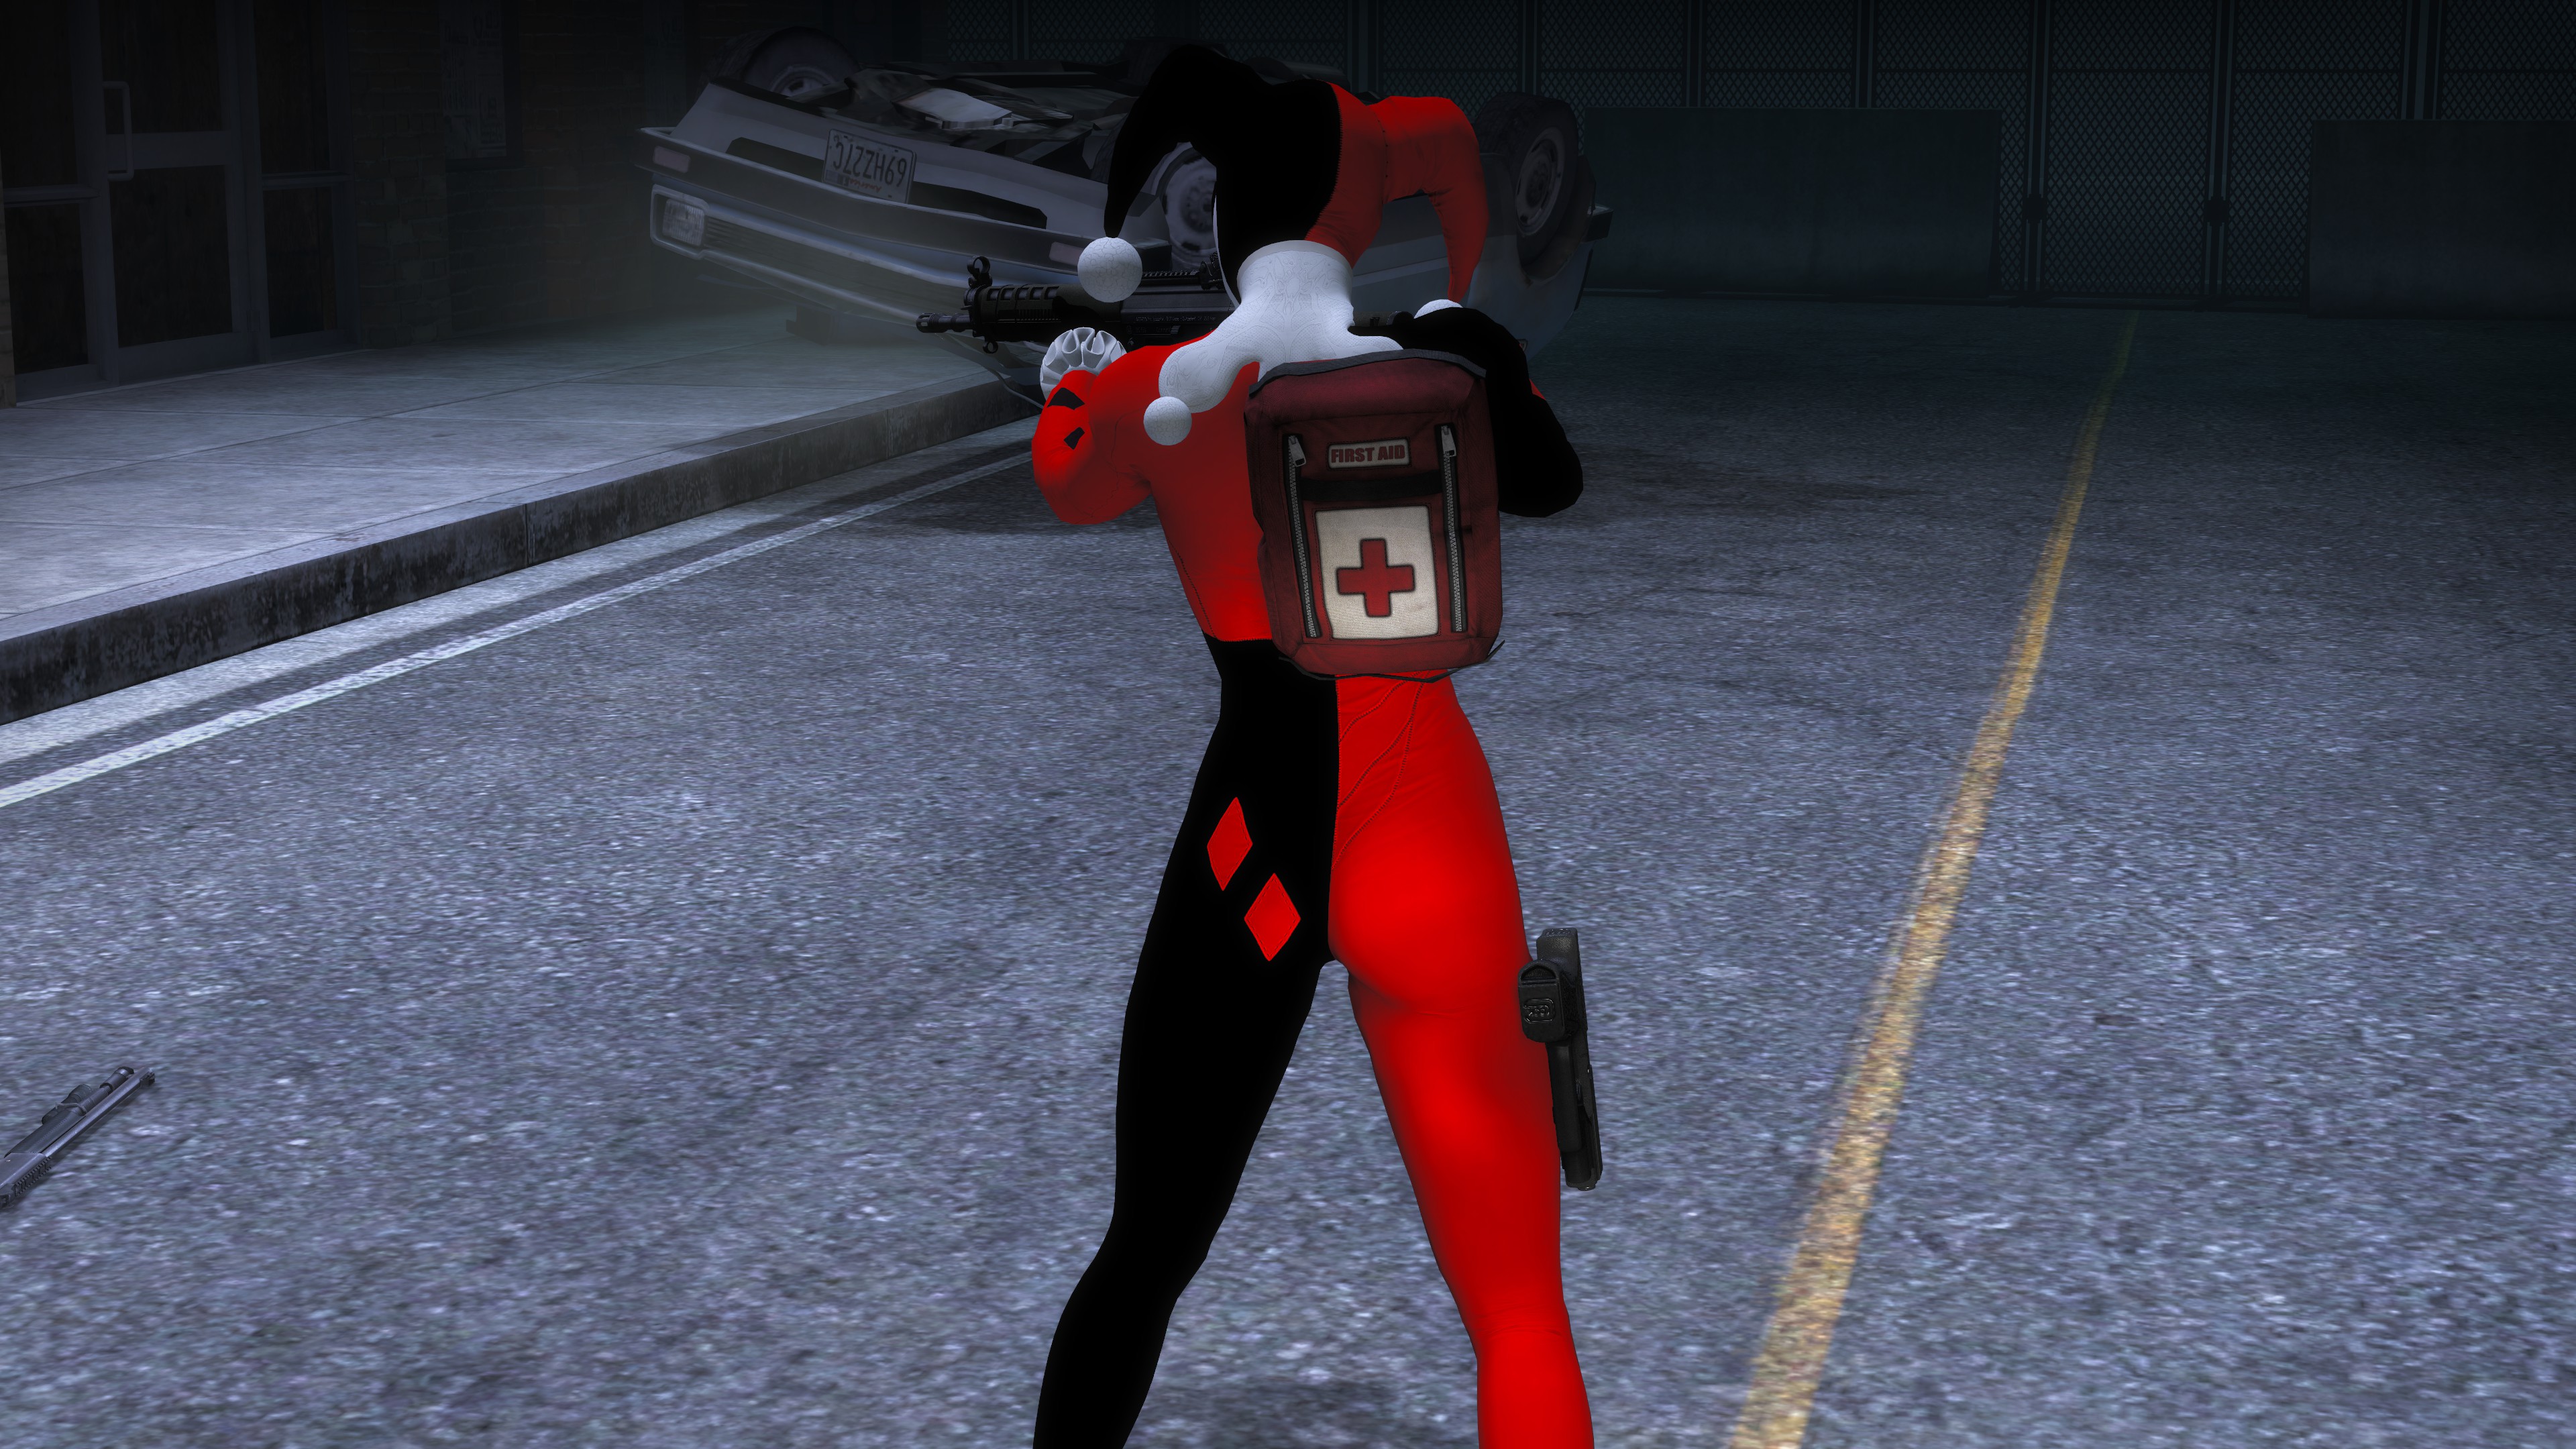
Make any changes if needed.
You'll be able to release this to the steam workshop using crowbar now.
Final words
If you require help with some steps join the "Dead 4 Mods" Discord Server[discord.gg].
We got channels where you can ask modding and mapping questions.
(Don't join and then send me a DM. Don't be that guy.)
Personal Discord Server[discord.gg]
Support me via Ko-Fi[ko-fi.com] or Paypal[paypal.me], so i can make more guides like this.
SD3D
E7aimy
But still thanks.
- Admin System - Command List★ 5 (3.9k)173k views8.2k ♥20 minUpdated Jan 5, 2021
- How to play L4D2 split-screen on PC★ 5 (1.1k)137k views2.2k ♥14 minUpdated Aug 15, 2021
- Top 50 Left 4 Dead 2 Custom Campaigns★ 5 (1.8k)87k views3.5k ♥8 minUpdated Jun 29, 2018
- Получаем все достижения в игре Left 4 Dead 2 [101/101]★ 5 (3.9k)46k views5k ♥166 minRussianUpdated Apr 18
- Screen too dark on most maps? Here's a fix for that!★ 5 (800)39k views1.1k ♥1 minUpdated Mar 17, 2021
- ACHIEVEMENT GUIDE 100%, LEFT 4 DEAD 2 ALL 101 ACHIEVEMENTS★ 5 (1.7k)38k views3.5k ♥19 minUpdated Nov 12, 2023


- Upgrading to PremiumTeam Fortress 2★ 5 (20k)1441k views11k ♥6 minUpdated May 11, 2022
- No More Room in Hell Official ManualNo More Room in Hell★ 5 (2.8k)569k views2.1k ♥29 minUpdated Apr 22, 2019
- NMRiH Community Hosting GuidesNo More Room in Hell★ 5 (526)351k views653 ♥1 minUpdated Aug 10, 2022
- ULTIMATE GUIDE FOR GAME DEV TYCOONGame Dev Tycoon★ 5 (5.8k)326k views10k ♥4 minUpdated 23 Jan, 2014
- How to 'Git Gud' Soon™MORDHAU★ 5 (2k)318k views3k ♥68 minUpdated Nov 16, 2024
- Лучшие кооперативные игры SteamPAYDAY 2★ 5 (1.5k)315k views2.1k ♥56 minRussianUpdated Apr 27, 2025






This guide was created by its original author on the Steam Community. Are you the author and want it removed? Request removal.