Easter Eggs (Refresher and for New People)
Origins
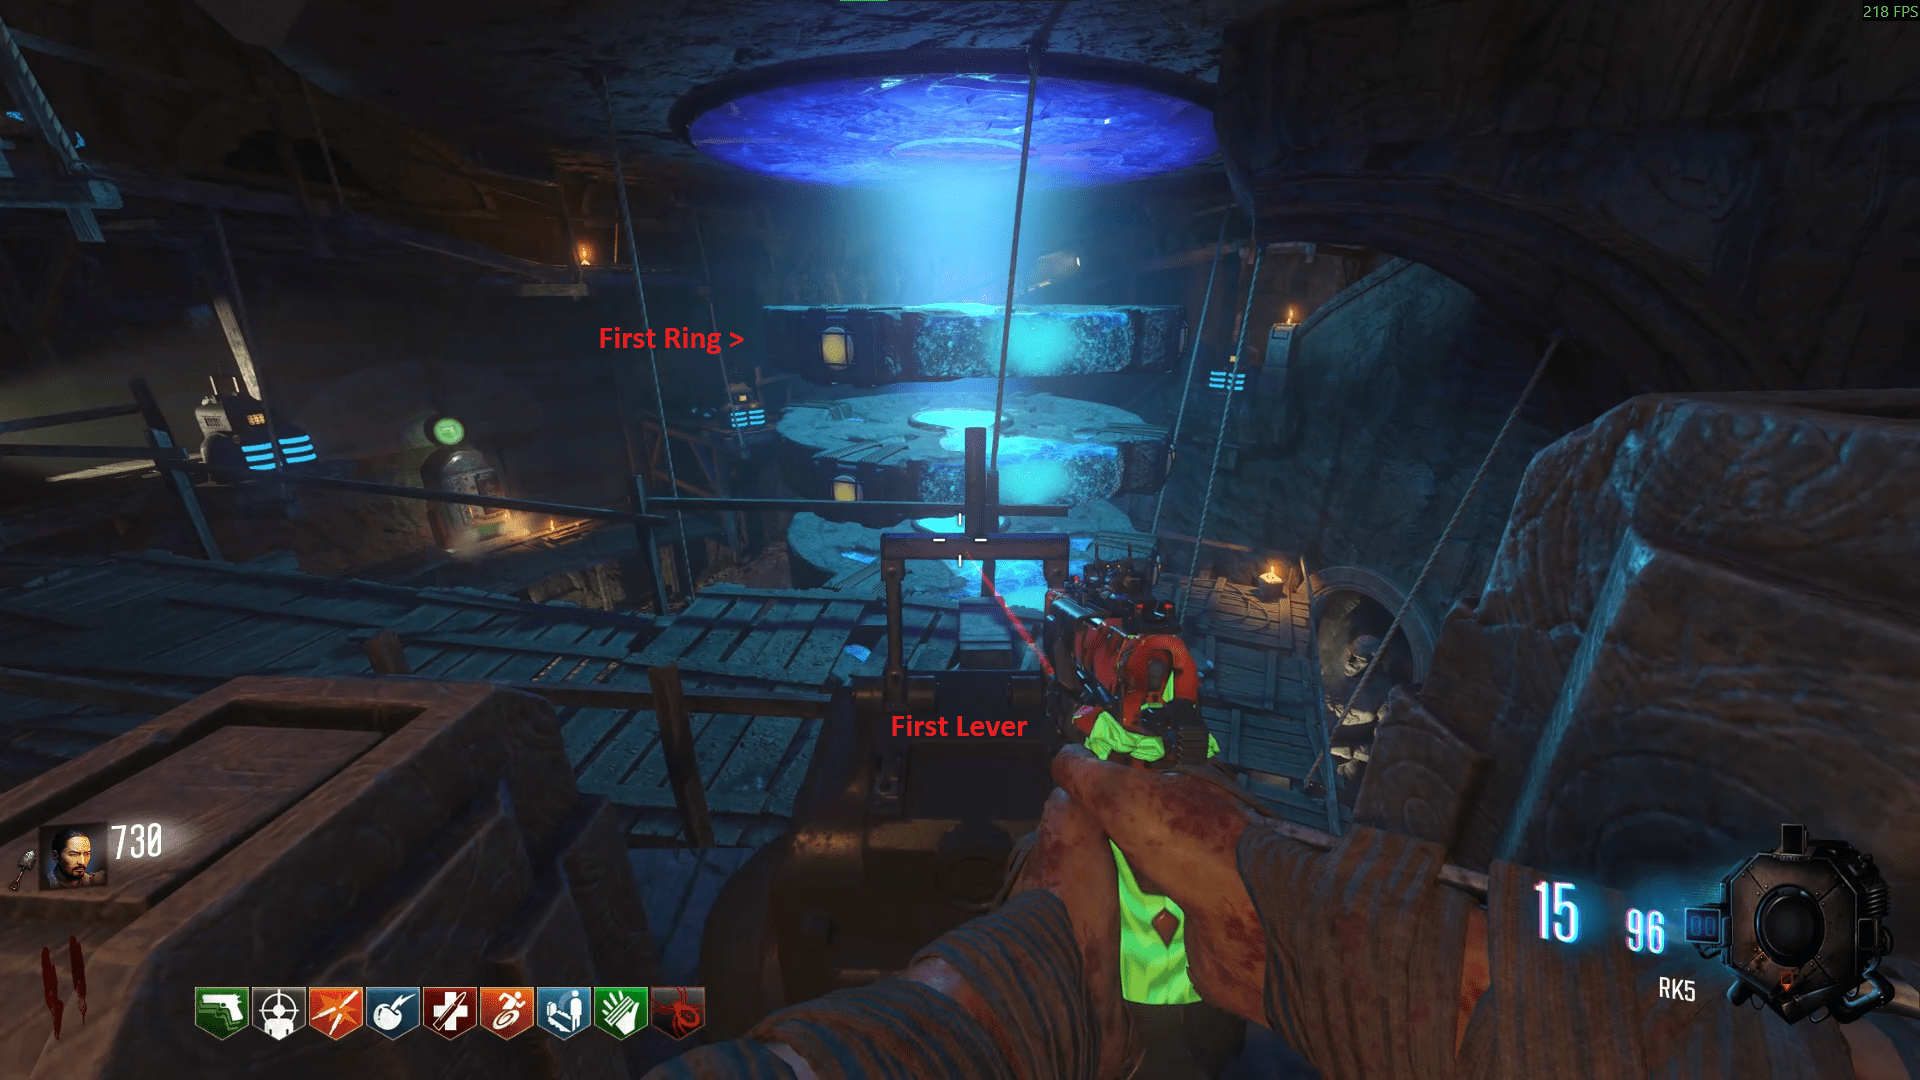
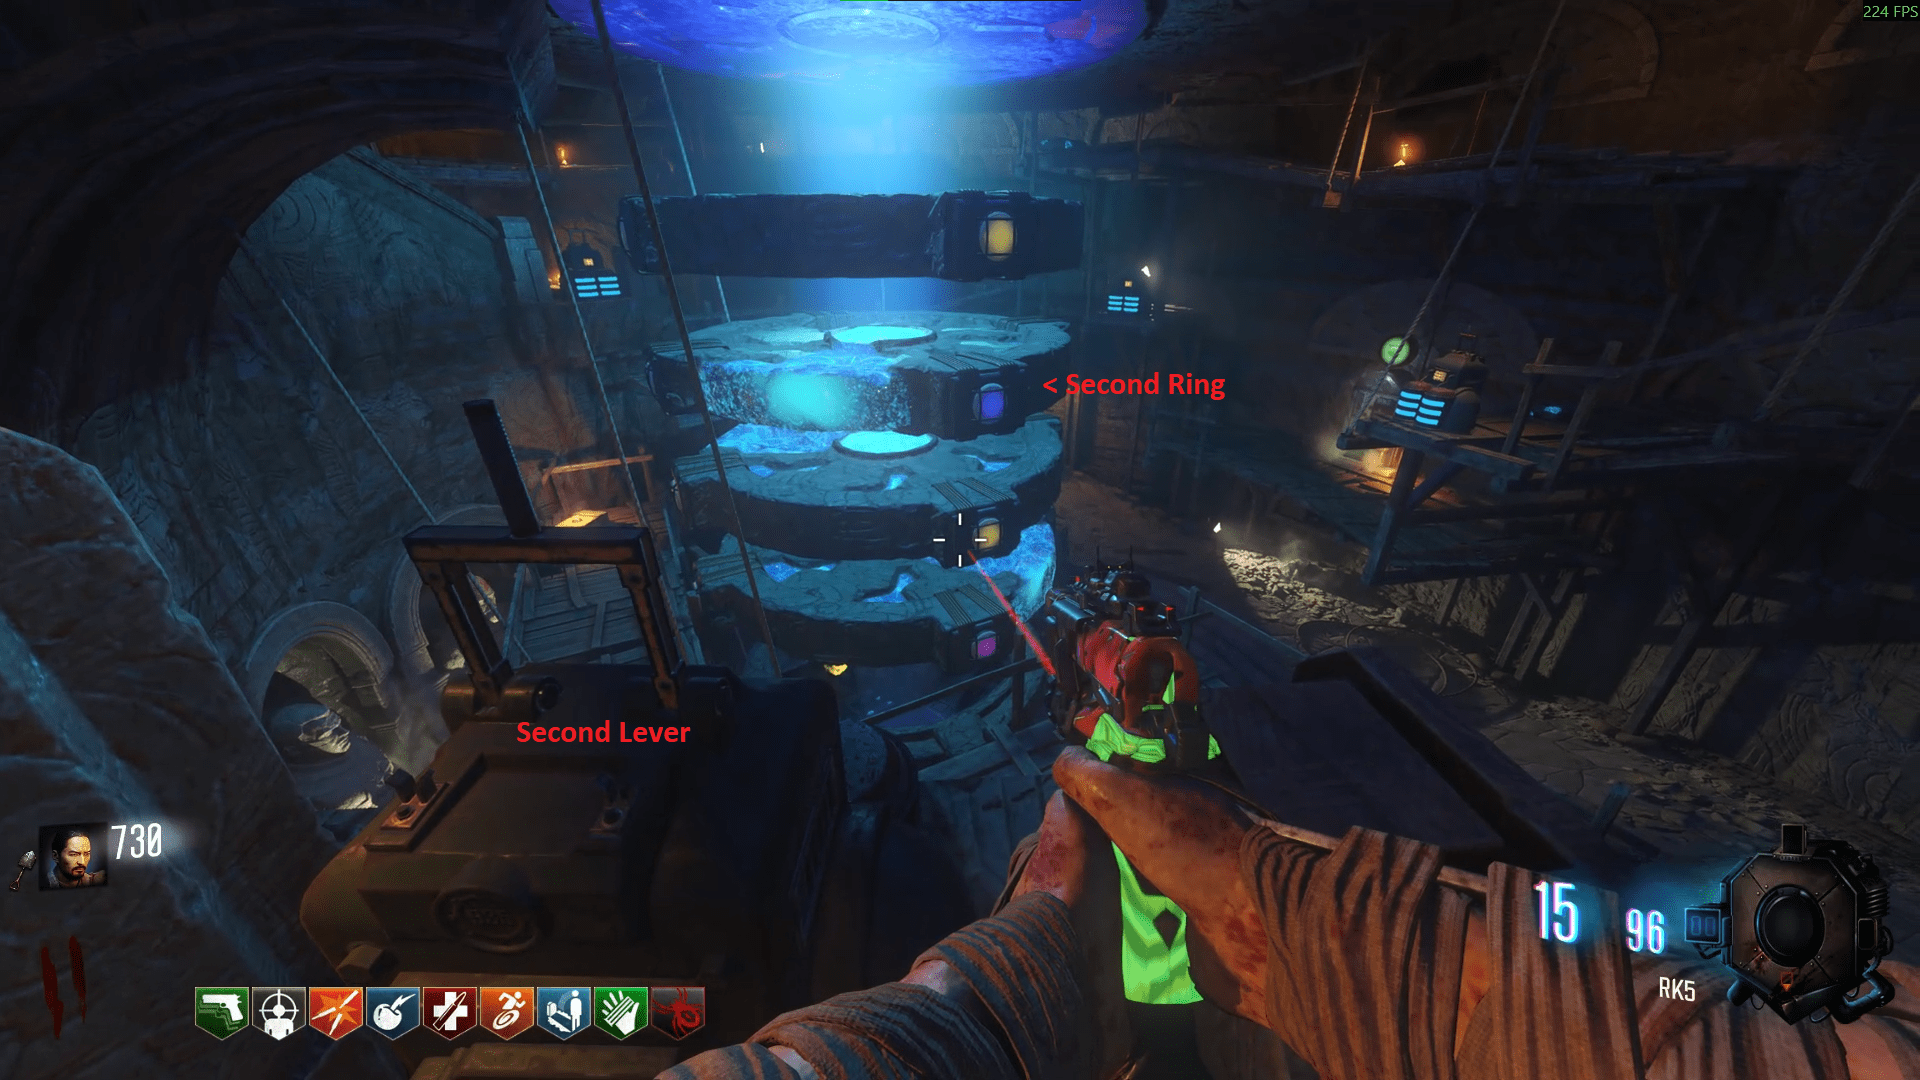
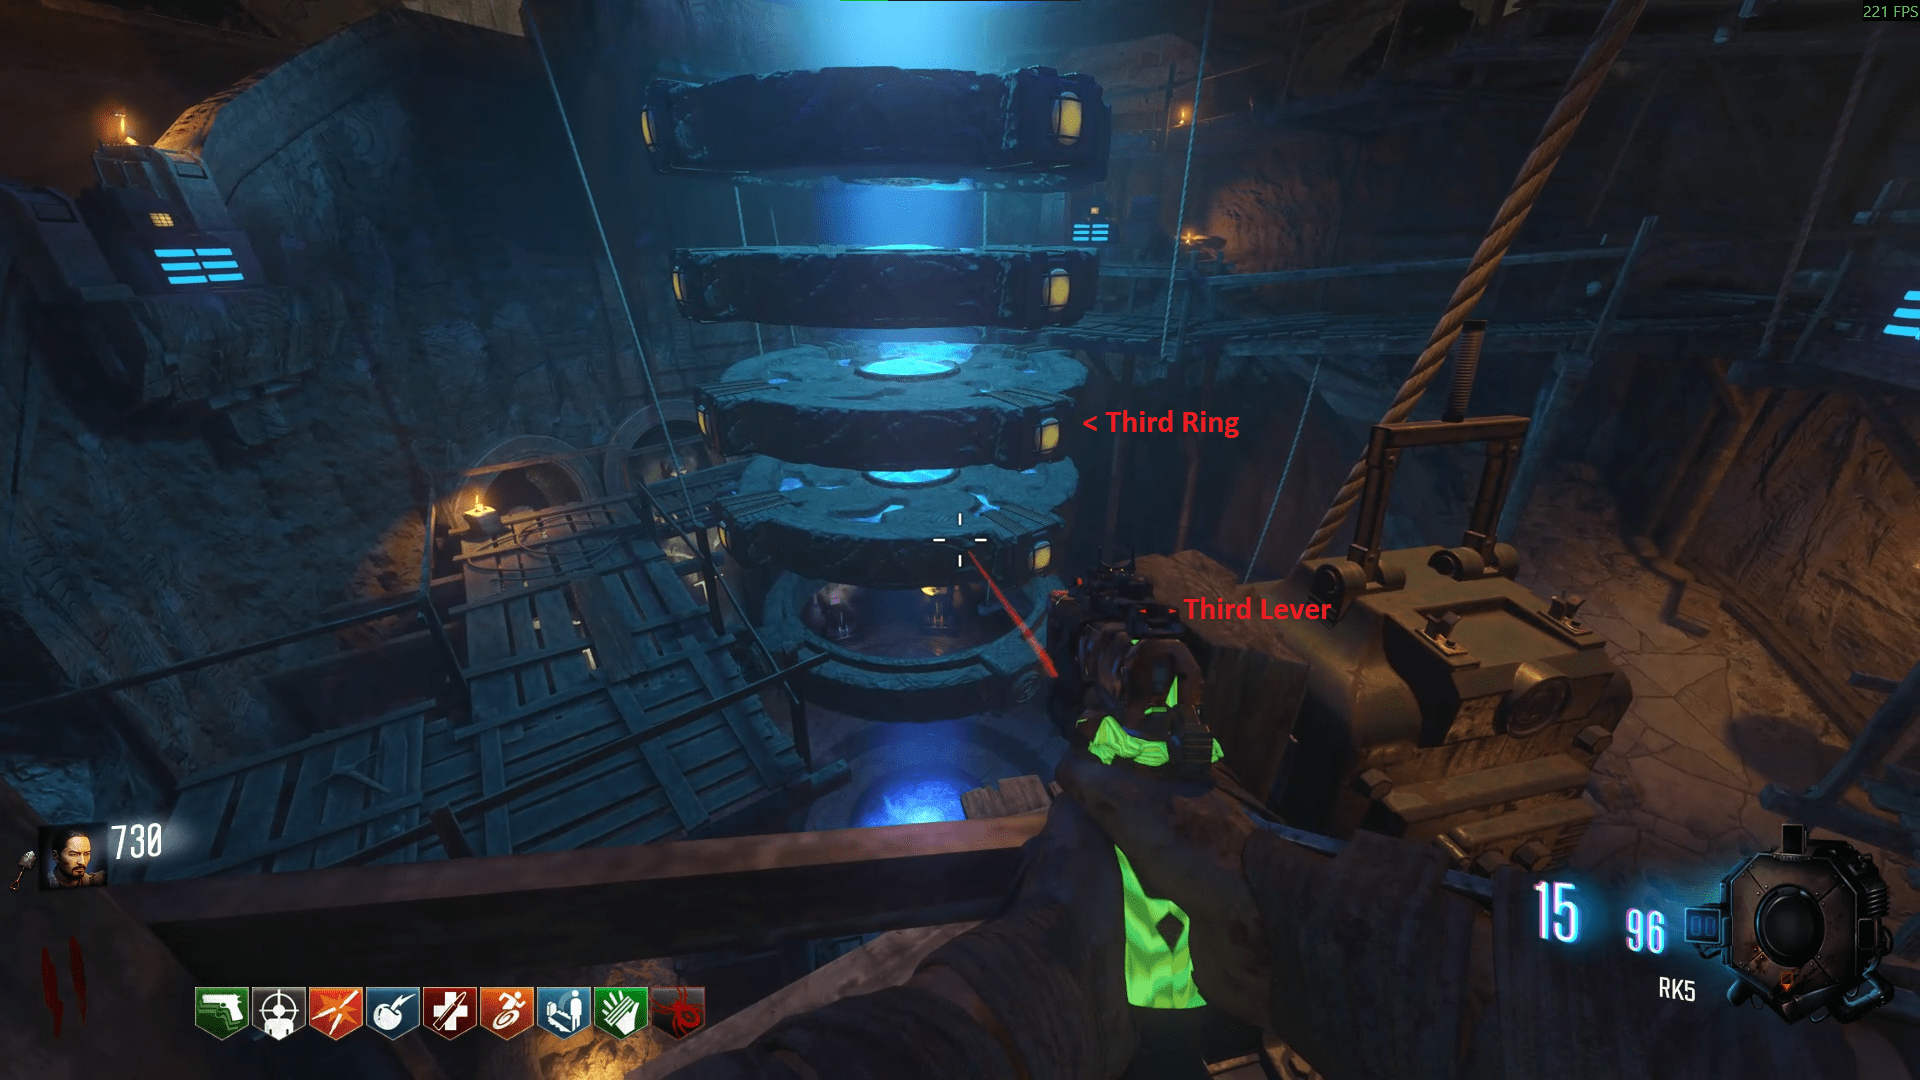
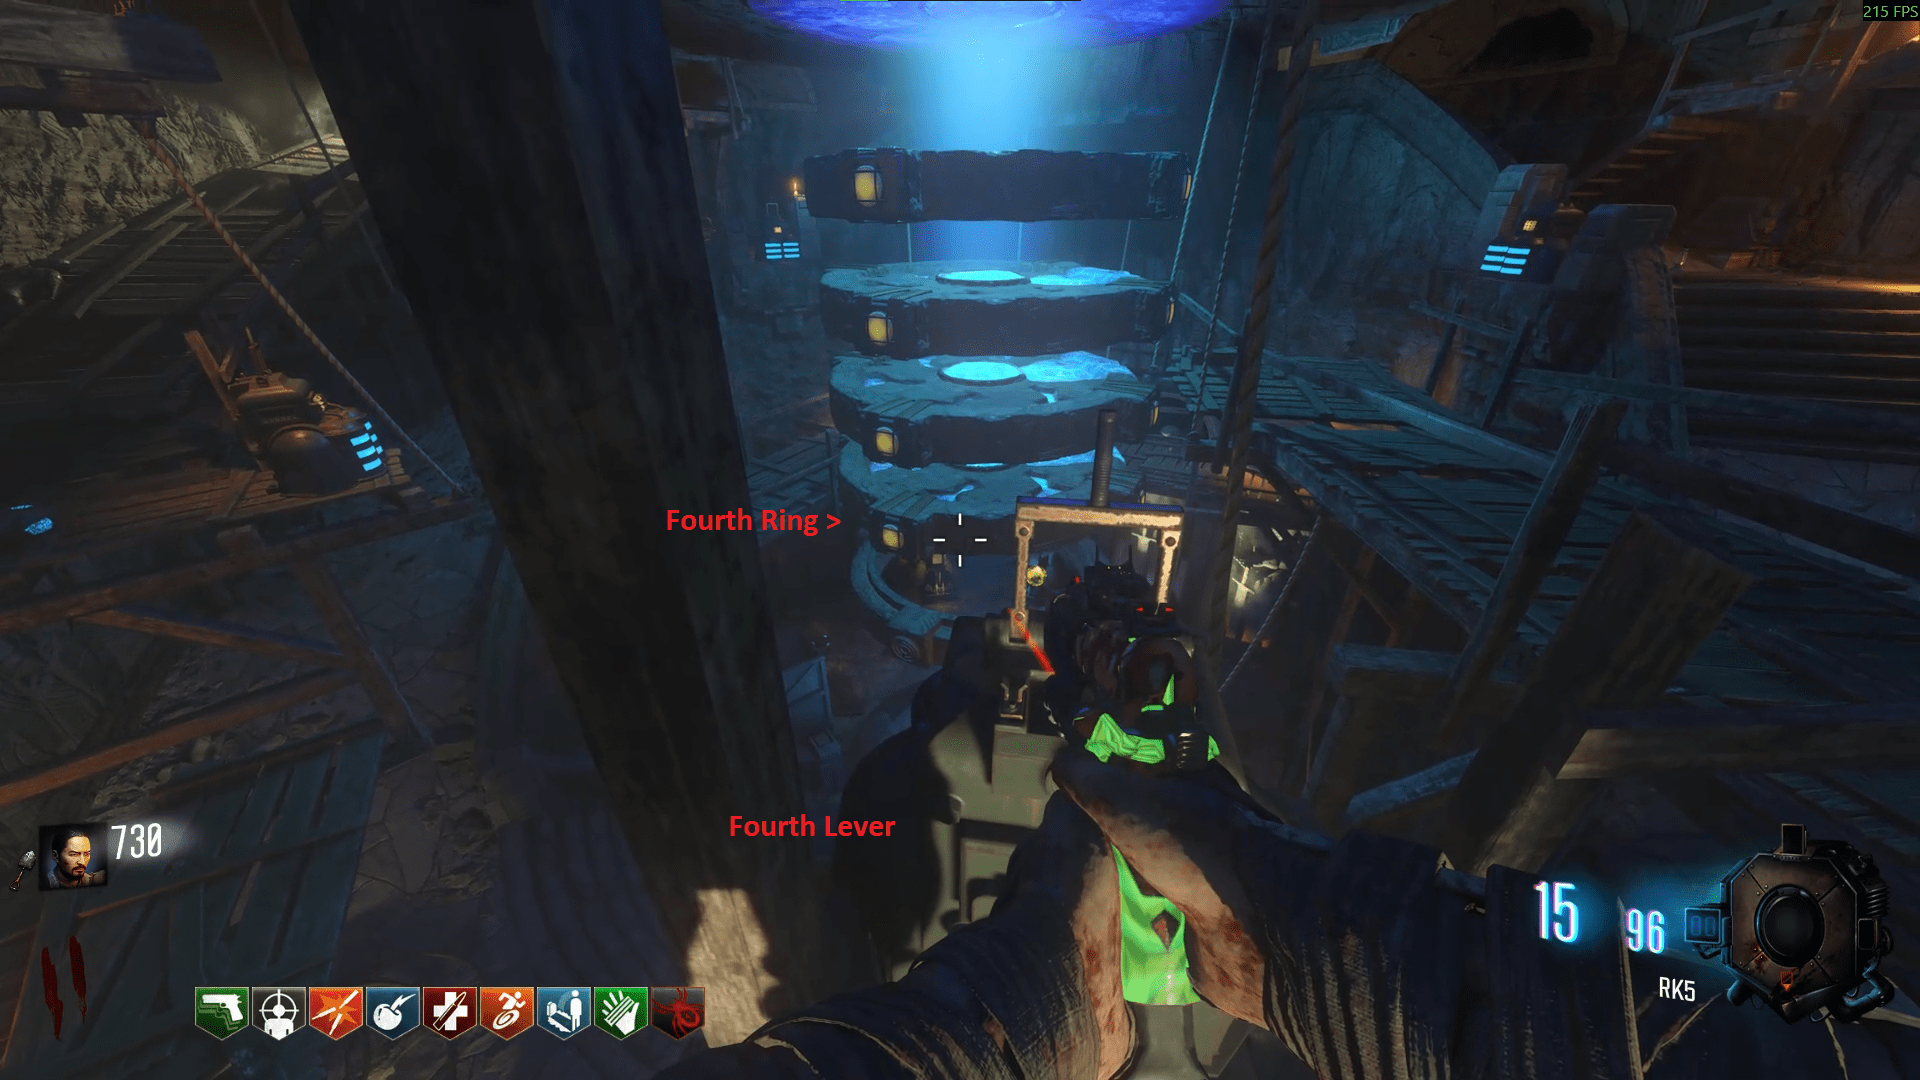
To use the rings, you must interact with each of the four levers. The images will describe how they work.
- Opposite the generator, just outside the Lightning tunnel entrance on some 935 boxes.
- Directly besides Stamin-Up, on the right.
- In the Lightning tunnel, on a workbench to the left upon entering.
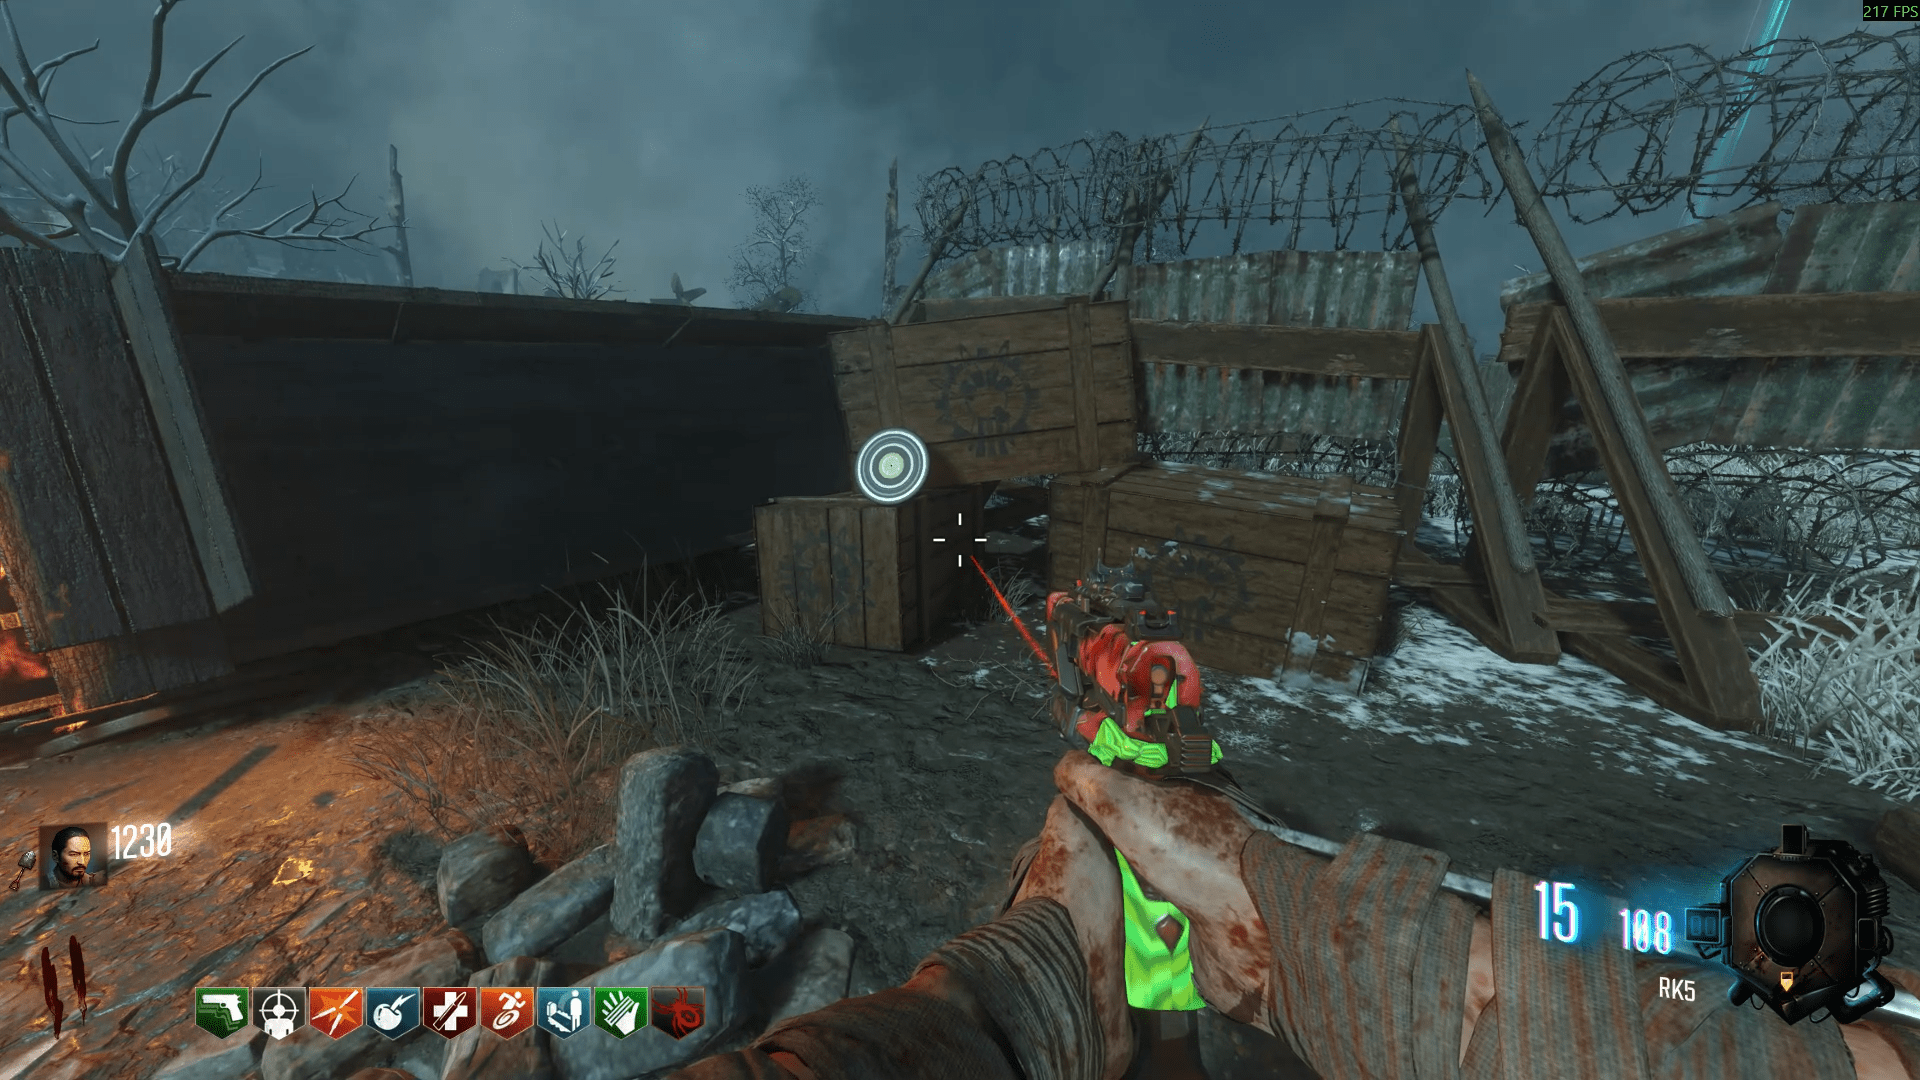
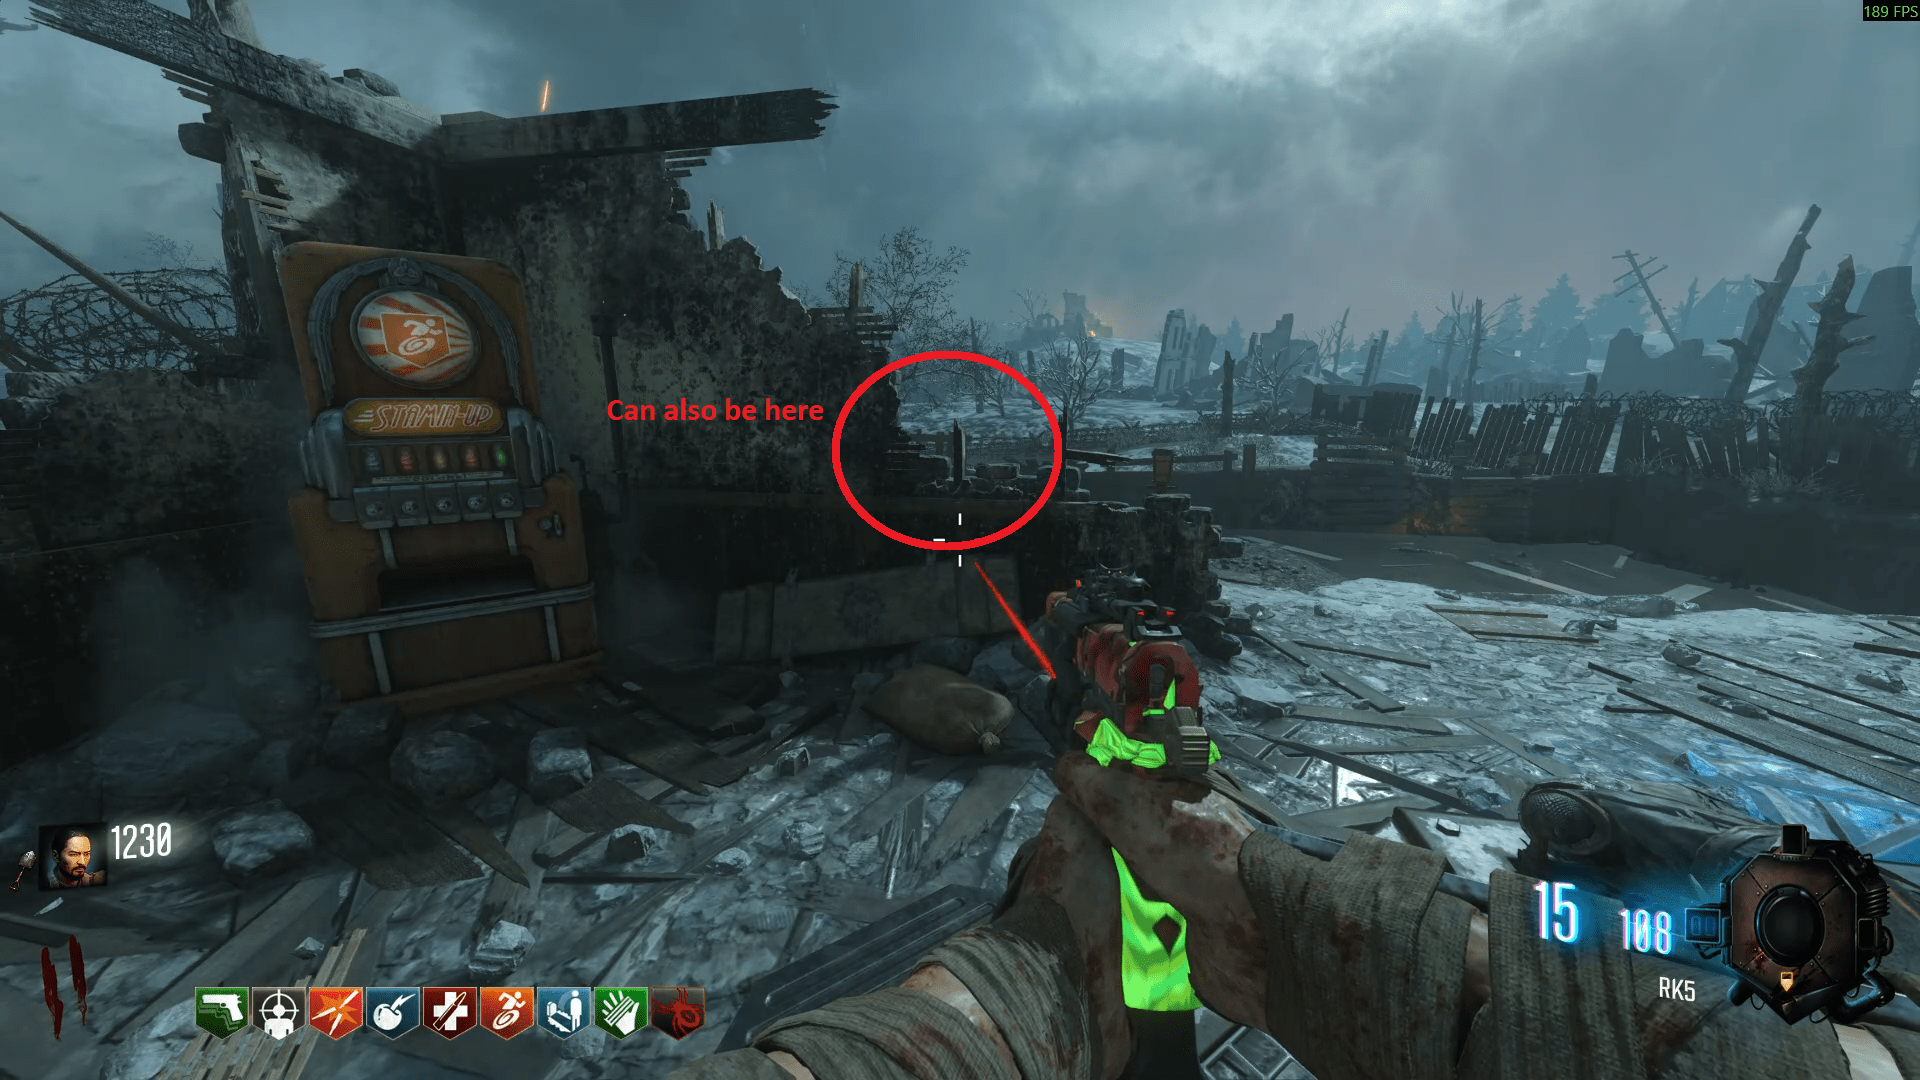
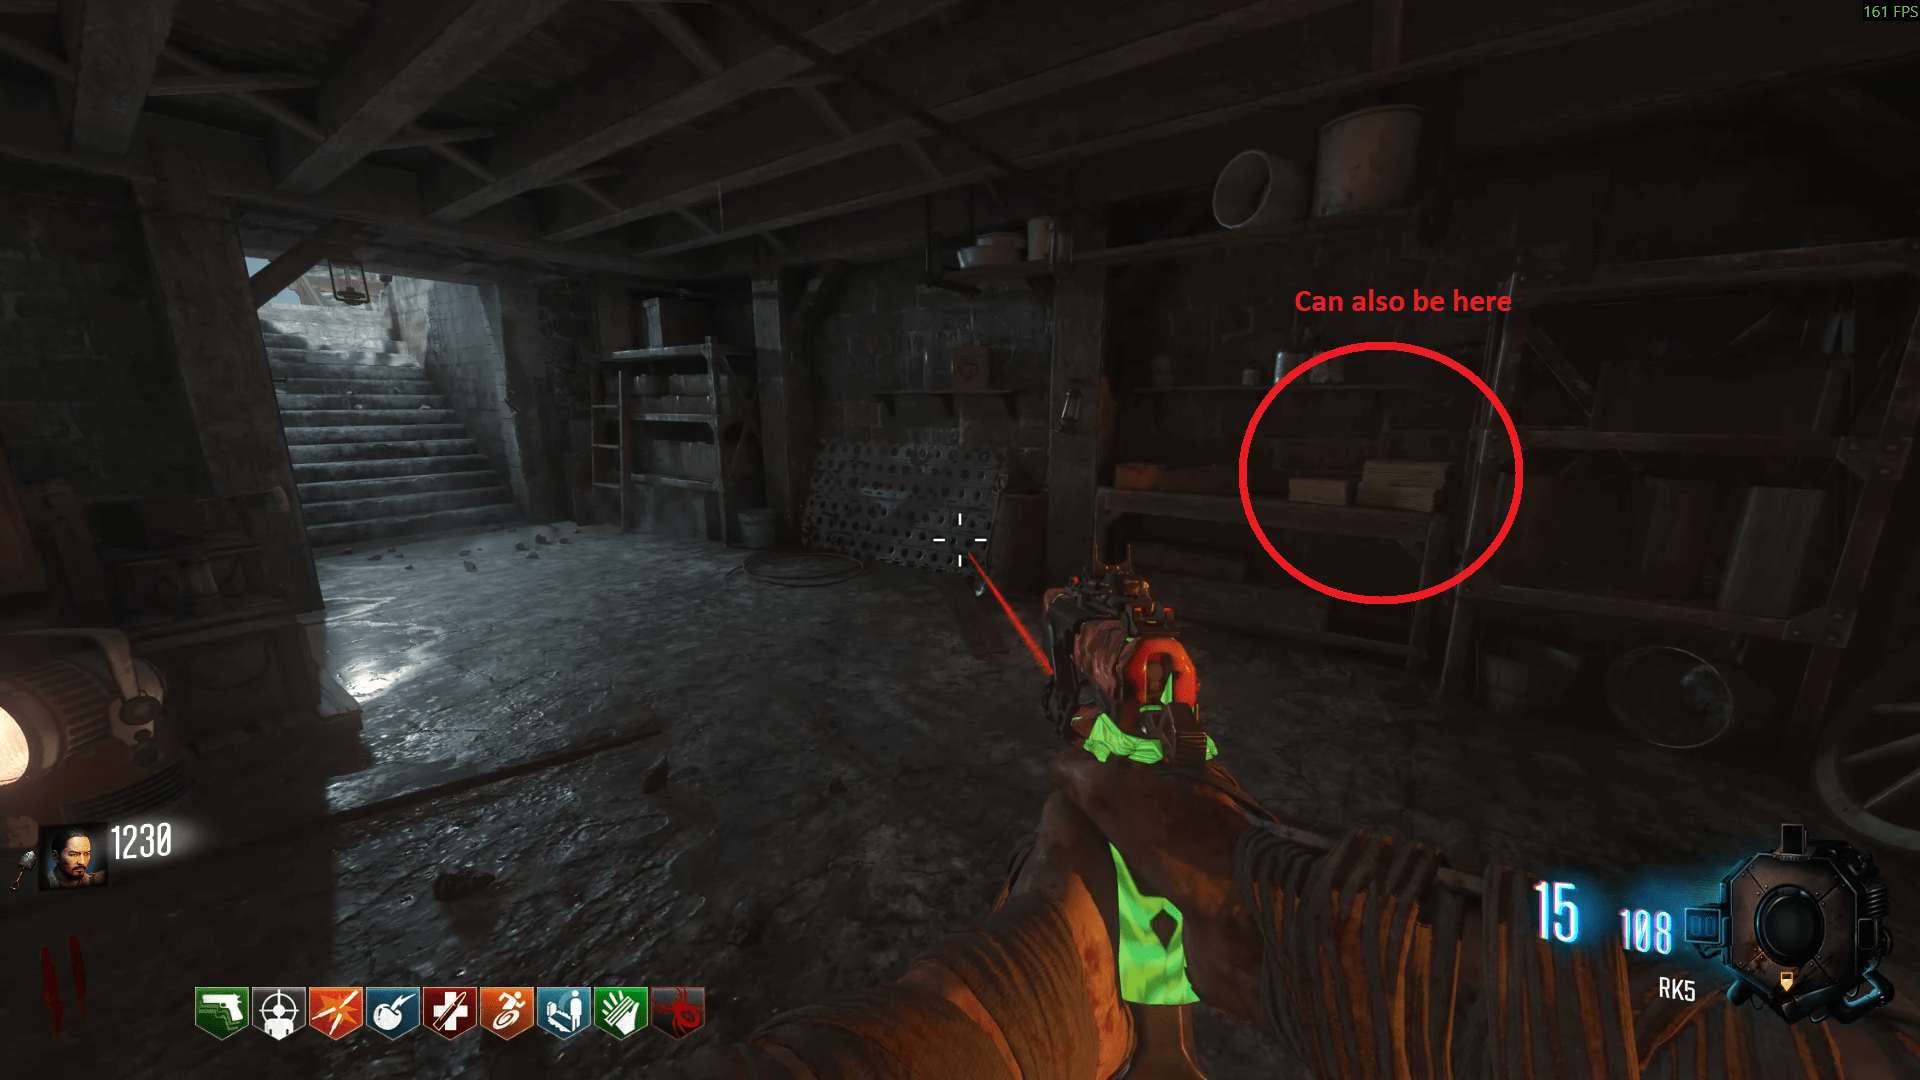
Once you have the disc, go to Generator 4 and enter the Wind tunnel. Place the Gramophone, enter the portal and pick up the Wind Crystal.
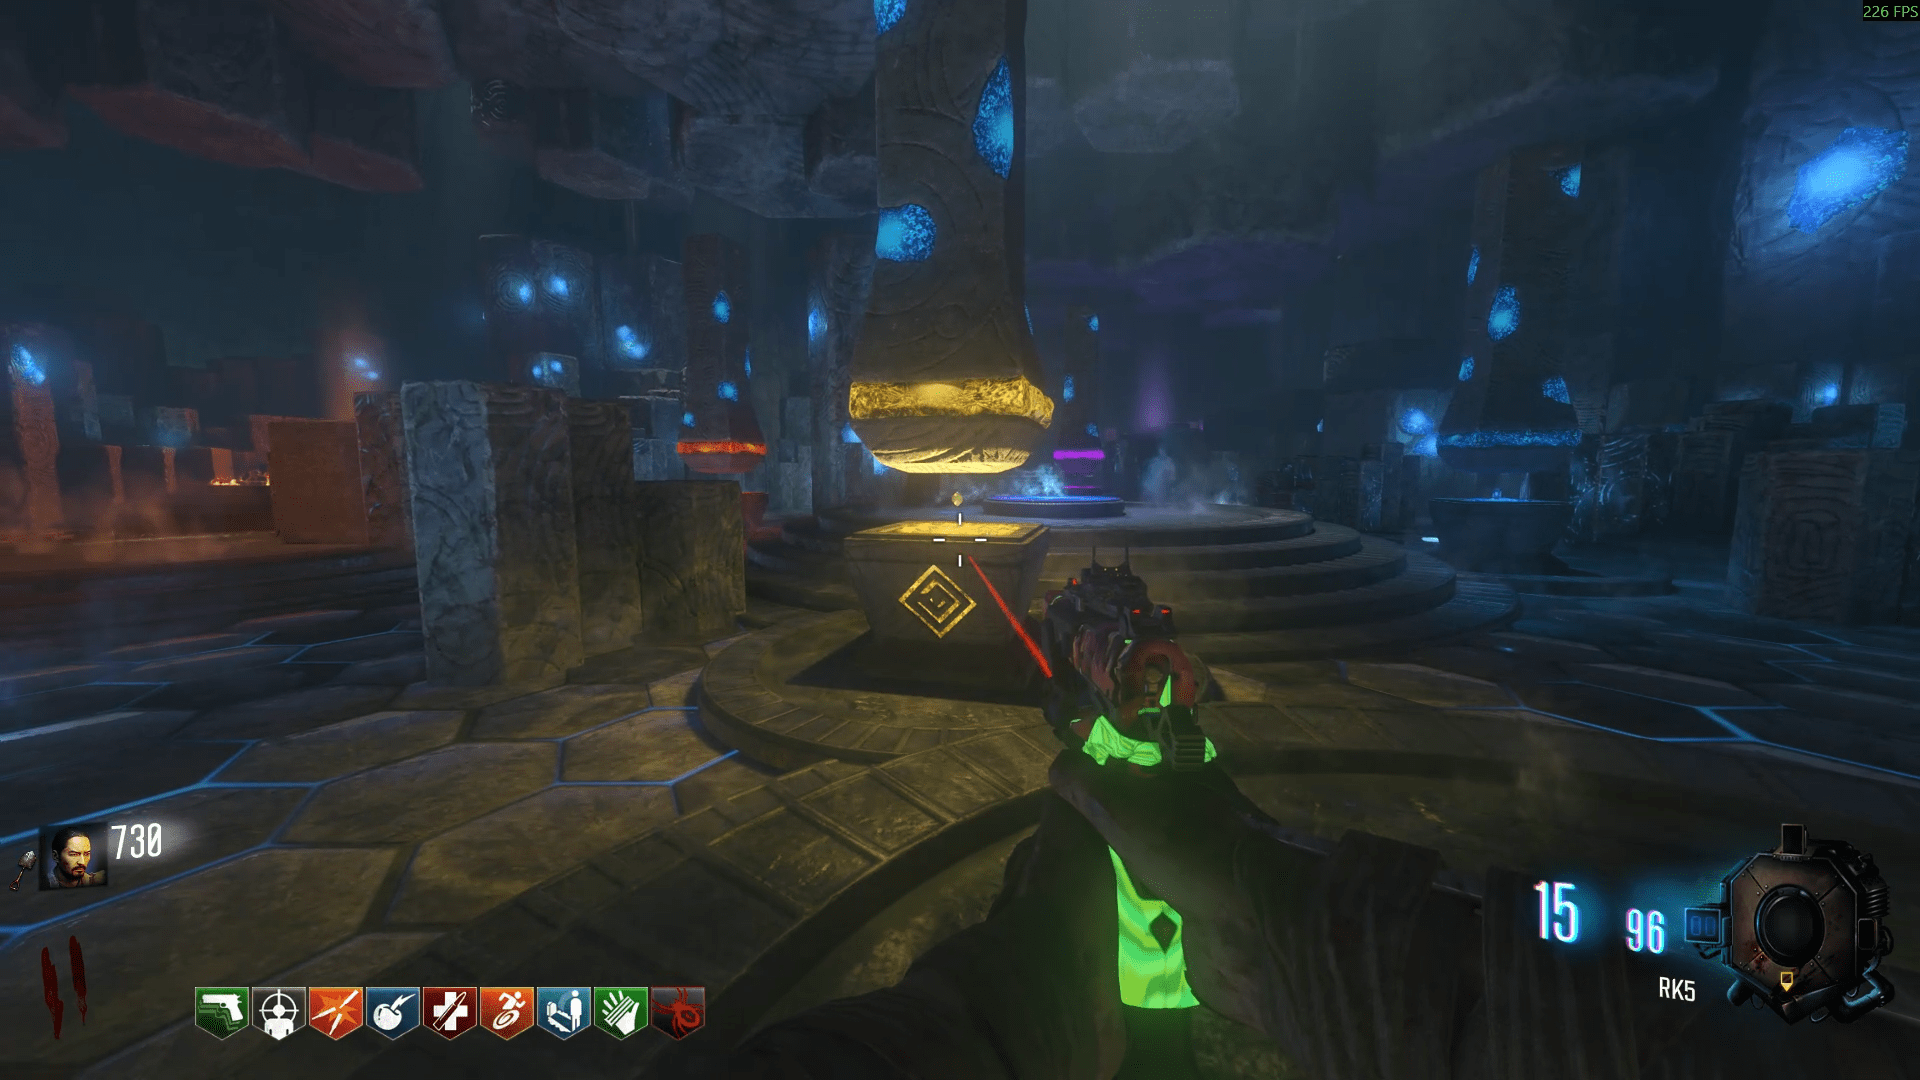
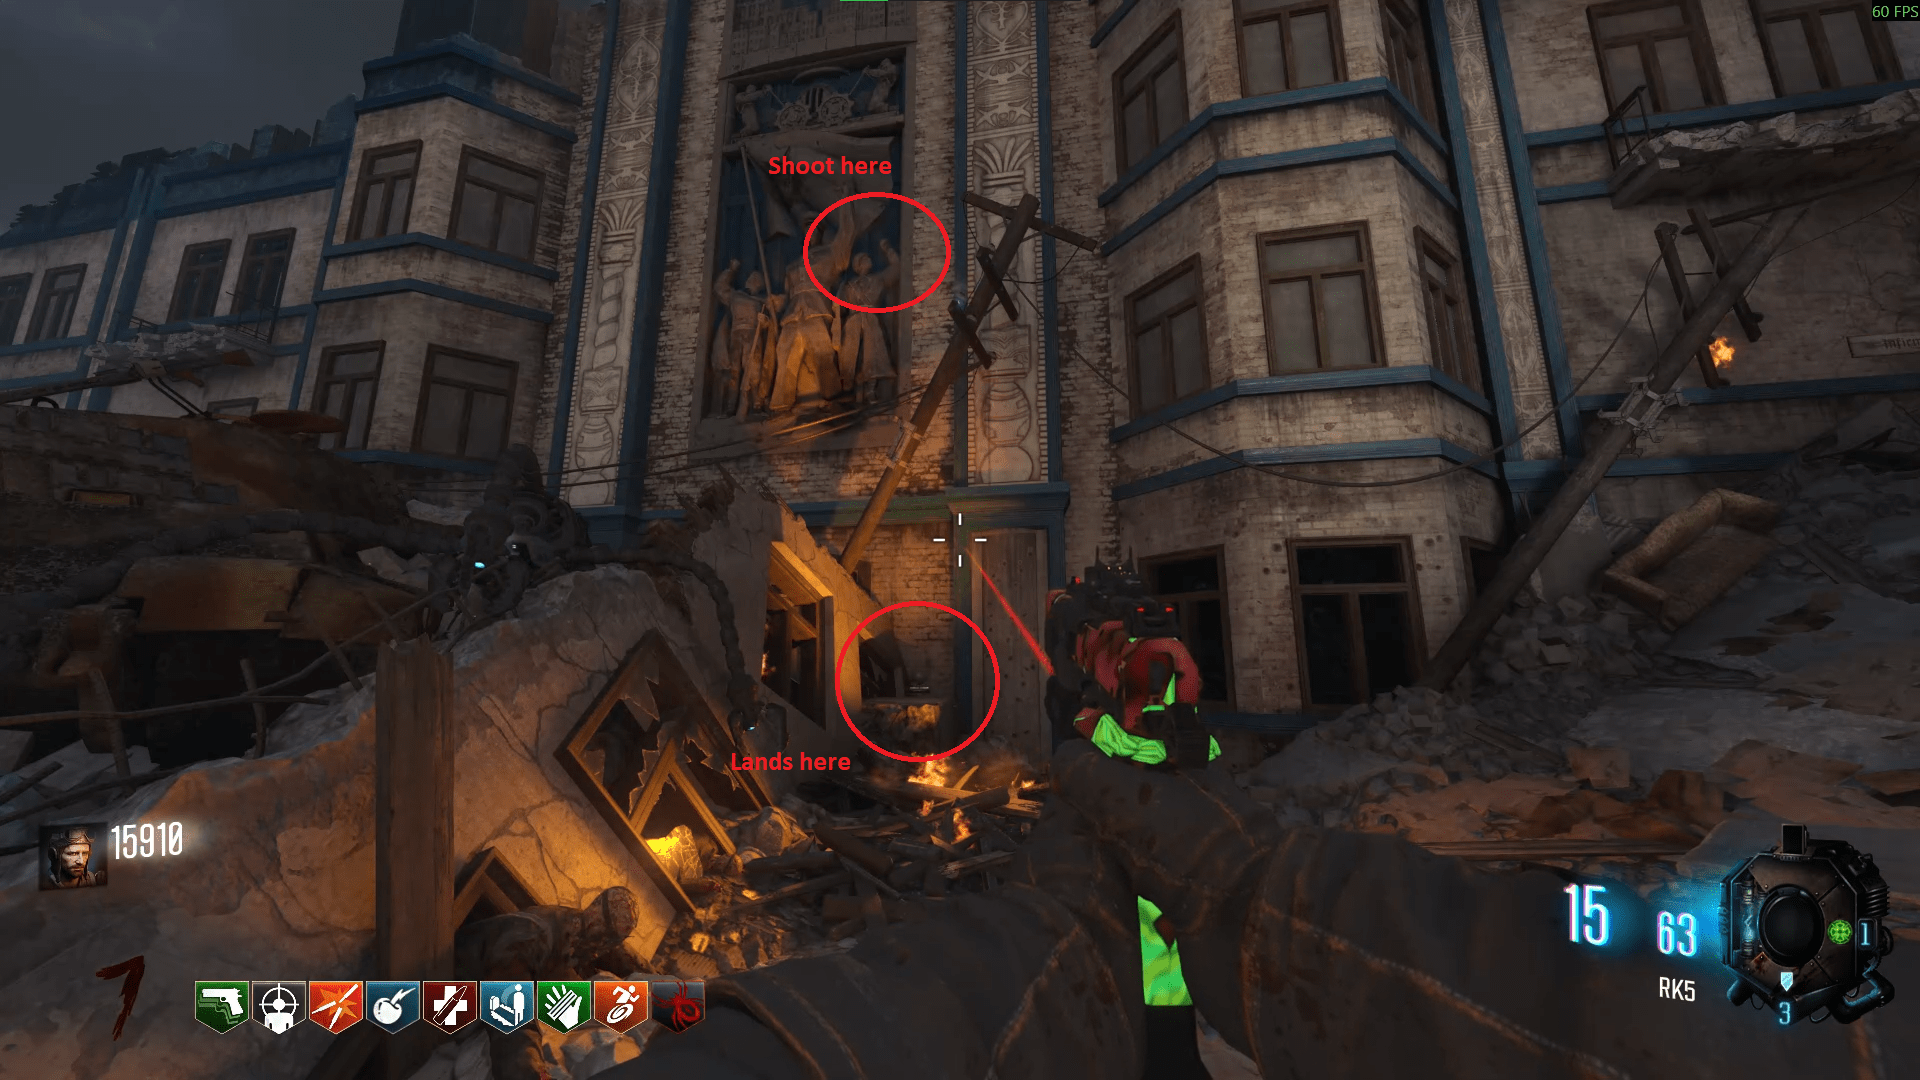
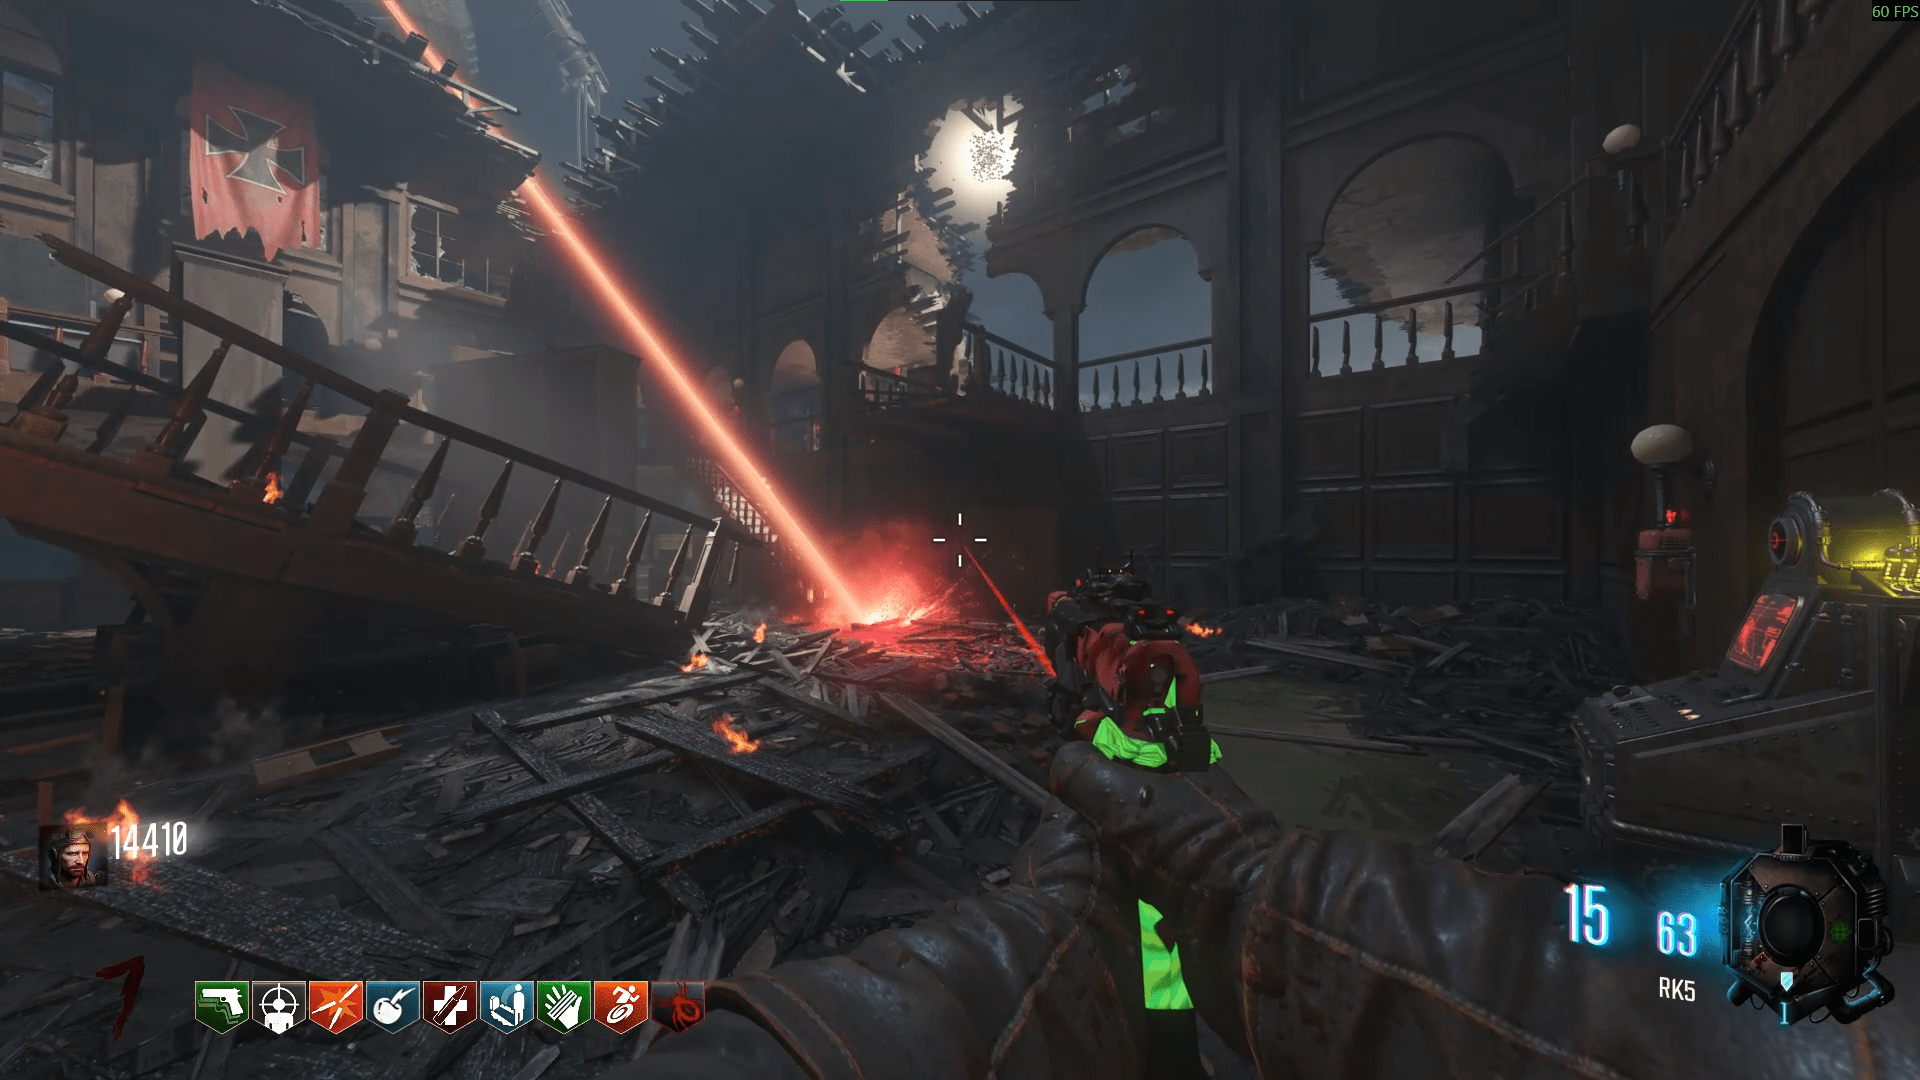
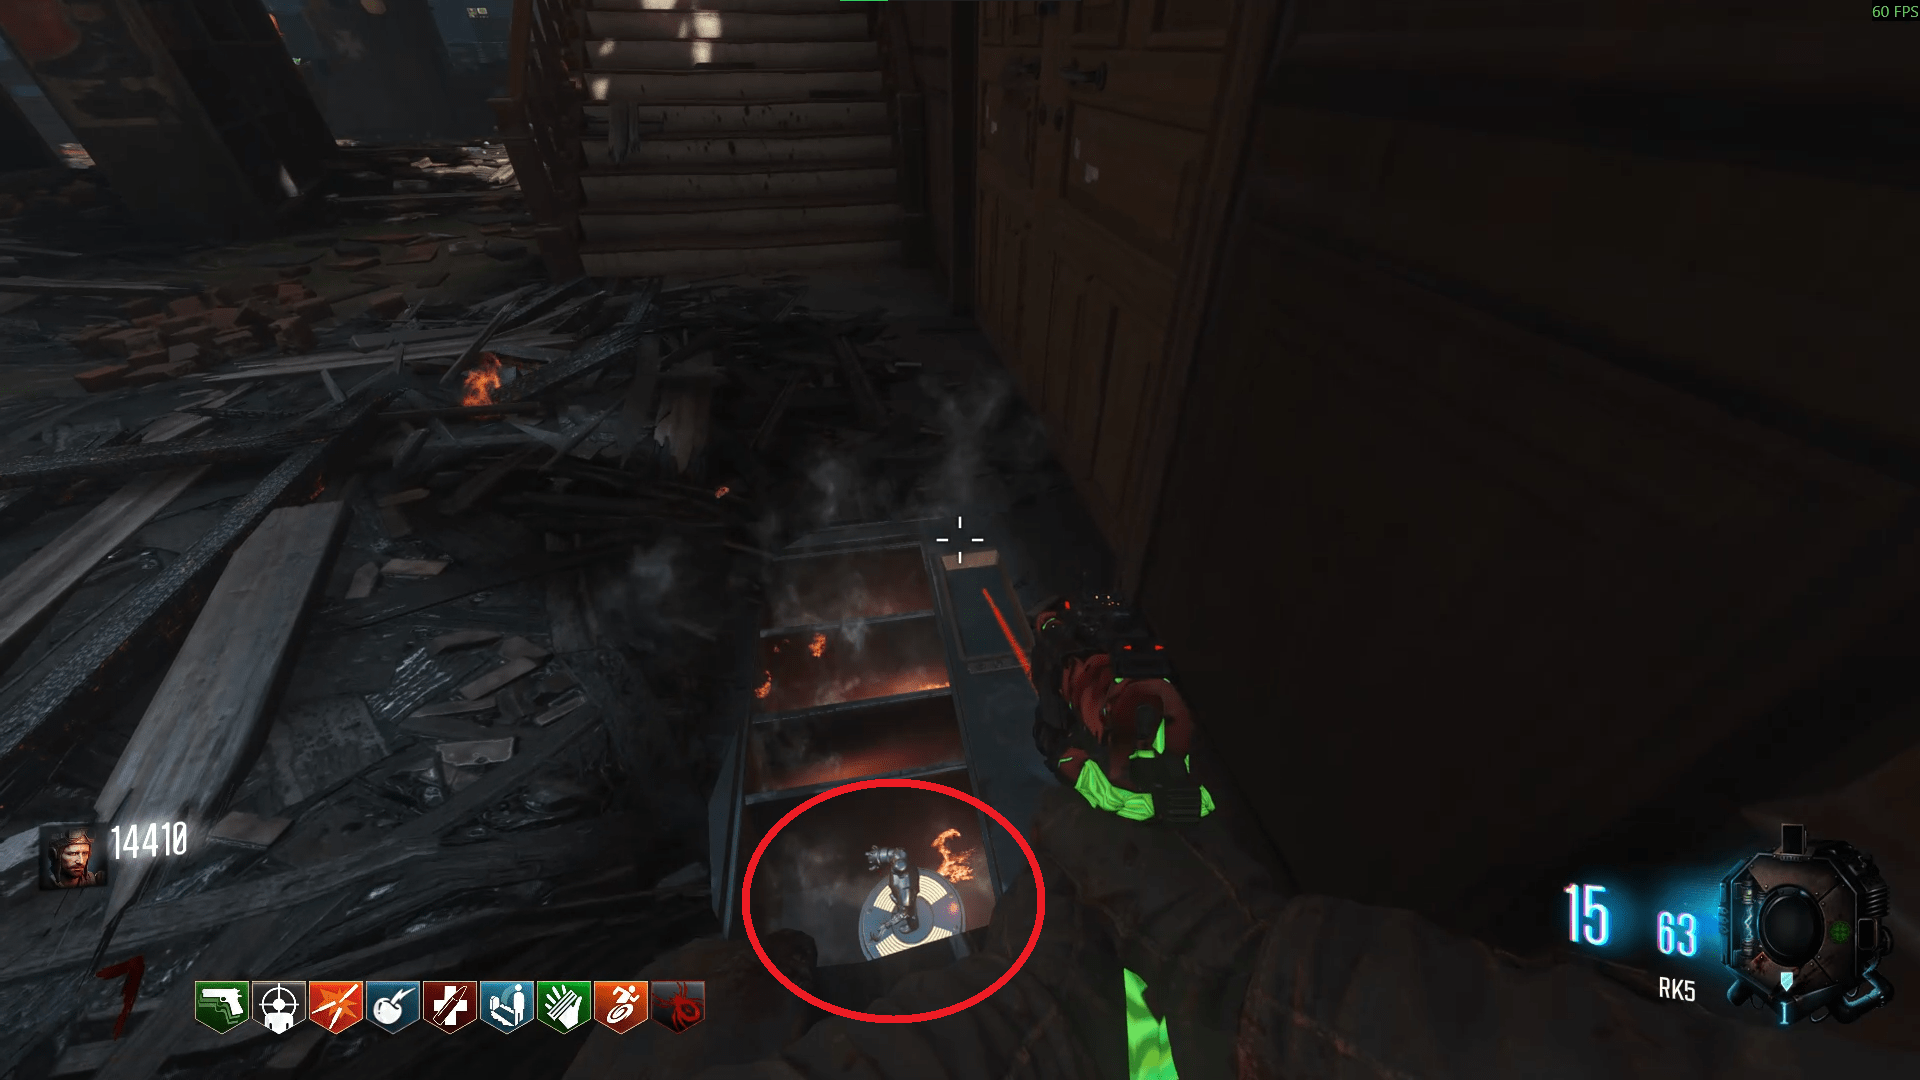
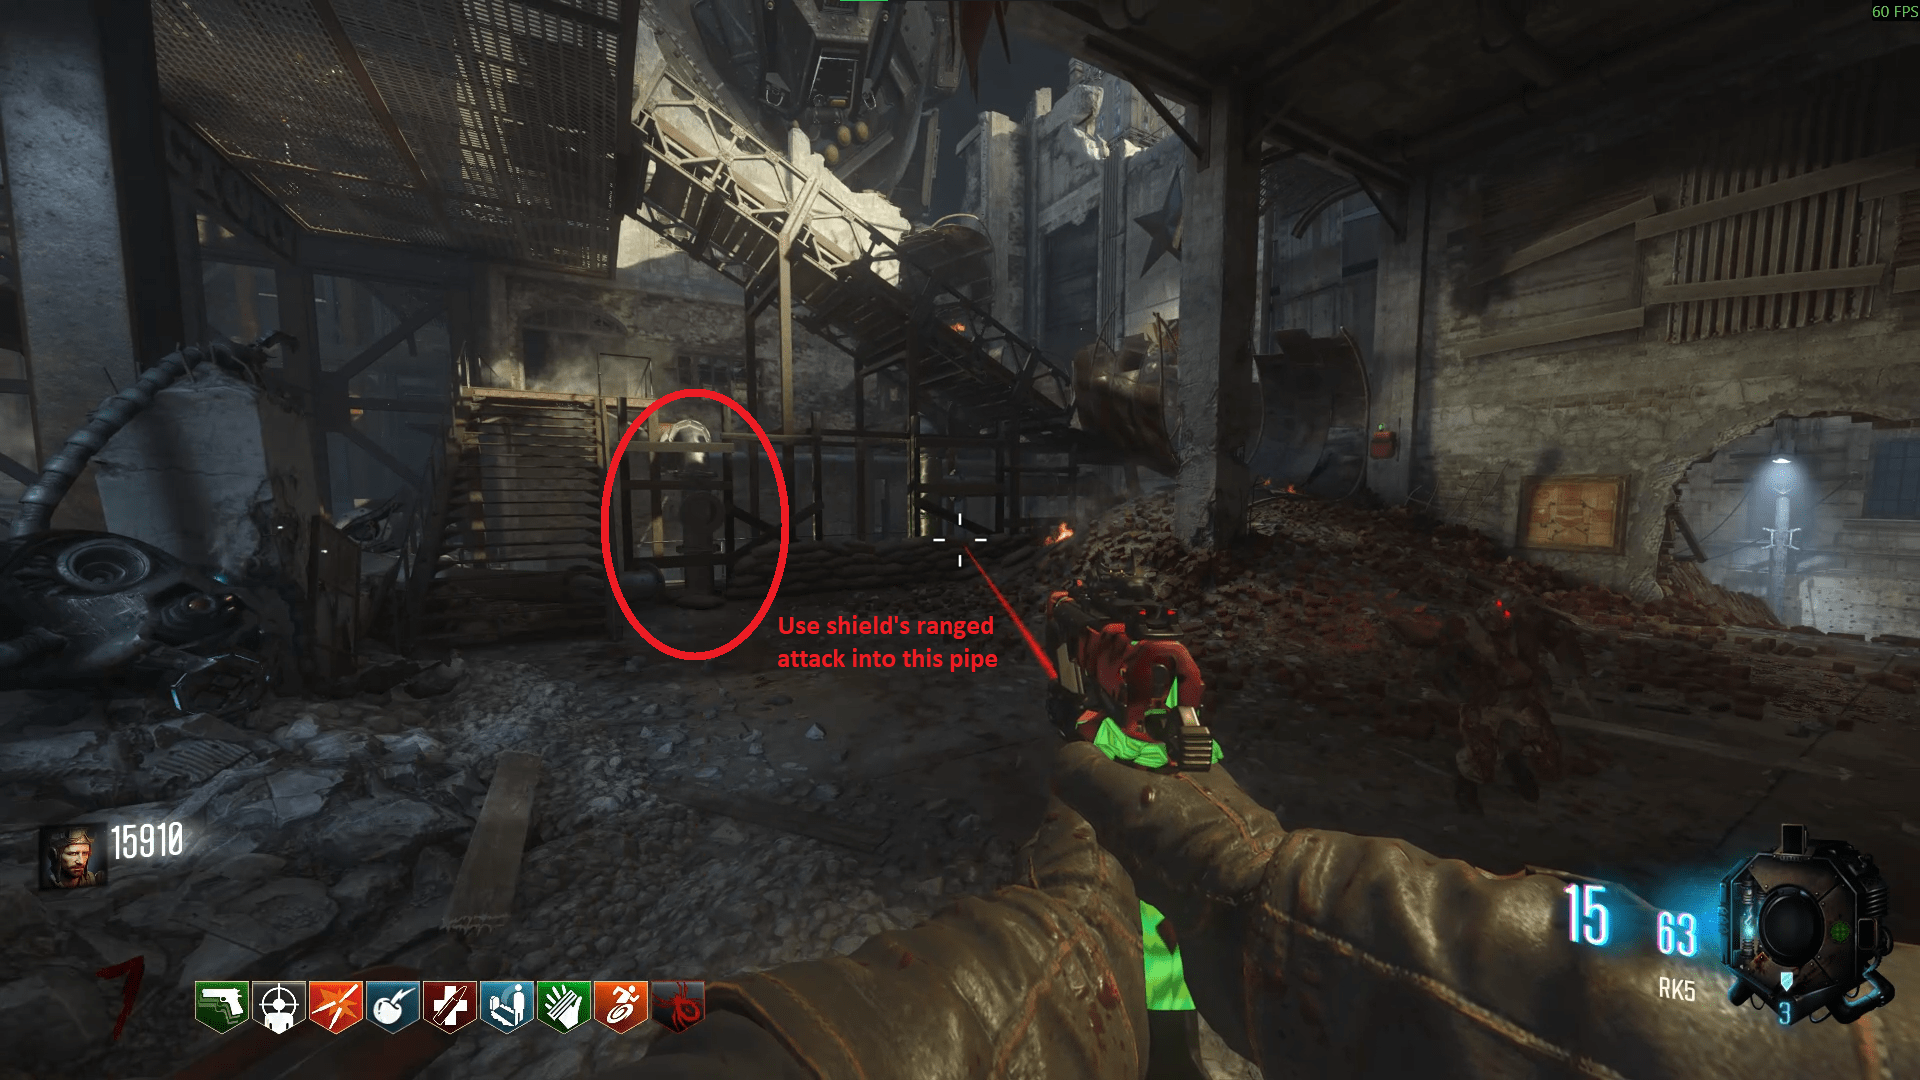
As for the staff pieces, there are three giant robots walking across the map. You need to enter each of them for each piece of the Wind staff. The first is 'Thor' who walks at Spawn, the second is 'Odin' who walks at the Mound and 'Freya' who walks at the Church. On the robot, find the foot that has yellow lights underneath and shoot it with a bullet weapon to open it up. Now just wait in the footprint until it walks over you, then pick up the staff piece inside.
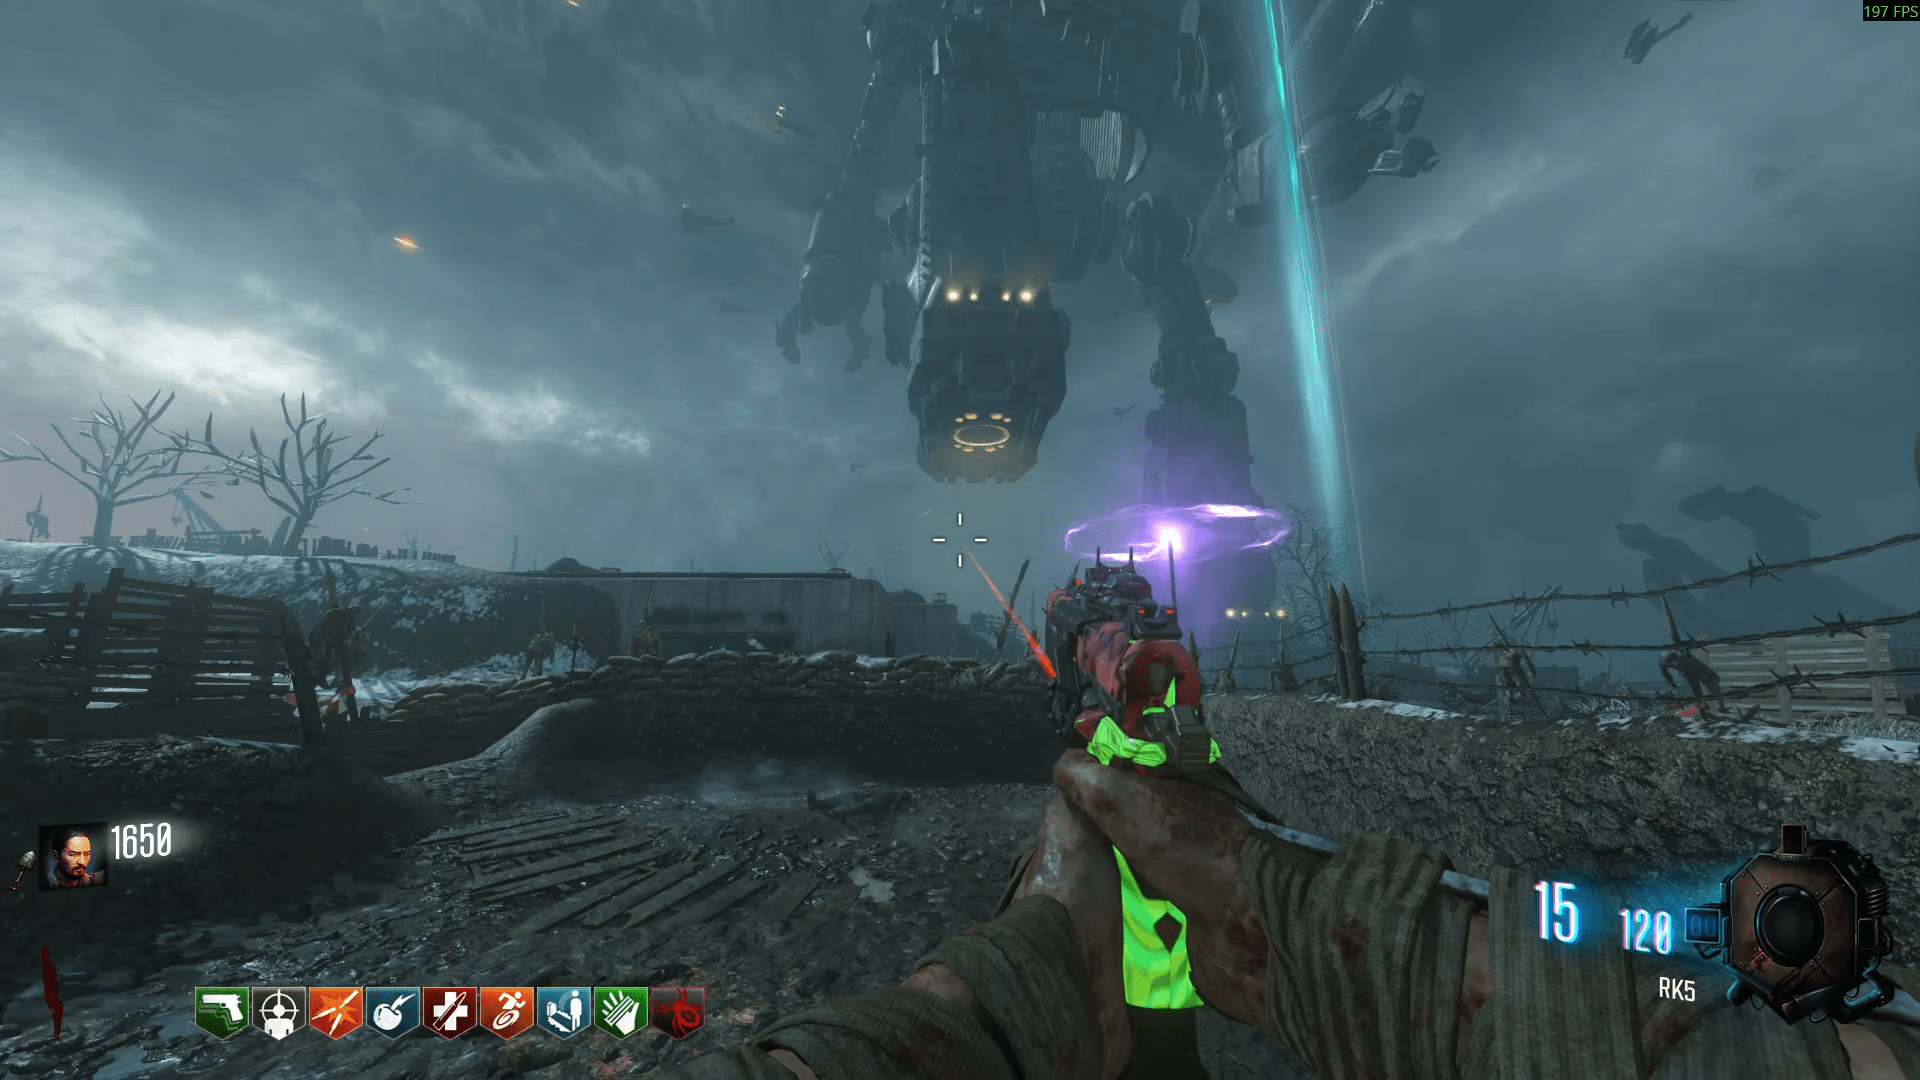
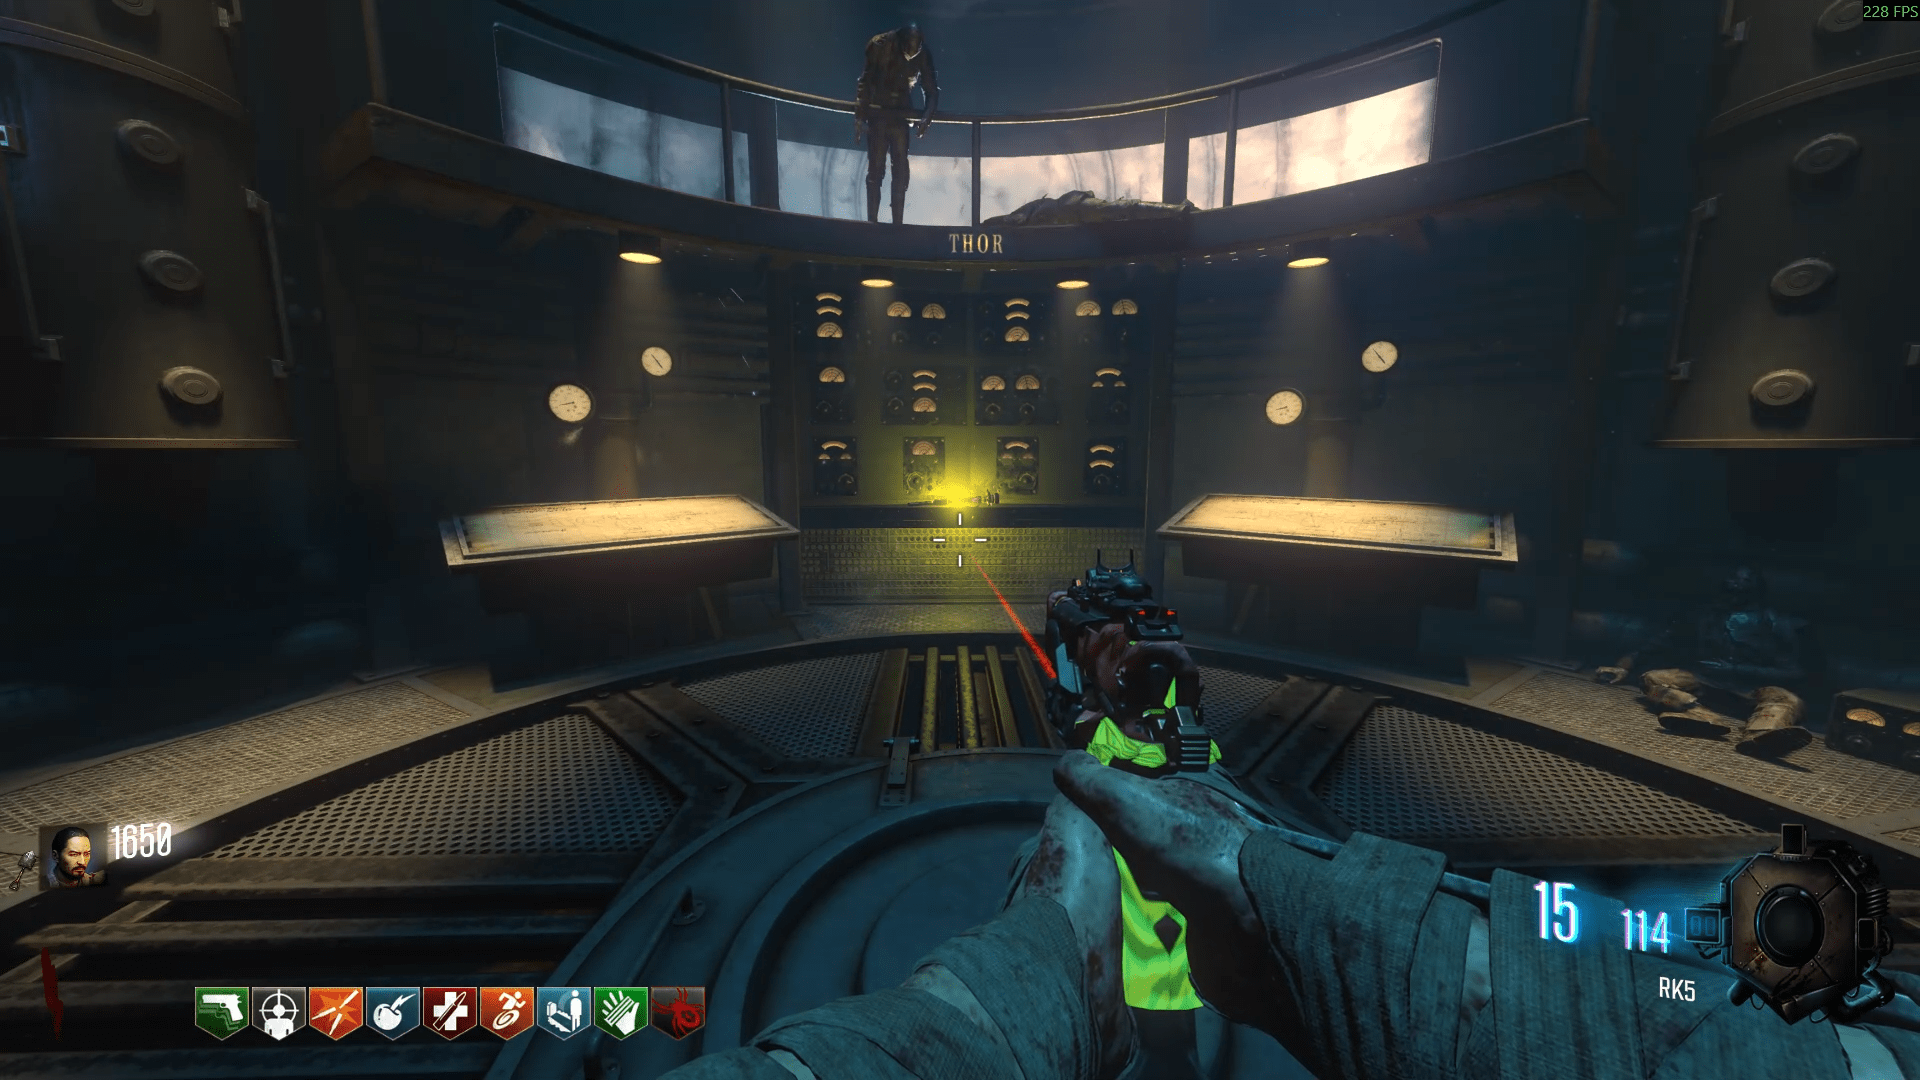
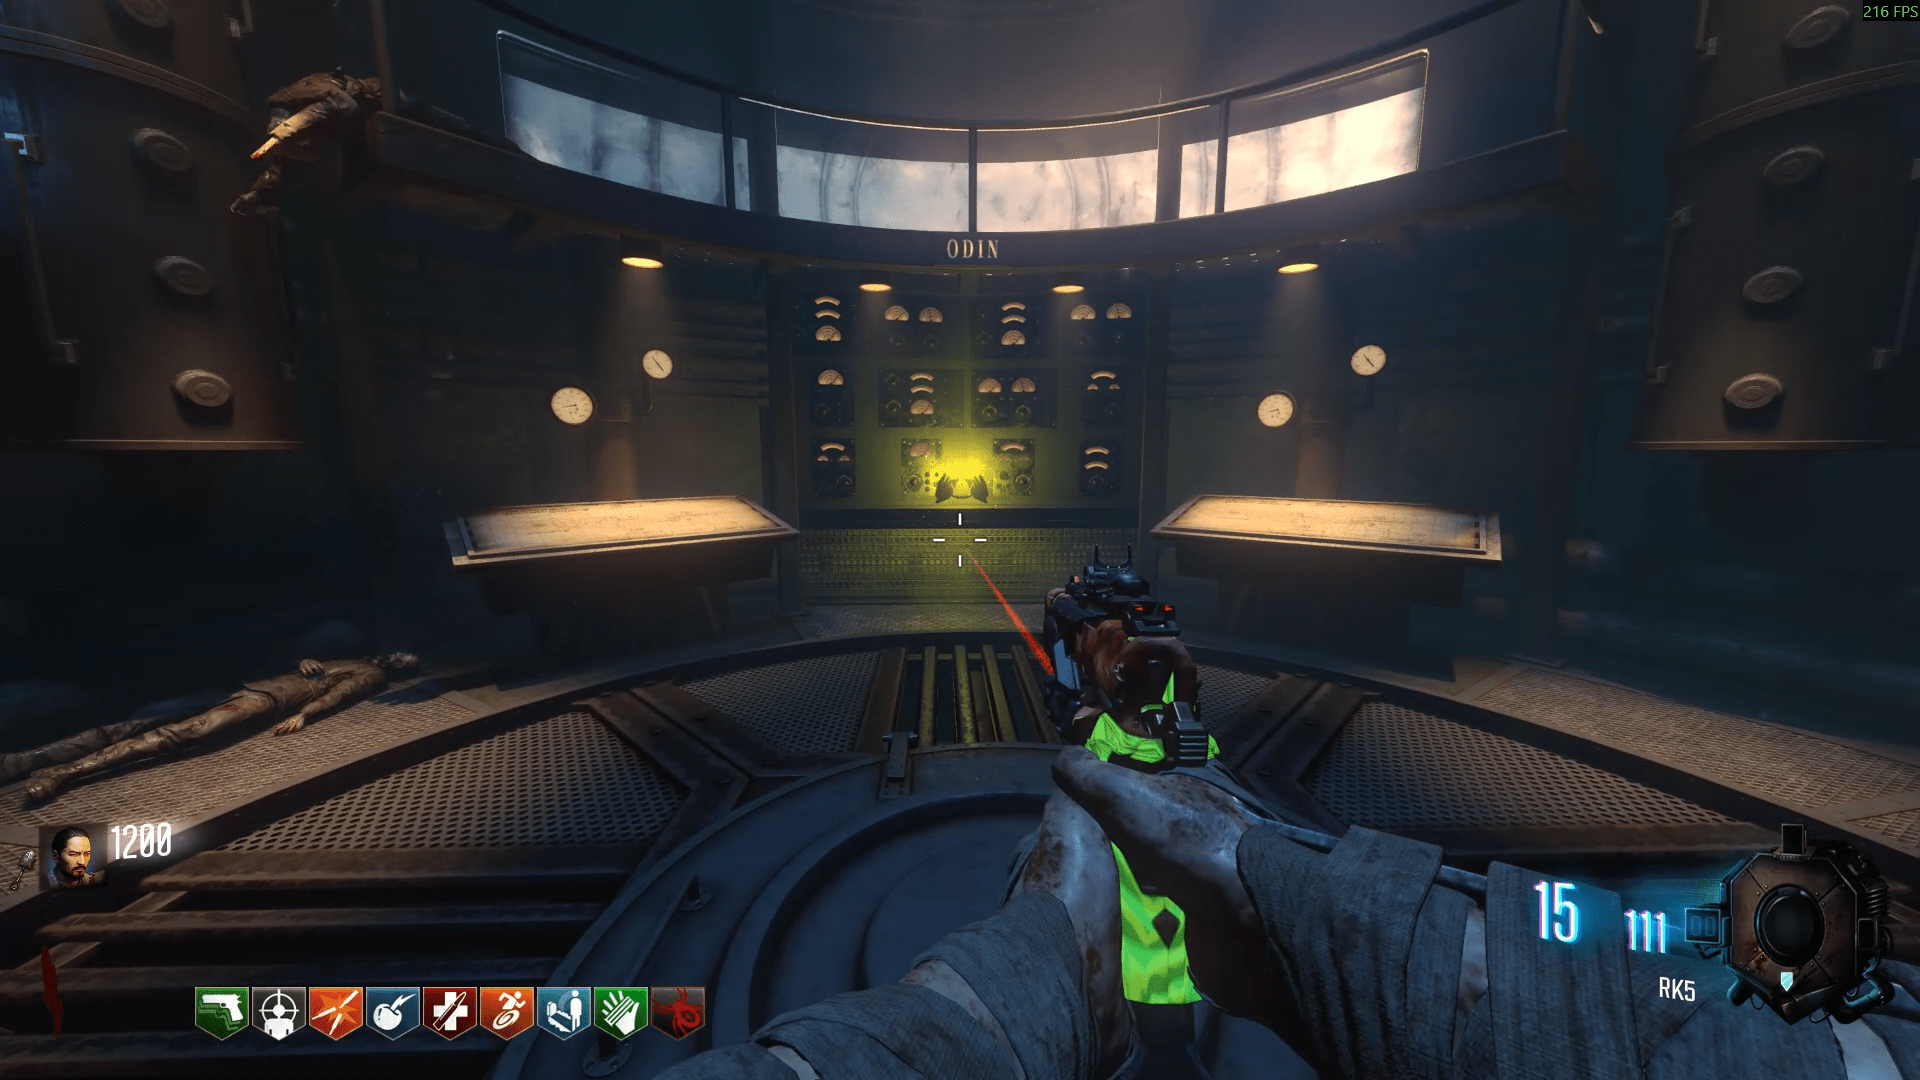
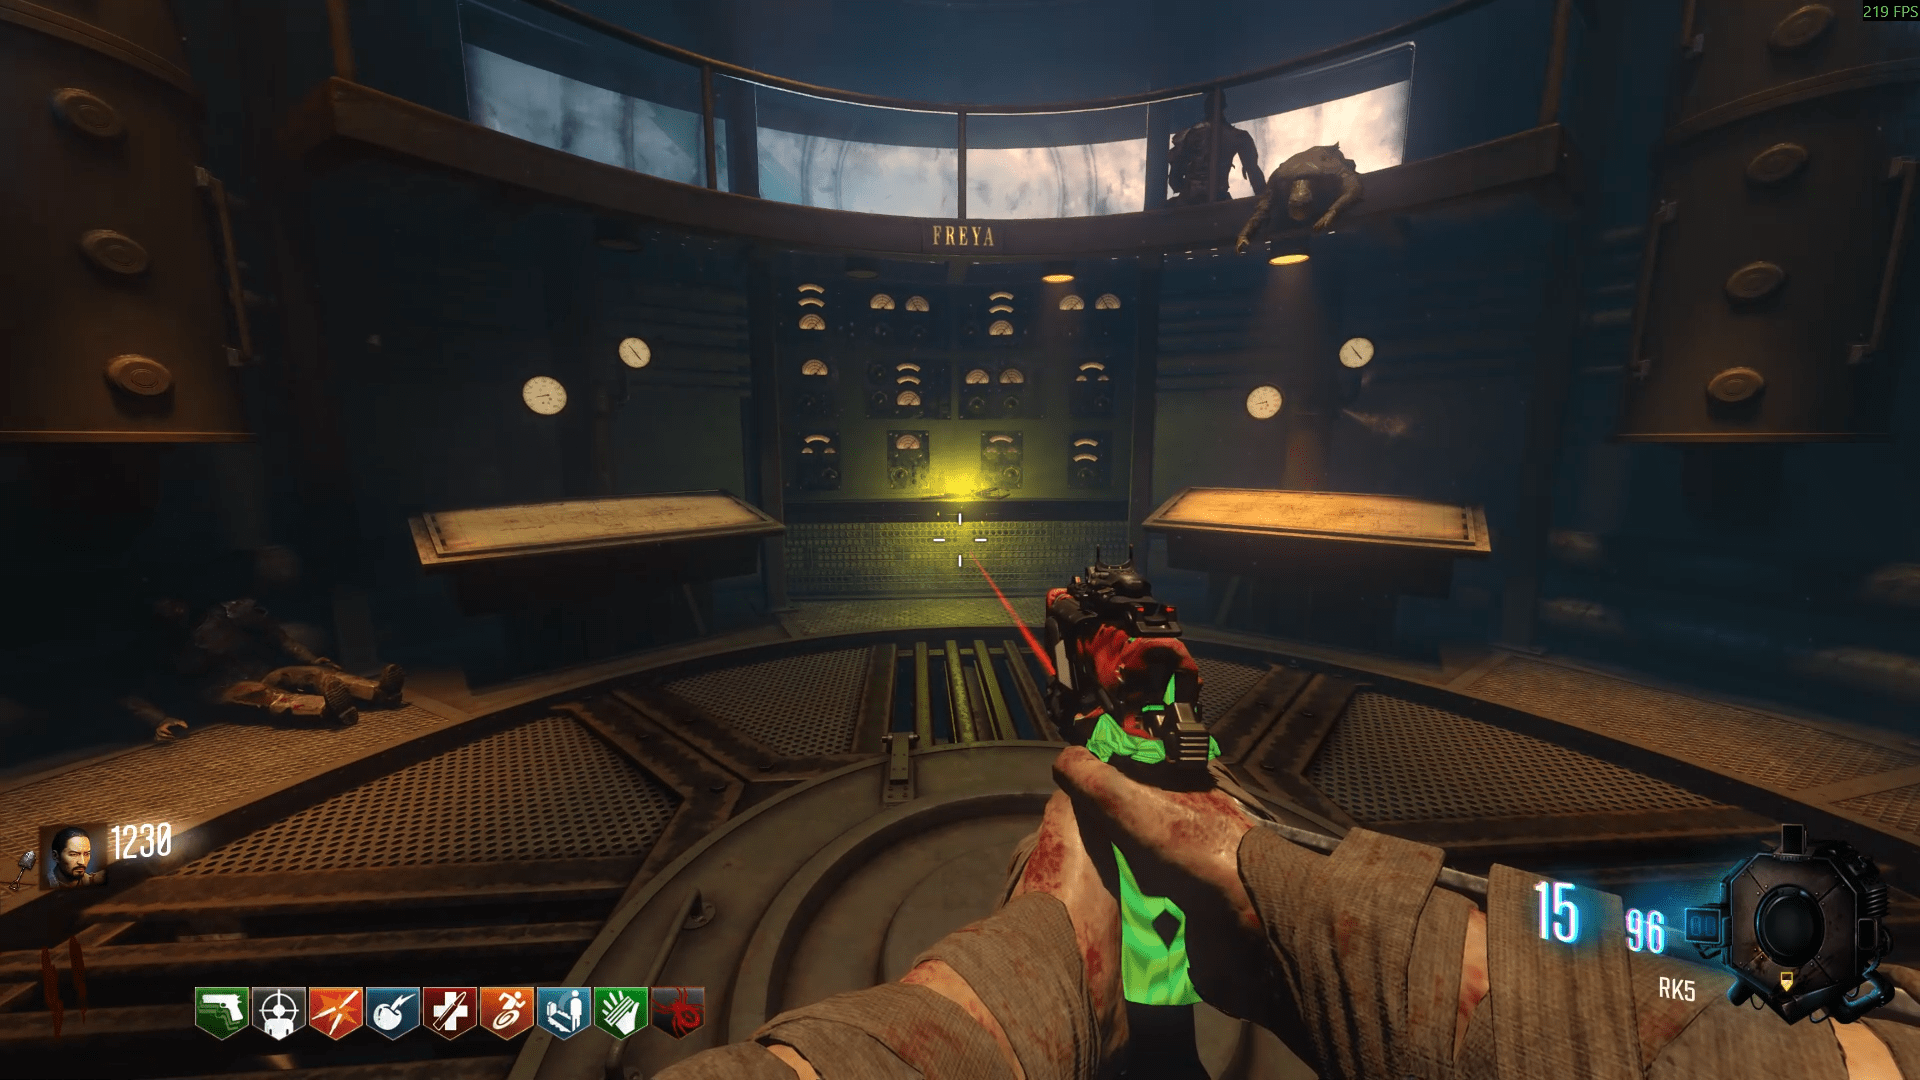
Upon retrieving all pieces, go into the Mound, all the way down, and craft the staff. Now we can start upgrading it. Head down to the Crazy Place through any portal and look up to find a puzzle. You need to match the rings to the image below.
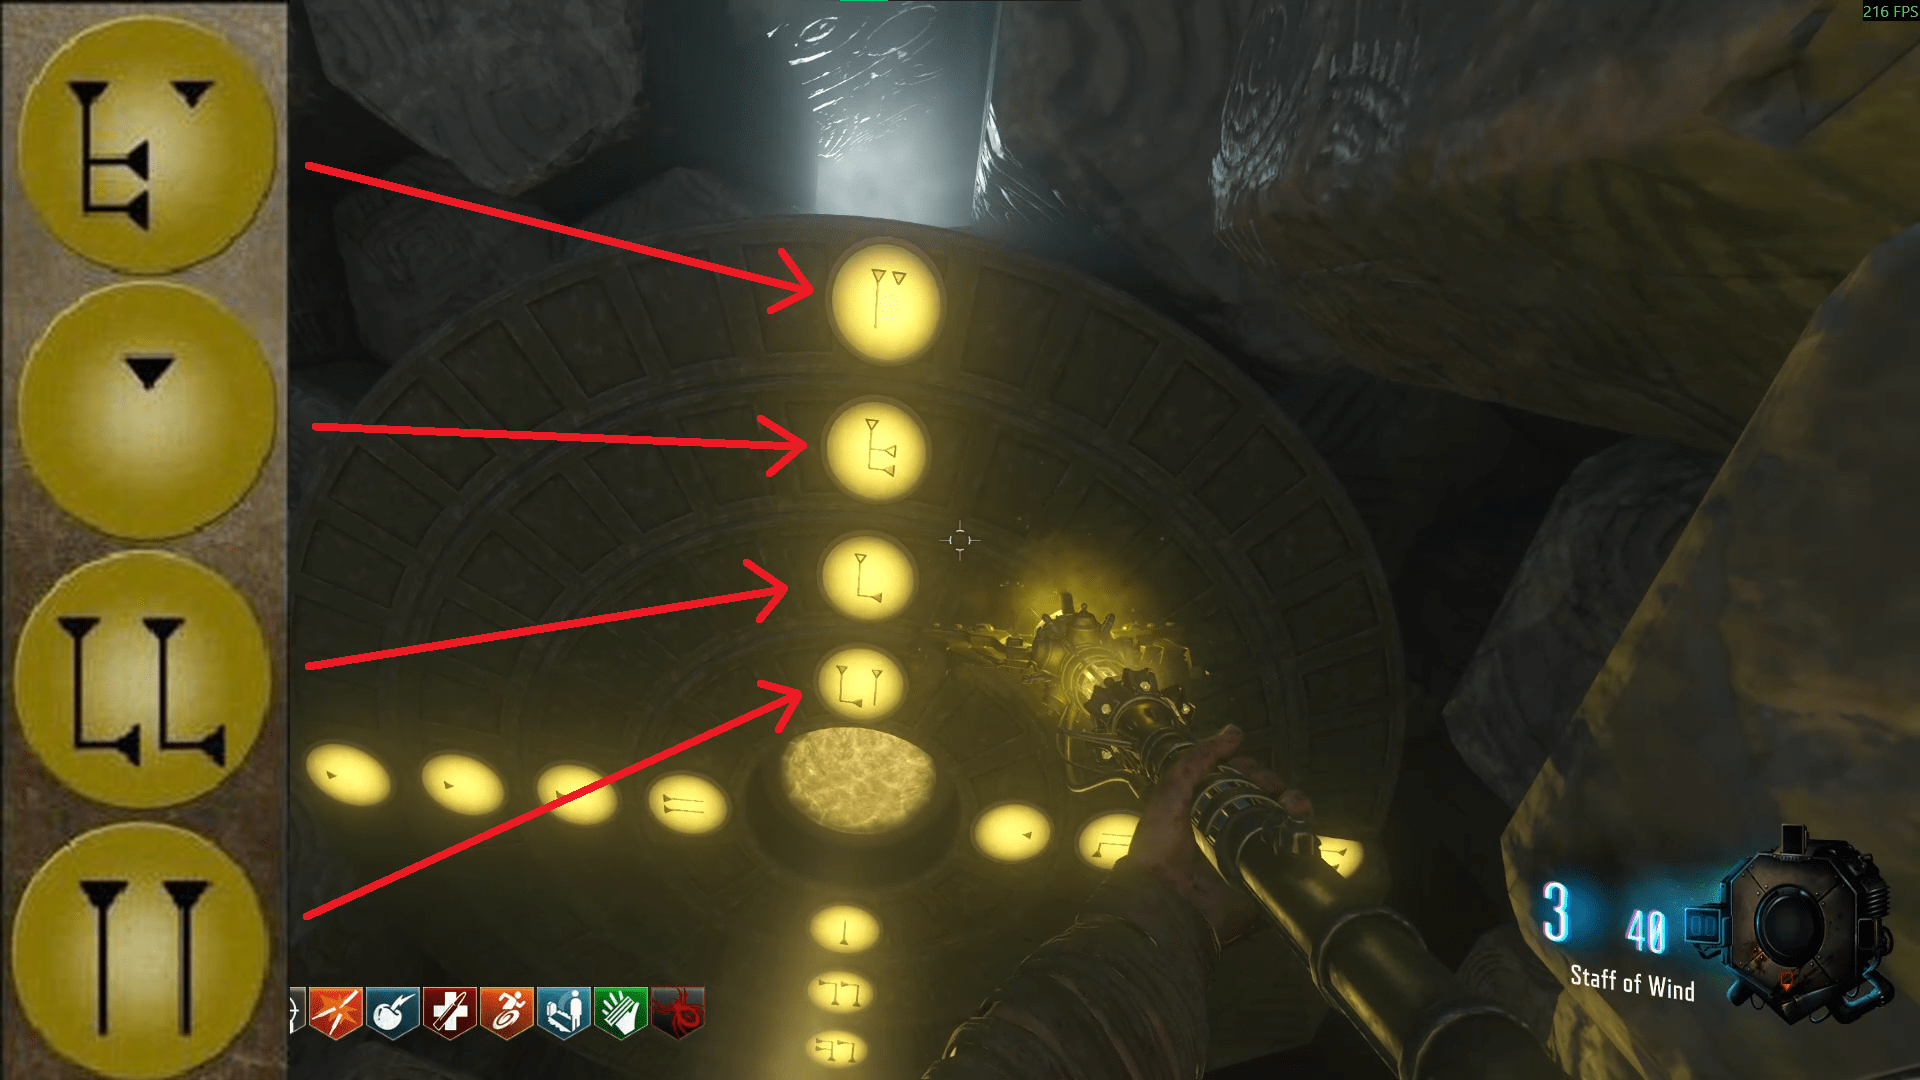 You will hear a sound and the puzzle will spin on its own when successfully completed. Head back into the Dig site and go to the following locations to shoot some smoking balls in the direction of the Mound. You can also just do this in the order listed to be efficient.
- Besides Generator 4, at the very back.
- On the Tank track leading towards Generator 5, on the right hand side behind the danger sign.
- Just to the left of Stamin-Up at Generator 5.
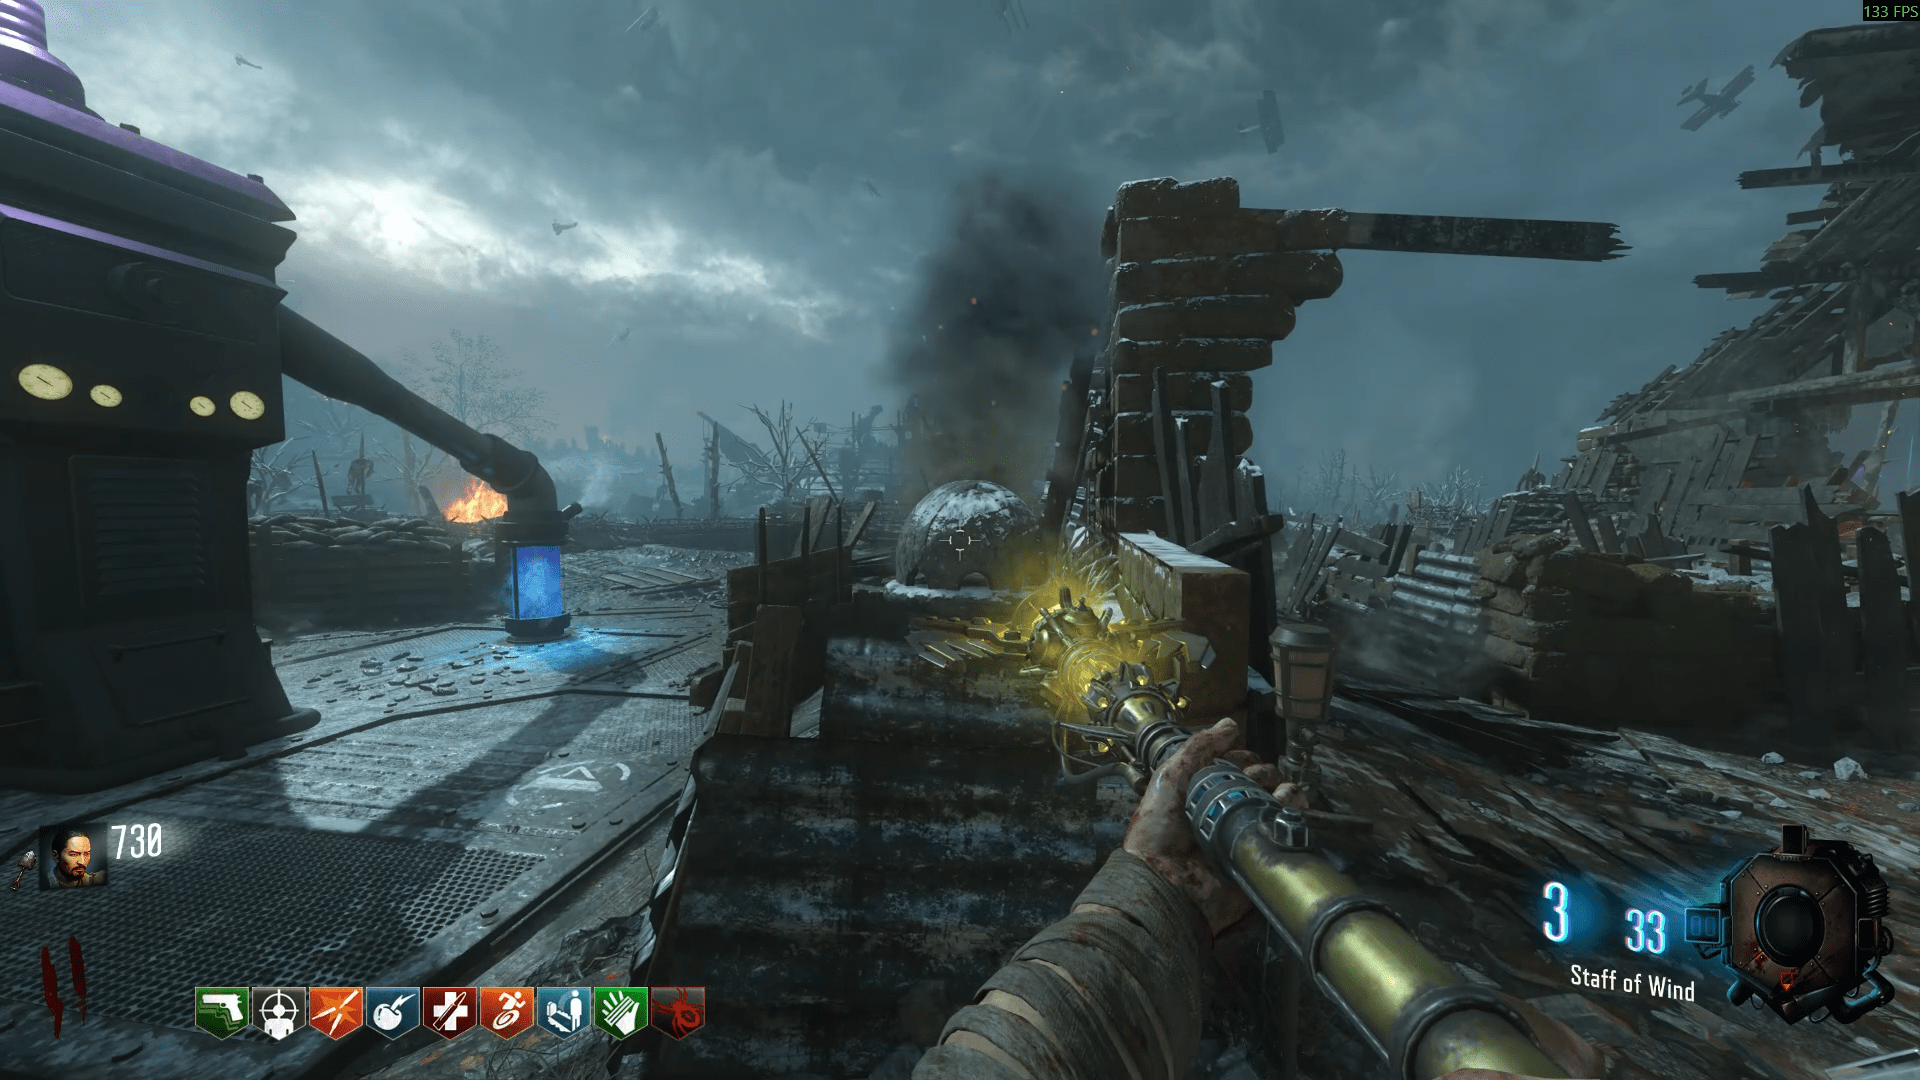
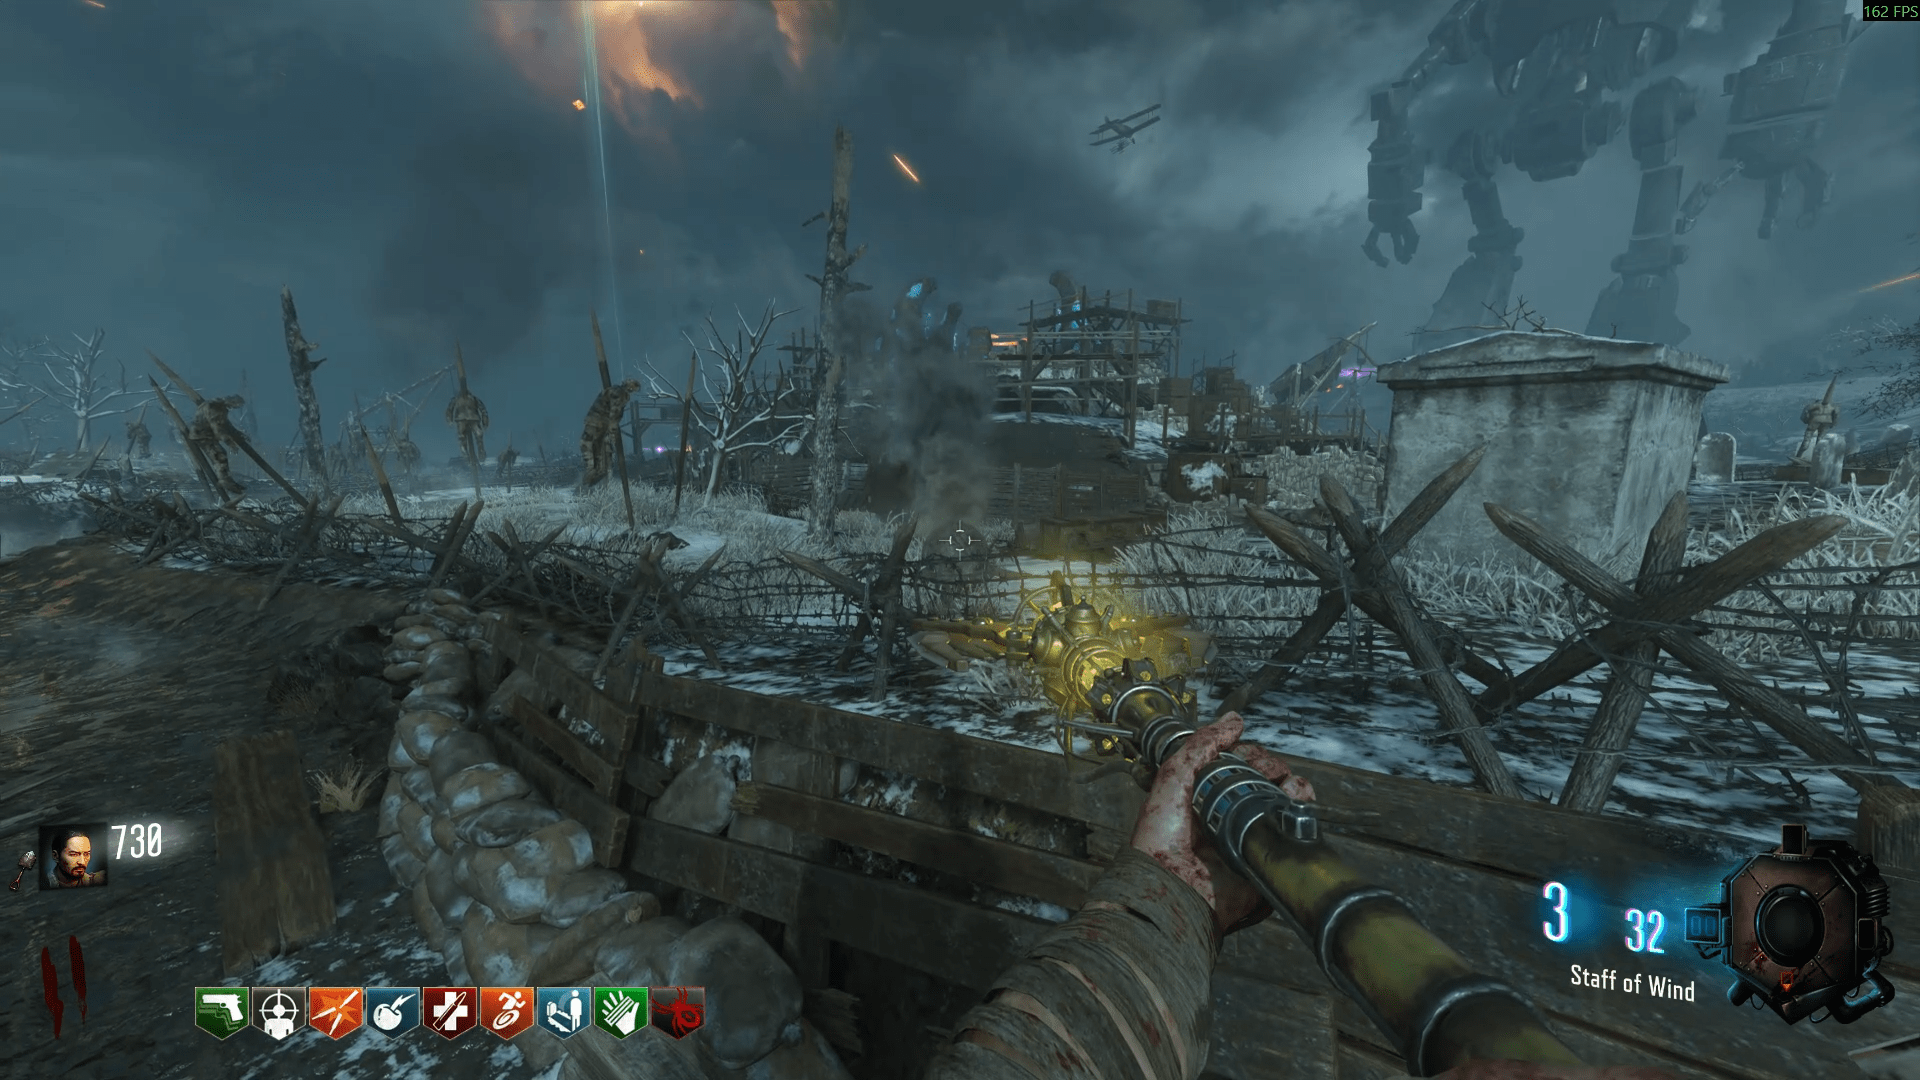
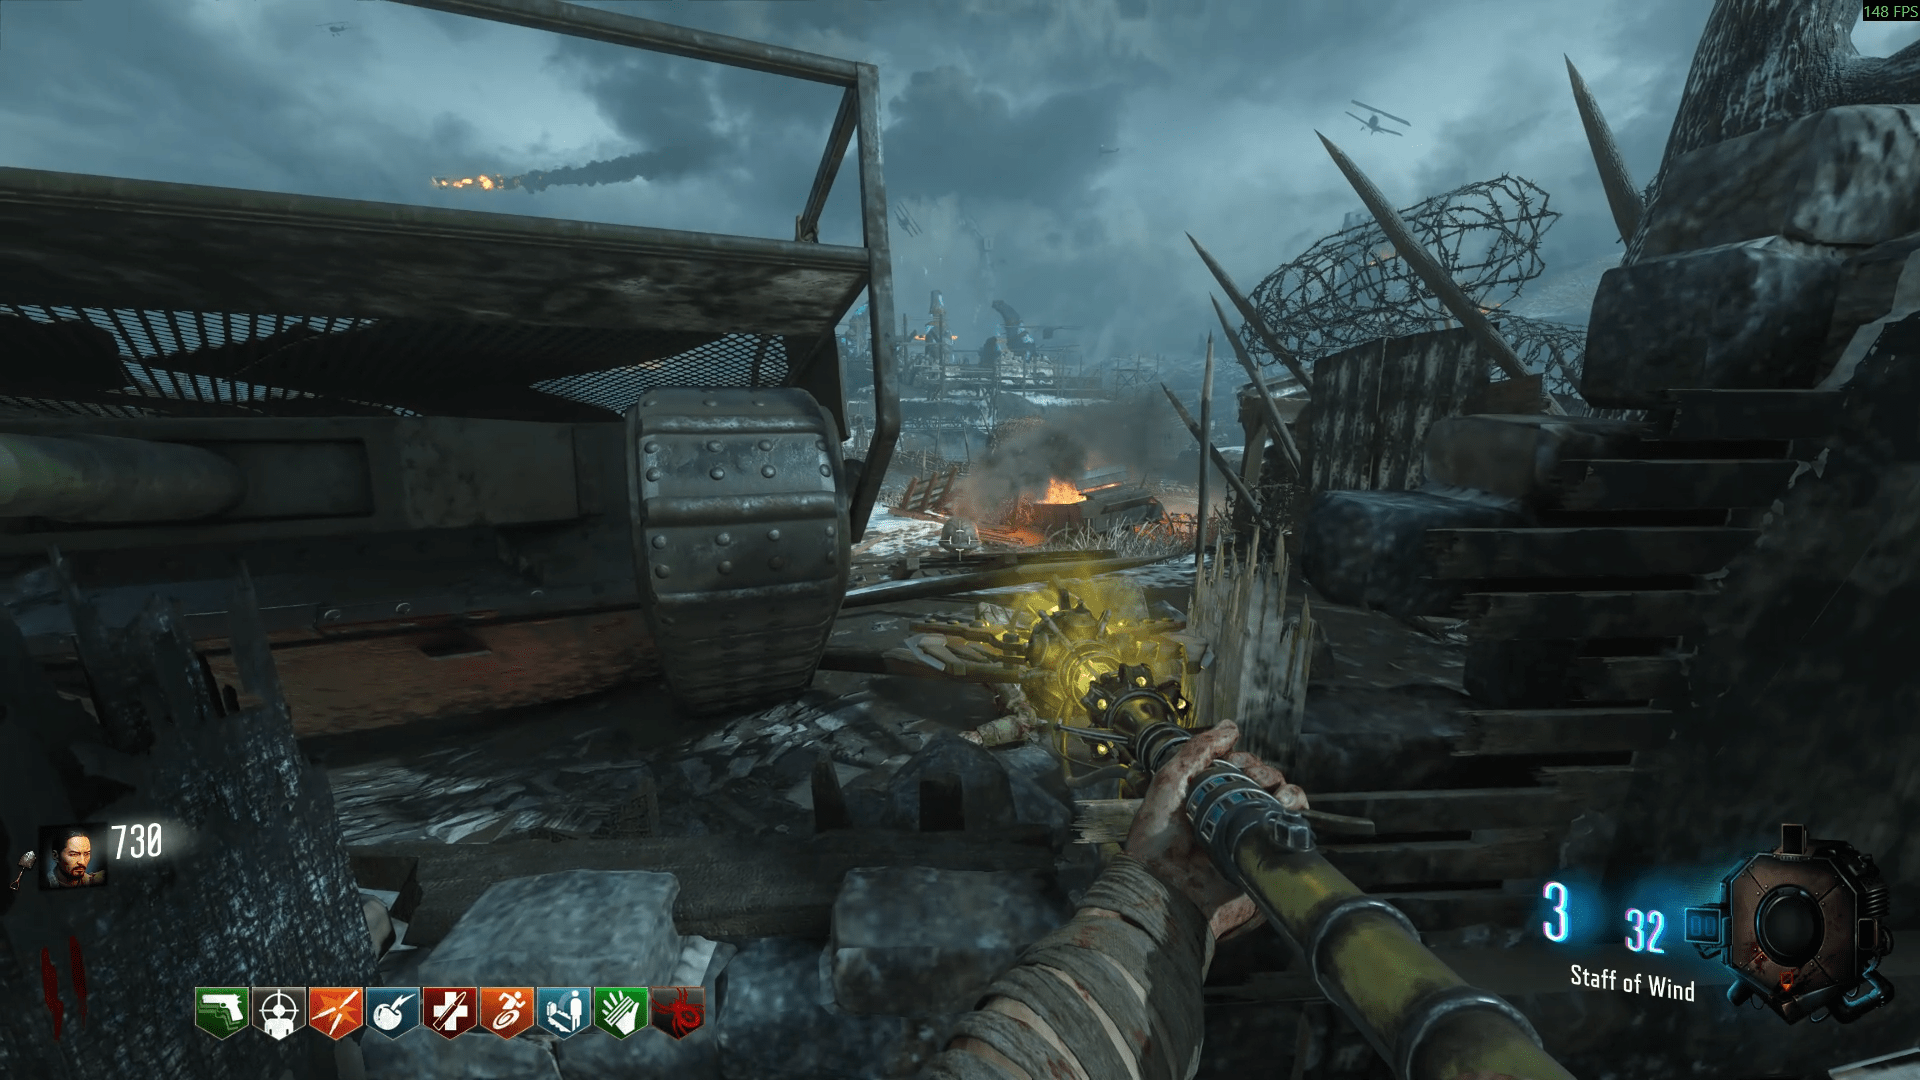
You will hear another sound and a large ray of light coming out of the Mound, now you need to head down the Mound and use the rings to align the colours to yellow. Then you must shoot the glowing yellow orb.
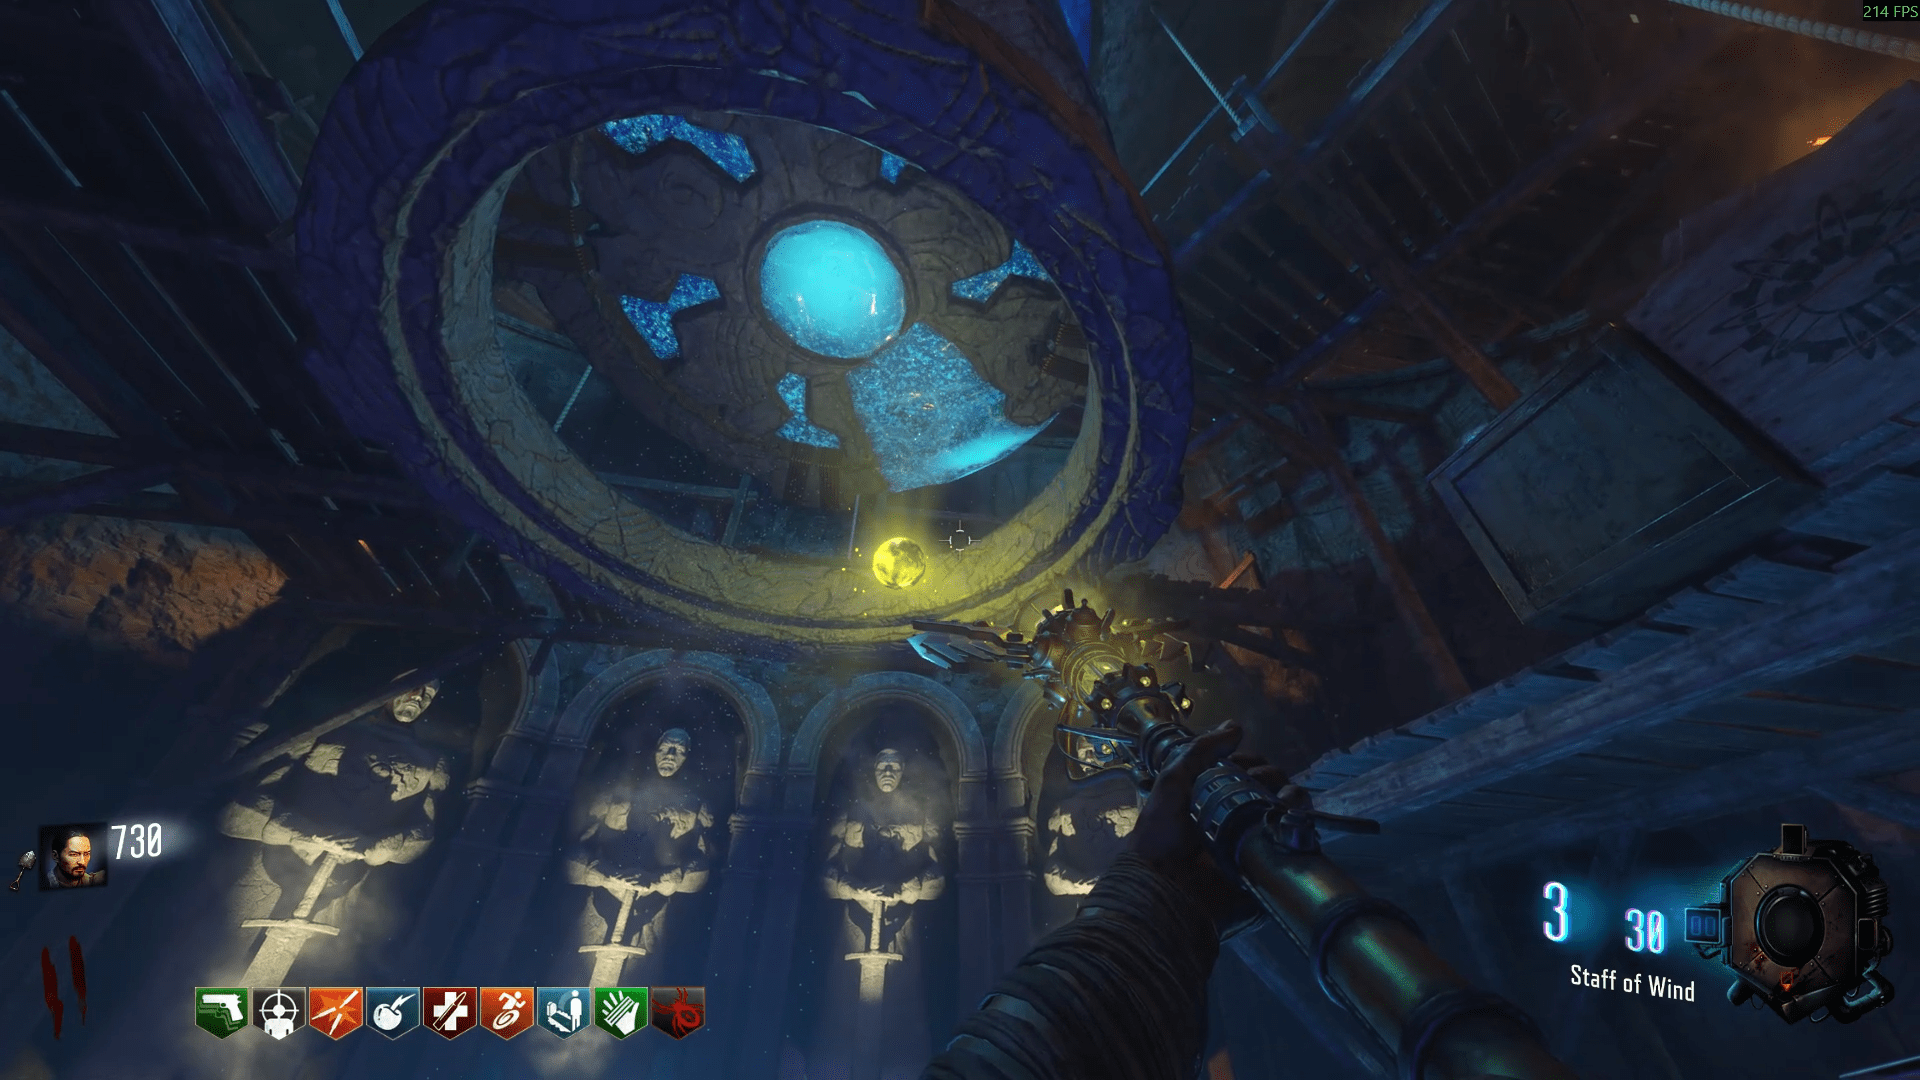
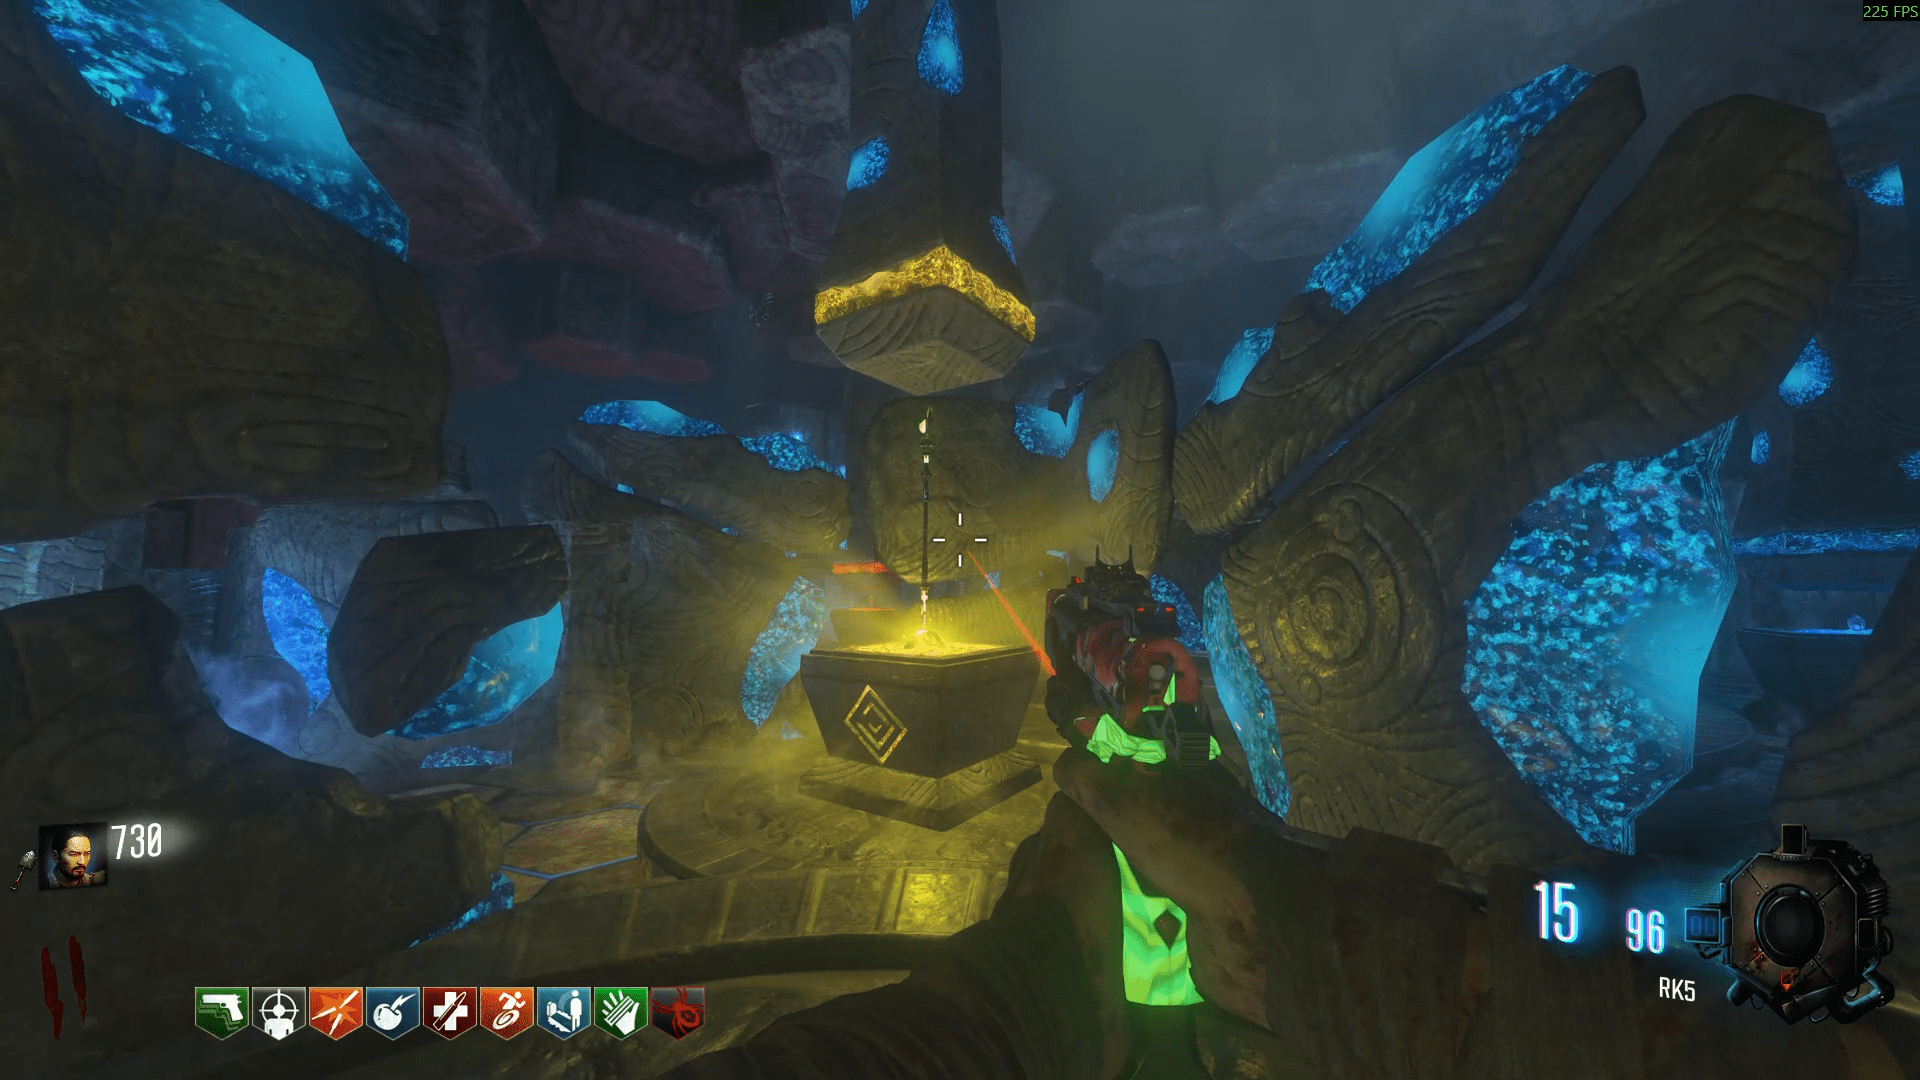
Once done, place the Wind staff into the yellow pedestal in the Crazy Place and accumulate around 20 kills to upgrade it.
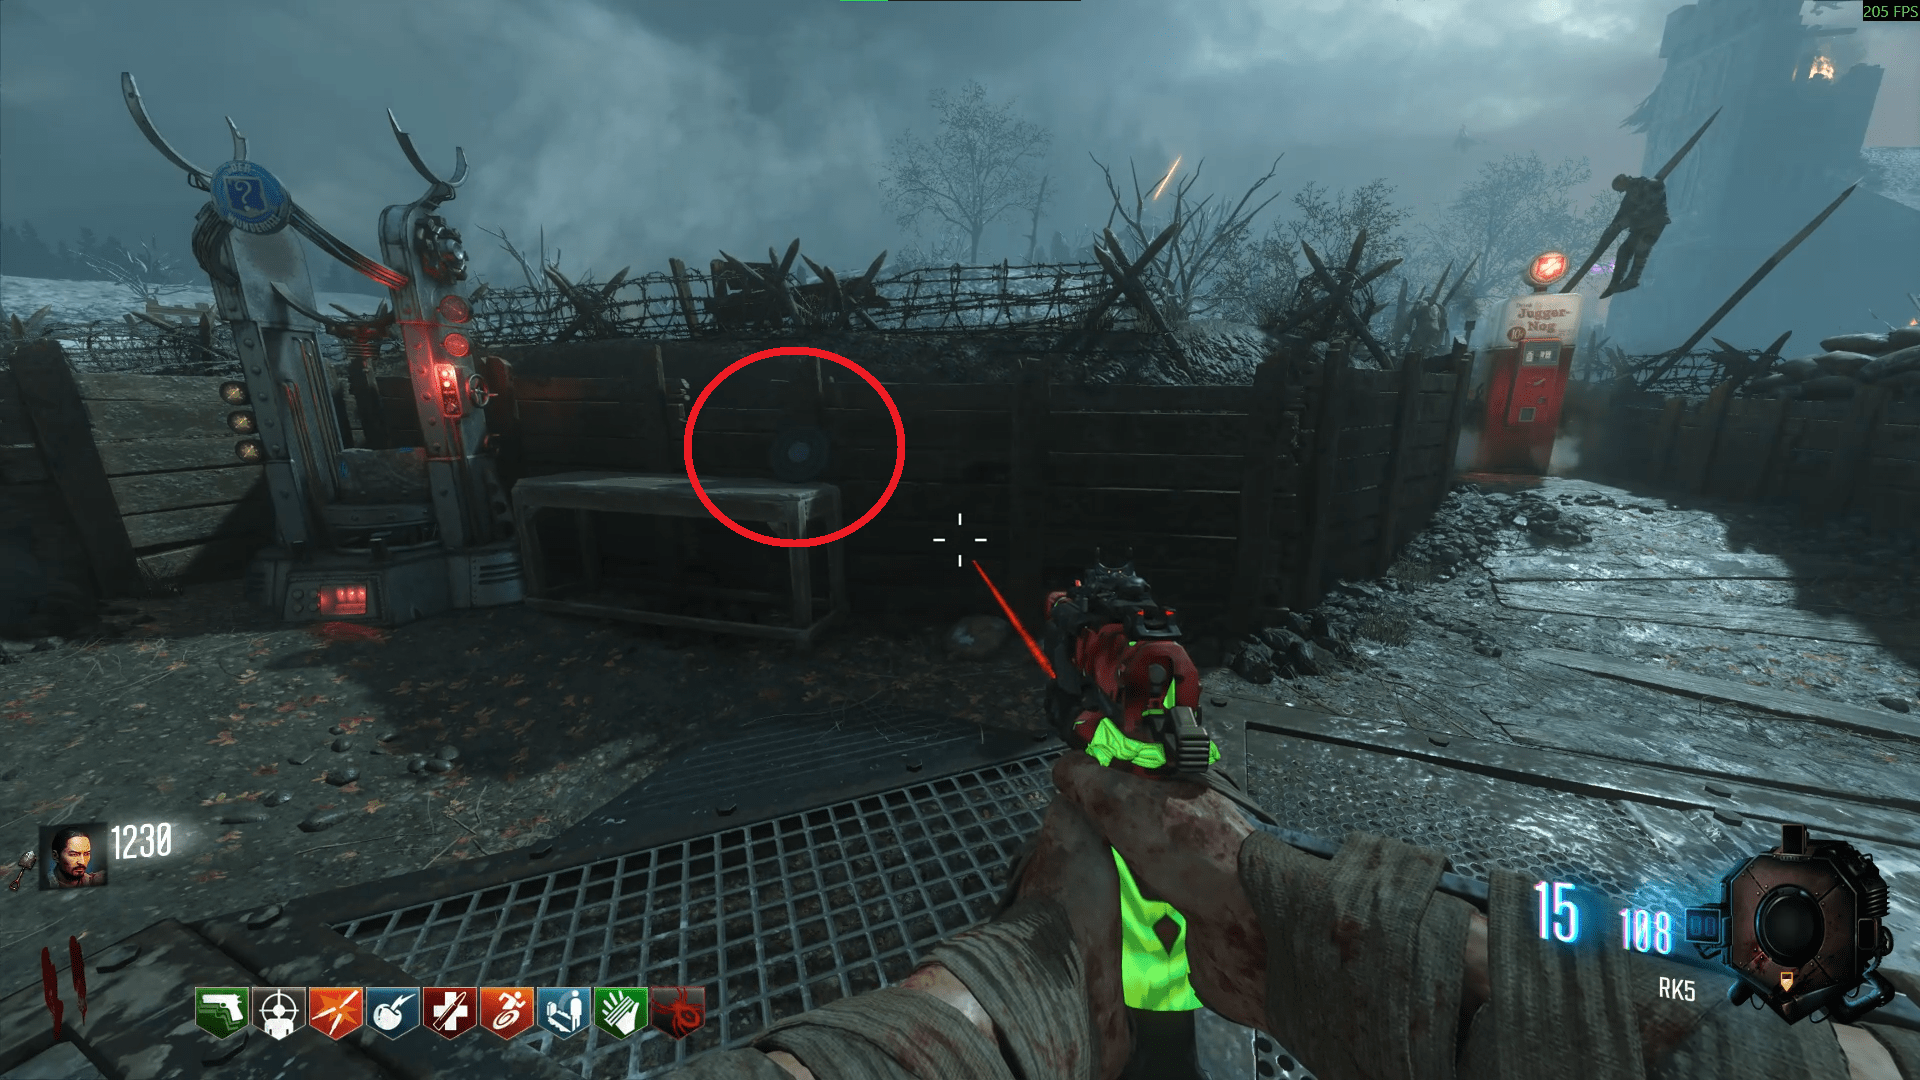
- Right in between the Wunderfizz and Juggernog at Generator 4.
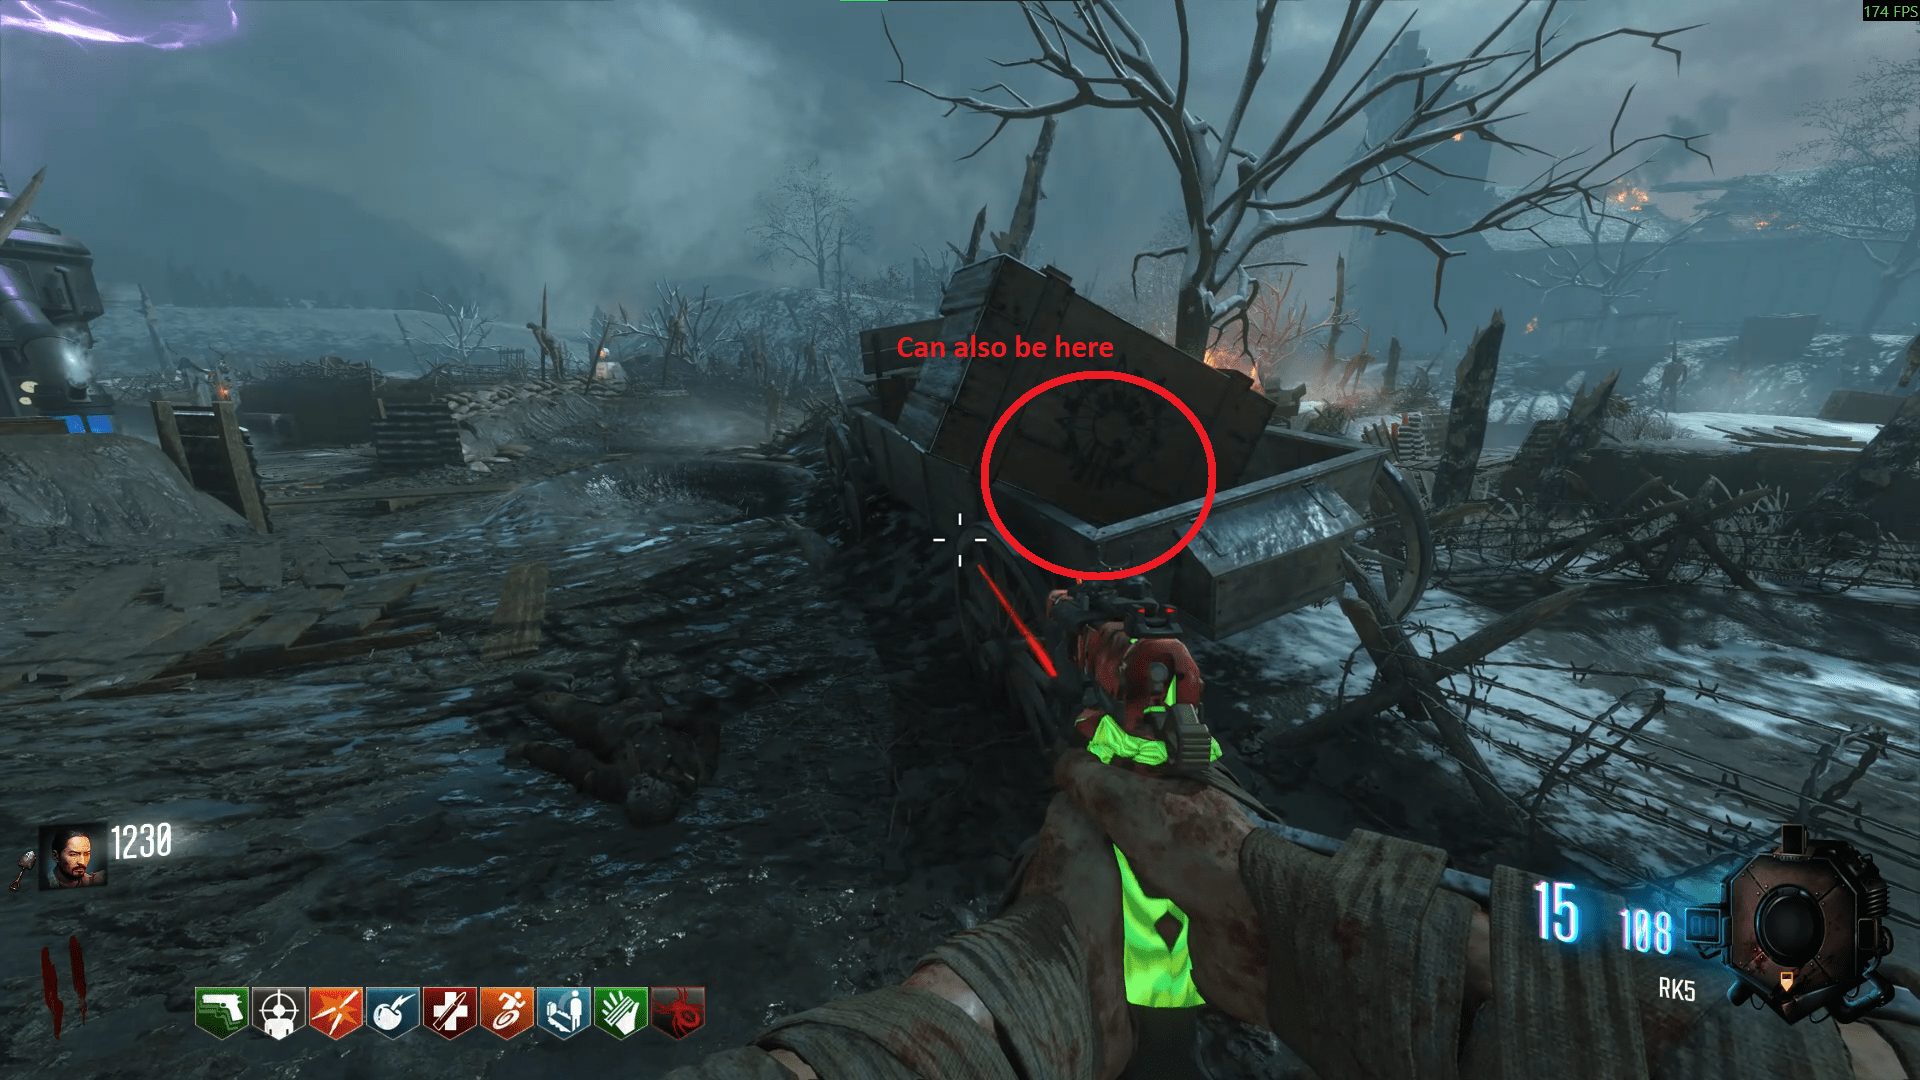
- On a wagon just before entering Generator 4.
- In the Wind tunnel, on the right of the portal.
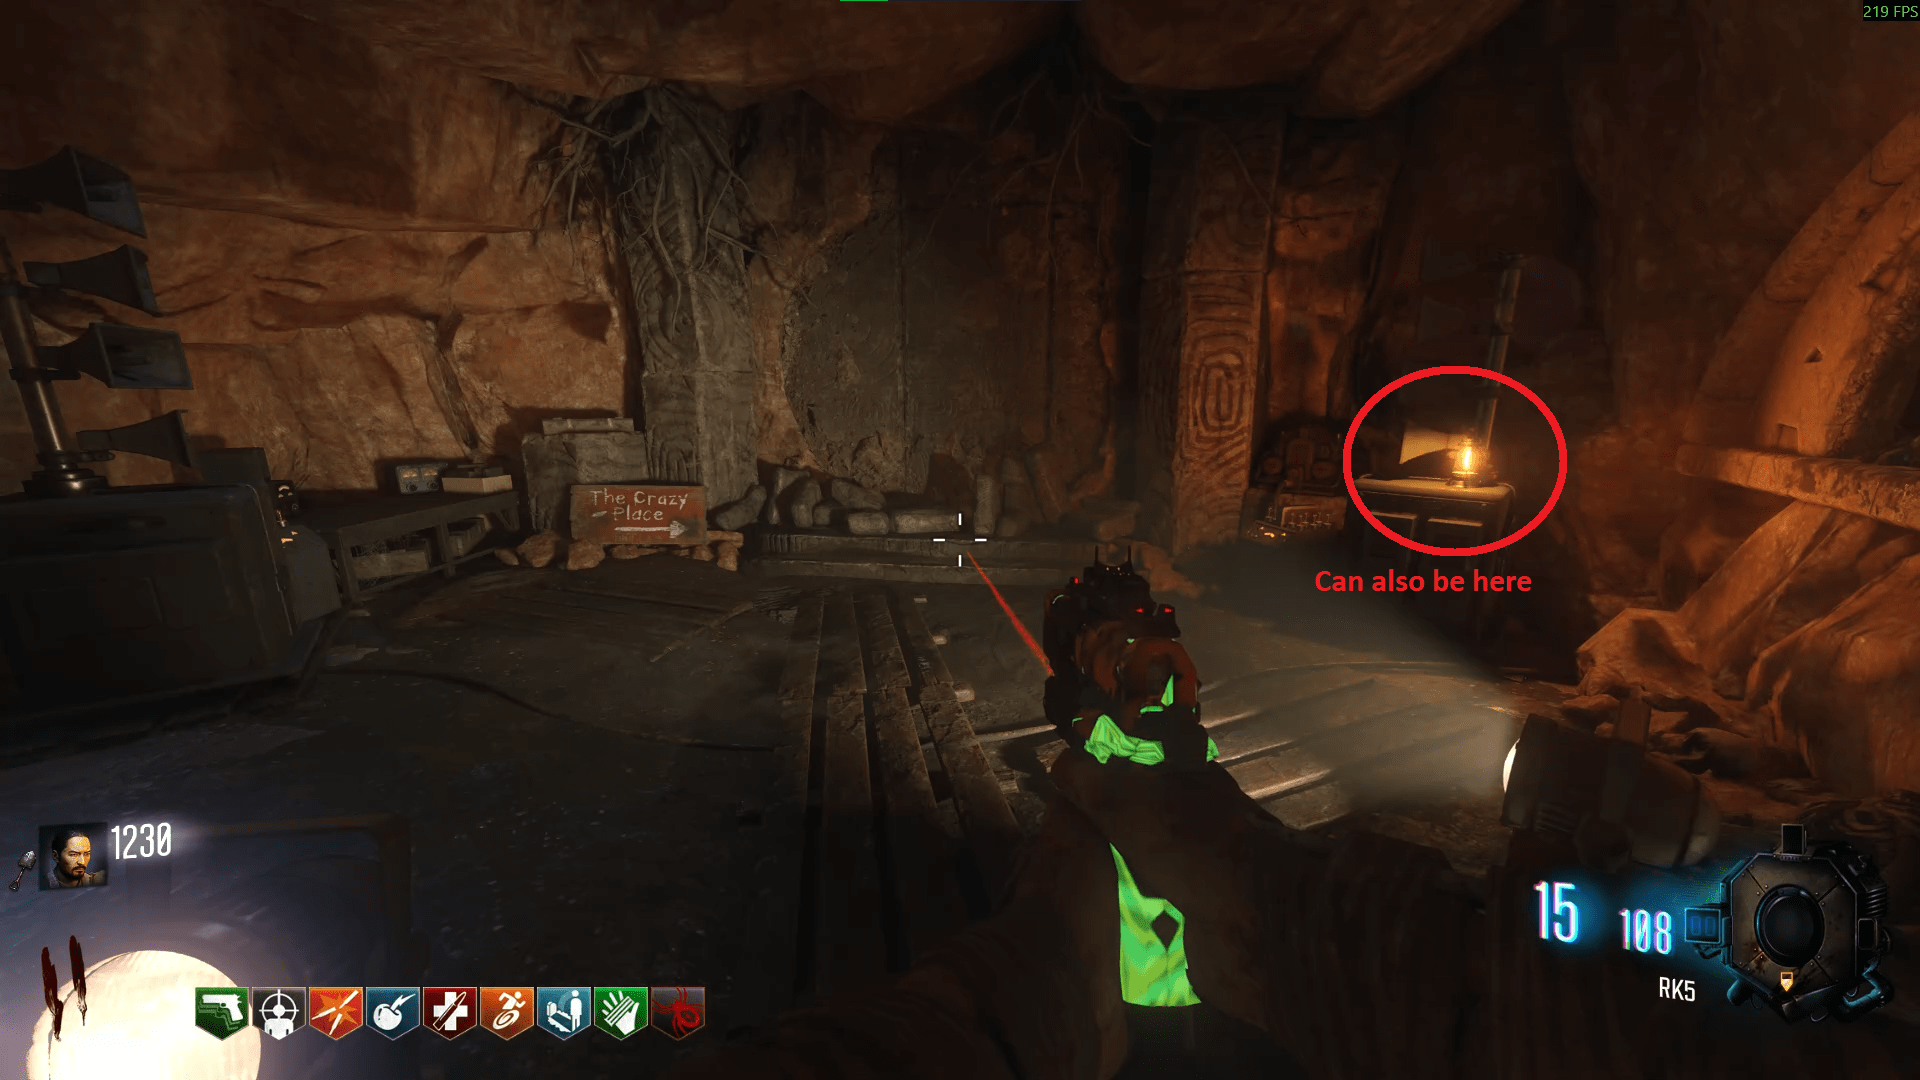
Once you have the disc, go to Generator 5 and enter the Lightning tunnel. Place the Gramophone, enter the portal, and retrieve the Lightning Crystal.
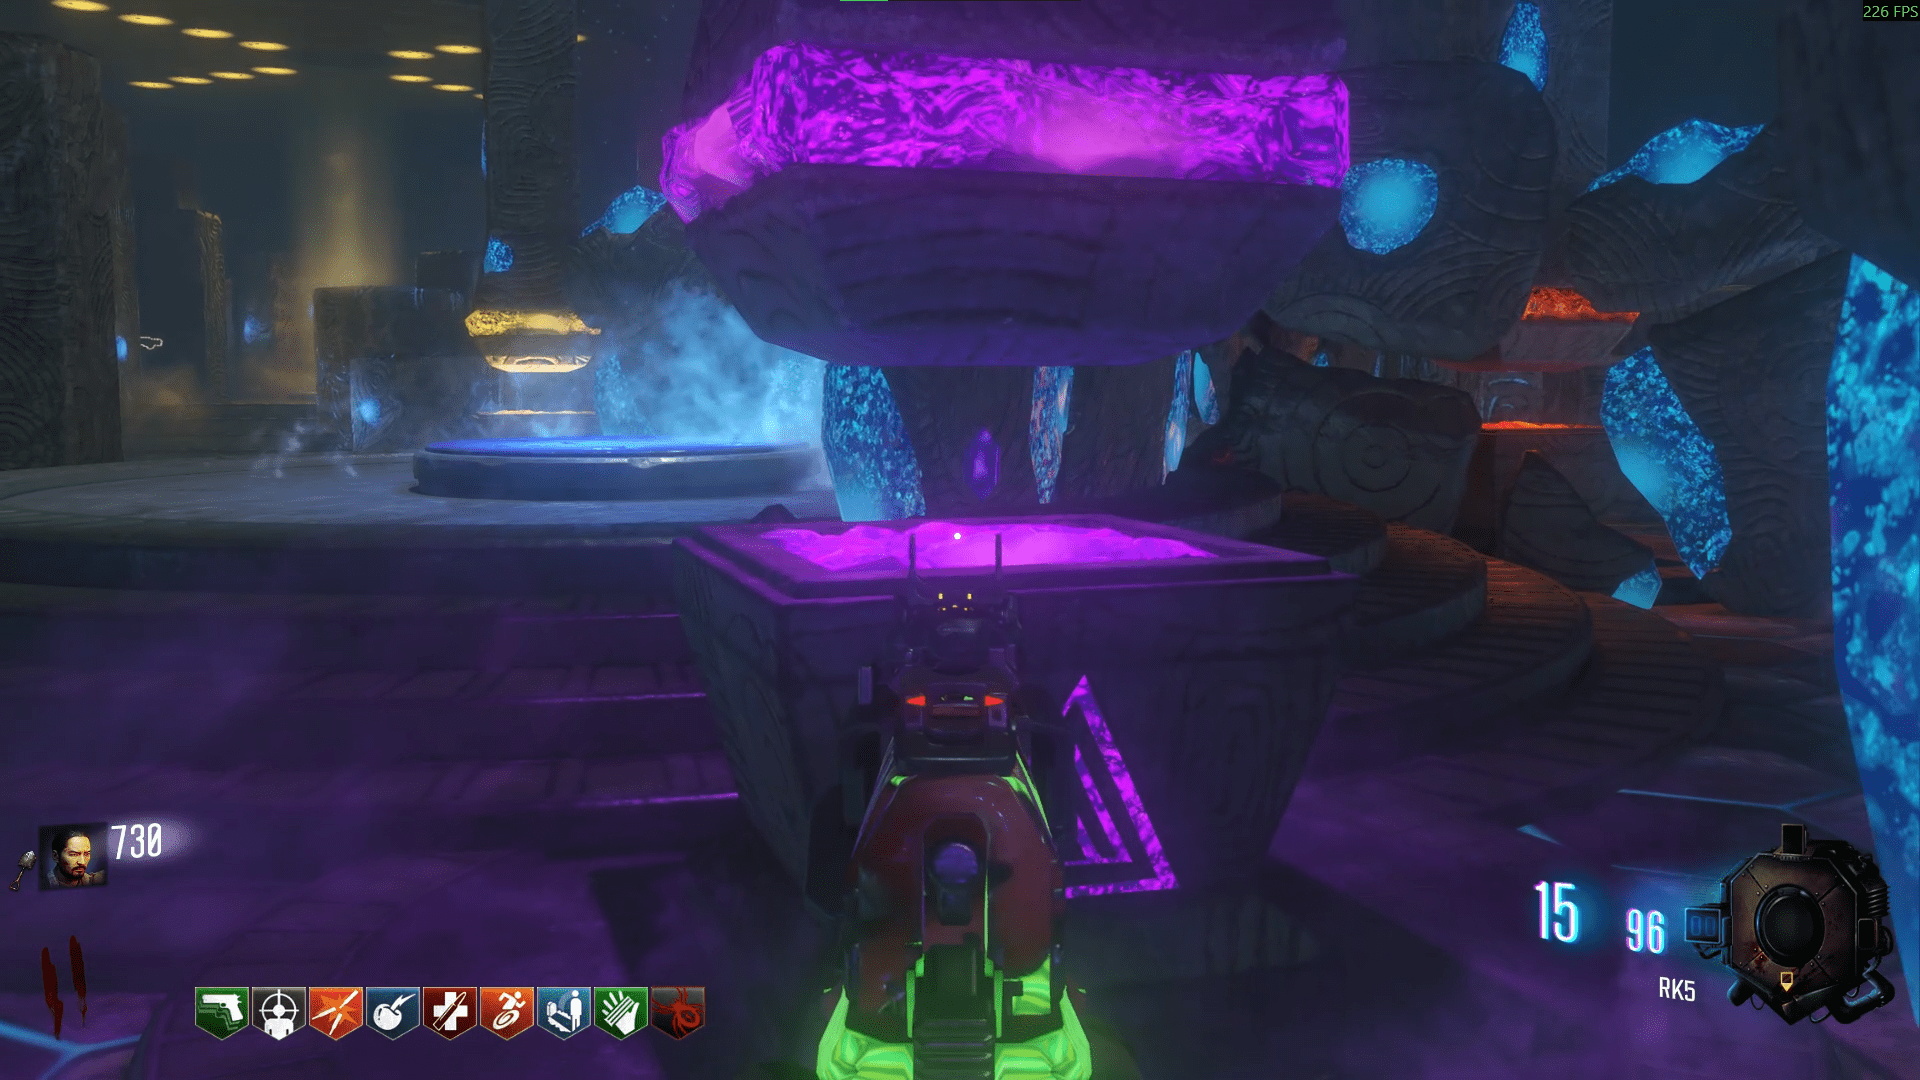
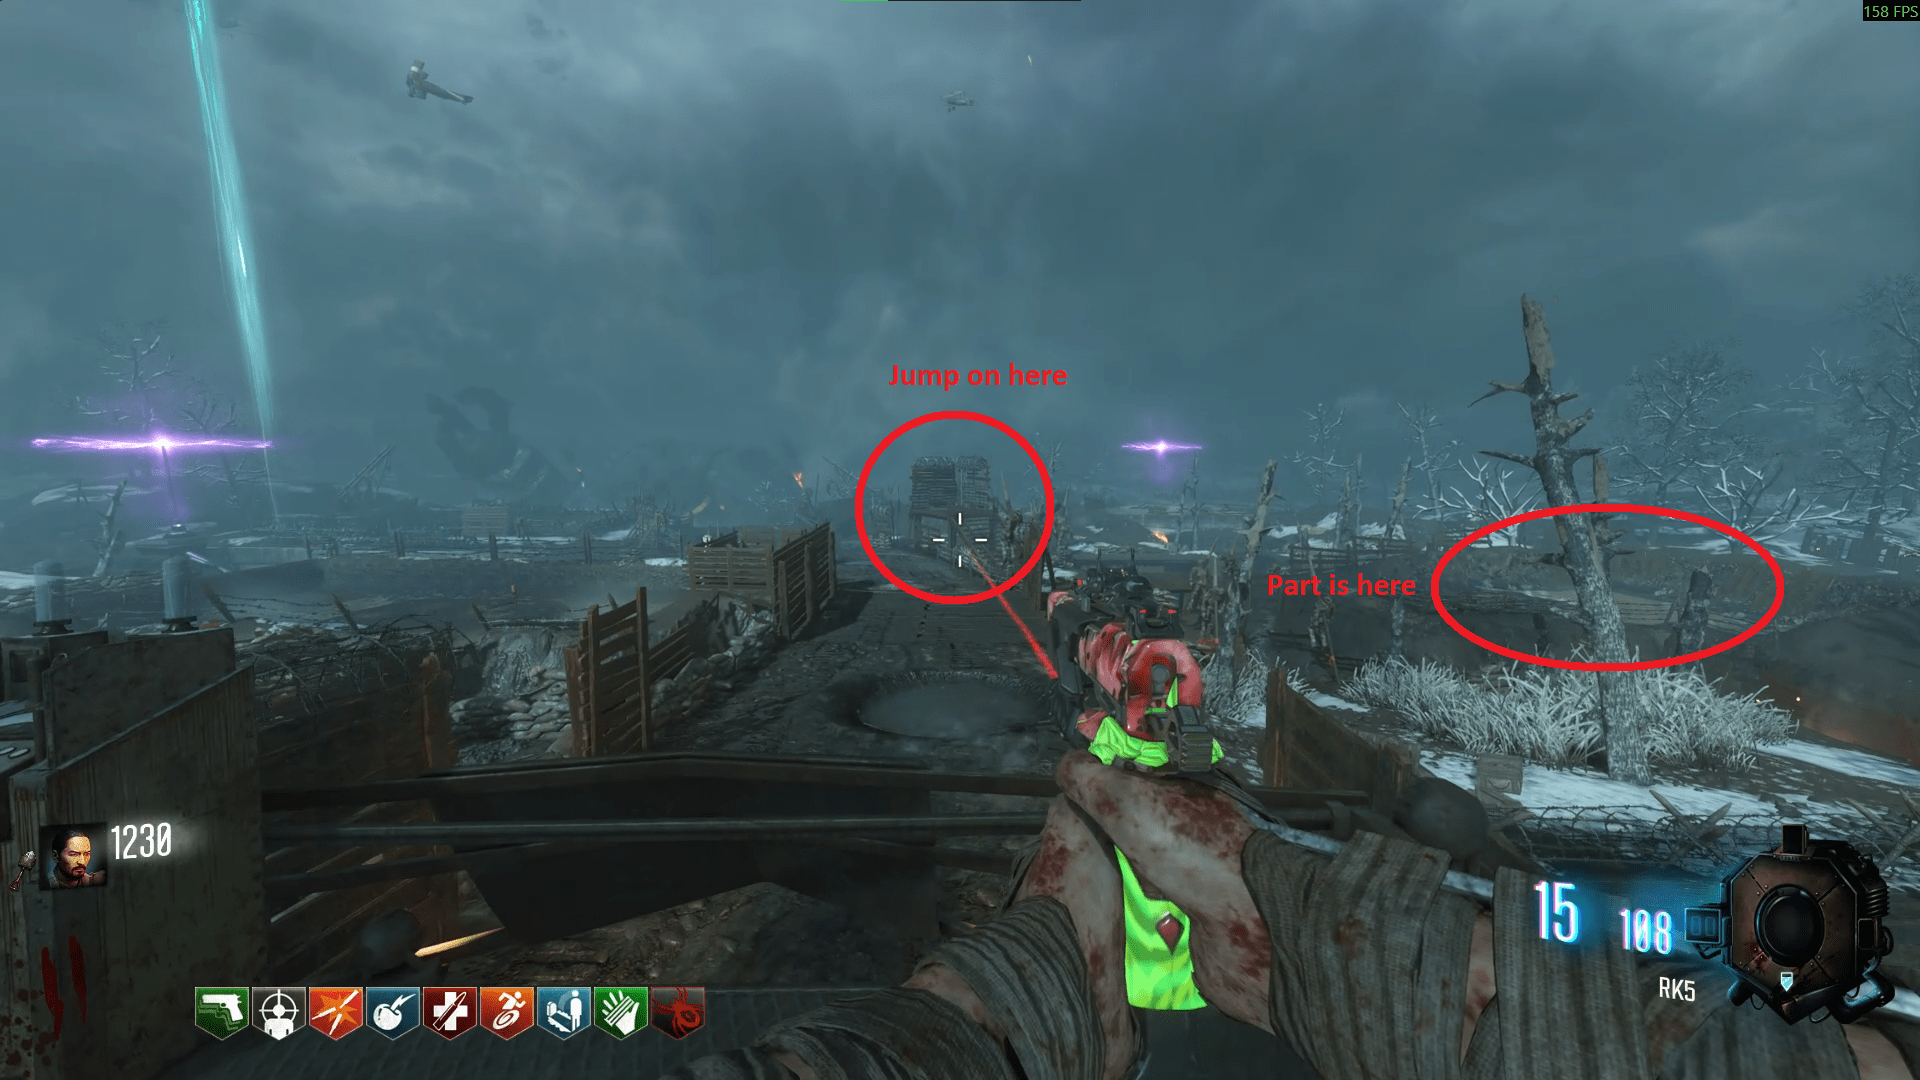
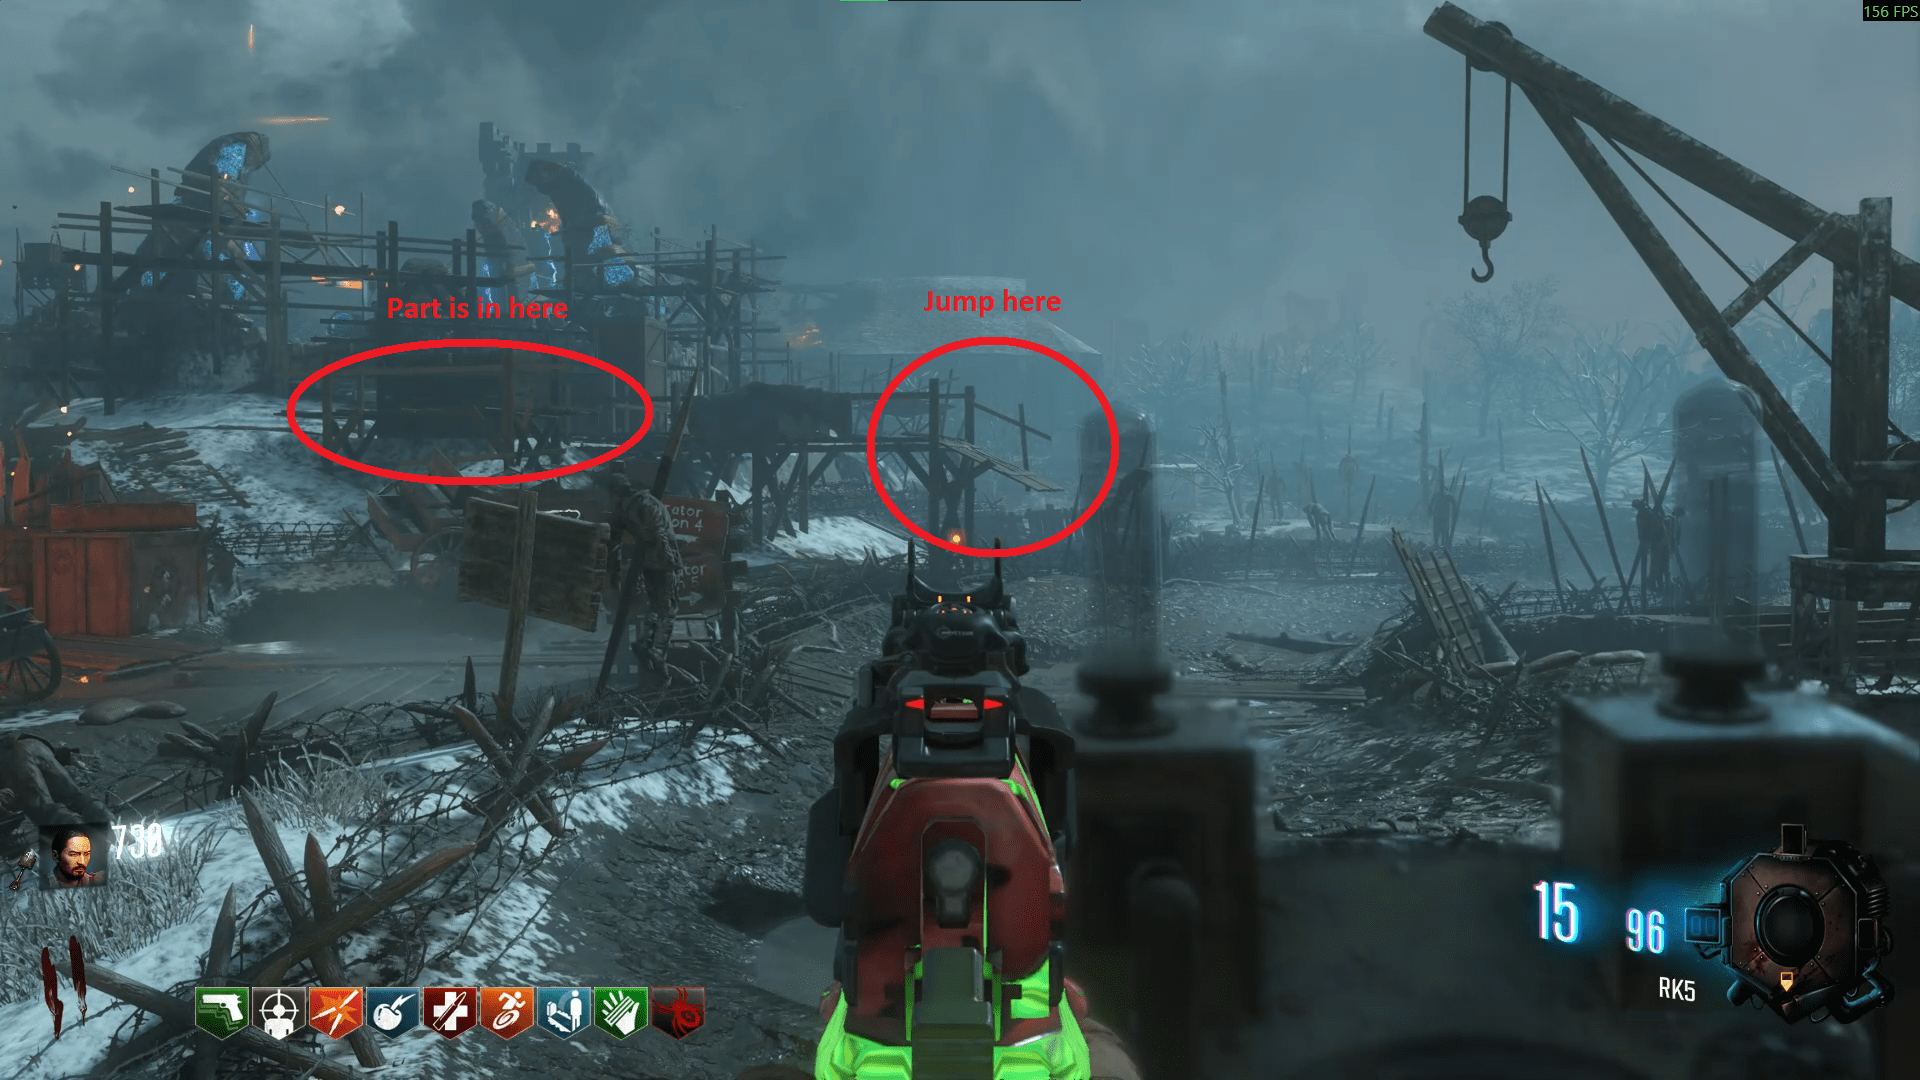
The staff pieces are rather unique in the sense that you need to ride the Tank to obtain them. The first piece you can do normally but the second and third piece you can either do by themselves or one after another if you have Stamin-Up and are quick enough. The first piece is in a robot's footprint after using the Tank from the Church, on the right side. The second piece is in the Mound, jumping from the left side of the Tank. The final piece is in the Church, jumping from the right side of the Tank.
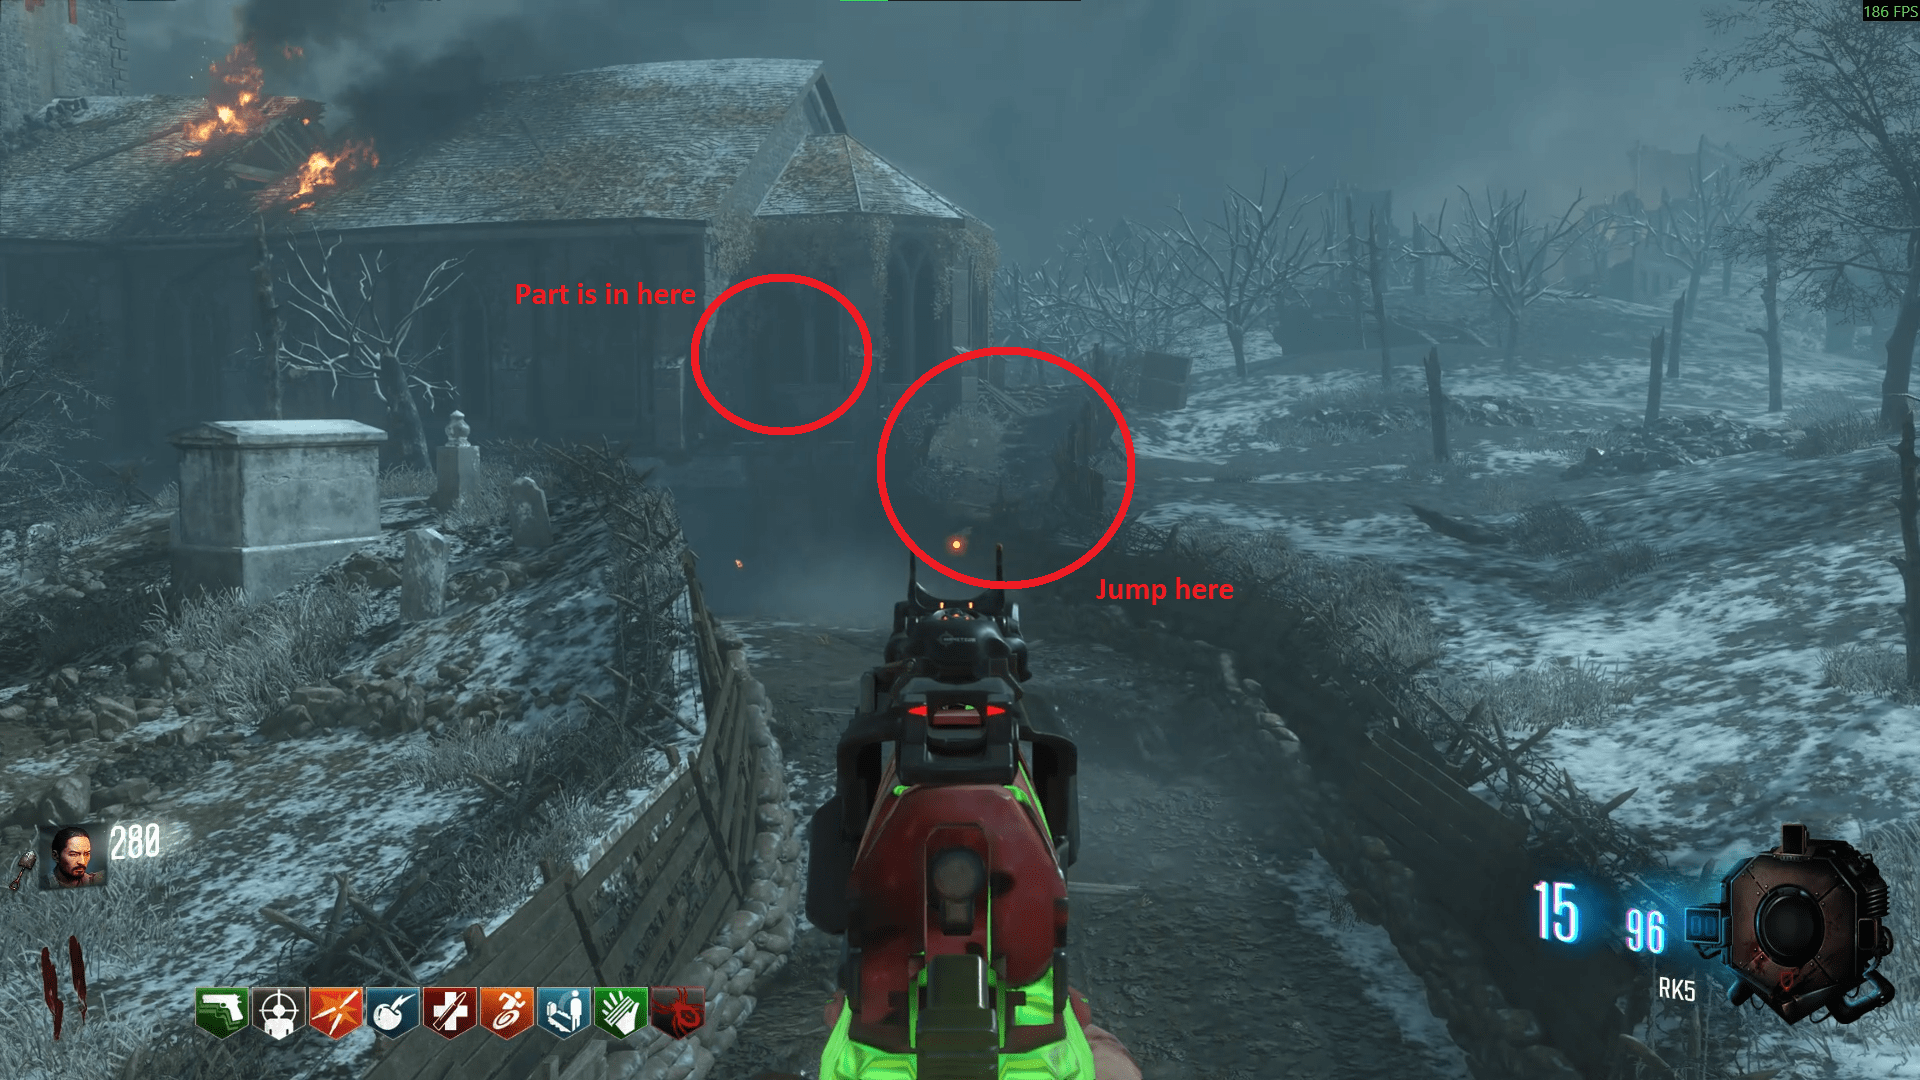
Upon retrieving the all pieces, go into the Mound, all the way down and craft the staff. Now we can start upgrading it. Head down to the Crazy Place through any portal and look to your left to find a puzzle. You will need to strike the chords in the correct position and order. From the image on the right, you should shoot the notes from top to bottom, left to right.
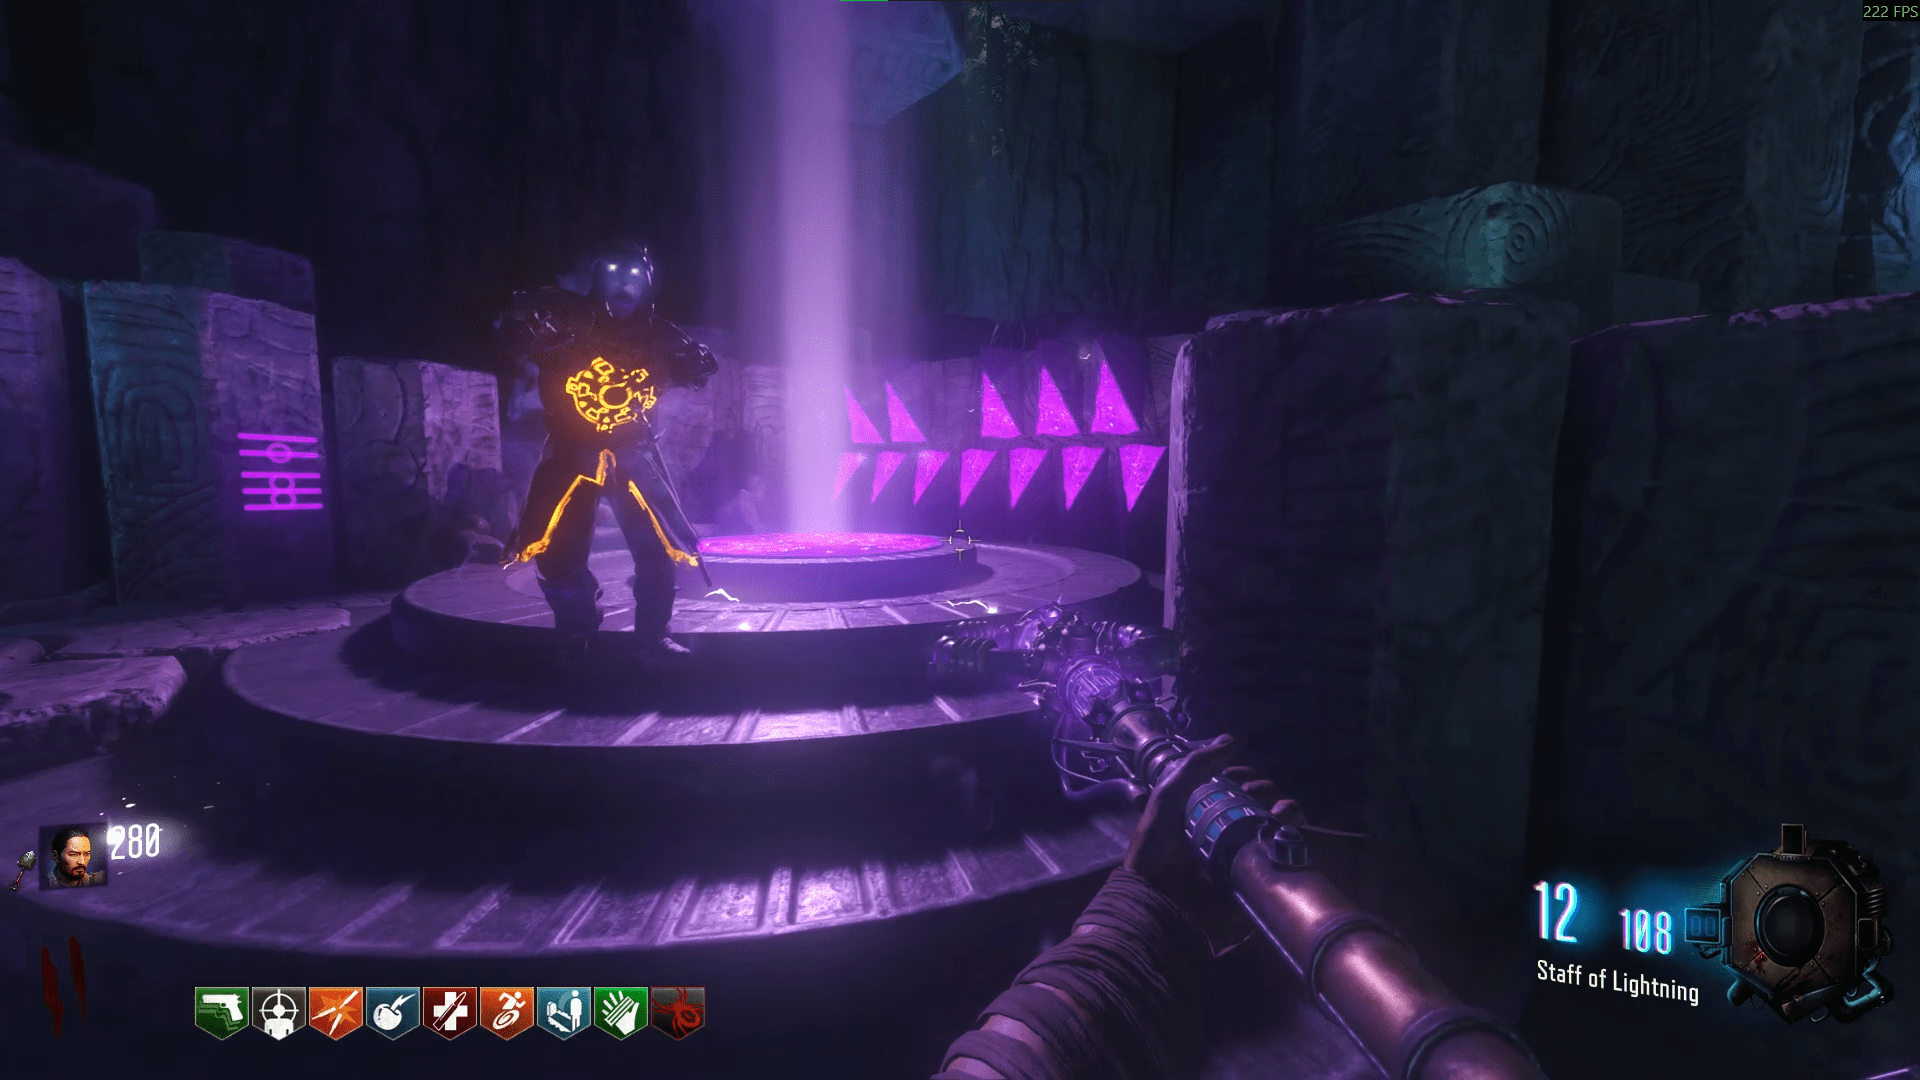
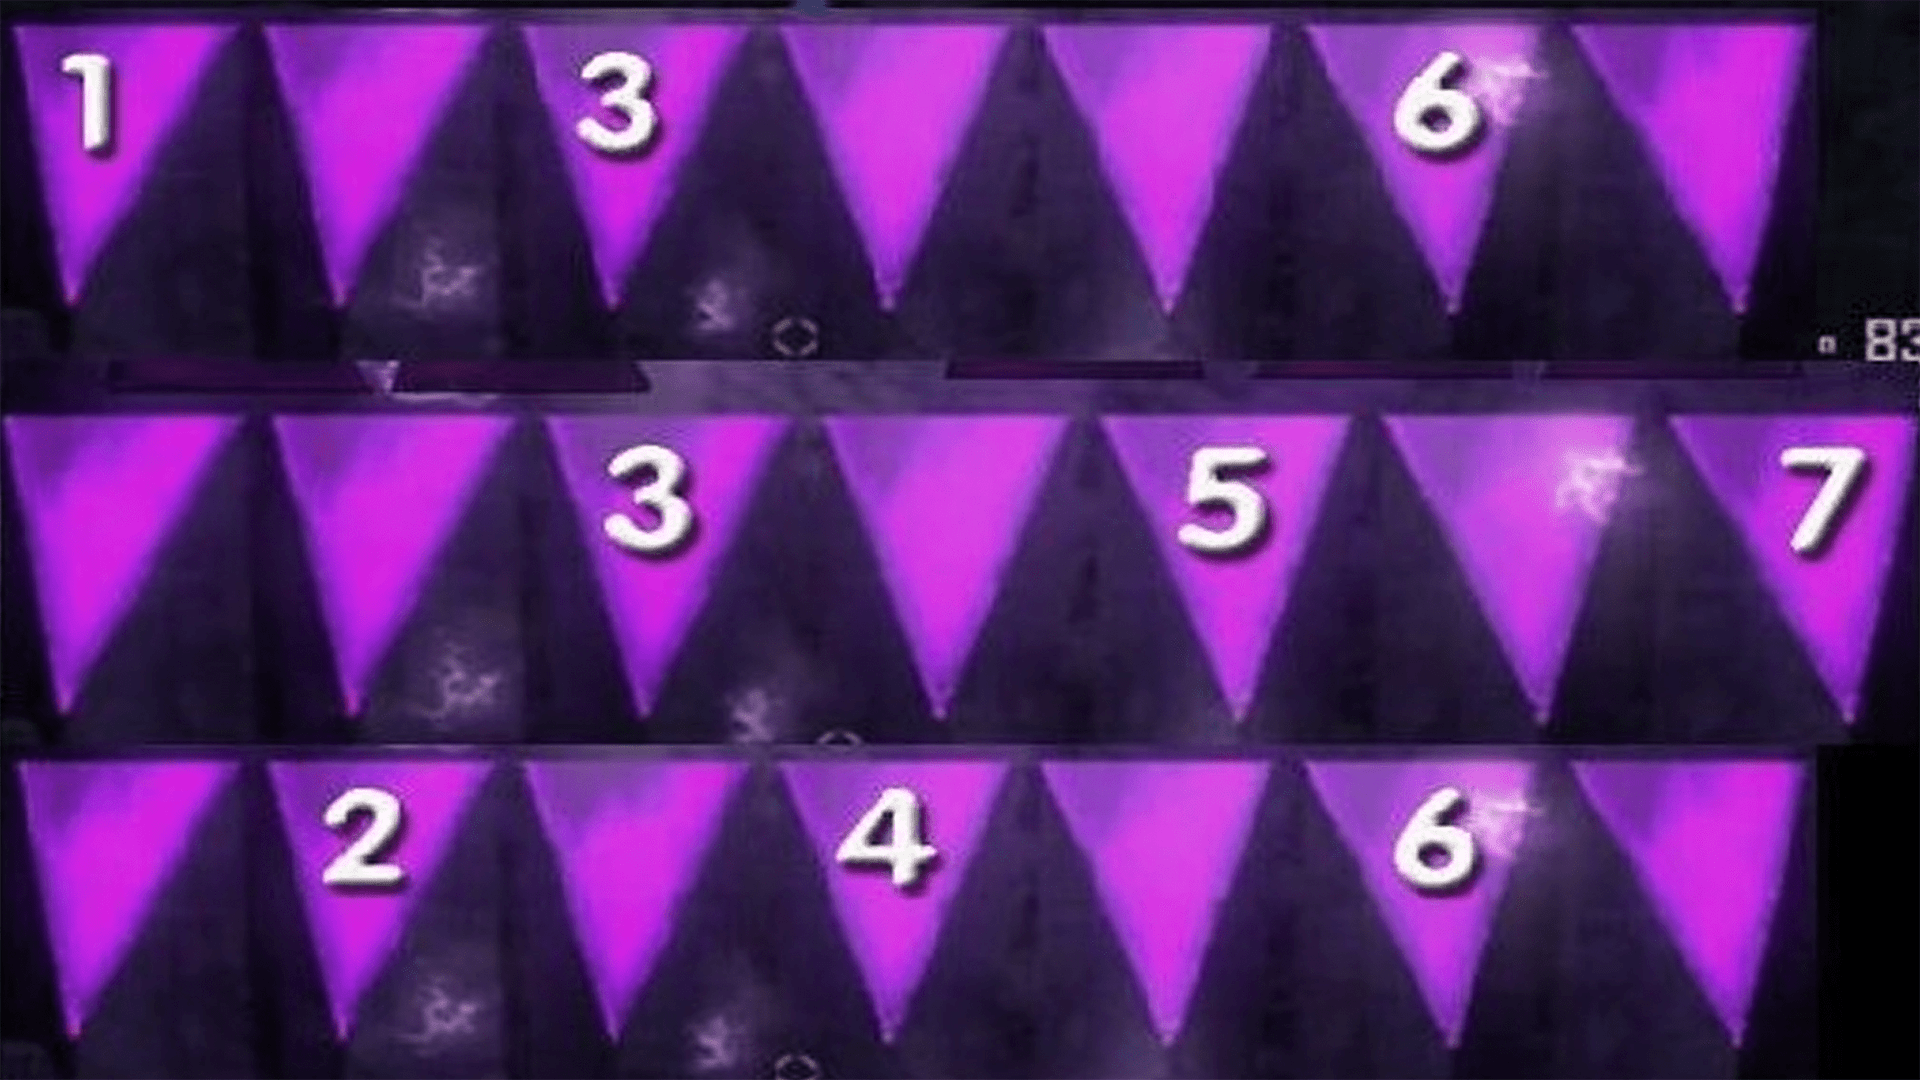
You will hear a sound and the screen will shake when successful. Head back into the Dig site and you will now have to find 7 (there's actually 8 but one's done already) electrical panels around the map. The following locations are;
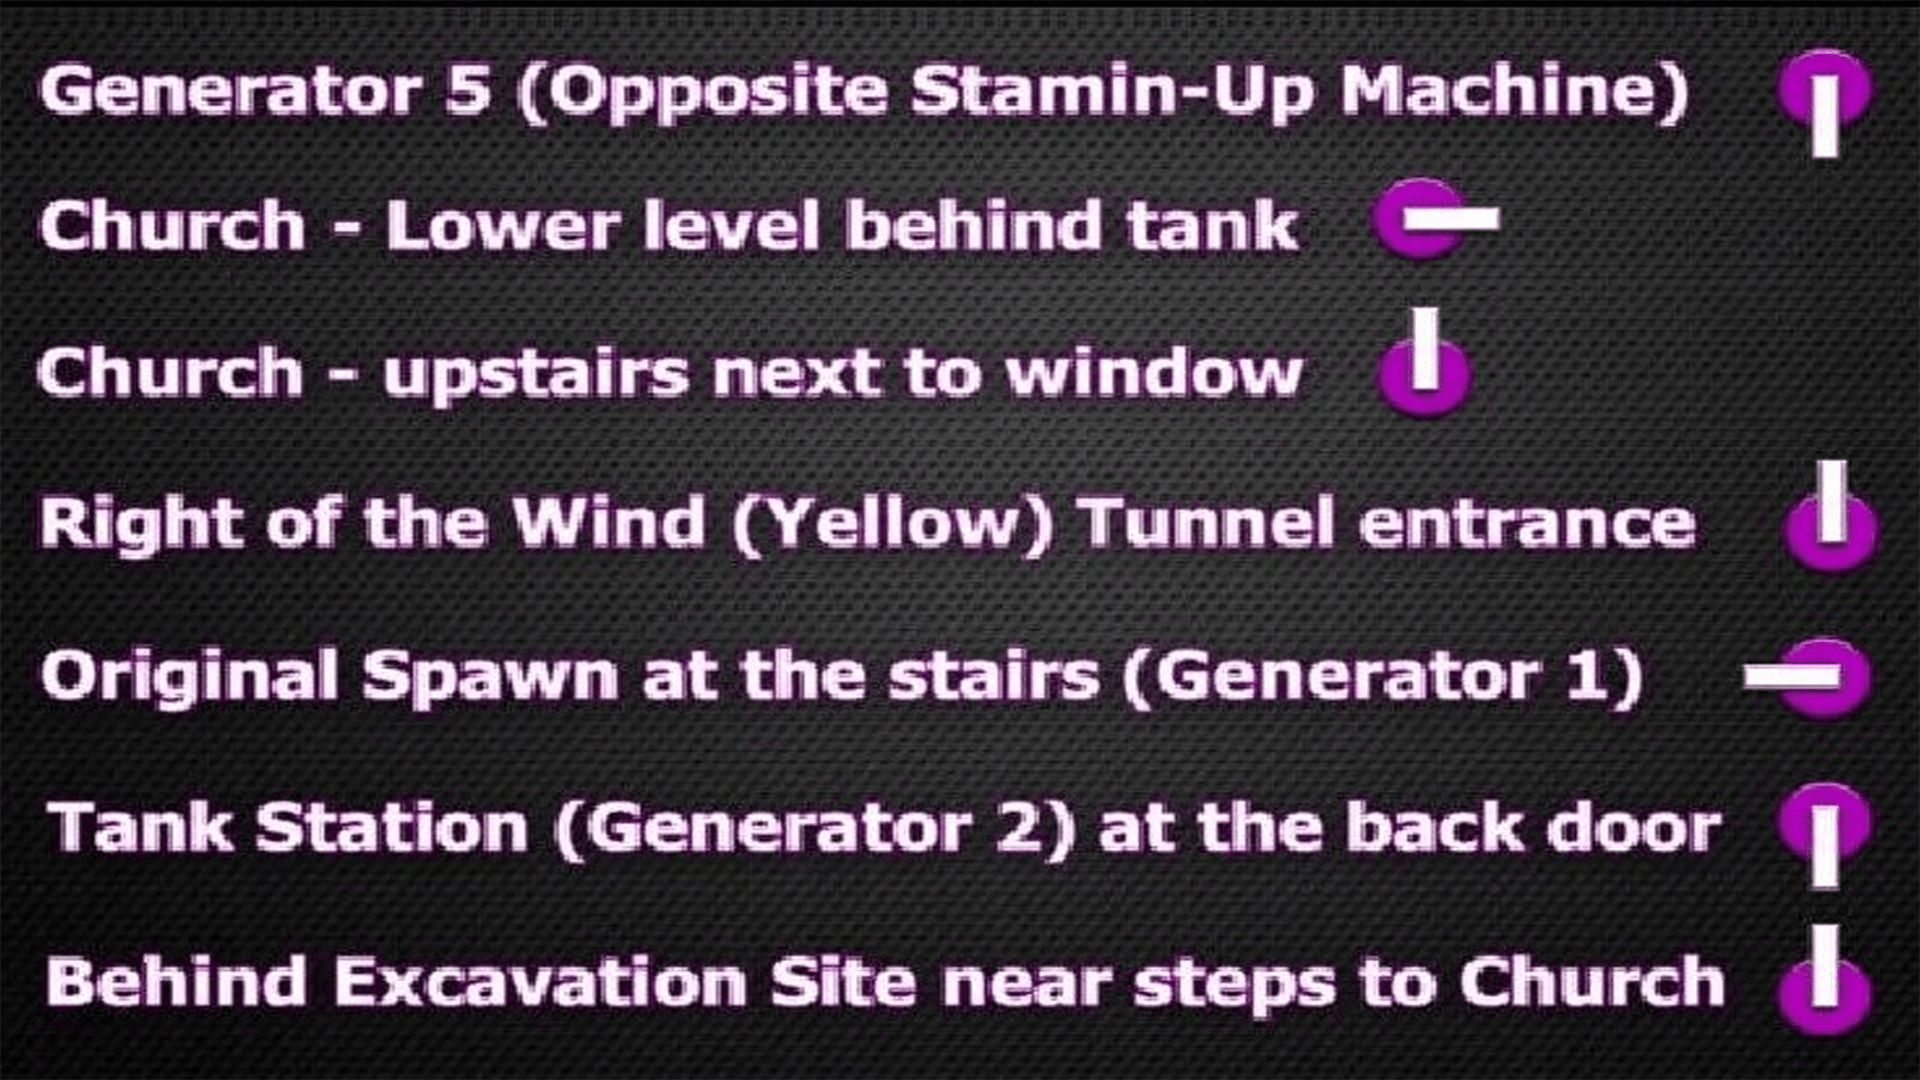
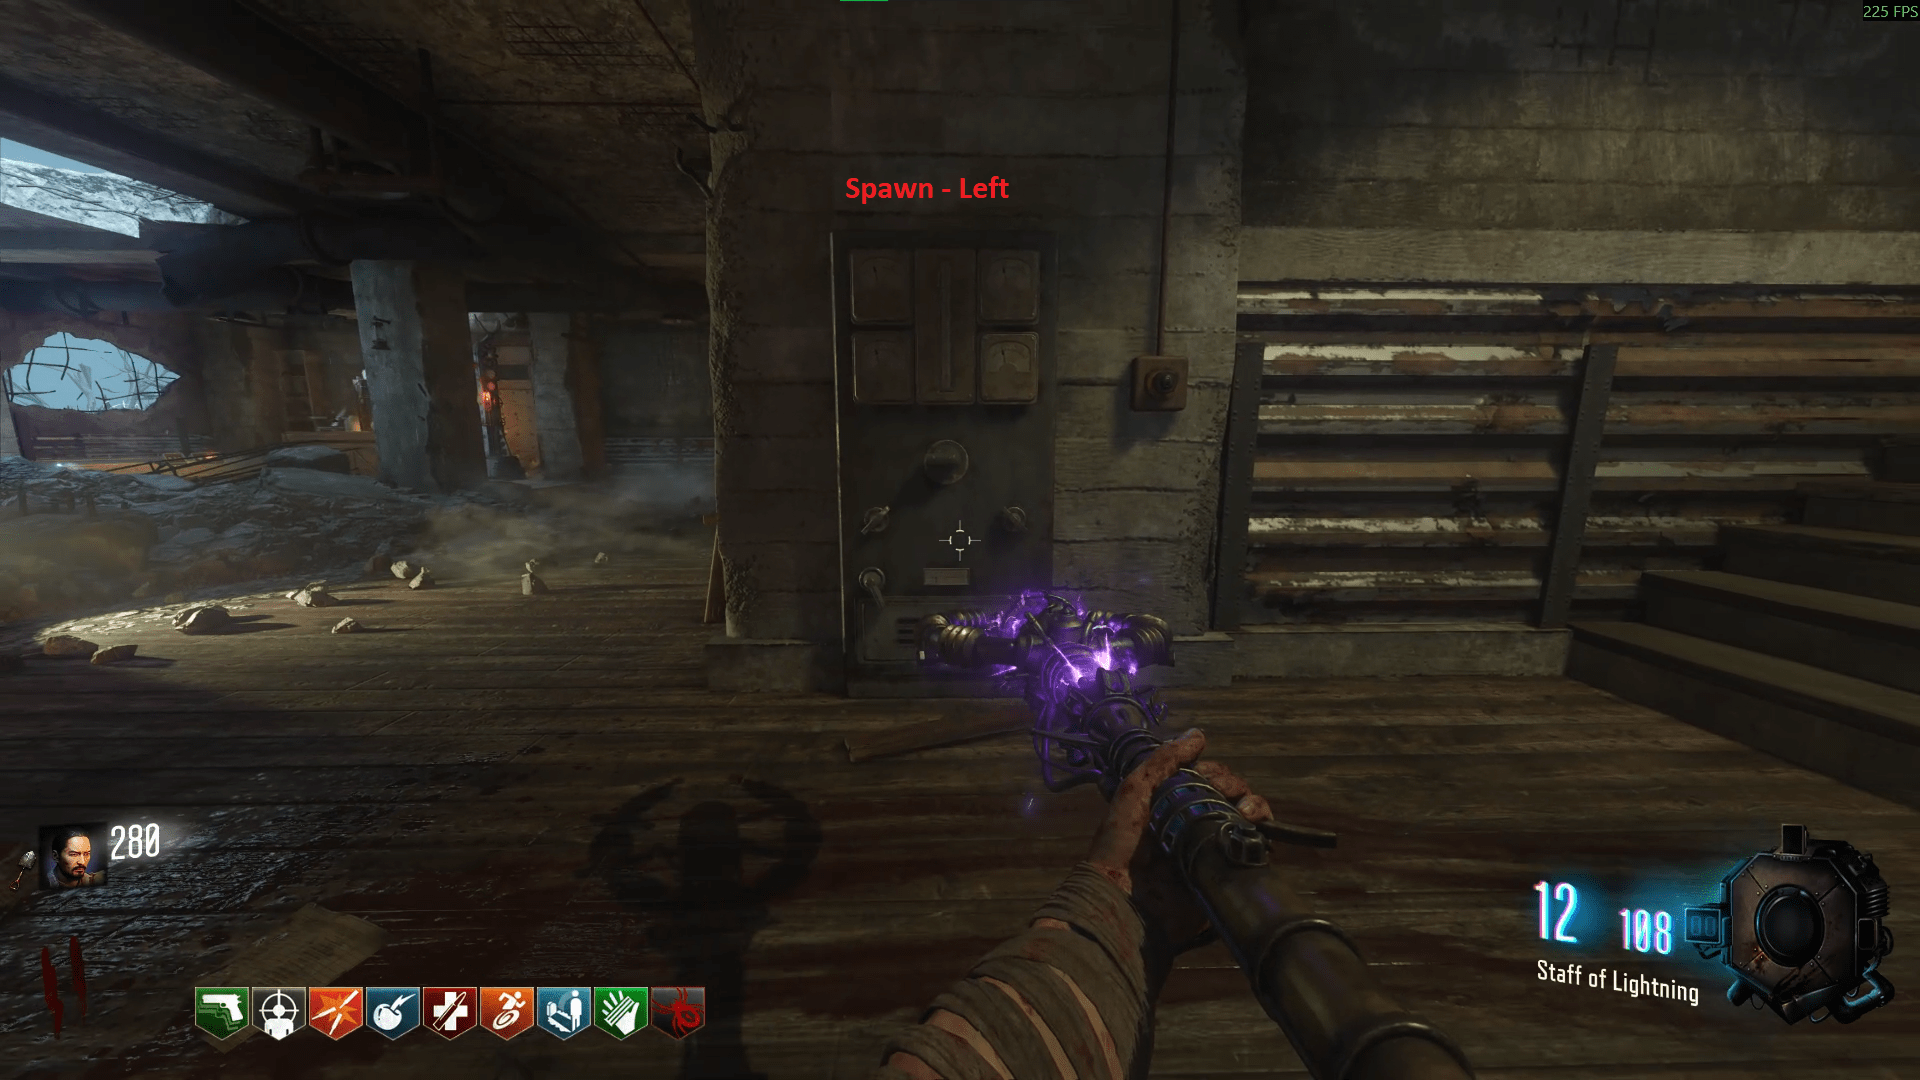
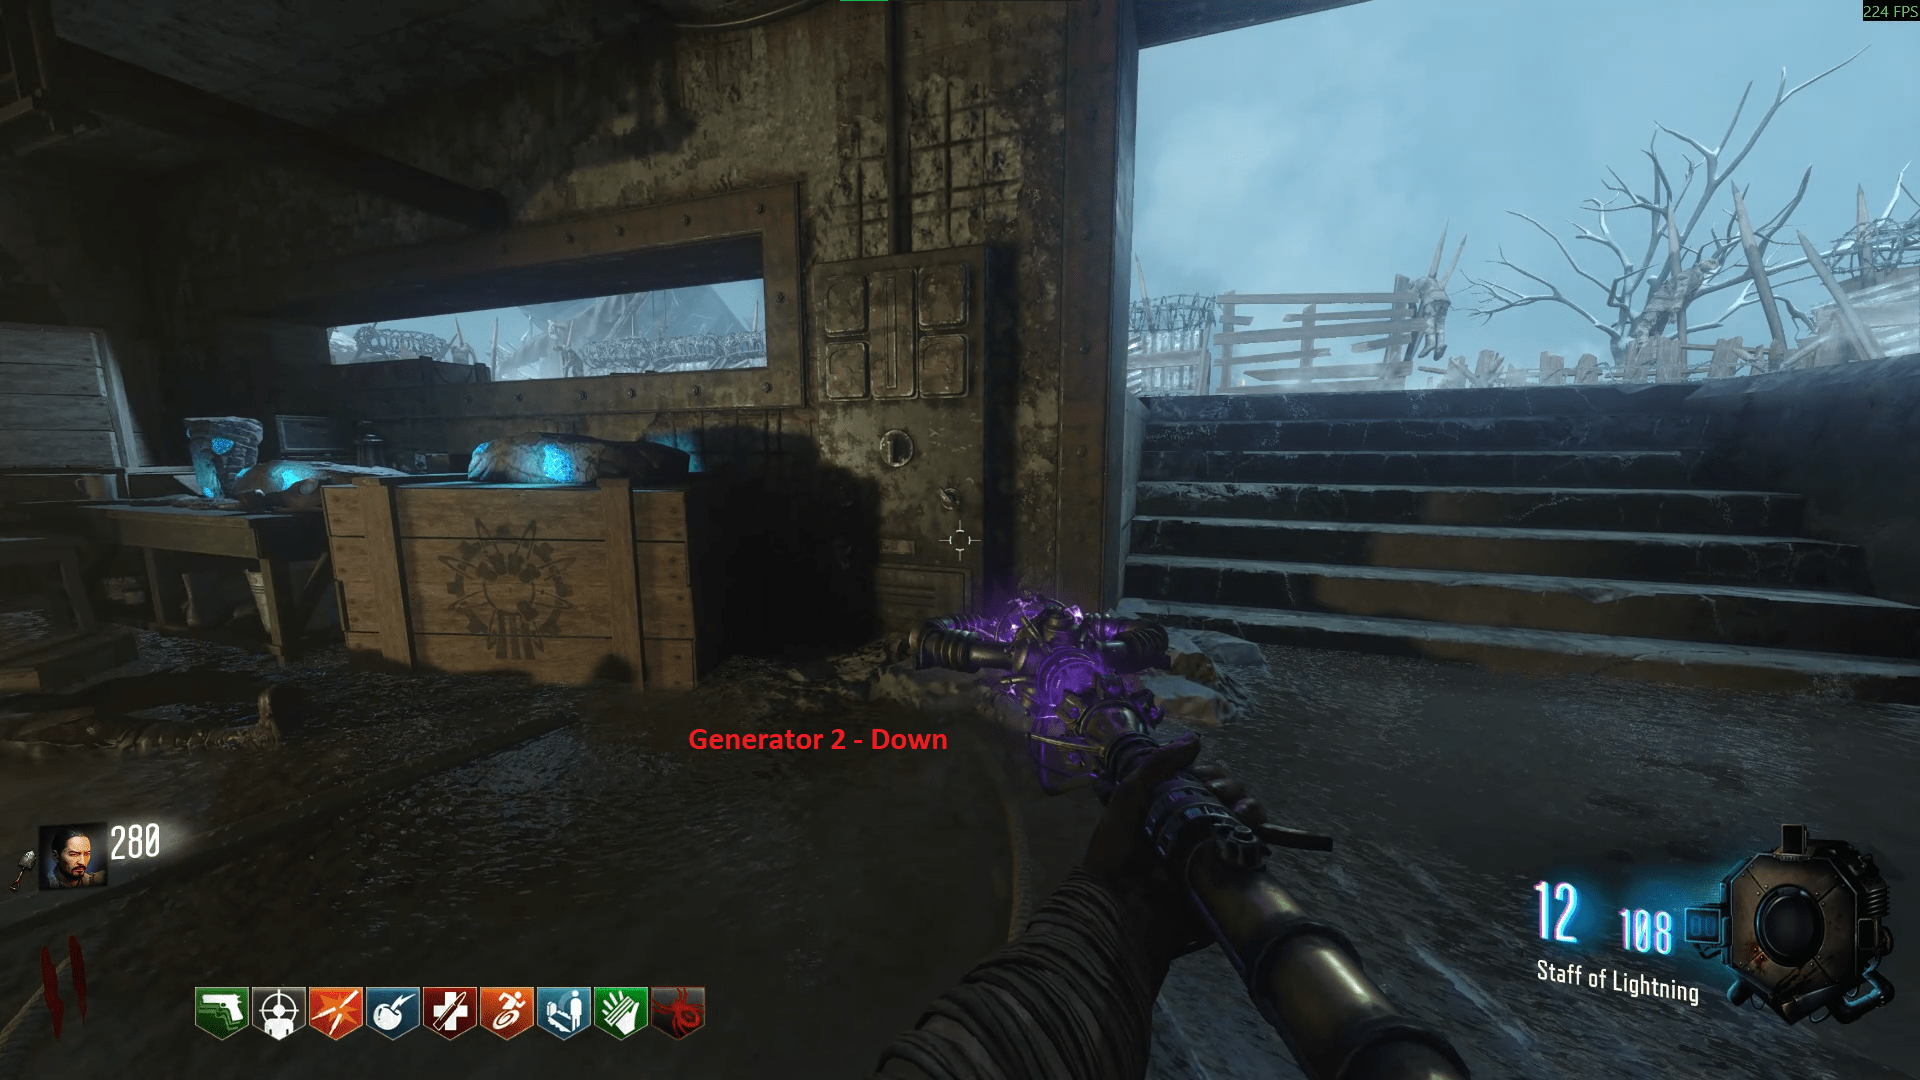
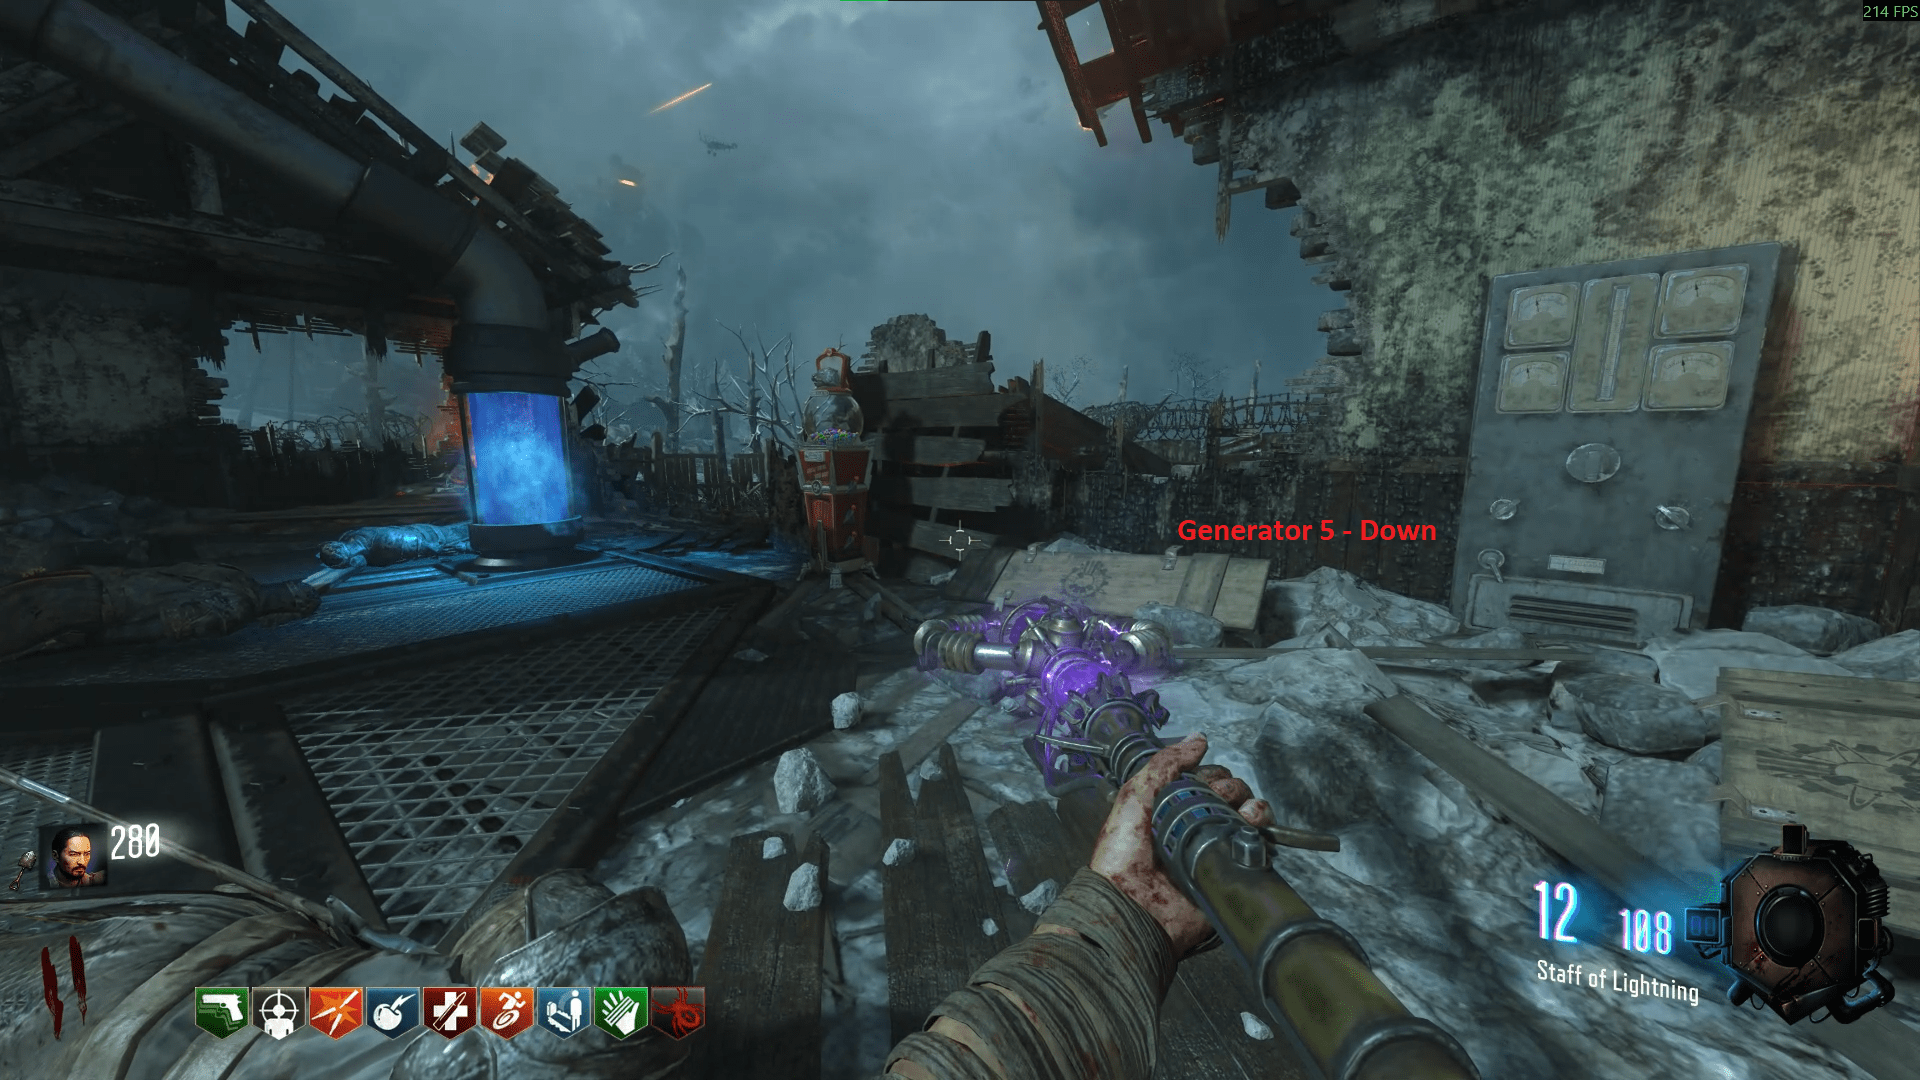
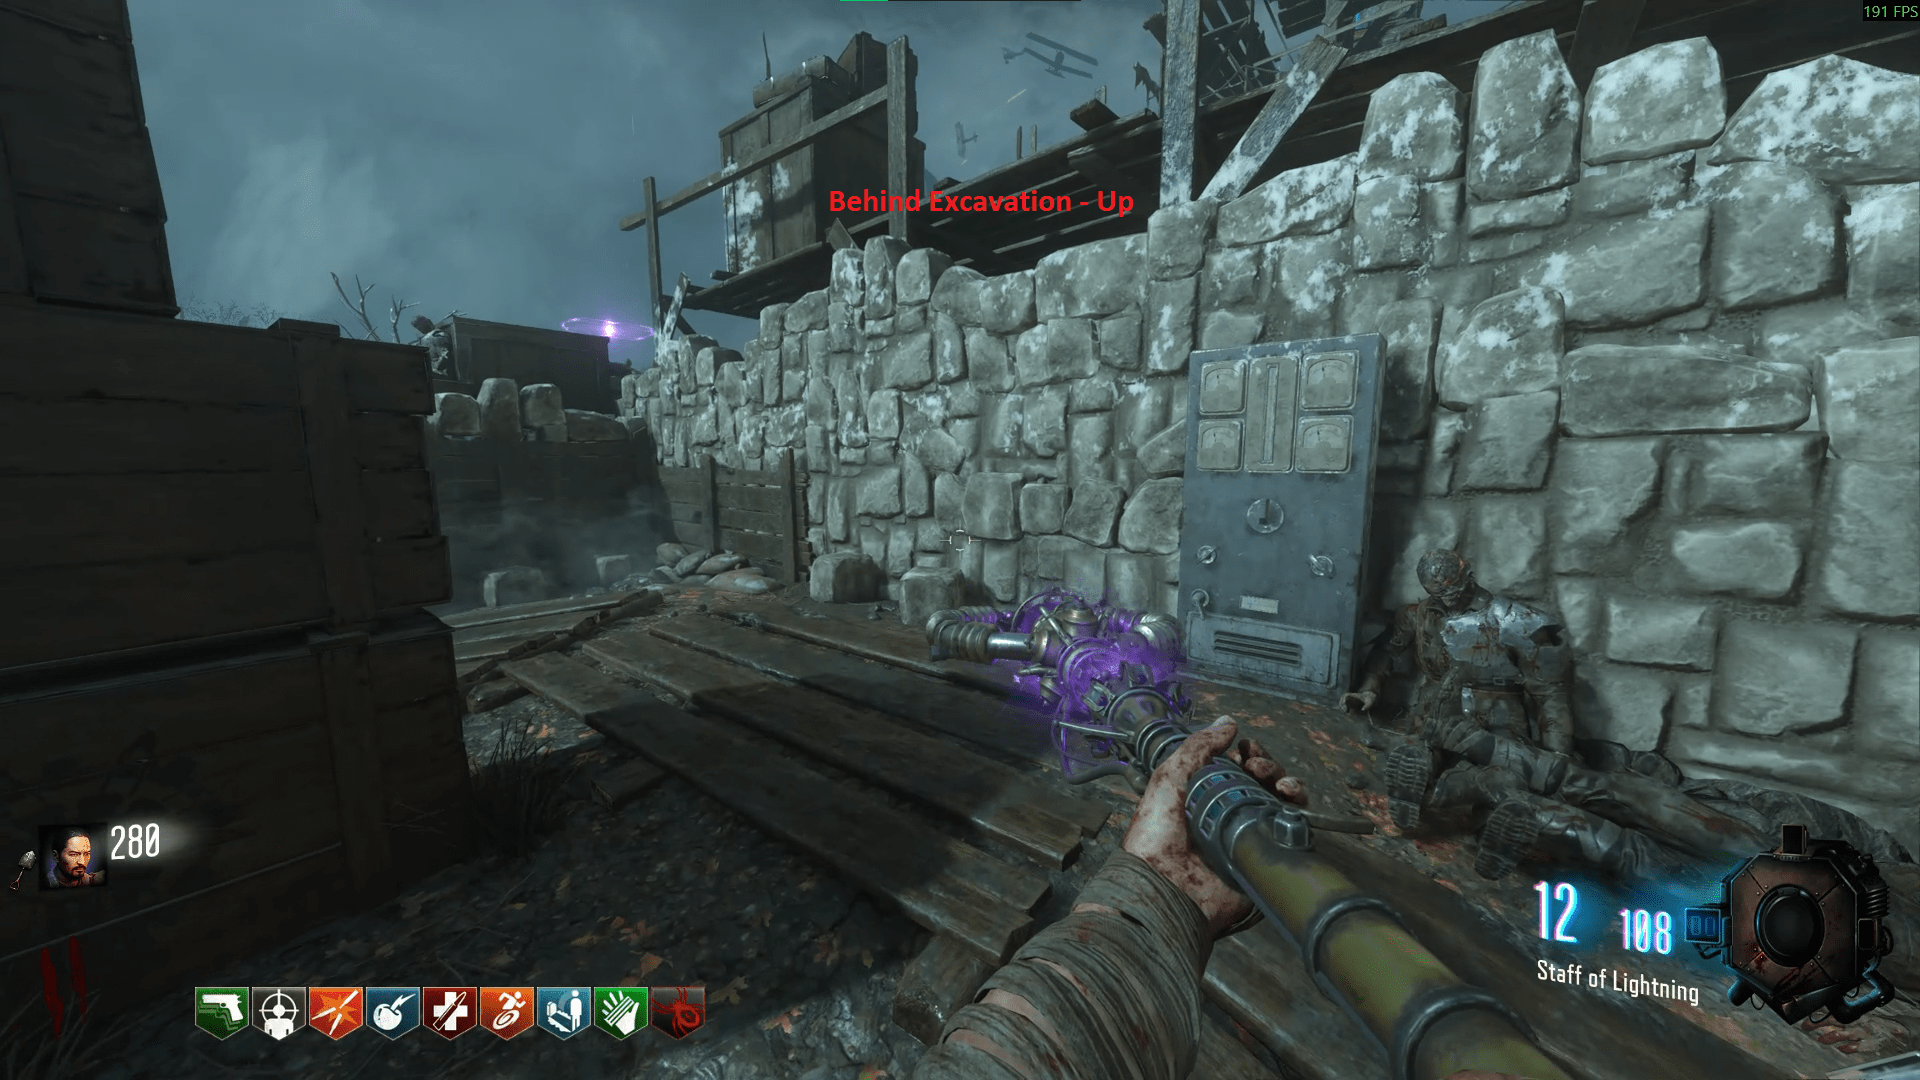
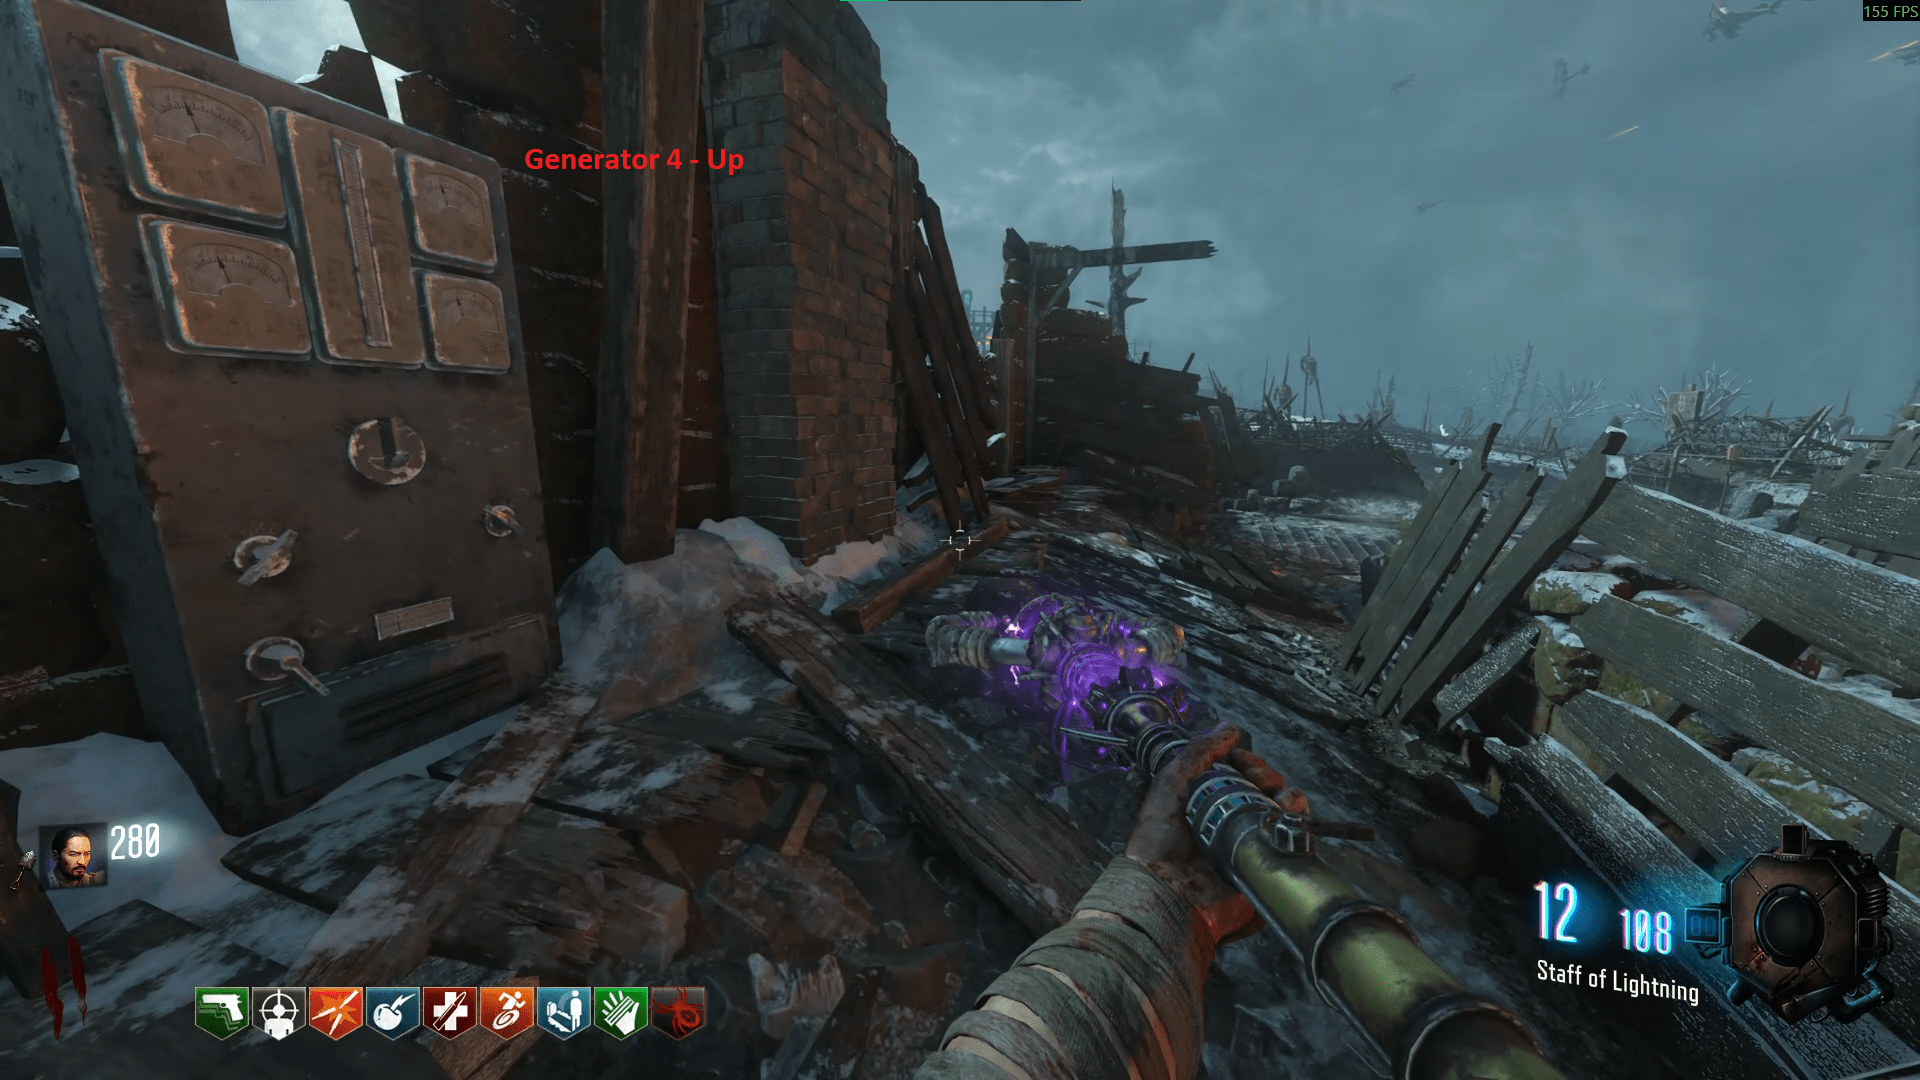
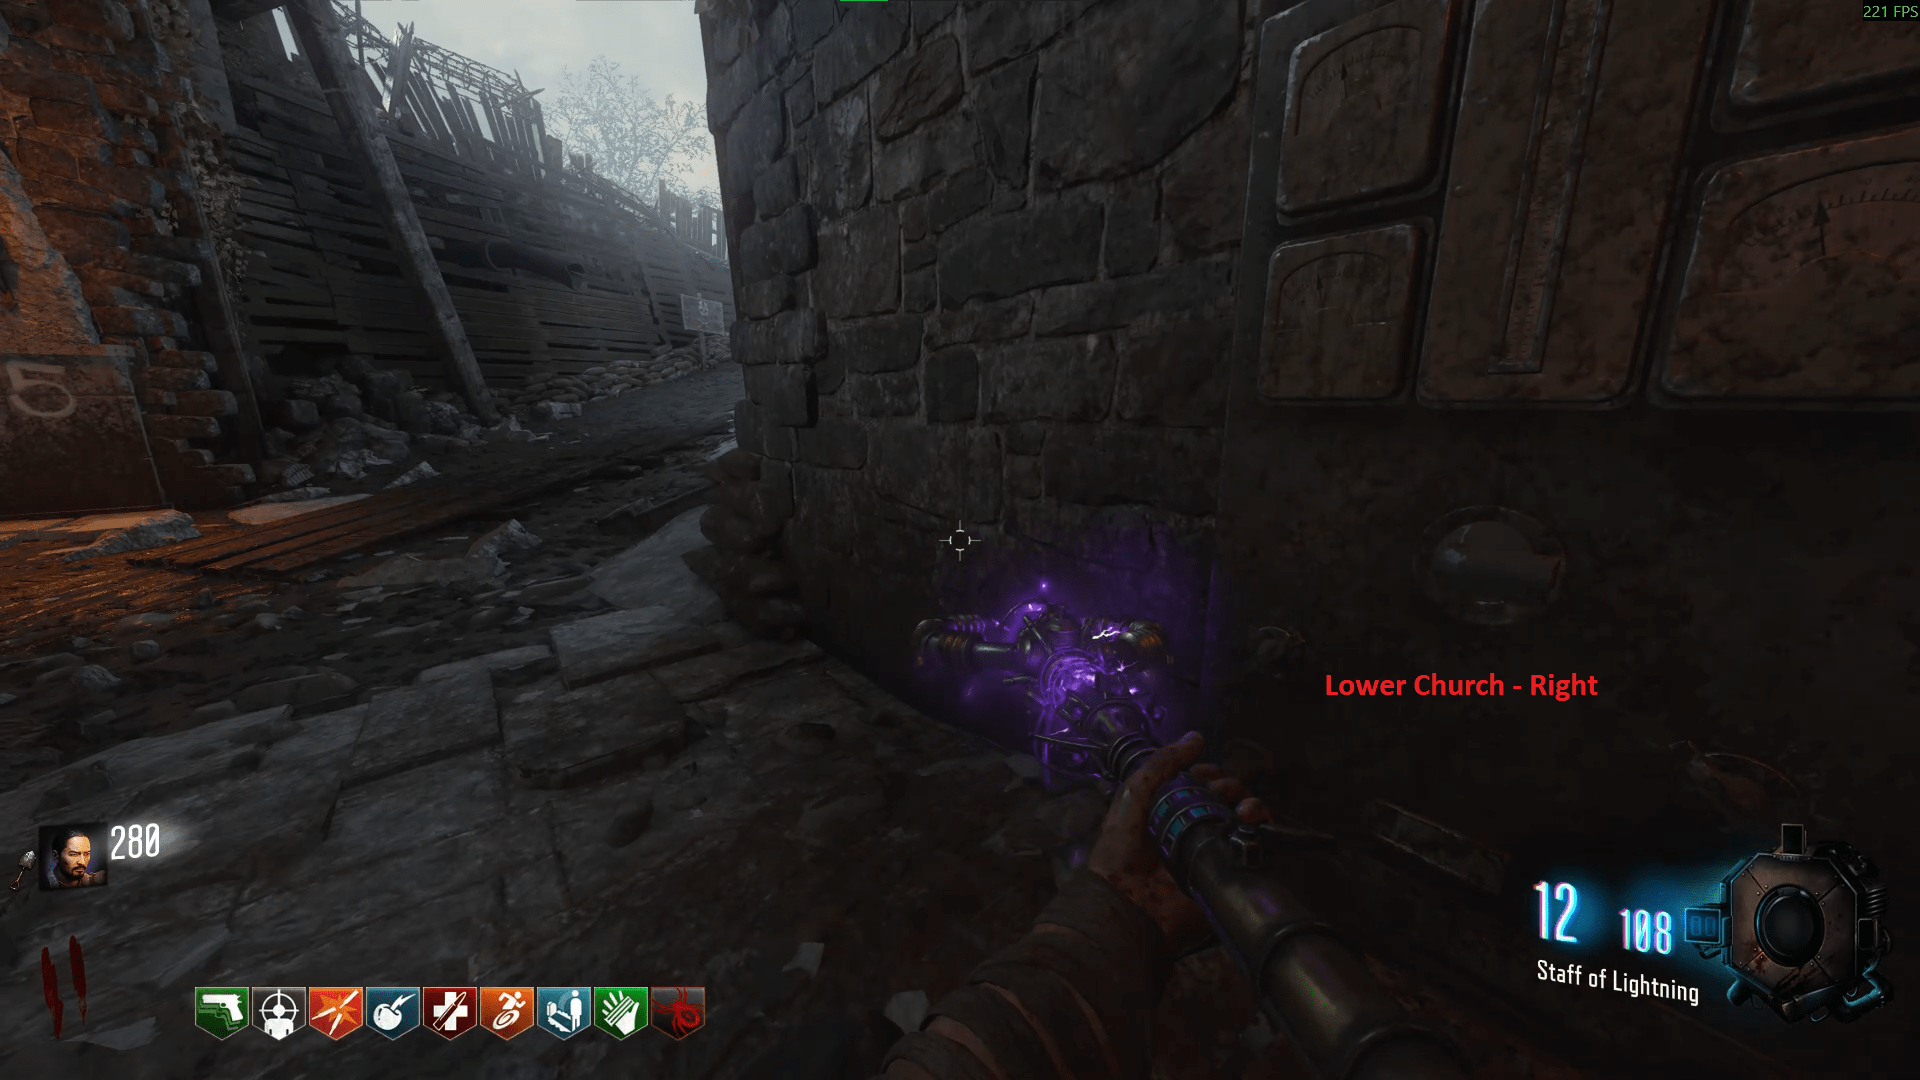
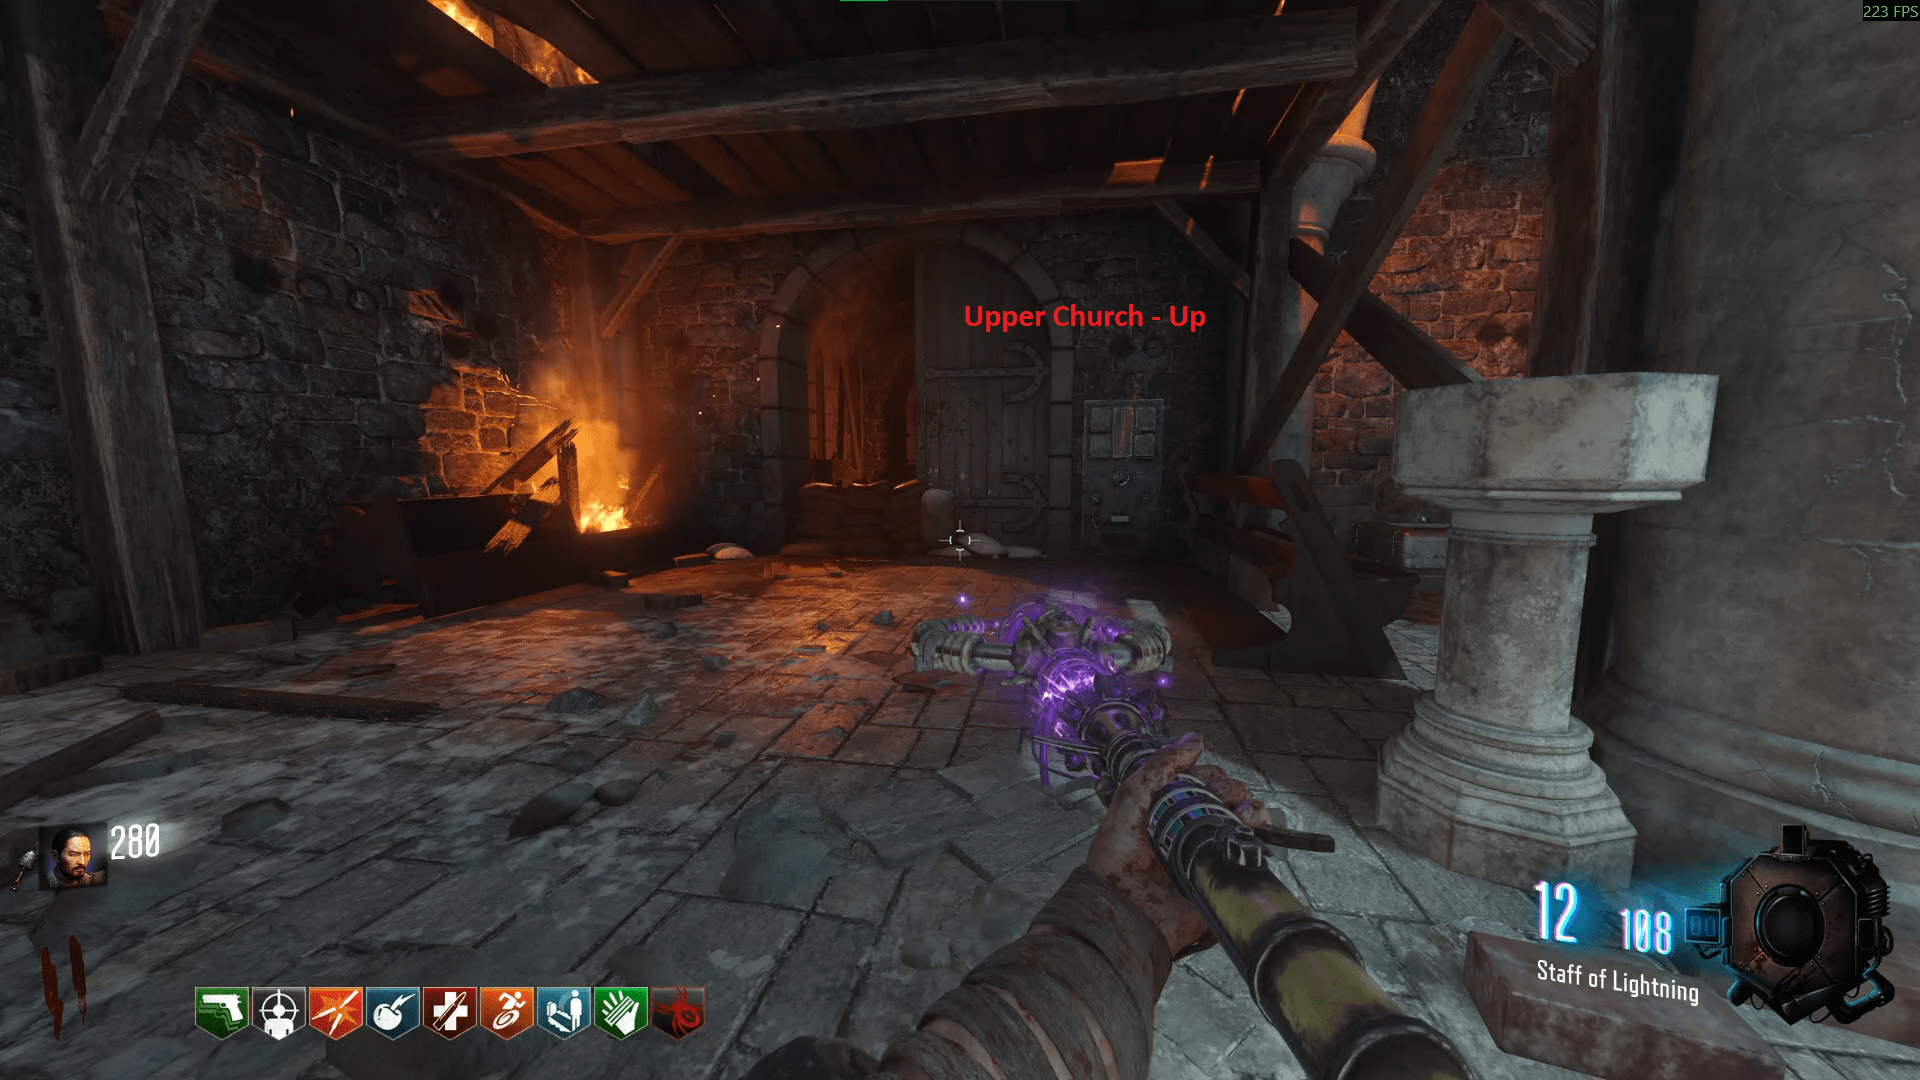
The completed electrical panel is located just before entering the main Excavation site (going up the ramp) after the intersection of Generators 2 and 3. It is in the doorway besides the music Easter egg rock, so you'll hear the hum of the rock when you're nearby the panel but just in case you hit it or someone griefs you, the panel faces up.
You will now hear another sound and a large ray of light coming out of the Mound if you have them all aligned correctly. Now you need to head down and use the rings again but make the lights purple instead, then shoot the glowing purple orb.
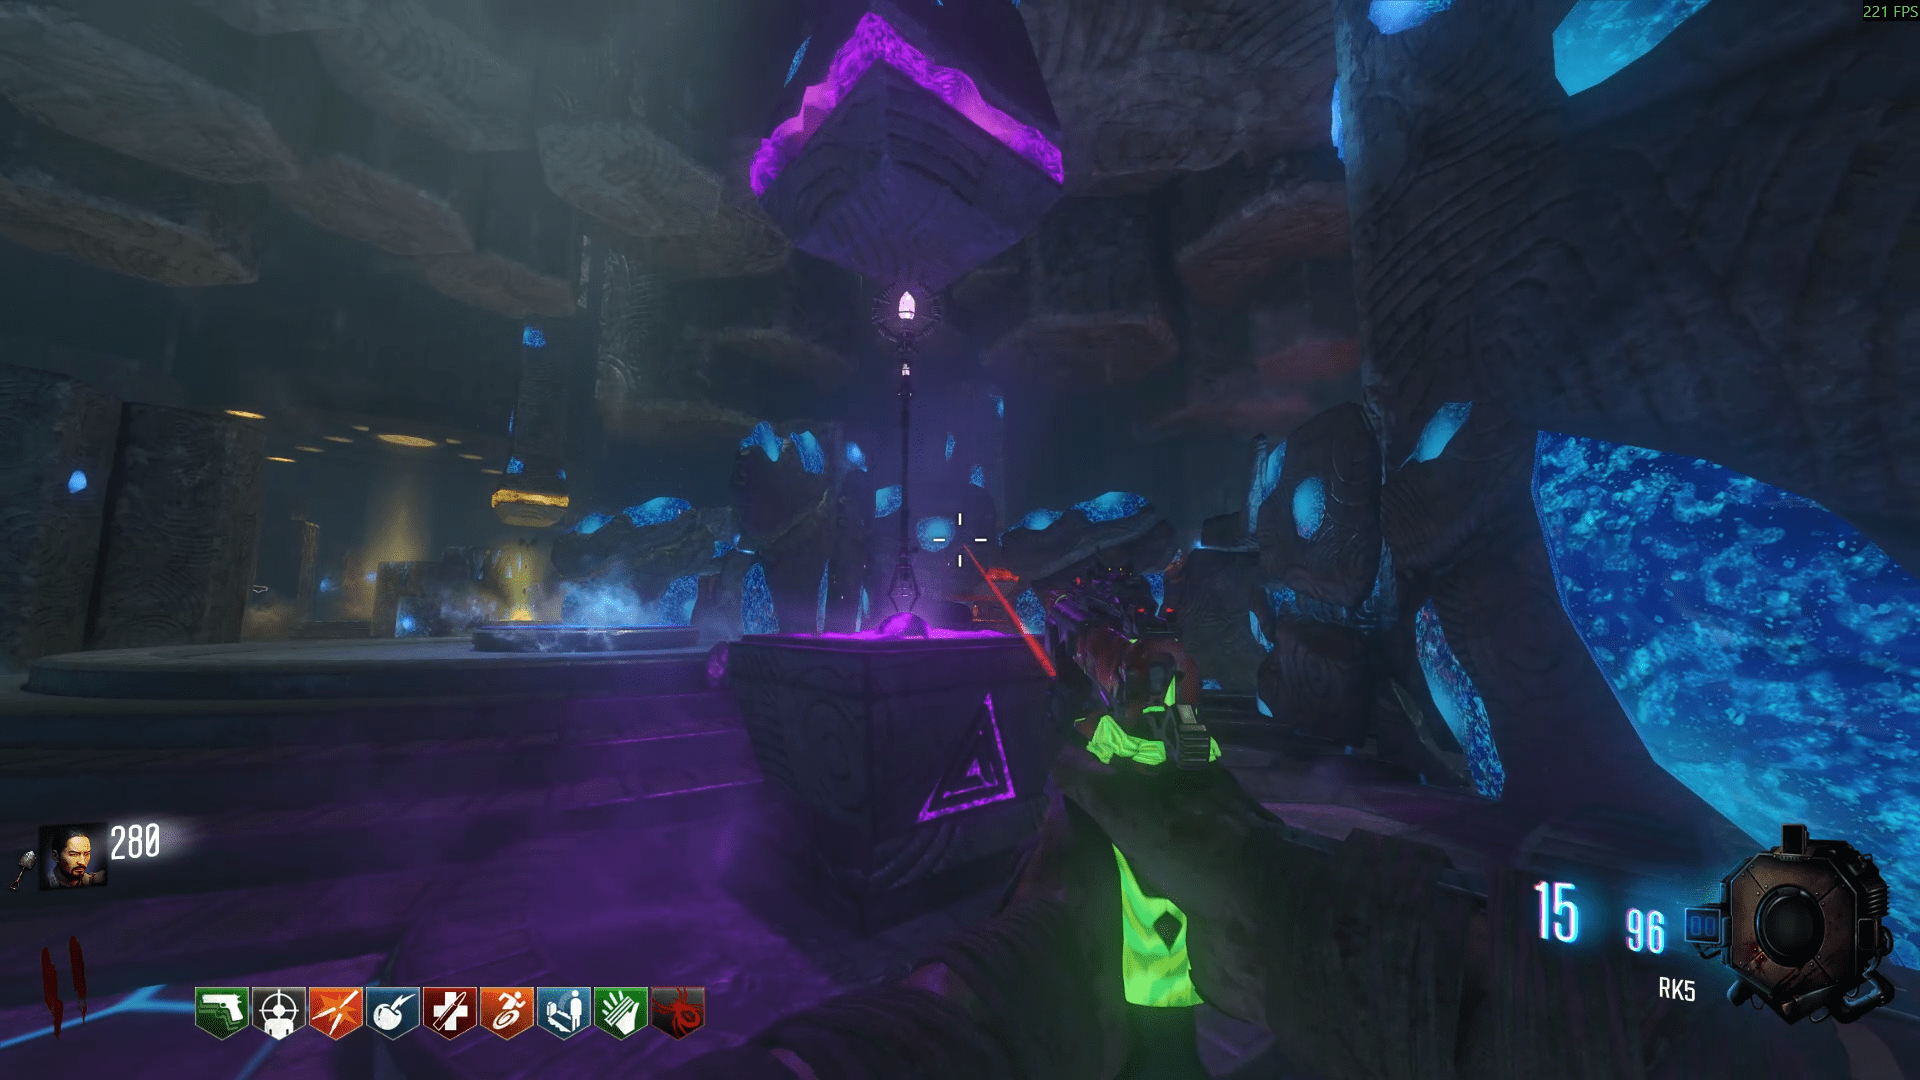
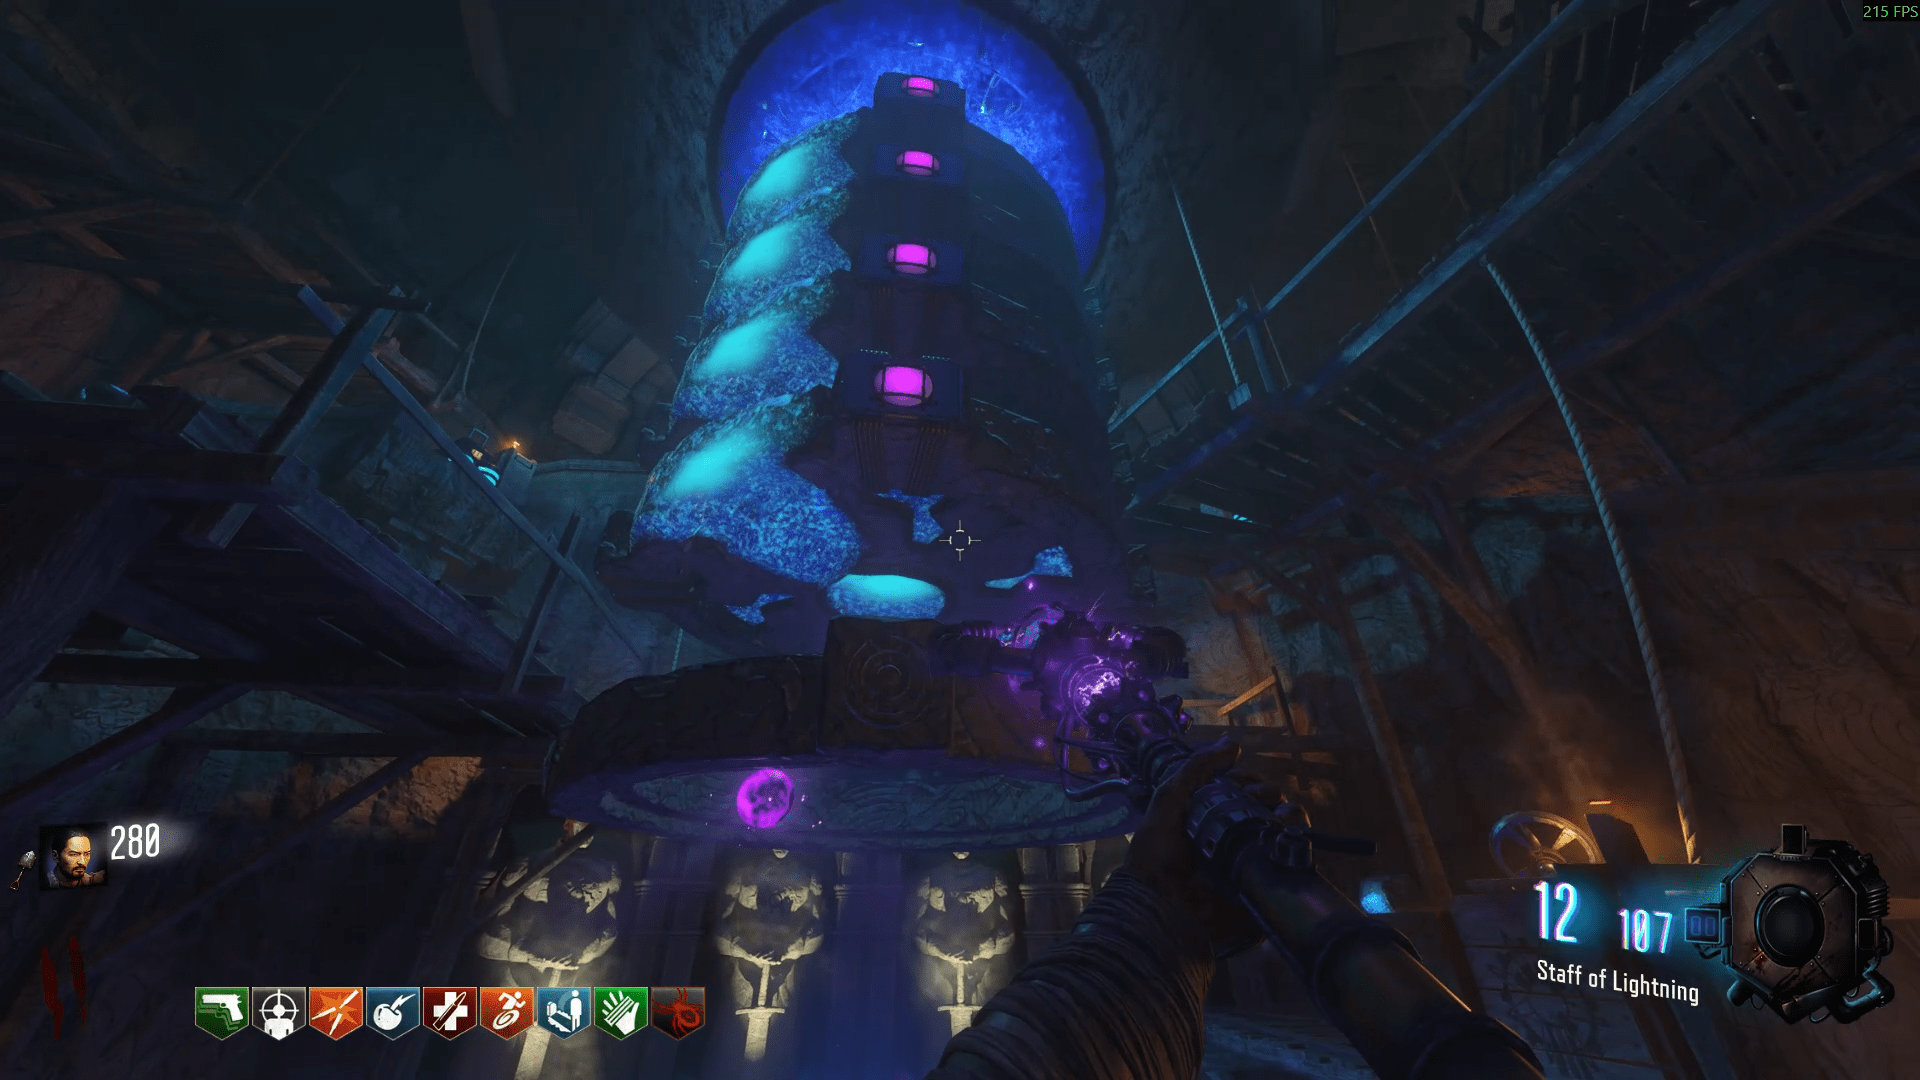
Once that's done, place the Lightning staff into the purple pedestal in the Crazy Place and accumulate the 20-ish kills once again to upgrade it.
Origins
- Directly in front of the door upon entering the bunker, on a workbench with Element 115.
- To the right of the Mystery Box, on a shelf besides some 935 boxes.
- On a shelf, opposite the stone tablets and electrical panel on the other side of the bunker.
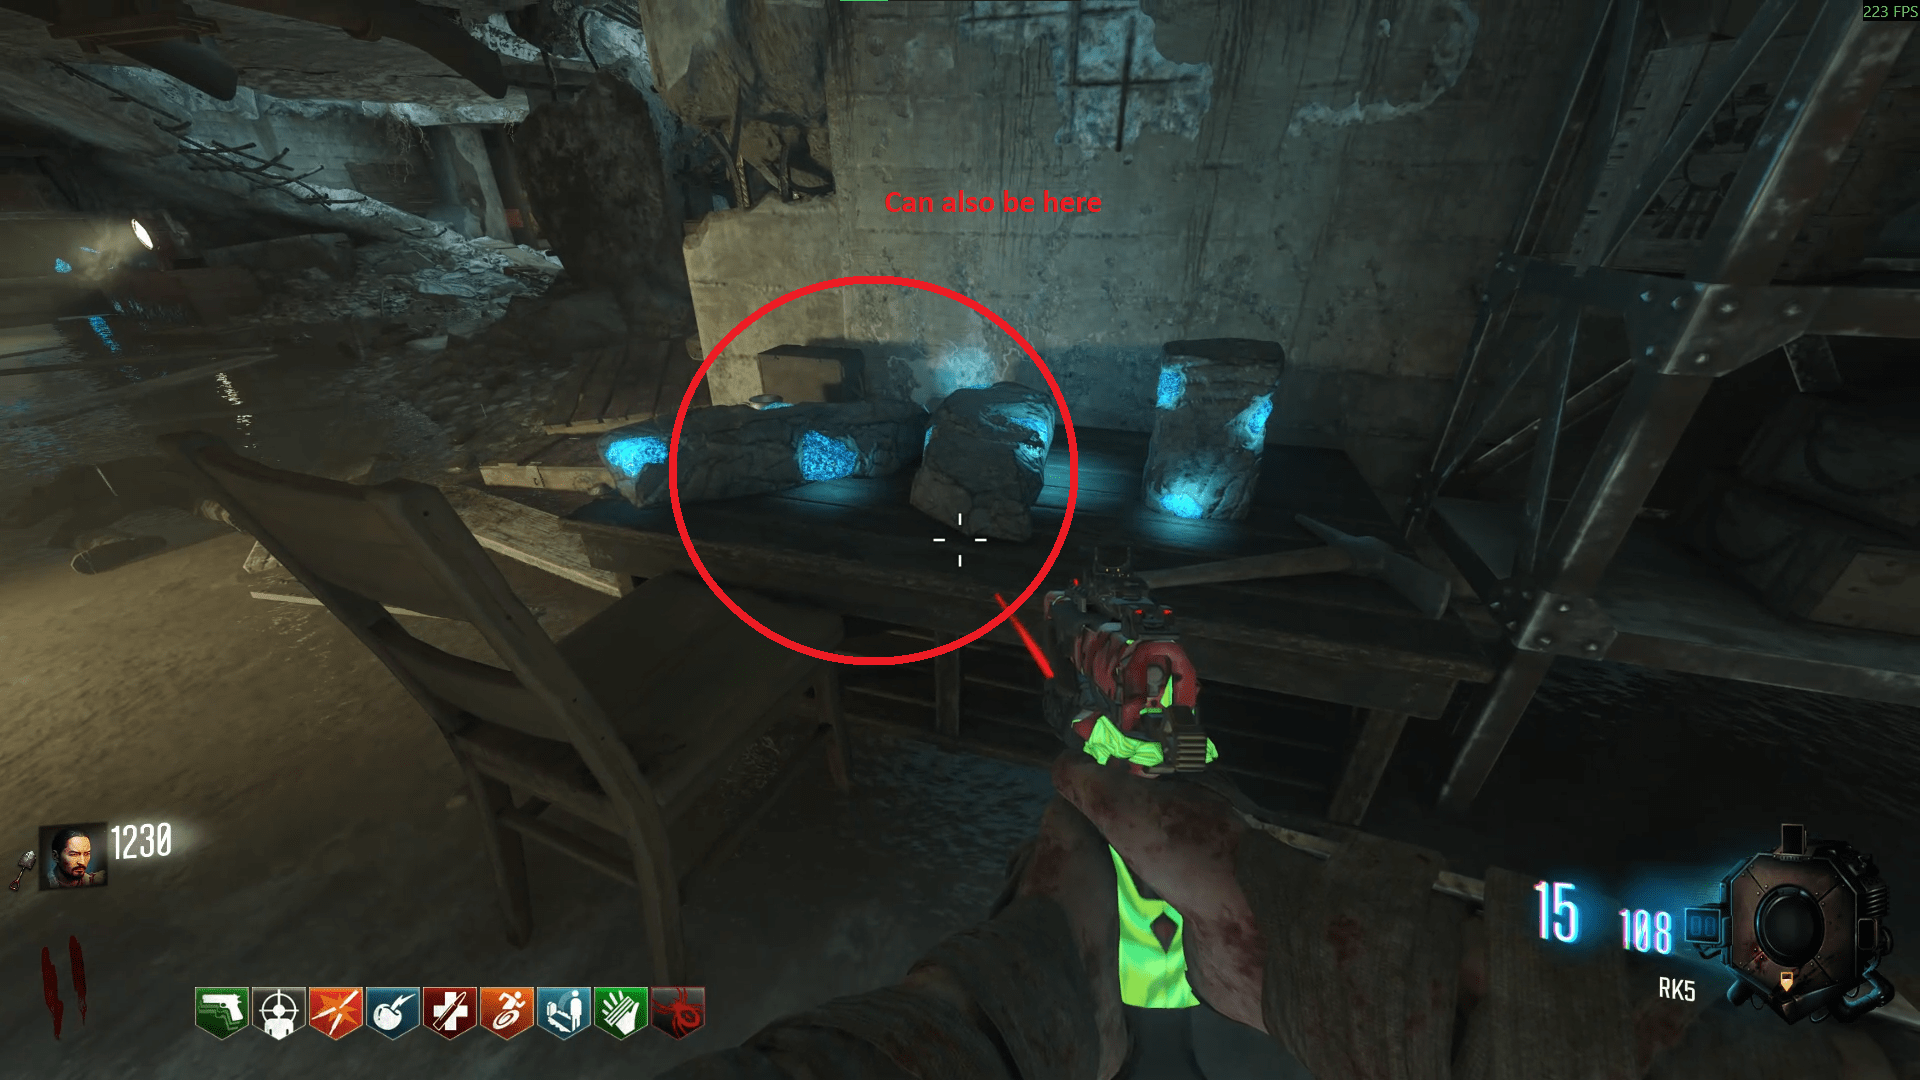
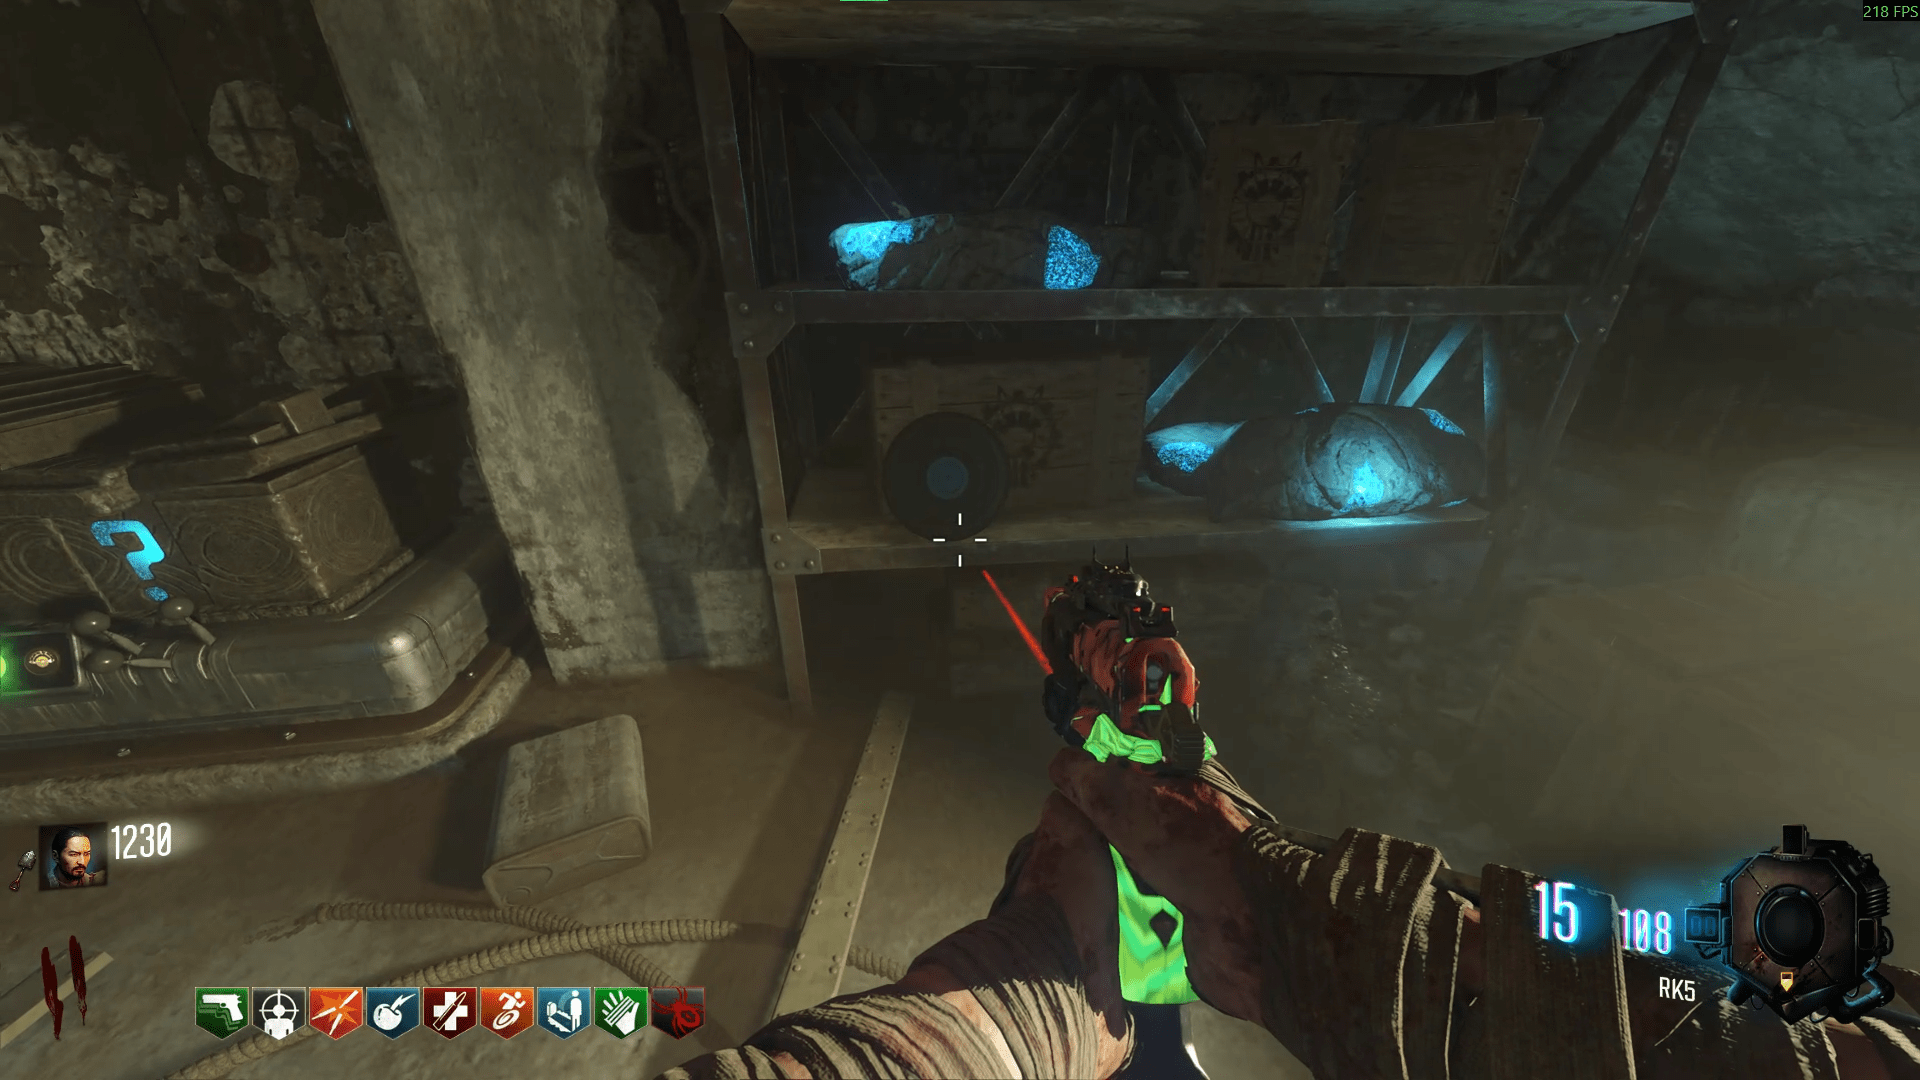
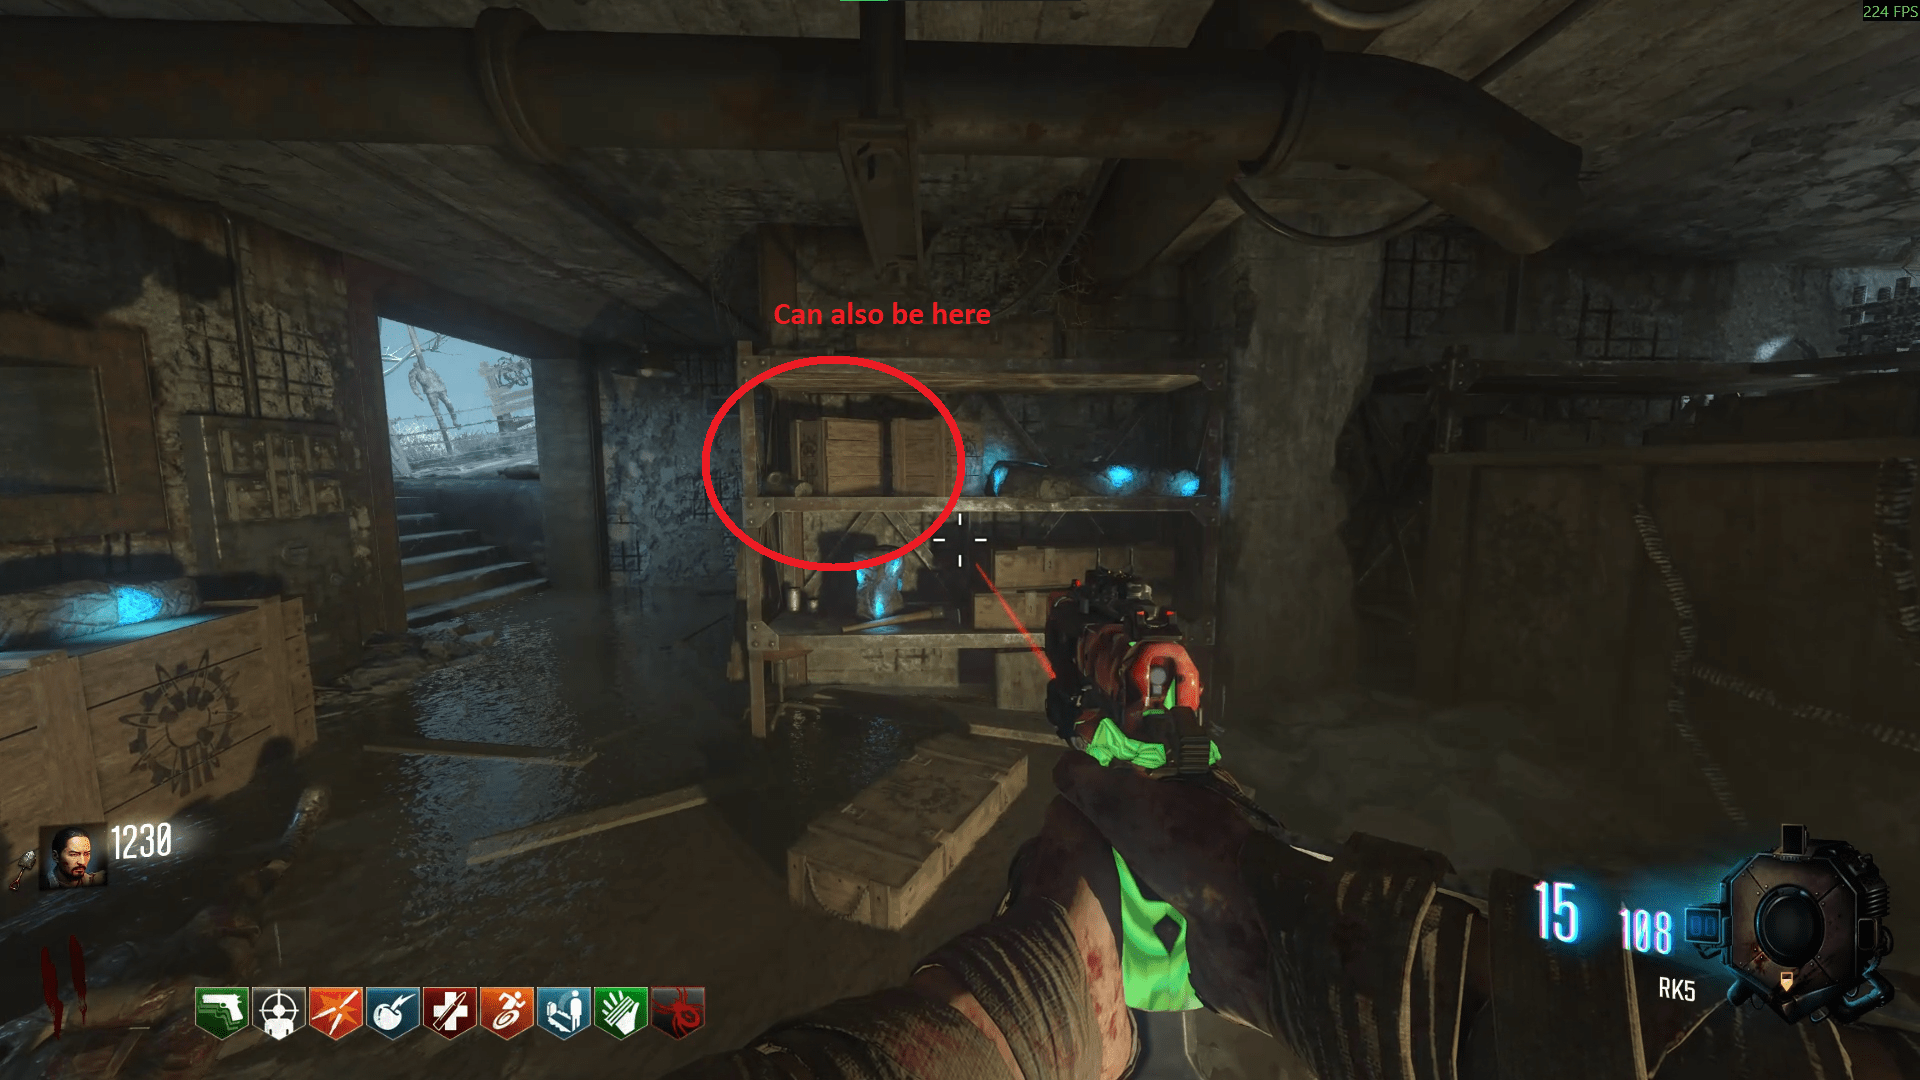
Once you have the disc, run over to the Church and enter the Ice tunnel. Place the Gramophone, enter the portal and pick up the Ice crystal.
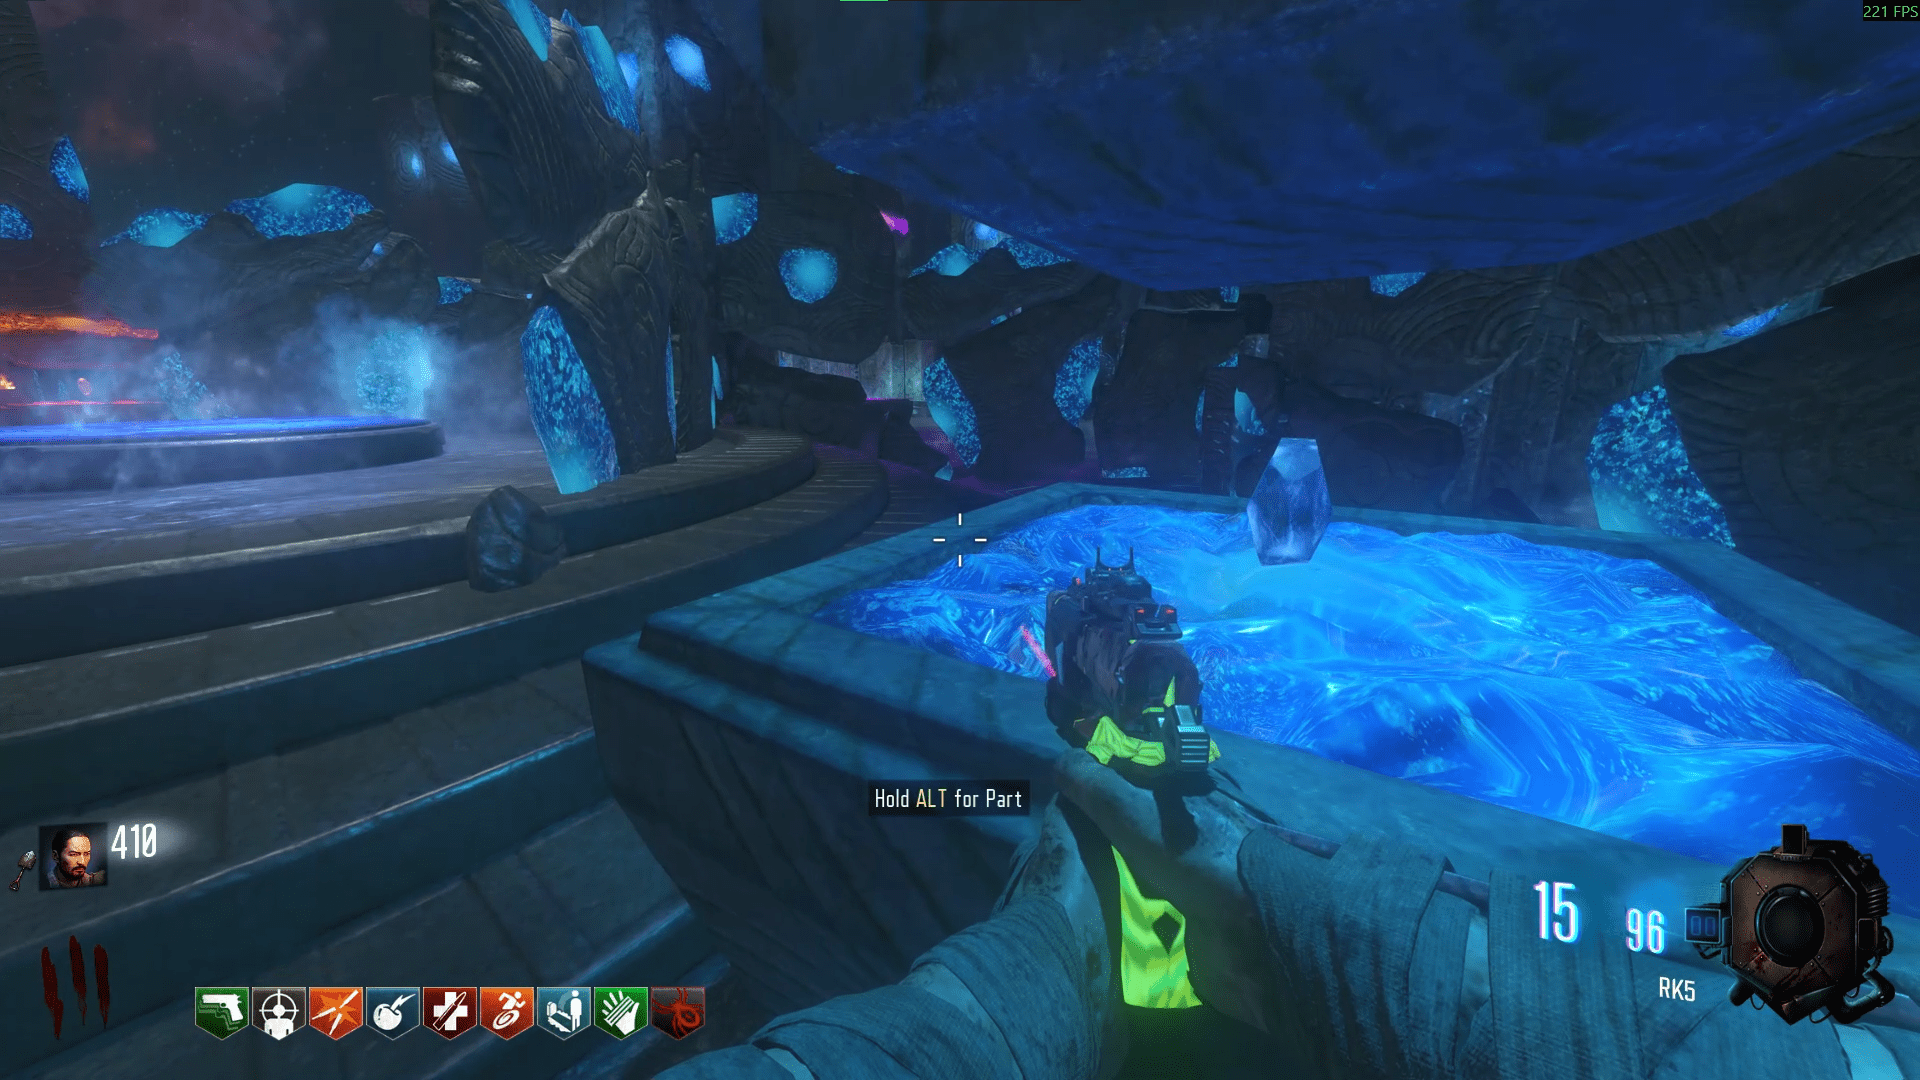
As for the staff pieces, you need to be on a snow round. The first one typically happens between rounds 2 and 4 then round 10 ish, then follows a similar pattern to the Panzersoldat (I believe), every 6-8 rounds. You must pick up a piece per main area of the map, so Spawn (Generators 2 and 3), the Mound (Generators 4, 5 and the Mound dig spots) and then the Church (Generator 6). There are 2 shovel spawns in Spawn and 2 in the lower Church.
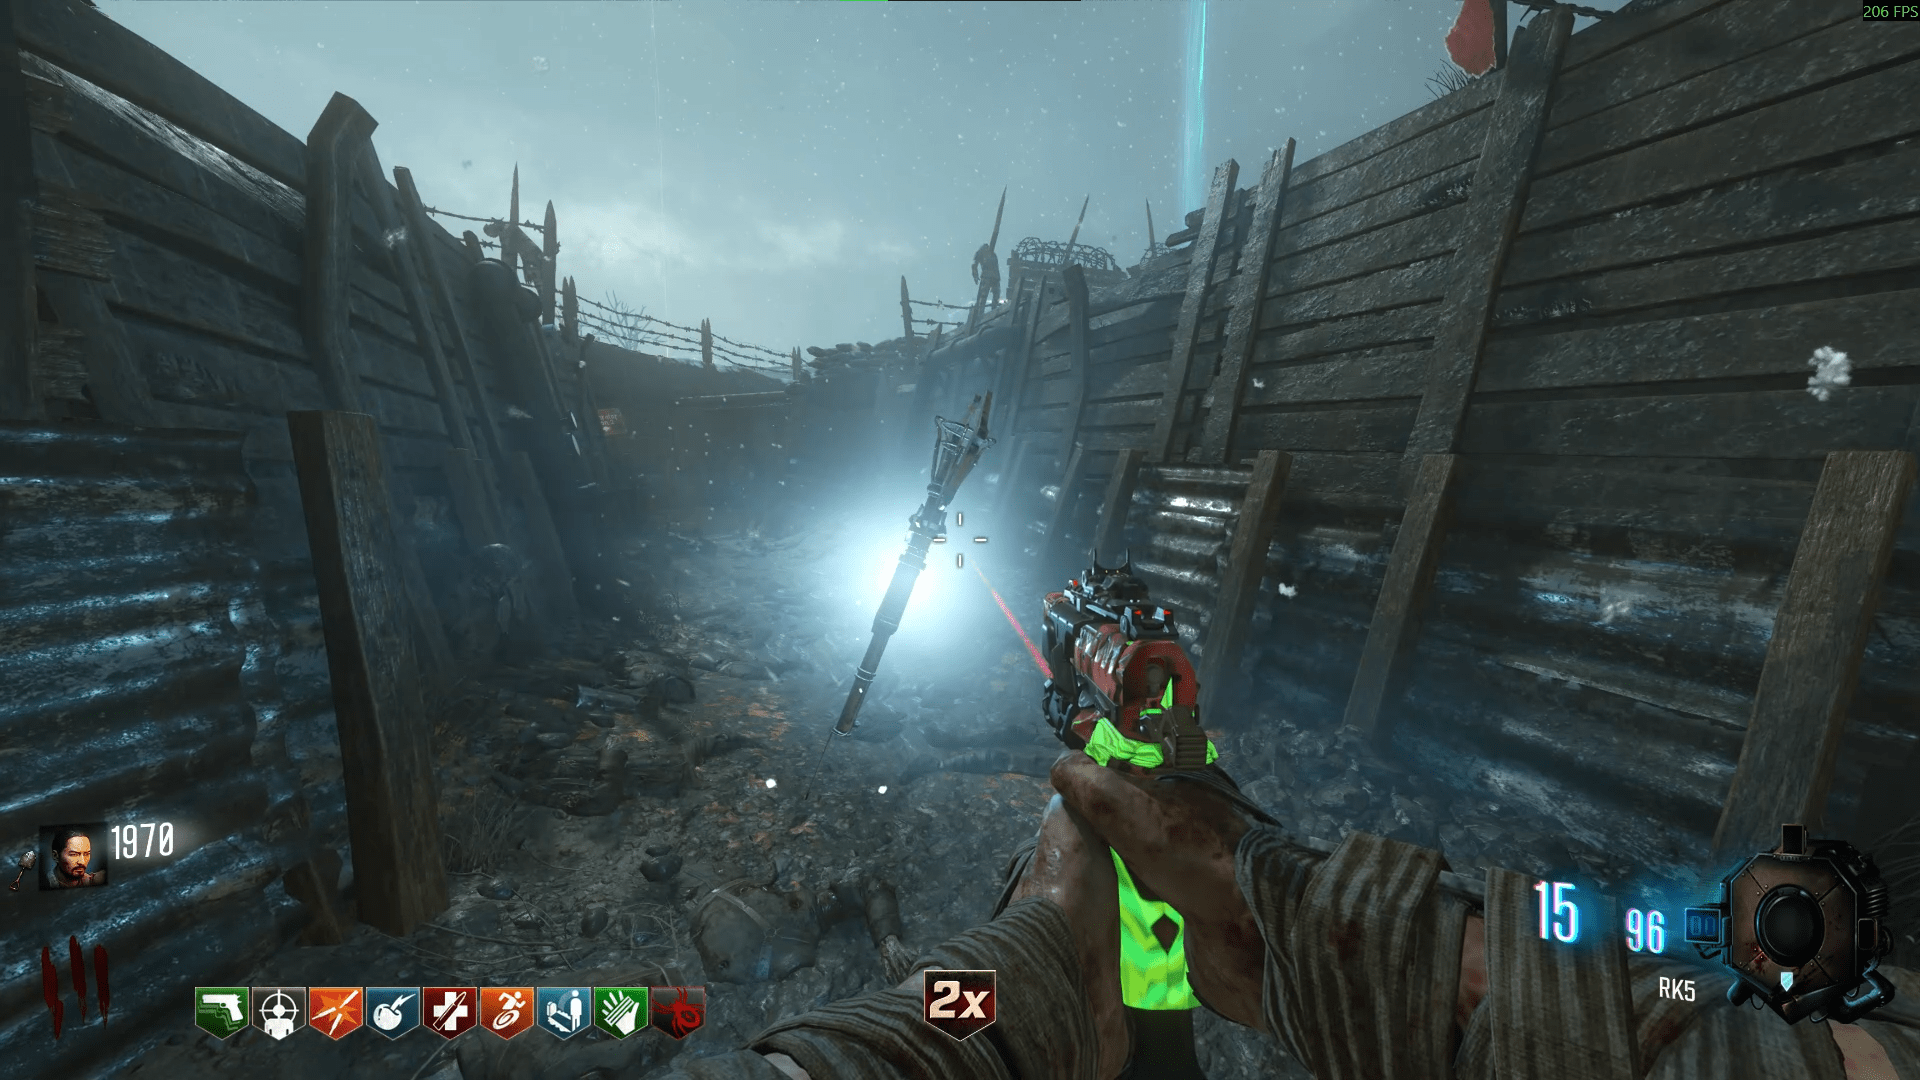
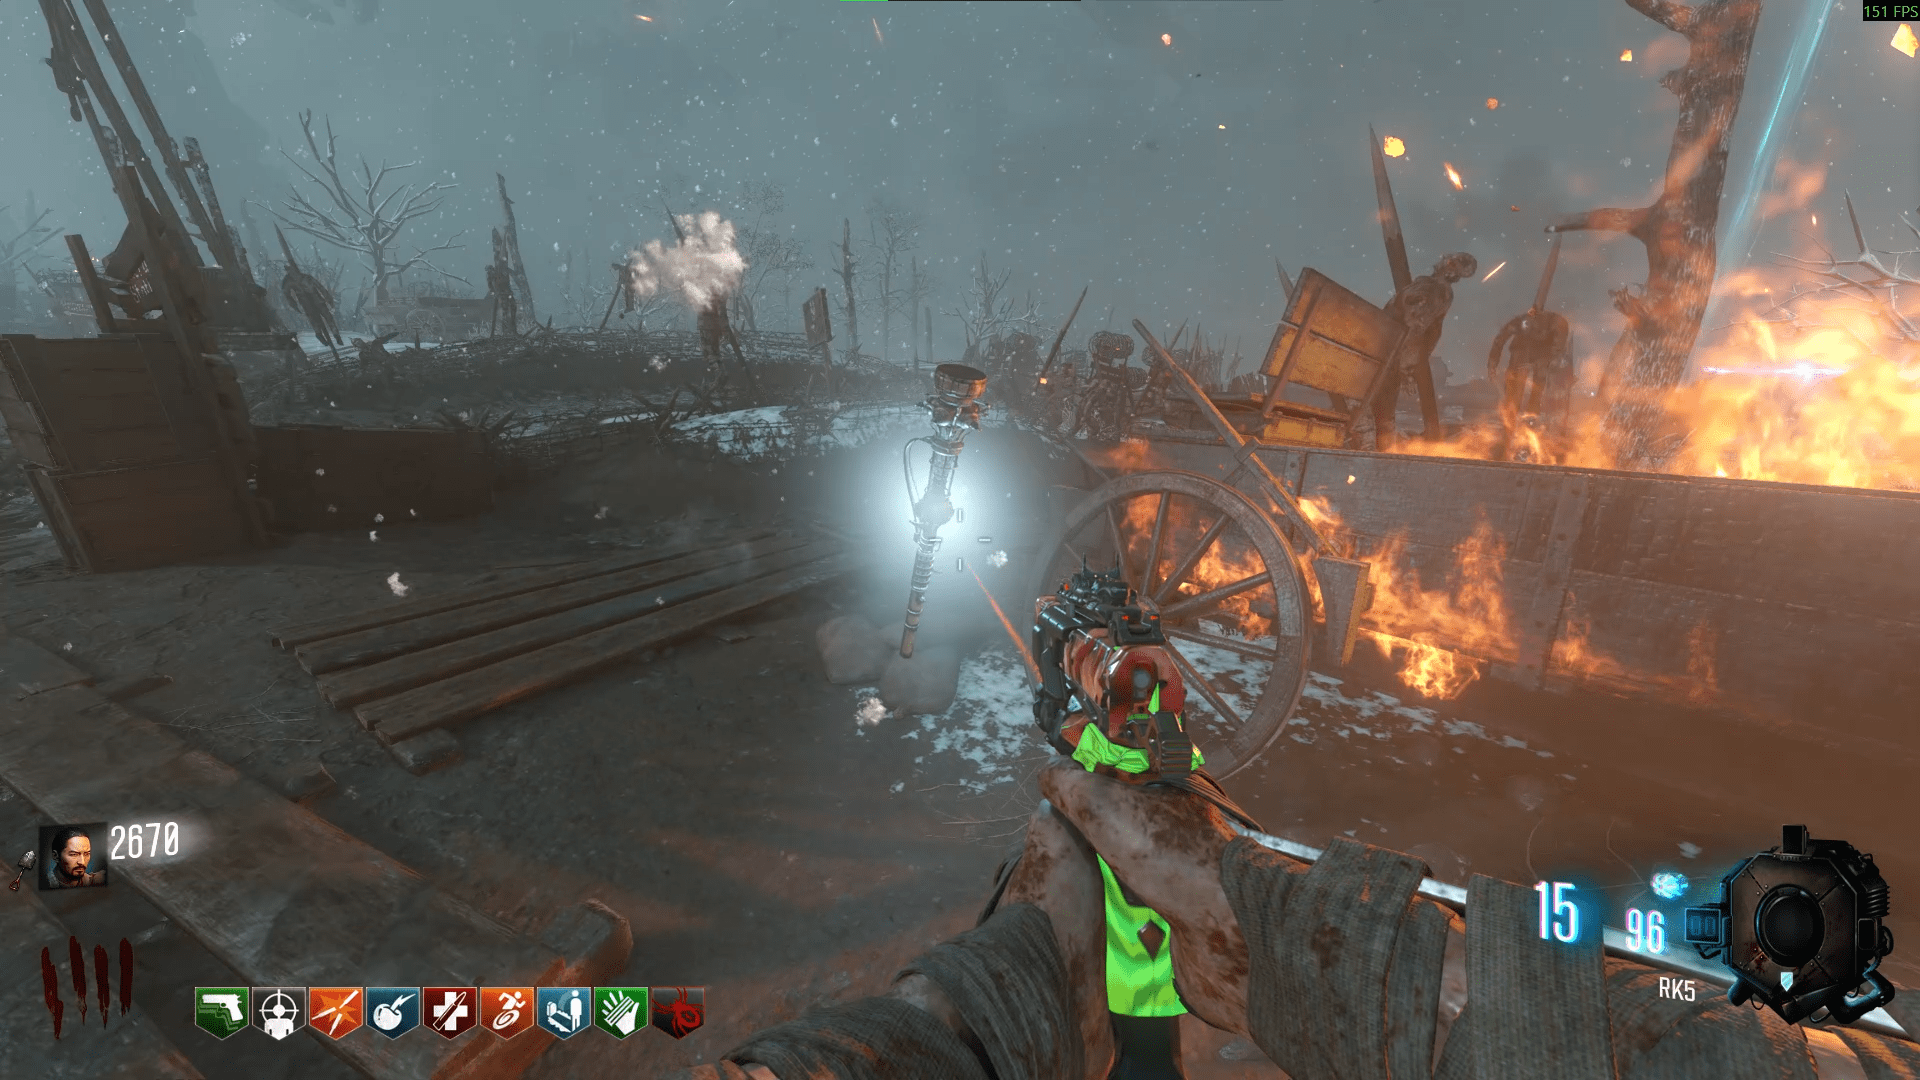
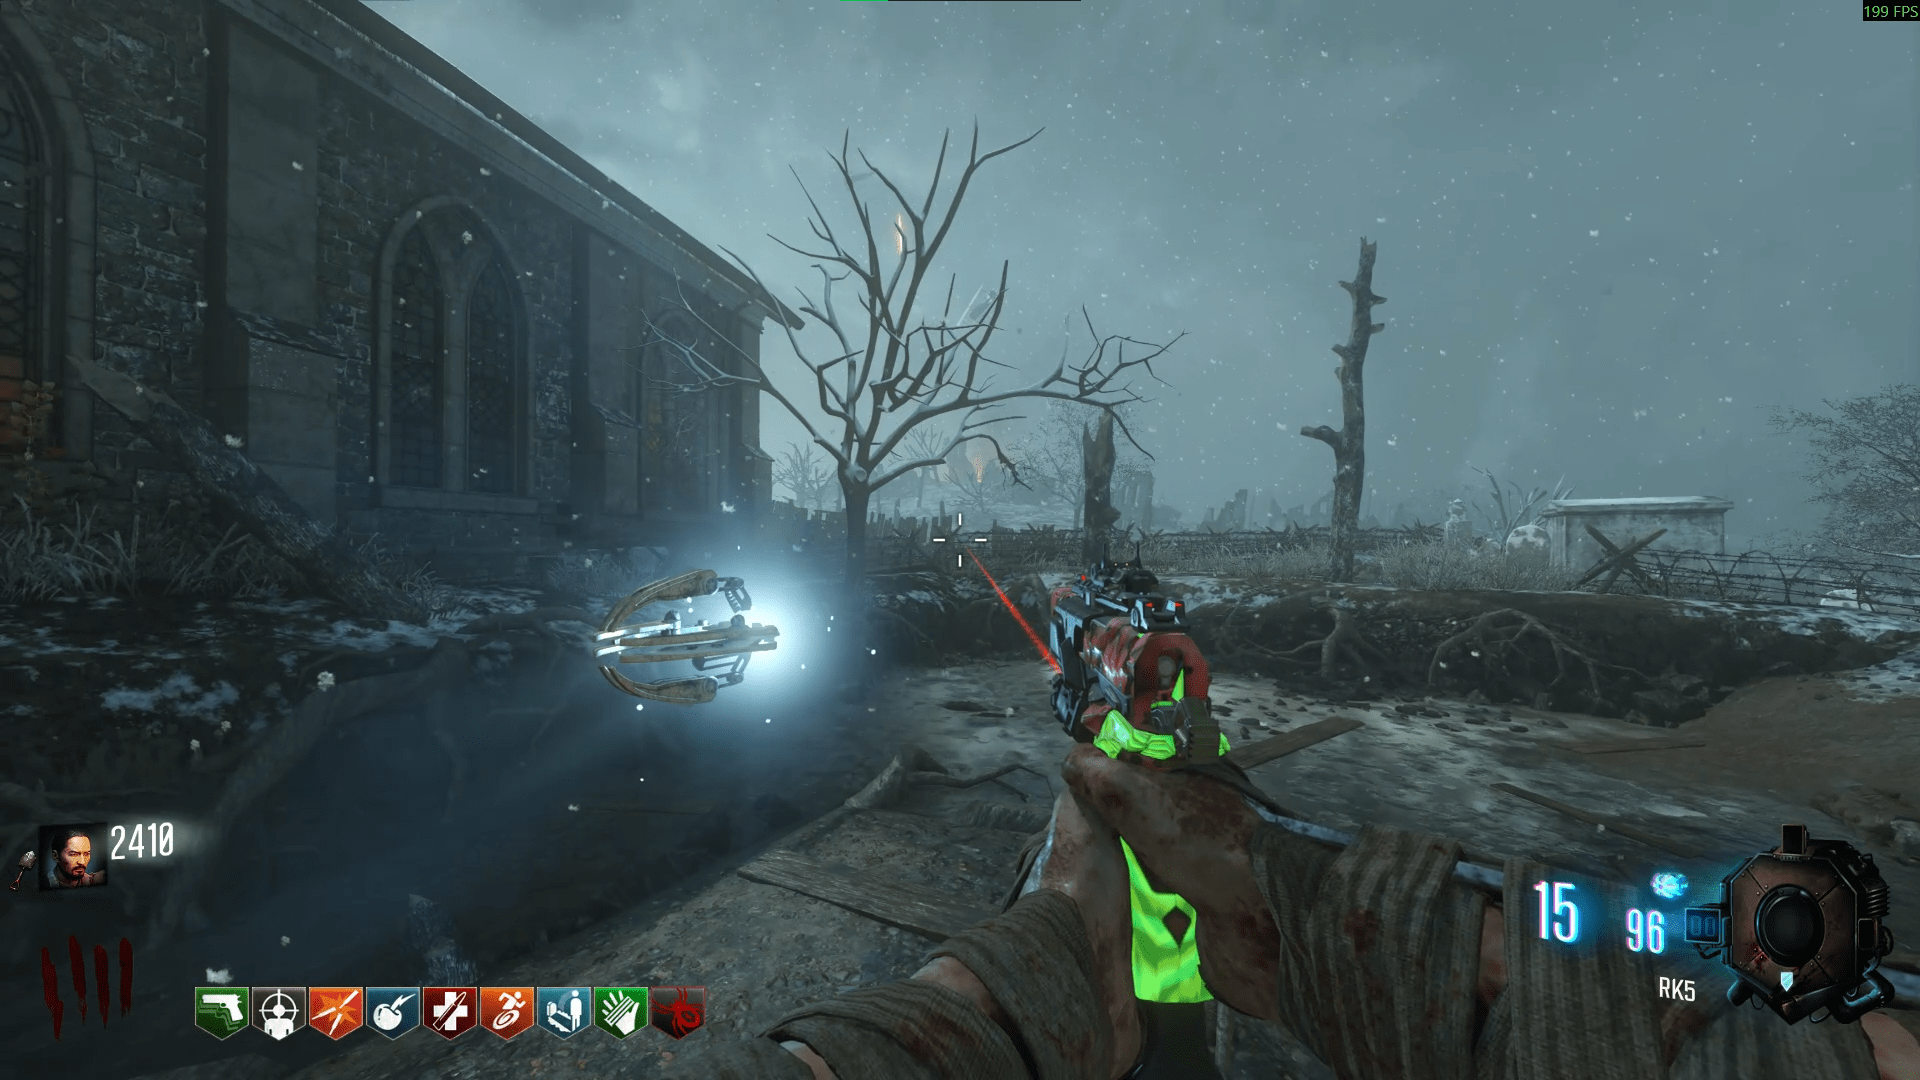
Upon retrieving all pieces, you're starting to realise what you have to do. Into the Mound and build the staff. To upgrade, go all the way back to the Crazy Place through any portal and look up to find another puzzle. You need to shoot them in a specific order determined by the light blue rock to the right of the portal. Refer to the image below (created by CrashPower, absolute legend) for what each pattern translates to.
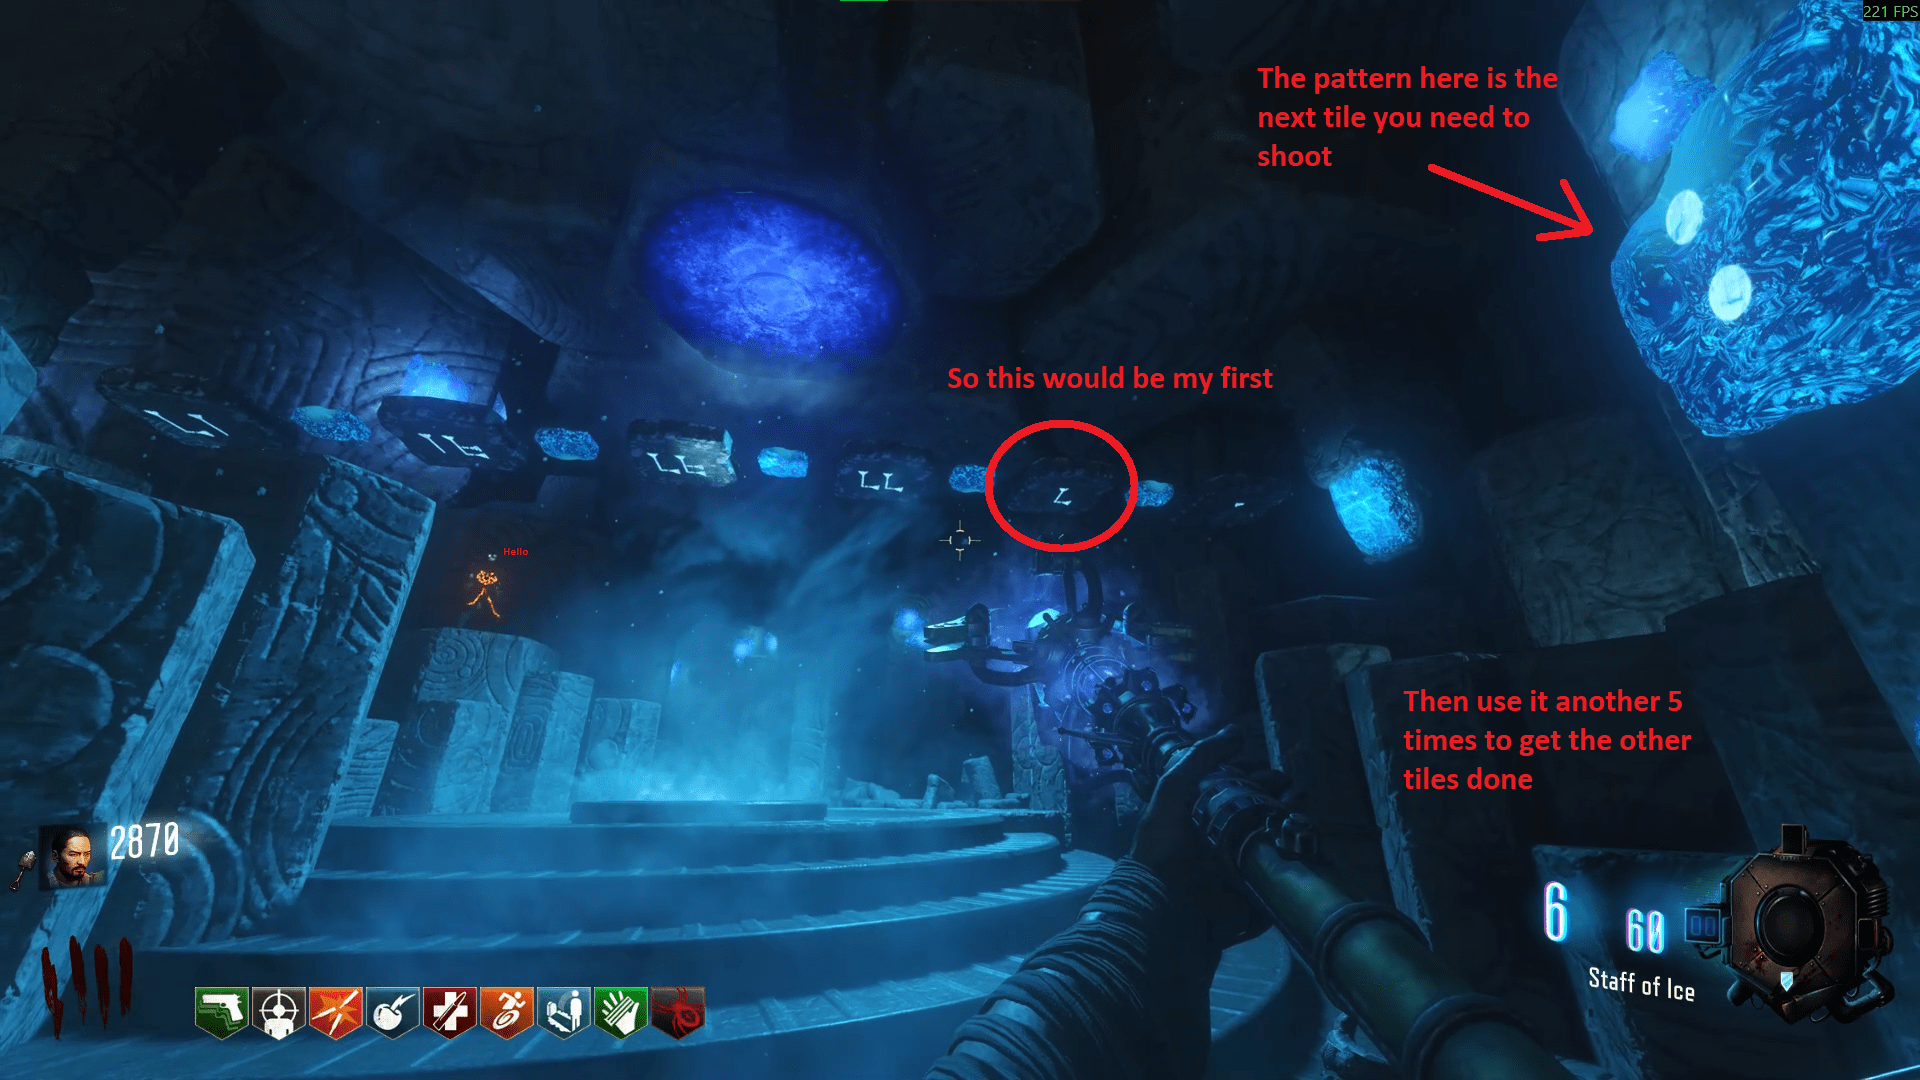
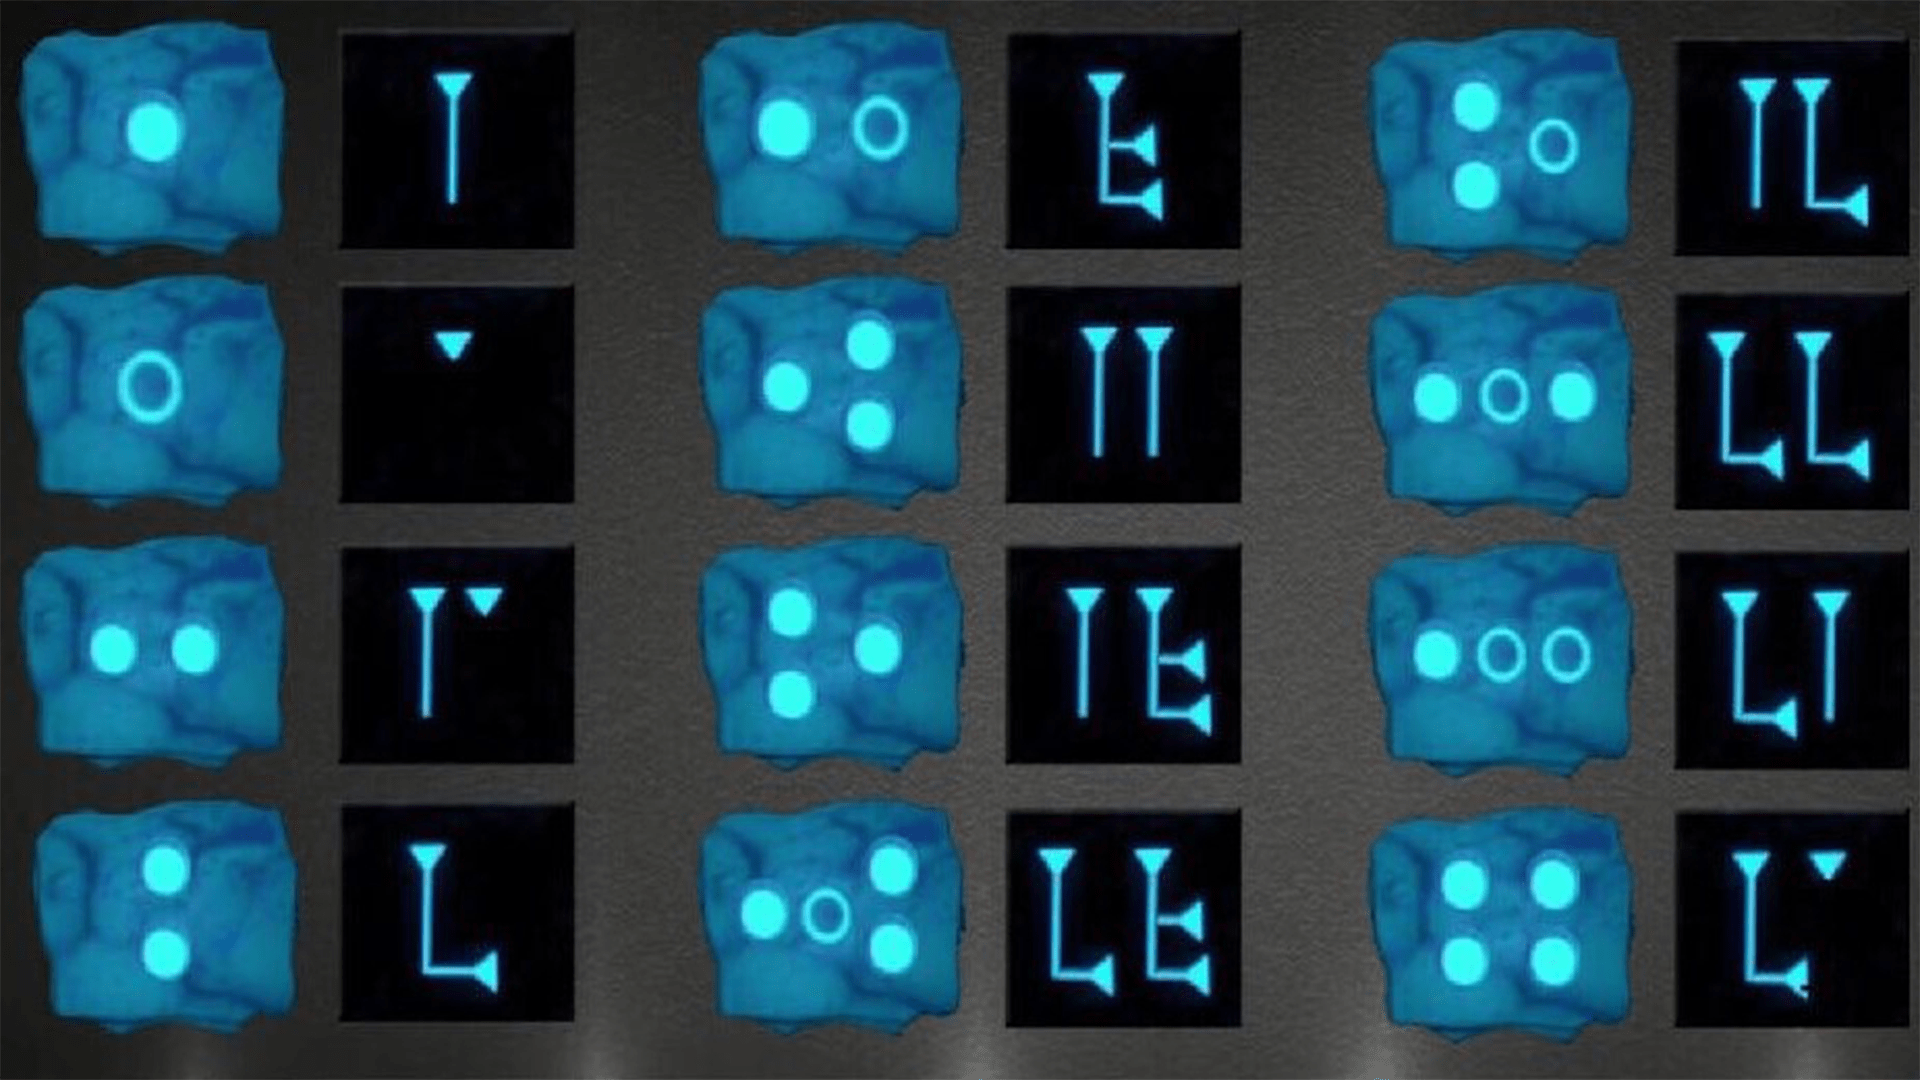 After completion, all puzzle tiles will be overturned and you'll hear the distinctive success sound again. Next up is making three people very sad by shooting the Ice staff at them, then again with a bullet weapon. Head out of the Crazy Place through the Fire portal then follow below;
 - The first gravestone is behind the Bunker of Generator 2 (the Tank stop), besides the giant's hand.
- The second is just below the Mound in the giant's footprint, on Generator 4s side.
- The third is in the next footprint along besides Generator 4, opposite the soul box.
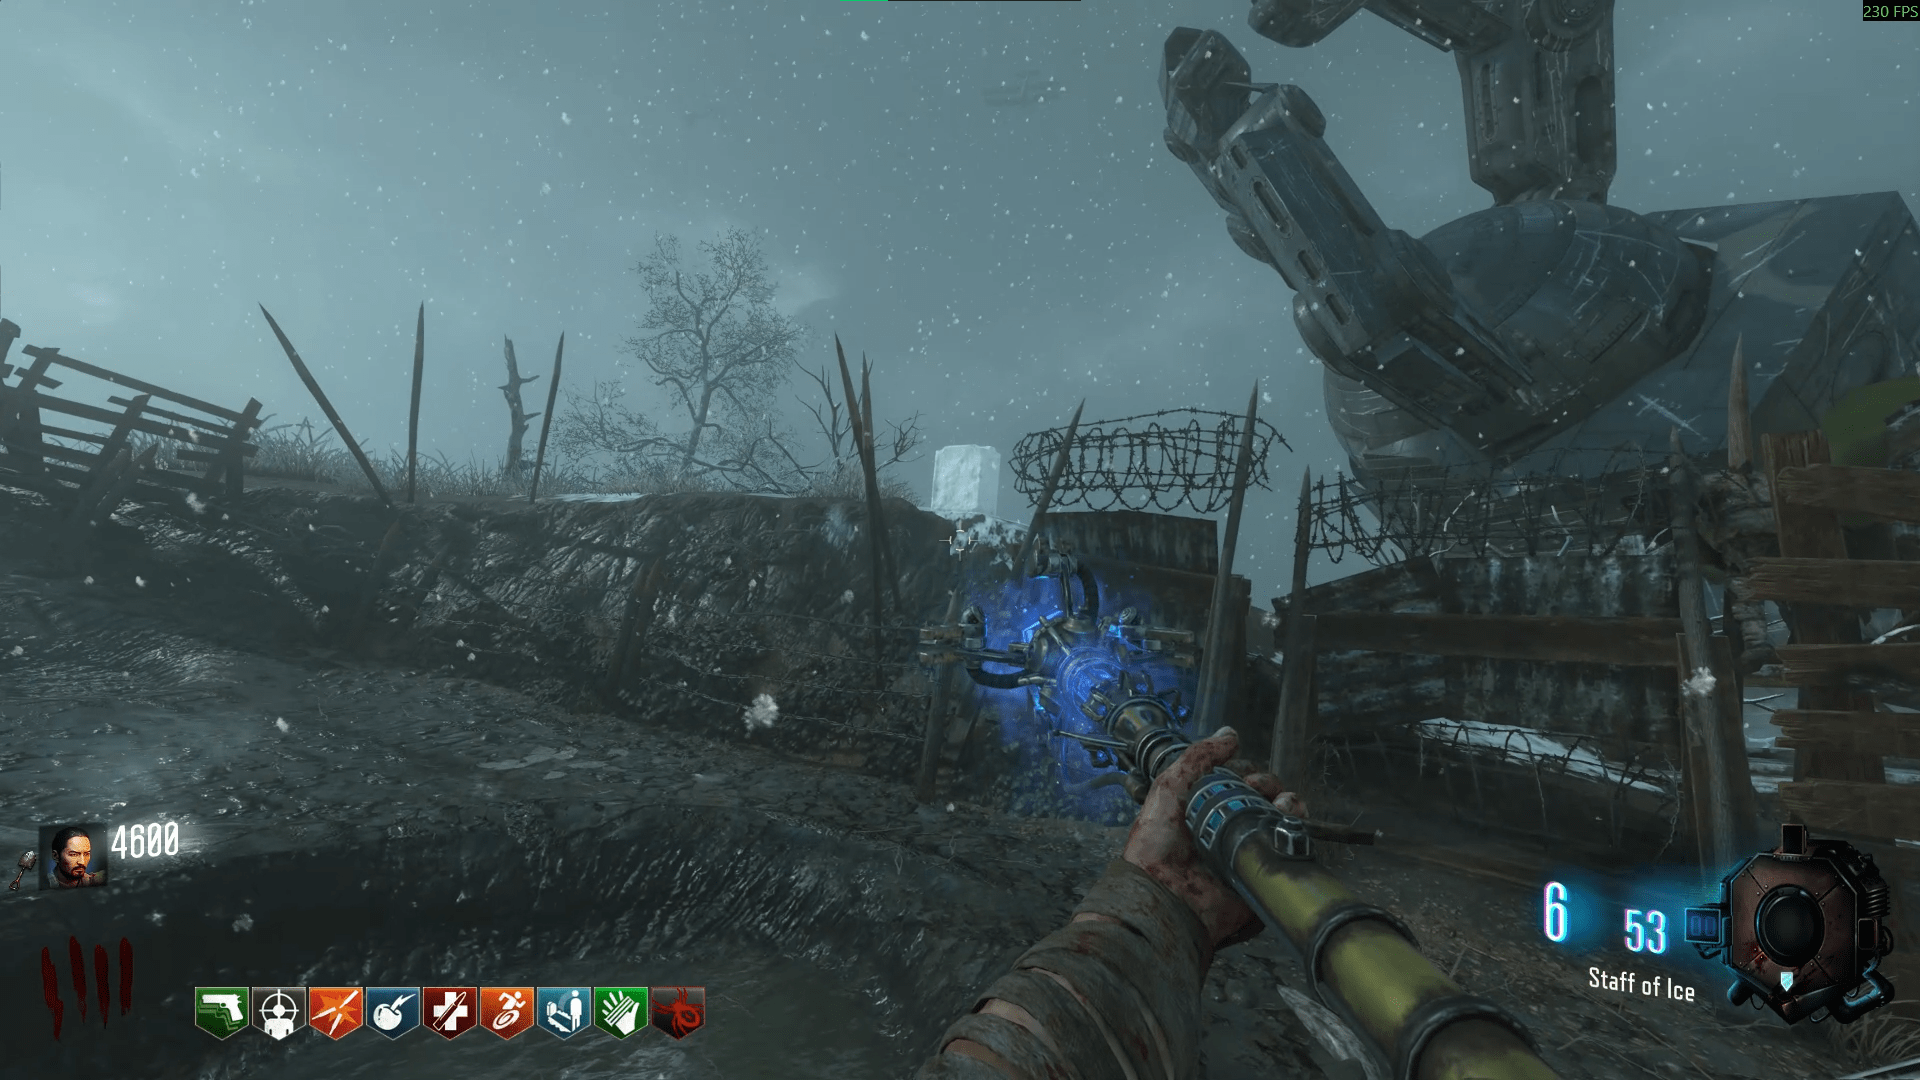
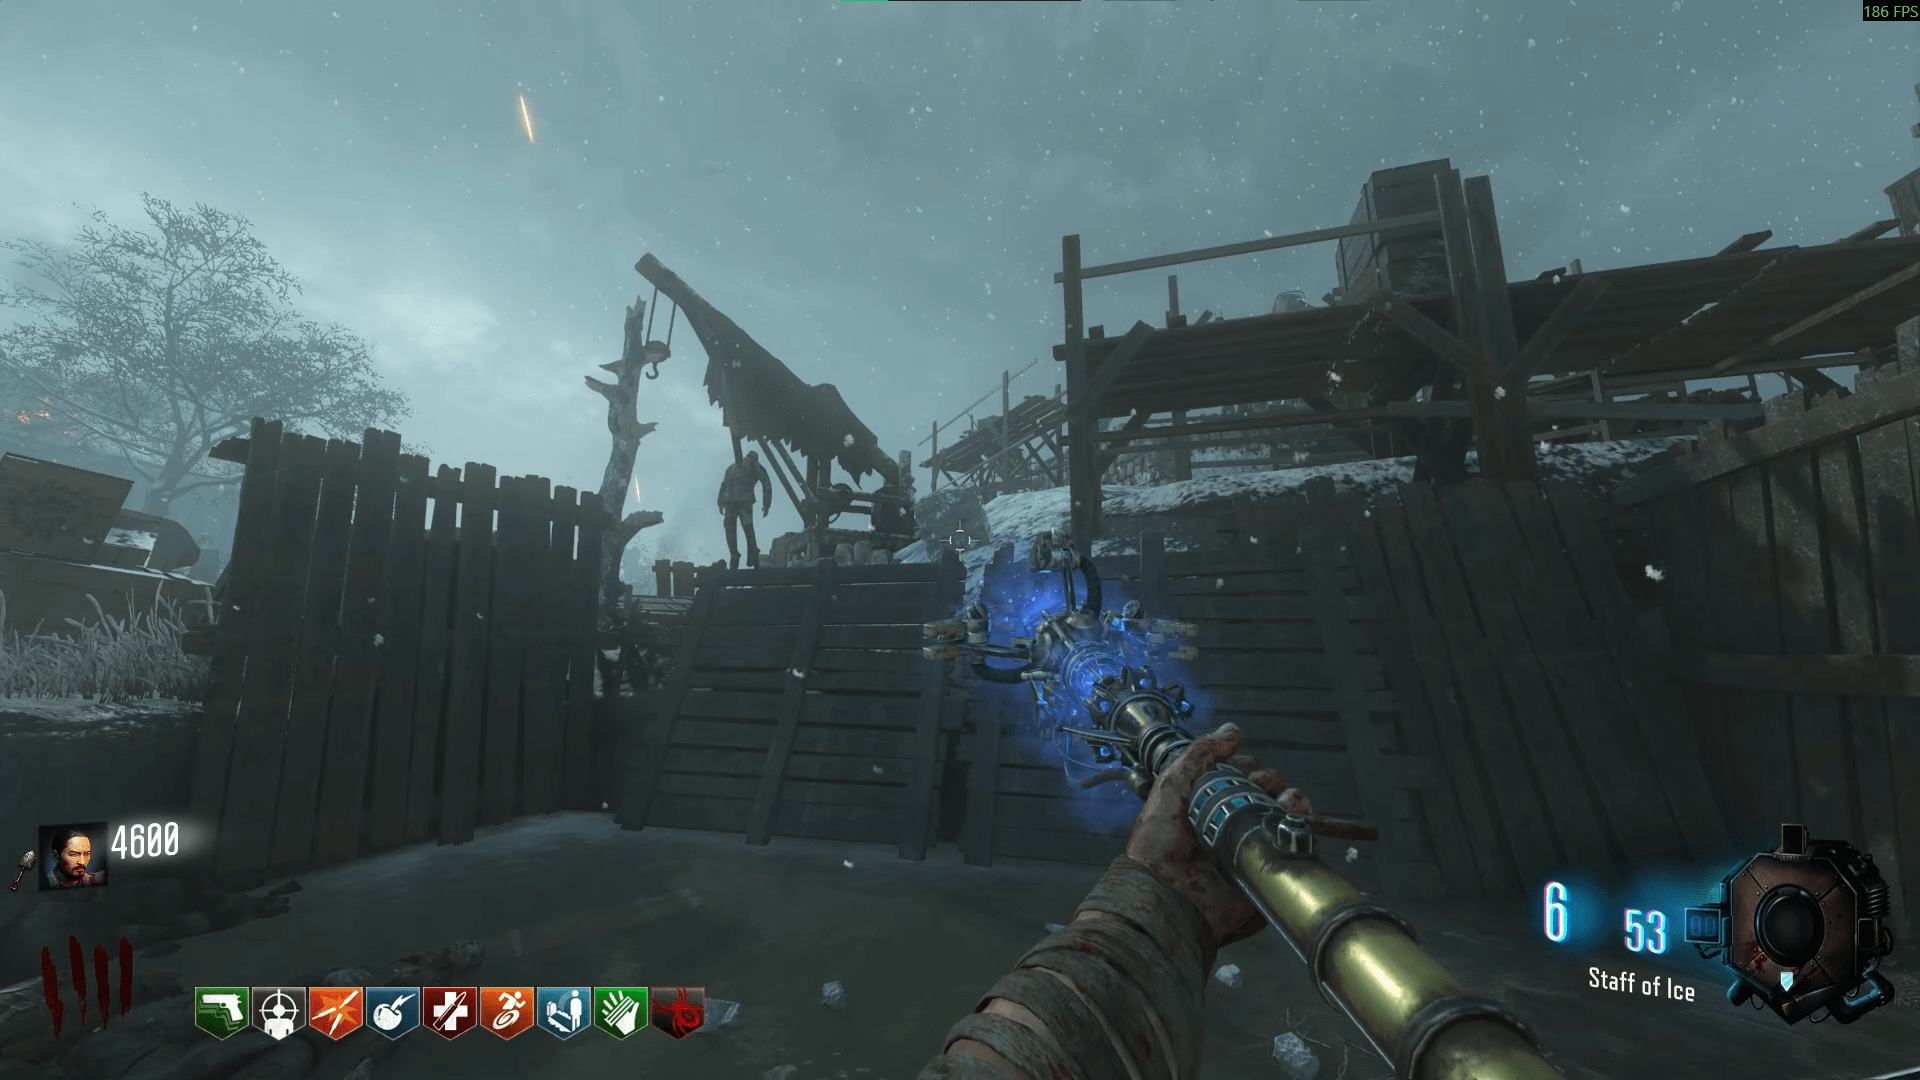
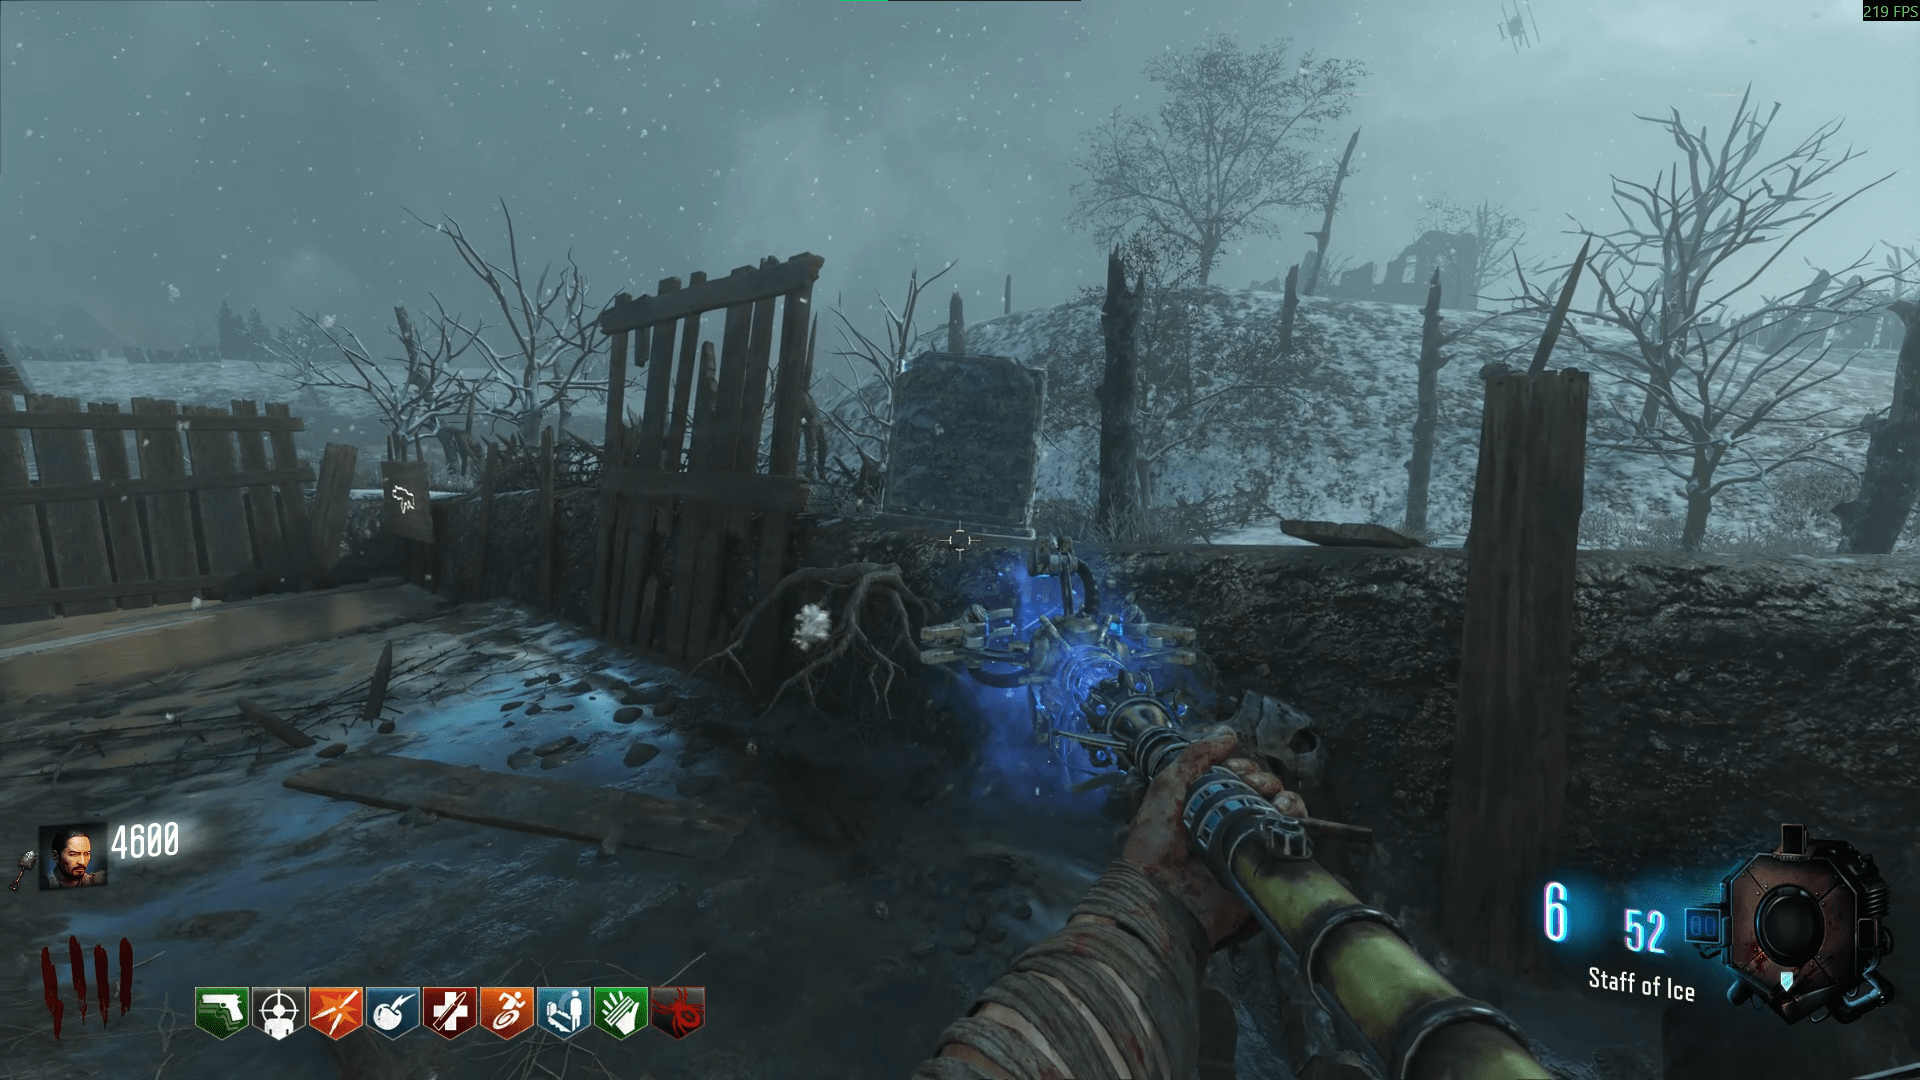
After destroying all three, back to the Mound it is and return to the rings once again. You should know the drill by now. To finalise the upgrade, make your way to the Crazy Place, insert the staff into it's pedestal and get those 20 kills.
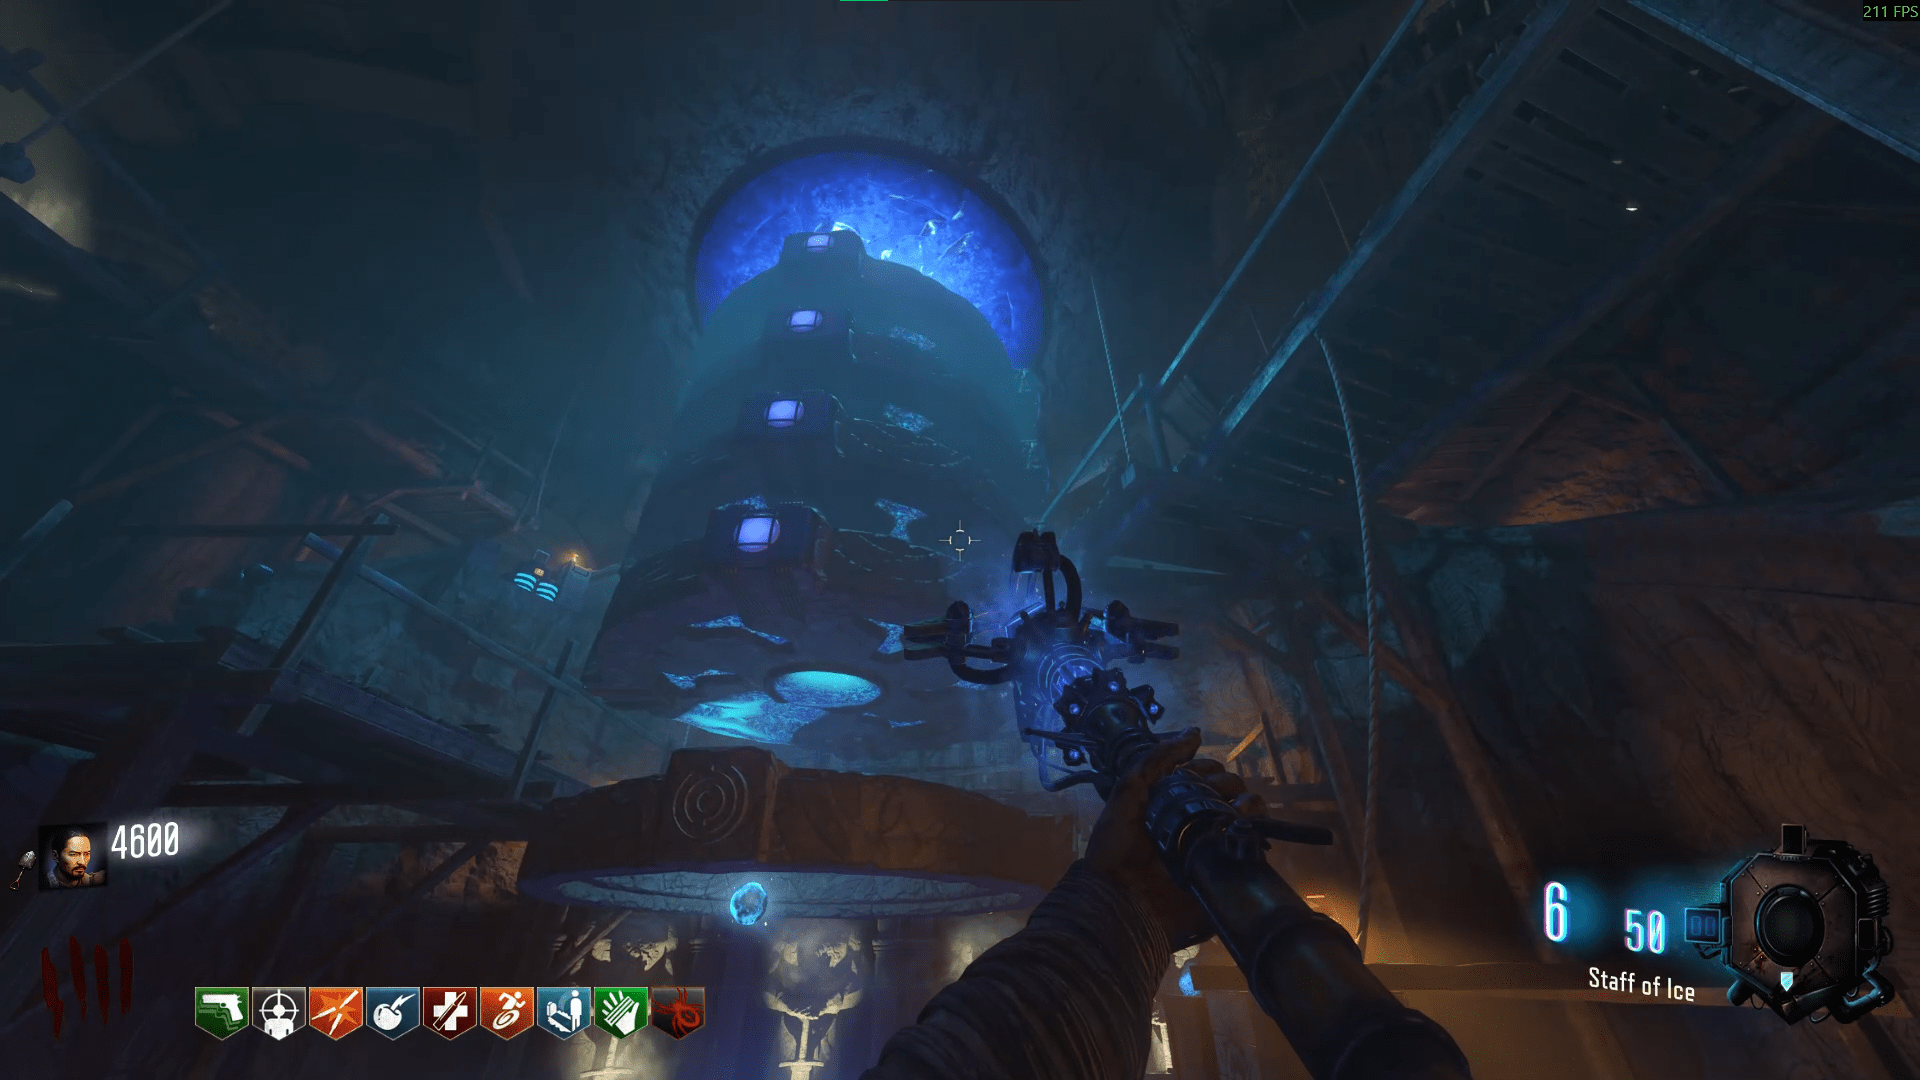
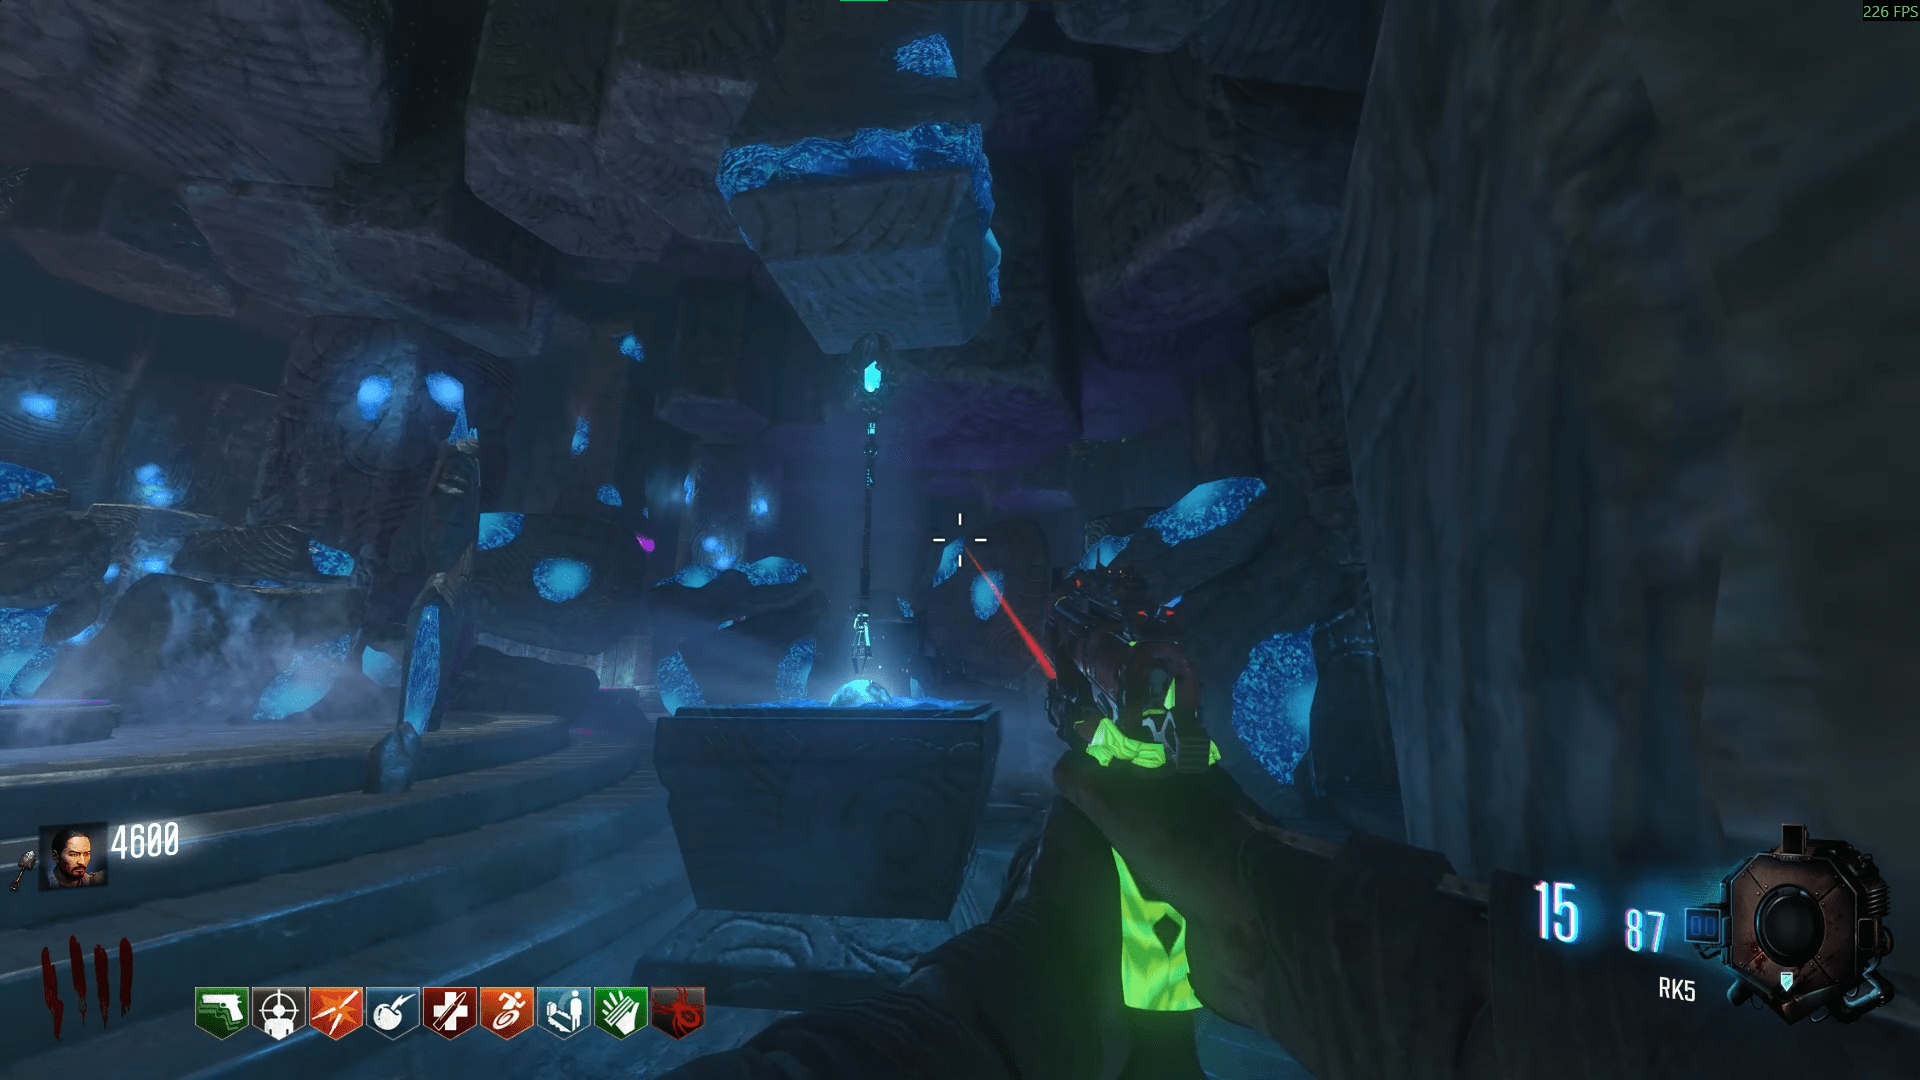
Now the Fire staff is the only staff that requires kills to be done for it's upgrade as well as building which is why it is last in the list. You'll see why.
- In the lower Church, between the Tank and the stairs besides a pillar.
- Upper Church, on a row of benches next to the tablet basin, electrical panel and a window.
- Laying on a 935 box above a zombie corpse next to generator 6.
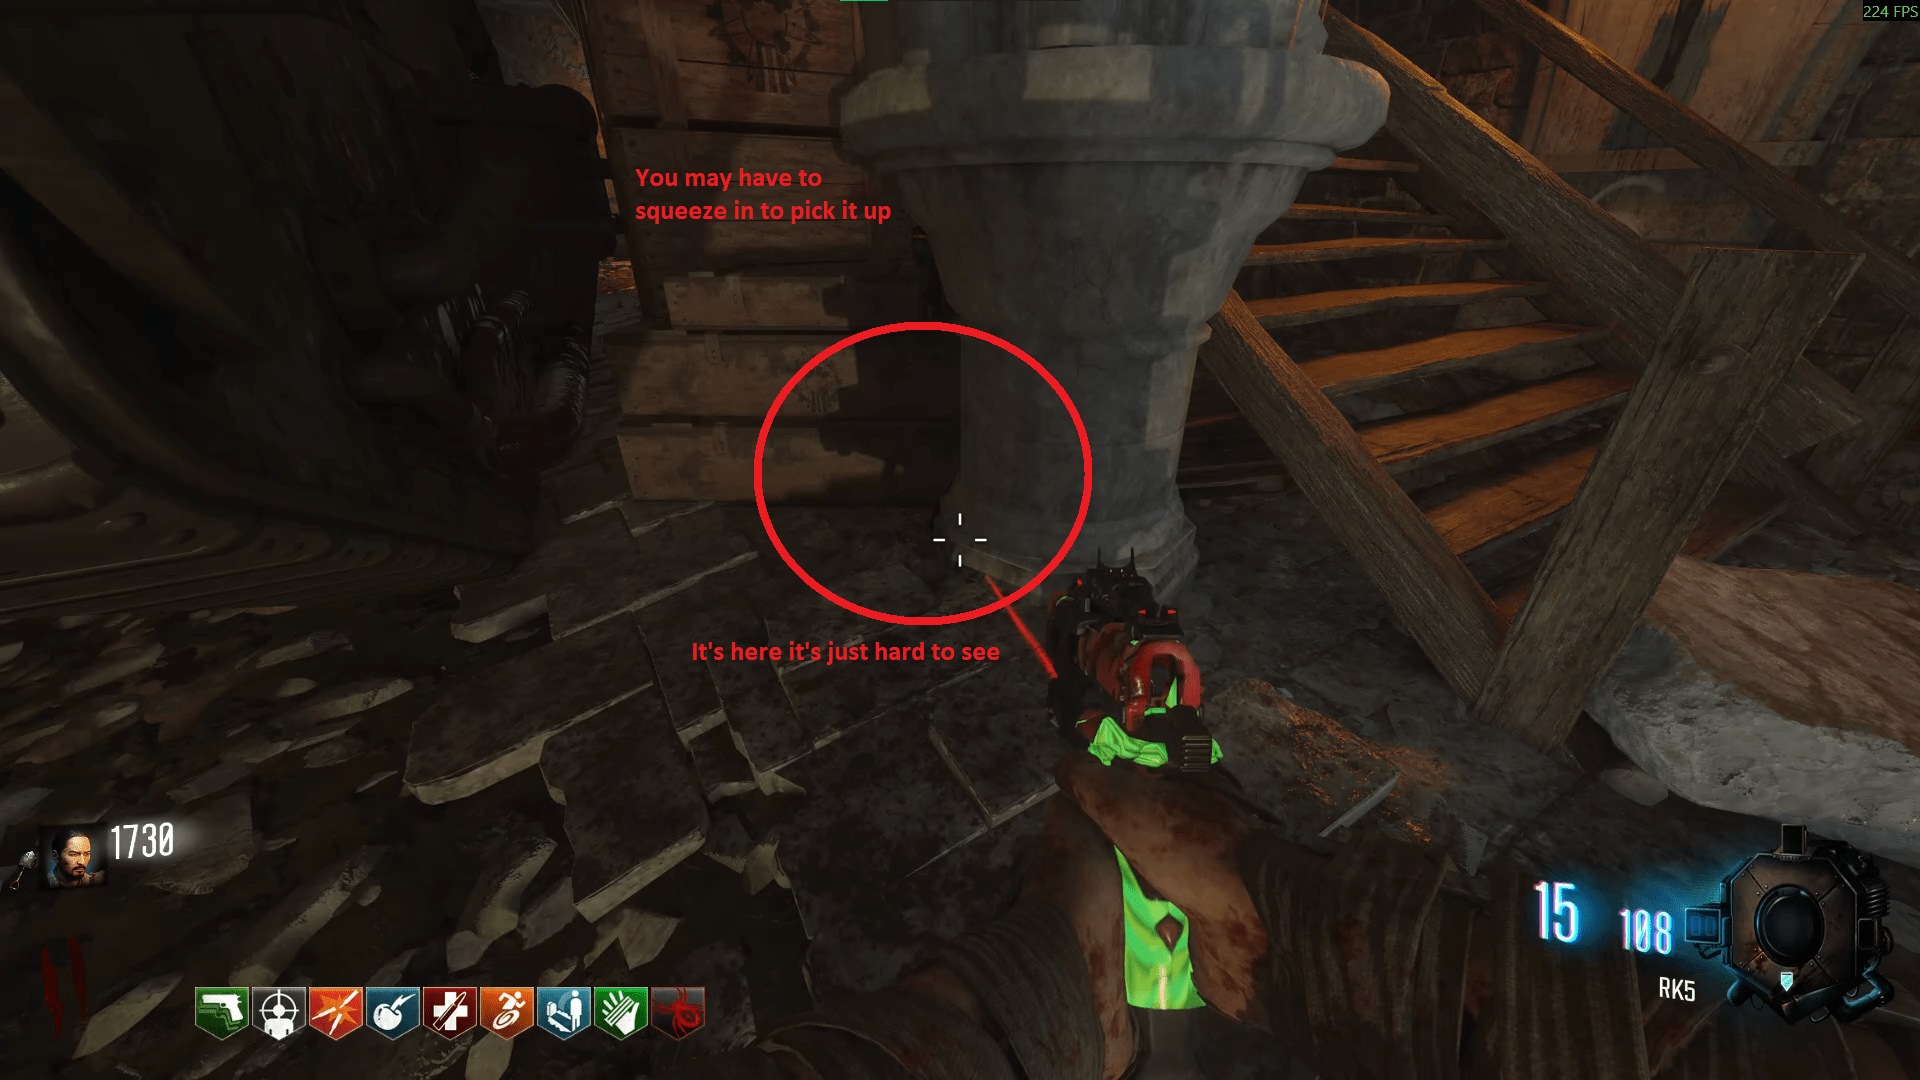
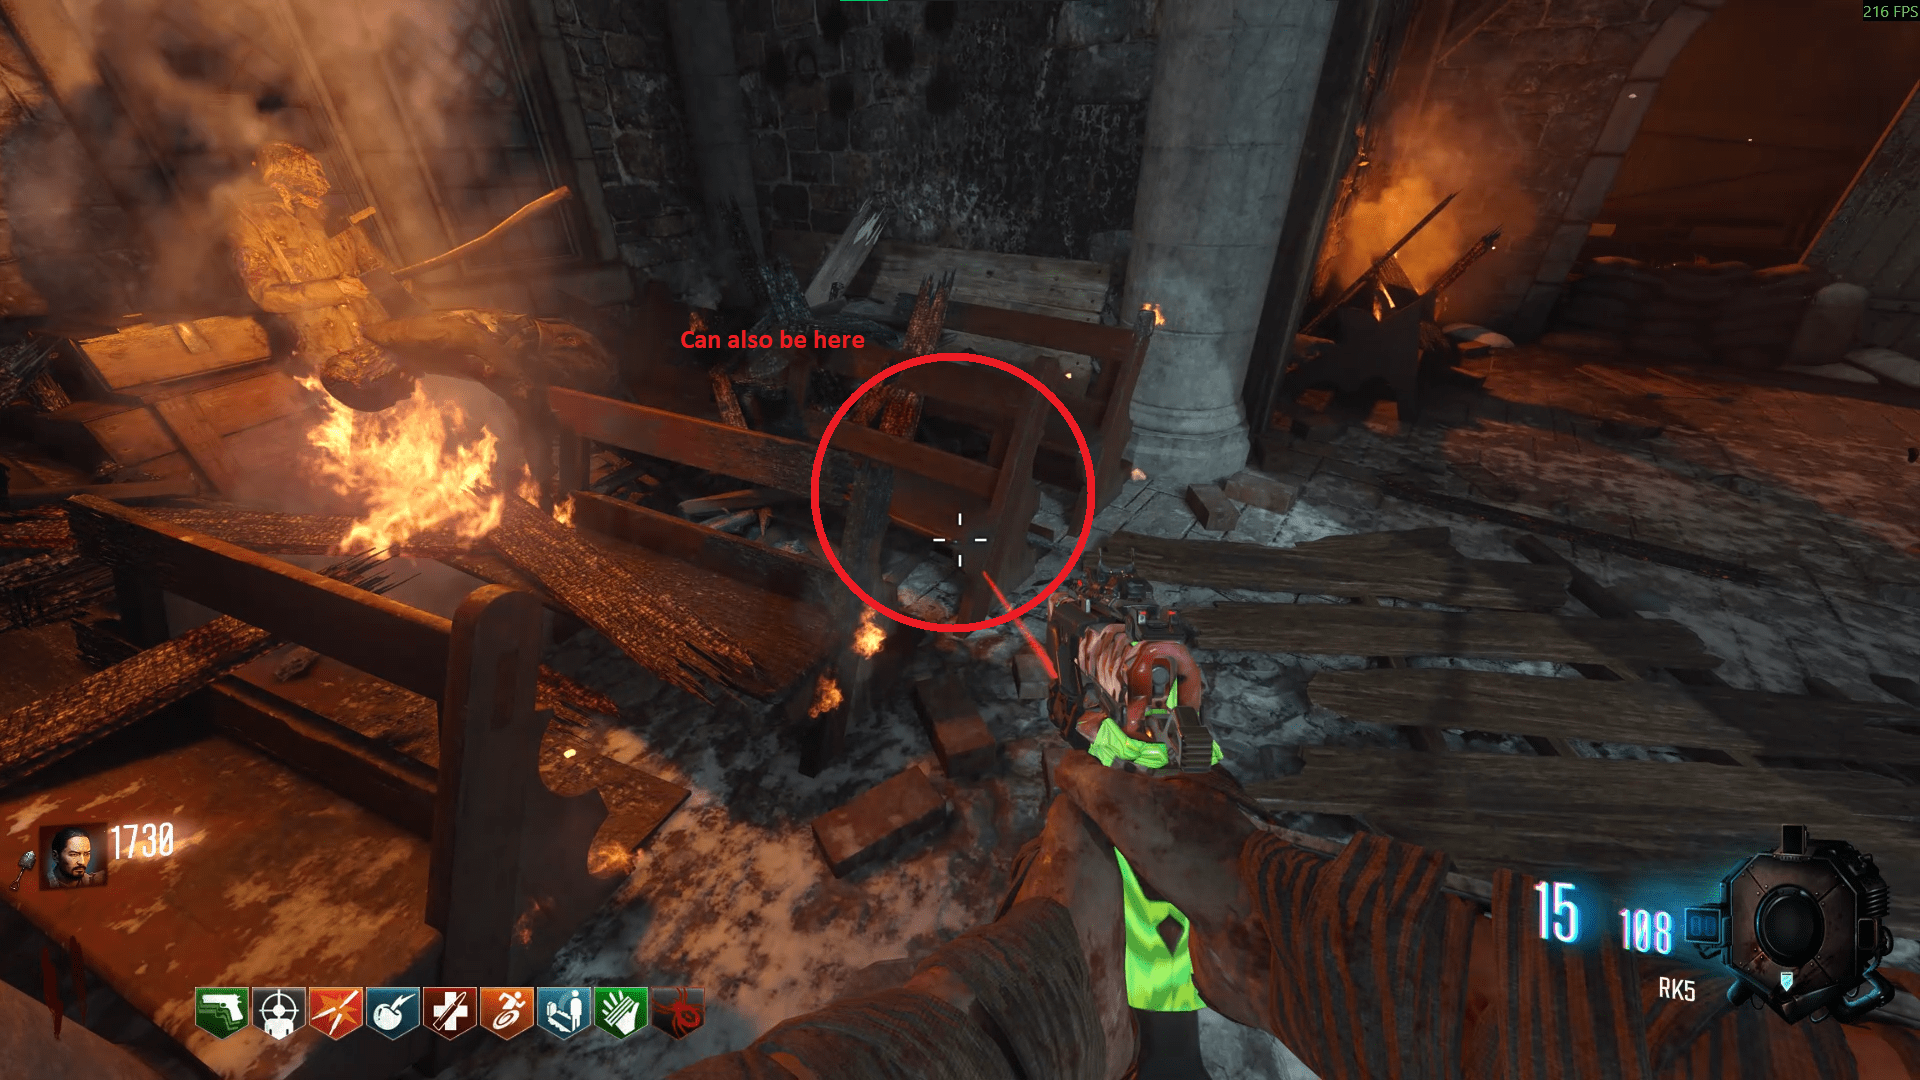
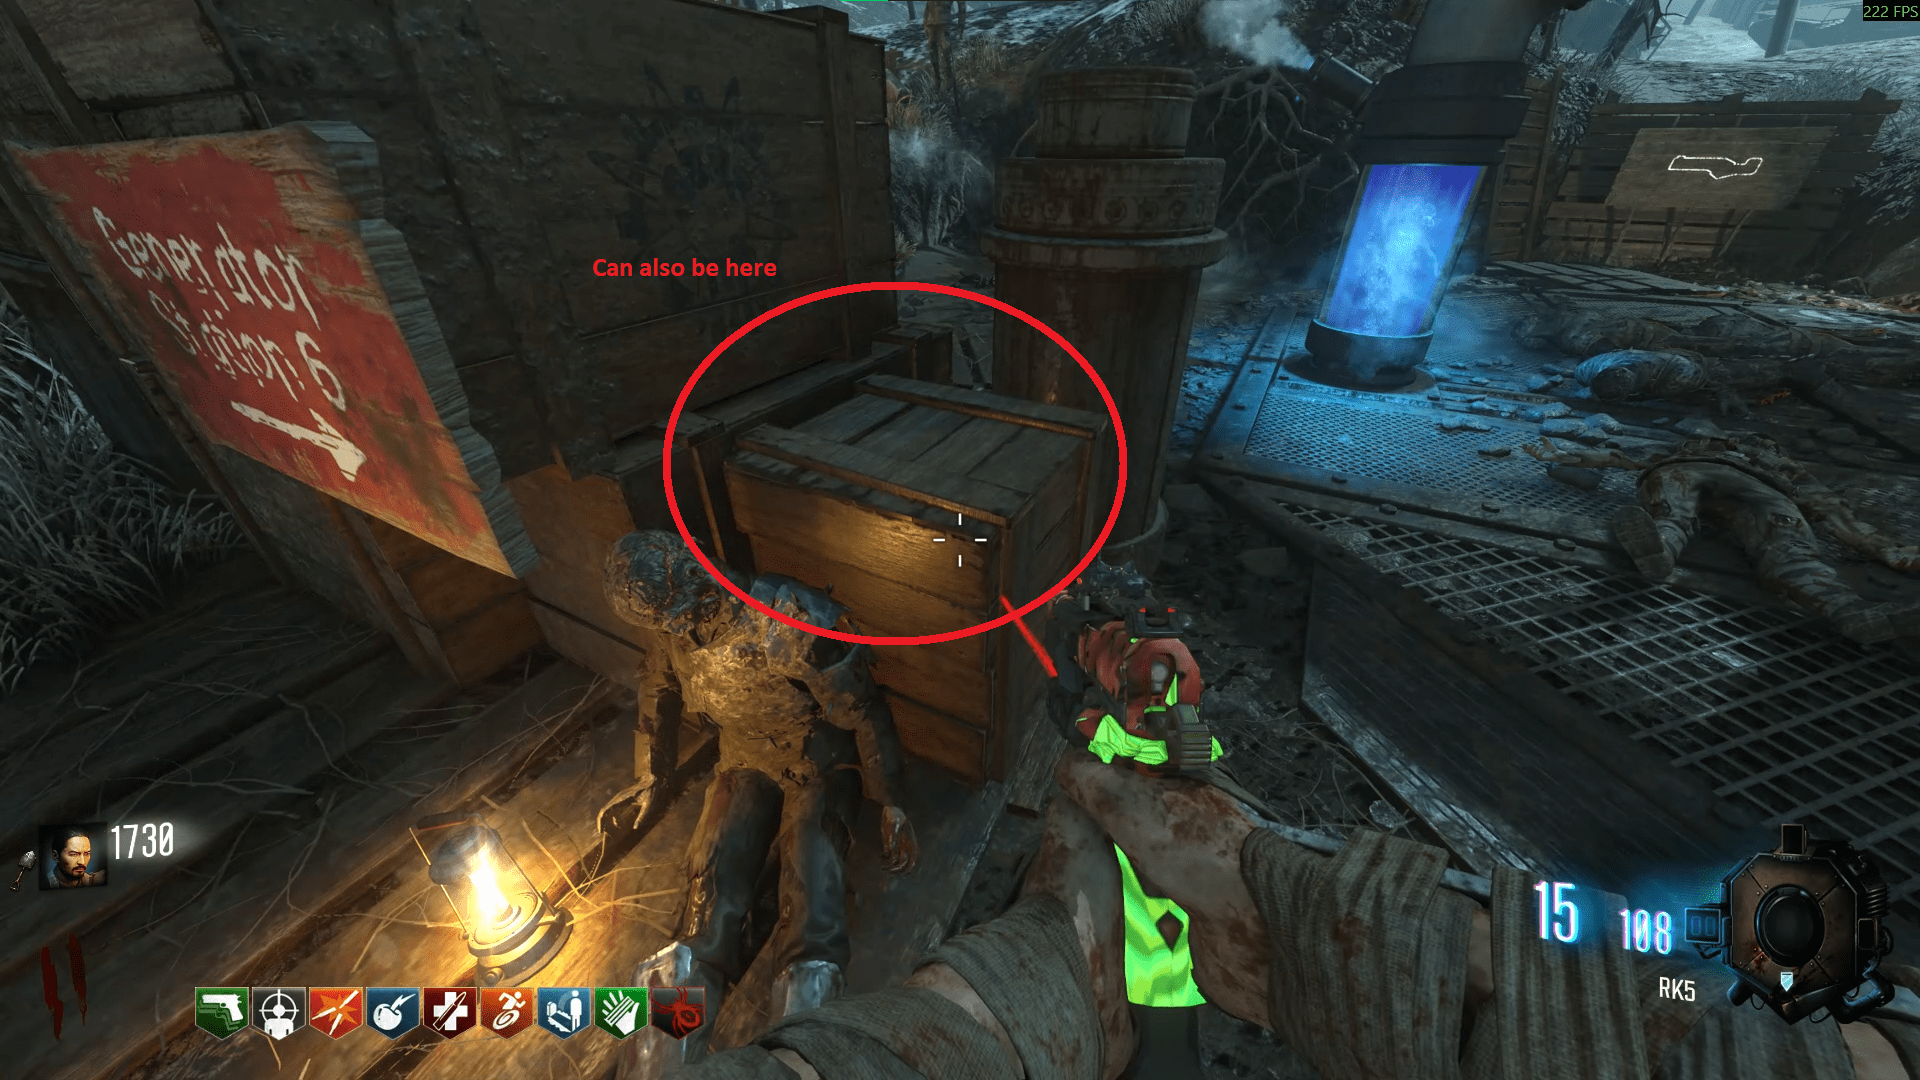
Once you have the disc, off you pop to Spawn to enter the Fire tunnel (heading towards Spawn from generator 3, it'll be on the right just before actually getting inside the Spawn room). Just do what you've been doing with the other staffs and enter the Crazy Place to pick up the Fire Crystal.
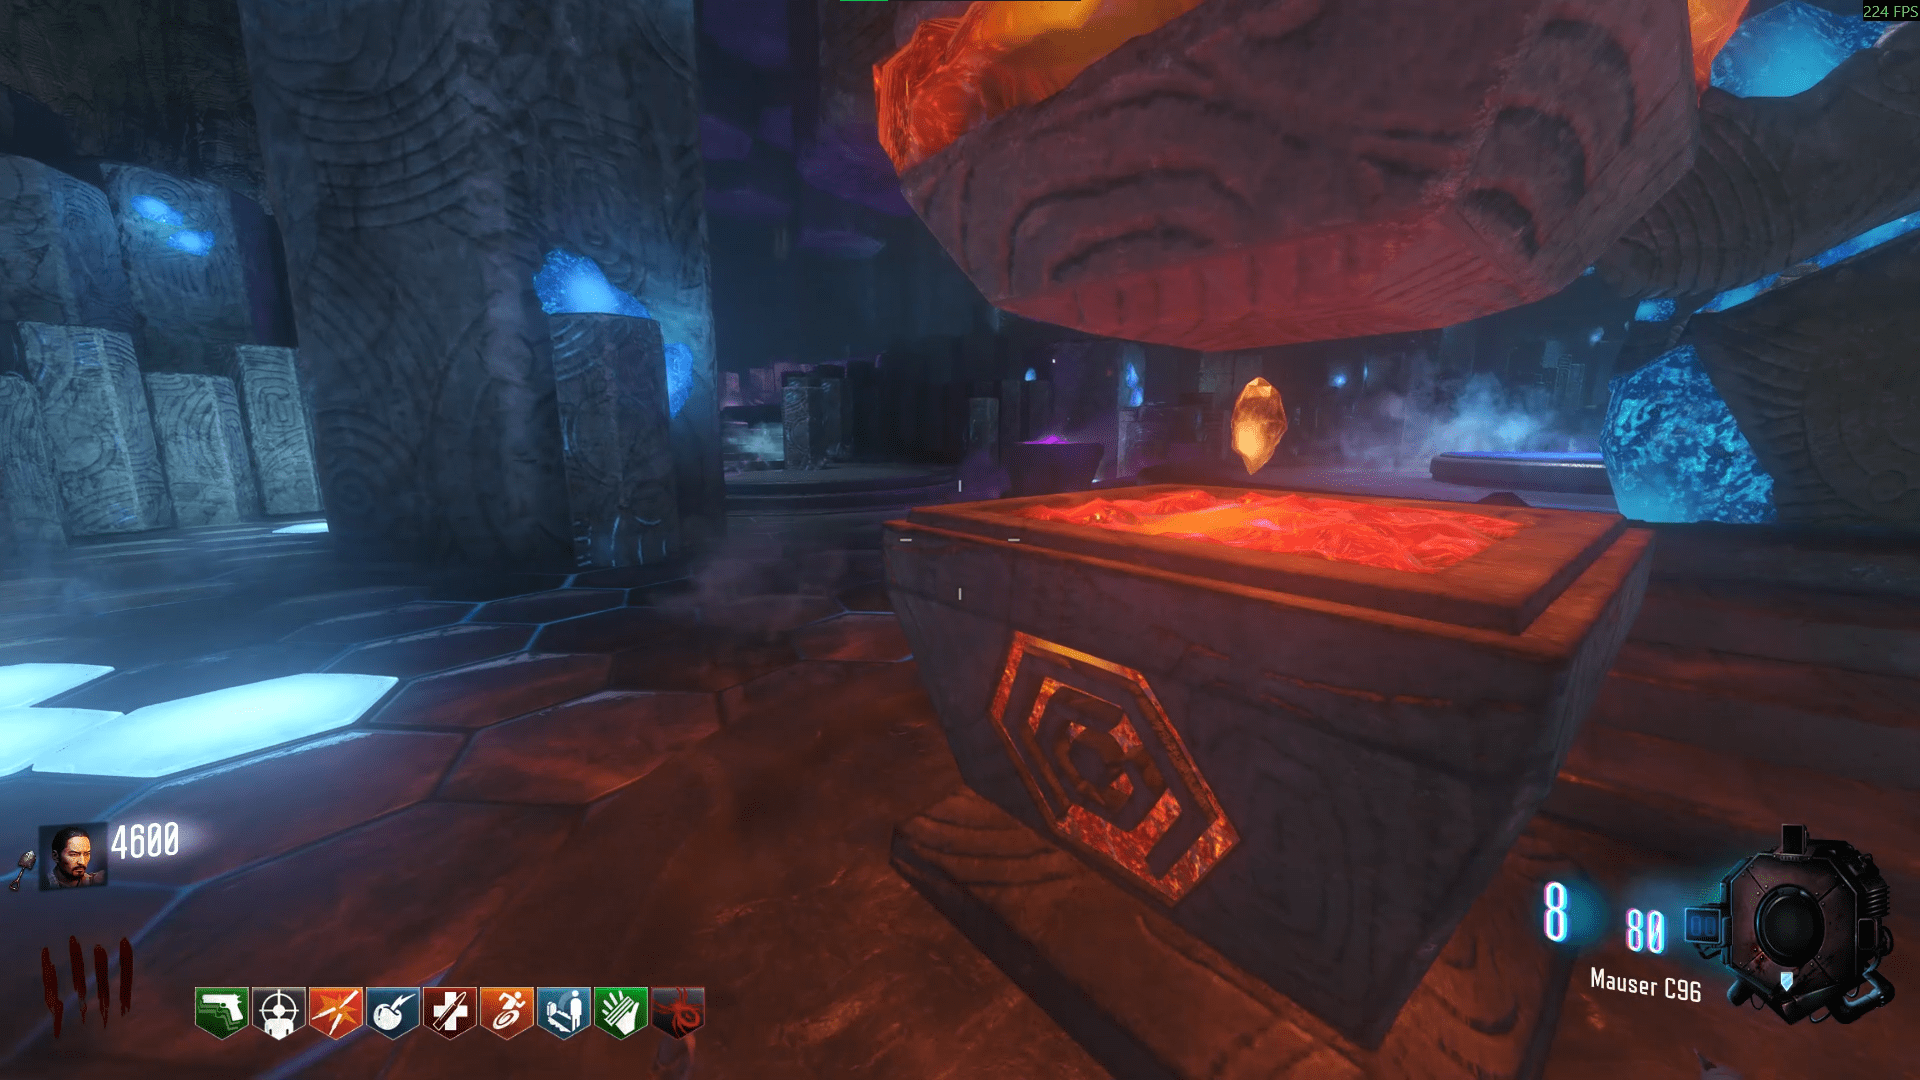
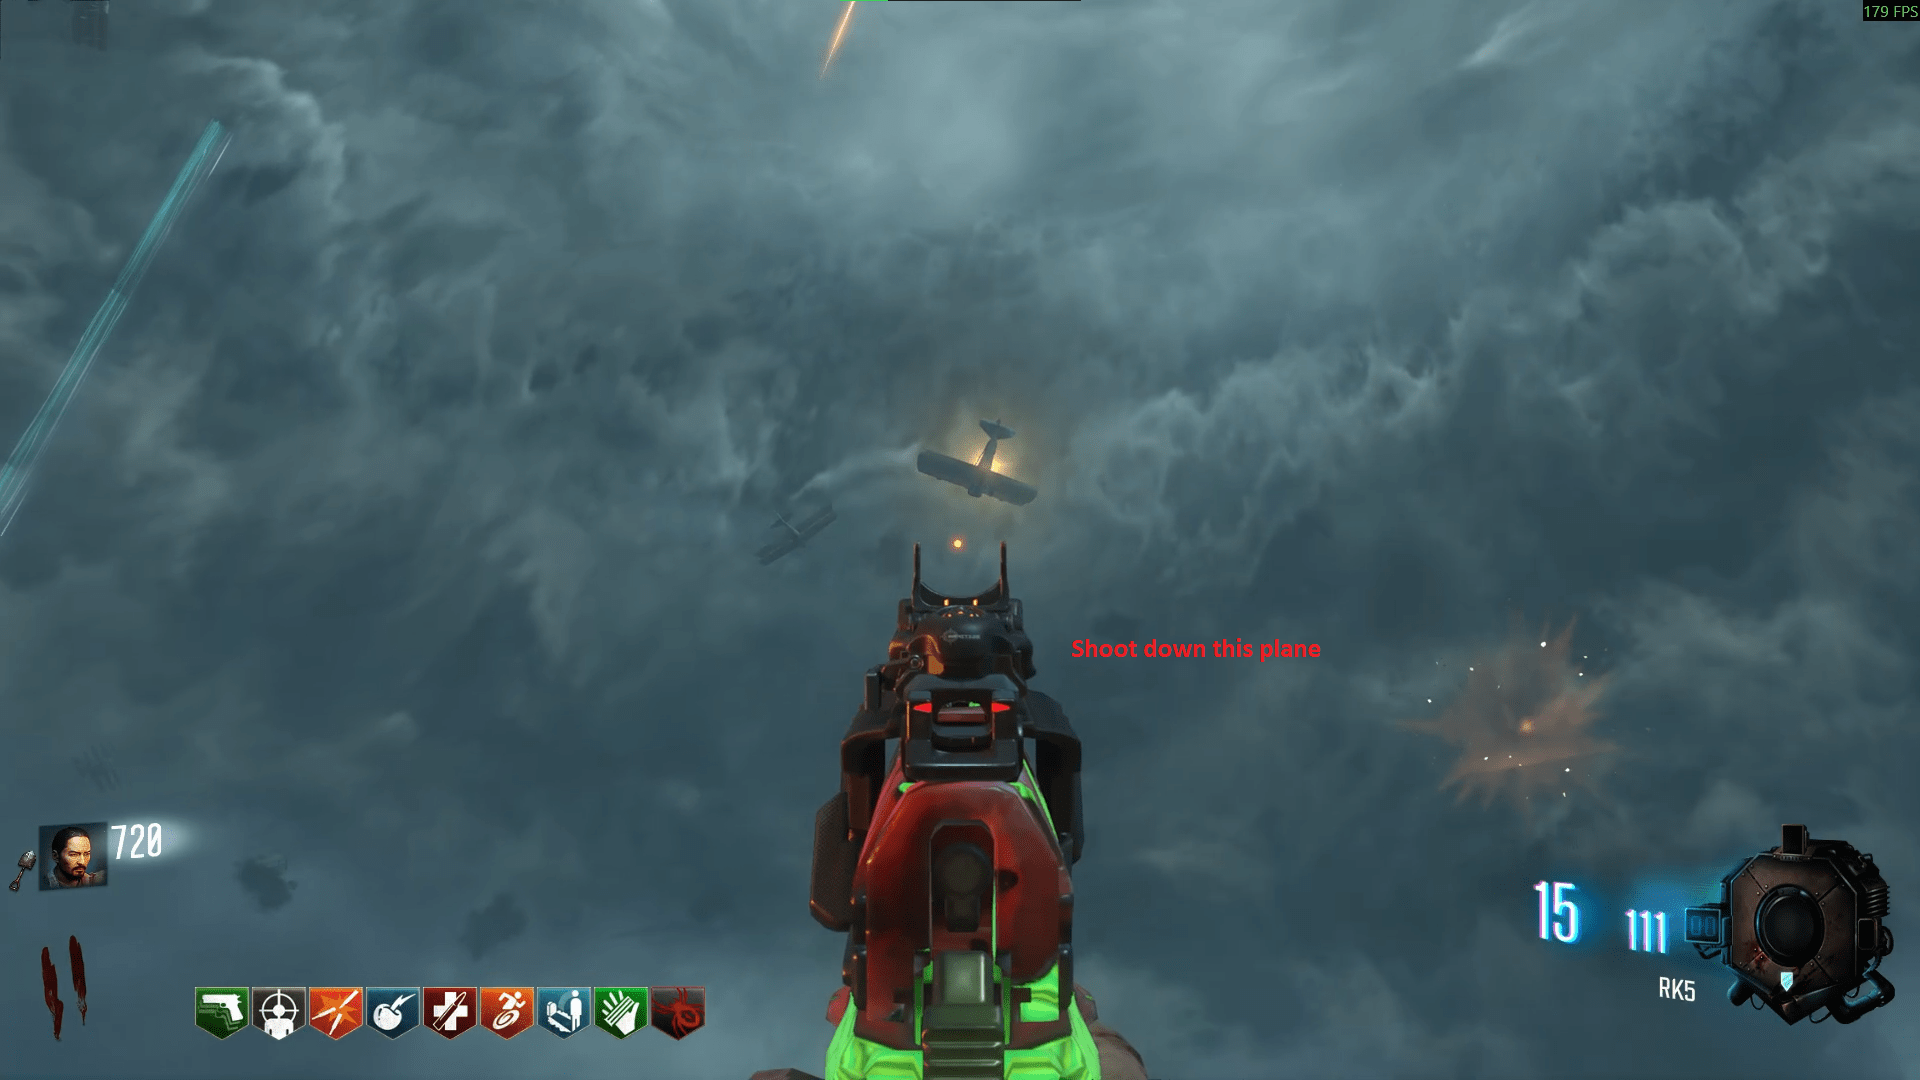
For the staff pieces, here's where it gets interesting. One is in the sky, another is in the generator 6 reward chest and the last is being held by the Panzersoldat. Simply shoot down the plane and pick up the piece, turn on generator 6 to receive another piece and then kill the Panzersoldat when he arrives.
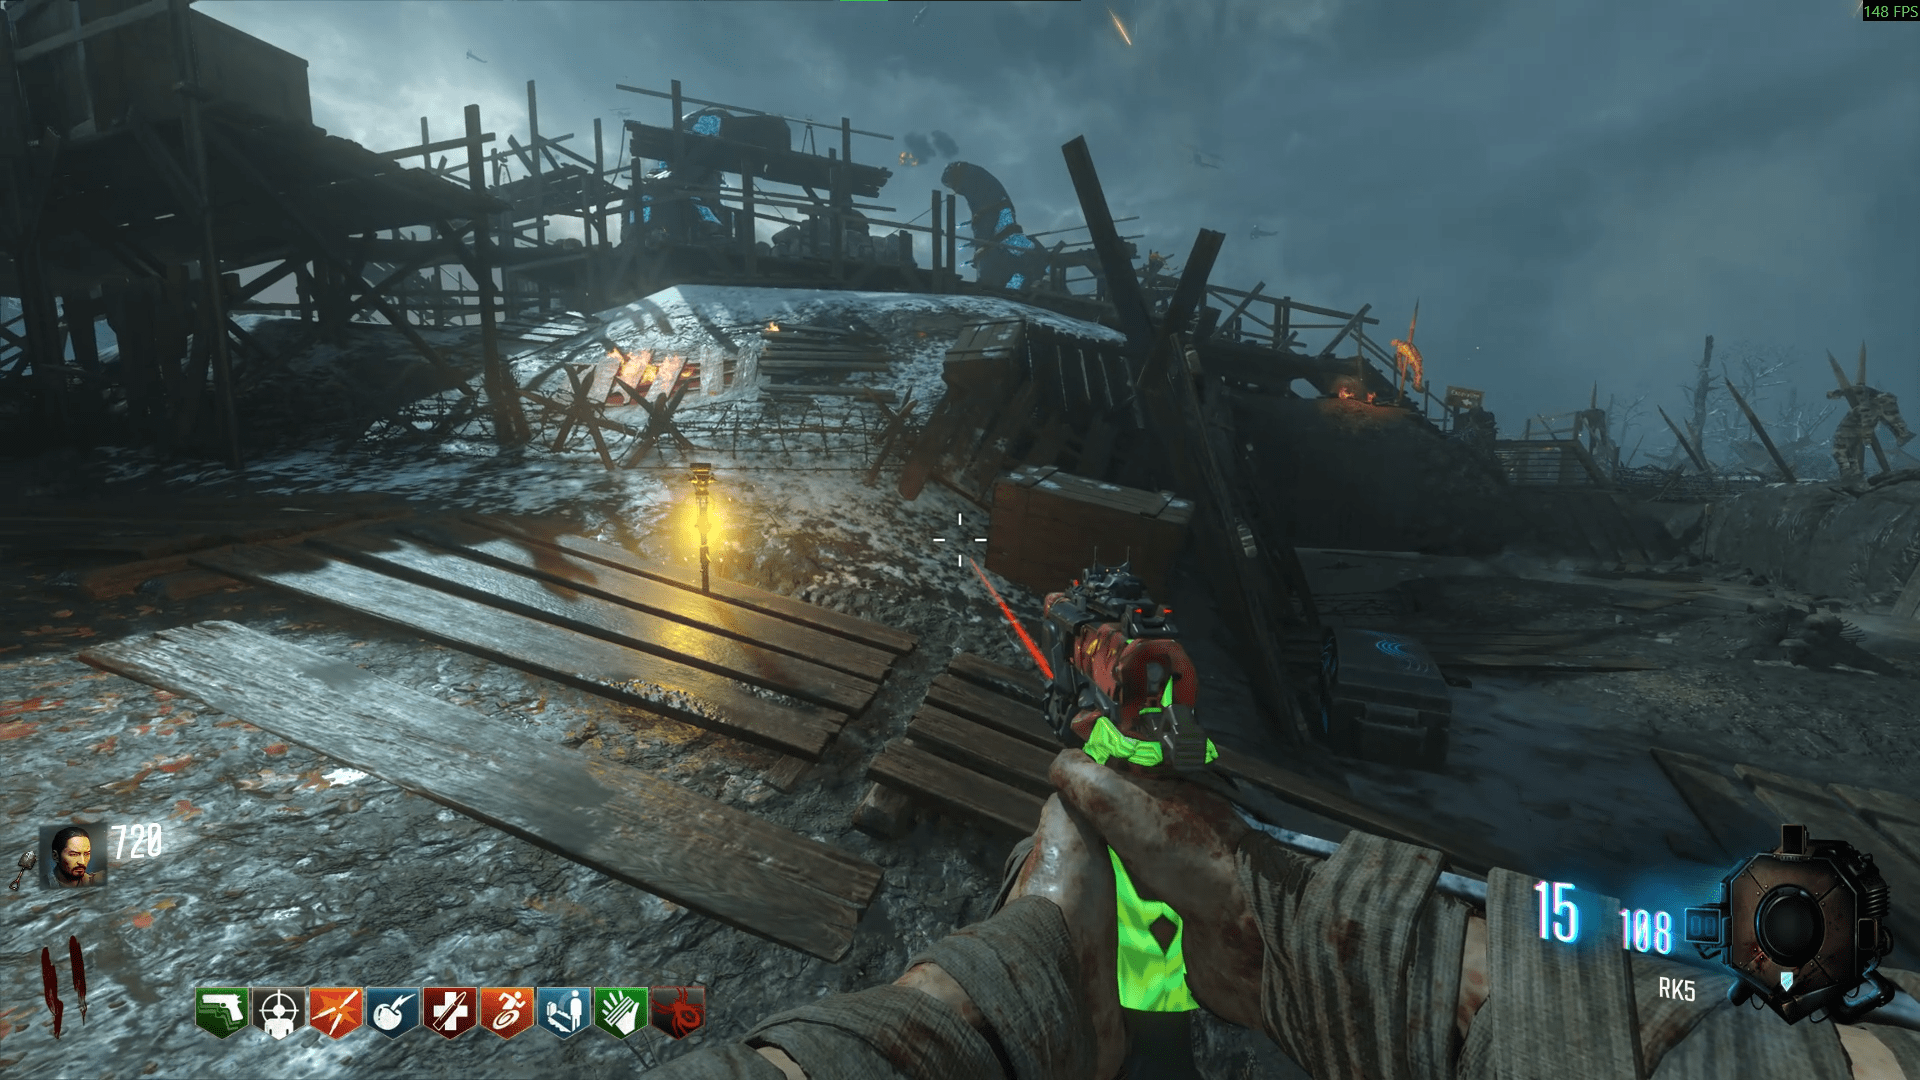
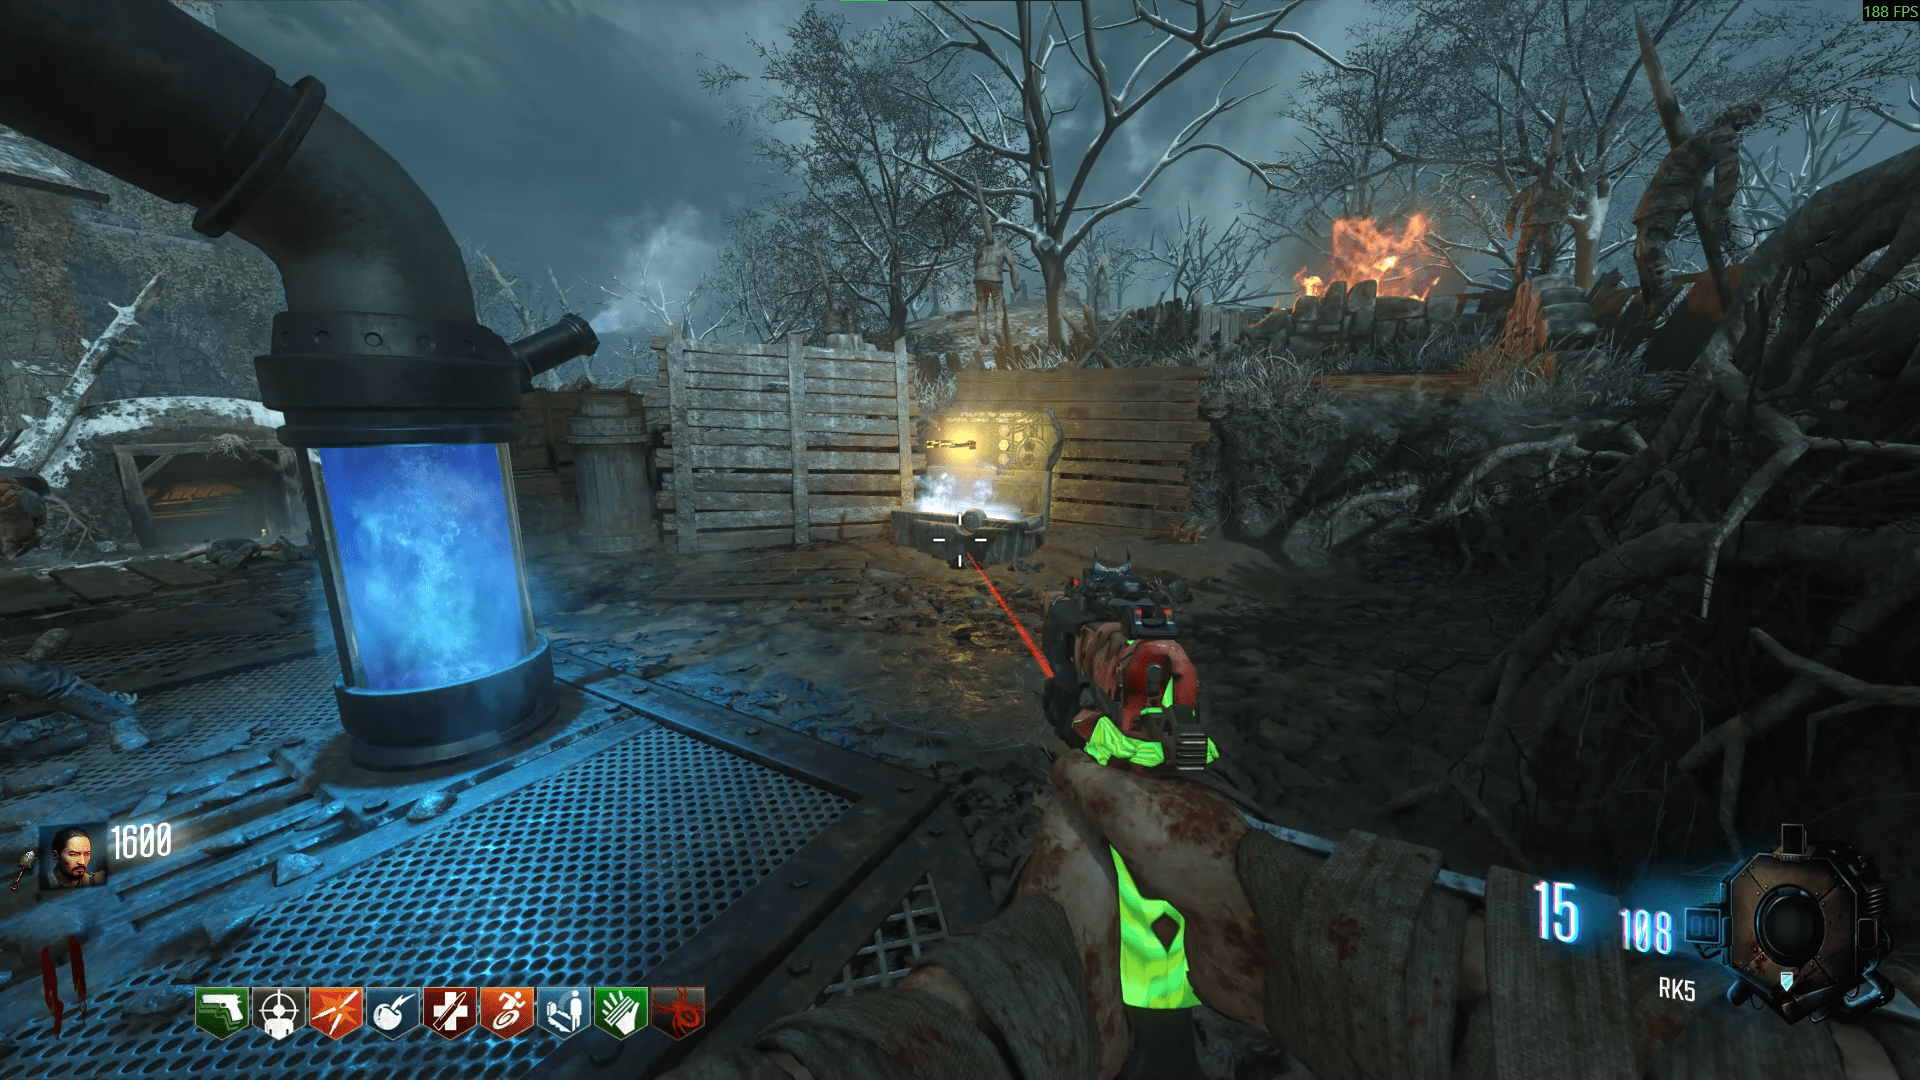
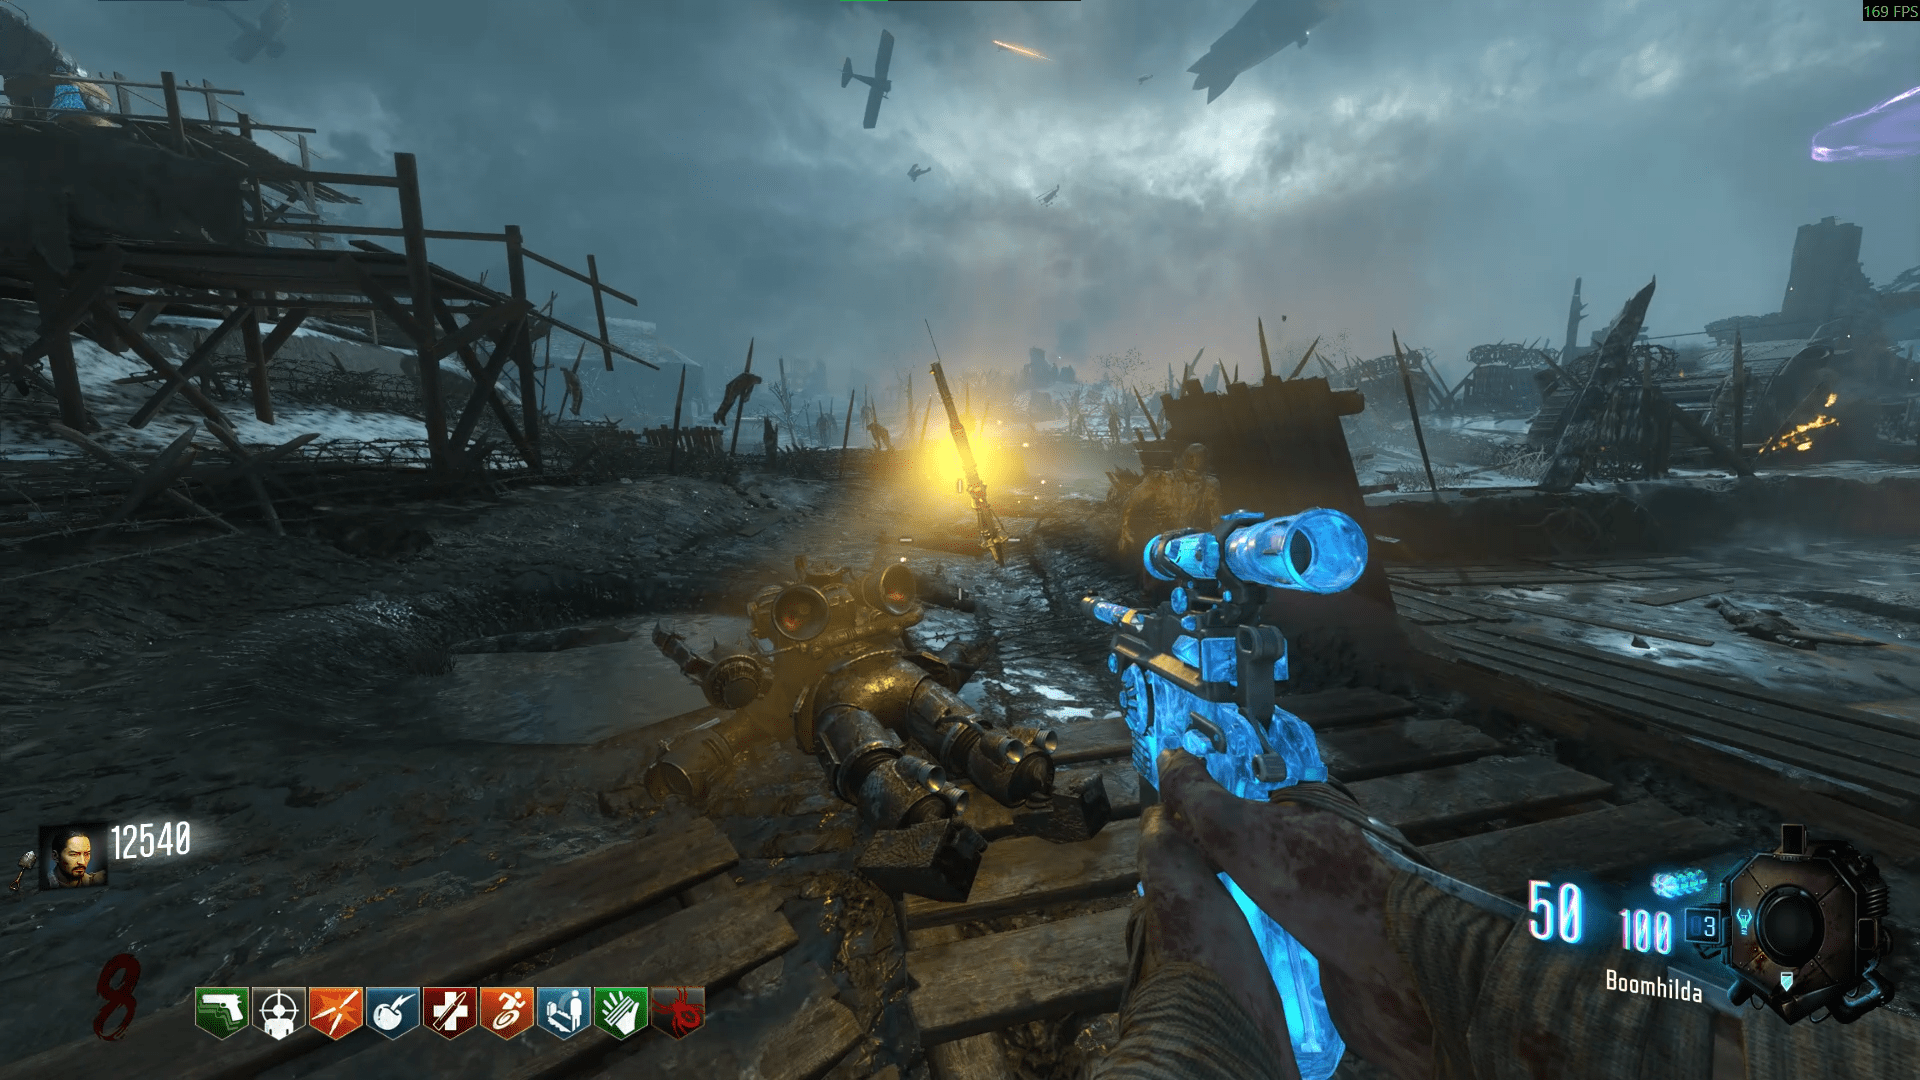
Upon retrieving the pieces, do the same old song and dance to build the staff. Then go back to the Crazy Place to upgrade it. However, now you'll have to kill some zombies on the grates on the floor besides the Fire portal, you'll need a fair few kills for this, enough to light up all four of the braziers.
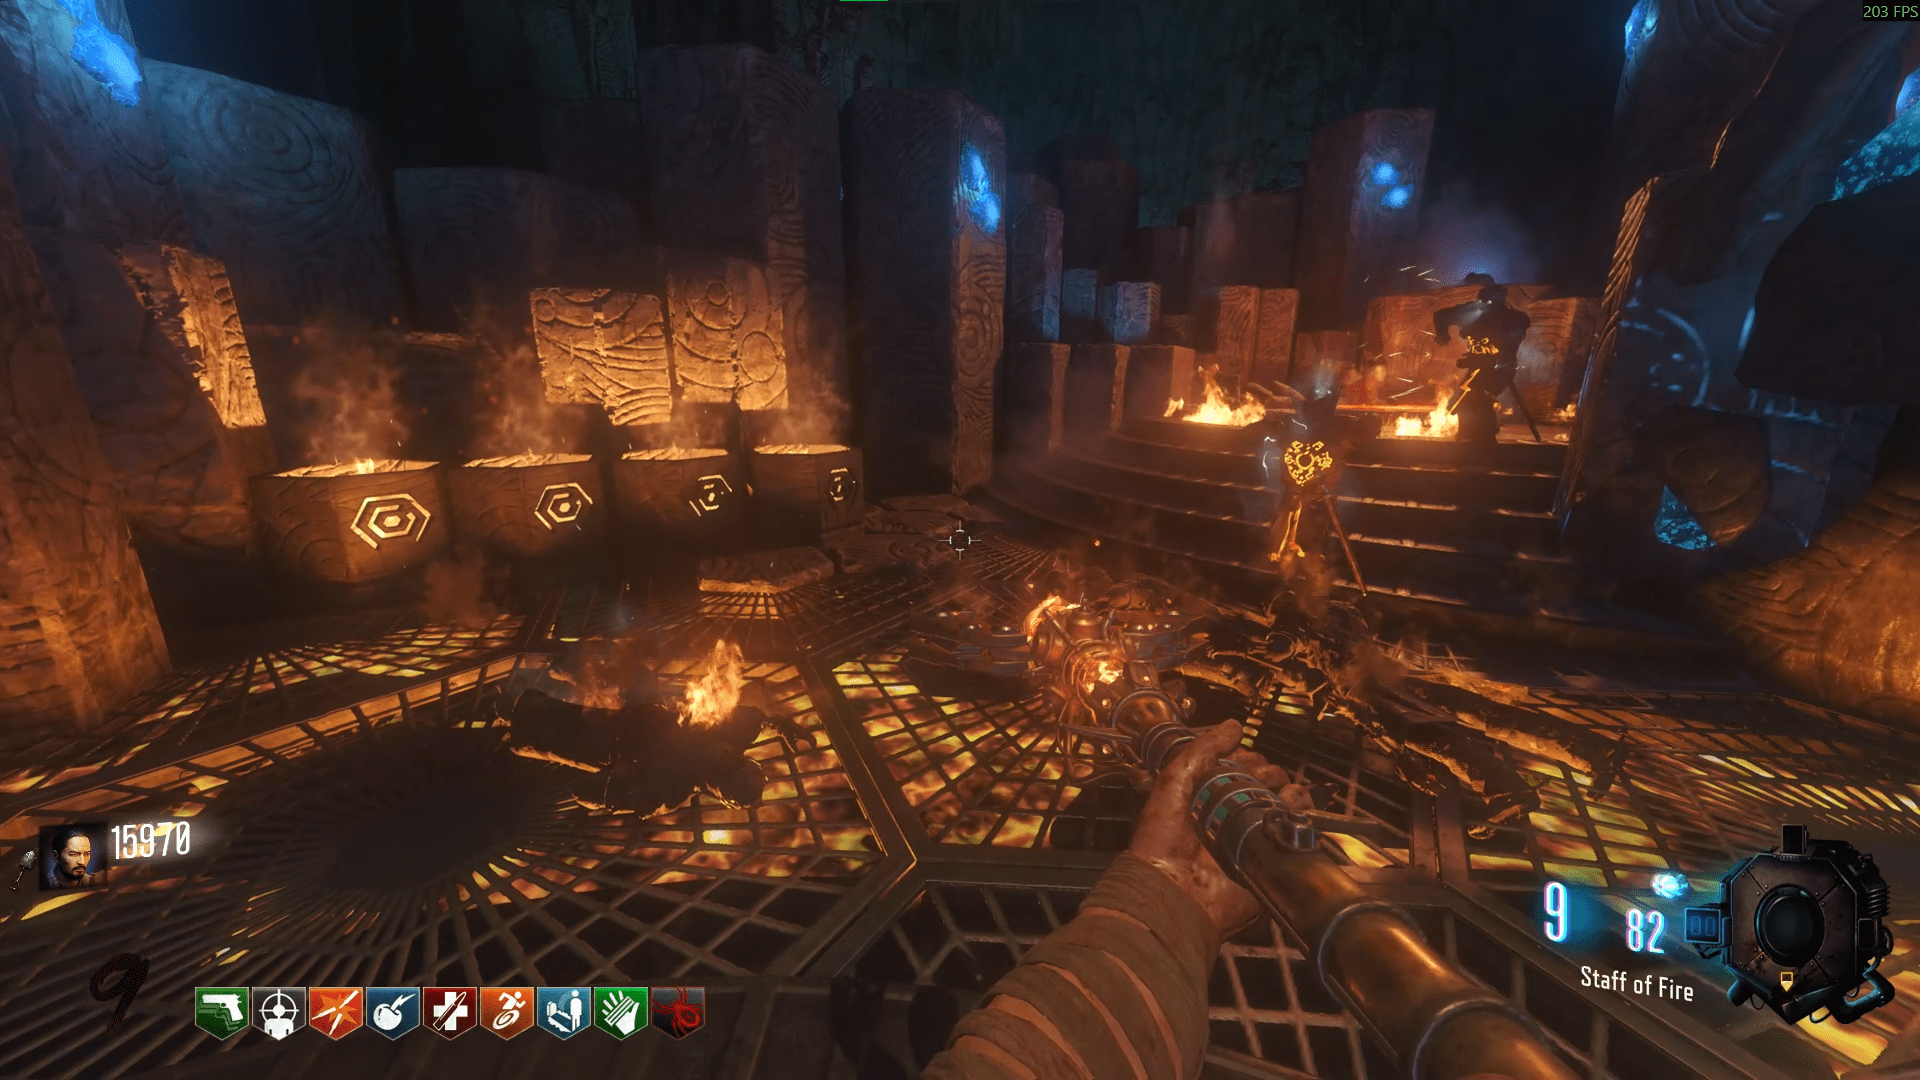
Upon filling the braziers, go to the upper Church to find some red symbols on the wall. You will now need to match these numbers to torches in the lower Church. Use CrashPower's cheat sheet below to decipher the symbols for the torches, then shoot the corresponding torches below, with the Fire staff, in any order as quick as you can. The lit symbols are the numbers of the torches you need to shoot with the Fire staff. If the distinctive success sound and Mound light didn't happen, try again but quicker.
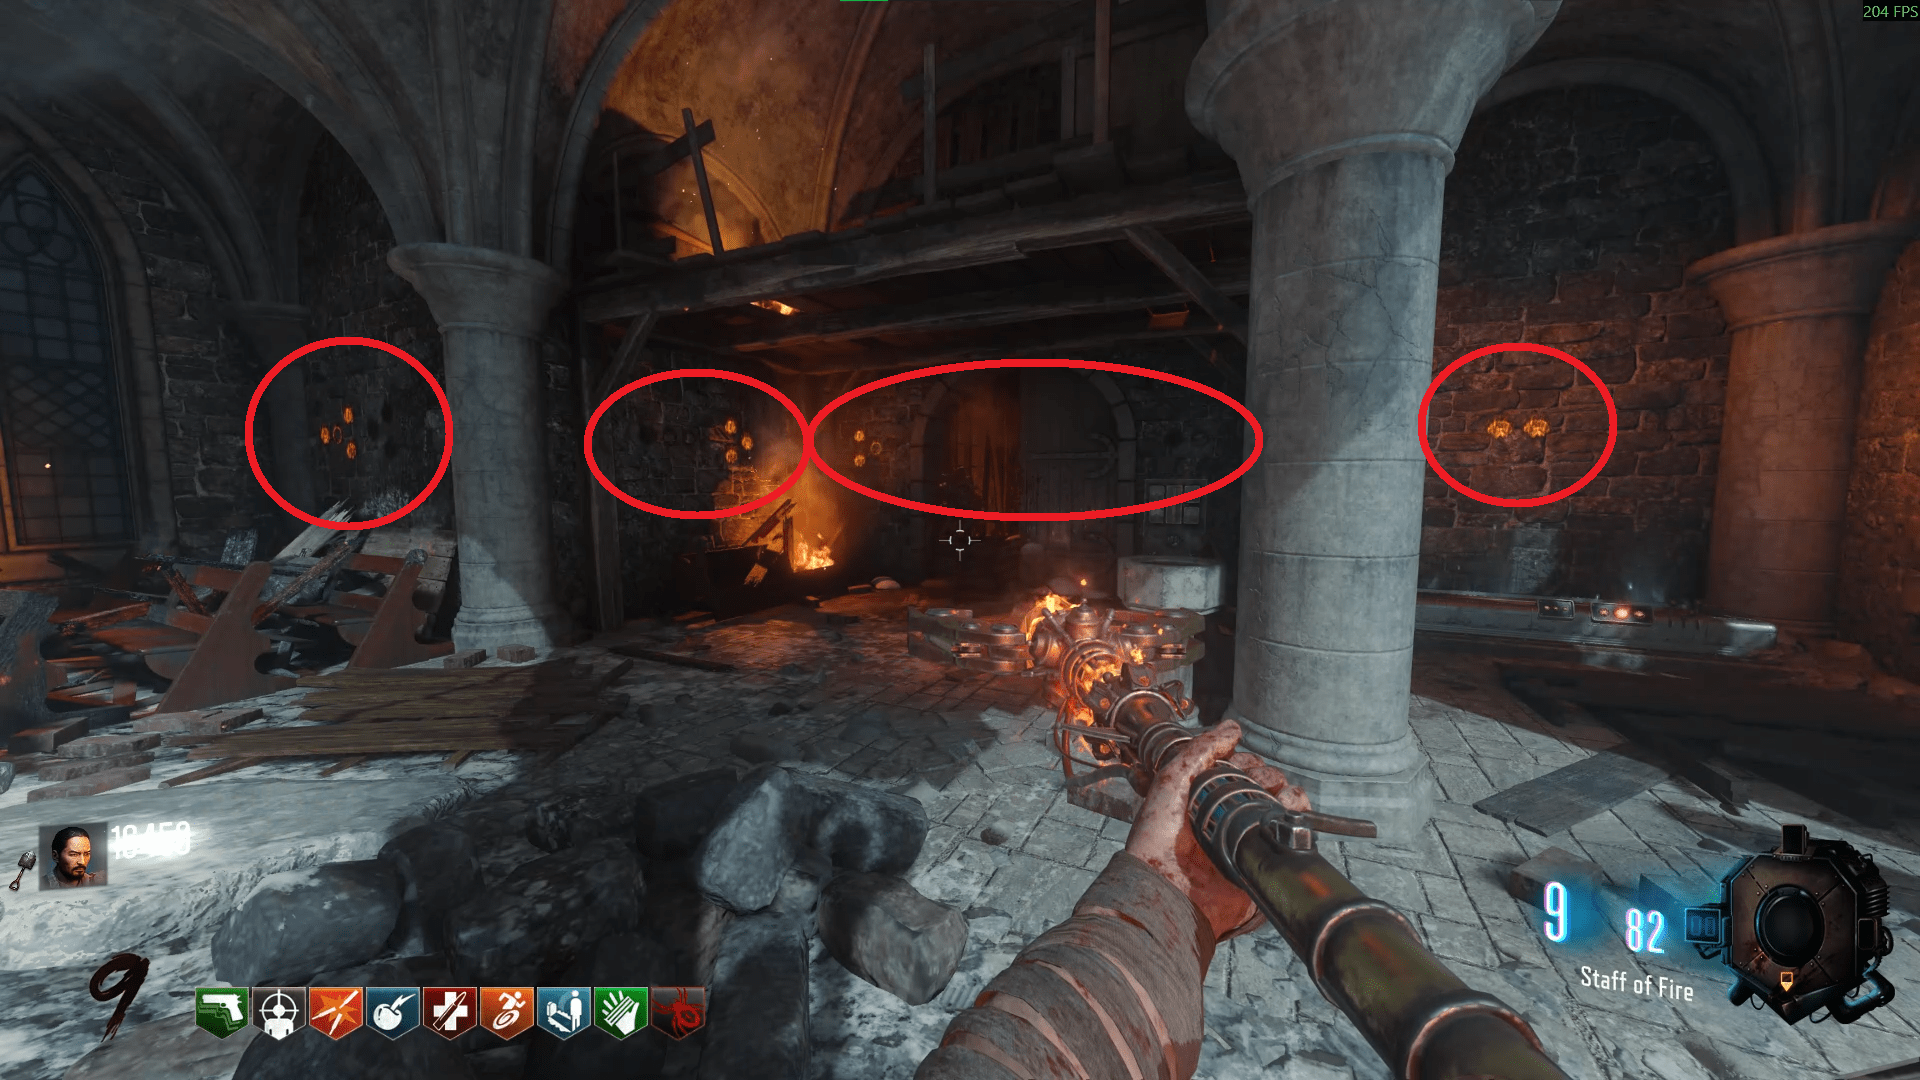
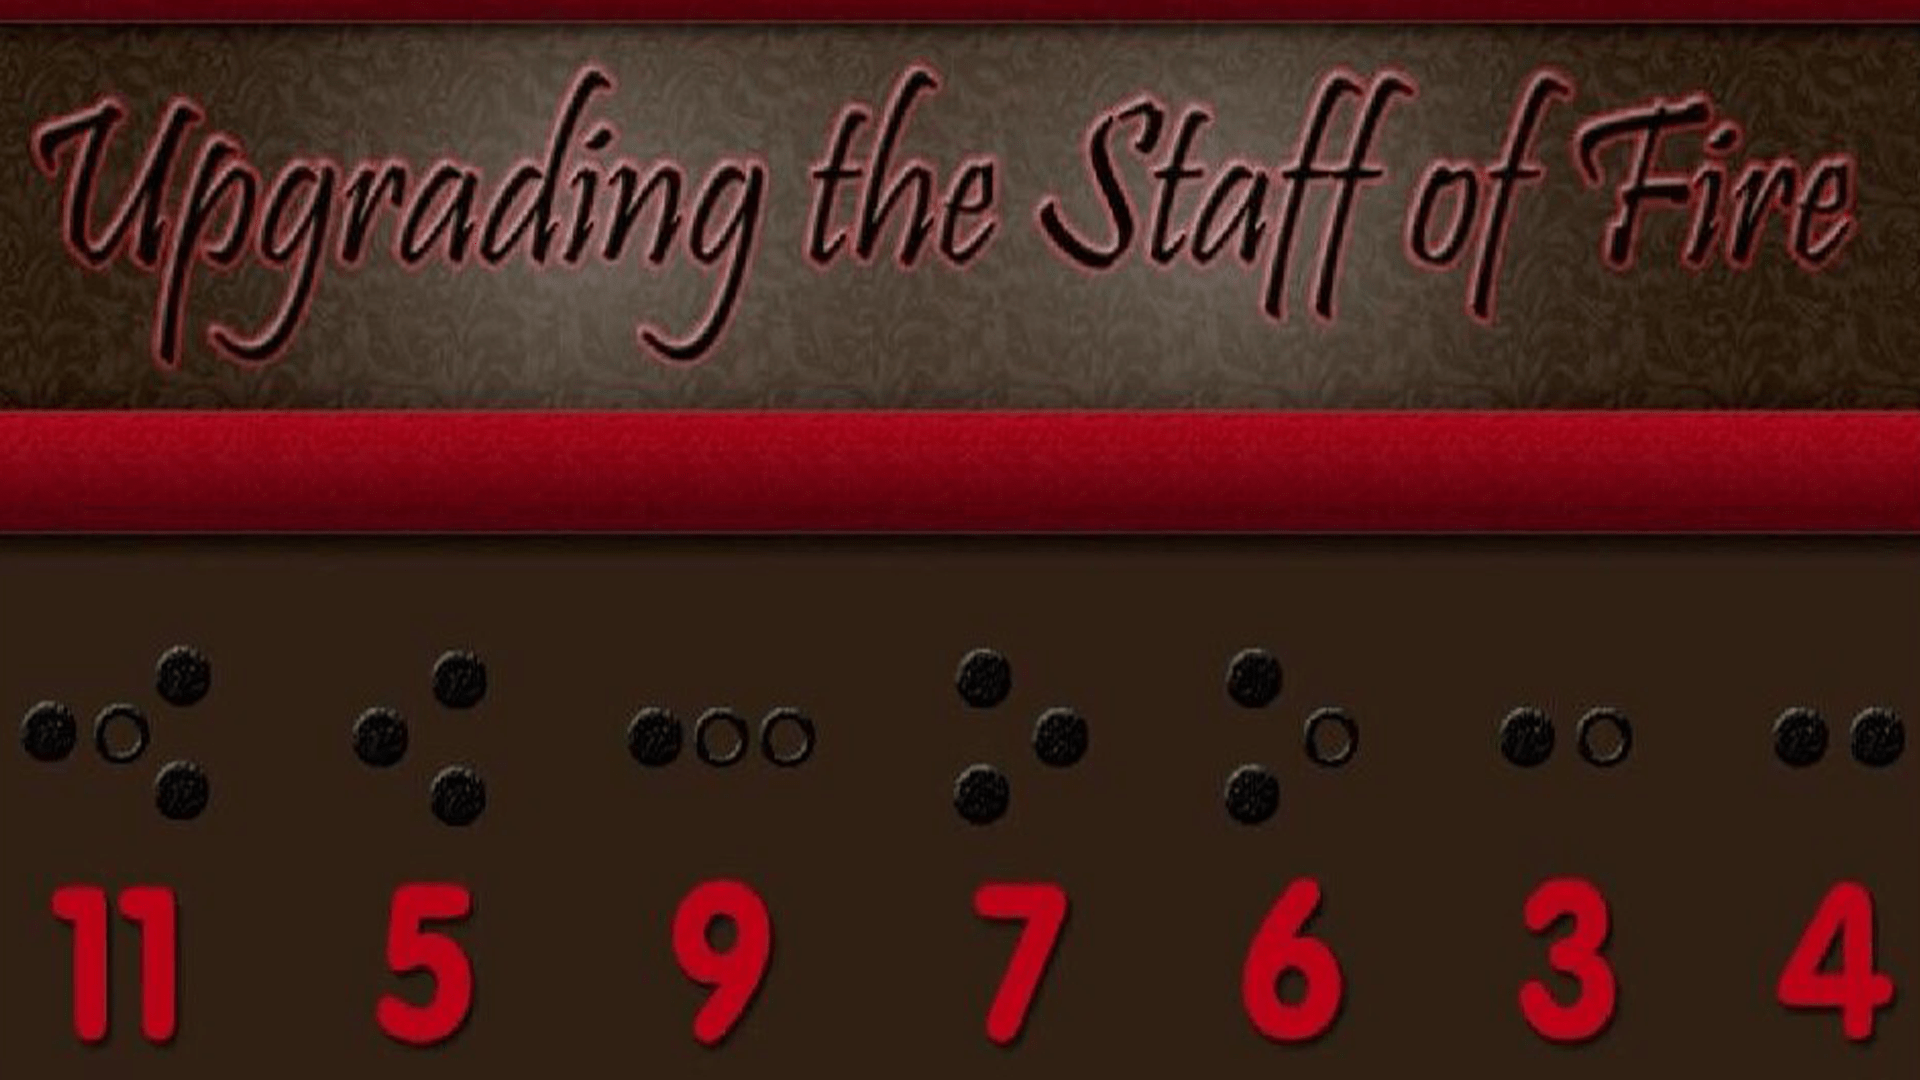
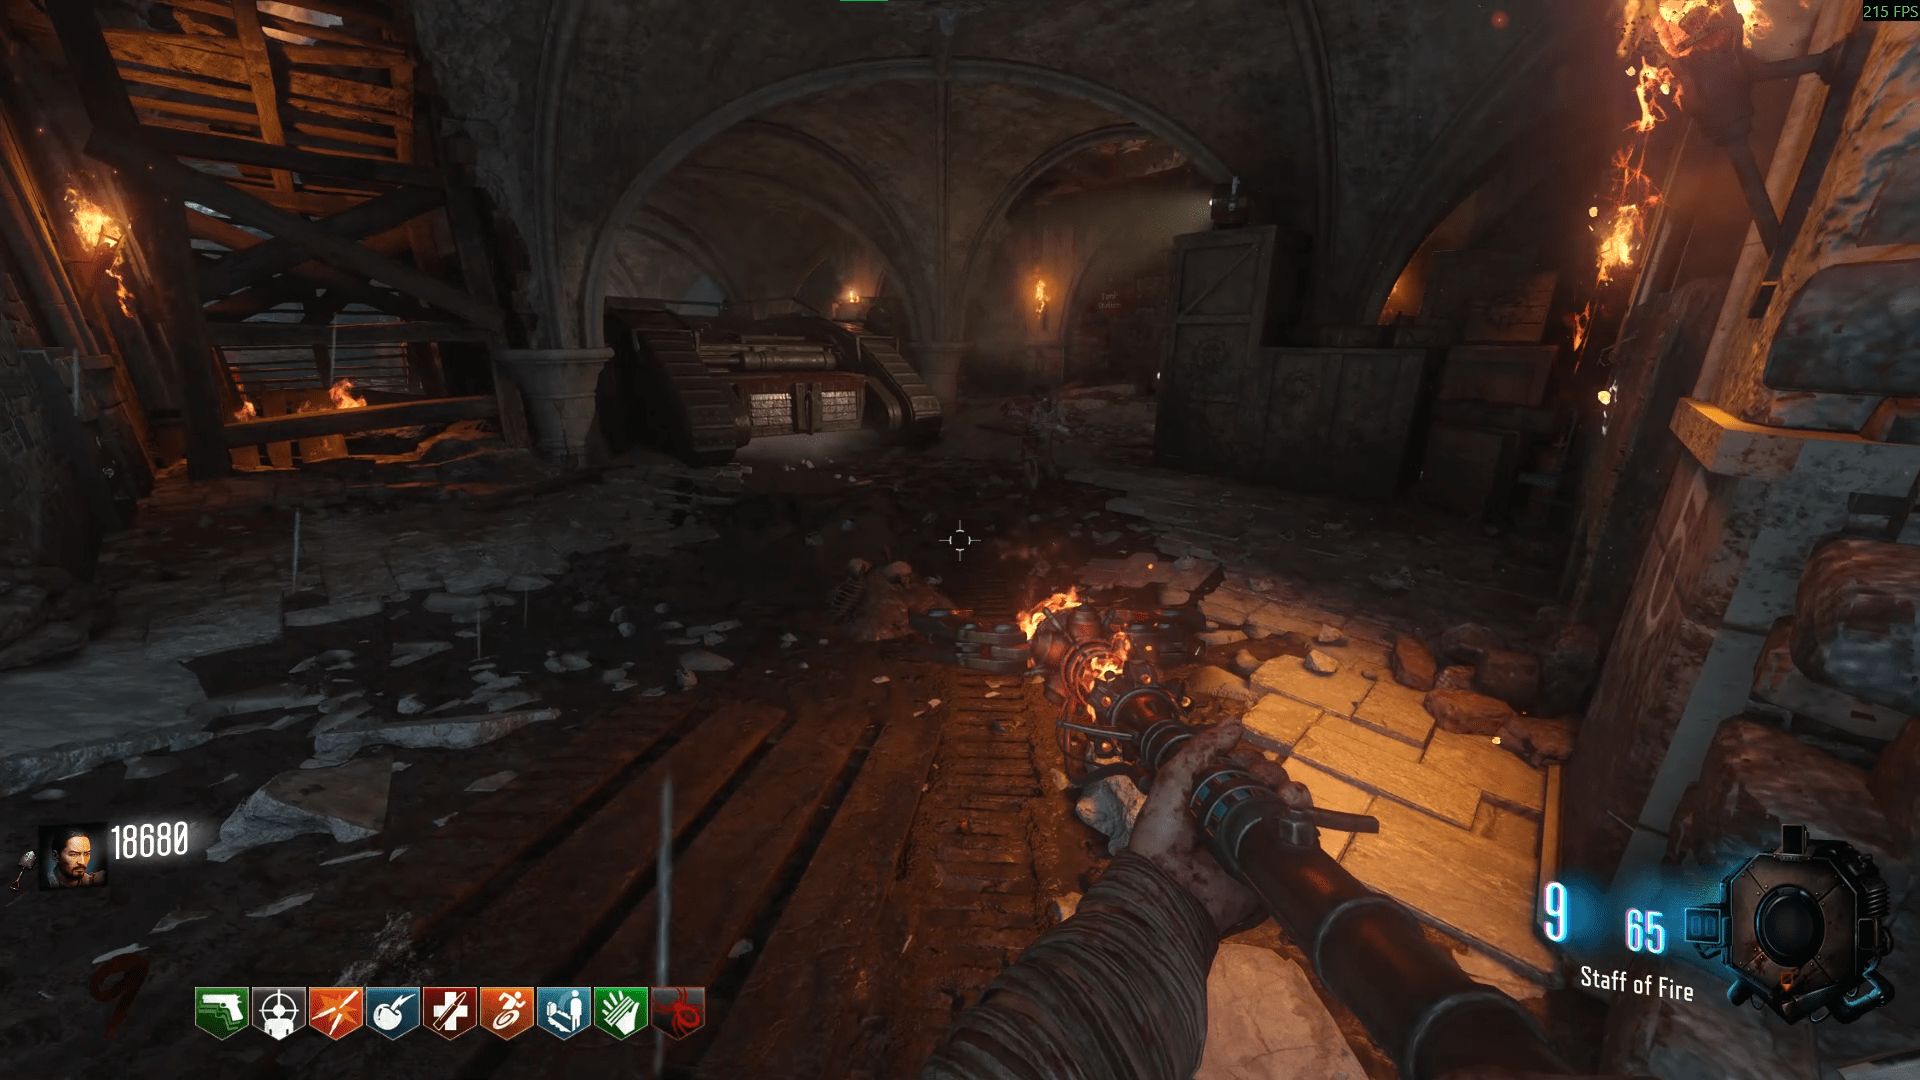
Now follow the routine and order the rings then shoot the orb in the Mound. Once again, down to the Crazy Place to get the kills to finalise the upgrade.
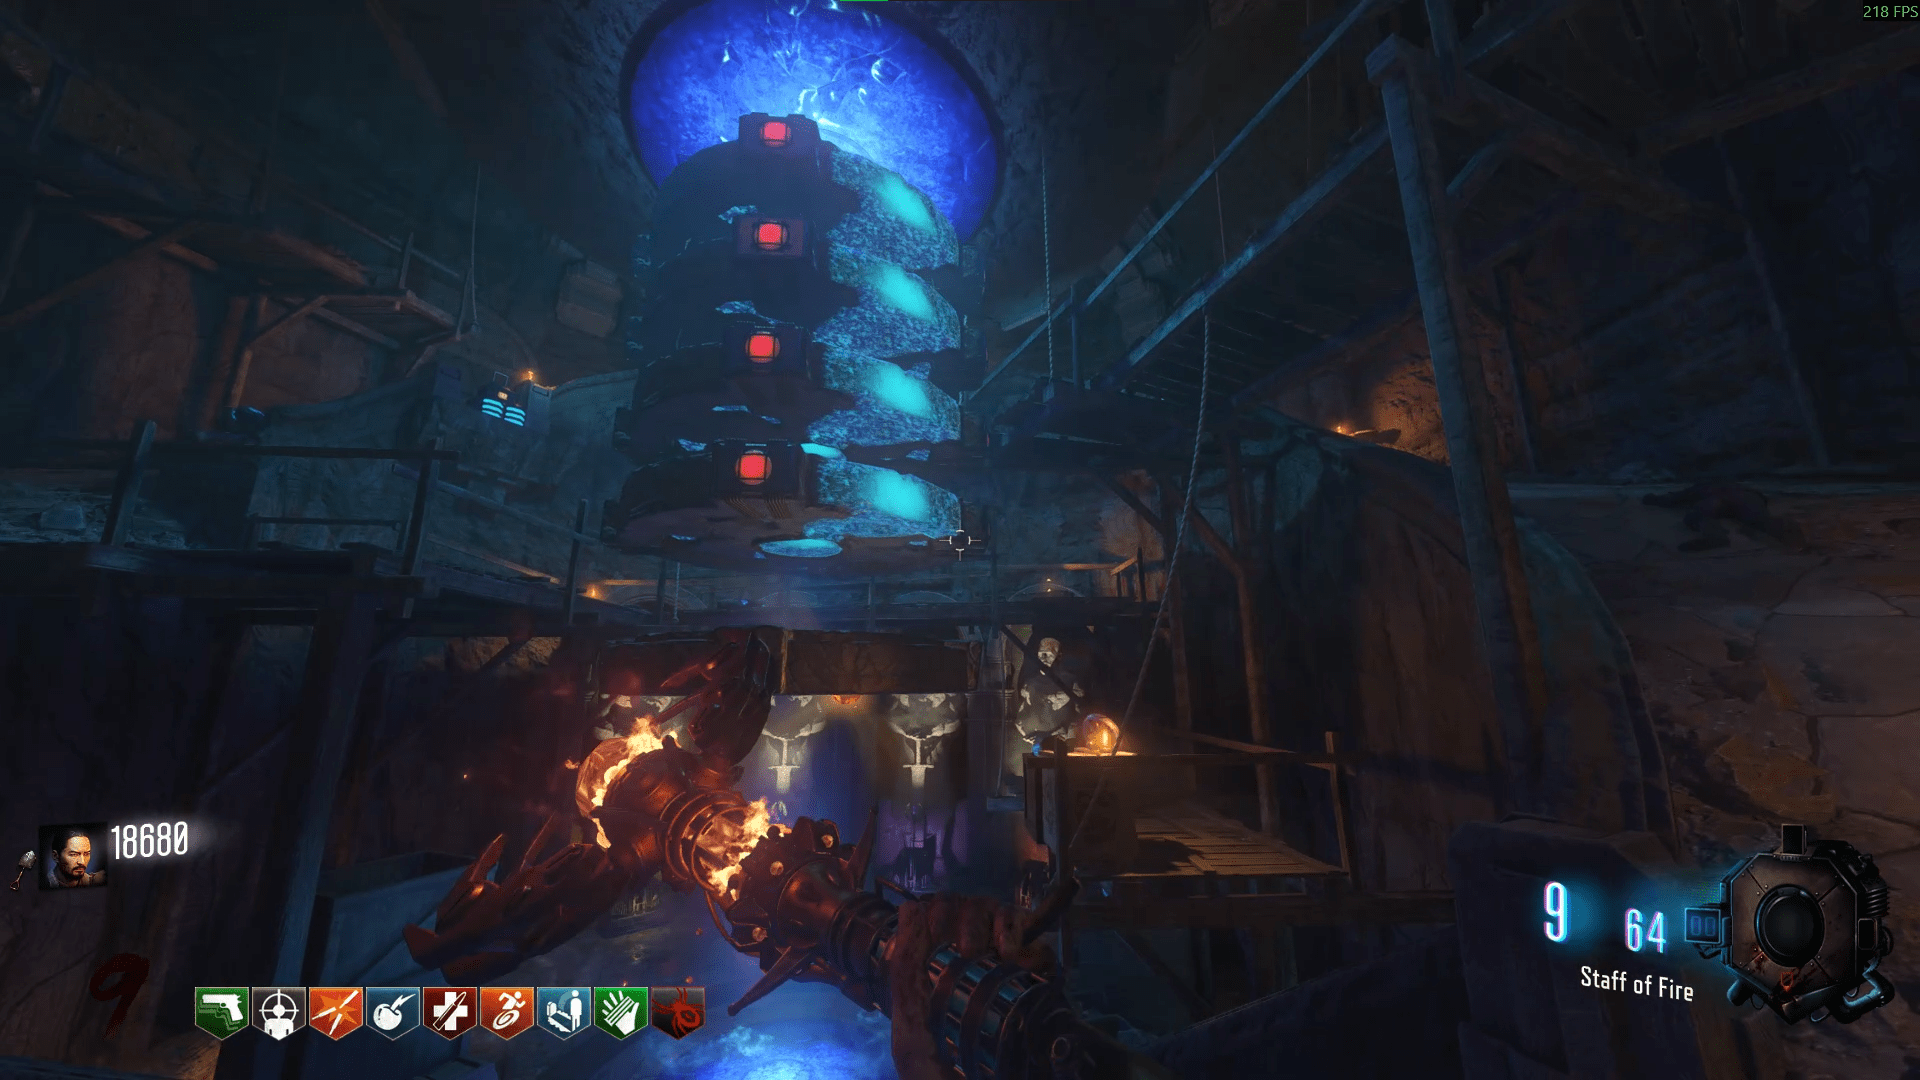
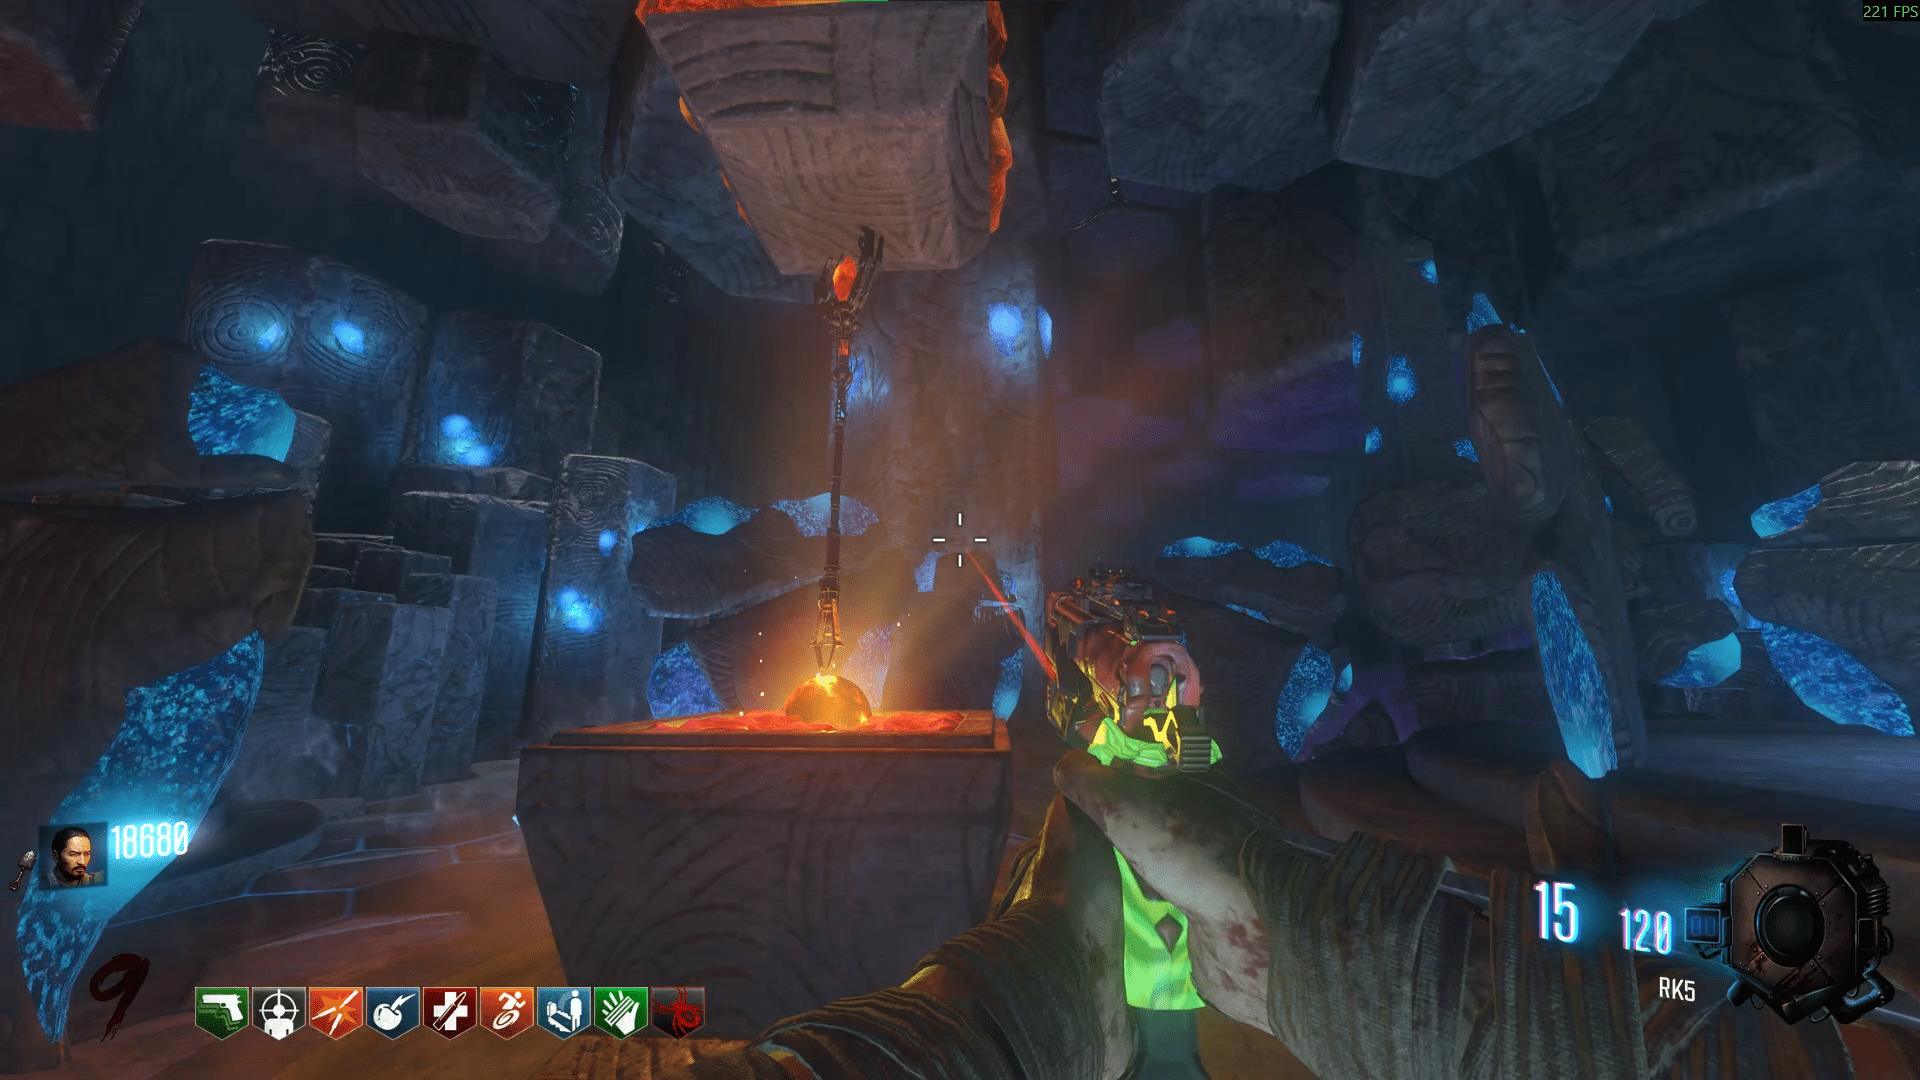
Now that you're done with the elemental staffs, you can officially start the Easter egg.
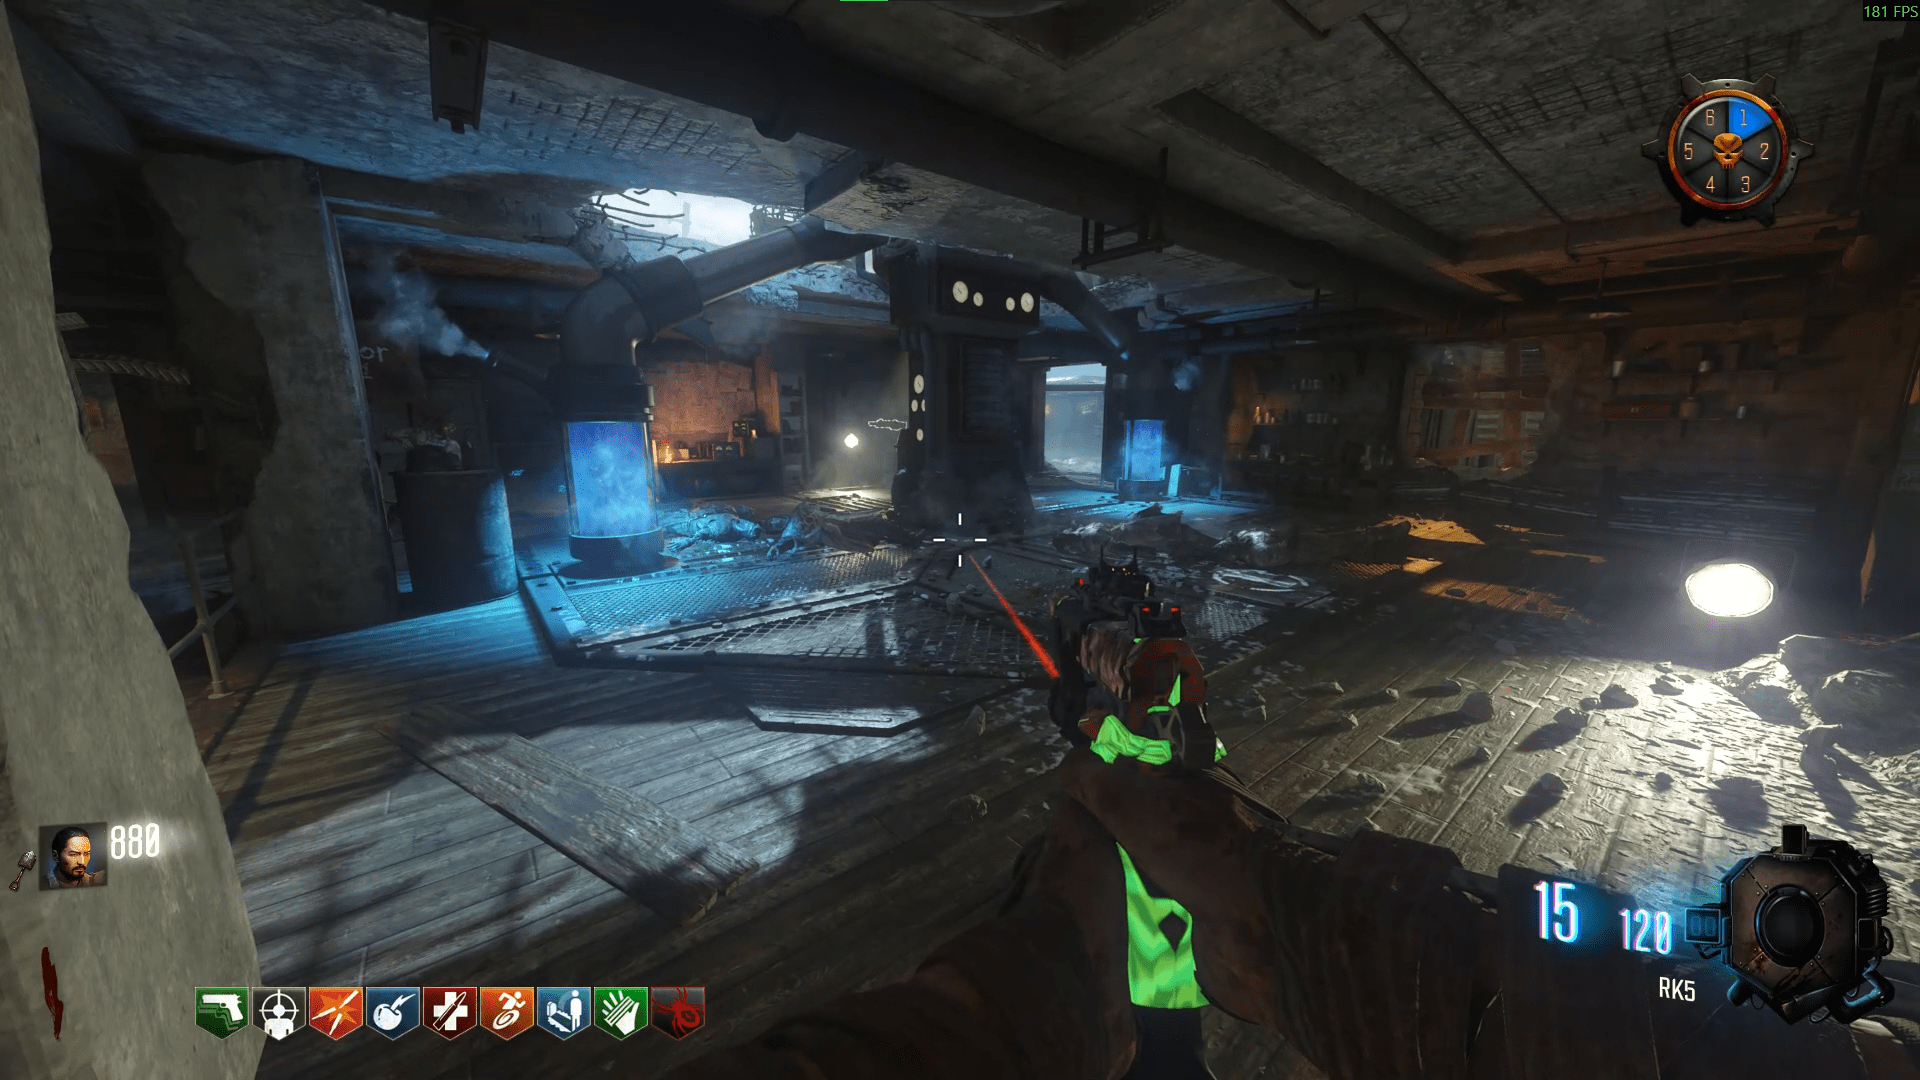
To obtain the G-Strikes, you must take a tablet from the Bunker of generator 2 and take it to a basin in the Church. From then, you need to get enough melee kills so that the tablet becomes clean.
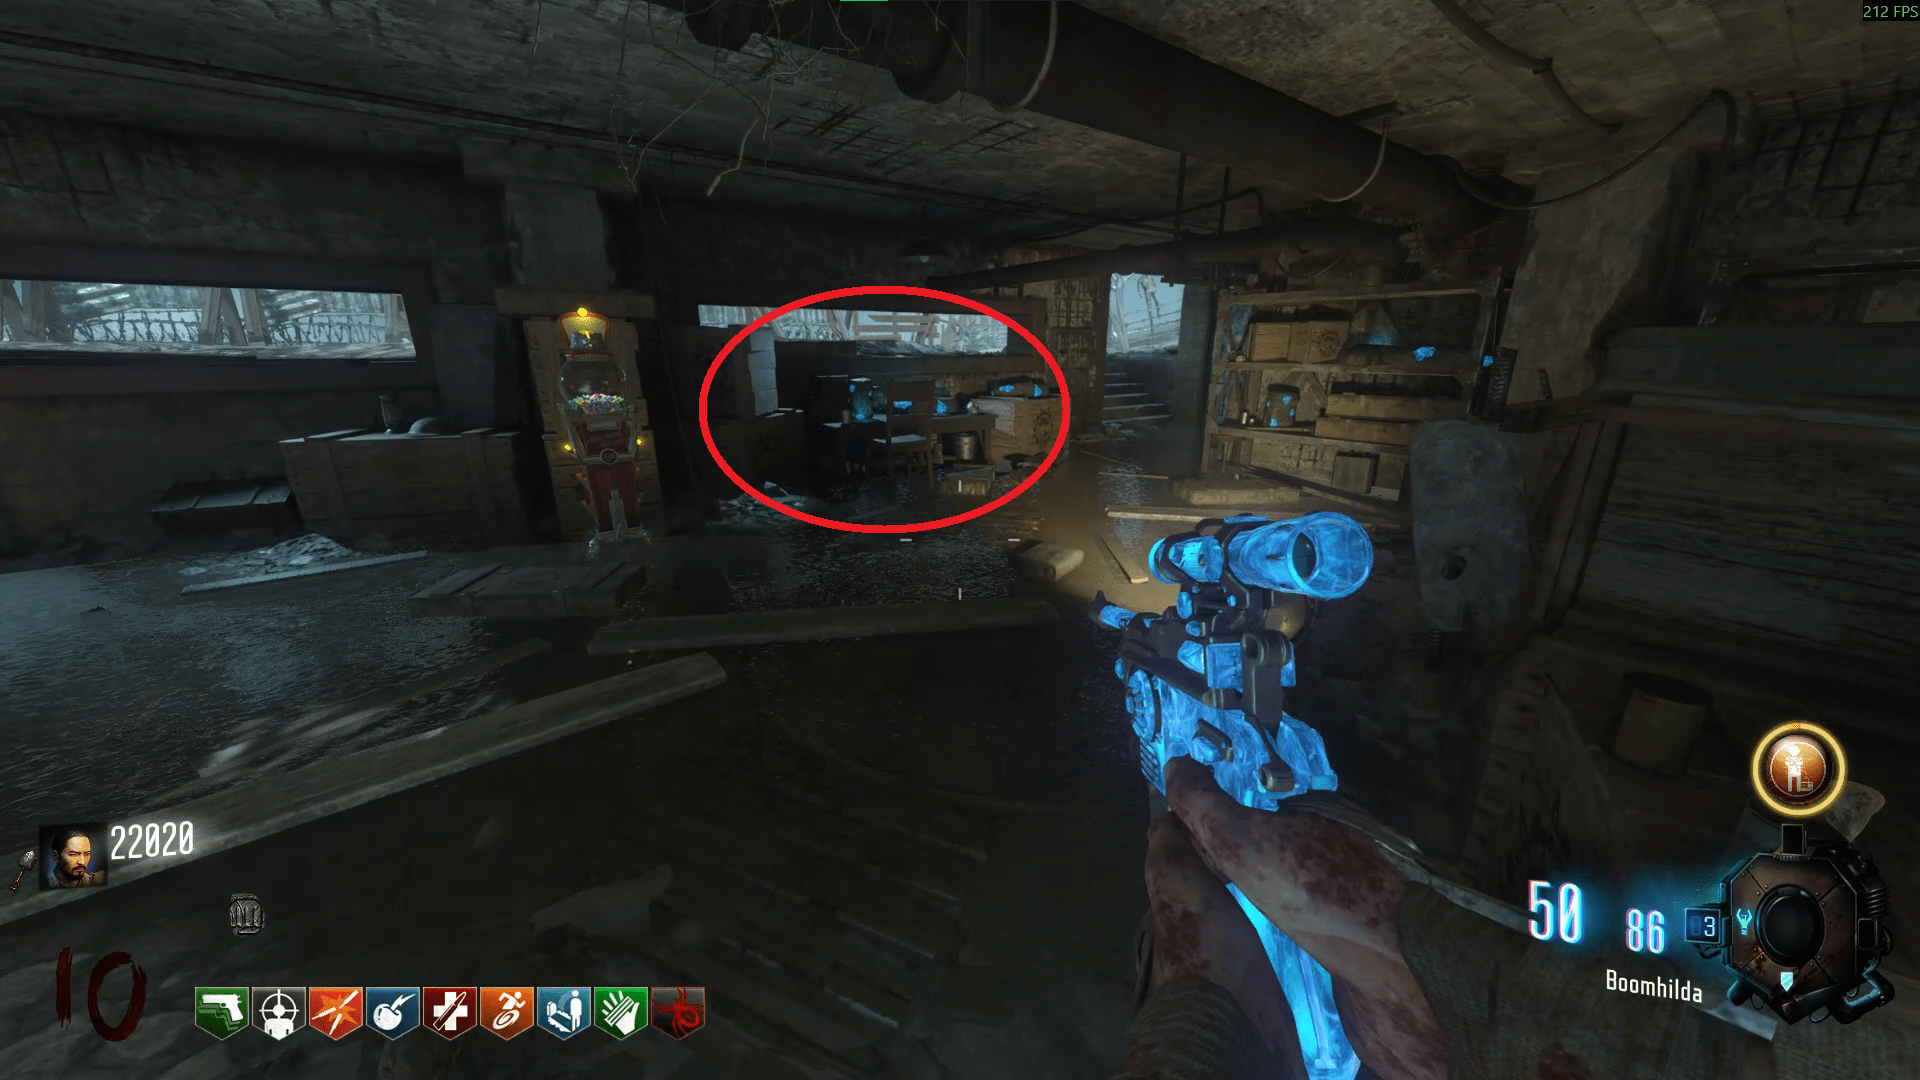
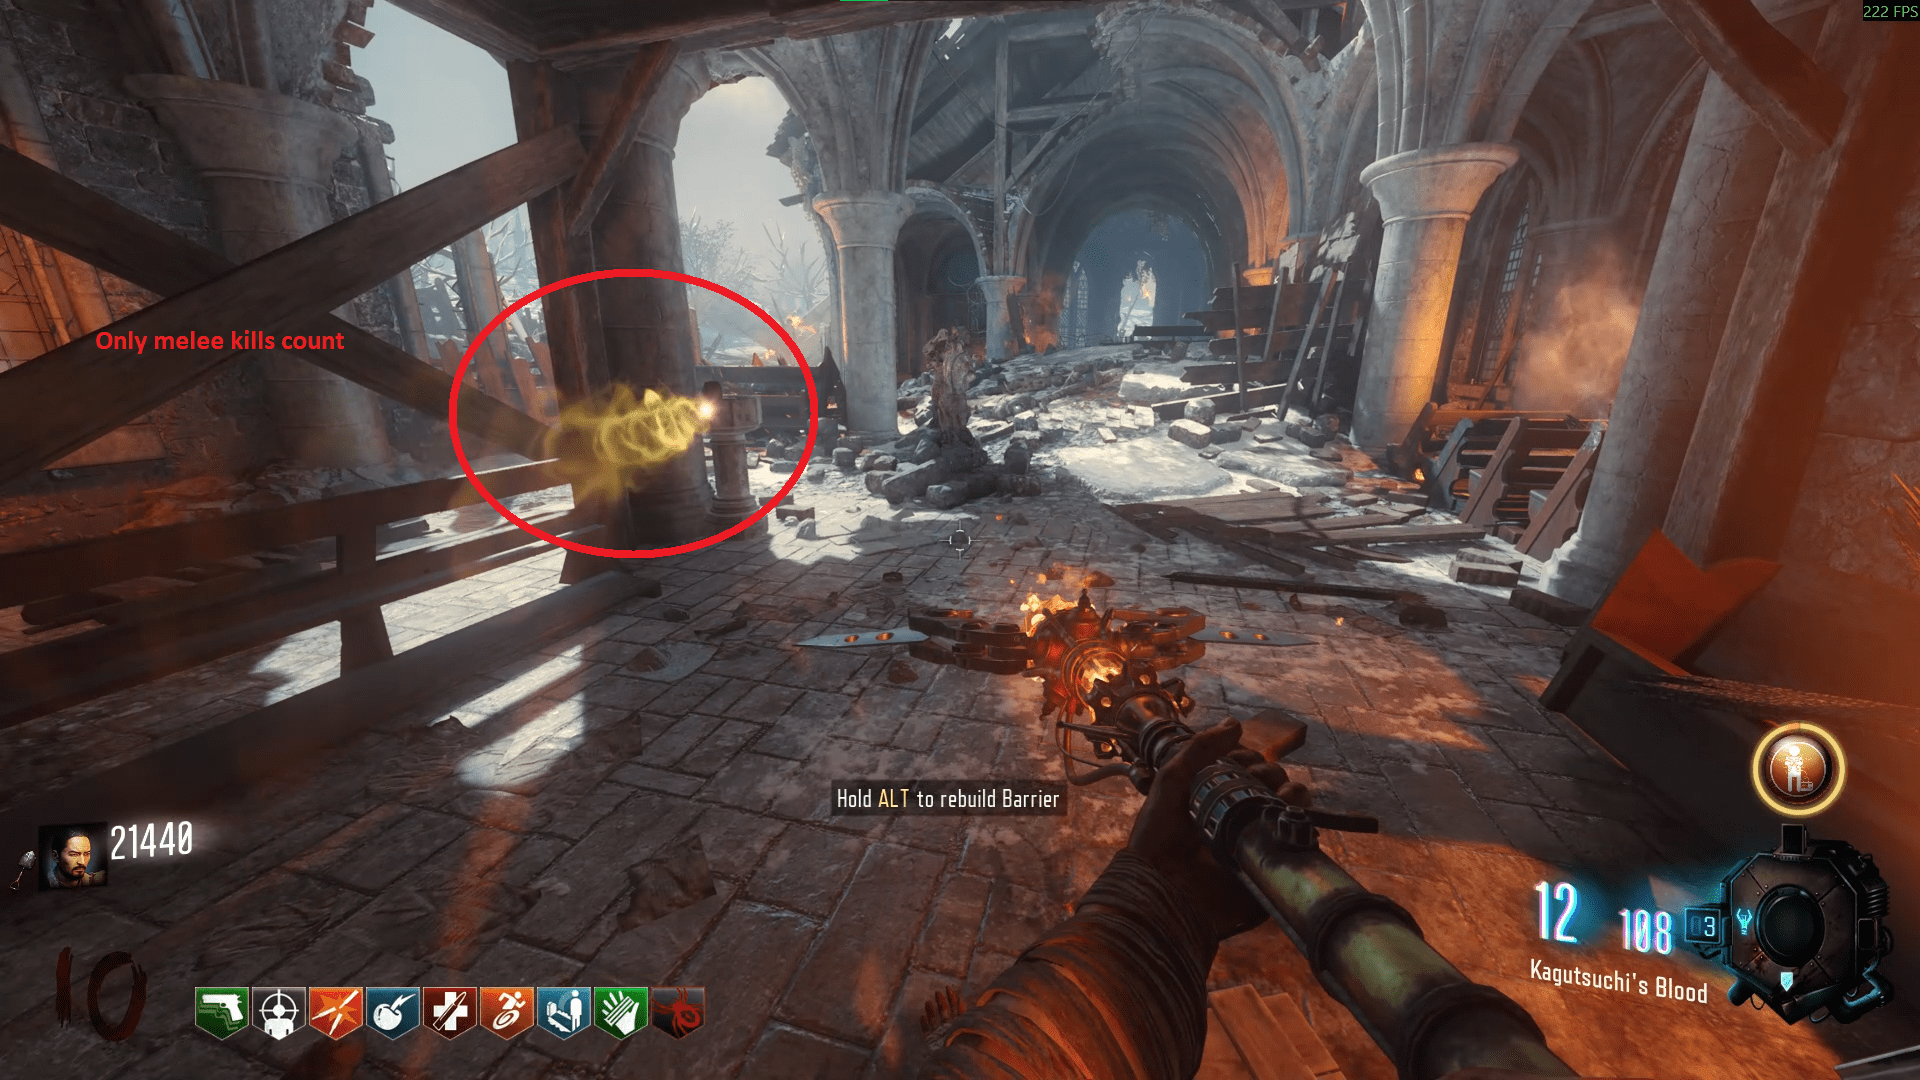
Origins
After you've cleaned the tablet, pick it back up and make your way back to the generator 2 Bunker. You can follow the path in the following screenshots if you need to. However, on your way back to the Bunker, you must avoid the mud at all costs, if you stand in the mud, you will have to go back to the Church to clean the tablet again (don't worry, you just need to interact with the basin, not fill it up with souls again).
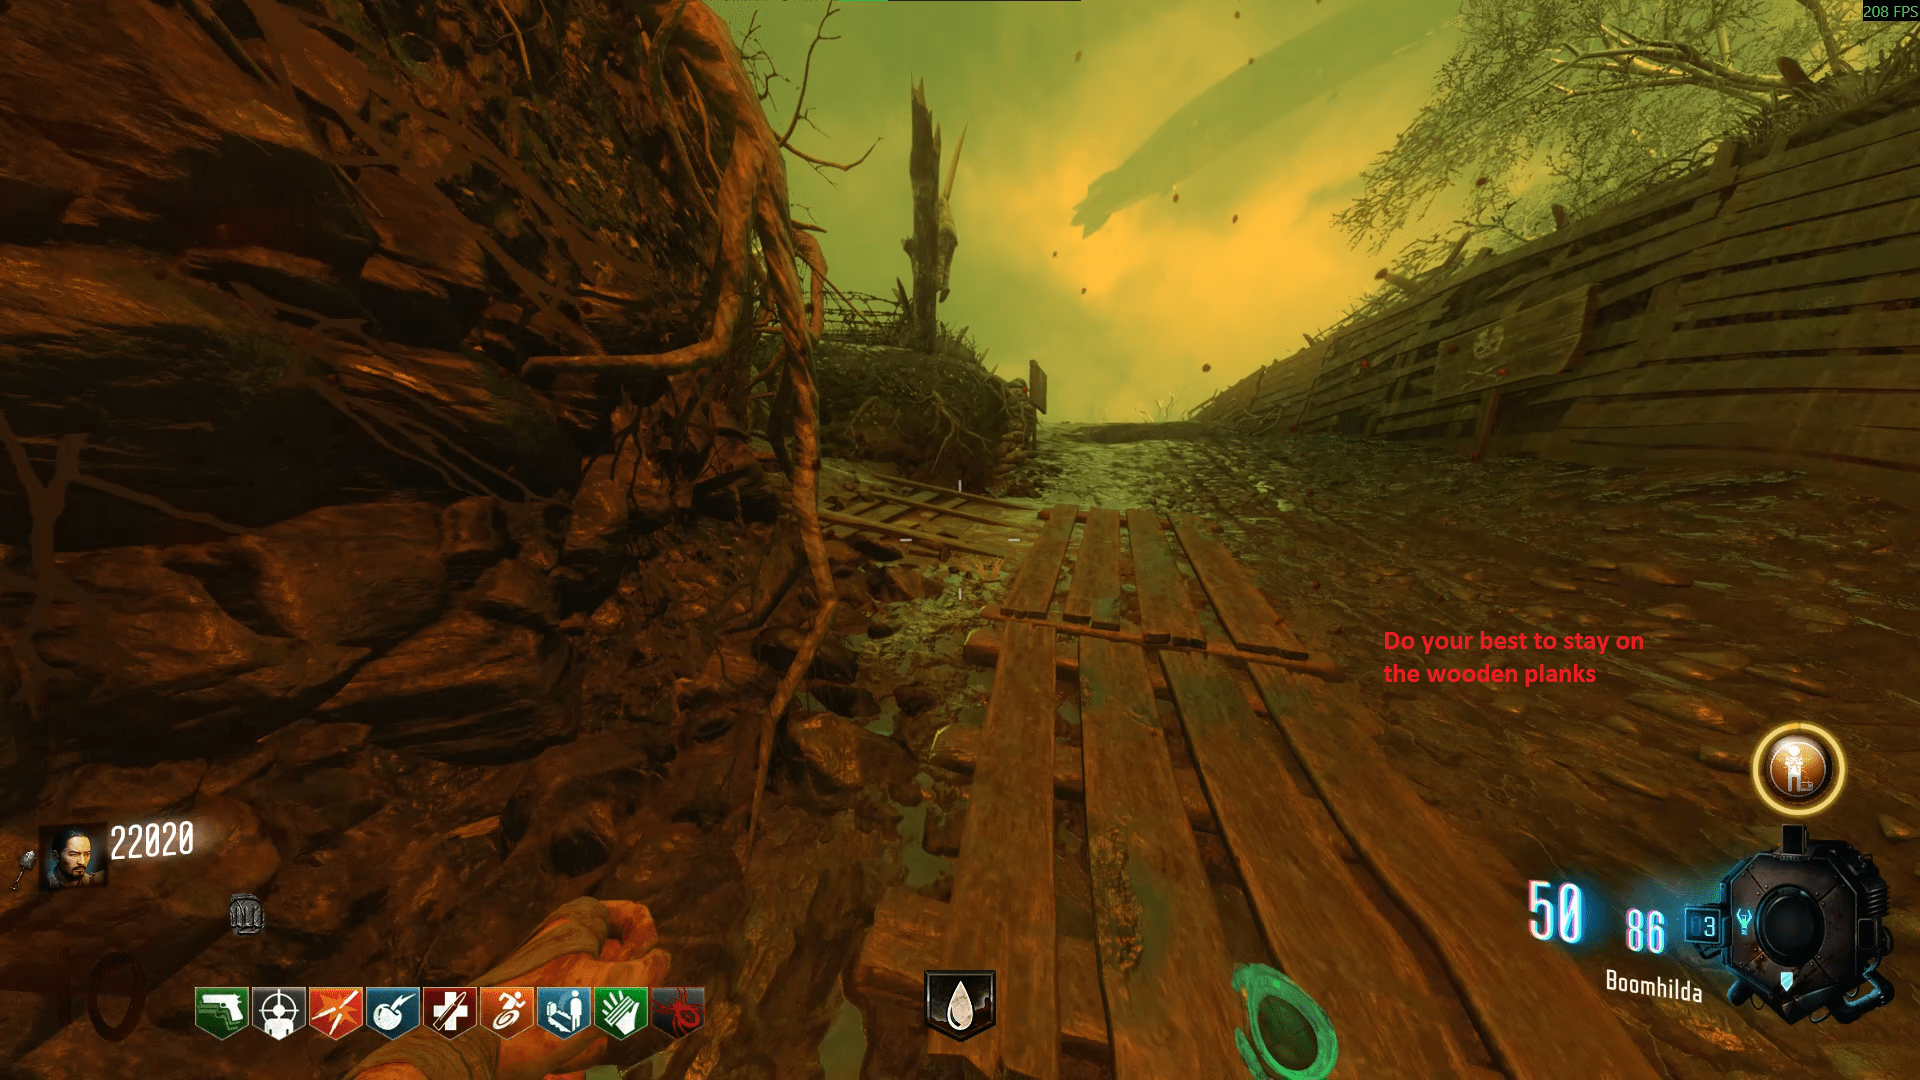
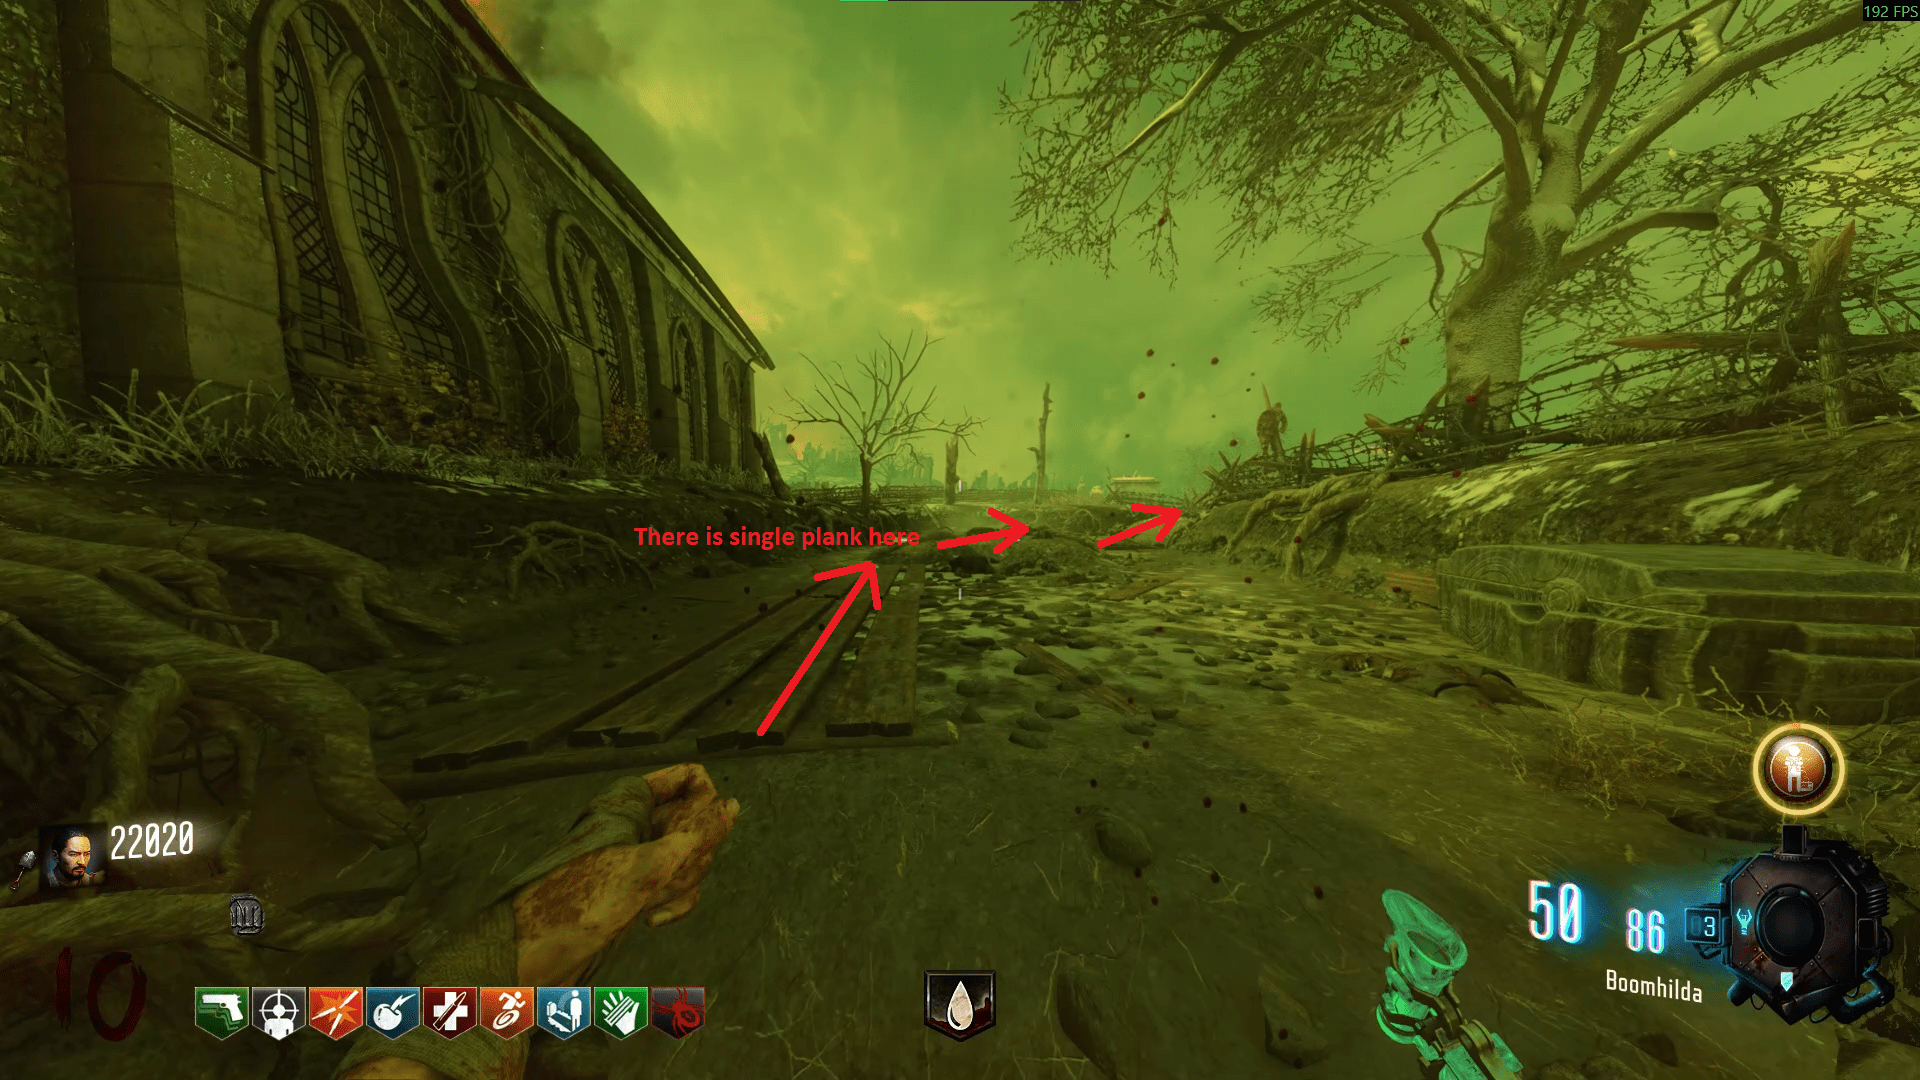
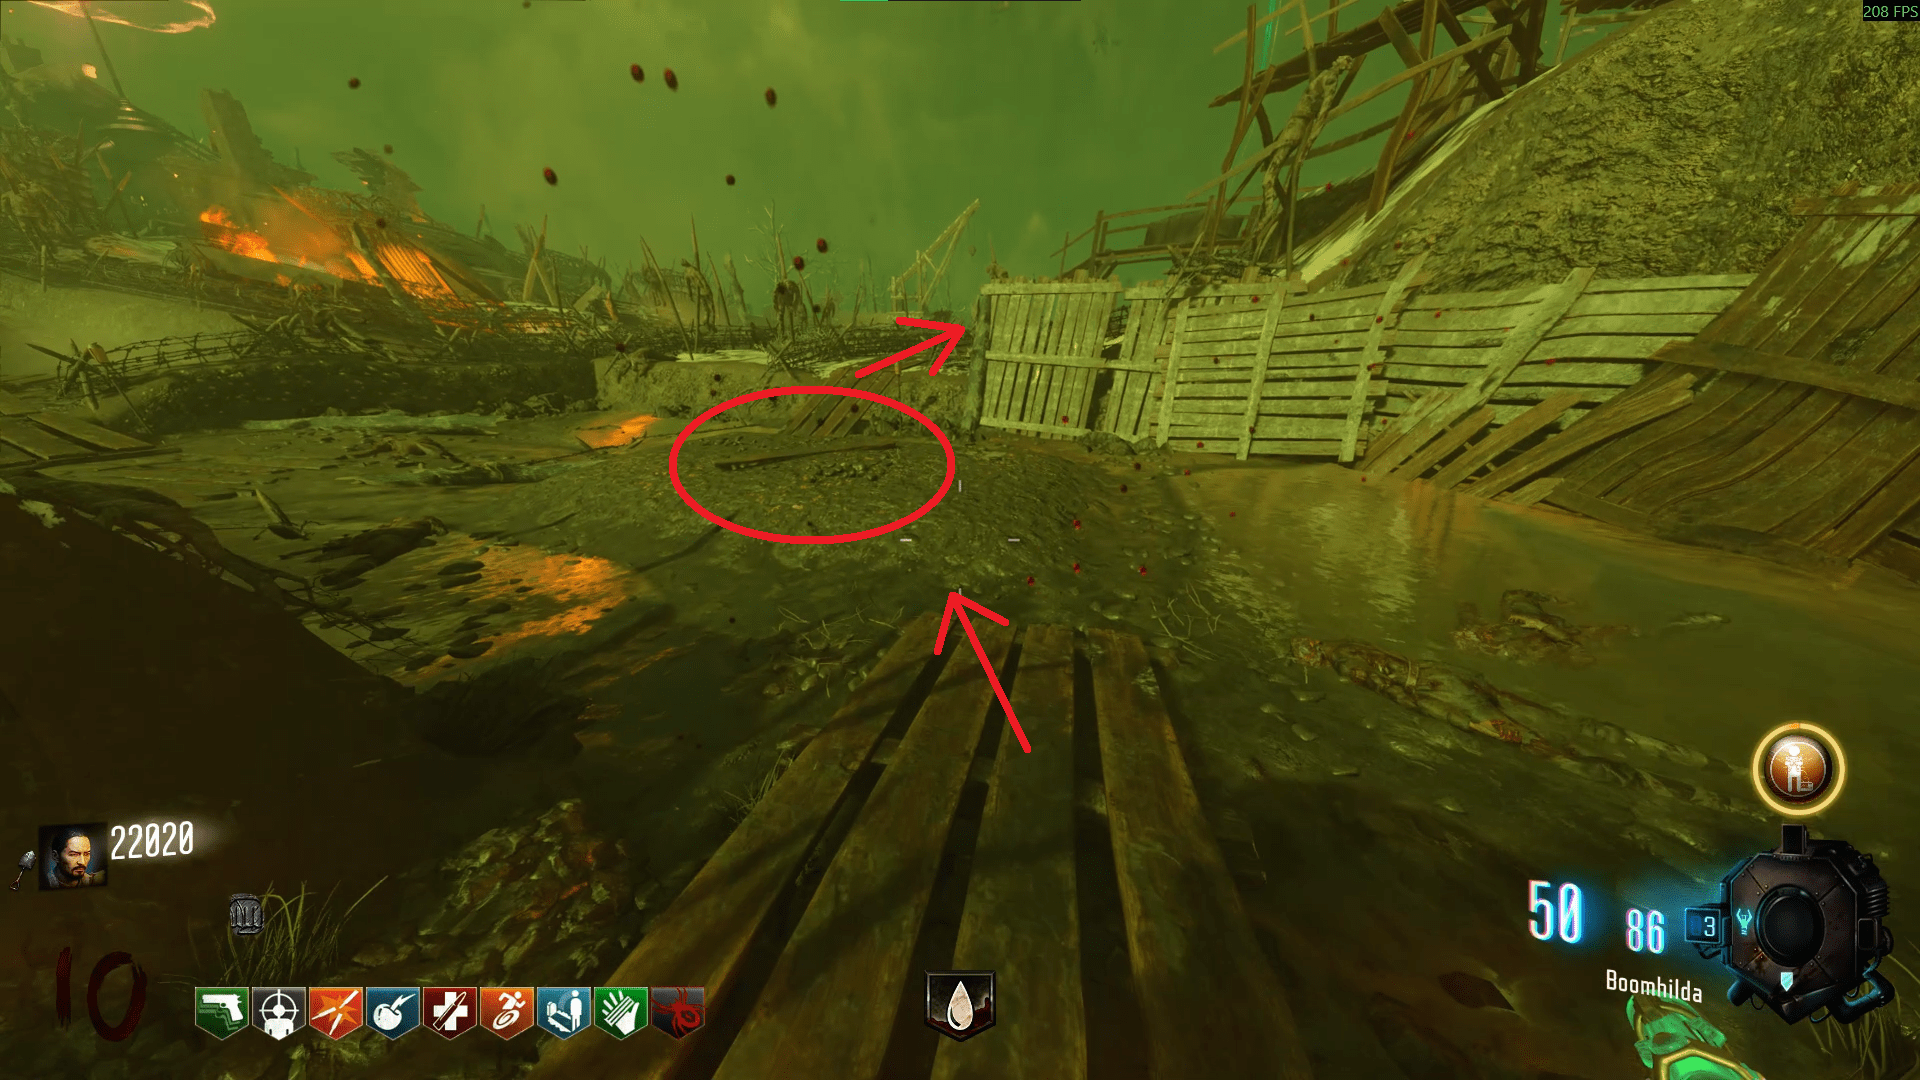
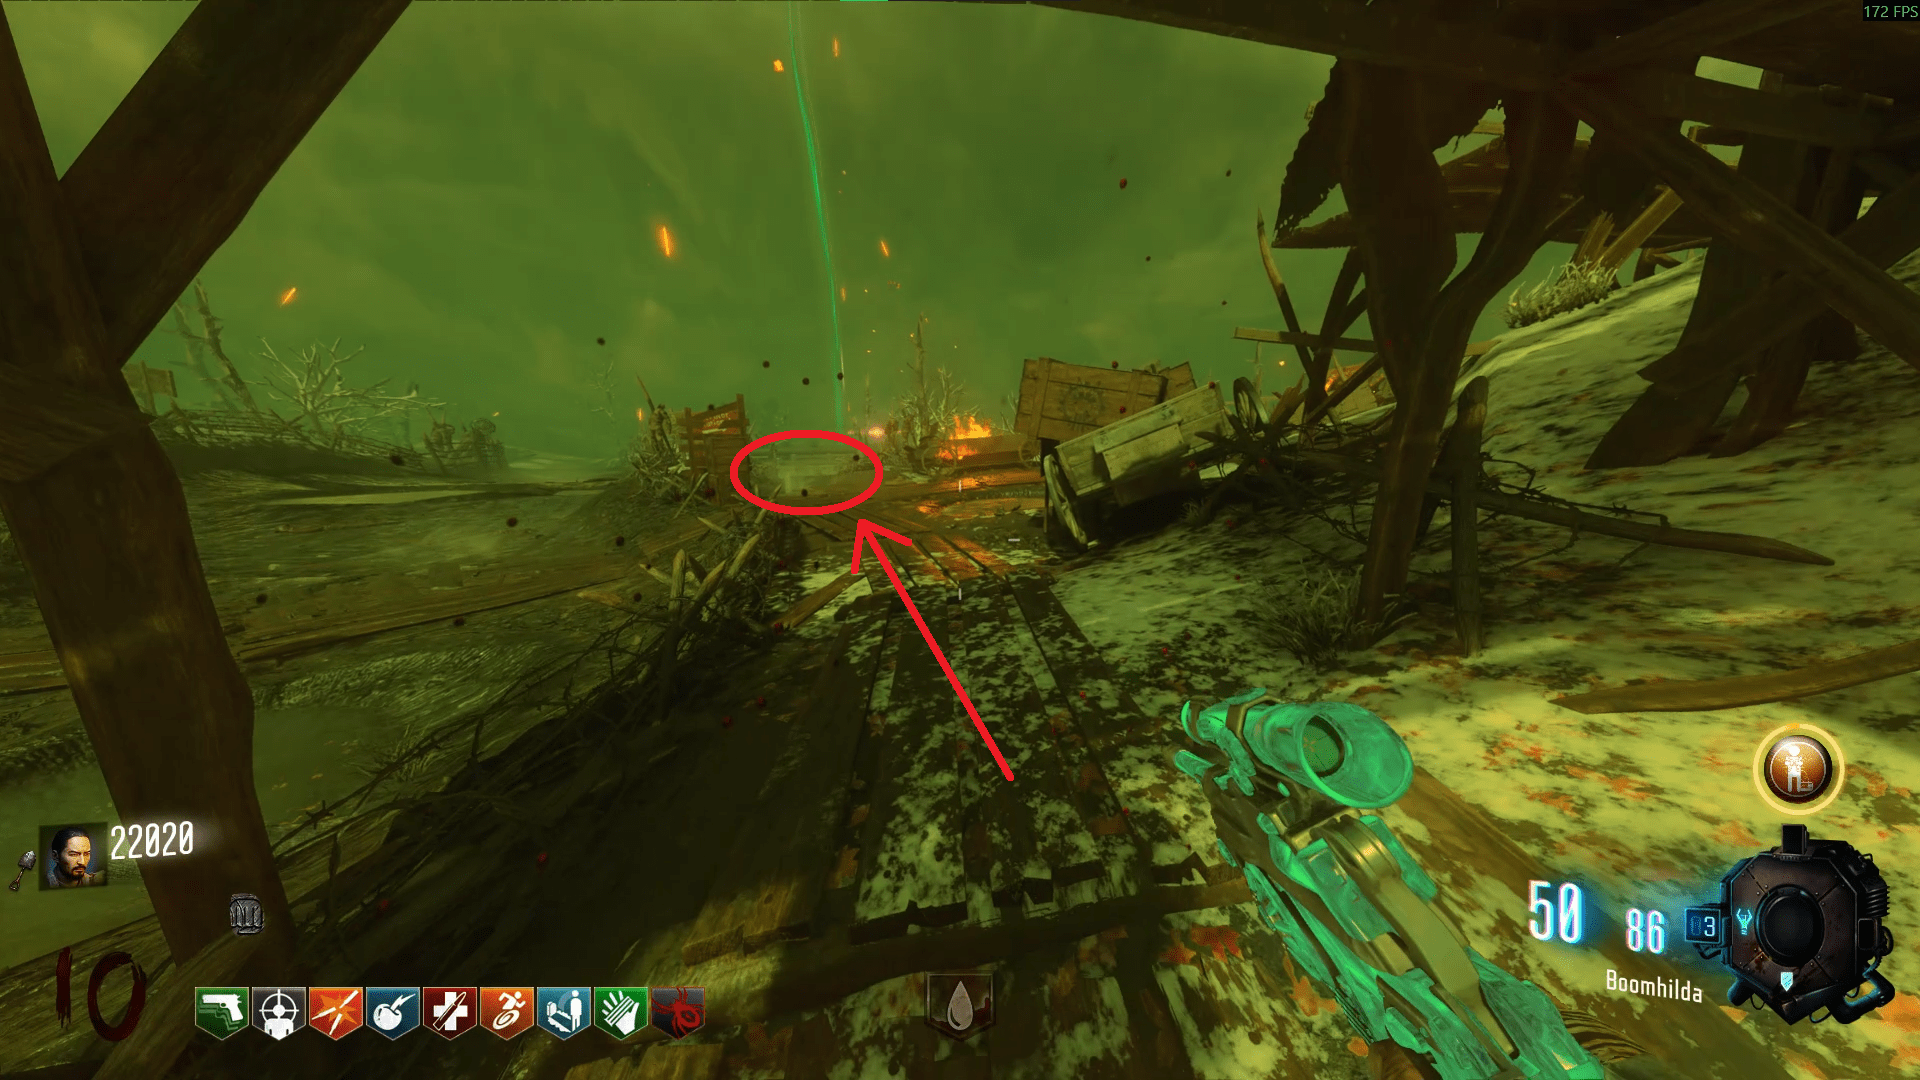
Place the tablet down back on the table you found it on earlier, then continue to get melee kills until the G-Strike appears like it does in the last screenshot. Just pick it up and you can continue the step.
You'll now need to place each of the staffs in their corresponding robots, this can be a little time consuming so be patient. If you're playing solo, I recommend picking one staff and sticking to it until that robot comes, then cycling between them until all staffs are in. However, leave the Wind staff until last, I'll explain why in step 4, so make sure you read ahead here.- So firstly, the Fire staff belongs in the newly spawned pedestal in the Mound, where all the staffs are located. You'll notice it right away.
- The Lightning staff belongs in 'Thor', the Spawn robot.
- The Ice staff belongs in 'Freya', the Church robot.
- The Wind staff belongs in 'Odin', the Middle robot.
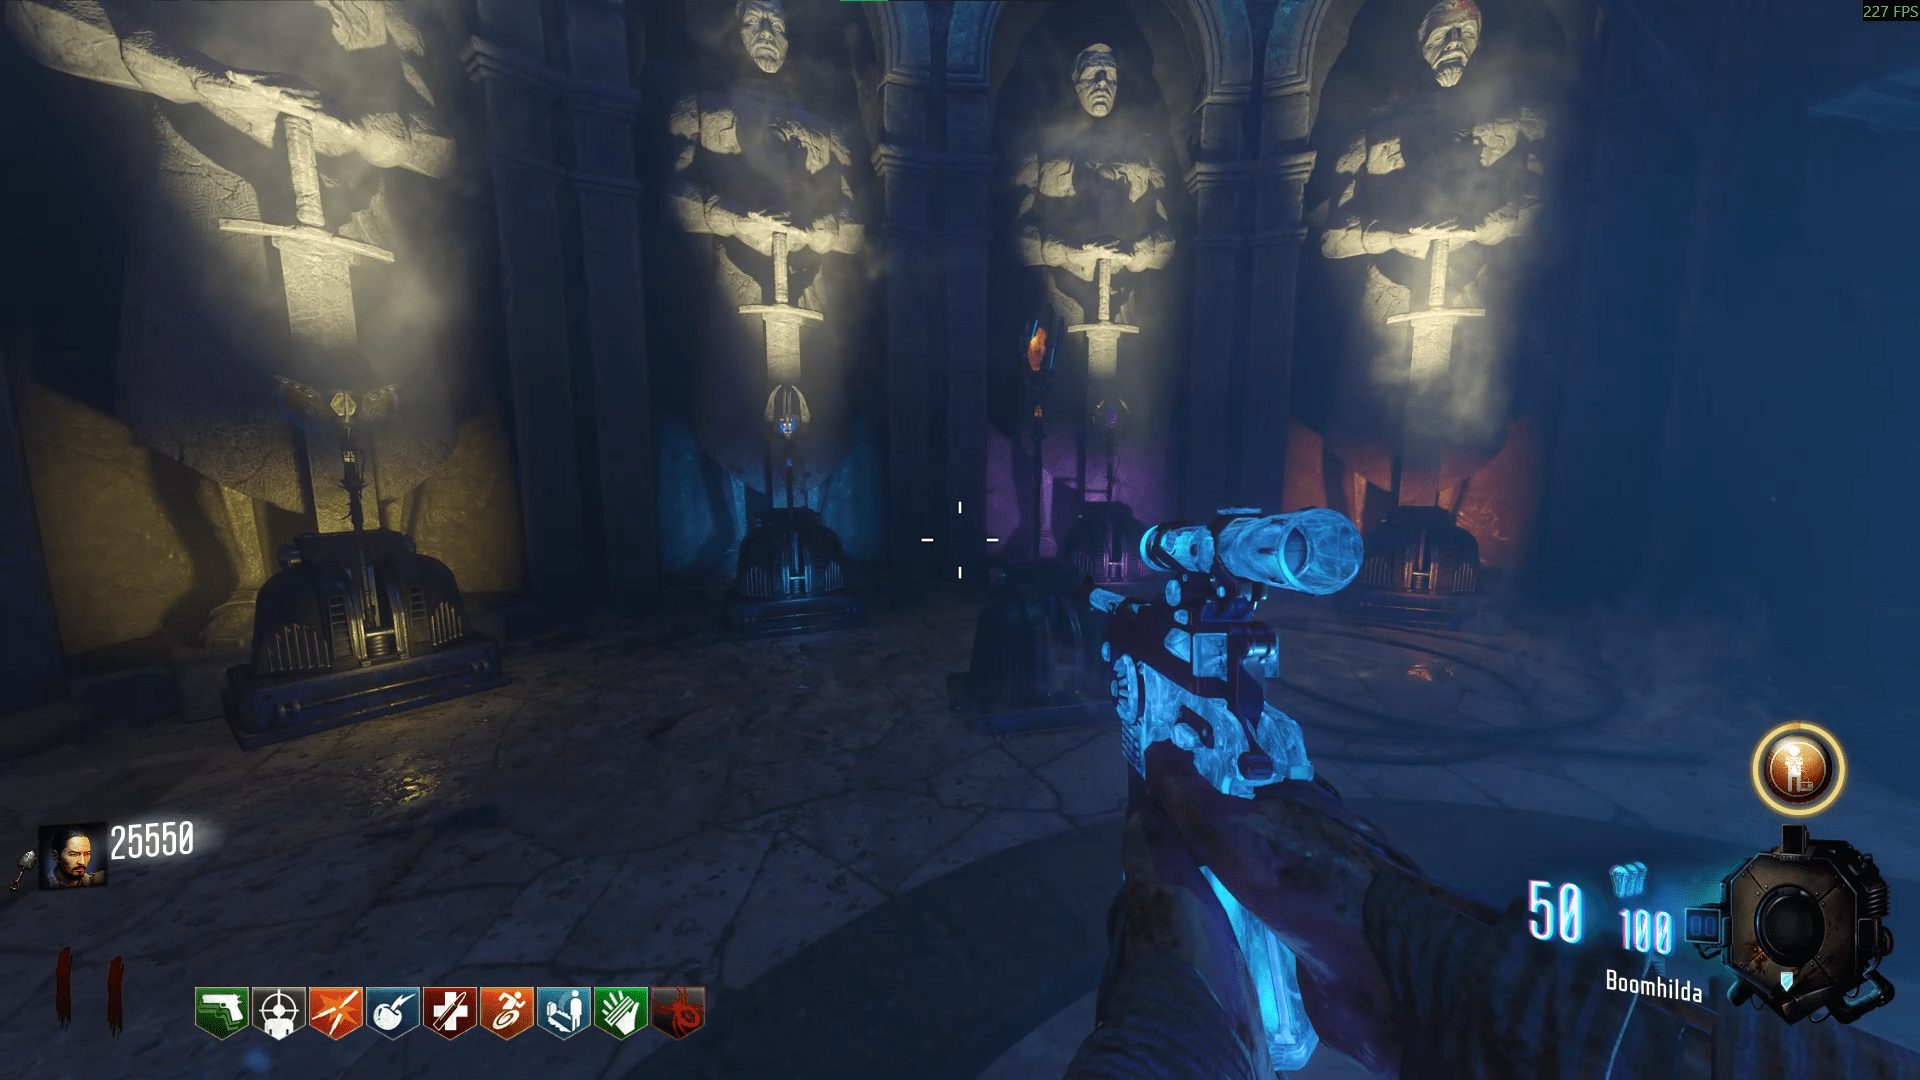
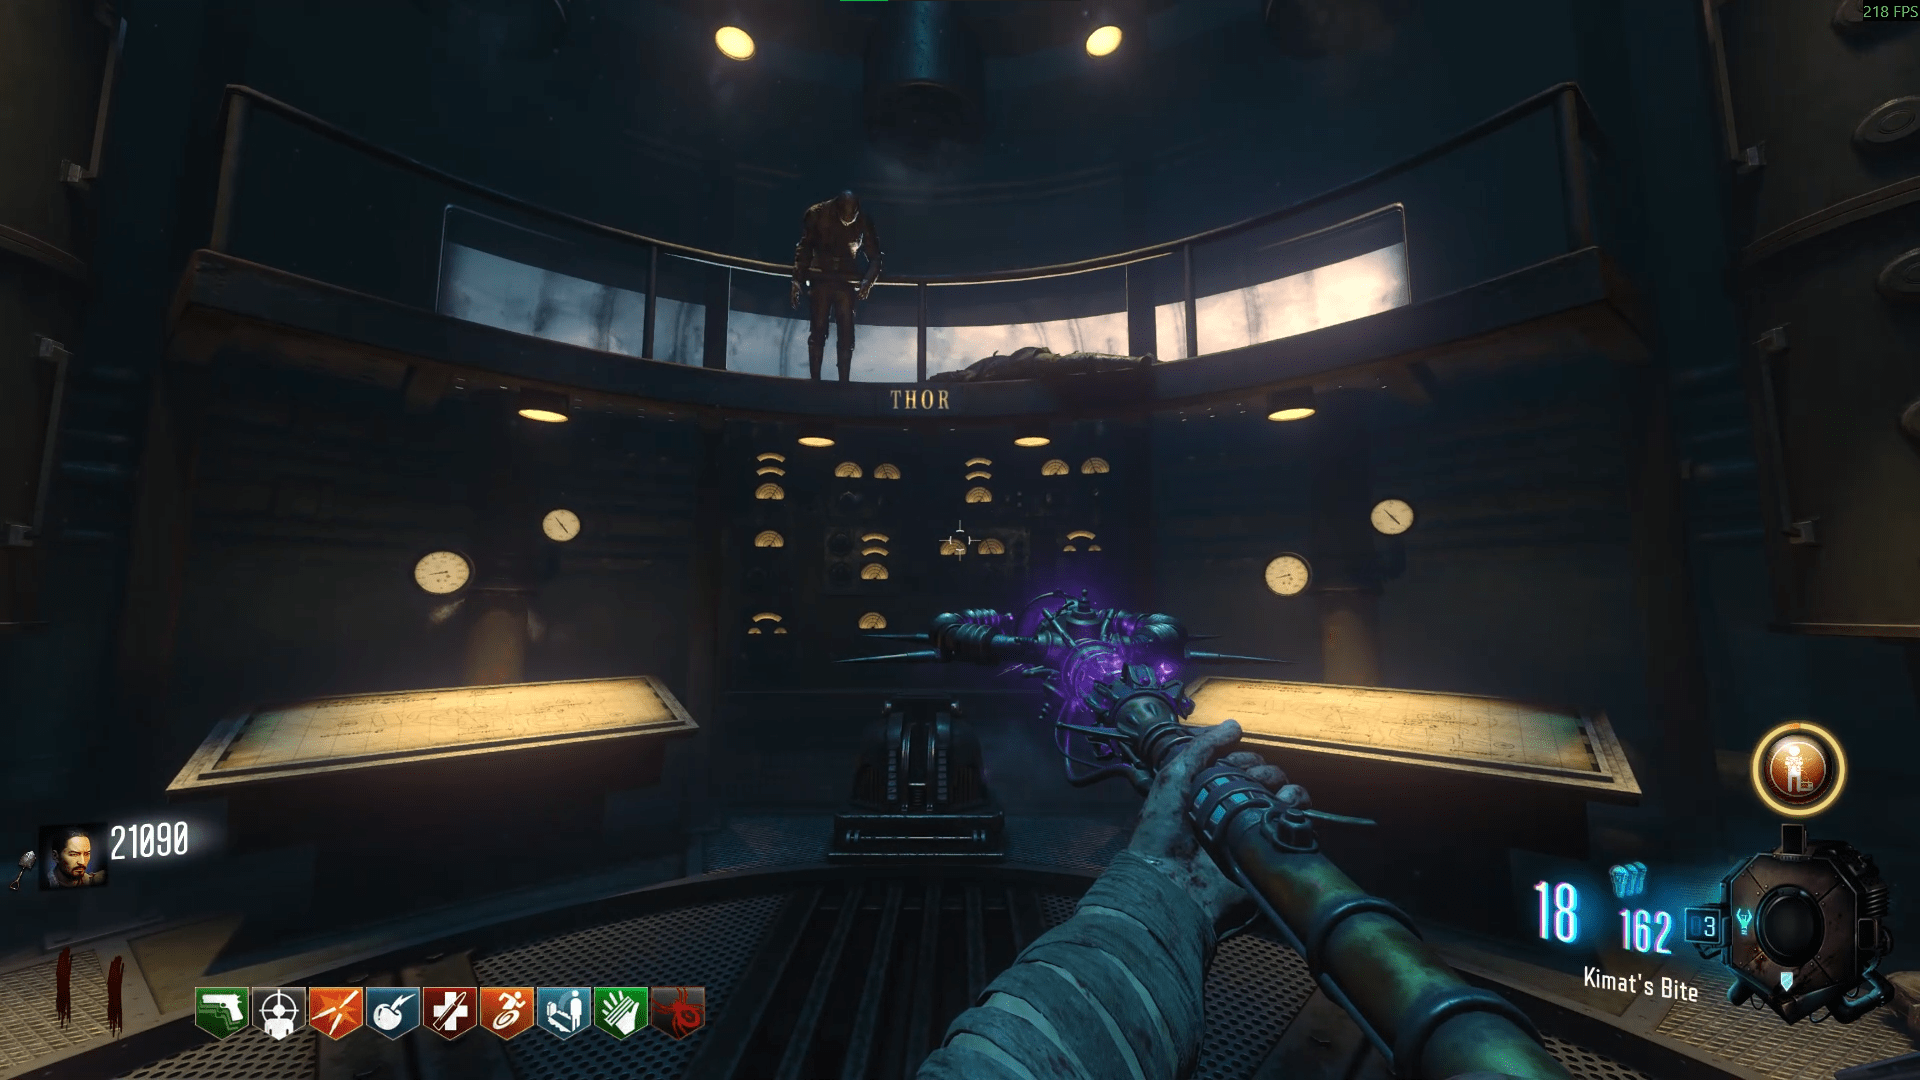
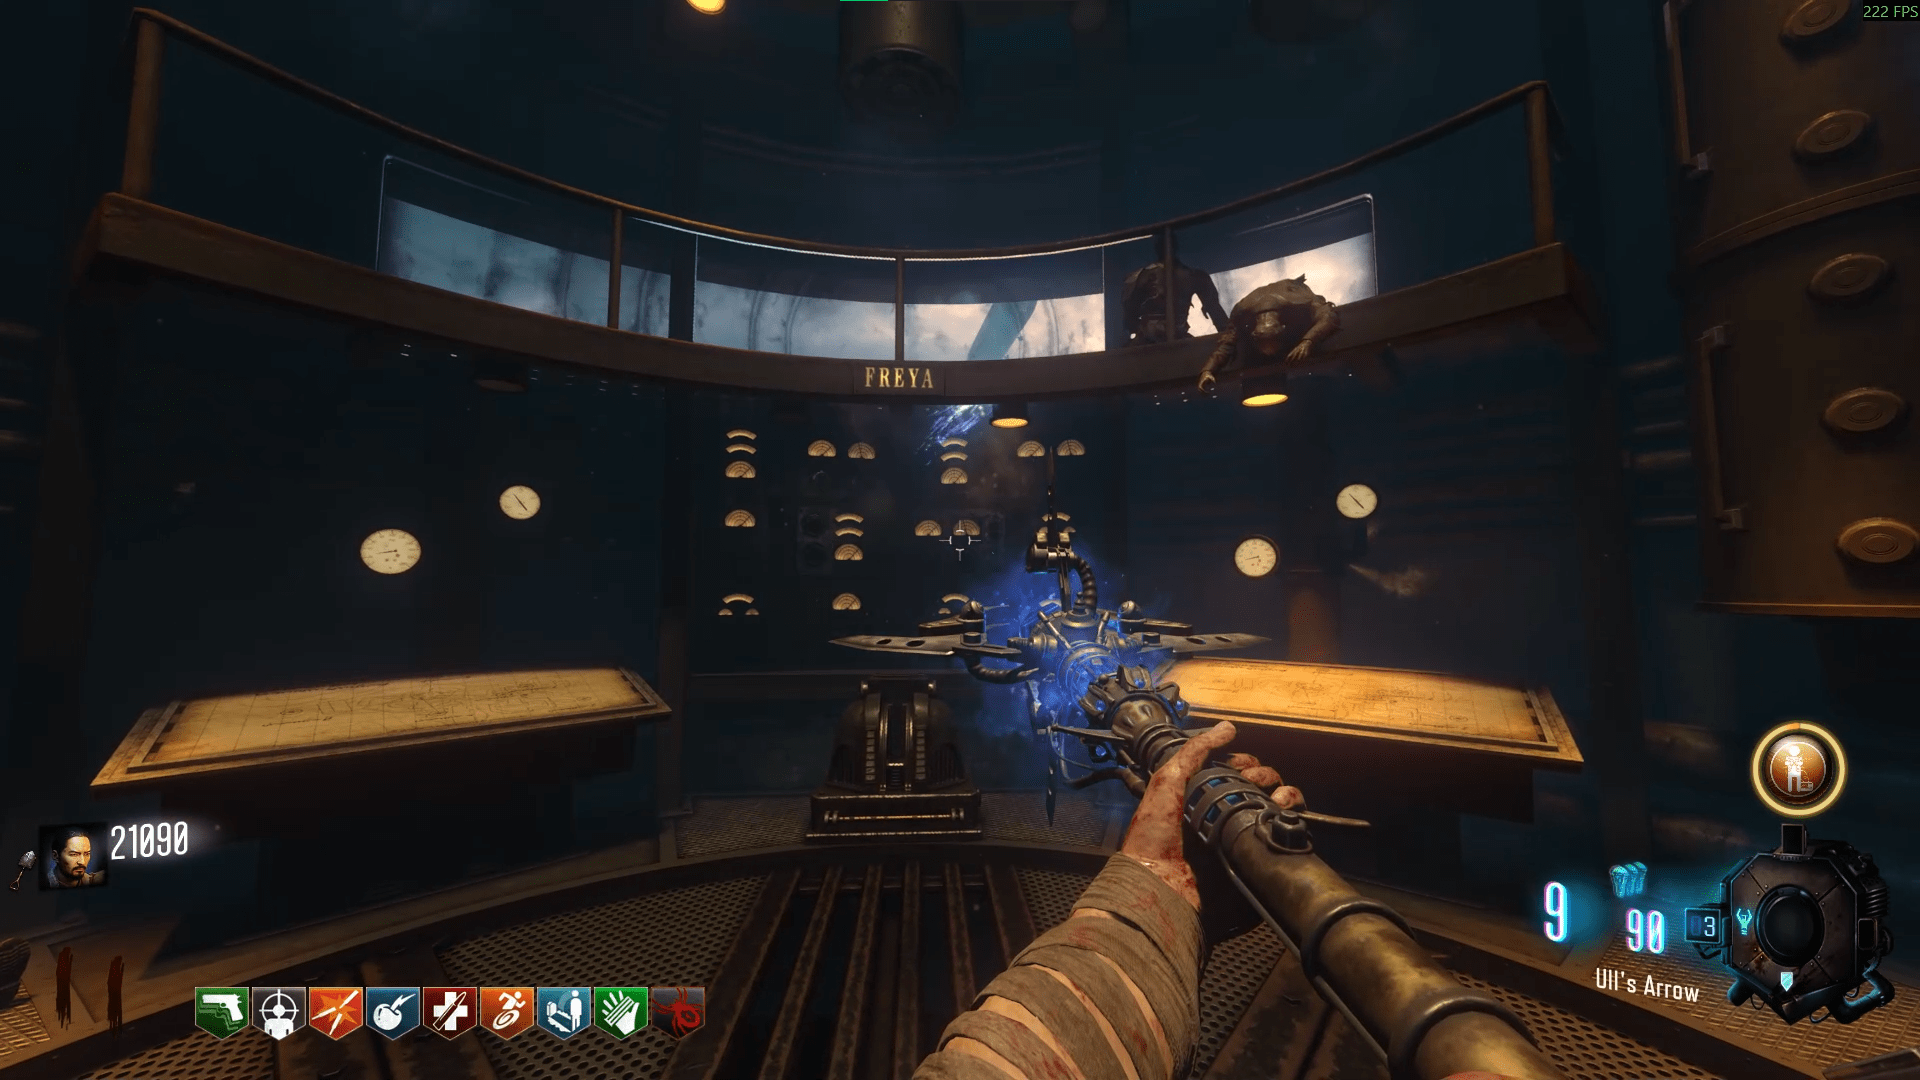
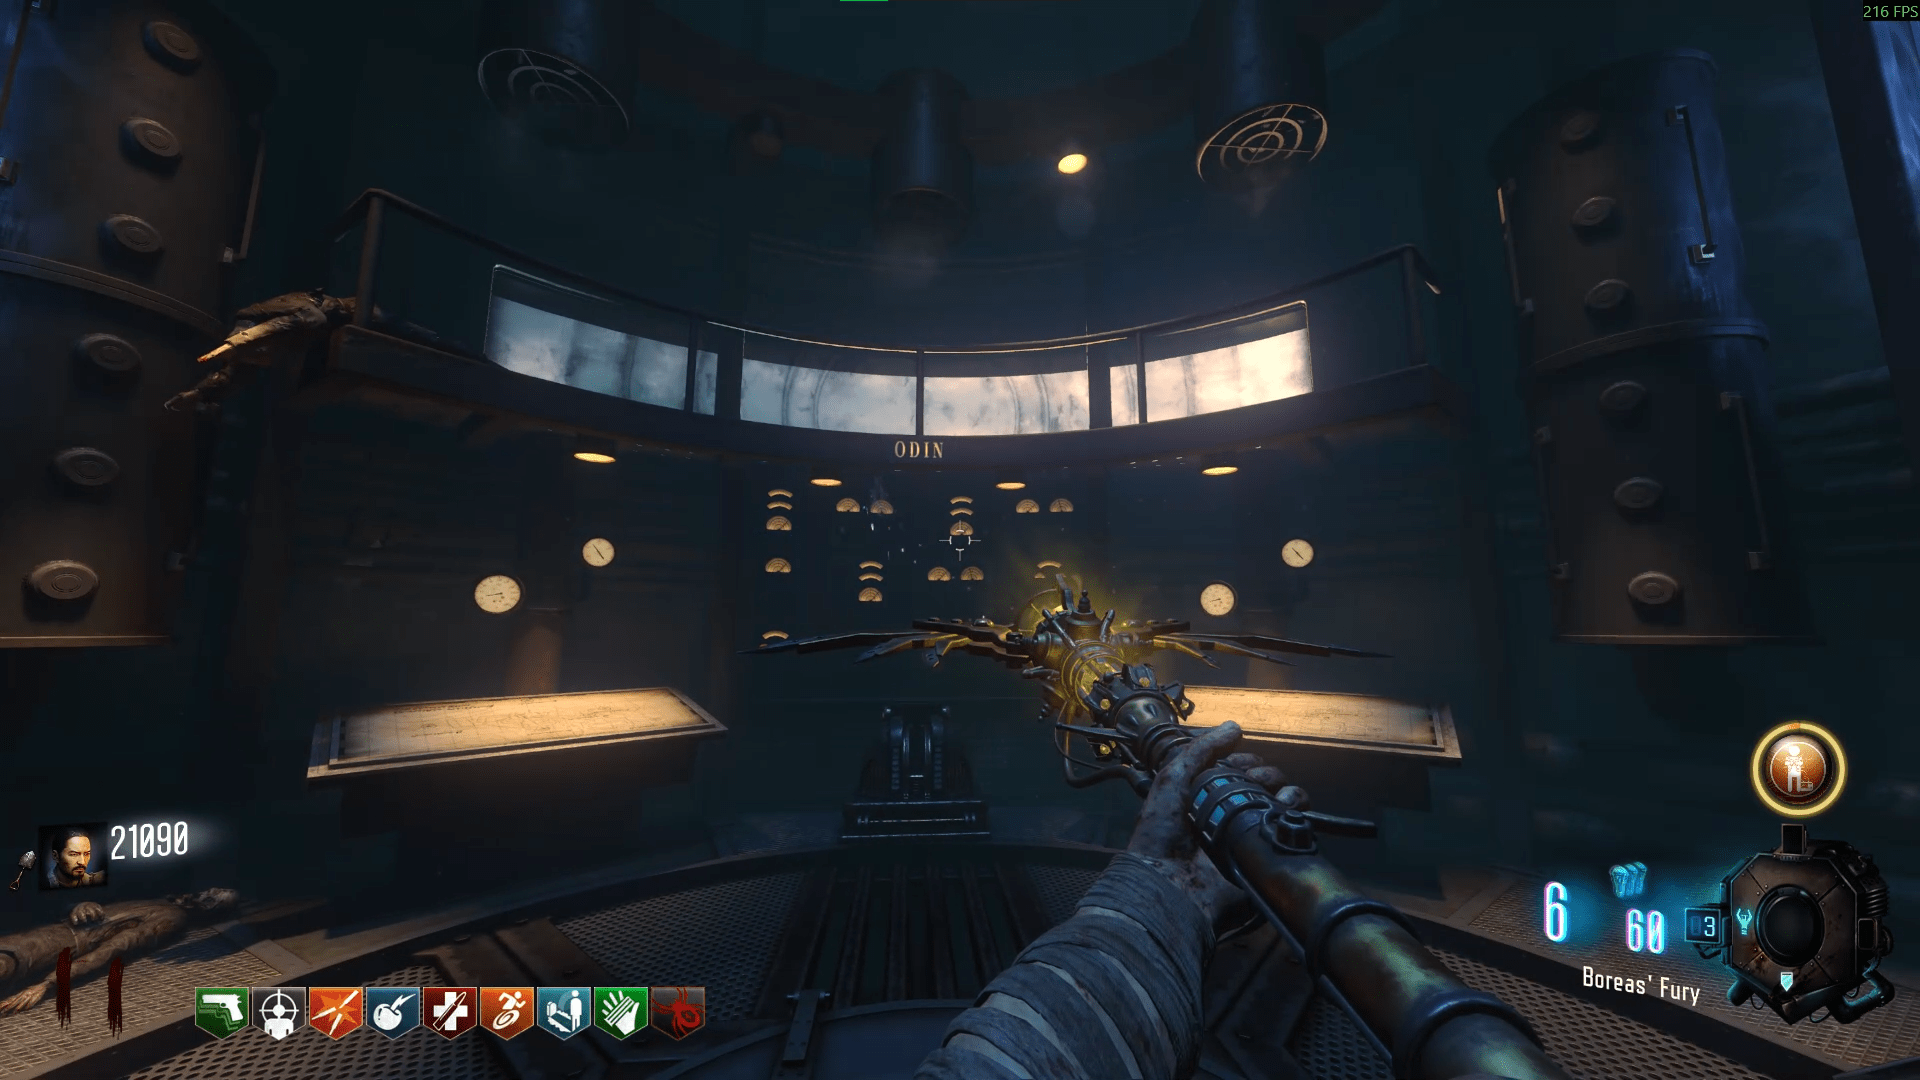
Now if you're doing the Wind staff last, make sure you get into the giant through one of the footprints either side of generator 5 because the next step is going to be a bit tricky. If you're doing this co-op, make sure the person with the Wind staff doesn't have the G-Strikes as you'll need the person with the G-Strikes to stay on the ground.
In co-op, have the person in the giant to press the button and communicate when to throw the G-Strike on the seal. This gives you more time to aim and succeed. Then you will need to send the Maxis drone out into the new seal hole to start the panzer onslaught.
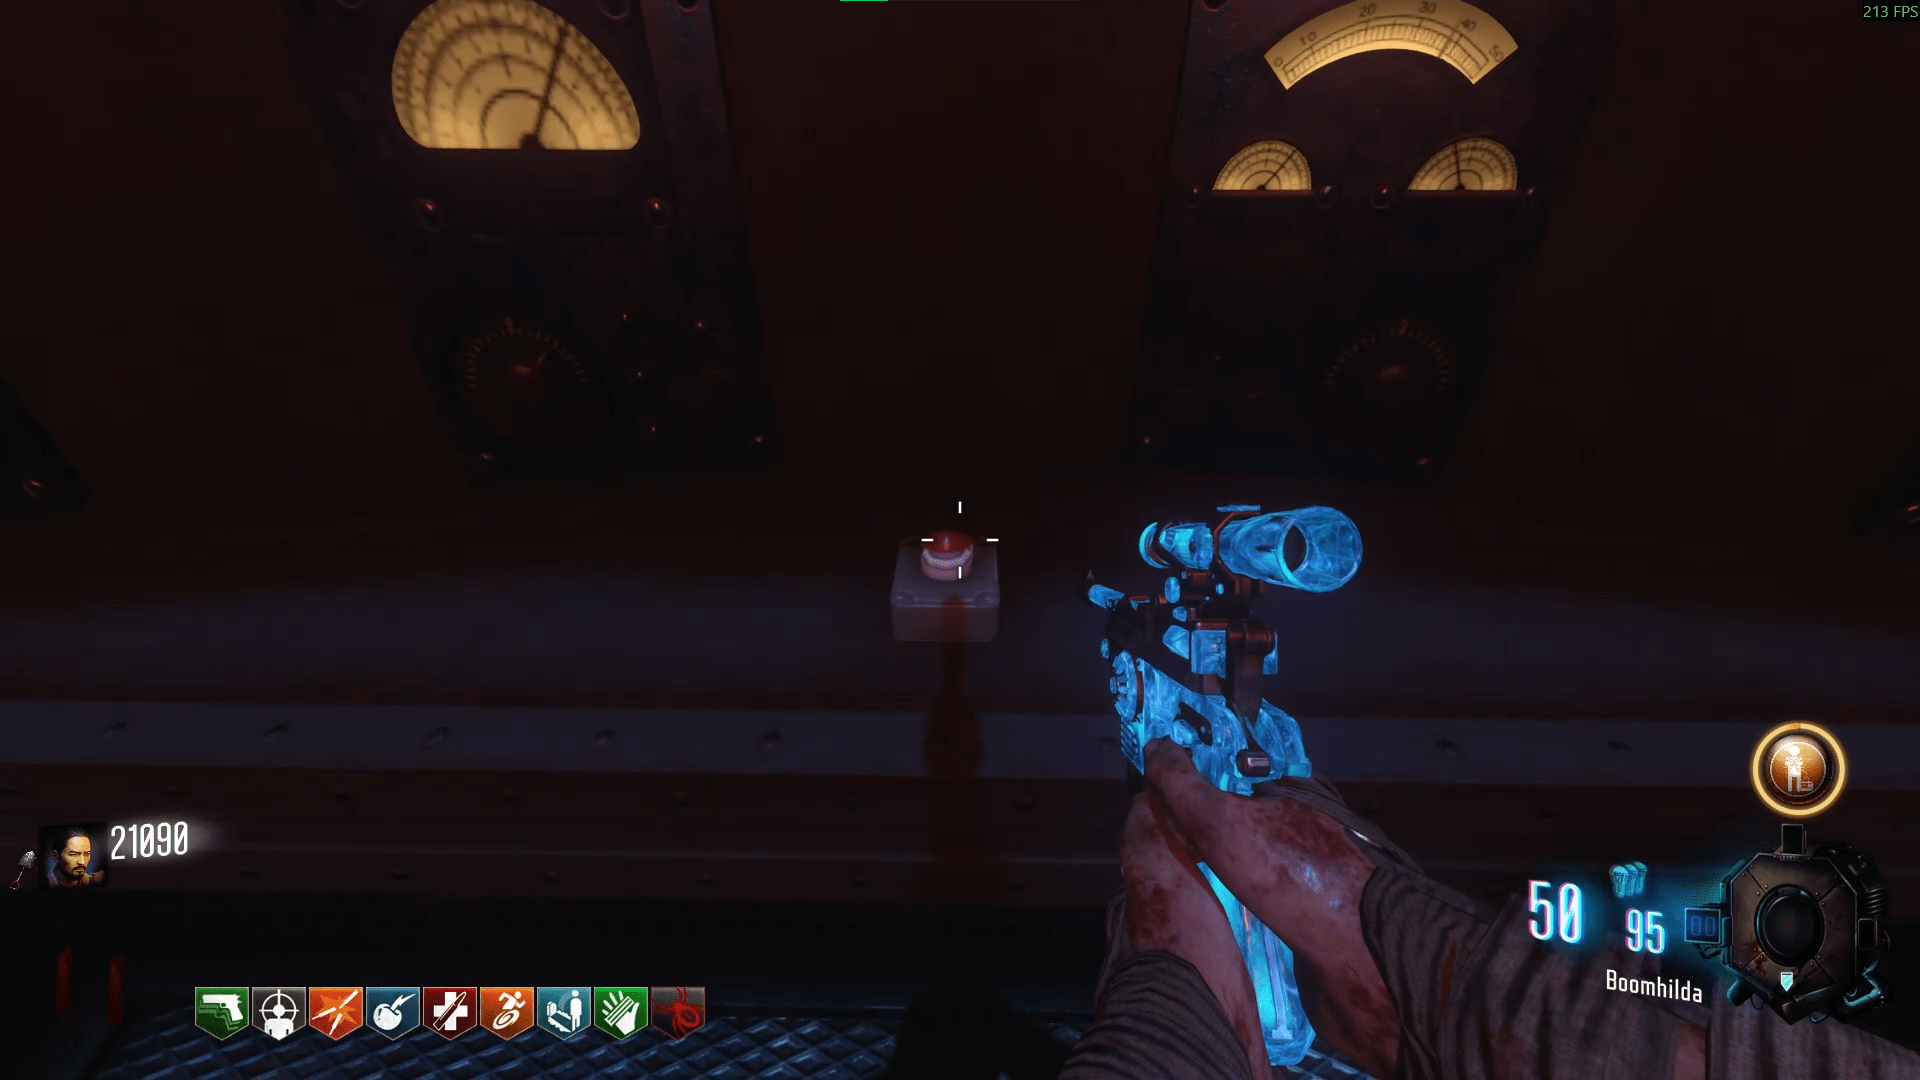
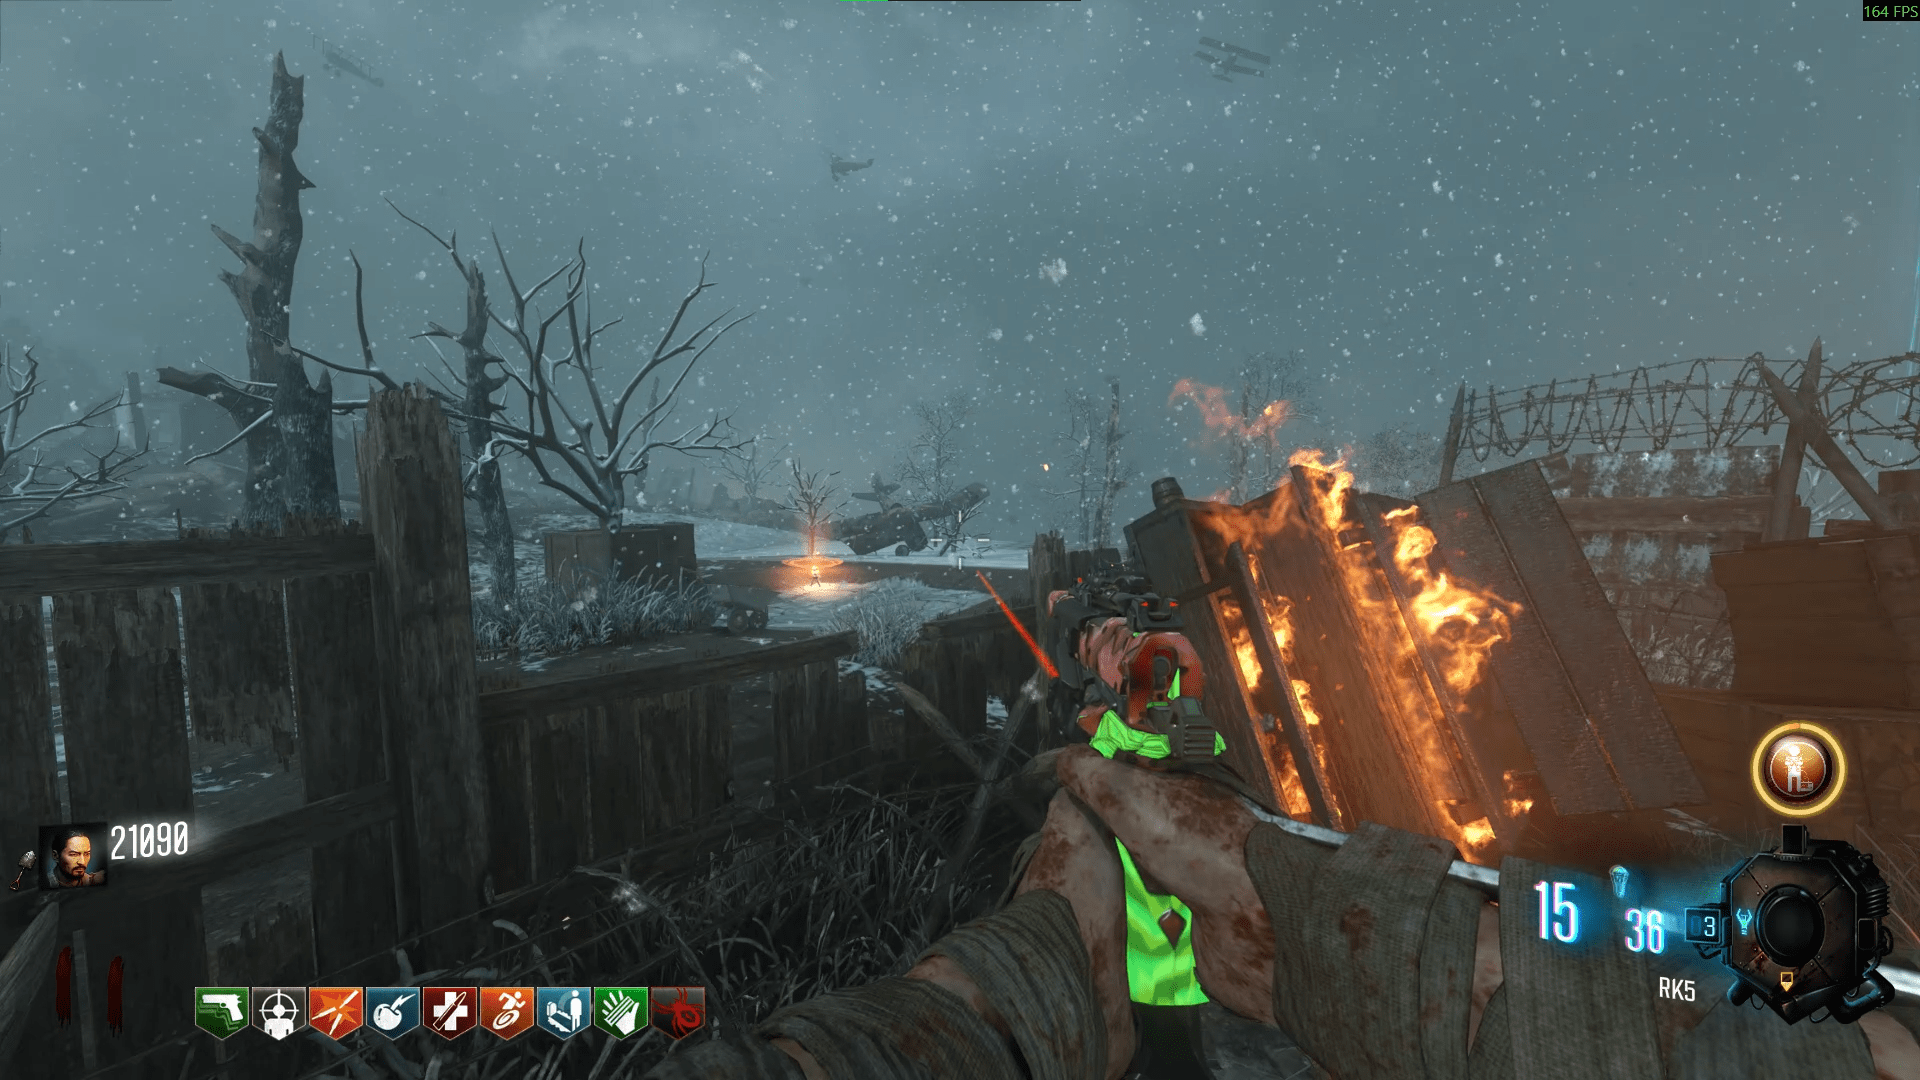
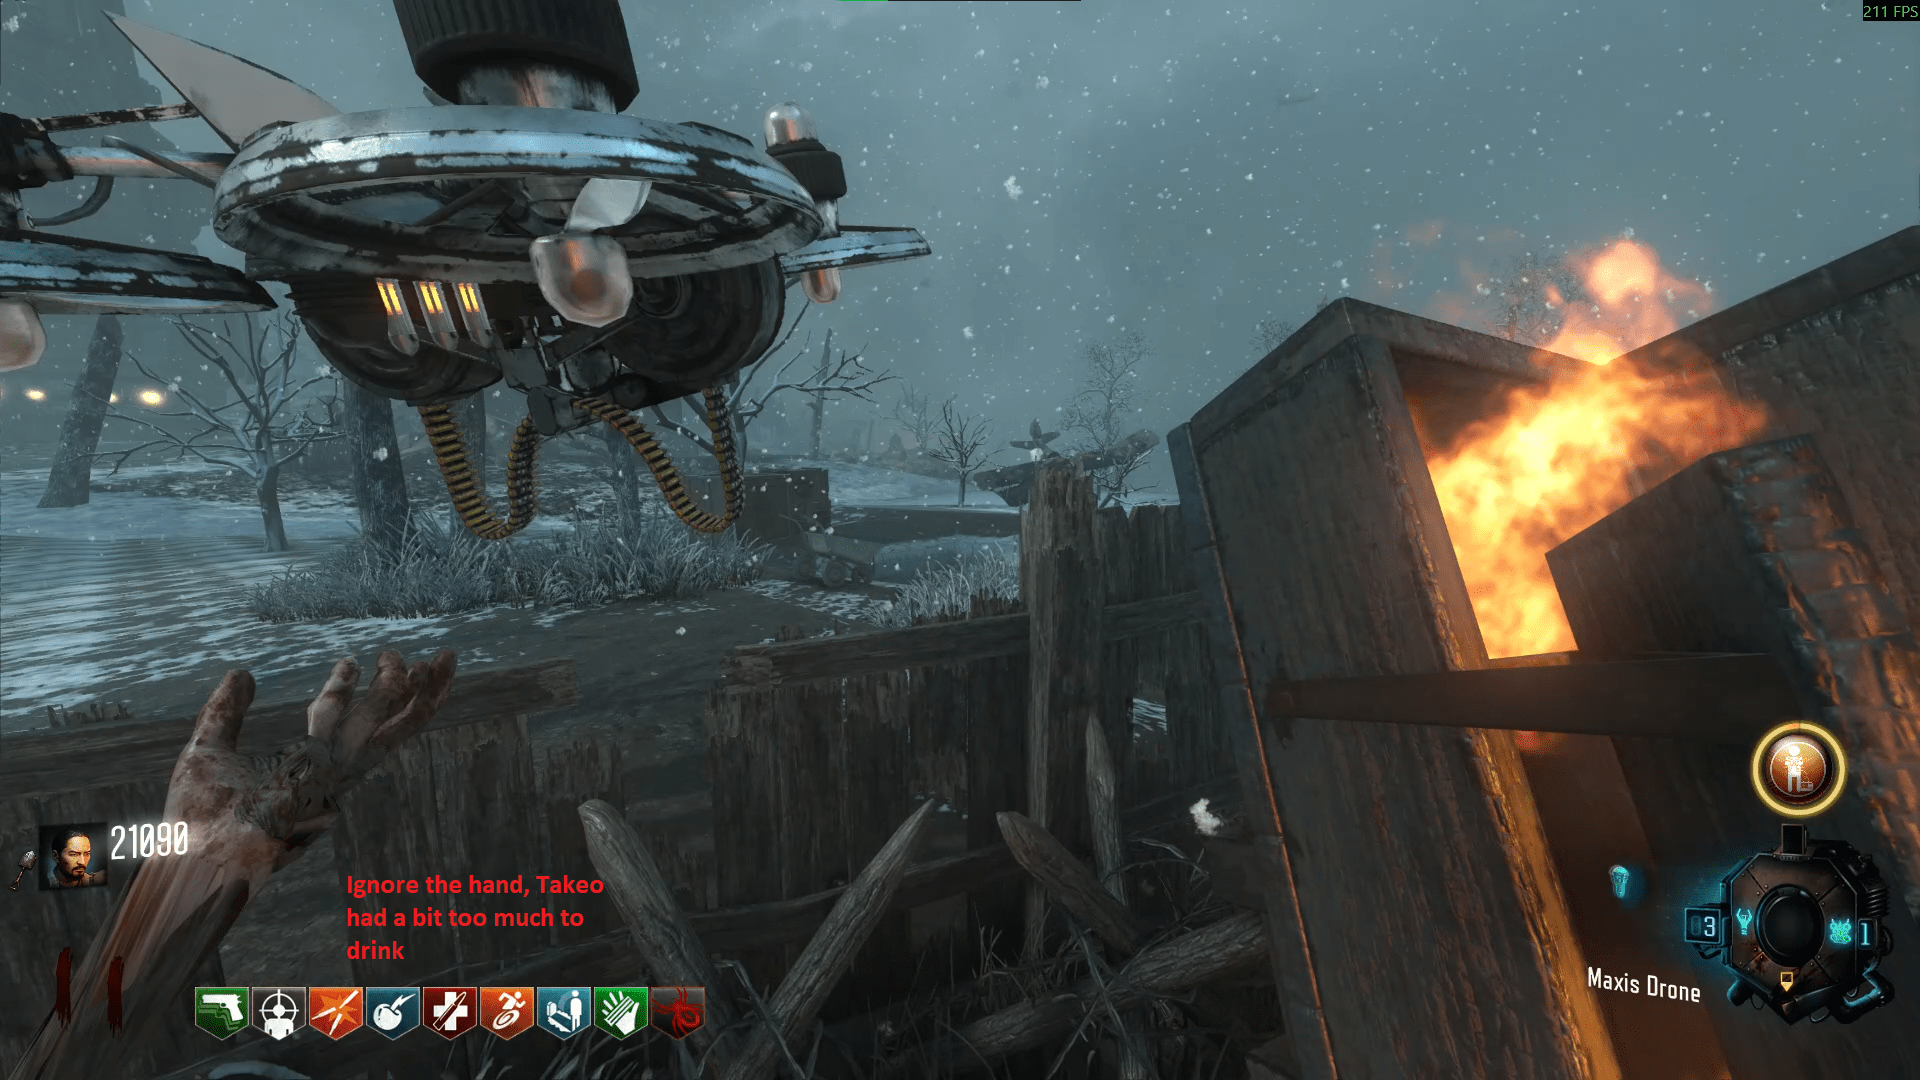
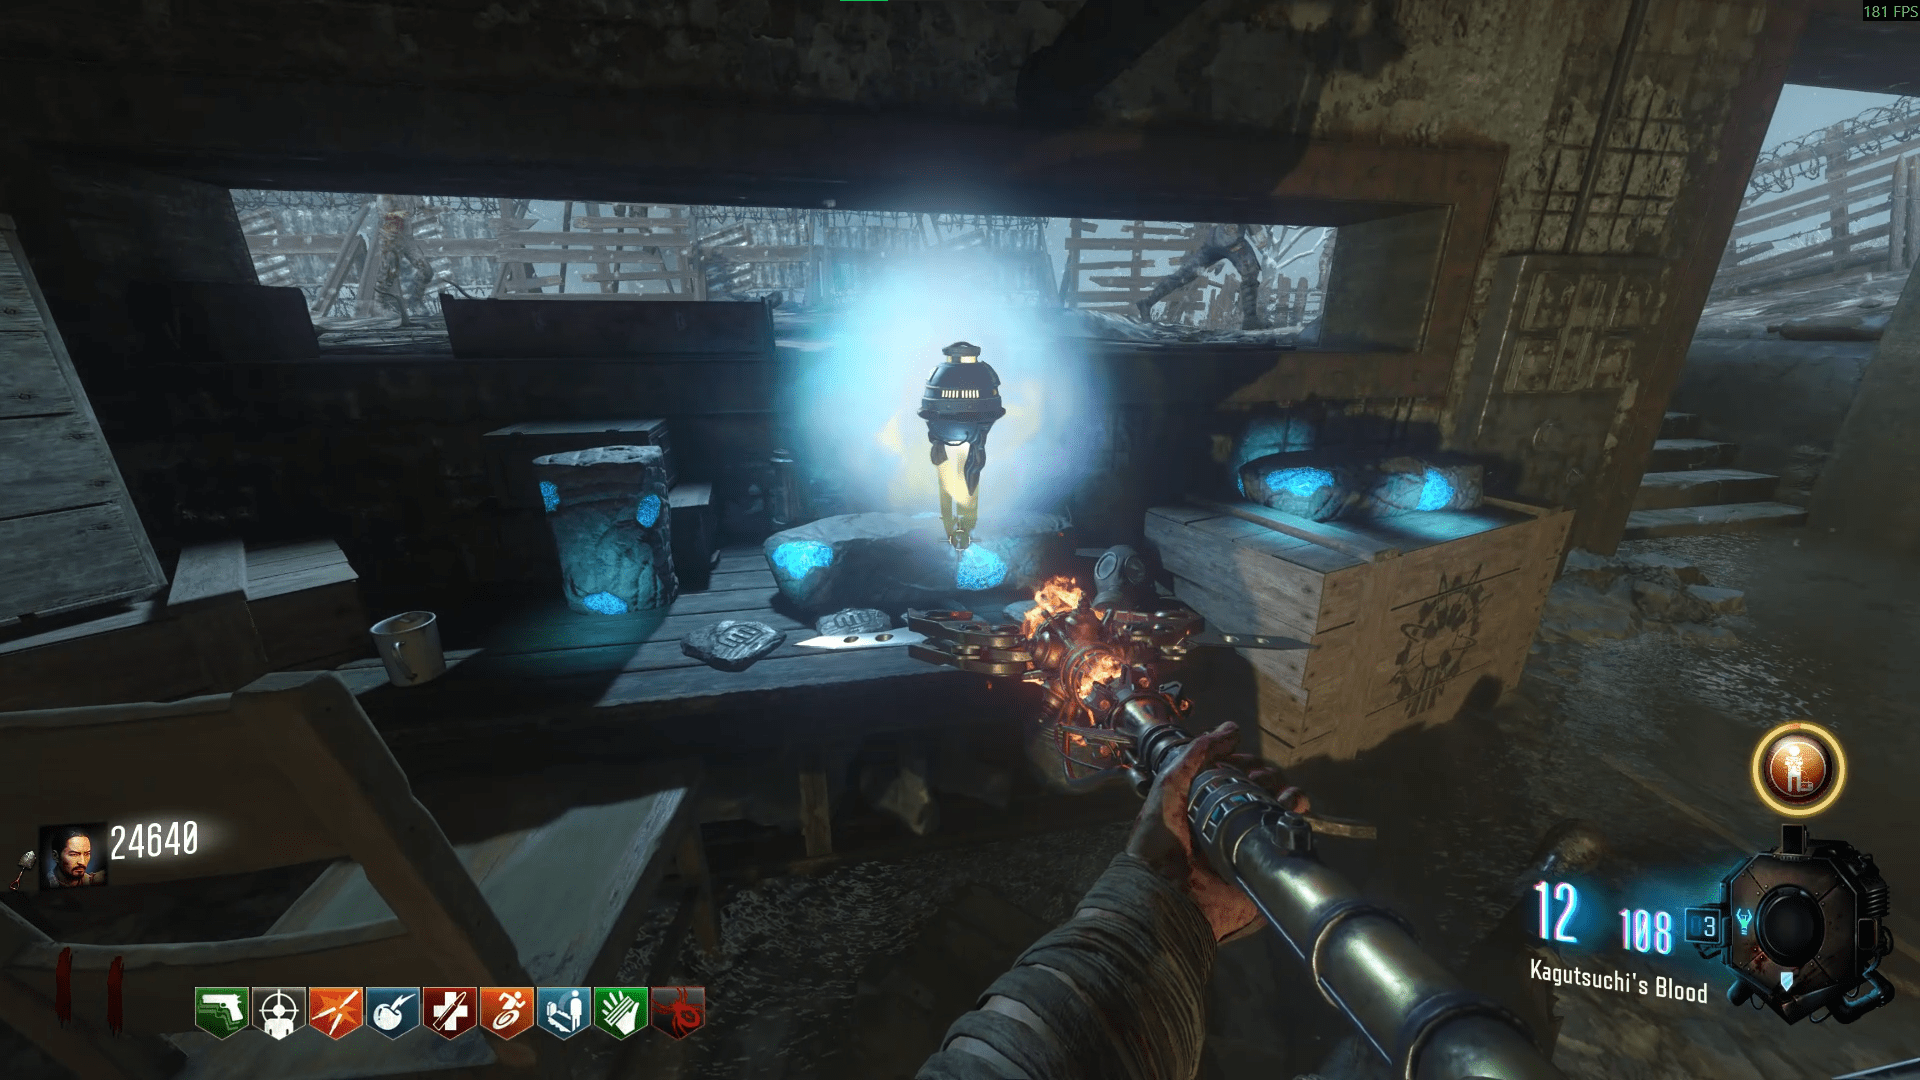
Be wary that sending the Maxis drone out will summon around 10 Panzersoldats, be ready when they come with either a strong weapon such as the Boomhilda (PaP'd Mauser/starting pistol) or the Fire staff, Kagutsuchi's Blood. Other staffs work too but the Fire staff is the most effective.
After you've massacred the German army, you'll be ready to Skewer the Winged Beast. I bet you've noticed a trend with these step names, yea? STEP EIGHT REZNOV, FREEDOM
- In the same footprint as the Ice staff gravestone, opposite side of it.
- Just outside the steps leading up to the Mound, near the MP-40 wallbuy.
- Right before entering the generator 5 area on the left side.
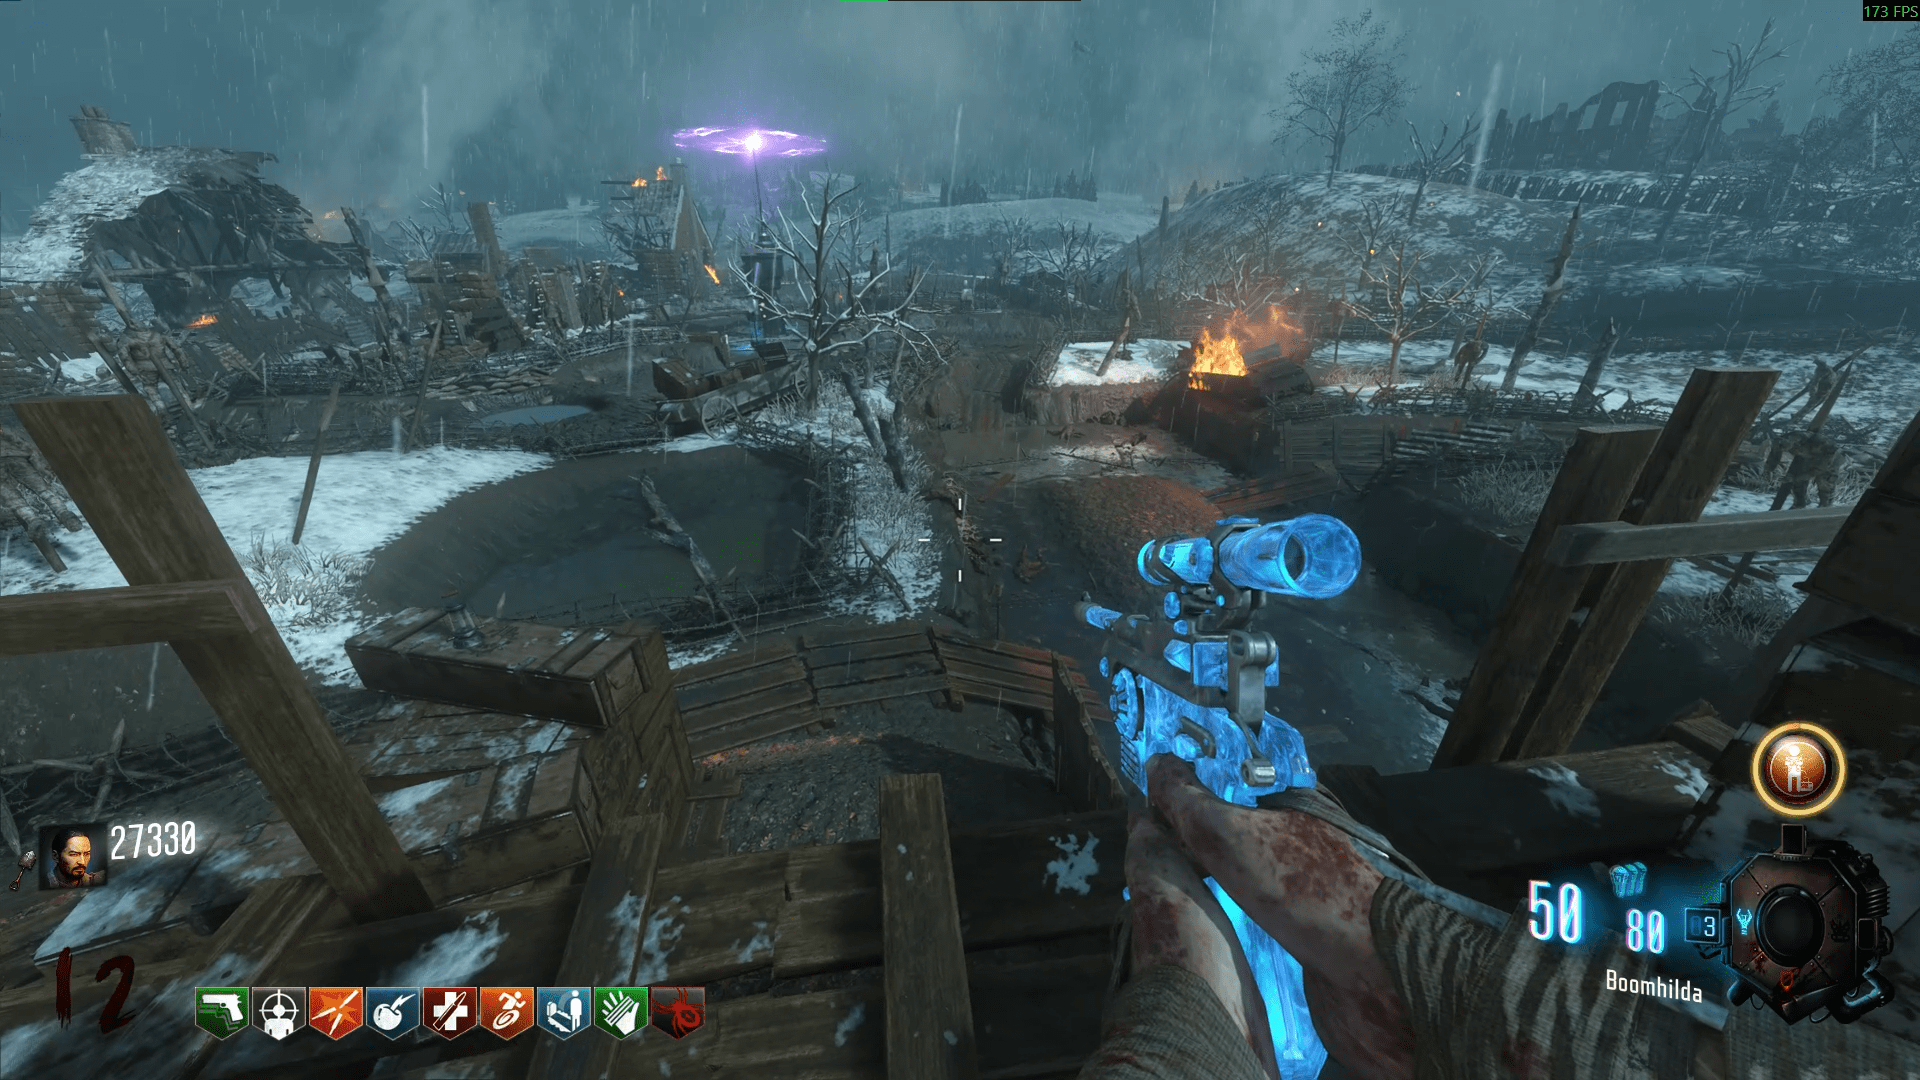
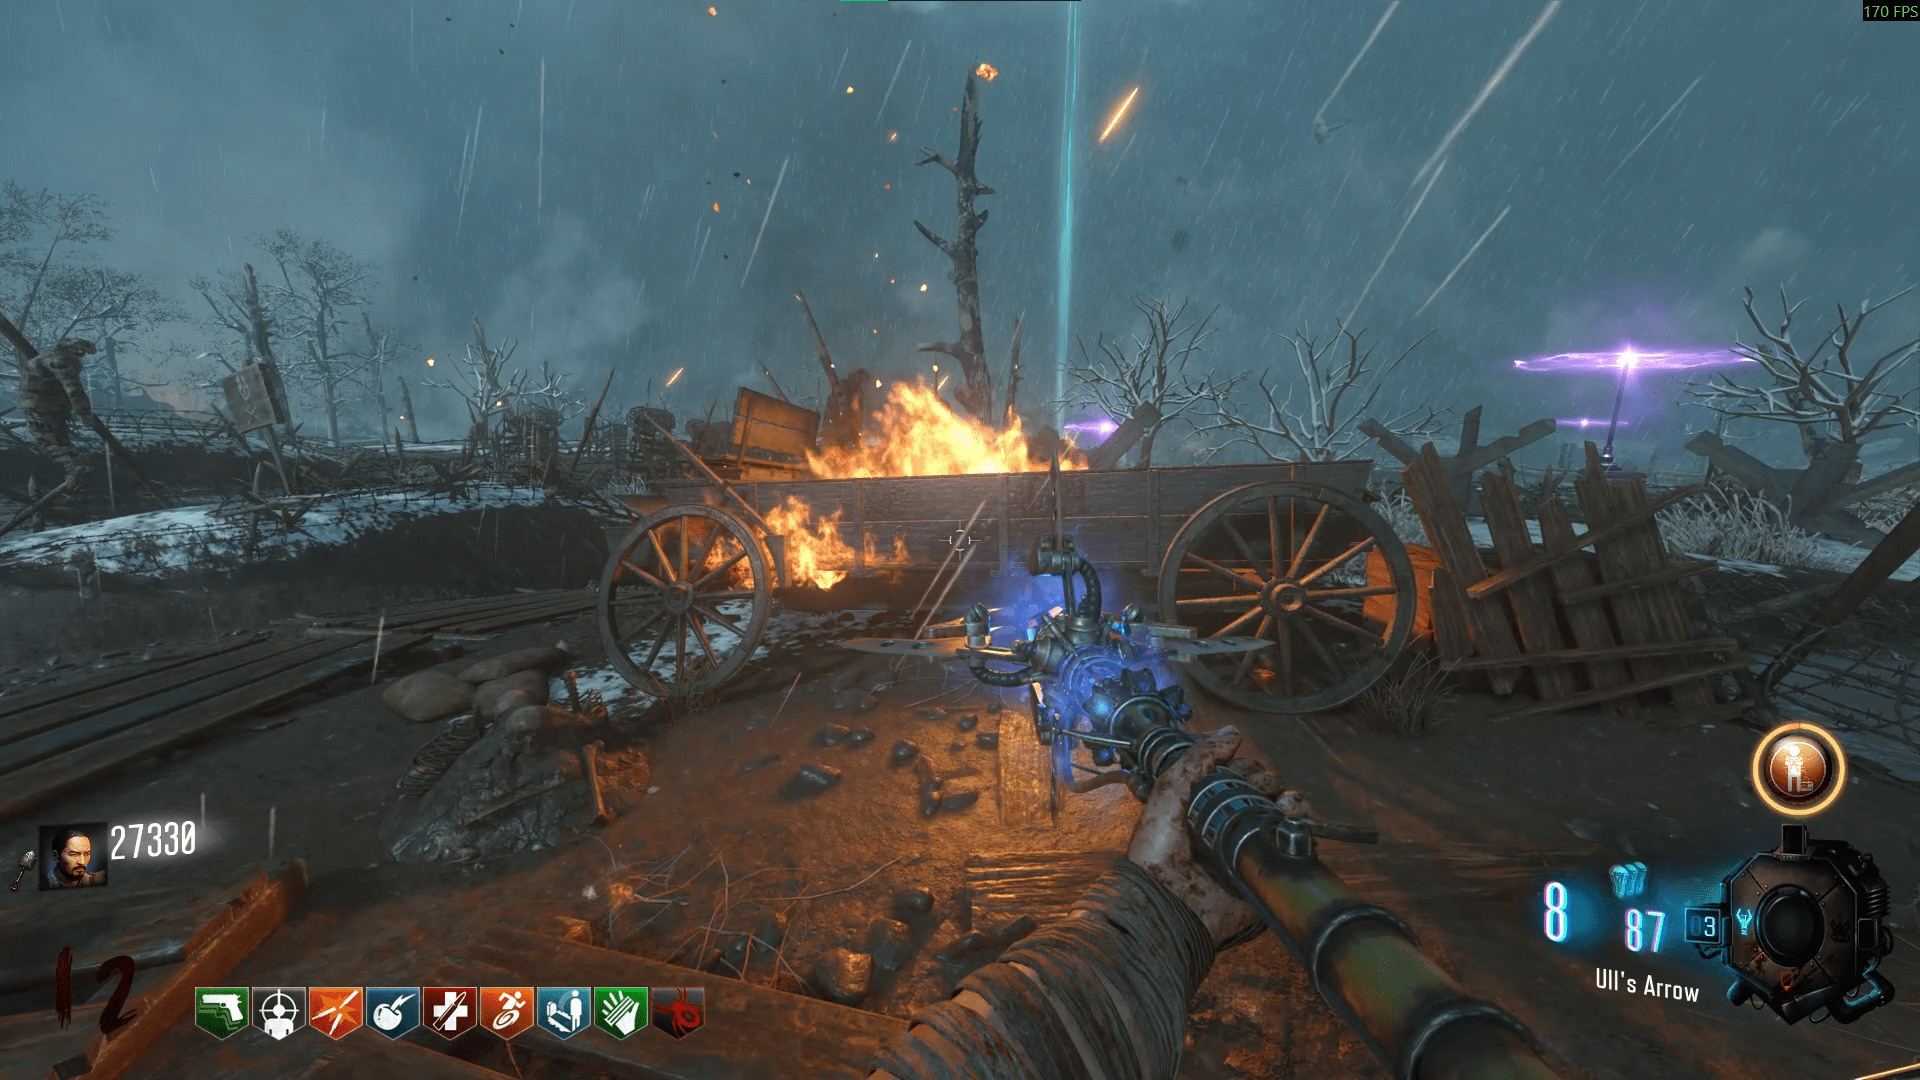
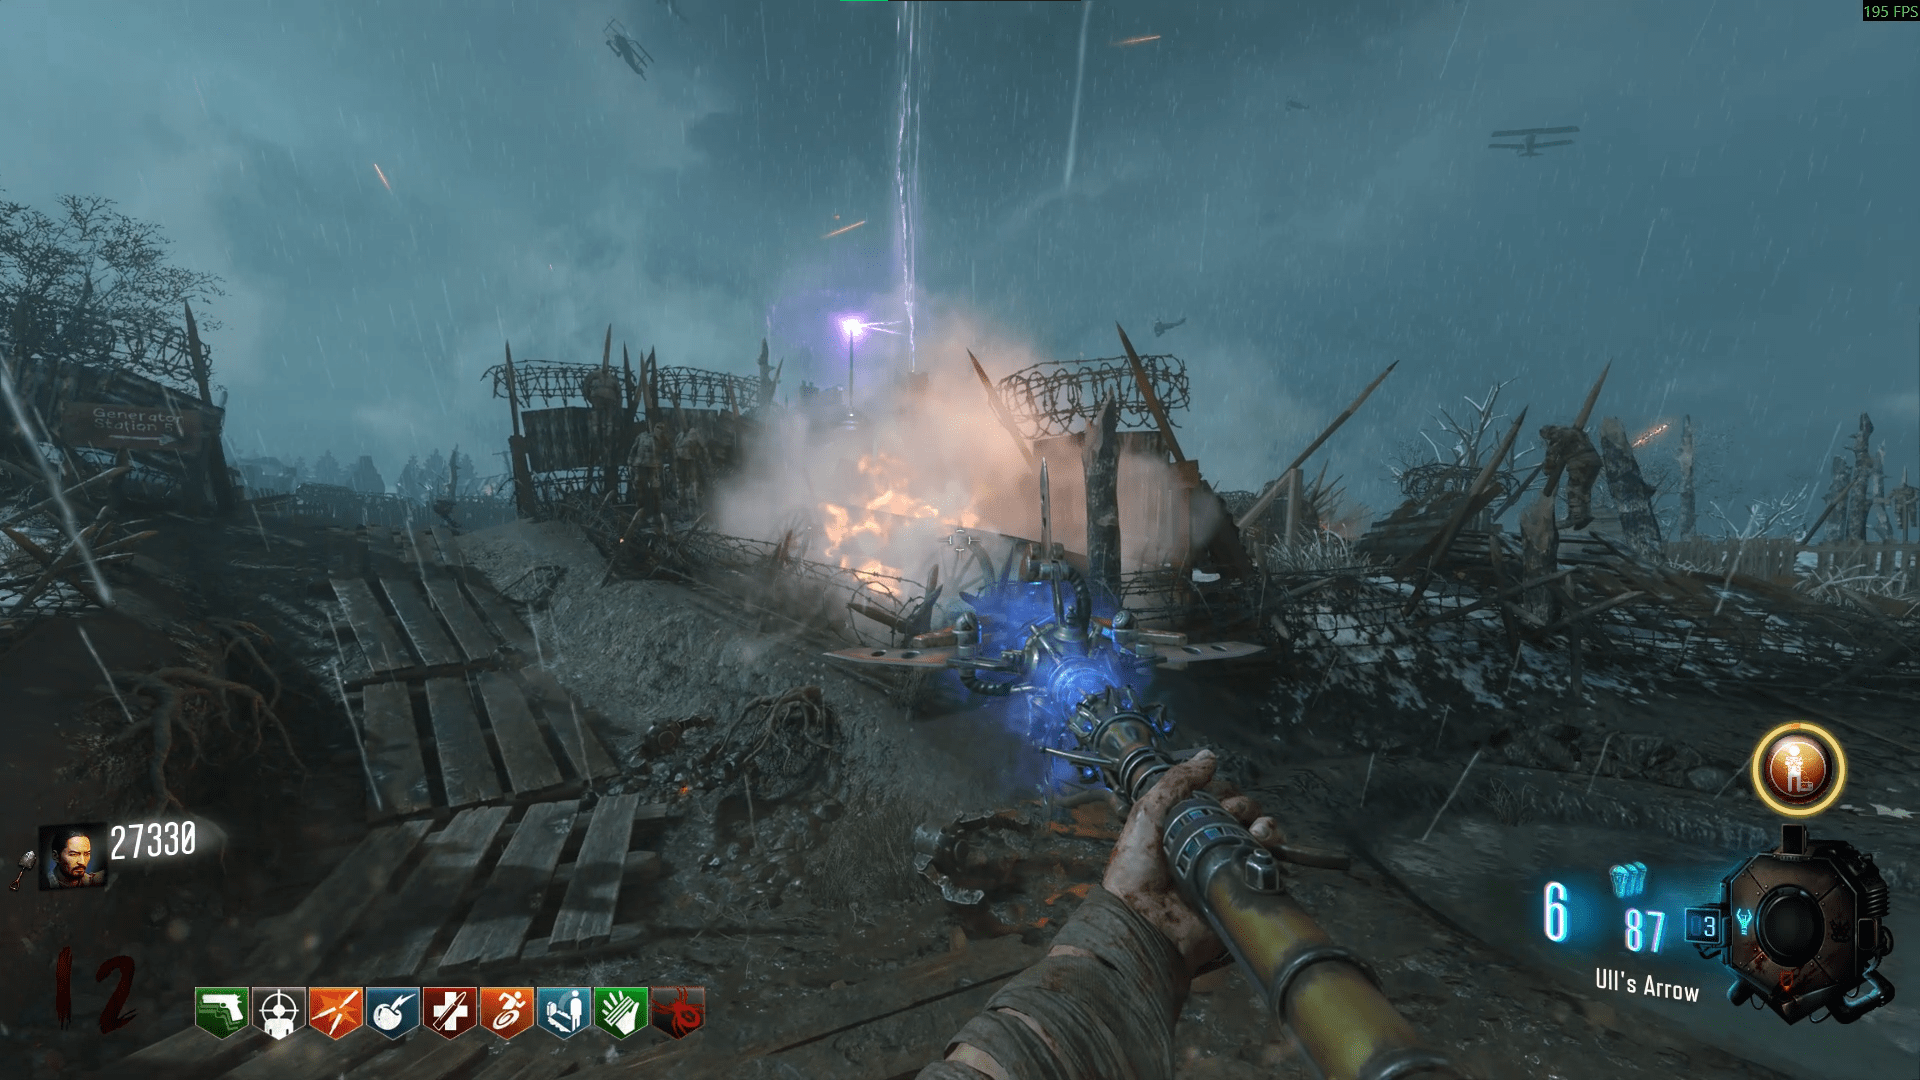
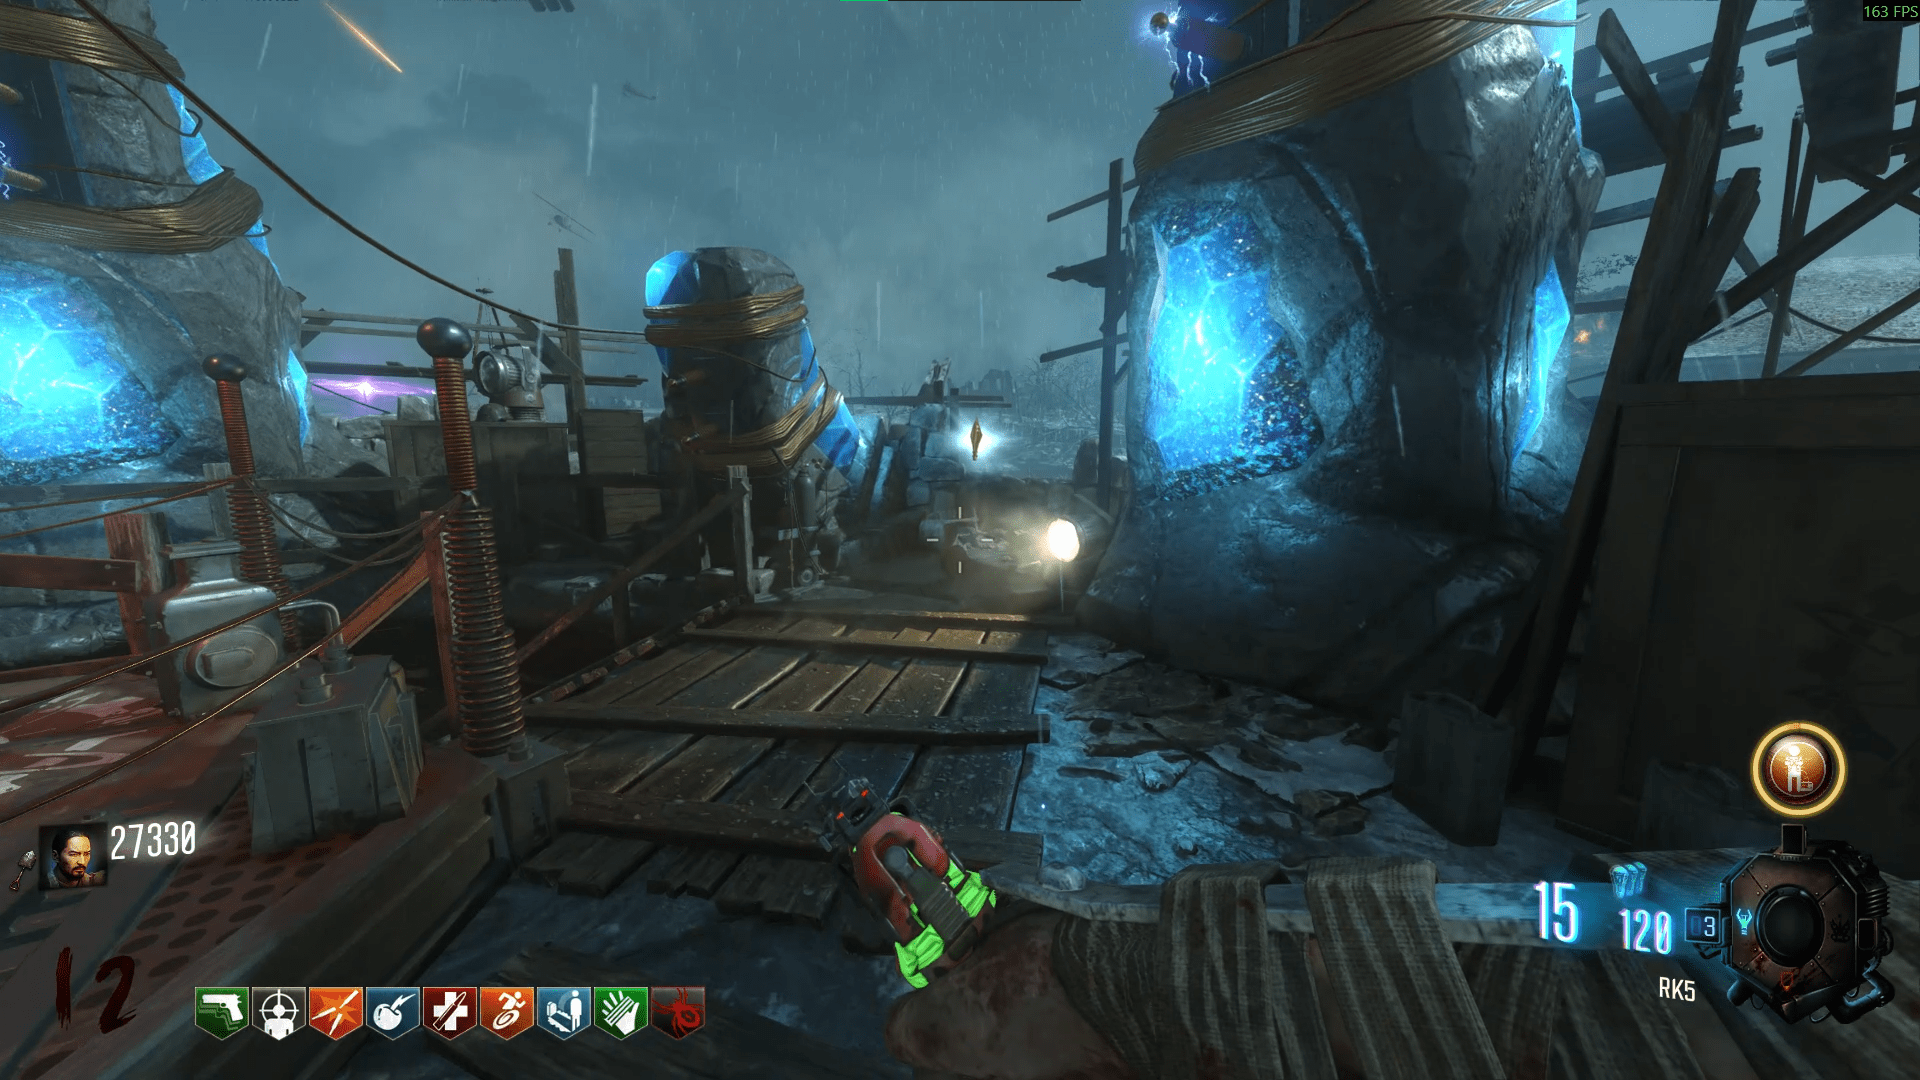
Upon entering zombie blood, look to the plane in the sky (it looks exactly like the one from the Fire staff) and shoot it down with a bullet weapon. Then run counter-clockwise around the Mound to find the pilot, kill him and retrieve the upgraded Maxis drone.
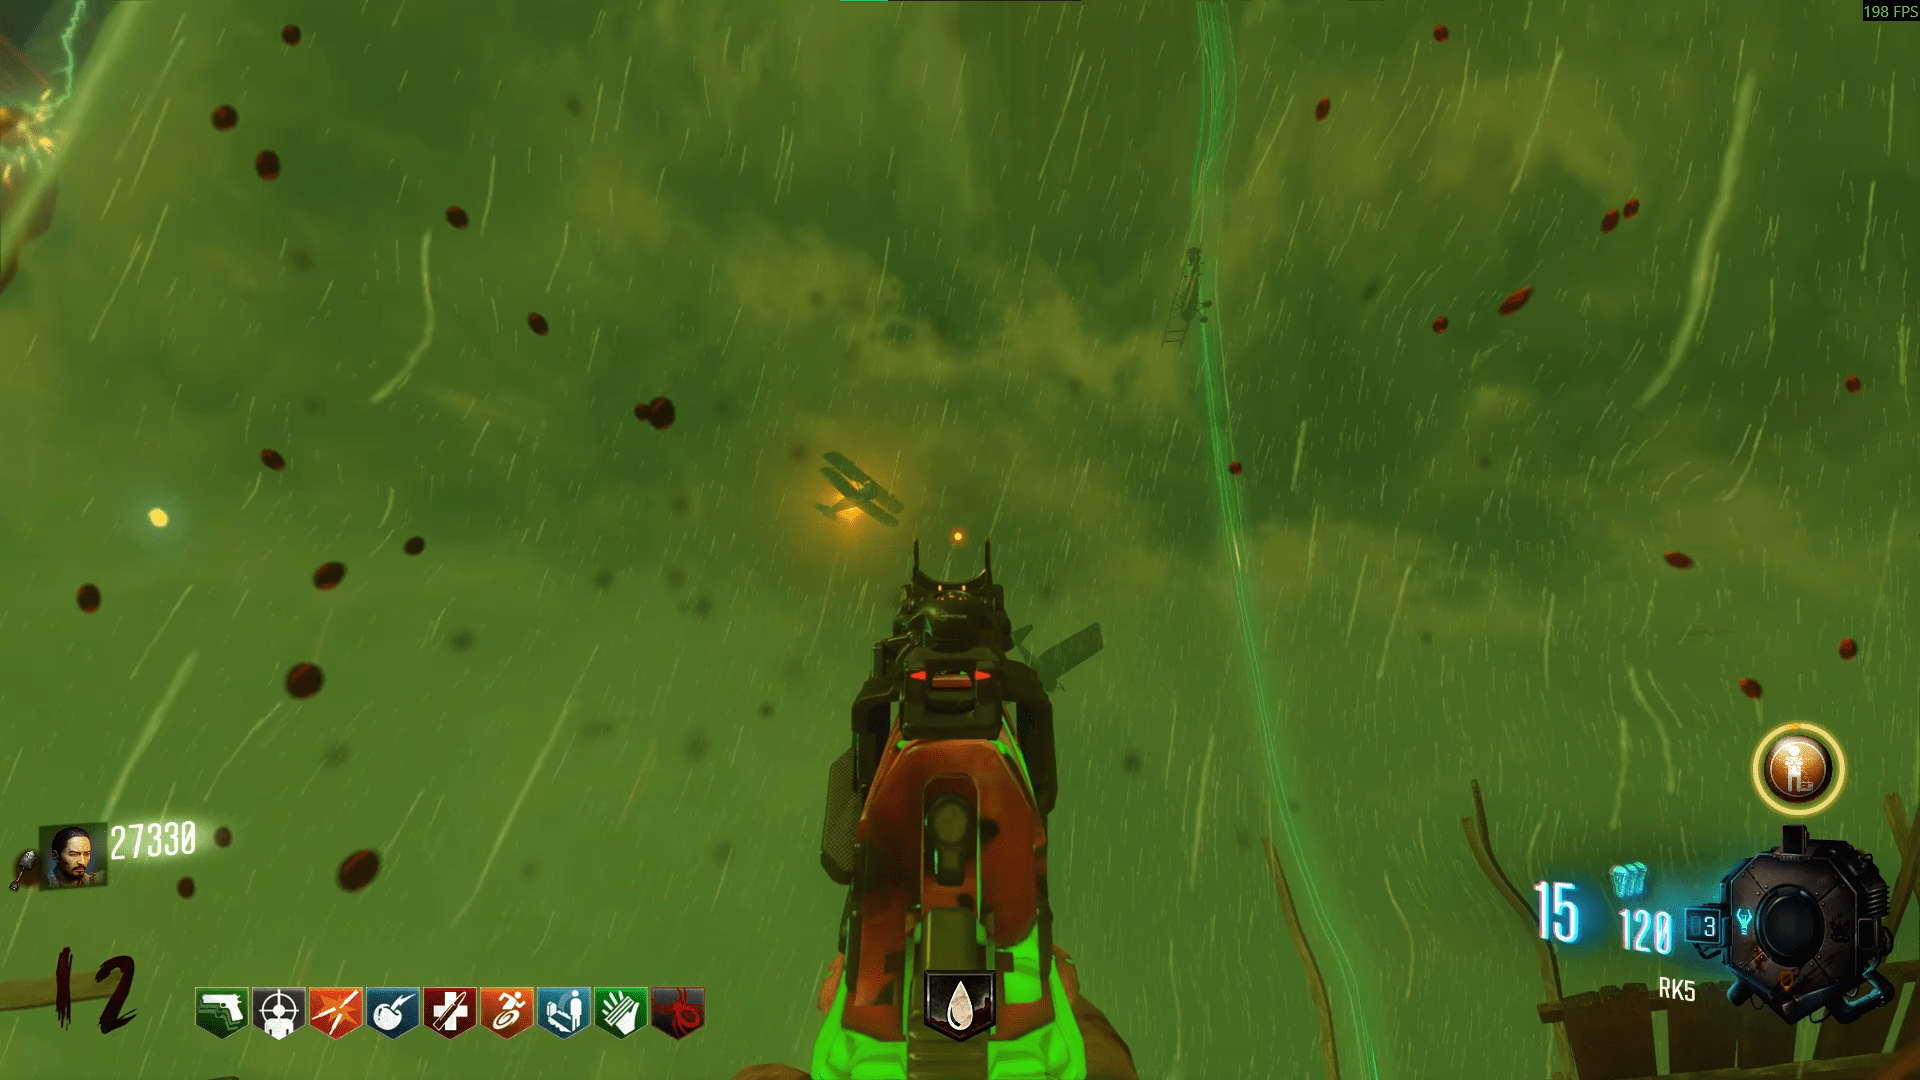
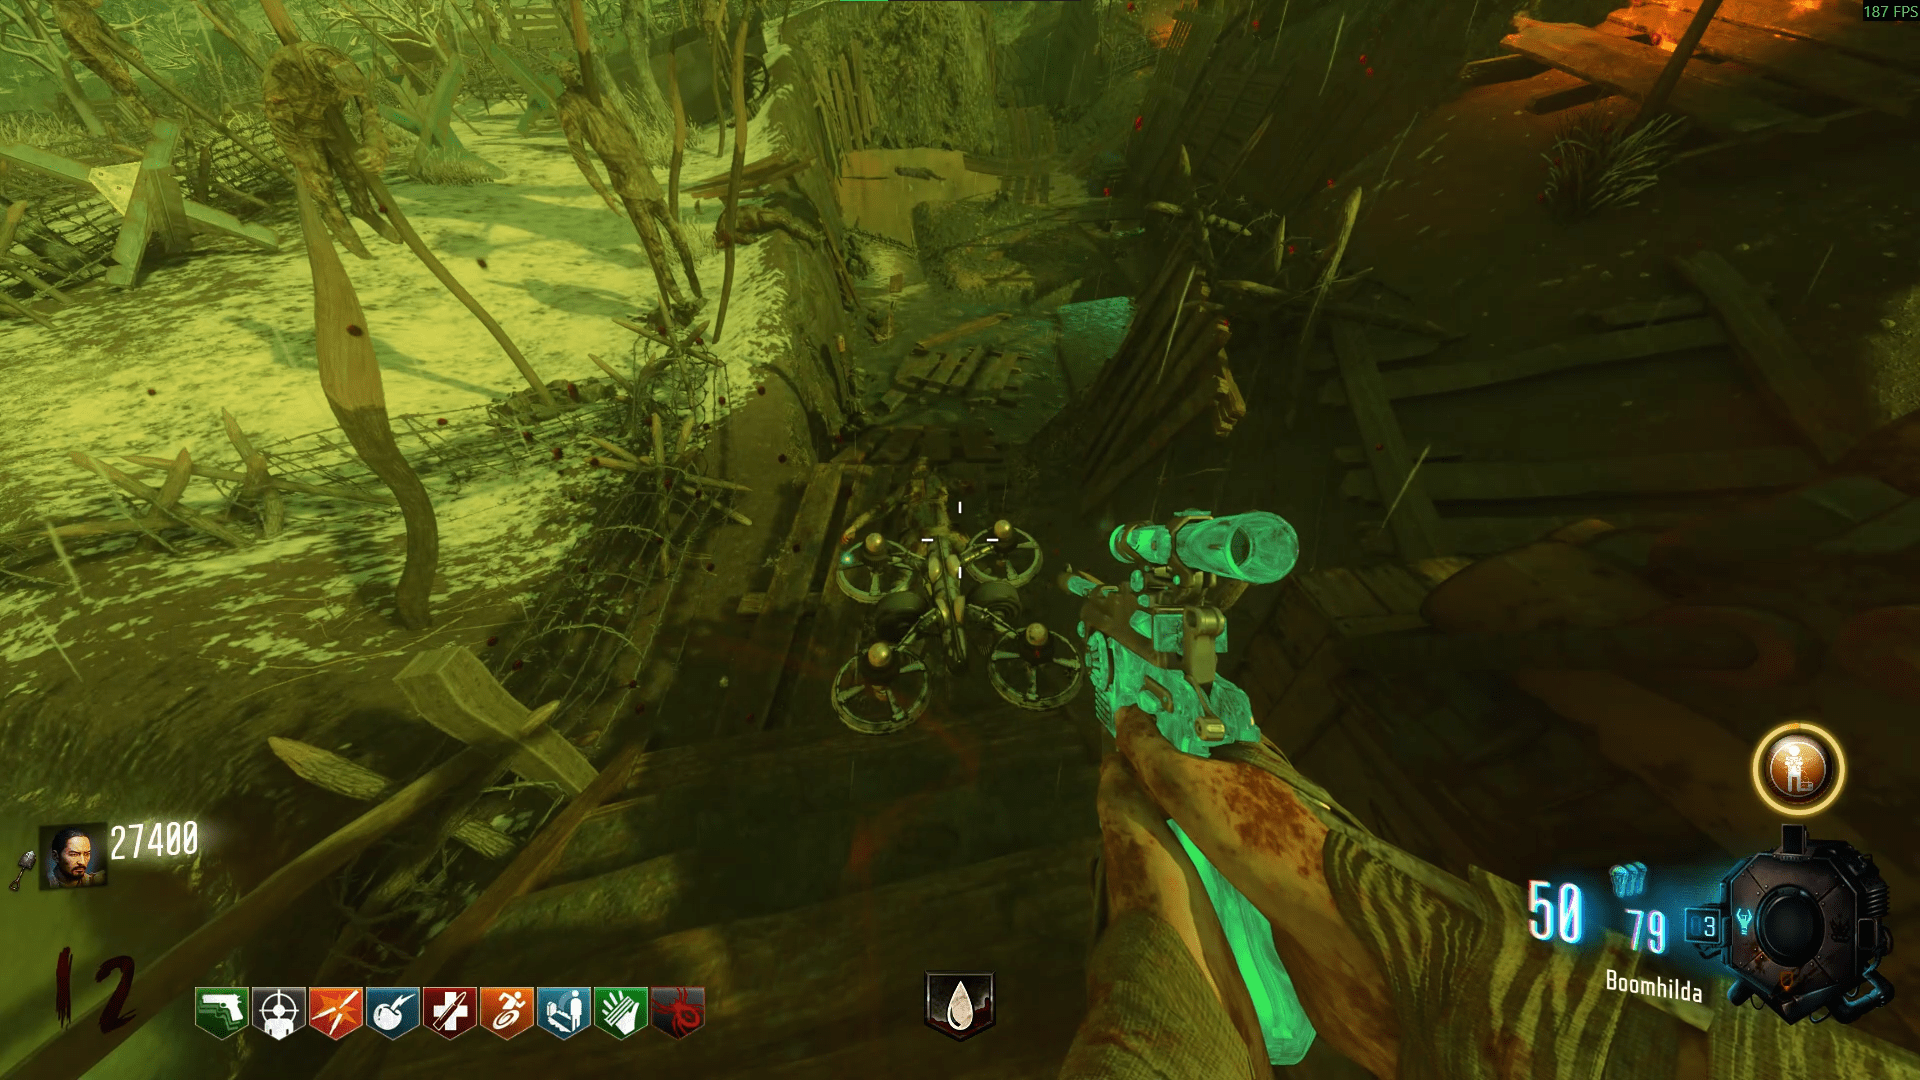
- After the first door to the Church from the Excavation site, just before the Church.
- Left side of generator 5.
- Right below the Mound on the robot's left side, leading up to the Wind tunnel.
- Behind Juggernog, with the Kuda wallbuy.
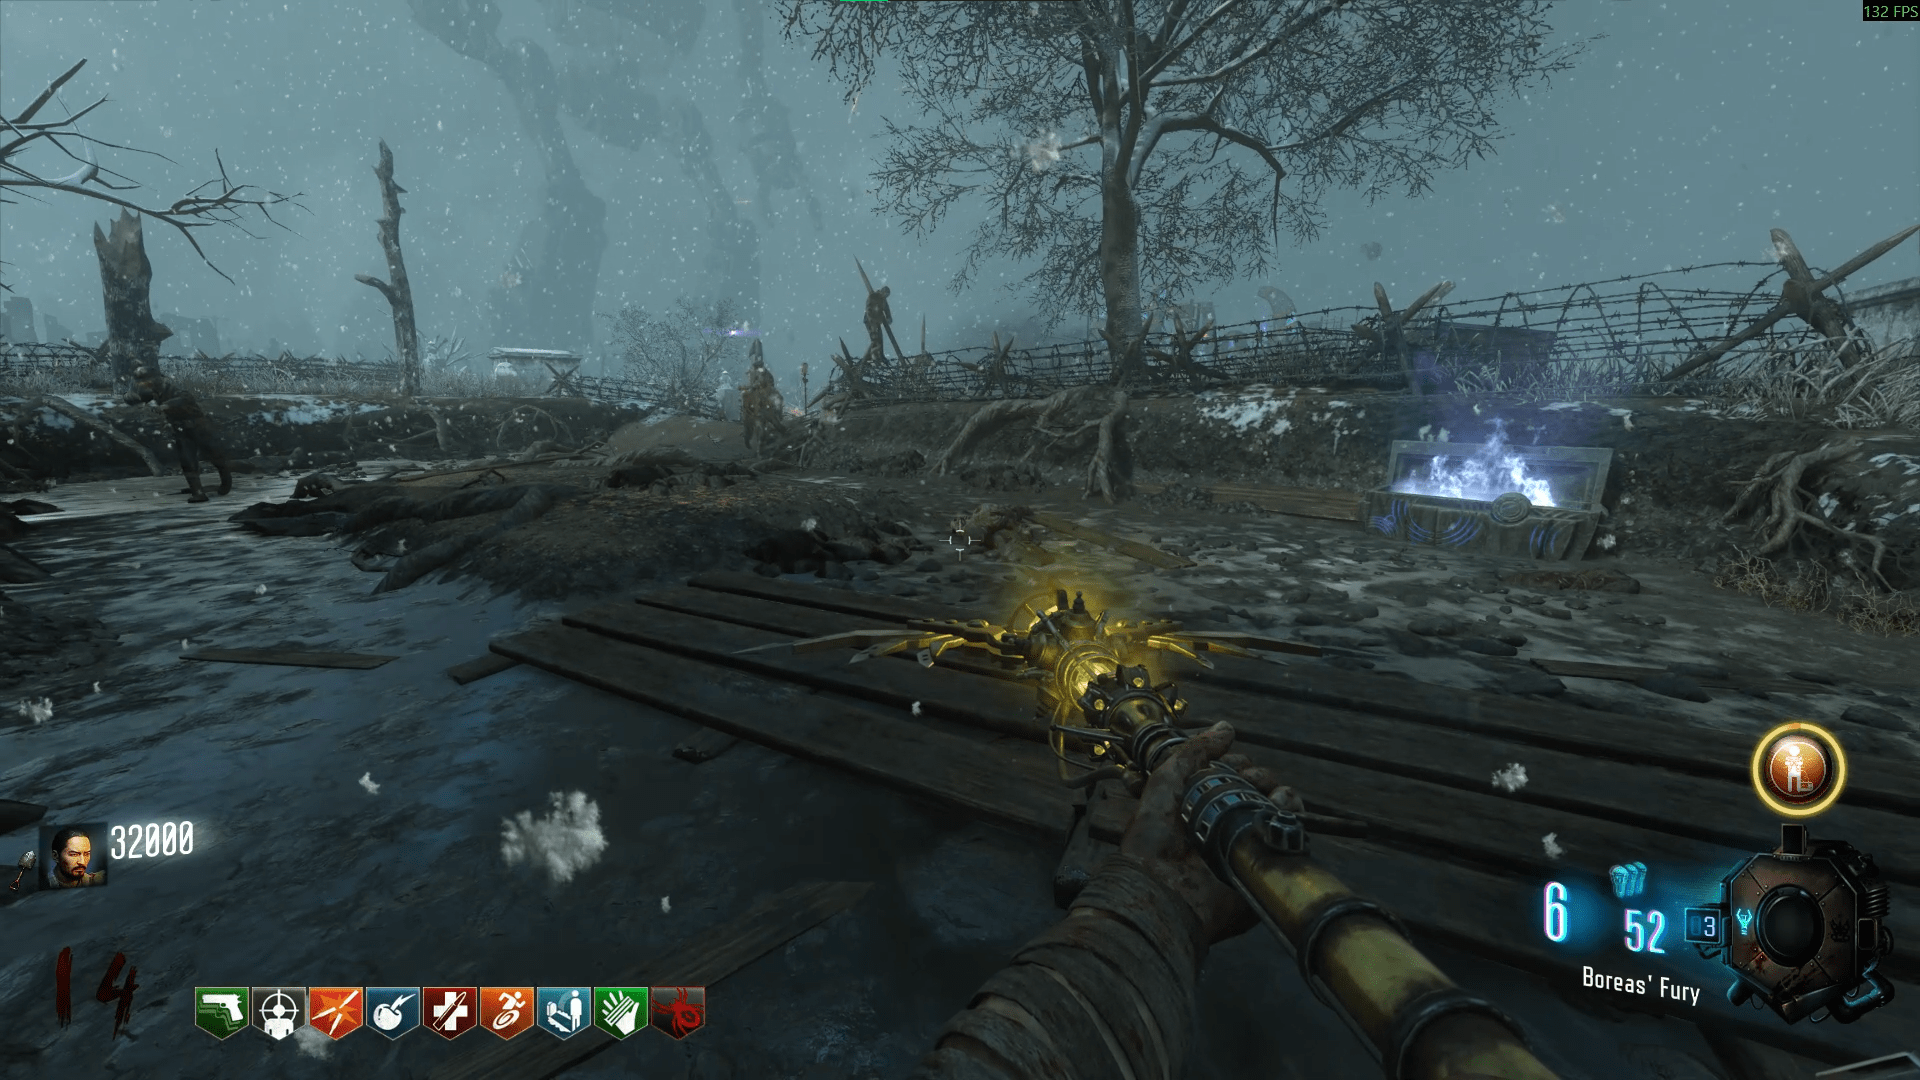
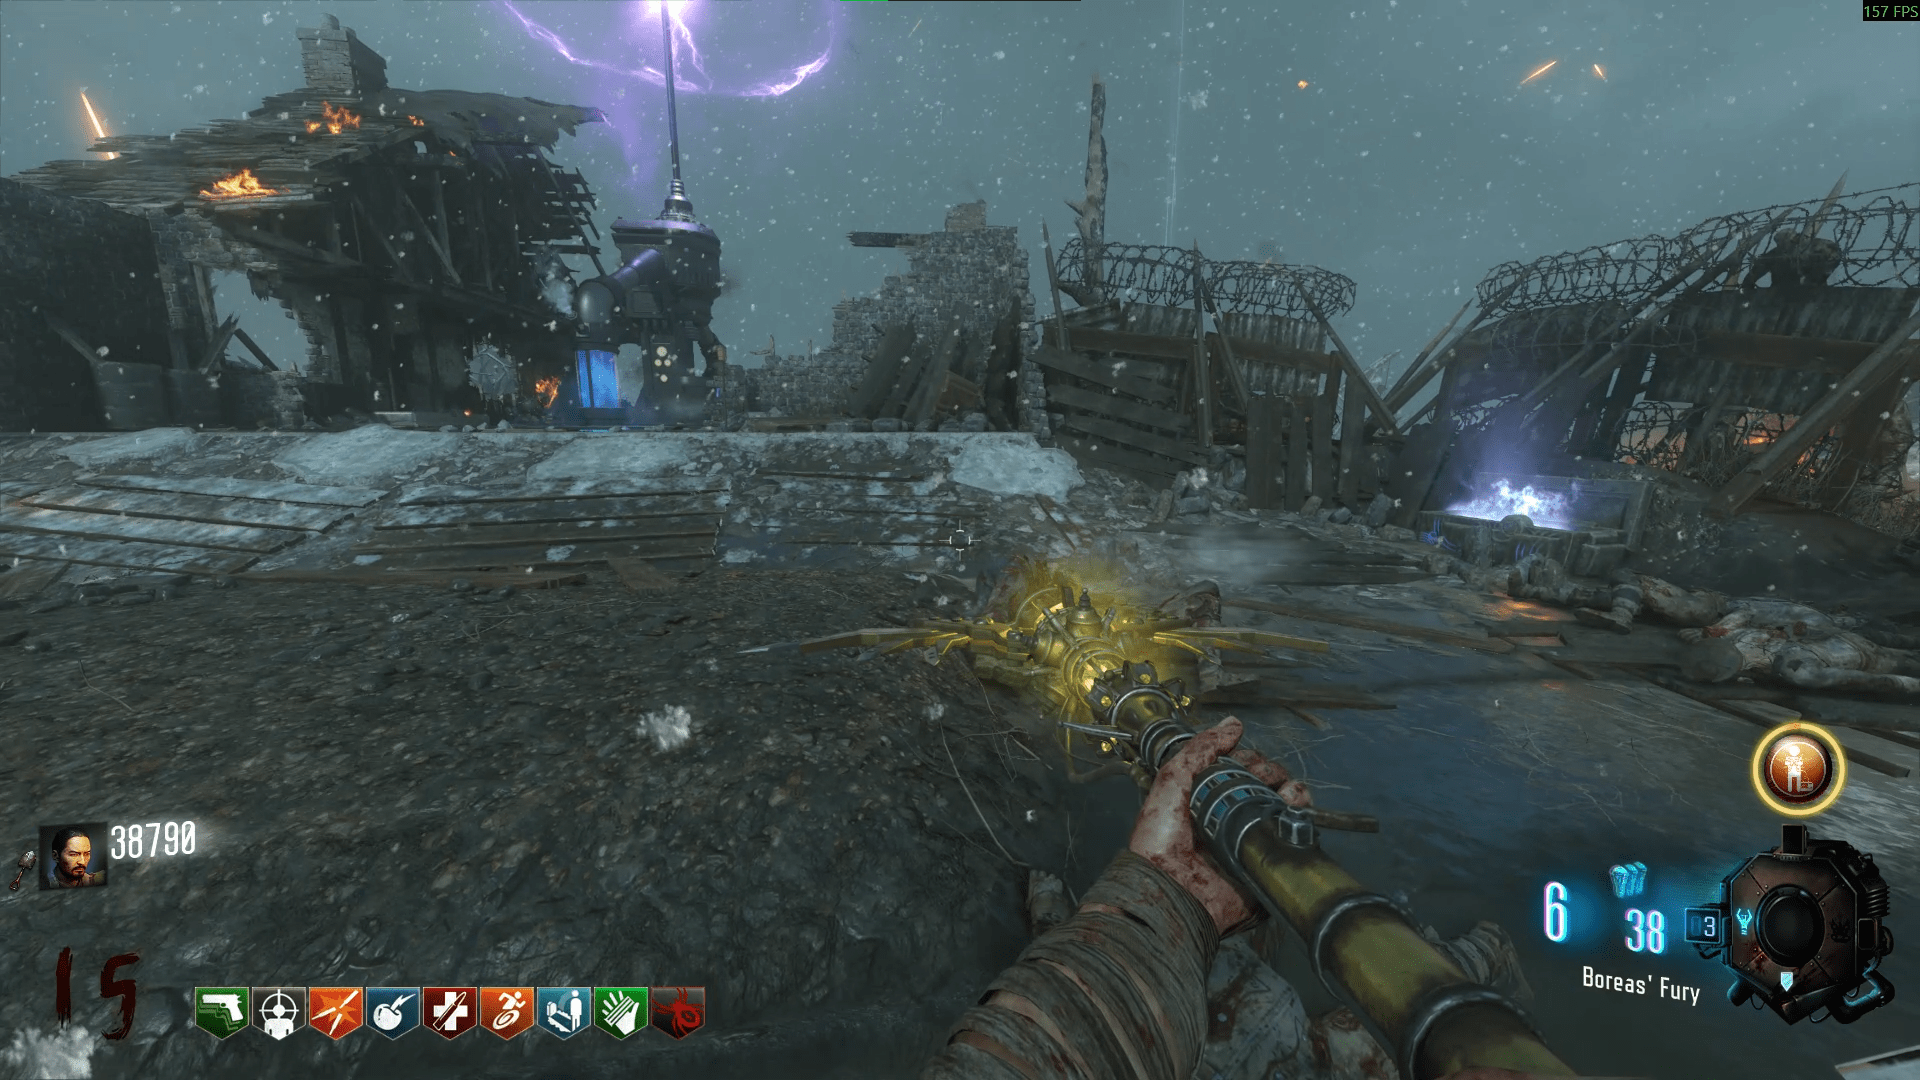
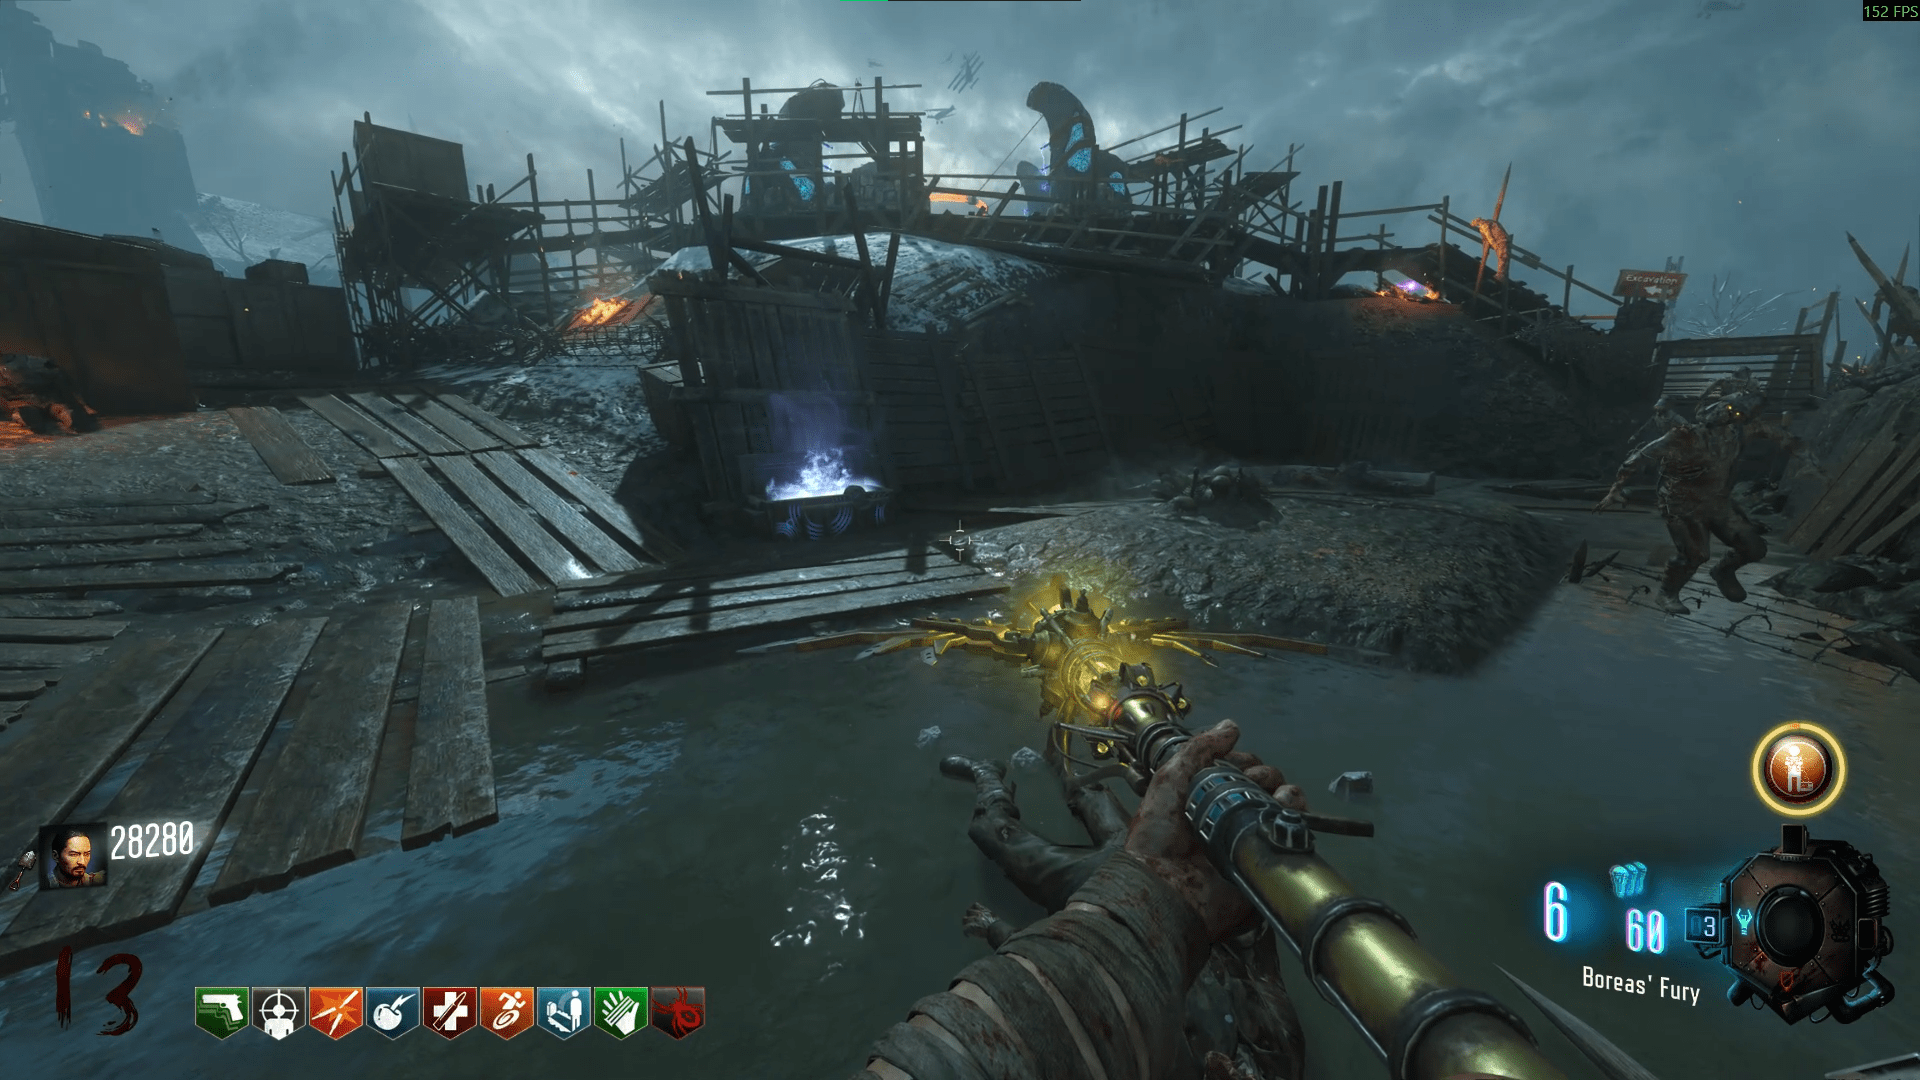
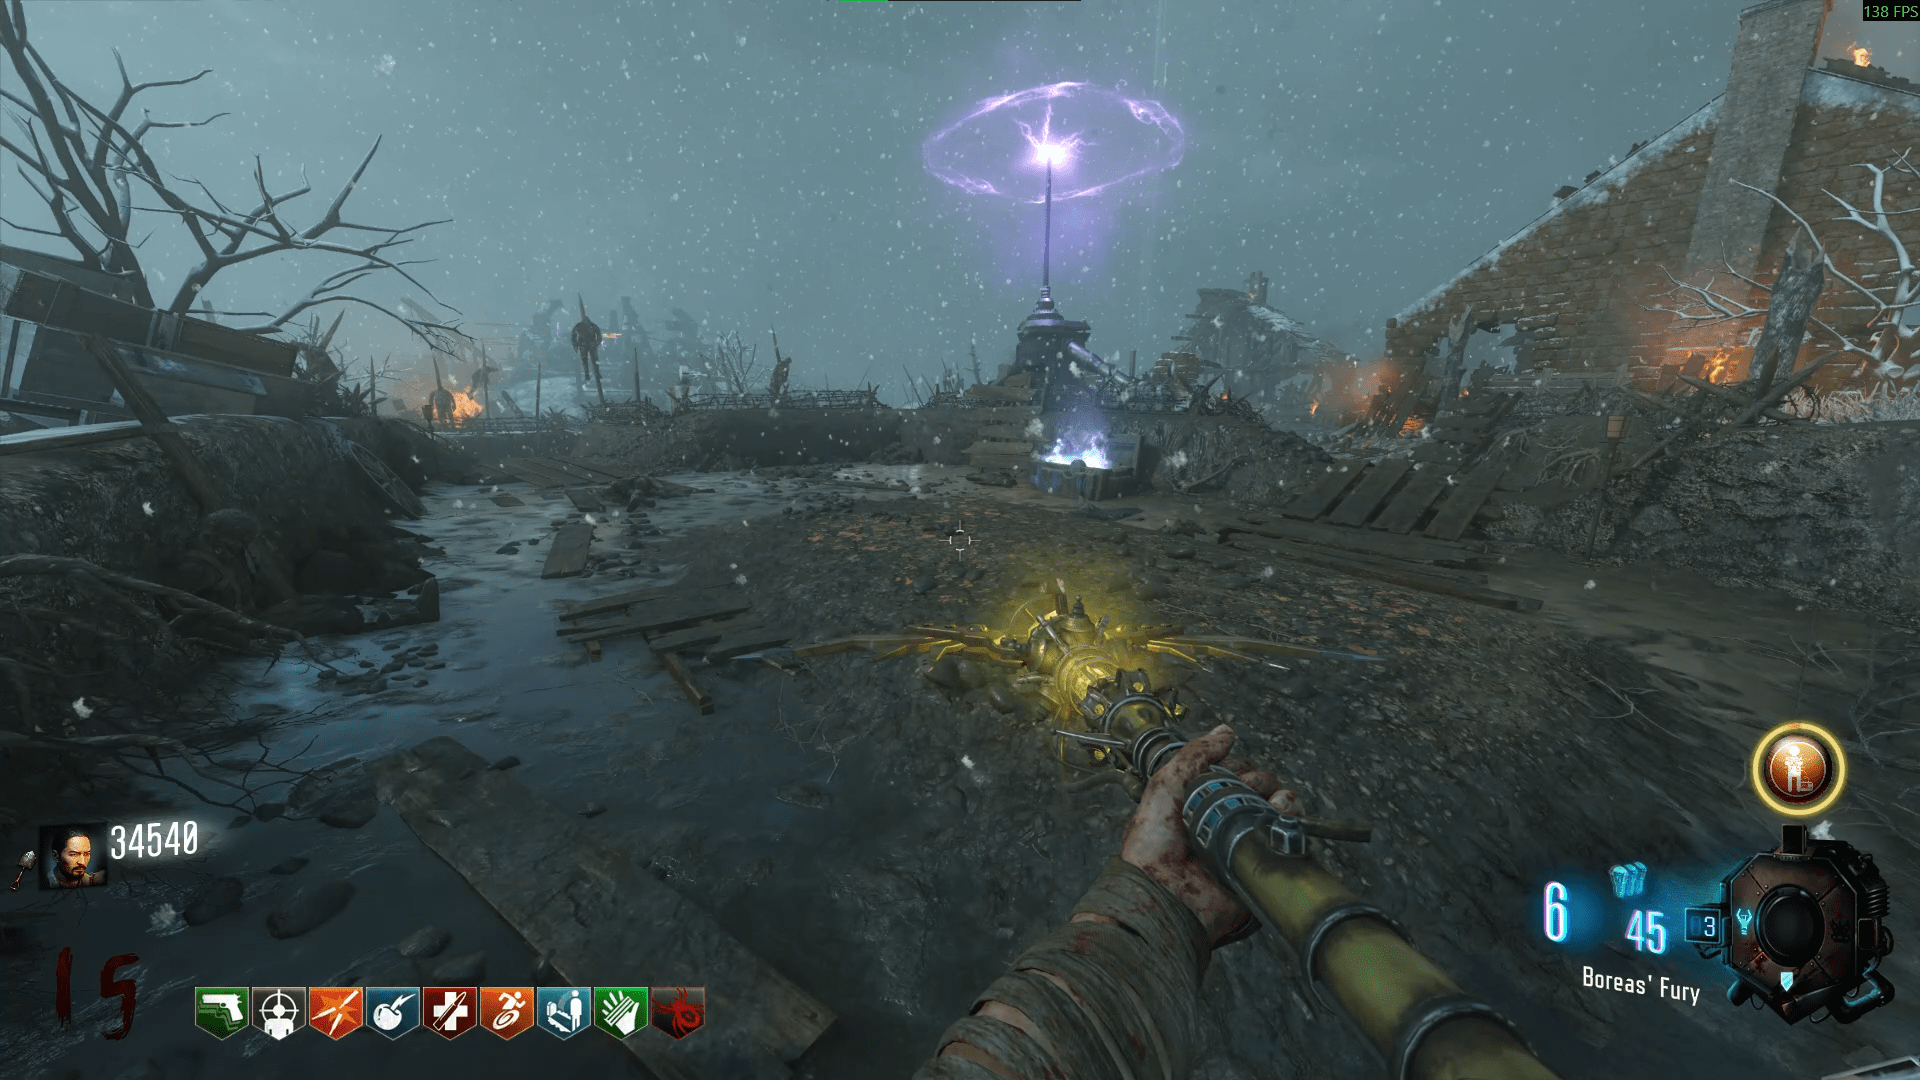
Now that you've filled the boxes, you need to upgrade the iron fist™. To do this, go down to the Staff pedestals in the Mound and start meleeing the Templar zombies with glowing white fists until they drop a white stone tablet. Pick this up.
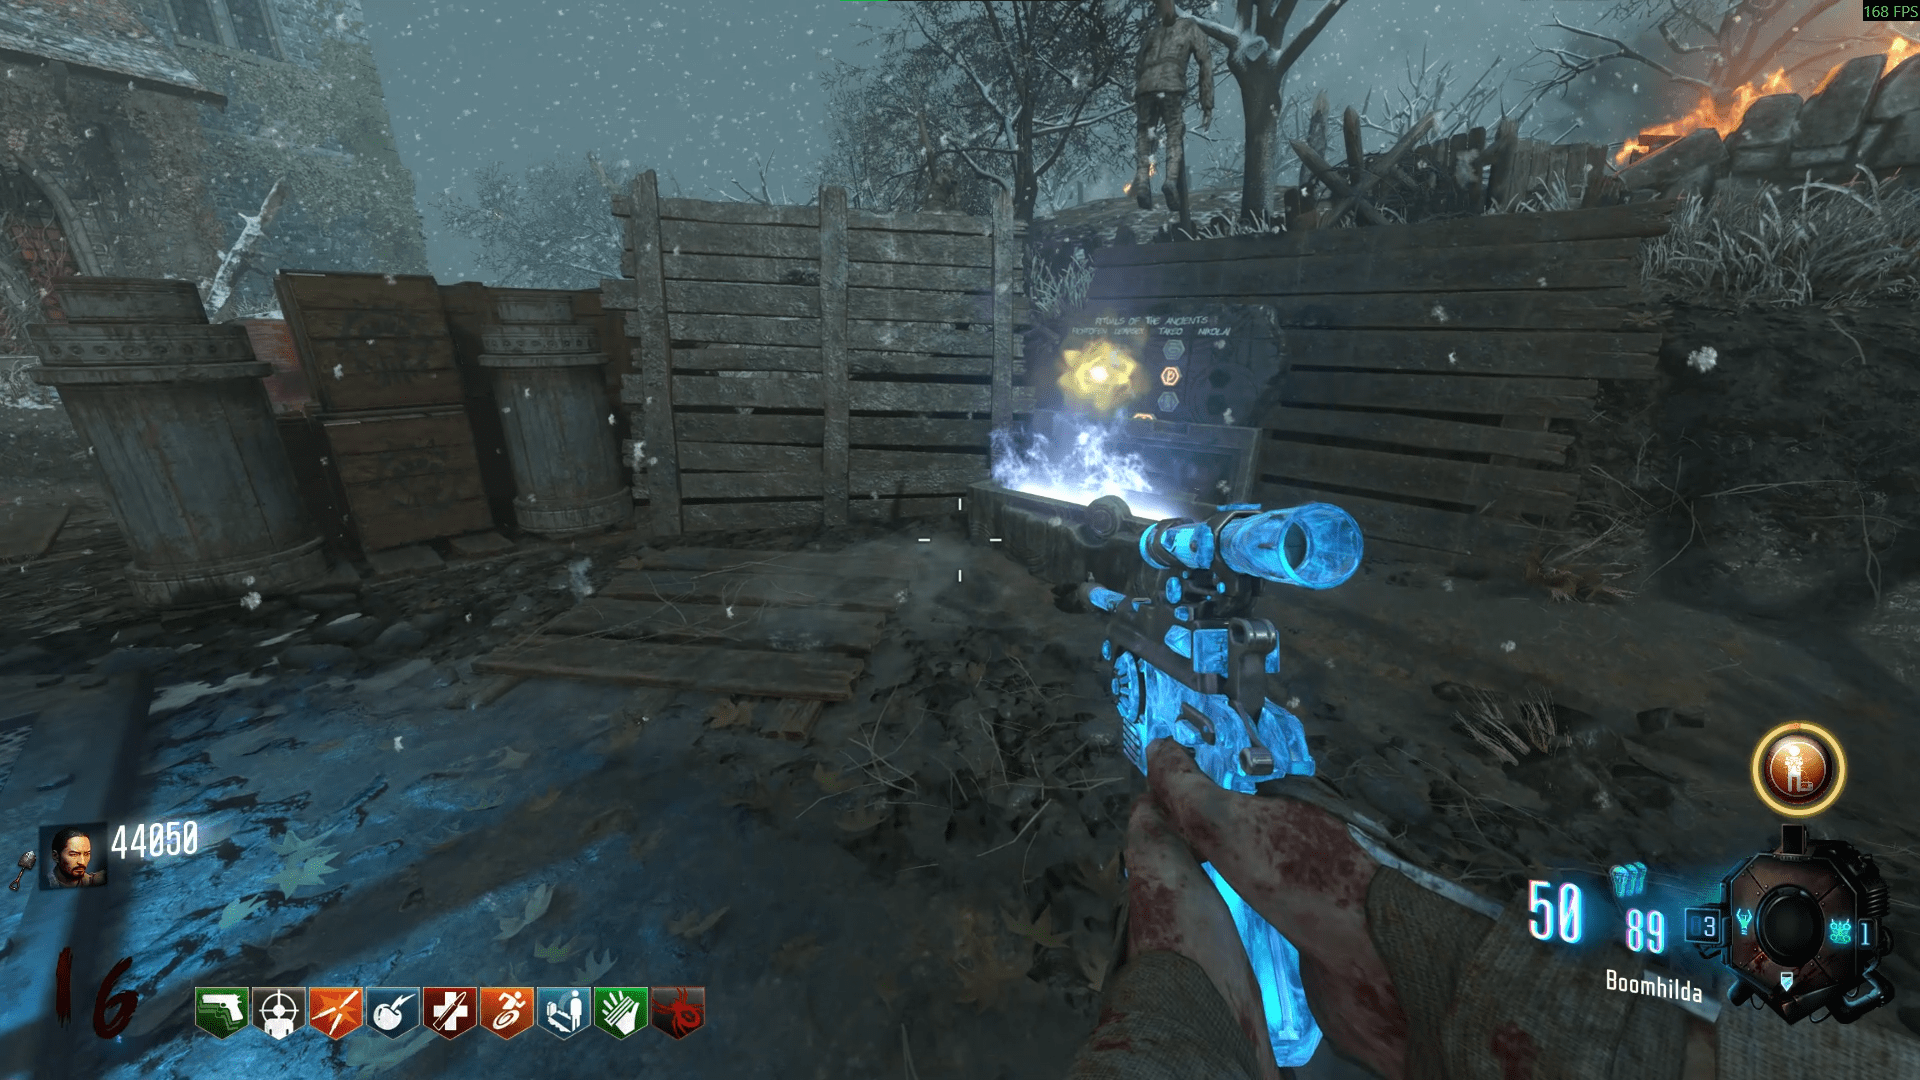
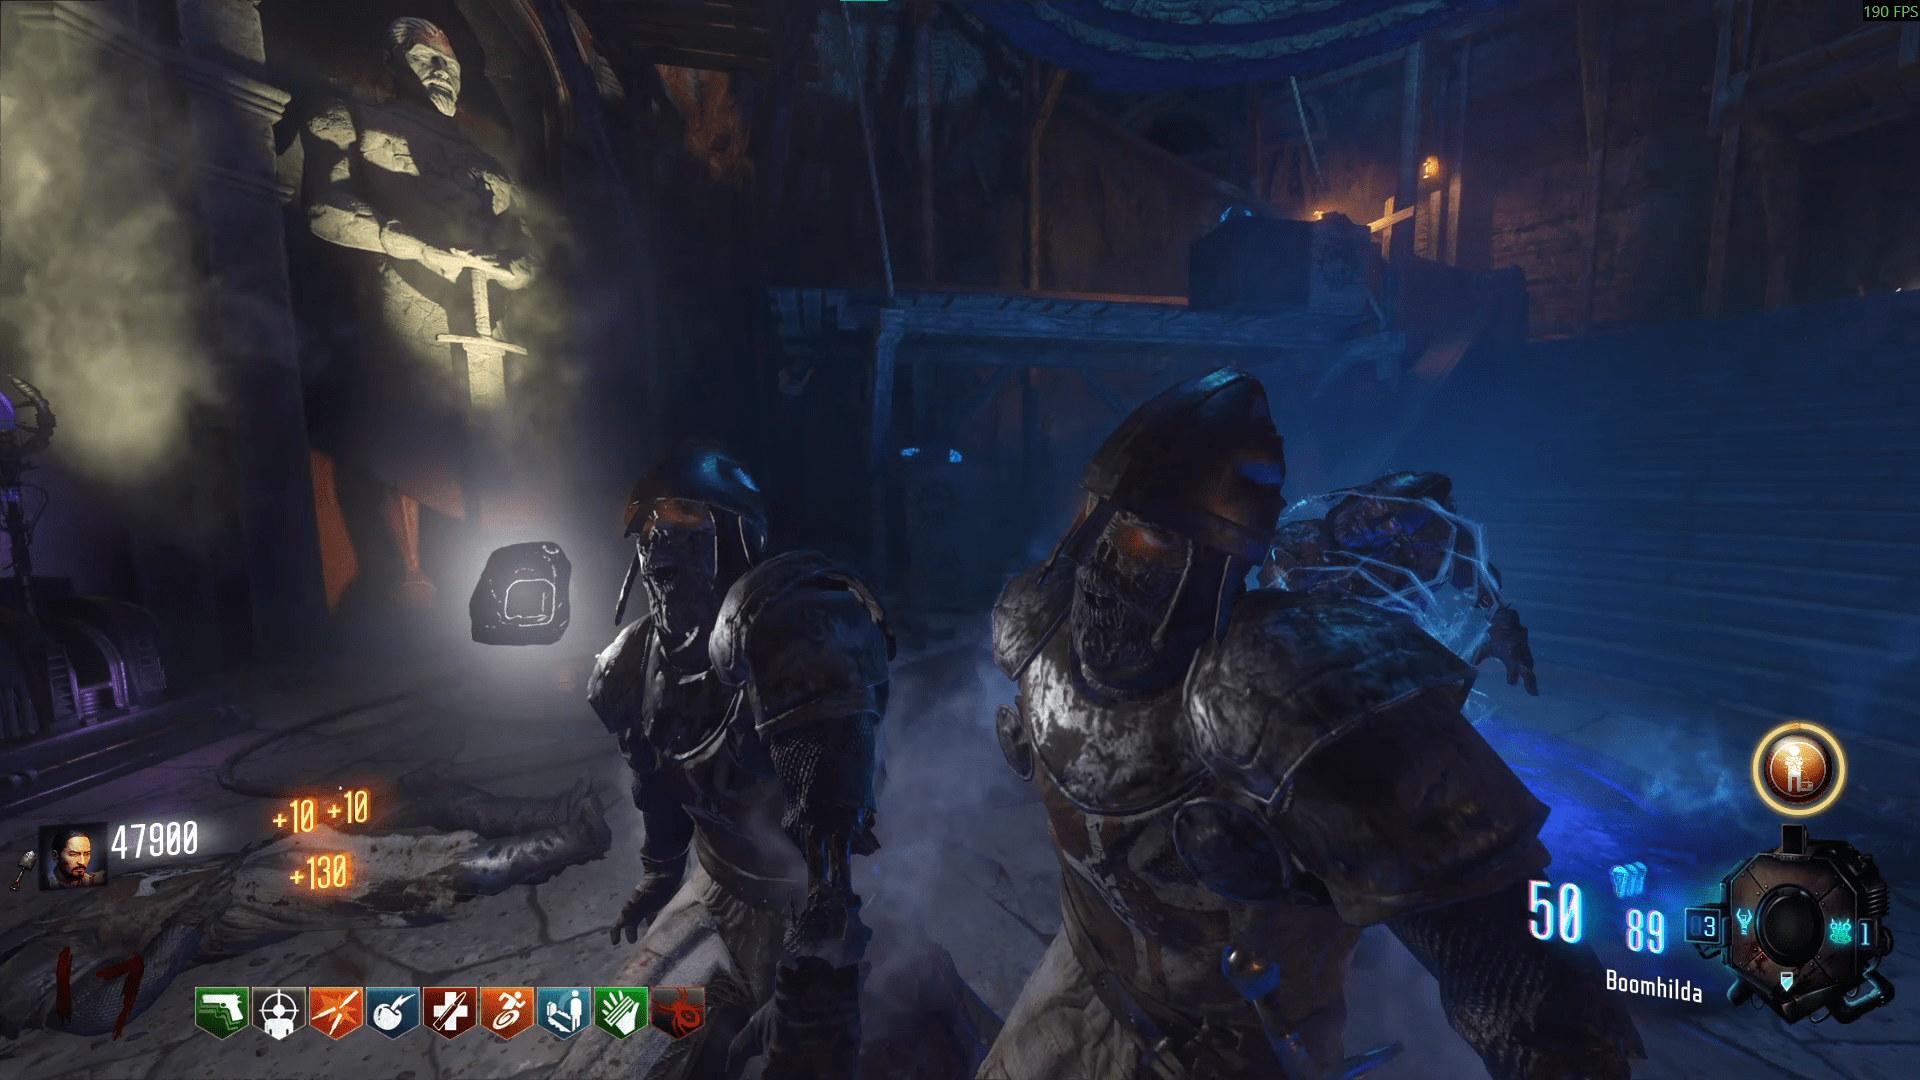
Note that you cannot take out the staffs from the pedestals, so make sure you have a good enough weapon to survive with, I recommend a PaP'd wallbuy from the Crazy Place so you can buy ammo.
Once you've killed the appropriate amount of zombies, send up the maxis drone, then interact with the pad in the centre of the room for the cutscene.
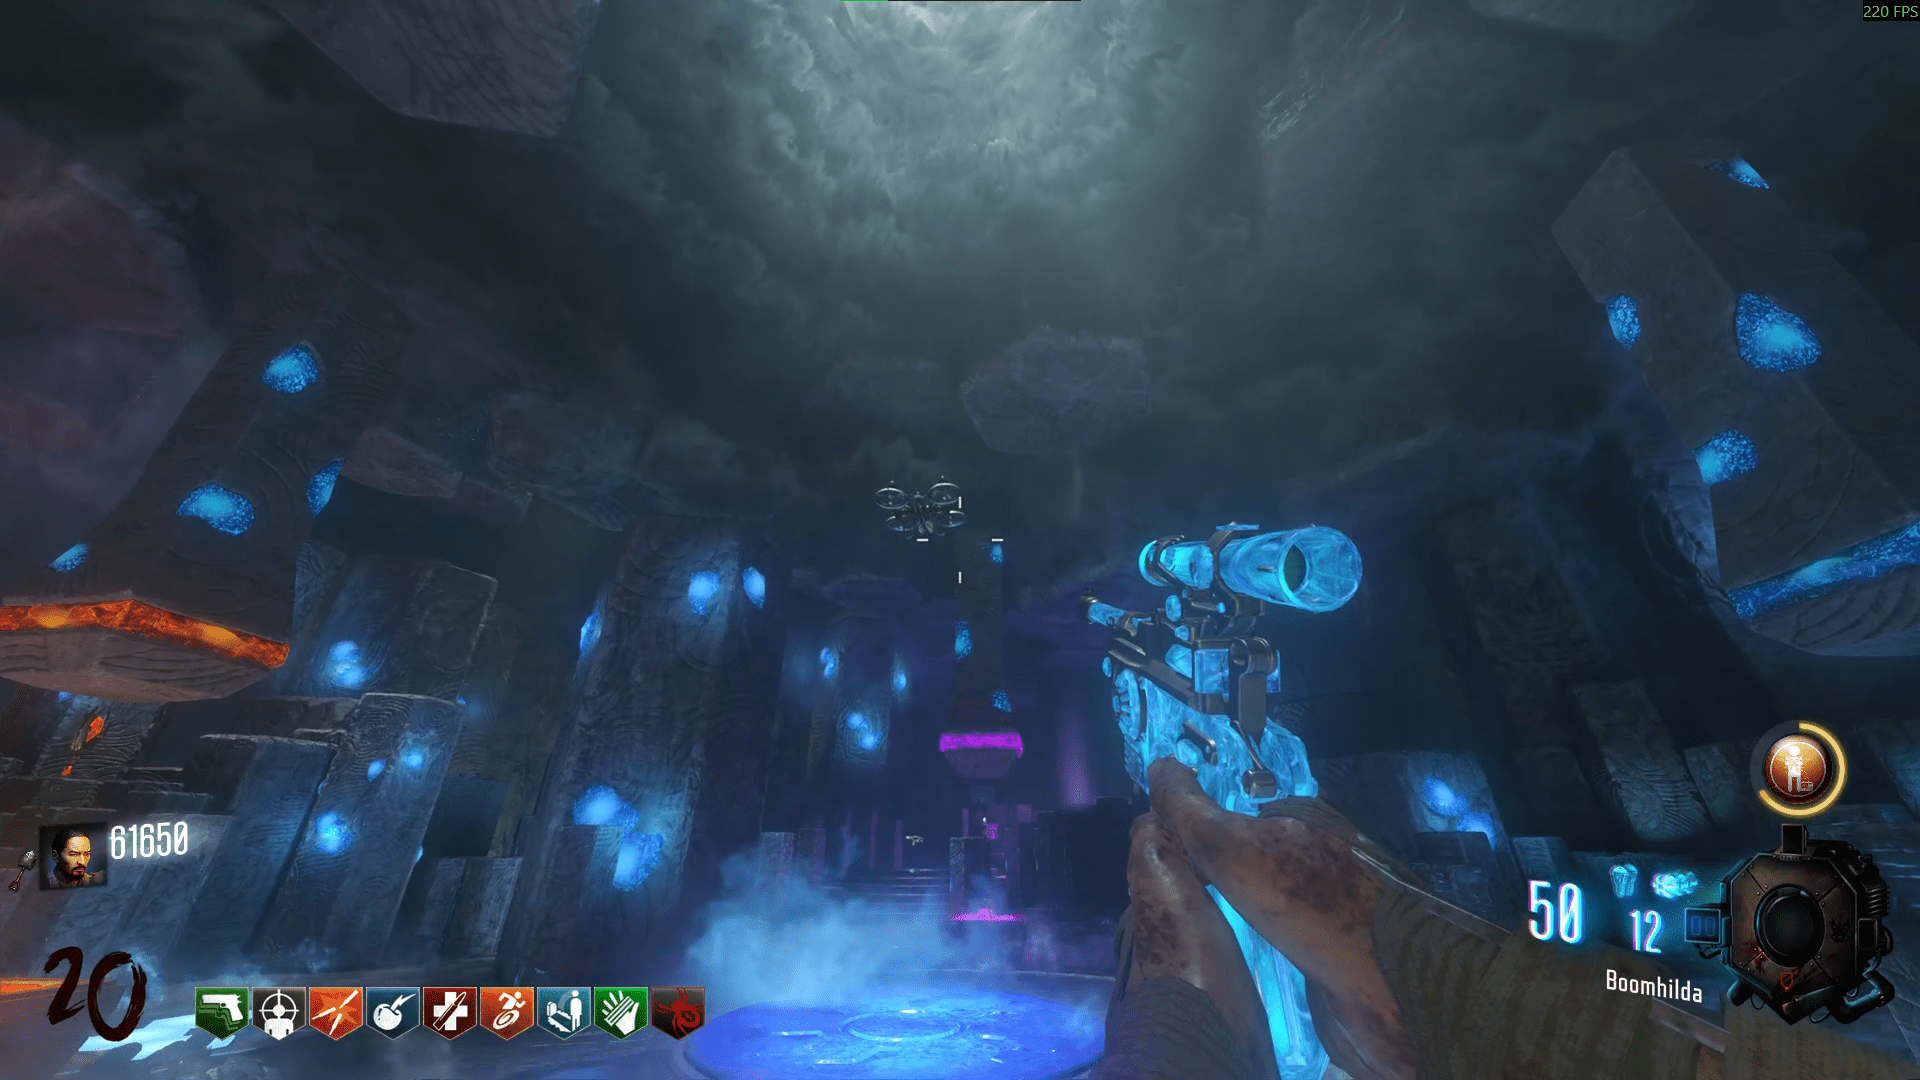
Shadows of Evil
This Easter Egg requires 4 people to complete. You must have the 4 people for the final step otherwise it will not progress further than Step 5 (I've personally tested this). Although, once you have initiated the last step, only 3 are technically required.
Upon spawning in, open up the map and start using Beast mode to unlock the areas. This includes each ritual piece and the ritual location itself. You have one Beast mode per player, so opening PaP shouldn't be too bad to finish by Round 1 or 2. Once you get to the PaP room, start the final ritual by inputting all the gateworms into the pedestals and interacting with the altar by the entrance.
Some advice I can give is that each ritual gives 500 points to each player that is in the ritual room when it's completed, plus it goes faster the more that are inside, so have every player inside before starting it each time. A Margwa spawns after the 2nd and 4th ritual, as well as the final ritual so kill it when it appears. You can share the 500 points per head for your teams economy if you want.
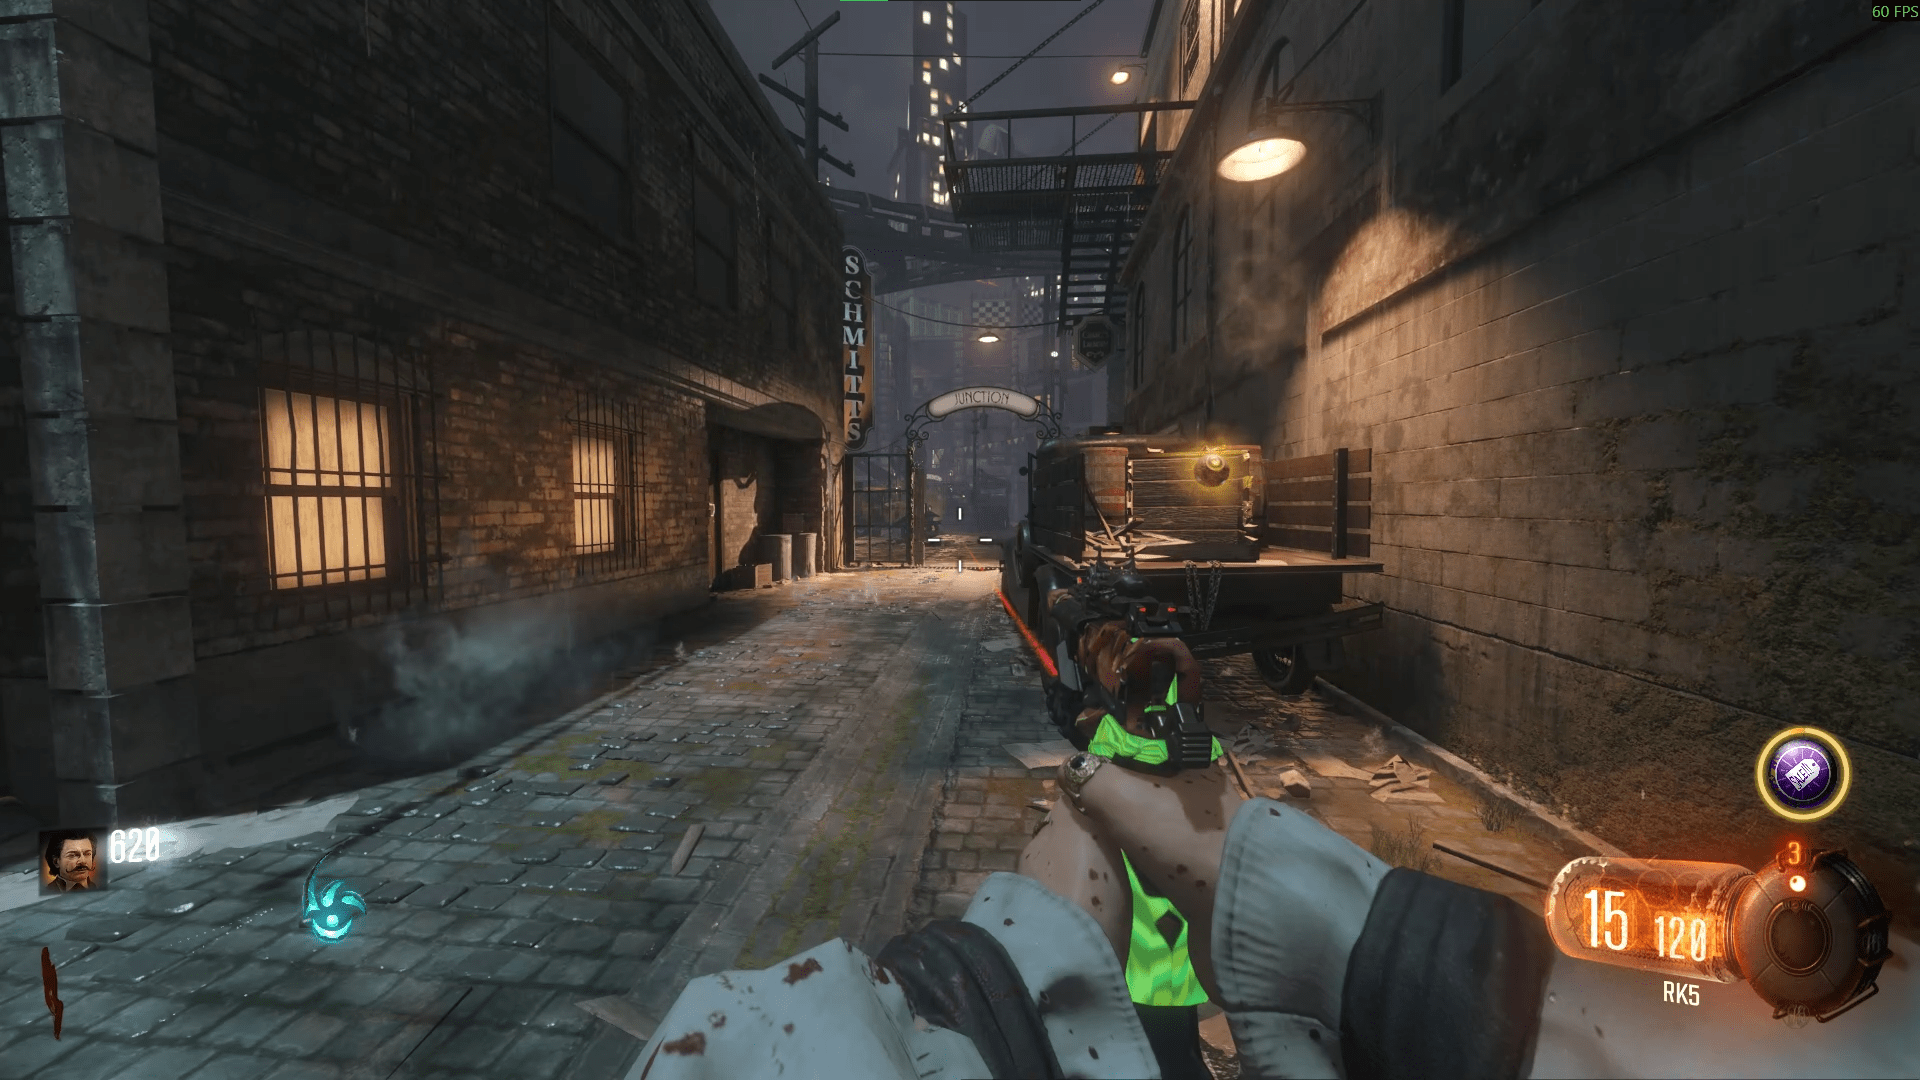
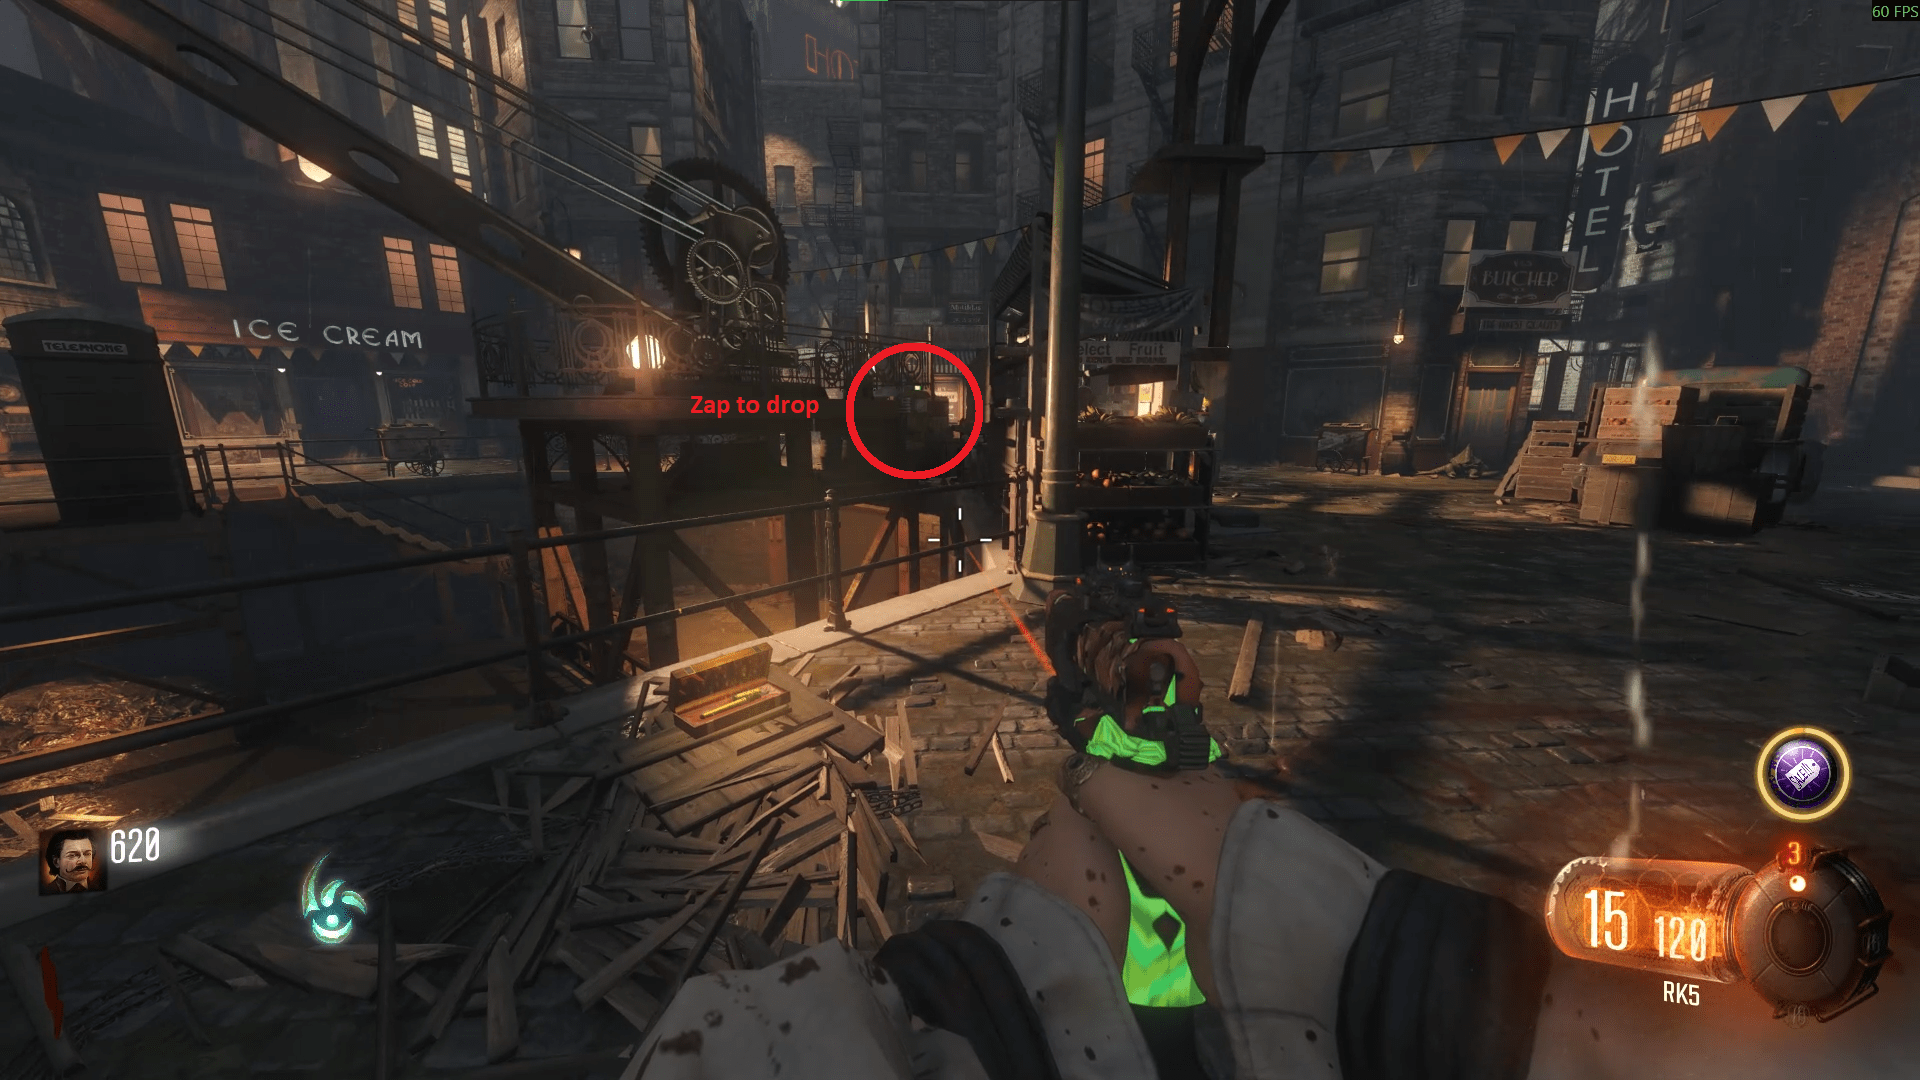
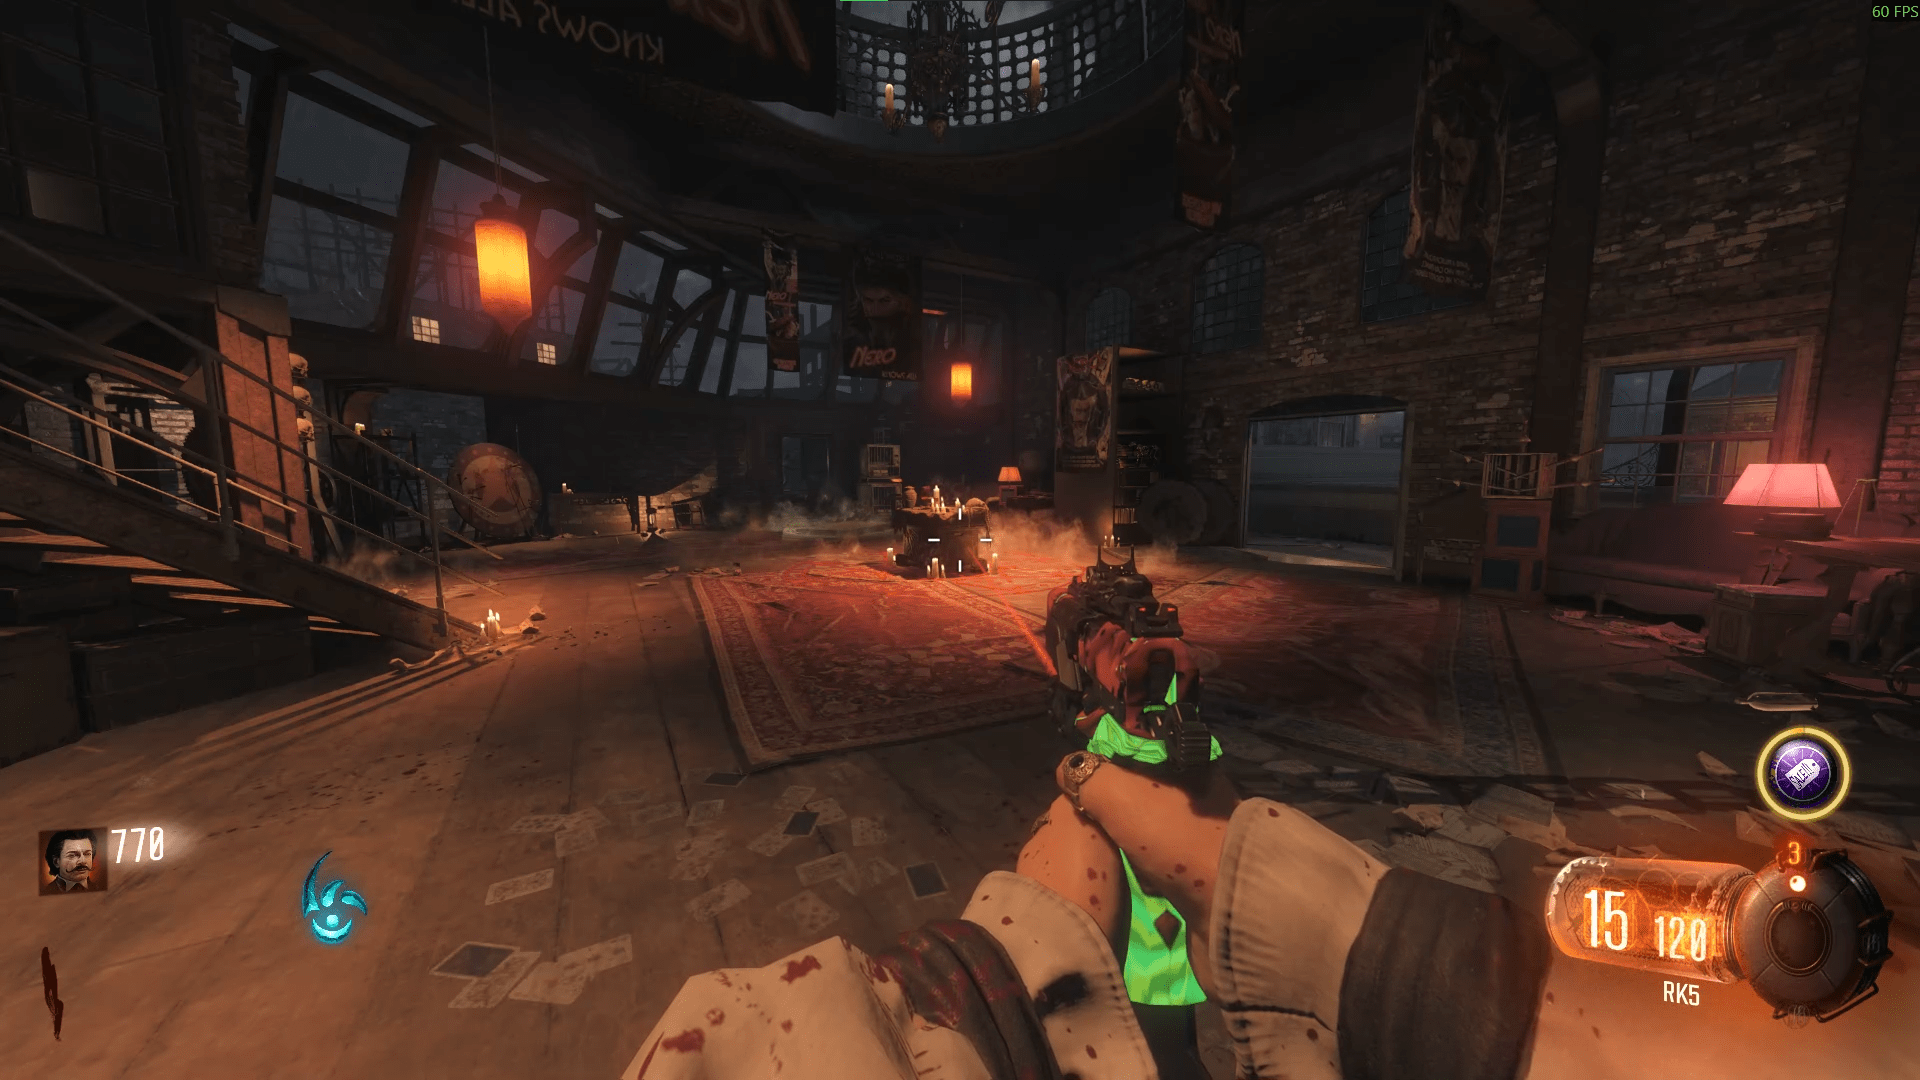
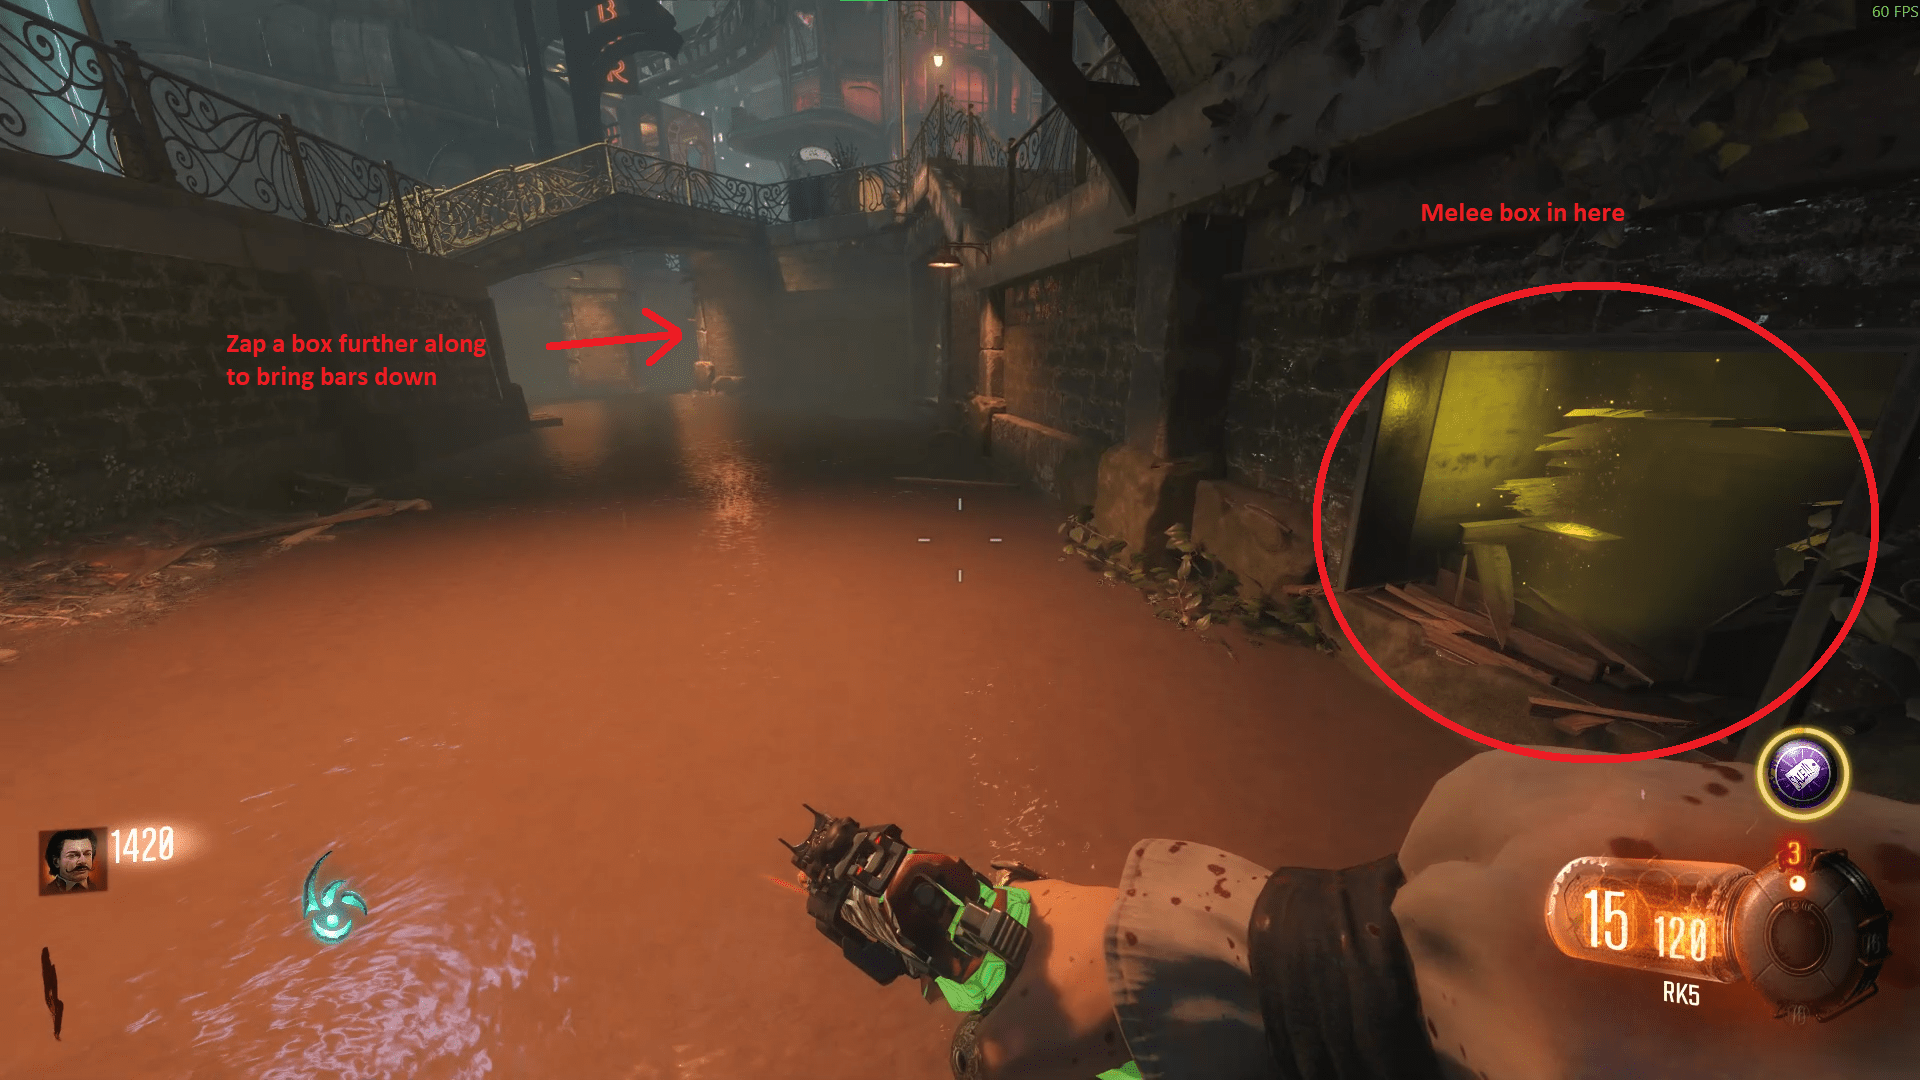
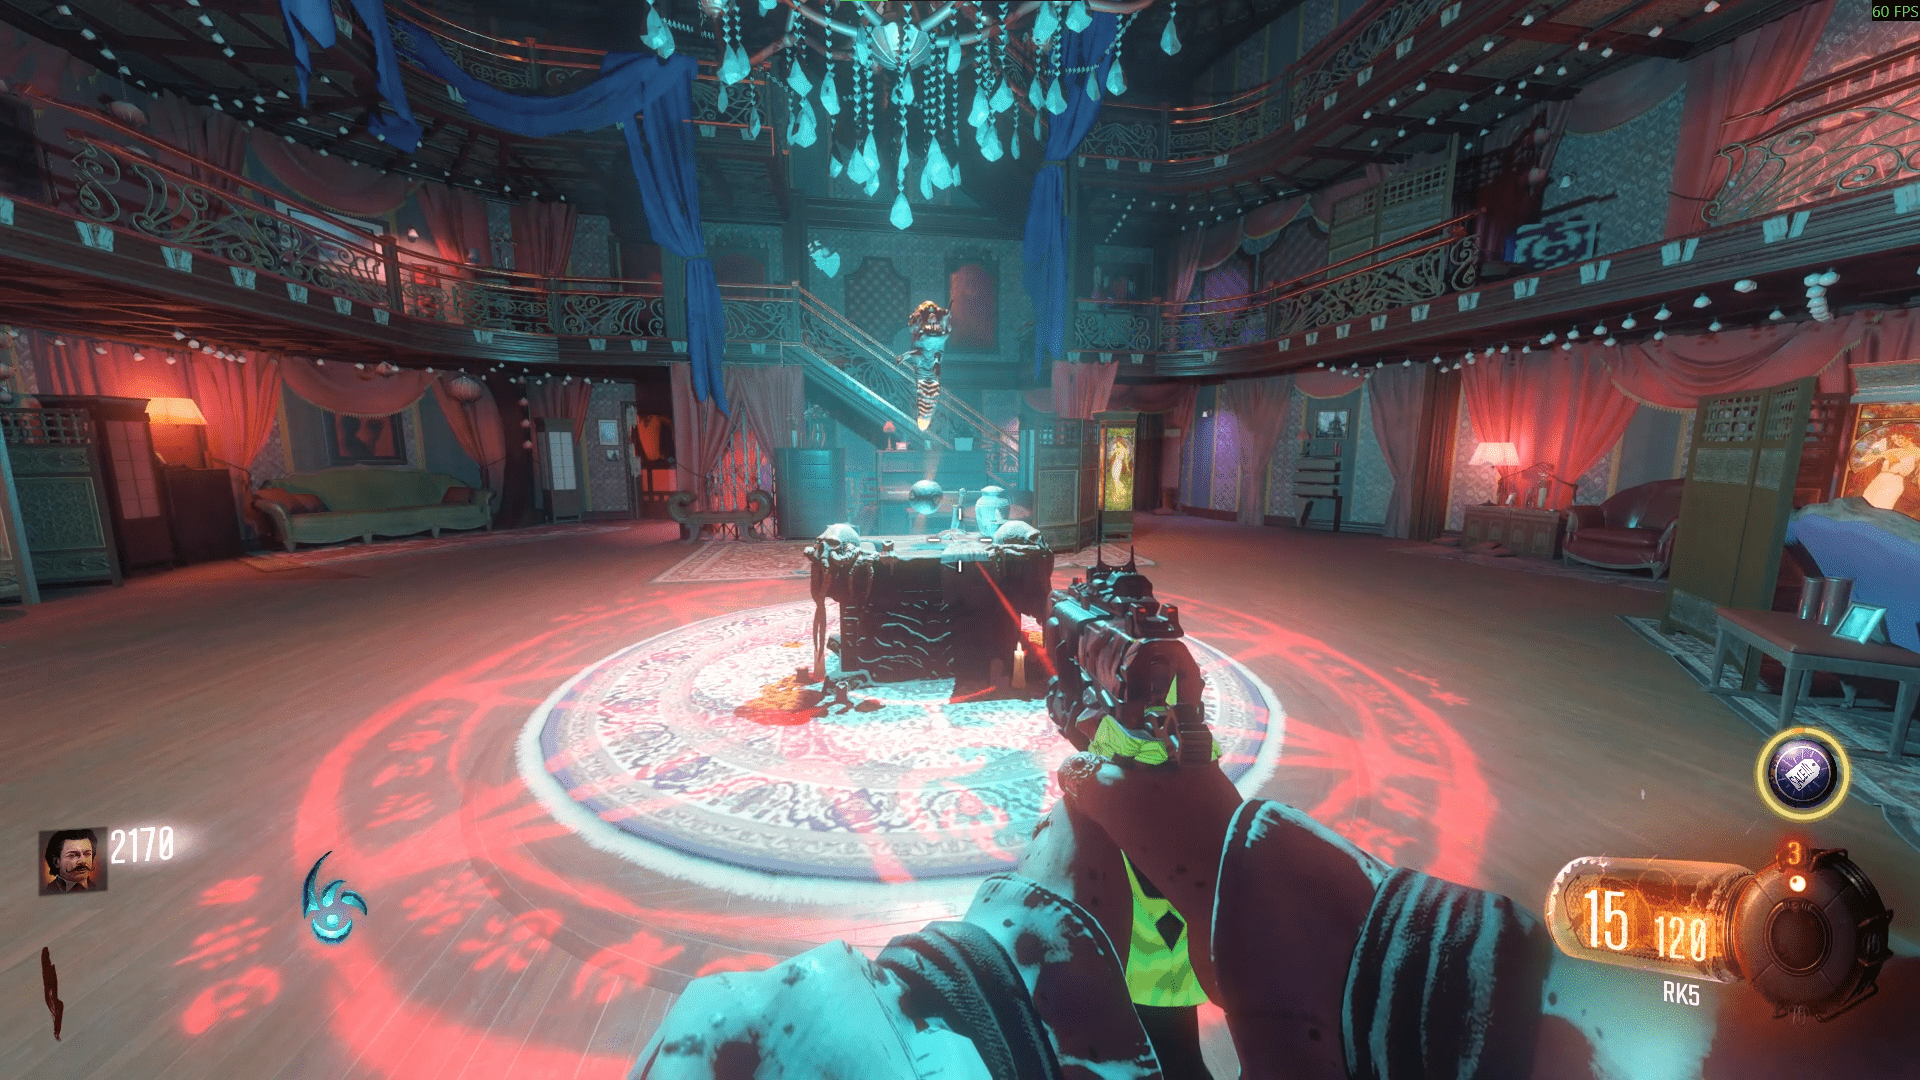
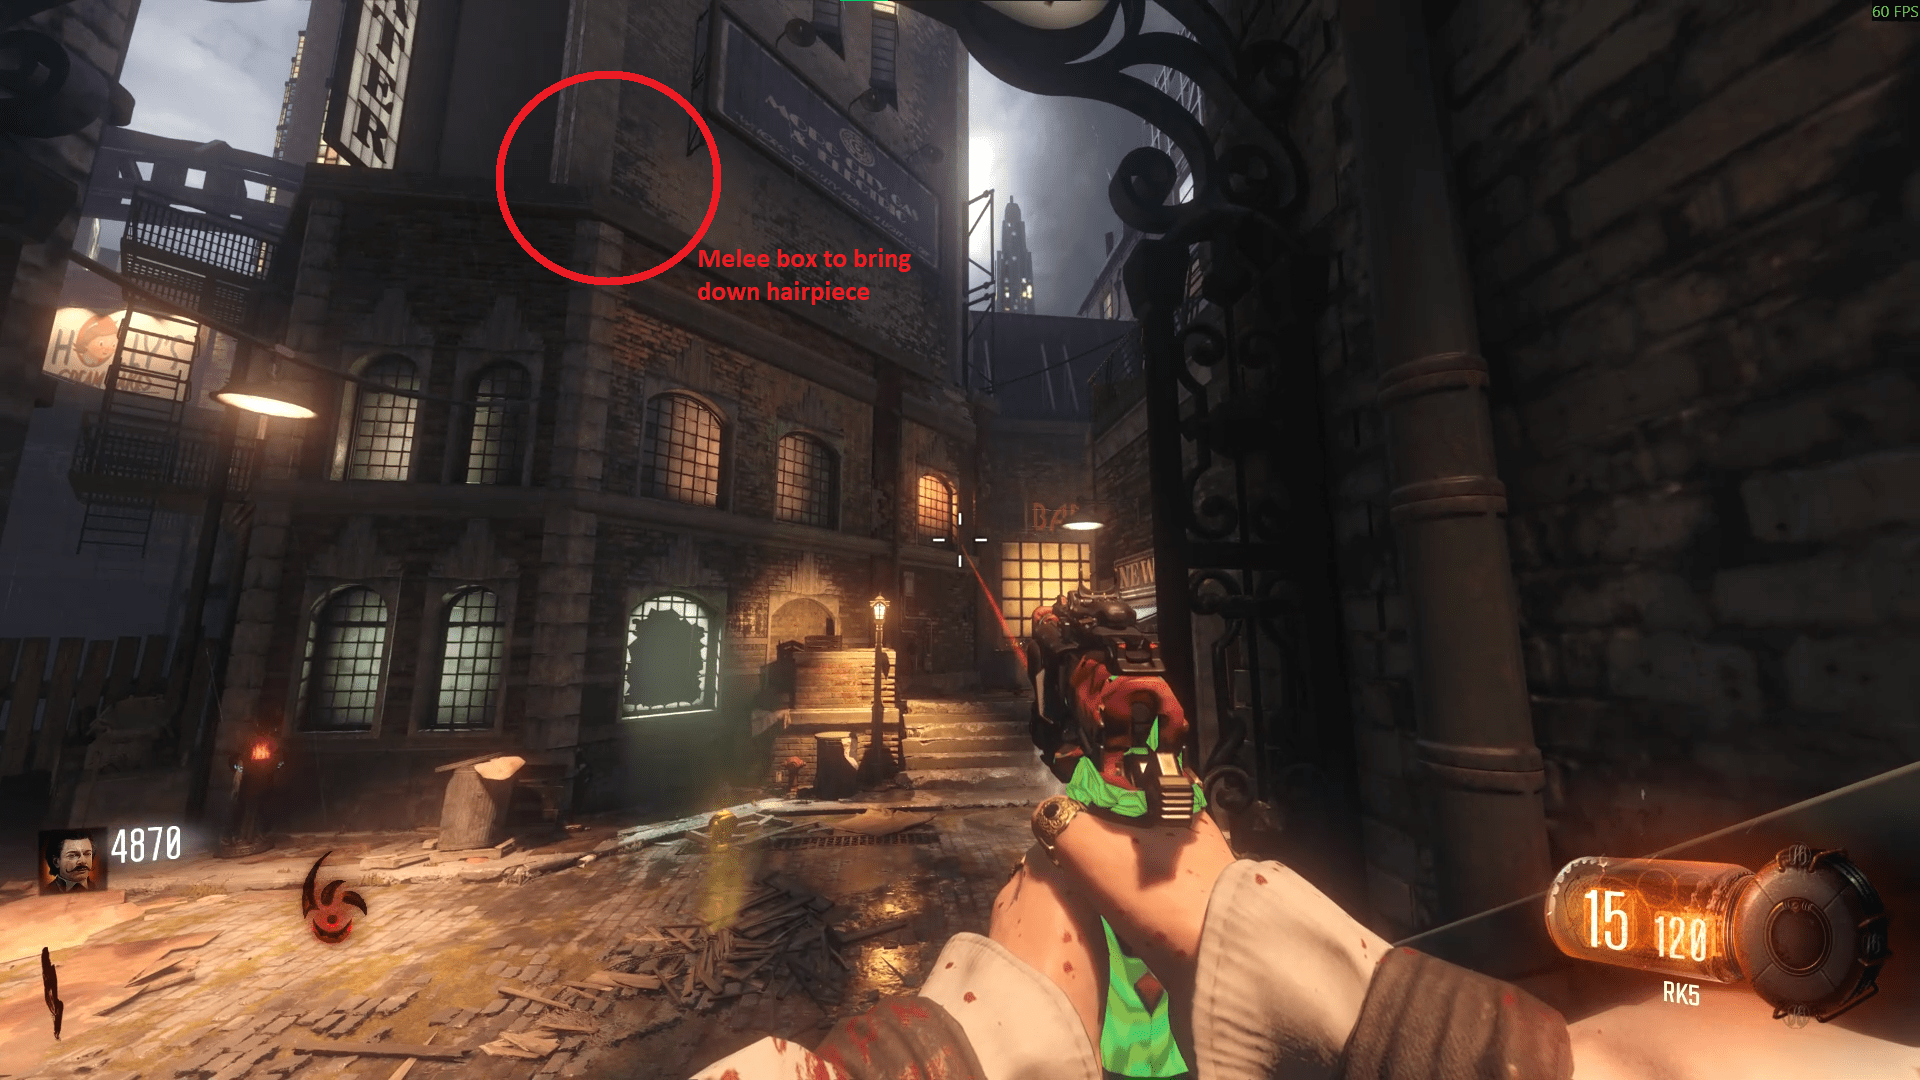
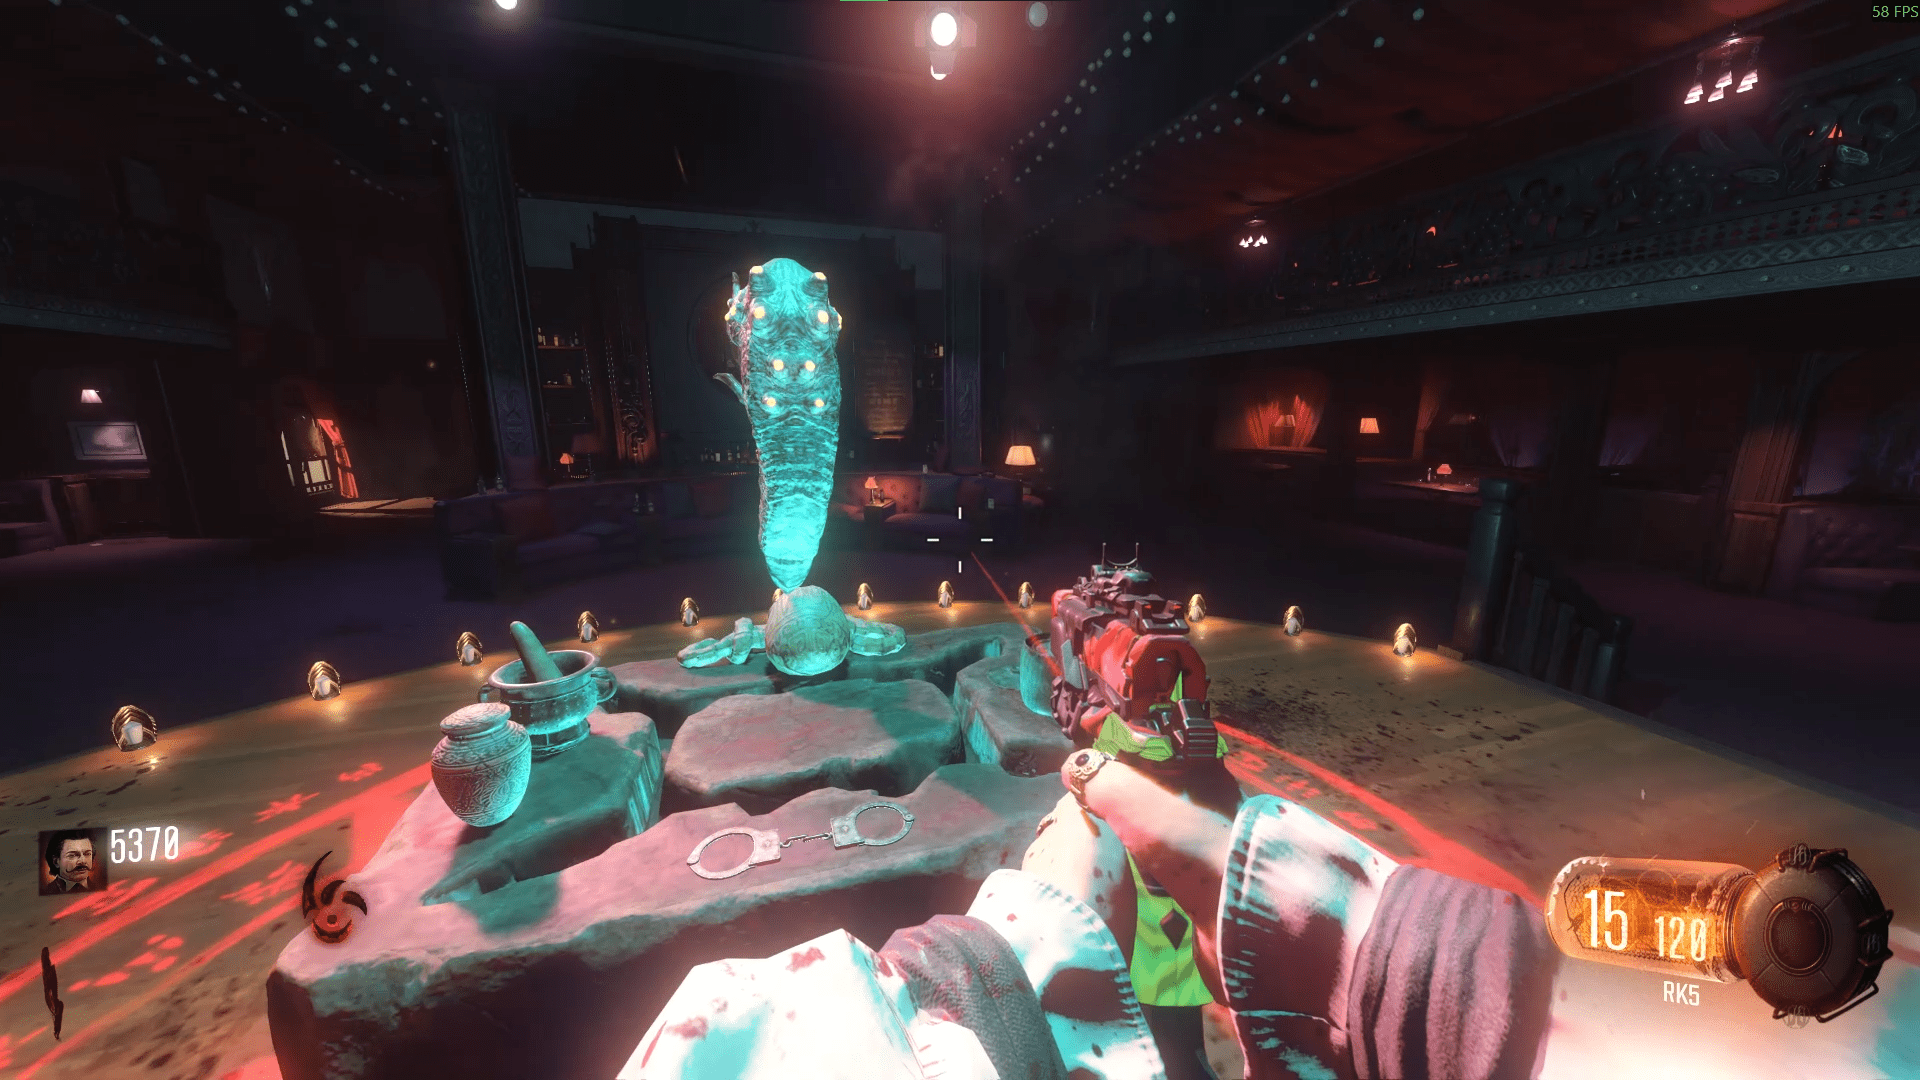
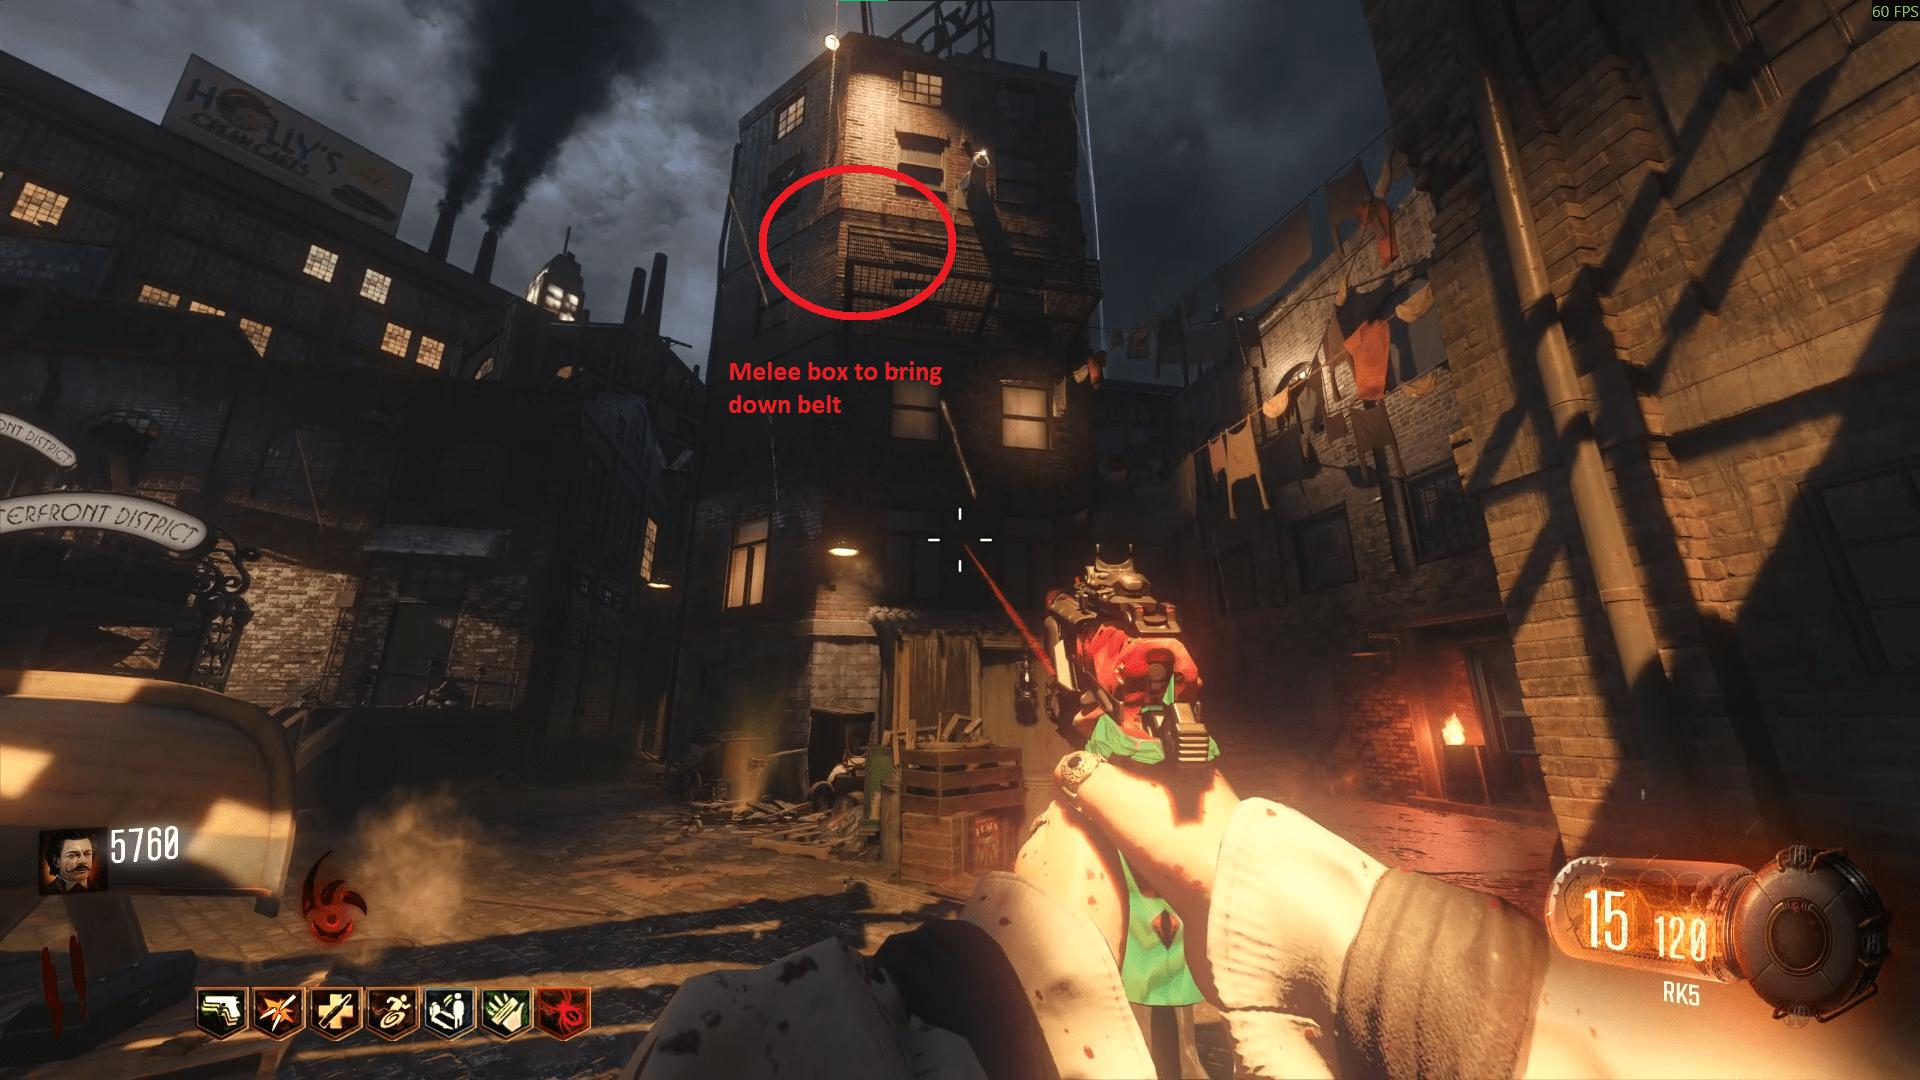
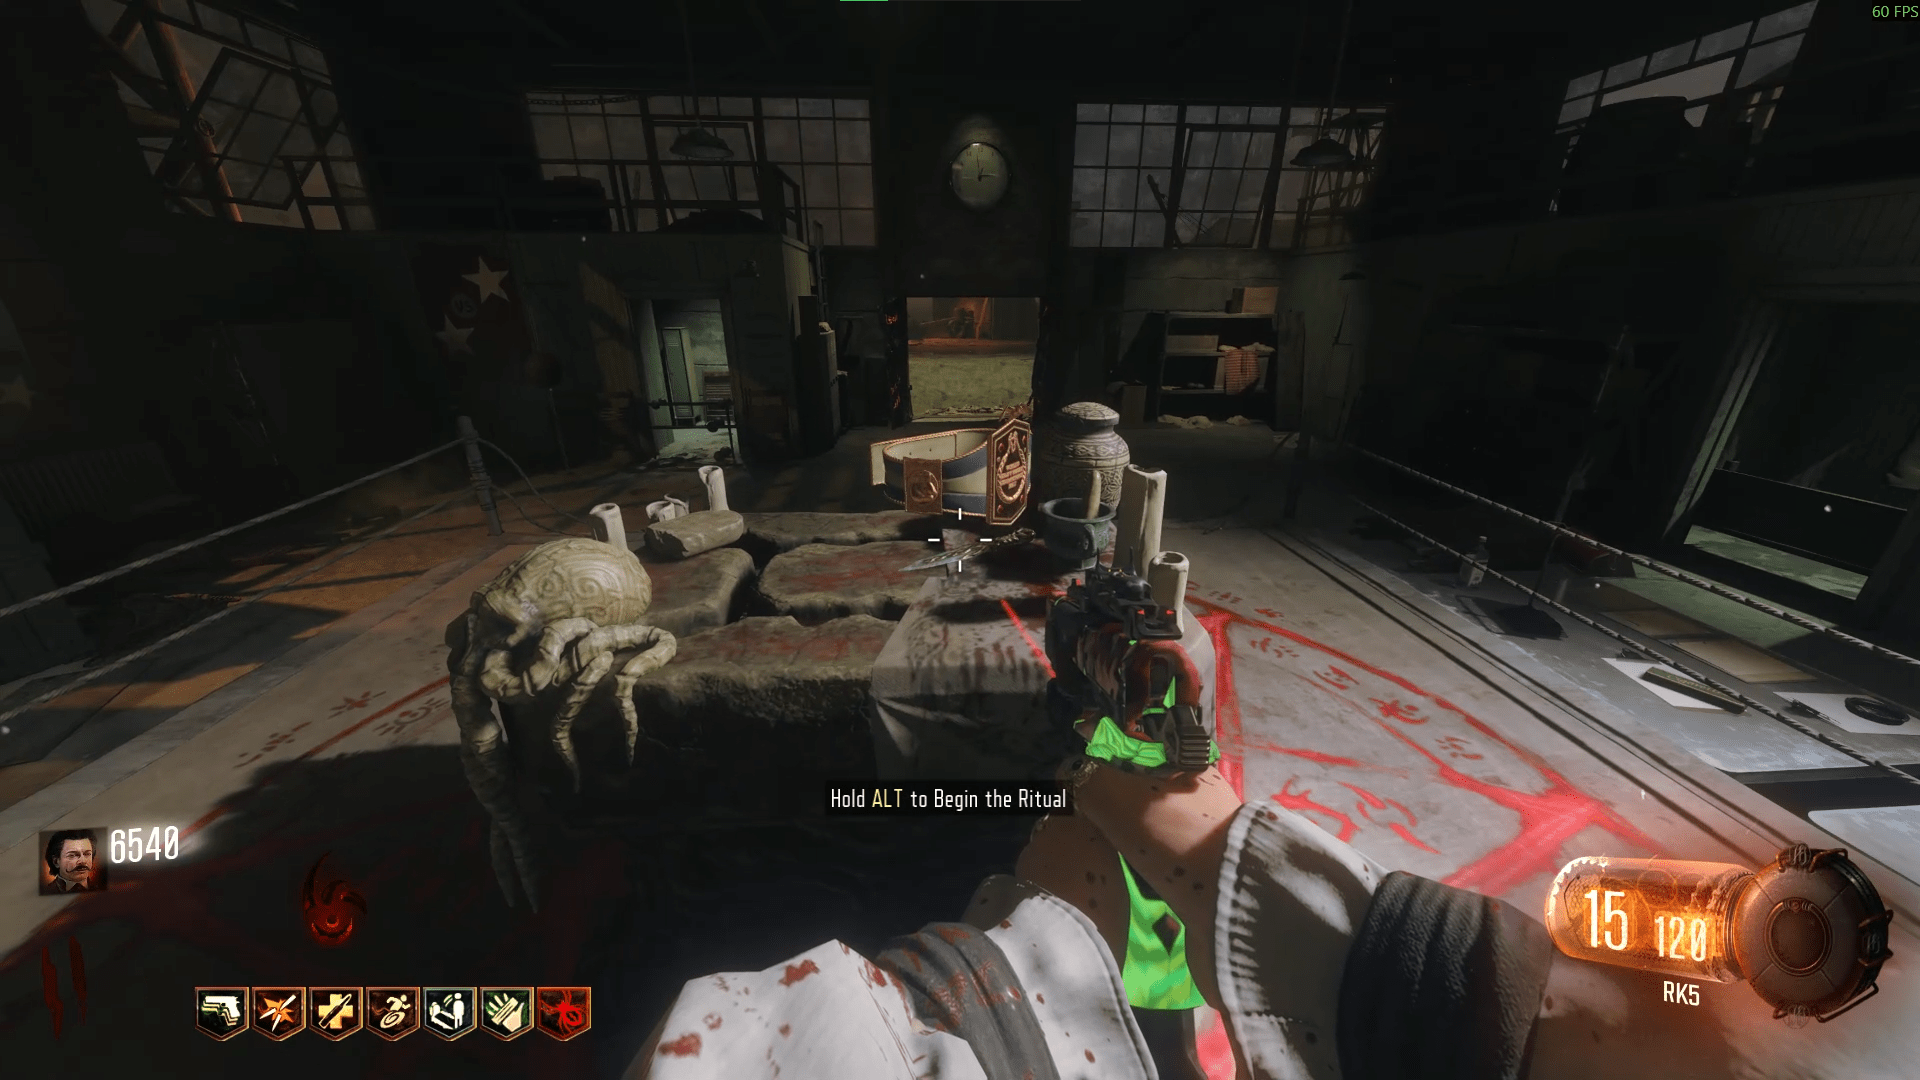
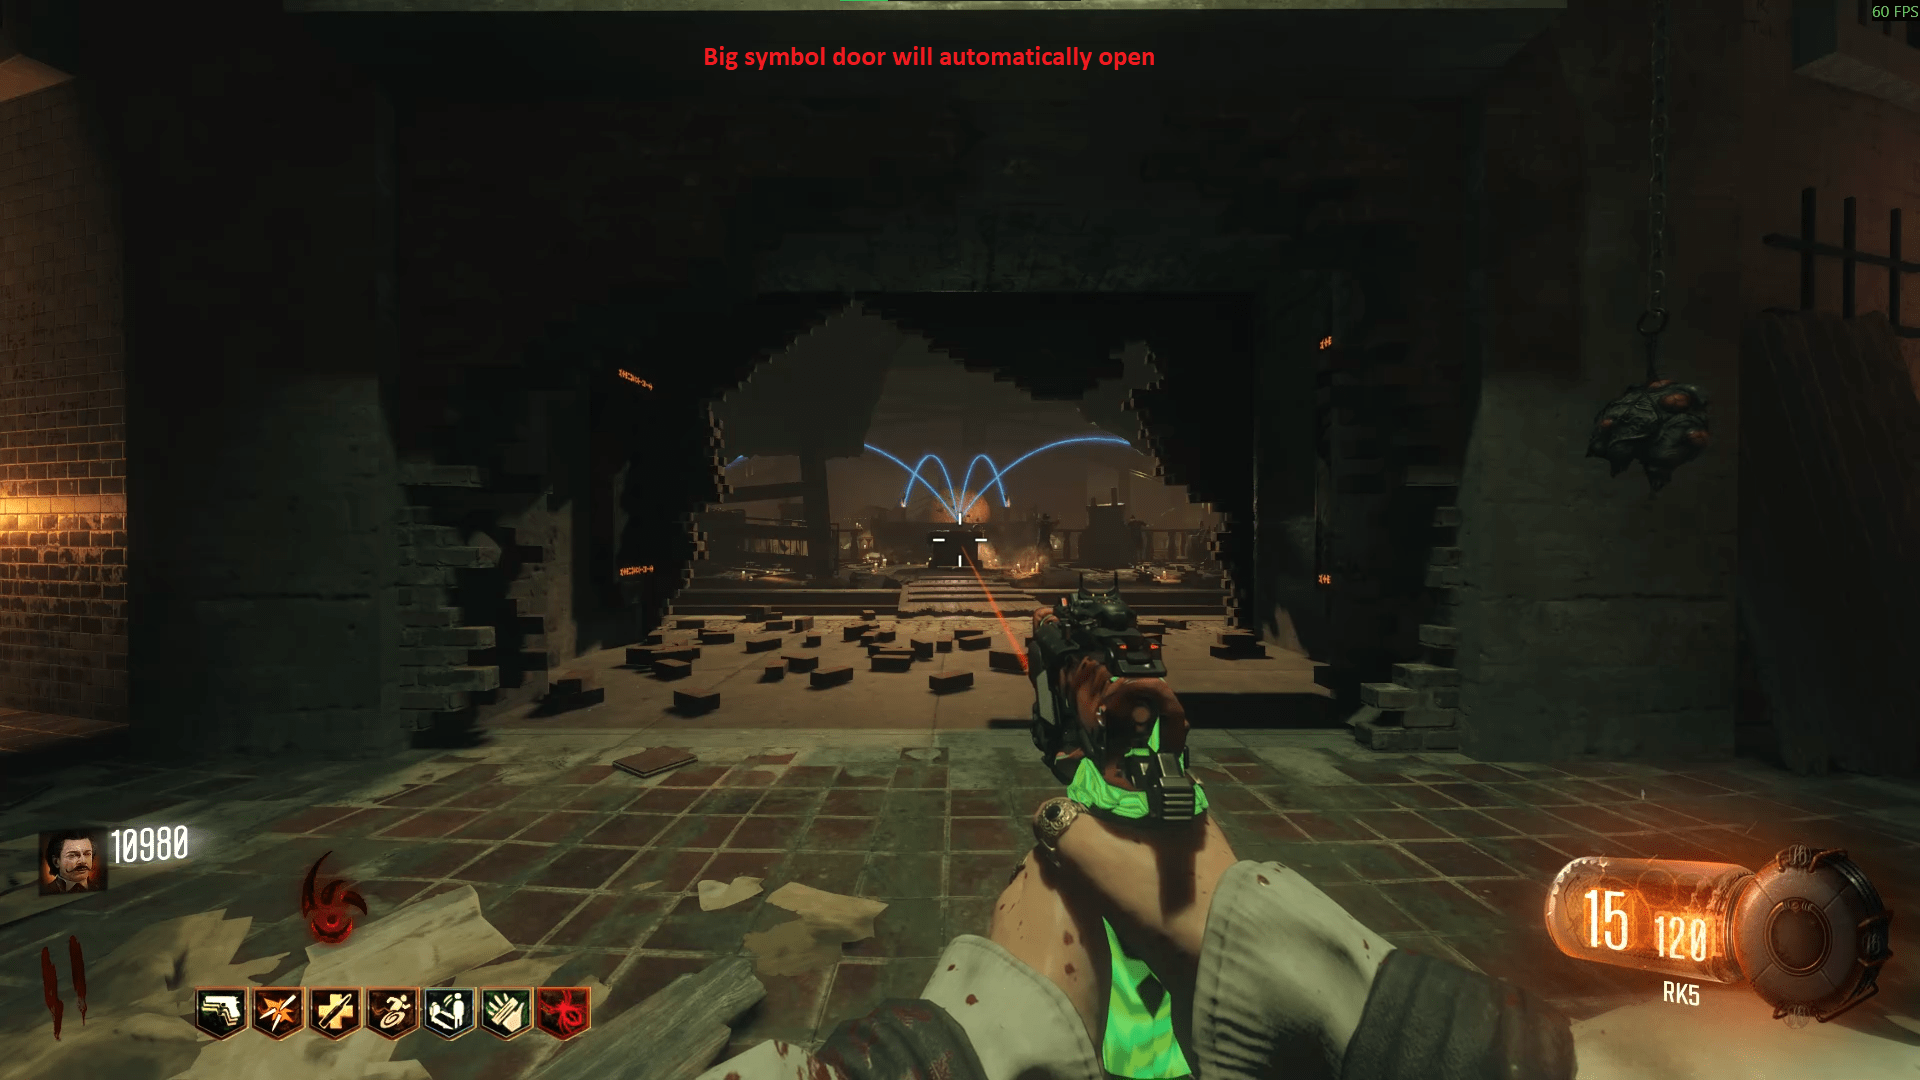
After doing that, your next goal is to obtain and upgrade the Apothicon Sword.
Now keep in mind, the symbols I show in the screenshots will more than likely not be the ones you find in your game, so do not try and copy mine thinking you'll open the wall.
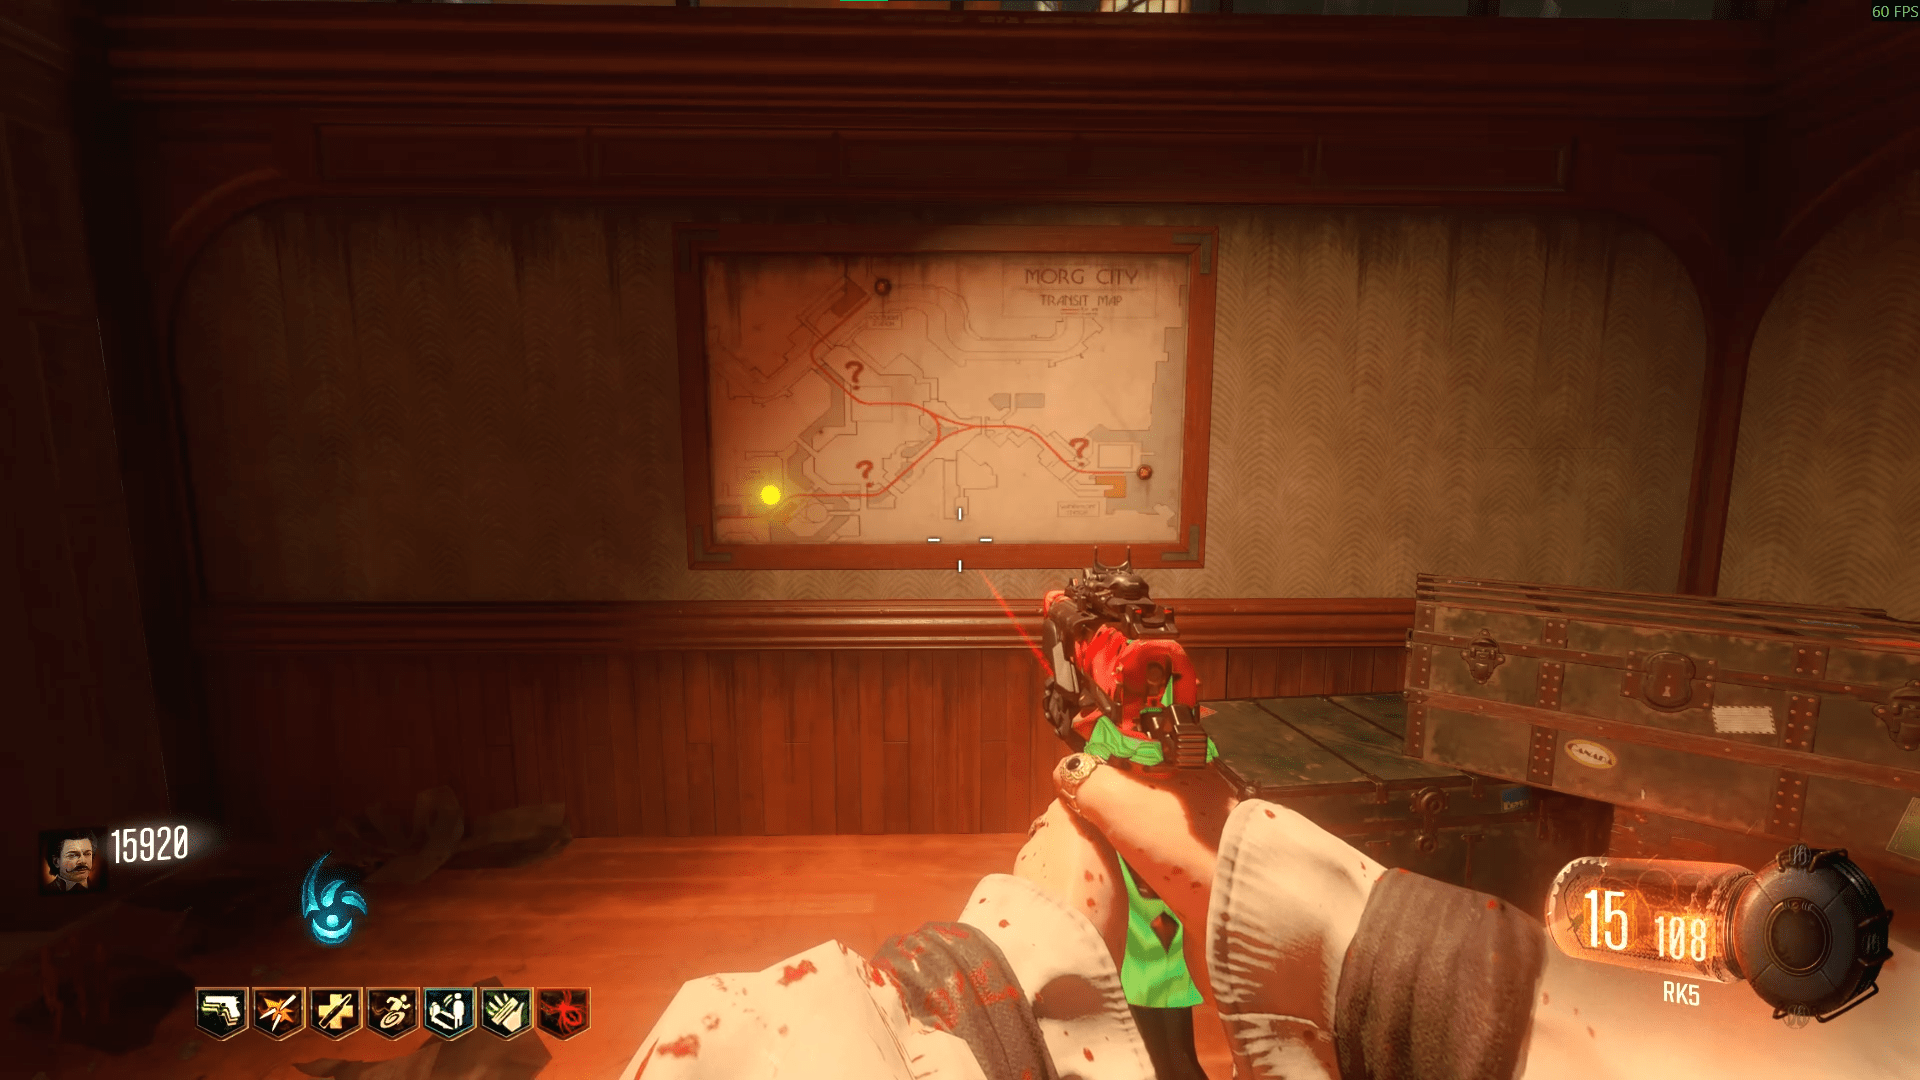
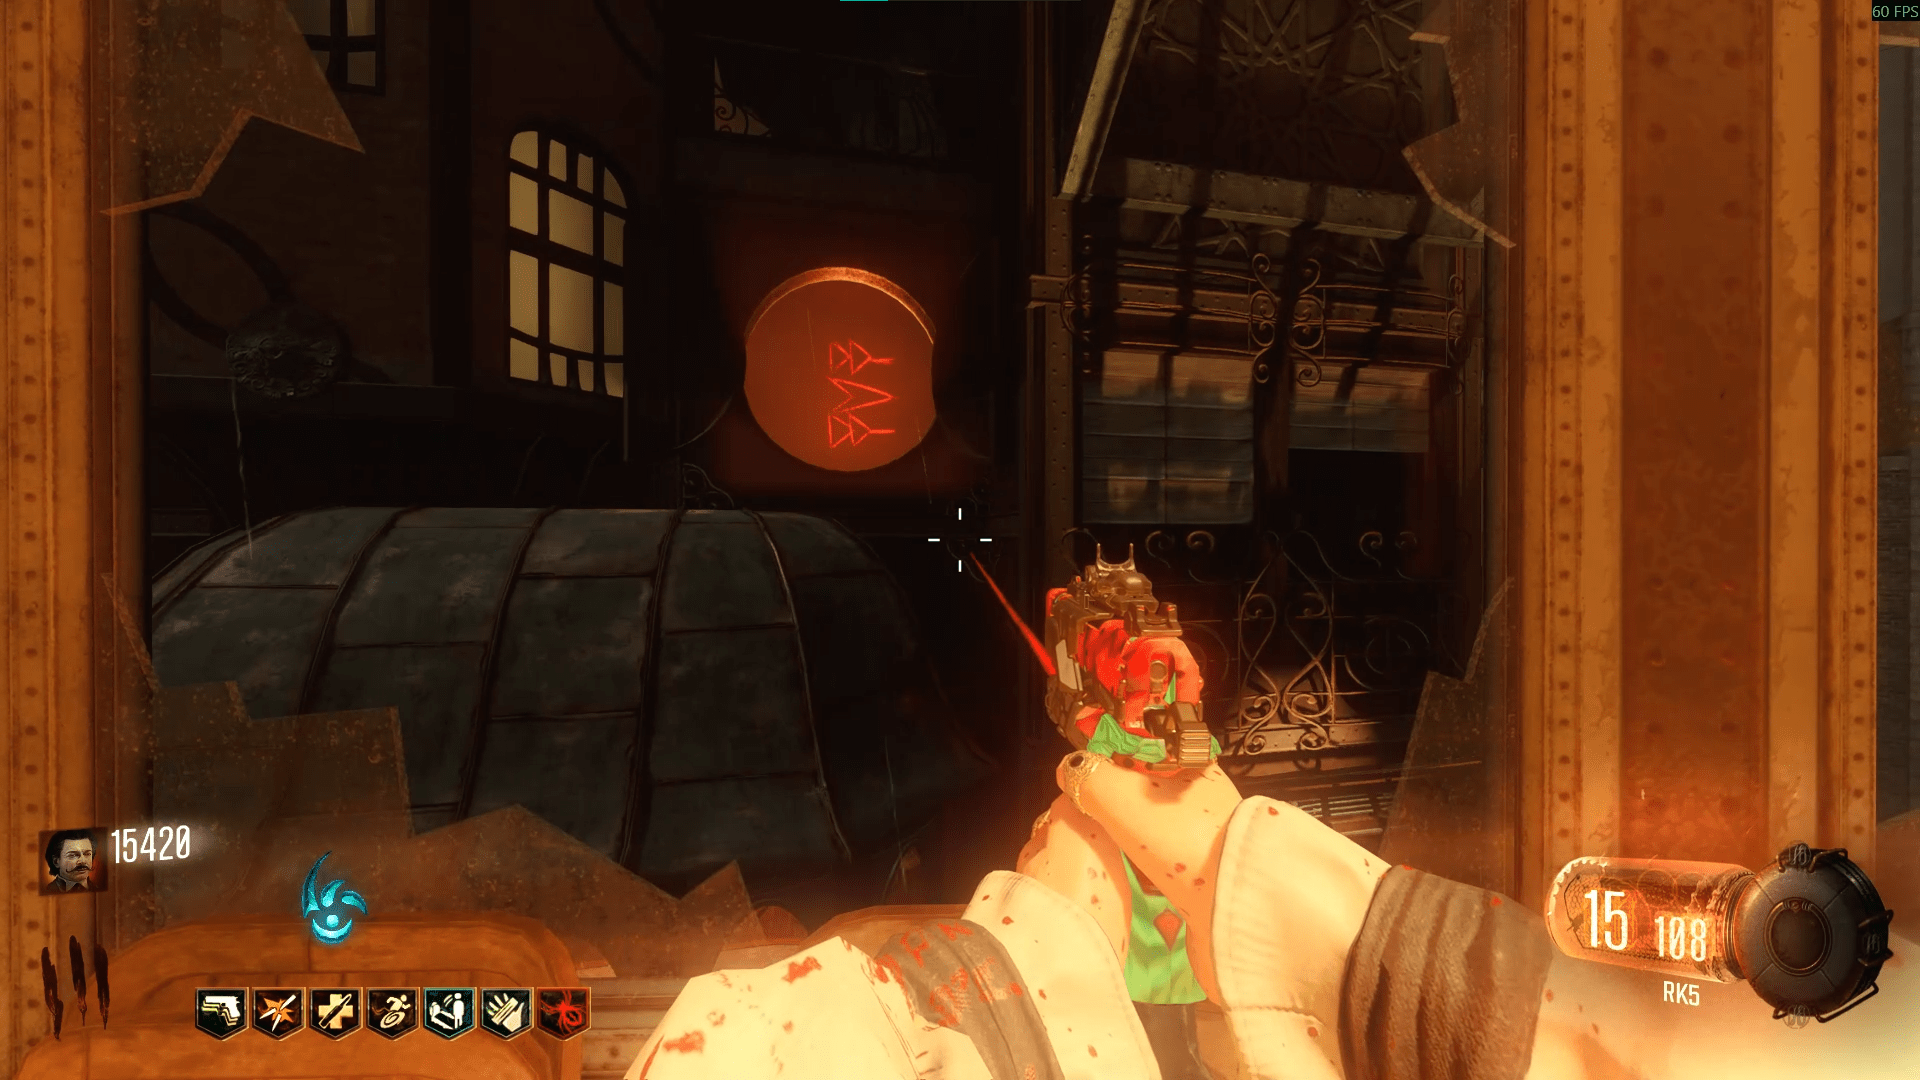
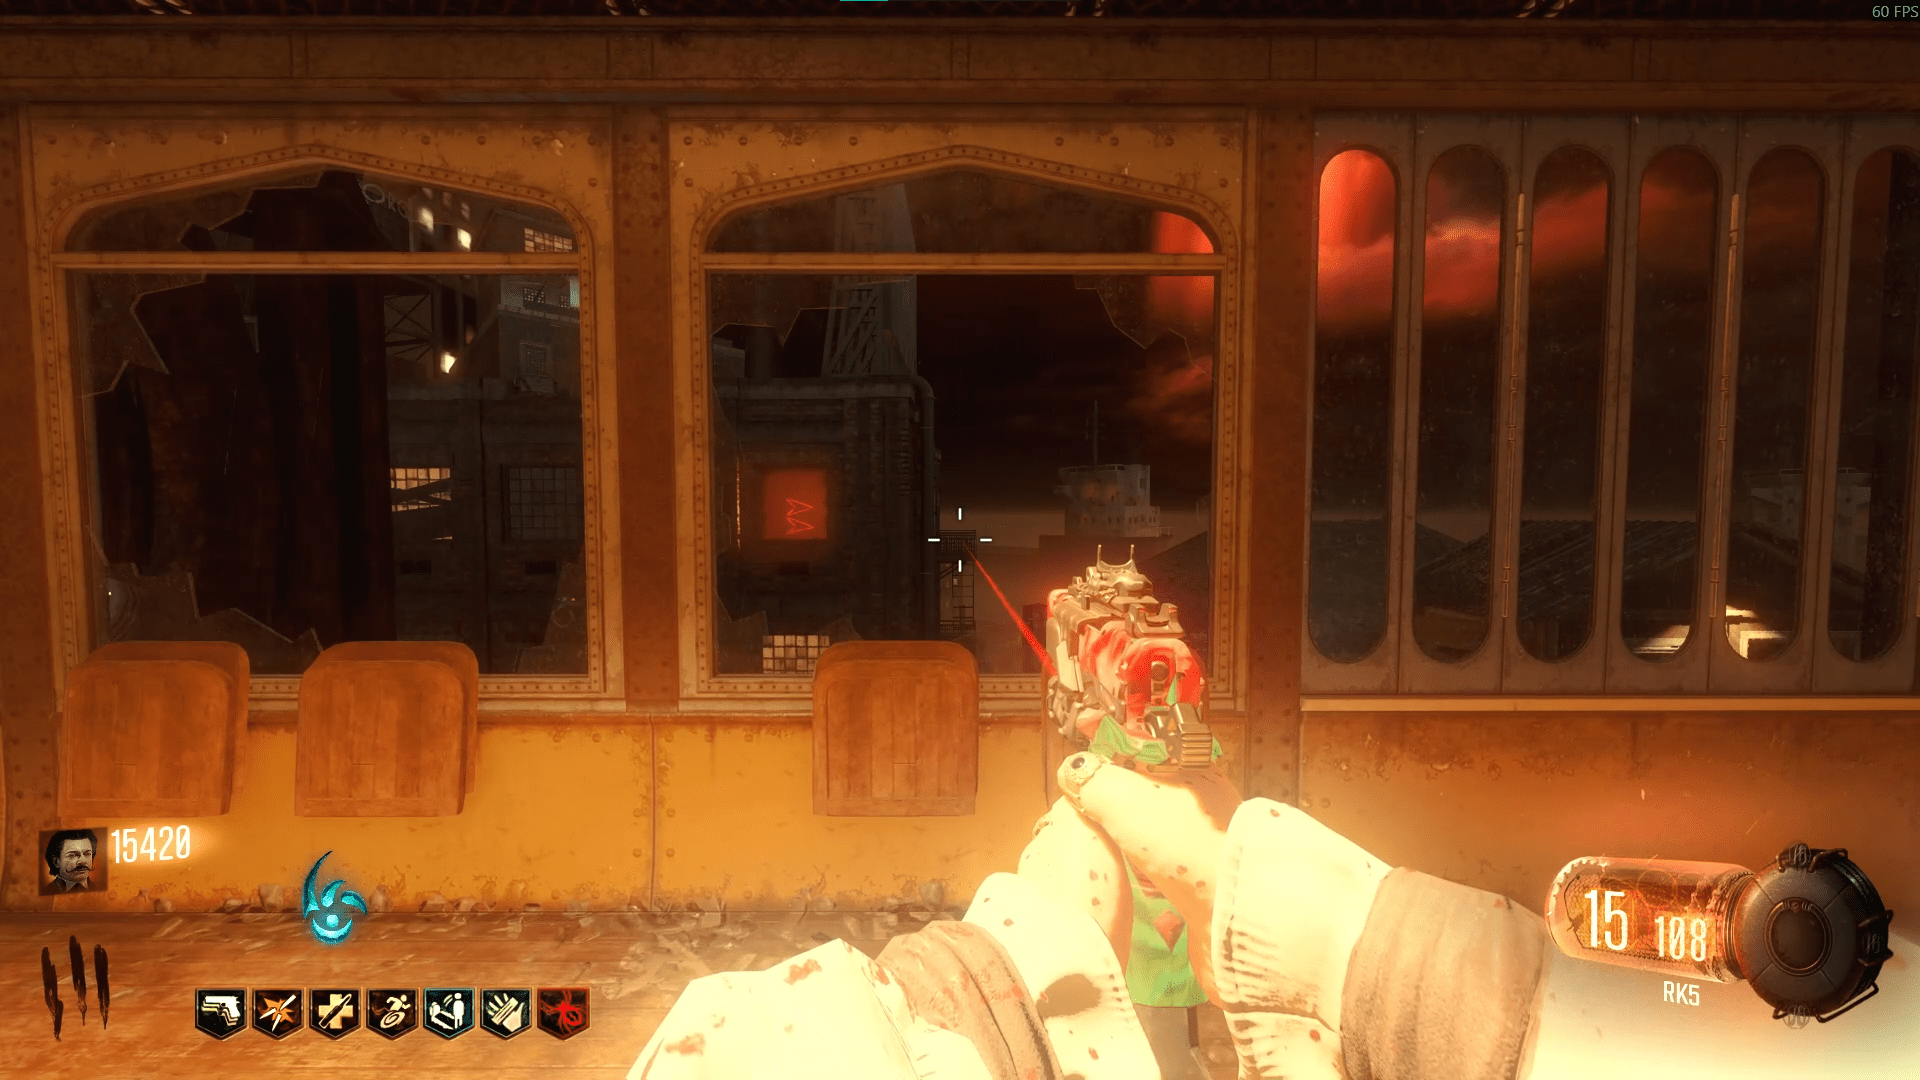
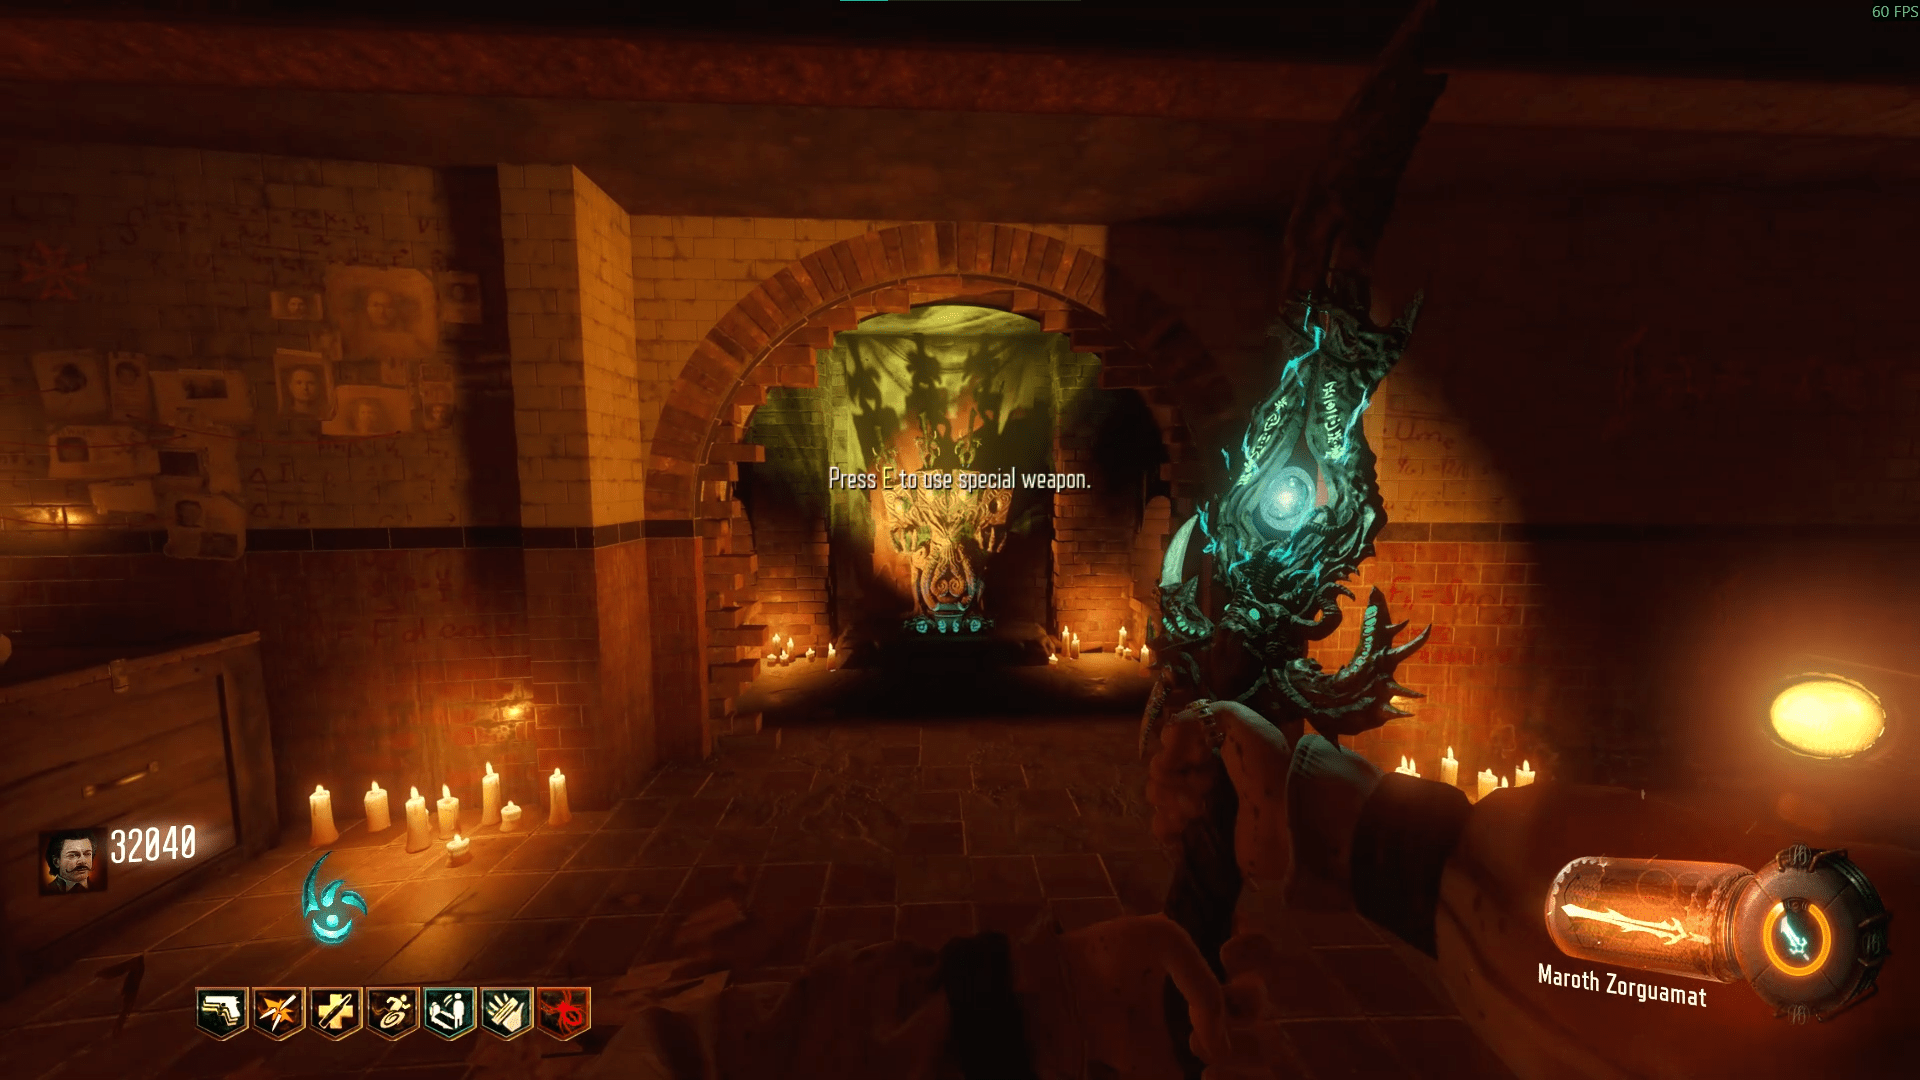
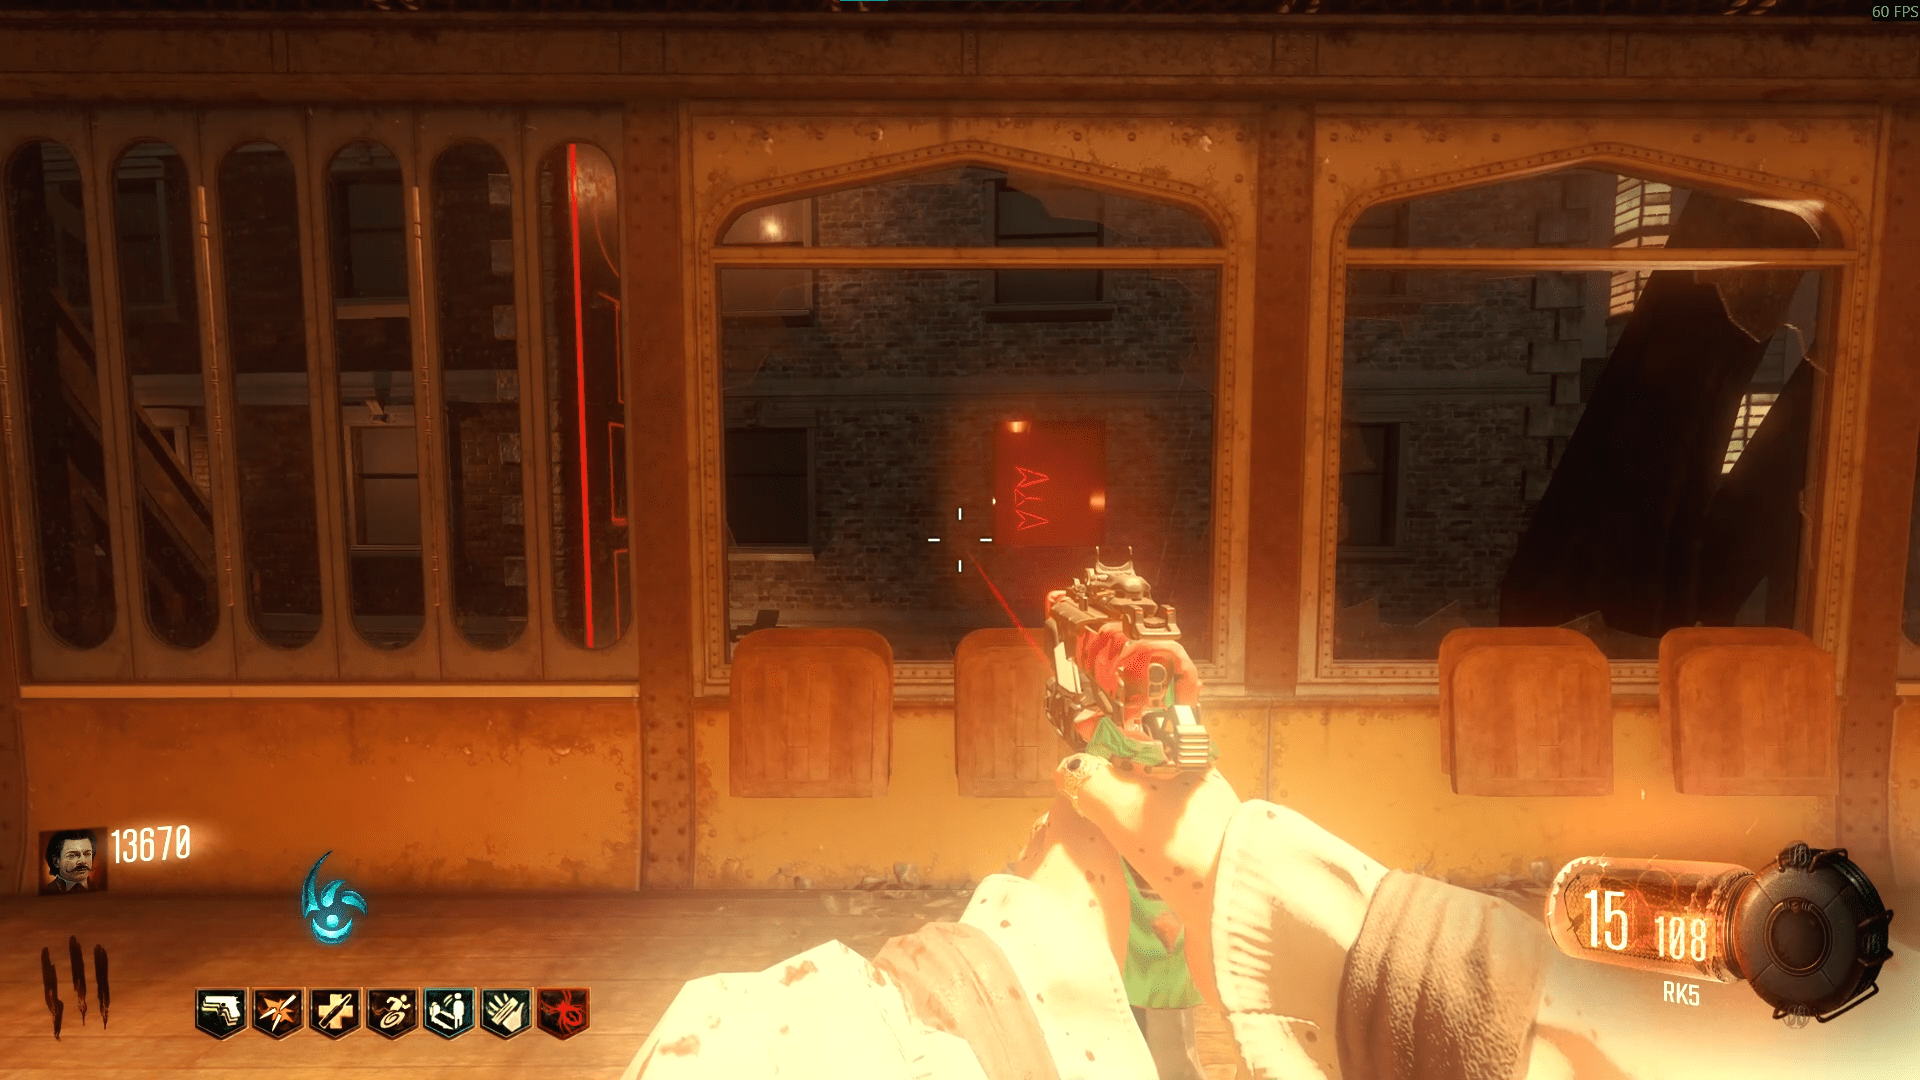 Once you have the three symbols, go down to the Rift and use Beast mode to input the symbols you found into the wall by zapping the appropriate one. After the wall shimmers and opens, take the egg from the pedestal inside. You'll now have to charge this egg in each of the four Cthulhu statues around the map. You open them by meleeing in Beast mode, and ideally should have opened them during when you opened up the map earlier. The four locations for the statues are as follows;
 - Directly opposite from where you found the Apothicon Sword egg.
- In the Canal District, below the ritual site behind the steps leading up to it.
- In the Footlight District, directly below the perk machine near the stairs.
- In the Waterfront District, behind the perk machine in a room next to the upper walkways.
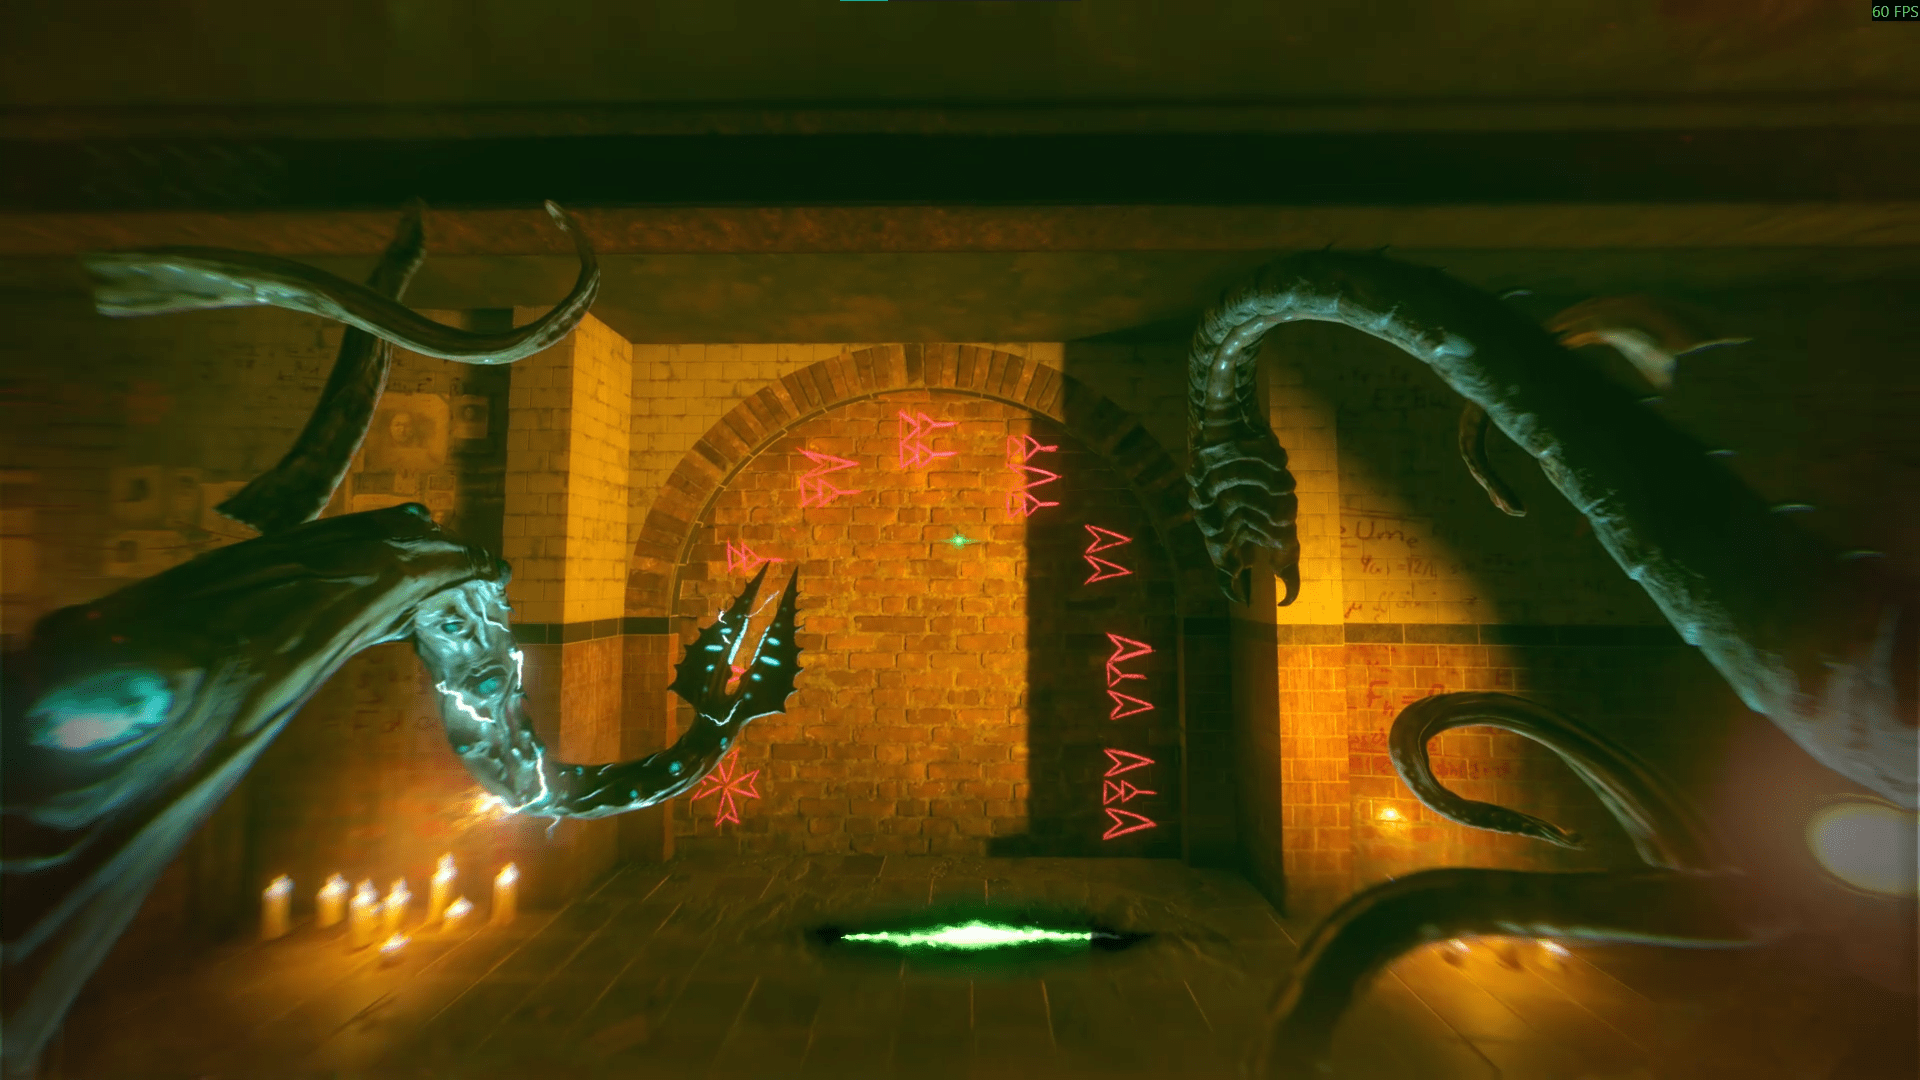
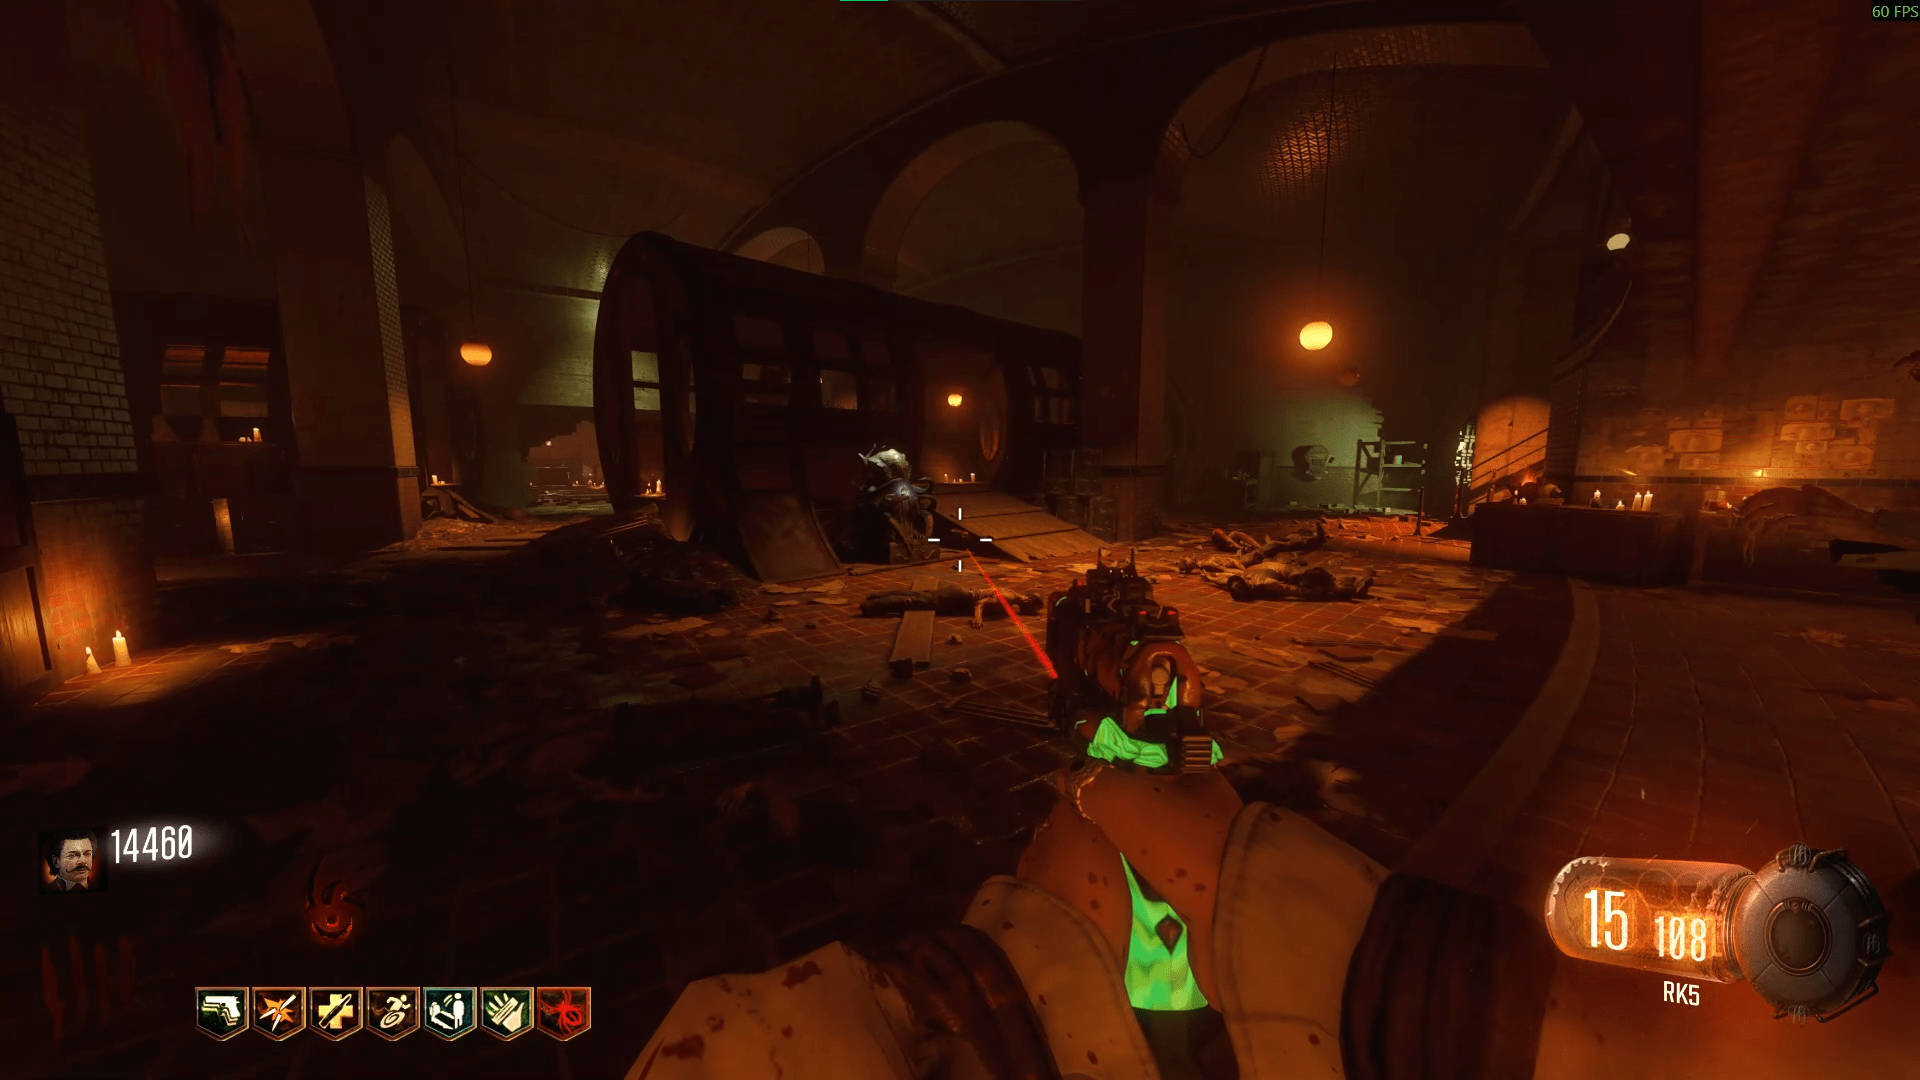
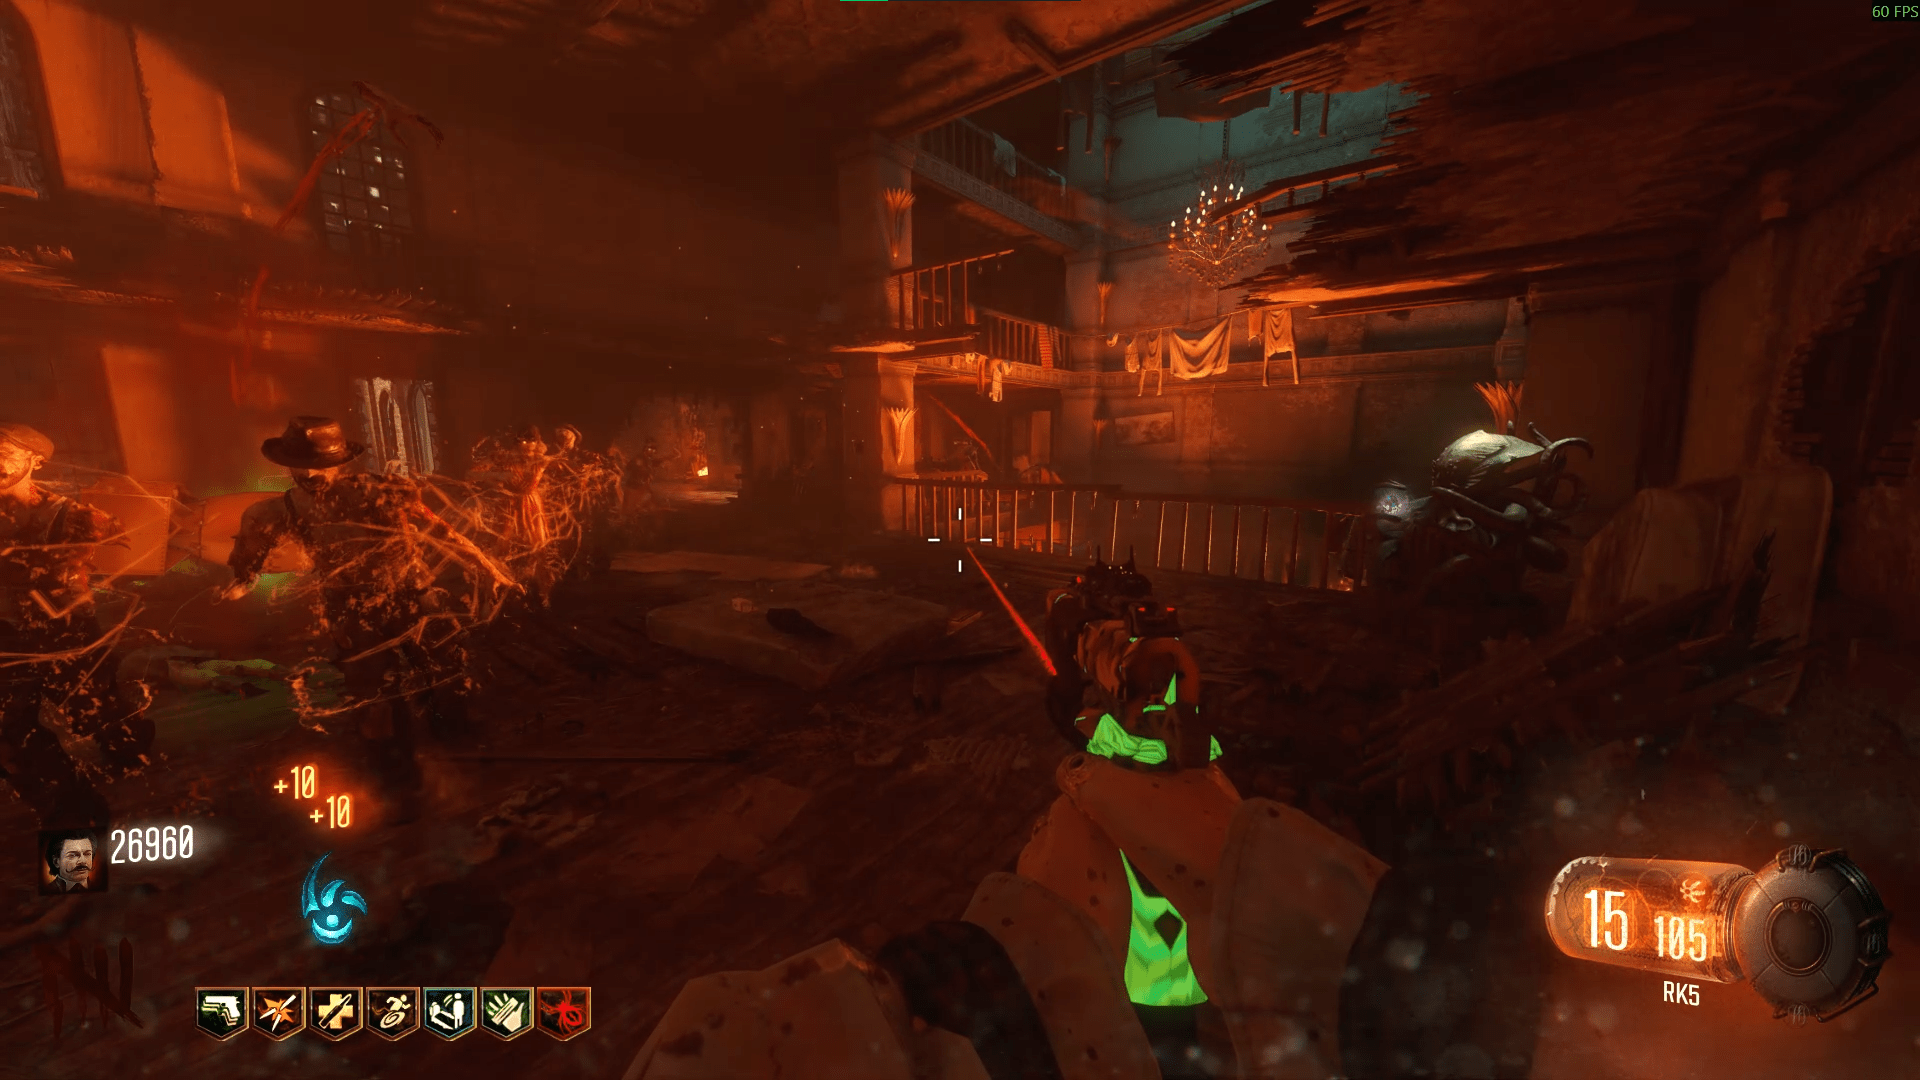
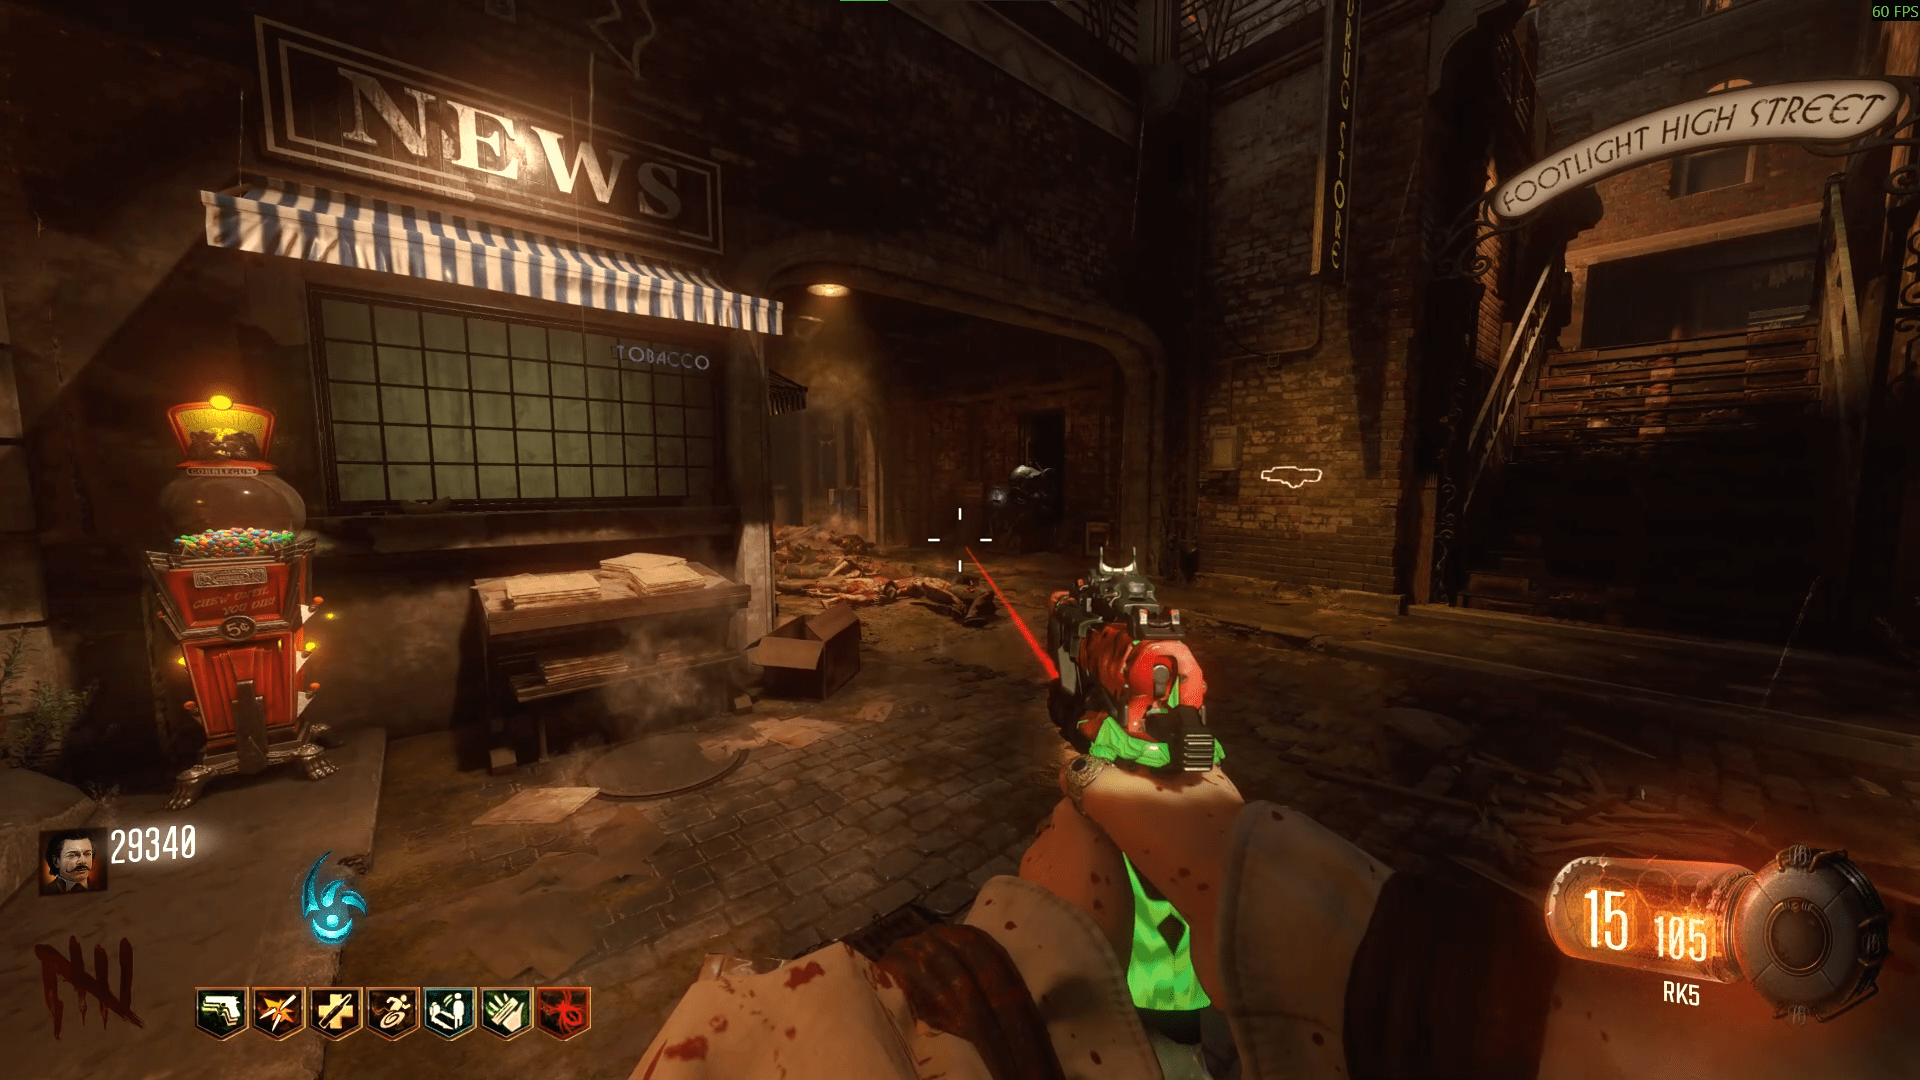
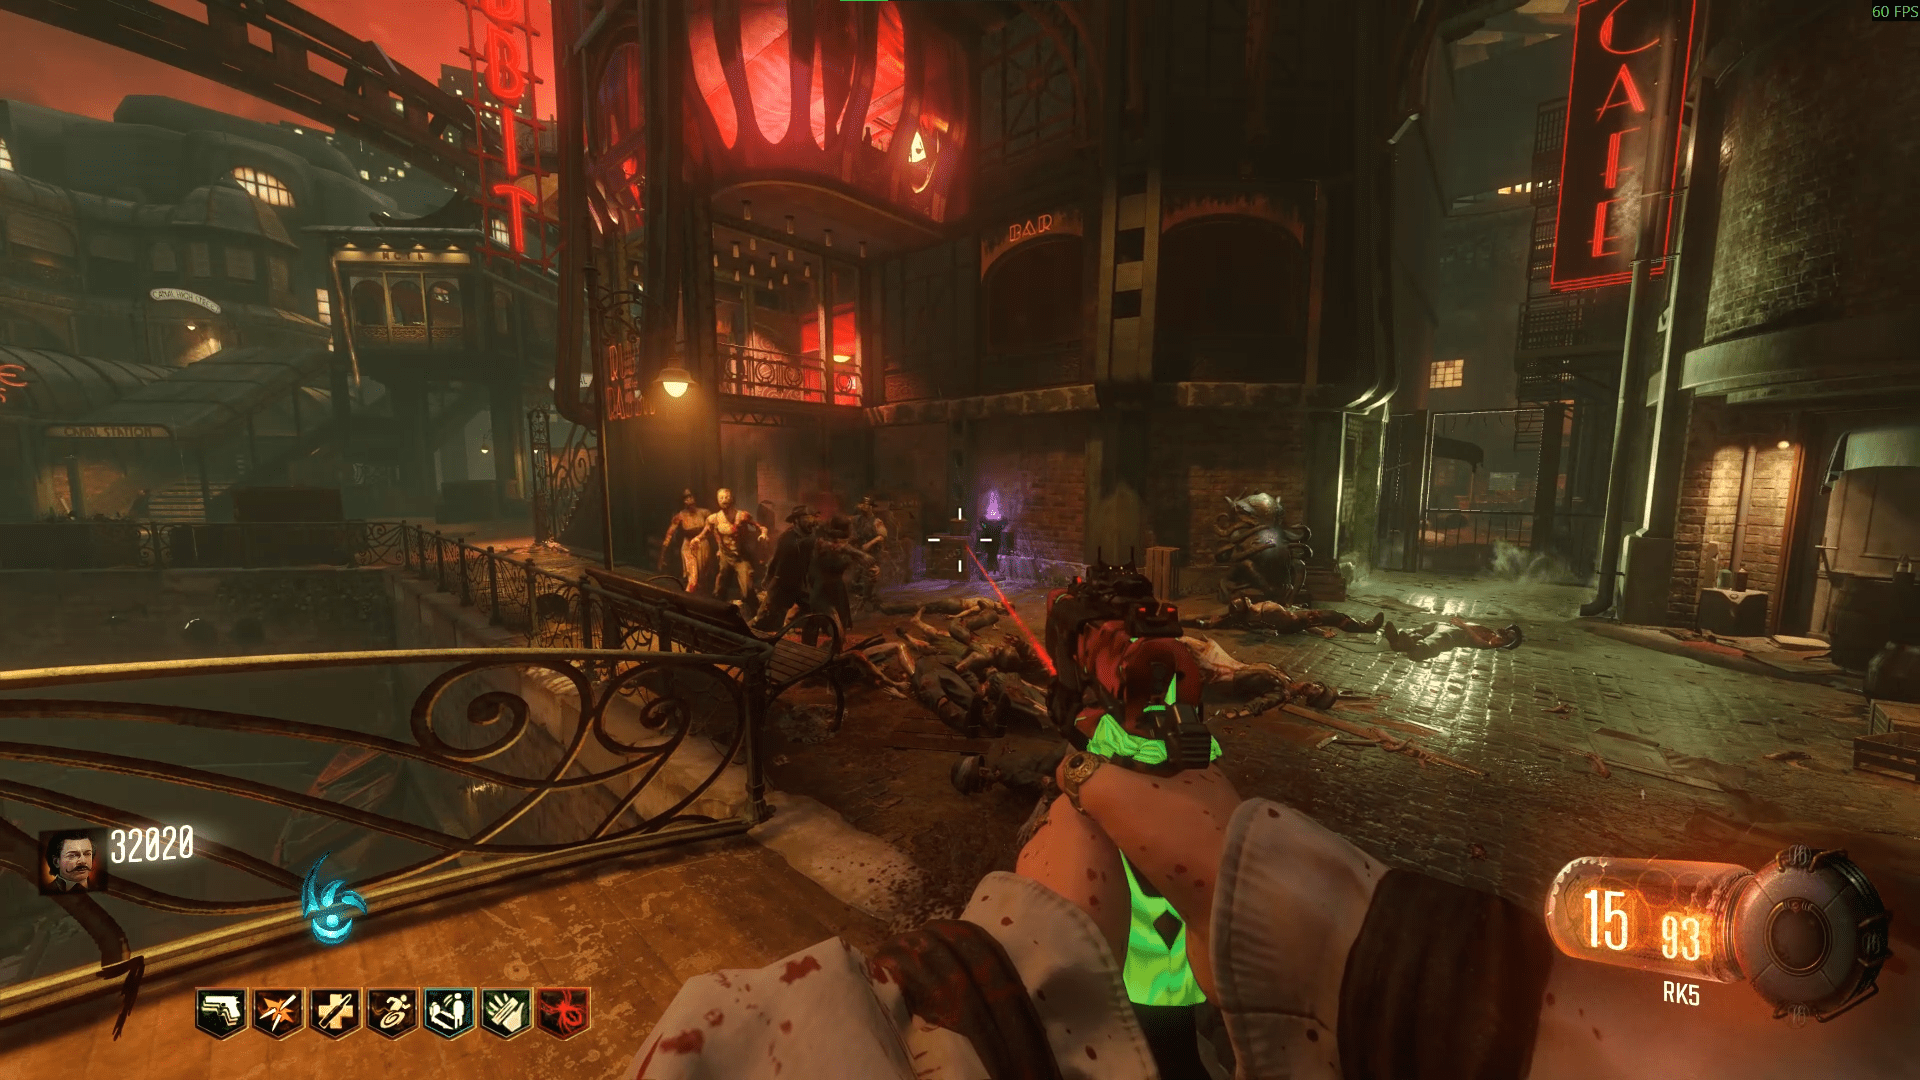
- Nero, the Magician, finds his Arch Ovum at the Spawn/Junction ritual site.
- Jessica, the Dancer, finds her Arch Ovum at the Footlight Burlesque ritual site.
- Floyd, the Boxer, finds his Arch Ovum at the Waterfront Boxing Gym ritual site.
- Jack, the Policeman, finds his Arch Ovum at the Canals Burlesque ritual site.
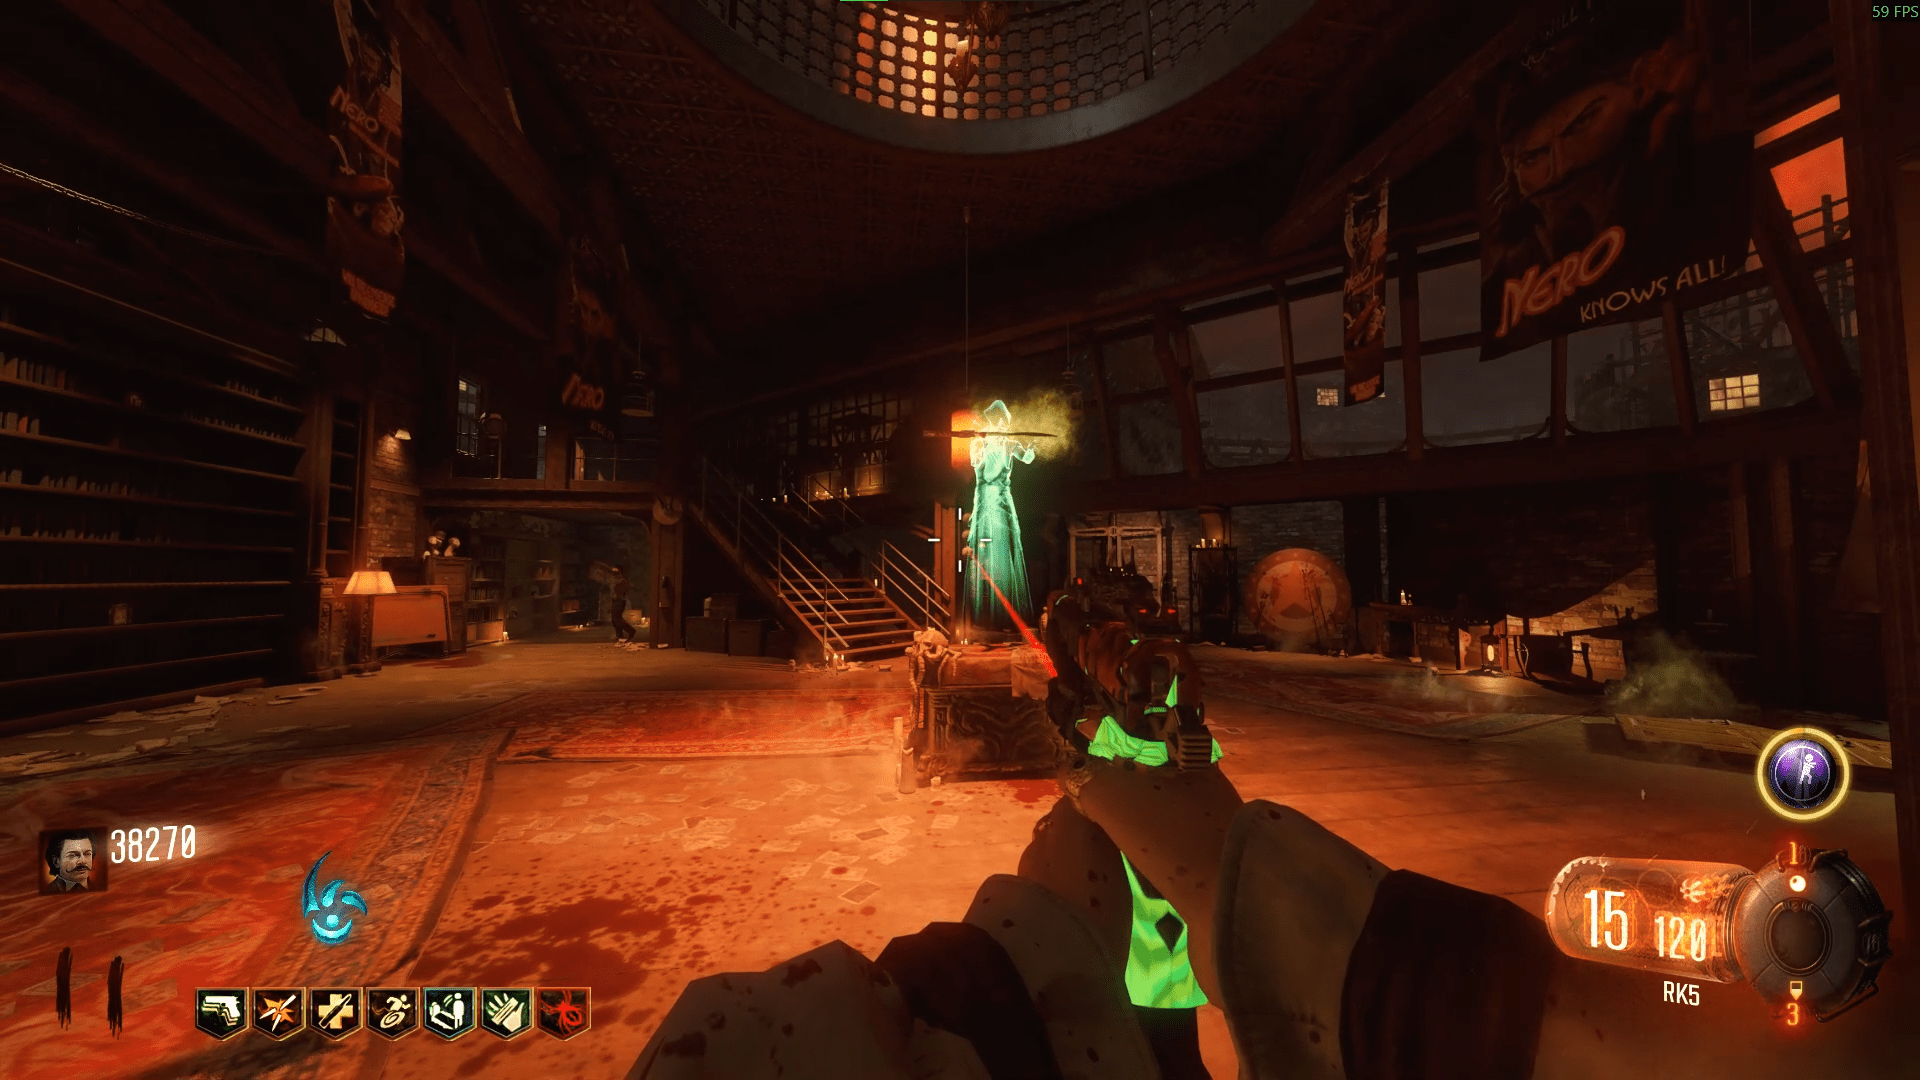
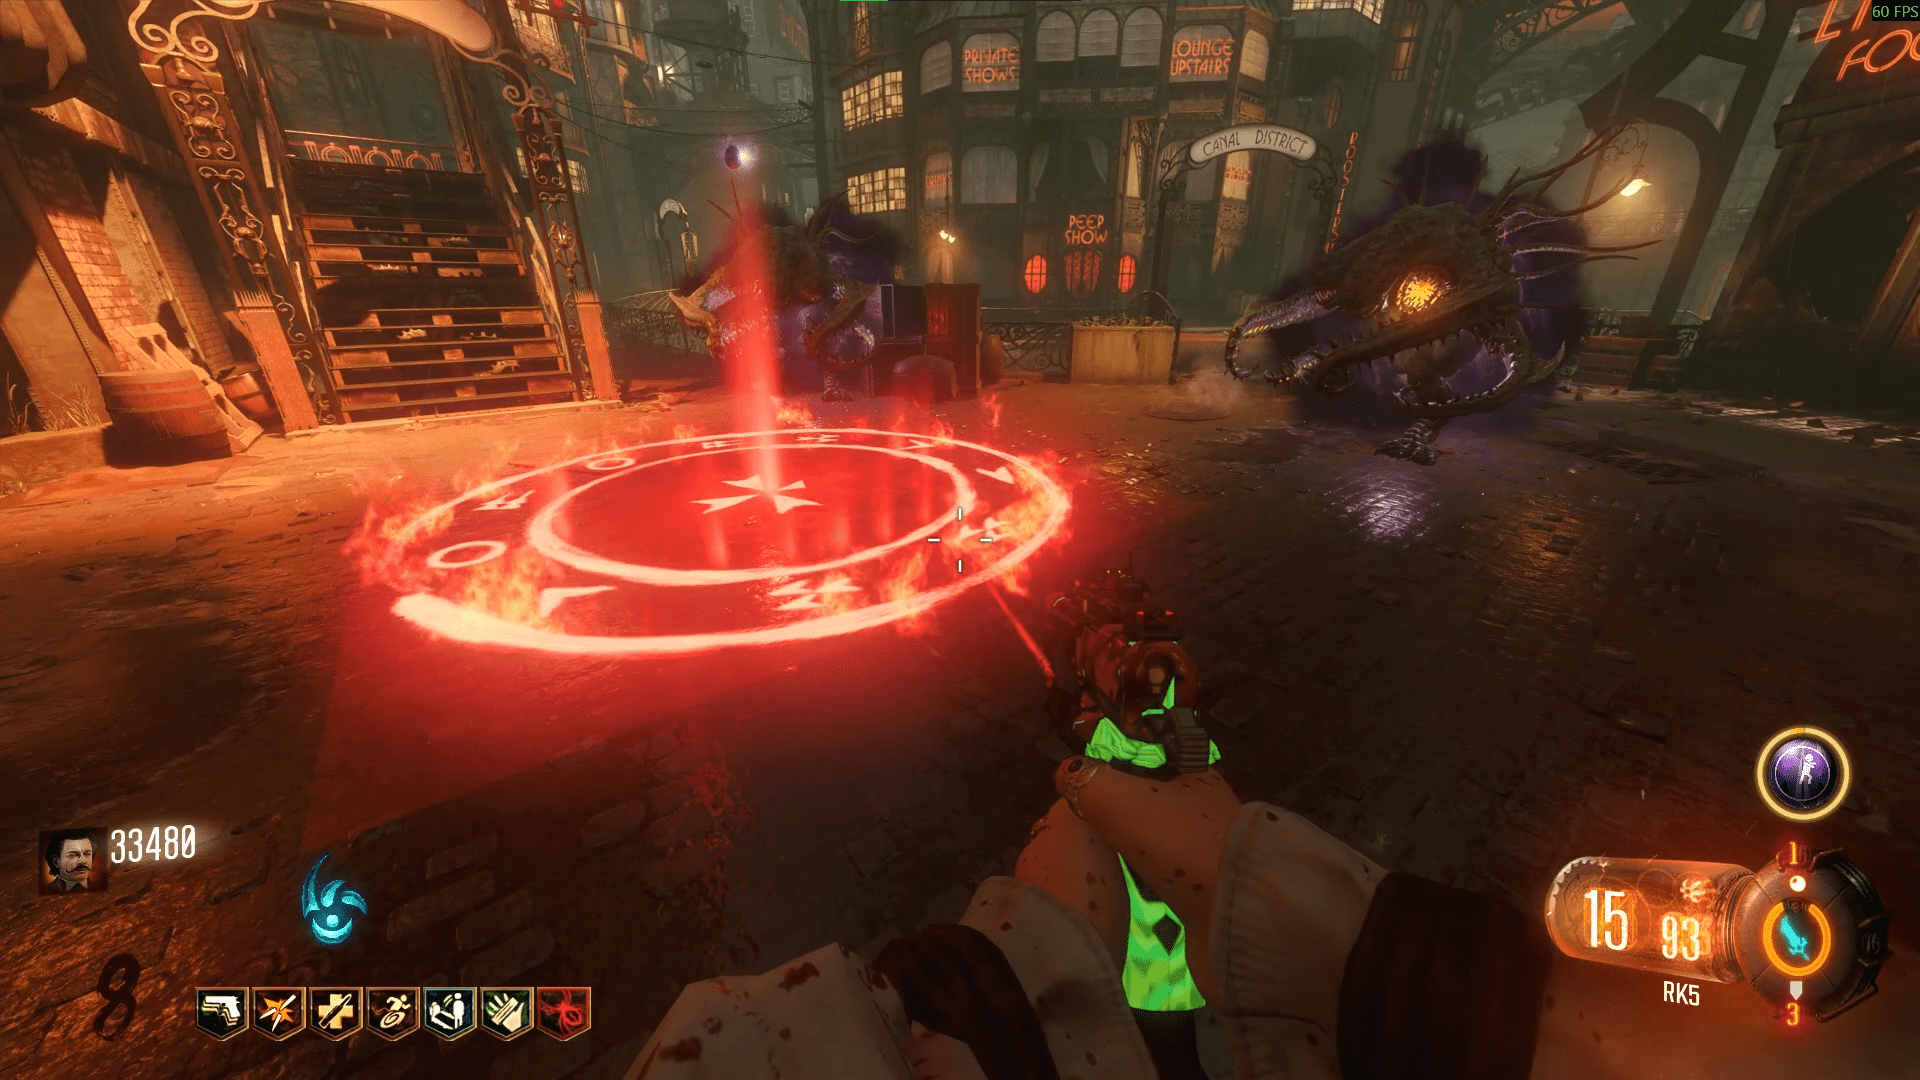
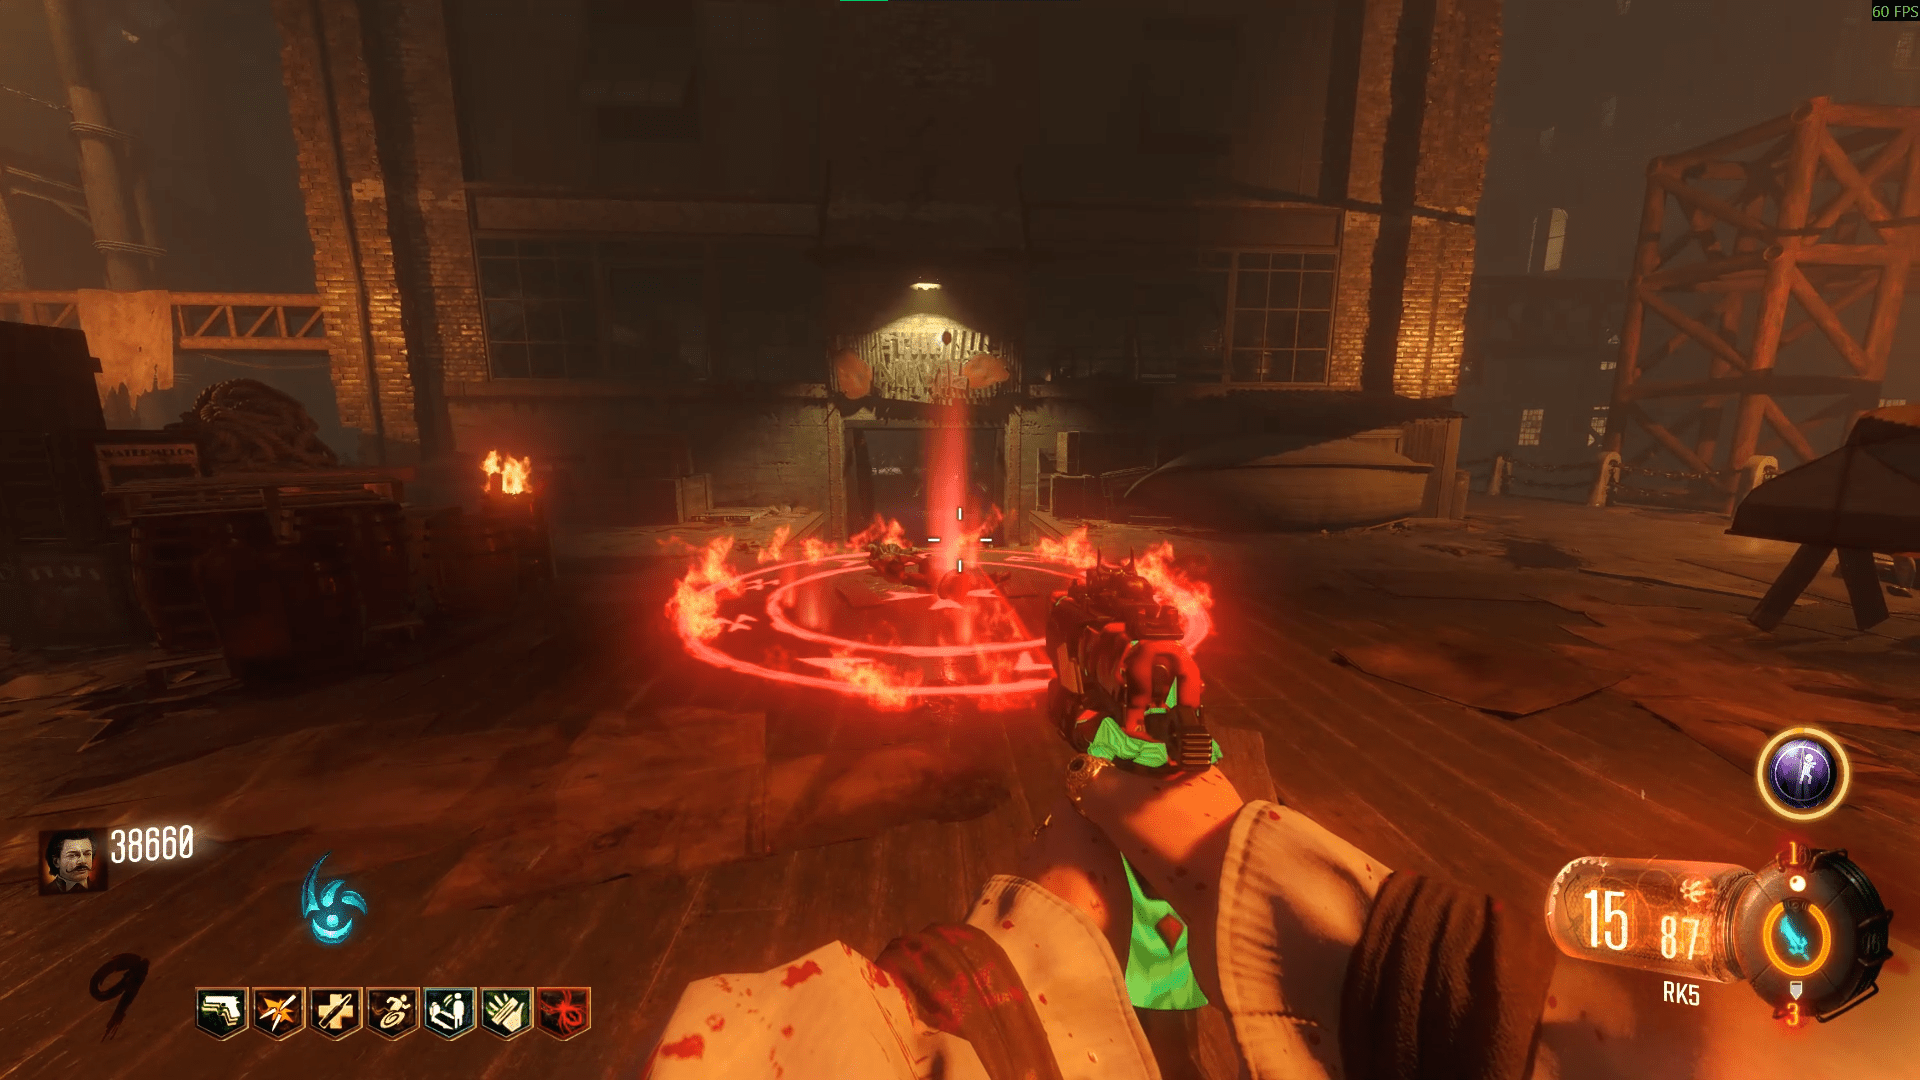
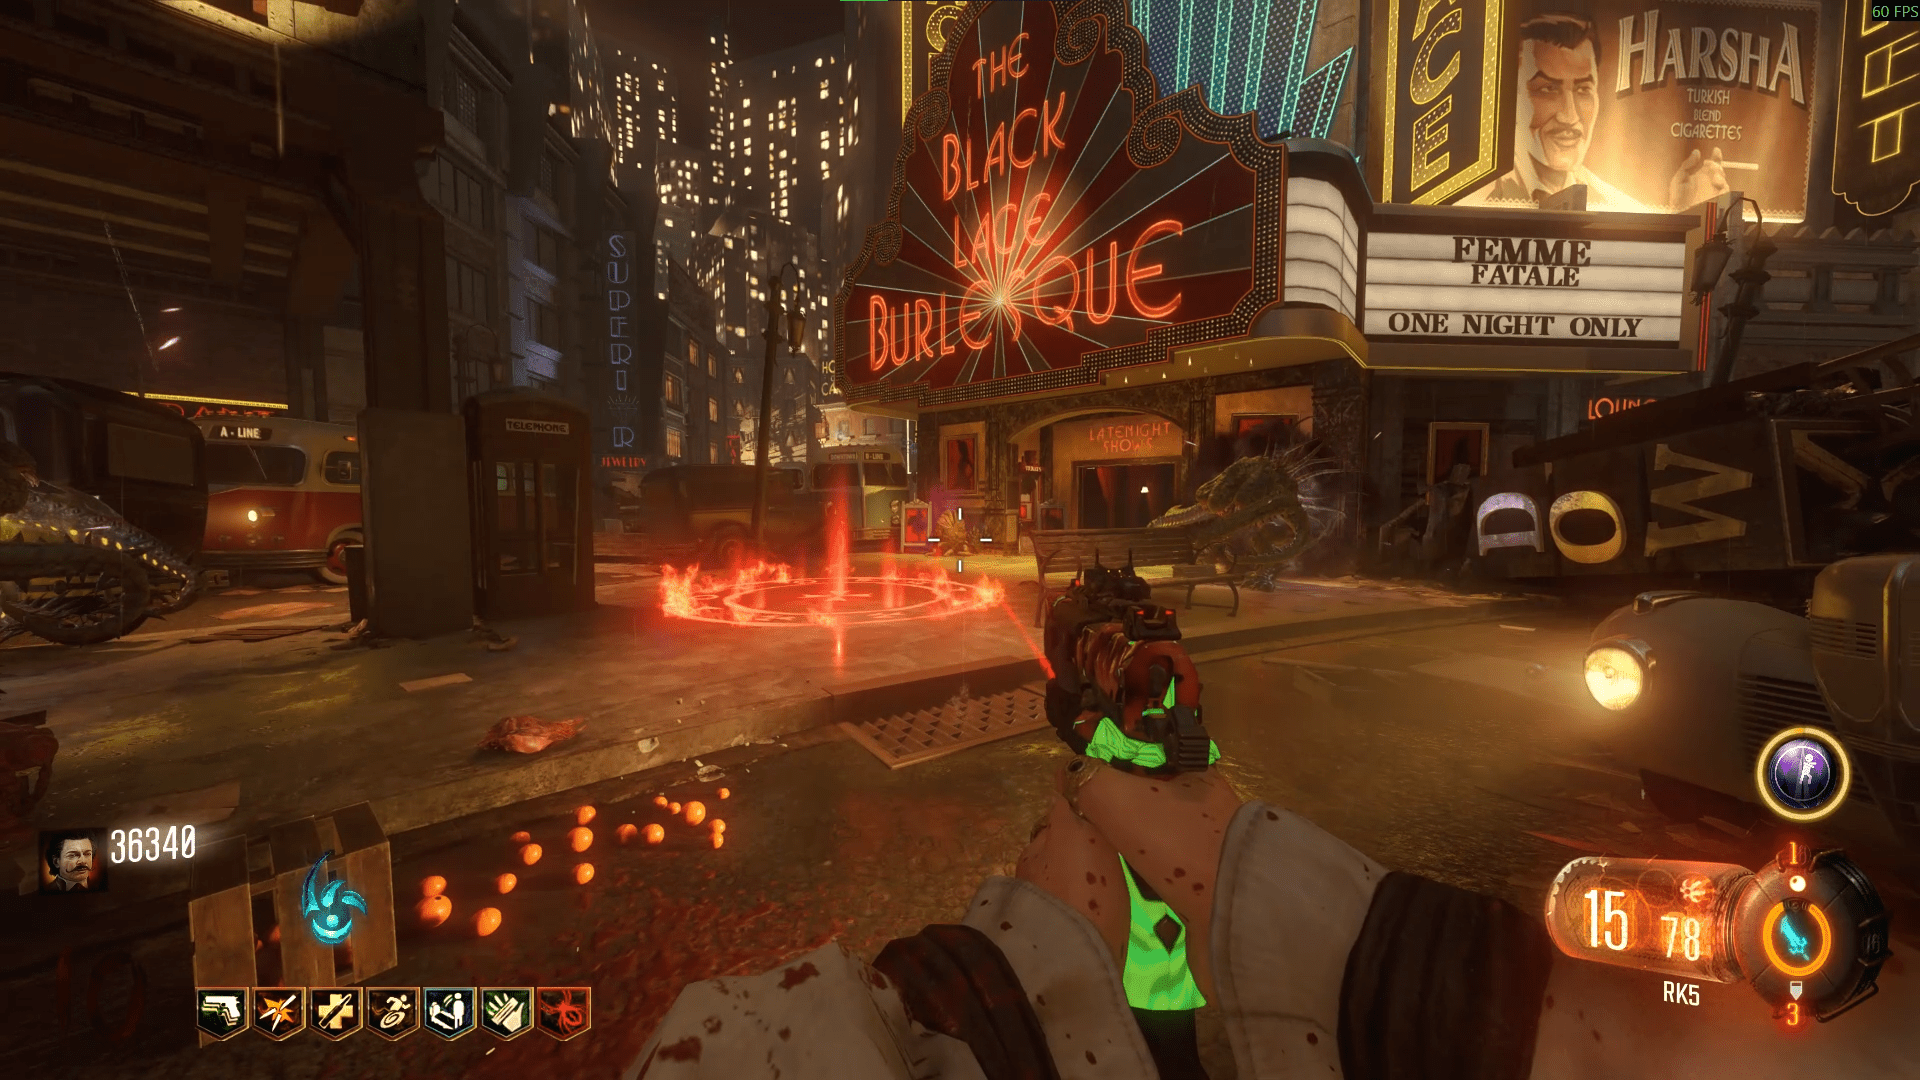
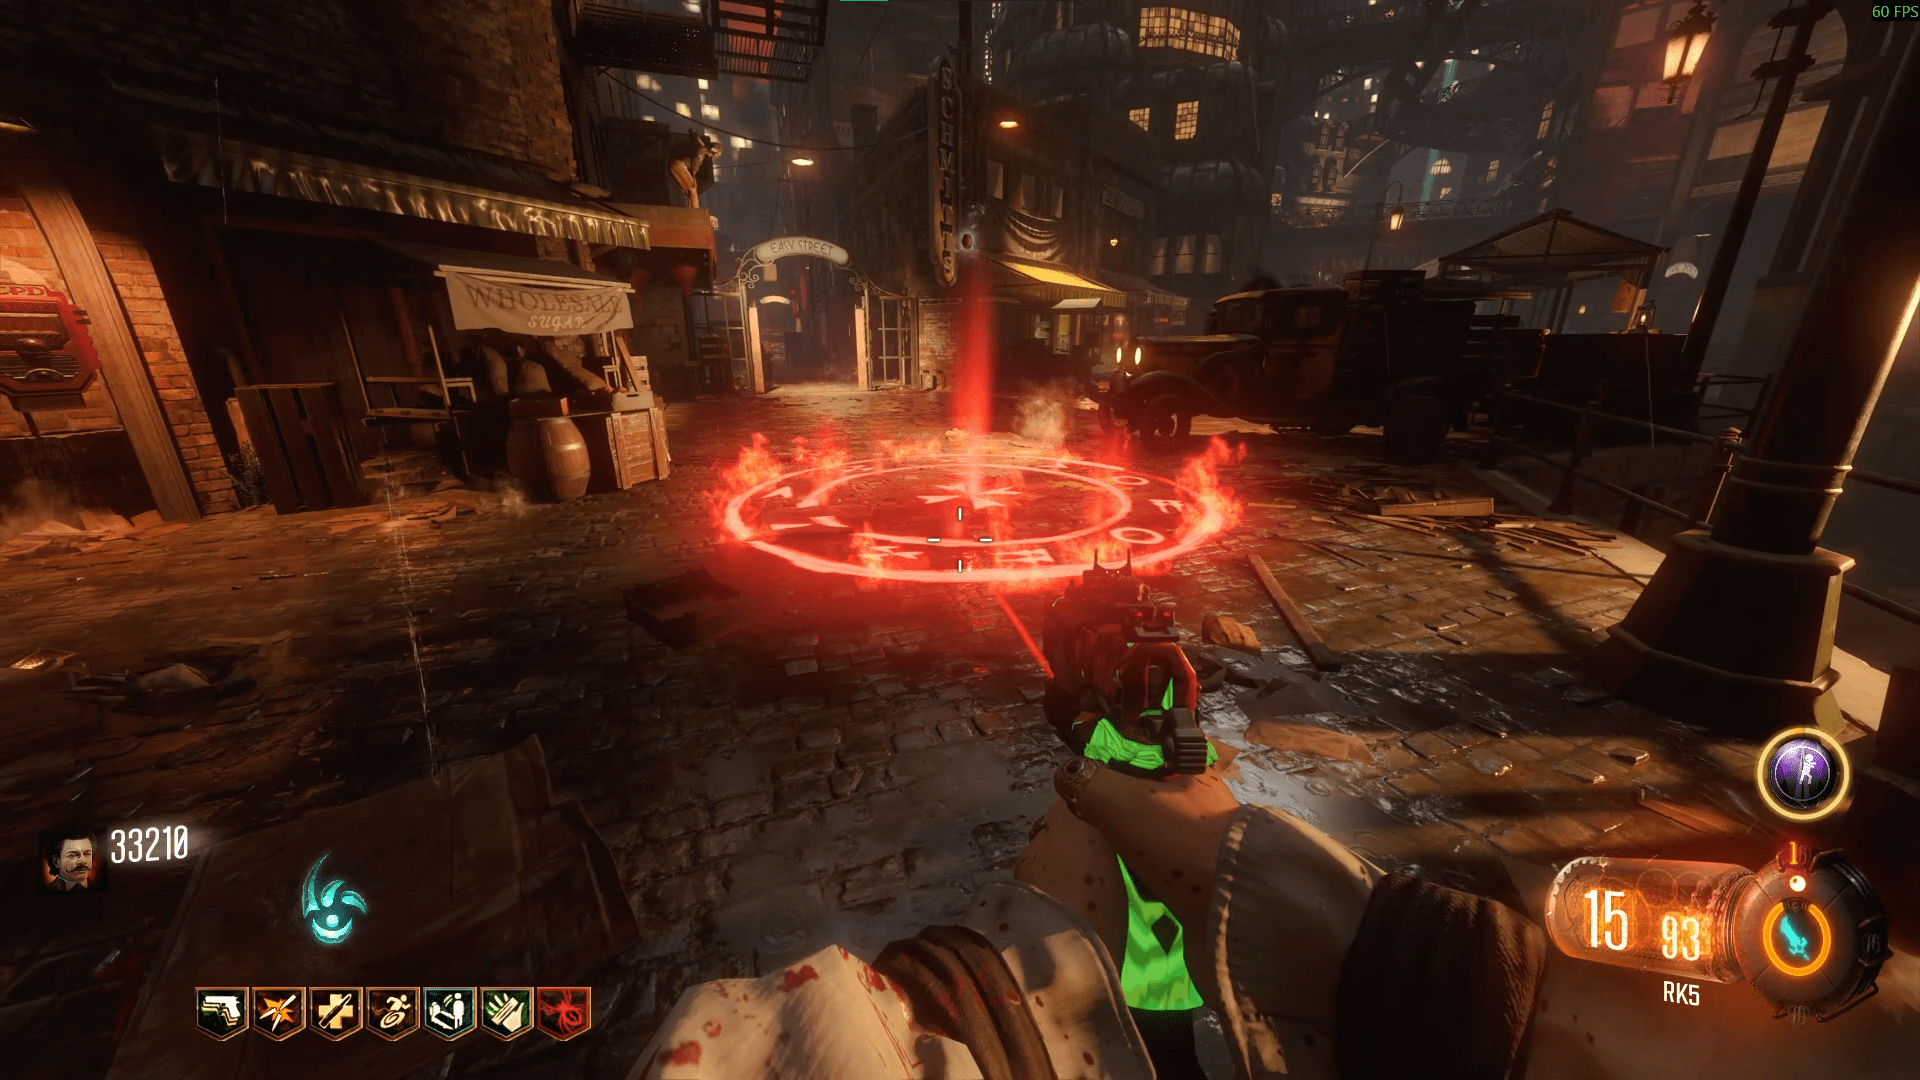
Interacting with the circular rituals on the ground will spawn Margwas that you have to kill before you can continue. Upon completion of the ritual (killing the Margwas), you must wait until the next round to start another. Note that failing a ritual by going down will still allow you to attempt the ritual again on the same round, so keep trying. Another note is that another player can completely kill your Margwas and it will still count for your Arch Ovum, as long as it was you who placed the egg. One final note is that only one player can place the Arch Ovum in the rituals at a time, so don't be discouraged or think that you can only do one player per round, that would be atrocious haha.
Once your Arch Ovum is full, go back to where you received the egg and then you can interact again to retrieve the Archon Sword.
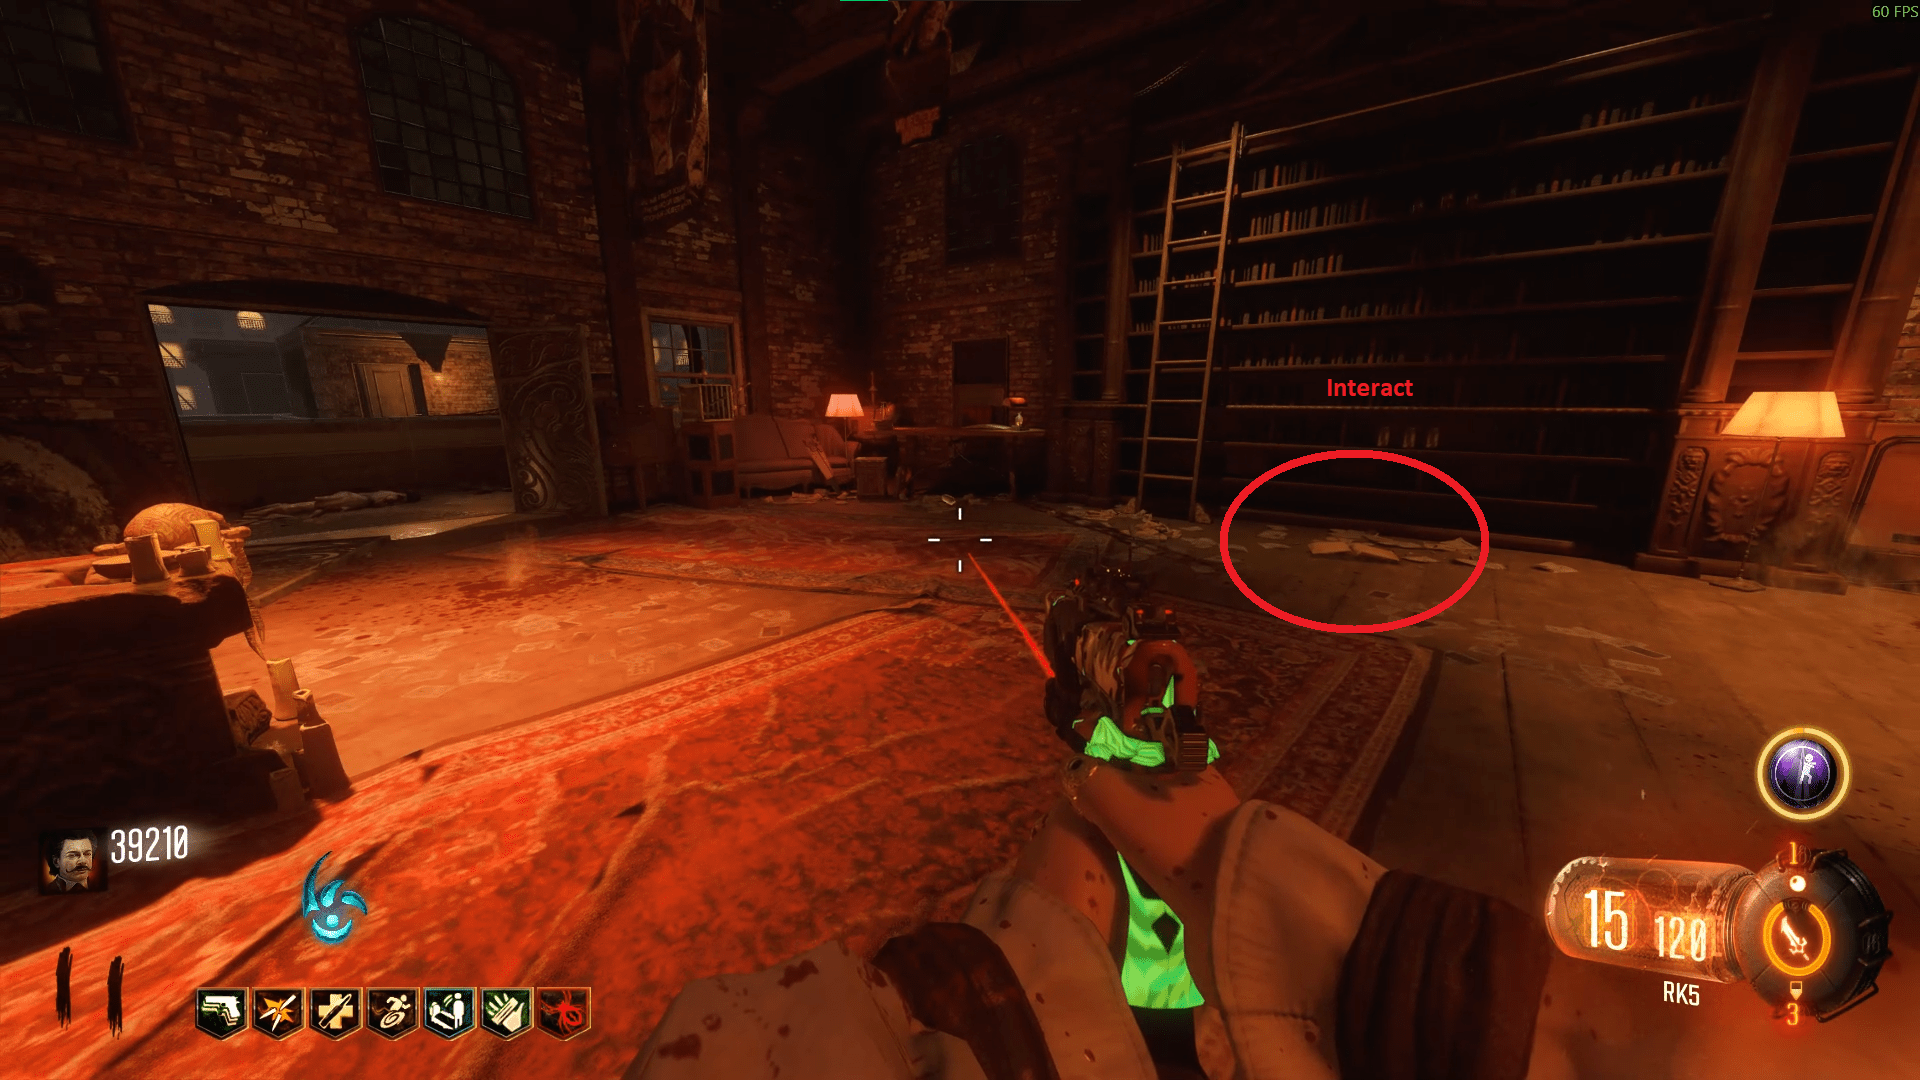
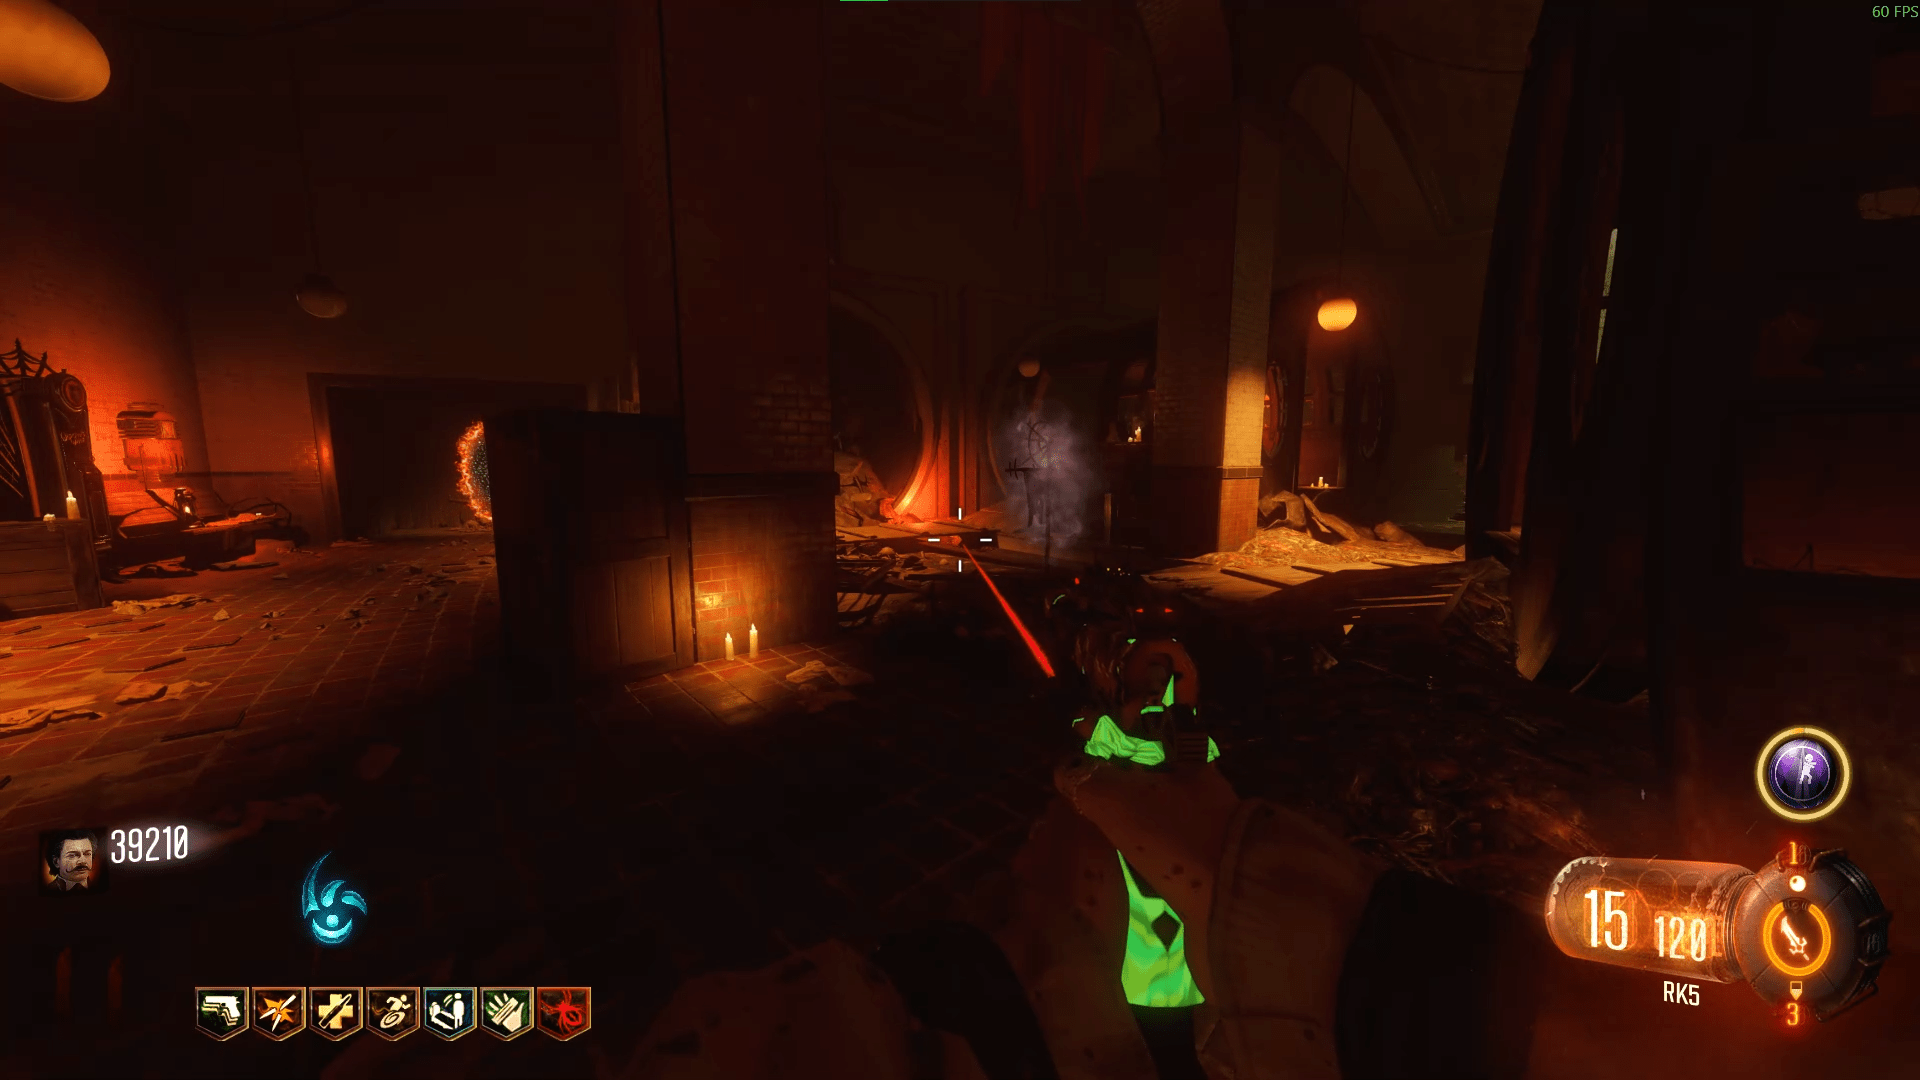
Before starting this step, everyone in the game must have the Archon Sword. After doing so, you must now interact with a book in Nero's ritual site. A flag will then spawn in the underground Rift which you'll have to pick up and place in various locations around the map.
Shadows of Evil
- The Junction's first is just after the steps down into the Rift, outside the Footlight entrance.
- The Junction's second is beside the circular ritual in the middle of the area.
- The Canals' first is just after entering the area through the first door from the Junction.
- The Canals' second is just before the second door into the Canals, before the ritual site.
- The Waterfront's first is just after entering the area through the first door from the Junction.
- The Waterfront's second is a little further down, before the second door to the ritual site.
- The Footlight's first is just after entering the area through the first door from the Junction.
- The second is after the second door, in the middle of the cars.
Upon placing the flag, you must defend the flag from meatballs and the Shadowman who are both trying to destroy it. It is rather strong so don't be afraid if a couple meatballs get through but do still try to kill them all. The Shadowman will destroy it in one hit if you allow him to charge his attack long enough, so shoot him to make him disappear every time he shows up. You'll know that the flag is ready to be taken to the next location by its obvious red shimmer and a 'ding' audiocue.
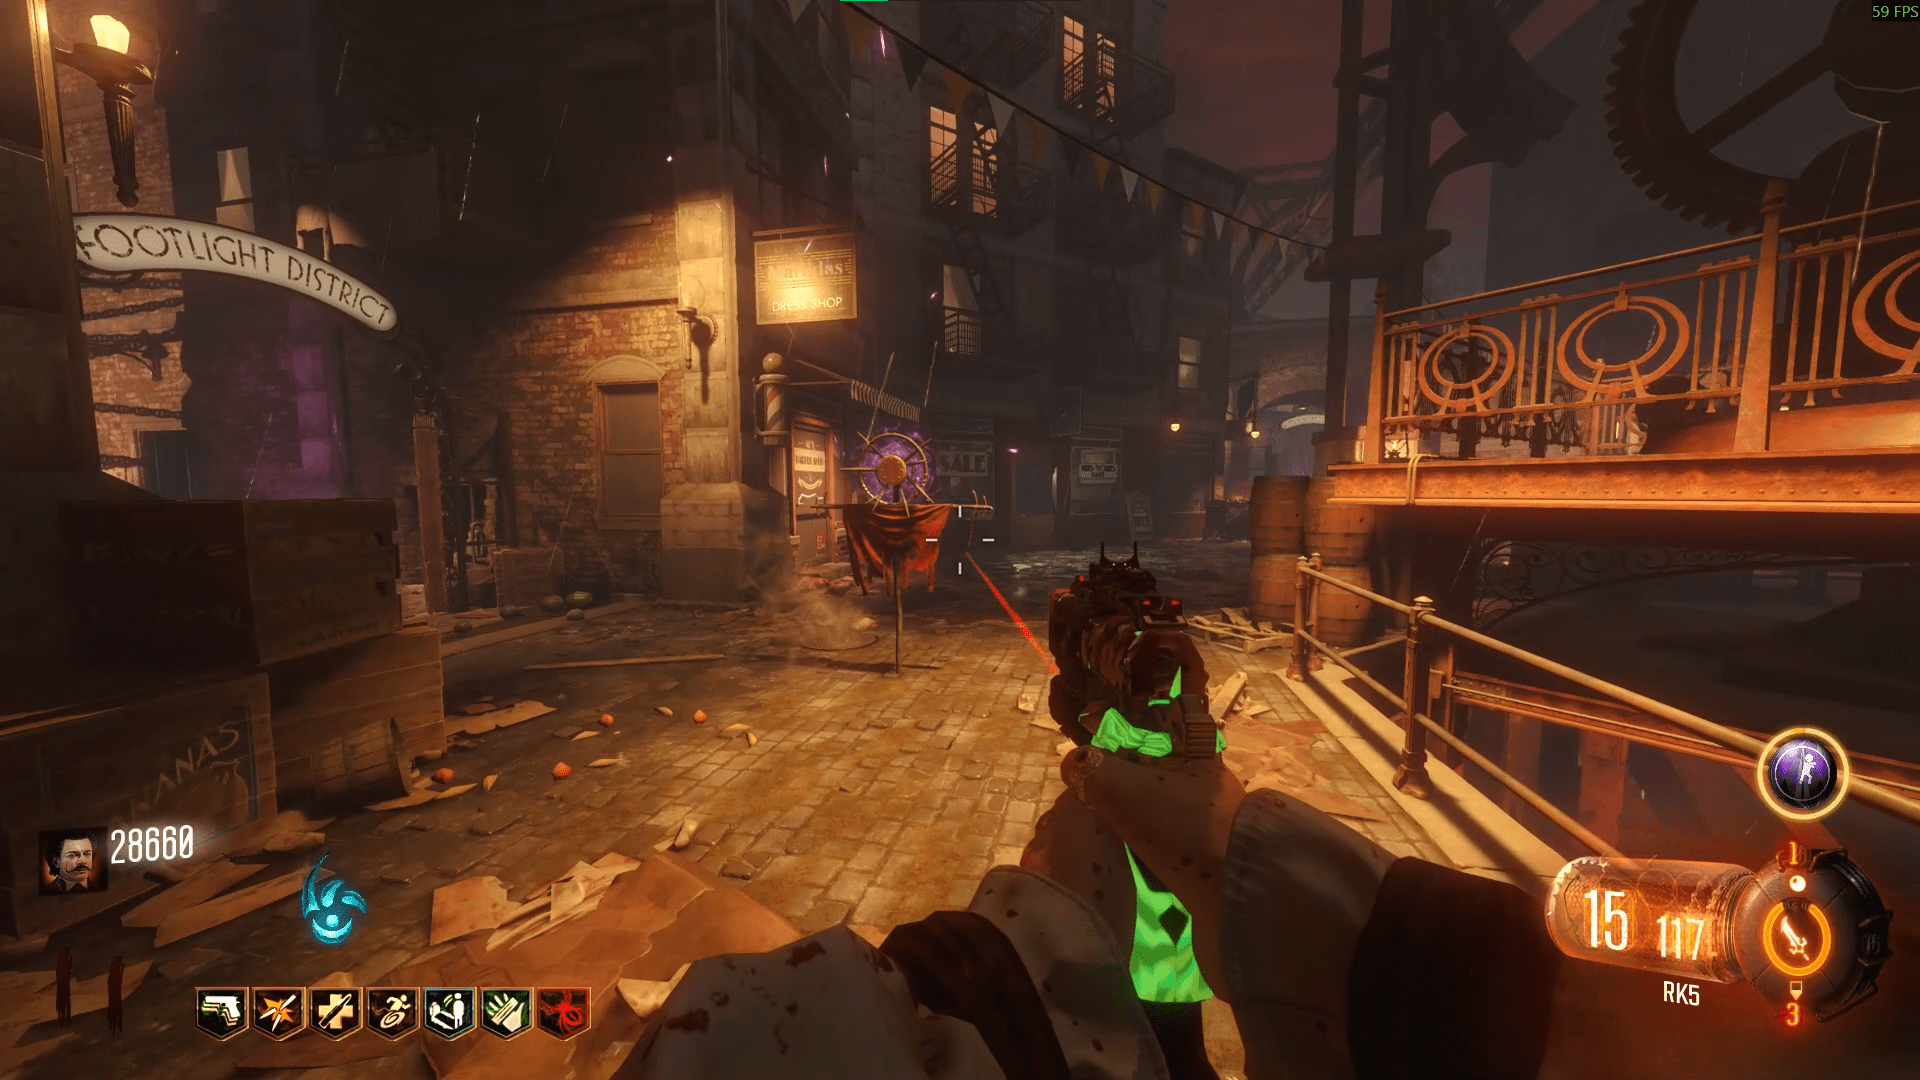
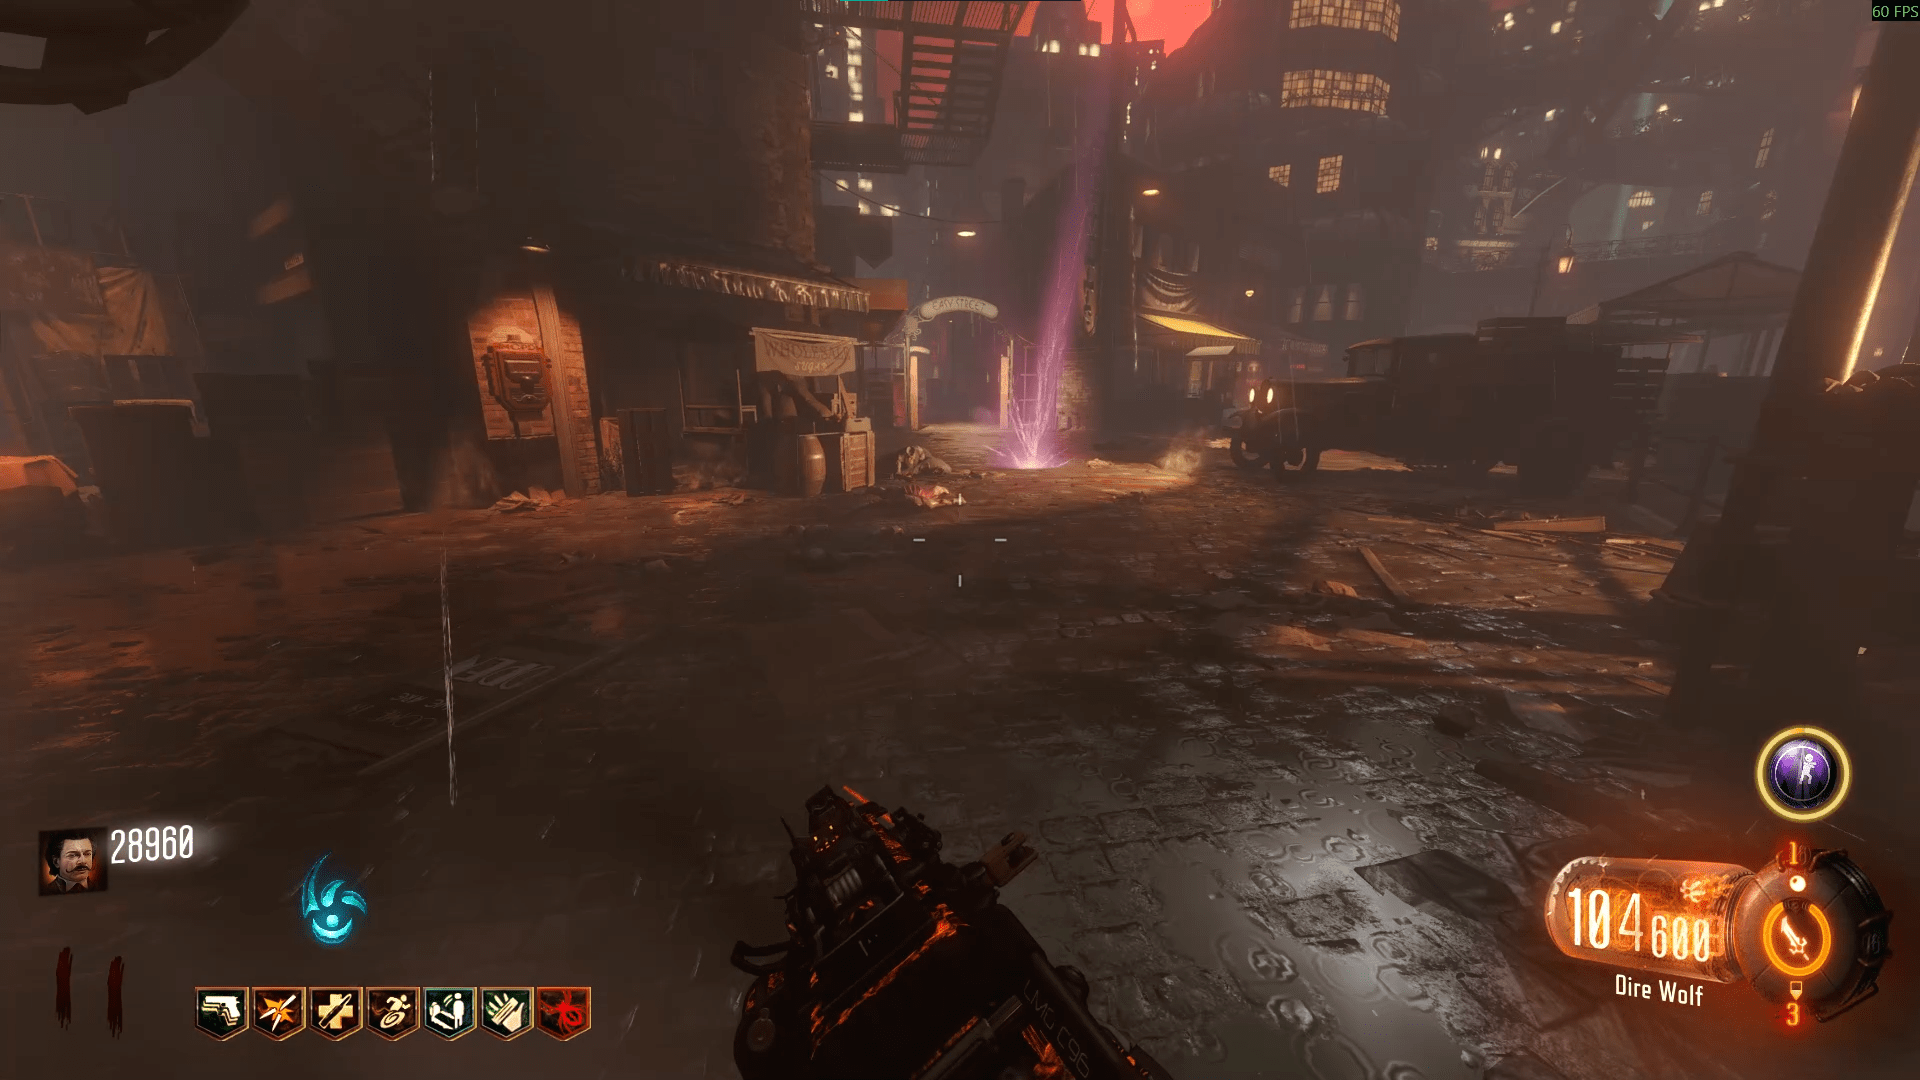
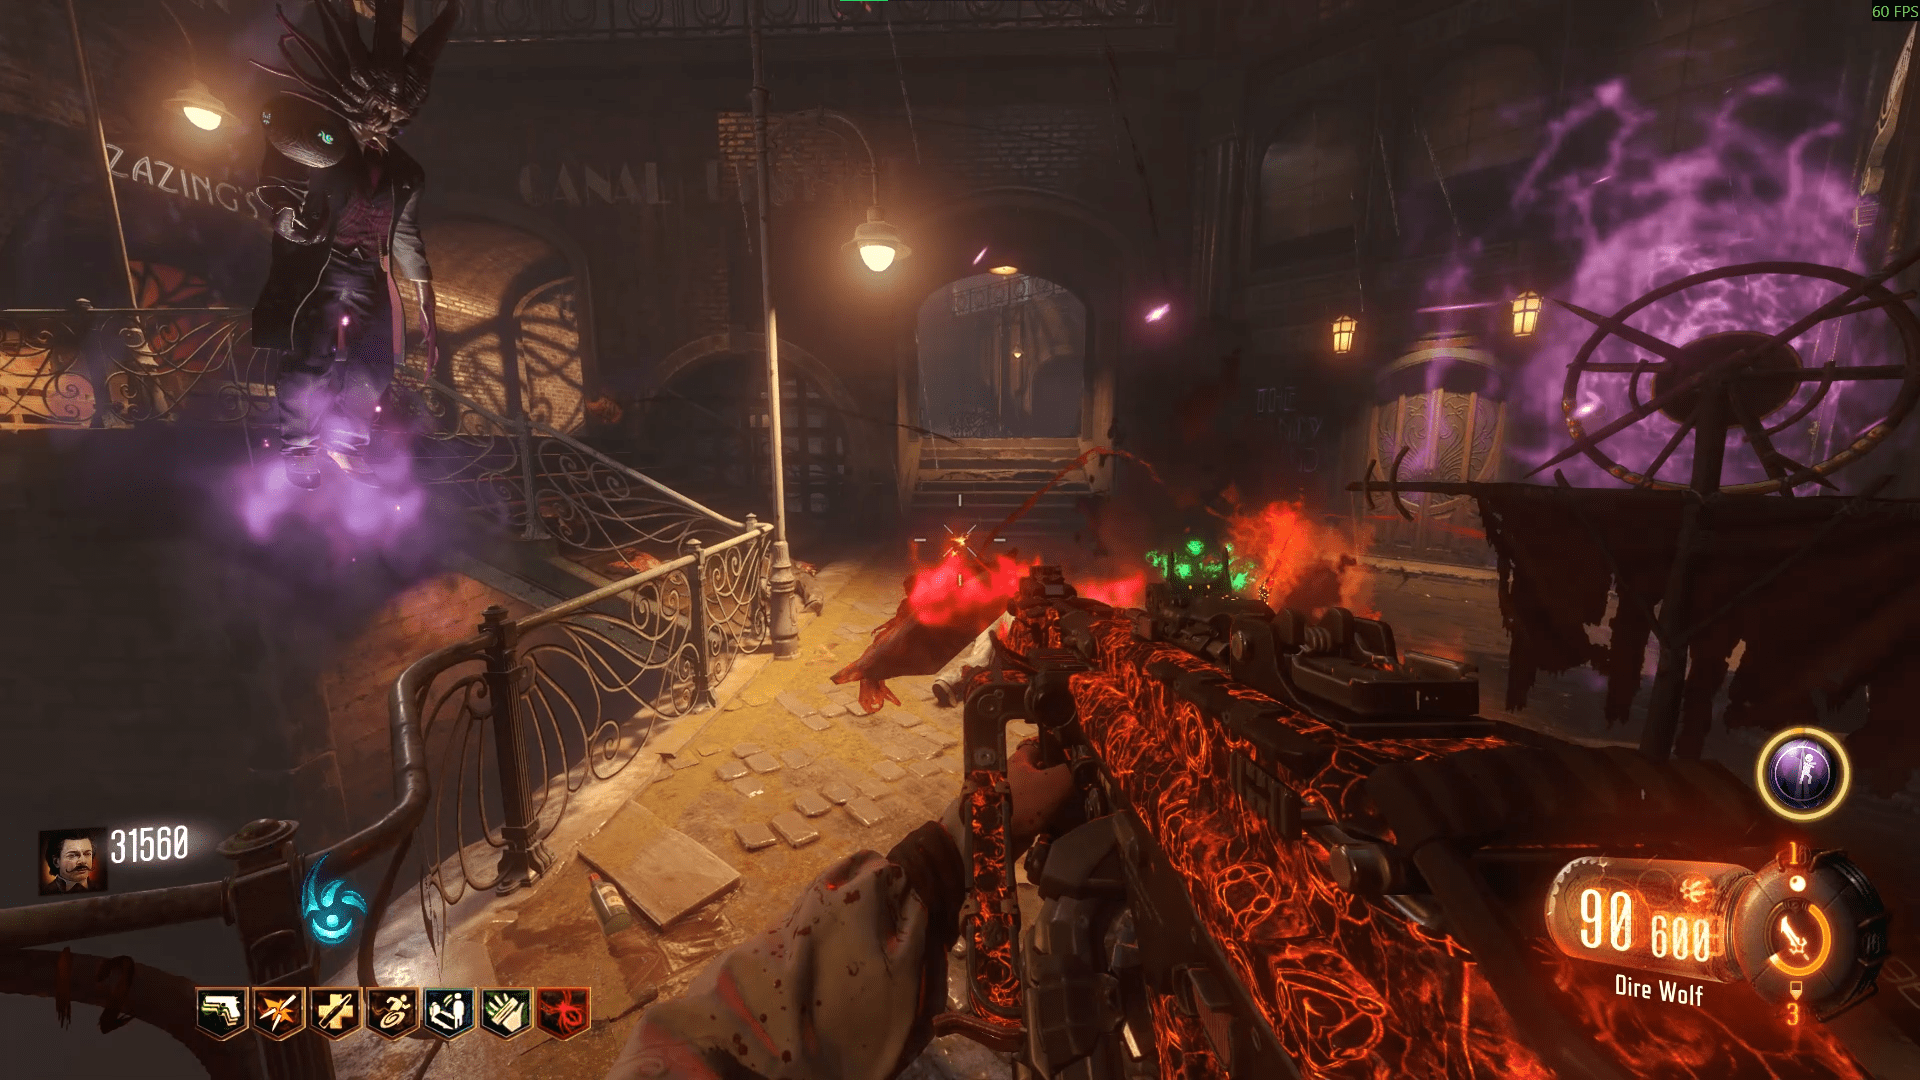
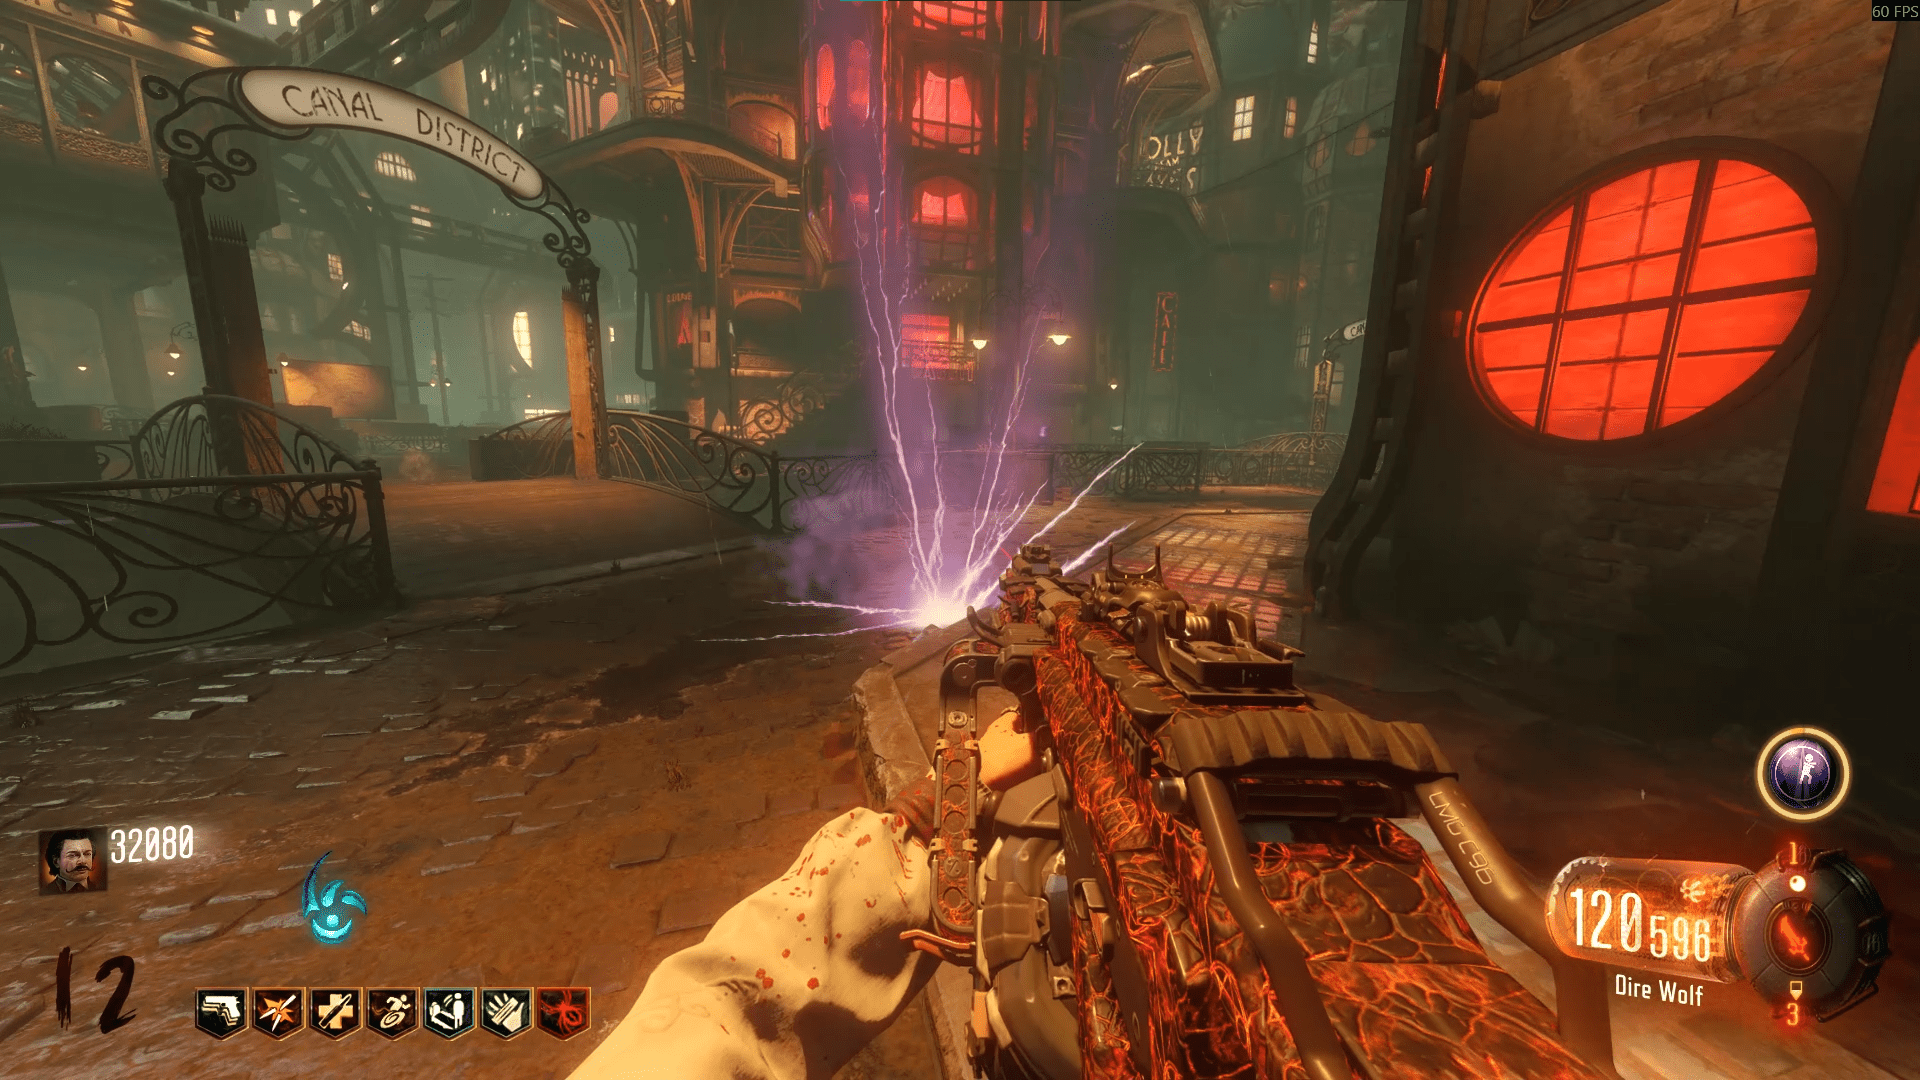
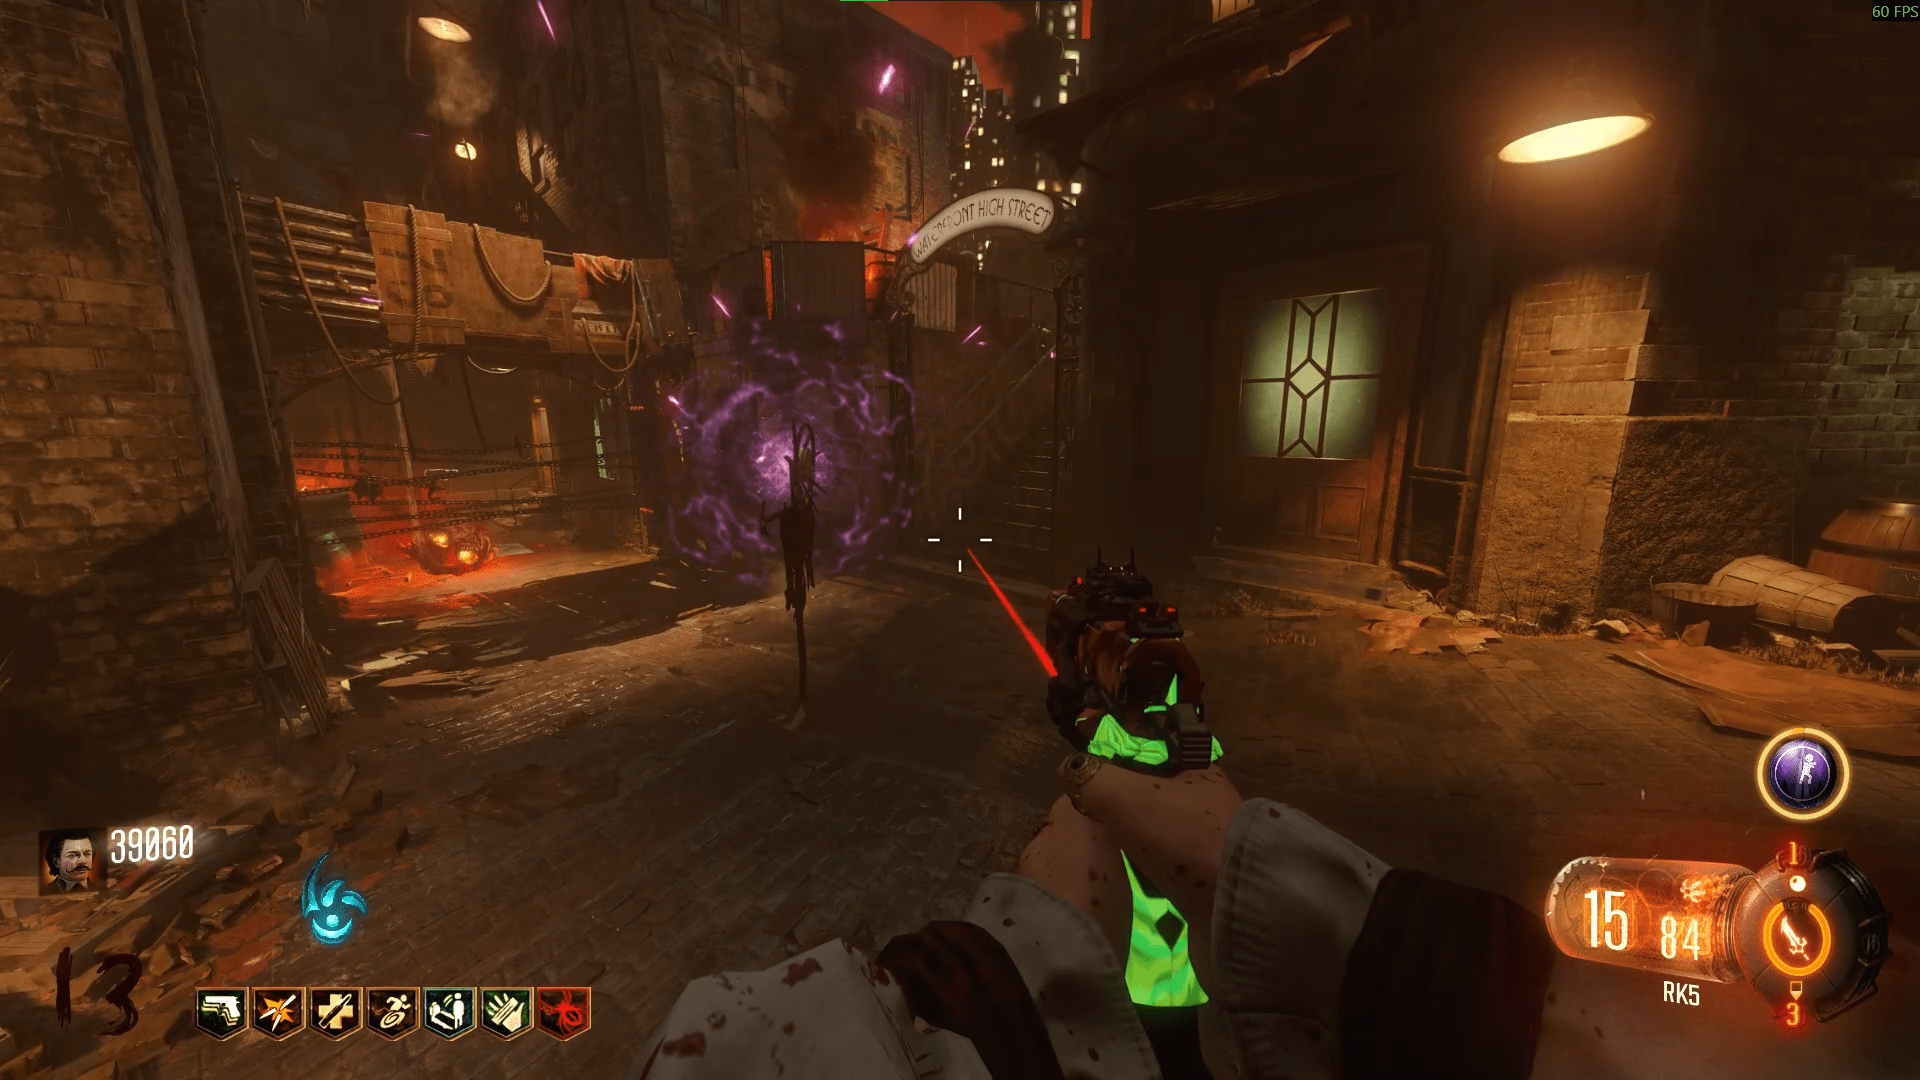
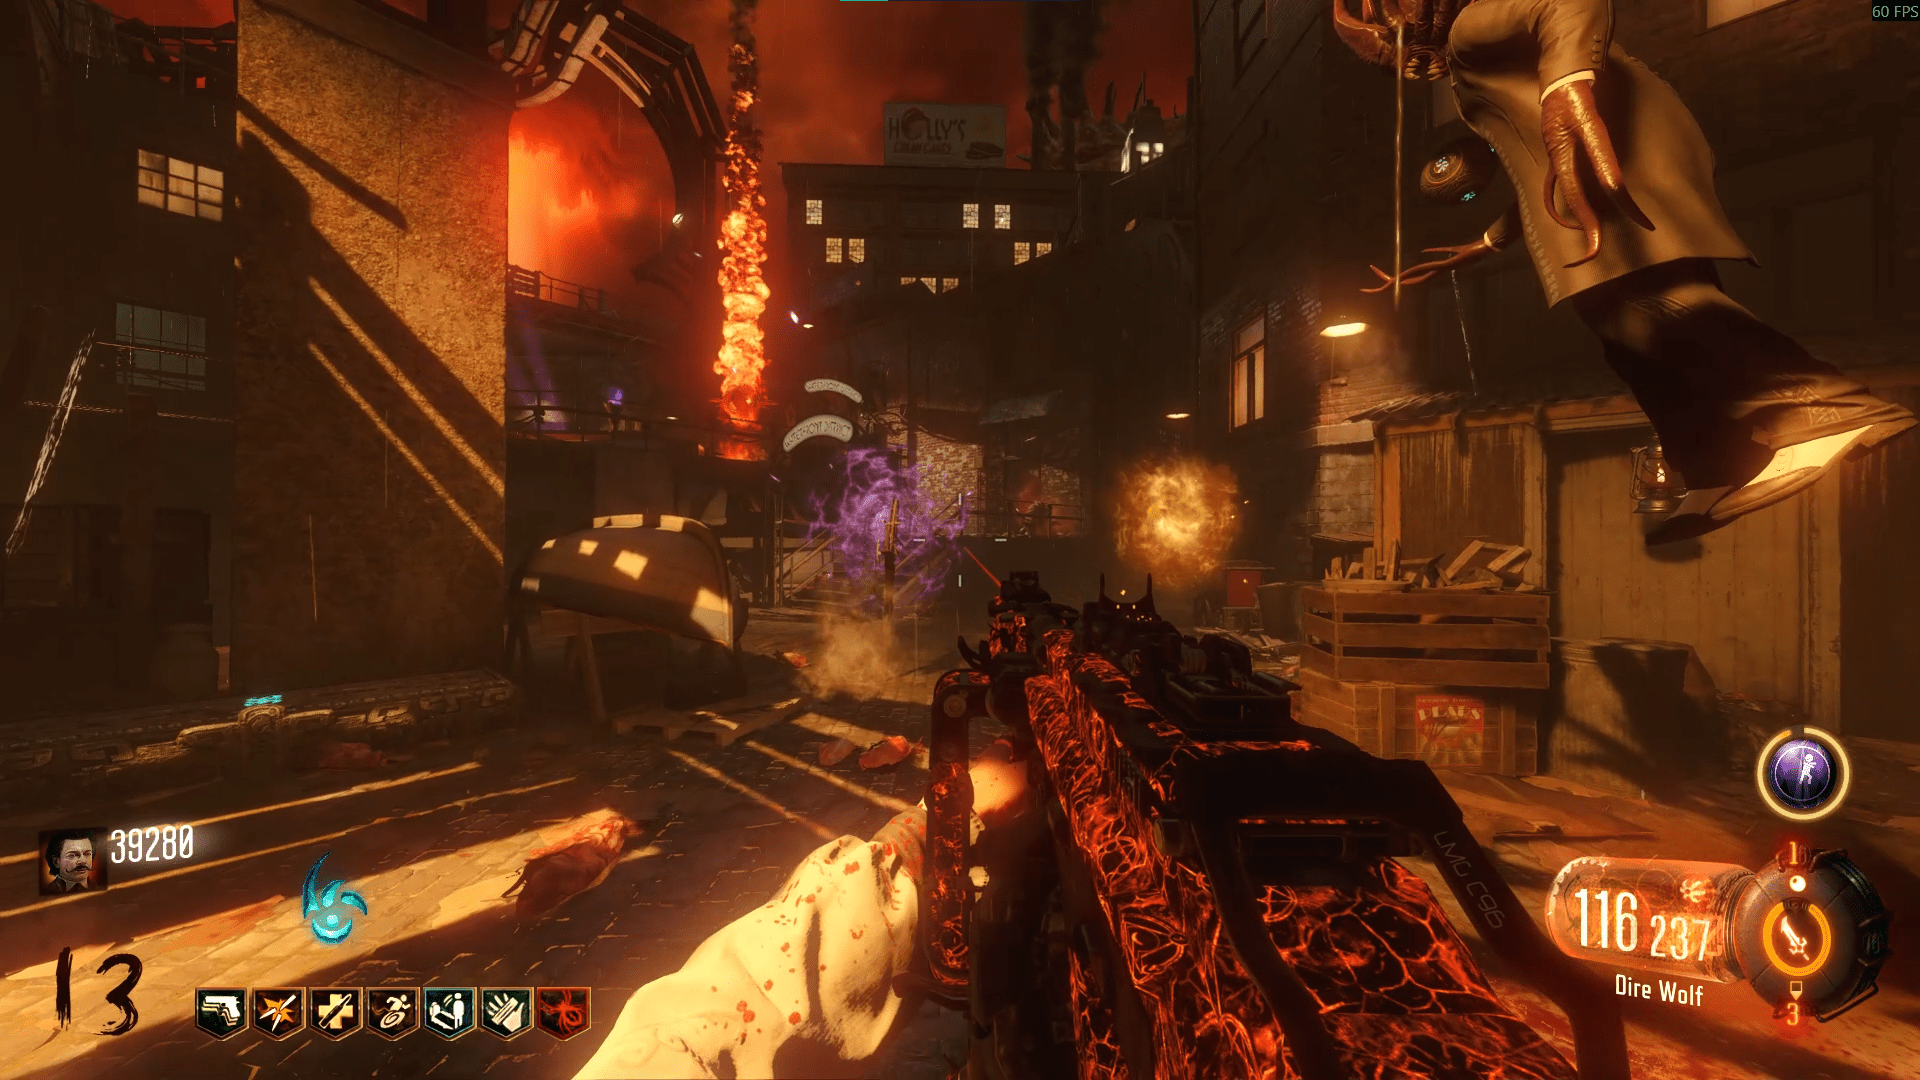
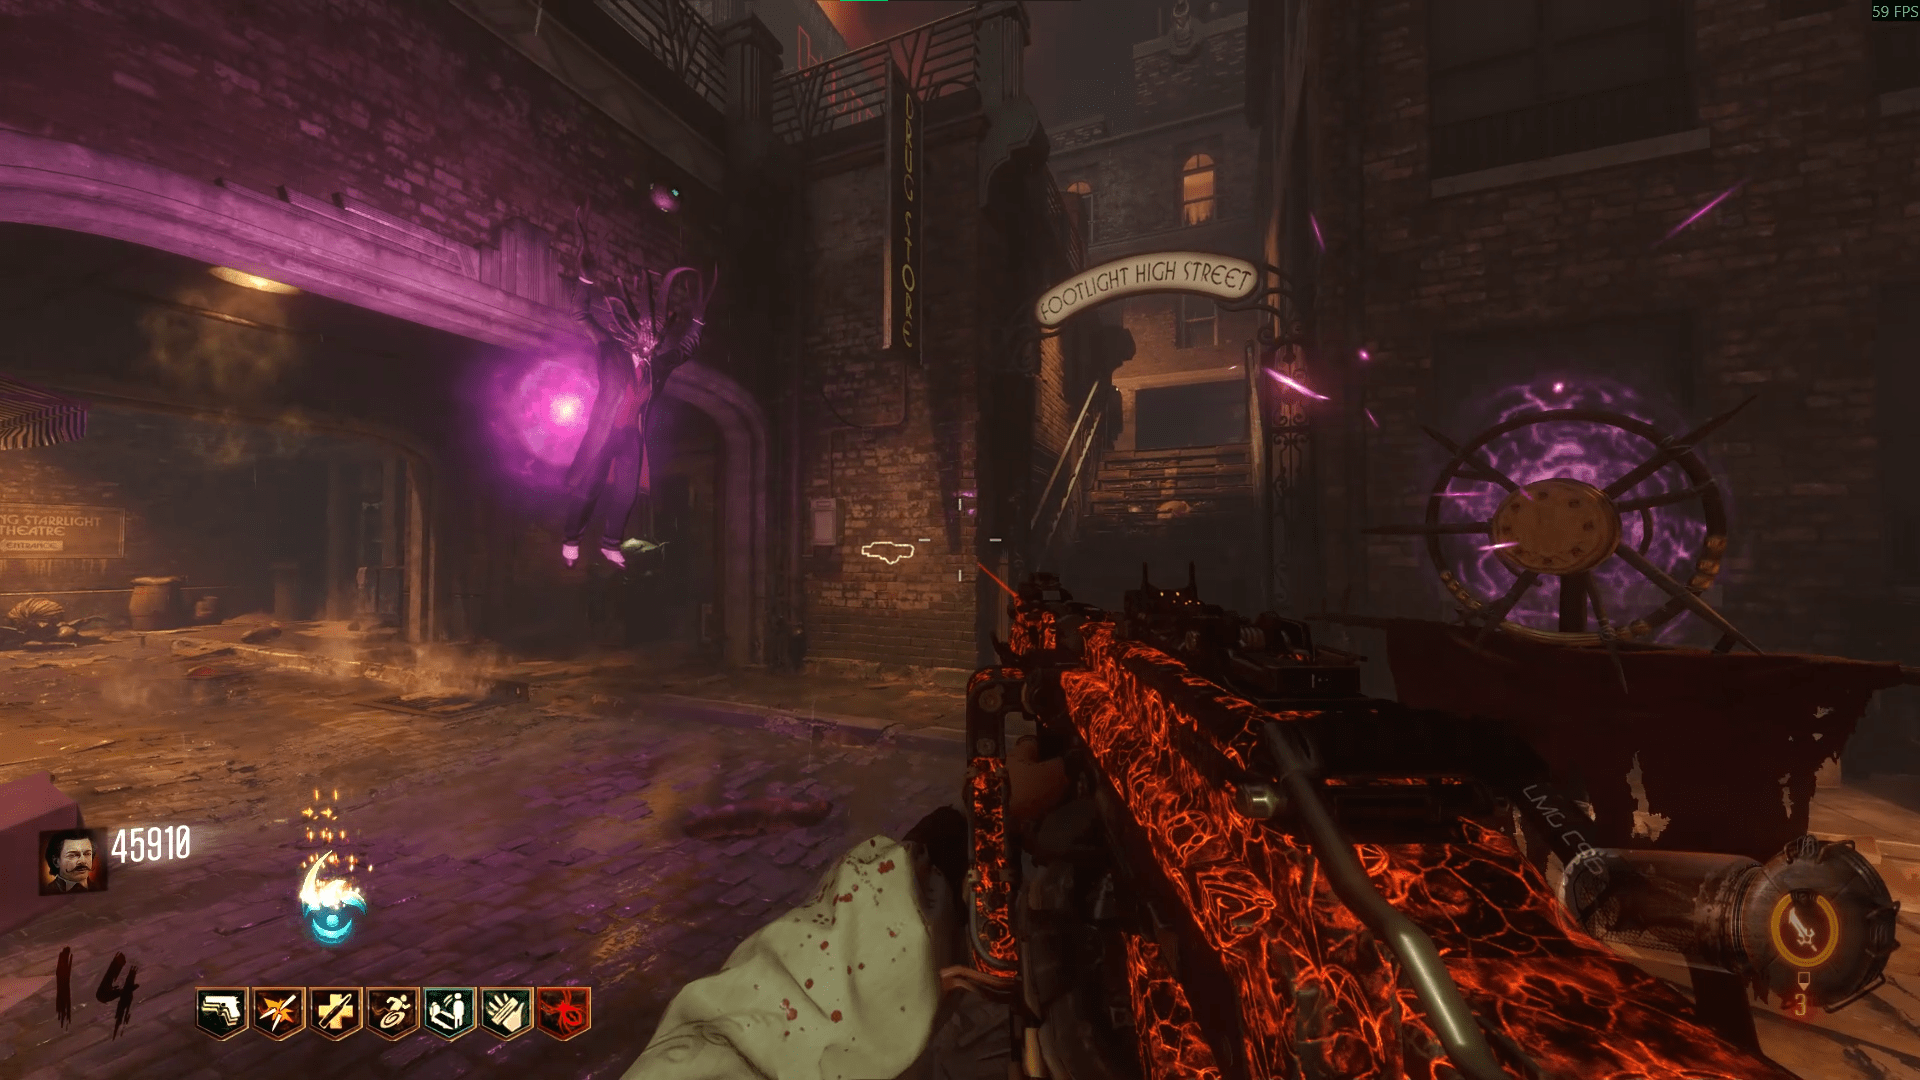
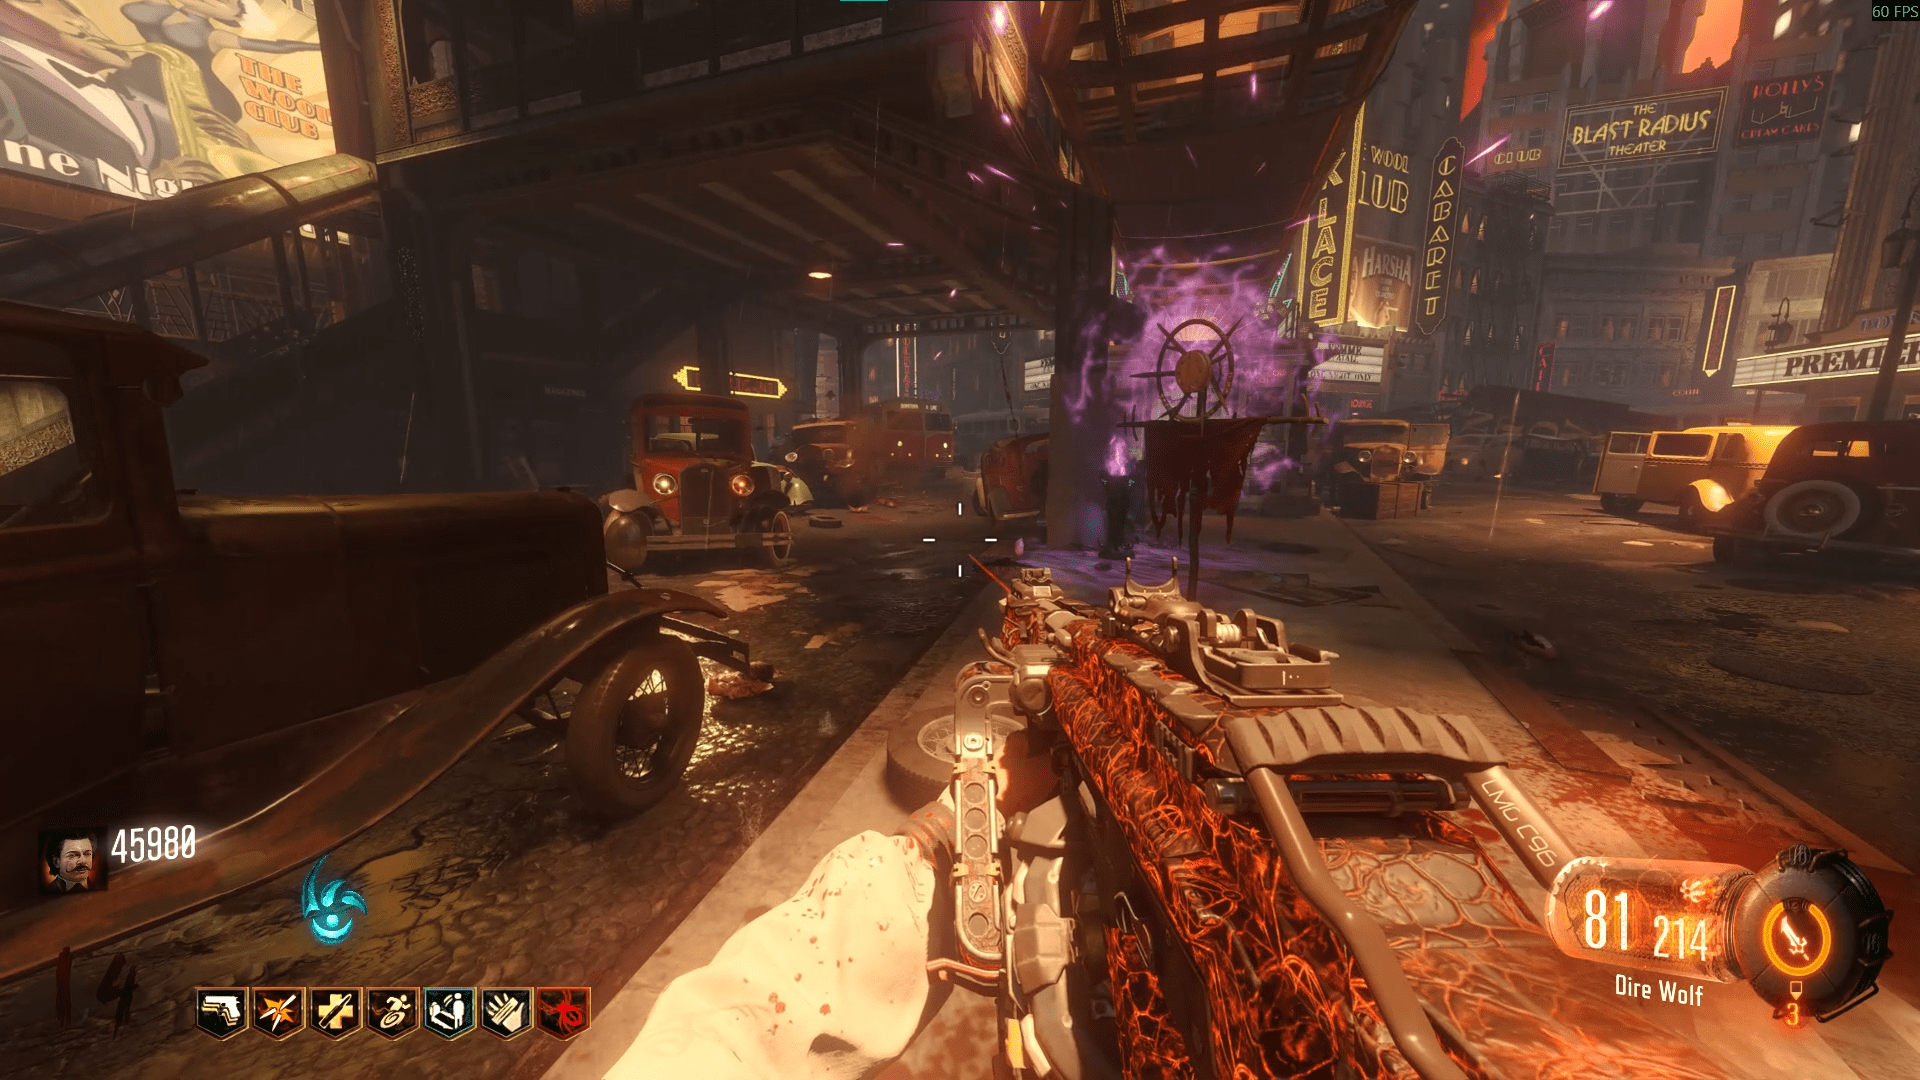
I apologise for any flags that are obscured from view or hard to see, I got caught up in the moment and forgot to take clearer screenshots but enjoy the Shadowman making his appearance.
Although, after doing all four flags and placing them in their respective ritual sites, you can progress to the next step.
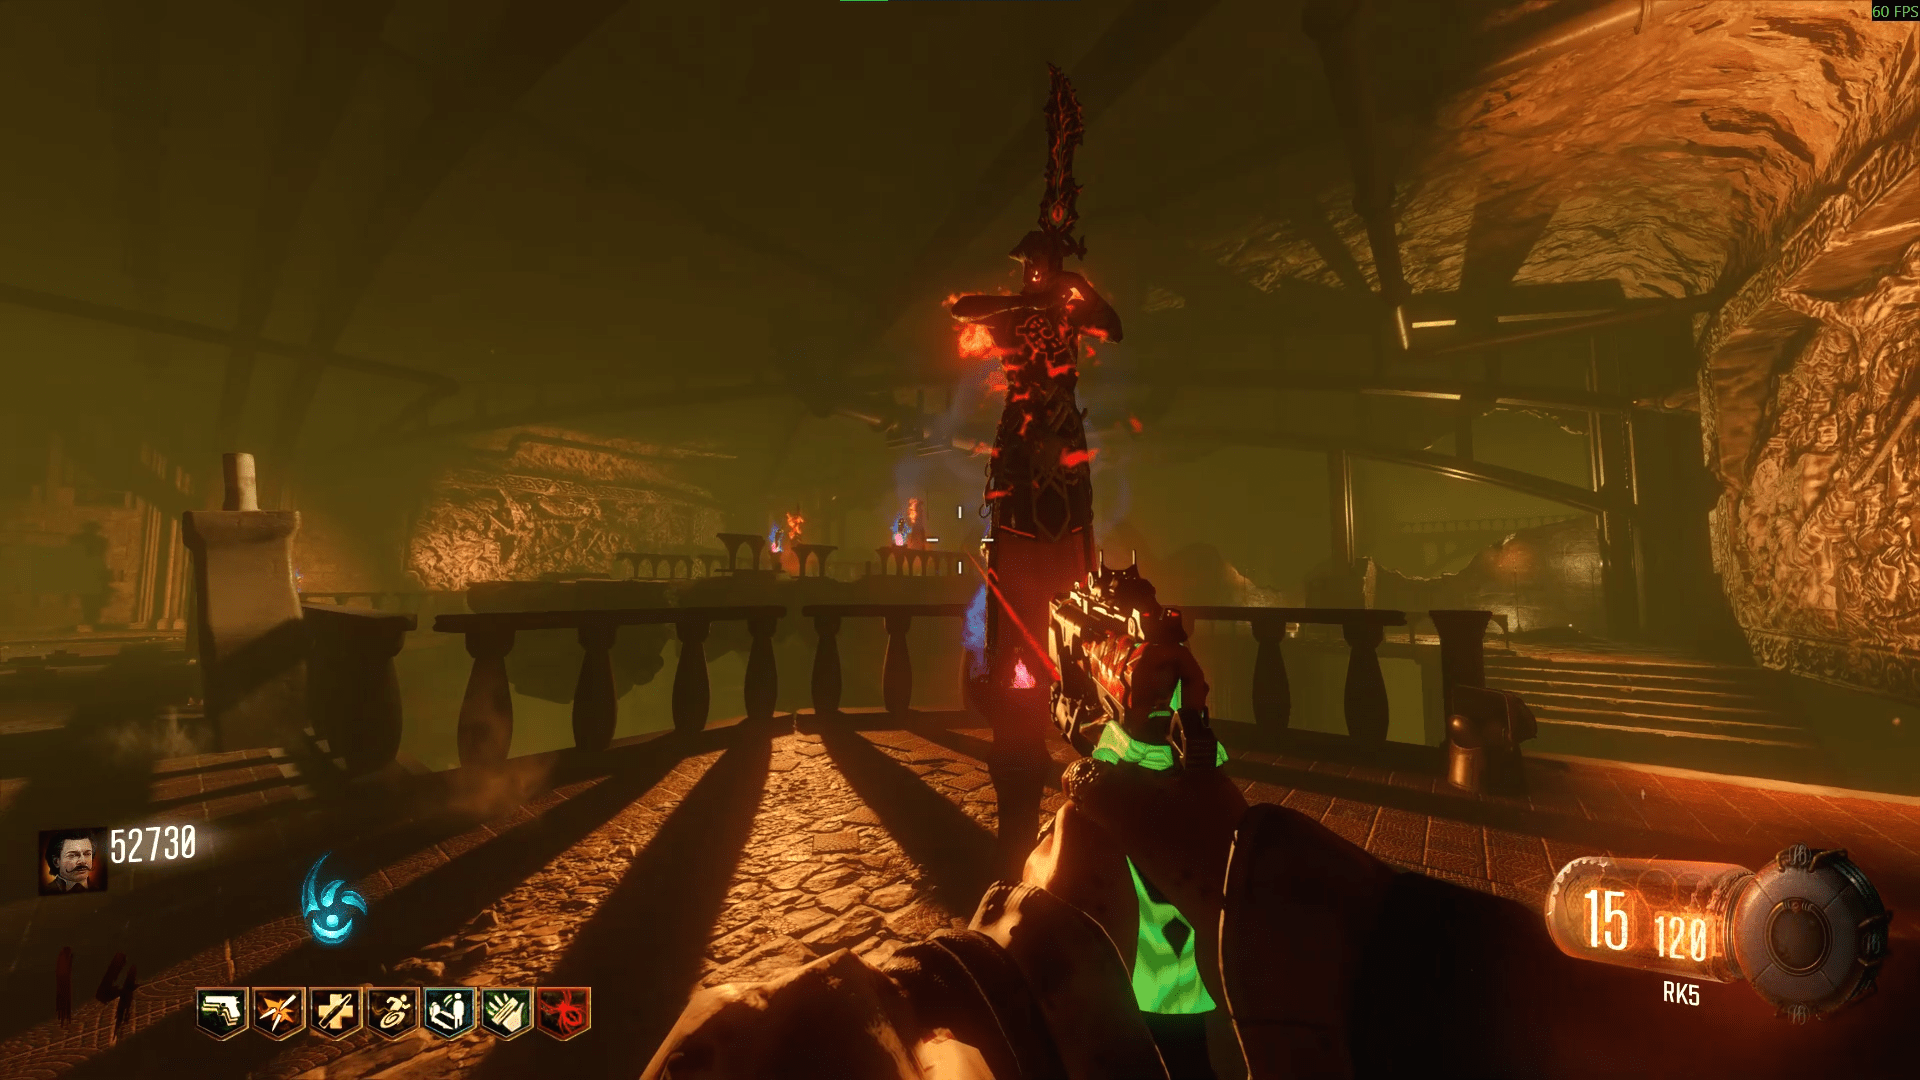
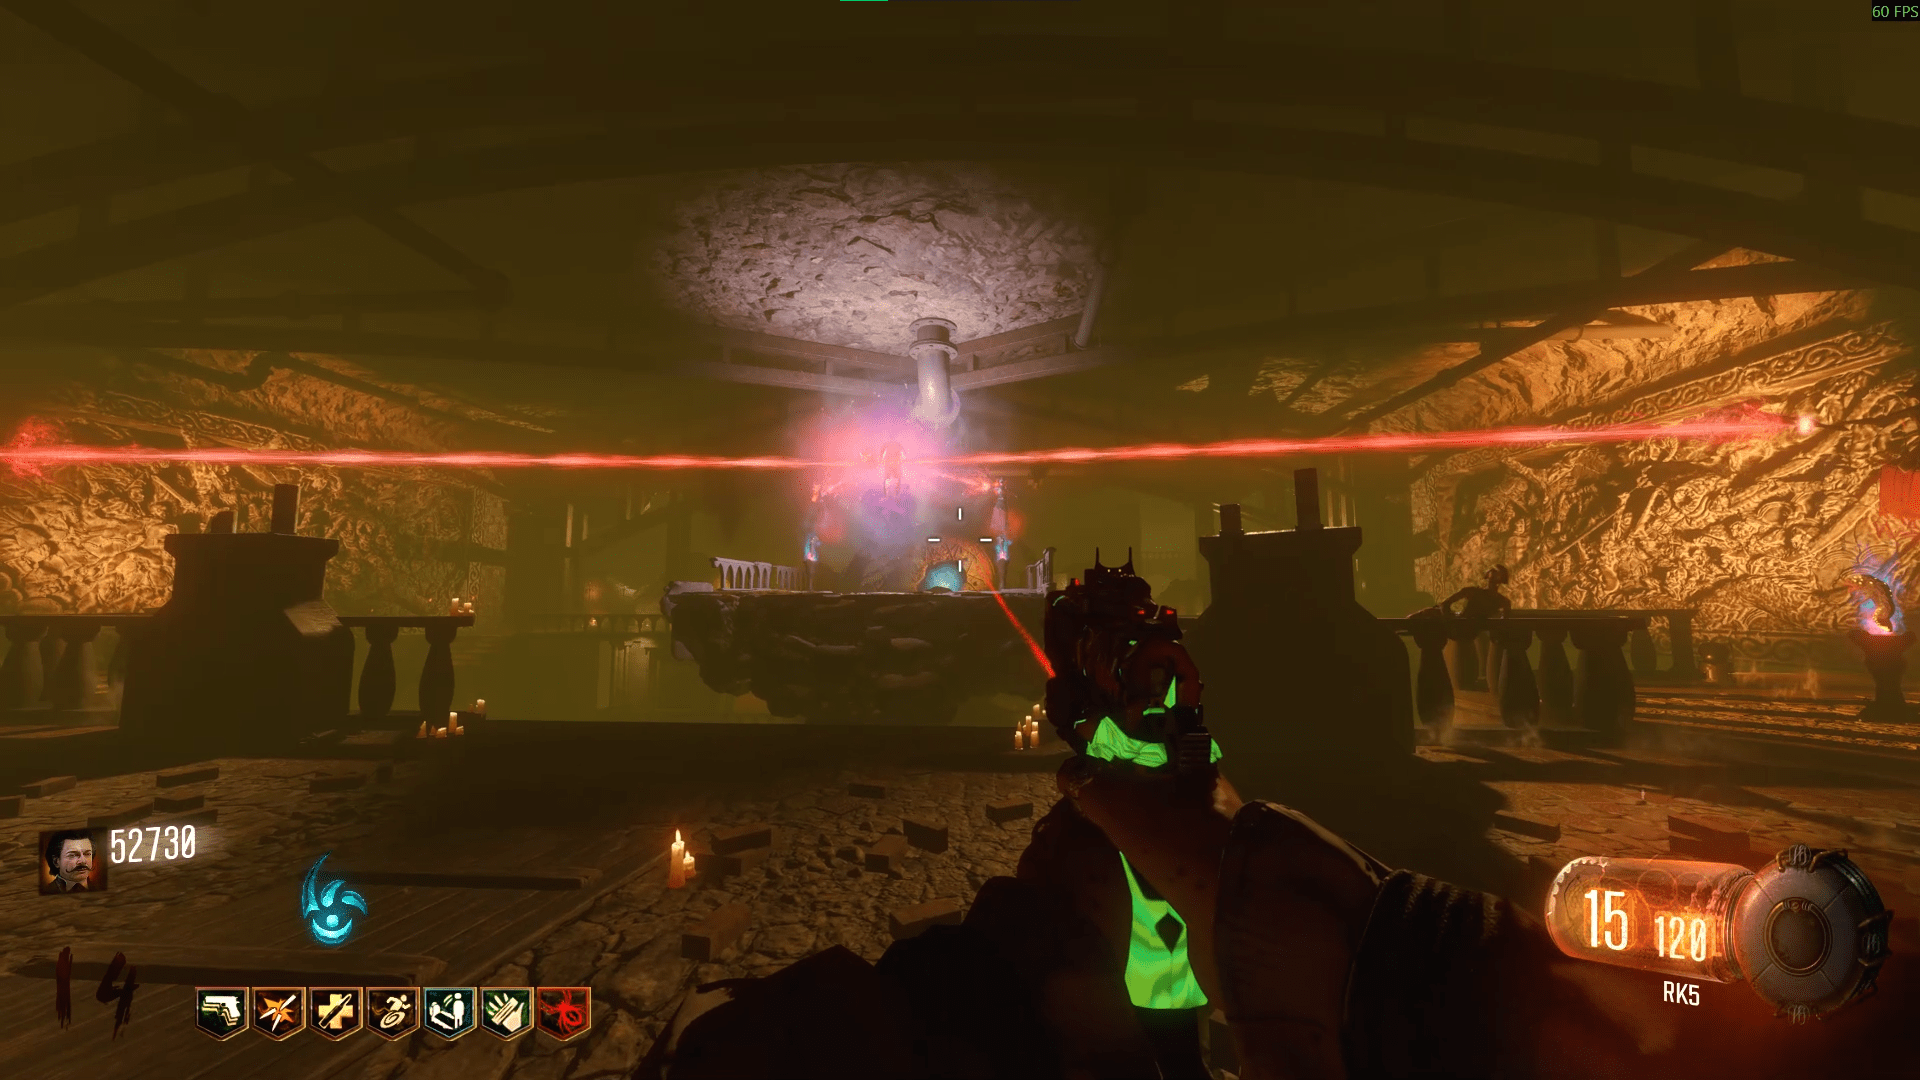
Upon giving the Swords, the Keepers will throw a beam into the Shadowman's shield and will destroy it. Shoot the Shadowman until he's above the middle ritual altar and then interact with it to be done with the step. If you fail to shoot him in time, his shield will come back. All you need to do to reset is kill the Margwa(s) then interact with all the Keepers again. The Keepers look sad when they haven't had interaction.
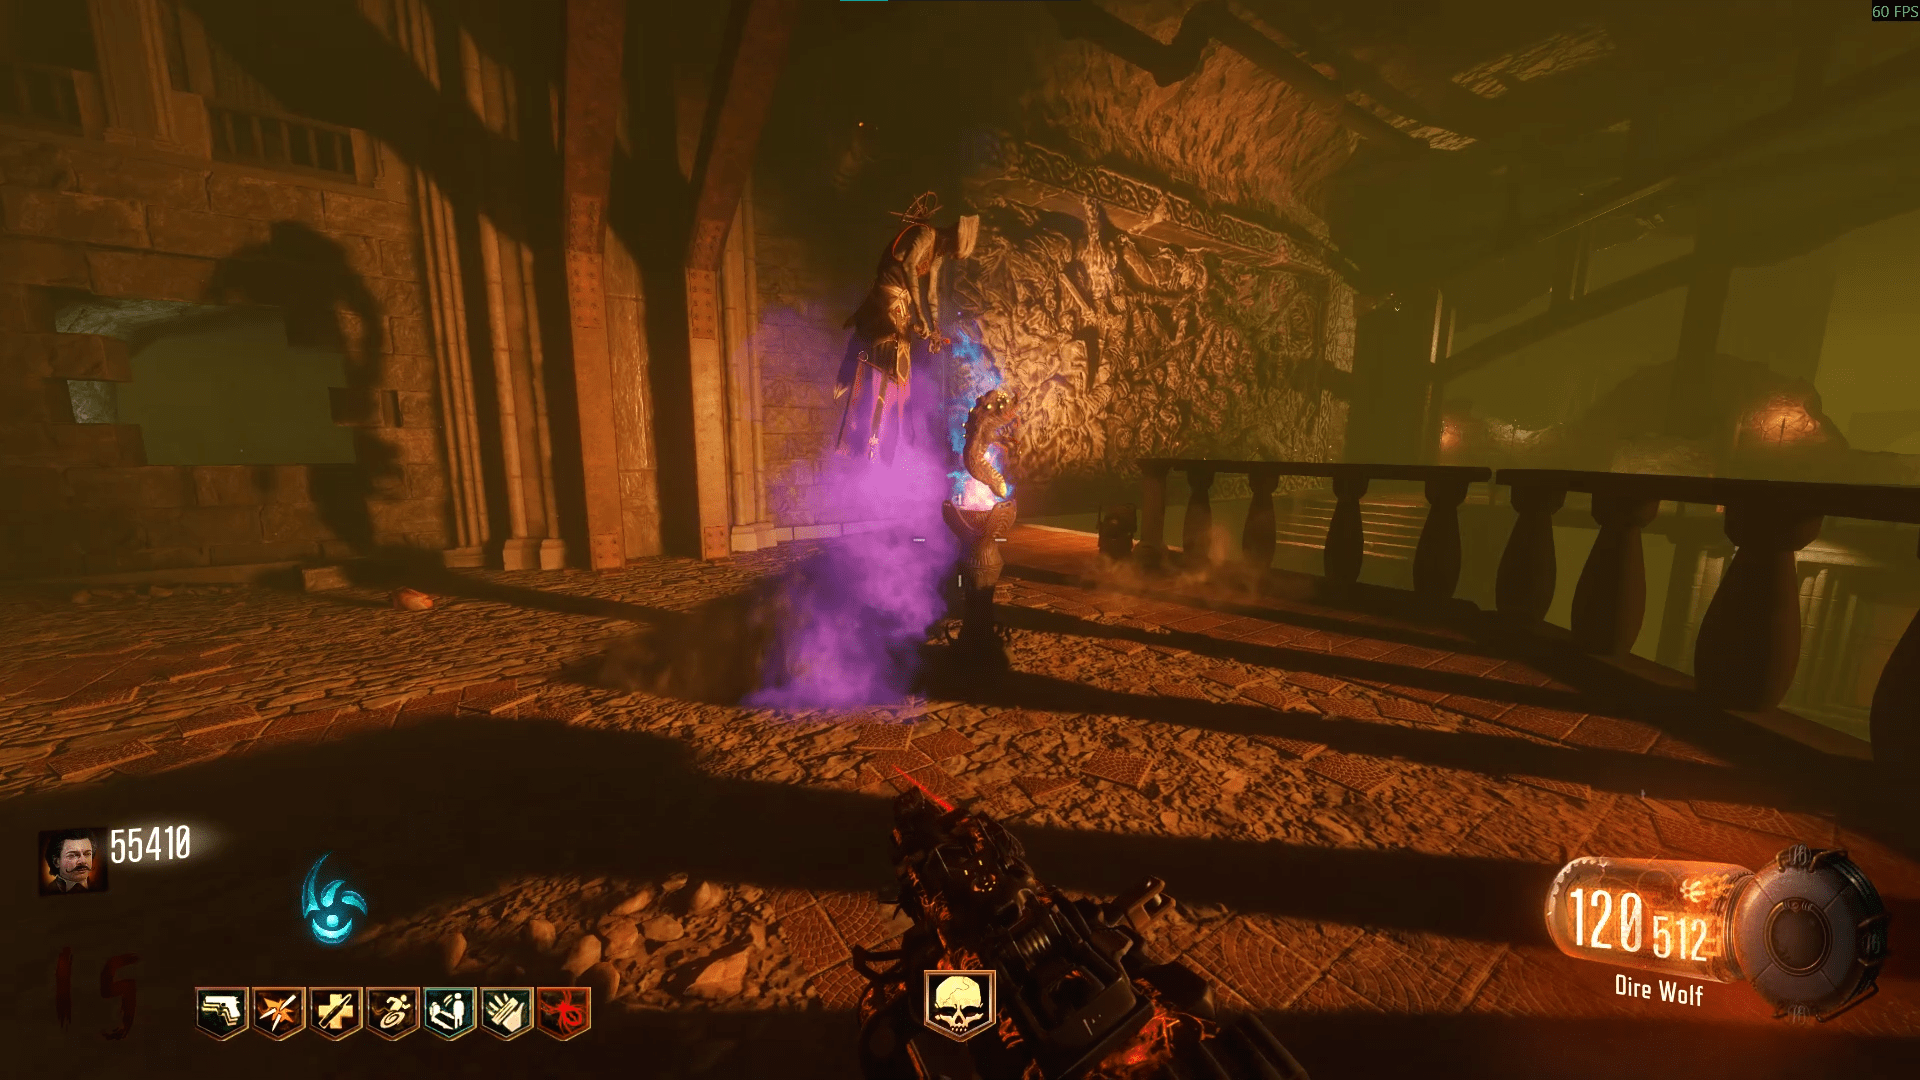
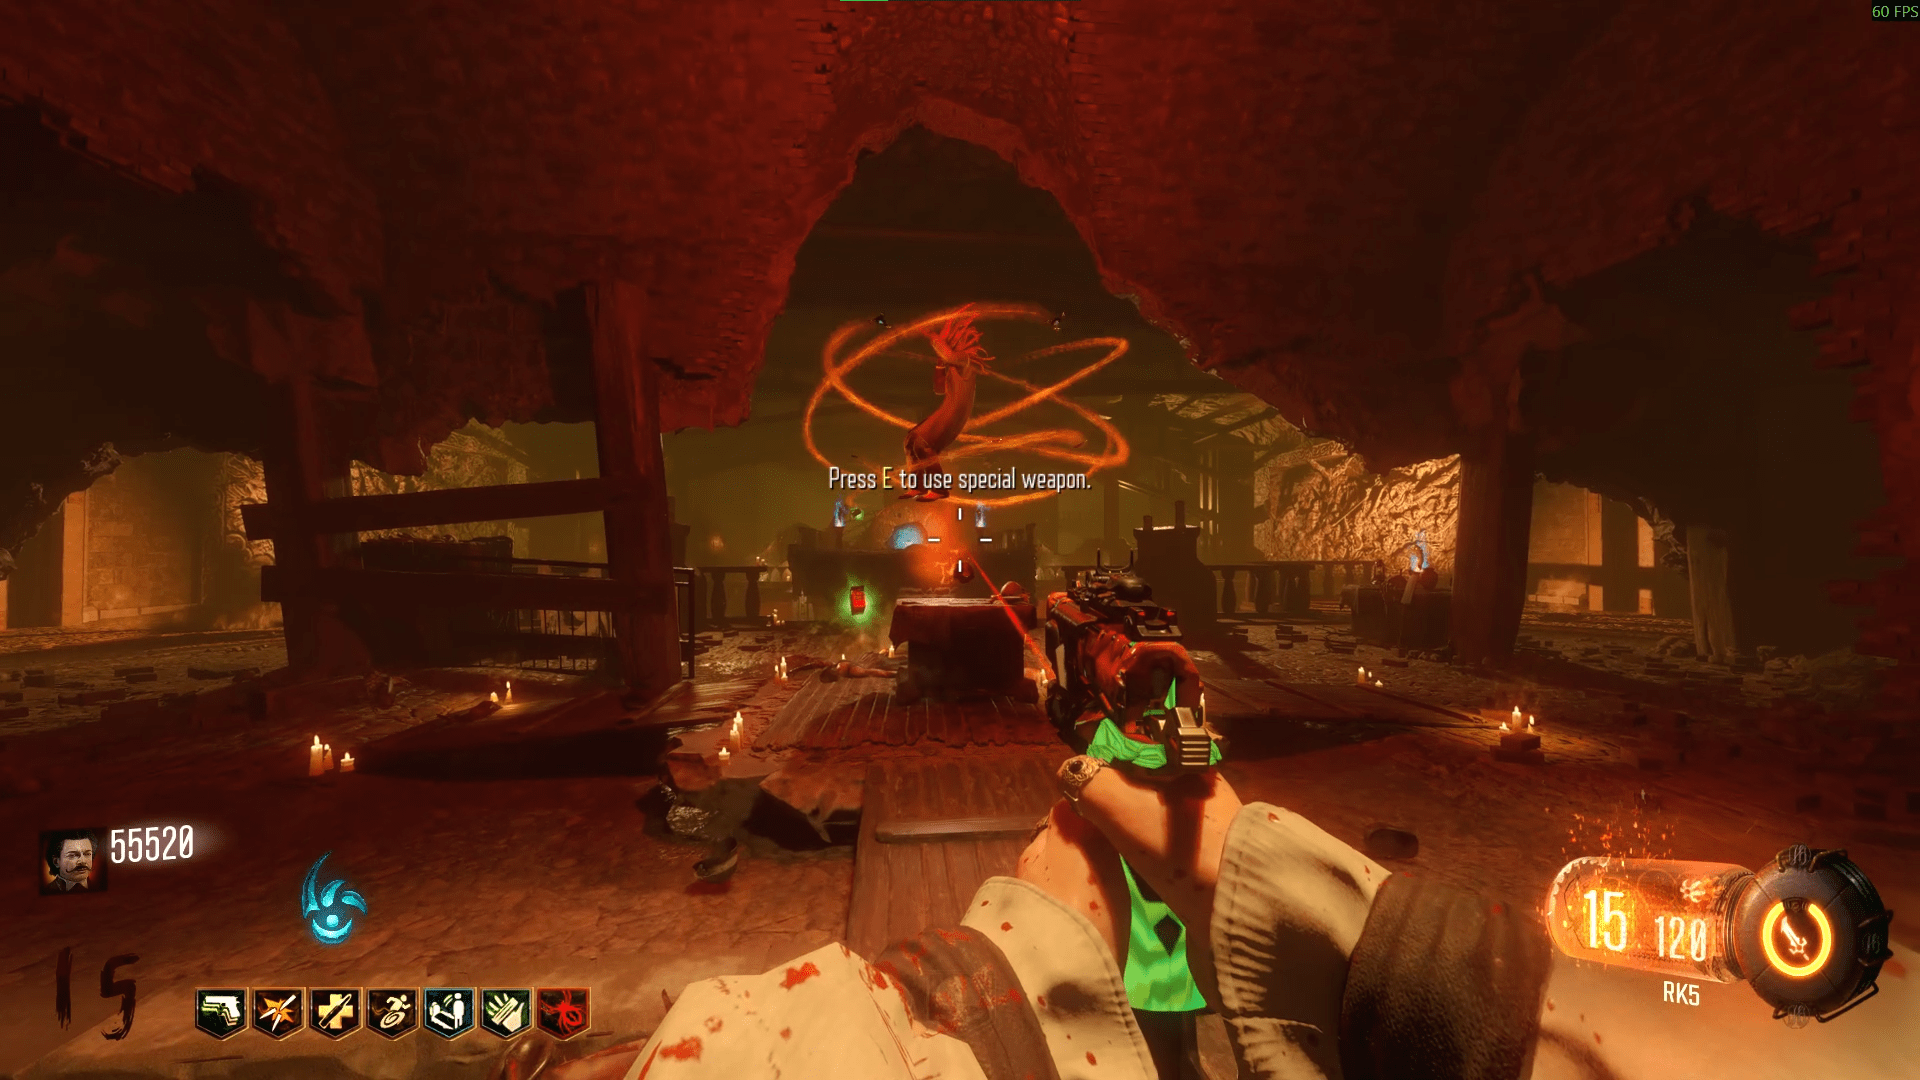
If you've successfully completed the last step, and there are still four people in your game, purple headed Margwas will start spawning. Killing one will reignite a Beast mode pedestal somewhere on the map. Each player will need to enter this Beast mode which will now be infinite, and can only deplete when attacked by Margwas or manual cancellation.
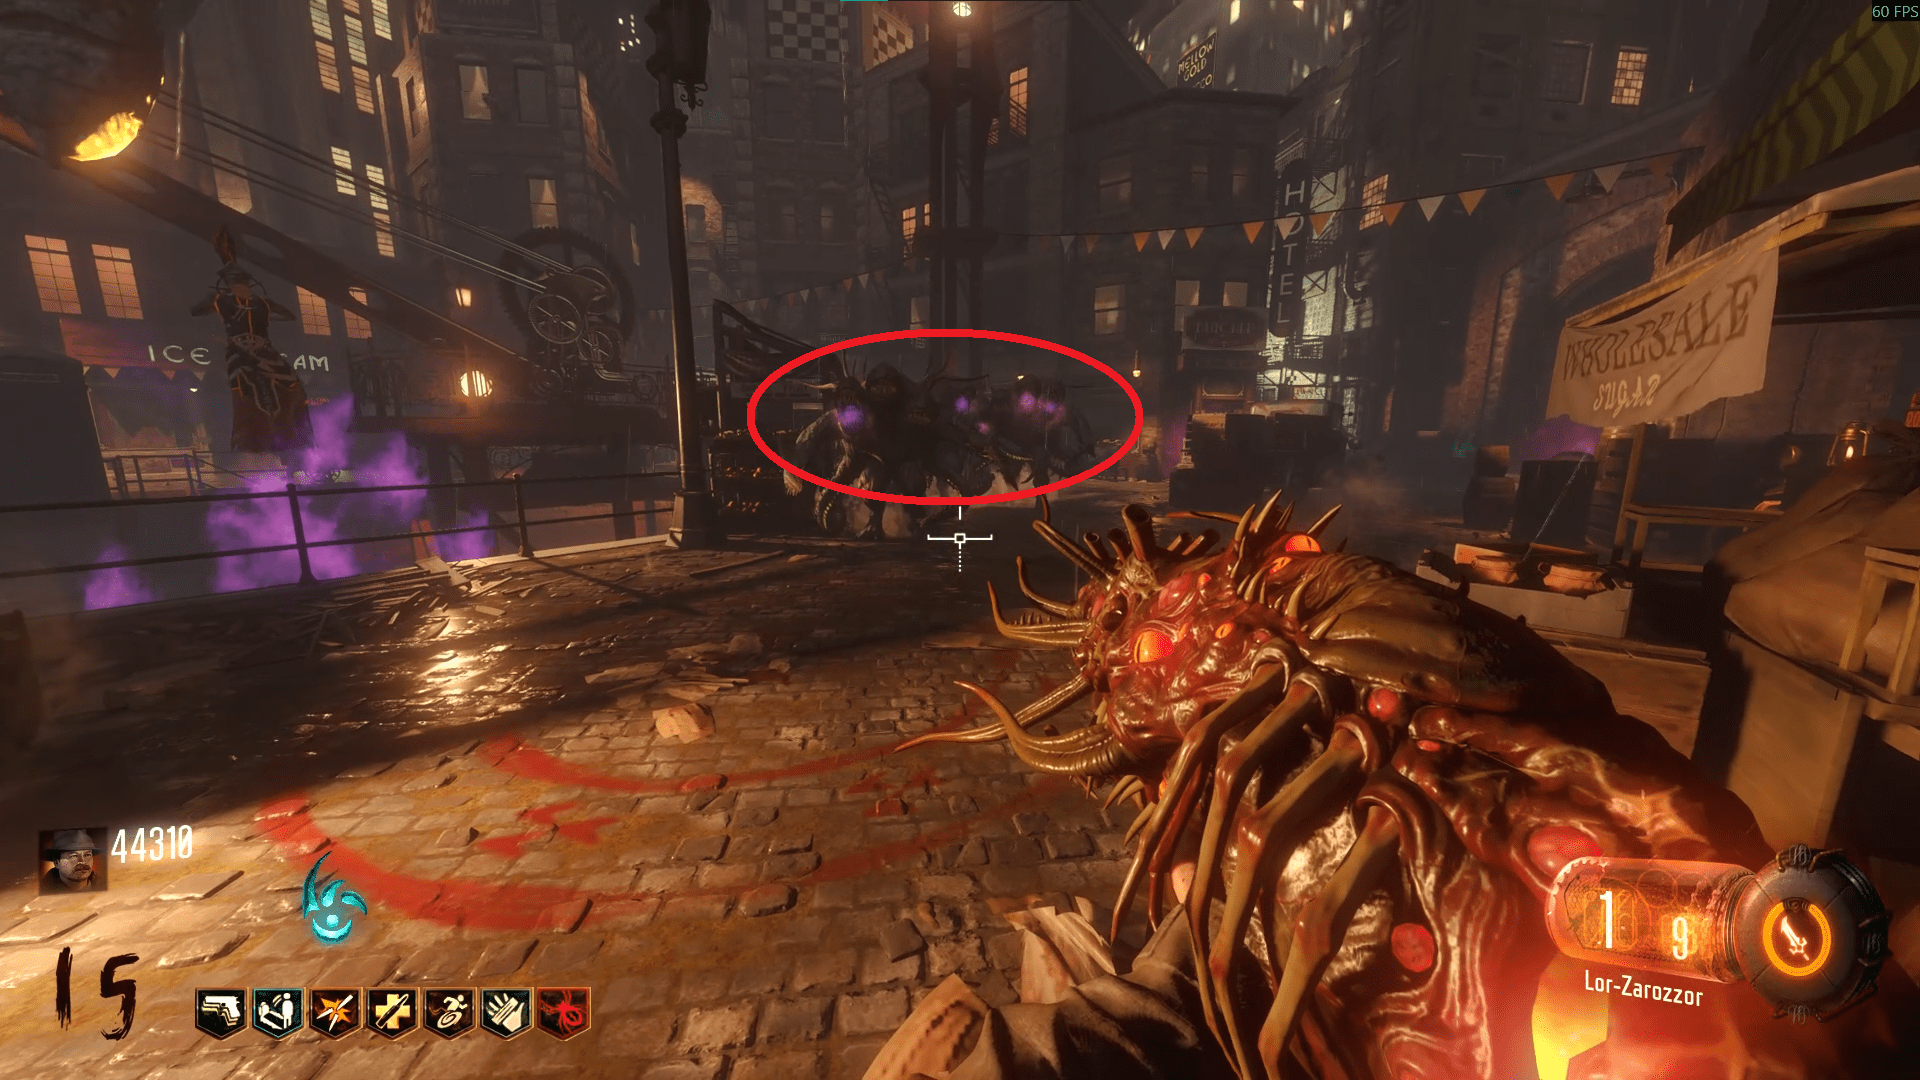
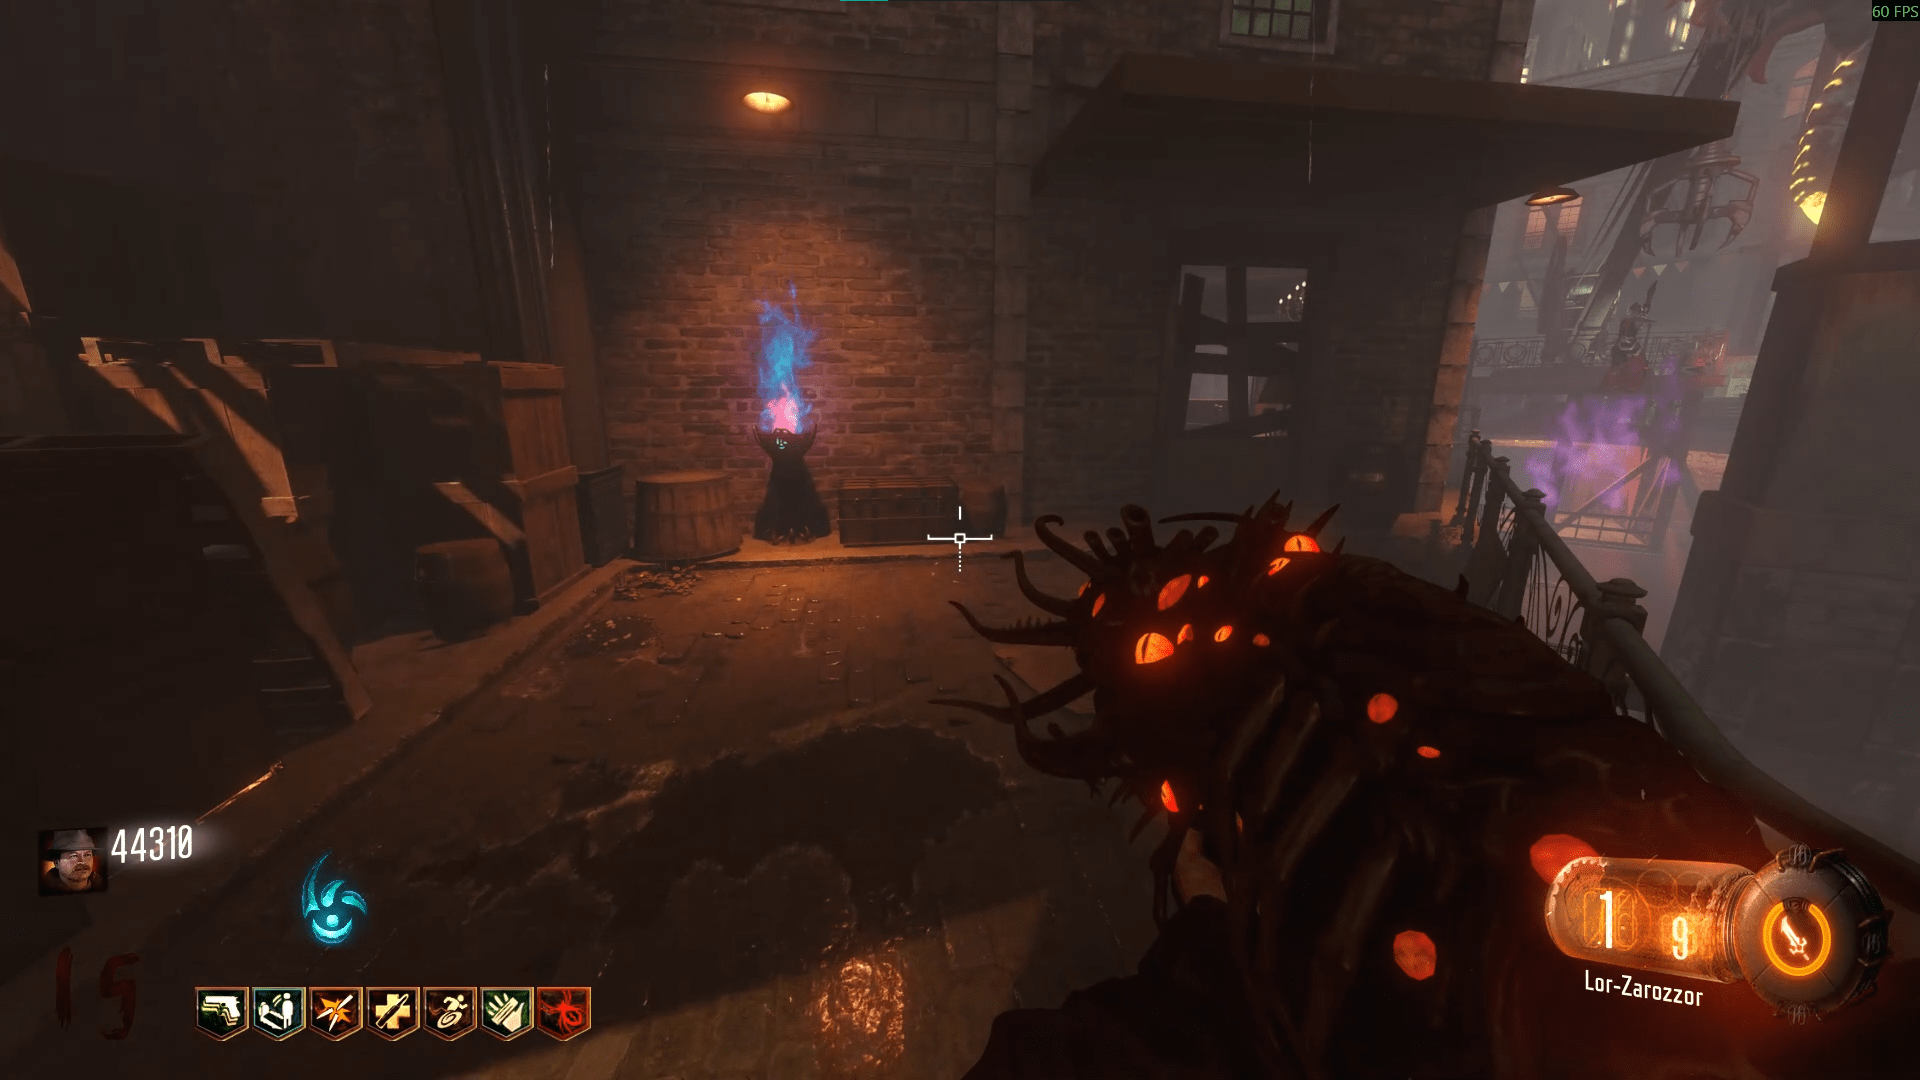
Once each player is in infinite Beast mode, you'll then need to decide who goes where as one person needs to be in the Junction, ready to zap the three Keepers and the other three need to be at each of the Tram stations. The requisites differ between the Junction person and the Tram people so I'll list their duties separately.
The Junction player, who will sit at the bottom of the Canal in the water, will zap the three Keepers after all of the Tram lines are lit up and the Gateworm has been smashed. Any time otherwise is not necessary. This player can also communicate when to start the action and who has not lit up their Tram lines, but this isn't completely necessary, you'll see why in a second.
As for the Tram people, have each player at each of the Tram stations. The two players without the Tram at their current locations, one will exit Beast mode to call the Tram to their location then quickly re-enter Beast mode to zap their electrical box. Now, these electrical boxes are located either on the left, middle or right of the ceiling above the doors to enter the Tram. They are the same boxes as the ones that you power the map with, so they should be easy to spot.
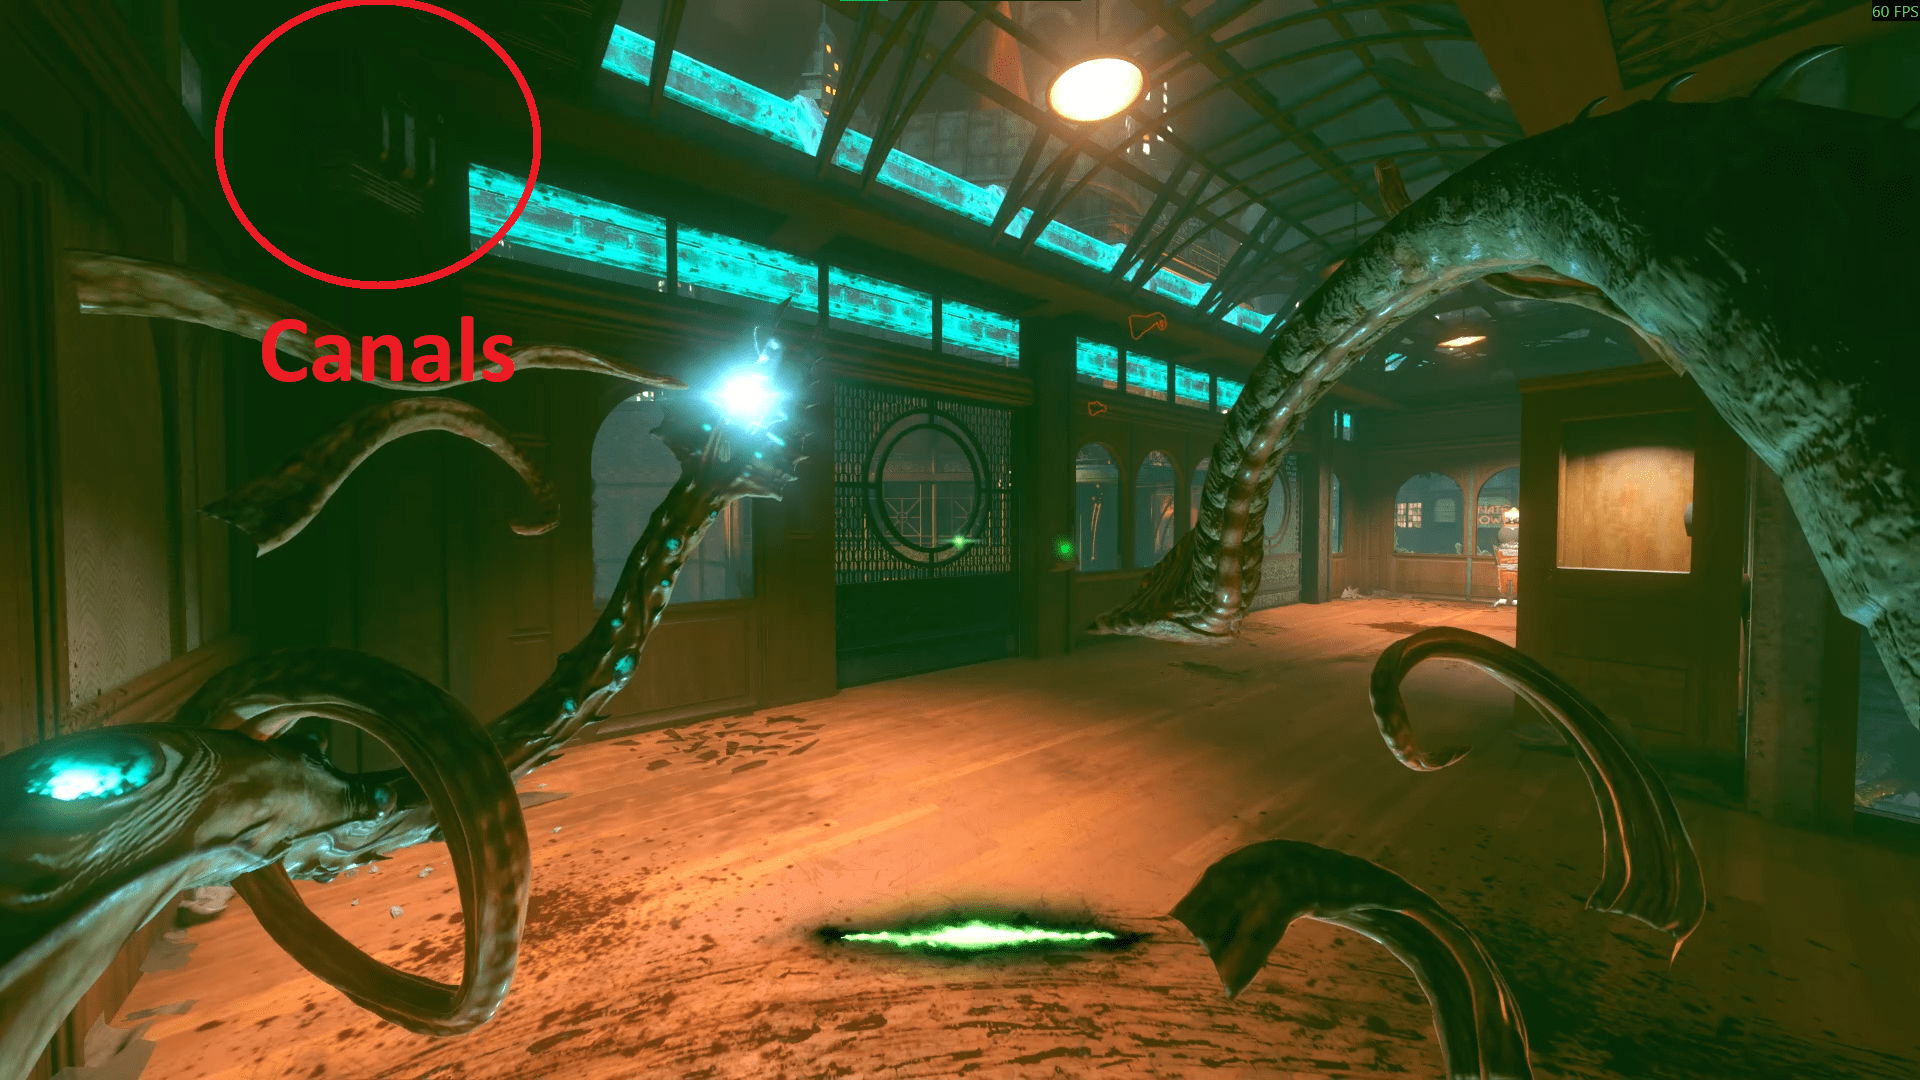
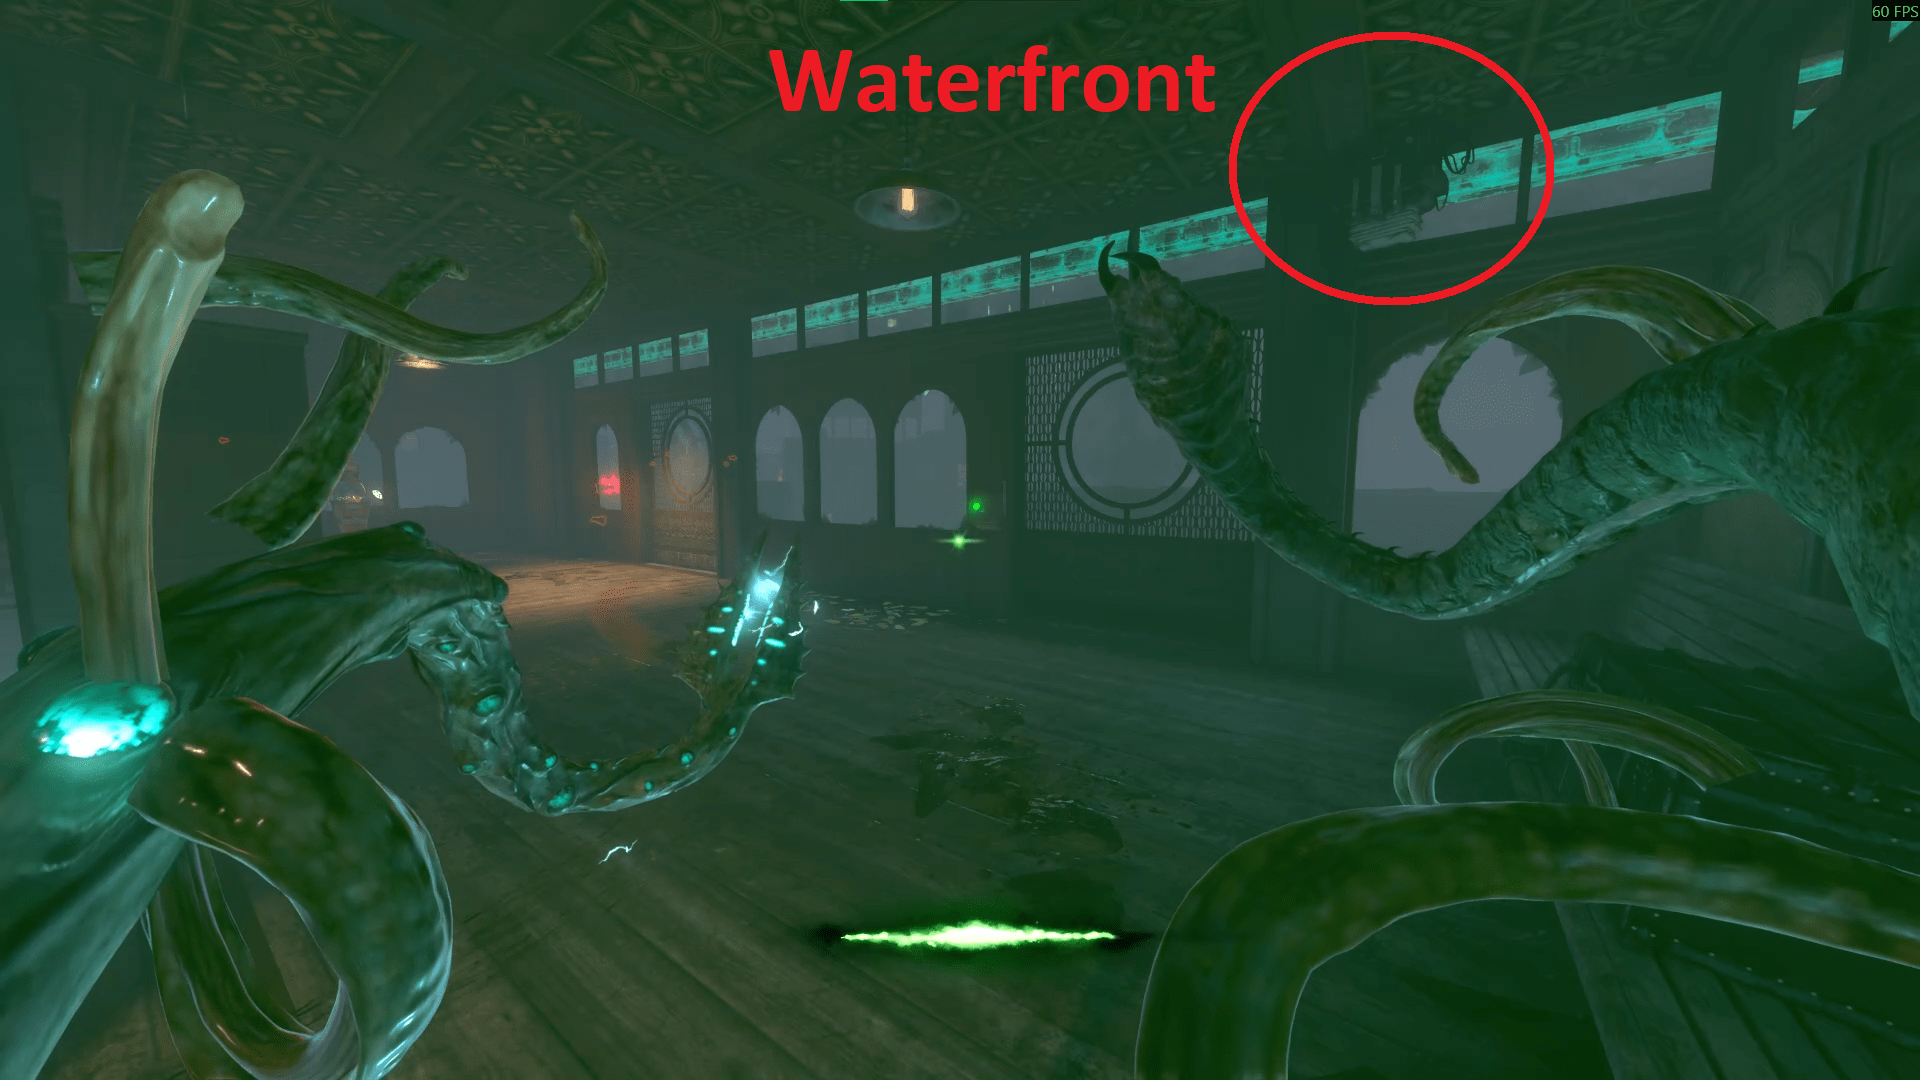
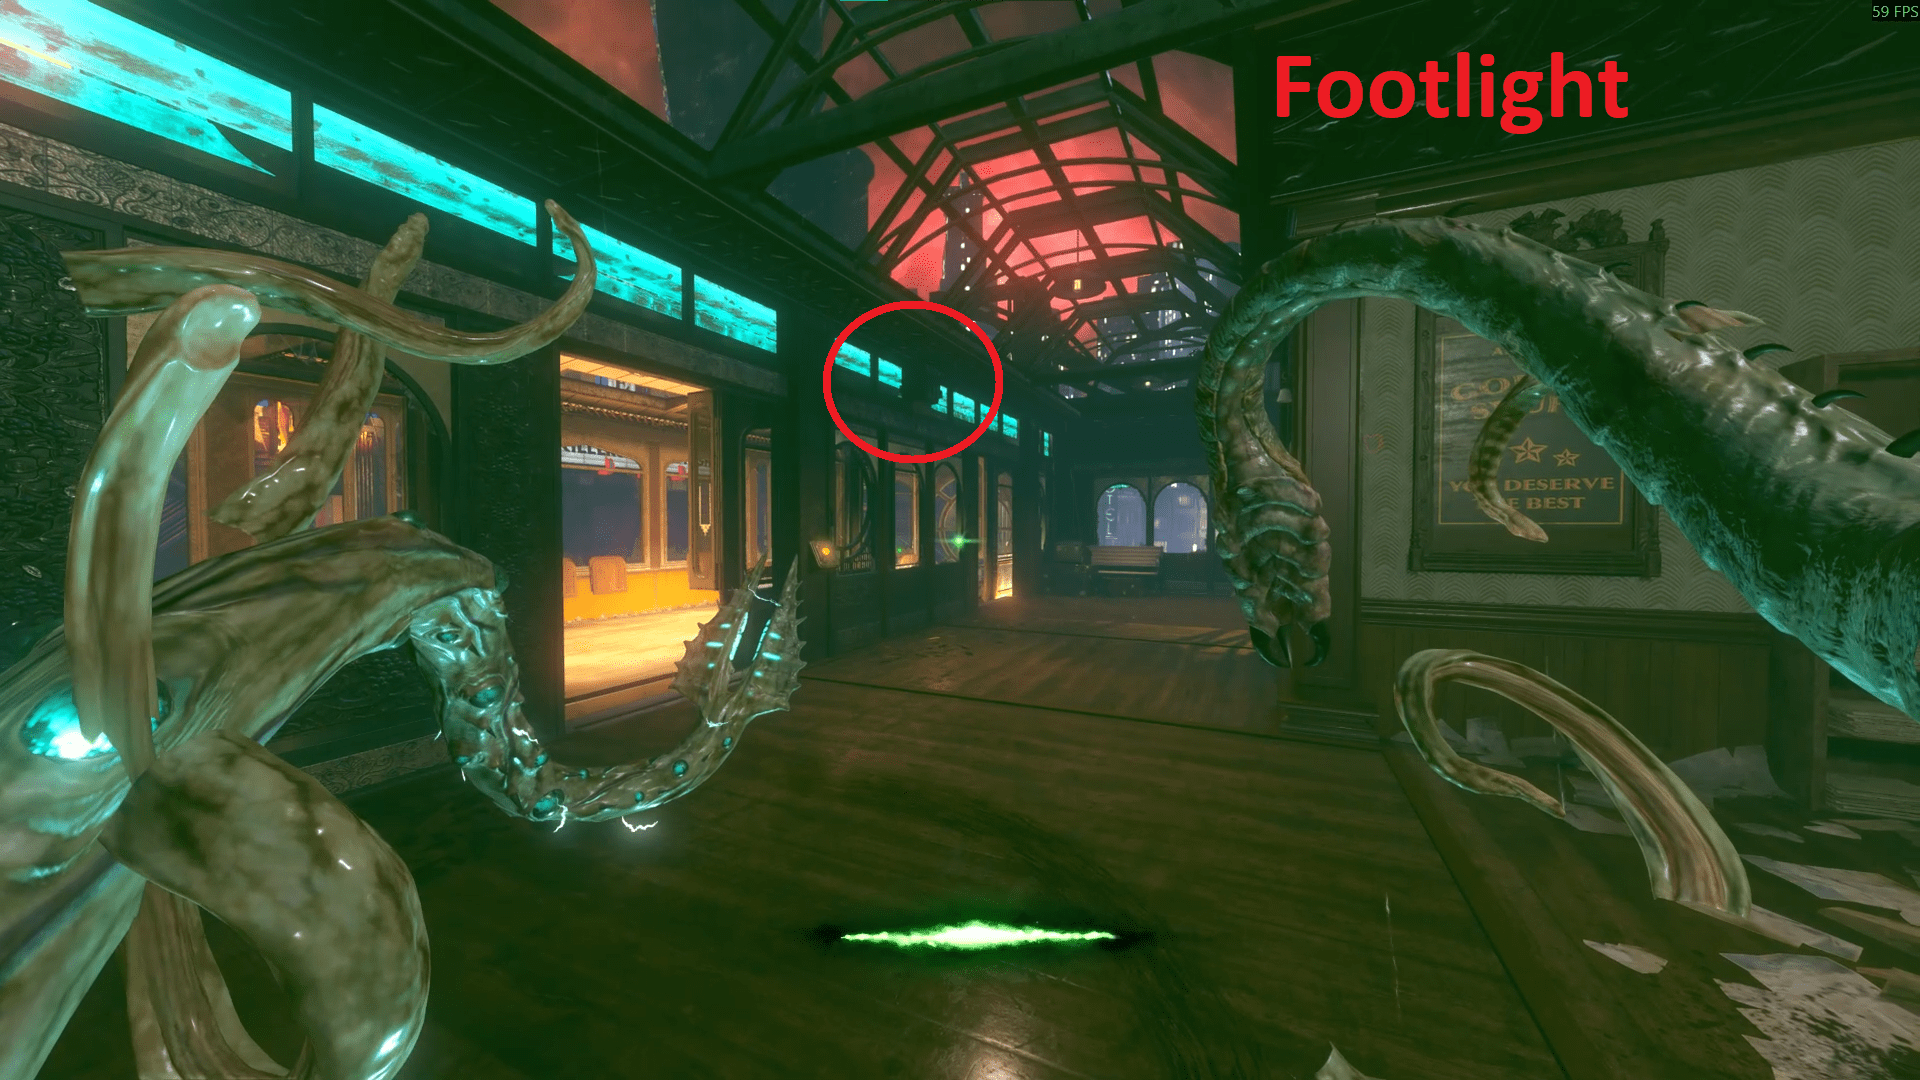
If every player has electrified their Tram lines, the Tram has smashed the Gateworm and the Junction player has zapped the three Keepers, the large beam of red should erupt from the Keepers and the final cutscene should start. Congratulations, the Easter Egg is now complete.
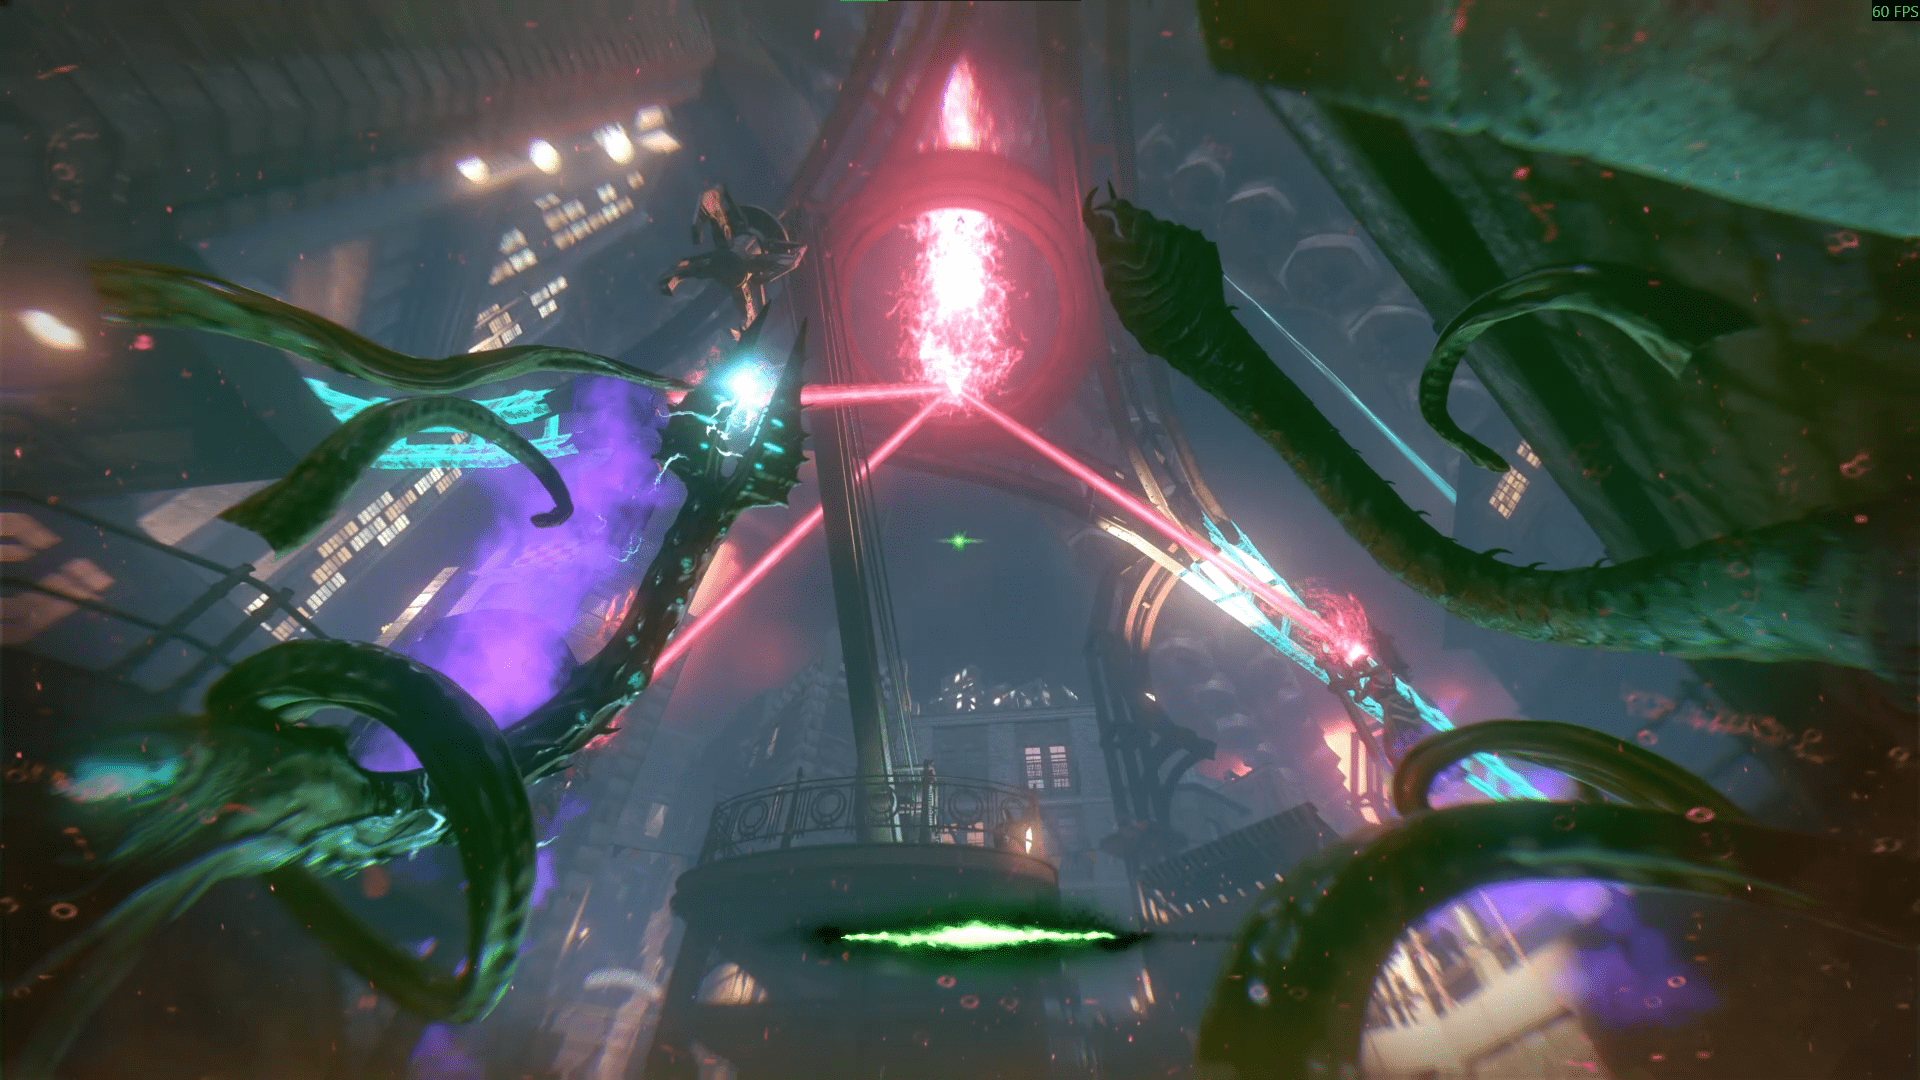
Now, if for some reason one player decides to leave for any reason, three players can still do this. The only difference here is that the Junction player must also hit the Tram electrical box and then run to the middle and zap the Keepers as quick as possible. It's most likely to succeed if you use the Footlight district Tram as this is closest to the Junction Keepers. This player also cannot call the Tram, as there won't be enough time.
The Giant
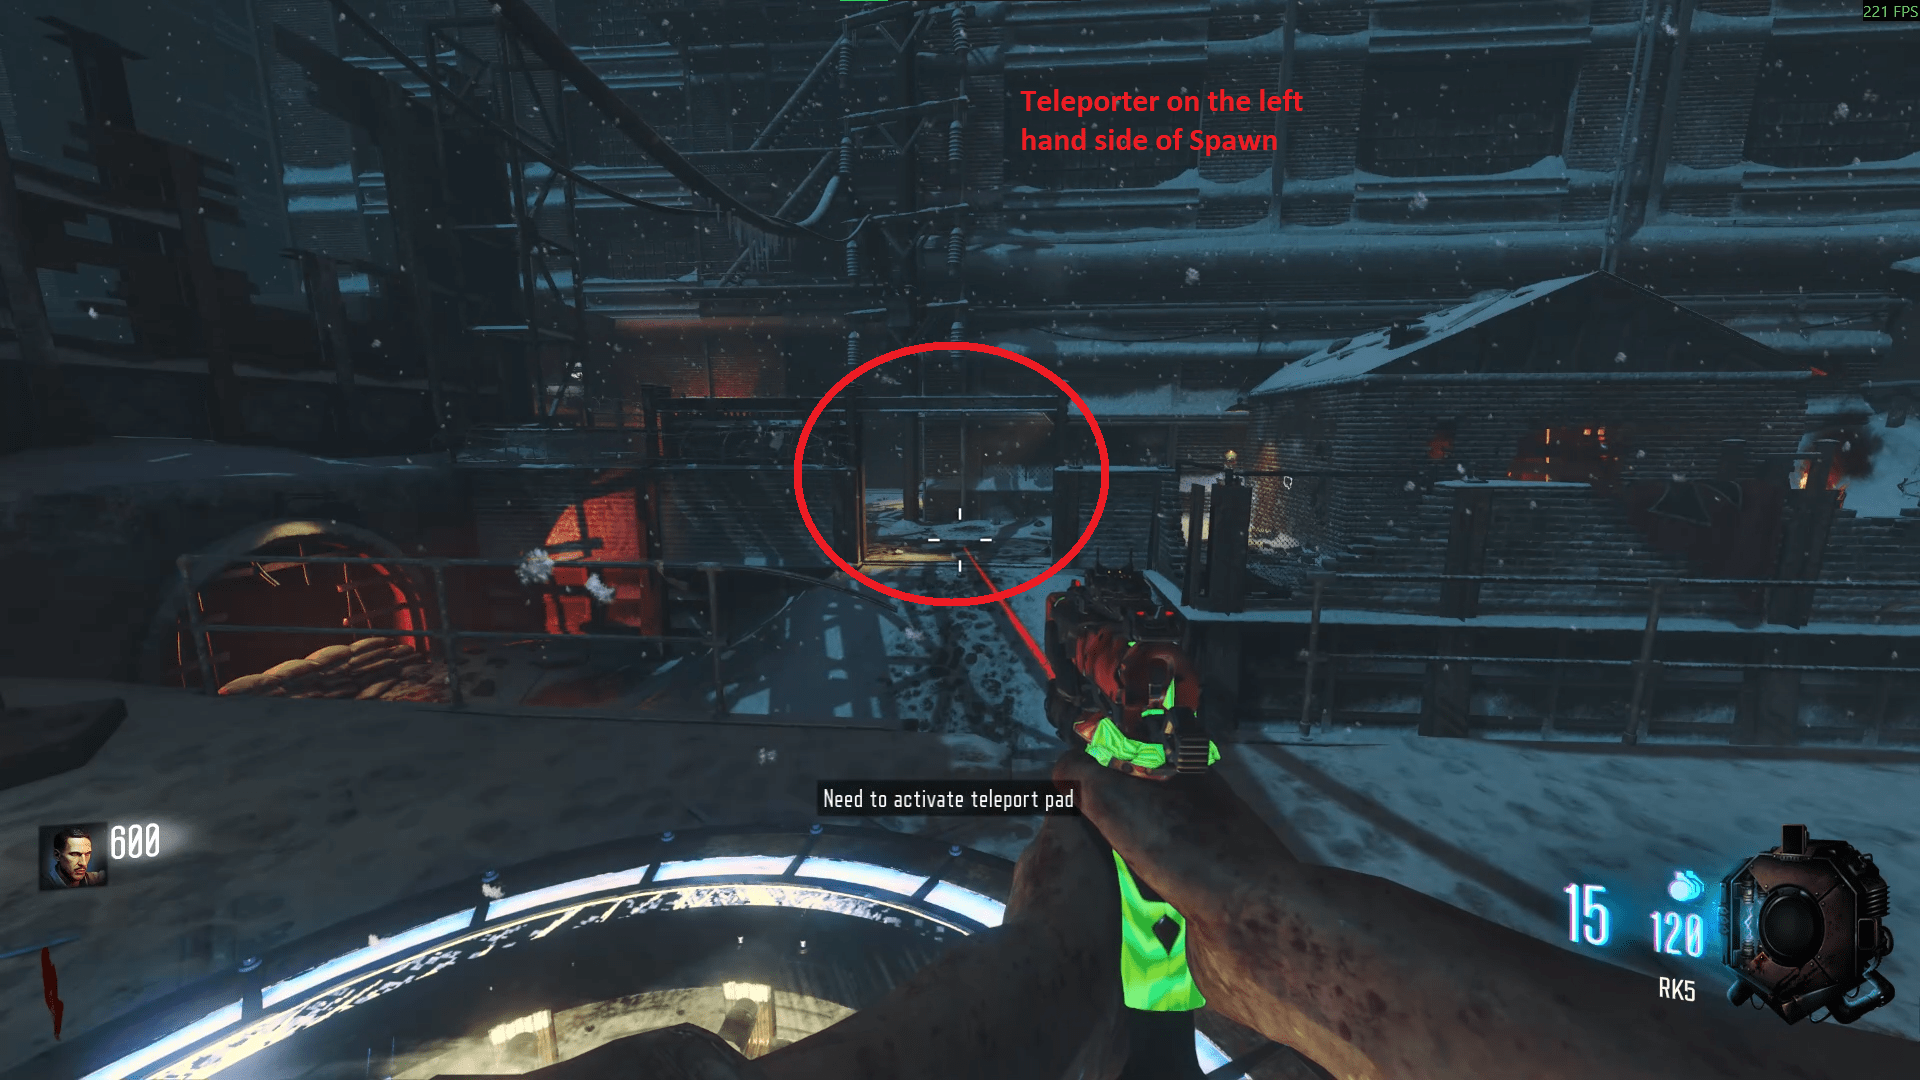
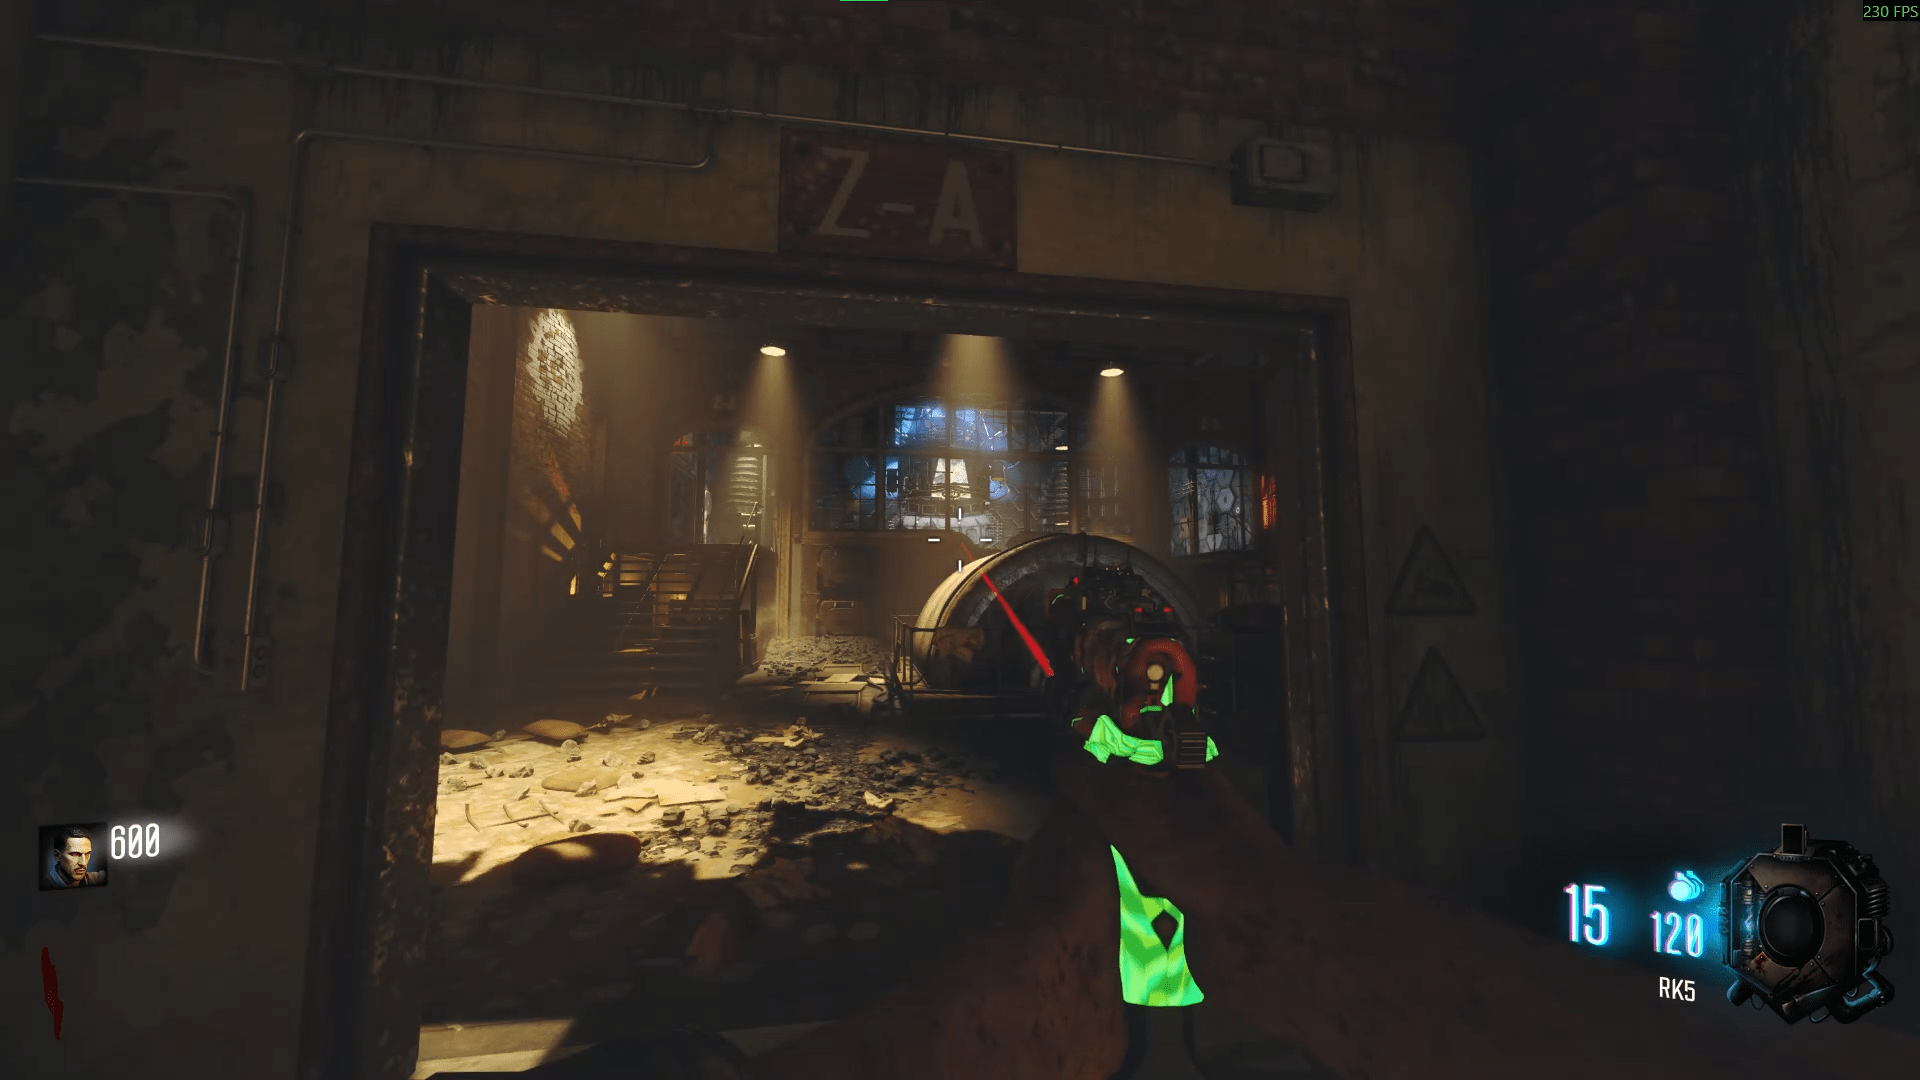
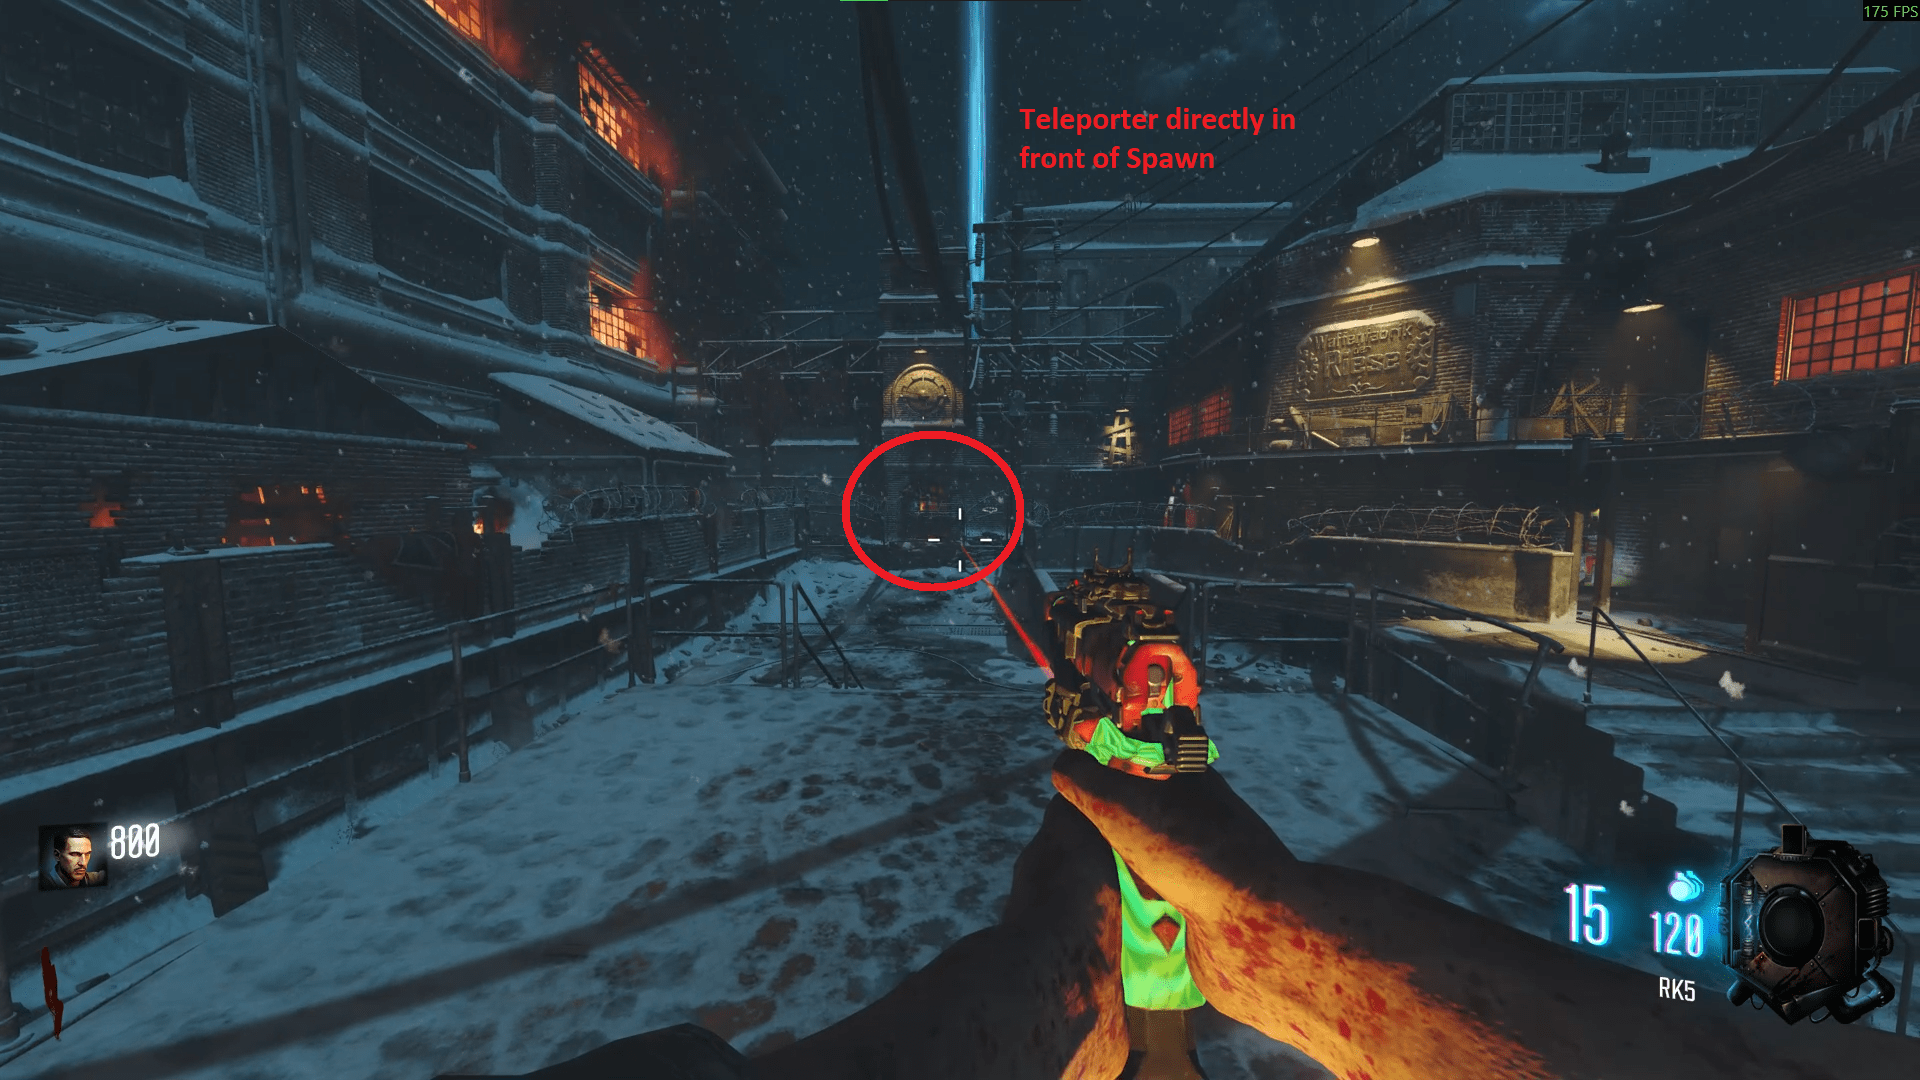
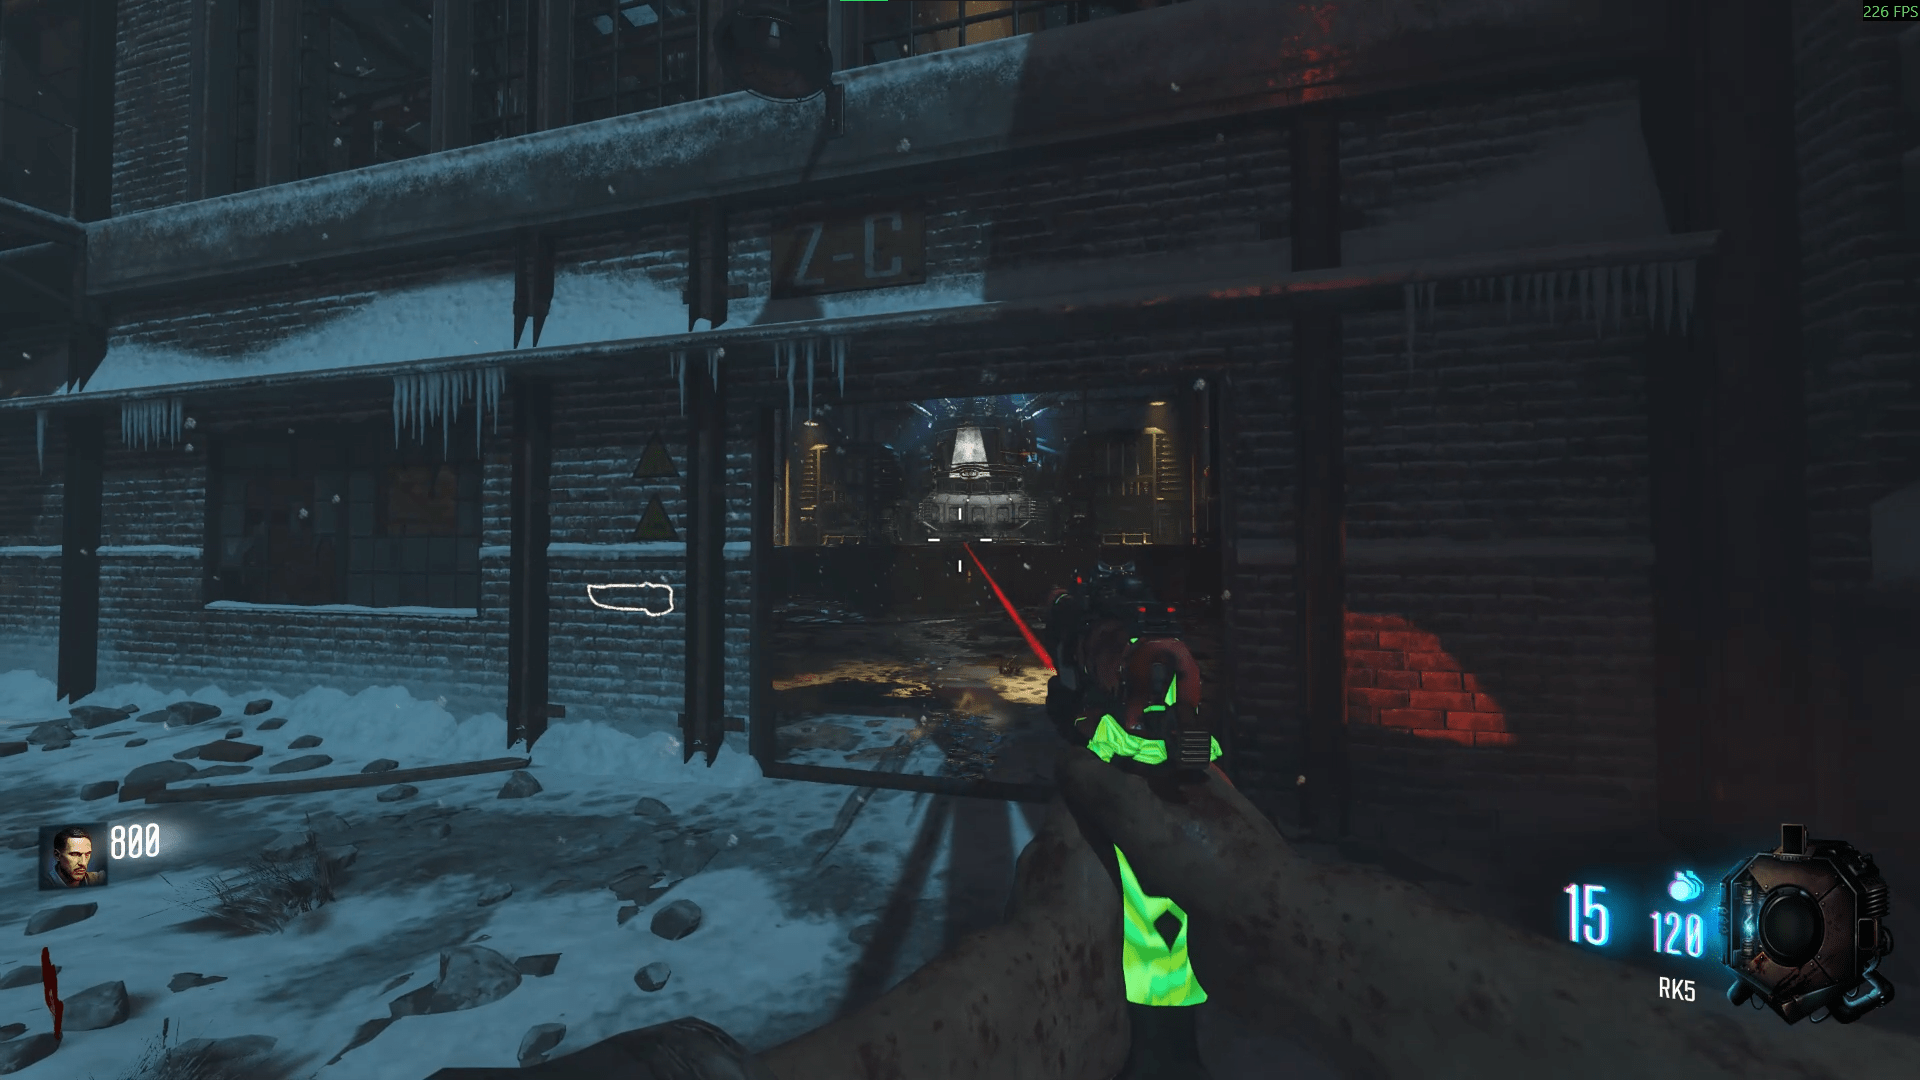
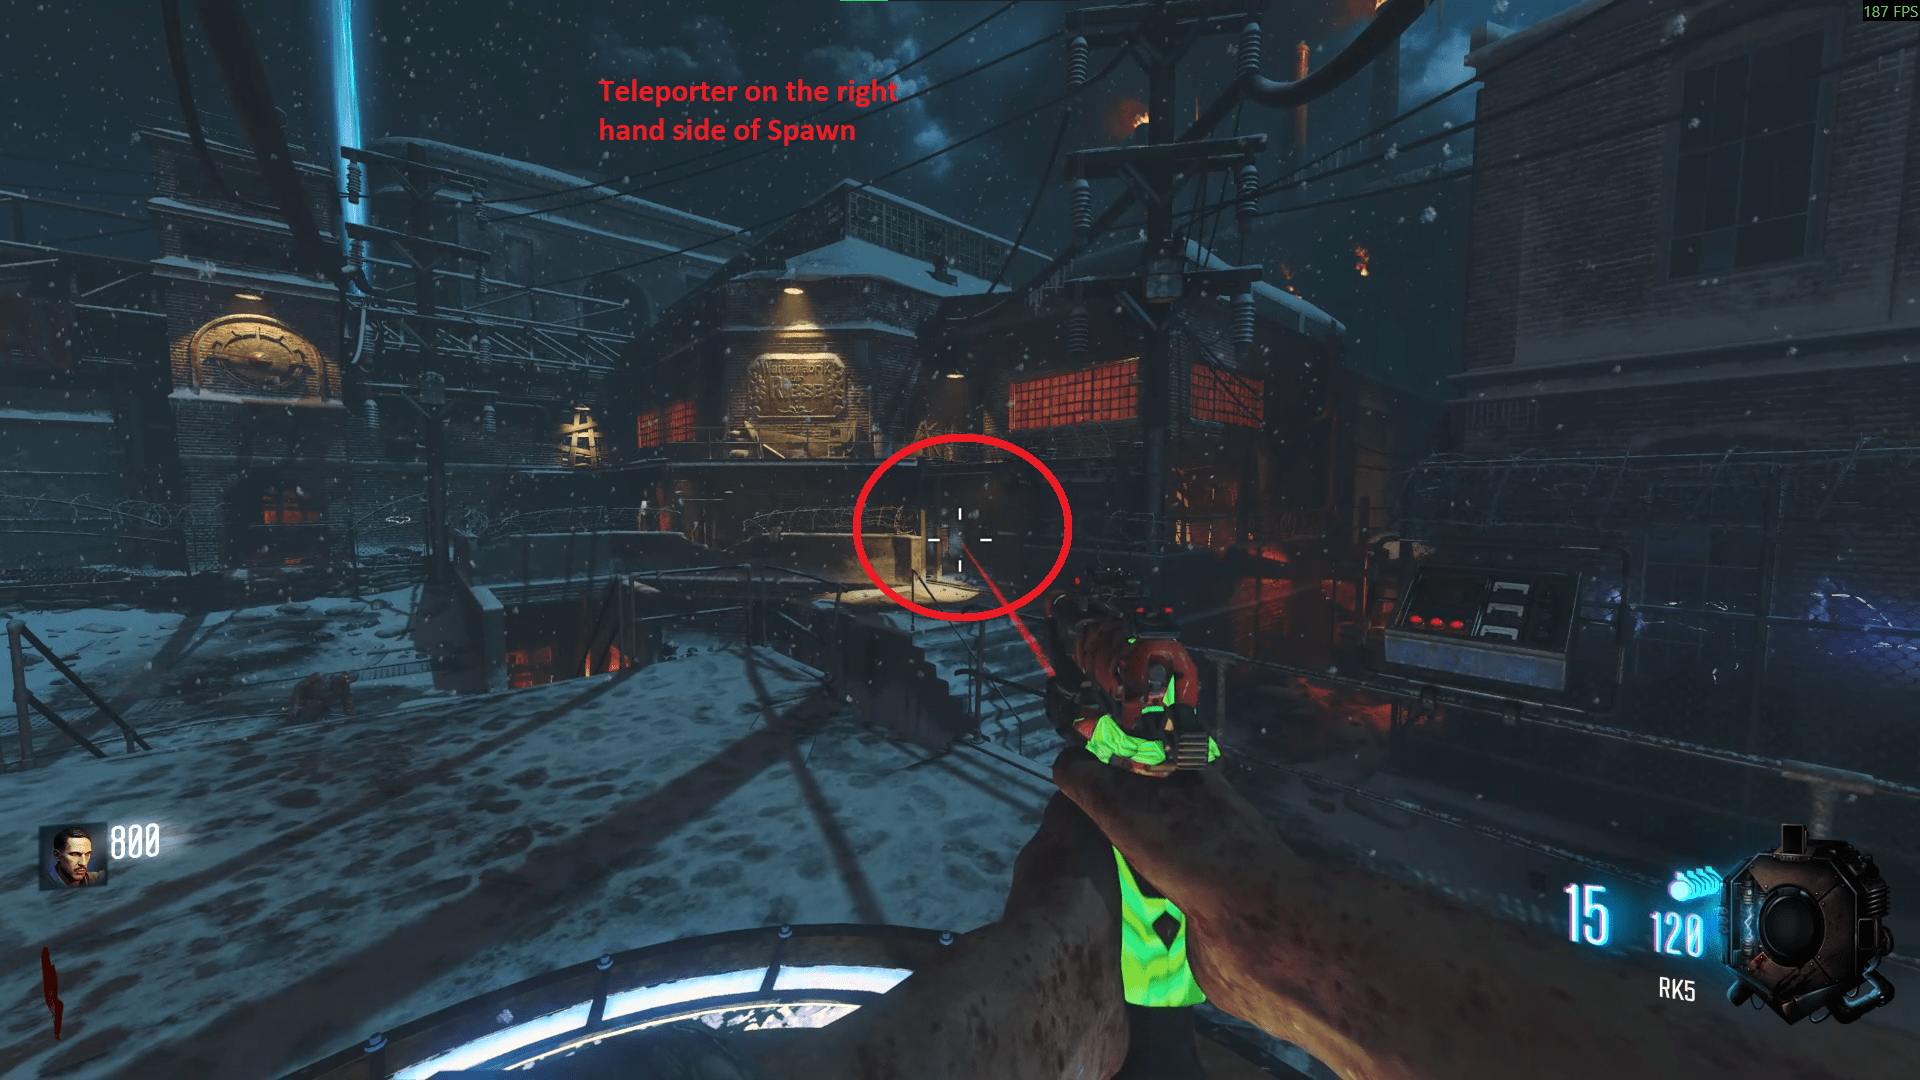
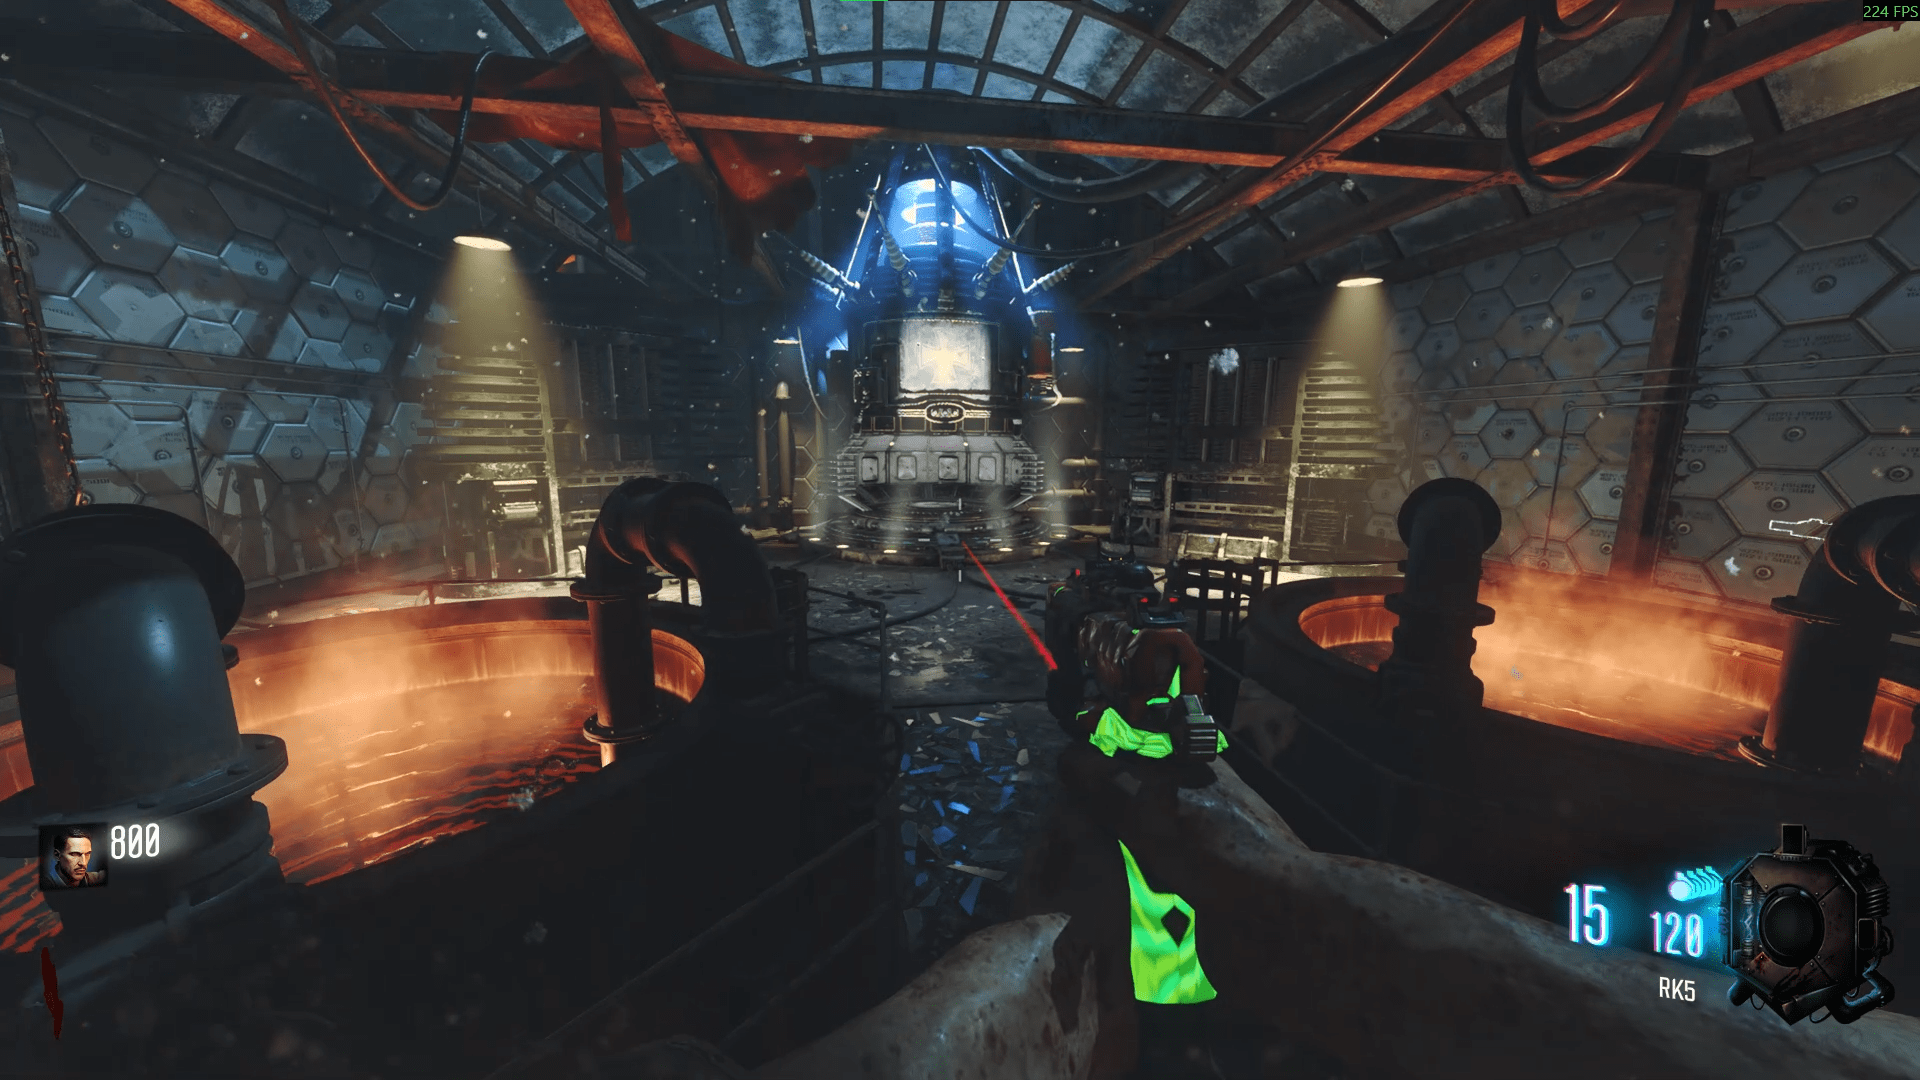
Once all the teleporters have been activated then you will be able to access Pack-a-Punch. Pack-a-Punch any weapon of your choosing and then go and shoot the box outside of the map, it is through the window on the left side of the left door from Spawn. You will notice several green glowing drop like items spinning and rising from the ground.
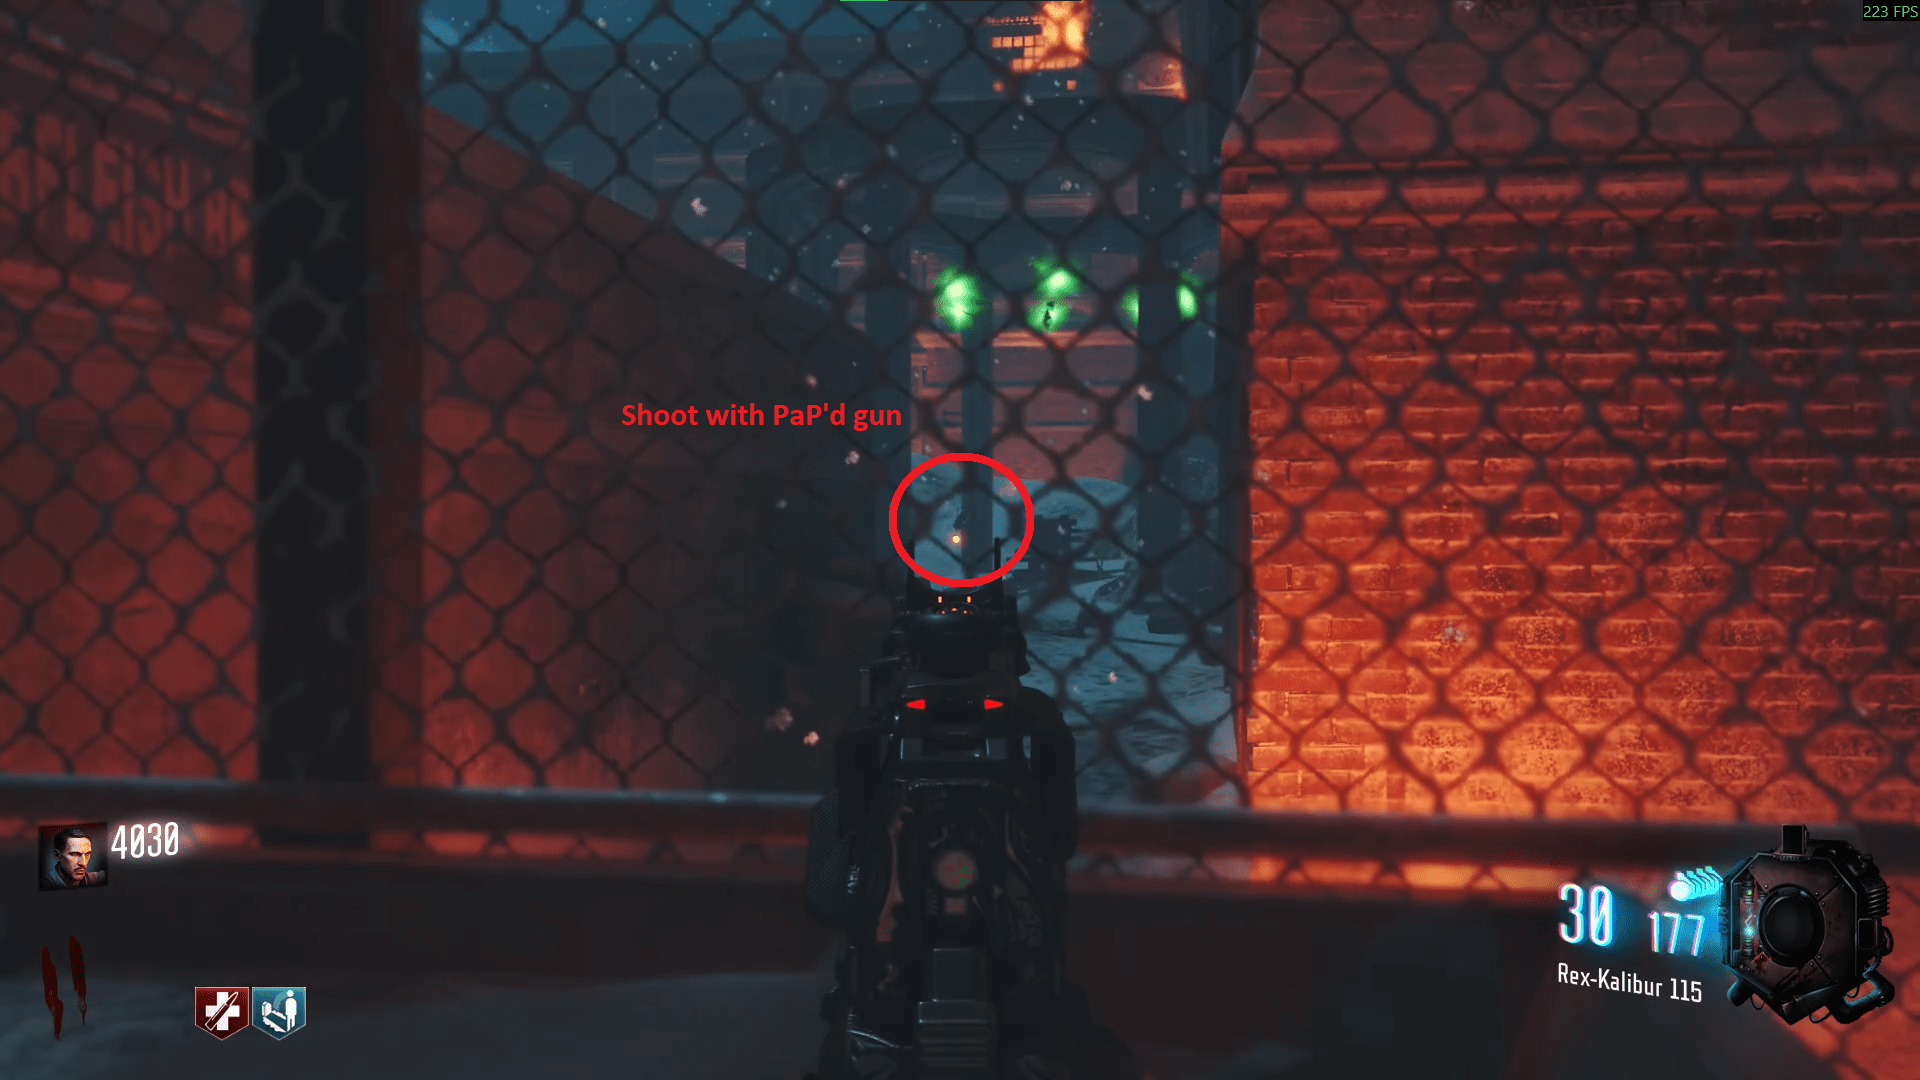
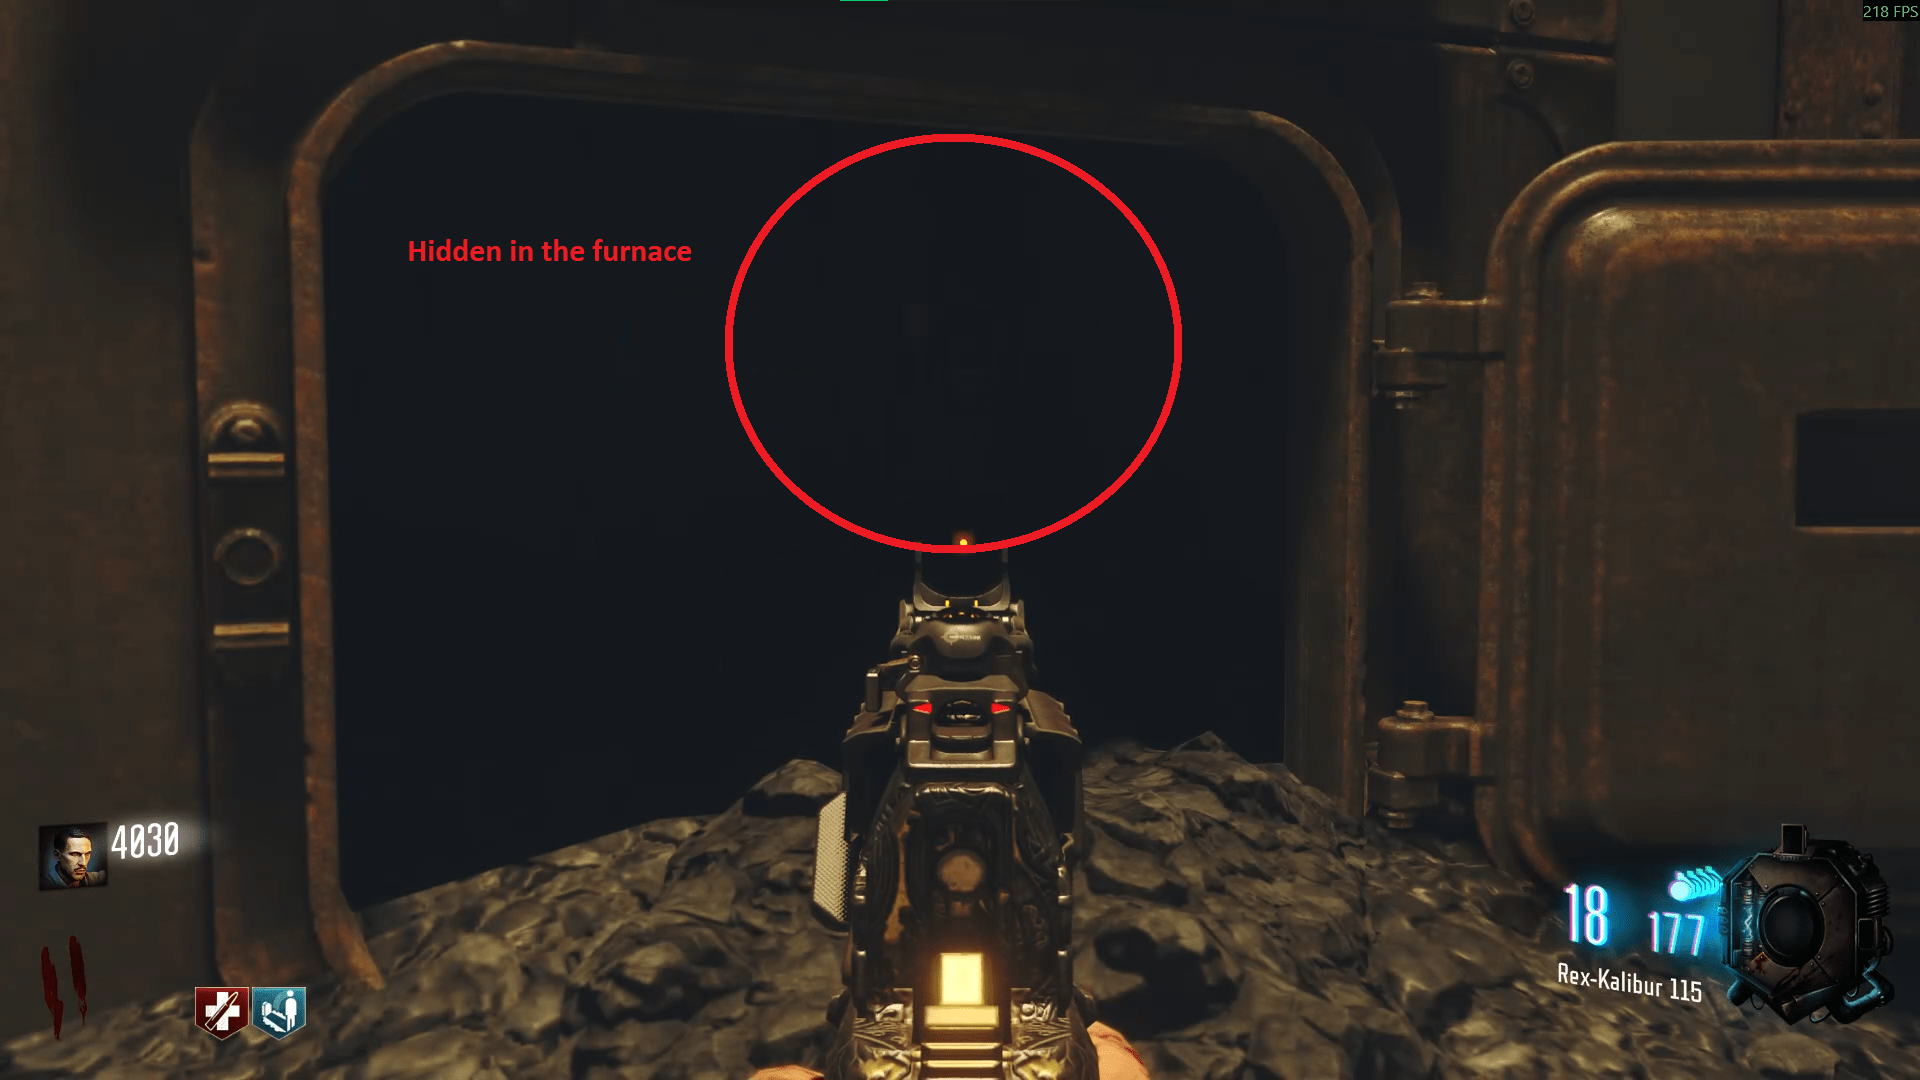
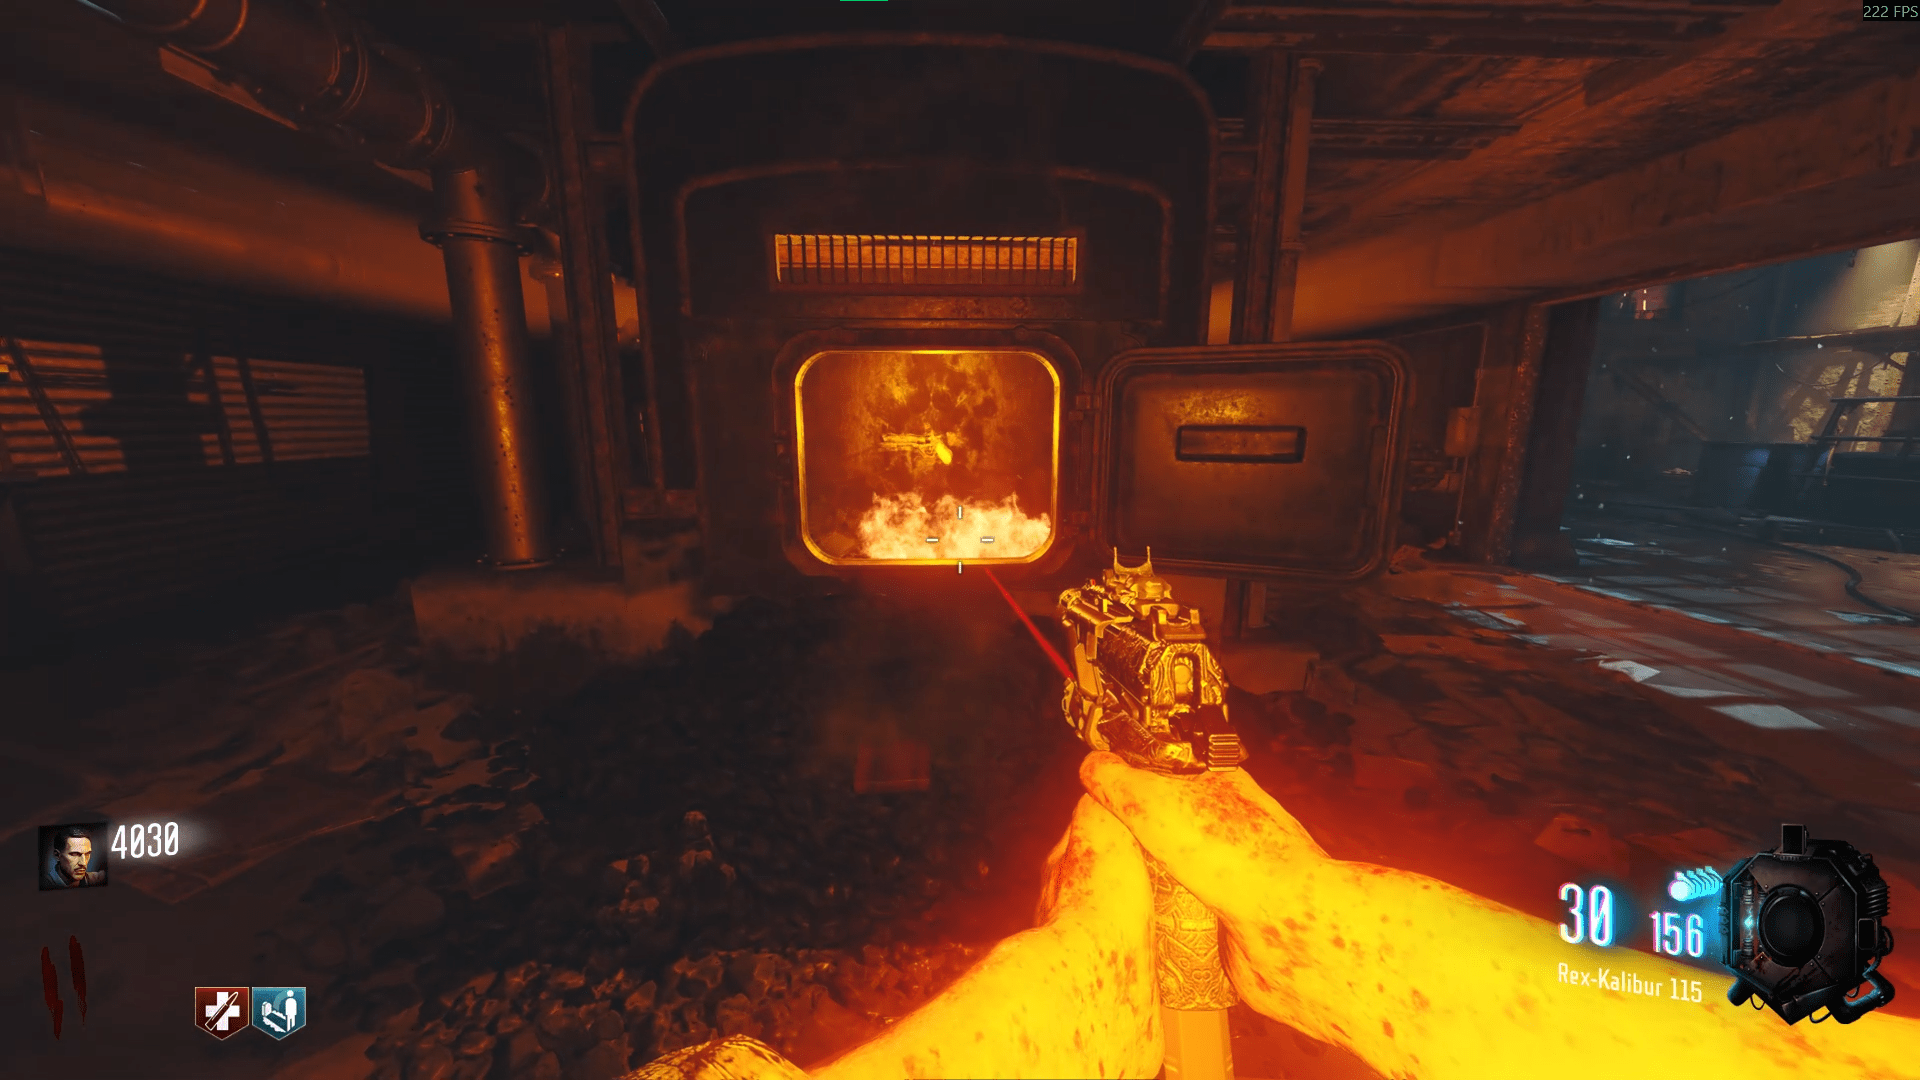
- The Cymbal Monkey is located underneath the left teleporter, in an unlit furnace spilling coal.
- The first Teddy Bear is above the power switch on the top flight of a fire escape outside of the map.
- The third and final Teddy Bear is in the left cooling vat just outside of the right teleporter. You will have to jump to see and shoot it.
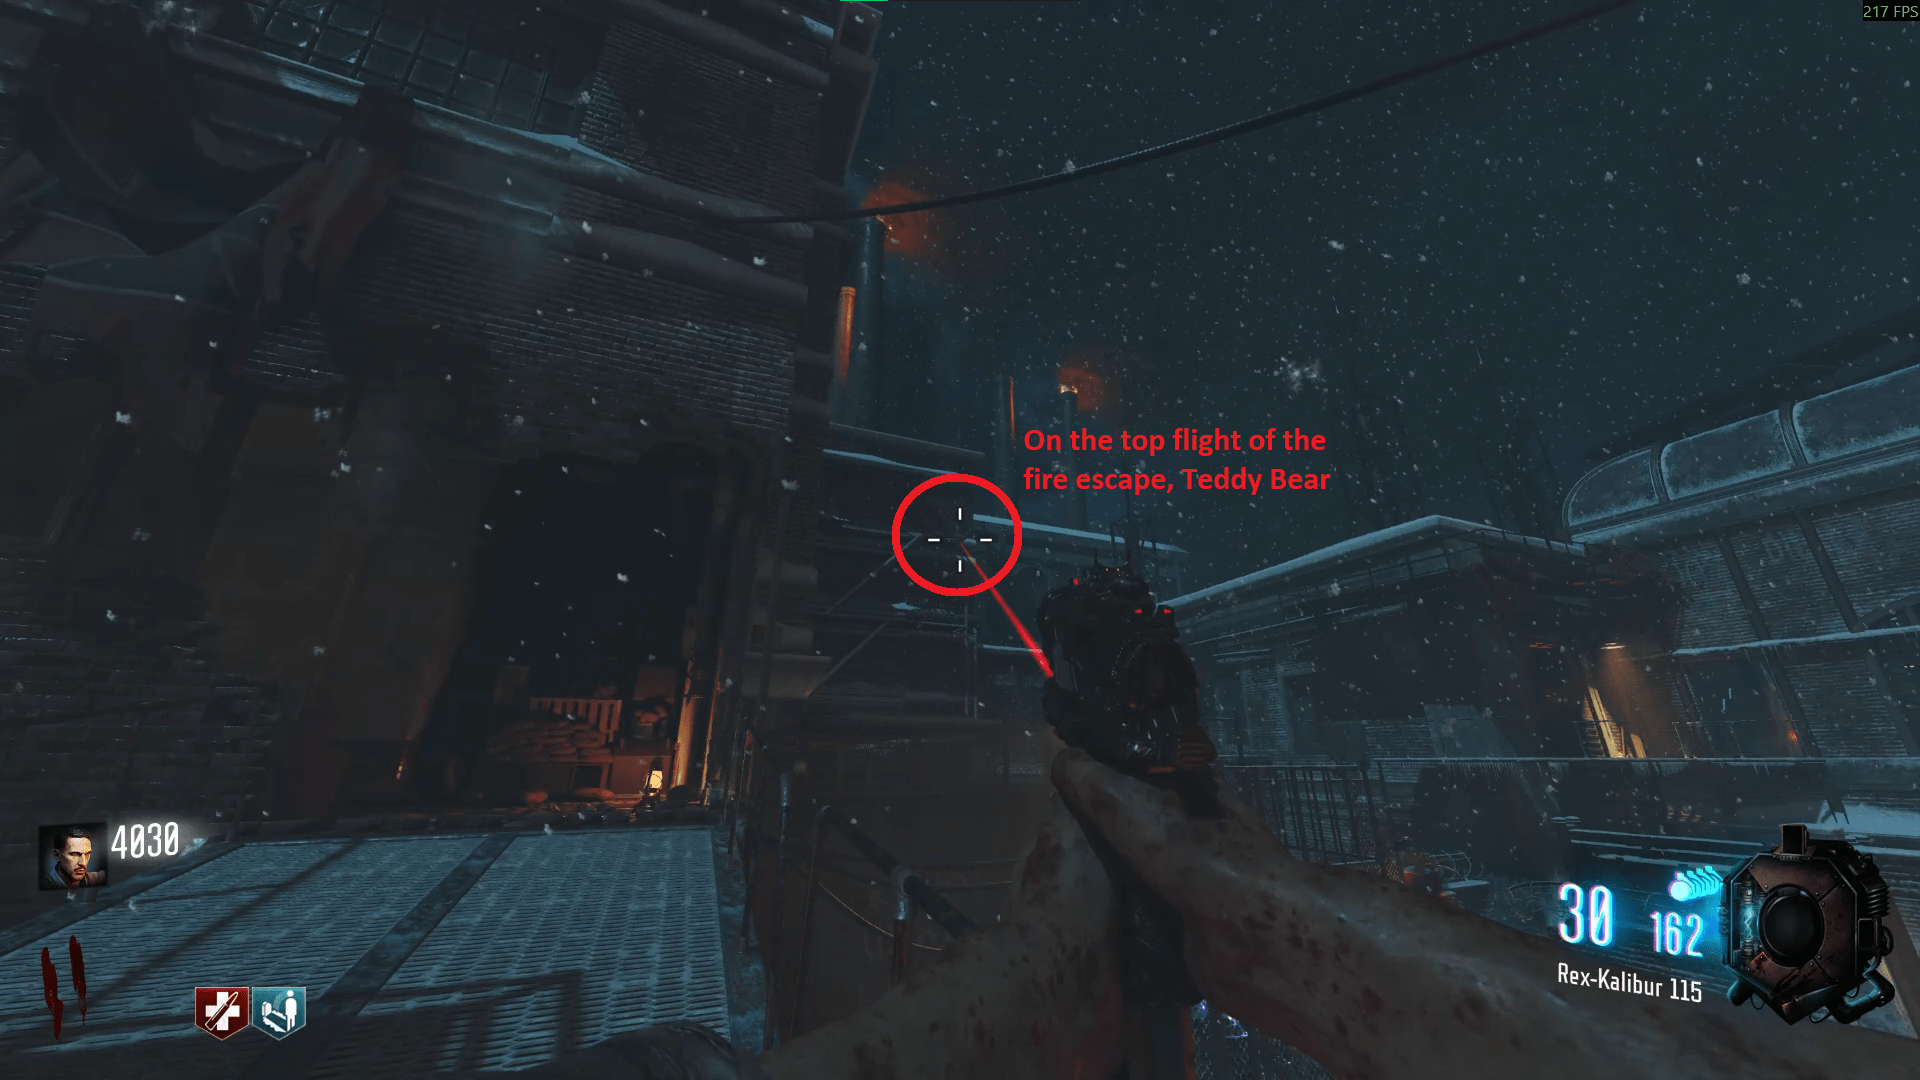
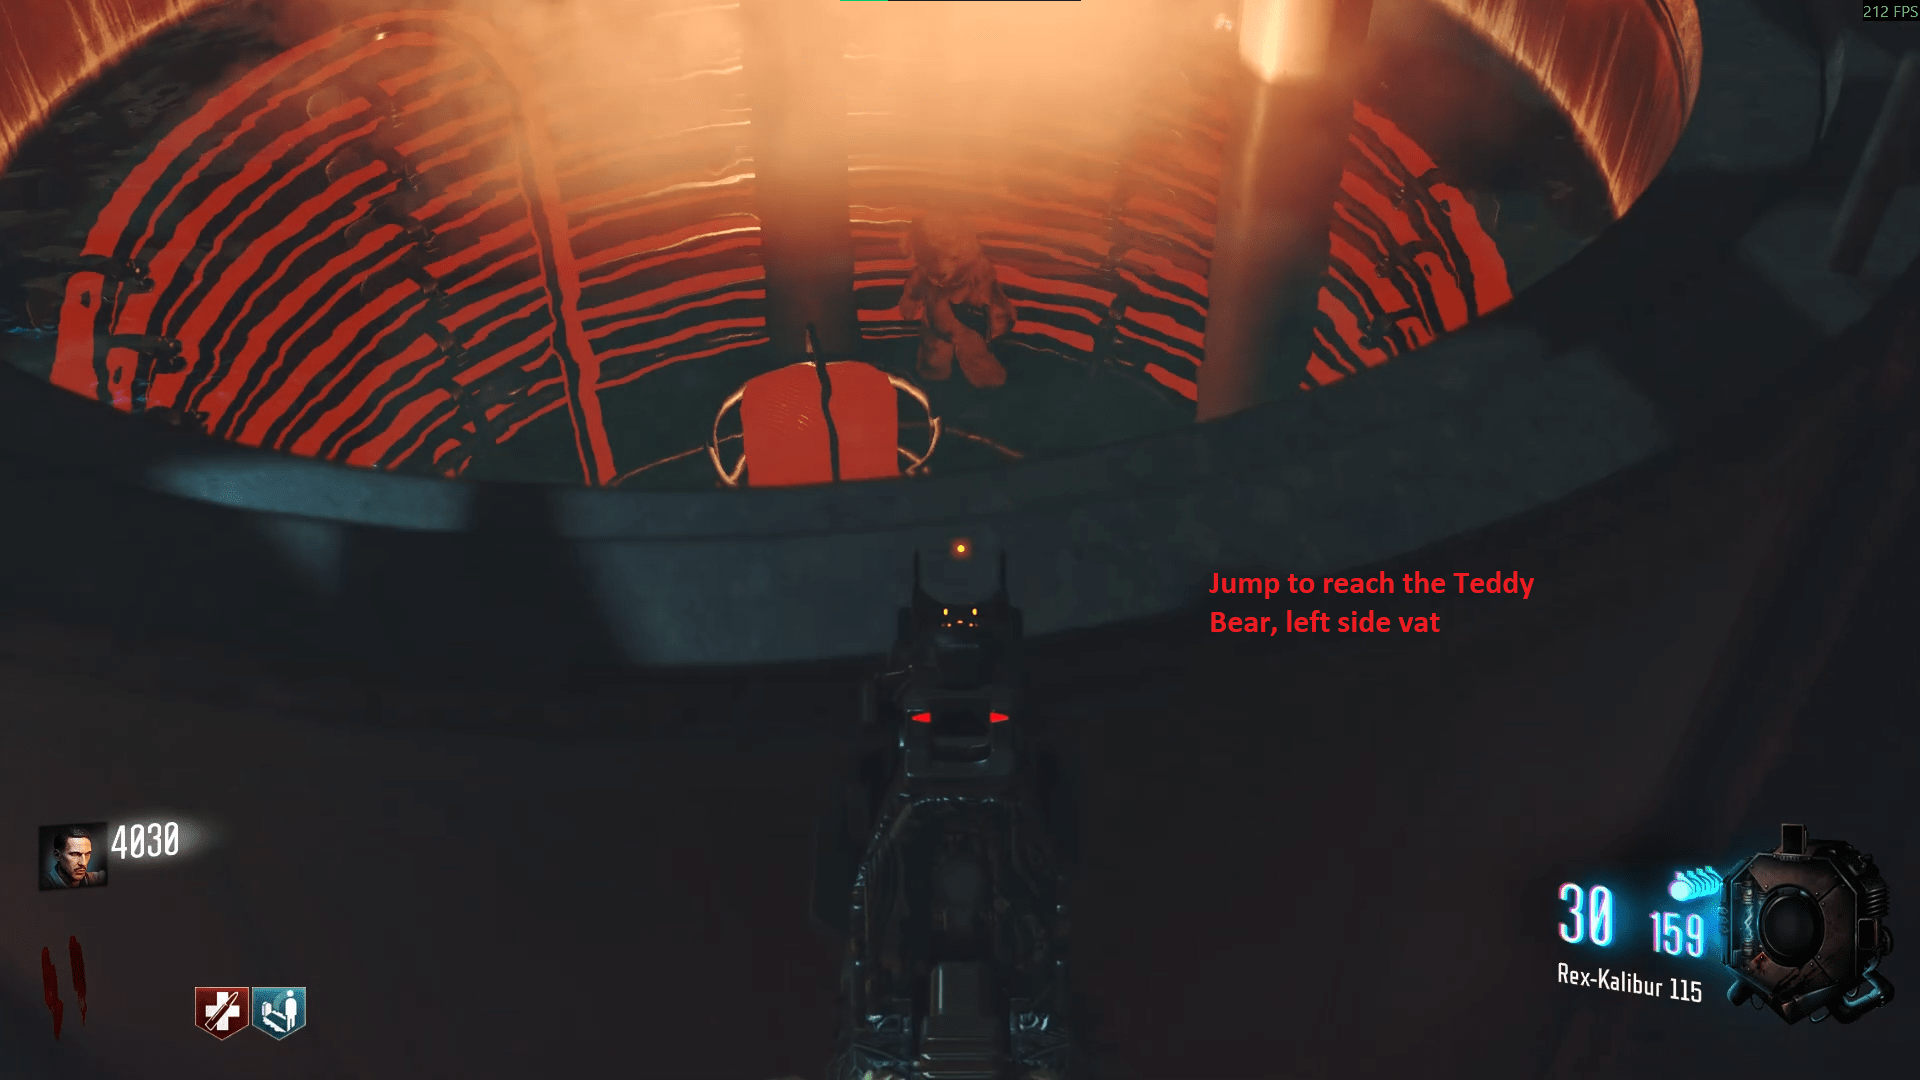
After you have shot all three items, Maxis will exclaim that he knows 'where and when you are'. Upon hearing this, run to the furnace room on the right side of the map (it is just before the second door on the stairs) which is also opposite a perk and box location. Once you are here, find the lit furnace with the Annihilator residing inside. Pick it up and congratulations, The Giant's Easter Egg is now complete.
Der Eisendrache
For the Elemental Bows, you can just CTRL + F to find the bow you actually want to do. I've named the as Storm, Void, Wolf and Fire.
You also only need one bow for every player that is in the game to complete the Easter Egg, so don't think you need to make them all if you're playing solo, you only need one per person. I just did it for the sake of the guide, to show the penultimate step.
- After the first door on the right side of Spawn, just past the Gate trap and Double Tap.
- In the Church on the back wall, same room as Speed Cola.
- In the Undercroft, on a wall besides the Pyramid Device.
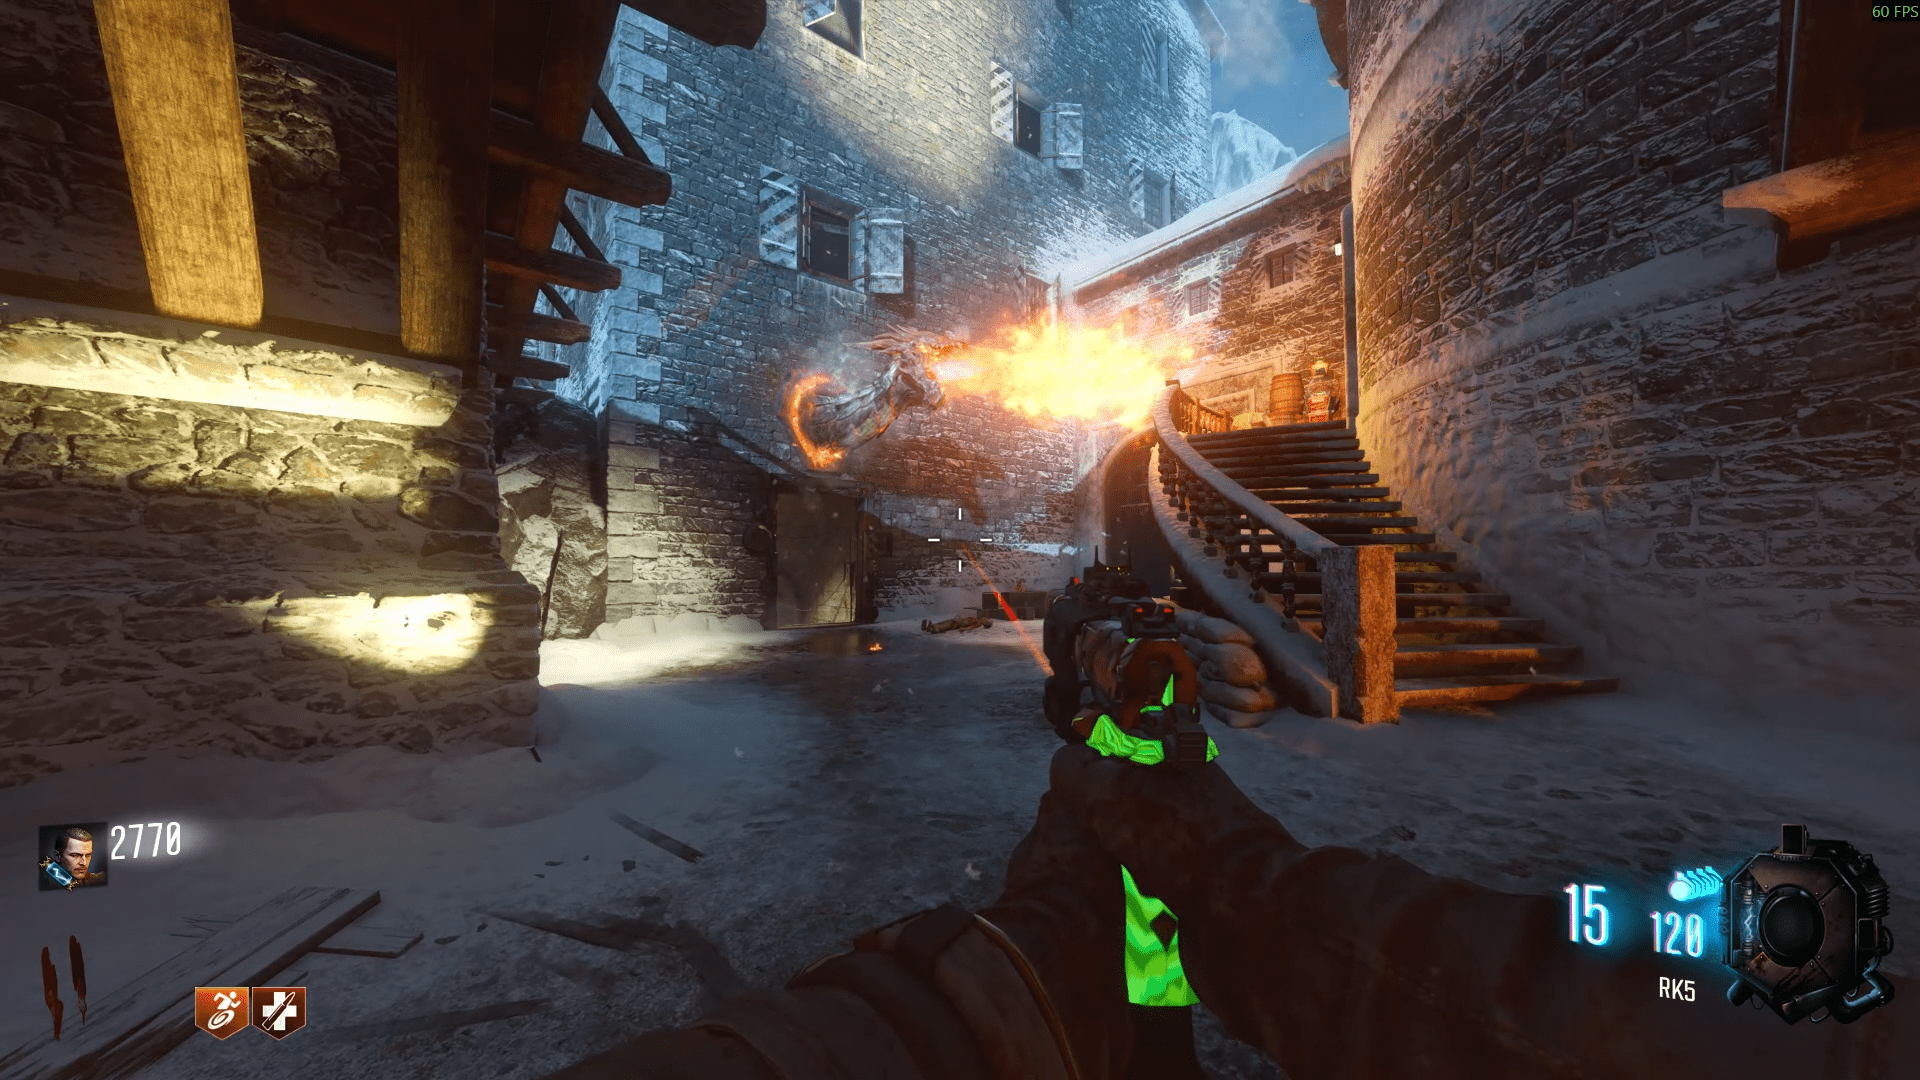
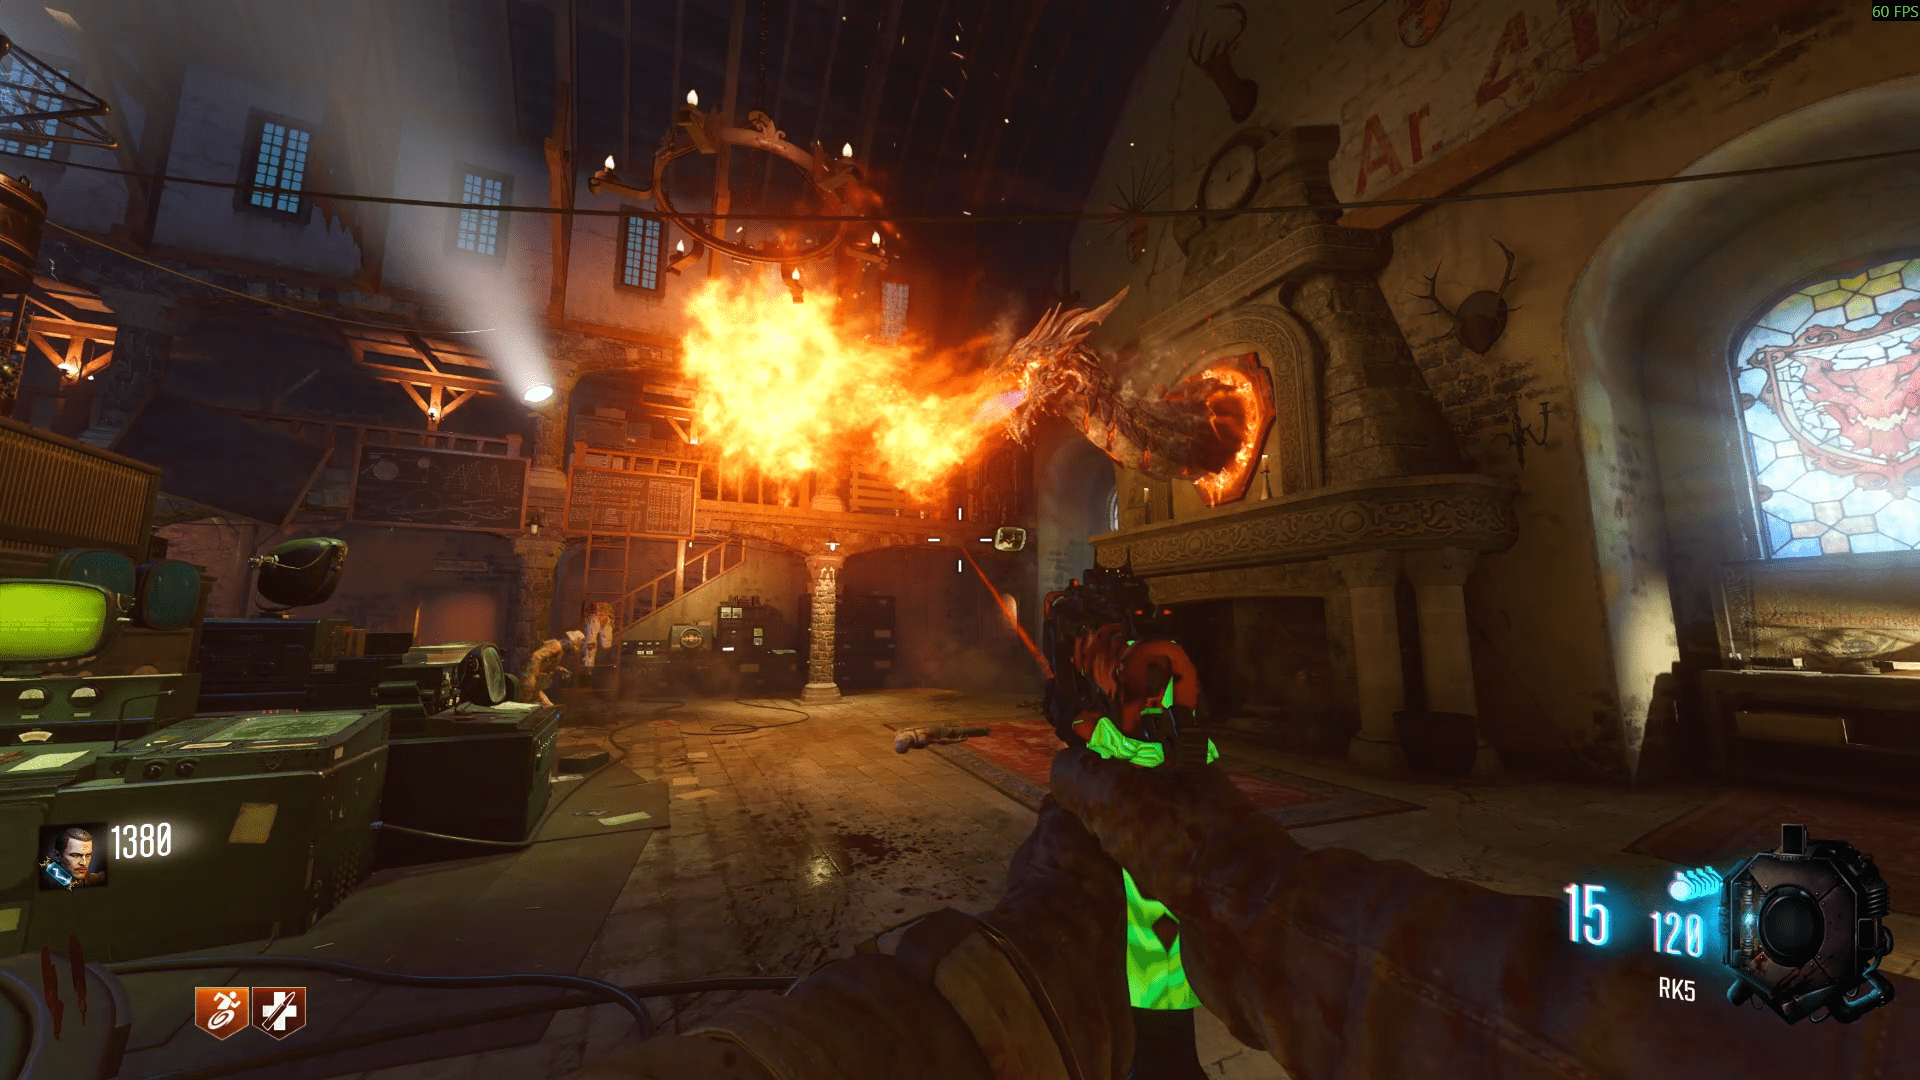
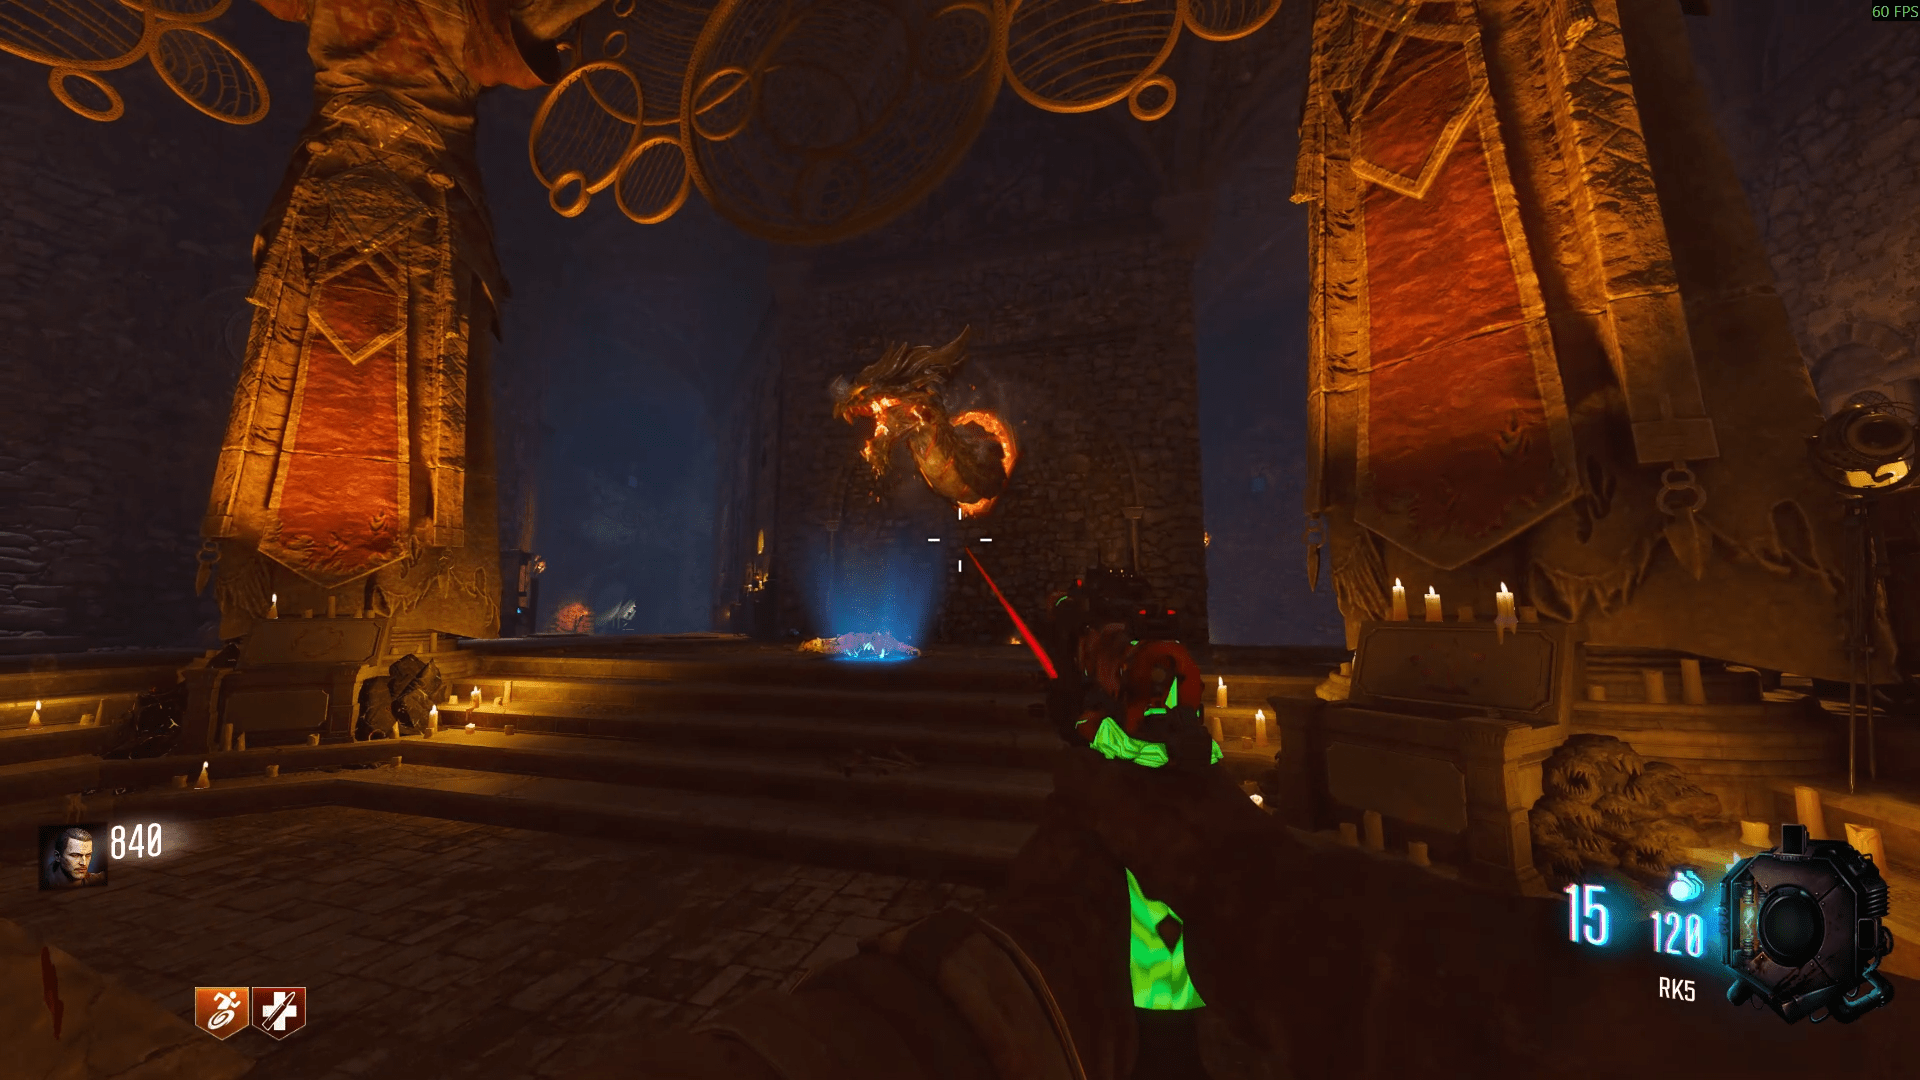
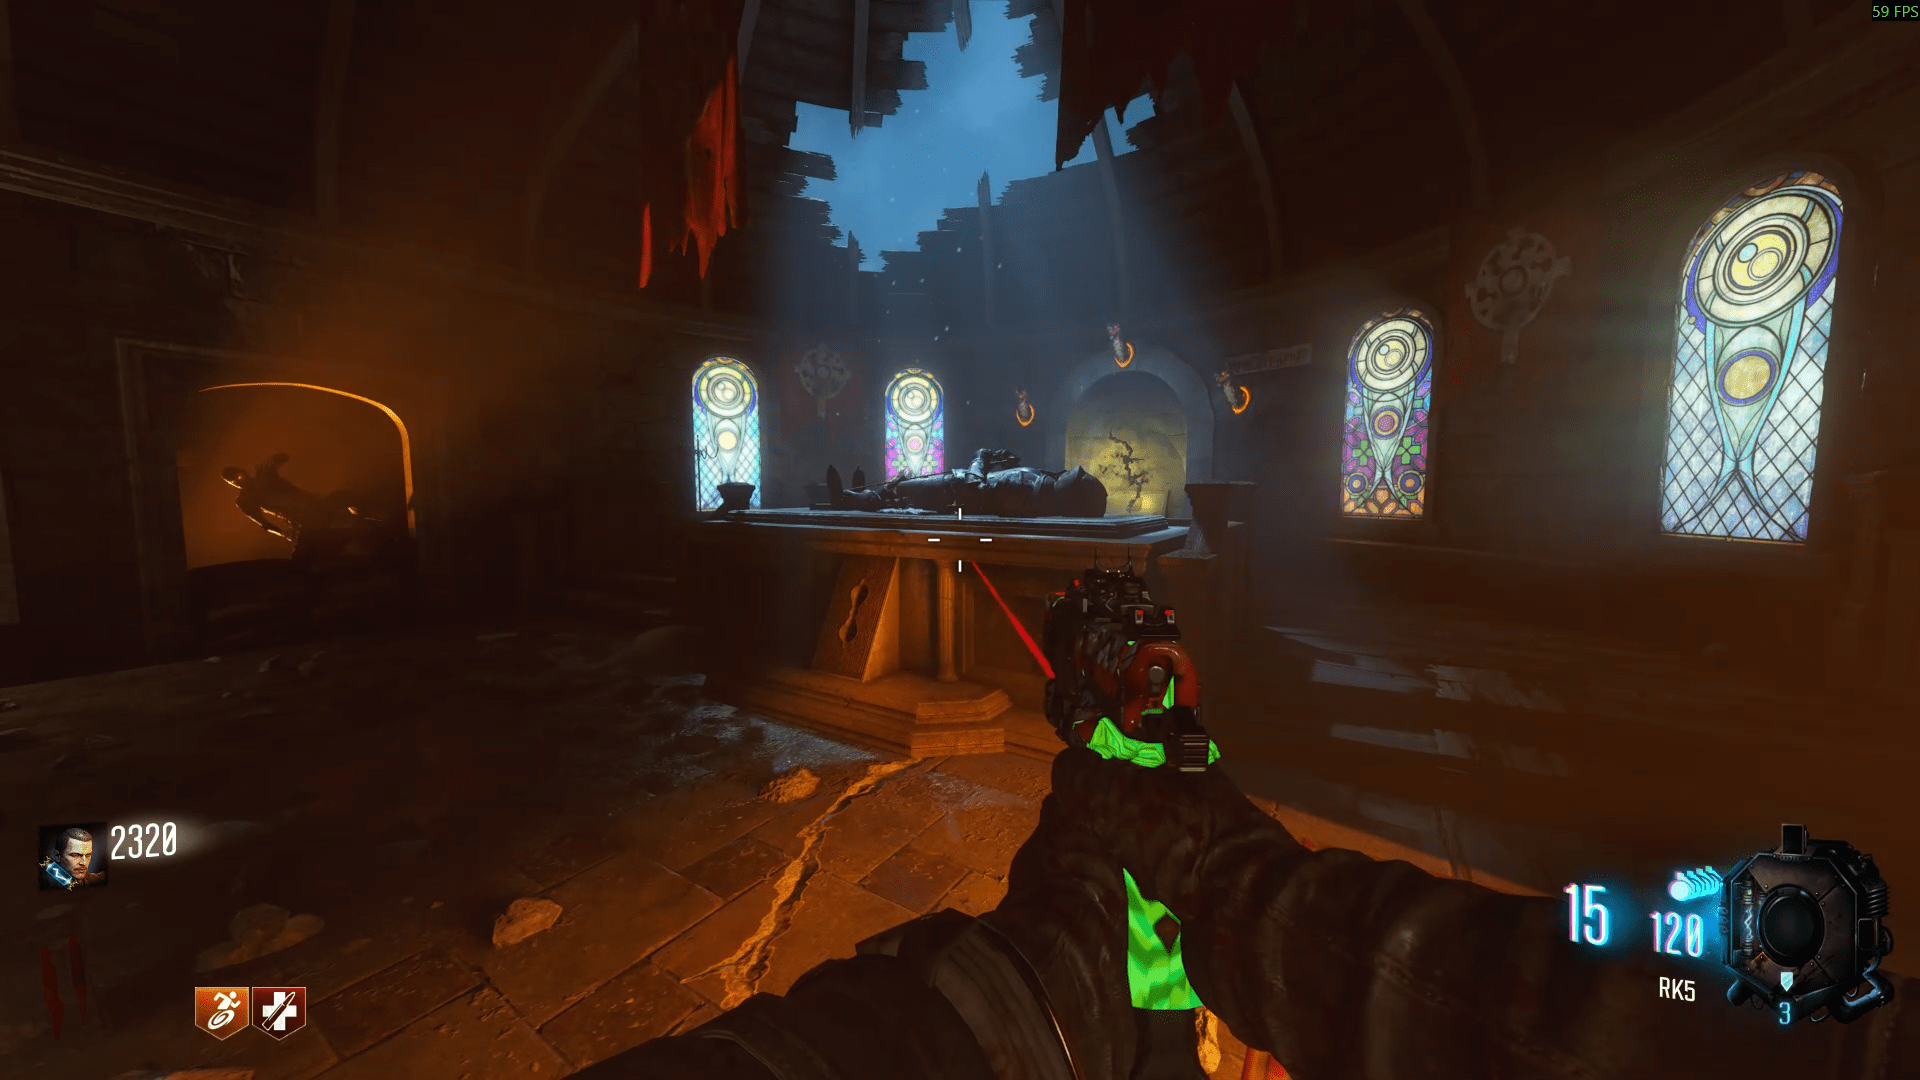
After filling the heads of the dragon, there is a small room between the Undercroft and the Church where you can pick up the Wrath of the Ancients bow, pick this up and you can begin its several upgrade processes.
- When climbing the stairs from the Courtyard, beyond the right side broken wall.
- When climbing the stairs from the Courtyard, beyond the left side broken wall.
- At the Rocket Test Launch Site, on the right side after leaving the Teleporter room.
For the Rocket Test Launch Site bonfire, instead of teleporting, go to the room above Double Tap and look through the window on the left. You can line up the crosshair between the mountains and tap to release the arrow.
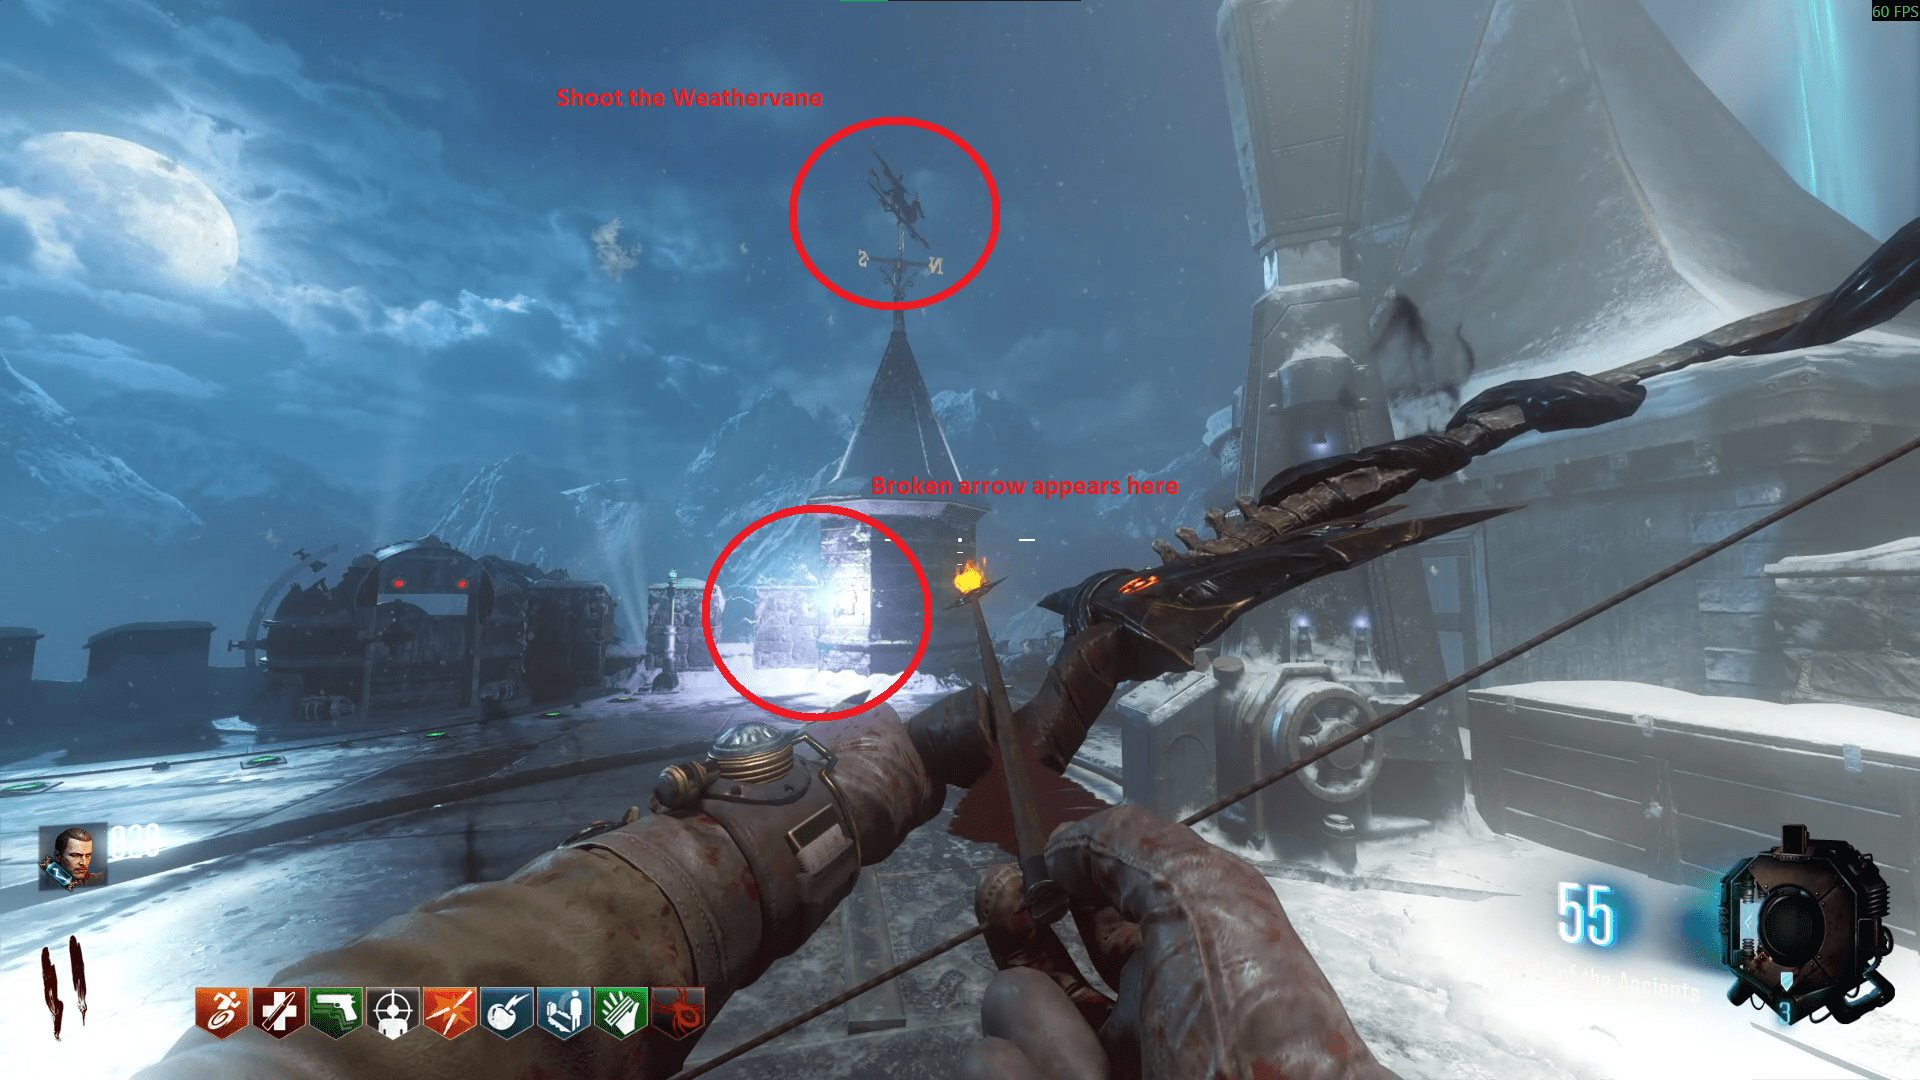
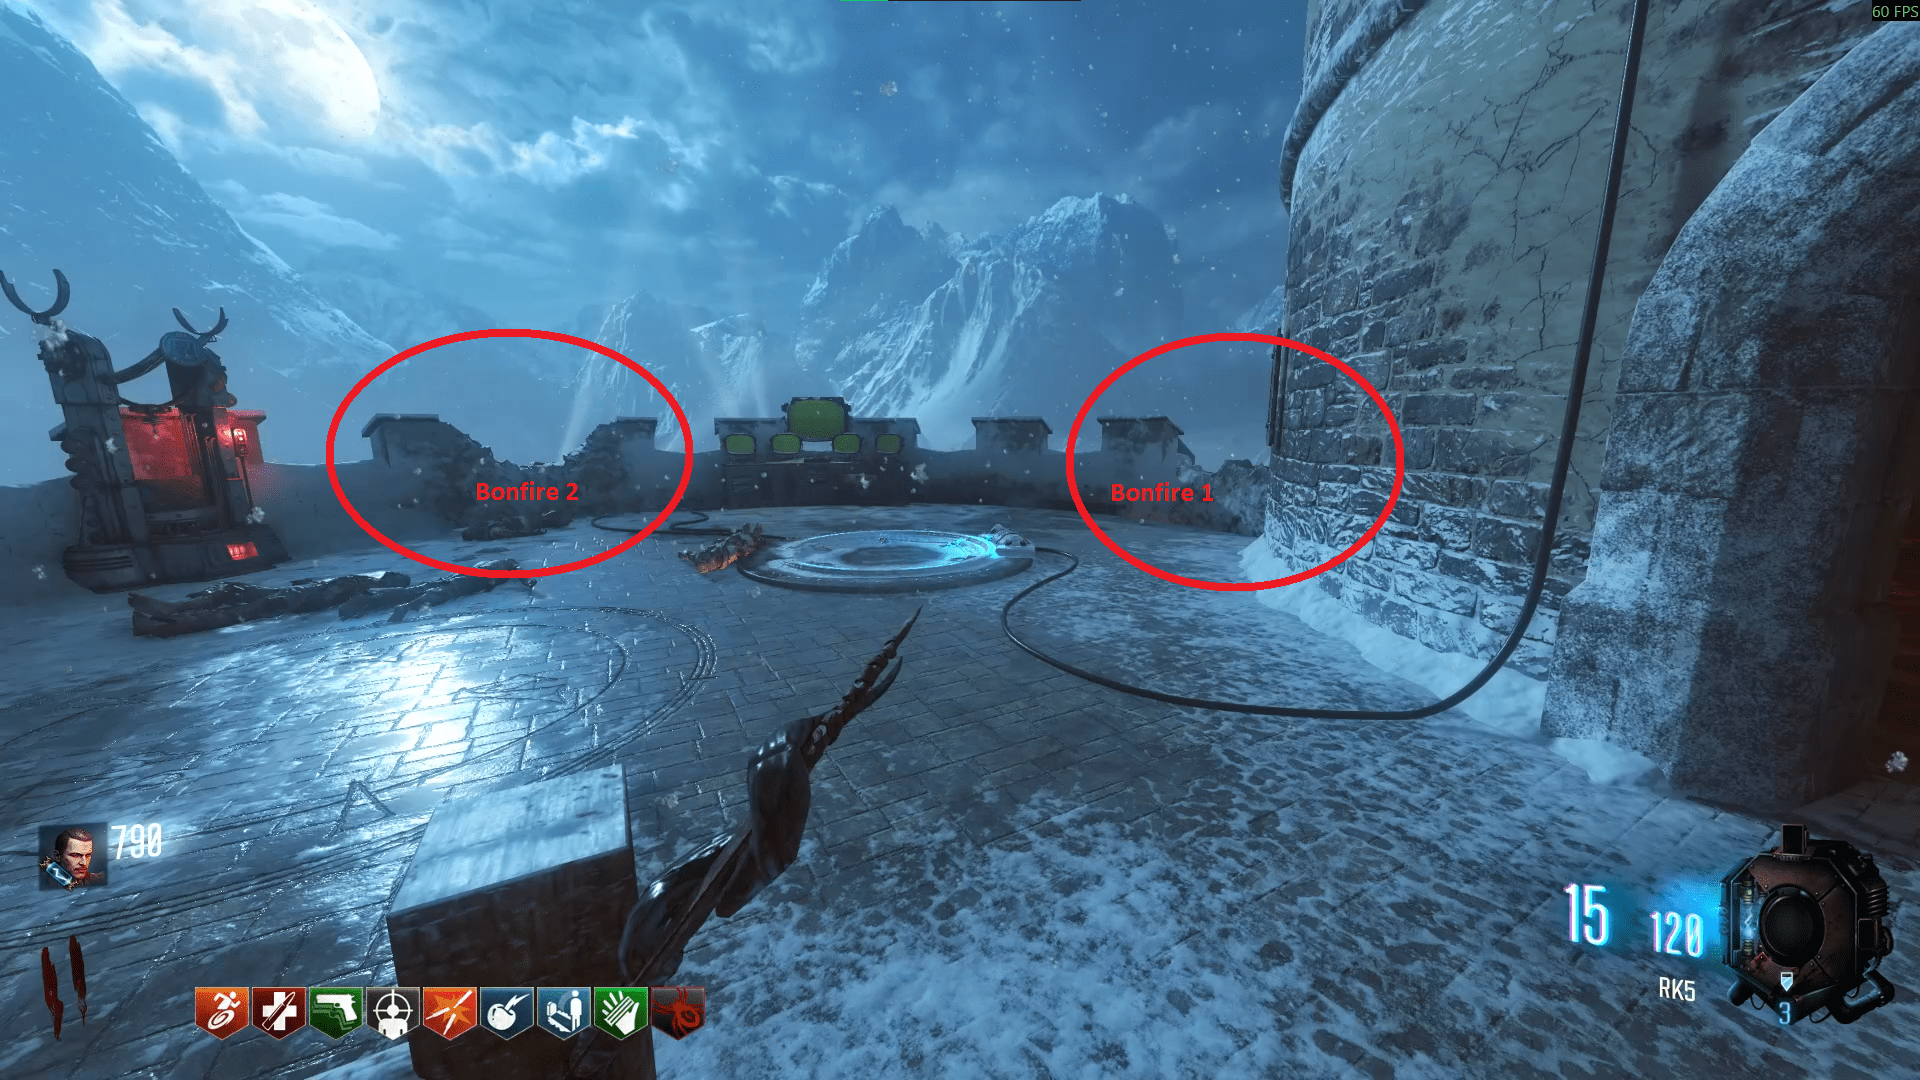
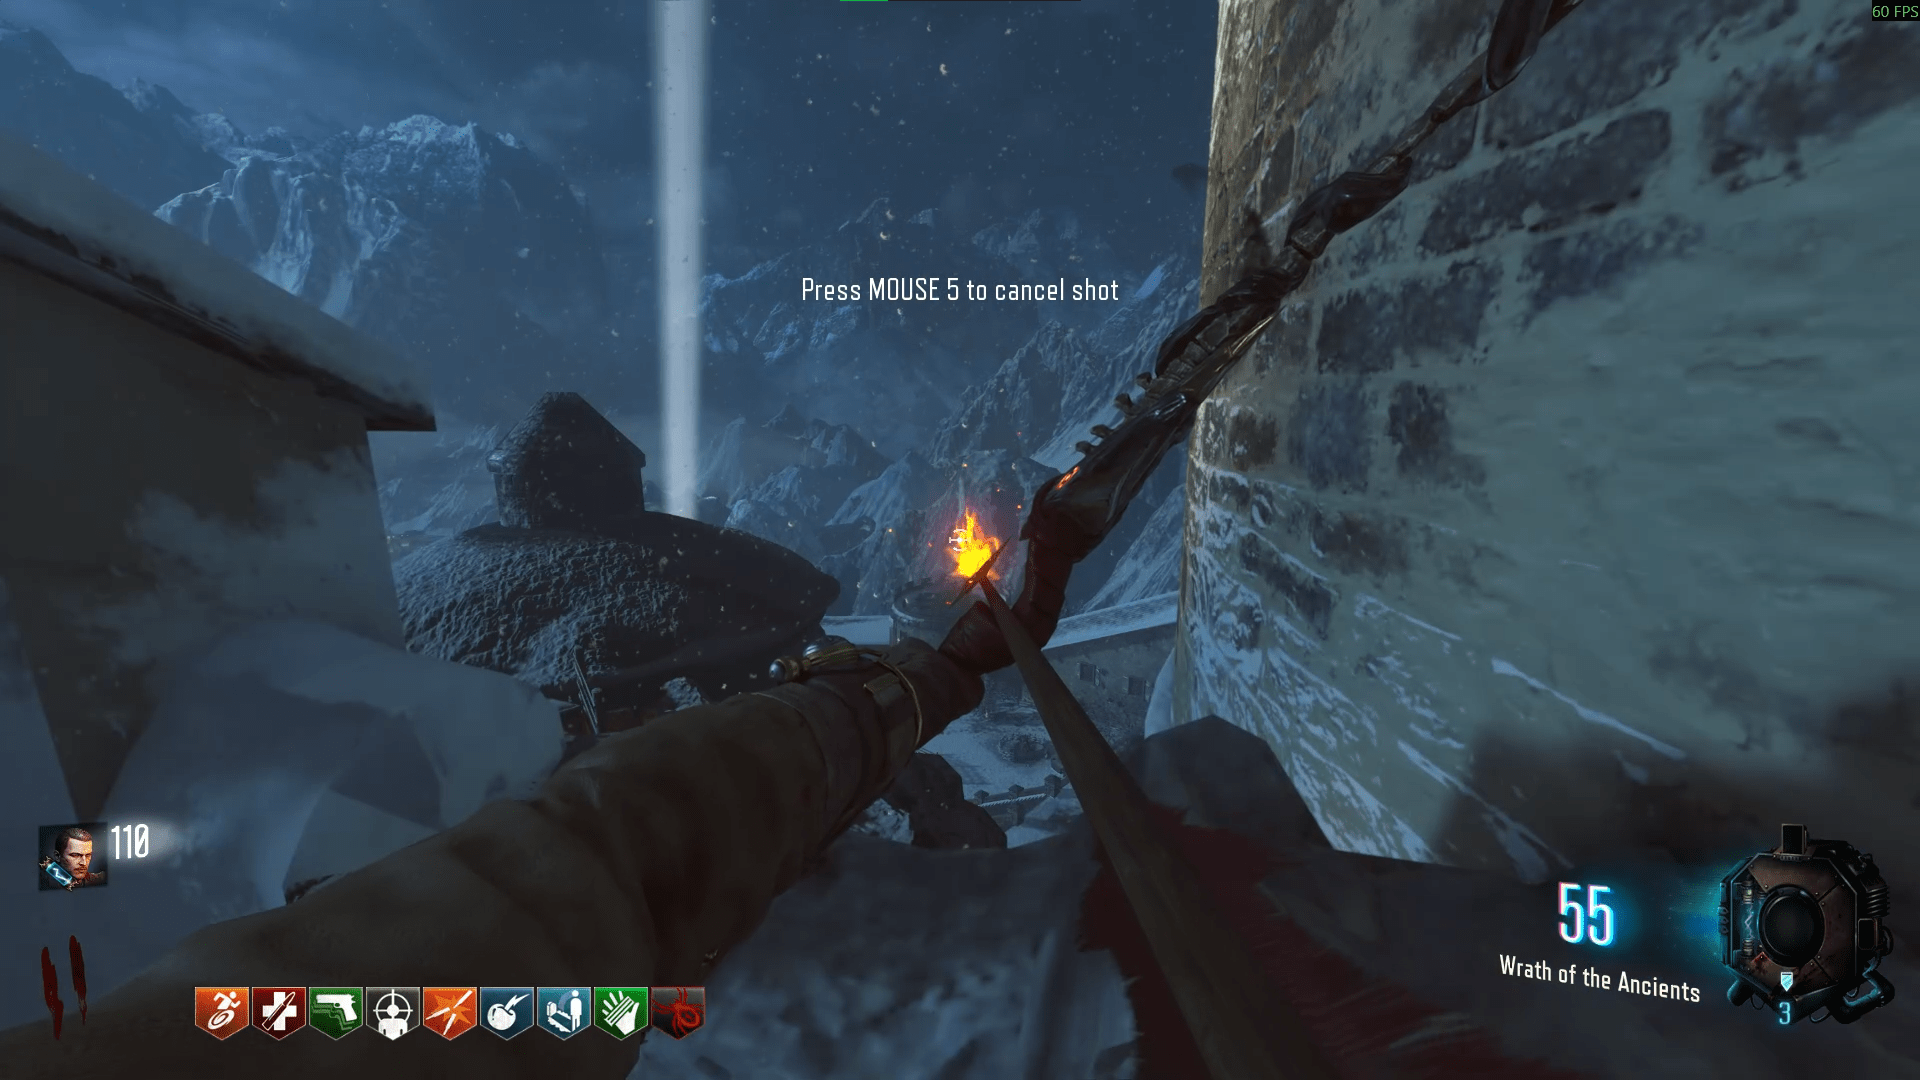
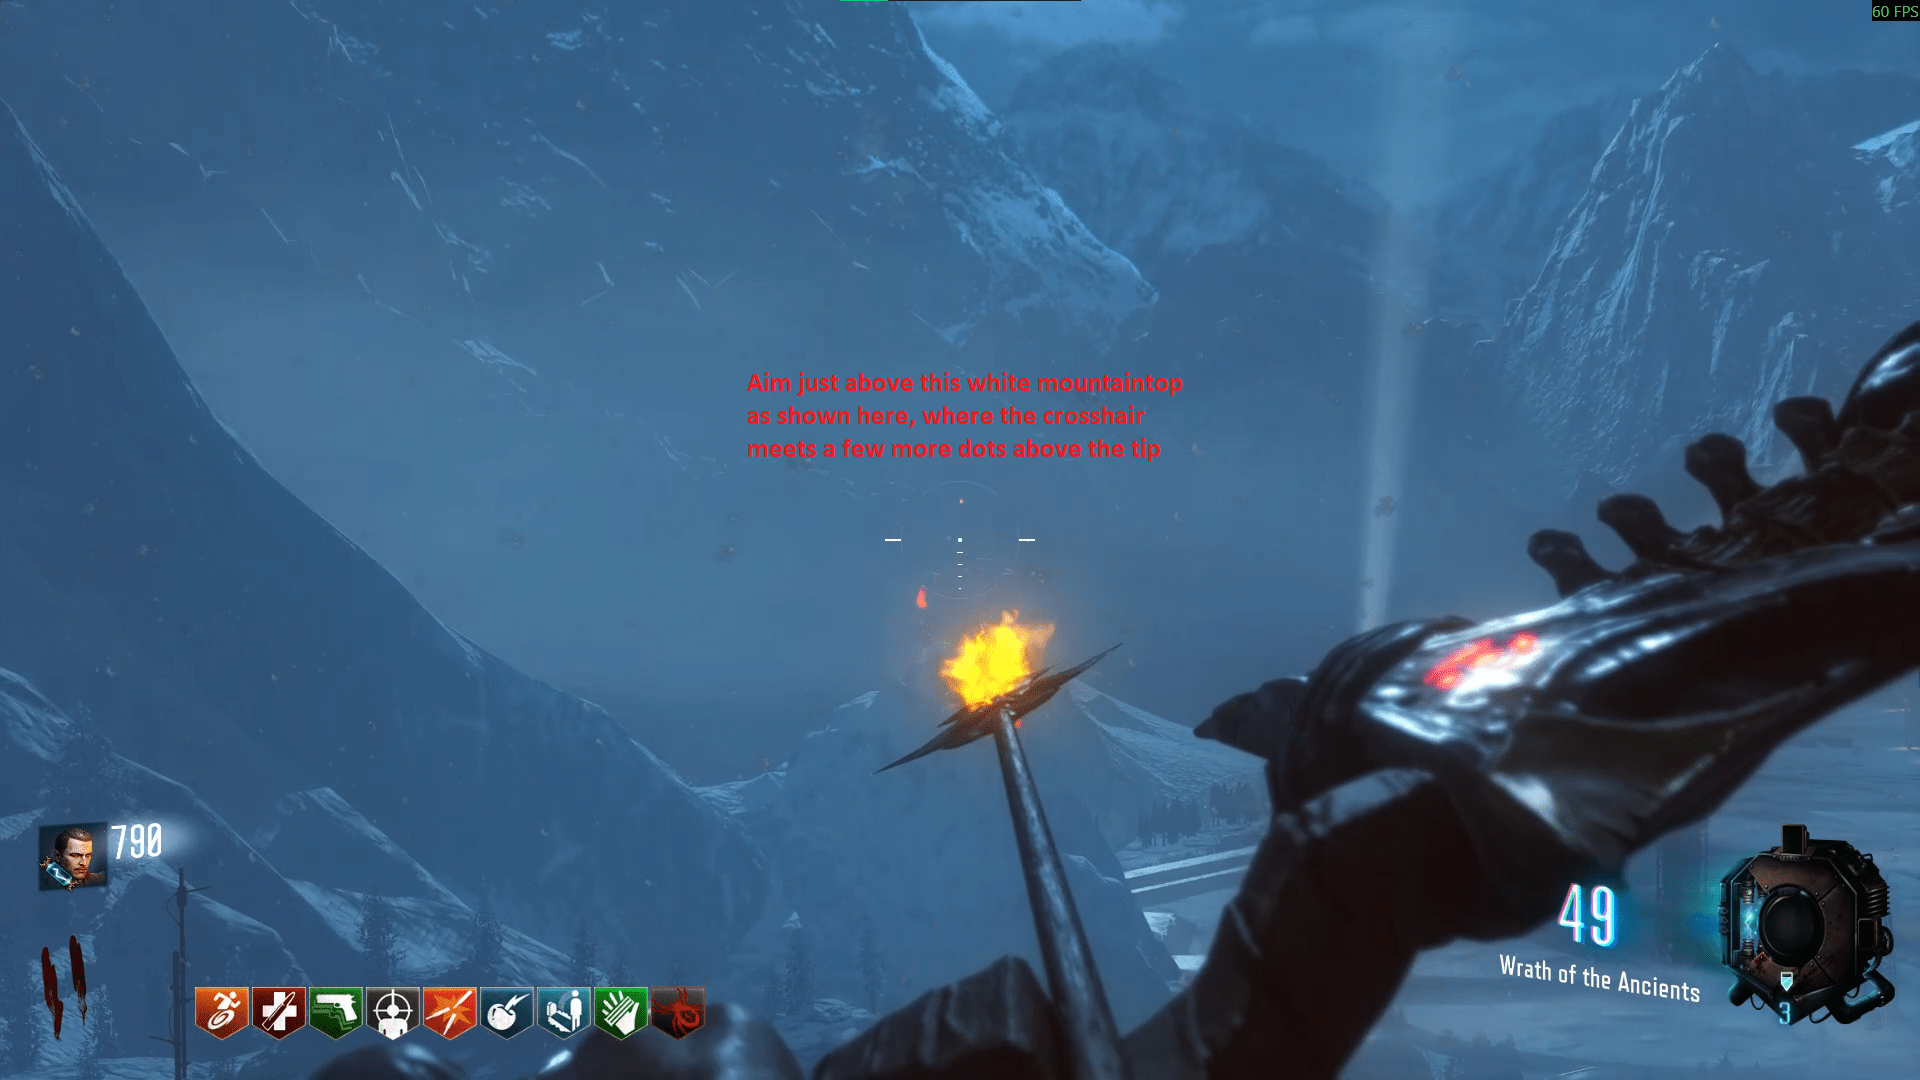
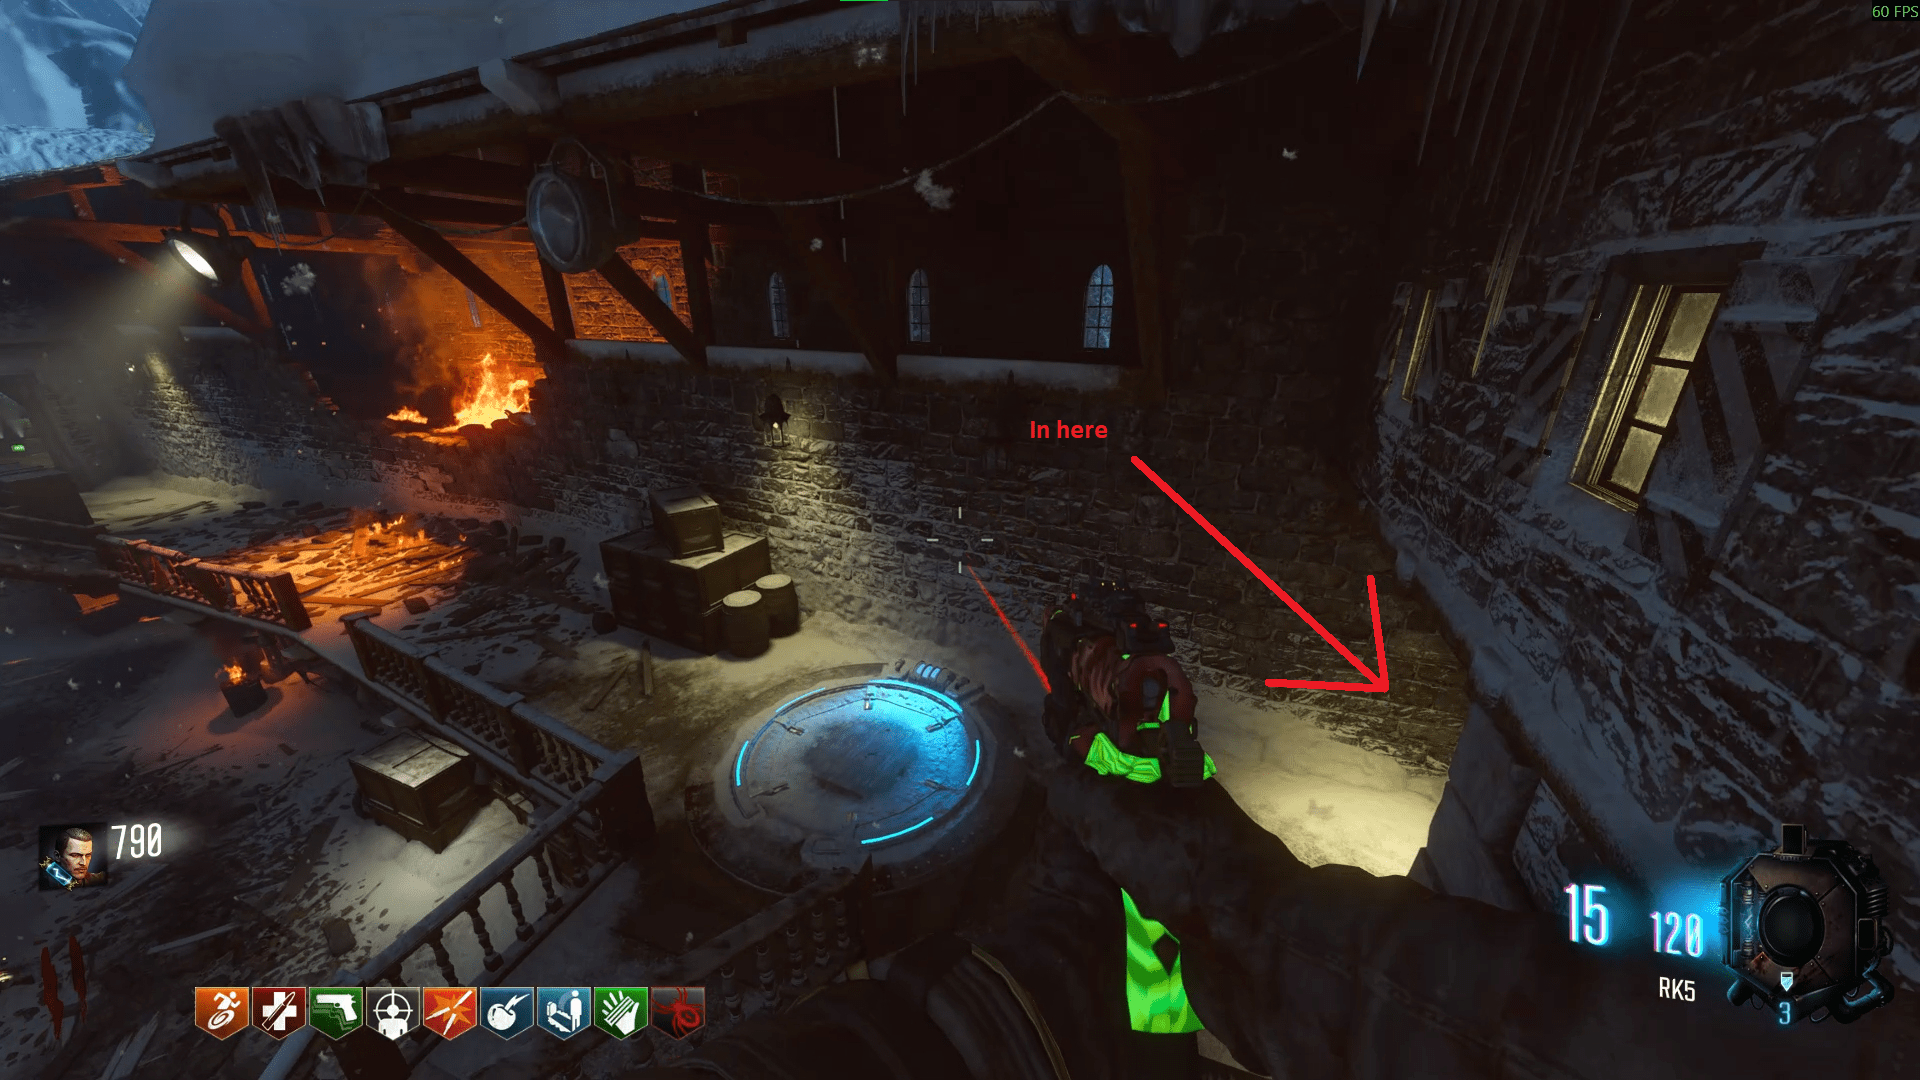
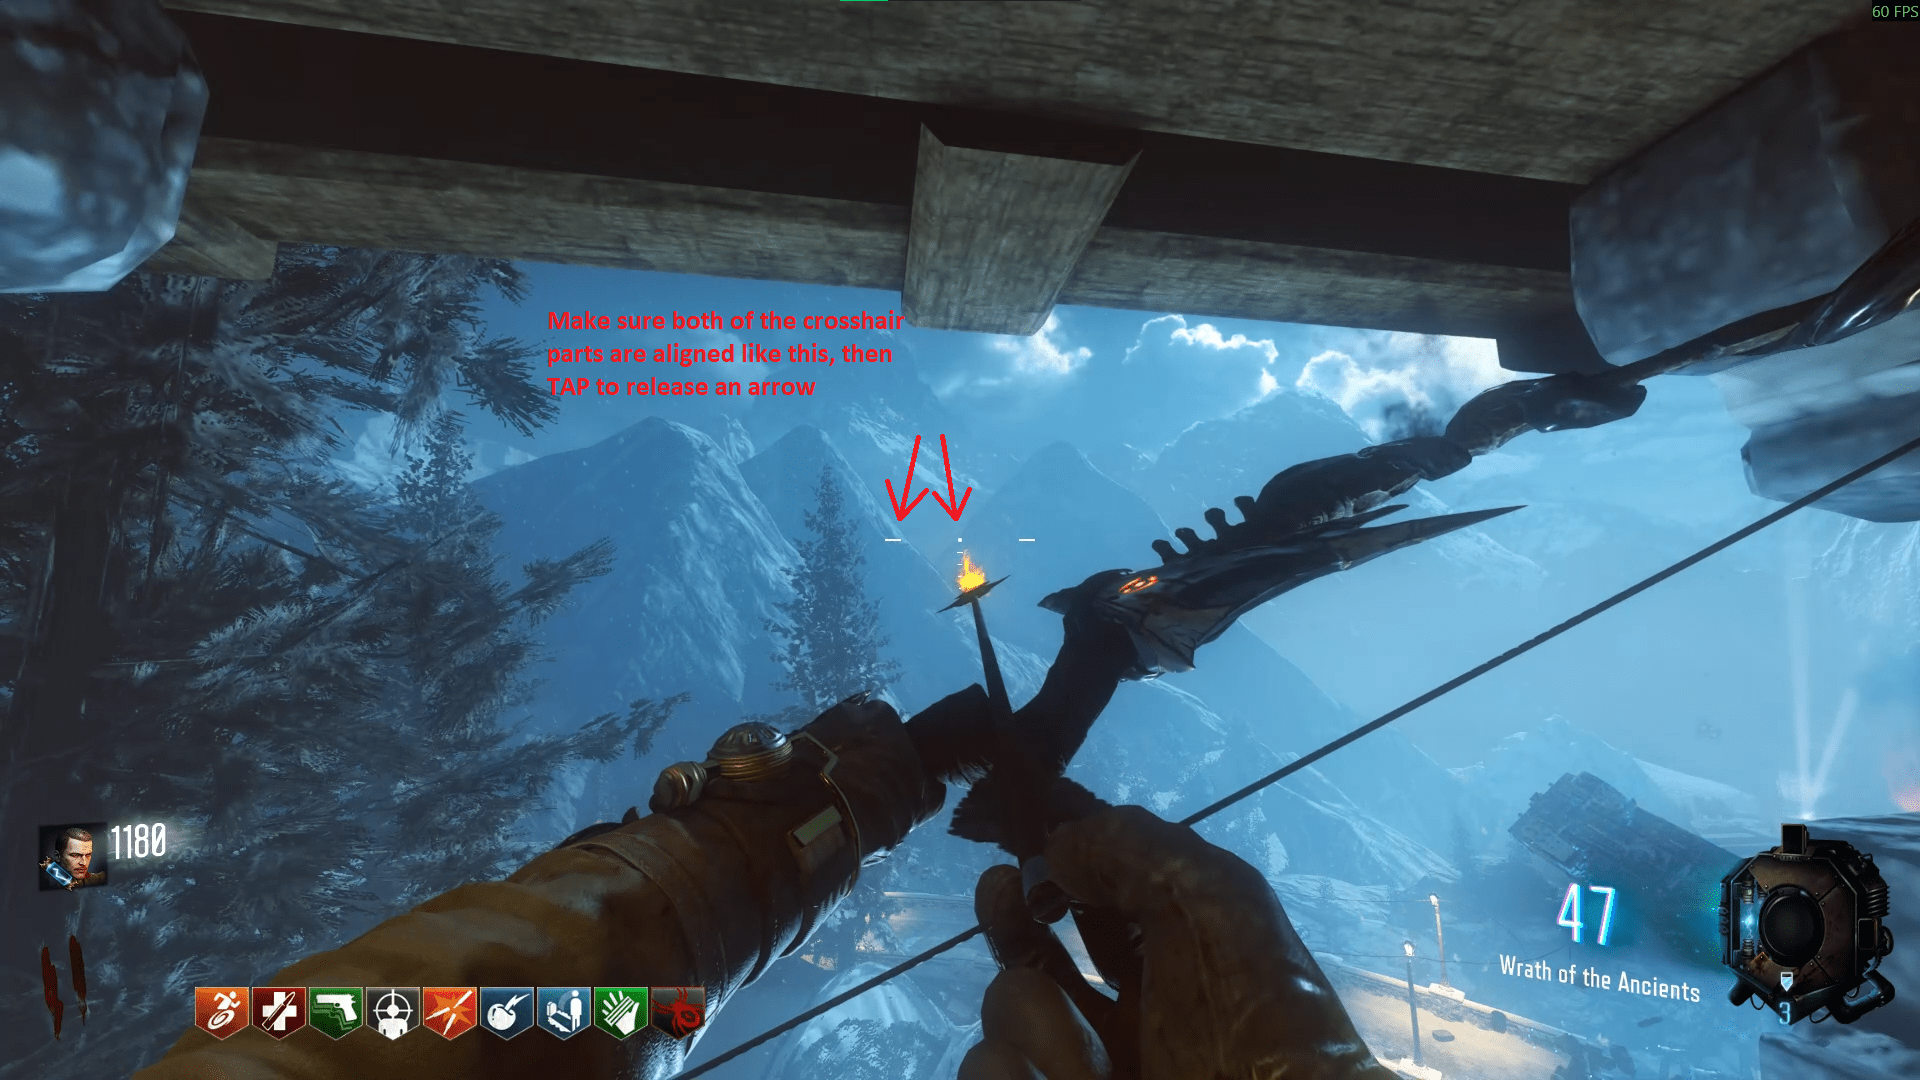
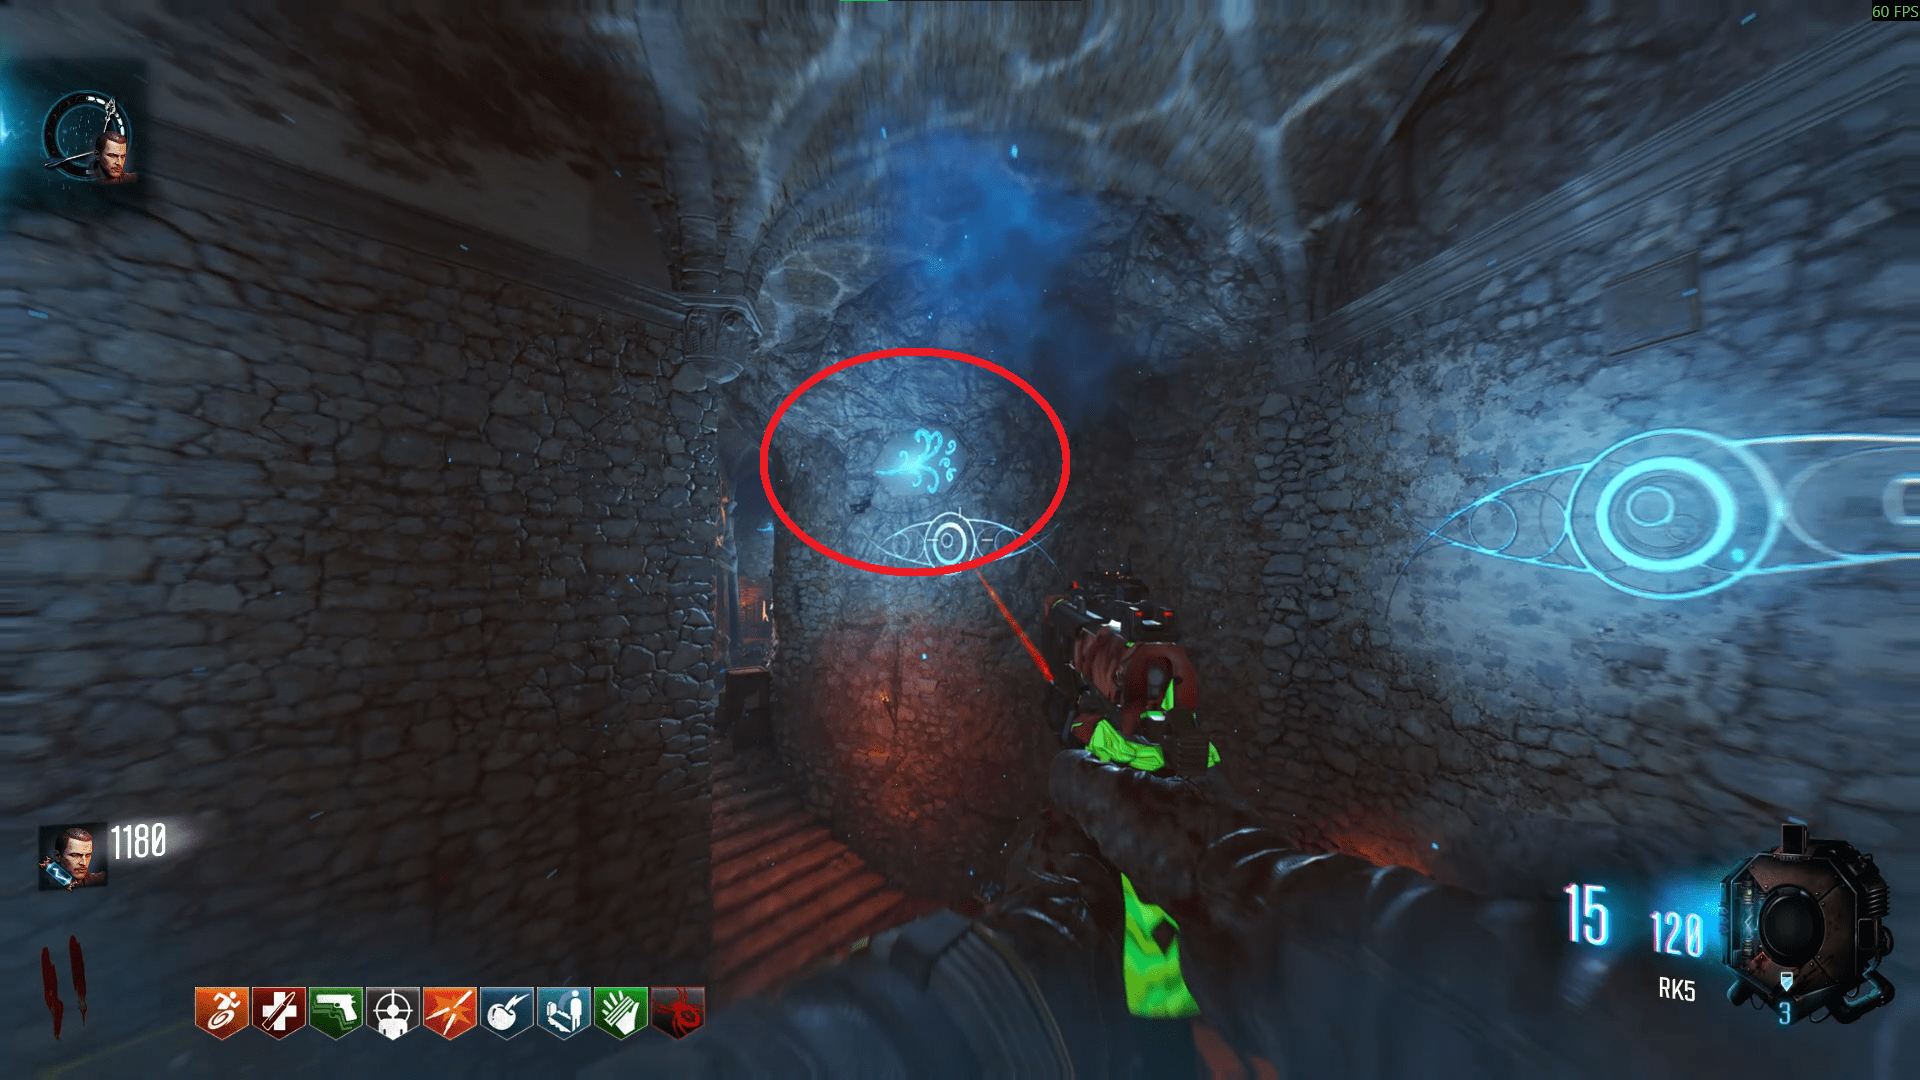
Next you have to go to the Undercoft, and wait for (or start) the anti-gravity mode to then run across the walls and touch each of the gusts of air symbols in one wallrun. To start anti-gravity, there are four pressure plates around the Pyramid Device that you need to stand on until they glow (like the dragon head screenshot). There are 5 total air symbols that you need to run across to complete the step. If you fail by landing on the floor before running across them all, just try again, there's no penalty for failing.
 After the wallrunning, there are now three electrical pots that you must charge with souls. For the Rocket Test Launch Site pot, you will need to go down there this time. However, the locations are;
 - In the Clocktower, lowest level underneath the stairs.
- In the room above Double Tap, where you likely shot the third bonfire.
- At the Rocket Test Launch Site, in a corner opposite the Teleporter.
This first pot, use it for the long range bonfire on the second broken wall from one of the last screenshots. This will save you a lot of headache trying to walk back and forth from the other location.
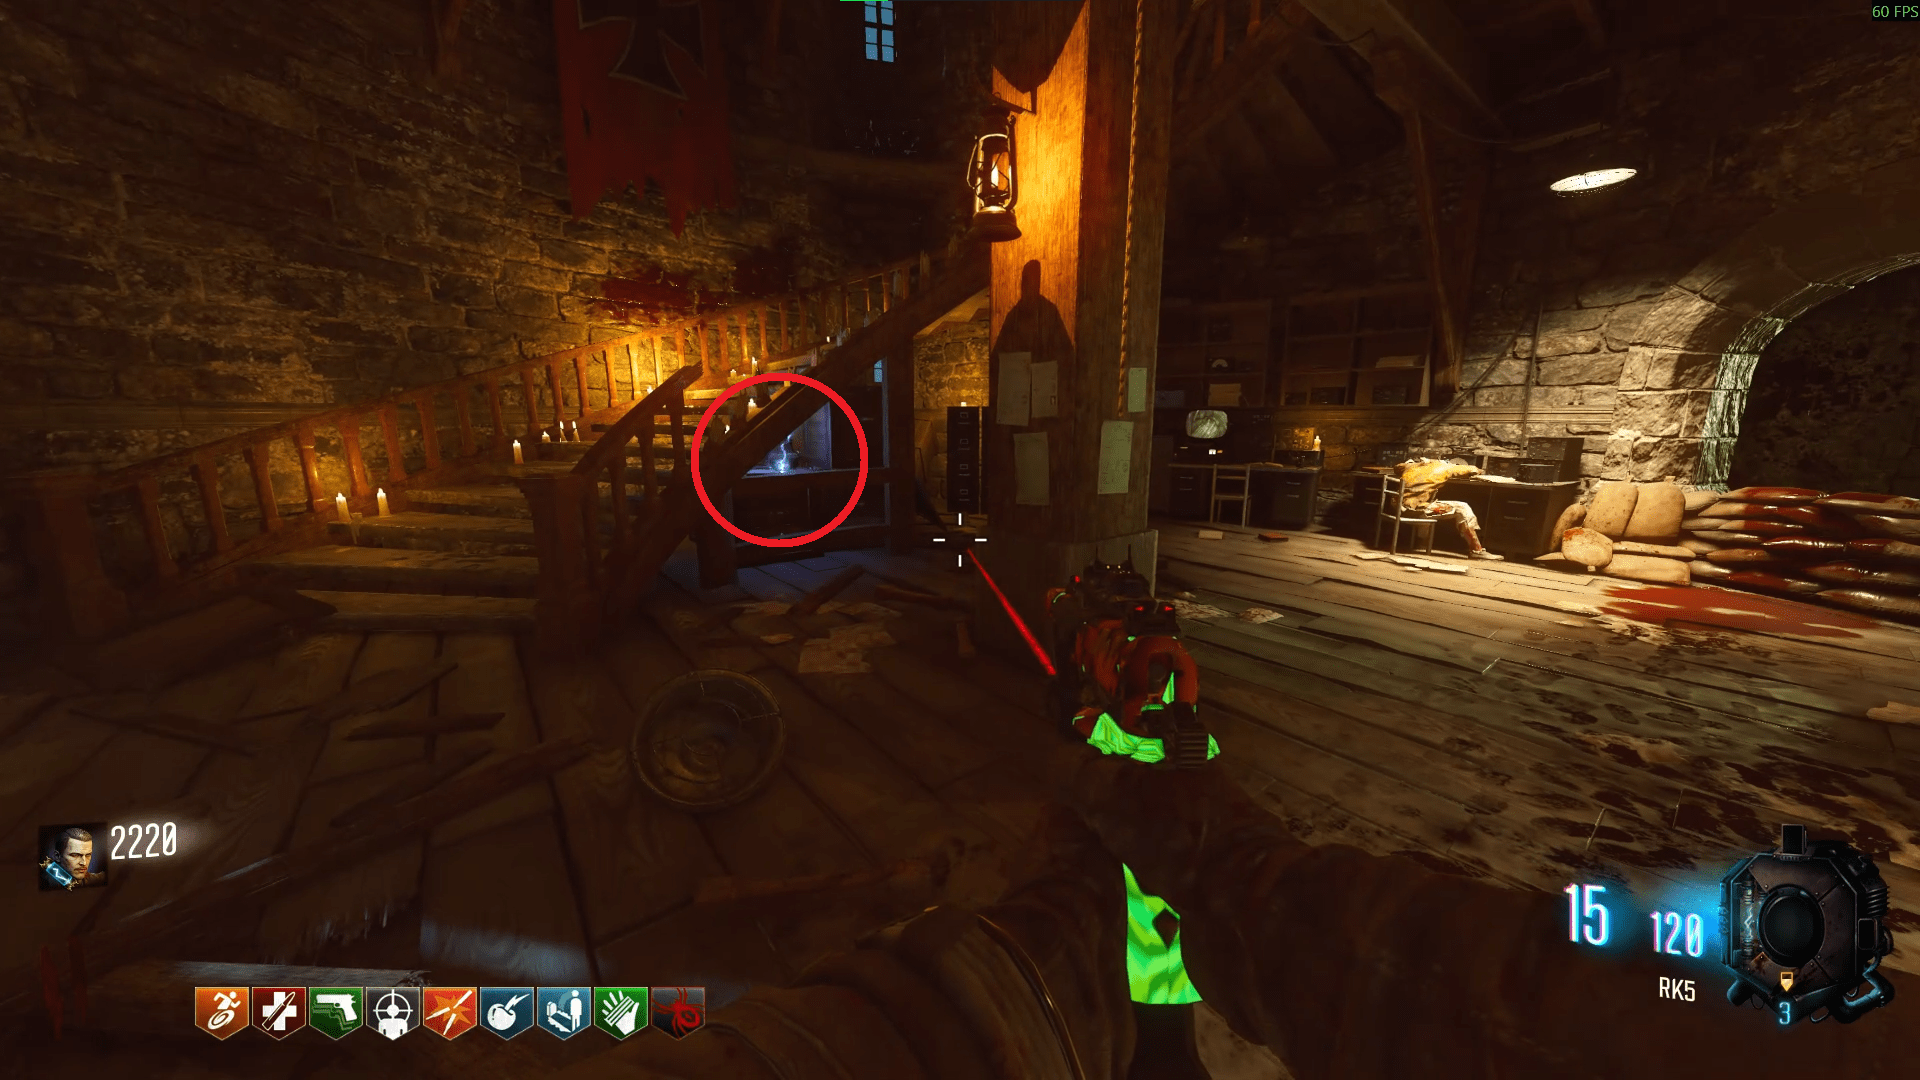
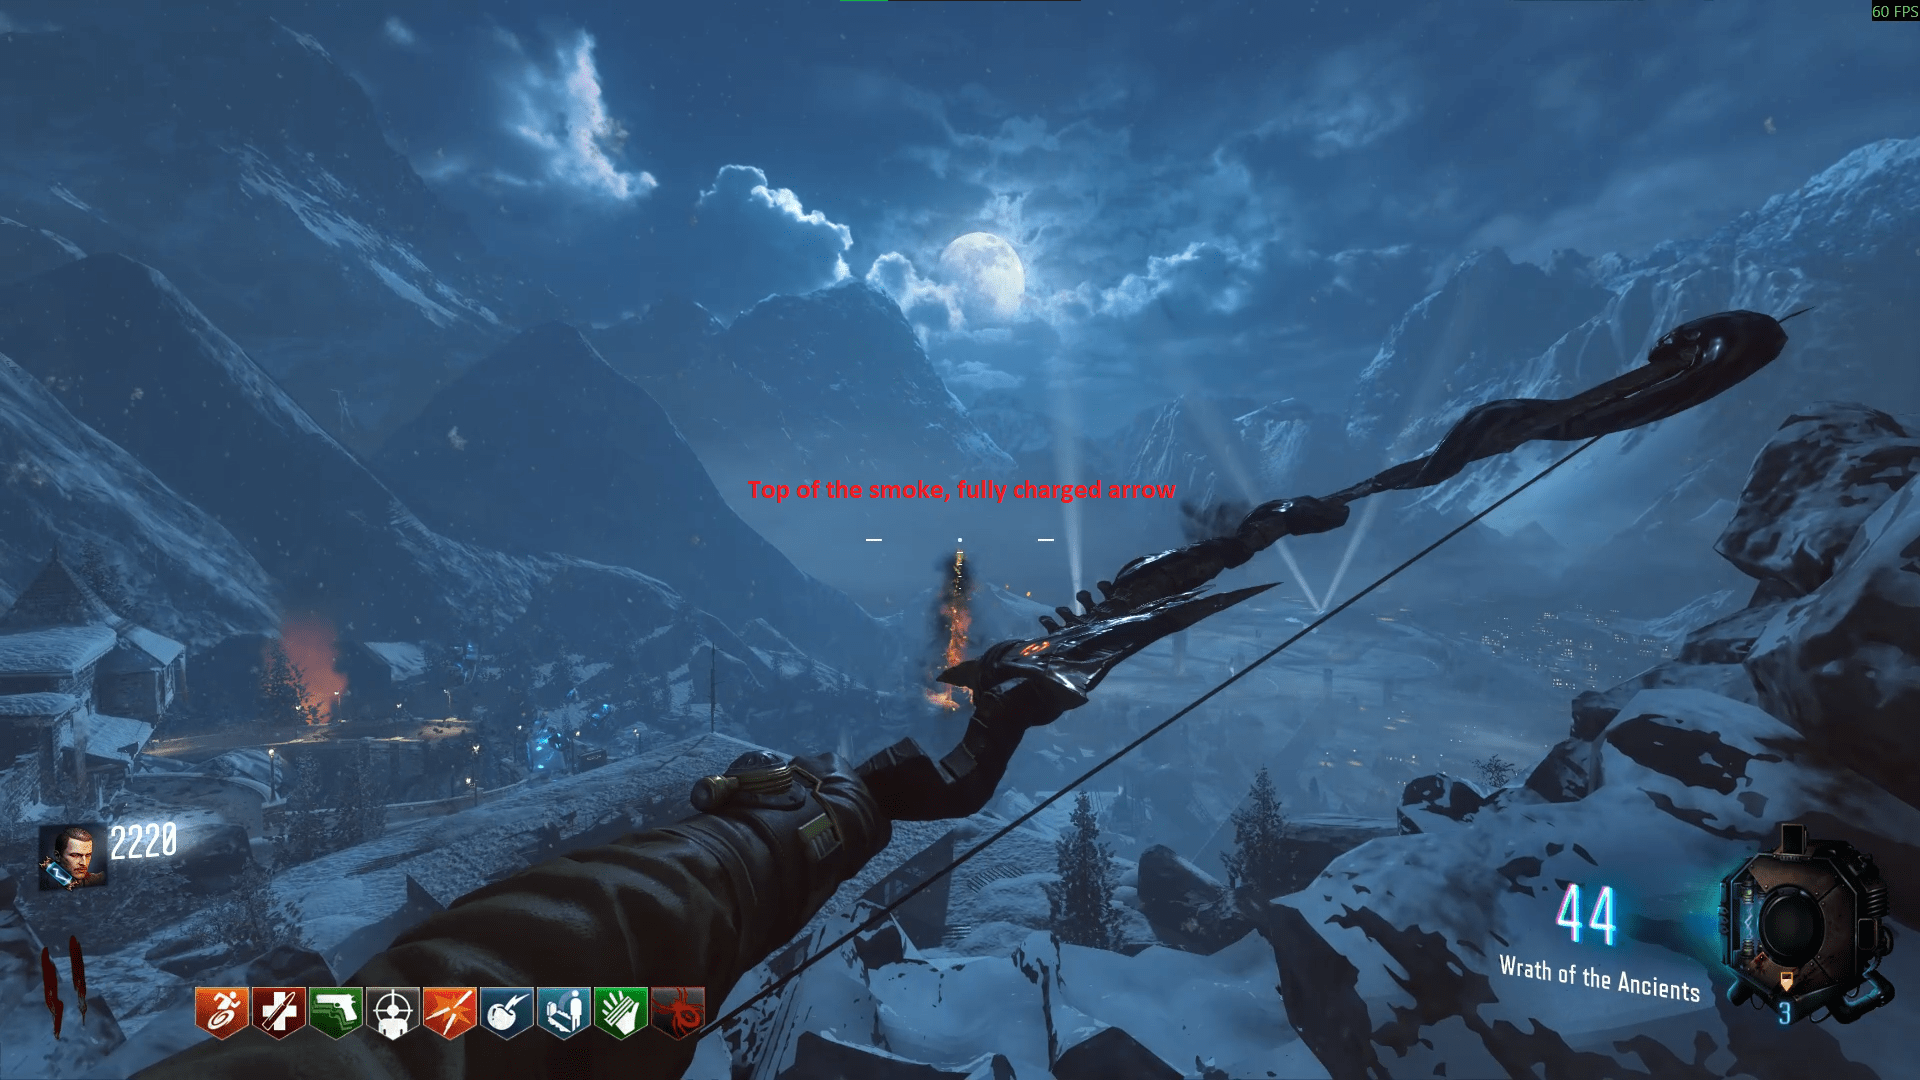
As for the second pot above Double Tap, either take the jump pad or walk back to shoot the closest bonfire to the Clocktower.
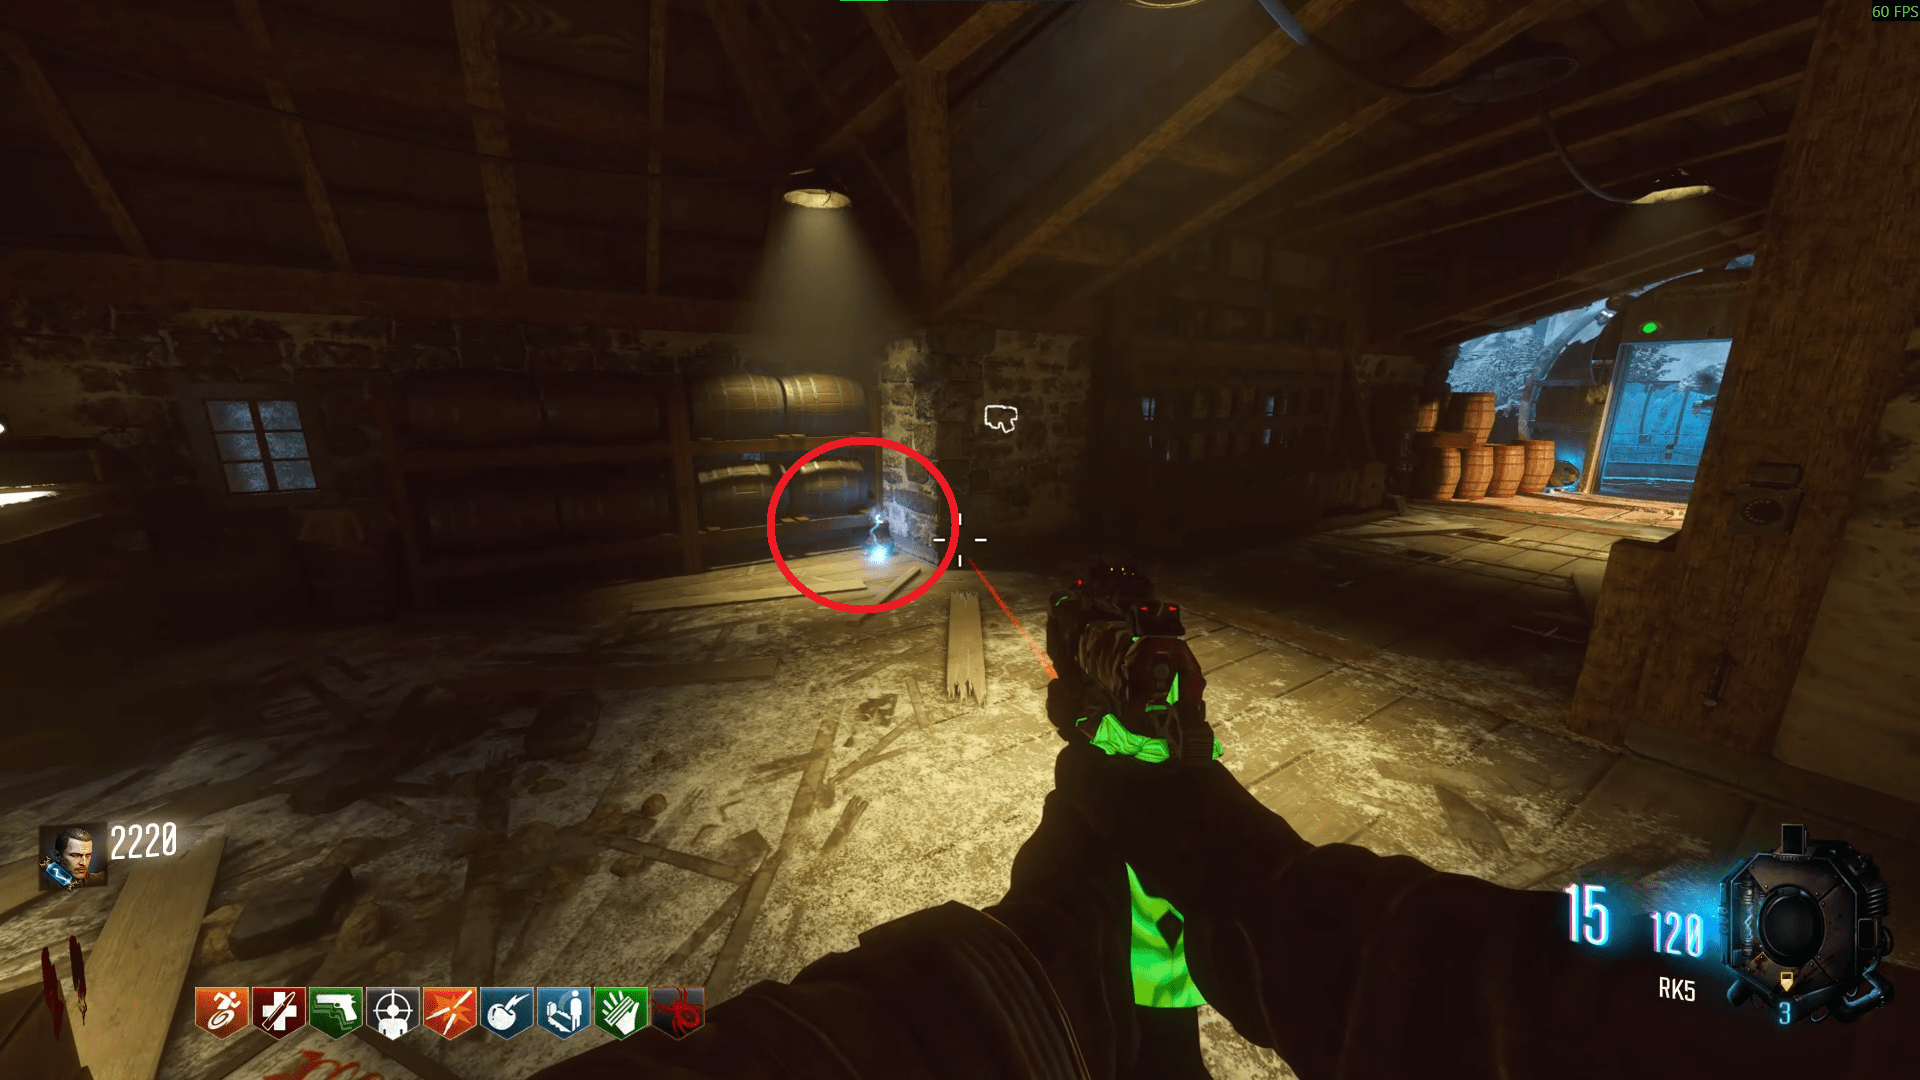
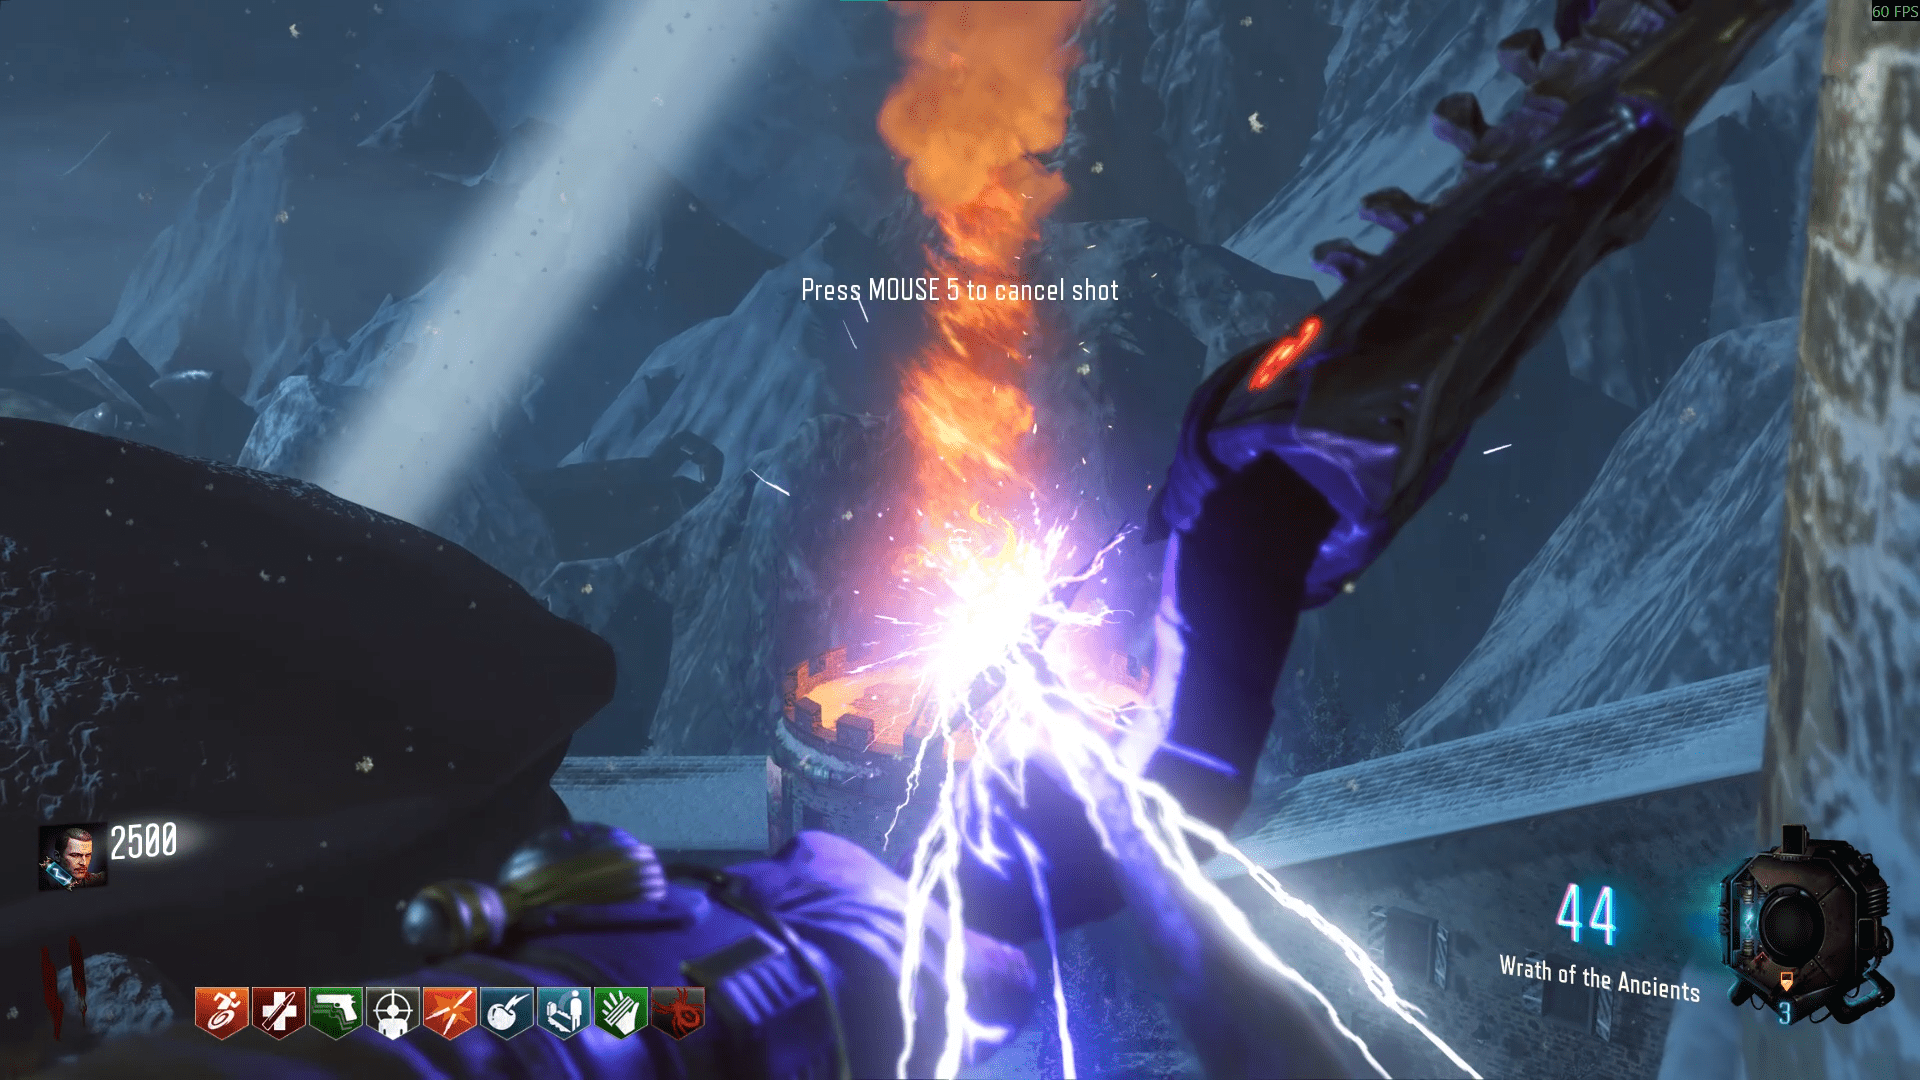
The third pot is the simplest, just fill it and shoot the bonfire. It's not too hard to hit from most places, the directions in the screenshot are merely a suggestion.
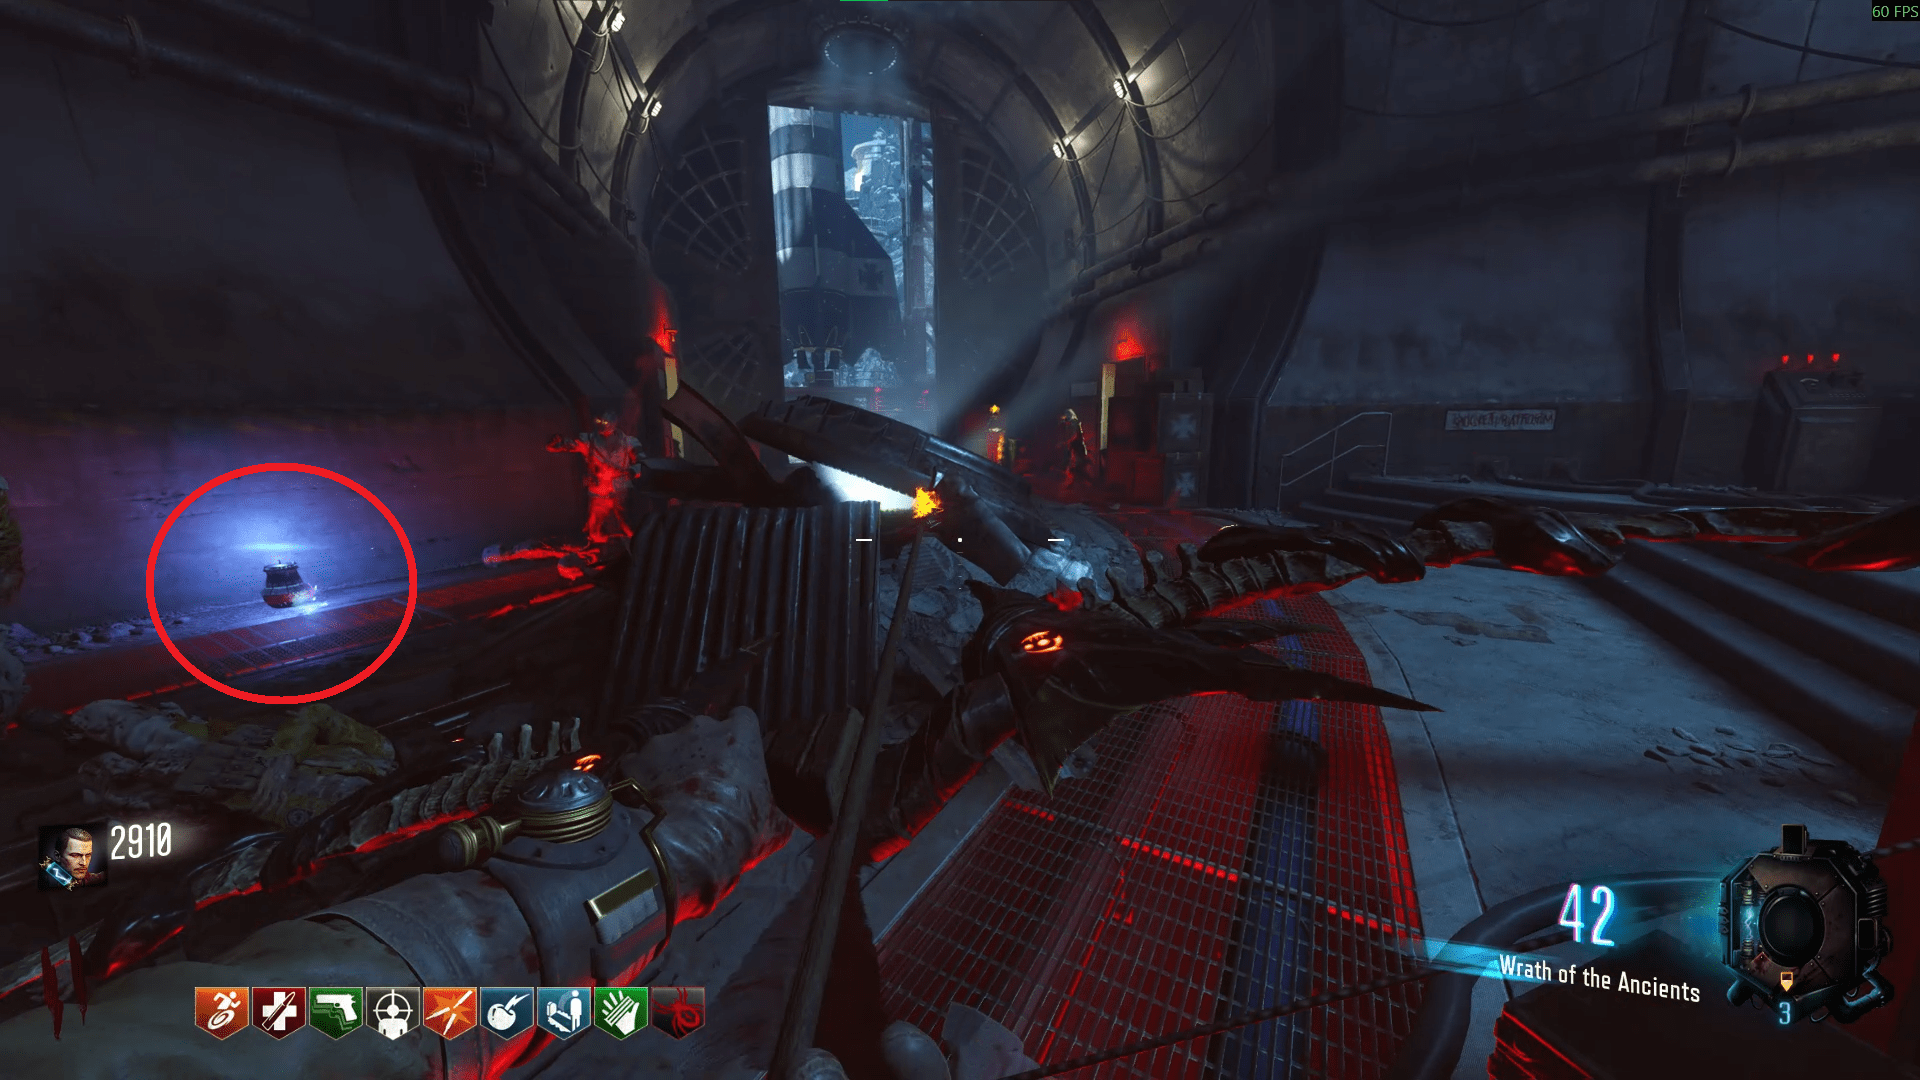
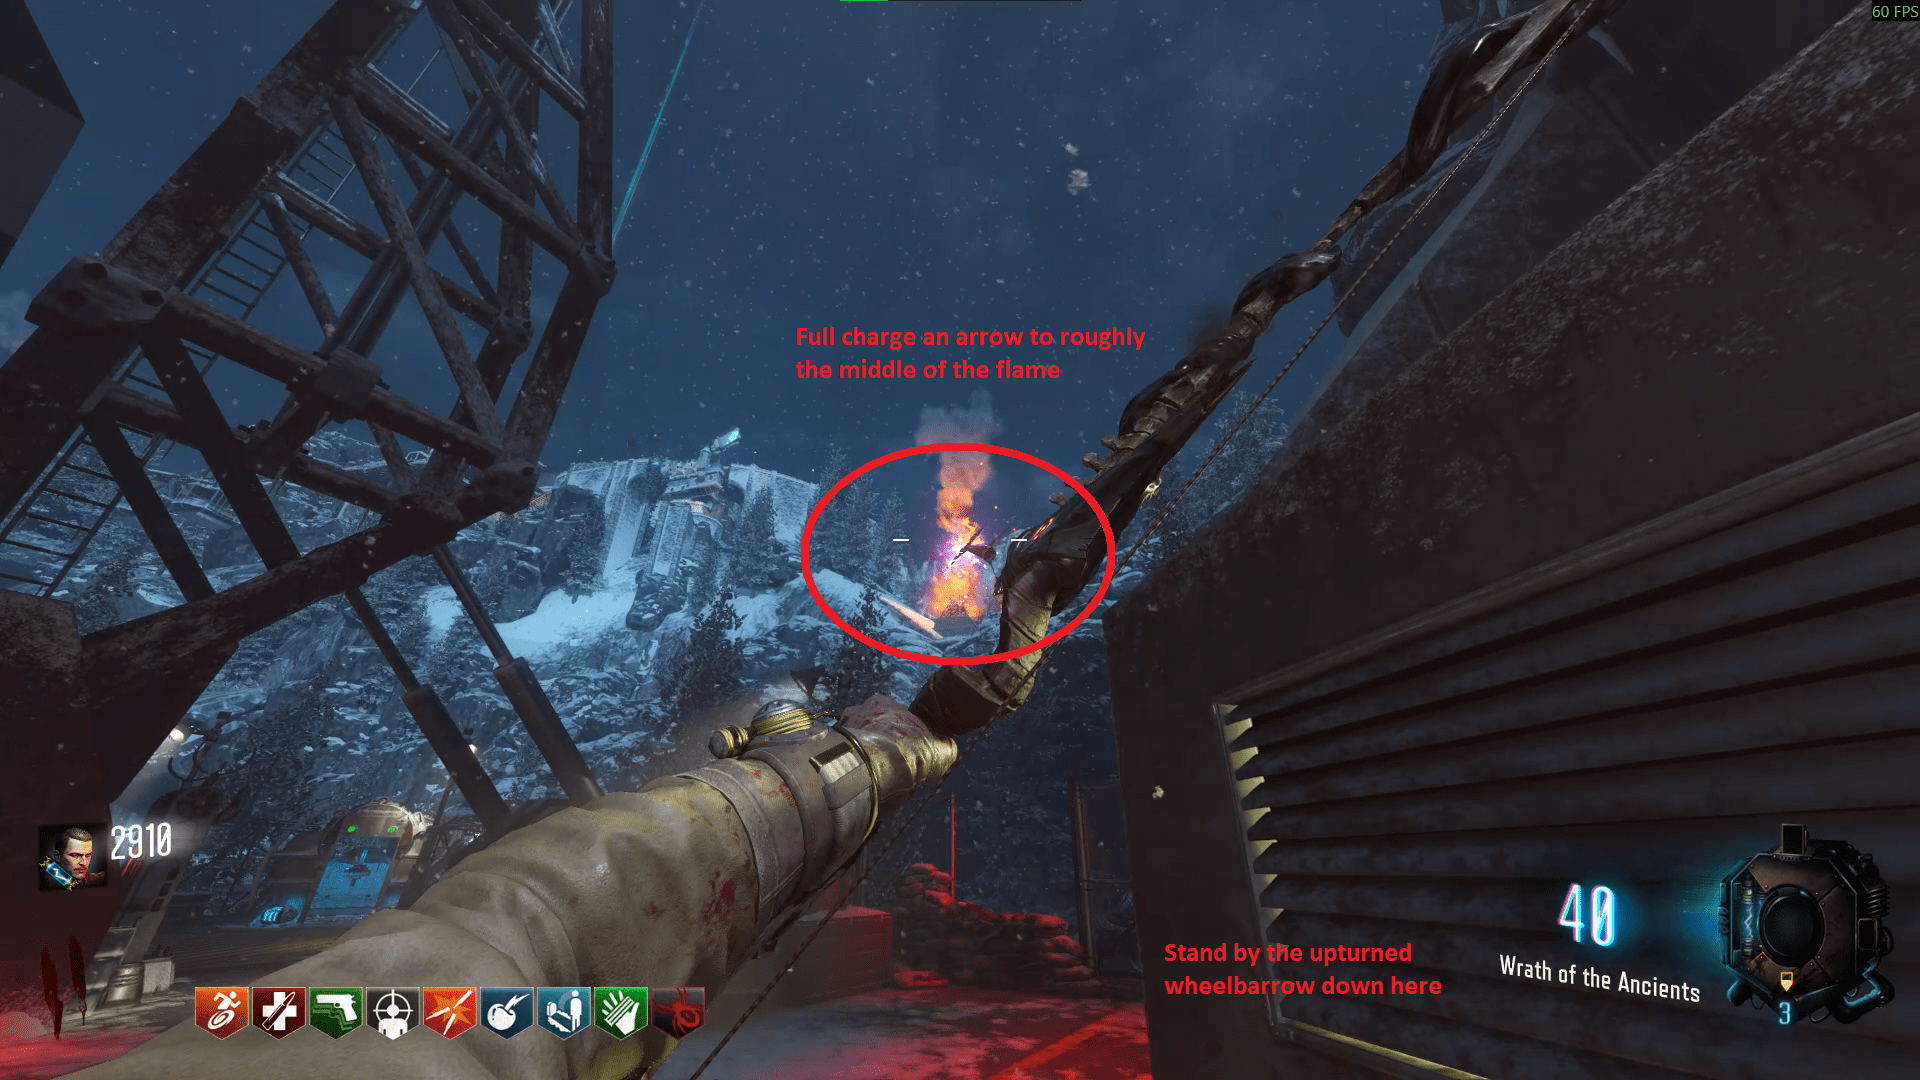
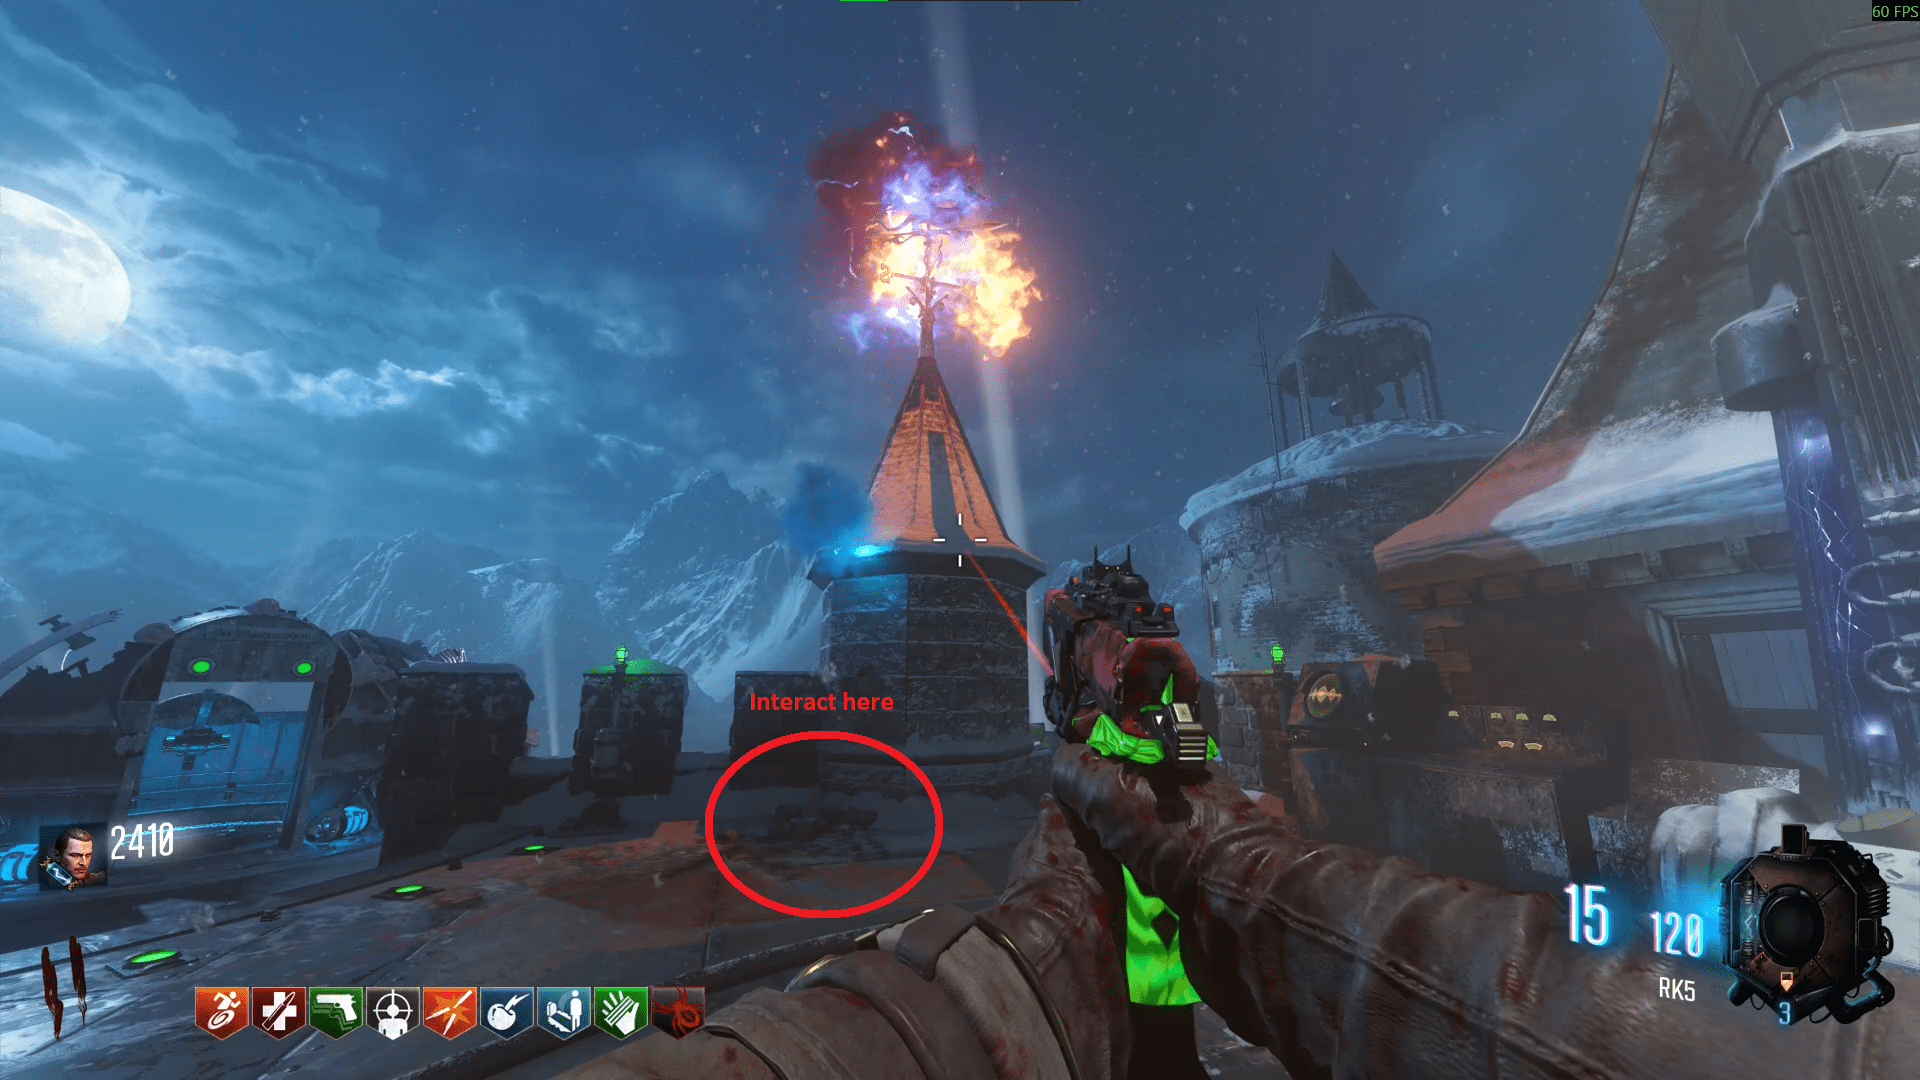
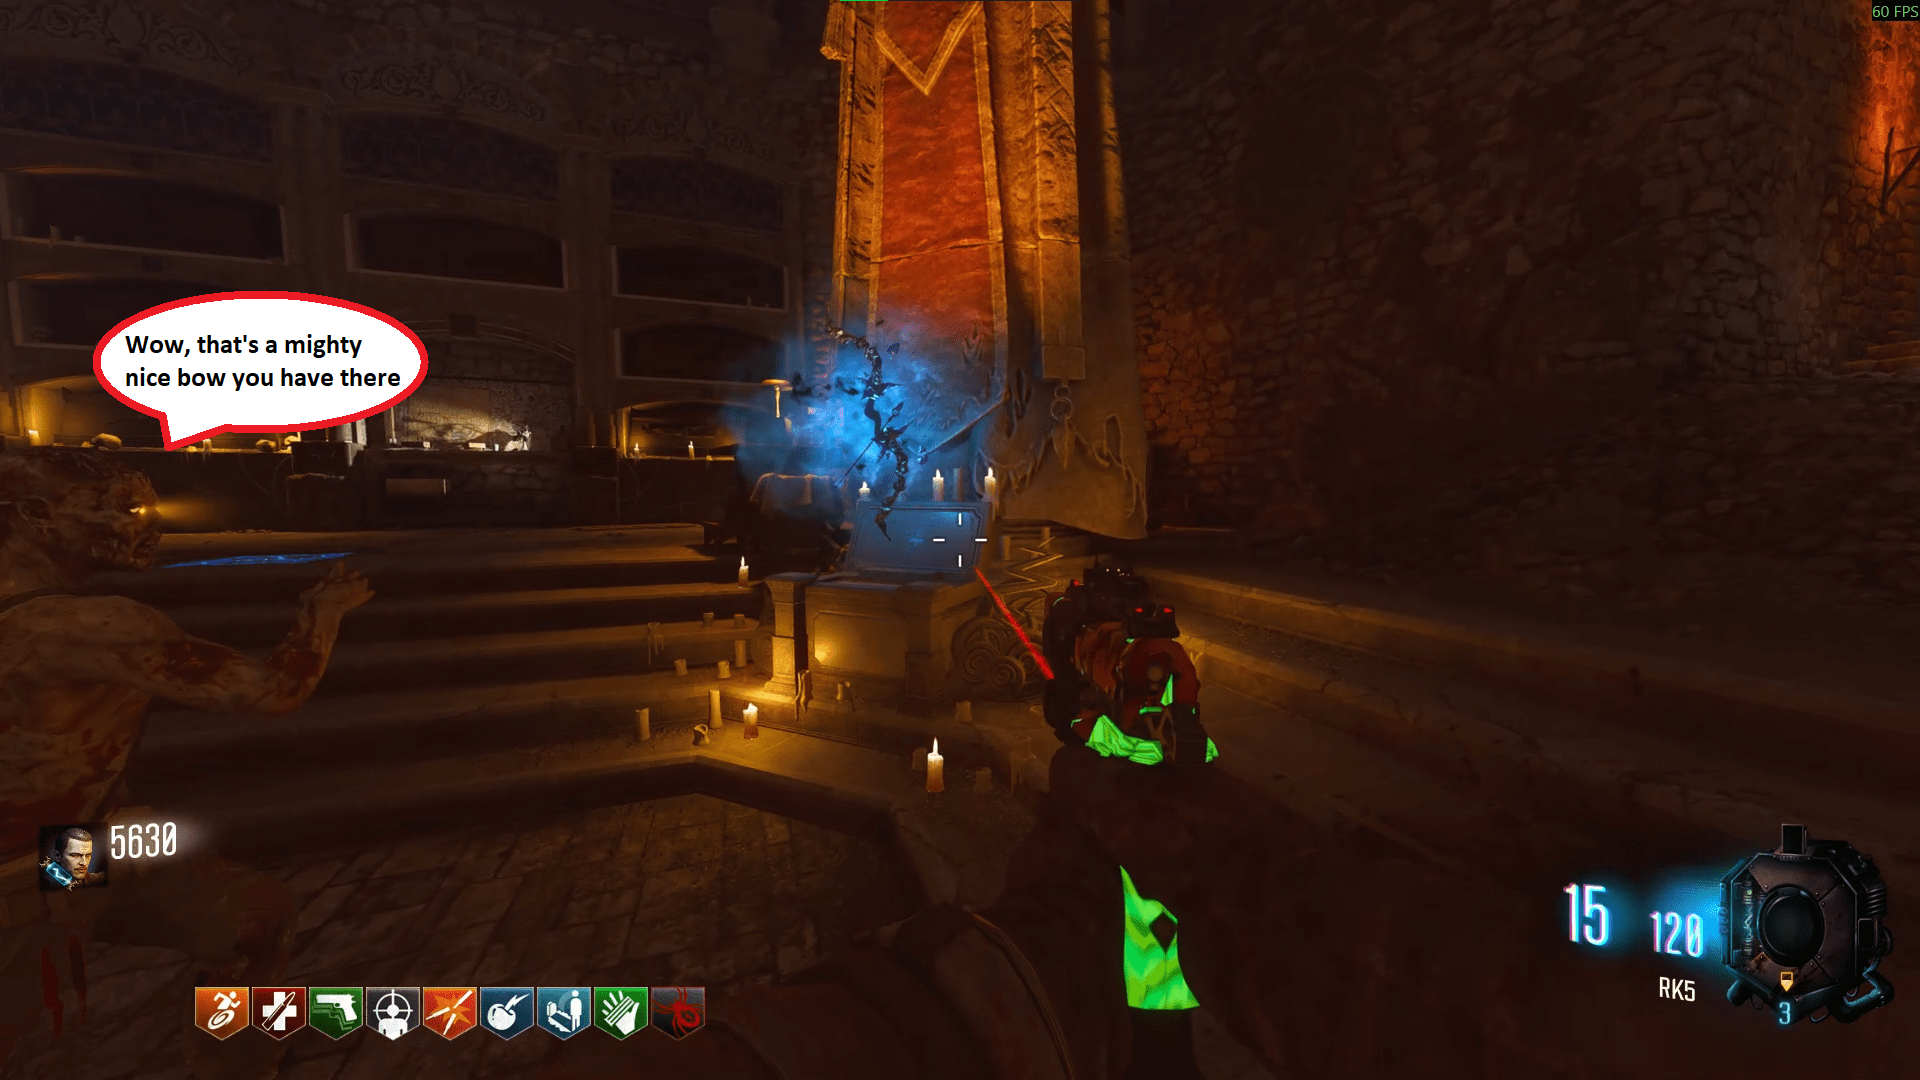
Now you'll see you're almost done, head back to the Weathervane and interact with the pile of rubble on the floor to fix the arrow, after that, just run down to the Undercroft and place the completed arrow into the box with a depiction of a storm on it.
Alternatively known as the 'Kreegakaleet lu Gosata'ahm' (translated as 'Decay Portal' or 'Demon Gate'). To begin upgrading this bow, you must obtain the broken arrow by shooting a ceiling, marked with a purple portal and skulls, in the gateway next to Double Tap. After that you must melee kill a zombie on a glowing tile in the room adjoining the Courtyard and Spawn.
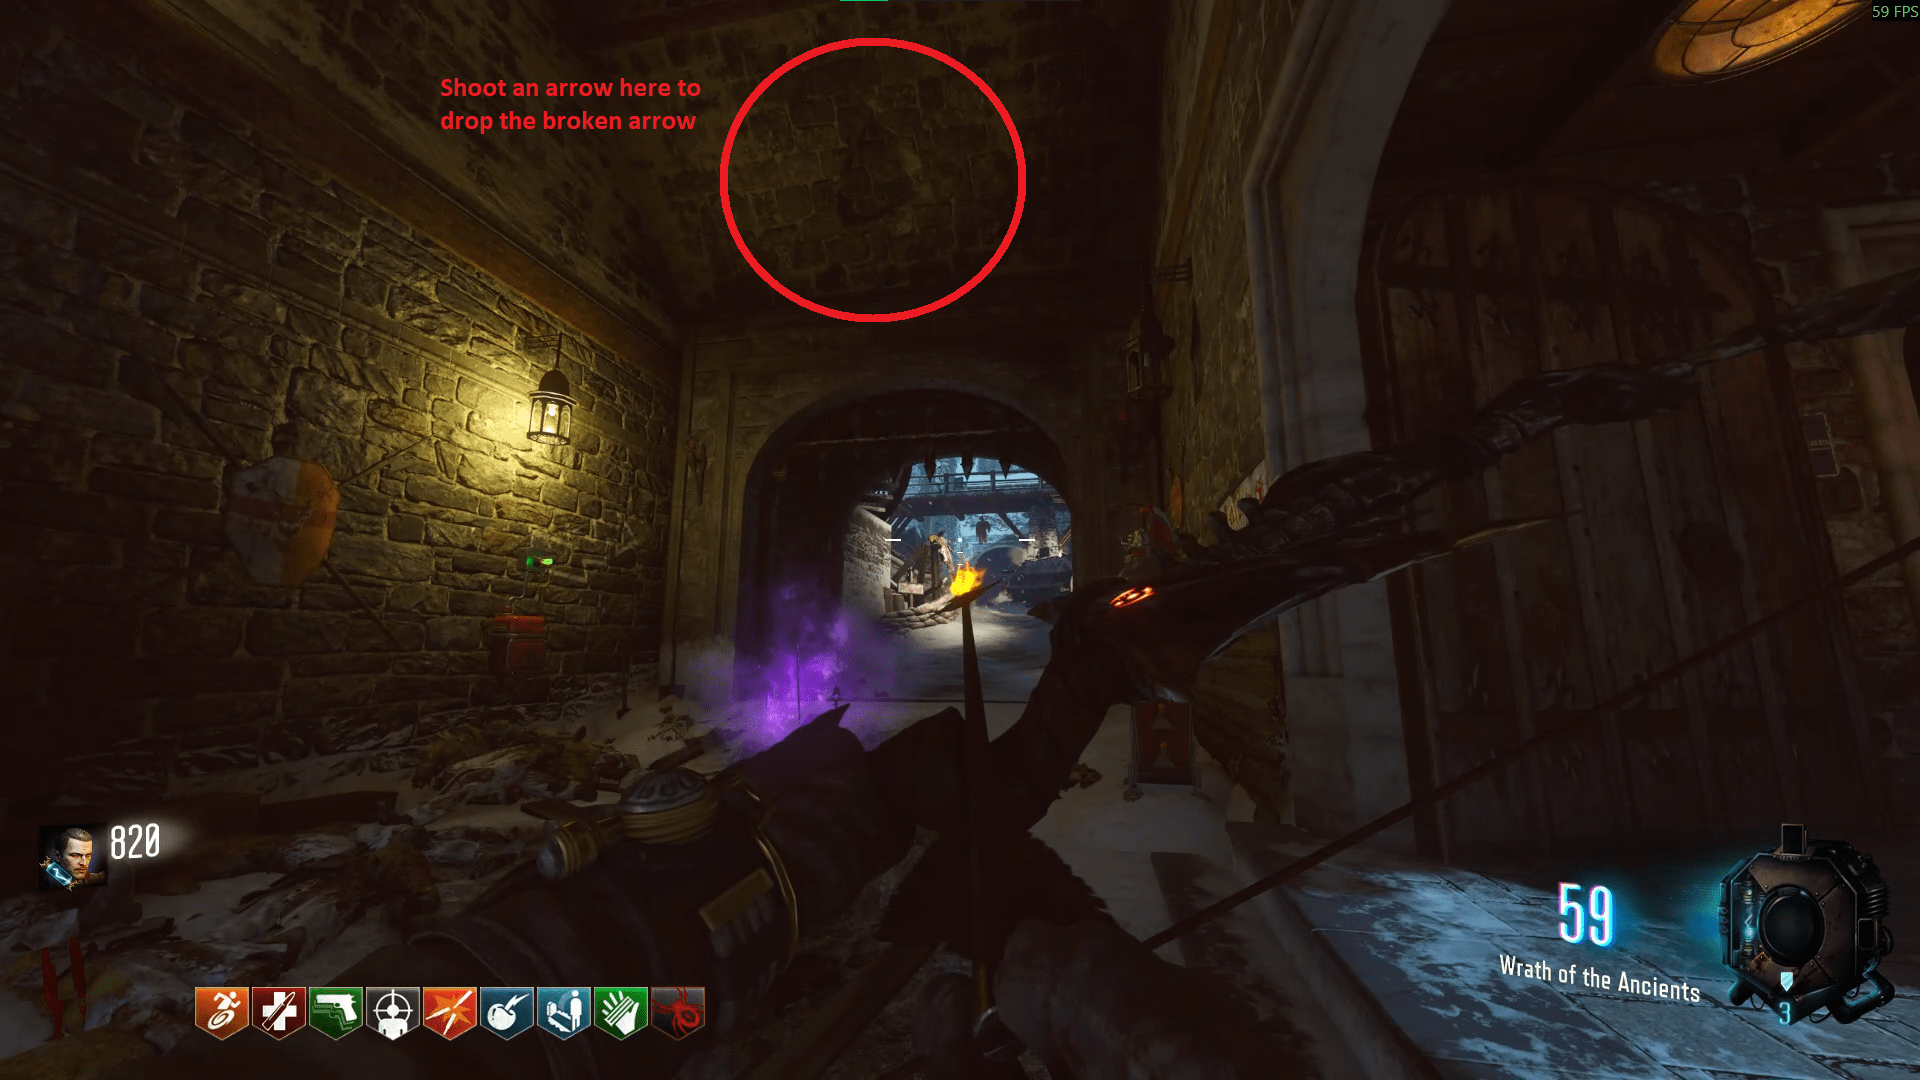
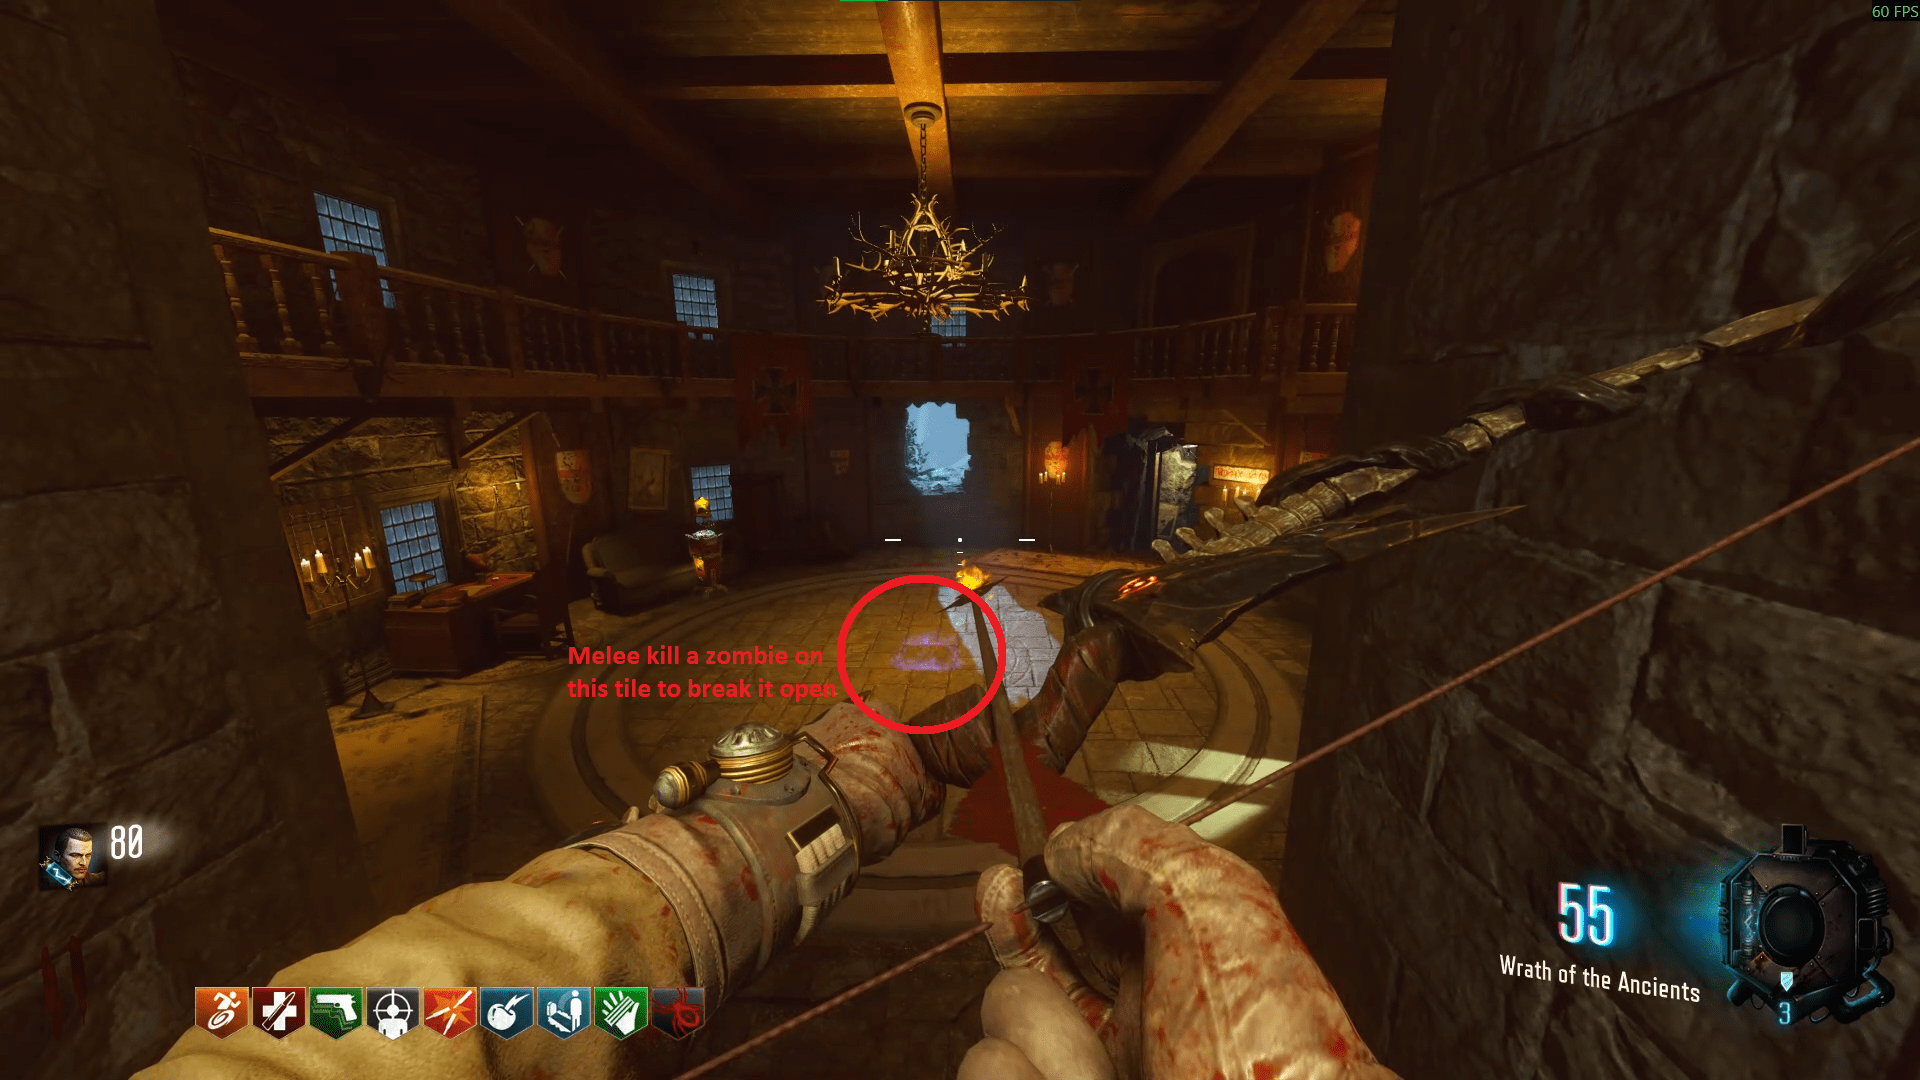 Upon melee killing, interact with the vase inside and it will ask that you return that which is scattered. These refer to six skulls placed around the map. A decent order to obtain these skulls are;
 - On the stairs to the right before entering the Church, on an exterior windowsill.
- Hidden between a broken wall opposite Mule Kick, right next to the demon ritual room.
- On a broken wall to the right of Double Tap.
- In a toy box in Samantha's room, just before entering the Church.
- In Groph's Lab/Teleporter room, in a sink in the corner.
- On the back of a truck in the Rocket Test Launch Site, left of when you exit the Teleporter room.
Der Eisendrache
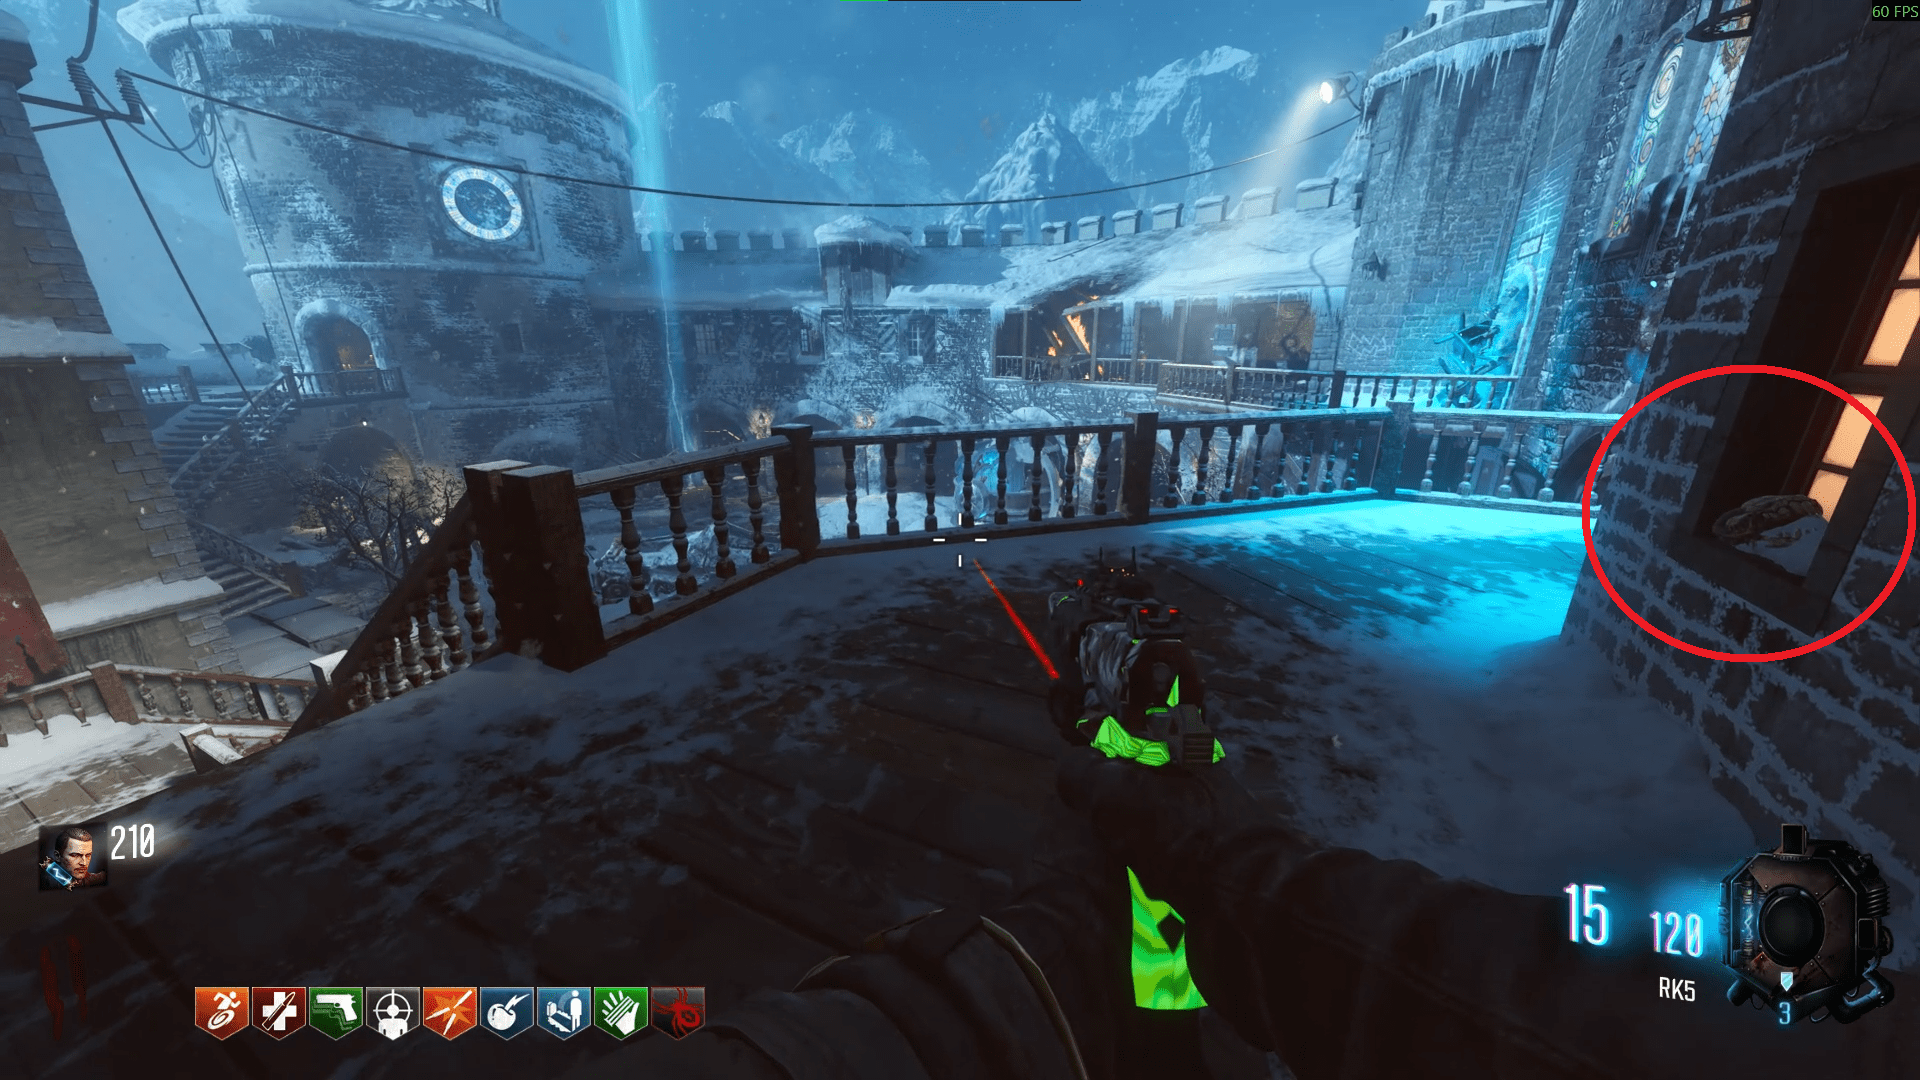
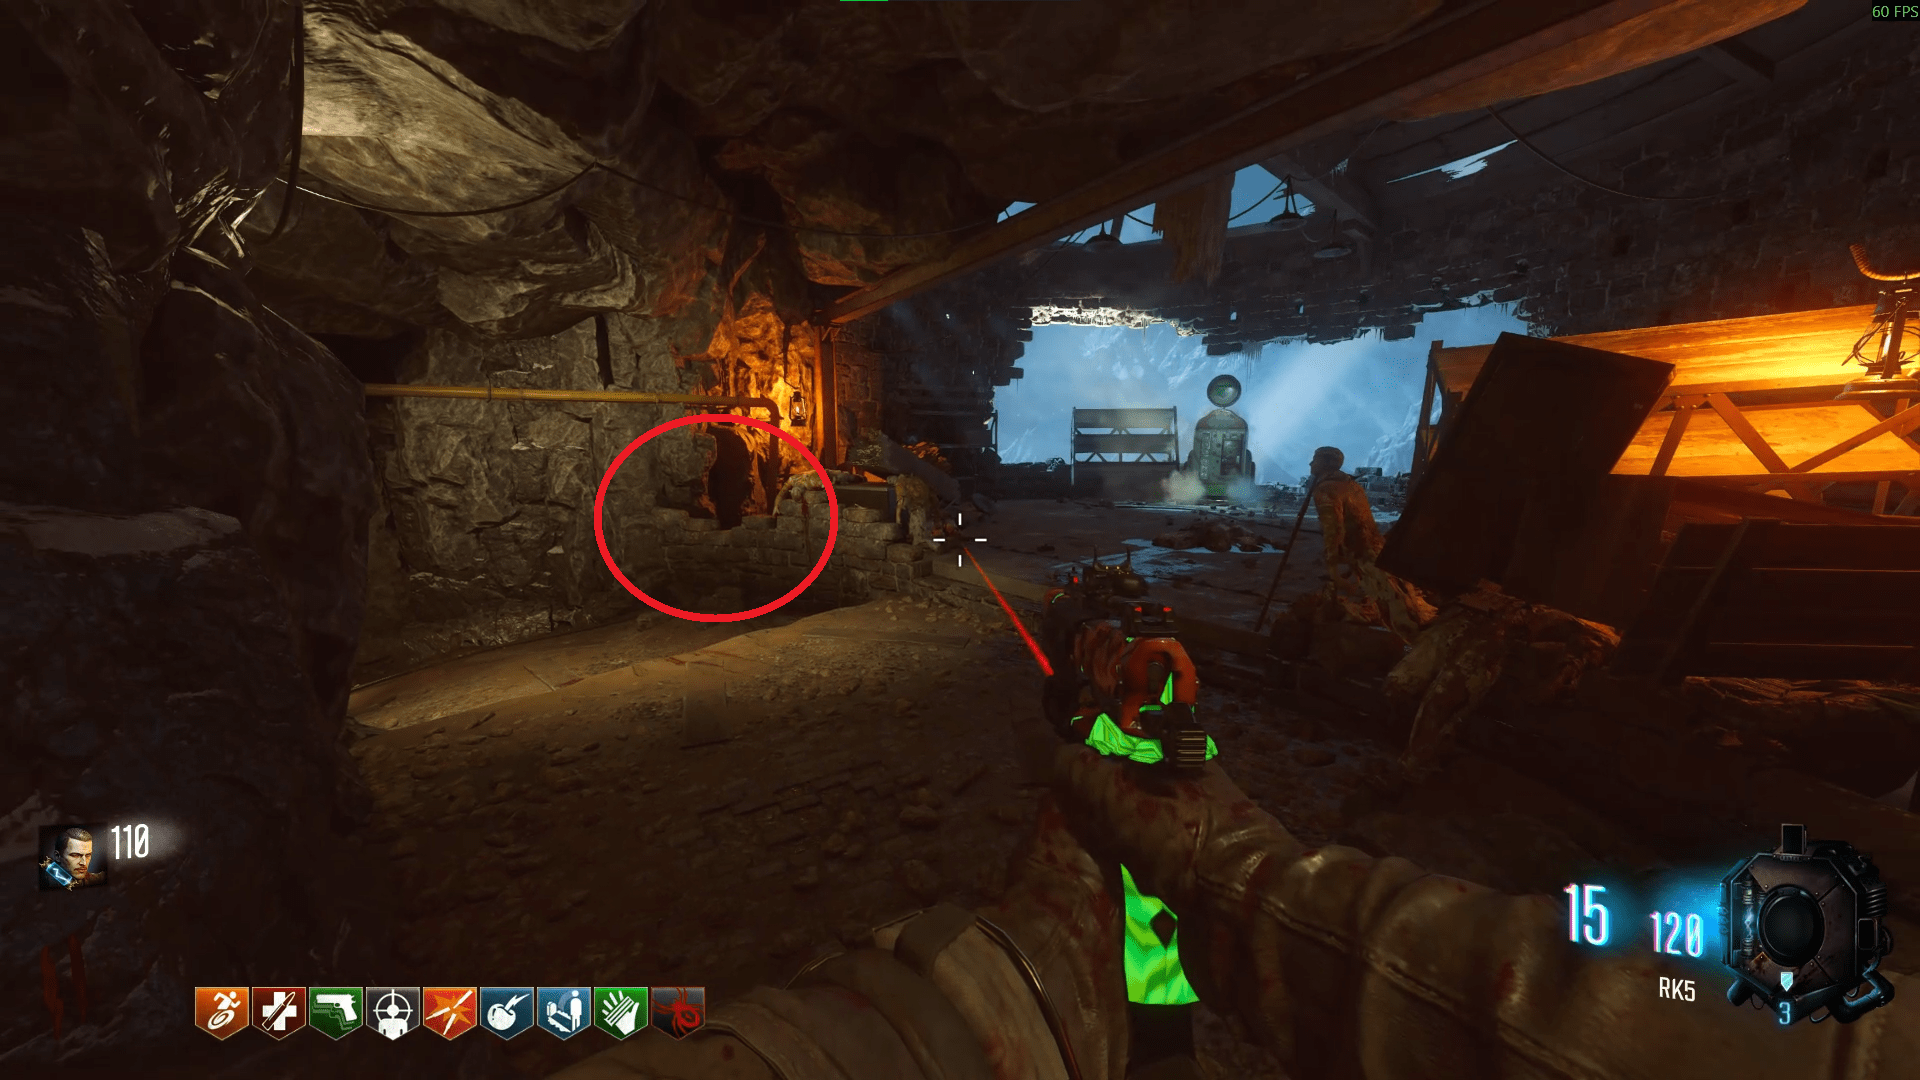
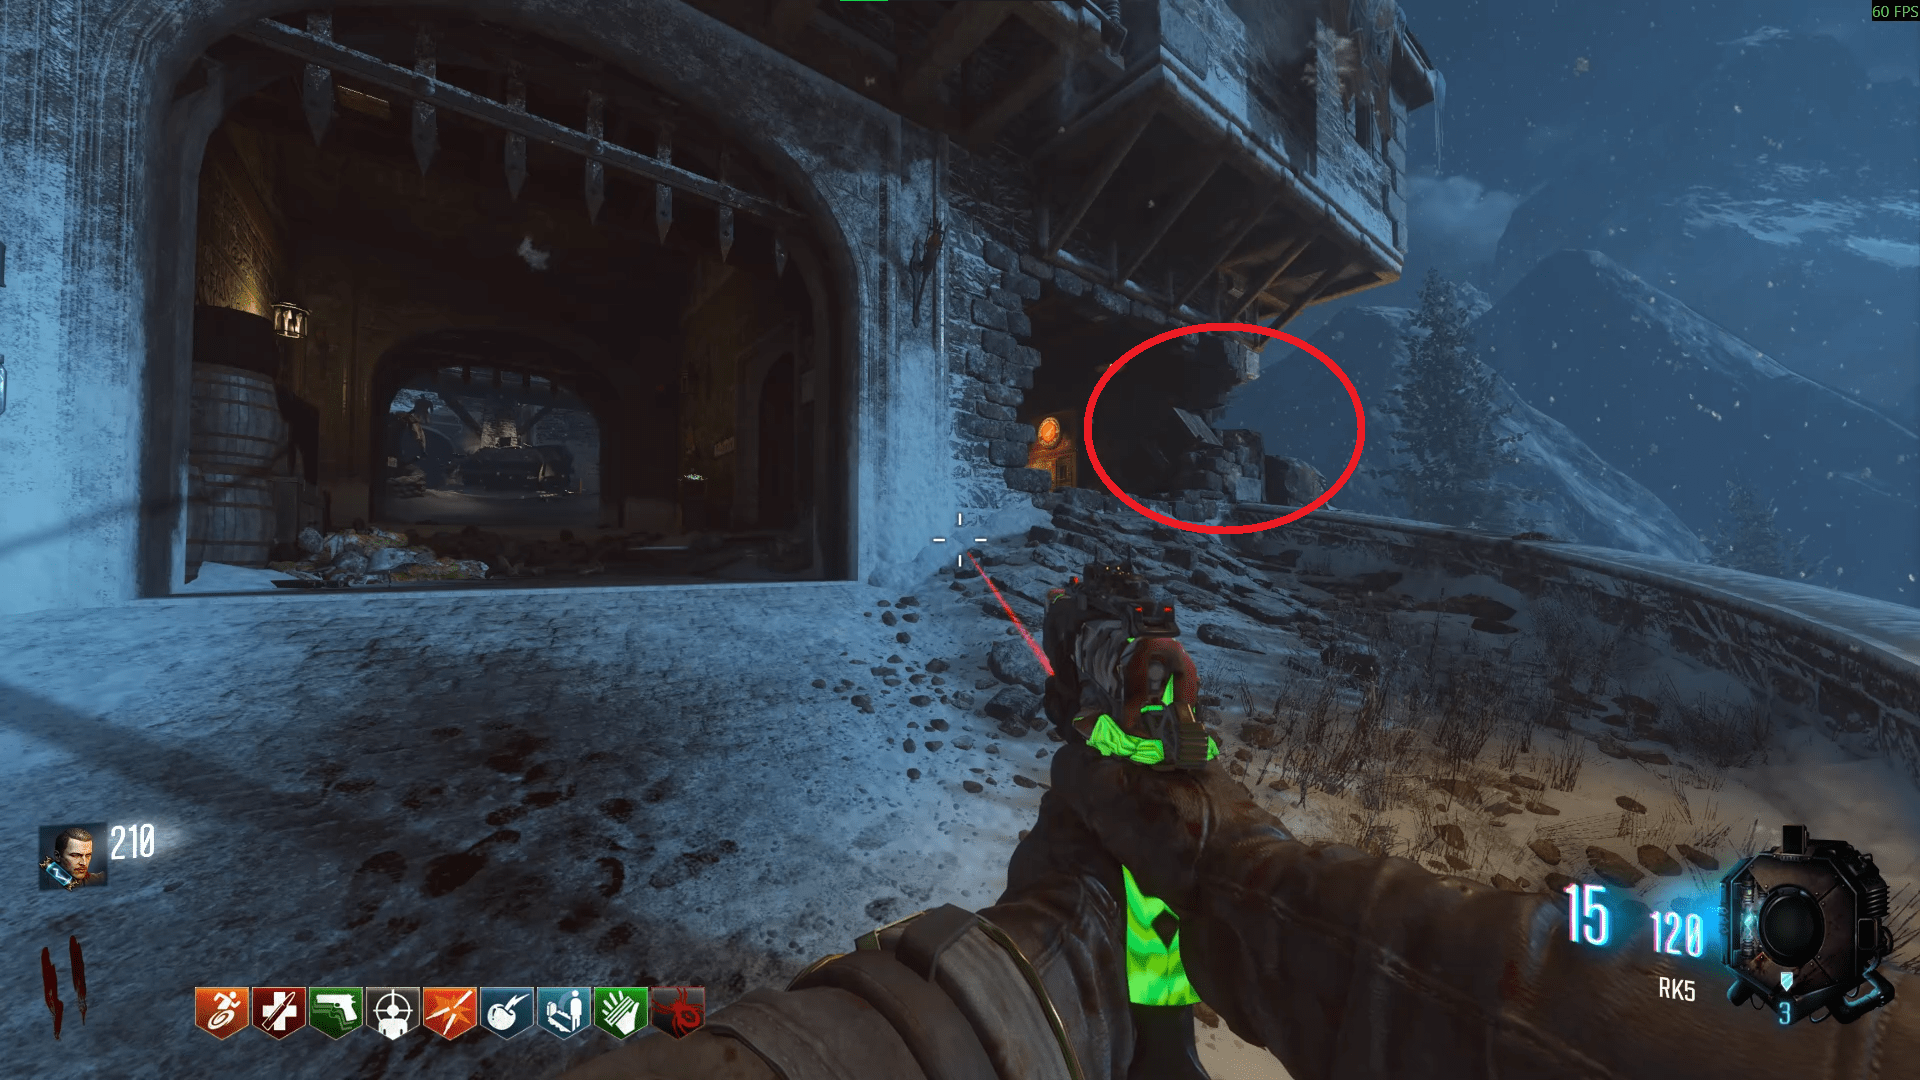
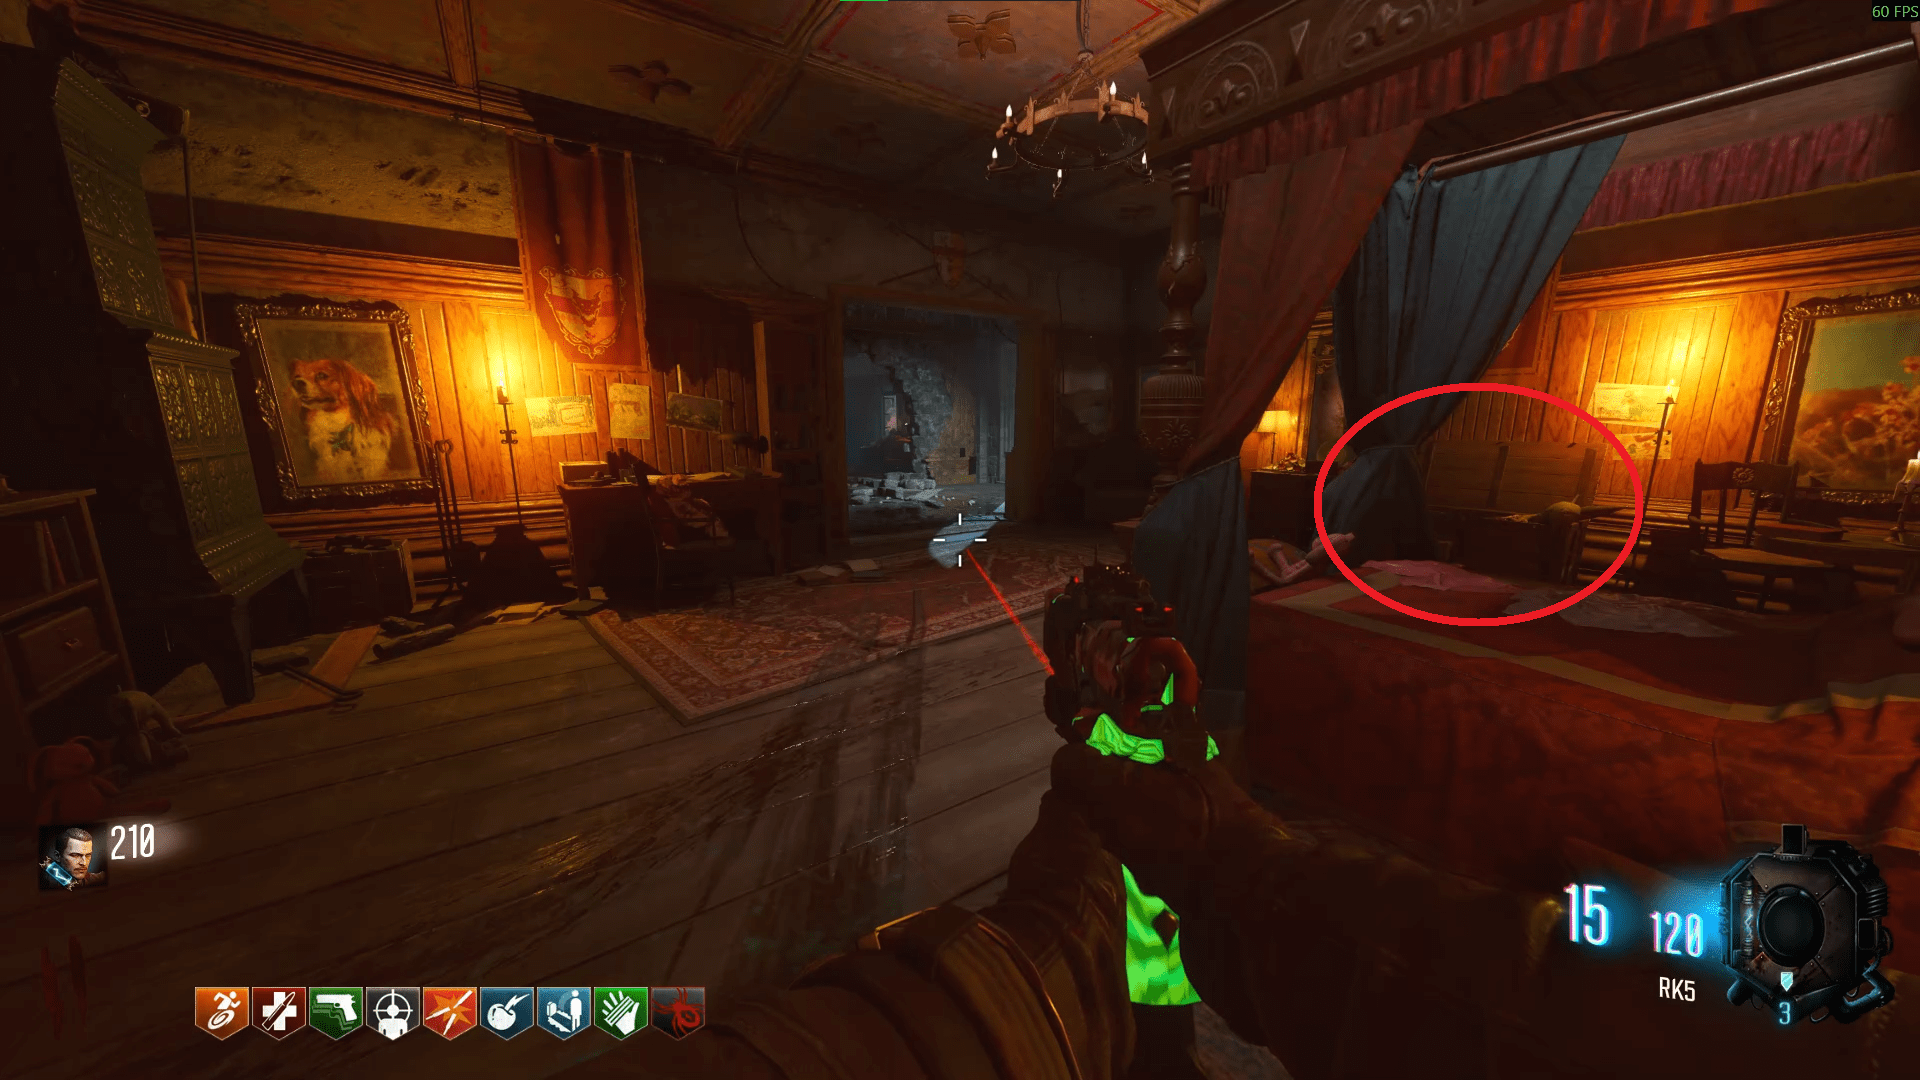
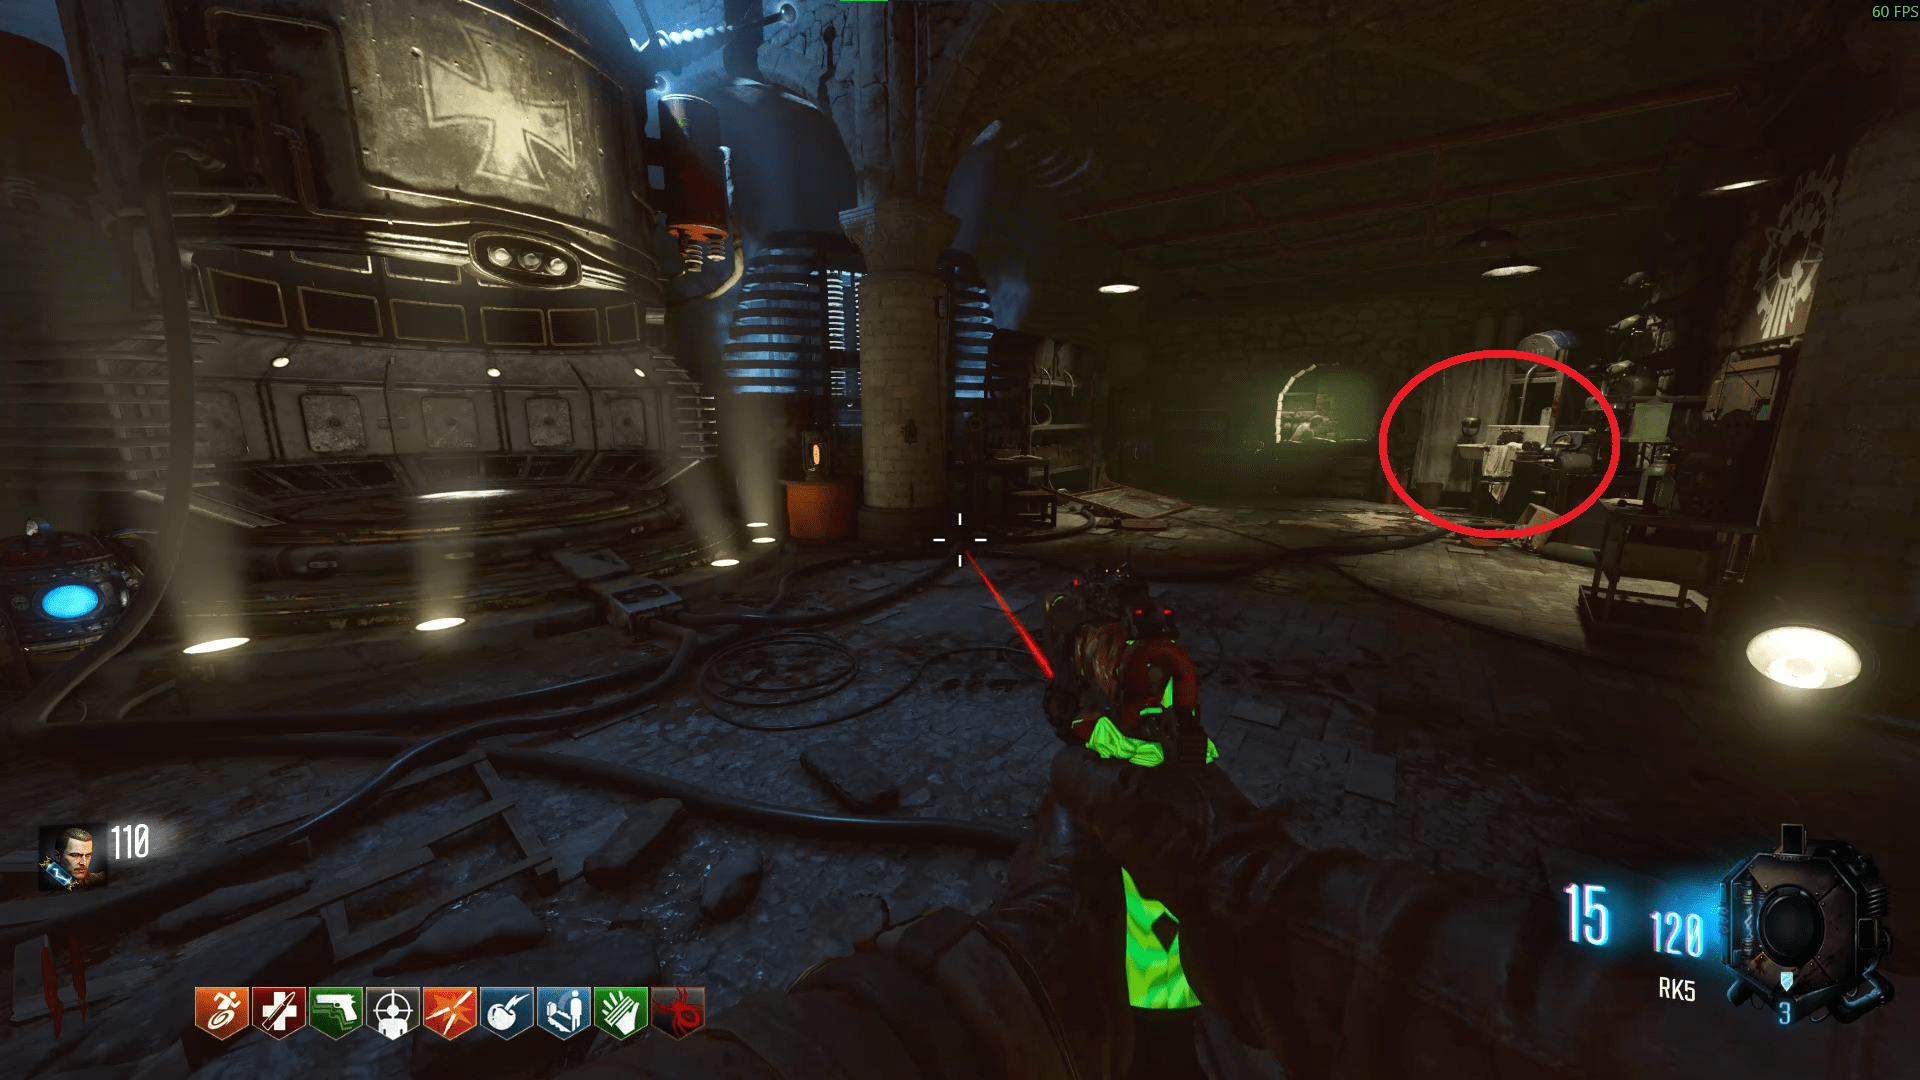
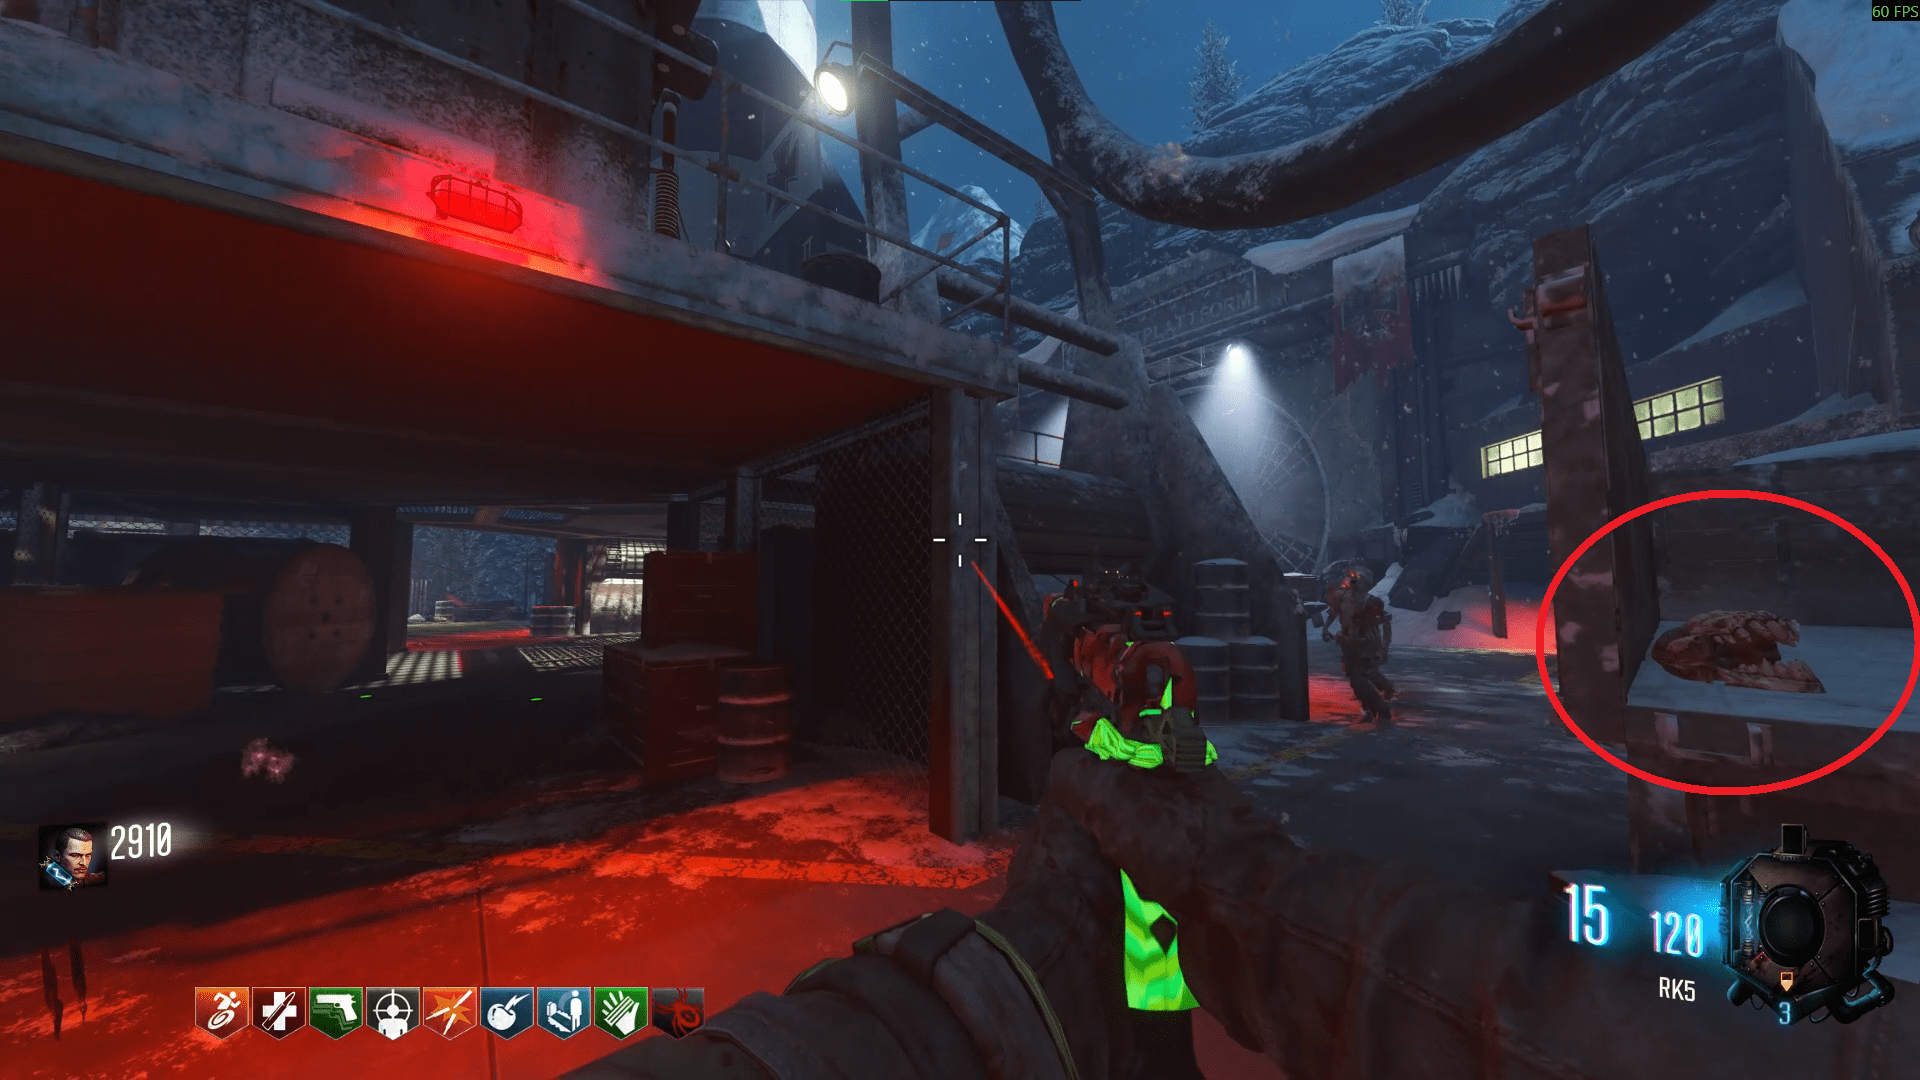
Now that you've picked up all the skulls, head back to the room and you'll need to make six crawlers for the heads to absolutely abolish (consensually, of course). This is where the Crawl Space Gobblegum is very useful.
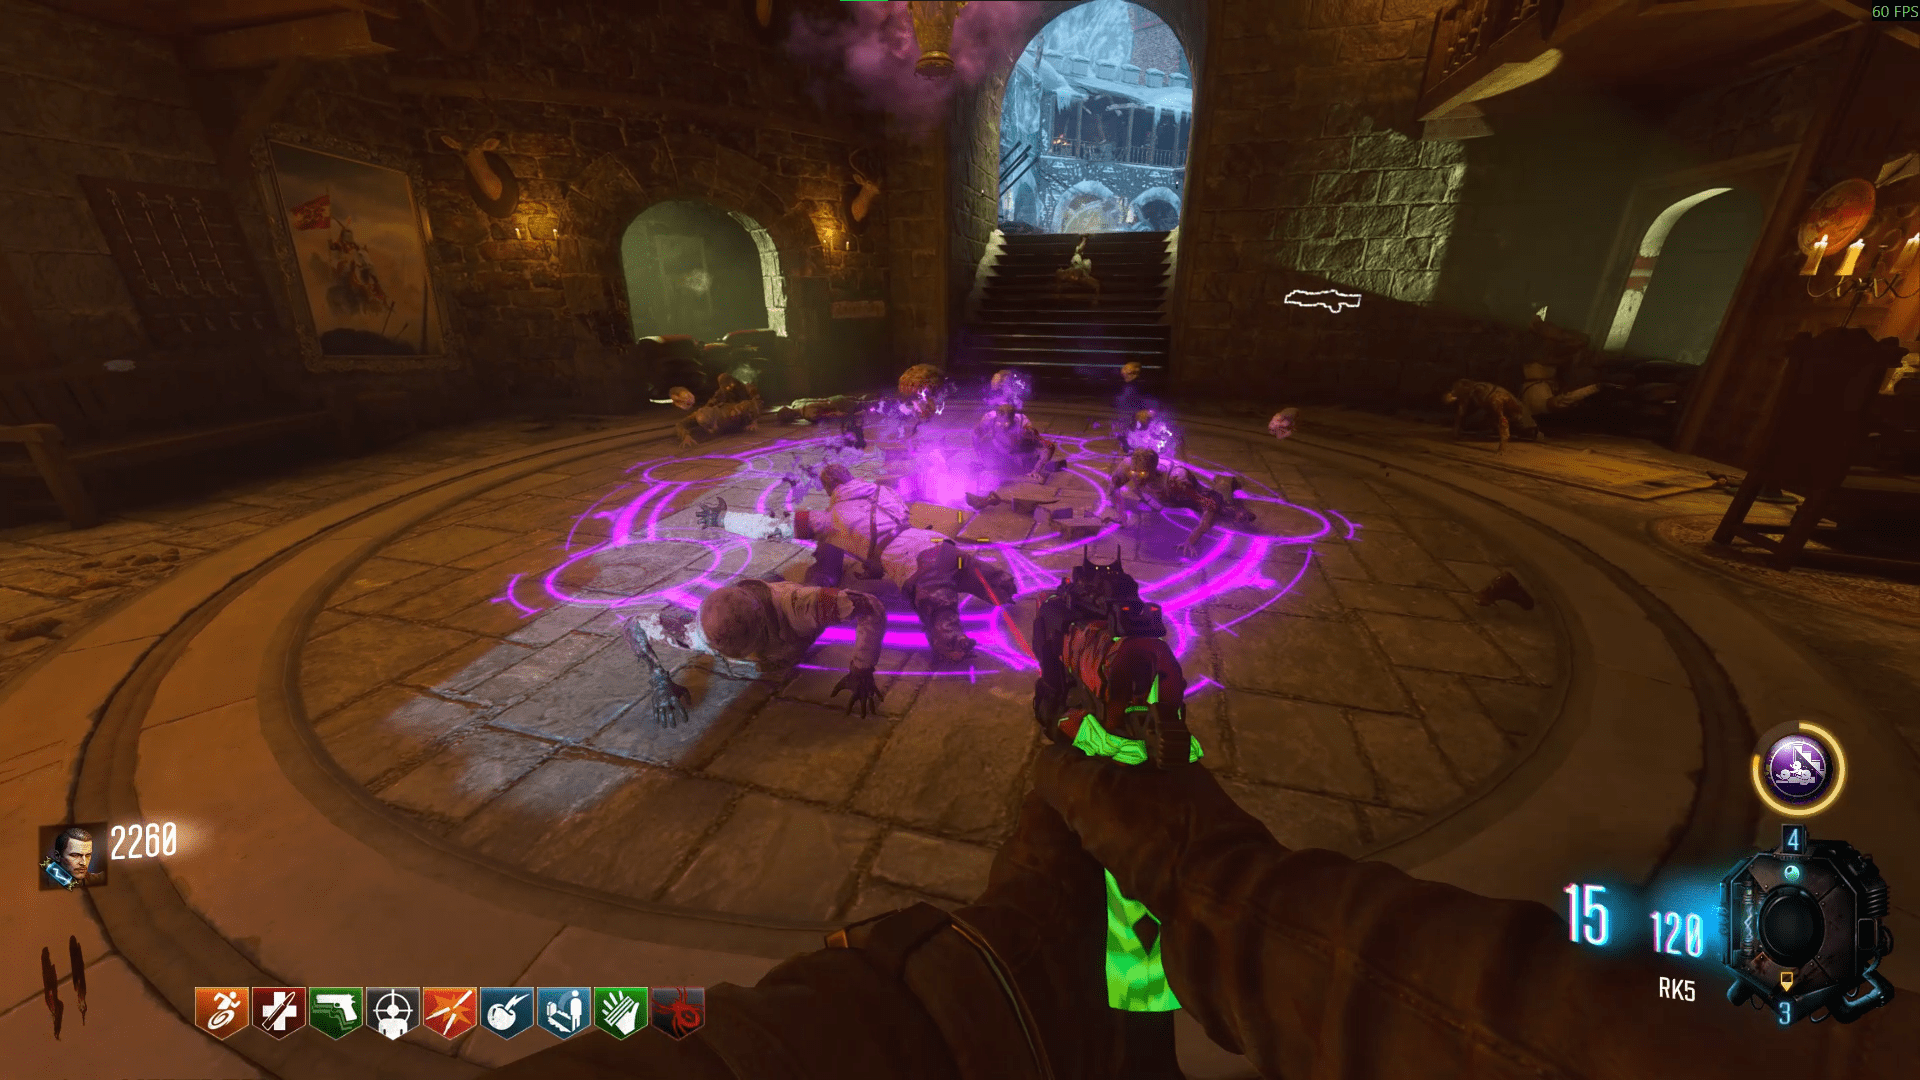
From here on, all you need to do is kill zombies, well after the demon guy says what his name is. I recommend turning on subtitles for this part, so you don't miss his name.
He will say a random combination of; Horn, Stag, Heart, Door, Crown, Griffin. You'll then go to the statue room (next to Stamin-Up and power) and interact with the statues with those images to then get the correct three symbols you need to write the demons name. You'll know which symbol correlates to which name but for the lesser known ones: Griffin looks like a standing four legged animal, while the Stag looks like a skull with horns and the Horn looks like a cornucopia. The rest are pretty self explanatory.
In the meantime, when the Void arrow holder kills zombies, they will see purple drops from zombies. They need to pick them up until the three symbols they need are dropped. Once you pick them up, the same symbol will light up on the floor of the ritual room and allow you to enter it as part of the name.
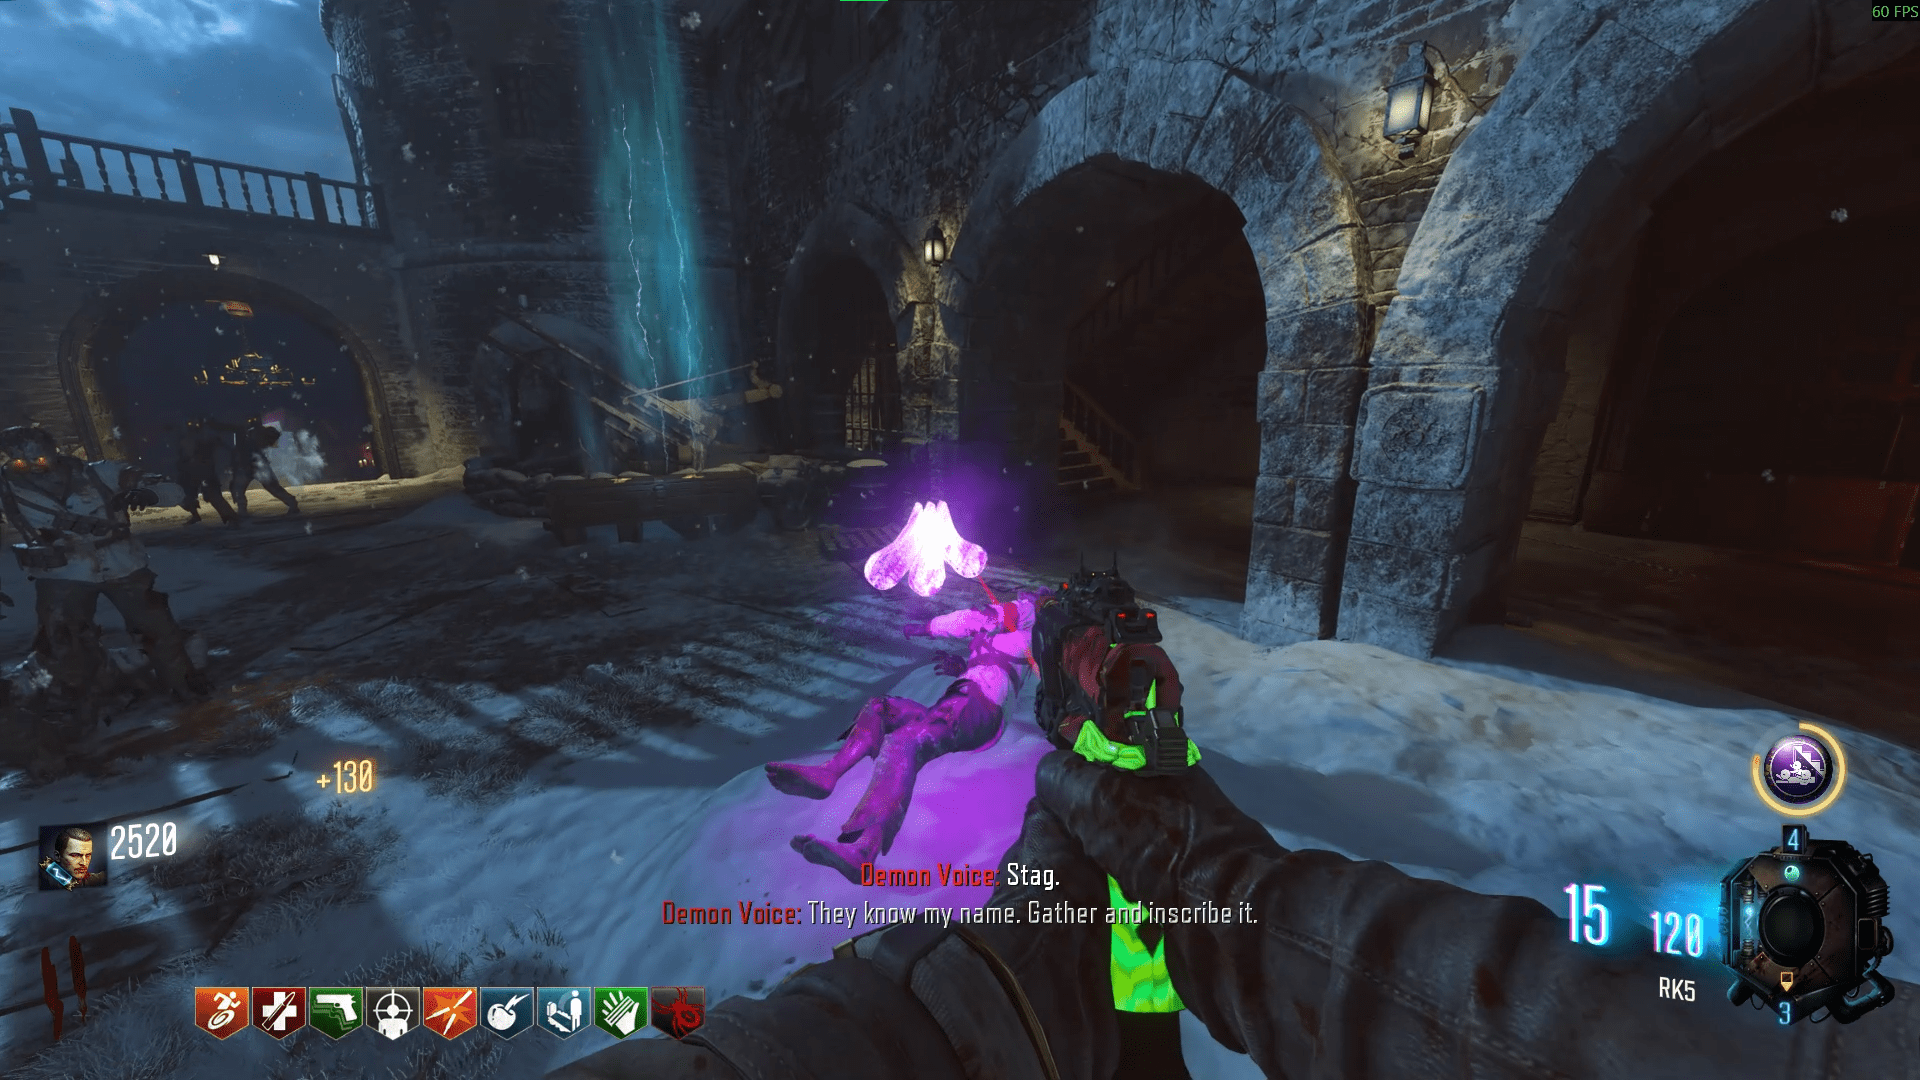
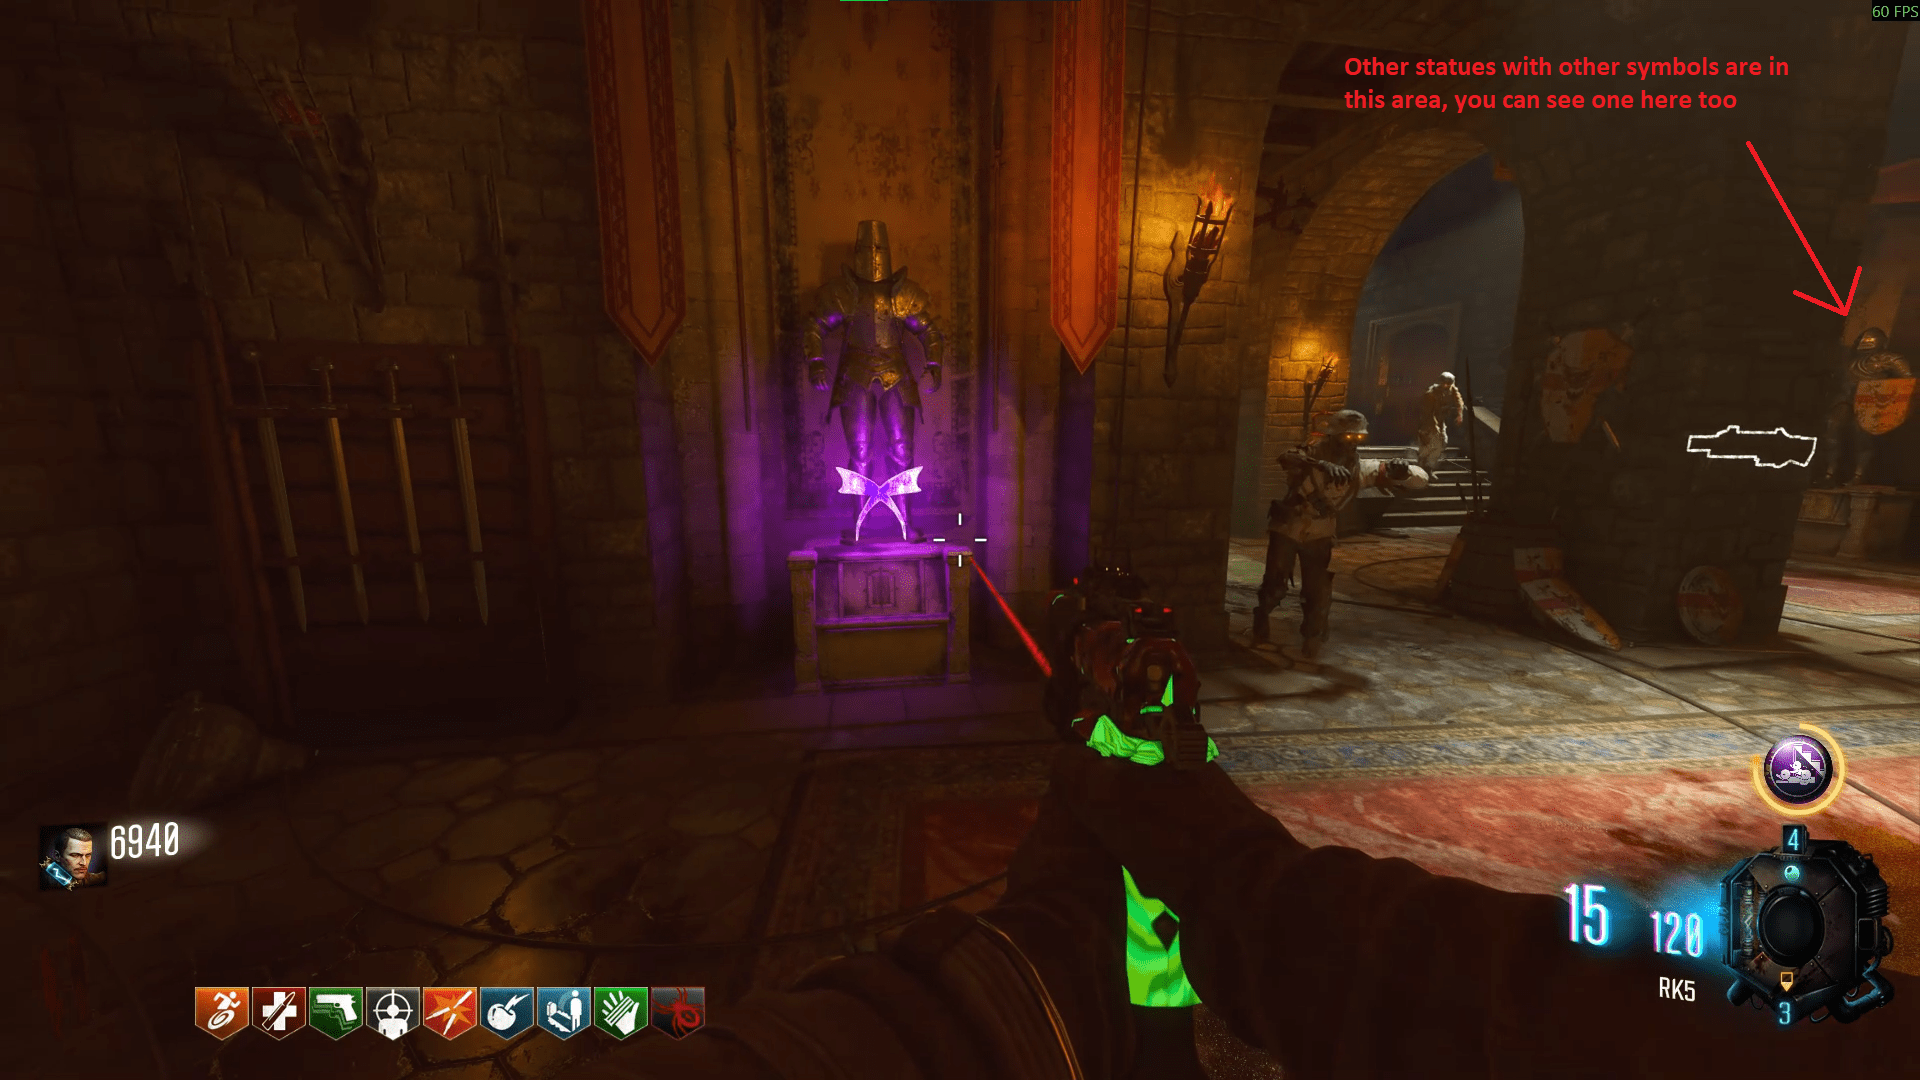
Once you have all the required purple symbols you need, you will then shoot them in the order that the demon guy said, that's what his name will be. So for example, mine was Heart, Door and Stag, which for me was the Tears, Ribbon and Spikes purple symbols.
Understand that your symbols will very likely not be the same as mine, and the statues do not have the same symbols each game. So do not attempt to copy mine and expect to complete the step.
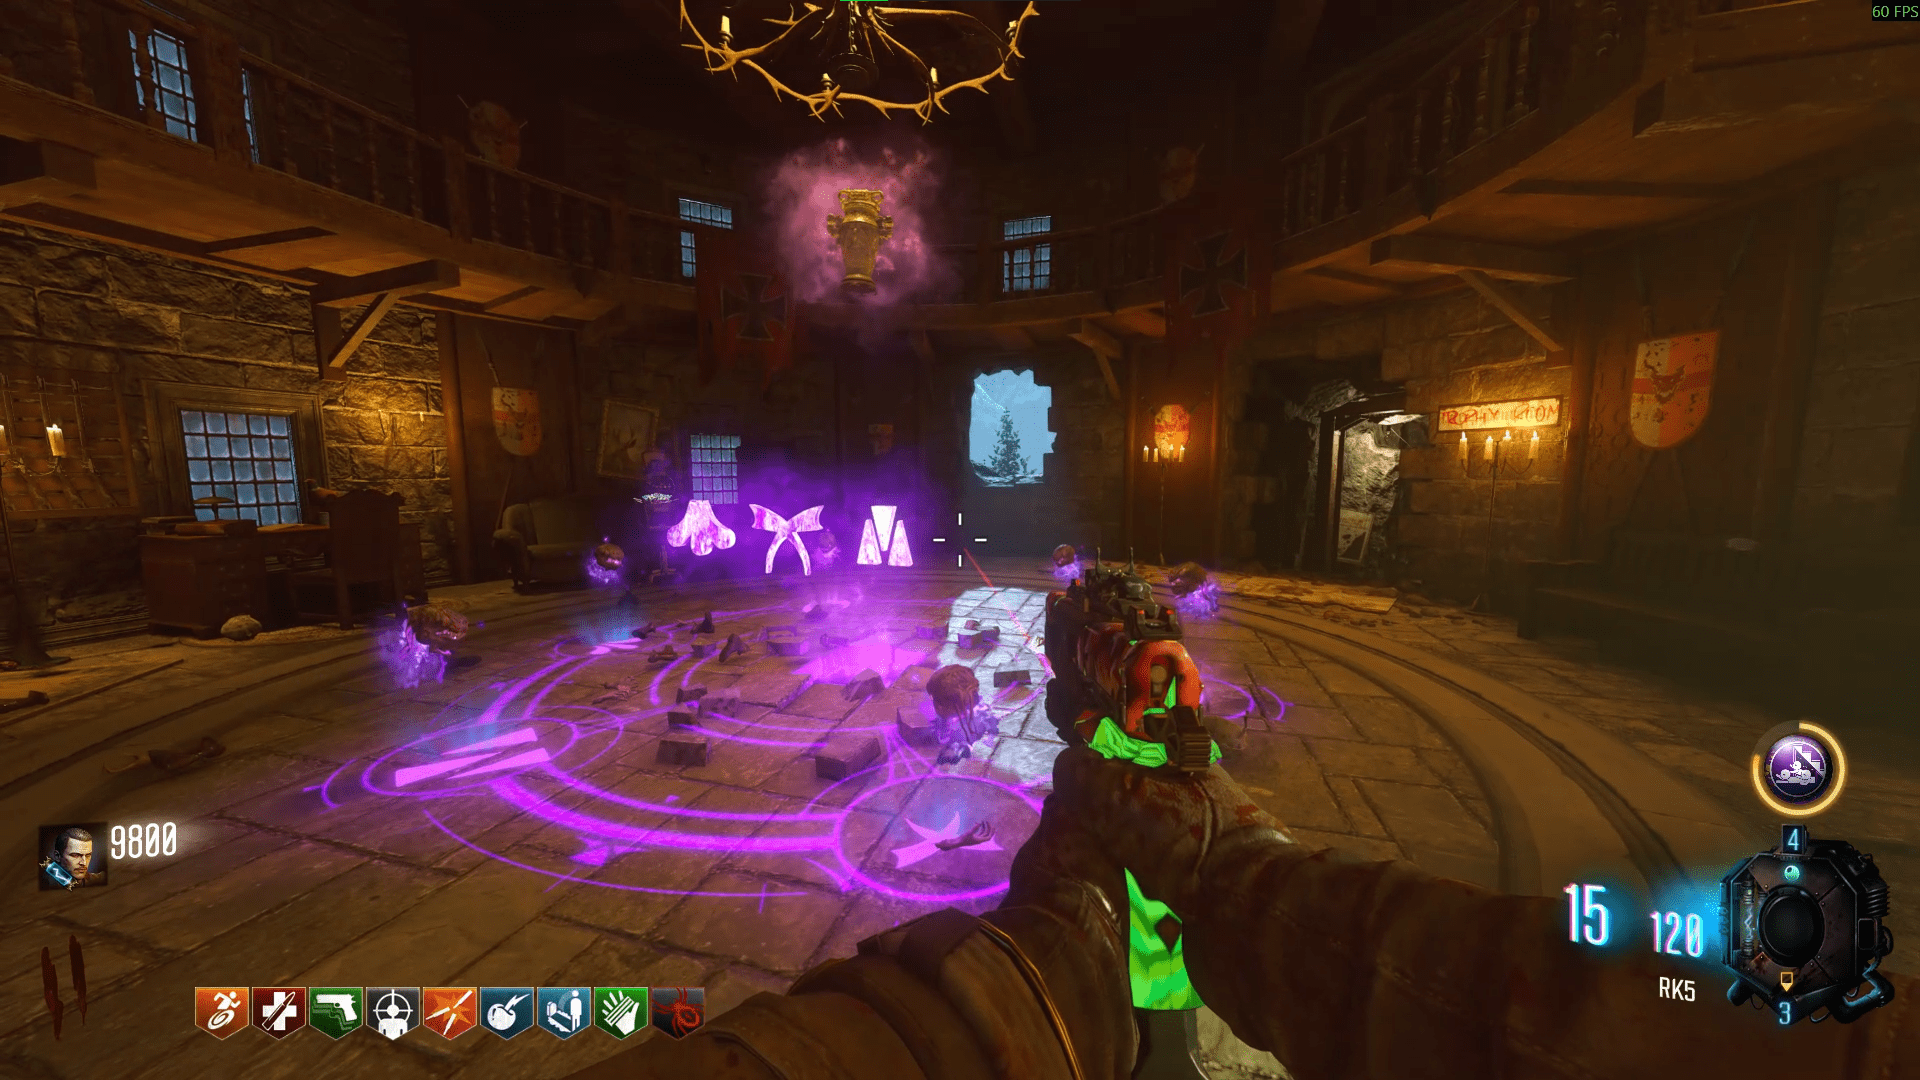
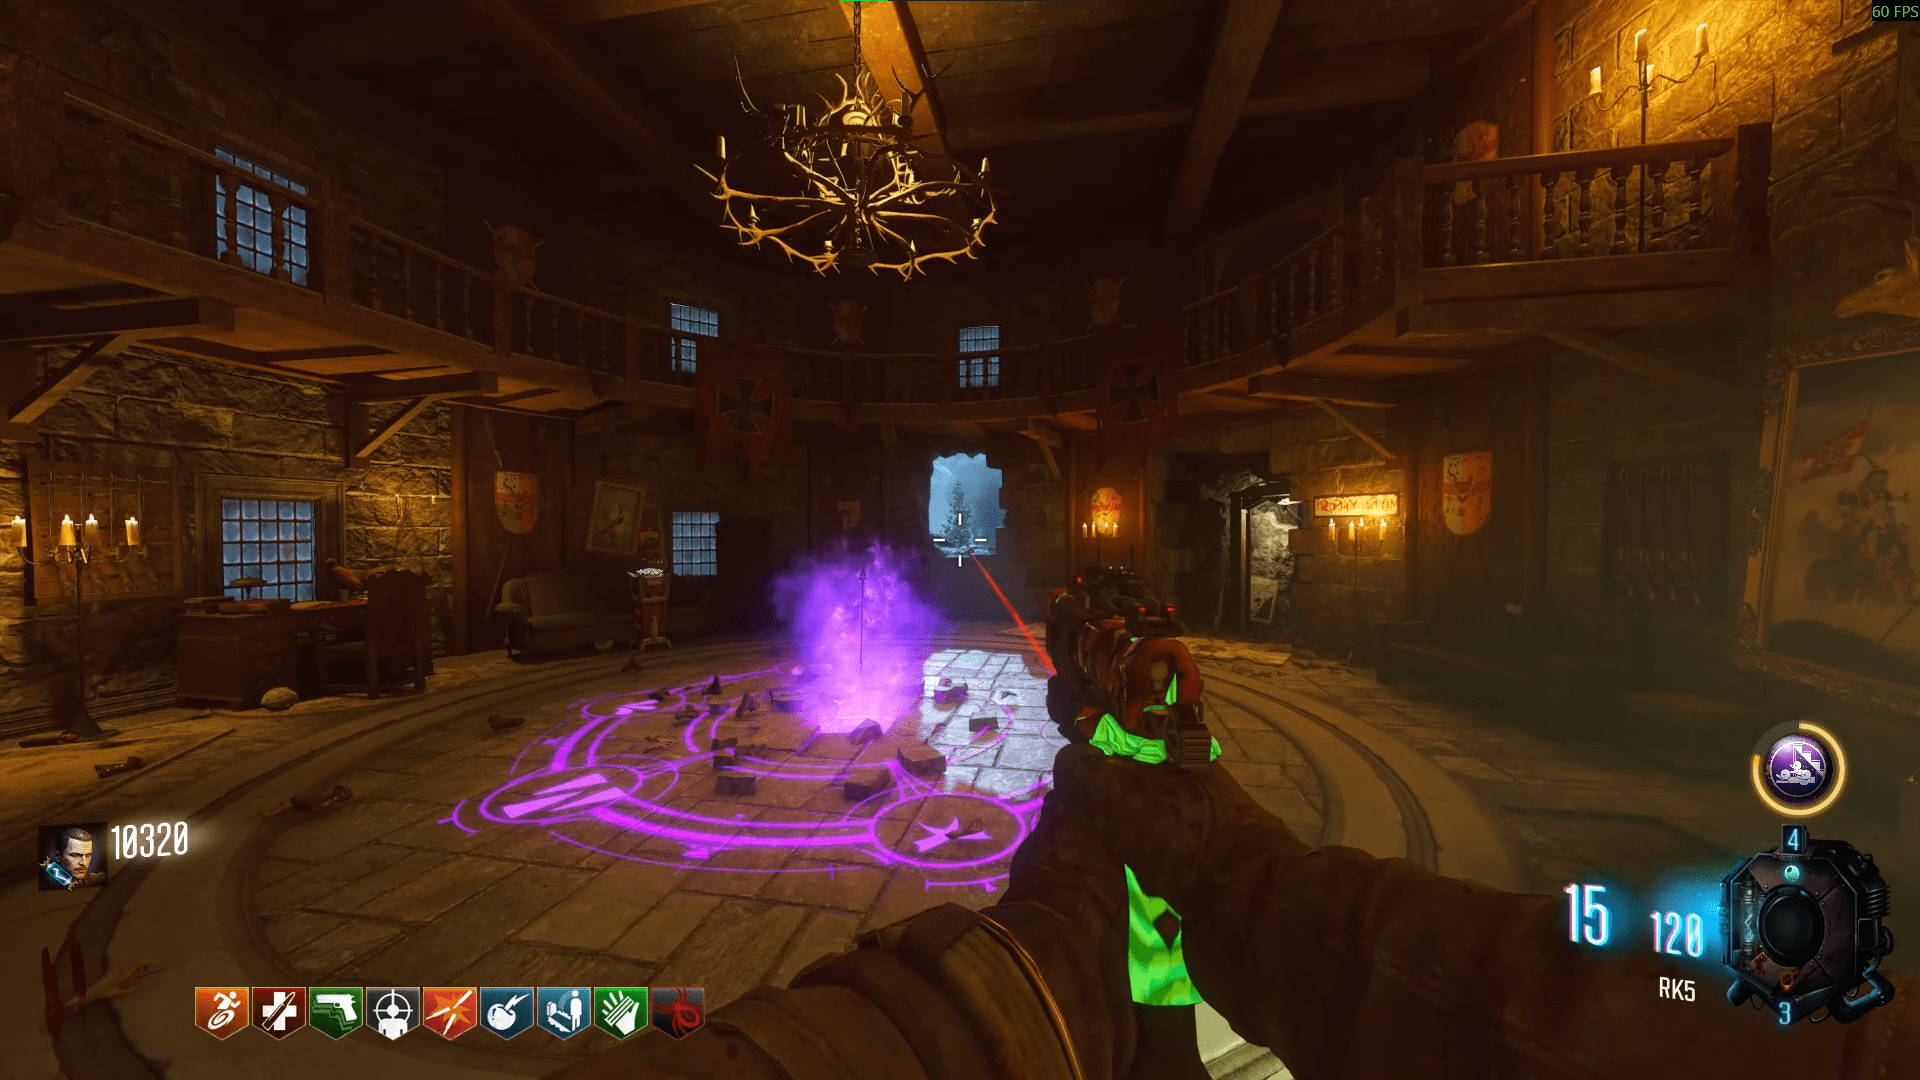
After you've inputted the name you can then interact with the vase again to complete the arrow. Then you're good to take the arrow to the Undercroft and place it in the box with the purple portal and skulls icon. Get the 20 kills and voilà, the bow is yours.
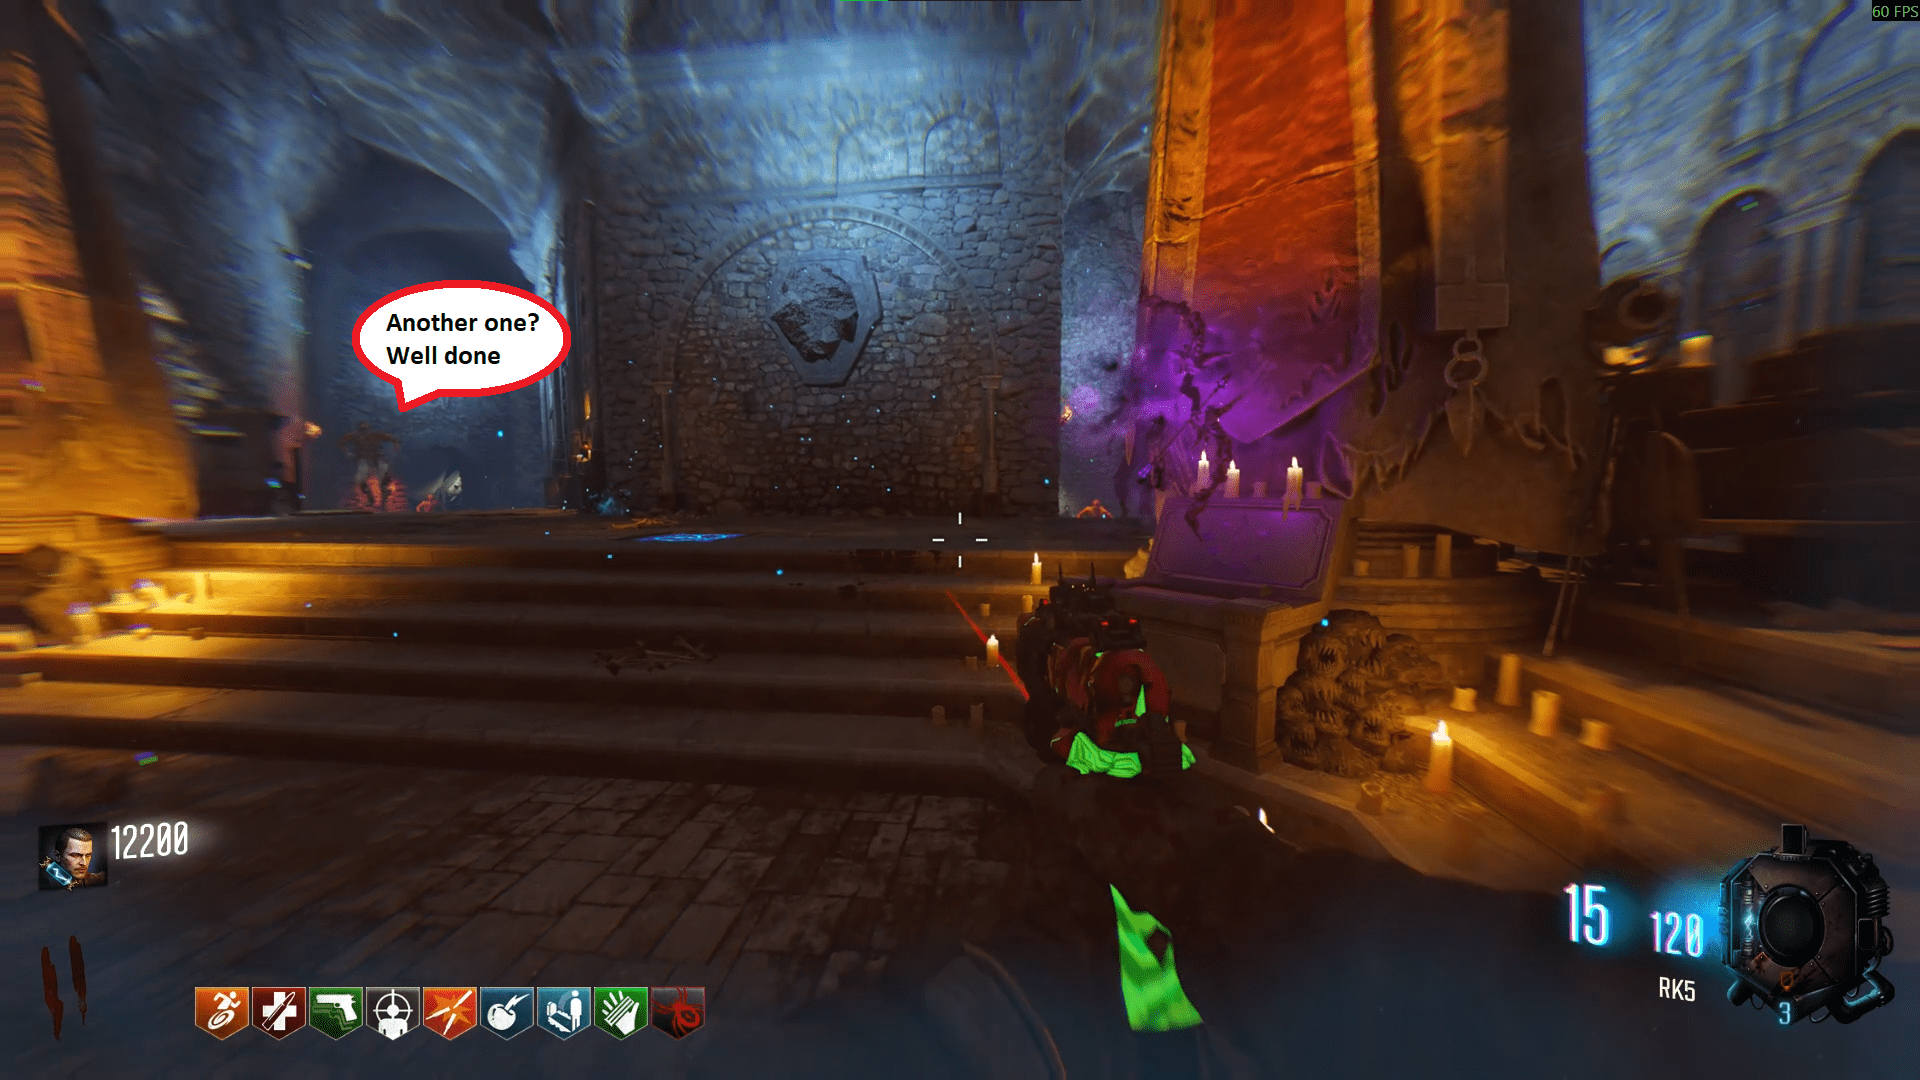
- The King sitting on his throne.
- The King straddling his horse in combat.
- The castle atop of the fiery mountain.
- The King and his wolven companion.
- In the Clocktower, besides the entrance to the Bastion and Courtyard.
- In the demon ritual room where the Void bow is made.
- Inside the Church on the upper stairs leading up and out to the Courtyard.
- In the corridor leading towards Samantha and Eddie's rooms, on the left after exiting to it.
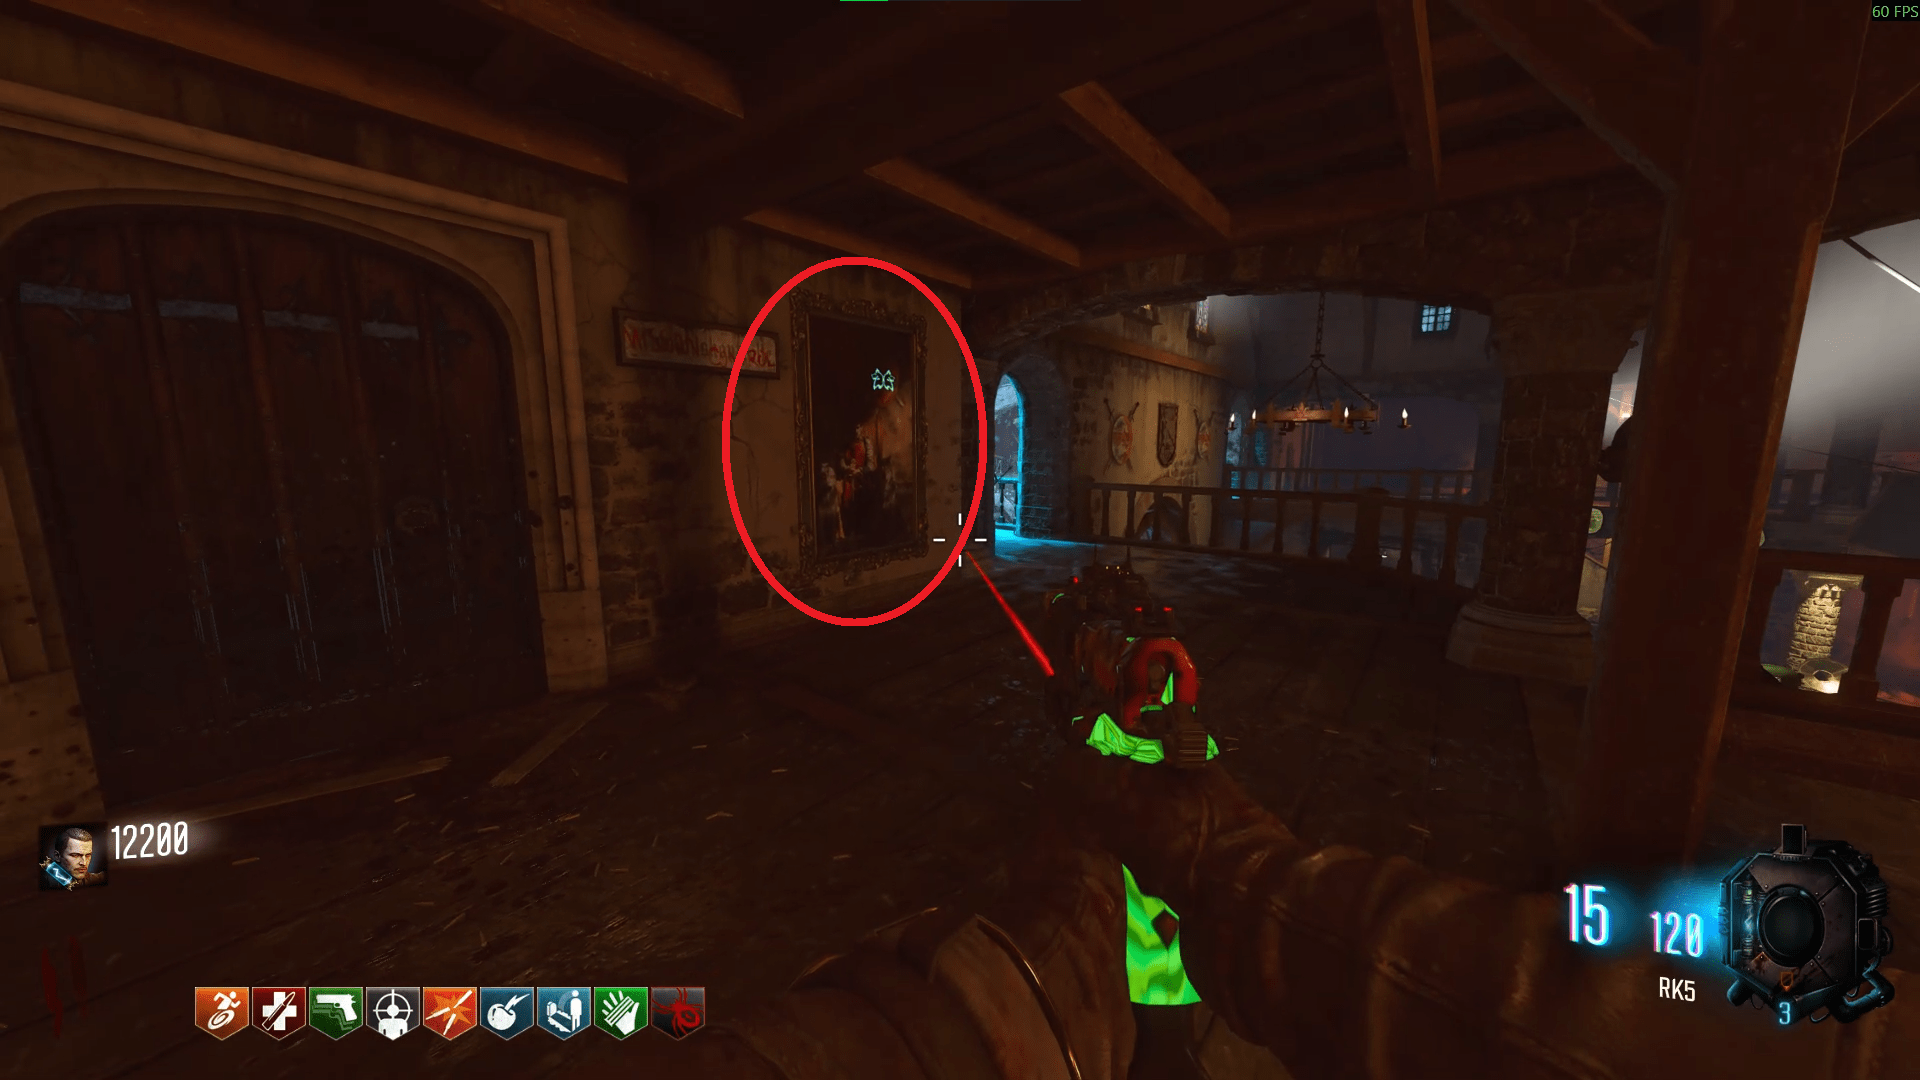
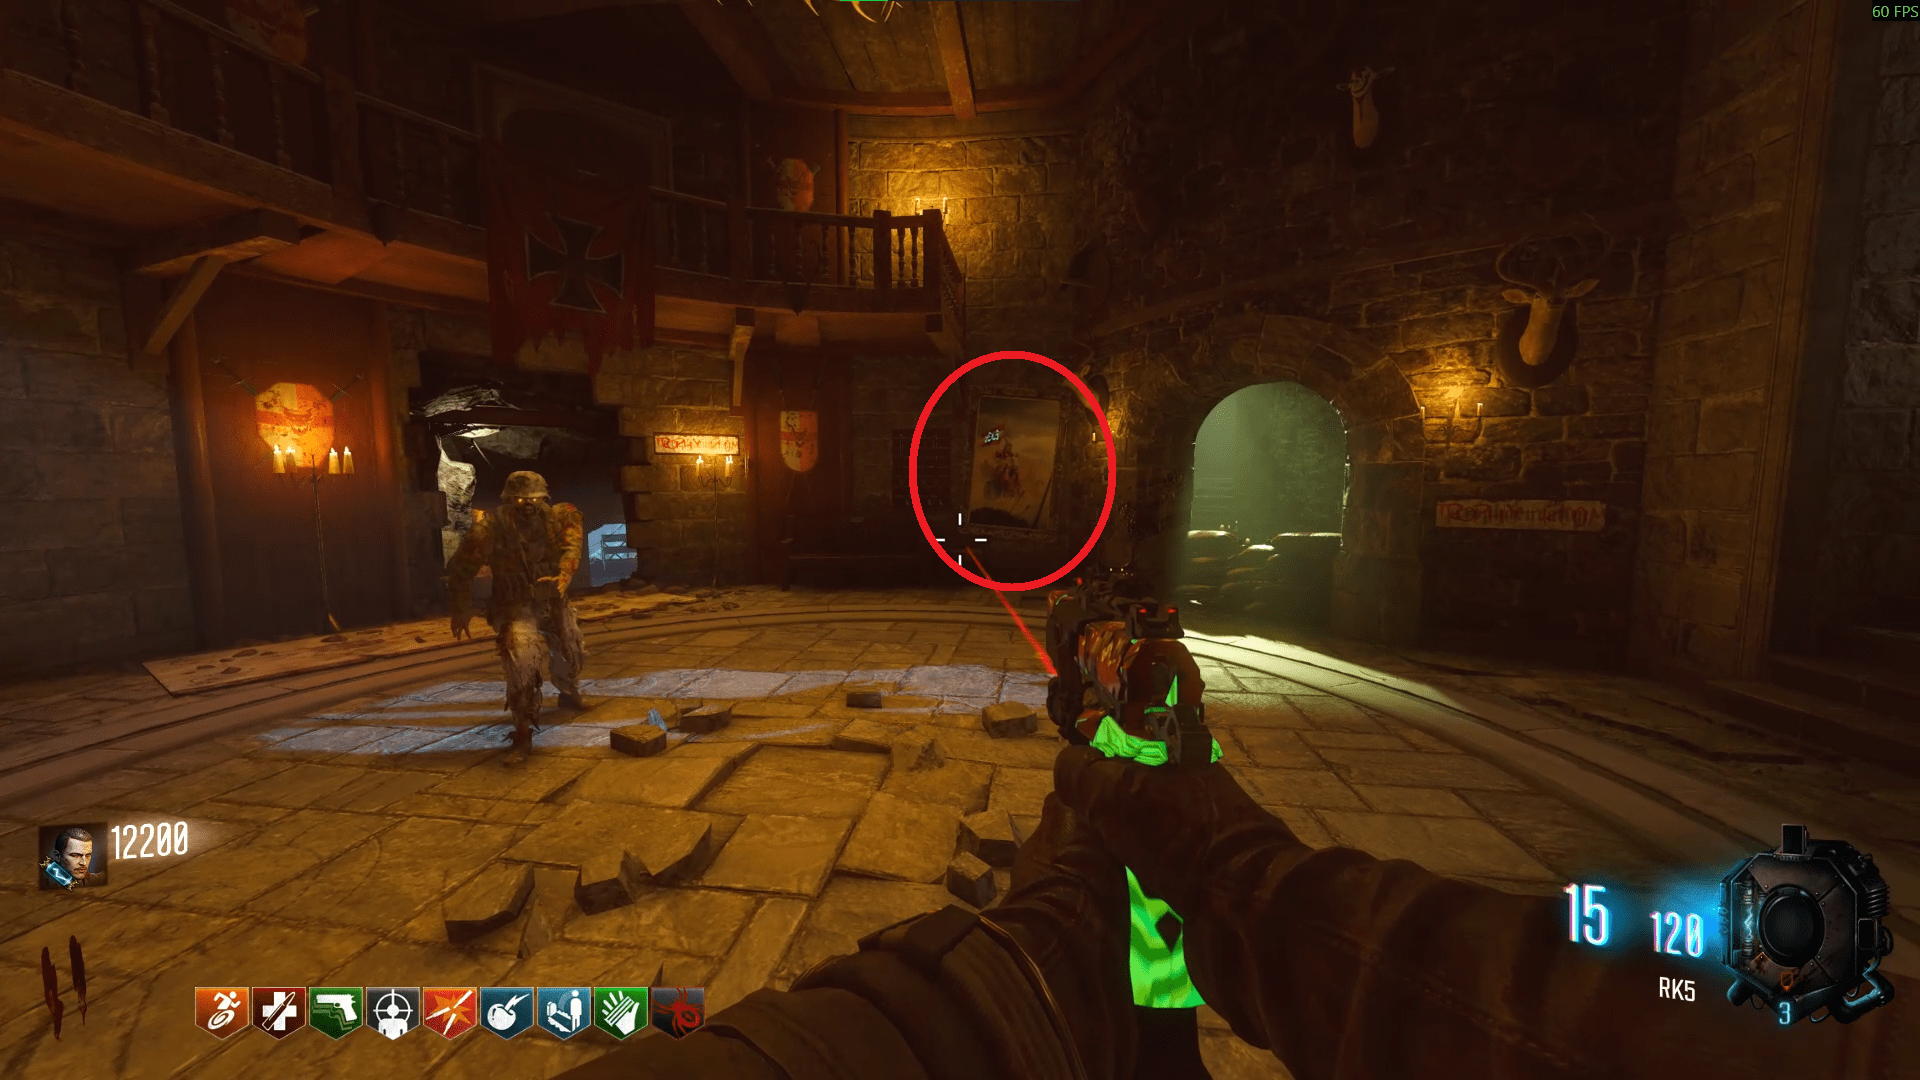
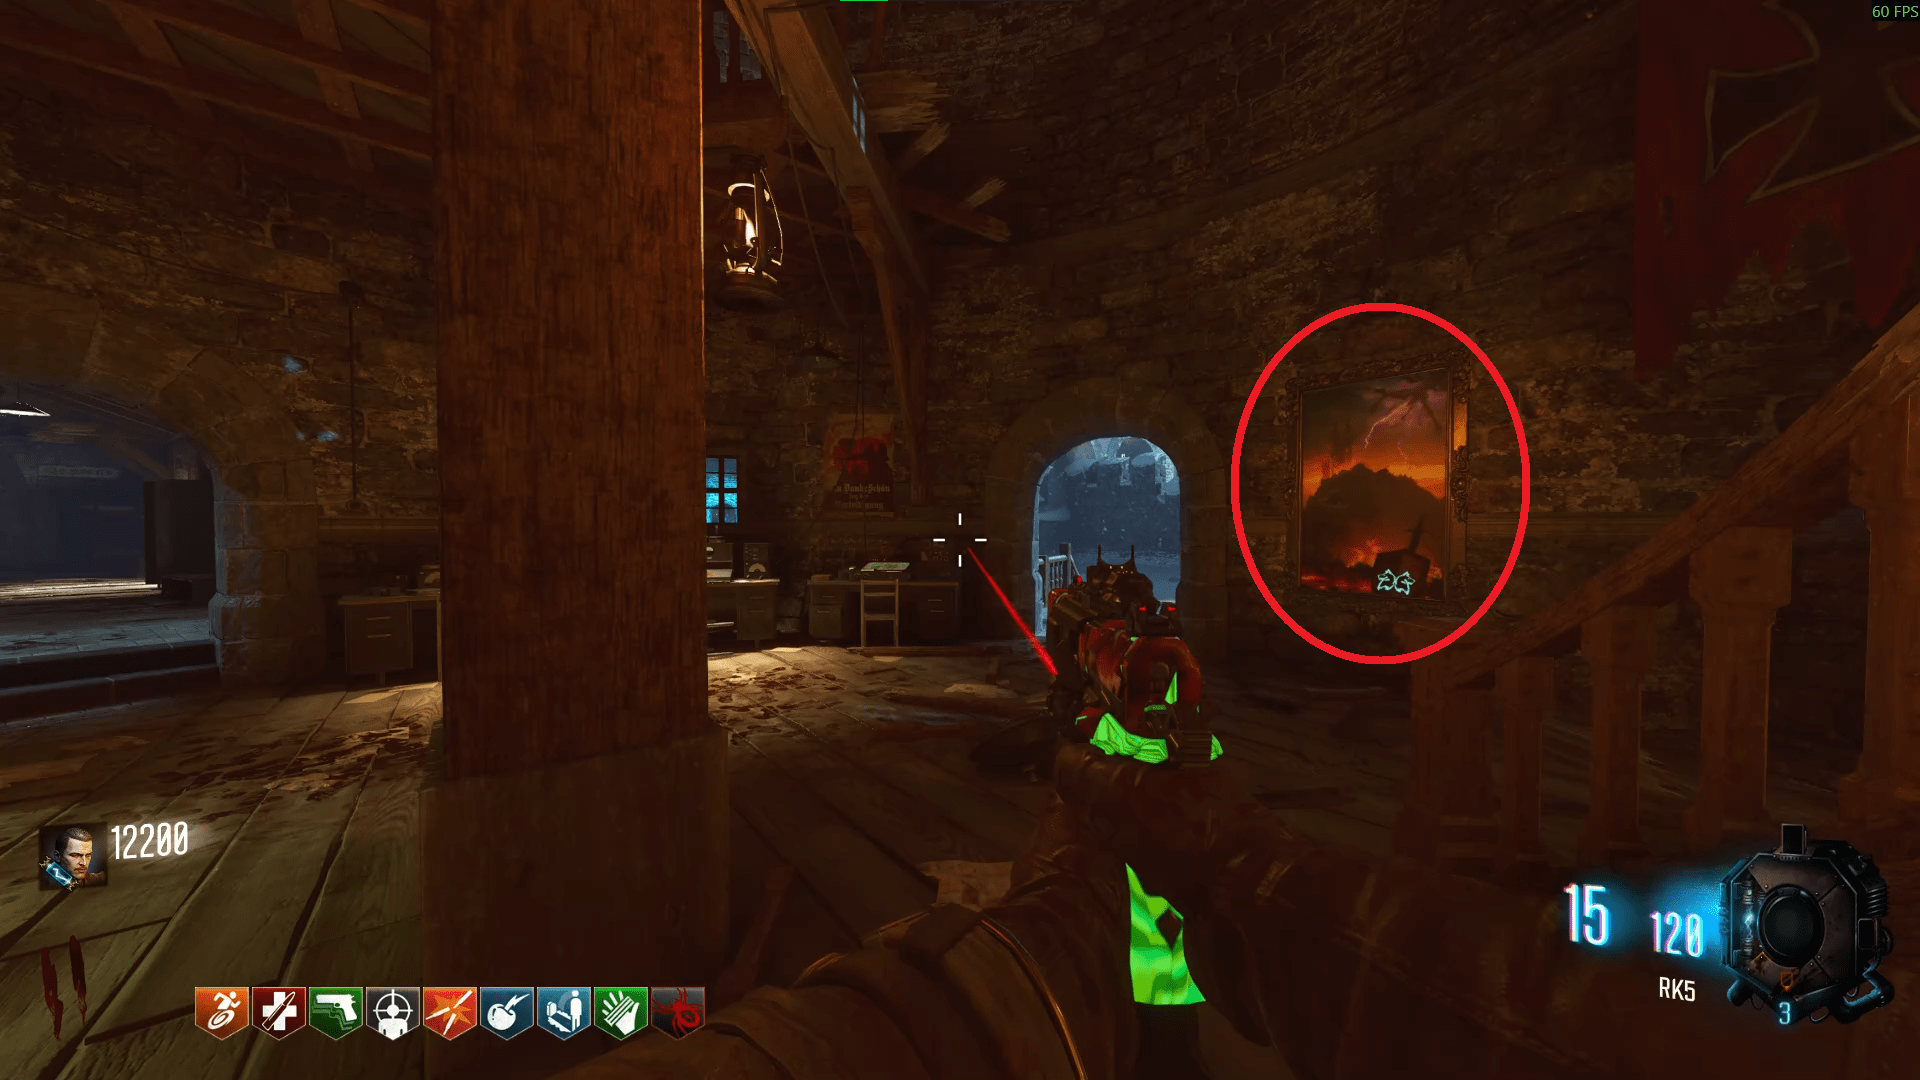
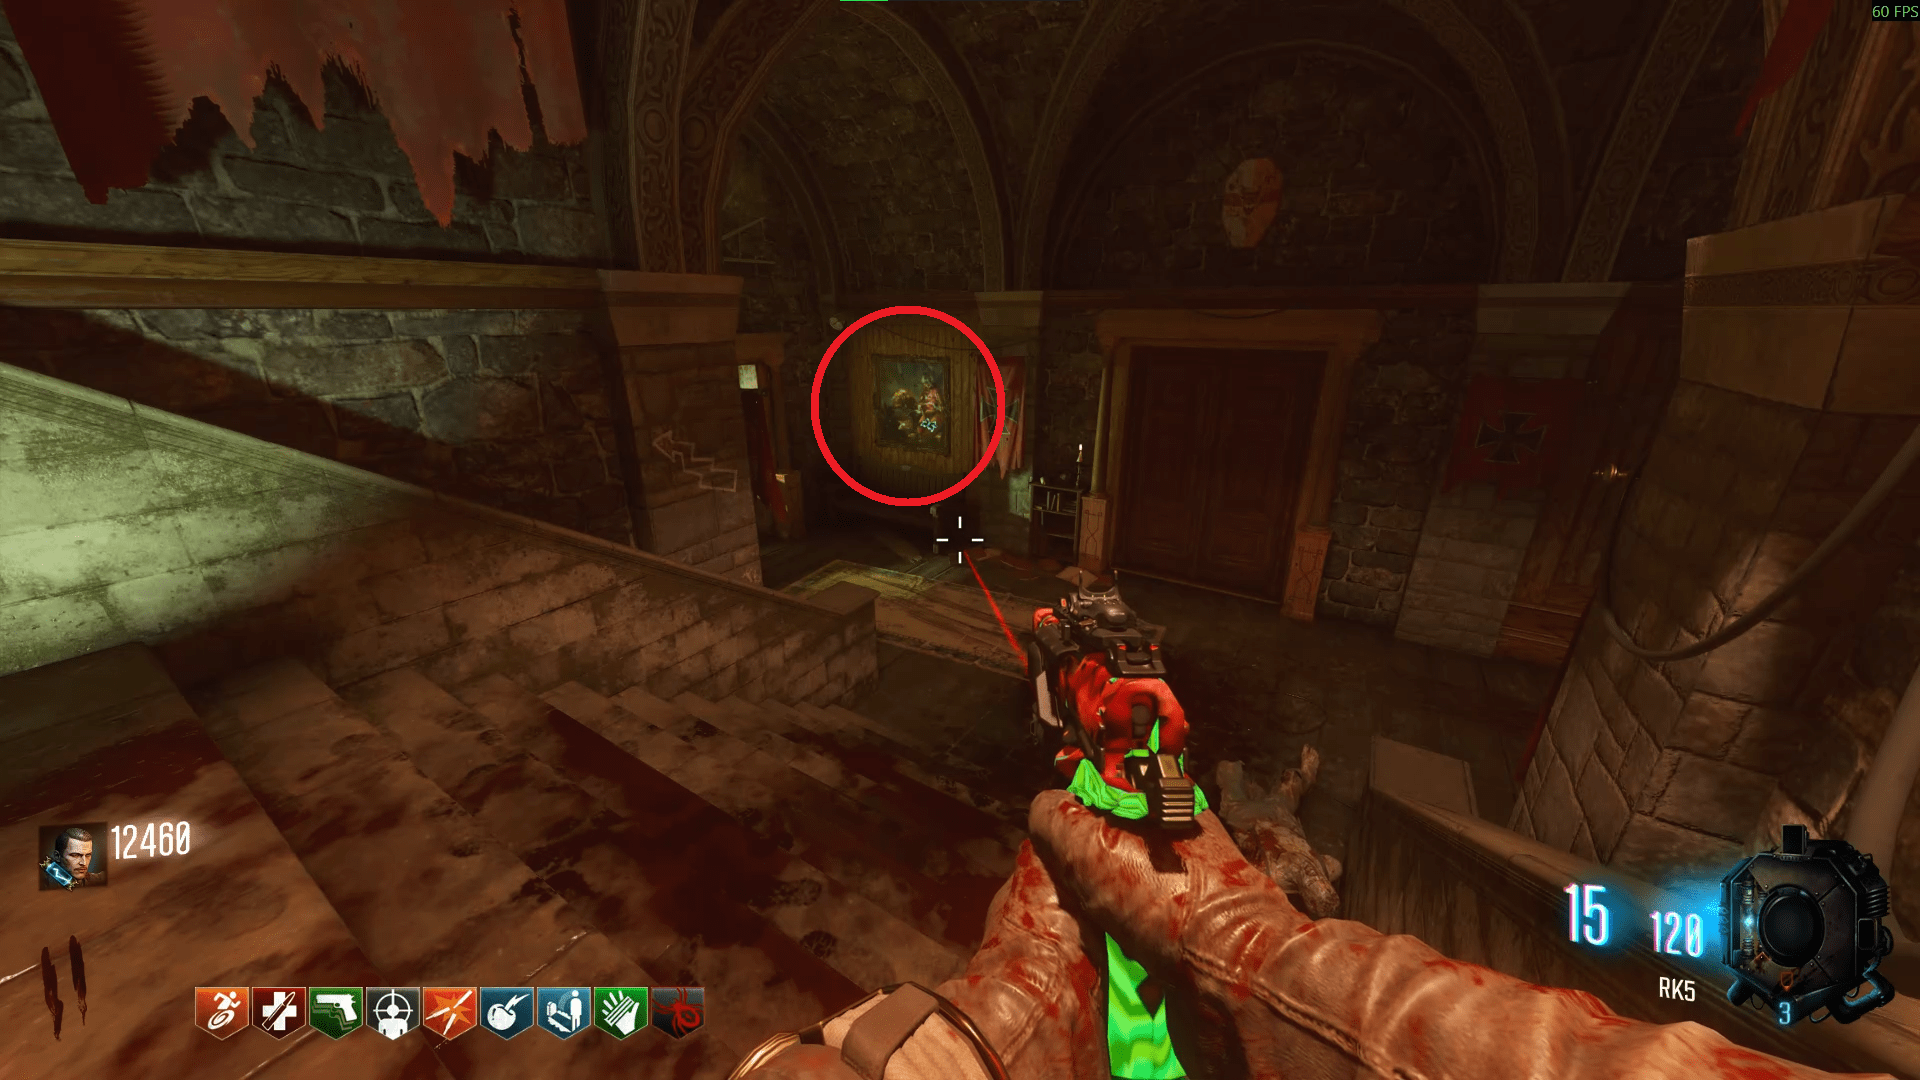
Upon interacting with all four paintings in the correct order, head down to the Undercroft through the Church and a wall will break open with the broken arrow, signified by a howling wolf sound effect.
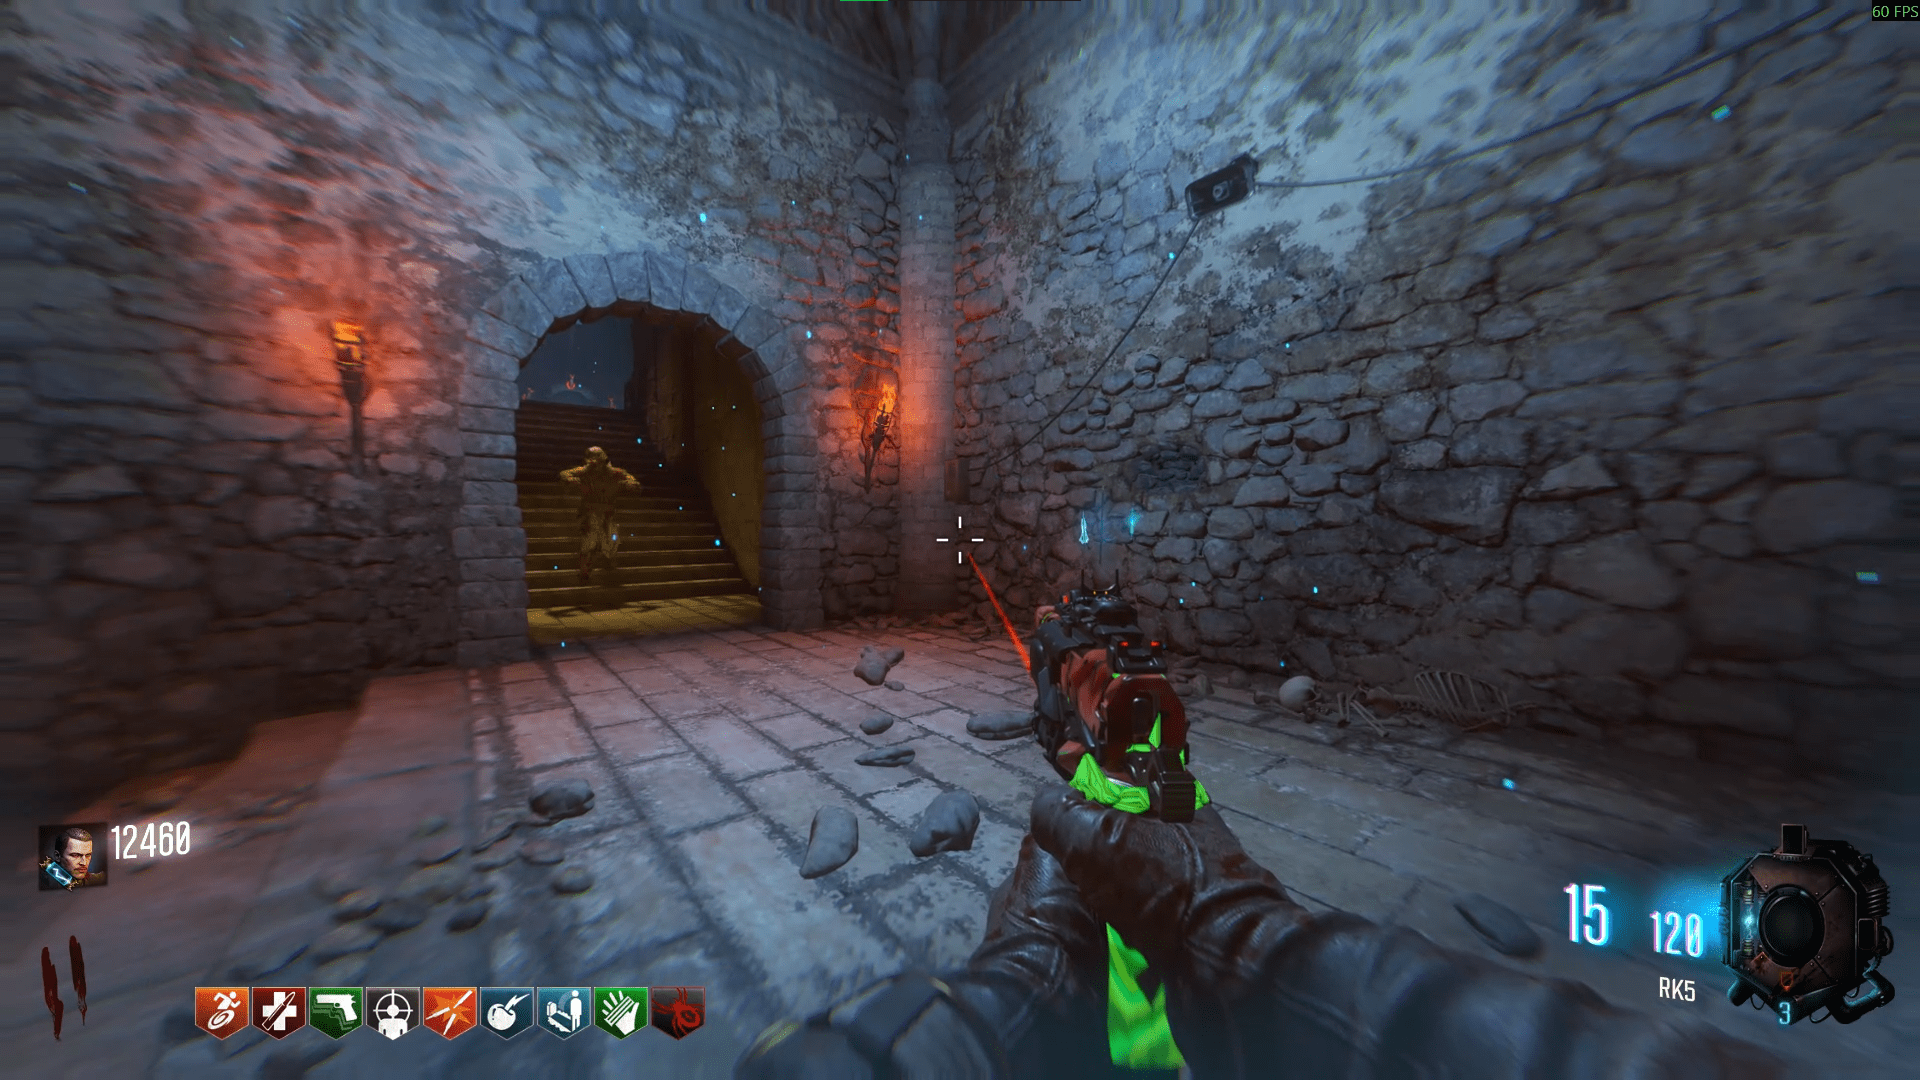
Pick the broken arrow up and go to the Rocket Test Launch Site. There will be a red tattered flag on the mountainside above. Shoot the flag, not the rocks below it, to have it release the skull of a wolf. Pick it up and return to the undercroft, then place it on the skeleton next to the Wolf bow box.
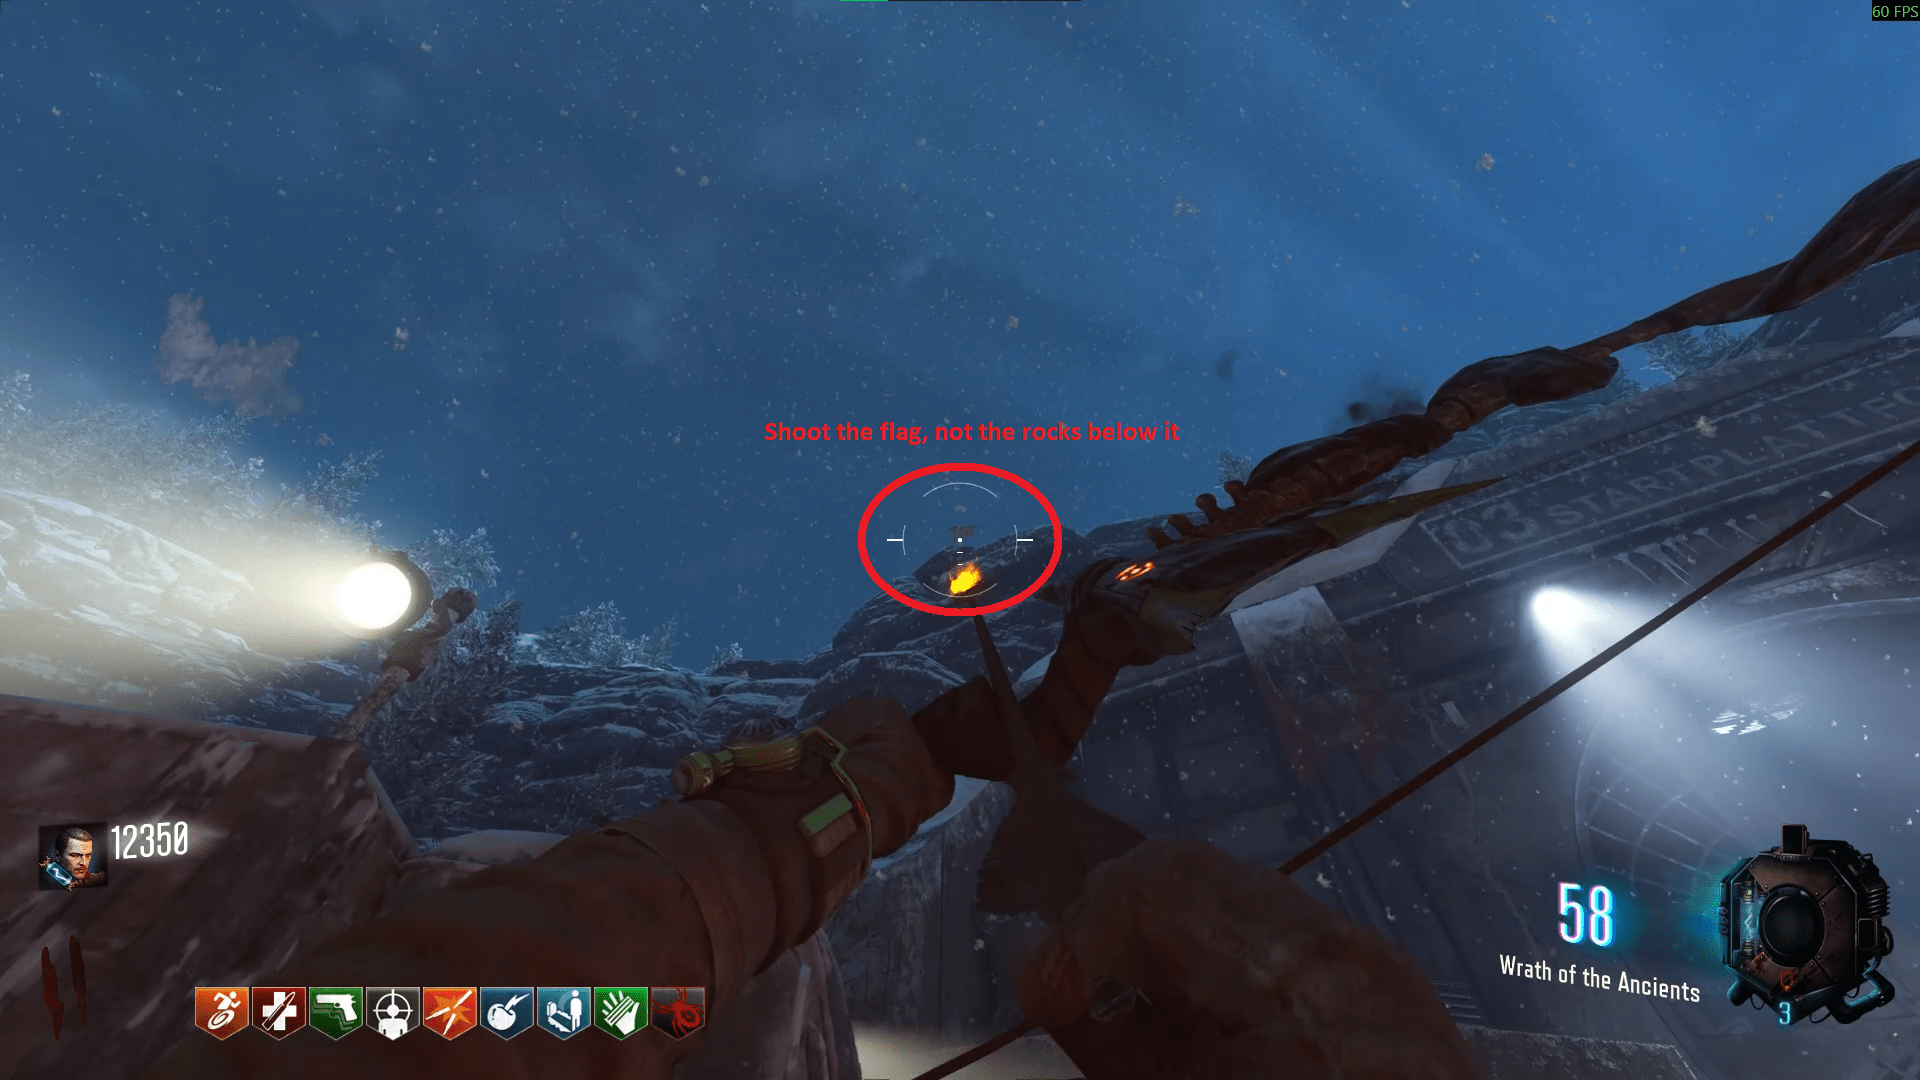
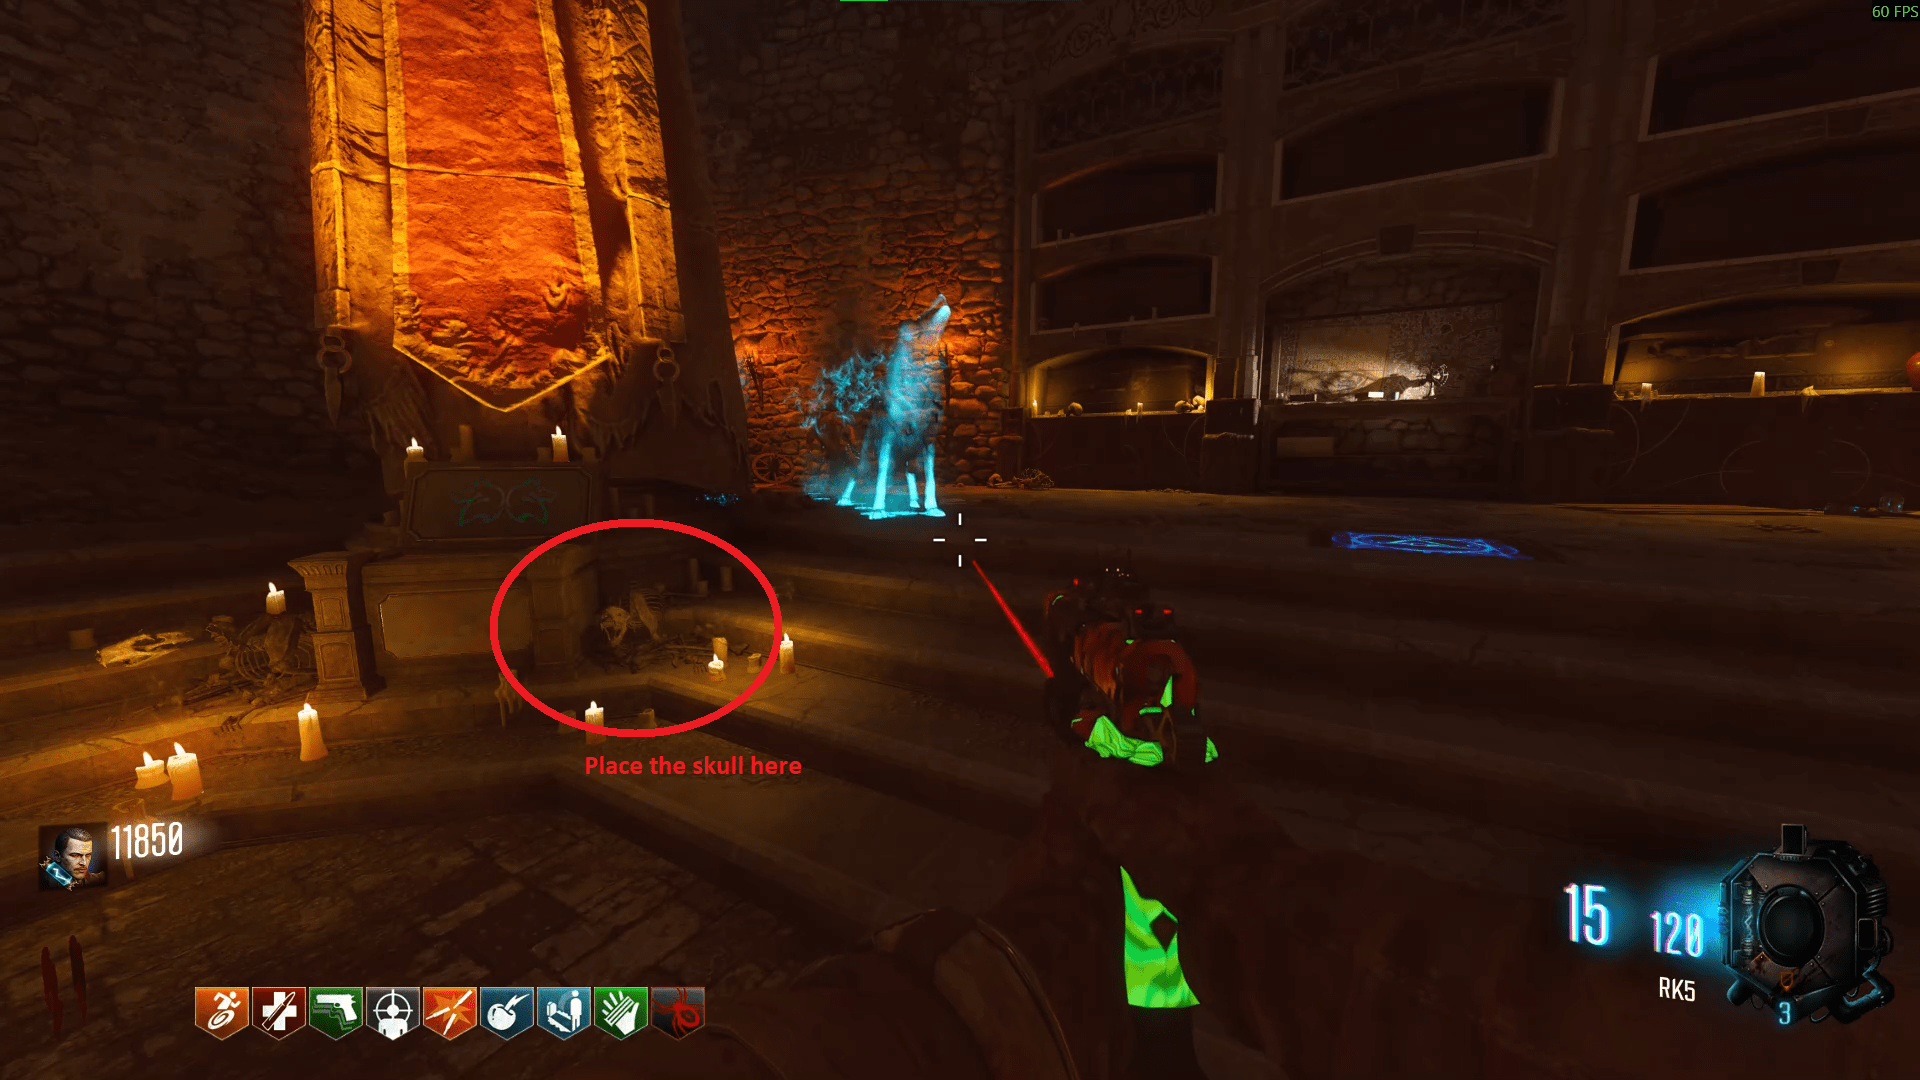
This summons the spectral best boy. Follow him to find some of the King's remains. After the wolf is done digging upon arrival, you must get 11 kills per digsite and this must be done three times. Keep following the wolf until he arrives back in the Undercroft and starts to sit underneath a wall. The three digsites are in the Courtyard, just outside of Double Tap and besides the Undercroft PaP machine.
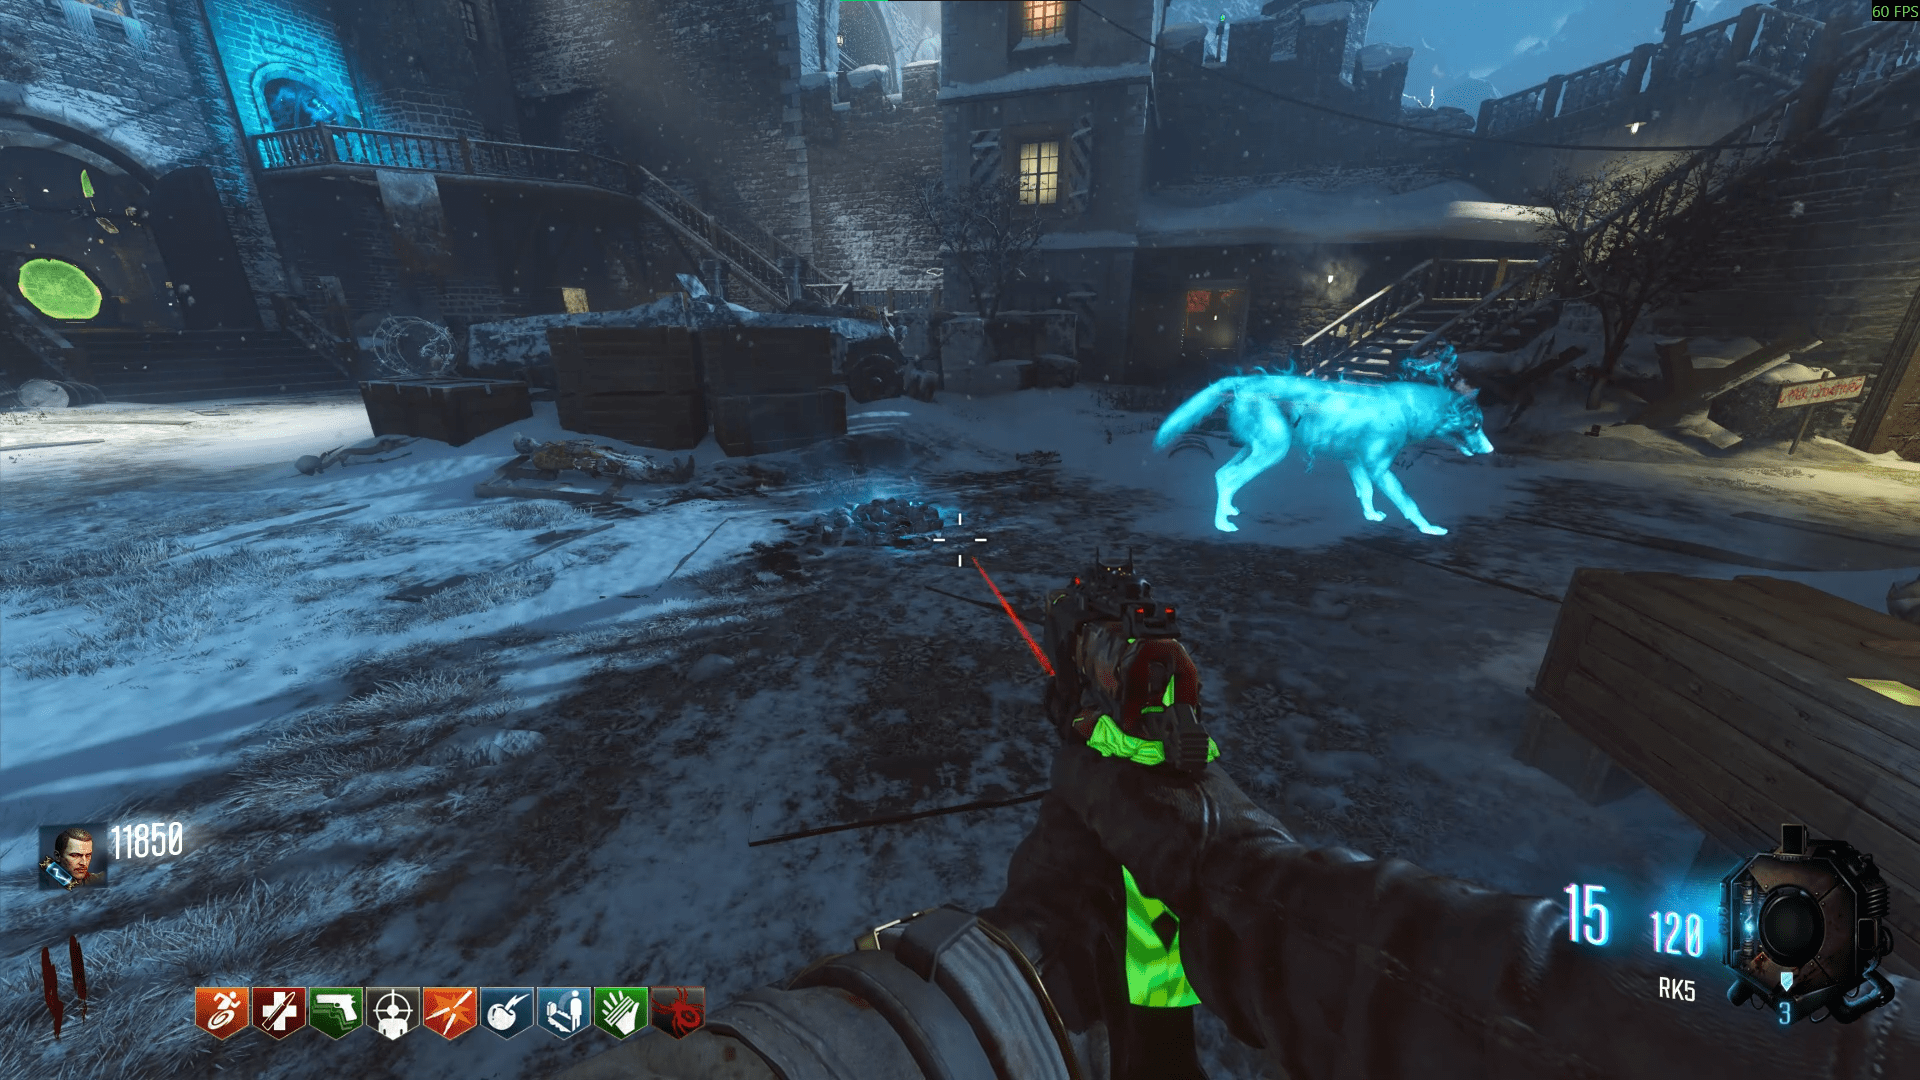
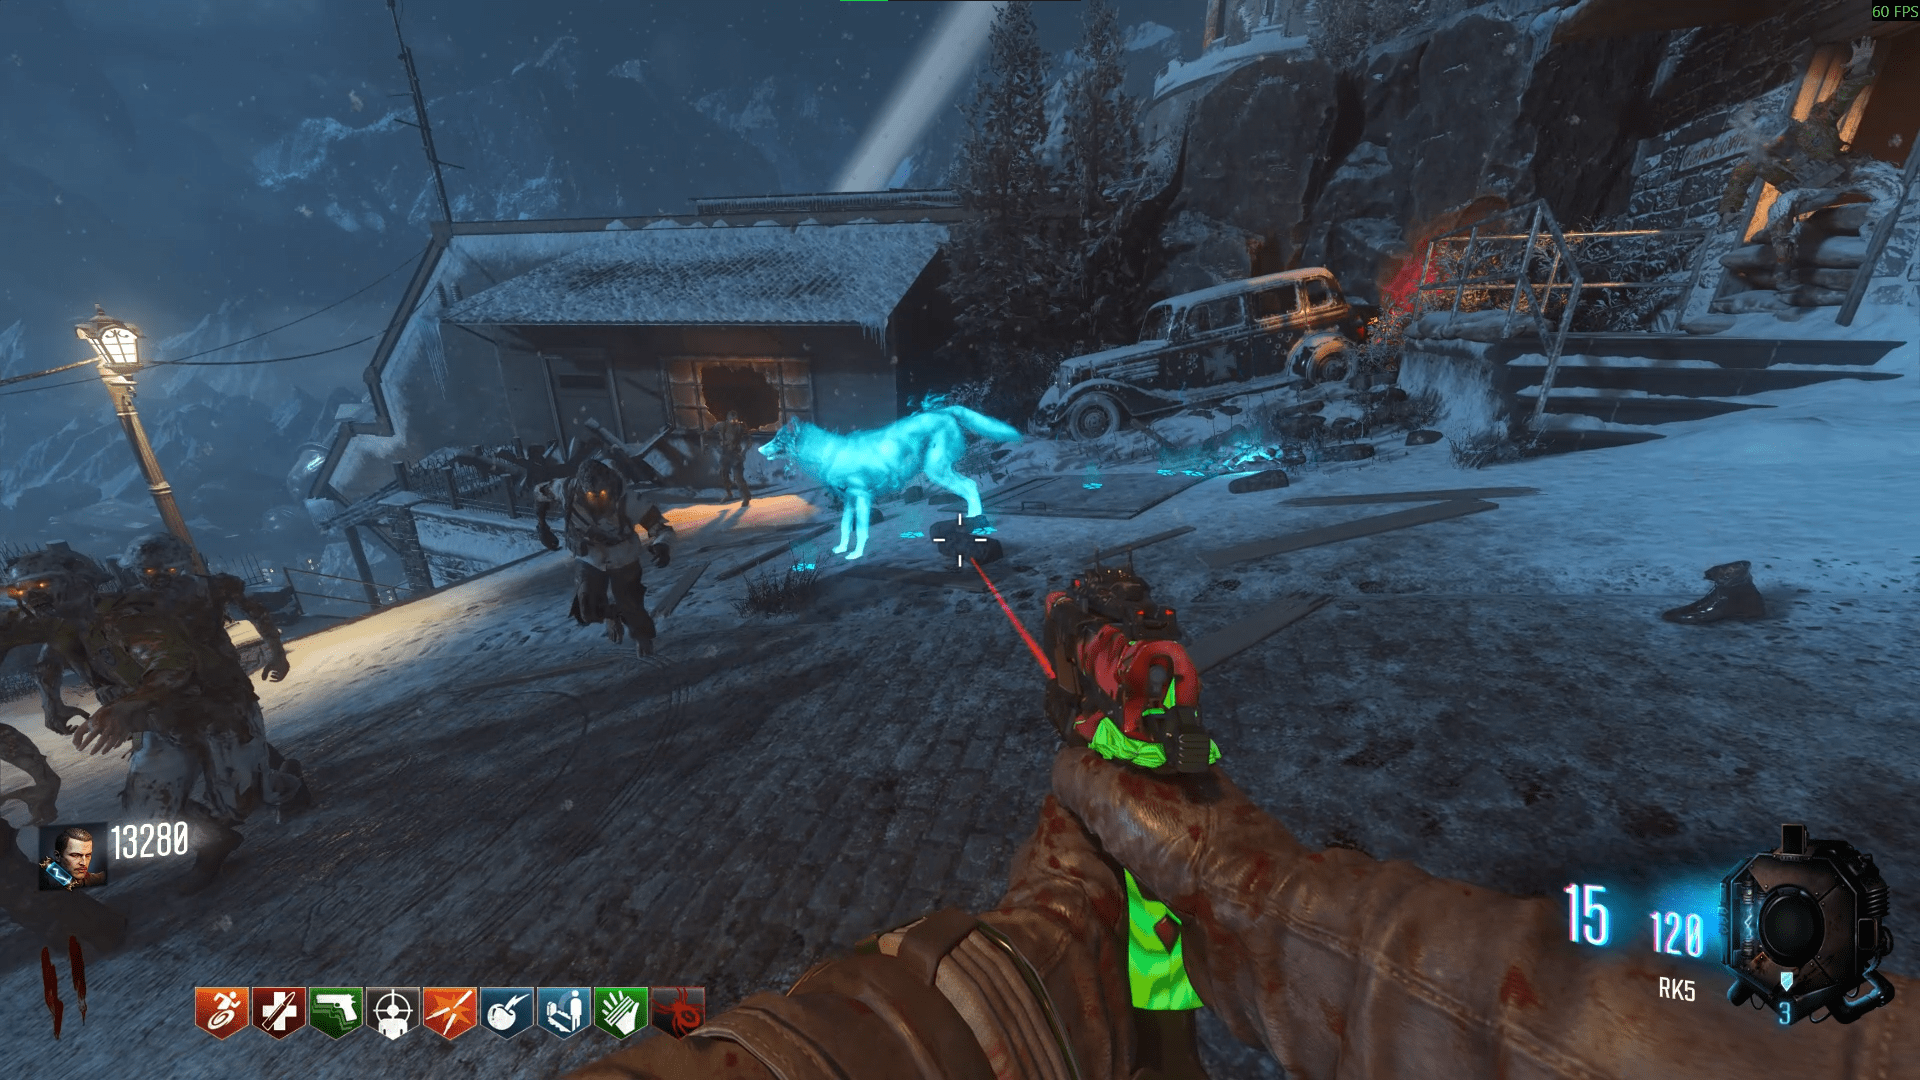
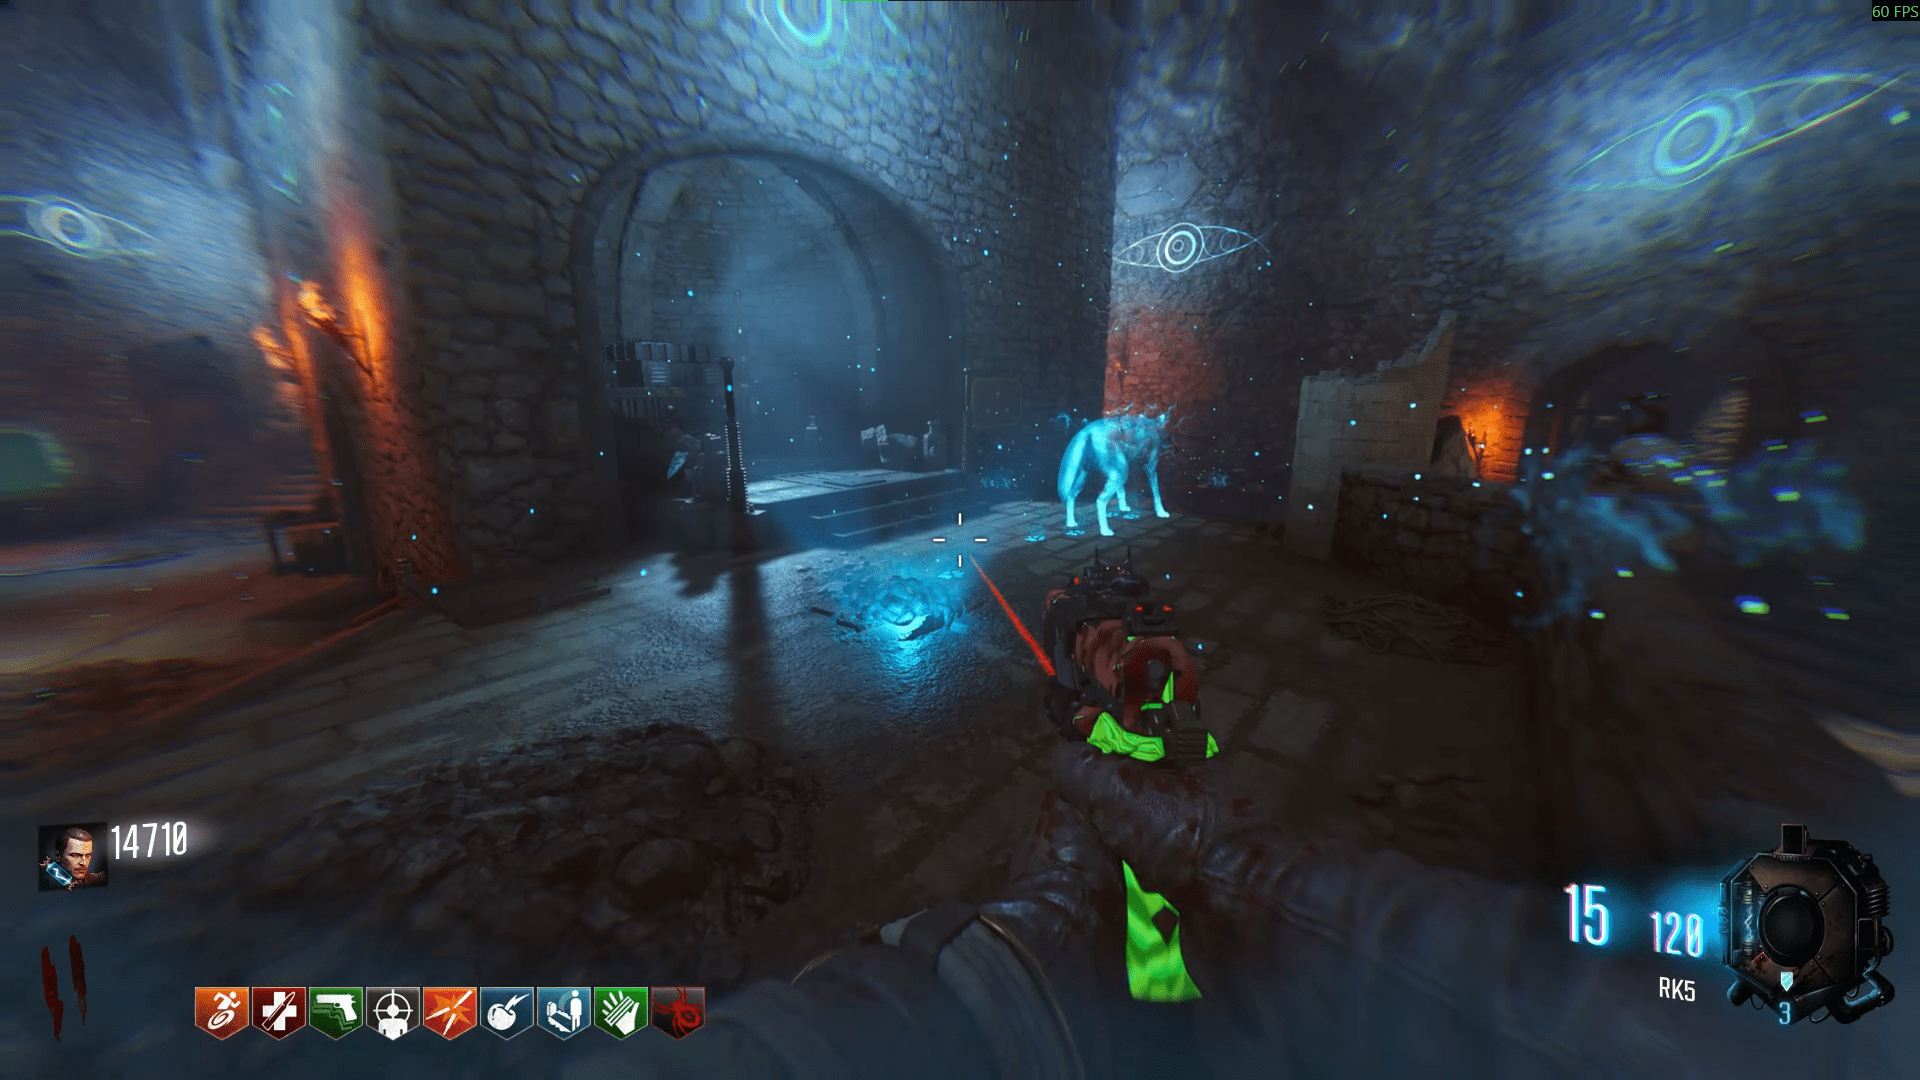
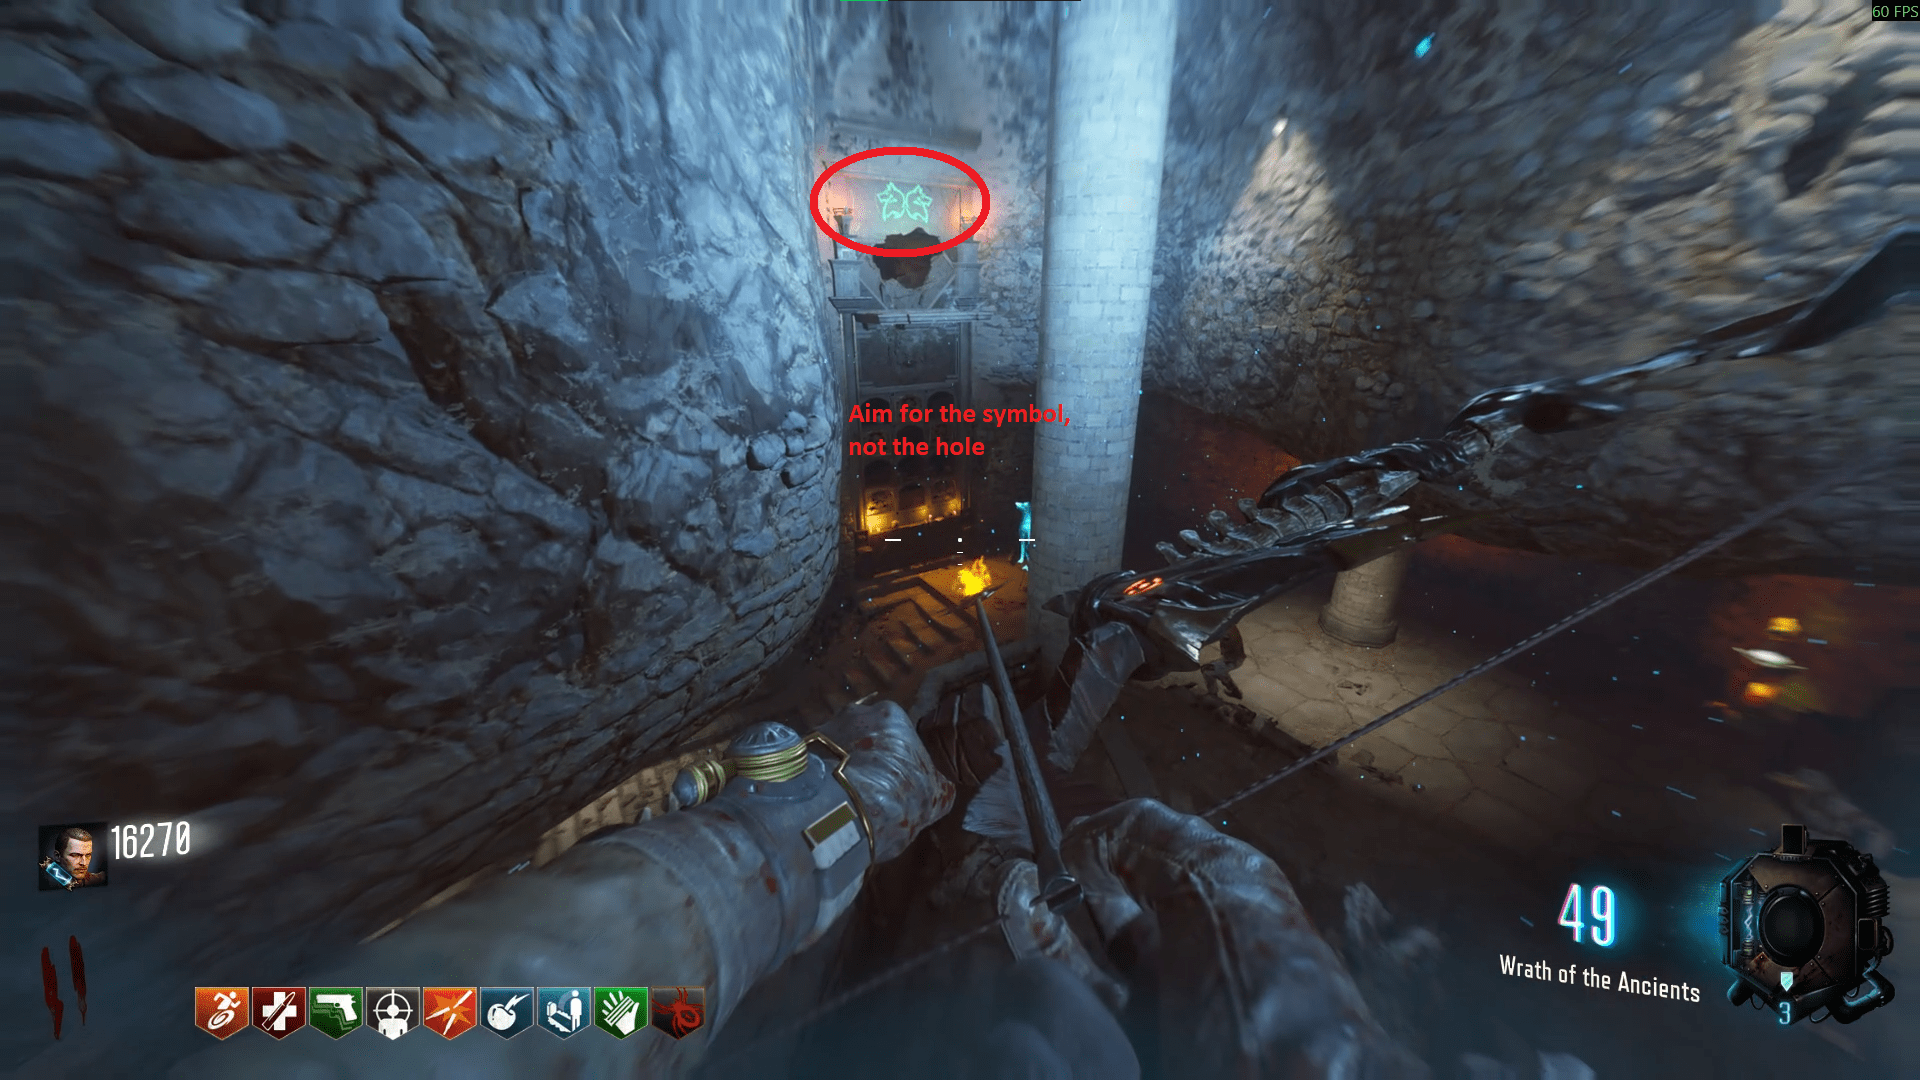
After he sits by the wall, wait for anti-gravity and then shoot the two wolves symbol above him while wallrunning to create a platform in which you can stand on. Stand on it, interact and claim your completed arrow. Then go and place the arrow into the appropriate box, same symbol as before, and get the 20 kills to create the Wolf bow.
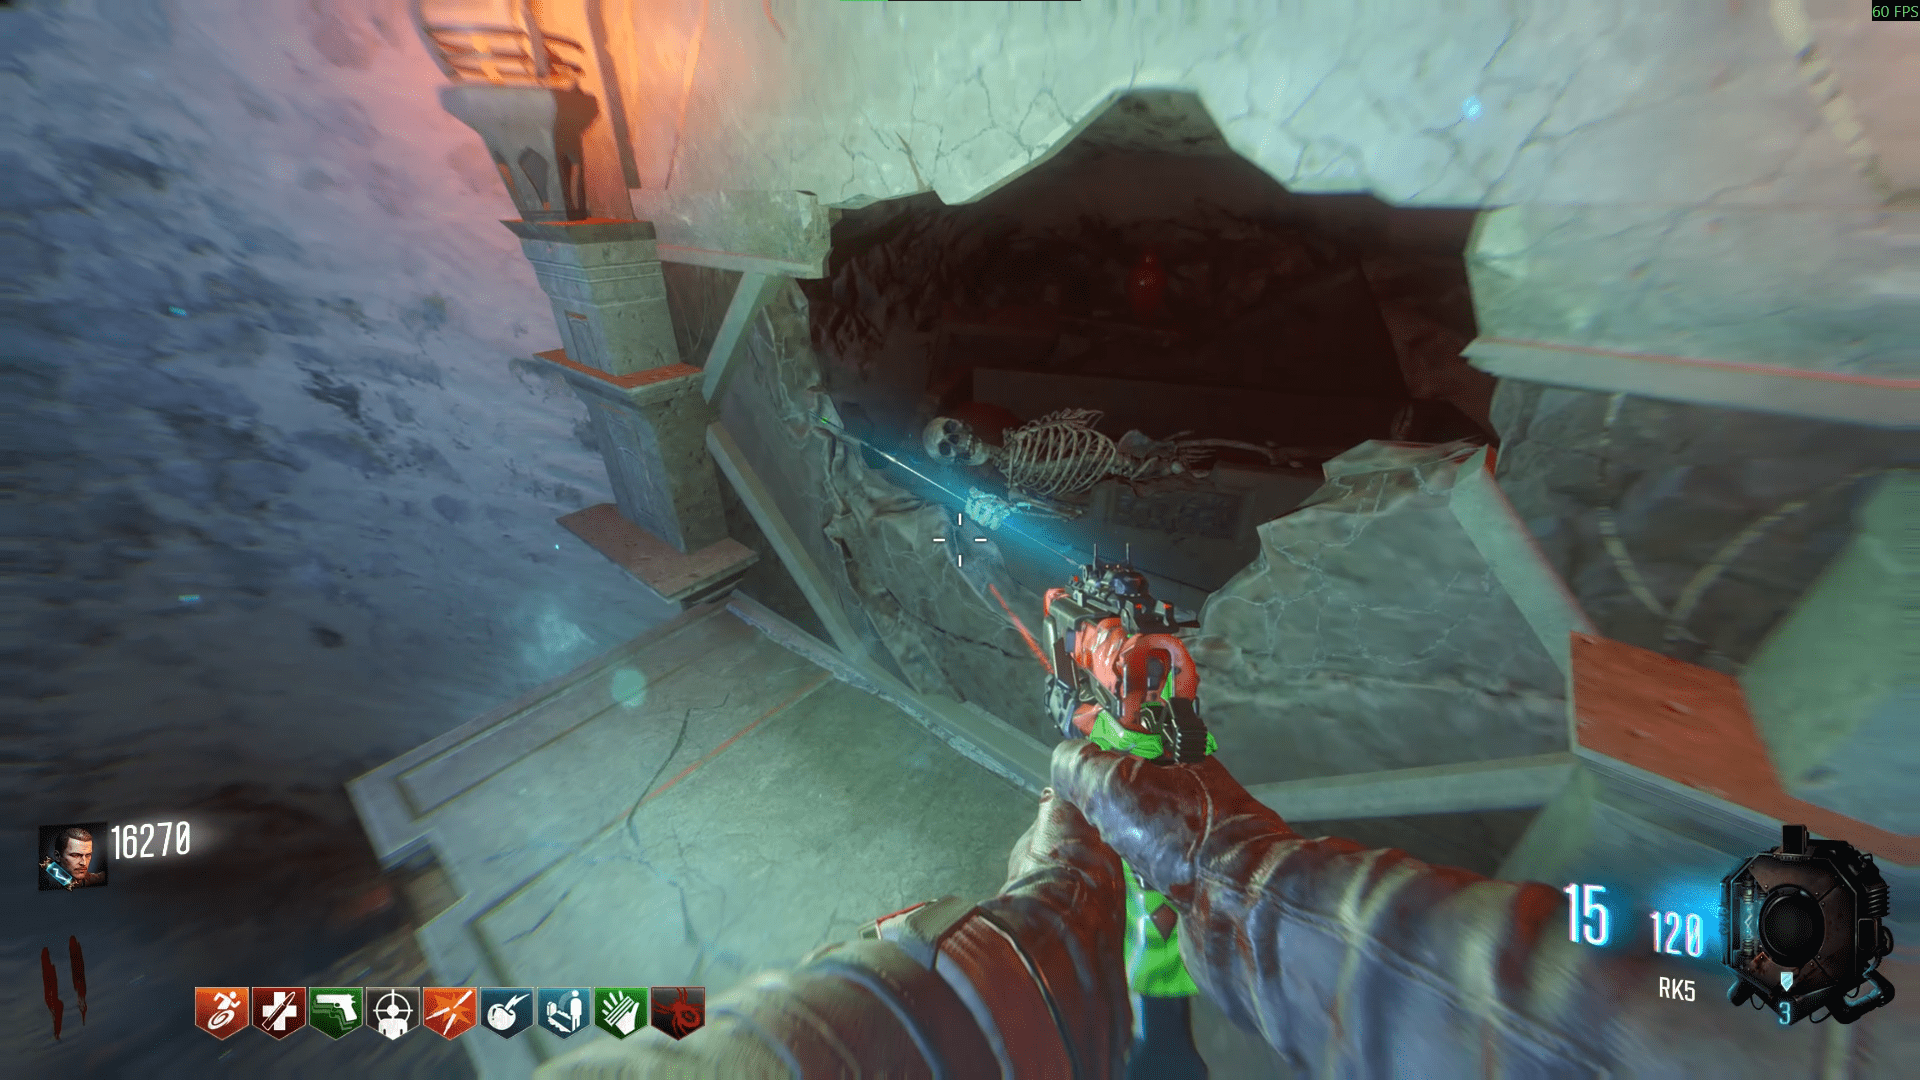
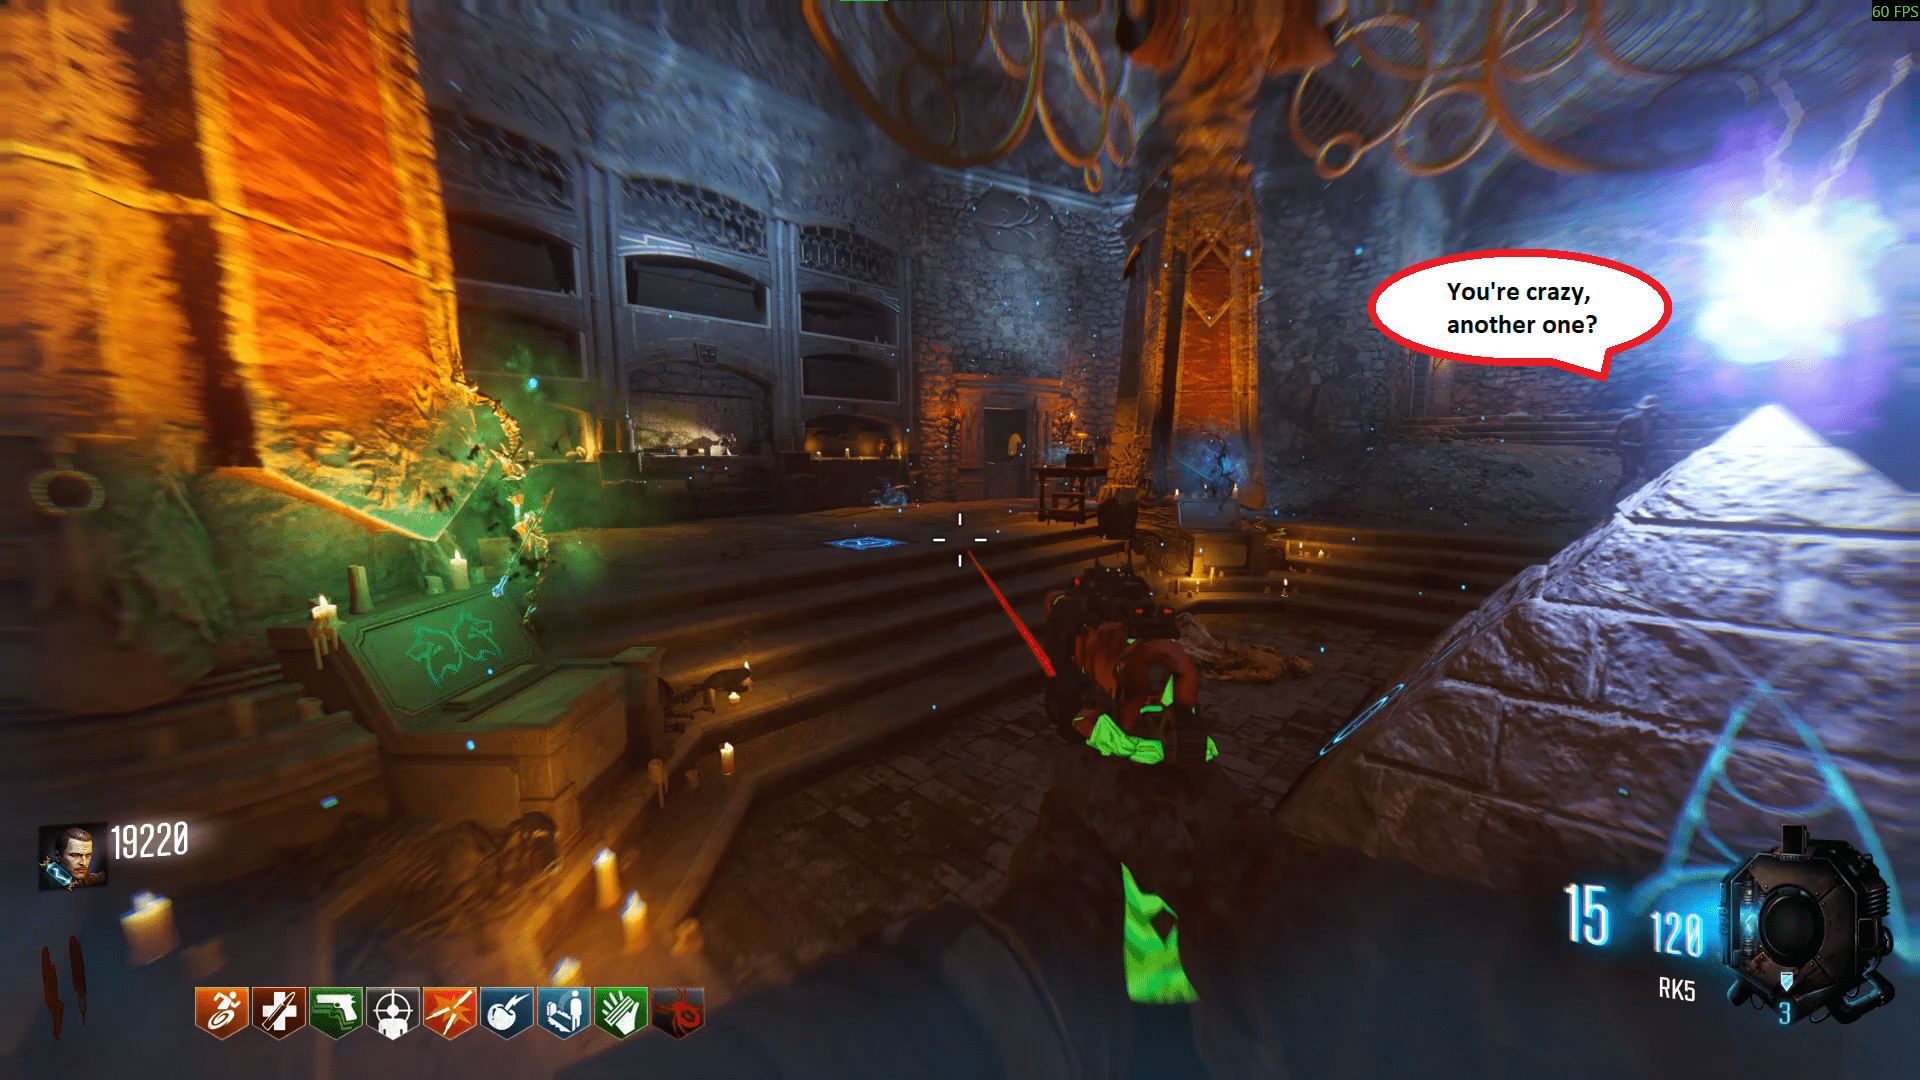
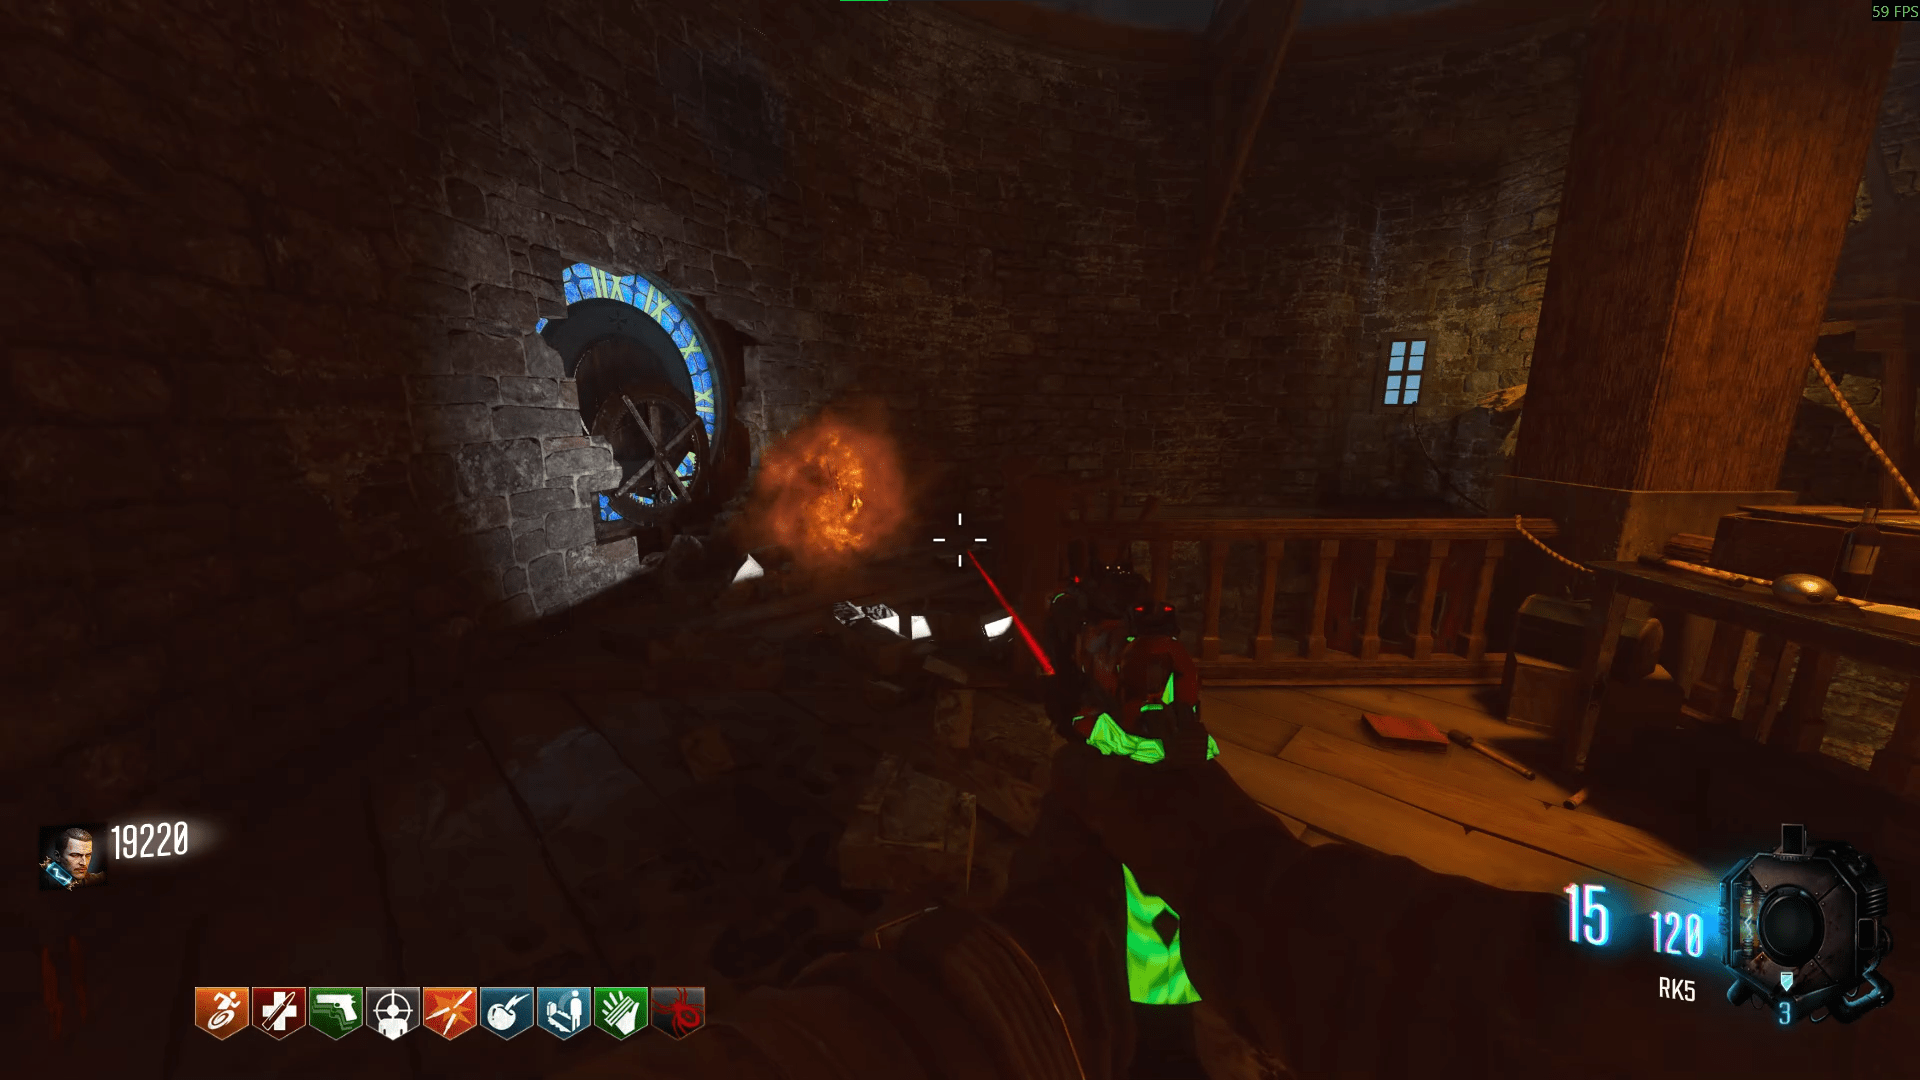
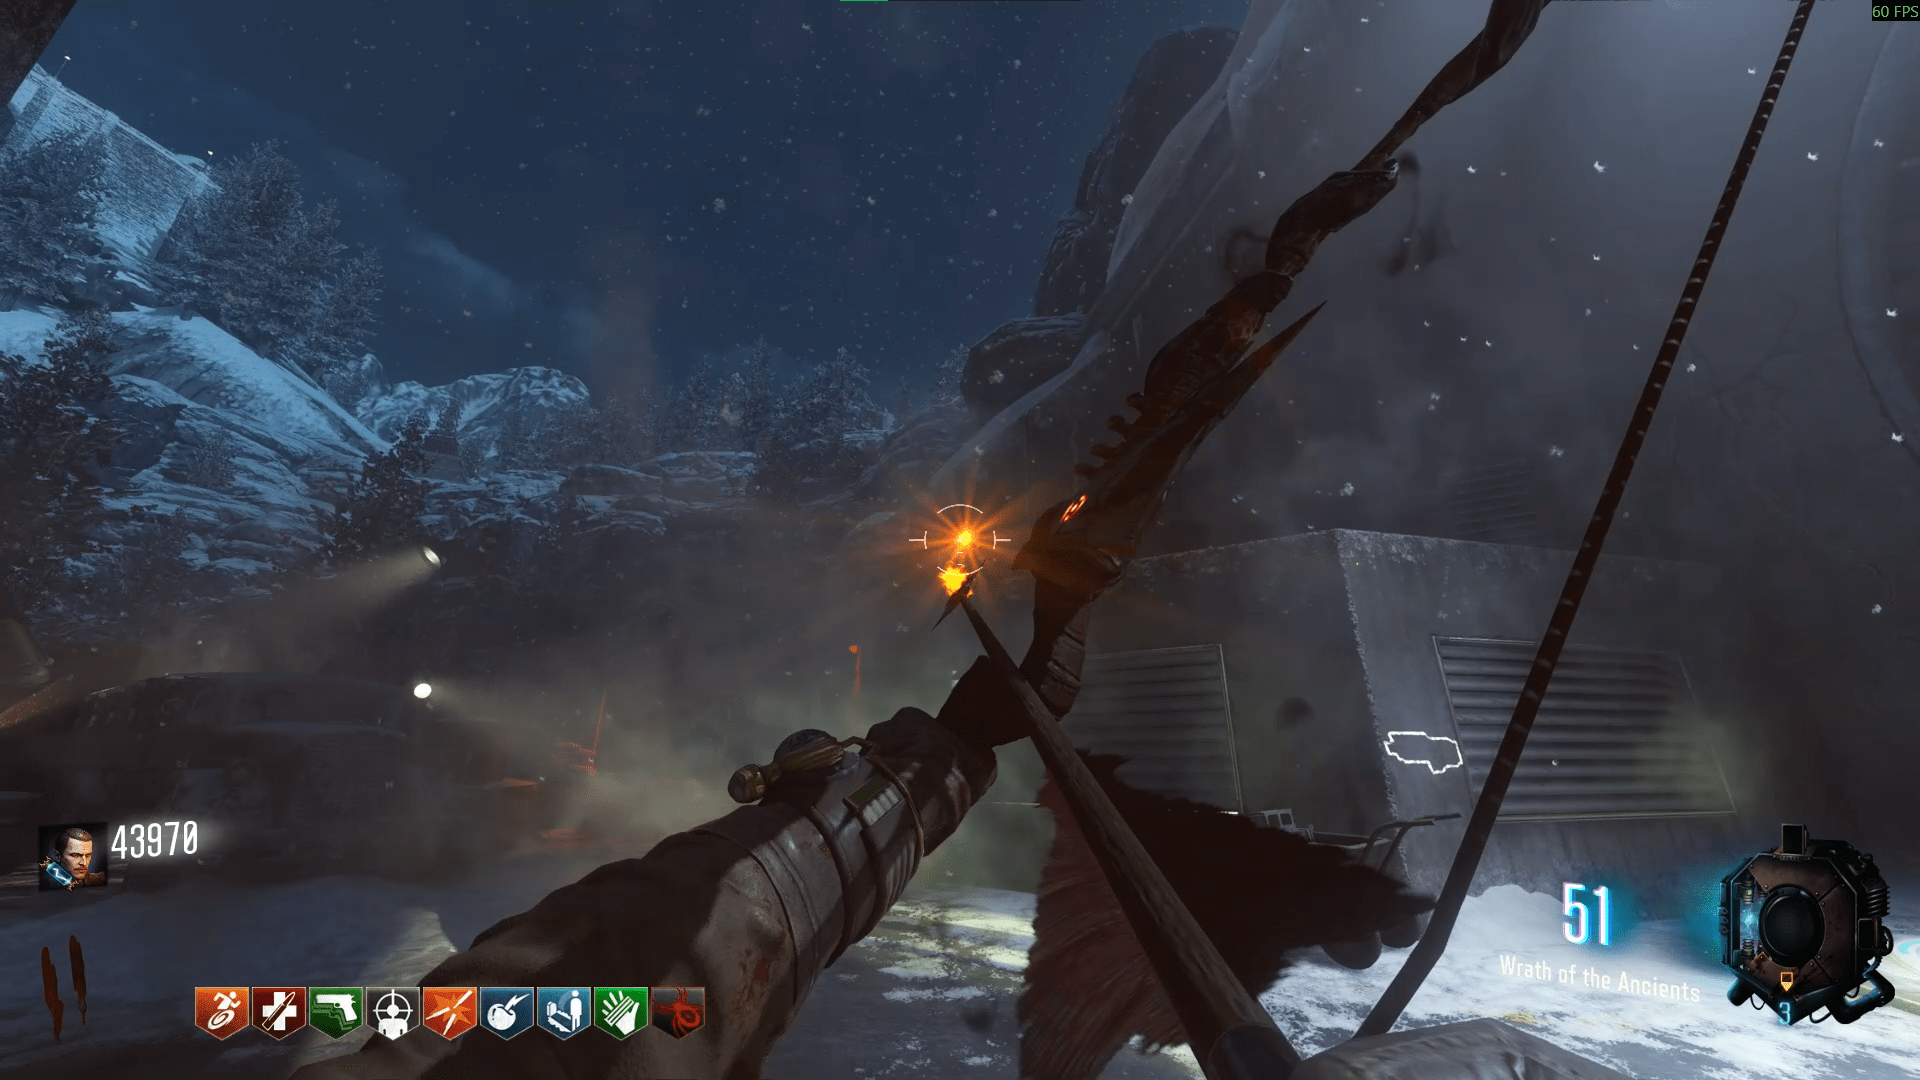
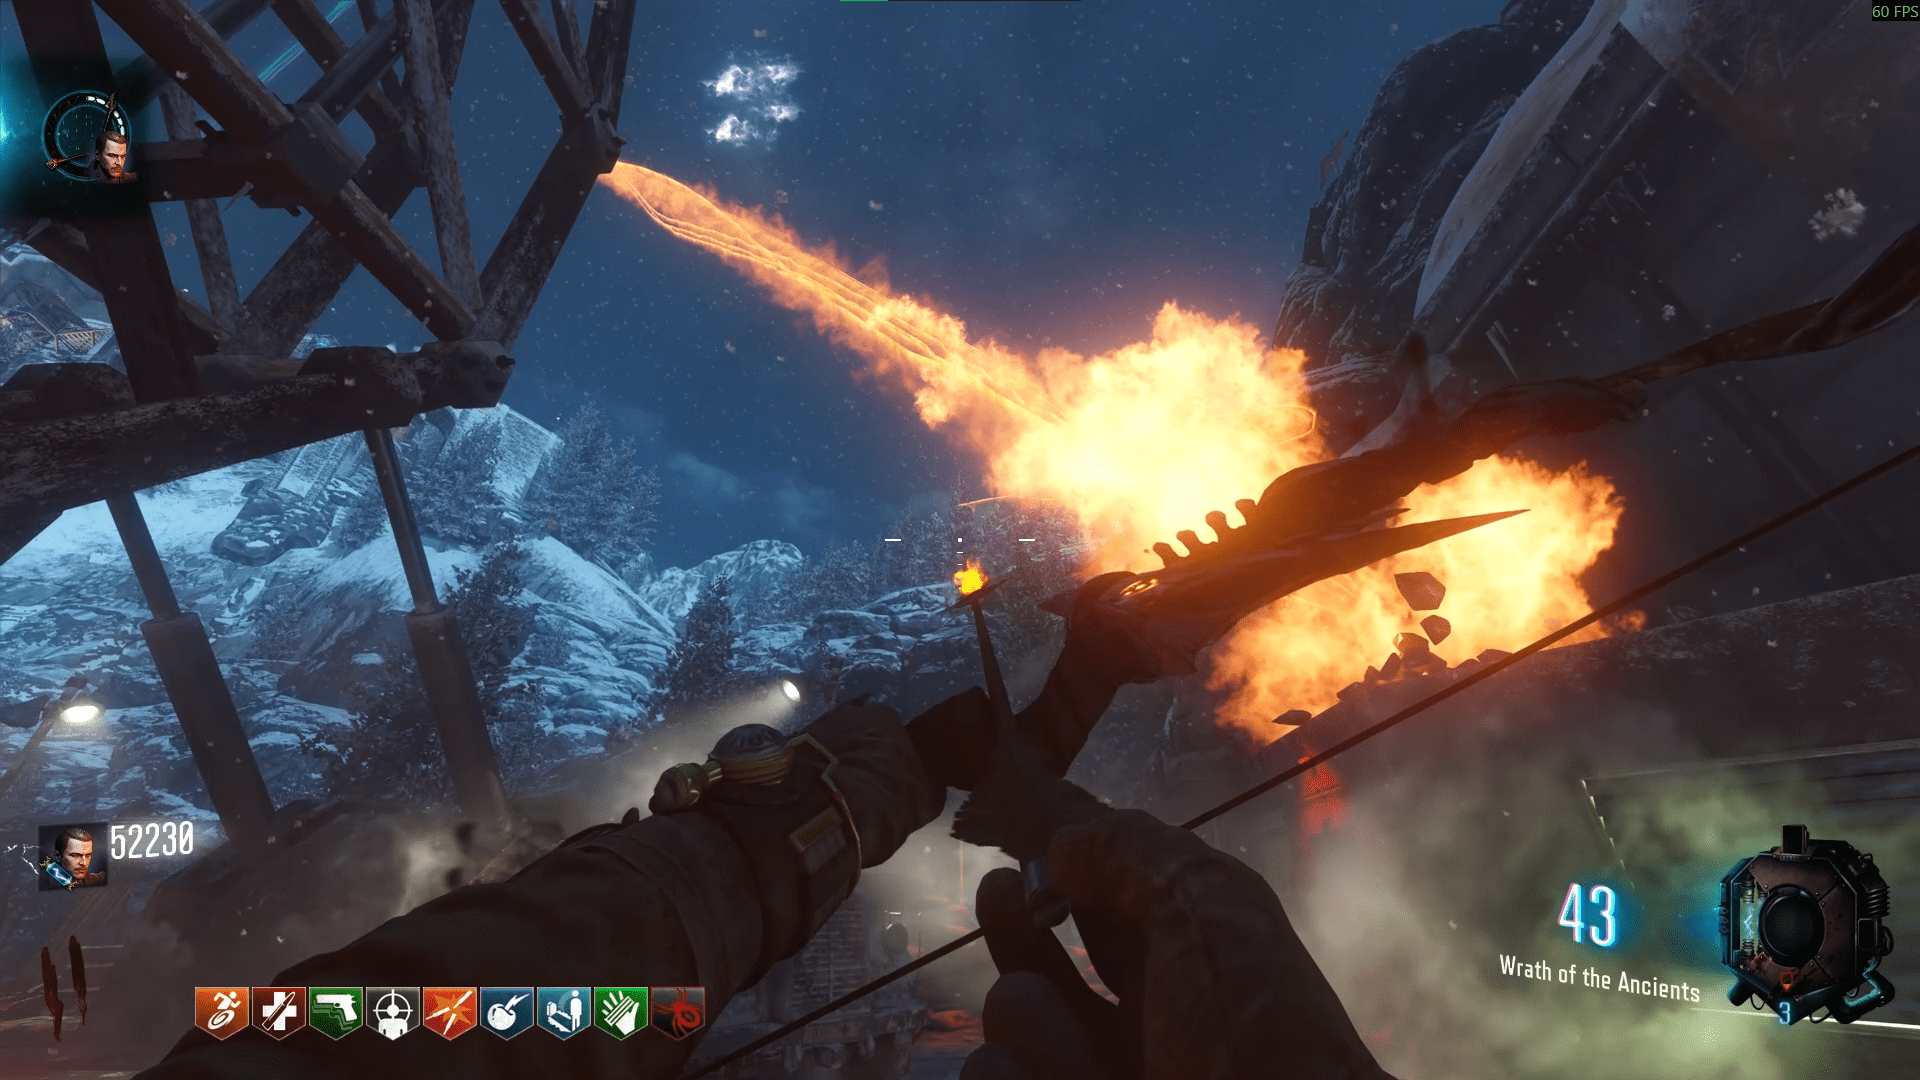
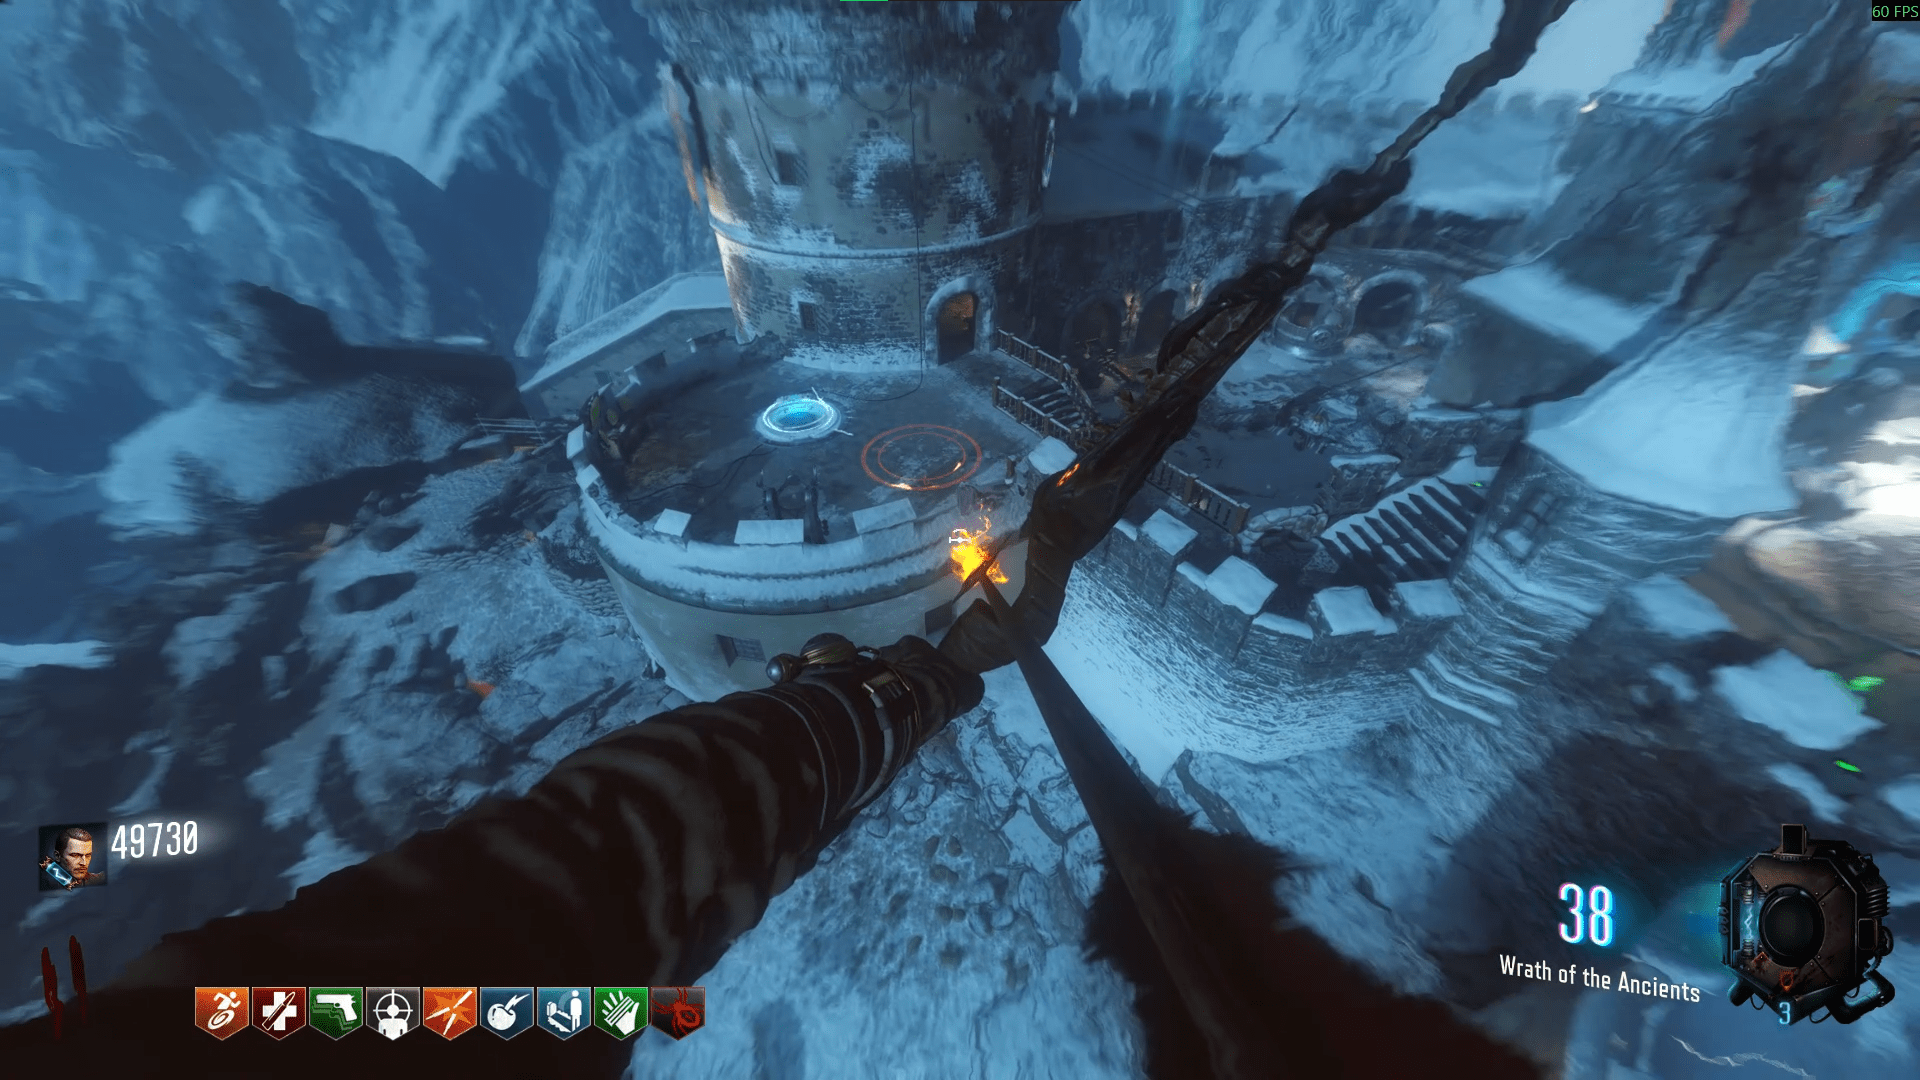
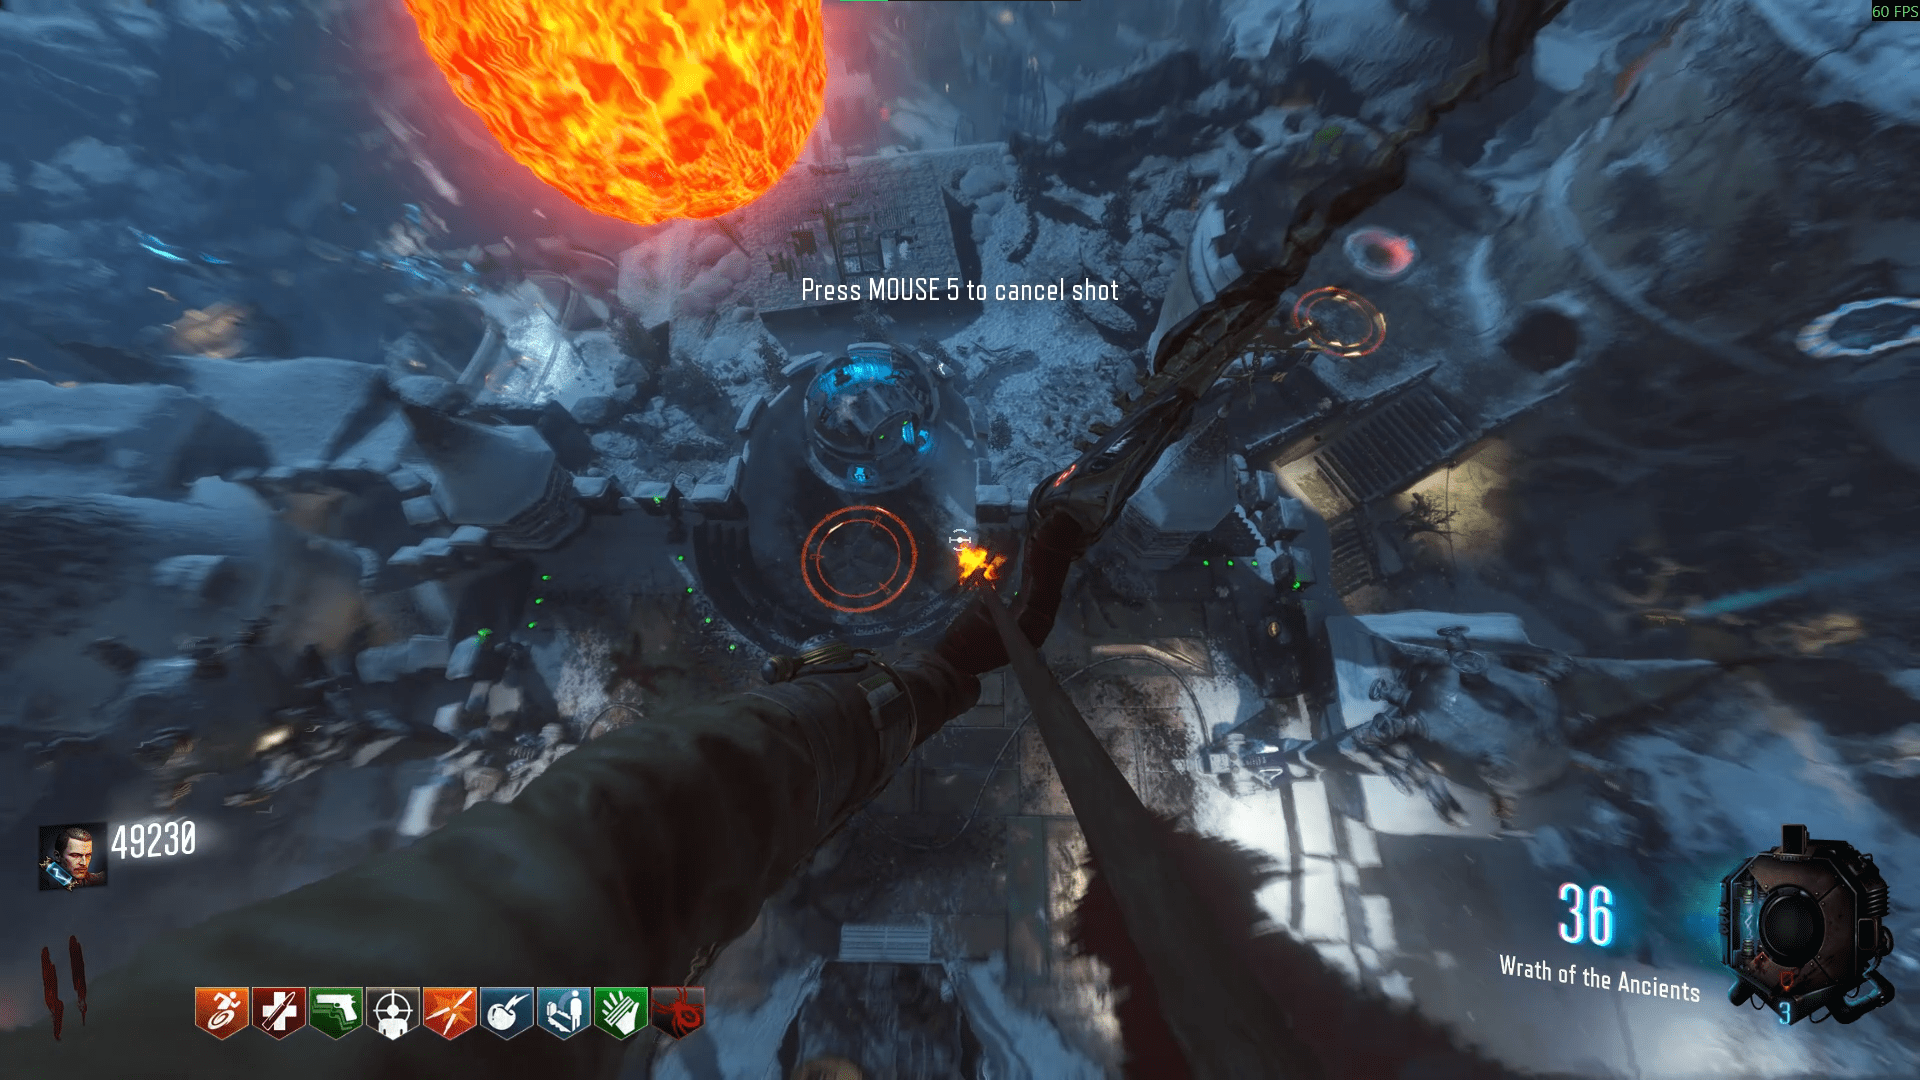
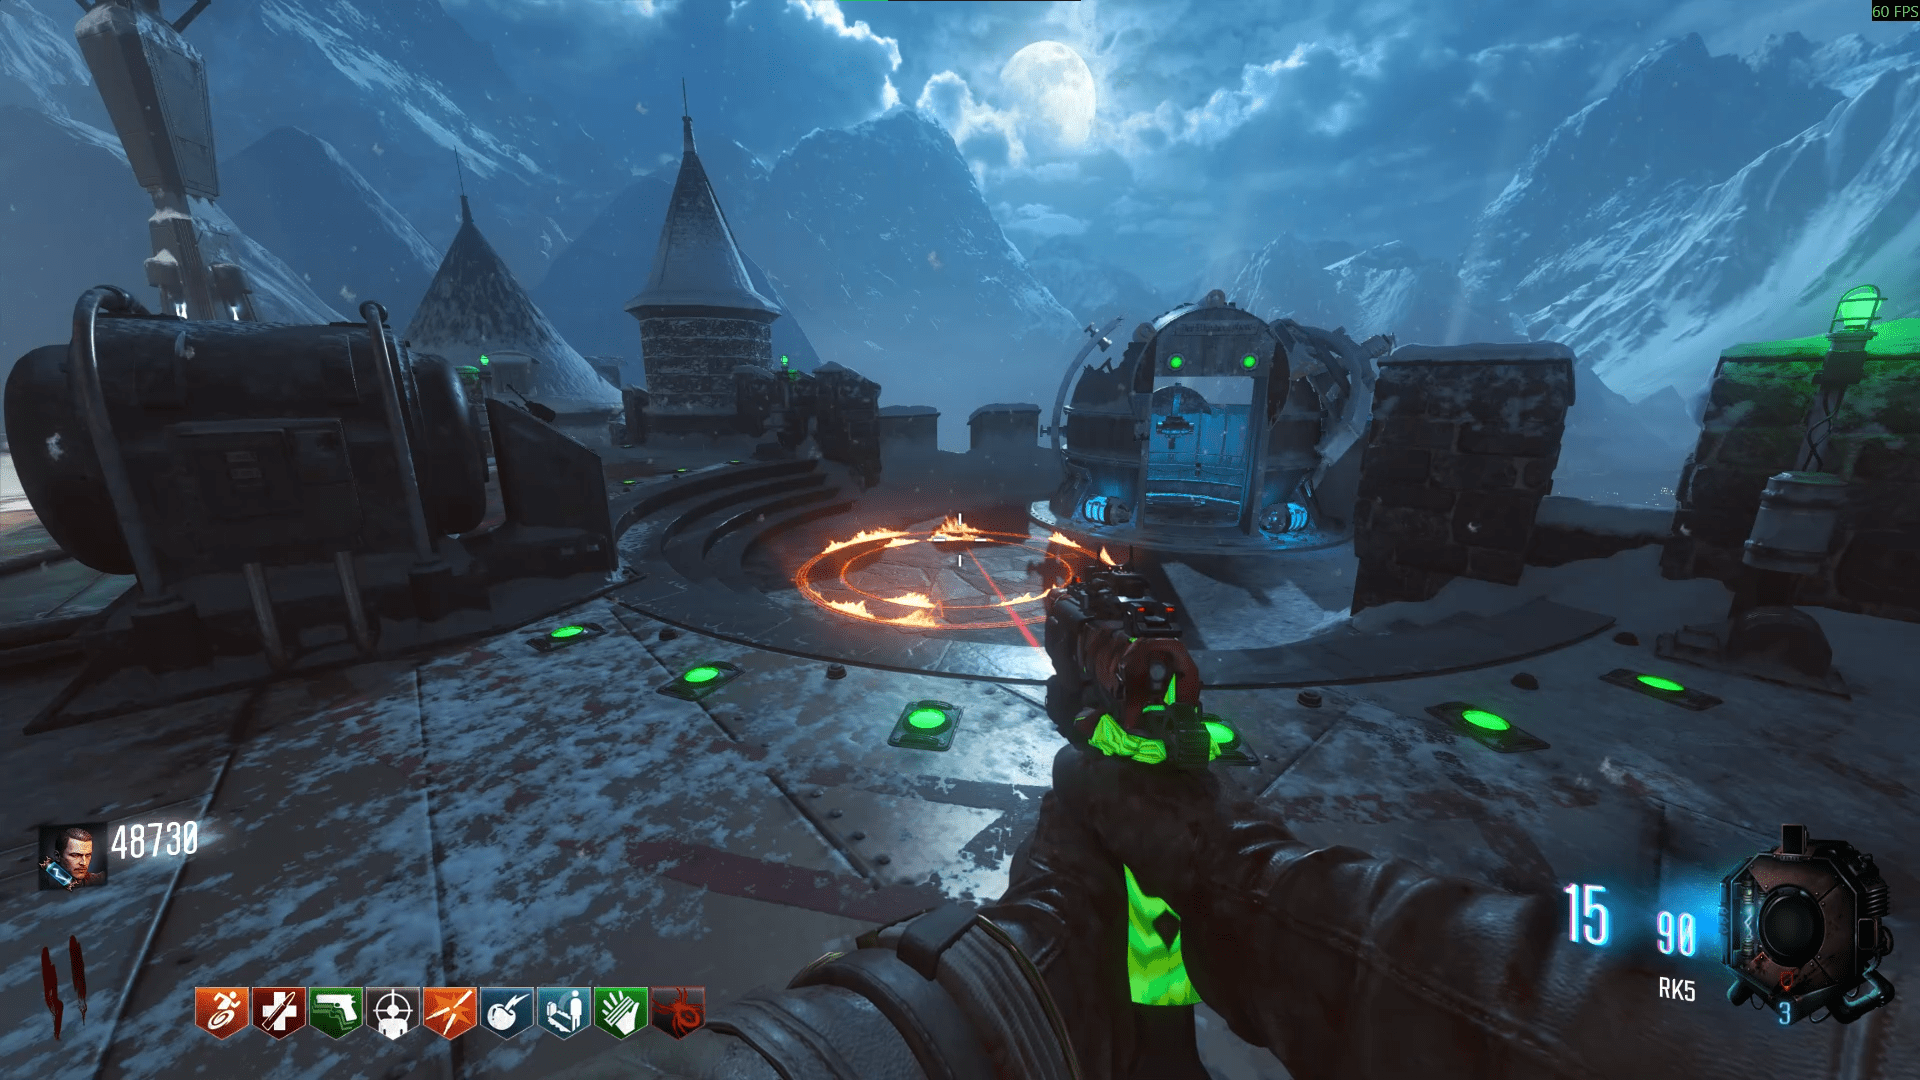
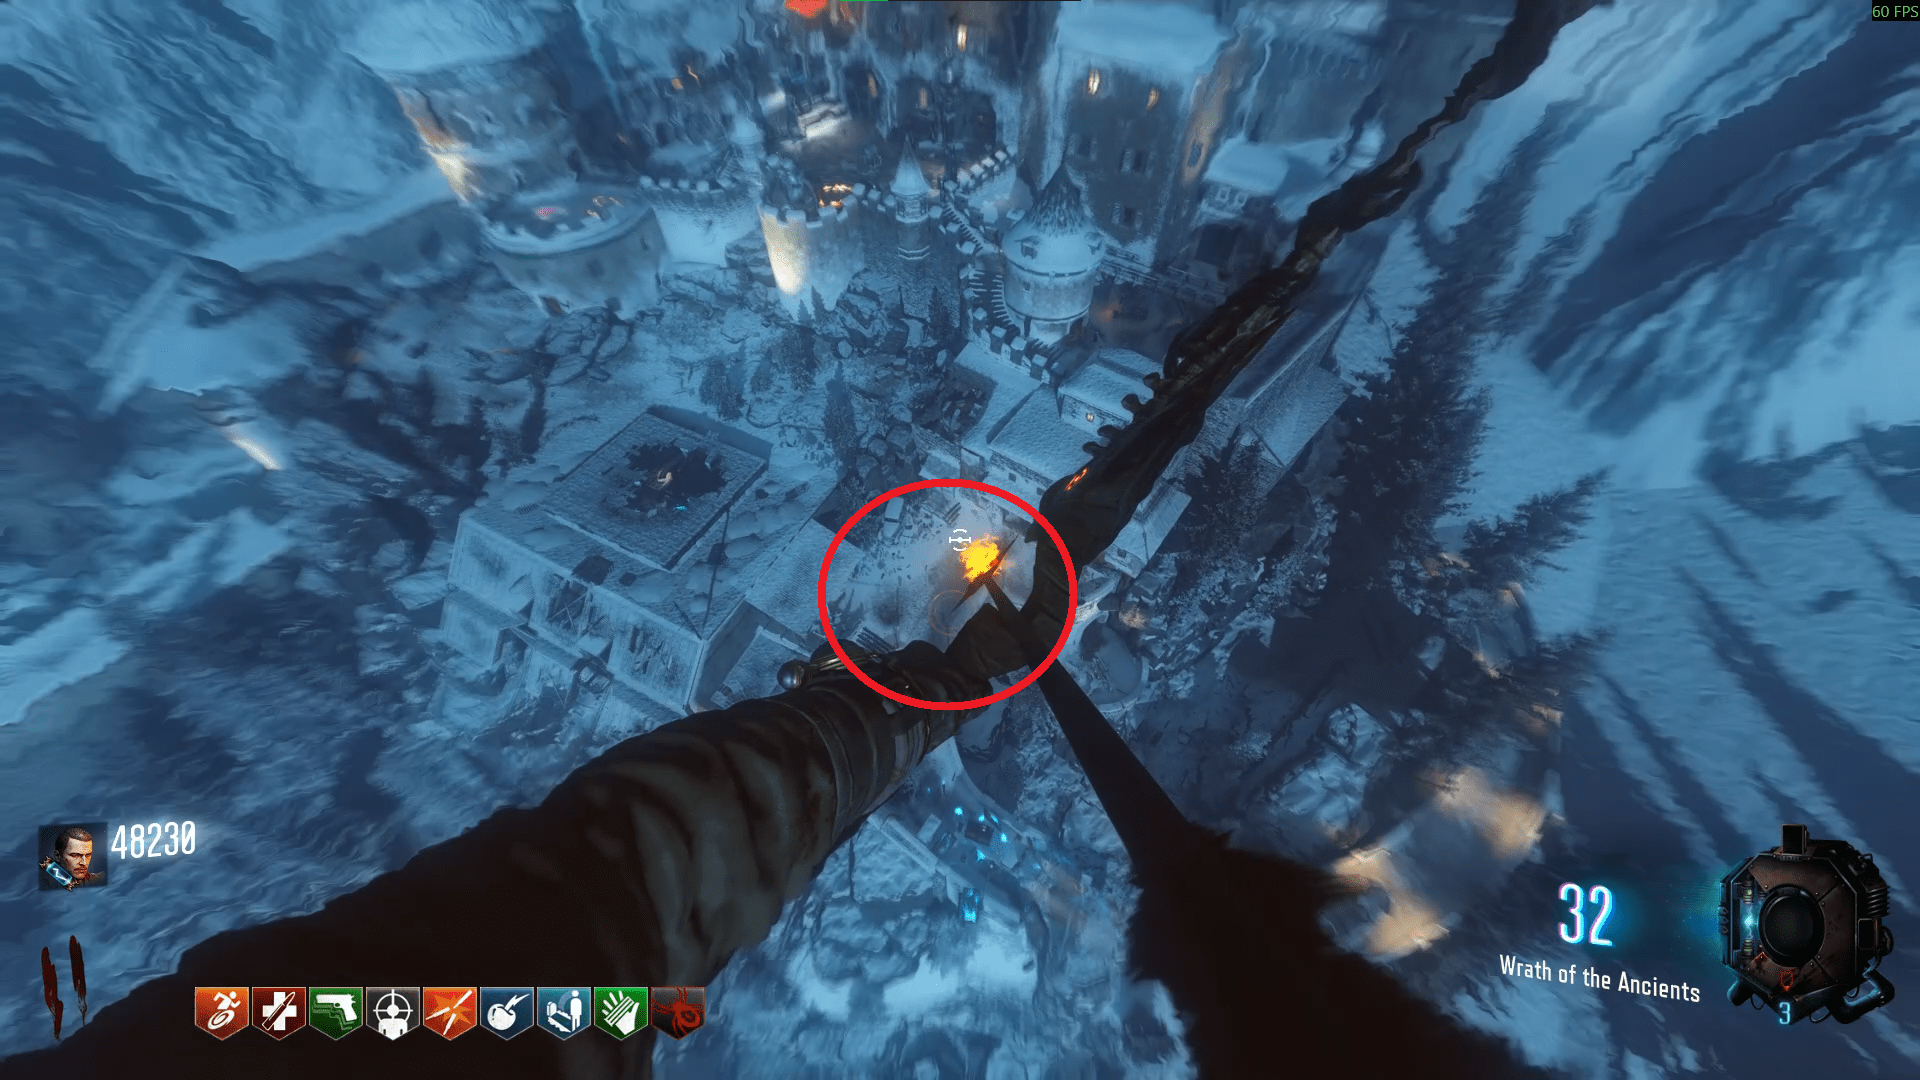
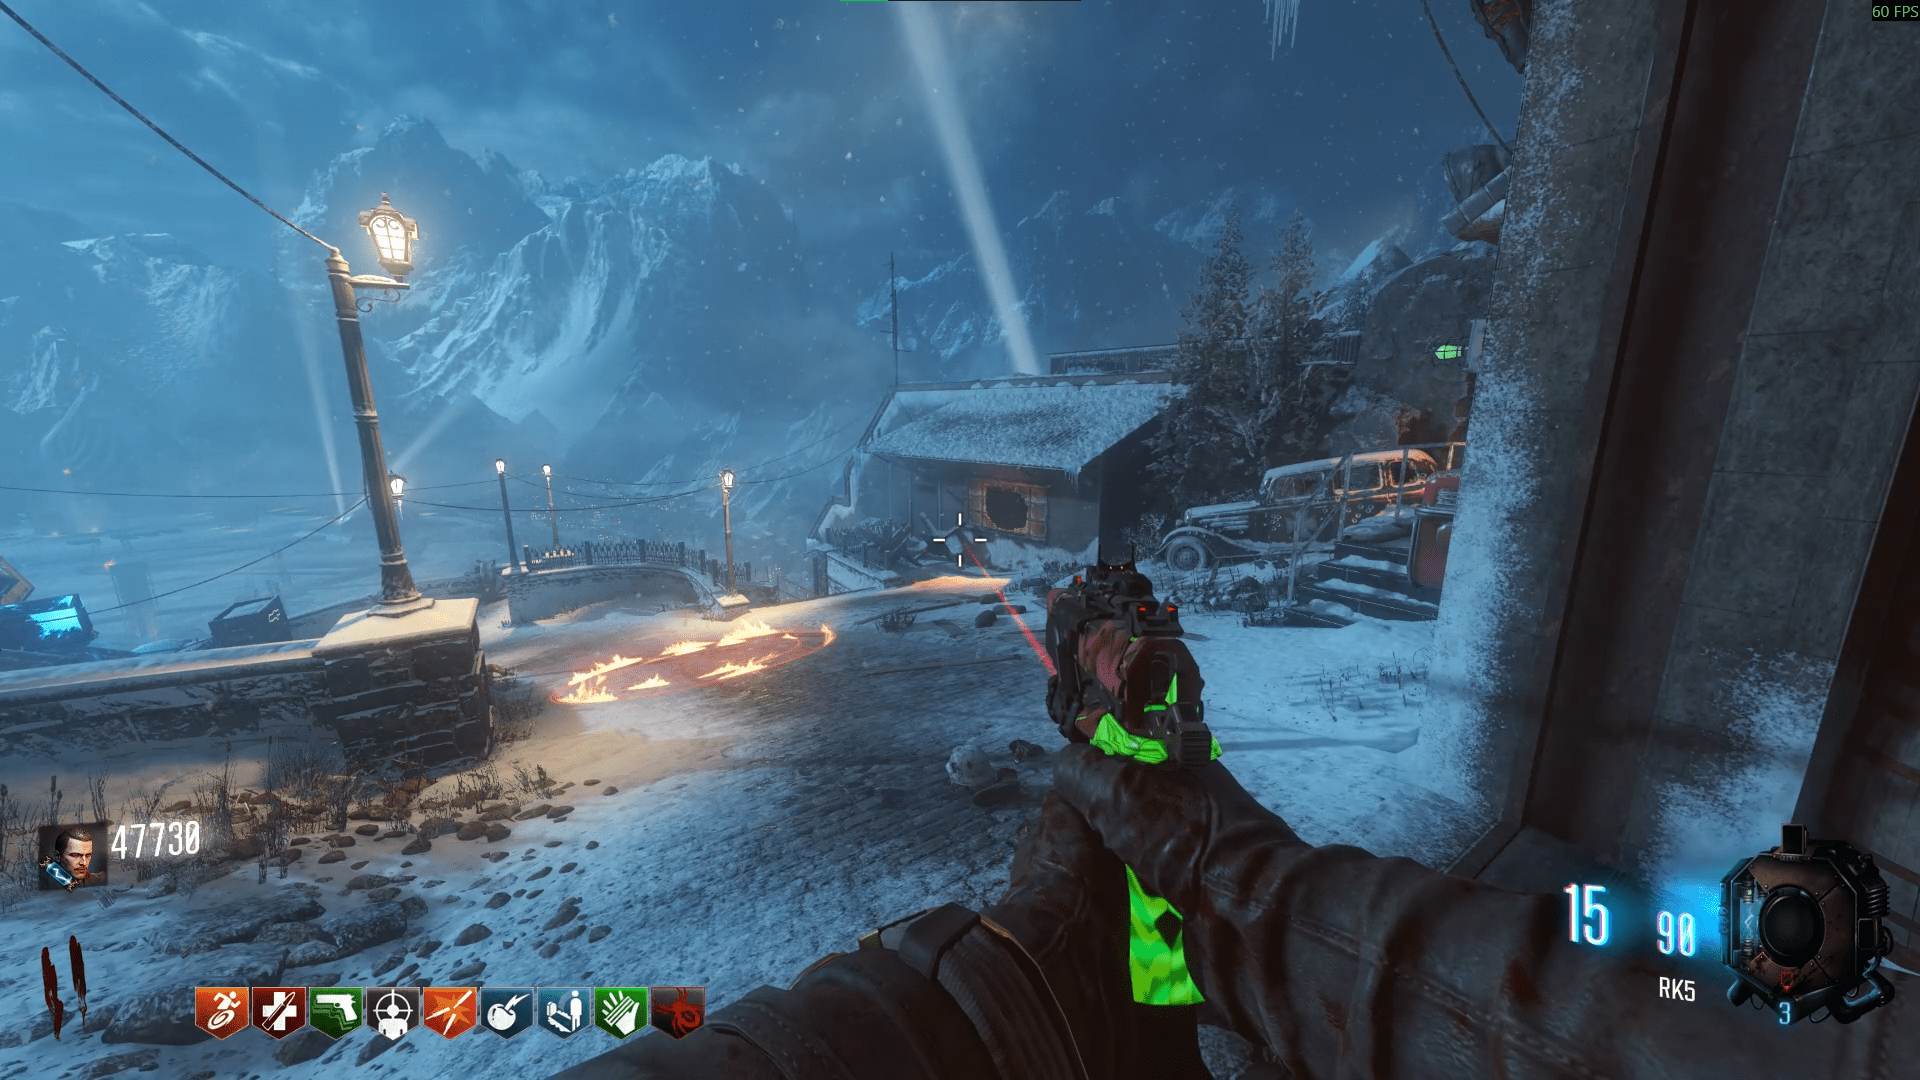
Afterwards, all you need to do is use the Wundersphere and delicately shoot three fiery circles on the ground to light them up. This is harder than it seems but definitely doable. Unfortunately I can't help with where to shoot but I did my best with it mid air to show where they are when you jump.
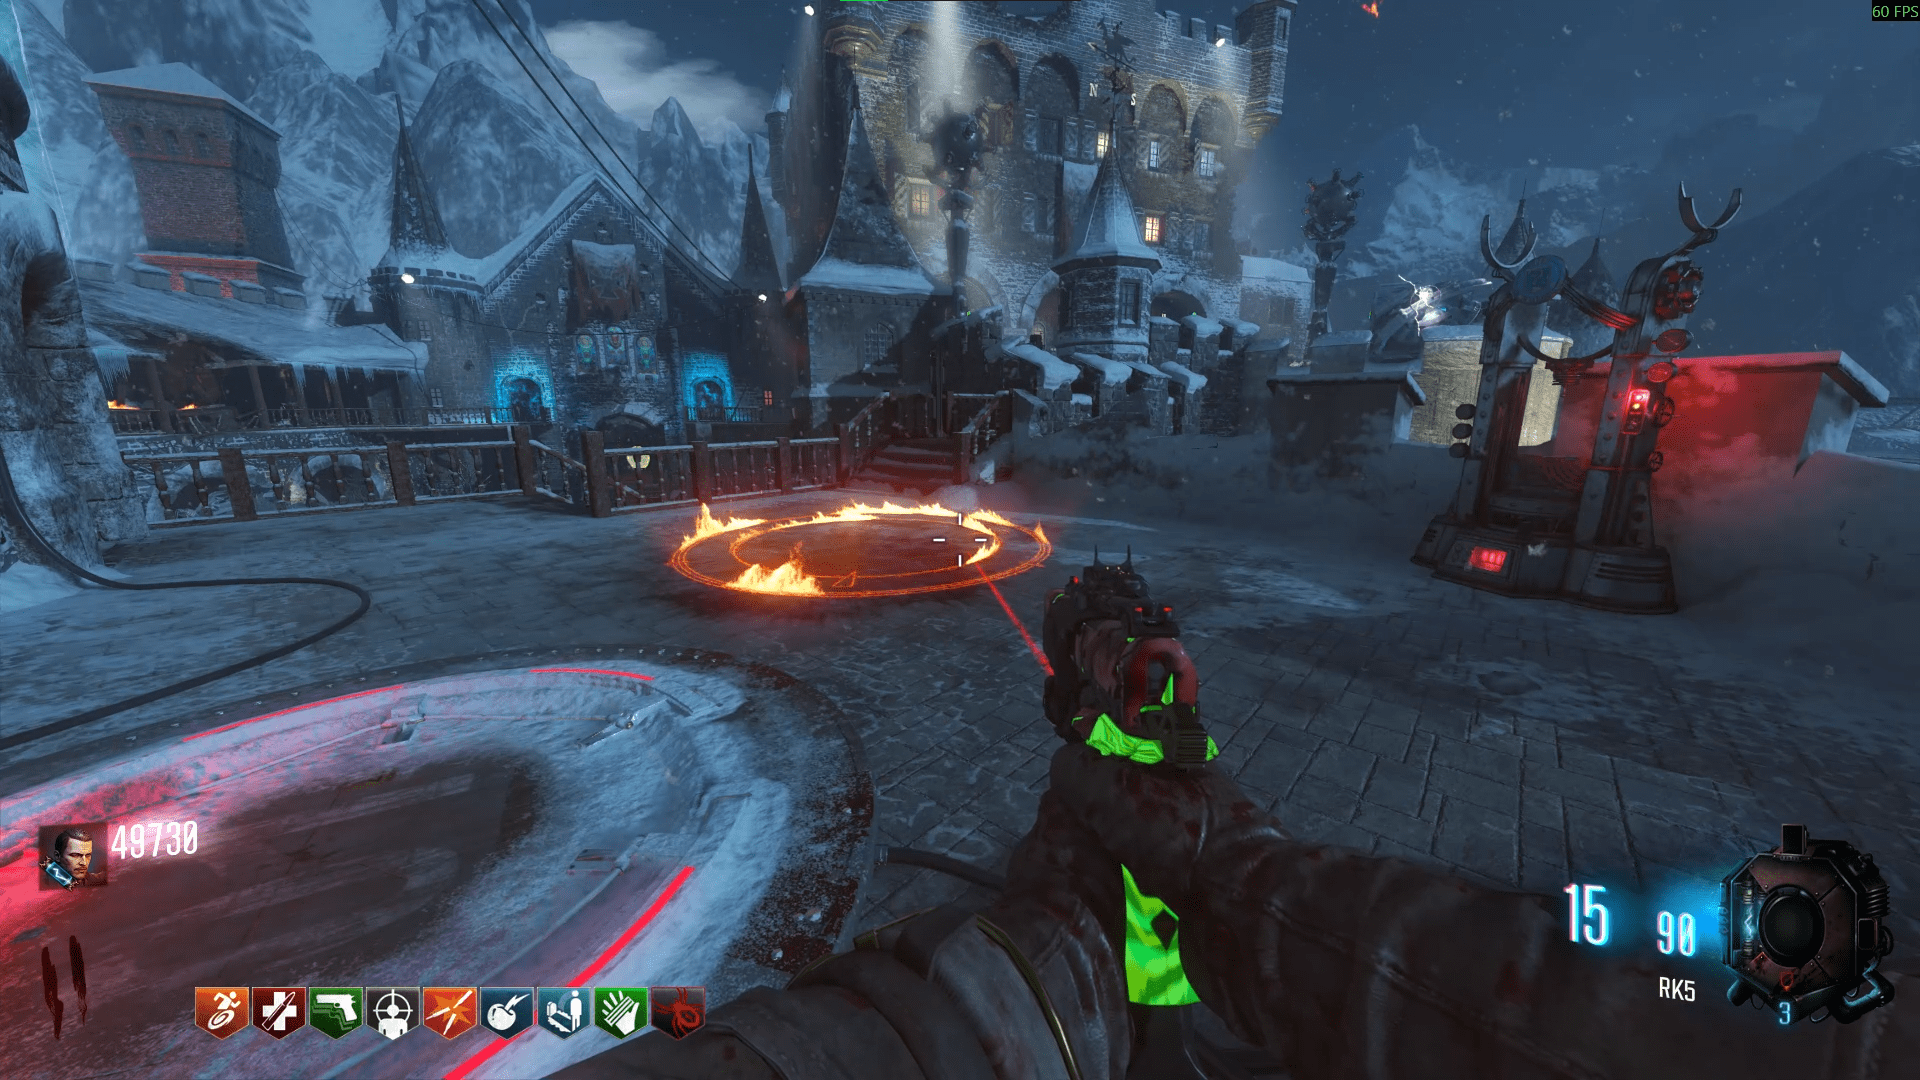
The three locations for the fire circles are as follows;- To the left of the Clocktower, next to a Wundersphere landing pad.
- In the middle of the Bastion, between the Tesla Trap and the Wundersphere to the Rocket Test.
- Outside of the Gate trap by Double Tap.
Der Eisendrache
After you've shot the circles, you'll now need to charge the circles with souls, each taking 10 kills to complete. You need to stand inside the circle while you get the kills, your screen will illuminate orange while you're inside. Getting a kill inside the circle will show an orange soul.
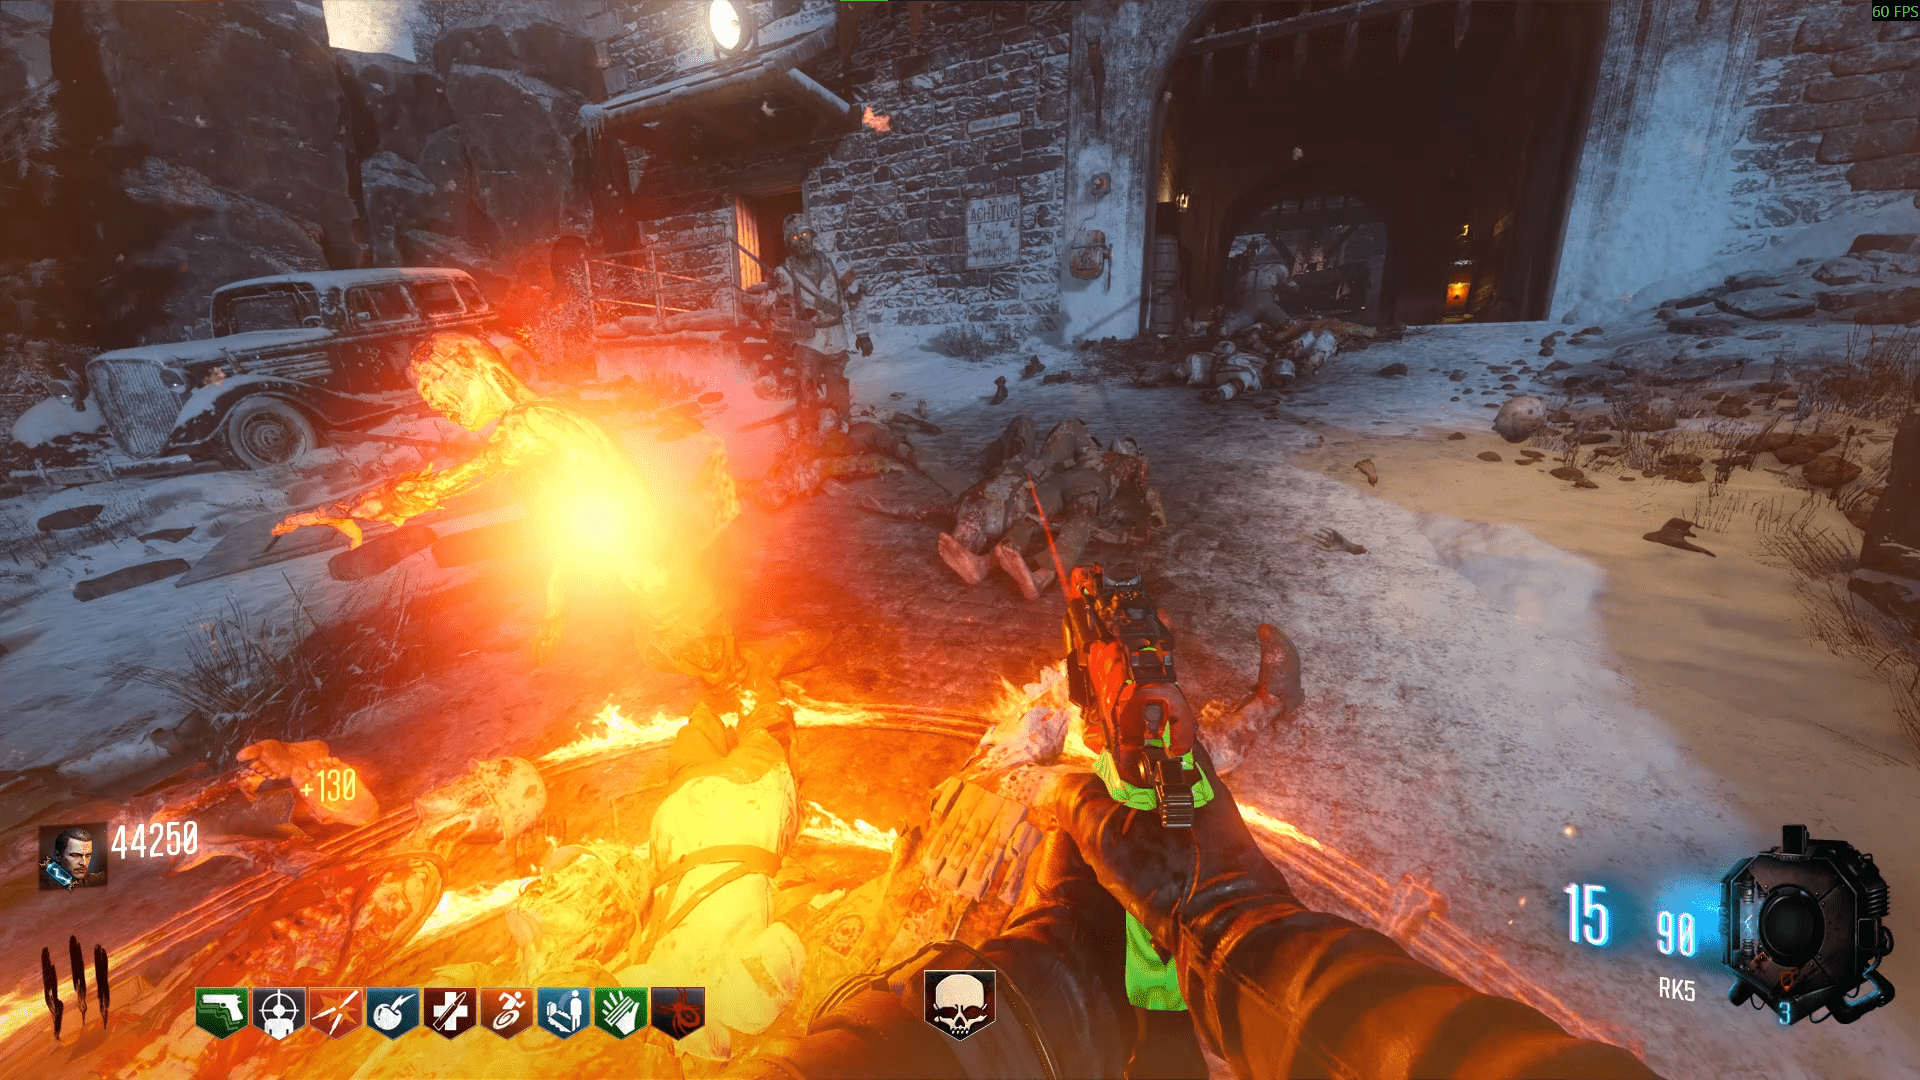
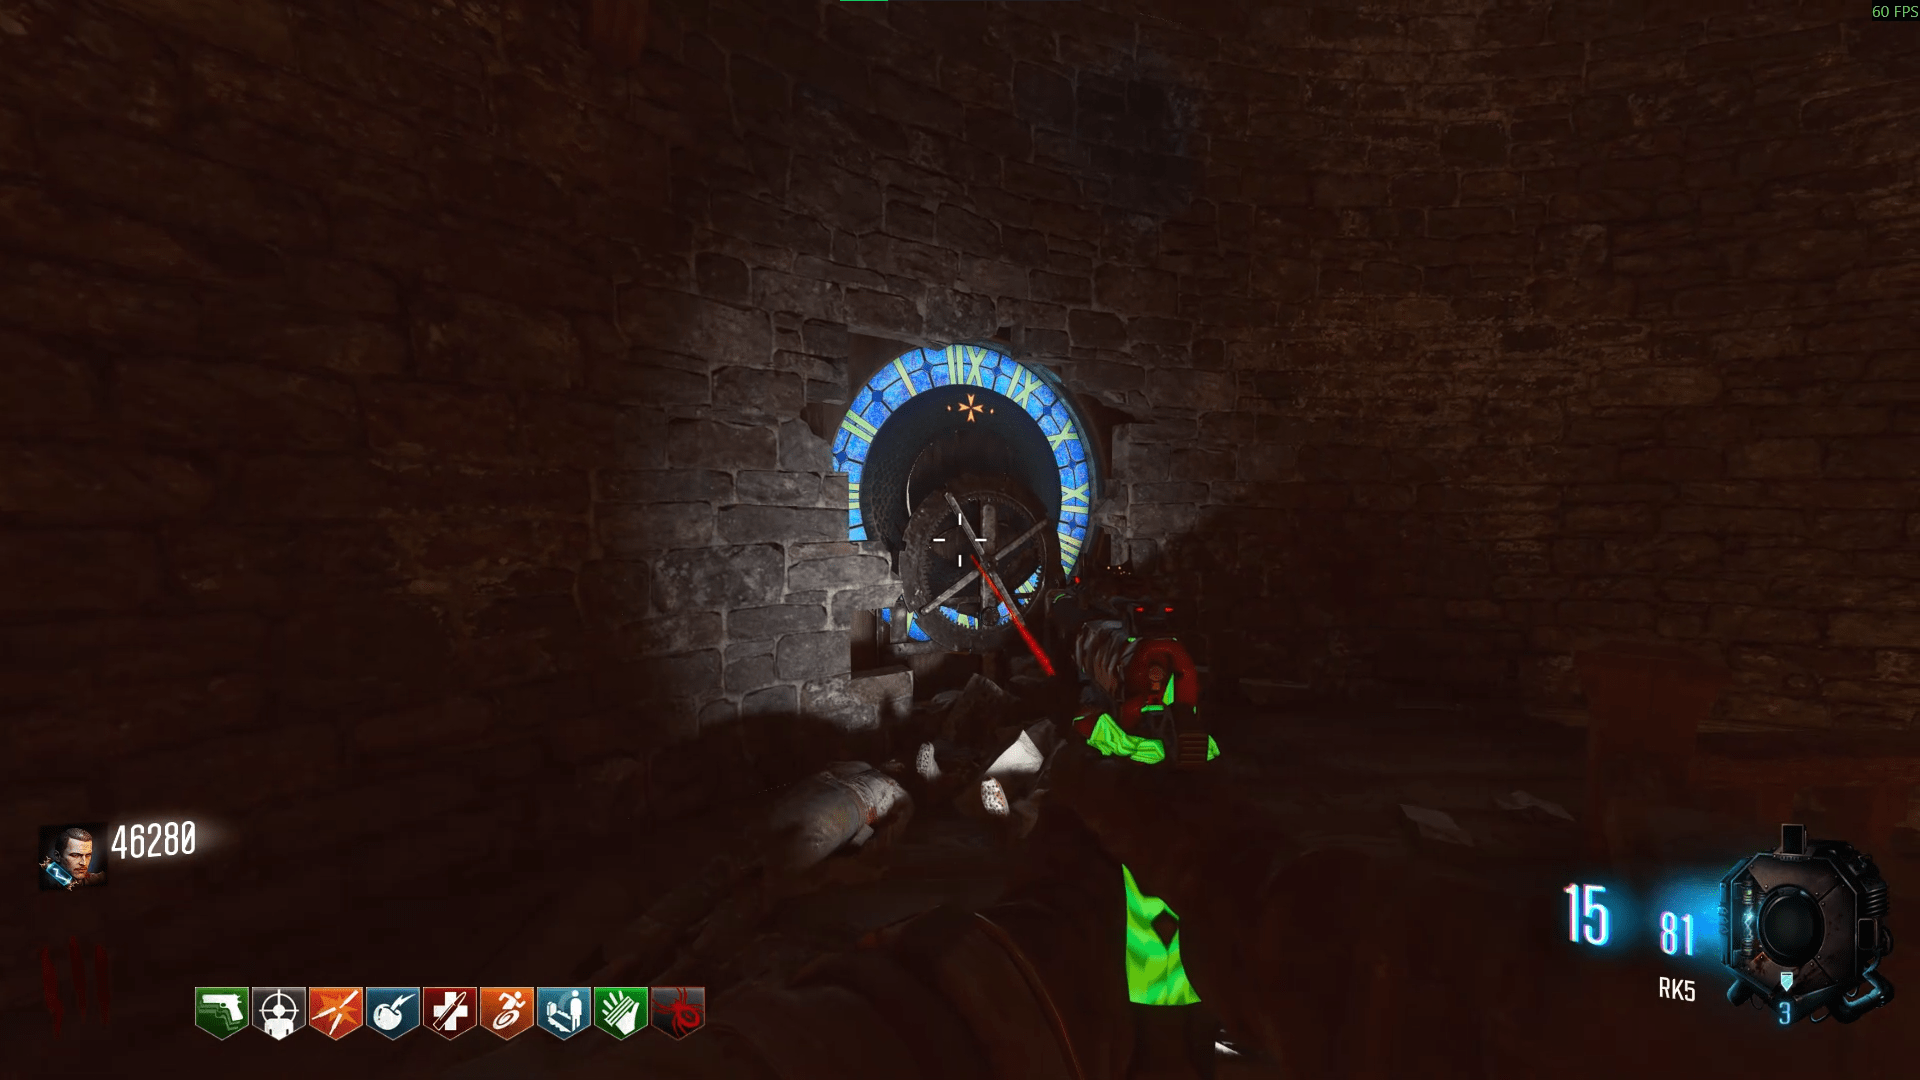
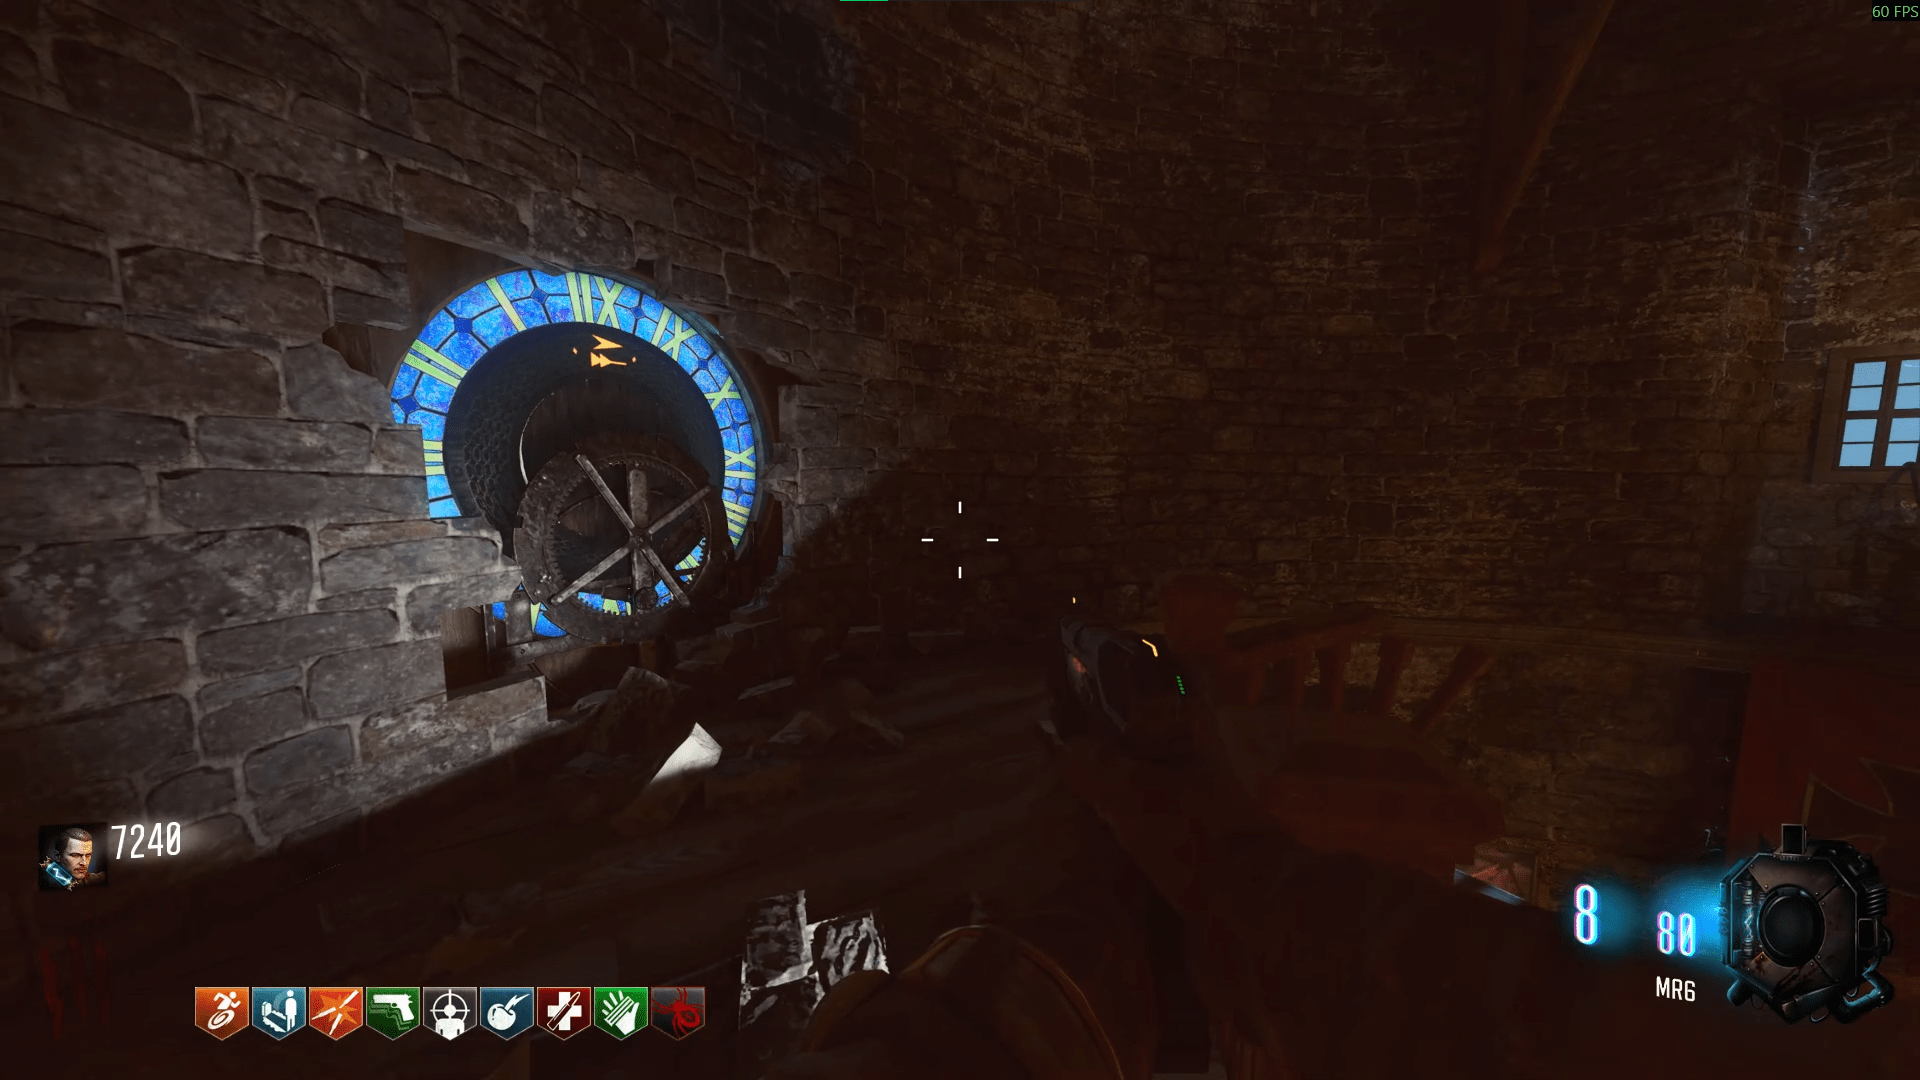
If you've charged all three of the circles, head to the Clocktower where you found the broken arrow and interact with the wheel in the wall. One of three symbols will appear on the wheel, which will correspond with one of three fireplaces/circles around the map.
This is where games will differ.
The reason I said this is that the three fireplaces correspond to each of the circles and requires a different path to get to in order to light the fireplace. You will only have 3 shots for this step, and failing it will result in you having to try again in the next round. So here, I'll show where to aim and how to shoot to get the fire mounds where they need to go. Thankfully, shooting a wall makes it drop down onto the floor, unless the ground below is out of bounds.
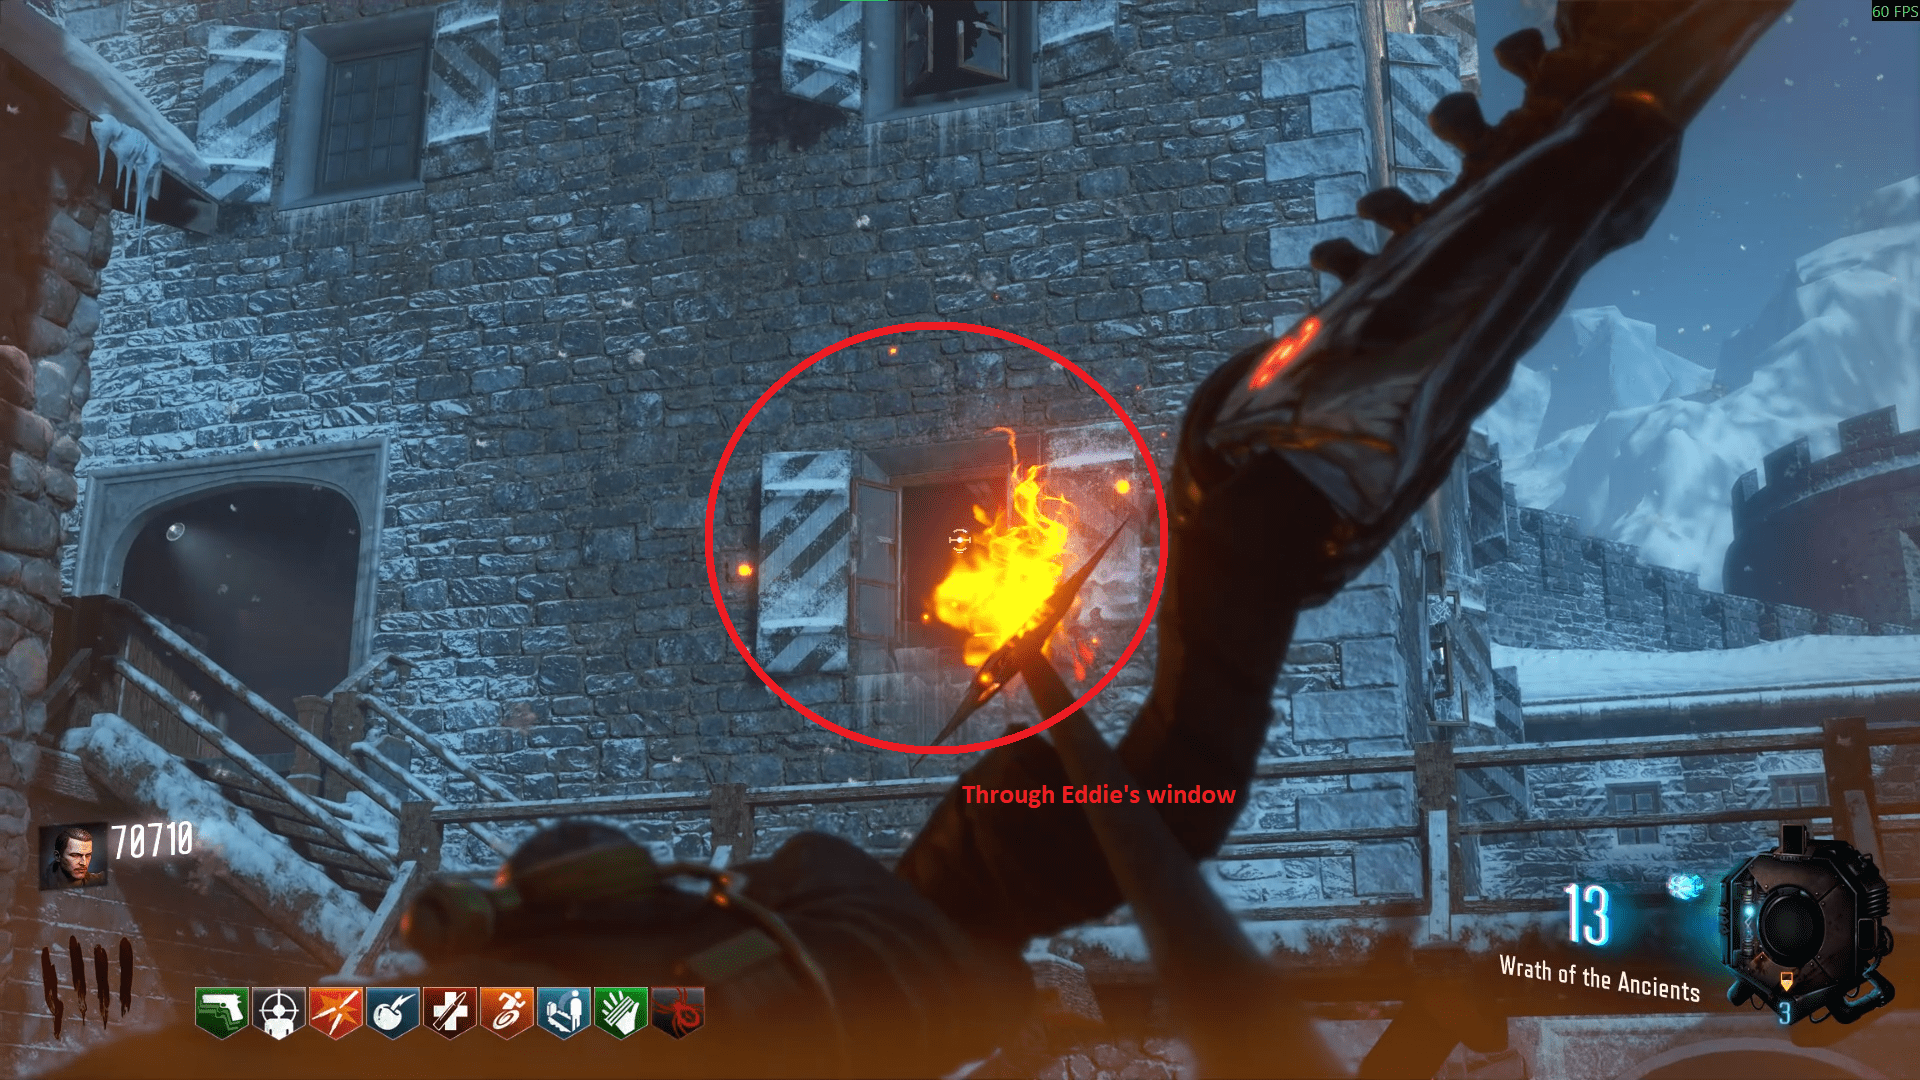
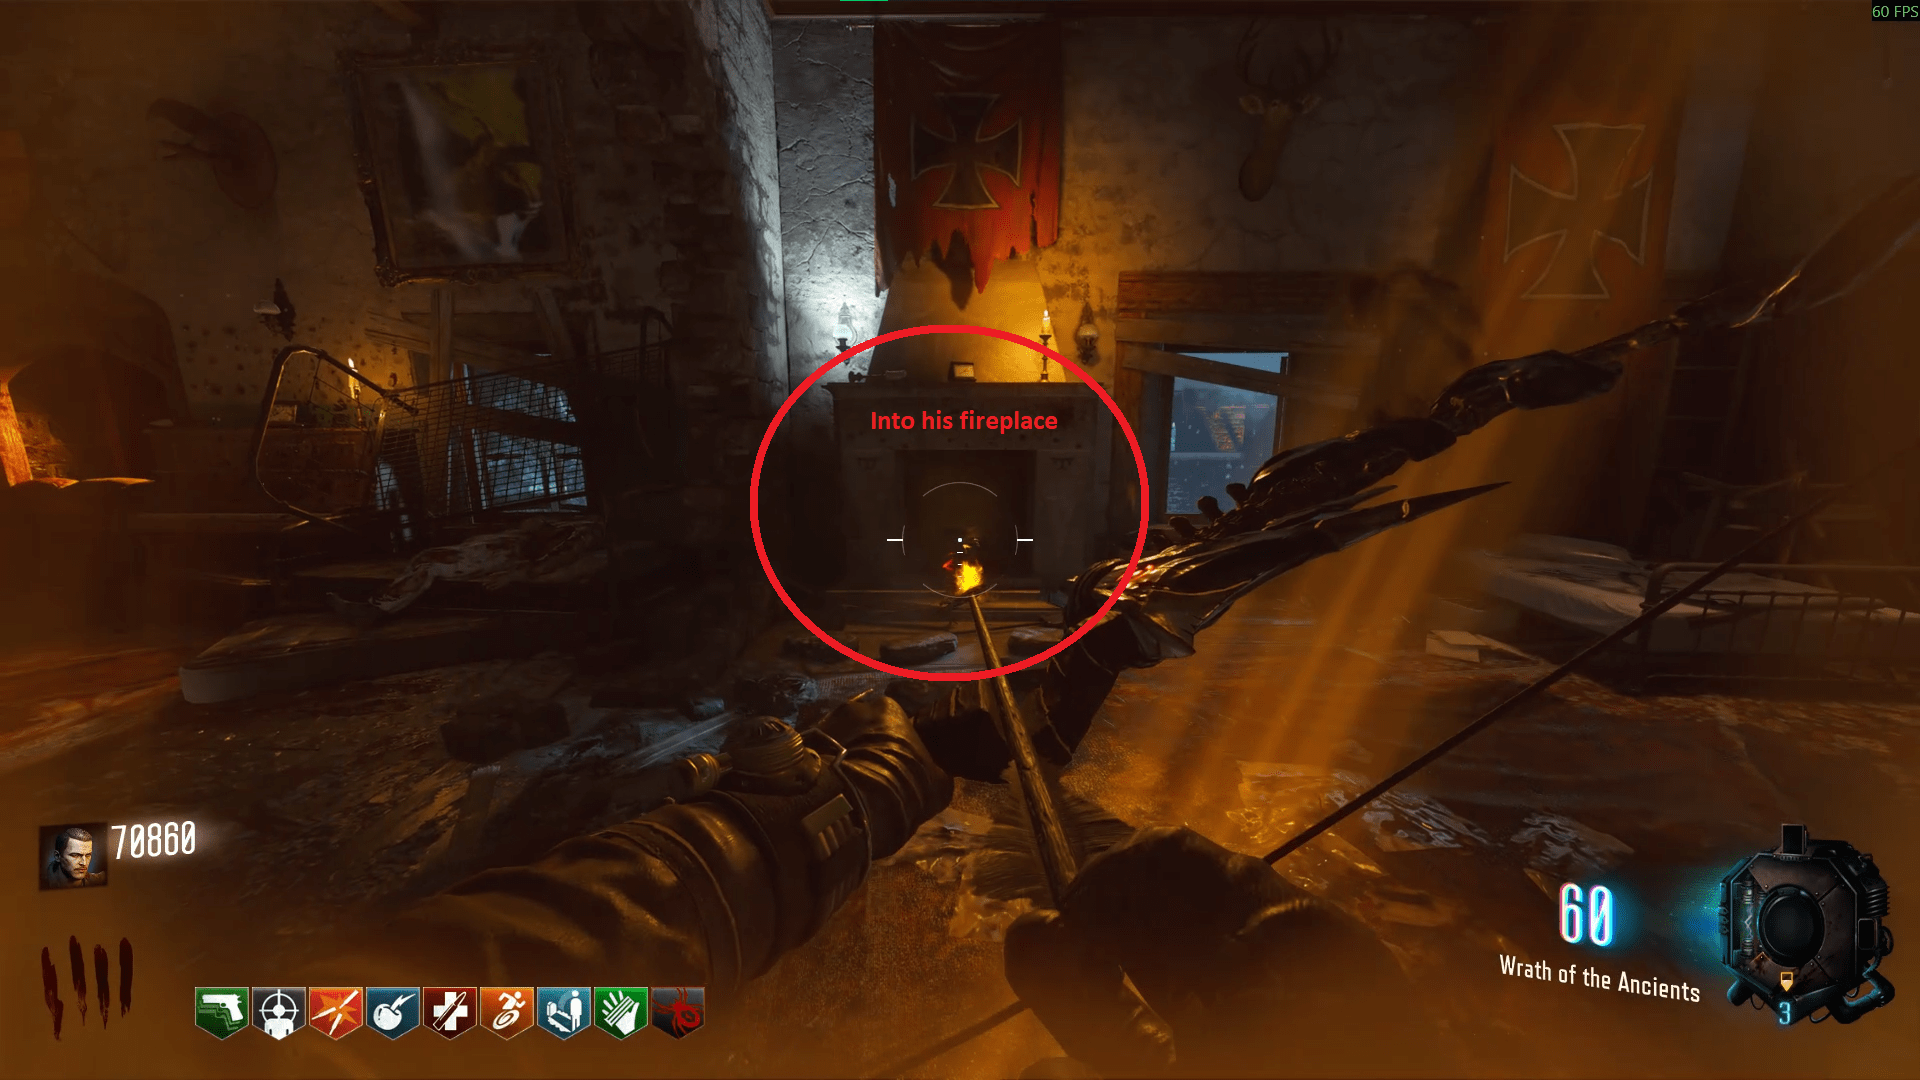
Before getting into the three possibilities, the way this step works is that you have to chain your shots until you reach the fireplace designated by the Clocktower wheel, from the fire circle that is lit up. Luckily, the symbol and the circle are tied together so I can show you the three ways to finish the step;- If your symbol was the cross, then you'll be at the Double Tap circle going to Eddie's fireplace. The thought here is that you'll stand in the circle, shoot forward towards the burnt tank (if you miss, and land it before the stairs, you can shoot underneath the stairs and still fire into Eddie's room) then onto the stairs to the left, through Eddie's window and into his fireplace. There is a quicker way to do this but I find this to be the safest.
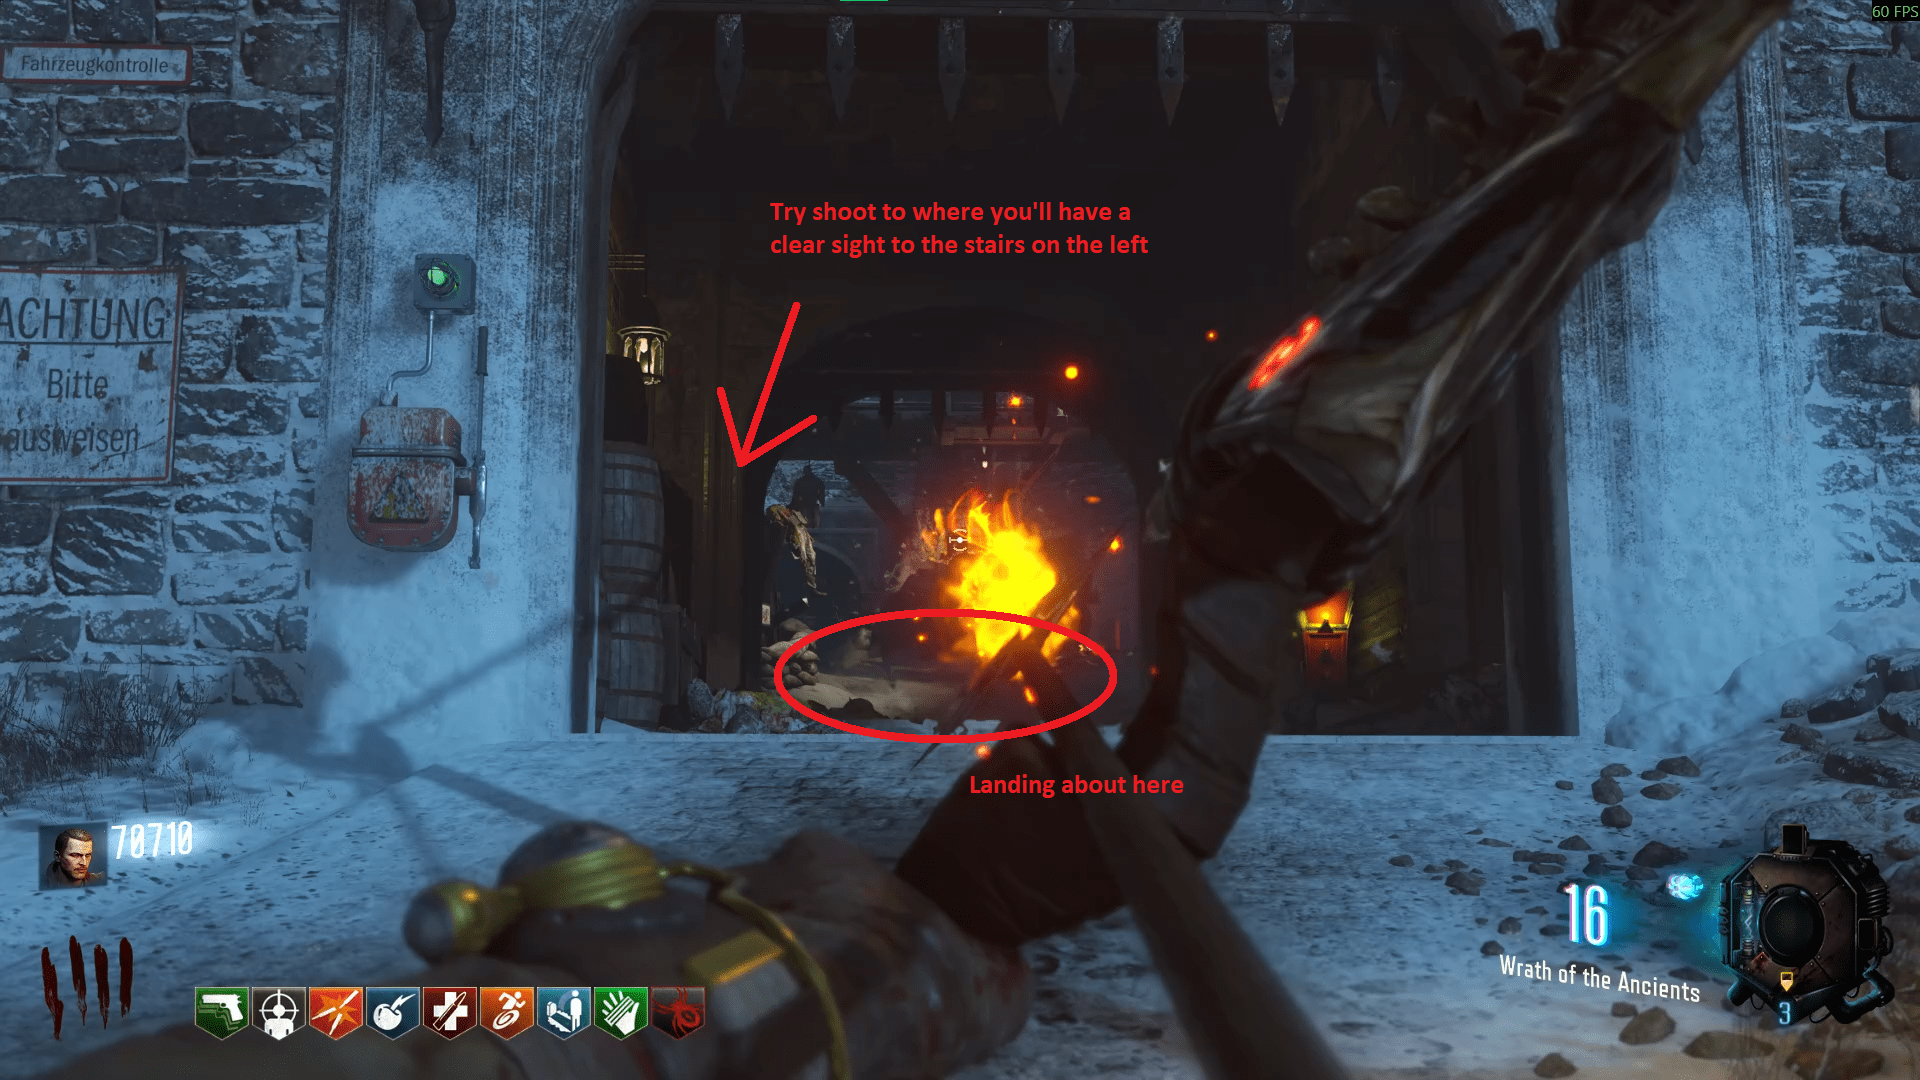
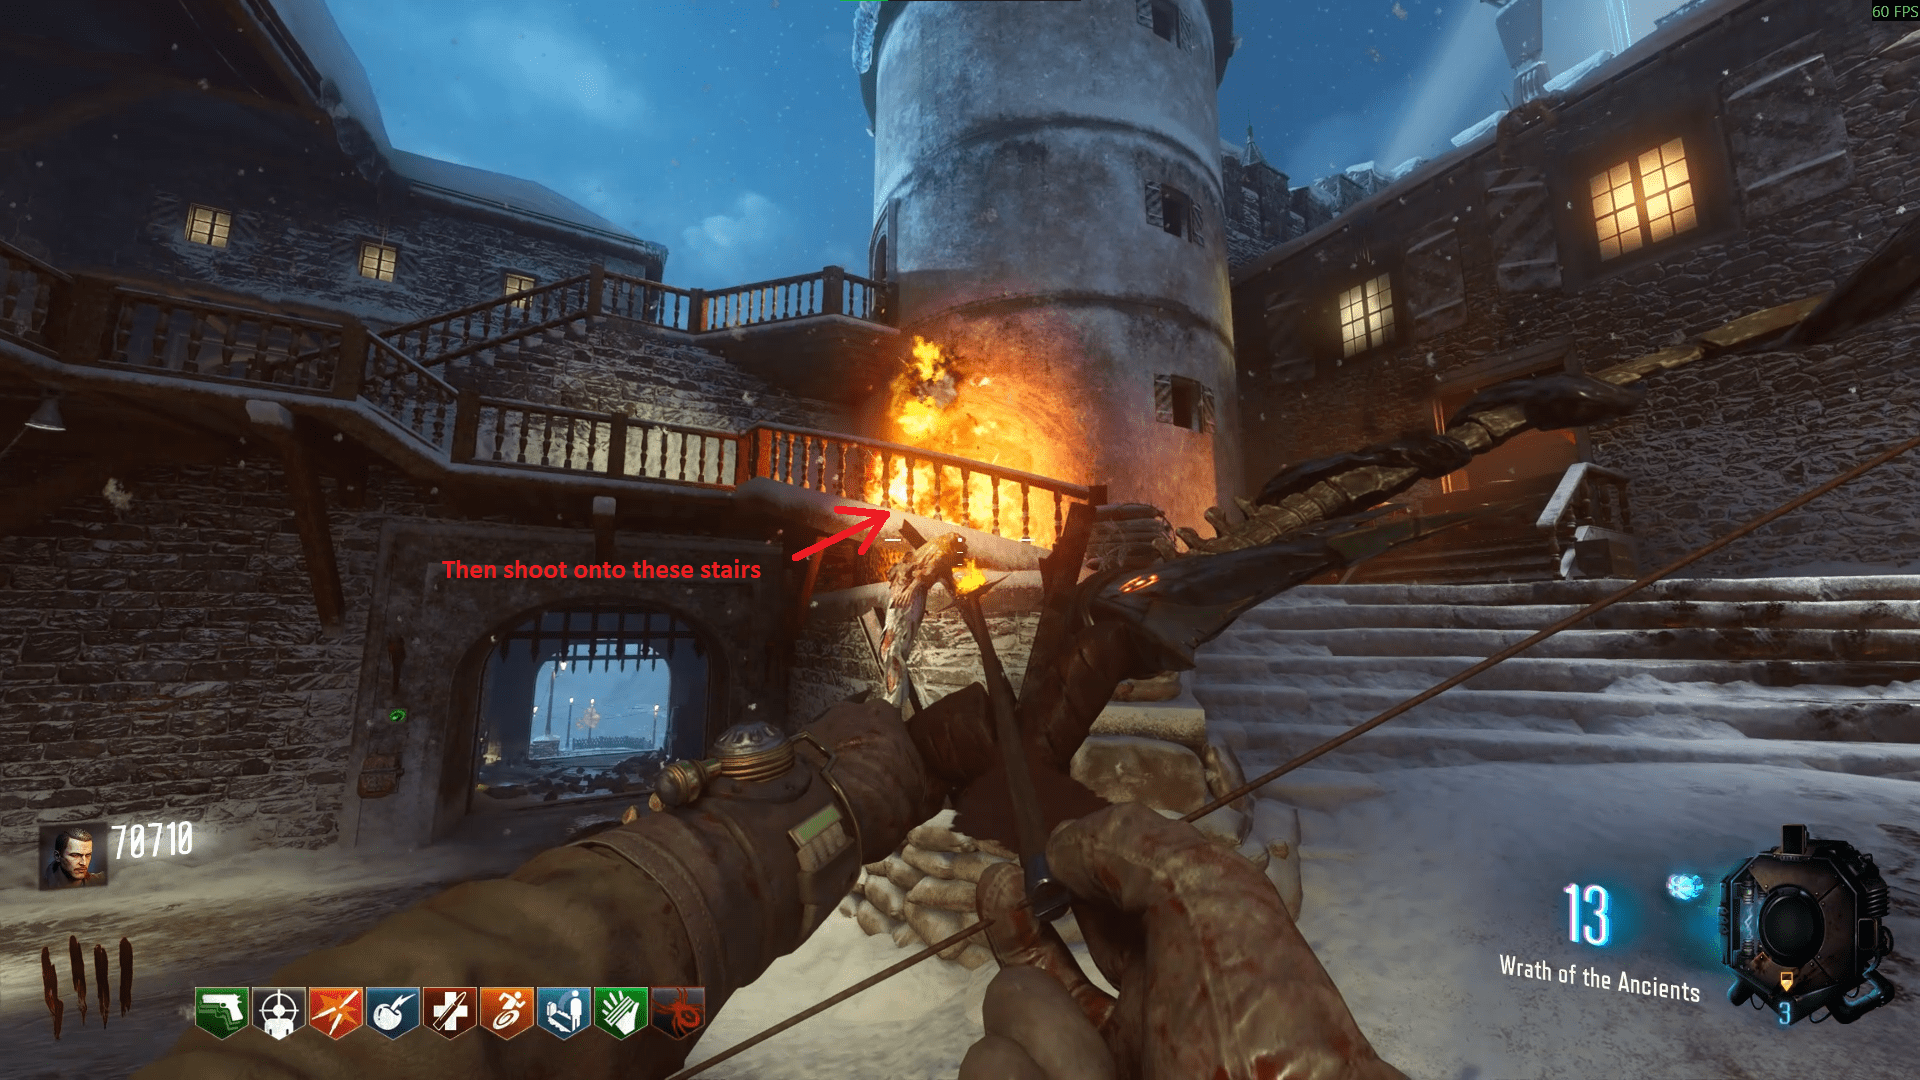
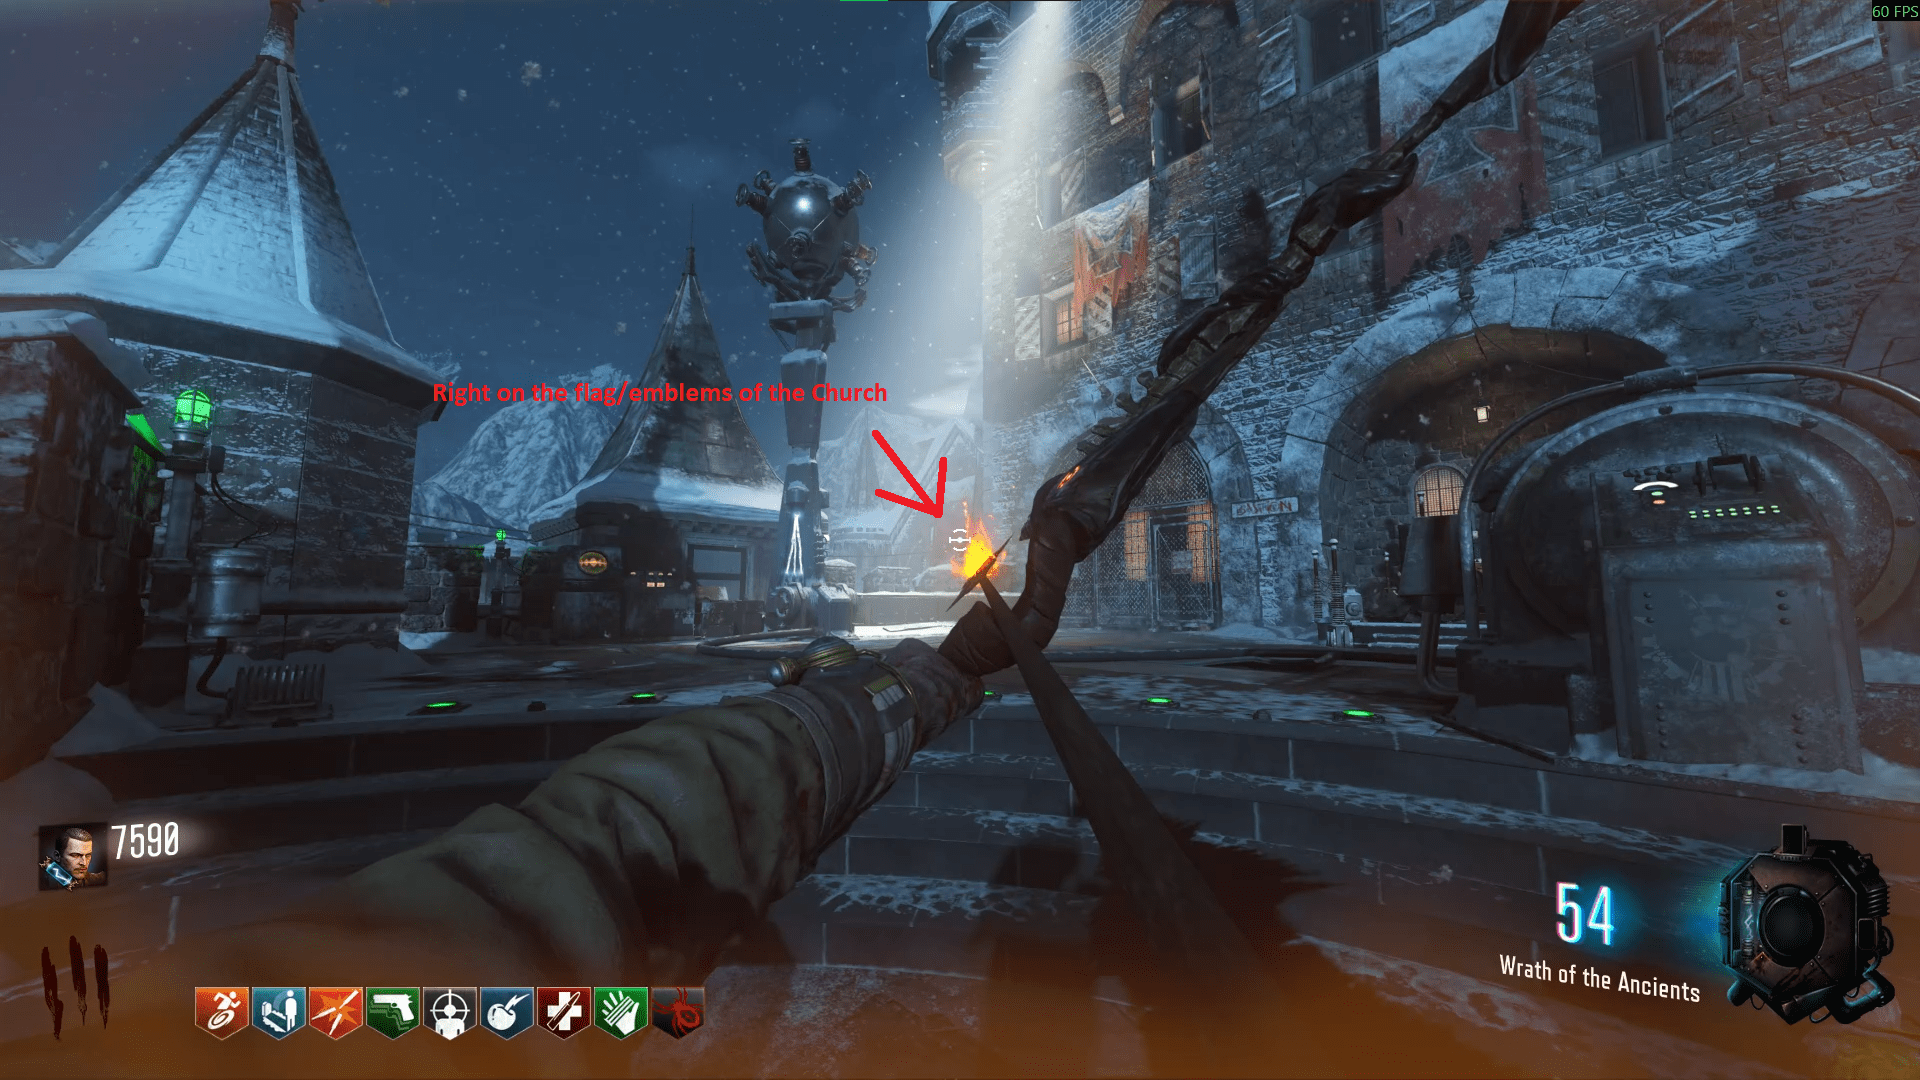
- If your symbol was the double arrows, then you'll be at the Bastion circle underneath the fire ball going to the Church fireplace. This one couldn't be simpler, shoot toward the Church aiming for the emblems on its front, it will then drop down to the ground. After that, aim to the left or right of the computers and finally into the fireplace.
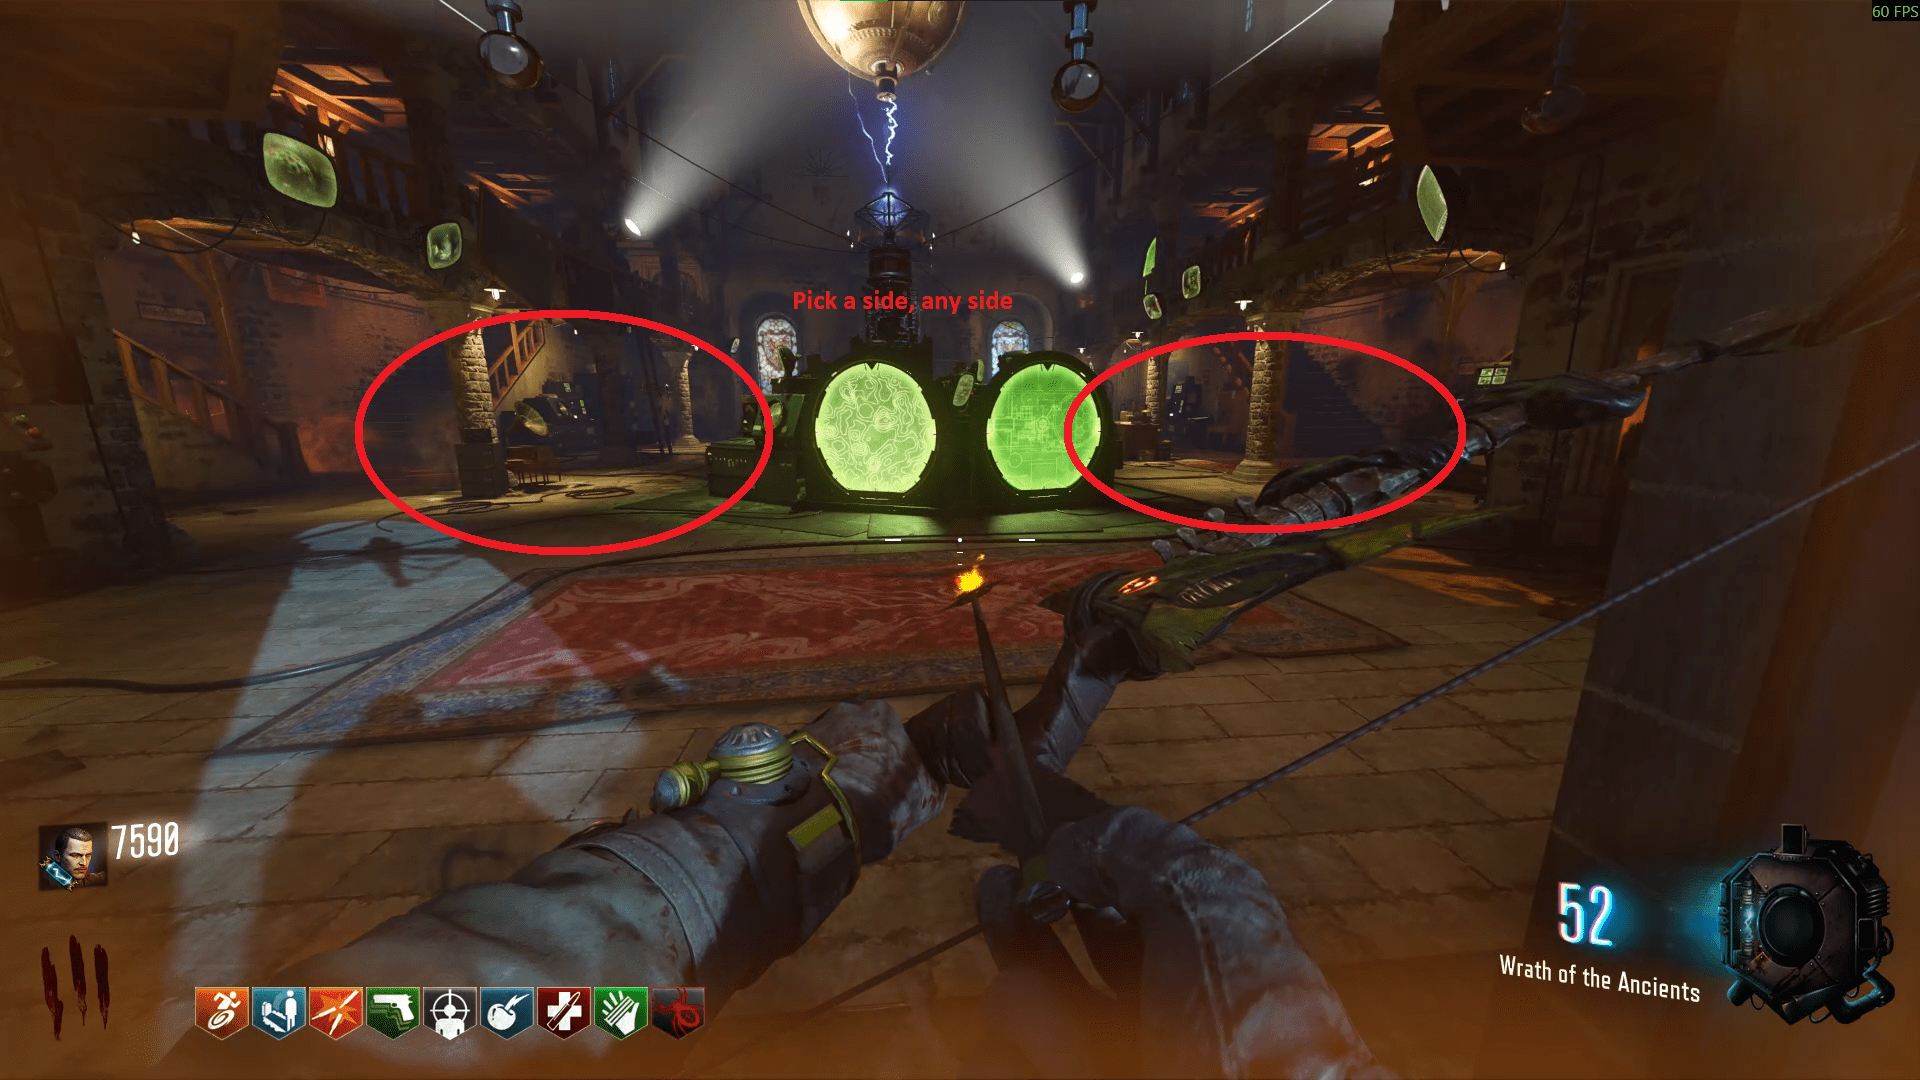
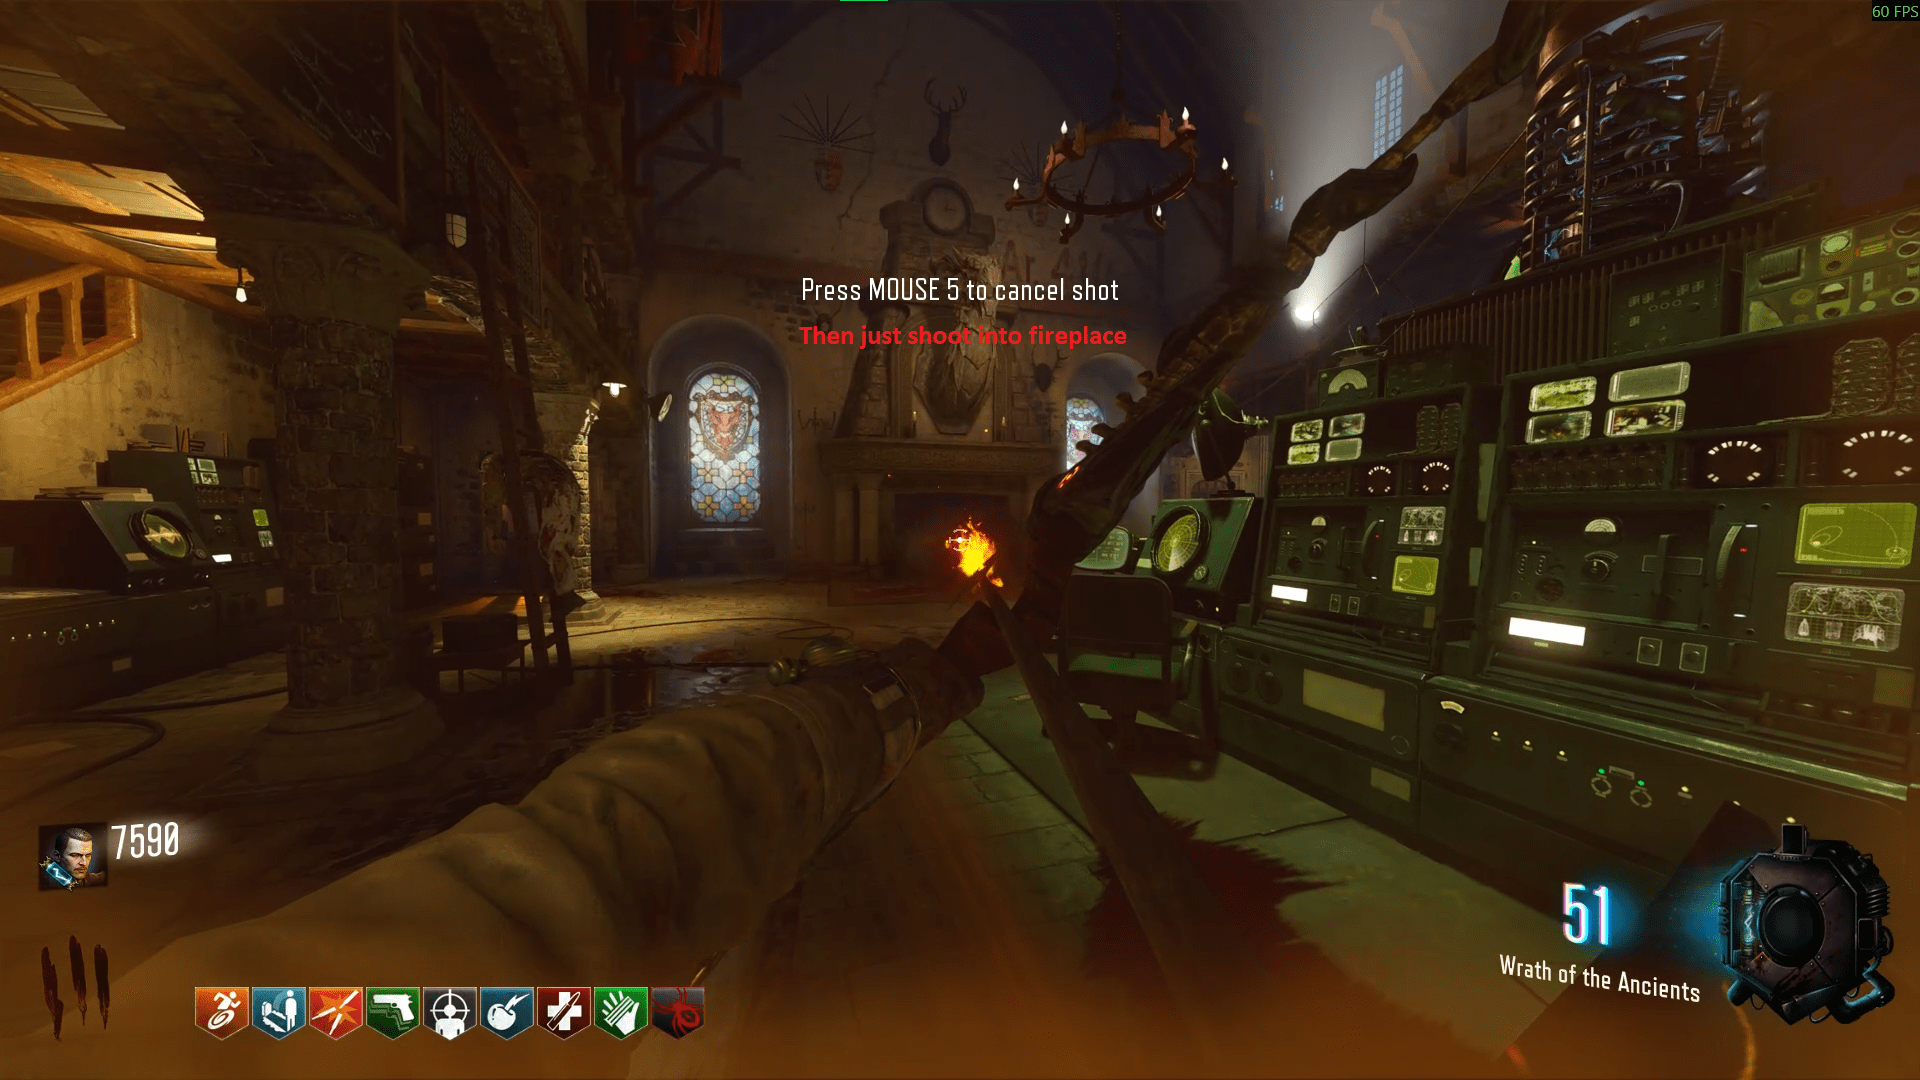
- If your symbol was the triple arrows, then you'll be outside the Clocktower going to the study fireplace. From the circle, aim towards the Death Ray and Wundersphere, you'll shoot in between the battlements furthest from you (the lighter coloured one) on the left. This will put the fire mound right beside the Death Ray pillar. Then look between the battlements again and aim towards the dragon head and slightly to the right into the doorway, fire there and then into the fireplace.
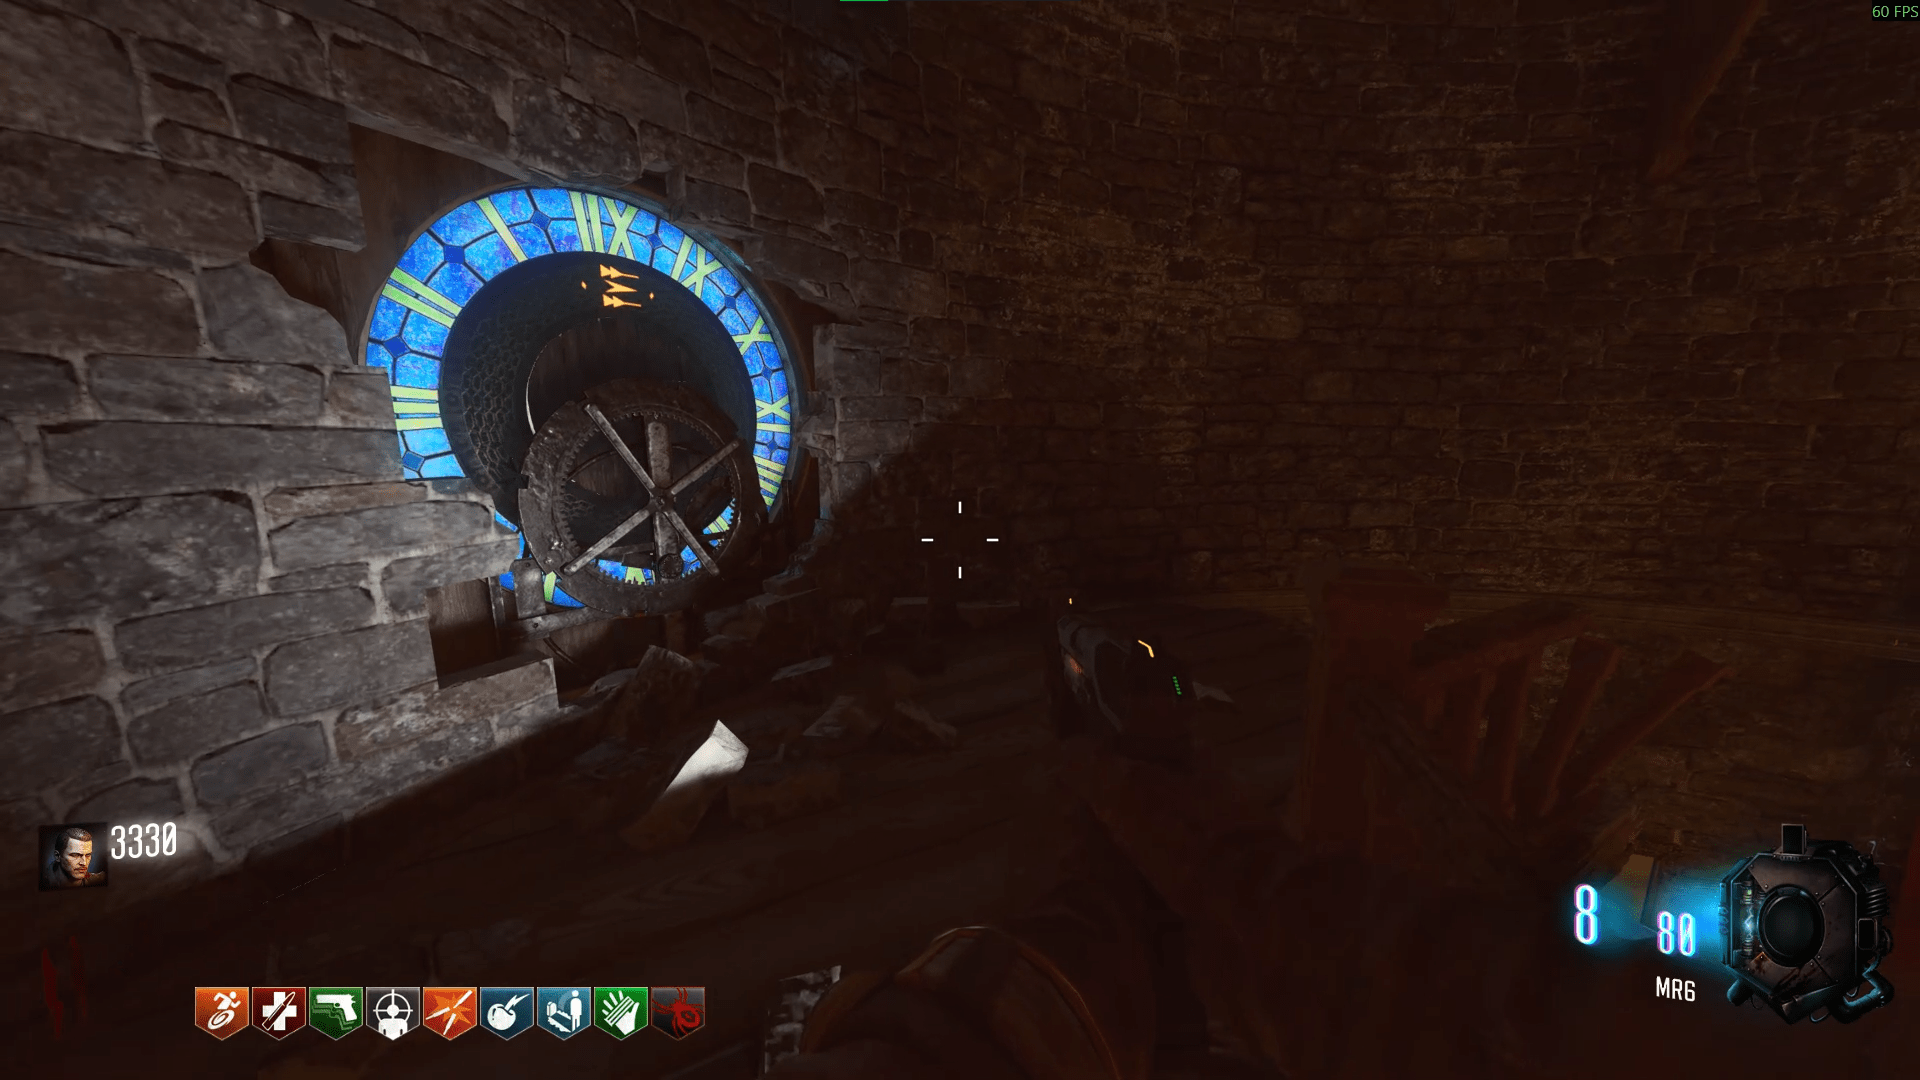
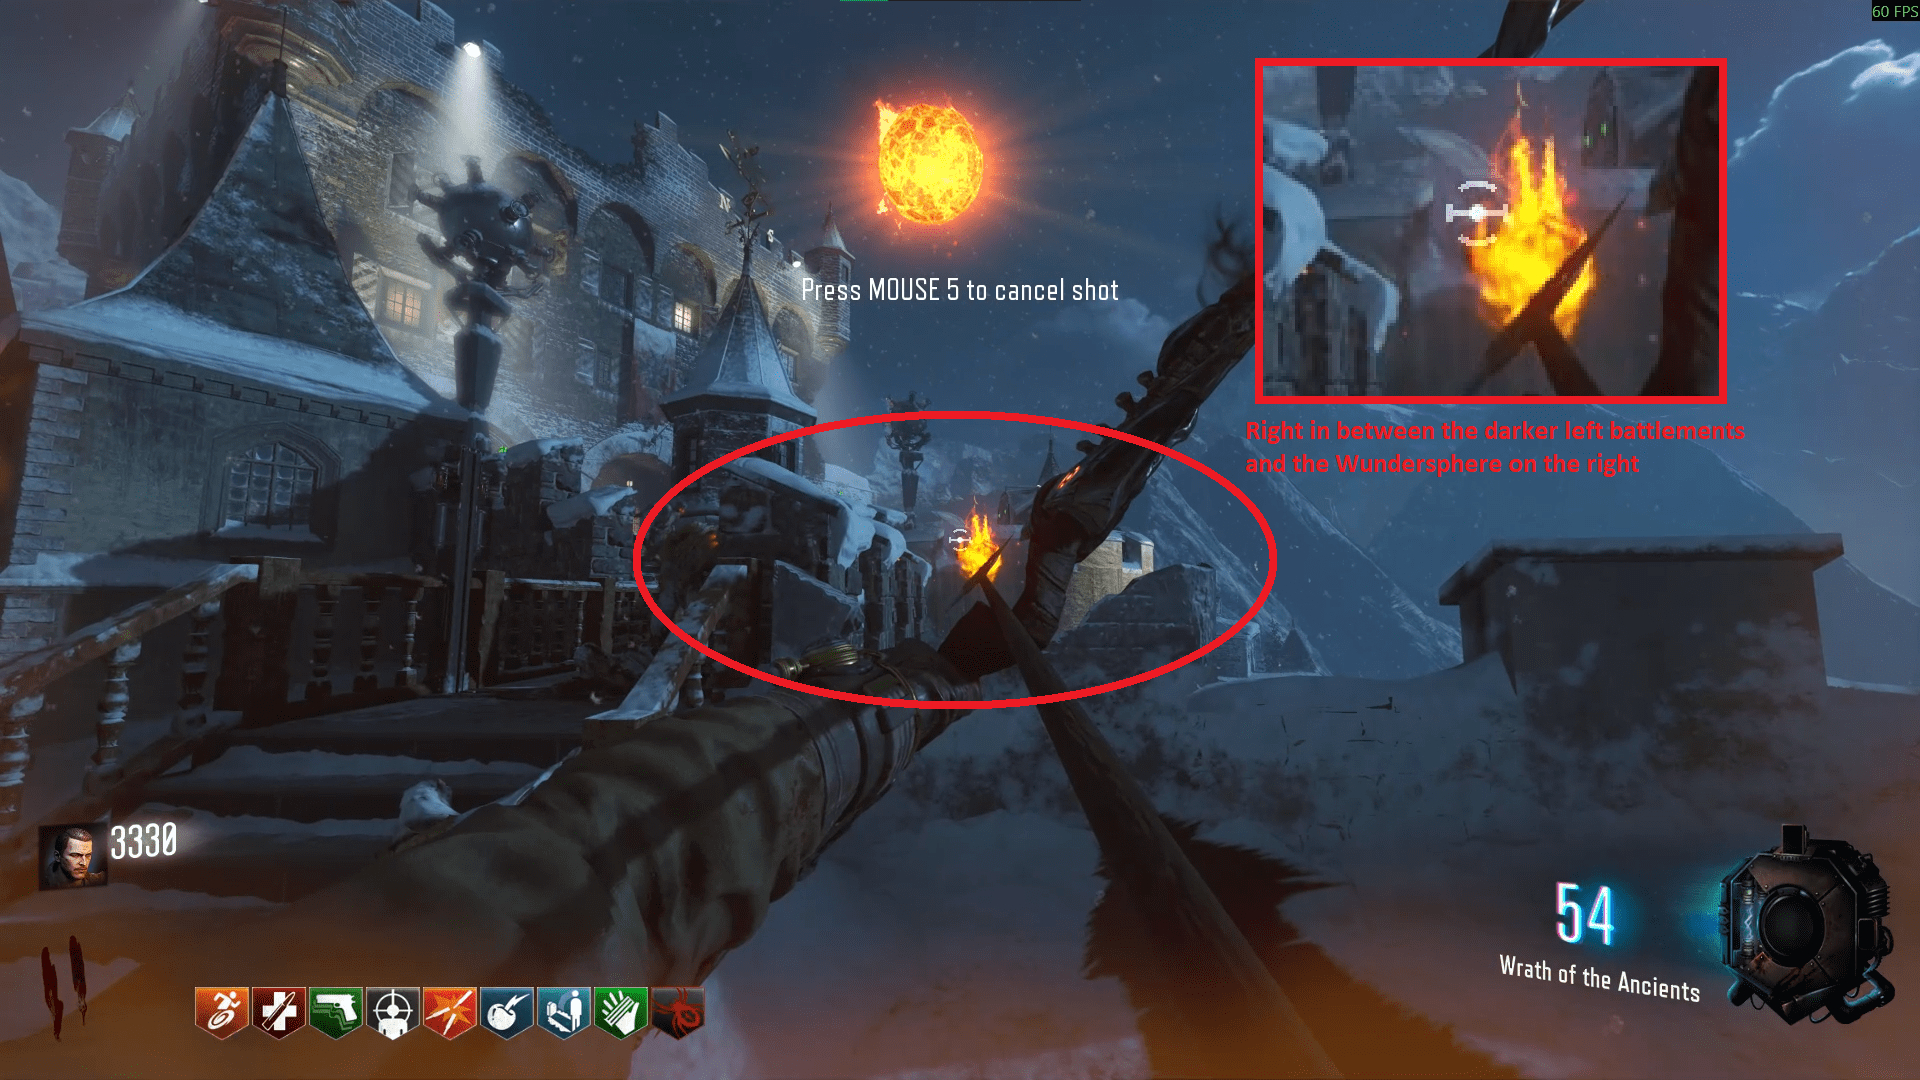
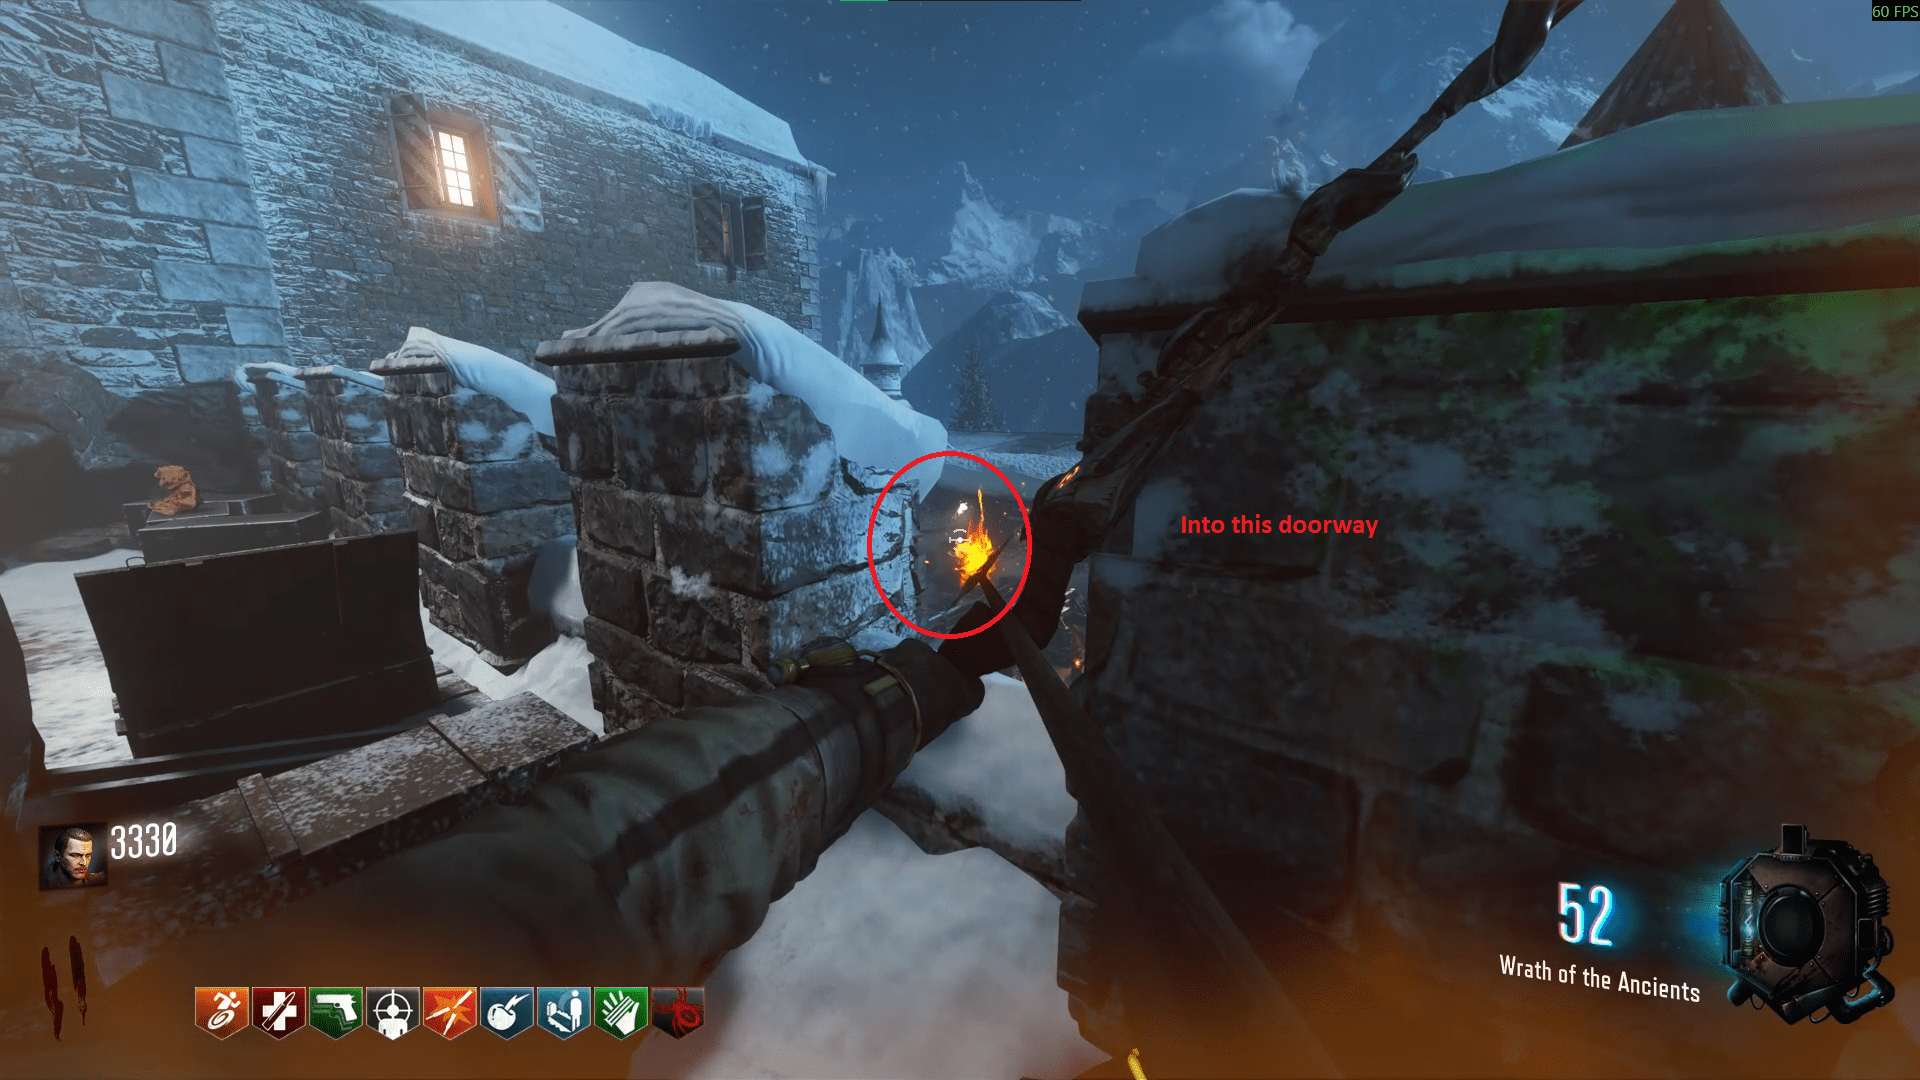
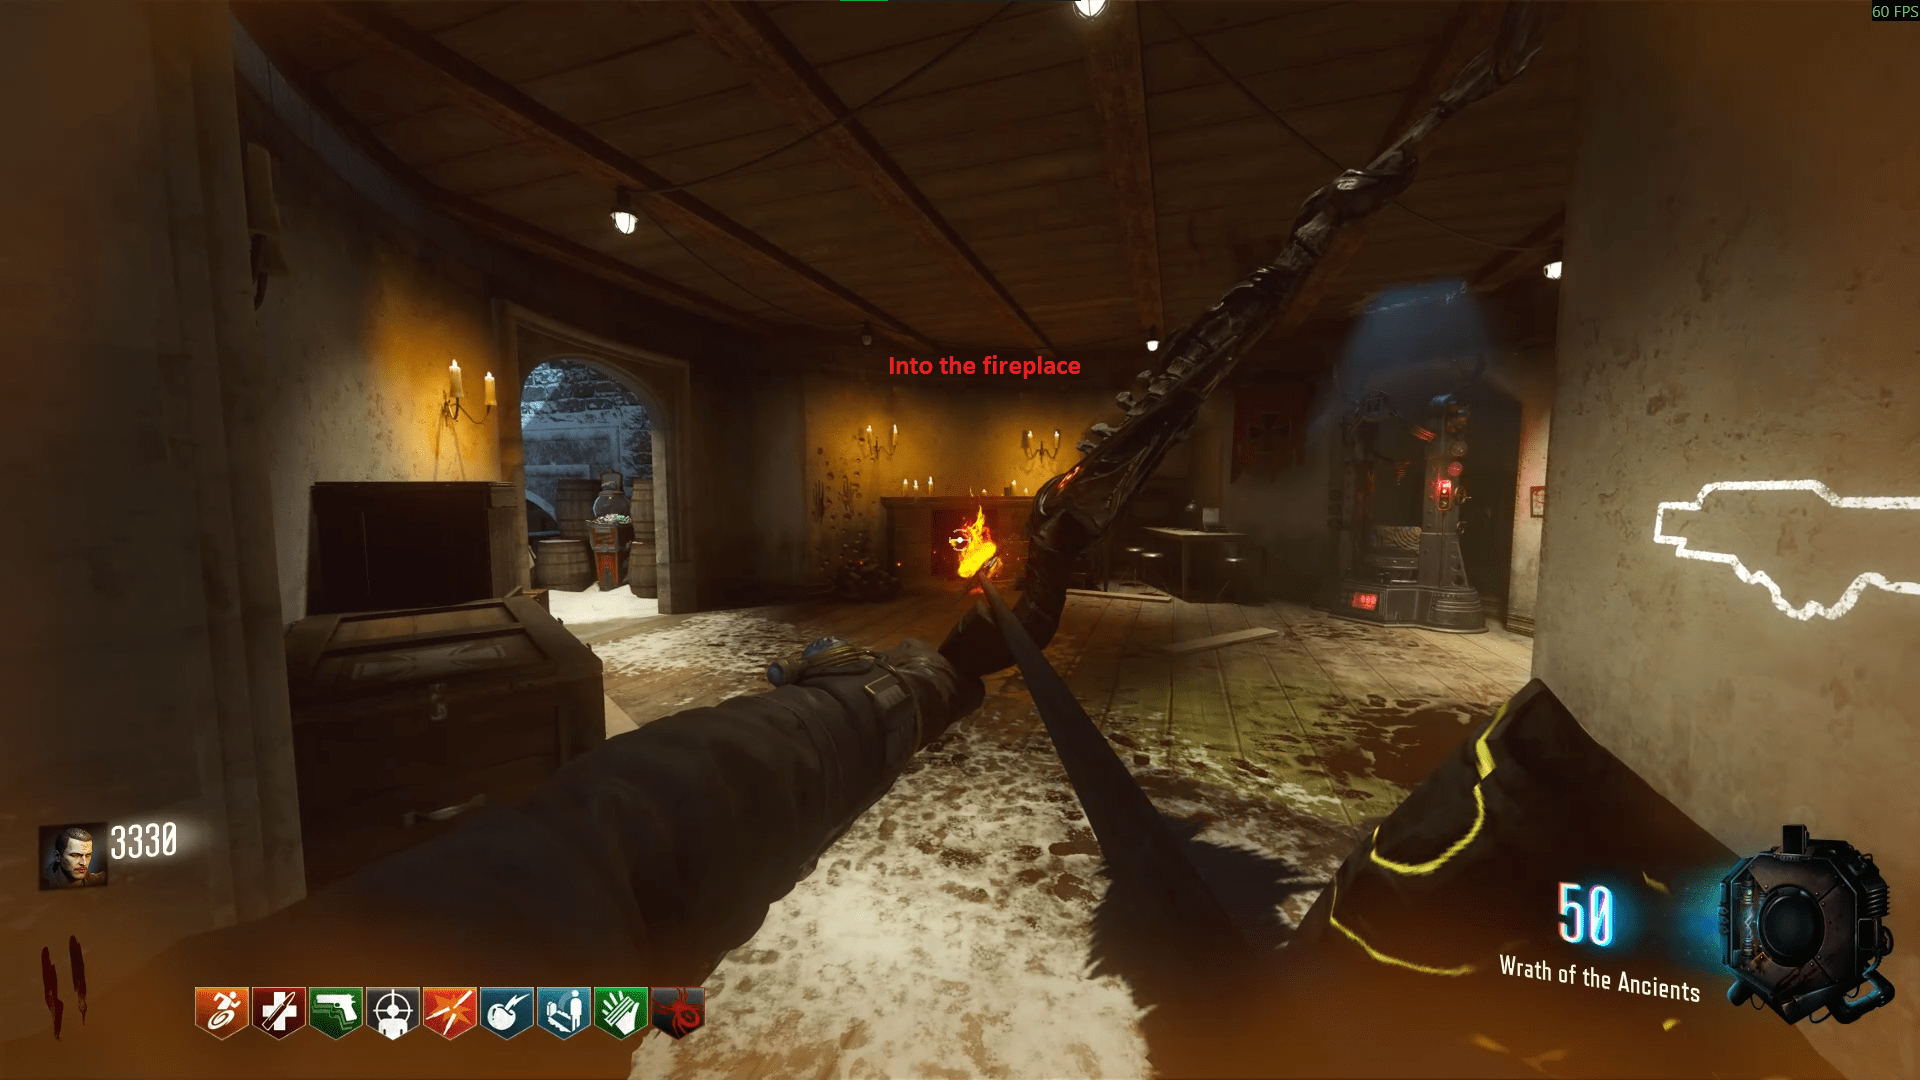
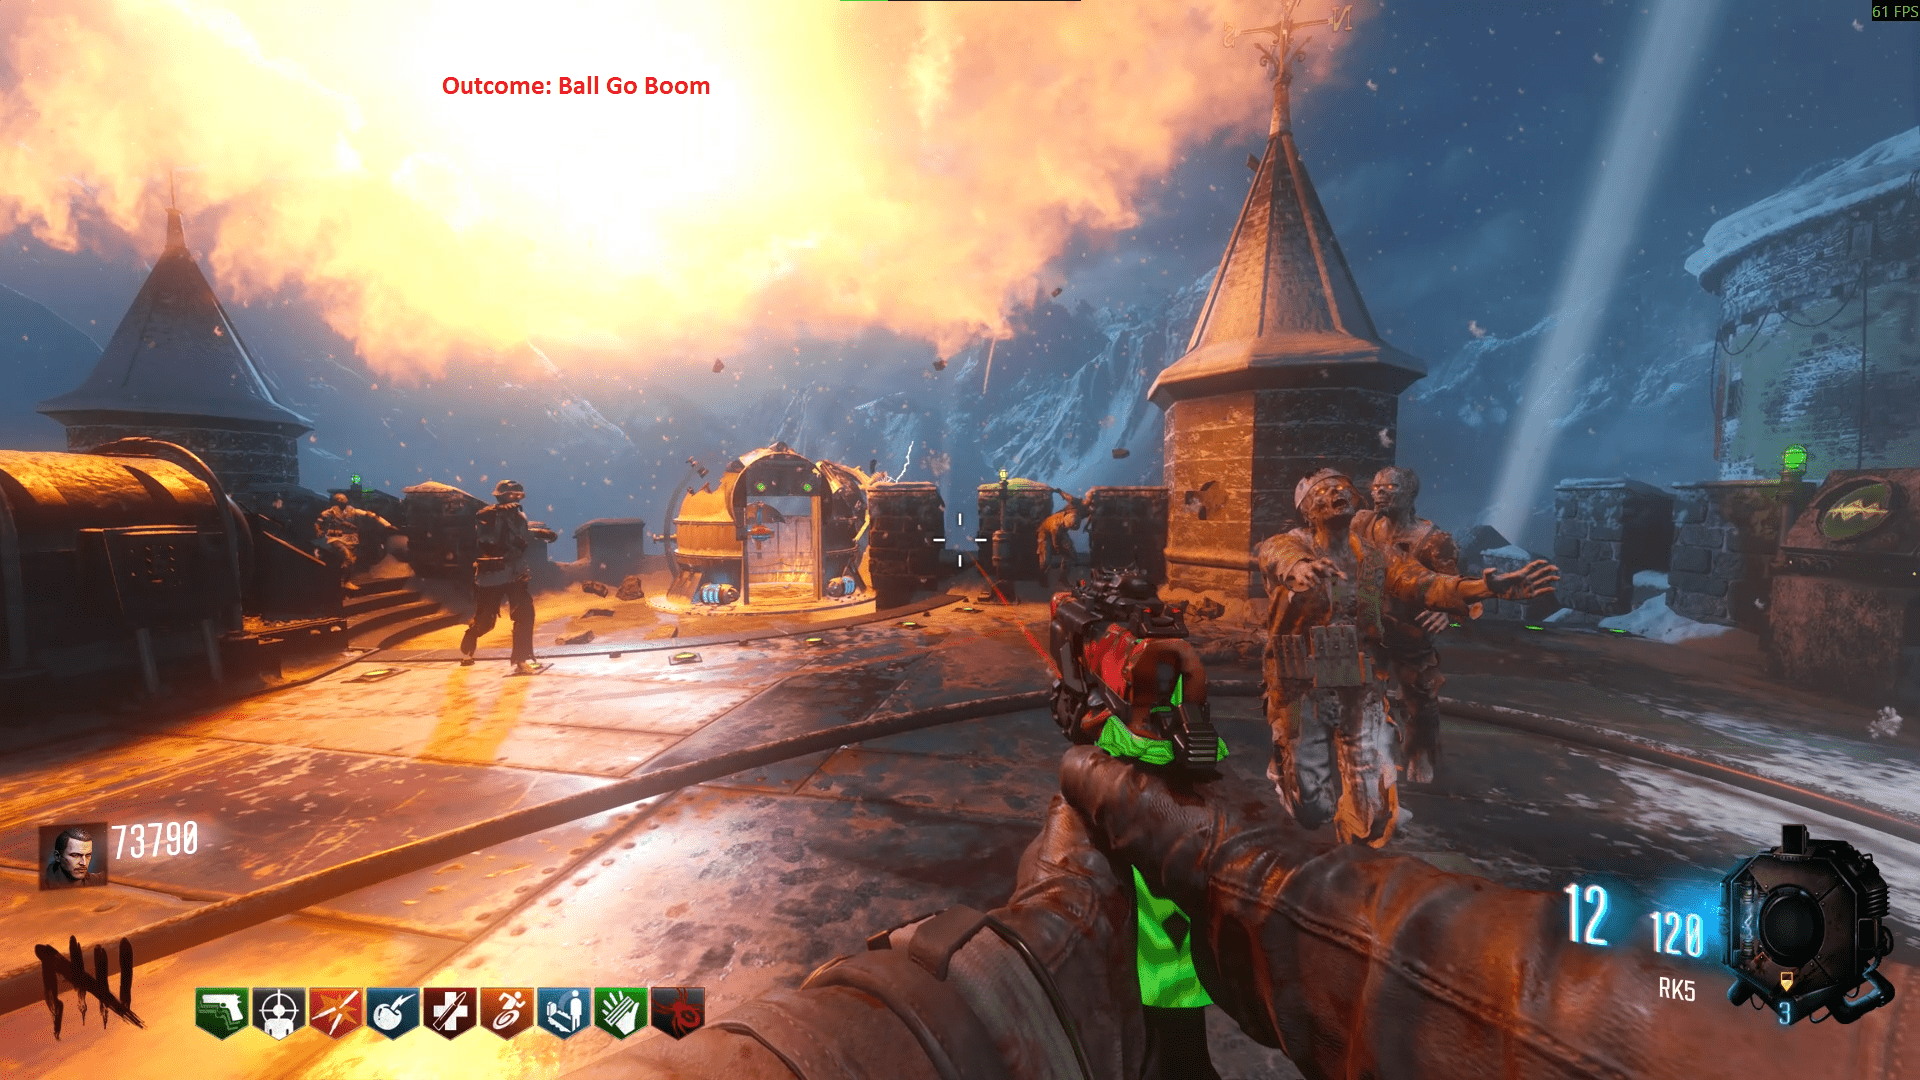
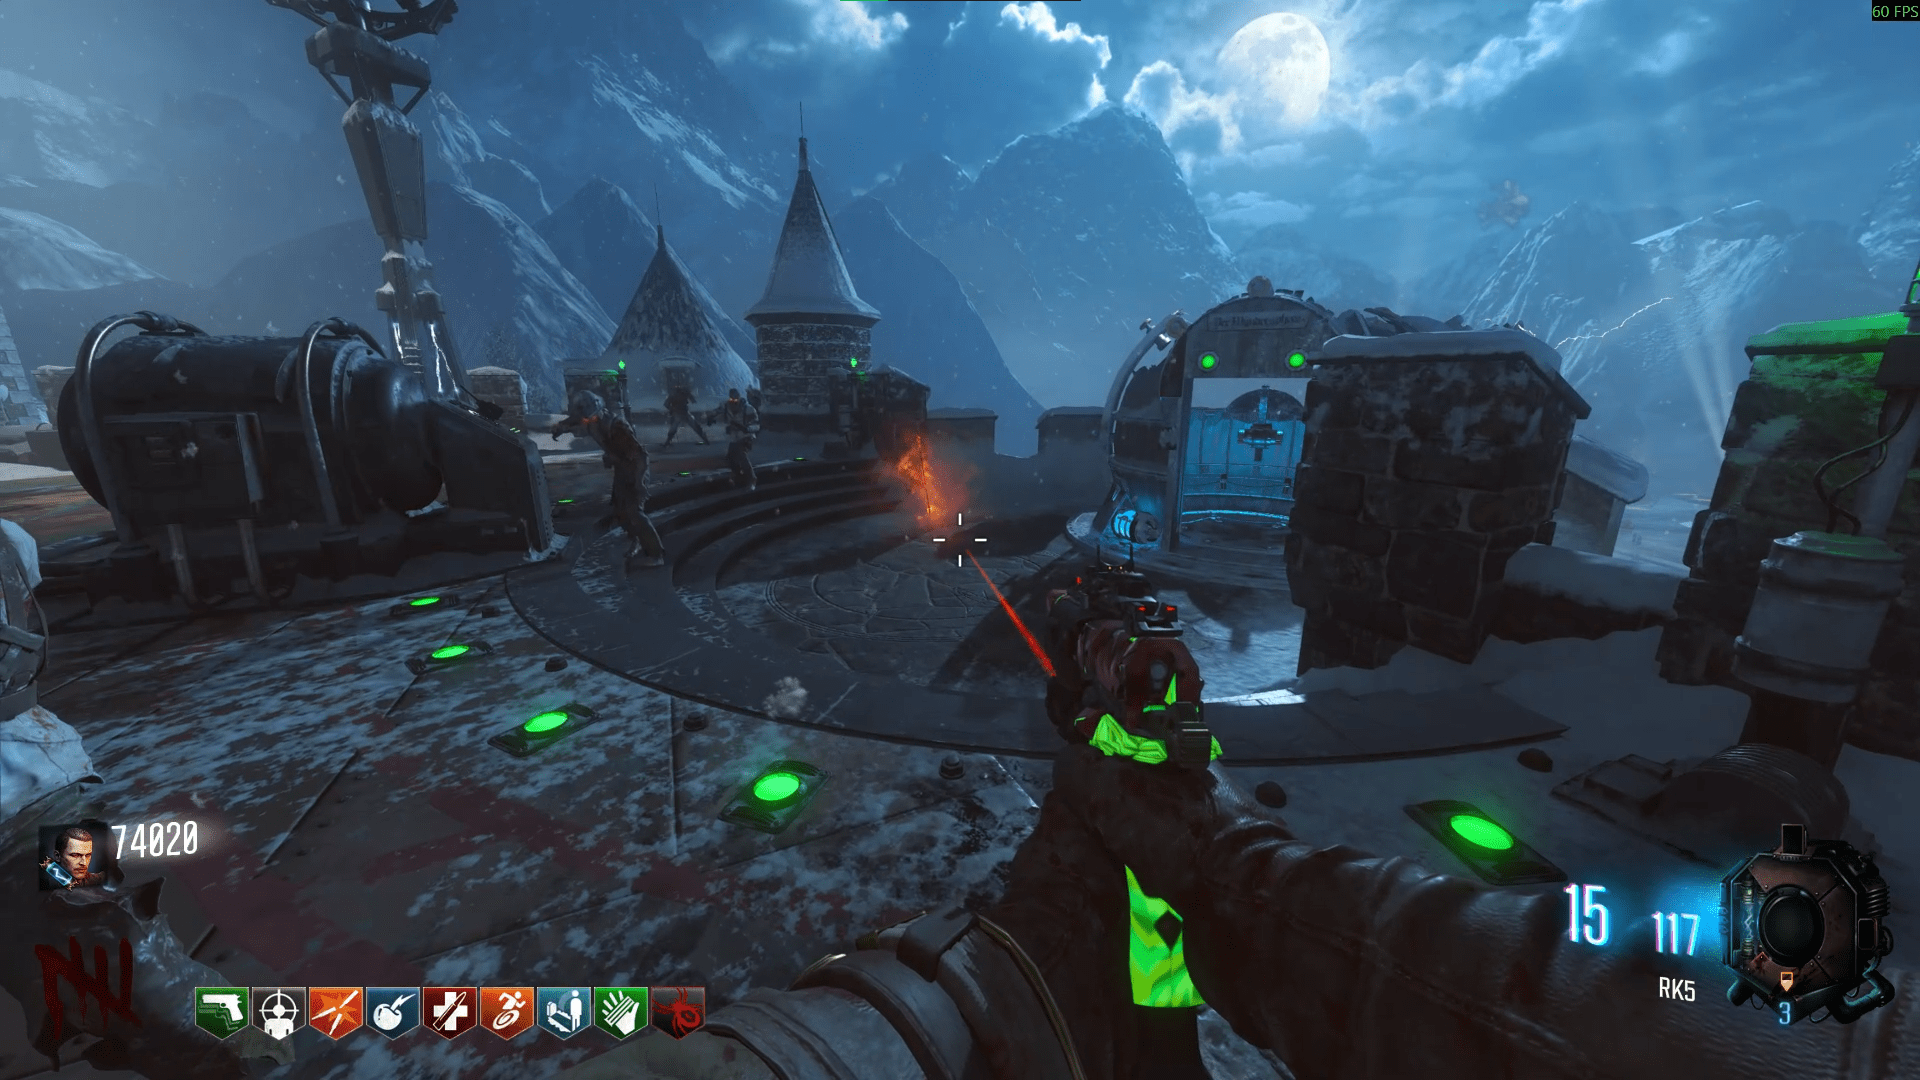
You will then interact with the newly lit fireplace, wherever it may be to place your arrow. Then head back to the big fiery ball and hold interact underneath it. It will rise and drop you the sought after completed arrow. Then once again, you'll take it to the Undercroft and get 20 kills to make the bow.
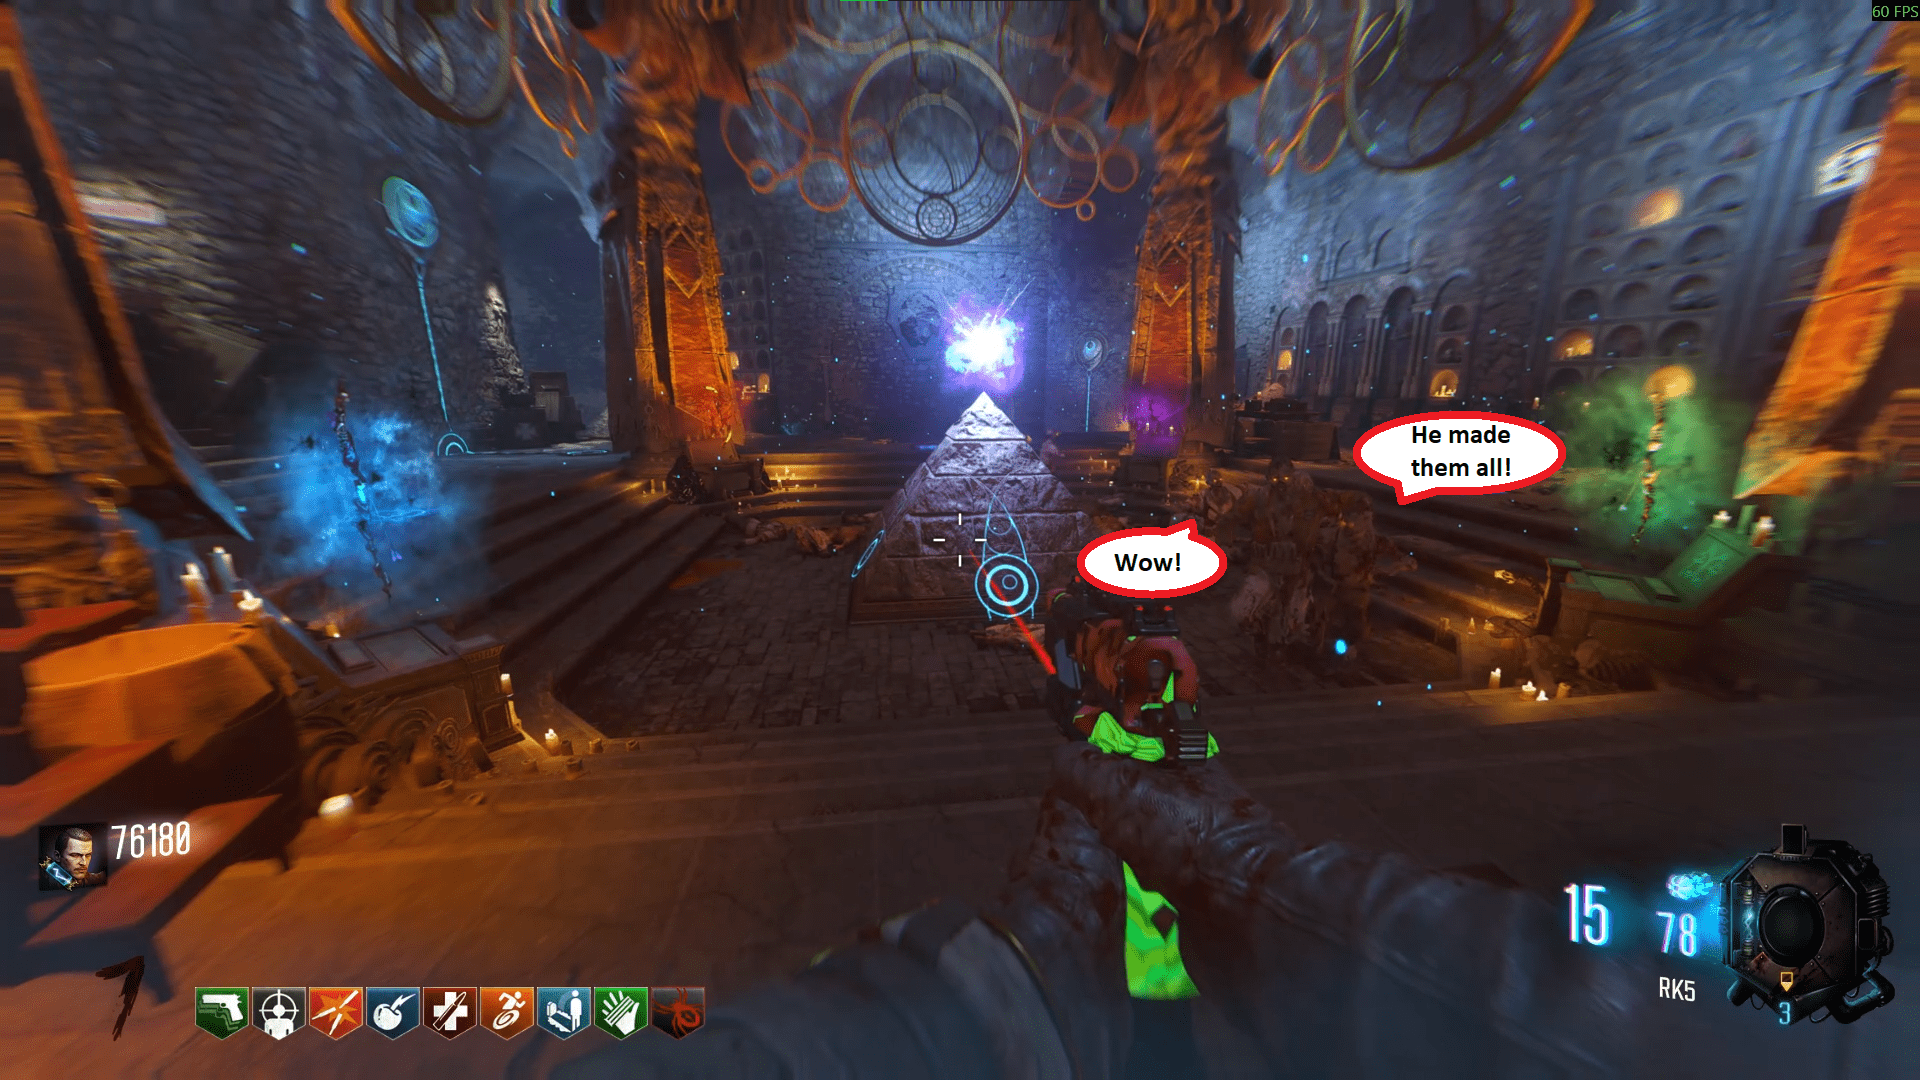
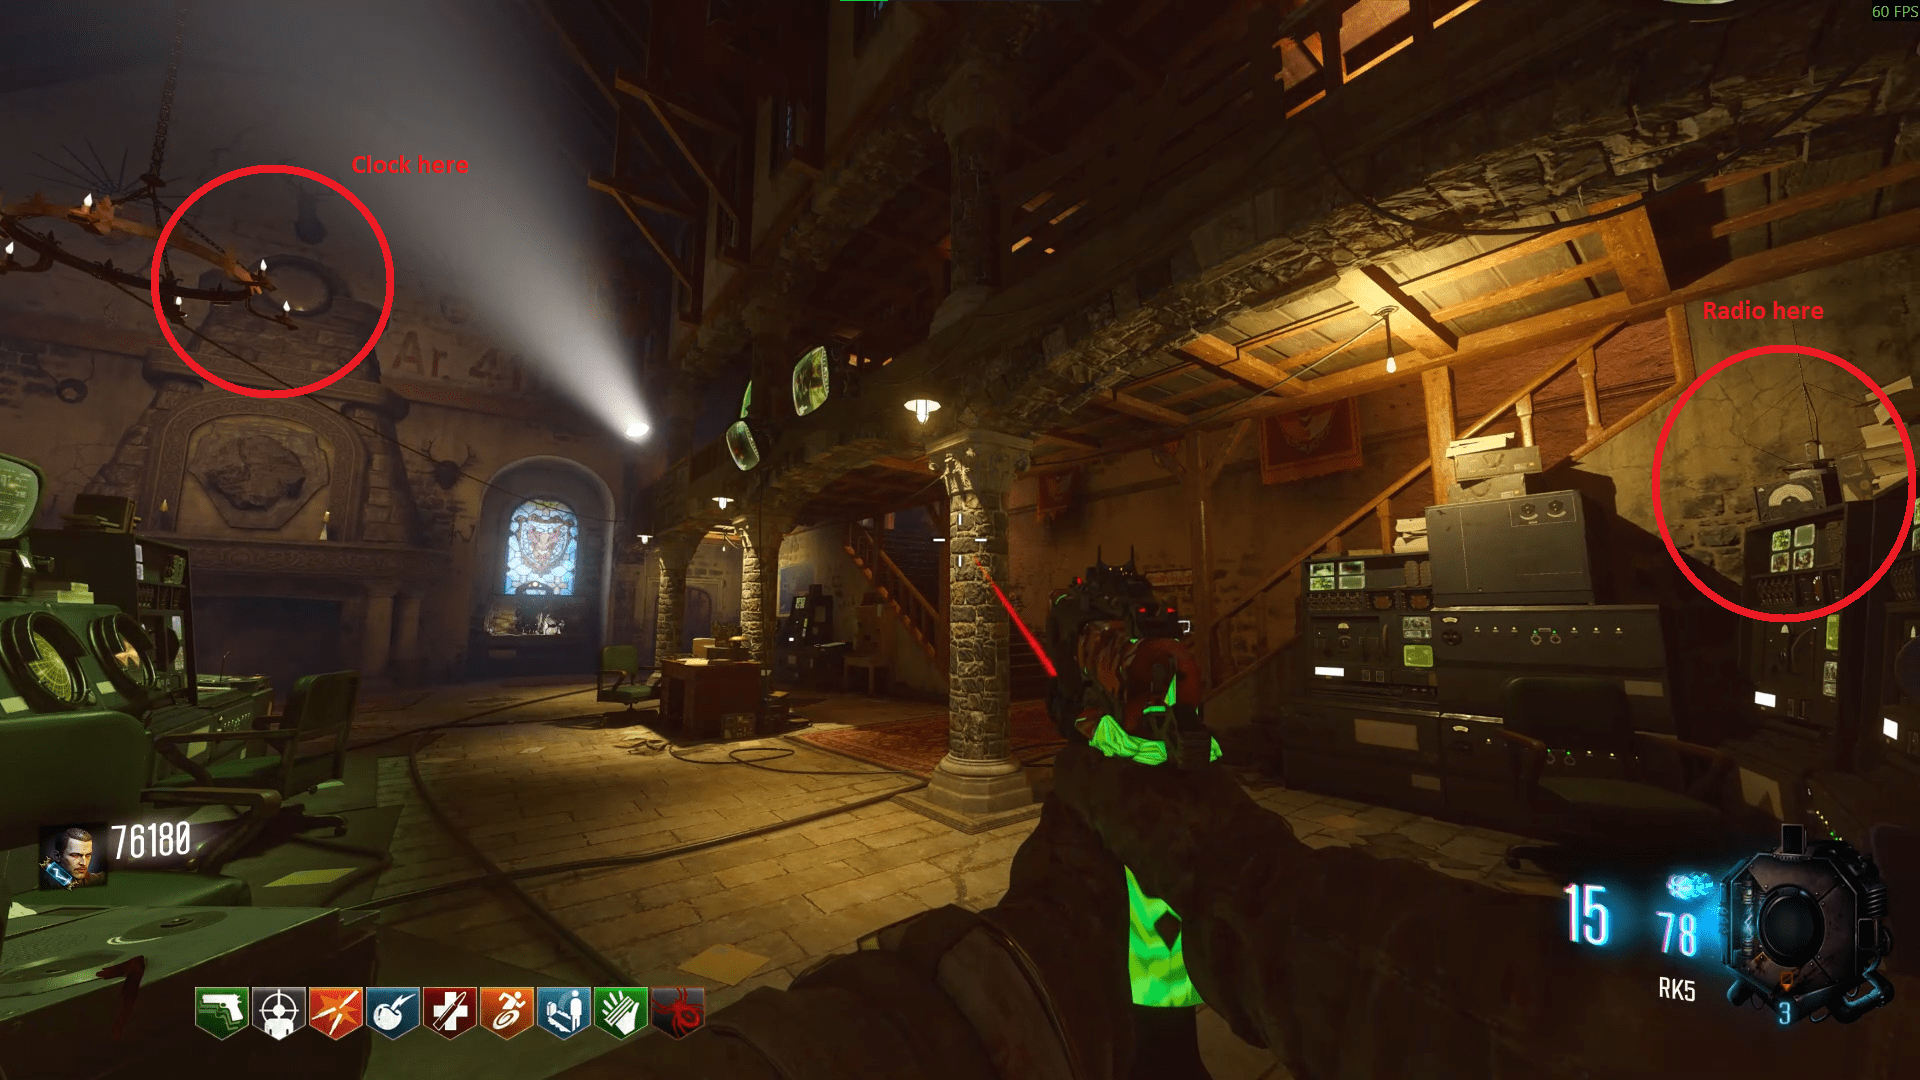
- Clock: In the Church, above the fireplace.
- Radio: In the Church, opposite Speed Cola, in front of the previous.
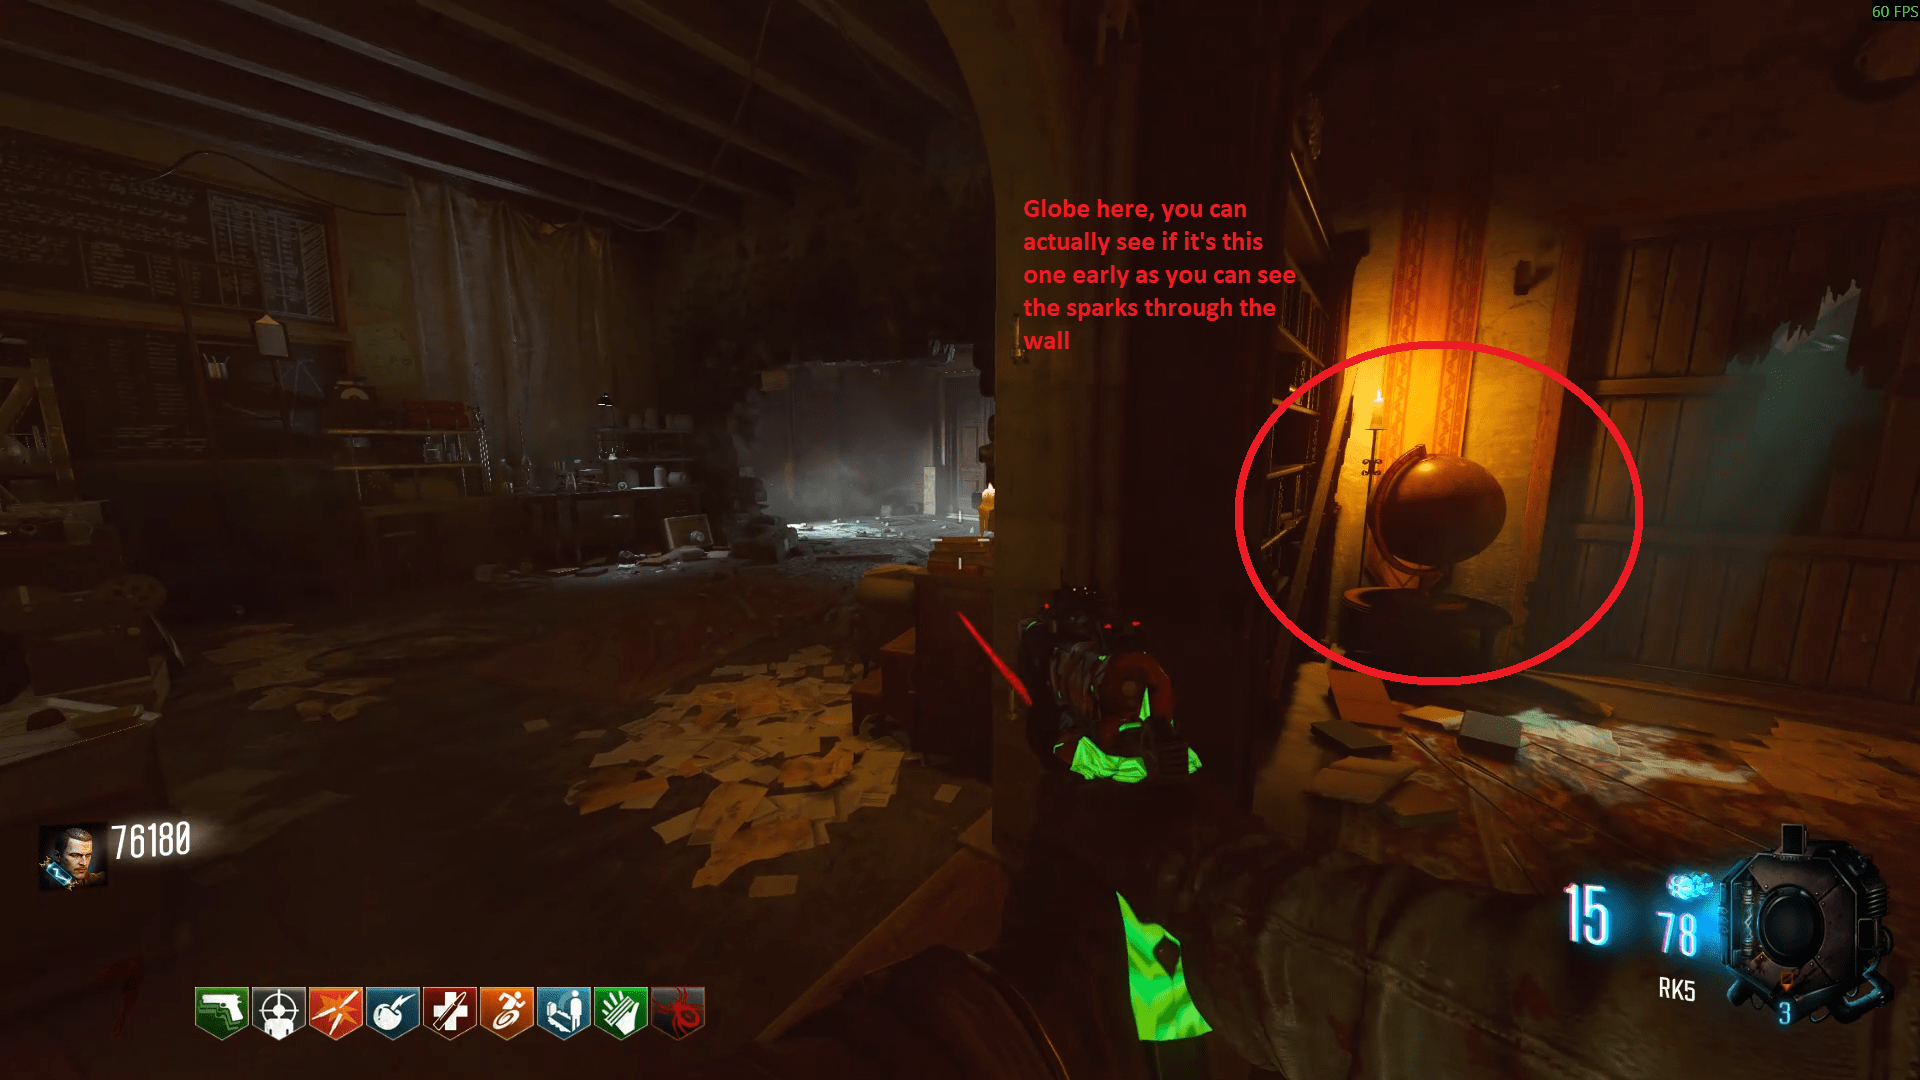
- Globe: Between Samantha's and another room. Can be seen through the wall if it's there.
- Phone: In the Power room, under a flag opposite the power switch.
- Clock: In the room besides the Clocktower, above the stairs to the Courtyard.
- Boxes: In the room above Double Tap, opposite the crafting bench and lightning pot.
- Wheel: On a car just outside Double Tap, leading towards Spawn.
- Phone: In Spawn, opposite Quick Revive.
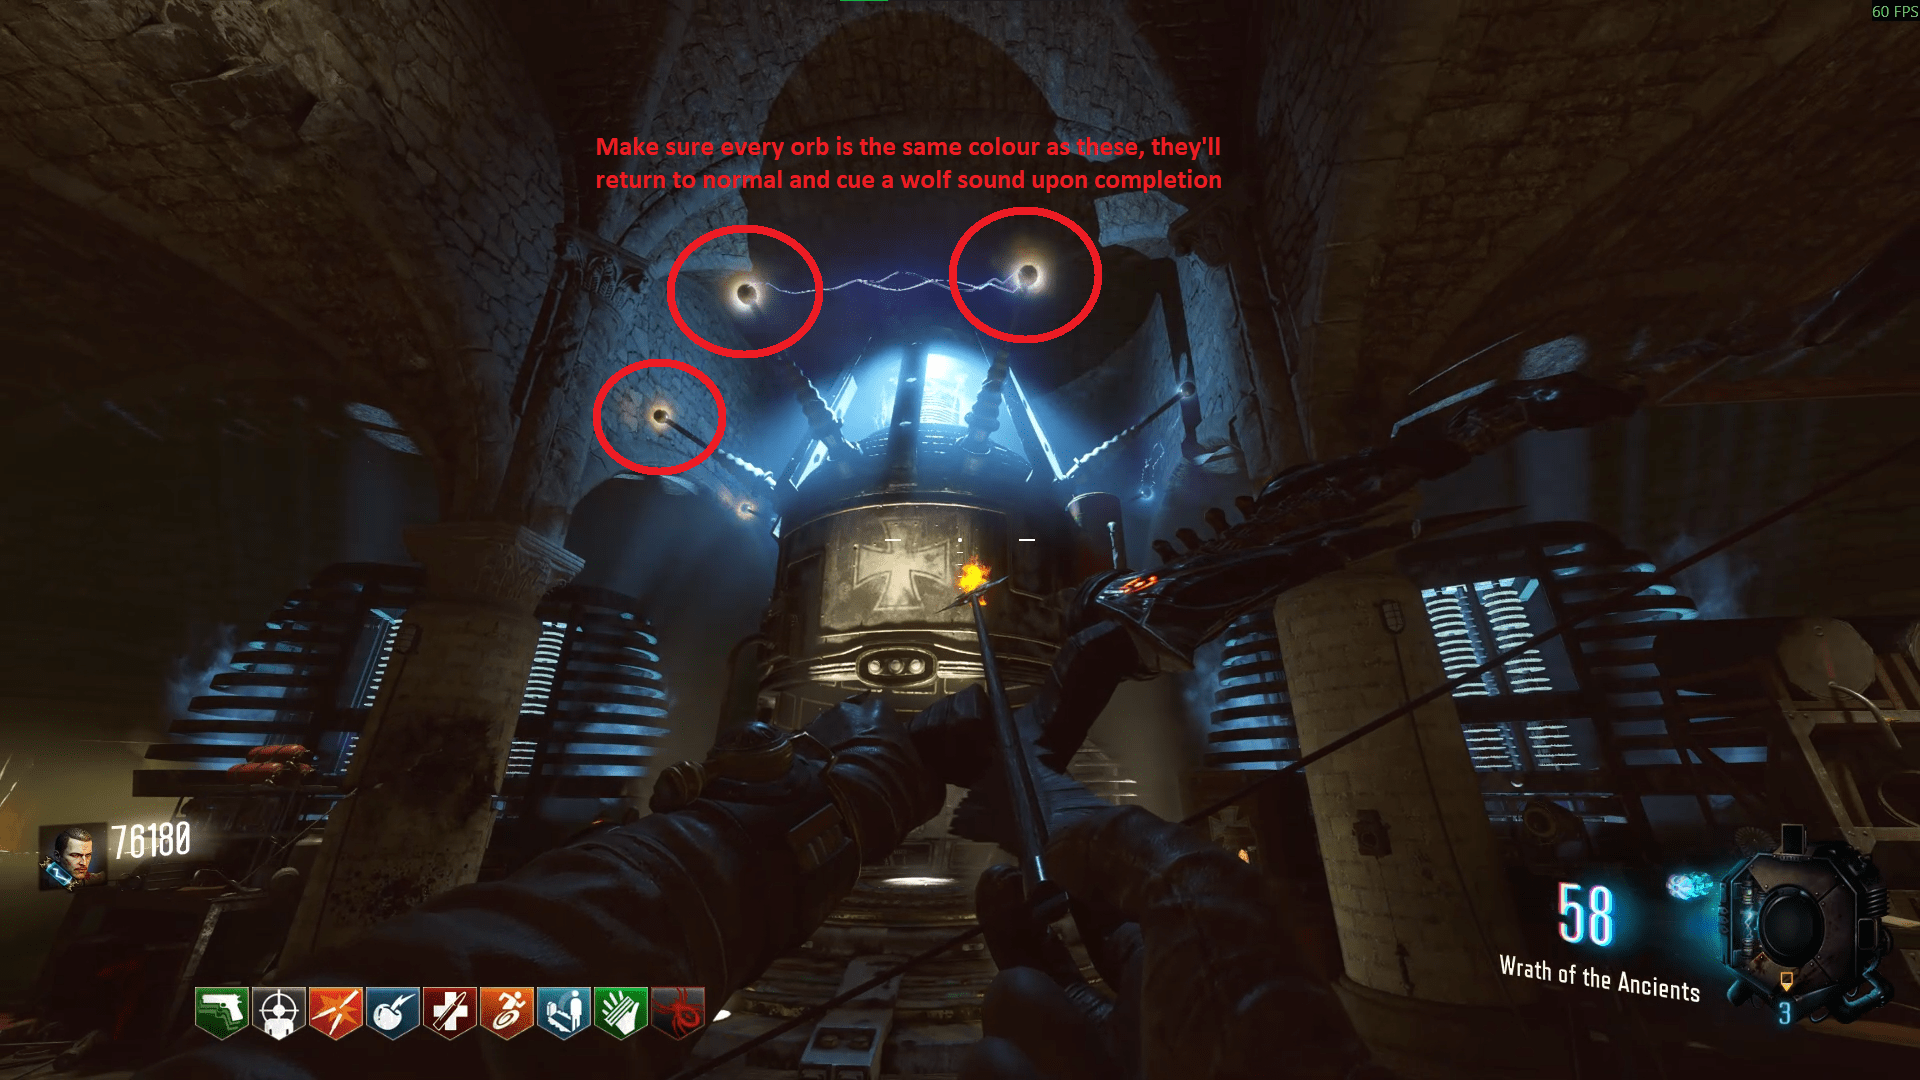
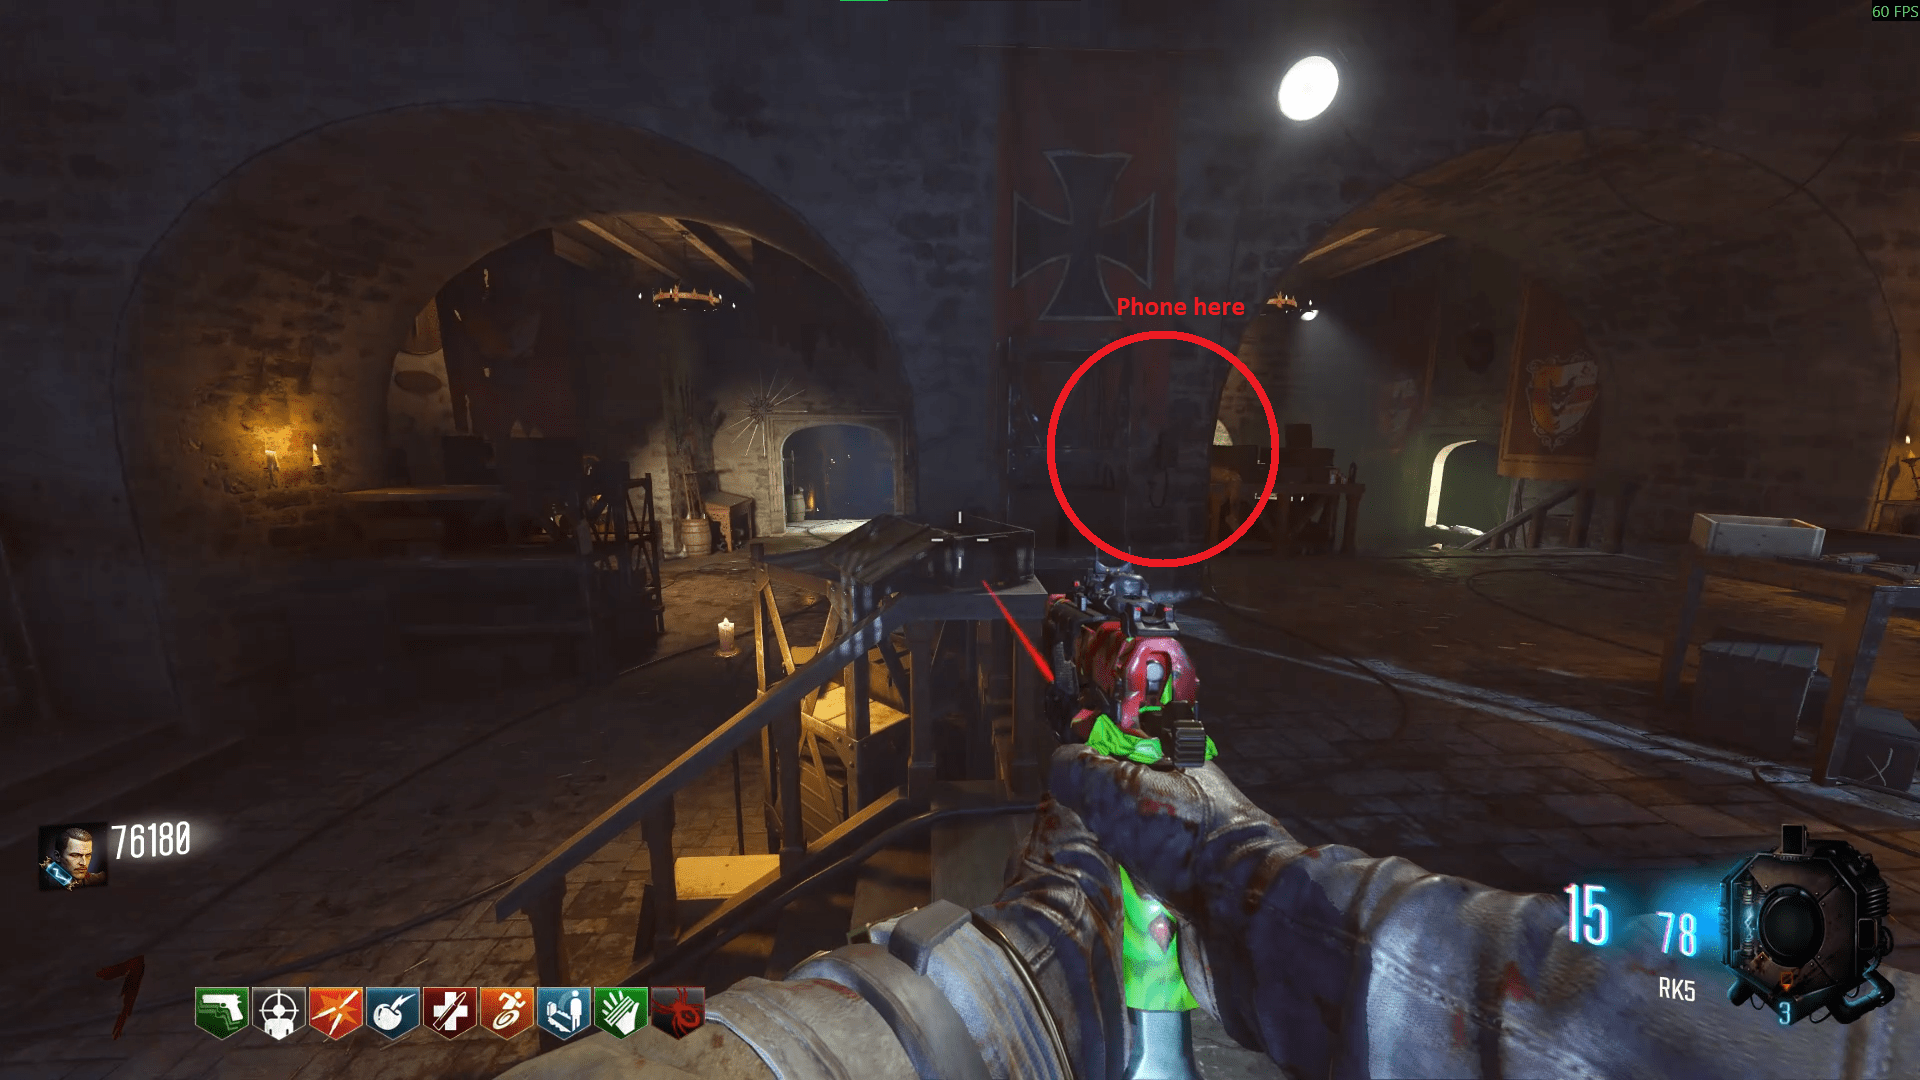
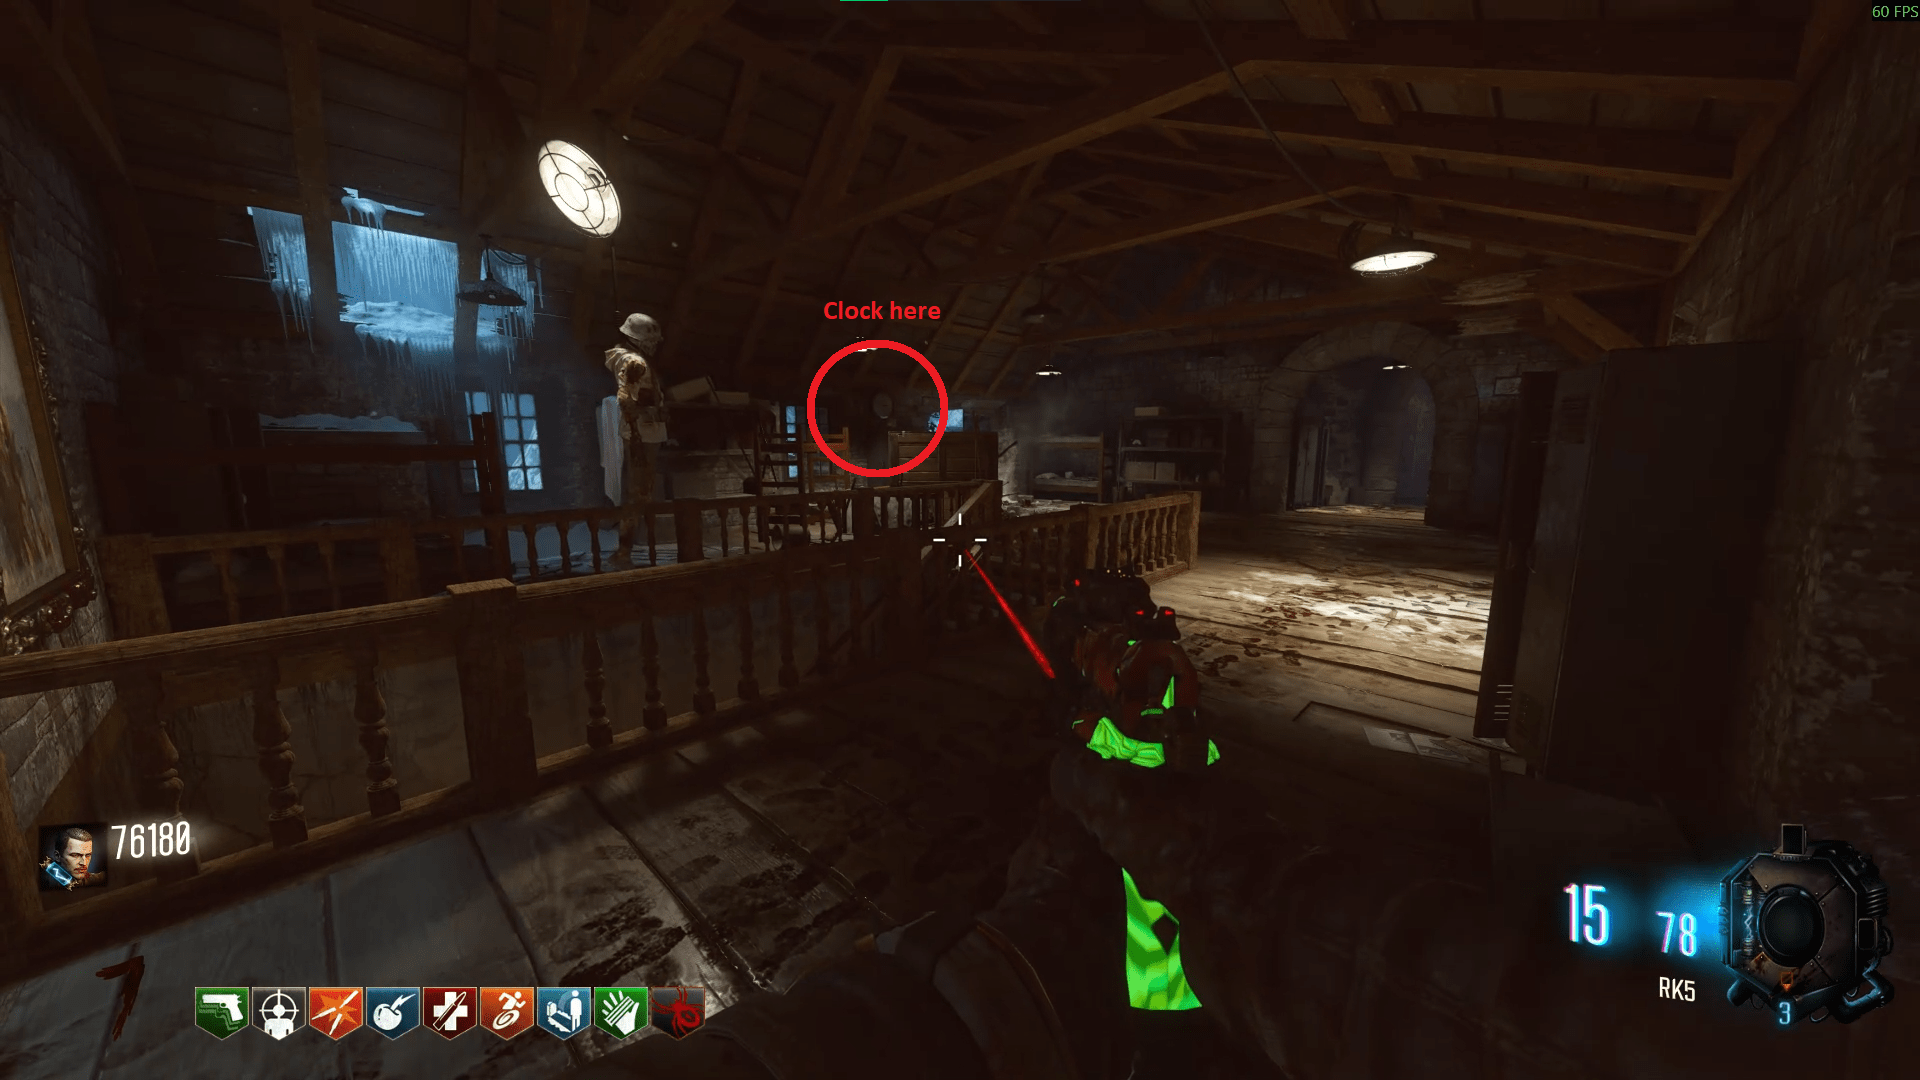
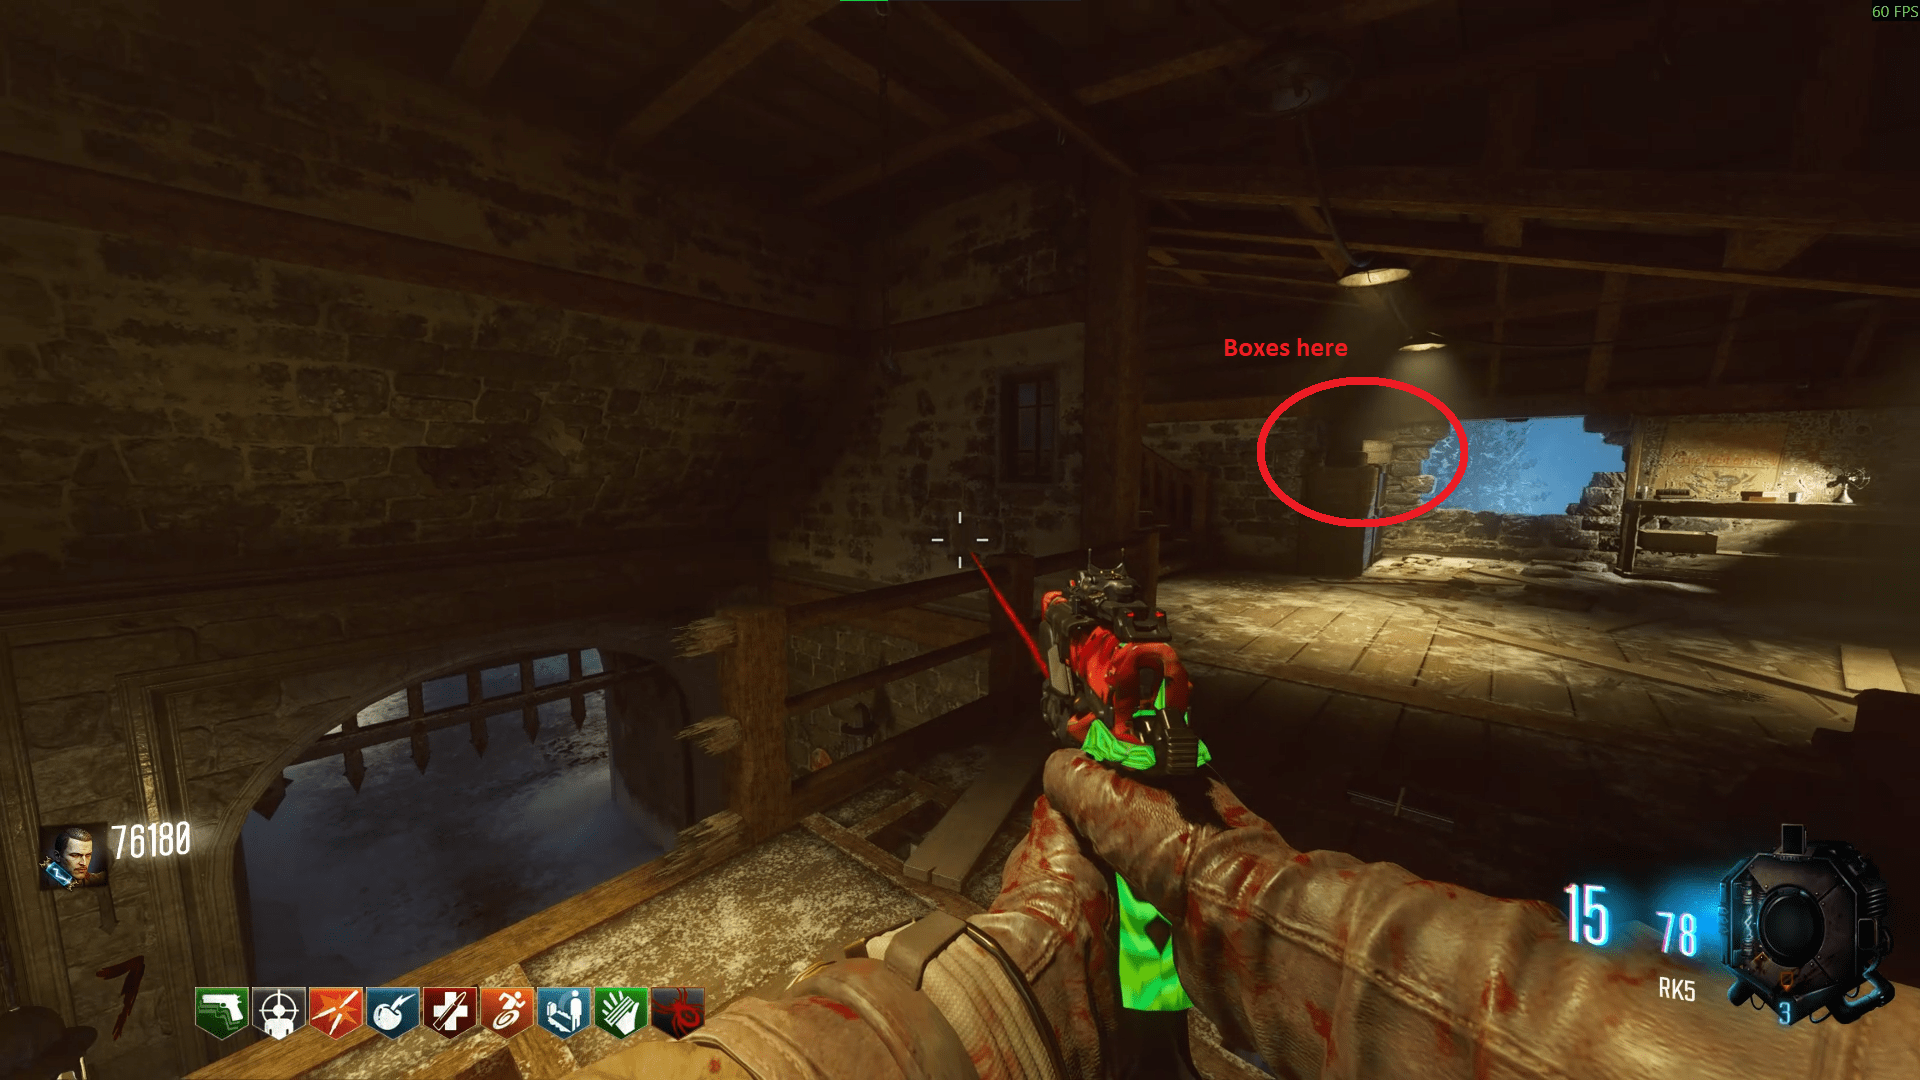
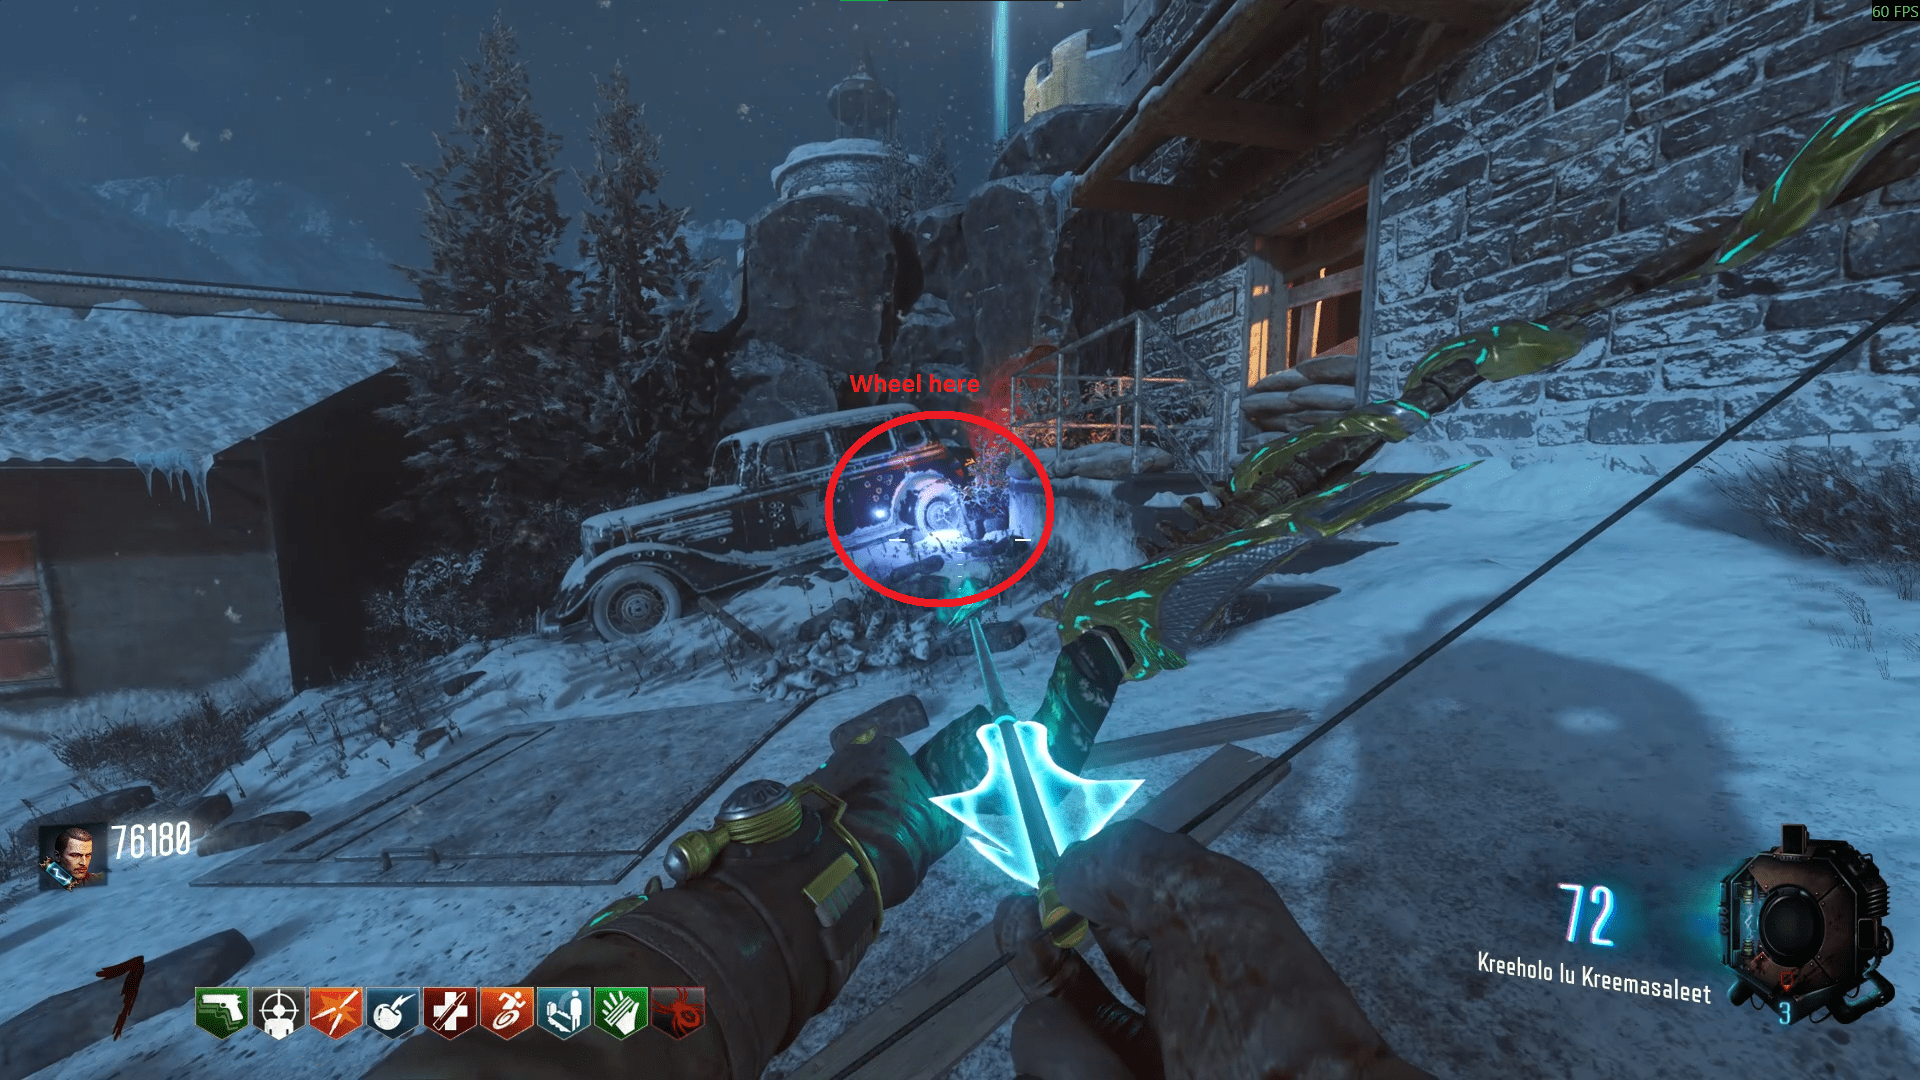
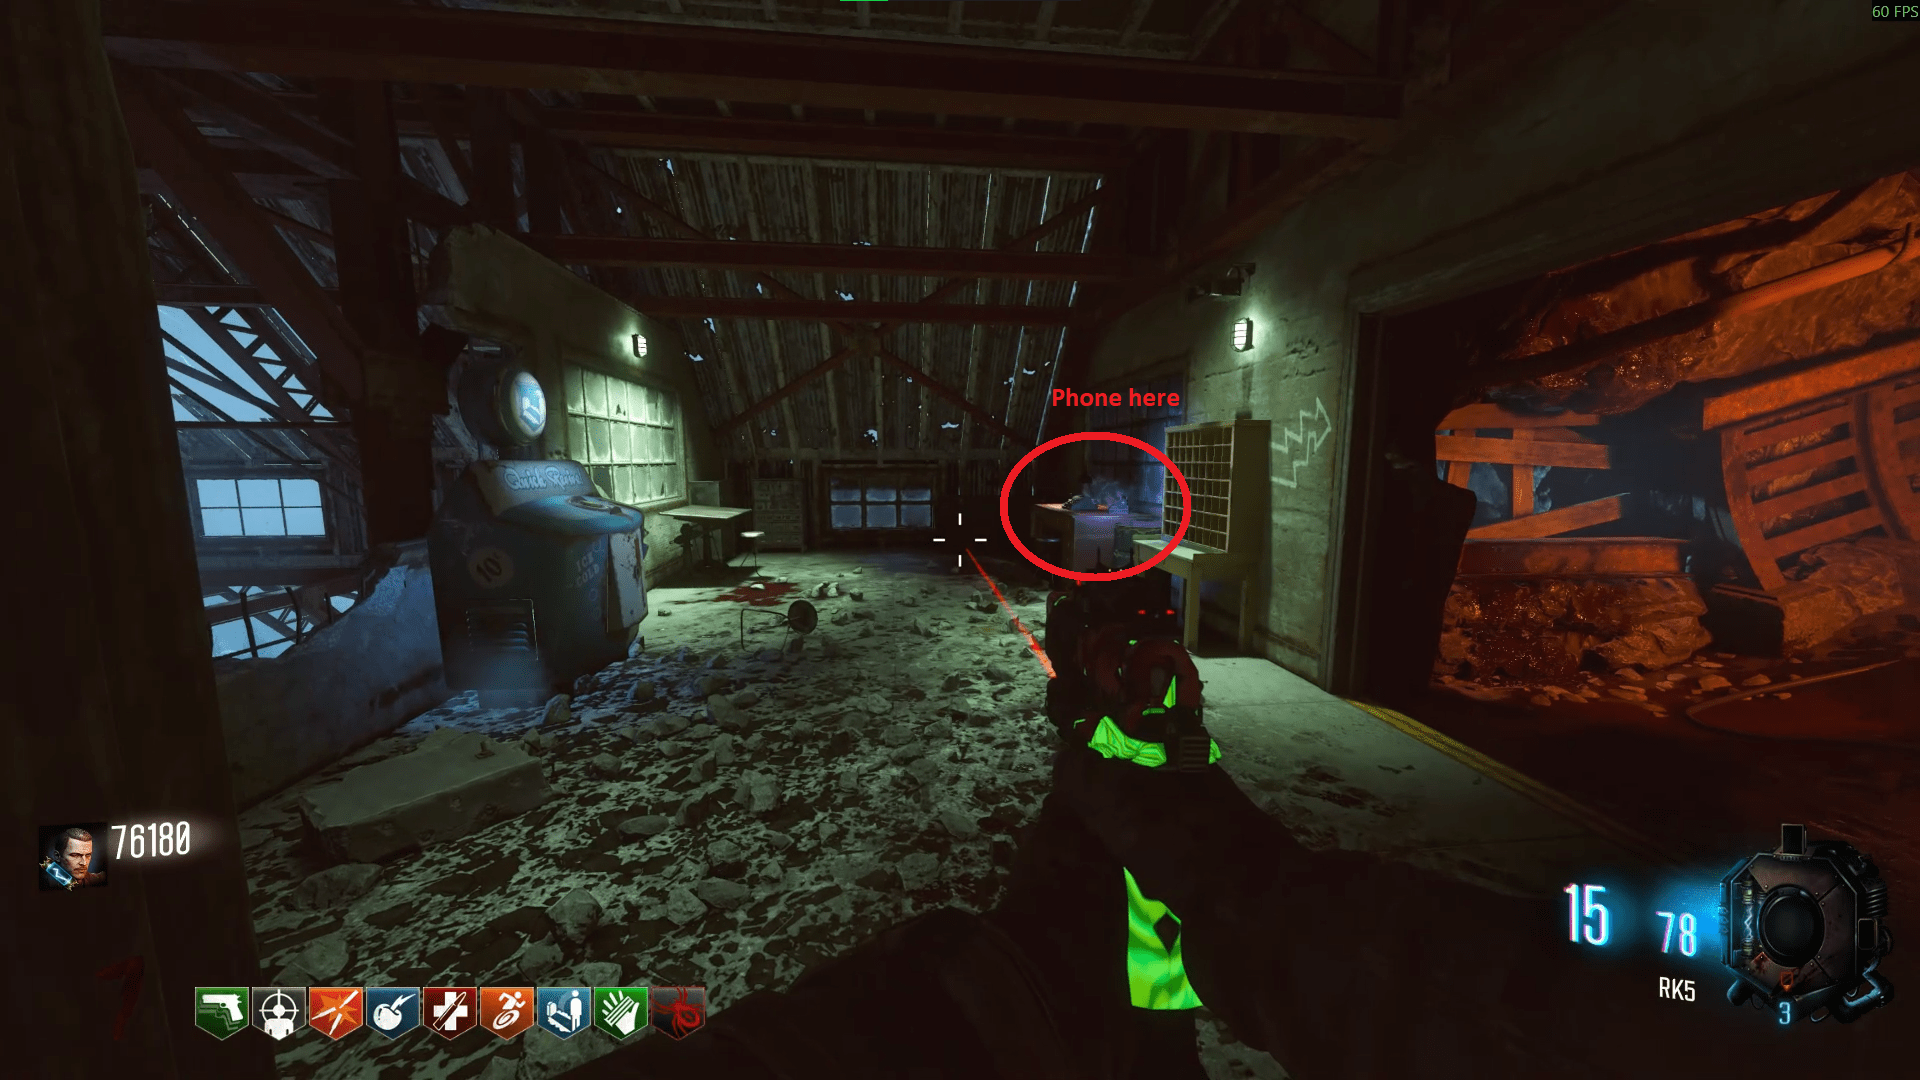
After the fourth wisp shot with the upgraded bow, you'll hear a conclusive keeper howl instead with a distinctive ending. That means that you can now teleport to the past and get Dr Groph's safe open. To do so, go to the Teleporter room and the teleporter should now have a purple glow in the middle of it.
If you end the round, you will have to do this step again to get the purple glow back.
After teleporting, you'll be in a small room. Take note of the code on the safe that Groph is putting in as well as take a fuse needed for the Simon Says after going back.
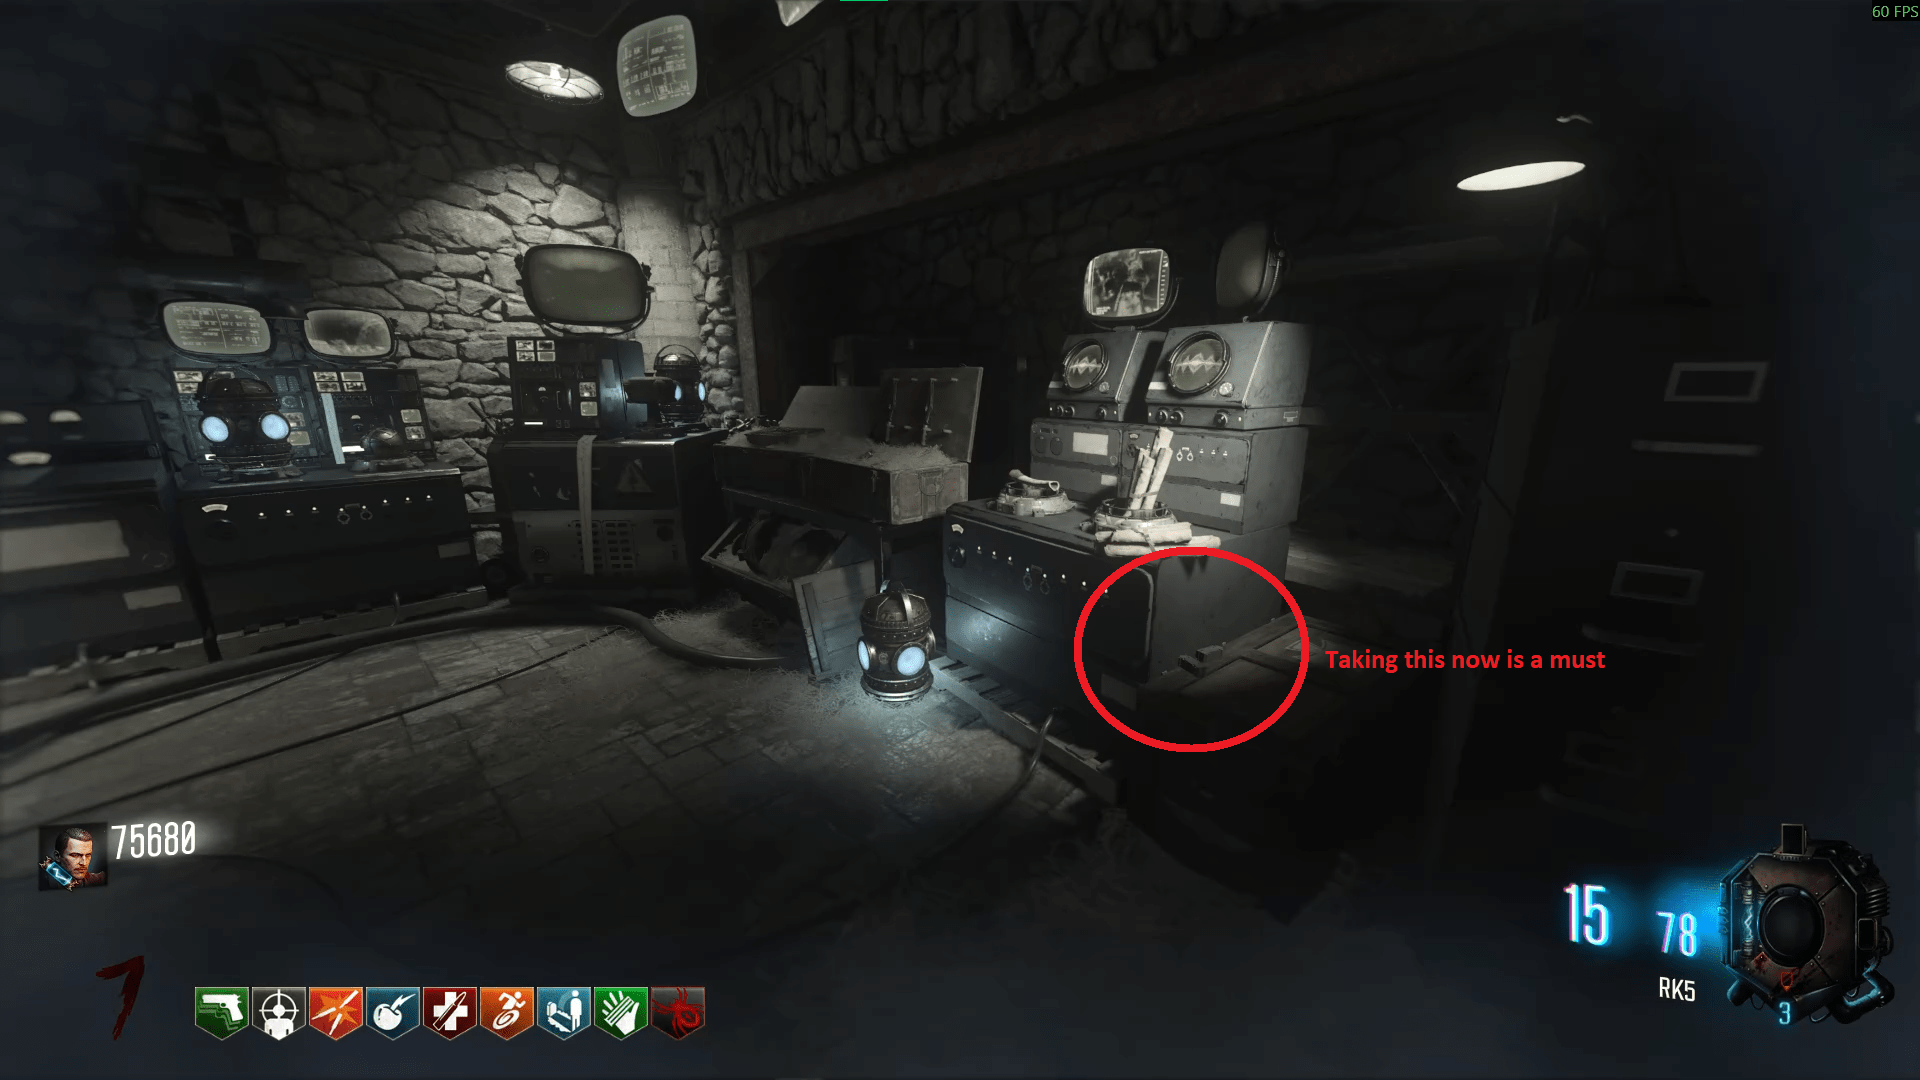
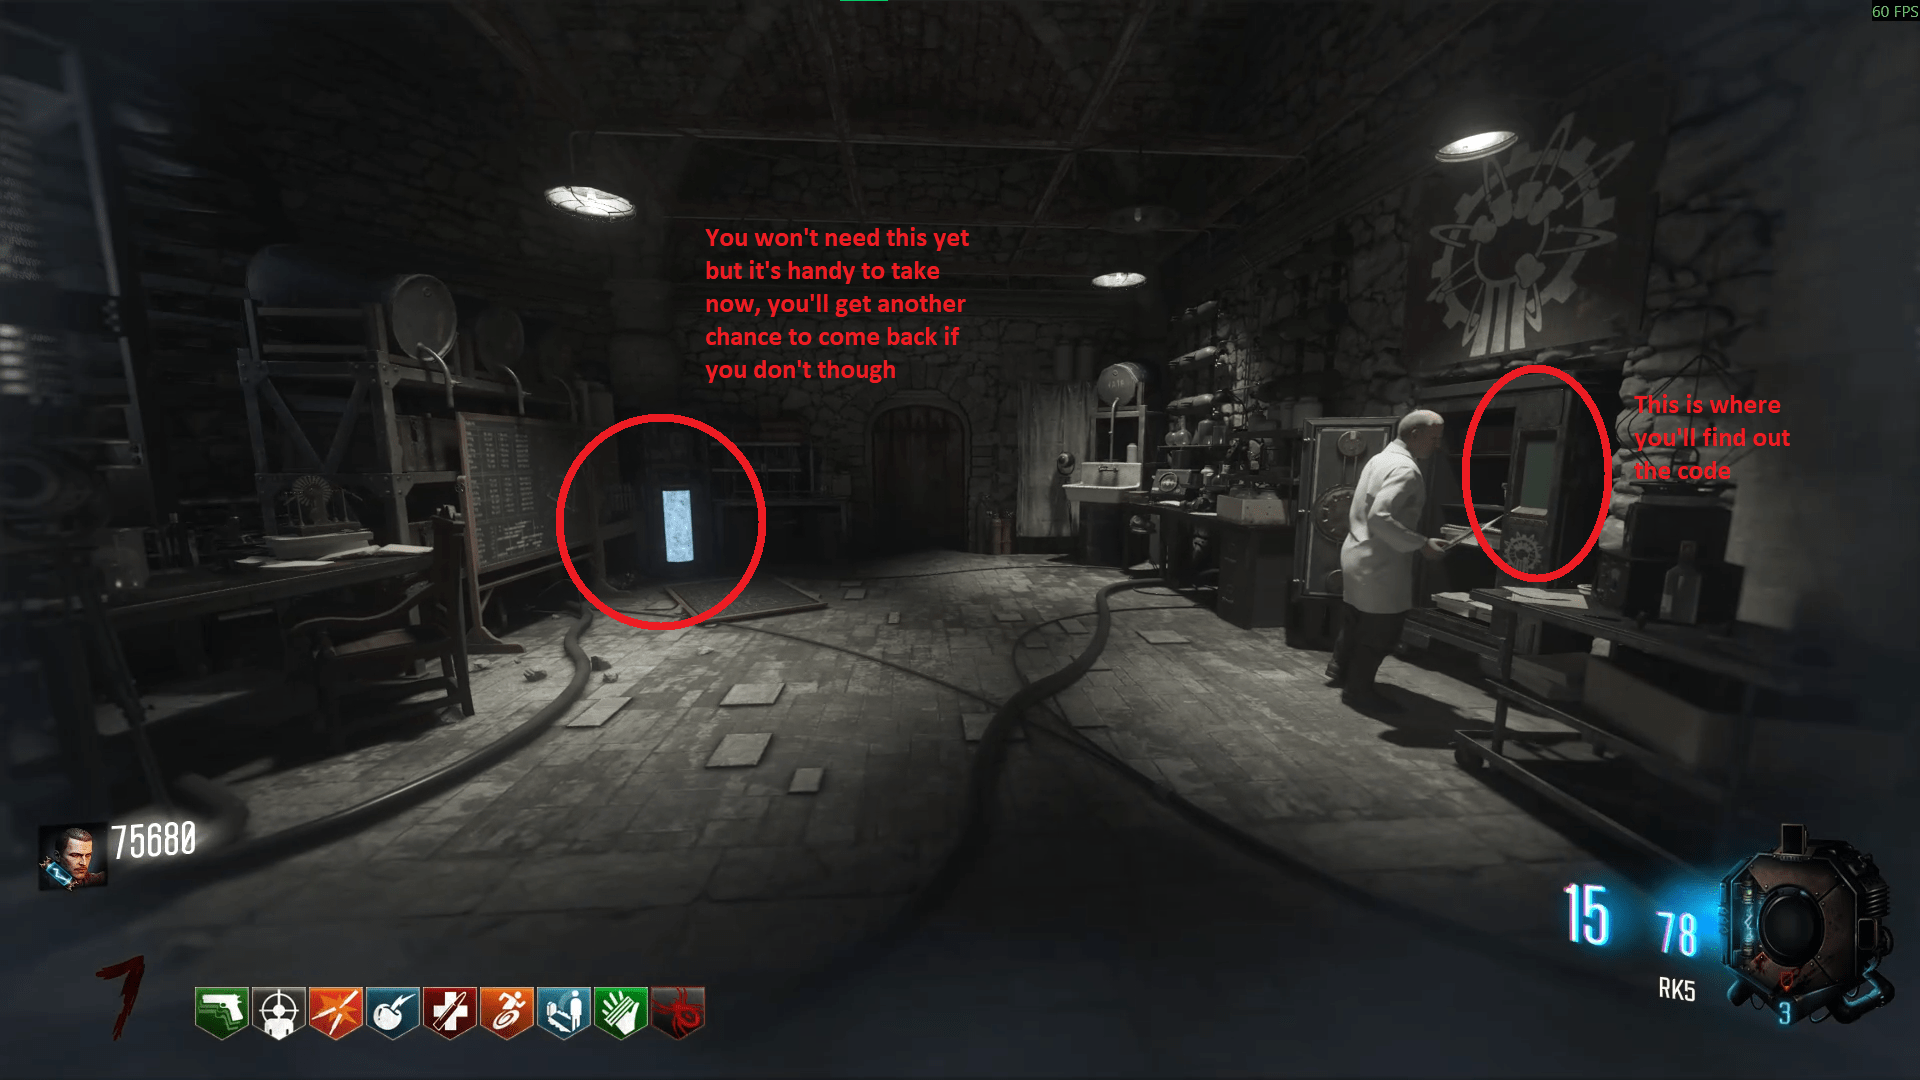
After coming back to the present, you'll be in the Rocket Test Site where a Panzersoldat will spawn. Kill him (and take the Ragnarok piece if one hasn't spawned already) and head back to the Bastion. The fuse you took will go into the left side of the Tesla Trap and then you'll need to switch it to 'Protect' mode on the other side.
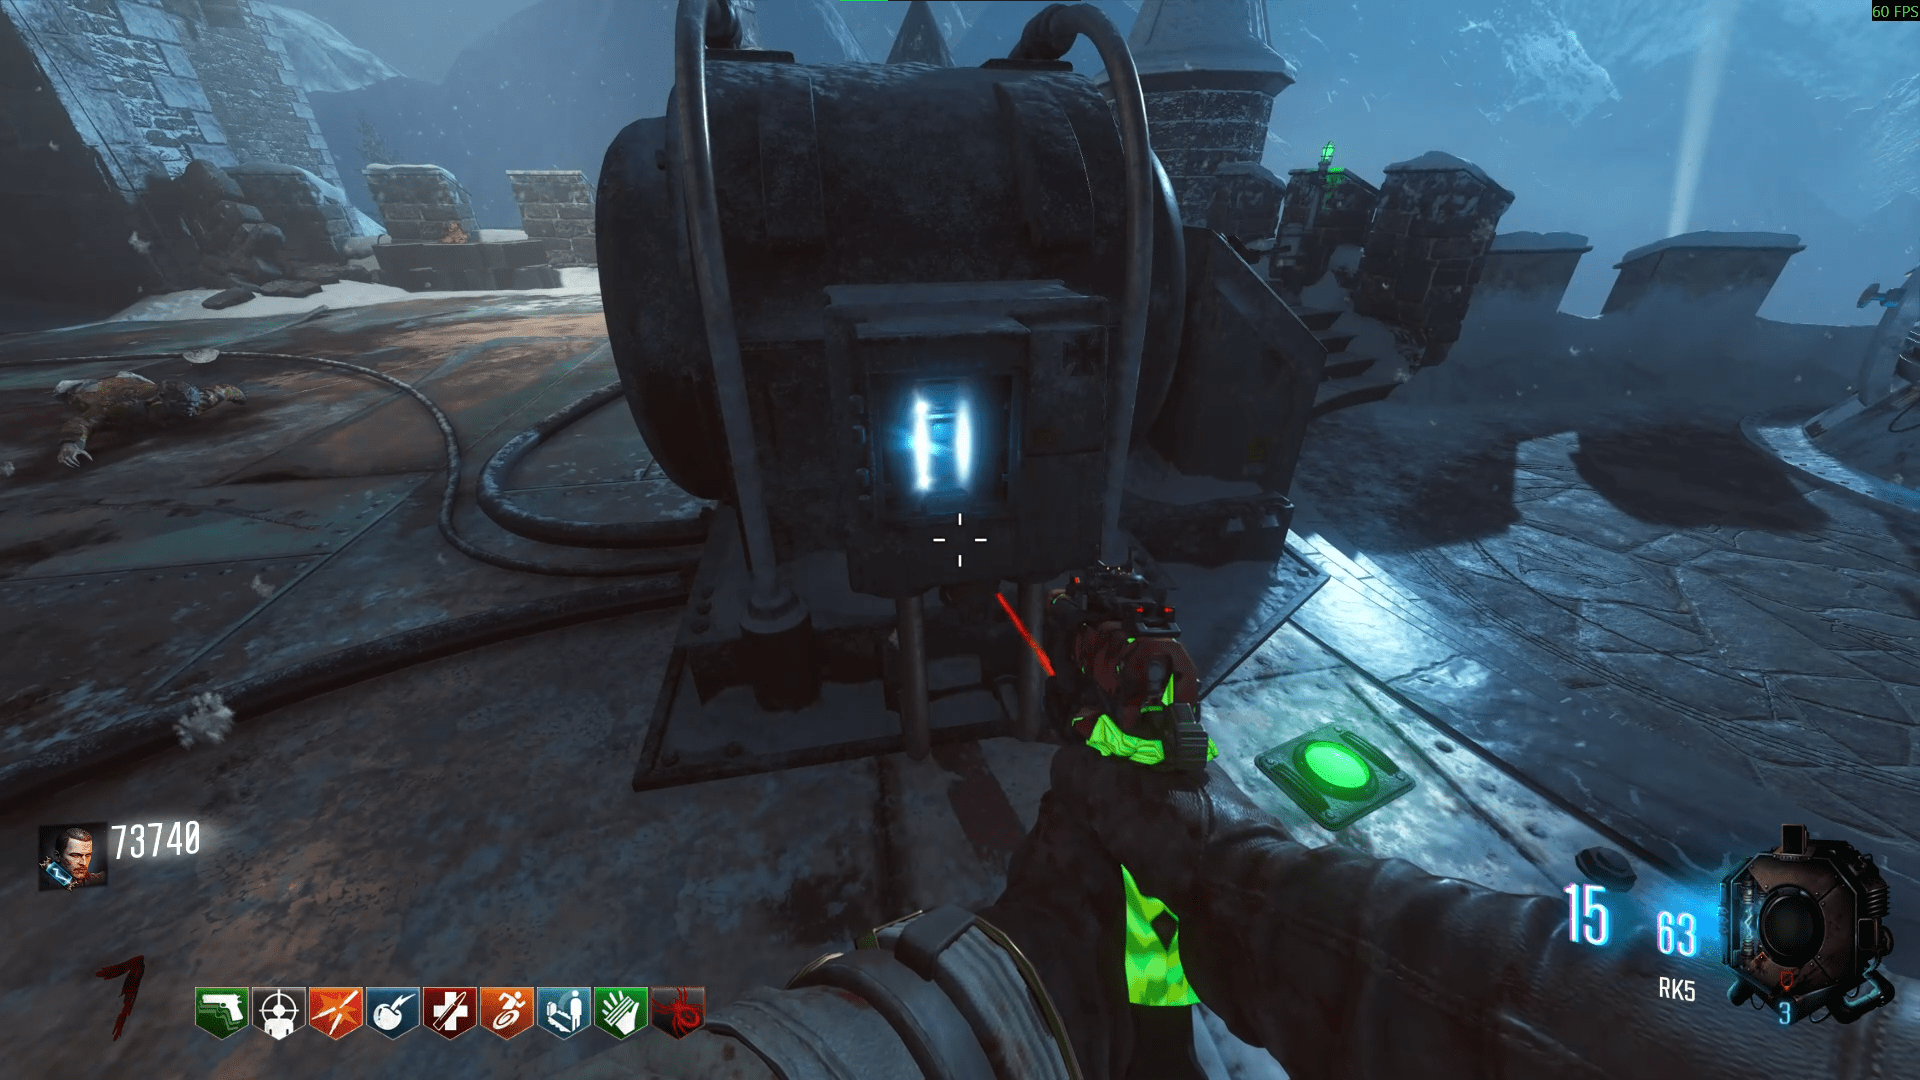
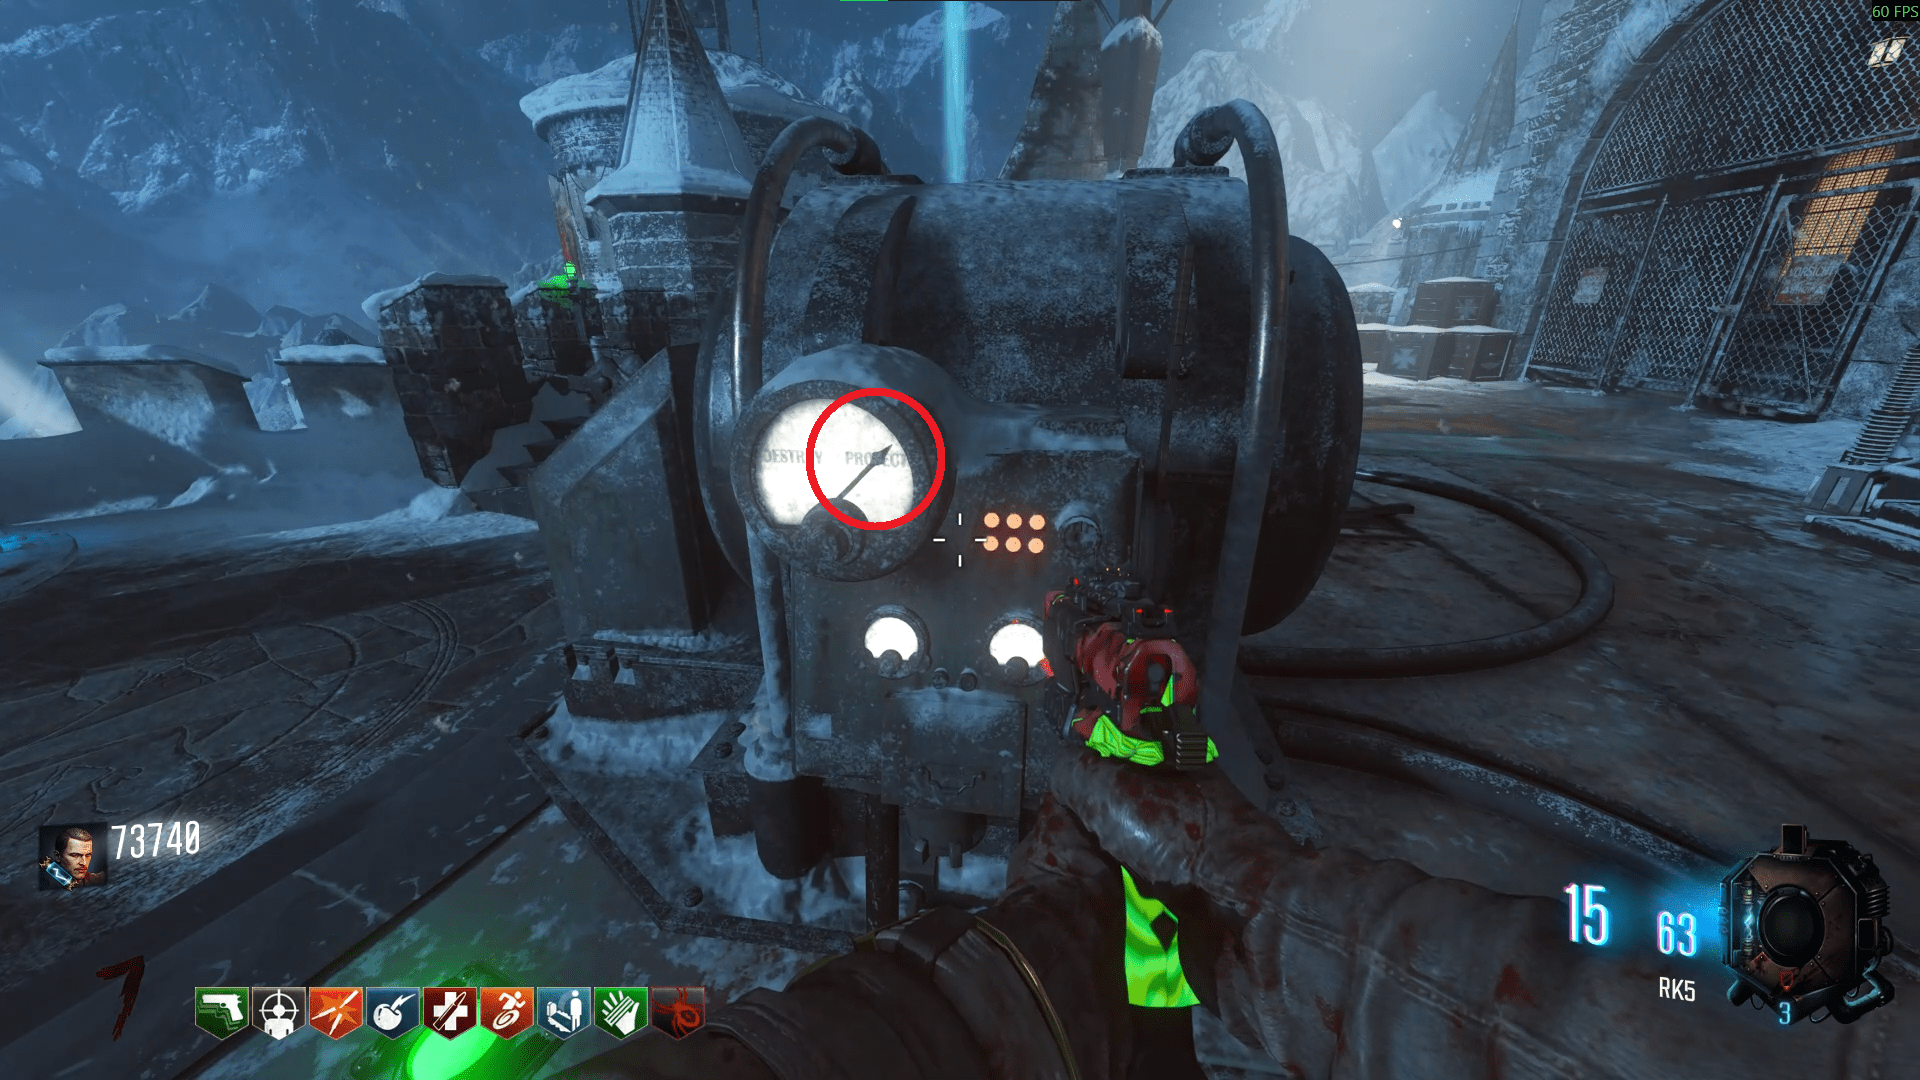
This will power up a console next to the Clocktower. You need to input the same code Groph put into his safe to open that same safe but this can only be done with the Tesla Trap on protect. If you are on solo, no hellhounds will spawn, but on co-op, you will have to defend yourself while putting in the symbols.
Der Eisendrache
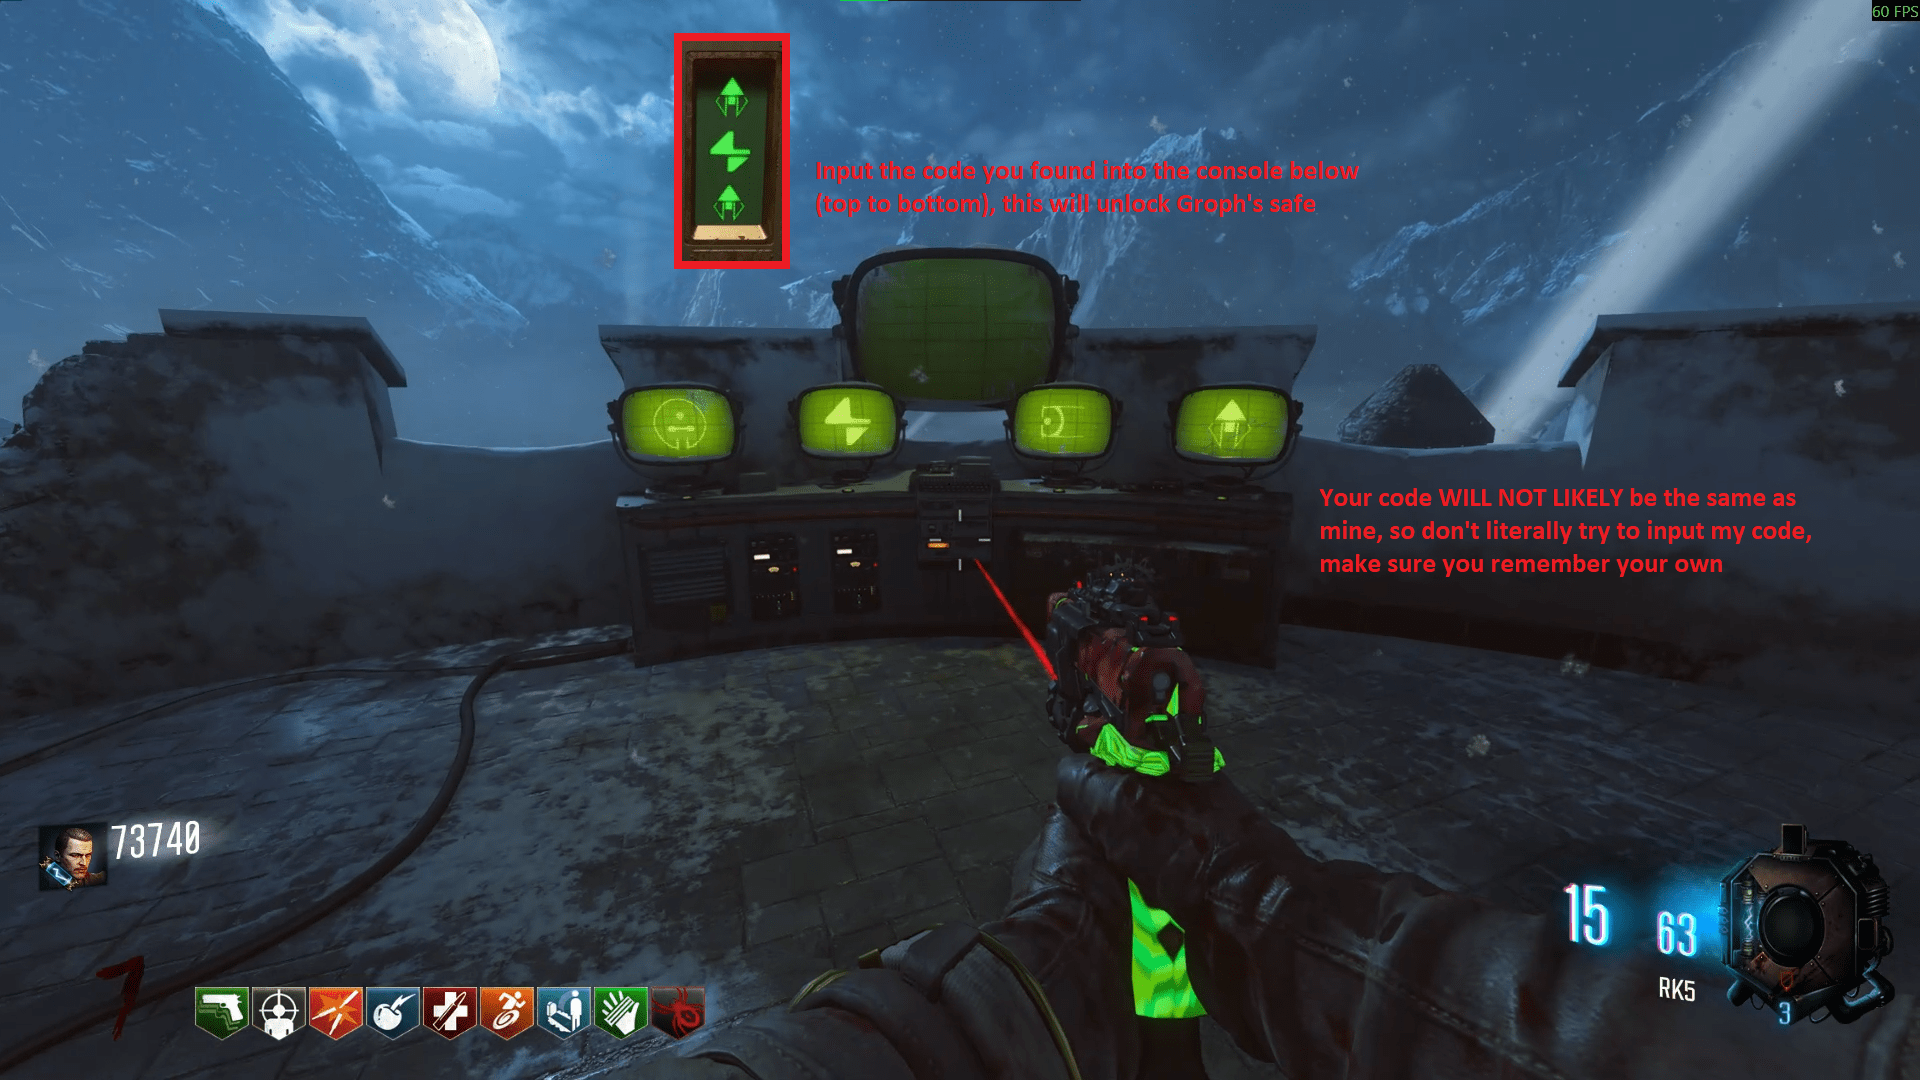
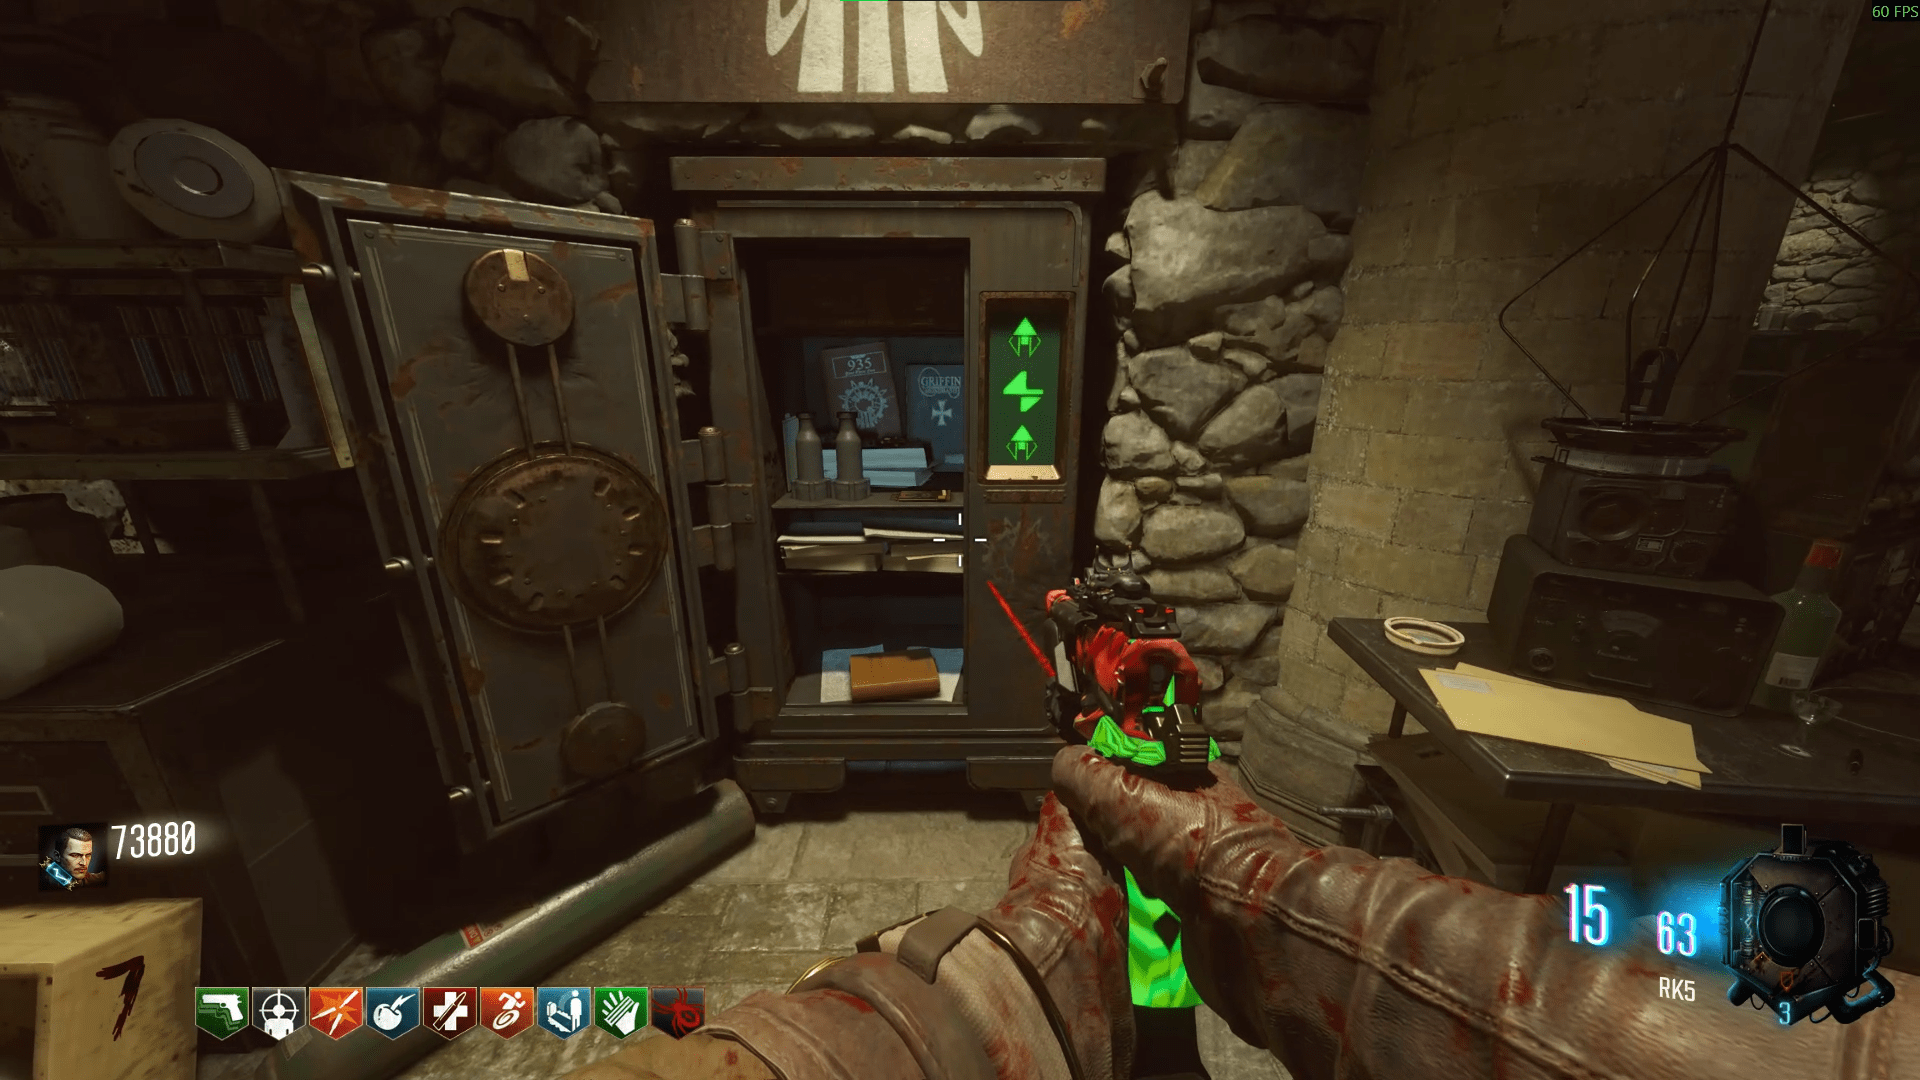
Then you'll run down to the safe and pick up the newly appeared keycard and tesla coils in the safe.
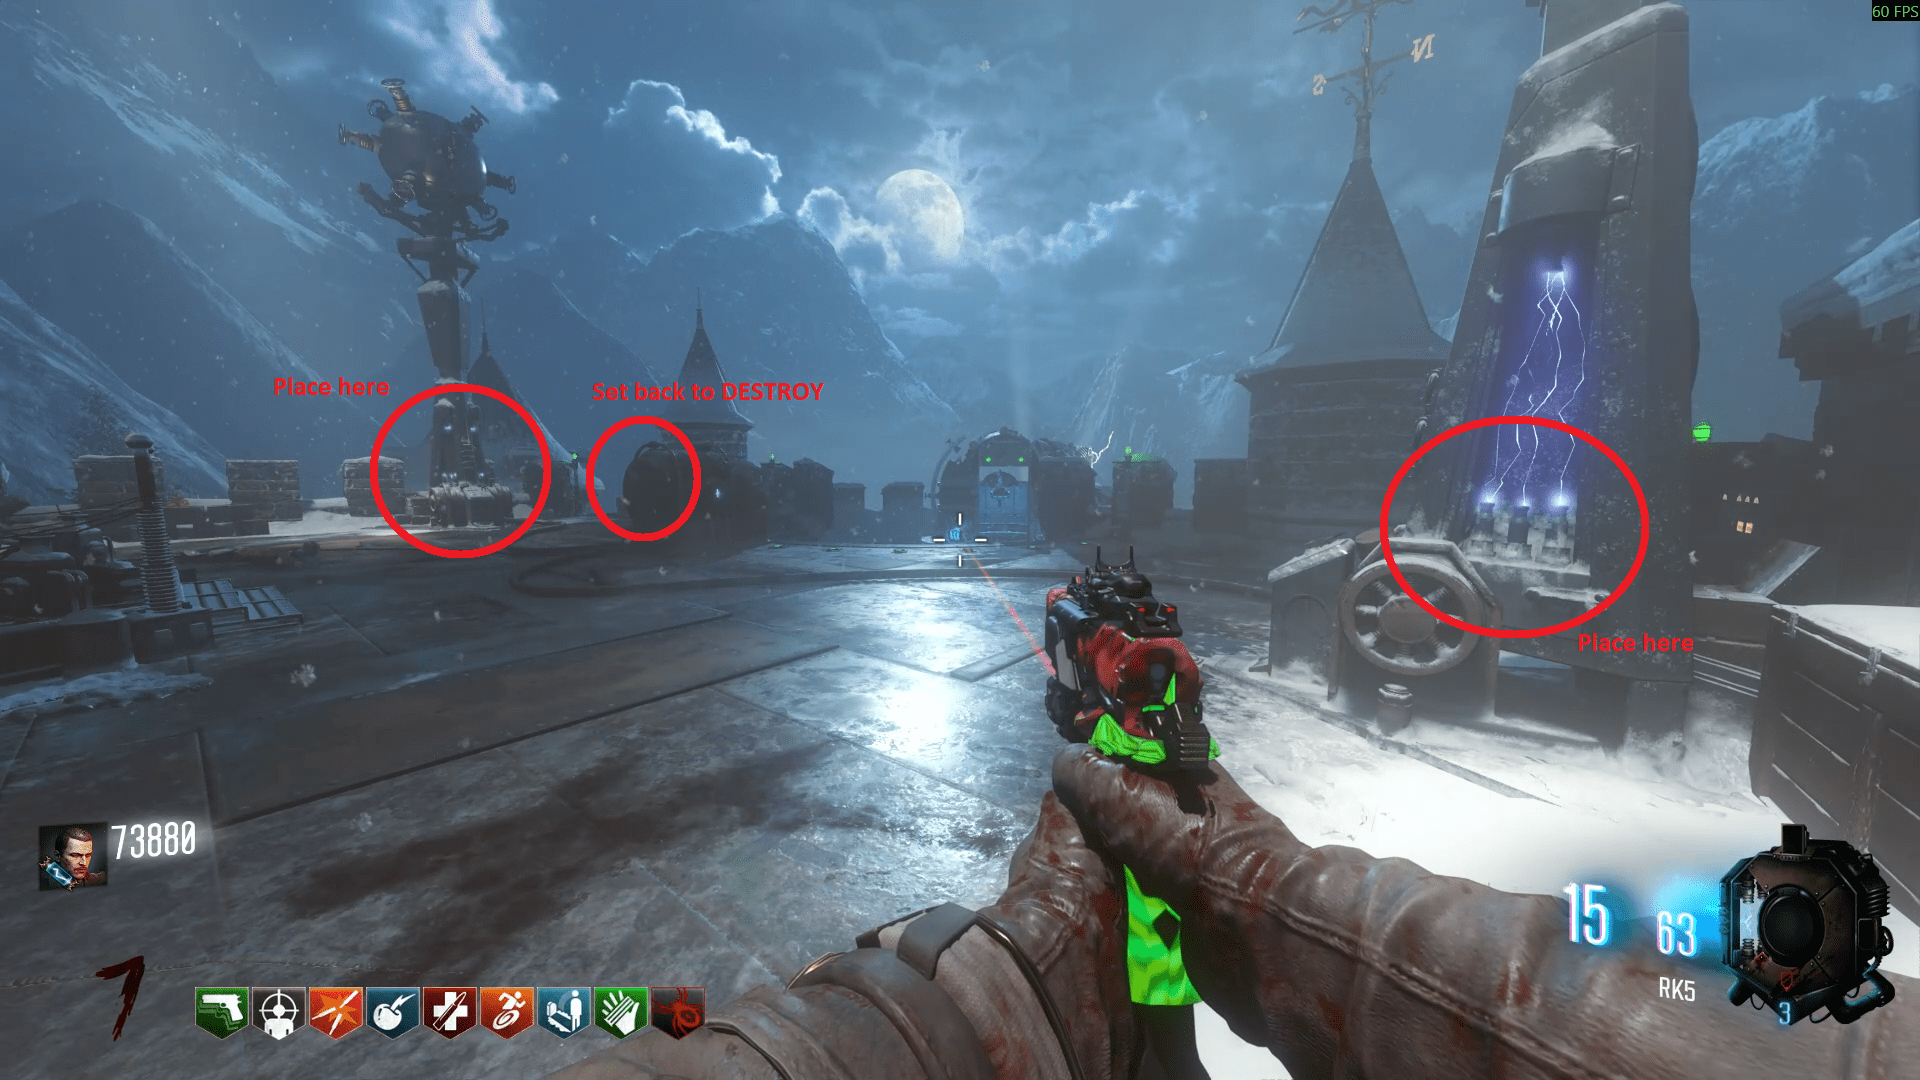
Now you'll need to charge the coils. Once you've set the trap back to 'Destroy', interact with the nearby console again to start a longer Simon Says game. Your symbols will likely be different to mine, so don't try use my screenshots as a reference for your game. Memorise or note your own down. The other console you'll need to do is in the Rocket Test Site, right next to the PaP location.
Now before we move on, a quick observation. If you're playing solo, you will not have to deal with hellhounds attacking you while doing this, but if you're on co-op, you will. if you don't want to progress the round, have the other player train the zombie(s) and dogs, then kill your own with any weapon. Each Simon Says lasts about 7-8 inputs.
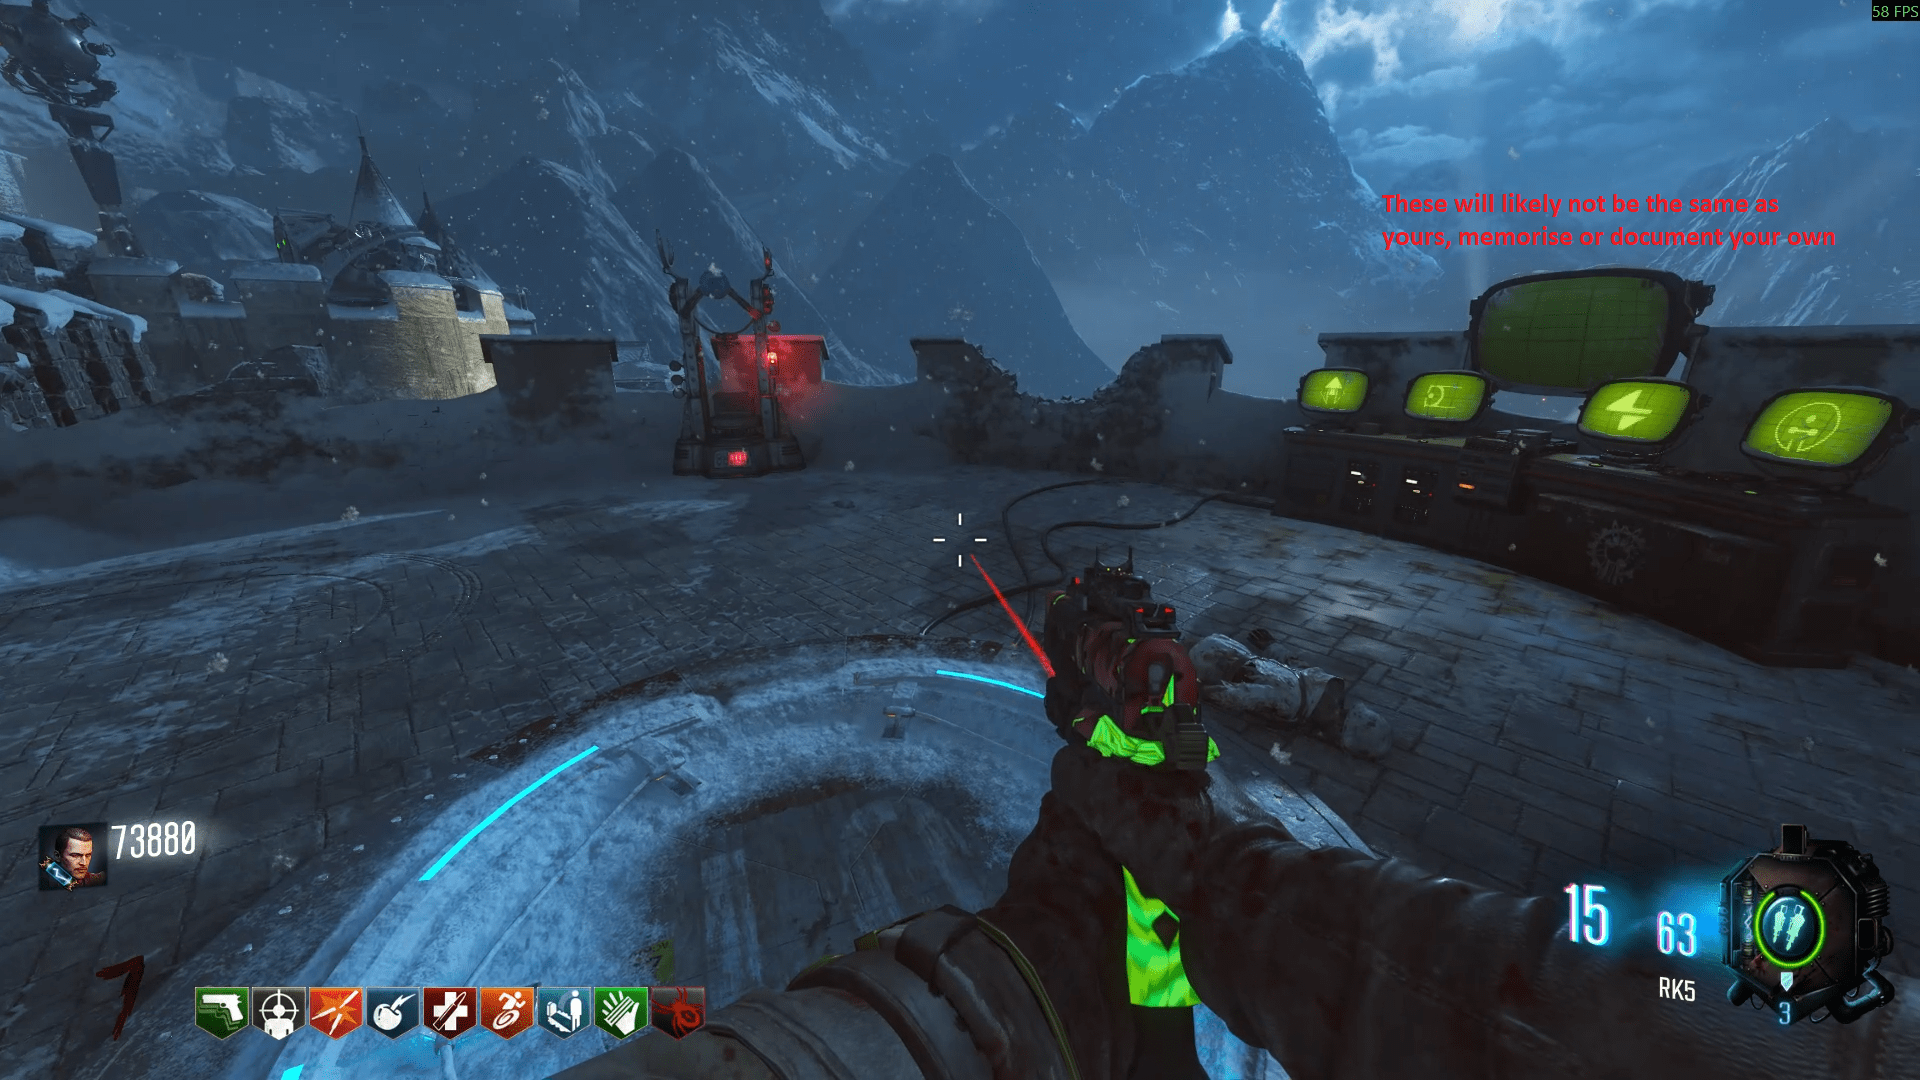
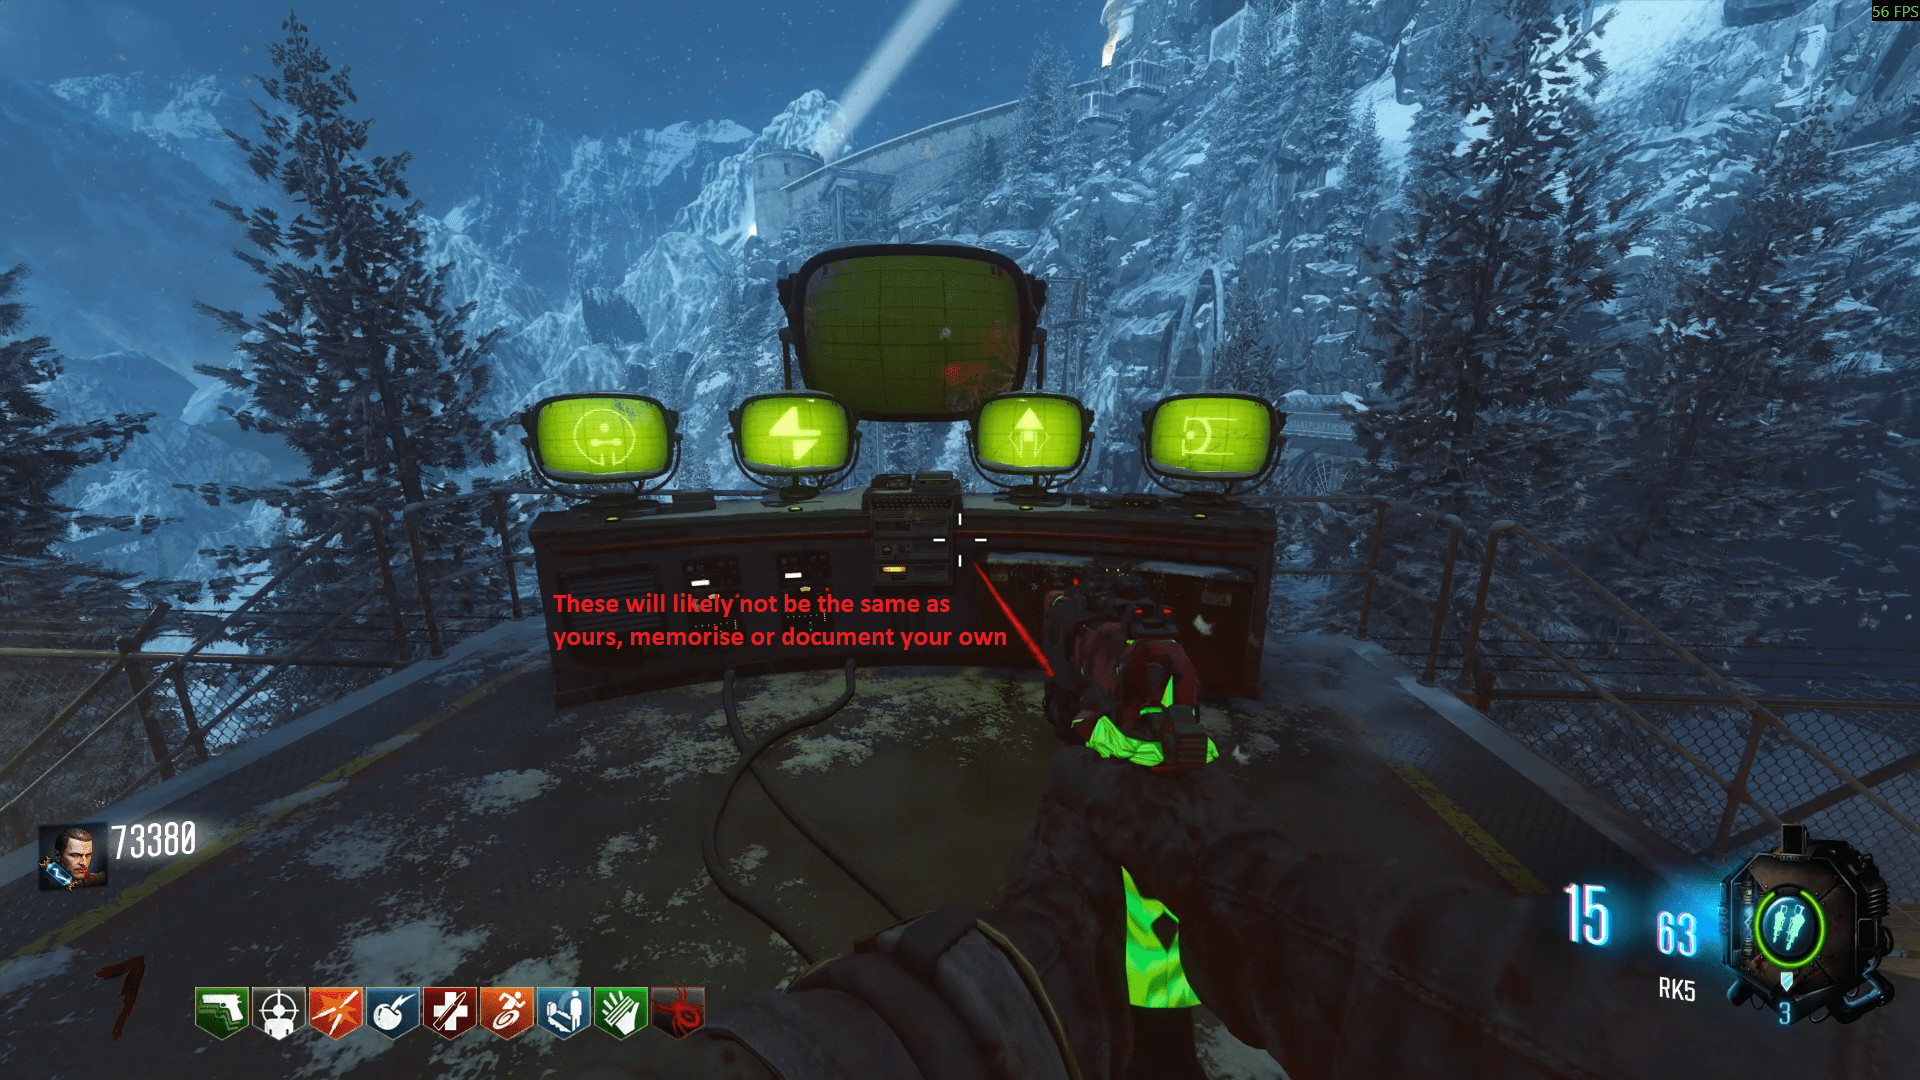
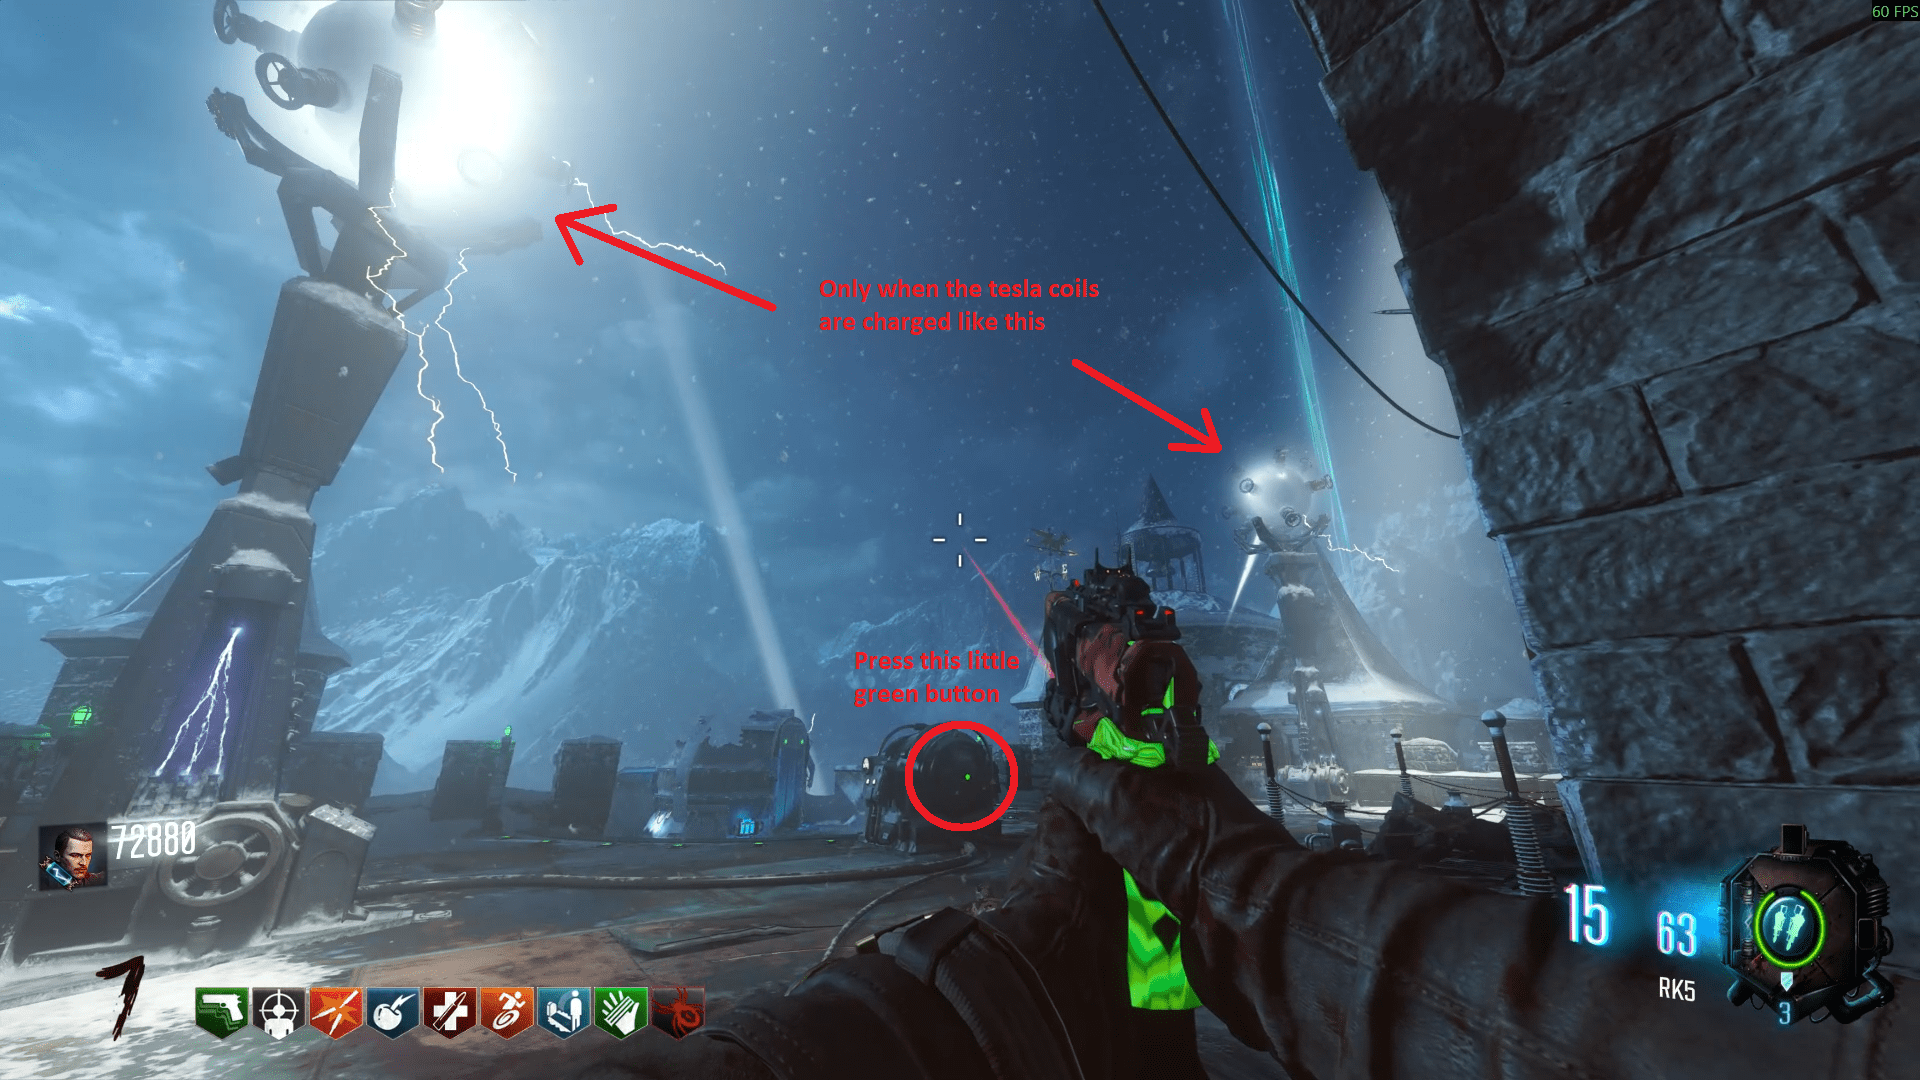
Doing this successfully will charge the coils and allow you to press a super secret green button the the Tesla Trap. Press it and you should bring Dempsey back down to Earth. Once he does, pick up the Vril device next to the pod in the centre of the Courtyard.
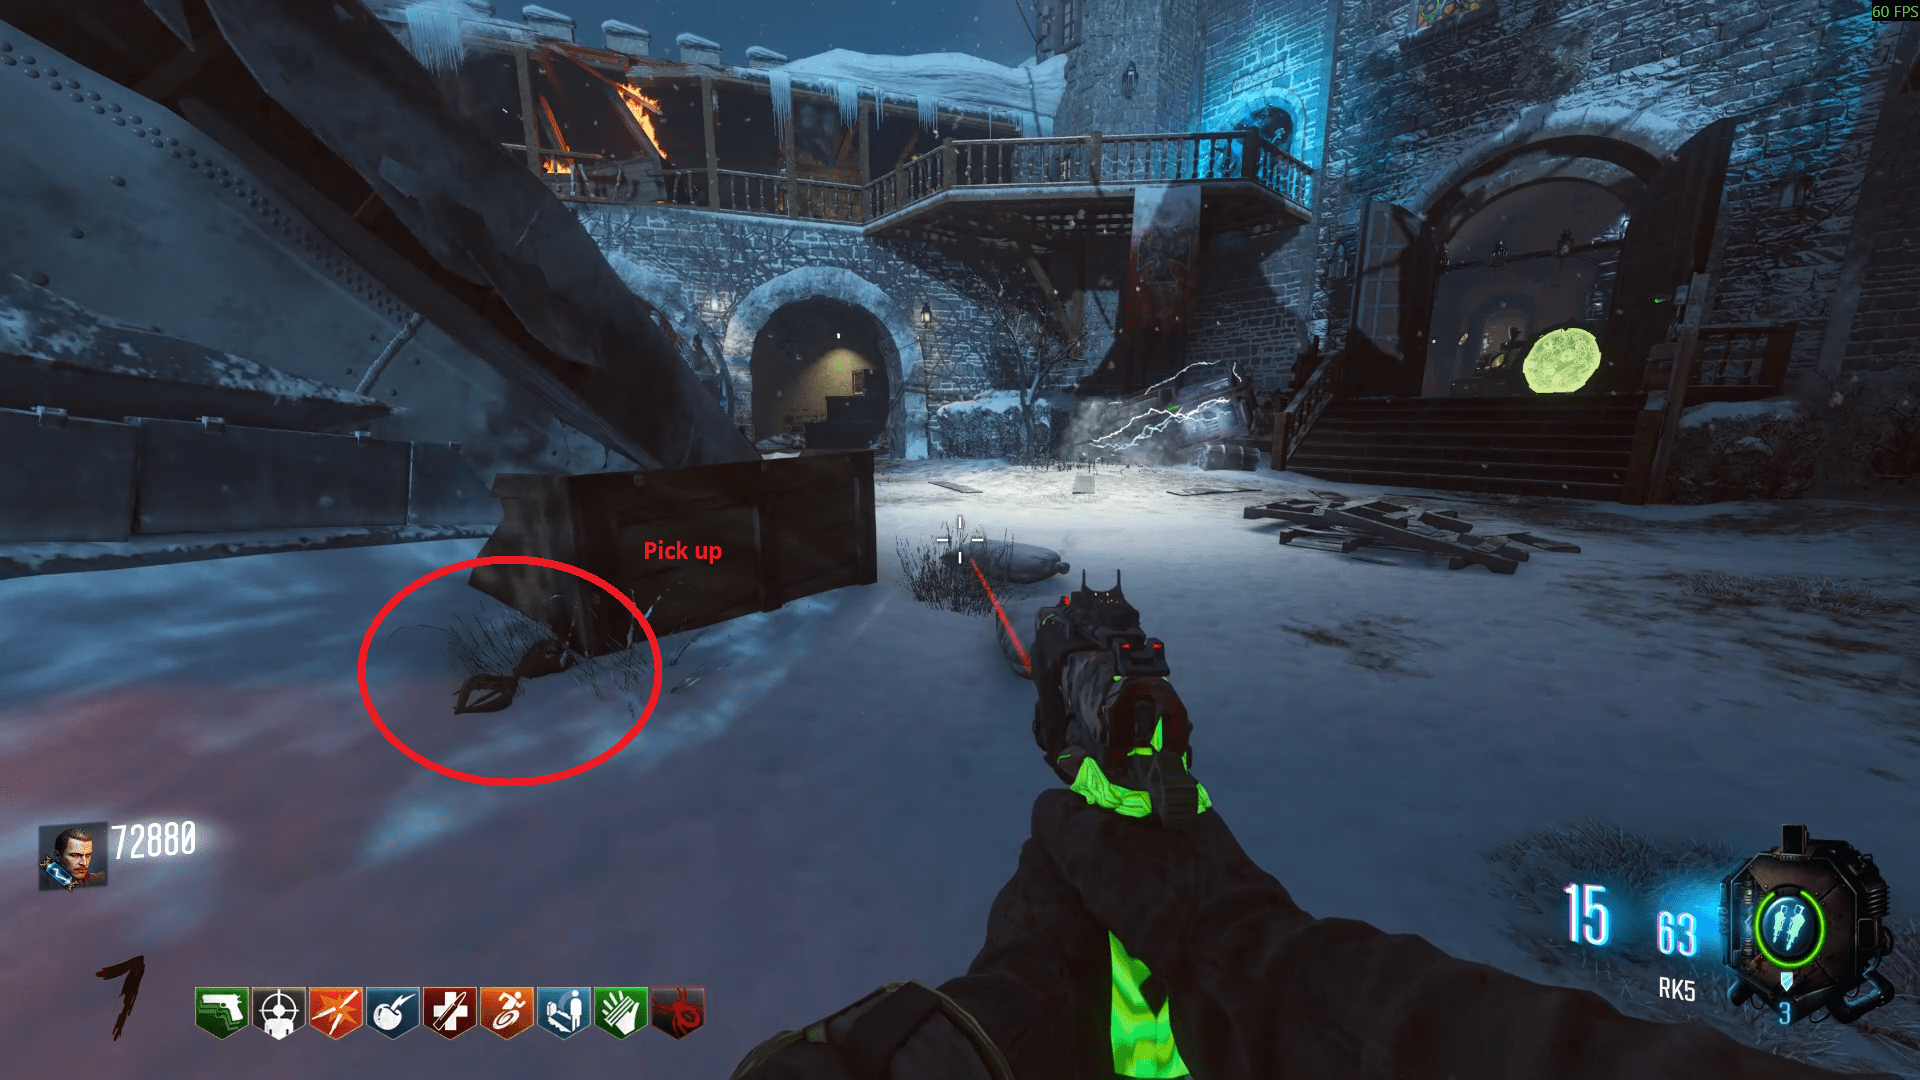
Once you've teleported back to the past, locate the book (Kronorium) in a box, near where you found the fuse the first time you came here, and interact with it, then pick up the flagstone in the crate that you've just opened in the other corner. Then just wait until you get back to the main map.
If you missed the Pyramid Device tube on the first teleport to the past, pick it up now as you'll need it at the end of this step.
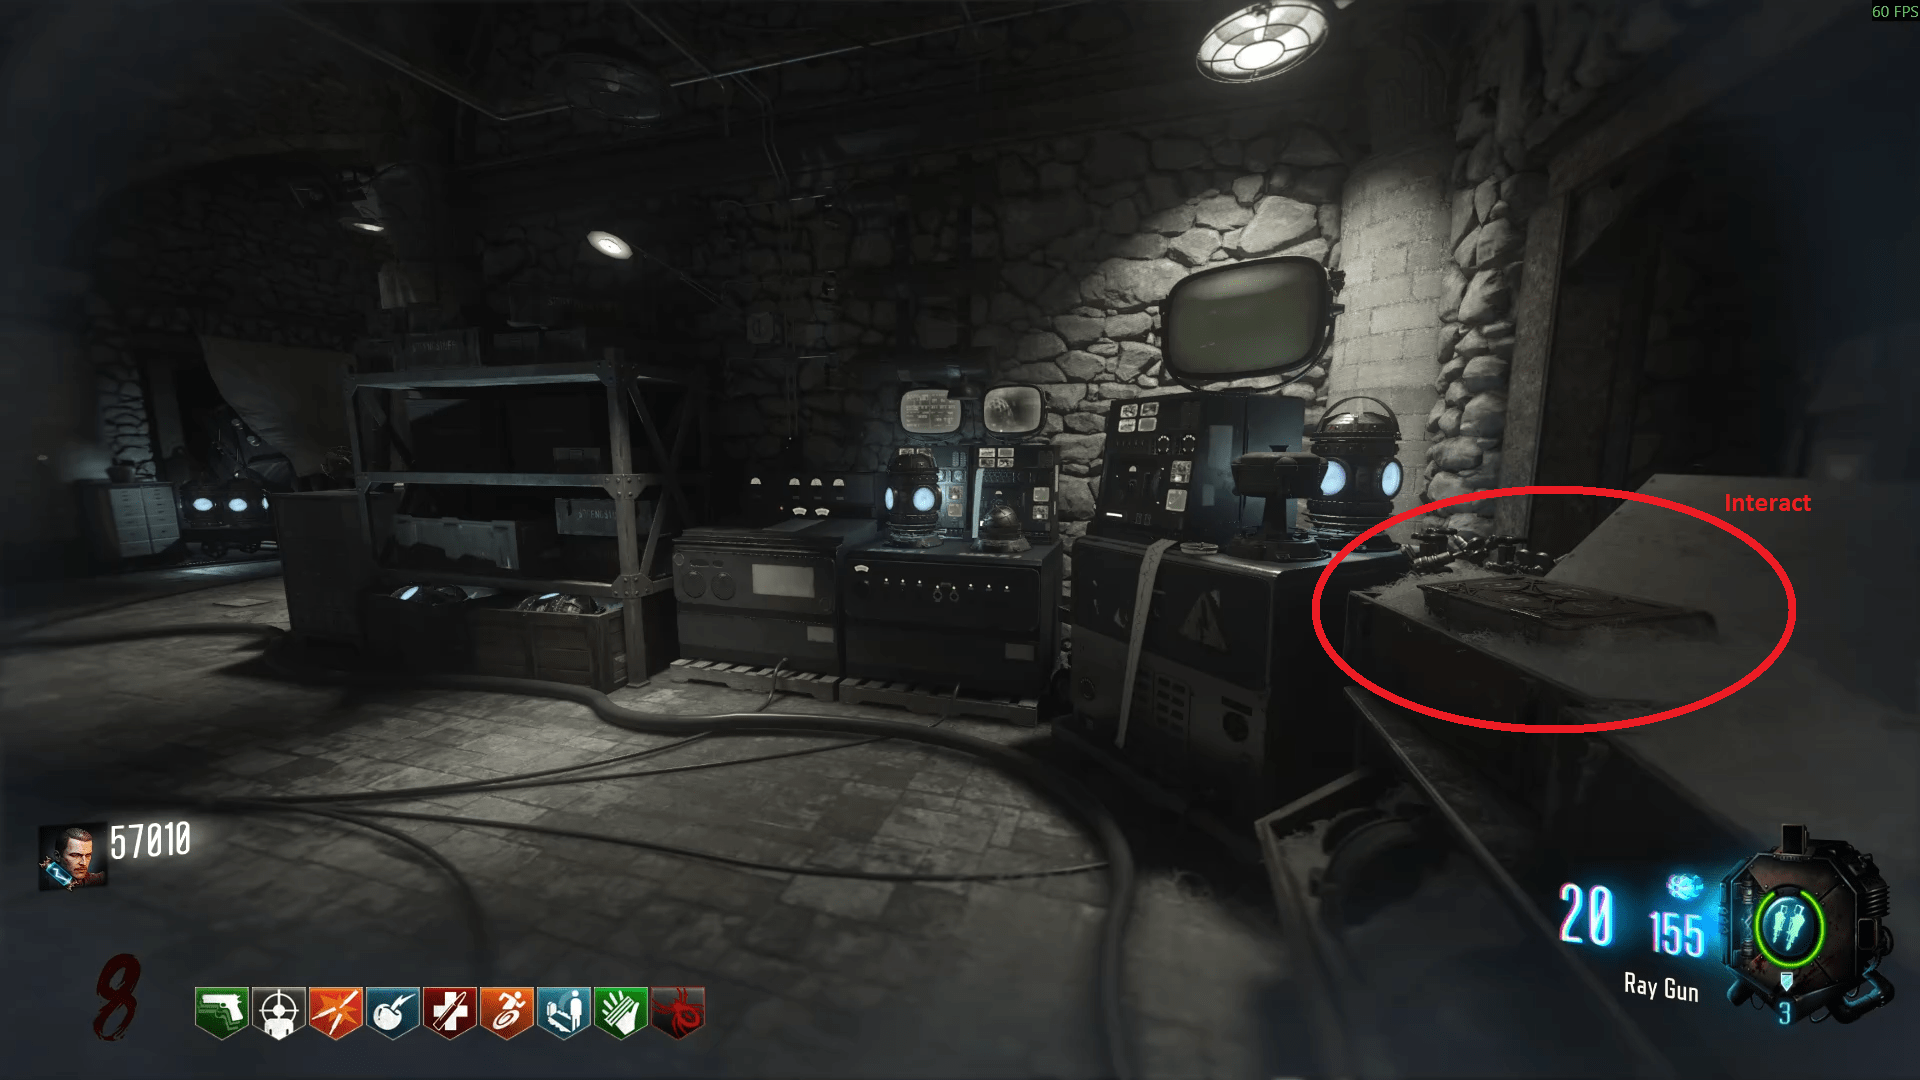
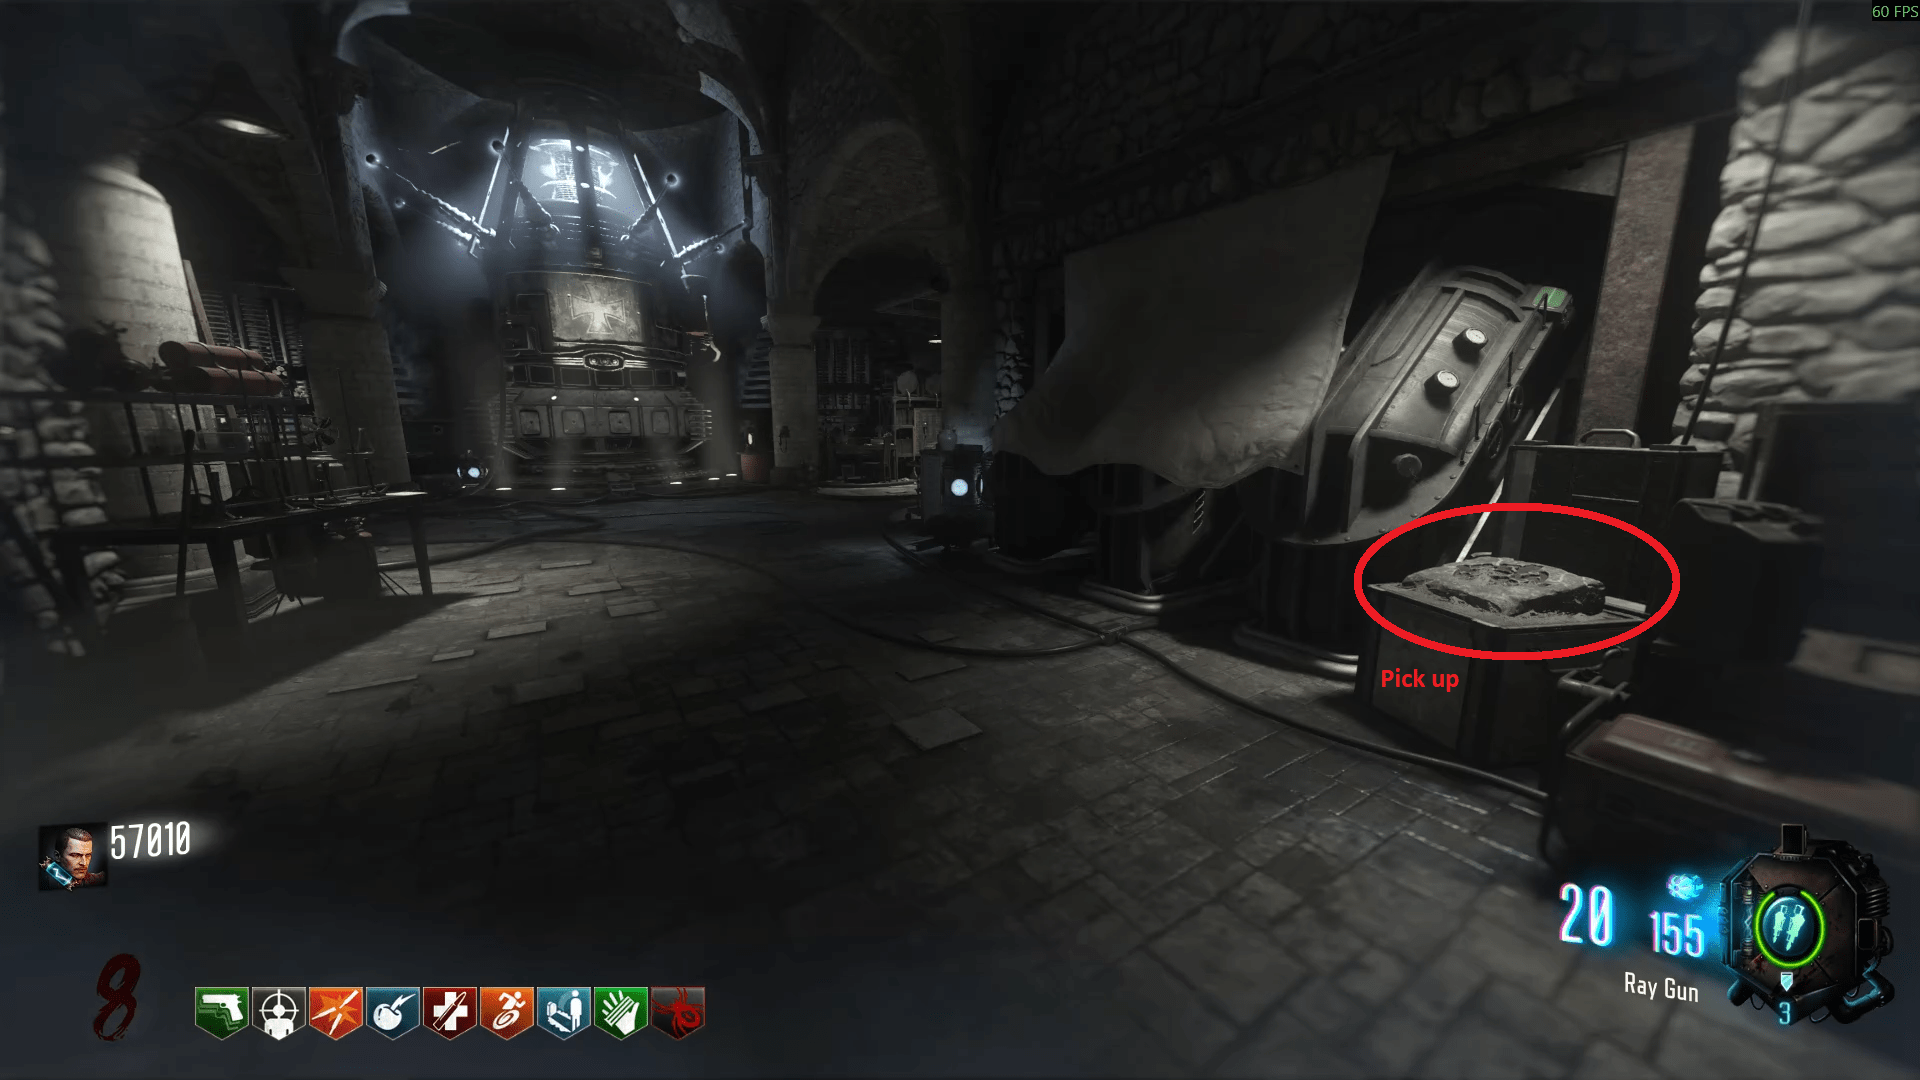
Now that you have the flagstone, you can input the Vril device into the tomb in the same room as the Wrath of the Ancients. However, note that however many upgraded bows you have completed will affect which one you need to use for this step. If you only have one bow, you don't need to worry, you'll use that bow for each of the four areas. For multiple bows, you'll have to pay attention to the vignette around your screen to determine which bow you need to use, I'll list these below anyway so you don't have to worry about deciphering it yourself (it's fairly easy anyway).
It's worth mentioning for ranked games, you'll only use the bows you've started the upgrade process on, which includes even just picking up the arrow. On unranked games, you need to craft every bow, every game.
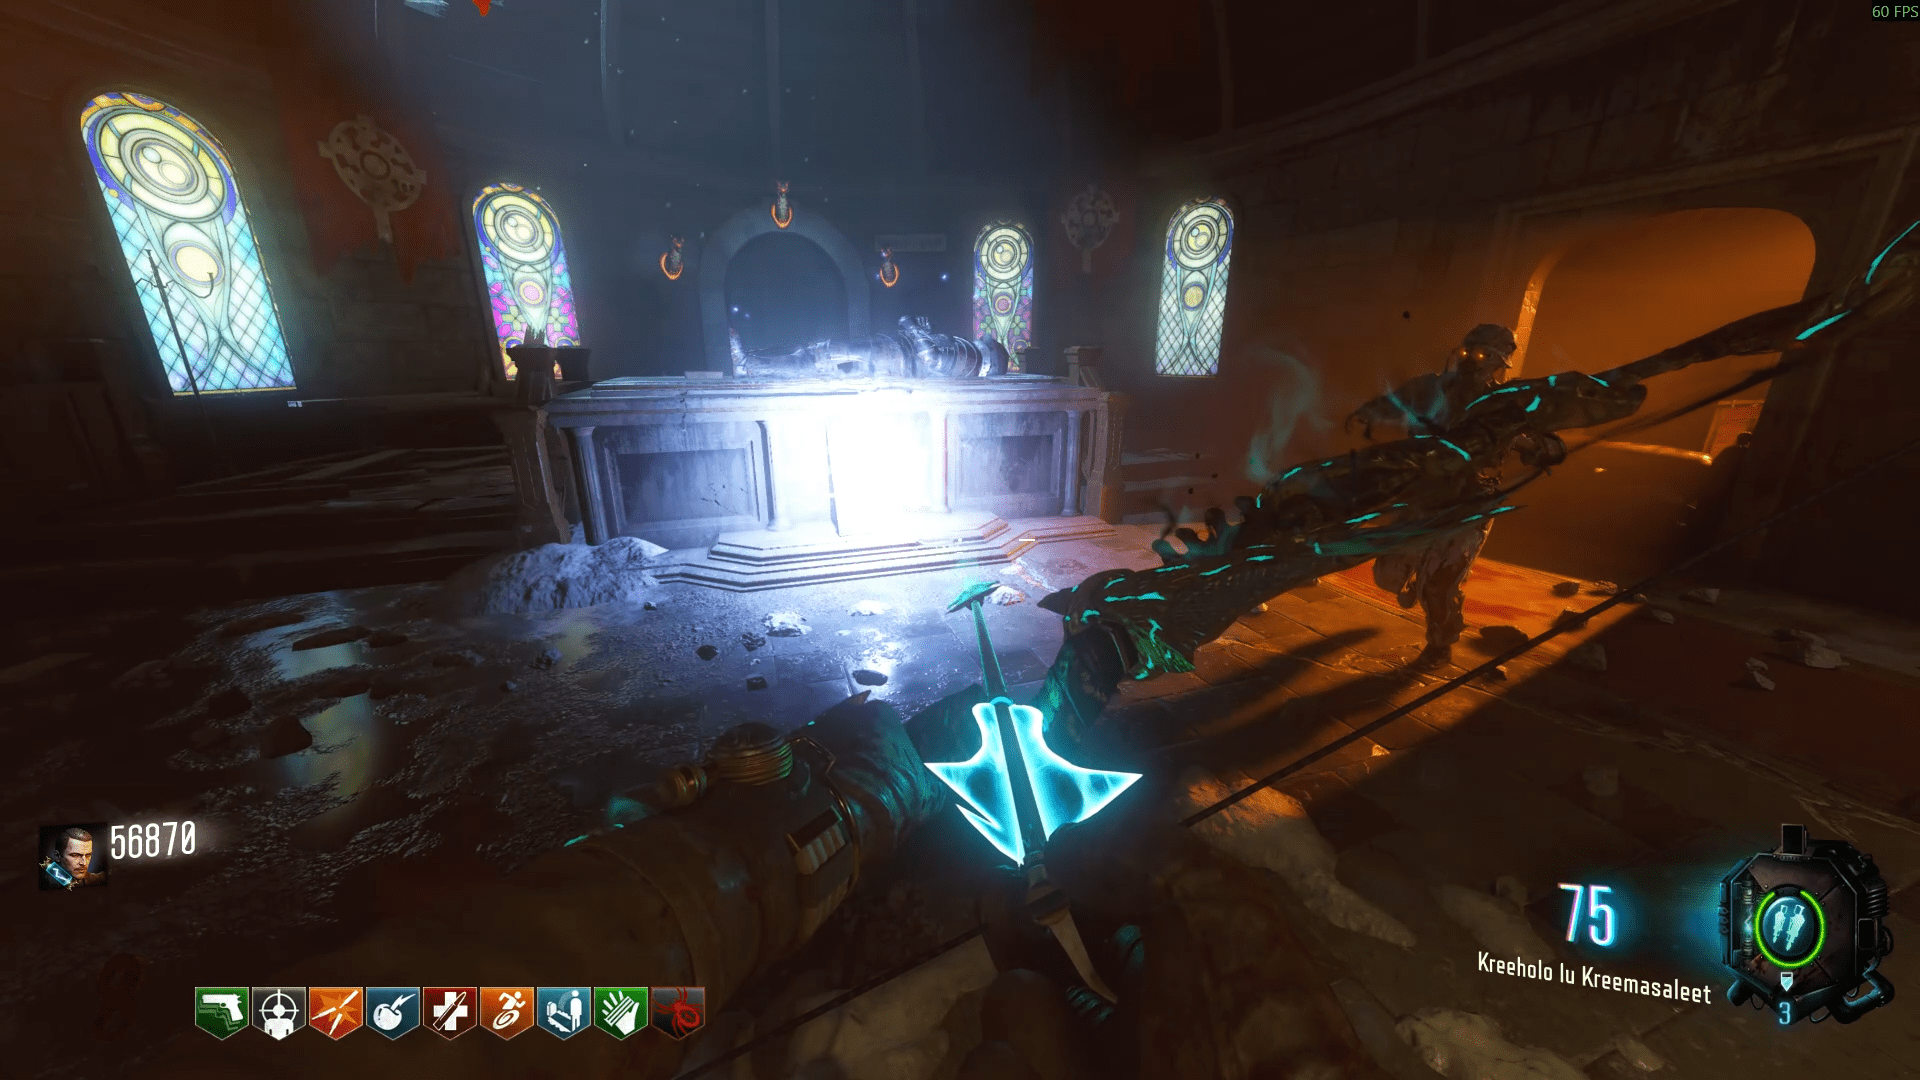
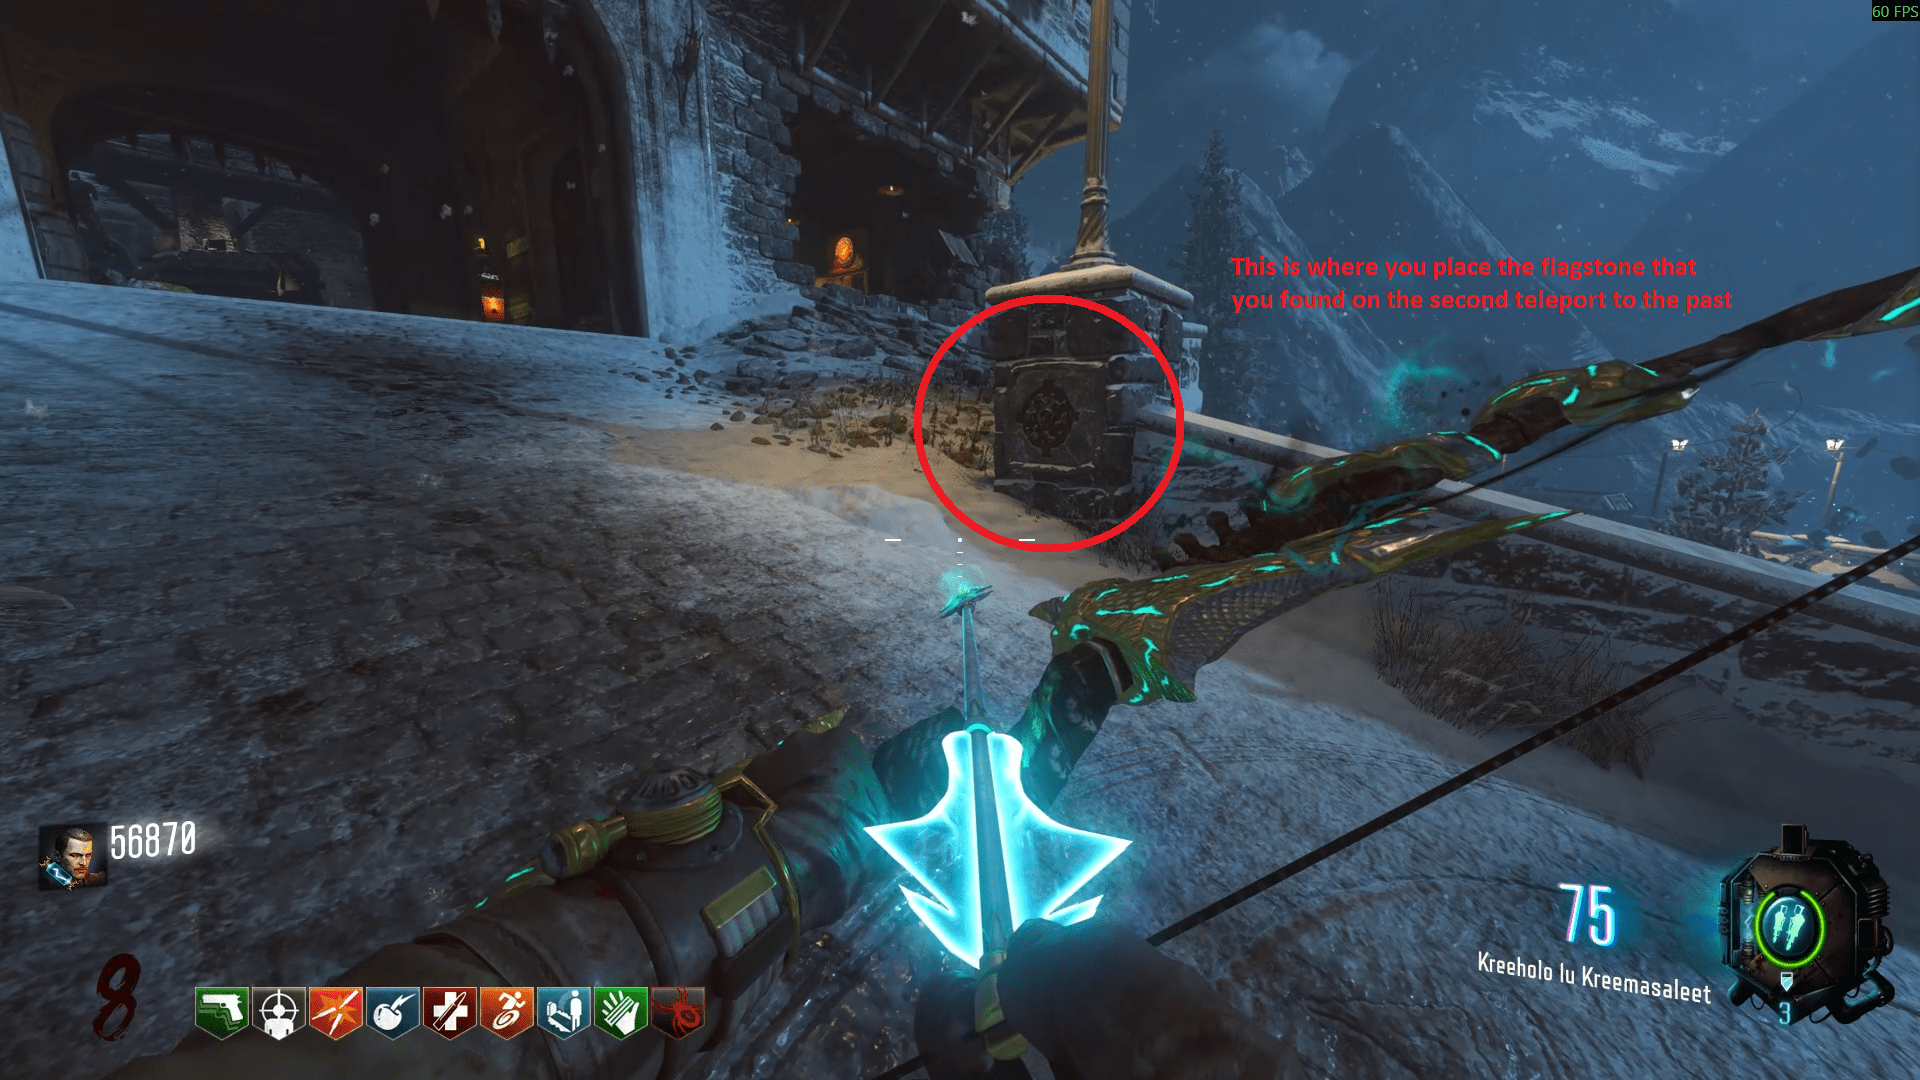 The following screenshots show both the location and what each bow's colour looks like because that was the easiest way to do it, haha. The Keeper can move to;
 - Just outside Double Tap, where the fire circle is. You'll also need to place the flagstone here.
- Opposite Mule Kick, between the Void bow room and Spawn.
- In the room just before power and Stamin-Up, same area as the statues for the Void bow.
- In the Courtyard.
- Storm bow is a darker shade of blue with a less prominent outline.
- Wolf bow is a lighter shade of blue/cyan with a bigger glow.
- Void bow has a purple outline.
- Fire bow has an orange-red outline.
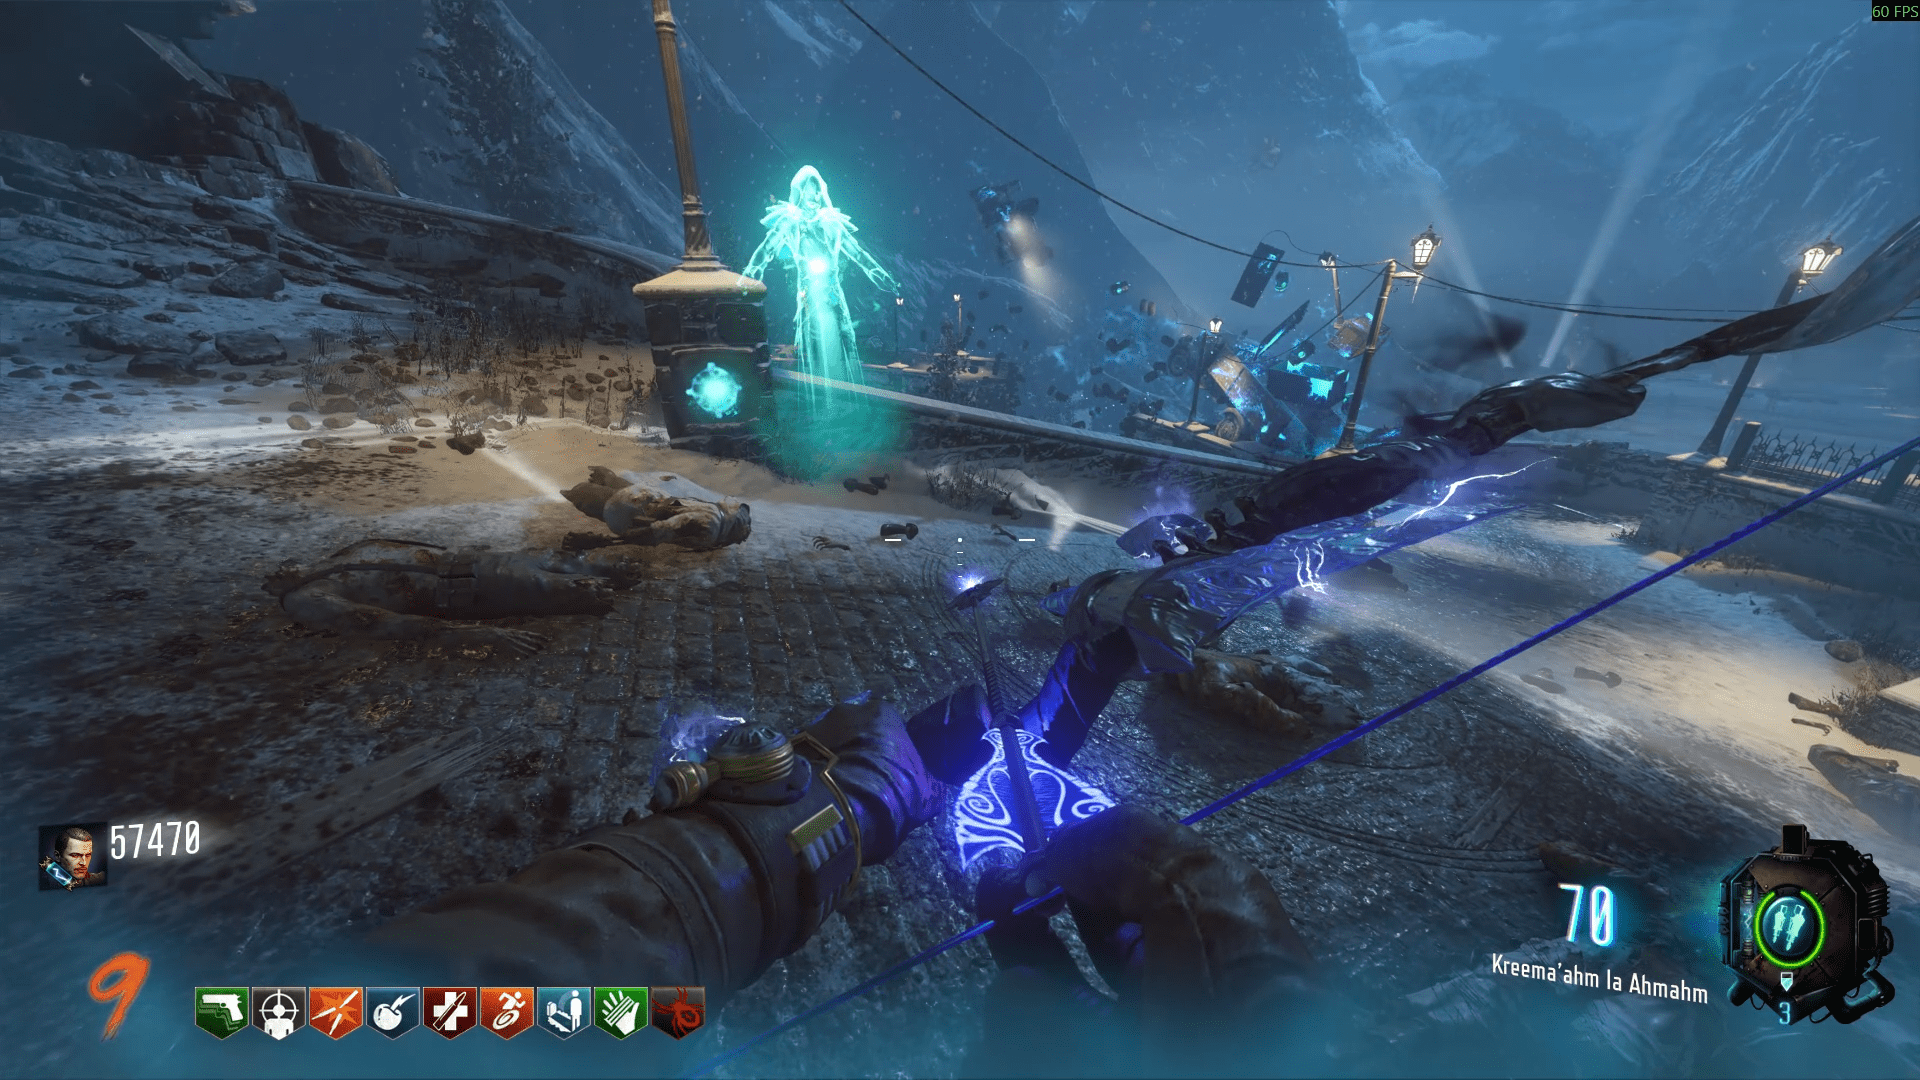
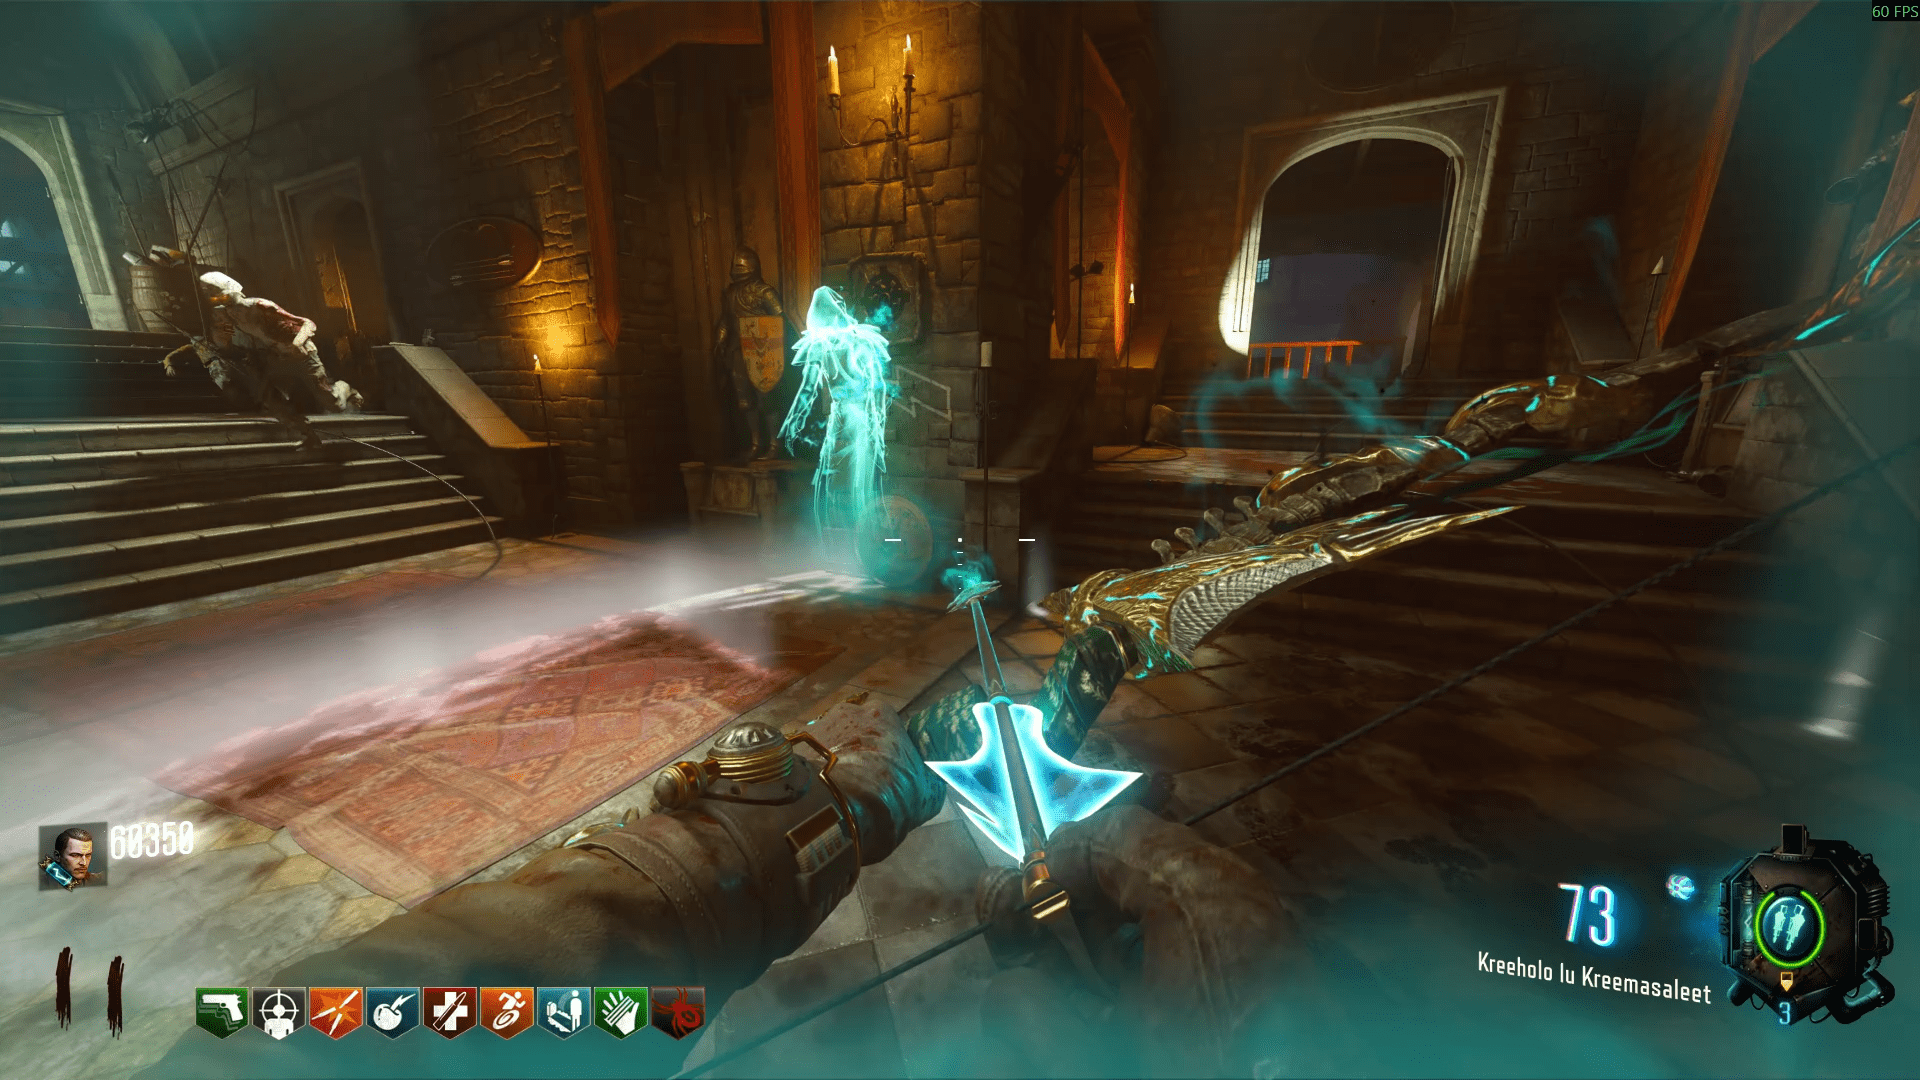
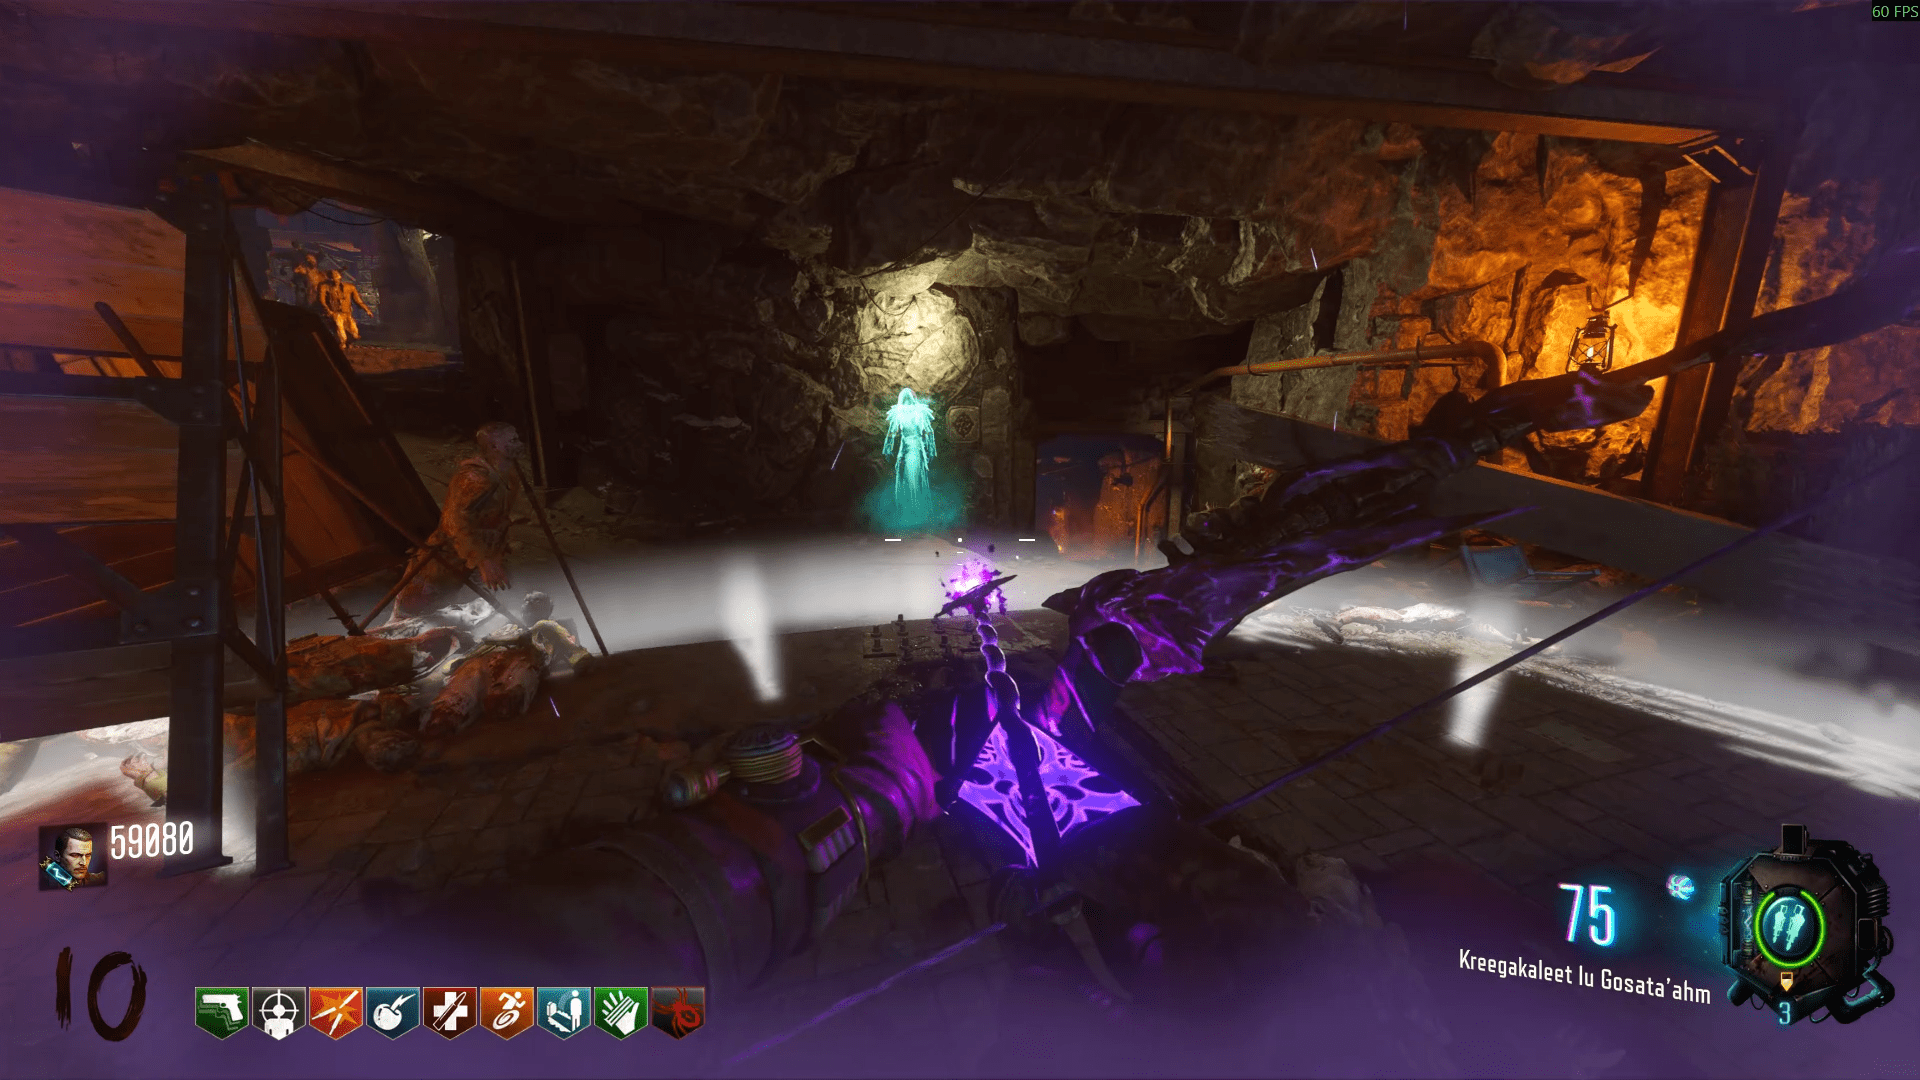
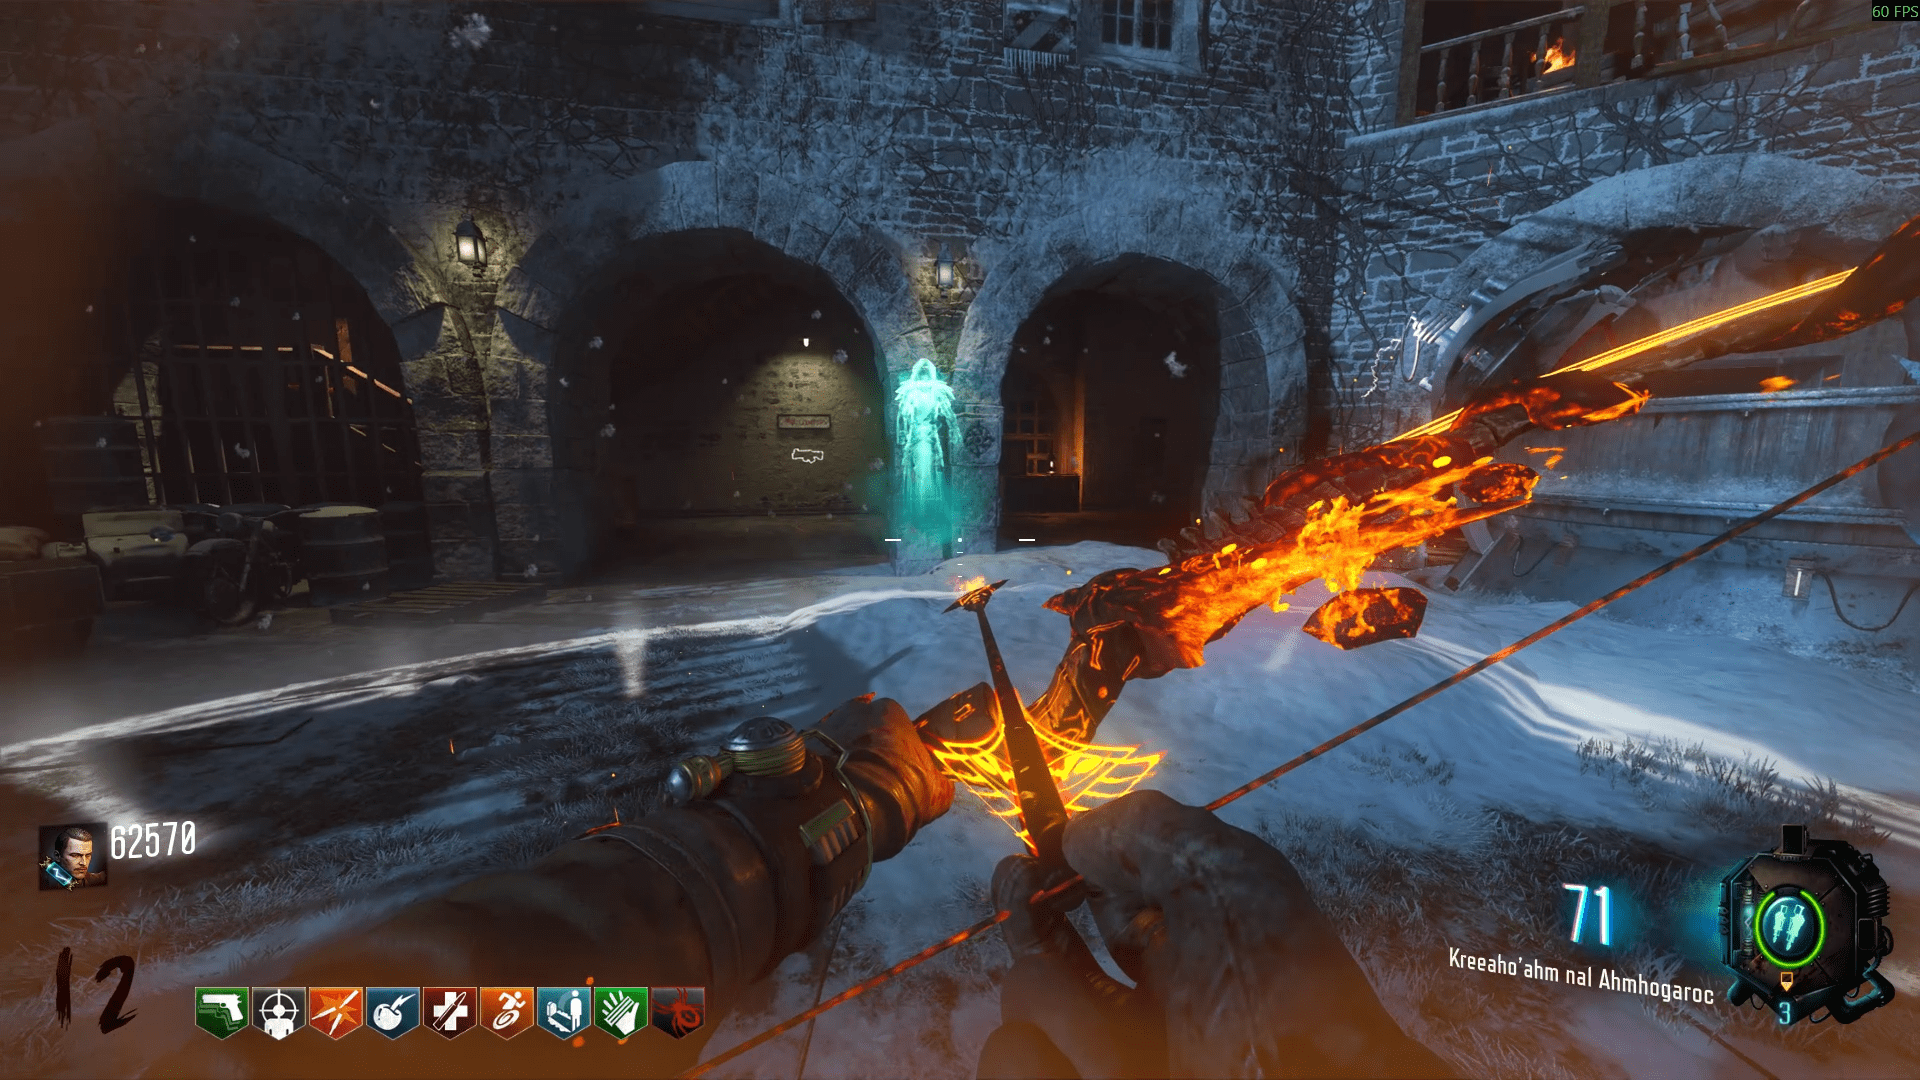
To complete this step, just stand in the circle and get kills with the appropriate bow. You'll likely only spend one round per circle but if you didn't kill enough zombies, you may spend more. Once it's done, the Keeper will become real and move to the Pyramid Device. From here, just follow it and once it's done and brought back the MPD, place the tube you found earlier from the teleport into the corner to repair it.
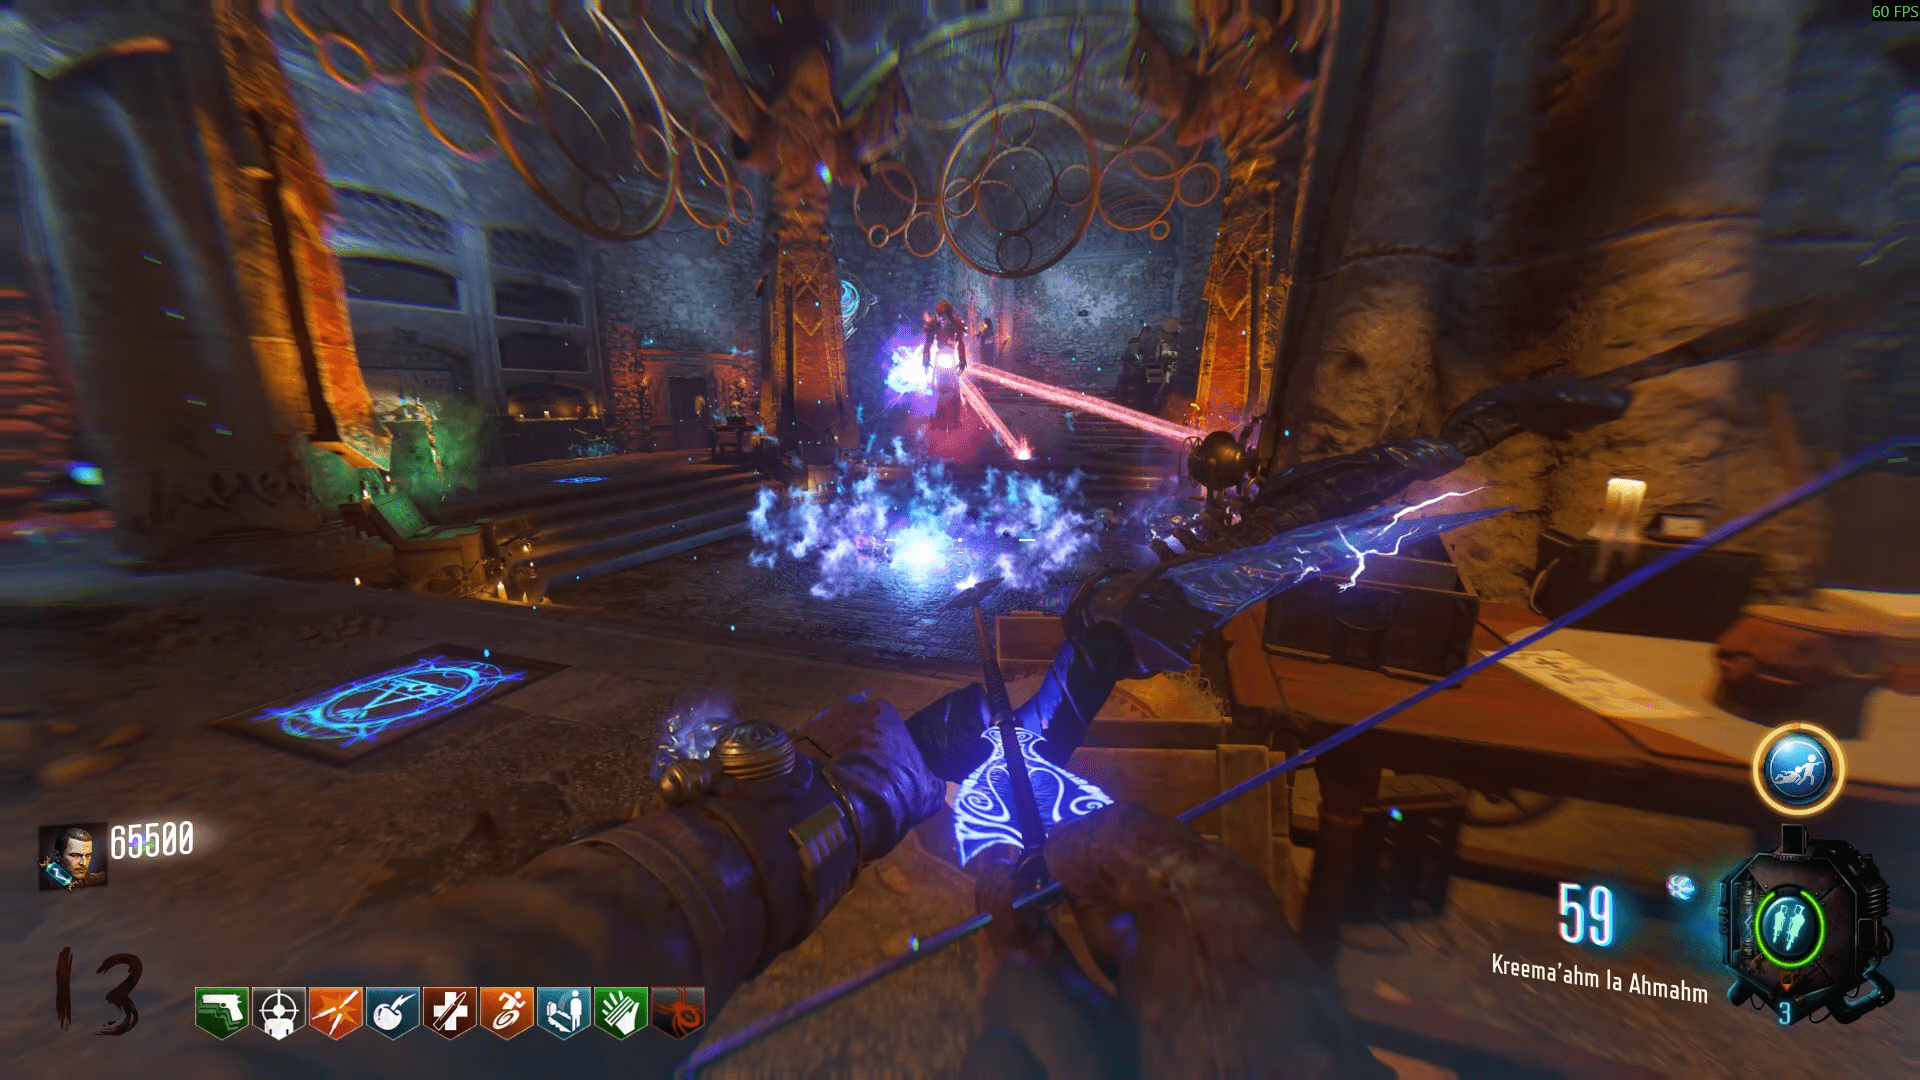
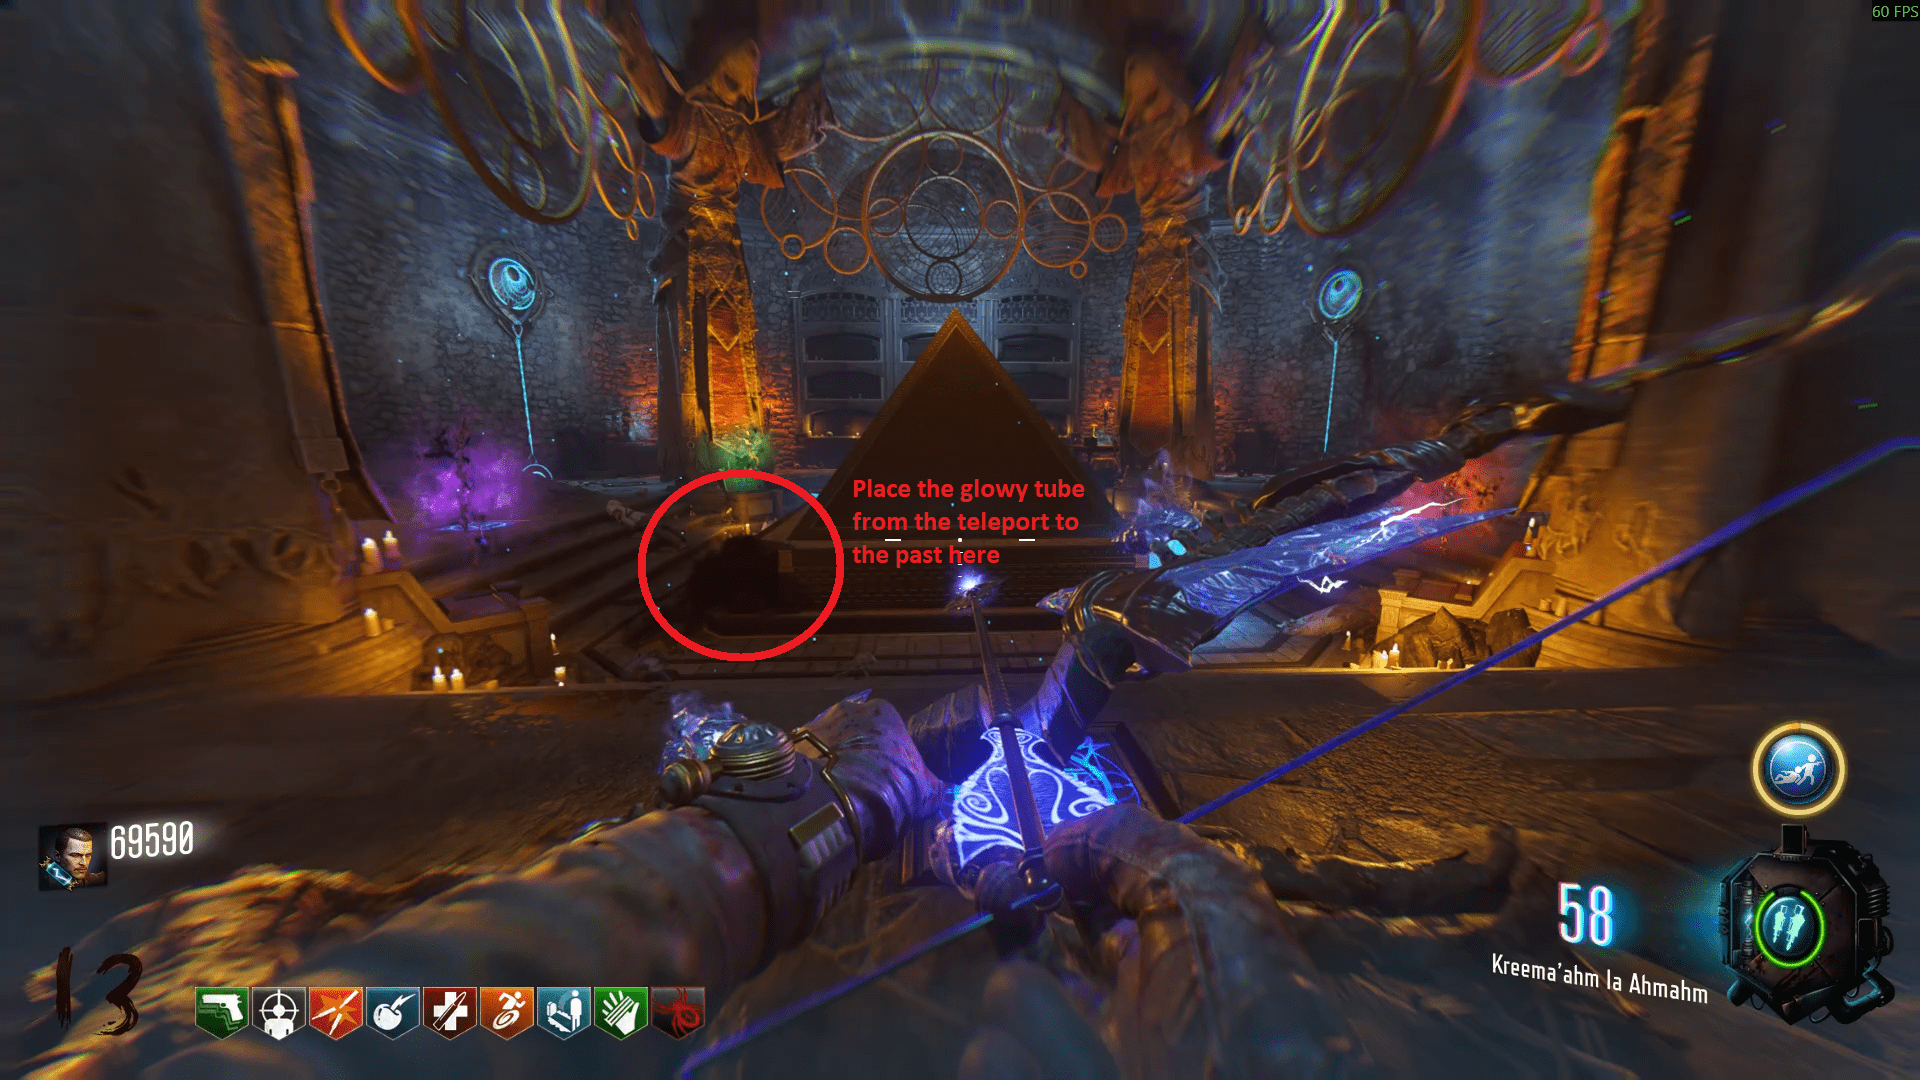
Now it's time to prepare for the boss fight.
- One from switching on two levers in and after the Rocket Test.
- Another dropped from the Panzersoldat (likely from the first time you teleported to the past)
- The final from using the Tesla Trap and picking it up by the Wundersphere.
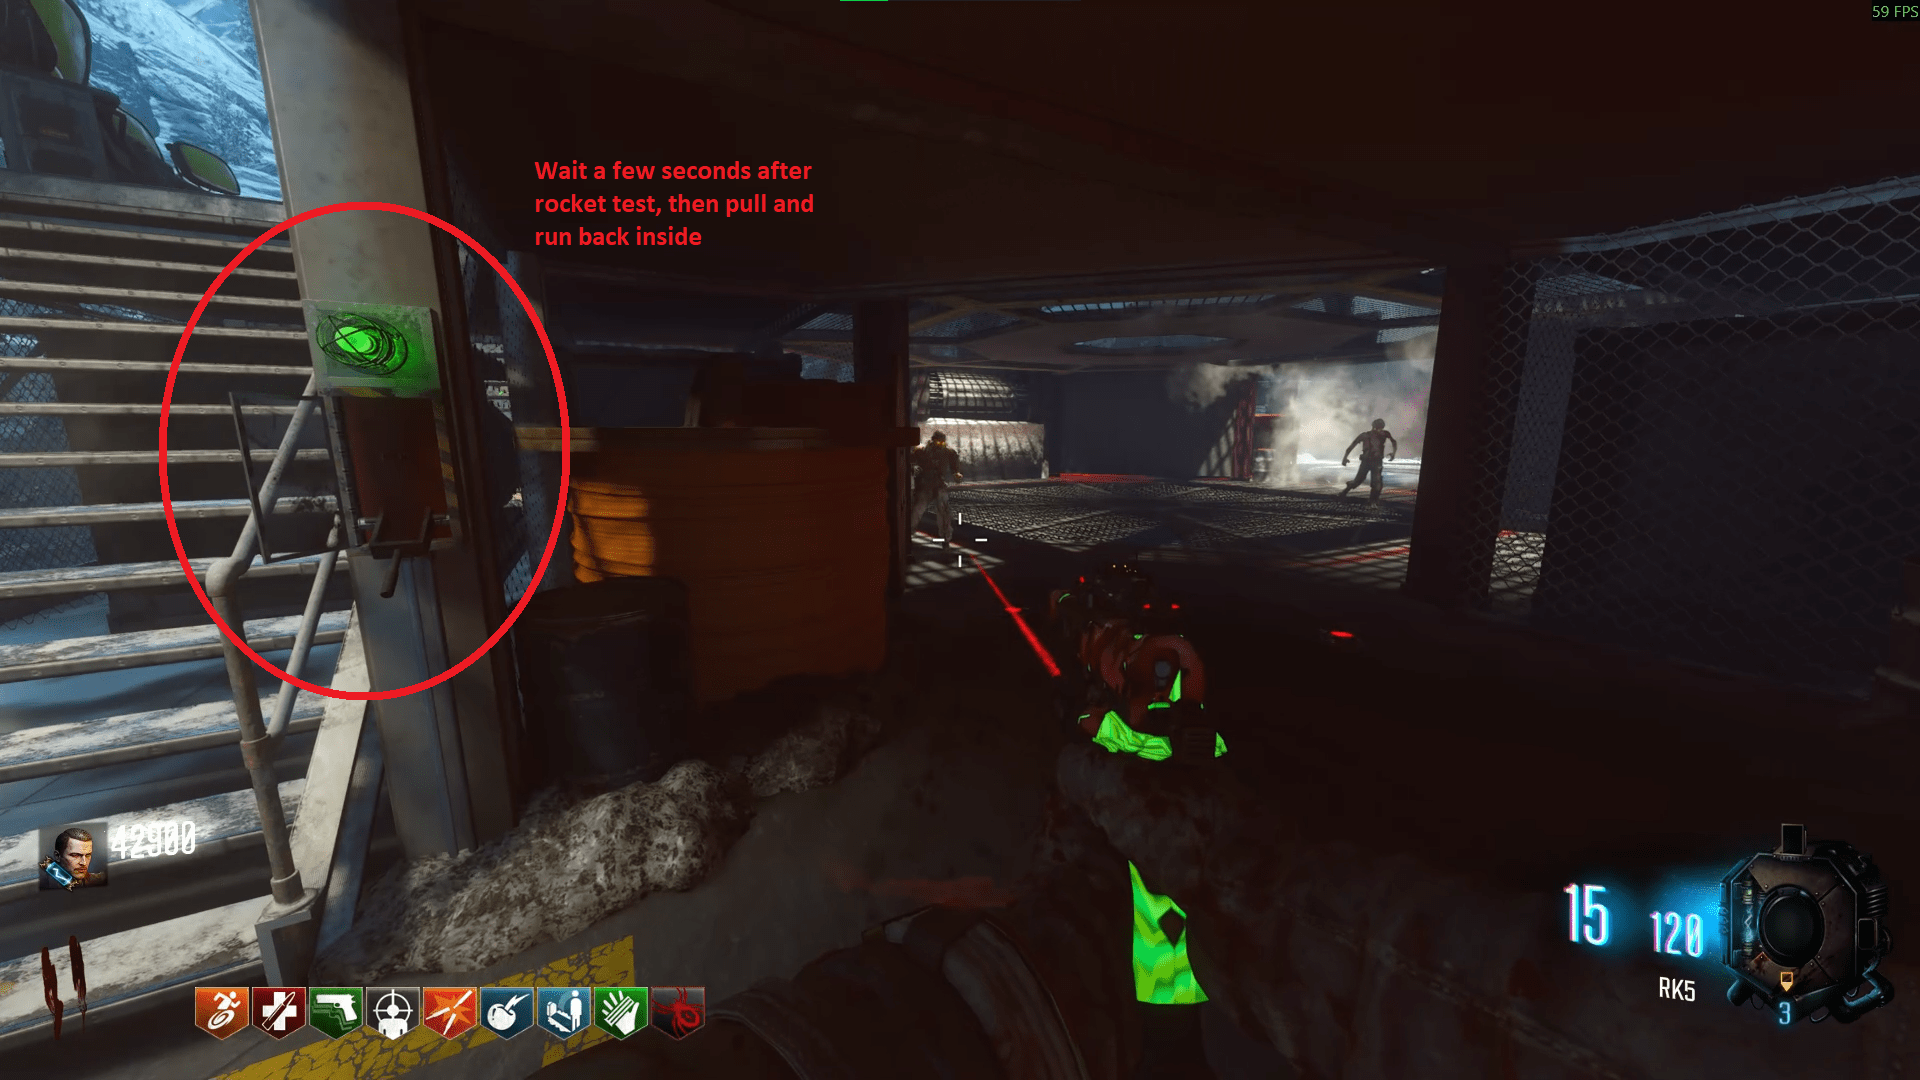
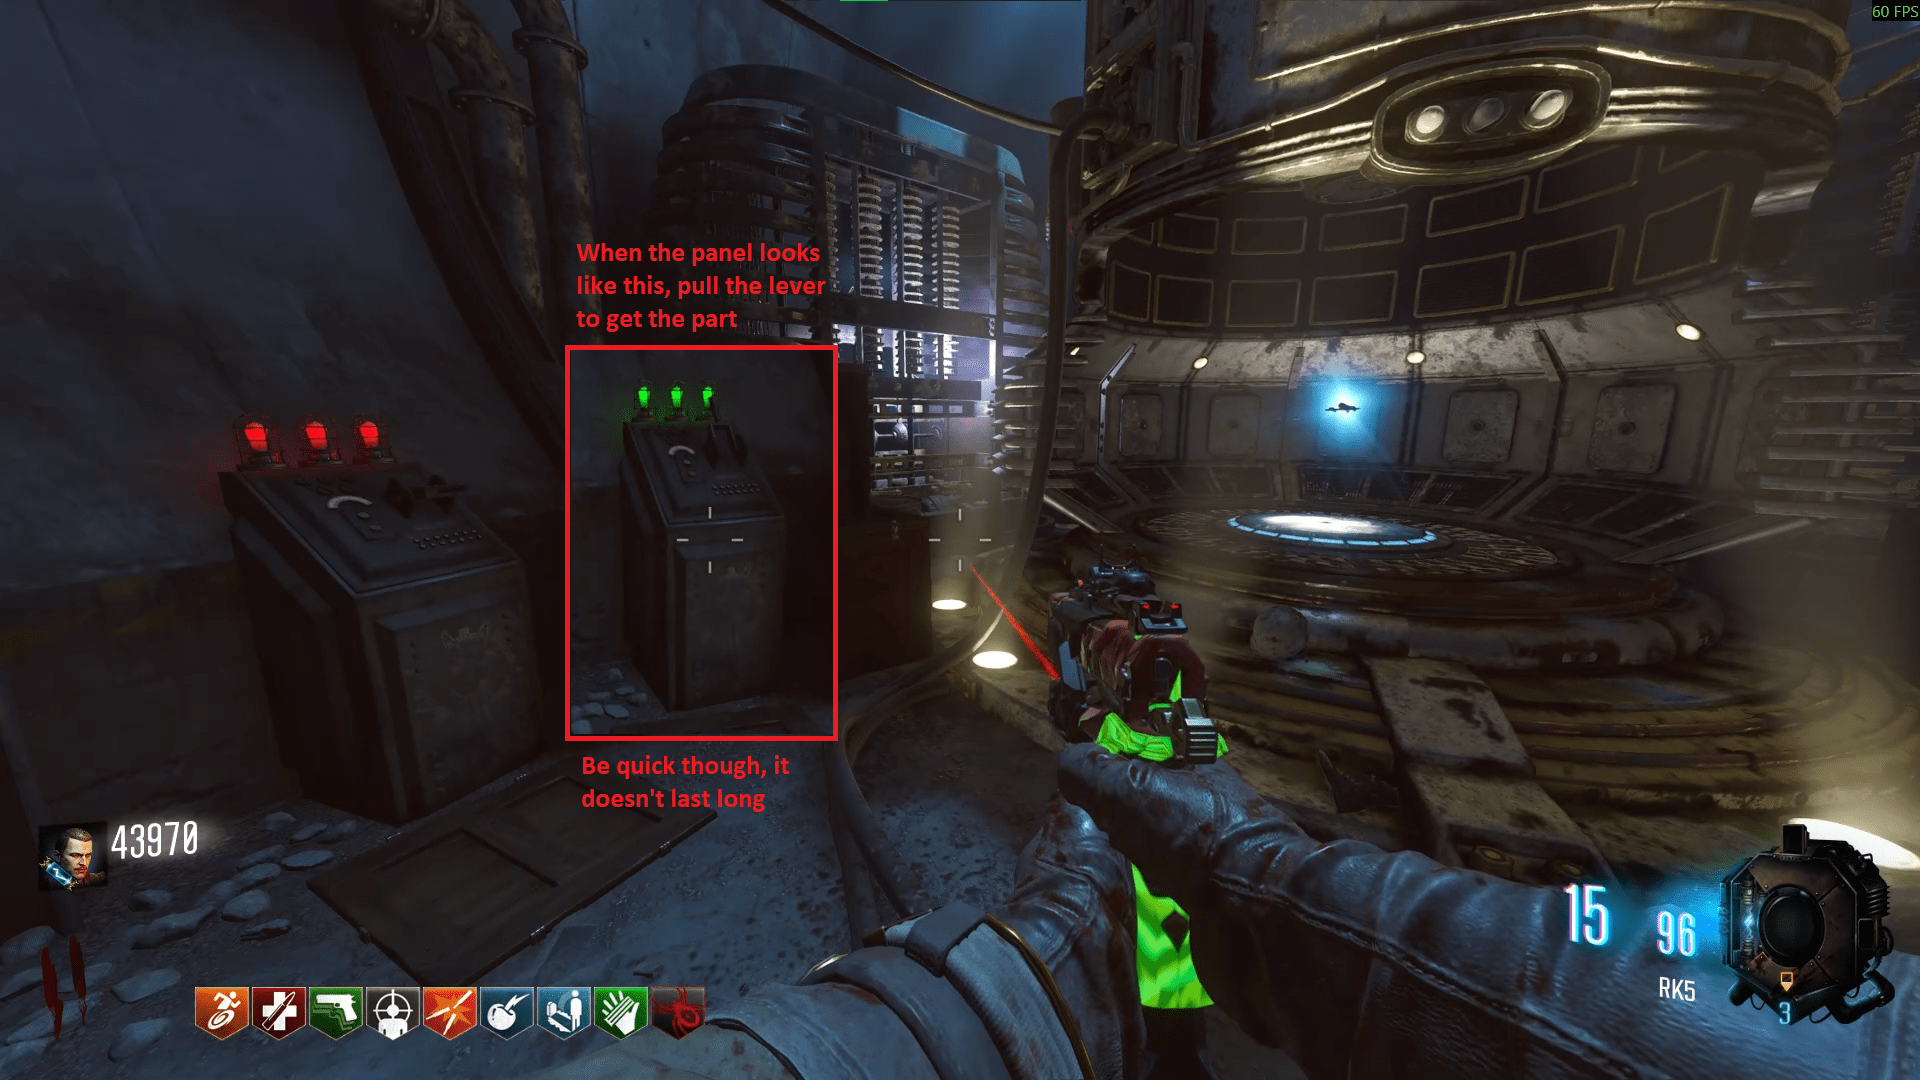
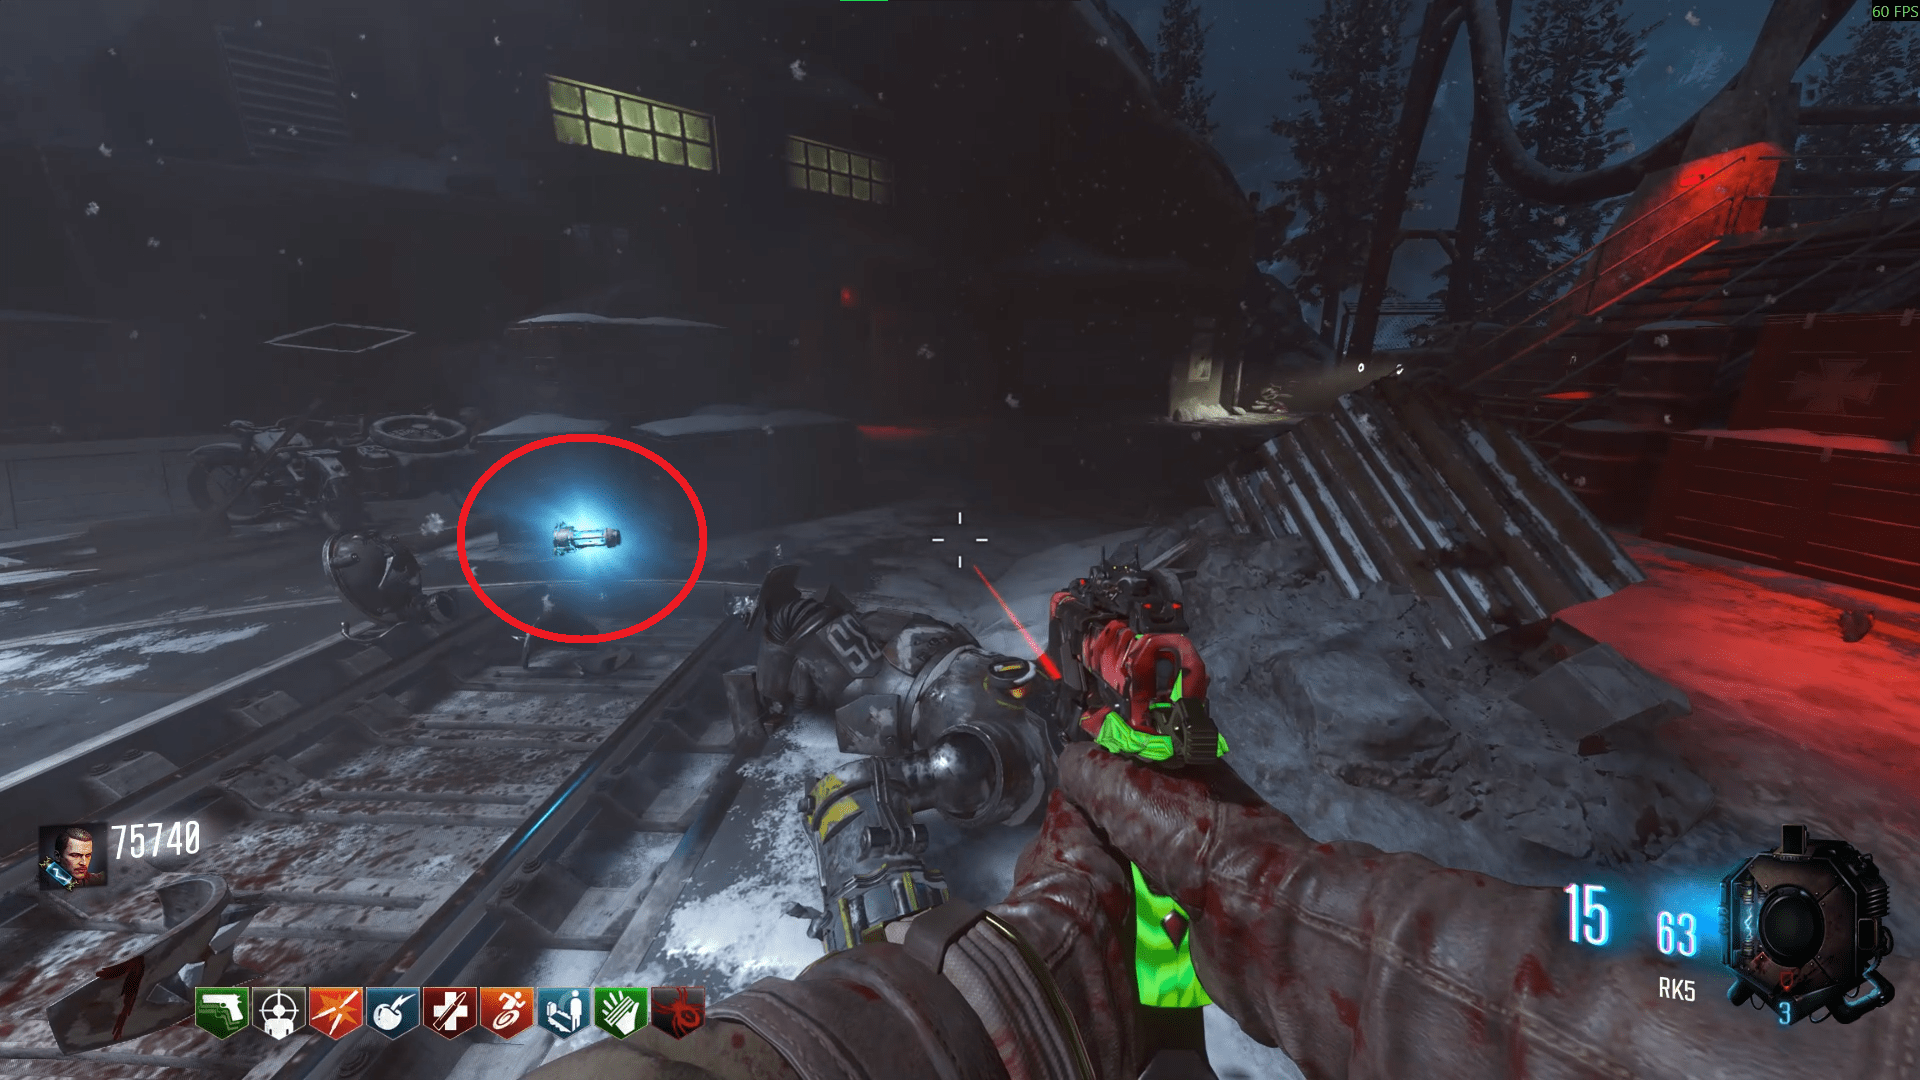
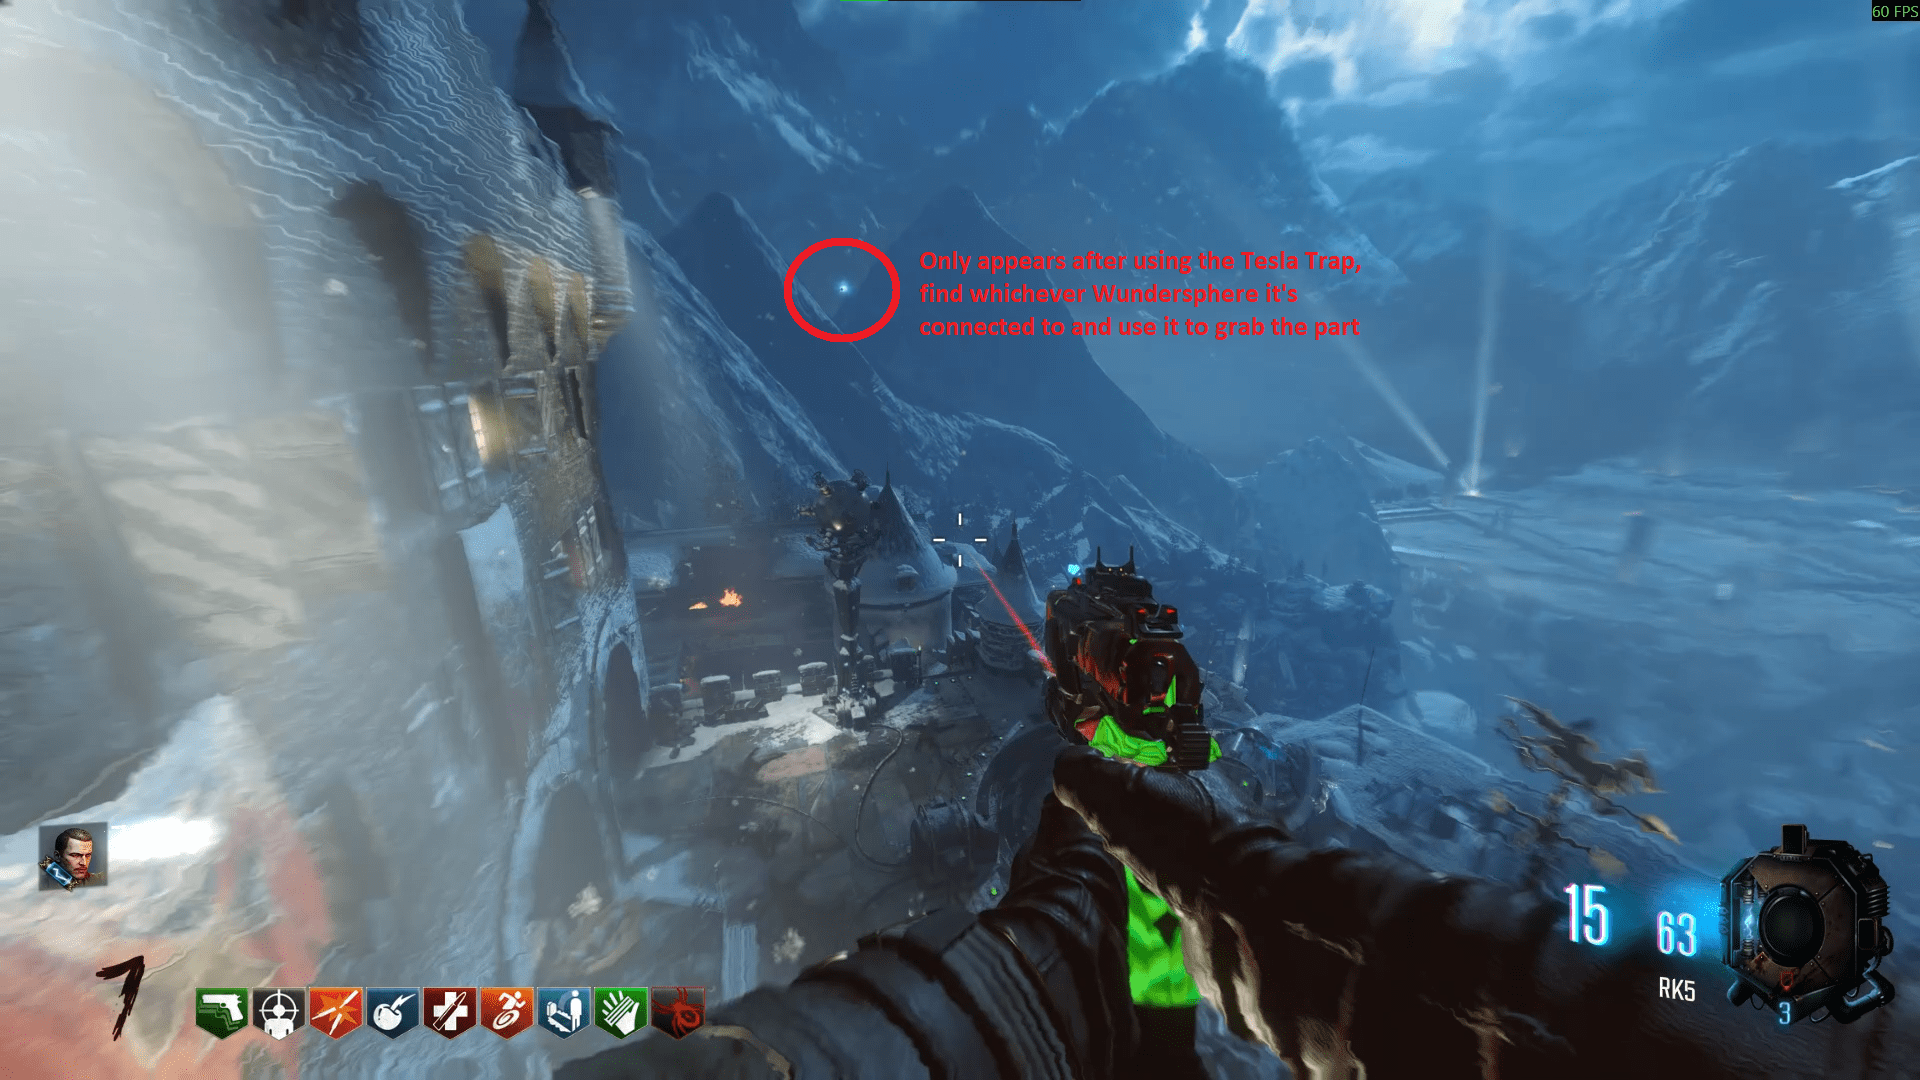
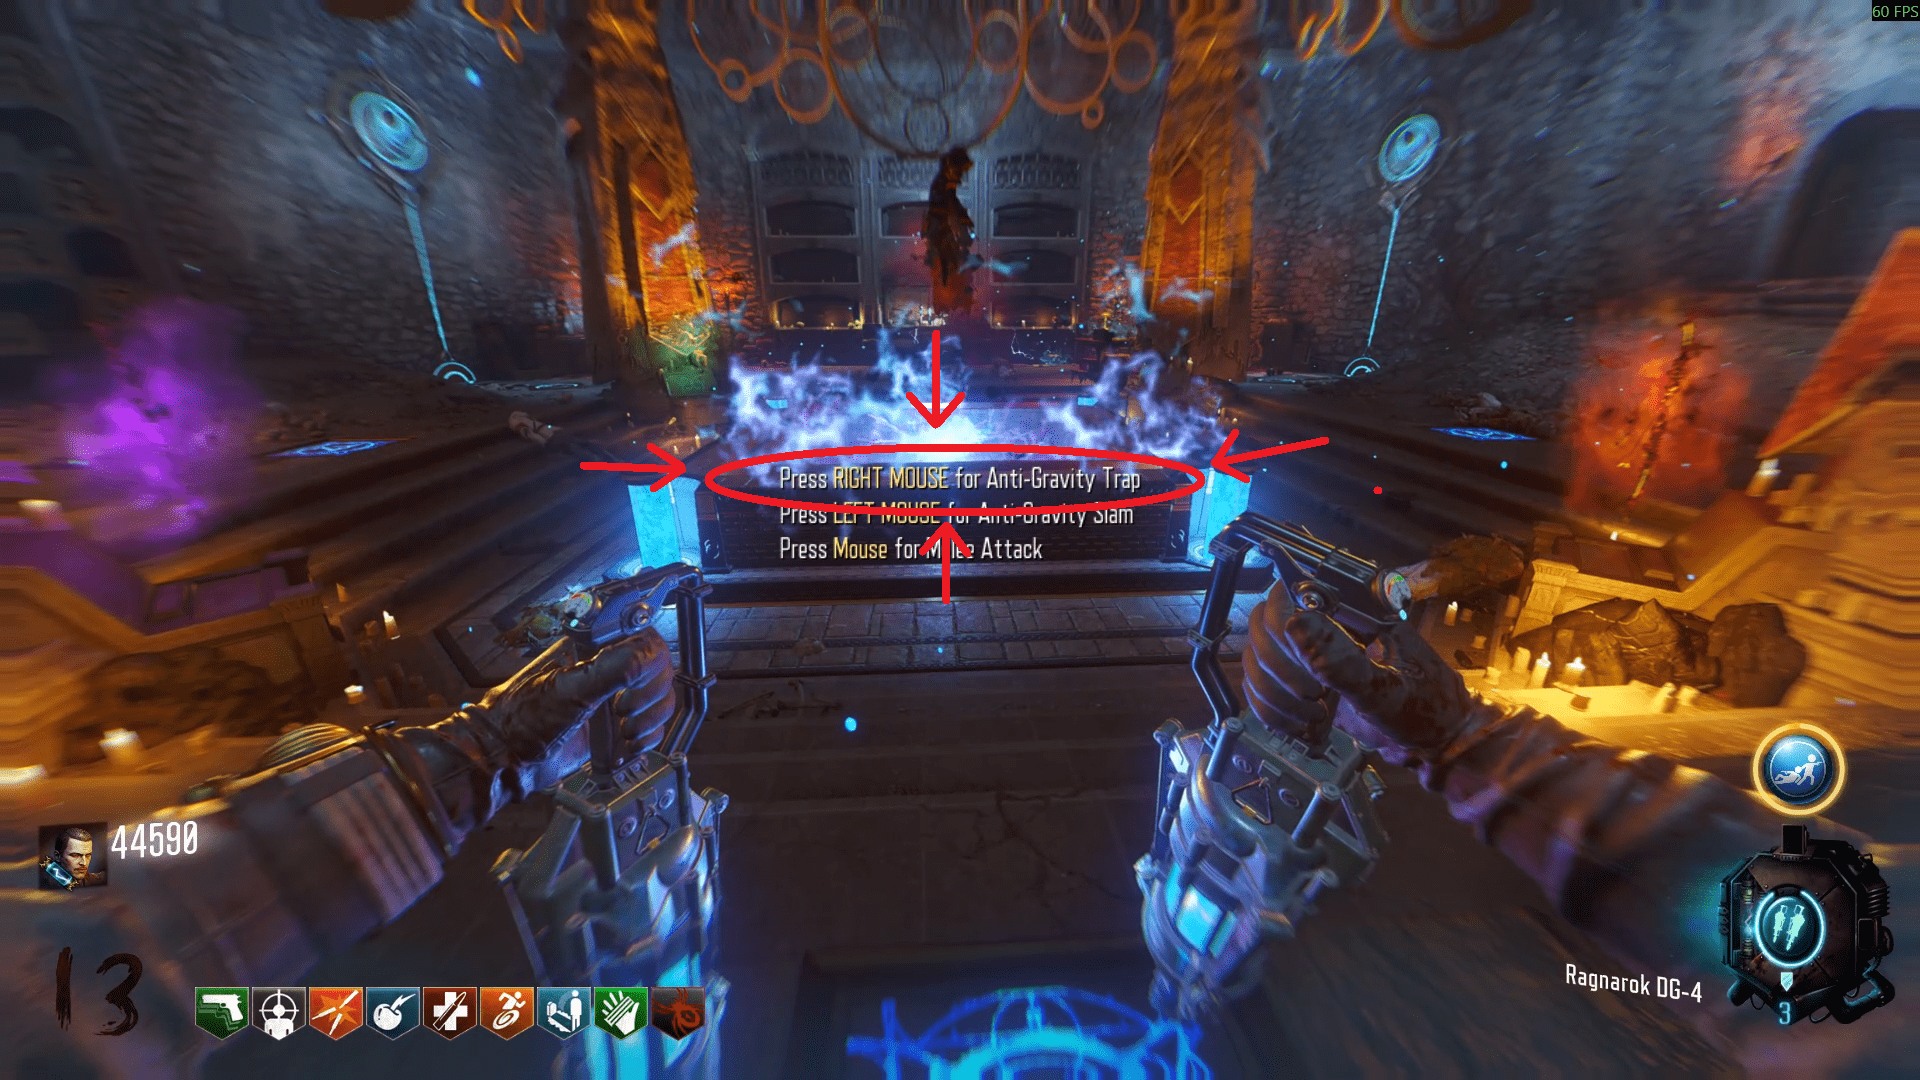
Now that you have the Ragnarok DG-4, equip it and then stand on one of the blue squares that you lit up to enable anti-gravity. You will then plant them into the ground. This will teleport you to the boss arena.
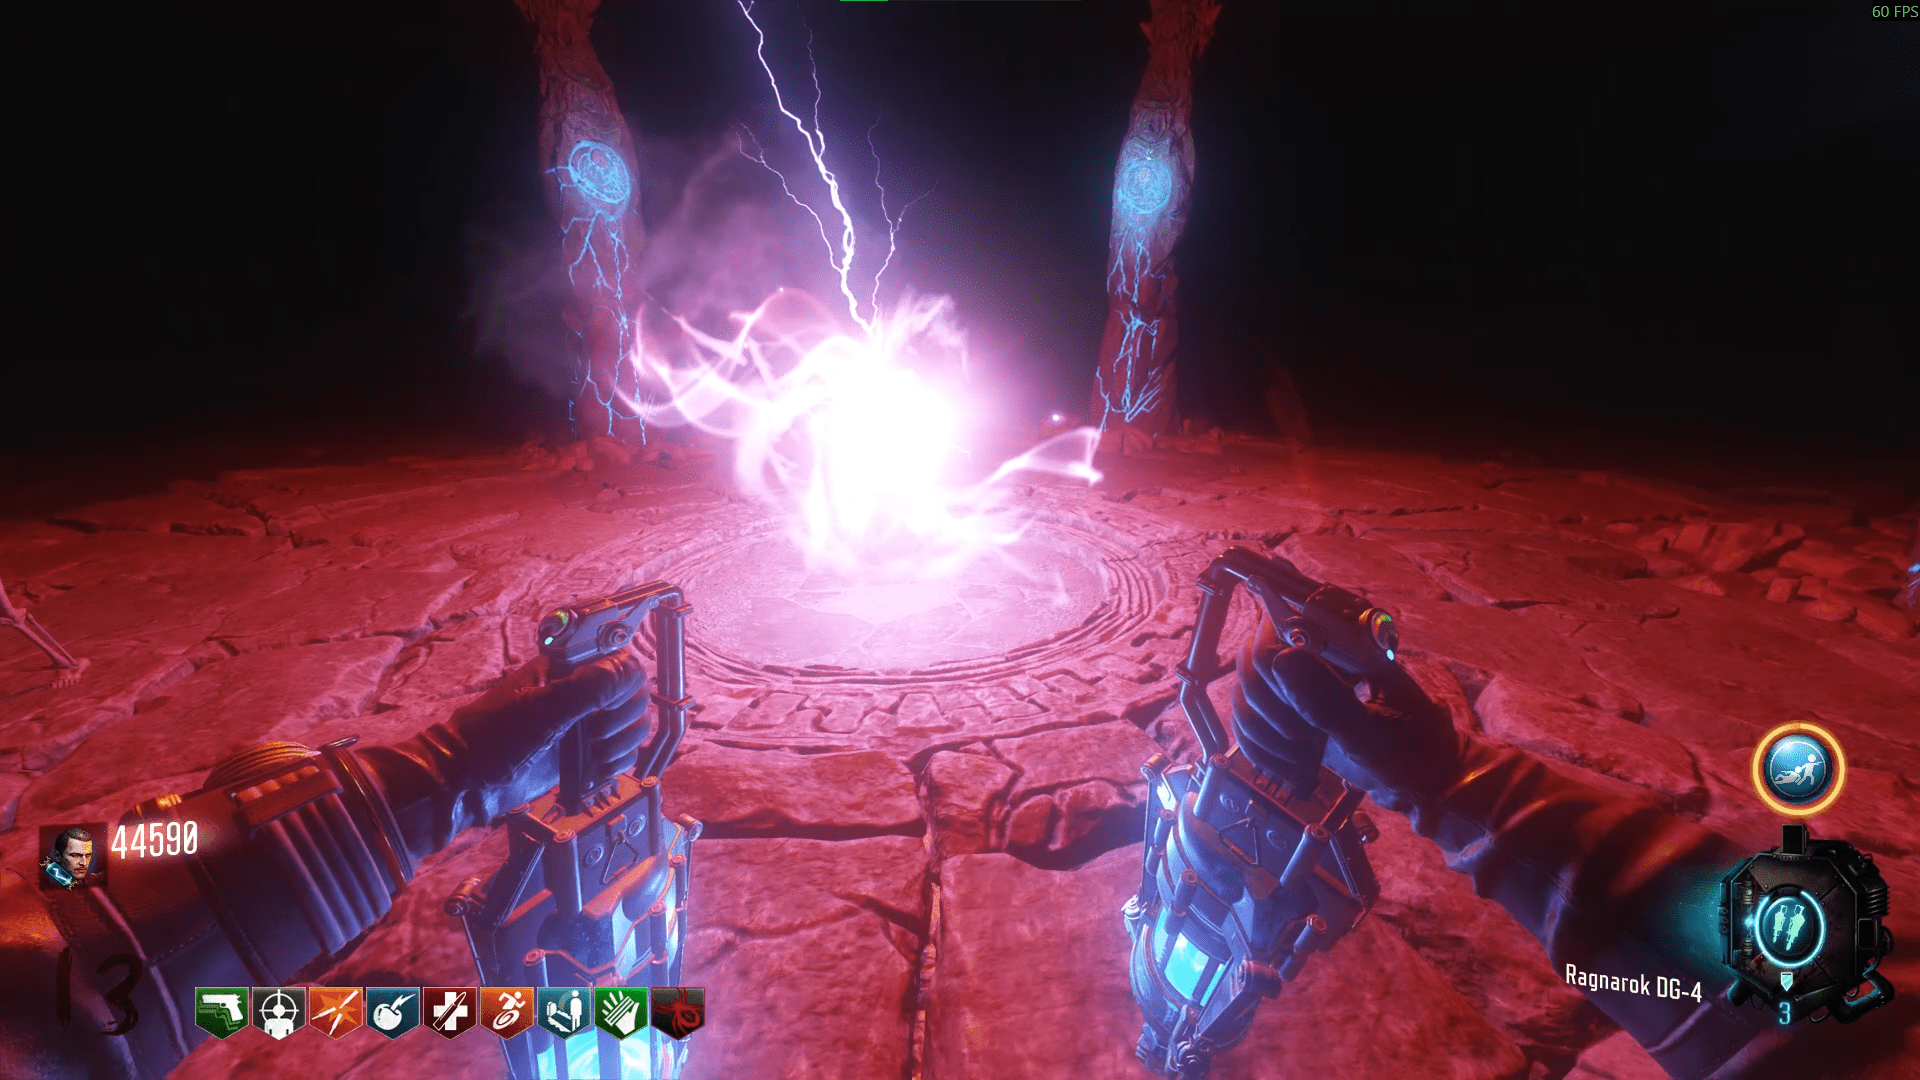
When you're here, the Apothicon will start attacking you. From here on out, all you need to do is survive and repeat the same action 3 times. Eventually, a big ball of lightning will appear underneath the Apothicon when he teleports to the centre of the arena. Bring out your Ragnarok DG-4s and plant them down inside the big ball. Face the Apothicon and then shoot the new glowing emblem on his chest.
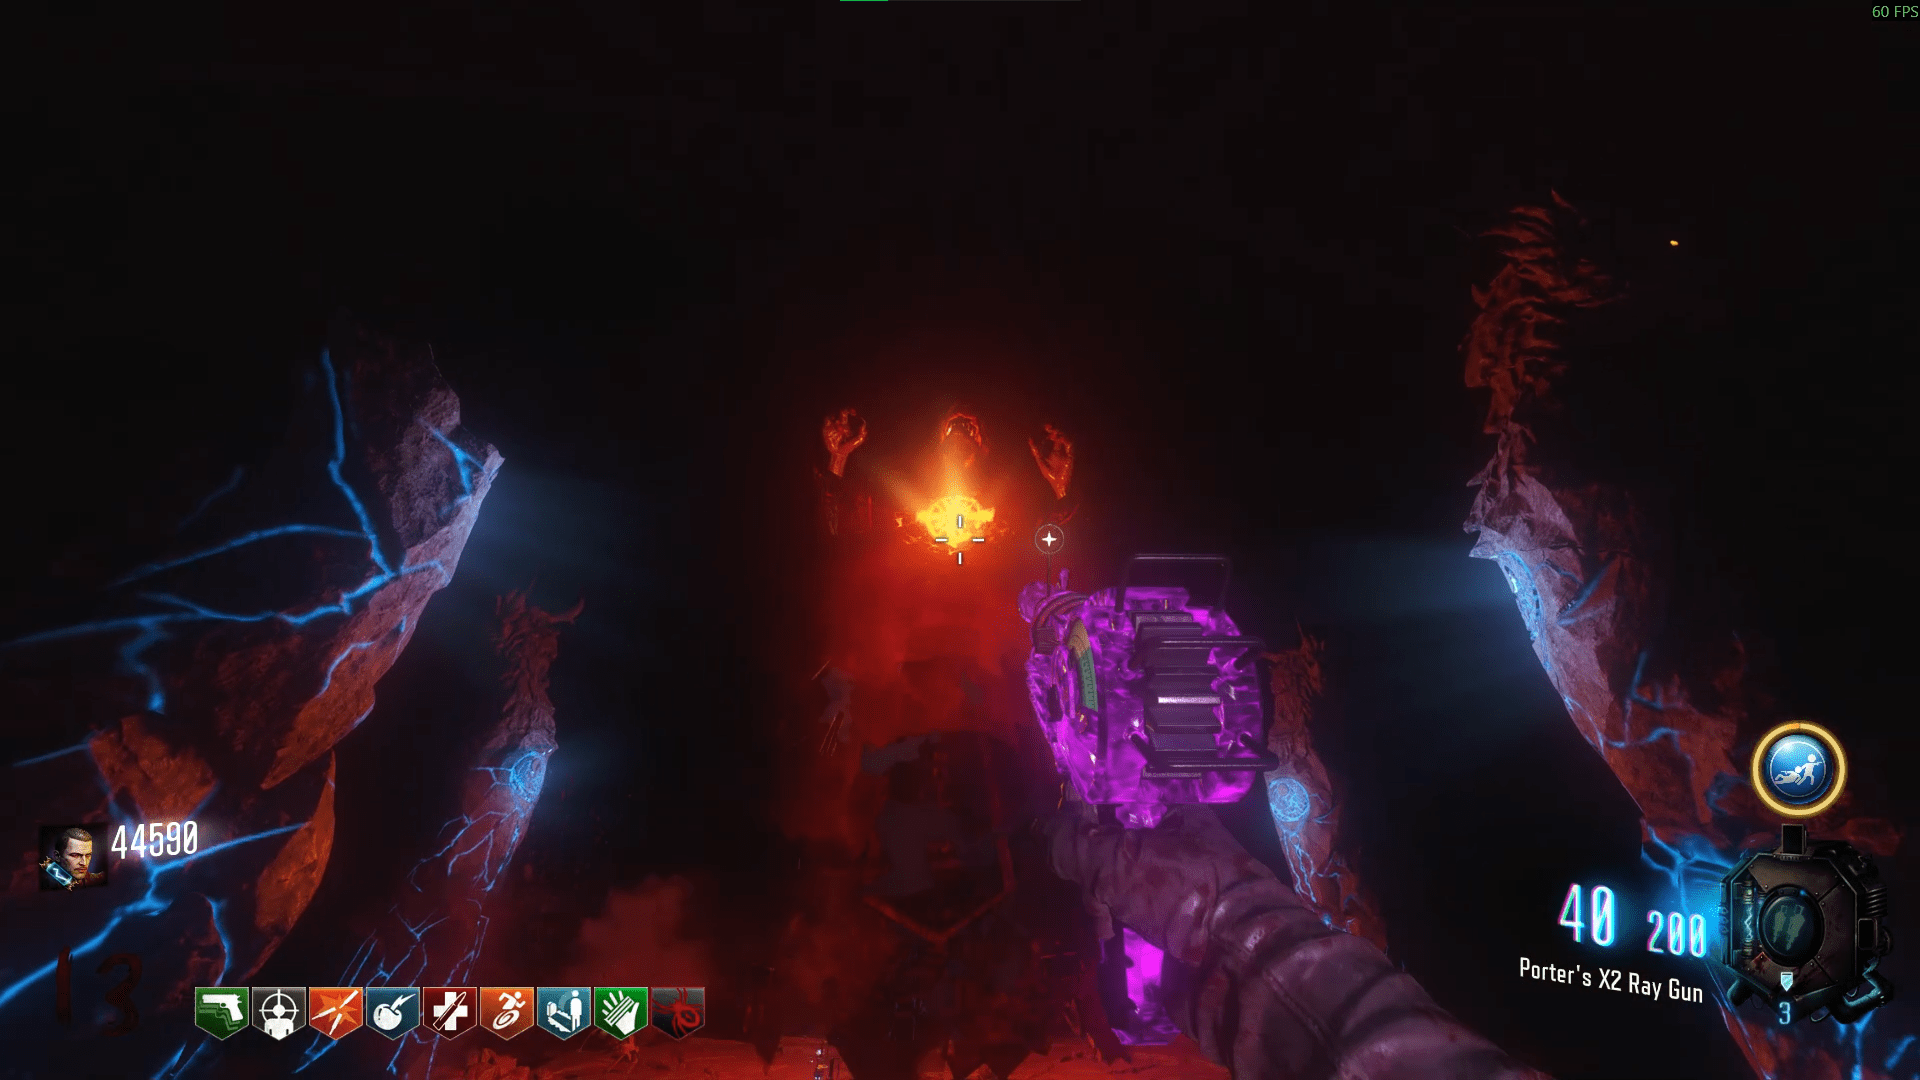
Der Eisendrache
The XM-53 and Raygun are excellent for dealing a lot of damage to him here, so if you have them, use them.
In between shooting the Apothicon, you'll get waves of Panzersoldats and hellhounds. Use these to charge up your Ragnarok DG-4s. Then rinse and repeat this two more times to finish the fight.
After returning back to the main map, place the Summoning Key inside the MPD and pick it back up. Then head up to the Clocktower, place the Summoning Key into the console you used for Simon Says and what do you know, that's the Easter Egg completed. Enjoy the show and enjoy the cutscene.
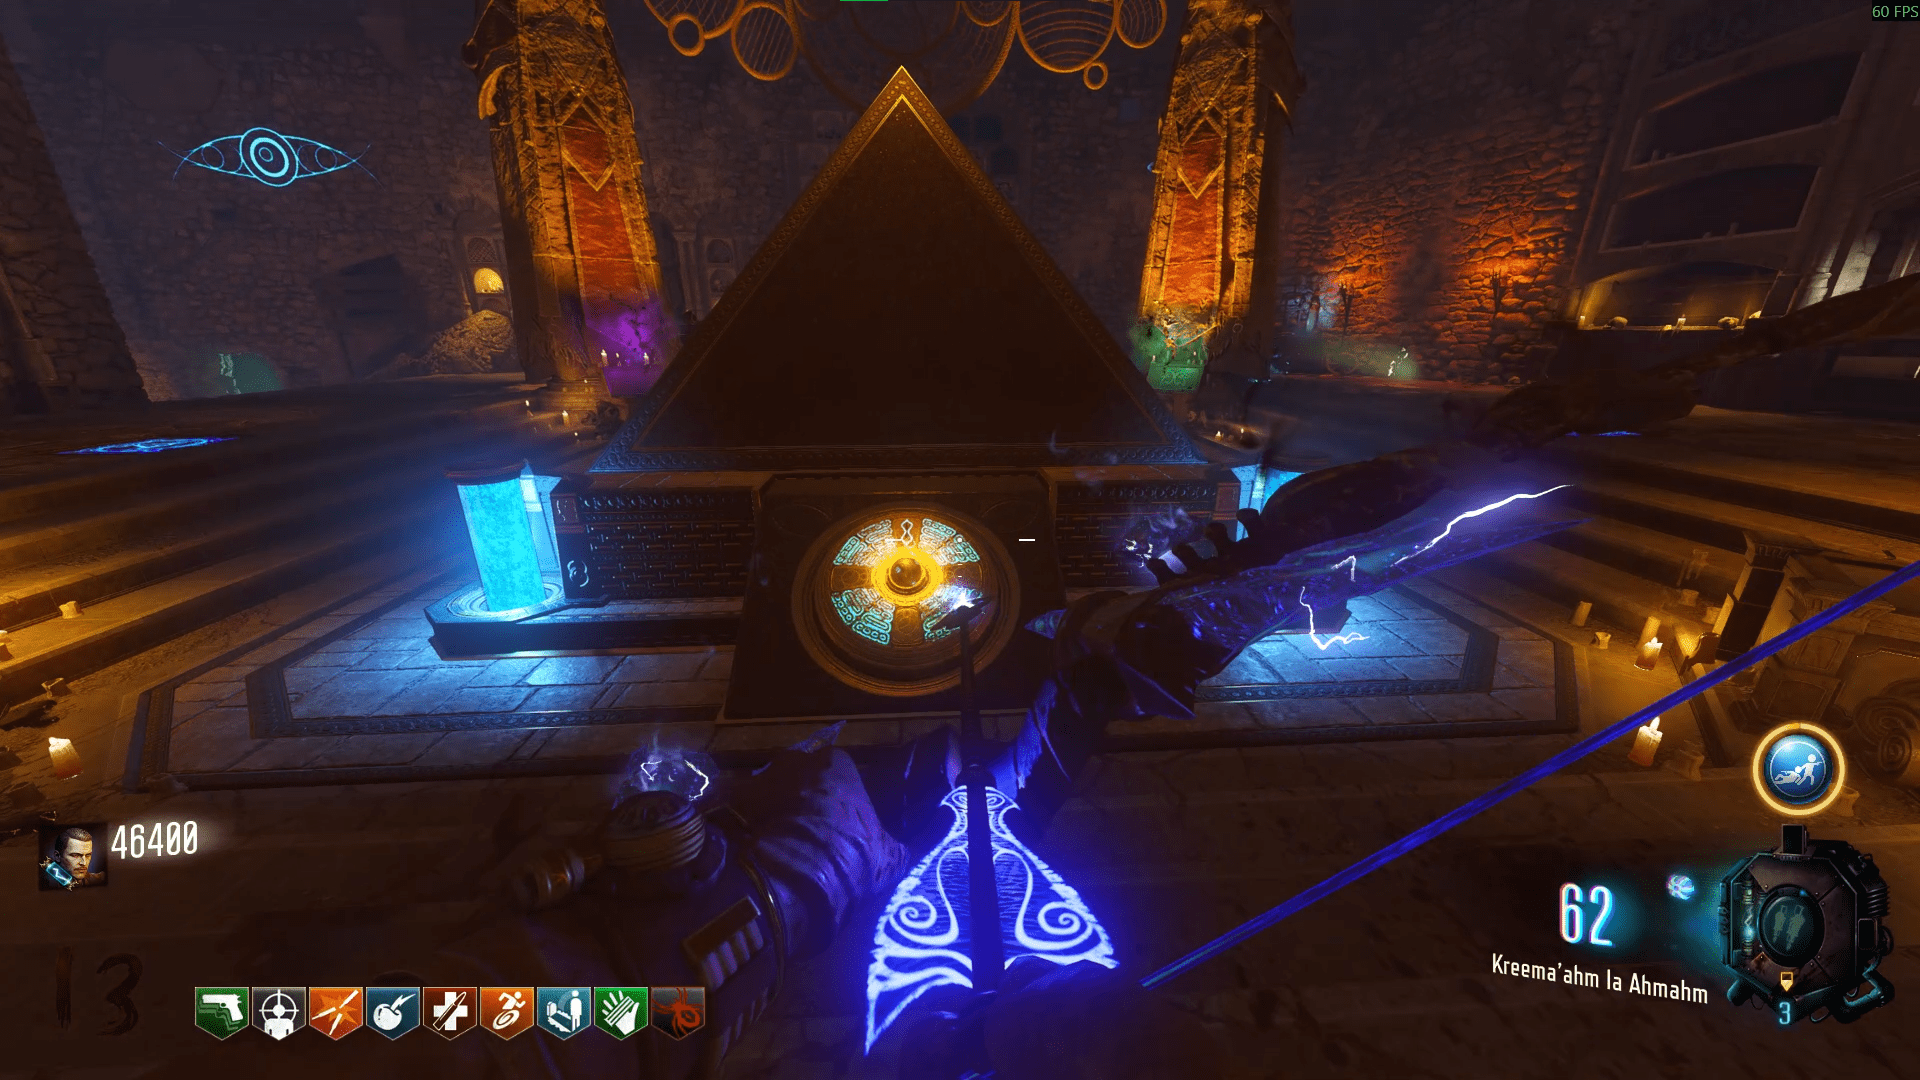
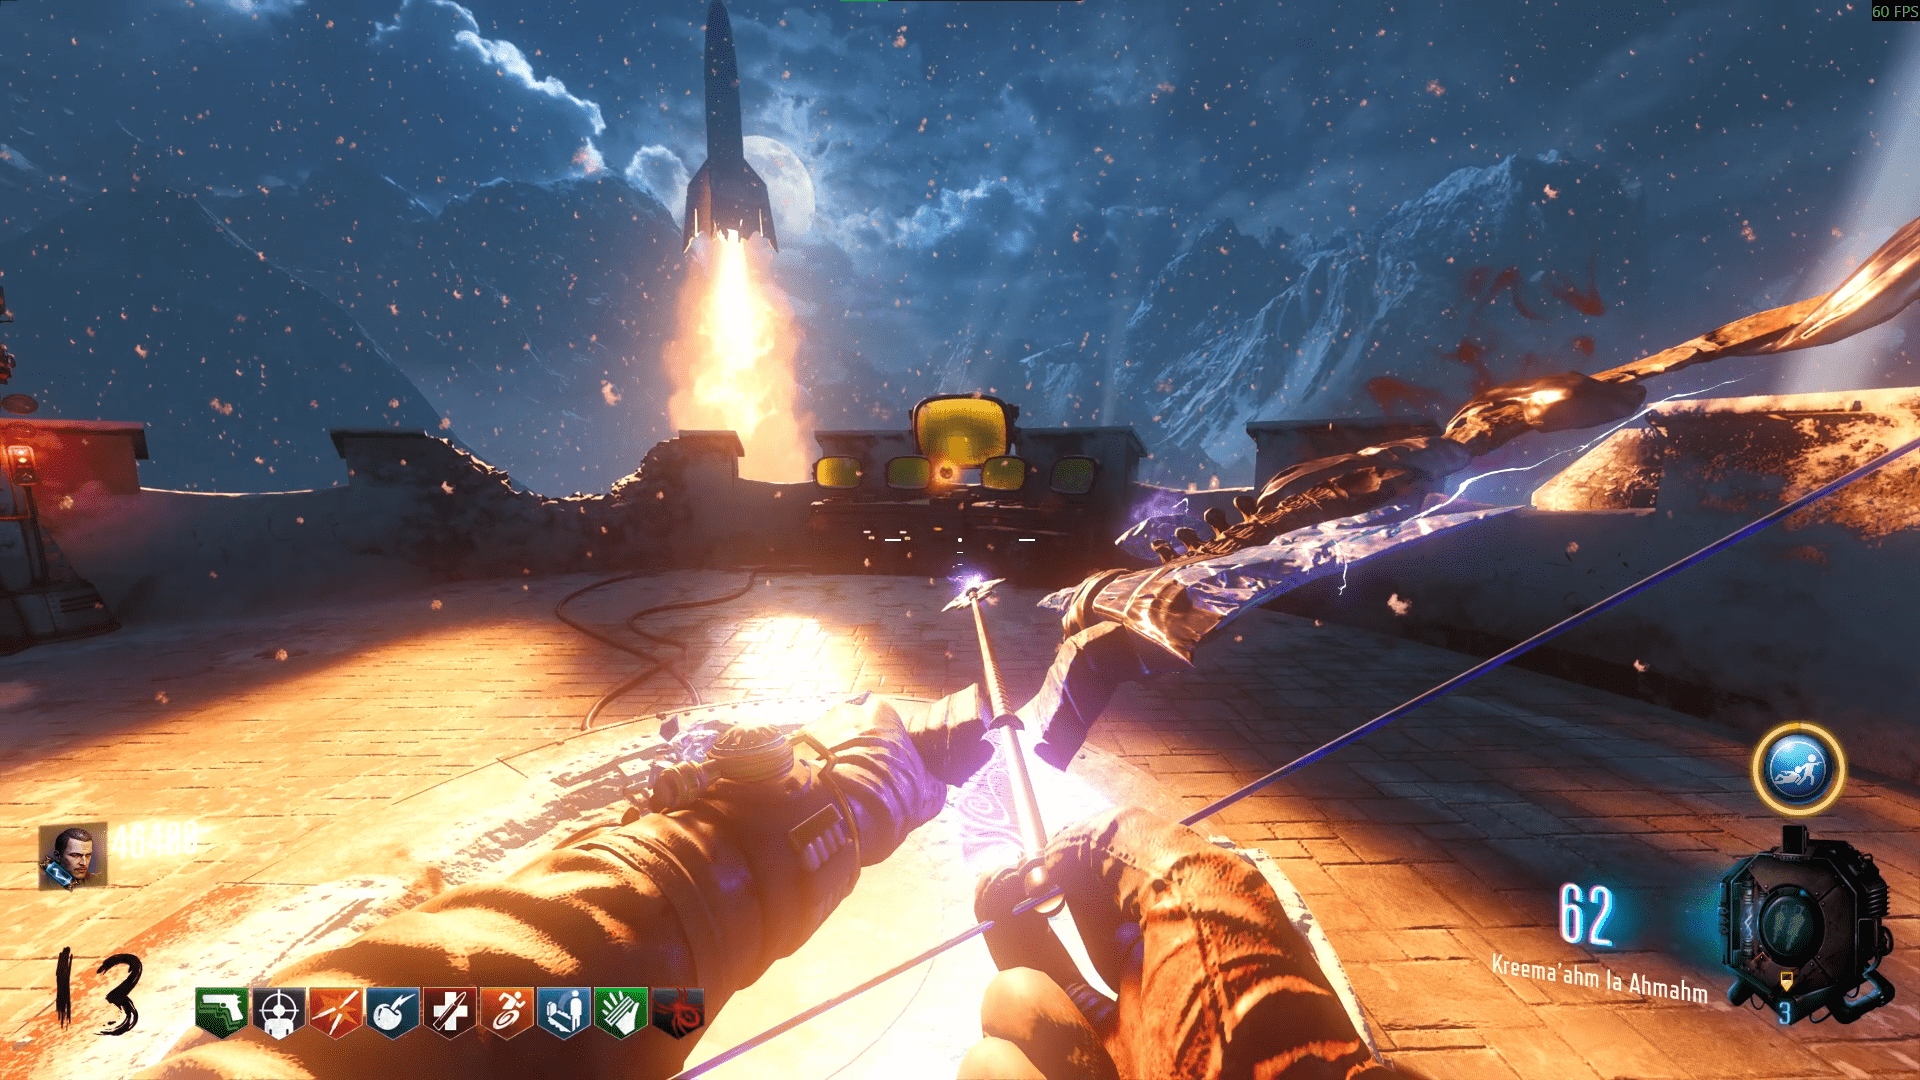
P.S - If you shoot a shot with the Storm or Void bow at Dempsey's pod, it'll appear in the cutscene.
Zetsubou No Shima
Alright so I may have lied just a smidge. In this Easter egg, I'll tell you how to upgrade the KT-4 but you don't actually need to during the egg. It's just purely for survival purposes since it's incredibly useful in the boss fight.
You also need the Anywhere but Here! Gobblegum before starting this Easter Egg as it is required for one of the steps.
- Pedestal one is directly in front of you when you spawn in.
- Second is through the second door on the left, besides the Plane trap.
- Third is the door connecting the Power room to the outside after opening the Bunker.
- The fourth is in the KT-4 bench room, the door's directly ahead of you upon opening the Bunker.
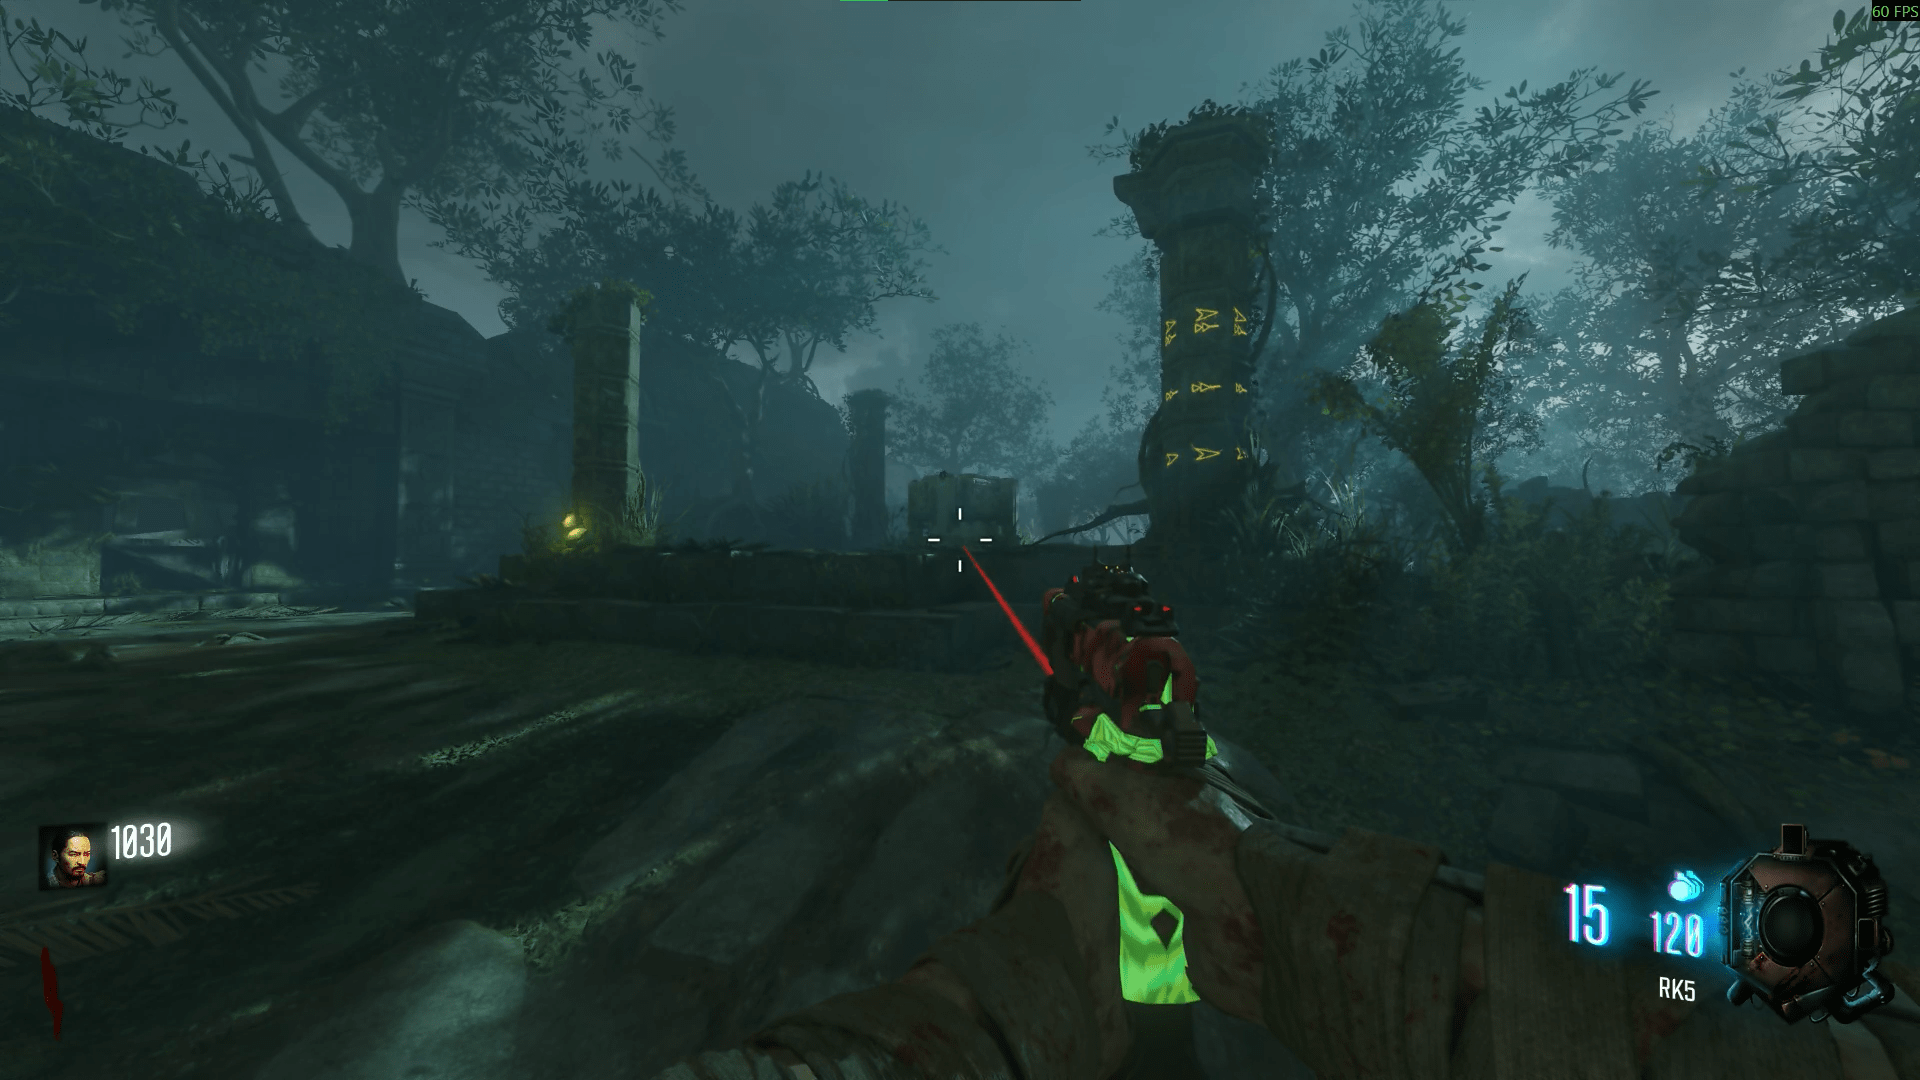
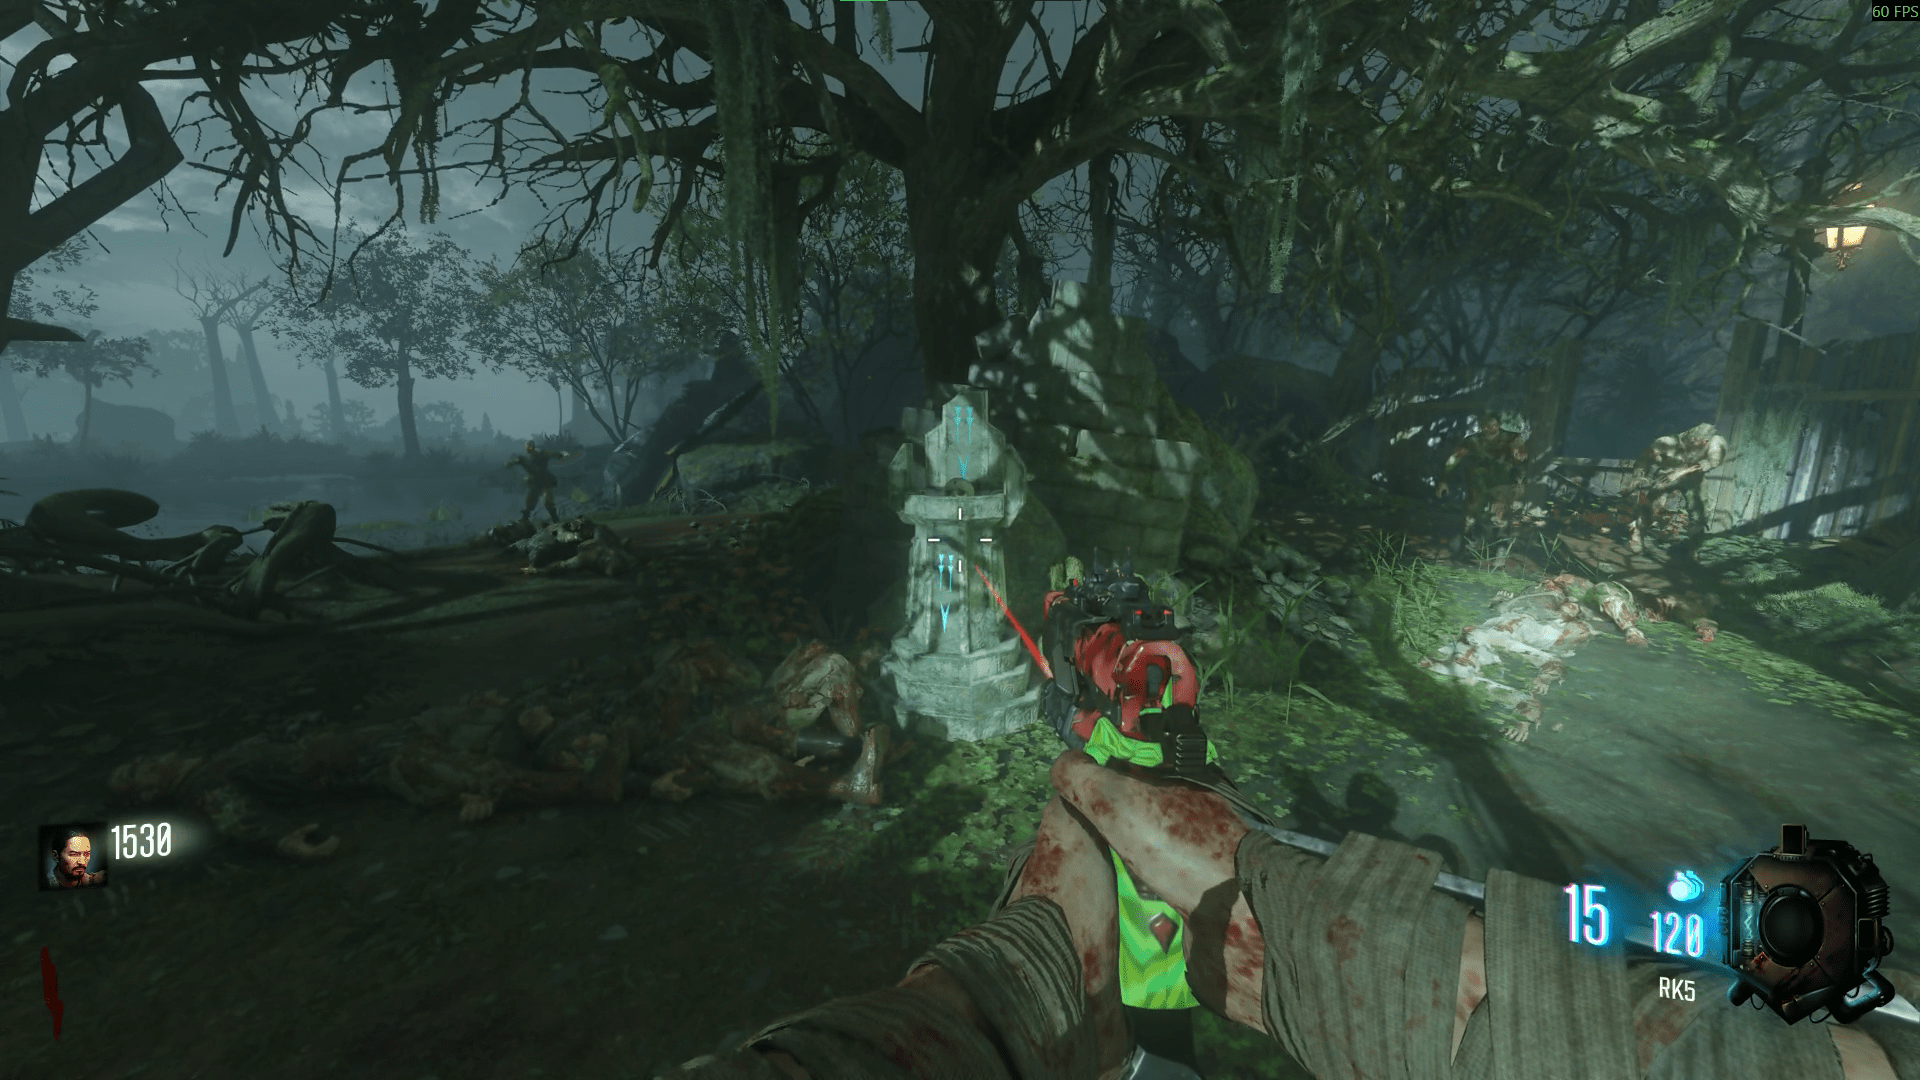
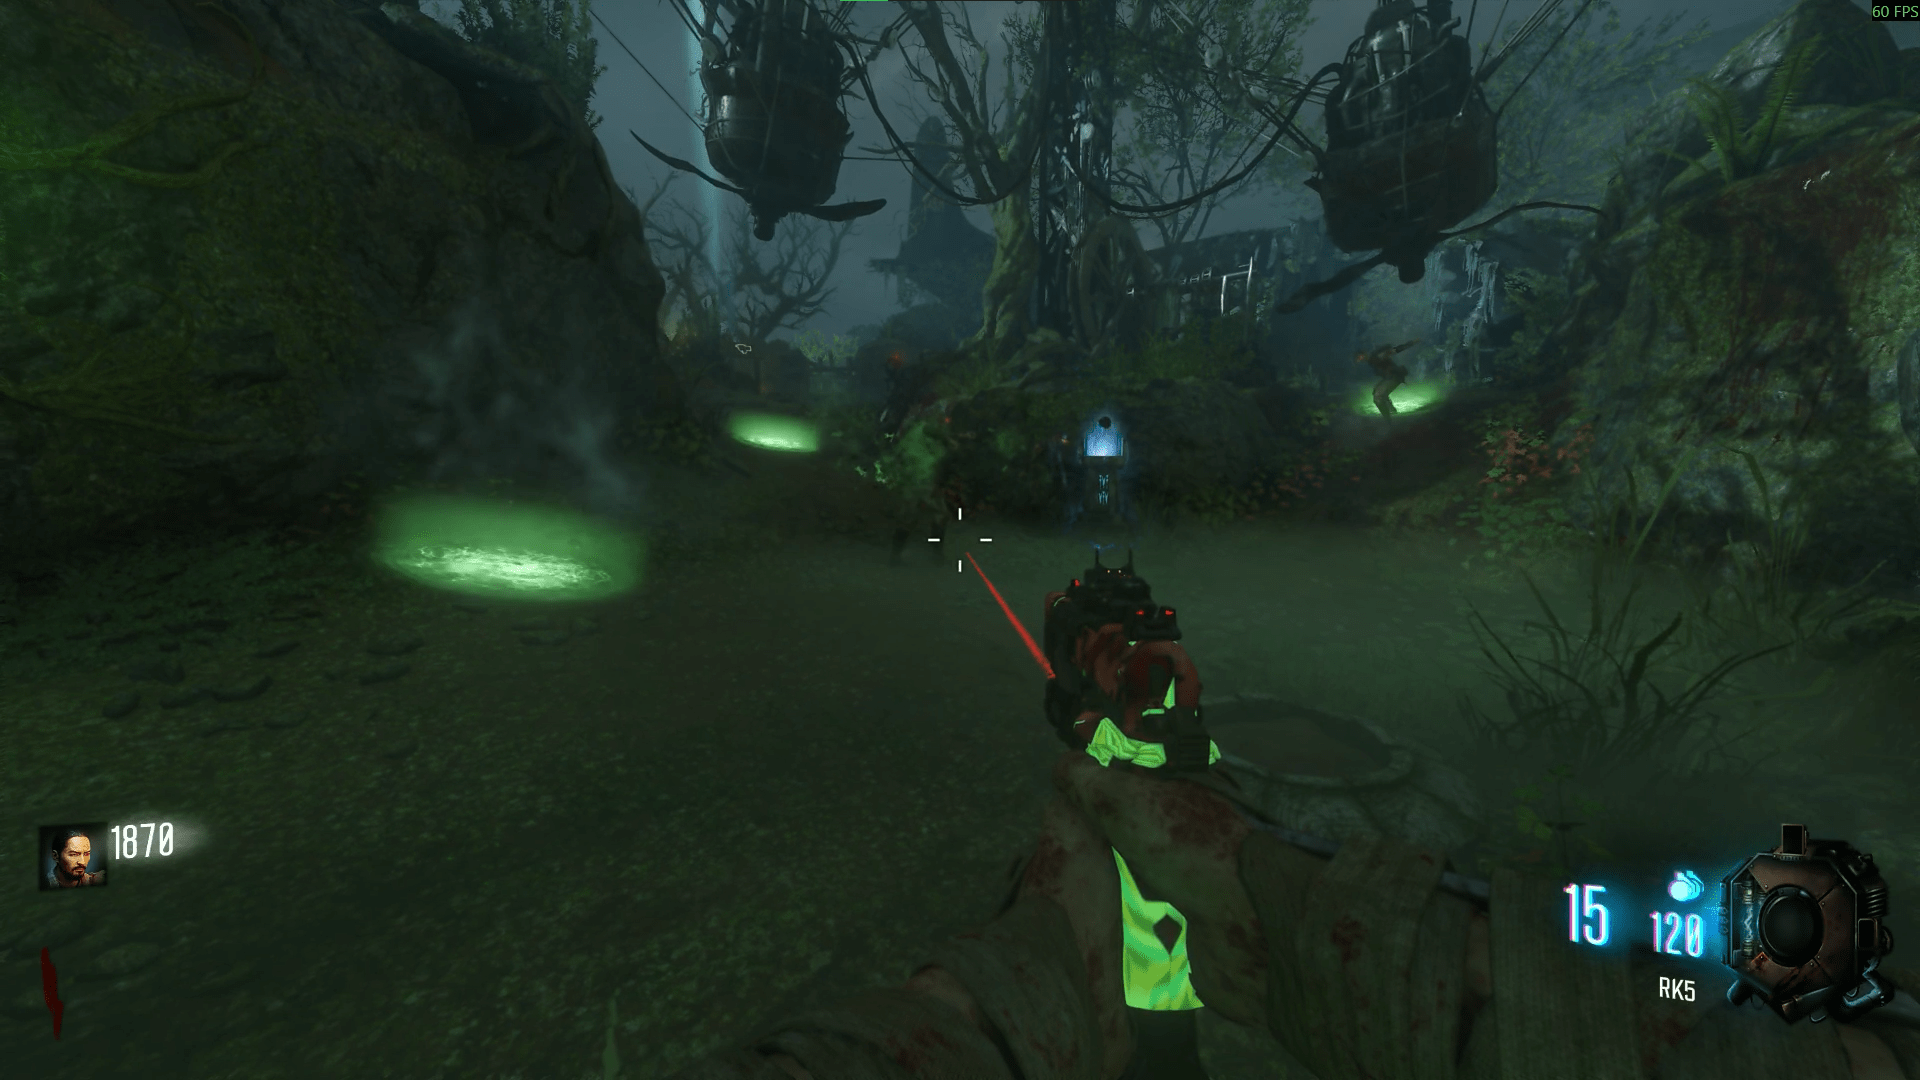
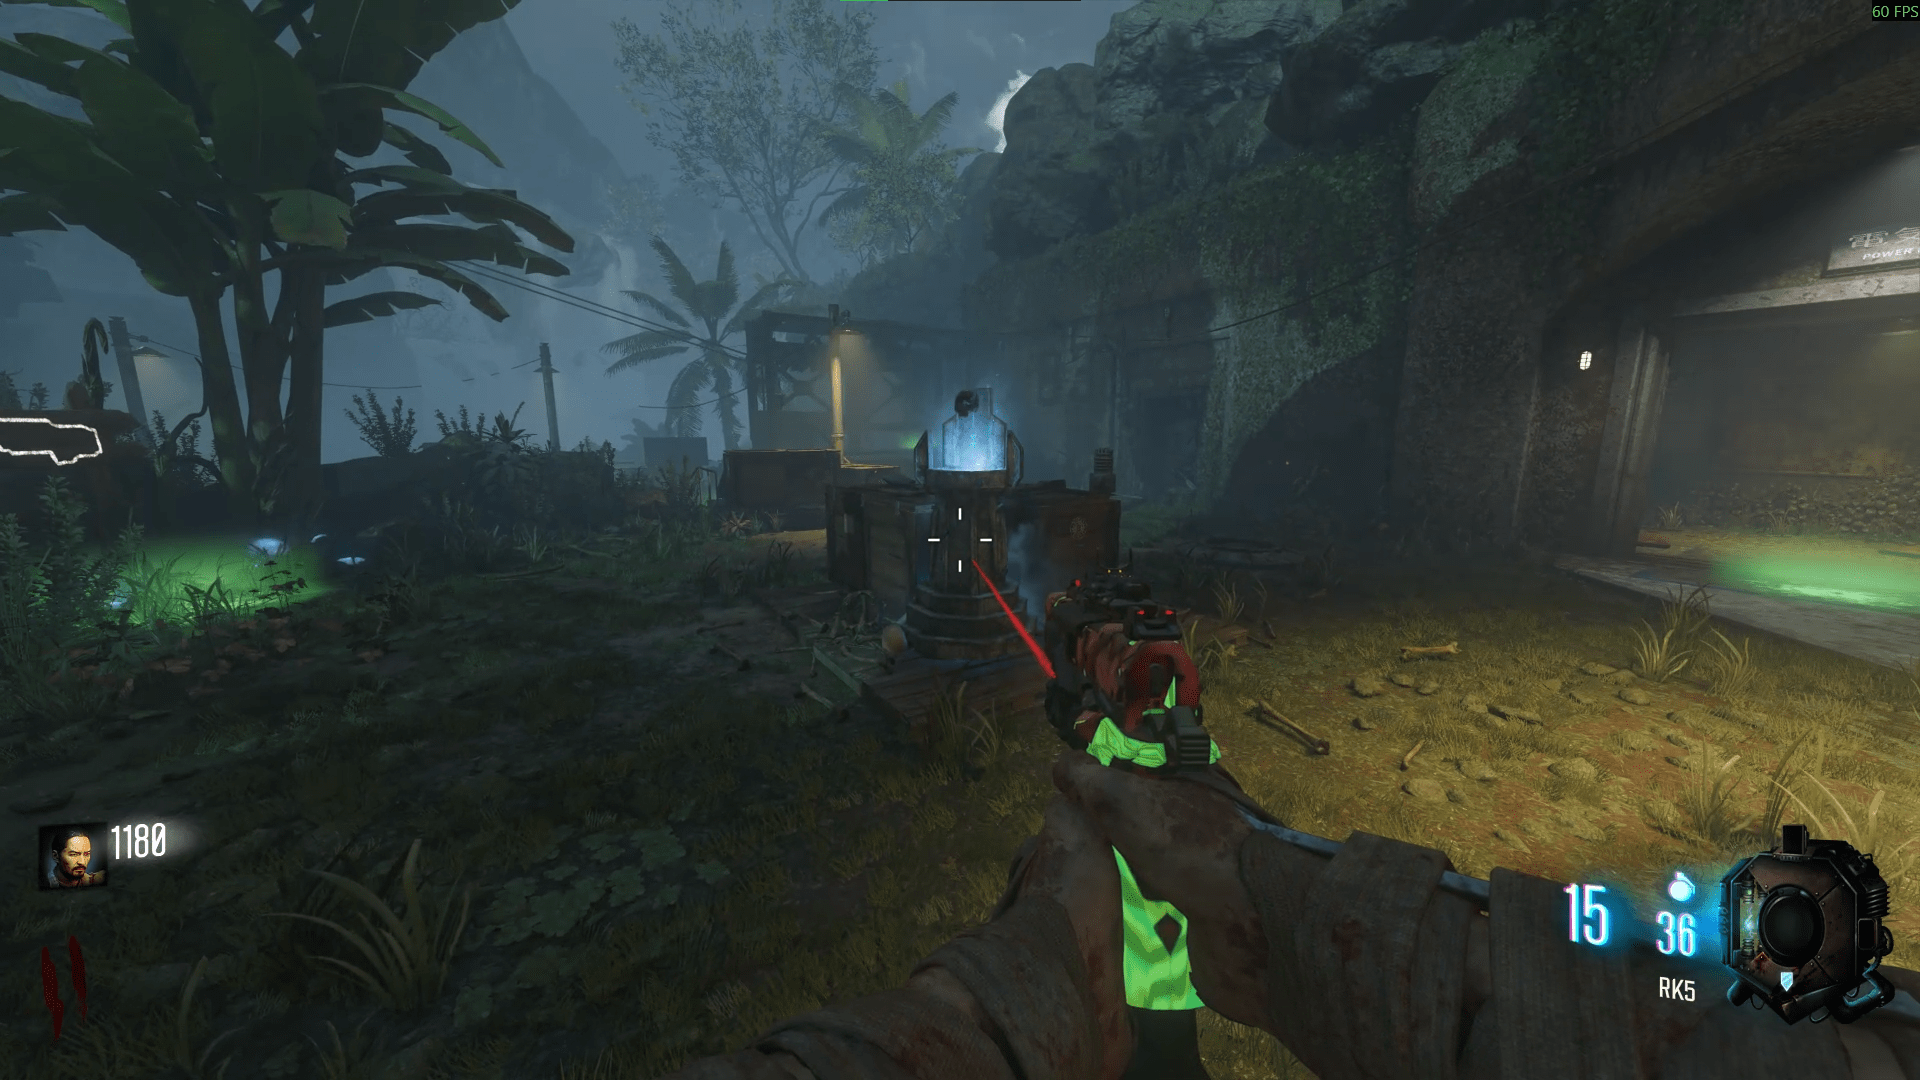
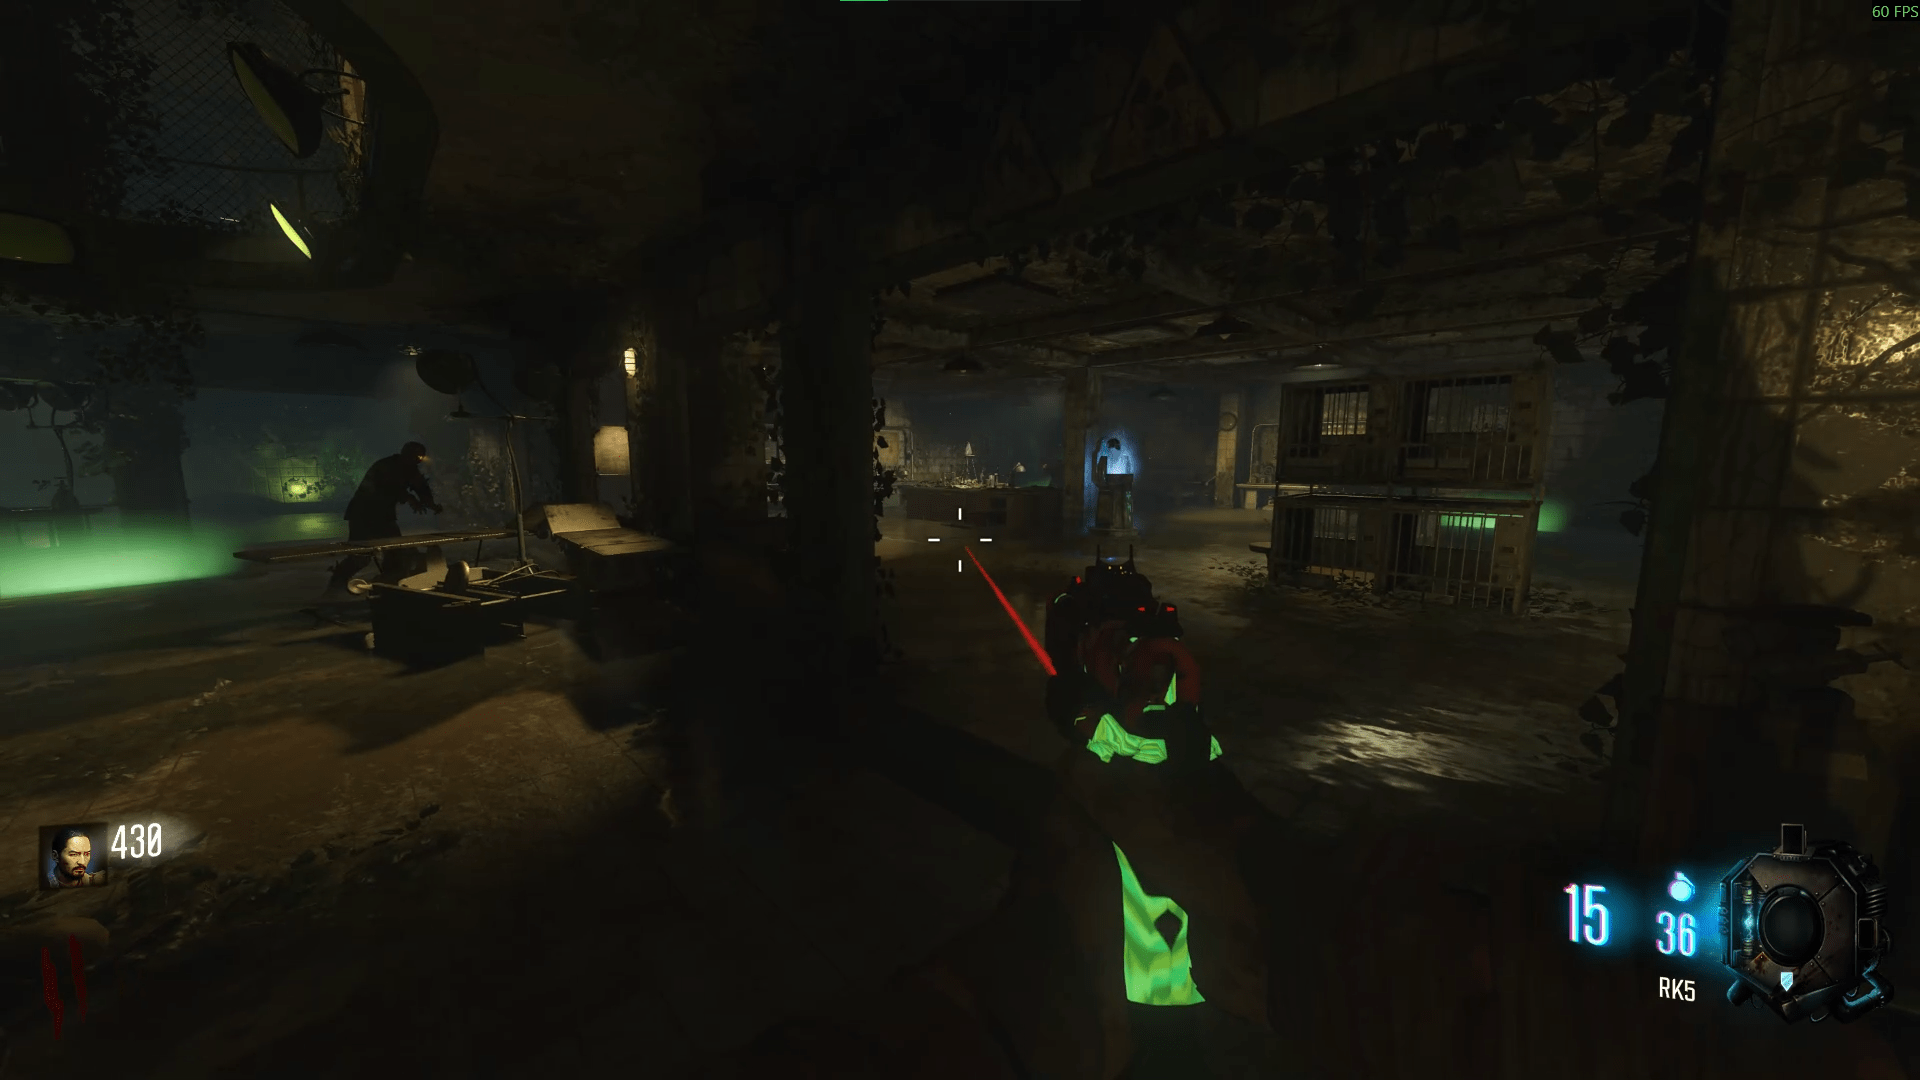
After you have cleansed all the skulls and placed them back into their slots, the fell tree will disappear and open a new pathway for you. This leads to the Skull of Nan-Sapwe. Head down, start the ritual and kill the Apothicons until you can pick up the skull.
Your next step is to use the Skull of Nan-Sapwe and interact with three different areas. You do not need to do this in one skull use, but it is much easier and less of a faff.
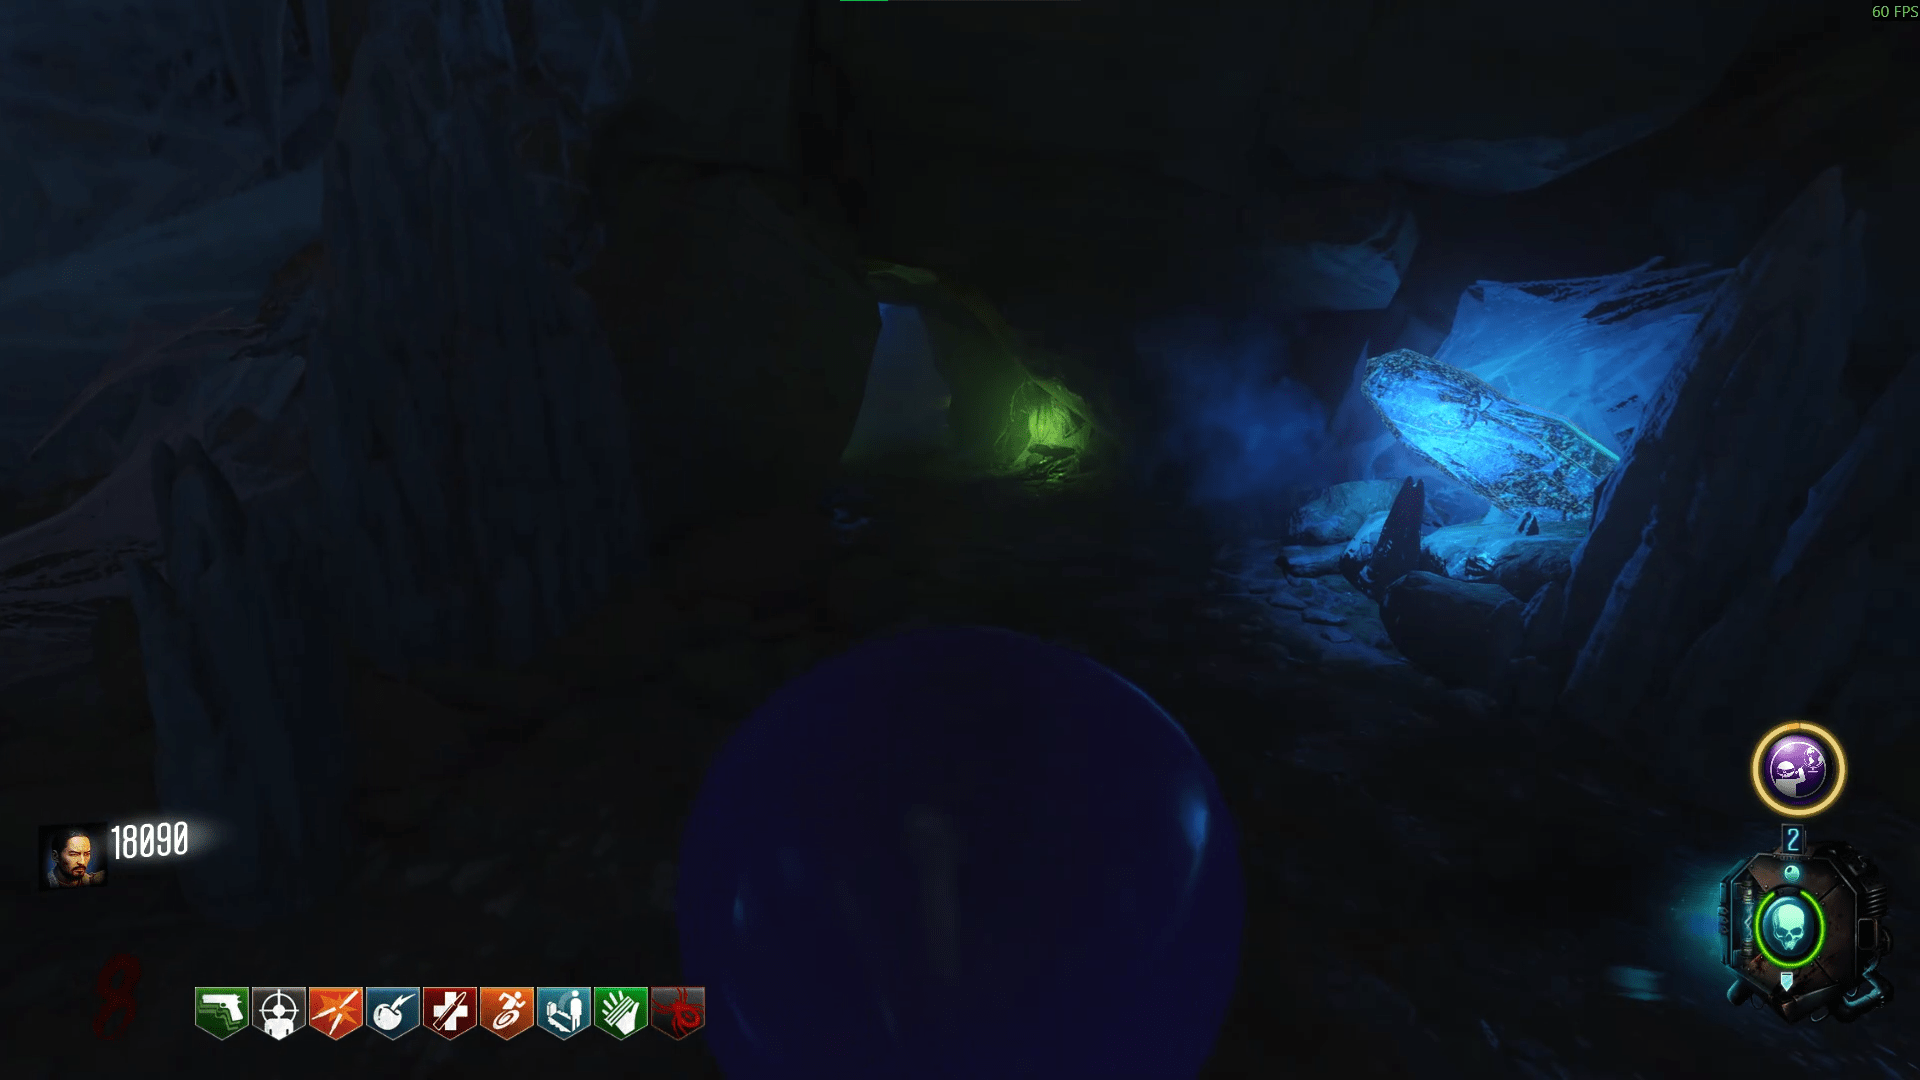
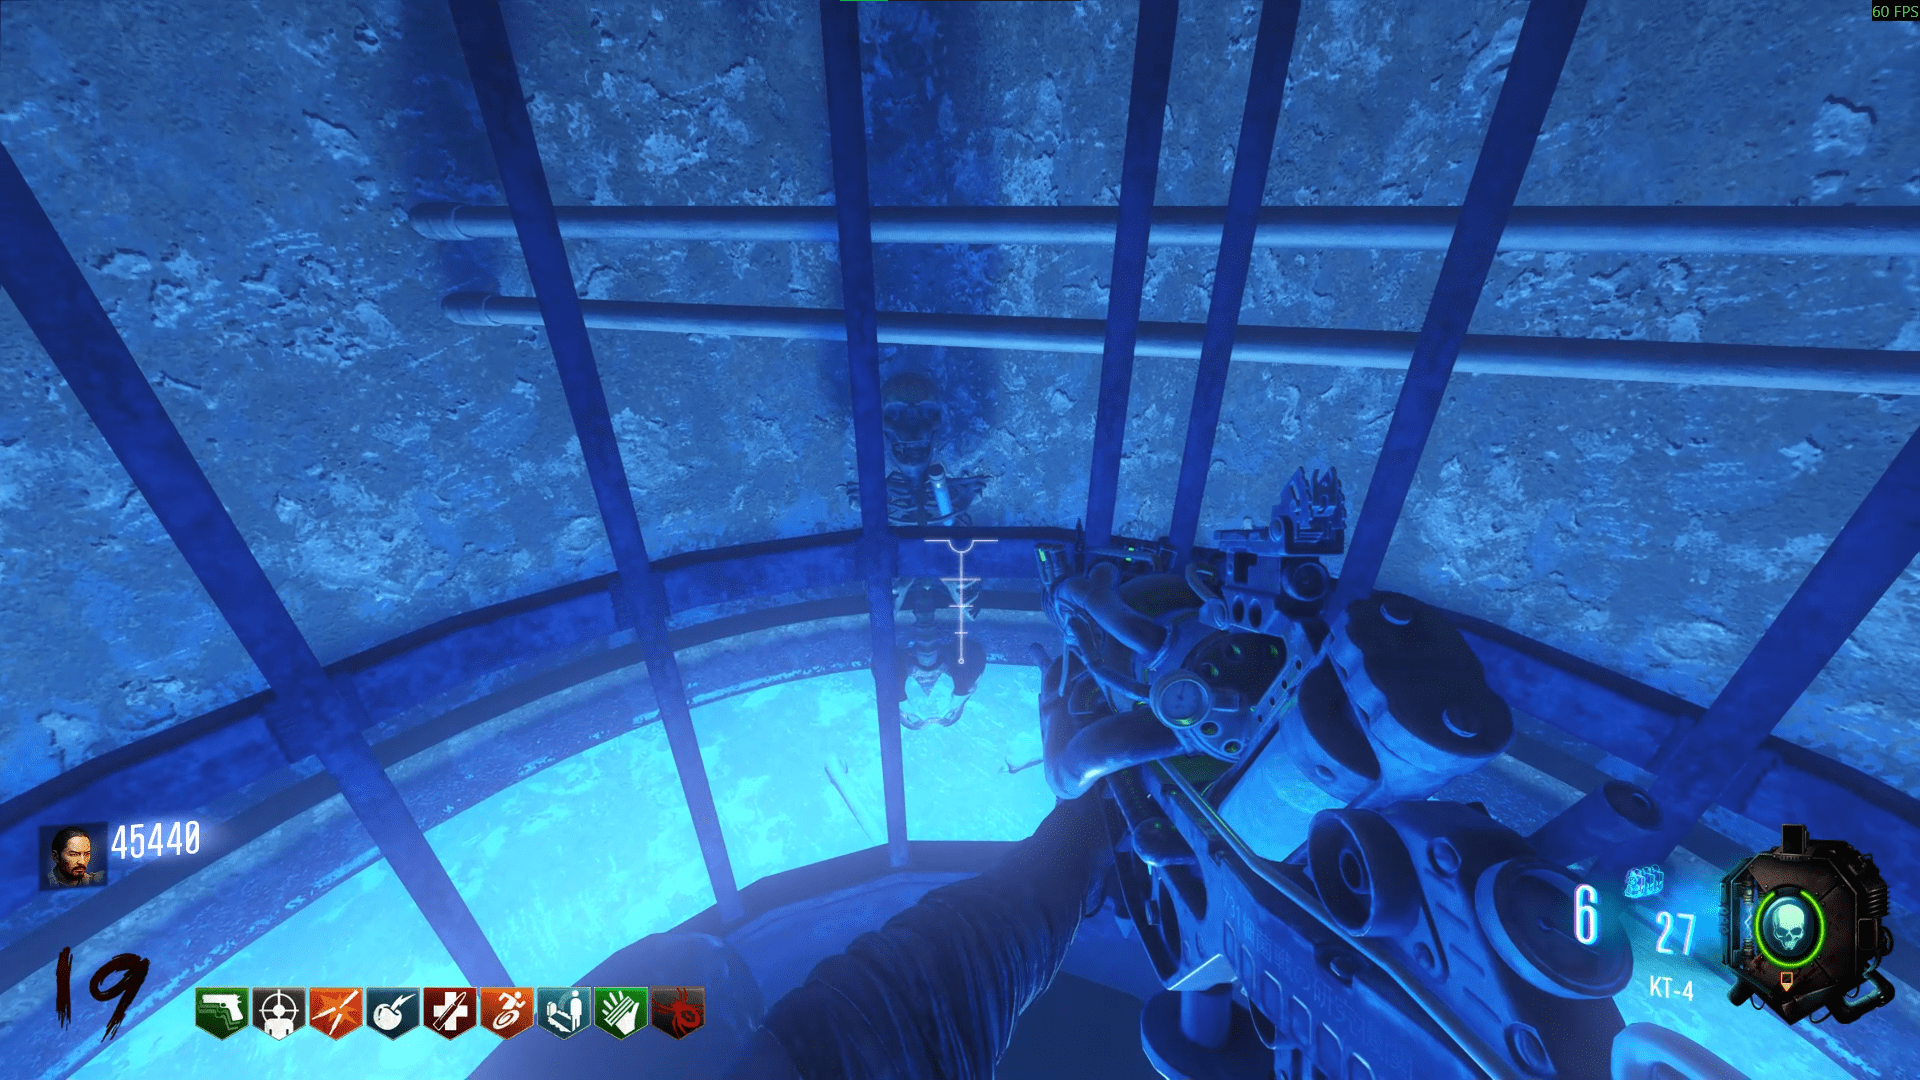
The first interaction is in the purple water room, right-most door after opening the Bunker. You will notice a torn page on the wall opposite the purple water. Bring out Nan-Sapwe and mesmerise the page to bring the other piece back. Now run to the lift (elevator for you Americans) which is opposite the Gobblegum machine after opening the bunker and mesmerise the doorway to the left of it. Finally, run all the way down to the KT-4 room, open the door to Mule Kick and swim down into the water. Further down into the water you'll notice a blue cavern, swim down it and mesmerise the final wall to the right of the KT-4 plant.
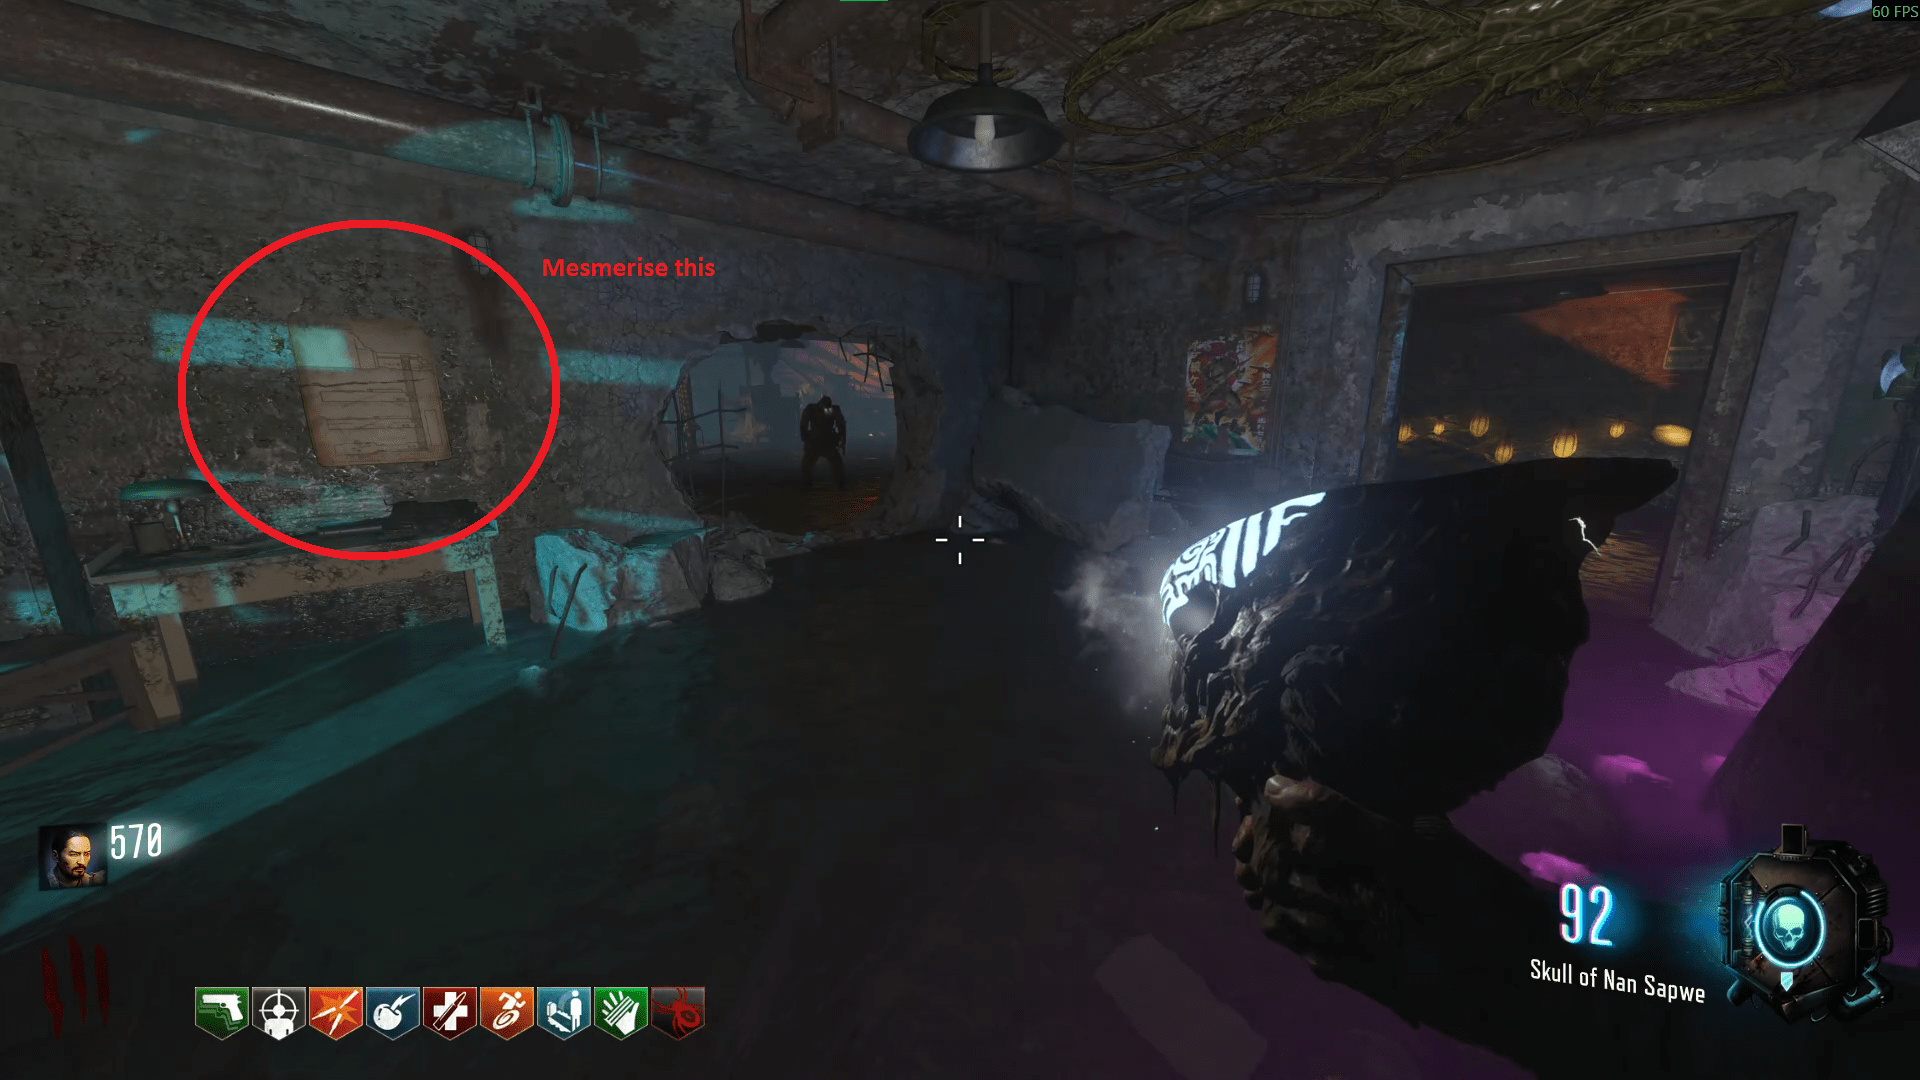
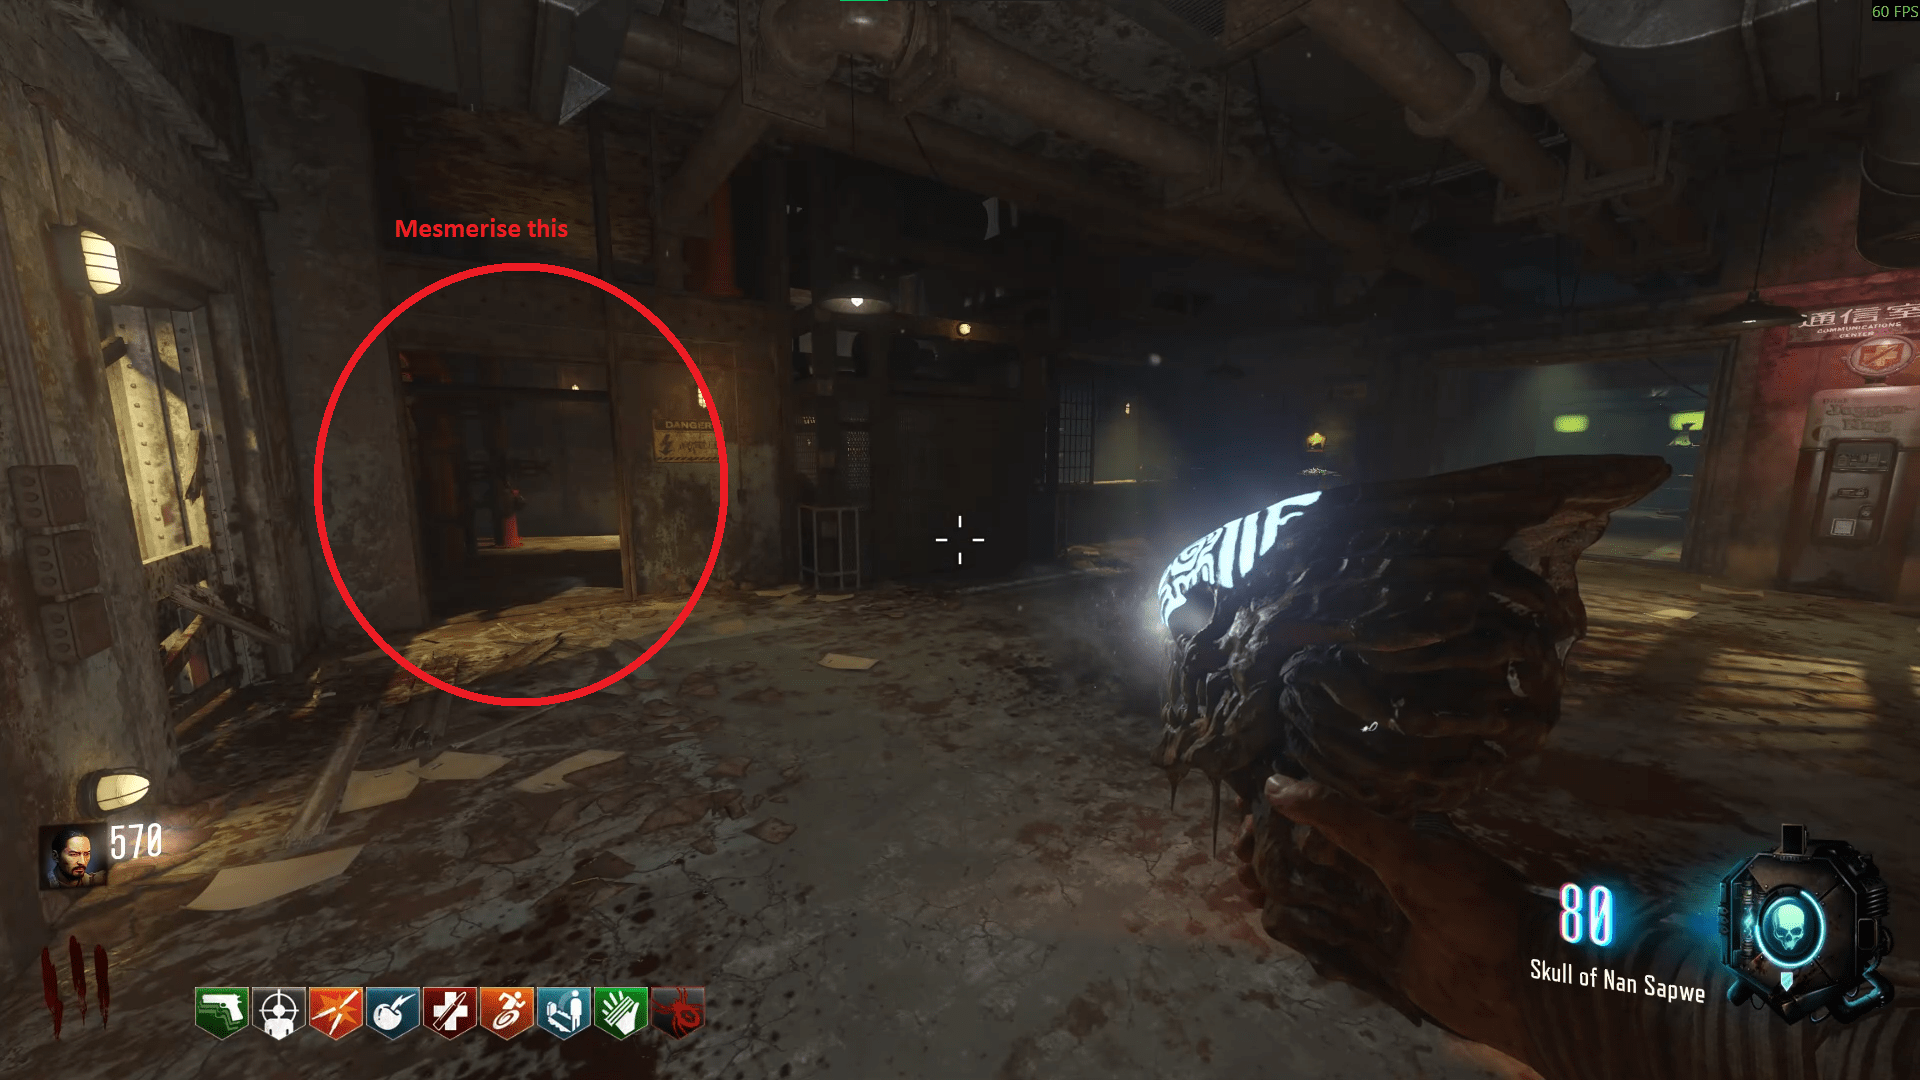
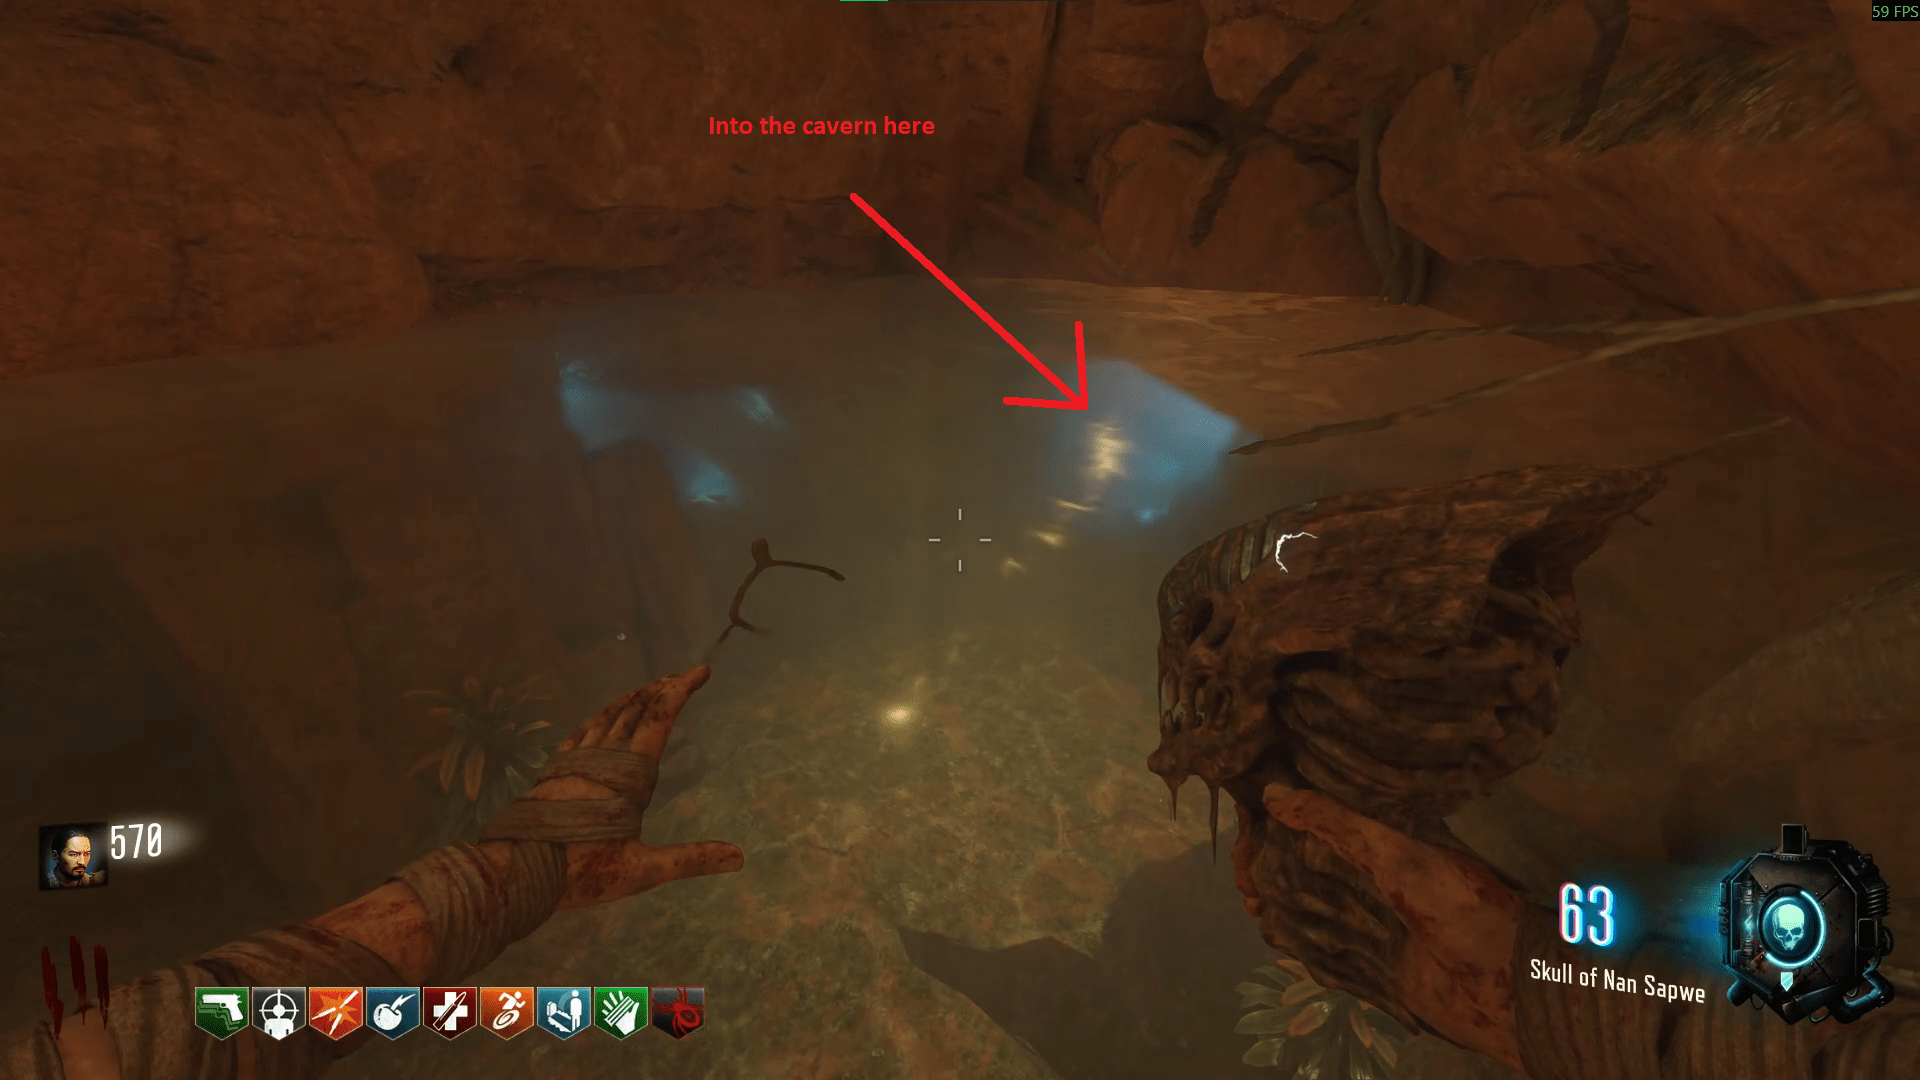
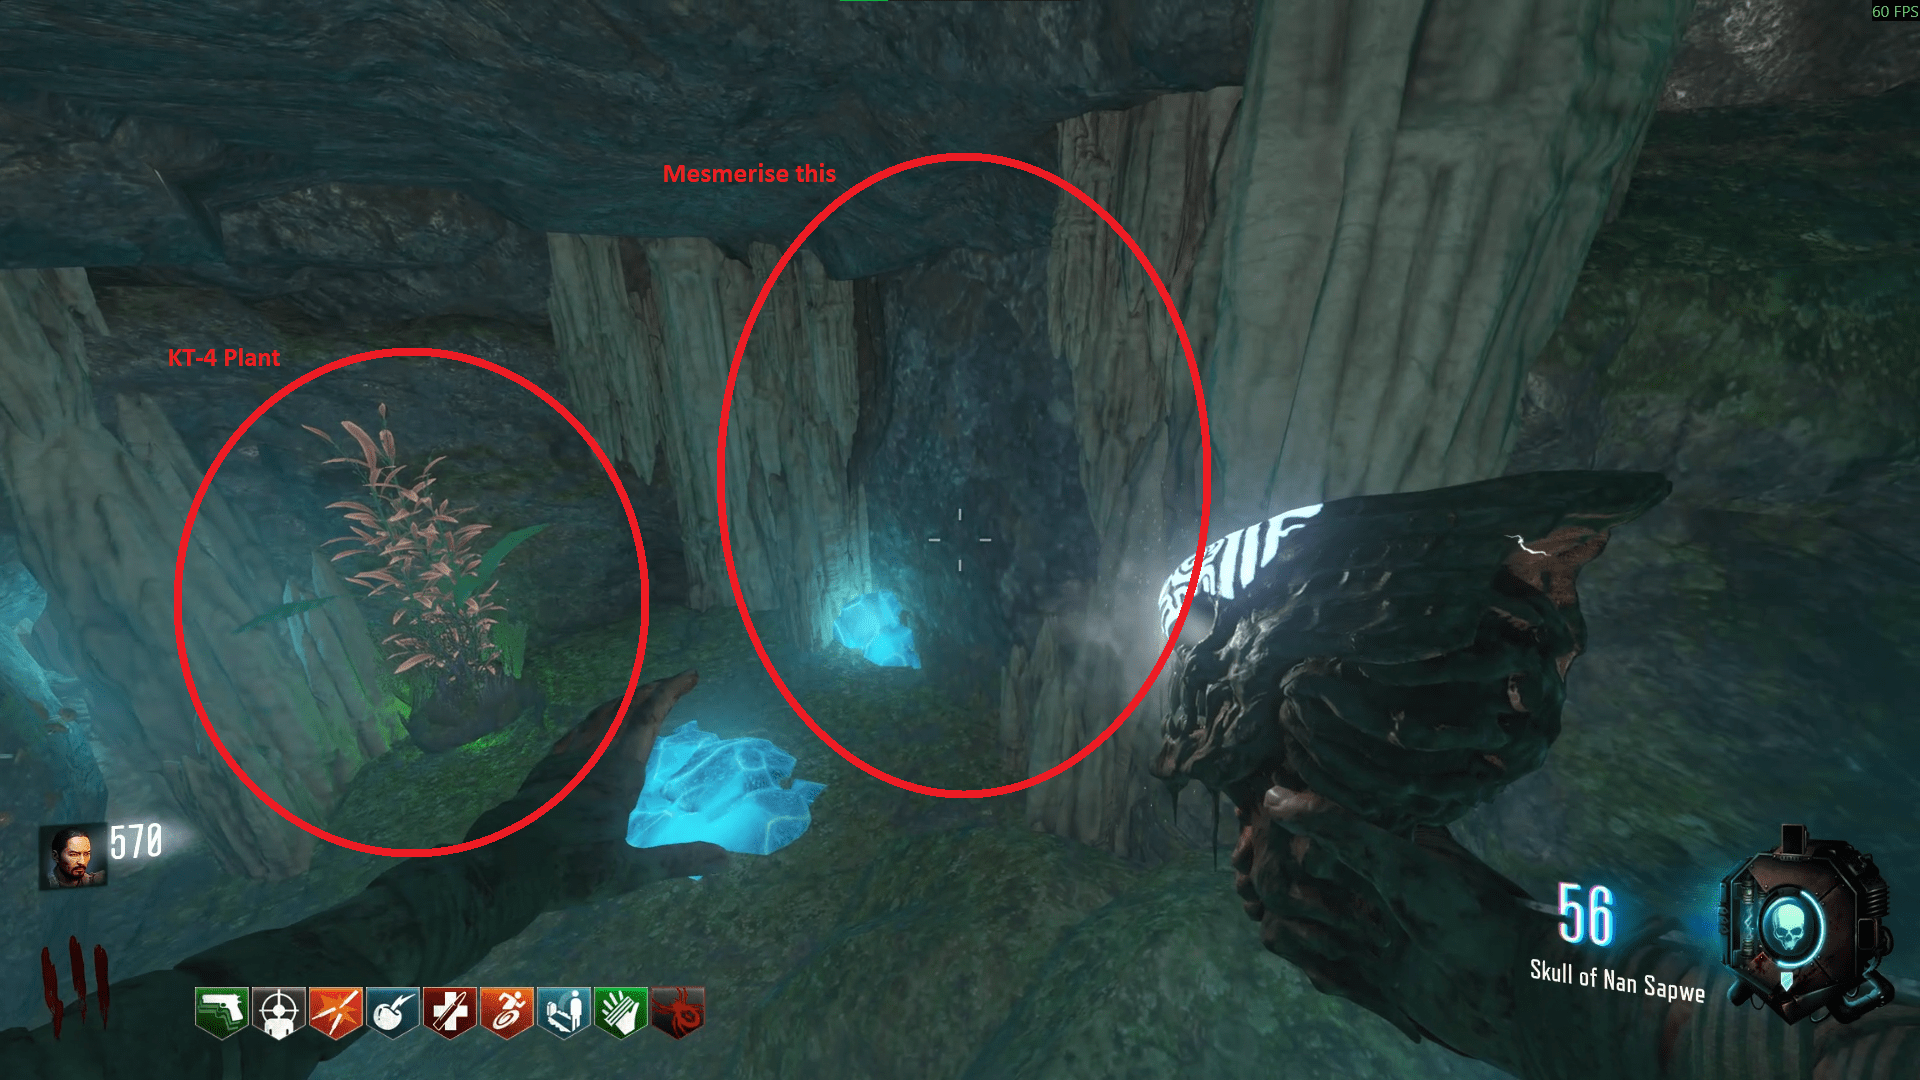
I'll mention the KT-4 plant again but you should get it now, so you don't have to go down more than you need to.
The following steps, or cogs, can be done in any order but try to complete your challenges throughout all of the steps so you can get the lightning as soon as possible.
- Green Vial, dropped from a zombie in the Green Lab area.
- Spider Venom, drawn from a spider in the Blue lab area.
- A plant from the underwater cavern, mentioned previously.
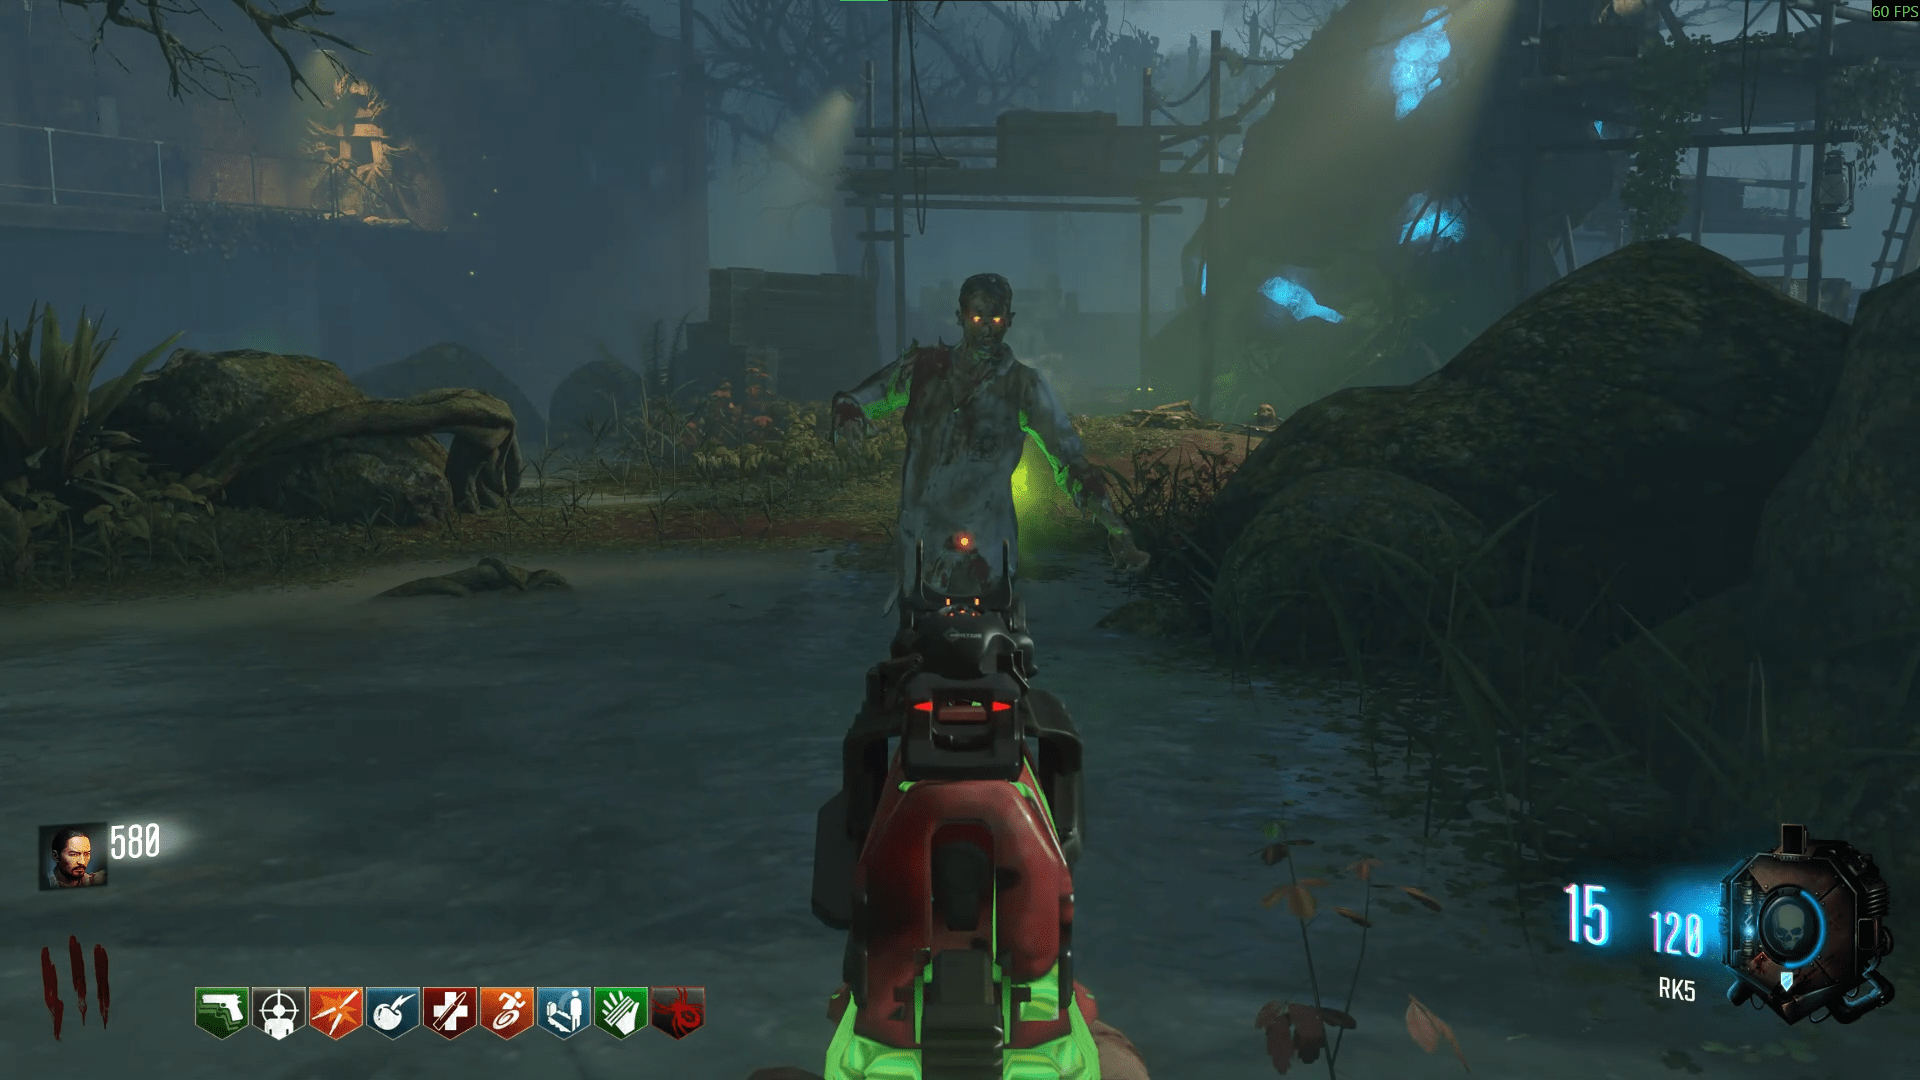
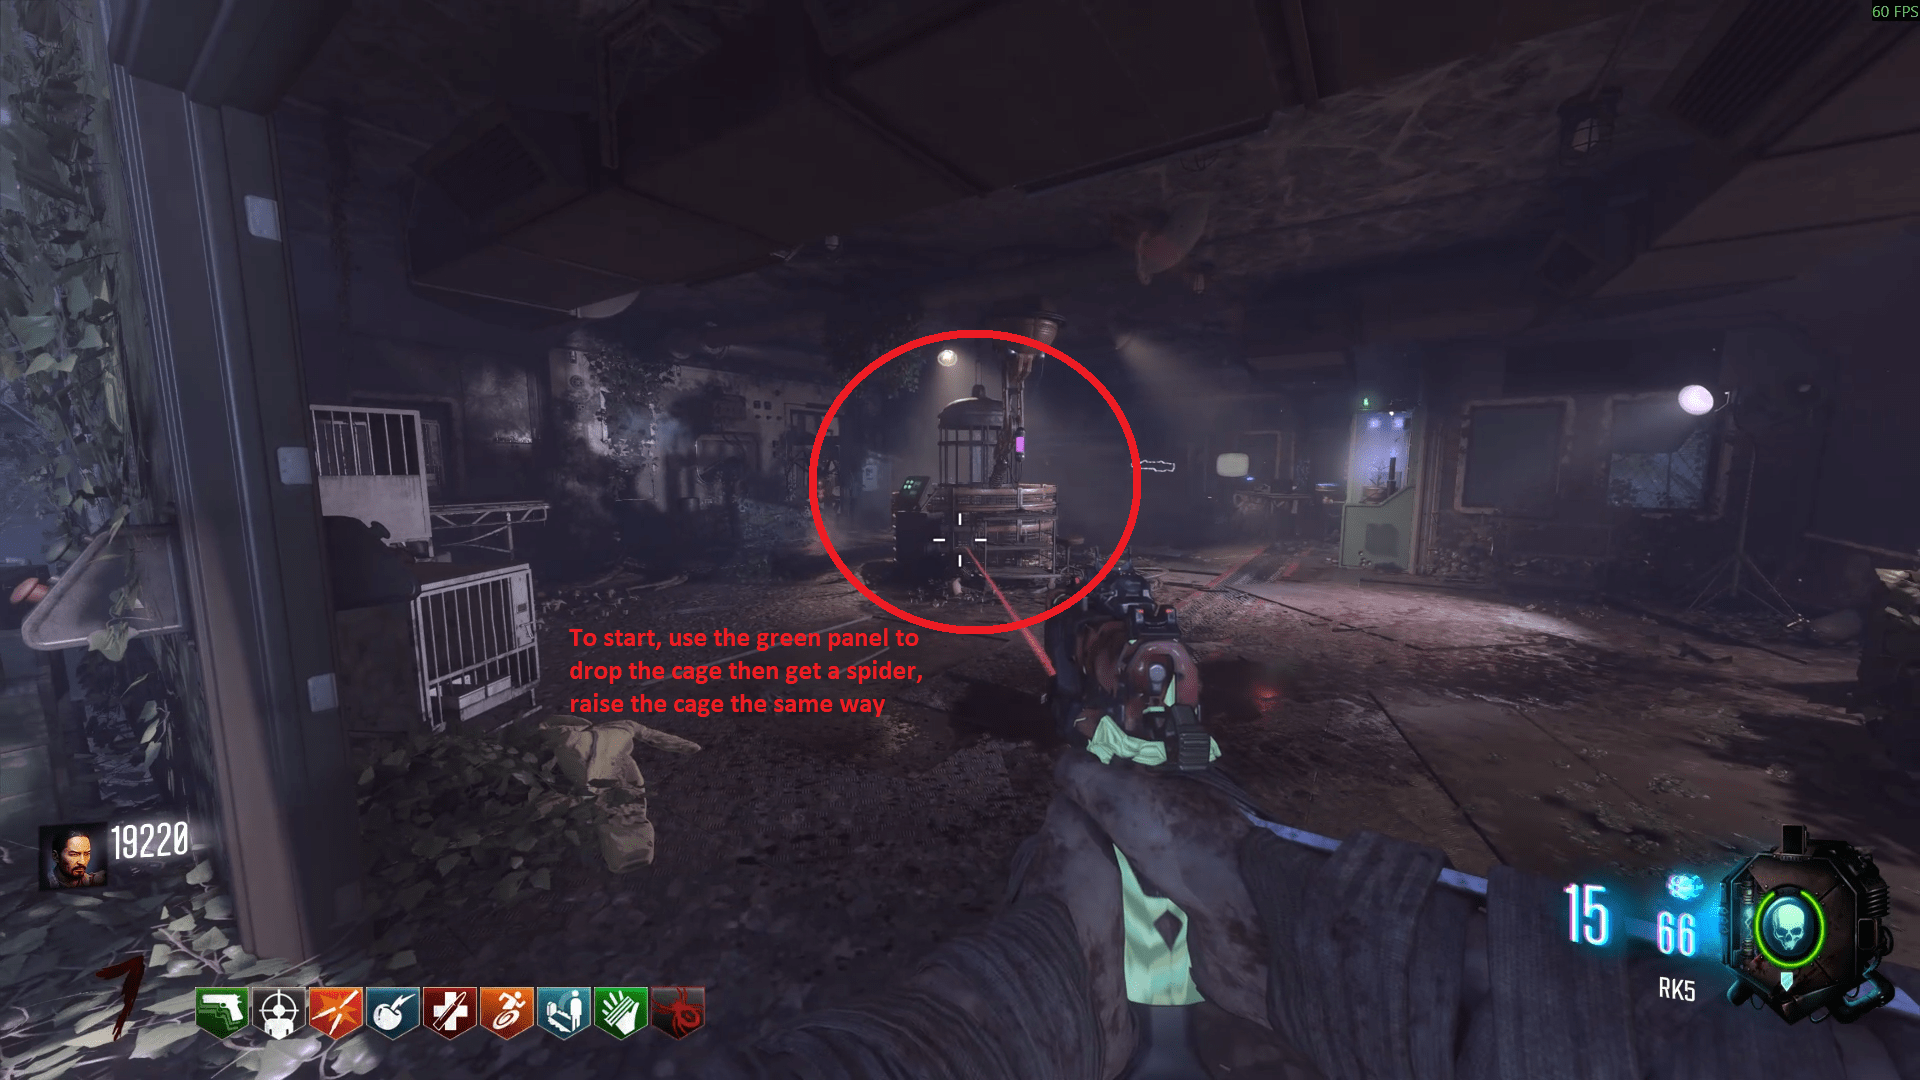
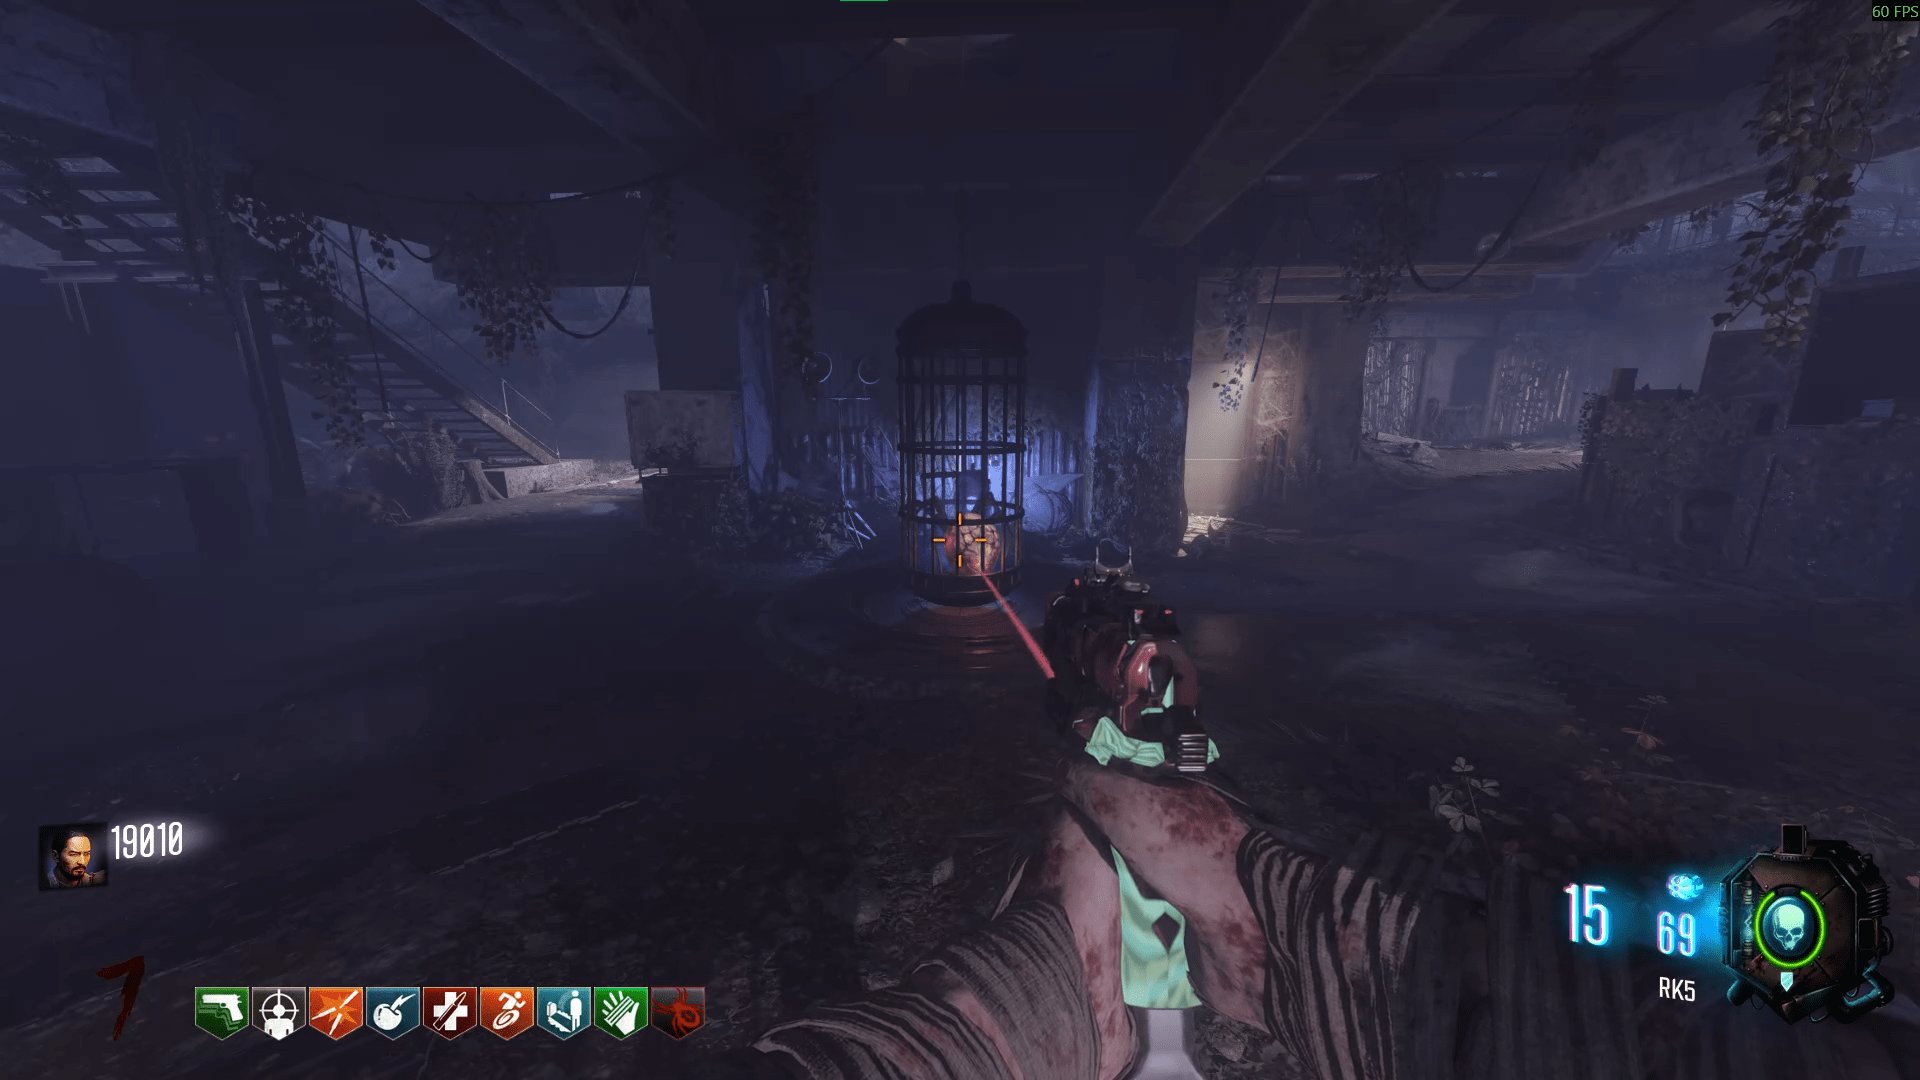
You can view where to get the plant above. You can build the KT-4 in the specialised workbench next to the fourth skull pedestal. The KT-4 is on the left wall, while the Masamune is on the front wall. Once you've built the KT-4, now you fight the Mother Spider.
Behind the blue water pond, shoot the big web with the KT-4 and make sure you're somewhat equipped. Enter to fight the spider. Just shoot the yellow foaming mouth when it appears and avoid the legs slamming down. Upon death, run over and pick up one of its teeth then just before the doorway in front of you, use Anywhere but Here! to teleport to a hatchery with the cog.
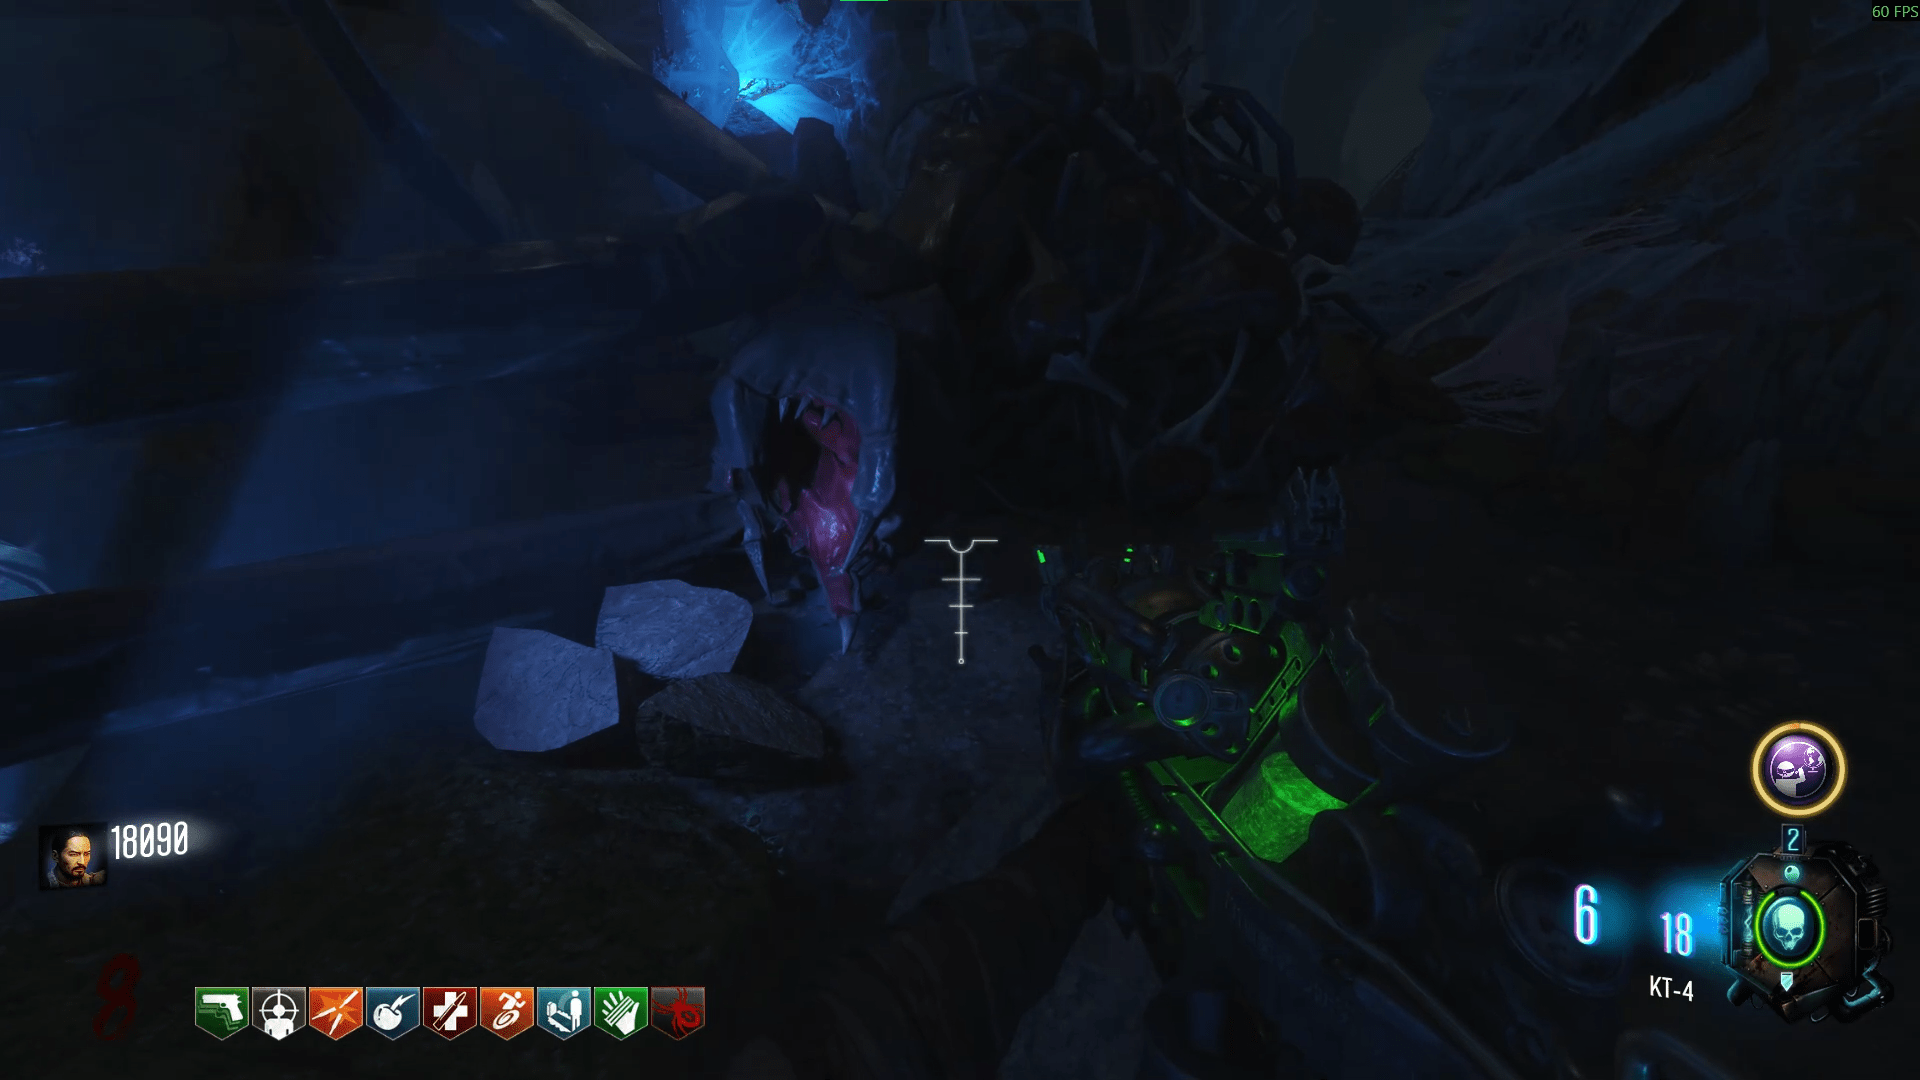
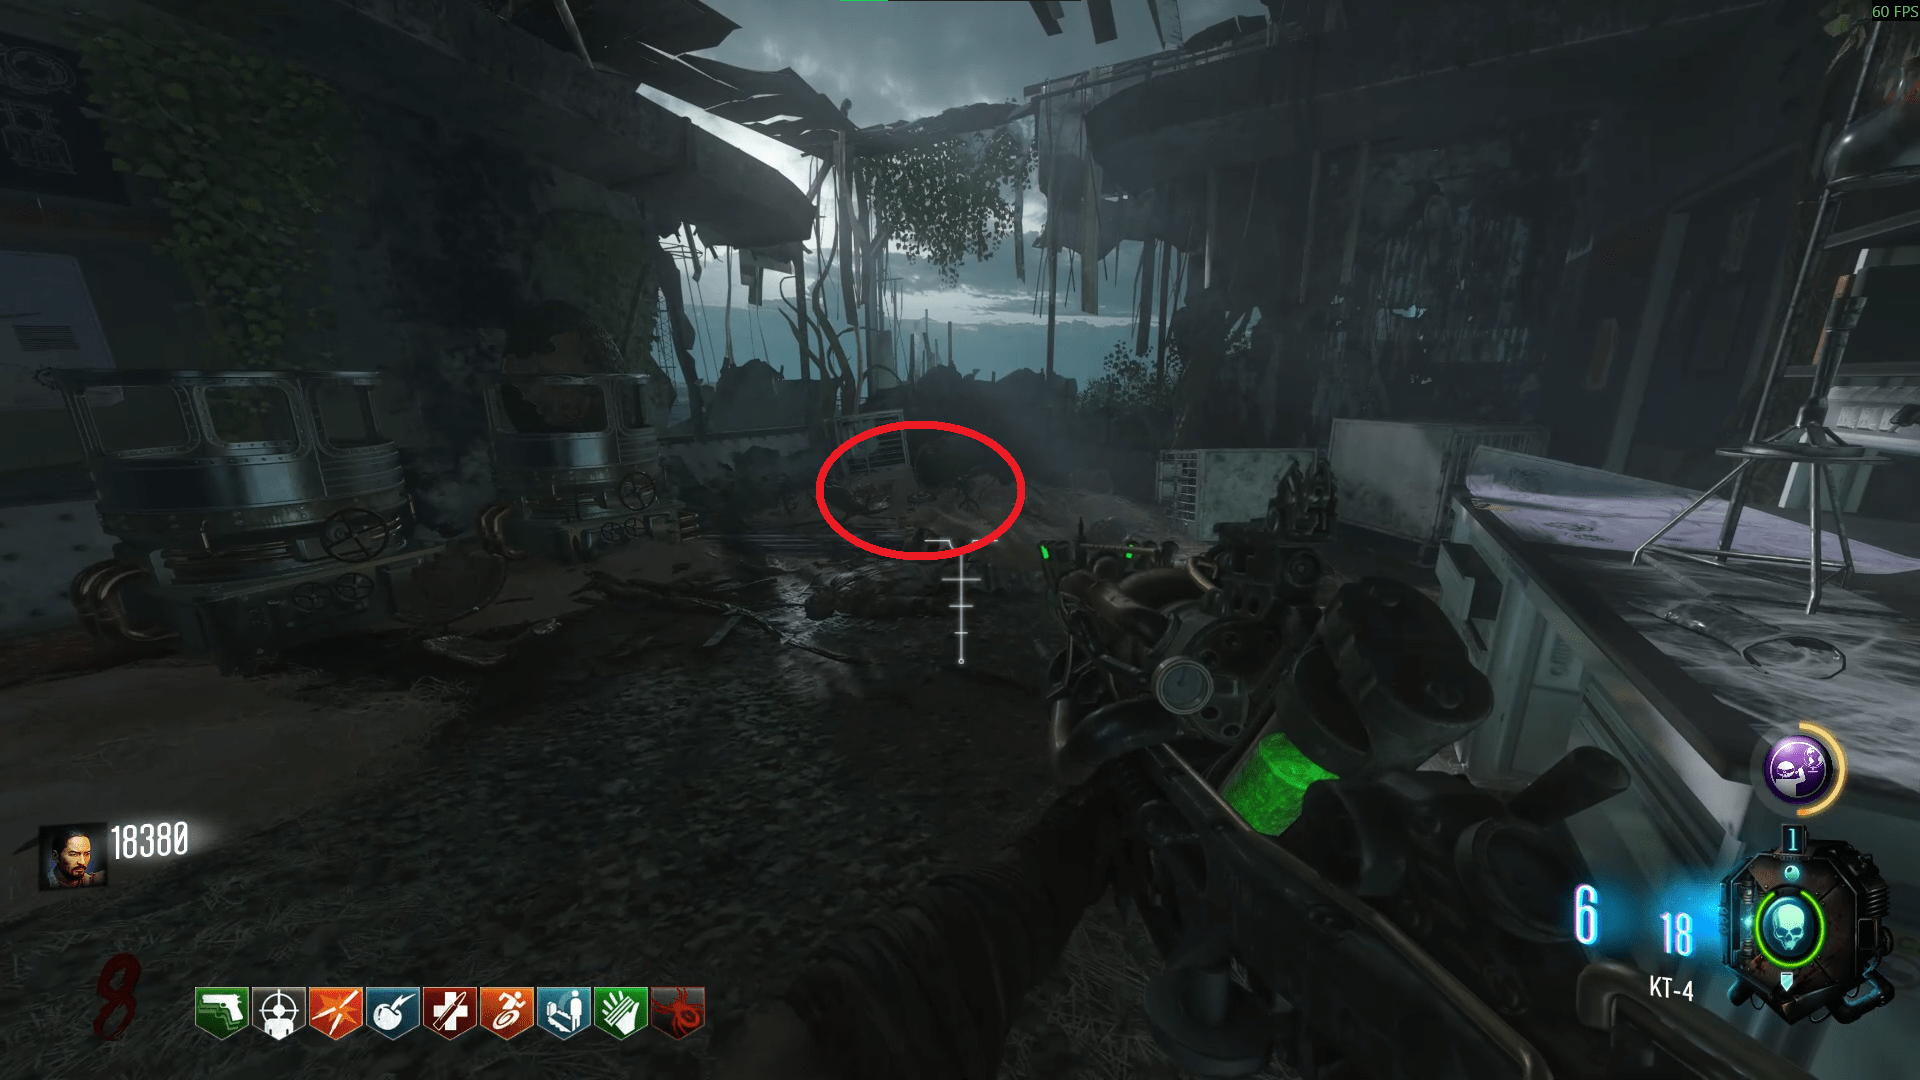
- Eat a fruit grown by a plant (Fruit Plant).
- Kill eight Spiders with spores.
- Kill three zombies as they are mutating (glowing orange and being pulled into the ground).
- Get thirty kills with the Propeller Trap (fallen plane above the second skull pedestal).
- Shoot the heads off of five mutated zombies (Thrashers, lumbering giants with spores on them).
- Obtain a power up from a plant (Basic Plant).
- Kill fifteen zombies attracted to a plant (Attraction Plant).
- Kill twenty zombies while underwater.
- Kill ten spore-infected zombies with headshots (zombies with orange mist on them).
- Kill a Thrasher before it becomes enraged (KT-4, Marshalls and shotguns are fantastic).
- Get twenty kills with the Fan Trap (trap between Bunker entrance and AA cannon).
- Water the same plant three times.
- Water five plants.
- Shoot five spores.
- Use a spore to regain air underwater (can do this while doing mesmerise and KT-4 plant).
- Destroy five webs with explosives.
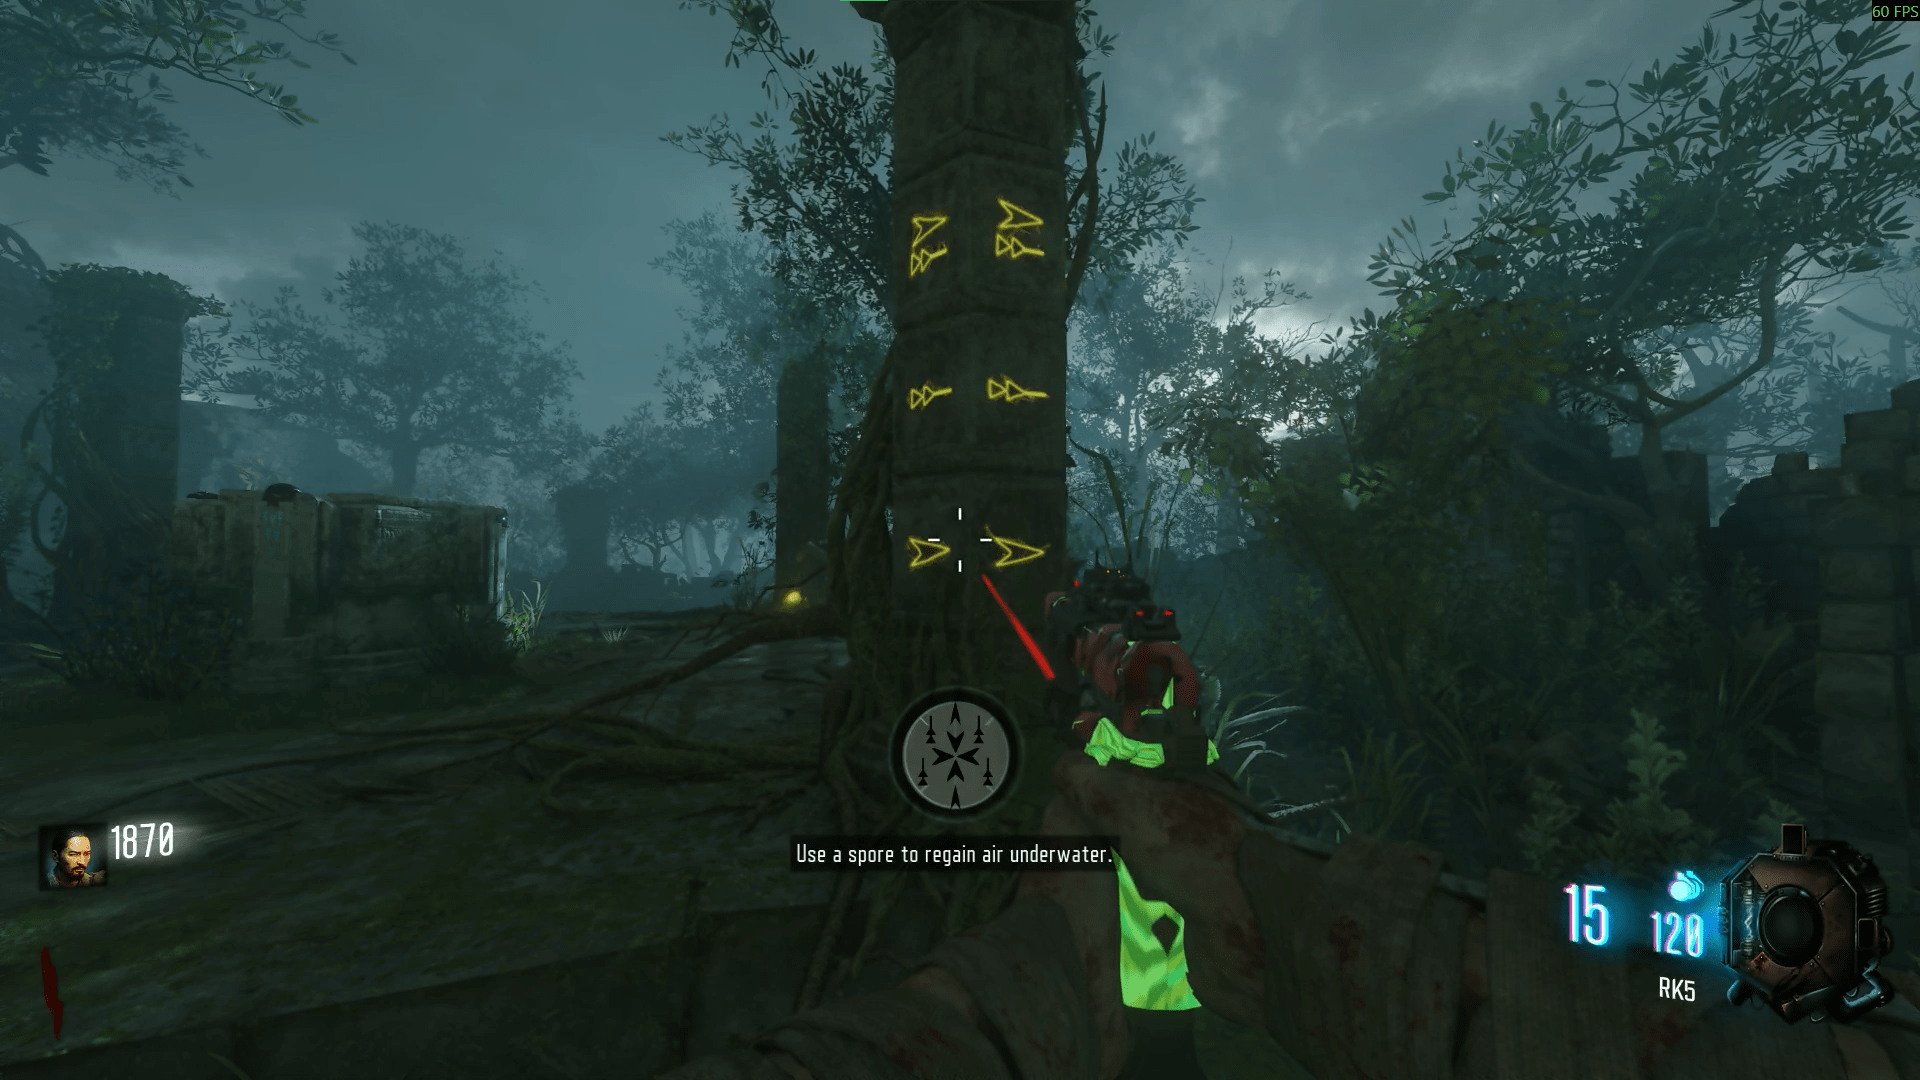
Beware that these are not 100% guaranteed, just the main way to obtain the plant.
There is a chance you can get the Clone Plant and the Epic Crawler Hour™ plant through these same methods, so take caution and be patient.
The Basic Plant -- Water Blue 3 times -- Charged KT-4 shot each water is optional for better rewards and the AA bullet.
The Fruit Plant -- Water Blue, Purple and Green -- Optional charged KT-4 can be used here too.
The Attraction Plant -- Water Purple 3 times -- Optional charged KT-4 can be used here too.
Upon completion of all everyone's challenges, lightning will now have a chance to strike the pillars.
For the next part, you will need the shield, outlined below are the locations for it;- Blue water Lab - All three are below the generator itself, on load bearing walls.
- Green water Lab - All three are on trees on the way out of the challenge pillars area.
- AA Cannon area - Two are on piles of rubble, either side of the cannon, one is on a box.
Zetsubou No Shima
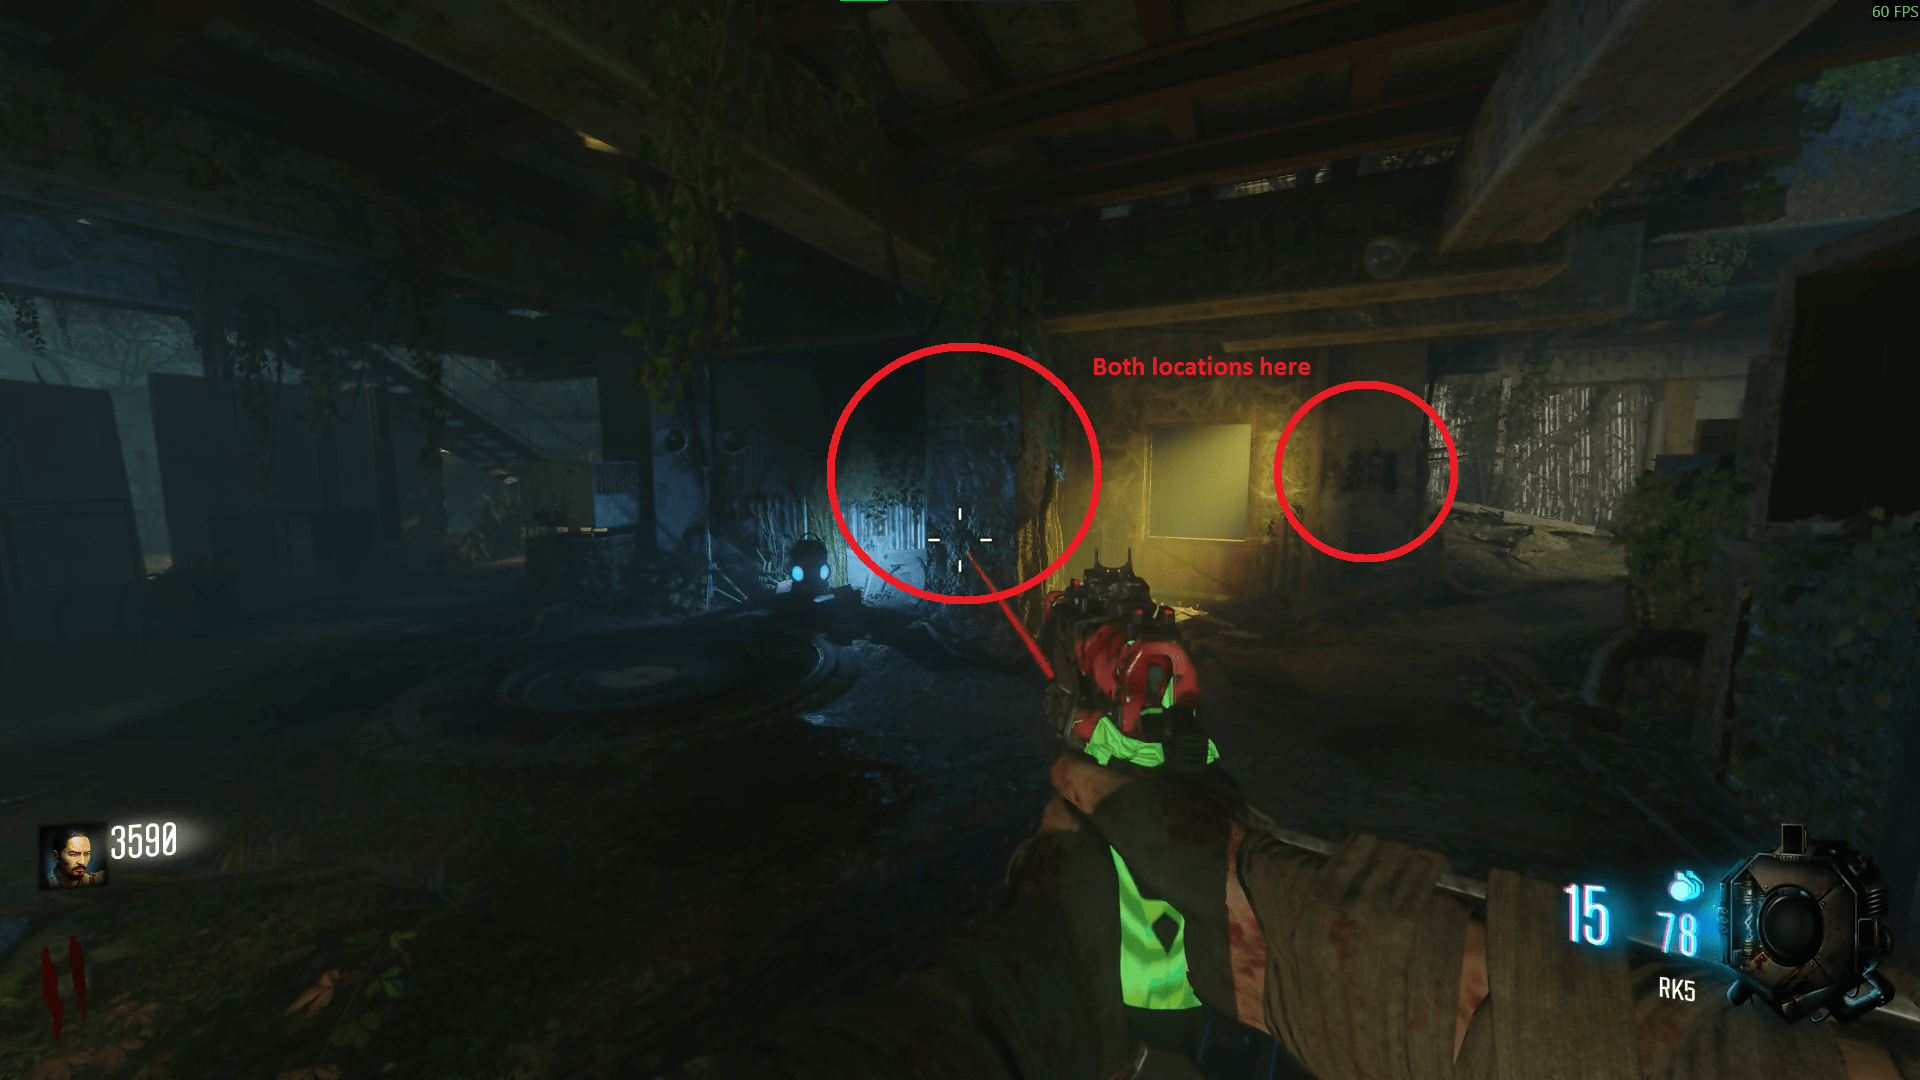
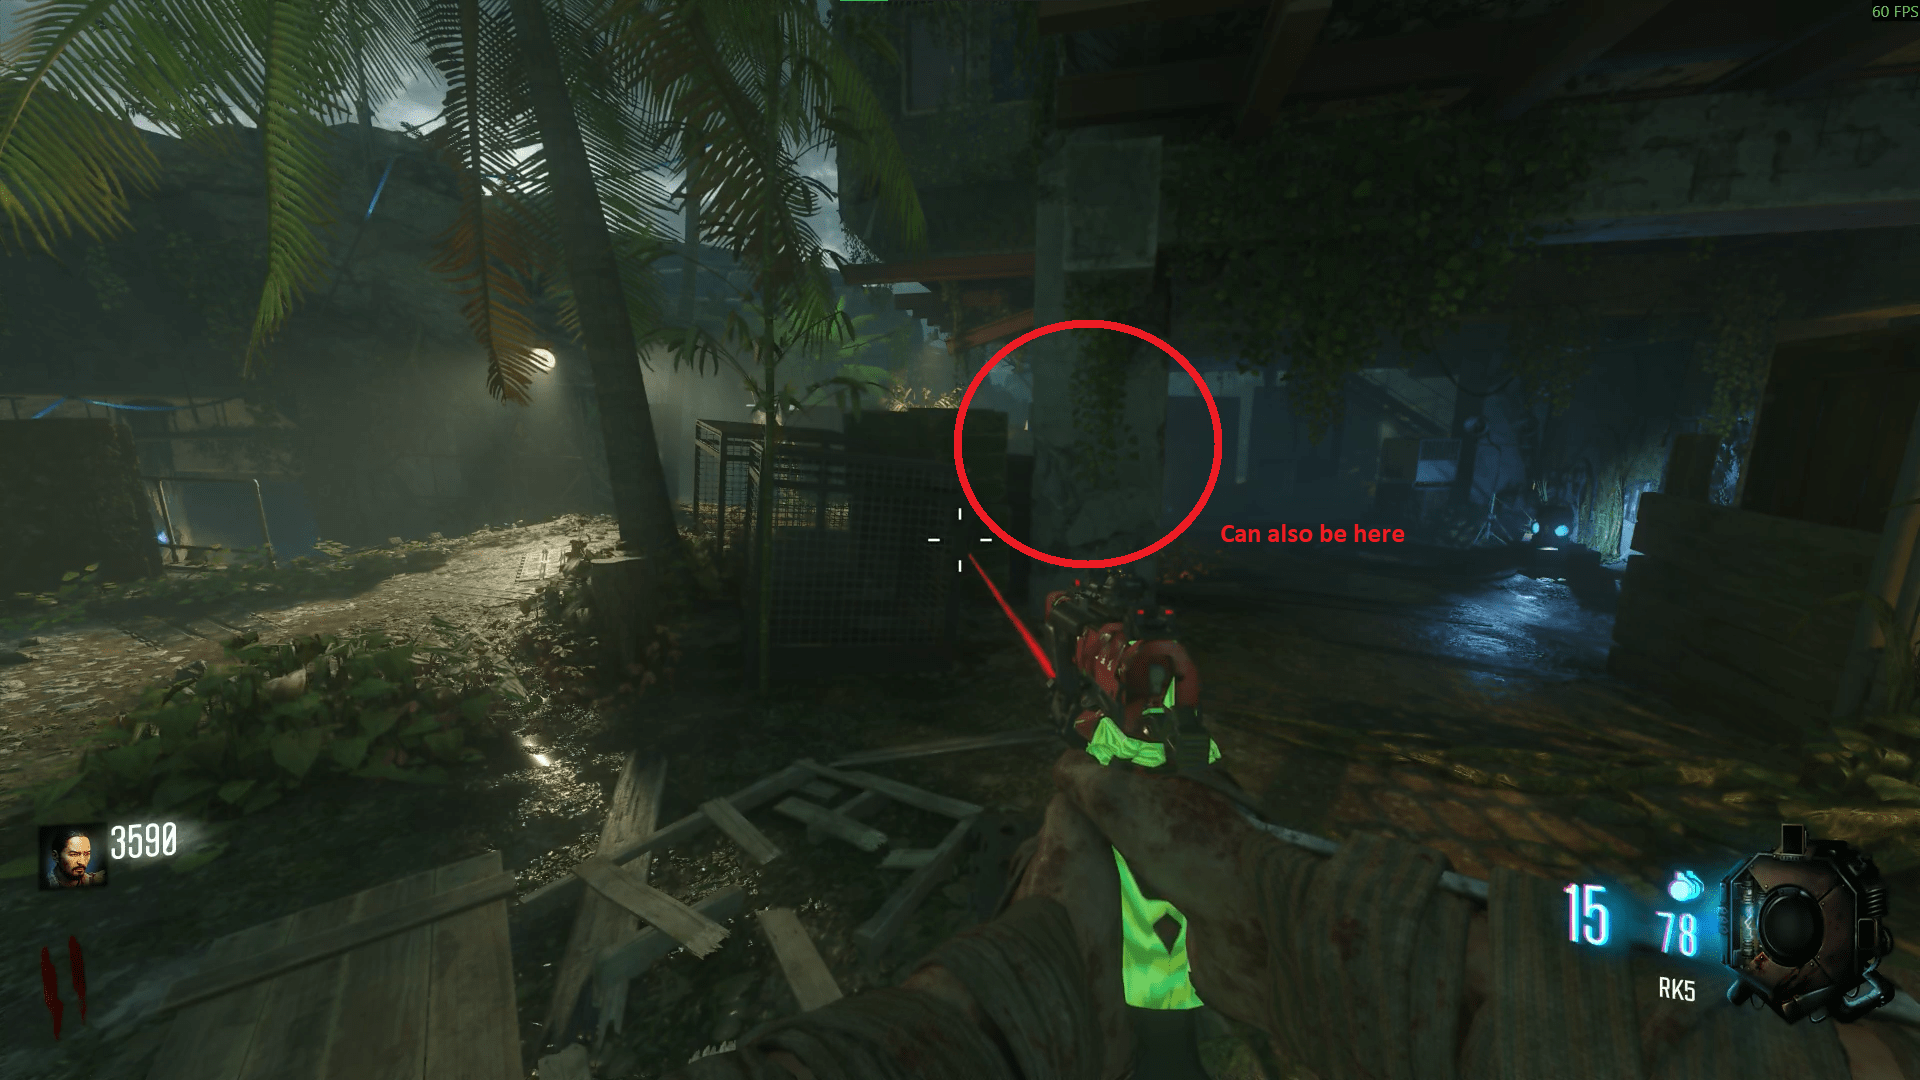
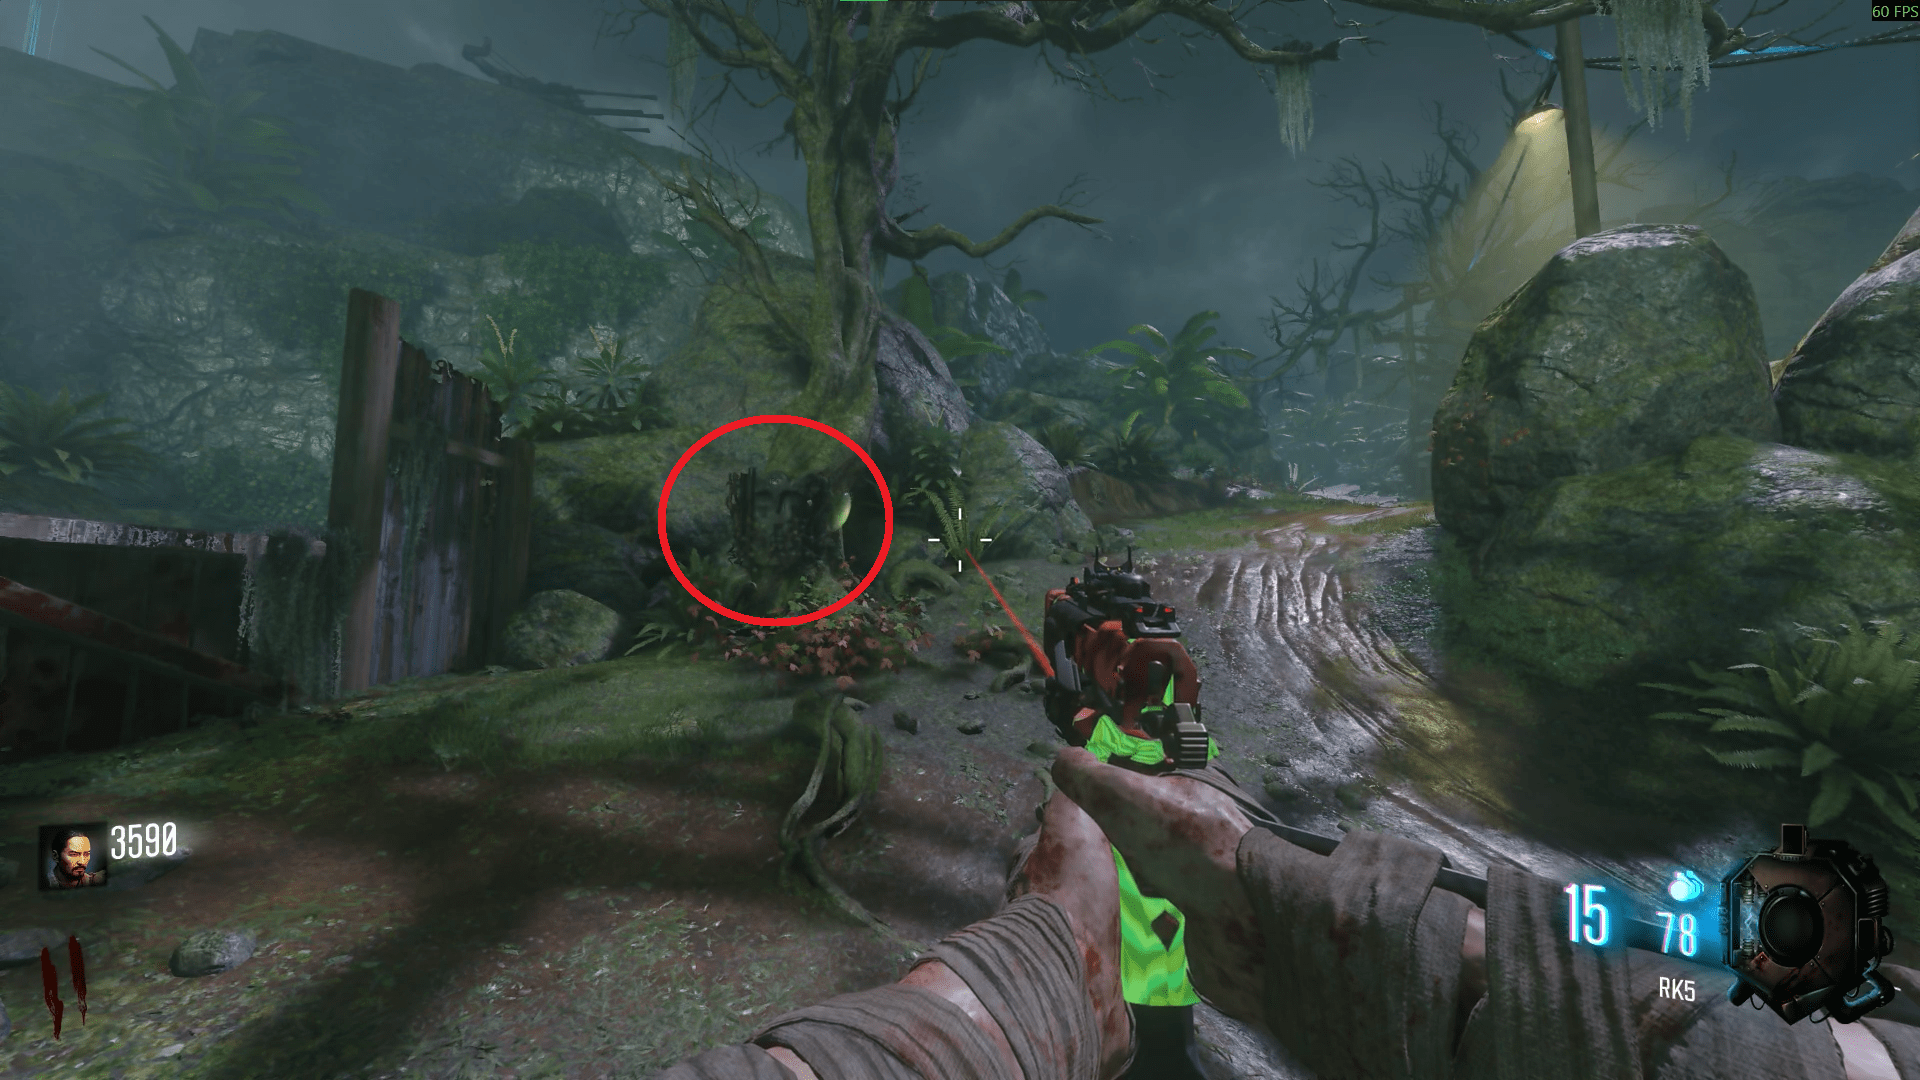
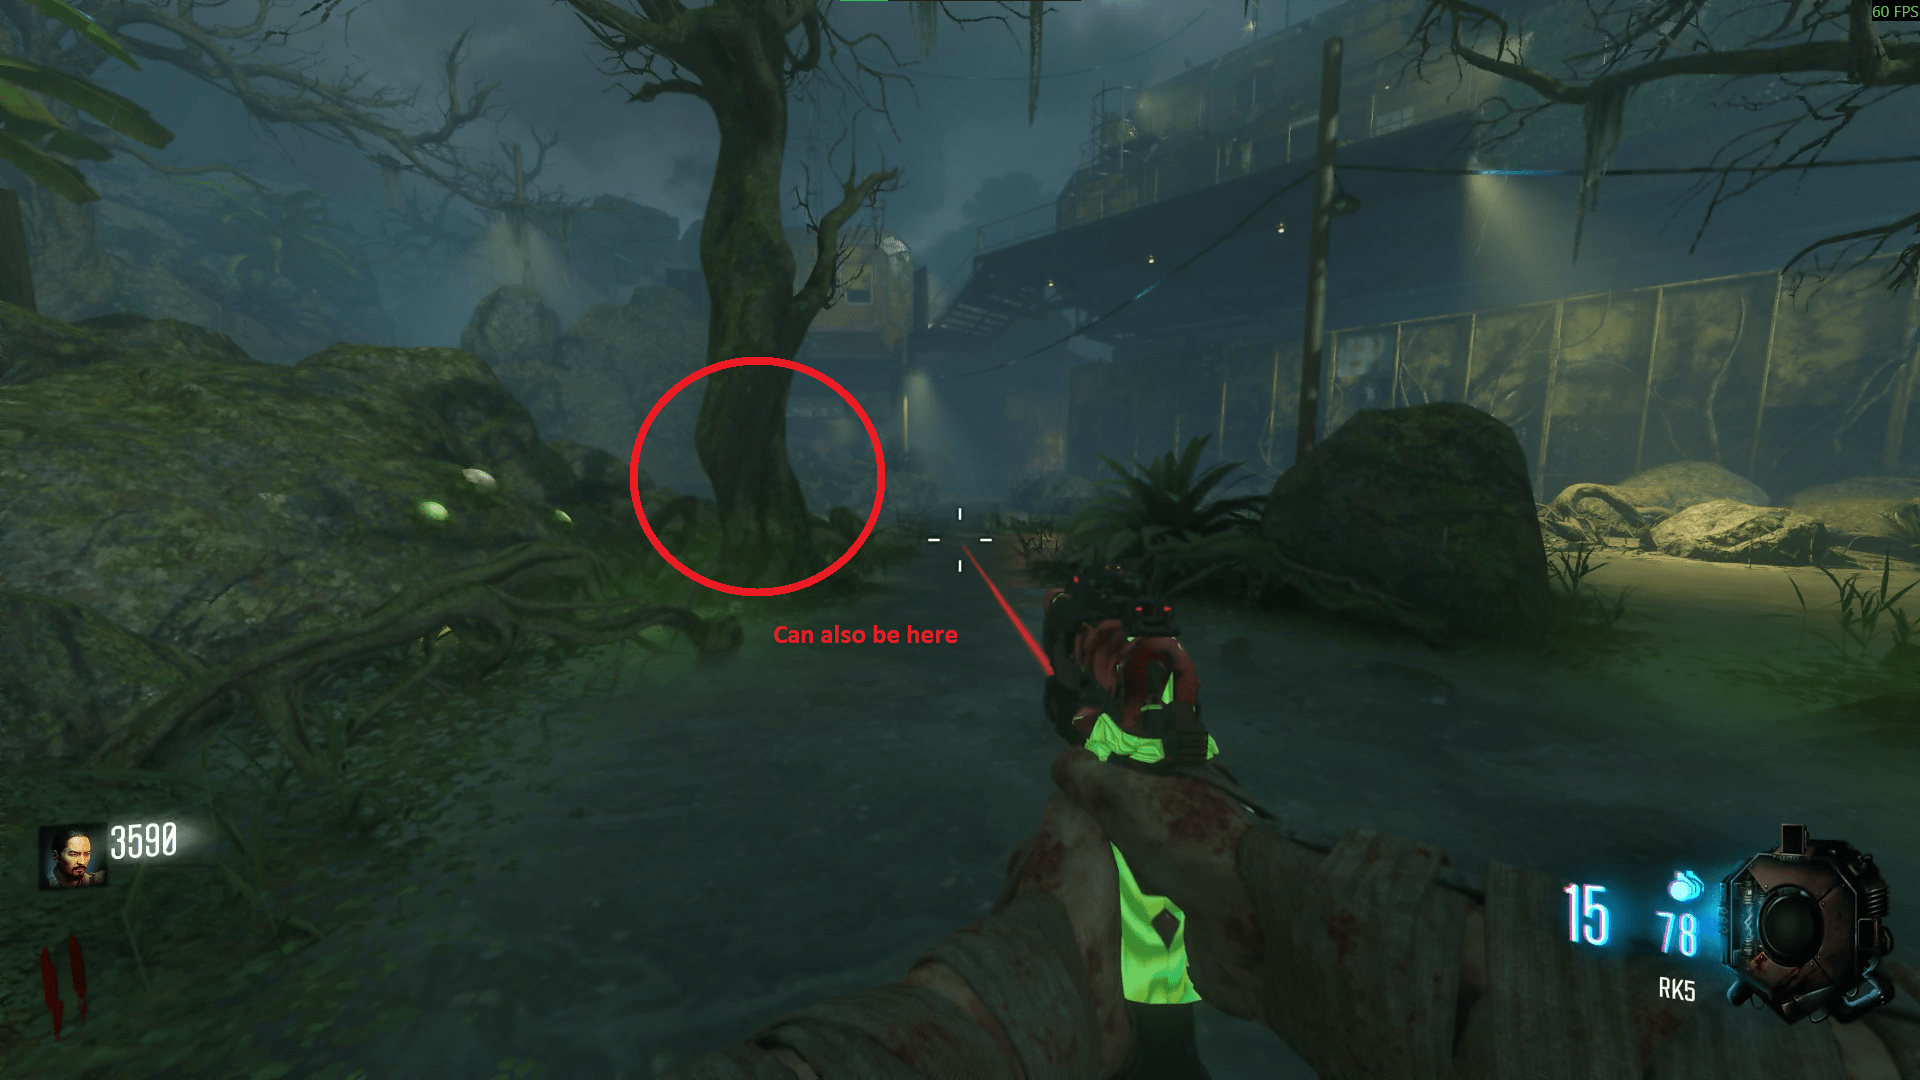
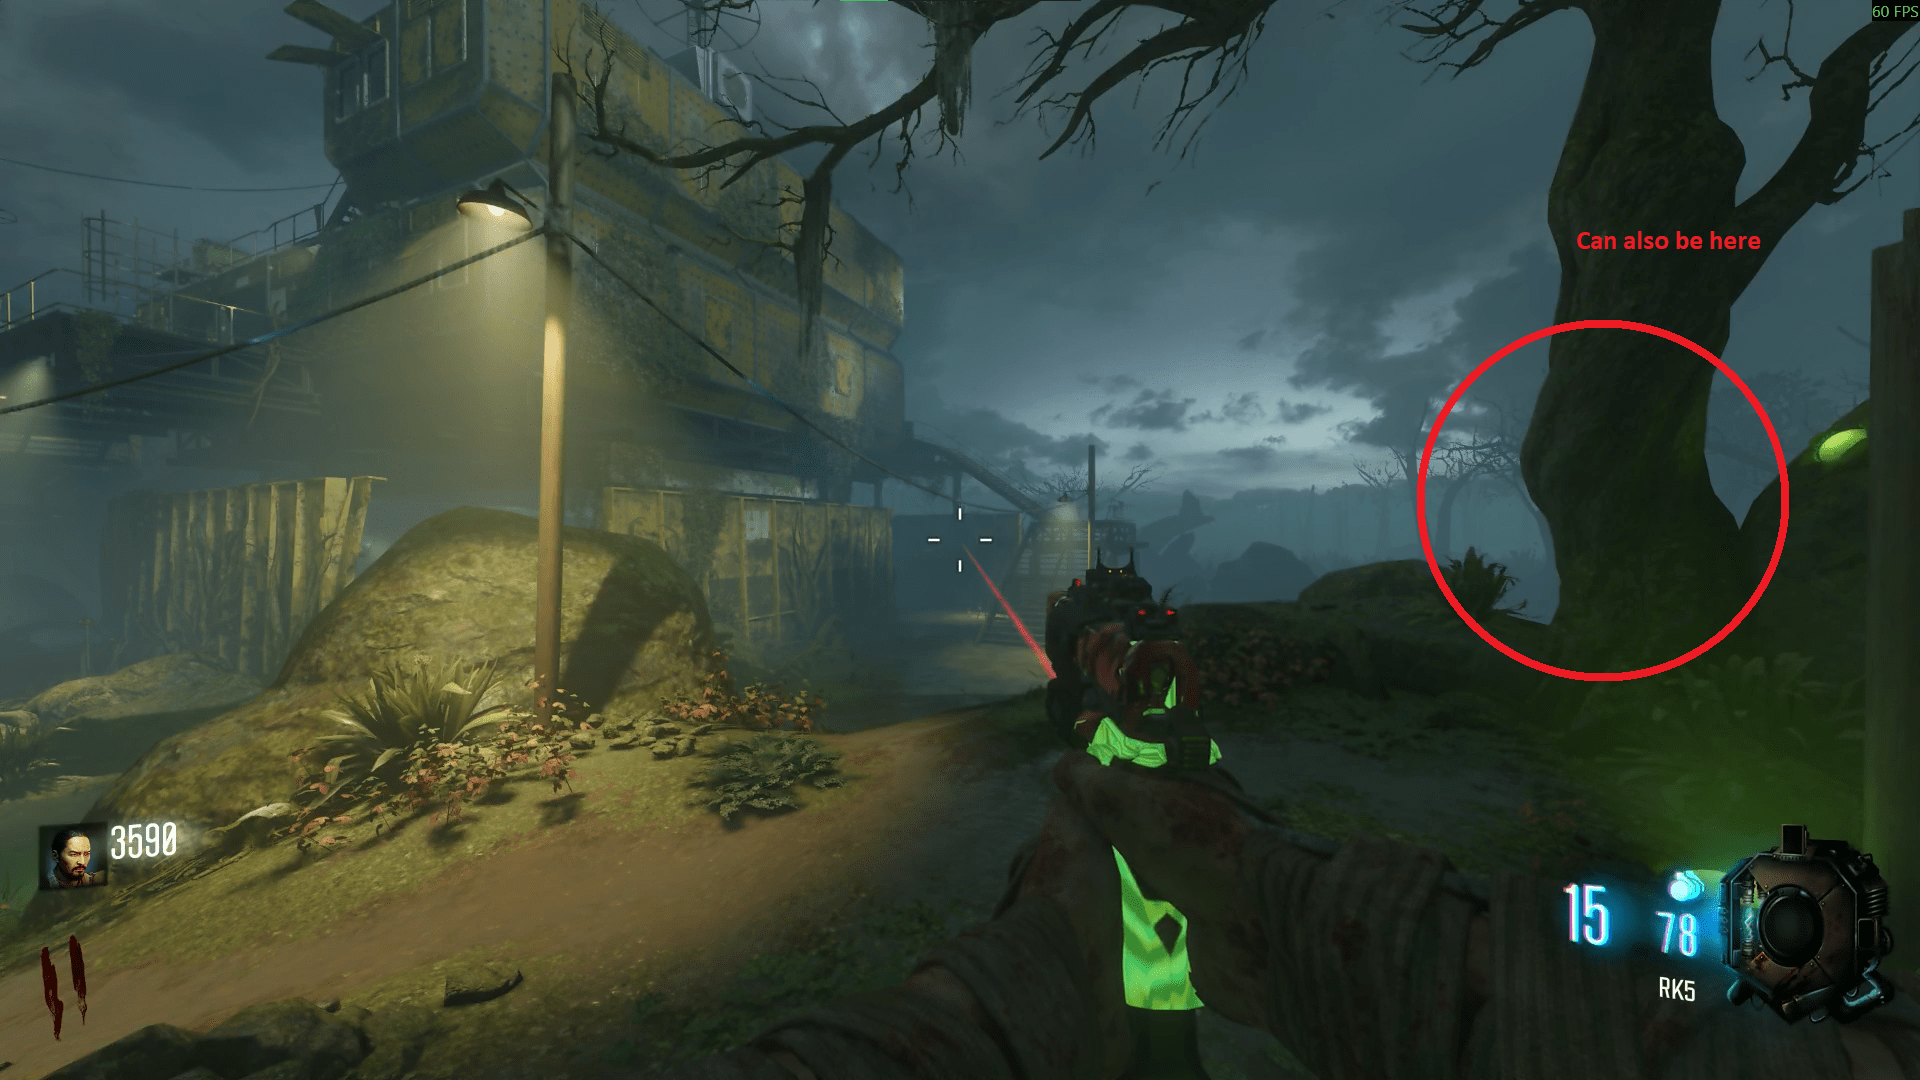
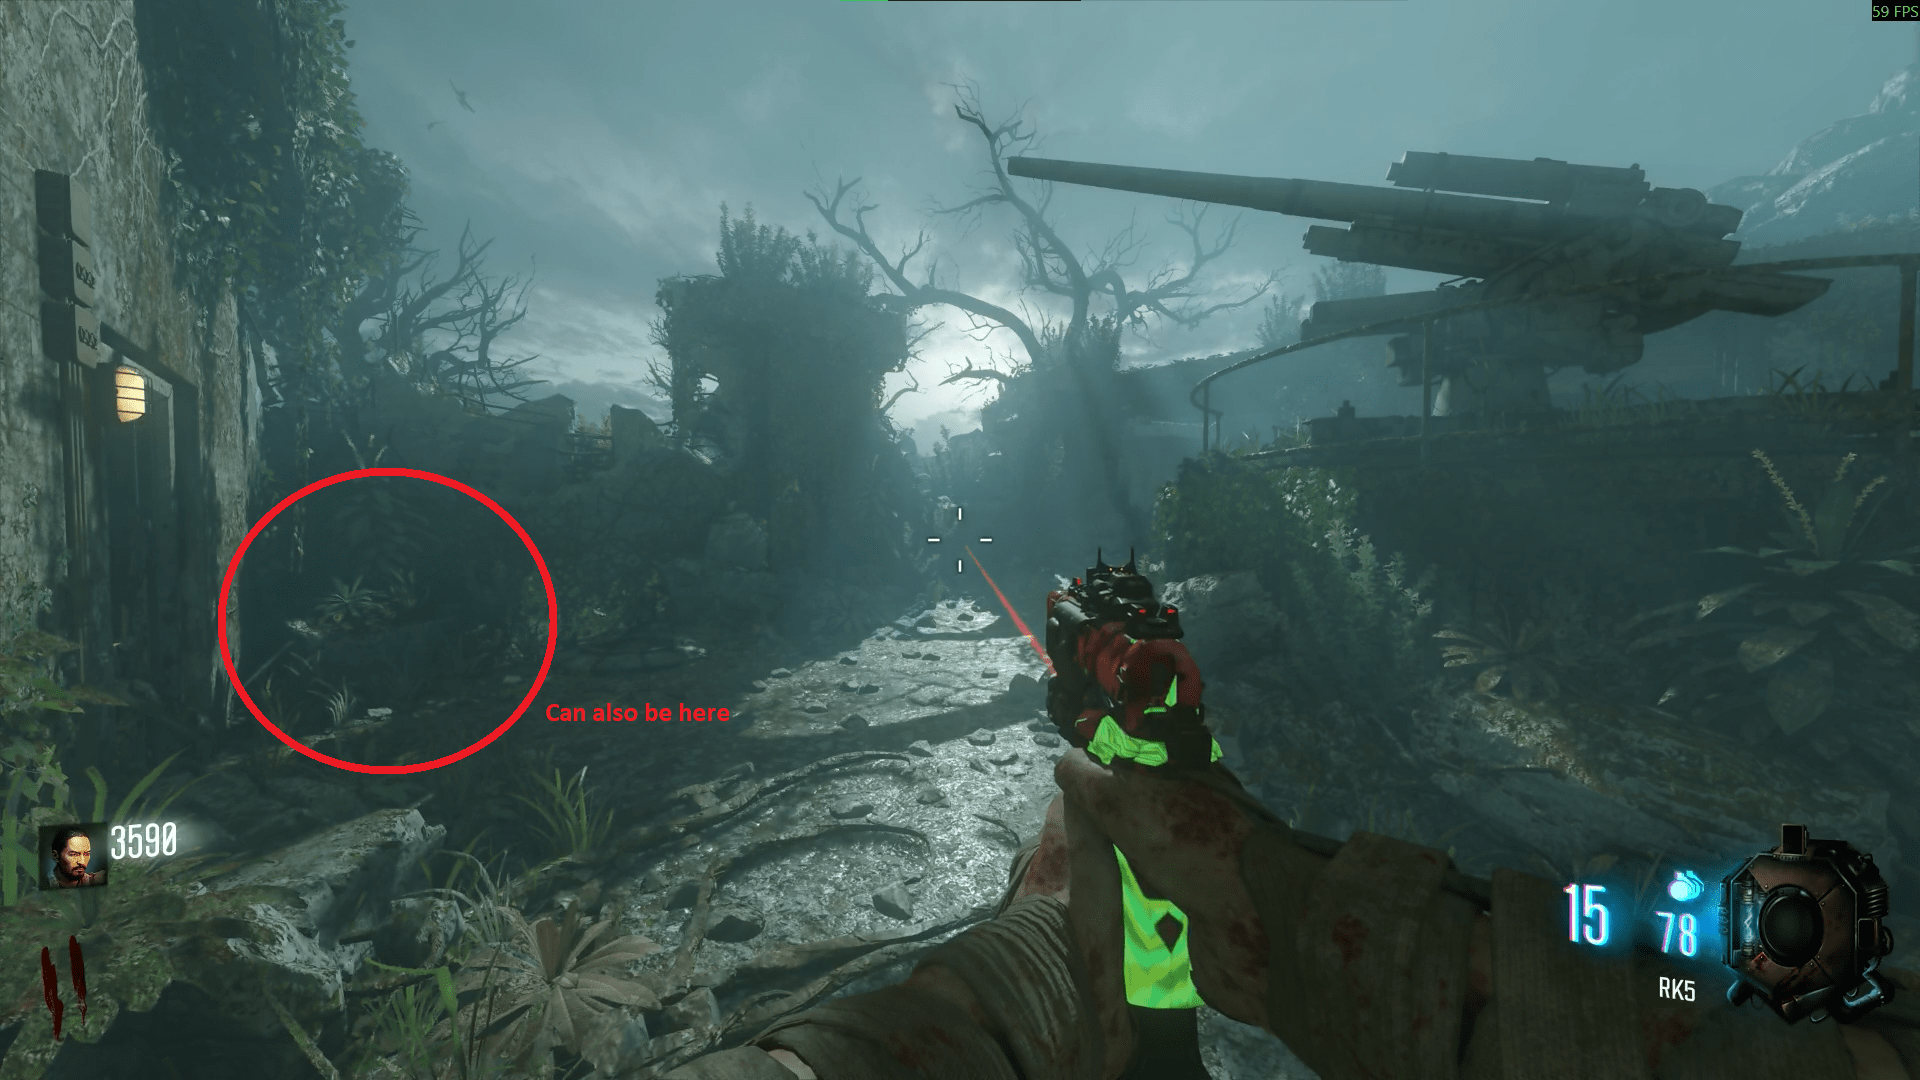
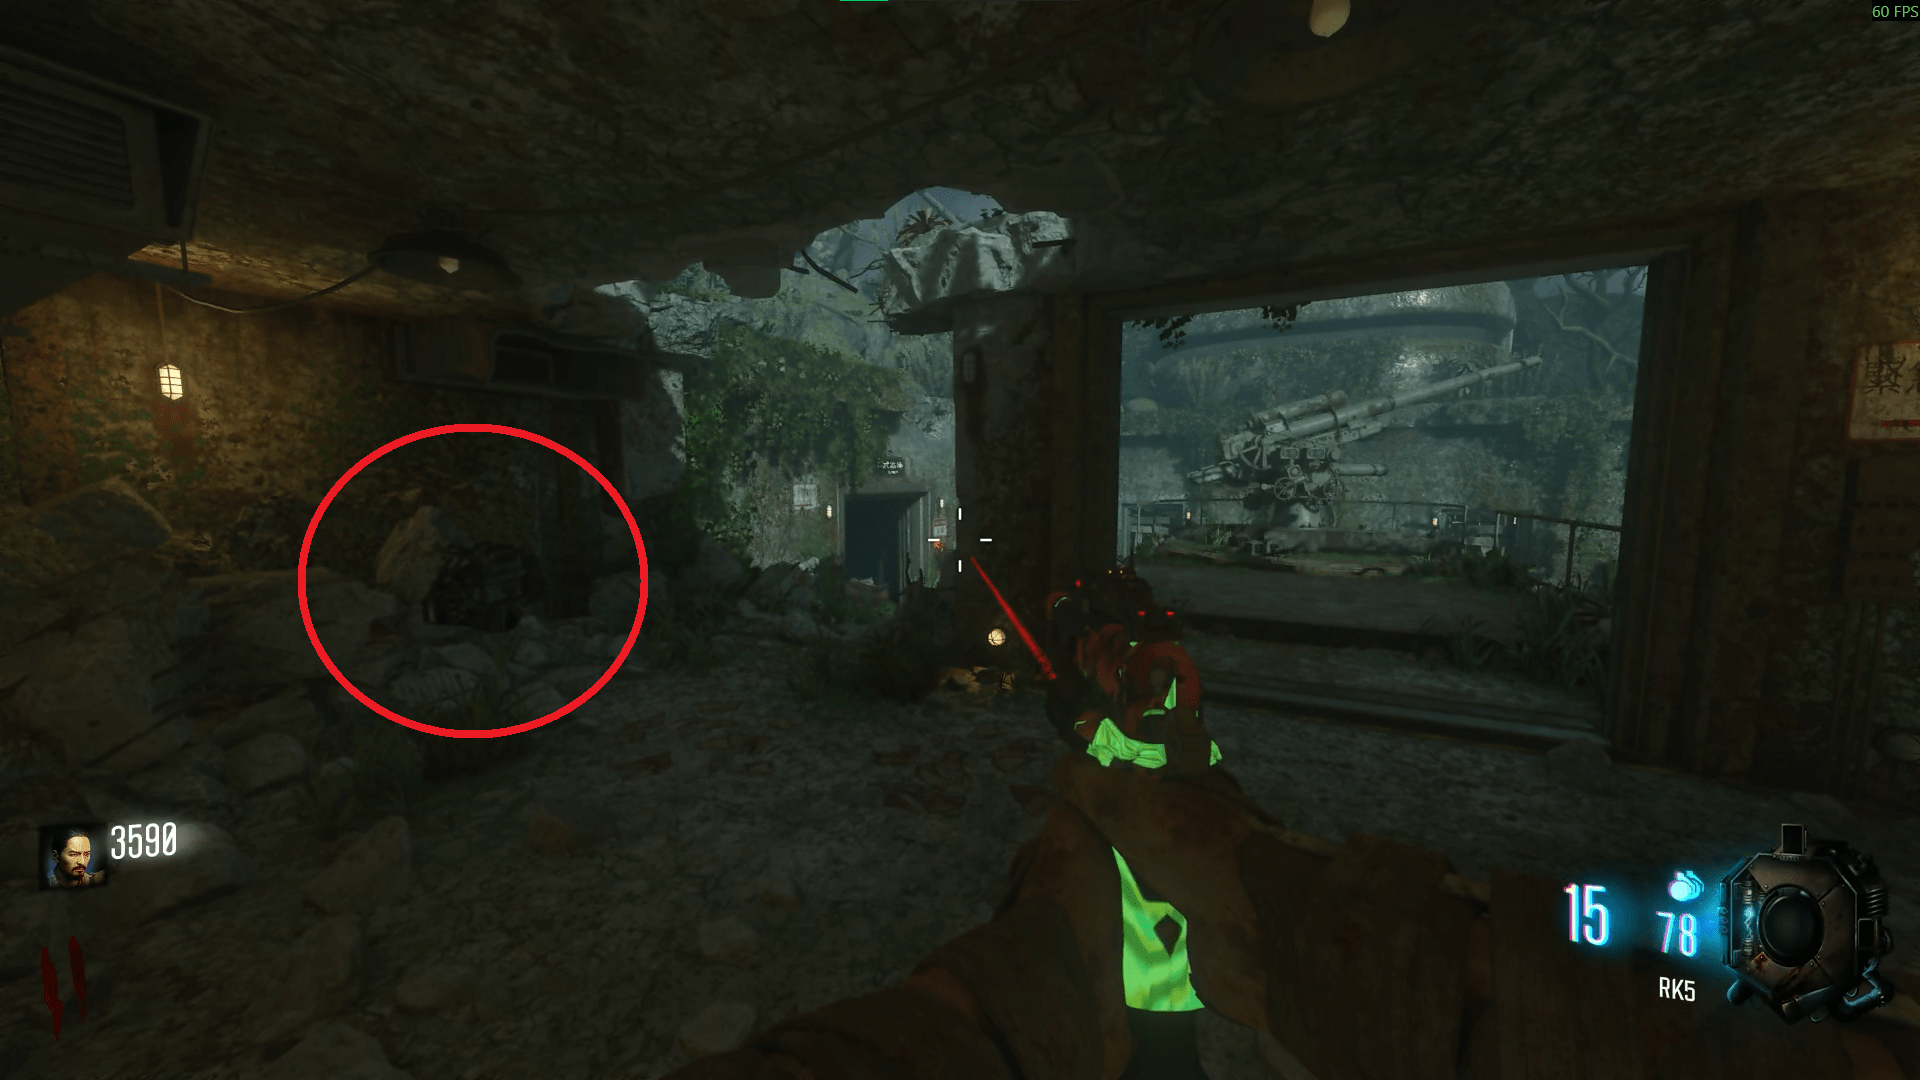
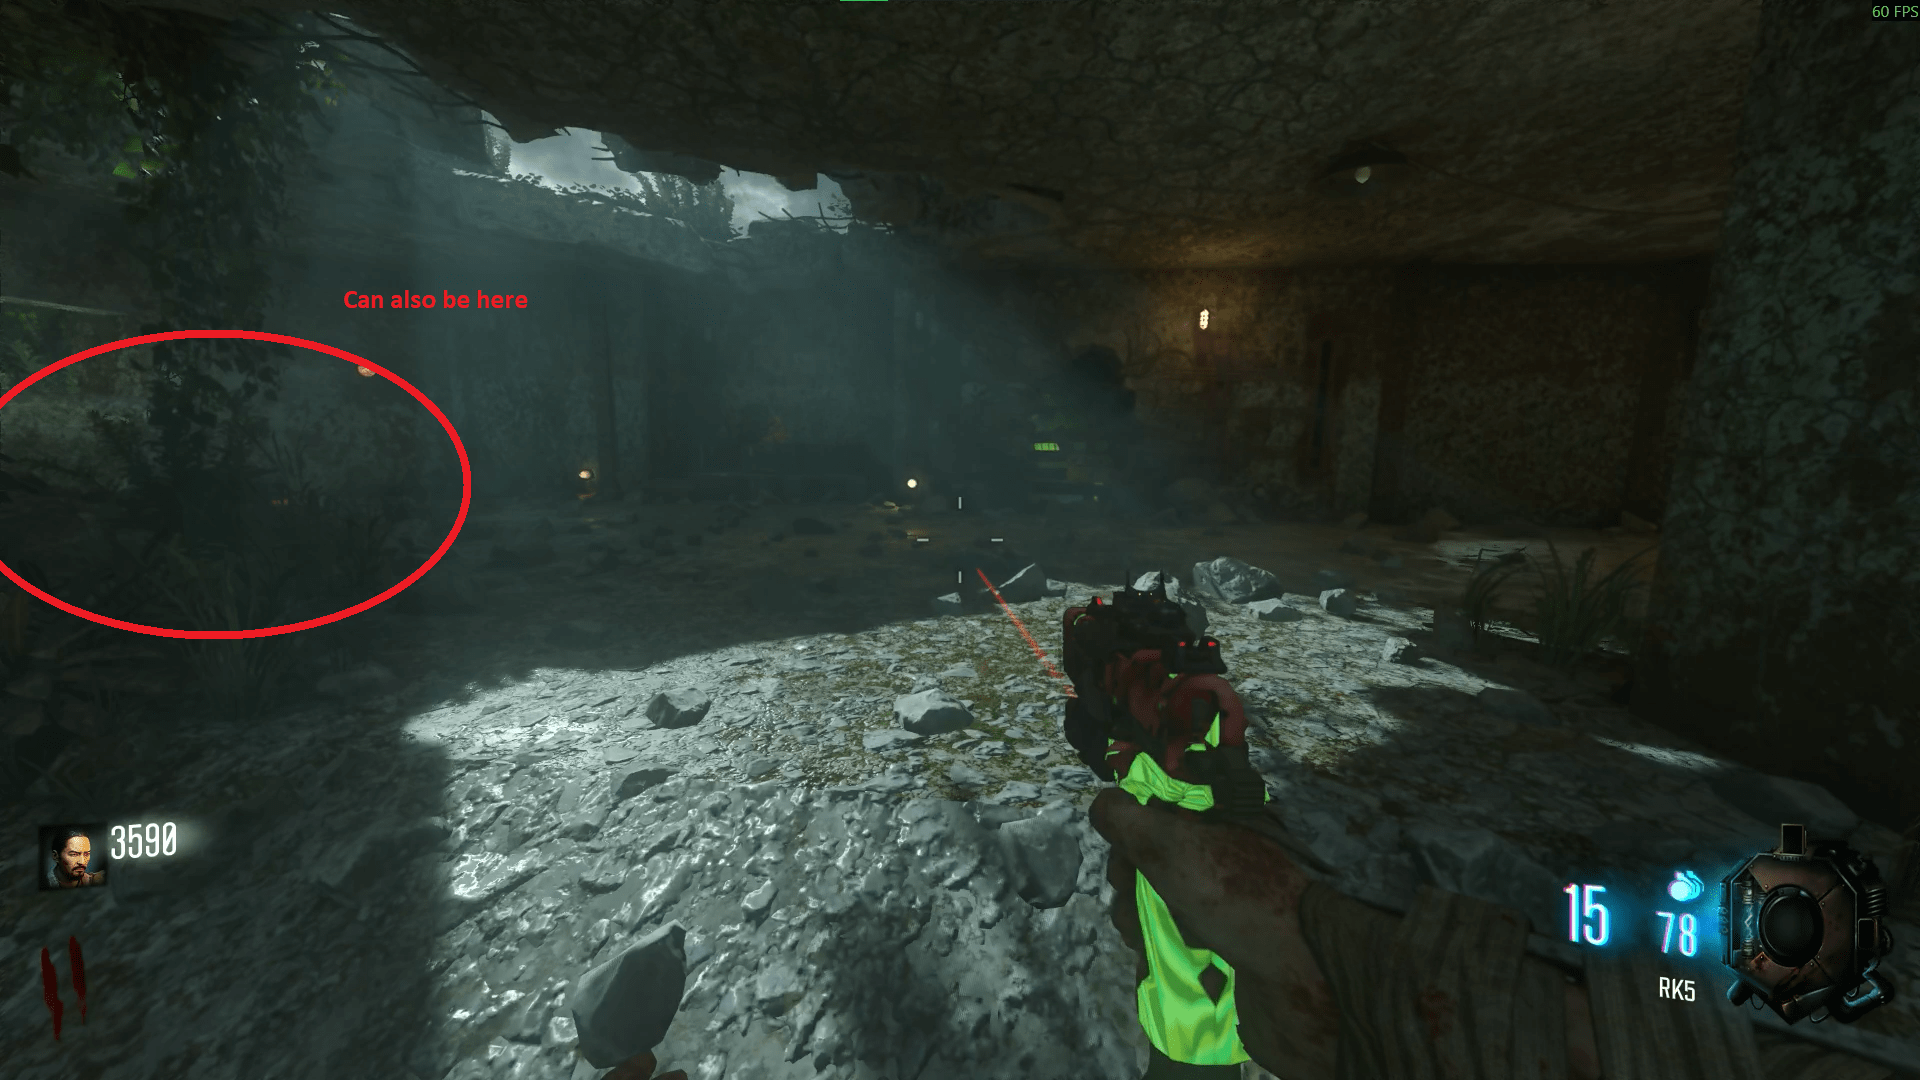
Once you've equipped the shield, go to the challenge pillars and wait for lightning to strike. After it does, bring out your shield and run through the electricity (you'll see chains of electricity and sparks on the shield window if done). Make sure the zombie doesn't hit your shield otherwise it will die and take the charge away. Now run to the Blue water Lab, to the zipline besides the crafting bench.
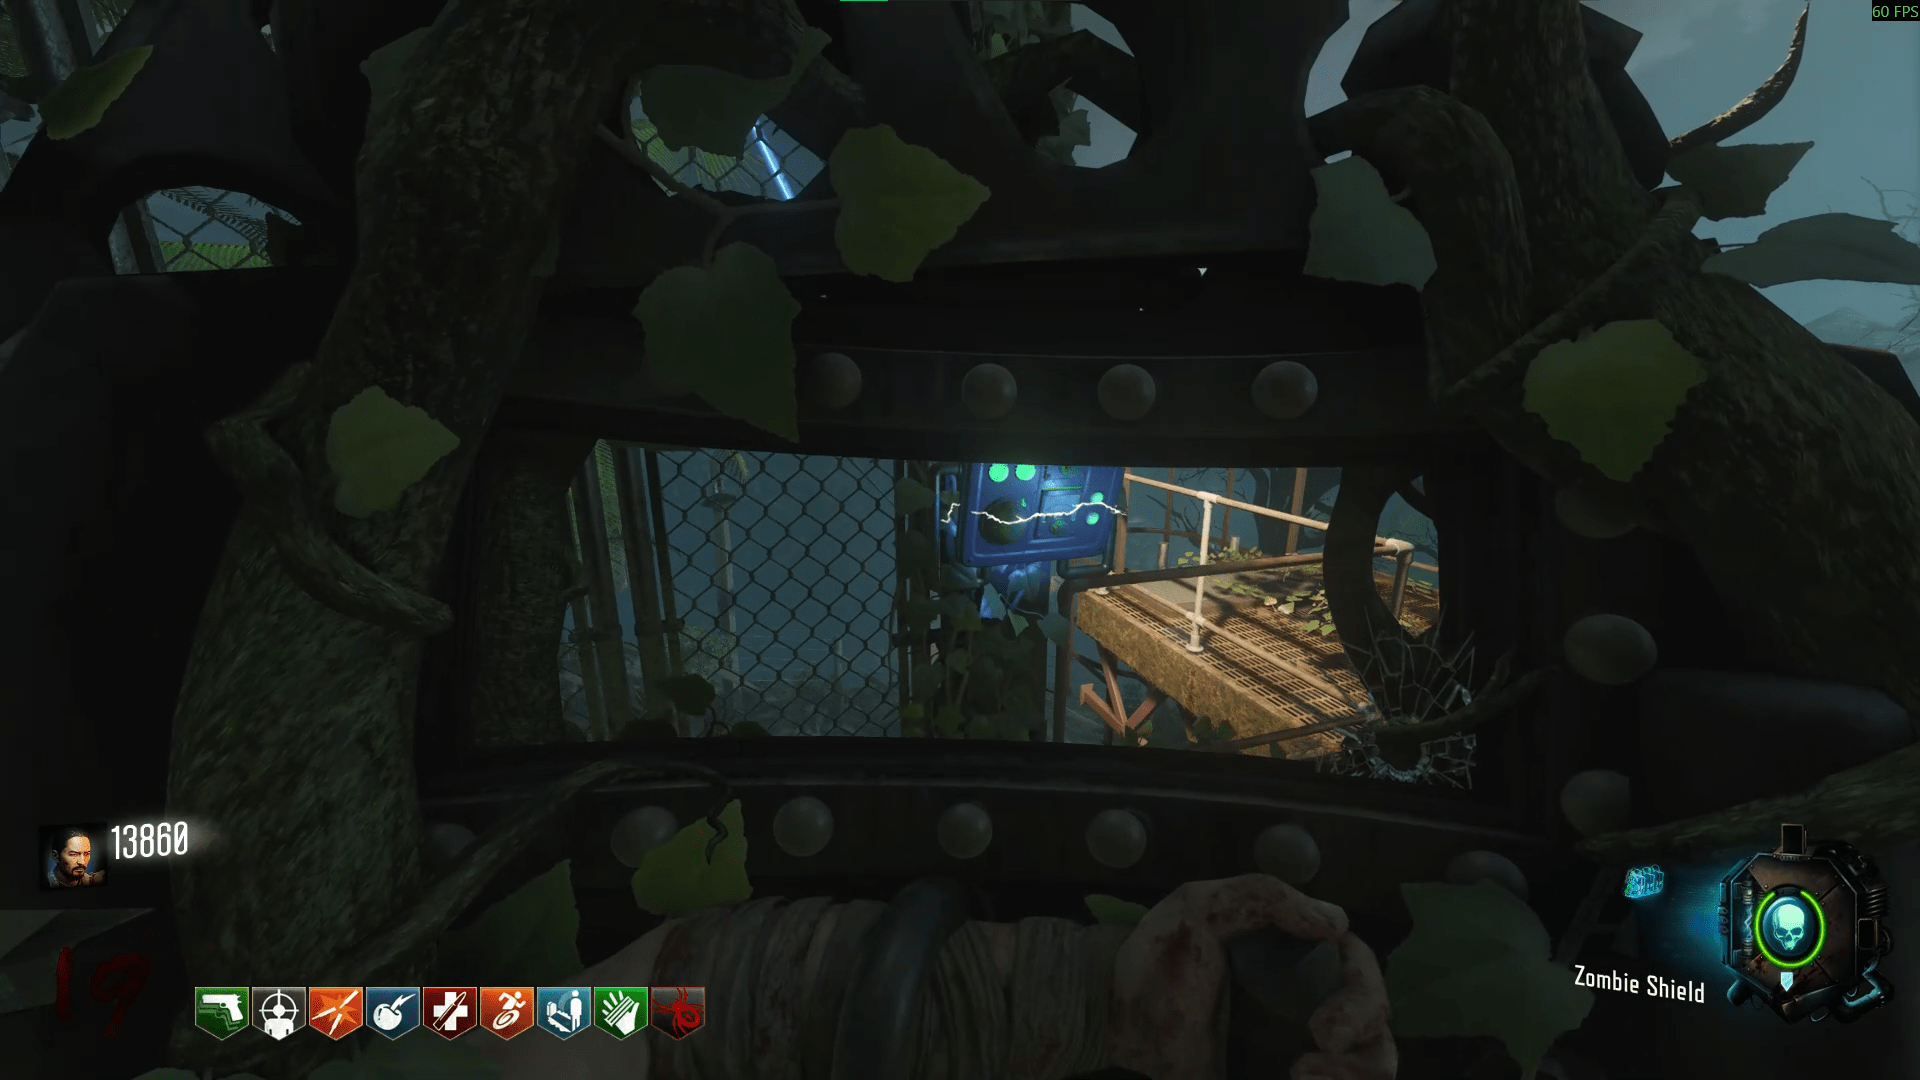
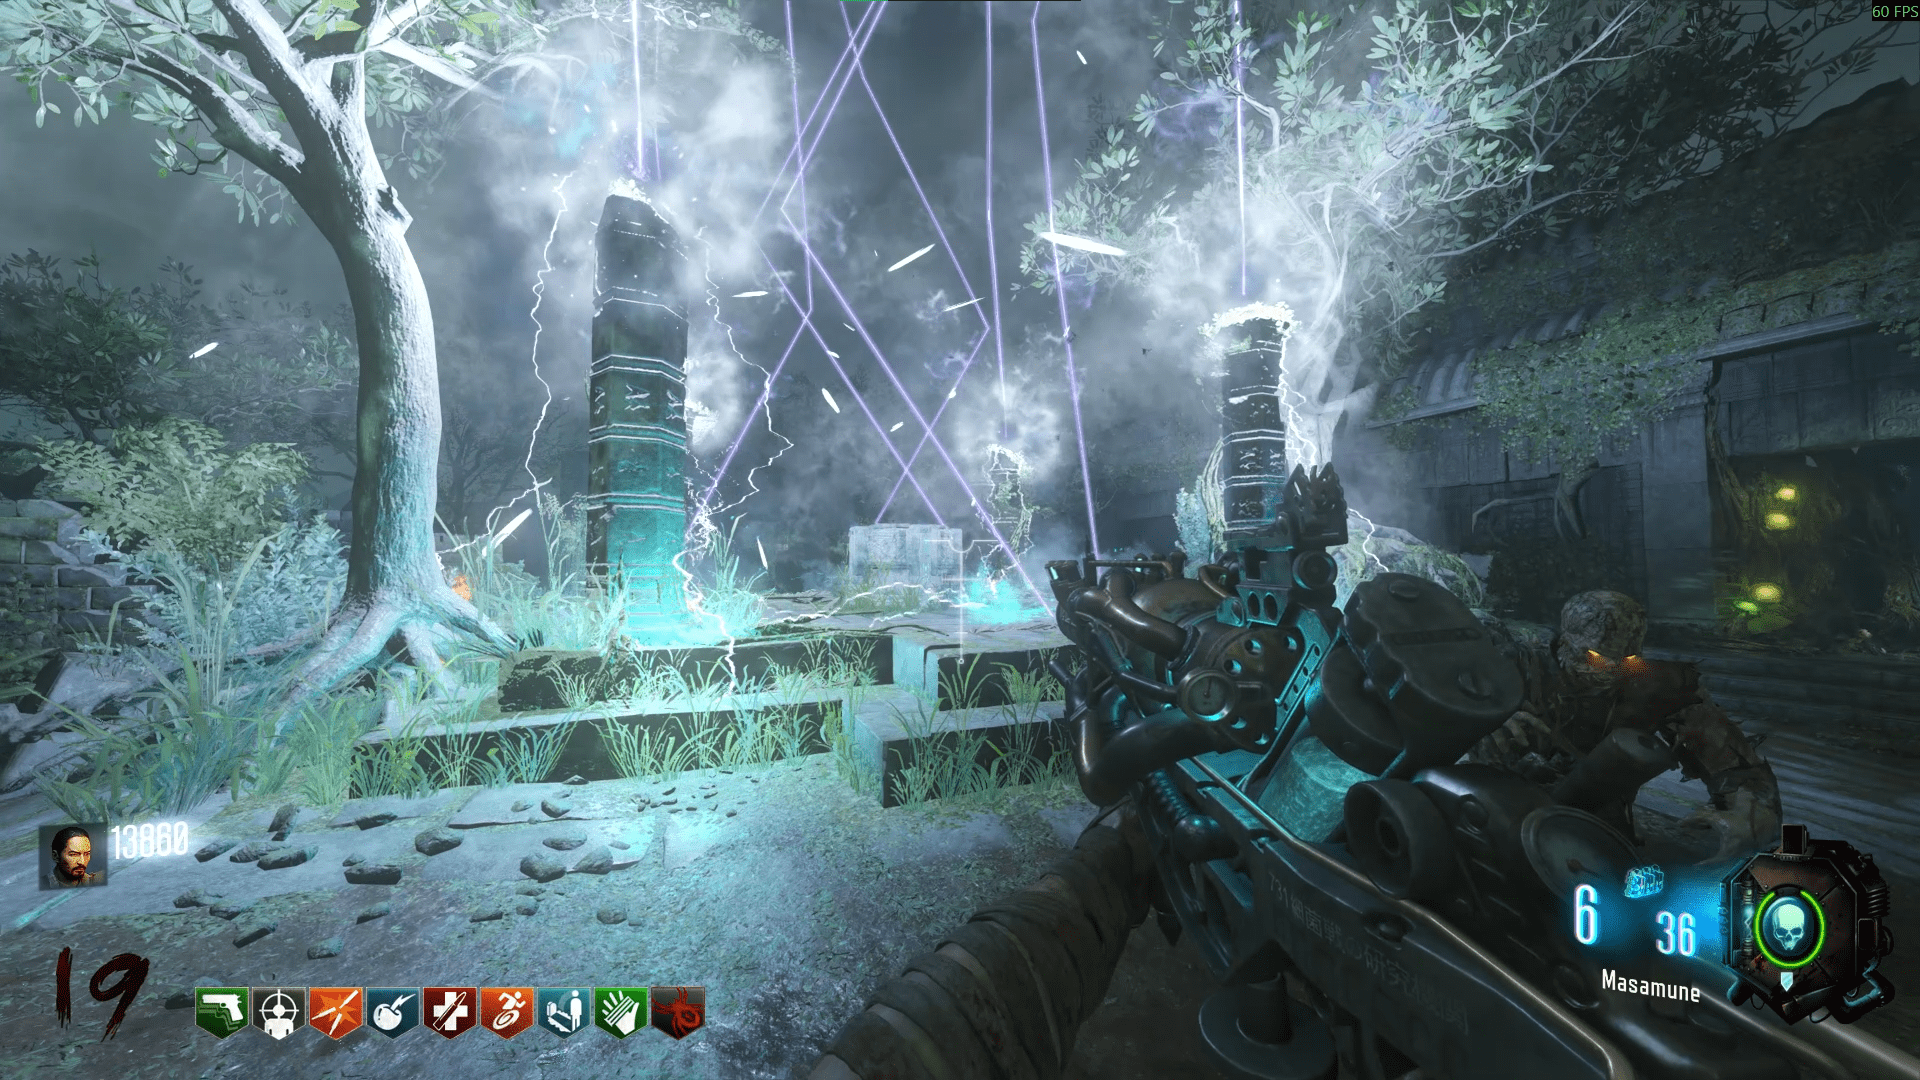
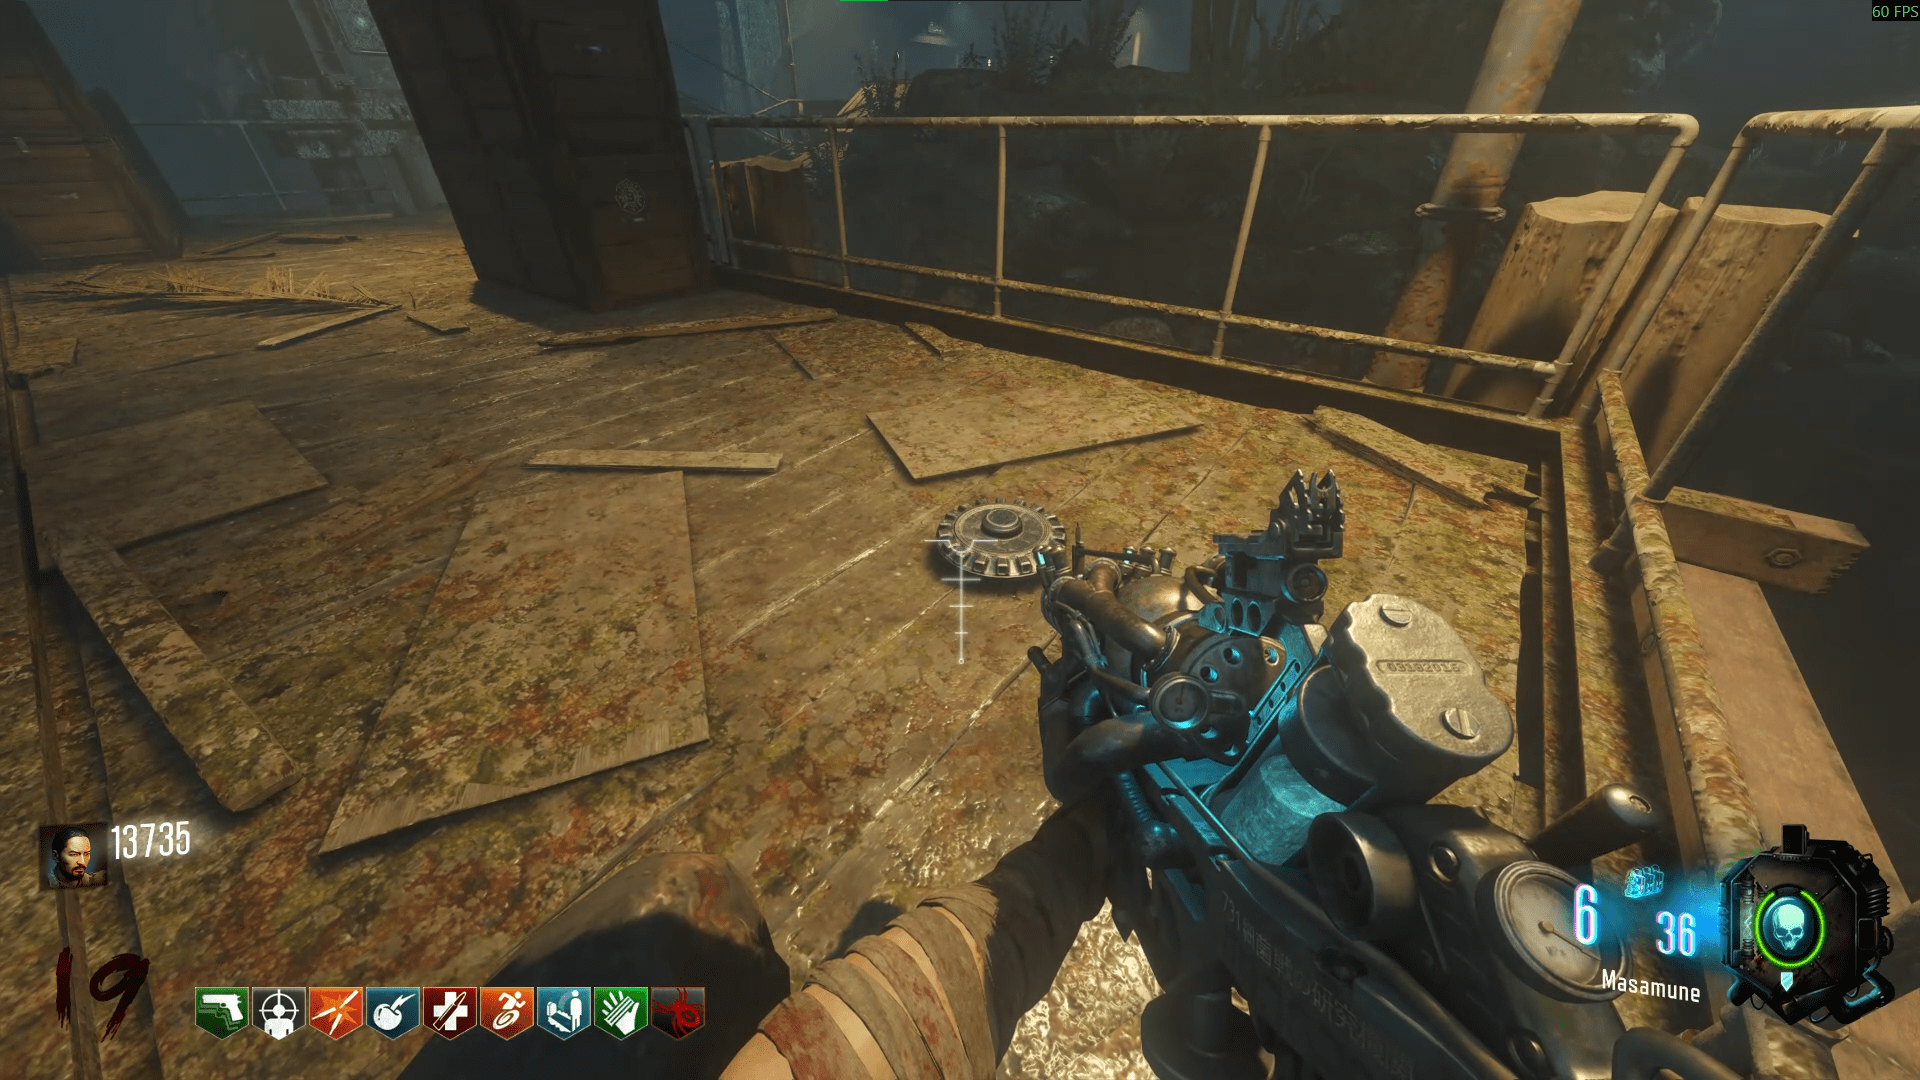
Now in solo, you'll have shield bash the buy panel to electrify it, use the zipline (with the shield out) then backpedal (S) and melee to drop down but in co-op, one person will enter the zipline and the electrified shield person has to bash the panel when the other player is just above the pier so that they'll drop down onto it. Be careful with both of these methods as they can be a little tight and hard to gauge but once you're on the pier, pick up the cog at the end.
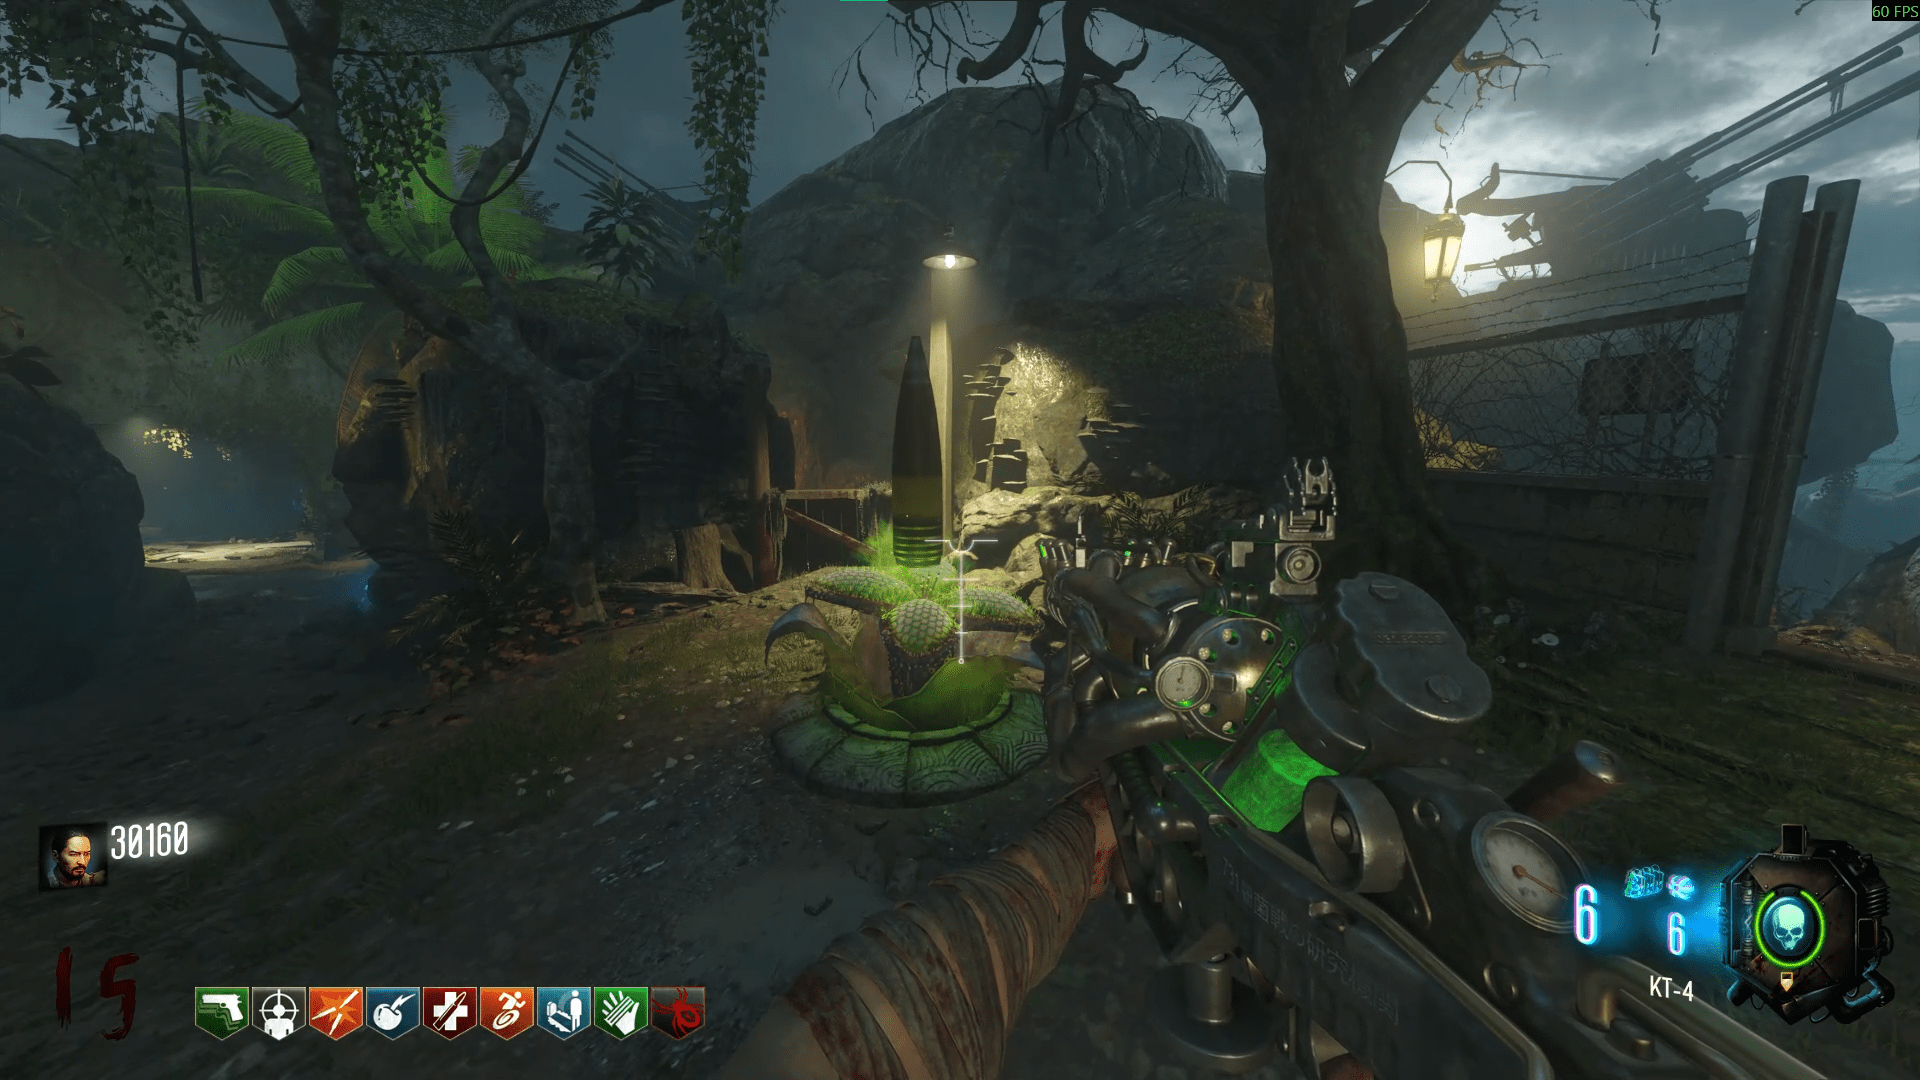
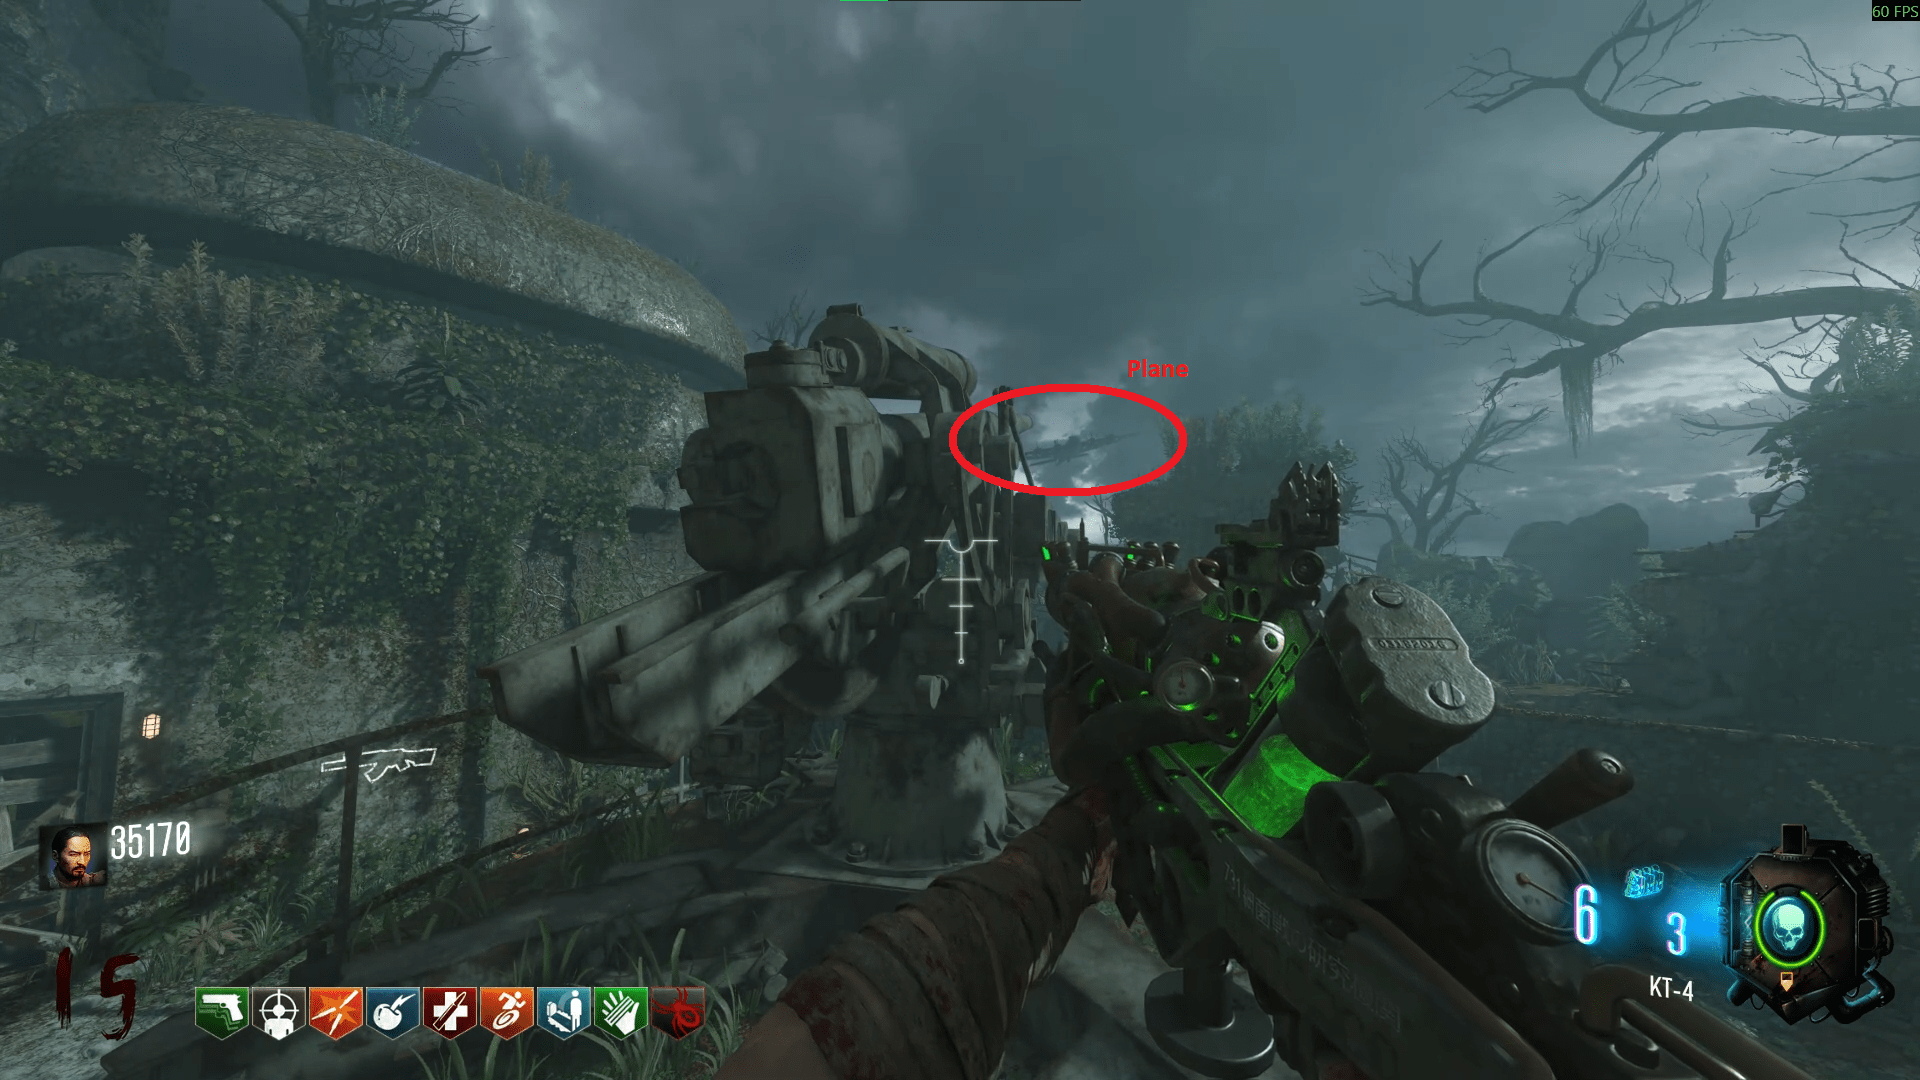
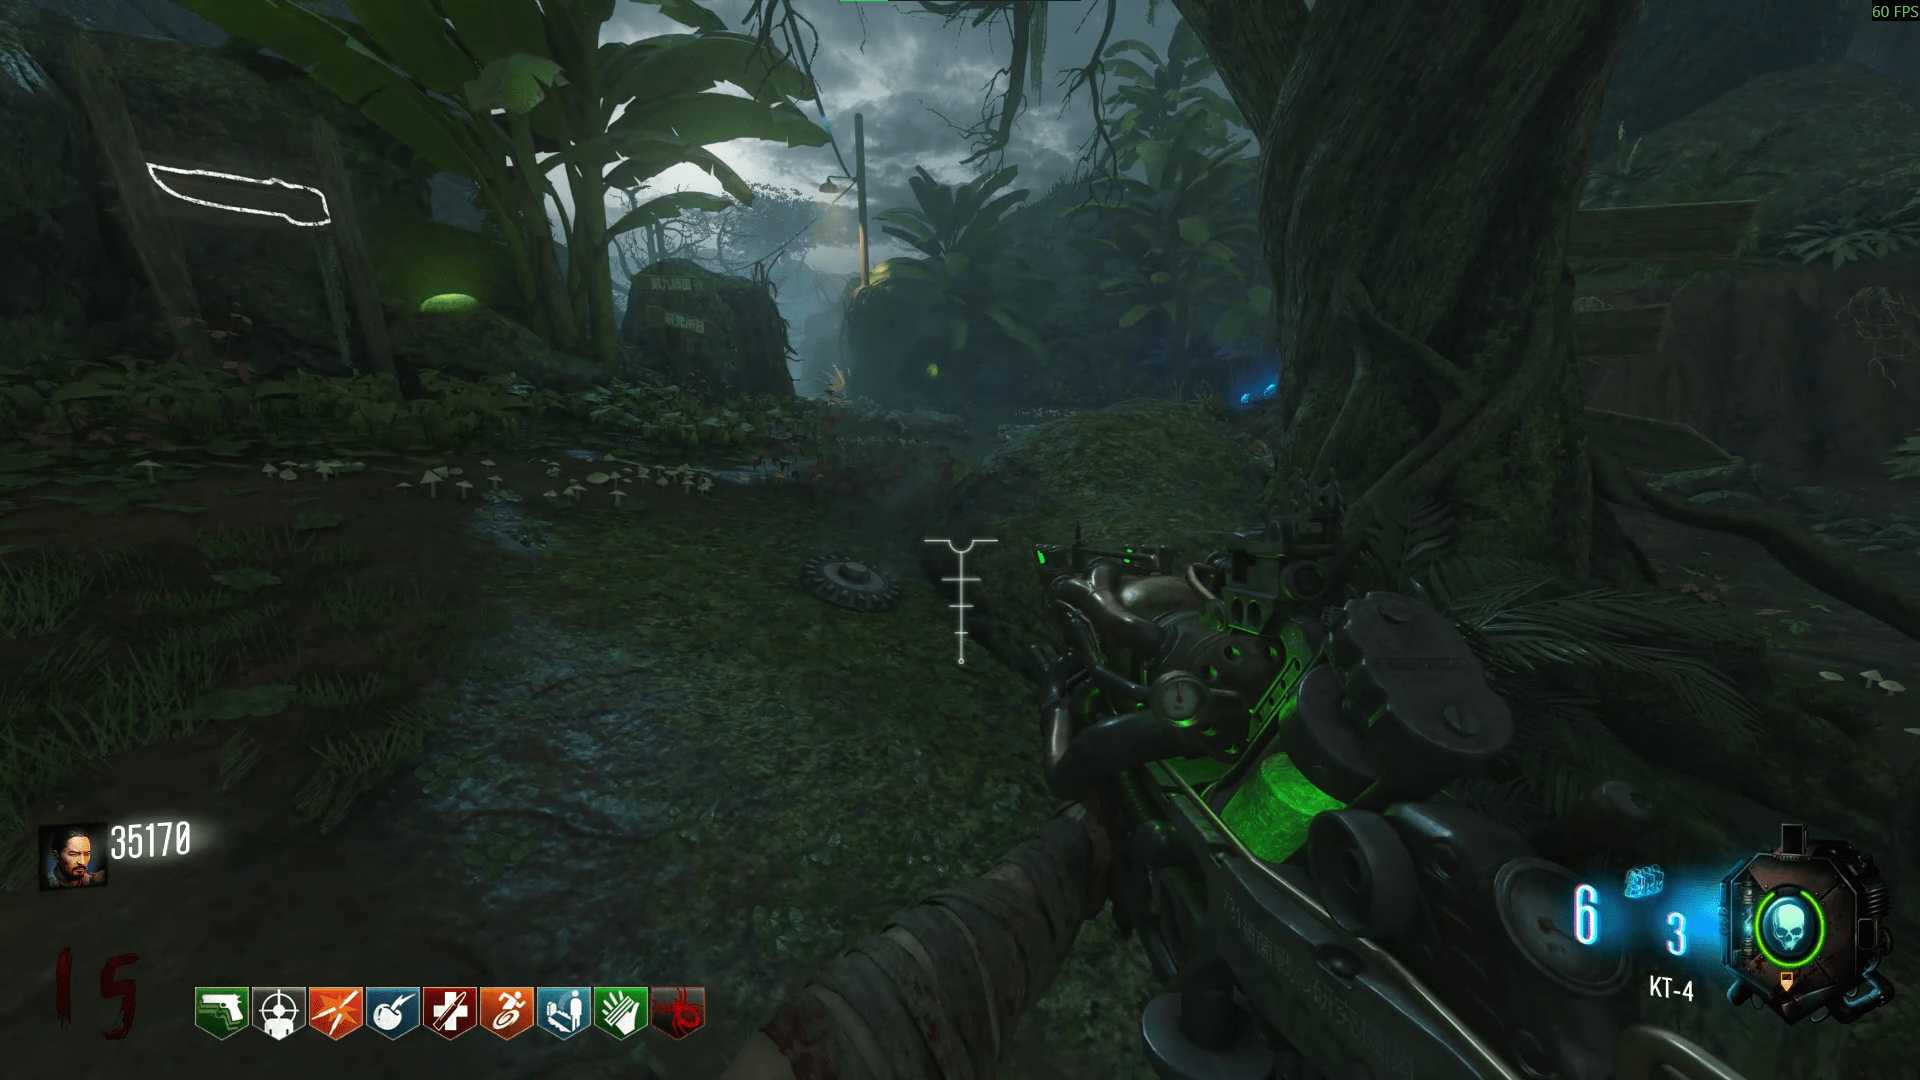
- Growing a plant with rainbow water.
- Electrifying the Green Lab cage, entering and picking up a blue vial.
First off, you'll need the rainbow water which you can get from the Sewer pipe fast travel in the KT-4 room. You can time it by counting the colours: Green to blue, green to blue to rainbow water. Just before the third green, interact and you'll pick up the rainbow water. Afterwards, go back down to where you found the KT-4 plant earlier with the mesmerised wall, and plant a seed, water it with rainbow water and shoot it with the KT-4. Do this for three rounds then go back down on the fourth to find the Masamune plant.
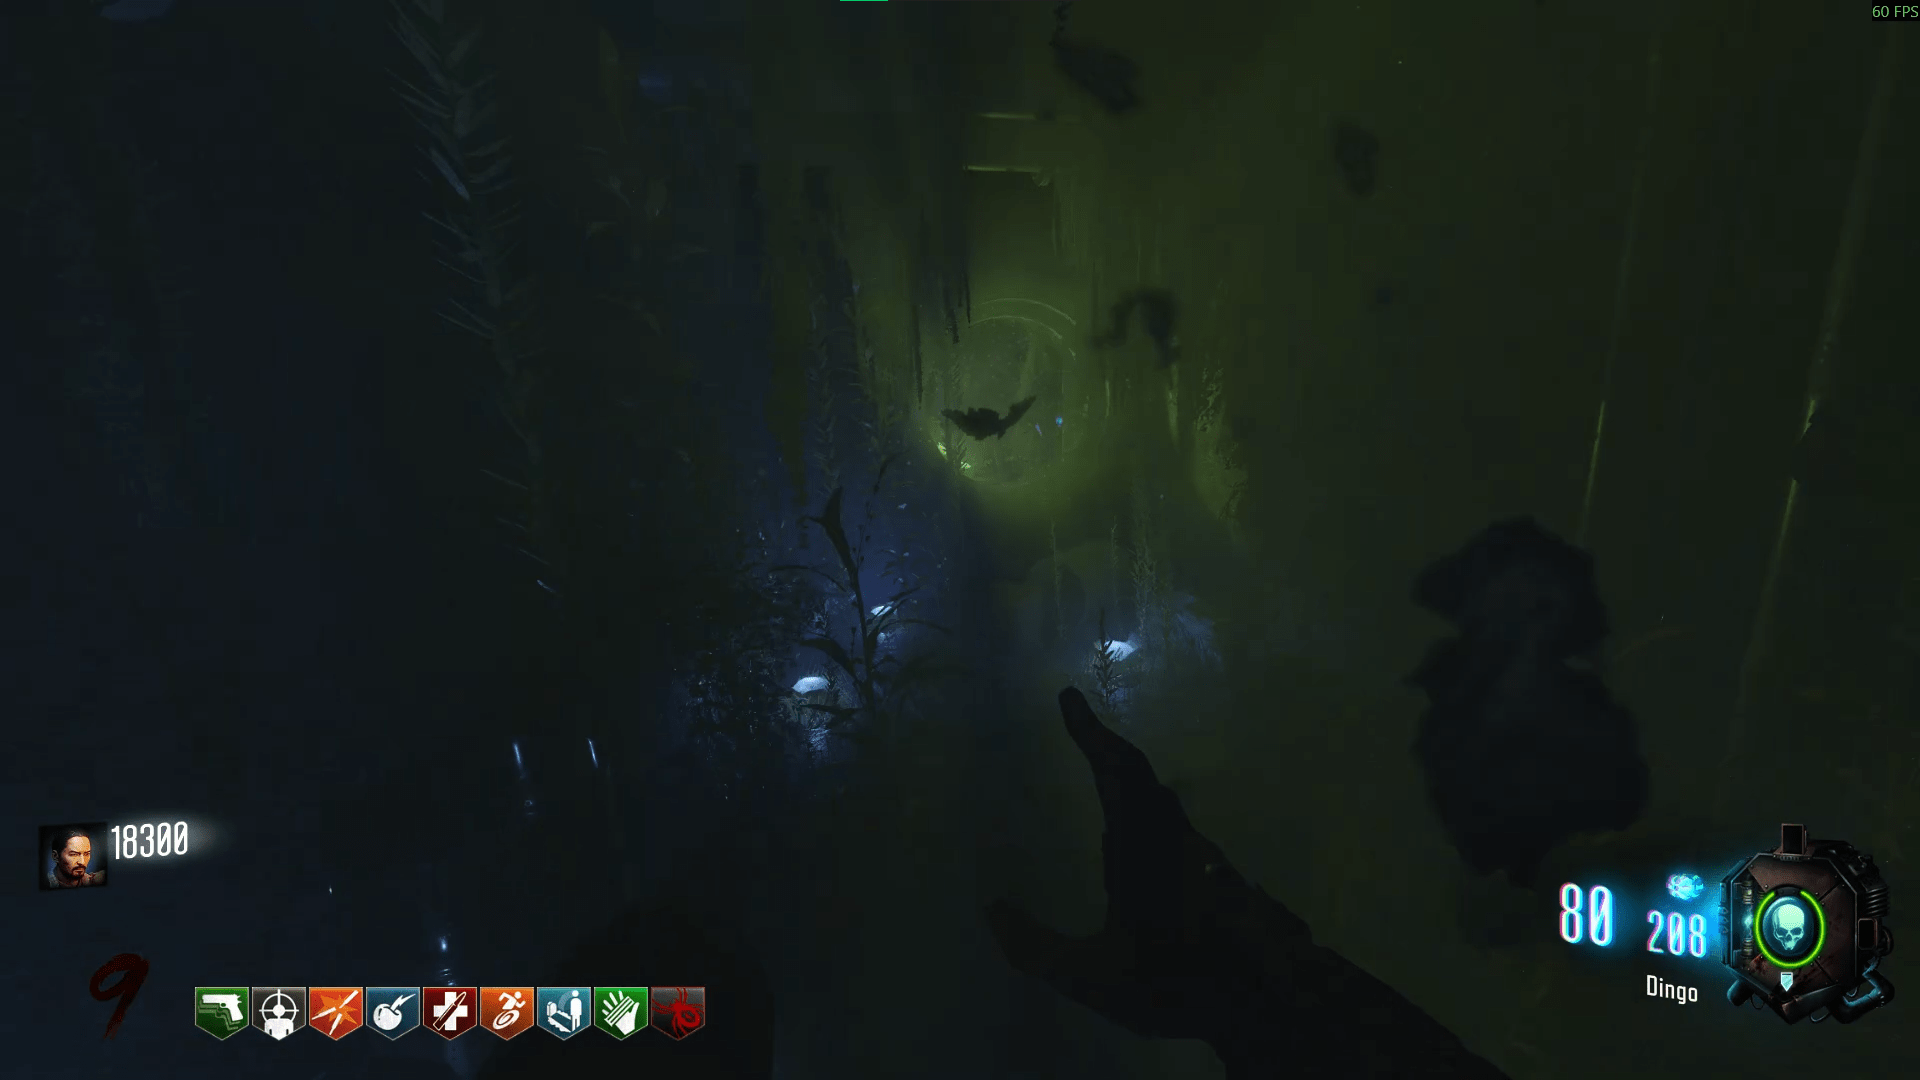
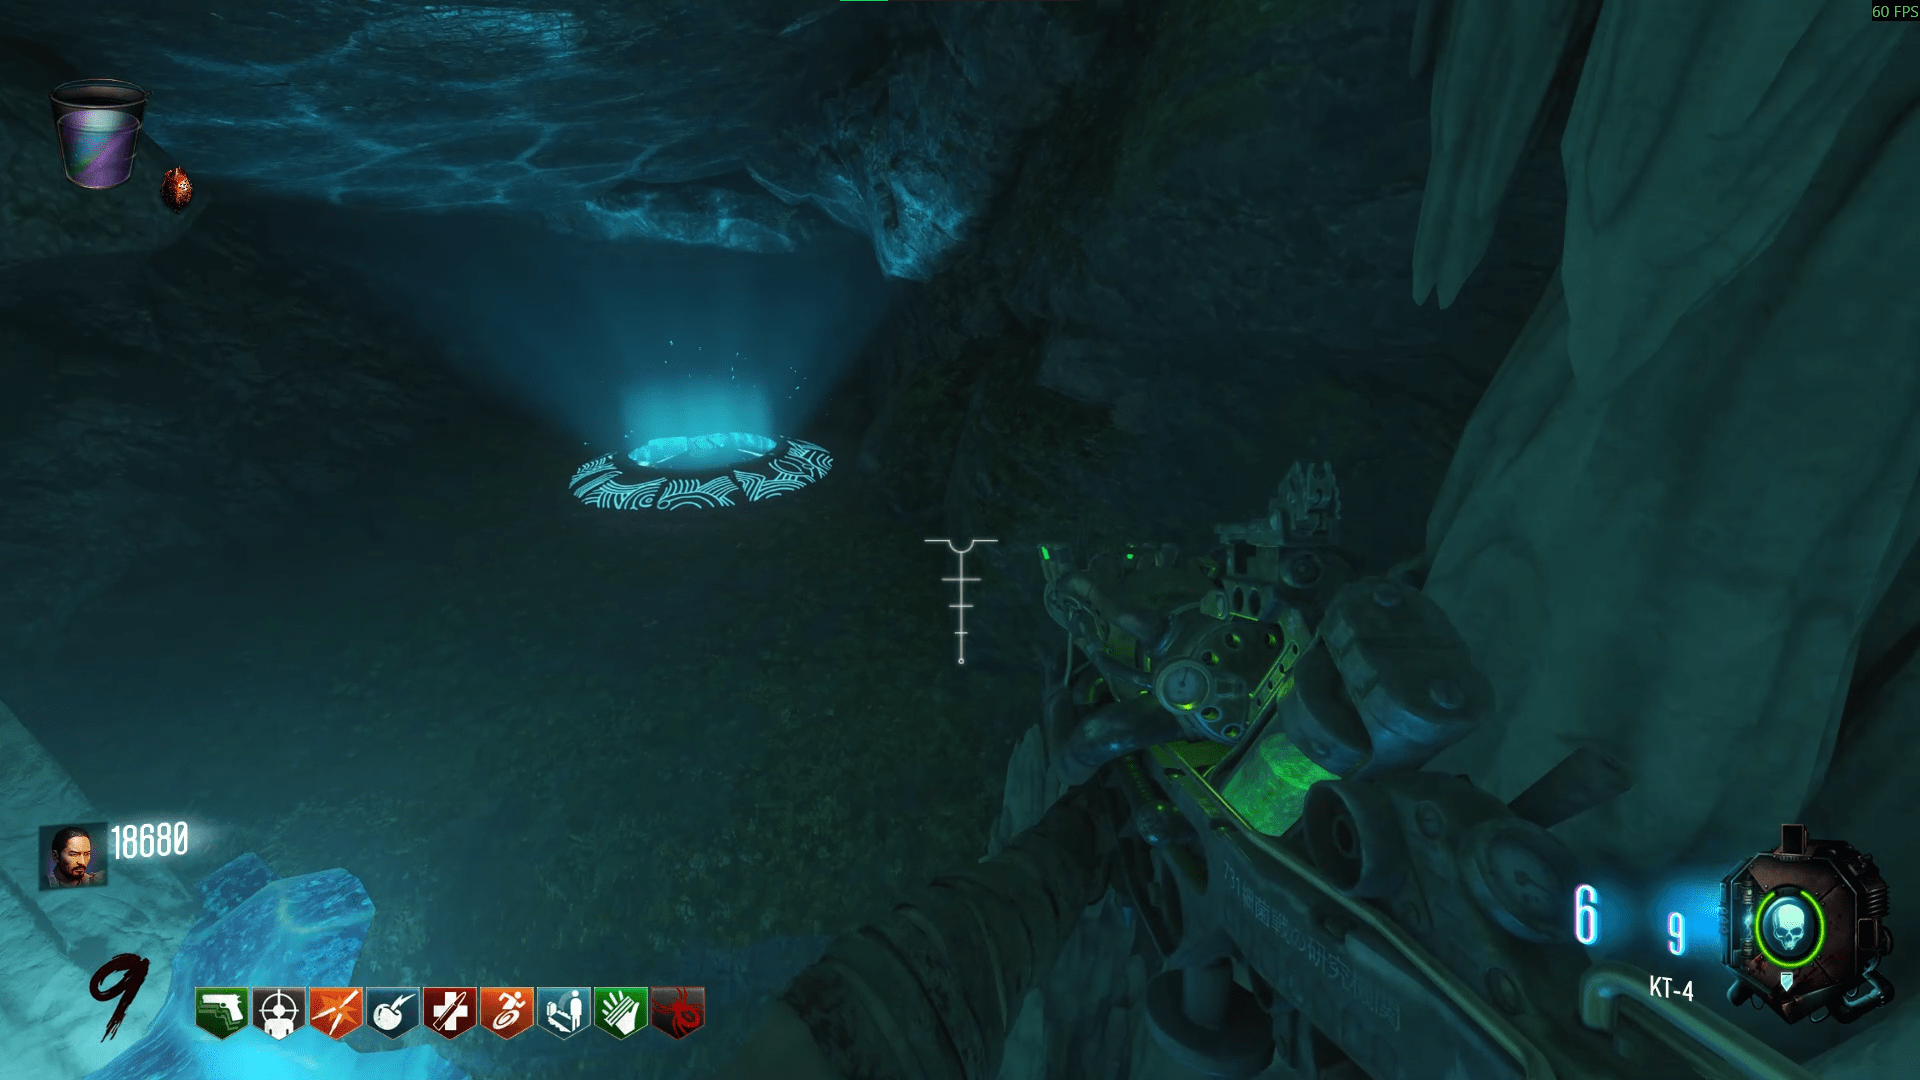
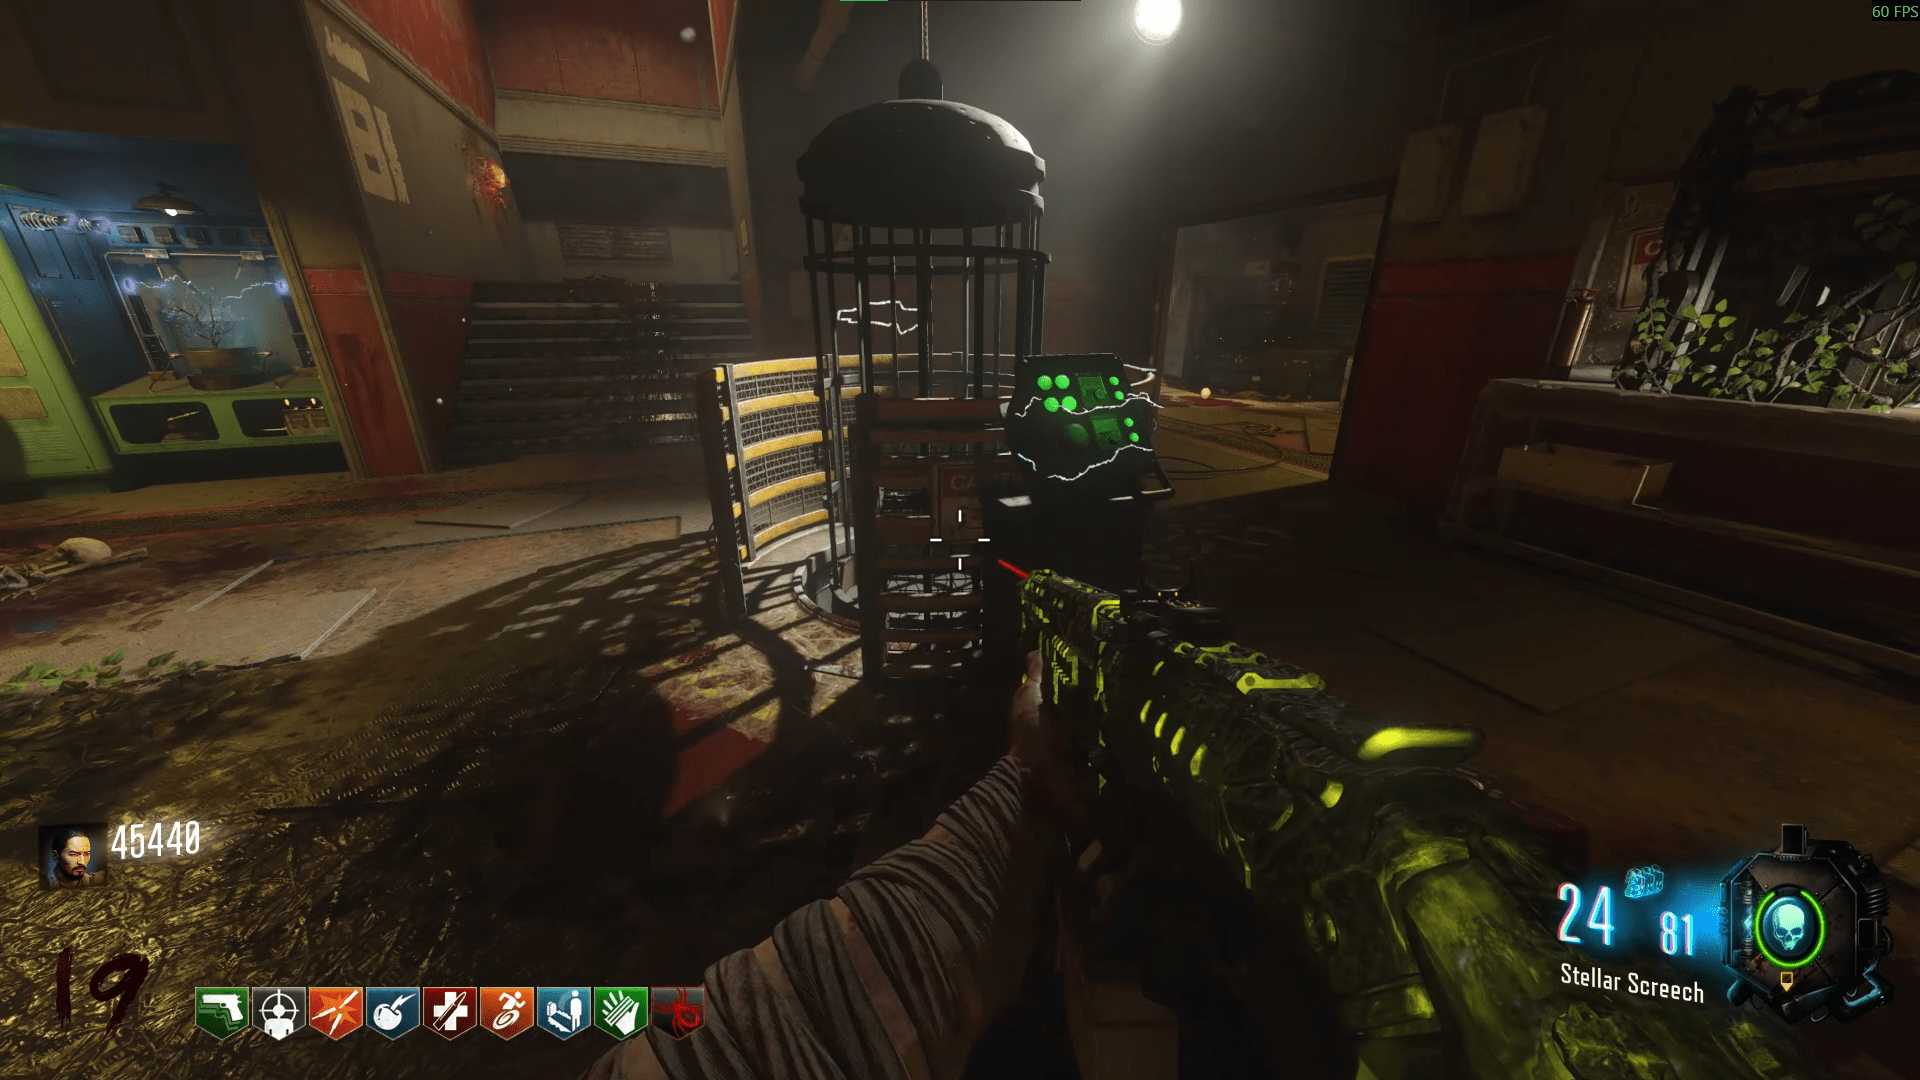
For the blue vial, you need to electrify the Green Lab cage and then enter it yourself. In solo, you'll only have a certain amount of time to pick up the vial, on co-op however, you'll be relying on your teammates to raise the cage back up (make sure you trust them, I've once been stuck down there for 15 minutes).
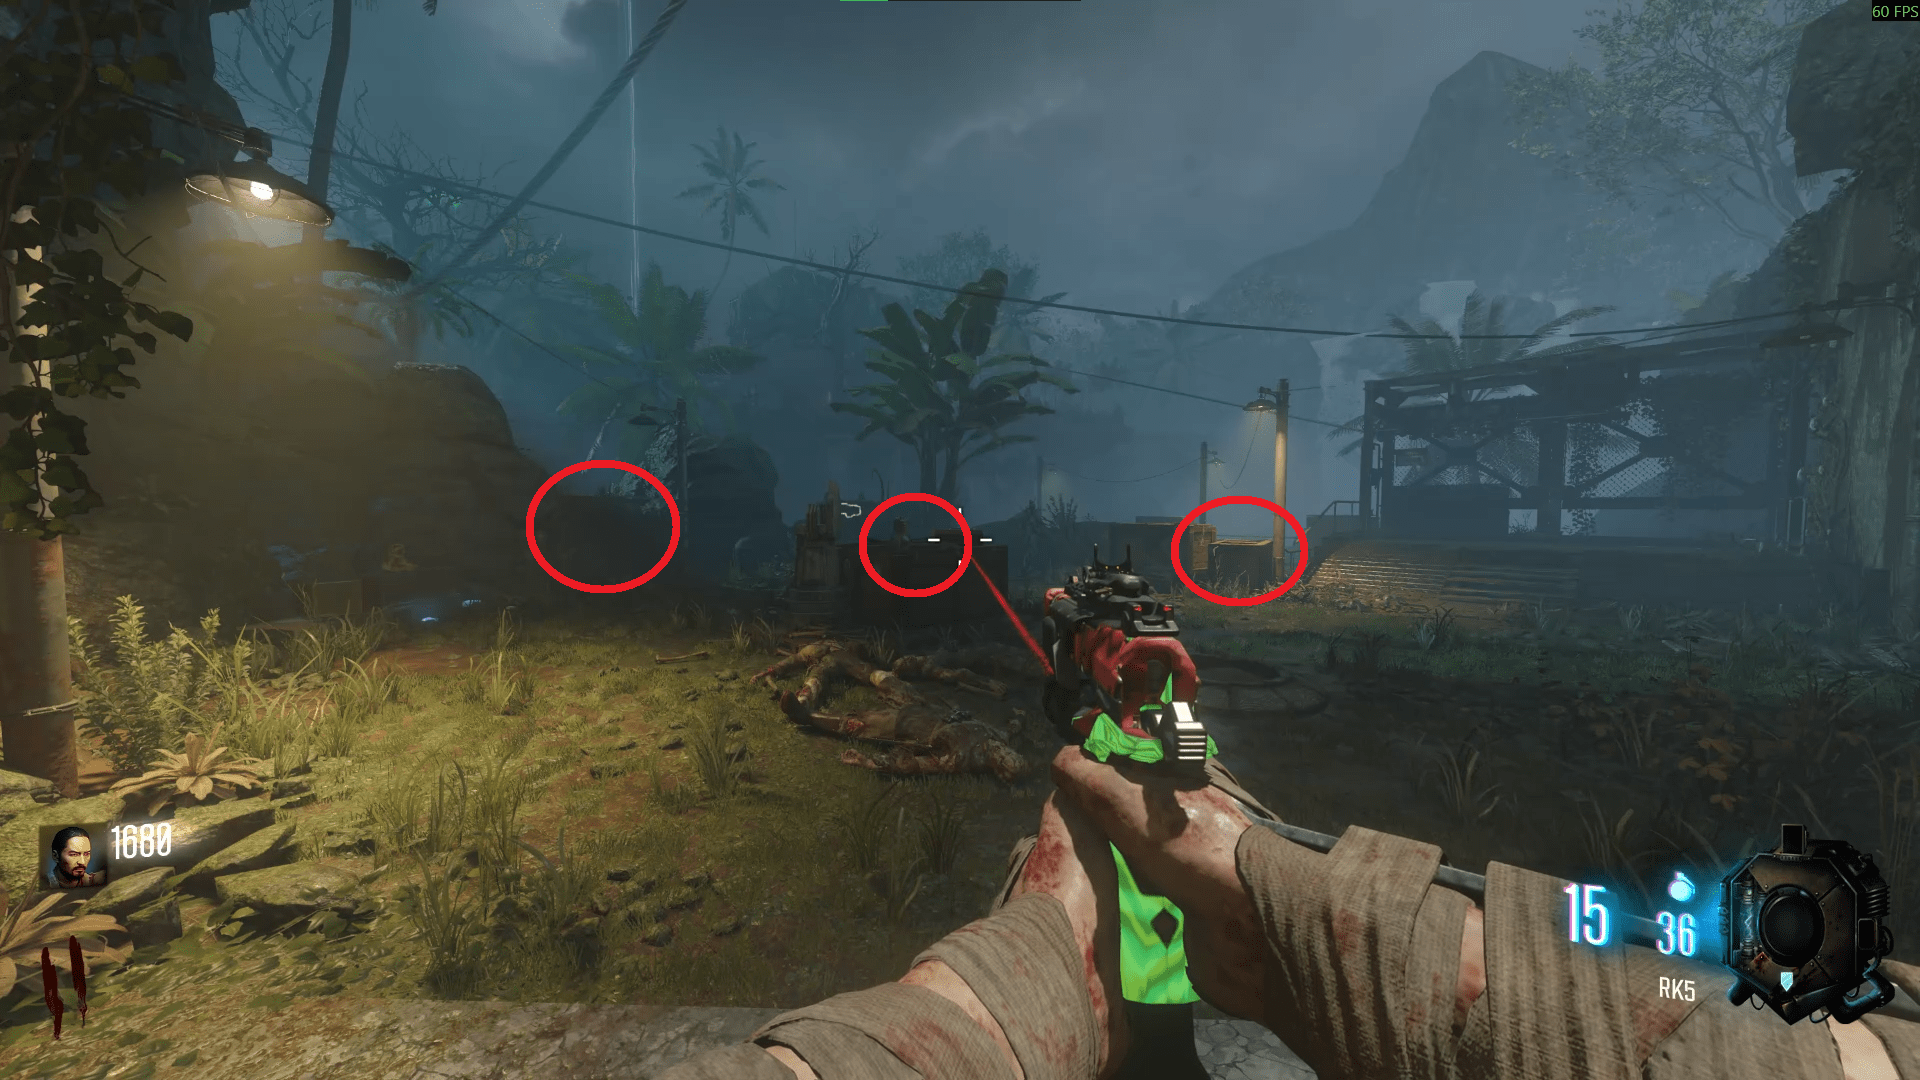
Now you can build the Masamune in the KT-4 room.
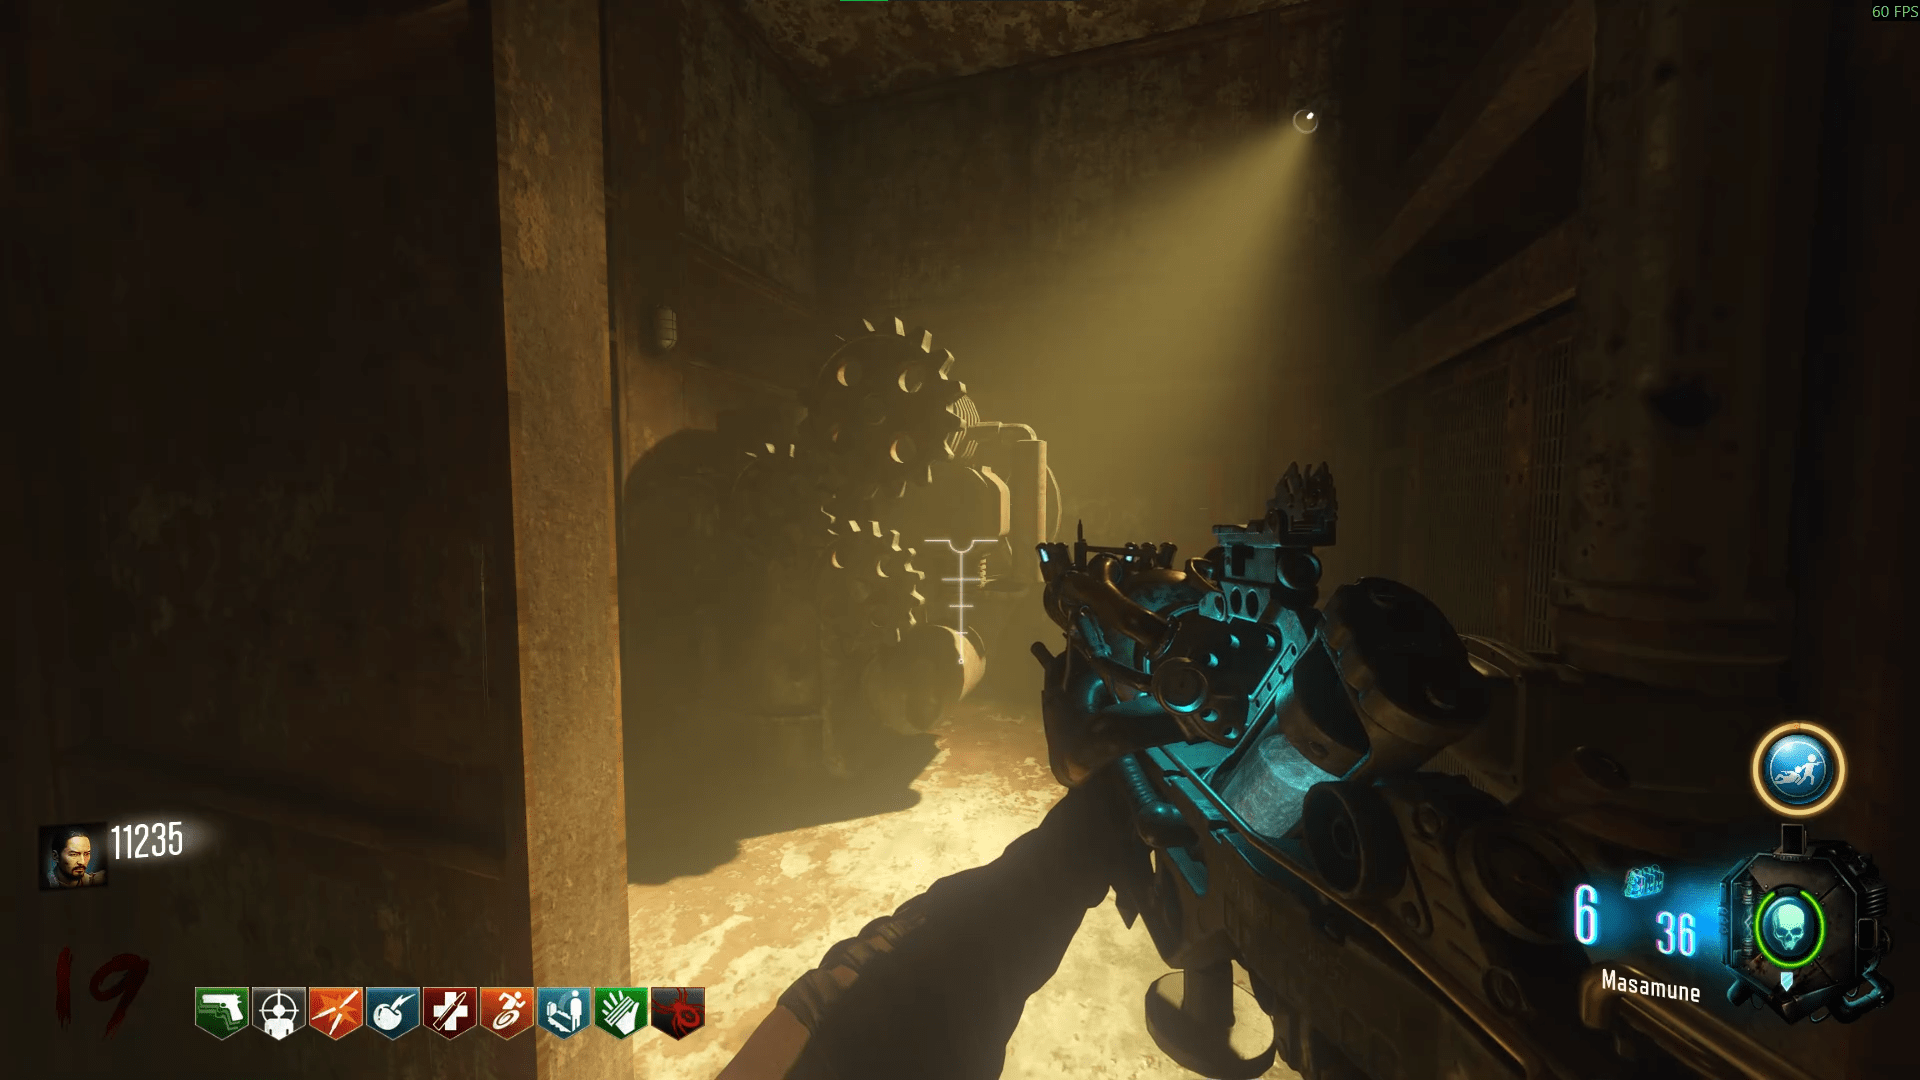
You can build this in the crafting bench where you didn't build the shield at. So Lab A or Lab B. Once you have it, make sure you're well prepared then place the three cogs behind the lift in the Bunker, and use the lift. You must now shoot the three tendrils spores with the KT-4 or Masamune to destroy them and progress.
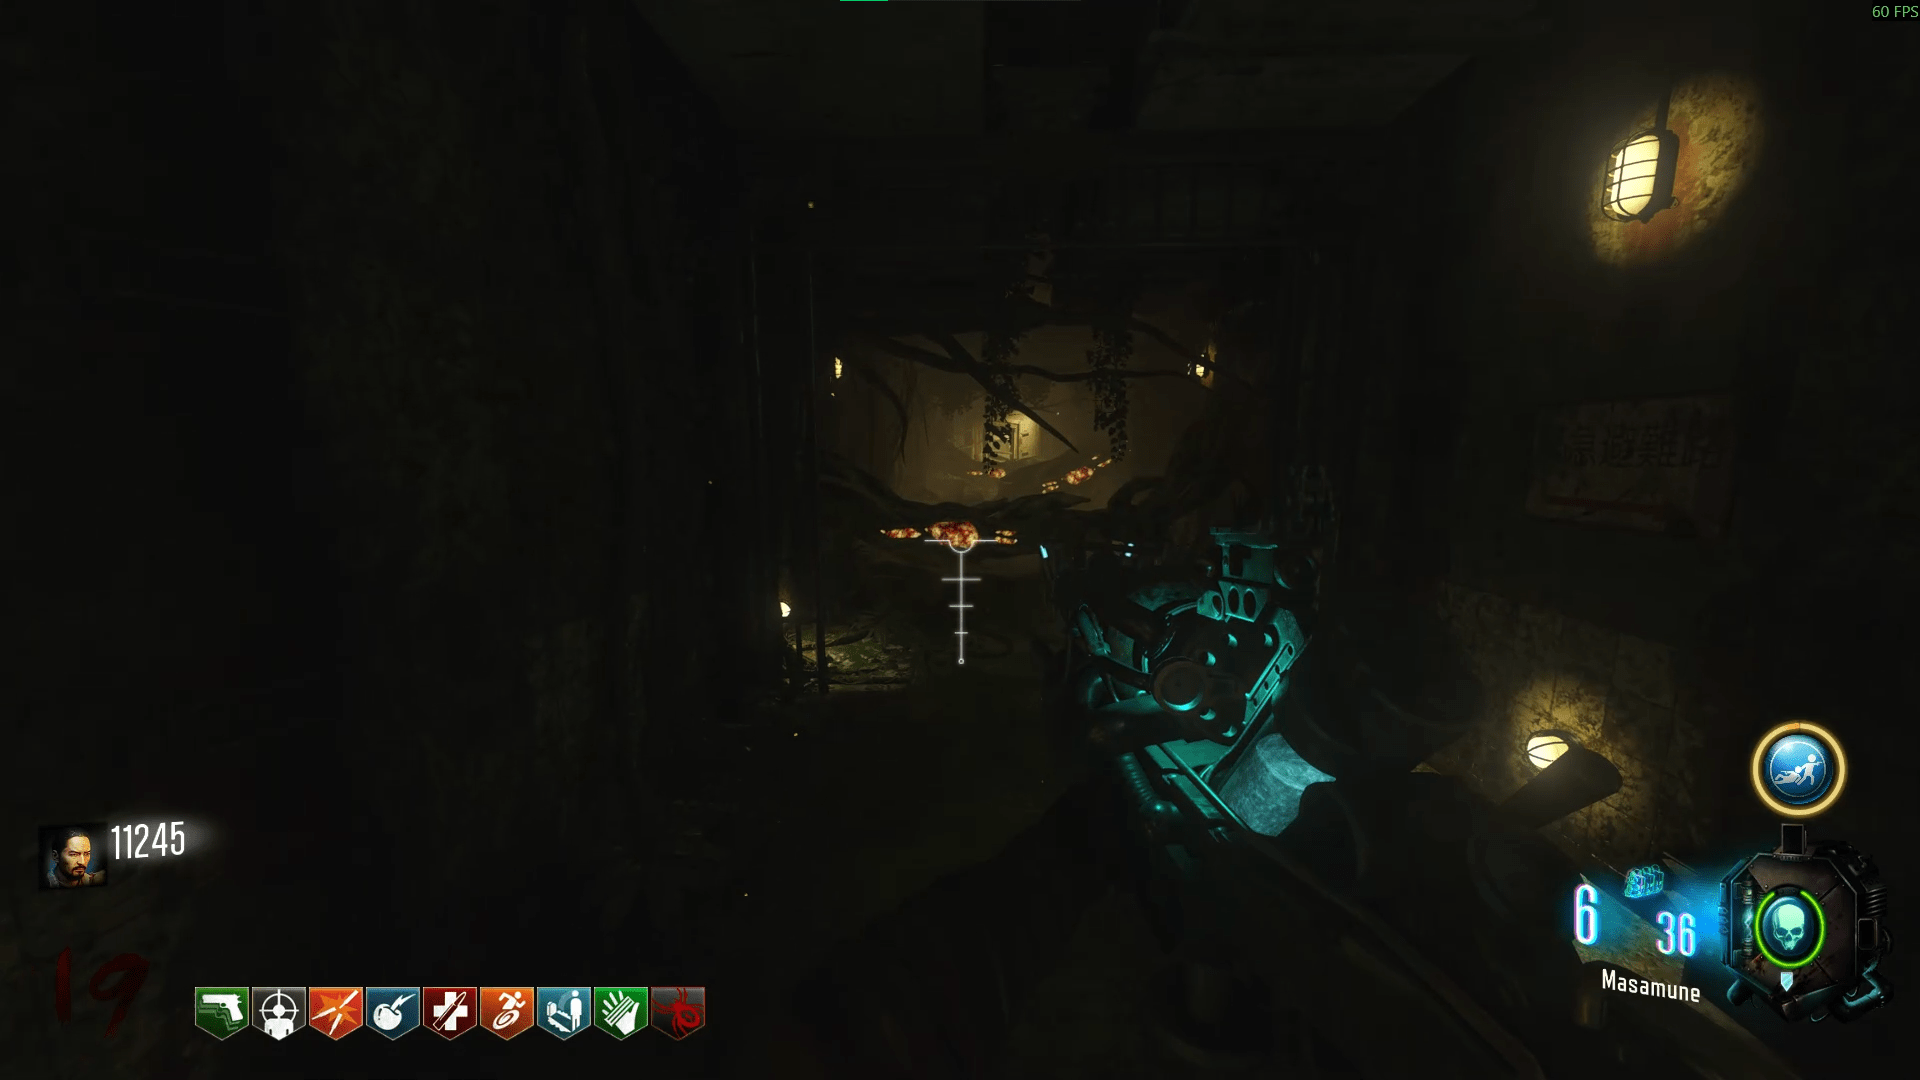
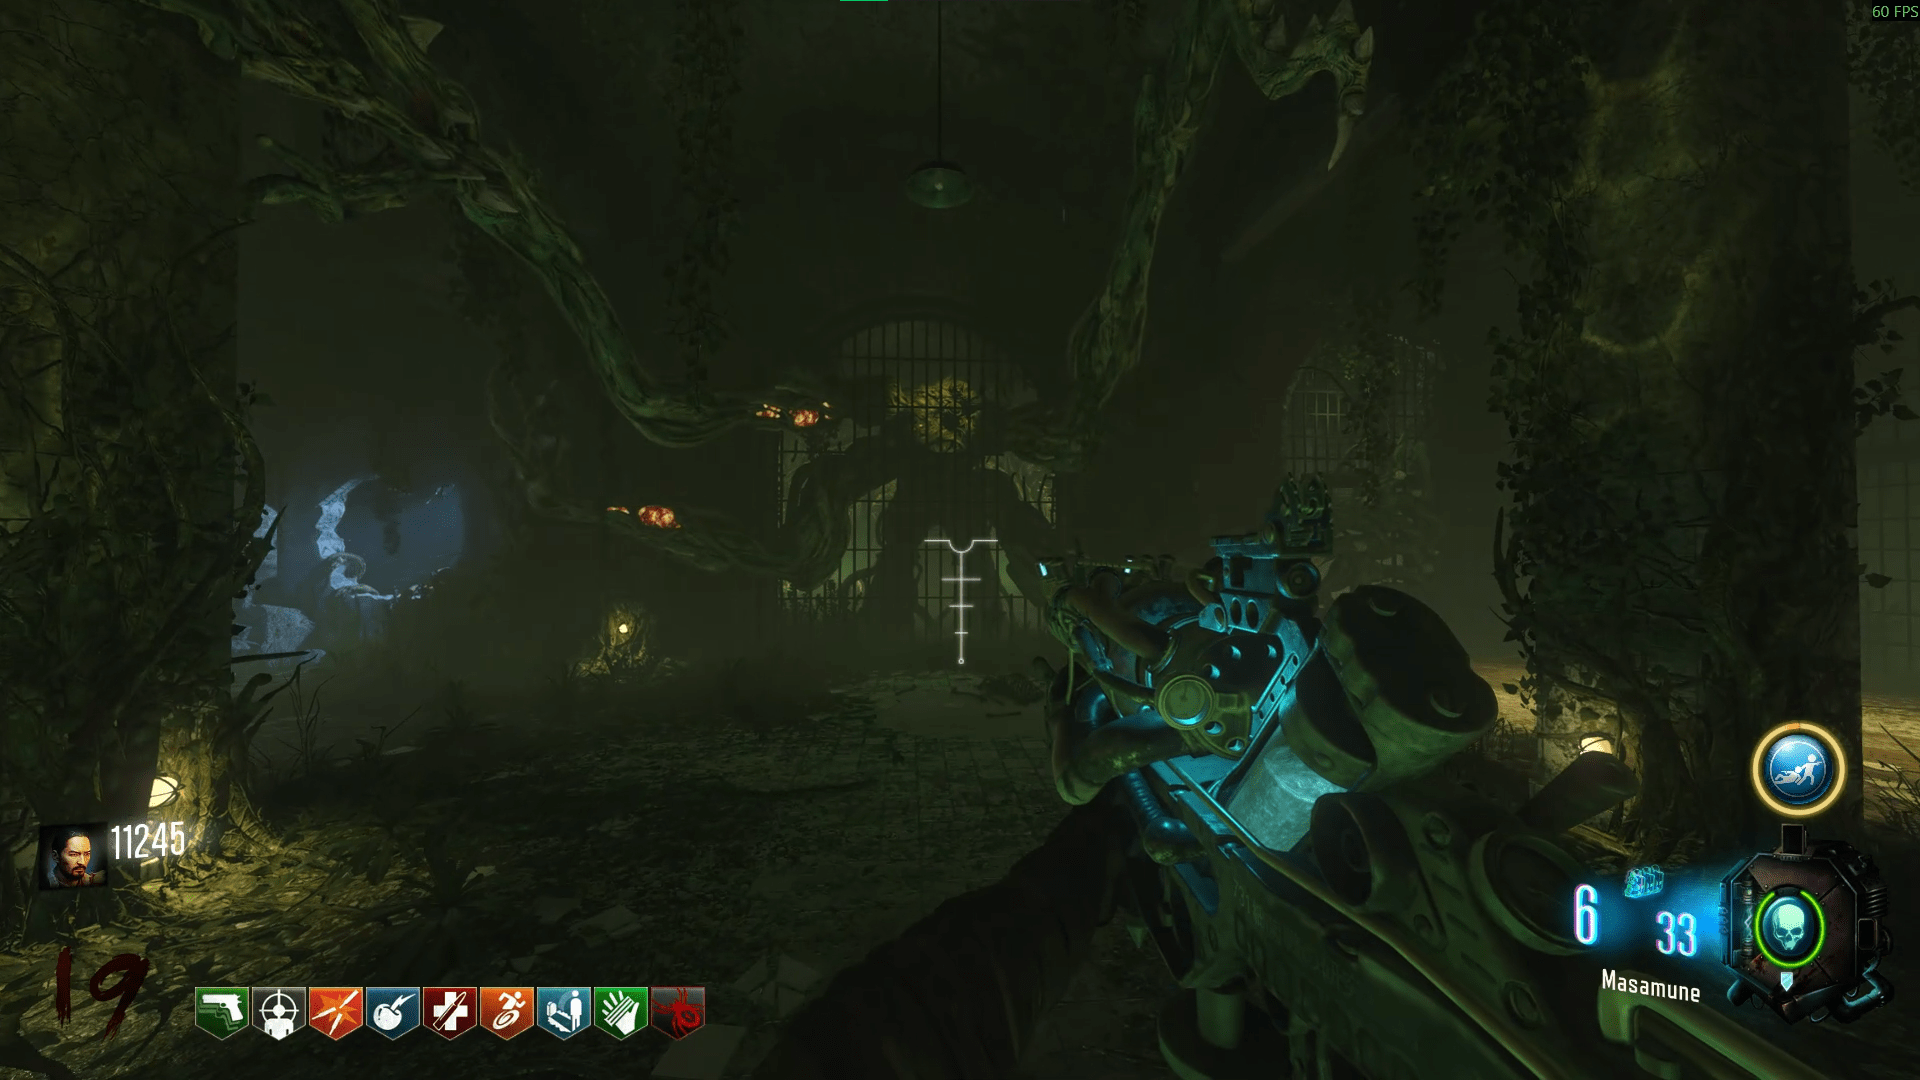
The Mega Thrasher isn't as bad of a boss as he may look. All you have to do is shoot the same spores on the tendrils four times, they appear periodically so just keep an eye out for them, otherwise just focus on surviving and you'll be done. After the fourth shot, the cutscene will start and you'll have finished the Easter Egg.
Gorod Krovi
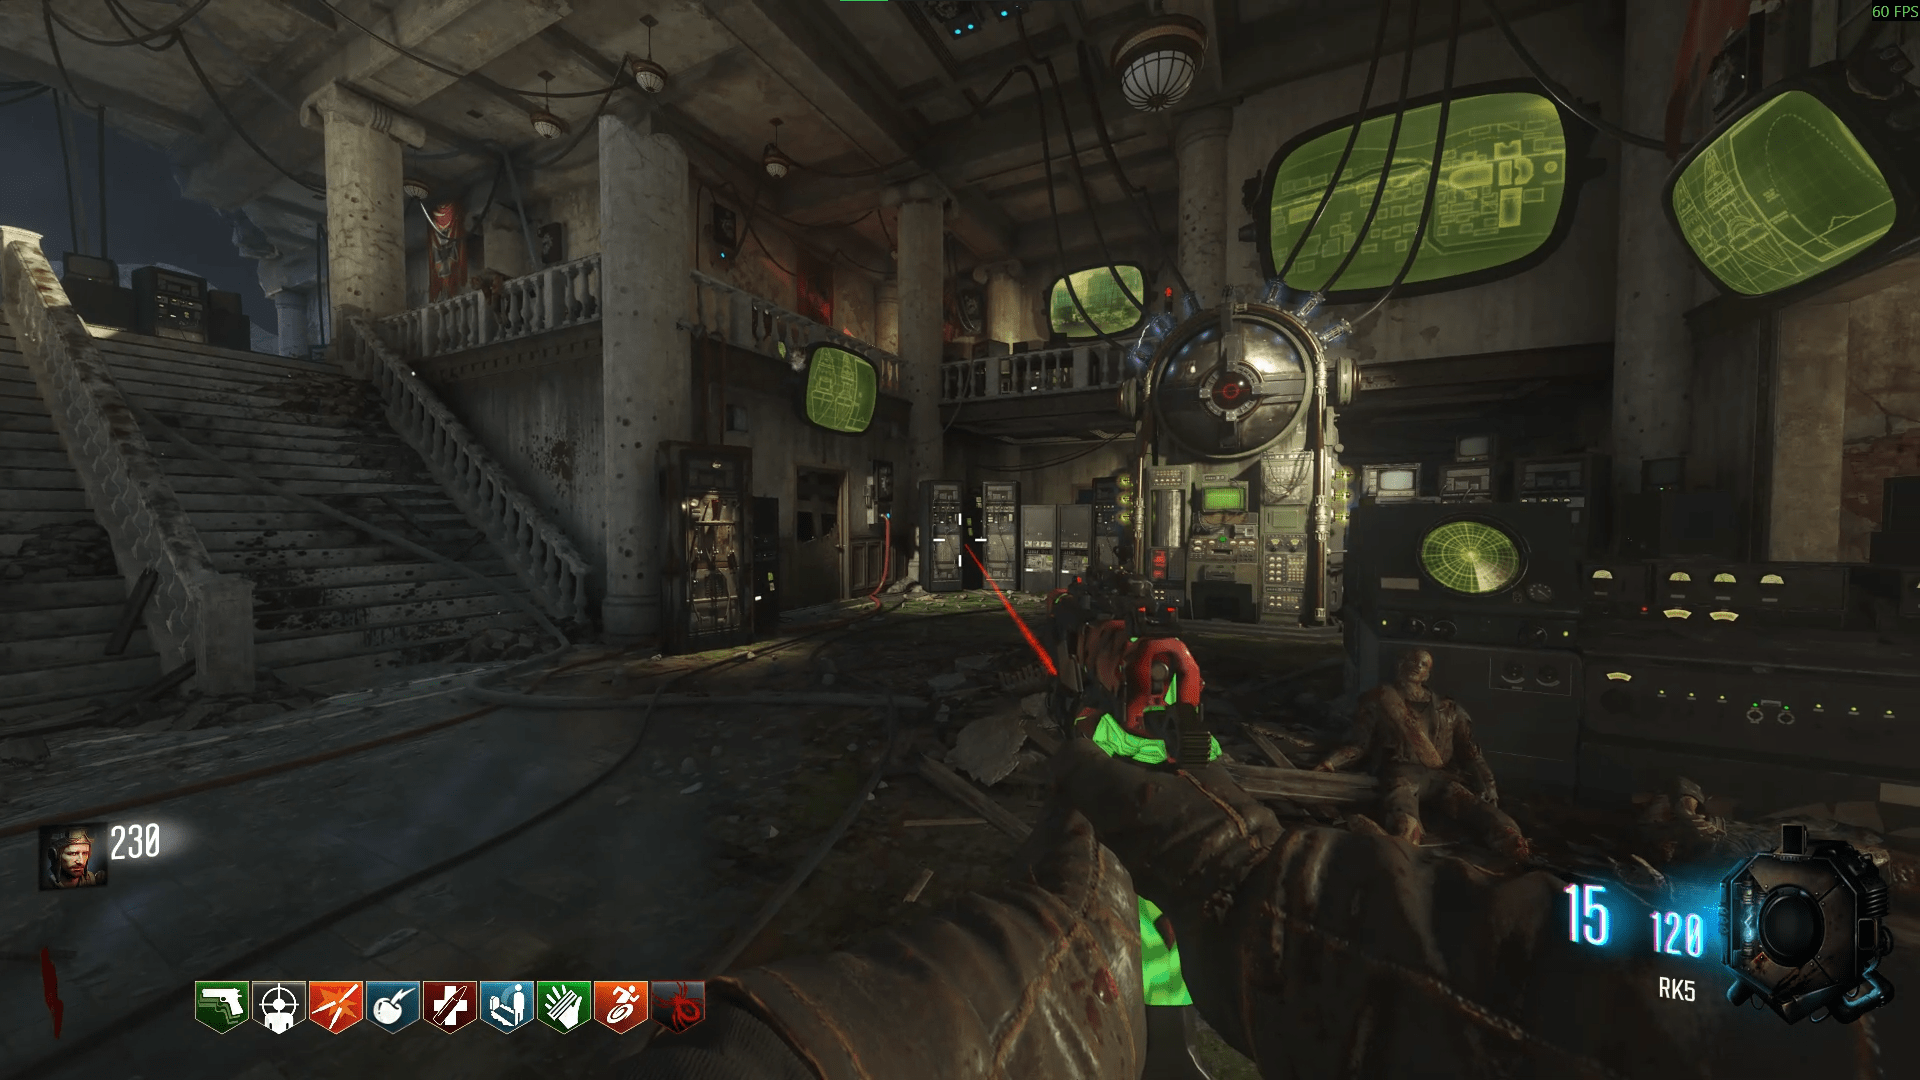 When you turn on power, zombies will now start to drop code cylinders that correspond to three pods that you need to bring down. You can only carry one cylinder at a time so when you pick one up, make sure to do it immediately. The cylinders are colour coded also; Blue for Dragon Command, Yellow for Supply Depot and Red for Tank Factory.
 - Dragon Command: Back end of the room, besides the Dragon fast travel.
- Supply Depot: In the main area on the back wall next to the Giant Laser Trap.
- Tank Factory: Also right beside the Dragon Fast Travel.
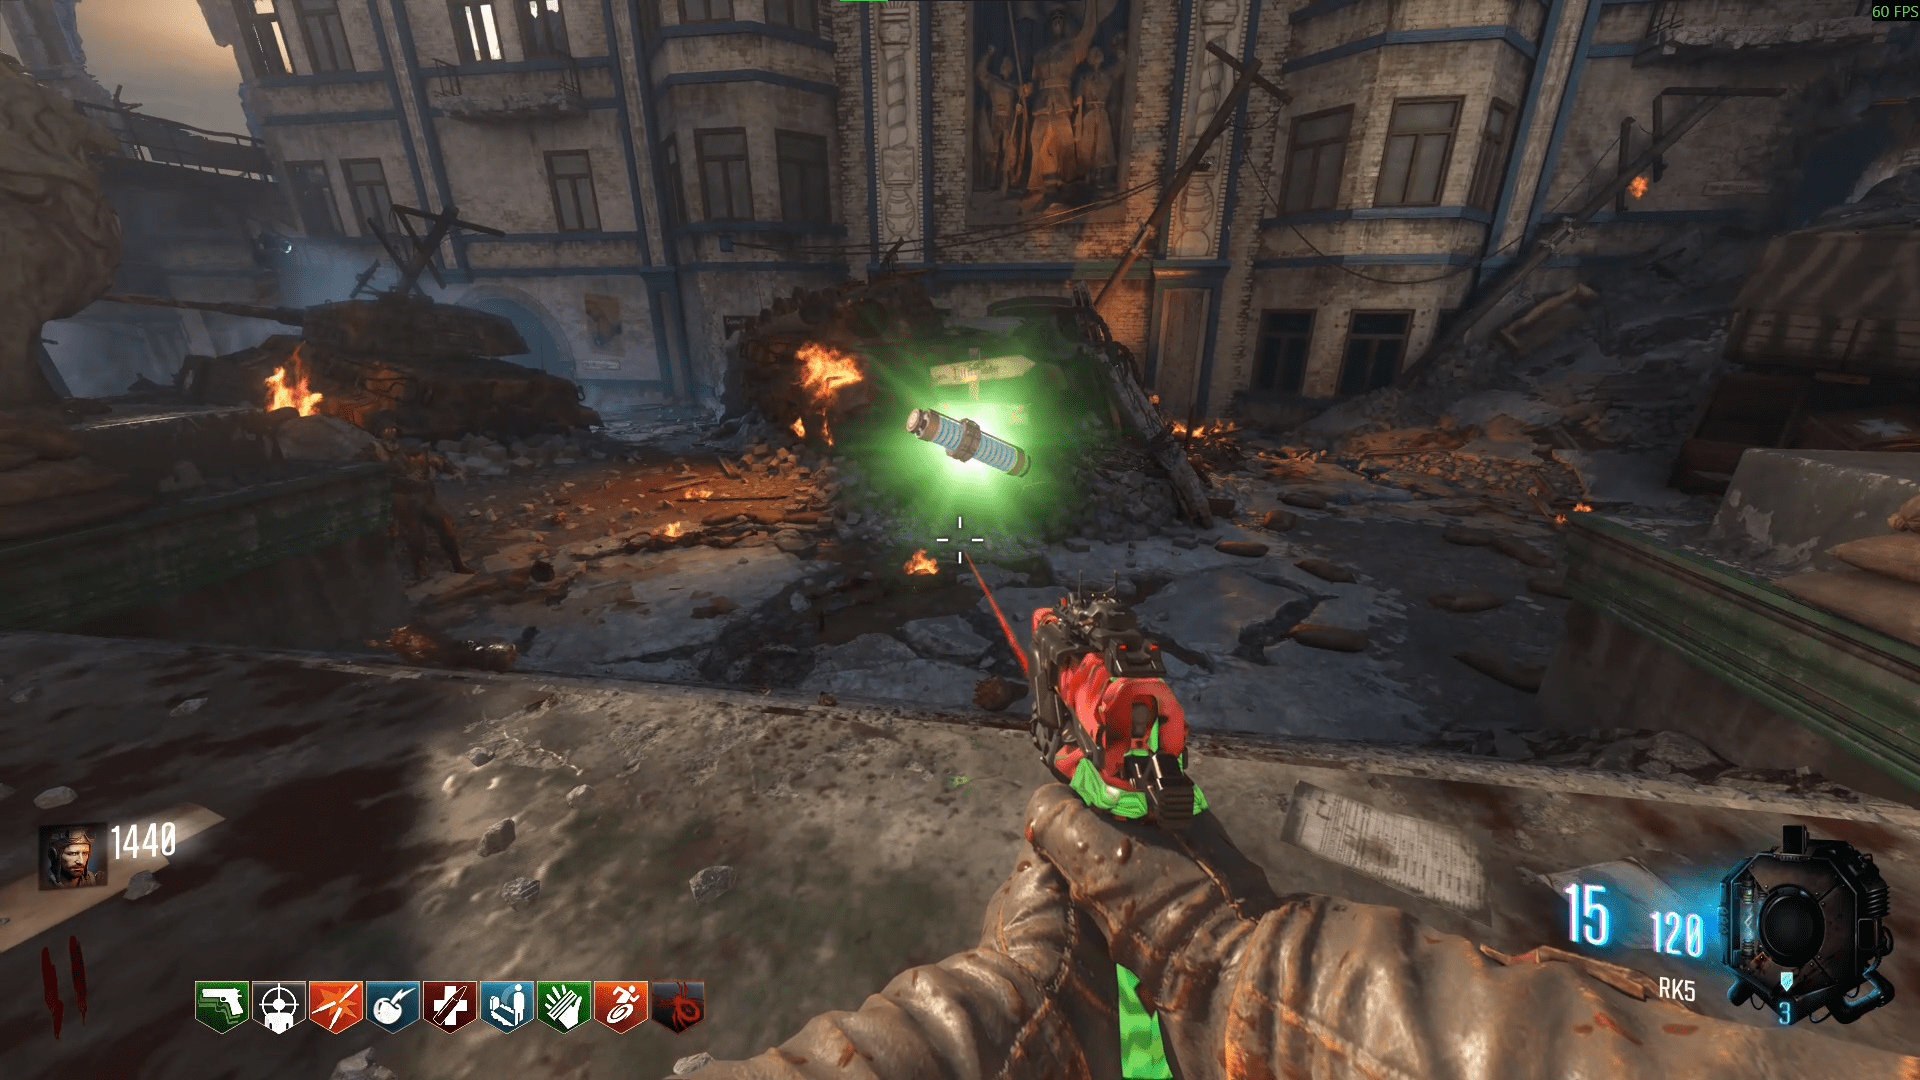
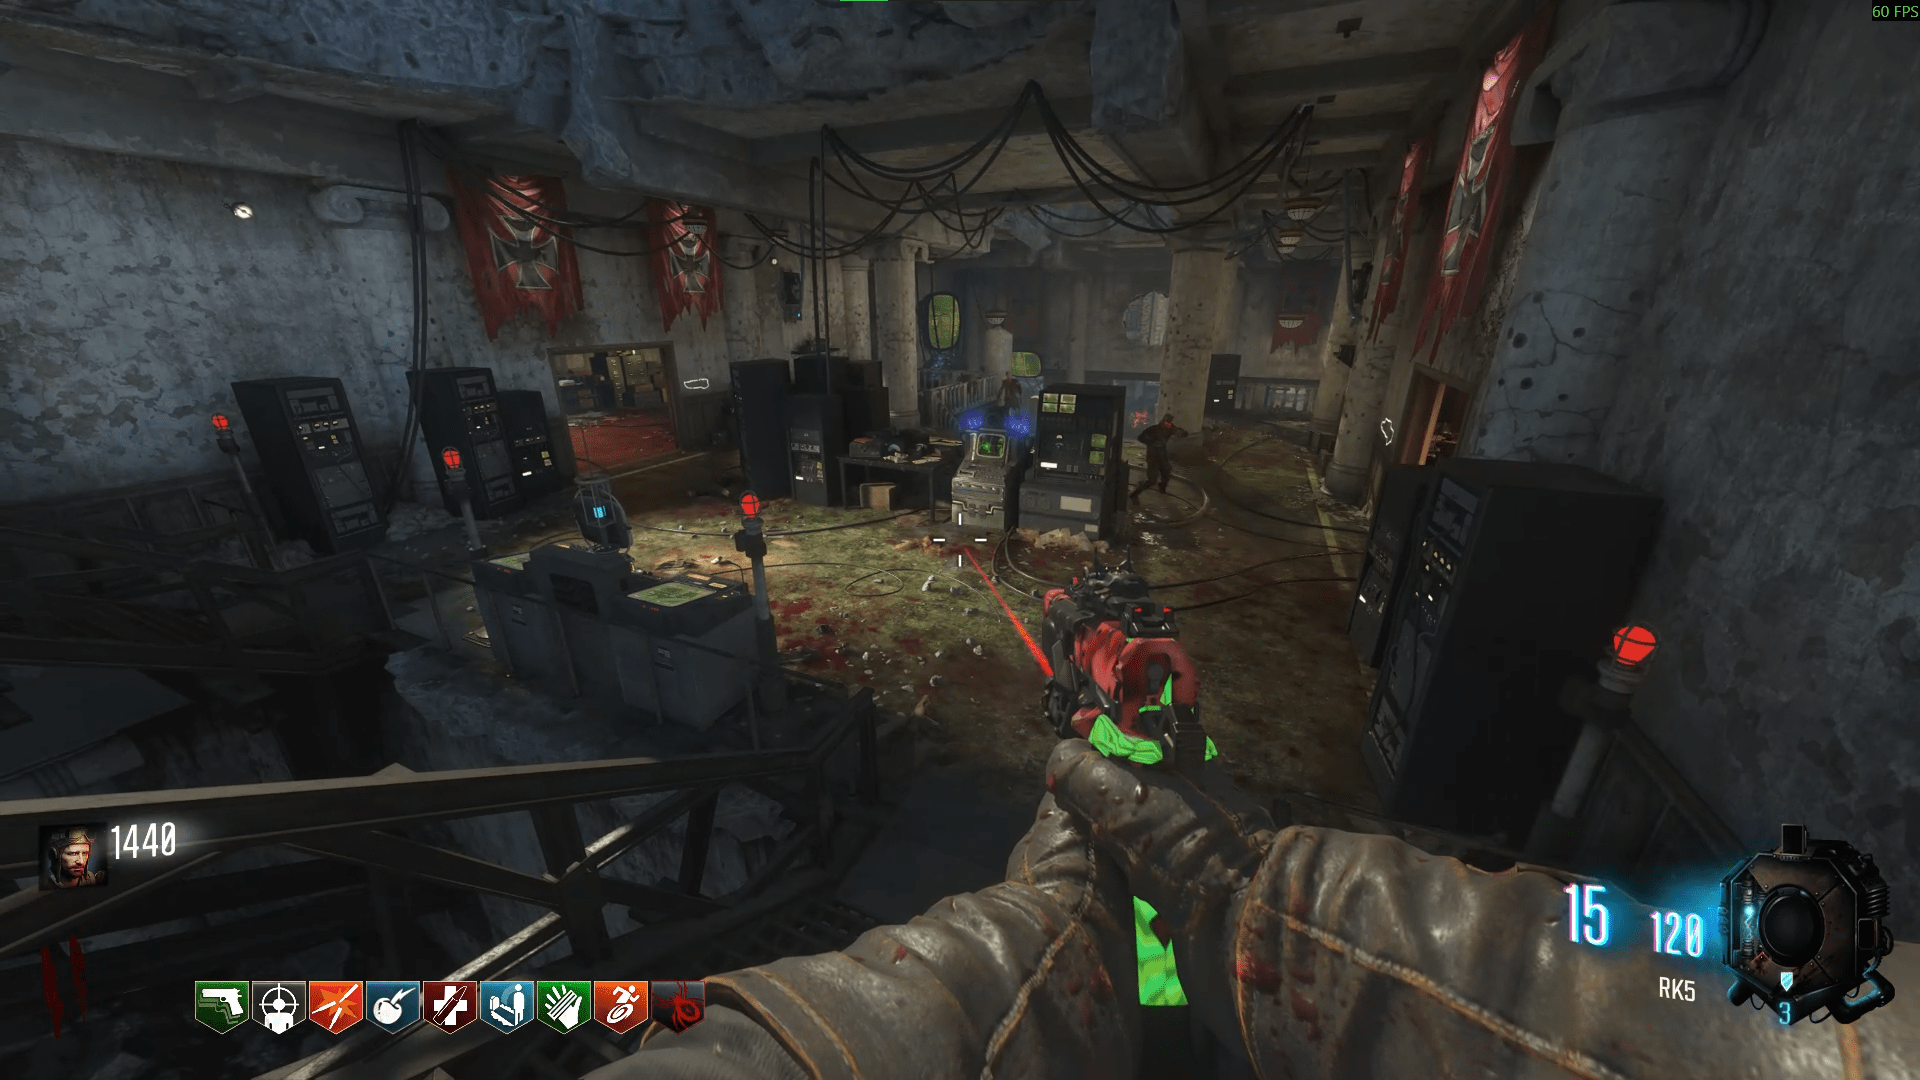
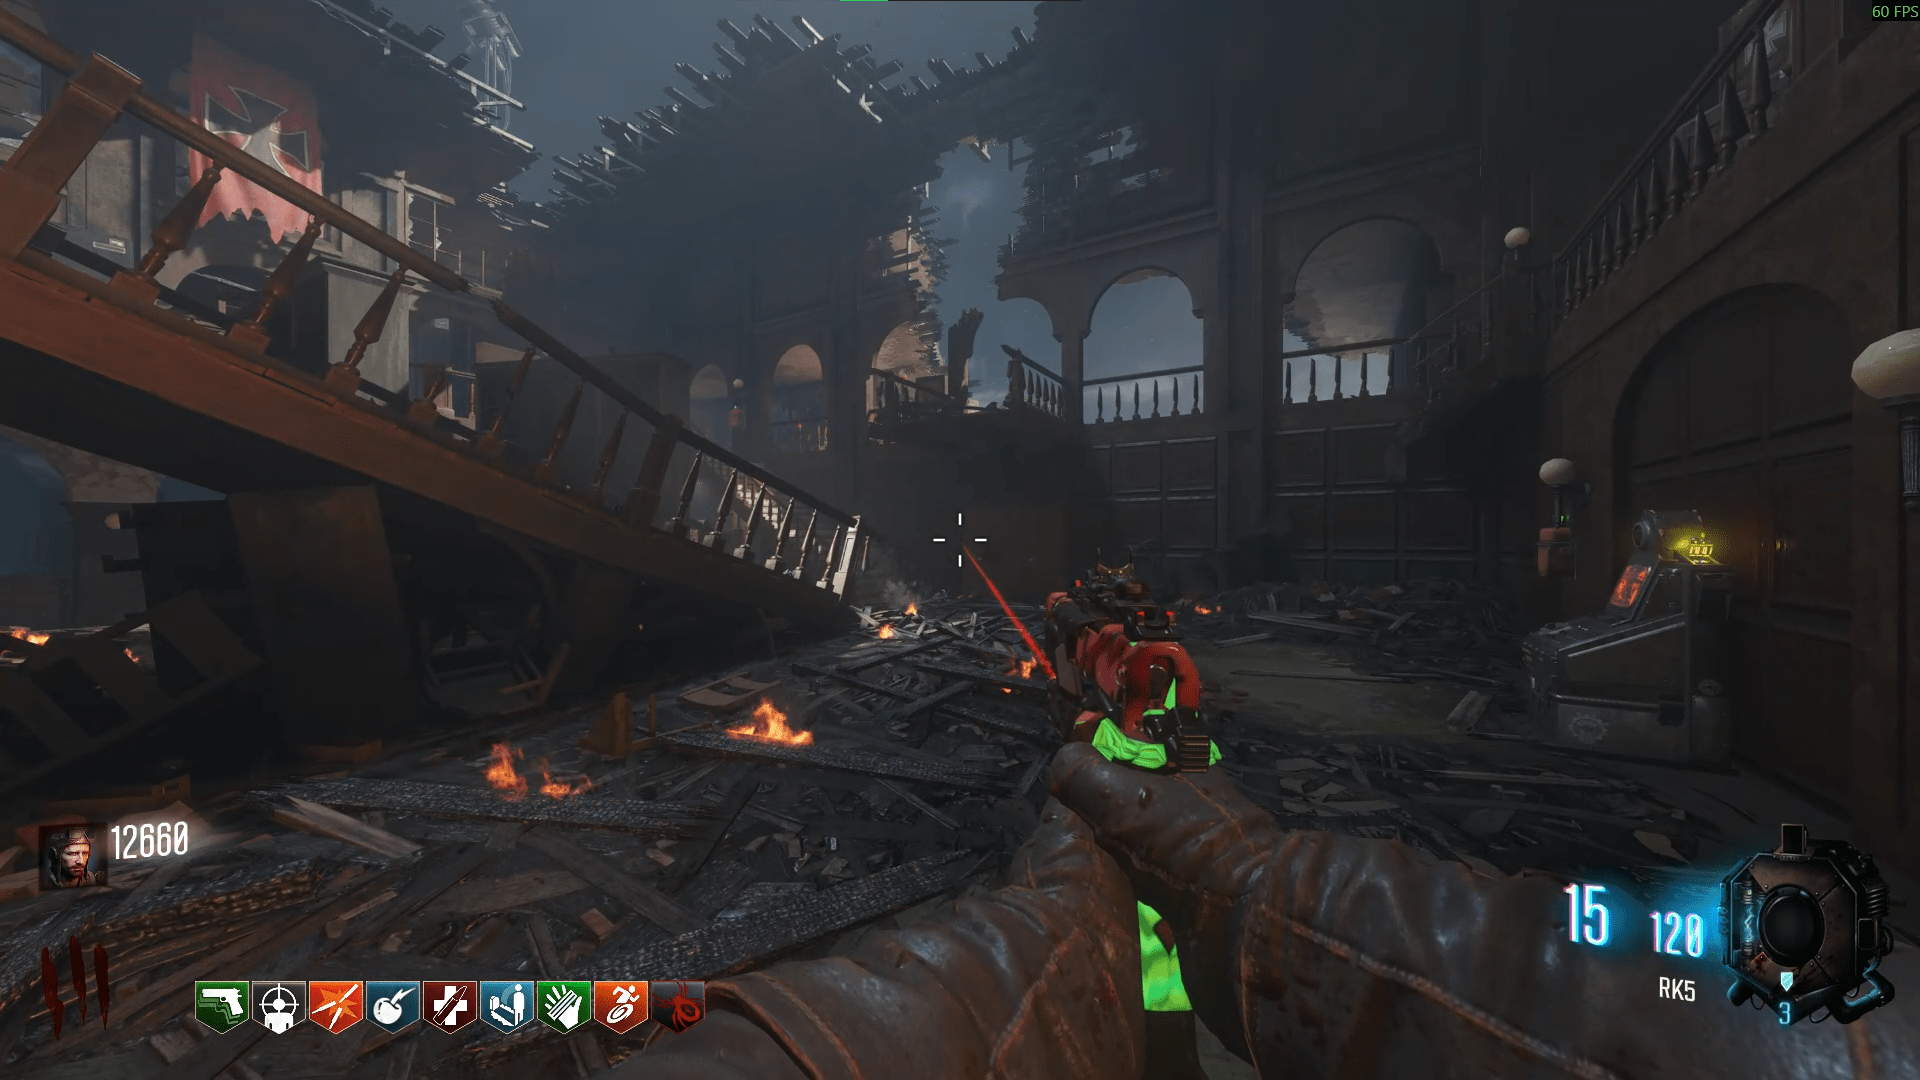
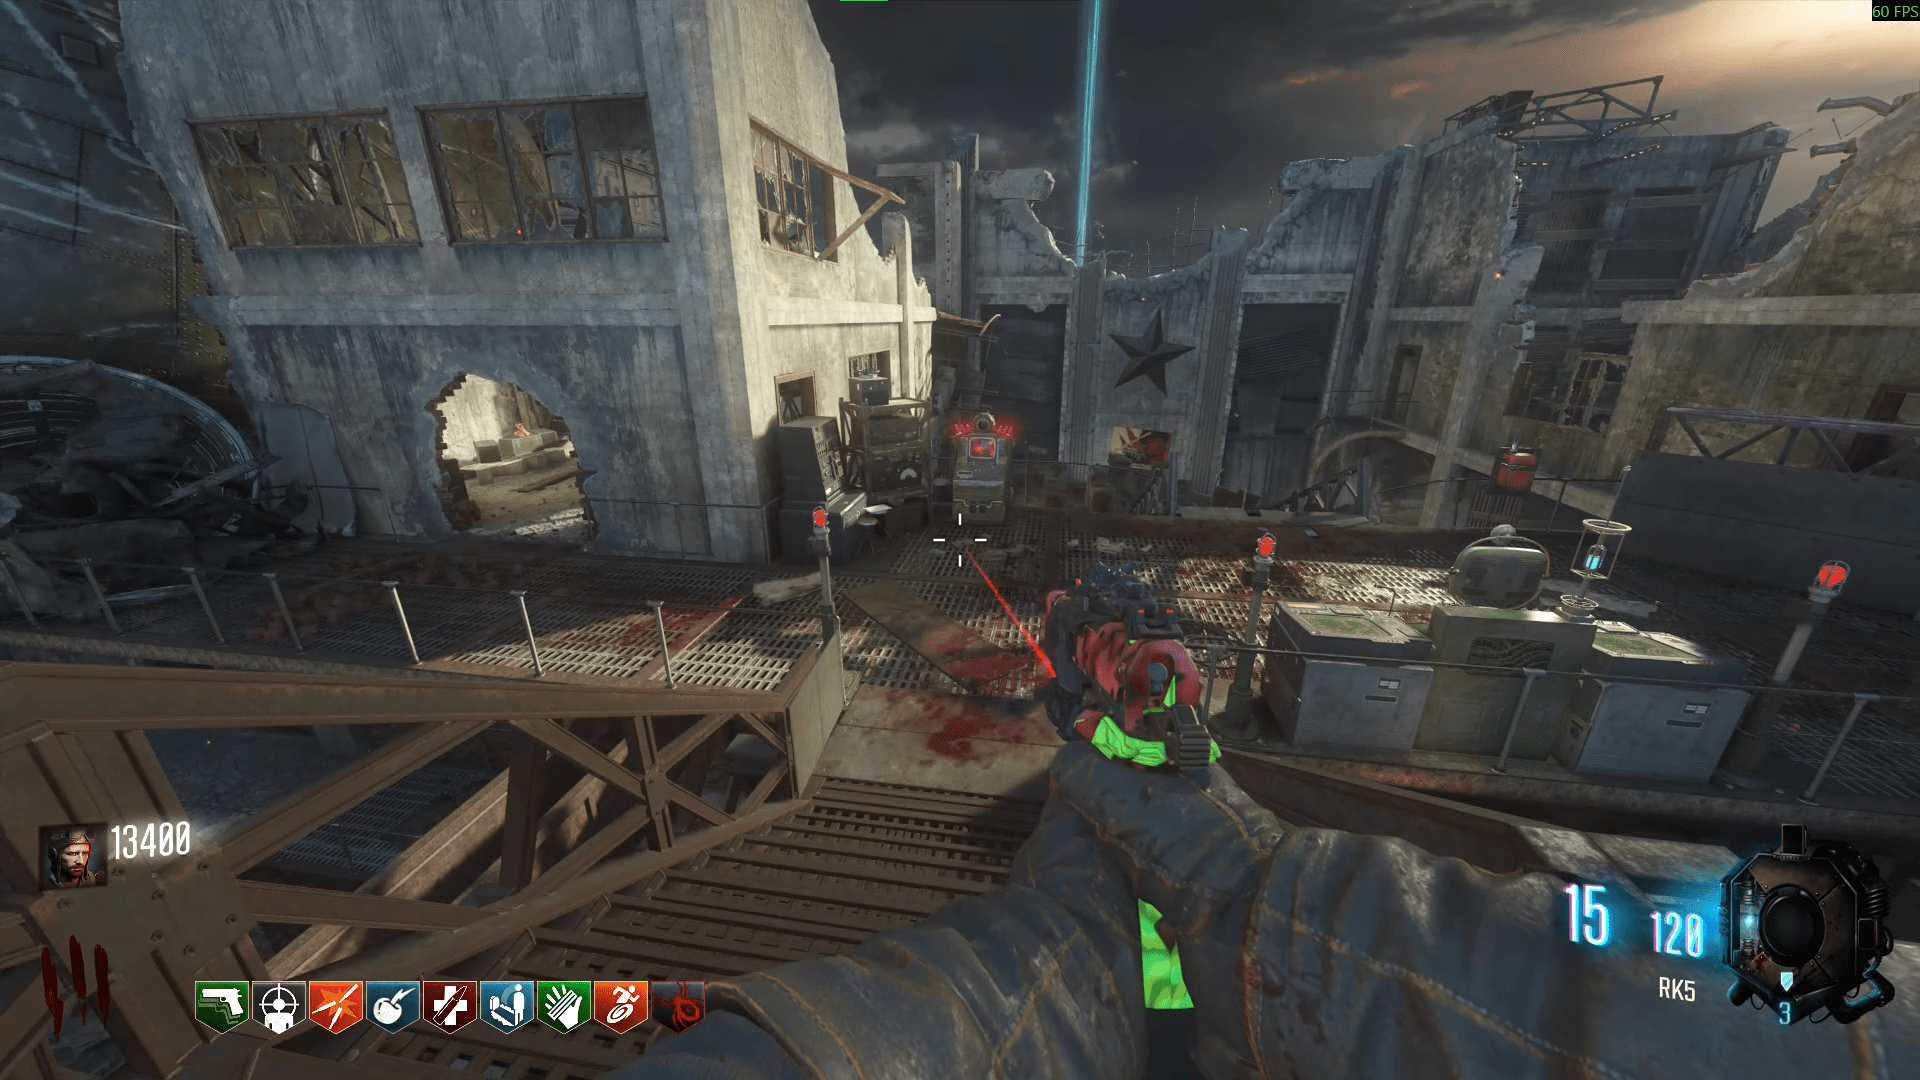
When you use one of these cylinders, a pod will drop from the sky and land in an area far away from you. You can find it by looking to the sky and seeing a large green light, just like how the Mystery Box looks. Once you're there, just defend it until it opens to give you a part then repeat twice more.
After which, you can place these three parts into the Bunker where the map connects again to enable the Dragon fast travel system to the Hatchery. Now just use the Dragon to the Hatchery.
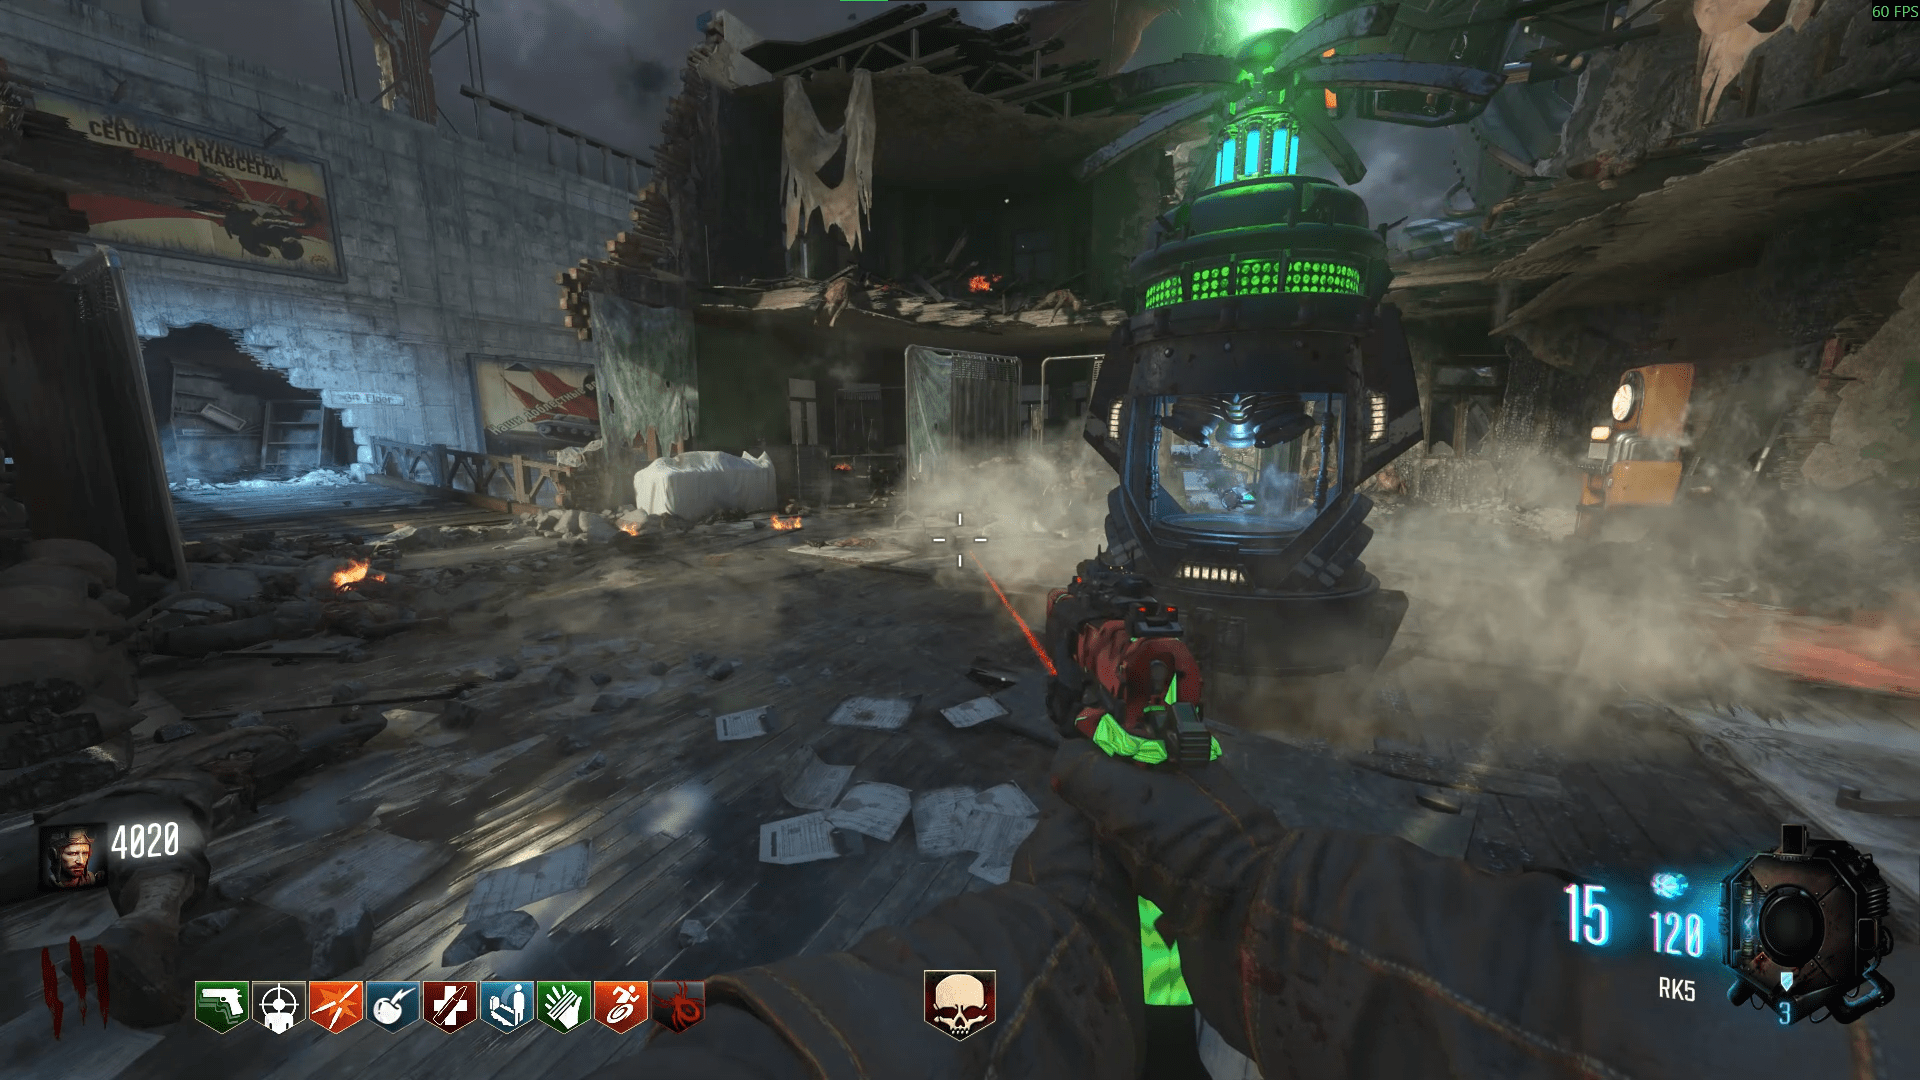
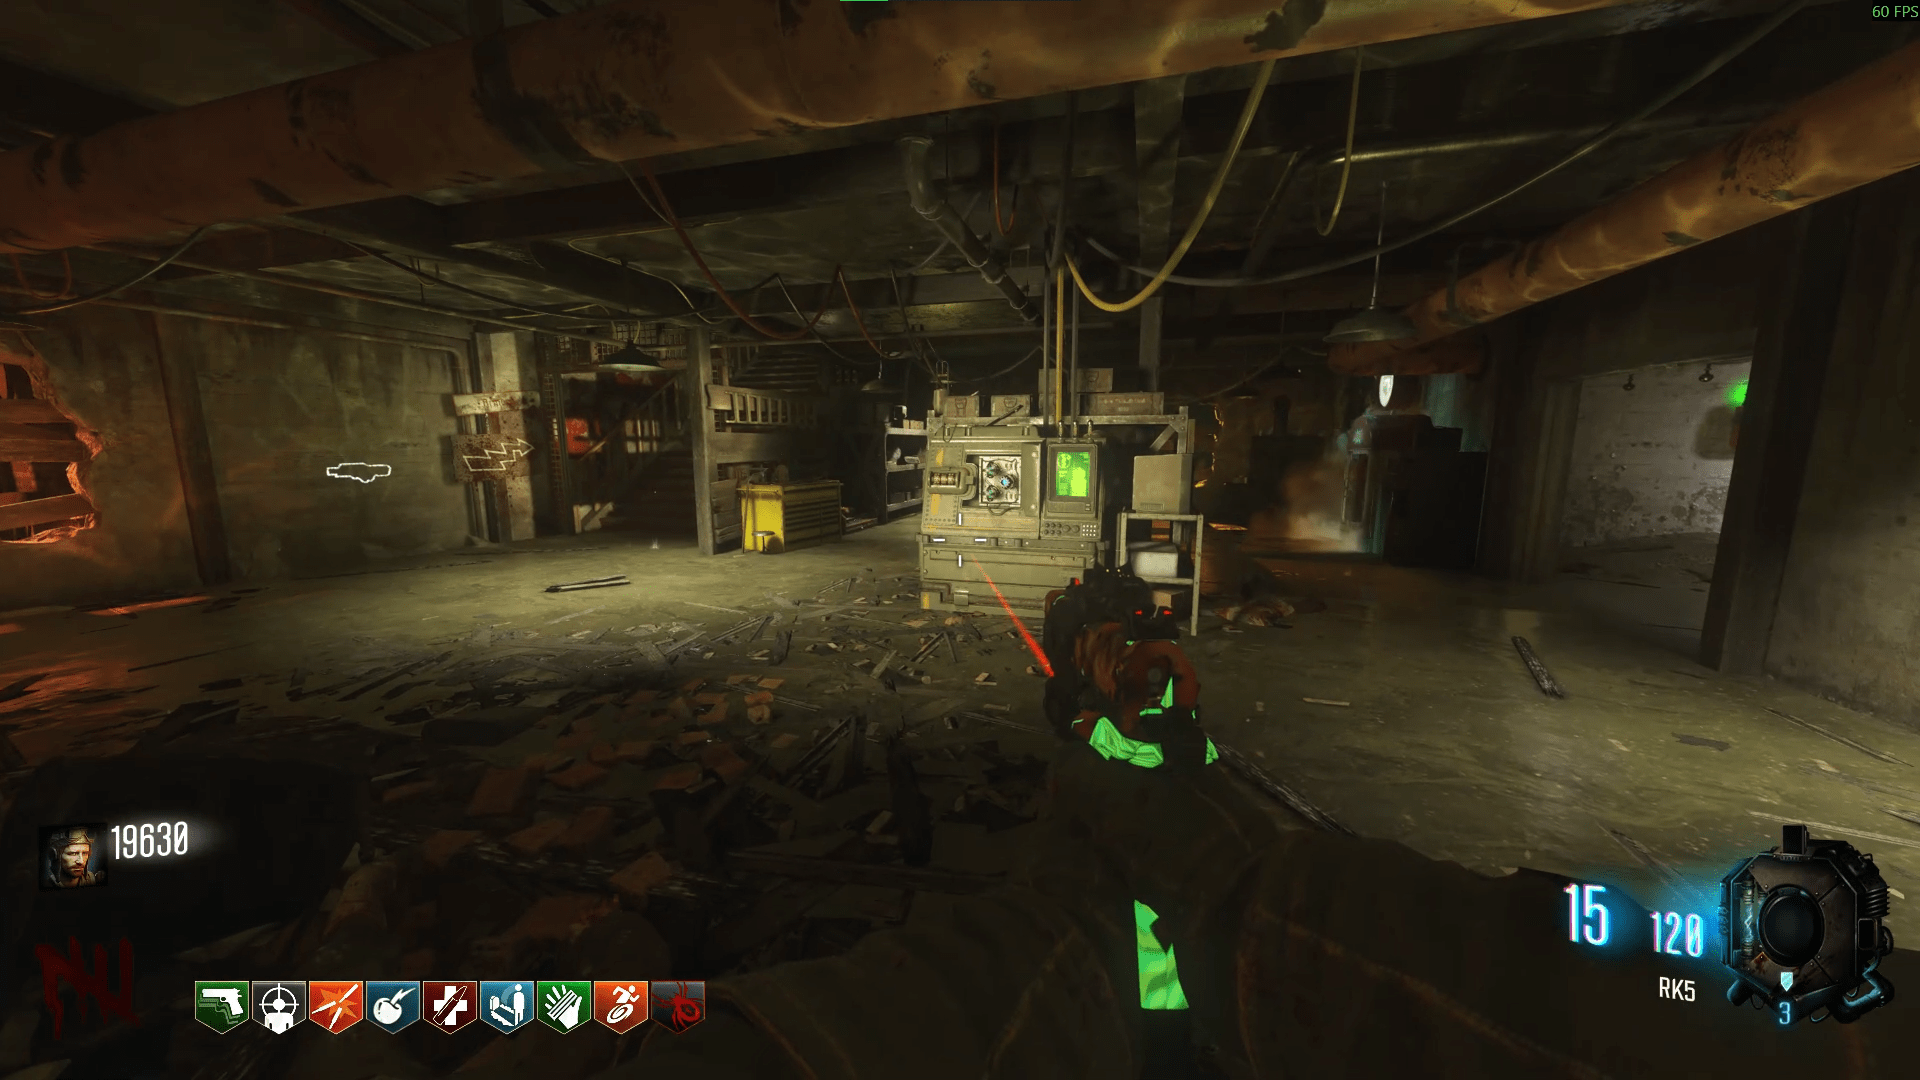
At the Hatchery, find the Dragon Egg above the Sewers exit back to Spawn, shoot it down from the ledge above and pick it up. This starts the Gauntlet of Siegfried which you'll need later.
When you've done that, you can get ready to head back to Spawn. Before you do however, you'll have to look out for a red light in the water through the Sewers that you need to shoot and disable so bring a fully automatic weapon if you can. It's alright if you didn't, you'll just have to be a bit more accurate. On success, you'll hear a clicking sound, we'll return to the Hatchery in a bit to pick up that trophy.
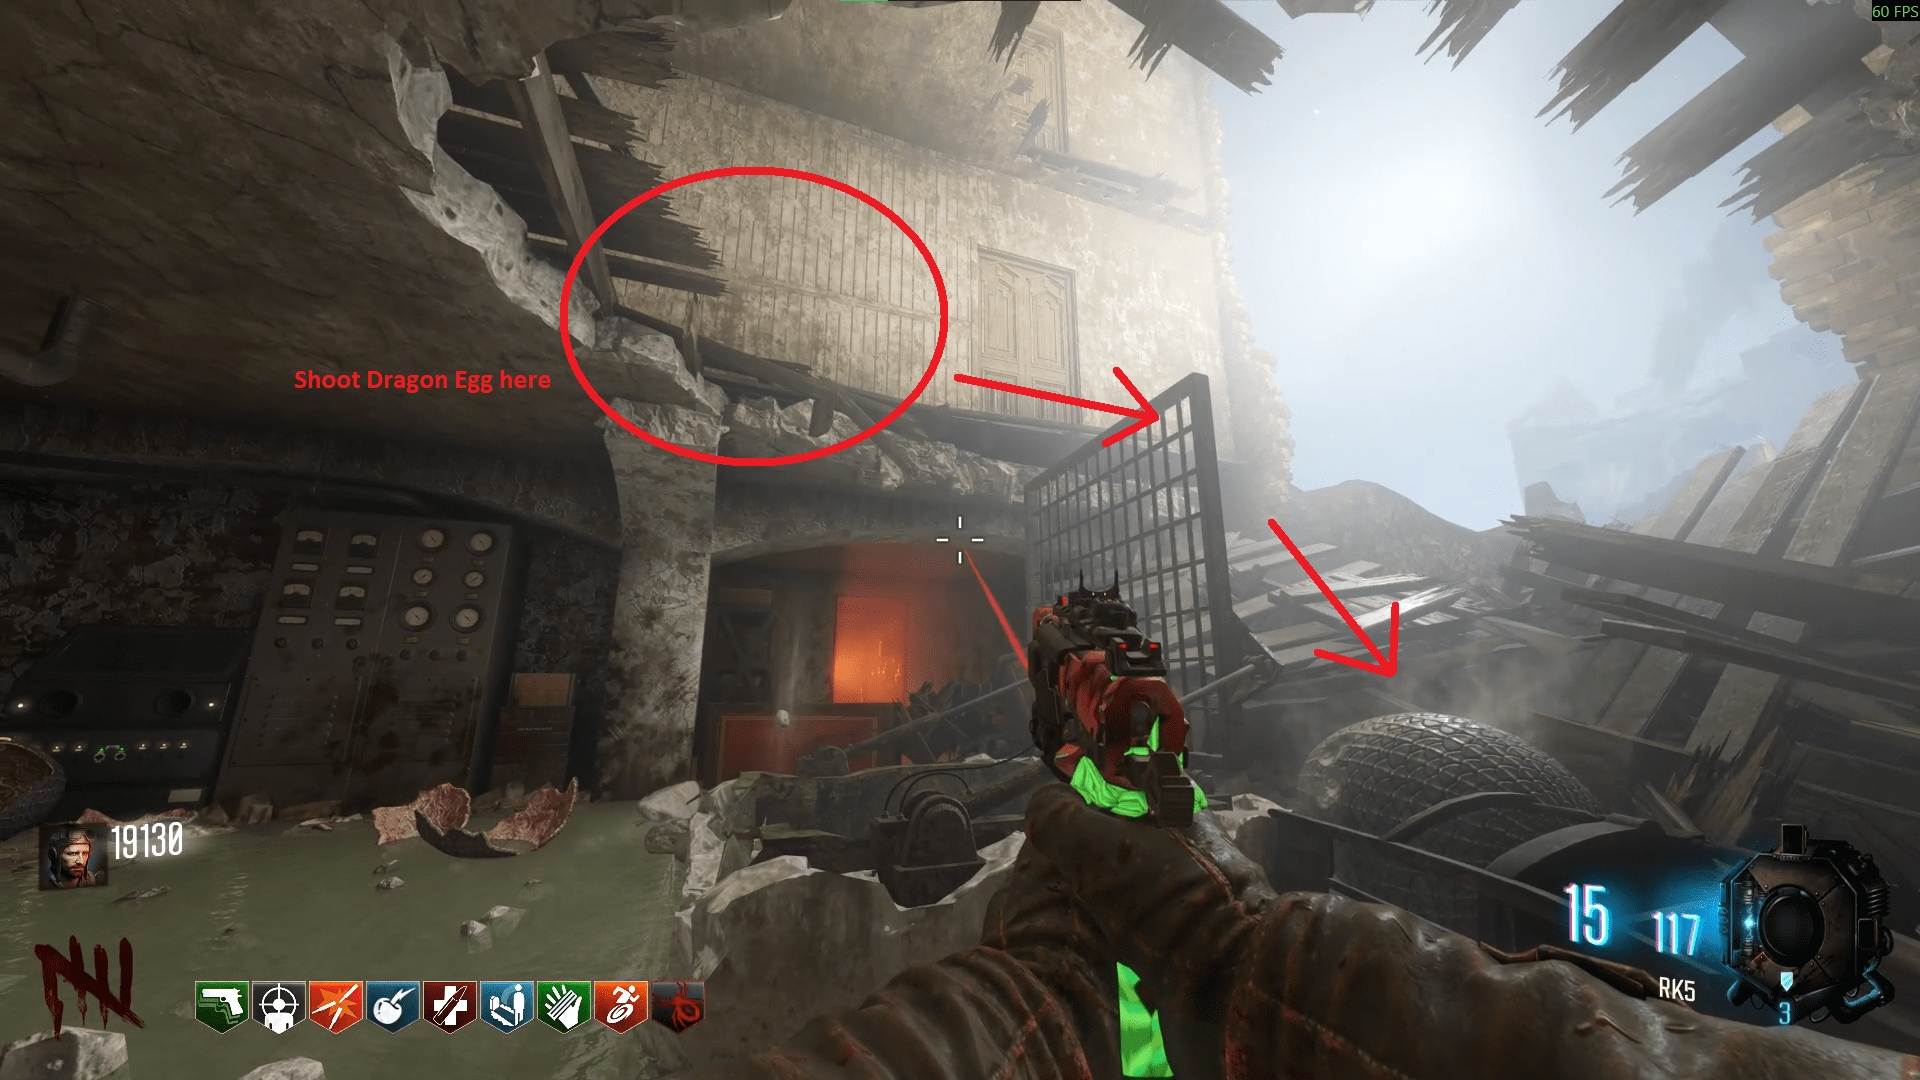
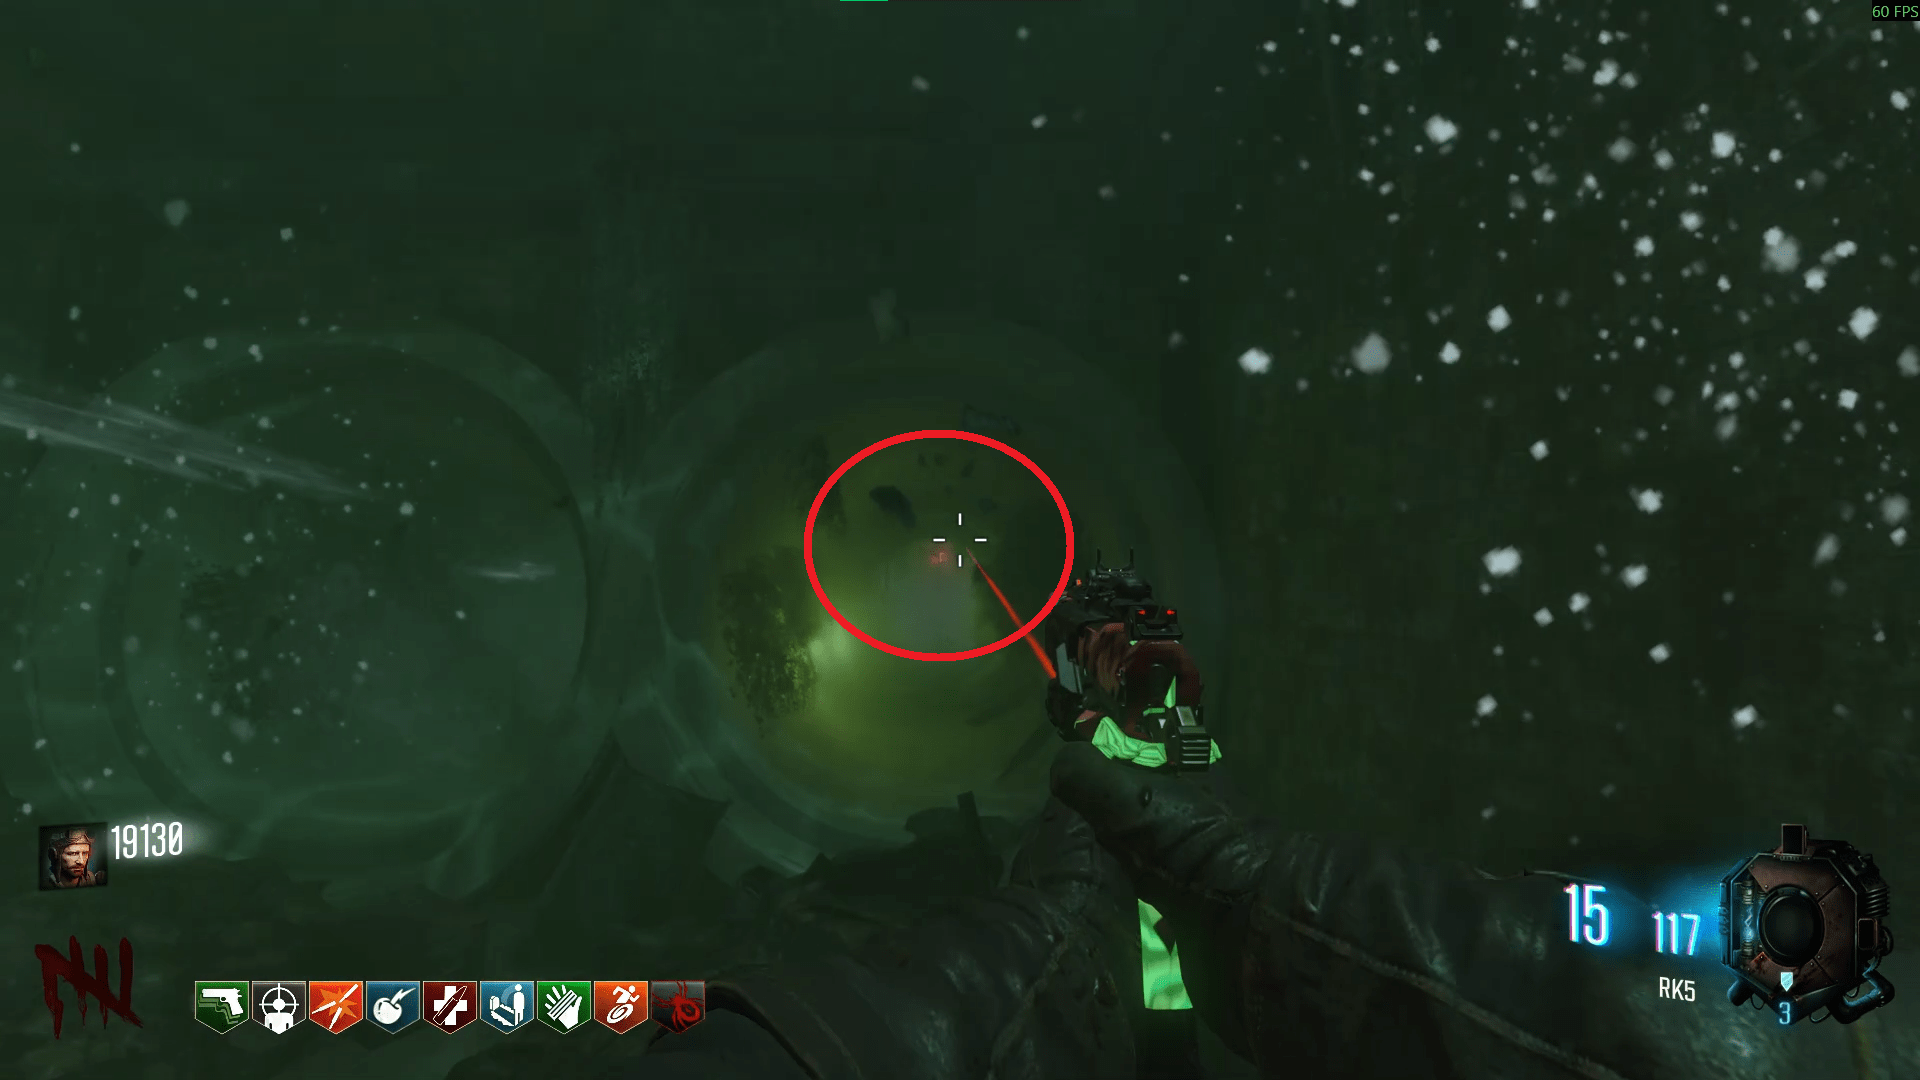
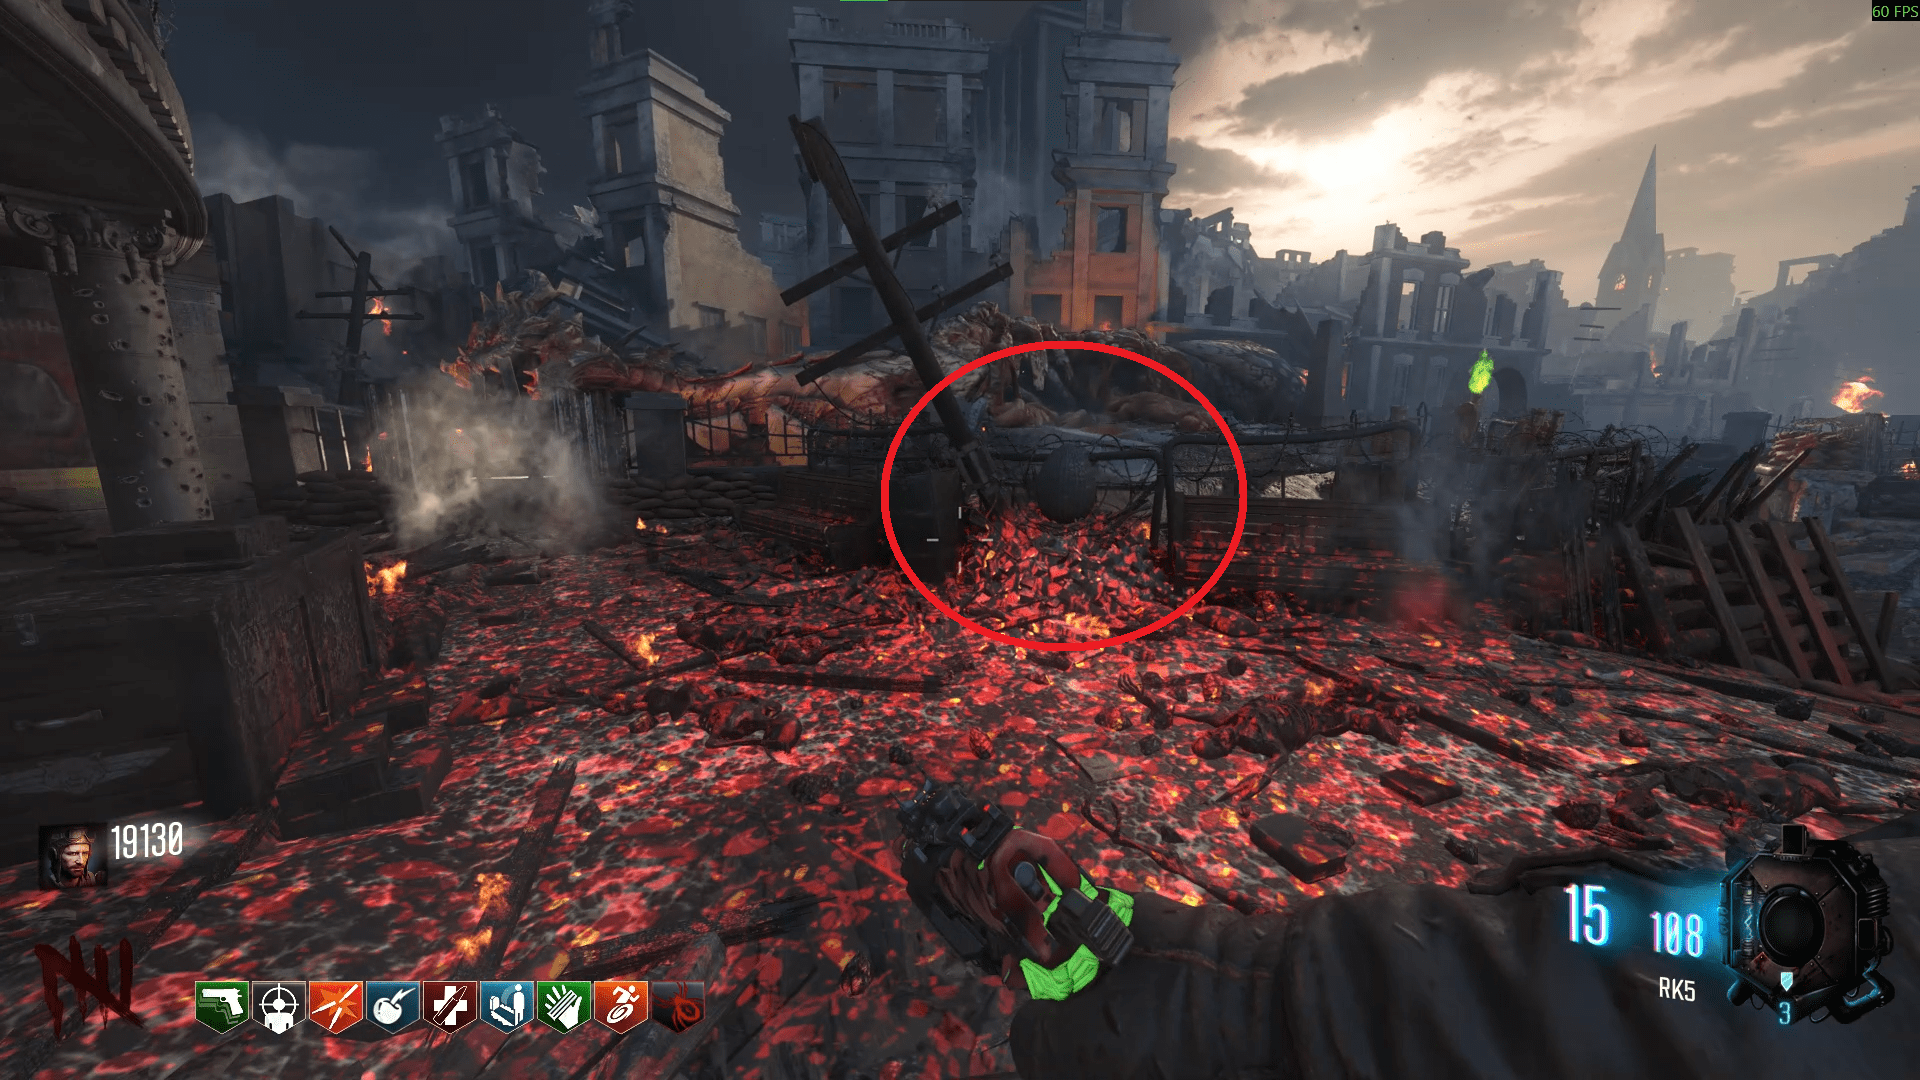
Upon re-entering Spawn, quickly run to the nest and place the Dragon Egg before the big Dragon breathes down on you. This gets the Dragon Egg ready for the next couple of rounds. Progress the rounds in a different location than Spawn so the egg can cool down, then pick it up two rounds later (basically add 2 to your rounds).
- Infirmary: Top of the Bunker's staircase, between two crates on the floor.
- Infirmary: On a bunk bed before going up to Stamin-Up.
- Infirmary; On a wall right in front of Stamin-Up.
- Department Store: To the right of Juggernog, on a chair.
- Department Store: Outside on a truck leading to the Bunker.
- Bunker: On a shelf, on the left of the entrance.
- Armoury: Left of the Wunderfizz machine.
- Armoury: To the right of the tunnel that connects the Armoury to the Supply Depot.
- Armoury: On the wall opposite the code valve.
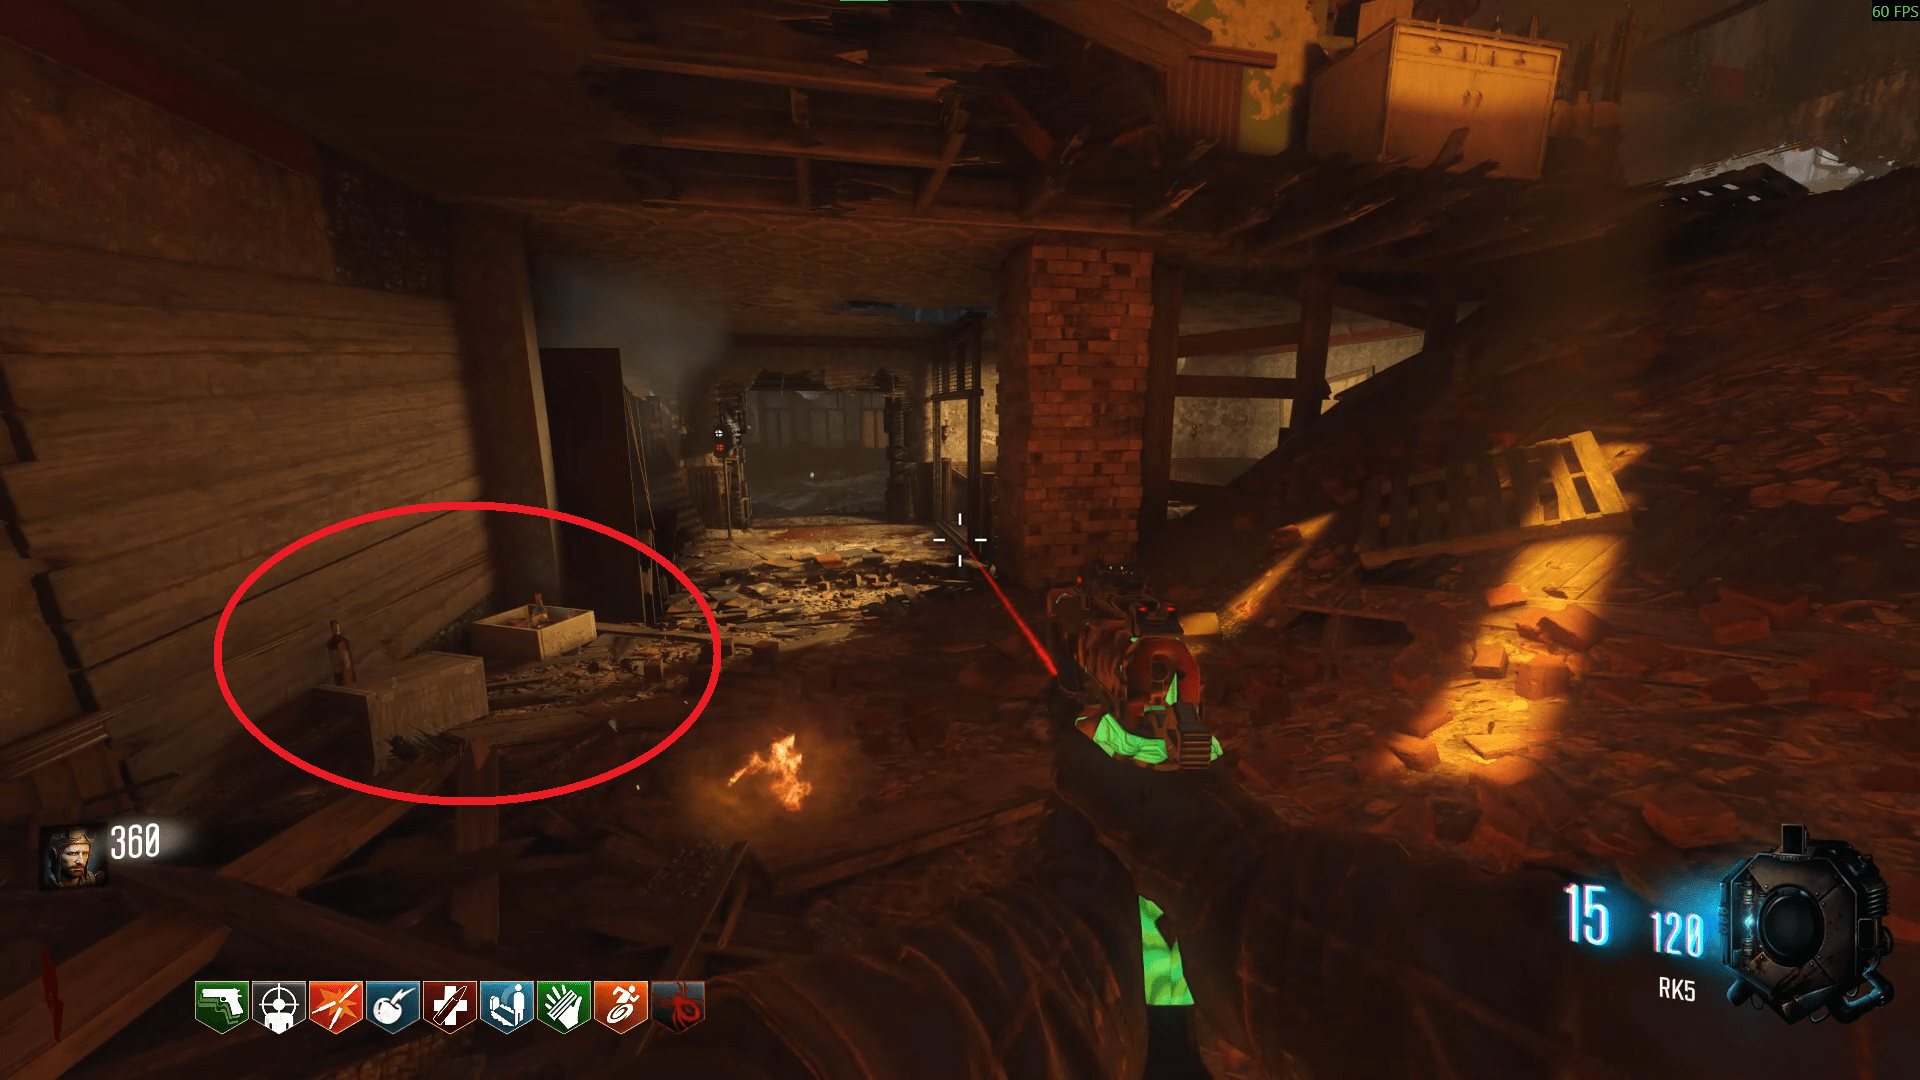
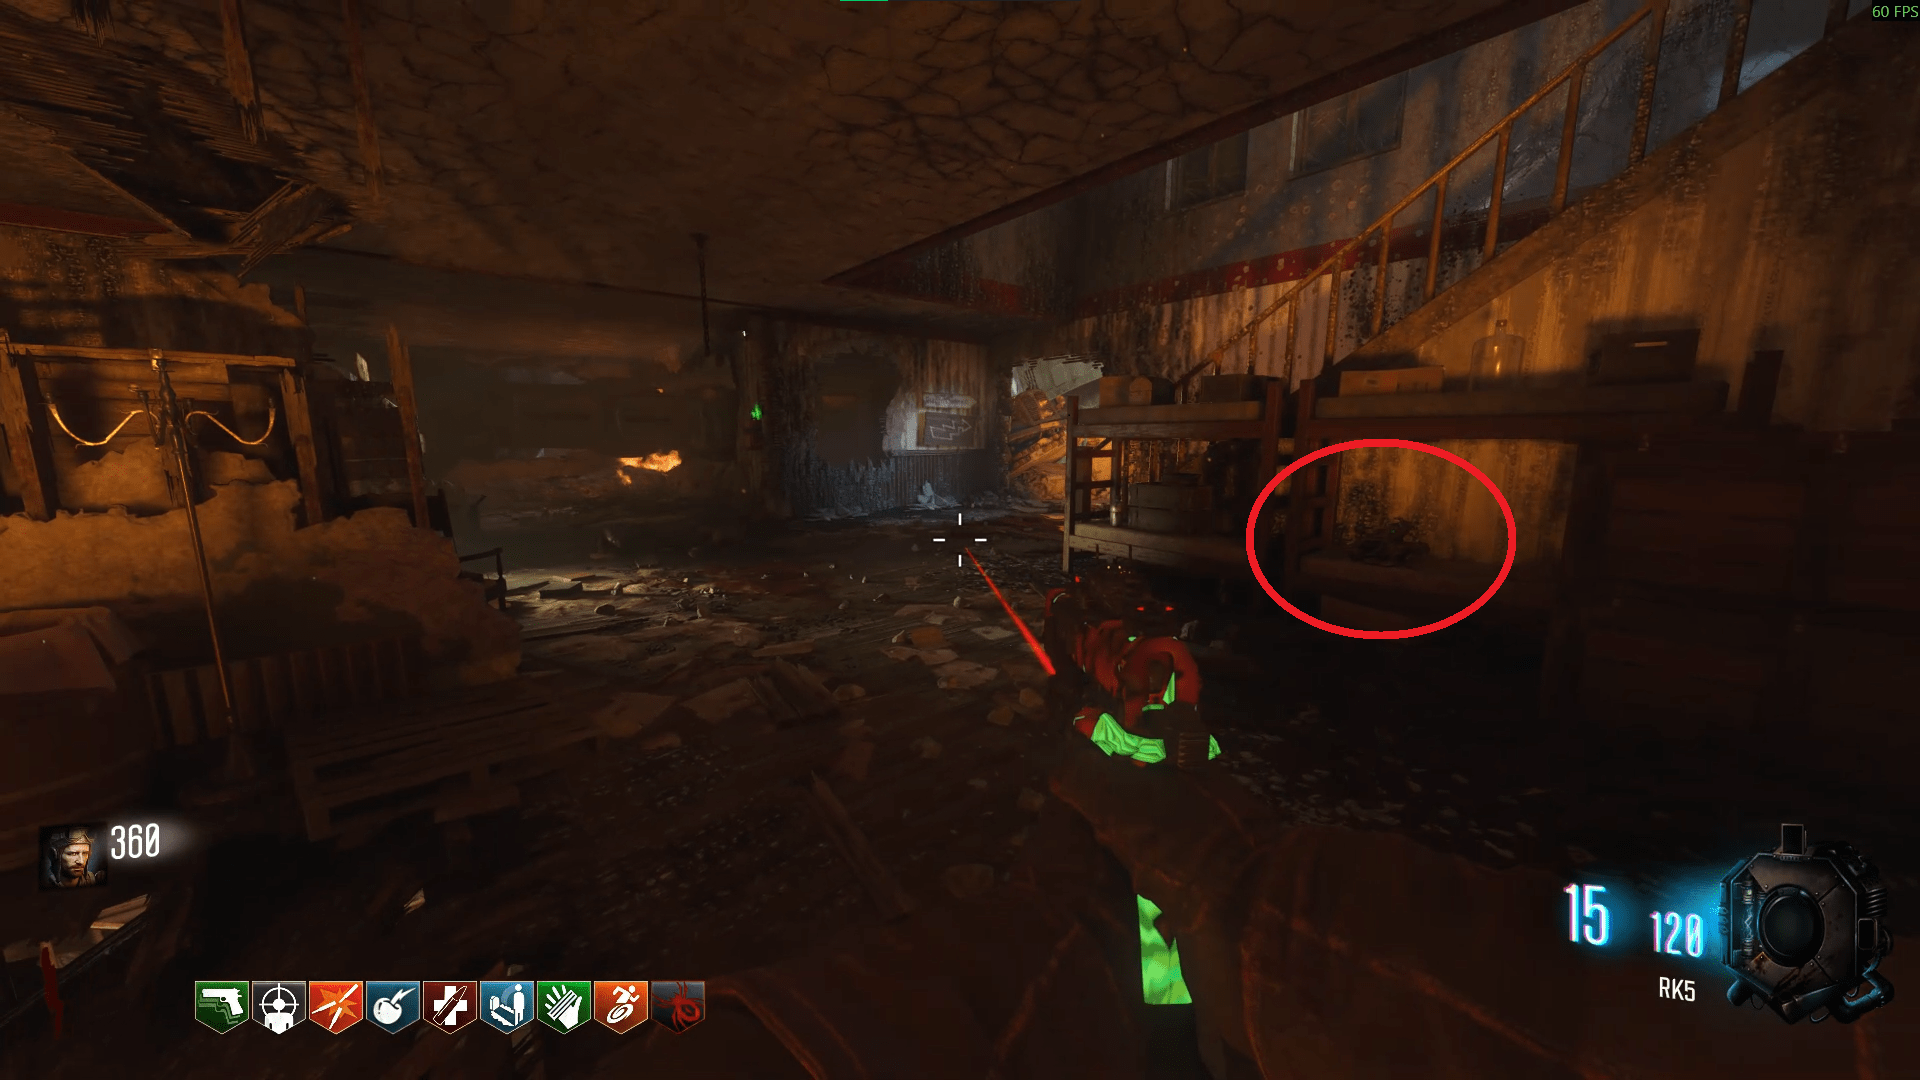
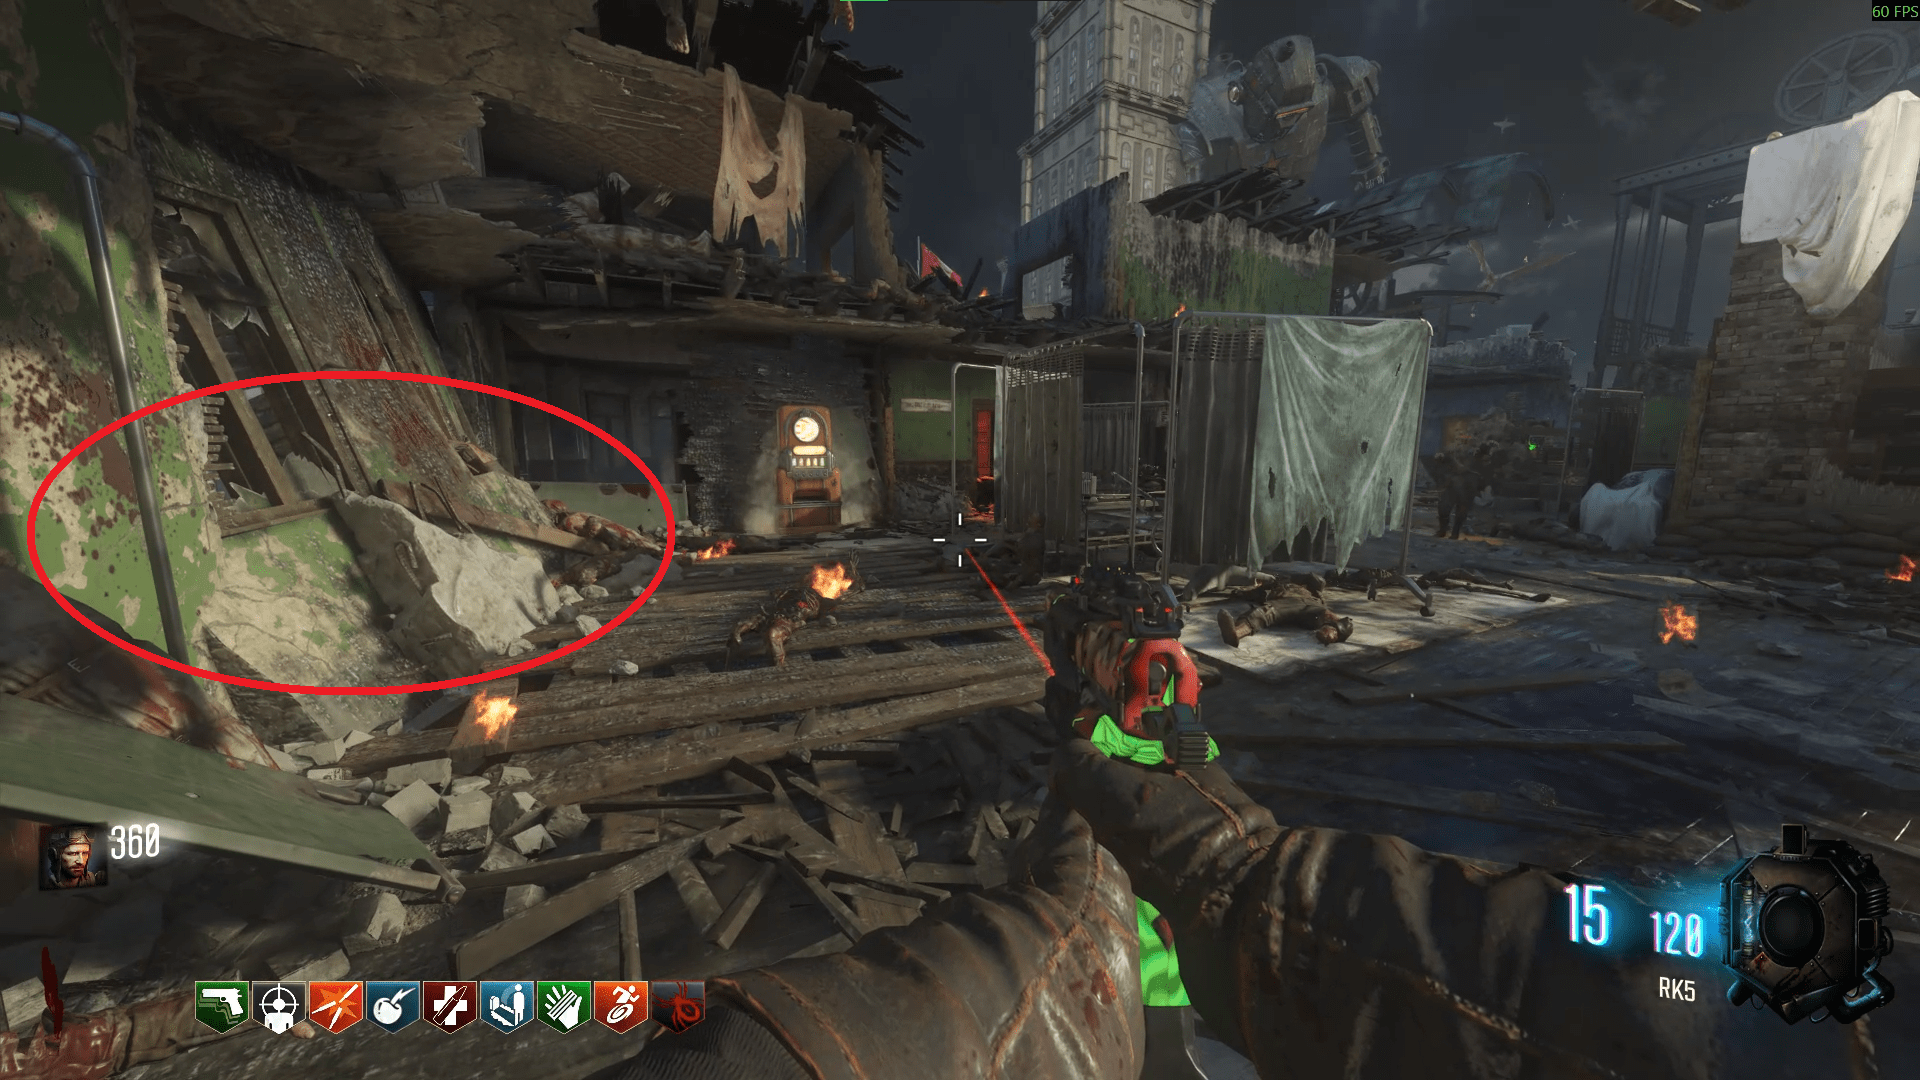
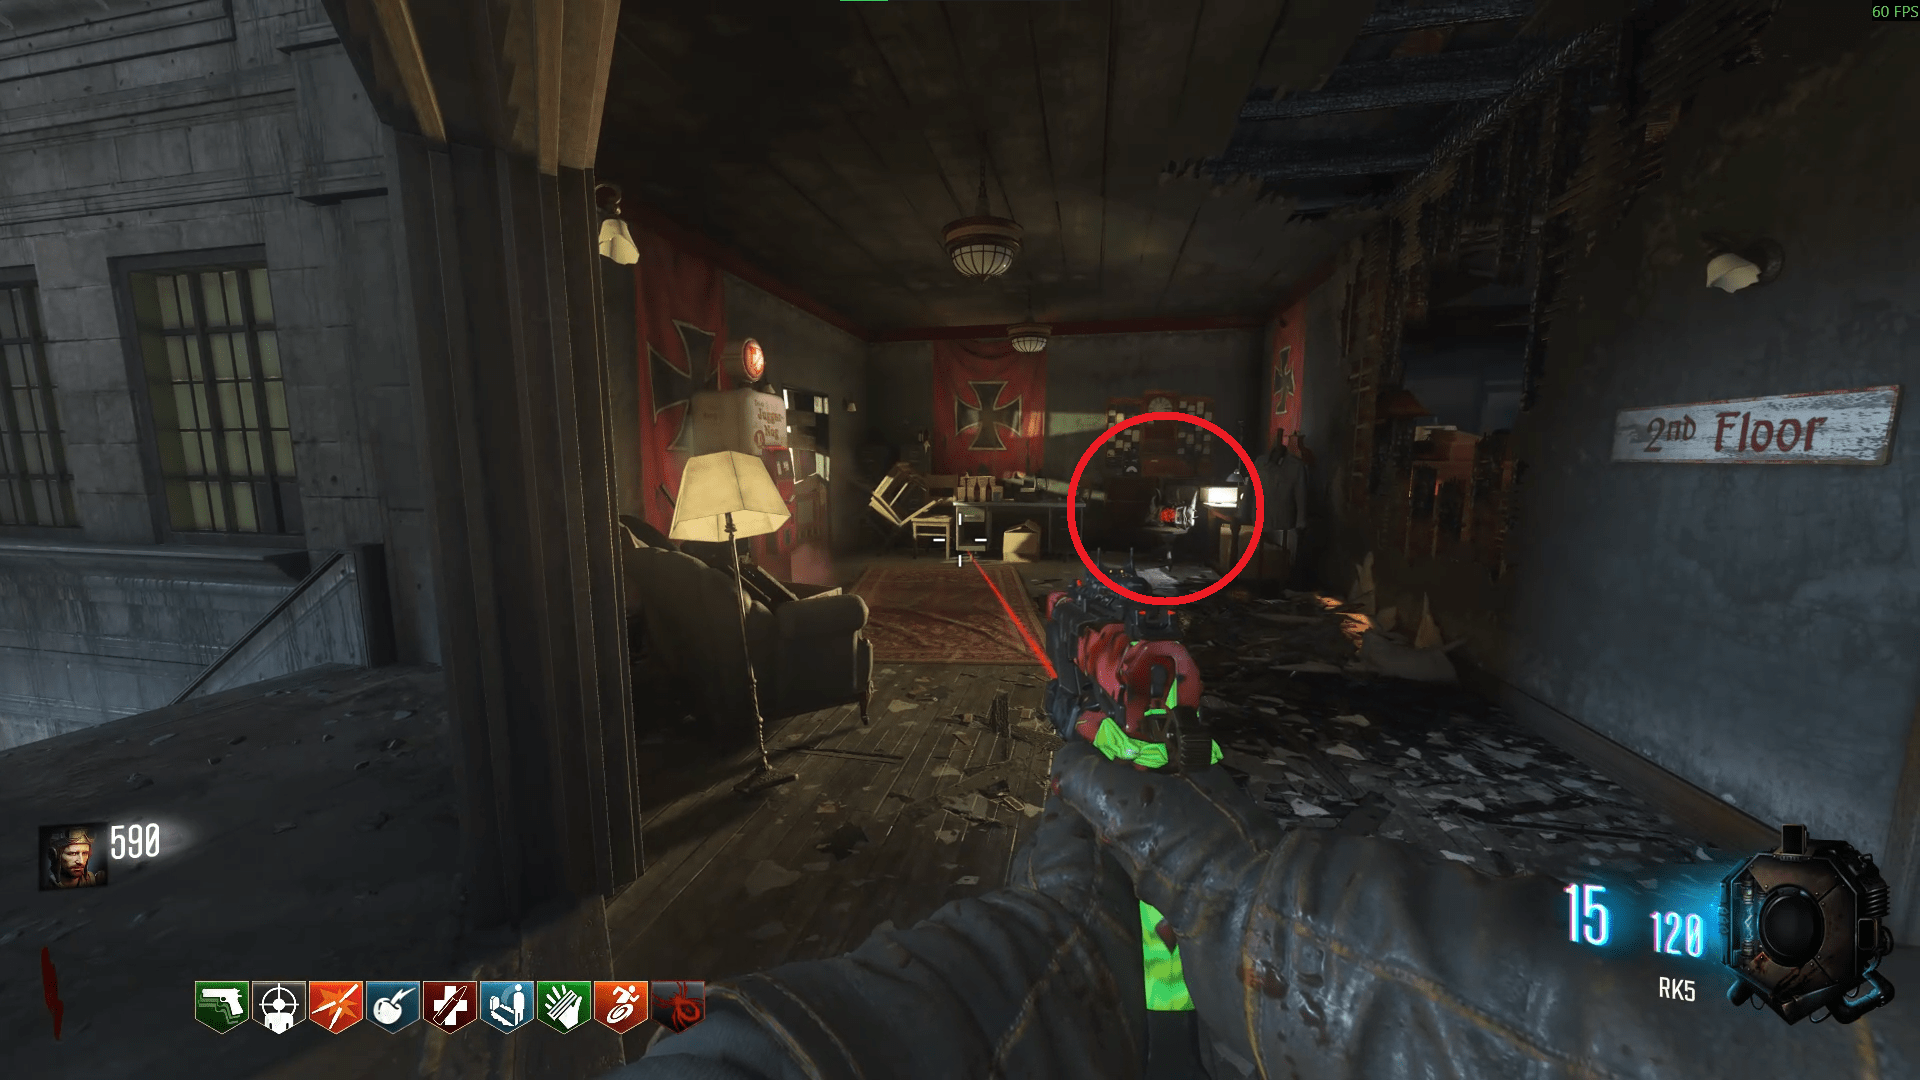
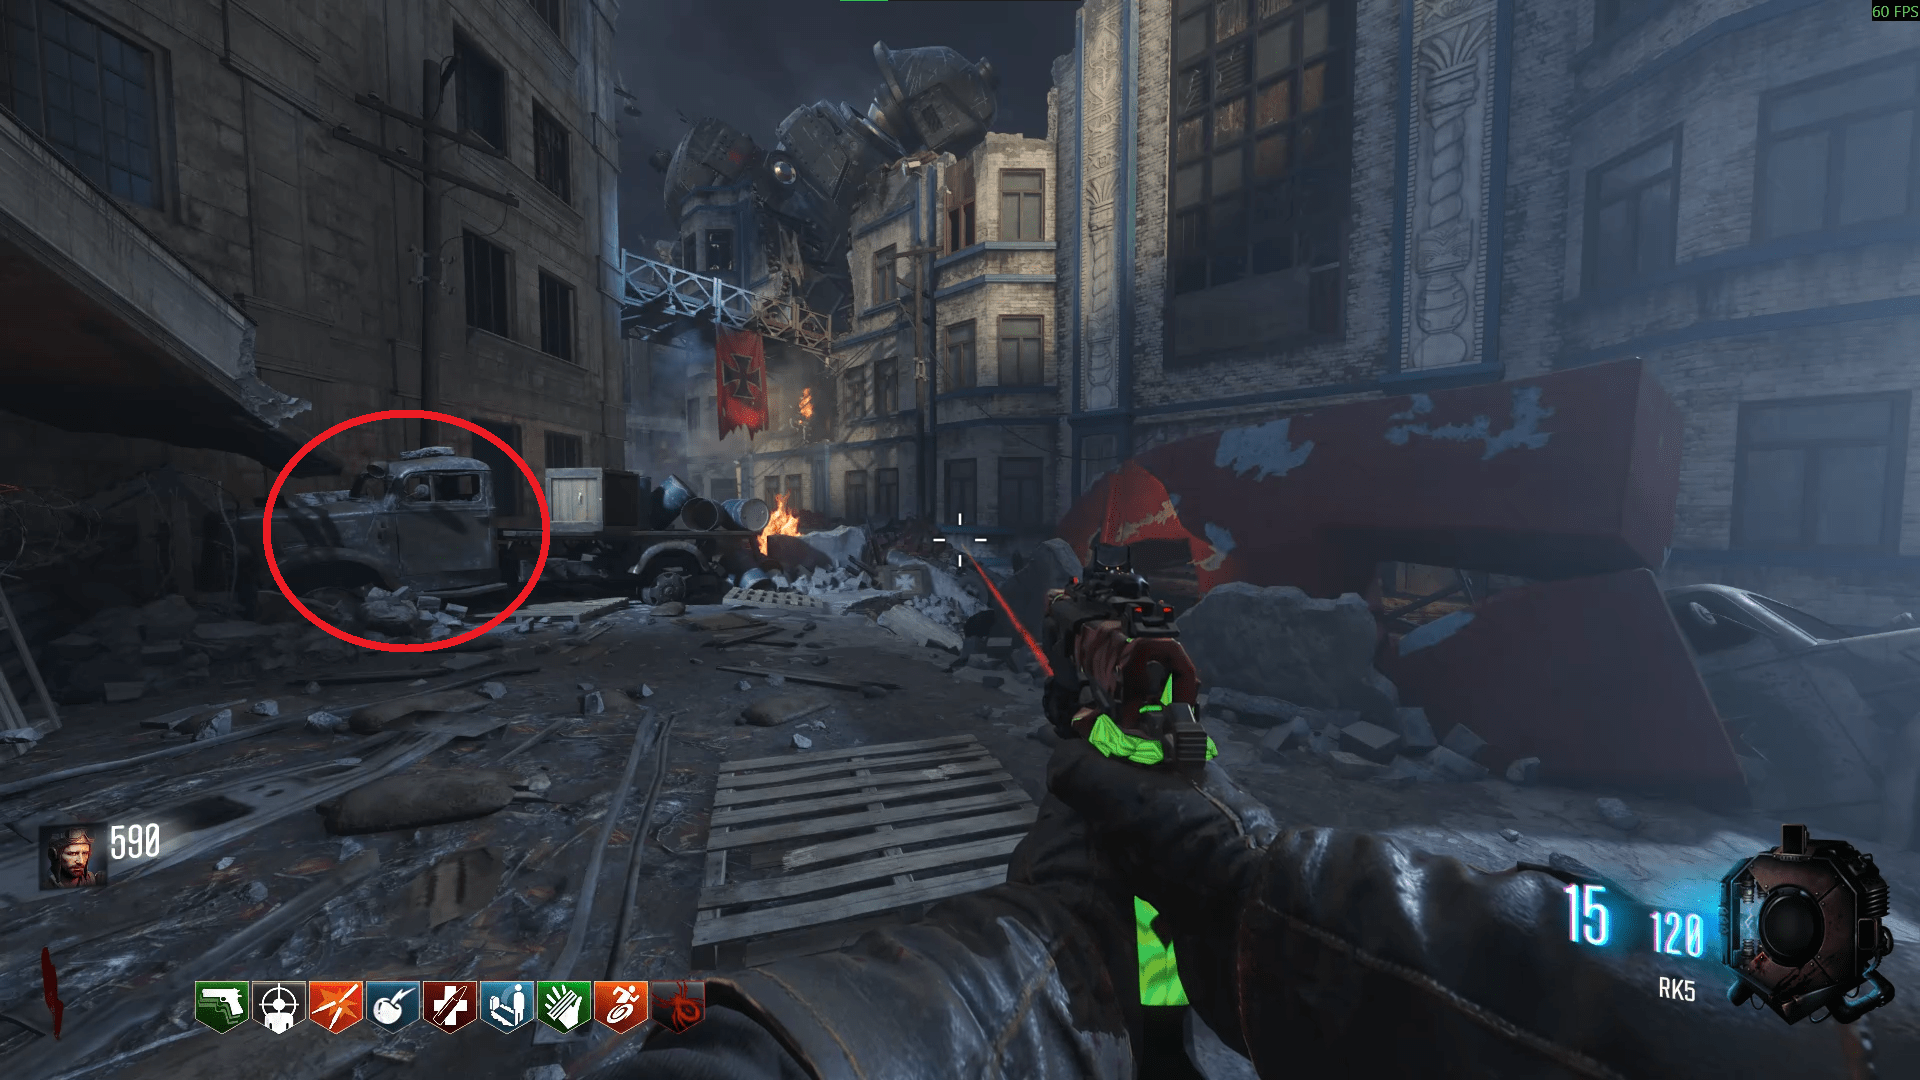
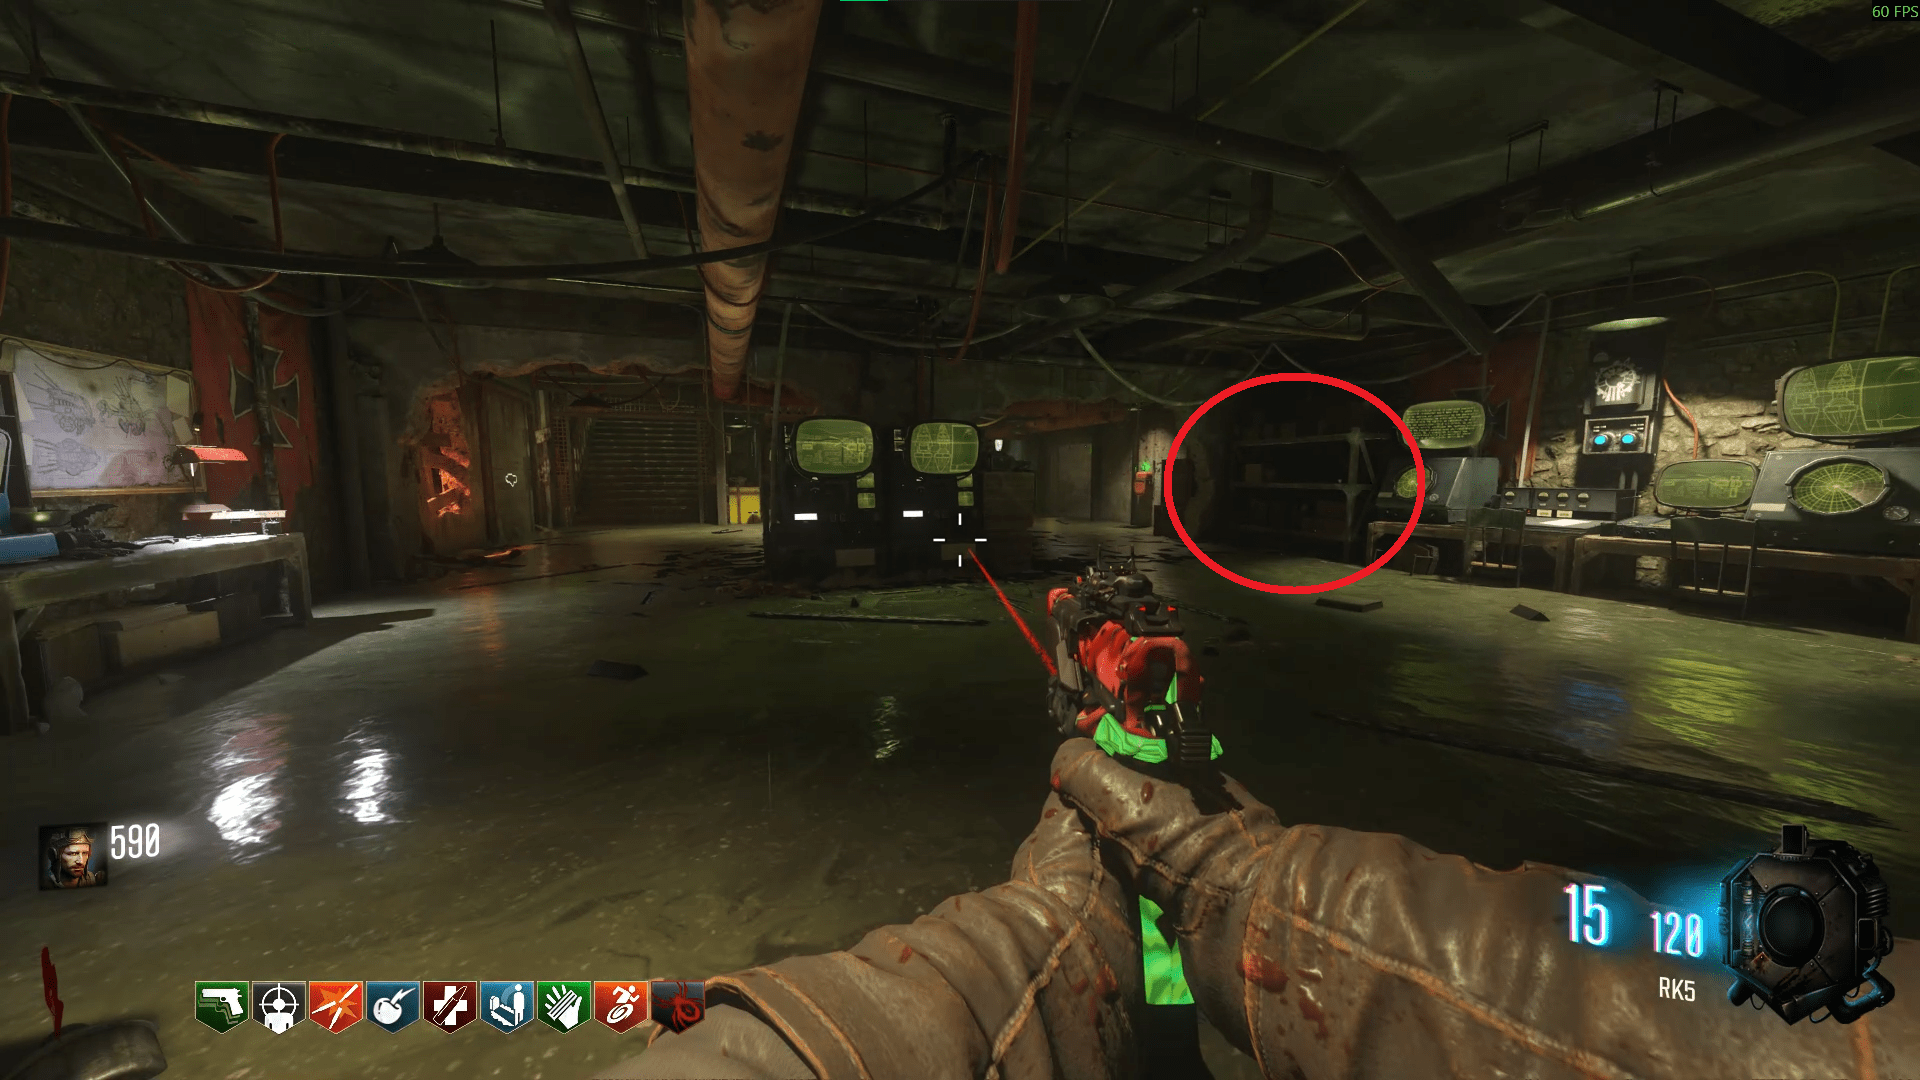
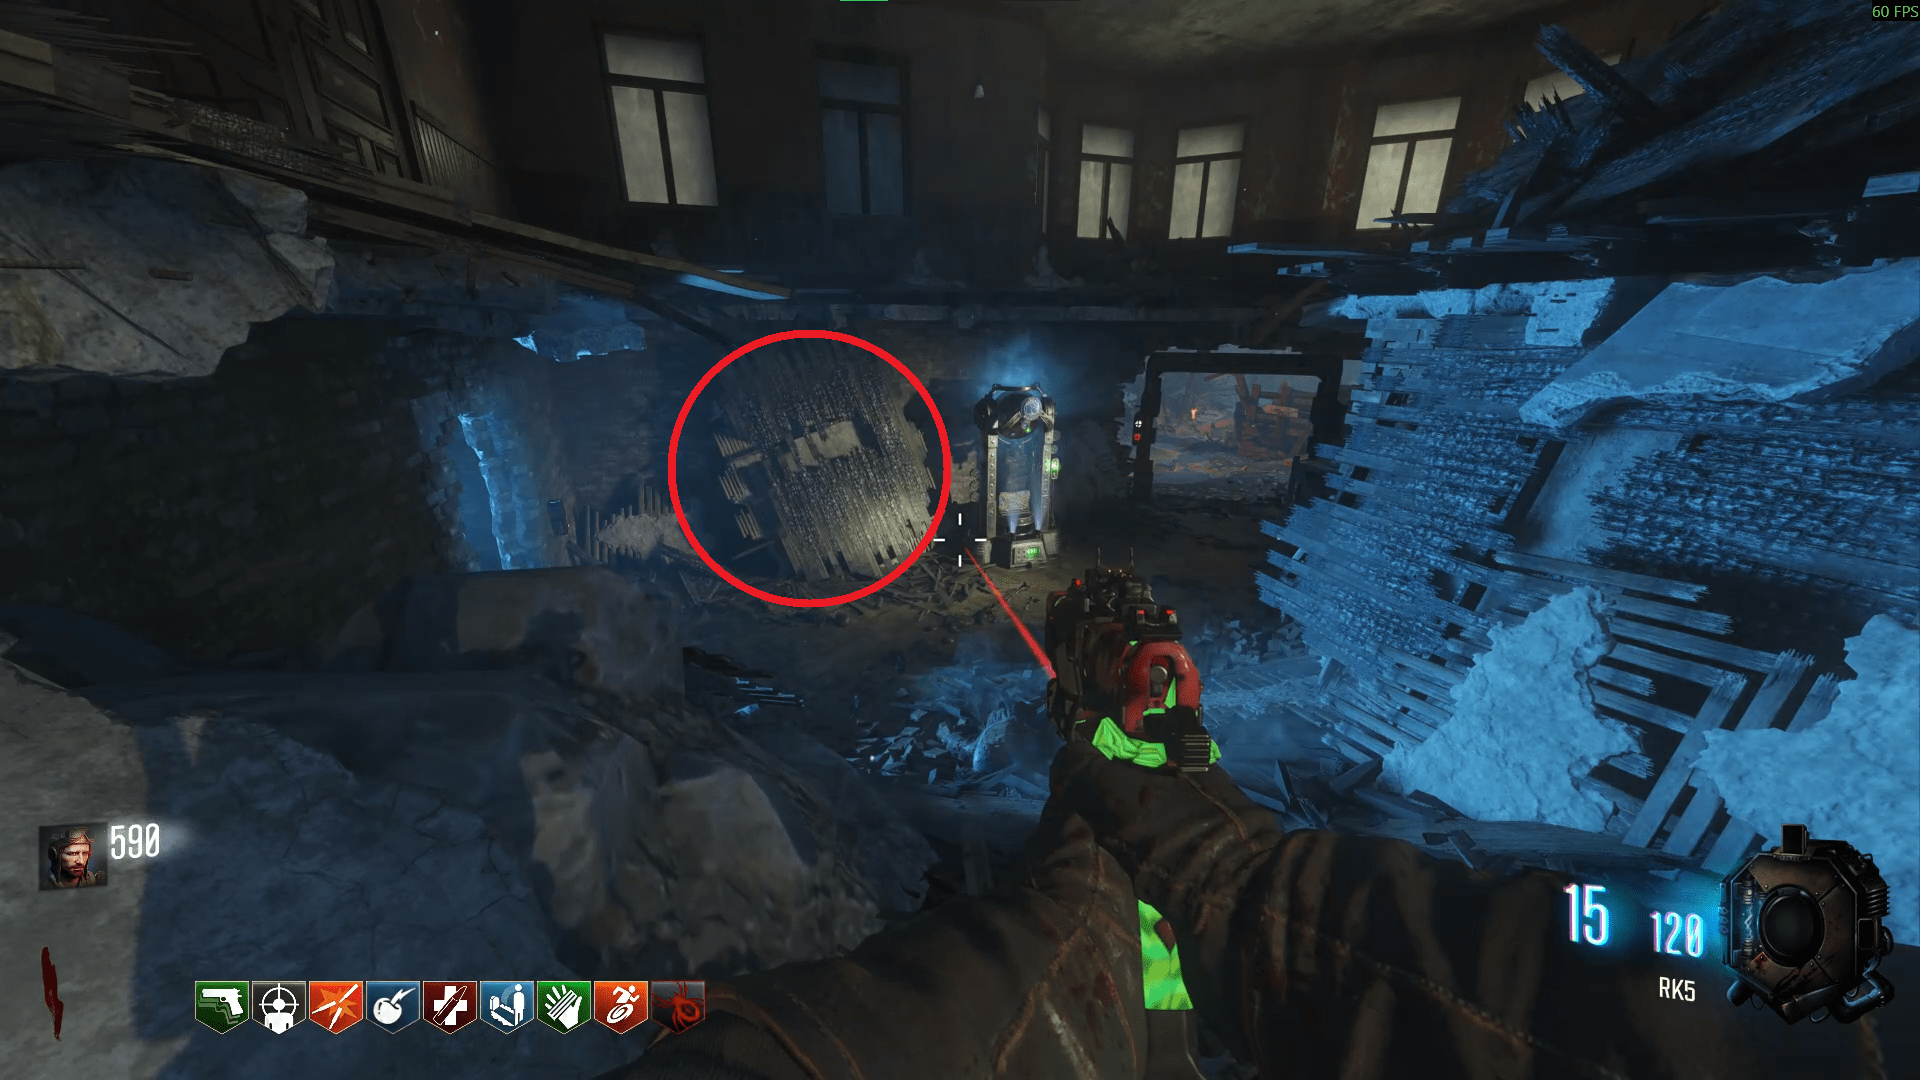
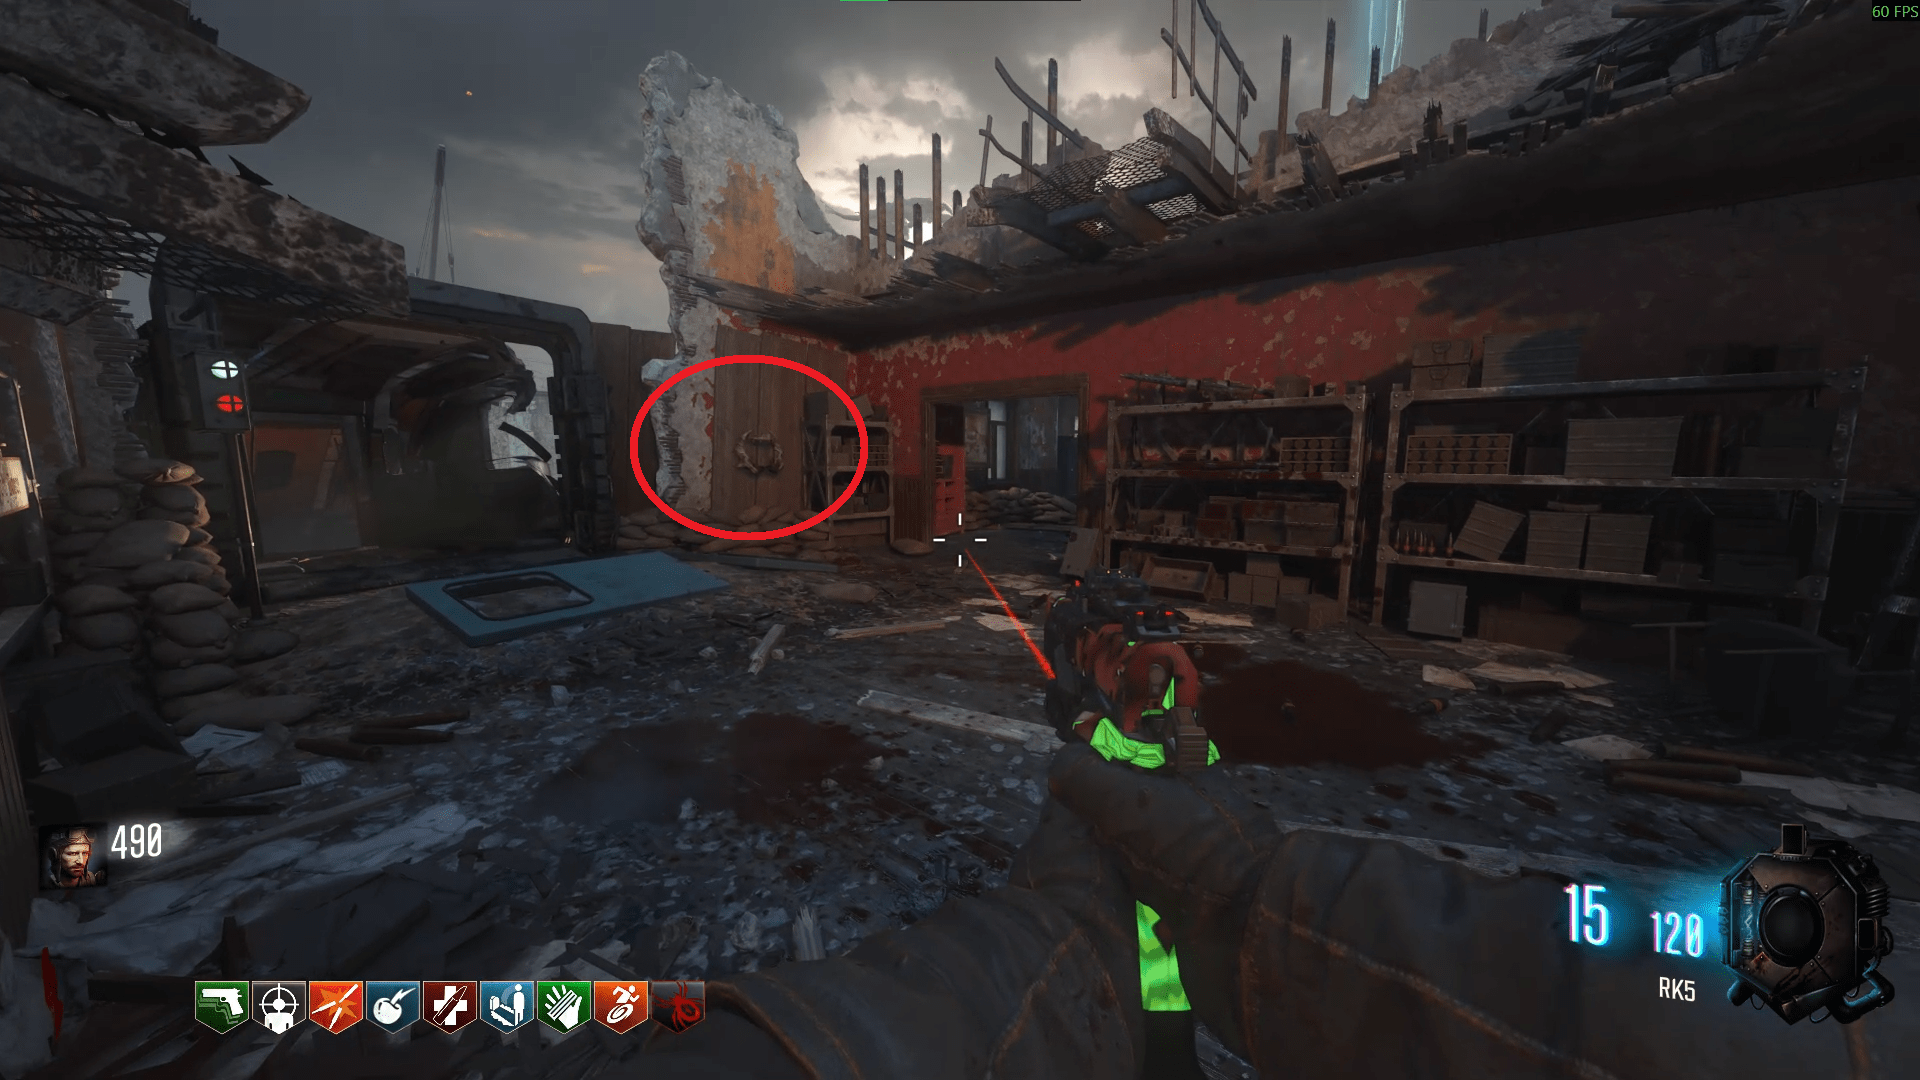
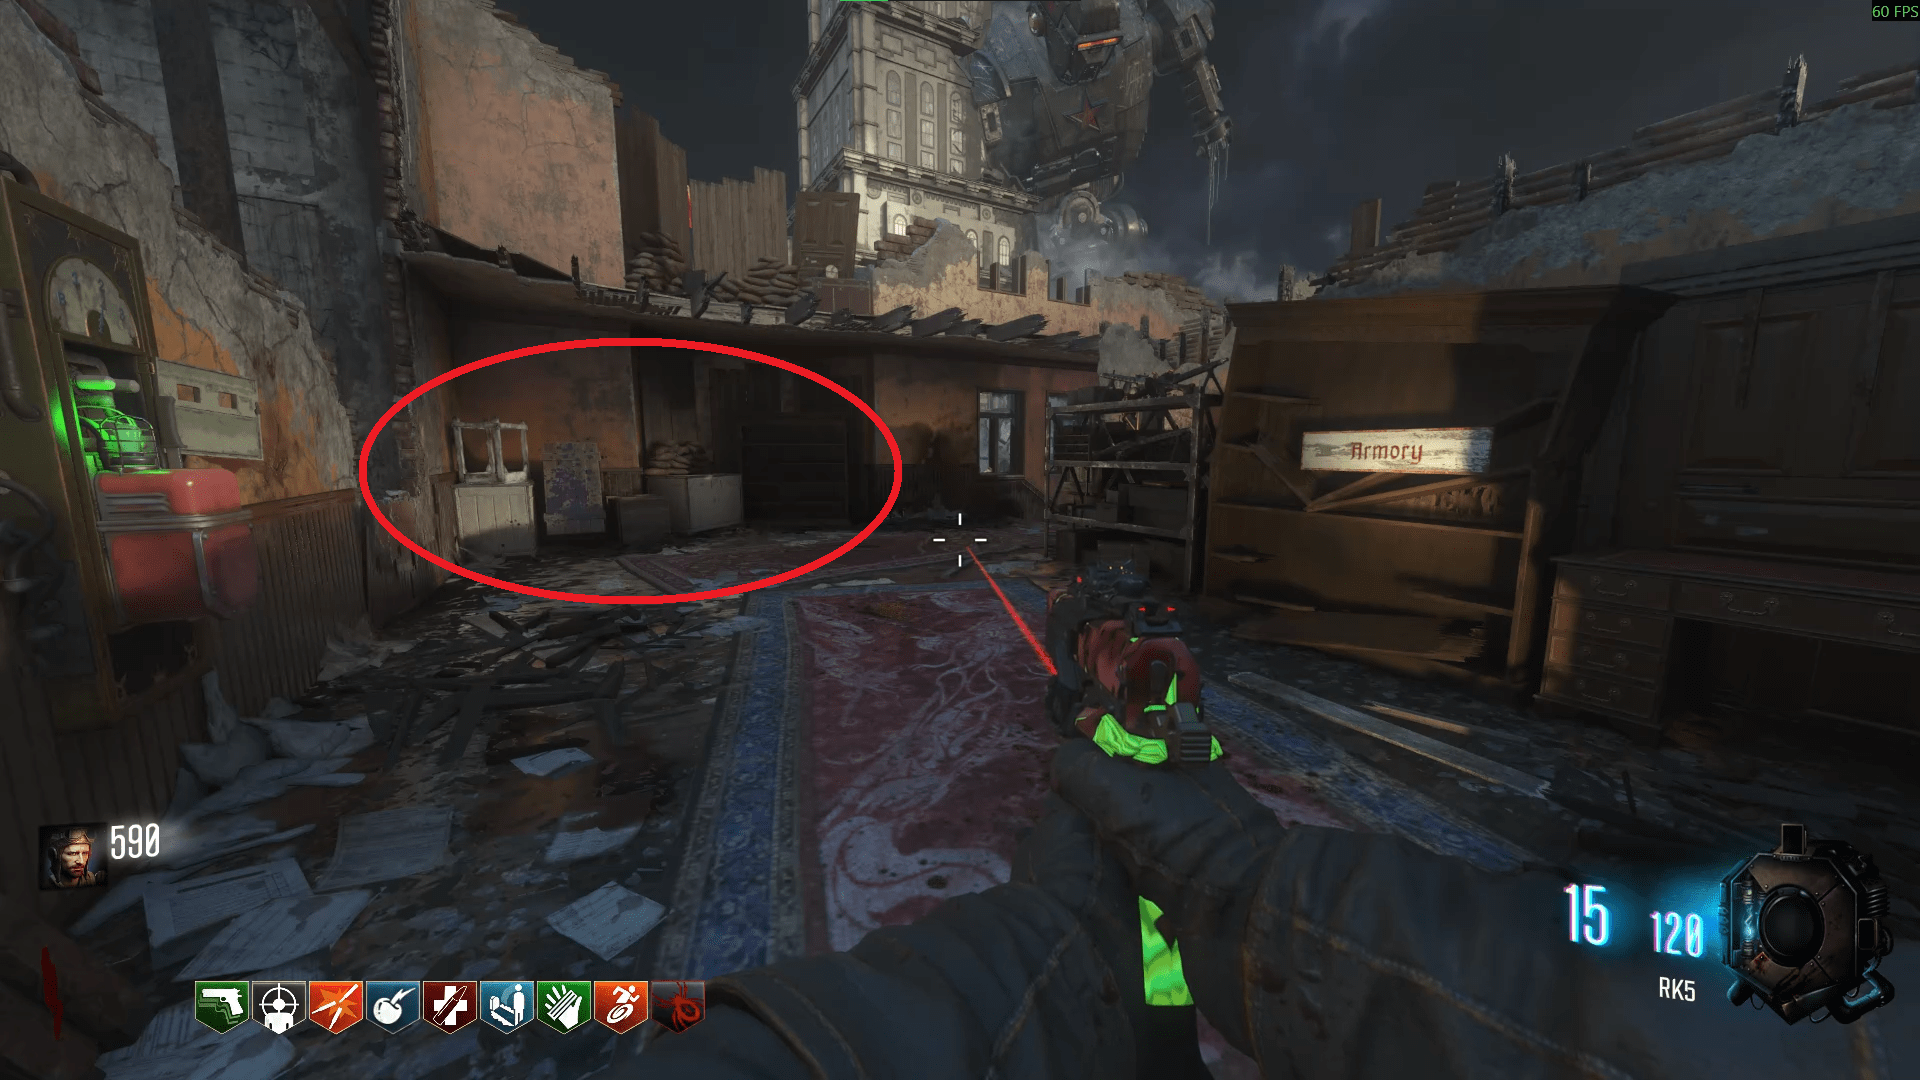
Hopefully by this time the Dragon Egg will be done, so go and pick it up. Now you can work on your first challenge: the napalm kills. Have a train of zombies get breathed on by the big Dragon, then proceed to kill them while they are on fire. Getting 15 kills will progress you to the next challenge as well as fill up your Dragon Egg ring in the scoreboard menu.
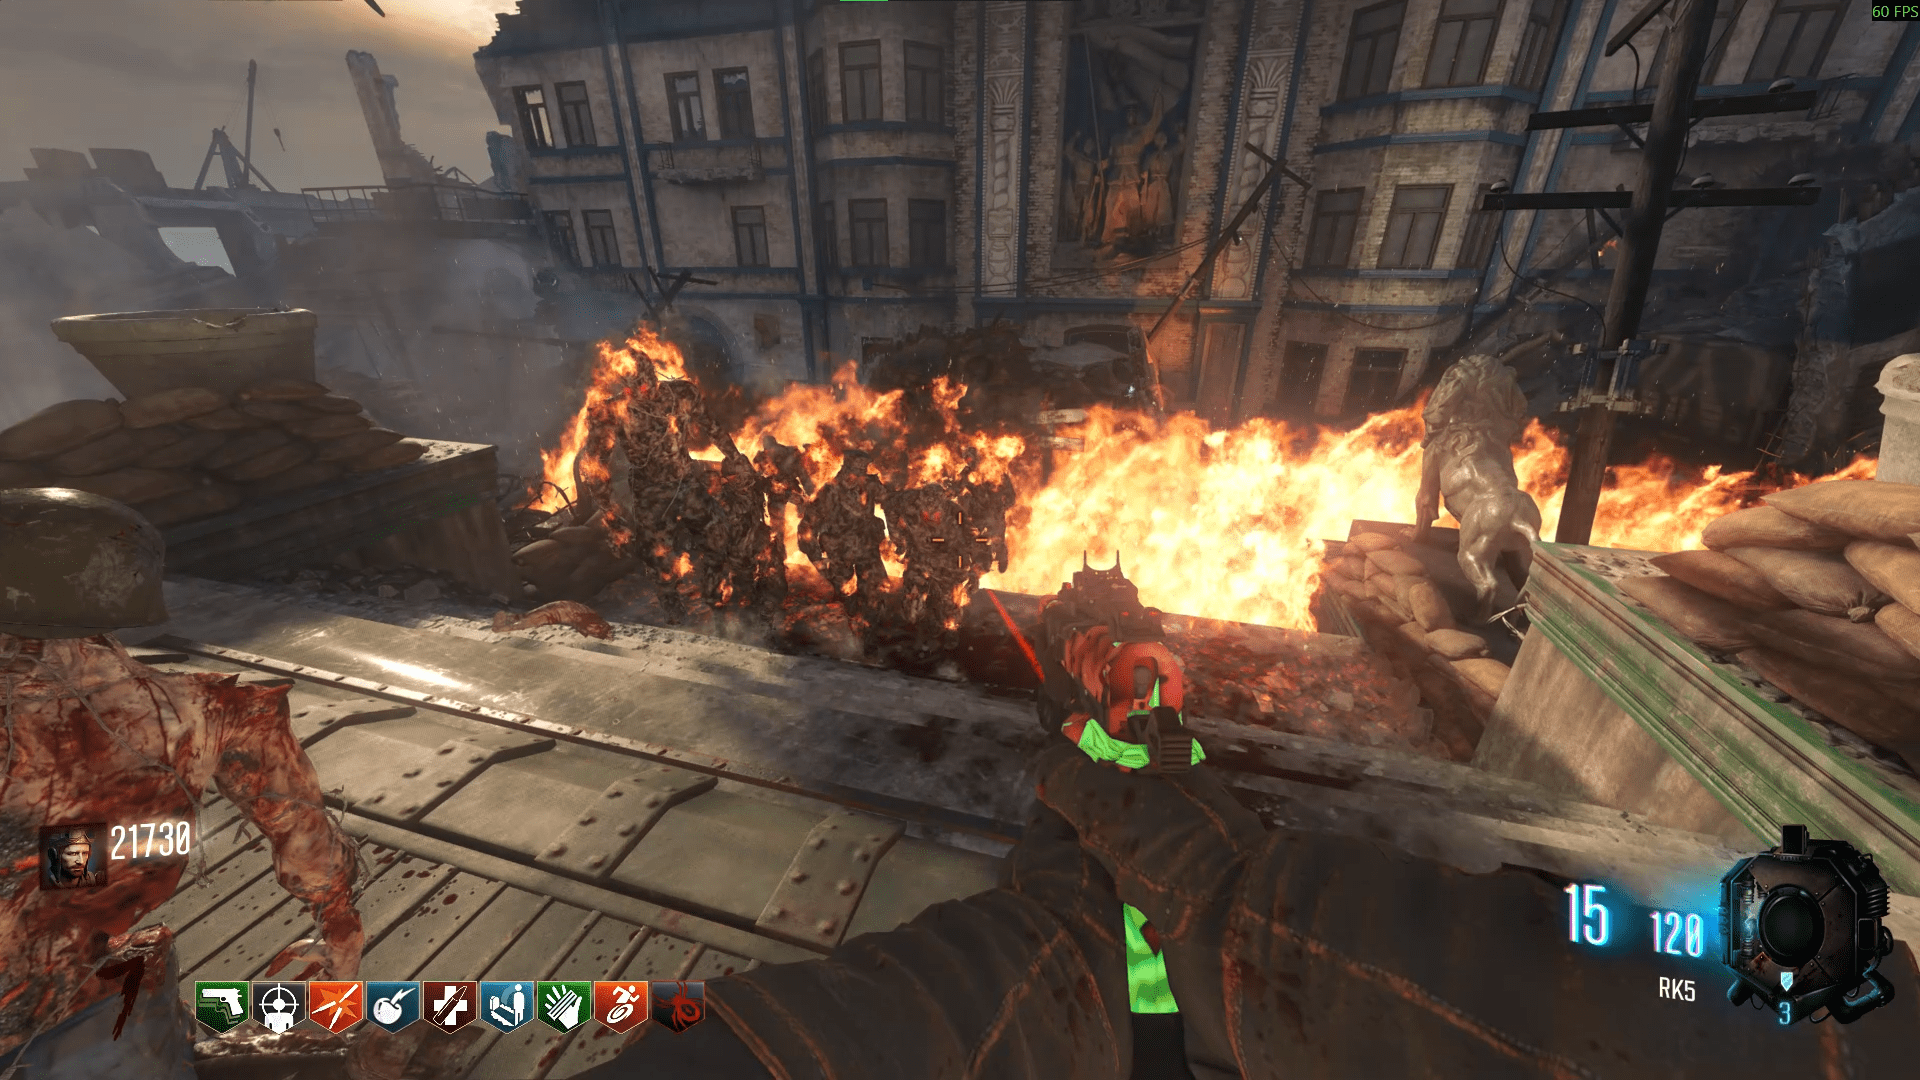
If you haven't gone back to the Hatchery yet, get prepared by buying the Bowie knife (and/or getting Perkaholic) and refreshing the shield. Your next challenges are to get the penetration and melee kills (in that order), which you'll do during the Dragon Strike lockdown event.
To start the Dragon Strike lockdown, go to the top floor and interact with the strange spinny console. Upon activation, you'll need to defend certain sides of the Hatchery. When the middle side is available, use the MG42 (bought for 1000 points) to get the penetration kills. Keep track of the Dragon Egg in the scoreboard menu so you know when you can complete the next challenge. Once it fills up a bit more, start on the melee kills to finalise the Dragon Egg and then finish the lockdown to obtain the Dragon Strike from the console.
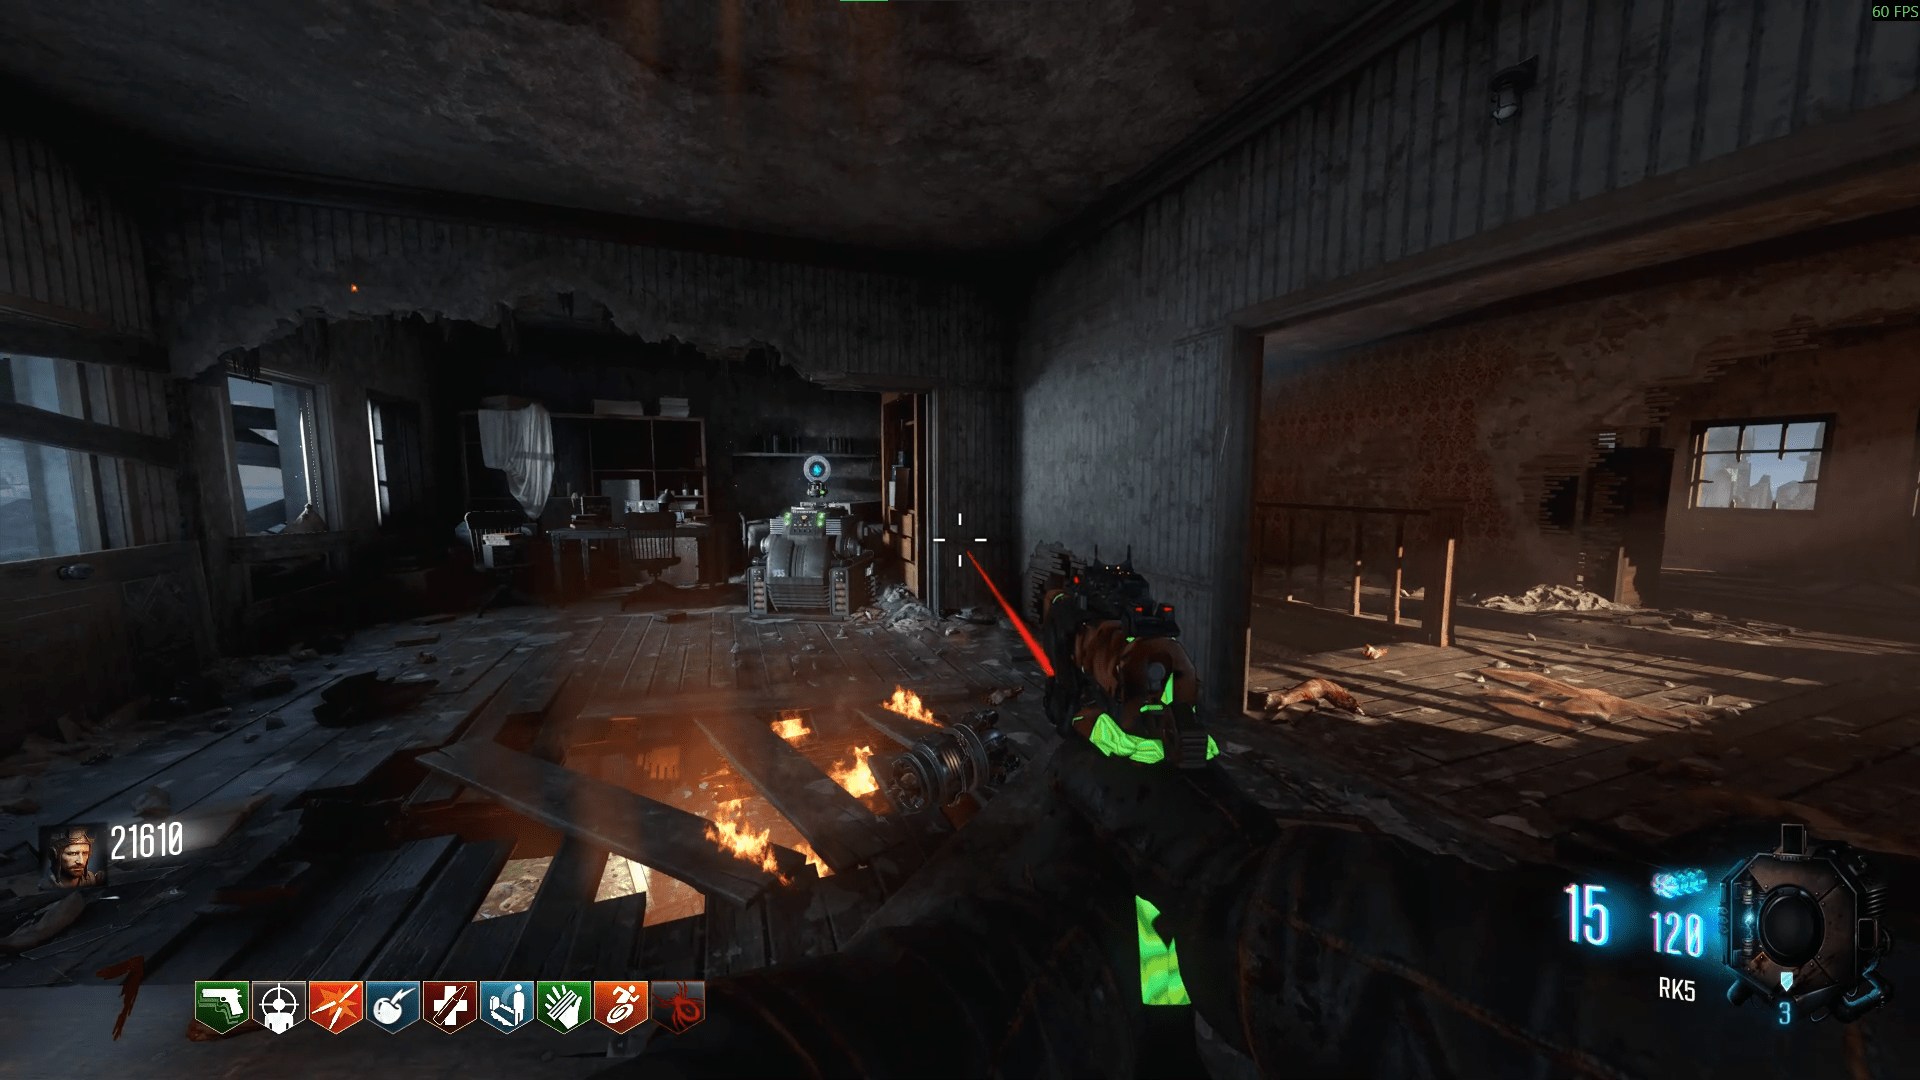
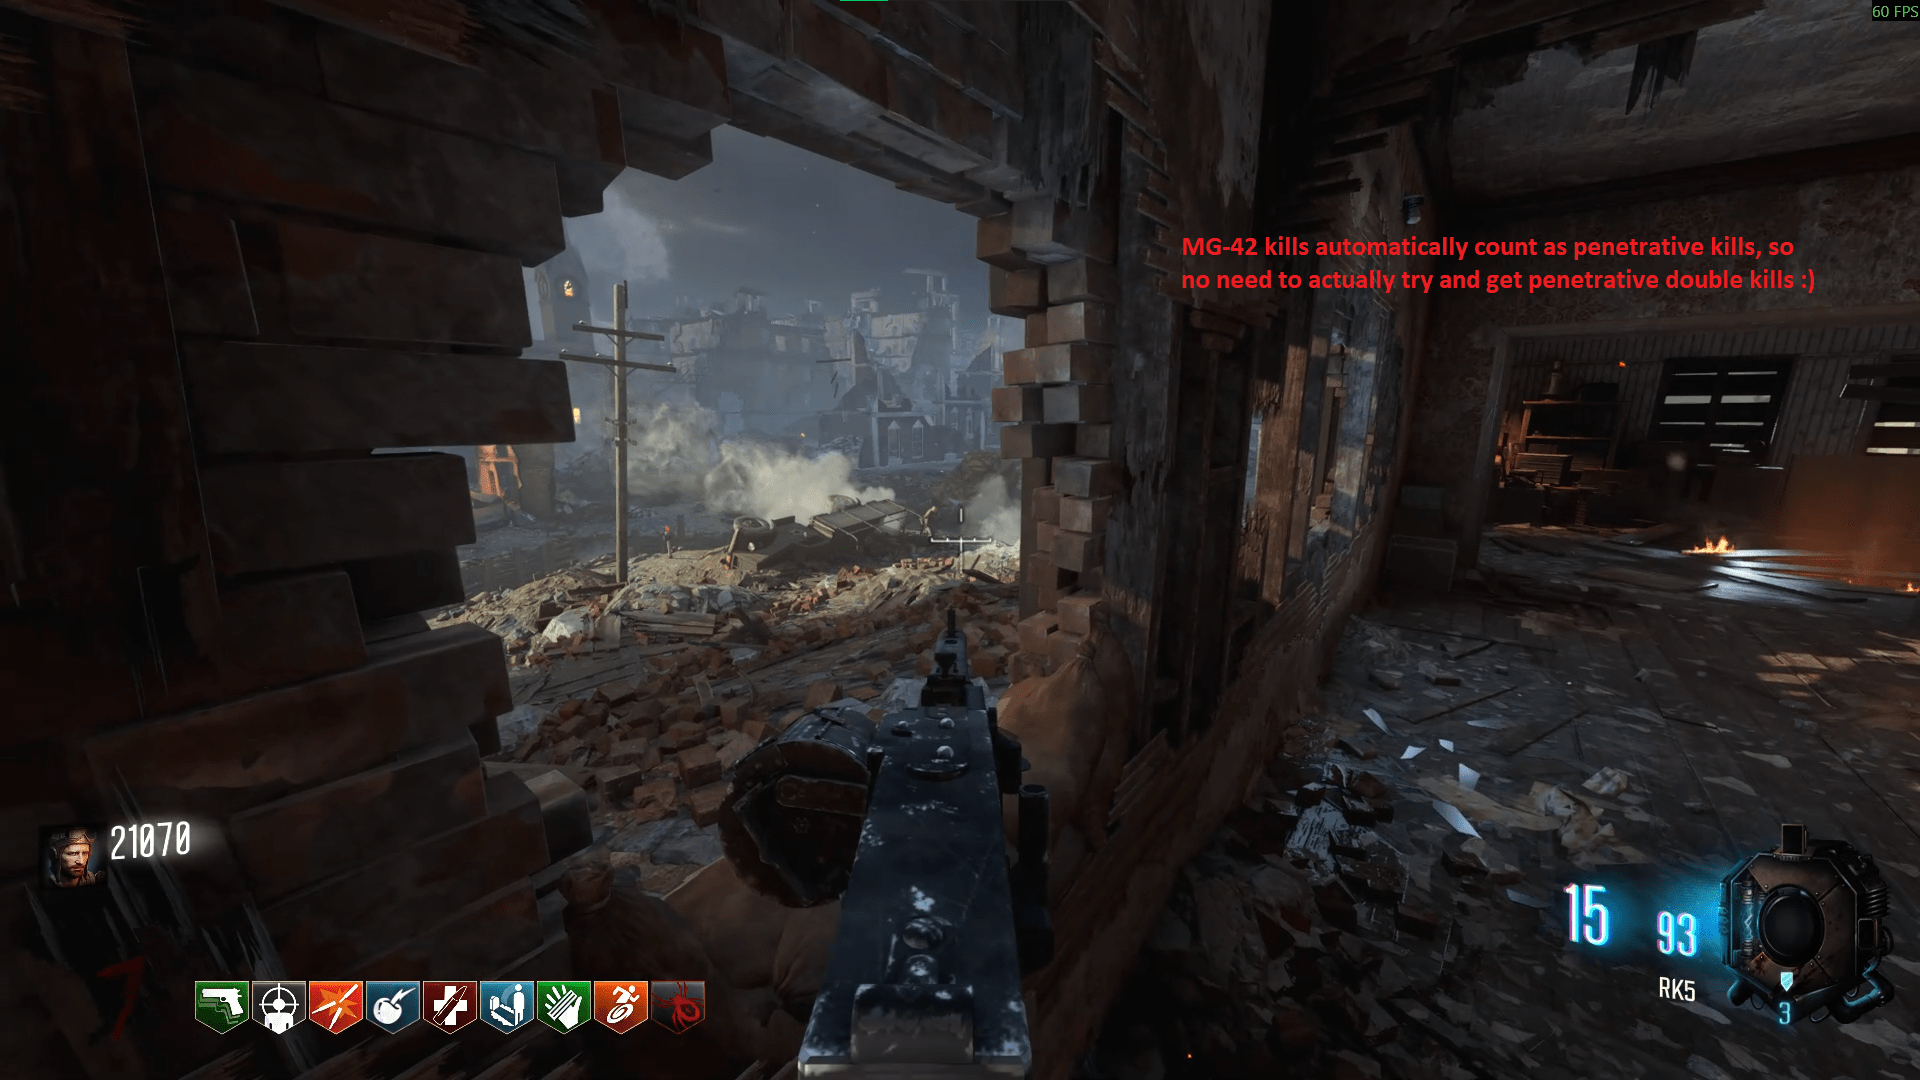
You may want to read ahead before you start the incubation lockdown.
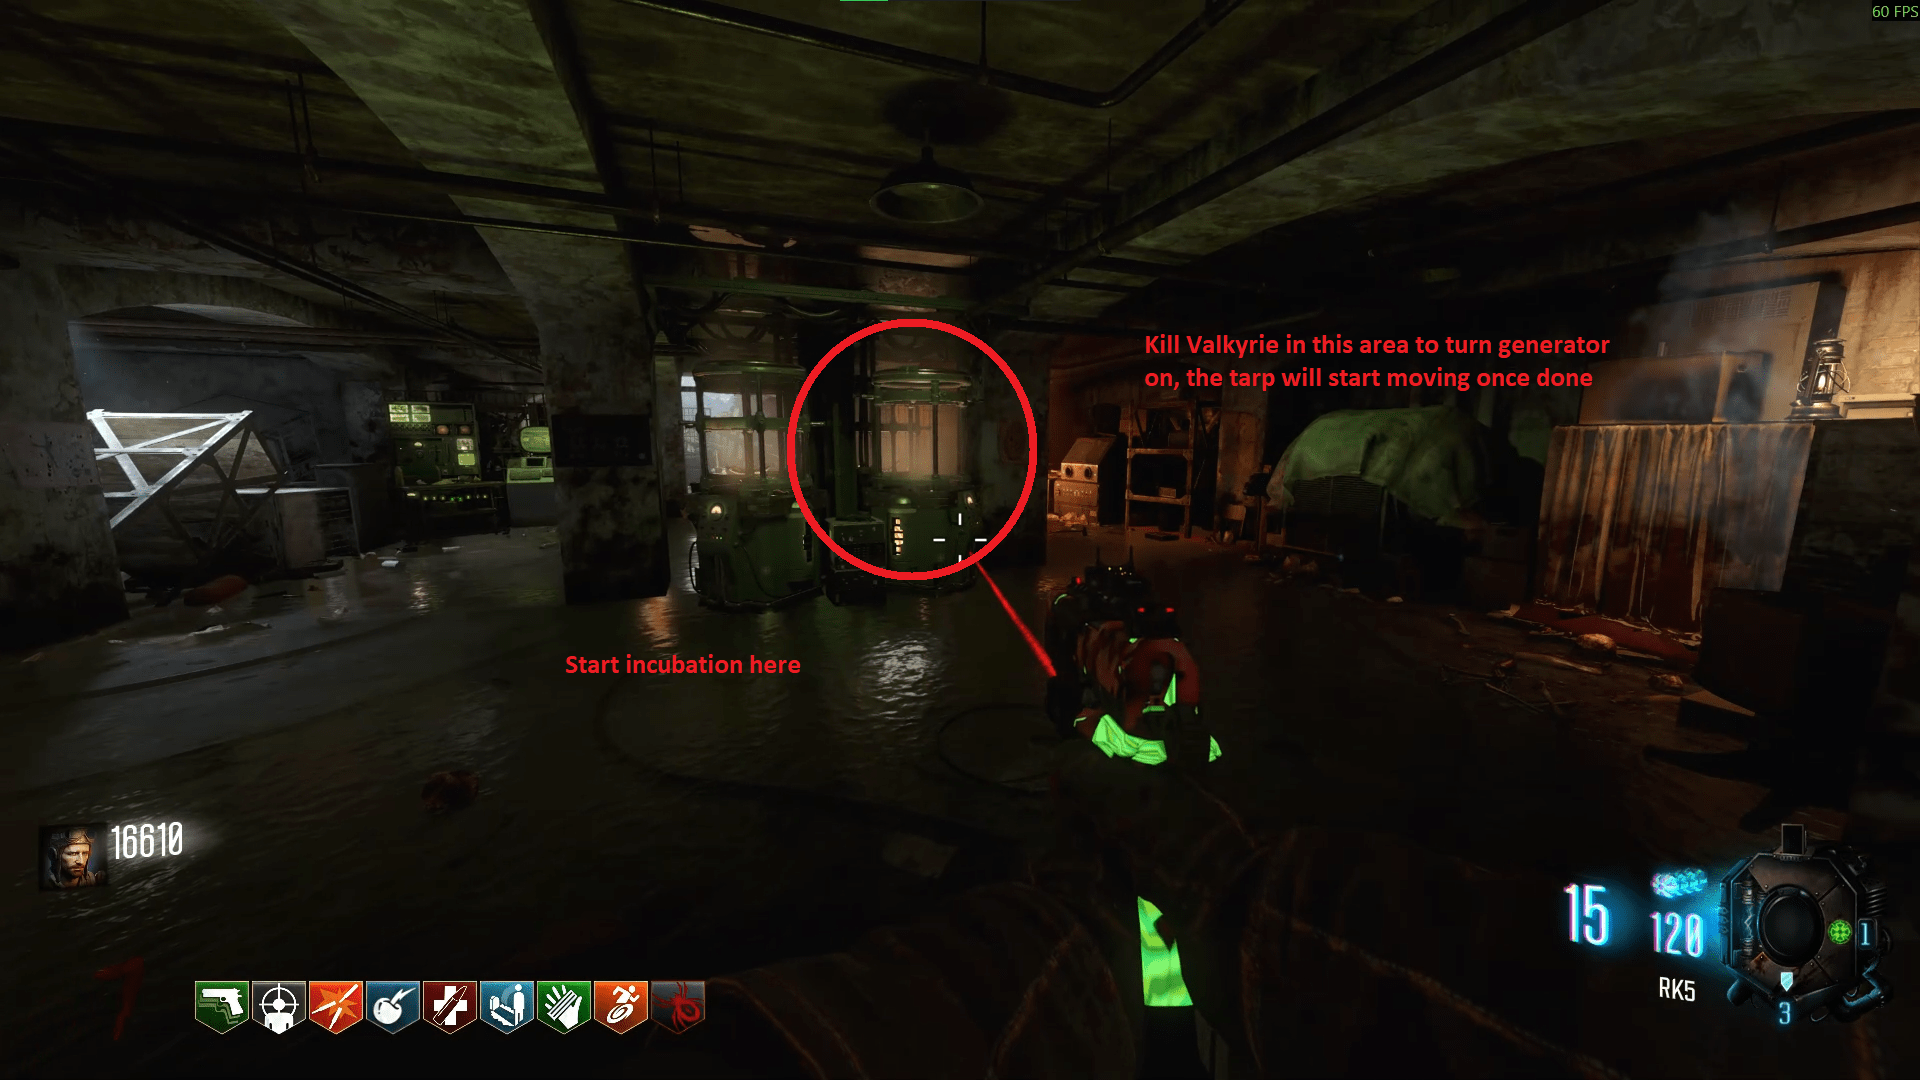
Your egg should be full by the end of the current lockdown and you can now start the incubation lockdown in the basement. This is also where you'll use a Valkyrie to power up the generator nearby. To start the incubation, place the egg into the incubator in the basement. You will again need to wait another 2 rounds for the incubation to finish, then come back and take the Dragon Egg. If you miss the Valkyrie powering the generator, wait until another Valkyrie spawns during the rounds.
Once you power up the generator in the basement, you'll only have 5 minutes to complete the Master Cylinder part of the Easter Egg, so if you can, try and leave the Valkyrie towards the end of the lockdown then have it die near the generator with the green tarp over it.
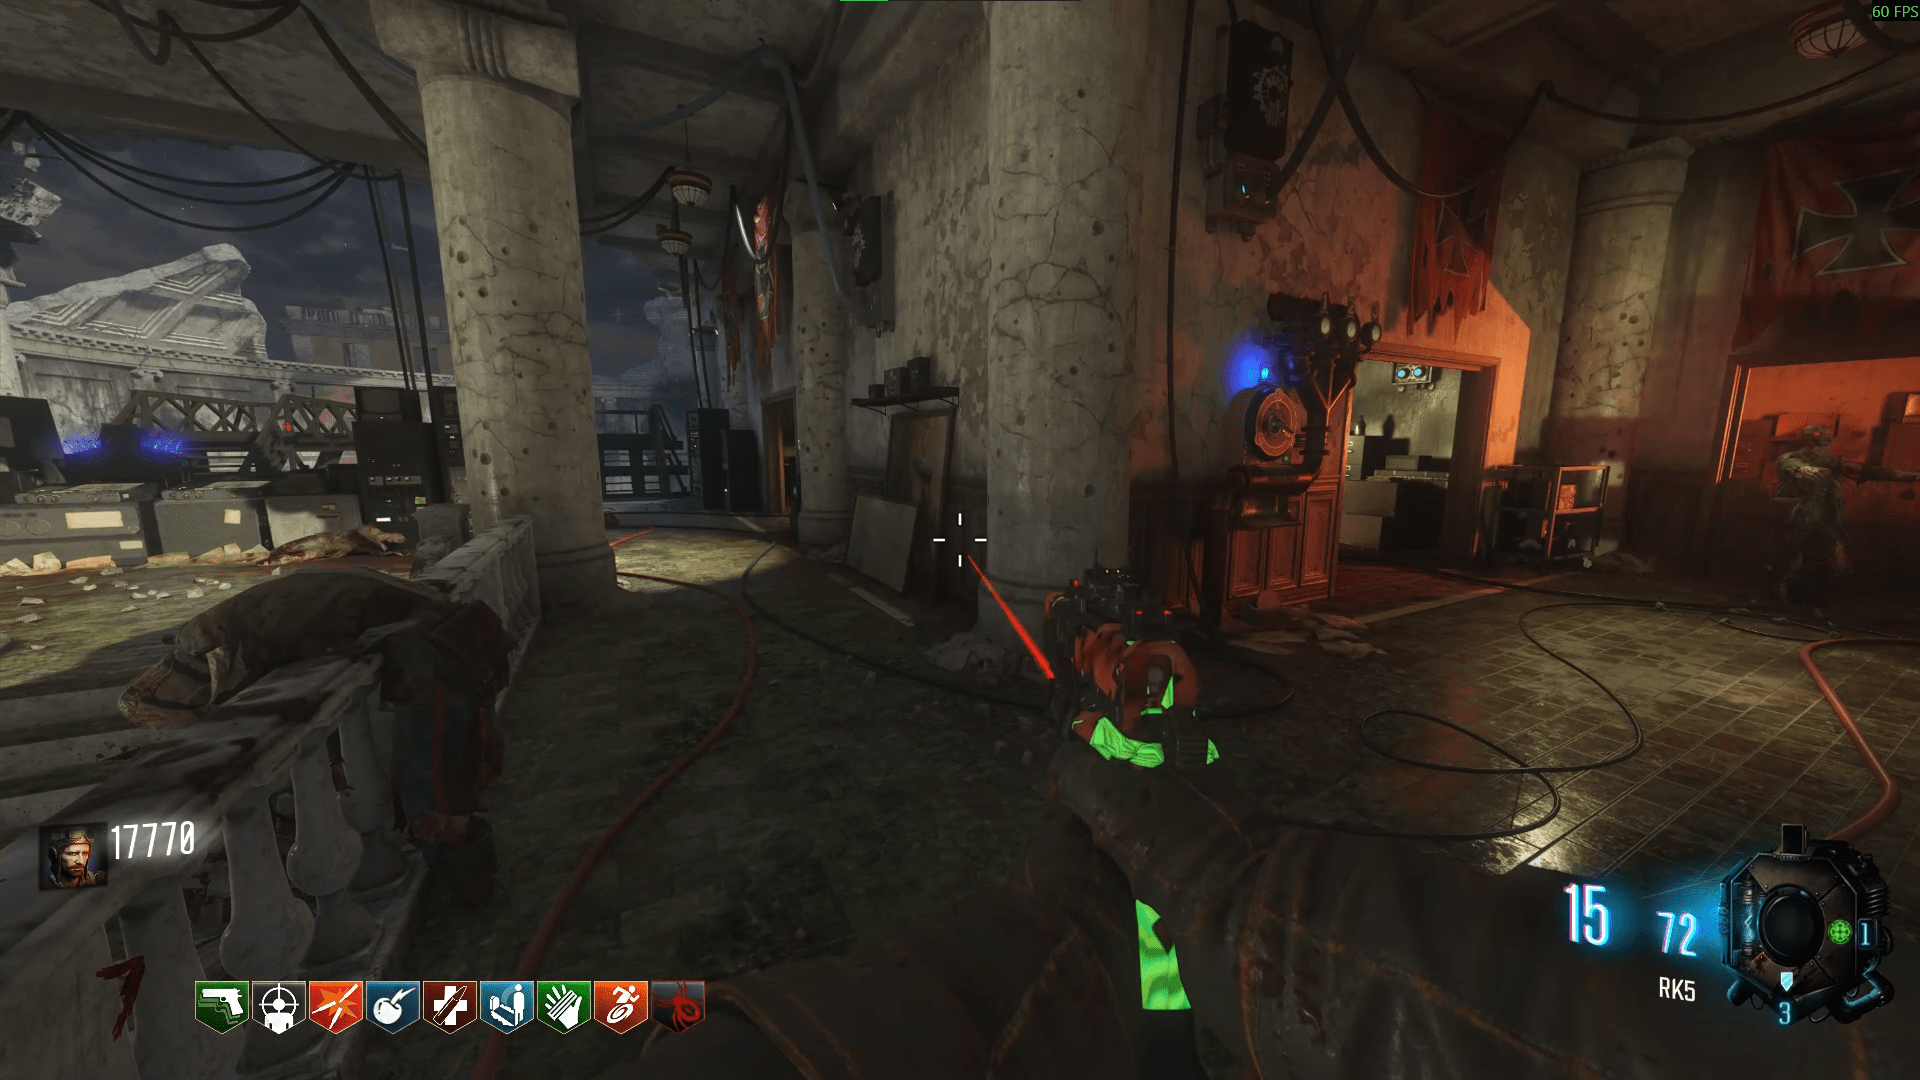
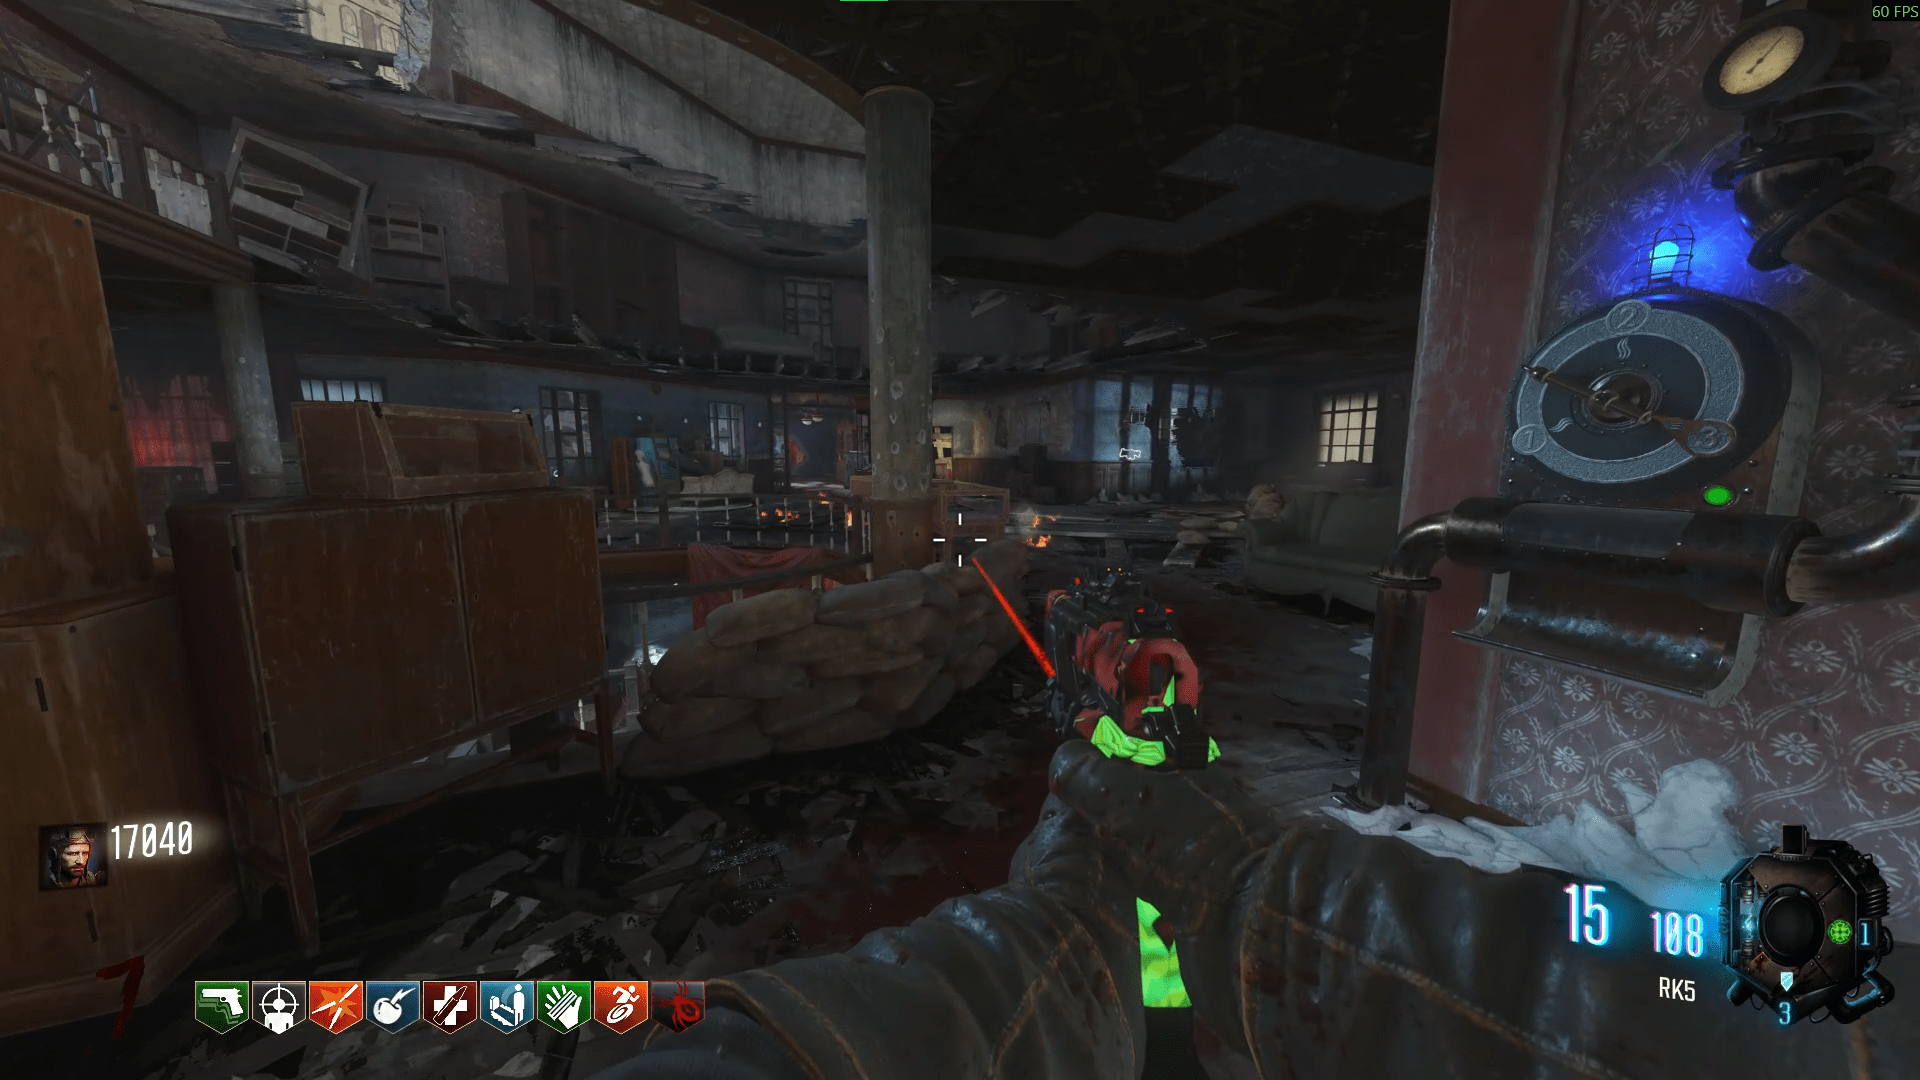
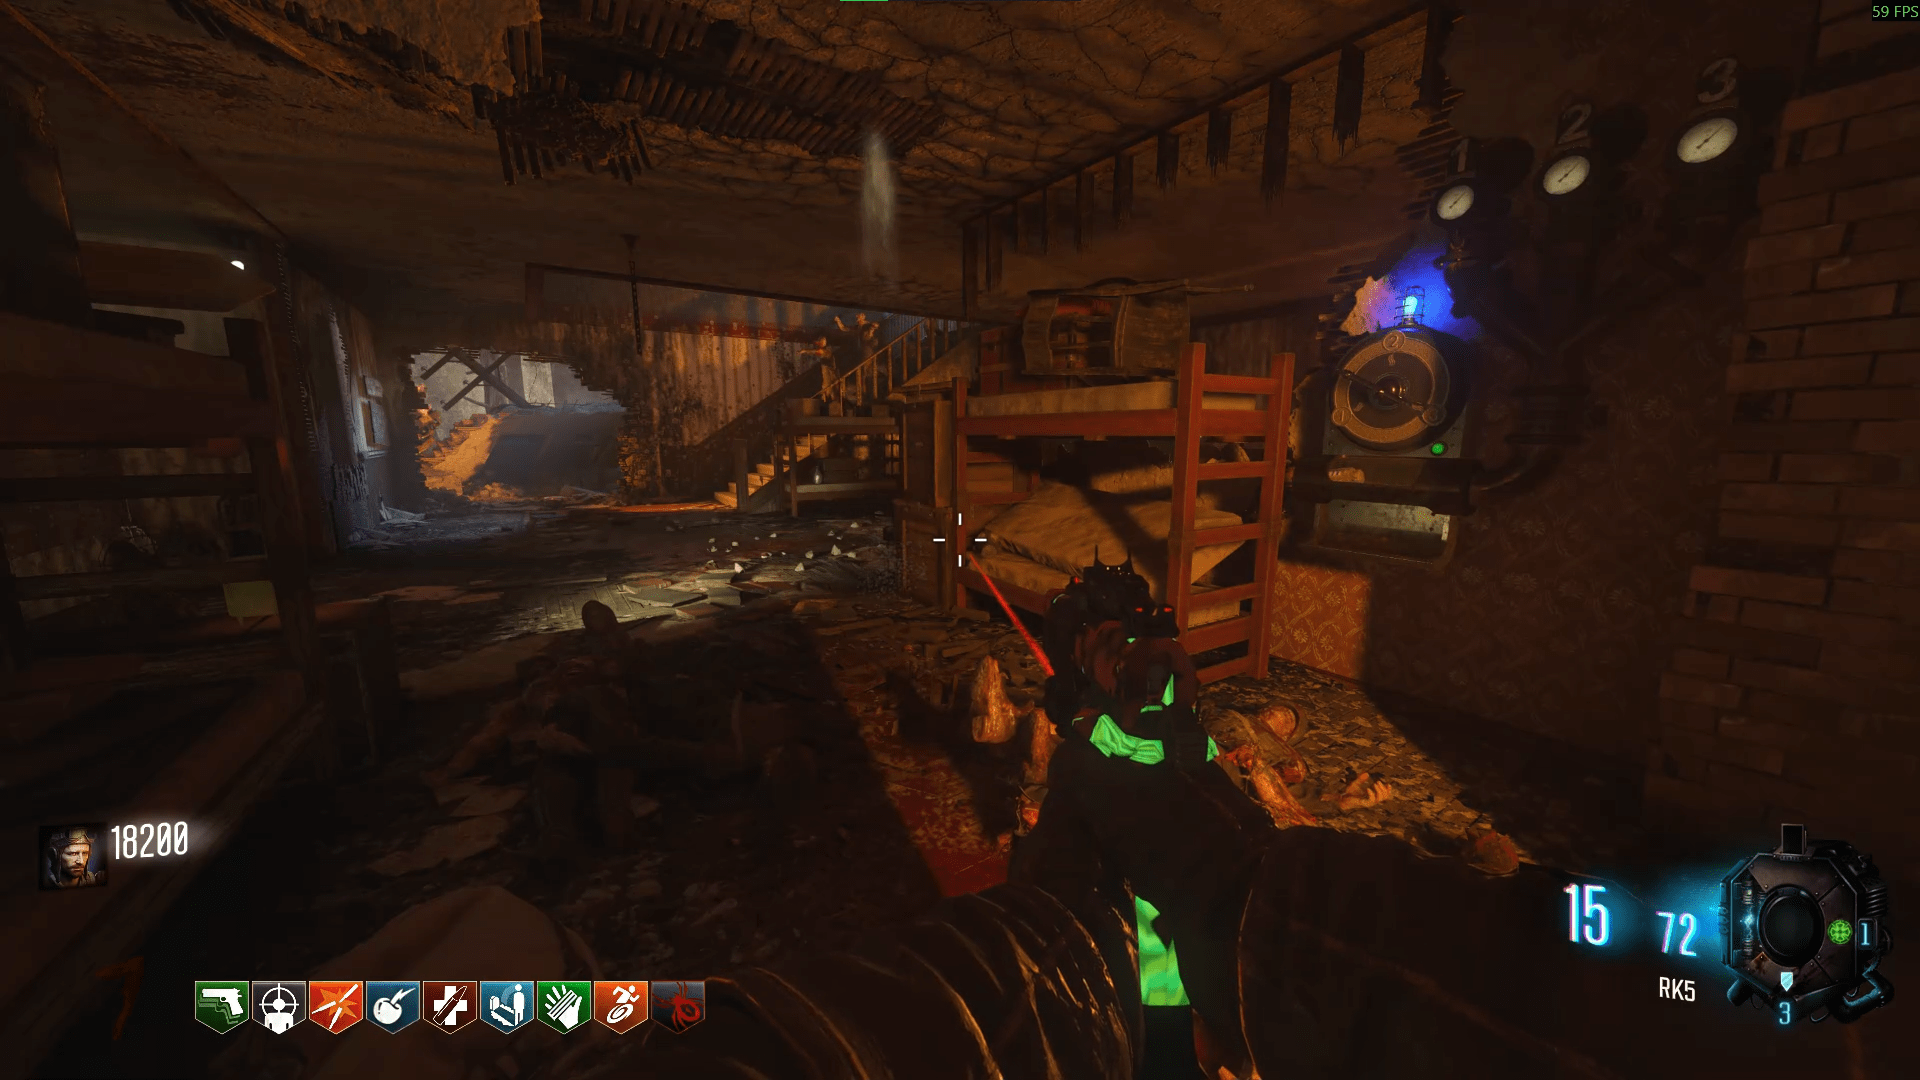
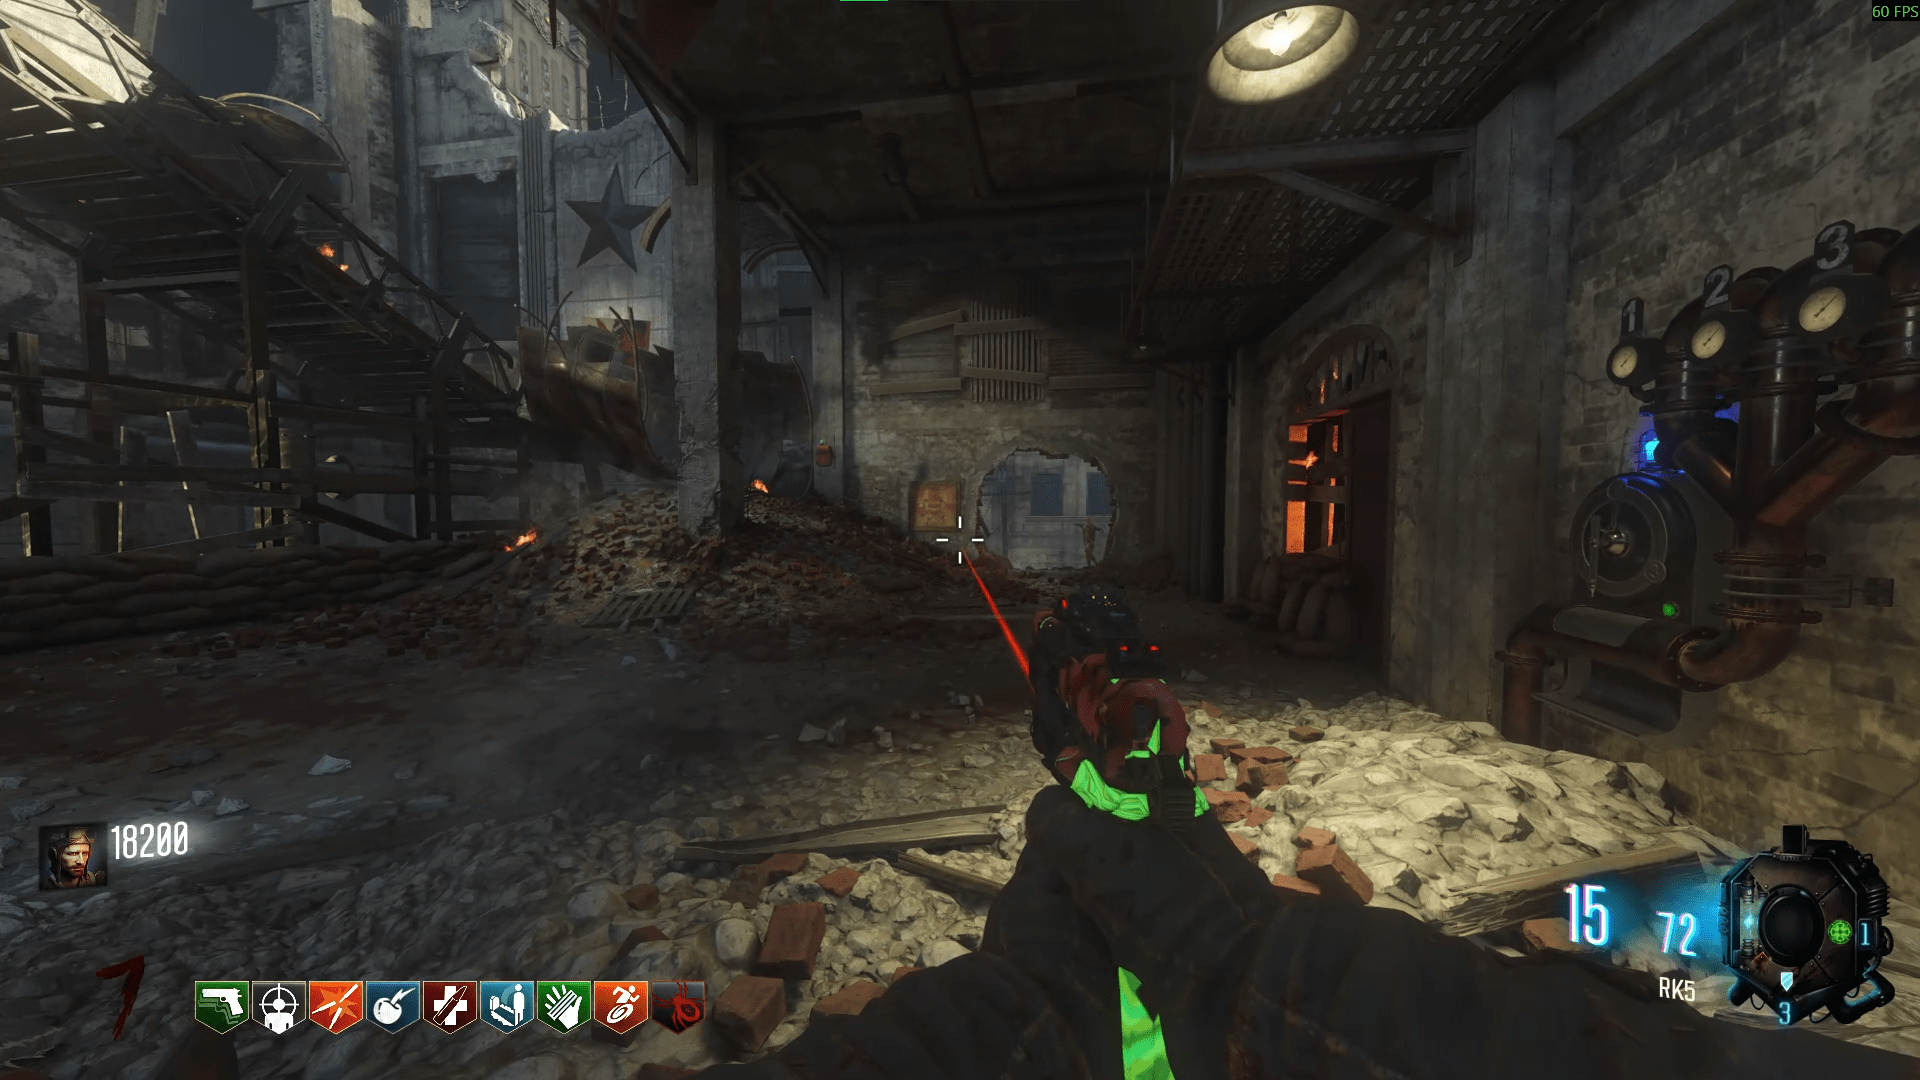
 Now here is a series of cheatsheets that you can use to obtain the Master Cylinder quite easily. Using them is straightforward, there are six valves around the map located;
 - Dragon Command: Inside in the upstairs room to the right after the entering.
- Department Store: On the 2nd floor (3rd for Americans), on a corner wall.
- Infirmary: Downstairs, below Stamin-Up between some bunk beds.
- Tank Factory: Left-most side of the bottom level.
- Armoury: Upstairs, right next to the bridge.
- Supply Depot: To the right of the Mystery Box spot underneath the stairs leading to Speed Cola.
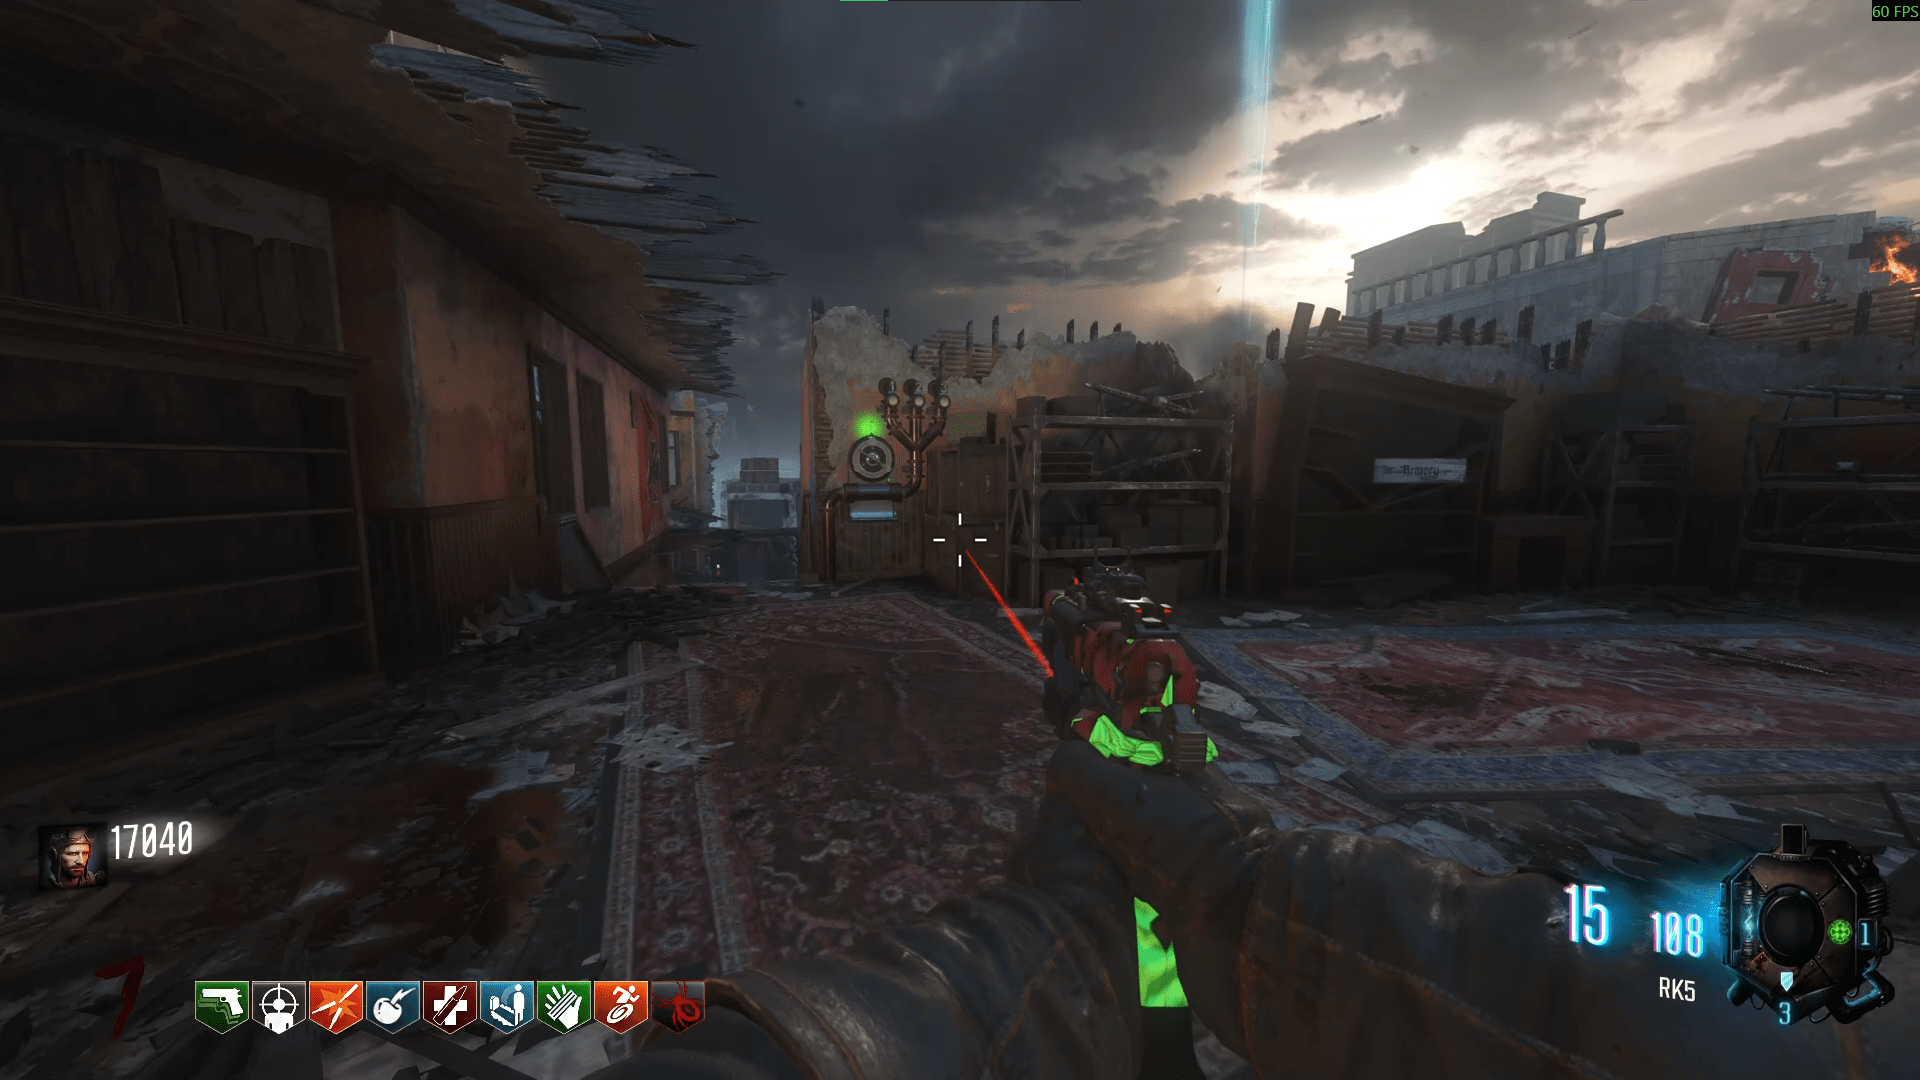
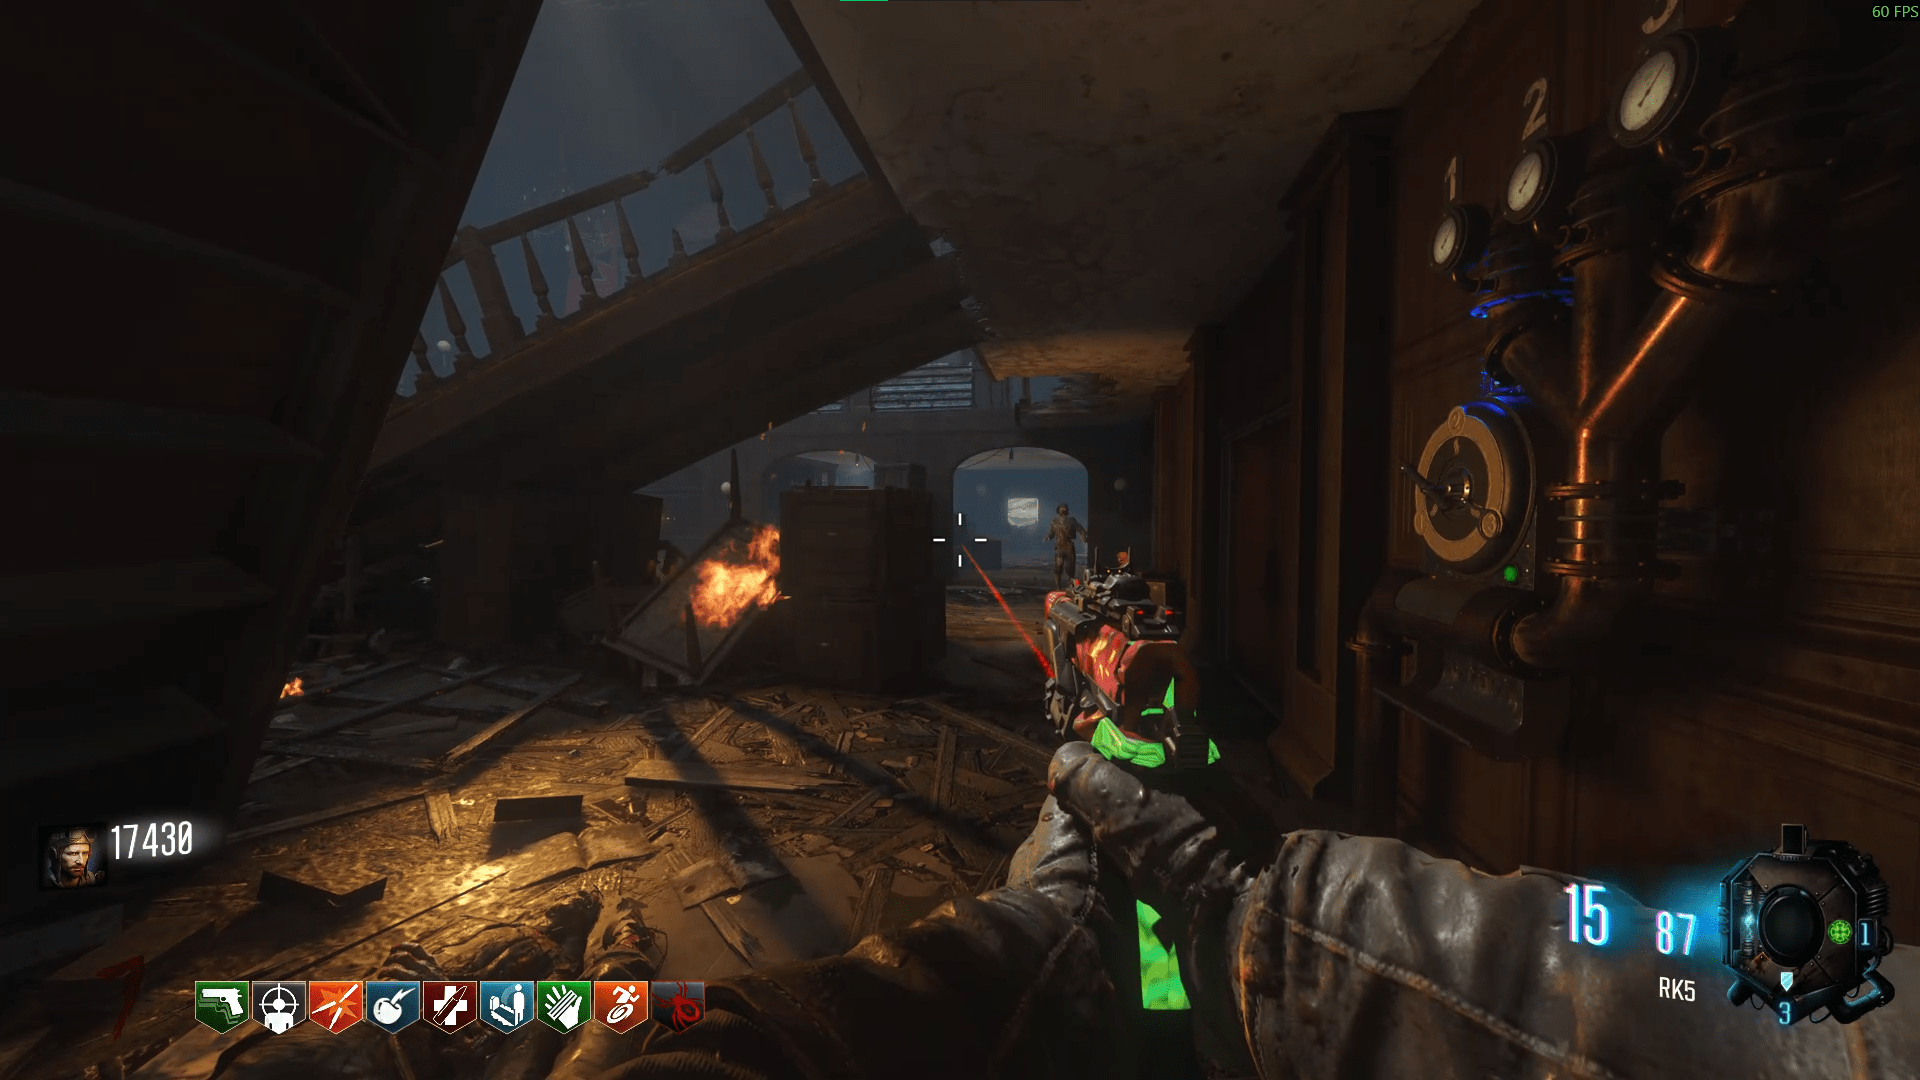
Gorod Krovi
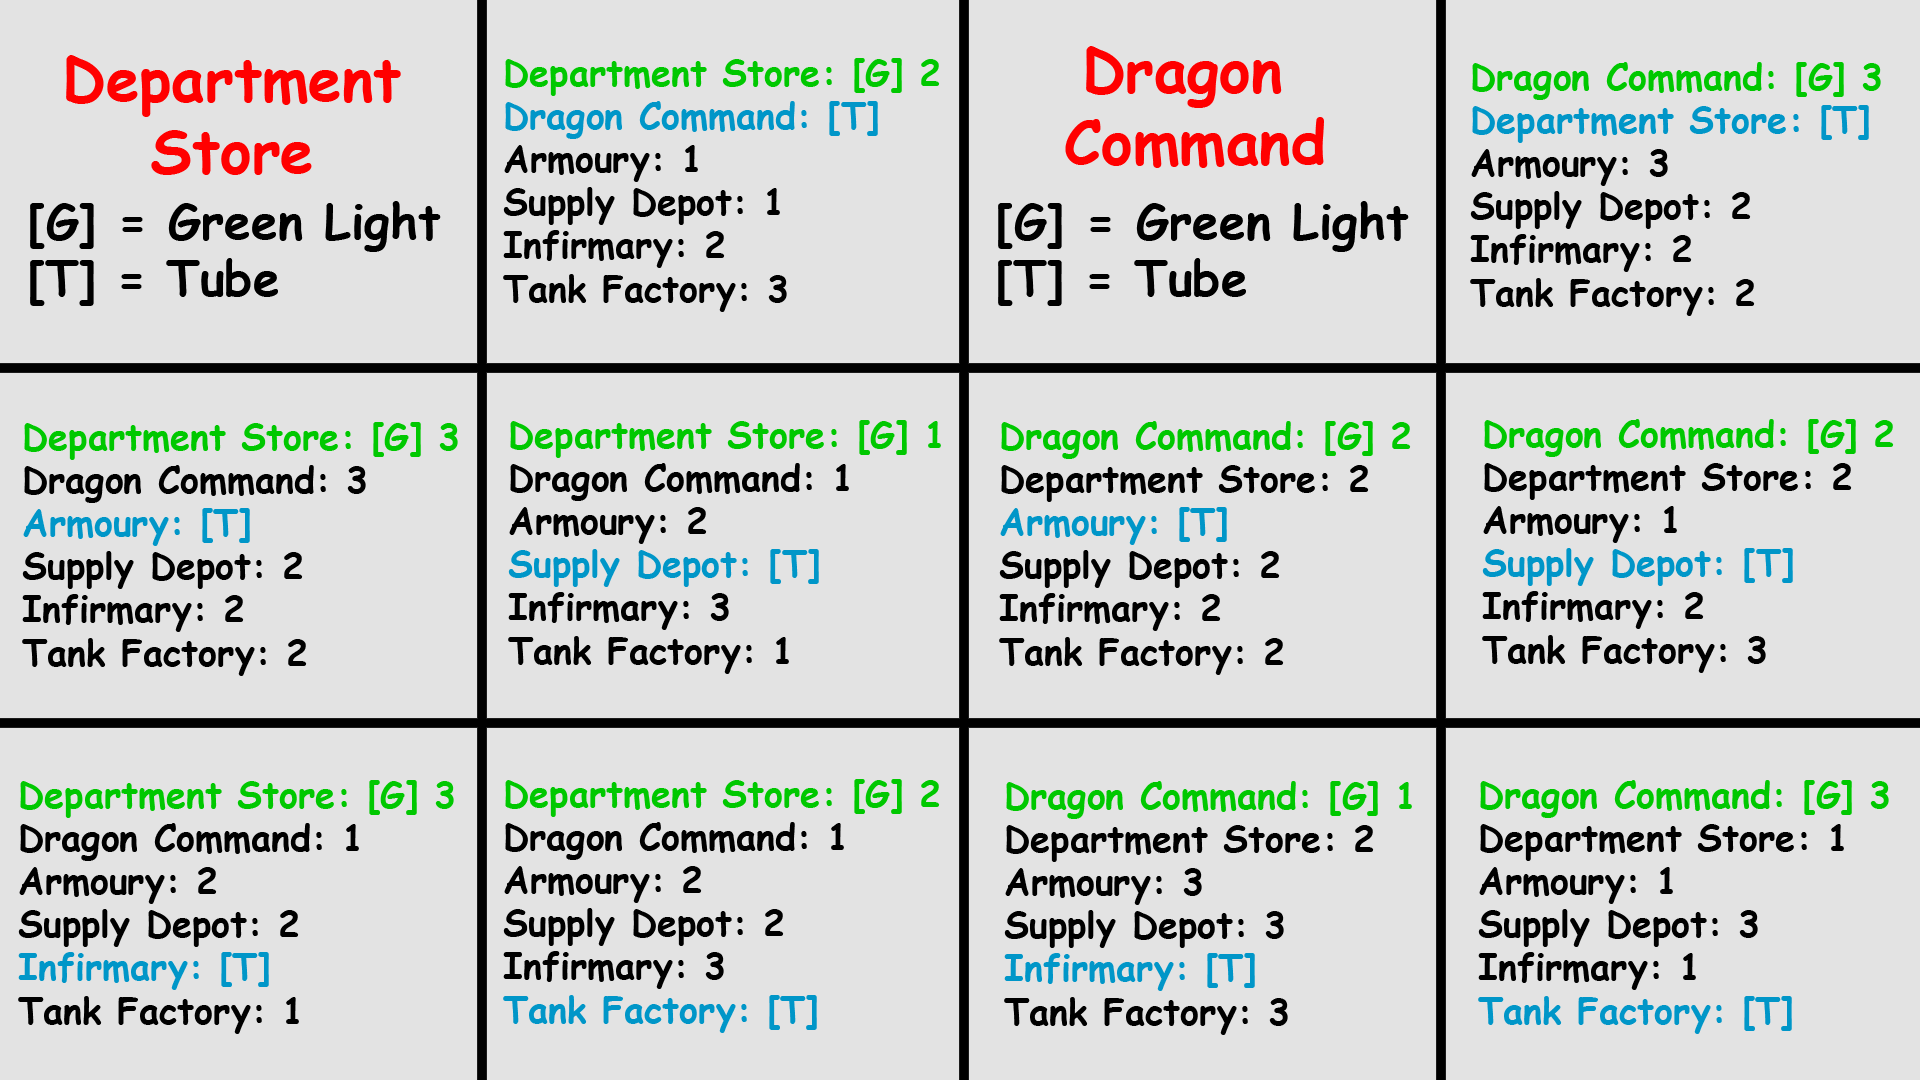
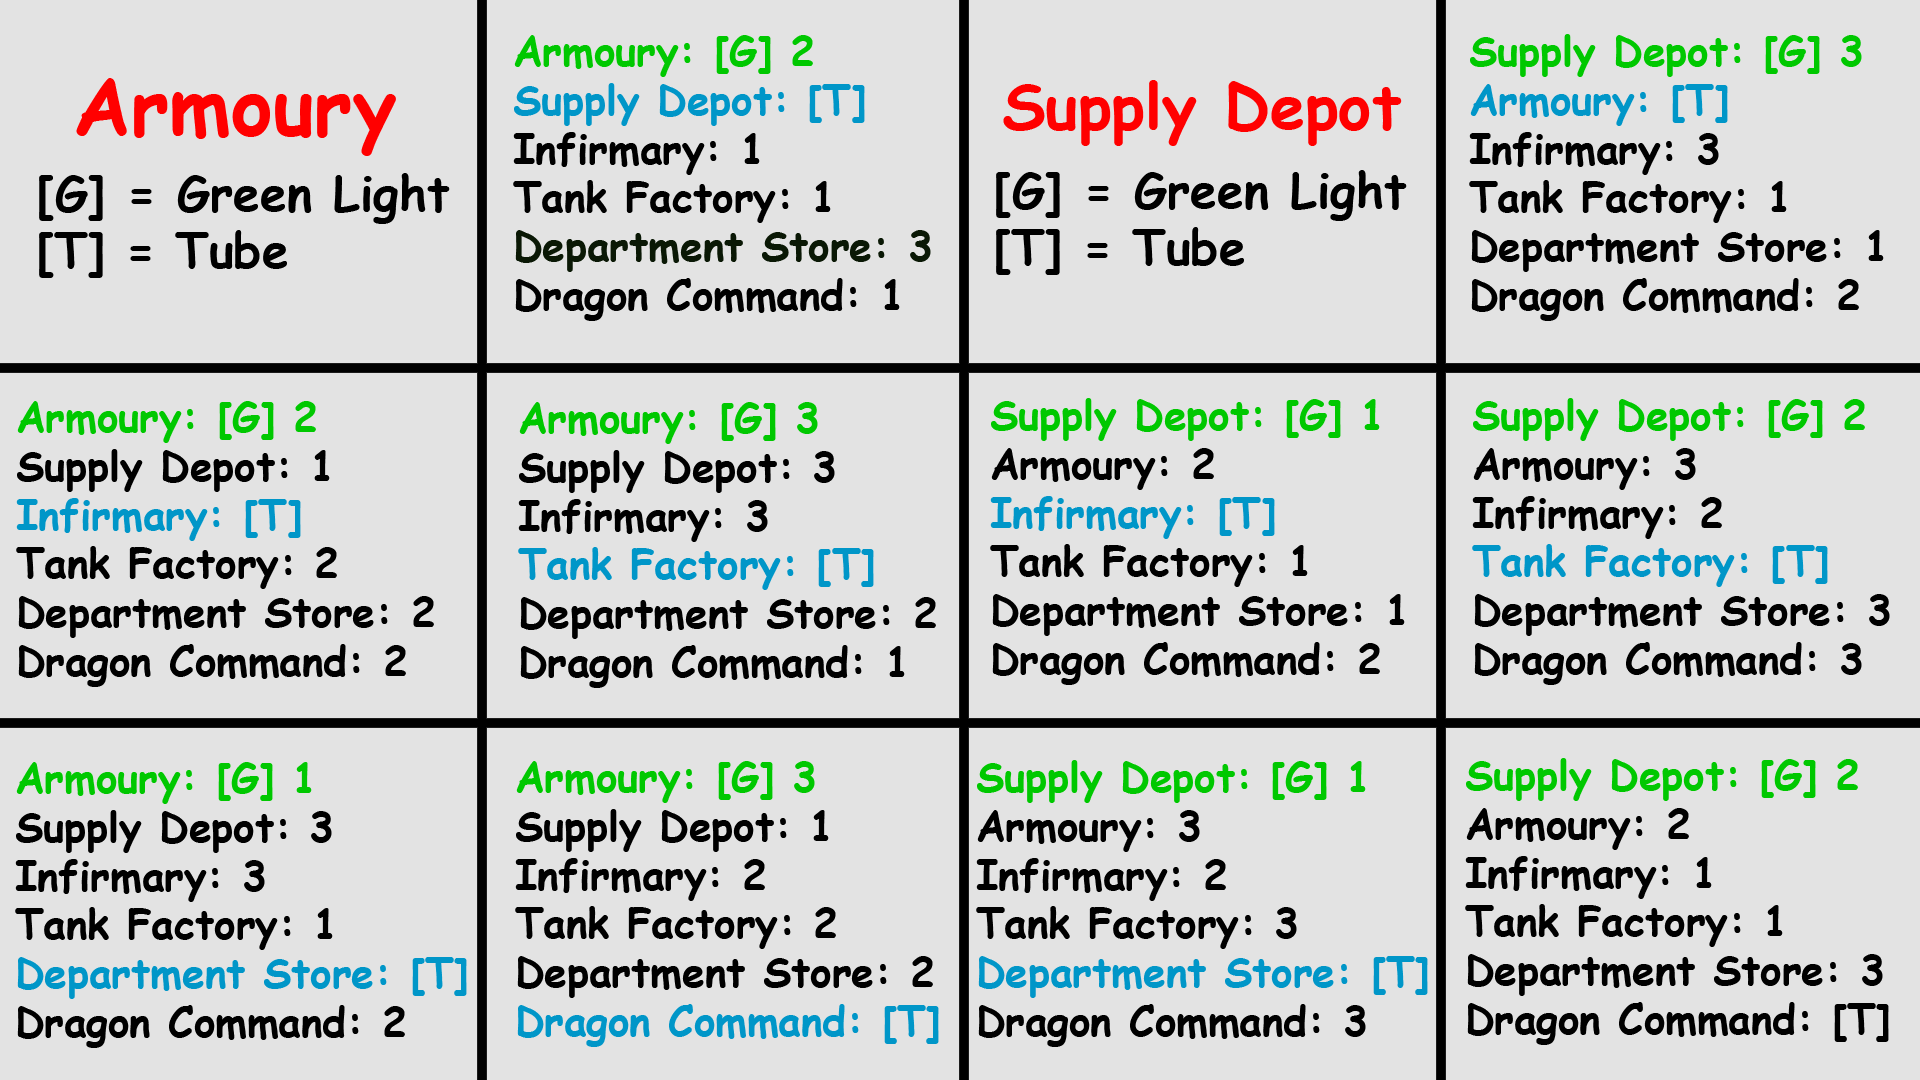
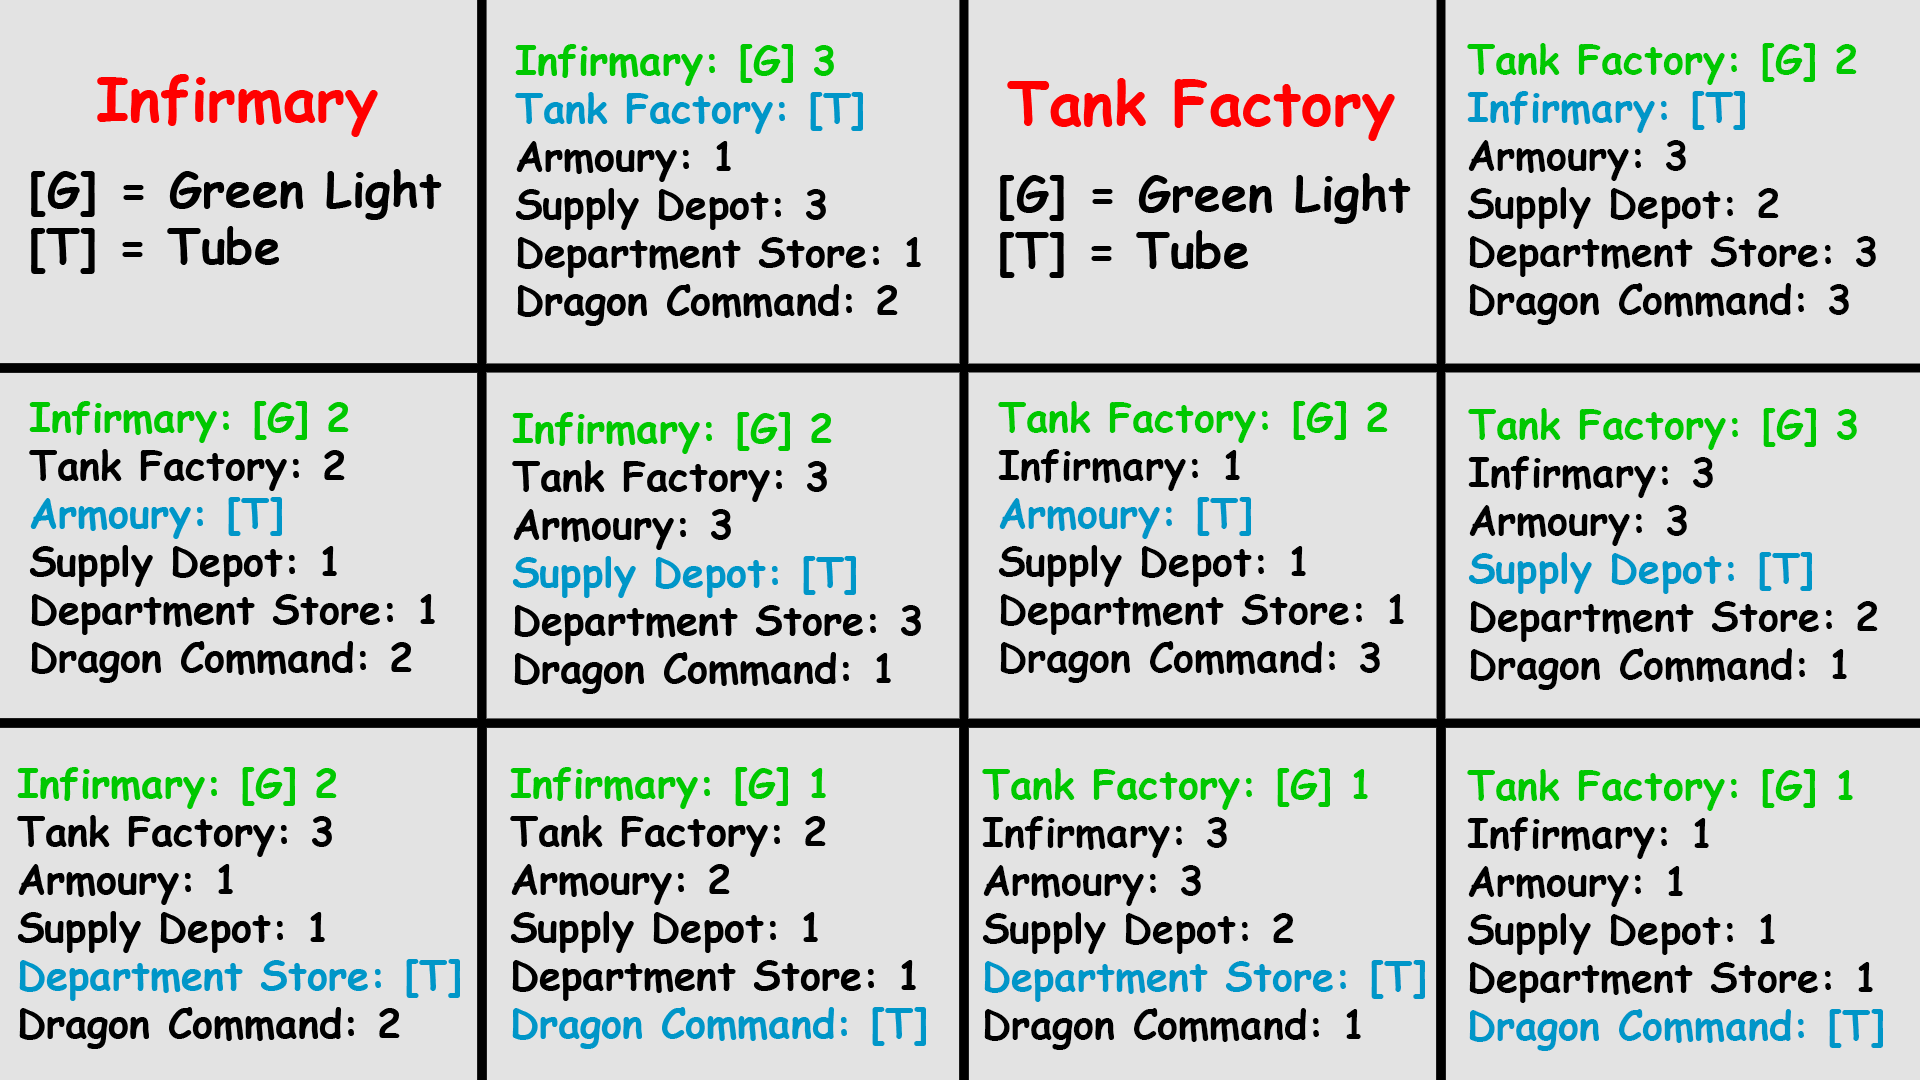
Find which valve has a green light, and the Master Cylinder stuck inside the tube. The legend on the cheatsheet shows 'G' for the green light valve and 'T' for the Master Cylinder.
Find the cheatsheet that has the 'G', or green light, in the location that you found it in your game. Then align it with where you found the Master Cylinder 'T', and you'll have the numbers you need to input into the rest of the valves to unstuck the Master Cylinder.
Using my game as an example, my green light was in the Armoury with the Master Cylinder in the Infirmary. This means that I would find the Armoury cheatsheet, then align my 'T' with Infimary. After that, I would run to each of the spots which has a number next to them and input that number into the corresponding valve. Picking up the Master Cylinder once it dropped in the Infirmary.
Head to where the Master Cylinder is and it should now be unstuck, interact with it to take it. If you didn't manage to do this in 5 minutes, you can go back to the Hatchery and interact with the generator to power it back up, this will give you another 5 minutes to do the step again.
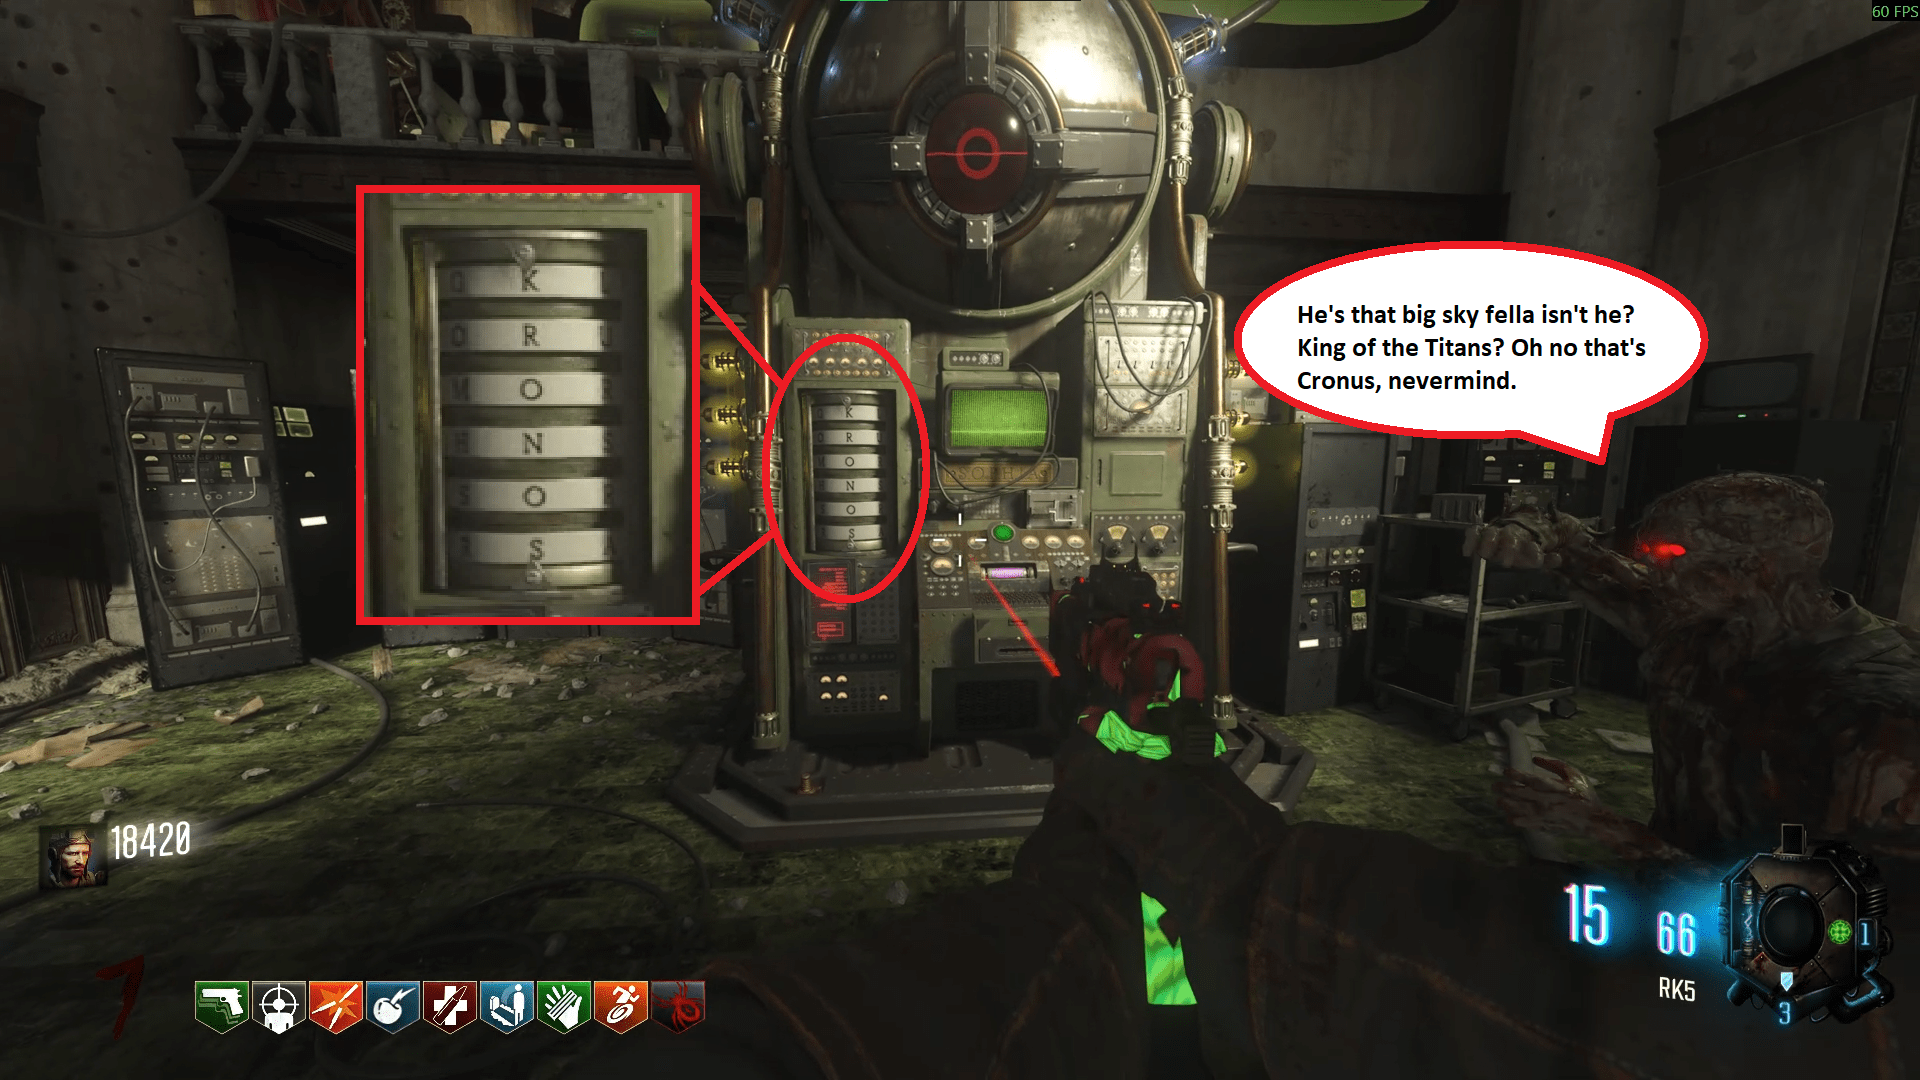
Once you have the Master Cylinder, go back to S.O.P.H.I.A and give it to her. You'll need to shoot the word 'KRONOS' into the dials, from top to bottom. Make sure you use a bullet weapon also. After inputting the passphrase, submit it, she will close the cylinder and you'll be done.
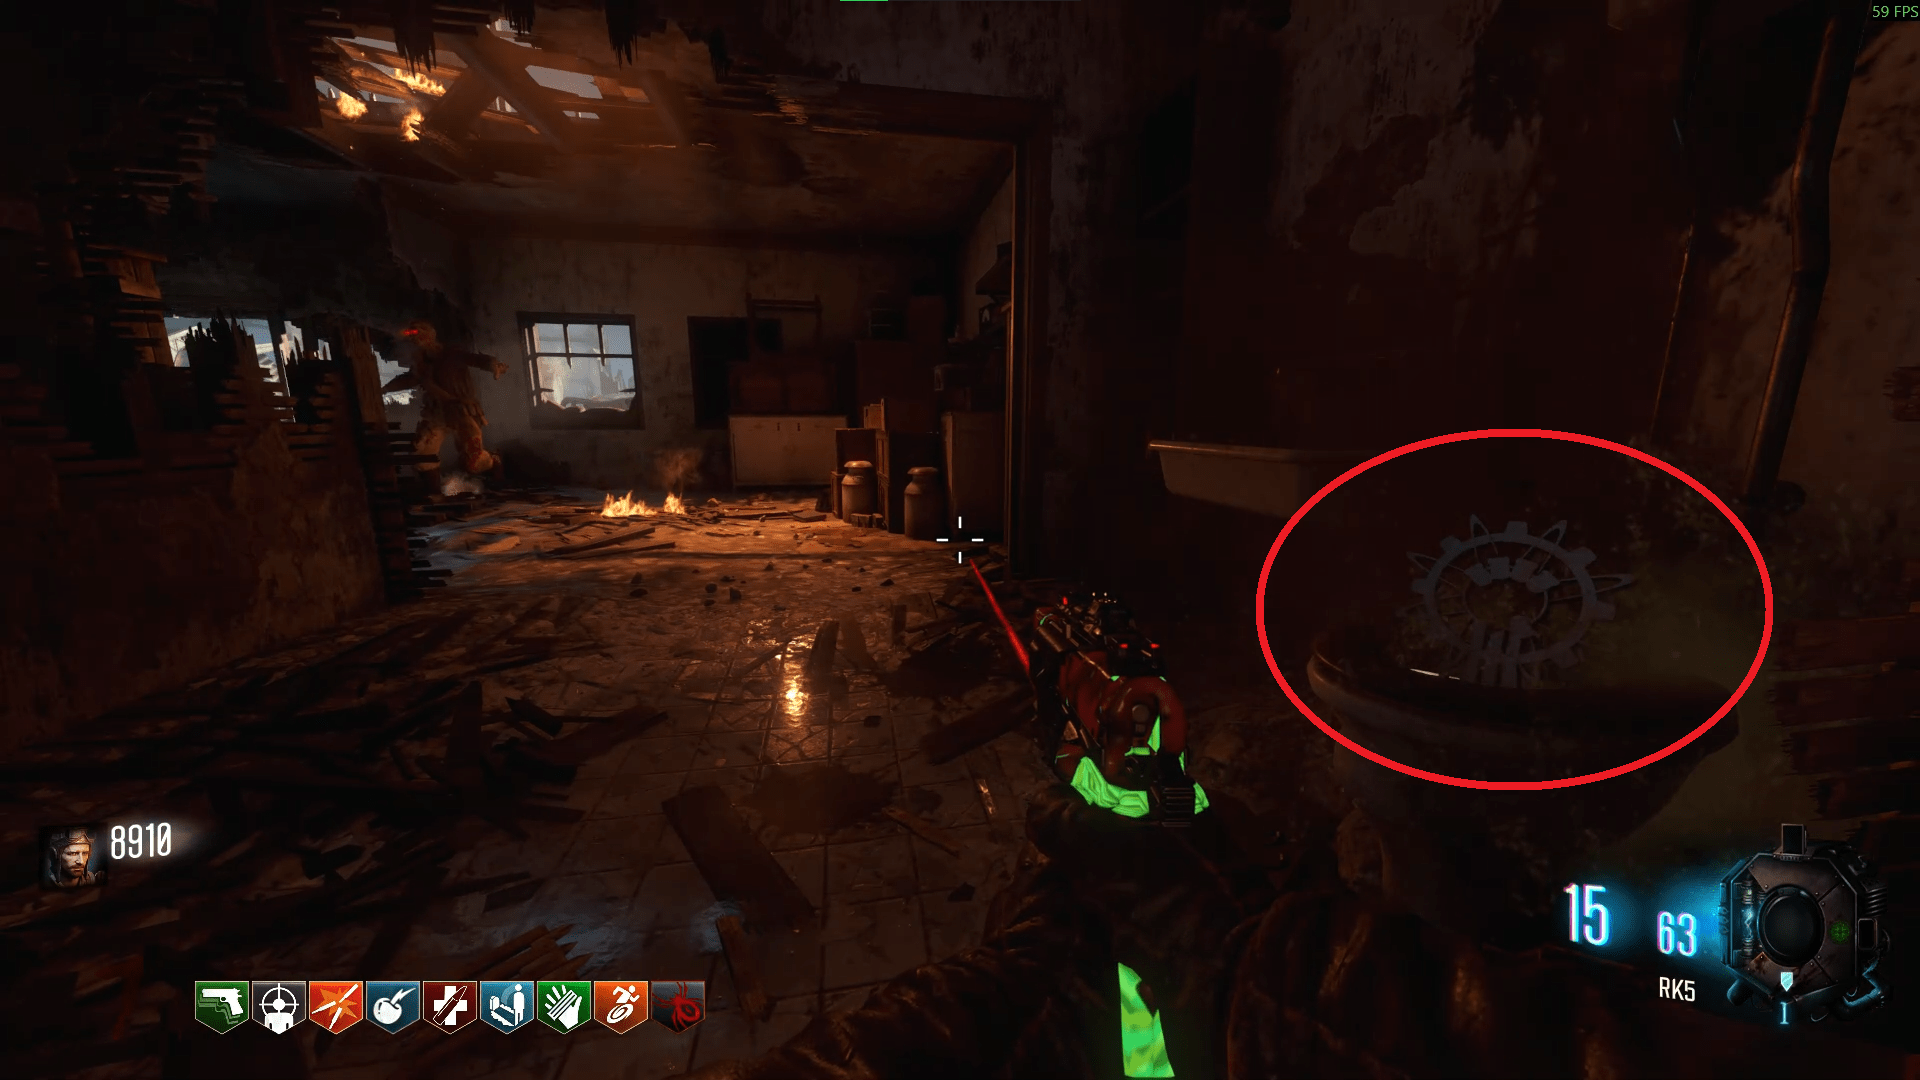
At this point, the Dragon Egg may be fully incubated. If not, then just wait for it to be. Head back to the Hatchery to pick it up. You remember when we shot that red light? Now's the time to pick up the trophy it dropped. On the same floor as PaP, there will be a toilet. Look inside and you'll see the first trophy just sitting there.
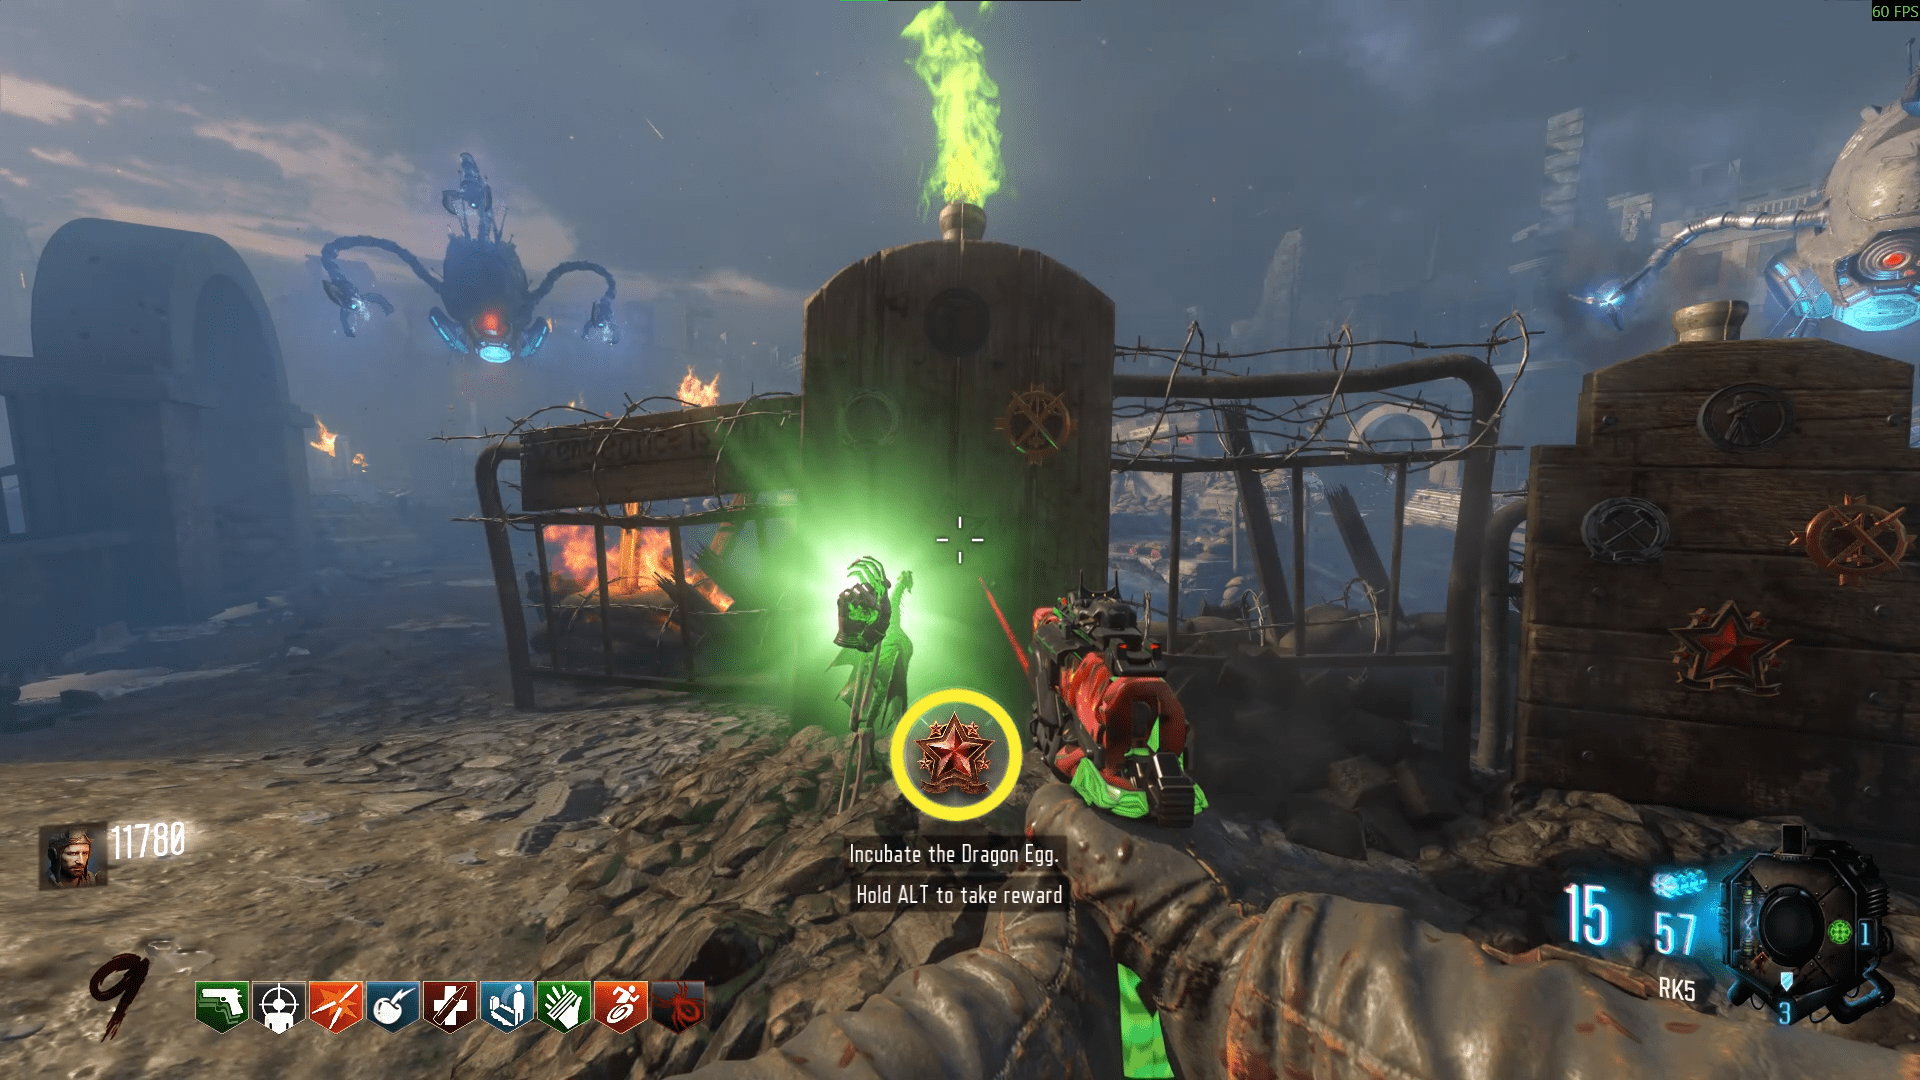
Then go back to Spawn via the Sewers and retrieve the Gauntlet of Siegfried from the gravestones.
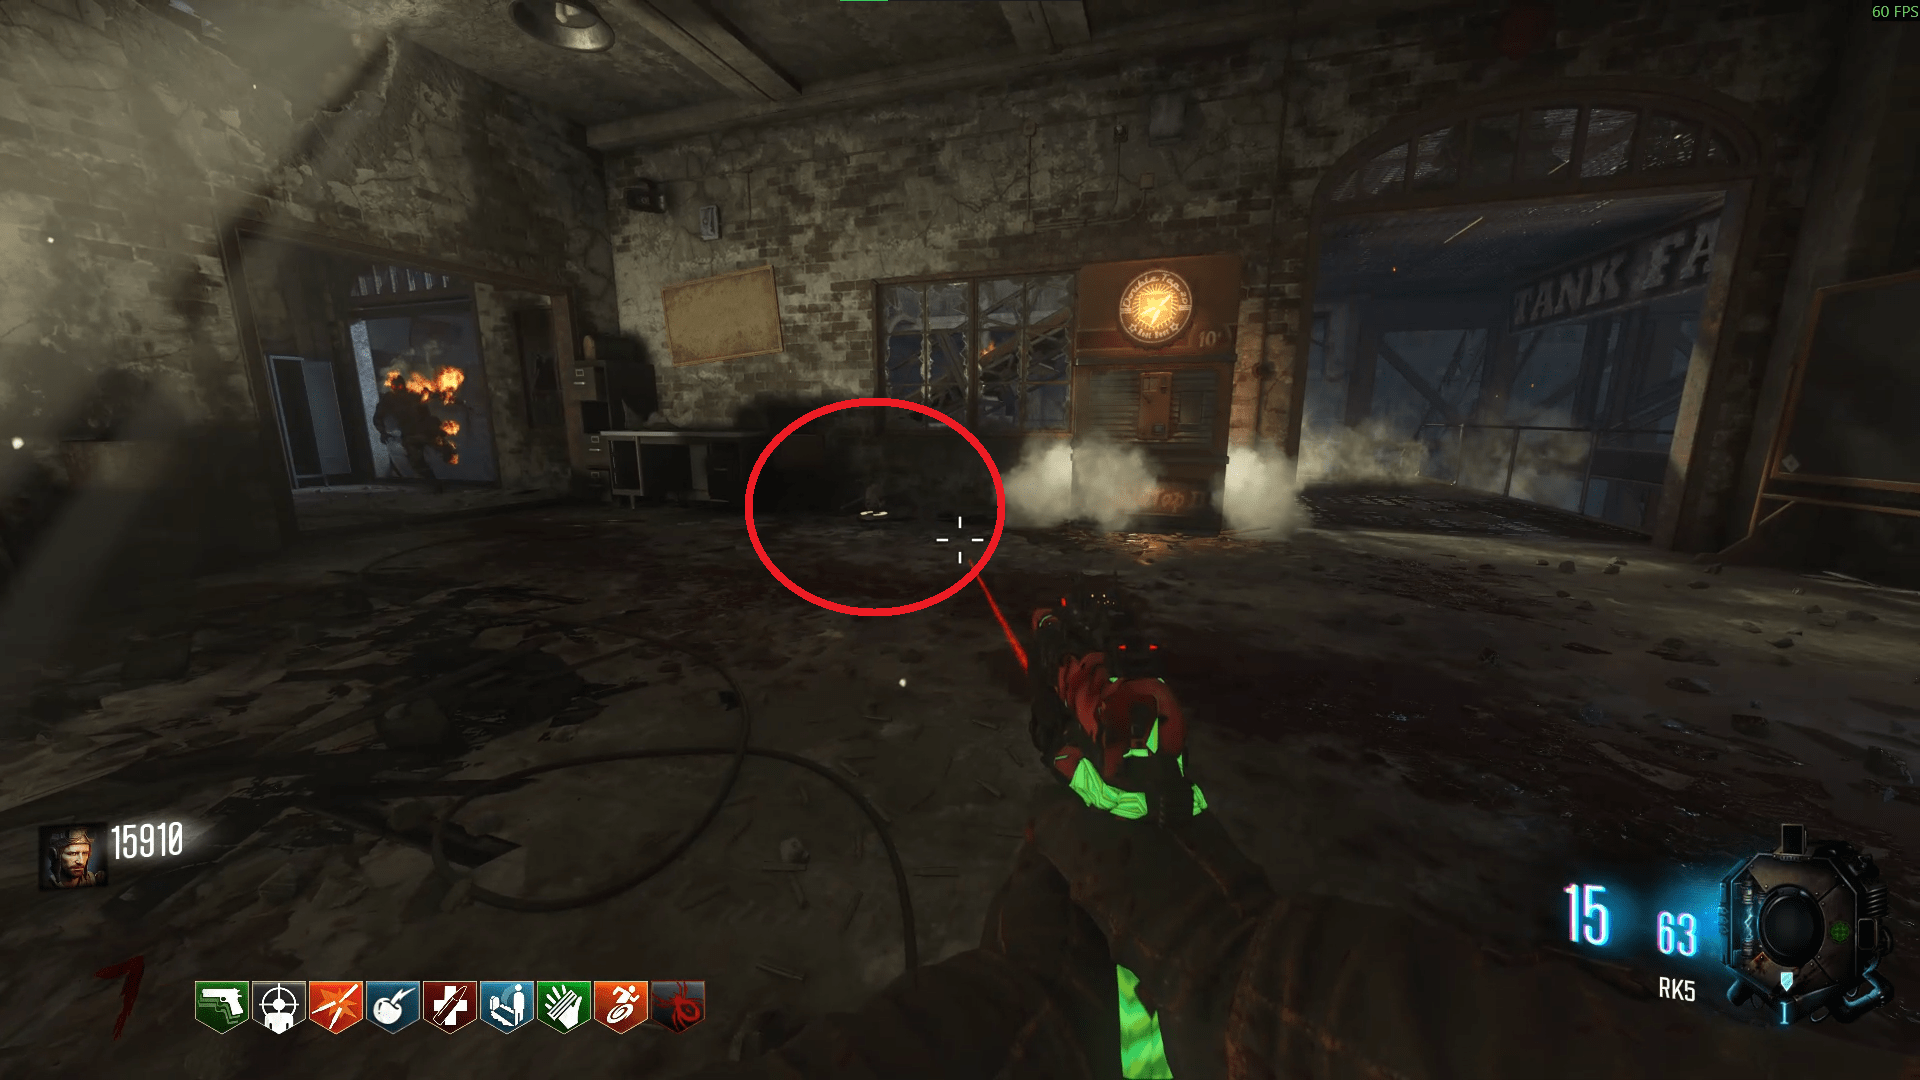
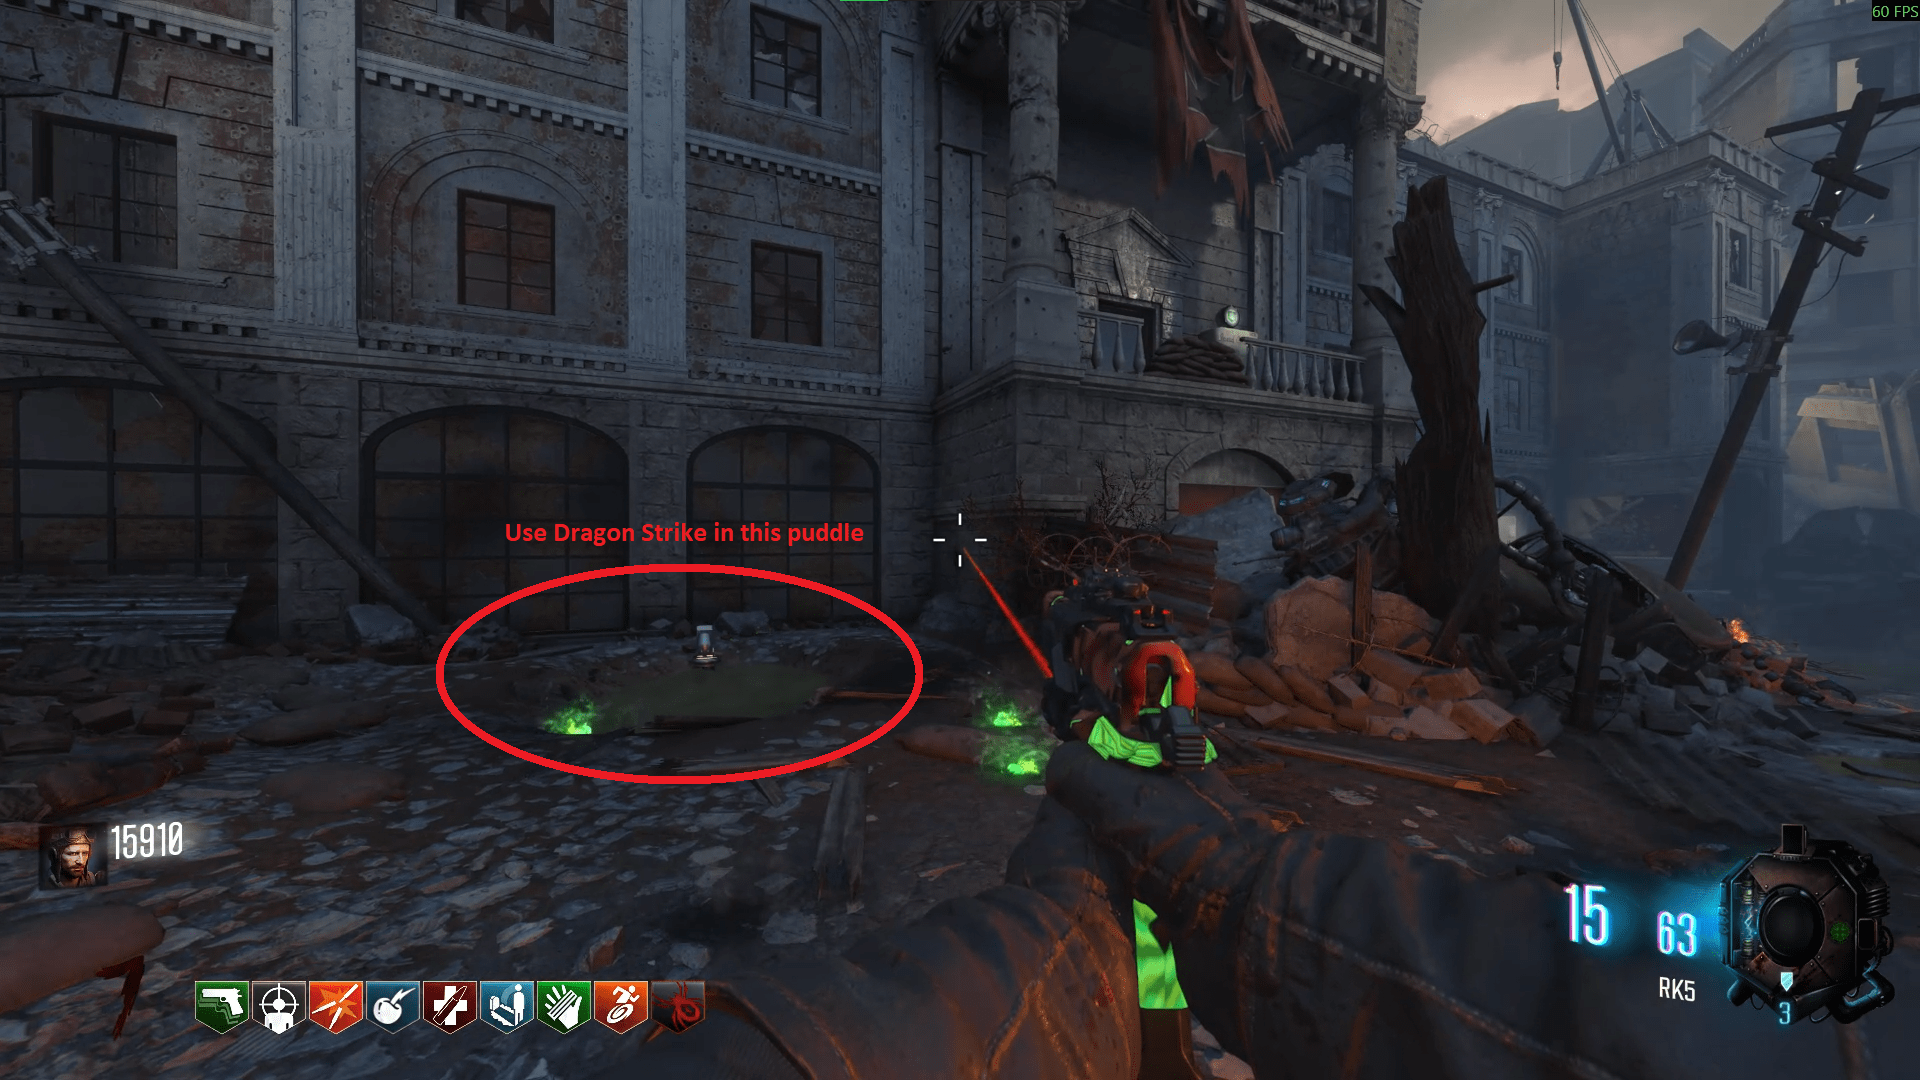
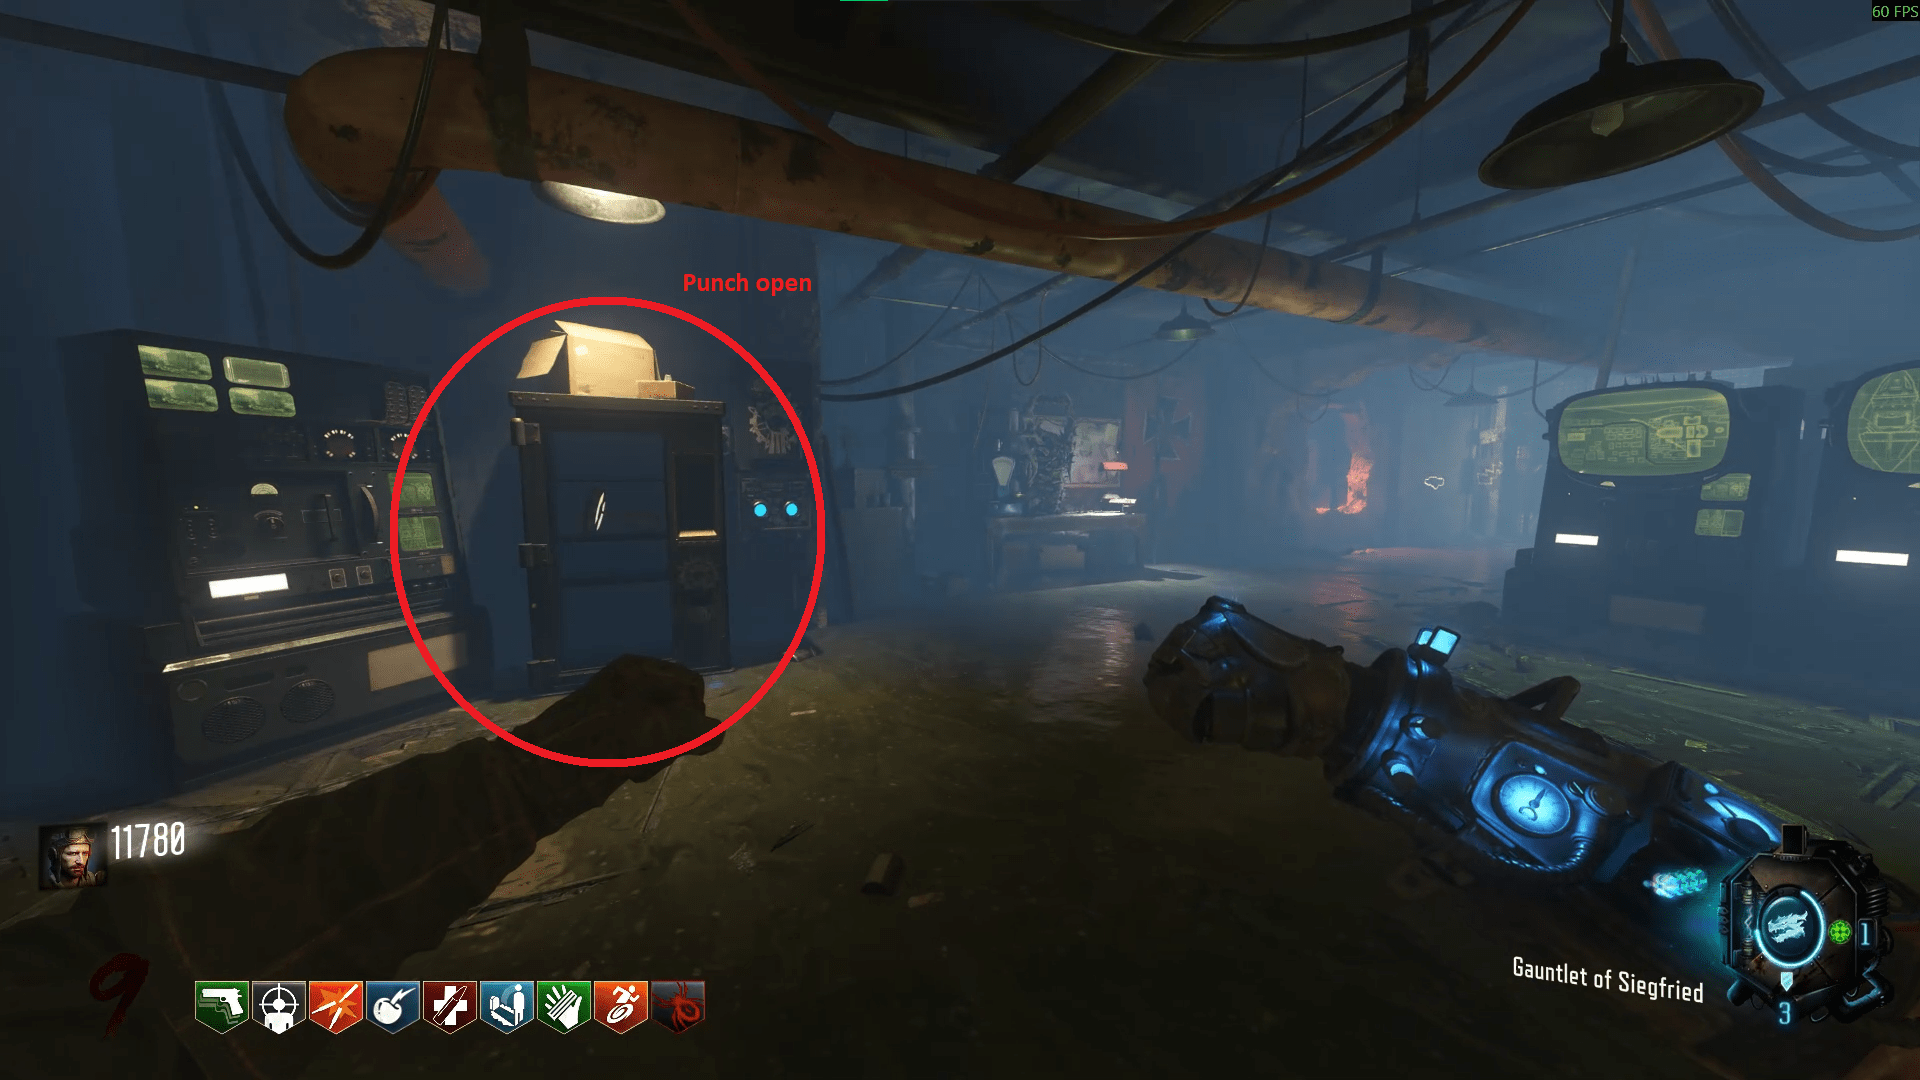
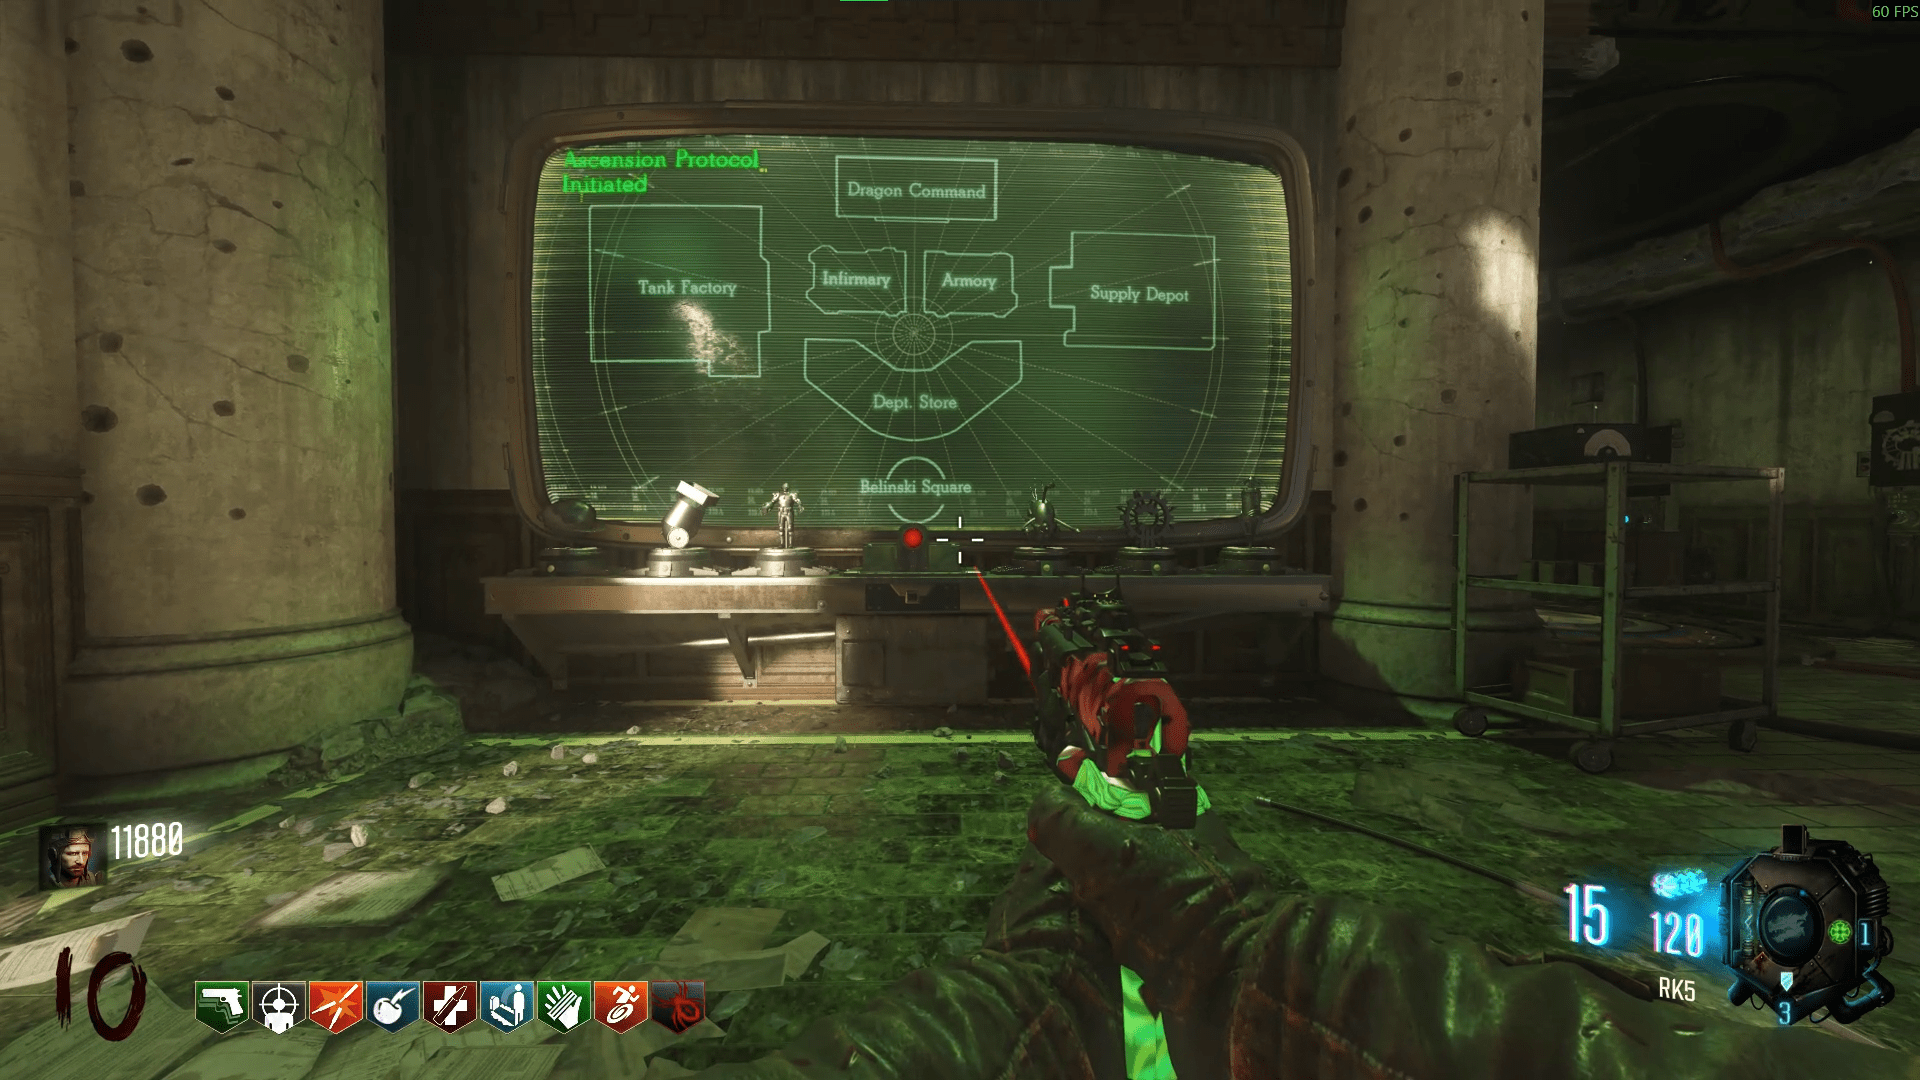
To actually start the trials, interact with the button under the big green screen in Dragon Command to place the trophies, then again to start the trials. You'll do this every time you want to (re)start a trial.
- Dragon Command: On the balcony of the 1st floor (2nd for Americans) on the left side.
- Department Store: Under the stairs at the back, on the ground floor (1st floor for Americans).
- Infirmary: On a structural pillar to the left of the Bunker stairs. Right of the bunk beds to upstairs.
- Tank Factory: Top level of Dragon fast travel, near Wunderfizz and Gobblegum machine.
- Armoury: Lowest level, on a wall beside the Wunderfizz.
- Supply Depot: Just after entering from the ground level, on the wall on the right. Next to a map.
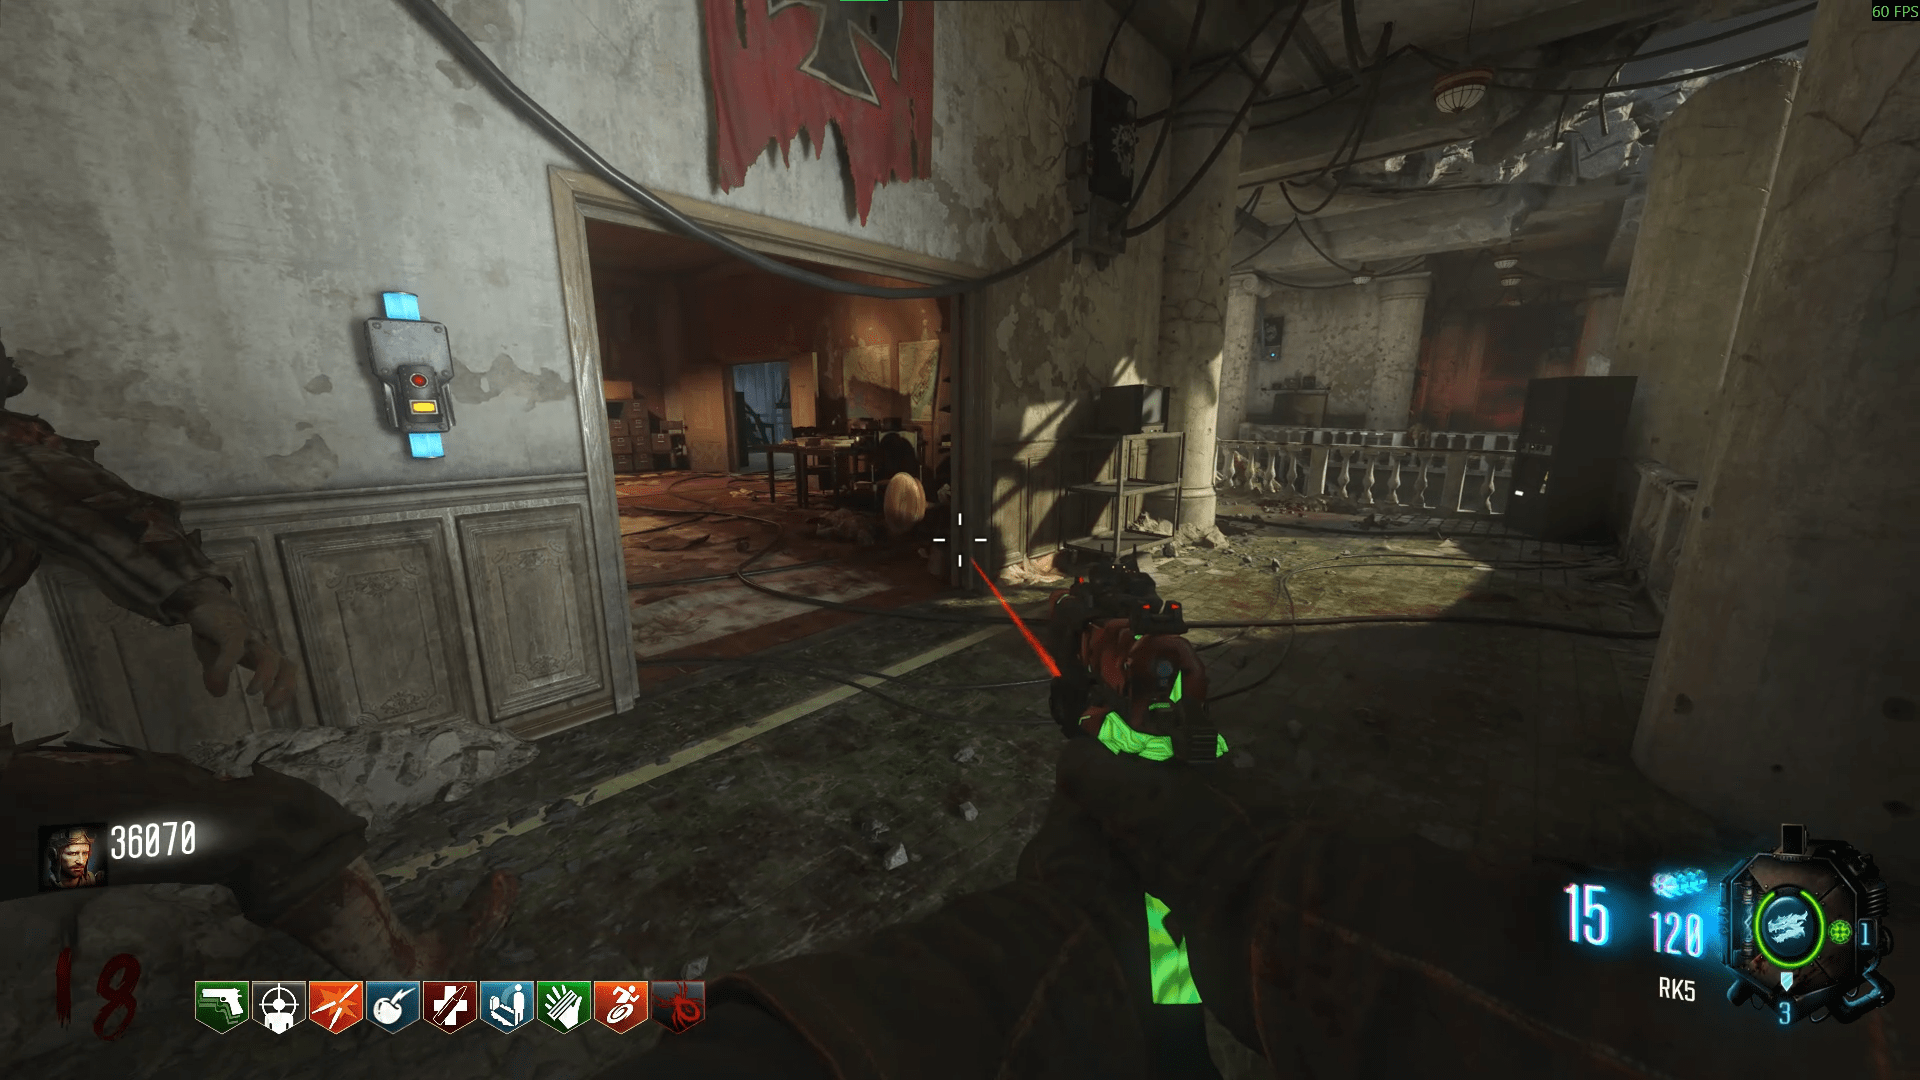
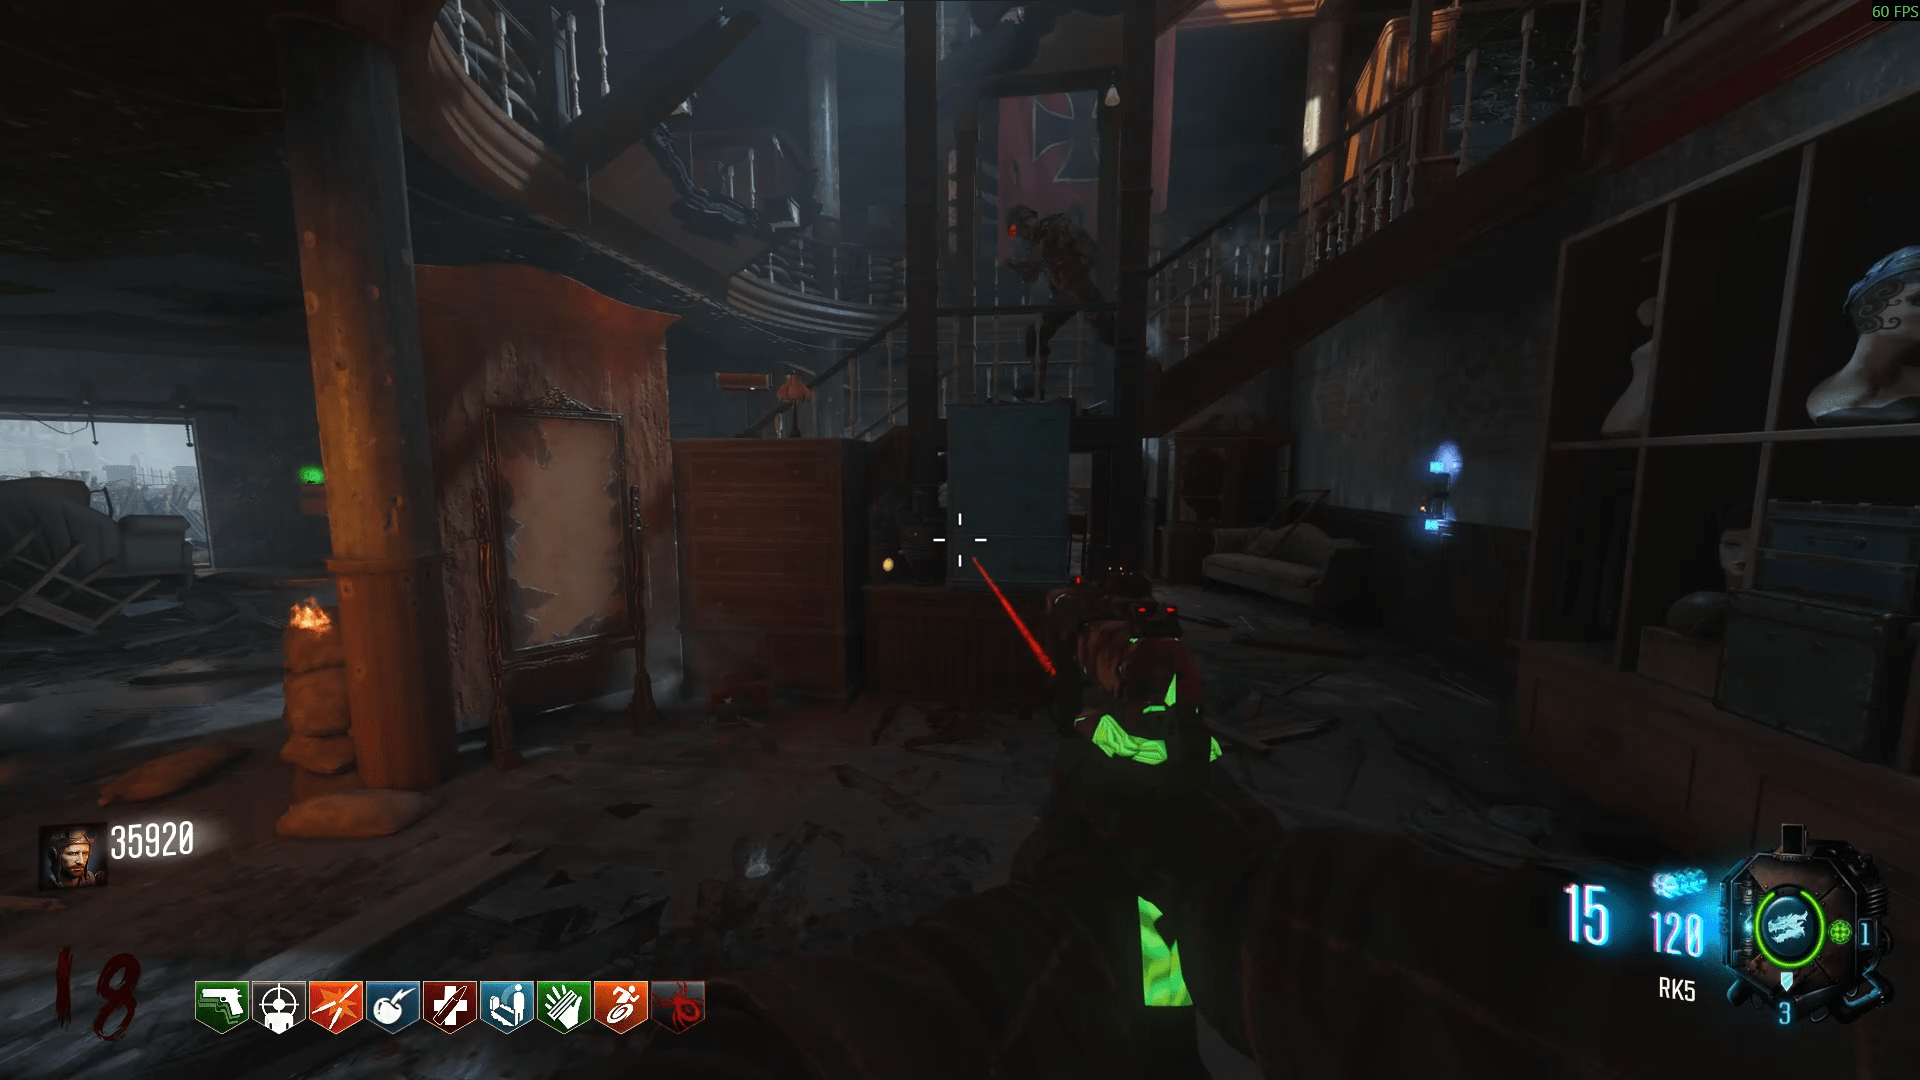
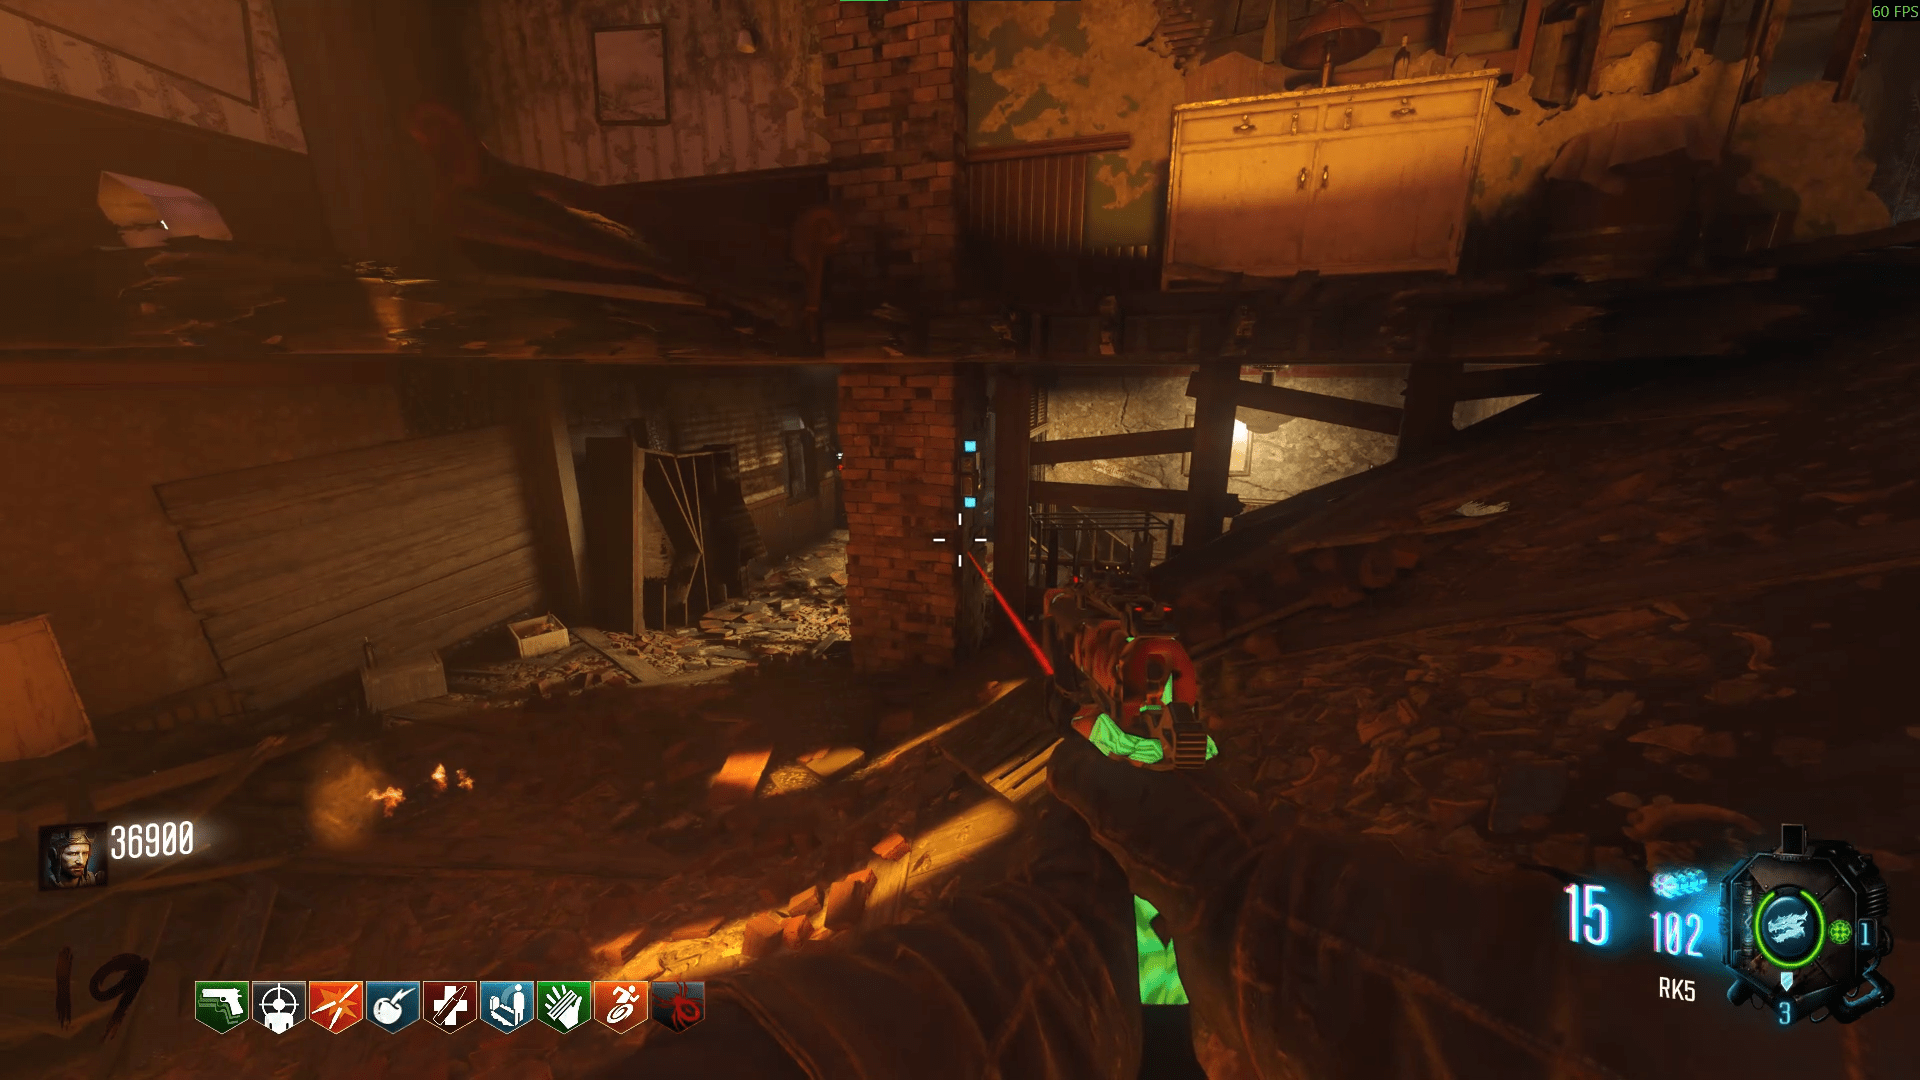
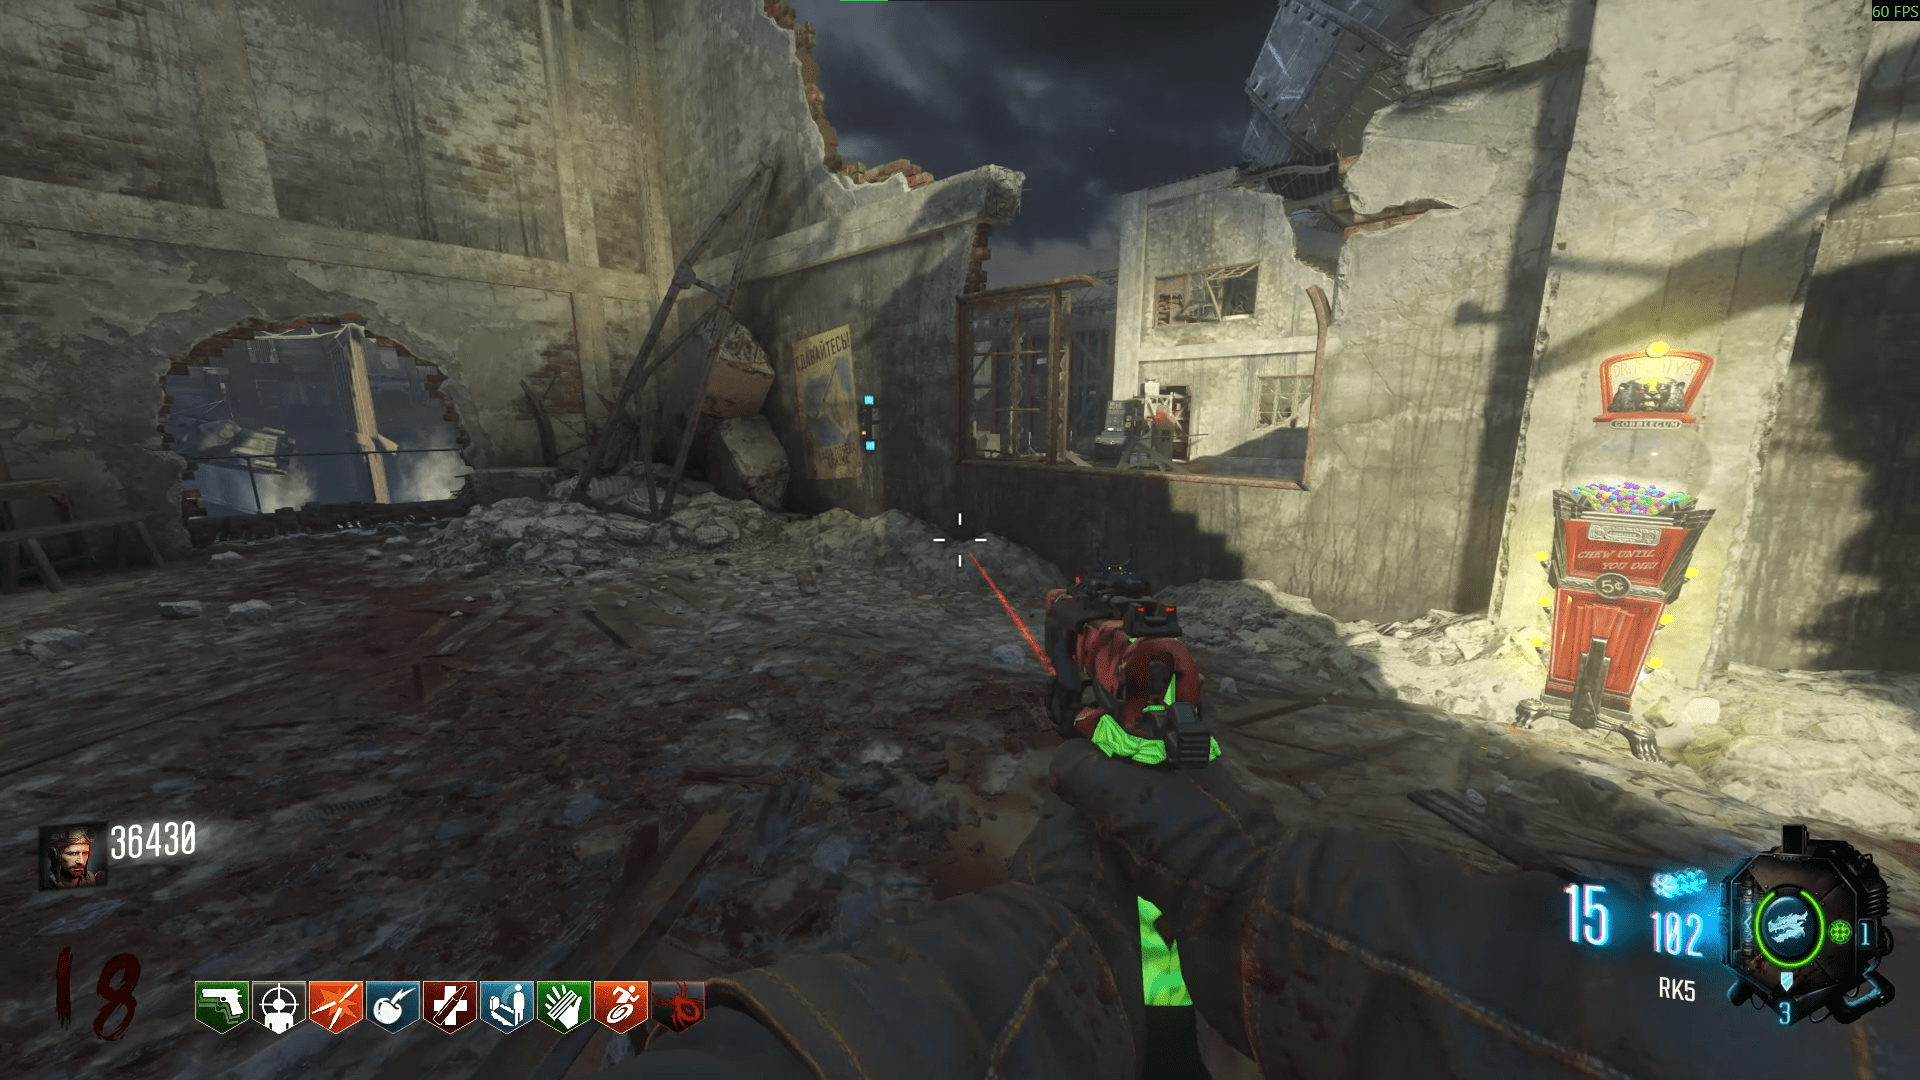
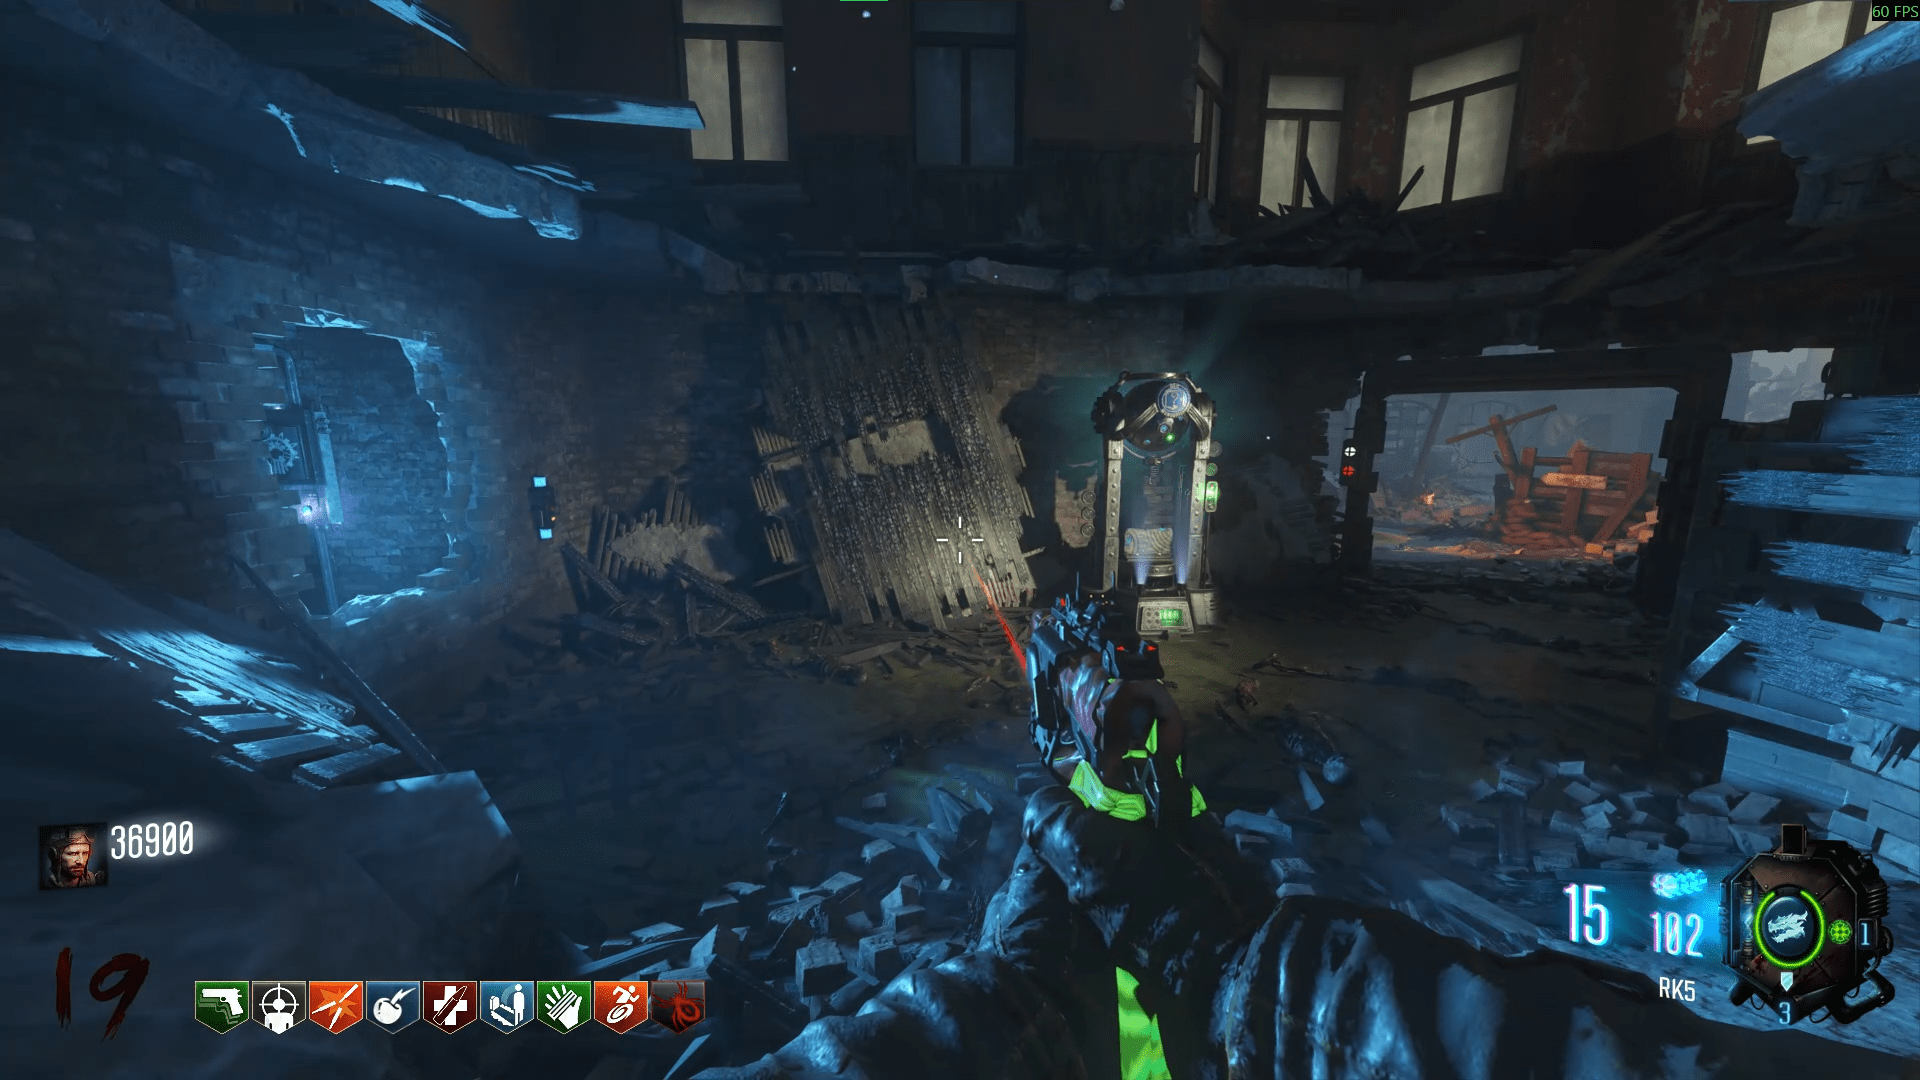
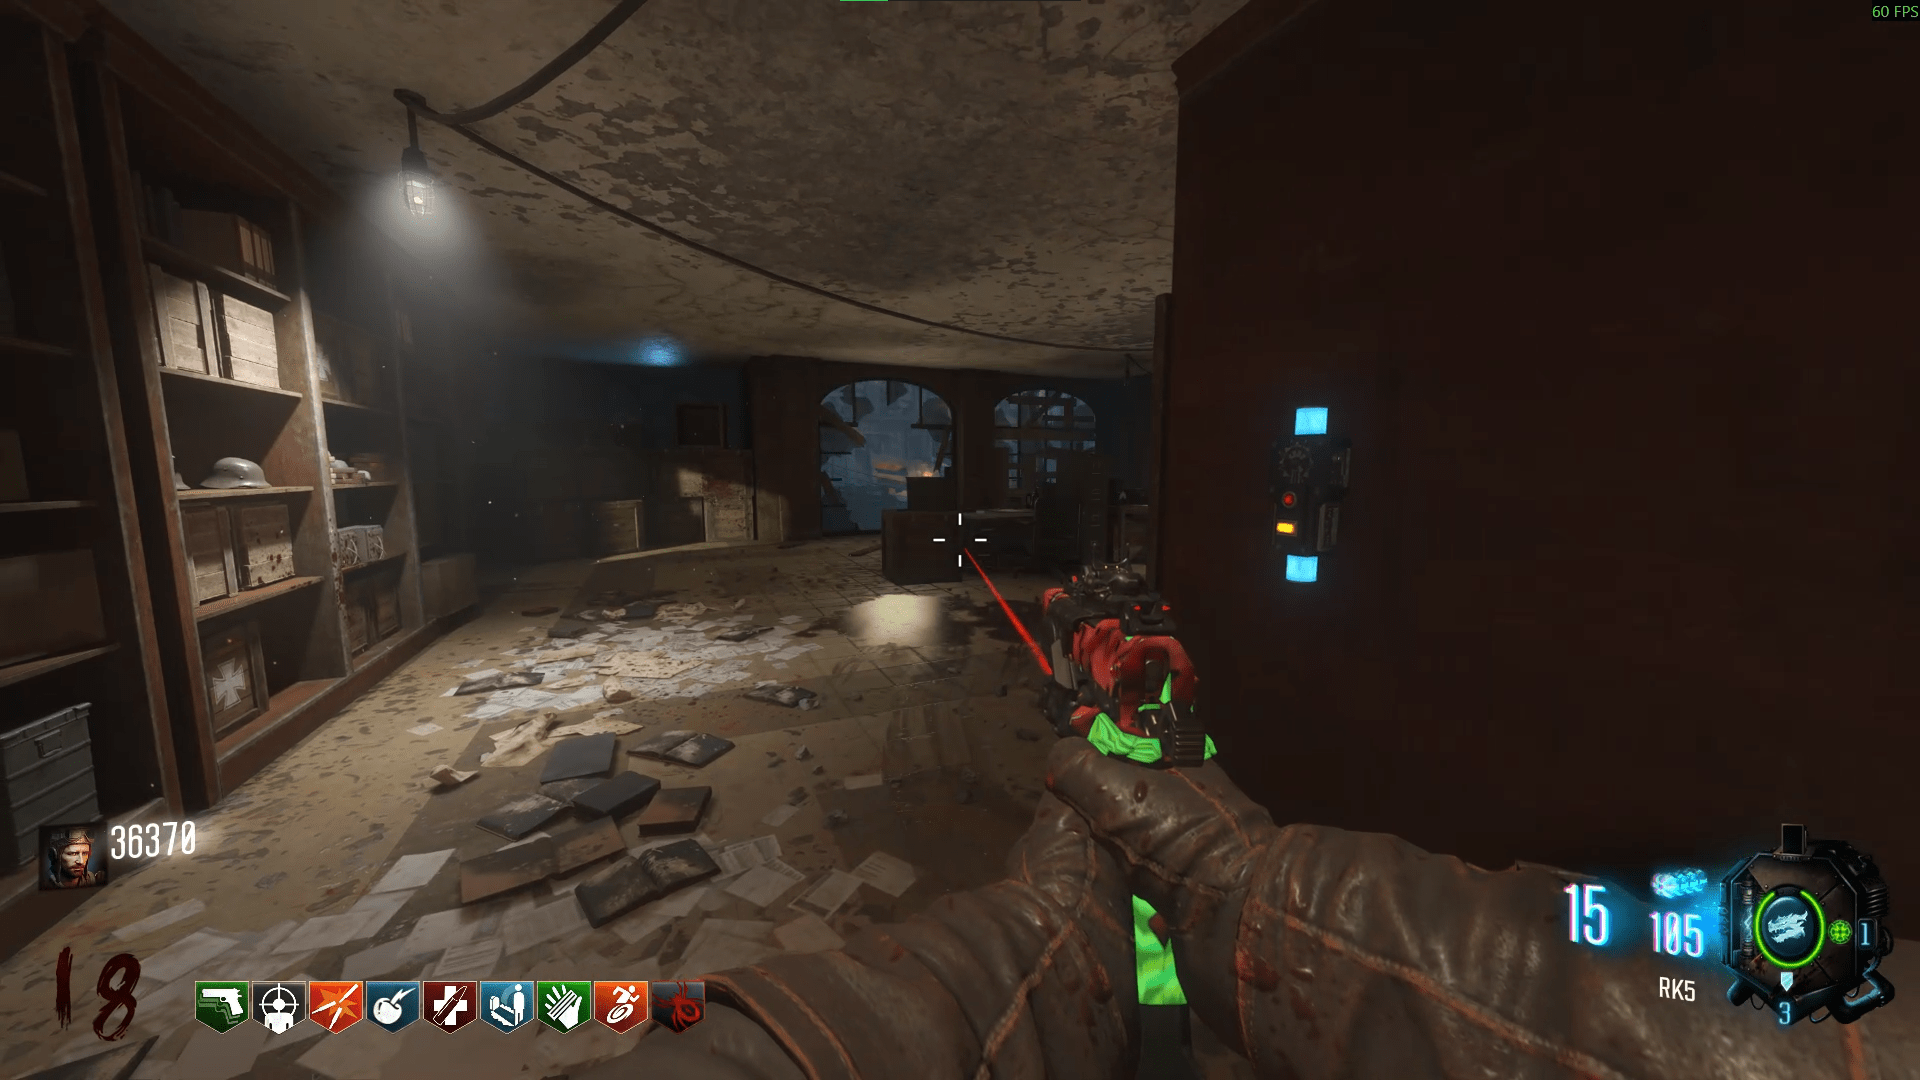
If playing in solo, you can pause the game and write down the order. If playing in co-op, I recommend memorising the first two bombs and recording it on your phone or somewhere easily accessible then noting down as you quickly go through the video. That way the other players can get the first bombs and not have to sit idle waiting for you.
When doing this in co-op, make sure to leave a couple seconds before hitting the next bomb as you may do it too quick and blow yourself up anyway. You get 2 minutes for this trial in co-op and 3 minutes in solo.
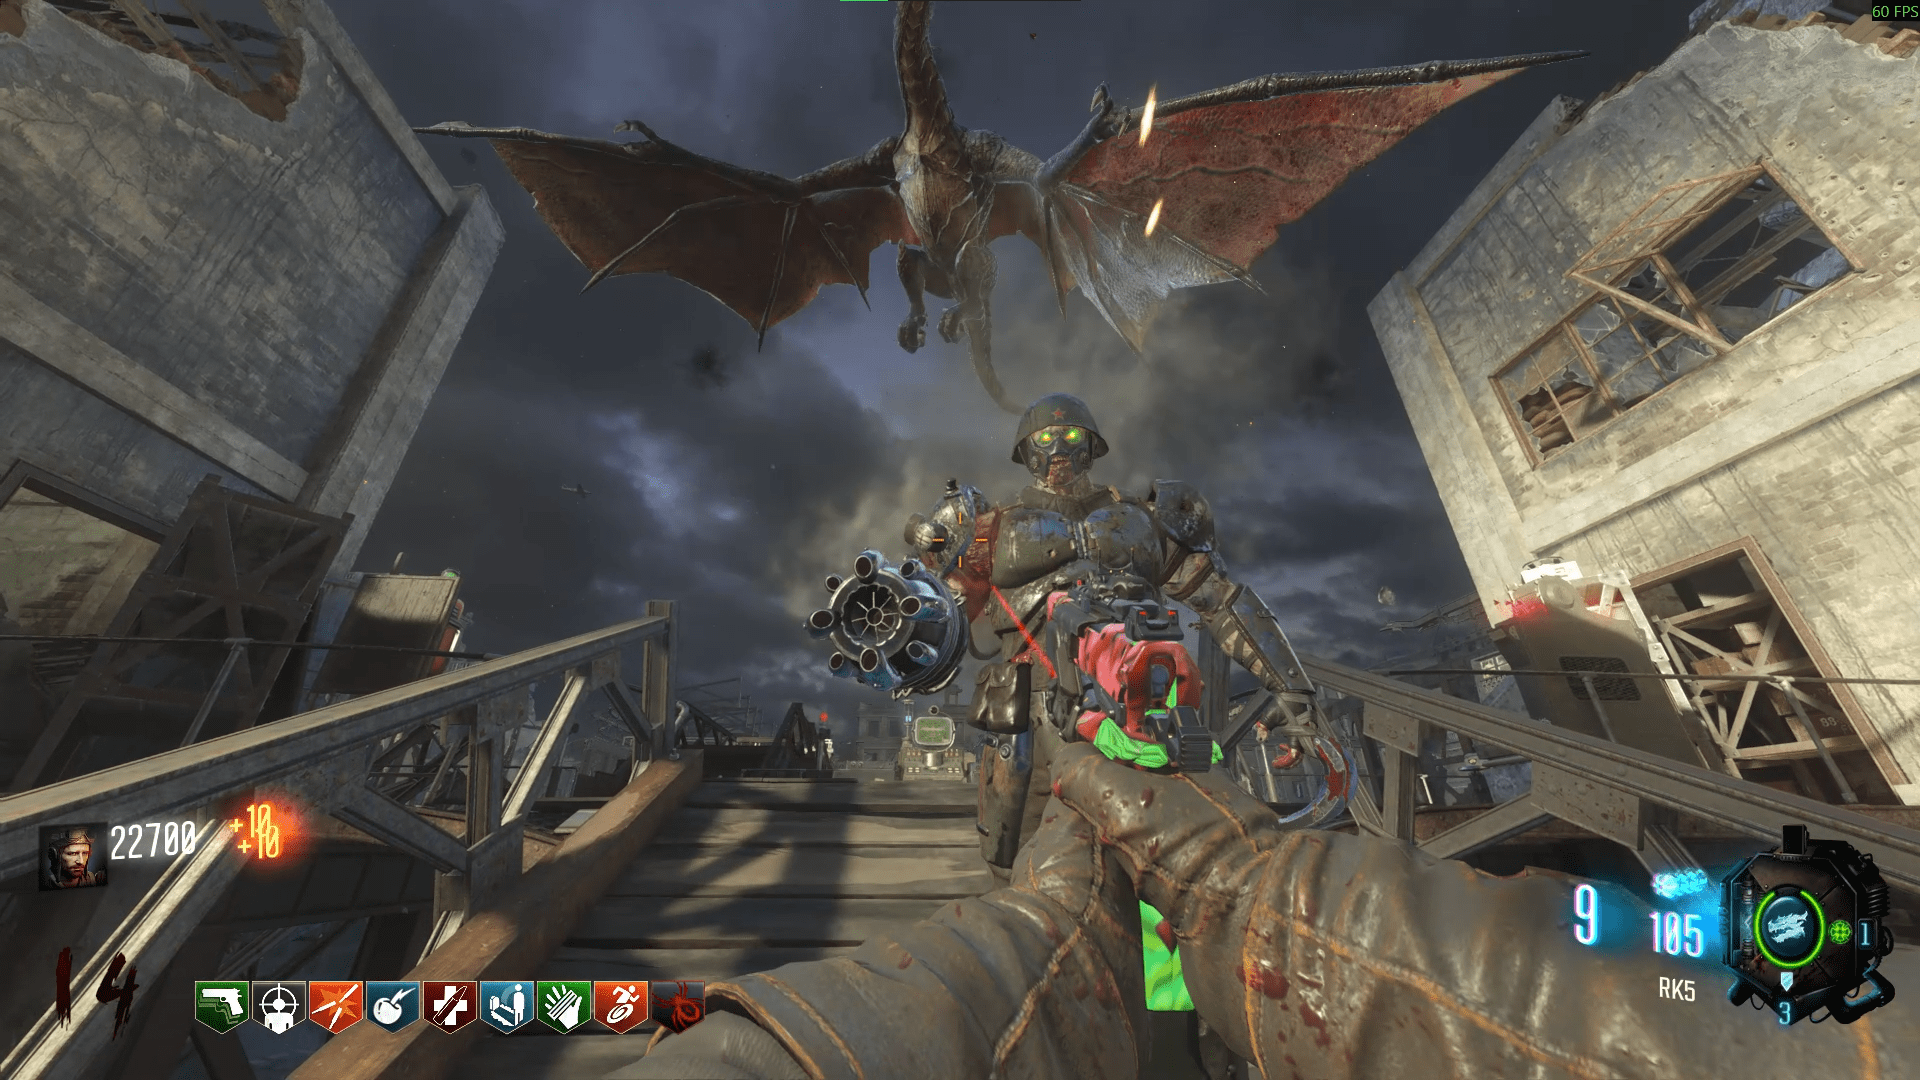
This path you are almost guaranteed to find him somewhere along the way. Once you have found him however, shoot his left shoulder to break his arm cannon and have him run after you to Dragon Command where you'll lead him to the right of the green monitor to be sucked up by S.O.P.H.I.A and complete the trial. Bear in mind that shooting his arm off makes him very vulnerable to Valkyrie damage, so do so with caution.
Oh and he has green eyes. Look out for those.
Gorod Krovi
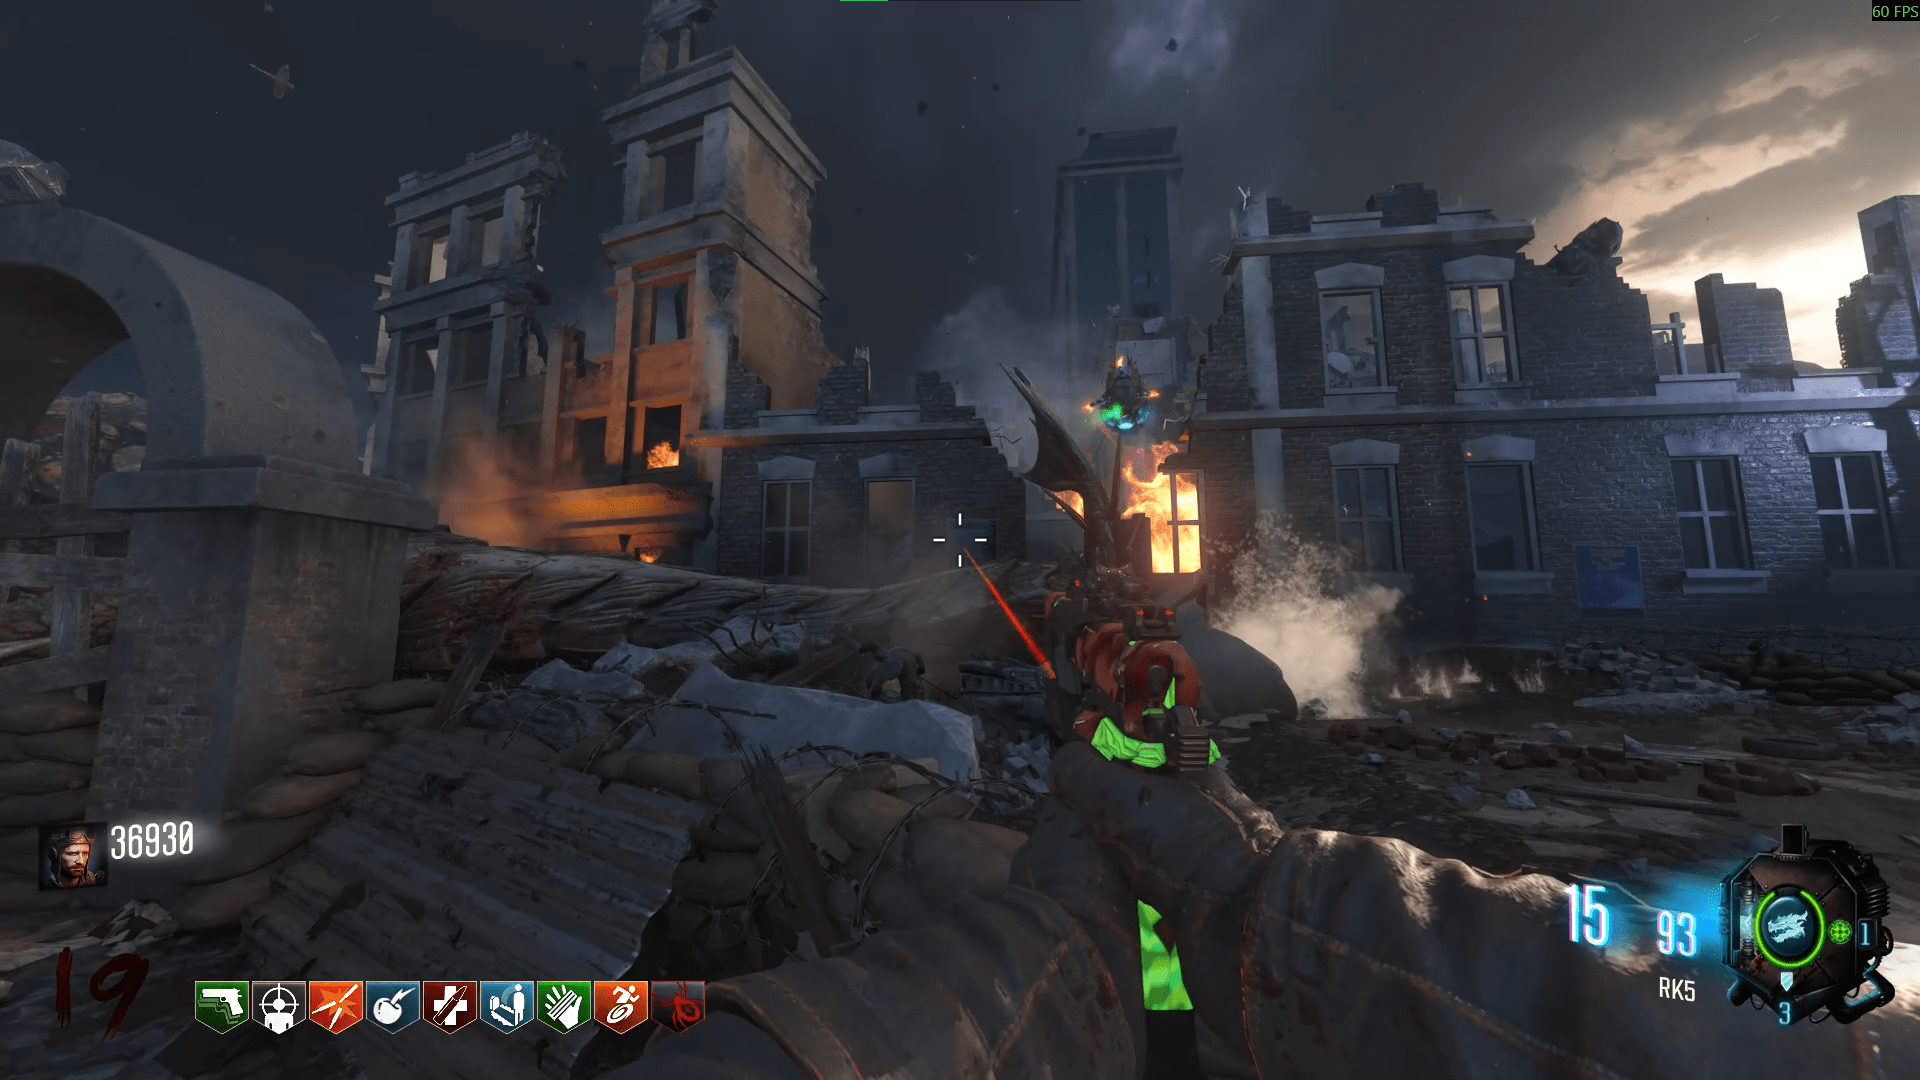
The Valkyrie itself spawns in Belinski Square (Spawn) and you must escort it back to Dragon Command to the right of the green monitor to be sucked up by S.O.P.H.I.A. It is to the left of Spawn when looking away from the main map.
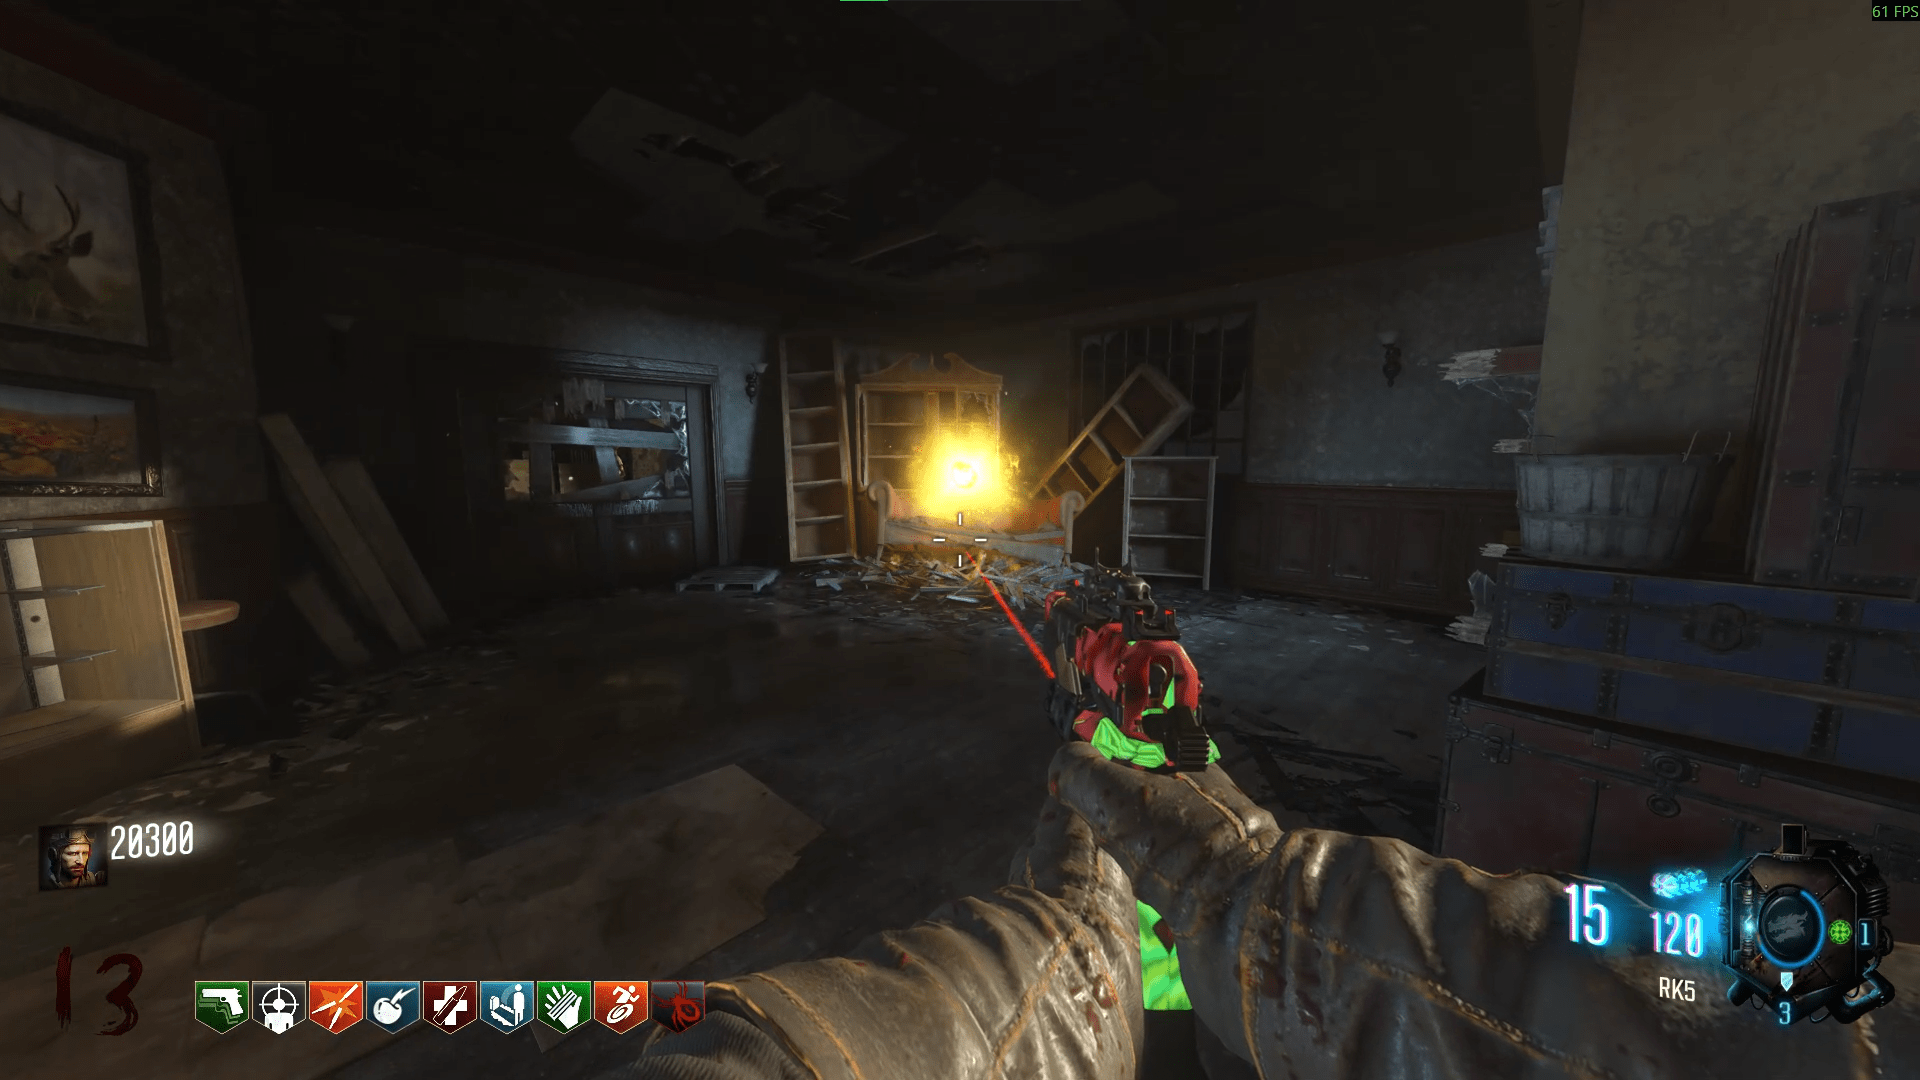
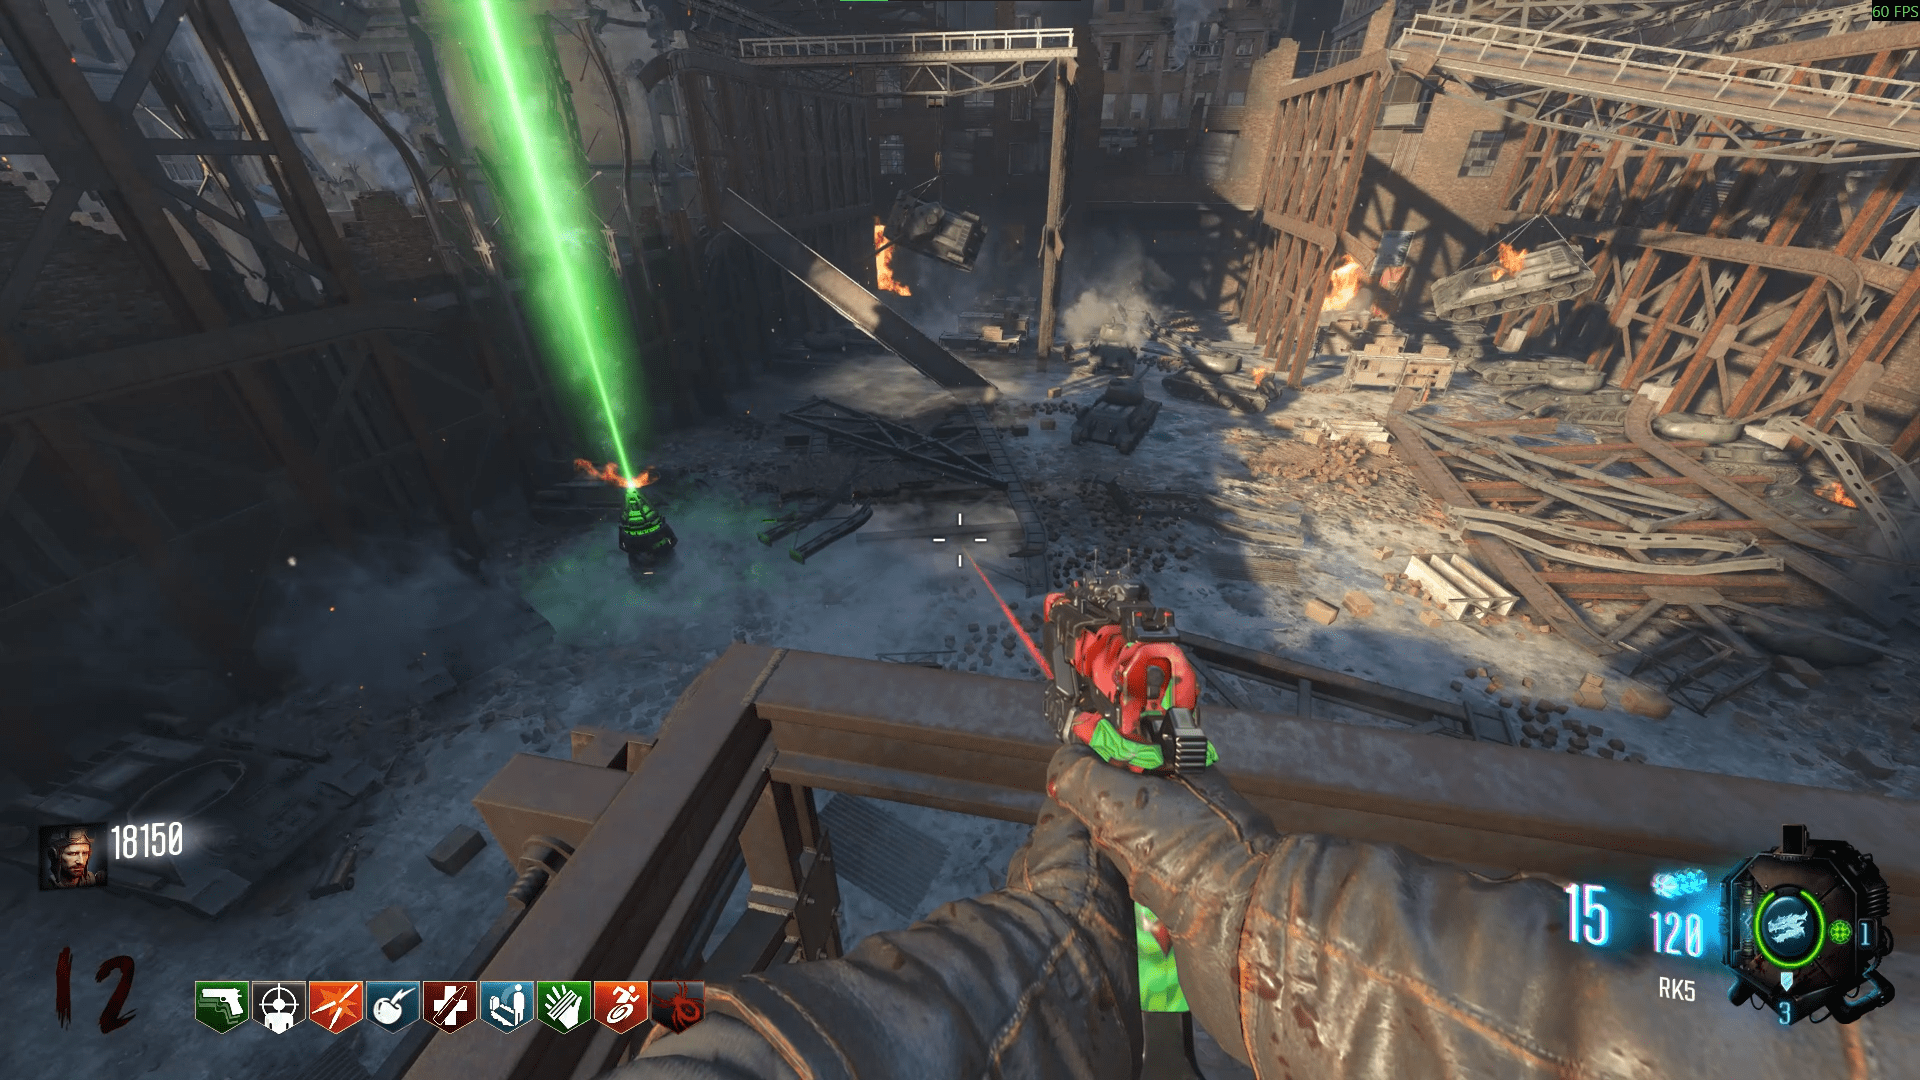
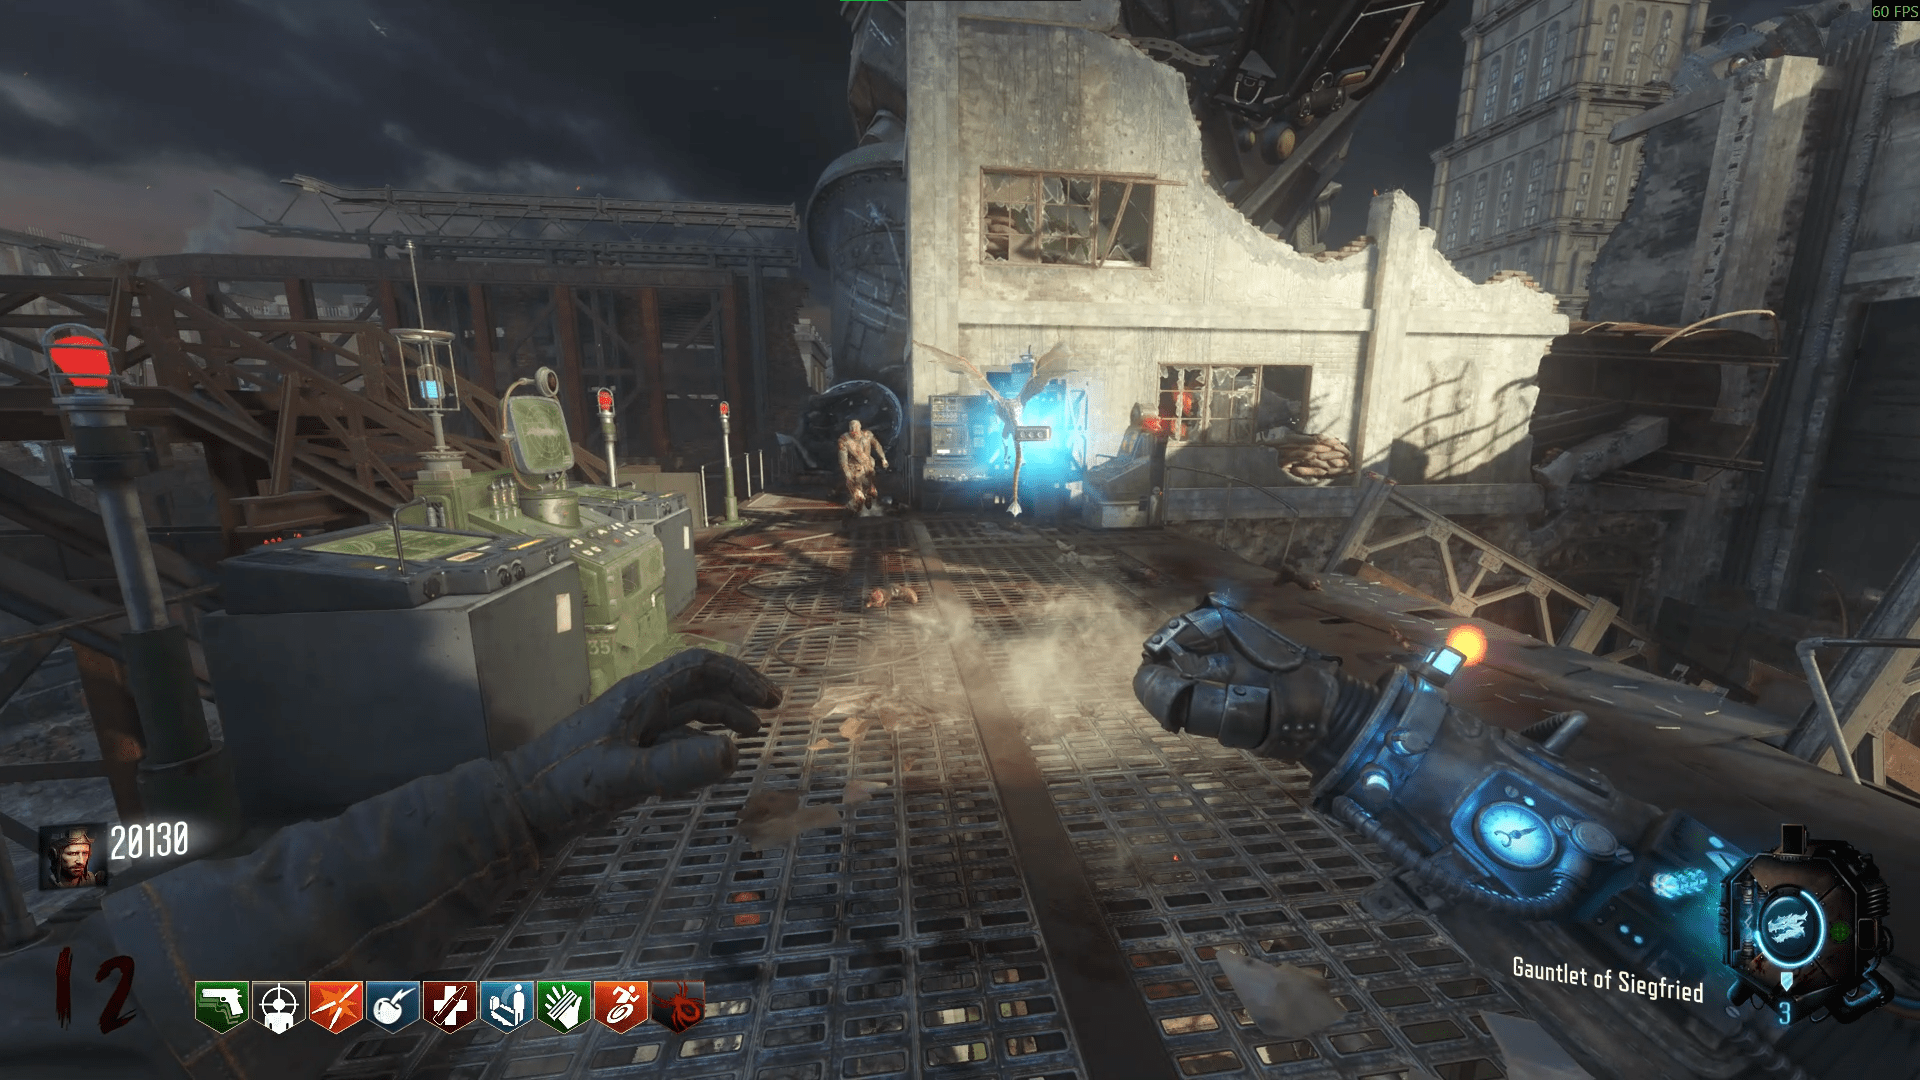
If you don't have your Gauntlet of Siegfried ready by the end of the pod's defence, you will likely fail unless you can kill enough in such a short amount of time. The pod doesn't last long after the defence is finished and zombies start spawning around you again.
After interacting with the monitor and starting the trial, a keycard will pop out of a drawer. Take this and go to the Hatchery. You'll find a console with four red lights that everyone needs to interact with at the same time to start another lockdown event. This follows the same routine as the one earlier for the Dragon Strike. Just survive and go back to pick the keycard back up. Once you do, head back to Dragon Command and give the keycard to S.O.P.H.I.A.
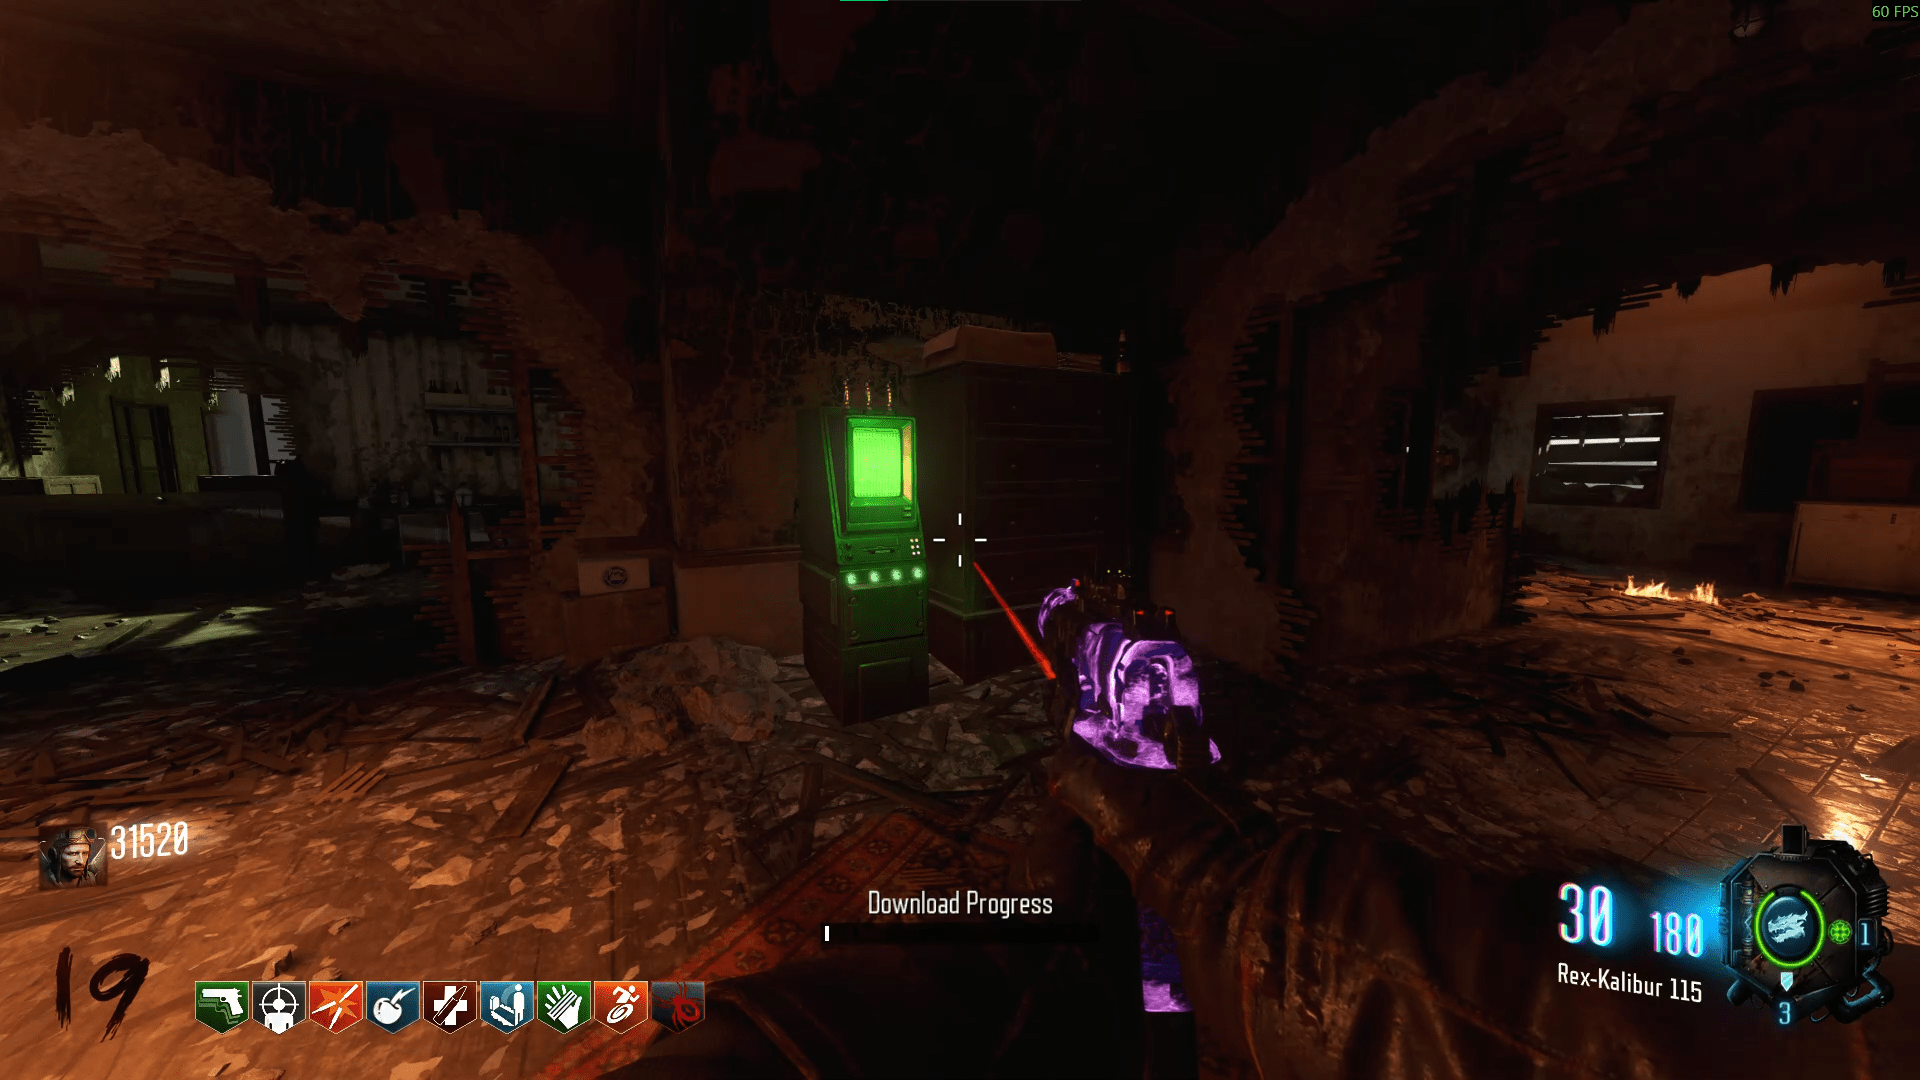
After taking the Power Core from S.O.P.H.I.A in Dragon Command, head over to Spawn and give it to Nikolai. You do this by wielding your Gauntlet and launching the whelp to the left of the derailed train car. Afterwards, run back to S.O.P.H.I.A and she will move herself to expose a grate.
Standing on this grate will send you to the Boss Fight. So make sure you're prepared.
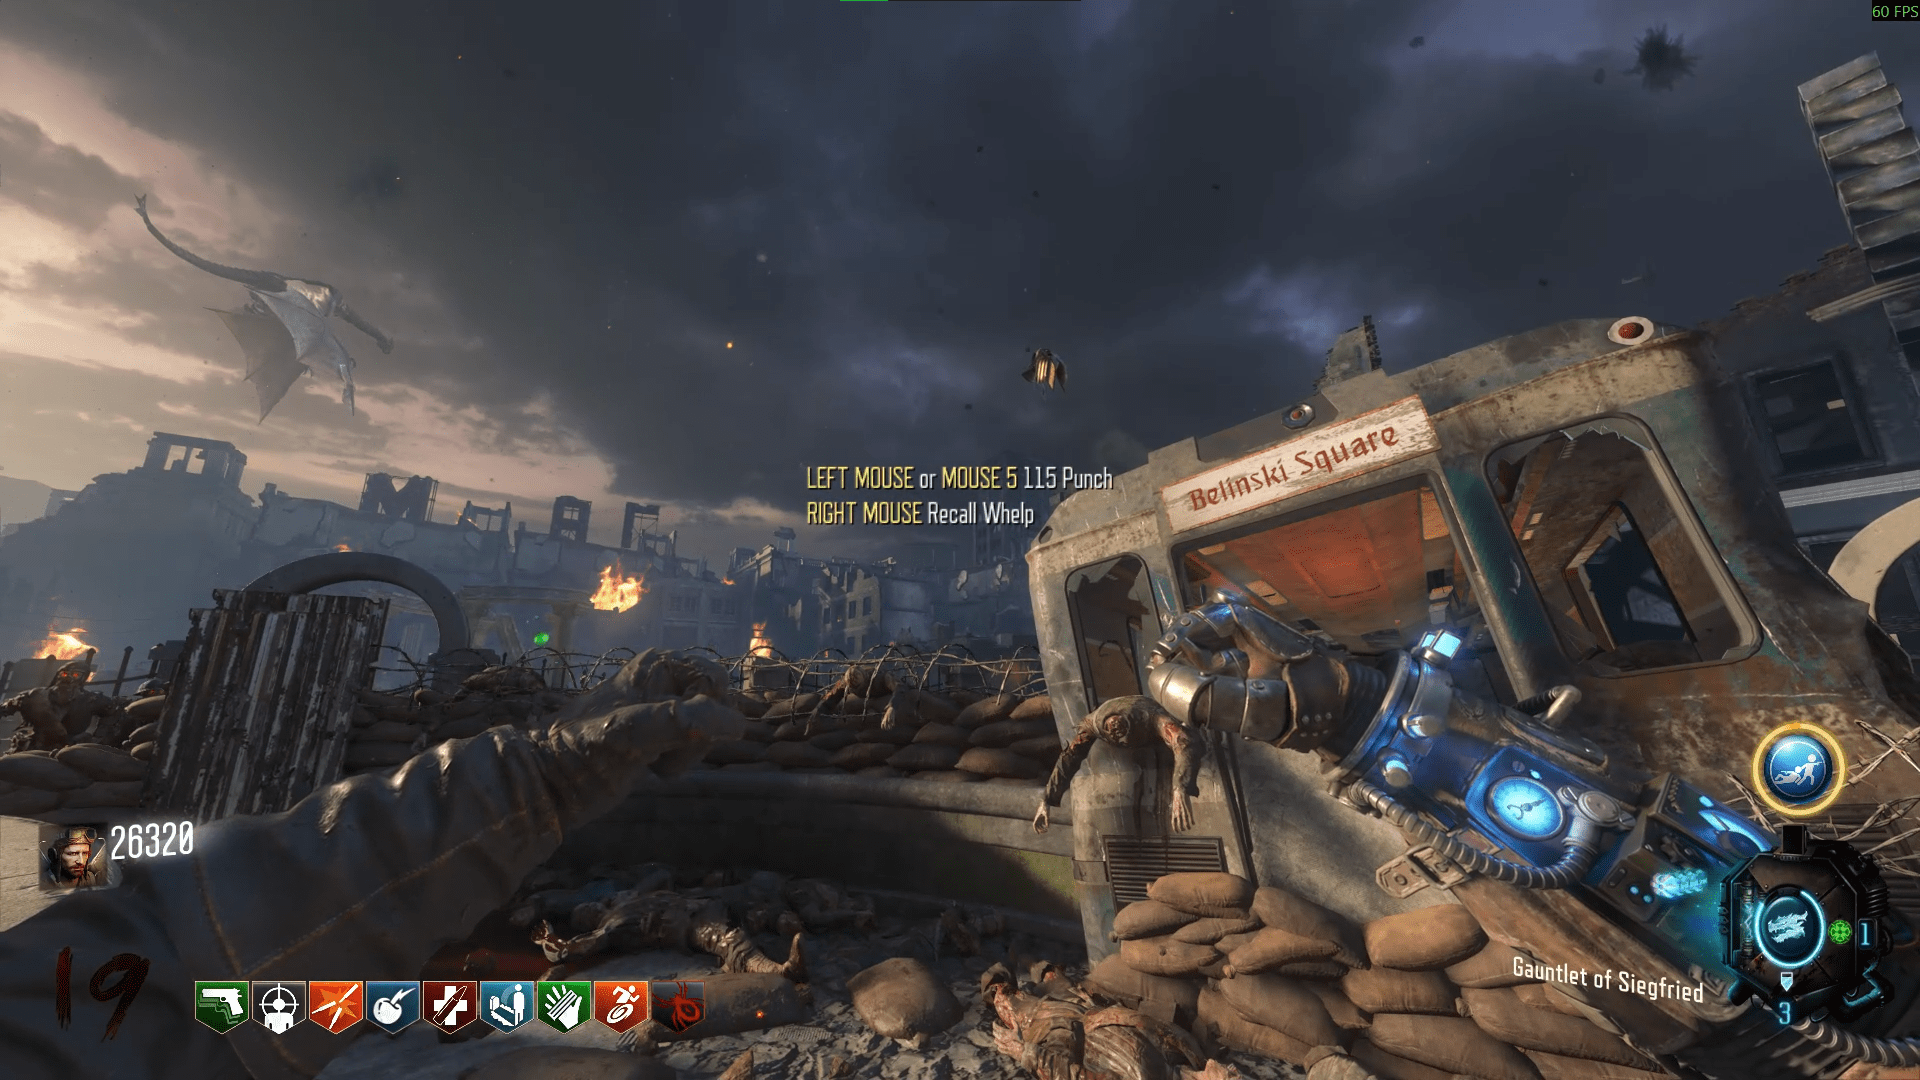
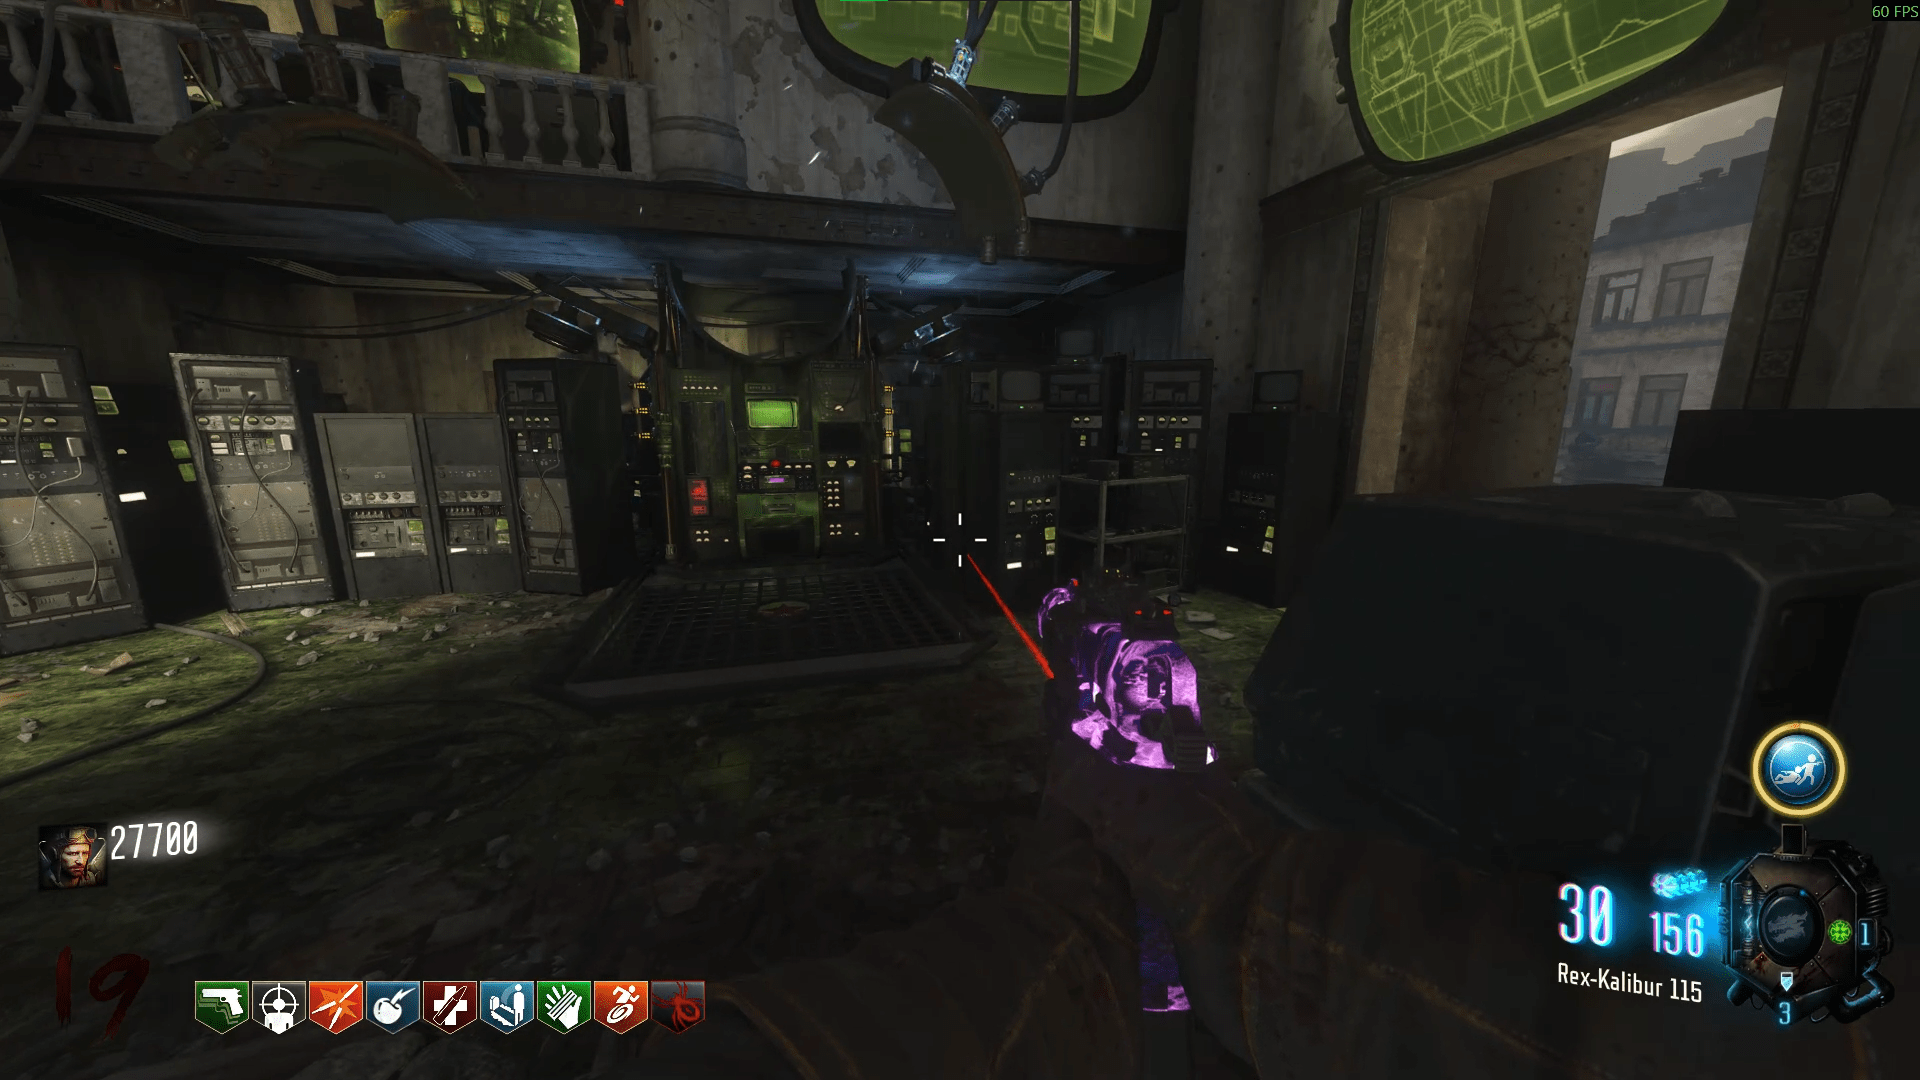
- Having some strong weapons, including the PaP'd Mark 3s, with good AATs (Turned, Dead Wire).
- A full setup of perks: Double Tap, Juggernog and Speed Cola at minimum.
- Idle Eyes, In Plain Sight, Near Death Experience or any other useful Gobblegums.
- Reading ahead so you know what you're doing.
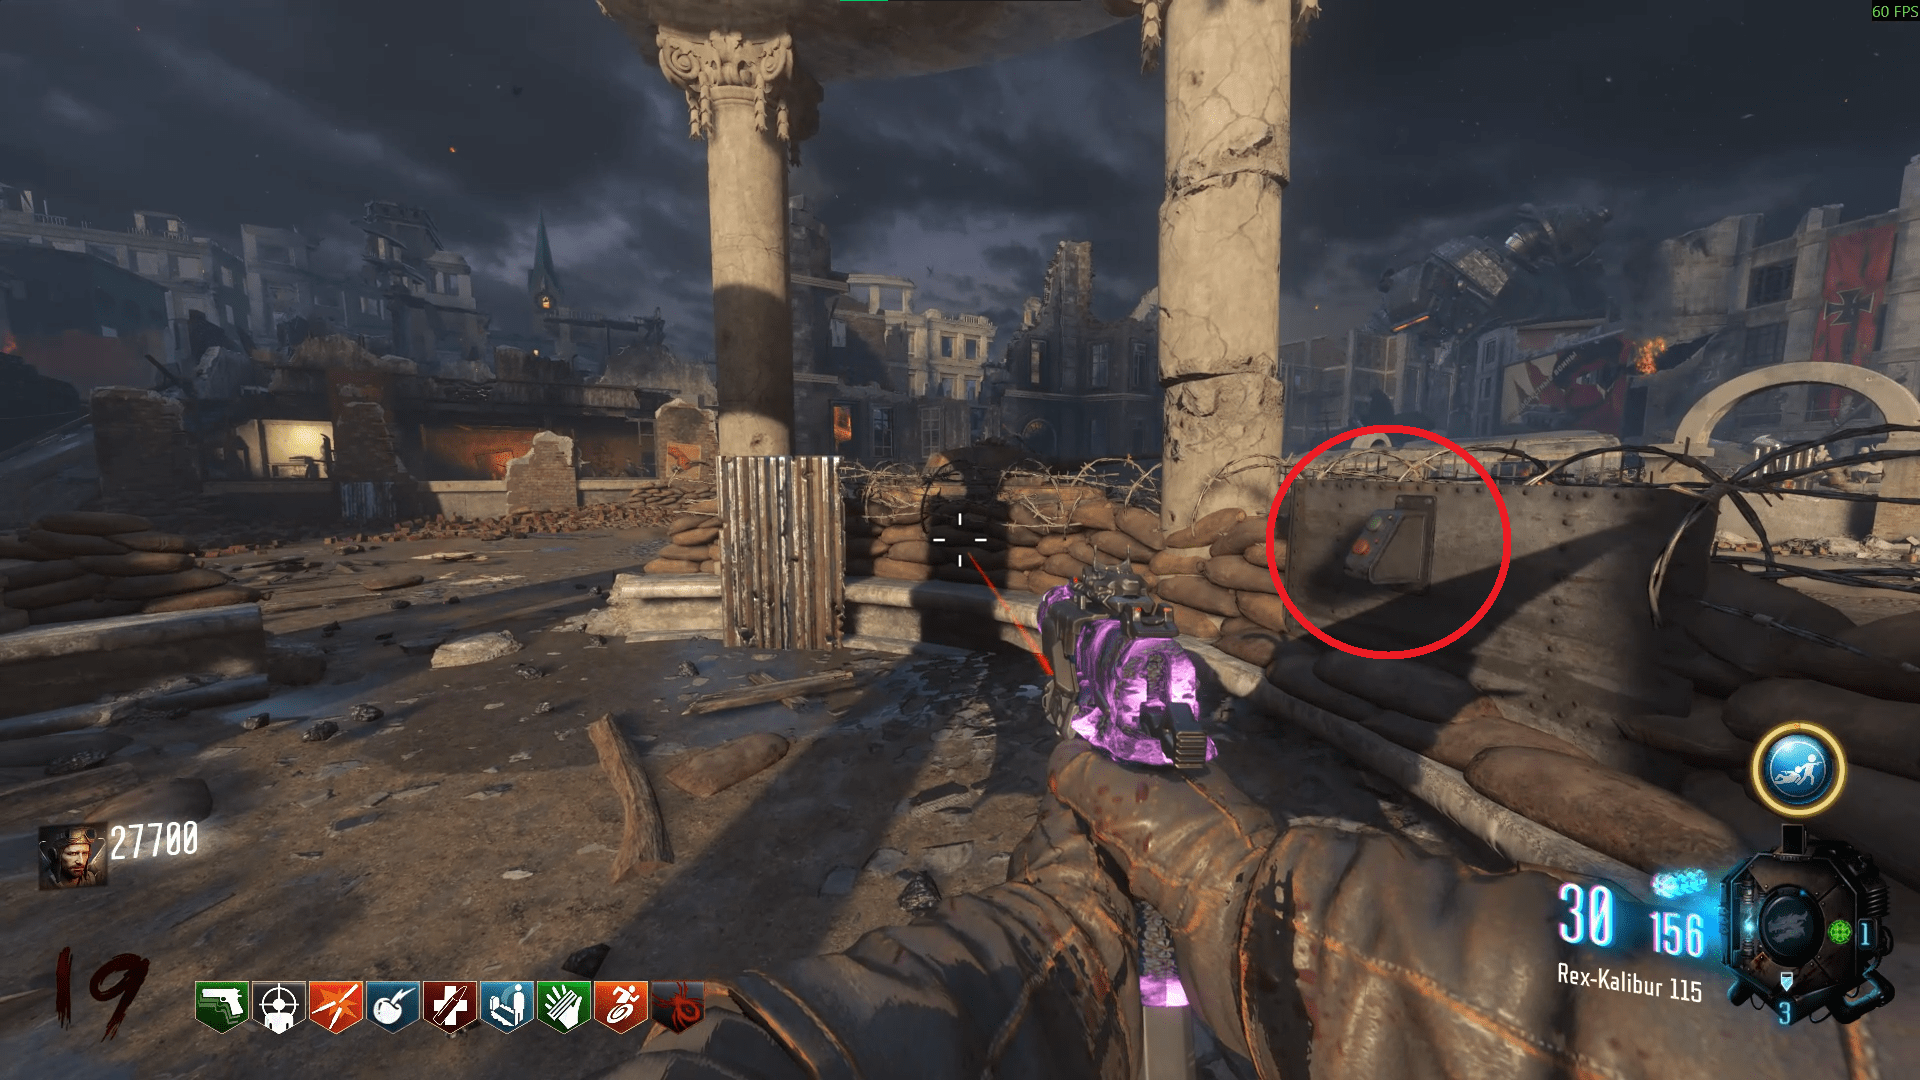
To start the fight, go to the middle of the arena and press the button in the small circular area. This spawns a Max Ammo which can be taken at any point as well as starts the fight itself.
Nikolai will help you with the fight and will shoot an electric harpoon into the Dragon three times during the fight. Your job is to fire at the newly acquired weak points until the Dragon quite literally explodes. The weak points themselves are a dark shade of red and fairly easy to distinguish.
Makes you wonder how Nikolai failed the first time, if he'd just used the harpoon and the minigun together earlier, this Easter Egg would've just been the Nikolai fight.
The order of the weak points are; Right wing, Left side of the underbelly and Neck.
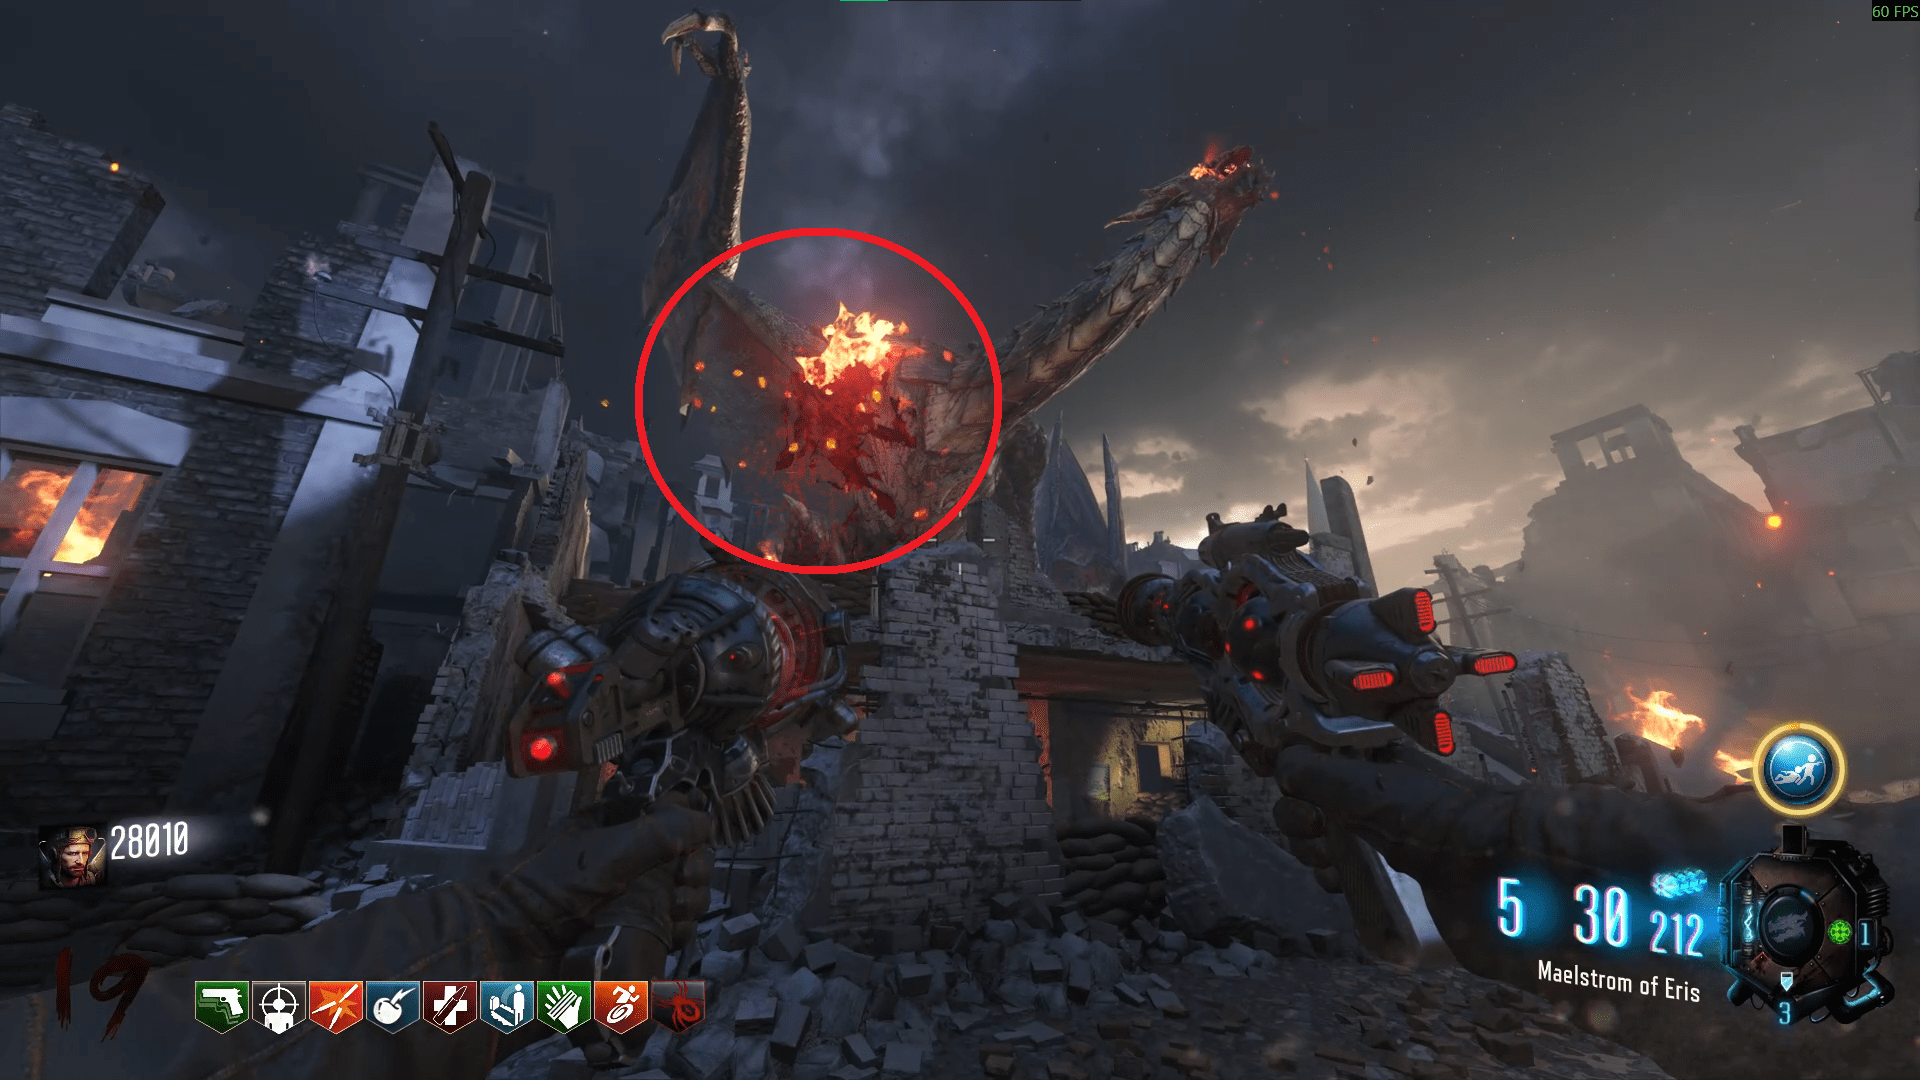
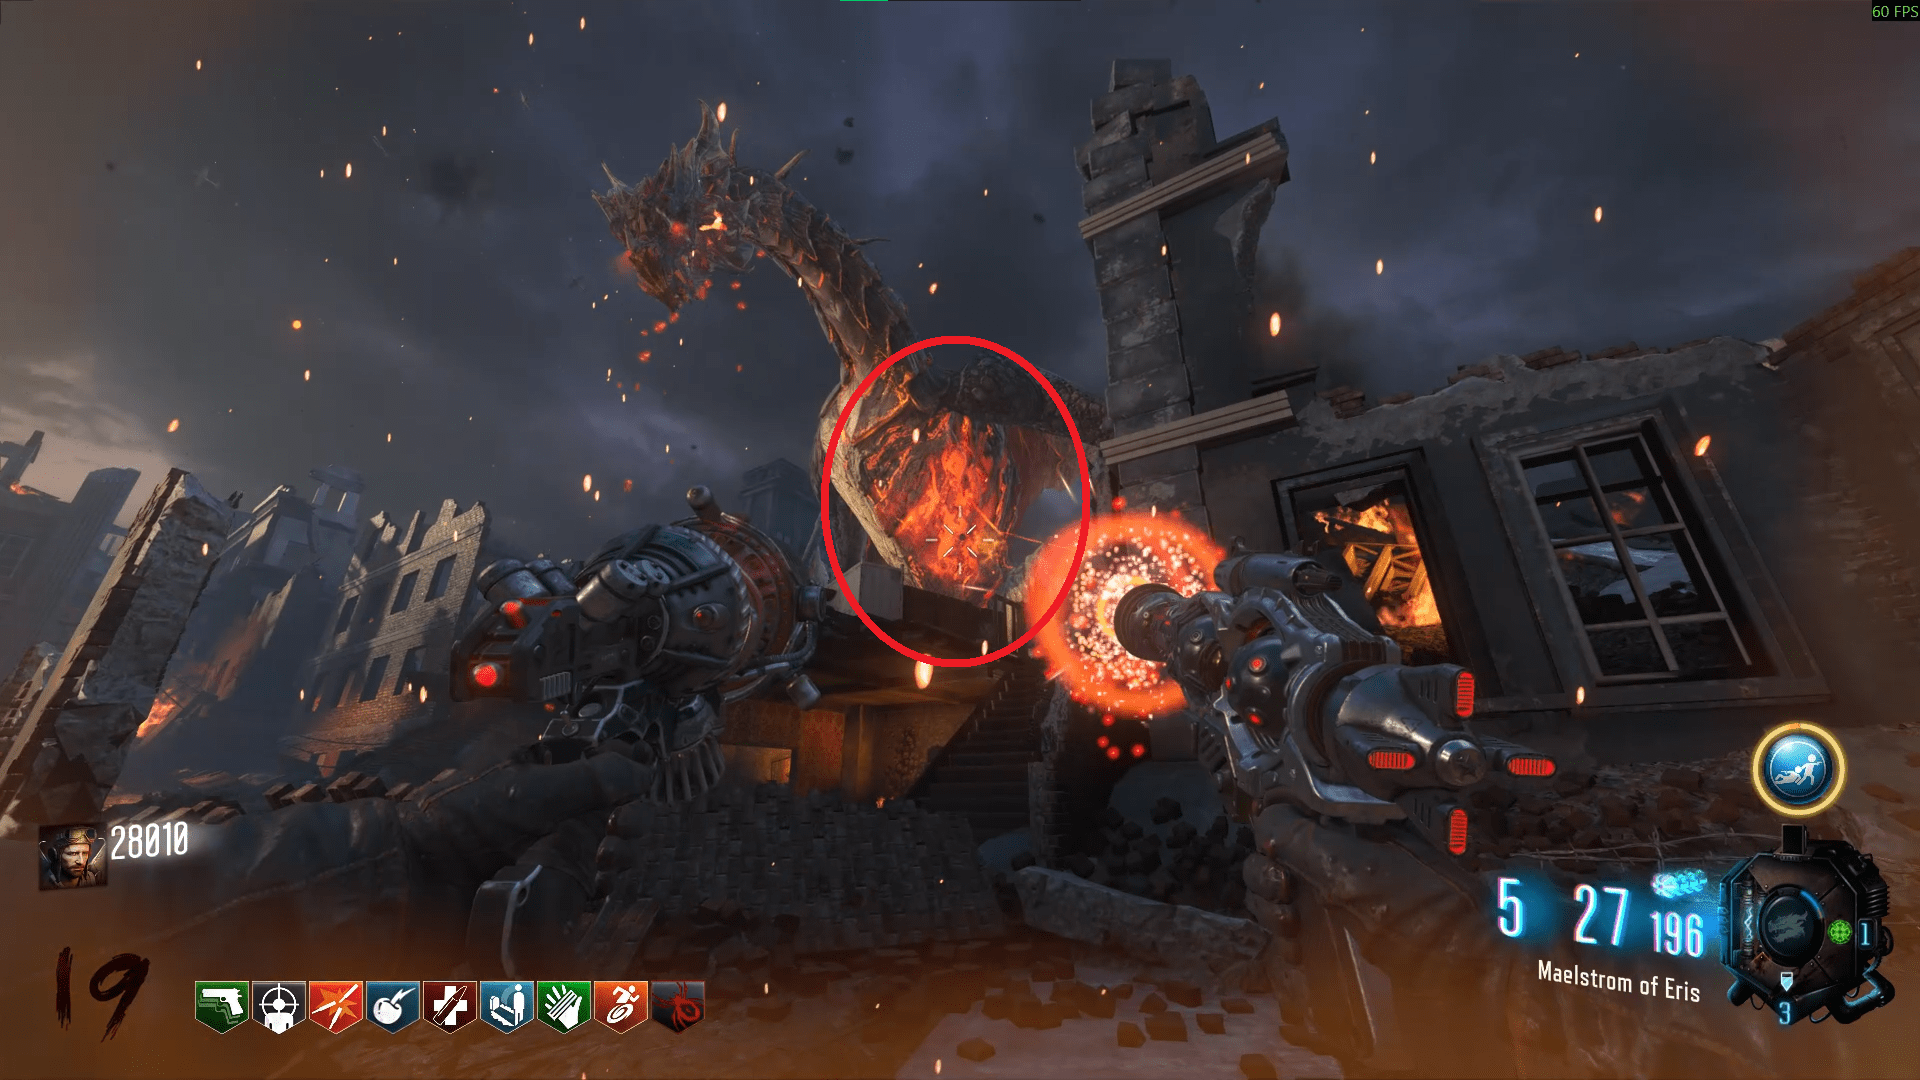
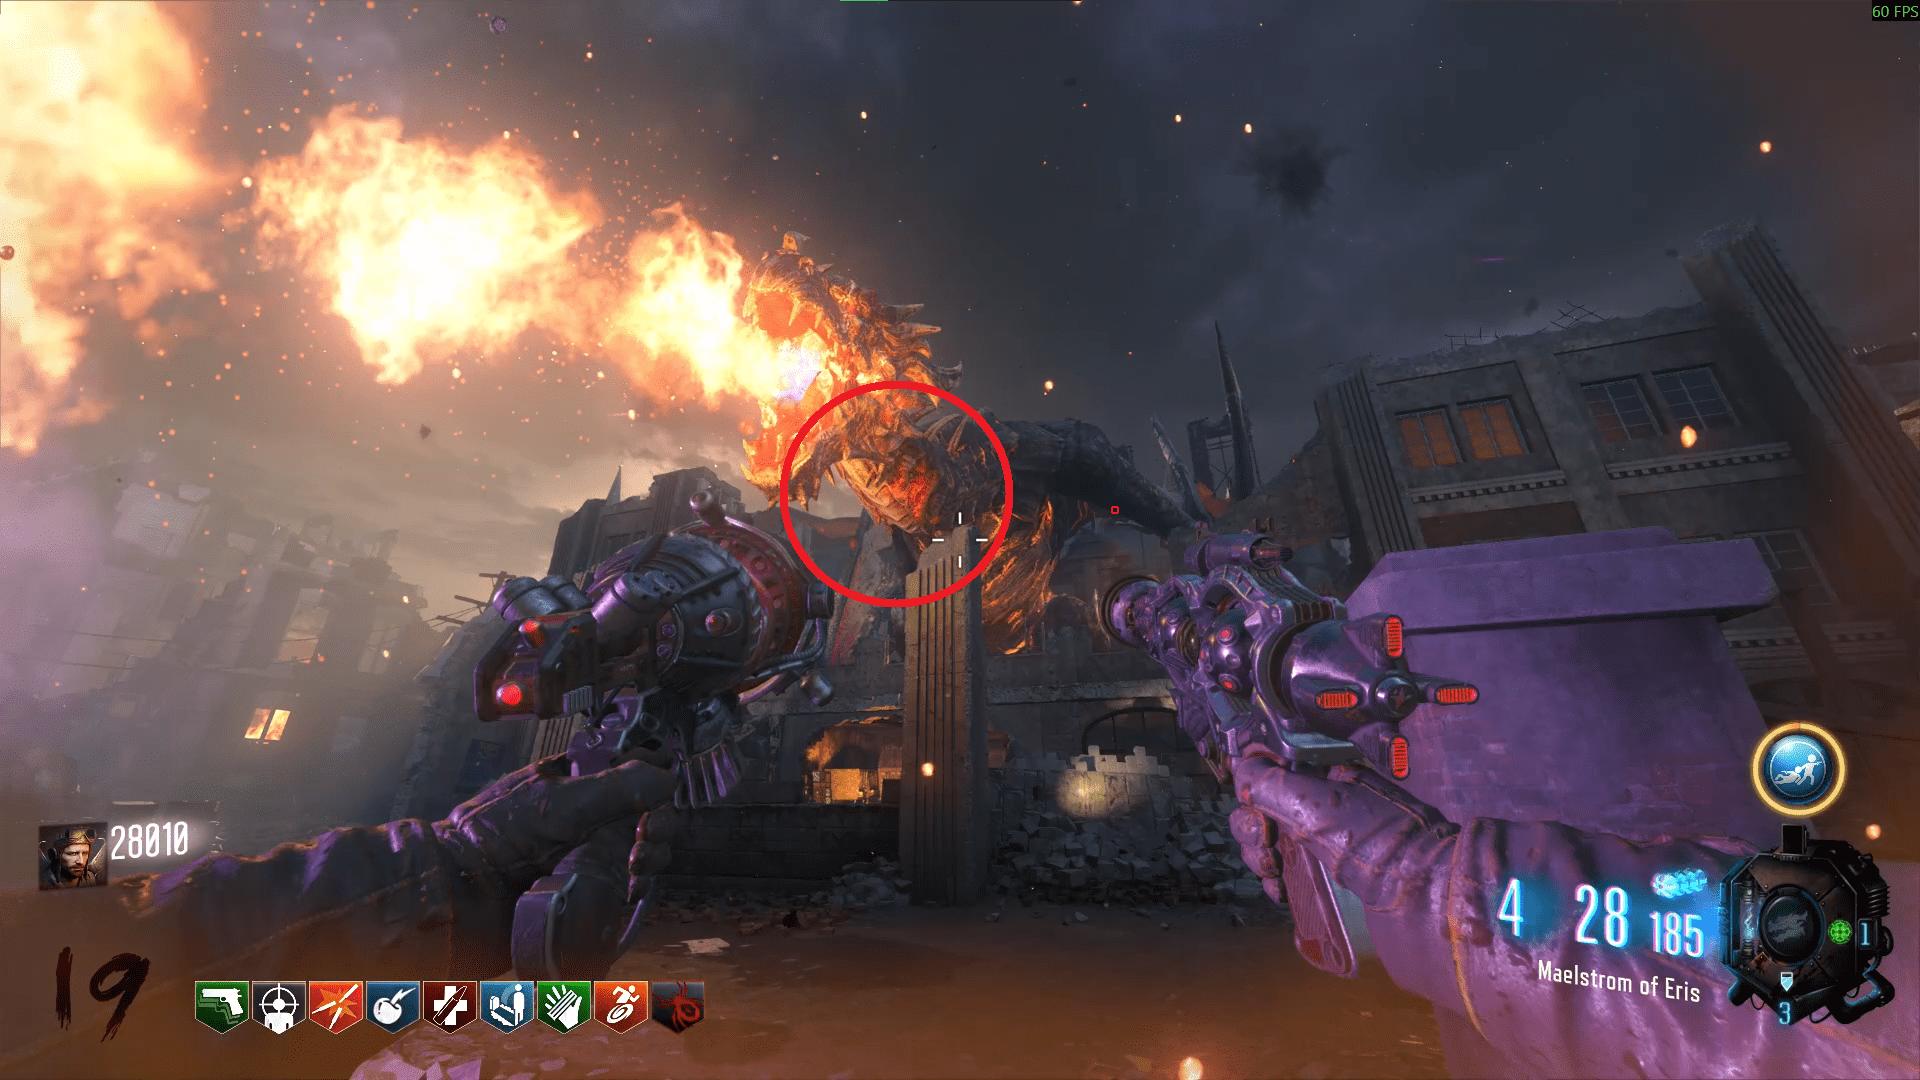
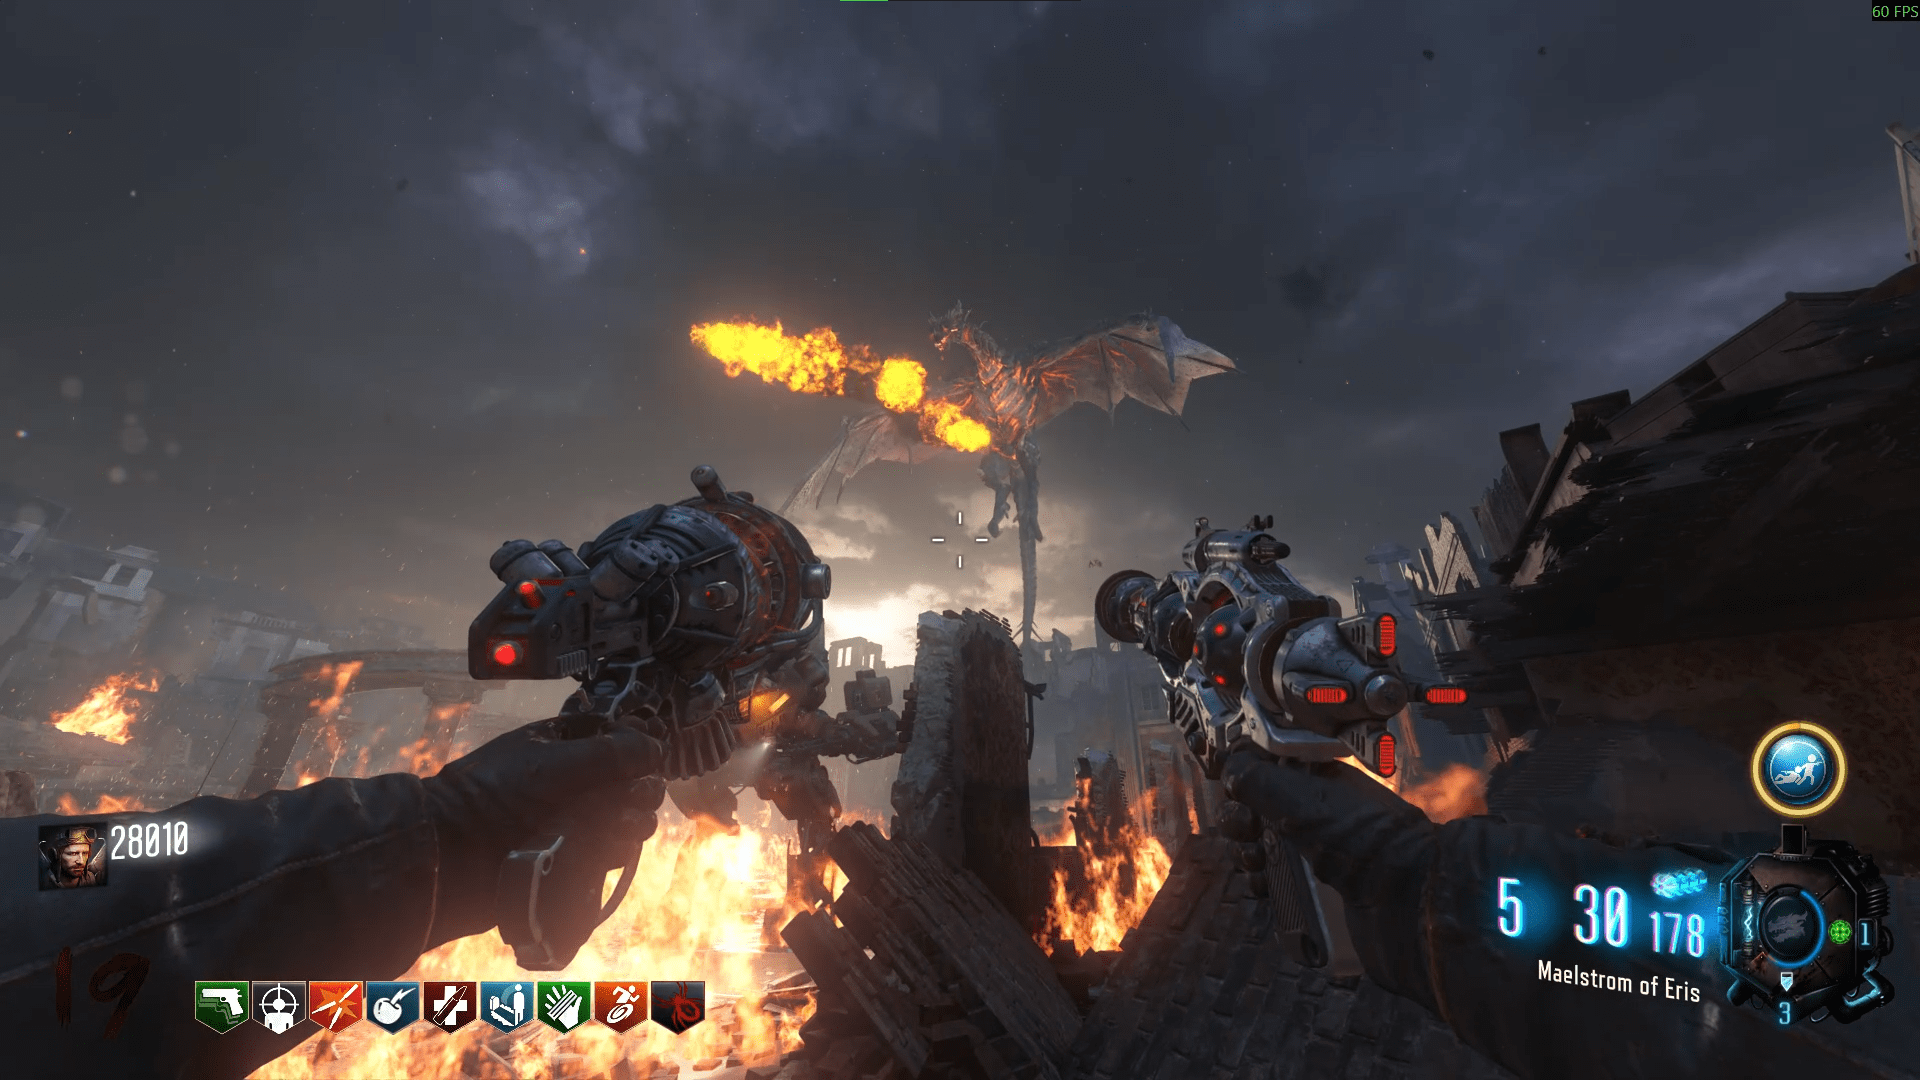
As well as this, the Dragon will sometimes fly straight up and fire balls of flame which do significant damage to you upon hit. So do your best to avoid these, especially when the arena is lit up.
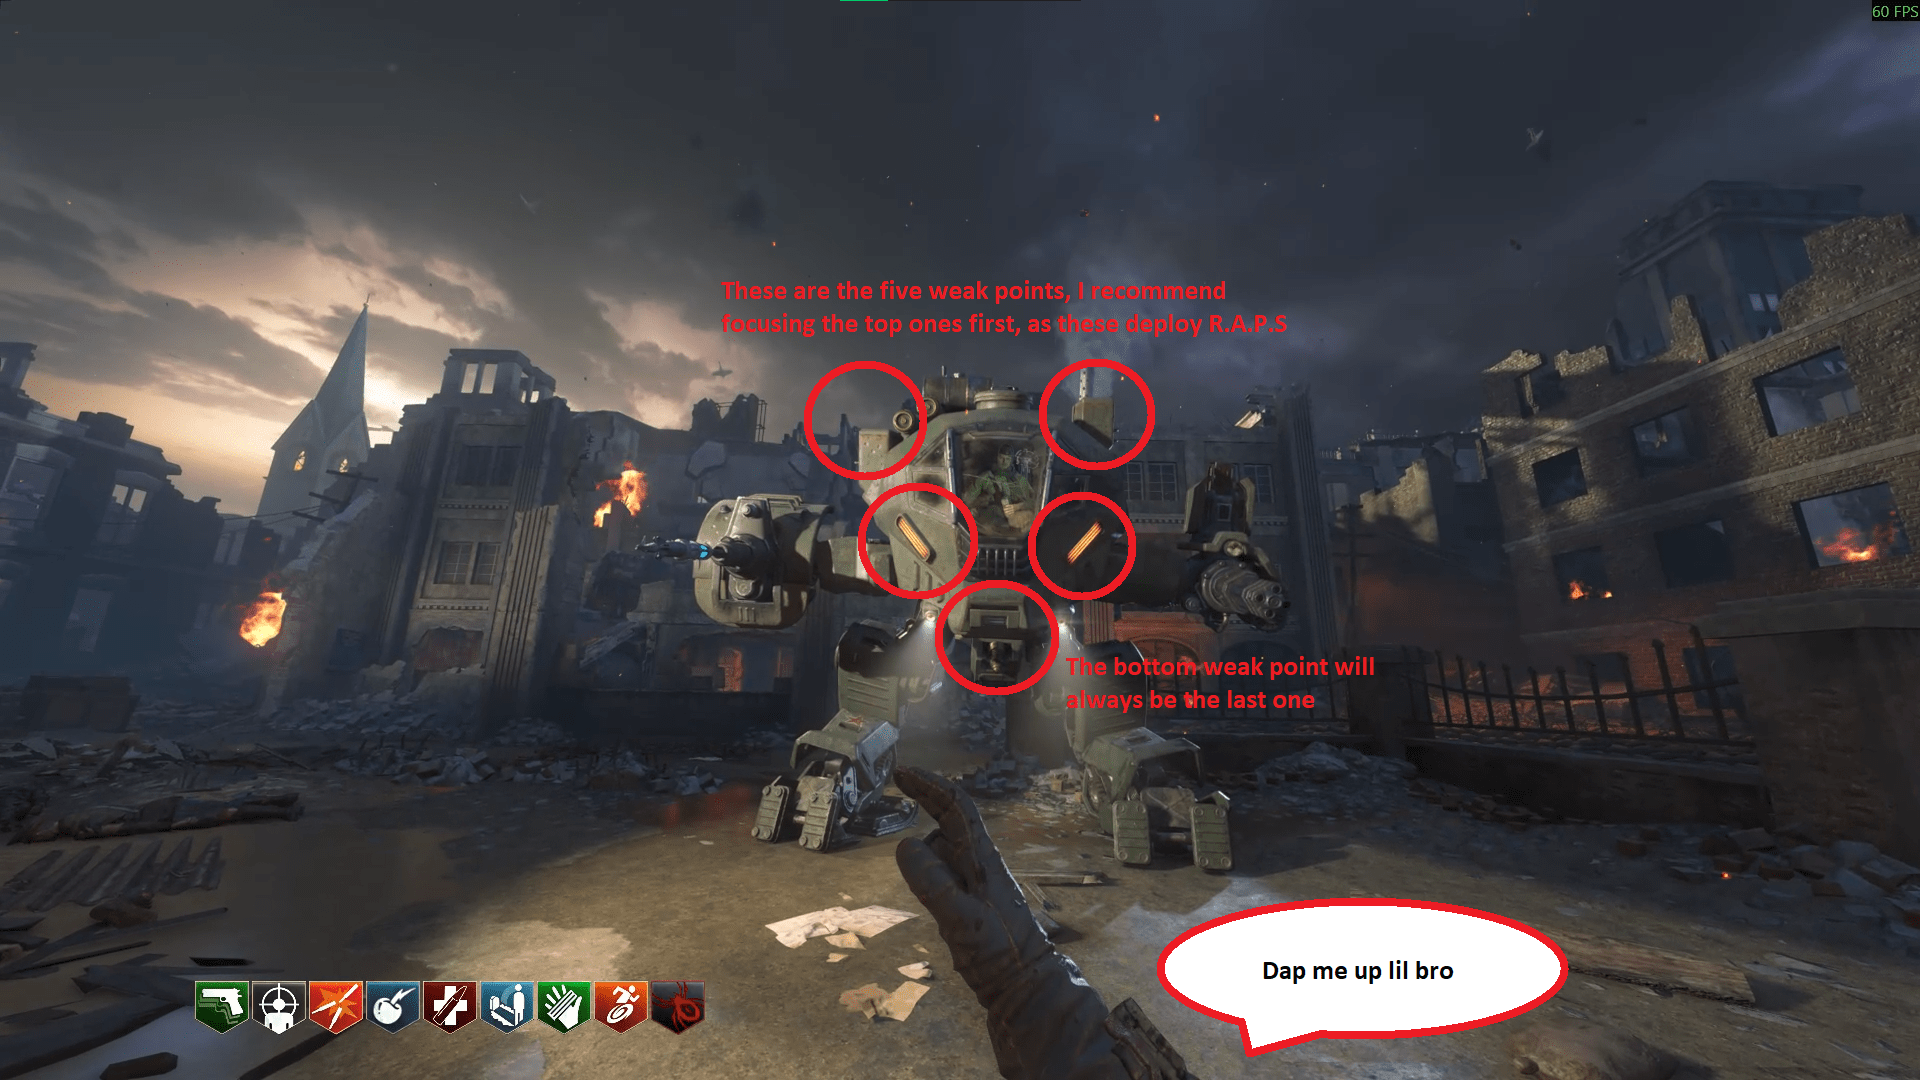
Personally, I focus his shoulder spots first, as these are the yellow ones that send out the R.A.P.S. Then I go for his facial weak spots. After that, I put everything I have into his last remaining weak spot to finish off the Easter Egg.
The map is also now larger than it was before with the Dragon, allowing you to take cover in the buildings surrounding the arena. Use this information if you need help.
Now this sounds straightforward, I know, but take extreme caution when doing this as he can and will down you very quickly if he gets you in his sights. His harpoon attacks are very deadly and are often telegraphed by him as well as a new vignette on your screen if you're in the area about to be fired upon.
After all that, congratulations. One more map left until you can get that beautiful Super EE achievement.
Revelations
I would highly recommend buying Stamin-Up as soon as you can as you'll be doing a lot of running around during this Easter Egg.
- Richtofen - 2nd Gravestone, on the closest left window from Quick Revive.
- Dempsey - 3rd Gravestone, on the side of the Origins jump pad.
- Takeo - 1st Gravestone, on the closest left window from Quick Revive.
- Nikolai - 4th Gravestone, on the side of the Origins jump pad.
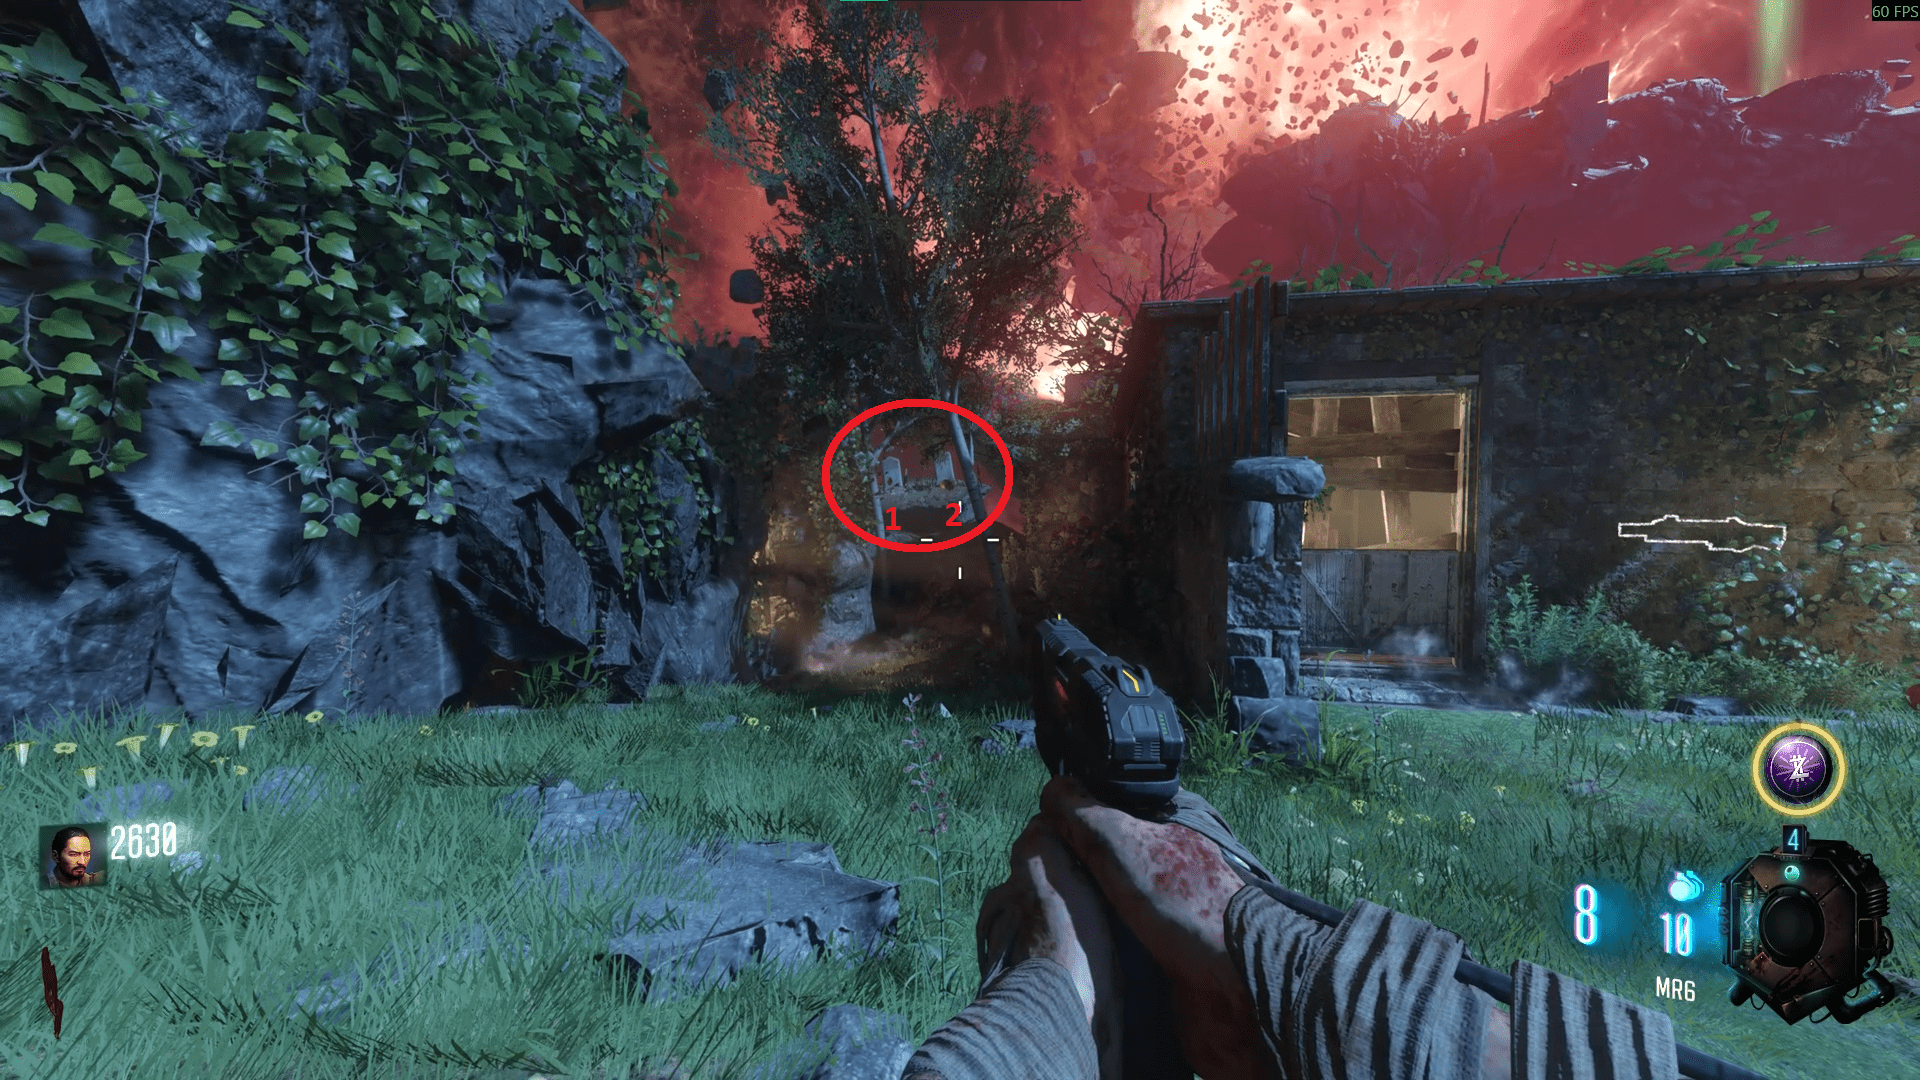
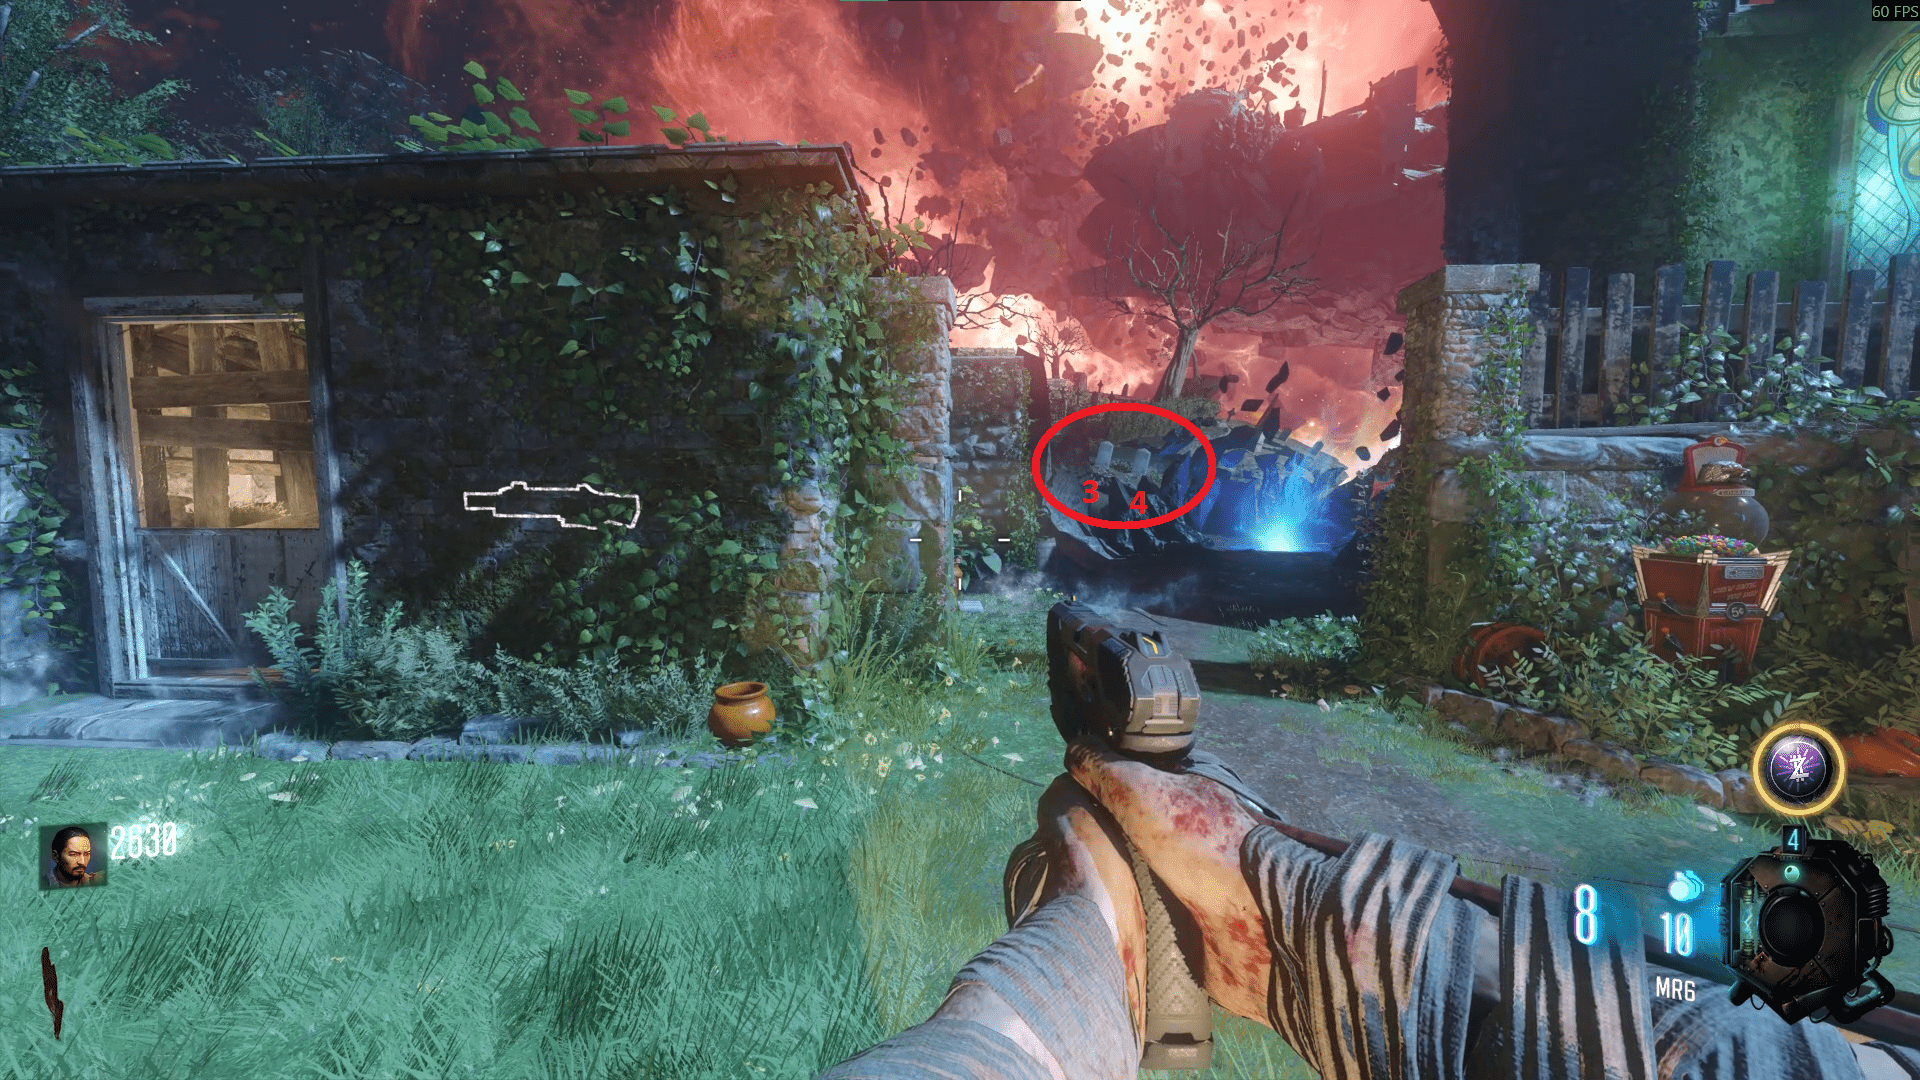
This will trigger a thunderstorm sound effect and four red lights will emit from the graves. After that, just finish off the Corruption Engines and trap the Giant Apothicon in Nacht to gain access to Pack-a-Punch. This will also spawn the triangular rock needed for the next step.
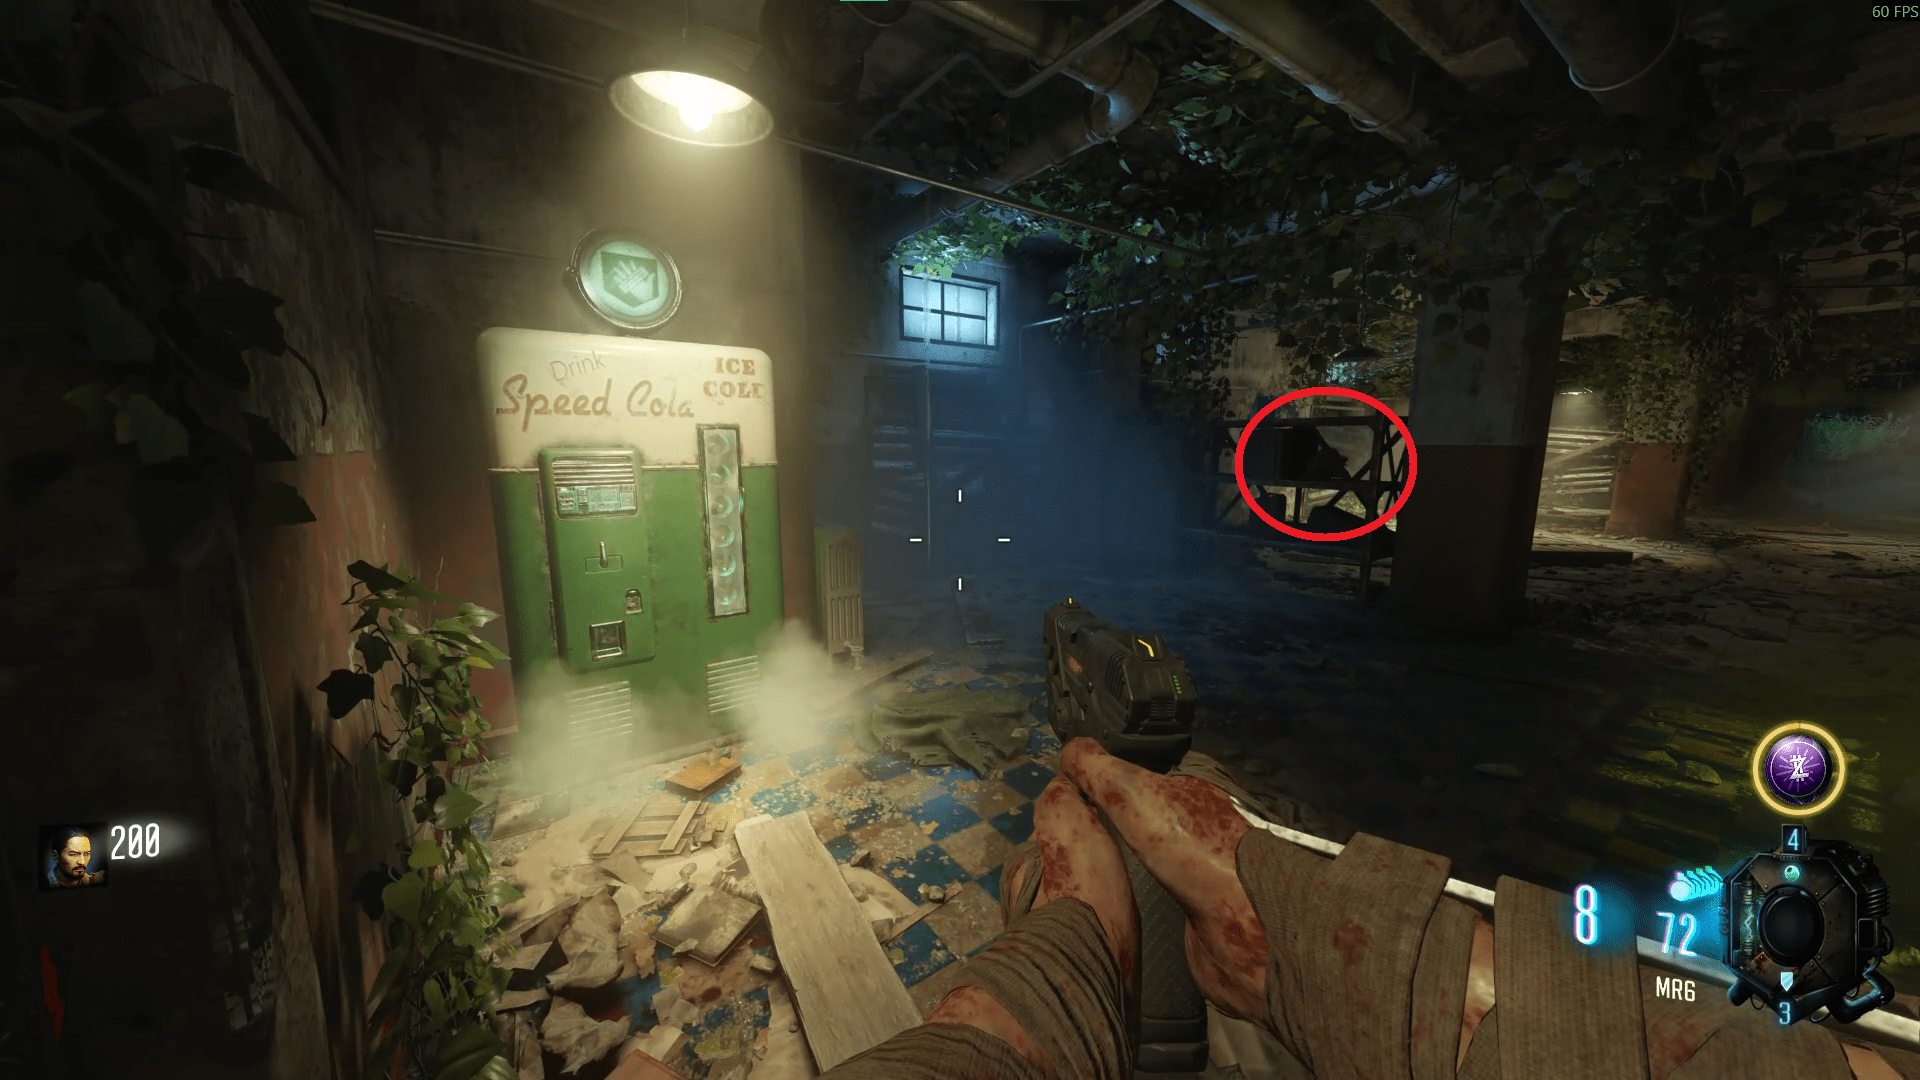
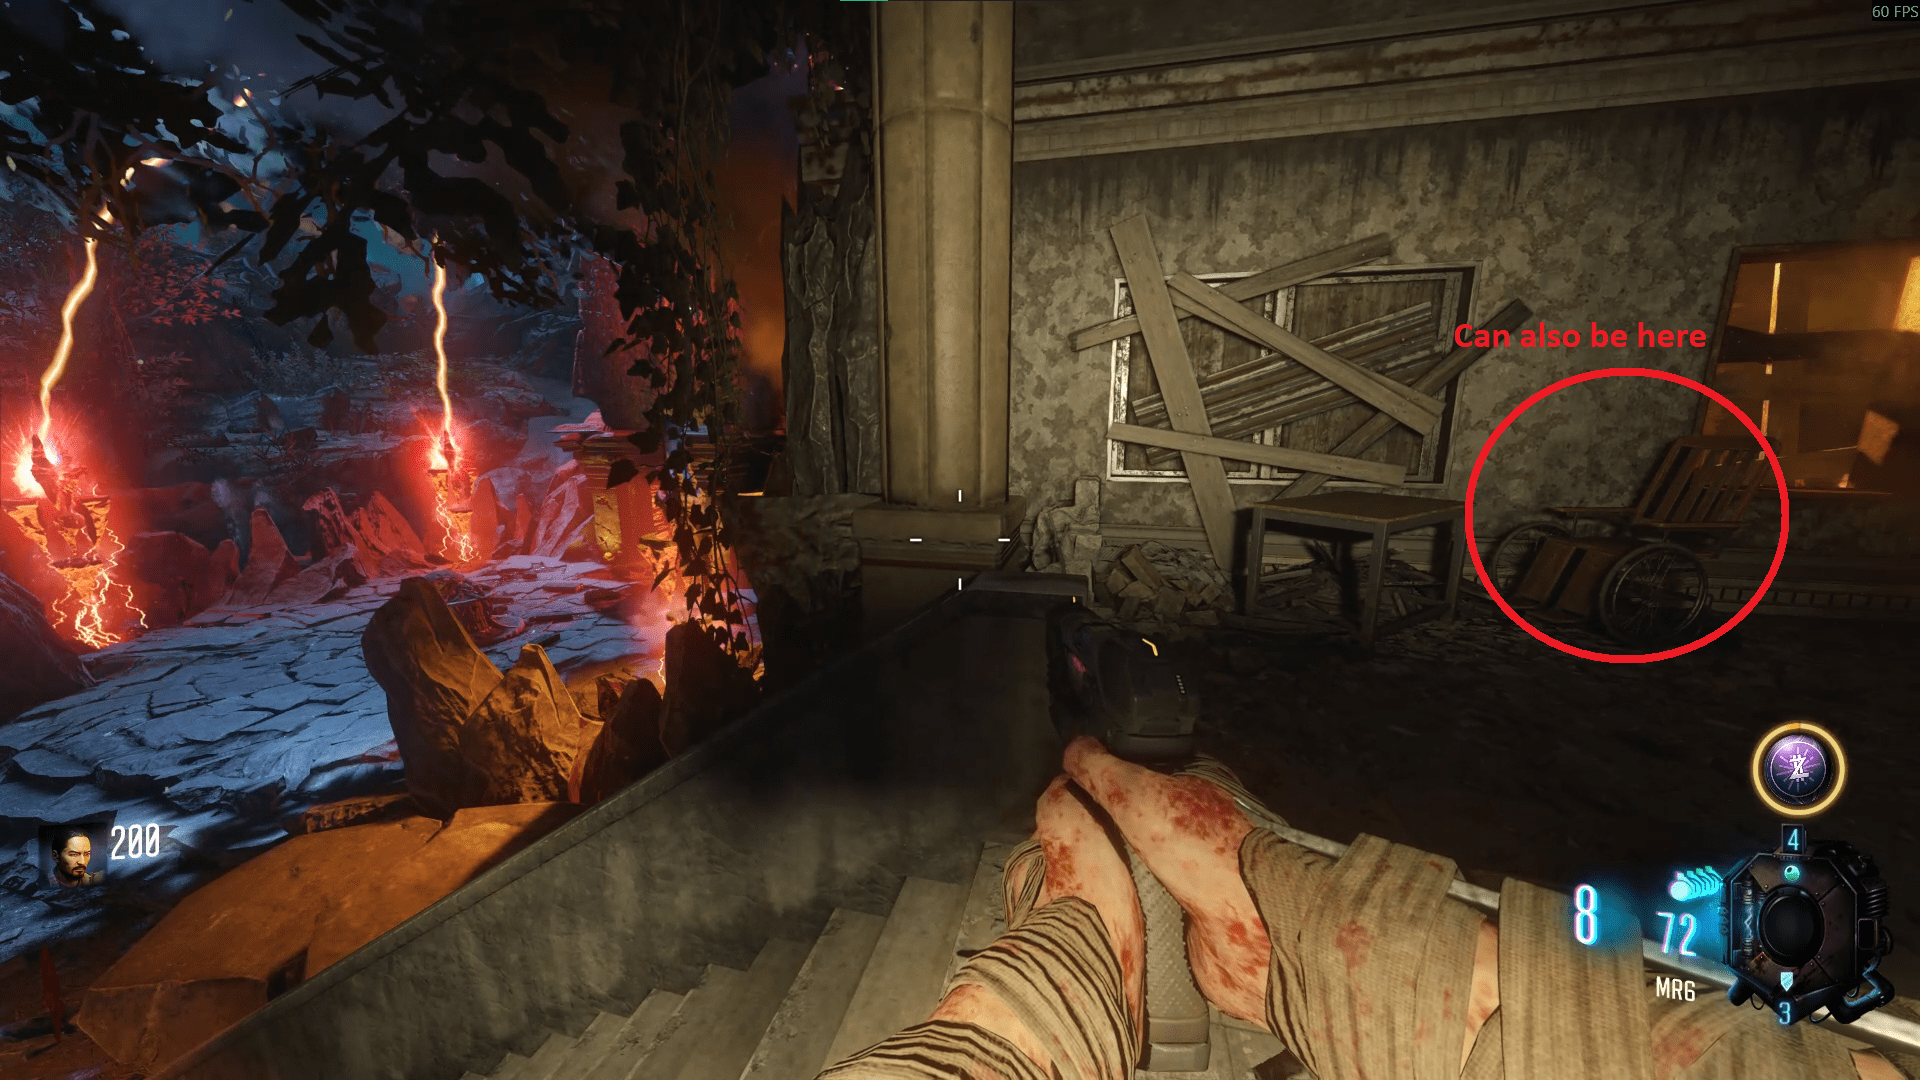
- In Verruckt, on some shelves to the right of Speed Cola.
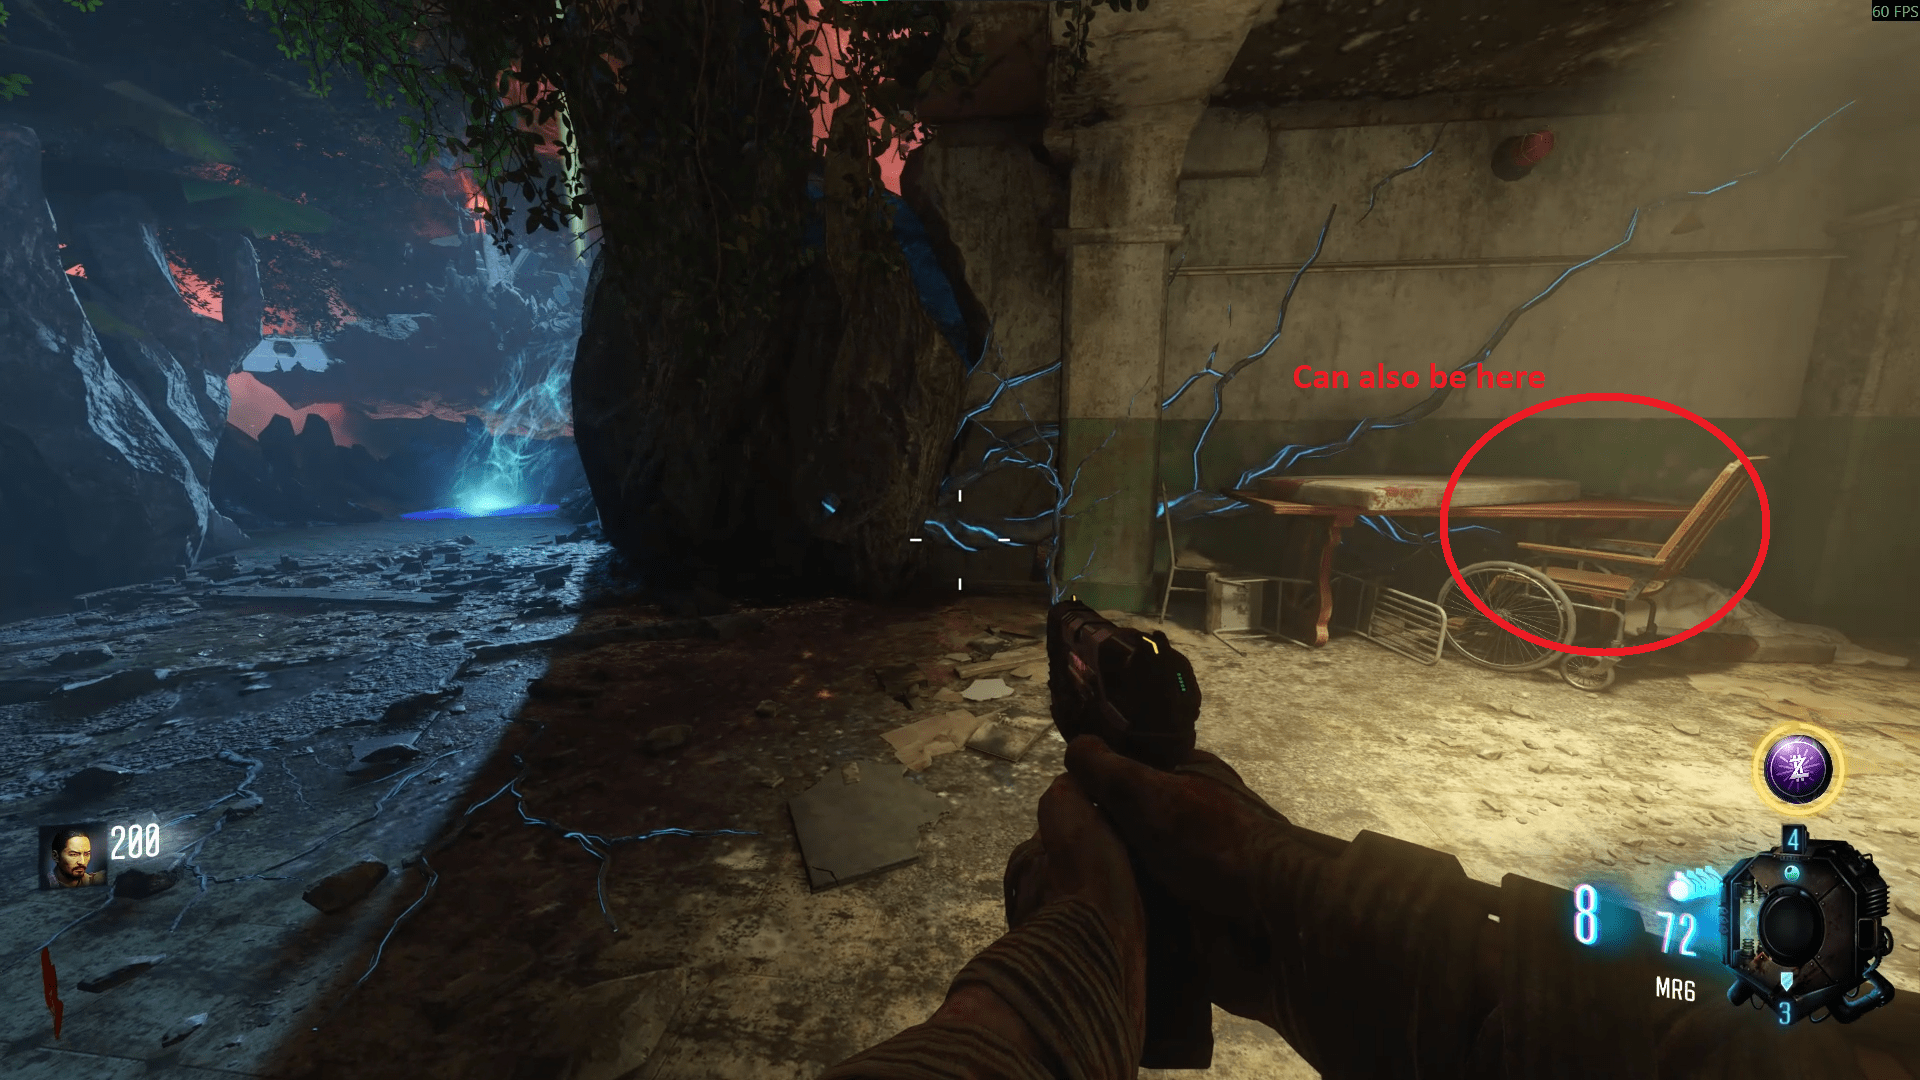
- In Verruckt, in a wheelchair at the top of the staircase just before the corruption engine.
- In Verruckt, in a different wheelchair opposite the jump pad to Mob of the Dead, past the Zetsubou No Shima test tubes.
- In Der Eisendrache, in the MPD room, in the debris beside the Pyramid.
- In Der Eisendrache, in the Primis room, on top of a white clothed barrel underneath the statues.
- In Kino Der Toten, on a table opposite the jump pad to Verruckt, left of the Gobblegum machine.
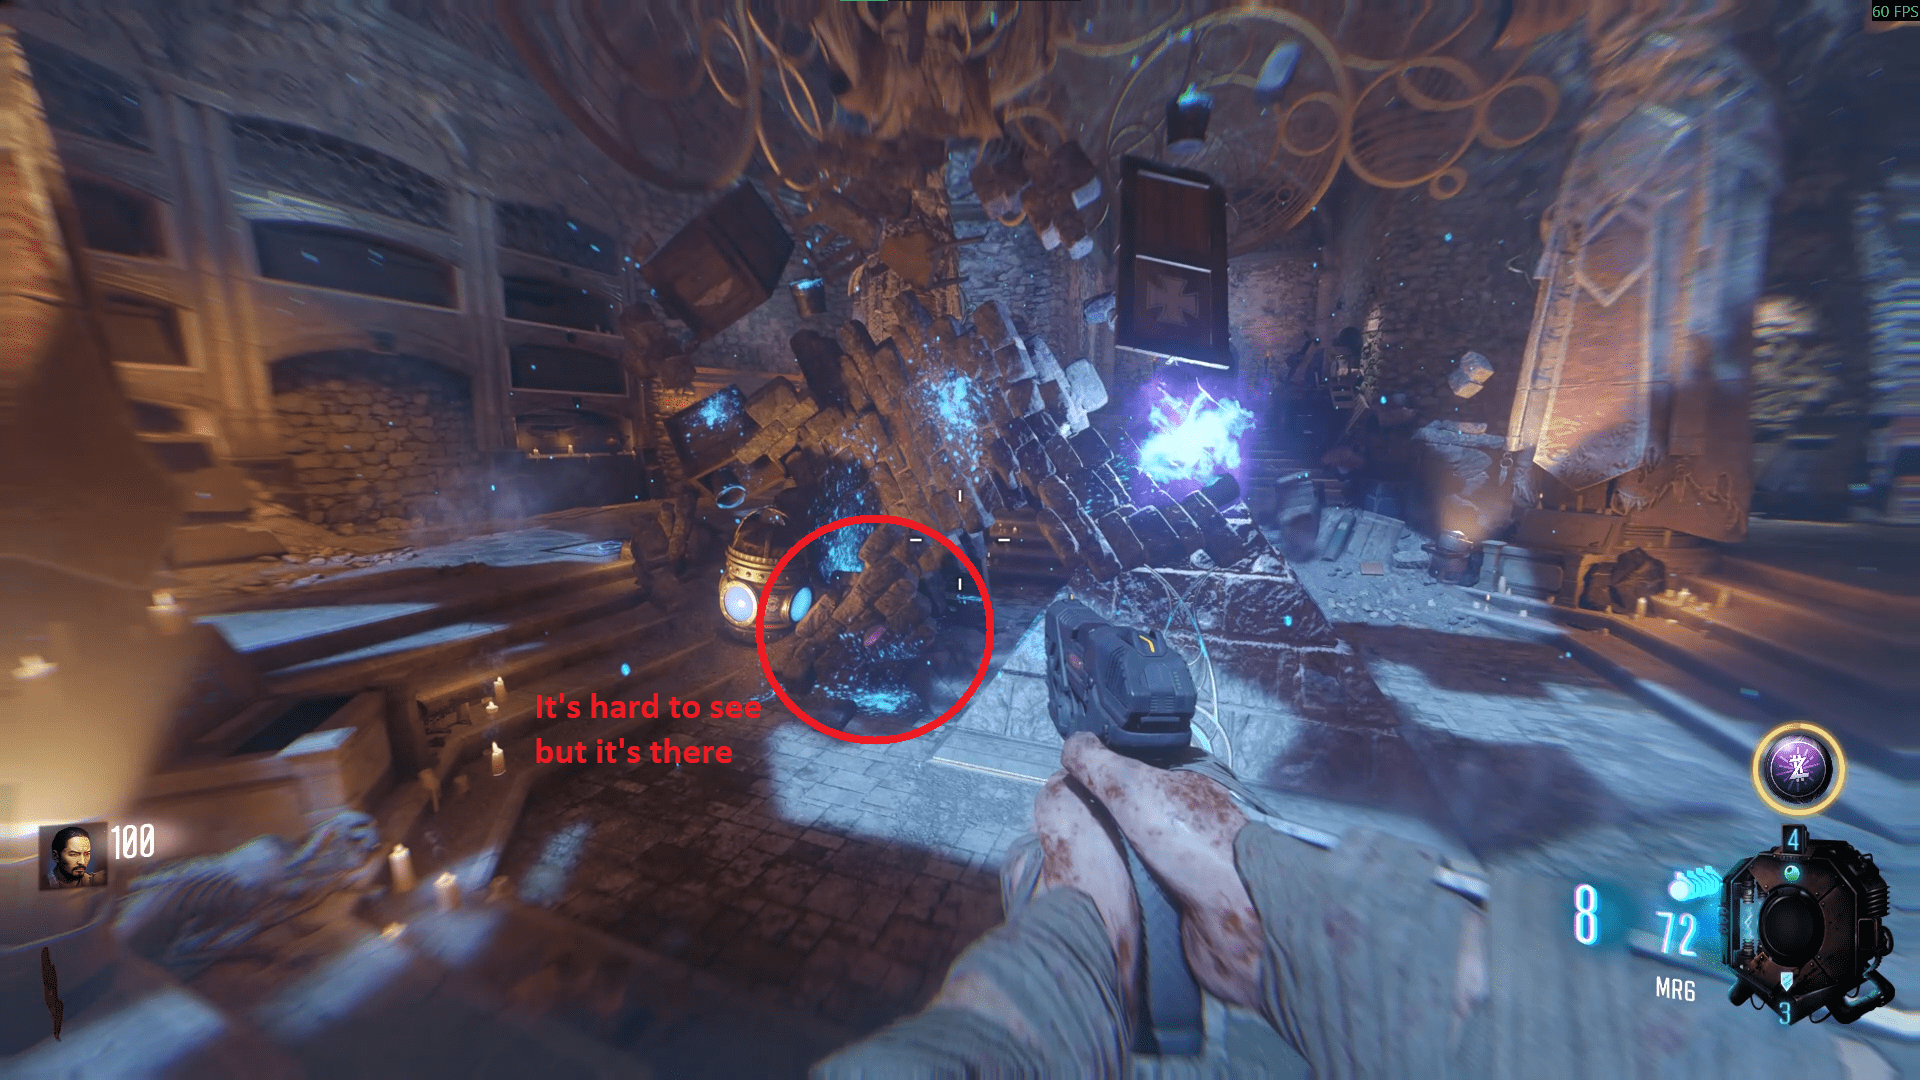
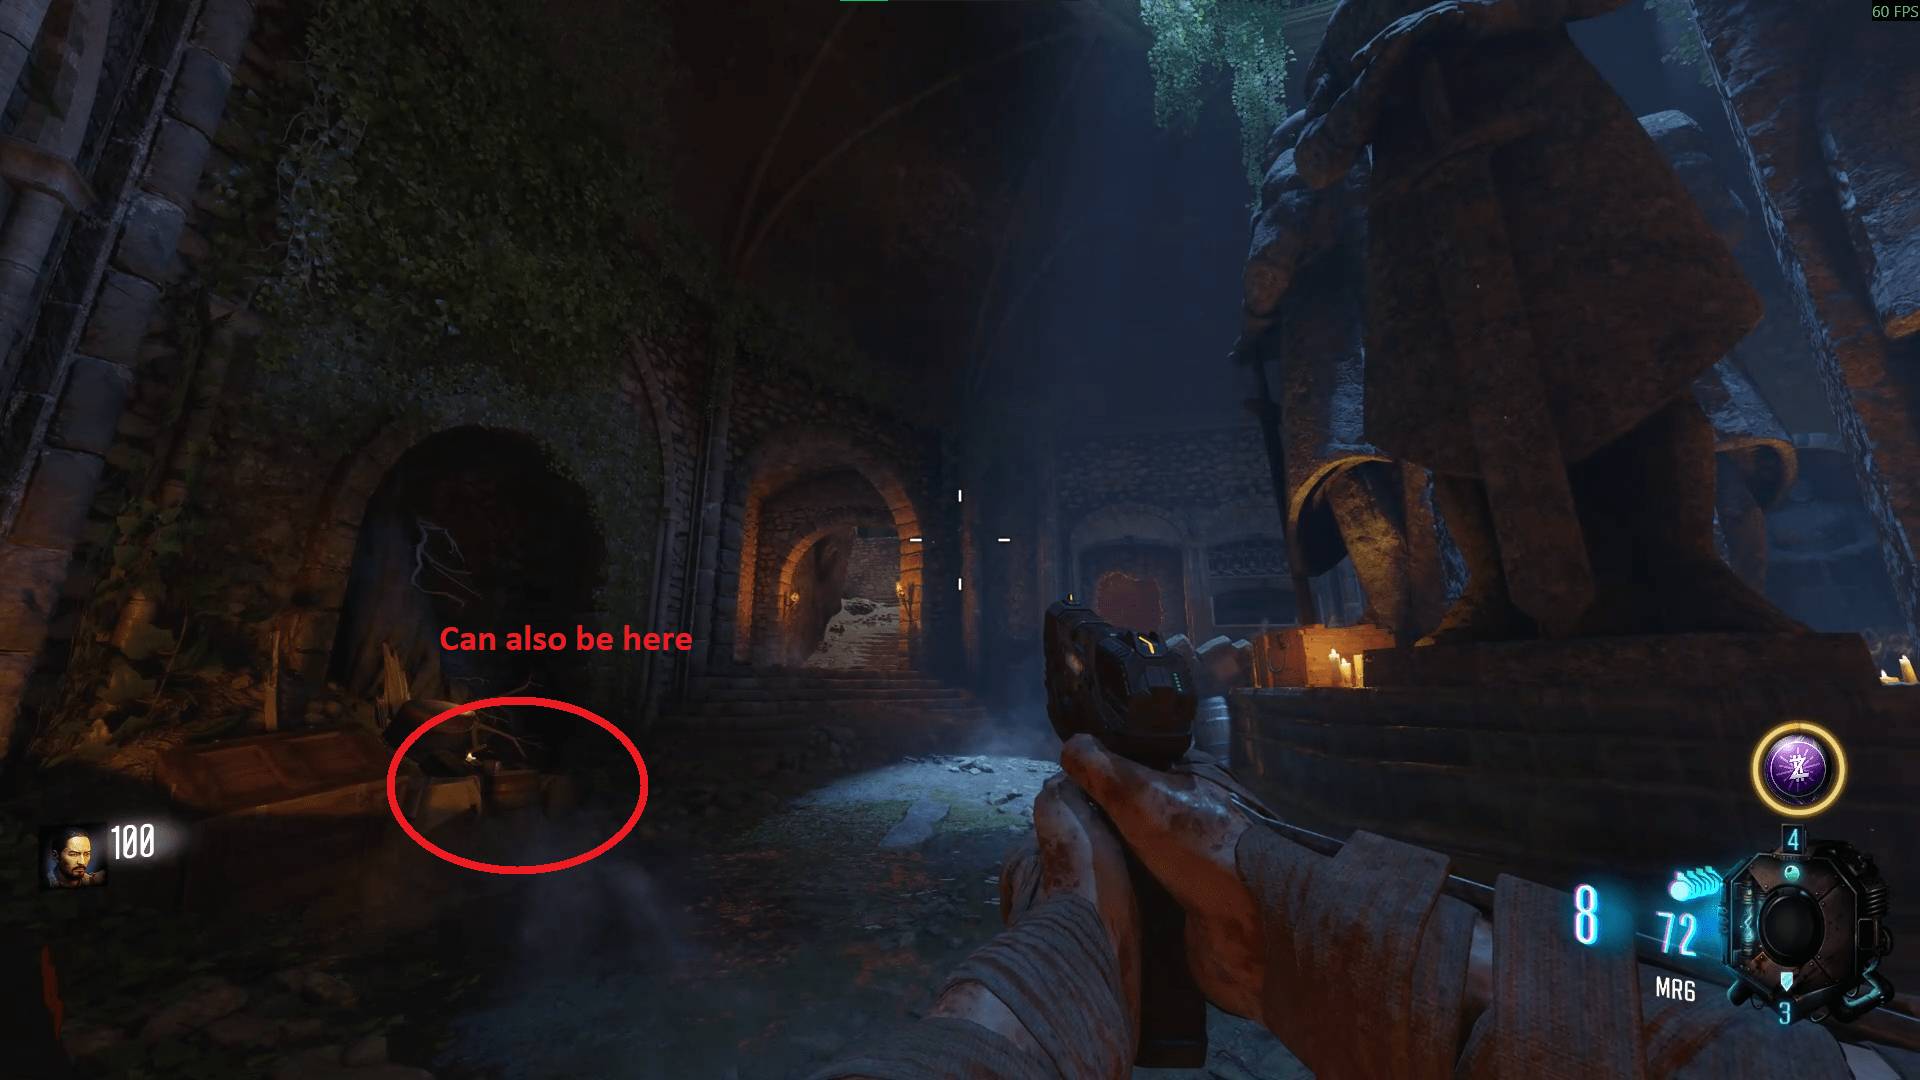
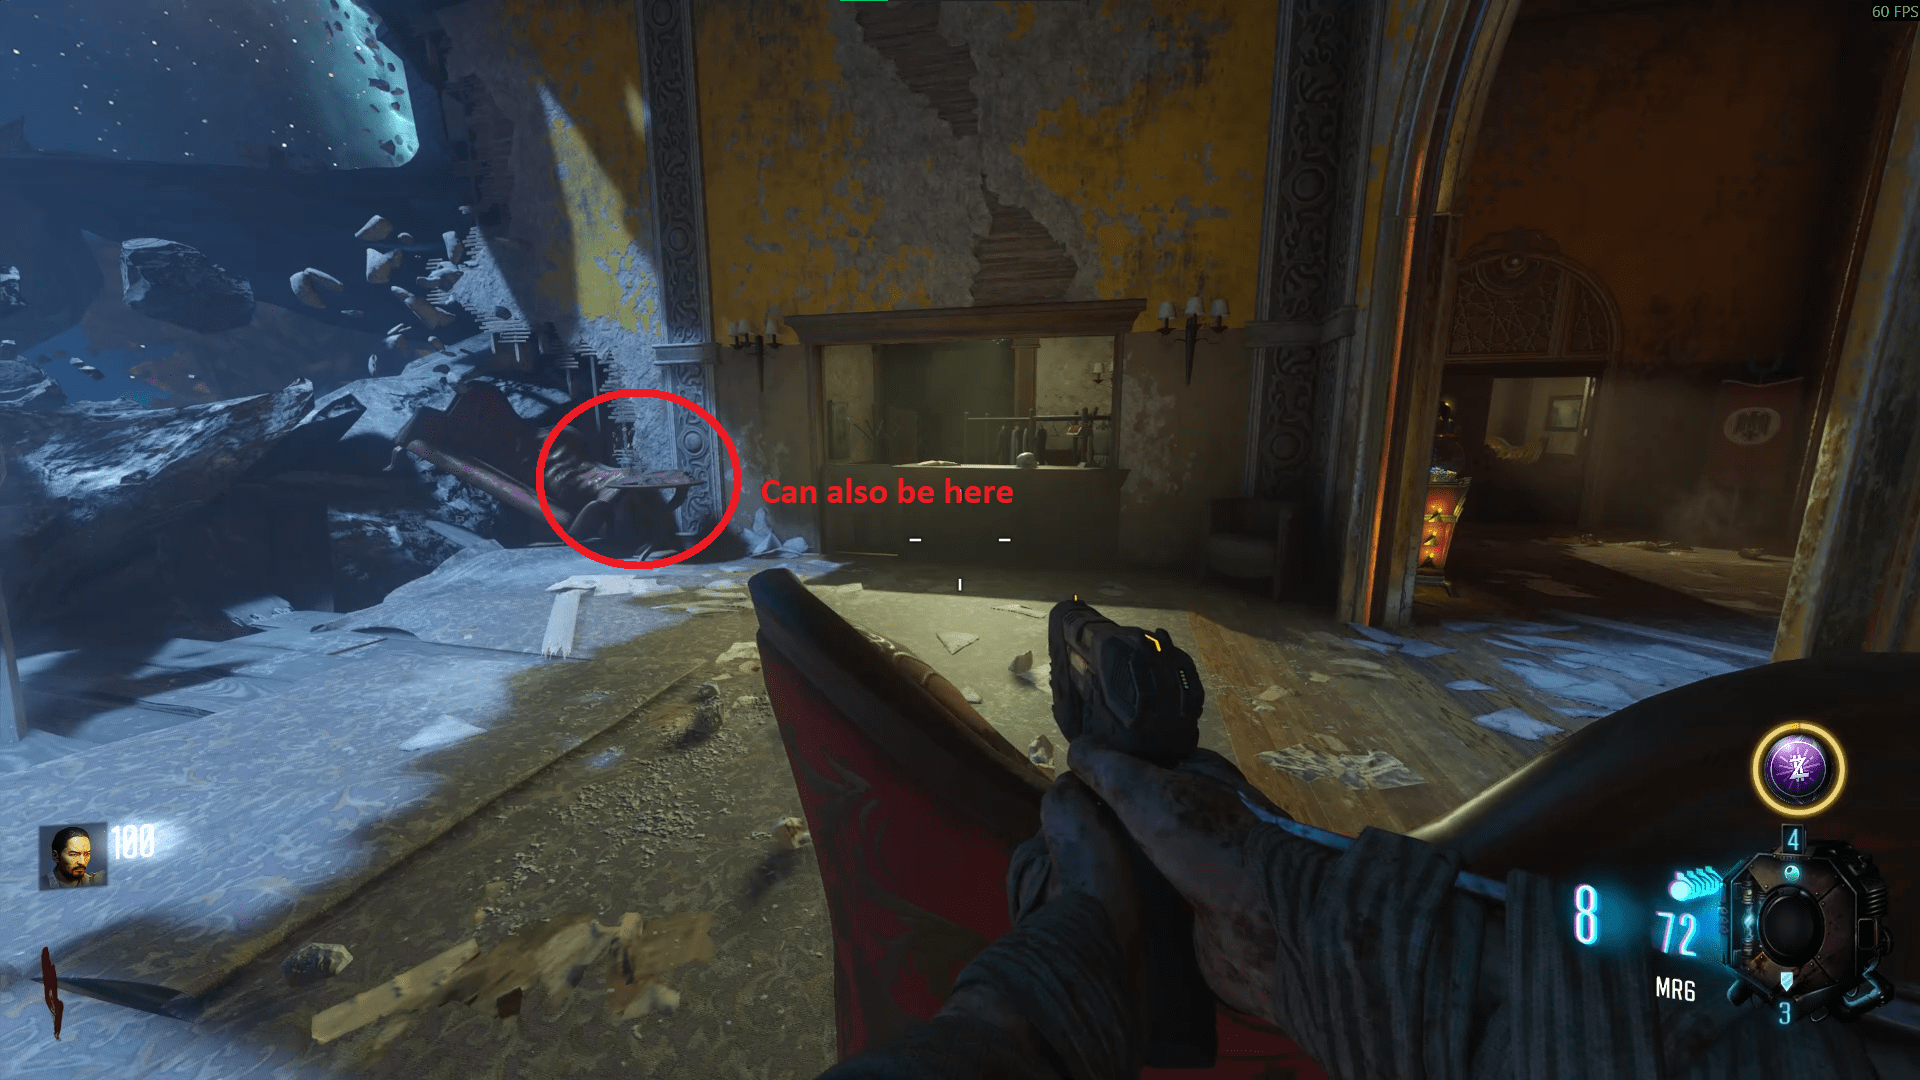
- In Origins, on top of the sandbags opposite Double Tap, where Speed Cola used to be originally.
- In Origins, in a corner at the top of the Mound.
- In Mob of the Dead, on the wall to the right of Mule Kick.
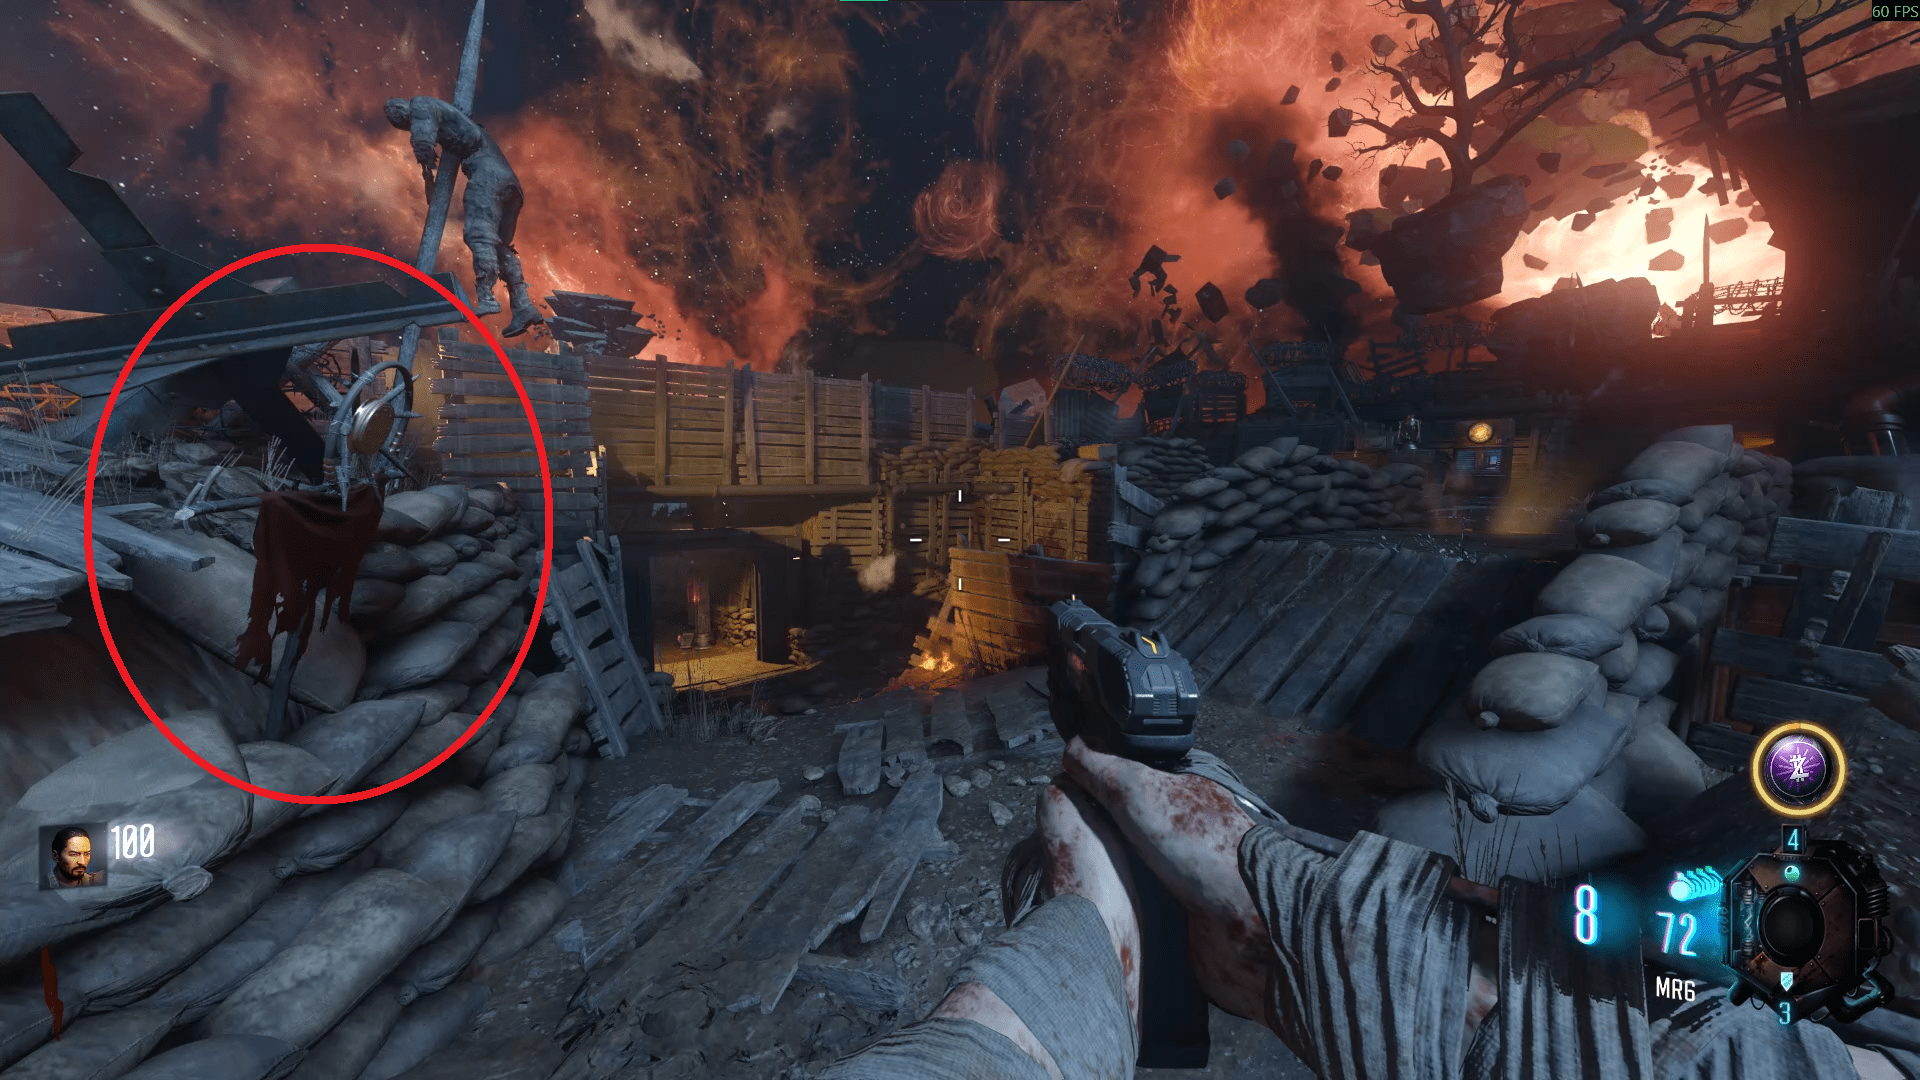
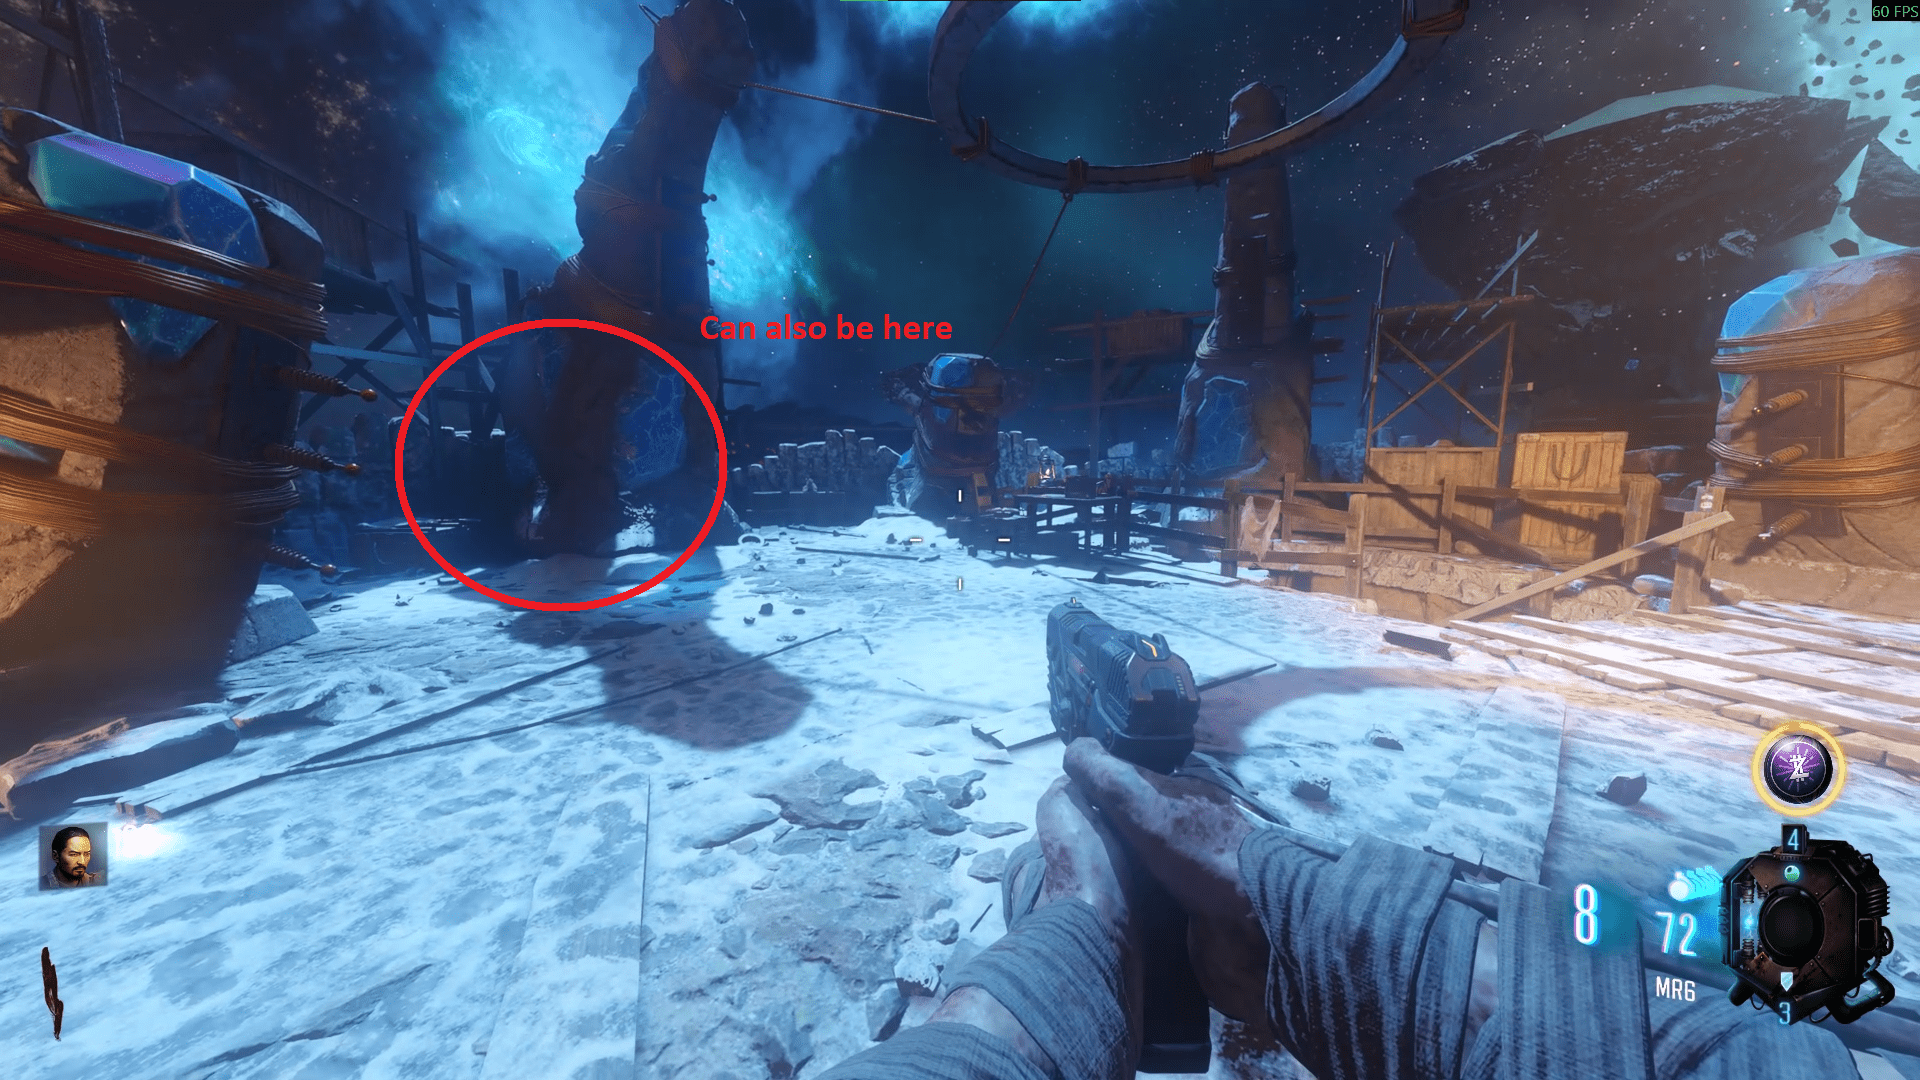
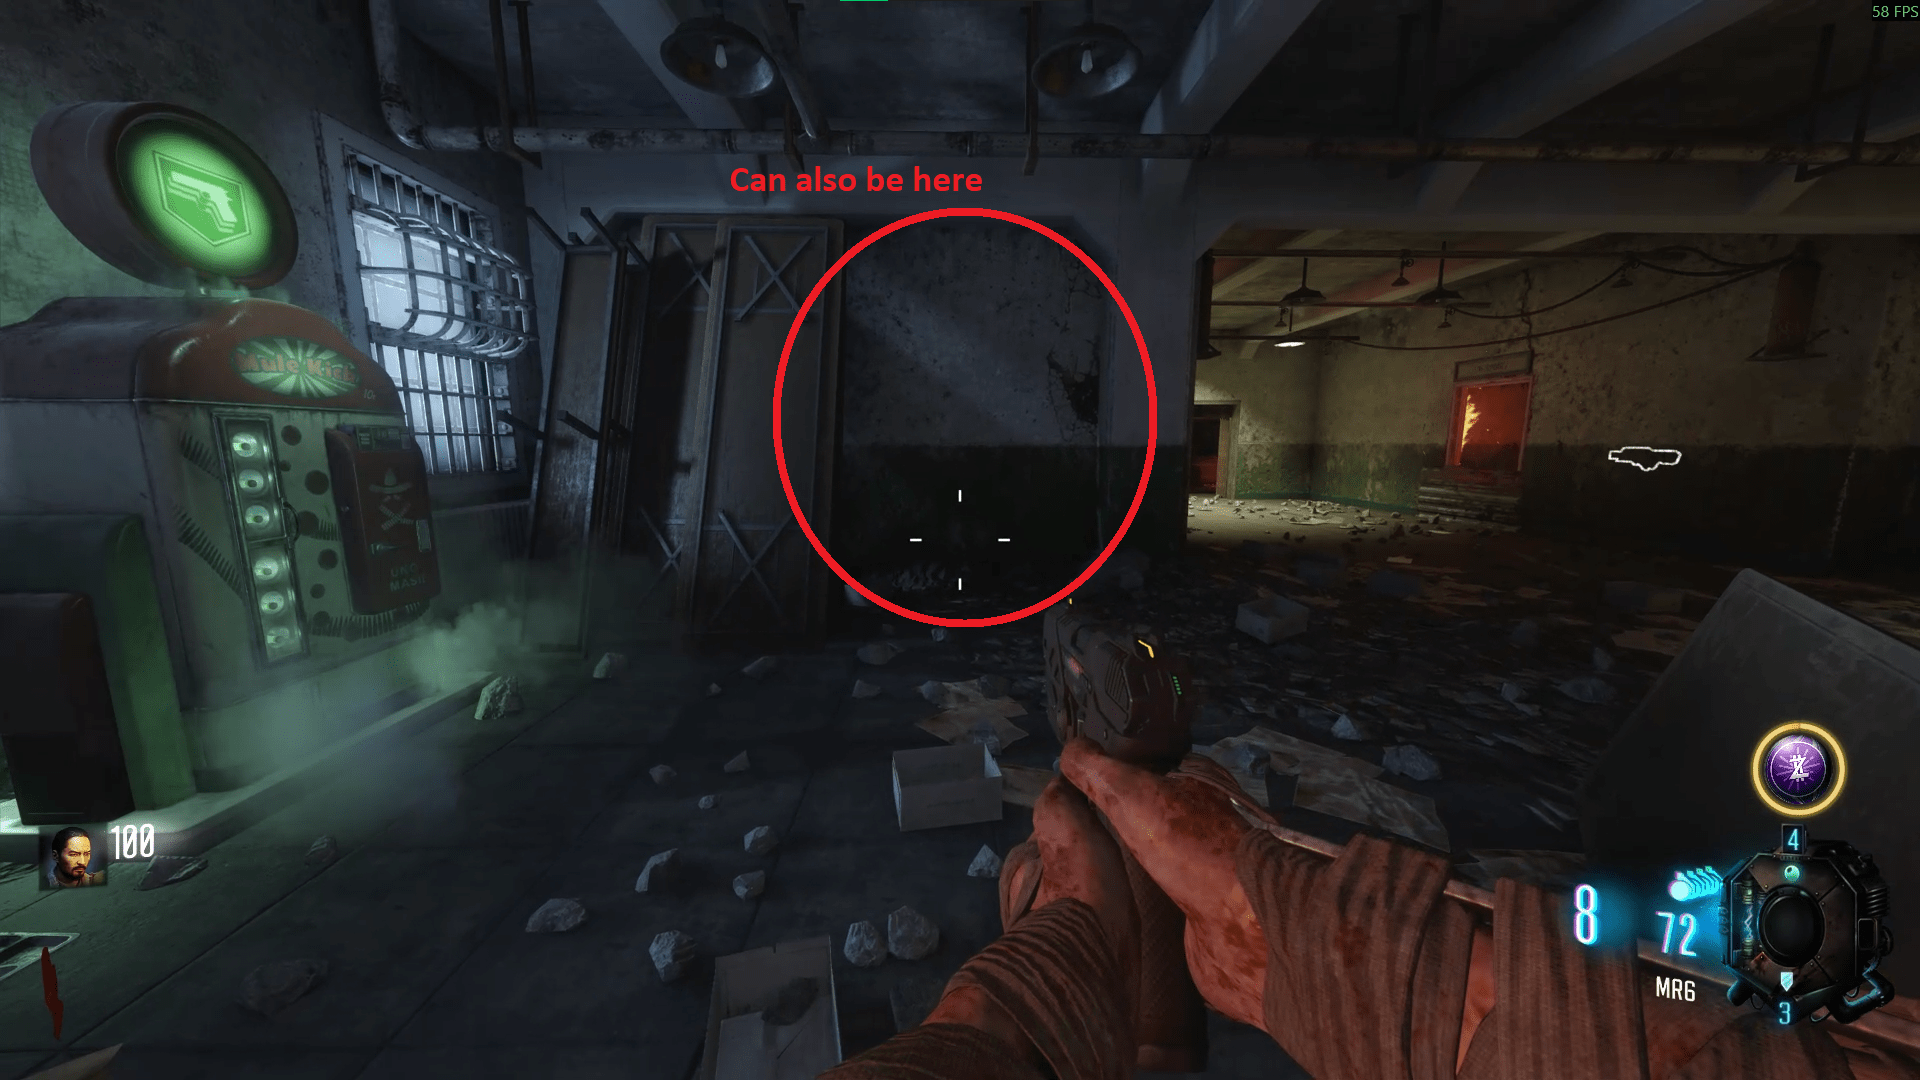
You can then build it at any of the areas with an unfinished altar on the wall: Der Eisendrache, Kino Der Toten, Verruckt and Origins.
After building, you'll need to find a strange rock on one of three jump pads. It is a small triangular rock that looks slightly different for each jump pad so don't look and dismiss it not being there too quickly. The three locations being;- Shangri-La side leading to Spawn.
- Verruckt side leading to Kino.
- Mob of the Dead side leading to Verruckt.
- The Normal Way: Kill everything you can before it gets to the Keeper (not recommended).
- My Favourite Way: Find the zombie and walk into it to slow it down. Better with friends as you can make a wall of shields and it just looks hilarious.
- The Best Way: Jump back and forth between the islands until you have a zombie in a barricade, then just keep him there.
- The Parasite Way: Wait until a special round and activate the Keeper. The Keeper can still kill the parasites but he's not very accurate so less chance of ending the round. Parasites don't attack the Keeper so you can leave him be.
- The Co-op Way: Have a friend take a zombie to the furthest point away from the Keeper, preferably a walker or crawler if you can. The zombie will likely not make it to the Keeper in time.
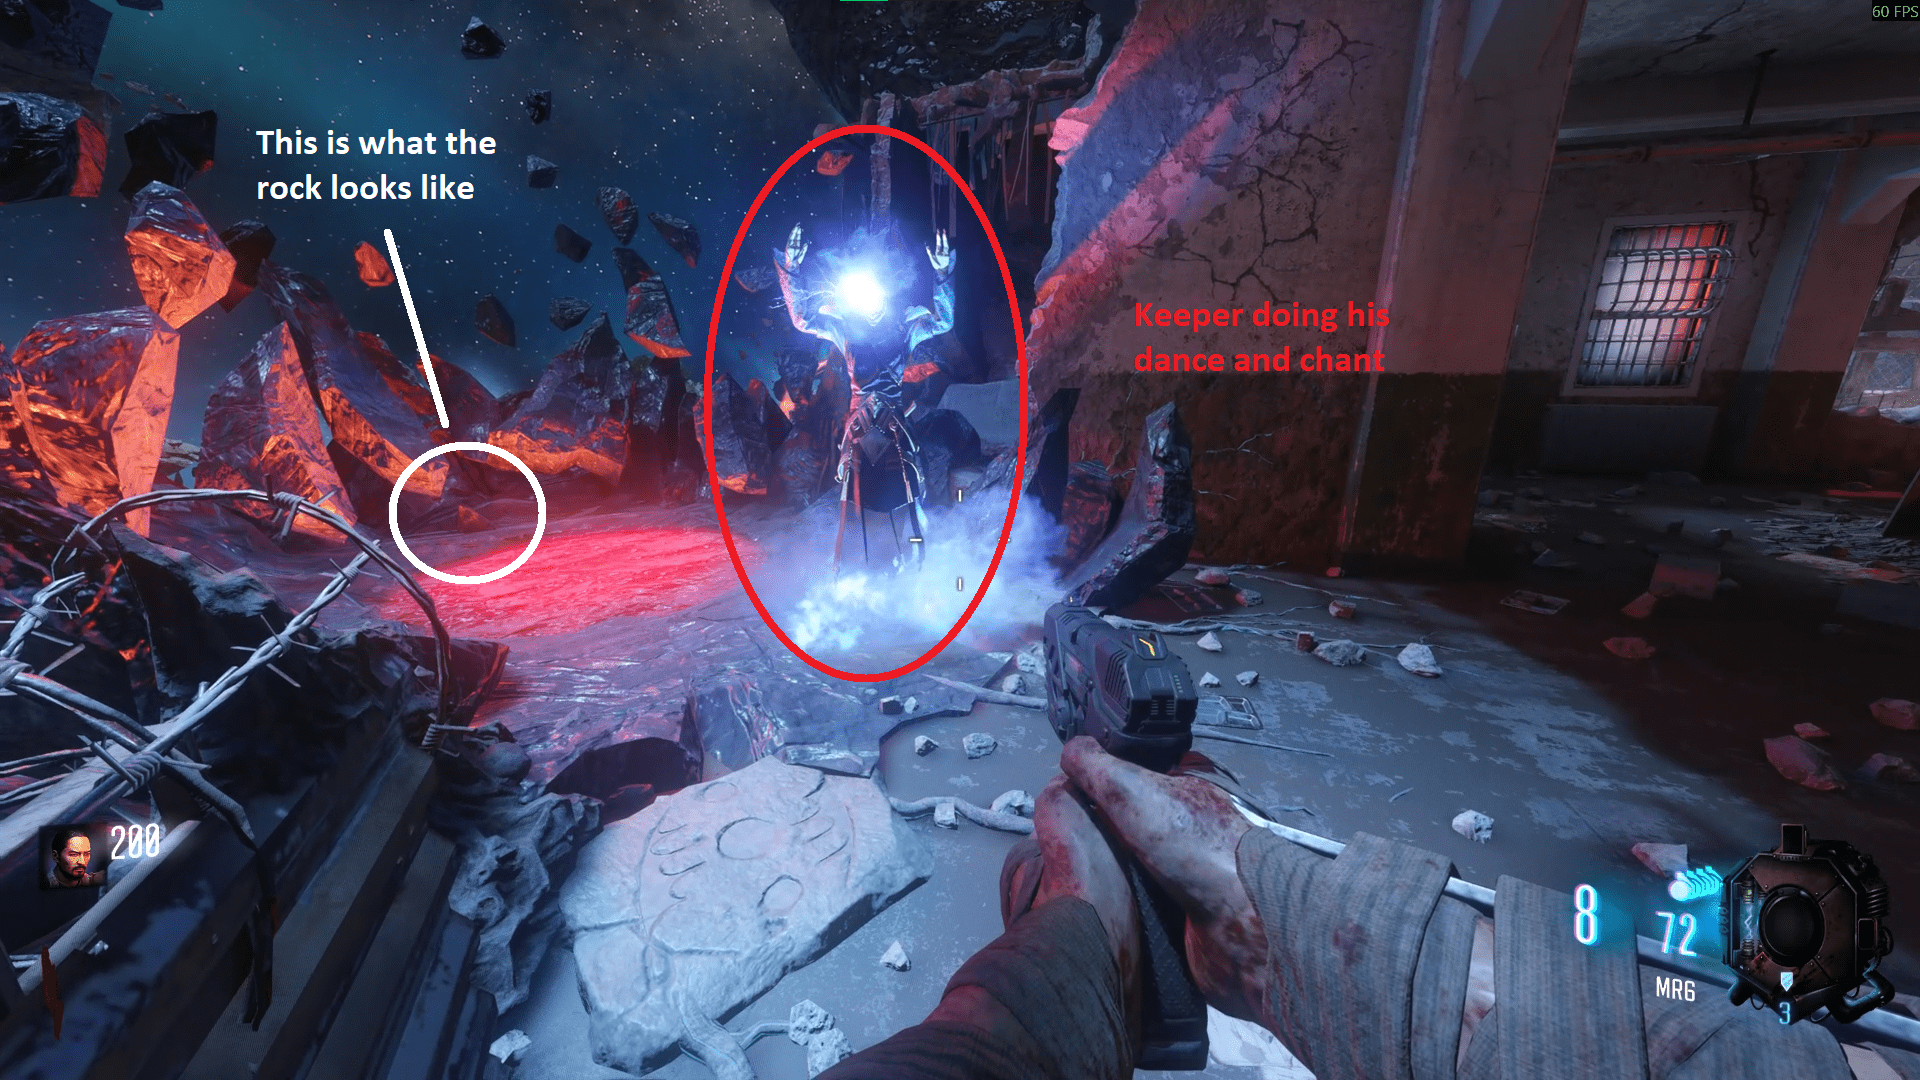
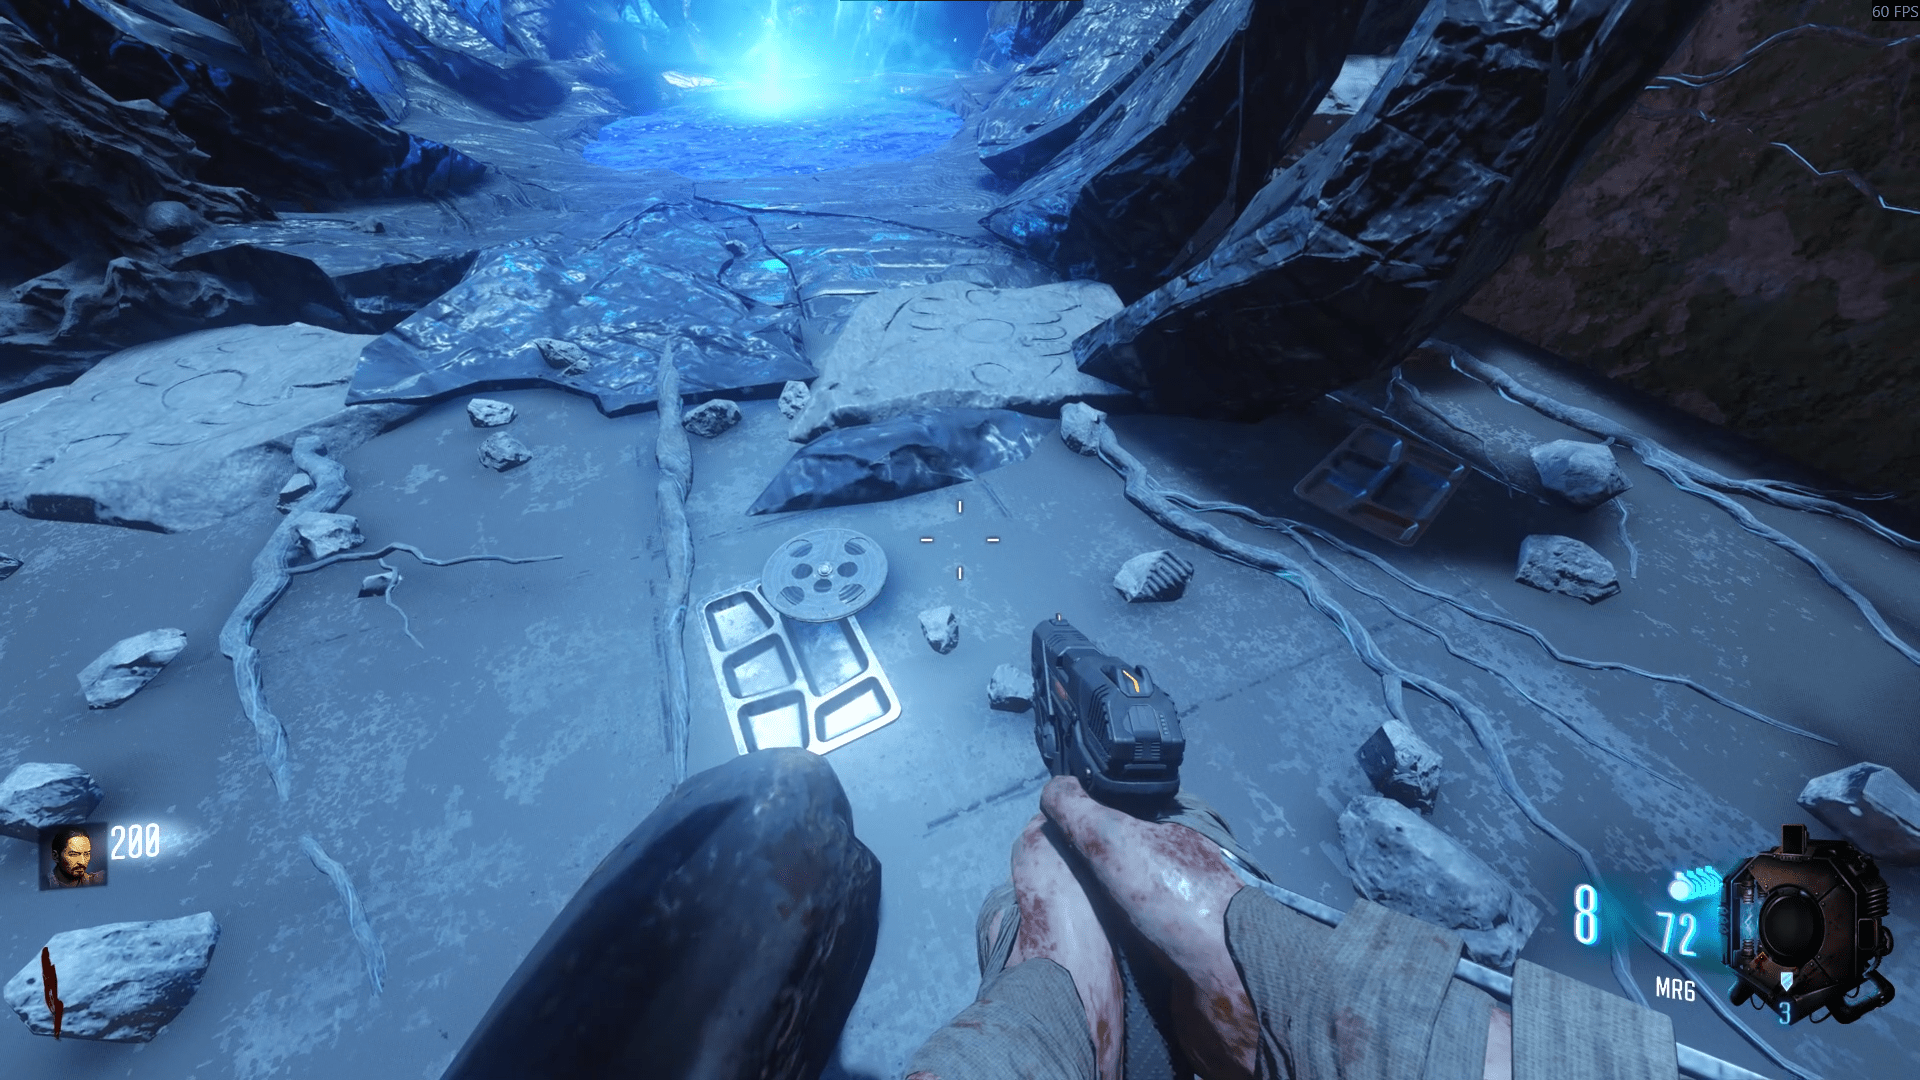
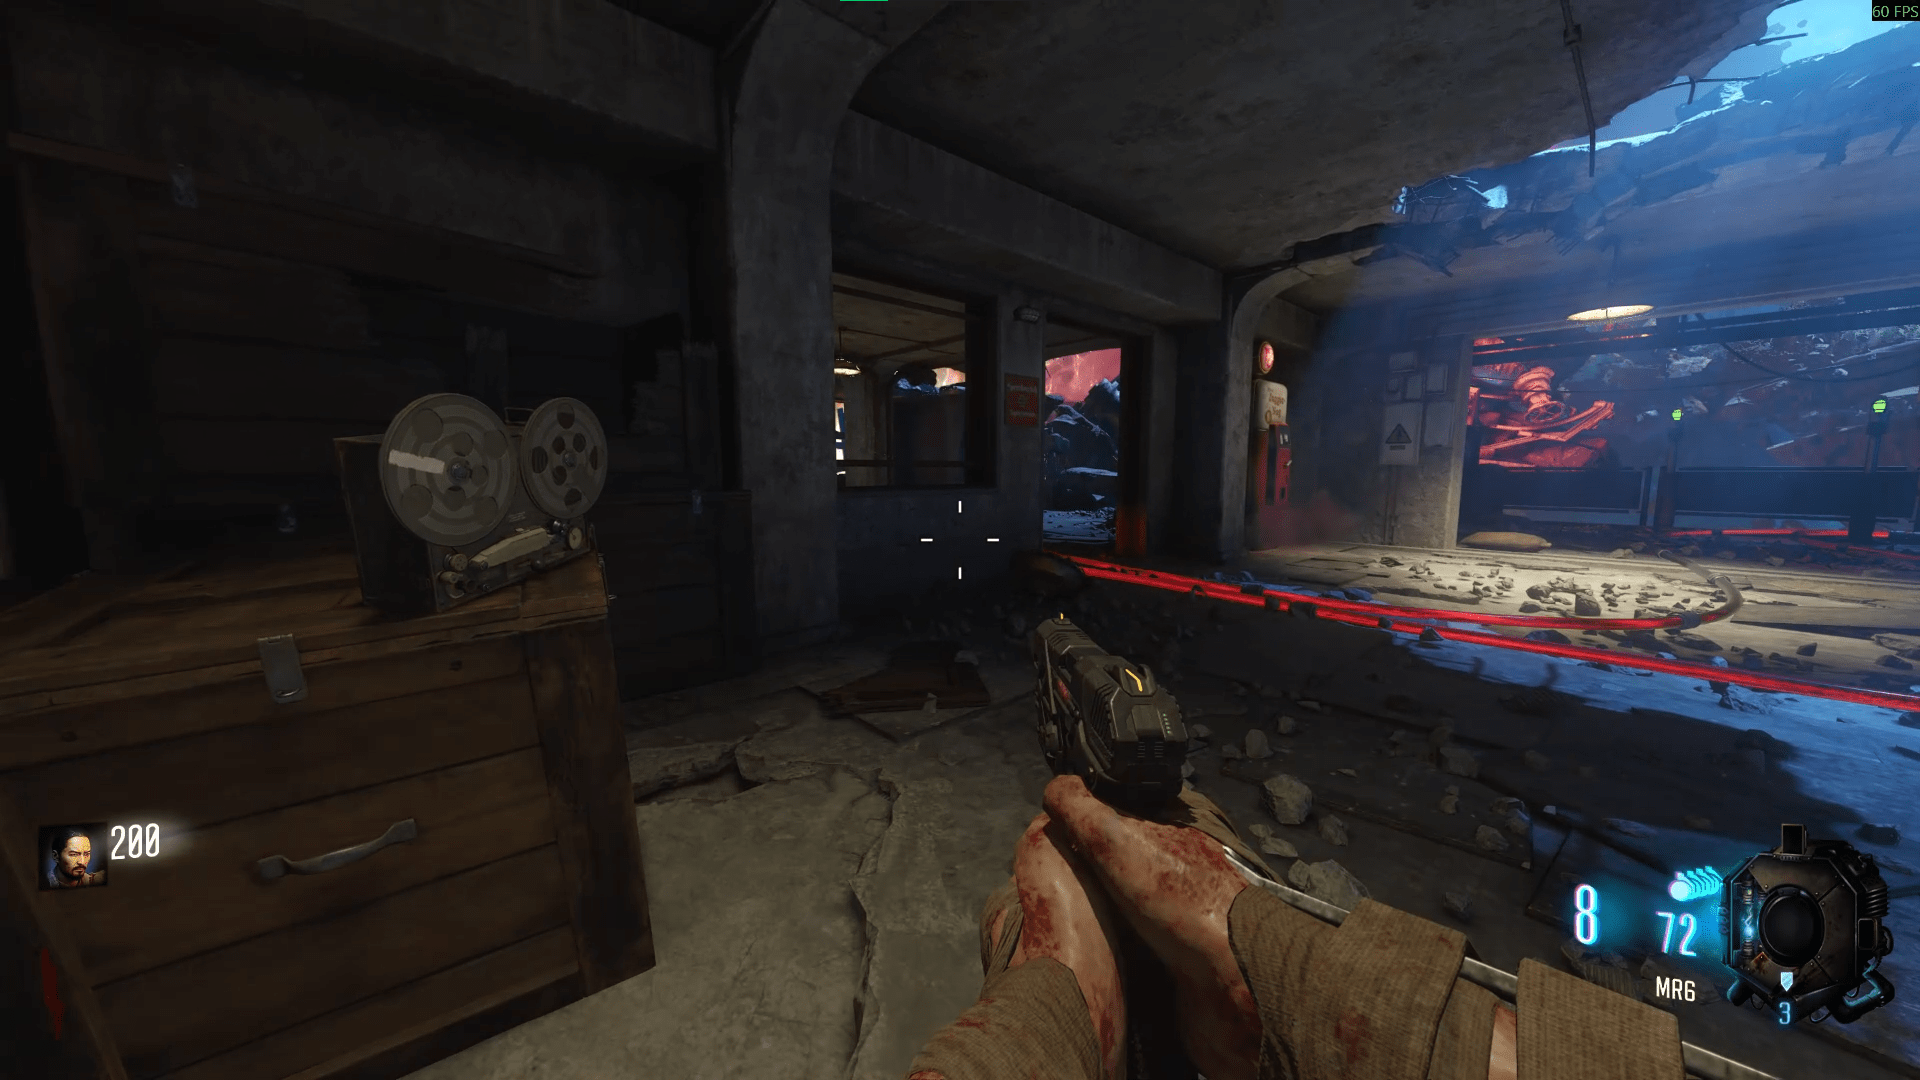
After a short amount of time the Keeper will be done and drop an audio reel. This particular audio reel will need to be placed in a tape player in Nacht, upstairs on the floor near Juggernog.
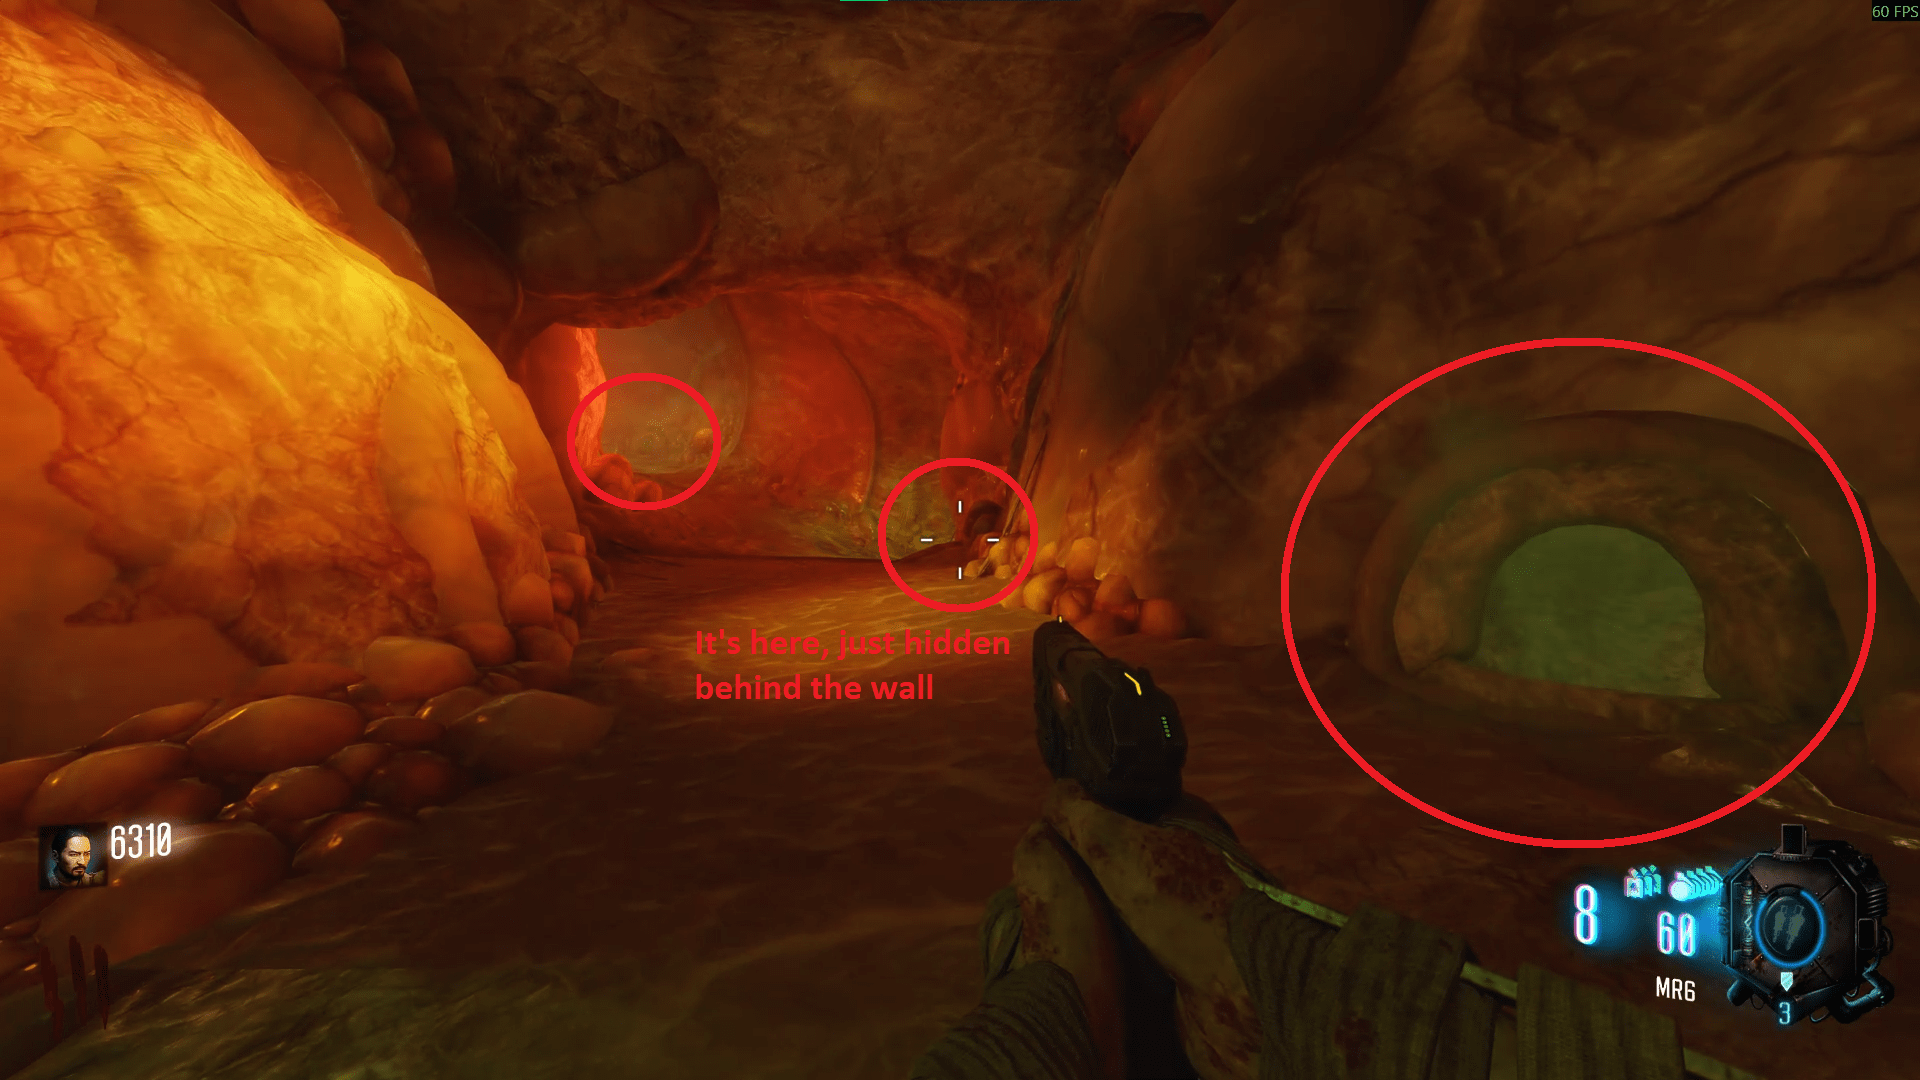
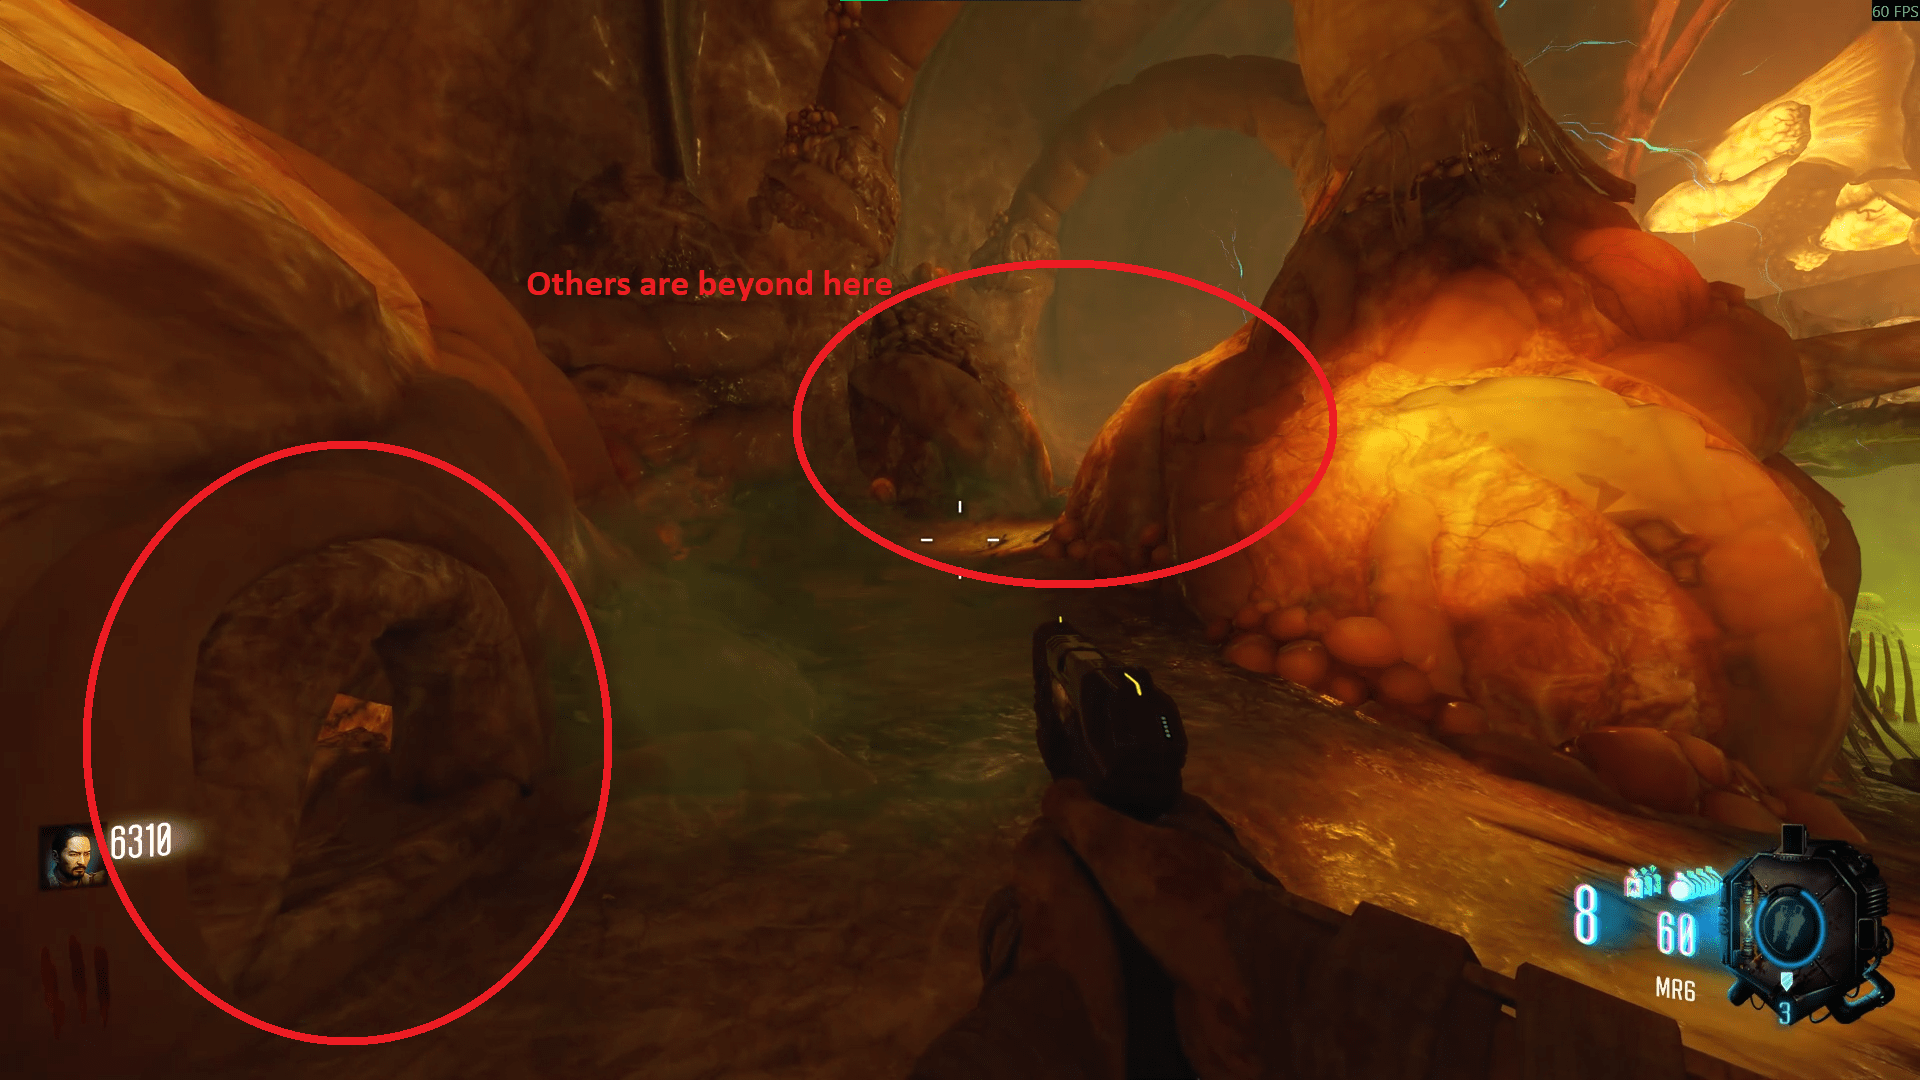
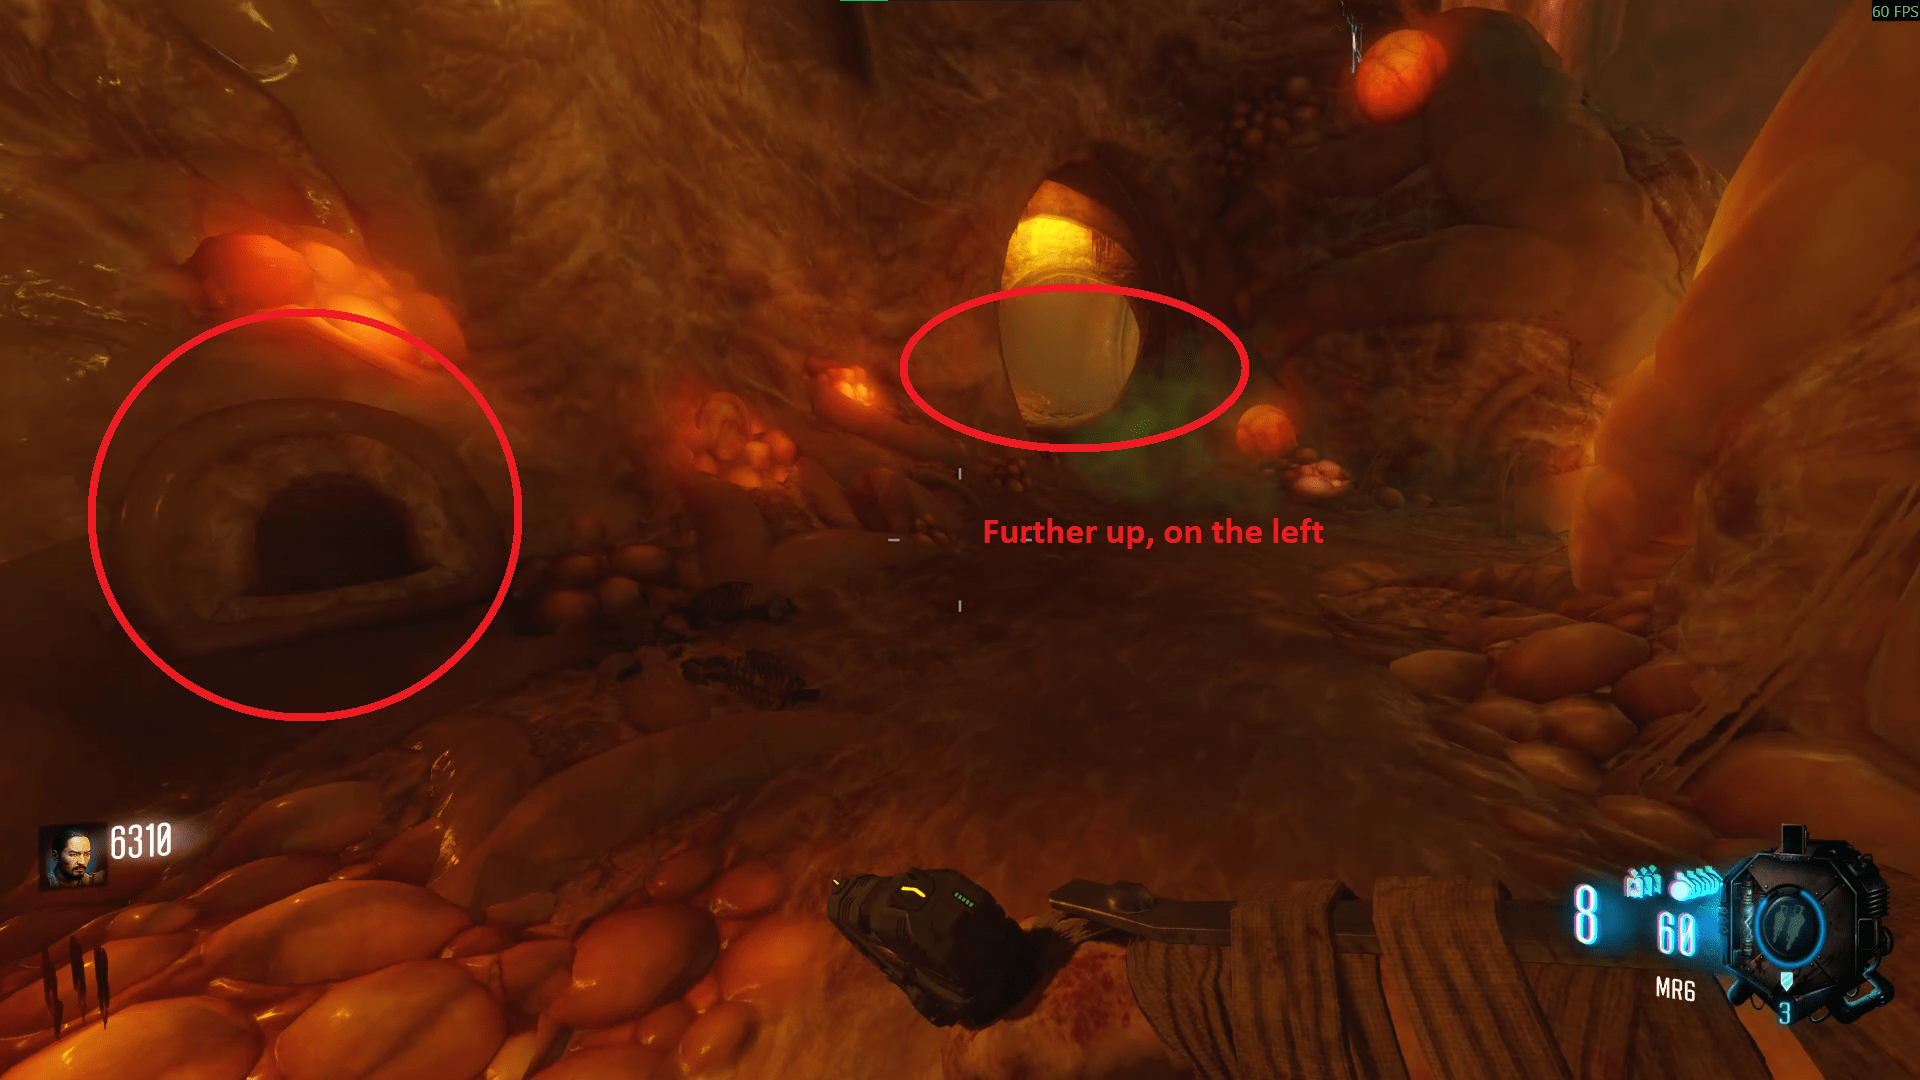
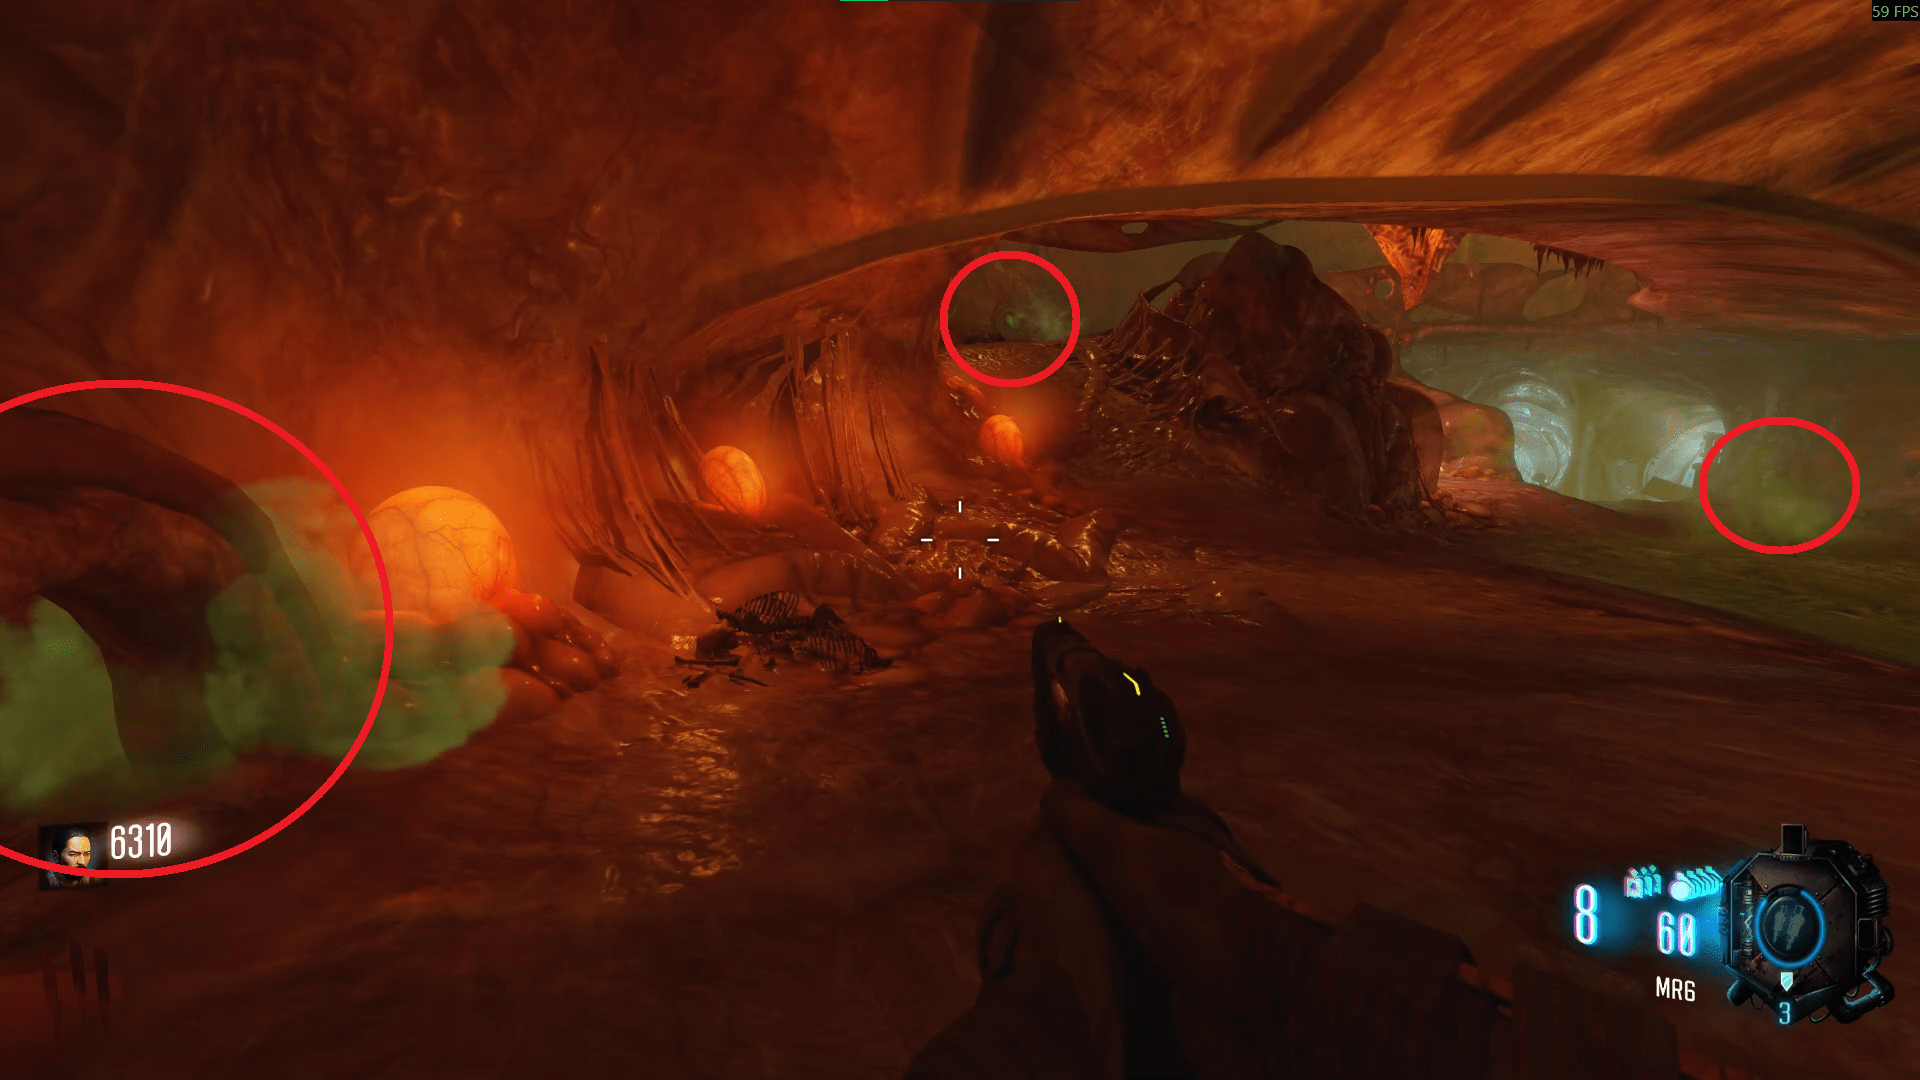
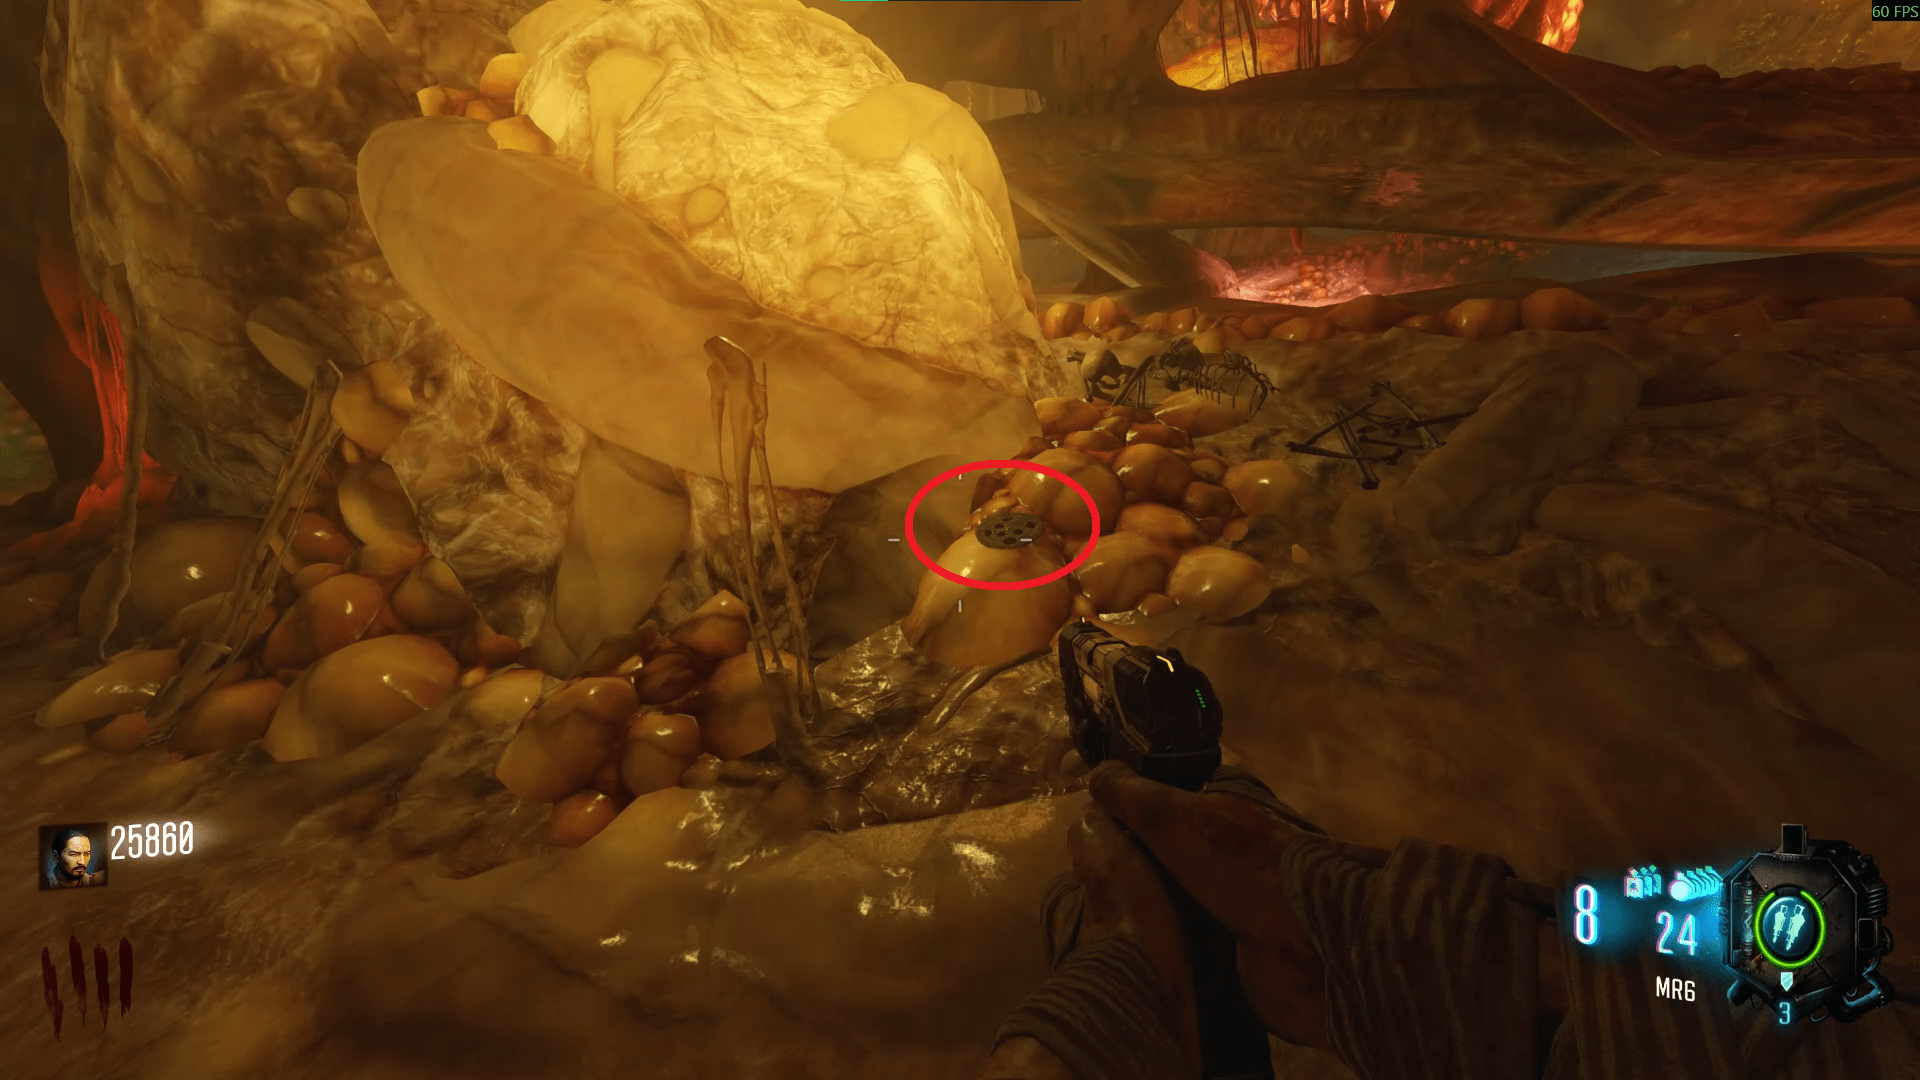
There are nine holes inside the Apothicon, all on the outer walls. You need to be precise and throw nine Lil' Arnies into these holes in segments of three. Each time you successfully throw three Lil' Arnies into three holes, a group of three Margwa's will spawn: Regular, Fire then Void variants.
Since the locations of these holes are fairly straightforward and relatively easy to find, I've instead grouped them into three groups so it's easier for you to remember which ones you've used over taking nine screenshots. You also can't use the same hole twice giggity;- The first three are on the wall to the right of you after you enter the Apothicon. They are quite close together and really quite hard to miss.
- The next three are on the left wall after you enter the Apothicon. They follow a straight line on the left, starting from directly to your left after landing then keep moving until you reach a 'ramp/stairs', the last one will be in the middle of them.
- The final three are at the back of the Apothicon, near PaP. There's one directly to the left on the left wall, one on the right just before the exits on the right wall and one behind the PaP on the ramp that leads to the bridge on the left wall, you shouldn't miss it.
Revelations
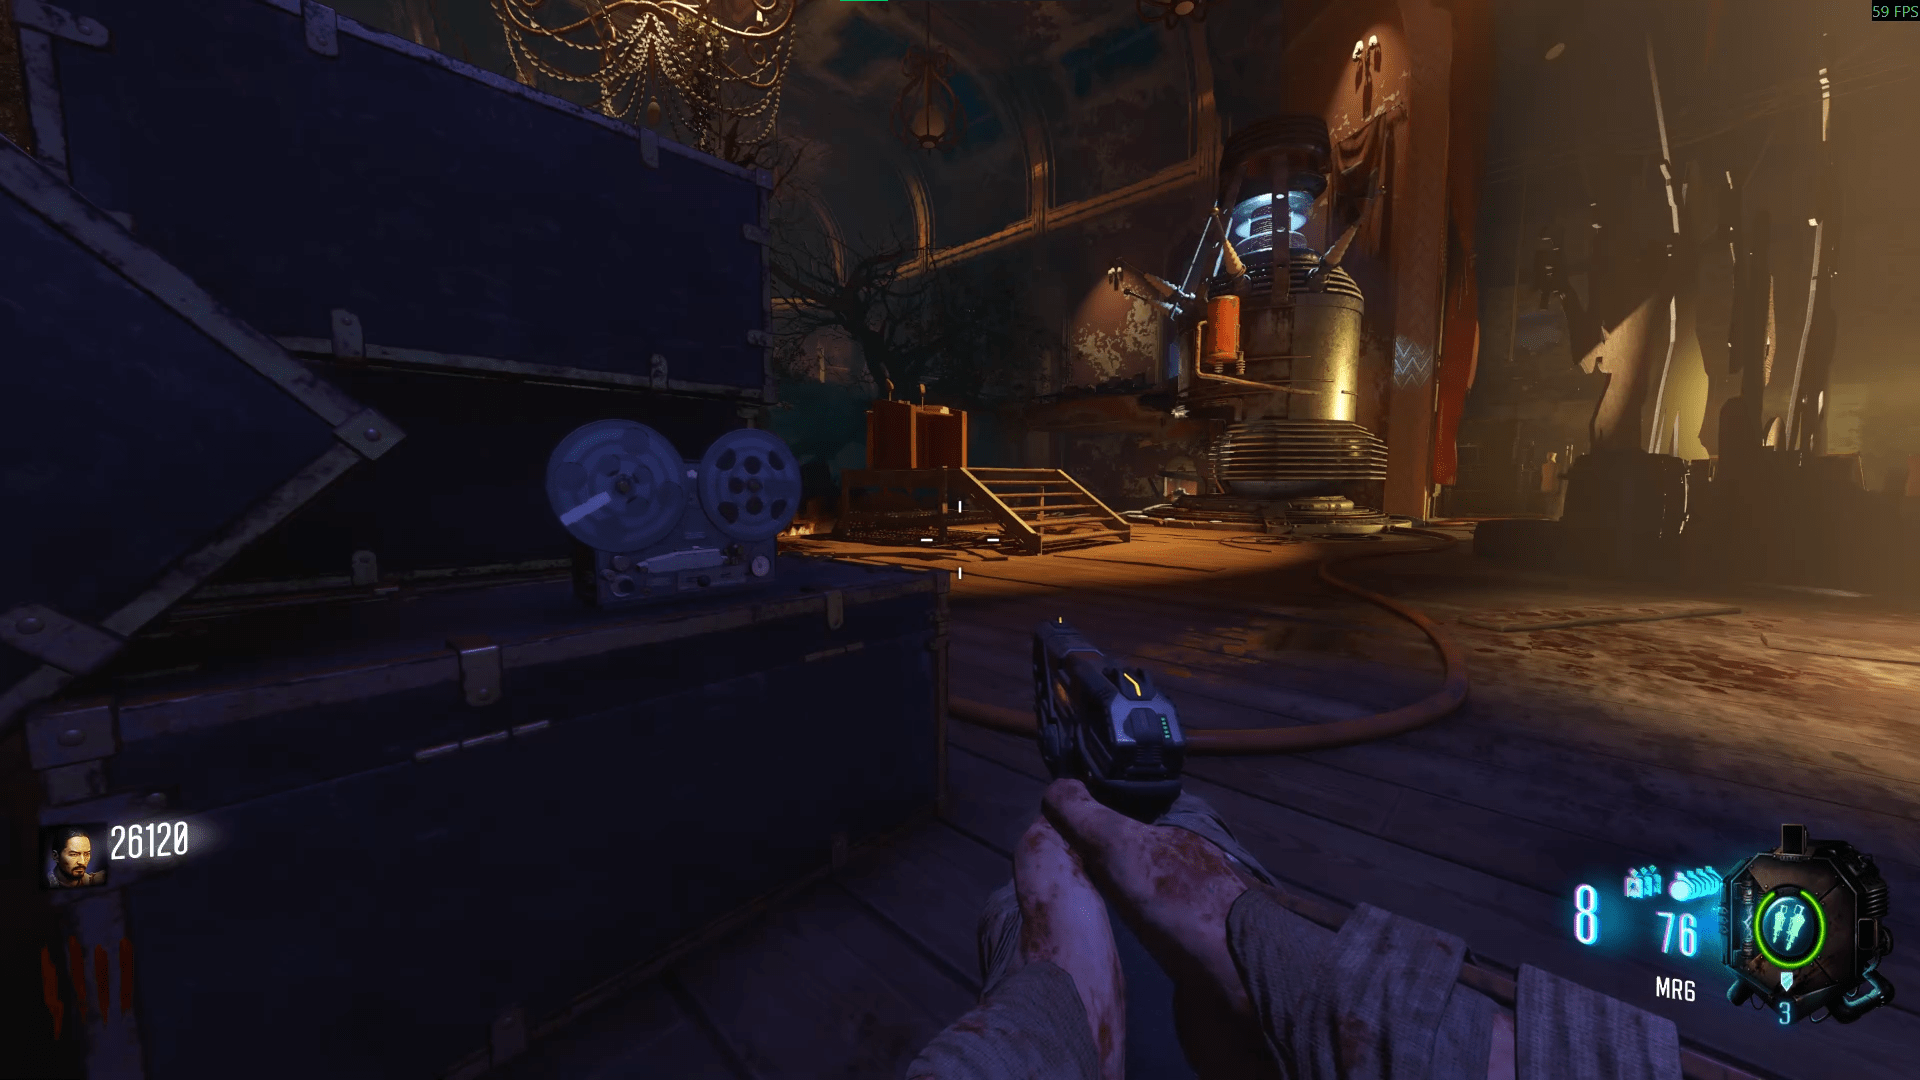
After killing the nine Margwa's however, you'll receive the audio reel on the bridge above PaP. Take this to the Kino stage where you'll find a second tape player on the opposite side of the teleporter, on some boxes.
- In Nacht, go to the top floor and look out towards Spawn. It is in between a wallbuy and Corruption Turret red beam.
- In Der Eisendrache, face opposite the teleport door and look up. To the right of the clock and under the free perk drop, you'll see it there.
- In Verruckt, directly to the right of the teleport door.
- In Verruckt, face opposite the Mob of the Dead jump pad towards the blue giant star. The rock blends in with the star so keep an eye out for it. It's ever so slightly above another rock.
- In Mob of the Dead, at the Corruption Engine looking up to the blue giant again, it once again blends in but you're looking to the left this time.
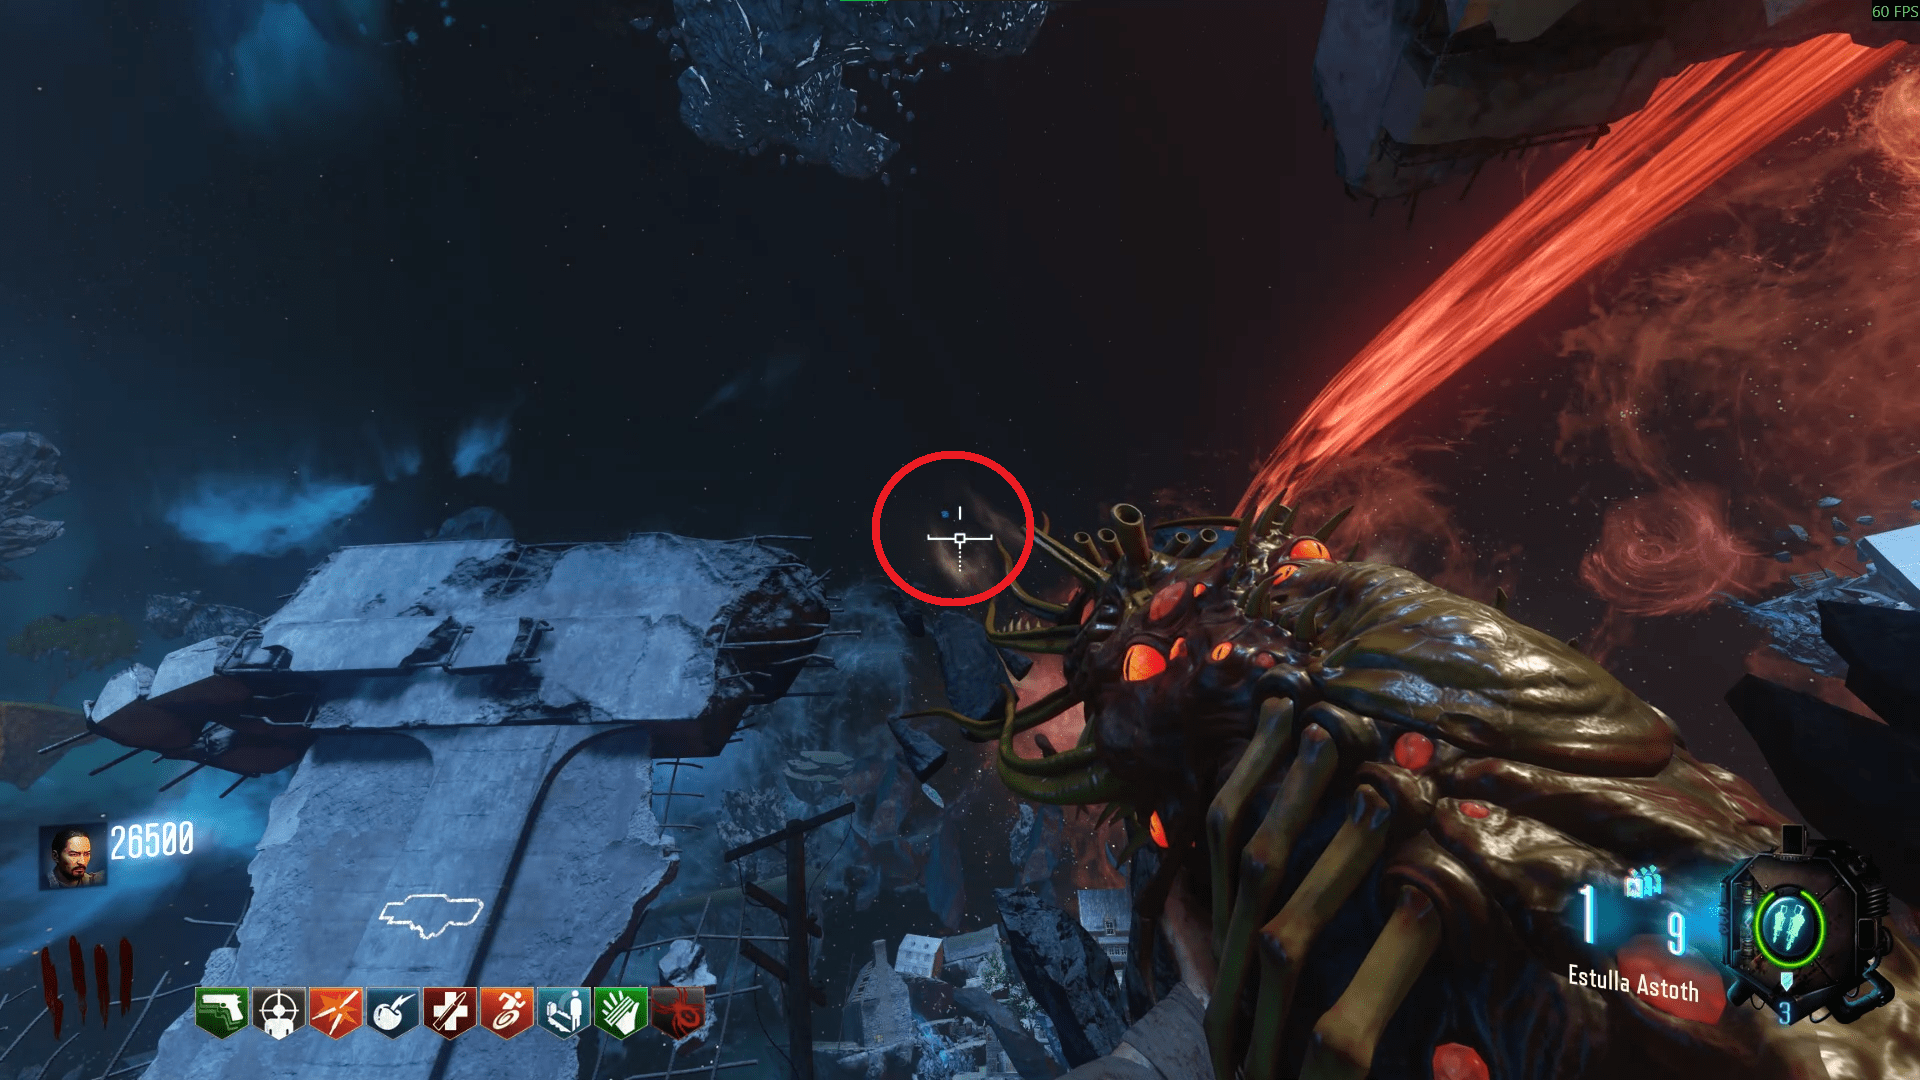
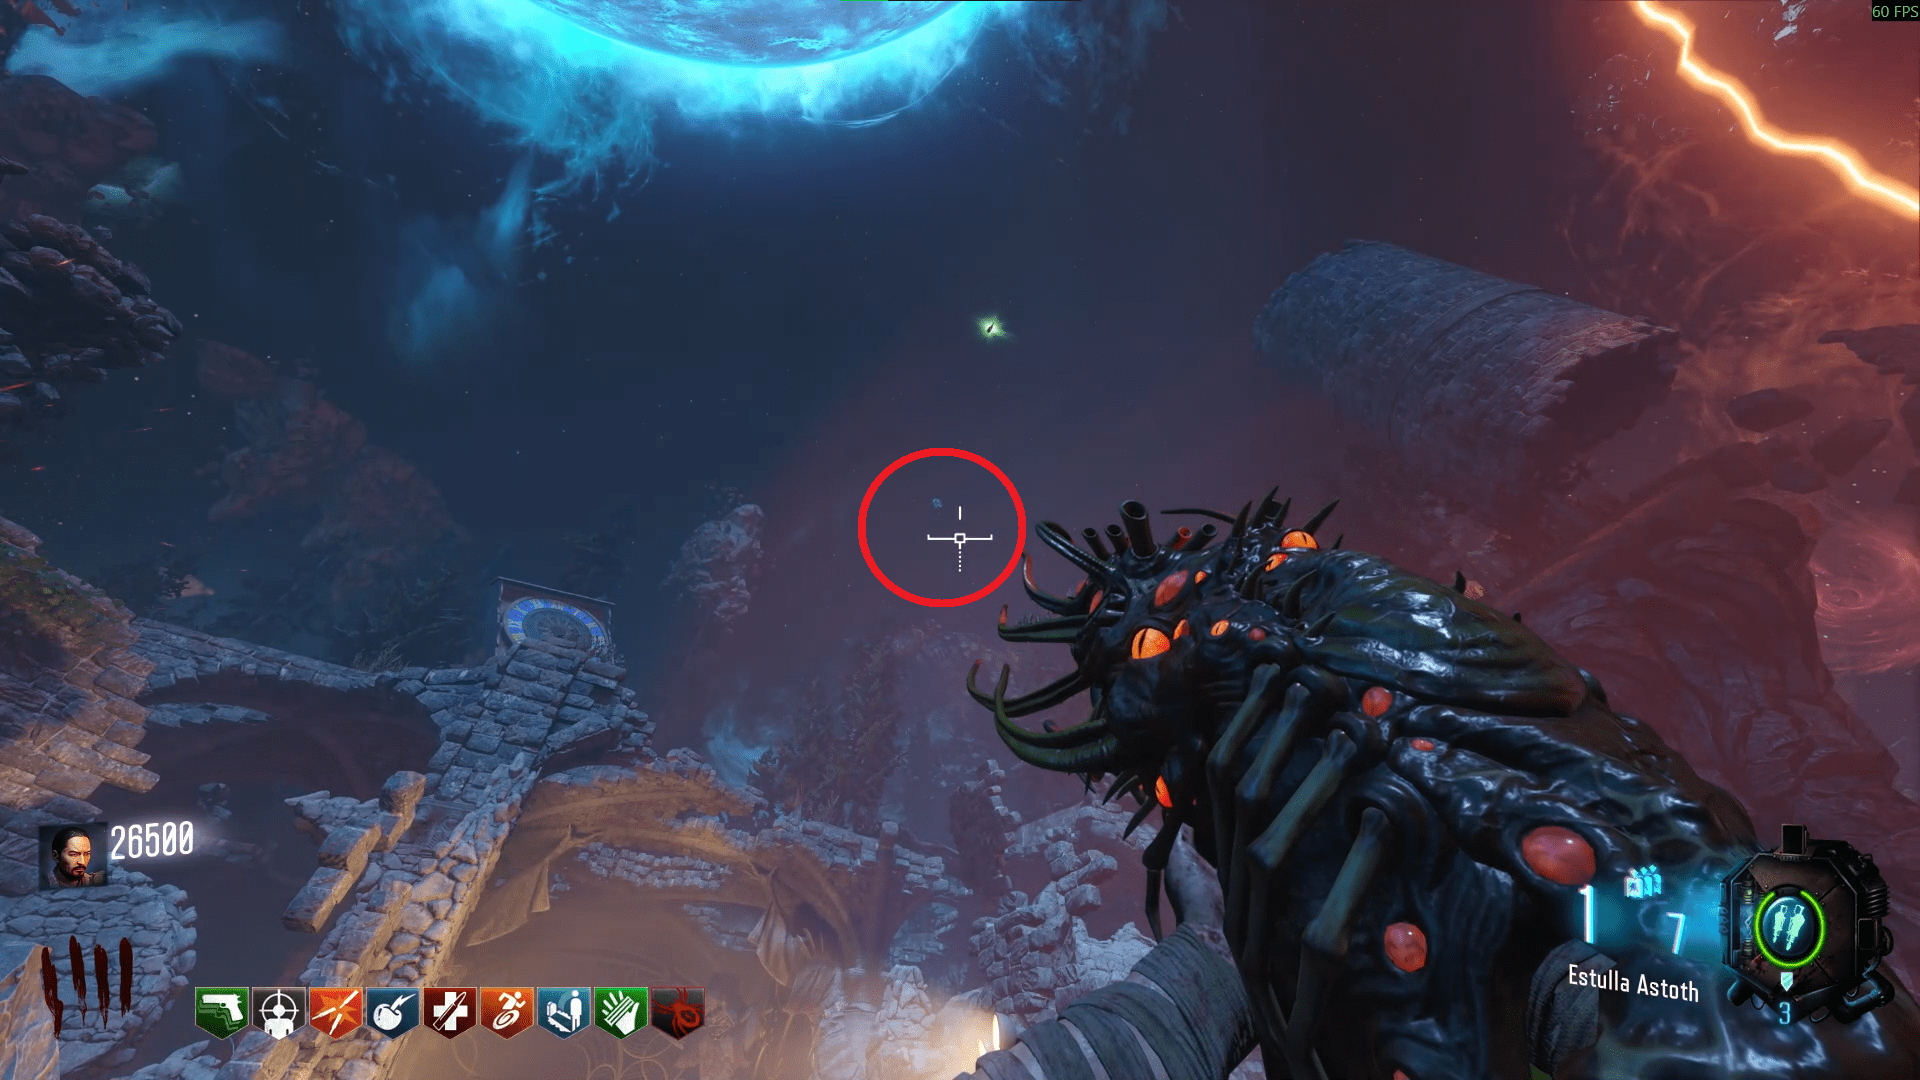
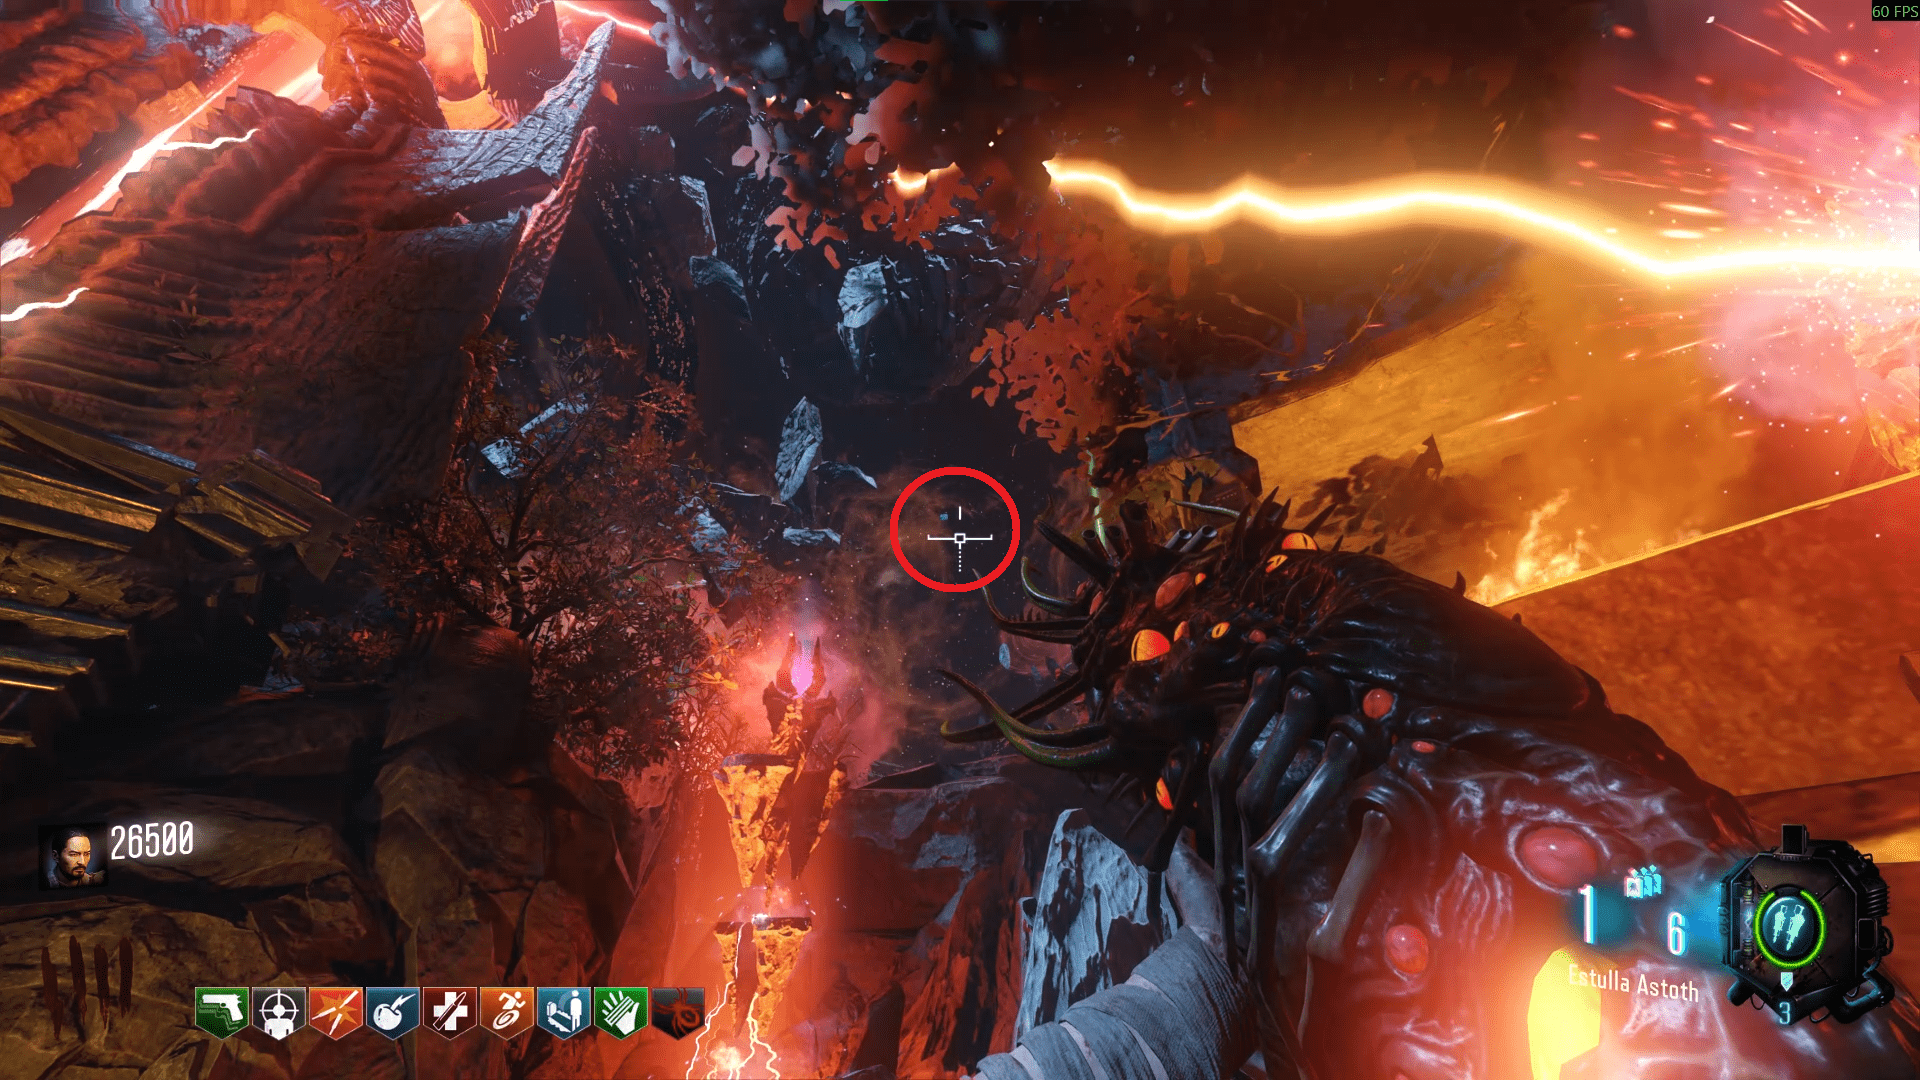
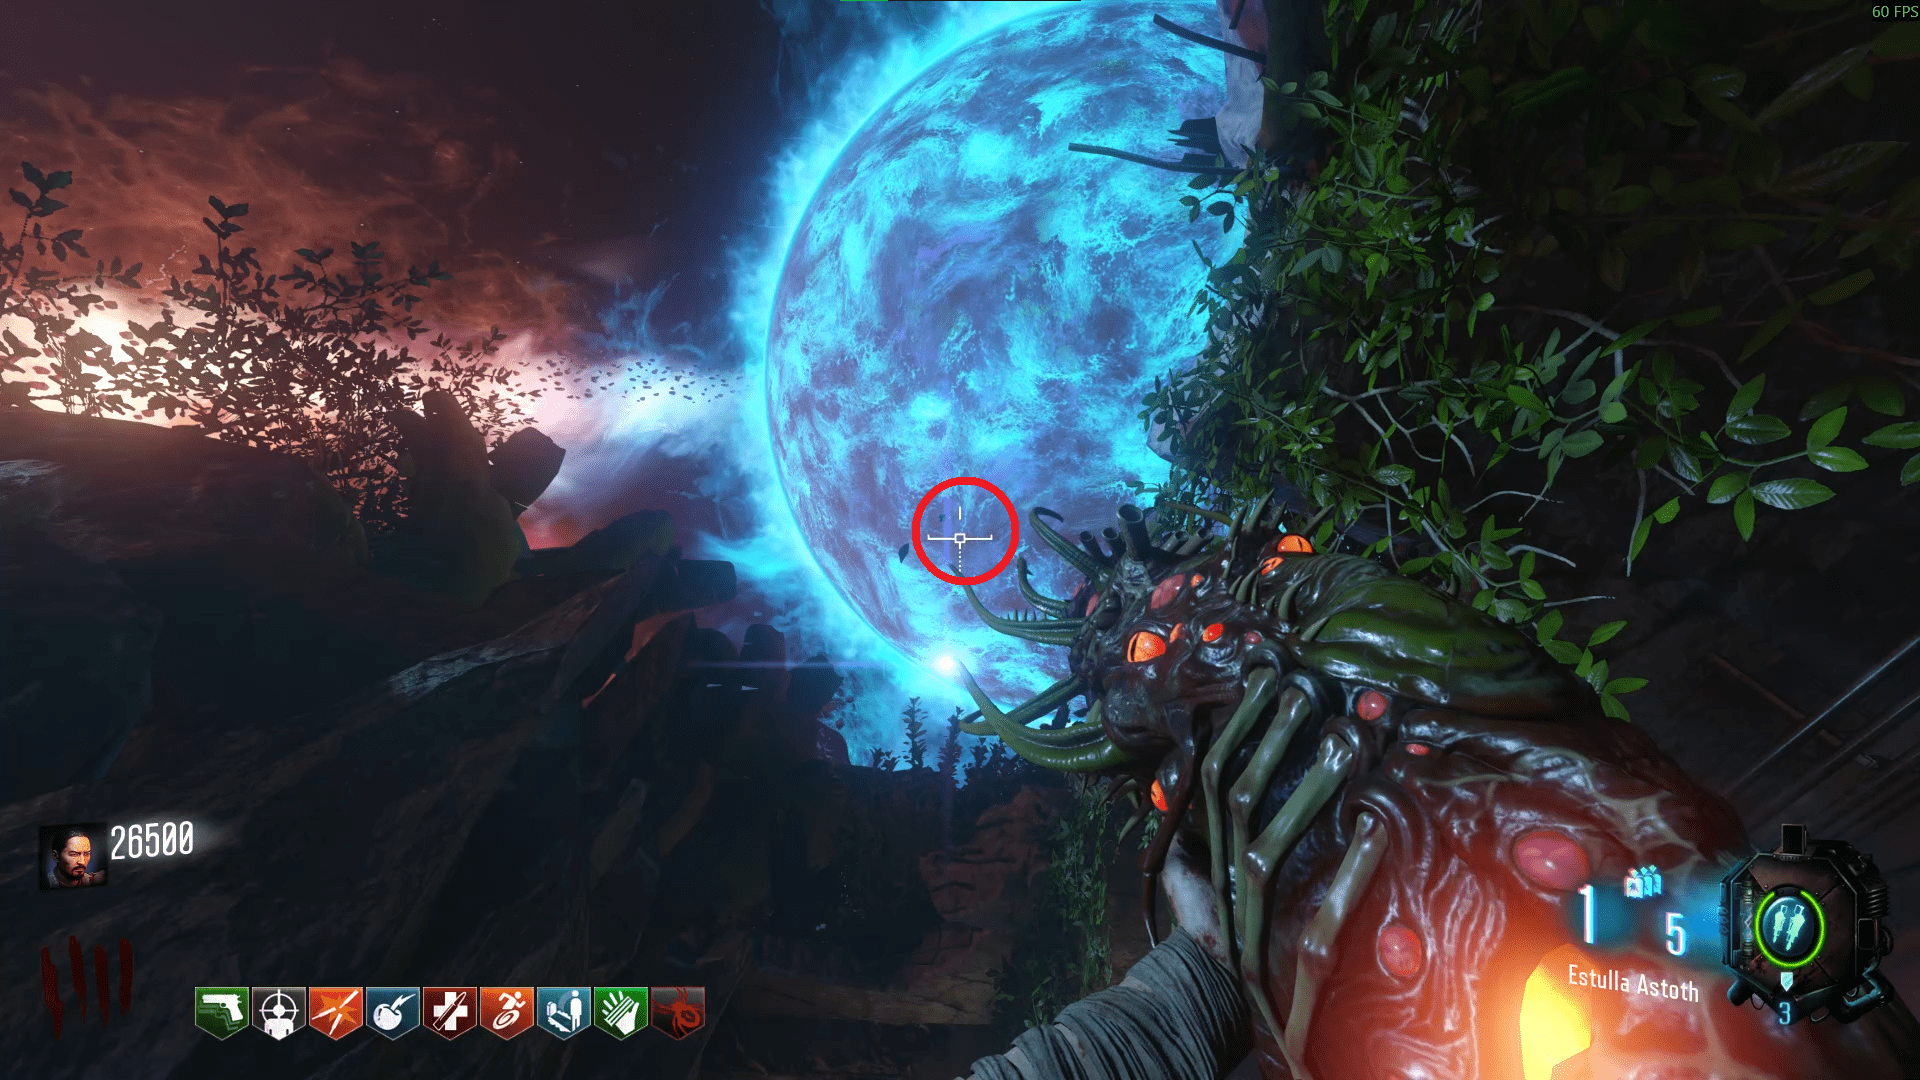
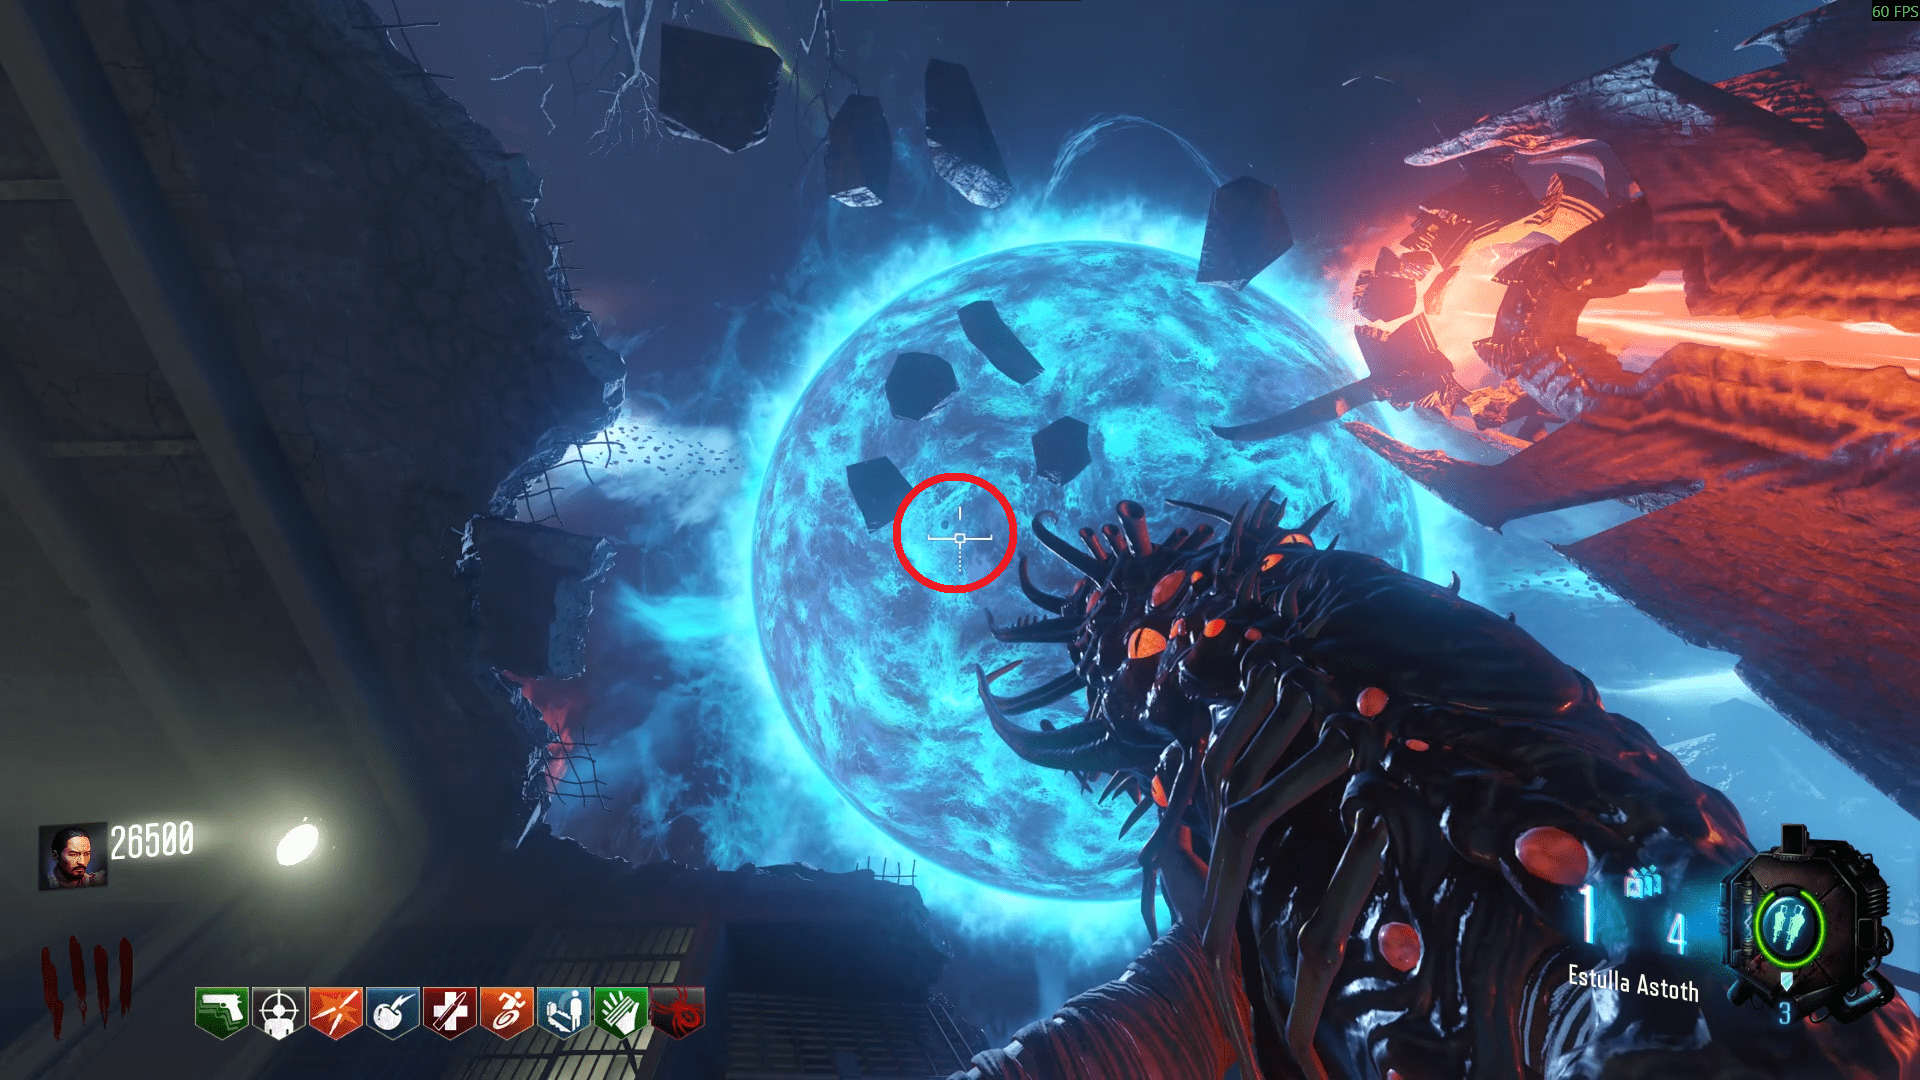
Go to Pack-a-Punch and you'll see the rocks you've collected. If you did it right then all 5 should be present and you have the option to PaP the Apothicon Servant.
There will be six strange rocks around the map that you need to find and shoot twice, first with the bullet weapon and then again with Apothicon Servant, although you can be less accurate with this as you only need to get the black hole in range of the bone. The locations are as follows;- In Spawn, in the Church besides the Corruption Engine. It's fairly difficult to see.
- In Origins, outside of the footprint on the right, behind a fire, in front of two larger triangular rocks.
- In Shangri-La, directly above Stamin-Up, on the destroyed wall above the torch.
- In Der Eisendrache, on the second to last wall outside the main area. You will have to use the MPD's anti-gravity to be able to wall run to shoot it out of place, then you can use the Apothicon Servant from the Corruption Engine to take the bone.
- In Verruckt, outside of the Corruption Engine on the left. It is indented onto a larger, lonely, triangular rock. Just on the left of the waterfall.
- In Nacht, above the Der Eisendrache teleport door to the right. It's best visible from the stairs when facing the door itself.
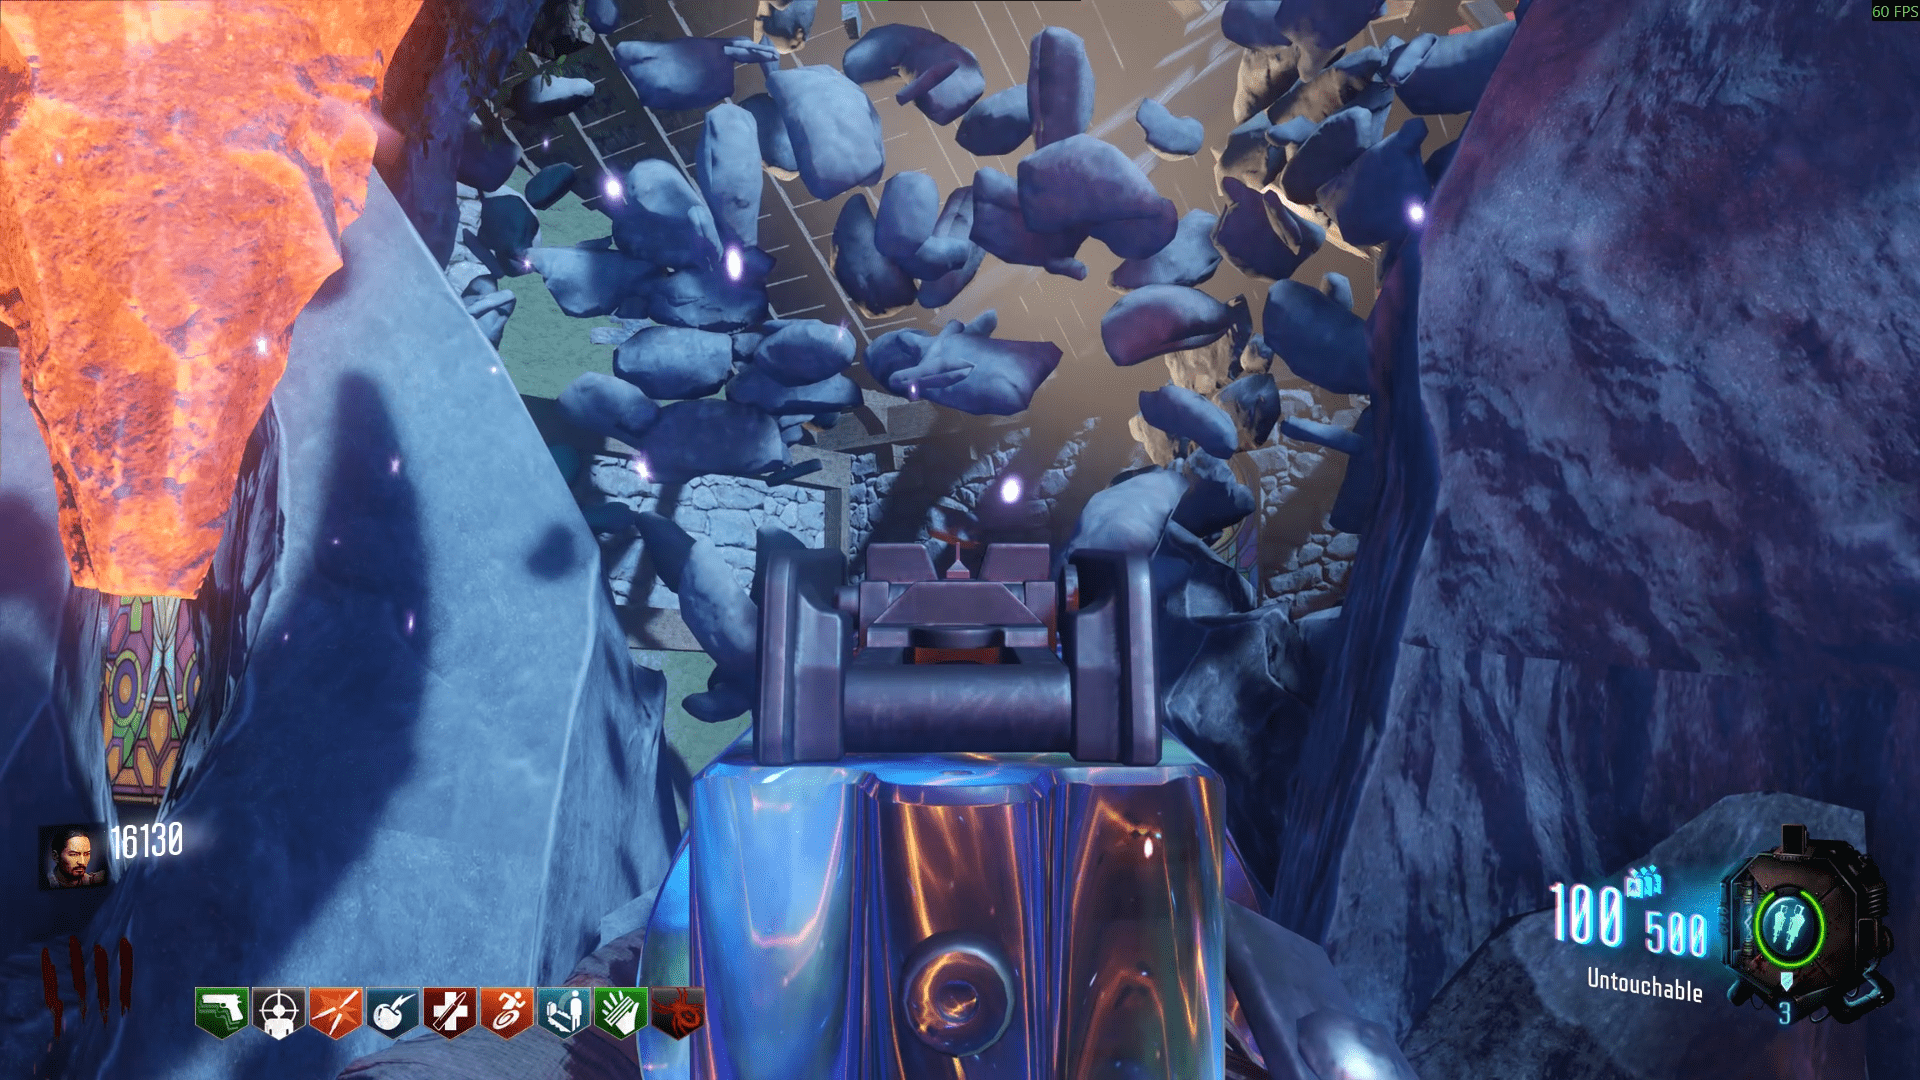
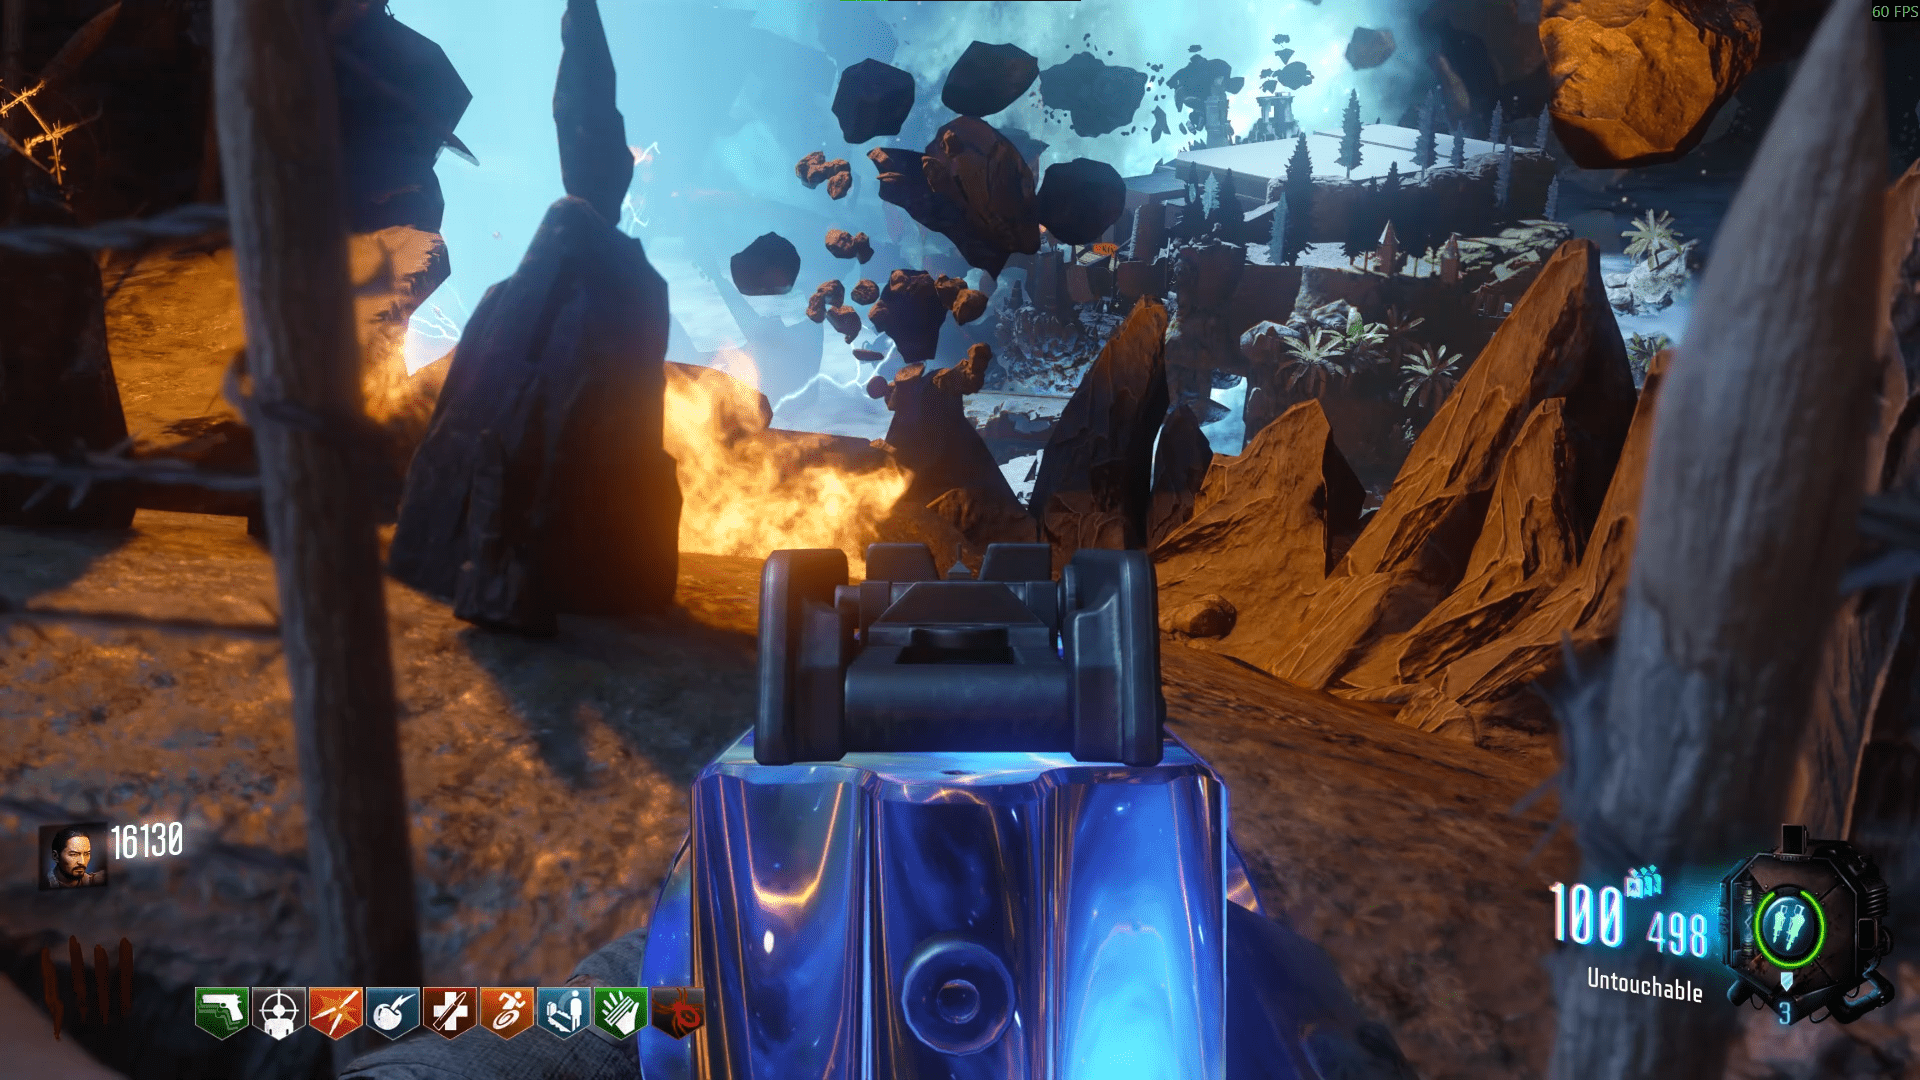
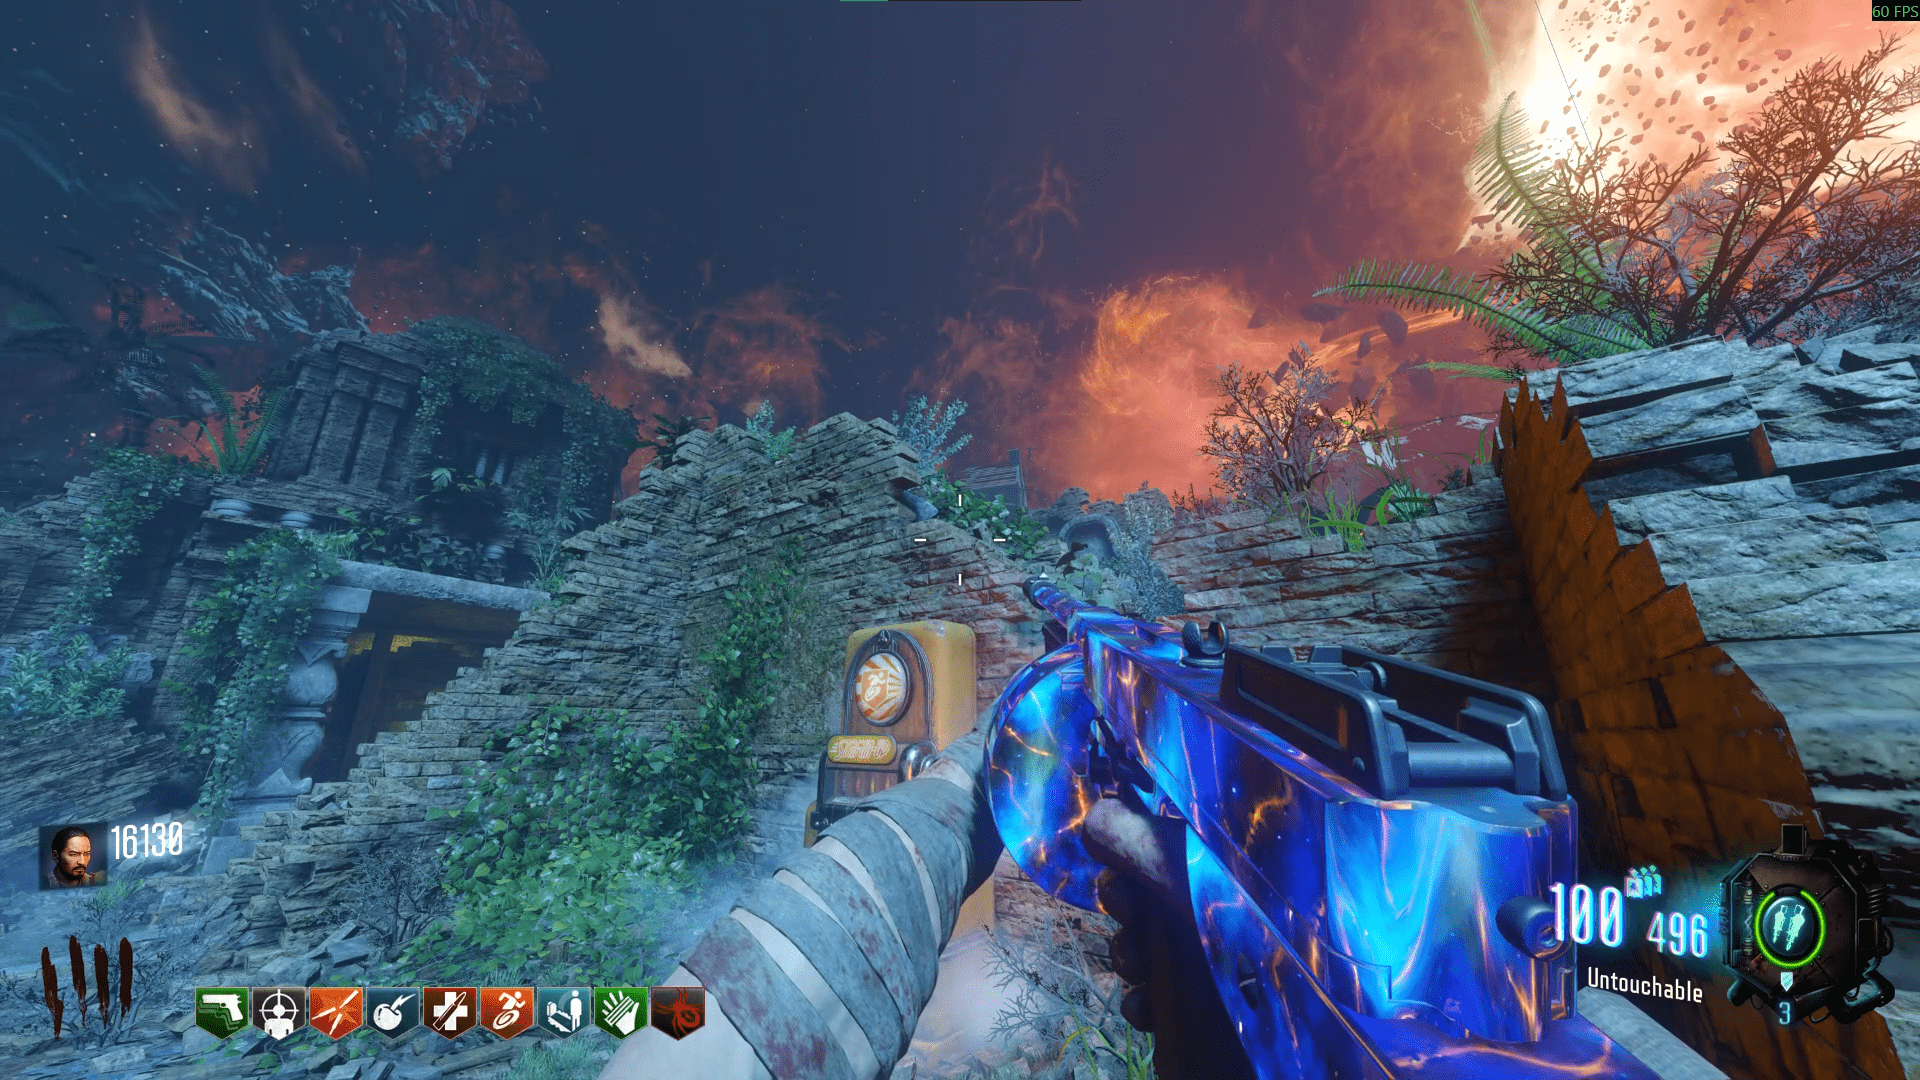
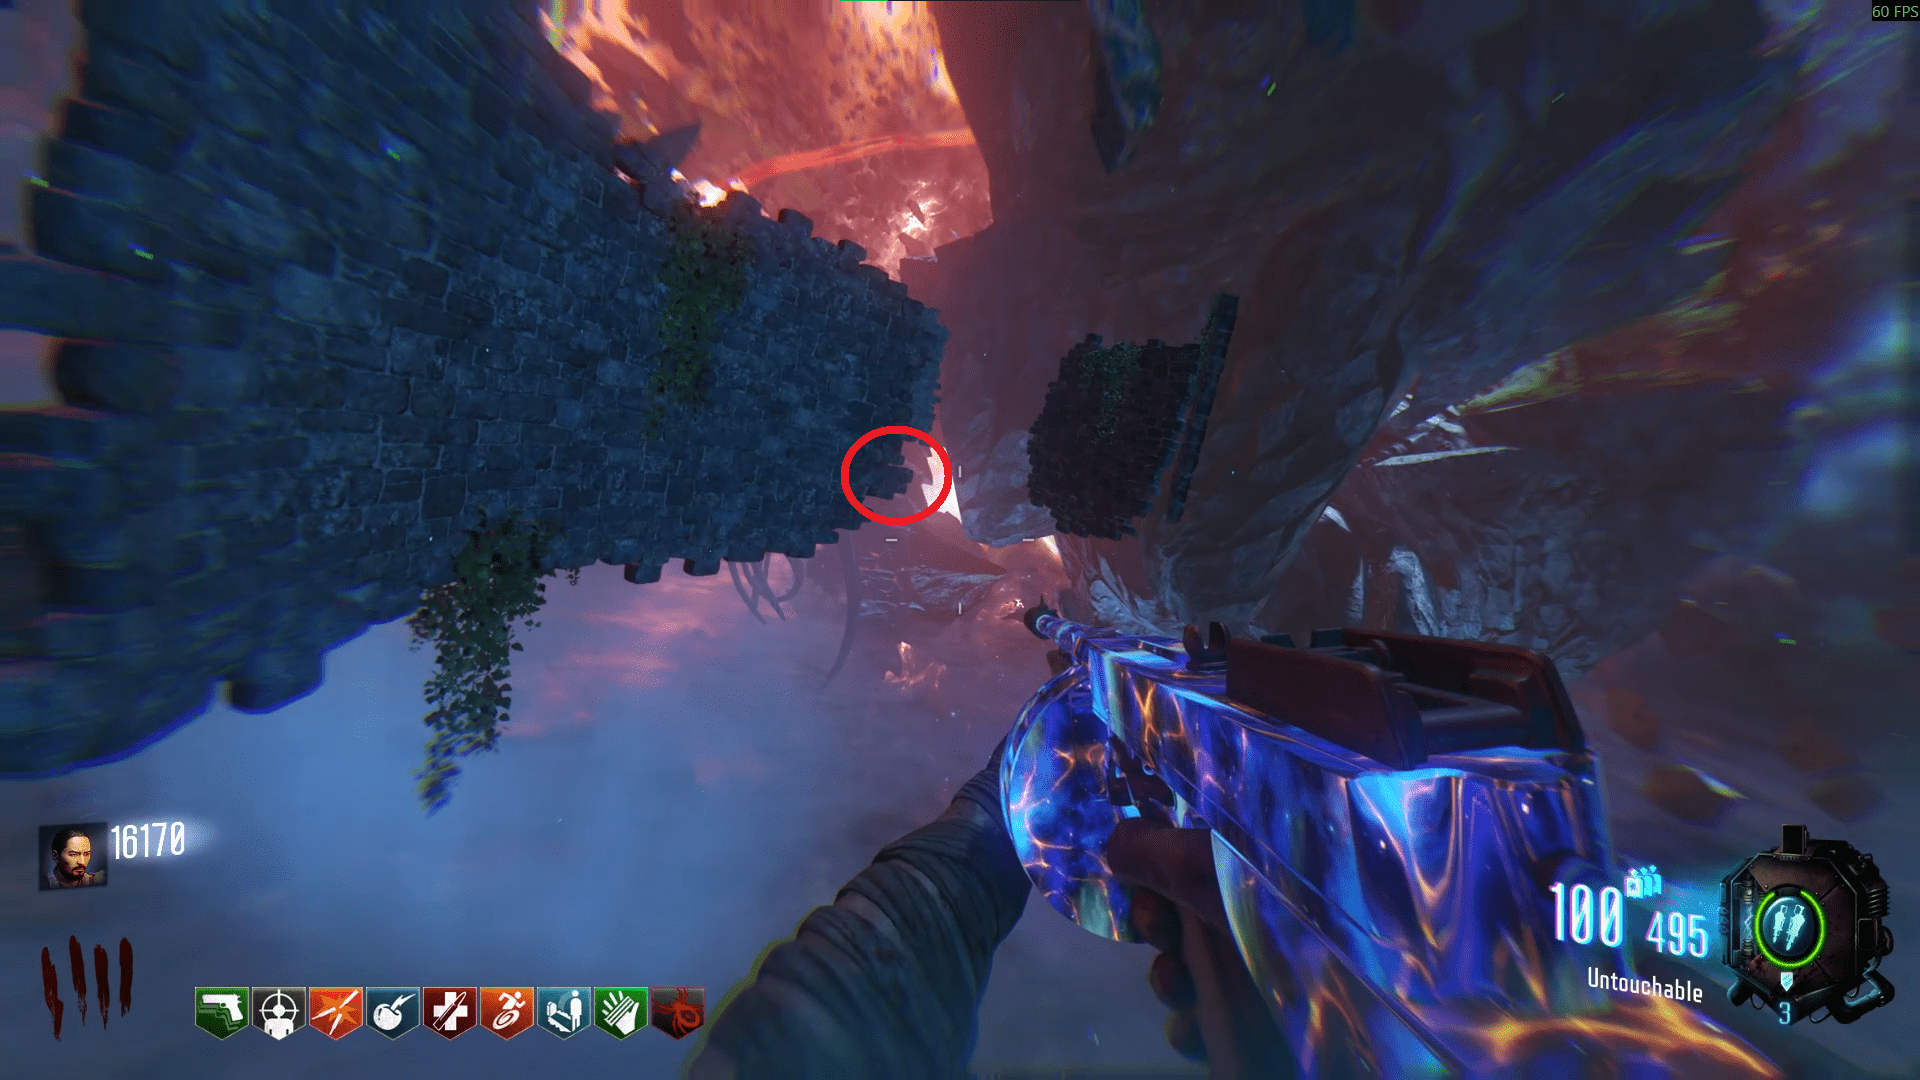
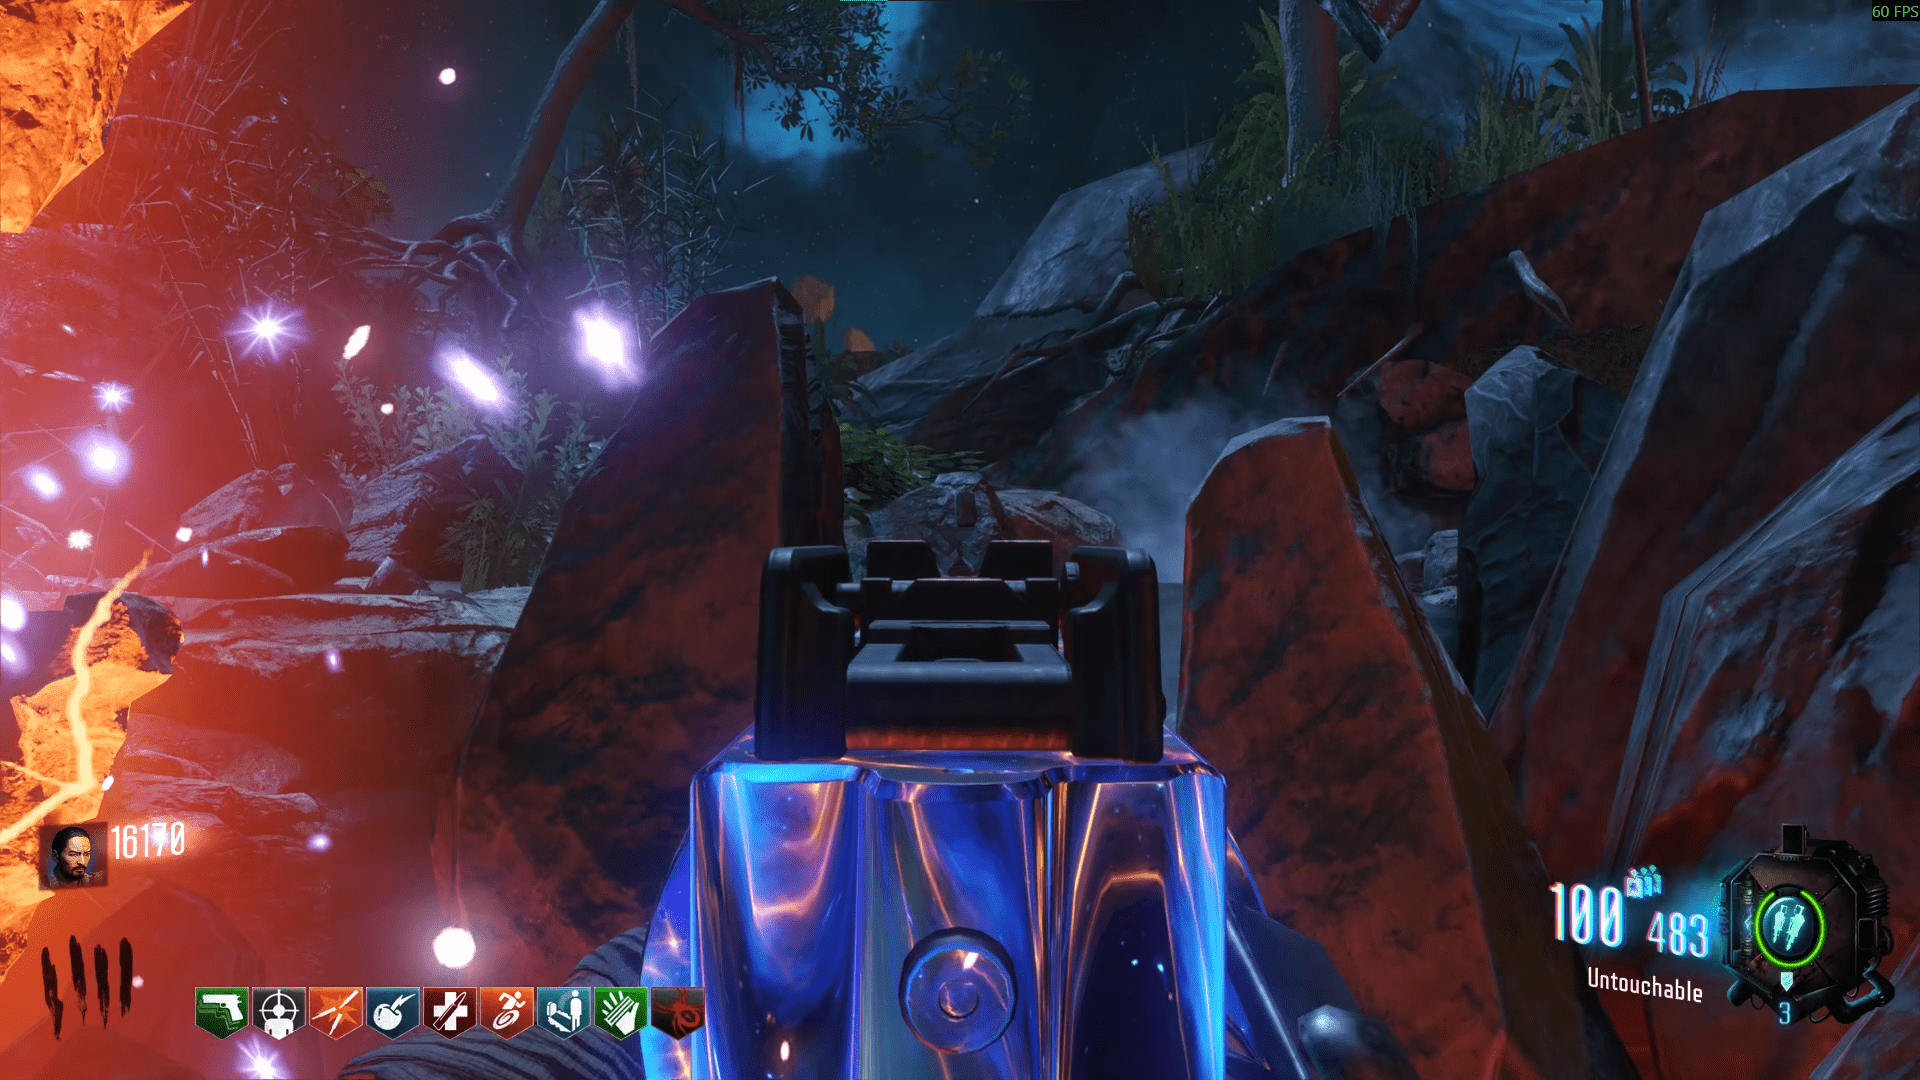
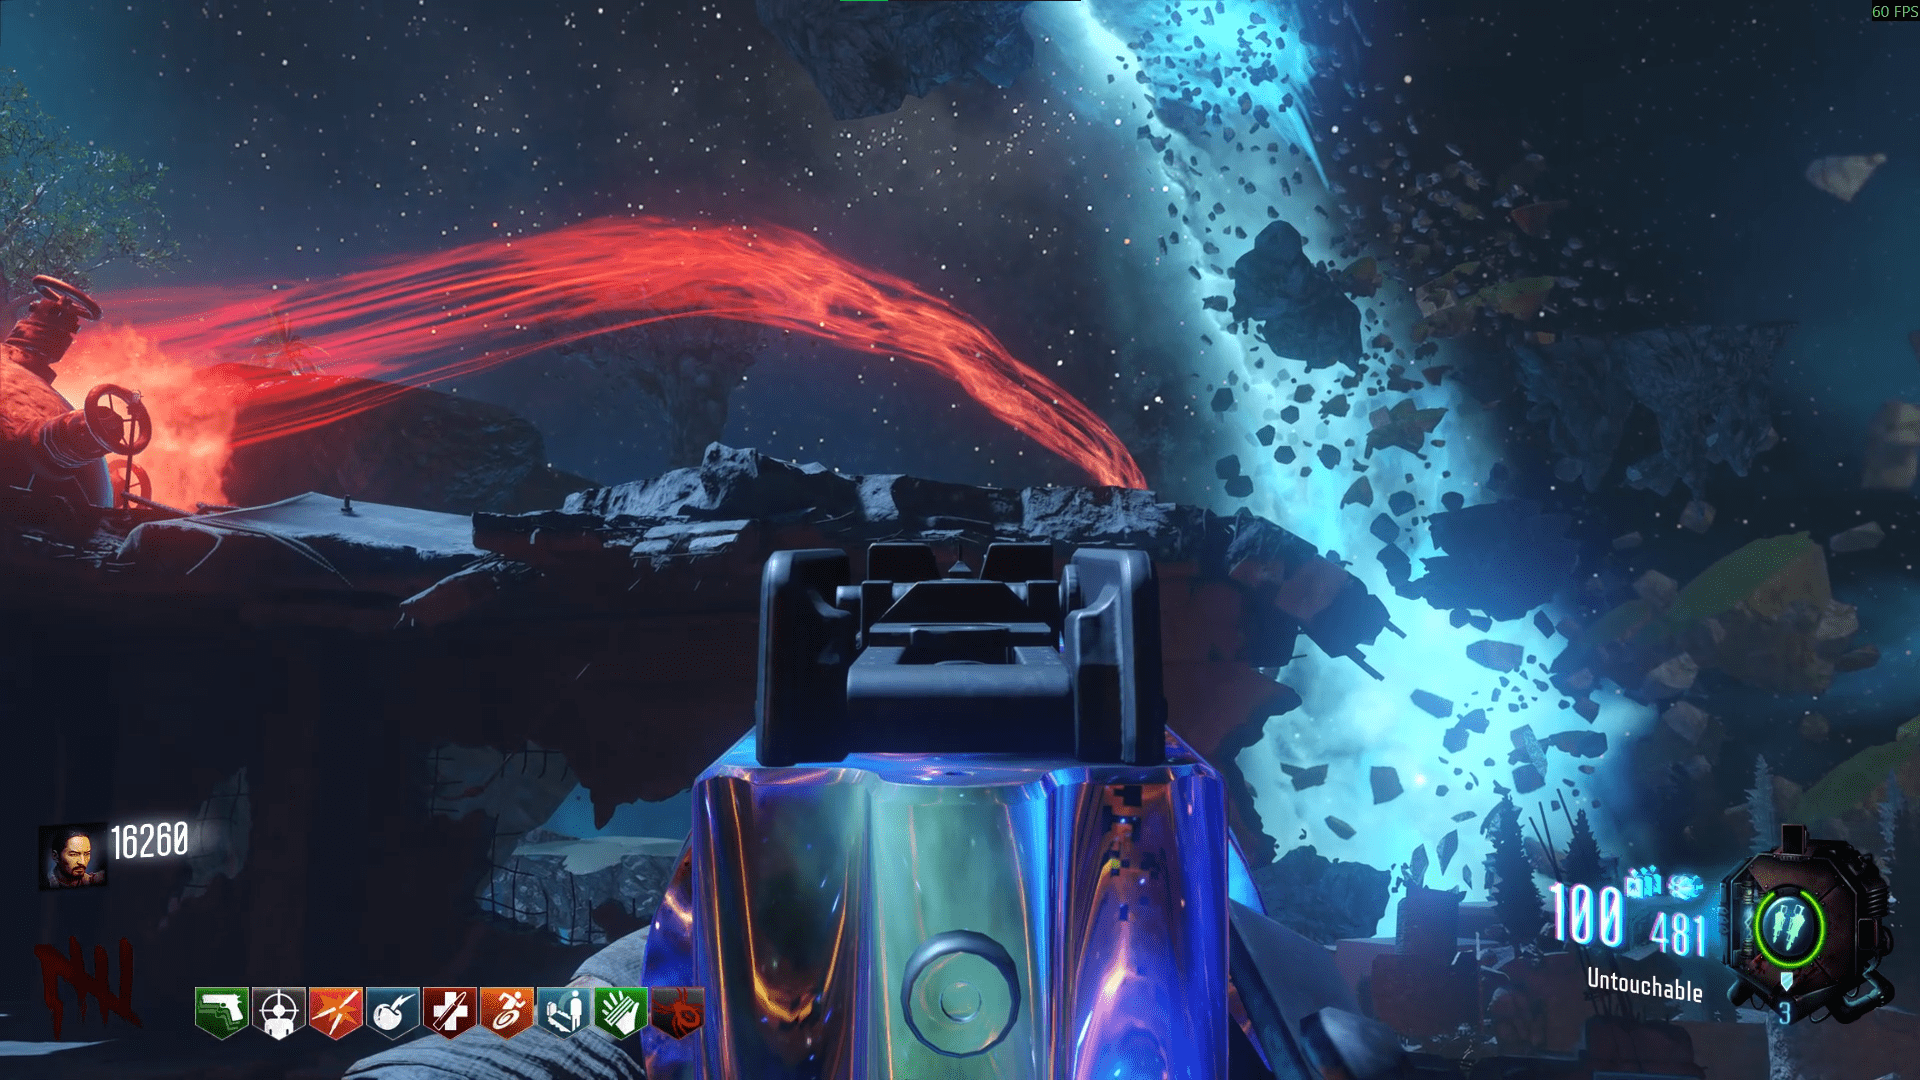
Obtaining all the bones will allow you to assemble Sophia's skeleton in Nacht. On the top floor, where you found the tape player earlier, there will be a pile of bones slowly growing.
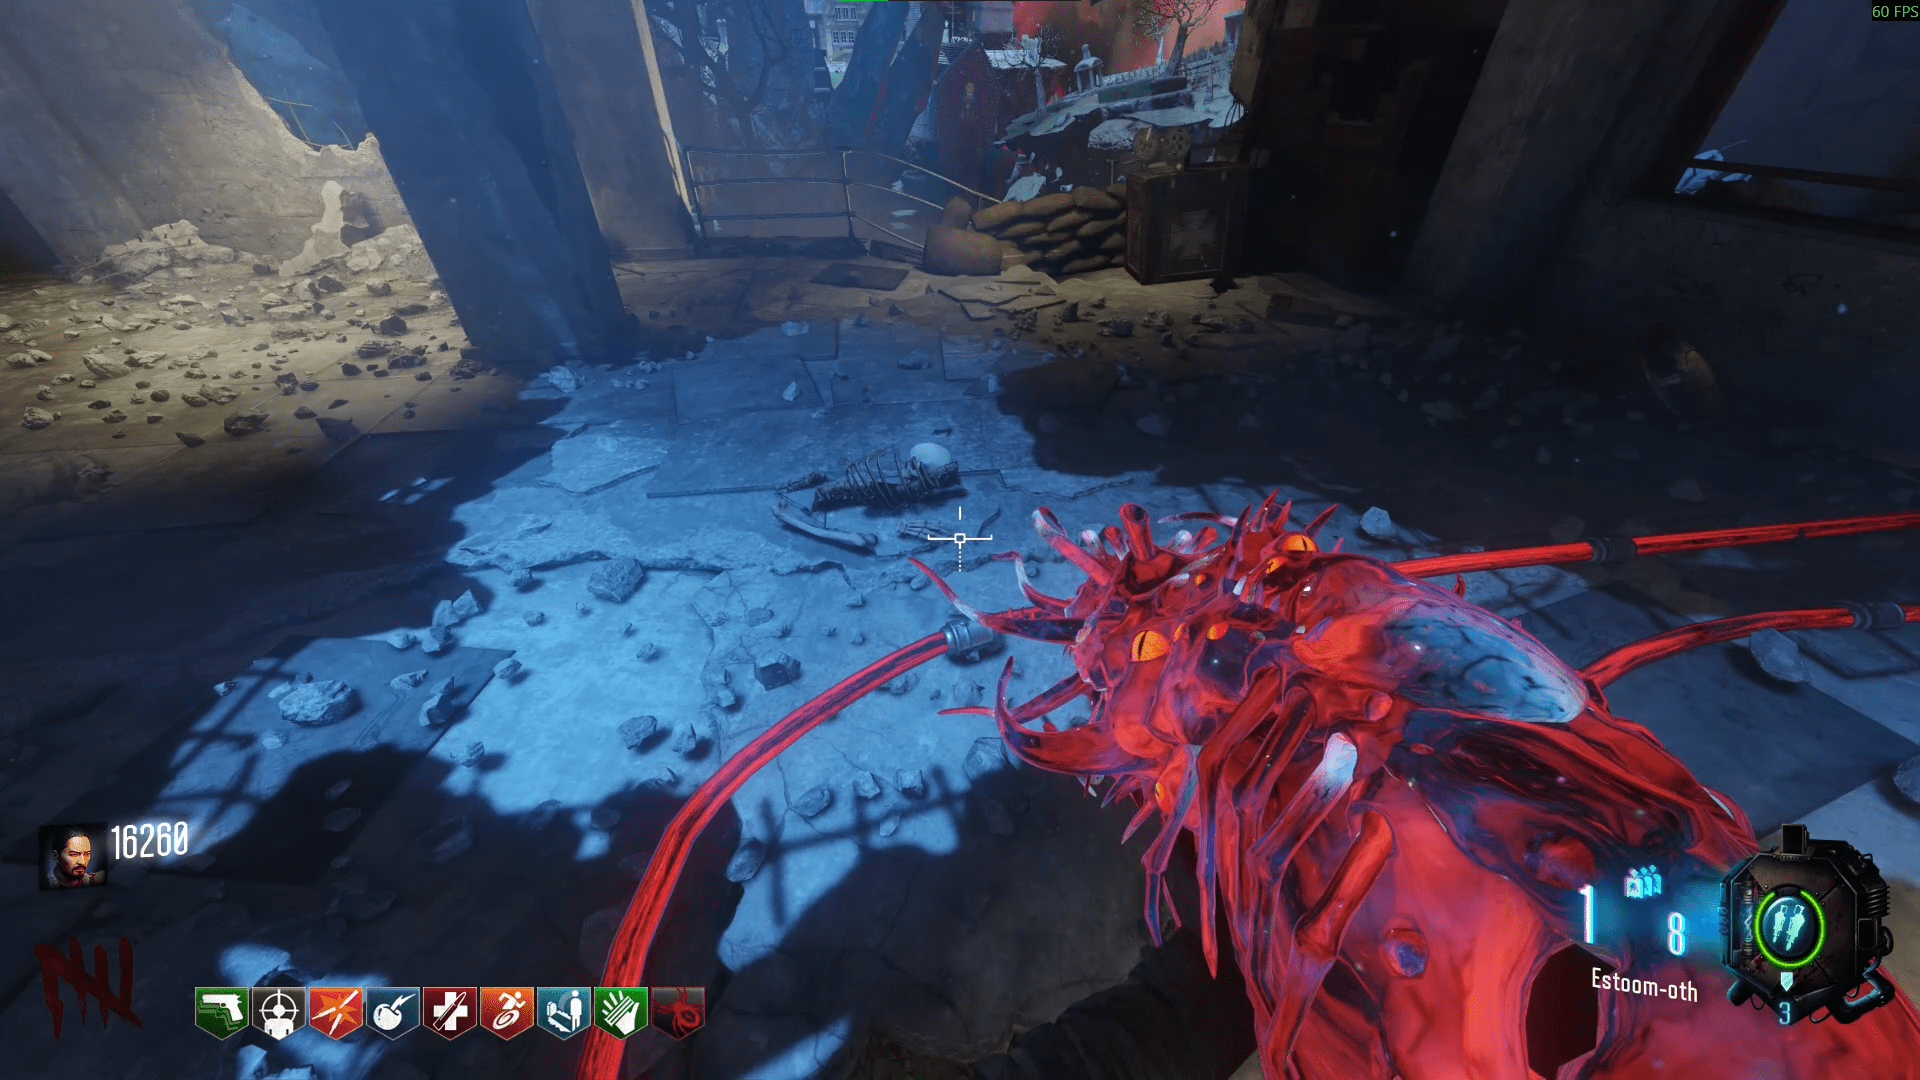
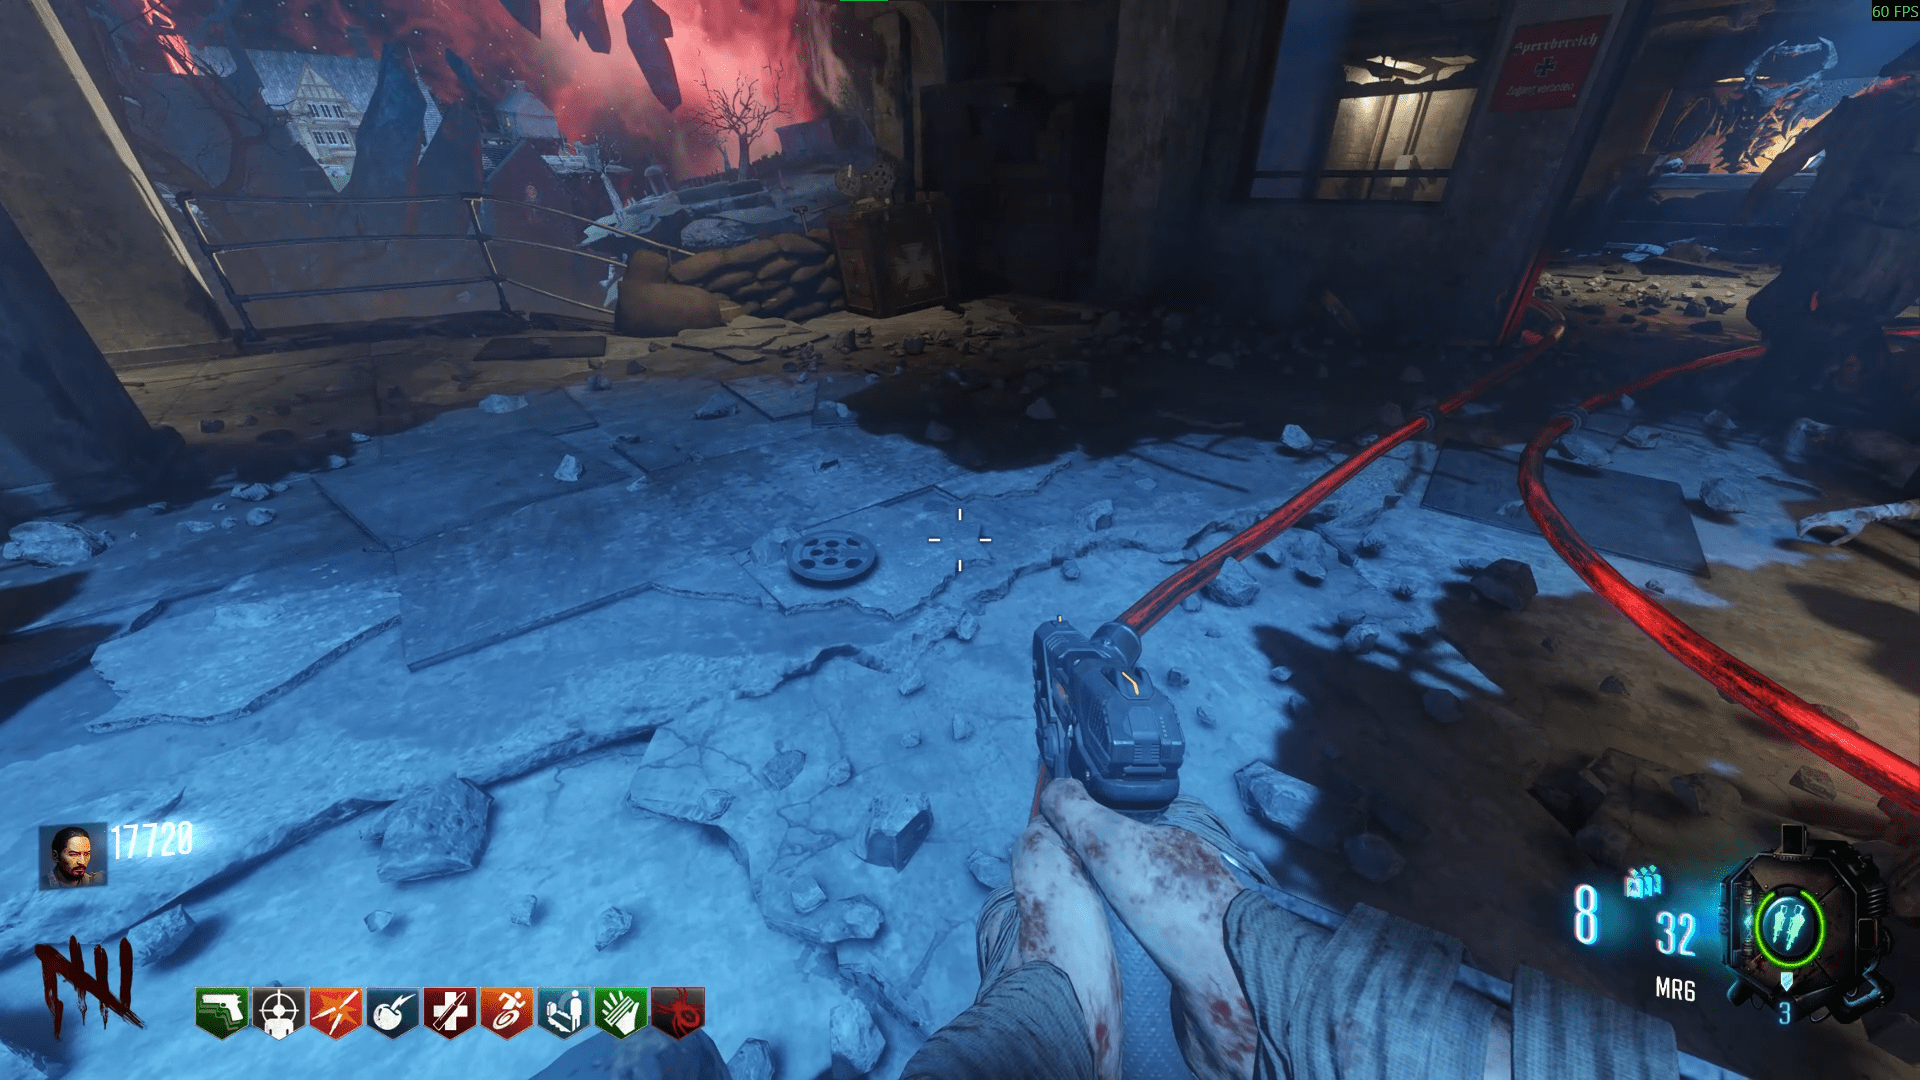
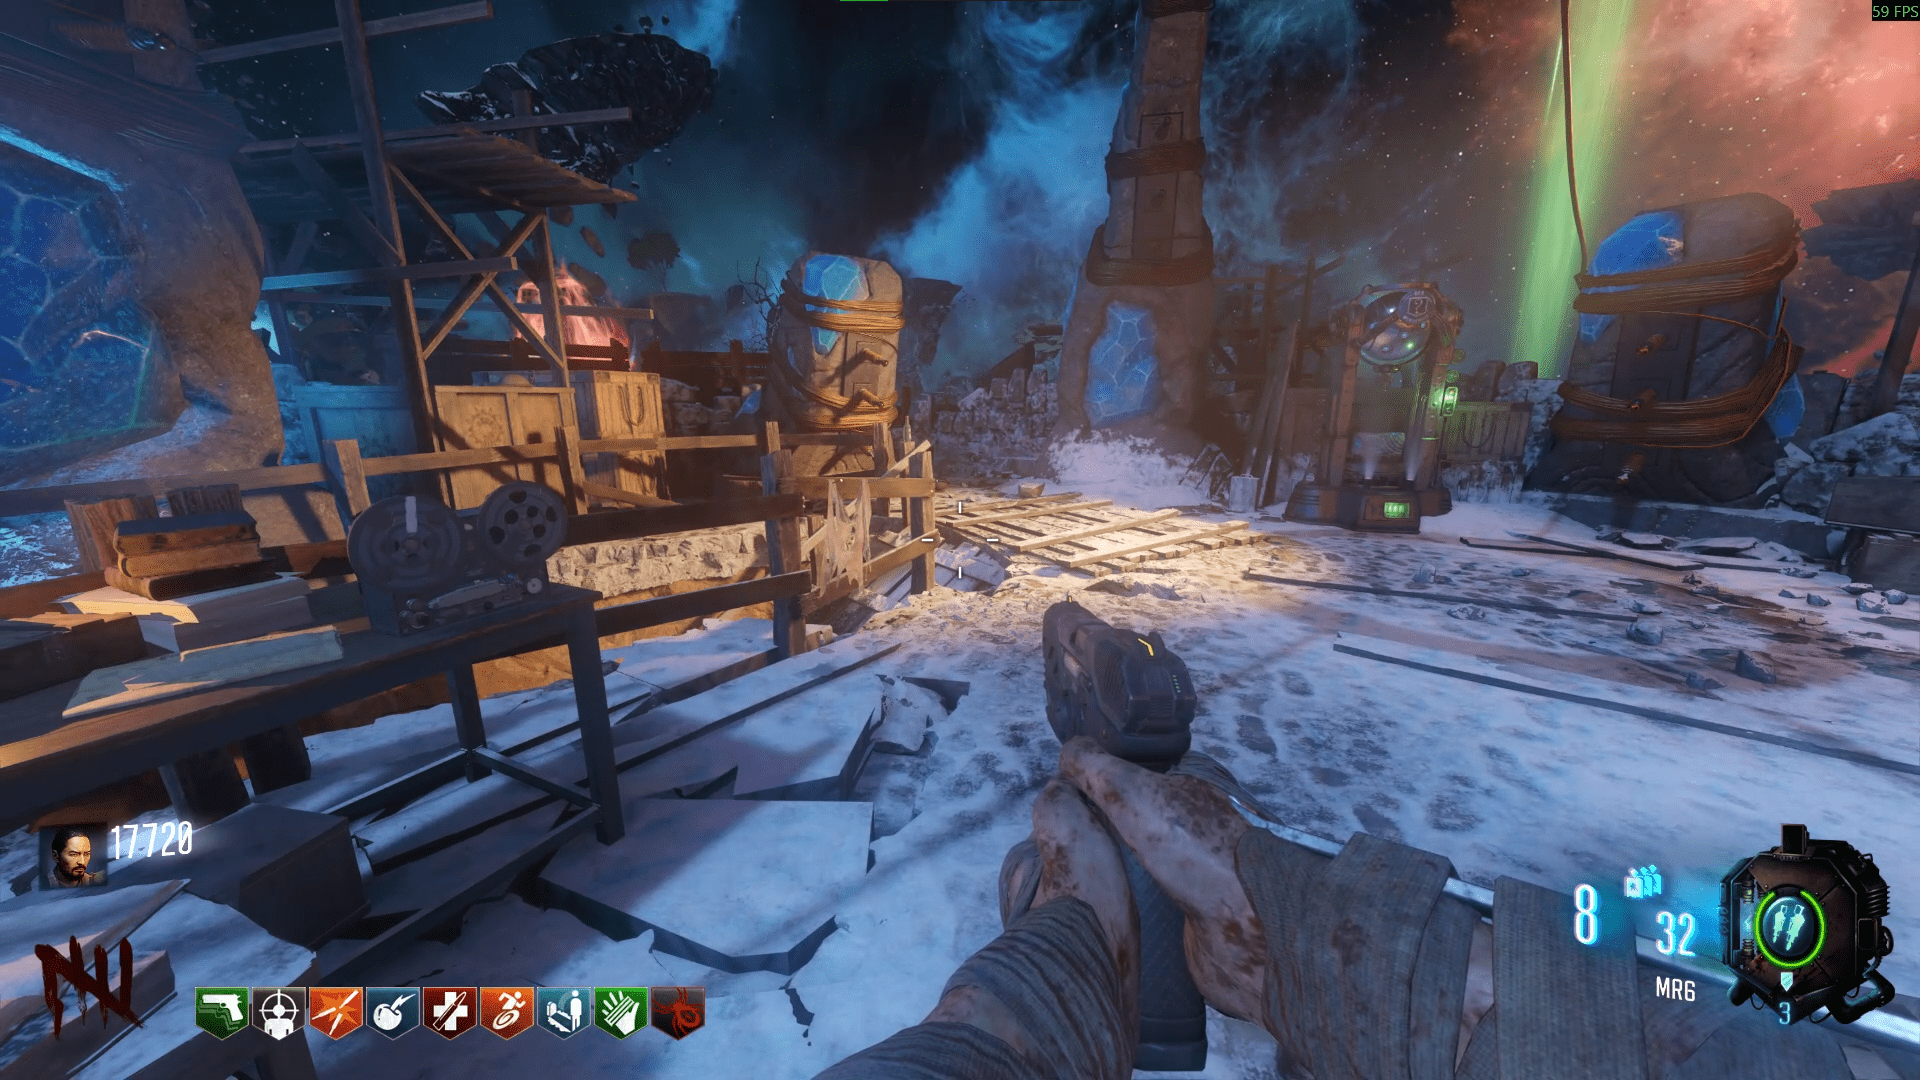
If you've collected all six, shoot the bones with the Apothicon Servant, then again to drop the final audio reel. You put this one in the tape player at the top of the Mound in Origins.
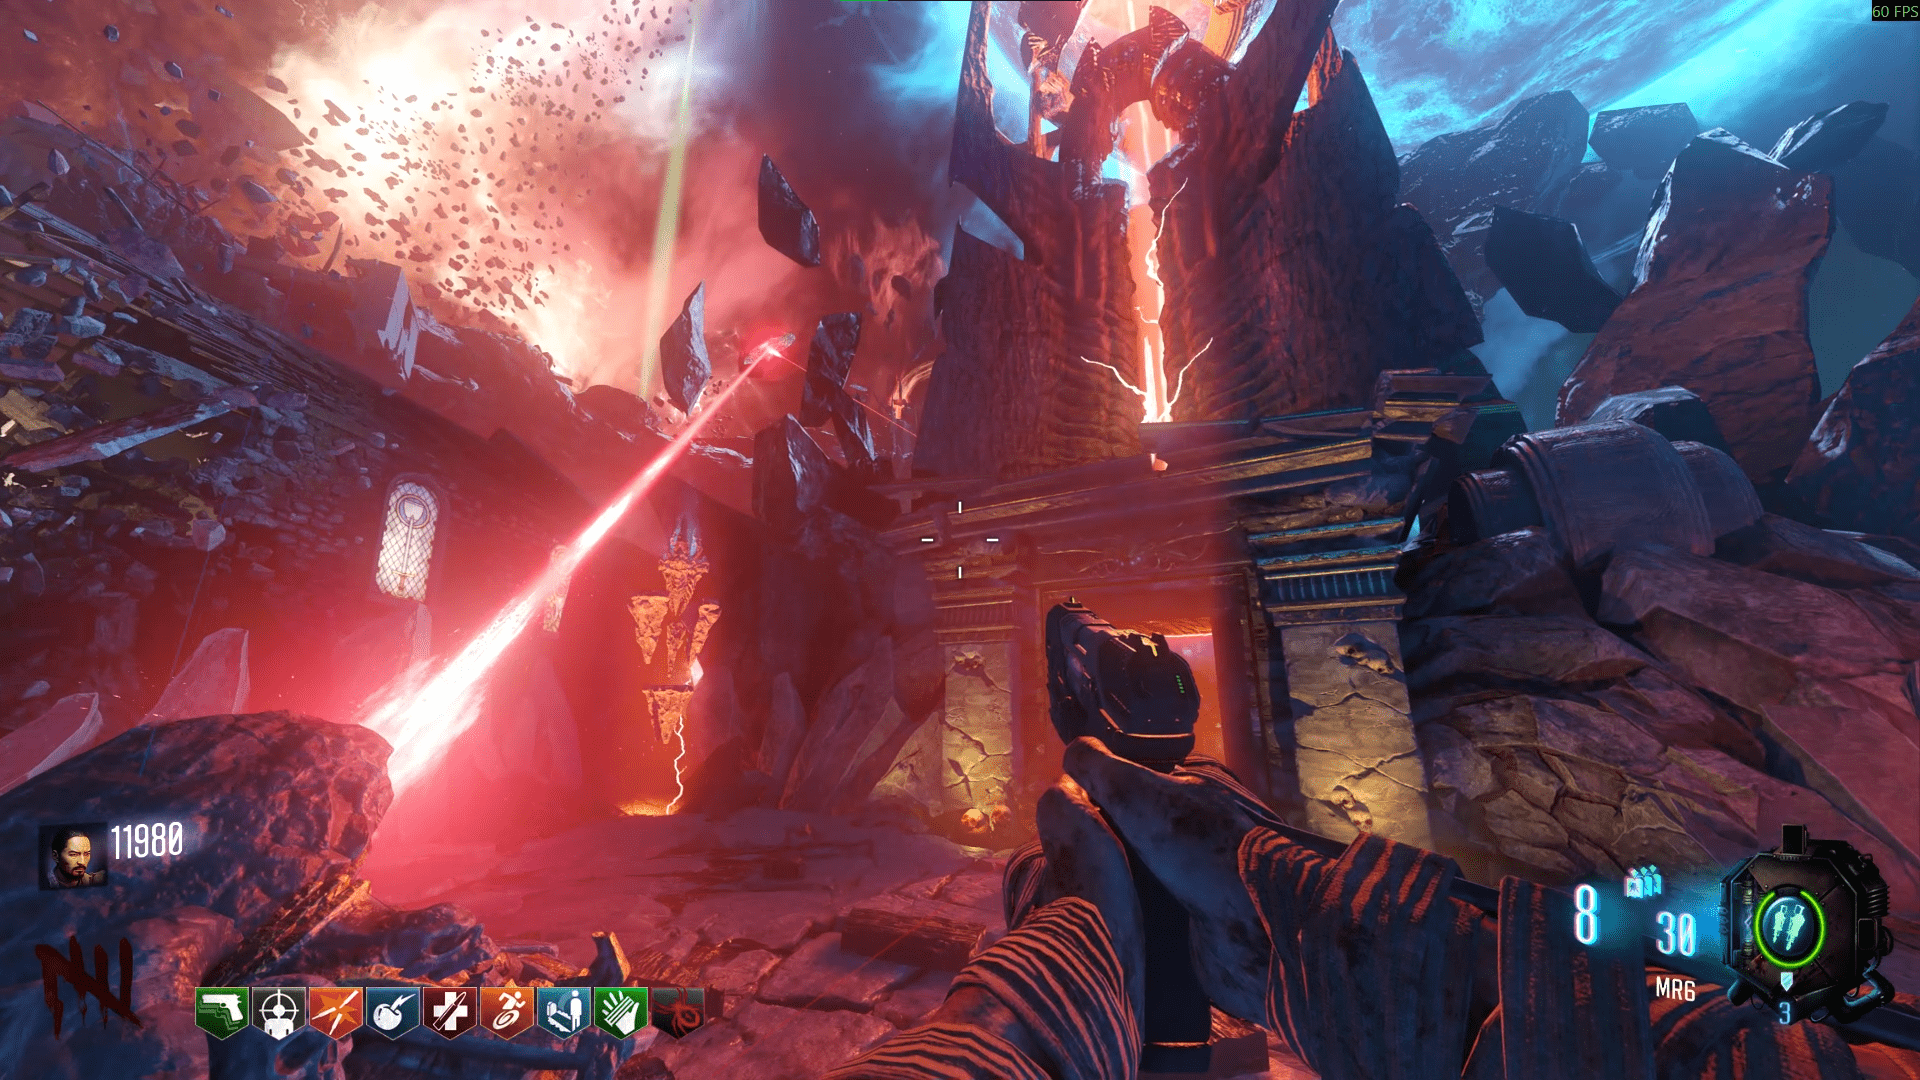
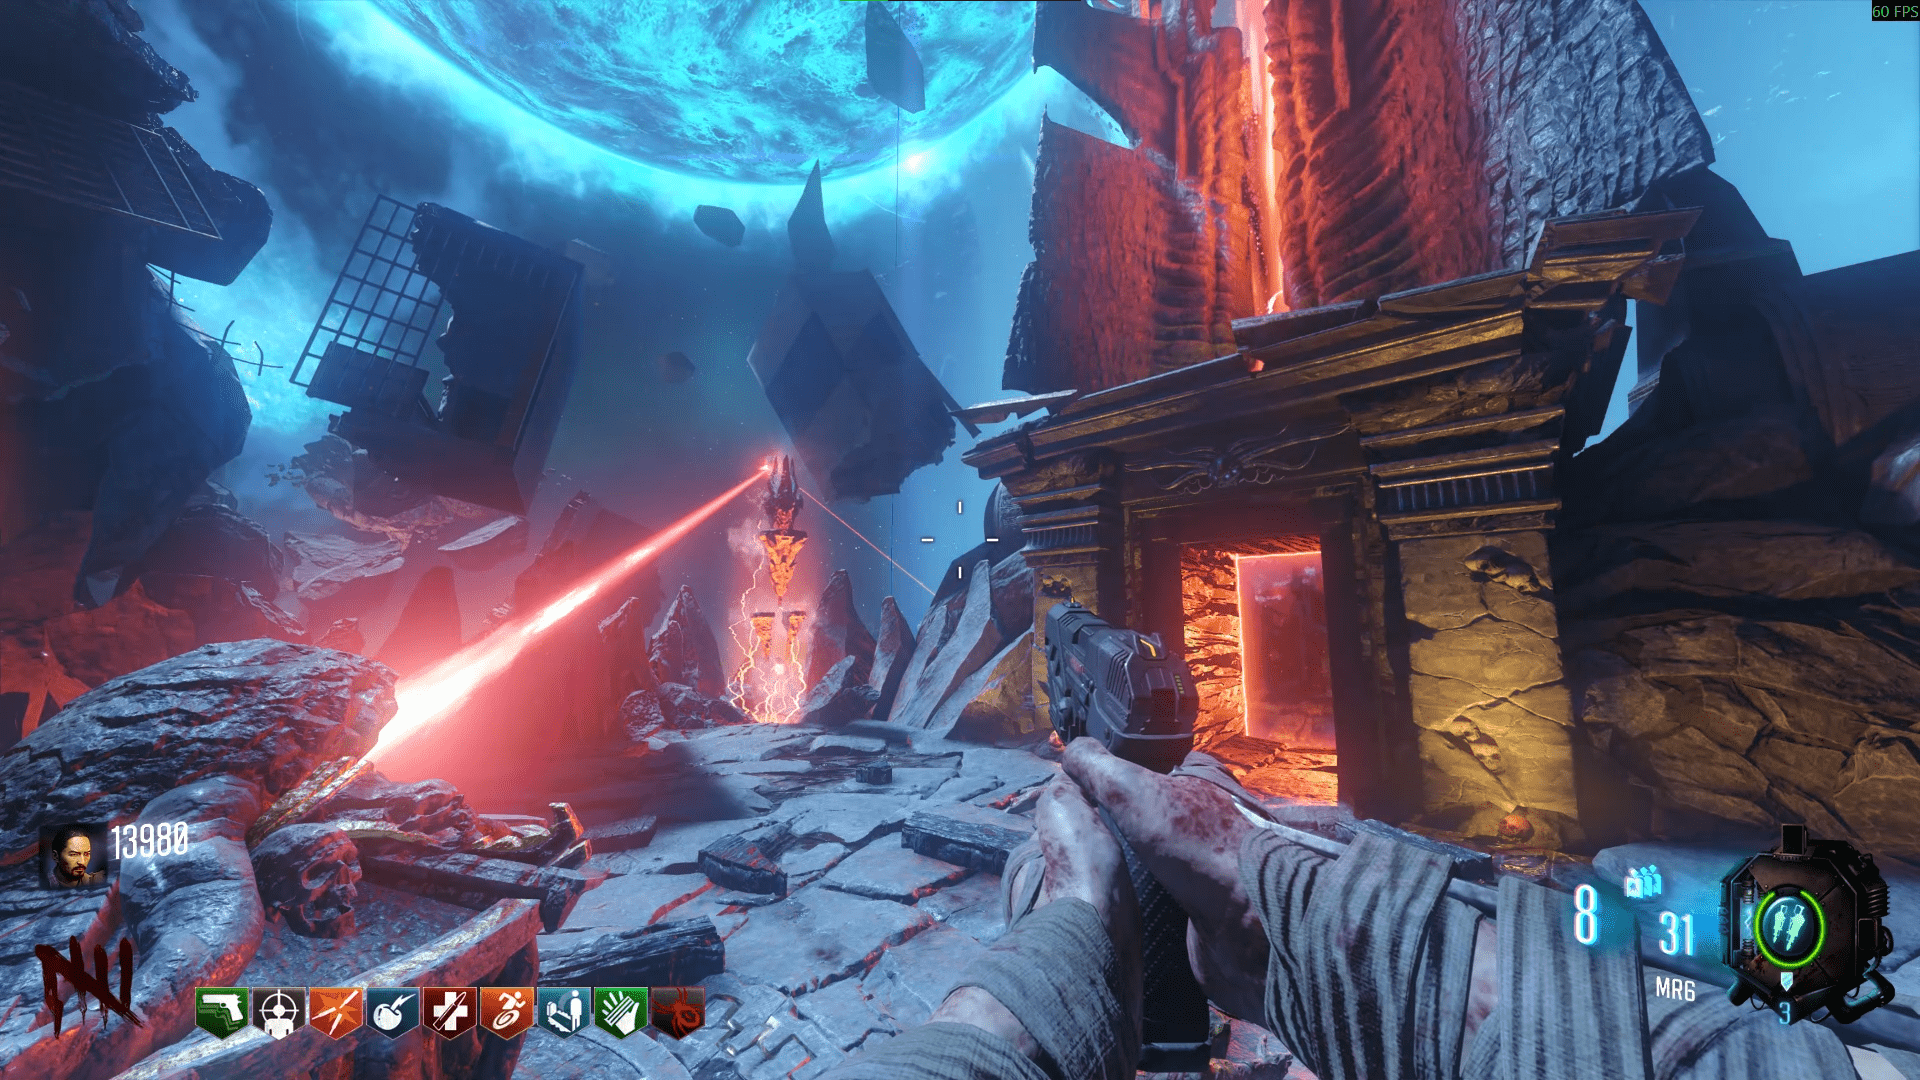
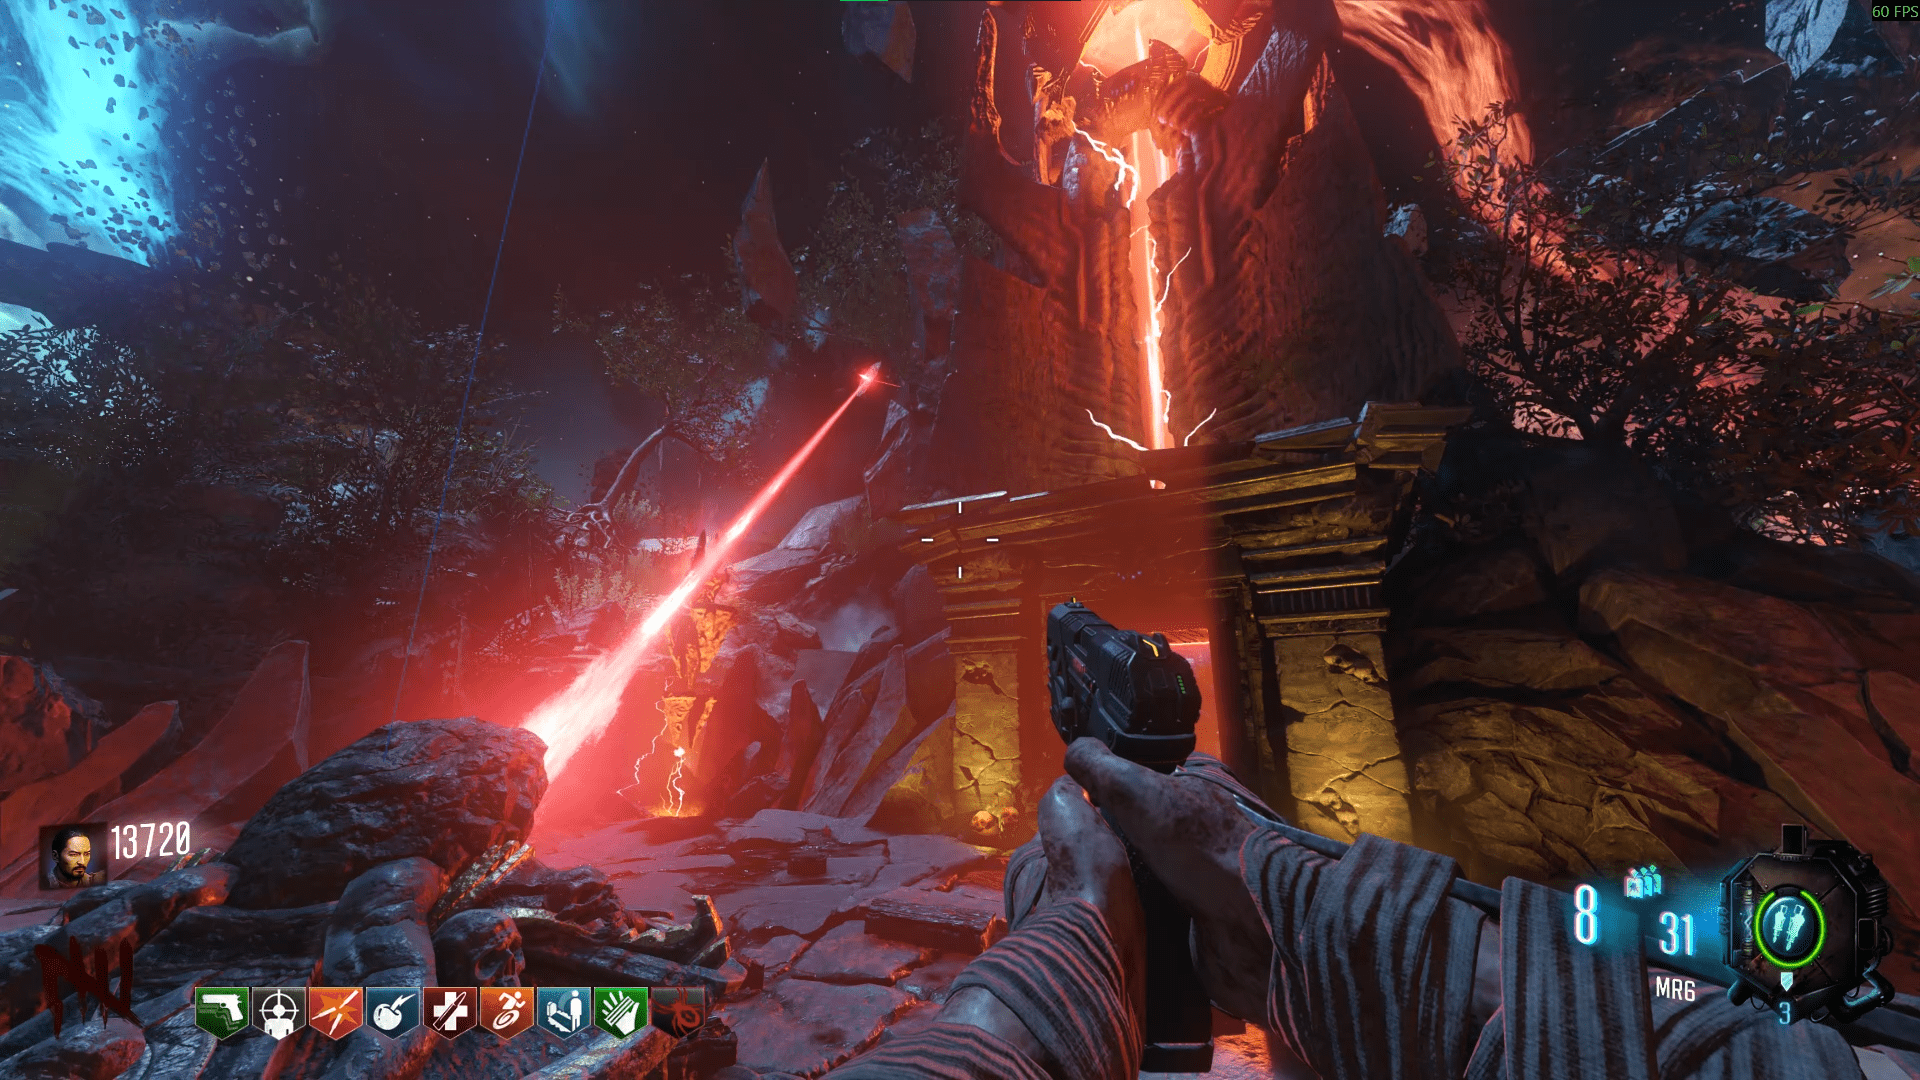
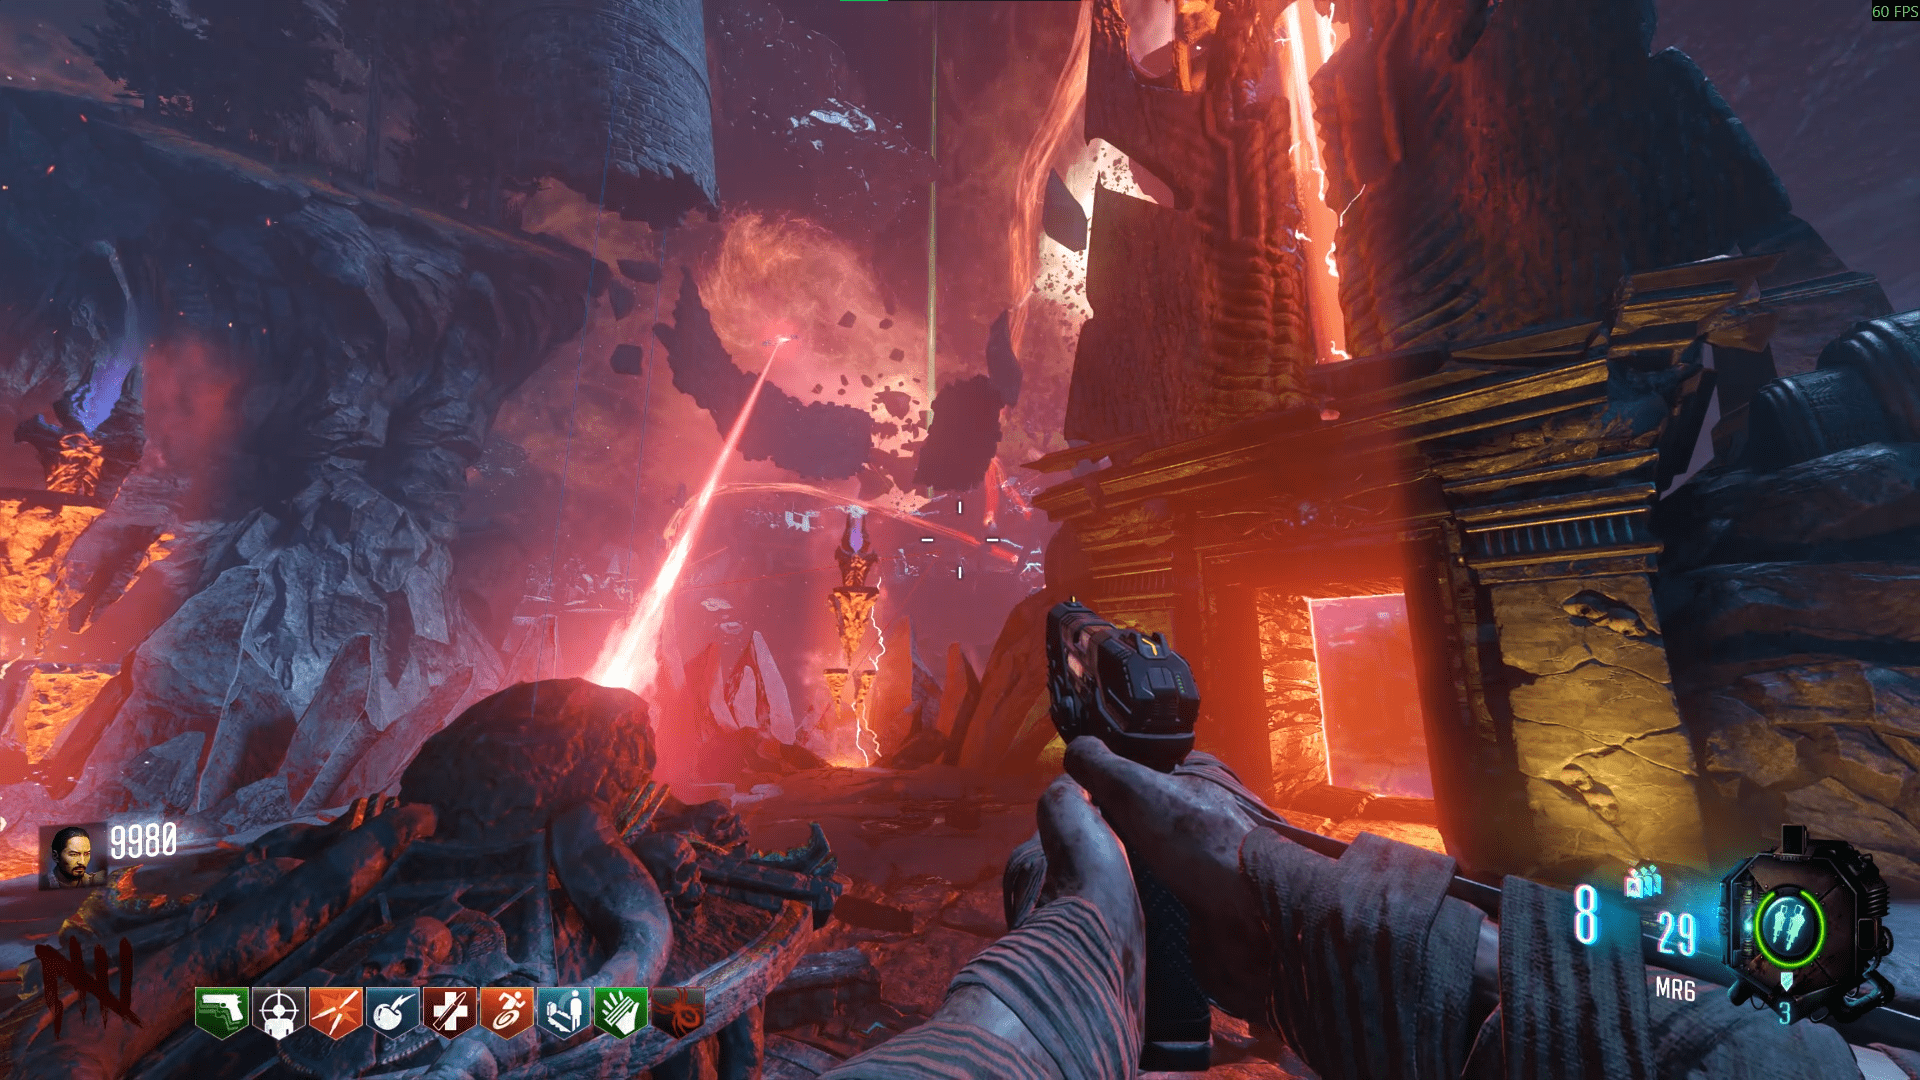
Upon arriving back at Nacht, Sophia's robotic eye will turn real and you'll have to follow it back to Kino.
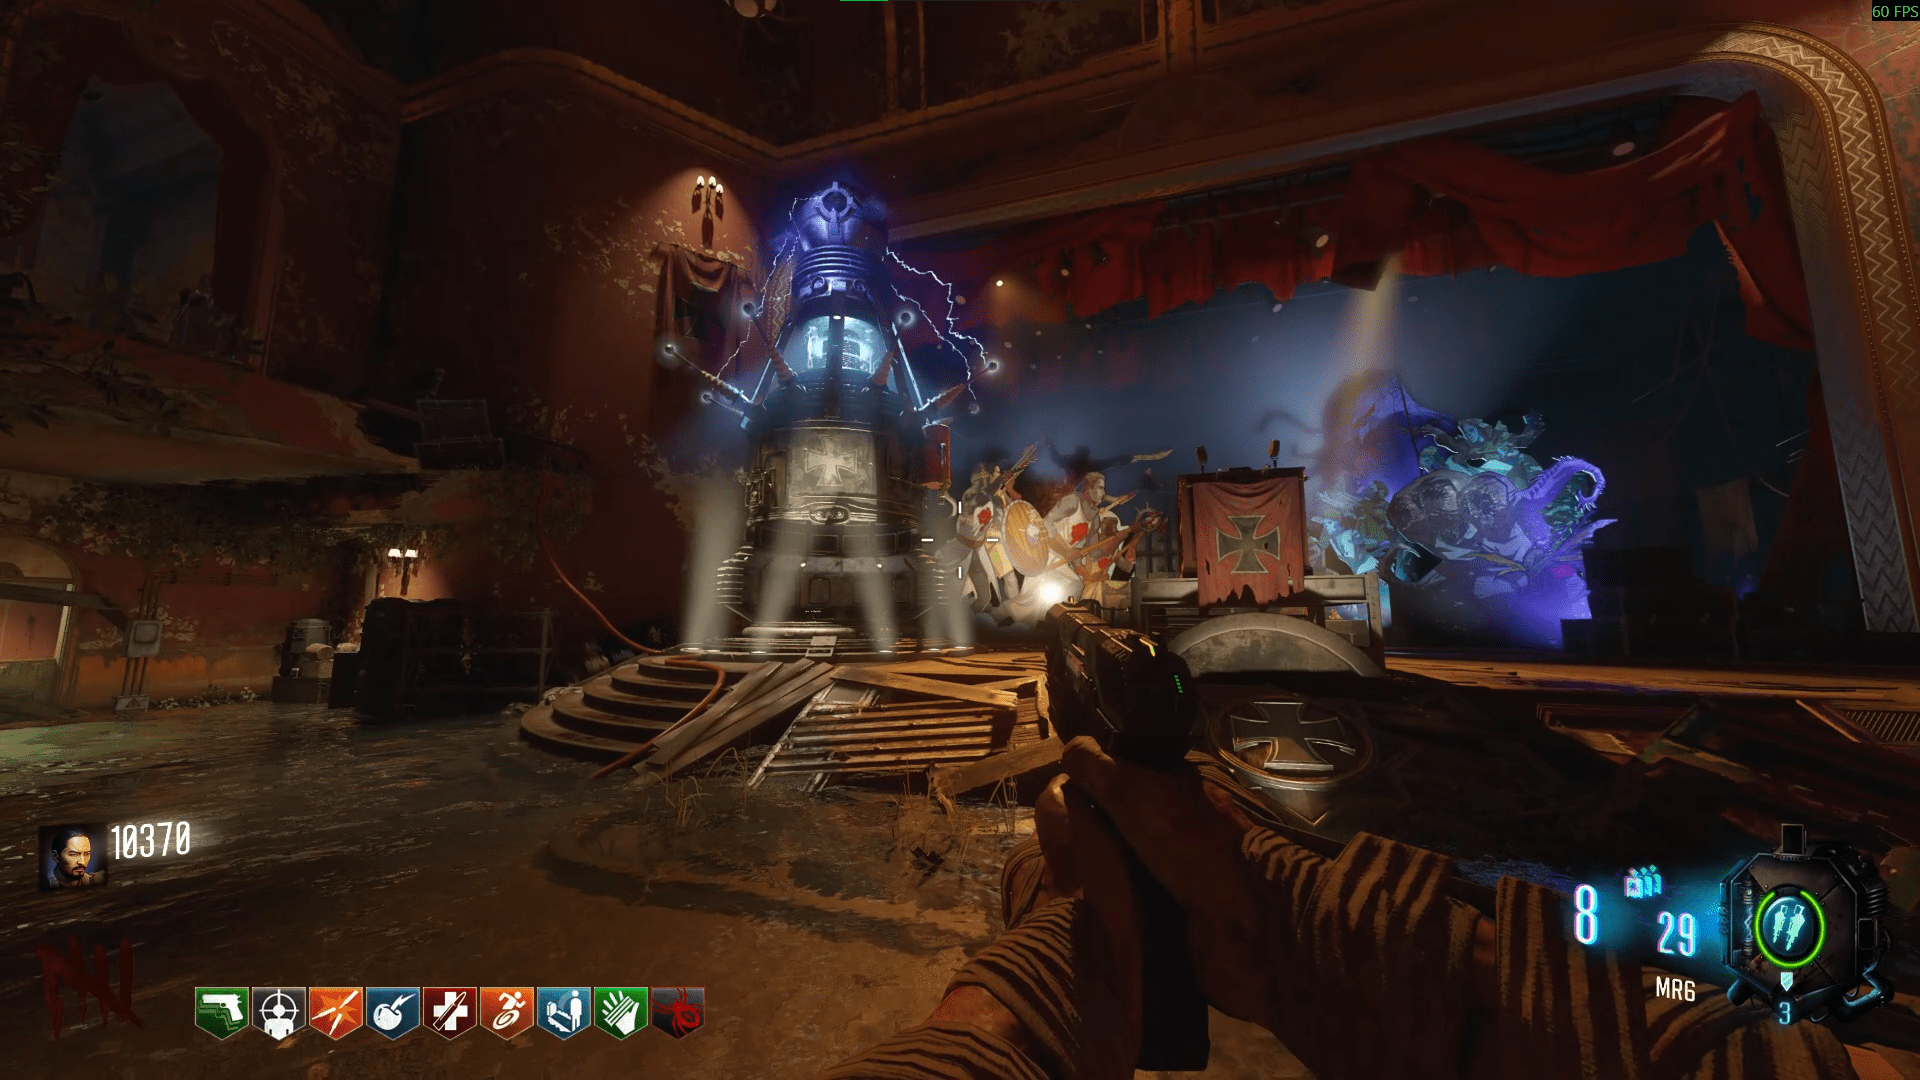
If you have someone in your game that has completed the Super EE before, it's worth mentioning that you can bring a light from Spawn into the teleporter with you, this allows you to unlock Takeo's Katana as a wall weapon (one hit til round 42) and every weapon you buy will be PaP'd by default. You know you have it when the battery looking thing next to your ammo count starts to spark heavily.
Be careful when you have this light, as taking any damage from any source will make you lose it. After you have the light, follow the next steps as well as placing this light into the fake mystery box in the room.
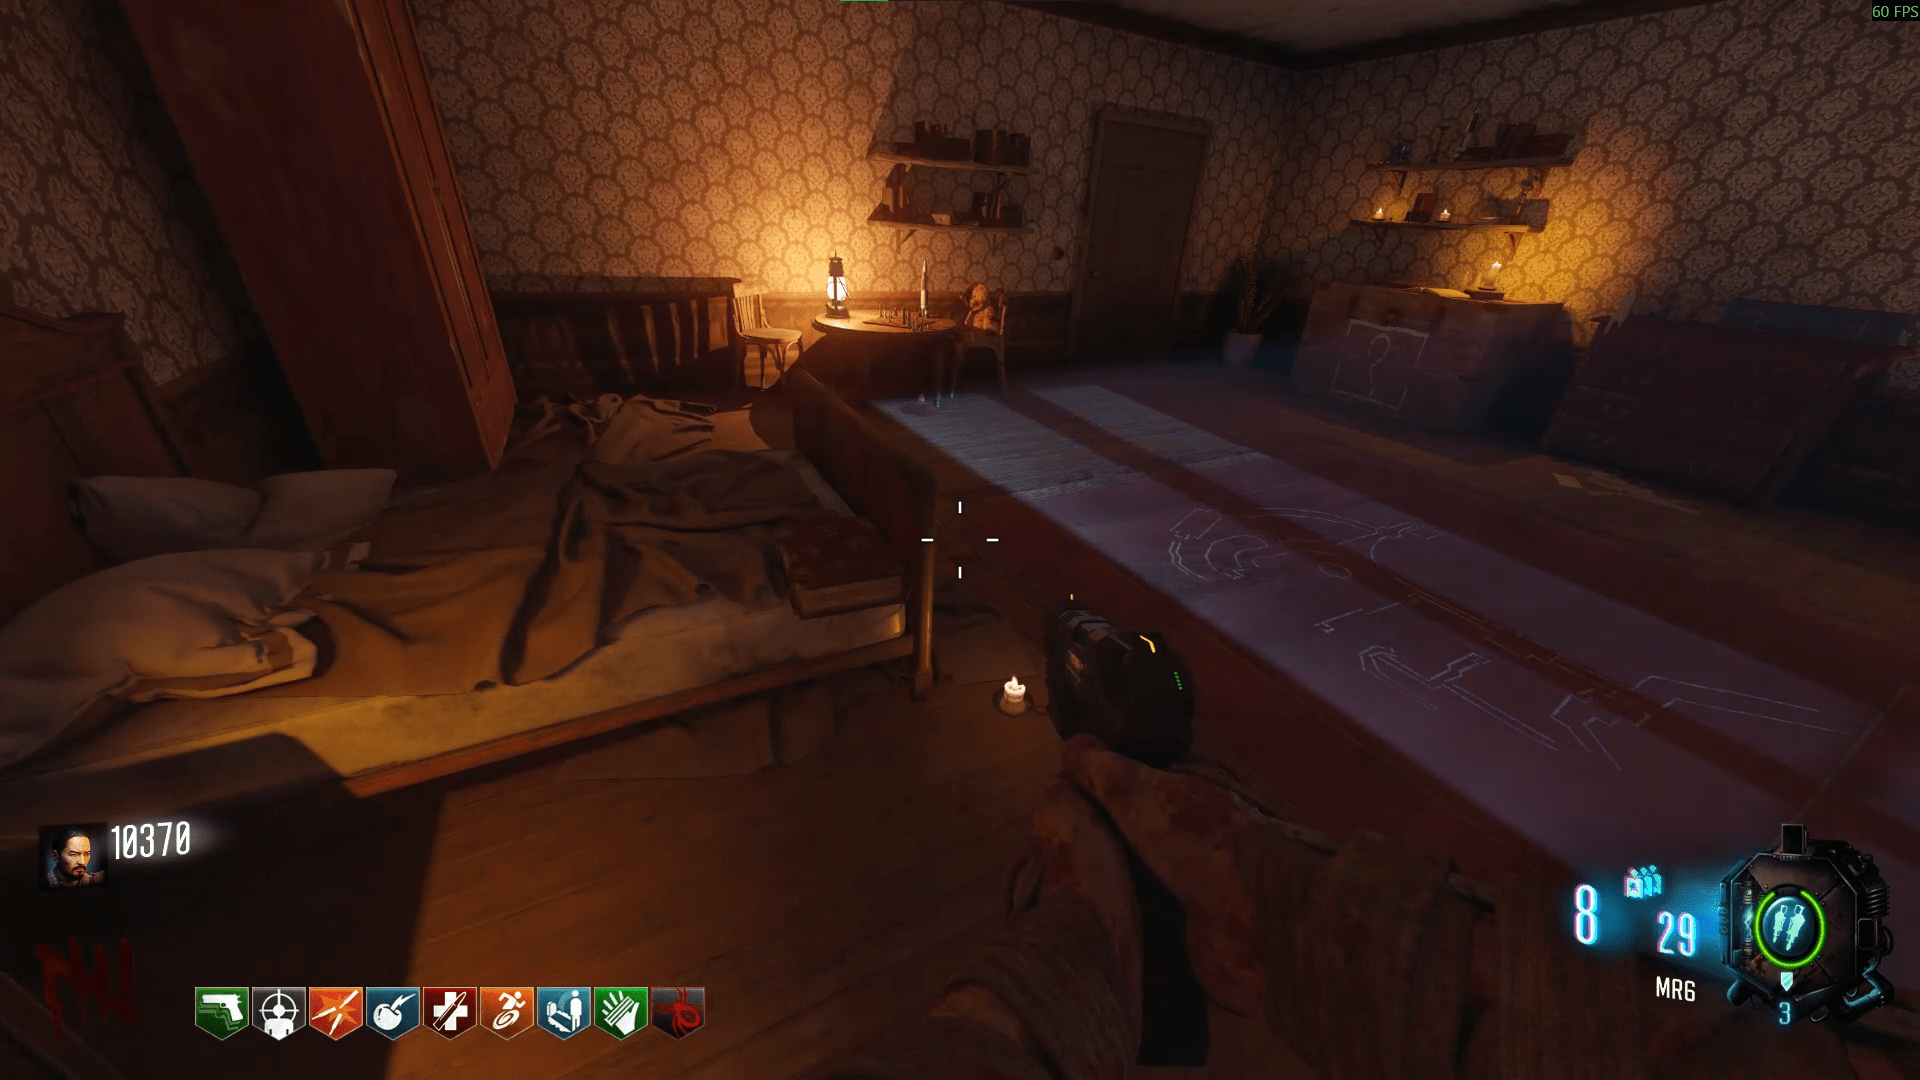
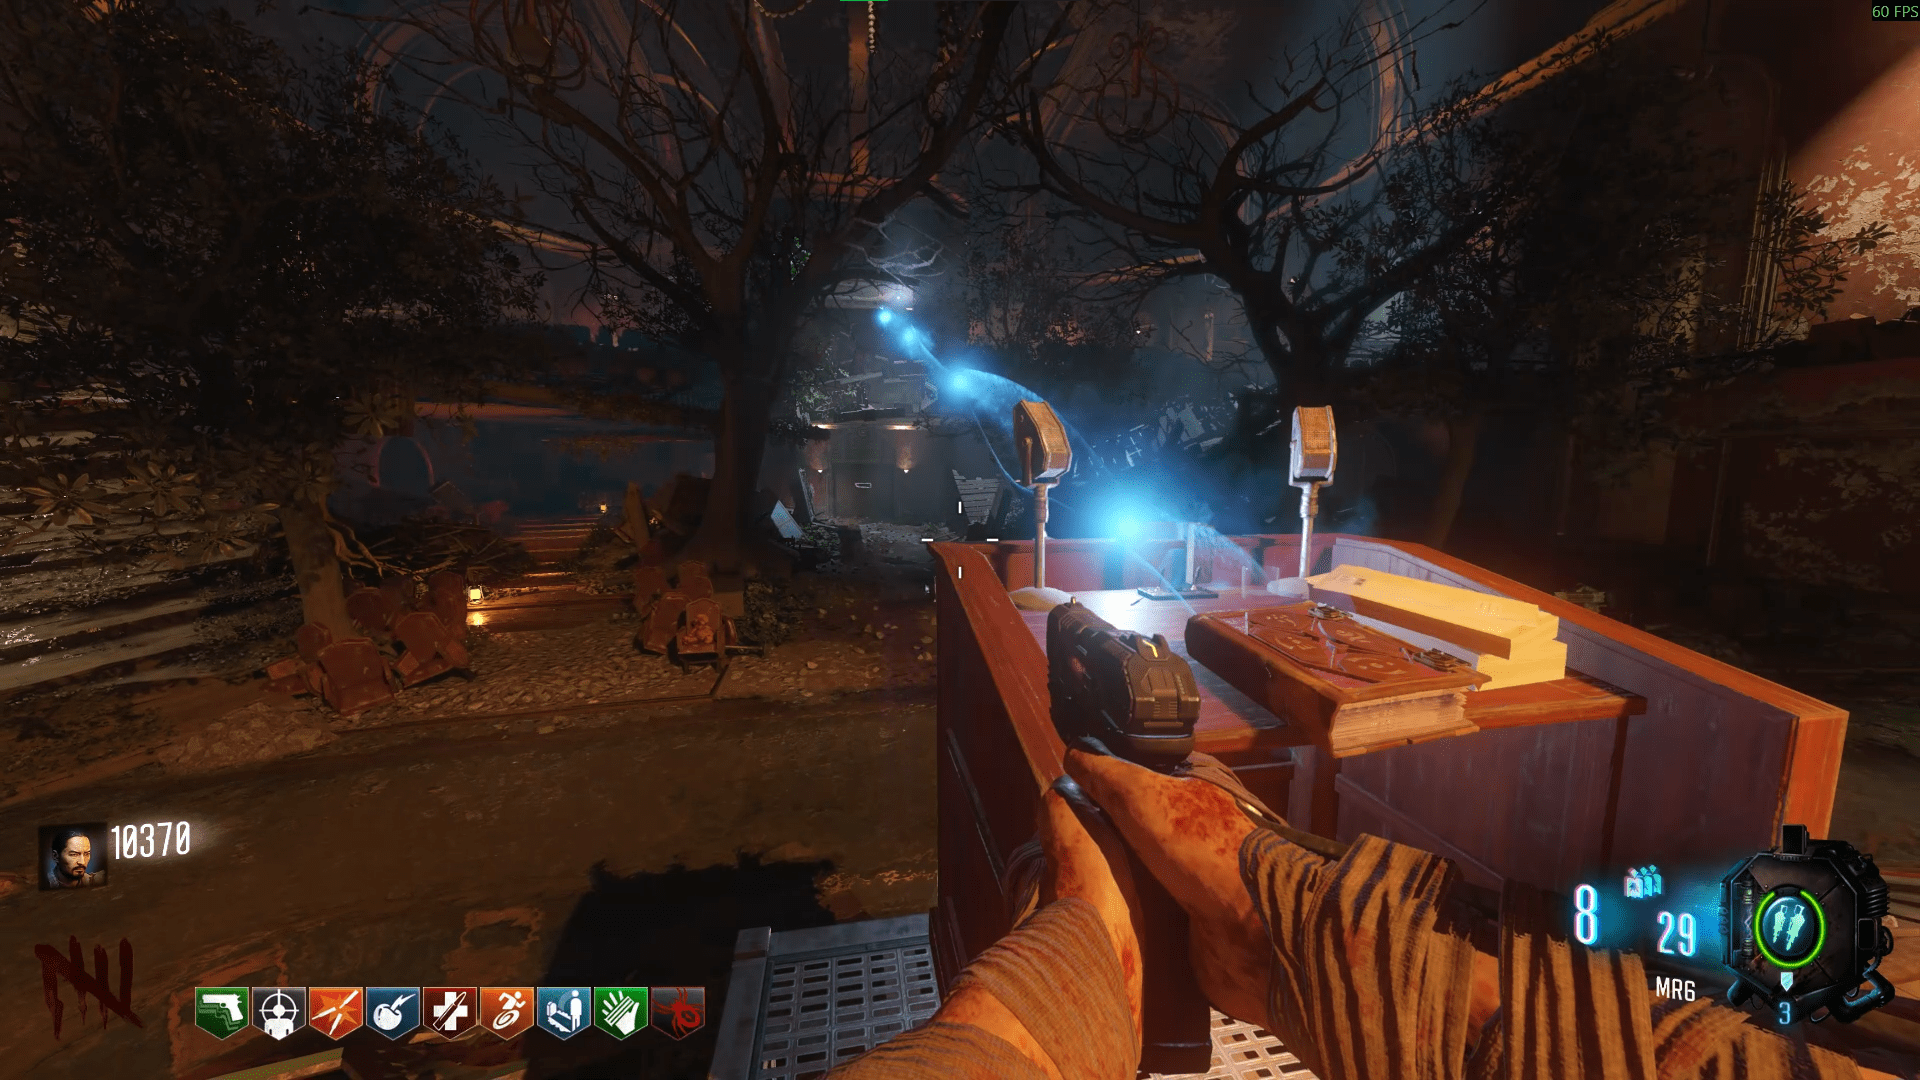
Once Sophia's seated into the teleporter, gather everyone inside and interact to teleport you to Samantha's room (the one from the Origins cutscene). Upon arrival, take the Kronorium from the foot of the bed and wait to be dismissed. Place the Kronorium on the podium in Kino to start the next step.
Before you run off to find the egg, know that only one of them spawns in at a time but there can be multiple per island. This goes contrary for the gateworm that hatches. Once you find the runic symbol for that island, there will no longer be a need to visit that island for another symbol.
There are so many guides online with missing eggs, I've had so many spawn in locations shown different to the videos so I'm going to actually try list every single one of them. If there is one I haven't listed, I beg of you, please show and prove it to me so there's at least one place on the internet that has all the locations. Collecting all the locations for this step has frustrated me to no end.
Through my own minimal testing, it seems like there's only one egg roughly per island with Nacht, Spawn and Shangri-La being one egg, Kino and Der Eisendrache being another, Verruckt as another and Mob of the Dead and Origins being the final.
Revelations
- In Nacht, on a fallen cabinet outside the Der Eisendrache teleport door.
- In Spawn, after the door to Origins, it's on a basket before the window on the left.
- In Spawn, right beside Quick Revive.
- In Spawn, just after the first door to Shang, it's on the right next to the stairs and a rubbish bin.
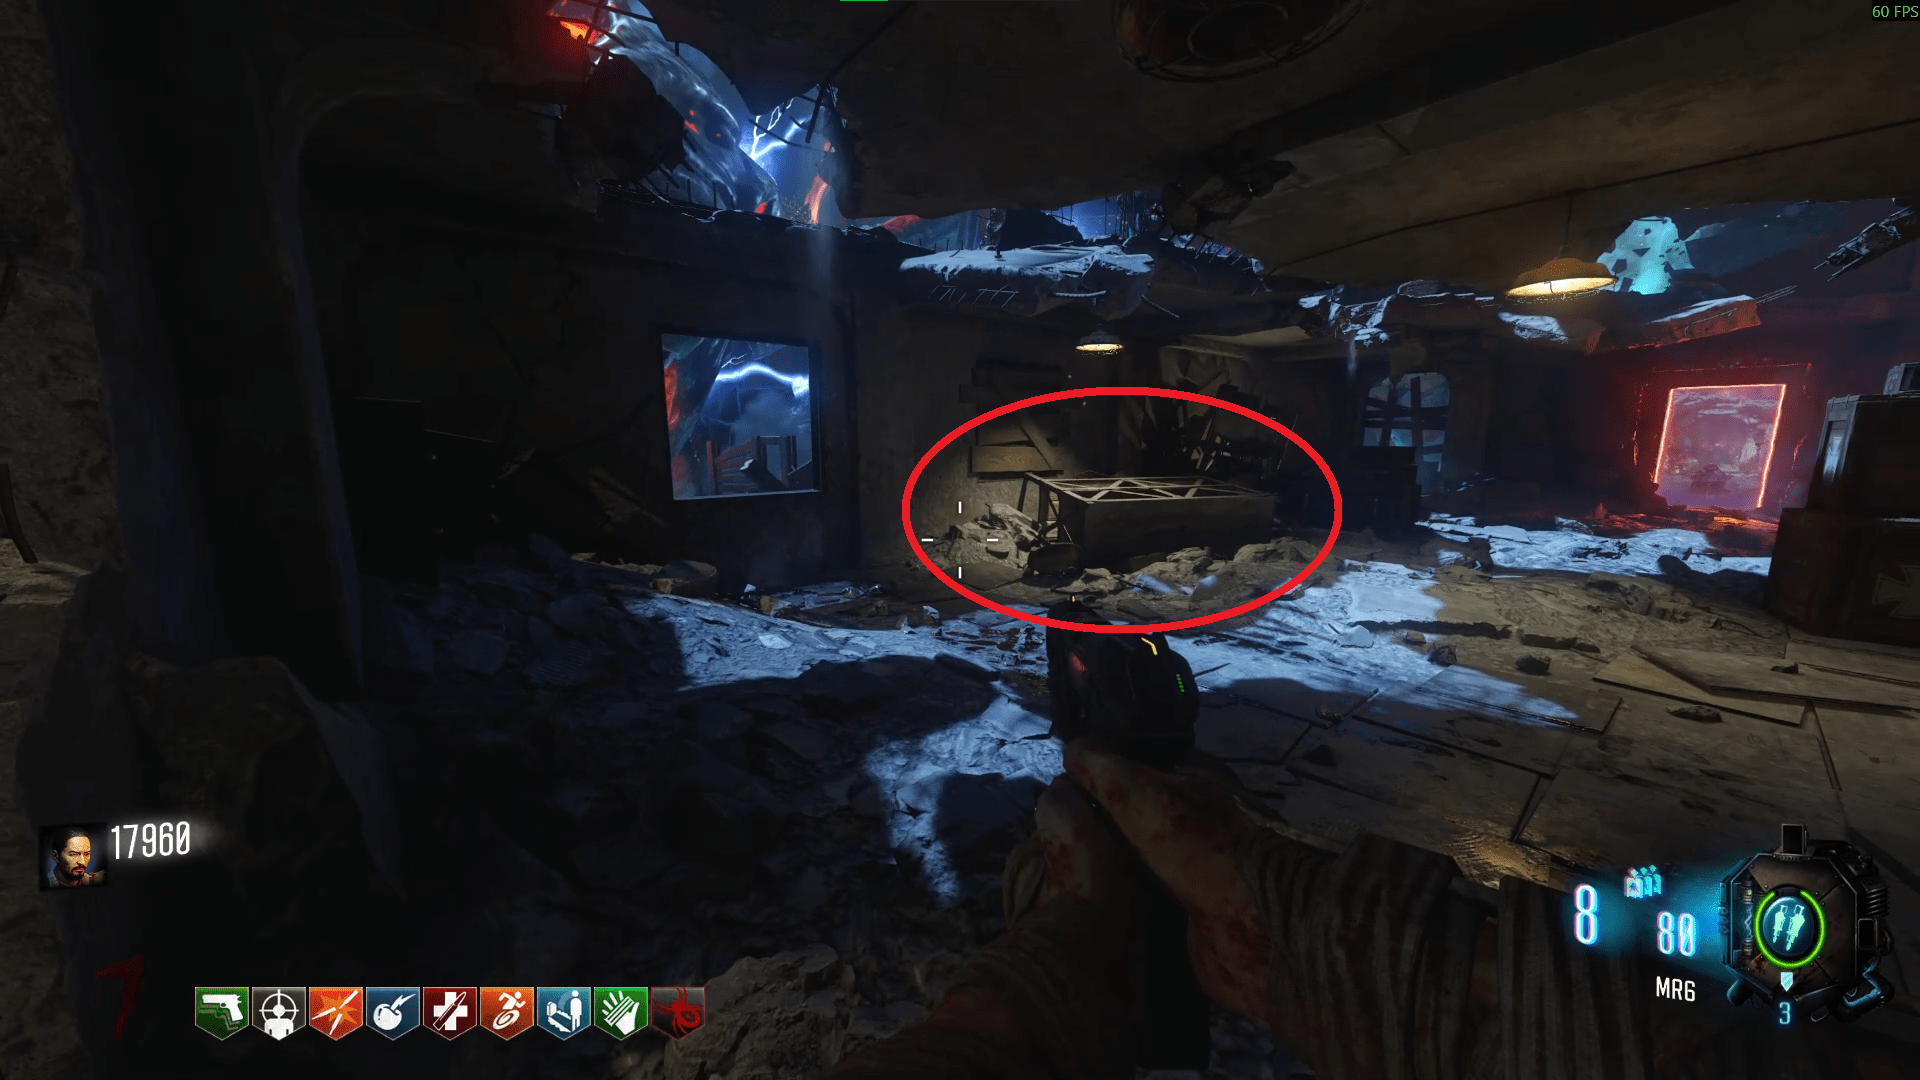
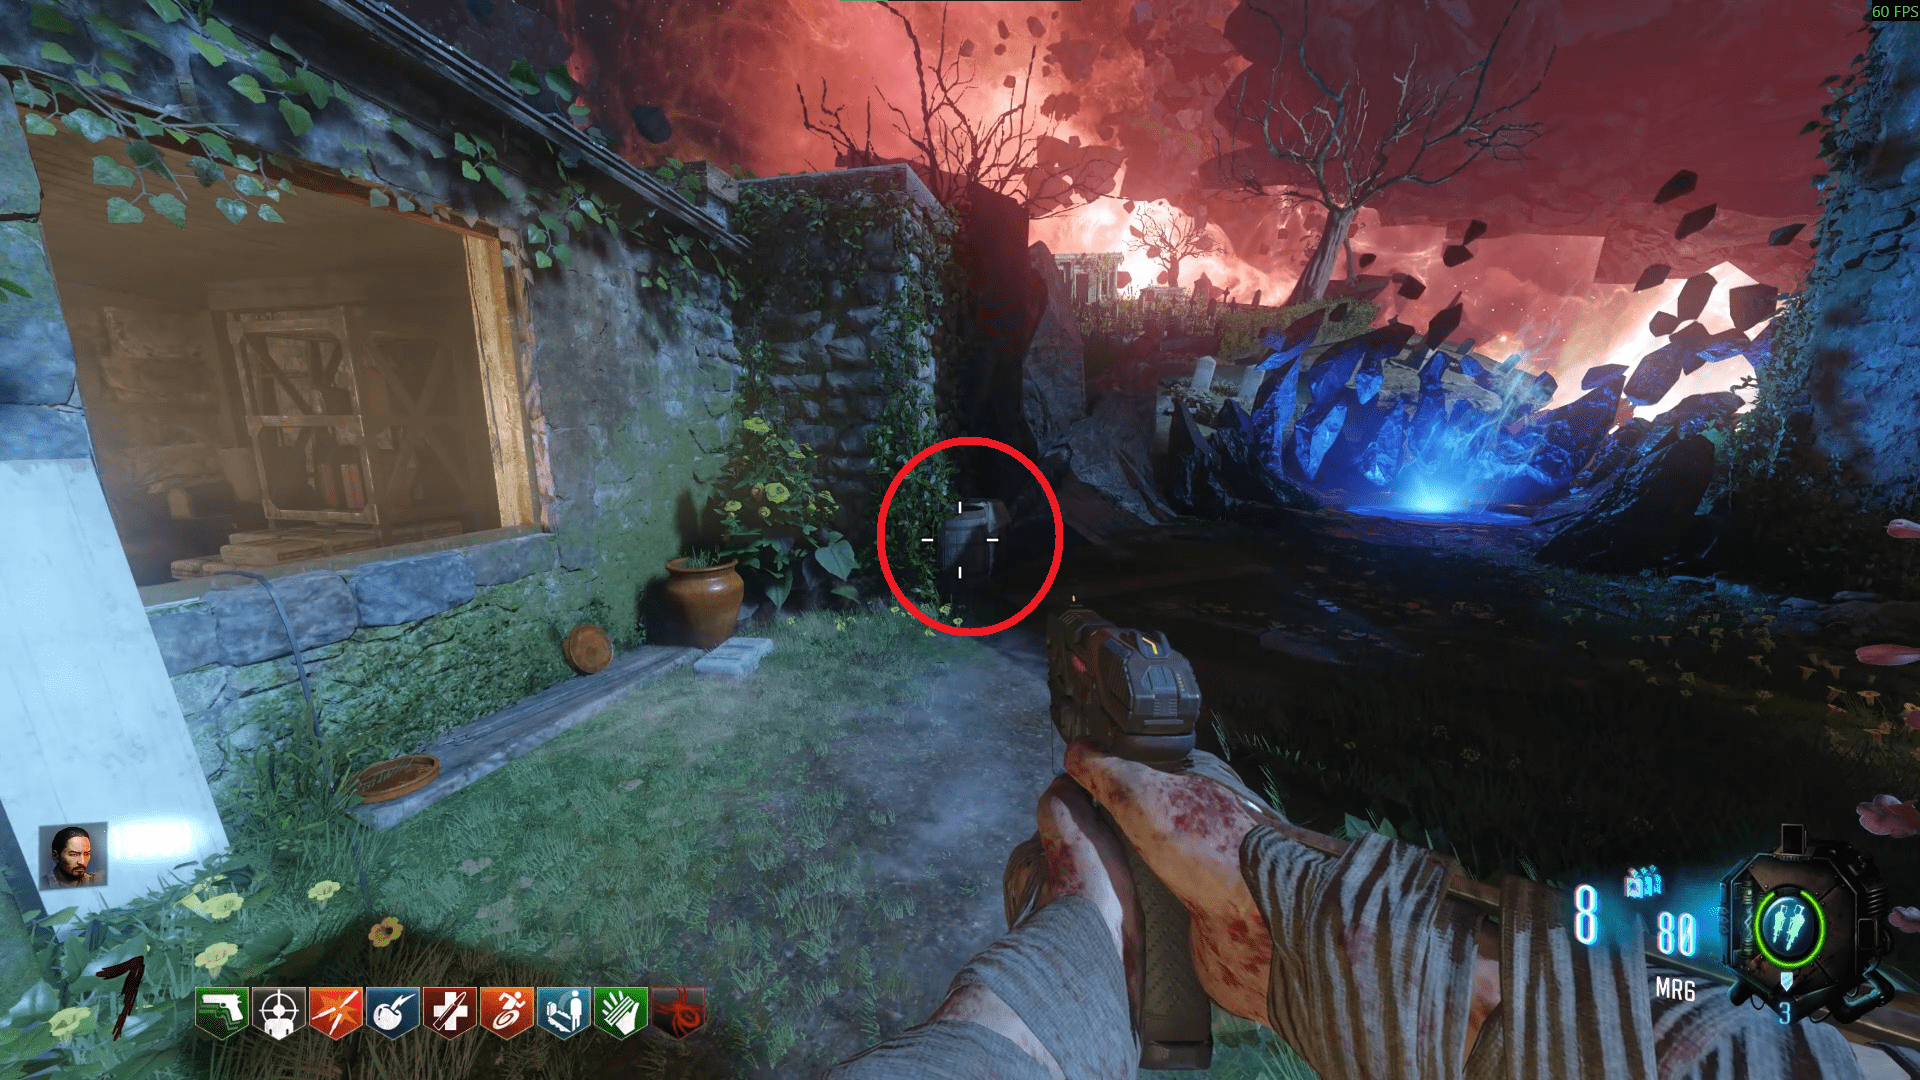
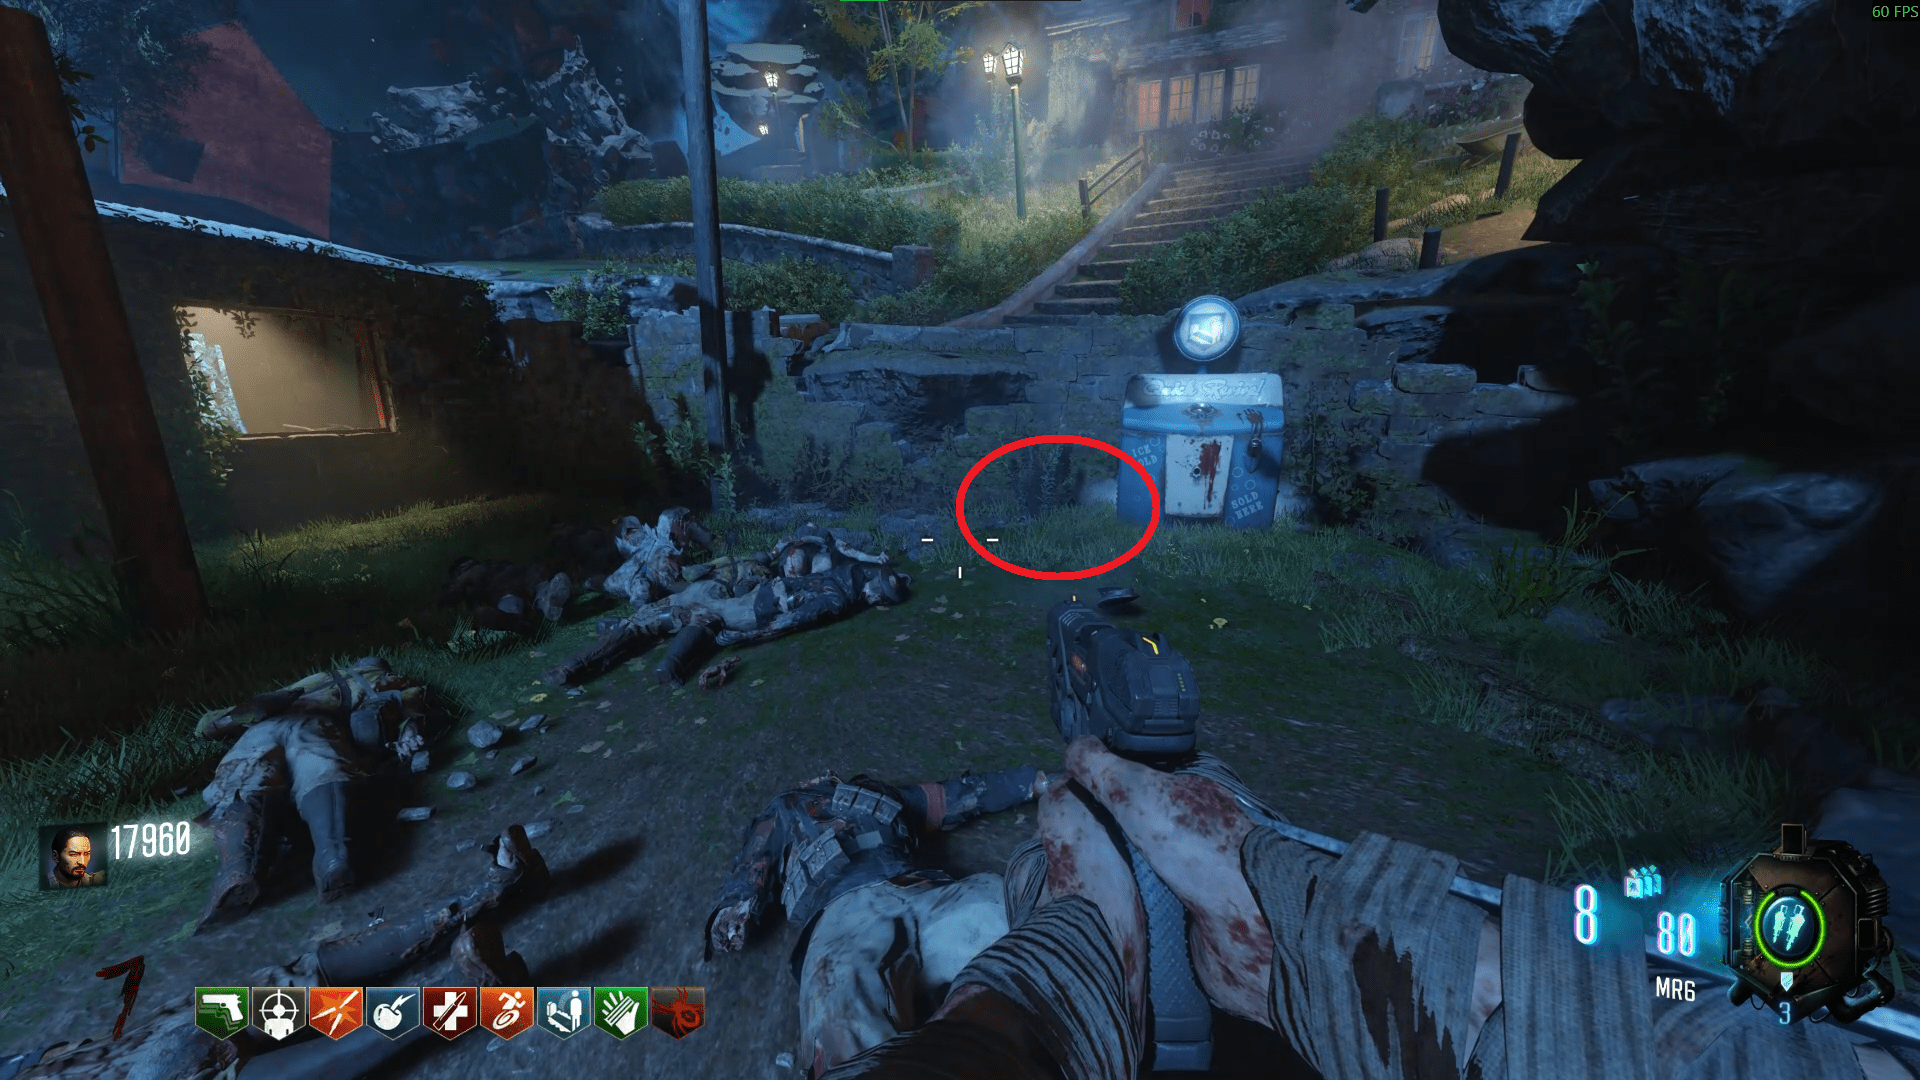
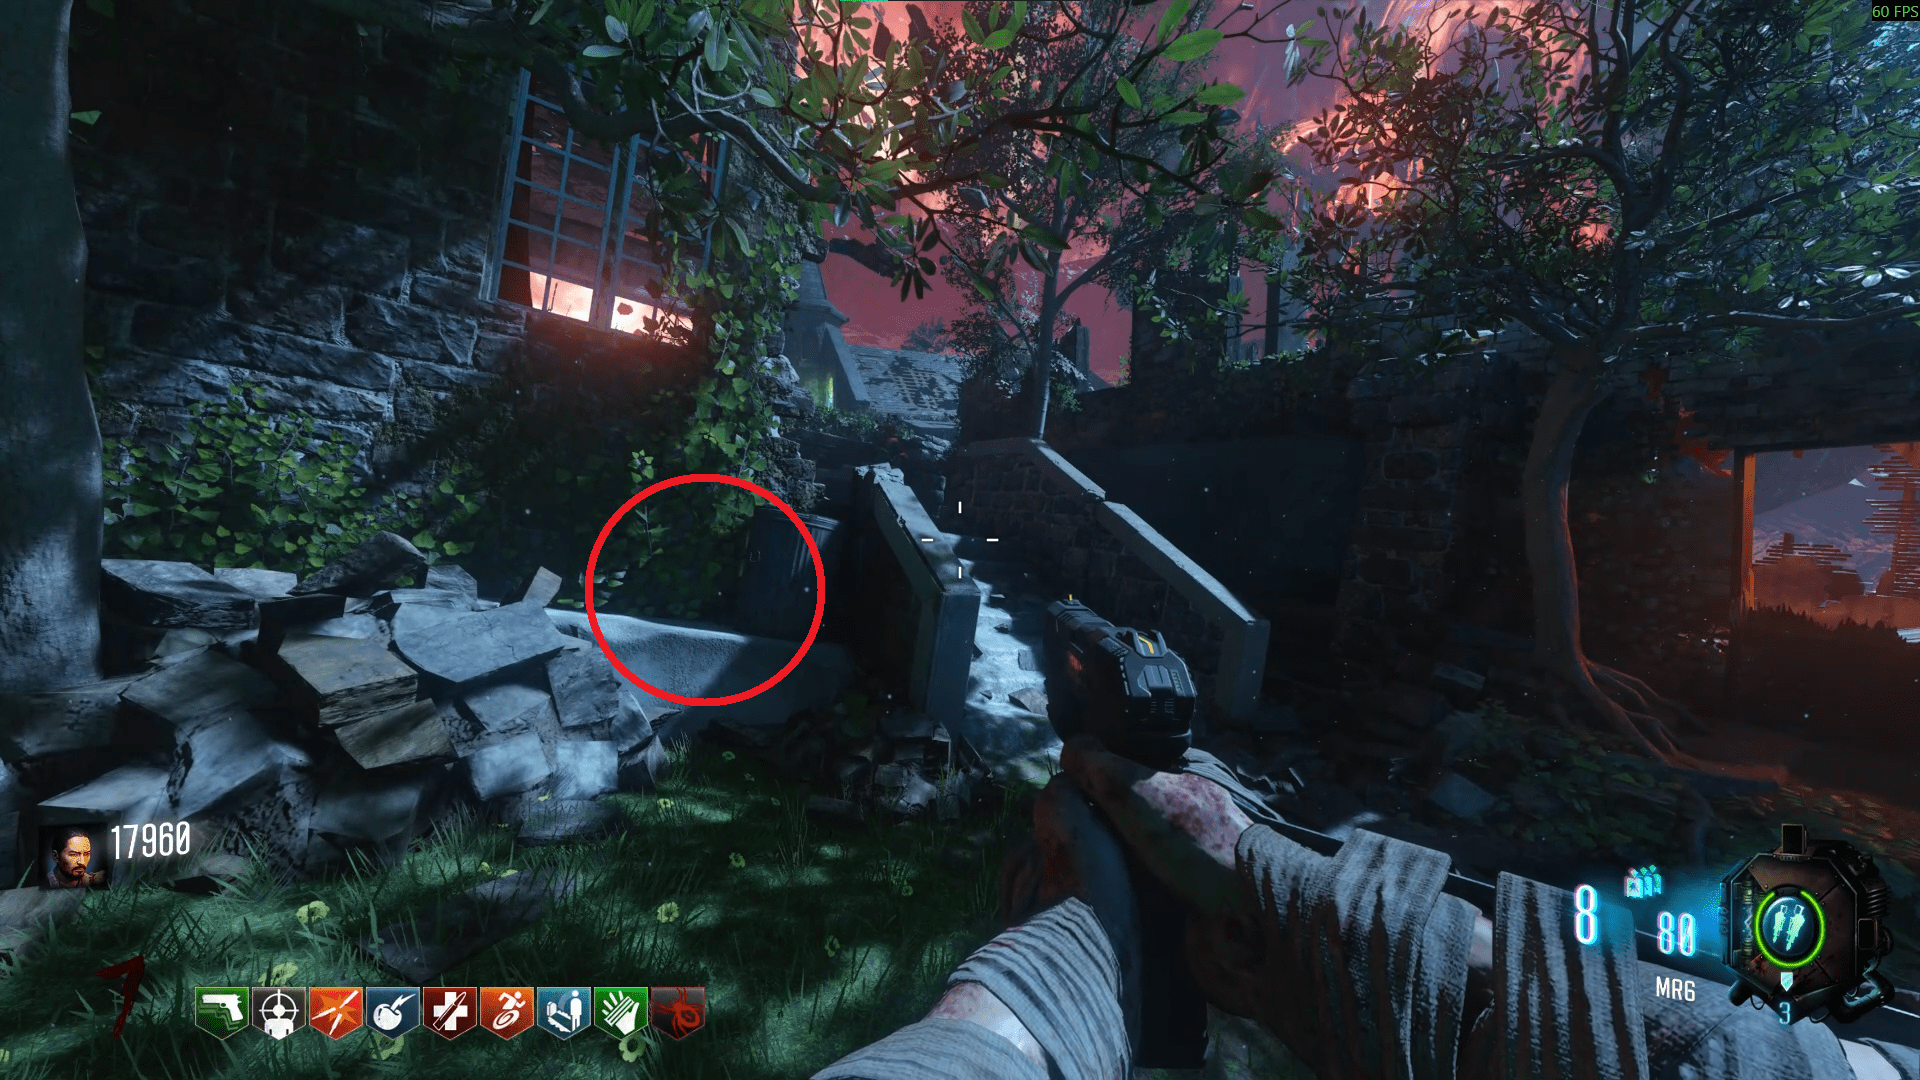
- In Shangri-La, underneath a broken support pillar directly to your right after coming from Spawn.
- In Shangri-La, underneath the dragon statue in the fire, on the stairs leading to the Primis room.
- In Der Eisendrache, inside the Primis statue room, in between the legs of the statues.
- In Der Eisendrache, next to the Wunderfizz machine in a bucket, in the area between Kino and Der Eisendrache. This is the lower entrance to Kino.
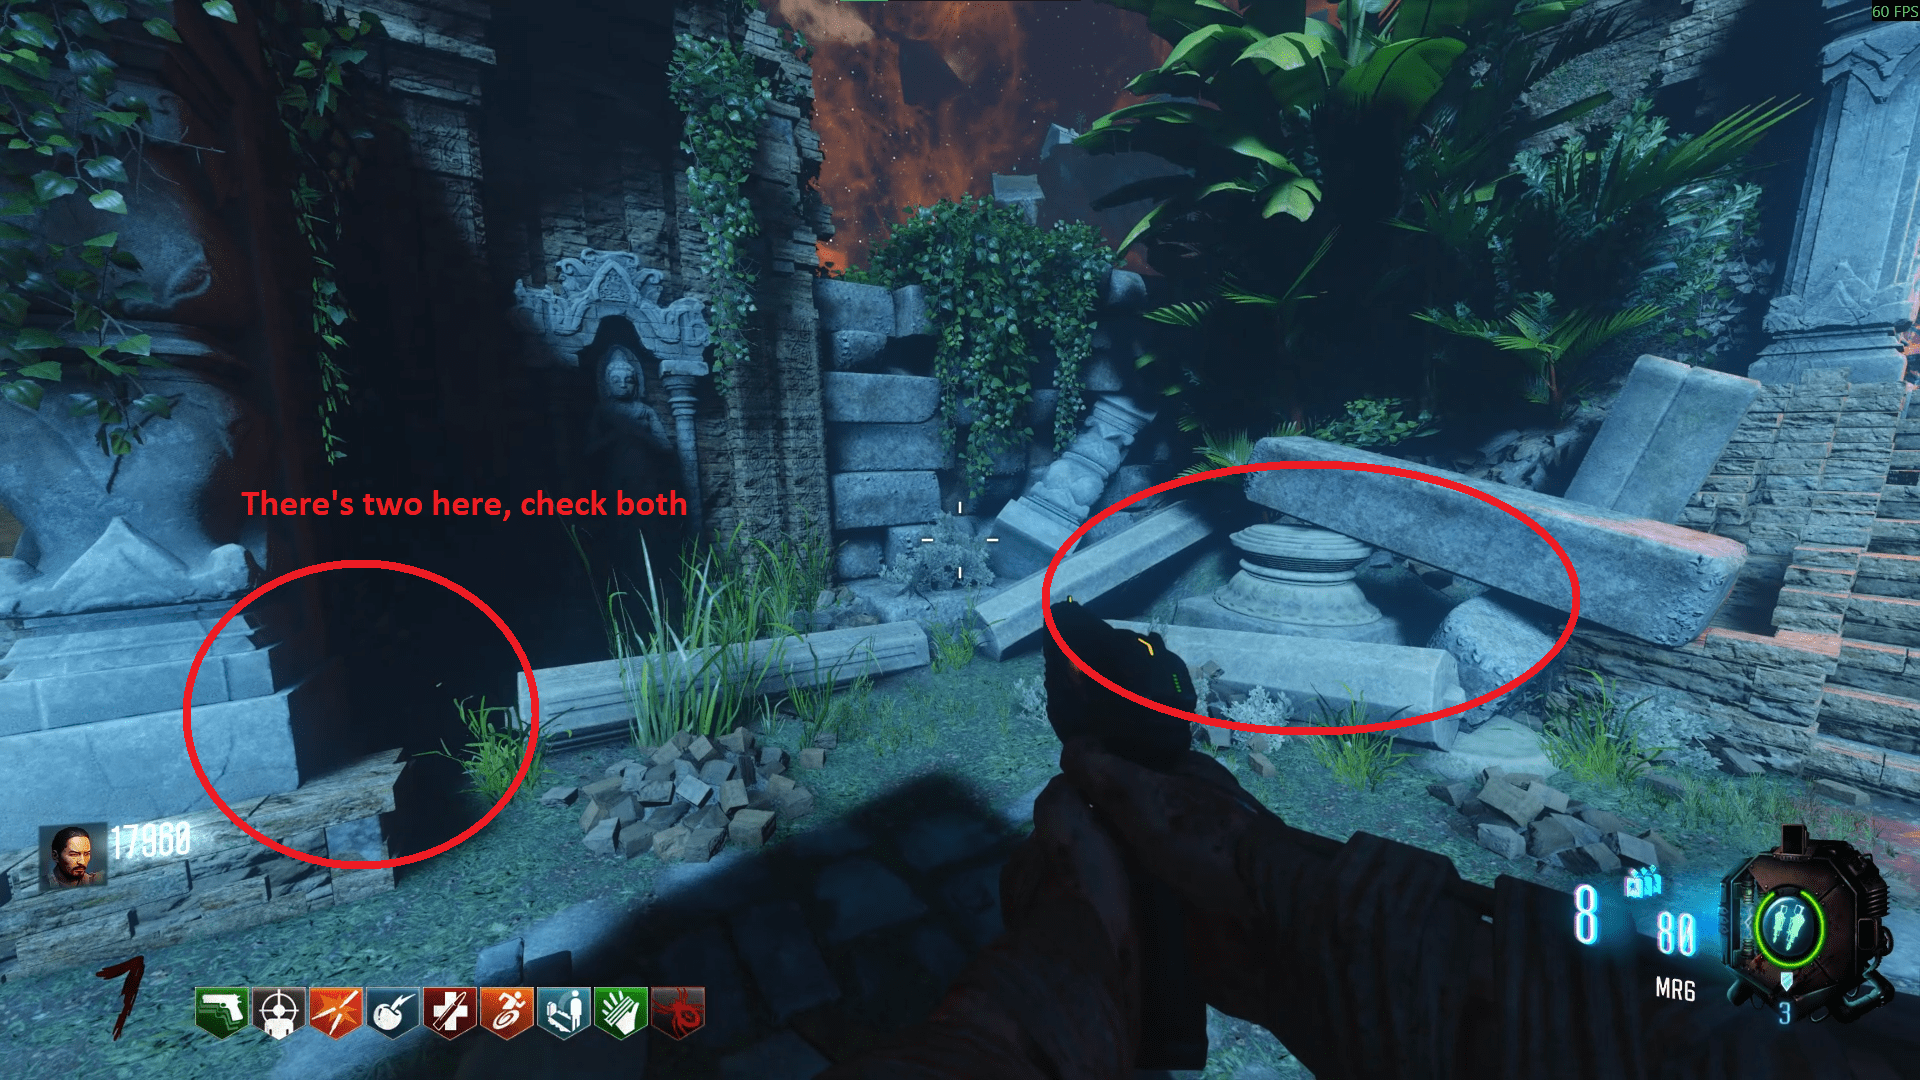
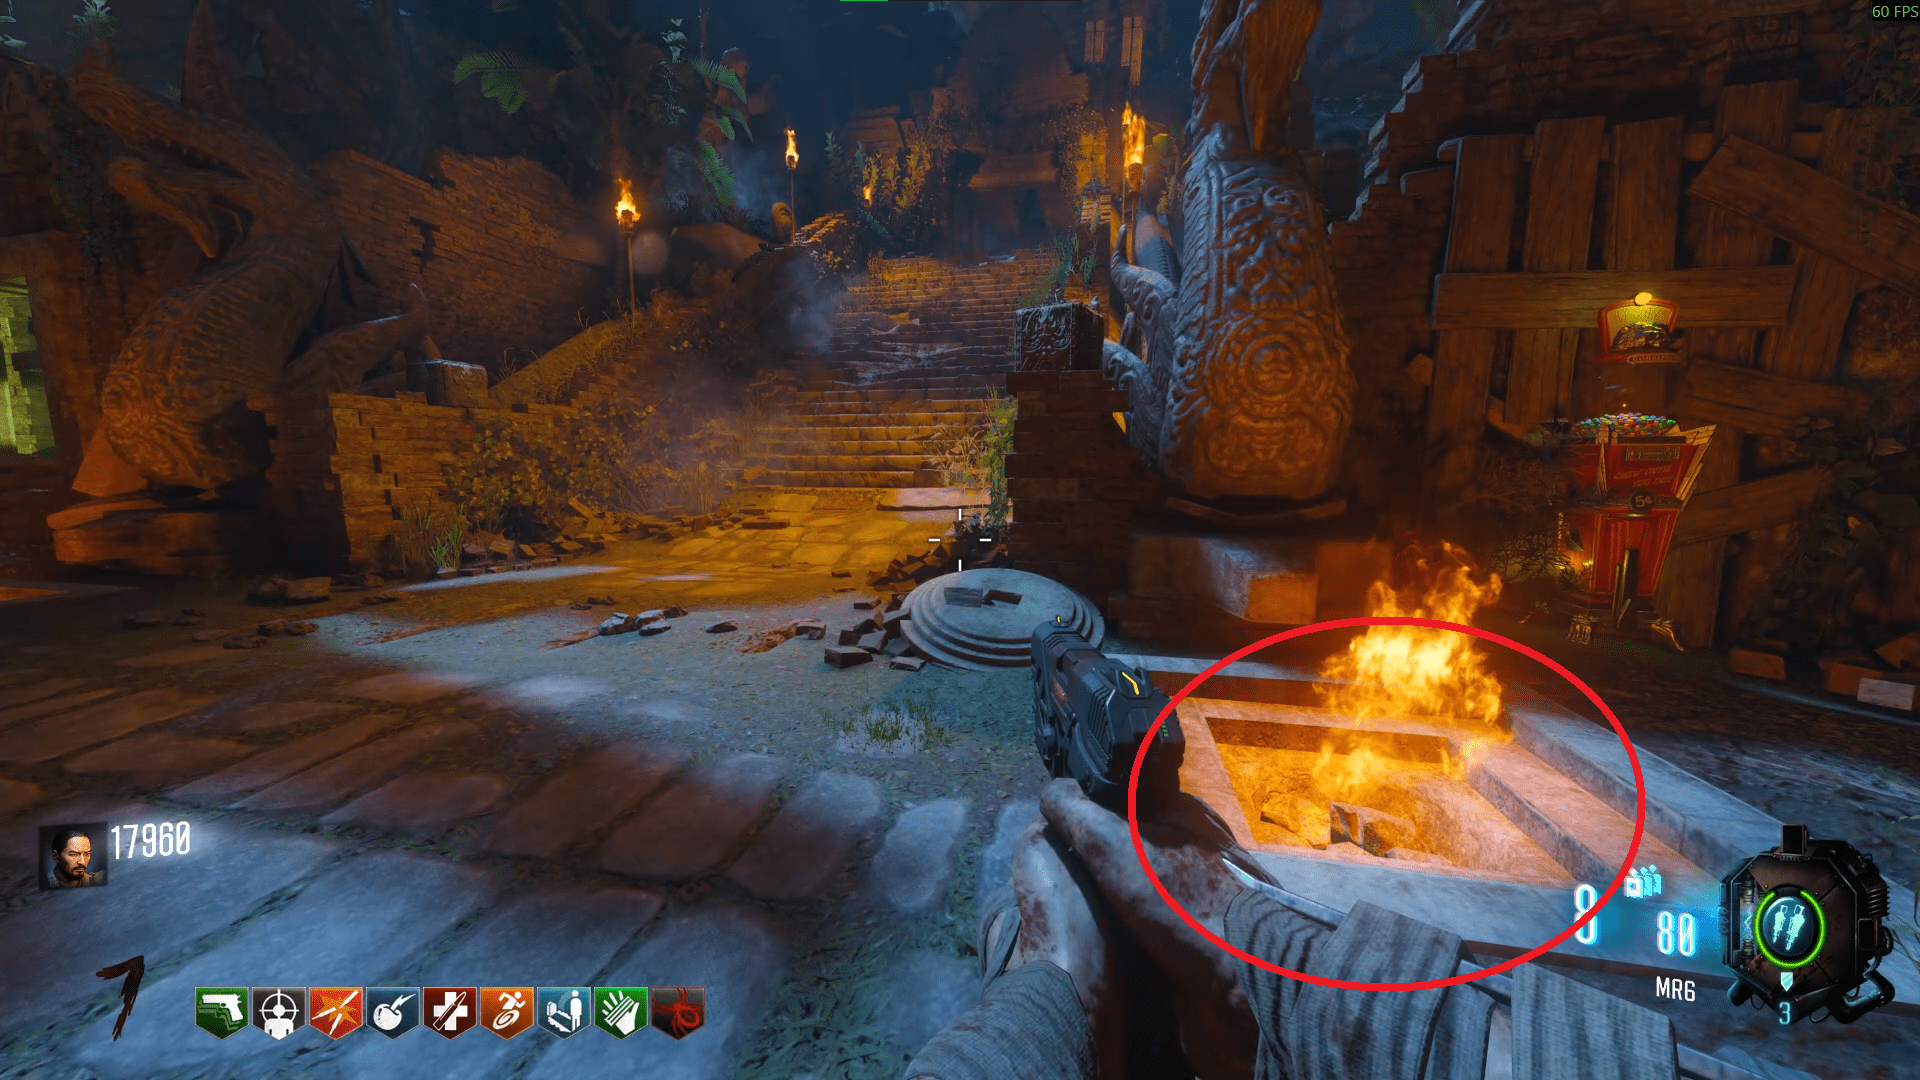
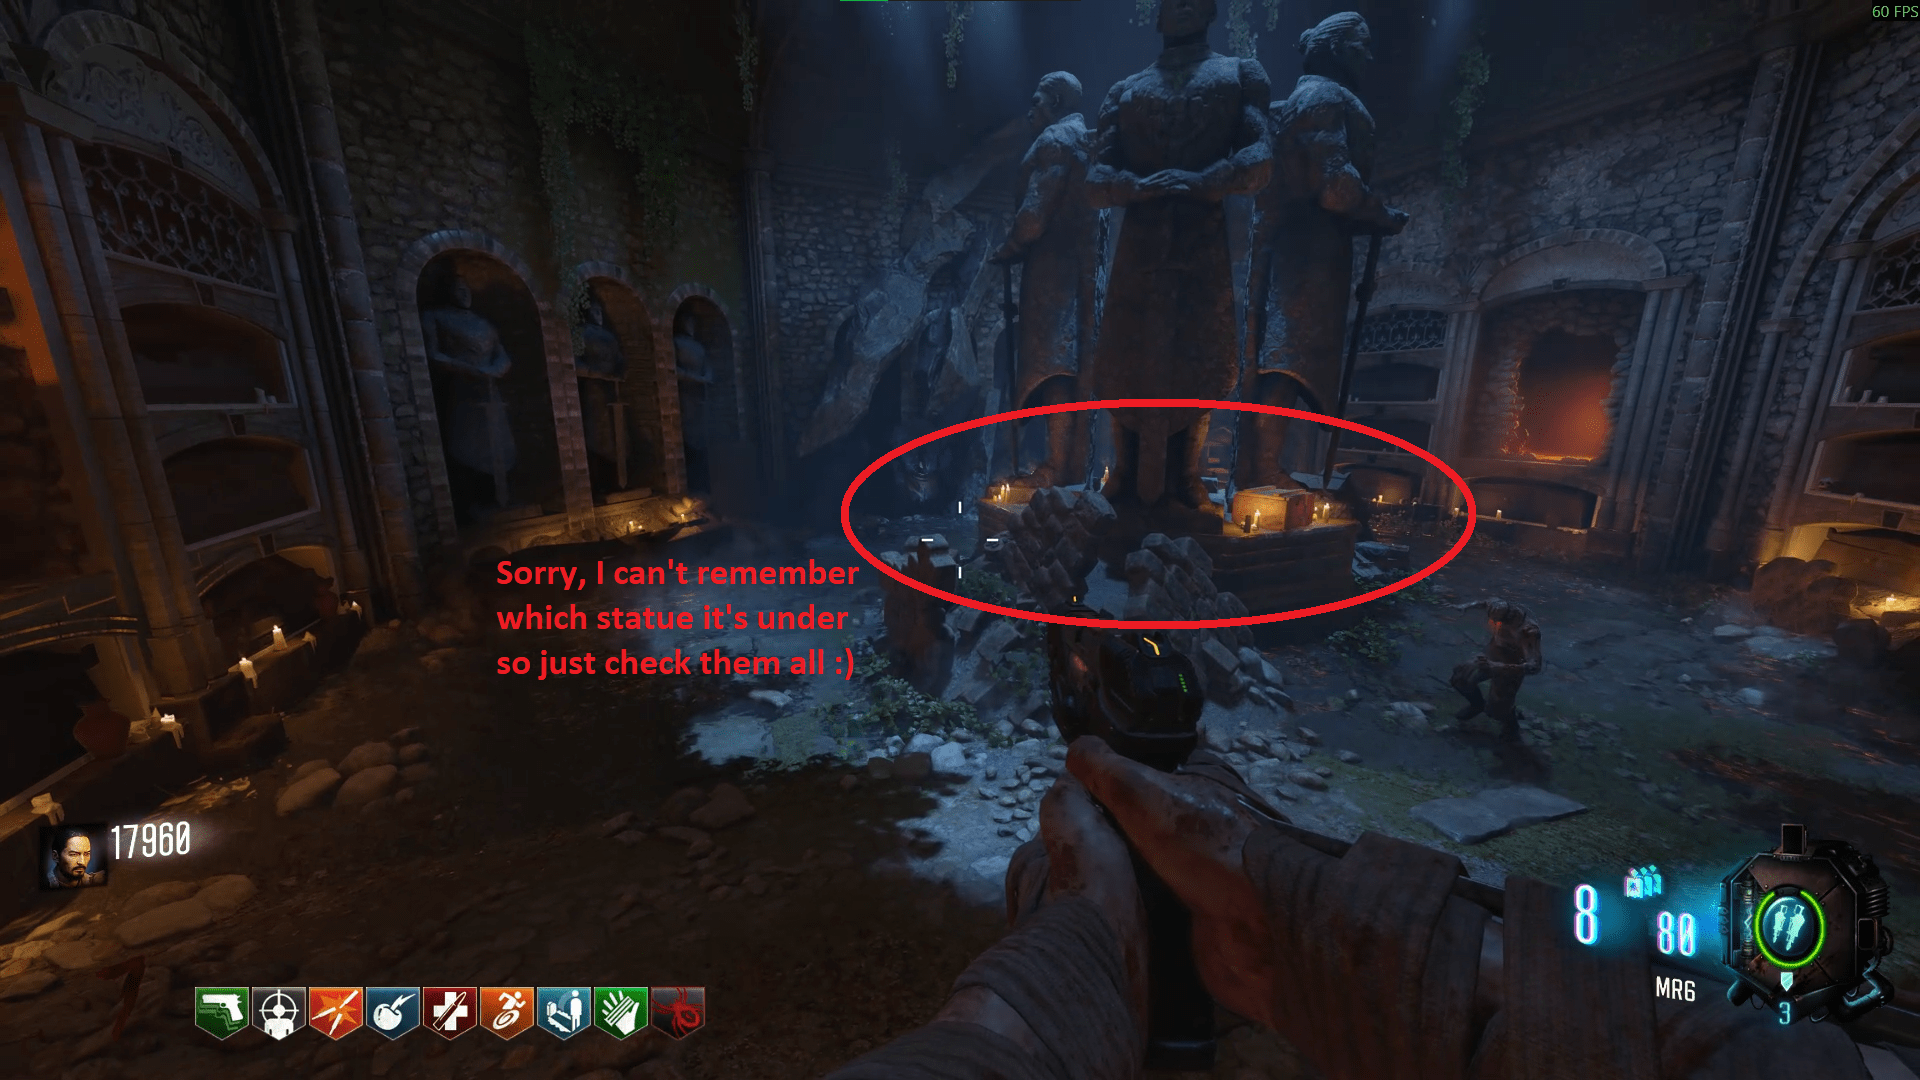
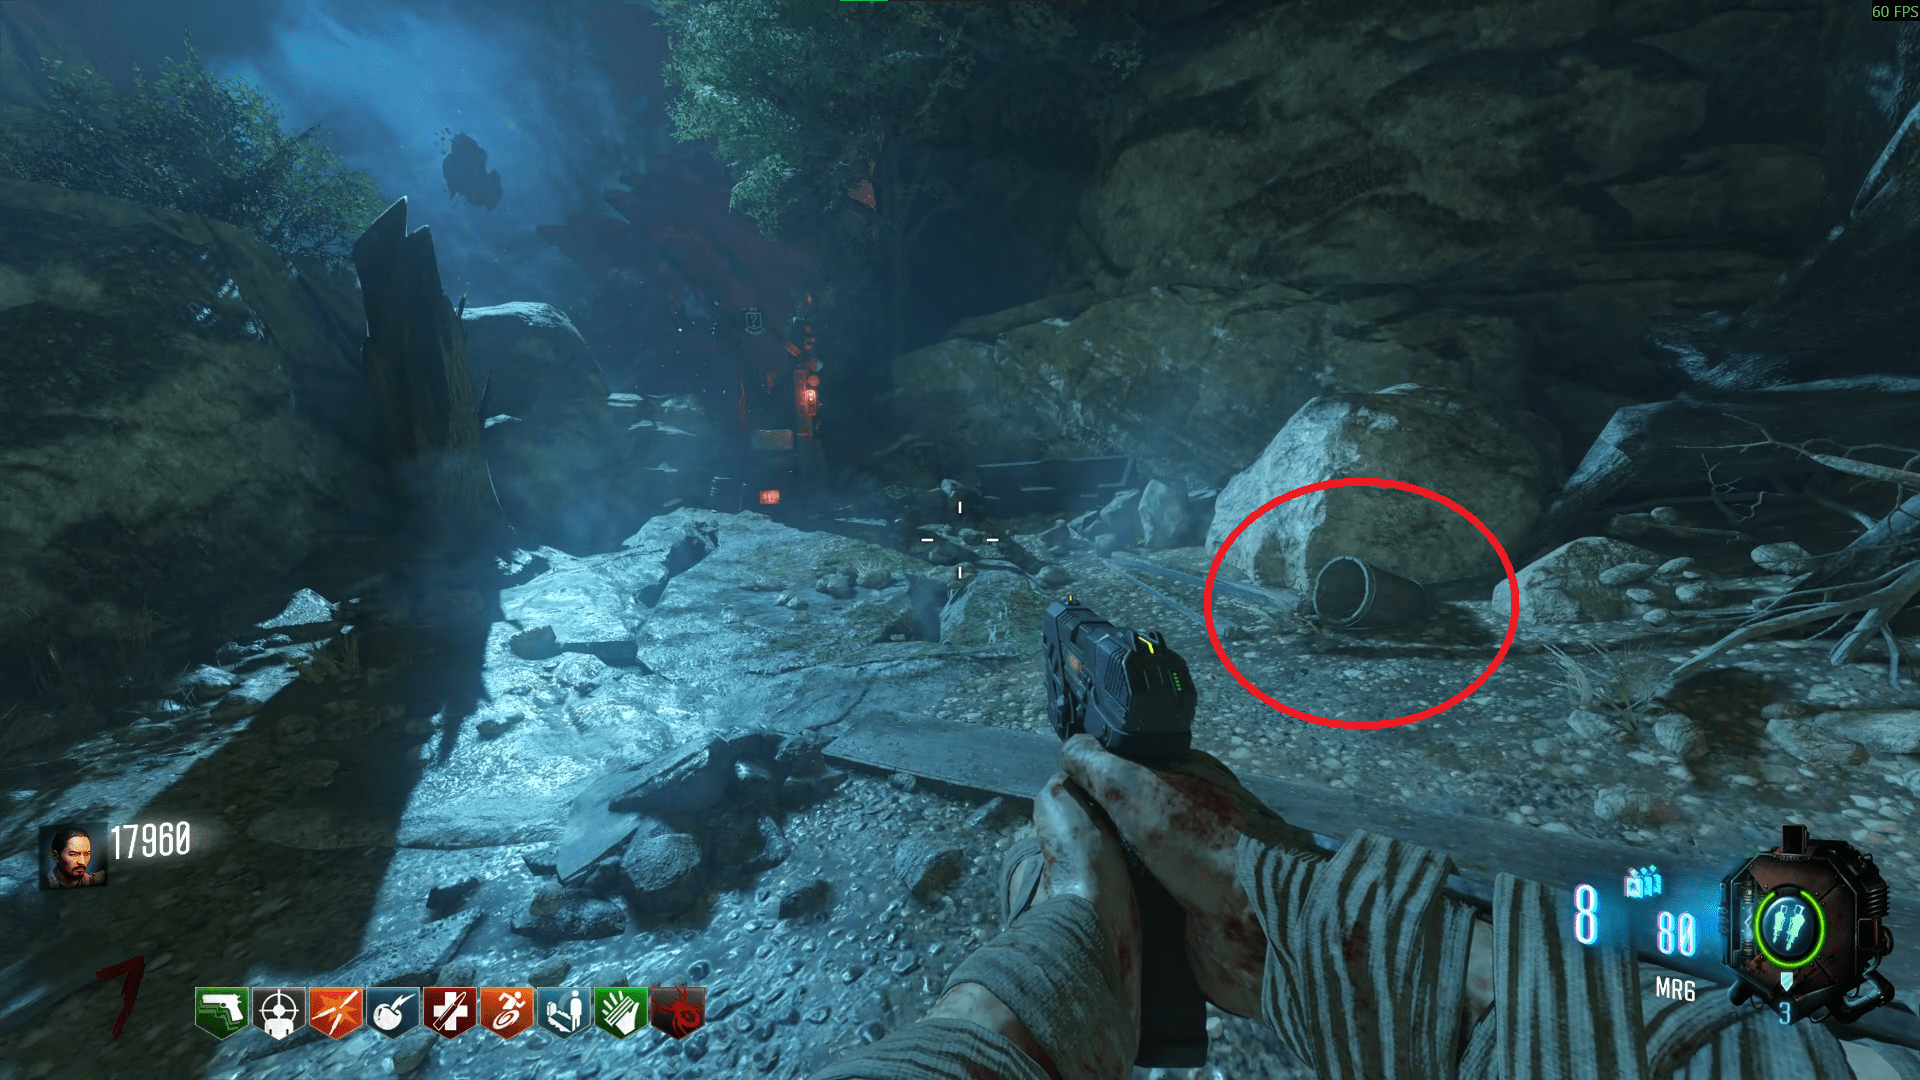
- In Kino Der Toten, in the seats behind the Music EE teddy bear, between it and the Bowie Knife.
- In Kino Der Toten, upon entering from Der Eisendrache from the upper entrance, it's on a balcony above you when going down to the main stage. You have to jump to collect this one.
- In Verruckt, after landing from Kino, directly on the right on the floor besides the window.
- In Verruckt, from the teleport door, it is on the ground inside a bush and fence on the left.
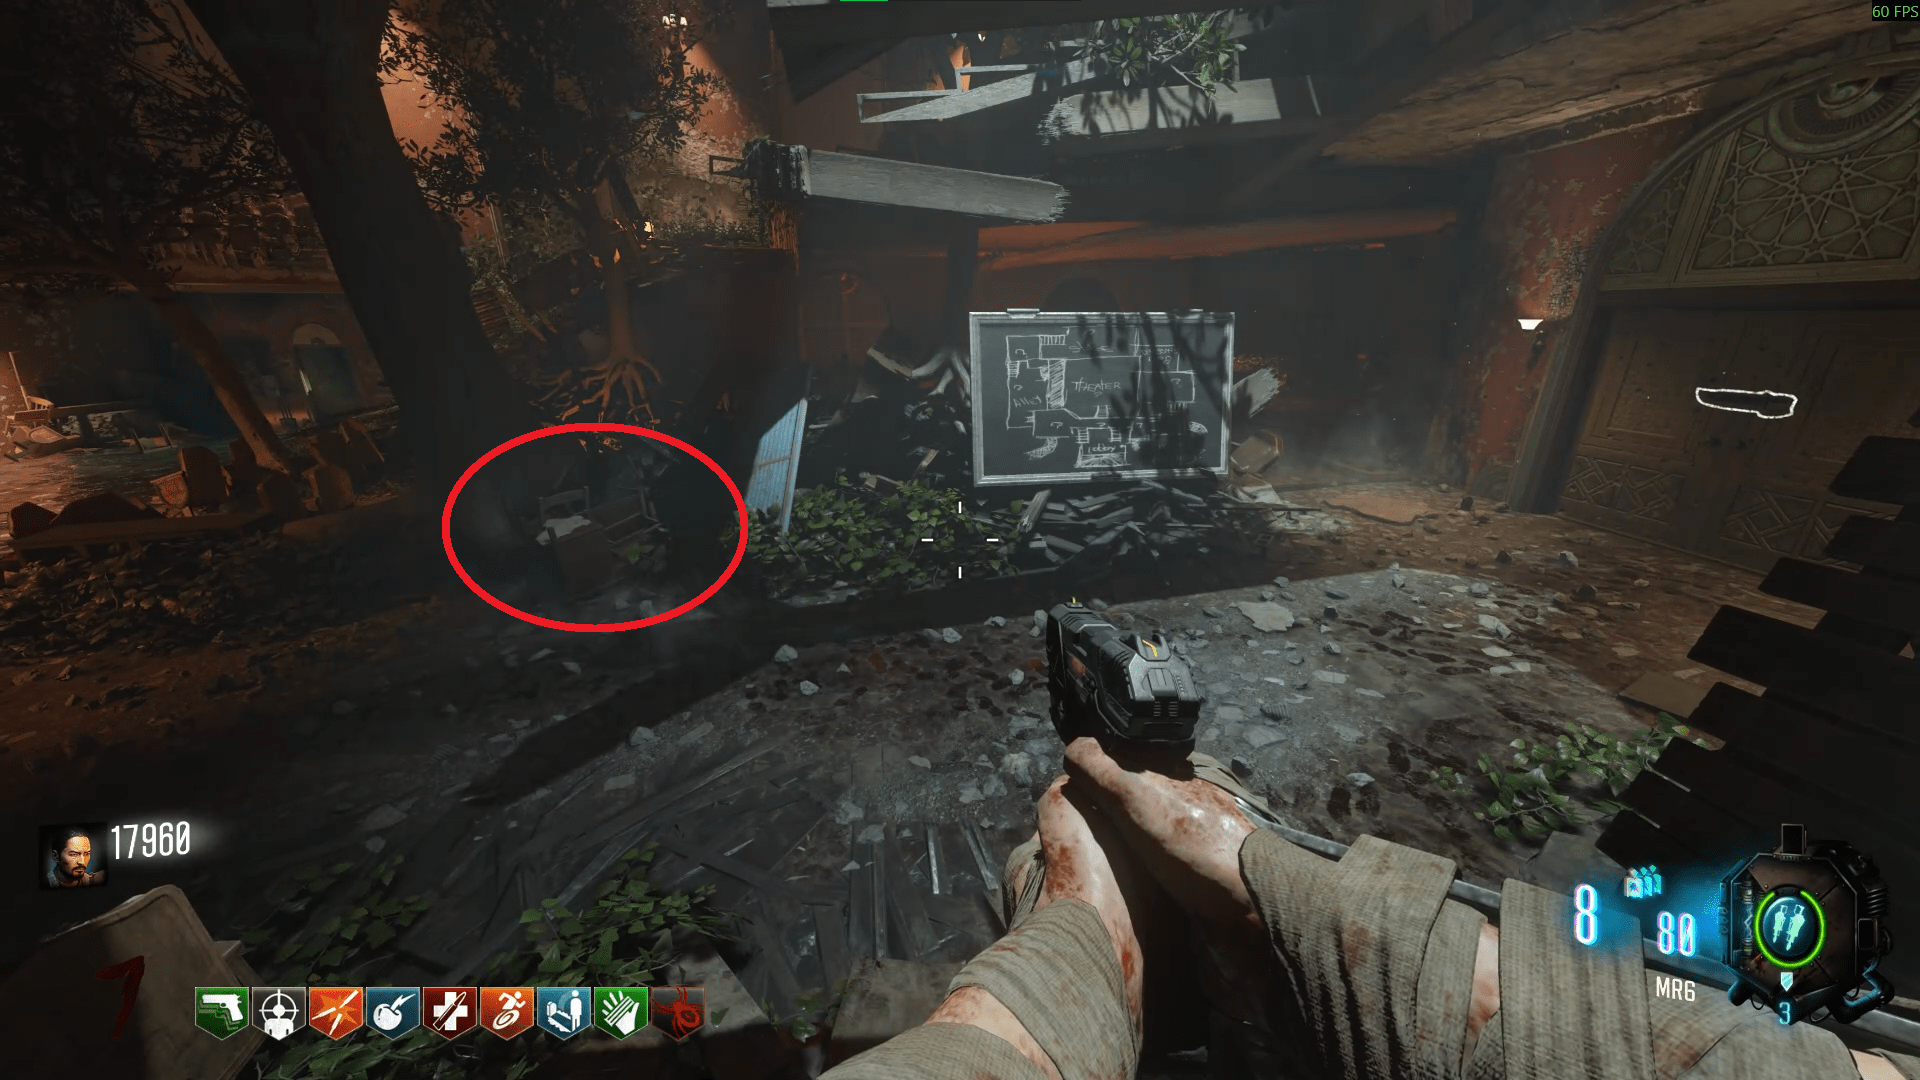
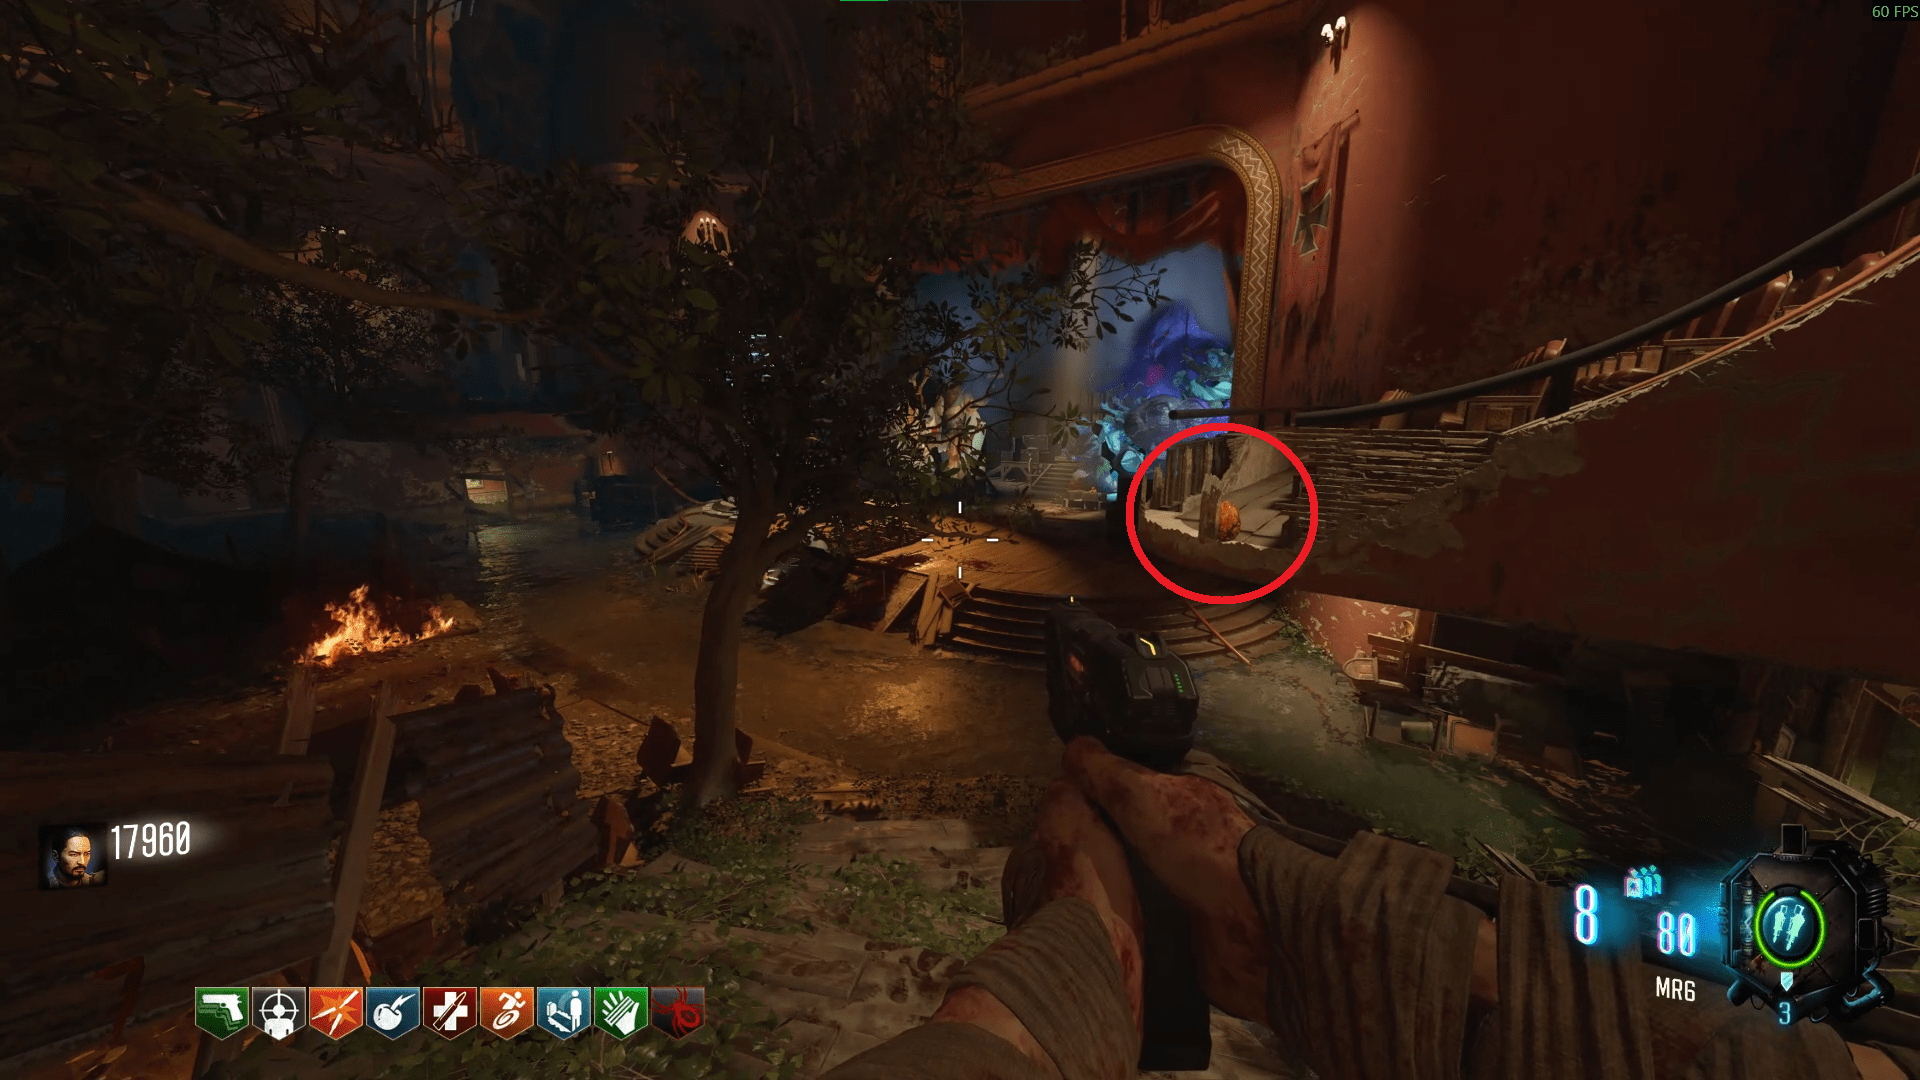
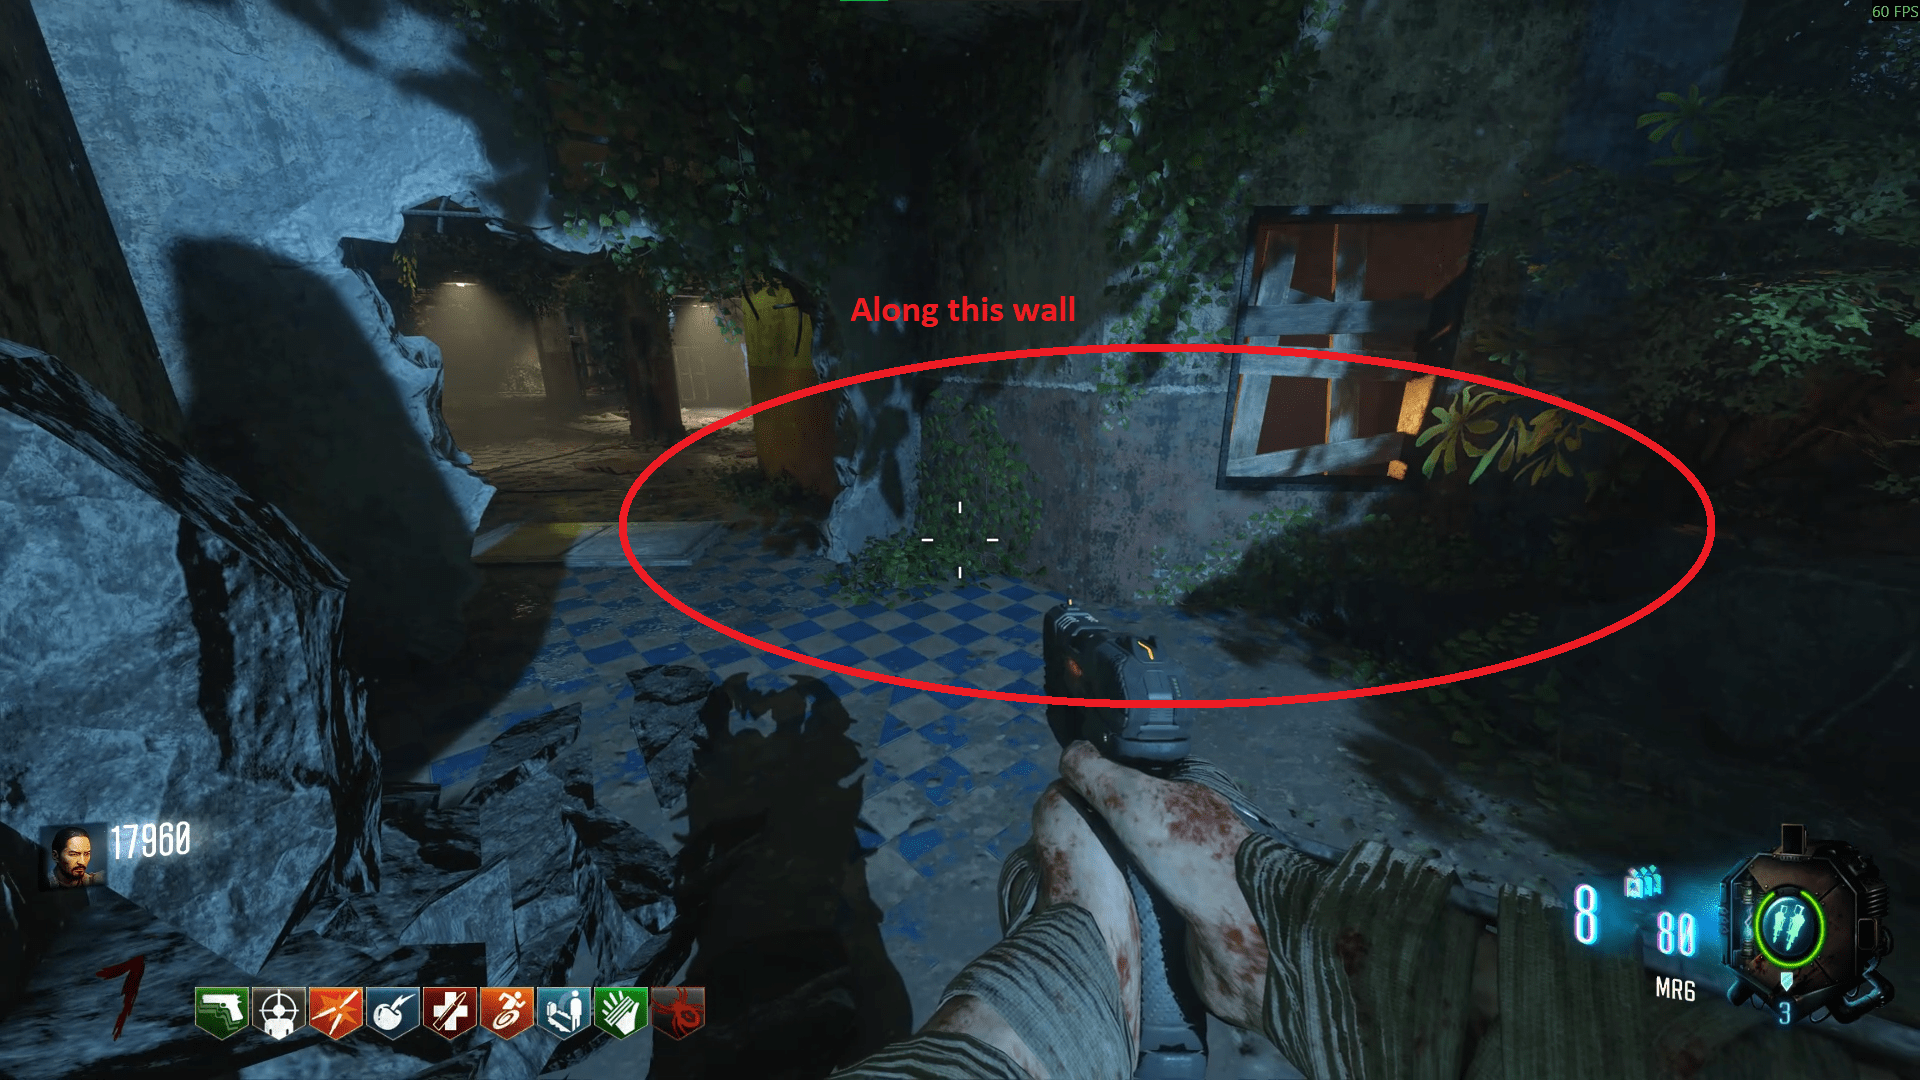
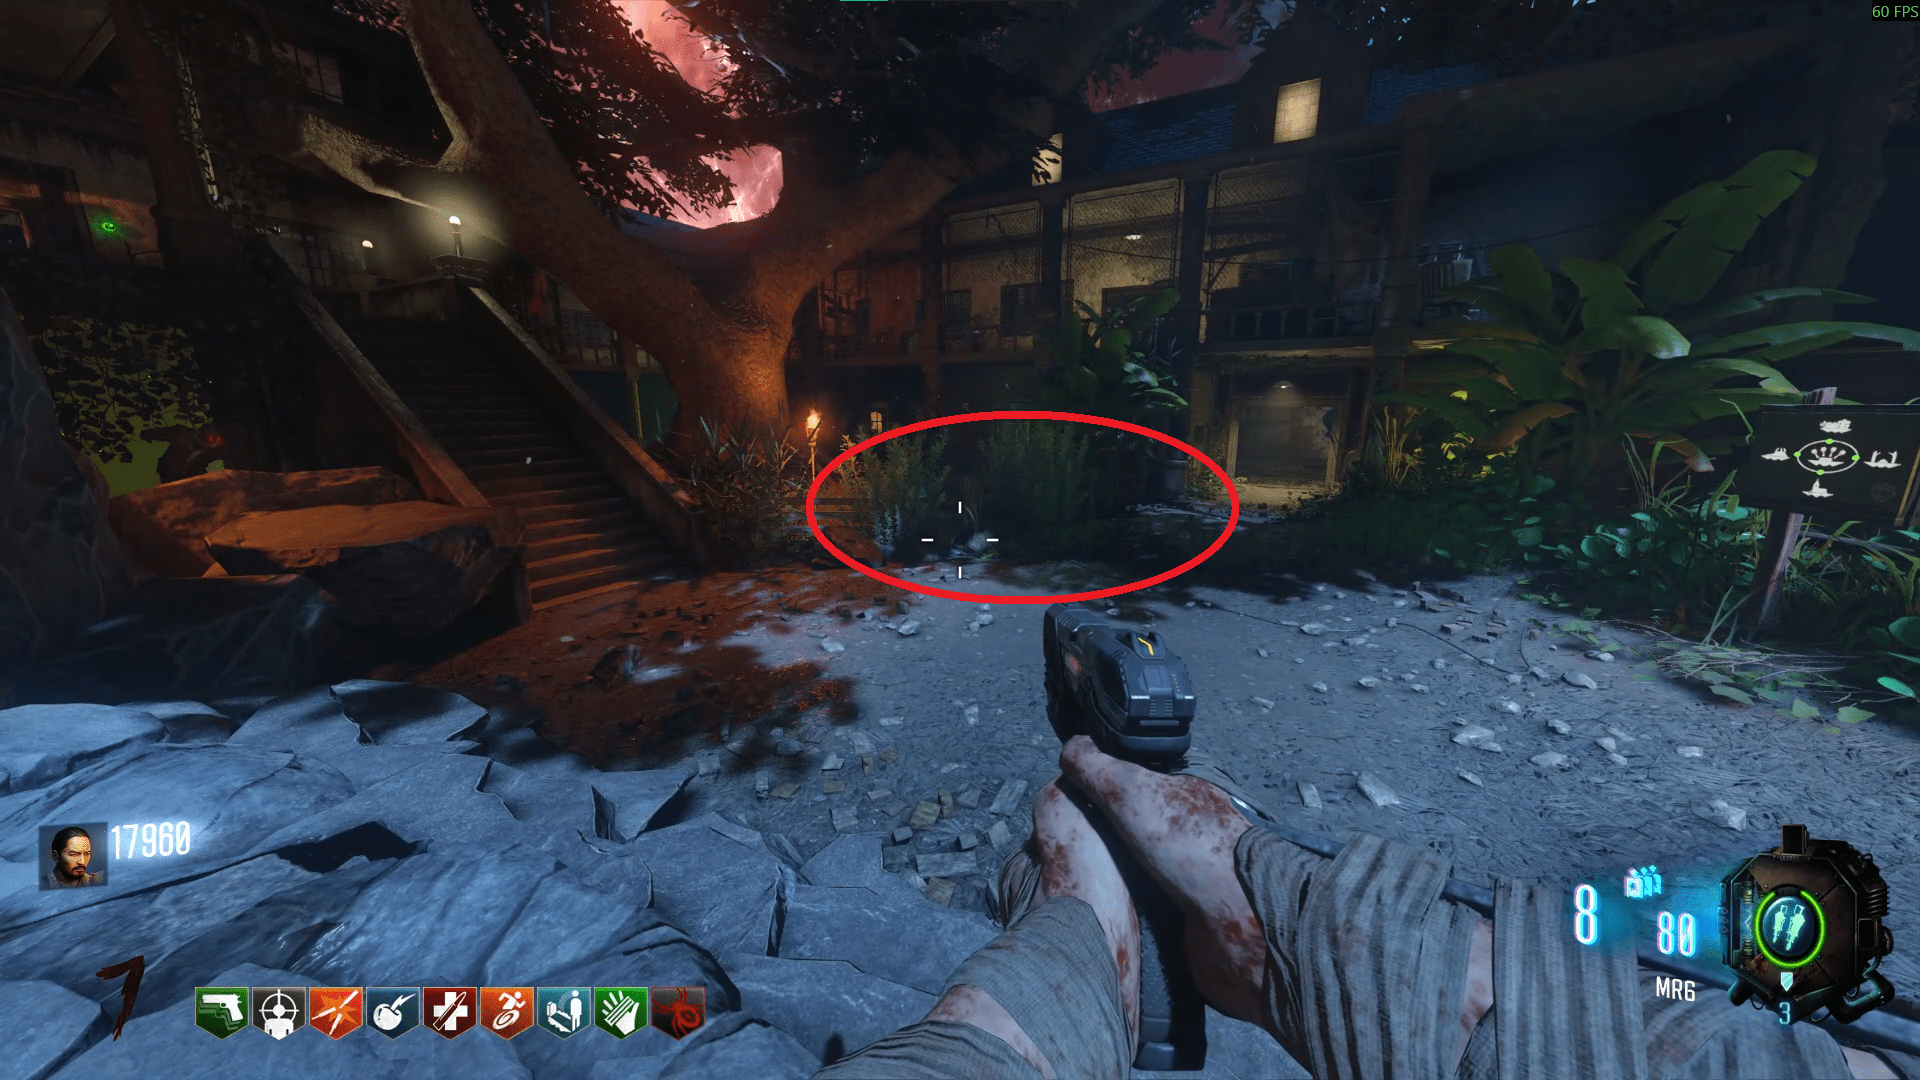
- In Verruckt, in the upstairs above Speed Cola, to the right of a cabinet with blue lights behind it.
- in Verruckt, in the upstairs above Speed Cola, behind the stairs on the right side in the corner.
- In Verruckt, in the upstairs, between the Zetsubou No Shima test tubes.
- In Verruckt, besides the jump pad before heading into Mob of the Dead, near two chairs.
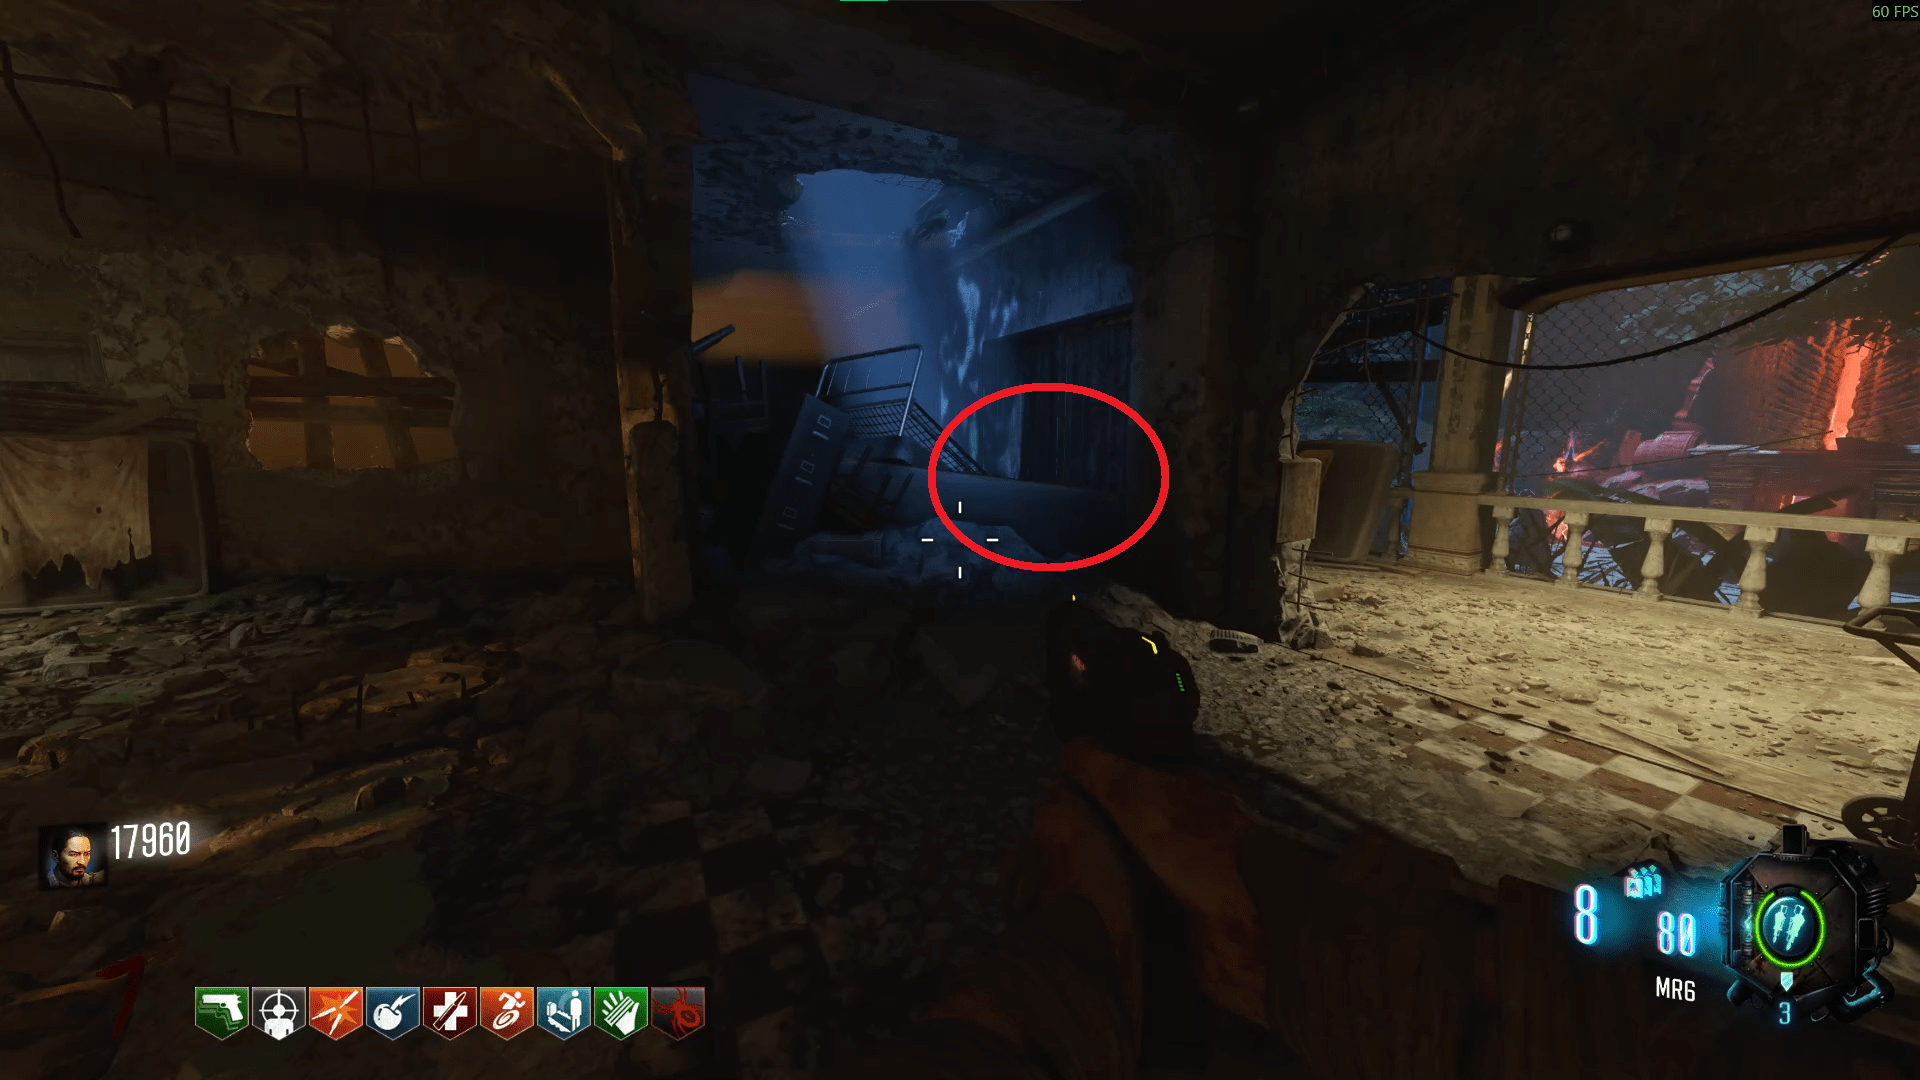
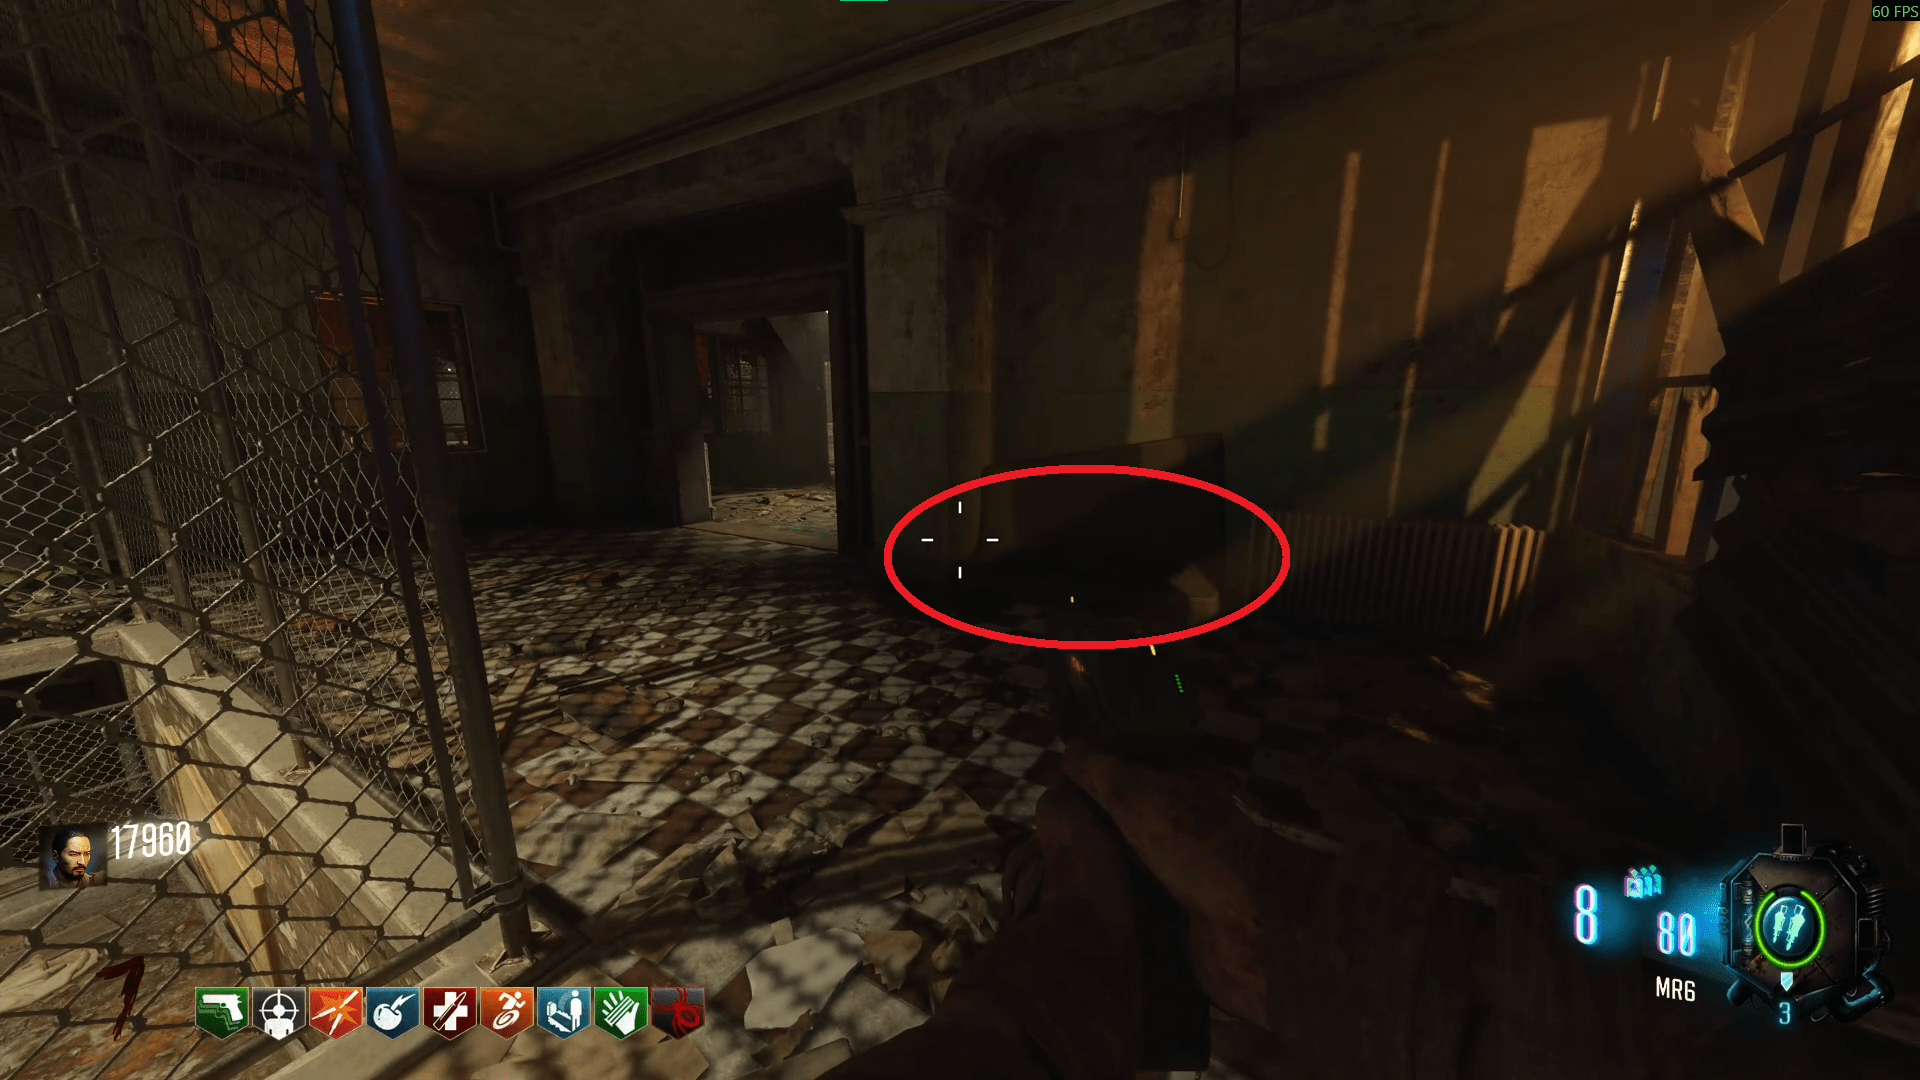
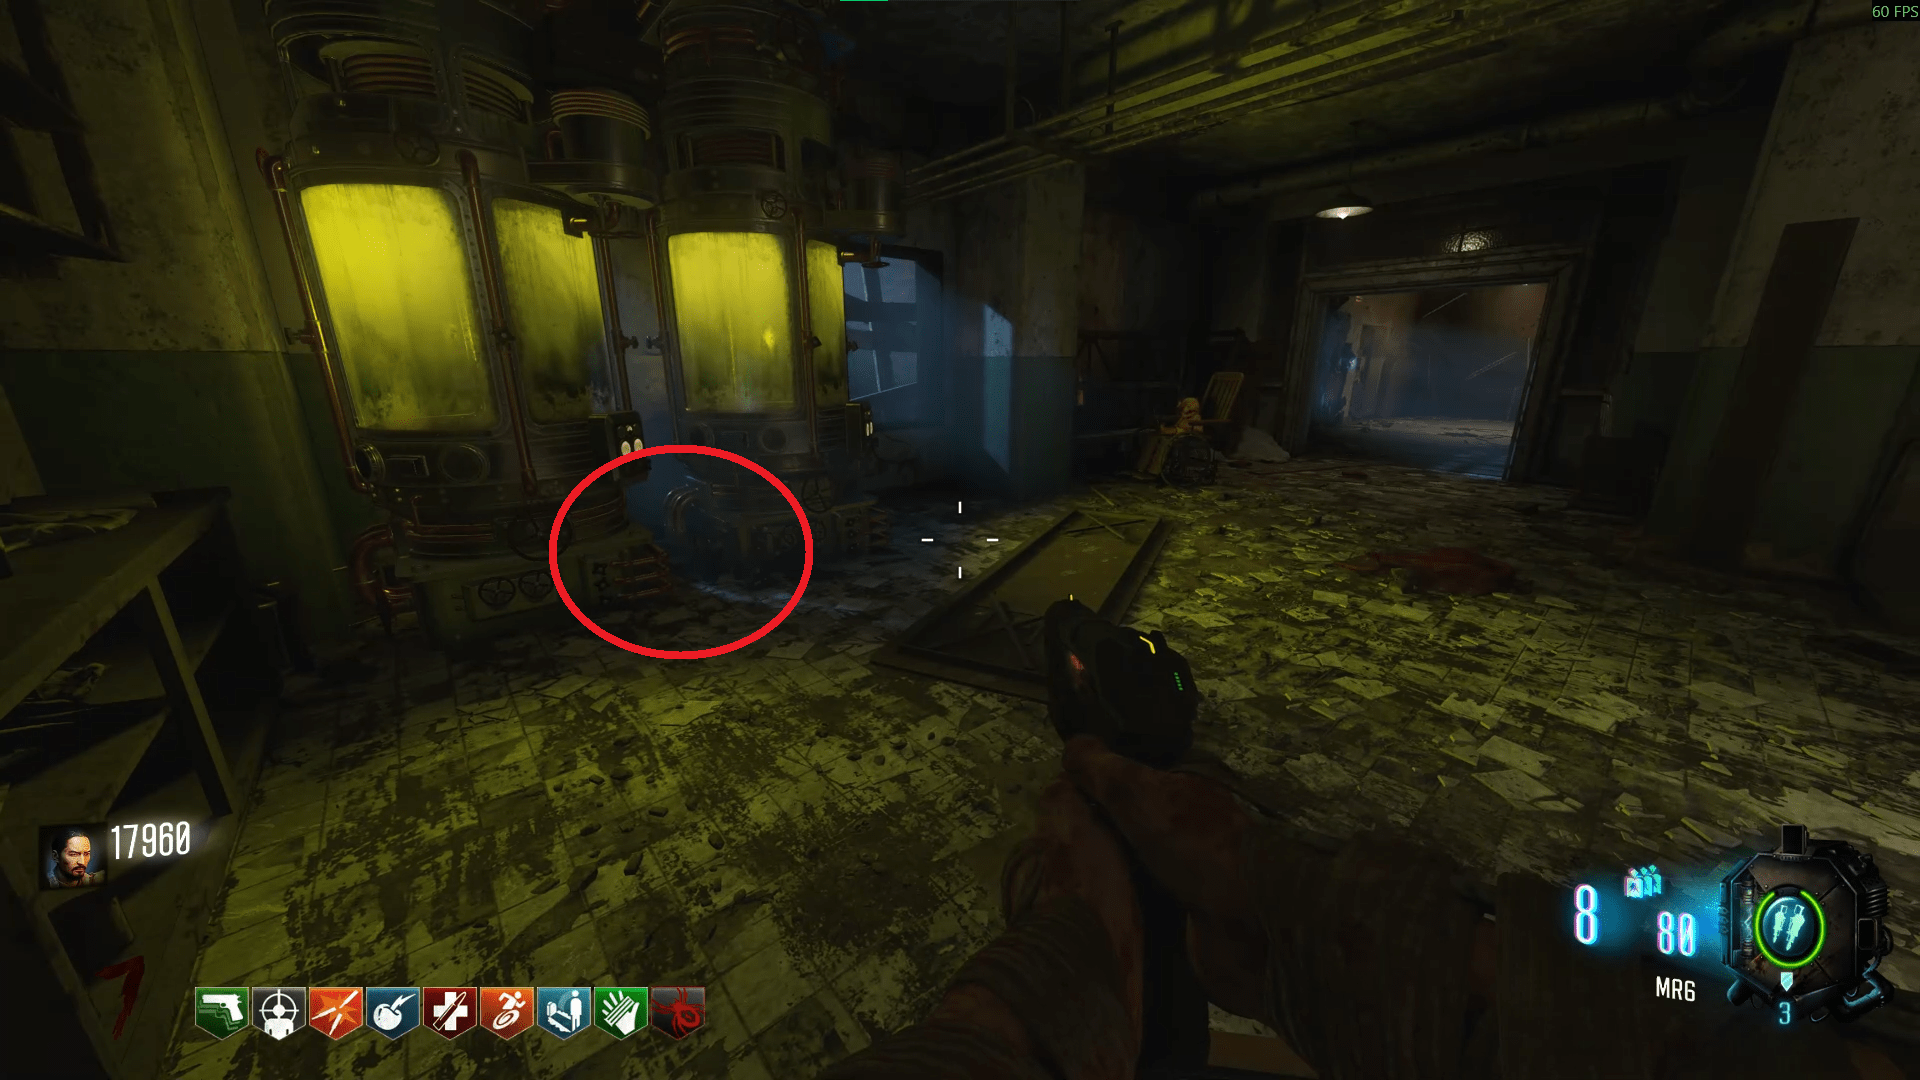
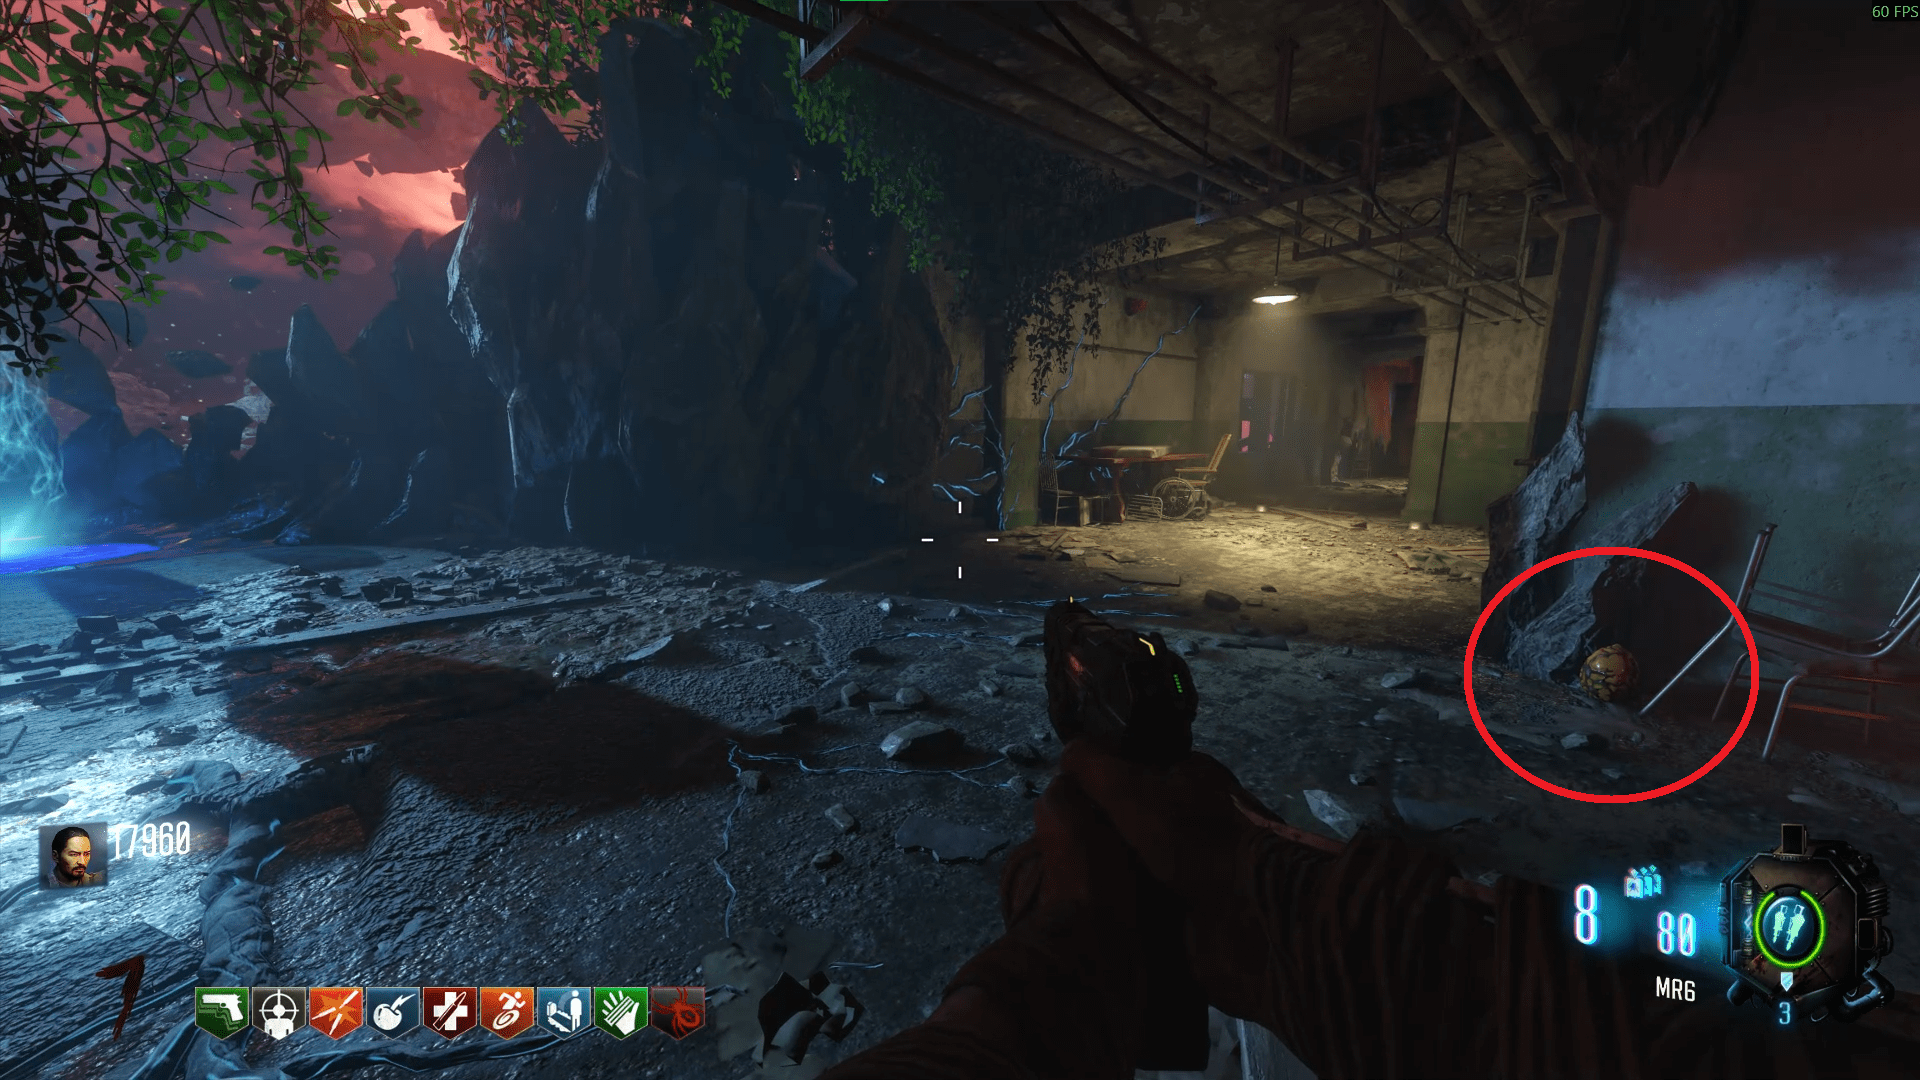
- In Mob of the Dead, directly to the right towards the Corruption Engine, where it meets the cells.
- In Buried, heading into the tunnels from Mob to Origins, on the right hand side, look left before the KN-44 wallbuy.
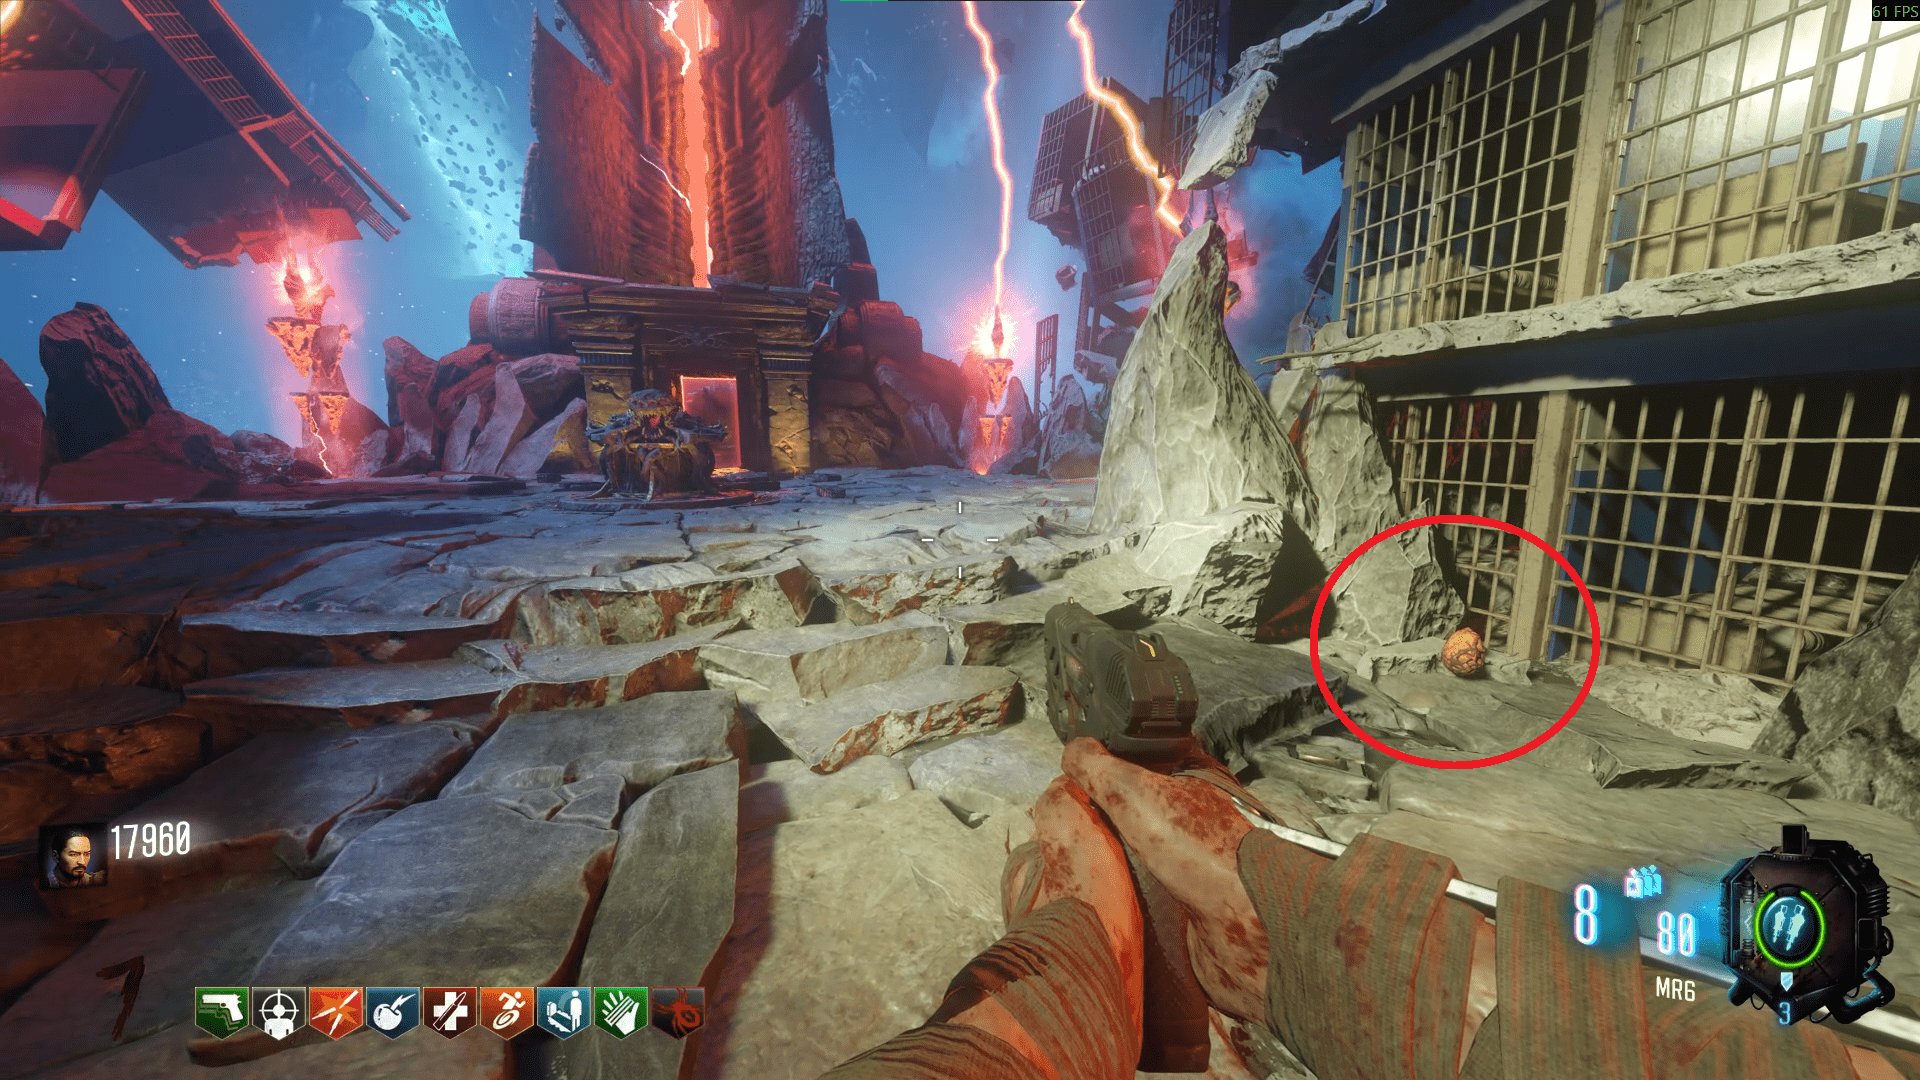
- In Origins, at the top of the Mound under a pile of snow near the Wunderfizz.
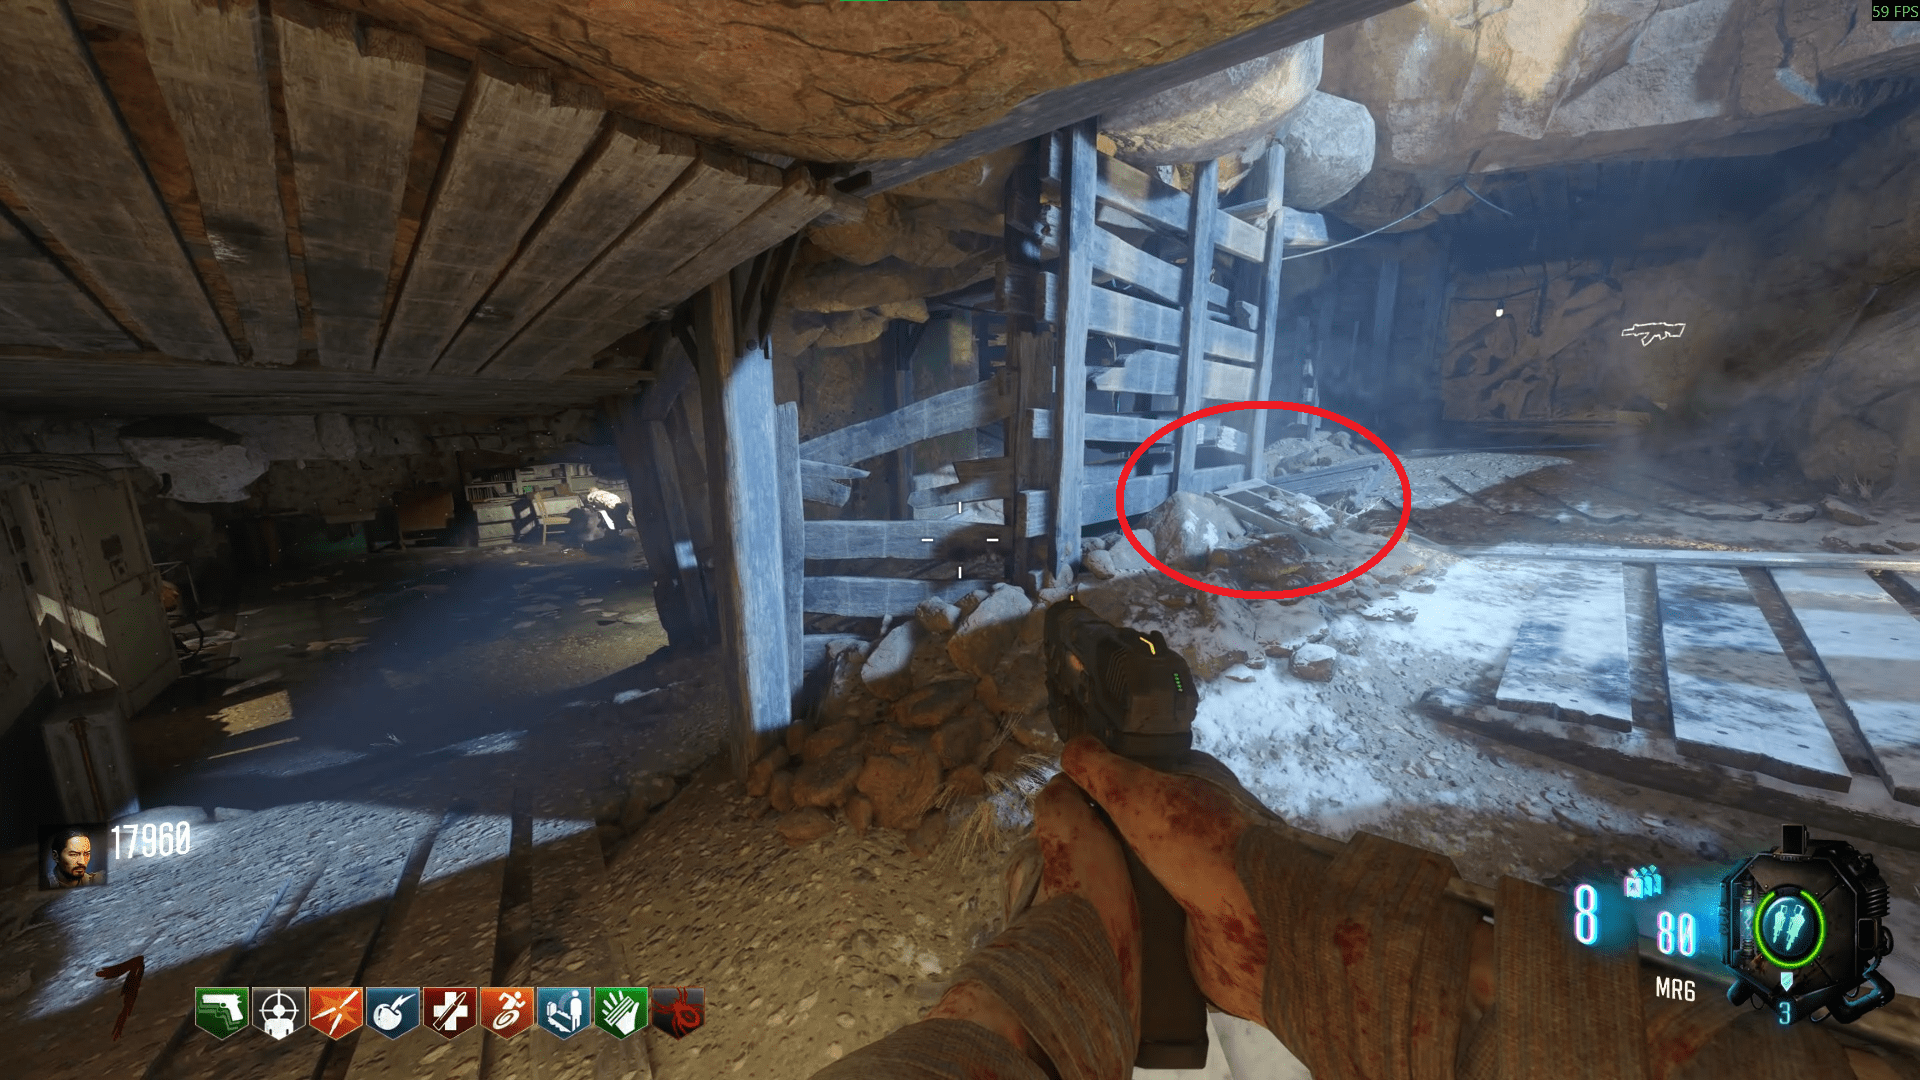
- In Origins, take a left from the Mound towards the Vesper. It's in the rocks on the left at the end.
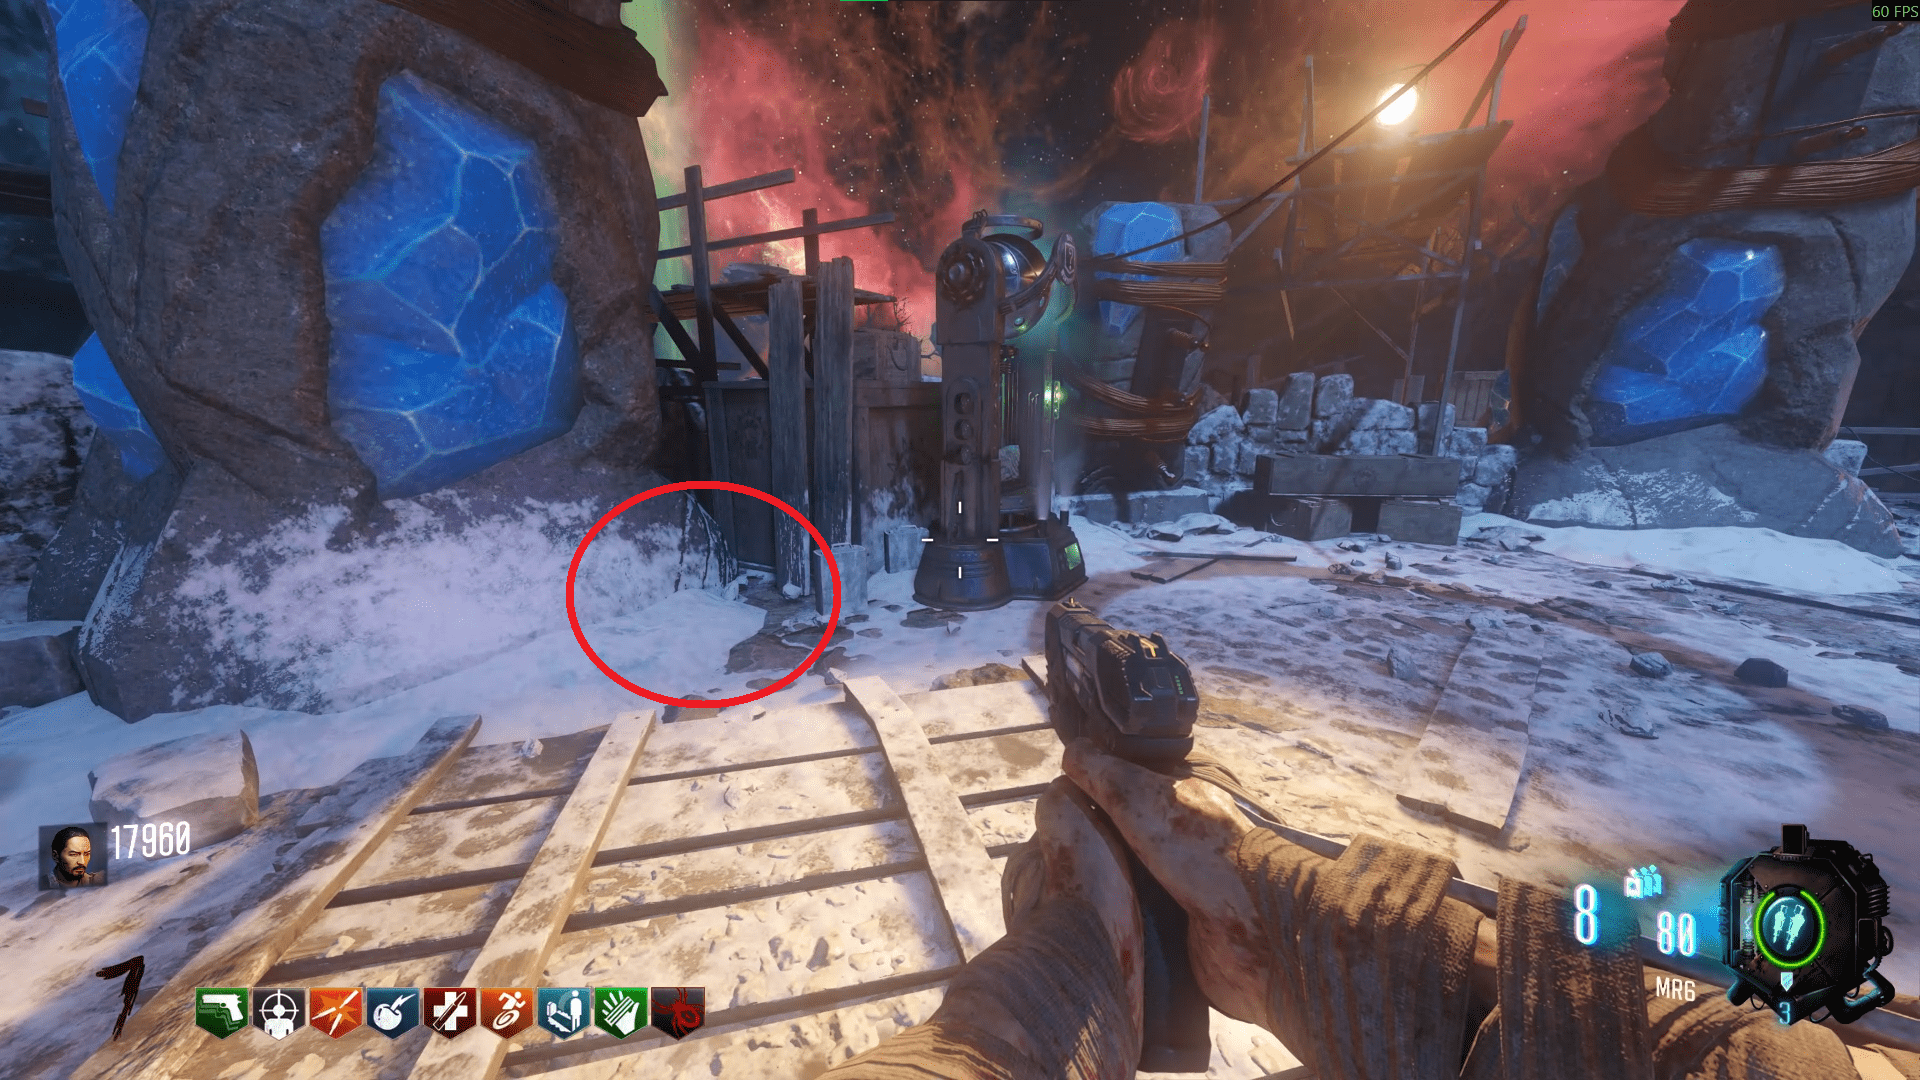
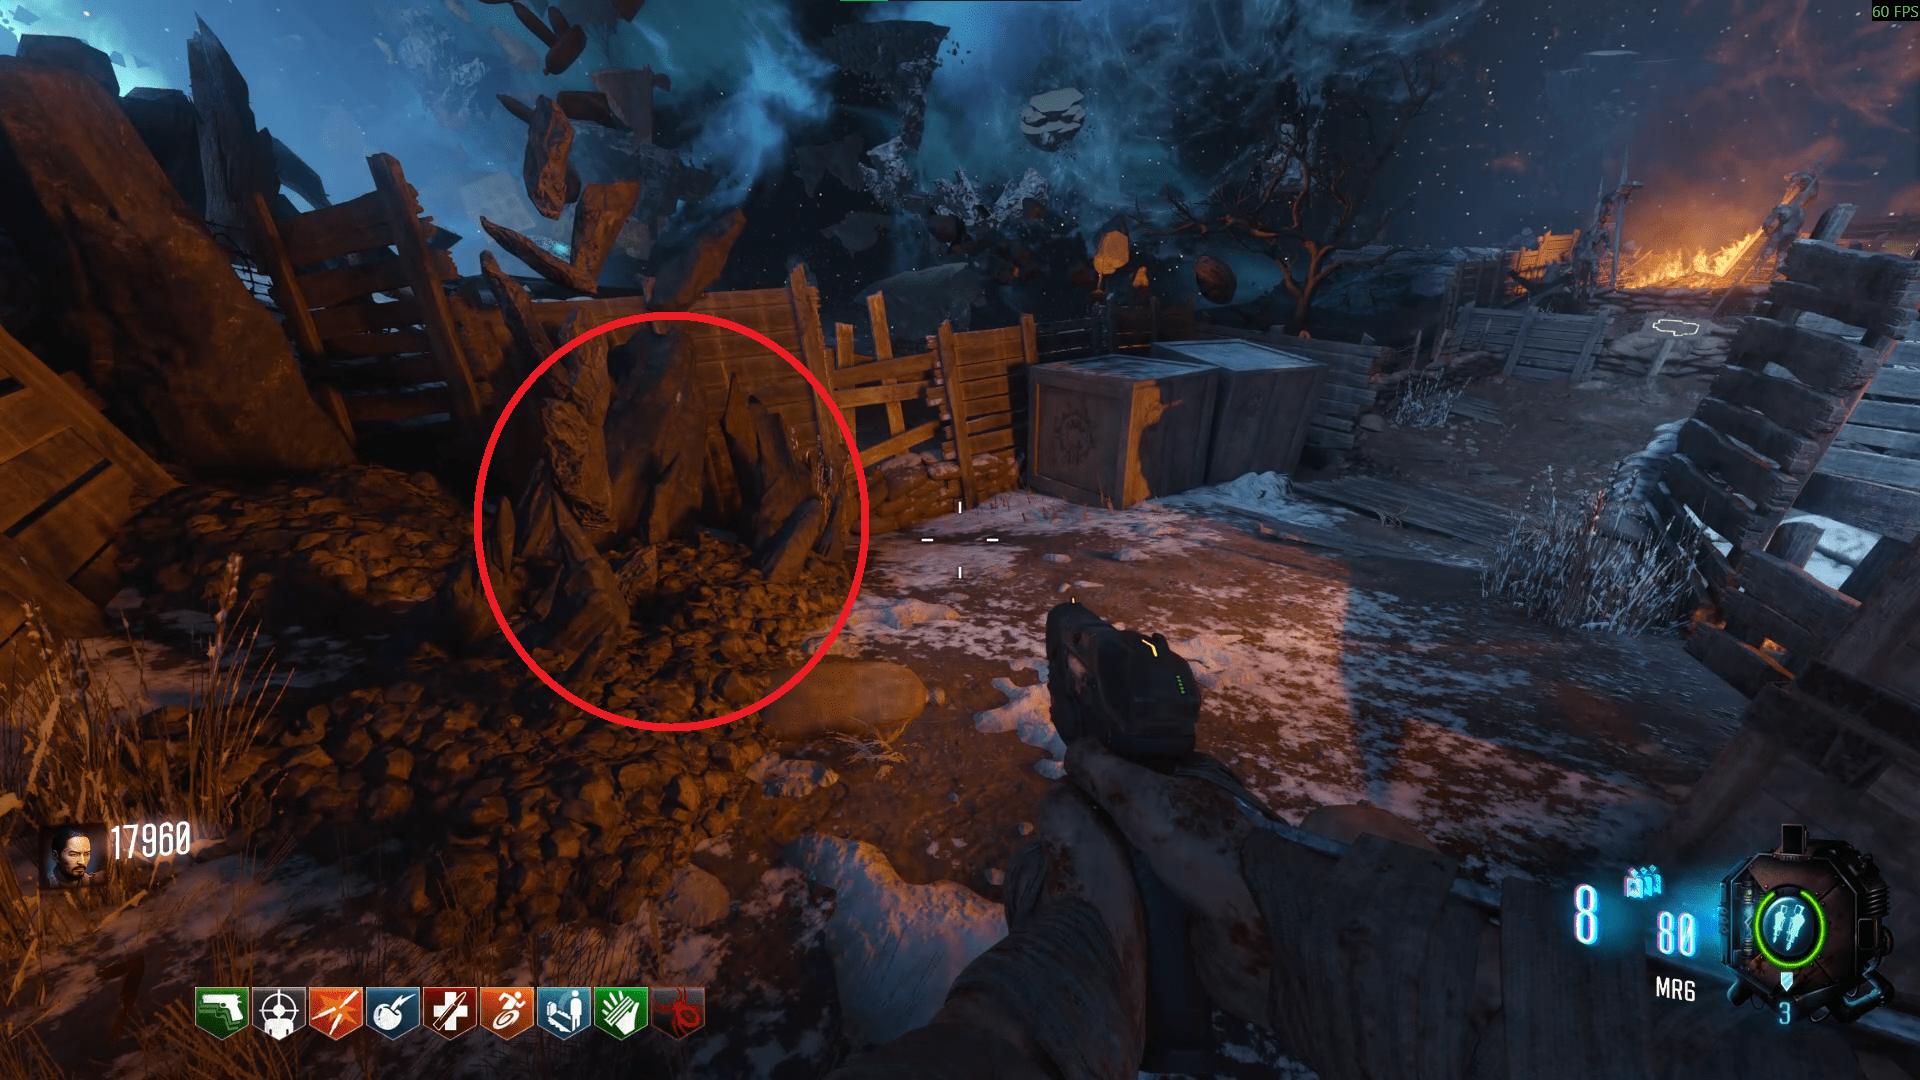
Once you have an egg, place it into the Giant Apothicon's stomach receptacles and get 10 kills to turn it into a gateworm. You can gather all four eggs before getting the kills if you wish too.
I've also seen that an egg will spawn per player currently on the map at a time, so if you're playing solo, you'll need to run around four times, while with four players, all four will spawn at the same time. Take this with a grain of salt however, as I personally haven't seen this happen.
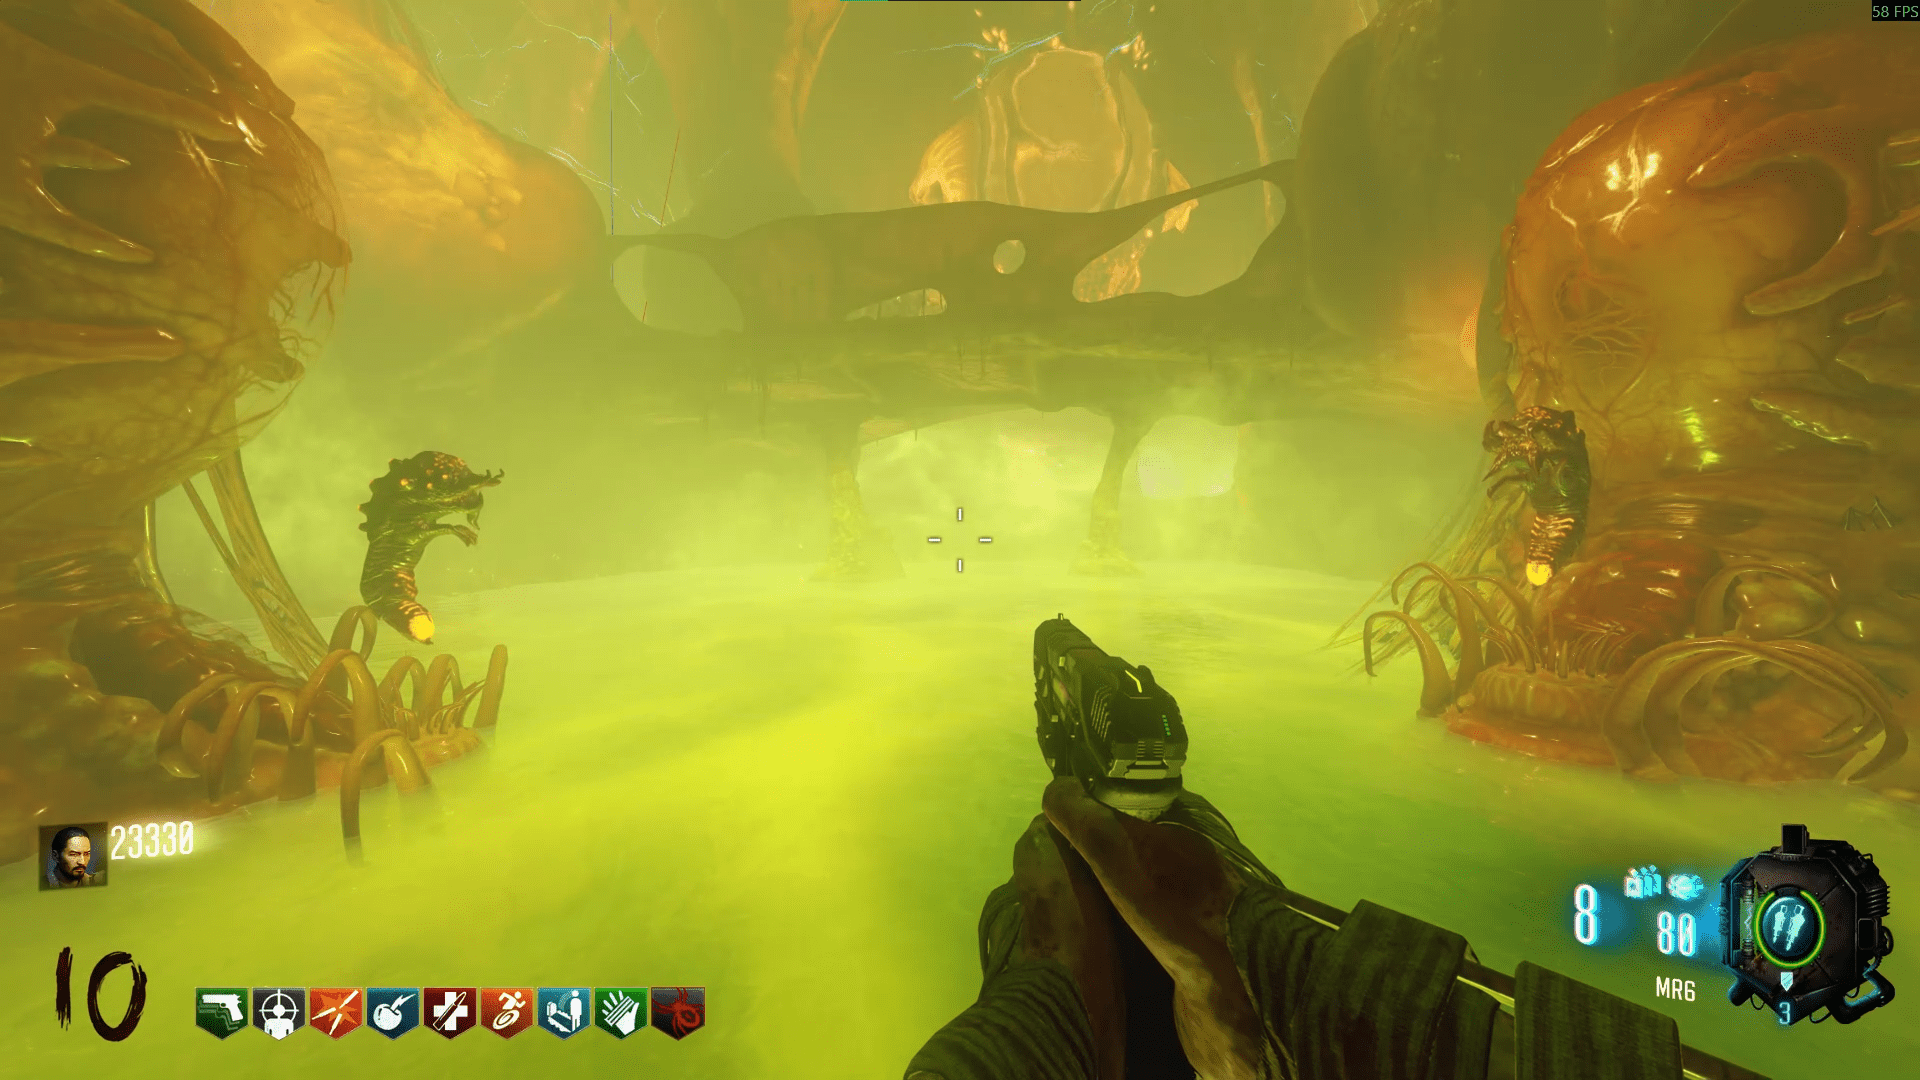
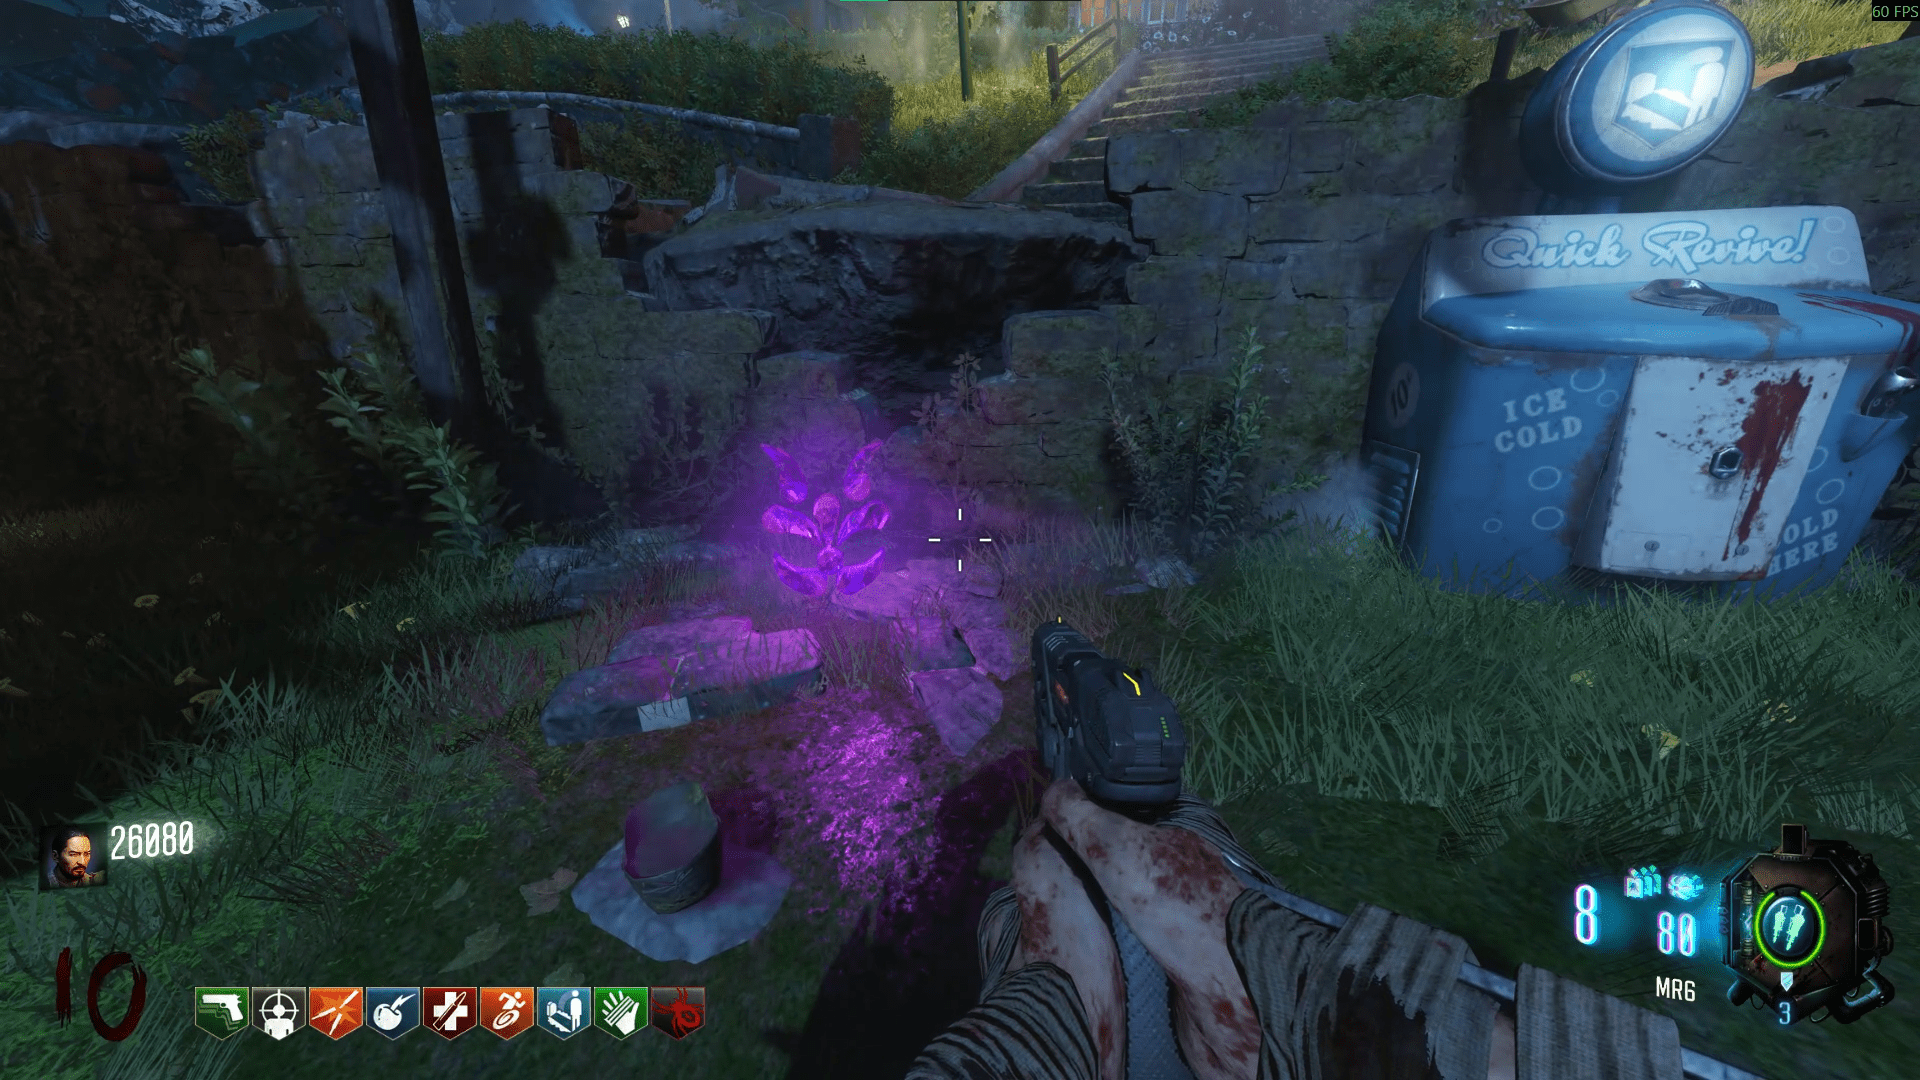
Pick up the gateworm and run around the four islands to find the runic symbols. Thankfully these are so much easier to spot given the distance for the sonar beep being pretty generous. There will only be one runic symbol per island however, so once you find it on that island, you no longer need to go back. You know you're close when the sonar beep starts then gets more intense. Just interact when the beeps get really quick and the gateworm will be released, then pick up the rune.
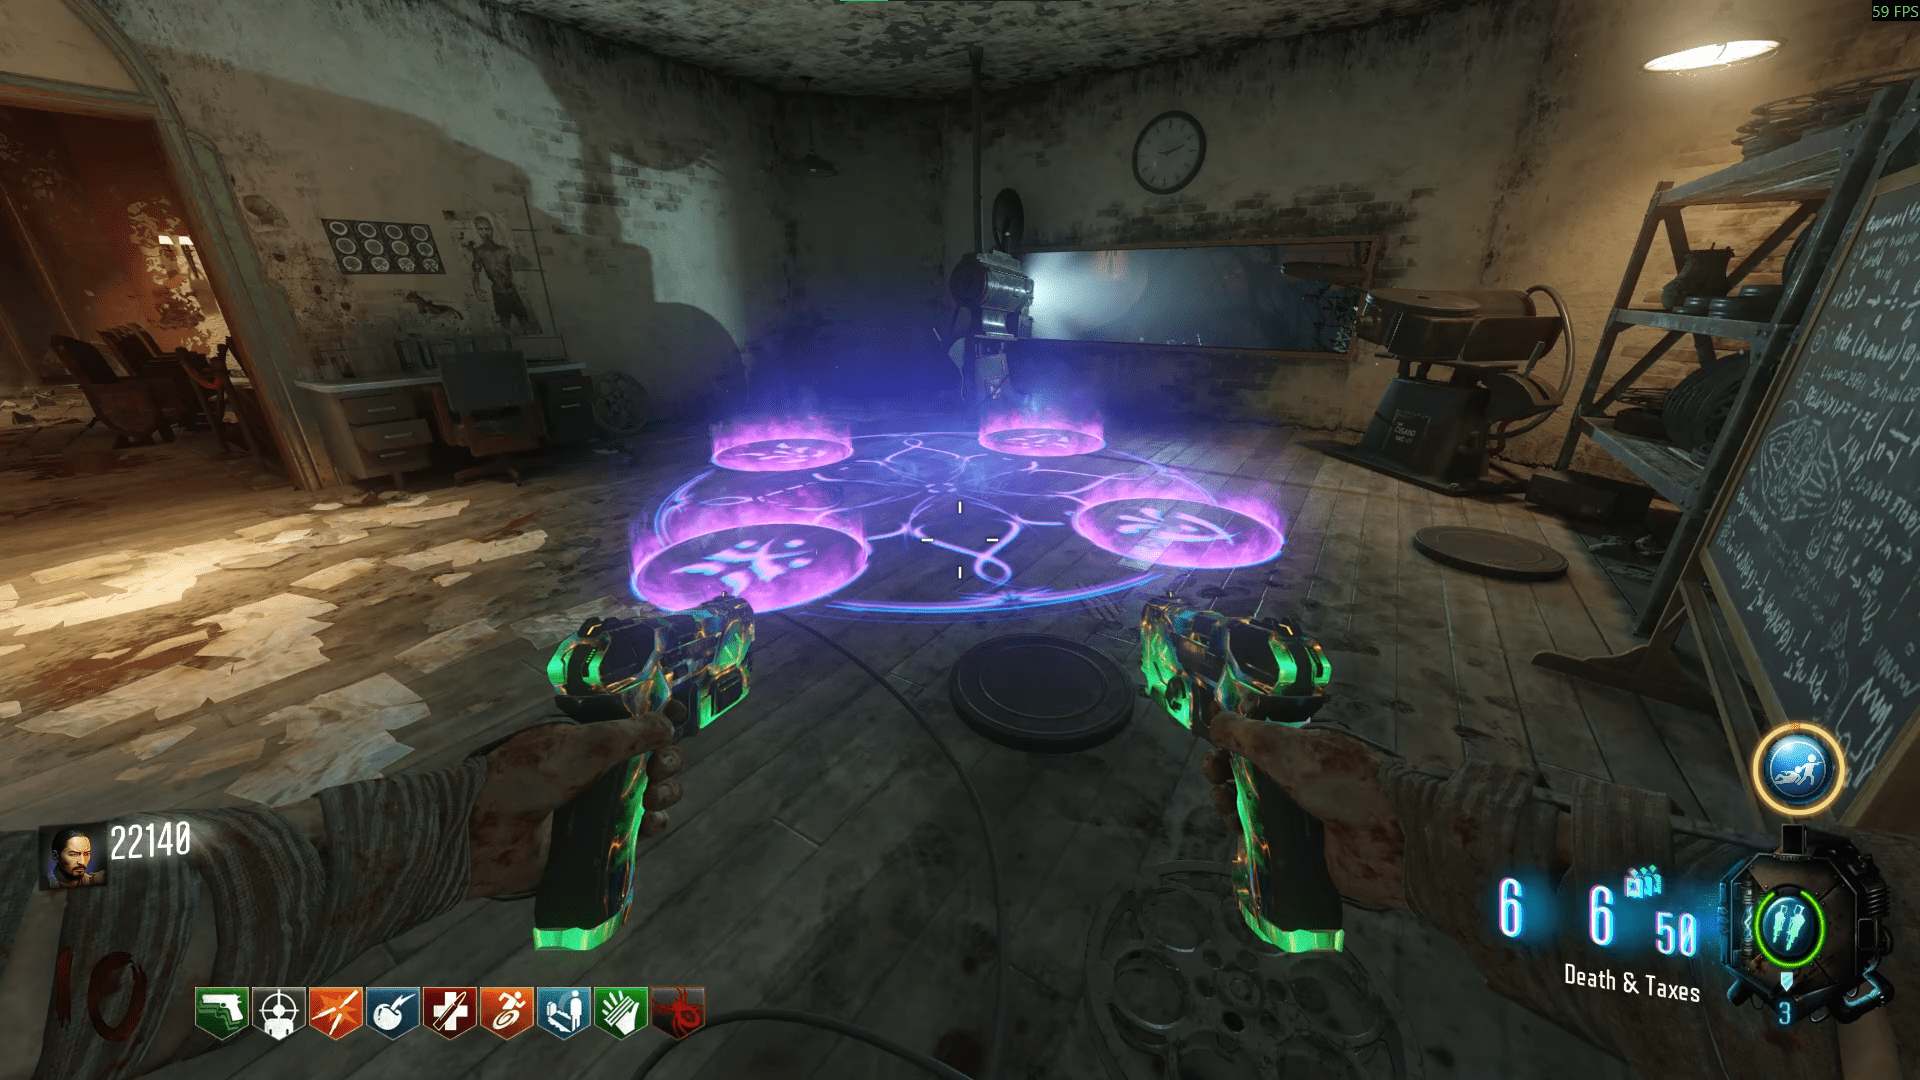
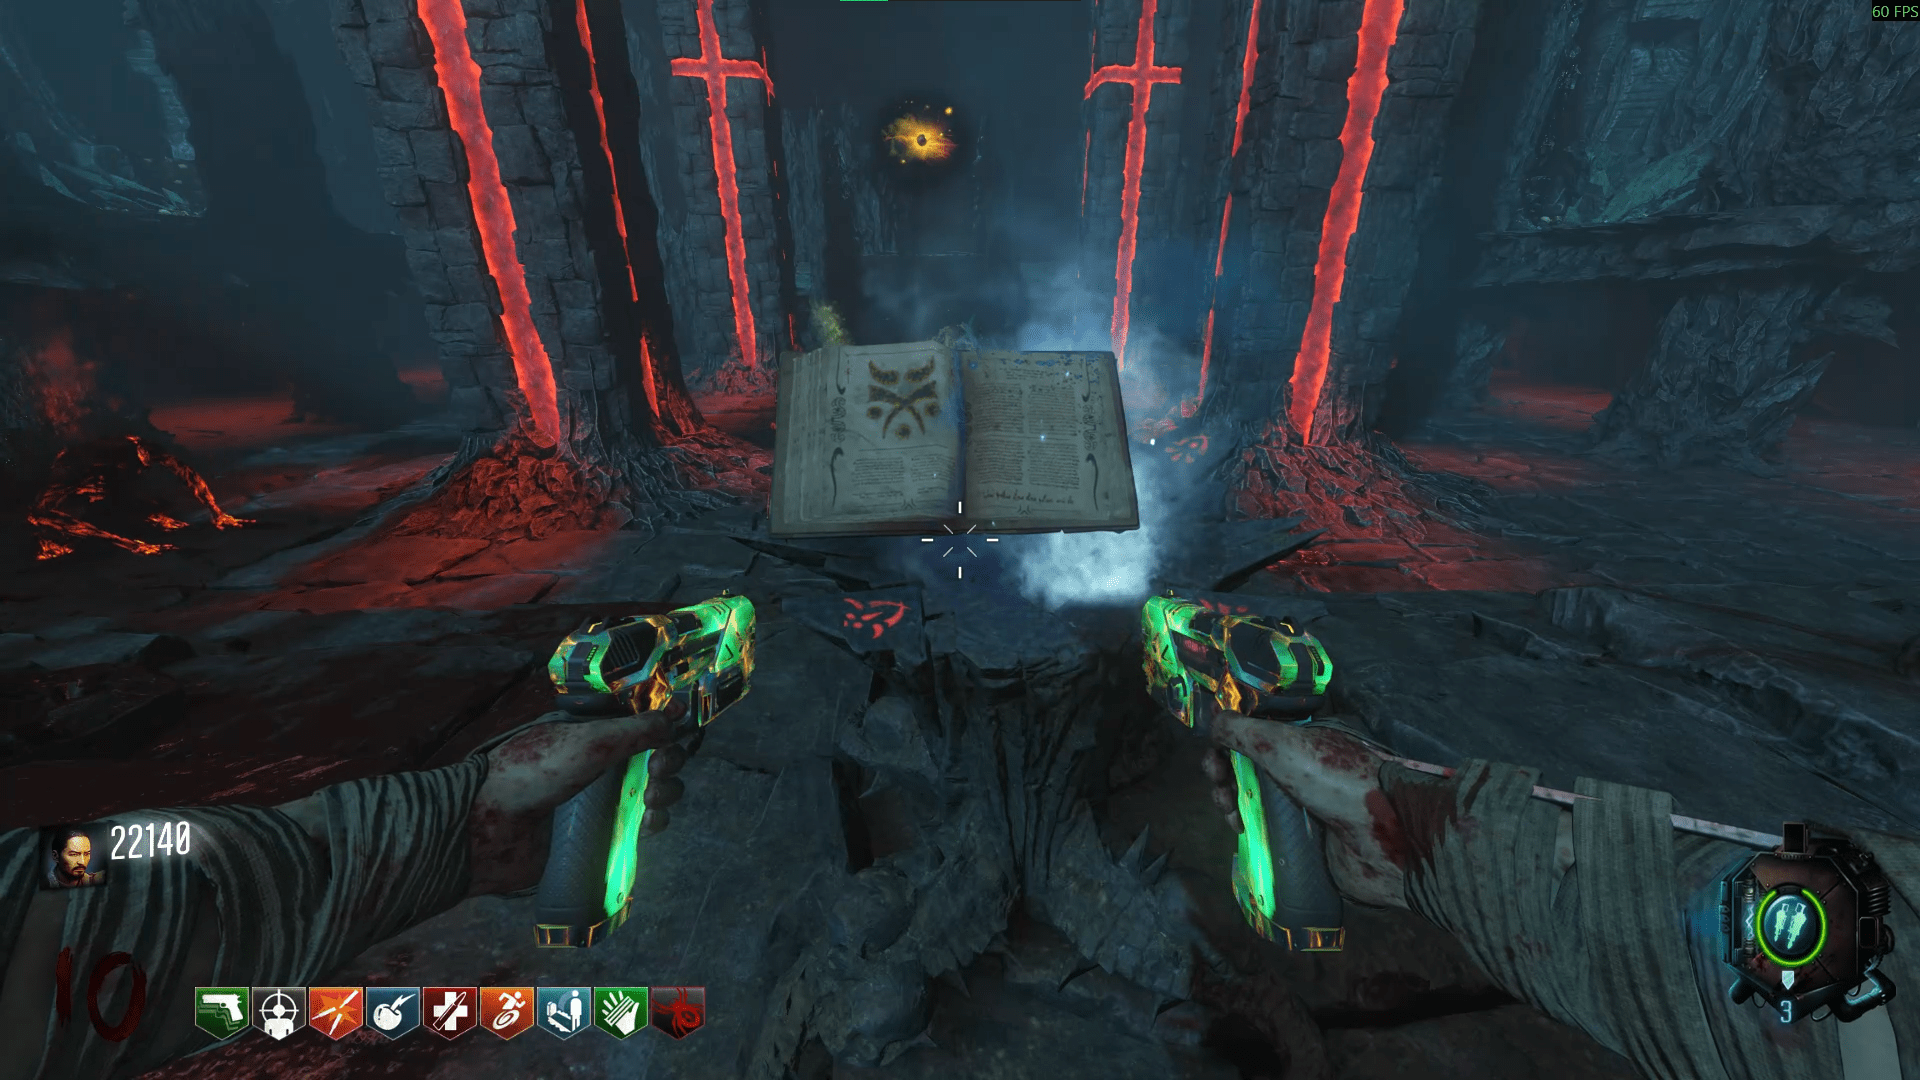
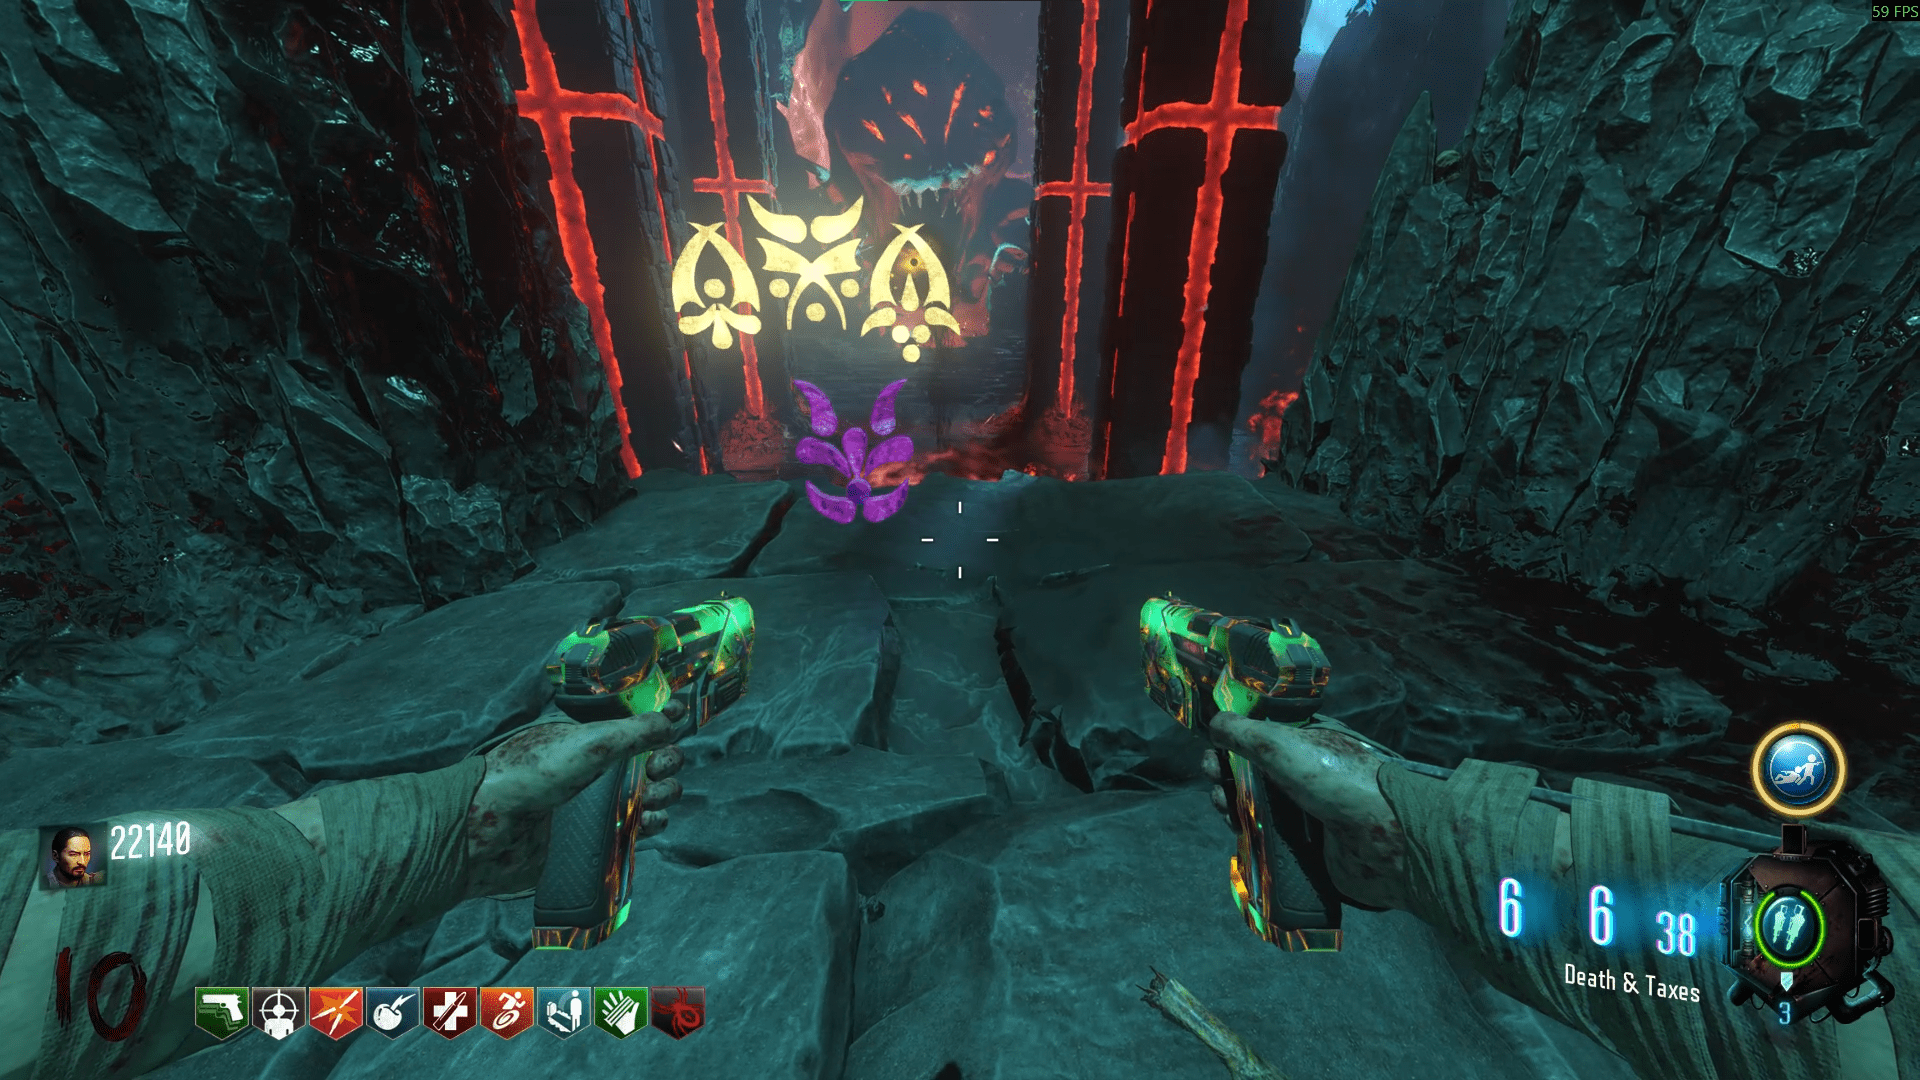
Go to the Kronorium lectern in the front of the room and interact with it. Make sure your graphics are set to at least medium as you'll barely make out what they say in low. Take a note or screenshot which symbols appear and in which order, as afterwards you'll go to the back of the room on the cliff ledge and input the same order of symbols.
Upon the last interaction of the symbols, the room will change and become like a big mini game where you have to kill the Margwa's to succeed. There are four stages here, and may or may not be in the same order as listed;- Spotlights - The room will be red and you'll survive by staying in the lights.
- Walls - Walls will be placed in the arena blocking your path. They act like the ones in Origins.
- Void - Pillars of void energy will cause damage to you when you are close to them.
- Lava - Lava will slowly rise from the bottom floor, cutting off access to it. Fire walls will also spawn.
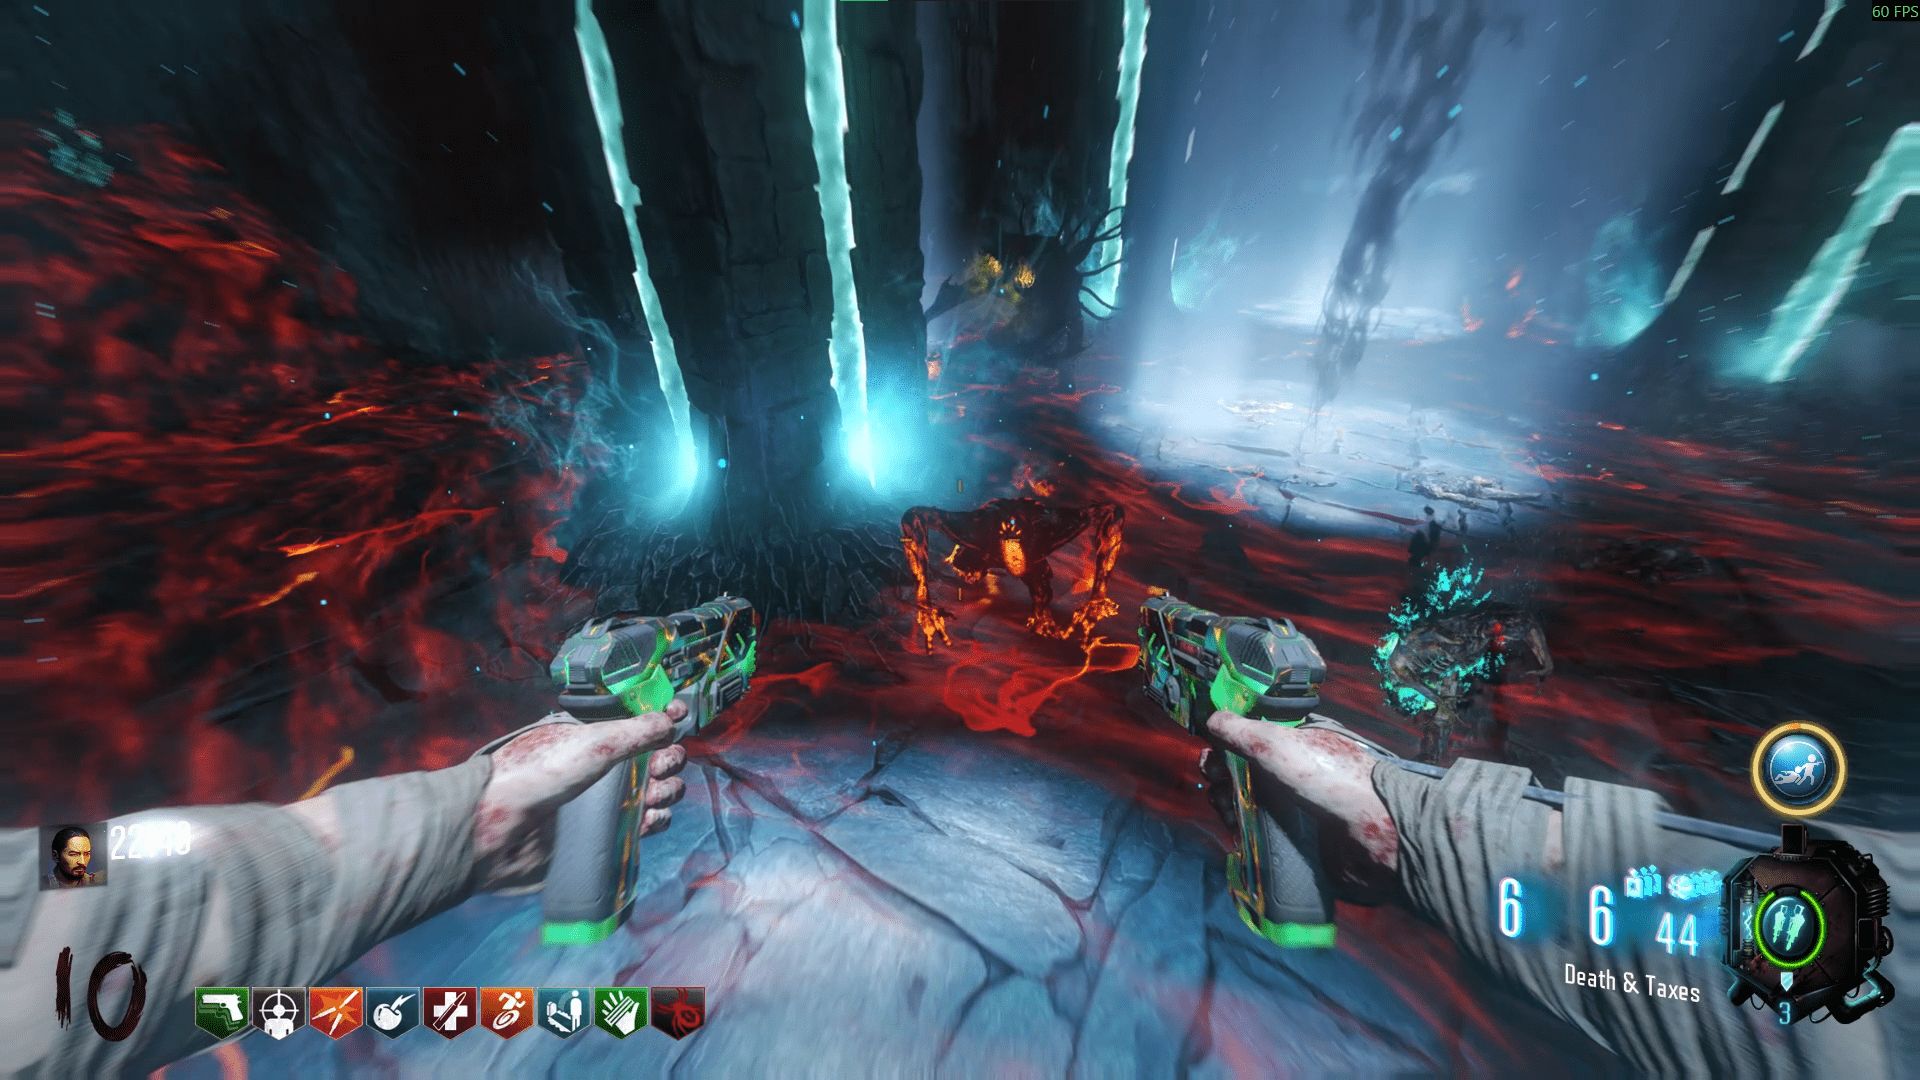
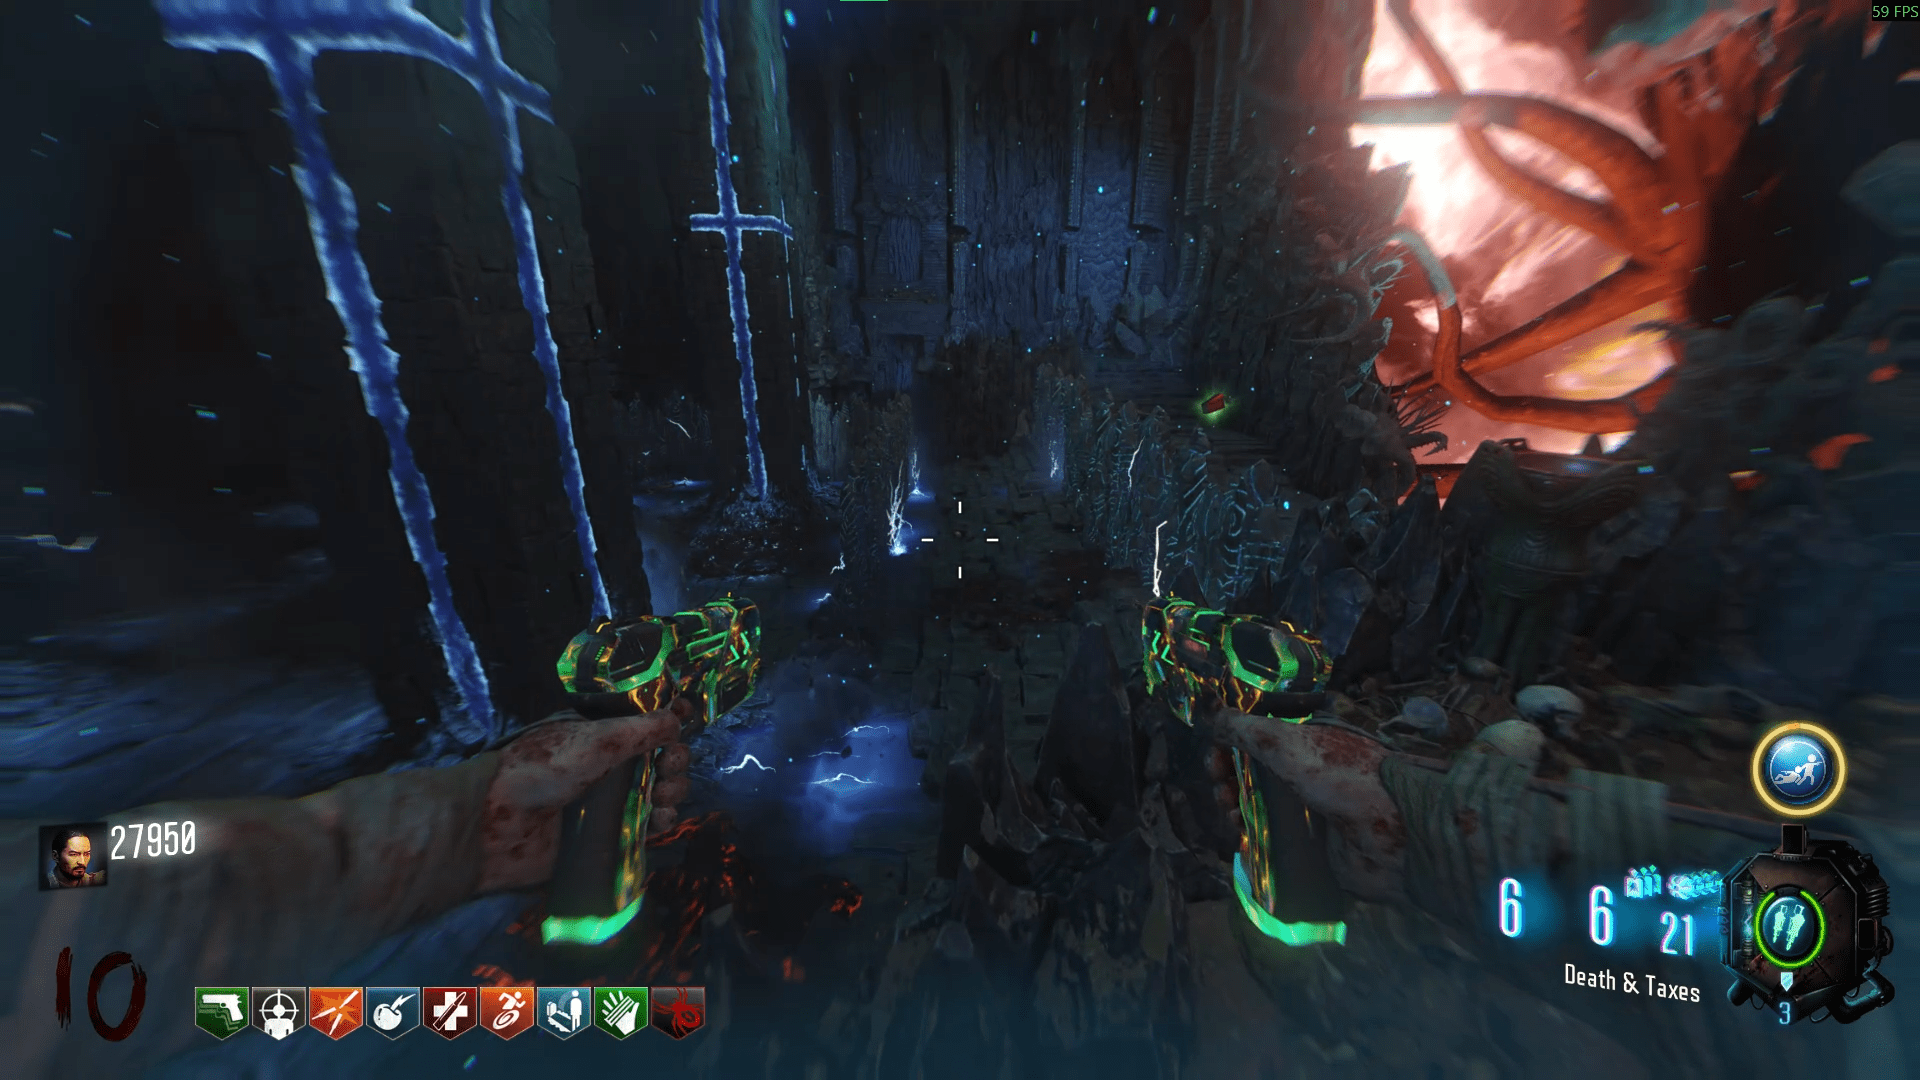
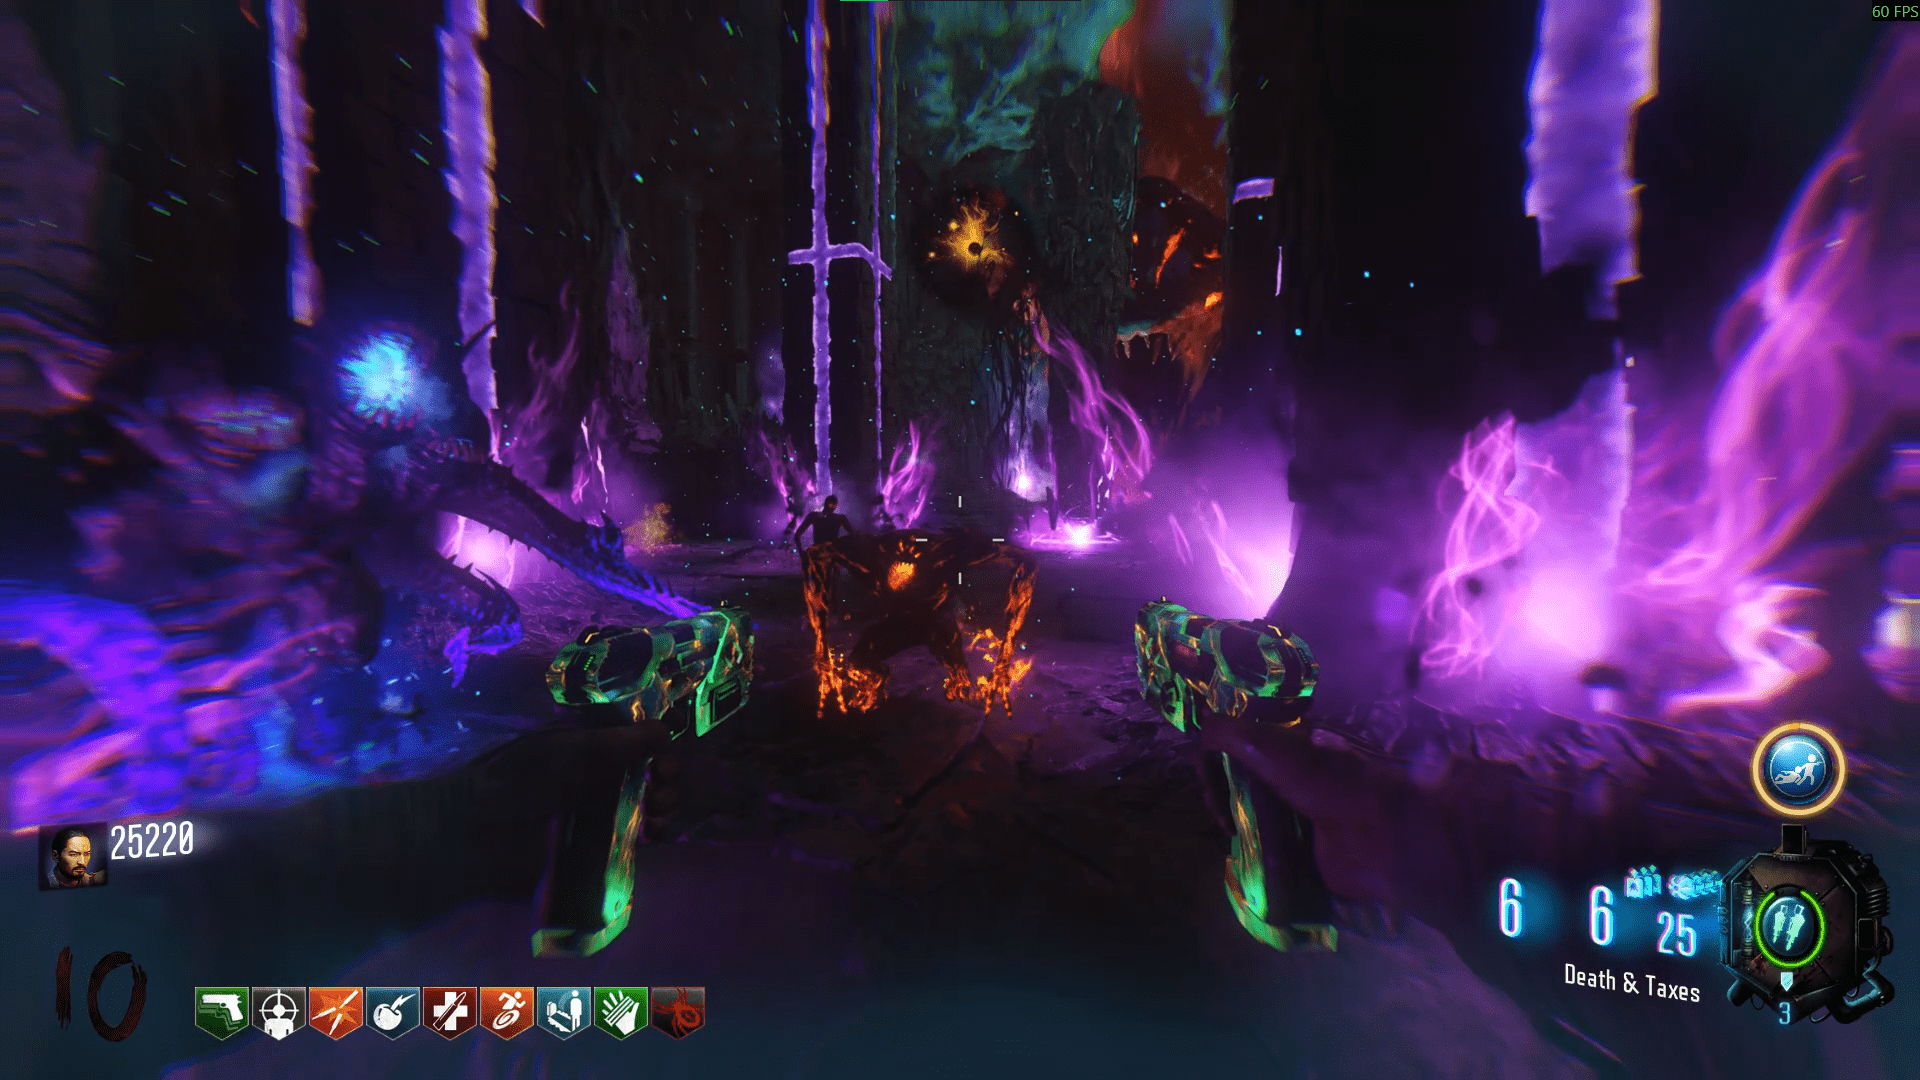
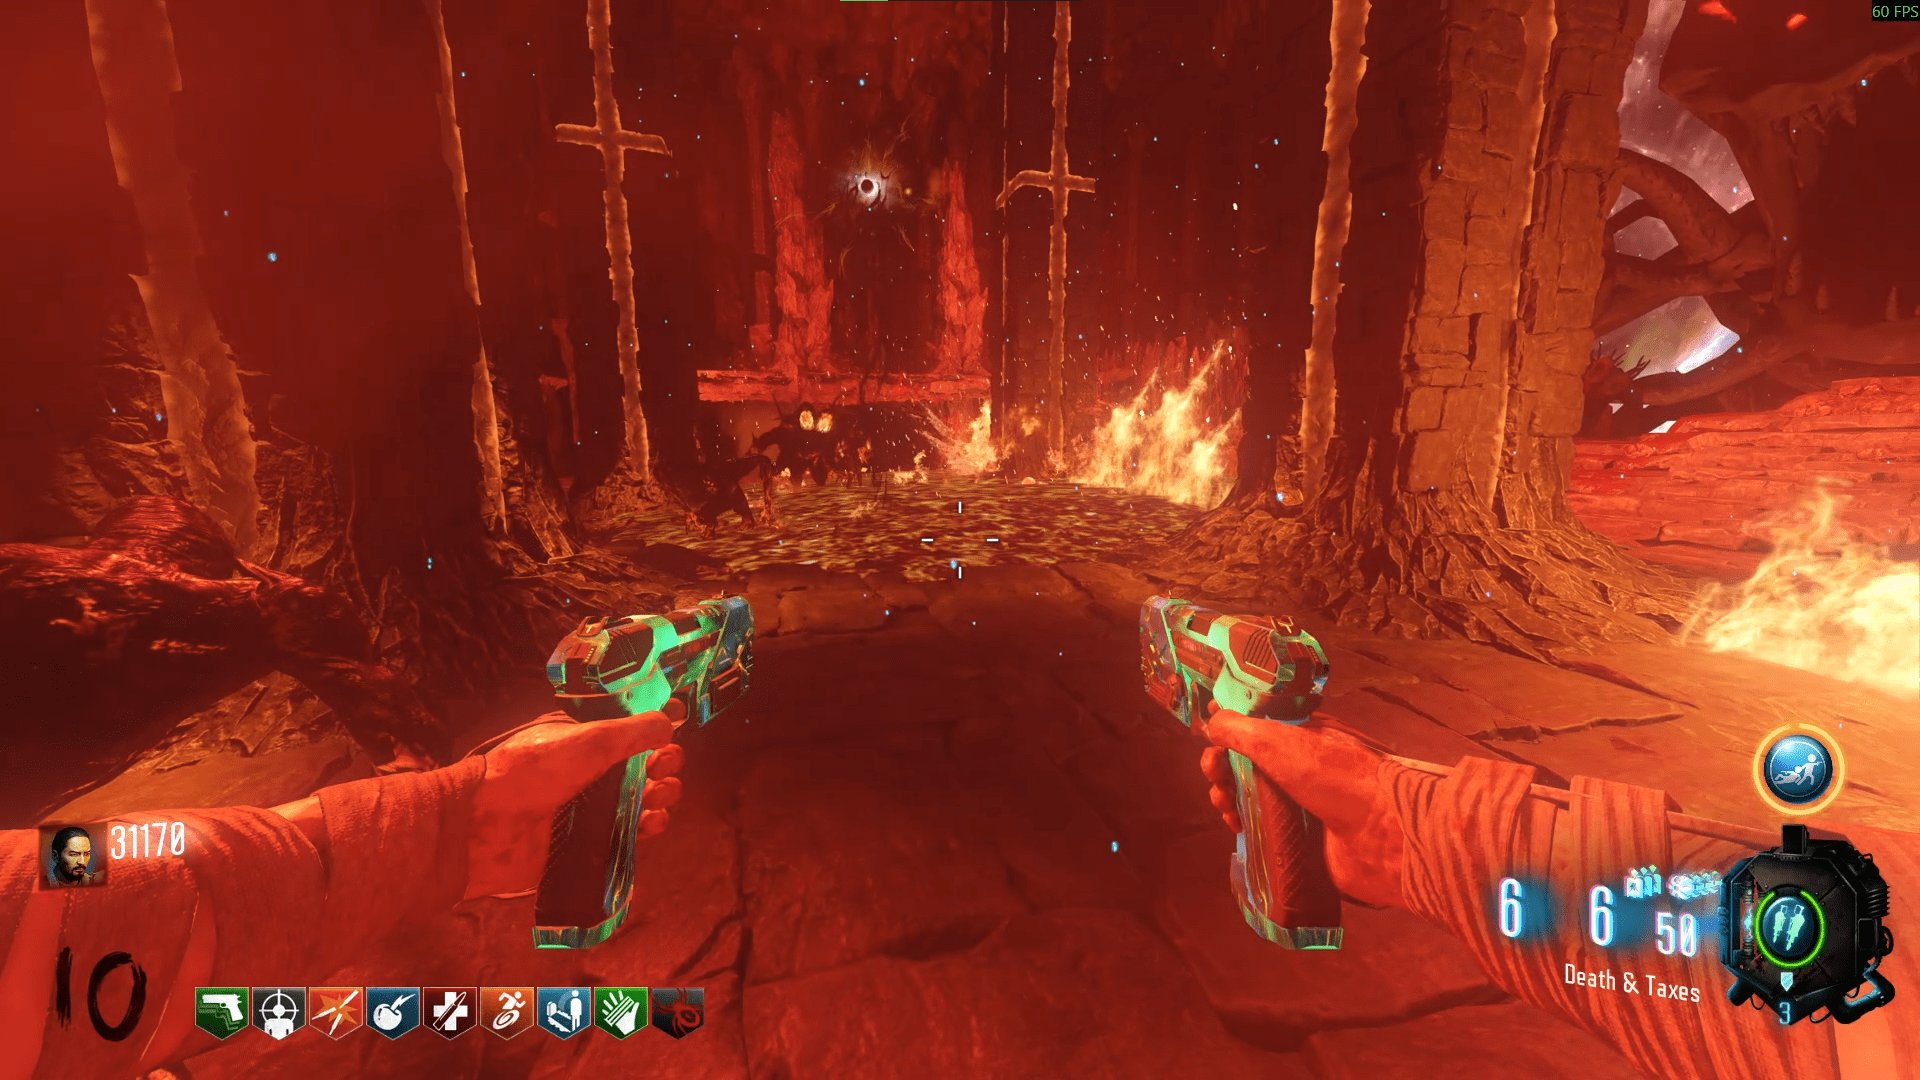
Once you've killed the two Margwas for each of the challenges, interact with the Summoning Key and you'll be teleported back into the main map with it in hand.
Revelations
- In Kino Der Toten, the radio on the chandelier on the ceiling of the theatre.
- In Der Eisendrache, the clock on the roof of the MPD.
- In Shangri-La, the focusing stone to the left of the stairs to the Primis room.
- In Origins, a tombstone just outside the Mound on the right hand side.
- In Mob of the Dead, a music box in a cell at the back of the area.
- In Verruckt, the mounted MG-42 on the fountain.
- In Nacht, a red barrel outside a barricade.
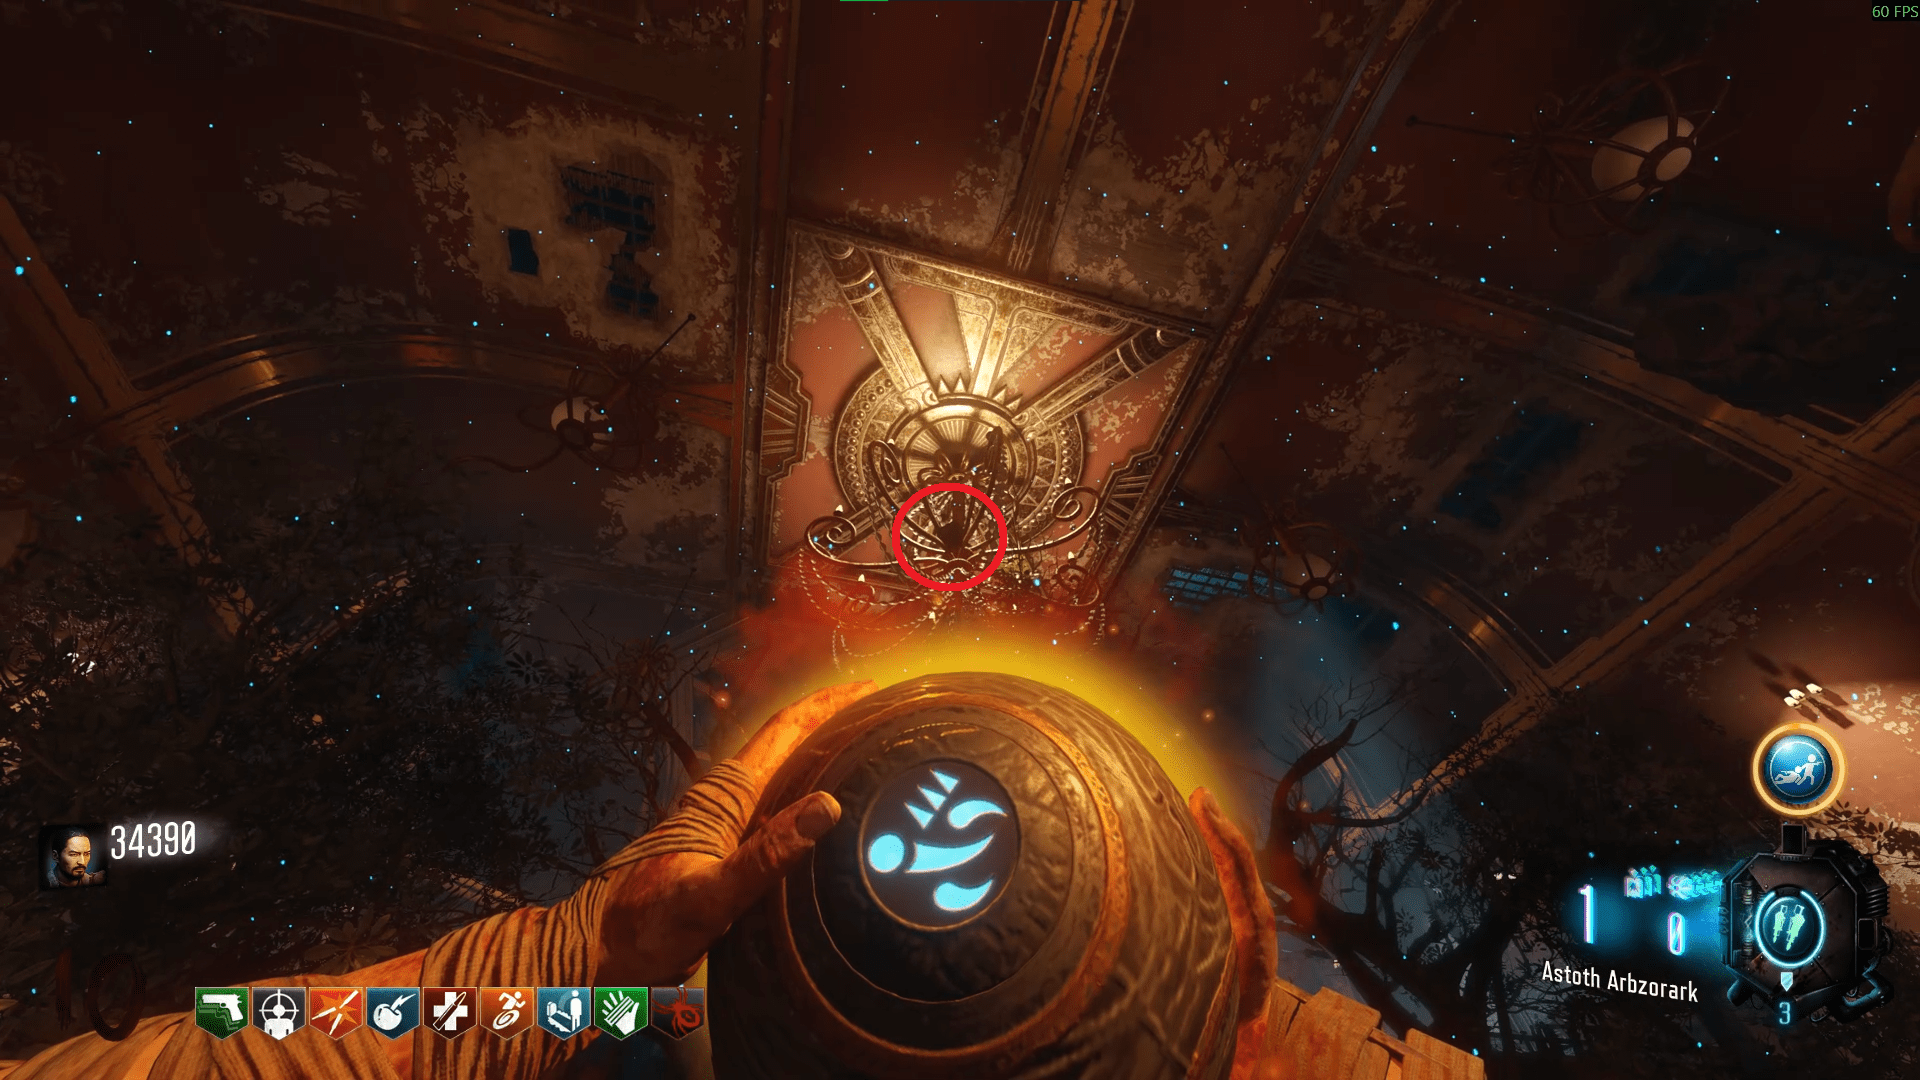
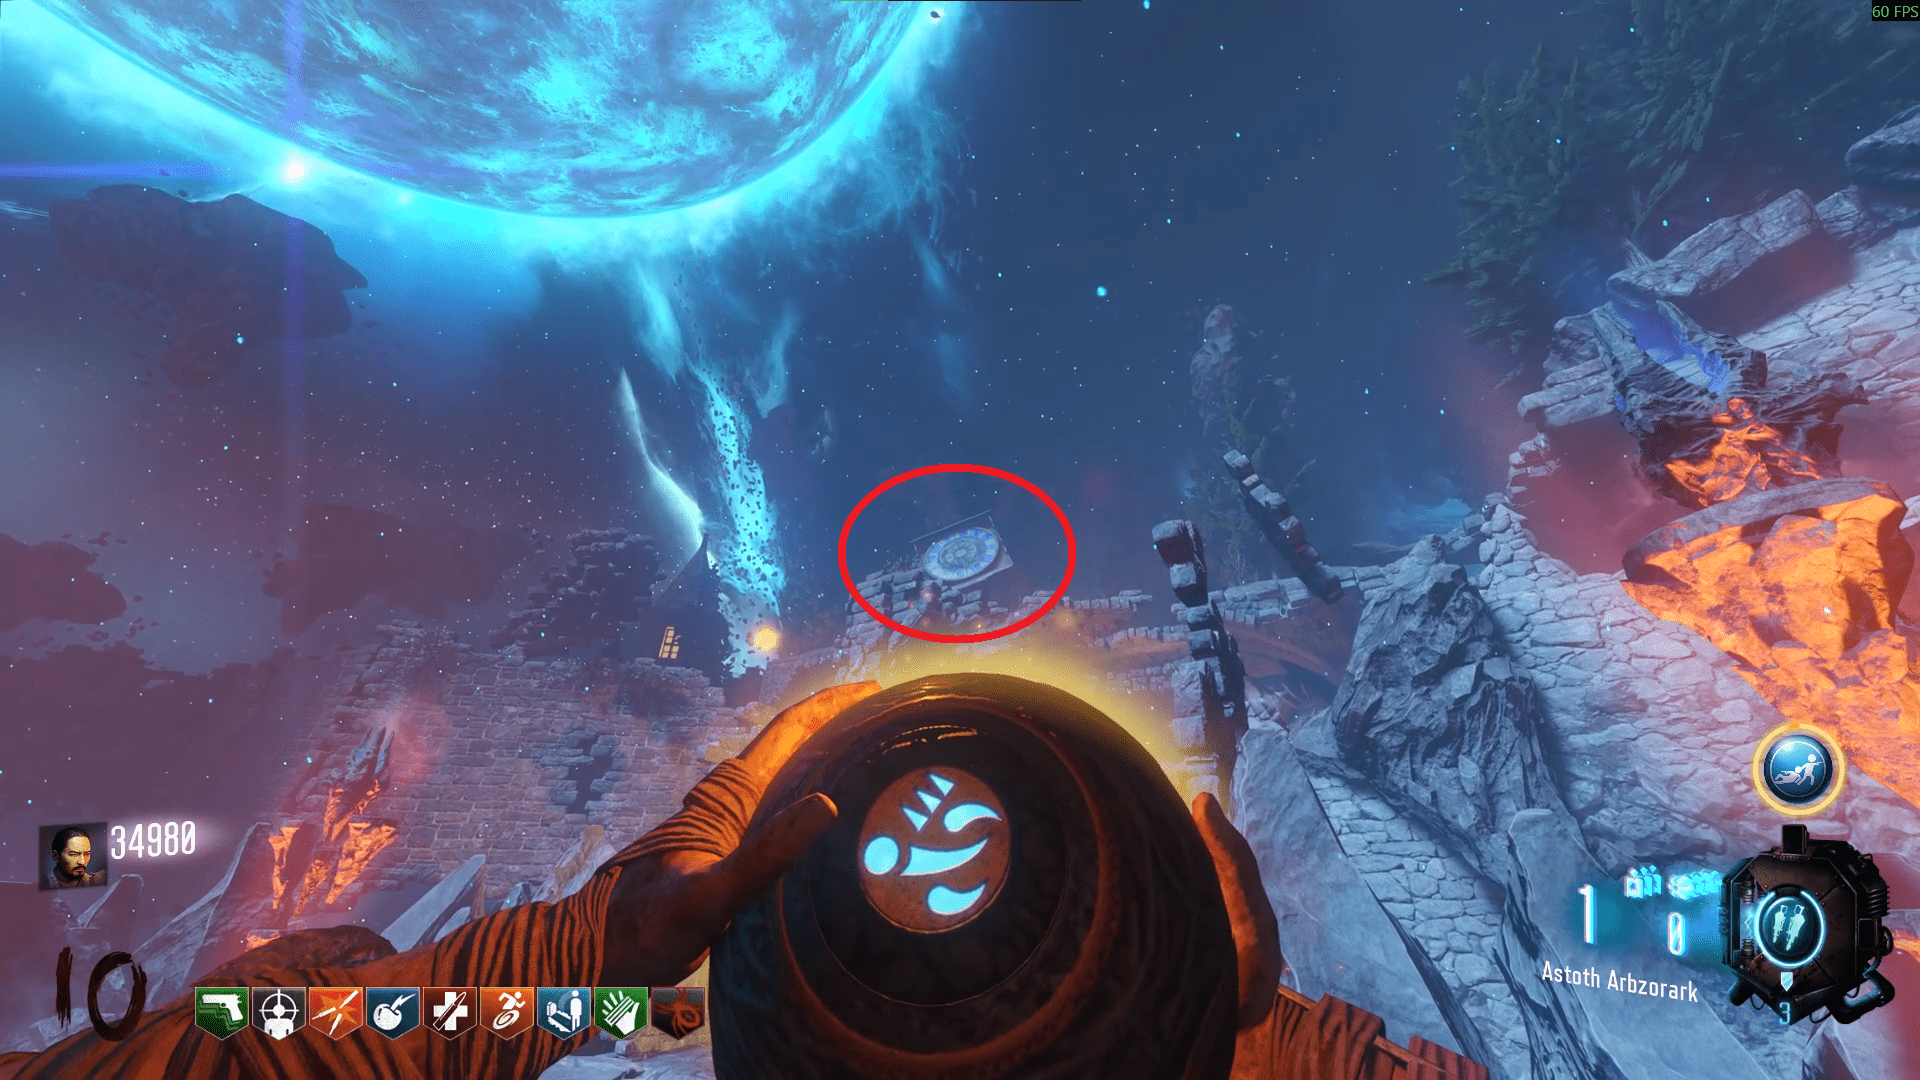
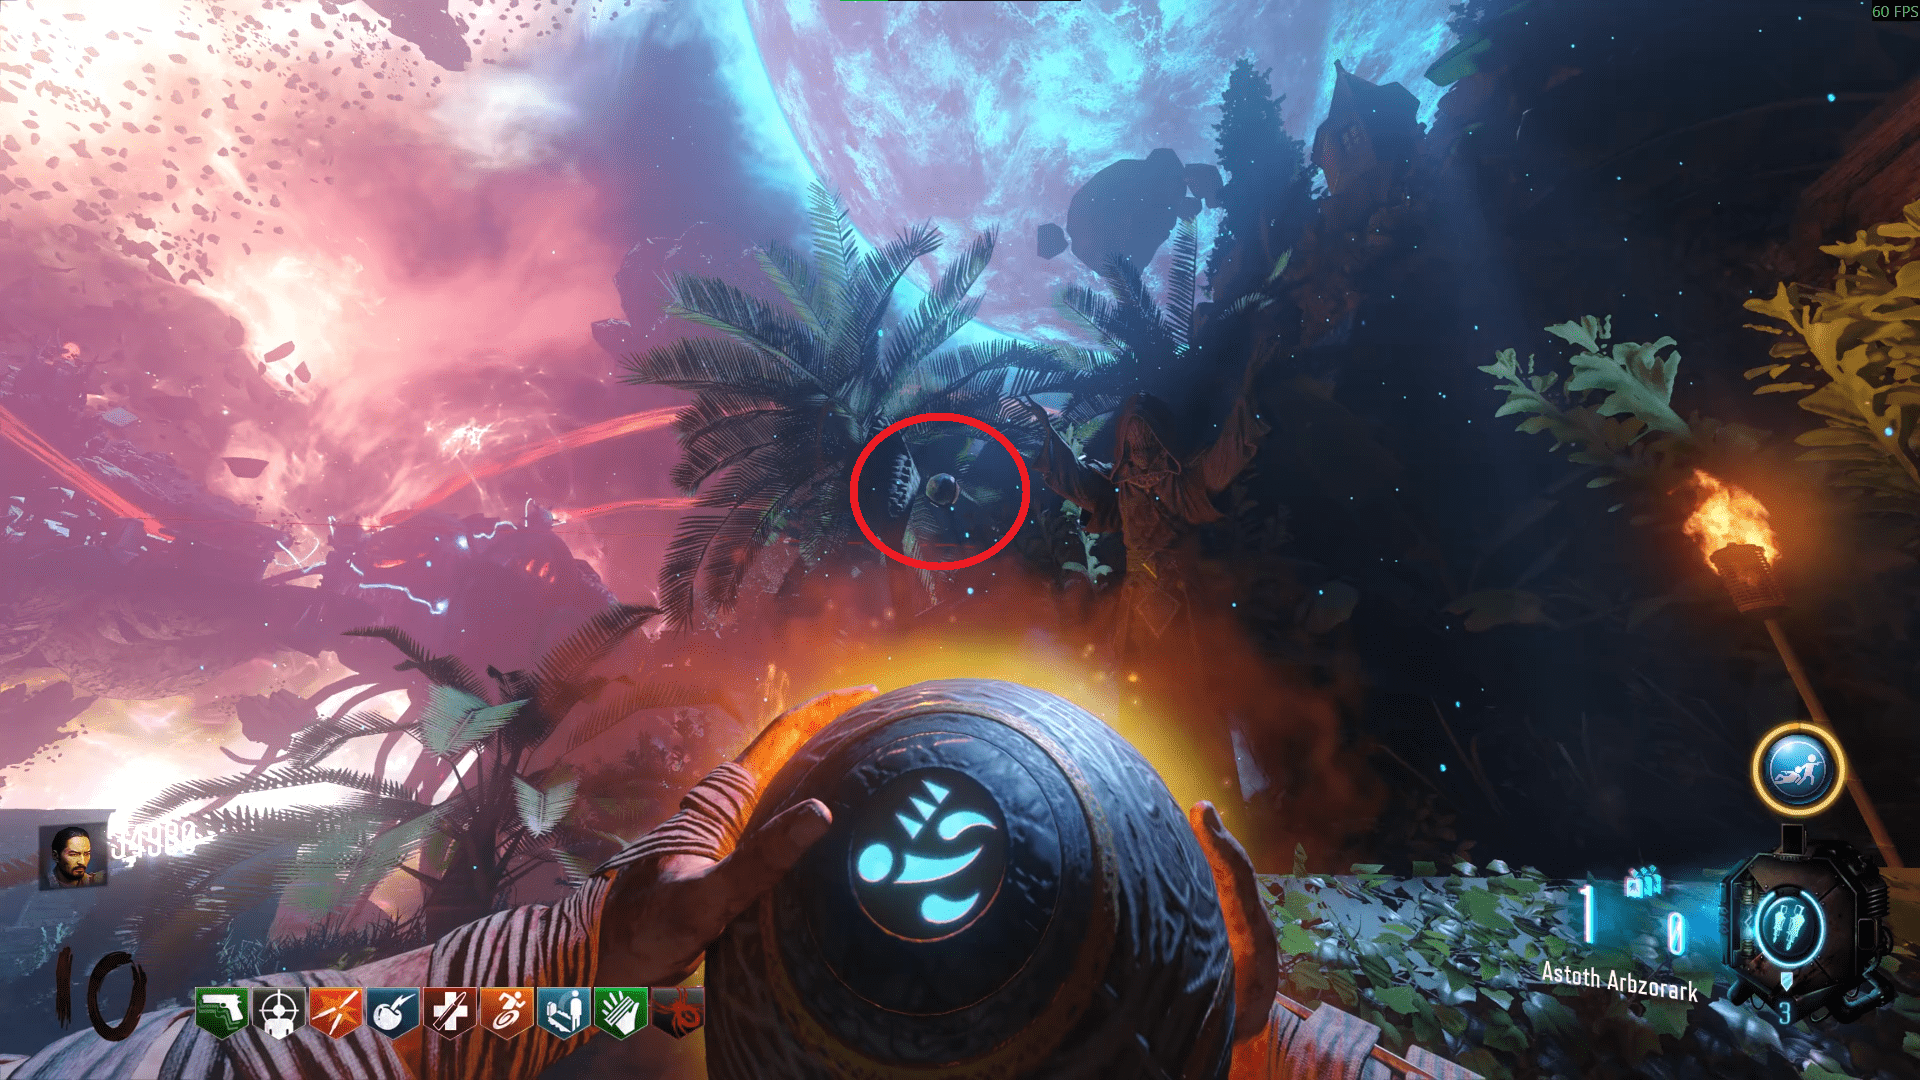
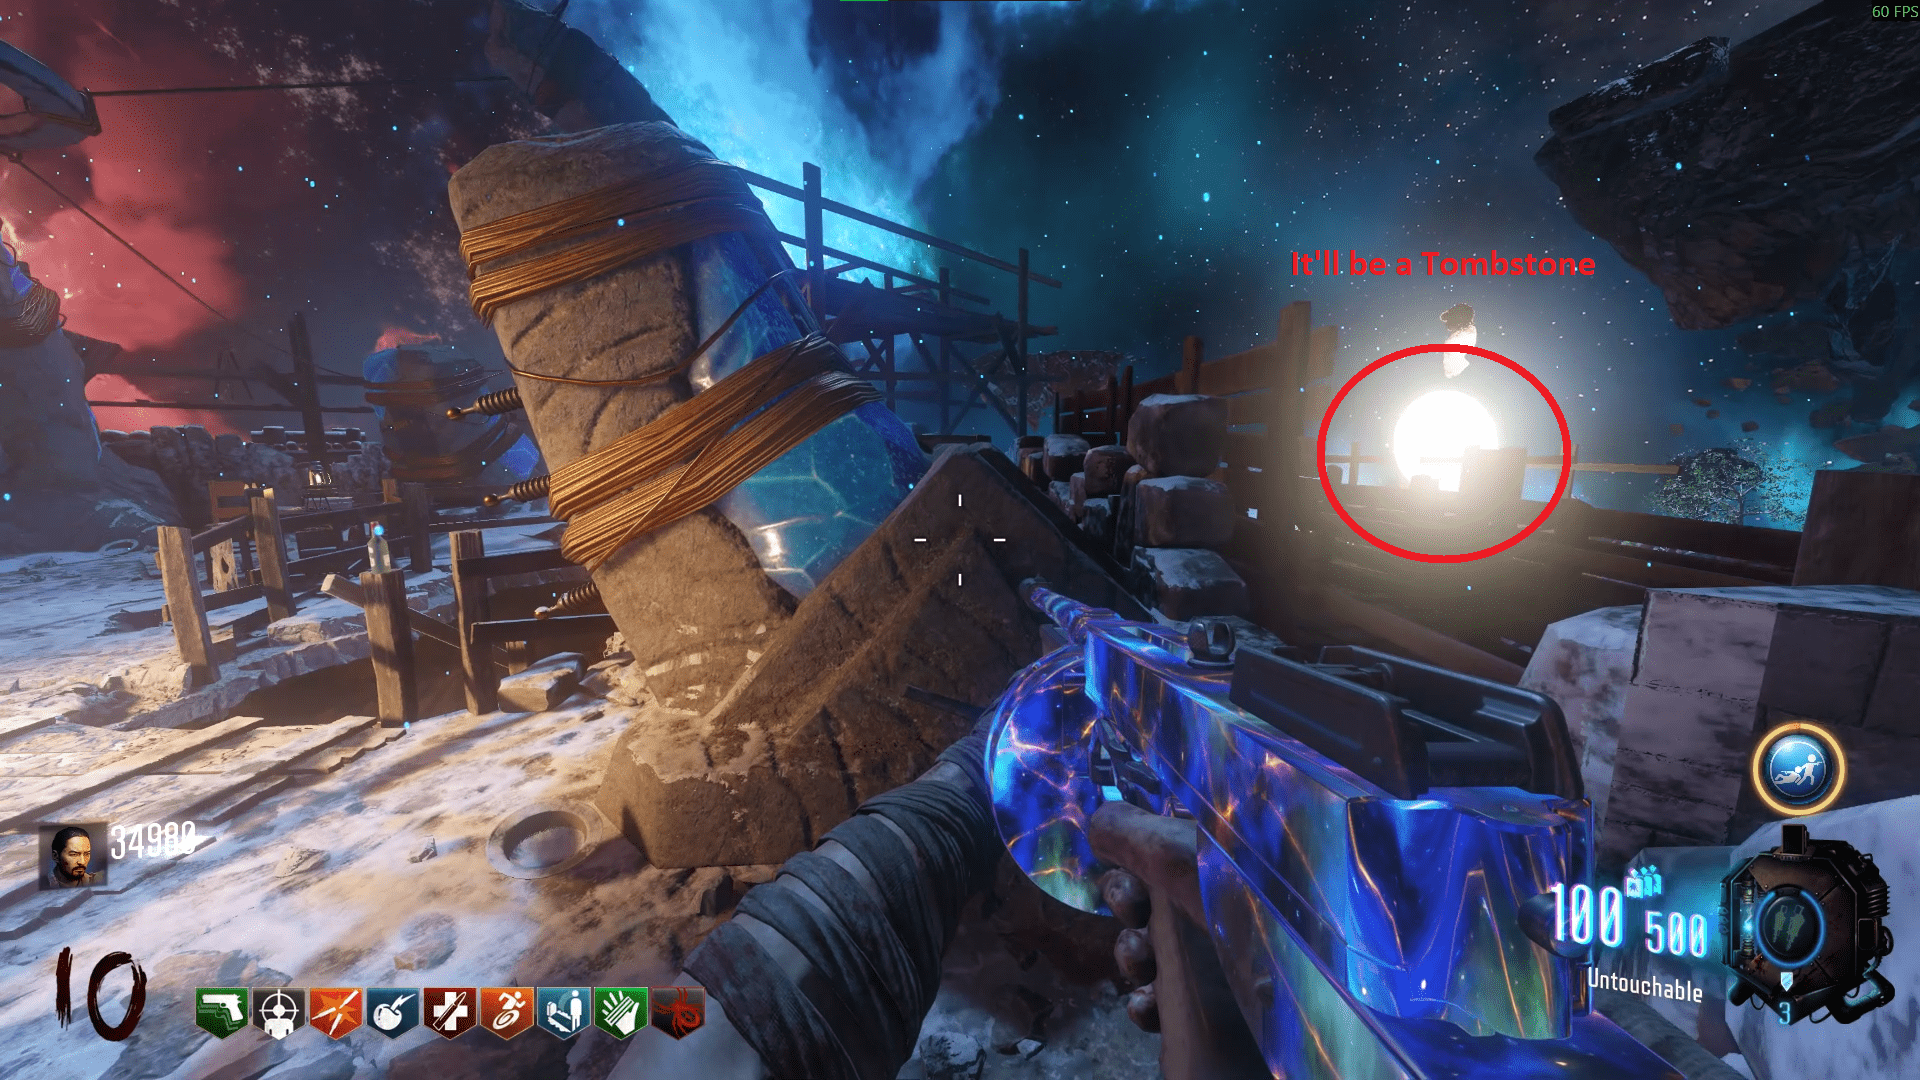
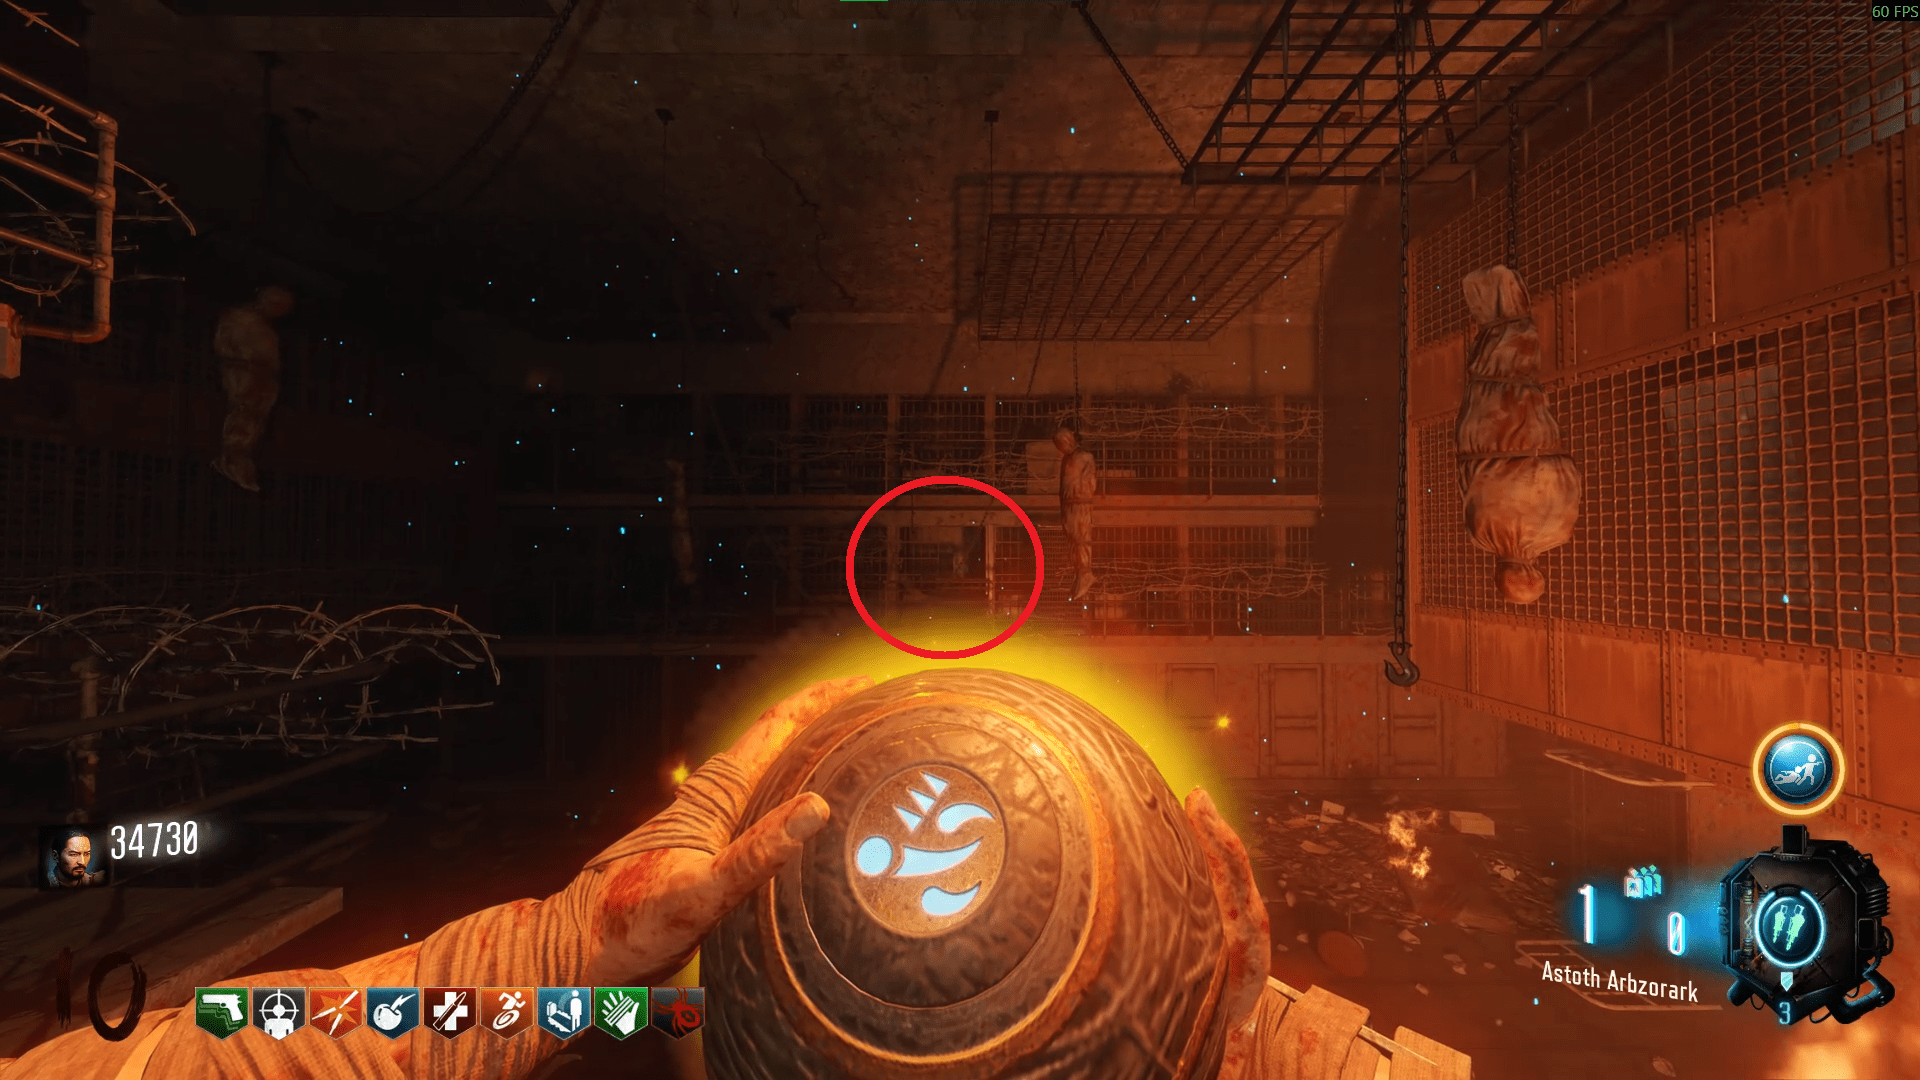
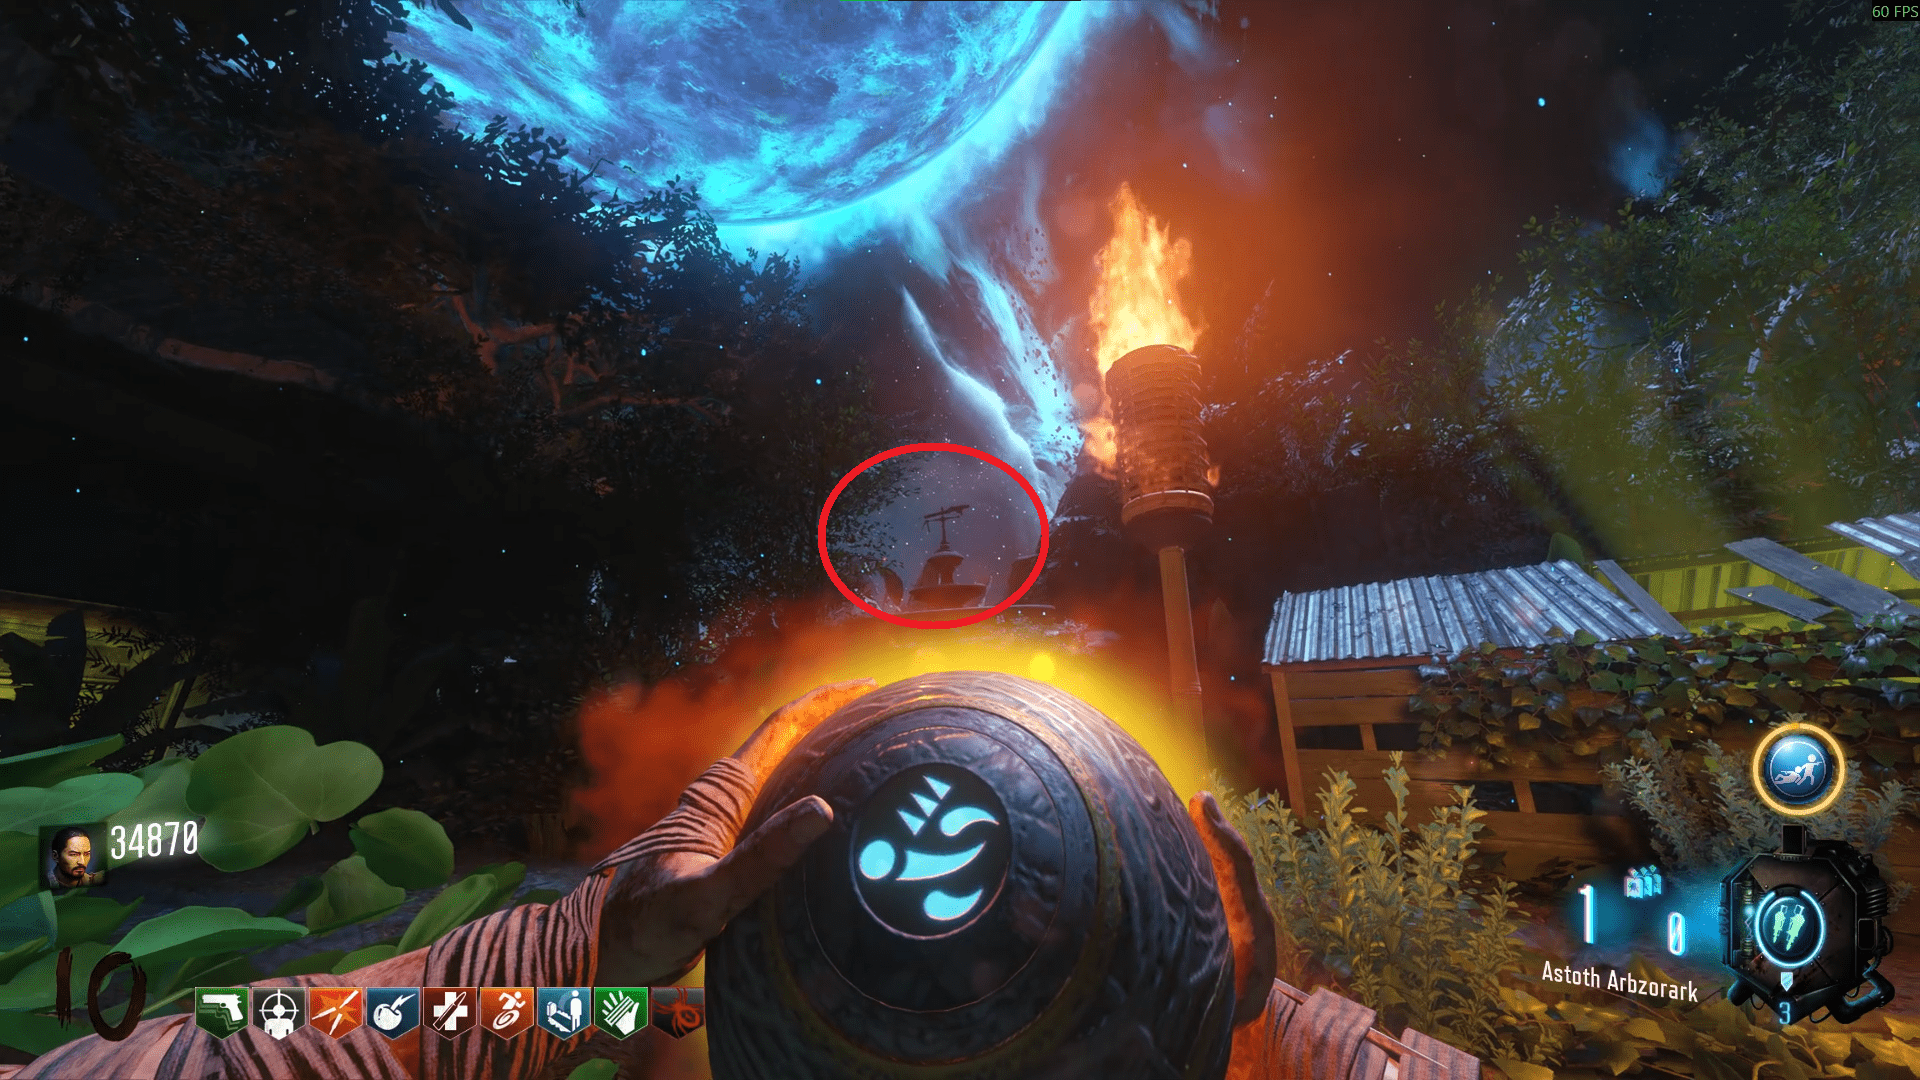
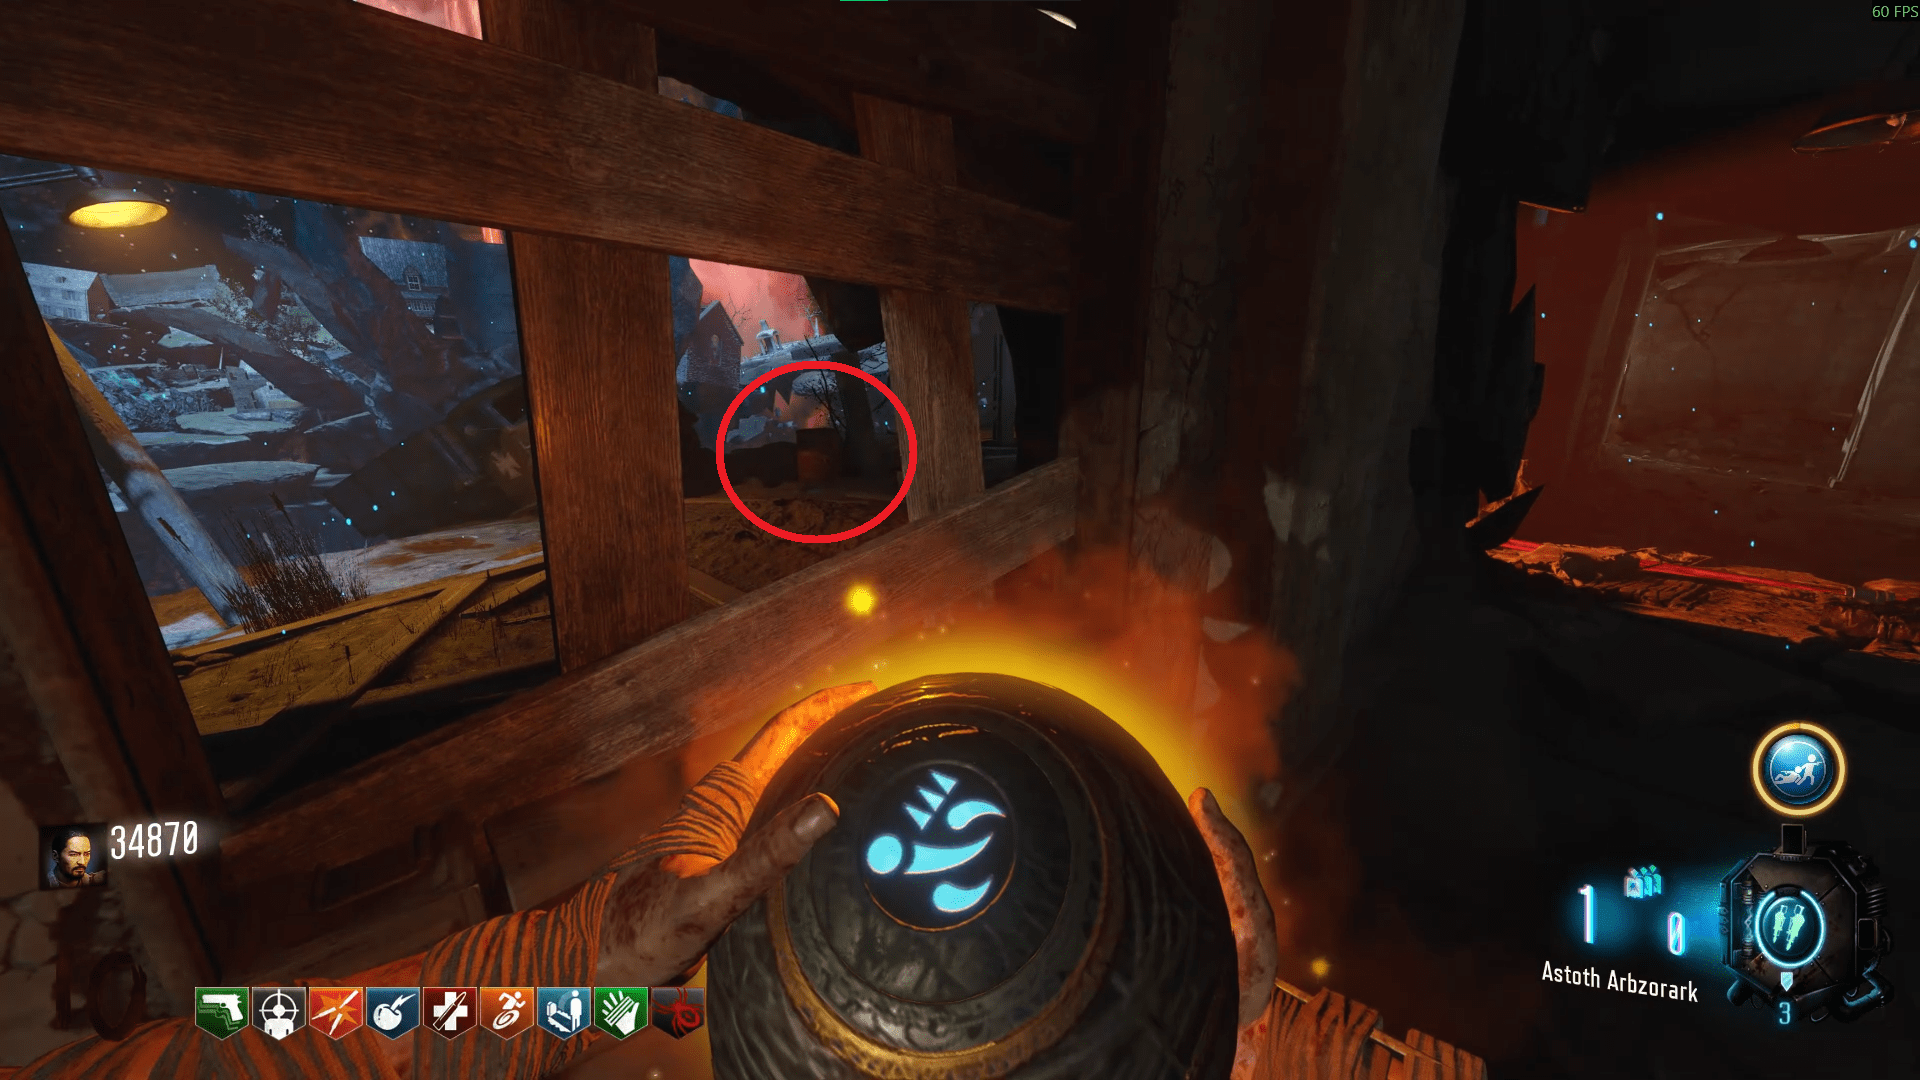
Once you've thrown it at the last item, you'll lose the Summoning Key and be able to go into the Boss fight. It is a good idea to be prepared for this as it acts like the Shadows of Evil step but with a lot more and stronger enemies.
Head to Kino and enter the teleporter when ready. Interact when everyone is in and you'll head back to the boss room.
The Summoning Key will now spawn again and you'll place it into one of the green lit pedestals in the corners of the room. Get roughly 20 kills and it will become charged, once this happens, pick it up and throw it into S.O.P.H.I.A in the middle of the room.
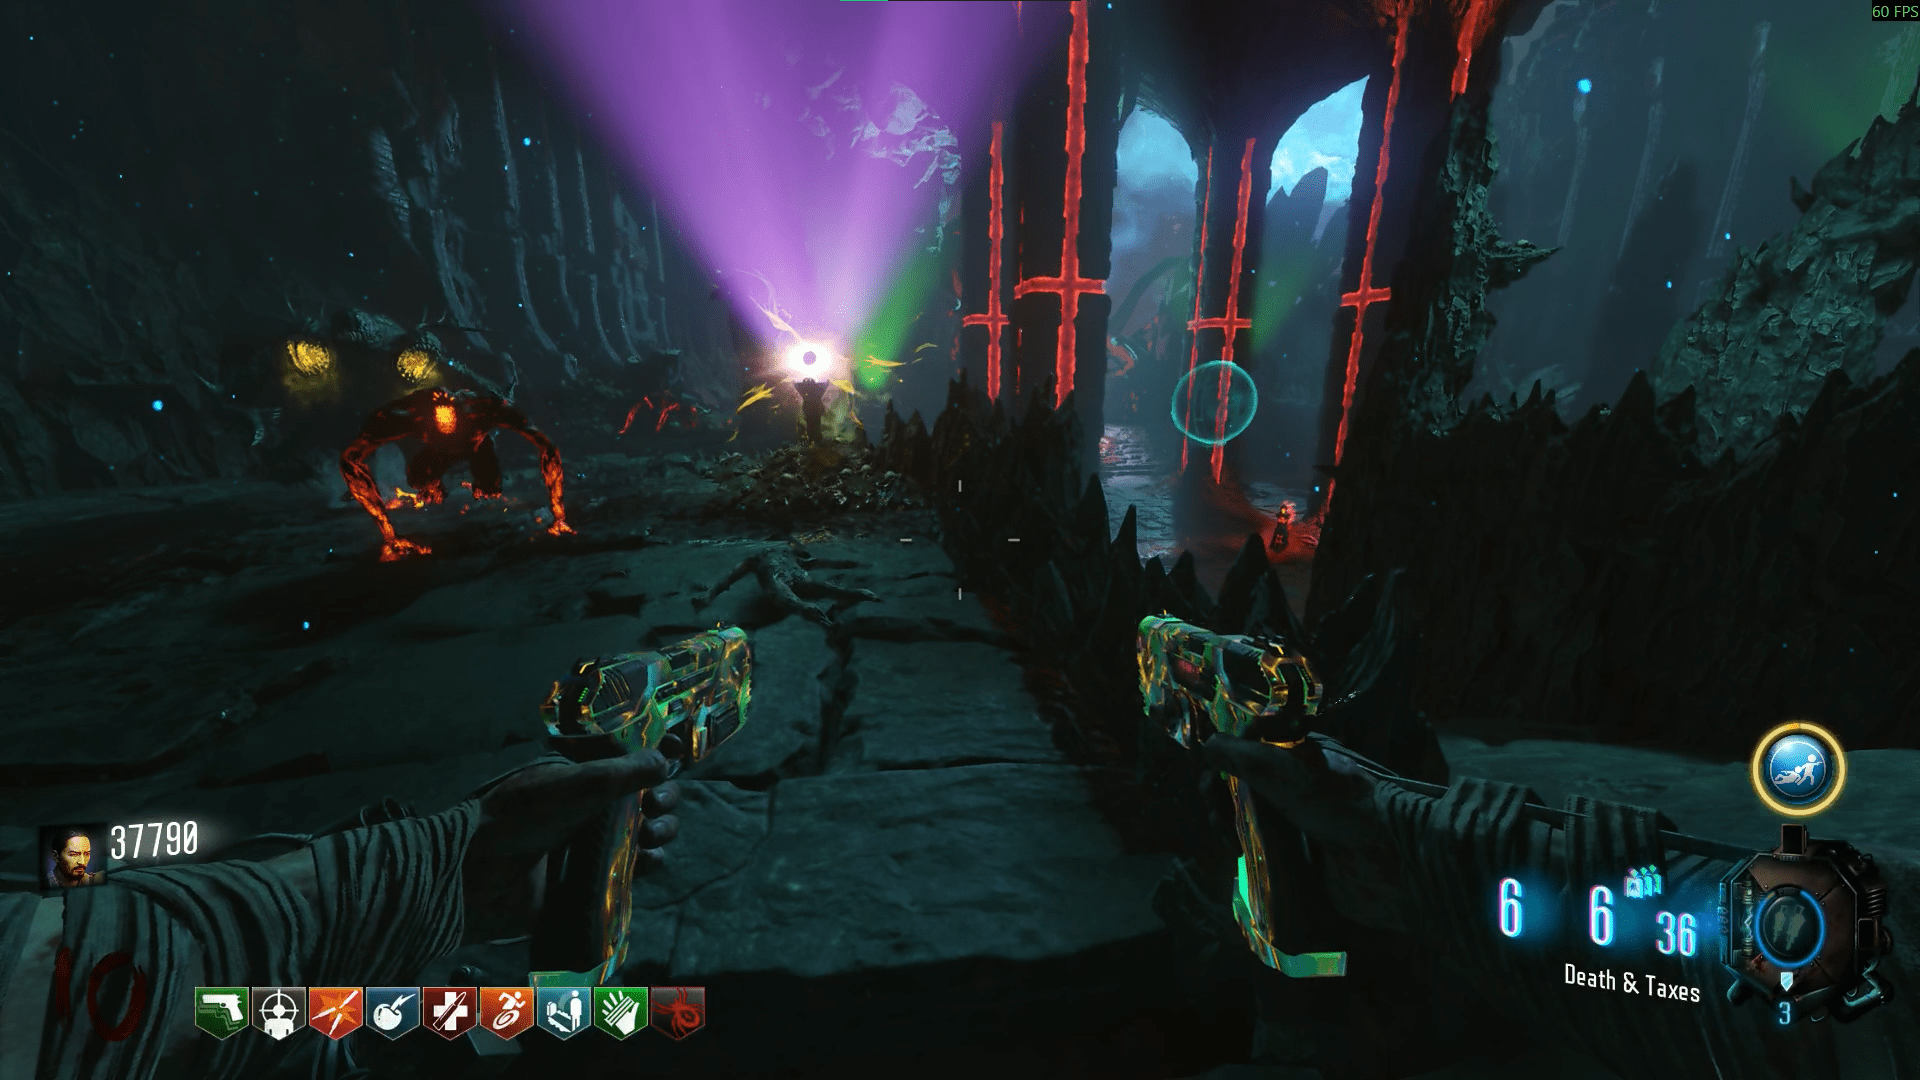
Doing so will cause her to beam the Shadowman's shield and you'll need to shoot the Shadowman until he reaches the inside of the Apothicon's mouth, then interact with the Kronorium on the lectern. Just like you did in Shadows of Evil. If you fail this step, you'll have to charge the Summoning Key and throw it to S.O.P.H.I.A again to break his shield.
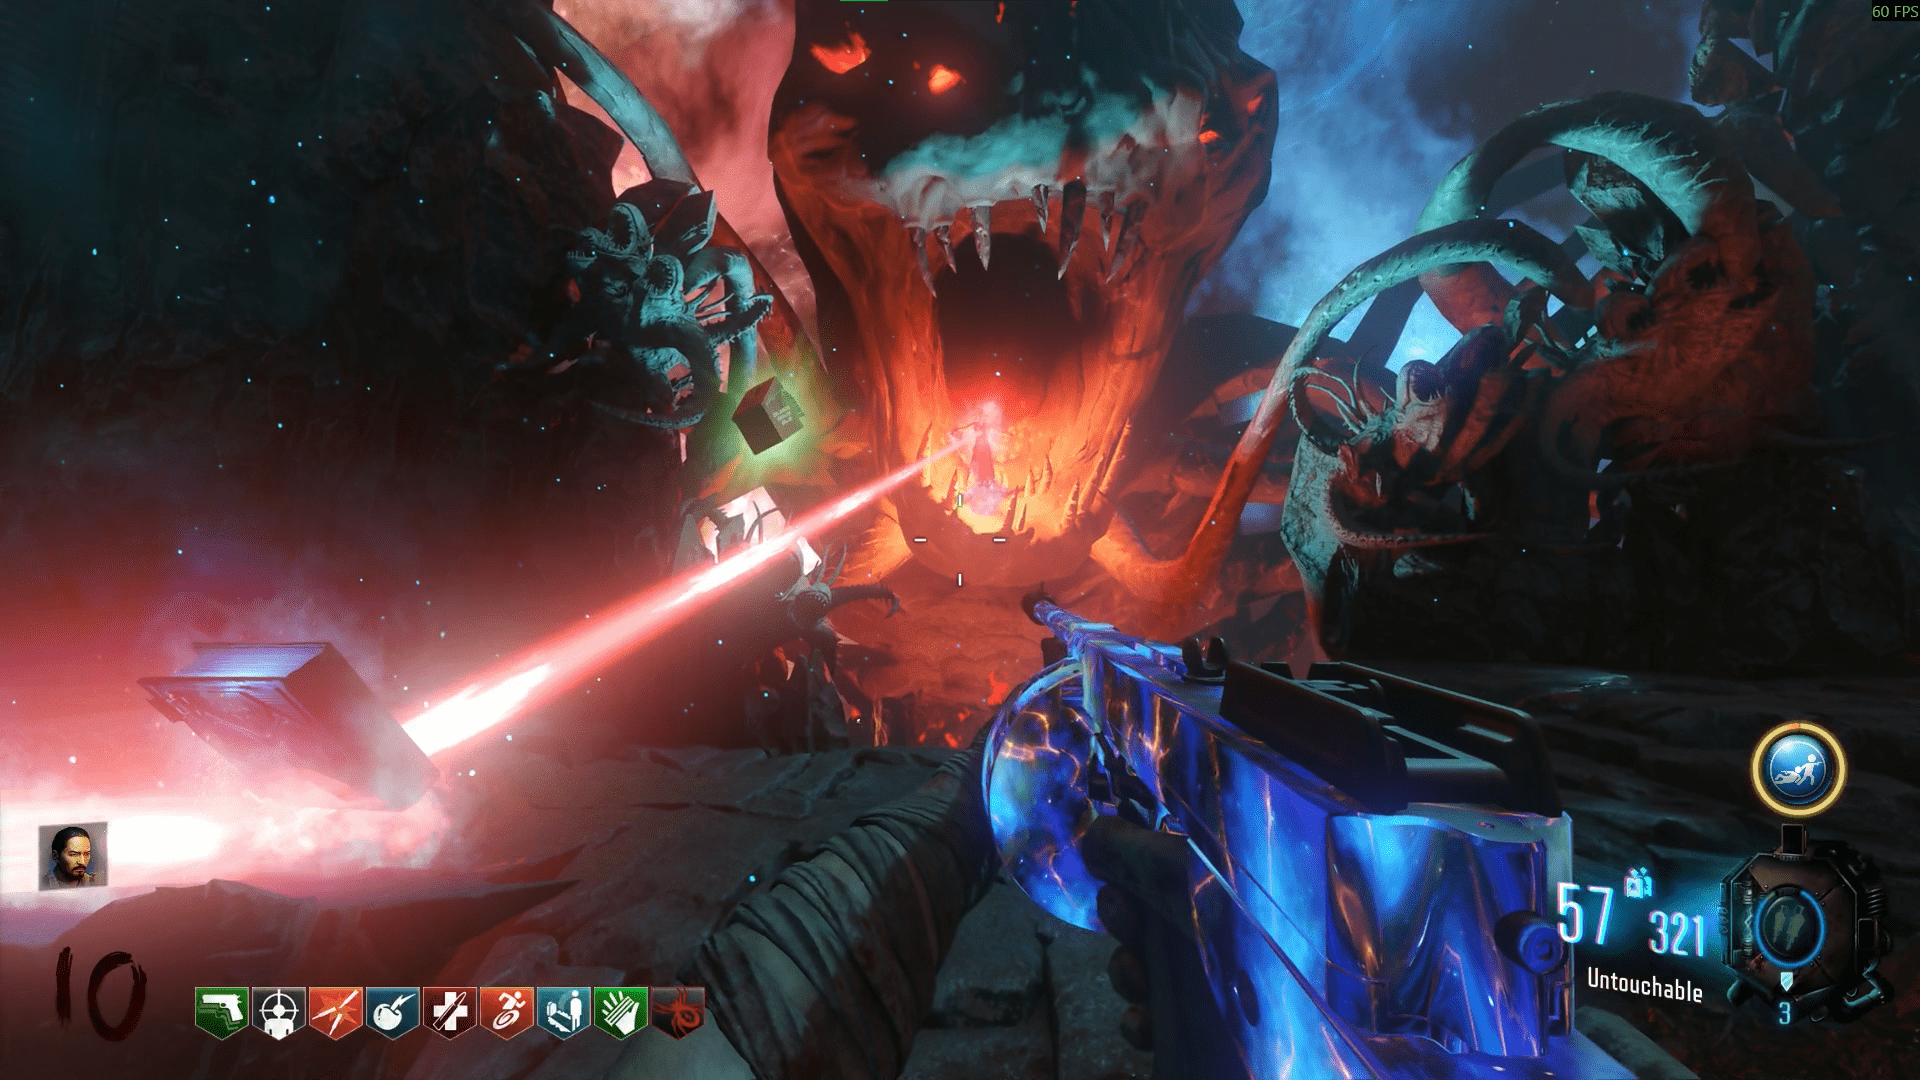
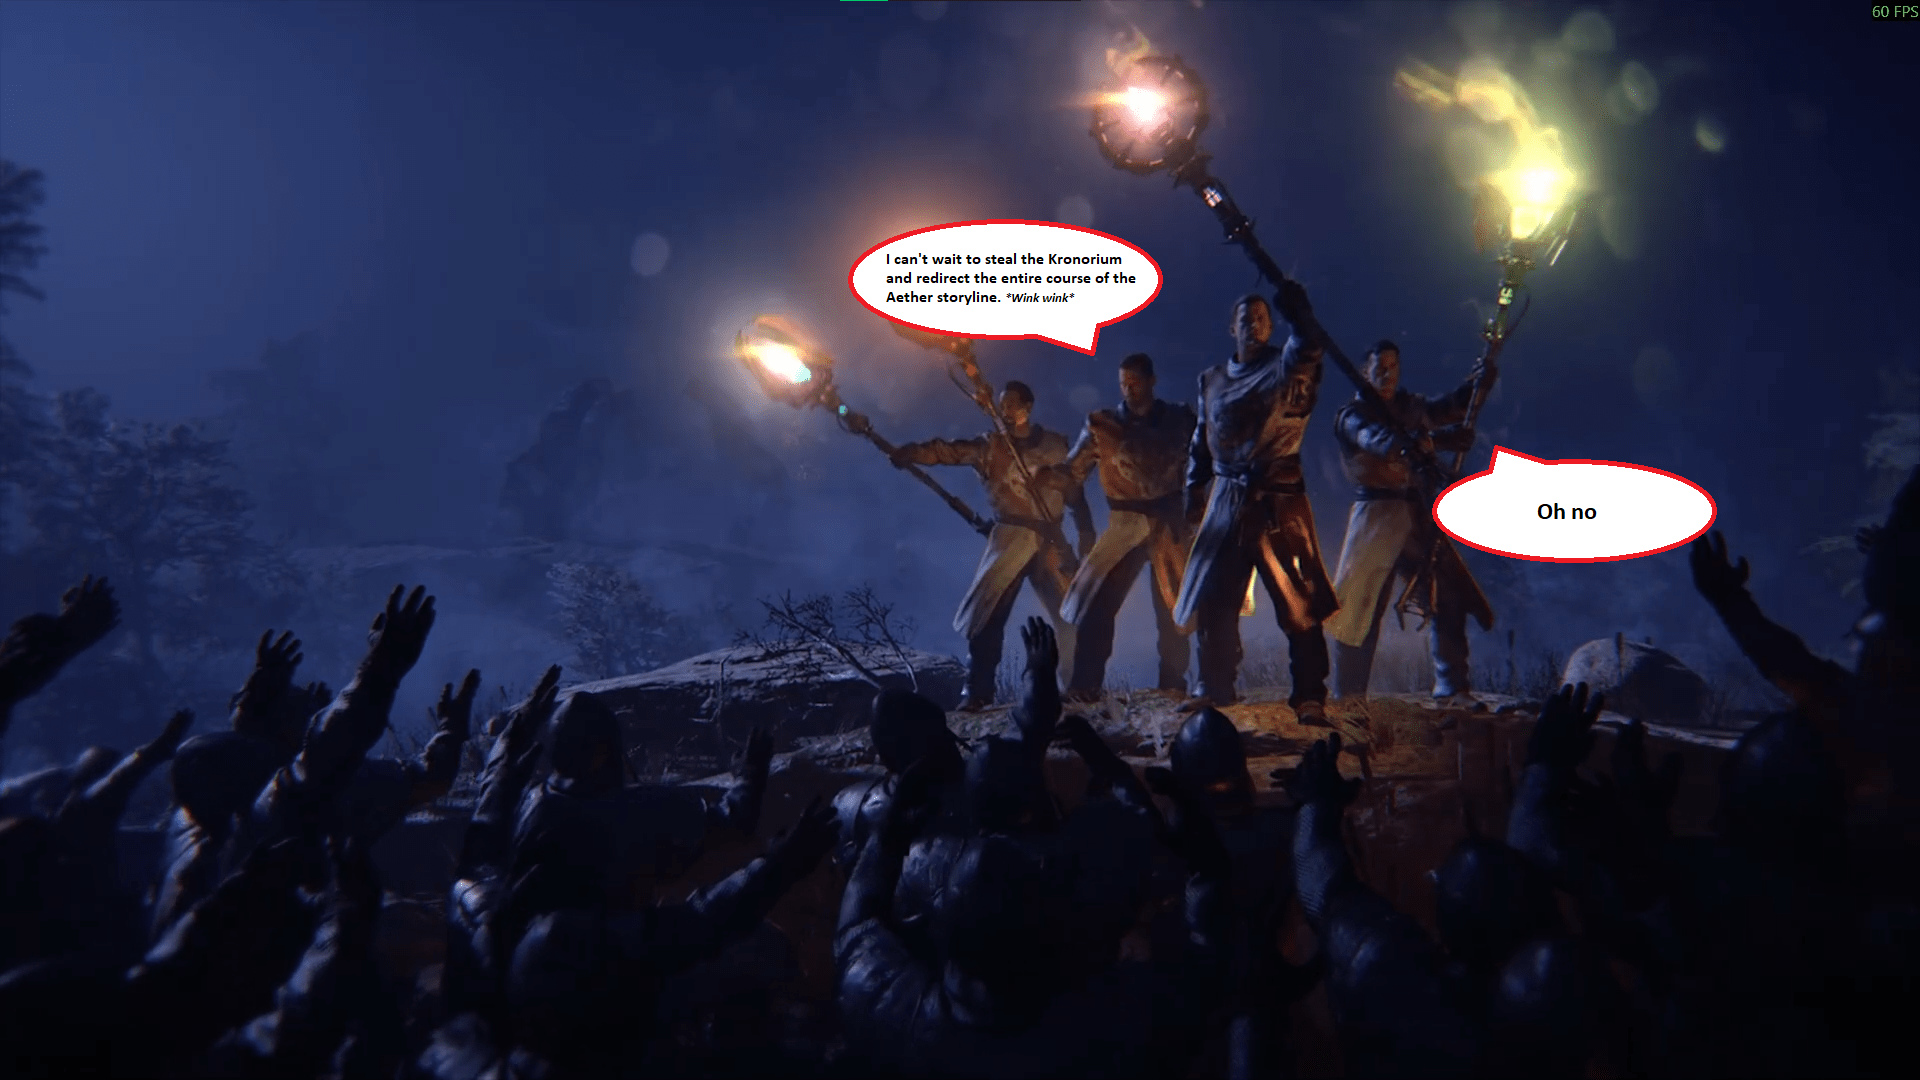
Congratulations, you've just completed the cycle and the Easter Egg. If you did this one last, then enjoy your million XP, RK5 and max ammo on spawn as well as your new calling card.
--
Old Information, for Fun of Course
Yes, in the guide picture there are little Octopus/Squid Shadowmen dotted about xD.
My Easter Egg Discord Server
Has now been stopped, but I thank all that have helped keep it alive.
I learned what semantic satiation was when I was redoing this guide because I kept reading Origins over and over to where it became weird to say or read.
Origins----------------------- 29
Shadows of Evil------------ 2
The Giant--------------------- 1
Der Eisendrache----------- 3
Zetsubou No Shima------- 1
Gorod Krovi----------------- 7
Revelations------------------ 1
Extra Credits Lost--------- 9
Shopping Frees Lost----- 3
Perkaholics Lost----------- 5
Starting Level-------------- 59
Ending Level-------------- 119
(Most of these lost gobblegums are from Gorod Krovi xD).
I had no idea that my lost gobblegums made the number 935, that is complete coincidence.
(I found out after Origins that recording the whole Easter Egg is just so much easier than taking separate screenshots and then forgot on Der Eisendrache haha (Gorod Krovi is just hard xD))
Origins - 1
Shadows of Evil - 2 (One modded for ending)
The Giant - 1
Der Eisendrache - 1
Zetsubou No Shima - 2 (I crashed the first time)
Gorod Krovi - 3
Revelations - 2
Starting Level - 418
Ending Level - 430
I've also had some friends ask to help them for their own Super EE, so my level's gonna be a bit skewed haha. Gorod Krovi ever the humbler.
It took me 40 minutes, 6 Shopping Frees, 7 Immolation Liquidations, 4 Extra Credits and god knows how many points to get the Lil Arnies on Revelations. Then I died in the elemental room because I'm an idiot who didn't bring NDE nor the Thundergun. Pro tip, don't use the RK5 against a Margwa.
AVO - Providing old screenshots.
Kovac - Providing old screenshots.
Rexalis - Assistance and Survival.
Daddgucci - Assistance and Survival.
OhWhere Sampson - Assistance and Survival.
Sr Airman Snakekiller - Assistance and Survival.
And finally, the legend himself who has helped me since Black Ops 2, CrashPower. He provides the Origins Cheatsheets as well as being one of the inspirations for me to create this guide. Go show him some love, he deserves it.
Other Guides and Thanks :D
If you feel this helped you in your runs toward the SEE, feel free to share it. I give thanks to all that make it this far in my guide. I also give many thanks to those who helped me create and build upon this guide.
Finally, I give my thanks for Treyarch for creating this story line for all of us who like to play and just one sorry that this wasn't made earlier for everyone else to use after the game released in 2015. Here's to another good time playing zombies, Hope you've had fun :D
I have also made guides for other Call of Duty games, should you require them :)
https://steamcommunity.com/sharedfiles/filedetails/?id=3353611213
https://steamcommunity.com/sharedfiles/filedetails/?id=3330969555
- All Around Enhancement Mod Description And Info★ 5 (597)211k views1.2k ♥34 minUpdated Aug 10, 2023
- Black Ops 3: Console Commands★ 5 (1.1k)123k views2.4k ♥7 minUpdated Feb 13, 2020
- Origins Ultimate Guide★ 5 (562)72k views1.7k ♥17 minUpdated Jun 24, 2017
- [2.0]All Around Enhancement Mod Description And Info★ 5 (186)71k views602 ♥38 minUpdated May 16
- Guide for Shadows of Evil [2020 updated]★ 5 (1.4k)67k views4.5k ♥24 minUpdated Mar 22, 2024
- Guide for Der Eisendrache [2020 updated]★ 5 (1.3k)65k views4.6k ♥30 minUpdated Feb 22, 2024






- Upgrading to PremiumTeam Fortress 2★ 5 (20k)1441k views11k ♥6 minUpdated May 11, 2022
- No More Room in Hell Official ManualNo More Room in Hell★ 5 (2.8k)569k views2.1k ♥29 minUpdated Apr 22, 2019
- NMRiH Community Hosting GuidesNo More Room in Hell★ 5 (526)351k views653 ♥1 minUpdated Aug 10, 2022
- ULTIMATE GUIDE FOR GAME DEV TYCOONGame Dev Tycoon★ 5 (5.8k)326k views10k ♥4 minUpdated 23 Jan, 2014
- How to 'Git Gud' Soon™MORDHAU★ 5 (2k)318k views3k ♥68 minUpdated Nov 16, 2024
- Лучшие кооперативные игры SteamPAYDAY 2★ 5 (1.5k)315k views2.1k ♥56 minRussianUpdated Apr 27, 2025






This guide was created by its original author on the Steam Community. Are you the author and want it removed? Request removal.