Innomotion Railway Works Operator's Guide
Important Info
MOST IMPORTANT: USE PHYSICS 1! Every single thing in this collection is designed to work on Physics 1, which allows you to have long and complex trains without lag. Using higher physics qualities will result in lag and possibly cause trains to not work properly.
I have many other trains on my workshop that are semi-compatible with the IRW collection. Many of those older trains will be updated and added to this collection over time.
All trains in this collection use 7u gauge track, and have a fairly large loading gauge. Not all train tiles on the workshop have enough physical space for these trains. Check my workshop page for train tiles that I have made. These tiles will be compatible with my trains.
Locomotive Operation
Most locomotives will have this standardized control setup:
W: Forwards
S: Reverse
1 / Left Click: Horn
2 / Right Click: Train Brakes
3: Bell
4: Cab Door A
5: Cab Door B
6: Front Headlights
7: Rear Headlights
8: Front Taillights
9: Rear Taillights
6 and 8: Front high beam headlights
7 and 9: Rear high beam headlights
0: Auxiliary function
What most of these controls do is self-explanatory, but here's some info on the less obvious ones:
Train Brakes: This control only does anything when other train cars are attached to the locomotive. Take a look at the Train Braking section of the guide for more info.
High beam headlights: Most locomotives are equipped with blueprint-edited headlights for extra brightness and visibility. To turn these bright lights on, you will need to activate both the headlights and taillights on the same end of the locomotive. The taillights will remain off.
Auxiliary function: This control is always linked to a button. It allows locomotives to operate equipment on other vehicles in the train. As of writing this guide, I've yet to release any vehicles that make use of the auxiliary function.
Train Braking
All train cars in the IRW collection are equipped with train brakes. These utilize the Smart Engine Controller from the Modpack Continuation to apply resistance to the wheel bearings when desired.
The purpose of the train brakes is to allow the train to stop without derailing. An issue that often came up with my older train systems is braking using the locomotive's engine would cause the couplers between cars to undergo so much pressure that a derailment would occur.
All train cars will have their brakes on by default to prevent runaways. Once connected to a locomotive, you can press 2 / Left Click to release the brakes on the connected cars. Take a look at the Coupling and Uncoupling Trains section of the guide to see how the brakes get connected to the locomotive.
Always remember that the controls for the train brakes are inverted. The brakes are on when the switch is off and vice versa.
All train cars have a timer placed on them that acts as a brake indicator.
Coupling and Uncoupling Trains
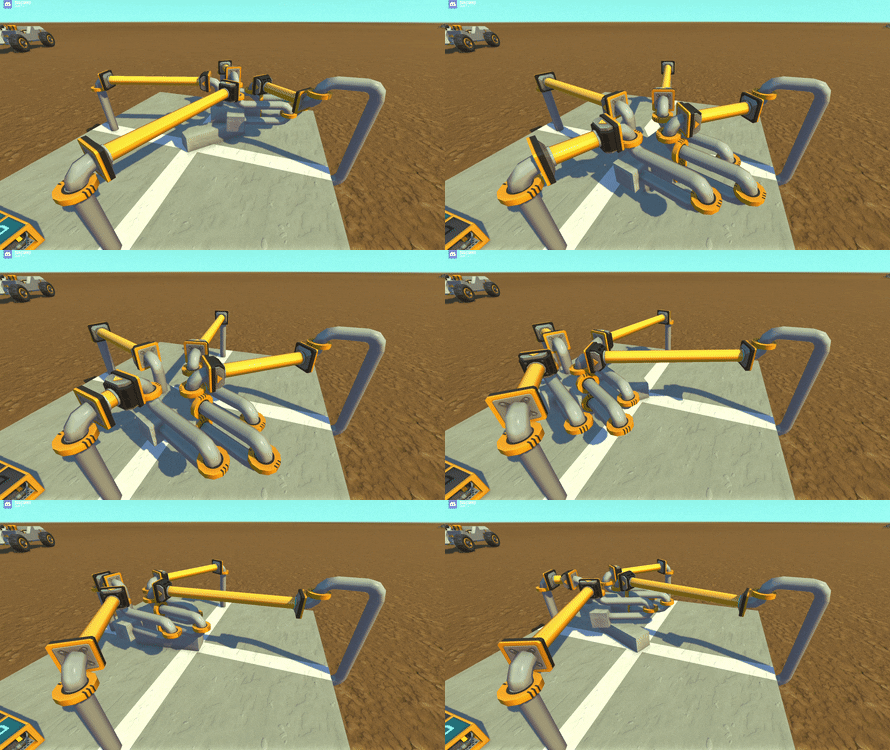
All trains in the IRW collection use weld couplers. Use your weld tool to connect the barrier blocks to each other as shown. To disconnect cars, simply delete and replace one of the two barrier blocks.
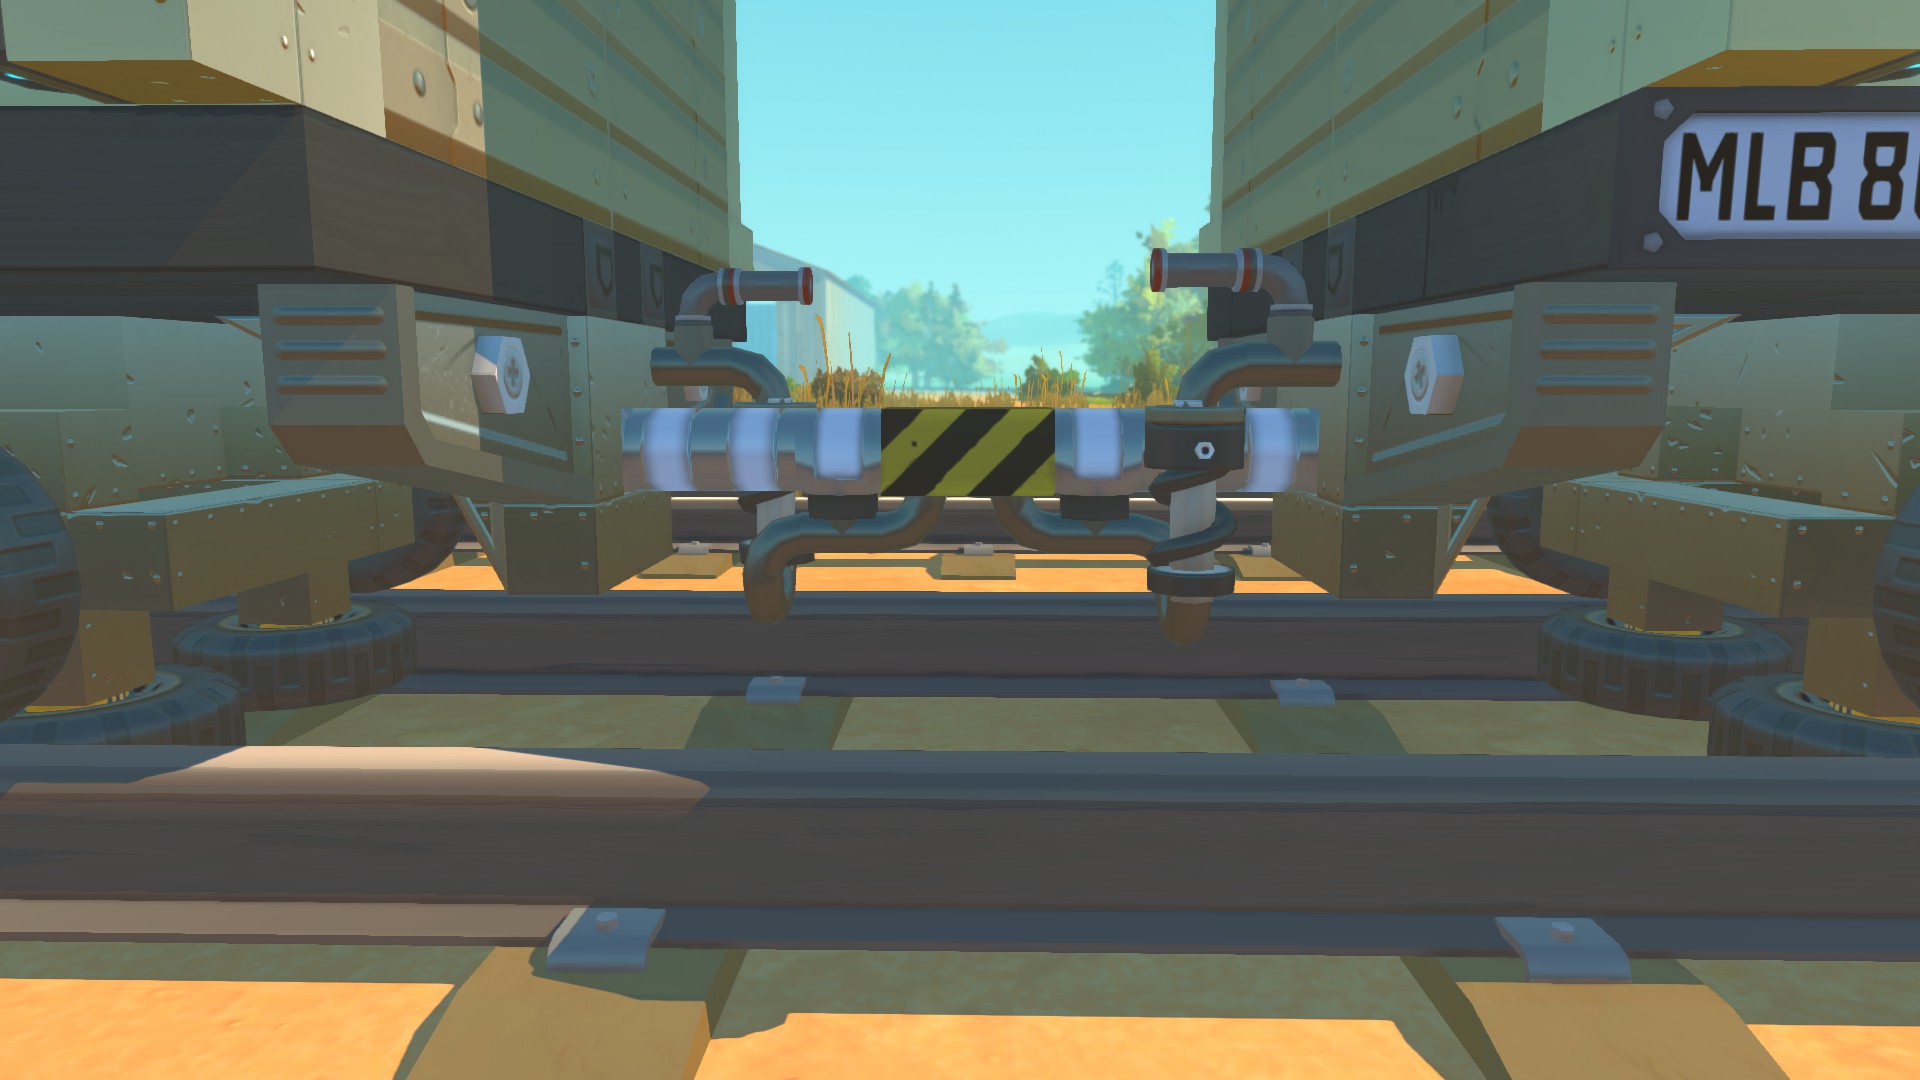
All train cars and locomotives will have logic gates on their ends, near the couplers. The black gates control the train brakes. The orange gate is only found on locomotives and other special equipment, and this gate controls auxiliary functions.
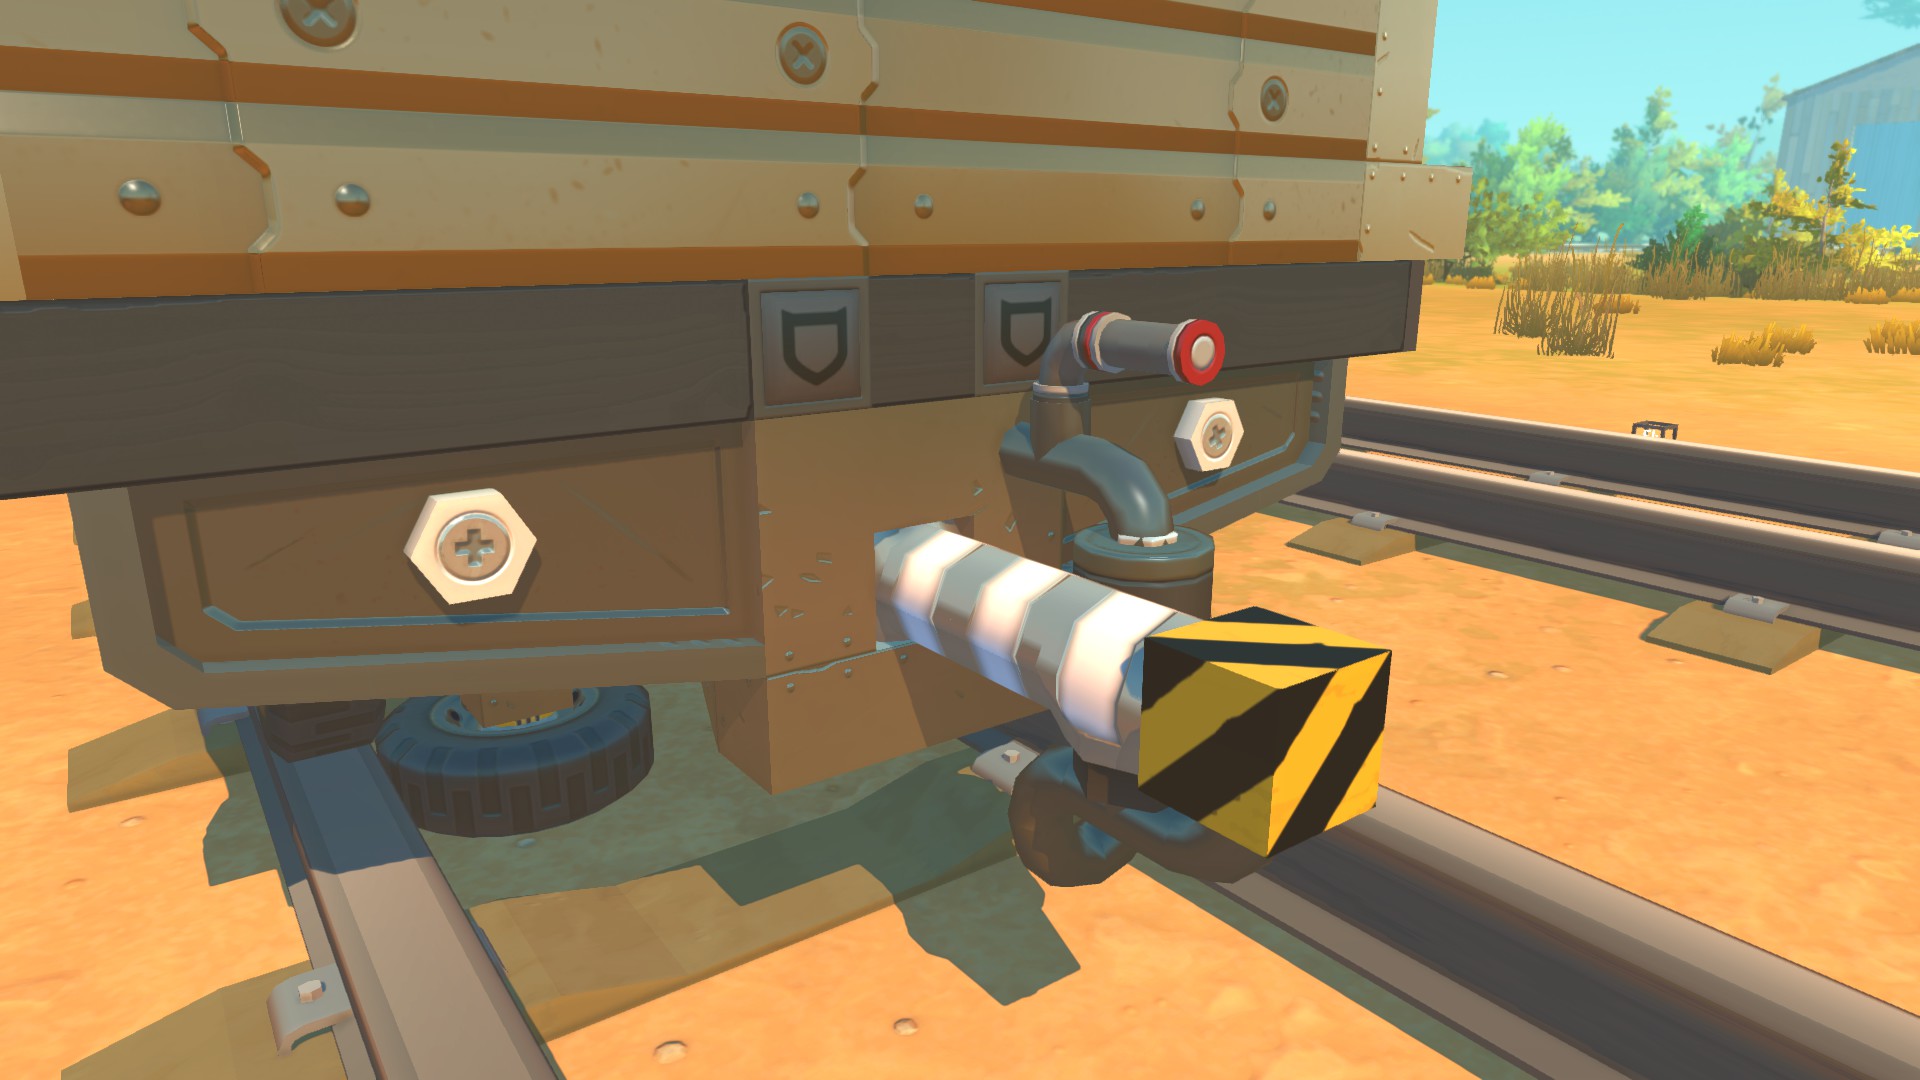
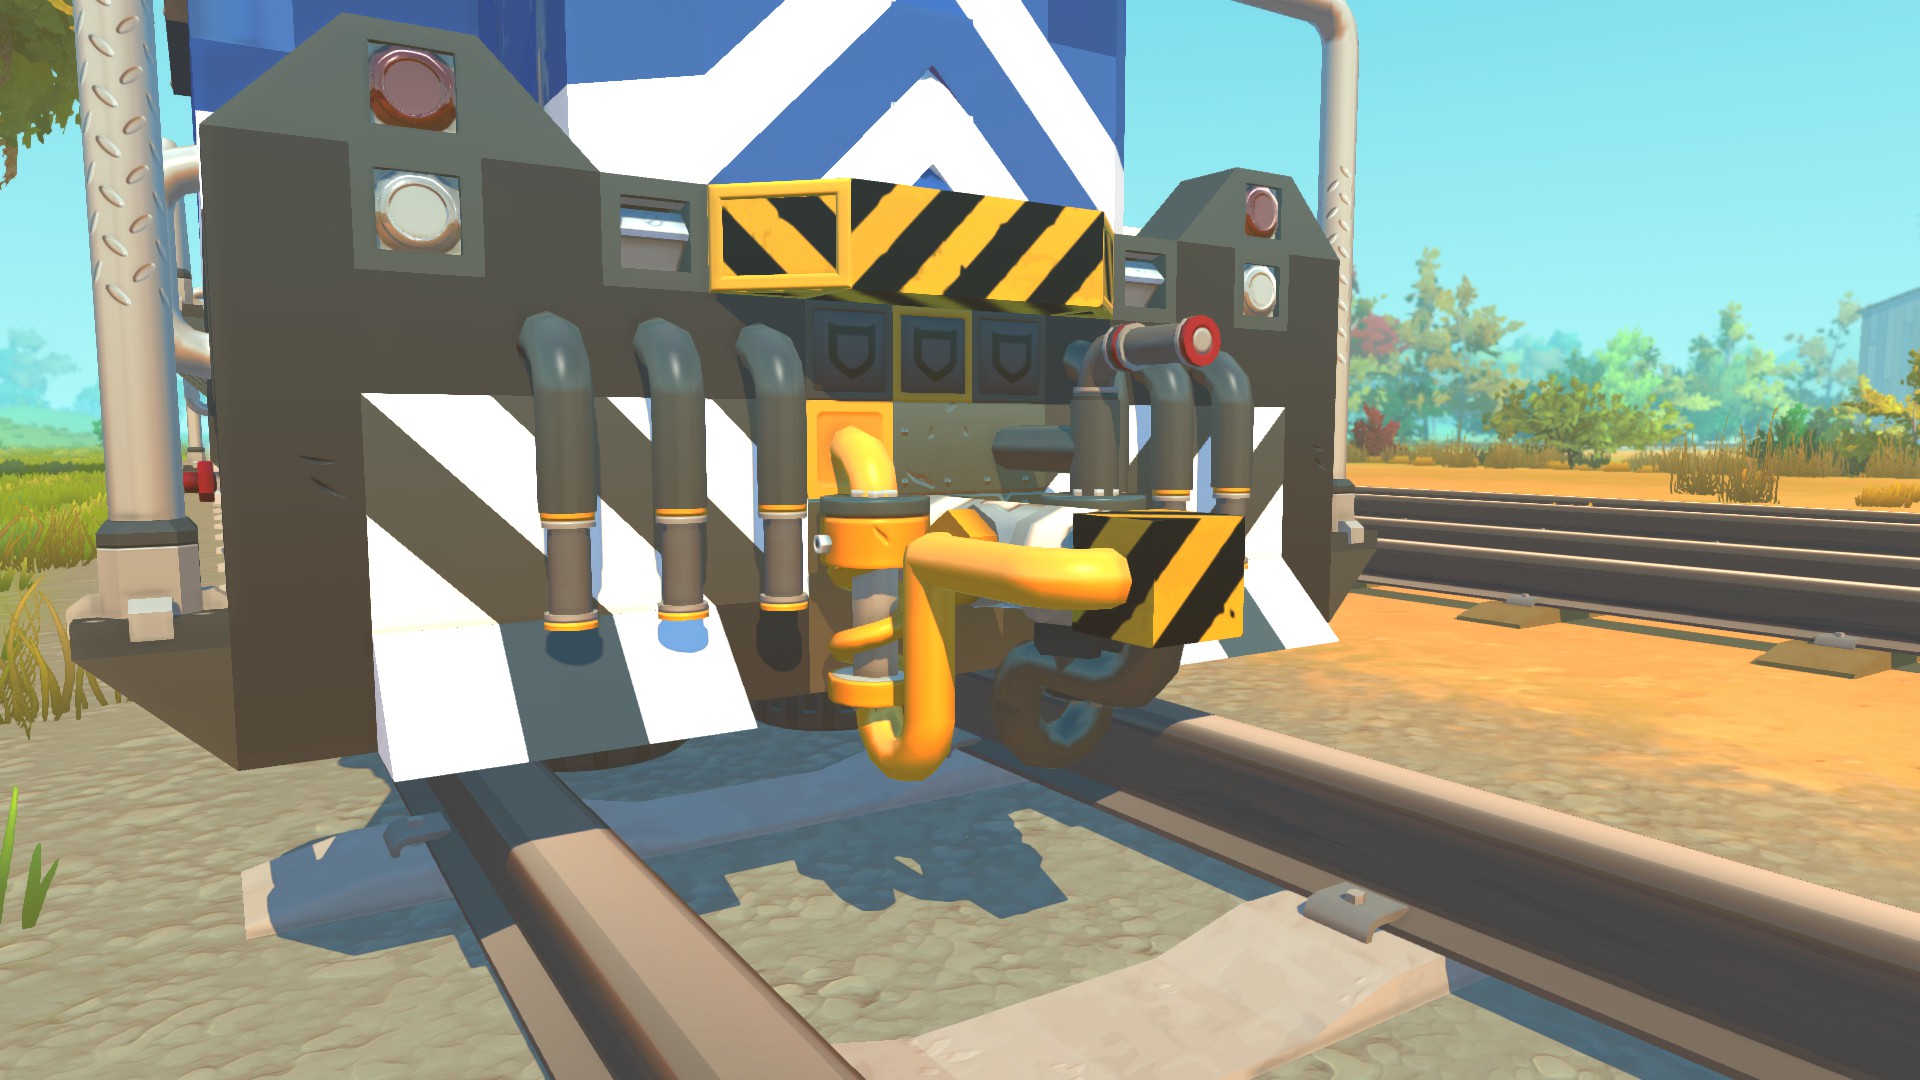
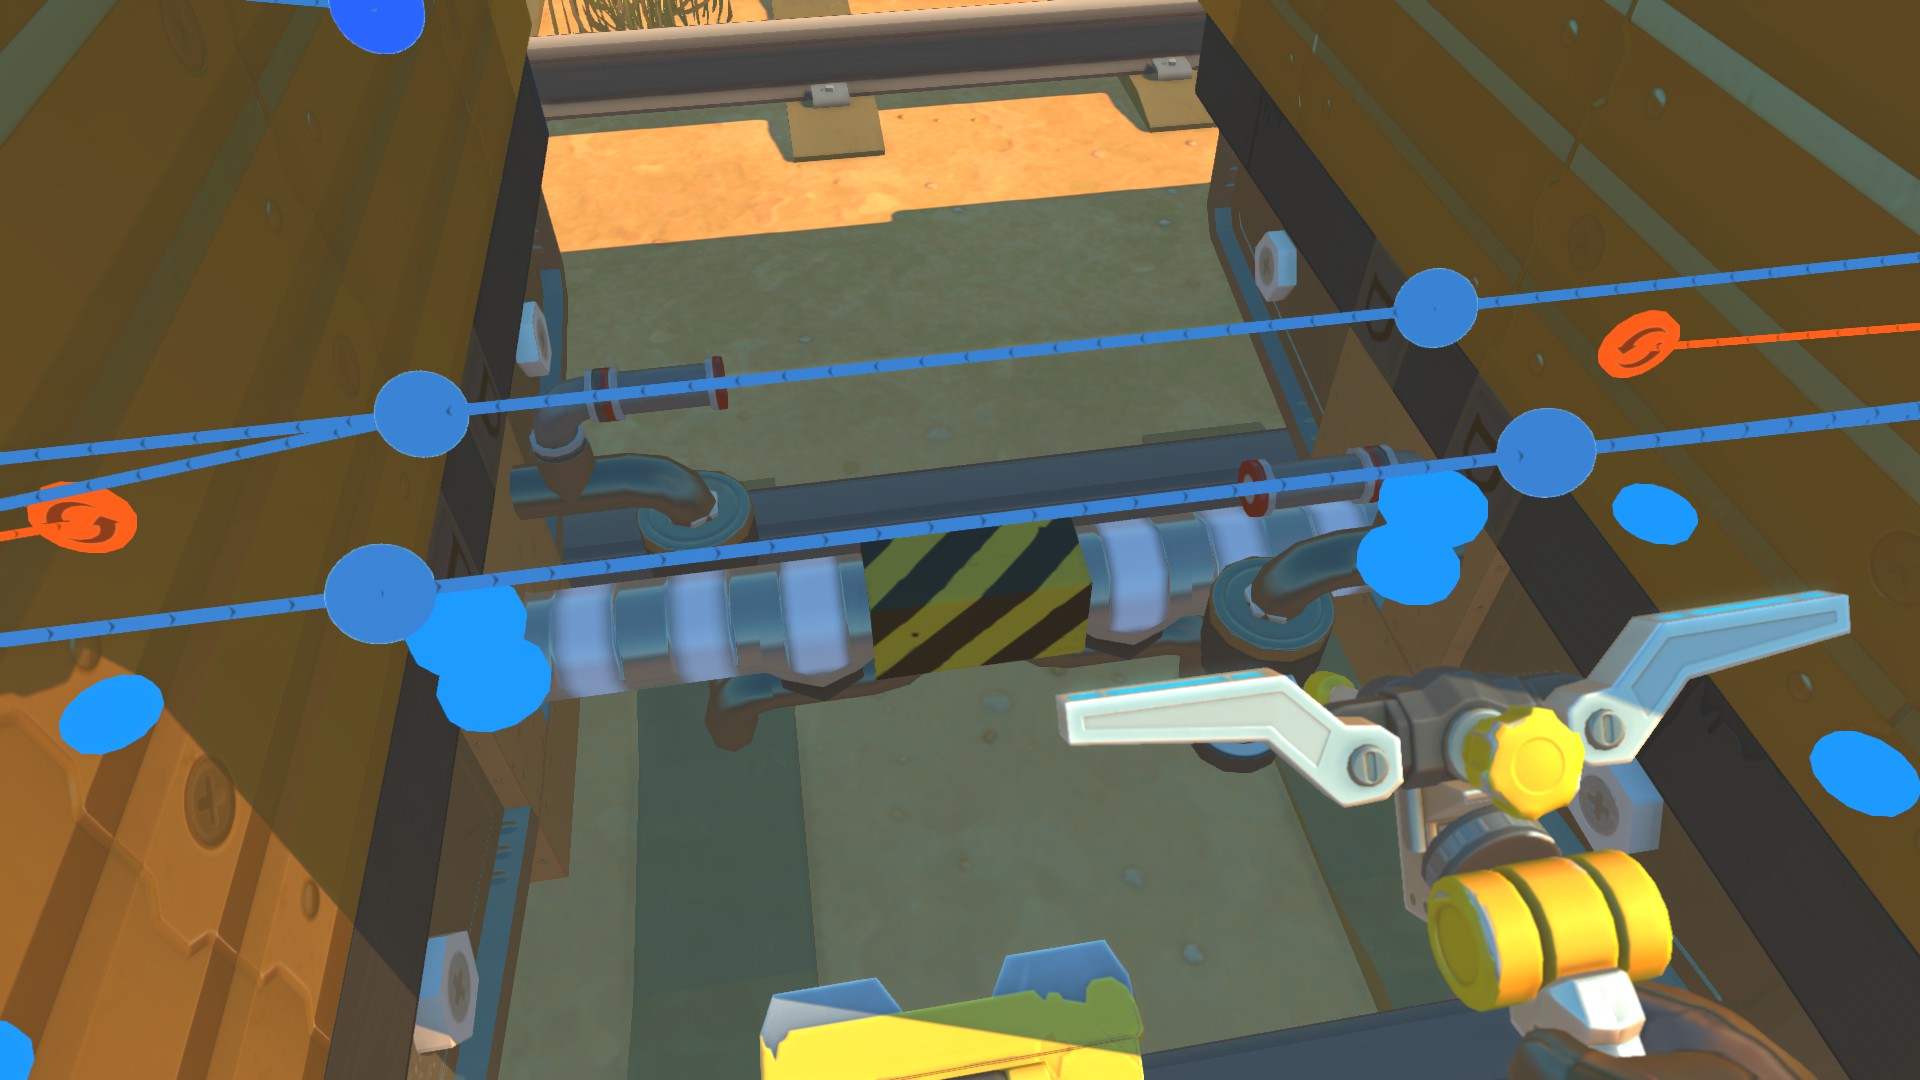
For the train brakes to work once cars are coupled, the gates must be connected to each other using the connect tool. Take a look at the image, and note the direction that the gates are connected in. It is very important that the gates are connected in the correct direction. The signal always flows down the train on the right side.
Cargo Loading
FUTURE PLANNED FEATURE
Passenger / Head End Power Operation
FUTURE PLANNED FEATURE
- How raids actually work (Version 0.5.1)★ 5 (550)19k views867 ♥3 minUpdated 7 Apr, 2021
- Как пройти выживание?★ 5 (448)18k views700 ♥25 minRussianUpdated 12 Aug, 2020
- Все команды для скрап механик★ 5 (259)15k views475 ♥1 minRussianUpdated 1 Dec, 2023
- Robots and weapons concept proposal★ 5 (421)10k views182 ♥3 minUpdated 1 Apr, 2022
- How Does Fuel Consumption Work? Which Engine Is the Most Efficient?★ 5 (182)10k views152 ♥3 minUpdated 16 Oct, 2020
- Русификатор для Scrap Mechanic by Pro100DarkTV (v2.5)★ 5 (317)9.9k views516 ♥1 minRussianUpdated 19 Jun, 2021


- Upgrading to PremiumTeam Fortress 2★ 5 (20k)1441k views11k ♥6 minUpdated May 11, 2022
- No More Room in Hell Official ManualNo More Room in Hell★ 5 (2.8k)569k views2.1k ♥29 minUpdated Apr 22, 2019
- NMRiH Community Hosting GuidesNo More Room in Hell★ 5 (526)351k views653 ♥1 minUpdated Aug 10, 2022
- ULTIMATE GUIDE FOR GAME DEV TYCOONGame Dev Tycoon★ 5 (5.8k)326k views10k ♥4 minUpdated 23 Jan, 2014
- How to 'Git Gud' Soon™MORDHAU★ 5 (2k)318k views3k ♥68 minUpdated Nov 16, 2024
- Лучшие кооперативные игры SteamPAYDAY 2★ 5 (1.5k)315k views2.1k ♥56 minRussianUpdated Apr 27, 2025






This guide was created by its original author on the Steam Community. Are you the author and want it removed? Request removal.